Audio file formats refer to the way an audio file is encoded and compressed. There are several types of audio file formats, including MP3, WAV, and AIFF.
As technology continues to advance, so do the various types of audio file formats available. From compressed MP3 files to high-quality WAV and AIFF files, it’s important to understand the differences between these formats to ensure that you’re using the best one for your needs.
Whether you’re a musician recording a demo, a sound editor working on a film, or a regular old music aficionado looking for the best sound quality, understanding the ins and outs of audio file formats is crucial. We’ll break down the most common audio file formats to help you understand which one is right for you.
Lossy Vs Lossless Compression
Lossy and lossless compression are two types of audio file formats that determine the quality and size of the file. Lossy compression results in smaller file size but some information is lost, while lossless compression does not compromise on quality but requires more storage space.
Lossy vs Lossless Compression: When it comes to audio file formats, two types of compression are used: lossy and lossless. Lossy compression is a process where data is discarded to reduce the file size, while lossless compression maintains all the original data and reduces the file size. Definition and Comparison: Lossy compression is a type of audio compression that eliminates data that is less likely to be heard by humans. This is achieved by using algorithms that remove data that is not required to reproduce the audio correctly. The result is a smaller audio file size with a slight reduction in quality. On the contrary, lossless compression preserves all the audio data, resulting in a larger file size, providing high-quality reproduction identical to the original audio. Popular Lossy Formats: Some popular lossy audio formats include MP3, AAC, and WMA. MP3, which stands for MPEG-1 Audio Layer 3, is the most commonly used audio format. It is compatible with almost all media players and devices. AAC, which stands for Advanced Audio Coding, is the successor to MP3, offering better quality at smaller file sizes. WMA, the Windows Media Audio format, is supported by Microsoft devices and software. Popular Lossless Formats: Some popular lossless audio formats include FLAC, ALAC, and WAV. FLAC, which stands for Free Lossless Audio Codec, is a popular open-source format that compresses the audio without losing any quality. ALAC, the Apple Lossless Audio Codec, is similar to FLAC but is compatible with Apple devices. WAV, which stands for Waveform Audio File, is an uncompressed lossless audio format that preserves all the audio data. Overall, both lossy and lossless compression formats have their strengths and weaknesses. Lossy compression reduces file size at the expense of quality, while lossless compression retains the high audio quality at the expense of file size. Choosing the right audio format depends on the intended use and personal preferences.
Commonly Used Audio File Formats
Audio file formats are essential for creating and storing audio files. Some of the most commonly used audio file formats include MP3, WAV, AIFF, FLAC, and OGG Vorbis. Each format has its own unique features and advantages. Understanding these formats can help you choose the best option for your needs.
When it comes to audio file formats, it can be difficult to choose which one to use. The commonly used audio file formats are MP3, WAV, AAC and FLAC, and each has its advantages and disadvantages. Let’s take a closer look at each of these file formats.
Mp3
MP3 is the most popular and widely used audio file format. Its popularity comes from its ability to compress large audio files into much smaller sizes. This compression results in a loss of audio quality, but the file size reduction makes it ideal for sharing and downloading music. MP3 files can be played on almost any device.
Wav
WAV is an uncompressed audio file format that offers high-quality sound. It is often used by professionals, as it does not compress audio, meaning the resulting files are larger in size. WAV files are compatible with almost all devices and software, but the large file size makes them less suitable for sharing and downloading.
Aac
AAC stands for Advanced Audio Coding and is a compression format that provides better audio quality than MP3 at the same size. It is commonly used by Apple devices and is compatible with many other software and devices.
Flac
FLAC stands for Free Lossless Audio Codec. Like WAV, it is an uncompressed format, but it compresses the audio without affecting the quality. FLAC files are often used by audiophiles who demand high-quality sound. However, the files are large, so they are not ideal for sharing or downloading. In conclusion, choosing the right audio file format depends on the intended use of the audio. Each format has its advantages and disadvantages, and it is essential to choose the right format based on the needs of the user.
Compatibility And Portability
When it comes to audio file formats, compatibility and portability are two crucial factors to consider. Cross-platform compatibility ensures that an audio file can be played on different devices, regardless of their operating system or software. Portability, on the other hand, refers to how easily an audio file can be transferred from one device to another without any loss in quality.
Cross-platform Compatibility
Cross-platform compatibility is essential when sharing audio files with individuals who use different operating systems or devices. The two most widely accepted audio file formats, MP3 and WAV, are compatible with both Windows and Mac computers, as well as smartphones and tablets. However, when it comes to high-resolution audio files, such as FLAC or ALAC, the compatibility may vary depending on the device in question.
Choosing The Right Format For Your Device
When deciding which audio file format to use, it’s essential to consider your device’s capabilities and storage capacity. For instance, MP3 files are known for their small file size, making them ideal for devices with limited storage, such as smartphones or MP3 players. On the other hand, if you have a device with ample storage and want to enjoy high-quality audio, uncompressed formats like WAV or AIFF are the way to go.
It’s worth noting that streaming services such as Spotify or Apple Music use their own proprietary audio file format, which can’t be downloaded or played on any other device. In contrast, lossless formats like FLAC offer the same quality as the original recording and can be played on most devices that support high-resolution audio.
Conclusion
Consider cross-platform compatibility and portability when choosing an audio file format. Pick the format that is suitable for your device and provides the desired quality. MP3 and WAV are the most widely accepted formats, while FLAC and ALAC offer the highest quality. However, keep in mind that proprietary formats from streaming services may be incompatible with other devices.
Credit: www.masteringthemix.com
Audio Editing And Post-processing
Audio editing and post-processing involves various file formats that can impact the quality of the final product. Choosing the appropriate audio file format based on your needs is crucial to ensure the best recording quality and compatibility with different devices.
Audio editing and post-processing are crucial stages in producing quality audio. After recording raw audio, it is necessary to polish it up before it can be finalized for listening. Audio processing tasks involve cleaning up, cutting, fading, mixing, equalizing, and removing unwanted noises. Audio editing software such as Audacity, Adobe Audition, and Logic Pro require different audio file formats for post-processing. Below are some audio formats suitable for audio editing.
Formats Suitable For Audio Editing
When it comes to audio editing, some audio formats are more suitable than others. The best format is the one that retains a high level of audio quality during editing. Lossless audio formats are suitable for audio editing as they preserve the original sound quality. Examples of lossless audio formats include WAVE, FLAC, and AIFF. These formats offer more data and information to edit, making it easy to refine audio files. On the other hand, lossy audio formats such as MP3 and AAC don’t provide enough data to edit, making it difficult to fine-tune audio files. Their compressed nature makes it easy to share online, but in return, you compromise the audio quality. Therefore, it’s important to consider your intended use before choosing the audio format to record.
Preserving Audio Quality During Editing
Audio quality is vital during post-processing tasks to ensure that the final audio product is of high quality. It’s essential to preserve the original audio format to maintain the best possible sound quality. Before starting the editing process, make sure that you save a copy of the original audio file in a lossless format. This saves the audio file’s quality and allows you to re-edit the audio file in the future. Another method of preserving audio quality during editing is to work on a copy of the original file. This way, you can revert to the original audio file if you edit the file too much. If you must use a lossy format, it’s best to save the copy as a lossless audio file after editing. This ensures that you retain the original sound quality of the audio file. In conclusion, it’s important to choose the right audio file format for your audio editing and post-processing tasks. Lossless audio formats such as WAVE, FLAC, and AIFF retain the highest possible audio quality, making them suitable for audio editing. Moreover, preserving the original audio file and working on a copy during the editing process helps maintain the audio quality.
Future Of Audio File Formats
New audio file formats are emerging with advancements in technology. These formats offer better sound quality and smaller file sizes, leading to faster streaming and downloads. Some of the popular audio file formats include MP3, AAC, WAV, and FLAC.
Emerging Audio Formats
As technology advances, there is a growing demand for audio formats that offer better quality and smaller file sizes. This has led to the emergence of new audio formats such as MPEG-H and AC-4. These formats are designed to deliver immersive audio experiences with spatial sound and object-based audio. MPEG-H, for instance, allows users to adjust sound settings, including speech intelligibility, bass management, and loudness. It also supports immersive audio for VR and AR applications. AC-4, on the other hand, provides high-quality sound at lower bit rates, making it ideal for streaming services.
Trends And Innovations
The future of audio file formats is promising, with several trends and innovations driving the industry forward. For instance, the use of artificial intelligence and machine learning is transforming the way audio is processed and delivered. Intelligent audio algorithms can now separate vocals from instrumentals, enhance sound quality, and even create personalized sound experiences. Another trend is the growing adoption of lossless audio formats such as FLAC, ALAC, and WAV. These formats offer CD-quality sound without compromising on file size or bitrate.
Conclusion
As we move towards a more connected and digital future, the demand for better audio experiences will only grow. Audio file formats will play a crucial role in delivering these experiences, and we can expect more innovations and developments in the future. From immersive audio to personalized sound, the future of audio formats is bright, and we cannot wait to see what lies ahead.
Credit: www.masteringthemix.com
Frequently Asked Questions On Audio File Formats Explained
What Are The Different Types Of Audio File Format?
Popular types of audio file formats include MP3, WAV, AIFF, FLAC, and AAC. These formats differ in terms of compression, sound quality, and compatibility with different devices and software. MP3 is the most commonly used file format due to its small size and compatibility with most devices.
Which Audio File Format Is The Best Quality?
The best audio file format for quality is typically considered to be WAV or FLAC. Both formats use lossless compression, which means that the audio quality is not degraded during compression. However, these formats may take up more storage space than other compressed formats like MP3.
Which Is Better Flac Or Wav?
FLAC and WAV both offer lossless audio quality, but FLAC is more efficient in terms of file size while WAV files tend to be larger. Ultimately, the choice of format depends on your intended use and personal preference.
Which Is Better Aac Or Wav?
AAC and WAV are both lossless audio formats with professional-grade quality. However, AAC is more compressed and efficient, producing smaller file sizes with better compatibility. On the other hand, WAV offers a more exact replication of the original recording, but with larger file sizes.
Ultimately, the choice between AAC and WAV depends on your specific needs and preferences.
Conclusion
From MP3 to WAV, we’ve covered everything you need to know about audio file formats! It’s important to choose the right format for your needs to ensure the best quality and compatibility. Whether you’re a music lover, a podcast creator, or a content creator, understanding audio file formats is essential.
With this knowledge, you can confidently choose the right format for your project and create high-quality audio content. Keep exploring, experimenting, and creating!
The concept of 1000 true fans for musicians is about building a loyal fanbase who will support and purchase from them regularly. As a musician striving to make it in today’s industry, one of the most important things you can do is build a dedicated fanbase.
The idea of “1000 true fans” suggests that if you can cultivate a core group of supporters who are truly passionate about your music and willing to spend money on it, you can make a sustainable living as an independent artist.
This article will explore what it means to have 1000 true fans, how to identify and nurture them, and how to leverage your fanbase to grow your career. Whether you’re just starting out or have been in the game for a while, understanding the principles of 1000 true fans can help you build a solid foundation for your music career.
Who Are True Fans?
True fans are a dedicated group of people who deeply love and support a musician, artist, or a creator. These fans go beyond just streaming their music or attending their concerts; they invest their time and resources, purchase merchandise, and promote their work to their friends and family.
Qualities Of A True Fan
Passionate about the musician’s work
Willing to invest money in the artist’s creations and merchandise
Active on social media, promoting their work to others
Attends concerts and events regularly
Willing to travel to see their favorite musician perform
True fans are more than just supporters, they are evangelists for an artist’s work, promoting their work through word of mouth and social media. They are dedicated and passionate about the musician’s work, and are willing to invest their time and money to support them.
The Importance Of True Fans For Musicians
For musicians, having true fans is crucial for long-term success. While 1 million followers on social media may look impressive, it doesn’t necessarily translate into sustainable income or a dedicated fanbase. On the other hand, having 1,000 true fans who actively support an artist’s work can provide a solid foundation for their career.
True fans purchase albums, attend concerts, and purchase merchandise, providing a significant source of income. They also promote the musician’s work to their friends and family, expanding their reach and attracting new fans. The support of true fans can help a musician build a sustainable career, allowing them to continue creating music and connecting with their audience for years to come.
Credit: upayasound.com
Understanding The Concept Of 1000 True Fans
For musicians, having 1000 true fans is more valuable than having millions of casual listeners. With a loyal fan base, they can earn a sustainable income through merch sales, concert tickets, and online platforms. Building a community and engaging with fans is key to achieving this goal.
What Is The Concept?
The concept of 1000 True Fans is based on the principle that a creator only needs a small but dedicated fan-base to support his work. The idea was first introduced by Kevin Kelly in his 2008 essay titled “1,000 True Fans,” in which he explained that creators, including musicians, don’t need to aim for mass-market success to make a living. Instead, they only need to find 1000 True Fans who are willing to support them with their content creator’s work.
How It Applies To Musicians
For musicians, the concept of 1000 True Fans can be incredibly beneficial. Instead of trying to appeal to the masses, they can focus on creating content that their dedicated fans will love, and in turn, those fans will become loyal supporters of their work. By having just 1000 True Fans, musicians can earn a substantial income through merchandise sales, concerts and other creative ideas. According to the 1000 True Fans model, each fan will spend an average of $100 annually on the musician’s work, and with 1000 fans, this would yield $100,000 annually- a significant sum for any musician looking to support himself or herself. The beauty of the concept is that it is achievable for most musicians, even those without a huge following. Focusing on developing a loyal fan base, providing quality content, and connecting with them on a deeper level is more essential than trying to get thousands of followers on social media. In conclusion, the 1000 True Fans concept gives musicians a focused approach for their creativity and niche industries instead of a one-size-fits-all strategy. Reaching out to loyal fans and providing them with value can help musicians grow their brand while still earning enough to pay their bills. As a musician, you don’t need millions of fans. Just 1000 True Fans can change your life and career completely.
Why 1000 True Fans Matter More Than Millions Of Followers
Building a loyal fan base of 1000 true fans is more valuable than having millions of followers for musicians. True fans are dedicated to a musician’s work and provide consistent support, leading to long-term success and sustainability. Focus on cultivating a smaller but devoted following rather than seeking mass appeal.
As a musician, having a massive social media following can seem like the ultimate achievement. After all, more followers mean more people seeing your content, right? Well, not necessarily. In reality, having 1000 true fans is much more important than having millions of followers, and here’s why.
Benefits Of Having 1000 True Fans
First and foremost, focusing on cultivating a dedicated group of 1000 true fans can create a more sustainable career for musicians. These fans will not only regularly attend concerts and buy merchandise, but they’ll also promote your music to their personal networks and support you through album releases and tours. Furthermore, having a smaller more engaged audience allows musicians to have deeper connections with their fans. This can lead to more meaningful collaborations, increased feedback on new music, and overall a more loyal fan base.
The Limitations Of A Large Following
On the other hand, having a large Twitter, Facebook, or Instagram following can often lead to superficial connections with fans. Followers may simply like a post or watch a video without truly engaging with the content or becoming a true fan of the musician. Additionally, a large following can be difficult to maintain, with follower count often fluctuating based on algorithm changes and overall audience trends.
How To Use 1000 True Fans Effectively
Now that we understand the benefits of having 1000 true fans let’s discuss how to utilize them effectively. First and foremost, it’s important to focus on building and maintaining relationships with these fans. This means keeping in touch through social media, hosting fan meetups, and offering exclusive content. Additionally, musicians can use their true fans to expand their reach through word of mouth marketing. Encouraging these fans to share new content with their personal networks can create a ripple effect, expanding an artist’s overall reach. In conclusion, while it might be tempting to focus solely on follower count, cultivating a dedicated group of 1000 true fans is ultimately much more valuable. By building and maintaining deep connections with these individuals, musicians can create more sustainable careers and truly impactful work.
Strategies For Turning Casual Fans Into True Fans
Turning casual fans into true fans is an essential strategy for musicians to attain their goal of having 1000 true fans. Creating valuable content, communicating intimately with fans, and providing unique experiences are ways of building a loyal fan base.
As a musician, having 1000 true fans is more valuable than having millions of fans who don’t engage with your content or support your music. True fans are loyal, passionate, and invested in your success. They not only stream your music regularly but also promote it to their friends and family, attend your concerts, and buy your merchandise. But how can you turn casual fans into true fans? Here are some strategies to consider:
Creating Quality Content
The first step to building a fan base is to produce high-quality music that captivates your listeners and leaves a lasting impression. Make sure you put out music that resonates with your audience by researching what they like and dislike. Create a distinctive branding that reflects your personality and style. Offer your supporters an opportunity to get involved in your music-making process by engaging them in conversations and asking for their feedback. Use your lyrics to tell stories that connect with your fans’ emotions and experiences.
Engaging Fans On Social Media
Social media is one of the most effective ways to communicate with your fans, build relationships, and provide value. Use social media platforms like Instagram, Twitter, and Facebook to interact with your supporters, answer their questions, and share exclusive content. Engage them with polls, Q&A sessions, giveaways, and behind-the-scenes photos and videos. Make sure to post consistently and use targeted hashtags to expand your reach. Collaborate with other artists and influencers in your niche to reach a wider audience.
Offering Exclusive Opportunities
True fans are willing to spend money on your music and merchandise if they feel valued and appreciated. Offer exclusive experiences and opportunities to your loyal supporters, such as early access to concerts, VIP packages, merchandise discounts, and fan clubs. Consider creating limited edition merchandise that only true fans can access. Give shoutouts and public recognition to fans who help promote your music and attend your shows regularly. Make sure to build genuine relationships with your fans by showing gratitude and appreciation for their support. In conclusion, turning casual fans into true fans is not an easy task, but it’s worth the effort. By creating quality content, engaging fans on social media, and offering exclusive opportunities, you can build a loyal fan base that supports your music and helps you grow as an artist. Remember to always put your fans first and show genuine appreciation for their support.
Building And Maintaining Relationships With True Fans
Building and maintaining relationships with true fans is crucial for musicians to thrive in the music industry. By cultivating a devoted fan base, musicians can rely on consistent support for their music career. A strong bond with true fans not only ensures a stable income but also opens up opportunities for collaborations and new ventures.
As a musician, your fans are your most valuable asset. They not only provide support and motivation but also play a crucial role in your success. That’s why it’s essential to build and maintain strong relationships with your true fans. To achieve this, you need to focus on personal connection, consistency, and authenticity while also showing appreciation for their ongoing support.
The Importance Of Personal Connection
One of the best ways to cultivate a loyal fan base is to establish a personal connection with each of your fans. This means taking the time to engage with them, be it online or in-person. Responding to their messages, comments, and emails is an excellent start. You can also interact with them through social media, where you can share behind-the-scenes footage, give shoutouts, and showcase exclusive content. Personalization also plays a significant role in forging stronger relationships with your fans. Use their names when replying to comments or messages, and try to reference past interactions. By making them feel seen and heard, they’ll be more likely to invest in your music and support your career.
Consistency And Authenticity
Consistency and authenticity are also important traits to maintain when building relationships with your fans. Consistency means staying true to your brand and consistently delivering high-quality content to your fans. This could mean releasing new music regularly, sticking to a posting schedule, or consistently responding to comments and messages. Authenticity is equally important as it shows your fans that you’re being genuine and transparent with them. It’s important to be honest about your experiences, your creative process, and your challenges as a musician. Fans appreciate artists who are open and relatable, as it helps to build a deeper connection.
Showing Appreciation
Finally, showing appreciation is a crucial part of maintaining strong relationships with your fans. Without them, you wouldn’t be where you are today. Therefore, it’s essential to express gratitude for their ongoing support. This could be something as simple as thanking them in a social media post, sending them exclusive merchandise, or even hosting intimate meet and greets. Engaging with your fans, being consistent and authentic, and showing appreciation are all crucial elements of building and maintaining relationships with your true fans. By focusing on these qualities, you can cultivate a fan base that not only supports your music but also invests in your career.
Credit: modelthinkers.com
Case Studies: How Musicians Have Successfully Utilized 1000 True Fans
Musicians have effectively utilized the 1000 True Fans approach, where they cultivate a small but dedicated following to support their work. Through case studies, it’s evident that these fans are crucial to an artist’s success, providing financial and emotional support that allows them to thrive independently in the industry.
Examples Of Musicians Who Have Built A Loyal Fan Base
Analyzing Their Strategies
Building a loyal fan base is important to ensure long-term success in the music industry. A strategy that many musicians have embraced to build such a following is the “1000 True Fans” model coined by Kevin Kelly. This model suggests that a musician needs to attract just 1000 true fans to earn a sustainable income from their craft. Many musicians have successfully utilized this model to build a loyal fan base. Let’s take a look at some case studies of musicians who have effectively leveraged this strategy.
Examples Of Musicians Who Have Built A Loyal Fan Base
Jacoby Jennings: Jacoby is a musician who adopted the 1000 true fans model and has been able to build a loyal following. He leverages live concerts and merchandise sales to connect with his fans and monetize his music. His strategy also includes touring different cities, offering discounts and exclusive content to his fans. Amanda Palmer: Amanda Palmer is another musician who has successfully built a loyal fanbase. She offers access to exclusive content and merchandises to her fans for a subscription fee. This has helped her to build a supportive fan following by keeping them updated with regular content and showing appreciation for their support.
Analyzing Their Strategies
To succeed with the 1000 true fans model, a musician must carefully analyze their strategies and understand what works best for their unique style. A common theme among successful musicians who have built a loyal following is offering exclusive content and fan engagement as part of their strategy. They leverage various platforms to connect with their fans and keep them engaged, such as social media and email marketing. These strategies help musicians stay connected with their fans, offering them value and appreciation, which ultimately builds a loyal and supportive community. In conclusion, the “1000 true fans” strategy has proven to be a successful path for musicians to build a loyal fanbase and earn sustainable income. Musicians who have adopted this model have carefully analyzed their strategies and leveraged various platforms to engage with their fans in meaningful ways. By following the examples set by successful musicians, upcoming musicians can also leverage this strategy to build a loyal following.
Common Mistakes To Avoid When Trying To Build A Fan Base
As a musician, building a loyal fanbase can be a daunting task. It takes more than just talent to attract a devoted following, and it can be easy to fall into common mistakes when trying to build a fan base. In this article, we’ll discuss three of the most common mistakes musicians make when trying to build a fan base, and how to avoid them.
Focusing Too Much On Numbers
While having a large number of fans may look impressive, it doesn’t necessarily mean that they are loyal or devoted. As a musician, it’s crucial to focus more on building a small, but dedicated fanbase. These fans, also known as “true fans,” are the ones who will attend every show, purchase your merchandise, and spread the word about your music to others.
Instead of focusing solely on the number of fans you have, focus on building meaningful connections with your existing fans through personalized interactions. Engage with them regularly on social media, reply to their messages or comments, and offer exclusive content for your loyal followers.
Neglecting Personal Connection
Building a personal connection with your fans is essential to building a sustainable career as a musician. Neglecting personal connections with your fans can lead to a lack of engagement and their indifference towards your music.
Make an effort to interact with your fans as much as possible. Attend meet-and-greets, reply to their emails, and reach out to them with exclusive updates. By doing so, you’ll build a deeper connection with your fans, which can lead to long-term loyalty.
Lack Of Consistency
Consistency is important to build a dedicated fan base. If you’re not regularly putting out new content and updates, fans may forget about you or lose interest in your work. Create a consistent schedule for your releases, shows, and updates to keep your fans engaged and avoid becoming irrelevant.
Additionally, try to maintain consistency in your branding, visual style, and messaging to create a recognizable and consistent identity. Keeping a consistent brand helps to communicate your image to potential fans, and makes it easier for them to identify and remember your music.
In conclusion,
In order to build a loyal fan base, it’s important to focus on building meaningful connections with your existing fans, rather than just a large number of followers. By avoiding the common mistakes of focusing too much on numbers, neglecting personal connections, and lacking consistency, you’ll be on your way to building a dedicated fanbase that will support you throughout your musical journey.
Frequently Asked Questions Of 1000 True Fans For Musicians
What Is The 1000 Superfans Theory?
The 1000 superfans theory is a business strategy that suggests a creator only needs 1000 true fans to sustain a successful business. These fans are individuals who will consistently buy a creator’s products and promote them to others. This theory was coined by Kevin Kelly.
What Is The 1000 Fan Rule?
The 1000 fan rule is a concept that suggests that a creator needs 1000 true fans to make a living from their work. These fans would be devoted enough to purchase every project or product the creator releases, allowing them to earn a sustainable income.
How Many True Fans Do You Need?
The number of true fans you need depends on your goals and business model. Generally, having 1,000 true fans who are willing to support you financially can sustain a creative career. However, the number can vary based on the industry and individual circumstances.
What Is The 1000 Customer Rule?
The 1000 customer rule is a concept that suggests a business should aim to acquire 1000 customers as quickly as possible. This helps validate the business model and provides a solid customer base for further growth.
Conclusion
As a musician, building a fan base of 1000 true fans can be the key to unlocking long-term success and financial stability. By cultivating deep relationships with these dedicated supporters, you can build a sustainable career that allows you to focus on creating great music and connecting with your audience.
With the right strategies and mindset, you can turn your passion for music into a fulfilling and lucrative career. So start building those authentic connections with your fans today, and watch your career take flight!
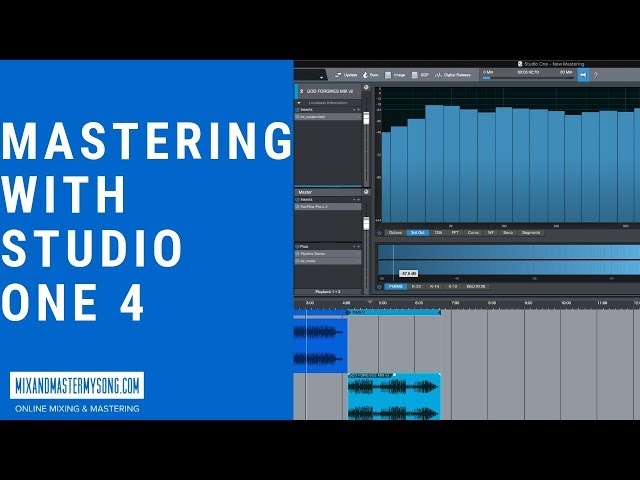
Mastering With Studio One 4 is an efficient audio mastering software for professional engineers and producers. It allows you to perform the final stage of audio production with ease and accuracy.
With a simple user interface and customizable features, Studio One 4 enables users to enhance the clarity, balance, and dynamic range of their audio tracks. Mastering With Studio One 4 also includes a range of helpful mastering tools such as EQ, compressor, limiter, and mid-side processing that users can apply to make their tracks sound perfect on any device and in any environment.
We will review the key features and benefits of Studio One 4, and how it can help you achieve professional-sounding audio mastering.
Credit: s1manual.presonus.com
Introduction To Studio One 4
Mastering with Studio One 4 is an innovative tool for music producers. This plugin allows you to edit and optimize your tracks with a variety of features, such as limiting, EQ, and compression. With Studio One 4, perfecting your sound has never been easier.
Studio One 4 is a powerful digital audio workstation software that is designed to streamline the music creation process. It offers a range of tools and features that enable musicians and producers to create high-quality music without requiring any additional plugins or hardware. Studio One 4 is a complete music production software package that can handle any task from composing to mastering.
User Interface
Studio One 4 has an intuitive and user-friendly interface that allows for easy navigation. It features a drag-and-drop functionality that makes it easier to import files and instrument plugins. The software has a customizable workspace that allows users to adjust the layout according to their preferences. Additionally, Studio One 4 has a visually appealing interface that makes the music creation process much more enjoyable.
System Requirements
Before installing Studio One 4, it is important to ensure that the system requirements are met. The software requires a 64-bit operating system, such as Windows 10 or MacOS 10.13 or higher. Additionally, it requires at least 4 GB of RAM and 40GB of free hard drive space for storing audio files and other data.
Installation
The installation process for Studio One 4 is straightforward, and it requires a few simple steps. Users can start by downloading the installer from the PreSonus website. Once downloaded, they can double-click on the installer to start the installation process and follow the on-screen instructions. Once the installation is complete, users can open Studio One 4 and start exploring the software’s features and tools. In conclusion, Studio One 4 is an excellent music production software that offers a range of tools and features for musicians and producers. With its intuitive interface, system requirements, and easy installation process, it’s an ideal software for anyone looking to master music production.
Setting Up Your Studio
Setting up your studio for mastering with Studio One 4 requires careful planning, and ensuring you have the right equipment. Once you have the basics covered, you can dive into the software and start perfecting your sound with precision and ease.
When it comes to mastering with Studio One 4, setting up your studio properly is key to achieving professional-sounding results. The first step to setting up your studio is configuring your audio interface.
Audio Interface Configuration
Configuring your audio interface correctly is crucial to getting the best possible sound out of your setup. You’ll want to ensure that your interface is selected as the default playback device in your computer’s audio settings. Additionally, you should check that your interface is properly connected and that all drivers are up to date.
Midi Setup
Next, it’s important to set up your MIDI devices in Studio One 4. To do this, navigate to the ‘Preferences’ menu and select ‘External Devices’. Here, you can add your MIDI devices and customize their settings to work seamlessly with Studio One.
Creating A New Project
Once you’ve got your audio and MIDI interfaces all set up, you’re ready to create a new project in Studio One 4. This is where you can set your project’s tempo, time signature, and other initial settings. You can also choose your desired bit depth and sample rate, both of which will impact the overall sound quality of your project. Overall, taking the time to properly set up your studio is essential to achieving professional-sounding results when mastering with Studio One 4. So be sure to follow these steps and optimize your studio for the best possible sound.
Working With Audio Tracks
Learn how to master audio tracks with ease using Studio One 4. This powerful software offers a comprehensive set of tools and features for mastering, allowing you to achieve a professional sound.
If you’re looking to produce professional-quality audio tracks, then you need to have an in-depth understanding of how to work with audio in your mastering software. Studio One 4 is one such mastering software that offers a range of powerful tools and features, specifically designed to help you work with audio seamlessly. In this post, we will look at three aspects of working with audio tracks in Studio One 4- recording audio, editing audio, and applying effects to audio- to help you become a master of your craft.
Recording Audio
Recording audio is the first and essential step to creating a masterpiece. With Studio One 4, you can record audio with ease. To start, select the track where you want to record, set the input device and level, and then hit the record button. You can also define the loop, set the tempo, and use the metronome to help you keep time. With advanced features, such as automatic delay compensation and multi-track comping, recording audio in Studio One is a breeze.
Editing Audio
Once you have recorded your audio, it’s time to edit it. Studio One 4 comes with a complete set of editing tools, including cut, copy, paste, split, and more. With Zoom tools, you can zoom in and out of a waveform and even pitch-correct vocals with the Melodyne Integration feature. Studio One 4 also allows you to process audio offline, meaning you can edit audio even when not connected to the internet.
Applying Effects To Audio
Adding effects to audio can give your tracks that final professional touch. With Studio One 4, you can apply a range of powerful effects, including reverb, delay, EQ, and more. You can also add effects to individual tracks, groups of tracks, or even the entire mix. With the drag and drop function, you can add effects to your audio tracks quickly. Plus, with the mixer’s inbuilt plugins, you can achieve professional-grade results. Overall, mastering with Studio One 4’s powerful tools and features can help you produce top-quality audio tracks with ease. With the right knowledge and skills, you can become a master of your craft.
Working With Midi Tracks
Learn how to master your MIDI tracks with Studio One 4. Easily edit note events and automation, utilize virtual instruments, and take advantage of the flexible MIDI editing capabilities to perfect your sound.
If you’re a music producer, you know the importance of MIDI in creating modern-day music. MIDI (Musical Instrument Digital Interface) is a standard protocol that allows different electronic musical instruments, computers, and other related devices to communicate with each other. Mastering With Studio One 4 is a professional-grade music software that makes MIDI composition and editing a breeze. In this article, we’ll explore how to record, edit, and quantize MIDI tracks using Studio One 4.
Recording Midi
Recording MIDI in Studio One 4 is incredibly straightforward. Start by creating a new MIDI track, and select the instrument you want to use from the instrument list. Once you’ve selected your instrument, click on the record button, and start playing your MIDI device. Studio One 4 will record the MIDI data and display it on the sequencer. Once you’ve finished recording, you can use the editing tools in Studio One 4 to make any necessary changes.
Editing Midi
Editing MIDI in Studio One 4 is a breeze thanks to its intuitive interface and tools. To edit a MIDI track, simply click on it to select it, and use the editing tools to make changes. You can cut, copy, paste, delete, and move MIDI notes with ease. You can also adjust the velocity, pitch, and length of MIDI notes using the provided tools. Studio One 4 also offers powerful quantization features to help you correct any timing errors.
Quantization And Groove
Quantization is a helpful feature that helps you align MIDI notes to a precise rhythmic grid. Studio One 4 offers several quantization options, including quarter-note, eighth-note, sixteenth-note, and thirty-second note quantization. You can also adjust the strength of the quantization to make it more or less severe. Another great feature of Studio One 4 is its groove quantization. Groove quantization allows you to apply a groove or feel to your MIDI tracks, giving them a more natural, human-like rhythm. You can choose from several groove templates or create your own. Mastering With Studio One 4 is a powerful music software that makes MIDI composition and editing a breeze. Whether you’re recording MIDI, editing MIDI, or using its powerful quantization features, Studio One 4 offers an intuitive and powerful workflow that will enhance your music production. Try it out today and take your music production to the next level.
Virtual Instruments And Plugins
Virtual instruments and plugins are essential tools in modern multimedia production. Studio One 4 offers a wide range of mastering plugins that allow users to fine-tune their productions for a polished, professional sound. With a variety of EQs, compressors, and limiters, Studio One 4 provides all the necessary tools for a mastering engineer to achieve a high-quality final mix.
Mastering with Studio One 4 is an excellent way to take your music production to the next level. This software is packed with features that let you fine-tune your sound and produce professional-quality tracks. In this post, we’ll be focusing on Virtual Instruments and Plugins, two essential components of modern music production.
Using Presonus Plugins
PreSonus Plugins are some of the most versatile and powerful tools available in Studio One 4. From EQ to Compression and Reverb to Delay, these plugins are perfect for mixing and mastering your tracks. When using PreSonus plugins, it’s essential to understand how they work and what each parameter does. Take the time to experiment and discover the unique sound each plugin can bring to your music.
Third-party Plugins
In addition to PreSonus Plugins, Studio One 4 also supports third-party plugins. This means that you can take advantage of the vast selection of plugins available on the market. Many third-party plugins offer unique features and functionalities that are not available in PreSonus Plugins. Some popular third-party plugins include Waves, iZotope, and FabFilter.
Building Custom Instrument Racks
Building custom instrument racks allows you to combine multiple virtual instruments, effects, and plugins into one customizable package. This feature is perfect for producers who work with complex sounds and want to streamline their workflow. With Studio One 4’s drag-and-drop interface, you can easily build custom instrument racks that best suit your needs. In conclusion, mastering with Studio One 4’s Virtual Instruments and Plugins is an excellent way to take your music production to the next level. Whether you’re just starting with music production or an experienced producer, these tools are an essential component of modern music production. By using PreSonus Plugins, third-party plugins, and building custom instrument racks, you can fine-tune your sound and produce professional-quality tracks.
Credit: m.youtube.com
Arranging Your Song
Learn the art of arranging your song with ease while mastering music production with Studio One 4. Maximize your creativity with its advanced features and tools, designed to make the music-making process simpler and more streamlined.
After coming up with a great melody, you need to arrange it to make a complete song. Arranging involves reordering melodic sections to create a coherent track. Mastering arrangement skills will boost your songwriting abilities and make you a better producer.
Building Song Sections
Building song sections is the foundation of arrangement. Determine which sections your song needs and place them in the right order. Here are the essential parts of a song:
Song section
Description
Intro
The beginning of the song that sets the mood.
Verse
The section that progresses the story or emotion of the song.
Chorus
The catchy part of the song that repeats the main idea.
Bridge
A section that provides a contrast to the chorus and leads to the final chorus and outro.
Outro
The end of the song that leaves the listener with a lasting impression.
Working With Tempo And Time Signatures
Tempo and time signatures determine the rhythmic structure of your song. Setting the right tempo will make your song feel natural and enhance the listener’s experience. Time signatures decide how many beats there are in a bar and affect the song’s feel and groove. Avoid time signature changes within a song to maintain a consistent flow.
Building A Mix
After arranging your song, you need to focus on mixing it to ensure that all elements fit together seamlessly. Mixing involves adjusting levels, panning, EQ, and effects to create a balanced and polished track. Follow these steps to build a mix:
Start by setting the levels of each track from the loudest to the softest.
Pan tracks to the left or right to create space and separation.
Use EQ to cut or boost frequencies to reduce conflicts or enhance elements.
Add effects like reverb, delay, and compression to give depth and character to the mix.
Master the final mix to ensure that it sounds good on different playback systems.
By following these guidelines, you’ll enhance your arrangement skills and create a better mix in Studio One 4. Stay persistent, and you’ll soon master the art of arranging songs.
Mixing And Mastering
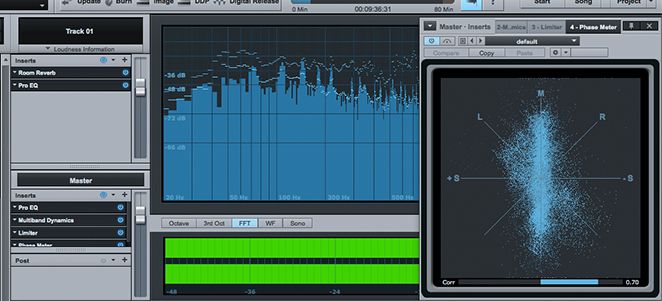
Mastering with Studio One 4 enhances the final sound while mixing. This program offers high-quality processing, excellent metering tools, and a user-friendly interface to ensure a polished and professional finish for your audio tracks.
Using Studio One’s Mixer
Studio One’s Mixer is a powerful tool that allows you to adjust the levels of individual tracks, apply effects, and create automation. By using the mixer, you can create a balanced mix that is pleasing to the ear. To use the mixer, you need to first add your tracks to the arrangement. Once you have done this, you can access the mixer by clicking on the Mixer button in the toolbar. The mixer will appear at the bottom of the screen, and you can adjust the levels of each track by using the faders. You can also add effects to each track using the inserts section of the mixer. Here you can add EQ, compression, and other effects to each track to sculpt the sound to your liking.
Equalization And Compression
Equalization and compression are two of the most important tools in the mixing and mastering process. EQ allows you to adjust the frequency balance of a track, while compression can help to control the dynamic range. In Studio One, you can access EQ and compression through the mixer. To add EQ to a track, simply click on the inserts section of the mixer and choose an EQ plugin. To add compression, you can do the same thing but choose a compressor instead. Once you have added your EQ and compression plugins, you can adjust the settings to achieve the desired sound.
Mastering Your Track
Once you have finished mixing your track, it’s time to master it. Mastering is the final step in the production process, and it involves making adjustments to the overall sound of the track to ensure it sounds great on all audio systems. In Studio One, you can master your track by using the Project page. Here you can add EQ, compression, and other effects to the master bus to create a final mix. You can also use the mastering tools in Studio One to adjust the loudness and overall sound of your track. By using Studio One’s Mixing and Mastering tools, you can produce professional-quality tracks that sound great on any system.
Collaboration And Sharing
Collaboration and sharing are made easy with Studio One 4. The software offers features like cloud storage and easy file sharing to make it simple for musicians to work together and collaborate on projects in real-time.
Collaboration and sharing are important steps in the production process, especially when it comes to mastering. Studio One 4 makes it easy to collaborate with other users and share your tracks with the world. Here’s how to do it.
Collaborating With Other Studio One Users
Collaborating with other Studio One users is easy thanks to the program’s advanced sharing features. With the Cloud sharing function, you can share your tracks with other Studio One users, regardless of location. You can also collaborate in real-time with other users using the program’s built-in collaboration tools, including chat, comments, and timelines. This allows for seamless collaboration on the same project with other users.
Exporting Your Tracks
When it comes to exporting your tracks, Studio One 4 provides a variety of options. Whether you want to export your tracks as a WAV, MP3, or other file type, Studio One makes it easy to export your tracks with just a few clicks. You can even export your tracks in high-resolution formats to ensure that your tracks sound amazing no matter where they are played.
Preparing Your Tracks For Distribution
One of the most important steps in the mastering process is preparing your tracks for distribution. With Studio One 4, you can easily prepare your tracks for distribution with just a few clicks. The program provides detailed information about each section of your track, making it easy to adjust levels, add effects, and more. You can even add metadata to your tracks to ensure that they are properly recognized by music distribution services. Overall, Studio One 4 makes it easy to collaborate with other users and share your tracks with the world. With its advanced sharing features and easy-to-use export and distribution tools, mastering your tracks has never been easier.
Credit: ask.video
Frequently Asked Questions For Mastering With Studio One 4
Does Studio One Have Mastering?
Yes, Studio One has built-in mastering tools such as multiband compression, EQ, and limiting to help you finalize your mix and prepare it for distribution. These tools can all be found within the Project page.
What Is The Best Mastering Software?
Choosing the best mastering software depends on your preferences, experience and budget. Some popular mastering software options include Ozone 9, Waves Abbey Road TG Mastering Chain, and iZotope’s RX 8. It is recommended to research each software’s features and read reviews before choosing one.
Which Is Harder Mixing Or Mastering?
Both mixing and mastering are essential components of the music production process, but they each come with their own set of challenges. Mixing involves blending different tracks and sounds together to create a cohesive and balanced mix, while mastering focuses on the final touches to give the track a polished and professional sound.
Both require expertise and attention to detail, so it’s difficult to say which is harder – it really depends on the individual project.
Does Studio One Support Mpe?
Yes, Studio One supports MPE (MIDI Polyphonic Expression) with version 5. 1 or later updates. It provides a better approach to MIDI recording, editing, effects, and virtual instruments through MPE.
Conclusion
Mastering with Studio One 4 can seem overwhelming at first, but with the right tools and techniques, you can produce professional-quality music. Utilizing the software’s intuitive interface and integrated mastering tools can help you achieve the polished sound you’re looking for.
From EQ and compression to adding effects like reverb, Studio One 4 has all the capabilities you need to take your music to the next level. Whether you’re a beginner or an experienced producer, Studio One 4 is a valuable tool for anyone looking to master their music.
So why not give it a try and see the difference it can make?
Studio One is a user-friendly DAW that enables you to create, mix, and master music with ease. With its advanced features, customizable interface, and drag-and-drop functionality, it is a popular choice for music producers and engineers.
We will answer some of the most common questions about Studio One, including its compatibility, MIDI mapping, and recording capabilities. Whether you’re a beginner or a seasoned pro, you’ll find everything you need to know about this powerful software. So without further ado, let’s get started!
Frequently Asked Questions Of Common Studio One Questions Answered
What Are Some Weaknesses Of Presonus Studio One?
Studio One’s weakness is its limited VST support, missing some advanced features found in other software, limited third-party integration, and occasional bugs in the program. Additionally, it can be challenging to work with multiple displays simultaneously as the interface doesn’t support it.
Overall, it still provides a good music production experience for beginners and professionals.
Is Studio One Easy?
Studio One can be easy to use for beginners and professionals alike. Its user-friendly interface and intuitive features make it easy to navigate and use. However, as with any software, there is a learning curve, and it may take some time to fully master all of its capabilities.
Does Studio One Come With Samples?
Yes, Studio One does come with samples. It includes a library of over 11 GB of samples, loops, and instrument presets for various genres of music production. These samples are designed to be easily accessible and usable in your projects.
Is Studio One A Good Daw For Music?
Studio One is a superb DAW for music production. It has an intuitive layout, quick workflow, and impressive audio quality. With its powerful features, Studio One is a favorite among musicians and producers.
Conclusion
Studio One is an impressive digital audio workstation that can turn your music ideas into reality. However, there are a lot of questions that may arise when you start using this software. We answered some of the most common Studio One questions, such as how to use VST plugins, how to import audio files, how to speed up your workflow, and more.
Understanding the basics of Studio One will help you unlock endless possibilities for music creation and production. Keep creating and exploring!
A VST is a virtual studio technology, while a VSTi is a virtual studio technology instrument. VST is a software interface used to integrate audio effects and virtual instruments into digital audio workstations (DAWs).
On the other hand, VSTi refers to virtual instruments that utilize VST technology to integrate directly with DAWs. VSTi provides a user interface to create and manipulate sounds, while VST offers an interface for processing audio signals. Both plugins and instruments enhance the overall experience of music production. This allows users to achieve professional-level results at a fraction of the cost of traditional studio equipment.
We will dive deeper into the differences and similarities between effect and instrument plugins and their benefits to music production.
Credit: blacktidemusic.com
What Are Vst And Vsti?
Plugins and instruments are both plugin formats used in digital audio production. The main difference between them is that VSTi plugins are virtual instruments, while VST plugins are effects processors.
What The Effect Format Means
VST stands for Virtual Studio Technology. It is a plugin format developed by Steinberg that allows users to integrate third-party software plugins into their digital audio workstations (DAWs). In other words, VST is a software interface that lets you load virtual instruments and audio effects inside your DAW.
What The Instrument Format Means
VSTi stands for Virtual Studio Technology Instrument. It is a plugin that conforms to the VST interface and includes software synthesizers or samplers. The ‘i’ in VSTi represents the word ‘instrument.’ It is also a plugin format developed by Steinberg, but it differs from VST in the sense that it allows virtual instruments to be integrated into the user’s DAW, instead of audio effects.
Difference Between Vst And Vsti
The main difference is simple: VST covers audio effect plugins, while VSTi covers instrument plugins. VST plugins work on audio signals already recorded or live. In contrast, VSTi plugins can produce a sound similar to a physical instrument.
Benefits Of Using Vst And Vsti
Plugins and instruments provide easy integration with DAWs and allow users to access a variety of third-party plugins.
Users can use VST and VSTi plugins to achieve professional-quality sound at a fraction of the cost of hardware equipment.
Effect and instrument plugins are cross-platform compatible, which is a significant advantage for users that work on different operating systems.
The size of VST and VSTi plugins is relatively small compared to hardware equipment, allowing users to save disk space and computer resources.
Conclusion
In conclusion, plugins and instruments are essential plugins for music producers, sound designers, and engineers alike. VST handles audio effects, and VSTi handles instruments. The main benefit of using VST and VSTi plugins is easy integration with your DAW. The small size and cross-platform compatibility make it a good choice for music production professionals.
Credit: www.therightbrothersfilm.com
The Key Differences Between Vst And Vsti
Effect and instrument plugins are both common plugins used by musicians, but there are some key differences. VST stands for Virtual Studio Technology and refers to the plugin format, while VSTi stands for Virtual Studio Technology Instrument and refers to the type of plugin that produces sounds.
Plugins and instruments are two essential plugins that aid in the production of high-quality audio in Digital Audio Workstations (DAWs). However, many people tend to confuse these two. In this blog post, we will delve into the key differences between effect and instrument plugins.
Main Function Of VST And VSTi
One significant difference between plugins and instruments is their main function. VST (Virtual Studio Technology) is a technology that allows DAWs to integrate with third-party software synthesizers and effects. In contrast, VSTi (Virtual Studio Technology Instrument) is a plugin that acts as a software synthesizer or sampler. VSTi can produce various sounds incorporated into DAWs, such as pitch, modulation, and volume. In contrast, VST provides different effects like distortion, chorus, and reverb.
Sound Types In VST And VSTi
Effect and instrument plugins differ in their sound types. As mentioned earlier, VST offers a wide range of audio effects that can turn plain audio into creative productions. On the other hand, VSTi provides different types of sound samples like drums, bass guitars, and pianos, which can be integrated into DAWs creating realistic sound production.
Compatibility With Daws
Another vital difference between plugins and instruments is their compatibility with different DAWs. You can integrate VST plugins and instruments into almost all DAWs, including Pro Tools, Ableton, and Logic Pro X. However, VSTi, being a specific plugin, may not be compatible with some DAWs that do not support the plugin format. For instance, Logic Pro X only accepts AU (Audio Unit) format for macOS-based systems, and it may not allow VSTi plugins.
Performance Efficiency
Effect and instrument plugins differ in terms of their performance efficiency. VST plugins require minimal computer power, and they can run on any computer or laptop without substantial processing power. On the other hand, VSTi plugins require more computer resources like memory and processing power, mainly if the sample library is extensive. For this reason, VSTi may experience a lag when used on an older computer or laptop. In conclusion, plugins and instruments are both essential plugins in the production of high-quality audio in DAWs. VST offers audio effects, while VSTi produces sounds such as drums and bass guitars. VST plugins can run on any computer, while VSTi requires more substantial processing power.
Advantages And Disadvantages Of Vst And Vsti
VST (Virtual Studio Technology) and VSTi (Virtual Studio Technology Instrument) are two different types of software plugins frequently used in digital music production. The major difference: VST shapes sound with effects, while VSTi creates the musical sounds themselves.
However, both have their advantages and disadvantages.
VST (Virtual Studio Technology) and VSTi (Virtual Studio Technology Instruments) are essential plugins used in digital audio workstations to create high-quality music tracks. Understanding the difference between these two plugins is crucial for anyone who wants to produce professional-quality music. Both VST and VSTi offer their own advantages and disadvantages that users should take into account when choosing their desired plugin.
Pros Of Effect Plugins
Using VST plugins in your music production can significantly enhance the workflow, making it easier and faster to create music. Below are some advantages of using VSTs:
Allows users to load multiple instruments quickly.
Provides users with a vast library of effects, instruments, and tools to choose from.
Most VST plugins are relatively affordable, making them accessible to a broad range of users.
Supports customization of the instrument parameters to match the desired sound.
Enables users to layer instruments or effects on top of each other to create new sounds.
Cons Of Effect Plugins
While VST plugins offer numerous benefits to the music creation process, they also present some downsides, which are:
VST plugins require a stable and high-performance computer system to function without glitches, which can be costly to set up.
Some VST instruments can be challenging to set up and configure for use, especially for beginners.
VST plugins can become unstable when multiple instances of the plugin are used simultaneously, leading to audio glitches and latency issues.
VST plugins can become outdated after some time, requiring that users purchase newer versions, which can be expensive.
Pros Of Instrument Plugins
VSTi plugins simulate real-world instruments and sounds, so you can produce music that feels natural and authentic. Below are some benefits of using VSTi plugins:
VSTi plugins produce lifelike and natural instrument sounds, helping users create a more realistic musical experience.
VSTi plugins are relatively easy to install and configure, making them accessible to a broad range of users.
Most VSTi plugins include simple and intuitive interfaces that users can quickly learn to use and master.
VSTi plugins offer users a broad variety of instrument sounds to choose from, giving them the ability to create any genre or style of music.
Cons Of Instrument Plugins
While VSTi plugins offer their advantages, they also have some drawbacks that users should consider:
VSTi plugins can be costly, and the prices can increase significantly for premium versions.
Some VSTi plugins require a steep learning curve to use, which can be difficult for beginners to handle.
VSTi plugins require a high-performance computer to function properly, which can be expensive to acquire or maintain.
Despite the realistic instrument sounds that VSTi plugins offer, they can sound artificial, especially when used to create sounds or tones that are not naturally found in real instruments.
In conclusion, the choice between VST and VSTi plugins mainly depends on the user’s preference and needs. Both plugins offer exceptional benefits and disadvantages, and it’s upon the user to weigh these and choose the best option for their music creation process.
Credit: www.behance.net
Popular Vst And Vsti Plugins Used In Music Production
VST and VSTi are popular plugins commonly used in music production. The main difference between the two is that VST is a virtual instrument and effect while VSTi specifically refers to virtual instrument plugins. These plugins enhance sound quality and provide an array of features for producers.
In the world of music production, VST and VSTi plugins play an essential role. The right plugins can make a significant difference in the quality of your music production. Before diving into some of the popular VST and VSTi plugins used in music production, let’s first understand the difference between VST and VSTi.
Top Effect Plugins
When it comes to VST plugins, there are countless options available in the market. Some of the top VST plugins are:
Plugin
Description
Native Instruments Kontakt
Kontakt is a software sampler that allows musicians and producers to play and manipulate samples.
Xfer Records Serum
Serum is a wavetable synthesizer that offers high-quality sound and an intuitive interface.
FabFilter Pro-Q 3
Pro-Q 3 is a top-notch equalizer plug-in that is highly versatile and user-friendly.
Waves SSL E-Channel
SSL E-Channel is a plugin created by Waves that models the sound of the legendary SSL 4000 E console.
Top Instrument Plugins
VSTi plugins are virtual instruments that can create a wide range of sounds. Here are some of the top VSTi plugins that have become popular in the music production industry:
Spectrasonics Omnisphere 2 – Omnisphere 2 is a synthesizer plugin that offers an extensive library of sounds and an array of features.
Native Instruments Massive – Massive is a wavetable synthesizer that is known for its wide range of sounds and high-quality filters.
SynthMaster – SynthMaster is a powerful virtual synthesizer that can create various sounds, from classic to futuristic.
Arturia V Collection 7 – V Collection 7 is a bundle of 24 classic keyboards and synths in one plugin.
In conclusion, VST and VSTi plugins are powerful tools for music production, and choosing the right plugin can help in creating professional-quality music. The plugins mentioned above are just a few examples of the vast array of VST and VSTi plugins available in the market. It is essential to select a plugin that fits your music production needs and preferences.
How To Choose Between Vst And Vsti
When deciding between VST and VSTi plugins, it’s important to understand the difference. VST (Virtual Studio Technology) plugins are effects or instruments that can be added to a digital audio workstation, while VSTi (Virtual Studio Technology Instrument) plugins are specifically designed for use as instruments.
Consider your needs and preferences when choosing between the two.
VST and VSTi are the two most popular plugin formats used for virtual instruments and sound processing in music production. While they have certain similarities, there are significant differences that can make choosing between the two a daunting task. In this section, we’ll explore the key considerations that you should keep in mind when deciding between VST and VSTi.
Before You Pick An Effect Plugin
When it comes to choosing between VST and VSTi, there are several key considerations to keep in mind. These include:
Compatibility: Ensure that the VST plugin you choose is compatible with your DAW and operating system.
Functionality: Consider the type of processing you need the plugin to perform, and choose a VST that can meet those requirements.
Quality: Look for a plugin that delivers high-quality sound processing and is rated highly by other producers.
Before You Pick An Instrument Plugin
Choosing a VSTi plugin requires a similar set of considerations, including:
Compatibility: Ensure that the VSTi plugin you choose is compatible with your DAW and operating system.
Sound Quality: Look for a VSTi that delivers high-quality sound that meets your requirements.
Functionality: Consider the type of virtual instrument you need the plugin to emulate, and choose a VSTi that can meet those requirements.
Ultimately, choosing between VST and VSTi depends on what you want to achieve with your music production. By considering the above factors, you can ensure that you select the right plugin for the job.
Frequently Asked Questions For Difference Between Vst And Vsti
Is It Better To Use Vst Or Vst3?
VST3 is the better option because it uses less CPU power and has better MIDI capabilities compared to VST. It also allows for side-chaining and better communication between plugins. However, not all DAWs support VST3, so it ultimately depends on your specific software and needs.
What Does Vst Stand For?
VST stands for Virtual Studio Technology. It is a standard for integrating software-based audio effects and instruments, allowing them to be used within Digital Audio Workstations (DAWs) and other recording software.
Are Vst And Vst2 The Same?
No, VST and VST2 are not the same. VST is a virtual instrument plugin format developed by Steinberg, while VST2 is an updated version of VST with added features like Multiple Audio Inputs and Outputs. VST3 is the latest version of the format.
Does Logic Pro Support These Formats?
Logic uses both VST and VST3 plugins for its audio processing.
Conclusion
To sum it up, understanding the difference between VSTs and VSTis is crucial for any music producer looking to enhance their digital production capabilities. While both offer similar features, VSTis tend to be more versatile and complex, providing users with an array of sound manipulation options.
However, VST plugins are more straightforward and convenient for those who prefer a simpler approach. Ultimately, the choice between the two comes down to personal preference and production needs. Make sure to take the time to experiment with both to determine which one best suits your music production style.
To use mix bus compression, apply the compressor to your entire mix to gel the sound together and add cohesion. Mix bus compression is an essential technique used by audio engineers to enhance and maintain a balanced mix.
Also, by processing the entire mix, it helps to level out peaks and dips in your mix to produce a more defined and rounded sound. This technique is particularly effective when applied to genres such as rock and pop, where a dense mix is common.
Moreover, the mix bus compressor can be used subtly to add warmth and definition or aggressively to achieve a more colored sound. However, it is important to use this technique with care, as over-compressing can lead to a loss of dynamics and depth.
Mix Bus Compression
In addition, as a music producer, having the right mix is essential for a track to be successful. One technique that can help achieve a polished and professional sound is bus compression. In this post, we will cover what glue compression is, why you should use it, and how to use it effectively.
What Is Mix Bus Compression?
Mix bus compression, also known as stereo bus compression, involves processing the entire mix instead of individual tracks. Furthermore, this technique involves using a compressor on the mix bus to control the dynamic range and add cohesion to the mix.
Additionally, the purpose of master bus compression is to bring all the elements of the mix together, making them sound as if they belong in the same sonic space. It can also help ensure consistency in the level of the track and boost the overall loudness of the mix.
Why Should You Use It?
Also, Bus compression can be used effectively to give your track a polished and professional sound. When done properly, it can enhance the clarity, definition, and punchiness of your mix, making it more enjoyable for your audience to listen to.
Glue compression can also save time by allowing you to make adjustments to the overall mix instead of tweaking individual tracks. It can also help you achieve a more consistent sound across different playback systems, such as car speakers or headphones, ensuring your track sounds great no matter where it’s played.
How To Use It Effectively
Before applying master bus compression, it’s essential to have a solid mix. Moreover, you should make sure that the levels of each track are balanced, and there are no significant issues with EQ or panning.
When it comes to choosing a compressor, you should consider the style and dynamic control that you want to achieve. A good starting point is to set the attack to a fast setting to prevent peaks, and the release to slow to control the overall mix. The ratio can be set according to the dynamics of the song, but 2:1 is a good starting point.
In addition, it’s essential to adjust the threshold carefully to ensure that the compression remains transparent and doesn’t add unwanted distortion. The makeup gain can be adjusted to compensate for any reduction in volume caused by the compression.
Additionally, you can use bus compression in conjunction with EQ or other forms of processing to achieve the desired result. Remember to A/B test your mix to hear the difference that compression is making and to make any necessary adjustments.
Credit: producelikeapro.com
Setting Up Mix Bus Compression
Learn how to effectively use glue compression to enhance your overall mix. With careful consideration of attack, release, and ratio settings, master bus compression can add depth, cohesion, and clarity to your mix.
Using bus compression can take your mixes to the next level. However, it’s important to set up your compressors correctly to ensure the best results. Here’s how to set up glue compression in four simple steps:
Choosing The Right Compressor
The first step in setting up master bus compression is choosing the right compressor. There are many compressors to choose from, but not all compressors are created equal. You want to choose a compressor that is transparent and doesn’t color the sound too much. Some popular choices for bus compression are the SSL G-Master Buss Compressor, the API 2500, and the Waves SSL G-Master Buss Compressor.
Setting The Threshold
Setting the threshold is the next step in setting up glue compression. The threshold determines when the compressor starts to kick in. You want to set the threshold so that you are only compressing the peaks of the mix. Start by setting the threshold to -3dB or -4dB and adjust as needed.
Adjusting The Ratio And Attack
Once you have set the threshold, it’s time to adjust the ratio and attack settings. The ratio determines the amount of compression that is applied to the peaks of the mix. A ratio of 2:1 is a good starting point for master bus compression. The attack determines how quickly the compressor reacts to the peaks of the mix. A faster attack will give you a more aggressive sound, while a slower attack will give you a smoother sound.
Setting The Release Time
The final step in setting up bus compression is setting the release time. The release time determines how quickly the compressor releases the gain reduction once the peaks have passed. A longer release time will give you a smoother sound, while a shorter release time will give you a more aggressive sound. Start by setting the release time to around 100ms and adjust as needed. Following these four steps will help you get your glue compression set up correctly. Remember to use your ears and adjust the settings to suit your individual mix. Happy mixing!
Mix Bus Compression Techniques
Learn how to elevate your mix to new heights with master bus compression techniques. These techniques help to glue all the elements of your mix together and add cohesion, balance, and warmth. Add a punch and refinement to your music with this essential tool.
Bus compression helps to bring cohesiveness and loudness to a mix and is a must-know technique for any audio engineer. In this post, we’ll cover some of the glue compression techniques that will take your mixes to the next level.
Parallel Compression
Parallel compression, also known as New York compression, is a technique that involves blending a compressed and uncompressed signal together. This method is excellent for adding body and depth to a mix without sacrificing the dynamics. Here’s how you can do it:
Duplicate the mix bus to create a new bus.
Compress the duplicated bus with a high ratio and low threshold to add sustain to the mix.
Blend the compressed bus with the original mix. Adjust the blend to taste.
Sidechain Compression
Sidechain compression is a technique that involves using the output of one track to trigger the compression of another track. This technique is excellent for creating space in the mix and ensuring that certain elements are heard. Here’s how you can do it:
Create a send from the kick drum track to the compressor on the mix bus.
Set the compressor to medium to high ratio and adjust the threshold to taste.
Adjust the attack and release times to allow the kick drum to punch through the mix.
Multiband Compression
Multiband compression is a technique that involves compressing different frequency ranges individually. This technique is excellent for controlling the dynamics in specific frequency ranges and is especially useful for genres like EDM and hip hop. Here’s how you can do it:
Insert a multiband compressor on the mix bus.
Split the frequency spectrum into multiple bands using the crossover points.
Apply compression to each band as required, adjusting the threshold, ratio, attack, and release settings to taste.
Master bus compression is an art form, and it will take some time to master. However, with these bus compression techniques, you’ll be well on your way to creating professional-level mixes.
Credit: www.youtube.com
Mix Bus Compression Tips
Learn how to enhance the sound quality of your mixes with glue compression tips. Discover how to use master bus compression to create a professional, polished, and cohesive sound for your audio productions.
Bus compression is an essential tool in modern music production. It can help glue together a mix and make it sound cohesive. However, glue compression can also be a tricky thing to get right. In this post, we’ll share some master bus compression tips to help you use this tool effectively and get the best possible results.
Avoid Overcompressing
One of the most important bus compression tips is to avoid overcompressing. It can be tempting to use a heavy-handed compression setting, but this can actually do more harm than good. Overcompressed mixes can end up sounding lifeless and flat. Instead, try to use a light touch when it comes to glue compression. Start with a low ratio and adjust the threshold until you hear a subtle but noticeable difference.
Use Your Ears
Another crucial tip is to trust your ears when setting up a mix bus compressor. Master bus compression is highly dependent on the individual mix and the genre of music you’re working on. There is no one-size-fits-all setting that will work for every mix. Therefore, you should always adjust the compressor settings based on what you’re hearing. Use your ears to guide you in selecting the right ratio, threshold, and attack/release settings.
Automate Your Settings
Automation is an essential part of modern music production, and it also applies to bus compression. It can be challenging to get the settings right for every part of a song using a single compressor setting. Instead, consider automating your glue compression settings as the mix progresses. You can set up different compression settings for verses, choruses, and bridges, for example, to ensure that the music is always hitting the compressor in the right way.
Experiment With Different Compressors
Finally, one of the most fun mix bus compression tips is to experiment with different compressors. There are many compressor plugins out there, and they all have unique characteristics that can affect the sound of your mix. Try using a variety of different compressors to see which ones work best for you. Some compressors can add warmth, while others can be more transparent and have less impact on the sound. Feeling stuck in your mix? Experiment with a new compressor. In conclusion, these mix bus compression tips will help you use this essential tool effectively. Avoid over-compressing, trust your ears, automate your settings, and experiment with different compressors. When done properly, mix bus compression can elevate your music production game and help your mixes sound more professional.
Credit: m.youtube.com
Frequently Asked Questions Of How To Use Mix Bus Compression
How Do You Use Compression On A Mix Bus?
To use compression on a mix bus, start by adding a compressor plugin to the mix bus. Adjust the threshold and ratio settings to achieve the desired amount of compression. Use makeup gain to bring the overall level back up if needed.
It’s important to use moderation with mix bus compression to avoid over-compression and loss of dynamics.
Is Mix Bus Compression Necessary?
While mix bus compression isn’t a requirement, it can help bring clarity and cohesion to a mix. It can add a sense of glue to the elements in a mix and help pull them together. However, it’s important to use compression subtly and only if necessary for the specific project.
The decision ultimately depends on the needs of the mix.
How Do You Use Compression In Mixing?
Compression is a critical tool in mixing that helps to balance the dynamics of audio. By controlling the levels of the loudest and quietest parts, compression makes it easier to hear everything in the mix. It can also add sustain and punch to drums, enhance the impact of bass and guitars, and give vocals a smoother and more consistent sound.
Compression settings depend on the individual track being processed and should be adjusted based on the desired result.
How Much Compression Does A Mixbus Have?
Mixbuses can have varying amounts of compression, as it is typically dependent on the specific audio production setup and preferences of the producer or engineer. There is no set level of compression for a Mixbus, as each project will require different levels of processing.
Conclusion
Mix bus compression is an essential tool that can bring your mixes to life. It can help you to control your dynamic range, add warmth and character to your tracks, and glue everything together. The key to using mix bus compression effectively is to use it sparingly and understand how it affects your overall mix.
By following these tips and experimenting with different settings, you can achieve a professional-sounding final mix that stands out from the crowd. Start experimenting and have fun with the compression on your mix bus!
To make a chorus sound bigger, use doubling, stacking, panning, and reverb. If you want to create a professional-sounding chorus that pops, you need to make it sound bigger.
Even if you have a good vocal track, you can take things to the next level. But how do you make a chorus sound bigger? There are a few techniques that you can use to create a richer, more dynamic sound.
The first technique is to use doubling. This means recording multiple takes of the same part. You can also stack different takes or have other singers come in to harmonize. Panning is also important to create a wider stereo image. Finally, adding reverb can help create the impression of a larger space. This article will explore these techniques and provide a guide on how to apply them to your chorus.
Credit: mixandmastermysong.com
Start With Double Tracking
If you’re working on a music production and wondering how to make your chorus sound bigger, then you are in the right place. One of the best ways to achieve this is by starting with double tracking – a technique where you record the same vocal performance twice and pan them in the stereo field to create a wider sound.
Use Slight Time Variation
When double-tracking, it’s important to use slight time variation between the two takes to create a more natural and organic sound. This could be done by moving the second take slightly ahead or behind the first take by a few milliseconds. It may take some experimentation to get the timing right, but once you find the sweet spot, you’ll hear the difference it makes to the overall sound of the chorus.
Consider Using Different Microphones
Using different microphones to record each take is another way to add some variation to the vocal sound. Different microphones have different characteristics, and when combined, they can create a more complex and interesting vocal sound. For example, you could try recording one take with a dynamic microphone and the other take with a condenser microphone.
Experiment With Different Vocal Styles
Experimenting with different vocal styles can also help to make your chorus sound bigger. Try changing the way you sing the second take. For example, if you sang the first take with a soft and breathy voice, try singing the second take with a more powerful and energetic voice. This will create contrast between the two takes, making the chorus sound fuller and more dynamic.
By using these tips, and some creativity, you can make your chorus sound bigger and more impressive than ever before. Give it a try and see how much difference it makes to your music production.
Credit: learnaudioengineering.com
Add Harmonies
To make a chorus sound bigger, an effective method is to add harmonies. Experimenting with different vocal parts and layering them together can create a fuller sound and add depth to the chorus. This technique can make the chorus more impactful and memorable for listeners.
Add Harmonies:
Adding harmonies is one of the best ways to make a chorus sound bigger. By layering harmonies on top of the main melody, you can create a fuller, more complex sound that will capture the listener’s attention. Here are some tips for adding harmonies that will take your chorus to the next level.
Use Thirds And Fifths:
When adding harmonies, using third and fifth intervals can create a rich and full-sounding chorus. Third harmonies are created by singing a note that is three notes higher or lower than the main melody, while a fifth harmony is created by singing a note that is five notes higher or lower. Experiment with different combinations of third and fifth harmonies to find the right sound for your chorus.
Choose Your Vowel Sounds Carefully:
Vowel sounds are an important consideration when adding harmonies to a chorus. To create a cohesive sound, make sure that all vocalists are singing the same vowel sound at the same time. This will help to avoid any dissonance or clashes that can detract from the overall effect. Consider experimenting with different vowel sounds to find the right combination for your chorus.
Try Using Swells To Build The Chorus:
Swells can be used to build the momentum of a chorus and create a sense of anticipation and excitement. Start by singing softly and gradually increase the volume as the chorus progresses. This will create a sense of crescendo that will draw the listener in and make the chorus feel bigger and more powerful. In summary, by adding harmonies that use thirds and fifths, choosing the right vowel sounds, and using swells to build the chorus, you can make your chorus sound bigger and more powerful. Experiment with these techniques to find the right combination for your song and watch your chorus come to life.
Create Space With Panning
Creating space with panning can make a chorus sound bigger and wider. Panning is the process of positioning audio in the stereo field by adjusting the balance between the left and right channels.
Pan Duplicates Differently
To create space, pan duplicate tracks in different directions. For example, if you have two guitar tracks, pan one to the left and the other to the right. This will make the guitar sound wider and give the impression of two guitarists playing together.
You can also pan vocal tracks differently. For instance, you can pan lead vocals slightly to the left and backing vocals slightly to the right. This will create a sense of depth and space.
Try Mixing Hard Panning And Narrow Stereo Widths
Mixing hard panning and narrow stereo widths can make a chorus sound wider and more dynamic. Hard panning involves panning a track fully to one side, while narrow stereo width involves panning a track partially to one side.
Use hard panning for instruments that need to stand out, such as lead vocals or guitar solos. Use narrow stereo width for instruments that need to sit in the background, such as rhythm guitars or keyboards.
Use Automation To Add Interest
Automation can add interest and variation to a chorus by changing the panning of tracks over time. For example, you can pan a guitar track from left to right during the chorus to create a sense of movement.
You can also use automation to create a call-and-response effect between different instruments. For instance, you can pan guitars and keyboards in opposite directions to create an interplay between them.
By utilizing these panning techniques, you can create a bigger and wider sound for your chorus. Experiment with different panning settings to find what works best for your mix.
Use Reverb And Delay To Create Ambience
By using reverb and delay effects, you can add ambience to your chorus and make it sound bigger. The reverberation effect can create a sense of space while the delay effect can add depth and dimension to your vocals and instruments.
Experiment with different settings to find the perfect balance for your mix.
Creating a bigger chorus sound can mean the difference between a great song and a mediocre one. One of the most effective ways to enhance a chorus is by using reverb and delay to create ambience. Reverb creates the feeling of space and can make vocals or instruments sound like they were recorded in a larger room. Delay, on the other hand, can provide depth and add a sense of movement to the sound. In this article, we will explain how to use reverb and delay to create a bigger and better chorus.
Add Depth To The Mix With Reverb
Using reverb is a great way to add depth and space to your mix. The amount of reverb you apply will depend on the sound you’re going for, but for a chorus, it’s best to use more than you would for a verse. You can create a spacious sound by increasing the decay time or the reverb time, which will make the sound linger longer. However, make sure you don’t overdo it, as too much reverb can lead to a muddy mix.
Use Short Delay Times For A More Intimate Sound
Delay can also be used to make a chorus sound bigger, but it should be used carefully. For a more intimate sound, use shorter delay times, typically between 50-250 milliseconds. This will create a subtle echo effect that can give the impression of more voices singing. Make sure the delay is in time with the song’s tempo, otherwise, it may sound out of place.
Combine Reverb And Delay For Extra Depth And Space
When you combine reverb and delay, you can create a bigger sound with extra depth and space. To achieve this effect, start with a longer reverb decay time and a shorter delay time. As you increase the delay time, the sound will become more spaced out and ethereal. Be careful not to use too much delay, as this can make the sound too diffuse and muddy. In conclusion, using reverb and delay can make a chorus sound bigger and more impressive. The key is to use these effects judiciously and experiment with different settings to get the sound you’re looking for. With these tools at your disposal, you can take your chorus to the next level and create a song that truly stands out.
Consider Using A Stereo Widener
If you’re a music enthusiast, you know that a chorus is a fundamental element of any song. The chorus is what makes the song memorable and catchy. However, if the chorus sounds too narrow, it can fail to capture listeners’ attention. One way to make the chorus more prominent and bigger is to use a stereo widener. In this post, we’ll discuss how to use it.
Find A Plugin That Works For Your Mix
There are several stereo widener plugins available in the market, each with its unique features. Some plugins have a gentle widening effect, while others produce a more extreme sound. It is essential to choose a plugin that suits your mix and style. The best way to find the right plugin is to experiment with different options available, and then select the one that delivers the sound you desire. Some of the popular options available in the market include:
Plugin
Features
S1 Stereo Imager
Stereo width control, individual panning, and width meters
Ozone Imager
easy-to-use, multiband stereo imaging plugin
Ozone Widening
harmonically rich and musically pleasing stereo widening
Soundtoys MicroShift
pitch-shifting, classic stereo widening, and chorus
Use With Caution To Avoid Making The Mix Too Wide
While stereo wideners are a great tool for enhancing the mix, it is essential to use them carefully to avoid making the entire mix too wide. If you make the mix too wide, it can lose focus and clarity, making it difficult for listeners to distinguish between instruments. Thus, it is crucial to use the stereo widener in moderation and ensure that the mix still has a center and a defined stereo image.
Experiment With Different Settings
The best way to use a stereo widener is to experiment with various settings to find the ideal sound. It is crucial to start with subtle settings, gradually increasing the stereo width to find the optimum sound. With most plugins, you can control the stereo width by adjusting the wet and dry signals, setting the width threshold, and controlling the frequency range. By experimenting with different settings, you can achieve the sound you’re looking for and give your chorus the presence and impact it deserves.
Finalize The Mix With Eq And Compression
If you want to make a chorus sound bigger, you need to finalize the mix with EQ and compression. These two audio effects can help you achieve a cohesive sound that can make all elements of the chorus come together harmoniously. However, you need to use the right techniques to ensure the best results.
Use Eq To Cut Problem Frequencies
One effective way to make a chorus sound bigger with EQ is to cut problem frequencies that can cause muddiness or harshness in the mix. For instance, if you notice that the vocals have too much low-end, you can use an EQ to reduce the bass frequencies to give the vocals more clarity. Likewise, if you find that the guitars or keys are too piercing, you can use an EQ to tame the high-end and make them sound less harsh. Take note that cutting frequencies should be done subtly.
Add Compression For A Cohesive Sound
Compression is also an important tool when it comes to finalizing the mix of a chorus. Compression helps to even out the levels of the different elements in the mix, making them sound more cohesive. For instance, if you have a dynamic vocal performance, a compressor can help to tame the peaks and bring up the quieter parts so that the vocals sit right in the mix. You can experiment with different compressor settings to get the best results.
Make Sure All The Elements Gel Together In The Mix
Lastly, to make a chorus sound bigger, you need to ensure that all the elements in the mix gel together. It means that no one instrument or vocal is overpowering others or sounds out of place. You can use techniques like panning, volume adjustment, and reverb to make sure that all the instruments and vocals are heard clearly, and they complement each other. Keep experimenting until you find the perfect balance.
Points to Remember
Do’s
Don’ts
Use EQ to cut problem frequenciesAdd compression for a cohesive soundEnsure all the elements gel togetherExperiment with different settings
Overdo the EQ or compressionMake one element too loudUse too much reverbStrive for perfection too much
Test The Mix On Different Systems
To make a chorus sound bigger, it’s essential to test the mix on different systems. This ensures that the music sounds great on any speaker, from a car stereo to high-quality headphones. By doing this, you’ll be able to make the chorus and other elements of the track sound fuller and more immersive.
Creating a chorus that sounds big and impressive is crucial to make your music stand out in a sea of other tracks. While you may think that you have achieved the perfect sound, the truth is that the mix may not translate well across all playback systems.
Listen On Headphones And Speakers
One of the best ways to get a sense of your mix’s sound is by testing it on both headphones and speakers. Headphones provide a more intimate and detailed sound while speakers offer a wider spatial perspective. When listening, keep an ear out for any inconsistencies in levels, clarity, or muddiness.
Try Your Mix In Your Car
Another way to get a gauge on your mix’s sound is by playing it in your car. Car audio systems reveal how your mix sounds in a confined space, and it may highlight unwarranted bass or uneven levels. You may notice that the drums don’t have as much punch as they do on your studio monitors or that the vocals disappear into the mix.
Make Adjustments As Needed For Different Playback Systems
It’s essential to make adjustments to your mix as needed for different playback systems. For instance, if you noticed the lack of punch in your car audio, add a bit more saturation in the mid-low frequencies. Alternatively, if you hear inconsistencies or anomalies on your headphones, consider rolling off some of the low-end frequencies. In conclusion, testing the mix on different systems is an ideal way of achieving a solid and impressive sound. By listening on headphones, speakers, and in your car, you get a better understanding of how your mix will sound on different playback systems and can make adjustments accordingly. Keep these tips in mind the next time you are creating a chorus, and you’ll undoubtedly impress your fans.
Credit: www.masteringthemix.com
Frequently Asked Questions For How To Make A Chorus Sound Bigger
How Do You Make The Chorus Bigger?
To make a chorus bigger, you can add instruments or vocal layers to create a fuller sound. Increasing the volume or adding reverb can also help. Consider changing the rhythm or melody slightly to make it stand out. Adding harmonies or doubling the vocal track can make a significant impact.
Experiment with different techniques and see what works best for your specific song.
How Do I Make My Chorus Louder?
To make your chorus louder, adjust the volume of the chorus track relative to the rest of the mix. Increase the chorus track’s volume, add compression, or apply a limiter to boost its level without clipping. Remember to always check the mix with different playback systems to ensure it sounds good at different volumes.
How Do I Make My Chorus More Exciting?
To make your chorus more exciting, consider using dynamic rhythms and melodies, adding harmonies or backing vocals, changing the lyrics slightly with each repetition, or adding a bridge section with a different melody. You can also try experimenting with instrumentation or incorporating unexpected sounds or effects.
How Do You Lift A Song Chorus?
To lift a song chorus, you can use dynamic changes in volume, add a stronger drum beat, introduce a new instrument, or change the melody slightly. It’s important to create contrast with the verse and build momentum leading up to the chorus.
Adding harmonies or a catchy hook can also make the chorus stand out and be more memorable.
Conclusion
To make a chorus sound bigger requires some creativity, experimentation, and knowledge in music production. From using EQ to enhance specific frequencies, adding reverb to create a sense of space, to layering vocal harmony, all these techniques can help to widen and intensify the sound of your chorus.
Remember, it’s important to avoid over-processing and to maintain a balanced mix. With these tips and a little bit of practice, you can make your chorus sound bigger and more impactful, capturing the attention of your listeners. Happy producing!
The best equipment for music production includes a computer, digital audio workstation software, audio interface, studio monitors, and headphones. These items provide a solid foundation for creating high-quality music productions.
As an Amazon Associate I earn from qualifying purchases.
When it comes to music production, having the right equipment is crucial. Also, a computer with ample processing power and storage is necessary, as is digital audio workstation (DAW) software to manipulate sound. An audio interface is needed to connect instruments and microphones to the computer, while studio monitors and headphones allow for accurate sound reproduction.
Additionally, a MIDI controller, microphone, and acoustic treatment for your workspace can further enhance the production process. In addition, with these tools at your disposal, you’ll be able to create professional-grade music productions.
Credit: www.native-instruments.com
Digital Audio Workstations (daw) for Music Production Equipment
Also, Digital audio workstations (DAWs) are essential tools for any music producer. For example, they allow you to create, edit, and mix music using a variety of instruments and effects, all within one software program. Some of the best DAWs on the market include Ableton Live, FL Studio, and Logic Pro X.
Moreover, Digital Audio Workstations, commonly known as DAWs, are software programs that allow music producers to record, edit, and mix music on their computers. As a result, they are the backbone of music production, enabling musicians to create high-quality recordings in their home studios. In this post, we will discuss the best equipment for music production, with a focus on DAWs. We’ll cover everything from selecting the right DAW to the essential features that every music producer needs.
Selecting The Right Daw for Music Production Equipment
In addition, choosing the right DAW is crucial for any music producer. However, there are plenty of options on the market, each with its own unique features and characteristics. Some of the factors to consider when choosing a DAW include your level of experience, your budget, and the music styles you plan to produce. If you’re a beginner, you may want to consider a DAW that is user-friendly and has a lower price point. Some popular beginner-friendly DAWs include GarageBand, LMMS, and Audacity. On the other hand, if you’re an experienced producer with a larger budget, you may want to invest in a more advanced DAW. Some professional-grade DAWs include Ableton Live, Logic Pro X, and Pro Tools.
Top Daws In The Market for Music Production Equipment
There are plenty of DAWs out there, but some of the most popular ones in the market include:
Ableton Live
Furthermore, Ableton Live is a powerhouse DAW that is popular for its versatility and ease of use. Then, it’s ideal for live performances, electronic music production, and DJing. It’s a bit pricier than some other options, but it’s worth the investment for its advanced features.
Logic Pro X
Additionally, Logic Pro X is a popular DAW among Mac users. In short, it’s a professional-grade DAW that is ideal for recording, editing, and mixing music. It’s also great for scoring films and creating sound effects.
Pro Tools
Also, Pro Tools is an industry-standard DAW that is commonly used in recording studios and post-production houses. Similarly, it’s known for its advanced audio editing capabilities and is perfect for recording live instruments.
Essential Features Of A Daw for Music Production Equipment
While the features of a DAW can vary from one software to another, there are some essentials that every DAW should have. These include:
Multitrack recording
Mixing capabilities
Virtual instruments and synthesizers
Audio editing tools
Support for multiple file formats
Time-stretching and pitch-shifting capabilities
When selecting a DAW, make sure it has all the essential features you need for your music productions. Also, this will help ensure that you can produce high-quality music that meets your standards. In conclusion, a digital audio workstation is a crucial tool in the arsenal of any music producer. When selecting a DAW, consider your level of experience, budget, and the type of music you plan to produce. Look for a DAW that has all the essential features you need, and invest in a high-quality audio interface and monitor system to enhance your overall music production experience.
Studio Headphones for Music Production Equipment
Moreover, for music production, studio headphones are essential equipment. In addition, they offer high-quality sound with noise-isolation and ensure accurate mixing and mastering of tracks. A good pair of headphones can make a significant difference in the final output of the recordings.
Studio Headphones Studio headphones are one of the most crucial equipment for music production. For example, it enables producers to hear subtle details in the mix, which makes it easier to make critical production decisions. Choosing the right studio headphones is essential to get the most out of your investment.
Types Of Studio Headphones for Music Production Equipment
Furthermore, there are two types of studio headphones:
Open-Back Studio Headphones
Closed-Back Studio Headphones
Open-Back Studio Headphones are designed for critical listening. They offer an open acoustic environment, which allows the sound to breathe. They are perfect for mixing and mastering.
Closed-Back Studio Headphones are designed for recording and tracking. They offer superior isolation, which prevents sound bleed, making them suitable for recording in a noisy environment.
Factors To Consider While Choosing Studio Headphones
Additionally, choosing the right studio headphones can be overwhelming. Here are some essential factors to consider while choosing the best studio headphones for your needs:
Frequency Response: The frequency range of the headphones should be wide, which allows the user to hear every detail in the mix.
Impedance: Low impedance headphones have better audio quality.
Comfort: Studio headphones are worn for extended periods, so comfort is critical. In addition, Make sure the headphones are comfortable and fit well.
Build Quality: The headphones should be sturdy and durable to withstand heavy usage.
Top Headphones In The Market for Music Production Equipment
Additionally, there are various studio headphones available in the market. As a result, here is a list of some best studio headphones:
Sennheiser HD 600: It is an open-back studio headphone that delivers clear and detailed sound.
Beyerdynamic DT 770 PRO: It is a closed-back studio headphone perfect for recording and tracking. It offers excellent noise isolation and comfort.
Audeze LCD-X: It offers a fantastic listening experience with its open-back design and a wide frequency range.
Audio-Technica ATH-M50x: It is a closed-back studio headphone that offers superior sound isolation and comfortable wearability.
In conclusion, choosing the right studio headphone can make a significant difference in the quality of the final product. However, whether you opt for open-back or closed-back studio headphones, make sure they fit your comfort level, produce excellent audio quality, and meet your budget requirements.
Audio Interfaces for Music Production Equipment
Additionally, Audio interfaces are essential for high-quality music production. Then, they convert analog audio signals into digital audio for recording on a computer and provide the necessary inputs and outputs for connecting instruments, microphones, and studio monitors.
When it comes to music production, high-quality audio interfaces are a necessity. In short, an audio interface acts as the backbone of any recording setup, enabling the inputting of high-quality audio signals into a computer for editing and production. In this section, we will explore the different types of audio interfaces, factors to consider while choosing an audio interface, and some of the top audio interfaces available in the market today.
Types Of Audio Interfaces for Music Production Equipment
Also, Audio interfaces come in different types and configurations, including USB, Thunderbolt, Firewire, and PCI formats. Similarly, in this section, we will briefly describe these audio interface types and their features:
USB Audio Interface: A USB audio interface is the most common type, and it is compatible with both Mac and PC. It is affordable, easy to use, and usually provides a decent amount of inputs and outputs for any small to medium recording setup.
Thunderbolt Audio Interface: Thunderbolt audio interfaces are designed for professional use. They offer faster data transfer speeds, low latency rates, and improved overall performance, making them a favorite among professional sound engineers.
Firewire Audio Interface: Firewire audio interfaces are becoming obsolete. They were once popular due to the high-speed data transfer rates, but Thunderbolt interfaces took over that market. Firewire interfaces are not recommended for new setups because it is challenging to find compatible hardware these days.
PCI Audio Interface: PCI audio interfaces are the best option for those who require extremely low latency and high channel count. They are expensive, difficult to install, and are suitable only for desktop computers.
Factors To Consider While Choosing An Audio Interface
Selecting the right audio interface can be challenging, given the many options available. Here are some important factors to consider when choosing an audio interface:
Number of Inputs and Outputs: Consider the number and type of inputs/outputs required for your recording setup.
Bit Depth and Sample Rate: Audio interfaces with higher bit depth and sample rate produce better sound quality.
Compatibility: Ensure that the audio interface is compatible with your computer and recording software.
Preamp Quality: High-quality preamps ensure that your recordings do not have any unwanted noise or distortion.
Latency: Low latency is essential for live recording and monitoring purposes.
Top Audio Interfaces In The Market for Music Production Equipment
Here are some of the best audio interfaces in the market, based on their features, performance, and user reviews.
Audio Interface
Number of Inputs/Outputs
Connection
Price
Universal Audio Apollo Twin MKII
2 In / 6 Out
Thunderbolt
$799
Focusrite Scarlett 2i2
2 In / 2 Out
USB
$159.99
MOTU M4
4 In / 4 Out
USB-C
$219
Audient iD44
20 In / 24 Out
USB-C
$699
In conclusion, choosing the right audio interface is crucial to producing high-quality music. Also, by considering the factors mentioned above, you can select an interface that suits your needs and budget. Whether you are a beginner or a professional musician, there is an audio interface out there that suits your music production needs.
Credit: www.digitaldjtips.com
Studio Monitors
Studio monitors are critical equipment for music production, as they are responsible for delivering accurate, high-quality sound that is essential for mixing and mastering music recordings. Choosing the right studio monitors is crucial for producing the best sound quality results. With a wide variety of studio monitors in the market, finding the right one can be a daunting task. This post will explore the different types of studio monitors, key factors to consider when purchasing studio monitors, and the top studio monitors available on the market.
Types Of Studio Monitors
There are two main types of studio monitors: active and passive. Active studio monitors have built-in amplifiers, which simplifies the setup process and offers better control over different speakers’ components. Passive studio monitors require a separate amplifier to function and offer a more traditional approach to audio quality control. Both types of studio monitors have their advantages, and choosing the right one depends on specific needs, technical requirements, and budget.
Factors To Consider While Choosing Studio Monitors
Several factors come into play when choosing the best studio monitors for music production. These include room size, listening preferences, monitor size, frequency response, and overall sound quality. Rooms with irregular shapes or reflective surfaces require monitors with better acoustic adjustment, while listening preferences such as loudness and genre need to be factored in when deciding on the frequency response needed. In most cases, the bigger the room, the larger the monitor required, and the better the sound quality.
Room Size
Listening Preferences
Monitor Size
Frequency Response
Sound Quality
Small
Loudness
5-6 inches
70 Hz to 20 kHz
Detailed
Medium
Genres
6-8 inches
60 Hz to 20 kHz
Neutral
Large
8-10 inches
50 Hz to 20 kHz
Warm
Top Studio Monitors In The Market
Presonus Eris E3.5: Small and budget-friendly, these monitors offer a clean and detailed sound with a wide frequency response.
JBL 305P MkII: These monitors pack a powerful punch, with precise sound imaging and an excellent low-frequency response, making it perfect for bass-heavy productions.
Yamaha HS8: With its 8-inch cone woofer, these monitors deliver an accurate and flat frequency response, making it an excellent choice for mixing and mastering.
KRK Rokit 5 G4: These monitors offer a unique and colorful design, with a sound that is both detailed and warm, making them a fan favorite among producers and DJs alike.
Choosing the right studio monitors can make all the difference in producing the best quality music. While there are many options available, understanding the different types, key factors to consider, and top studio monitors in the market can help guide you towards making the right choice.
Midi Controllers
MIDI controllers are essential equipment for music production because they allow for precise control over virtual instruments and audio software. Choosing the right MIDI controller can greatly improve workflow and creativity, as well as enhance the overall sound quality of your productions.
MIDI controllers are the ultimate must-haves for any music enthusiast who wants to create, record, and produce their beats. These controllers allow you to connect with your favorite music production software and generate the sound you want effortlessly.
Types Of Midi Controllers
MIDI controllers come in different forms and shapes. The most common ones include:
Keyboard Controllers: These controllers are designed to mimic traditional piano or keyboard keys and are perfect for controlling virtual instruments.
Pad Controllers: They comprise drum pads that allow you to create drum beats, sequences, and samples.
Fader Controllers: These controllers feature sliders that enable you to enhance your mixes by adjusting the faders and knobs’ positions.
Mixing Controllers: With these controllers, you can adjust the balance, EQ, and volume of each track in your mix.
Factors To Consider While Choosing A Midi Controller
When shopping for a MIDI controller, you need to consider the following factors:
Portability: If you plan to use the controller while on the move, then you should consider its size and weight.
Compatibility: Ensure that your controller is compatible with your preferred software and that it will work well with your computer’s operating system.
Control Method: Choose a controller that provides the best control method for you. For instance, keyboard controllers are perfect for controlling musical notes, while pad controllers are suited for drumming beats.
Sensitivity: Check if the controller responds to velocity, aftertouch, and note-on. Such features can enhance your music’s realism.
Budget: Finally, your budget is a crucial consideration. Ensure that you choose a controller that offers the best value for your money.
Top Midi Controllers In The Market
1. Akai Professional MPK Mini MKII:
This is a perfect controller for anyone who wishes to produce travel-friendly music. With its 25-mini-key design, eight drum pads, and eight assignable knobs, this controller is compact, yet powerful.
2. Arturia KeyLab MKII 49:
The Keylab MKII is perfect for anyone looking for a keyboard controller with a lot of control options. It comes with 16 RGB-backlit pads, 9 faders, 9 rotary encoders, and 5 expression control inputs.
3. Native Instruments Komplete Kontrol M32:
This 32-mini-key controller is designed to provide optimal control for creating and recording music. It provides eight touch-sensitive control knobs, ergonomic pitch, and modulation touch strips, along with a three-digit LED display.
4. Novation Launchpad Pro MK3:
This pad controller comprises of 64 RGB-backlit velocity-sensitive pads, which makes it perfect for beat making. It also has eight custom modes, dedicated capture MIDI function, and an offline note mode. Choosing a MIDI controller can be a daunting task, but considering the factors mentioned above and researching to ensure that the controller you pick meets your specific needs, goal, and budget, can help you make an informed decision.
Microphones
For music production, the best equipment one can invest in is a high-quality microphone. A good microphone can capture the essence and soul of the music being recorded, making it an essential tool for any musician, producer or engineer. With various types and models available, finding the perfect microphone for a specific need is crucial.
Types Of Microphones
Microphones are available in different types, each designed to pick up sound in a particular way. Dynamic, condenser, ribbon, and USB microphones are popular types that professionals use to record high-quality audio. Dynamic microphones work great for loud sounds, such as drums and electric guitar amps. Condenser microphones, on the other hand, pick up more detail and are useful for recording vocals, acoustic guitars, and pianos. Ribbon microphones are ideal for mellow sounds, such as string instruments, horns, and percussions. Lastly, USB microphones are easy to use and offer decent quality recording at an affordable price.
Factors To Consider While Choosing A Microphone
Choosing the right microphone can be challenging, but it’s essential to get the best performance from your recording setup. The following factors can help you select the right microphone for your needs: – Pick-up pattern: Microphones come with various polar patterns that determine the direction they pick up sound. Omni, cardioid, and figure-8 are popular pickup patterns that you can choose depending on the type of sound you are recording. – Sensitivity: Microphones vary in their sensitivity levels, and you should choose one that matches the sound source you are recording.
High-sensitivity microphones are ideal for quiet sounds, such as vocals and speech, while low-sensitivity mics are required for loud sounds. – Frequency response: This refers to the range of frequencies that a microphone can capture. If you want to record high-pitched sounds, you need a microphone with a higher frequency response.
Top Microphones In The Market
Here are some of the most popular microphones in the market today:
Microphone
Type
Price Range
Shure SM7B
Dynamic
$399-$449
Audio-Technica AT4053B
Condenser
$599-$649
Rode NTR
Ribbon
$449-$499
Rode NT-USB Mini
USB
$99-$149
All of these microphones are great for music production, and you can choose the type based on your recording needs. The SM7B is a popular dynamic microphone used for podcasting, broadcasting, and recording vocals. The AT4053B is a better condenser microphone for recording acoustic guitars, drums, and violins. The Rode NTR is a high-end ribbon microphone that delivers a warm and rich tone, ideal for recording vocals and quiet instruments. Lastly, the Rode NT-USB Mini is a budget-friendly option for podcasters and musicians looking for a quick and easy way to record their music.
Plug-ins
The best equipment for music production is incomplete without plug-ins. These tools can enhance sound quality and allow you to create unique effects while producing music. With a variety of options available, there is no limit to creativity in music production.
Types Of Plug-ins
Plug-ins are essential software tools used to enhance the functionality of digital audio workstations (DAWs) in music production. There are different types of plug-ins available in the market, but they can be broadly classified into two categories: Native Plug-Ins and Third-Party Plug-Ins.Native Plug-Ins: These plug-ins come pre-installed with your DAW. They are efficient and work seamlessly with the DAW you’re using. Third-Party Plug-Ins: These plug-ins are created by external developers and can be integrated with your DAW. They offer different features and effects that may not be available in your DAW’s native plug-ins.
Factors To Consider While Choosing Plug-ins
Choosing the right plug-ins can make or break the music production process. Here are some factors to consider while choosing plug-ins:
Compatibility: Ensure that the plug-ins are compatible with your DAW and computer system.
Quality: Consider the quality and reputation of the plug-in developer.
Functionality: Check the plug-in’s features and effects to determine if they meet your music production requirements.
Cost: Plug-ins can range from free to expensive. Consider your budget and the cost of the plug-in while choosing one.
Top Plug-ins In The Market
There are several plug-ins available that offer top-quality sound and features. Here are some of the top plug-ins in the market:
Plug-Ins
Features
Waves SSL 4000 Collection
Emulates the EQ and compression of the iconic SSL 4000 mixing console.
FabFilter Pro-Q 3
An advanced equalizer with features such as dynamic EQ, surround sound support, and linear phase mode.
Soundtoys 5
A collection of unique and creative effects, with features such as delay, saturation, and reverb.
Izotope Ozone 9
Offers mastering tools such as equalizer, dynamic EQ, and loudness control, making it an all-in-one mastering suite.
Native Instruments Komplete 13
A massive collection of instruments and effects, including virtual synthesizers, guitar amps, and sampled instruments.
In conclusion, plug-ins are essential tools for music production that can enhance the quality and functionality of your DAW. Understanding the types of plug-ins, factors to consider while choosing, and top plug-ins in the market can help you make an informed decision that meets your music production needs.
Credit: www.learnhowtoproducemusic.com
Accessories
When it comes to producing music, having the right accessories can make a big difference in the quality of your output. Accessories such as headphones, cables, and microphones can help you achieve a more professional sound. In this article, we’ll take a closer look at the essential accessories for music production, factors to consider while choosing accessories, and the top accessories in the market.
Essential Accessories For Music Production
Some essential accessories you need for music production include headphones, audio interfaces, microphones, and cables. Considering the role each accessory plays in your production process, you should ensure that you have the following:
Headphones: A good pair of headphones is essential for mixing and monitoring your tracks. Closed-back headphones isolate external noise and provide a better listening experience.
Audio Interfaces: Audio interfaces convert analog signals to digital signals allowing your computer to process and record sound. A good audio interface should come with a high sampling rate, low-latency performance, and microphone preamps.
Microphones: A good microphone can capture your sound accurately. A condenser microphone is ideal for recording vocals and acoustic instruments while a dynamic microphone works best for recording amplified instruments like guitars and drums.
Cables: Reliable cables are essential for connecting your accessories to your computer. Ensure that you have the necessary cables for each accessory you use.
Factors To Consider While Choosing Accessories
When choosing accessories for your music production, consider the following factors:
Factor
What to consider
Compatibility
Ensure that the accessories you choose are compatible with your computer, Digital Audio Workstation (DAW), and other music production software.
Budget
Choose accessories that fit your budget without compromising on quality.
Brand
Choose a reputable brand with a proven track record for producing quality music production accessories.
Reviews
Read reviews from other music producers to get an idea of the quality and performance of the accessories you intend to buy.
Top Accessories In The Market
There are several accessories in the market, making it challenging to choose the best. Here are some of the top accessories you can consider:
Sennheiser HD 280 Pro: These headphones offer excellent sound isolation and a frequency response of 8Hz to 25kHz.
Focusrite Scarlett 2i2 (3rd Gen): This audio interface comes with high-performance converters, low-latency performance, and easy-to-use controls.
Shure SM7B: The Shure SM7B dynamic microphone offers a smooth, warm sound, and is perfect for recording vocals and instruments.
Hosa CMP-159 Stereo Breakout Cable: This affordable cable enables you to connect your headphones or audio interface to your computer or other audio devices.
The above accessories are just a few among many in the market that can help take your music production to the next level. Before making your purchase decision, consider your budget, needs, and preferences.
Frequently Asked Questions Of Best Equipment For Music Production
What Equipment Is Needed To Be A Music Producer?
To be a music producer, you need a computer with music production software like Ableton Live, Logic Pro or FL Studio. You also require studio monitors, audio interface, MIDI keyboard, and a microphone for recording vocals and instruments. With the right gear, you can create professional music tracks.
What Is Best Device To Make Music On?
The best device to make music on depends on personal preferences and needs. Some popular options include digital audio workstations (DAWs) like Ableton, Logic Pro, and FL Studio, as well as hardware synthesizers and drum machines like the Roland TR-8S and Korg Minilogue.
Ultimately, the best device will be one that meets your specific requirements for sound quality, user interface, and workflow.
What Is The Best Instrument To Make Music?
The best instrument to make music depends on your personal preference and the type of music you want to create. Popular choices include guitar, piano, drums, and violin. It’s important to choose an instrument that you enjoy playing and feel confident with.
Experiment with different options to find the perfect fit for your musical style.
What Is The Best Thing To Use To Make Music?
The best thing to use for making music is a Digital Audio Workstation (DAW). It’s a software that allows you to record, edit and produce music on your computer. There are many options available such as FL Studio, Ableton Live, Logic Pro and Pro Tools.
Choosing the right DAW is subjective and depends on personal preference, skill level and budget.
Conclusion
In essence, choosing the best music production equipment is a crucial step in creating phenomenal beats. Whether you’re a professional music producer or an aspiring artist, the right gear plays a vital role in the quality of your output. Thus, it’s essential to identify your needs and preferences when picking your items.
Lastly, remember that the right equipment brings out the best in you, and excellent music production will always require effort, dedication, and a willingness to learn and grow.
The best free saturation VST plugins include FerricTDS, Molot, and Softube Saturation Knob. These plugins provide excellent saturation effects for music production and are easily accessible online.
Finding the right plugins for music production can be a daunting task, especially for beginners. However, using saturation plugins can add warmth, depth, and character to your sounds. Saturation plugins are effective in adding harmonic distortion to different sounds, making them more vibrant and lively.
This article highlights the best free saturation VST plugins that can enhance your music production. With these plugins, you can add richness and dimension to your tracks without breaking the bank. Keep reading to discover more about the top free saturation VST plugins that you can use in your music projects.
Credit: www.productionmusiclive.com
Understanding Saturation Vst Plugins
Saturation VST Plugins are essential tools for adding harmonics to your tracks, giving your sounds warmth and character. With so many options to choose from, it can be overwhelming to select the best Free Saturation VST Plugins. However, with careful research, you can find the right one to elevate your music production.
Saturation VST plugins are essential for music production, mixing, and mastering. They add warmth, depth, and character to audio tracks, making them sound more natural and vibrant. In this blog post, we will explore what Saturation VST plugins are and their different types.
What Are Saturation Vst Plugins?
Saturation VST plugins simulate the analog saturation that occurs in vintage audio equipment, such as tape machines, preamps, and compressors. When audio is processed through these older gears, it creates subtle harmonic distortion that adds thickness and depth to the sound. Saturation VST plugins recreate this analog harmonic distortion in a digital way, giving users access to vintage vibes without spending a fortune on analog gear.
Types Of Saturation Vst Plugins
Saturation VST plugins come in different types and flavors. Here are some of the most common saturation VST plugins:
Type of Saturation VST Plugins
Description
Tape Saturation
Emulates the saturation of vintage tape machines, providing peak limiting and frequency response shaping typically associated with analog tape.
Tube Saturation
Emulates the sound of analog vacuum-tube gear, adding warmth, harmonics, and distortion to audio signals.
Transformer Saturation
Simulates the effect of audio transformers on analog signals, adding harmonic distortion and warmth to audio tracks.
Console Emulation Saturation
Recreates the harmonic distortion and frequency response of analog mixing consoles, providing a vintage-sounding character to your audio tracks.
In conclusion, understanding saturation VST plugins is crucial for music producers and mixers. With these plugins, users can achieve a vintage, warm, and dynamic sound that elevates their mixes and sets them apart from the crowd. The available types of saturation VST plugins provide different shades of saturation to cater to the specific needs of audio tracks in music production. So, experiment and choose the best one for your recording and processing needs.
Benefits Of Using Saturation Vst Plugins
Saturation VST plugins are a great addition to music production as they add warmth, depth and character to audio recordings. By using the best free saturation VST plugins, producers can achieve a desirable analog sound without expensive hardware.
Saturation refers to the distortion effect that adds warmth, harmonics, and character to an audio signal. Saturation VST plugins are essential tools for music producers, sound designers, and recording engineers. They can enhance the overall sonic quality and bring a vintage vibe to any track. In this blog post, we will explore the benefits of using saturation VST plugins.
Enhancing Harmonic Content
Saturation VST plugins can be used to enhance the harmonic content of any audio signal. Harmonics are additional frequency components that are related to the fundamental frequency of the sound. By adding harmonics, you can make the sound fuller and more complex. Saturation plugins emulate the harmonic distortion that occurs naturally in analog gear, such as tape machines and tube amplifiers. This emulation can breathe life into a sterile digital signal and give it a more organic feel.
Adding Warmth And Character
Saturation VST plugins can add warmth and character to an audio signal. This warmth is a result of the harmonic distortion that adds extra frequencies to the sound. It can make a track sound more inviting and pleasant to the ear. Saturation can also add character and personality to a sound. It can induce a vintage or retro vibe, or add roughness and edge to a modern sound.
Creating Vintage Sound Effects
Saturation VST plugins are often used to create vintage sound effects. These effects mimic the sound of old gear and give a track a nostalgic feel. For example, you can use saturation to emulate the sound of vinyl records, cassette tapes, or 70s rock albums. Saturation can also be used to create lo-fi or degraded sounds. This effect can be useful for creating soundscapes, background noise, or atmospheric effects. In conclusion, saturation VST plugins are essential tools for any music producer, sound designer, or recording engineer. They can enhance harmonic content, add warmth and character, and create vintage sound effects. Saturation plugins can give any track a unique personality and make it stand out from the crowd.
Top 5 Best Free Saturation Vst Plugins
Saturation VST plugins are a must-have for music producers. They add warmth, depth and character to the sound. But with so many options available, it can be overwhelming to find the right one. To help you out, we’ve curated a list of the top 5 best free saturation VST plugins. These plugins are easy to use, offer great sound quality, and won’t break the bank.
Plugin 1: Name and Description
Plugin 1 is a powerful saturation VST plugin that adds warmth and grit to any sound. It features intuitive controls that make it easy to dial in just the right amount of saturation. With its versatile range of tones, this plugin is perfect for use on drums, vocals, guitars and more.
Plugin 2: Name and Description
Plugin 2 is a classic saturation VST with a vintage feel. It features a simple interface that is easy to navigate and allows for precise control over the amount of saturation applied. This plugin is perfect for adding warmth and character to anything from synths to drums.
Plugin 3: Name and Description
Plugin 3 is a saturation VST plugin that adds warmth and depth to any sound. It features a unique tone shaping control that lets you dial in the perfect saturation for your mix. With its easy-to-use interface and high-quality sound, this plugin is perfect for beginners and veteran producers alike.
Plugin 4: Name and Description
Plugin 4 is a versatile saturation VST plugin that can add anything from subtle warmth to heavy distortion to your sound. It features an intuitive interface and a wide range of controls that allow you to shape the saturation to your liking. This plugin is ideal for adding character to guitars, basses, and drums.
Plugin 5: Name and Description
Plugin 5 is a unique saturation VST plugin that simulates the sound of analog tape. This plugin adds warmth and richness to any sound and features easy-to-use controls for adjusting the amount of saturation and tape noise. It’s perfect for adding a vintage vibe to your mixes and works well on guitars, pianos, and vocals.
These are the top 5 best free saturation VST plugins that can add warmth, depth, and character to your sound. Each plugin is unique, but they all offer great sound quality and intuitive controls. Whether you’re a beginner or a pro, these plugins are a great addition to any music producer’s arsenal.
Credit: www.productionmusiclive.com
How To Install And Use Saturation Vst Plugins
Saturation VST plugins are essential for adding warmth and character to audio tracks. Some of the best free saturation VST plugins are Ignite Amps’ PTEq-X, Boz Digital Labs’ Bark of Dog 2, and Klanghelm’s DC1A2. Once you’ve downloaded and installed your favorite plugin, it’s easy to start using it in your DAW for that extra analog vibe and overdrive.
Adding saturation to your tracks is a great way to bring warmth and character to your mixes. The good news is that there are plenty of excellent free saturation VST plugins out there that you can start using today. In this post, we’ll cover how to install these plugins and use them in your digital audio workstation (DAW).
Installing Saturation Vst Plugins
Getting your free saturation VST plugin up and running is a straightforward process. Here’s what you need to do:
First, find the plugin you want to download. Some popular free saturation VST plugins include TDR Saturator, DC1A, and IVGI, among others.
Download the plugin from the developer’s website.
Unzip the downloaded folder.
Copy the plugin file (.dll on Windows or .vst on Mac) to your DAW’s plugin folder.
Restart your DAW or refresh the plugin list if necessary.
Using Saturation Vst Plugins In A Daw
Once you’ve installed your VST plugin, it’s time to start using it in your DAW. The process can vary slightly depending on which DAW you’re using, but here are the general steps:
Create a new track or open an existing one and load the saturation plugin onto it.
Adjust the plugin settings according to your taste. Most saturation plugins will have controls for adjusting the amount of saturation, drive, and output level.
Start playing your track and listen to the difference the saturation makes. You’ll likely notice more warmth and character in the sound.
Tips For Getting The Best Results
While all saturation plugins operate on the same basic principle, there are some tips and tricks you can use to get the best out of your plugins. Here are a few ideas:
Experiment with different plugins. Each saturation VST plugin has its own unique sound, so try out a few and see which one works best for your needs.
Use subtle amounts of saturation. It’s easy to overdo it with saturation, which can lead to a harsh or distorted sound. Try dialing back the amount of saturation and see if you like the result.
Try using different saturation types for different sounds. Some saturation plugins emulate the sound of tape saturation, while others mimic the warmth of tube saturation. Experiment with different types and see what works best for each sound.
Consider using saturation in conjunction with other effects. Saturation can work well with other effects like reverb and delay, adding a unique character to your tracks.
Now that you know how to install and use saturation VST plugins, you’re ready to start experimenting with these powerful tools. Have fun and get creative with your mixes!
Credit: bedroomproducersblog.com
Frequently Asked Questions Of Best Free Saturation Vst Plugins
What Is The Best Free Saturation Plugin?
One of the best free saturation plugins is the Saturn by FabFilter. It offers a variety of distortion types and can be used for subtle or extreme saturation effects. It also has a user-friendly interface and is compatible with different DAWs.
What Is A Saturator Vst?
A saturator VST is a type of audio plugin used in sound processing. It adds harmonics and saturation to the original sound, giving it warmth and character. It is used in music production and mixing to enhance the audio quality and add unique characteristics to tracks.
Does Studio One Have A Saturation Plugin?
Yes, Studio One has a built-in saturation plugin called RedlightDist. It offers a range of character options and allows users to add warmth to their tracks or generate distortion or fuzz effects.
Does Logic Have Saturation Plugin?
No, Logic doesn’t have a built-in saturation plugin. But Logic’s stock plugins offer distortion and saturation options that can help achieve a similar effect. Additionally, there are various third-party saturation plugins available for Logic that can be used.
Conclusion
To sum it up, free saturation VST plugins are readily available online, and they offer excellent value for music producers and sound engineers. Whether you’re a beginner or a seasoned professional, these plugins can take your music to the next level.
With various options in the market, it can be overwhelming to choose the right one. However, with the above-reviewed plugins, you can never go wrong. They are easy to download, install and operate. Give them a try and experience an unmatched richness, warmth, and depth in your tracks.
The Neve 33609 is a stereo compressor widely regarded as a classic in the music industry. The Neve 33609 stereo compressor has earned a reputation as an essential audio tool for music production, broadcast, and post-production.
Its unique compression characteristics, including its ability to add harmonic distortion, make it a favorite among audio engineers seeking a warm, vintage sound. Neve, a legendary name in the audio gear world, designed this compressor using discrete components, which resulted in a superb quality sound.
The unit features both compressor and limiter functions, switchable between feed-forward and feedback modes, selectable ratios, and several sidechain filtering options. The 33609 is known for its pristine audio design, making it a go-to choice for engineers worldwide.
Credit: vintageking.com
Features Of Neve 33609 Stereo Compressor
The Neve 33609 stereo compressor is renowned for its smooth and musical sound, making it a popular choice for mixing and mastering engineers. Its features allow for precise control over dynamics, including a switchable side-chain high-pass filter and blend control for parallel compression.
Neve 33609 Stereo Compressor is a classic analog compressor that offers powerful and flexible audio processing capabilities. It is widely used in recording studios and live sound applications to achieve a polished and professional sound. Below, we will explore the various features of this compressor, including:
Threshold And Ratio Controls:
Neve 33609 Stereo Compressor comes equipped with threshold and ratio controls that allow you to adjust the compression threshold and the level of compression respectively. With these controls, you can fine-tune how and when the compressor kicks in. For instance, by setting a low threshold and high ratio, you can achieve a more dramatic and dynamic compression effect.
Attack, Release And Limiter Controls:
The attack and release controls of Neve 33609 Stereo Compressor allow you to adjust the speed of the compressor to suit different types of audio signals. Meanwhile, the limiter control comes in handy when trying to prevent clipping and keep your sound levels under control. These controls give you the flexibility to customize the compression effect as per your specific needs.
Input And Output Controls:
The input and output controls on Neve 33609 Stereo Compressor enable you to adjust the level of the input and output signals respectively. With these controls, you can easily level-match your audio signals, which is essential for achieving a clean and consistent sound. By setting the input level correctly, you can also avoid introducing any unwanted noise or distortion in your audio signal.
Metering And Monitoring System:
Neve 33609 Stereo Compressor features a comprehensive metering and monitoring system that allows you to keep track of the level and gain reduction of your audio signals. This is particularly useful when working on complex audio projects where multiple signals are being compressed simultaneously. The metering system enables you to monitor your signals and make fine-tuned adjustments to achieve the desired result.
Stereo Link Options:
The stereo link options on Neve 33609 Stereo Compressor enable you to link the compression of the left and right channels together, creating a cohesive stereo image. This feature is particularly useful when working on music tracks where stereo imaging is crucial. By linking the channels, you can achieve a consistent and balanced sound across the entire stereo field. In summary, Neve 33609 Stereo Compressor is a versatile and reliable compressor that offers a myriad of features for fine-tuning audio signals. Its threshold and ratio controls, attack, release and limiter controls, input and output controls, metering and monitoring system, and stereo link options make it an excellent tool for achieving a polished and professional sound.
Credit: vintageking.com
Applications Of Neve 33609 Stereo Compressor
The Neve 33609 stereo compressor offers superior sound quality, making it an ideal choice for mastering and mixdown applications. This compressor is widely used in the music industry, providing exceptional control over the input and output signals for a polished sound.
Neve 33609 Stereo Compressor is a classic compressor that has been widely used in professional audio production for over 60 years. Its exceptional sound quality and versatility make it ideal for a wide range of applications, including music production, broadcasting, and sound engineering. Here are some details about the applications of Neve 33609 Stereo Compressor:
Music Production
If you are a music producer or engineer, you are likely aware of the importance of compression for achieving a polished and professional sound. The Neve 33609 Stereo Compressor is a popular choice for music production due to its warm and musical sound, which is emphasized by its unique transformer-based design. Its fast response time, variable threshold, and ratio settings make it perfect for leveling out vocal performances, adding punch to drums, and shaping the dynamics of guitars and other instruments.
Broadcasting
The Neve 33609 Stereo Compressor has also been a fixture in broadcasting for decades. Its ability to maintain a consistent sound level while preserving the dynamic range of the audio makes it perfect for radio and TV broadcasting applications. Additionally, its sophisticated gain reduction metering and variable knee settings make it easier to achieve consistent and professional-sounding broadcasts.
Sound Engineering
In live sound reinforcement and sound engineering, compressors are a critical tool for ensuring consistent and clear audio quality. The Neve 33609 Stereo Compressor excels in this area due to its robust build quality and intuitive controls. Its ability to handle complex and dynamic audio signals ensures that it can keep up with even the most demanding live sound requirements with ease. Whether you are a music producer, sound engineer, or broadcaster, the Neve 33609 Stereo Compressor is an excellent choice for high-quality audio compression. Its versatility and reliability make it an indispensable tool for any professional audio setup.
Credit: vintageking.com
2026 Update: Official 33609/N Specs
AMS Neve still builds the 33609/N by hand in Burnley, UK. According to its published specifications, the compressor offers ratios of 1.5:1 to 6:1 with fast (about 3 ms) and slow (about 6 ms) attack. The separate limiter has a threshold of +4 to +15 dBu and fast (2 ms) or slow (4 ms) attack. The limiter comes after the compressor’s make-up gain, so you can drive it creatively from the compressor’s output.
Frequently Asked Questions Of Neve 33609 Stereo Compressor
What Type Of Compressor Is The Neve 33609?
The Neve 33609 is a classic dual-channel limiter/compressor, renowned for its smooth sound and flexible controls. It features independent threshold, ratio, attack, and release controls for each channel, and can be used for mastering or individual tracks. The Neve 33609 is a favorite among sound engineers and music producers for its warm, vintage sound and precise control.
What Is The Limiter Ratio Of 33609?
AMS Neve doesn’t quote a conventional ratio for the 33609 limiter. Its spec says the output changes by less than 0.1 dB when the input steps from +10 dBu to +20 dBu, which effectively makes it a brick-wall limiter.
What Type Of Compressor Is Neve 2254?
The Neve 2254 is a classic analog limiter/compressor module that was used in studios from the late 1960s into the 1970s.
What Is The Neve 33609 Stereo Compressor?
The Neve 33609 Stereo Compressor is a high-end, classic analog compressor that has been widely used in professional recording studios for decades. It delivers a warm, smooth sound and is renowned for its ability to add character and depth to any audio signal.
Conclusion
The Neve 33609 Stereo Compressor is undoubtedly one of the most iconic and sought after pieces of audio equipment in the world. Its unique sound and versatility have made it a mainstay in recording studios for decades. With its understated design, legendary sound quality, and ease of use, it’s no wonder why so many professionals turn to the Neve 33609 Stereo Compressor to achieve their desired sound.
If you’re looking for a piece of equipment that will elevate your audio game to the next level, look no further than the Neve 33609 Stereo Compressor.