Categories
Archive

Gain Staging Presonus Studio One

Gain staging in Presonus Studio One is essential to balancing the levels in your DAW. Ensure all your tracks are set to peak at around -18dBFS to prevent overloading and clipping.

Presonus Studio One is a powerful digital audio workstation with a comprehensive set of tools for music production. Gain staging is critical in Studio One, as it allows you to balance the levels of your tracks for optimal sound quality.

The process involves adjusting the input and output levels of your tracks to ensure that the sound remains clear and free of distortion, clipping, and overloading. Gain staging in Studio One is a straightforward process, and by following a few simple steps, you can achieve a well-balanced mix that sounds professional and polished. We’ll explore how to gain stage in Presonus Studio One and offer some tips and tricks to get the most out of your DAW.

Setting Up Your Gain Staging In Presonus Studio One

Gain staging is an essential task that ensures optimum sound quality in Presonus Studio One. With the right gain structure, you can prevent distortion, minimize noise, and achieve pristine recordings. Follow these easy steps to set up your gain staging in Presonus Studio One.

Setting up your gain staging in Presonus Studio One is an important aspect of recording, mixing, and mastering audio. Gain staging refers to the process of properly setting the gain levels at each stage of the audio signal flow. In this blog post, we will guide you on how to configure your audio interface, choose the right input channels, and set input levels in Presonus Studio One.

Configuring Your Audio Interface

Before you start working on your audio recordings, it’s important to ensure that your audio interface is properly configured. To configure your audio interface in Presonus Studio One, follow these simple steps:

  1. Go to Studio One -> Options -> Audio Setup to access your Audio Device settings.
  2. Ensure that your audio interface is selected as your Audio Device.
  3. Choose the appropriate sample rate and buffer size for your project.
  4. Once you have configured your audio interface, you can move on to setting up your input channels.

Choosing The Right Input Channels

Choosing the right input channels is crucial to the success of your recording project. In Presonus Studio One, you can choose to record from a wide variety of input sources, including microphones, instruments, and line-level sources. To choose the right input channels in Presonus Studio One, follow these steps:

  • Open your Studio One session and create a new track.
  • Go to the top of the screen and click on the drop-down box labeled Input.
  • Select the appropriate input channel for your recording source.
  • Make sure that your input channels are properly connected to your audio interface.

Setting Input Levels

The next step in the gain staging process is to set your input levels. Input levels refer to the amount of gain that is applied to the audio signal from the input source. In Presonus Studio One, you can easily set your input levels by following these steps:

  • Select your track by clicking on it.
  • Locate your Input Gain knob in the mixer section of your screen.
  • Adjust the input gain knob until your input levels are within the recommended range, typically between -12 dB and -6 dB.
  • Use the Clip Gain feature to make minor level adjustments before the signal reaches any plugins or effects.

In conclusion, setting up your gain staging in Presonus Studio One is a crucial step in the recording, mixing, and mastering process. By properly configuring your audio interface, choosing the right input channels, and setting your input levels, you can achieve optimal gain staging and ensure the best possible sound quality for your project.
Gain Staging Presonus Studio One

Credit: www.youtube.com

Adjusting Levels With Plugins

Setting the Gain Staging in Presonus Studio One is crucial when adjusting levels with plugins. By using the plugin chain and correctly gain staging each plugin, you’ll optimize the sound quality of your mix.

Adjusting Levels with Plugins is one of the most critical aspects of producing high-quality audio content. In Presonus Studio One, one of the most efficient ways of adjusting levels accurately is through the use of plugins. While there are different types of plugins available in the software, three of the most commonly used are compressors, limiters, and equalizers.

Compressors

Compressors are plugins that aid in controlling dynamic ranges. Dynamic range refers to the difference between the loudest and softest parts of an audio track. A compressor accomplishes this by decreasing the volume of the loudest parts while increasing the softest parts. By doing this, the audio track’s dynamic range is compressed, resulting in a more consistent sound. This consistency is desirable for most types of audio content and can improve the overall mix.

Limiter

A limiter is similar to a compressor. However, its primary function is to control peak levels rather than dynamic range. When an audio track’s peaks go above a certain threshold, a limiter is used to prevent the volume from going too high. This ensures that the audio remains clear and consistent, and that distortion or clipping does not occur.

Equalizers

Equalizers are plugins that come in handy when trying to improve the tonal quality of an audio track. They aid in adjusting the levels of different frequency bands, enabling you to boost or cut certain frequencies to balance or enhance the audio. For instance, cutting out the low frequencies can eliminate rumble and muddiness, or increasing the mid frequencies of a vocal track can add clarity and warmth. Equalizers come in varying types, such as graphic, parametric, and shelving. Understanding these different types can help you select the most appropriate equalizer for your audio track. In summary, understanding plugins, such as compressors, limiters, and equalizers, enables you to make precise and accurate adjustments to audio tracks. By gaining an in-depth knowledge of these plugins, you can maximize their potential in Presonus Studio One and create audio that is rich, clear, and of excellent quality.

Using Volume Automation In Presonus Studio One

Gain staging in Presonus Studio One can be achieved with volume automation, a powerful tool that allows you to control the volume of individual tracks or entire mixes. By setting the right levels, you can avoid distortion and achieve a well-balanced sound.

When it comes to mixing music, gain staging is a critical aspect that every audio engineer should understand. Having proper gain staging ensures that each track in your mix sounds clear and crisp, without any unwanted distortion or noise. In Presonus Studio One, you can use volume automation to adjust the levels of your tracks, allowing you to achieve smoother transitions between parts of your song. Below, we’ll look at the three volume automation modes in Presonus Studio One: Draw Mode, Latch Mode, and Touch Mode.

Draw Mode

In Draw Mode, you can manually draw volume curves on your track’s automation lane. This mode is handy for making precise volume adjustments over time. You can access Draw Mode by clicking the Draw Mode button at the top of your Studio One window. Once you’re in Draw Mode, you can choose from a range of drawing tools to create the exact curves you need. Using Draw Mode, you can create completely custom volume adjustments that may not be possible with the other two modes.

Latch Mode

Latch Mode is an automation mode that lets you record volume adjustments directly into your track’s automation lane. In this mode, when you press the volume fader on your mixer, the automation lane will start recording the changes you make. Once you release the fader, the changes will stop recording, and the automation lane will keep the recorded adjustments. Using Latch Mode allows you to create dynamic volume changes in real-time, and it’s particularly useful for creating dynamic swells and fades.

Touch Mode

Touch Mode is a mode that starts recording volume adjustments when you touch a fader or knob on your controller and stops recording when you release it. Unlike Latch Mode, which keeps the recorded adjustments, Touch Mode only applies the recorded changes when you’re actually touching the controller. In other words, if you release the controller before the end of a segment, the automation lane will revert to its previous level. Touch Mode is particularly useful when you need to make subtle adjustments to your track’s volume, such as during a vocal performance. In conclusion, using volume automation in Presonus Studio One is an excellent way to achieve smoother transitions and more dynamic mixes. By understanding the three automation modes – Draw Mode, Latch Mode, and Touch Mode – and using them appropriately, you can create professional-sounding mixes that truly stand out.
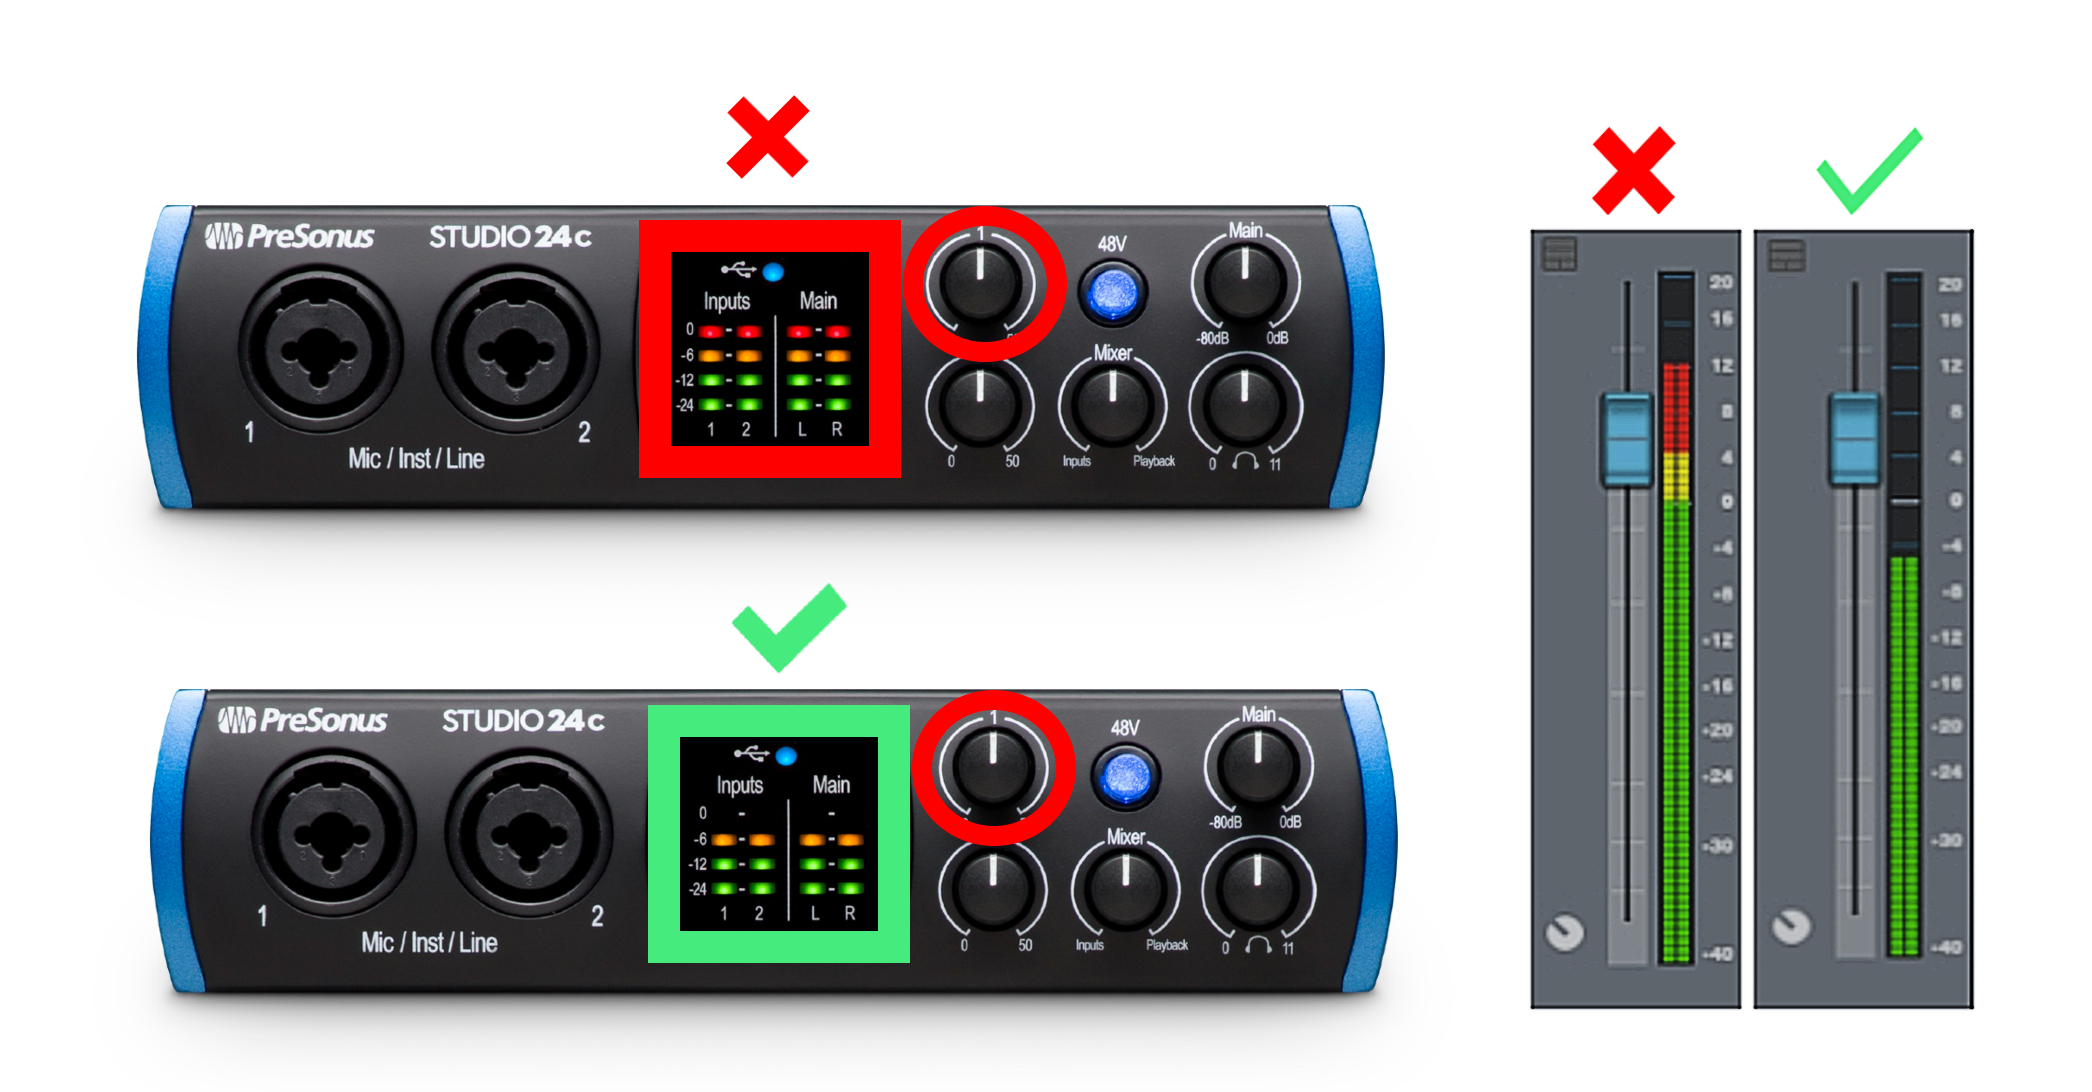
Gain Staging Presonus Studio One

Credit: support.presonus.com

Tips And Tricks For Gain Staging In Presonus Studio One

Learn how to properly set gain levels in Presonus Studio One with these easy-to-follow tips and tricks. From understanding the importance of headroom to using the clip gain tool, this guide will help you achieve optimal sound quality in your recordings.

If you are looking for a high-quality sound output, then gain staging is a step you cannot afford to skip. Presonus Studio One is a fantastic digital audio workstation (DAW) that can help you gain stage your project to perfection. In this blog post, we will discuss tips and tricks for gain staging in Presonus Studio One, including using reference tracks, using low cut filters, and avoiding digital clipping.

Using Reference Tracks

Reference tracks are an excellent tool to help guide your gain staging process. To use reference tracks in Presonus Studio One, follow these steps:

  1. Choose a reference track that has a similar sound to the project you are working on.
  2. Import the reference track into your Presonus Studio One project.
  3. Adjust the reference track’s volume so that it matches the volume of your project’s mix.
  4. Listen to how the reference track’s levels sound and compare them to your mix.
  5. Make adjustments to your mix to match the reference track’s levels.
  6. Continue to adjust and compare until you are satisfied that your mix matches the reference track.

Using reference tracks will give you an additional tool to help you achieve the desired results in your gain staging.

Using Low Cut Filters

Low cut filters are an essential tool for gaining stage your mixes with Presonus Studio One. They work by removing frequencies below a specified threshold, allowing you to clean up your mix and remove any unwanted sounds. To use low cut filters in Presonus Studio One, follow these steps:

  • Select the track you want to apply the low cut filter to.
  • Open the inserts section of the track.
  • Select the EQ plugin from the list of available plugins.
  • Select the low cut filter option.
  • Choose the frequency you want to cut from the list of available frequencies.
  • Adjust the filter to taste, carefully monitoring the sound to avoid removing too much of the desired frequencies.

Using low cut filters is an excellent way of removing unwanted sounds and ensuring your mix is clean and well balanced.

Avoiding Digital Clipping

Digital clipping can occur when your mix is too loud, and your system cannot handle the volume. To avoid digital clipping in Presonus Studio One, follow these tips:

  • Use gain staging to ensure that your mix’s overall volume is not too high.
  • Use volume envelopes to avoid sudden changes in volume.
  • Use limiters to avoid any sudden spikes in volume.
  • Export your mix at a lower volume to give your listeners the best experience and avoid digital clipping.

Avoiding digital clipping will help ensure that your mix sounds fantastic and is free from any unwelcome noise. In conclusion, gain staging is an important step in the music production process, and Presonus Studio One is a powerful tool to help achieve it. Remember, using reference tracks, low cut filters, and careful volume management can make a significant difference in the quality and clarity of your mix.
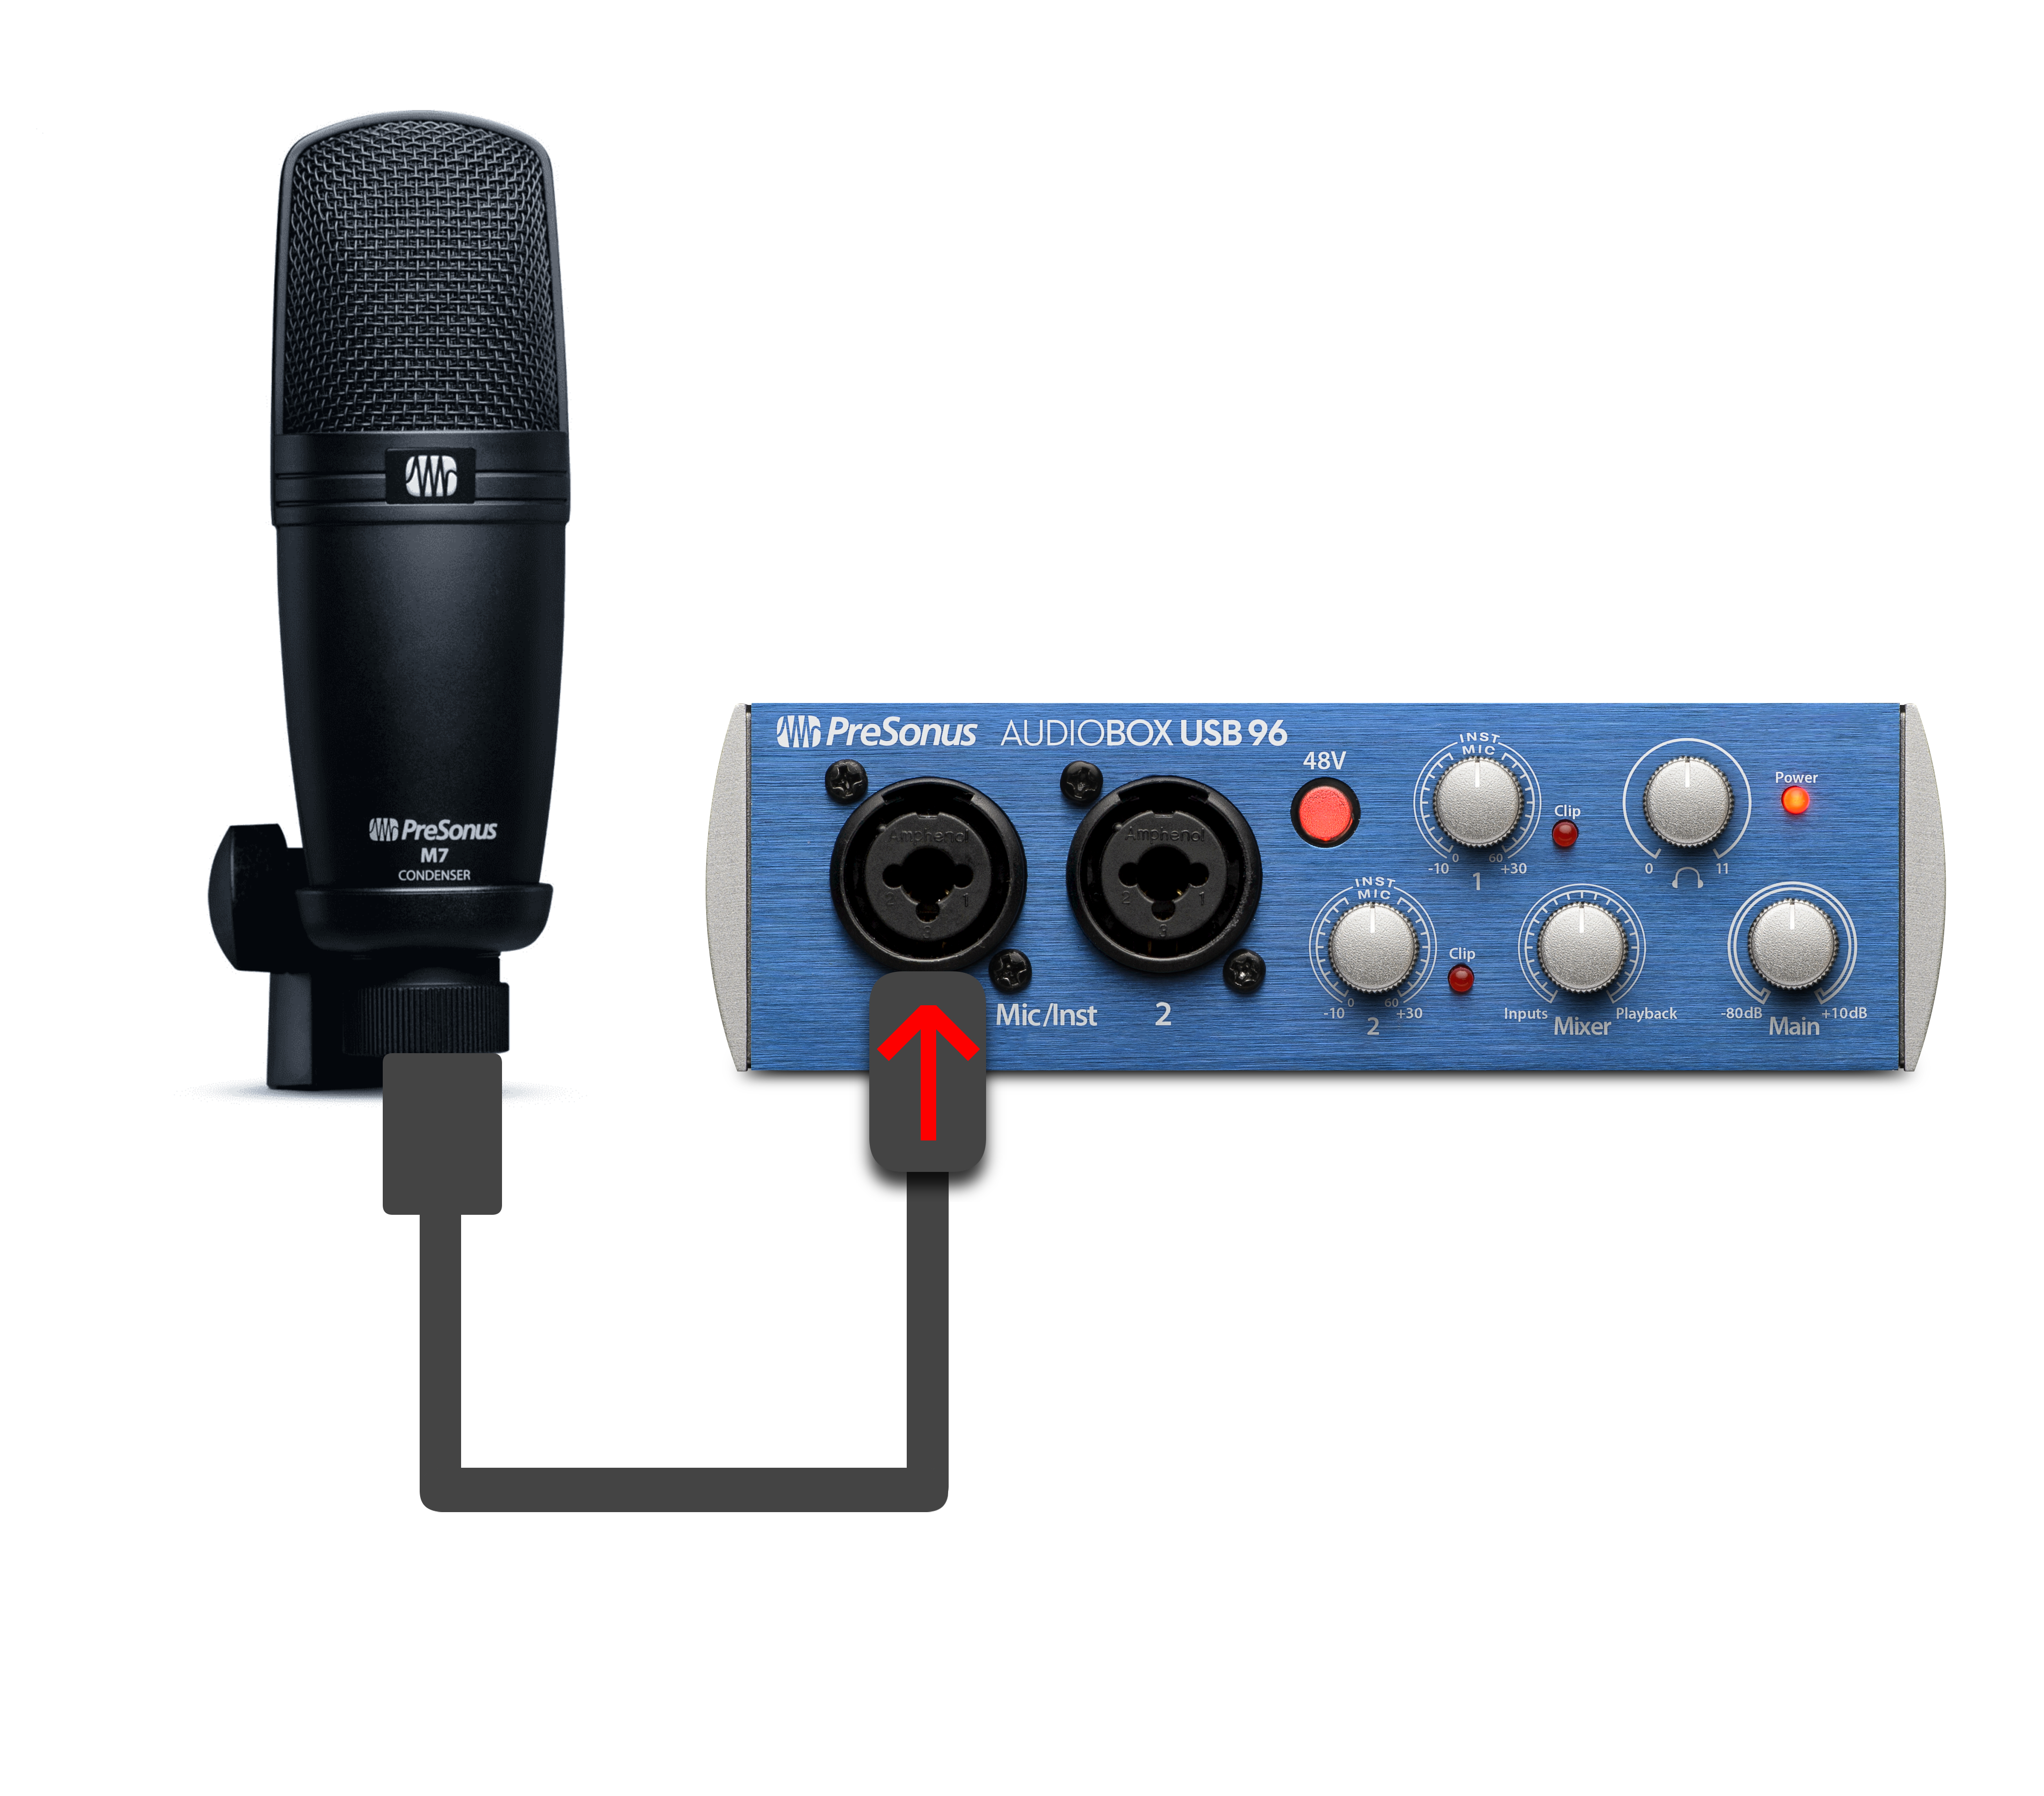
Gain Staging Presonus Studio One

Credit: support.presonus.com

Frequently Asked Questions For Gain Staging Presonus Studio One

What Is The Best Level For Gain Staging?

The best level for gain staging is between -18dB and -12dB. This allows enough headroom for additional processing and prevents clipping. It also ensures a clear and consistent signal throughout the mixing process.

Is Gain Staging Necessary?

Gain staging is necessary in music production to achieve optimal sound quality and prevent distortion. By properly setting the levels of each instrument and track, you can maintain a balanced mix and improve the overall clarity and detail of your music.

Is Gain Staging The Same As Mixing?

No, gain staging is not the same as mixing. Gain staging refers to setting the appropriate levels of audio signals to minimize distortion and noise. Mixing, on the other hand, involves adjusting the volume, panning, and EQ of individual tracks to create a balanced and cohesive final mix.

What Is Gain Staging For Audio Recording?

Gain staging for audio recording is the process of adjusting the levels of each individual audio signal in a recording chain to ensure that they remain at a consistent and appropriate level throughout the recording process. This helps to prevent clipping and distortion while improving the final sound quality of the recording.

Conclusion

Proper gain staging is essential in achieving high-quality sound recordings. Presonus Studio One makes it easy to adjust the input, output, and track levels to ensure minimal distortion and optimal signal-to-noise ratio. As you work through your recording and mixing process, keep in mind the importance of gain staging and how it can impact the final product.

With the tools and techniques provided by Studio One, you have everything you need to create professional-grade recordings and take your music to the next level.
Categories
Archive

How to Make Piano Music in Fl Studio

To make piano music in FL Studio, open the software and create a new project, then add a piano instrument and start programming the notes using the piano roll editor. FL Studio is a popular digital audio workstation used by music producers and composers.

FL Studio is a versatile tool that allows you to create high-quality piano music. However, it can be overwhelming and confusing for beginners. Therefore, it is important to know some basics before you dive into making piano music in FL Studio.

We will guide you on how to make piano music in FL Studio in simple and easy-to-follow steps. We will cover everything from setting up your project to programming the notes using the piano roll editor. By the end of this article, you will be able to create your own beautiful piano music in FL Studio.

Setting Up The Basics

Start creating your piano music in FL Studio by setting up the basics. Choose a tempo, select your preferred instruments and set up your project file with the correct channel settings to start composing your masterpiece.

Installing Fl Studio And Setting Up A New Project

Before diving into creating piano music using FL Studio, you need to have the software installed on your computer. Simply head over to the FL Studio website and download the latest version available. Once you have installed the software, launch it and start setting up your project. First, you need to create a new project. To do this, click on FileNew from the dropdown menu. Alternatively, you can use the hotkey combination, which is CtrlN. This will open up a new project window. In the new project window, you will see several options to customize your project. You can select the desired tempo, time signature, and other settings based on your preference. Once you are done, click on the Accept button to set up your new project.

Connecting A Midi Keyboard To Your Computer

To create piano music in FL Studio, you need to connect a MIDI keyboard to your computer. If you do not have a MIDI keyboard, you can also use your computer keyboard as a controller. However, for better results, it’s recommended that you use a MIDI keyboard. Start by connecting one end of the MIDI cable to the MIDI out port on your keyboard and the other end to the MIDI in port on your computer. Once connected, launch FL Studio and click on Options from the menu bar. Select MIDI settings from the dropdown menu. In the MIDI settings window, you will see a list of devices. Find your MIDI keyboard and select it to enable it as a MIDI input device. You can also customize other settings based on your preference. Once you are done, click on the Close button to save your settings. With your MIDI keyboard connected and set up, you are now ready to create beautiful piano music using FL Studio.

Understanding The Interface

An understanding of the interface is essential for making piano music in Fl Studio. Familiarize yourself with the different tools and functions to create beautiful melodies and harmonies with ease.

When it comes to creating piano music in FL Studio, understanding the interface is the first step towards making progress. The interface is the control center of FL Studio that allows you to access all the features necessary to create amazing music.

Navigating The Channel Rack And Piano Roll

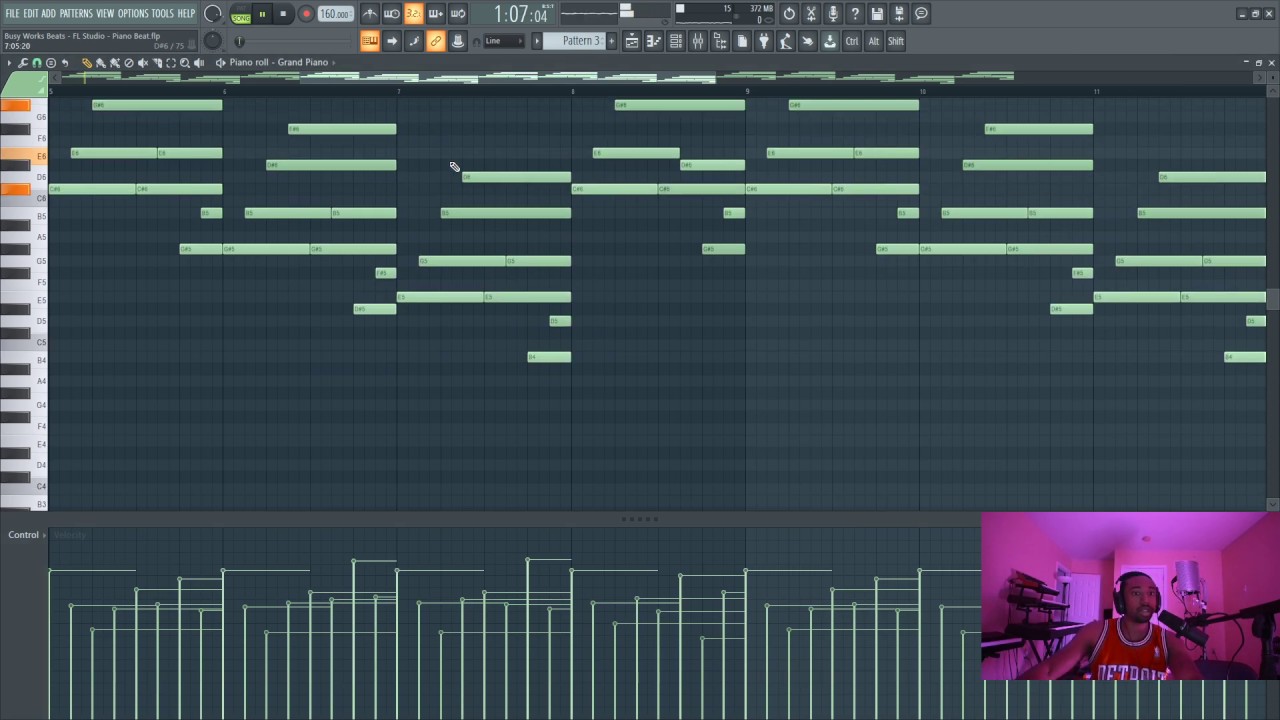
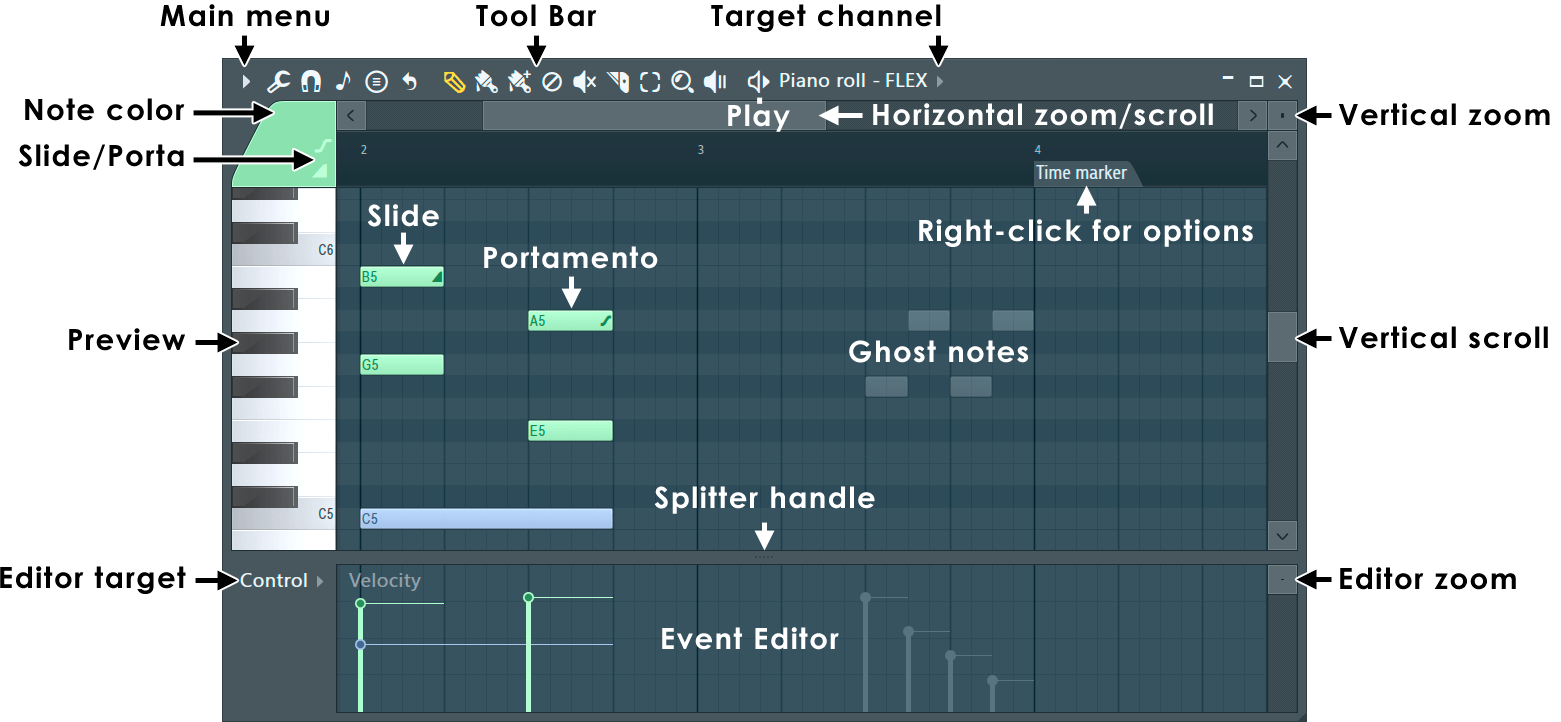
The Channel Rack and Piano Roll are two essential components of FL Studio. The Channel Rack consists of all the instruments, sounds, and samples that you can use in your project. On the other hand, the Piano Roll is where you create and edit your melody. To navigate around the Channel Rack or Piano Roll, you can use the arrow keys or the scroll wheel of your mouse.

Getting Familiar With The Mixer And Playlist

The Mixer and Playlist are two other essential components of FL Studio. The Mixer is where you apply effects, adjust volume levels, and create tracks. The Playlist is where you arrange your patterns, create song structure, and add automation clips. To get familiar with the Mixer and Playlist, simply click and drag your mouse to create new tracks and patterns.

Using The Browser To Find Sounds And Plugins

The Browser is another feature that you will use often when creating piano music in FL Studio. It allows you to browse through samples, presets, plugins, and other resources that you may need for your project. To use the Browser, simply click on the icon on your toolbar or press the F8 key on your keyboard. From there, you can search for specific sounds, instruments, or plugins that you want to use in your project. Overall, FL Studio provides a user-friendly interface that makes it easy for beginners and experts alike to create music. By understanding the interface and getting familiar with the essential components, you will be well on your way to creating amazing piano music in no time.

Creating A Melody

Learn how to make piano music in FL Studio by creating a melody. Start by selecting notes that work well together, build on them to create a chord progression, and use various tools within the software to refine the sound.

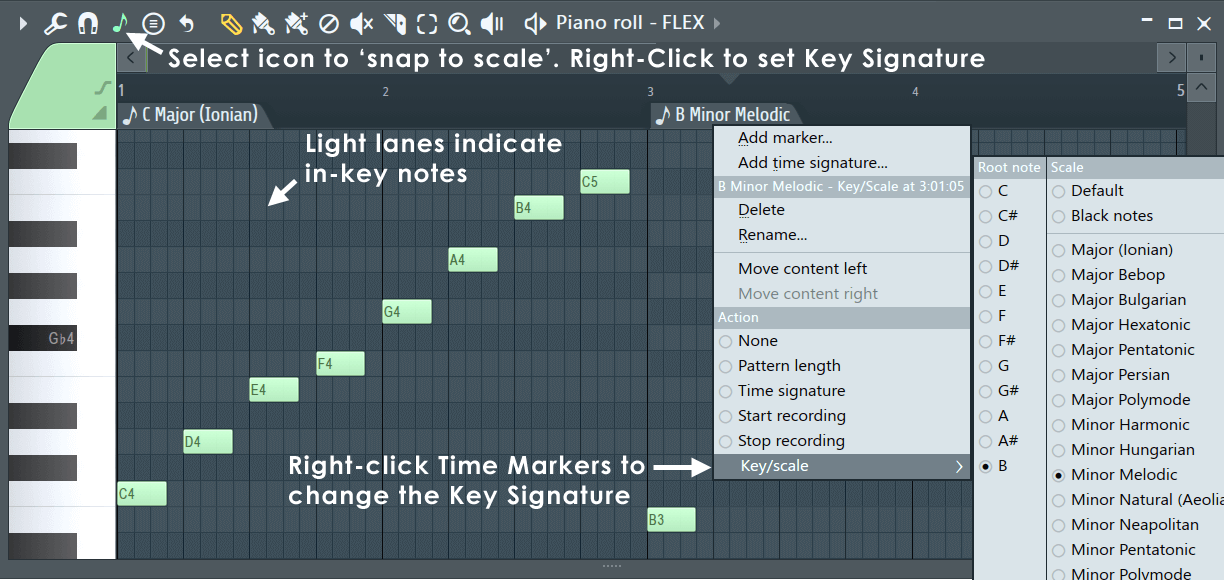
Creating a Melody Creating a melody is essential in making piano music in FL Studio. It is no doubt the backbone of any music piece, regardless of the genre. With that in mind, this section will cover the crucial steps to creating a melody that sounds great and keeps your listeners hooked. Choosing the Right Instrument Before starting, choose a piano instrument that you like and suits the song’s feel and genre. FL Studio offers several piano instruments, such as the FL Keys, Grand Piano, and others. They differ in settings, volume, and tonality, which you can customize depending on what you want. Writing Notes in the Piano Roll With your piano instrument of choice ready in the Channel Rack, go to the Step Sequencer and create a pattern. Once done, go to the Piano Roll to write notes. Make sure you have the right piano sound selected, as mentioned before, and choose the right note duration. Generally, shorter notes sound more upbeat and faster, while longer notes sound more relaxed and slower. Using the Paintbrush and Stamp Tools The Paintbrush and Stamp Tools are some of the most used Piano Roll tools in FL Studio. The Paintbrush tool is the default tool for adding and drawing notes to your melody. Conversely, the Stamp tool copies and pastes notes from other regions or patterns. With these tools, you can create unique melodies that fit the song’s style and direction. Adding Variation and Dynamics to Your Melody A monotonous melody can be boring and uninteresting to the listener. To make your melody stand out, add some variation and dynamics. Variation can be achieved by shifting notes an octave higher or lower, using different rhythms or patterns, and changing the note’s velocity. Adding dynamics means adjusting the notes’ volume, accentuating some notes more than others to create an emotional effect. In Conclusion Creating a melody is an exciting and creative process that requires patience and experimentation. Making music is more of an art than science, so don’t be afraid to try out new ideas and sounds. Remember, the most important thing is to keep your listener engaged and create emotions through your melody. With these few tips on hand, you are one step closer to making beautiful piano music in FL Studio.

How to Make Piano Music in Fl Studio

Credit: www.image-line.com

Building Chords And Harmonies

Creating unique and captivating harmonies and chords is essential for making beautiful piano music in Fl Studio. Experiment with different notes and progressions to develop your own style and sound that will keep your audience engaged and captivated.

Building chords and harmonies is the foundation of making beautiful piano music in Fl Studio. Understanding basic music theory is crucial for creating chords that complement each other and bring depth to your melody. In this article, we will dive into the process of building chords and harmonies step by step. Let’s get started! ### Understanding basic music theory Before we start creating chords in the Piano Roll, let’s understand some basic music theory. Chords are made of three or more notes played together, which create harmony. The basic chords in music are the major and minor triads. The major triad consists of the first, third, and fifth notes of the major scale, while the minor triad consists of the first, third, and fifth notes of the minor scale. Knowing these chord types will be helpful when constructing chords in Fl Studio. ### Creating chords in the Piano Roll Now that we have an understanding of basic theory let’s create some chords. To create chords in the Piano Roll, place your first note in the grid and drag it across to the desired length. Next, add the third note of your chosen triad by placing it two steps higher, and then add the fifth note two steps higher than the third. This creates a complete triad. You can also shift the notes up or down octaves to create more complex chords. ### Using the Chord Stamp tool If you want to save time creating your chords, the Chord Stamp tool in Fl Studio can be used to create complex chords in one click. To use it, select the Chord Stamp tool and choose your chord type. Then, click on the grid where you want the chord to appear, and it will be added instantly, saving you time and effort. ### Adding tension and release with harmonies Once you have your chords, it’s time to add some depth to your composition by using harmonies. Harmonies are additional notes that complement your chords. Adding tension and release with harmonies can make your music more dynamic and interesting. For instance, if your chord progression is C – Am – F – G, adding a minor seventh to the Am chord creates tension that is subsequently released when the song progresses to F. In conclusion, building chords and harmonies is the foundation of creating beautiful piano music in Fl Studio. Understanding basic music theory is crucial to this process. Creating chords in the Piano Roll is easy once you have a grasp of basic theory, and the Chord Stamp tool can help you create complex chords in seconds. Adding tension and release with harmonies creates a more dynamic and interesting sound. Keep these tips in mind when creating your next piano composition!

Working With Drums And Percussion

Drums and percussion are key elements in producing a great piano track in FL Studio. They add rhythm, complexity and texture to the music. If you’re looking to create a dynamic and engaging piano track, it’s important to pay attention to the drums and percussion used in your composition. In this section, we will discuss how to choose the right drum samples, program a drum pattern in the Piano Roll, and use the Step Sequencer to add swing and groove to your drums.

Choosing The Right Drum Samples

When selecting drum samples for your composition, it’s essential to consider the style and genre of music you’re creating. Are you making a classical piano piece, or are you going for a more modern, electronic vibe? Ensure you choose the right drum kit that complements the piano sound, tempo and melody of your track.

Classical Piano:Electronic Music:
Bowed cymbals, Orchestra snare, Woodblock808 kick, Claps, Hi-hats, Snares
Percussion Ensemble, Timpani, TriangleTrap drums, Dubstep drums, House drums

Programming A Drum Pattern In The Piano Roll

After choosing the appropriate drum kit, select the Piano Roll and start programming your drum pattern. The Piano Roll is a graphical representation of the MIDI notes in your composition. It is a powerful tool that allows you to edit and manipulate your music’s rhythm. Here are some simple steps to follow when programming your drum pattern:

  1. Click on the Piano Roll icon from the toolbar
  2. Select the drum sampler channel from the Channel Rack
  3. Click on the pattern grid to create your drum pattern
  4. Adjust the velocity of each note to create a dynamic groove

Using The Step Sequencer

The Step Sequencer is another tool in FL Studio that helps to create drum patterns quickly and efficiently. It’s ideal for creating drum patterns with repetitive beats, such as trap or hip-hop. Here’s how to use the Step Sequencer:

  1. Select the Step Sequencer icon from the toolbar.
  2. Select the drum sampler channel from the Channel Rack.
  3. Click on the pads in the Step Sequencer to create your drum pattern.
  4. Adjust the velocity and duration of each pad to create a dynamic and rhythmic pattern.

Adding Swing And Groove To Your Drums

Swing and groove are essential elements in any music production. Adding swing to your drums can make your composition sound more natural and human-like, whereas adding groove can give it a more mechanical, robotic feel. Here’s how to add swing and groove to your drum tracks:

  • Open the Piano Roll of your drum track
  • Click on the Snap option and select “Step”
  • Select the notes you want to add swing or groove to
  • Right-click and select “Humanize” or “Quantize” to add swing or groove respectively.

To sum up, the drums and percussion in your composition play a fundamental role in creating a compelling and engaging piano track. Make sure you choose the right drum samples, program your pattern, and add swing and groove using the Piano Roll and Step Sequencer. Experiment with different combinations until you achieve the desired sound and rhythm that complements your piano track.

Mixing And Mastering Your Track

Learn the process of creating piano music in FL Studio and how to mix and master your track to achieve a professional sound quality. With the right techniques and tools, you can produce music that stands out and captures the emotions of your audience.

Mixing and mastering your track is the final step in creating a professional-sounding piano music production in FL Studio. When it comes to mixing, you will balance the levels of each instrument in the mixer to ensure that they work together in the most effective way possible. Additionally, you can use EQ, compression, reverb, and delay to help improve the overall quality of the mix and make each instrument sound unique. After mixing is complete, you’ll move on to the mastering stage, where you adjust the overall levels and apply equalization, compression, and limiters to the final mix.

Balancing Levels In The Mixer

Balancing levels in the mixer is an essential part of piano music production in FL Studio. To balance levels, you’ll need to use the slider in the mixer to adjust the volume for each instrument. Every instrument should sound clear and present, and the mixing process will ensure they sound good together in the final production. If the drums are too loud, try lowering their volume. If the piano is too quiet, boost its volume slightly. You need to balance levels so that no single instrument overpowers the track.

Applying Eq And Compression

Using EQ and compression in FL Studio can help you create a professional-sounding final mix. EQ could be used to adjust the balance of different frequencies, while compression helps maintain a consistent level of volume. You can use these effects to give each instrument its place in the mix. A technique called “side-chaining” can be useful for genres like EDM or Techno. This technique uses an instrument to “duck” when another instrument is playing.

Using Effects Like Reverb And Delay

Effects like reverb and delay give piano music a sense of space and atmosphere. Reverb creates a sense of space, while delay creates the impression of echoes. You can use these effects to create depth within the mix and make each instrument sound unique. Don’t overdo it, or the effects may become too intrusive, and the mix will sound muddy.

Mastering Your Track For Radio Or Streaming

Mastering your final mix involves preparing it for the different platforms where it will be played. You want to make sure that your track sounds great on a variety of devices like home music systems, headphones, smartphones, or car stereos. To achieve this, you should balance the overall volume and apply EQ, compression, and limiters to the final mix. Make sure your track has a good dynamic range and not too loud, or it might result in distortion. You want to ensure that your final mix sounds just as great on the various platforms where your track will be played. In summary, mixing and mastering your track is the final and most important stage of creating a professional-sounding piano music production in FL Studio. You should balance levels in the mixer, use EQ, compression, reverb, and delay to help improve the mix, and master your final mix for radio or streaming. Keep these tips in mind, and your piano music production will be sure to sound great!

Collaborating With Others

Collaborating with other musicians can enhance the quality of your piano music created in FL Studio. By working with others, you can brainstorm new ideas and add different musical elements to your composition. Communication and imagination are essential for a successful collaboration.

Collaborating with other musicians can be incredibly rewarding, bringing fresh perspectives and ideas to your compositions. This is especially true for piano music, which can benefit greatly from collaborating with other instrumentalists. Here are some tips for successful collaboration in Fl Studio.

Exporting Your Stems For Collaboration

Sharing your project with other musicians in Fl Studio is easy. To start, make sure you have all of your project’s components saved and backed up. Then, go to the File menu and select Export > Project Bones. This will save all of your project’s individual instrument tracks as separate files, making them easy to share. You can also choose to export your entire project as a single MIDI file, which can be opened and edited in any other DAW.

Using The Zgameeditor Visualizer For Videos

If you’re collaborating with someone on a music video, Fl Studio’s ZGameEditor Visualizer can be a great tool. This plugin allows you to create visually stunning music videos that synchronize with your music. To use it, simply add the plugin to your project and customize the visualizer settings to fit your music. You can also use the built-in video recorder to capture your visualizations for use in music videos or live performances.

Finding Other Musicians To Collaborate With

Finding other musicians to collaborate with can be a bit tricky, but there are plenty of online resources available. Try searching for local music groups on social media, or join an online music community to connect with like-minded musicians. Be sure to communicate your goals and expectations clearly, and be open to different ideas and approaches. With the right collaboration partner, you can create beautiful and unique piano music that you never would have created on your own. With these tips, you’re well on your way to successfully collaborating with other musicians in Fl Studio. Remember to communicate effectively and be open to new ideas, and you’ll be sure to create beautiful and unique piano music that you can be proud of.

How to Make Piano Music in Fl Studio

Credit: www.image-line.com

Promoting Your Music

Learn how to create beautiful piano music using FL Studio, a popular digital audio workstation. From setting up your project to adjusting the tempo and learning keyboard shortcuts, this guide has everything you need to start producing your own original tracks.

Once you’ve created your stunning piano music in FL Studio, it’s time to promote it to the world. Without promotion, your music may not get the exposure it needs to be successful. Here are some tips on how you can promote your music to get it heard by a wider audience:

Uploading Your Music To Streaming Platforms

One of the easiest ways to promote your piano music is to upload it to streaming platforms like Spotify, YouTube, and Apple Music. These platforms have millions of active users who are constantly searching for new music. By uploading your music, you’ll make it available to a wider audience, and with a little bit of luck, your music may end up on the platform’s popular playlists.

Using Social Media To Get Your Music Heard

Social media is another powerful tool that you can use to promote your piano music. Platforms like Twitter, Facebook, and Instagram provide you with an opportunity to reach a larger audience. You can share your music with your followers, post updates about your upcoming performances, and participate in conversations related to your music.

Networking With Other Musicians And Fans

Networking with other musicians and fans is another great way to promote your piano music. Attend local events and connect with other musicians and fans in your area. Collaborating with other musicians can help you expose your music to new audiences, while connecting with fans can help you build a dedicated following.

Submitting Your Music To Blogs And Playlists

Finally, you can submit your piano music to various blogs and playlists. Music blogs and online radio stations are always looking for new music to feature on their websites. Submitting your music to these platforms can help you get exposure to a wider audience. Similarly, submitting your music to curated playlists on platforms like Spotify can also help you reach new listeners. In conclusion, promoting your piano music in FL Studio is all about making it available to a wider audience. By uploading your music to streaming platforms, using social media to get your music heard, networking with other musicians and fans, and submitting your music to blogs and playlists, you can increase your chances of getting your music heard by a wider audience.

How to Make Piano Music in Fl Studio

Credit: m.youtube.com

Frequently Asked Questions On How To Make Piano Music In Fl Studio

How Do I Make My Fl Studio Sound Like A Piano?

To make FL Studio sound like a piano, you can use the software’s built-in piano sound or a plugin like Keyscape or Pianoteq. Adjust the velocity and timing of the notes to mimic a piano player’s touch. Use reverb and EQ to create a realistic piano sound.

Experiment with different microphone positions and techniques to enhance the sound further.

Does Fl Studio Have A Piano Plugin?

Yes, FL Studio does come with a piano plugin. It’s called “FL Keys” and it’s a sample-based plugin that offers high-quality piano sounds. You can find it in the browser under the “Plugin presets” > “Generators” > “FL Keys” folder.

How Do You Make Piano Notes In Fl Studio?

To make piano notes in FL Studio, you need to select a plugin like FL Keys or Kontakt. Then, open the piano roll, choose the length of the notes and place them on the grid. You can also adjust the timing and velocity to create more realistic piano sounds.

How Do I Record Piano Sounds In Fl Studio?

To record piano sounds in FL Studio, connect your MIDI controller to your computer and open FL Studio. Create a new project and insert a new instrument channel for the piano sound. Select a piano VST plugin and start playing your MIDI controller to record the piano sounds in FL Studio.

Conclusion

To sum it up, creating piano music in FL Studio is an exciting and fulfilling process. It requires a combination of technical skills and creativity to produce a unique melody that resonates with the audience. By following these steps and experimenting with various features, you can produce music that reflects your personal style and artistic vision.

Whether you are a seasoned musician or a beginner, FL Studio offers endless possibilities to explore and express yourself through music. So, let your imagination run wild and start making beautiful piano music today!

Categories
Archive

Making Bass Pop Production Tips

To make bass pop in music production, try layering sounds and emphasizing mid-range frequencies. Additionally, use sidechain compression to avoid muddiness in the mix and try experimenting with distortion to add harmonics.

Bass is a crucial element in music production, especially in genres like hip-hop, R&B, and electronic dance music. When the bass pops, it adds depth, power, and groove to the track, making it more enjoyable to listen to. However, achieving that perfect bass sound can be challenging, requiring a careful balance of different techniques and tools.

We will explore some effective production tips for making bass pop, from layering and equalizing to compression and distortion. Whether you are a beginner or a seasoned producer, these techniques will help you produce bass that truly thumps and grooves.

Start With High Quality Samples

Creating a popping bassline is a vital component in producing high-quality, memorable music. However, to achieve this, it’s essential to begin with the right foundation. Starting with high-quality samples sets the tone for your entire mix. It ensures that your sound is coherent, and every layer blends well. Here are some tips to help you make the most out of your bass pop production:

Choose The Right Kick Drum

The kick drum is the backbone of your bassline. It establishes a rhythm and the groove of your track. Therefore, it’s crucial to choose a high-quality sample with a powerful punch. A good kick drum should be well EQ’d and compressed, without any unnecessary noise. It should blend seamlessly with the bassline and other elements of the track, and most importantly, it should be the right key for the rest of the instrumental, ensuring it doesn’t clash with the bass.

Find The Perfect Bassline

The bassline is where your track comes to life. Experiment with different basslines until you find one that complements your instrumental. Your bassline should sync well with the kick drum and be easy to follow along with. Depending on your track’s genre, you might want to go for a simple or complex bassline. In any case, it should be the focal point of the mix, so take your time to get it perfect.

Experiment With Synth Sounds

If you want your bassline to sound unique and memorable, don’t shy away from experimenting with synth sounds. A synth bassline can add some exciting texture and tonal elements to your mix. Try layering multiple sounds to get a fuller, deeper bass. You can even add some effects to create a more dynamic sound.

By following these tips, you can achieve a high-quality bassline that elevates your mix to the next level. Remember to start with high-quality samples, choose the right kick drum, find the perfect bassline, and don’t be afraid to experiment with synth sounds.

Making Bass Pop Production Tips

Credit: www.youtube.com

Focus On Low End Eq

As a music producer or mixer, one of the critical areas of focus to make bass pop is the low end. A well-mixed low end can make or break a track, and it is essential to get it right. One of the most important tools for shaping the low end is the EQ.

Cut Unnecessary Frequency

The first step to crafting a killer low end is to cut out any unnecessary frequencies. Start by using a high-pass filter to roll off any unwanted rumble or noise below the fundamental frequency. This can help reduce muddiness and create space for other instruments to breathe.

Next, identify any non-essential low-end frequencies in individual tracks and use a cut to remove them. This approach can help create a more defined and punchy low end.

Eq And Compress The Kick Drum

The kick drum plays a crucial role in shaping the low end. It is essential to get it just right. Start by using an EQ to boost the kick drum’s fundamental frequency around 60-100 Hz. This step can help to make the kick drum more prominent and give it a fuller sound.

After EQ-ing, it’s time to compress the kick drum. Compression can help control the dynamic range of the kick drum, making it more consistent and creating a more compelling low end for the track.

Eq For Clarity

It’s not just about boosting and cutting frequencies. EQ can also be a powerful tool for creating clarity in the low end. Pay attention to the relationship between the kick and bass in the mix.

Use EQ to carve out space for each element. For example, if the bass and kick drum are competing for space around 80-100 Hz, consider dipping the bass a few dB in this range. This step can help create more room for the kick drum to punch through the mix.

Remember, the low end is where the power of the track resides. Taking the time to get it right can make the difference between a weak or powerful sounding track.

Add Layering For Depth

Incorporating layering in your bass production can add depth and make it stand out in the mix. By layering different bass sounds, you can create a fuller and more complex sound that will enhance the overall quality of your track.

With this production tip, your bass will pop and give your music a more professional sound.

Layering is a great technique for creating a sense of depth and energy in your bass tracks. Adding multiple layers of bass can create a fuller sound that captures the listener’s attention. Layering bass tracks may seem daunting, but it’s a simple process that can add a considerable punch to your songs.

Layer Multiple Bassline Elements

To add depth to your bassline, consider layering multiple bass elements. Combine different bass sounds, such as a sawtooth wave with a sub-bass, to create a more complex sound profile. By layering bassline elements, you can add a unique character to the sound and create a more memorable track.

Use Distortion For Texture

Adding distortion to your bass track can create unique textures that weren’t previously present. It’s a simple process that can add grit and a growling quality to your sound. Start by adding some mild harmonic distortion and dialling up the effect depending on your desired sound. Distortion can also help in creating a dirty and aggressive sound that will cut through any mix.

Add Percussion For Movement

It’s essential to add percussion elements to your bass tracks to create movement, groove and interest in the song. Experiment with different rhythms and play with the placement of percussion elements. You can try adding shakers, snaps, claps, or hi-hats, moving them offbeat or playing around with different velocities to achieve a unique sound. By adding percussion, you can create a distinct rhythm that will add energy and flow to the song. Incorporating these tips into your production process will help you create bass tracks that stand out from the rest. Layering, distortion, and percussion can transform monotonous bass tracks into energetic and exciting pieces. Remember to experiment with these techniques and find what works best for your tracks.

Create Movement With Automation

Creating movement in a bassline is crucial to ensure it stands out in a mix, and automation is a powerful tool to achieve this. With automation, you can add variation and dynamism to your tracks and make them more interesting to the listener. In this section, we’ll explore some tips for using automation creatively in your bassline production.

Automate Filters For Builds And Drops

Filter automation is a great way to add excitement and energy to your builds and drops. By automating low-pass, high-pass, or band-pass filters, you can create a sweeping effect that builds tension and anticipation before the drop. For example, you can start with a low-pass filter and gradually open it up to reveal the full bassline just before the drop. Conversely, you can start with a high-pass filter and gradually close it to create a sense of closure.

Add Modulation Effects For Interest

Modulation effects such as chorus, flanger, and phaser can also be automated to create interest and movement in your bassline. You can automate the rate, depth, and feedback parameters of these effects to create varying textures and tones. For example, you can use a flanger effect to create a swirling, undulating bassline, or a phaser effect to create a pulsating, rhythmic bassline. These effects can help your bassline cut through the mix and add depth and dimensionality to your track.

Use Sidechain Compression For Rhythm

Sidechain compression is a popular technique used in EDM and other electronic genres to create a pumping, rhythmic effect. By sidechaining your bassline to another element in your mix, such as the kick drum, you can create a rhythmic pumping effect that adds to the energy of your track. You can use a compressor with a quick attack and release time to achieve this effect and adjust the threshold and ratio settings to control the amount of compression.

Consider Spatial Effects

When it comes to making bass pop in your music production, there are several techniques you can use to take your tracks to the next level. One essential area to focus on is spatial effects. Spatial effects create a sense of space and dimension within your music, allowing your bass to stand out and make an impact. In this post, we’ll explore some tips for using spatial effects to enhance your bass production.

Add Reverb For Space And Dimension

One of the most effective techniques for creating a sense of space around your bass is using reverb. Reverb can give the impression that your bass is playing in a large room or hall, adding depth and dimension to your track. It can be especially effective if you want your bass to sit back in the mix and provide a subtle foundation for the rest of your music.

When using reverb on your bass, keep in mind that too much can quickly muddy up your mix. Instead, use a subtle amount of reverb and experiment with different room sizes and decay times to find the perfect balance. A short decay time can add a sense of clarity, while a longer decay time can create a more pronounced reverb effect.

Use Delay For Depth And Movement

In addition to reverb, adding delay to your bass can create a sense of depth and movement. Delay can create a sense of space by introducing a slight delay or echo that adds dimension to your bass. It can also help your bass cut through a busy mix by giving it a sense of movement and dynamics.

When using delay on your bass, try experimenting with different delay times and feedback settings. A shorter delay time can add a subtle sense of depth, while longer delay times can give your bass a distinct character and personality.

Experiment With Panning And Stereo Imaging

Panning and stereo imaging can also be effective techniques for creating spatial effects in your bass production. By panning your bass to one side of the mix, you can create a sense of space and openness, allowing your bass to stand out and be heard more clearly. Stereo imaging can also be used to create a sense of width and dimension, allowing your bass to fill up the mix and create a sense of balance and harmony.

When experimenting with panning and stereo imaging, try to keep the overall balance of your mix in mind. While it can be tempting to pan your bass hard to one side, this can quickly throw off the balance of your mix and create an unpleasant listening experience. Instead, use subtle panning and stereo imaging to add dimension and space without sacrificing balance.

By considering spatial effects in your bass production, you can bring a new level of depth, dimension, and impact to your tracks. Whether you’re using reverb, delay, panning, or stereo imaging, these techniques can help your bass stand out and create a memorable listening experience.

Mastering For A Powerful Low End

Every music producer strives to create a powerful bass sound to grab listener’s attention and enhance the overall music experience. Mastering is one of the critical processes to achieve a punchy low end for bass-heavy music genres, but it requires a delicate approach to avoid ruining the mix. This blog provides some practical mastering tips for making bass pop production.

Control Dynamics With Compression

Compression is a potent tool for controlling the dynamics of a track, bringing out the quieter elements while suppressing the louder ones. When used correctly, compression can help glue the low end of the mix together, delivering a consistent, powerful sound. However, it’s crucial to use compression sparingly, avoiding over-compressing the low frequencies, which may result in a weak, lifeless sound.

Eq For Punch And Clarity

As much as compression helps blend the elements of the mix, EQ can help shape the sound of each individual element, including the bass. EQ allows you to boost specific frequency ranges in the mix, and when done correctly, it can make the bass sound more defined and punchier. Boosting the fundamental frequency range of the bass, typically below 100Hz, can help bring out the power and body of the low-end, giving the track the necessary weight and depth.

Use Limiting For Volume And Loudness

Limiting is another crucial tool when it comes to mastering bass-heavy music. It helps to control the dynamics of the mix and ensures that the track remains at a consistent volume, resulting in a loud and powerful sound. When limiting, it’s essential to set the threshold low enough to catch any rogue peaks but not too low that it stifles the dynamics of the bass. A good starting point is a 1 to 2dB gain reduction, but this may vary depending on the genre and individual track requirements.

Collaborate With Other Producers

To make your bass pop productions stand out, consider collaborating with other producers. Work with others to come up with new ideas and techniques for making your sound unique and dynamic. By pooling your skills and resources, you can create something truly special that will capture the attention of your audience.

Collaborating with other producers is a great way to improve your bass pop production skills. Working with others allows you to share ideas, learn new techniques, and get valuable feedback on your mix. Here are a few ways to collaborate with other producers to improve your bass pop production.

Share Ideas And Techniques

When you collaborate with other producers, you get the opportunity to share ideas and techniques that can help you improve your bass pop production skills. By sharing your knowledge and experience, you can learn from each other and push each other’s boundaries. For example, you can discuss your favorite software, sample packs, or plugins. You may also discuss the tips and tricks that you’ve learned along the way to achieve that perfect bass sound.

Get Feedback On Your Mix

Another advantage of collaborating with other producers is that you can get valuable feedback on your mix. With fresh ears, other producers can provide you with an unbiased opinion on your mix and let you know where you can make improvements. They can suggest changes to the arrangement, sound selection, levels, and processing to make your mix more cohesive and professional.

Learn From Different Production Styles

When working with other producers, you will get a chance to learn from different production styles. Each producer has their own unique approach to music production that can teach you new ways of approaching your own work. By exposing yourself to different styles of music, you can incorporate new ideas and techniques into your bass pop productions. You may also learn new ways of using software, processing, or techniques you never thought of before. Overall, collaborating with other producers can be a fruitful experience that can help you improve your bass pop production skills. So, try to connect with other producers, share ideas, and learn from each other to take your bass pop productions to the next level.

Keep Experimenting

If you’re into music production or electronic music, you’ll know the value of a good bassline. A well-crafted bassline can take a track to new heights, making it feel more dynamic, powerful, and engaging. But how can you make your bass pop? One key way to achieve this is by experimenting with different sounds and techniques. Here are some tips on how to keep experimenting and creating killer basslines.

Try New Sounds And Techniques

The first step in creating popping basslines is to experiment with different sounds and techniques. This means trying out different synthesizers, effects, and processing chains to find the perfect sound for your track. You can also experiment with different playing techniques, such as slapping, tapping, or fingerstyle, to add more texture and dynamics to your bassline.

One of the key aspects of trying new sounds and techniques is to have an open mind. Don’t be afraid to try something that might seem unconventional or outside the box. Sometimes these experimental techniques can lead to some of the most interesting and engaging basslines.

Keep Learning And Improving

Another way to keep experimenting and creating killer basslines is to keep learning and improving. This can involve taking online courses, reading articles, watching tutorials, or even just practicing on your own. The more you learn and practice, the more you’ll be able to push your own boundaries and create truly unique and engaging basslines.

Learning and improving also means being open to feedback. Whether it’s from other producers, your fans, or even your own critical ear, being able to take feedback and use it to improve your craft is key to creating popping basslines.

Don’t Be Afraid To Break The Rules

Finally, don’t be afraid to break the rules. Sometimes the best basslines come from breaking conventions and trying something new. This might mean experimenting with different time signatures, using unusual chord progressions, or even just breaking away from the typical verse-chorus-bridge structure.

Breaking the rules can also mean creating something truly unique and different. By pushing the boundaries, you can create something that stands out from the crowd, and that people will remember and want to listen to again and again.

In conclusion, creating popping basslines is all about experimenting, learning, and breaking the rules. By staying open-minded and continually pushing your own boundaries, you can create truly engaging basslines that take your tracks to new heights.

Making Bass Pop Production Tips

Credit: m.youtube.com

Frequently Asked Questions On Making Bass Pop Production Tips

How Do I Make My Bass Stand Out More In Mix?

To make your bass stand out more in a mix, start by using EQ to boost the low-frequency range, add compression to even out the sound, and use sidechain compression to create space for the bass in the mix. Ensure your bass has a unique tone to stand out and experiment with different layering techniques.

Finally, try using stereo widening to create a wider soundstage.

How Can I Make My Bass Speaker Sound Better?

To make your bass speaker sound better, here are some tips: 1. Adjust the equalizer settings to enhance frequencies. 2. Keep the speaker away from walls or corners. 3. Ensure the speaker is properly powered and connected. 4. Replace any damaged or worn out components.

5. Play with different sound settings and experiment to find your ideal setup.

How Do I Make My Bass Sound Fuller?

To make your bass sound fuller, you can try boosting the low frequencies with an EQ, adding harmonic saturation or distortion, using a compressor to even out the volume, and experimenting with different playing techniques. You may also consider using a bass amplifier or speaker that is designed to enhance the bass frequencies.

How Can I Make My Bass Guitar More Punchy?

To enhance the punchiness of your bass guitar, try these techniques: adjust your playing style to hit the strings harder, use a compressor pedal to even out the tone, experiment with different EQ settings to boost the low-end frequencies, and consider upgrading your strings to ones that are thicker or made of a different material.

Conclusion

To sum it up, producing bass pop music requires a thoughtful approach that takes into account all the essential elements, including melody, rhythm, harmonies, and sound engineering techniques. With these tips, you can ensure that your bass pop production elevates to the next level, creating a unique and memorable experience for the listeners.

So, get creative, experiment with different tools and techniques, and make sure to always keep your audience in mind. By following these tips, you can produce catchy and compelling bass pop music that resonates with your audience.

Categories
Archive

Best Studio Monitors Under 500

The best studio monitors under $500 are the JBL Professional 305P MkII and the PreSonus Eris E5. Both models have received highly positive reviews from audio professionals and enthusiasts for their accurate sound reproduction and affordability.

As an Amazon Associate I earn from qualifying purchases.

If you’re a music producer, mastering engineer, or simply looking to upgrade your home studio setup, having a good pair of studio monitors is essential. They allow you to hear and mix audio with precision and accuracy, making sure your music sounds great on all types of speakers and headphones.

But with so many options available in the market, it can be overwhelming and confusing to choose the right one. That’s why we’ve researched and found two excellent studio monitor options that won’t break the bank: the JBL Professional 305P MkII and the PreSonus Eris E5. We’ll take a closer look at their features, pros, and cons to help you make an informed purchase decision.

Best Studio Monitors Under 500

Credit: m.youtube.com

Top 5 Studio Monitors

Experience superior sound quality with these top 5 studio monitors for under $500. Whether you’re recording vocals or mixing tracks, these monitors offer excellent sound accuracy and clarity. Upgrade your home studio today.

Are you searching for the best studio monitor within a budget of $500? If yes, then you’re in the right place. Studio monitors play a crucial role in your music production journey. Whether you’re mixing, mastering, or recording, you need the best monitor available within your budget to get accurate and reliable feedback. In this article, we have compiled a list of the top 5 studio monitors under $500 with their features and benefits.

Monitor #1: Presonus Eris E5

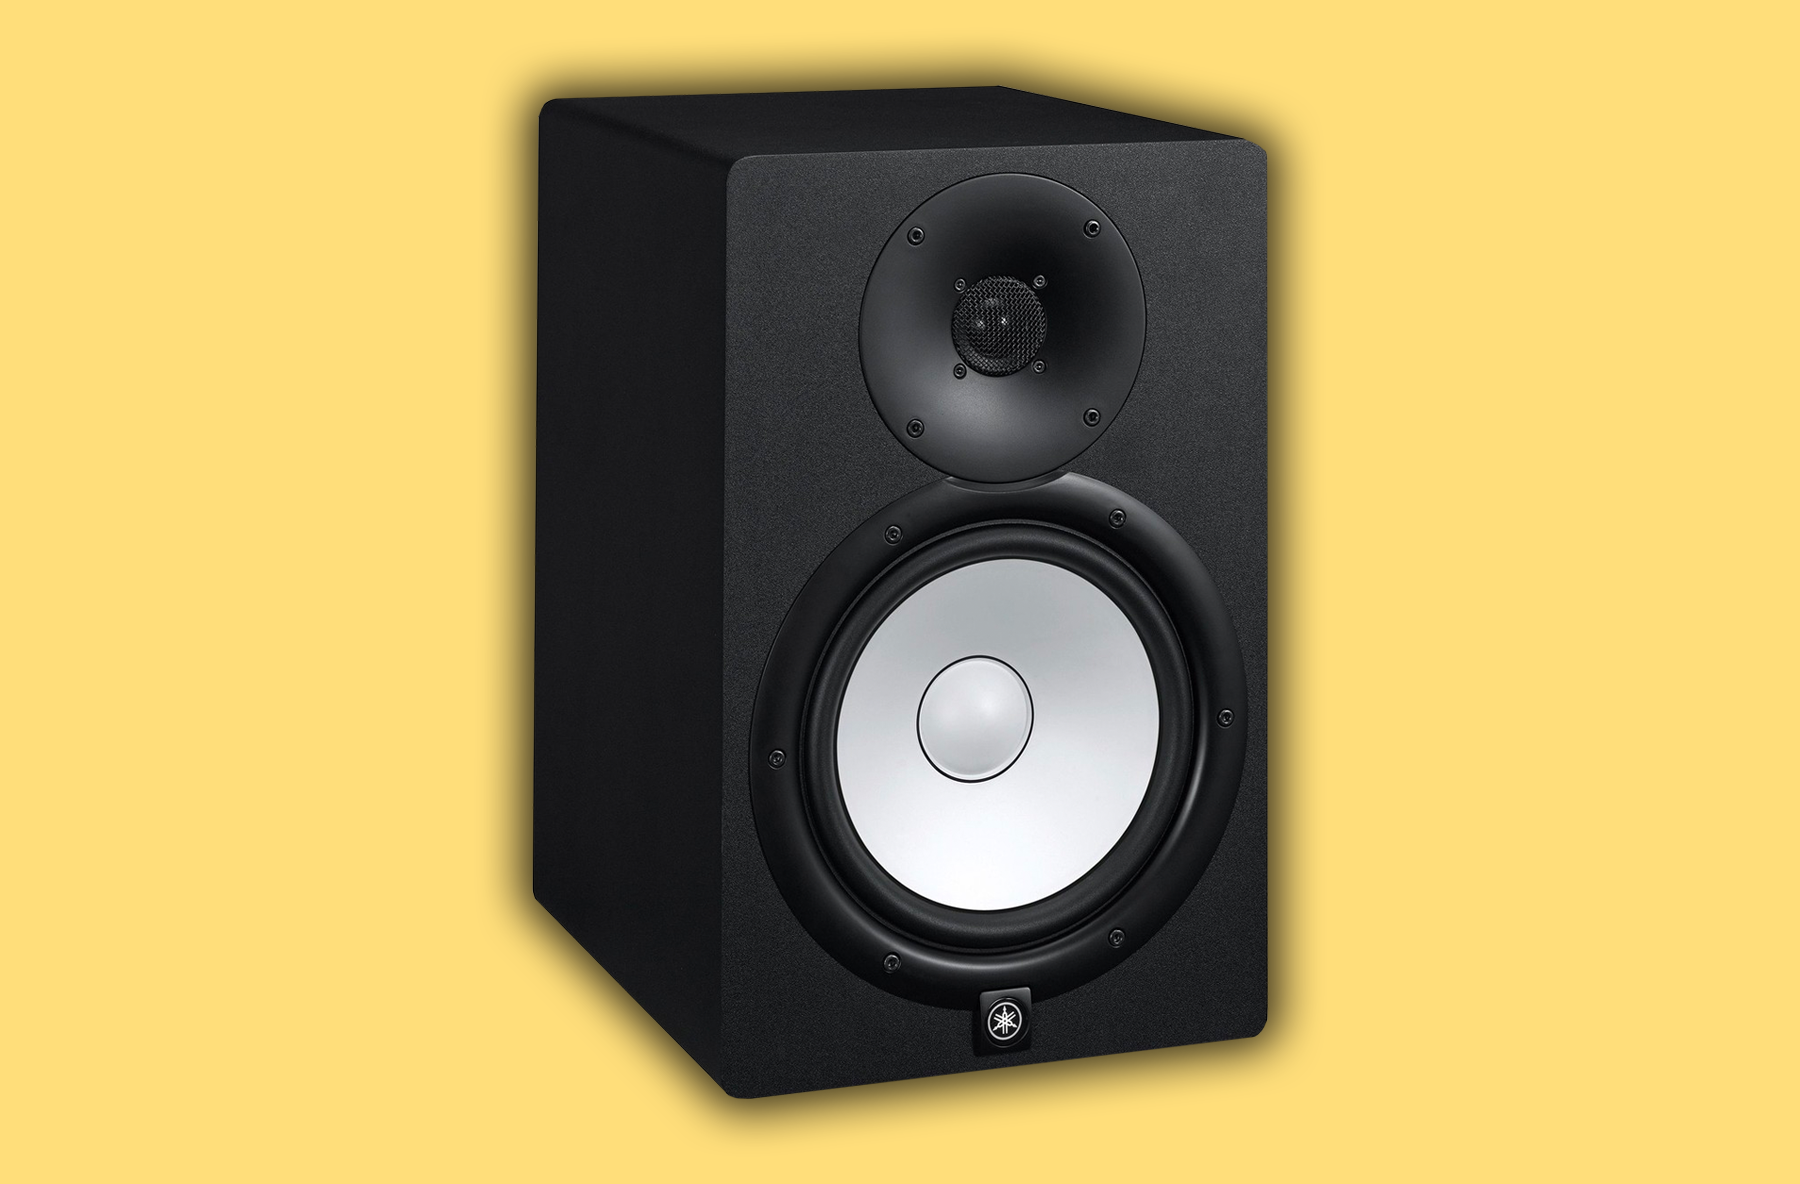
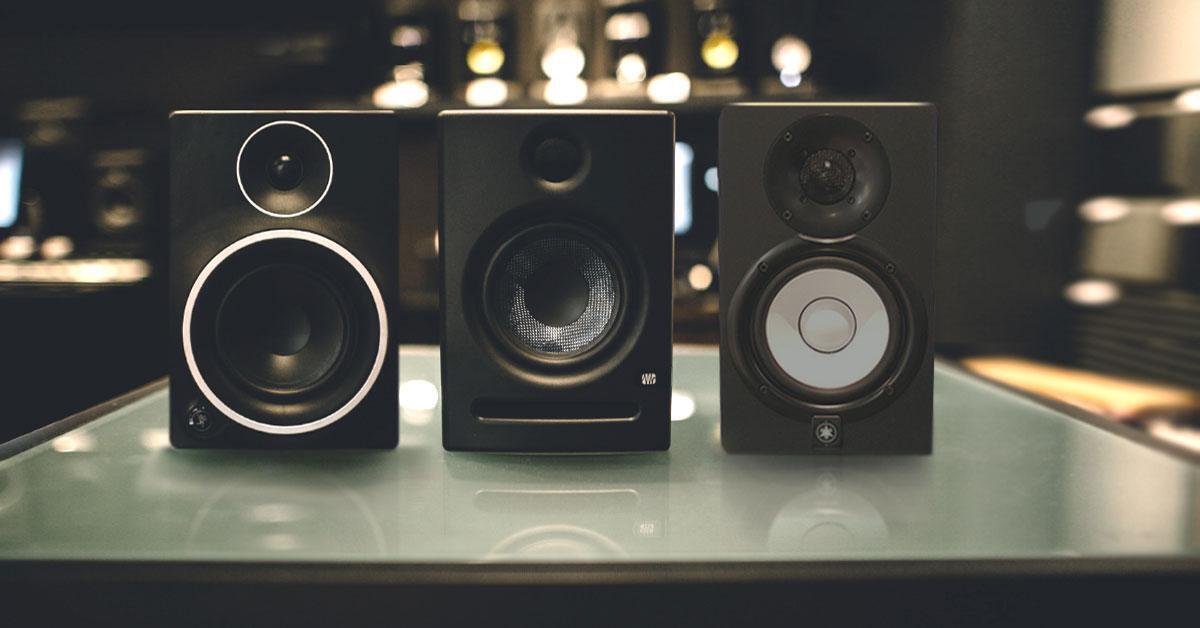
The Presonus Eris E5 is a two-way active studio monitor that delivers an accurate and clean sound. With a 5.25-inch Kevlar low-frequency driver and a 1-inch silk-dome tweeter, the Eris E5 offers frequency response ranging from 53 Hz to 22 kHz. It also has a built-in Acoustic Tuning feature that compensates for low-frequency bass boost and high-frequency treble boost caused by room acoustics. With its compact size and well-balanced sound, the Eris E5 is perfect for small mixing and recording setups.

Monitor #2: Jbl Professional 305p Mkii

The JBL Professional 305P MkII is a renowned studio monitor that has been upgraded with the latest technology. With its 5-inch low-frequency transducer and 1-inch soft-dome high-frequency tweeter, it delivers an accurate and detailed sound. The 305P MkII has a wide sweet spot and an impressive frequency response ranging from 49 Hz to 20 kHz. It also offers flexible connectivity options, including balanced XLR and 1/4-inch inputs, making it a perfect fit for any studio environment.

Monitor #3: Mackie Cr-x Series Cr5bt

The Mackie CR-X Series CR5BT is a versatile studio monitor that provides excellent sound quality and connectivity options. With its 5-inch polypropylene-coated woofer and 0.75-inch ferrofluid-cooled silk-dome tweeter, it delivers crystal clear sound with a frequency response ranging from 60 Hz up to 20 kHz. It also has built-in Bluetooth connectivity, making it easy to stream audio from any compatible device. The CR5BT is perfect for small home studios or for music enthusiasts who appreciate a balanced and accurate sound.

Monitor #4: Krk Rp5 Rokit G4

The KRK RP5 Rokit G4 is a popular studio monitor among music producers worldwide. With its 5-inch Kevlar low-frequency driver and 1-inch Kevlar tweeter, it delivers a clear and precise sound with a frequency response ranging from 43 Hz to 40 kHz. It also has a built-in LCD screen that displays input level, EQ settings, and other vital information. The KRK RP5 Rokit G4 has a well-balanced sound that allows you to hear all the details in your music production.

Monitor #5: M-audio Bx5 D3

The M-Audio BX5 D3 is a compact studio monitor that offers great sound quality at an affordable price. With its 5-inch low-frequency driver and 1-inch natural silk-dome tweeter, it delivers a well-defined sound with a frequency response ranging from 52 Hz to 35 kHz. It also has a rear port that reduces boundary coupling and offers a more extended low-frequency response. The BX5 D3 is perfect for music producers who want a decent monitor within a tight budget. In conclusion, these are the top 5 studio monitors under $500. Whether you’re a professional music producer or just starting, these monitors will provide you with the necessary accuracy and clarity to produce quality music.

Features To Consider

When selecting the best studio monitors under $500, one must consider factors such as frequency response, size and design, power, connectivity, and accuracy. These features impact the overall sound quality and performance of the monitors, making thoughtful consideration crucial to achieving optimal results.

When it comes to producing music or any audio content, having the right set of studio monitors can make all the difference. However, with so many options available in the market, it can be overwhelming to choose the perfect one for your needs. Before making a purchase, it is important to consider the different features that are available to ensure that you get the best value for your money. Here are some important features to consider when choosing the best studio monitors under 500.

Size And Power

The size and power of a studio monitor determine its output capability, with larger monitors often having more power and producing a higher sound pressure level. It is important to consider the size and power of the studio monitor based on your room size and the distance between your listening position and the monitor. A 5-inch monitor might be enough for a small room, whereas a larger 8-inch monitor might be required for a larger space.

Frequency Response

The frequency response of a studio monitor refers to the range of frequencies that the monitor is capable of producing. A wider frequency range means that the monitor can reproduce a broader spectrum of sounds, resulting in more accurate and detailed sound reproduction. A good studio monitor should have a frequency response of at least 50Hz to 20kHz, which covers most of the audible frequency spectrum.

Driver Configuration

The driver configuration of a studio monitor refers to the number and type of drivers used to produce sound. A 2-way monitor uses a woofer for low and mid frequencies and a tweeter for high frequencies, while a 3-way monitor also includes a mid-range driver. A 3-way monitor provides more accurate and detailed sound reproduction, but it is more expensive than a 2-way monitor.

Connectivity Options

The connectivity options of a studio monitor determine the different ways in which it can be connected to your audio interface or mixer. Most studio monitors come with balanced XLR and TRS inputs, which provide a cleaner signal and reduce interference. Some monitors also include unbalanced RCA inputs, which are suitable for connecting consumer-level devices such as CD players and gaming consoles. In conclusion, choosing the right studio monitor requires careful consideration of its features to ensure that it meets your specific requirements. By considering the size and power, frequency response, driver configuration, and connectivity options of a studio monitor, you can make an informed decision and enhance your listening experience.

Budget-friendly Alternatives

Looking for budget-friendly alternatives for studio monitors? Check out our list of the best studio monitors under $500 for excellent sound quality without breaking the bank. These options are perfect for home studios and content creation.

Budget-Friendly Alternatives When it comes to studio monitors, you can easily spend a small fortune on a pair. However, if you’re just starting out or on a tight budget, there are plenty of affordable options available. Here are three monitors that won’t break the bank:

Monitor #6: Model And Description

JBL Professional 305P MkII is a compact two-way nearfield studio monitor that delivers high-quality sound without breaking the bank. With a 5″ low-frequency transducer and 1″ soft-dome high-frequency transducer, this monitor offers a frequency response of 49Hz – 20kHz. The JBL 305P MkII also features JBL’s patented Image Control Waveguide technology, which ensures a wide sweet spot and accurate imaging.

Monitor #7: Model And Description

Presonus Eris E5 XT may be just what you need. This monitor features a 5.25″ woven composite low-frequency driver and a 1″ silk-dome tweeter, which deliver a frequency response of 48Hz – 20kHz. The Eris E5 XT also includes acoustic tuning controls that allow you to adjust the monitor’s response to your room.

Monitor #8: Model And Description

Edifier R1850DB is an affordable option that’s ideal for home studios and desktop setups. This monitor features a 4″ bass driver and a 13mm silk dome tweeter, which deliver a frequency response of 60Hz – 20kHz. The Edifier R1850DB also includes a built-in amplifier, Bluetooth connectivity, and a remote control, making it a versatile option for music producers on a budget. No matter which monitor you choose, these budget-friendly options offer high-quality sound and are a great way to get started with music production.

How To Choose The Right Studio Monitors

If you’re an audio engineer or producer, you know that studio monitors are an essential tool in your kit. They allow you to accurately hear the sounds you’re working on, which is crucial when mixing or mastering music. However, with so many options available on the market, it can be challenging to choose the right one, especially if you’re on a budget. In this article, we’ll explore how to choose the right studio monitors under 500 dollars.

Define Your Budget

The first thing you need to do is to define your budget. Studio monitors can range from a few hundred to several thousand dollars. By setting a budget, you’ll narrow down your search options and can focus on models that fit your price point. It’s essential to keep in mind that more expensive doesn’t always mean better, and you can find excellent options under 500 dollars.

Consider Your Space

The space you’ll be working in can significantly impact your choice of studio monitors. If you’re working in a small room, you’ll need monitors that are efficient and compact. On the other hand, if you have a larger studio space, you may want to consider larger monitors with more power. Additionally, it’s essential to pay attention to the acoustics of your space as certain monitors may be more suited to particular room types.

Determine Your Needs

The type of music you’ll be working on and what you’ll be using the speakers for should also be considered when choosing studio monitors. For example, if you’re mixing music with a lot of bass, you’ll want monitors with good bass reproduction. Consider the genre you’ll be working with, the instruments used, and other factors that could impact your choice of studio monitors.

Research And Compare

Once you’ve narrowed down what you’re looking for, it’s time to research and compare different models. Look for reviews and feedback from other audio engineers or producers who have used the monitors you’re interested in. Compare specifications such as frequency range, wattage, and driver size of different models. Take your time, and don’t rush into buying the first studio monitors that pique your interest.

In conclusion, choosing the right studio monitors is essential for achieving accurate and high-quality sound. By defining your budget, considering your space and needs, and researching and comparing different models, you’ll be able to choose the best studio monitors under 500 dollars that will suit your needs and budget. Take your time and carefully weigh your options to make an informed decision.

Setting Up Your Studio Monitors

Great quality sound is important for any music producer, artist, or audio engineer. The sound quality depends mostly on the type of studio monitors and how they are set up. This section will focus on how to properly set up your studio monitors to ensure the best sound quality possible.

Placement

The placement of your studio monitors is crucial to achieve the best sound quality possible. Position your monitors at the same distance from the listener creating an equilateral triangle between your chair and the two monitors. Keep the monitors at an angle of approximately 30 degrees facing your ears. Ensure that the monitors are positioned at the same height as your ears or slightly tilted towards your ears.

Placing monitors against a wall or in a corner will create a bass build-up. Therefore, it’s recommended to pull the monitors away from the walls to reduce bass build-up and maintain proper stereo imaging.

Calibration

The next step to setting up your studio monitors is calibration. This means adjusting the volume levels and frequency response of the monitors. The ideal volume level for studio monitors is between 85 dB to 100 dB, but monitors should not exceed their maximum SPL at the listening position. This is important to protect your ears from hearing damage.

You can also calibrate your monitors using a software frequency-response measurement tool that allows you to measure the frequency response of your monitors and room. This calibration helps correct any anomalies in the frequency response caused by the room’s acoustic properties.

Room Treatment

Room treatment is crucial to achieve accurate sound reproduction from your studio monitors. Acoustic foam panels or bass traps can be added to the room to reduce unwanted room reflections, echoes, and resonance. The panels reduce the first reflections from walls, ceilings, and floors, which improves clarity and sound quality. It’s recommended to add absorptive panels to the first reflection points on the walls, ceiling and floor.

Another solution is to use digital room correction (DRC) to correct the frequency response caused by the room’s acoustics. DRC captures the frequency response of the room in real-time and corrects it to provide optimal sound quality.

Conclusion

Proper placement, calibration, and room treatment are key factors to achieve the best sound possible from your studio monitors. With these tips, you can get the most out of your monitors without having to spend a fortune.

Best Studio Monitors Under 500

Credit: plus.pointblankmusicschool.com

Best Studio Monitors Under 500

Credit: www.sweetwater.com

Frequently Asked Questions Of Best Studio Monitors Under 500

How Much Should I Spend On Studio Monitors?

The amount you should spend on studio monitors depends on your needs, budget and quality expectations. Decent budget monitors can cost around $200, while high-end models can go for $5,000 or more. It’s recommended to invest in quality monitors as they impact the overall sound quality.

Why Is Genelec So Popular?

Genelec is popular because of its superior sound quality, reliable performance, and innovative design in the professional audio industry. The company’s commitment to sustainability and green practices has also contributed to its popularity among environmentally conscious consumers.

Is It Worth Getting Studio Monitors?

Yes, it is worth getting studio monitors if you want to produce high-quality audio recordings. Studio monitors provide accurate and transparent sound which is essential for mixing and mastering audio tracks. They allow you to hear every detail of your recordings and make better decisions in the mixing process, resulting in better overall sound quality.

What Size Monitor Is Best For Home Studio?

The ideal monitor size for home studios is between 22 and 27 inches. This size range offers a perfect balance between screen size and desk space usage. A smaller monitor may compromise the visual details while a larger monitor may be too overpowering for smaller workspaces.

Conclusion

All in all, finding the best studio monitor under 500 dollars can be a challenge, but it’s definitely worth the effort. With the right pair of monitors, you’ll be able to hear your mixes more clearly, resulting in better songs and more satisfied clients.

Whether you’re a professional audio engineer or an aspiring artist, investing in a good set of monitors is never a bad idea. So, take a look at our top picks and choose the one that suits your needs the best – you won’t be disappointed!

More in our Headphones & monitors guide.

Categories
Archive

Do You Need a Studio to Make Music

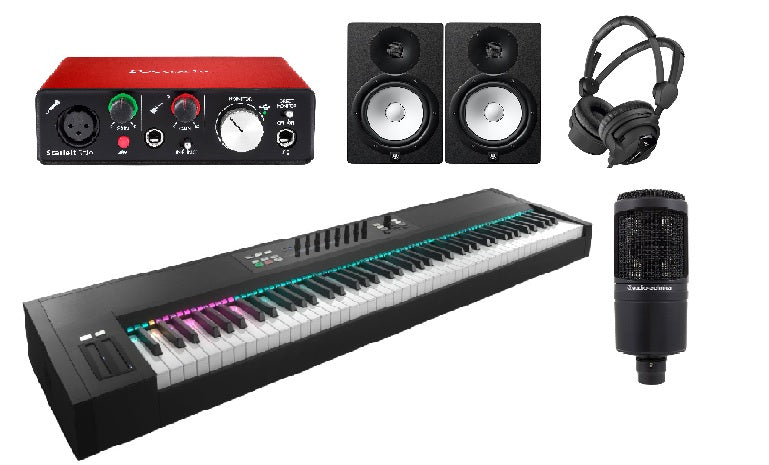
No, you do not need a studio to make music. Nowadays, with advancements in technology, one can create music from the comfort of their own home using a computer and digital audio workstation (DAW) software.

While having a studio with high-quality equipment may enhance the sound quality of your recordings, it is not a necessity. Many successful musicians have started producing music from their bedrooms or home studios. With some basic equipment and the right skills, anyone can make music without the need for a professional setup.

Related reading: Using the Arpeggiator in Fl Studio and Studio Desk. For background, see the Wikipedia article on Recording studio.

This article will explore the options available for those who wish to start producing music independently and offers tips on how to get started.

Do You Need a Studio to Make Music

Credit: www.djtechdirect.com

The Advantages Of Having A Music Studio

Having a studio for making music comes with numerous advantages such as having a dedicated space to work on music without distractions, improved acoustics for recording vocals and instruments, and access to professional equipment and software. Overall, a studio can greatly enhance the sound quality and production value of the music being created.

Access To High-end Equipment

One of the most significant advantages of having a studio is the access to high-end equipment that can take your music production to the next level. High-quality microphones, speakers, mixers, and other recording equipment are essential for creating professional-grade recordings with exceptional sound quality that stands out in the crowded music industry.

Better Sound Quality

A well-equipped studio enables you to create tracks with superior sound quality compared to what you can produce at home. The controlled environment of a studio provides optimal acoustics for capturing sound without disruptions from external noise and distortions. This means that your music will sound clearer, more balanced, and professional. Better sound quality is essential for standing out in the competitive music industry and increasing your chances of success.

Separation From Distractions

Another major advantage of having a studio is that it provides a space to focus solely on music production. When you are at home, there are several distractions, such as family, pets, and everyday noise that can interfere with your creative flow and productivity. However, in a studio, you can create an environment designed to keep distractions at bay, enabling you to concentrate solely on recording, mixing and producing your music. This enhances the quality of your work and can lead to more efficient use of your time.

To Conclude

While having a studio may come with a significant investment in equipment and rent, the advantages it offers are irreplaceable. Access to high-end equipment, superior sound quality, and a distraction-free environment are some of the reasons why having a studio is critical to creating world-class music.

Do You Need a Studio to Make Music

Credit: m.youtube.com

The Advantages Of Not Having A Music Studio

Contrary to popular belief, you don’t need a big, expensive studio to make music. In fact, there are several advantages to not having a studio that can actually improve the quality of your music.

Cost Savings

One of the biggest advantages of not having a studio is the cost savings. Building and maintaining a studio can be quite expensive. From purchasing the equipment to paying rent for the physical space, the costs can quickly add up. Without a studio, you can save a lot of money that can be used for other important things like marketing your music.

Flexibility

Another major advantage of not having a studio is flexibility. When you have your own studio, you are limited to only creating music in that space. However, without a studio, you have the flexibility to record music anywhere. You can record at home, in a hotel room, or even outside. This flexibility allows you to be more creative and make music whenever inspiration strikes.

Utilizing Technology for Music Studio

Advancements in technology have made it easier than ever to create music without a studio. With just a laptop and some software, you can create, mix, and master your music from anywhere in the world. Additionally, there are many online platforms that allow you to collaborate with other musicians and producers from around the world.

Mobility

Without a studio, you have the ability to be mobile. You can take your music with you wherever you go. Whether you’re on tour or traveling for leisure, you can continue to make and produce music. This mobility also allows you to play live shows and perform in different locations without the burden of having to maintain a physical studio.

In conclusion, not having a studio can actually provide many advantages for musicians. From cost savings to flexibility, utilizing technology, and mobility, there are many reasons why you don’t need a studio to make great music.

Factors To Consider Before Building A Music Studio

Before deciding if you need a studio to make music, consider your budget, space, and equipment needs. Evaluate if you prefer working alone or collaborating, and if you want access to specialized resources. Ultimately, the decision should align with your goals and creative process.

Factors to Consider Before Making a Decision If you are an aspiring musician or a seasoned professional, you may have wondered whether a studio space is necessary to make music. While many successful musicians have created chart-topping hits in their bedrooms or living rooms, there are several factors you must consider before making a decision. These factors include budget, type of music being made, space available, and collaboration needs. In this blog post, we will explore each of these factors in detail to help you make an informed decision. Budget The first factor to consider is your budget.

Setting up a professional recording studio can be expensive, and it may not be feasible for everyone. However, with advances in technology, you can create high-quality music from the comfort of your home without breaking the bank. You can opt for budget-friendly equipment and software that can help you produce professional-grade recordings without spending a fortune. Type of Music Being Made The type of music you are producing is also an important factor to consider. Different genres may require different setups, and some may require acoustically-treated recording spaces.

Practical Tips for Music Studio

For instance, if you are producing electronic music, you may not need a full-fledged recording studio. Conversely, if you are recording a live band, you may need a larger space with sound isolation and acoustic treatment to capture the best recording. Space Available Your available space is another factor to consider. If you have a dedicated room in your house or apartment that can double up as a recording space, you may not need a separate studio. Outfitting your available space with appropriate equipment and sound treatment can help you create a recording that sounds professional.

However, if you are cramped for space, a commercial studio may be a more practical option. Collaboration Needs Lastly, consider your collaboration needs. If you are working on a project with other musicians or producers, you may need a space that can accommodate multiple people. Commercial studios may offer larger spaces that are conducive to collaboration, whereas a small home setup may not be suitable. In conclusion, there is no one-size-fits-all answer to the question of whether you need a studio to make music.

It ultimately depends on your budget, the type of music you are producing, your available space, and your collaboration needs. By considering each of these factors carefully, you can make an informed decision and create high-quality music that sounds professional no matter where you choose to record.

Examples Of Musicians Who Do Or Don’t Use Studios

When it comes to making music, many aspiring musicians wonder if they need a studio to achieve their goals. The answer is no, but having a studio can certainly make things easier. In this post, we will explore the examples of musicians who do or don’t use studios.

Famous Musicians Who Use A Studio

Many famous musicians choose to use studios to record their music. For example, Taylor Swift, Beyoncé, and Drake are just a few of the musicians who have recorded albums in studios.

Recording studios can offer several benefits. They typically have state-of-the-art equipment and experienced sound engineers who can help perfect a sound. Studios also provide a professional environment free of distractions, allowing musicians to focus solely on their music.

Famous Musicians Who Don’t Use A Studio

On the other hand, there are also many famous musicians who choose not to use a studio. Some musicians, like Justin Bieber, prefer to record their music in a more casual setting, such as a home studio.

Other musicians, like Billie Eilish, have recorded entire albums in bedrooms or other non-studio environments. The rise of home recording software has made it easier than ever for musicians to create professional-sounding recordings without ever leaving their homes.

However, recording outside of a studio does come with its challenges. Musicians may not have access to the same high-end equipment as they would in a studio. Additionally, outside noises and distractions can affect the quality of the recording.

Conclusion

Overall, whether or not a musician needs a studio depends on their personal preference and resources. While a studio can provide access to top-of-the-line equipment, recording outside of a studio is becoming increasingly more common and accessible. Ultimately, the goal should always be to create music that speaks to the listener, regardless of where it was recorded.

Importance Of Finding The Right Balance

Music creation can be an immensely satisfying experience, regardless of whether you are an amateur or a professional musician. You might think renting a recording studio is necessary if you want to produce high-quality music, but that’s not always the case. With modern technologies, producing music is more accessible than ever.

How To Strike The Right Balance

It can be challenging to find a balance between the resources you have and the quality of music you want to produce. You don’t want to compromise the quality of your music, but you also need to work within your budget. So how do you strike the right balance?

Here are some tips to help you:

  1. Invest in quality equipment – It’s important to invest in equipment that will produce high-quality sounds.
  2. Choose a suitable location – A quiet place free of distractions is essential for effective music production.
  3. Utilize technology – Modern equipment and software can significantly enhance the quality of your music.
  4. Collaborate with other artists – Working with other musicians can help fill the gaps in your knowledge or experience.

The Consequences Of Getting It Wrong

Getting the balance wrong can have severe consequences. For example, investing too heavily in equipment can negatively impact your overall budget. Poor production quality is another consequence that can lead to underwhelming music that won’t be accepted by an audience. A noisy or distracting location can also lead to distractions and might only result in poor quality work.

Overall, the importance of finding the right balance can’t be overstated when it comes to music production. Collaboration and advanced technology can help offset some of the deficiencies in your resources. By utilizing cost-effective and modern techniques, you can produce high-quality music that will captivate your fans.

Do You Need a Studio to Make Music

Credit: www.compassselfstorage.com

Frequently Asked Questions For Do You Need A Studio To Make Music

Can I Make A Song Without A Music Studio?

Yes, you can make a song without a studio. With a good microphone, computer, and software, you can record and produce your song at home. There are many affordable options for equipment and software that can help you create a quality song from the comfort of your own home.

Can You Make A Music Studio At Home?

Yes, it is possible to make a music studio at home. You can start with a computer, digital audio workstation, and audio interface. You will also need some acoustic treatment, monitors, headphones, and a microphone. With a bit of research and investment, you can create a fantastic home studio.

What Do You Need To Own A Music Studio?

To own a music studio, you need a suitable location, music equipment, and soundproofing to minimize noise. In addition to this, you may need to hire professionals, such as sound engineers, to assist with the technical aspects of recording music.

It is also important to have a solid business plan and budget to ensure your studio’s success.

How Much Does It Cost To Build A Music Studio?

The cost of building a music studio depends on various factors such as studio type, size, equipment, and location. The cost can range from a few thousand dollars to over $100,000. It’s important to have a detailed budget plan and consult with professionals in the industry for an accurate estimate.

Conclusion

There’s no doubt that having a studio can make the process of making music much more convenient and efficient. However, it’s not the only way. Advances in technology mean that home recording setups have become increasingly accessible and affordable. Ultimately, the choice of whether or not to invest in a studio depends on your personal circumstances and goals as a musician.

Whether you choose to create in a professional or home-based environment, the most important thing is to enjoy the process and let your creativity flourish.

Categories
Archive

How To Write 5 Finger Melodies

To write 5 finger melodies, you need to focus on 5 notes within a particular key and use them to create simple but memorable melodies. Writing 5 finger melodies can seem like a daunting task for many beginner musicians, but with the right approach and some practice, it can become more comfortable and fulfilling.

The first step is to select a key you want to work with, and then focus on the 5 most important notes in that key. By using these notes to create simple and catchy melodies, you can make music that is easy to play and easy to remember.

Whether you’re writing for piano, guitar, or any other instrument, 5 finger melodies are a great way to get started and build your musical skills. We’ll explore some tips and tricks to help you write your own memorable 5 finger melodies.

Understanding Melodies

Writing melodies can be an exciting yet daunting task for beginners. But understanding the basics of melody writing can make it easier and enjoyable. Melodies are the catchy tunes that we hum and remember long after we have forgotten the lyrics. They are the heart of any song and can make or break it. The challenge lies in creating a melody that not only sounds good but also complements the lyrics and evokes the intended emotion. To write a good melody, one needs to understand the importance of notes, rhythm, and timing.

Notes

Notes are the building blocks of melody. They are the sounds that we create by pressing down a key on a piano or by plucking a string on a guitar. The distance between two notes is called an interval, and it determines the pitch or frequency of the sound produced. The different combinations of notes and intervals create melodies. As a beginner, it is essential to choose a key or scale that suits your voice or instrument. It will help you to stay in tune and create a cohesive melody.

Rhythm

Rhythm refers to the timing and emphasis of notes in a melody. It is the way in which the melody flows and creates a musical pattern. Rhythm can make a melody catchy or monotonic. The rhythm of a melody depends on the speed or tempo of the song and the time signature. The time signature is indicated at the beginning of a piece of music and tells the musician how many beats are in each measure and what type of note receives a beat. Practicing rhythm exercises can help improve your melody writing skills.

Timing

Timing is crucial in melody writing. It refers to the duration of each note and how long it is held. The timing of a note can create tension or release in a melody. It can also affect the emotion that the melody evokes. The timing of a melody depends on the tempo of the song, the time signature, and the phrasing. Phrasing is the way in which a melody is divided into smaller sections, and it can affect the timing and flow of a melody. It is essential to practice timing exercises to ensure that your melody is well-structured and flows smoothly.

Writing a memorable melody takes practice and patience. Understanding the basics of notes, rhythm, and timing can help you write better melodies. By experimenting with different combinations of notes, rhythm, and timing, you can create a melody that is unique and evokes the intended emotion.

How To Write 5 Finger Melodies

Credit: galaxymusicnotes.com

The 5 Finger Technique

Are you struggling to write simple melodies on the piano? The 5 Finger Technique might be just what you need to get started with. This technique is a simple and effective way to write melodies that are easy to play and remember, even if you’re a beginner pianist.

What Is It?

The 5 Finger Technique is a basic piano technique that uses only five notes played with the five fingers of your hand. Typically, the starting note is C, and the notes are played in ascending or descending order on the white keys only.

Using the 5 Finger Technique, you can create simple melodies with just a few notes. This makes it an ideal method for novice pianists who are just learning about melody writing.

How It Works

To get started with the 5 Finger Technique, you need to select one of your hands. The right hand is usually the best option for beginners, but you can use your left if you prefer.

Next, place your hand in the C position, with your thumb on C and your other four fingers on the next four white keys in a row. Then, play the five notes in order, moving your fingers up or down the keyboard.

Once you are comfortable with playing the five notes in order, you can begin to experiment by playing them out of order. Try playing the notes in different rhythms and sequences to create a melody.

Another great way to use the 5 Finger Technique is to create harmonies. You can use your other hand to play chords that will harmonize with the melody that you create with the 5 Finger Technique.

Examples

Here are some simple examples of melodies you can create using the 5 Finger Technique:

Example 1Example 2
C-D-E-C-D-E-E-EC-C-C-E-C-C-E-E

As you can see, these melodies are made up of just a few notes, but they are still catchy and memorable. With practice, you can use the 5 Finger Technique to write longer, more complex melodies that will impress your friends and family.

So, if you’re looking to get started with melody writing on the piano, give the 5 Finger Technique a try. It’s a simple, effective, and fun way to create melodies that you can be proud of.

Step-by-step Guide

To write captivating 5 finger melodies, first, start with a simple melody that you can remember easily. Then, apply basic music theory to expand your melody and give it structure. Build your melody with a few variations and repeat it to ensure the tune is catchy.

Finally, record and listen to your melody to make sure it sounds right.

Are you looking for a step-by-step guide to write 5 finger melodies? Look no further! In this post, we’ll provide you with a detailed tutorial to help you create beautiful melodies using only 5 fingers. We’ll cover everything from selecting a key to adding dynamics.

Selecting A Key

Before you start writing your melody, it’s essential to choose the right key. The key you select will determine the overall mood and emotion of your melody. There are 12 different keys to choose from, and each key has its unique sound. To select the right key for your melody, consider the following factors:

  • What feeling or mood are you trying to convey?
  • What is your song’s overall theme?
  • What is the range of the singer or instrument playing the song?

Once you’ve considered these factors, select a key that best fits your song’s mood and theme. You can use a piano or keyboard to experiment with different keys and find the one that works best for your melody.

Choosing A Chord Progression

The next step is to choose a chord progression. A chord progression is a sequence of chords that repeats throughout the song. It provides the foundation for your melody and helps establish the song’s overall structure. Choosing the right chord progression can take your melody to the next level. Here are some tips to help you choose the right chord progression:

  • Consider the key you’ve selected
  • Choose chords that complement the melody you have in mind
  • Experiment with different chord progressions to find the one that works best

Building A Melody

Now that you’ve selected a key and chord progression, it’s time to start building your melody. Here are some tips to help you create a memorable melody.

  • Start with a simple rhythm using quarter notes or eighth notes
  • Limit your melody to 5 consecutive notes
  • Consider the intervals between the notes (e.g., step-wise, skipping, or repeating)
  • Experiment with different note lengths to add interest

Adding Dynamics

Finally, it’s time to add dynamics to your melody. Dynamics refer to the loudness or softness of notes in a song. Adding dynamic changes can make your melody more interesting and expressive. Here are some tips to help you add dynamics to your melody:

  • Use crescendos (gradually getting louder) and decrescendos (gradually getting softer) to build tension and release
  • Experiment with adding accents and staccatos to emphasize certain notes
  • Consider the emotion or feeling you want to convey and use dynamics to support that emotion

Conclusion

Congratulations! You now have a step-by-step guide to help you write 5 finger melodies. Remember to select the right key, choose a chord progression, build a melody, and add dynamics to create a memorable and expressive melody. Now it’s time to start creating!

How To Write 5 Finger Melodies

Credit: www.songbirdsmusicartdancecenter.com

Common Mistakes To Avoid

Learn how to write 5 finger melodies by avoiding common mistakes. Keep sentences brief, use unique and SEO-friendly content without overused words, vary expressions, and skip the conclusion paragraph to keep readers interested. Additionally, ensure your writing passes AI writing detection and sounds like a human.

Common Mistakes to Avoid When Writing 5 Finger Melodies Writing 5 finger melodies can be a fun and creative experience. However, there are some common mistakes that people tend to make when writing them. In this post, we will discuss three of these mistakes and how to avoid them. Overusing Repetition One of the biggest mistakes people make when writing 5 finger melodies is overusing repetition. While repetition can be a powerful tool in music, too much of it can make a melody sound boring and uninspired. To avoid this mistake, try adding some variation to your melody. For example, you can change the rhythm, use different notes, or add some ornamentation. This will keep your melody interesting and engaging for the listener. Ignoring Dynamics Dynamics are an essential part of music. However, when it comes to 5 finger melodies, people tend to ignore dynamics and focus solely on the notes. To avoid this mistake, try experimenting with dynamics in your melody. You can play some notes louder or softer than others to create contrast and add dimension to your melody. This will make your melody more dynamic and interesting to listen to. Forgetting to Vary Timing Timing is critical in music. However, when writing a 5 finger melody, people tend to forget about it and stick to a strict tempo. This can make your melody sound robotic and lifeless. To avoid this mistake, try varying the timing in your melody. You can speed up or slow down certain sections to create tension and release. This will add interest and excitement to your melody. Conclusion Writing 5 finger melodies is a fun and creative process that allows you to express yourself through music. However, by avoiding these common mistakes, you can take your melodies to the next level and create something truly unique and memorable.

Tips For Improvement

To write 5 finger melodies, it’s crucial to start by understanding basic music theory. Begin by learning about scales and chords, then experiment with different chord progressions. Once you have a solid foundation, use your creativity to develop unique and memorable melodies.

Consistent practice and experimentation will lead to improvement over time.

As a beginner, writing 5 finger melodies can be quite challenging. However, with consistent practice and effective tips, you can improve your melody writing skills and even write beautiful melodies that people can enjoy. Here are some tips for improvement:

Practice Makes Perfect

The more you practice, the better you become. Therefore, it’s essential to practice writing melodies every day to enhance your skills. It’s advisable to start with simple melodies and gradually progress to complex ones. Consistent practice will help you develop a better understanding of melody structure and composition, making melody writing more comfortable in the long run.

Experiment With Different Styles

Writing melodies in different styles is a great way to hone your skills. Experiment with various genres such as classical, pop, rock, jazz, and folk to learn how to write melodies that suit each style. By doing so, you’ll develop a better understanding of rhythm, harmony, and melody composition, which will make your melodies more diverse and exciting.

Listen To Music Critically

Listening to music critically can improve your melody writing skills significantly. When listening to songs, pay attention to the melody, rhythm, and overall composition. Analyze how the melody fits with the lyrics and the overall feel of the song. By doing this, you’ll develop a more critical ear, which will help you in melody composition. In conclusion, consistently practicing, experimenting with different styles, and listening to music critically are effective ways of improving your 5 finger melody writing skills. These tips will help you develop your musical composition abilities and create melodies that are pleasing to the ears.

How To Write 5 Finger Melodies

Credit: pianoadventures.com

Frequently Asked Questions Of How To Write 5 Finger Melodies

How Do You Write A Catchy Melody?

To write a catchy melody, start by choosing a key and tempo that fits the mood you want to create. Then, experiment with different chord progressions and melodies until you find one that feels memorable and engaging. Consider adding repetition, contrast, and climax to make your melody more dynamic.

Finally, practice and refine until the melody flows smoothly and sounds great on its own.

How To Do Five Finger Chords?

To play five finger chords, place your five fingers on the piano keys, with the thumb on C, index finger on D, middle finger on E, ring finger on F and pinky finger on G. This forms the C Major chord.

Practice moving your fingers to different positions to play other chords in different keys.

How Do Musicians Write Melodies?

Musicians write melodies through a combination of creativity and technical music knowledge. They experiment with different musical notes, scales, and rhythms until they find an arrangement that sounds good. Some use a natural talent or inspiration, while others follow specific composition techniques.

It takes practice, patience, and dedication to produce a catchy and memorable melody.

How Do You Write A Pop Melody?

To write a pop melody, focus on creating a simple, catchy tune with a memorable hook. Keep the melody within a comfortable vocal range, use repetition or variation to create interest, and consider the lyrics as you compose. Experiment with chord progressions and different instruments to find the sound that works best for your melody.

Conclusion

To wrap it up, writing 5 finger melodies can seem complex, but it’s definitely achievable. Keeping in mind the techniques discussed above, you can produce stunning melodies in no time. Practicing and experimenting with different combinations can help you find your style and develop it further.

With patience and persistence, you can create melodies that will capture listeners and leave them wanting more. Focus on your creativity and let your musical instincts guide you. Happy composing!

Categories
Archive

Ways To Humanize Your Tracks

Humanizing your tracks can be achieved through emotional storytelling and using natural sounds, creating a connection with the listener. To do this, consider adding personal experiences and perspectives to your music.

Connecting with your audience is crucial in any art form and music is no exception. As a musician, your goal is to evoke emotion and create a relatable experience for your listeners. Humanizing your tracks is a way of achieving this by adding a personal touch to your music.

The use of natural sounds, such as birds chirping or waves crashing, can add depth and emotion to your tracks. Additionally, incorporating memories and personal experiences into your music can create a connection between you and your audience. We will delve into ways to humanize your tracks and create a memorable experience for your listeners.

Ways To Humanize Your Tracks

Credit: sessionville.com

Start With Live Recordings

When it comes to making music, adding a human element to electronic tracks can take your sound to the next level. While electronic instruments have their place in modern music, they often lack the emotion and authenticity that only a live recording can bring. Here are a few easy ways to start humanizing your tracks:

Capture Authentic Performances

The best way to start humanizing your tracks is by recording live performances. This could be anything from a live band to a single instrument played by a skilled musician. These recordings bring a level of energy and emotion that can’t be replicated by electronic instruments. Even if you plan to create an electronic track, starting with a live recording can give your song a strong foundation.

Add Human Elements To Electronic Instruments

If you’re starting with electronic instruments, don’t worry. There are still ways to add a human element to your tracks. One way is to use velocity control to manually adjust the volume and intensity of each note. This can add a sense of variation and emotion to your instrument. Another way is to use automation to add small imperfections like pitch bends or timing variations. These little fluctuations can make a big difference in the overall feel of your track.

Remember, the key to humanizing your tracks is to add emotion and authenticity to your music. By starting with live recordings or adding human elements to electronic instruments, you can create tracks that connect with your audience on a deeper level.

Play With Dynamics

Humanizing your tracks is important for connecting with your listeners on an emotional level. One way to achieve this is by playing with dynamics in your music. Use volume changes, variations in instrumentation, and other techniques to add depth and personality to your tracks.

Captivating music has the ability to evoke emotions and provoke reactions from the listener. The dynamics within the audio play a significant role in imparting emotions. If you want to humanize your tracks, you should play with dynamics to convey and emphasize emotions more effectively. In this article, we will discuss two ways to incorporate dynamics in your music to humanize your tracks.

Vary Velocity To Emphasize Emotion

The speed or velocity of your music affects the listener’s response and can alter how they feel. A slower tempo may provide a sense of sadness, whereas a quick rhythm invokes excitement or energy. Slowing down or speeding up the beats in the main sections of a track adds soulfulness. Varying the velocity of your tracks skillfully can bring out a wide array of emotions. For instance, in a track about loss, you can use a slow, sad melody in the beginning, followed by a faster tempo to depict excitement in the middle. Finally, slow the pace again to illustrate acceptance towards the end. Varying the velocity of the instrumentation enables you to convey an array of emotions, making your music sound human.

Use Crescendos And Decrescendos To Add Tension

Crescendos and decrescendos are deliberate changes in the loudness or softness of a particular section of the composition. It is done gradually, resulting in a slow or smooth build-up. Crescendos add tension to a section and can be used to enhance drama. A decrescendo is the opposite of a crescendo and can signify a soft closure to a section in your music. Excellently timed crescendos can amplify the feelings of anticipation, excitement, or wonder in your music, making it sound more natural. Similarly, decrescendos used in a delicate melody add a sentimental and emotional touch to the track.

Conclusion

Using dynamics effectively is a vital move for capturing the listener’s attention and conveying emotions through the music. The tempo, loudness and softness of a particular section affects the listener’s experience and response. The key takeaway is to vary the tempo, use crescendos and decrescendos to add drama and emotion, and create a more soulful and human sound. With these tips, you can make your music more engaging and memorable to the listeners.

Experiment With Groove

Humanizing your tracks can add a personal touch and emotion to your music. Experiment with groove, adding subtle variations to rhythms and incorporating live instruments or vocals for a more organic sound. Implementing these techniques can make your tracks more relatable and have greater impact on your audience.

Experiment With Groove: One of the best ways to humanize your tracks is to experiment with the groove. Groove is the way your music makes you move, and humanizing your tracks is all about making them feel more natural. So how can you add more groove to your tracks? Here are two techniques to try: Add Swing To Loops And Sequences: Adding swing to your loops and sequences is a great way to give your tracks a more human feel. Swing is a subtle timing variation that can make your beats sound less rigid and more natural. To add swing, you can adjust the timing of individual notes or use a plugin to apply swing to entire loops or sequences. Here are some tips: – Use a swing setting of around 60-70% for a subtle effect. – Try adding swing to your hi-hats or percussion to give them a more lively feel. – Experiment with different swing settings to find the right groove for your track. Introduce Imperfections To Percussion: Another way to humanize your tracks is to introduce imperfections to your percussion. This can mean adding extra hits, adjusting the timing or velocity of notes, or using more organic sounds like shakers and hand drums. Here are some ideas: – Use different drum kits or percussion samples to add texture and variation to your beats. – Intentionally add “mistakes” like missed or extra hits to make your percussion sound more natural. – Humanize electronic percussion by adding reverb, delay, or other effects. – Layer percussion loops to create more complex rhythms. Experimenting with groove is one of the most effective ways to humanize your tracks. By adding swing to your loops and sequences and introducing imperfections to your percussion, you can give your music a more natural, organic feel. So get creative and see what kind of groove you can come up with!

Incorporate Unconventional Sounds

Adding unconventional sounds to your tracks not only makes them unique, but also adds a human touch that can make the music much more engaging. By incorporating sounds of the world around us, you can create a more immersive experience for your listeners. Here are some ways to do that:

Record Foley Footage For Unique Textures

One way to incorporate unconventional sounds is by recording foley footage. Foley is the reproduction of everyday sound effects that are added to films, videos, and other media in post-production to enhance audio quality. To create foley footage, record sounds such as footsteps, breathing, or the rustling of leaves, and then layer them onto your tracks. This technique adds a natural feel to your music and can create unique textures.

Use Found Audio To Create Atmosphere

Another way to incorporate unconventional sounds is by using found audio. Found audio is pre-existing audio that you find in the world and incorporate into your tracks. For example, you could record ambient noise from a busy street or the sounds of nature in a forest. By using found audio, you can create a sense of atmosphere in your tracks, making them feel more realistic and immersive.

By incorporating unconventional sounds into your tracks, you can add a human touch that makes your music more relatable and engaging. So, the next time you’re producing music, consider incorporating foley footage or found audio to create a unique, immersive experience for your listeners.

Utilize Natural Reverb

Music has the power to evoke emotions and connect people. A critical factor in creating emotionally evocative music is the right use of reverb. In any recording, adding reverb is essential to make the sound natural and create an illusion of space. One way to achieve this is to utilize natural reverb. This approach captures the sound of the instruments and vocals in a more realistic and organic way, giving a human touch to the music.

Record In Spaces With Character

Your choice of location for music recording plays a crucial role in capturing the natural reverb of the instruments and vocals. Recording in unique spaces like a cathedral, an empty concert hall, or a spacious warehouse can infuse a unique character into your music that sets it apart. These spaces have a long decay time that creates a rich and lush reverb sound that complements your music.

Emphasize Instrumental Resonance

Another way to humanize your tracks by utilizing reverb is to focus on instrumental resonance. Certain instruments like guitars, pianos, and drums produce natural reverb that can be captured while recording. Emphasizing the resonance of these instruments while recording adds an organic touch to your music and elevates its emotional impact. Capturing natural reverb is essential, as it showcases the beauty of the instrument and how it interacts with the space around it.

In conclusion, the use of natural reverb is essential in creating music that touches the soul. Recording in spaces with character and emphasizing instrumental resonance enables capturing the natural beauty of the instruments and adds a human touch to your tracks.

Collaborate With Other Musicians

One of the best ways to humanize your tracks is to collaborate with other musicians. Working with like-minded artists can add new dimensions and ideas to your music, making it more relatable and enjoyable for your listeners. Plus, it can be a great opportunity to network and expand your fan base.

Collaborating with other musicians is a great way to add a human touch to your tracks. By working with other artists, you can bring new ideas and perspectives to your music, and create a more dynamic and organic sound. This approach can also help you build relationships with other musicians, which can lead to more opportunities and exposure for your music. Here are some ways you can collaborate with other musicians to humanize your tracks:

Bring In Live Instrumentalists

One way to add a human touch to your tracks is to bring in live instrumentalists. By using real instruments instead of virtual ones, you can add a sense of warmth and spontaneity to your music. Live instrumentation can also help you create more dynamic arrangements, with musicians playing off each other’s energy and improvising. Whether you bring in a guitarist, a drummer, or a full horn section, live instrumentation can help you humanize your tracks and make them stand out.

Work With Vocalists To Add Narrative

Another way to humanize your tracks is to work with vocalists to add narrative. By collaborating with a singer or rapper, you can add a personal element to your music and create a sense of storytelling. Vocalists can also bring a unique timbre and style to your tracks, which can help them stand out. Whether you’re looking to create a hook or a full verse, working with vocalists can help you add a human touch to your tracks and connect with your audience on a deeper level.

In conclusion, collaborating with other musicians is a great way to humanize your tracks and create a more organic and dynamic sound. By bringing in live instrumentalists and working with vocalists to add narrative, you can add a personal element to your music and create tracks that stand out.

Focus On Arrangement

When it comes to producing music, arrangement is one of the most important factors that determine the quality of your tracks. A good arrangement can make all the difference between a mediocre song and a hit track. Focusing on arrangement means bringing creativity and intentionality to how your music flows from beginning to end. In this post, we’ll explore how to humanize your tracks by focusing on arrangement.

Use Silence And Space To Build Anticipation

Using silence and space is a powerful way to create anticipation in your tracks. Silence can be used to give the listener a break, build tension, or accentuate a particular sound. When used strategically, silence can be even more effective than sound. Similarly, space can be used to give certain elements of your track breathing room and to create a sense of openness. It’s important to remember that silence and space are just as important to your arrangement as sound. Don’t be afraid to experiment with silence and space to create the right emotional impact.

Create A More Dynamic Arc In Your Tracks

Creating a dynamic arc in your track means the difference between a flat and a dynamic sounding track. A dynamic arc identifies the highs and lows, and creates a journey for the listener to follow along. Here are a few elements to keep in mind when creating a dynamic arc in your track:

  • Start with an opening that hooks the listener right away, whether it’s an intro or a vocal piece.
  • Throughout the track, add interesting elements and build momentum, so that the track keeps evolving rather than staying static.
  • Use breakdowns or moments of stripped-back instrumentation or percussion to create contrast and suspense.
  • Integrate a climactic moment where the track reaches its peak intensity before resolving in a satisfying way.

Remember, the goal is to create an engaging listening experience for your audience, so be intentional with every element you introduce in your track.

Mix To Emphasize Depth

Adding depth to your music is an excellent way to humanize your tracks. Mixing can add realism when you apply volume and pan effects to create a more natural soundstage. Emphasizing depth can make listeners feel like they’re in the room with the performers, giving the music an added layer of authenticity.

Mixing is an essential process in music production. It enables you to create a balanced and polished sound that captures the listener’s attention. One crucial element of mixing is emphasizing depth. Depth allows the listener to perceive the distance between the instruments and vocal tracks, creating a more authentic sound with an immersive experience. Below are two tips on how to mix to emphasize depth in your music tracks.

Place Instruments In The Sound Field

To create depth, you must first place your instruments well in the sound field. Consider the space each instrument occupies and position them accordingly. A standard sound field consists of three elements, namely the center, left, and right positions. The lead vocal or main instrument should be placed in the center position while the supporting instruments are positioned in the left or right position, creating a well-balanced mix. Additionally, you can use automation to create movement in your sound field, bringing your music to life.

Use Reverb And Panning To Create A More Natural Space

Reverb and panning are two important tools that create a more natural space for your music tracks. Reverb replicates the sound of a room or hall, creating a sense of space for your tracks. Whereas, panning moves an instrument from the center of the sound field to the left or right of the stereo field for a more immersive experience. You can experiment with different types of reverbs and panning techniques to find what works best for your music. Always keep in mind that overusing these effects can lead to muddiness in your mix. Hence use them strategically for specific instruments. In conclusion, mixing the tracks to emphasize depth will help you create a more immersive sound experience for your listeners. Placing instruments in the sound field and using reverb and panning are two ways to achieve this. When done correctly, it brings out the different layers of your music, making it sound more human and authentic.

Ways To Humanize Your Tracks

Credit: www.youtube.com

Frequently Asked Questions For Ways To Humanize Your Tracks

How Do You Humanize Content?

To humanize content, use a conversational tone that connects with readers, tell relatable stories, use personal pronouns, include quotes and interviews, and use humor when appropriate. Use an active voice and avoid generic corporate language. Creating content that speaks to human emotions, experiences, and values can help readers connect with your brand or message.

How Do I Humanize Chatgpt Content?

To humanize ChatGPT content, follow these guidelines: Keep sentences brief, use active voice, avoid starting sentences with certain phrases, write with an informal and human tone, and be unique and plagiarism free. Ensure your work passes AI writing detection.

How Do We Humanize?

Humanizing can be achieved through simple acts of kindness and empathy towards others. It involves treating people as individuals with unique needs, desires and perspectives. This can be done by actively listening, showing genuine interest and appreciation for others’ viewpoints, and practicing compassion.

Ultimately, humanizing is about creating meaningful connections and fostering a sense of community.

How Do You Humanize Management?

Humanizing management involves putting an emphasis on relationships, empathy, and communication. This includes treating employees with respect, listening to their concerns, engaging in open dialogues, and creating a positive work culture. By prioritizing the well-being of employees, management can build a strong team and improve overall productivity.

Conclusion

It’s time to add a personal touch to your tracks and make them more human-like. By applying the tips we shared in this post, you can create a connection with your audience and turn them into loyal fans. Whether it’s through storytelling, adding imperfections or using real-life sounds, humanizing your tracks adds a level of emotion and authenticity that cannot be achieved through perfect production alone.

So, don’t be afraid to experiment and inject some personal flair into your music. Your audience will love it!

Categories
Archive

Vocal Correction With Dynamic Eq

To correct vocal imperfections, dynamic EQ can be used effectively by adjusting the frequency of specific sections. Dynamic EQ adjusts frequency amplitude based on a threshold, making it a more precise form of EQ than standard EQ.

Vocal correction is an essential yet challenging process, whether in a professional studio or a home recording setup. Dynamic EQ provides a more sophisticated approach to EQing, allowing for better vocal correction and improvement. Unlike standard EQ, dynamic EQ uses a threshold to adjust frequency amplitude on specific sections of a vocal track, rather than globally.

Using dynamic EQ, the user can set a precise threshold, frequency range, and Q value, and the EQ will only adjust those frequency ranges when the threshold is triggered. This helps avoid potential frequency conflicts, leading to a cleaner and more natural sound without affecting the overall tonality.

Vocal Correction With Dynamic Eq

Credit: reverb.com

Understanding Dynamic Eq

Dynamic EQ is a powerful tool for vocal correction, allowing for precise adjustments to certain frequency ranges while leaving others untouched. This technique can help improve the clarity and presence of vocals in any recording, making the final product sound more polished and professional.

How Is Dynamic Eq Different From Static Eq?

Dynamic EQ is an advanced form of equalization that is vastly different from static EQ. Where static EQ involves boosting or cutting a frequency by the same amount across the entire audio spectrum, dynamic EQ is more precise. It only works on a specific frequency range and only if the amplitude of the signal crosses a particular threshold. Unlike static EQ, dynamic EQ can make changes to a frequency only when it exceeds a defined threshold. It acts almost like a dynamic compressor, with an emphasis on specific frequency ranges. This allows for the correction of specific frequency problem areas without affecting the other frequencies in the audio signal. Therefore, Dynamic EQ is perfect for refining the details of the audio signal, rather than just making broad changes across the whole spectrum.

When To Use Dynamic Eq For Vocal Correction?

In vocal correction, Dynamic EQ is vital when traditional EQ methods aren’t enough to fix a problem area in the recording. For instance, suppose the vocal has a harshness in a particular frequency range that needs correcting. In that case, the Dynamic EQ can isolate that frequency and bring it down only when the singer hits that note or range, which helps maintain the natural sound of the singer’s voice. Another situation when Dynamic EQ could be useful is when there is an extraneous noise or element that needs attenuation. Applying traditional static EQ would bring down the frequency range across the entire track, affecting the whole recording. However, Dynamic EQ can isolate the frequency range and lower it only when that noise or element occurs, helping retain the natural sound of the vocal. In summary, Dynamic EQ is an efficient tool for specific and targeted vocal corrections, allowing more accurate control of the audio signal.

Vocal Correction With Dynamic Eq

Credit: www.fullcompass.com

Identifying Problem Frequencies

Vocal correction with dynamic EQ is a technique used to address issues in a vocal recording. One of the key steps in this process is to identify problem frequencies, which can be achieved with the help of a spectral analyzer. In this section, we will explore common vocal issues and their frequency ranges, as well as how to use a spectral analyzer to identify problem frequencies.

Common Vocal Issues And Their Frequency Ranges

Before using a spectral analyzer to identify problem frequencies, it’s important to understand the common vocal issues and their frequency ranges. Here are a few examples:

Vocal IssueFrequency Range
Plosives (popping sounds)100-300 Hz
Sibilance (hissing or whistling sounds)3-8 kHz
Nasality (excessive nasal resonance)1-2 kHz
Boxiness (muddy or boomy sound)200-400 Hz

These are just a few examples, but there are many other vocal issues that can occur. Knowing the frequency range associated with each issue can help you identify problem frequencies more quickly and accurately.

Using A Spectral Analyzer To Identify Problem Frequencies

A spectral analyzer is a tool that displays the frequency spectrum of an audio signal. This can be useful for identifying problem frequencies in a vocal recording. Here’s how to use a spectral analyzer to identify problem frequencies:

  1. Load the vocal recording into your digital audio workstation (DAW) and insert a spectral analyzer on the vocal track.
  2. Play back the vocal recording and watch the spectral analyzer display.
  3. Look for spikes or dips in the frequency spectrum that correspond to the common vocal issues and their frequency ranges.
  4. Use a dynamic EQ to address the problem frequencies. This allows you to target specific frequencies and adjust them in real-time based on the level of the vocal.

By identifying problem frequencies with a spectral analyzer and correcting them with dynamic EQ, you can achieve a more polished and professional-sounding vocal recording.

Setting Up Dynamic Eq

Dynamic EQ is an excellent tool for vocal correction, which allows you to enhance certain frequencies without affecting the rest of the mix. To set up dynamic EQ, you need to identify which frequencies need changes and adjust the settings accordingly.

Selecting The Right Dynamic Eq Plugin

Before setting up dynamic EQ, it’s important to choose the right plugin. There are various dynamic EQ plugins available, each with its unique features. Make sure to choose a plugin that fits your requirements. Some plugins have advanced features for fine-tuning while others have a simpler interface for beginners. Do some research and select the one that suits your needs best.

Setting Thresholds And Eq Points

Once you’ve selected the right plugin, the next step is to set up your dynamic EQ. The first thing to do is to set your threshold and EQ points. The threshold specifies the point at which the gain reduction will be applied. EQ points specify which frequencies will be reduced or increased. Ensure that you set your threshold and EQ points correctly since these affect the overall sound of your vocal.

Applying Reduction And Gain

After setting the threshold and EQ points, you can apply gain and reduction to your track. Firstly, set your gain reduction levels, keeping in mind that too much reduction can result in an unnatural sound. Secondly, apply gain to compensate for the level difference when reduction is applied. Ensure that both reduction and gain are at appropriate levels to achieve a natural-sounding result. In conclusion, setting up dynamic EQ requires careful consideration of various factors. Choosing the right plugin, setting thresholds and EQ points, and applying reduction and gain are all vital for achieving an ideal outcome. By following these steps, you can improve your vocals and ensure they sound polished and professional.

Vocal Correction With Dynamic Eq

Credit: www.izotope.com

Tips For Effective Vocal Correction

Learn how to effectively correct your vocal recordings with the use of dynamic EQ. This technique allows you to focus on specific problem areas in the recording and make adjustments to improve the overall sound quality. With some practice, you can achieve a professionally polished vocal track.

Tips for Effective Vocal Correction When it comes to vocal correction, Dynamic EQ is a method that’s often used to make subtle yet significant improvements to a vocal track. It’s an effective tool that can help you bring out the best in a performer’s voice, but like any other audio processing technique, it’s important to use it correctly. Here are some tips for getting the most out of Dynamic EQ when it comes to vocal correction. Start with subtle corrections When it comes to vocal correction with Dynamic EQ, it can be tempting to start pumping up the EQ until you hear a significant difference. However, this approach can often lead to over-processed and artificial-sounding vocals. Instead, start with subtle corrections and add more as needed. The goal is to make small adjustments that enhance the natural character of the voice, not completely change it. Avoid over-EQing Over-EQing is a common mistake when it comes to vocal correction, and it can lead to harsh and unpleasant-sounding vocals. When using Dynamic EQ, it’s important to avoid over-EQing by staying within a reasonable range of gain reduction. As a general rule of thumb, try to keep any boosts or cuts within 3-5 dB to avoid over-processing. Use automation for dynamic EQ One of the biggest advantages of Dynamic EQ is the ability to automate it over time. This makes it an excellent tool for vocal correction because you can use it to address specific problem areas without affecting the rest of the track. By automating Dynamic EQ, you can ensure that the vocal stays consistent throughout the track, which is essential for a polished and professional-sounding final result. In conclusion, when it comes to vocal correction with Dynamic EQ, it’s important to start with subtle corrections, avoid over-EQing, and use automation for dynamic EQ. By following these tips, you can achieve a polished and professional-sounding vocal track that enhances the natural character of the performer’s voice.

Real-world Examples

Vocal correction using dynamic EQ is not a new concept, but it still offers real-world benefits. By balancing the sound of the voice across the frequency spectrum, dynamic EQ ensures clarity, intelligibility and overall quality of the recording.

Before And After Dynamic Eq Examples

Understanding the impact of dynamic EQ on vocal correction is best demonstrated with real-world examples. The before and after dynamic EQ examples below illustrate how powerful dynamic EQ can be.

Before Dynamic EQAfter Dynamic EQ
The vocals are muddy and lack clarity, making it difficult to discern the lyrics from the accompanying instrumentals.The vocals are prominent and clear, and the dynamic EQ ensures each phrase is distinct and easy to follow for the listener.
The vocals are too bright and overbearing, creating a discordant atmosphere.The dynamic EQ addresses the overbearing aspects of the vocals while retaining a sense of natural brightness, ensuring the listener is not overwhelmed.

Case Studies Of Successful Vocal Correction With Dynamic Eq

Dynamic EQ has proven useful in resolving a broad range of vocal defects, as shown in the following case studies:

  • A recording artist, whose vocals are nasal, lacks brightness, and sound too quiet, achieved a more natural vocal tone using a targeted dynamic EQ to address these issues.
  • Another artist, whose vocals were too bright and harsh, experienced correction through the use of dynamic EQ that specifically targeted high-frequency peaks, resulting in a smoother, more pleasing sound.

Dynamic EQ is a powerful tool in tackling various vocal problems, and these case studies demonstrate how it can be applied to yield an array of impressive results. Its ability to address specific regions of the vocal spectrum is particularly useful when dealing with issues like nasal vocals, harshness, and lack of clarity.

Frequently Asked Questions Of Vocal Correction With Dynamic Eq

Should I Use Dynamic Eq On Vocals?

Yes, dynamic EQ can be useful for vocals as it helps to control frequency-specific changes in the vocal performance. This can be particularly helpful in compensating for inconsistencies in a performance and avoiding vocal masking. However, it is important to use dynamic EQ judiciously as too much processing can result in an unnatural sound and loss of vocal clarity.

What Is Dynamic Eq Good For?

Dynamic EQ is good for controlling and adjusting the EQ levels of an audio signal in real-time. It is especially useful in situations where the audio has varying levels of loudness or when adjusting specific frequency ranges. Dynamic EQ ensures an optimal and balanced sound output throughout your audio recording or mixing process.

What Is The Best Equalizer Setting For Vocals?

The best equalizer setting for vocals depends on the unique qualities of the singer’s voice and the instrumentals of the music. A good starting point is to reduce mid-range frequencies and boost high and low frequencies in small increments until the vocals sound clear and balanced with the rest of the audio.

Ultimately, trial and error is essential for achieving the desired sound.

What Is Vocal Corrective Eq?

Vocal corrective EQ refers to the process of using equalization to correct tonal imbalances in vocal recordings. It involves boosting or reducing certain frequencies to enhance the clarity, warmth, and overall balance of the vocals. This technique is commonly used in music production and audio engineering to improve the quality and intelligibility of vocal performances.

Conclusion

A good vocal mix can take a song from good to great. One of the best ways to achieve that is through dynamic eq vocal correction. Understanding how to use dynamic eq will enable you to tame any harsh frequencies of a vocal while retaining the important elements of the voice.

This approach, when applied correctly, can result in a more polished and professional-sounding track. As you explore this technique, don’t forget to trust your ears and keep experimenting until you find what works best for your unique situation.

Categories
Archive

How To Record Vocals At Home

To record vocals at home, you need a microphone and software, such as GarageBand or Audacity. Set up a recording space with minimal background noise and experiment with microphone placement to find the best sound.

Are you an aspiring musician or podcaster? Do you want to create high-quality recordings of your voiceovers or music tracks from your own home? If yes, you’re in luck as there are countless resources that can help you learn how to record vocals at home with professional-level results.

Having a home recording setup can save you money and trouble, allowing you to create audio content on your own terms. Whether you’re a beginner or have some recording experience, this guide will walk you through the steps needed to achieve great-sounding vocals. Let’s dive in!

Invest In Basic Equipment

Equip your home studio with basic equipment to achieve professional quality recordings of your vocal performance. Investing in a good microphone, audio interface, headphones and recording software are essential to start recording your voice at home.

Invest In Basic Equipment Recording vocals at home has become easier and more affordable than ever before. Whether you’re a professional musician, a hobbyist or a beginner, investing in basic equipment is crucial to achieving high-quality recordings. In this blog post, we’ll discuss some of the essential equipment you need to record vocals at home effectively. Get a Quality Microphone A good microphone is the fundamental recording tool that captures your voice with clarity and accuracy. Consider investing in a condenser microphone as they are commonly used to record vocals due to their ability to capture the nuances of a human voice. They are also affordable and perfect for home recording setups. Pop Filter and Windscreen A pop filter is another essential tool that helps reduce the popping sounds made during recording vocals. It is a mesh screen that you place between the vocalist and the microphone to filter out the popping sounds and give you cleaner recordings. A windscreen, on the other hand, helps to reduce unwanted noise from wind or air movements. Headphones and Speakers Invest in good quality headphones to ensure that you hear every detail in your recording. A closed-back design is ideal as it prevents any sound leakage, allowing you to focus on your recording. You also need to invest in good quality speakers to ensure that the recording sounds great. When selecting speakers, choose ones that have a flat frequency response, allowing you to hear the recording’s true sound without any coloration. In conclusion, investing in basic equipment is essential to record high-quality vocals at home. A quality microphone, pop filter, windscreen, headphones, and speakers will make a significant difference in the final output of your recording. Once you have your equipment, it’s time to start recording! Remember, practice makes perfect, so don’t be discouraged if your first few recordings don’t sound great – keep at it.

Prepare Your Recording Space

Creating a suitable and convenient recording environment is a vital initial step when recording vocals at home. You should focus on finding a peaceful and quiet space, treating it with acoustic treatment, and selecting preferable gear to achieve high-quality recordings.

Recording vocals at home can be a daunting task, but with a little preparation, anyone can achieve a professional sound quality. The first and most important step in recording vocals at home is preparing your recording space. In this section, we will cover three essential H3 headings to follow when preparing your recording space.

Choose A Quiet Location

Choose a location in your home that is quiet and isolated from any external noise. You may consider using a closet or a small room. If you are unable to find a quiet location, you may need to invest in soundproofing materials such as acoustic foam or a vocal booth.

Clear Out Background Noise

Background noise can significantly impact the quality of your recording. Therefore, it is essential to clear out any background noise before recording. Turn off any appliances or electronics that may create noise, such as fans or air conditioners. Also, consider recording at a time when your household is quiet and peaceful.

Make Sure The Room Is Acoustically Treated

Acoustic treatment is necessary to ensure capturing high-quality vocals. Consider investing in acoustic foam or blankets to absorb any excess echo or reverberation. You can also use furniture to help deaden sound. Experiment with the placement of acoustic materials to find the right sound for your recording space. Preparing your recording space is crucial for a successful recording session. Follow these three H3 headings, and you’ll be well on your way to achieving professional sound quality right from the comfort of your home.

Position The Microphone

Properly positioning the microphone for recording vocals at home is crucial to achieving high-quality audio. Make sure to place the mic at a distance of 6-8 inches from your mouth and slightly off-center to reduce plosives and pops.

Recording vocals at home can prove to be a challenging task, mainly when you don’t have the right equipment and setup. One of the crucial elements in recording is the microphone’s placement. It plays a significant role in the quality of the recorded vocals. A well-placed microphone can turn an ordinary performance into an outstanding one. In this guide, you will learn the mic placement techniques, the distance from the microphone, and how to optimize mic levels.

Mic Placement Techniques

There are various techniques to position the microphone depending on the type of mic you are using. The most common and best technique is using the cardioid microphone. Place the microphone directly in front and slightly above the performer’s mouth. It ensures you capture the vocalist’s voice and reduce external noise. It also allows the singer to move naturally, providing an authentic performance.

Distance From The Microphone

Determining the microphone’s distance is key to ensuring the vocals are neither too soft nor too loud. The general rule of thumb is having the performer about six inches away, allowing you to capture all the nuances of their performance. However, the distance can vary depending on the singer’s voice and the preferred microphone placement technique.

Optimizing Mic Levels

You want to ensure the microphone is optimized to capture the vocals’ best sound quality. To do this, consider the mic levels. Boosting the microphone’s levels improves the intensity of the recording, while lowering the levels lowers the intensity. Aim to a level that captures the nuances of the performance while not overloading the microphone. You can adjust the levels in the recording software to your desired range. In conclusion, the microphone placement technique, distance, and the levels are all essential components in recording vocals at home. By following the tips in this guide, you can perfect your recording techniques and ensure you capture the best performance.

How To Record Vocals At Home

Credit: www.audio-issues.com

Set Up Your Digital Audio Workstation (daw)

To record high-quality vocals at home, you need a digital audio workstation (DAW). The DAW is the software that enables you to record, edit, mix, and master audio on your computer. Setting up your DAW is crucial to get the best out of your recording. In this article, we will guide you on how to set up your DAW for vocals recording.

Choosing The Right Software

The first step is to choose the right DAW software. There are plenty of options available such as GarageBand, Pro Tools, Logic Pro, and Audacity. Choose the software that is compatible with your operating system, easy to use, and has the features you need. Most software offers a trial version, so try a few before settling for one.

Connecting And Configuring Hardware

Before you start recording, you need to connect and configure your hardware. This includes a microphone, audio interface, headphones, and monitors (speakers). Connect your microphone to your audio interface, and then your audio interface to your computer. Configure your hardware by selecting the input and output devices in the settings of your DAW. Ensure you test the signal levels and adjust the settings for optimum performance.

Optimizing Settings

Optimizing your settings is essential for quality recordings. Start by selecting the desired sample rate and bit depth for your recording. Using 48kHz and 24-bit depth should suffice for most recordings. Ensure that you select the right audio driver (ASIO for Windows or CoreAudio for Mac). Finally, adjust the buffer settings to avoid latency during recording and playback.

Record Your Vocals

Learn how to record vocals at home with these simple tips! Set up a quiet room, invest in a good microphone and audio interface, and use a pop filter to improve the sound quality. Don’t forget to experiment with positioning and distance from the microphone for the best results.

Finalize Lyrics And Melody

Before you start recording, make sure that you have the final version of your lyrics and melody. You don’t want to start recording a section of your song only to realize that you want to change one of the lines. This would waste a lot of time and energy, so avoid it by having your lyrics and melody finalized before you hit the record button.

Warm Up Your Voice

It is a good idea to warm up your voice before you start recording. Just like you would warm up before exercise, your voice needs some prep work too. Start by doing some vocal exercises, like lip trills and humming, to loosen up your vocal cords. Then, sing a few scales to get your voice warmed up and ready to go.

Record Multiple Takes

When you start recording, make sure to do multiple takes. The first take may not be perfect, and that’s okay. Don’t be afraid to experiment with different styles and approaches to the song. By doing multiple takes, you’ll have more options to work with when it comes to editing your vocals later on. During each take, make sure to sing with emotion and conviction. This will help bring your song to life and create a connection with your listeners. Additionally, pay attention to your breath control and pitch accuracy. These are crucial elements of a great vocal performance. In conclusion, recording vocals at home can be a fun and rewarding experience. By following these tips, you can create a professional-quality recording that showcases your vocal talents. Remember to finalize your lyrics and melody, warm up your voice, and record multiple takes to get the best possible performance. Happy recording!

How To Record Vocals At Home

Credit: www.supremetracks.com

Edit Your Vocals

Learn how to edit your vocals at home with these simple tips. From using the right equipment to adjusting levels and adding effects, you can produce professional-sounding recordings in no time. Practice makes perfect, so keep experimenting and refining your technique.

After you have recorded multiple takes and selected the best ones, it’s time to edit your vocals. The editing process will help ensure your vocals sound polished and professional. Here’s how you can edit your vocals at home:

Review And Choose The Best Takes

Carefully listen to all the takes you have recorded and choose the best ones. It’s important to select the takes that have the best tone, delivery, and emotion. Keep in mind that you can always combine different takes to create a seamless vocal performance.

Adjust For Pitch And Timing

If you notice any pitch or timing issues with your vocals, you can use pitch correction and time correction tools to fix them. Some popular software for this includes Antares Auto-Tune and Celemony Melodyne. However, be careful not to overdo it as pitch correction can make vocals sound robotic.

Apply Eq And Compression

EQ and compression are crucial in making your vocals sound balanced, clear, and professional. EQ helps to remove unwanted frequencies and accentuate and boost others, while compression helps to even out the dynamic range of your vocals. Experiment with different EQ and compression settings to find what works best for your vocals. In conclusion, editing your vocals is a crucial part of the recording process. With a bit of practice, you can develop the skills to edit your vocals to sound polished and professional. Remember to take your time, experiment with different techniques, and trust your ears to help you create the perfect vocal performance.

Mix Your Vocals With The Instrumental Track

To get a professional vocal recording at home, it is important to mix your vocals with the instrumental track. This way, your voice will blend in with the music and create a cohesive sound. Make sure to use a good microphone and record in a quiet environment to achieve the best results.

To achieve a professional-sounding vocal track, it’s essential to mix your vocals with the instrumental track. Mixing involves balancing the levels and panning of each track and adding effects as needed. Here’s how to mix vocals with the instrumental track in a few easy steps. ### Import and sync the instrumental track First, import the instrumental track into your DAW and make sure it’s synced up with your vocal track. You can do this by ensuring both tracks have the same starting point and tempo. Listen to both tracks together and adjust the starting point or tempo of one track if needed to ensure everything lines up perfectly. ### Adjust levels and panning Next, adjust the levels of each track to find the right balance between the vocals and the instrumental. You want to make sure the vocals are loud enough to be heard clearly but not so loud that they overpower the instrumental. Adjusting panning can also help to create a pleasing stereo image. Experiment with panning the vocals slightly to the left or right to give the track more depth. ### Apply effects as needed Once you’ve adjusted the levels and panning, you can start adding effects to the vocal track. Common effects include reverb, delay, compression, and EQ. Reverb helps to create a sense of space around the vocal while delay can add depth and interest. Compression and EQ can help to smooth out the vocal and make it sit better in the mix. Be careful not to overdo it with effects. Too much processing can make the vocal sound artificial. Mixing your vocals with the instrumental track takes practice and patience. With the right techniques and tools, you can create a professional-sounding vocal track right from the comfort of your own home.

How To Record Vocals At Home

Credit: m.youtube.com

Finalize Your Recording

To finalize your recording at home, make sure to edit out any mistakes, adjust levels for consistency, and add any desired effects or enhancements. It’s also important to listen to the recording on different devices to ensure it sounds good across different platforms.

Master The Final Track

Once you have recorded your vocals, it’s time to master your final track. This step ensures that your vocals sound clean and polished. To master your final track, follow these steps:

  1. Remove any background noises or hisses with a noise reduction tool.
  2. Apply EQ to balance the frequencies in your recording.
  3. Add compression to level out the dynamics of your vocals.
  4. Apply reverb or delay effects to add depth and dimension to your vocals.

Export It In The Desired Format

Once you have mastered your final track, it’s time to export it in the desired format. This step prepares your track for distribution and ensures that your track is compatible with different listening platforms. Follow these steps:

  1. Choose the export format based on where you plan to share your music.
  2. Select the sample rate and bit depth based on the quality you want to achieve.
  3. Name your file and select the location where you want to save it.
  4. Export your file and save a copy for backup.

Share Your Music With Others

Now that you have finalized and exported your final track, it’s time to share your music with others. Sharing your music is a vital step in building your audience and getting your music noticed. Follow these steps:

  1. Upload your track to your preferred music distribution platform.
  2. Share your track on social media to reach a wider audience.
  3. Send your track to blogs, playlists, and music curators for potential features.
  4. Encourage your fans to share your music with their friends and family.

By following these steps, you can confidently finalize your recording, export it in the desired format, and share your music with others. With time and practice, you’ll become a pro at recording vocals from the comfort of your home.

Frequently Asked Questions Of How To Record Vocals At Home

What Equipment Do I Need To Record Vocals At Home?

To record vocals at home, you’ll need a condenser microphone, a pop filter, a microphone stand, a digital audio interface and recording software. A quiet recording environment with soundproofing or acoustic treatment is also recommended.

How Do I Start Recording Singing At Home?

To start recording singing at home, you need a computer, an audio interface, and a microphone. Download recording software, set up your equipment in a quiet space, and adjust the mic and input levels for optimal sound. Test the recording, adjust as needed, and start singing!

How Can I Record My Voice At Home Professionally?

To record your voice professionally at home, you need to invest in good equipment like a microphone, audio interface or mixer, and recording software. Find a quiet space with minimal background noise and adjust the gain and levels correctly. Test and adjust your mic placement for optimal sound quality.

Use pop filters and acoustic treatment if necessary. Finally, edit and master the recording for a crisp, high-quality output.

What Is The Best Way To Record Yourself Singing?

The best way to record yourself singing is to use good quality equipment, like a microphone and computer software, to capture your voice. You should also find a quiet space with good acoustics and practice your singing beforehand to ensure you give your best performance.

Conclusion

Recording vocals at home has become easier than ever before with the right equipment and techniques. By following the tips discussed you can create studio-quality recordings from the comfort of your own home. From selecting the right microphone to creating a soundproof recording space, every step is important to achieve professional-sounding results.

Remember to take your time, be patient, and practice consistently to improve your skills. With dedication, you can make your home recording studio a success. Happy recording!

Categories
Archive

How To Submit Music For Tv Film

To submit music for TV and film, research music supervisors who curate music for those mediums and follow their submission guidelines. Getting your music placed in TV and film can expose your music to a wider audience and help you gain critical recognition.

However, the music submission process can be daunting, especially if you’re new to the industry. Music supervisors, who curate music for TV shows and films, are the gatekeepers to represent your music. The key to success is to research and find the music supervisors and production companies who are looking for music like yours.

Follow their submission guidelines carefully and ensure that your music matches what they’re looking for. We’ll provide you with a guide on how to submit your music for TV and film, as well as tips to increase the chances of getting your music placed.

How To Submit Music For Tv Film

Credit: dittomusic.com

Researching The Market

Before submitting your music to TV and film, it is essential to research the market thoroughly. Understanding the industry requirements, identifying potential opportunities, and analyzing the demand for music in various genres can help you get your music in front of the right people and increase your chances of success.

Identifying Potential Opportunities

To identify potential opportunities, it is important to keep an eye on the latest trends in the TV and film industry. Look for new TV series or movies that are currently in production and research their music needs. You can also search for the latest music trends and styles that are popular in TV and film, and create music that aligns with those styles.

Another way to identify opportunities is to research and learn about the different music libraries, publishers, and licensing agencies that work with TV and film productions. Many of these companies have submission guidelines and accept music from independent artists, which can help you gain exposure and credibility within the industry.

Understanding The Requirements

To increase your chances of success, it is essential to understand the specific requirements of the TV and film industry. The music needs to fit the scene and the emotions of the story and should be able to support the visuals and dialogue. Music supervisors usually look for tracks with a clear beginning, middle, and end, which are easy to edit and synchronize with the visual content.

Before submitting your music, make sure to read the submission guidelines carefully and follow them diligently. Try to meet the technical requirements and provide as much information as possible about your music, such as the genre, instruments used, and inspiration behind the track. This can help the music supervisor to understand your music better and identify whether it is suitable for their project or not.

In conclusion, researching the market is a crucial step in submitting your music for TV and film. By understanding the industry requirements and identifying potential opportunities, you can increase your chances of success and get your music in front of the right people.

Creating And Preparing The Music

To submit music for TV or film, creating and preparing high-quality music is crucial. The music should fit the mood and tone of the scene to catch the attention of the media producer and enhance the overall visuals. Mix and master the music to ensure a professional sound that will be enticing to media professionals.

Creating And Preparing The Music Getting your music featured in TV shows or films can significantly elevate your music career. But to make that happen, you must create and prepare high-quality music tracks that meet the specific requirements of the project. Developing High-Quality Music Tracks Before anything else, you should focus on creating high-quality music tracks that resonate with the project’s theme and genre. Here are a few tips to keep in mind while developing your music tracks for TV or film: – Pay attention to the project’s guidelines and requirements. Understand the mood, tone, and style of the project to create music that complements it. – Use professional music software and equipment to ensure your music tracks are of high quality. This will help you achieve the sound and production quality that the industry demands. – Incorporate live instruments and real samples to give your music an authentic sound and texture. – Collaborate with other professional musicians to add depth and complexity to your music. Customizing The Music According To Requirements Once you have created high-quality music tracks, it’s time to customize them according to the project’s requirements. Here are a few tips to keep in mind while customizing your music tracks: – Edit the music length to fit the required scene or sequence duration. Ensure that your music does not overpower the visual elements or dialogue but complements them. – Add or remove sections of the music track to pace and intensify the mood of the scene. This can help you create an emotional connection with the viewers. – Use sound effects, transitions, and audio filters to make the music sound more appealing and effective. In conclusion, creating and preparing music for TV or film requires a lot of effort, creativity, and technical skills. But by following the tips shared in this article, you can significantly increase your chances of getting your music featured in TV shows or films.

Creating Supporting Documents

To submit music for TV and film, it’s important to create supporting documents. This includes a cue sheet, which lists all the songs used in a project, and any necessary licenses and permissions. Make sure to organize and present these documents clearly for submission.

Preparing A Press Kit

A press kit is an essential document you will need as a musician when submitting your music to TV and film. It provides all the necessary information that filmmakers and producers need to know about you and your music. A well-curated press kit includes a bio, high-resolution images, contact information, and promotional media such as music videos or audio tracks.

When creating your press kit, ensure that it is professional and visually appealing as it is also a representation of your brand. It is essential to make it easy to navigate and understand, including all relevant information in a clear and concise manner. It should give a comprehensive overview of who you are as an artist and what you stand for, as well as highlighting any notable achievements and performances you have had.

Creating A Cue Sheet

A cue sheet is an essential document that includes all the music used in a TV or film production. It serves as a reference and ensures that the music is properly licensed and credited, and that the musician is compensated accordingly. When submitting your music for TV and film, it is important to prepare a cue sheet to protect your rights as the composer or publisher of your music.

The cue sheet should include the track title, composer, performer, publisher, and any relevant licensing information. It should also specify the duration of each track used in the production. Filmmakers and music supervisors rely heavily on cue sheets, and any missing information can delay the licensing process or lead to inaccurate royalty payments. Hence, it is crucial to ensure that your music’s cue sheet is accurate and up-to-date.

Choosing The Right Distribution Channel

Selecting the right distribution channel is crucial when submitting music for TV or film. Consider factors such as target audience, genre, and the scope of the project. Careful research and networking with industry professionals can aid in the decision-making process.

Submitting your music for TV and film is an excellent way to gain exposure for your work and advance your music career. One key aspect of submitting your music for TV and film is finding the right distribution channel. This process can be both daunting and time-consuming if not handled correctly. However, by choosing the right distribution partner and exploring various distribution options, you can increase your chances of success in submitting your music.

Choosing An Appropriate Distribution Partner

When it comes to submitting your music for TV and film, it is essential to choose an appropriate distribution partner who understands the specific requirements of the film and TV industry. Not all distribution partners are created equal, but certain things set the good ones apart from the bad ones. Here are some qualities to look for when selecting a distribution partner:

  • Expertise in clearing rights and licensing
  • Experience in pitching music to the TV and film industry
  • A wide network of industry contacts
  • Transparency in terms of fees, royalties, and contracts
  • A good reputation in the industry

Exploring Various Distribution Options

Once you have selected an appropriate distribution partner, it’s time to explore various distribution options to determine which one best suits your needs. Two of the most popular distribution options include:

  • Library and production music – This type of distribution involves submitting your music to a library or production company that specializes in providing music for TV and film. Often, the libraries have their music supervisors who search for music from the internal catalog for a particular project. You keep ownership of your music, but there is usually a percentage given to the library.
  • Music supervisors – Another option is to work with a music supervisor who will look for music on your behalf. Music supervisors work on specific projects and require a more significant amount of work to keep a good working relationship. Supervisors may request additional recording/editing, revision, or improvement for the music tracks which can happen within a short amount of time.

It’s important to consider all the options and choose what works best for your music and your career. Submitting your music for TV and film can offer significant exposure, so it’s important to make sure you’re doing it right. By selecting an appropriate distribution partner and exploring the various options available, you’ll increase your chance of success in this arena.

Submitting The Music

Submitting music for TV or film can be a great way to get exposure for your work. To increase your chances of success, make sure you research the specific requirements and guidelines for each production company or music supervisor. Additionally, be prepared to submit high-quality recordings and be flexible when it comes to revisions and edits.

Submitting Music To Libraries

Submitting your music to a music library is a great way to get your music heard by music supervisors and producers. A music library is a collection of pre-cleared music that is available for licensing in film, TV shows, commercials, and other media. Here are the steps to follow when submitting your music to a music library:

  • Research various music libraries and find the one that best fits your music style.
  • Check the submission guidelines and requirements before submitting your music.
  • Select the music tracks that best showcase your style and genre.
  • Make sure your music is of the highest quality and professionally mixed and mastered.
  • Include all necessary information with your submission, such as contact information, track title, and artist name.

Contacting Music Supervisors And Production Companies

Another effective way to get your music featured on TV shows and films is by contacting music supervisors and production companies directly. These professionals oversee the music selection process for TV shows and films. Here are some tips for successfully reaching out to music supervisors and production companies:

  • Research the music supervisors and production companies that work on the types of TV shows and films that fit your music style.
  • Check their submission guidelines and requirements before submitting your music.
  • Personalize your email by mentioning the specific TV show or film and how your music can enhance the overall production.
  • Include all necessary information with your submission, such as contact information, track title, and artist name.
  • Follow up with a polite email a few weeks after your initial submission to ensure they received your music.

In Conclusion

Submitting your music to libraries and contacting music supervisors and production companies can significantly increase your chances of getting your music featured on TV shows and films. Remember to research and follow submission guidelines, personalize your submissions, and always present your music in the best possible way. With these tips, you can take the next step in launching your music career.

How To Submit Music For Tv Film

Credit: www.youtube.com

Promoting The Music

Submitting your music for TV and film can be a fruitful way for promoting your work. To do so, research on music libraries, synchronization companies and music supervisors, craft a professional email pitch, include relevant information, and be persistent in your follow-ups.

As a musician looking to submit your music for TV/Film, promoting your music is crucial to increase the chances of getting noticed. Here are some tips on how to promote your music:

Creating A Professional Website And Social Media Presence

One of the primary ways to promote your music is by creating a professional website and social media presence. Your website should showcase your music, provide information about yourself, and include contact information for interested parties. Use social media platforms like Facebook, Instagram, and Twitter to promote your music and connect with potential collaborators, fans, and industry professionals. Keep your branding consistent across all platforms, using the same profile picture, color scheme, and voice to maintain a professional image.

Networking And Collaborating With Other Musicians And Artists

Networking and collaborating with other musicians and artists can help you gain exposure for your music. Attend industry events, join music groups and forums, and participate in music-related discussion groups to connect with like-minded individuals in the industry. Consider collaborating with other musicians and artists to create new and innovative music that can capture the attention of music supervisors for TV/Film. Forming relationships with other musicians and artists can also lead to valuable opportunities and connections for future projects.

Conclusion

Promoting your music is an essential aspect of submitting your music for TV/Film. By creating a professional website and social media presence, networking and collaborating with other musicians and artists, you can increase your chances of getting your music noticed. Follow these tips to promote your music effectively and achieve success in the TV/Film music industry.

Negotiating The Deal

Submitting music for TV or film can be a daunting task, but negotiating the deal can be even more challenging. It’s important to research and understand industry standards, communicate effectively with decision-makers, and be confident in your worth as a musician.

After understanding the basics of music licensing, it’s time to negotiate the terms of the contract. Negotiation is an essential part of the process because it determines the profitability of your music and its use in TV shows and films. In order to protect your interests, you must be prepared to negotiate with producers and music supervisors. Here are some tips to help you negotiate a favorable deal:

Understanding The Basics Of Music Licensing

Before negotiating, it is important to understand the basics of music licensing. Licensing is the legal process of obtaining permission to use a piece of copyrighted music in a film or television show. The licensing fees vary depending on the duration of the music piece and the coverage of the use. The two common types of music licensing are sync and master. Sync licensing refers to synchronizing music with an audio-visual work, such as a movie or television show. On the other hand, a master license gives permission to use a specific recording of a piece of music.

Negotiating The Terms Of The Contract

Negotiating the terms of the contract is crucial for the success of your music. It’s important to clearly define the terms, including the compensation, duration of the use, and the type of license. Here are some tips to ensure you get the best deal:

  • Research: Know the standard rates for your type of music and usage. This will help you negotiate from a position of strength.
  • Be flexible: Sometimes, getting a foot in the door is more important in the long term than negotiating a high fee. You can also negotiate other favorable terms, such as the length of the contract.
  • Read the fine print: Pay close attention to the details in the contract, including the coverage of use, exclusivity clauses, and payment terms.
  • Be professional: Always maintain a professional attitude during negotiations. Present yourself in a positive manner and be respectful of the other party’s needs.

By following these tips, you can negotiate a favorable deal that helps you achieve your objectives while protecting your interests. Remember that the negotiation process is an integral part of the overall music licensing process, and it must be approached with care.

Ensuring The Rights And Royalties

Submitting music for TV and film requires careful management of rights and royalties. To ensure proper payment and recognition, it’s crucial to work with a licensing agency, create a detailed sync license, and track usage across all media platforms.

Ensuring The Rights And Royalties Submitting music for TV and film can be an excellent opportunity for musicians to expose their work to a broader audience. However, it is essential to ensure that you protect your rights and get the royalties you deserve. Registering with a Performing Rights Organization (PRO) and tracking the usage of your music are two crucial steps that should not be overlooked. Let’s take a closer look at each of them. Registering With A PRO A PRO is an organization that collects and distributes royalties on behalf of songwriters and music publishers. Registering with a PRO is essential to ensuring that you receive performance royalties every time your music is played on TV or film. The three major PROs in the United States are ASCAP, BMI, and SESAC. Here’s how to register with a PRO: 1. Choose a PRO that fits your needs. Each PRO has its own requirements and benefits, so it’s essential to research and select the right one for you. 2. Create an account and complete the application process. You’ll need to provide basic information, such as your name, address, and social security number or tax ID. 3. Register your songs. You’ll need to provide information about each of your songs. This includes the title, writer(s), publisher(s), and percentage ownership. Once you’ve registered with a PRO, you can be confident that you will receive the royalties owed to you. Tracking The Usage Of Your Music Tracking the usage of your music is crucial to ensuring that you receive the proper royalties. This includes monitoring where your music is being played, how many times it’s being played and by whom. If you’re working with a music supervisor, they may handle this for you. However, if you’re submitting your music independently, you’ll want to take the following steps: 1. Keep a log of your submissions. Record the title of the song, which TV show, film, or commercial it was submitted to, and the date of submission. 2. Monitor your cue sheets. A cue sheet is a document that lists the music used in a TV show or film. It’s essential to ensure that the cue sheet lists your music accurately and includes all the necessary information. 3. Keep track of performance royalties. Your PRO will provide you with quarterly statements that show where your music has been played and how much you’ve earned. Be sure to review these statements carefully and contact your PRO if you have any questions. In conclusion, ensuring the rights and royalties for your music is critical to your success as a musician. By registering with a PRO and tracking the usage of your music, you can be confident that you’re getting the royalties you deserve.

How To Submit Music For Tv Film

Credit: www.youtube.com

Frequently Asked Questions On How To Submit Music For Tv Film

How Do I Get My Music On Tv?

To get your music on TV, you need to contact music supervisors, licensing companies, production companies, and placement companies. You can also participate in music conferences and submit your music to sync licensing libraries. Building relationships and networking with industry professionals can also help increase your chances of getting your music on TV.

How Do I Sell My Music To My Tv?

To sell your music to TV, you can start by creating a list of music supervisors and production companies. Research their credits and submission guidelines before reaching out to them. It’s important to have high-quality recordings, so consider investing in professional mixing and mastering.

Networking and attending industry events can also be helpful in making connections and getting your music heard by the right people.

How Do I Submit A Song To Netflix?

To submit a song to Netflix, you need to work with a music supervisor who has a relationship with Netflix and is responsible for selecting songs for their shows and movies. You can find music supervisors by networking with industry professionals or by doing research online.

How Much Do Tv Shows Pay For Music?

TV shows pay different rates for music depending on many factors such as the length of use, popularity of the song, and the budget of the show. Typically, licensing fees range from a few hundred to tens of thousands of dollars for one song.

Conclusion

To sum up, submitting your music for TV and film can be a challenging but rewarding process. It is important to research the market, understand the industry, and always be prepared with a well-crafted pitch. Remember to build strong relationships with music supervisors and production companies, and stay persistent in promoting your work.

With these tips in mind, you can increase your chances of success and see your music brought to life on the big screen. Happy submitting!