Categories
Audio Production Gear

Rockwool Acoustic Panels: DIY Guide to Mineral Wool Panels

Rockwool acoustic panels are the cheapest way to make real studio treatment: a frame of 1×4 pine, a core of mineral wool such as ROCKWOOL Safe’n’Sound, and breathable fabric stretched over the front. This guide covers which mineral wool to buy, how Rockwool compares with Owens Corning 703 and 705 rigid fiberglass, how thick to build, and where to hang the finished panels so your mixes translate.

As an Amazon Associate I earn from qualifying purchases. This write-up is based on manufacturer specifications, published absorption data and retailer listings, not hands-on testing.

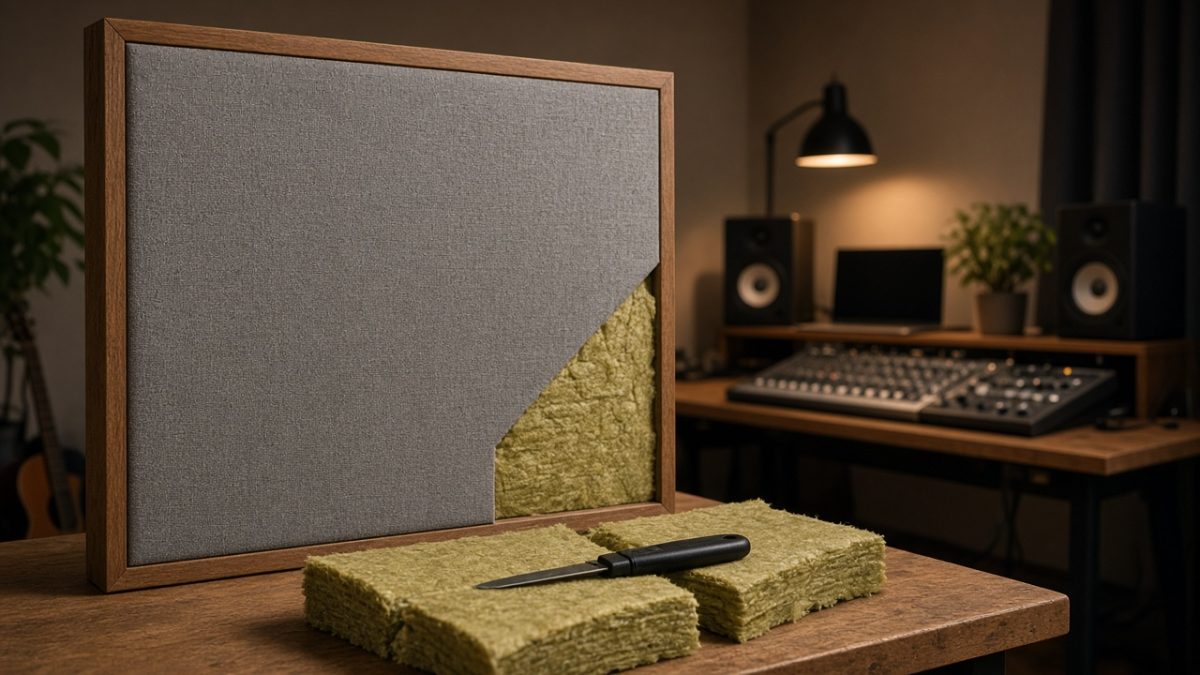
Rockwool acoustic panels DIY build with mineral wool core and fabric cover

Why mineral wool beats foam

Thin foam tiles mostly absorb high frequencies. Below about 250 Hz they do very little. That’s where small rooms have their worst problems: boomy bass, notes that vanish at the mix position, and long low-end decay. Dense mineral wool and rigid fiberglass absorb across a much wider range, and they get better at low frequencies the thicker you build. One published comparison puts 2 in acoustic foam at 0.29 absorption at 250 Hz, against 0.67 for a 2 in mineral wool panel. If you are new to how absorption works, read how acoustic panels work first.

The best mineral wool for DIY panels

ROCKWOOL Safe’n’Sound (best value)

Safe’n’Sound is a 3 in stone wool batt sold in packs of 12 pieces at 15-1/4 × 47 in, covering 59.7 sq ft per pack. Big-box hardware stores stock it. At the time of writing Home Depot listed it at about $80–84 a pack, with a 4.6-star average from more than 1,100 reviews. It holds its shape well, cuts with a serrated bread knife, and is naturally water-repellent. That helps in basements and garages. It is sold as building insulation, not a rigid acoustic board, so it needs a frame to hold it.

Owens Corning 703 (classic studio board)

OC 703 is a rigid fiberglass board at about 3 lb/ft³. It has been the standard studio absorber for decades, and 4 in of 703 is published at roughly 0.56 absorption at 125 Hz. It usually comes from acoustic or insulation suppliers rather than hardware stores. One specialty retailer listed a six-panel case of 2 in 703 FRK (foil-faced) for about $146. The foil face reflects some high frequencies, so buy plain 703 for broadband panels. Use FRK only when you want a little top-end liveliness kept in the room.

Owens Corning 705 (denser board)

705 is the 6 lb/ft³ version: stiffer, heavier and easier to handle as a clean board. The same retailer listed a five-pack of 2 in 2×4 ft boards for about $136. At equal density, mineral wool and fiberglass perform similarly. Choose based on availability, budget and how much stiffness your frames need.

Rockwool and mineral wool options on Amazon

If you’d rather not haul batts home from a hardware store, these boards ship to your door. The three Lynn Manufacturing listings belong to the same listing family, which showed 4.6 stars from 57 ratings. Buyers generally report using them in 1×2 frames wrapped in burlap, and for bass traps and ceiling clouds. Prices and stock are as seen Oct 27, 2026, and may change.

Product Size Count Price Per unit Best for
ProRox SL960 squares 12×12×2 in 3 $37.90 $12.63 Small panels, art frames, tests
Mineral wool board 24×24×2 in 5 $105.90 $21.18 Mid-size panels, clouds
ProRox SL960 boards 24×48×1 in 10 $209.90 $20.99 Full 2×4 panels, bass traps
ATS denim/recycled batts 24×48×2 in 6 $145.99 $24.33 Soft, low-itch builds

Quick pick guide

  • Small DIY or a first test: the 12×12 ProRox 3-pack.
  • Full-size Rockwool acoustic panels: the 24×48 ProRox 10-pack, doubled to 2 in. Use the 24×24 boards for square panels.
  • Soft option: the ATS denim batts, if you want to avoid itchy mineral wool.

Density and thickness: what each size actually does

Thickness and density are the two numbers that matter most when you choose a core. In general, a thicker porous absorber reaches lower frequencies, and density mostly changes how stiff the board is and how much air resistance it offers. Very dense boards can even reflect a little more at the surface. For studio panels, medium-to-high density boards around the 3–6 lb/ft³ range are the common choice, which is why ProRox SL960 (6 lb/ft³) and Owens Corning 703/705 show up in so many builds.

1 inch boards

On its own, a 1 in board mostly tames high frequencies: harsh slap echo, hand-clap flutter and sibilant splash off a bare wall. It’s a good thickness for thin decor panels or for doubling up. Because the 24×48×1 ProRox pack is sold as 10 boards, the usual approach is to stack two boards per frame and get a 2 in panel.

2 inch panels

Two inches is the classic all-purpose panel. It handles speech and vocal frequencies well and deals with first reflections from your monitors, so it suits side walls and the wall behind your desk. It does much less in the low end, so don’t expect 2 in panels to fix a boomy room.

4 inch panels and deeper

At 4 in, absorption reaches noticeably lower, and that makes 4 in and deeper builds the usual choice for corners and the rear wall. You can get there by stacking boards: four 1 in ProRox boards or two 2 in boards in a deeper frame built from 1×6 lumber instead of 1×4.

Why an air gap helps

Spacing a panel a few inches off the wall is the cheapest upgrade in acoustics. Sound reaches the core at a point where air particles are moving faster, so a spaced panel generally works lower than the same panel mounted flat. Two to four inches of gap is a common, practical range for home studios. Simple wooden stand-off blocks or deep French cleats do the job, and they cost almost nothing extra.

Materials list for a Rockwool acoustic panel build

Here’s what a typical build of four 24×48 in panels needs. Quantities assume 2 in deep panels.

  • Core: eight 24×48×1 in boards (stacked in pairs), four 24×48×2 in boards, or four batts from the ATS denim case
  • Frame lumber: 1×4 pine or poplar for 2 in panels (1×2 if you skip side frames and wrap the board directly), or 1×6 for 4 in traps
  • Fasteners: 1-1/4 in or 1-5/8 in wood screws, wood glue, and optional corner brackets
  • Fabric: breathable acoustic fabric or burlap, about 2 yards per panel at 54–60 in wide
  • Staples: a manual or electric staple gun with 3/8 in staples
  • Backing (optional): landscape fabric or thin breathable cloth to contain fibers
  • Hanging hardware: Z-clips, French cleats or picture wire, plus wall anchors rated for the weight
  • Tools: tape measure, square, saw, drill, serrated bread knife or insulation knife, and scissors
  • Protective gear: gloves, a dust mask, long sleeves and safety glasses

Step-by-step: how to build Rockwool acoustic panels

This tutorial builds a 24×48 in panel. The 24×24 version works exactly the same way with shorter rails.

Example cut list

Panel size Long rails Short rails Core
24×48 in, 2 in deep 2 × 48 in (1×4) 2 × 22-1/2 in (1×4) One 2 in board or two 1 in boards
24×24 in, 2 in deep 2 × 24 in (1×4) 2 × 22-1/2 in (1×4) One 24×24×2 in board

These dimensions assume nominal 1× lumber at 3/4 in thick, with short rails butted between the long rails. That gives an inside opening of about 22-1/2 in, slightly narrower than the 24 in board. Measure your actual lumber and boards first, then adjust the short rails so the core fits snugly. Alternatively, cut the rails to wrap the outside of the board for a full 24 in opening.

  1. Measure the core. Mineral wool sizes can vary slightly, so measure the boards before cutting wood.
  2. Cut and assemble the frame. Cut the rails, add a bead of wood glue to each joint, and screw through the long rails into the short rails. Check the frame for square by measuring both diagonals.
  3. Add support strips. Screw a couple of thin strips across the back to stop the core falling out while leaving most of the back open.
  4. Fit the core. Put on your gloves and mask, then press the board into the frame. When stacking two 1 in boards, align the edges so there are no gaps.
  5. Cut the fabric. Leave 3–4 in of extra fabric on every side so you can pull it around to the back.
  6. Stretch and staple. Lay the fabric face down with the frame on top, then staple the center of each long side, then the center of each short side. Work outward toward the corners, keeping the tension even.
  7. Fold the corners. Fold them like wrapping a present, trim the excess and staple flat.
  8. Close the back. Optionally staple breathable backing fabric over the rear.
  9. Fit the hardware. Attach Z-clips, cleats or picture wire, plus stand-off blocks if you want an air gap.

For more frame styles and finishing ideas, see our DIY acoustic panels guide.

Choosing fabric for mineral wool panels

The fabric has one job: let sound through to the core. If you can’t breathe through it easily, it’s too tight and will reflect high frequencies back into the room.

  • Acoustically transparent fabric: purpose-made panel fabric is the most reliable choice and comes in many colors. Some types carry a flame-resistance rating.
  • Burlap: cheap, breathable and easy to find, although it can show staples and may fade or sag. Stretch it firmly.
  • Avoid: vinyl, leather, tightly woven upholstery fabric and anything with a backing or coating.

Fire safety matters too. The mineral wool itself doesn’t burn easily, but fabric and wood do. If you’re treating a rental, a shared building or a client-facing space, look for fabric with a stated flame-resistance rating, and check local rules.

Safety when cutting mineral wool

Mineral wool and fiberglass fibers can irritate skin, eyes and airways, so treat them like any other insulation job. As general advice, wear gloves, a dust mask, long sleeves and safety glasses while cutting. Work in a ventilated area or outdoors, and vacuum offcuts and dust when you finish. Once a panel is fully wrapped, the fibers are contained. Always follow the manufacturer’s safety data sheet for the specific product.

Rockwool vs fiberglass vs cotton denim

All three work as porous absorbers, so the choice usually comes down to handling, sourcing and cost.

Core Example Handling Notes
Rockwool / stone wool ProRox SL960, Lynn mineral wool board Itchy, so wear protective gear Rigid boards, naturally water-repellent
Rigid fiberglass Owens Corning 703 / 705 Itchy, so wear protective gear Classic studio standard, usually from specialty suppliers
Cotton denim / recycled fiber ATS denim batts Soft, low-itch Maker-claimed NRC 1.05; thickness can vary ±0.5 in

In short, Rockwool boards give clean edges and easy framing. Fiberglass is the long-time studio standard, and denim is the friendliest to handle, which makes it a good choice for a bedroom or shared living space.

Where to place Rockwool panels

First reflection points

Sit in your mix position while a friend slides a mirror along each side wall. Wherever you can see a monitor in the mirror, place a panel. Repeat on the ceiling, and on the wall behind your monitors if your desk is close to it.

Corners and bass traps

Bass builds up in corners, so the deepest panels go there. Straddle a vertical corner with a 4 in or thicker panel and leave an air pocket behind it, or stack panels floor to ceiling.

Ceiling clouds

A panel hung flat above the space between you and your monitors catches the ceiling reflection. Use eye hooks and chain or cable rated well above the panel’s weight.

Room-size examples

These are examples only. Every room is different, so measure and adjust.

  • Example: small bedroom studio (about 10×10 ft). Two 24×48 panels at the side-wall reflection points, plus two deeper panels in the front corners.
  • Example: medium room (about 12×14 ft). Add a ceiling cloud and two panels on the rear wall to the four above.
  • Example: vocal corner. Two or three 24×48 panels behind and beside the singer. Our guide to recording vocals in a closet alternative covers this setup.

Keep the layout symmetrical so the stereo image stays centered, and see how to install acoustic panels for mounting details. Once the panels are up, our studio monitor guide helps you get the most from a treated room.

Cost of a DIY 4-panel starter setup

Using the Amazon prices as seen Oct 27, 2026 (prices may change), here’s what the core material costs for four 24×48×2 in panels:

Option Buy Pack price Material per panel Used for 4 panels Leftover
ProRox SL960 24×48×1 (stack 2) One 10-pack $209.90 $41.98 (2 boards) $167.92 (8 boards) 2 boards for a fifth panel
ATS denim batts 24×48×2 One case of 6 $145.99 $24.33 $97.33 2 batts for two more panels
Lynn board 24×24×2 (smaller panels) One 5-pack $105.90 $21.18 $84.72 1 board for a fifth 2×2 panel

So the out-of-pocket cost for core material is $209.90, $145.99 or $105.90 depending on the option. Then add lumber, fabric, staples and hanging hardware at your local prices. For a first test before committing, the 12×12×2 ProRox 3-pack is $37.90. For more ways to stretch a budget, read our guide to improving production quality on a budget.

Common mistakes to avoid

  • Using fabric that’s too tight. If you can’t breathe through it, it reflects highs. Test it before you buy a full roll.
  • Treating only one side. Uneven treatment pulls the stereo image off center, so mirror every panel on the opposite wall.
  • Relying only on 1 in boards. A room full of thin panels can sound dull up top while the bass stays boomy. Mix thin reflection panels with thick corner traps.
  • Skipping the corners. Corners are where bass builds up, so they’re usually the most effective place for deep panels.
  • Weak hanging hardware. Dense boards are heavier than they look. Use anchors and cleats rated well above the panel’s weight, especially overhead.
  • Leaving gaps in the core. When stacking boards, butt the edges together tightly, and don’t compress the board into a frame that’s too small.
  • Over-treating. Covering every wall can make a room feel lifeless. Treat the key points, listen, measure, and then add more panels if needed.

Finally, give your ears time. Live with the new setup for a few days of mixing before deciding what to add. Free measurement software and a basic measurement microphone can show which frequencies still ring, so the next panel goes where it helps most.

Rockwool acoustic panels FAQ

Are mineral wool panels better than foam?

For most studio problems, yes. Dense mineral wool absorbs over a wider frequency range than thin foam, especially toward the low mids.

How many panels do I need?

Start with the first reflection points and the front corners, which is usually four to six panels in a small room. Then measure and add more where needed.

Can I use 1 inch boards?

Yes. On their own they mostly control highs, so stack two for a 2 in panel or more for corner traps.

Do I need an air gap behind the panel?

It isn’t required, but spacing panels a few inches off the wall generally extends their low-frequency range for free.

Will acoustic panels soundproof my room?

No. Panels improve how a room sounds inside. Blocking sound from leaving takes mass, sealing and decoupling, which is a different job.

Is cotton denim as good as mineral wool?

It’s a soft, low-itch alternative. ATS claims an NRC of 1.05 for its 2 in batts, but that’s a maker claim and its thickness can vary by ±0.5 in.

Recap

  • DIY mineral wool panels are the best-value way to treat a home studio properly.
  • Use 2 in panels for reflections and 4 in or deeper with an air gap for corners.
  • Build simple 1×4 frames, fill them with mineral wool and wrap them in breathable fabric.
  • Place panels at the first reflection points, in the corners and as a ceiling cloud, symmetrically.
  • Wear gloves, a mask and long sleeves when cutting, or choose denim for easy handling.
  • A four-panel core-material kit runs about $106–210 at Oct 27, 2026 prices.

For the theory behind absorption ratings, see the noise reduction coefficient explainer. To plan the rest of your space, read our home studio setup for beginners and best room treatment tips.

Categories
Audio Production

How to Find the Key and BPM of a Song

To find the key and BPM of a song, run the audio through a detector for a first estimate, then confirm by ear: tap along to check the tempo, and play the suspected root note and scale against the track. The free Solar Heavy BPM and key finder analyses an MP3, WAV or other audio file in your browser and returns a tempo and key with confidence ratings, half-time and double-time alternatives, and the next most likely key.

Automatic detection is a strong hint, not the final answer. Here is how to use it and how to verify it.

How BPM detection works

The tool looks for onsets, the moments where new notes and drum hits start, then measures the most regular spacing between them. That spacing, converted to beats per minute, is the estimate. Songs with clear drums give the most reliable results; ambient pieces and rubato performances are harder.

The half-time / double-time problem

A beat at 70 BPM and one at 140 BPM line up with the same drum hits, so detectors often pick the wrong one. That’s why the tool always shows both. Choose the one that matches how the song feels: count where the snare lands. In most hip hop and trap the snare falls on beats 2 and 4 at the slower tempo, while producers often set the DAW to the double-time value for hi-hat programming. Neither is wrong, as long as you are consistent.

How key detection works

The tool compares the song’s pitch content with standard major and minor key profiles. On the developers’ generated test tracks it was about 62% exact and about 90% correct including closely related keys. Most misses were the relative key, for example C major instead of A minor, which share the same notes.

Telling relative major from minor

When the result is C major or A minor:

  • Listen for home. Which chord or bass note does the song resolve to at the end of sections? That’s the tonic.
  • Check the bass. Bass lines usually land on the root at phrase starts.
  • Hum the root. Play C, then A, against the chorus. One will feel settled; the other will feel like it wants to move.

How to use the BPM and key finder

  1. Drop the audio file onto the BPM and key finder. MP3, WAV and AAC/M4A work almost everywhere; OGG and FLAC depend on the browser.
  2. Use at least 5 seconds of music. The tool analyses up to 90 seconds from the middle of the track, where the groove is usually most stable.
  3. Read the tempo and key with their confidence ratings.
  4. Check the alternatives: half-time, double-time and the second most likely key.
  5. Confirm the tempo with the tap button, or with the online metronome.

The file is decoded and analysed on your device and never uploaded, so it is safe for unreleased tracks.

Confirming in your DAW

  • Tempo: set the project BPM, drop the audio in at bar 1 aligned to the first downbeat, and watch the grid for 16 bars. If transients drift steadily, nudge the tempo by 0.1–0.5 BPM. Older recordings without a click may drift naturally, so check a few sections. Pro Tools users can follow How to Find the Tempo of a Beat in Pro Tools.
  • Key: load a piano, play the scale of the suspected key over the chorus, and listen for clashes. One wrong note usually points to a mode (a raised sixth suggests Dorian) or a borrowed chord rather than a wrong key.

Why producers need both numbers

  • Sampling. Matching the sample’s key and tempo to your project avoids extreme stretching and pitch artefacts. If you must shift, small moves (a semitone or two, a few BPM) sound most natural.
  • Remixes and edits. You need the original tempo to warp stems and the key to write new chords that fit.
  • DJ mixing. Harmonic mixing works by moving between compatible keys; tempo matching keeps the beatmatch clean.
  • Vocal sessions. Knowing the key lets you set a pitch-correction plugin to the right scale. Our vocal tuner helps singers check pitch while they practice.
  • Delay and reverb timing. Once you know the BPM, the delay and reverb calculator gives you every note value in ms.

Tips for cleaner detection

  • Trim long intros and outros that have no drums.
  • Use the full mix rather than an acapella when detecting tempo, and use a harmonic part (keys, pads, bass) when key detection is uncertain.
  • Watch out for detuned recordings. Tape-era tracks and vocals pitched for effect can sit between keys. If the root sounds slightly sharp or flat against your piano, the song may not be at A440 tuning.
  • Key changes confuse detectors. If the last chorus modulates up, analyse each section separately.

To dig deeper into theory, see Why Learn Music Theory? and Chord Finder and Chord Identifier.

Who this is for

  • Producers and beatmakers sampling or remixing.
  • DJs preparing harmonic sets.
  • Singers and session players learning a song.
  • Engineers setting up a session from a client’s reference.

Frequently asked questions

How does a BPM finder work?

It finds where new notes and drum hits start, measures the most regular spacing between them, and converts that to beats per minute.

Why does it show half or double my tempo?

A beat at 70 BPM and one at 140 BPM line up with the same hits, so the tool shows both. Pick the one that matches how the song feels.

How accurate is the key detection?

About 62% exact and about 90% including closely related keys on the tool’s test tracks. Most misses are the relative key, so confirm by ear.

Are my files uploaded?

No. The file is decoded and analysed in your browser and never sent to a server.

Which audio formats can I use?

Any format your browser can decode. MP3, WAV and AAC/M4A work almost everywhere; OGG and FLAC depend on the browser.

Categories
Audio Production

MIDI, Controllers and Hardware: The Complete Guide Hub

MIDI connects controllers, synths and software. These guides cover setups, controllers and studio hardware. This hub collects every Solar Heavy Studios guide on midi and hardware in one place, grouped by subtopic, so you can learn in order or jump straight to the problem you have today.

A learning path through MIDI and hardware

Start with MIDI basics: what MIDI messages are, how MIDI velocity works and how MIDI CC messages control parameters. Connect gear with USB MIDI, then learn MIDI mapping so your MIDI keyboards, MIDI controllers, pad controllers and control surfaces control your DAW. Next, learn timing tools: quantization, MIDI humanization and MIDI clock sync. Then explore pattern tools such as arpeggiators and step sequencers, and expressive control with MPE. Finally, explore hardware instruments: drum machines, grooveboxes, samplers, hardware synths and Eurorack modular systems.

Start here

Free tools and quick guides

Subtopics in this hub

Each subtopic has a short explanation below. Where a full guide already exists on the site, it is linked; the rest are being written.

MIDI CC

MIDI Control Change (CC) messages send continuous controller data, with 128 controller numbers each carrying a value from 0 to 127. Some numbers have standard meanings, such as CC1 for the mod wheel, CC7 for volume, CC10 for pan, CC11 for expression and CC64 for the sustain pedal. Others are free for assignment. CC data is how knobs, faders and pedals control synth and DAW parameters, and can be recorded and edited like automation.

MIDI basics

MIDI (Musical Instrument Digital Interface) is a protocol that sends performance instructions, not audio. Messages include note on and note off with velocity, control changes, pitch bend, program changes and timing information. MIDI uses 16 channels per connection so one cable can address several instruments. Because MIDI is data, you can change notes, timing and sounds after recording.

MIDI clock sync

MIDI clock sends 24 pulses per quarter note from a master device so other devices follow its tempo. Start, stop and continue messages control transport. Typically, the DAW is the master and hardware follows, though either can lead. Clock jitter and USB latency can cause slight timing drift, so check sync carefully and consider dedicated sync tools for tight timing.

MIDI controllers

MIDI controllers are devices that send MIDI but do not make sound themselves: keyboards, pad controllers, fader banks, knob boxes and wind controllers. They let you play instruments and control software with physical hands-on control. Choose controllers based on how you work: keys for playing parts, pads for drums and clips, faders for mixing.

Read the full guide: What are the Best MIDI Controllers? Unleash Your Musical Potential Now!

MIDI humanization

Humanization adds small random variations to timing and velocity so programmed parts sound less mechanical. Use small amounts: a few milliseconds of timing variation and modest velocity changes. Better still, apply intentional variation, such as accenting downbeats and pushing or dragging specific notes, because real players vary in musical patterns rather than at random.

MIDI keyboards

MIDI keyboards range from compact 25-key models to full 88-key weighted controllers. Key count, key action (synth-action, semi-weighted, or hammer-action), velocity response, aftertouch and extra controls such as pads, knobs and faders are the main differences. Choose based on your playing ability, available desk space and whether you need to play two-handed parts.

MIDI mapping

MIDI mapping assigns a controller's knobs, faders and buttons to parameters in your DAW or plugins. Most DAWs have a MIDI learn function: click the parameter, move the control, and it is assigned. Saving mappings in templates and plugin presets speeds up workflow. Consistent mappings, such as the same knob for filter cutoff in every synth, build muscle memory.

Read the full guide: Using the Midi Mapping Function in Ableton Live : Mastering Music Production

MIDI velocity

Velocity measures how hard a note is played, from 1 to 127. It usually controls volume but can also control brightness, sample layer selection, attack time or other parameters. Velocity curves on controllers and in DAWs adjust how your playing translates into values. Varied velocity makes drums and keys sound more realistic.

MPE

MIDI Polyphonic Expression (MPE) gives each note its own MIDI channel so pitch bend, pressure and timbre can be controlled per note. It allows expressive gestures such as bending one note in a chord. MPE requires both a compatible controller and a compatible instrument, and is now supported by many synths and DAWs.

USB MIDI

Most modern controllers connect over USB and are class compliant, meaning they work without special drivers on major operating systems. USB carries both MIDI data and often power. Some hardware also offers traditional 5-pin DIN MIDI ports for connecting directly to other hardware without a computer. USB hubs and cable quality occasionally cause connection problems.

Read the full guide: Choose USB MIDI Controller: Unleash Your Musical Creativity

Arpeggiators

An arpeggiator plays held chords as sequences of individual notes, following patterns such as up, down, up-down or random, at a chosen rate and octave range. Arpeggiators are built into many synths and DAWs. They are great for generating ideas; record the output as MIDI so you can edit individual notes later.

Control surfaces

Control surfaces are hardware controllers designed for DAW control, usually with motorised faders, transport buttons and displays showing track names. They often use protocols such as Mackie Control or HUI, or dedicated integration. They make mixing more hands-on and reduce mouse use.

Drum machines

Drum machines generate drum sounds from synthesis, samples or both, and usually include a step sequencer. Classic models defined the sound of hip hop, house and techno, and many modern units and plugins reproduce or extend them. Hardware drum machines encourage fast pattern-based writing away from the computer screen.

Read the full guide: Best Drum Machines: Top Picks for Beat Makers

Eurorack

Eurorack is a popular modular synthesizer format with standard module dimensions and power connections, so modules from different makers fit in the same case. It allows deep experimentation but can become expensive and complex. Start with a clear goal and a small case, and consider software modular environments to learn first.

Grooveboxes

Grooveboxes combine sequencing, drum sounds, synths or samples, and effects in one device for making complete tracks without a computer. They suit live performance and quick sketching. Many can sync with a DAW and send individual outputs for recording.

Hardware synths

Hardware synthesizers provide hands-on control and, in many cases, analogue circuits with their own character. Monophonic synths play one note at a time and suit basses and leads; polyphonic synths play chords. Recording hardware requires audio inputs on your interface and attention to latency and clock sync.

Pad controllers

Pad controllers provide velocity-sensitive pads for finger drumming, triggering samples and launching clips. Many include knobs, faders or screens and deep integration with specific DAWs. Pad sensitivity and size matter for finger drumming, so try them before buying if possible.

Quantization

Quantization moves notes to the nearest grid position to fix timing. Full quantization makes parts perfectly in time but can sound robotic. Partial quantization, or strength settings, moves notes only part of the way. Groove quantization applies the feel of a template, such as swing.

Samplers

Hardware and software samplers record or load audio and play it back from keys or pads, with control over pitch, start point, loop, envelopes and filters. Hip hop production has deep roots in hardware samplers. Modern samplers include slicing, time-stretching and resampling.

Step sequencers

Step sequencers divide a bar into steps, often 16, and let you switch each step on or off and set its pitch, velocity or other parameters. They make it fast to program drum and bass patterns and encourage experimentation with rhythms. Many offer per-step probability and parameter locks.

Worked example: setting up a MIDI keyboard in a DAW

  1. Connect the keyboard over USB and confirm it appears in your computer’s MIDI devices.
  2. Enable it as a MIDI input in the DAW’s preferences.
  3. Create an instrument track, arm it for recording and play a few notes to confirm sound.
  4. Check that velocity responds as expected; adjust the keyboard’s velocity curve if notes are too loud or quiet.
  5. Use MIDI learn to map the knobs to filter cutoff, resonance and reverb send.
  6. Assign the sustain pedal (CC64) and the mod wheel (CC1) and test both.
  7. Save the setup in your DAW template so it loads every time.

MIDI troubleshooting checklist

  • No notes arriving: check the DAW’s MIDI input settings and that the track is armed or monitoring.
  • Notes arriving but no sound: check that an instrument is loaded and the track output is routed to the master.
  • Stuck notes: send an all notes off or panic message.
  • Wrong sounds on hardware: check MIDI channels and program change messages.
  • Drifting timing with hardware: confirm which device is the clock master and avoid two masters.

Choosing your first controller

For most producers, a compact keyboard with velocity-sensitive keys, a few pads and assignable knobs covers almost everything. If you play piano, a larger keyboard with weighted keys makes performances more natural. If you mainly make beats, a pad controller may suit you better. Integration with your DAW, through scripts or dedicated modes, saves time compared with generic mapping.

Integrating hardware with a DAW

Hardware synths and drum machines connect to a DAW in two directions: MIDI from the DAW to play the hardware, and audio from the hardware into the interface. Create a dedicated track that sends MIDI to the device and an audio track that records its output, or use your DAW’s external instrument device if available. Compensate for latency so recorded audio lines up with the grid. Record each part to audio once finished, so the project still works when the hardware is not connected.

MIDI 2.0

MIDI 2.0 extends the original protocol with higher-resolution values, more channels and two-way communication so devices can describe their capabilities. It remains compatible with the original MIDI, often called MIDI 1.0. Support is arriving gradually in operating systems, DAWs and hardware, so check each device’s documentation. For most current work, MIDI 1.0 skills remain fully relevant.

Common MIDI messages at a glance

Message What it does Typical use
Note on / note off Starts and stops a note, with velocity Playing any instrument
Control change (CC) Sends a controller value from 0 to 127 Knobs, faders, pedals, mod wheel
Pitch bend Bends pitch with higher resolution than CC Pitch wheel, slides
Aftertouch Pressure after a key is pressed, per channel or per note Vibrato, filter swells
Program change Selects a preset or patch Switching sounds on hardware
Clock, start, stop Shares tempo and transport Syncing hardware and DAW
System exclusive (SysEx) Manufacturer-specific data Patch dumps, firmware, deep editing

Writing expressive MIDI parts

Programmed MIDI often sounds stiff because every note has the same length, velocity and timing. Real players vary all three. For drums, accent the backbeat or downbeats and lower the velocity of ghost notes and in-between hi-hats. For keys, let the top note of a chord ring slightly louder than the inner notes and vary note lengths so chords do not all stop at once. For basses, slightly shorten notes before rests to create space. Recording CC data such as the mod wheel or expression pedal during a pass adds movement that is hard to draw by hand.

Recording MIDI well

Play along with a click and a simple loop, and record several passes. Most DAWs can record each pass into separate takes or layers, so you can keep the best one. Use overdub or merge modes to build drum parts one instrument at a time. After recording, fix only the clear mistakes and keep the natural feel. If timing is loose, try partial quantization before full quantization.

Hardware versus software

Software instruments are cheaper, recallable and easy to automate; hardware offers physical controls, a focused workflow and sometimes a unique sound. Many producers combine both: they sketch with hardware for inspiration and finish in the DAW for recall and editing. Your budget, space and preferred way of working should guide the choice more than any claim about one being better.

Cables and connections

Traditional MIDI uses 5-pin DIN cables, with separate In, Out and Thru ports. Many compact devices use 3.5 mm TRS MIDI jacks, which come in two wiring standards known as Type A and Type B, so check which one your device needs and use the correct adapter. USB host devices and dedicated MIDI interfaces let you connect hardware without a computer or add more ports. Wireless MIDI over Bluetooth is convenient for controllers but may add latency.

Building a small hardware setup

A focused hardware setup often starts with one groovebox or drum machine, one synth and a simple mixer or multi-input interface. Decide which device will be the clock master, usually the DAW or the groovebox, and route MIDI from it to the others. Give each device its own audio input so you can record parts separately. Label cables, keep a note of MIDI channels for each device, and save patterns and patches regularly, because hardware memory can be overwritten easily. Add new gear only when you have learned the current setup well, as each device adds connections, settings and things to troubleshoot.

Saving and recalling hardware sounds

Unlike plugins, many hardware synths do not save their settings inside your DAW project. Store patches on the device, back them up with SysEx dumps or the manufacturer’s librarian software where possible, and write down the patch number used in each song. For analogue synths without memory, take a photo of the panel settings. Recording the final part to audio remains the most reliable way to preserve a sound.

MIDI files

Standard MIDI files (.mid) store notes, velocities and controller data, and open in almost any DAW. Exporting parts as MIDI files is the easiest way to share ideas with collaborators who use different software or instruments.

Common mistakes

  • Quantizing every part fully, removing the groove.
  • Leaving all notes at the same velocity.
  • Running two devices as clock masters at once.
  • Forgetting to record hardware parts to audio.
  • Buying a large controller you do not have space or need for.
  • Copying settings from a tutorial without listening in your own track.

FAQ

What is MIDI?

A protocol that sends performance data, not audio.

Do I need a MIDI controller?

Not required, but it makes playing parts much faster.

USB MIDI or 5-pin DIN?

USB for computers; 5-pin DIN for hardware synths.

Do I need a MIDI keyboard to produce music?

No, you can draw notes with a mouse, but a keyboard makes writing faster and more musical.

Is MIDI audio?

No. MIDI is performance data that tells an instrument what to play.

Put it into practice with our studio service, and bookmark this hub as new guides are added.

Categories
Audio Production

Music Business, Distribution and Royalties: The Complete Guide

Release, distribute and get paid: distributors, royalties, publishing and the business side every independent artist needs. This hub collects every Solar Heavy Studios guide on music business in one place, grouped by subtopic, so you can learn in order or jump straight to the problem you have today.

A learning path through the music business

Start with ownership: copyright for songs covers two separate rights, the composition and the sound recording, and that split explains most of the money. Learn how publishing works and the main royalty types: performance royalties collected by PROs, mechanical royalties, and neighbouring rights for recordings. Use split sheets whenever you co-write, and understand music contracts, producer points, beat leasing and exclusive rights before signing anything. Then turn to releasing: music distribution, UPC codes, release strategy, pre saves, playlist pitching, music marketing and EPKs. Finally, explore further income: sync licensing, selling beats online, Content ID, how streaming payouts are calculated, and when sampling clearance is needed.

This hub is general education, not legal or financial advice. Rules differ by country and change over time, so check with the relevant organisations or a qualified professional before making decisions.

Start here

Free tools and quick guides

Subtopics in this hub

Each subtopic has a short explanation below. Where a full guide already exists on the site, it is linked; the rest are being written.

Content ID

Content ID is YouTube's system for identifying copyrighted audio and video in uploads. Rights holders, often through distributors or administrators, submit reference files; when a match is found, the owner can monetise, track or block the video. Musicians can earn from other people's videos using their music. Be careful with non-exclusive beats and samples, because two parties claiming the same audio causes disputes.

Read the full guide: Get Youtube Content ID For Your Music: Unlock Earnings!

EPKs

An electronic press kit (EPK) is a concise package that introduces you to press, promoters, labels and playlist curators. It usually includes a short biography, high-quality photos, links to music and videos, notable achievements, upcoming releases or shows, and contact details. Keep it current, easy to scan and hosted on a simple web page or shareable document.

PROs

Performing rights organisations (PROs) collect performance royalties for songwriters and publishers when compositions are played publicly, including radio, live venues, TV and streaming. Examples include ASCAP, BMI and SESAC in the United States, PRS for Music in the UK and SOCAN in Canada. Songwriters usually join one in their territory and register every song they write.

UPC codes

A UPC (Universal Product Code) identifies a release as a product, such as a single, EP or album. Distributors usually provide UPCs automatically. Each track on the release also needs an ISRC (International Standard Recording Code), which identifies the individual recording and is used to track streams and sales.

Beat leasing

Beat leasing grants artists non-exclusive rights to use a beat under set limits, such as a maximum number of streams or sales, while the producer keeps ownership and can lease it to others. Lease terms vary widely. Both sides should have a written agreement that states usage limits, credit, publishing splits and what happens if the beat is sold exclusively.

Copyright for songs

A song typically involves two copyrights: the composition (melody, lyrics and harmony), owned by songwriters and publishers, and the sound recording (master), owned by the artist or label. Copyright generally exists automatically once a work is fixed in a tangible form, but registration with a national copyright office may provide extra legal benefits in some countries.

Exclusive rights

An exclusive beat sale transfers more extensive rights to one artist, usually removing the beat from further leasing. Exactly what transfers depends on the contract: it may cover the master rights, while the producer often keeps a share of publishing. Existing leases typically remain valid. Read terms carefully, because 'exclusive' does not always mean full ownership.

Mechanical royalties

Mechanical royalties are paid to songwriters and publishers when a composition is reproduced, such as in physical copies, downloads and on-demand streams. Collection methods vary by country. In the United States, the Mechanical Licensing Collective (The MLC) administers a blanket licence for digital streaming. Publishers or administrators often collect mechanicals on behalf of songwriters.

Read the full guide: What are Mechanical Royalties in the Music Industry?

Music contracts

Music contracts include recording agreements, publishing deals, producer agreements, management contracts, licensing agreements and distribution terms. Key points to check include rights granted, territory, duration, royalty rates, advances and recoupment, and termination clauses. Never sign a significant contract without understanding it, and consider an experienced music lawyer.

Music distribution

Distributors deliver your music to streaming services and stores, collect the money and pay you. Services differ in pricing models (annual fees, per-release fees or a commission), payout splits, extra features and support. Compare them on what you keep, how splits with collaborators are handled, and what happens to your releases if you stop paying.

Read the full guide: What Is Music Distribution

Music marketing

Music marketing means reaching listeners and turning them into fans. Common methods include short-form video, consistent social media, email lists, live shows, collaborations, press and playlist pitching. Focus on a few channels you can sustain, and measure what actually drives listeners rather than chasing every platform.

Read the full guide: How to Do Music Marketing

Neighbouring rights

Neighbouring rights pay performers and owners of sound recordings when recordings are broadcast or played publicly, such as on radio and in venues. They exist in many countries, with organisations such as PPL in the UK collecting them. In the United States, digital performance royalties for recordings are collected by SoundExchange.

Performance royalties

Performance royalties are generated when a composition is performed publicly, whether live, on radio, on TV or through streaming. PROs collect these and divide them between songwriters and publishers. Registering songs correctly with your PRO, with accurate splits, is essential to being paid.

Read the full guide: Musicians How To Collect Live Performance Royalties : Boost Your Earnings

Playlist pitching

Playlist pitching is submitting music to editorial, algorithmic or independent playlists. Spotify for Artists lets artists pitch one unreleased song to its editorial team before release. Independent curators may accept submissions directly. Avoid services that guarantee streams, because artificial streaming breaks platform rules and can lead to removed music.

Pre saves

A pre save lets fans add an upcoming release to their library in advance, so it appears automatically on release day. Pre saves build anticipation and can signal early interest. Distributors and link services provide pre-save pages; promote them as part of a wider release campaign.

Producer points

Producer points are a percentage of the master recording royalties paid to the producer, usually expressed in points. Points are often paid after recording costs are recouped, though this depends on the agreement. A producer may also negotiate an upfront fee and a share of publishing if they co-wrote the composition.

Publishing

Music publishing is the business of managing compositions: registering songs, licensing them and collecting royalties. Songwriters can sign publishing deals, use publishing administrators, or self-publish. Publishers typically take a share of income in exchange for administration, collection and sometimes promotion or advances.

Read the full guide: Tunecore Publishing Administration Review

Release strategy

A release strategy plans how and when music comes out. Many independent artists release singles regularly to stay visible, and group songs into EPs or albums when they have momentum. Plan artwork, metadata, pitching, content and promotion weeks ahead, and keep releasing consistently rather than waiting for one perfect launch.

Sampling clearance

Sampling a recording usually requires permission from two parties: the owner of the master recording and the owner of the composition. Without clearance, the release can be taken down or lead to legal claims. Royalty-free sample packs grant licences in their terms, so check those terms. Recreating a sample avoids master clearance but still needs the composition.

Selling beats online

Producers sell beats through marketplaces, personal websites and social media. Success depends on consistent quality, clear licensing terms, good tags and titles, and building relationships with artists. Offer tiered licences, deliver tagged previews and untagged files after purchase, and keep records of every licence sold.

Split sheets

A split sheet records who wrote what share of a song, signed by all writers, ideally at the session. It prevents disputes and provides the information needed to register the song with PROs and publishers. Include song title, writers, their PRO, publishing details and agreed percentages.

Streaming payouts

Streaming services do not pay a fixed rate per stream. Most use a pro-rata model, dividing revenue in each market among rights holders according to their share of total streams. Payments vary by country, subscription type and service, and are split among labels, distributors, publishers and songwriters. Some services set minimum thresholds before a track earns.

Sync licensing

Sync licensing places music in film, TV, ads, games and online video. It requires a sync licence for the composition and a master use licence for the recording. Owning both, or having a clear chain of ownership, makes your music easier to license. Libraries and sync agents help connect music with music supervisors.

Read the full guide: What Is Sync Licensing

Where the money comes from

Income Who it pays Typically collected by
Streaming and sales of recordings Owner of the master Distributor or label
Performance royalties Songwriters and publishers PROs
Mechanical royalties Songwriters and publishers Mechanical collection societies, publishers or administrators
Neighbouring rights / digital performance Performers and master owners Neighbouring rights organisations, SoundExchange in the US
Sync fees Composition and master owners Direct deals, publishers, libraries
YouTube Content ID Rights holders who registered Distributors or administrators

Release checklist

  • Final master and artwork meeting the distributor’s specifications.
  • Correct metadata: artist names, featured artists, writers, producers, genre and explicit content flags.
  • ISRC for each track and a UPC for the release.
  • Splits agreed and documented with all collaborators.
  • Sample clearances or licences on file.
  • Songs registered with your PRO and publishing administrator.
  • Release date set with enough lead time for pitching.
  • Pre-save link and content planned for release week.

Worked example: a two-writer song

Two writers create a song: one writes the beat and chord progression, the other writes the lyrics and topline. They agree a 50/50 split of the composition and sign a split sheet. The artist releases the song through a distributor, which pays the master owner for streams. Each writer registers the song with their own PRO, listing the same 50/50 split, so performance royalties reach both. Mechanical royalties are collected by the relevant collection bodies or by each writer’s publishing administrator. If the song is placed in a TV show, both composition owners must approve the sync licence, along with the master owner.

Protecting yourself

Keep records of sessions, files, split sheets and agreements. Use clear written terms for every beat sale and collaboration. Be cautious of offers promising guaranteed streams, playlist placements for payment, or contracts asking for rights to all future work. If something sounds too good to be true, take time to research and seek advice before signing.

Metadata matters

Incorrect or incomplete metadata is one of the most common reasons royalties go missing. Every release should list the correct artist names, songwriter names, producer credits, ISRCs and publishing information, spelled the same way everywhere. Use the same legal names and IDs with your distributor, PRO and publisher. If a song is credited differently in two databases, the systems may fail to match it, and the money can sit unclaimed. Keep a simple spreadsheet for each release with titles, ISRCs, UPC, release date, writers, splits and registration status.

Building a sustainable income

Few artists rely on one income source. A typical independent mix might combine streaming and download income, performance and mechanical royalties, live shows, merchandise, beat sales, sync placements, teaching or session work, and fan support through memberships or direct sales. Diversifying protects you when one source drops. Focus first on the income streams that suit your skills and audience, and track what each one actually earns so you can put time where it pays back.

Working with managers, labels and agents

As your career grows, you may work with professionals who take a percentage of income in exchange for their work. Managers guide your career overall, booking agents find live shows, labels fund and promote releases, and publishers handle compositions. Before signing, check what each will actually do, what they are paid, how long the agreement lasts and how it can end. A good team multiplies your efforts; a poor agreement can limit you for years.

Owning your audience

Platforms change their algorithms and rules, so build direct relationships with fans. An email list and a website you control let you announce releases, shows and merchandise without depending on any one platform’s reach.

Understanding recoupment

Many deals include an advance, money paid upfront that is later recovered from your share of royalties. Until the advance and any recoupable costs are recovered, you may receive no further royalty payments. Recoupment is not a loan you repay from your own pocket in most standard deals, but it does mean the advance is your money paid early, not a bonus. Ask exactly which costs are recoupable, such as recording, videos, marketing or tour support, and whether recoupment is cross-collateralised across several releases or deals. A smaller advance with fair terms is often better than a large one with heavy recoupment.

Registering outside your home country

Royalties earned abroad usually reach you through agreements between collection societies, which can be slow and incomplete. Publishing administrators register songs directly in many territories, which can improve collection for songs that perform internationally.

Common mistakes

  • Not using split sheets with collaborators.
  • Forgetting to register songs with a PRO.
  • Releasing music with uncleared samples.
  • Buying fake streams or paid playlist placements that break platform rules.
  • Signing contracts without understanding recoupment or term.
  • Copying settings from a tutorial without listening in your own track.

FAQ

What royalties can an independent artist earn?

Master (streaming) royalties, publishing royalties including performance and mechanical, and sync fees.

Do I need a publisher?

Not necessarily, but you should register your songs with a PRO and an admin service to collect publishing.

How long does distribution take?

Usually days, but submit a few weeks early for playlist pitching.

Do I need a publisher?

Not necessarily, but you need some way to collect publishing royalties, such as an administrator or self-publishing setup.

What is the difference between a distributor and a label?

A distributor delivers music to stores; a label usually funds, markets and owns or licenses the recordings.

Put it into practice with our free tool, and bookmark this hub as new guides are added.

Categories
Audio Production

Workflow and Productivity: The Complete Guide Hub

Templates, shortcuts and habits that help you finish more music in less time. This hub collects every Solar Heavy Studios guide on workflow in one place, grouped by subtopic, so you can learn in order or jump straight to the problem you have today.

A learning path through production workflow

Begin with the foundations of an organised studio: studio setup, file naming, session file management, sample organization, project backups and version control for projects. Then speed up everyday work with templates, keyboard shortcuts, freezing tracks, bouncing in place and smart sound selection. Build habits with producer routines, practice routines, time management for producers, deadlines and beat a day challenges. Finally, learn how to get songs out the door: finishing songs, beating creative blocks, getting feedback on mixes and working through collaboration online.

Start here

Free tools and quick guides

Subtopics in this hub

Each subtopic has a short explanation below. Where a full guide already exists on the site, it is linked; the rest are being written.

Beat a day challenges

A beat-a-day challenge means finishing a short idea every day for a set period. The aim is volume and speed rather than perfection: you practise starting, arranging and exporting quickly, and build a library of ideas. Set a time limit, keep the scope small, and accept rough results. Review the collection afterwards and develop the best ideas into full tracks.

Bouncing in place

Bouncing in place renders a track, including its instrument and effects, to a new audio file inside the project. It saves CPU, commits decisions, and lets you edit or reverse audio creatively. Keep the original MIDI or instrument track muted or hidden in case you need to change it later.

Collaboration online

Online collaboration usually means sharing stems or projects through cloud storage or dedicated platforms. Agree on tempo, key, sample rate and file naming before starting. If collaborators use different DAWs, exchange consolidated audio stems that all start at bar one. Keep a shared notes document listing who did what, and agree on credits and splits early, in writing.

Creative blocks

Creative blocks often come from perfectionism, fatigue or too many options. Constraints help: limit yourself to a few sounds, a single synth, or a fixed time. Change context by remaking a song you like, starting from drums instead of chords, or working away from the computer. Rest and listening to new music also refill your ideas.

Read the full guide: How To Overcome Creative Blocks

Deadlines

Deadlines turn open-ended projects into finished work. Break a project into stages with their own dates, such as writing, arrangement, mixing and mastering, and build in time for revisions. For client work, agree on revision limits and delivery formats at the start.

Feedback on mixes

Useful feedback comes from trusted listeners who know the genre. Ask specific questions, such as whether the vocal is loud enough or the low end feels balanced. Share level-matched versions with references and note the playback system they used. Look for repeated comments rather than reacting to every opinion.

File naming

Consistent file naming makes projects easy to find and share. A common pattern includes the artist, song title, version and date or number, such as Artist_Song_Mix_v03. Name audio tracks clearly before recording, so takes do not end up as Audio 1-17. Avoid special characters that some systems handle poorly.

Finishing songs

Finishing requires decisions. Set a clear definition of done, such as a complete arrangement and a balanced rough mix, and stop tweaking once you meet it. Work in passes: write, arrange, mix, then master, rather than polishing one section forever. Finishing many songs teaches more than perfecting a few.

Freezing tracks

Freezing temporarily renders a track to audio to save CPU while keeping it editable; you can unfreeze it to change settings. It is useful for heavy synths and effects. Unlike bouncing, freezing is meant to be reversible, so you can still change the instrument later.

Keyboard shortcuts

Learning shortcuts for frequent actions, such as split, duplicate, zoom, quantise and record, saves a lot of time. Learn a few at a time and use them until they become habit. Many DAWs let you customise shortcuts and create macros for repeated tasks.

Read the full guide: Pro Tools Keyboard Shortcuts: Discover More

Practice routines

Deliberate practice targets specific skills, such as sound design, drum programming, mixing a vocal or ear training. Short focused sessions, with a clear goal and a way to review results, produce faster improvement than unfocused noodling.

Producer routines

A routine reduces the effort of starting. Many producers keep regular sessions, separate creative and technical days, and start with a warm-up. Find a schedule that fits your life and protect it. Consistency matters more than long occasional sessions.

Project backups

A common rule is the 3-2-1 approach: three copies of important data, on two different types of storage, with one copy offsite or in the cloud. Use automatic backups where possible and test that you can restore files. Collect all audio into the project folder before backing up.

Sample organization

Organise samples by type, such as kicks, snares, loops and vocals, and keep favourites in a separate curated folder. Tagging and rating in your DAW browser or sample manager speeds up searching. Delete or archive packs you never use, and keep track of licensing terms.

Session file management

Keep each project in its own folder with audio, samples and bounces inside it. Use your DAW's collect-and-save or consolidate function so the project does not depend on files elsewhere. Save incremental versions and keep exports in a dedicated subfolder.

Sound selection

Choosing the right sounds early makes mixing easier. A well-chosen kick and bass that suit each other need less EQ than mismatched sounds. Audition sounds in context with the track, not soloed, and commit rather than browsing endlessly.

Studio setup

A functional studio places monitors in an equilateral triangle with the listening position, keeps the desk symmetrical in the room, and treats early reflections where possible. Keep cables tidy, frequently used gear within reach, and the computer quiet. Comfort and good lighting help long sessions.

Templates

A template is a project preloaded with your common tracks, routing, buses and effects. It removes setup time and keeps sessions consistent. Build separate templates for writing, recording and mixing, and update them as your workflow evolves.

Read the full guide: Fl Studio Template Folder: Maximize Your Workflow with Custom Templates

Time management for producers

Time management for producers means planning sessions, limiting distractions and batching similar tasks. Time-box activities such as sound design, set goals for each session, and track how long tasks really take, so planning becomes accurate.

Version control for projects

Version control for music usually means saving incremental versions, such as Song_v01, v02, with notes on changes. Some producers also use cloud storage with file history. This lets you return to earlier ideas and recover from mistakes or corrupted files.

Worked example: a session folder structure

Folder Contents
Artist_Song/ Main project file and incremental versions
Audio/ Recorded and imported audio, collected by the DAW
Samples/ Copies of samples used in the project
Bounces/ Rough mixes, mixes and masters, with version numbers
Stems/ Exported stems for collaborators, mixing or mastering
Notes/ Lyrics, feedback, credits and session notes

Collect all files into this structure before archiving, so the project opens on any machine.

A finishing checklist

  • Is the arrangement complete from intro to ending?
  • Do the main elements work in mono and on small speakers?
  • Is the vocal or lead clearly audible throughout?
  • Have you compared the mix with level-matched references?
  • Are files collected, named and backed up?
  • Have you exported the mix, instrumental and any stems you need?

Separating creative and technical work

Switching constantly between writing and technical tasks slows both. Many producers separate sessions: writing and sketching ideas quickly in one session, then arranging, editing and mixing in later sessions. During writing, use simple sounds and avoid detailed mixing; during mixing, avoid rewriting parts unless they truly do not work. This separation keeps momentum during creative work and objectivity during technical work.

Building a personal sound library

Over time, save your best sounds: drum hits you processed, synth presets, vocal chains and effect racks. Store them in a clearly named folder or browser collection, so you reuse your signature sounds instead of searching through thousands of samples. Back up this library like your projects, because it represents hours of work.

Designing a template that actually saves time

A good template reflects the way you really work rather than an idealised setup. Start by looking at your last five projects and noting which tracks, buses and effects appeared in every one. Those become the core of the template. Typical elements include a drum bus with light processing, a music bus, a vocal chain with corrective EQ and compression, a couple of send effects such as a short room reverb, a long hall or plate and a tempo-synced delay, and a reference track channel routed directly to the outputs so it bypasses mix processing. Colour-code track groups so you can find them quickly, and name every track and bus clearly.

Keep templates lean. Loading dozens of heavy instruments makes projects slow to open and can tempt you into the same sounds every time. A useful compromise is to include empty instrument tracks with your favourite plugins loaded on a neutral preset, or to save instrument racks separately and load them as needed. Revisit your template every few months, removing what you never use and adding what you keep setting up manually.

Managing CPU and system performance

Workflow suffers when the computer struggles. When CPU load climbs, increase the buffer size during mixing, freeze or bounce heavy instruments, and disable plugins you are not using rather than simply bypassing them, since some DAWs still process bypassed plugins. Use lower buffer sizes only while recording or playing parts live. Keep the operating system and audio drivers up to date, close background apps that use the disk or network, and store samples on a fast drive. These habits prevent crashes and dropouts that interrupt creative flow.

Getting useful feedback without losing your vision

Feedback is most valuable when it comes at the right stage. Early in a song, ask whether the idea and hook are strong; during mixing, ask about balance and translation. Share a level-matched bounce, explain what kind of feedback you want, and ask listeners to note the time in the track for each comment. When several people point to the same issue, take it seriously. When only one person dislikes a deliberate artistic choice, you can keep it. Write feedback into a notes file so revisions are tracked and nothing is forgotten.

Working with collaborators across DAWs

When collaborators use different software, project files rarely transfer cleanly. Exchange audio stems instead: export every track from bar one to the end, at the same sample rate and bit depth, with effects either printed or supplied dry plus a wet version. Include a text file listing tempo, key, time signature and any tempo changes. For MIDI parts, also export MIDI files so the collaborator can change sounds. A consistent naming scheme, such as Song_Instrument_Version, prevents confusion when files move back and forth.

Building a sustainable routine

Long-term progress comes from steady habits rather than occasional marathon sessions. Decide when and how long you can work each week and treat those sessions as appointments. Start each session with a short warm-up, such as programming a drum pattern or designing a sound, to get into the mindset. End by writing a quick note about where you stopped and what to do next, so the next session begins without hesitation. Track finished songs rather than hours spent, because output is the clearest measure of a working routine.

Dealing with too many unfinished ideas

Most producers collect folders of loops that never become songs. Schedule regular review sessions to listen through unfinished ideas, rate them quickly, and pick one or two to develop into full arrangements. Archive the rest. Turning even a portion of these sketches into finished tracks builds skills in arrangement and mixing that loop-making alone does not teach.

Arranging faster with a structure map

Many loops stall because the arrangement step feels overwhelming. A structure map speeds it up. Before arranging, write a simple plan of sections and their lengths, such as intro 8 bars, verse 16, chorus 8, verse 16, chorus 8, bridge 8 and final chorus 16. Drop markers into the DAW timeline for each section, then copy your loop across the whole song length. From there, arrange by subtraction: remove elements to create quieter verses, intros and breakdowns, and keep the full arrangement for choruses or drops. A reference track in the same genre helps you check section lengths and where energy rises.

Add transitions once the structure exists: risers, drum fills, reverse cymbals, filter sweeps, a bar of silence before a drop, or a change in drum pattern. Small variations every four or eight bars, such as an extra percussion layer or a melodic response, keep listeners engaged without rewriting the song.

Exporting and archiving a finished project

When a song is done, export everything you might need later: the main mix, an instrumental, an a cappella if there are vocals, a clean or radio edit if needed, and stems grouped by drums, bass, music, vocals and effects. Name each file clearly with the song title and version. Then collect and save the project, include notes on plugins used, and back it up in at least two places. Future remixes, sync requests and live performances become much easier when this archive exists.

Finally, keep a simple log of finished songs, release status and where each archive lives. This record makes catalogue management, licensing requests and registration far easier as your body of work grows.

Common mistakes

  • Working without backups.
  • Leaving tracks unnamed and files scattered across drives.
  • Endlessly tweaking a song instead of finishing it.
  • Browsing presets for hours instead of committing.
  • Ignoring collaboration agreements until after release.
  • Copying settings from a tutorial without listening in your own track.

FAQ

How do I finish more songs?

Set deadlines, use templates and separate writing from mixing sessions.

Should I use a template?

Yes, a template removes setup work at the start of every session.

How long should a session be?

Short focused blocks with ear breaks often beat marathon sessions.

How often should I back up projects?

Back up at the end of every session, and keep an offsite or cloud copy.

Should I freeze or bounce tracks?

Freeze when you might still change the instrument; bounce when you want to commit.

Put it into practice with our free tool, and bookmark this hub as new guides are added.

Categories
Audio Production

Recording and Mic Technique: The Complete Guide Hub

Great recordings start with the source, the room and mic placement. Fixing it at the source always beats fixing it in the mix. This hub collects every Solar Heavy Studios guide on recording in one place, grouped by subtopic, so you can learn in order or jump straight to the problem you have today.

A learning path through recording

Begin with the signal chain: audio interfaces, preamps, phantom power and DI boxes. Learn the main microphone types (dynamic, condenser and ribbon) and their polar patterns. Then cover the digital settings that affect every session: sample rate, bit depth, buffer size and latency, along with healthy recording levels. With the basics in place, practise mic placement on real sources: vocal recording, recording acoustic guitar, recording electric guitar and recording drums. Finally, learn session skills: click tracks, headphone mixes, punch in recording, comping takes, and building a home vocal booth with pop filters.

Start here

Free tools and quick guides

Subtopics in this hub

Each subtopic has a short explanation below. Where a full guide already exists on the site, it is linked; the rest are being written.

DI boxes

A DI (direct injection) box converts a high-impedance, unbalanced instrument signal, such as a bass guitar or keyboard, into a low-impedance, balanced mic-level signal suitable for a preamp. It allows long cable runs without noise and often includes a ground lift switch to cure hum. Passive DIs need no power; active DIs need phantom power or batteries and suit passive pickups. Many interfaces have built-in instrument inputs, which perform a similar role for home recording.

Audio interfaces

An audio interface converts analogue signals from microphones and instruments into digital audio for your computer and back again for monitoring. Key features include the number and type of inputs, preamp quality, phantom power, headphone outputs, monitor outputs and driver stability. Choose based on how many sources you need to record at once, not just the specification sheet. Two inputs suit most solo producers; drums and bands need more.

Read the full guide: The Best Audio Interfaces

Bit depth

Bit depth determines the dynamic range of digital audio. 16-bit gives about 96 dB of theoretical dynamic range and 24-bit about 144 dB, far more than any real-world analogue chain needs. Recording at 24-bit gives generous headroom, so you can leave space for peaks without worrying about noise. 32-bit float files in a DAW are practically impossible to clip internally, but converters still clip at 0 dBFS.

Read the full guide: Bit Depth For Recording

Buffer size

Buffer size is the amount of audio the computer processes in each block. Smaller buffers reduce latency, which matters while recording and monitoring through the software. Larger buffers give the CPU more time, preventing clicks and dropouts when mixing with many plugins. A common workflow is a small buffer while tracking and a larger one while mixing.

Click tracks

A click track is a metronome that keeps performers in time with the session tempo. It makes editing, quantising and adding loops much easier. Choose a click sound that cuts through the headphone mix without being harsh, and consider count-ins and subdivisions for complex parts. Keep the click out of open microphones by managing headphone volume.

Comping takes

Comping, short for compiling, means recording several takes and combining the best sections into one performance. Most DAWs offer take lanes or playlists for this. Listen to each phrase across takes, choose the best for tone, timing and emotion, and use short crossfades at edit points. Aim for a performance that sounds natural, not a patchwork.

Condenser microphones

Condenser microphones use a charged diaphragm and capacitor plate and need power, usually phantom power. They are sensitive and capture detail and high frequencies well, making them popular for vocals, acoustic guitars and overheads. Their sensitivity also picks up more room sound and background noise, so they benefit from a treated space.

Dynamic microphones

Dynamic microphones use a moving coil and magnet and need no power. They handle high sound pressure levels and are less sensitive to room reflections, making them excellent for guitar amps, drums, live vocals and untreated rooms. Many dynamic mics have low output, so they need a preamp with plenty of clean gain or an inline booster.

Headphone mixes

A good headphone mix helps performers play and sing their best. Give them a clear balance of themselves, the click and the key instruments, with a little reverb on vocals if it helps. Closed-back headphones reduce bleed into microphones. Interfaces and DAWs often provide separate cue mixes so the performer's mix differs from the engineer's.

Home vocal booth

A home vocal booth does not need to be a built room. Absorbent material around and behind the singer, a corner with heavy blankets, or a wardrobe full of clothes can significantly reduce reflections. Avoid small, boxy enclosures that create a resonant sound. The goal is a dry vocal so reverb can be added later in the mix.

Read the full guide: Optimize Your Space With A Home Vocal Booth

Latency

Latency is the delay between a sound entering the system and being heard. In recording, it can make performers feel out of time. Reduce it with smaller buffer sizes, direct monitoring on your interface, and by avoiding high-latency plugins on recording tracks. DAWs also compensate recorded audio for known interface latency.

Read the full guide: How To Reduce Latency In Ableton

Mic placement

Microphone placement shapes the recorded sound more than any plugin. Distance controls the balance of direct sound and room; angle changes brightness; position relative to the source picks different tonal areas. Moving closer to a directional mic increases the bass through the proximity effect. Experiment and listen before reaching for EQ.

Read the full guide: Cello Mic Placement: Mastering the Art of Perfect Sound

Phantom power

Phantom power supplies DC voltage, typically 48 volts, through a balanced microphone cable to power condenser microphones and active DI boxes. Most interfaces provide it with a switch. Dynamic microphones are not harmed by phantom power, but some older ribbon microphones can be damaged by it, so check the manufacturer's guidance. Mute or lower monitors before switching it on.

Read the full guide: 48V Phantom Power

Polar patterns

A polar pattern shows how sensitive a microphone is to sound from different directions. Cardioid picks up mainly from the front and rejects the back. Supercardioid and hypercardioid are narrower. Omnidirectional picks up equally in all directions. Figure-8 picks up front and back but rejects the sides. Choosing the right pattern controls bleed and room sound.

Read the full guide: Polar Patterns in Audio

Pop filters

A pop filter sits between the singer and the microphone to reduce plosive bursts on sounds such as 'p' and 'b'. Nylon mesh and metal mesh designs are common. They also keep a consistent distance between the singer and mic. Angling the mic slightly or placing it at mouth height off-axis also reduces plosives.

Read the full guide: Why You Need Pop Filters: The Secret to Clear, Professional Audio

Preamps

A preamp raises the low-level signal from a microphone to line level. Clean preamps aim for transparency with low noise, while coloured preamps add character through transformers or tubes. Most modern interface preamps are clean enough for professional results. Gain staging, setting enough gain without clipping, matters more than the preamp brand.

Punch in recording

Punching in means re-recording a section of an existing take, starting and stopping recording at set points. It fixes mistakes without recording an entire part again. Set a pre-roll so the performer hears the lead-in, use punch-in and punch-out markers, and check crossfades at the edit points to avoid clicks.

Recording acoustic guitar

A common starting point for acoustic guitar is a small-diaphragm condenser pointed near where the neck meets the body, about 15 to 30 cm away. Pointing at the soundhole produces boomy results. Stereo techniques such as XY or spaced pairs add width. Listen in the room to find where the guitar sounds best before setting the mic.

Read the full guide: What are Some Tips for Recording Acoustic Guitar?

Recording drums

Drum recording ranges from one or two microphones to a full multi-mic setup with close mics on each drum, overheads and room mics. Good results start with a well-tuned kit and balanced playing. Check phase between microphones, especially the overheads and close mics. Even minimal setups can sound excellent with careful placement.

Read the full guide: The Art Of Recording Drums With One Mic

Recording electric guitar

Electric guitar amps are often recorded with a dynamic microphone close to the speaker grille. Pointing at the centre of the cone gives a bright sound; moving towards the edge gives a darker sound. Adding a second mic or room mic increases options. Many producers also record a DI signal for re-amping or amp simulation later.

Recording levels

In 24-bit recording, peaks around −12 to −6 dBFS leave plenty of headroom while keeping noise far below audible levels. There is no benefit to recording as close to 0 dBFS as possible. Set levels from the loudest parts of the performance, because singers and players often perform louder during takes than during soundcheck.

Read the full guide: Proper Audio Recording Levels

Ribbon microphones

Ribbon microphones use a thin metal ribbon suspended in a magnetic field. They have a natural, smooth high end and usually a figure-8 pattern. They are popular on guitar amps, brass, strings and drum rooms. Many are fragile, have low output and need a quiet preamp with plenty of gain.

Read the full guide: Best Ribbon Microphones: Capture Pristine Sound!

Sample rate

Sample rate is how many times per second audio is measured. 44.1 kHz and 48 kHz capture the full range of human hearing. Higher rates such as 96 kHz can reduce aliasing in some processing and give more room for time stretching, but increase file size and CPU load. Choose one rate per project and keep it consistent.

Read the full guide: Sample Rate For Recording

Vocal recording

For vocals, start with a large-diaphragm condenser or dynamic microphone, a pop filter and a dry space. Keep the singer at a consistent distance, roughly a hand's width or two, and set levels with headroom. Make the singer comfortable with a good headphone mix. A great performance matters more than equipment.

Read the full guide: Vocal Recording : Unlock Your Voice’s Potential

Worked example: a home vocal session

  1. Set the project to 24-bit at 44.1 or 48 kHz and a small buffer size.
  2. Place the microphone away from walls, with absorption behind the singer, and add a pop filter.
  3. Set the preamp gain while the singer performs the loudest section, aiming for peaks around −10 dBFS.
  4. Build a headphone mix with the beat, the vocal and a little reverb; enable direct monitoring if latency is noticeable.
  5. Record several full takes, then punch in on difficult lines.
  6. Comp the best phrases, crossfade edits and name the comp track clearly.

Microphone type at a glance

Type Power Strengths Common uses
Dynamic None Robust, rejects room sound Guitar amps, drums, vocals in untreated rooms
Condenser Phantom power Detailed, sensitive Vocals, acoustic instruments, overheads
Ribbon Usually none (some active models need it) Smooth highs, natural tone Guitar amps, brass, room mics

Gain staging through the recording chain

Every stage of the chain, from the instrument to the preamp to the converter, has a range where it performs well. Too little gain at the preamp means you raise the signal later and raise the noise with it; too much clips the converter, which cannot be undone. Set gain at the preamp first, watch the input meter in the DAW, and leave the track fader alone while recording, because the fader changes playback level, not what gets recorded. If a source is too quiet even at maximum gain, move the mic closer or use a microphone with higher output before reaching for more preamp gain.

Managing bleed and noise

When several sources play at once, each microphone picks up the others. Some bleed is natural and can glue a live recording together, but too much limits your choices in the mix. Use directional microphones and point their rejection zones toward the other sources, place absorbent gobos or furniture between players, and keep headphone levels low enough that the click does not leak. Turn off fans and noisy appliances, keep cables away from power supplies, and record a few seconds of room tone so you can identify any steady noise later.

Session organisation

A tidy session saves time in editing and mixing. Name tracks before recording, so files on disk are named sensibly. Colour-code instrument groups, add markers for song sections, and keep notes of microphone choices and positions in case you need to match a sound later. Back up the session folder at the end of every recording day, ideally to a second drive or cloud storage, because recorded performances are often impossible to recreate.

Monitoring options

Performers can hear themselves through the software, with plugins and effects, or through direct monitoring on the interface, which bypasses the computer and has almost no delay. Direct monitoring is the safest choice when latency is noticeable, and many interfaces let you blend input and playback with a dedicated control or mixer application. Software monitoring is useful when the performer needs to hear an effect such as amp simulation.

Pre-session checklist

  • Instruments tuned and new strings or heads settled in.
  • Cables tested, spares to hand.
  • Session tempo, key and sample rate confirmed.
  • Click and headphone mix checked by the performer.
  • Input levels set from the loudest section.
  • Enough free disk space for every take.

Re-amping

Recording a clean DI signal alongside a miked guitar or bass lets you send that DI back through an amp or amp simulation later. A re-amp box converts the line-level output back to instrument level and impedance, so the amp responds as if a guitar were plugged in.

Common mistakes

  • Recording too hot and clipping the converter.
  • Using a sensitive condenser in an untreated, noisy room.
  • Ignoring phase between multiple microphones.
  • Monitoring through plugins with high latency while recording.
  • Fixing placement problems with EQ instead of moving the mic.
  • Copying settings from a tutorial without listening in your own track.

FAQ

Condenser or dynamic mic for vocals at home?

Dynamic mics reject more room noise; condensers capture more detail in a treated space.

What level should I record at?

Peaks around −12 to −6 dBFS at 24-bit leave plenty of headroom.

Do I need an audio interface?

For XLR mics and low latency, yes.

What sample rate should I record at?

44.1 or 48 kHz is fine for most music; use one rate consistently.

Do I need an expensive microphone?

No. Placement, room and performance usually matter more.

Put it into practice with our free tool, and bookmark this hub as new guides are added.

Categories
Audio Production

Ear Training and Psychoacoustics: The Complete Guide Hub

Train your ears to hear frequencies, compression and pitch, and understand how human hearing affects mixing. This hub collects every Solar Heavy Studios guide on ear training in one place, grouped by subtopic, so you can learn in order or jump straight to the problem you have today.

A learning path through ear training and psychoacoustics

Start by protecting what you have: learn about your hearing range, hearing protection, tinnitus and listening fatigue. Then learn how hearing shapes mix decisions: Fletcher Munson curves, loudness bias, masking, and how fair A B comparison works. Build practical skills with frequency ear training, interval ear training, chord ear training and critical listening. Finally, explore how we perceive sound in space and tone: pitch perception, timbre, harmonics and overtones, stereo perception, phase perception, the precedence effect, binaural audio and spatial audio.

Start here

Free tools and quick guides

Subtopics in this hub

Each subtopic has a short explanation below. Where a full guide already exists on the site, it is linked; the rest are being written.

A B comparison

An A/B comparison switches between two versions, such as processed and unprocessed audio or your mix and a reference, to judge differences. The key rule is level matching: louder almost always sounds better, so match loudness before comparing. Switch quickly, ideally without knowing which is which, and focus on one aspect at a time, such as low end or vocal clarity.

Fletcher Munson curves

The Fletcher–Munson curves, refined in modern equal-loudness contours standardised in ISO 226, show that human hearing is less sensitive to low and very high frequencies at quiet levels. At low volumes, mixes sound thinner; at high volumes, bass and treble seem stronger. Mixing at a moderate, consistent level and checking at several volumes helps balance decisions.

Binaural audio

Binaural audio is recorded or rendered so that, on headphones, it reproduces the cues our two ears use to locate sound. Recording with microphones placed in a dummy head or in the ears captures these cues. Binaural rendering can place sounds around and above the listener on headphones, but the effect works best on headphones rather than speakers.

Read the full guide: Binaural Audio Essentials: Immerse Yourself

Chord ear training

Chord ear training teaches you to recognise chord qualities, such as major, minor, diminished, augmented and seventh chords, and later progressions. Start by hearing the difference between major and minor triads, then add sevenths and inversions. This skill helps you transcribe music, play by ear and write harmony faster.

Critical listening

Critical listening means analysing sound deliberately rather than enjoying it passively. Focus on one element at a time: the balance of instruments, the stereo image, depth, dynamics, tonal balance and effects. Listening to well-produced references in a good environment, and taking notes, trains you to hear details you can apply to your own mixes.

Frequency ear training

Frequency ear training teaches you to identify frequency ranges by ear, such as hearing a boost at 250 Hz or 3 kHz. Apps and websites play boosted or cut bands and ask you to guess. Regular short sessions build the skill. It speeds up EQ work, because you can reach for the right area without sweeping.

Harmonics and overtones

Most musical sounds contain a fundamental frequency plus higher harmonics or overtones. Their relative levels define timbre and why the same note sounds different on a piano and a violin. Saturation and distortion add harmonics, which is why they make sounds audible on small speakers that cannot reproduce the fundamental.

Hearing protection

Long exposure to loud sound can damage hearing permanently. Occupational guidance, such as the recommended exposure limit from NIOSH in the US, uses 85 dBA over eight hours as a reference, with safe time halving for every 3 dB increase. Use musicians' earplugs at gigs and rehearsals, take breaks, and monitor at moderate levels.

Hearing range

Human hearing is often described as roughly 20 Hz to 20 kHz, but the upper limit declines with age and noise exposure. Many adults hear considerably less than 20 kHz. This is one reason not to make extreme decisions in the very high frequencies based on your own hearing alone; analysers help confirm what is there.

Interval ear training

Interval ear training teaches you to recognise the distance between two notes. Associating intervals with familiar songs helps at first. Practise ascending, descending and harmonic intervals. It improves melody writing, transcription and tuning.

Listening fatigue

After long sessions, ears become less sensitive, especially to high frequencies, and judgment worsens. Mixes made while fatigued often end up too bright or too loud. Take regular breaks, keep monitoring levels moderate, and make important decisions early in a session or after rest.

Loudness bias

Loudness bias is the tendency to judge a louder version as better. It affects decisions about compression, EQ, saturation and mastering. Level-match before comparing processing, and use a loudness meter to check, because even a small level difference changes perception.

Masking

Masking happens when one sound makes another harder to hear, typically when they share frequency ranges. Bass and kick, vocals and guitars, and pads and leads often mask each other. EQ, arrangement changes, panning and sidechain ducking reduce masking.

Read the full guide: Frequency Masking Insights And Pro Tips

Phase perception

Our ears are relatively insensitive to absolute phase, but relative phase between sounds matters greatly. When two similar signals are combined out of phase, frequencies cancel, causing thin or hollow sounds. Phase differences between the left and right channels affect stereo image and mono compatibility.

Pitch perception

Pitch perception relates mainly to frequency, but loudness, timbre and duration also influence it. Very low frequencies may be perceived through their harmonics, which is why the missing fundamental effect lets small speakers suggest bass. Pitch discrimination improves with training.

Precedence effect

The precedence effect, also called the Haas effect, means that when the same sound reaches us from two directions within a short time, we localise it to the source that arrives first. Producers use small delays to widen sounds, but too long a delay becomes an audible echo, and short delays can cause comb filtering in mono.

Spatial audio

Spatial audio formats such as Dolby Atmos place sounds in three dimensions, using objects that can be positioned around and above the listener. Listeners may hear them on speaker systems or through headphones with binaural rendering. Mixing in spatial formats requires specific tools and monitoring.

Stereo perception

We locate sounds in the stereo field by level and timing differences between ears. Panning uses level differences; small timing delays also influence position. A wide, balanced stereo image keeps important elements centred, with supporting parts spread to the sides.

Timbre

Timbre is the quality that distinguishes sounds with the same pitch and loudness. It depends on harmonic content, how it changes over time, and the attack and noise components. EQ, saturation and filtering change timbre.

Tinnitus

Tinnitus is the perception of ringing, hissing or buzzing without an external source. Noise exposure is a common cause. If you notice ringing after a session or gig, it is a warning sign. Persistent tinnitus should be checked by a doctor or audiologist.

Read the full guide: Can You Be a Musician With Tinnitus

Worked example: a 15-minute daily ear training routine

Minutes Exercise Goal
0–5 Frequency identification with an ear training app Name boosted bands within one octave
5–8 Interval recognition Identify intervals by sound
8–11 Chord quality recognition Distinguish major, minor and seventh chords
11–15 Critical listening to a reference track Note balance, width, depth and effects

Consistency matters more than session length. Track your scores to see progress.

Listening level guidelines

Mixing at a consistent, moderate level, often described as comfortable conversation volume, helps decisions translate and protects your hearing. Check the mix briefly at higher and lower levels. If you need to raise your voice to talk over the speakers, the level is likely too high for long sessions. A sound level meter app gives a rough check of your room level.

How psychoacoustics affects mixing decisions

  • Because of equal-loudness contours, check bass and treble balance at more than one volume.
  • Because of loudness bias, level-match every before-and-after comparison.
  • Because of masking, solve clashes with arrangement and EQ instead of turning everything up.
  • Because of listening fatigue, take breaks and revisit decisions with fresh ears.
  • Because of the precedence effect, use short delays carefully for width and check mono.

Setting up a fair A/B test

A trustworthy comparison needs three things: matched levels, quick switching and a clear question. First, measure both versions with a loudness meter and adjust until their integrated or short-term loudness matches within a fraction of a decibel. Second, use a plugin or DAW feature that switches instantly, because auditory memory for fine detail fades within seconds. Third, decide what you are judging before you press play, such as whether the vocal sits forward enough or whether the low end is controlled. Blind testing, where a plugin or a friend randomises which version you hear, removes expectation bias. If you cannot reliably pick the processed version in a blind test, the processing may not be worth keeping.

Training your ears for EQ decisions

Frequency recognition is easier when you associate ranges with descriptive words. Many engineers use rough categories: sub bass for the felt rumble below about 60 Hz, bass for body and weight, low mids for warmth or muddiness, mids for presence and honk, upper mids for bite and harshness, and highs for air and sparkle. These boundaries are approximate and vary between sources, but having a shared vocabulary makes feedback and self-correction faster. Practise by boosting a narrow band on pink noise or a full mix and sweeping slowly, noting how each region changes the character. Then try identifying boosts without looking. Start with octave bands and narrow down as you improve.

Cuts are harder to hear than boosts, so practise both. Once you can identify a resonance by ear, you will reach for the right frequency much faster and avoid the habit of boosting and sweeping for long periods, which can tire your ears and mislead your judgment.

Listening for depth and space

Depth in a mix comes from several cues working together: level, high-frequency content, the ratio of direct sound to reverb, and pre-delay. Distant sounds are usually quieter, duller and more reverberant, with less pre-delay. Close sounds are louder, brighter and drier. Train yourself to notice these cues in reference tracks. Pick one element, such as a snare or backing vocal, and ask how far away it sounds and why. Then try recreating that placement in your own session with level, EQ and reverb. This turns abstract ideas about front-to-back placement into repeatable techniques.

Listening on different systems

Ear training is not only about hearing details on great monitors; it is also about predicting how a mix will sound elsewhere. Spend time listening to familiar commercial tracks on headphones, earbuds, laptop speakers, a phone and a car system. Notice how the bass changes, how vocals hold up, and which elements disappear on small speakers. Over time you build a mental model of how your monitors relate to the outside world, which is the foundation of mix translation.

Using reference tracks as an ear-training tool

Choose two or three well-produced tracks in the genre you work in and learn them deeply. Listen in short focused passes: one for the kick and bass relationship, one for vocal level and tone, one for stereo width, one for effects and space. Write down what you hear. When you later mix, these references act as anchors, telling you whether your low end is too heavy or your vocal too buried. Always level-match references to your mix before comparing.

Protecting your ears over a career

Your hearing is your main professional tool. Simple habits protect it: wear high-fidelity earplugs at concerts, clubs and loud rehearsals; keep headphone volume moderate, especially on public transport where background noise tempts you to turn up; take short breaks every hour; and avoid mixing immediately after loud exposure, when temporary threshold shifts dull your hearing. Get your hearing tested periodically by an audiologist so you have a baseline. If you notice muffled hearing or ringing after exposure, rest your ears and treat it as a warning.

Musical ear training for producers

Producers benefit from musical ear training even if they do not read music. Recognising scale degrees helps you write melodies that resolve, hearing chord qualities helps you choose emotional colour, and identifying rhythms helps you program grooves. A practical approach is to sing or hum a melody, then find it on a keyboard; transcribe basslines from songs you like; and identify whether progressions sound major or minor. Many free and paid apps provide structured drills for intervals, chords, scales and rhythm.

Hearing compression

Compression is one of the hardest effects to hear at first, because good compression is often subtle. Train by exaggerating it: set a high ratio, a low threshold and a fast attack on a drum loop, and listen to how transients are flattened and sustain rises. Then slow the attack and hear the punch return as transients slip through. Change the release and notice pumping or breathing. Once you know what heavy settings sound like, gradually reduce the amount until you can still detect the change. Always level-match with the output gain, because makeup gain alone can make compression seem like an improvement.

Hearing distortion and saturation

Gentle saturation adds harmonics that make a sound feel denser, warmer or more present, while heavy distortion is obvious. Practise by adding saturation to a bass or vocal and blending it in slowly with a mix control. Listen for added brightness, thickness and perceived loudness. Learn to notice unwanted distortion too: clipping on recordings, overloaded plugins and inter-sample peaks on masters. Spotting these early prevents problems that cannot be fixed later.

Common mistakes

  • Comparing processed and unprocessed audio at different levels.
  • Mixing at high volume for long sessions.
  • Ignoring early signs of tinnitus.
  • Making final decisions while fatigued.
  • Relying on eyes and analysers instead of training your ears.
  • Copying settings from a tutorial without listening in your own track.

FAQ

Can you train your ears?

Yes, with short, regular practice sessions.

Why do louder mixes sound better?

Our ears hear more bass and treble at higher levels, so always compare at matched loudness.

How do I protect my hearing?

Monitor at moderate levels and take breaks.

How long does frequency ear training take?

Most people notice improvement after a few weeks of short daily practice.

Can hearing damage be reversed?

Noise-induced hearing loss is generally permanent, so prevention is essential.

Put it into practice with our free tool, and bookmark this hub as new guides are added.

Categories
Audio Production

Music Theory for Producers: The Complete Guide Hub

Producer-focused music theory: scales, chords, progressions and melody, explained for use in a piano roll rather than on paper. This hub collects every Solar Heavy Studios guide on music theory in one place, grouped by subtopic, so you can learn in order or jump straight to the problem you have today.

A learning path through music theory for producers

Start with the major scale, the minor scale and the relative minor, then learn how key signatures and the circle of fifths organise them. Build triads from those scales and write chord progressions, then add seventh chords, extended chords and chord inversions with smooth voice leading. Next, cover melody and bass: melody writing, pentatonic scale ideas, basslines, arpeggios and counter melody. Rhythm deserves equal attention: time signatures, rhythm and syncopation, and swing and groove. Finally, add colour and drama with modes, the harmonic minor, borrowed chords, secondary dominants, modulation and key changes, and the principle behind them all, tension and release.

Start here

Free tools and quick guides

Subtopics in this hub

Each subtopic has a short explanation below. Where a full guide already exists on the site, it is linked; the rest are being written.

Arpeggios

An arpeggio plays the notes of a chord one after another instead of together. Arpeggios add movement to sustained harmony and are central to trance, synthwave and many piano parts. Vary the order (up, down, up and down), the rhythm and the octave range for different feels. Many synths and DAWs include arpeggiators that generate patterns from held chords, which you can then edit.

Basslines

A bassline connects the harmony and the rhythm. Simple basslines play chord roots on strong beats; more developed ones use passing notes, octaves, chord tones and rhythmic patterns that lock with the kick drum. In electronic music, the relationship between kick and bass is critical, so decide whether they hit together or alternate. Keep the bass in key and avoid notes that clash with the chord.

Borrowed chords

Borrowed chords come from the parallel key: for example, using chords from C minor while in C major. Common examples in a major key are the minor iv chord, the flat VI and the flat VII. They add emotional colour, often a bittersweet or dramatic feeling, without fully changing key. Use them for contrast at the end of a phrase or in a pre-chorus.

Chord inversions

An inversion places a note other than the root at the bottom of a chord. In first inversion, the third is lowest; in second inversion, the fifth is lowest. Inversions let chords move smoothly with fewer jumps, create descending or ascending bass lines, and change the weight of a chord. They are essential for voice leading.

Chord progressions

A chord progression is the sequence of chords in a section. Progressions built from the chords of one key sound coherent. Some patterns, such as I–V–vi–IV, appear in many popular songs because they balance stability and movement. Change the rhythm, the voicings and the order of familiar progressions to make them your own.

Read the full guide: How To Make Chord Progressions

Circle of fifths

The circle of fifths arranges the twelve keys so that each step clockwise moves up a perfect fifth and adds one sharp, or removes a flat. It shows closely related keys, helps you find relative minors, and explains why some chord movements, such as V to I, feel strong. Producers use it to plan key changes and find chords that work together.

Read the full guide: Harmony Theory Circle Of Fifths

Counter melody

A counter melody is a secondary melody that plays alongside the main one. It works best when it moves when the main melody holds, sits in a different register and uses contrasting rhythm. Counter melodies add depth to choruses and final sections without needing new chords.

Extended chords

Extended chords add notes beyond the seventh: ninths, elevenths and thirteenths. They create rich, sophisticated harmony common in jazz, neo-soul, R&B and lo-fi. Voicings matter: dropping the fifth or root, or spreading notes across octaves, keeps extended chords from sounding muddy, especially in lower registers.

Harmonic minor

The harmonic minor scale is the natural minor with a raised seventh degree. This creates a strong leading tone that pulls to the tonic and makes a major V chord possible in a minor key. It has a distinctive exotic or classical character because of the wide gap between the sixth and seventh degrees.

Key signatures

A key signature shows which sharps or flats apply throughout a piece, telling you the key. In a DAW, knowing the key helps you choose samples, tune drums and basses, and use scale highlighting in piano rolls. Each key signature is shared by a major key and its relative minor.

Major scale

The major scale follows the pattern whole, whole, half, whole, whole, whole, half steps. It sounds bright and stable and is the reference point for most Western theory. Chords built on each degree of the major scale give the familiar major, minor and diminished chords used in popular music.

Melody writing

Good melodies balance repetition and variation, have a clear shape with a high point, and fit the rhythm of the words or groove. Step-wise motion feels smooth; leaps add drama. Landing on chord tones on strong beats creates stability, while non-chord tones add tension. Singing ideas before playing them often gives more natural results.

Read the full guide: Chords And Melody Writing

Minor scale

The natural minor scale follows the pattern whole, half, whole, whole, half, whole, whole. It sounds darker or more emotional than major. Many genres, including trap, drill, drum and bass and techno, rely on minor keys. The harmonic and melodic minor scales alter the natural minor for stronger chord progressions and smoother melodies.

Modes

Modes are scales built by starting the major scale on different degrees. Dorian has a minor sound with a brighter sixth, popular in funk and house. Phrygian has a dark, flat second used in metal and some electronic music. Lydian has a dreamy raised fourth. Mixolydian sounds major with a flat seventh, common in rock and blues.

Modulation key change

A modulation moves the music to a new key. A common pop approach moves the final chorus up a half or whole step for a lift. Smoother modulations use a pivot chord that belongs to both keys. Key changes create energy and contrast but can feel forced if overused.

Pentatonic scale

Pentatonic scales use five notes and avoid the half-step intervals that can clash with chords. Major and minor pentatonic scales are easy to improvise with and fit over many progressions. They form the basis of blues, rock and much pop melody, and are a safe starting point for hooks.

Read the full guide: What is the Pentatonic Scale? Discover the Musical Magic!

Relative minor

Every major key shares its notes with a relative minor key, which starts on the sixth degree. C major and A minor use the same notes. Moving between relative keys changes the mood without introducing new notes, and many songs move between them from verse to chorus.

Rhythm and syncopation

Rhythm defines how notes fall in time. Syncopation places emphasis on weak beats or between beats, creating energy and surprise. Most groove-based genres rely heavily on syncopated bass, chords and drums. Contrast syncopated parts with steady ones, such as a four-on-the-floor kick, so the groove stays clear.

Secondary dominants

A secondary dominant is the V chord of a chord other than the tonic. In C major, D7 is the V of G, so it leads strongly to G. Secondary dominants add momentum and colour, temporarily pointing toward another chord. They are common in jazz, gospel, soul and pop.

Seventh chords

Seventh chords add a fourth note a seventh above the root. Major seventh chords sound smooth and lush; minor sevenths are mellow; dominant sevenths create tension that wants to resolve. They give progressions a richer, more sophisticated sound than triads.

Swing and groove

Swing delays every second subdivision, so straight eighths or sixteenths become long-short pairs. DAW swing or groove templates apply this automatically. Groove also comes from small timing shifts and velocity changes between parts. Hip hop, house and lo-fi rely on subtle swing to feel human.

Tension and release

Tension and release drive musical interest. Tension comes from dissonant chords, unresolved melodies, rising pitch, build-ups and rhythmic density; release comes from resolution to stable chords and simpler textures. Planning where tension peaks and releases gives a song shape.

Time signatures

A time signature tells you how many beats are in each bar and which note value counts as one beat. 4/4 dominates popular music. 3/4 and 6/8 give a waltz or rolling feel. Odd meters such as 5/4 and 7/8 create unusual, asymmetric grooves.

Read the full guide: How to Master Time Signatures in Fl Studio: Insider Secrets Revealed!

Voice leading

Voice leading is the way individual notes move from one chord to the next. Good voice leading keeps common notes in place and moves the others by small steps. It makes progressions sound smooth and connected, and is the main reason to learn inversions.

Worked example: making a simple progression more interesting

Start with a basic progression in C major: C – G – Am – F (I–V–vi–IV). It works, but it can sound generic.

Step Change Result
1 Use inversions: C – G/B – Am – F A smooth descending bass line
2 Add sevenths: Cmaj7 – G/B – Am7 – Fmaj7 A softer, richer sound
3 Borrow a chord: replace the last F with Fm on the final repeat A bittersweet moment before the next section
4 Add a secondary dominant: E7 before Am Stronger pull into the minor chord
5 Change the rhythm: anticipate chord changes by an eighth note More forward motion and groove

Each step uses one theory concept. You do not need all of them in one song; pick the ones that support the mood.

Theory in the DAW

Piano rolls make theory visual. Scale highlighting or folding shows which notes belong to the key, chord tools can stack triads and sevenths, and MIDI effects can generate arpeggios and strums. These are helpful, but learn what they do so you can break the rules deliberately. Training your ear alongside theory helps you recognise what you hear in references and recreate it quickly.

How much theory do producers need?

Many successful producers learned by ear, and you do not need to read notation to make music. However, a working knowledge of keys, chords and rhythm saves a lot of trial and error. It helps you communicate with musicians, write basslines that fit, choose samples in the right key, and understand why a section feels flat. Treat theory as a vocabulary that describes what already sounds good, not as rules that limit you.

Practice routine

  • Play or program the major and natural minor scale in a new key each week.
  • Learn the chords of that key and write one short progression using them.
  • Transcribe the chords and bassline of a song you like.
  • Write a melody over your progression using only chord tones, then add passing notes.
  • Experiment with one new concept, such as a borrowed chord or a mode, per session.

Theory and genre

Different genres emphasise different areas of theory. House and techno often use simple harmony with a strong focus on rhythm and groove. R&B, neo-soul and lo-fi lean on extended chords and voice leading. Trap and drill favour minor keys, dark intervals and melodic hooks over sparse harmony. Film and cinematic music use modulation, tension and orchestration. Studying the theory behind your favourite genre gives you shortcuts to its sound.

Intervals: the foundation underneath everything

An interval is the distance between two notes, measured in semitones. Scales, chords and melodies are all built from intervals, so learning them speeds up everything else. A minor third (three semitones) and a major third (four semitones) decide whether a chord sounds minor or major. A perfect fifth (seven semitones) is stable and strong, which is why power chords and many basslines rely on it. A tritone (six semitones) is unstable and tense, and it sits inside every dominant seventh chord, which explains why that chord wants to resolve. Small intervals such as seconds create tension when played together and smooth movement when played in sequence.

Chord functions

Within a key, chords tend to behave in three ways. Tonic chords (I, and often vi) feel like home. Subdominant chords (IV and ii) move away from home. Dominant chords (V and vii°) create tension that pulls back to the tonic. Thinking in functions rather than individual chord names helps you substitute chords: if a progression uses IV, try ii in its place for a softer move, or use vi instead of I for a less final landing. Most pop progressions are simply movements between these three functions.

Writing in minor keys

Minor keys are common in modern production, but the natural minor scale has no strong pull back to the tonic because its fifth chord is minor. Producers often raise the seventh note in the V chord, taking it from the harmonic minor, to create a stronger resolution. In genres that favour a darker, static mood, such as trap or techno, the natural minor’s weaker resolution is often preferred, and progressions may move between i, VI, III and VII without ever using a dominant chord.

Using theory to fix a section that feels flat

If a section sounds static, try one change at a time: move the bass to a chord inversion, add a seventh, shift the melody’s highest note to a new place, or change the chord rhythm. Small theoretical changes often solve problems that more sounds cannot.

Common mistakes

  • Writing chords and melodies in different keys by accident.
  • Using only root-position chords, causing jumpy voicings.
  • Overloading low registers with extended chord notes.
  • Ignoring rhythm while focusing on harmony.
  • Treating theory rules as limits instead of tools.
  • Copying settings from a tutorial without listening in your own track.

FAQ

Do I need theory to make music?

No, but it makes writing faster and helps you fix ideas that sound wrong.

What scale should I learn first?

Major and natural minor; most popular music uses them.

How do I find the key of a sample?

Use a key finder, then confirm by playing the root note along.

Do I need to read sheet music to produce?

No. Piano rolls and ear training cover most production needs, though notation can help with session musicians.

What key should I write in?

Any key works; choose one that suits the vocalist's range or the samples you use.

Put it into practice with our free tool, and bookmark this hub as new guides are added.

Categories
Audio Production

Songwriting and Arrangement: The Complete Guide Hub

Write better songs and turn loops into finished arrangements with structure, contrast and hooks. This hub collects every Solar Heavy Studios guide on songwriting in one place, grouped by subtopic, so you can learn in order or jump straight to the problem you have today.

A learning path through songwriting and arrangement

Start with song structure: how intros, verses, pre choruses, choruses, bridges and outros fit together, and how song length affects listeners. Learn to write hooks, lyrics and toplines, including writing to a beat and co writing. Then move to arrangement: arrangement energy, builds, drops, breakdowns and transitions, instrumentation choices, call and response, and repetition and variation. Use a reference arrangement to map sections, make quick song demos, and keep strategies ready for writer’s block.

Start here

Free tools and quick guides

Subtopics in this hub

Each subtopic has a short explanation below. Where a full guide already exists on the site, it is linked; the rest are being written.

Arrangement energy

Arrangement energy is the sense of intensity across a song. It rises and falls with the number of instruments, the register they play in, rhythmic density, volume and effects. Plot the energy of each section on a simple graph: most songs build through verses and pre-choruses to peak in choruses and the final section, with breakdowns giving relief. Contrast between sections makes high-energy moments feel bigger.

Breakdowns

A breakdown strips the arrangement back, often removing drums and bass, to create contrast and space. In electronic music it usually precedes a build and drop; in pop and rock it might be a quiet section before the final chorus. Breakdowns give listeners a rest and make the return of the full arrangement more powerful.

Bridges

A bridge is a contrasting section, usually once, often after the second chorus. It introduces new chords, melody or lyrical perspective so the final chorus feels fresh. Many songs use a key change, a half-time feel, or a stripped-back texture in the bridge. Not every song needs one; a breakdown or instrumental section can play the same role.

Builds

A build increases tension before a big moment, often a drop or chorus. Common tools include rising risers and noise sweeps, snare rolls increasing in speed, filters opening, pitch rising and the removal of low end. The length of a build should match the payoff; long builds to small drops disappoint listeners.

Call and response

Call and response alternates between two parts, where one phrase is answered by another. It comes from gospel, blues and many traditional musics, and appears in vocals, instruments and even drum fills. It keeps arrangements conversational and gives space between phrases.

Choruses

The chorus is usually the emotional and melodic peak, carrying the main hook and title. It often has a higher melody, fuller arrangement and repeated lyrics, making it easy to remember. Strong choruses contrast with verses through melody range, rhythm, chords or energy.

Co writing

Co-writing combines different strengths: one writer might bring the beat and chords, another the topline and lyrics. Agree on goals, respect ideas, and record everything. Settle splits at the end of the session, ideally on a split sheet, to avoid misunderstandings later.

Drops

A drop is the high-energy release after a build in electronic music, usually featuring the main bass and drum pattern. Its impact comes from contrast: a moment of silence or filtered sound before full-range energy returns. The drop often replaces the vocal chorus as the main hook.

Hooks

A hook is the most memorable part of a song, often a short melodic or lyrical phrase, but it can be a riff, a sound or a rhythm. Strong hooks are simple, repeated and placed prominently. Many songs combine several hooks, such as a vocal hook in the chorus and an instrumental hook in the intro.

Instrumentation choices

Choosing instruments shapes genre, mood and space in the mix. Fewer, well-chosen sounds usually make clearer arrangements than many layered ones. Assign each instrument a role and frequency range, and add or remove parts across sections to control energy.

Intros

The intro sets the mood and quickly establishes the hook or groove. Streaming listeners decide fast, so many modern songs keep intros short or start with the hook. DJ-friendly tracks use longer intros with drums for mixing. Match the intro to how the song will be heard.

Lyric writing

Good lyrics use concrete images, a clear point of view and natural phrasing that fits the melody. Write around a central idea or title, show emotions through details rather than stating them, and read lyrics aloud to check rhythm. Rhymes help memorability but should not force awkward words.

Outros

The outro ends the song, through a fade, a final hook, a stripped-back section or a hard stop. Endings should feel intentional. DJ edits often include outro drums for mixing, while radio edits may end quickly after the final chorus.

Pre chorus

A pre-chorus connects the verse to the chorus, building tension with rising melody, changing chords or increasing rhythm. It makes the chorus arrival feel stronger. Many pop songs rely on pre-choruses to create lift.

Reference arrangement

Reference arrangement means mapping the structure of a song you admire: marking section lengths, when instruments enter and leave, and where energy changes. Dragging the reference into your DAW and placing markers gives you a template to follow, without copying its music.

Repetition and variation

Repetition makes music memorable; variation keeps it interesting. Repeat hooks and grooves, but change small details on each repeat: add a harmony, alter a drum fill, switch an instrument, or vary the last line. Listeners notice both.

Song demos

A demo captures a song quickly so you can judge it, share it or pitch it. Focus on structure, melody, lyrics and basic arrangement rather than polish. A simple vocal with chords is enough to test whether a song works.

Song length

Many modern streaming songs are relatively short, often under about three and a half minutes, partly because listeners skip quickly. Genre matters: club tracks and progressive music are longer. Let the song's ideas determine length, cutting sections that do not add something new.

Song structure

Song structure is the order of sections. Common pop structures include verse, chorus, verse, chorus, bridge, chorus. Electronic music often uses intro, build, drop, breakdown, build, drop, outro. Structure gives listeners a sense of familiarity and progression.

Read the full guide: What is the Typical Song Structure Used in Popular Music?

Topline writing

A topline is the vocal melody and lyrics written over an instrumental. Toplining often starts with improvising melodies on nonsense syllables to find the flow, then fitting words. Strong toplines contrast rhythmically with the beat and leave space for breaths.

Transitions

Transitions connect sections smoothly: drum fills, risers, reverse cymbals, filter sweeps, drops in instrumentation, or vocal pickups. Good transitions signal change and keep momentum. Silence can be one of the most effective transitions.

Verses

Verses tell the story and set up the chorus. They usually have a lower or narrower melody, less dense arrangement and changing lyrics. The second verse often adds new elements to avoid repeating the first exactly.

Writer's block

Writer's block often comes from pressure or routine. Change something: a new instrument, a different tempo, a time limit, or writing in a new place. Start with small tasks, like writing a drum loop or one line, and allow imperfect ideas to exist before editing.

Read the full guide: How To Beat Writers Block

Writing to a beat

Writing to a beat means creating melody and lyrics over an existing instrumental. Listen several times to understand its sections and mood, freestyle melodies, then structure lyrics around the beat's natural phrases. Leave space where the beat has its own hooks.

Worked example: mapping a pop song

Section Bars Energy What changes
Intro 4 Low Hook melody on one instrument
Verse 1 16 Low to medium Vocal enters, sparse drums and bass
Pre-chorus 8 Rising Chords change faster, risers, drums build
Chorus 8 High Full drums, wide synths, vocal harmonies
Verse 2 16 Medium Keeps one chorus element, adds a counter melody
Pre-chorus 8 Rising Same as before with a new fill
Chorus 8 High Adds an ad-lib or extra layer
Bridge 8 Low New chords, stripped back
Final chorus 16 Highest Doubled, extra harmonies, possible key change
Outro 4 Falling Hook returns alone

Use this as a starting point and adjust bar lengths and sections to suit your genre.

From loop to song

Many producers get stuck with an eight-bar loop that sounds great but never becomes a song. To move forward, duplicate the loop across a full song length, then remove elements to create sections: take out drums for the intro, bass for the verse, add everything for the chorus. Once you have a rough structure, write new parts for sections that need contrast, such as a different chord progression for the bridge. Removing elements is often faster and more effective than adding new ones.

Writing process options

  • Lyrics first: start with a title or concept and write words, then find a melody.
  • Melody first: hum or sing melodies and fit words later.
  • Chords first: write a progression on piano or guitar and improvise over it.
  • Beat first: create an instrumental and topline over it.
  • Hook first: write the chorus first, then build verses that lead into it.

No method is correct. Switching methods is a reliable way to break habits and find new ideas.

Judging your own songs

It is hard to judge a song right after writing it. Take a break of a day or more, then listen once from start to finish without stopping, noting where your attention drops. Those moments usually point to sections that are too long, too repetitive or lacking contrast. Play the song to a trusted listener and watch their reactions rather than asking only for opinions. Compare the structure and energy with a reference track in the same genre.

Arranging for the vocal

When a song has vocals, the arrangement should support them. Leave space in the midrange during verses, so the lyrics are clear, and fill gaps between vocal phrases with instrumental responses rather than playing over the words. Lower or simplify busy parts under important lines, and save the densest arrangement for moments when the vocal is sustaining or absent. Automating small level changes in the backing track around the vocal keeps it in front without heavy processing.

Finishing and editing

Once the full structure exists, edit ruthlessly. Shorten intros that take too long to reach the hook, cut repeated sections that add nothing, and check that each chorus feels like a payoff. Make sure the title or main hook appears clearly. Then finalise the arrangement before mixing, because arrangement problems are much harder to fix with processing.

Melody and rhythm in hooks

The most memorable hooks usually combine a simple melodic shape with a distinctive rhythm. Try writing the rhythm of a hook first, by tapping or speaking it, and then adding pitches. Short phrases with space after them are easier to remember than long, continuous lines. Repeating a phrase with a small change on the final repetition, such as a higher note or a different last word, creates a satisfying sense of completion. Contrast the rhythm of the chorus hook with the verse melody, so listeners hear a clear change when the chorus arrives.

Prosody: matching words and music

Prosody is the relationship between lyrics and music. Stressed syllables should usually fall on strong beats, and the emotional meaning of a line should match the melody and chords underneath. A hopeful line might rise in pitch; a resigned one might fall. When a lyric feels awkward to sing, the stresses are often in the wrong place. Speak the line naturally, note which syllables you emphasise, and adjust the melody or the words so they agree.

Building a writing habit

Songwriting improves with volume. Writing regularly, even short ideas, builds skill faster than waiting for inspiration. Keep a running list of titles, phrases and concepts on your phone, and record voice memos of melodies as soon as they appear. Set a regular session where the only goal is to finish a rough demo, however imperfect. Over time you will have a large pool of ideas to develop, and finishing will become a habit rather than an event.

Arrangement for different listening contexts

Consider where the song will be heard. Club tracks need DJ-friendly intros and outros and long, clear sections. Songs aimed at short-form video benefit from a hook that works in a few seconds. Radio and streaming favour strong hooks early. Film and game music must support the picture or gameplay. Adapting the arrangement for each context, through edits or alternative versions, gives one song more opportunities.

Song section checklist

  • Does the intro establish the mood and reach the first vocal or hook quickly enough?
  • Does each verse add new information, lyrically or musically?
  • Does the pre-chorus build tension that the chorus releases?
  • Is the chorus clearly the peak, with the title or main hook?
  • Does the bridge or breakdown provide real contrast?
  • Does the final chorus feel bigger than the earlier ones?
  • Does the ending feel intentional?

If any answer is no, revise that section before adding production detail. Structural fixes are faster now than after mixing.

Rewriting

First drafts rarely contain the best version of a song. Rewrite weak lines, test alternative chorus melodies, and try the song at a different tempo or key. Keep earlier versions, because sometimes the original instinct was right.

Compare the versions side by side after a break, and choose the one that best serves the song’s core idea.

Common mistakes

  • Looping the same eight bars without building a structure.
  • Making every section the same energy level.
  • Waiting too long to reach the hook.
  • Overcrowding arrangements so the vocal has no space.
  • Leaving splits undiscussed after co-writing sessions.
  • Copying settings from a tutorial without listening in your own track.

FAQ

How do I turn a loop into a song?

Map sections, then add and remove elements to create contrast.

What is a common song structure?

Intro, verse, chorus, verse, chorus, bridge, chorus, outro.

How do I beat writer’s block?

Set limits, use references and finish small ideas.

How long should a song be?

As long as it stays interesting. Many streaming-era pop songs run around two and a half to three and a half minutes.

Should I write lyrics or music first?

Either works. Try both and use whichever produces better ideas for you.

Put it into practice with our free tool, and bookmark this hub as new guides are added.

Categories
Audio Production

How to Use Slant Rhymes in Song Lyrics

Here is how to use slant rhymes: pair words that share some sounds but not all, usually the stressed vowel or the final consonant (time and line, heart and hard), and place them where a perfect rhyme would feel forced or predictable. Slant rhymes give you far more word choices, so you can say what you mean instead of what rhymes. The free rhyme finder lists perfect and near rhymes side by side, grouped by syllable count, with a syllable counter for whole lyrics.

Perfect rhymes vs slant rhymes

Type What matches Examples
Perfect rhyme Every sound from the last stressed vowel to the end cat / hat, light / night
Vowel (assonant) slant rhyme The stressed vowel, with different consonants after it time / line, rain / made
Consonant slant rhyme The ending consonant, with a different vowel heart / hurt, black / block
Mixed near rhyme Similar vowel and similar consonant heart / hard, home / phone

Slant rhymes are also called near rhymes, half rhymes or imperfect rhymes. They are everywhere in pop, rock, hip-hop and folk, because singing blurs small differences in consonants and listeners hear the vowel match as a rhyme.

Why songwriters rely on slant rhymes

  • More honest lines. Perfect rhymes for a word are limited. Searching near rhymes opens dozens of options, so the meaning leads and the rhyme follows.
  • Less predictable endings. When a listener can guess the rhyme word before it arrives, the line loses impact. A near rhyme keeps the ear interested.
  • Natural, conversational tone. Many great lyrics sound like speech; forced perfect rhymes make them sound like greeting cards.
  • Multisyllabic flows. In rap especially, matching vowel sounds across several syllables matters more than matching every consonant.

Step 1: Write the line you mean first

Start with what you want to say, not the rhyme. Write the first line of the pair in plain words, then underline the word at the end you will rhyme against. If that word has few rhymes, consider moving a different word to the end of the line before you go searching.

Step 2: Find the stressed vowel

Say the end word slowly and find the vowel that carries the stress. In “together”, the stress falls on the second syllable, so the important sound is the “eh” of “-geth-“. Slant rhymes need to match that stressed vowel more than anything else; matching an unstressed ending alone will not sound like a rhyme.

Step 3: Search perfect and near rhymes together

Type the word into the rhyme finder and press Find rhymes. You get perfect rhymes and near or slant rhymes, grouped by syllable count. Useful features while writing:

  • Click any result to look up its rhymes and follow a chain of ideas.
  • Filter by syllables so the new word fits the rhythm of the line.
  • Turn on consonance to see words that share the ending consonant, which is the second family of slant rhymes.

The dictionary of about 20,000 common English words is built in and loads once in your browser, so lookups are instant and nothing is sent to a server.

Step 4: Choose by meaning, then by sound

From the list, pick words that serve the story first. Among those, prefer the one whose vowel matches most strongly when sung. Sing both lines over the melody rather than reading them; a pairing that looks weak on paper often sounds fine when held on a note, and the reverse happens too.

Step 5: Match the syllables

A good rhyme can still fall flat if the lines have different rhythms. Paste your lyrics into the rhyme finder’s syllable counter to see the count for every line. It looks up each word in its pronunciation dictionary and estimates words it does not know from their spelling. Lines that answer each other across verses usually work best with similar counts and stress patterns, so use the counts to spot a line that is too long or too short for the melody.

Worked example

First line: “I keep your number in my phone”. Perfect rhymes for “phone” (alone, stone, known, bone) push toward familiar ideas. Searching near rhymes adds words like “home”, “cold”, “go” and “road”, which share the long “o” vowel. If the song is about distance, “I still don’t know the way back home” keeps the meaning and lands a natural slant rhyme. Check the syllable counter: eight syllables in each line, so both fit the same melodic phrase.

Where to place slant rhymes

  • Verses carry story and detail, so the freedom of near rhymes helps most here.
  • Choruses often benefit from at least one strong perfect rhyme for a satisfying, memorable landing.
  • Internal rhymes inside a line, using assonance, add flow without drawing attention to themselves.
  • Contrast works: a section of slant rhymes followed by a perfect rhyme makes the perfect one hit harder.

Three exercises to train your rhyme ear

  1. Rhyme ladder. Pick a common end word, look it up, then click a near rhyme and look that up. After five steps, write a couplet using the first and last words. It forces you away from the obvious pairs.
  2. Rewrite a cliché. Take a tired pair such as fire and desire and replace one word with a slant rhyme that changes the image. Notice how the line becomes more specific.
  3. Vowel-only verse. Write four lines where every end word shares the same stressed vowel but no two share the final consonant. Sing it and listen to how connected it still sounds.

Keep the results in a notebook or notes app; good near-rhyme pairs you discover in practice often turn up later in real songs. Ten minutes of this before a writing session warms up the same instincts you use when a line will not land.

Common mistakes

  • Matching only unstressed endings. “Happy” and “money” share “-y” but not the stressed vowel; it rarely reads as a rhyme.
  • Choosing sound over sense. A rhyme that changes your meaning costs more than an imperfect one.
  • Ignoring rhythm. Rhyming lines with very different syllable counts can feel off even when the words match.
  • Never singing the draft. Always test the pair on the melody.
  • Using only slant rhymes in the hook. Hooks usually need a firm landing somewhere.

FAQ

What is a near rhyme?

A near rhyme, also called a slant rhyme, shares some sounds but not all, usually the vowel or the final consonant, like time and line or heart and hard.

What is the difference between a perfect rhyme and a slant rhyme?

A perfect rhyme matches every sound from the last stressed vowel to the end. A slant rhyme matches only part of it.

Do professional songwriters use slant rhymes?

Yes. They are common in every popular genre, because singing smooths over small differences in consonants.

How does the syllable counter work?

It looks up each word in a built-in pronunciation dictionary and counts its vowel sounds, estimating unknown words from their spelling.

Keep building your craft with our songwriting guide, see the definition of half rhyme, and if you write for rap, our tips on recording rap vocals pick up where the lyric leaves off. Need a title once the lyric is done? Try the song name generator. Stuck on a line right now? Open the free rhyme finder.