Categories
Archive

Top Picks Best Microphone Stands

Top picks for the best microphone stands include the On-Stage MS7701B, K&M 210/9, and Hercules MS533B. These stands are durable, versatile, and affordable.

As an Amazon Associate I earn from qualifying purchases.

A good microphone stand is essential for recording and performing music, speeches, and podcasts. There are various styles and models of microphone stands available, but finding the best one requires considering factors such as stability, adjustability, and portability. The On-Stage MS7701B is a popular choice, thanks to its sturdy build and adjustable height.

The K&M 210/9 is also a great option, offering a high level of stability, adjustability, and convenience. The Hercules MS533B is another top pick, designed with a stable tripod base and a versatile boom arm. We’ll dive into the details of each stand, helping you choose the perfect one for your needs.

Different Types Of Microphone Stands

Discover the top picks for the best microphone stands available in different types, including tripod, boom, and desk stands. These stands offer versatility, stability, and durability to improve the quality of your audio recordings and performances.

Microphone stands are essential for recording and live performances. They come in different types and sizes, each designed for specific purposes. In this article, we will discuss the different types of microphone stands and their uses.

Desk Stands

These types of stands are ideal for podcasters, vloggers, and anyone who needs a flexible and compact setup. Desk stands are designed to keep your microphone stable on a desk or table while providing adjustable height and angle options. They come in varying sizes, styles, and prices, making them a popular choice for beginners and professionals alike.

Boom Stands

Boom stands, also known as floor stands, are the most common type of microphone stands. They are versatile and can be used for a wide range of applications, including live performances, recording, and broadcasting. Boom stands feature an adjustable arm that extends from the main pole, giving you greater control over the position of your microphone. They are also available in various sizes and price ranges, making them suitable for all budgets.

Floor Stands

Floor stands, also known as tripod stands, are designed for stability and balance. They have three legs that provide a sturdy base for heavy microphones. Floor stands are an excellent choice for recording studios, where microphones need to be kept in place for long hours. They come in different sizes, ranging from small to large, making them suitable for all types of microphones. In conclusion, choosing the right microphone stand is crucial for any recording or live performance. Desk stands, boom stands, and floor stands are the most common types available in the market. Depending on your specific needs, each type of stand has its unique features and benefits. So, make sure to consider these factors when choosing the right stand for your microphone setup.
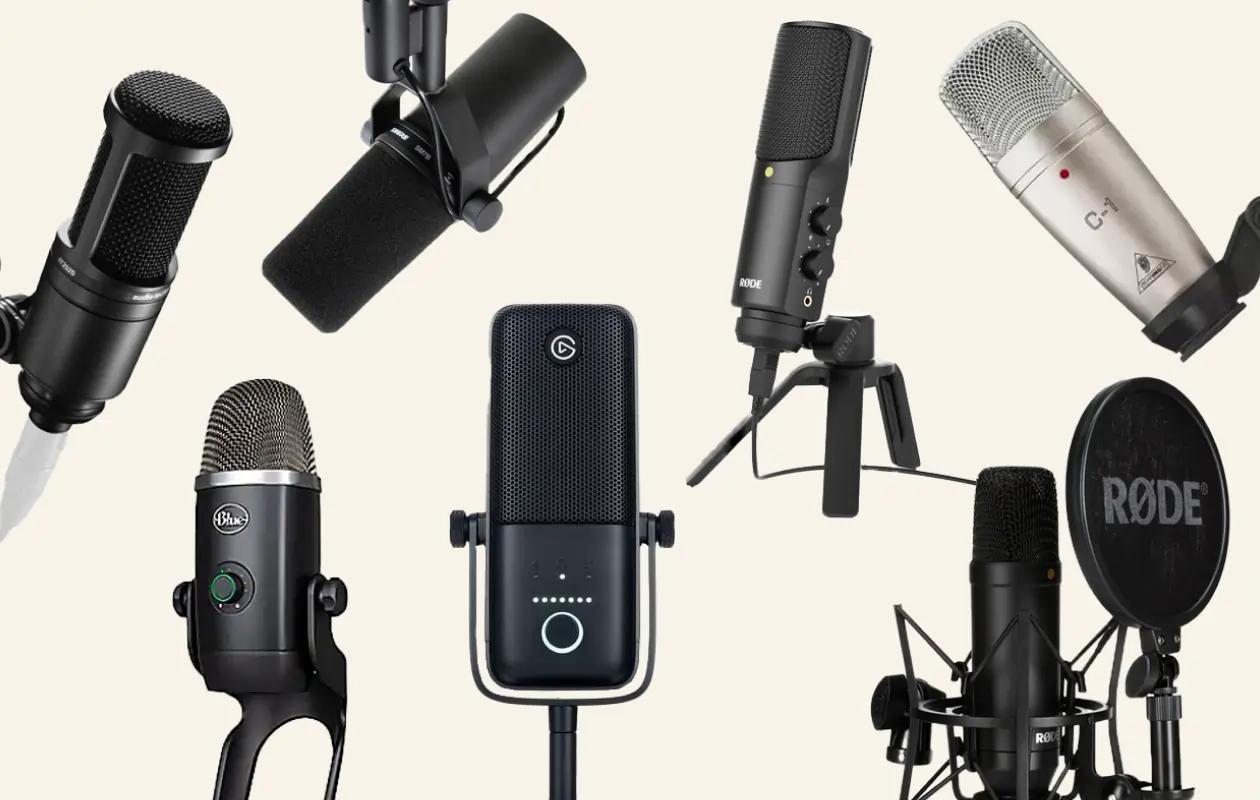
Top Picks Best Microphone Stands

Credit: riverside.fm

Features To Consider When Purchasing A Microphone Stand

Choosing the best microphone stand can enhance the sound quality of your performance. Important features to consider include stability, adjustability, portability, and compatibility with your microphone. Check out our top picks for the best microphone stands on the market.

As a musician or content creator, investing in a high-quality microphone stand is crucial for achieving the perfect sound and recording quality. But with so many options available on the market, it can be overwhelming to decide which one to choose. To make your decision easier, we have compiled a list of our top picks for the best microphone stands available and important features to consider when purchasing. Let’s dive in and explore the key features in detail:

Durability

When it comes to durability, it’s essential to select a stand that can withstand the test of time and continuous use. Consider the material used to construct the stand, with steel being the most popular due to its sturdiness and resilience. It’s also essential to examine the stand’s weight and ensure it’s not too heavy to carry around conveniently but sturdy enough to ensure stability.

Weight Capacity

The weight capacity of the microphone stand is another critical feature to consider. You want to ensure that the stand can hold the weight of your microphone and any additional equipment, such as a pop filter or shock mount. Check the weight capacity specification of the stand before making your purchase to ensure you have the perfect fit for your equipment.

Adjustability

Adjustability is an important feature to consider in a microphone stand, as it allows you to position your mic at the perfect height and angle for the sound you want to achieve. Consider stands that are adjustable in height, arm length, and pivot points. It’s important to ensure that the stand is easy to adjust and won’t move or slip out of place when you set it.

Portability

Portability is an essential feature if you plan to use your microphone stand on location or in different settings frequently. Look for stands that are lightweight, compact, and easy to disassemble and reassemble. This will make it easy to carry the stand around and set it up wherever you want without any hassle. In conclusion, when purchasing a microphone stand, you must prioritize durability, weight capacity, adjustability, and portability. Take your time to review these features before making a purchase to ensure you have the perfect fit for your needs. With our top picks for the best stands and evaluating the features to consider mentioned above, you can guarantee you will have the perfect microphone stand for your recording needs.

Top 5 Microphone Stands On The Market

These top 5 microphone stands are the perfect choices for any musician or podcaster. They offer stability, durability, and easy adjustment for the optimal recording experience. From the On-Stage MBS5000 to the K&M 210/2, these stands are sure to meet all your needs.

Top 5 Microphone Stands on the Market When it comes to recording high-quality audio, having the right microphone stand can make all the difference. A good microphone stand can provide stability, adjustability, and versatility, allowing you to capture audio in a variety of different settings. In this article, we’ll be highlighting the top 5 microphone stands on the market today, each from a different top-rated brand. Brand 1: On-Stage MS7701B The On-Stage MS7701B is a popular choice for musicians and podcasters alike. This stand is made from high-quality steel and features a durable tripod base for stability. It also has a height adjustment range from 36-63 inches, making it a great choice for both sitting and standing positions. Additionally, it has a telescoping boom arm that can be adjusted from 19-33 inches, providing even more versatility. Brand 2: K&M 210/9 The K&M 210/9 is another top-rated microphone stand known for its durability and versatility. This stand is made from high-quality steel and features a heavy-duty base for stability. It also has a height adjustment range from 36-63 inches, as well as a telescoping boom arm that can be adjusted from 18-30 inches. Additionally, it has a unique anti-vibration system that helps reduce unwanted noise and vibrations. Brand 3: Ultimate Support TS-100B The Ultimate Support TS-100B is a popular choice for those looking for a high-end microphone stand. This stand is made from sturdy aluminum and features a unique tripod design for maximum stability. It also has a height adjustment range from 3-9 feet, making it a great choice for performances and large recording spaces. Additionally, it has a patented TeleLock system that allows for easy and secure height adjustment. Brand 4: Atlas Sound MS-25 The Atlas Sound MS-25 is a professional-grade microphone stand known for its durability and reliability. This stand is made from high-quality steel and features a heavy-duty cast iron base for stability. It also has a height adjustment range from 35-63 inches, as well as a 10-inch adjustable boom arm. Additionally, it has a unique clutch system that allows for easy and secure height adjustment. Brand 5: Hercules MS533B The Hercules MS533B is a top-rated microphone stand known for its innovative design and ease of use. This stand is made from high-quality aluminum and features a tripod base for stability. It also has a height adjustment range from 42.5-71 inches, making it a great choice for both sitting and standing positions. Additionally, it has a unique EZ Mic Clip that allows for easy and secure microphone placement. Final Thoughts Whether you’re a musician, podcaster, or recording engineer, having a high-quality microphone stand is essential for capturing great audio. The top 5 microphone stands on this list are all from top-rated brands and have been chosen for their durability, versatility, and high-quality construction. With any of these stands, you can be confident that you’re getting a product that will provide years of reliable performance.

Top Picks Best Microphone Stands

Credit: medium.com

Brand 1

Brand 1 has been manufacturing high-quality microphone stands for professionals for several years. Their products are known for their durability, functionality, and convenience. If you are looking for a reliable and sturdy microphone stand for your studio or stage performance, Brand 1 offers some of the best options on the market.

Description

Brand 1’s microphone stands are made of high-quality materials that ensure their longevity. Most of their models have a stable tripod base that prevents them from toppling over, even when under pressure. Their microphone clips are compatible with most microphone brands and sizes. Additionally, they are lightweight, easy to assemble and disassemble, making them perfect for on-the-go musicians and performers.

Pros And Cons

ProsCons
Sturdy and durableStable tripod baseLightweight and portableCosts more than some competitorsSome models may not be suitable for heavier microphones

Price

Brand 1’s microphone stands are not the cheapest, but they are worth the investment. Prices start at around $50 and can go up to $100 depending on the model and features.

If you want a reliable and high-quality microphone stand that can withstand years of use, Brand 1 is a fantastic choice. Their products are durable, functional, and convenient, making them perfect for busy professionals who need equipment that can keep up with their demanding schedules.

Brand 2

Brand 2 offers some of the best microphone stands on the market. From vertical to boom stands, their top picks provide sturdy construction, adjustable heights, and versatility for professional and amateur performers alike.

Brand 2 offers a range of sturdy and reliable microphone stands that are perfect for both amateur and professional use. The high-quality stands are designed to provide optimal support and stability for your microphones, so you can focus on delivering your best performances without any distractions. In this section, we will review the Description, Pros and Cons, and Price of the top picks of microphones stands from Brand 2.

Description

Brand 2 offers a diverse range of microphone stands to meet the varying needs and preferences of different users. The stands are made from durable materials such as steel, aluminum, and plastic, and come in different designs such as tripod, boom, and desktop stands. Many of the stands feature adjustable height, swivel mount, and cable management systems to enhance convenience and flexibility during use.

Pros And Cons

When it comes to the pros of Brand 2 microphone stands, here are some of the key advantages:

  • Sturdy and durable design provides optimal stability for the microphone during use.
  • Adjustable height, swivel mount, and cable management systems enhance convenience and flexibility.
  • The budget-friendly price range makes these stands a great value for money proposition.

Despite the many benefits of Brand 2 microphone stands, there are a few cons to keep in mind:

  • Some users have reported issues with the tightening mechanism on certain stands.
  • The plastic components on some models may feel flimsy to some users.

Price

Brand 2 offers an affordable range of microphone stands that cater to the needs of different users. The cost of the stands varies based on factors such as the design, material, and features. In general, the stands are priced between $15 and $50, making them an attractive option for budget-conscious individuals or those looking for a cost-effective alternative to more expensive brands. In summary, Brand 2 microphone stands are a reliable and affordable option for users looking for high-quality stands that combine durability, flexibility, and convenience. With their adjustable height, swivel mount, and cable management systems, these stands are ideal for a wide range of applications, from podcasting and home recording to live performances and studio sessions. Despite a few minor drawbacks such as issues with the tightening mechanism and plastic components, the pros of these stands far outweigh the cons, making them a great value for money proposition.

Top Picks Best Microphone Stands

Credit: emastered.com

Brand 3

Brand 3 offers an impressive selection of microphone stands for professionals and beginners alike. With sturdy construction, innovative designs, and versatile features, their top picks are highly recommended for excellent performance.

Brand 3 offers some of the best microphone stands in the market, catering to the needs of both professionals and beginners. The speciality of Brand 3 stands is their versatility and adjustability. They aim to provide maximum comfort and convenience to the user, making them a popular choice among musicians and podcasters.

Description

Brand 3 microphone stands are made with high-quality materials, ensuring durability and stability. They are designed to provide maximum flexibility, making them suitable for all kinds of microphones regardless of their size and weight. The stands offer height adjustment options, allowing the user to set them up at the perfect height according to their needs. Brand 3 stands come with quality grip pads that ensure the stand doesn’t slip or slide off the desk or table.

Pros And Cons

Brand 3 stands are well-loved for their flexibility and adjustability, making them a favourite of musicians and podcasters. They are durable, sturdy, and able to hold heavy microphones. The stands come with several height adjustment options, making them perfect for both seated and standing performances. However, some users find the stands to be a little heavier than other models, which can be inconvenient if you plan on carrying them around. Some customers have reported difficulty when adjusting the stands, which can be frustrating if you are in a hurry.

Price

Brand 3 microphone stands are slightly more expensive than other brands available in the market. However, considering their durability and versatility, the price is justified. The price range of Brand 3 stands starts from $50 and goes up to $150, depending on the model and features. In conclusion, if you are a musician or a podcaster looking for a sturdy, versatile, and adjustable microphone stand, then Brand 3 has plenty of options for you to choose from. They may be a little heavy and pricey, but the convenience and quality they offer make them worth the investment.

Brand 4

Brand 4 offers a range of sturdy and reliable microphone stands that are perfect for various settings. With features such as adjustable height and sturdy base, these stands are great top picks for musicians and podcasters alike.

Brand 4 microphone stands are known for their durability and versatility. The brand has been in the industry for several years, and with its innovative designs and features, its products have earned a spot among the top picks of microphone stands. Here, we discuss the description, pros and cons, and price of their best microphones stands in the market.

Description

Brand 4 microphone stands are built to last. They are constructed using high-quality materials that can withstand the wear and tear of constant use. Most of their microphone stands come with adjustable height options that can cater to different users, from standing performers to seated podcasters. Additionally, these stands have sturdy bases that provide stability and prevent tipping.

Pros And Cons

Like any other brand, Brand 4 microphone stands have their own set of advantages and disadvantages. One of the pros is the brand’s reputation for producing quality products. These stands are also adaptable to different situations and settings. However, the downside of using Brand 4 microphone stands is their price. They are comparatively expensive compared to other microphone stands in the market, which might not fit the budget of some users.

Price

The price of a Brand 4 microphone stand ranges from $50 to $200, depending on the model and features. While they may be more expensive compared to other brands, their durability and versatility justify the cost. Additionally, investing in a high-quality microphone stand can prevent future expenses from having to replace a broken or low-quality stand. Overall, Brand 4 microphone stands are a reliable and worthwhile investment for anyone in need of a sturdy and adjustable stand. While they may not fit everyone’s budget, the quality and durability of these stands make them a top pick in the industry.

Brand 5

Brand 5 offers top-quality microphone stands that are durable, easy-to-use, and affordable. Whether you need a desktop stand, floor stand or boom arm stand, you can count on Brand 5 to meet your needs. Check out their best picks for the top microphone stands on the market.

Brand 5 offers high-quality microphone stands that cater to the needs of professional and amateur musicians alike. Their mic stands are made to last and provide optimal ease of use during performances and recording sessions. In this post, we’ve reviewed the top picks of the best microphone stands in the market, and Brand 5 has made it to our list. Here’s a closer look at their product:

Description

Brand 5’s microphone stands are constructed with durable materials that ensure longevity and stability. The stands feature adjustable heights, allowing users to set the perfect height and angle for their microphones. The stands also come with rubber feet to prevent slipping, which is a crucial feature during performances or recordings.

Pros And Cons

Pros:

  • Durable construction provides stability during performances.
  • Adjustable heights and angles offer flexible microphone positioning.
  • Compatible with various microphone sizes and weights.

Cons:

  • Higher priced than some other microphone stands on the market.
  • Some users may find the stands to be heavy, making them challenging to transport.
  • May require some time to set up and adjust

Price

Brand 5’s microphone stands range in price from $80 to $200, depending on the model and features. While they may be a bit higher priced than some other options, the investment is worth it for the durability and stability they provide during performances and recording sessions. In the long run, the high-quality construction can save you money in replacement costs. In conclusion, Brand 5 provides some of the best microphone stands in the market, offering benefits such as durability, flexibility, and stability. While they may come with a higher price tag, their construction quality serves as an investment for musicians who want long-lasting equipment.

Frequently Asked Questions For Top Picks Best Microphone Stands

What Microphone Stand Is Best?

The best microphone stand depends on your needs. If you’re using it for live performances, a boom stand is reliable. For recording, a shock mount stand with an adjustable height is a good option. Consider the material, weight, and compatibility with your microphone when choosing a stand.

How Do I Choose A Microphone Stand?

Choose a microphone stand that suits your microphone’s weight, size, and type. Look for stands that are adjustable in height, have a sturdy base, and are easy to set up. Consider the type of microphone you have – dynamic microphones require less stand flexibility than condenser microphones.

Check the stand’s cable management features and ensure it is compatible with your microphone’s mount.

What Mic Stand Do Podcasters Use?

Podcasters generally use boom arm stands or desk-mounted stands for their microphones. Popular options include the Rode PSA1, Heil PL-2T, and Samson MBA38. These stands allow for flexibility in positioning and are designed to reduce unwanted noise and vibrations.

What Microphone Stand Do Streamers Use?

Streamers commonly use mic stands with a boom arm for flexibility in positioning the microphone. The Rode PSA1 and the Blue Compass are popular choices. The stand should also be sturdy and adjustable to fit the streamer’s setup.

Conclusion

Overall, a great microphone stand can make a difference in your sound quality and performance. We hope our top picks helped you find the perfect one for your needs. Remember to prioritize factors like stability, adjustability, and portability when making your decision.

With the right microphone stand, you can take your recordings or live performances to the next level. Happy singing, speaking, or playing!

Categories
Archive

Ideas for Musician Business Cards

Musician business cards should be visually appealing and highlight the essential information about the artist, such as contact information and genre of music. As a musician, having a business card is an essential tool to promote yourself and your music.

It is an inexpensive and convenient way to provide potential fans, clients, and industry professionals with your contact information. Unlike digital forms of networking, a physical business card can leave a lasting impression and build a personal connection. When creating a musician business card, it is essential to consider the card’s overall design, such as incorporating graphics and color schemes that reflect your musical style.

It is also crucial to include critical information about yourself, such as your name, contact information, and the genre of music you play. By following these tips, you can create an effective musician business card that will help you promote your music and connect with your audience.

Ideas for Musician Business Cards

Credit: zapped.to

Choose The Right Information

Selecting the right details for musician business cards is crucial for creating an impactful first impression. Incorporating a logo, contact information, and social media handles can help make a memorable card that reflects the musician’s brand.

Include Your Contact Information

When it comes to musician business cards, it’s important to choose the right information to include. First and foremost, your contact information is paramount. Make sure to include your full name, phone number, email address, and website (if you have one). Avoid using complicated or ambiguous fonts, as clarity is key.

Add Social Media Handles

In addition to your contact information, it’s important to include your social media handles. This allows potential fans and clients to connect with you on a personal level. Make sure to include handles for platforms such as Twitter, Instagram, and Facebook. This not only helps you connect with your audience but also helps with branding.

Mention Your Genre

Your business card should also mention your genre. This helps potential clients or fans know what kind of music you create. Whether you’re a pop singer, heavy metal band, or classical pianist, be sure to add your genre to your business card. This information helps with marketing and promotions.

Conclusion

Creating a musician business card is vital for anyone in the music industry. It’s essential to choose the right information to include, such as your contact information, social media handles, and genre. With the right design and information, your business card can serve as your calling card and help you stand out in an incredibly crowded industry.

Ideas for Musician Business Cards

Credit: www.pinterest.com

Incorporate Unique Designs

Make your musician business cards stand out with unique designs that showcase your personality and style. Consider incorporating music-related graphics, custom artwork or fun shapes to make a lasting impression on potential clients and fans.

Create A Memorable Logo

A musician’s business card is a reflection of their personality and brand. One way to make your card stand out is by incorporating a memorable logo. A logo is a visual representation of your brand and music. It can consist of your name stylized in a unique way or a simple icon that represents your musical style. Consider using bold and contrasting colors to make your logo pop. Keep in mind that your logo should be easy to recognize and memorable.

Experiment With Fonts And Colors

Another way to make your musician business card unique is by experimenting with fonts and colors. Play around with different font styles that capture the essence of your music. You can use a mix of bold and italic fonts to create a visual hierarchy. For colors, try to incorporate your brand’s color scheme or use colors that complement each other. However, avoid using too many colors as it can make your card appear cluttered.

Table: Examples Of Font Styles And Colors

Font styleColor
Narrow Sans SerifRed & black
Handwritten scriptBlue & white
Thick SerifYellow & gray

Use Creative Shapes And Textures

Don’t be afraid to think outside the box and use creative shapes or textures for your musician business card. You can opt for a die-cut design that mimics your guitar or an interesting texture like woodgrain or metallic foiling. These unique design elements will make your card more memorable and make it stand out from the standard rectangular business cards. Incorporating unique designs into your musician business card is crucial to making a lasting impression on potential clients and fans. A memorable logo, experimenting with fonts and colors, and using creative shapes and textures can help you achieve this. Remember to keep your design elements cohesive and reflective of your brand and music style.

Highlight Your Skills

Showcase your musical talents by highlighting your skills on your business card. List your instruments, genres, and notable achievements to give potential clients a snapshot of your abilities and experience. Make sure to include your contact information for easy booking.

As a musician, it’s important to create an impactful first impression when networking or promoting your music. One of the most effective ways to do this is by having a well-designed business card that highlights your skills. Here are some ideas for what to include on your musician business card under the subheading ‘Highlight Your Skills.’

List Your Musical Accomplishments

Showcasing your musical accomplishments on your business card can set you apart from the competition. List your most notable ones, such as albums, songs, or performances. For example:

  • Performed at the Sydney Opera House
  • Released three studio albums
  • Headlined the 2019 Coachella Music Festival

Mention Any Certifications Or Awards

Including any certifications or awards you’ve earned on your business card can further establish your credibility as a musician. For instance:

Certifications:Music Teacher Certification from XYZ University
Awards:Winner of Best New Artist at the 2020 Grammy Awards

In summary, designing a musician business card that highlights your skills is a great way to make a lasting impression. Consider including your musical accomplishments, certifications, and awards on your card to stand out from the crowd.

Make It Functional

Need inspiration for your musician business card designs? Try making them more functional by including QR codes linking to your social media and music streaming platforms, or adding your signature song lyrics for a personal touch.

As a musician, your business card speaks volumes about your brand and the quality of services you offer. It is a reflection of your art and can make or break the first impression that prospective clients or collaborators have of you. Therefore, when designing your musician business cards, it’s essential to prioritize functionality as much as aesthetics. Here are some ideas to help you create a functional musician business card.

Choose Legible Font Sizes

When selecting fonts for your musician business cards, make sure they are easy to read. Choose legible font sizes that are not too big or too small to read. Your name and contact information should be the most prominent text on the card, and they should be easy to read at a glance. Avoid using too many fonts on your card to keep it looking neat and professional.

Consider Double-sided Cards

Consider using double-sided musician business cards when designing your card. This can provide you with more room to showcase your branding elements, such as your logo, tagline, or unique selling proposition. On the back of the card, you might list your services, upcoming gigs, or social media handles. Using double-sided business cards can also distinguish you from your competitors and make your card stand out in a stack of cards.

Other Design Considerations

In addition to choosing legible fonts sizes and considering double-sided cards, there are other design elements you should keep in mind. Some of these include:

  • Choosing a color scheme that reflects your brand and genre of music
  • Using high-resolution images or illustrations
  • Avoiding clutter and using white space effectively to allow the design elements to breathe
  • Choosing a card material that aligns with your brand and is durable enough to withstand wear and tear

Conclusion

When designing musician business cards, always prioritize functionality, and aesthetics should come second. Choose legible font sizes, consider double-sided cards, and keep other design considerations in mind to create a card that accurately reflects your brand and entices prospective clients and collaborators. Remember that your business cards are your first impression, so make it count!

Include A Call-to-action

Including a clear and concise call-to-action on your musician business card can encourage potential clients to take the next step. Consider adding information about your services, website or social media handles, and a message prompting them to reach out for more information.

Include a Call-to-Action – Ideas for Musician Business Cards Including a call-to-action (CTA) on your musician business card is an excellent way to encourage your potential clients to take action. A business card with a CTA influence your clients to follow through with the desired action. Whether it’s booking your services, contacting you for more information, or visiting your website, a strong CTA can really make a big difference.

Prompt Your Clients To Take An Action

When designing your musician business card, always include a CTA that prompts your clients to take action. This makes it crystal clear what the cardholder should do, and what steps they should take next. Some CTAs can include:

  • Contact us now
  • Visit our website
  • Follow us on social media
  • Book your appointment today
  • Subscribe to our mailing list for more information

Use Action-oriented Language

When creating your CTA, use action-oriented language, such as “book now” or “visit our website,” to encourage your potential clients to take action. This kind of language helps to convey a sense of urgency as well as a call to action.

Ensure Each Heading Adheres To Html Syntax

Always ensure that each H3 heading adheres to HTML syntax, such as using the correct opening and closing tags as well as correctly formatting the heading text. This makes it easier for search engines to read and index your content, which can benefit your SEO tactics. In conclusion, including a call-to-action on your musician business card is essential for converting potential clients into actual clients. Remember to use action-oriented language and adhere to HTML syntax to optimize your chances of success.

Ideas for Musician Business Cards

Credit: www.pinterest.jp

Order High-quality Prints

Order high-quality prints of your musician business card design to promote yourself effectively. Consider adding your instrument or band image to make it instantly recognisable. Make sure to include all your essential contact information and social media handles.

If you’re a musician trying to make it big in the industry, having the perfect business card can make all the difference. It’s not just about sharing your contact information, but it’s also a representation of yourself and your brand. So, when it comes to ordering your business cards, it’s important to make sure they are high-quality prints. Here are some ideas to consider when placing your print order.

Choose A Reputable Printer

The first step to ensuring high-quality prints for your musician business cards is to choose a reputable printer. There are many online printing services available, but it’s essential to go for a reliable company that offers quality printing services. Do some research and read reviews to determine which printers have the best track record for delivering consistent quality prints that match your requirements.

Opt For Premium Paper Stock And Finishes

Your business card paper stock and finishes are just as important as the design and messaging that you choose. Opting for premium paper stock and finishes can help your musician business card stand out from the competition. Some of the top options include glossy or matte finishes, foil accents, and embossing or debossing. Also, consider the thickness of the paper stock, as thicker stocks offer durability and a premium feel.

Final Thoughts

In conclusion, ordering high-quality prints for your musician business cards is crucial to ensure that you make a lasting first impression. Choosing a reputable printer and opting for premium paper stock and finishes are just a few ways to ensure that your business card represents you and your brand in the best way possible. Take the time to consider all the aspects of your design and make the most of the printing process to get the most out of your musician business cards.

Consistency Is Key

Consistency is key when it comes to designing musician business cards. Keep the branding elements consistent, such as colors and fonts, to create a professional and memorable impression. Incorporating a visual representation of your music style on the card can also make it stand out.

Ensure Consistency With Your Brand

When it comes to designing business cards for musicians, consistency with your brand is crucial. It’s important to present yourself as a cohesive and professional artist, and your business cards play a big role in that. Your design should match the overall aesthetic and message of your music brand. Some tips for ensuring consistency with your brand include:

  • Using the same color palette and font styles as your website, social media profiles, and album art
  • Including your logo on the business card
  • Incorporating any unique visuals or graphics that represent your music brand

Match Colors With Other Promotional Materials

To create a cohesive look across all of your promotional materials, you’ll want to match the colors on your business cards with those used on your website, album art, and other promotional materials. This can help to reinforce your brand and make it more recognizable. It’s important to choose colors that complement each other and reflect the mood and style of your music. For example, if your music has an upbeat and lively vibe, you might choose bright, bold colors. On the other hand, if your music is more introspective and mellow, you might opt for softer hues. In addition to the color palette, you’ll also want to consider the design and layout of your business cards. Keeping things clean and simple can help to make your cards more legible and impactful.

Conclusion

By ensuring that your business cards are consistent with your music brand and promotional materials, you can help to reinforce your message and make yourself more memorable to potential fans and industry contacts. When designing your business cards, remember to keep things simple, choose colors that reflect your music style, and include any unique visuals or designs that help to set you apart from other musicians.

Distribute Strategically

Distribute your musician business cards strategically by leaving them at music stores, studios, and venues. Include your contact information, social media handles, and a website link. Make sure your card is visually appealing and represents your brand.

Strategic distribution of musician business cards is essential for their effectiveness. A well-placed card can lead to new gigs and collaborations, so it’s important to think outside the box when it comes to where and how to distribute them.

Leave Them At Music Stores And Venues

Music stores and venues are the perfect place to leave your musician business cards. Not only do they attract a like-minded crowd, but they also often have a bulletin board where flyers and business cards can be displayed. Make sure your card stands out by using a bold design and clear contact information.

Partner With Other Musicians To Distribute

Partnering with other musicians to distribute your cards is a great way to reach a wider audience. Find musicians who have a similar style or audience and give them some of your business cards to distribute at their own gigs. Offer to do the same in return, creating a mutually beneficial arrangement. This tactic increases your potential reach and can lead to new collaborations and relationships.

Utilize Social Media

Social media platforms are a convenient and easy way to distribute your musician business cards. Share a photo of your business card on your Instagram, Facebook, or Twitter, and make sure to tag other musicians or venues you’ve collaborated with. This not only helps to spread the word, but it also gives you extra visibility.

Conclusion

In conclusion, distributing your musician business cards strategically is vital to their success. Look for opportunities to partner with other musicians and leave them at music-related venues and stores. Additionally, online platforms such as social media can help to spread the word and boost your visibility. Don’t be afraid to think outside the box and get creative with your distribution tactics.

Frequently Asked Questions On Ideas For Musician Business Cards

What Do You Put On A Music Business Card?

A music business card should contain your name, your position/title, your contact information, your website or social media handles, and a professional and eye-catching design. Additionally, you may want to include a logo or tagline that represents your music brand.

Keep it simple and memorable for maximum impact.

What Do Singers Put On Their Business Cards?

Singers commonly put their name, contact information, social media handles, and a brief description of their music style or genre on their business cards. It’s important to include all relevant information without overcrowding the card, and to use a professional design that reflects the singer’s brand.

Do Musicians Need Business Cards?

Yes, musicians should have business cards. Business cards can help them share their contact information and promote themselves to potential clients, industry professionals, and fans. It is an easy and convenient way to make sure people have a way to reach out to them after a performance or networking event.

How Do I Make A Catchy Business Card?

To create a catchy business card, choose a distinctive design that reflects your brand. Keep your contact information clear and concise, and focus on the essentials. Use eye-catching colors and font styles without compromising readability. Use high-quality materials to ensure a professional look and feel.

Finally, consider adding a unique touch, like a QR code or a tagline, to make your card stand out from the crowd.

Conclusion

So there you have it! Musician business cards are more than just a piece of paper with a name and number. They represent you, your music, and your brand. By incorporating some of these ideas, you can create a card that showcases your creativity, style, and personality.

Remember to keep it professional and make it memorable. With the right design and information, your business card can help you stand out in a competitive industry and improve your networking opportunities. Give your music career a boost with a well-designed business card today!

Categories
Archive

Importance Of Gain Staging Plugins

Gain staging plugins are crucial for achieving a balanced mix. Using proper gain staging ensures that each track in a mix is optimized for a clean and dynamic output.

Gain staging plugins play a vital role in the production of high-quality audio tracks. These plugins help to regulate the volume levels of different tracks in a mix and ensure that each track receives the correct processing for a balanced output.

By using gain staging plugins, sound engineers can reduce the risk of signal clipping and distortion that can ruin a mix. Furthermore, gain staging offers the advantage of turning down the volume on individual tracks, thus freeing up headroom for adding new sounds while avoiding conflicts that could cause unwanted distortion. We will explore the importance of gain staging plugins in producing high-quality audio mixes.

Importance Of Gain Staging Plugins

Credit: www.youtube.com

Why Are Gain Staging Plugins Important?

Why Are Gain Staging Plugins Important?

When it comes to mixing audio, gain staging is one of the most important processes that can affect the quality of your sound. Gain staging plugins play a critical role in this by balancing audio levels and maintaining audio quality, preventing distortion and clipping. In this blog, we will discuss the significance of gain staging plugins and 3 reasons why it’s important for quality audio production.

Balancing Levels In The Mixing Process

The first important reason to use gain staging plugins is to balance levels. The mixing process can involve several tracks and it’s essential to ensure that each track is set at the right level. If some tracks are quieter than others, the mix may sound unbalanced, and important parts of the audio may not be heard. Gain staging plugins help to balance the levels to maintain a consistent volume throughout the mix. It provides better control over the audio and optimizes sound performance to create a pleasant listening experience.

Maintaining Clarity And Detail Of Audio

The second reason why gain staging plugins are important is to maintain clarity and detail of audio. The level of gain staging determines the details and clarity of your audio. If it’s too high, it can cause distortion, and noises can cause it to clip. On the other hand, setting it too low can lead to loss of audio details, resulting in an audio production with poor sound quality. A gain staging plugin helps to achieve the correct level, maintaining the clarity and detail of audio while avoiding distortions and other audio abnormalities.

Preventing Distortion And Clipping

The third significant reason why gain staging plugins are vital is to prevent distortion and clipping. When audio levels go beyond the maximum limit, it causes distortion, which can be noticeable to listeners. Distortion can ruin the audio quality, making it difficult to add other effects. Gain staging plugins help to avoid audio levels going beyond the maximum limit, ensuring audio levels are within an acceptable range to prevent clipping and distortion.

Ensuring Consistent Sound Quality

To sum it up, gain staging plugins are essential to producing consistent sound quality, which is vital in audio production. With a balanced level of gain staging, it’s possible to create high-quality sound and enhance the level of detail and clarity while preventing distortion and clipping. This ensures that the intended message is communicated effectively to the listener, resulting in a superior listening experience.

Different Types Of Gain Staging Plugins

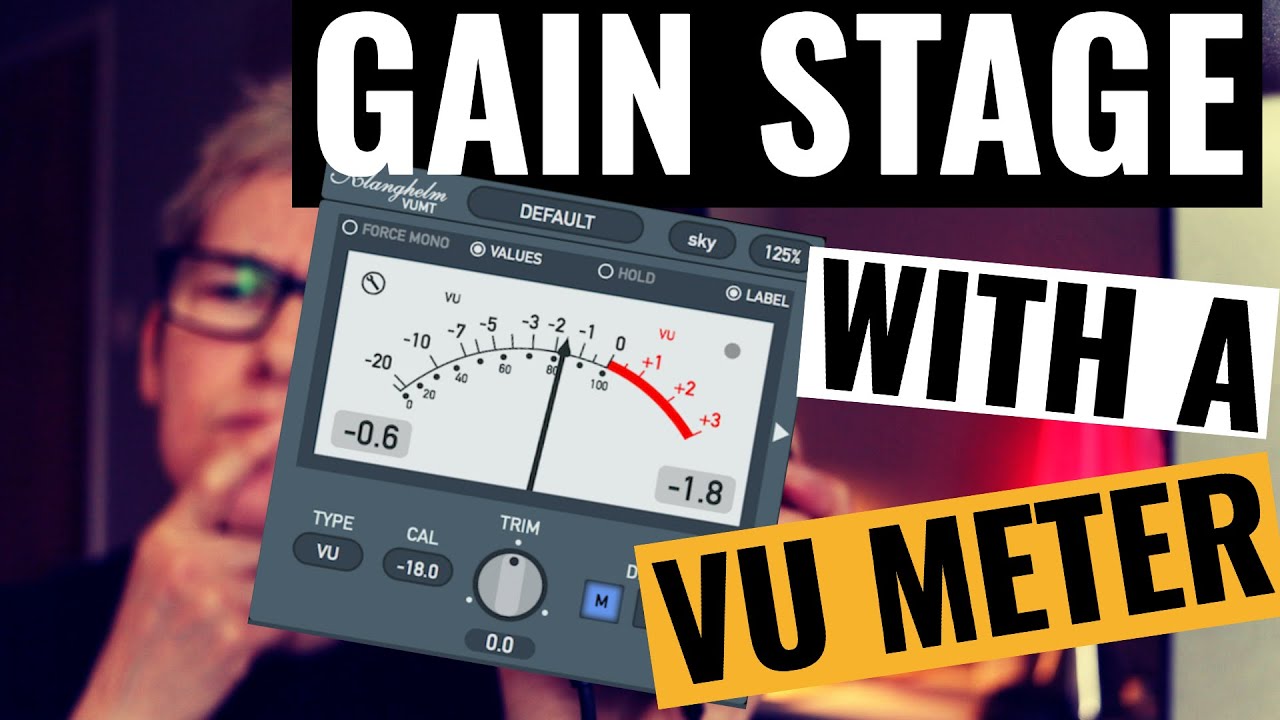
Gain staging plugins play a crucial role in achieving a balanced and clean mix. Different types of gain staging plugins, such as VU meters, EQs, and compressors help to control the input and output levels of each track in a mix.

Proper use of these plugins can lead to a professional and polished sound.

Different types of gain staging plugins play an important role in optimizing the audio recordings to make them sound professional. The process of gain staging helps to ensure that the audio levels are balanced throughout the recording chain, from the microphone to the final mix. Gain staging plugins are used to adjust the level of the recorded audio signal to optimize the processing by other plugins and ensure the final mix sounds good on a variety of playback systems. In this section, we will examine some of the different types of gain staging plugins, including peak limiters, compressors, and equalizers.

Peak Limiters

Peak limiters are designed to prevent the audio signal from exceeding a certain level, thereby preventing clipping and distortion. Peak limiters are especially useful when recording instruments such as drums or electric guitars that can produce sudden spikes in volume. By setting the peak limiter’s threshold, the signal level can be effectively controlled, ensuring that the loudest parts of the recording don’t distort or clip. Peak limiters are often used in conjunction with other gain staging plugins to ensure the final mix is balanced and distortion-free.

Compressors

Compressors are perhaps the most widely used type of gain staging plugin. They effectively reduce the dynamic range of a recording by attenuating the loudest parts of the signal. This makes the softest parts of the signal and the overall sound more audible, while reducing the risk of distortion. Compressors are versatile plugins that can be used to shape the tone and character of a recording, from subtle compression to heavy pumping.

Equalizers

Equalizers are used to adjust the frequency response of a recording, enabling users to boost or cut certain frequency ranges. This can be especially useful for vocals or instruments that need to stand out in the mix. Equalizers can help balance the frequency spectrum of a recording, ensuring that each instrument is audible and not competing with other instruments in the mix. With careful use, equalizers can enhance the overall clarity and balance of a recording.

How To Use Gain Staging Plugins

Gain staging plugins are essential tools for achieving optimal sound quality in your audio productions. By carefully adjusting the gain levels of each element in a mix, these plugins enable you to control volumes and prevent distortion, resulting in a cleaner, more professional-sounding final product.

If you’re looking to take your audio production to the next level, then utilizing gain staging plugins is an absolute must. Not only do these plugins help to ensure a more consistent and controlled sound, but they also help to prevent distortion and other audio problems. However, it’s important to understand how to use these plugins effectively in order to get the most out of them.

Setting Levels Correctly

The first and most important thing to keep in mind when using gain staging plugins is setting your levels correctly. This means ensuring that your input levels are neither too hot nor too low, and that your output levels are set to an appropriate level as well. It’s also important to pay attention to gain staging within each individual track, ensuring that your levels are balanced throughout your mix.

Choosing Appropriate Plugins

Another important consideration when using gain staging plugins is choosing the right ones for your particular needs. There are a wide variety of gain staging plugins available on the market, each with their own strengths and weaknesses. Some plugins are designed specifically for certain types of audio, while others are more general-purpose. It’s important to do your research and choose plugins that are both appropriate for your needs and of high quality.

Knowing When To Use Each Type Of Plugin

Along with choosing the right plugins, it’s also important to know when to use each type of plugin. Different gain staging plugins are designed for different stages of the audio chain, and it’s important to use them appropriately. For example, some plugins are designed specifically for input gain, while others are intended for use during the mixing process. Knowing when and where to use each type of plugin is vital to getting the best results possible.

Avoiding Overprocessing

While gain staging plugins can be incredibly helpful, it’s also important to avoid overprocessing your audio. Using too many plugins or setting your levels too high can lead to distortion and other audio issues, so it’s important to use these plugins judiciously. Be sure to monitor your audio carefully, and don’t be afraid to experiment in order to find the right balance for your needs.

Using Gain Stages In Different Parts Of The Audio Chain

Finally, it’s important to understand that gain staging plugins can be used in different parts of the audio chain in order to achieve different effects. For example, input gain plugins can help to prevent clipping and distortion, while output gain plugins can help to boost levels without causing distortion. Understanding how to use these plugins in different parts of your audio chain can help you achieve the best results possible. In conclusion, gain staging plugins are a powerful tool for audio production, but they require a bit of finesse to use effectively. By keeping these tips in mind, you can ensure that you’re using these plugins in the right way and getting the most out of them.

Importance Of Gain Staging Plugins

Credit: www.uaudio.com

Top Gain Staging Plugins On The Market

Gain staging plugins are essential for attaining a balanced mix with optimal levels. Some of the top plugins include Waves Vocal Rider, iZotope Neutron 3, and Plugin Alliance’s Brainworx bx_console, which offer precision control over gain levels and dynamic range while preserving the mix’s tonal character.

Top Gain Staging Plugins on The Market Gain staging is a fundamental process in any audio production, and the use of appropriate plugins can make a significant difference in the end result. The market is flooded with a plethora of gain staging plugins, and it can be challenging to identify the best one for your specific needs. In this blog post, we’ll explore the top gain staging plugins on the market that can enhance your audio production process. Plugin Name and Developer: 1. Waves Vocal Rider by Waves 2. Sonalksis TBK Stereo by Sonalksis 3. Brainworx bx_console N by Plugin Alliance 4. FabFilter Pro-Q 3 by FabFilter Key Features and Functions: Waves Vocal Rider is a vocal gain riding tool that keeps the vocals consistently audible in the mix. Sonalksis TBK Stereo is a gain staging plugin that balances stereo signals by controlling channel gain and pan. Brainworx bx_console N emulates the classic Neve analog console and provides a flexible gain structure. FabFilter Pro-Q 3 is a versatile EQ plugin that includes a gain compensation feature, enabling the user to normalize the gain when boosting or cutting frequencies to avoid unintended distortions. Pros and Cons: Waves Vocal Rider’s main advantage is its ability to automate the vocal levels without additional sidechain compression. However, it may not be as effective in tracks with complex arrangements. Sonalksis TBK Stereo excels in managing stereo imaging and has no significant downsides. Brainworx bx_console N offers a classic console’s sound, but it may not be suitable for modern, genre-bending productions. FabFilter Pro-Q 3’s strength lies in its precision and comprehensive EQ controls, but it may not be as intuitive for beginners. User Reviews and Ratings: Waves Vocal Rider has received positive reviews from users, with many commending its efficiency and time-saving attributes. Sonalksis TBK Stereo has a rating of 4.5 out of 5, with users praising its ease of use and sonic clarity. Brainworx bx_console N has a rating of 4.4 out of 5, with users noting its versatility and warmth in the sound. FabFilter Pro-Q 3 has a rating of 4.8 out of 5, with users raving about its precision and flexibility. In conclusion, each gain staging plugin has unique features, pros, and cons that can influence its suitability for different audio productions. Users’ preferences may vary based on their technical skills, workflow, and sonic preferences. However, these top gain staging plugins can provide an excellent starting point for anyone looking to enhance their audio production quality.

Tips For Using Gain Staging Plugins Effectively

Gain staging plugins are an integral part of the mixing process, allowing the control of levels without distortion. To use these plugins effectively, it is essential to prioritize balance, use a reference track, and adjust levels while monitoring the waveform.

If you want your mix to turn out right, you need to be familiar with gain staging plugins. These plugins adjust the input and output levels of your tracks, which helps you achieve a cleaner mix. However, to use these plugins effectively, you need to follow specific tips.

Practice On Different Audio Sources

One of the most important tips to use gain staging plugins effectively is to practice on different audio sources. This will help you understand how gain staging plugins affect different types of sounds and instruments. For instance, you can practice on vocals, drums, guitars, or even synths. Using gain staging plugins effectively involves knowing how to apply them to different instruments in your mix. Additionally, practicing on different audio sources will help you hone your skills and achieve a cleaner mix.

Experiment With Different Plugin Combinations

Gain staging plugins can be used in combination with other plugins such as EQs or compressors. Combination of plugins is called plugin chains. To better understand how to use these plugins, you should experiment with different plugin combinations. For instance, you can try combining an EQ plugin with a gain staging plugin to shape the sound of a particular track. Experimenting with different combinations will help you understand which plugins work best together and in which order.

Use Your Ears To Gauge Effectiveness

Gain staging is an art and not a science. To effectively use gain staging plugins, you need to use your ears to gauge effectiveness. This means that you should listen to your tracks and adjust the gain staging plugins until you achieve the perfect sound. It’s important to trust your ears when using gain staging plugins. They will help you determine the right levels for your tracks and ensure that your mix sounds fantastic.

Double Check Your Mixing Levels Before Mastering

It’s important to double-check your mixing levels before mastering your tracks. If you don’t, you may end up with an unbalanced mix and affect the sound of mastering. To ensure that your mixing levels are correctly set, you should use a gain staging plugin on every track and ensure that the output levels are consistent. Double checking will help you achieve a clean mix and prepare your track for mastering. In conclusion, using gain staging plugins effectively is essential in the mixing process. To achieve a clean mix, you need to follow the tips mentioned above, practice on different audio sources, experiment with different plugin combinations, use your ears to gauge effectiveness, and double-check your mixing levels before mastering.

Importance Of Gain Staging Plugins

Credit: channelrobot.com

Common Mistakes To Avoid When Using Gain Staging Plugins

Gain staging plugins can be a lifesaver when it comes to mixing and mastering audio files. However, to reap the full benefits of these plugins, it’s crucial to use them correctly. Unfortunately, too many audio engineers make mistakes when using gain staging plugins, which results in poorly mixed tracks. In this post, we’ll look at the common mistakes to avoid when using gain staging plugins.

Overprocessing Audio

One of the most common mistakes people make when using gain staging plugins is overprocessing their audio. It’s easy to get carried away and add too many effects to your track, but it can quickly muddy up the sound. Adding too many plugins can cause distortion, phase cancellation, and other unwanted artifacts, resulting in a less polished final mix.

When using gain staging plugins, it’s essential to only use what’s necessary. Focus on using plugins that improve the mix without being too harsh or heavy-handed. Be mindful of the effects you’re using and the order in which they’re applied. This approach will ensure the track remains crisp, clear, and well-balanced.

Using Too Many Plugins

It’s tempting to use as many plugins as possible, but it’s not always the best approach. When you use too many plugins, the processing power of your computer can be stretched beyond its limit, causing the session to crash. Besides, using too many plugins can degrade the quality of your audio. Some plugins have overlapping functions, so it makes sense to use only the ones that best suit your needs.

When using gain staging plugins, it’s important to prioritize quality over quantity. A handful of high-quality plugins applied strategically will do a better job than many low-quality plugins haphazardly applied.

Not Checking Gain Stages Before Mastering

When you skip gain staging, you’re essentially mixing with one arm tied behind your back. Setting gain correctly ensures that all tracks are at an appropriate volume relative to each other. This process will help eliminate problems that occur when you try to balance too many tracks all at once.

When it comes to mastering, gain staging becomes even more important. Even the smallest inconsistency in the gain staging can amplify flaws in the final mix, making them nearly impossible to correct. By checking the gain stages before mastering, you’ll be able to correct any inconsistencies and ensure a clean, polished master.

Using The Wrong Type Of Plugin For The Audio Source

Not all gain staging plugins are created equal. Some are designed for specific types of audio sources, such as vocals, drums, or guitars. Using the wrong plugin type can result in poor sound quality, phasing issues, and other problems.

When using gain staging plugins, it’s crucial to choose the right tool for the job. It’s best to experiment with different plugins to find the one that works best for your track. Choose plugins that suit the type of audio source you’re working with, and be sure to read the documentation to understand how each plugin works.

Frequently Asked Questions Of Importance Of Gain Staging Plugins

Do You Need To Gain Stage Vst?

No, there is no need to gain stage VST. VST plugins usually have an internal gain staging mechanism and you should try to avoid adding any additional gain stages unless it’s absolutely necessary. It can cause unwanted distortion or clipping and negatively impact the sound quality.

What Is Gain Staging Plugins?

Gain staging plugins are tools used in digital audio production to manage the audio levels and balances between different tracks. They help enhance sound quality by ensuring that input levels are optimized and prevent distortion caused by overloading. Essentially, gain staging is the process of balancing the levels of all audio in a mix, allowing individual sounds to be easily heard while creating a cohesive sound.

What Is The Value Of Gain Staging?

Gain staging is the process of ensuring that each element in an audio signal chain is correctly level-matched and optimized for the best sound quality. It’s vital in recording and mixing, helping to reduce noise and distortion, and getting the most out of your equipment.

What Is A Good Gain Staging Level?

A good gain staging level is when you set the volume levels of your audio equipment in a way that produces the best sound quality without introducing excess noise or clipping. This means avoiding setting levels too low or too high and finding the sweet spot that works for your equipment and the audio you are working with.

Conclusion

Gain staging plugins play a crucial role in bringing out the best in any digital audio production. By controlling the input and output levels of plugins, gain staging allows producers to prevent distortion and create balanced soundscapes. Whether you’re a seasoned audio engineer or a beginner producer, integrating gain staging plugins into your workflow can elevate the quality of your productions and enhance the listener’s experience.

Investing in these powerful tools is without a doubt a wise decision for any audio professional looking to create a polished and professional sound. So, what are you waiting for? Get started with gain staging today!

More in our Plugin guides.

Categories
Archive

Defining Yourself As A Musician

Defining yourself as a musician is all about identifying your unique sound and niche. As a musician, it’s essential to establish your identity through your distinct music style and genre.

Music is a form of art that touches people’s hearts and souls, changing lives in a matter of minutes. Musicians have the power to evoke emotions through their compositions, making it crucial to establish their identity. Defining yourself as a musician is essential, as it enables you to create a brand for yourself.

Your music style reflects your personality and the type of audience you want to attract. It takes time and effort to find your sound, but once you do, you’ll be on your path to musical greatness. In this post, we’ll delve into what it means to define yourself as a musician and the steps you can take to establish your identity.

Introducing Yourself As A Musician

As a musician, it’s important to define yourself and your style. Sharing information about your influences, genres you enjoy, and your unique approach to music can help listeners connect with your work. Whether you’re a seasoned pro or just starting out, it’s crucial to establish your identity and make it clear to potential fans.

Introducing Yourself as a Musician When it comes to getting started as a musician, one of the most important steps is figuring out how to define yourself as an artist. This starts with introducing yourself to the world as a musician. In this blog post, we’ll explore what it means to be a musician, how to define yourself as one, and why it’s important to do so.

What Is A Musician?

Being a musician is much more than simply playing an instrument or singing. While those are important aspects of the craft, being a musician involves a deeper understanding and appreciation of music. Musicians are creators, whether they’re writing their own songs or interpreting existing pieces. They’re also performers, bringing their music to life on stage or in the studio.

How To Define Yourself As A Musician

Defining yourself as a musician can be challenging. It’s a process that requires introspection and a clear understanding of your strengths and weaknesses. One approach is to think about the type of music you want to create or perform, the instruments you want to use, and the overall tone or vibe you want to convey. This can help you build a clear identity as an artist. Another key factor in defining yourself as a musician is your personal brand. In today’s digital age, branding is key to standing out in a crowded market. Consider the visual elements of your brand, such as your logo, website, and social media profiles, as well as the tone and message of your music and online presence. All of these elements should work cohesively to create a strong personal brand.

The Importance Of Defining Yourself As A Musician

Defining yourself as a musician is important for several reasons. First, it helps you connect with your audience. When people listen to your music or see you perform, they want to know who you are and what you stand for. By defining yourself as a musician, you give your fans a sense of who you are as a person and an artist, which can lead to deeper connections and more loyal fans. Second, defining yourself as a musician helps you stand out in a crowded market. There are thousands of musicians out there, all vying for attention. By creating a clear brand and identity, you can distinguish yourself from the competition and build a unique niche for yourself in the industry. Lastly, defining yourself as a musician can help you stay focused and motivated. By having a clear idea of who you are as an artist and what you want to achieve, you can set clear goals and work towards them with purpose and direction. In conclusion, defining yourself as a musician is a crucial step in building a successful career in the industry. By understanding what it means to be a musician, defining your personal brand, and creating a clear identity, you can connect with your audience, stand out in a crowded market, and stay focused on your goals.

Developing Your Musical Identity

Developing your musical identity is an important aspect of being a musician. Your musical identity defines who you are as a musician and sets you apart from others. It’s like your unique voice, and it reflects your style, influences, and creativity. To develop your musical identity, you need to focus on discovering your style, exploring your influences, and creating your own sound.

Discovering Your Musical Style

Discovering your musical style is the first step towards developing your musical identity. Your musical style reflects your personality, creativity, and emotional feelings. It’s crucial to identify your style, as it will help you to focus on what you do the best. Here are some tips to consider when discovering your musical style:

  • Identify your strengths and weaknesses
  • Listen to different genres of music
  • Experiment with different instruments

Exploring Your Influences

Exploring your influences is an important step towards developing your musical identity. Your influences shape your musical tastes, and they provide a framework for your creative expression. Here are some tips to consider when exploring your influences:

  • Listen to your favorite artists and bands
  • Study their music and lyrics
  • Identify what you like about their music

Creating Your Own Sound

Creating your own sound is the final step towards developing your musical identity. Your sound is unique to you, and it reflects your creativity and personality. Here are some tips to consider when creating your own sound:

  • Experiment with different sounds and instruments
  • Don’t be afraid to take risks and try new things
  • Be true to yourself and your musical style

Developing your musical identity takes time and practice. It’s important to be patient and persistent in your efforts, as it will pay off in the end. Remember, your musical identity is unique to you, and it’s something that you can be proud of.

Building Your Brand

As a musician, defining your brand is crucial for success. It involves identifying your image and personality, choosing an appropriate genre, developing a signature sound, and creating a unique online presence. Done correctly, building your brand can help you stand out from the crowded music industry.

Building Your Brand: Defining Yourself As A Musician As a musician, it’s important to establish a brand that represents the essence of who you are as an artist. Building your brand can take time and effort, but with dedication, it can lead to bigger and better opportunities in your music career. Identifying Your Target Audience One of the first steps in building your brand as a musician is identifying your target audience. This means figuring out who exactly your music appeals to and who you want to reach with your music. Are you targeting a specific age group, gender, culture or interest group? Understanding your target audience will help you tailor your marketing efforts and connect with your fans on a deeper level. Establishing Your Online Presence In today’s digital age, it’s crucial for musicians to establish a strong online presence. This includes having a website and profiles on social media platforms such as Facebook, Instagram, YouTube, and Twitter. Your website and social media profiles should be consistent with your brand image and contain high-quality photos, debut artist videos, visualizers, behind the scenes clips, and testimonials if you have any, of your skills and talents. Your website should also include links to your music and merch, booking information, and tour dates. Networking and Collaborating Networking and collaborating with other musicians, producers, labels, and influential bloggers can help you build valuable connections and expand your reach. Attend local music events, participate in online forums, and seek guest interviews on related platforms and outlets. Collaborating with other musicians can also help you broaden your exposure and learn new techniques that will improve your skills as a debut artist. In conclusion, building your brand requires effort, dedication, and attention to detail. By identifying your target audience, establishing your online presence, and networking and collaborating, you can create a strong presence in the music industry and attract a larger audience of fans and supporters. Remember, your brand represents who you are as an artist, so it’s important to be authentic, consistent and innovative.

Defining Yourself As A Musician

Credit: www.pinterest.com

Growing Your Fan Base

As a musician, defining yourself and your unique sound is key to growing your fan base. Develop a distinct image and brand that sets you apart from others in your genre. Utilize social media platforms to share your music and engage with fans on a regular basis.

As a musician, your ultimate goal is to create music that resonates with your fans. But how do you build a thriving fan base? Here are three effective ways to grow your fan base and engage with your audience.

Engaging With Your Fans

Engaging with your fans is critical to growing your fan base. By interacting with them, you create a sense of community and build relationships. Here are some ways you can engage with your fans:

  • Respond to comments on your social media pages
  • Hold Q&A sessions on social media
  • Create exclusive content for your fans

Promoting Your Music

Promoting your music is key to gaining new fans. Here are some ways to promote your music:

  1. Create a website to showcase your music and merchandise
  2. Submit your music to streaming services and music blogs
  3. Collaborate with other musicians

Playing Live Shows

Playing live shows is a fantastic way to connect with fans and gain new ones. Here are some tips on playing live shows:

TipDescription
Choose the right venueFind venues that fit your music style and target audience
Promote the showUse social media and email marketing to promote your show
Engage with the crowdInteract with your fans, and make them feel like you appreciate their support for your music

In conclusion, growing your fan base takes time, effort, and dedication. By engaging with your fans, promoting your music, and playing live shows, you can create a loyal fan base that will follow your musical journey for years to come.

Navigating The Music Industry

As a musician, it’s crucial to define your unique sound and style to stand out in the competitive music industry. It’s essential to explore different genres and experiment with various techniques to discover your distinctive voice. Self-discovery and authenticity are key to defining yourself as an artist.

The music industry is often considered a tough nut to crack. However, with the right knowledge, it is possible to make a living from your craft. Understanding the business side of music, finding opportunities as a musician, and protecting your rights as an artist are all crucial elements of navigating the music industry successfully. In this article, we will discuss each of these elements in detail to help you define yourself as a musician.

Understanding The Business Side Of Music

As a musician, it’s essential to understand the business side of the industry. This includes knowing about contracts, royalties, and other legal aspects of music. In addition, you must be familiar with the various revenue streams that exist within the industry. This can include money earned from streaming services, live performances, and merchandise sales. Understanding these aspects is crucial to help you make informed decisions about your career and ensure that you are getting the best deal possible.

Finding Opportunities As A Musician

Finding opportunities as a musician can be challenging, but it is essential to your success. Networking with other musicians and industry professionals is a great way to find new opportunities. You can attend industry events, join online forums, or even start your own local group to meet like-minded people. Another way to find opportunities is to create and promote your music online. Platforms like YouTube, Soundcloud, and Bandcamp are all great ways to get your music out there and generate interest from industry professionals.

Protecting Your Rights As An Artist

Protecting your rights as an artist is crucial to your success in the music industry. This includes copyrighting your music, trademarking your band name, and registering with the appropriate organizations like ASCAP or BMI. In addition, it’s essential to have a solid understanding of your legal rights and responsibilities as a musician. This includes knowing about contracts, royalties, and other legal aspects of music. By understanding and protecting your rights as an artist, you can ensure that you are getting the recognition and compensation that you deserve. In conclusion, defining yourself as a musician in the music industry requires a combination of creativity and business acumen. By understanding the business side of music, finding opportunities as a musician, and protecting your rights as an artist, you can navigate the industry successfully and make a living from your craft. Remember, it’s essential to stay informed and up to date with the latest trends and developments in the industry to ensure your continued success.

Defining Yourself As A Musician

Credit: www.azquotes.com

Balancing Creativity And Commercial Success

As a musician, it’s important to strike a balance between creativity and commercial success. Defining yourself and your unique sound can help you stand out in a crowded industry while still appealing to a wider audience. By staying true to your artistic vision while also being open to opportunities for growth and collaboration, you can establish yourself as a successful musician.

As a musician, it’s easy to get lost in the quest for commercial success. After all, we all want our music to be heard by as many people as possible. However, it’s important to remember that being a musician is not just about making money. It’s also about expressing yourself creatively, sharing your unique voice with the world, and building a legacy that will last long after you’re gone. In this blog post, we’ll explore how to balance your desire for commercial success with your artistic vision, so you can define yourself as a musician on your own terms.

Staying True To Your Artistic Vision

One of the biggest challenges musicians face is staying true to their artistic vision. When you’re trying to create music that will sell, it’s all too easy to compromise on your artistic integrity. However, if you sacrifice your vision for the sake of commercial success, you risk losing your uniqueness and leaving behind a body of work that lacks substance. To stay true to your artistic vision, keep the following in mind: – Understand your core values as an artist – Be clear about the message you want to convey through your music – Collaborate with others who share your vision and values – Don’t be afraid to take risks and try new things, but also be mindful of your creative direction

Making Strategic Career Decisions

As important as it is to stay true to your artistic vision, it’s also necessary to make strategic career decisions to achieve the commercial success you want. If you want to build a lasting career as a musician, you need to have a clear understanding of your goals, your audience, and your competition. Here are some tips for making strategic career decisions: – Research the market and understand your competition – Define your unique selling point (USP) and market yourself accordingly – Build a strong online presence, including a website, social media, and email marketing – Network with other musicians, industry professionals, and your fans – Be open to opportunities that align with your vision and goals

Maintaining Your Success And Creative Drive

Finally, it’s important to maintain your success and creative drive over the long term. The music industry is notoriously fickle, and even the most successful musicians can fall out of favor with their audiences. To avoid this, keep the following in mind: – Focus on building a loyal fanbase that will support you over the long term – Continuously develop your skills and stay up-to-date with industry trends – Diversify your income streams (e.g. touring, merchandise, sync licensing, etc.) – Stay true to yourself and your artistic vision, even if it means taking a different path from your peers By balancing your desire for commercial success with your artistic vision, making strategic career decisions, and maintaining your success and creative drive, you can define yourself as a musician on your own terms. It’s not always easy, but by following these tips, you can build a lasting legacy as an artist and make your mark on the world.

Overcoming Challenges As A Musician

As a musician, defining yourself and your unique sound is crucial for success. Overcoming challenges such as imposter syndrome and comparison can be difficult, but focusing on your individuality and honing your craft can help you stand out in the crowded music industry.

As a musician, you are passionate about your craft and have a burning desire to succeed. However, the journey to success is often filled with challenges that can be frustrating and demotivating. Fortunately, these challenges are not insurmountable, and with a positive mindset, you can overcome them. In this article, we will explore some common challenges that musicians face and discuss practical strategies to overcome them. Let’s begin by looking at the first challenge:

Dealing With Rejection

Rejection is a common experience that musicians go through at some point in their careers. It can be disheartening to pour your heart and soul into your art only to be met with a rejection letter. However, rejection is not a reflection of your talent or worth as a musician. It’s merely a part of the journey. To deal with rejection, you need to develop a thick skin and learn to embrace the feedback. Use rejection as a learning opportunity to improve your skills and refine your craft. Remember that every successful musician has faced their fair share of rejection before making it big.

Coping With Setbacks

Another challenge that musicians face is setbacks. Setbacks can come in various forms, such as cancelled shows, lack of gigs, or equipment failures. These setbacks can be frustrating and can hinder your progress. To cope with setbacks, you need to stay motivated and focused on your goals. Don’t let setbacks derail your passion for music. Instead, use setbacks as an opportunity to refocus and re-strategize. Take the time to learn and grow from the experience to come back stronger.

Managing The Pressures Of Being A Musician

As a musician, you face immense pressure to make it big, especially in today’s digital age, where social media platforms are flooded with aspiring musicians. The pressure can affect your mental health and wellbeing, and it’s essential to manage it effectively. To manage the pressures of being a musician, you need to prioritize your mental health and wellbeing. Take care of yourself by cultivating healthy habits, such as exercise, meditation, and healthy eating. Seek support from friends, family, and professionals when needed. Remember that success takes time, and it’s essential to enjoy the journey. In conclusion, being a musician comes with its challenges, but the key to overcoming them is to persevere, stay positive and focused, and never give up on your dreams. With these practical strategies, you can overcome any challenge and achieve success as a musician.

Continuing To Evolve As A Musician

As a musician, defining yourself through your music is an ongoing process that requires constant evolution. Continuously exploring new sounds, genres, and techniques can help you develop and refine your unique style as an artist. Whether you’re a professional musician or a hobbyist, embracing the journey of growth can lead to creative breakthroughs and fulfillment.

As a musician, defining yourself can be a daunting task. There are so many genres, styles, and techniques to choose from, along with the pressure to stay relevant and fresh. However, one of the most important traits one can possess is a willingness to continue evolving. In this section, we will explore three ways to embrace growth, experiment with new sounds, and challenge oneself as an artist.

Embracing Growth And Change

One of the most difficult things a musician can do is pivot from what they know best into unknown territory. The comfort of familiarity can be a safe space, but it can also prevent growth and change. Embracing growth and change means being open to new music styles, new instruments, and new collaborations. As a musician, consider attending workshops and masterclasses, seeking mentorship from industry professionals or even collaborating with other musicians. It can help challenge your own thoughts and allow you to approach music from a different perspective.

Experimenting With New Sounds

Experimenting with new sounds is a vital part of evolving as a musician. As music continues to evolve and change, the ability to incorporate new sounds and styles into your work is an important skill. Consider learning a new instrument or studying a different genre to incorporate new sounds into your music. It can be as simple as playing with new chord progressions or experimenting with different tempos. Whatever method you choose, the important thing is to keep pushing the boundaries of what you know and continuing to evolve.

Challenging Yourself As An Artist

As a musician, it’s important not to become complacent or stagnant. Challenging yourself as an artist means setting goals to push beyond your comfort zone. Consider setting challenges like completing a composition every week, attempting to write a song in a genre foreign to you, or even collaborating with a musician whose skills complement yours in a way you have never tried before. By setting challenges and pushing yourself, you can continue to evolve as an artist and improve your craft. In conclusion, as a musician, continuing to evolve is vital in staying relevant in a constantly changing industry. Embracing growth and change, experimenting with new sounds, and challenging yourself as an artist are three ways to help you along on that journey. Keep exploring and experimenting to become the best musician you can be.

Frequently Asked Questions On Defining Yourself As A Musician

How Do You Define Yourself As A Music Artist?

As a music artist, I define myself through my unique sound, lyrics that resonate with listeners, and my ability to evoke emotions through my music. I strive to connect with my audience and create an experience that leaves a lasting impact.

How Do I Write About Myself As A Musician?

To write about yourself as a musician, keep it short and simple. Use active voice and avoid passive sentences. Focus on your unique style, achievements, and goals. Write in SEO-friendly language and avoid common phrases or clichés. Be genuine and showcase your passion.

What Classifies You As A Musician?

To be classified as a musician, you need to have skills in playing a musical instrument, singing or composing music. You need to be skilled enough to create music that people enjoy listening to. It’s not just a hobby but a profession.

Your skills must be able to entertain people with your music.

How Do You Consider Yourself A Musician?

As a musician, I consider myself someone who creates, performs, and produces music. I have a passion for music, and I have developed the necessary skills and knowledge to excel in the field. I believe that being a musician is not just a job, but a way of life, and I am constantly learning, growing, and improving my craft.

Conclusion

Defining yourself as a musician takes time, effort, and dedication. It’s important to understand your strengths, weaknesses, and musical style in order to showcase your unique sound and personality. Building a strong brand, networking with other musicians, and consistently creating quality content can help to establish a successful career in music.

Remember to stay true to yourself and never stop learning and growing as an artist. With these tips and a passion for music, anyone can define themselves as a successful and talented musician.

Categories
Archive

Reverb Mixing Tips For Deep Music

For deep music, use subtle reverb to create space and depth without cluttering the mix. Consider applying gated reverb to drums for a more controlled sound.

When mixing deep music, it’s important to create a sense of space and depth without muddying the mix. One way to achieve this is by using reverb. However, it’s crucial to use it subtly, as too much can make the mix sound cluttered.

Additionally, gated reverb can be applied to drums to create a more controlled sound. We will explore some tips for using reverb in deep music mixes that will help bring your production to life. With the right approach, you can create a mix that is both immersive and clear, with each element occupying its own unique space within the mix.

Choosing The Right Type Of Reverb

Choosing the right type of reverb is crucial to achieving a deep and full sound in music. Reverb is the technique used to add space and depth to a sound, mimicking the natural reverberation that occurs in a room. With different types of reverb available, it’s essential to understand how each one works and when to use them.

Hall Reverb

Hall reverb is modeled on the sound of a large concert hall, providing a spaciousness and natural decay that can give a sense of grandeur and depth to a recording. This type of reverb is great for orchestral instruments and classical music, creating a sense of space around individual notes or phrases. When used subtly, it can give a mix a sense of space, helping each instrument to sit in its own place in the recording.

Plate Reverb

Plate reverb is a classic effect that originated in the 1950s, used extensively in the recording of pop and rock music. It involves a metal plate that vibrates in response to the sound waves, creating a unique sound that was popular in the era of classic rock and roll. Plate reverb is a bright and lively type of reverb, great for adding a sense of energy and excitement to a recording. It works well on drums, vocals, and guitars, giving each instrument a sense of space and depth.

Room Reverb

Room reverb is the most common type of reverb and is modeled on the sound of a small room. Room reverb can create a sense of intimacy and warmth, making it ideal for acoustic instruments like guitars and piano. It works well for adding a sense of space to vocals, helping them to sit in the mix without overpowering other instruments. With the right settings, room reverb can also create a sense of distance and depth that can add richness to a recording.

Understanding Pre-delay

Understanding Pre-Delay is a crucial element of Reverb Mixing. It is the time gap between the original sound source and the onset of the reverb tail. This time gap is not insignificant as it has a massive impact on how we perceive space in a mix. In this article, we will look at how Pre-Delay affects the perception of space in deep music and how you can set the Pre-Delay time for maximum effect.

How Pre-delay Affects The Perception Of Space

Pre-Delay is the key to creating a sense of distance between the listener and the sound source. It is an essential tool for mixing deep music as it allows you to create a sense of space without compromising the clarity of the original sound. In deep music, the goal is to create a sense of depth and dimensionality that pulls the listener in and makes them feel like they are part of the music.

The Pre-Delay time determines how long before the onset of the reverb tail the original sound is heard. A longer Pre-Delay time means that the sound source is perceived as being further away from the listener. Conversely, a shorter Pre-Delay time creates a sense of intimacy and proximity.

Setting The Pre-delay Time

Setting the Pre-Delay time is both an art and a science. While there are no hard and fast rules, you can use the following guidelines as a starting point:

GenrePre-Delay Time
Acoustic Music30-50 ms
Rock Music20-30 ms
Electronic Music10-20 ms
Deep Music50-80 ms

Remember, these are just guidelines, and the best Pre-Delay time depends on the individual mix and the feelings you want to evoke. Experiment with different values and listen to how it affects the mix. Use your ears and trust your instincts.

In conclusion, understanding Pre-Delay is vital for creating a sense of space and depth in deep music mixing. The Pre-Delay time determines the distance between the listener and the sound source and is a powerful tool for creating intimacy or distance. Start with the guidelines above and keep experimenting until you find the perfect balance for your mix.

Using Eq To Shape The Reverb

Shape the reverb of deep musical tracks by using EQ adjustments. Enhance the ambiance of your mix by carving out resonant frequencies. Use subtle changes to produce a more natural and transparent sound.

Reverb is an essential tool in creating depth and dimension in music production. However, it can also create muddiness and clutter in the mix if not used properly. One way to avoid these issues is by using EQ to shape the reverb. Here are some tips on how to use EQ effectively to shape your reverb and add a beautiful dimension to your deep music.

Removing Low-end Muddiness

Low-end frequencies can build up in the reverb and muddy up the mix, especially in deep music. A good technique to remove the unwanted low-end frequencies is by using a high-pass filter in the EQ. By setting the high-pass filter to a frequency range between 100Hz to 300Hz, you can remove the low-end muddiness without affecting the overall sound. It is important to use your ears to find the right amount of cut as every mix is different.

Boosting High-frequency Energy

In deep music, boosting high-frequency energy can help add clarity to the mix and bring out the details of the instruments in the reverb. To achieve this, a good way is to use a shelving EQ to boost the high frequencies. Set the shelf frequency to around 5kHz to 8kHz and adjust the gain to add the right amount of brightness to the mix. It is important to not overdo it, as too much boost can make the mix sound harsh.

Cutting Unwanted Frequencies

Another way to shape the reverb is by cutting unwanted frequencies that don’t contribute to the mix. Use a notch filter in EQ with a Q-factor of 3 to 5 to cut out unwanted resonances and frequencies. Sweep the EQ across the frequency range and listen closely to identify any unwanted frequencies. Once you find them, cut them out using the notch filter and ensure that it doesn’t affect the overall sound and feel of the mix. By using these tips and techniques, you can use EQ to shape your reverb in deep music and add dimension and depth to your mix. Remember, the key is to use your ears and experiment to find the right balance of EQ settings that work best for your mix.

Creating A Sense Of Depth With Reverb

If you’re looking to create a sense of depth in your mix, using reverb is a great tool to achieve this. Reverb can help add a sense of space and ambiance to your music. When used correctly, it can take your mix to the next level and make it sound more professional.

Applying More Reverb To Background Sounds

When using reverb, it’s important to remember that every element in your mix does not need the same amount of reverb. Applying more reverb to background sounds, such as pads, can help create a sense of depth by making them sound further away. When doing this, make sure to avoid applying too much reverb as it can muddy up the mix and compete with other elements.

Applying Less Reverb To Foreground Sounds

In contrast, using less reverb on foreground sounds, like vocals or lead instruments, can help them stand out and sound closer to the listener. This can help create separation between the different elements in your mix and add clarity. Applying no reverb to foreground sounds can also work, depending on the desired effect.

A good tip is to use a reverb bus to control the overall reverb levels in your mix. By routing all of your individual tracks to this bus, you can control the amount of reverb applied to each element more easily and effectively.

Overall, when using reverb in your mix, it’s important to consider how it will affect each individual element and the overall balance of the mix. By applying more reverb to background sounds and less reverb to foreground sounds, you can create a sense of depth and ambiance that will help elevate your music.

Using Panning To Enhance The Stereo Image

Enhancing the stereo image of deep music can be achieved with the use of panning. By carefully placing elements in the left and right channels, a wider and more immersive sound can be achieved. Additionally, reverb can be used to create a sense of depth and space within the mix.

Panning The Reverb To The Opposite Side Of The Source

When mixing deep music, one of the essential aspects to focus on is the stereo image. Using panning can significantly enhance the spatial depth and width of the mix. A simple yet effective technique is to pan the reverb to the opposite side of the source. For instance, if the lead synth is panned slightly to the right, the reverb should be panned to the left. This creates a natural-sounding sense of space and depth in the mix, making it sound more immersive.

Adding Multiple Reverb Sends With Different Panning

Another way to use panning to enhance the stereo image in reverb mixing is by adding multiple reverb sends with different panning. This technique helps achieve a well-balanced and three-dimensional soundstage. It is especially useful when working with complex arrangements with multiple elements competing for space. Simply add several reverb inserts, each with different settings, and assign them to different tracks. Then, pan each track accordingly to create a rich and dimensional sound.

Reverb InsertPanning
Reverb 1Left -30
Reverb 2Right +30
Reverb 3Center

By experimenting with different panning settings and fine-tuning the reverb mix, you can create a powerful and deep-sounding mix that draws the listener into the music. Remember to always keep the sound image balanced and natural-sounding. With these reverb mixing tips and techniques, you can achieve a great-sounding mix that enhances the depth of your deep music productions.

Automating Reverb Settings

Automating reverb settings is an effective way to create depth in music. By adjusting the pre-delay, decay time, and wet/dry mix, you can achieve a unique sound that enhances the listener’s experience. Experiment with different settings to find the perfect balance for your mix.

As a music producer, mixing and perfecting your music is essential. One of the most important aspects of mixing is reverb. Creating a perfect balance and sound clarity for your track requires skills and tricks, one of which is automating reverb settings.

Changing Reverb Settings Throughout The Song

One way to use automation to create interest and movement in your track is by changing reverb settings throughout the song. Starting with a dry mix and slowly automating the reverb on the vocals or instruments can add depth and character to your track. Gradually adjusting the decay and size of the reverb while mixing can create an evolving sound that moves with your song.

Using Reverb Swells To Build Tension

Another technique to use with automating reverb settings is using reverb swells to build tension. By automating the reverb swell on a particular sound, you can create a heightened sense of tension. For instance, applying a swelling reverb on a snare build-up during a chorus or breakdown can create a climactic effect, making the listener feel excited and engaged. When automating reverb settings, it’s crucial to have a clear vision of the mood and sound you’re trying to create. By experimenting with different reverb settings and effects, you can create a unique sound that sets your track apart, making it standout to your listeners. In conclusion, automating reverb settings in your deep music is a powerful technique that can add depth, character, and tension to your songs. By using automation to change reverb settings throughout the song or creating reverb swells, you can create unique and engaging sounds that your fans will love.

Avoiding Common Reverb Mistakes

To achieve a deep, rich sound when mixing music with reverb, it’s crucial to avoid common mistakes. These can include overusing reverb, not considering the space the music will be heard in, and failing to adjust the reverb settings to fit the specific track.

With the right approach, however, reverb can add an essential layer of depth and texture to any piece of music.

Reverb mixing can make or break your music production. Knowing how to use reverb correctly can help you achieve the desired emotional impact, but using it carelessly can make your mix sound muddy and indistinct. In this section, we’ll focus on the most common reverb mixing mistakes and how to avoid them.

Using Too Much Reverb

One of the most common mistakes when mixing with reverb is using too much of it. While reverb can add depth and create a sense of space, using too much reverb can make a mix sound overly-wet and washed out. It can also make the track sound cluttered and unclear. To avoid this, start by applying the reverb effect to individual instruments or tracks instead of the entire mix. This can help you control the level of reverb and allows you to tailor the effect to each instrument’s specific needs. You can also adjust the decay time and the pre-delay to achieve a more natural-sounding reverb.

Choosing Inappropriate Reverb Types

Another mistake is selecting inappropriate reverb types for your mix. Different types of reverb are suitable for different genres of music. For example, a plate reverb may work for a rock or pop song but may not be suitable for a jazz or classical piece. To avoid this, experiment with different reverb types and find the ones that complement your mix. Always keep in mind the overall tone and style you’re trying to achieve and select the reverb effects that enhance that tone. Don’t forget to listen critically and make adjustments as needed.

Placing Reverb On The Master Bus

Many novice mixing engineers place reverb on the master bus, applying it to the entire mix. This can cause problems as the reverb will be added to all the tracks irrespective of whether that track needs the effect or not. To avoid this, apply reverb on individual tracks or groups of tracks. This gives you better control and ensures that the reverb effect complements each instrument. If you want to add reverb to the entire mix, use an auxiliary channel instead of the master bus. This can help you blend the reverb with the mix without overpowering the instruments. In conclusion, avoiding the above common reverb mixing mistakes can significantly improve the quality of your music production. Remember, less is often more when it comes to reverb, and always select the reverb effect that complements your mix’s tone and character.

Reverb Mixing Tips For Deep Music

Credit: www.waves.com

Experimenting With Unconventional Reverb Sources

Deep music is a genre that requires a unique approach when it comes to reverb mixing. While traditional reverb sources such as rooms, halls, and plates can work wonders for enhancing the depth and space in the mix, it never hurts to explore unconventional sources for reverb.

Using Delay As A Reverb Source

If you’re looking to experiment with unconventional reverb sources, using delay as a reverb source can be a game-changer. Delays can create interesting and unique soundscapes that traditional reverb can’t match. To achieve this, you can try feeding a delay into a reverb unit, creating a dense and otherworldly sound.

Another interesting way to use delay as a reverb source is by placing a short delay before the reverb unit. This technique adds a sense of density to the reverb, making it sound thicker and more immersive.

Using Convolution Reverb With Non-reverb Sounds

Convolution reverb is a type of reverb that uses sampled impulses to recreate the sound of real acoustic spaces. While convolution reverb is typically used on traditional instruments and vocals, it can offer a unique sound when used with non-reverb sounds.

Using a convolution reverb with non-reverb sounds can add a sense of location and space to the mix. For example, you can use a convolution reverb to recreate the sound of a busy street or a crowded club and apply it to a synth or a drum loop. This technique can help place the sound in a specific context, creating a more immersive listening experience.

Experimenting with unconventional reverb sources can be a fun and creative way to add depth and space to your mix. Whether you’re using delay as a reverb source or convolution reverb with non-reverb sounds, the key is to keep experimenting and exploring new techniques.

Reverb Mixing Tips For Deep Music

Credit: www.productionmusiclive.com

Frequently Asked Questions On Reverb Mixing Tips For Deep Music

How Do You Use Reverb For Depth?

To use reverb for depth, apply it subtly to enhance the ambience and create a sense of space. Begin by selecting the right reverb type, such as hall or plate, and adjust the decay time and pre-delay to achieve desired results.

Keep in mind the mix and context while adjusting the levels to add depth without overpowering other elements.

How Can I Make My Reverb Sound Better?

To make your reverb sound better, you can try adjusting the decay time, pre-delay, and damping controls. Ensure that the reverb fits the genre and desired effect and experiment with using multiple reverb plugins or units. Adjusting the EQ, adding compression, and using automation can also enhance the reverb sound.

Do You Put Eq Before Reverb?

Yes, you should put EQ before reverb to ensure that any unwanted frequencies are removed before adding the desired reverb effect. EQ helps in shaping the tone and frequency of the track, whereas reverb adds space and depth to it.

Hence, it’s essential to apply EQ before reverb to get the best results.

How Do I Make My Mix More Depth?

To make your mix more depth, you can try adjusting the levels of each element to create more space and separation. Adding reverb or delay can also give a sense of depth and space. Try using compression to even out the levels, and experiment with panning to create a wider stereo image.

Don’t overdo it though, as too much processing can make the mix sound cluttered.

Conclusion

To achieve a deep and spacious reverb sound in your music, it’s crucial to apply the right techniques during mixing. Crafting the perfect reverb can enhance your music and add a sense of atmosphere that captivates listeners. By following these tips, you can produce a sound that has dimension, clarity and depth.

Keep in mind that experimenting, patience and careful listening are key to achieving the perfect reverb mix. With these tools and techniques, you’ll have the knowledge to create music that truly resonates with your audience.

Categories
Archive

Korg Nano Review

The Korg Nano is a compact and versatile MIDI controller that offers excellent functionality and portability. Its compact size and robust build make it an ideal choice for musicians on the go.

With its responsive pads, knobs, and buttons, the Korg Nano provides a seamless experience for controlling software instruments and digital audio workstations. Whether you’re a beginner or a professional musician, the Korg Nano is a reliable and affordable option that delivers exceptional performance.

Design And Build Quality

The design and build quality of the Korg Nano series is a crucial aspect that sets these compact MIDI controllers apart from others. Let’s delve into the details of its design and build quality to understand why it’s a popular choice for music producers and performers.

Compact And Portable

The Korg Nano series is renowned for its compact and portable design, making it ideal for musicians on the go. The controllers are incredibly lightweight and can easily fit into a backpack or laptop bag, offering unmatched portability for music production and live performances.

Materials And Construction

The Nano series is crafted from high-quality materials, ensuring durability and reliability. The controllers are built to withstand the rigors of travel and live performances, featuring sturdy construction that can endure the demands of professional use. Whether it’s in the studio, on stage, or on the road, the Korg Nano series delivers exceptional performance and longevity.

Product Features

Exploring the Korg Nano Review, let’s delve into the Product Features of this powerful music production tool.

Key Features

The Korg Nano boasts compact design for portability and convenience.

It offers intuitive controls for easy maneuverability.

Plug-and-play functionality for quick setup.

Functionality And Versatility

  • Diverse range of musical applications.
  • Customizable settings to suit individual preferences.
  • Provides seamless integration with various DAWs.

Performance

The Korg Nano delivers exceptional performance with its compact design and impressive features, making it a top choice for musicians seeking versatility and portability. Whether you’re on stage or in the studio, this review highlights the Nano’s outstanding performance capabilities.

User Experience

When it comes to performance, the Korg Nano is a standout in its category. Its compact and lightweight design allows for effortless portability, making it ideal for musicians on the go. Not only does it provide exceptional functionality, but it also delivers a seamless and enjoyable user experience.

With its intuitive layout and user-friendly interface, the Korg Nano ensures that navigating through its features is a breeze. The buttons and knobs are strategically placed, allowing for quick and easy adjustments without any confusion or frustration. Whether you’re a professional musician or a hobbyist, the Korg Nano streamlines your workflow, enhancing your overall musical experience.

Compatibility With Daws

One of the standout features of the Korg Nano is its remarkable compatibility with DAWs (Digital Audio Workstations). Whether you’re using popular software like Ableton Live, Logic Pro, or FL Studio, the Korg Nano seamlessly integrates with your preferred DAW, making it a powerful tool for music production.

With its customizable settings, the Korg Nano allows you to easily map its controls to the specific functions within your DAW. This level of flexibility ensures that you can tailor the device to suit your individual workflow, enabling you to maximize your productivity and creativity.

Additionally, the Korg Nano’s MIDI capabilities enable it to communicate seamlessly with your DAW, allowing you to control various parameters and instruments with precision. Whether you’re composing, recording, or performing, the Korg Nano’s compatibility with DAWs ensures that you have a versatile and reliable tool at your disposal.

Pros And Cons

When it comes to MIDI controllers, the Korg Nano series has established itself as a reliable and portable option for music producers and performers. In this review, we’ll dive into the pros and cons of the Korg Nano series, including the NanoKEY, NanoPAD, and NanoKONTROL, to help you decide if it’s the right choice for your musical needs.

Advantages

The Korg Nano series boasts several advantages that make it an attractive option for music enthusiasts. Here are some of the key benefits:

Advantages of Korg Nano
1. Compact and Portable
2. Easy Integration
3. Versatile Controls
4. Budget-Friendly
5. USB-Powered

1. Compact and Portable:

The Nano series is designed with portability in mind. Each controller is incredibly compact, making it convenient to fit in a backpack or laptop bag. Whether you’re a DJ on the go or a producer who frequently travels, the Korg Nano series won’t weigh you down.

2. Easy Integration:

With its plug-and-play functionality, the Korg Nano series seamlessly integrates with popular digital audio workstations (DAWs) like Ableton Live and Logic Pro. This simplicity ensures you can quickly connect and use the controller without any technical headaches.

3. Versatile Controls:

Despite their small size, the Nano controllers offer an impressive range of controls. From the NanoKEY’s responsive keys to the NanoPAD’s touch-sensitive pads and the NanoKONTROL’s sliders and knobs, these controllers provide a versatile and tactile interface for music creation.

4. Budget-Friendly:

For musicians on a budget, the Korg Nano series delivers great value for the price. Compared to larger MIDI controllers, the Nano series offers a more affordable option without compromising on functionality or build quality.

5. USB-Powered:

One of the most convenient features of the Korg Nano series is its USB-powered operation. By connecting the controller to your computer via USB, you eliminate the need for an external power source, simplifying your setup and reducing cable clutter.

Limitations

While the Korg Nano series has many advantages, it’s essential to consider its limitations to make an informed decision. Here are some of the limitations to be aware of:

  1. Limited Key Range
  2. No Motorized Faders
  3. Small Size Can Be a Challenge
  4. No Aftertouch

1. Limited Key Range:

Due to its compact size, the NanoKEY has a limited key range, which may not be suitable for advanced piano playing or professionals who require a full-sized keyboard. However, for basic melody composition and triggering samples, it offers sufficient functionality.

2. No Motorized Faders:

Unlike some larger MIDI controllers, the NanoKONTROL does not feature motorized faders. This means that if you’re working with automation in your DAW, the faders won’t move automatically to reflect the changes. However, they still function as traditional faders, allowing you to manually adjust levels.

3. Small Size Can Be a Challenge:

While the compact size of the Nano series is advantageous for portability, it can become a challenge for individuals with larger hands. Those with bigger fingers may find themselves struggling with the smaller knobs, buttons, and keys. However, it ultimately comes down to personal preference and comfort.

4. No Aftertouch:

Although the Nano series offers expressive controls, it lacks aftertouch functionality. Aftertouch allows for additional expression by detecting the pressure applied after a key is pressed. If aftertouch is a critical feature for your music production, you may need to consider other MIDI controllers.

Comparison With Competing Products

Comparison with Competing Products:

Similar Products In The Market

Korg Nano series competes with similar products from top brands like Akai and Novation.

Points Of Distinction

Korg Nano stands out for its compact design, intuitive controls, and high-quality build.

Korg Nano Review

Credit: www.soundonsound.com

User Feedback

User Feedback: User feedback is invaluable when it comes to evaluating the performance and usability of products like the Korg Nano series.

Customer Reviews

Customer reviews: Real user experiences shed light on the strengths and weaknesses of the Korg Nano devices.

Common User Experiences

Common User Experiences: Let’s look at some key feedback points from users who have used the Korg Nano series.

Verdict

Discover the verdict on the Korg Nano in this insightful review. Uncover its features, performance, and overall value for music enthusiasts.

After an in-depth review of the Korg Nano, it is clear that this compact MIDI controller packs a punch. With its small form factor and impressive range of features, the Nano is an excellent choice for musicians on the go.

Summary Of Key Points

  • The Korg Nano is a compact MIDI controller designed for musicians looking for portability.
  • Despite its small size, the Nano offers a range of features including 16 velocity-sensitive pads, 8 knobs, and X-Y touchpad control.
  • The controller is easy to set up and use, with seamless integration with popular software programs.
  • With sturdy construction and responsive controls, the Nano is built to withstand the rigors of live performances.
  • The controller offers a great value for its price, making it a strong choice for both beginners and experienced musicians alike.

Recommendation

In conclusion, the Korg Nano is a versatile MIDI controller that delivers on its promises. With its compact size, impressive features, and affordable price point, it is a must-have for musicians on the go.

ProsCons
Compact and portableMay feel cramped for those with larger hands
Wide range of featuresLimited control options for advanced users
Easy to set up and useSome users experienced connectivity issues
Durable constructionLack of visual feedback

In summary, the Korg Nano is a solid choice for musicians seeking a portable MIDI controller with a pocket-friendly price. Its compact design, impressive features, and ease of use make it a standout option in the market. Whether you’re a beginner or an advanced musician, the Nano is sure to enhance your music production experience.

Korg Nano Review

Credit: www.macprovideo.com

Korg Nano Review

Credit: m.youtube.com

Frequently Asked Questions For Korg Nano Review

What Is A Korg Nanokontrol Used For?

The Korg nanoKONTROL is used for controlling music software and hardware. It offers hands-on control of mixing, recording, and playback functions.

Does Korg Nanokontrol2 Work With Pro Tools?

Yes, the korg nanoKONTROL2 is compatible with Pro Tools for controlling various parameters in the software.

What Is Nanokey?

The nanoKEY is a compact and portable MIDI keyboard controller ideal for music production on-the-go.

How Do I Reset My Korg Nanokontrol Studio?

To reset your Korg nanoKONTROL Studio, follow these steps: (1) Power off the device. (2) Hold down the “Set” and “Track Left” buttons. (3) While holding, power on the device. (4) Release the buttons when the display shows “Factory Set.

” Your nanoKONTROL Studio is now reset.

Conclusion

Upgrading your music setup with the Korg Nano adds versatility and creativity. The compact design, intuitive controls, and advanced features make it a must-have for musicians and producers. Elevate your music production experience with the Korg Nano and unleash your full potential.

Discover endless possibilities today.

Categories
Archive

Secret Tips To Perfect Drums

For perfect drums, focus on tuning, practicing with a metronome, investing in quality drumsticks, and experimenting with different musical styles. Drumming is a highly intense and exhilarating activity that involves a great deal of technique and practice to perfect.

Also, from properly tuning your drums to using a metronome to developing a diverse range of playing styles, there are many secrets to mastering this art form. Also, we will reveal some of the best tips and tricks to help you enhance your drumming skills and take your performance to the next level.

Related reading: Programming Drums and How To Reverb Drums. For background, see the Wikipedia article on Drum kit.

By following these expert recommendations, you can hone your technique, boost your creativity, and become a truly skilled and versatile percussionist. In addition, read on to learn more!

Secret Tips To Perfect Drums

Credit: m.youtube.com

1. Warm-up Exercises

Moreover, to perfect your drumming, warm-up exercises are critical. These exercises will prepare your muscles and relax your joints before you begin playing. For example, spend at least 10-15 minutes warming up to improve your drumming skills and prevent possible injuries.

In addition, Drumming is more of a physical activity that requires both mental and physical effort. Whenever you sit down to play a kit, it’s crucial to warm up your muscles properly to prevent any injury during the session. As a result, under the subheading of “Warm-up Exercises”, let’s discuss why this routine is essential, how to prepare for it, and some recommended exercises.

Why Warm-up Is Crucial

Furthermore, warming up is a basic yet essential part of any drummer’s routine, and you should never skip this step. Warm-up exercises prepare your body for the physical and mental exertion that’s going to happen while drumming. However, it loosens up your joints and muscles, which reduces the likelihood of cramps, strain, and other injuries.

The Ideal Warm-up Routine for Perfect Drums

Additionally, there’s no fixed formula for a warm-up routine as it depends on the specific requirements of the drummer. However, in general, a warm-up should start with light exercises that gradually increase the intensity. Then, your routine should be around 10-15 minutes long, enough to get your muscles feeling loose and ready to play.

Recommended Warm-up Exercises for Perfect Drums

Also, here are some beginner-level warm-up exercises that you can try to prepare yourself for the drumming session:

ExerciseDescription
Basic StretchingLoosen up your limbs and perform squats and lunges.
Finger exercisesTap your fingers on a surface or use a portable drum pad to practice sticking patterns and rudiments.
Footwork drillsUse pedals to play patterns and warm up your legs.
Full-body workoutIncorporate some aerobic exercises like jumping jacks or jogging to help you elevate your heart rate.

Moreover, wrap Up: Warming up is a crucial aspect of drumming, and you should never skip this routine. In short, it helps reduce the likelihood of injuries and prepares you both mentally and physically for the session. Start with basic exercises and eventually build up your routine according to your requirements. Happy drumming!

2. Tuning For Perfect Drums

In addition, to perfect your drums, tuning them is crucial. Similarly, use a drum key to slowly adjust the tension of each drumhead, making sure they are evenly tuned and in sync with each other. Don’t forget to tune both batter and resonant heads for a balanced sound.

Furthermore, Tuning is vital in achieving the perfect sound from your drum set. Also, whether you’re performing on stage or recording in the studio, having a well-tuned drum kit can make a world of difference. In this section, we will cover the importance of proper tuning, the types of drum heads, how to tune each drum component, and common tuning mistakes to avoid.

Importance Of Proper Tuning for Perfect Drums

Additionally, proper tuning ensures that each drum produces the right pitch and tone. This is important because an out-of-tune drum can cause dissonance and make the overall sound of the drum set unpleasant. In addition, in contrast, a well-tuned drum has a clear and pleasing tone and vibrates in harmony with the other drums.

Types Of Drum Heads for Perfect Drums

Before tuning your drums, remember that the type of drum head you use can affect the sound it produces. Also, there are two types of drum heads: single-ply and double-ply. Single-ply is thinner and produces a brighter tone, while double-ply is thicker and produces a warmer tone.

How To Tune Each Drum Component

Moreover, each drum component requires a different method of tuning. Here are a few basic tips for tuning each drum:

  • Bass drum: Place a pillow or blanket inside the bass drum for a tighter sound. Tune each lug to the same pitch to achieve an even sound.
  • Snare drum: Tighten the lugs around the snare wires first, then adjust the other lugs to match. Tune the top head higher than the bottom head for a crisp sound.
  • Toms: Tune the top head higher than the bottom head. Furthermore, make sure to tune each lug to the same pitch to achieve an even sound.

Common Tuning Mistakes To Avoid for Perfect Drums

Additionally, here are some common tuning mistakes you should avoid:

  • Over-tightening: This can cause the drum head to warp or break, resulting in a poor sound.
  • Uneven tuning: Failing to tune each lug to the same pitch can cause dissonance and an uneven sound.
  • Incorrect choice of drum heads: Using the wrong type of drum head can affect the tone and quality of the sound.

Remember, tuning your drums takes practice, patience, and experimentation. With these tips, you can achieve a perfectly tuned drum set and take your drumming to the next level.

3. Proper Grip And Technique

Having a proper grip and technique while playing the drums is crucial for achieving a perfect sound. Make sure to hold the sticks correctly and practice proper posture to avoid injury and improve your drumming skills.

Why Grip And Technique Matter

Proper technique and grip are crucial for playing drums with precision and control. Not only can it prevent injuries, but it can also enhance your overall drumming experience. By having the correct grip and technique, you can play faster, more smoothly, and with greater ease. It’s important to develop good habits early on and to continue to practice them regularly.

Correct Hand Positioning And Grip for Perfect Drums

To start, make sure that your grip is not too tight or too loose. Holding the sticks too tightly can cause tension and fatigue in your hands while holding them too loosely can lead to a lack of control and accuracy. Ensure that your palms are facing each other and that you are holding the sticks between your thumb and first two fingers. Your back fingers should wrap around the stick for support and balance.

How To Use Drumsticks Effectively

The way you hold and use your drumsticks can affect the sound that you produce. When holding your sticks, make sure to keep them parallel to the drumhead and play with the tips for a clear and defined sound. To produce a louder sound, hit the drum with the middle part of the stick while keeping your strokes smooth and consistent. Practicing these techniques can help you produce a better sound and transition seamlessly between beats.

Drumming Technique Tips in Perfect Drums

In addition to proper grip and hand positioning, there are several drumming techniques that you can use to improve your playing. For instance, utilizing the rebound of the stick can generate a smoother sound and reduce hand fatigue. You can also use finger control to produce more intricate patterns and rolls. To prevent injury, avoid using excessive force and practice stretches to keep your hands and wrists limber. Proper grip and technique are essential for any drummer looking to perfect their craft. By developing good habits and practicing effective techniques, you can achieve better control, accuracy, and sound quality. Remember to stay relaxed and focused and to have fun while drumming.

Secret Tips To Perfect Drums

Credit: issuu.com

4. Metronome Practice

Metronome practice is a secret tip to perfect drums. Keeping time with a metronome can improve your rhythm, timing and accuracy. Incorporate this practice into your drumming routine and watch your skills improve.

Metronome practice is an essential part of perfecting your drums. It helps you maintain perfect timing and improve your sense of rhythm. In this section, we will discuss the benefits of metronome practice, how to use a metronome for practice, and metronome practice drills.

Benefits Of Metronome Practice for Perfect Drums

Practicing with a metronome provides many benefits for drummers. Some of the key benefits include:

  • Improving timing: Playing along with a metronome helps to develop a strong internal sense of timing and rhythm.
  • Building consistency: Consistent practice with a metronome helps build muscle memory and creates good habits.
  • Enhancing creativity: When you have a strong sense of timing, it frees up your mind to play more creatively and experiment with different rhythms and patterns.

How To Use A Metronome For Practice

Using a metronome may seem daunting at first, but it’s easy to get the hang of it. Here’s how to use a metronome for practice:

  1. Start with a slow tempo: Start with a slow tempo and gradually increase it as you get comfortable.
  2. Choose the right time signature: Choose a time signature that matches the song you’re practicing with.
  3. Focus on accuracy: Play each note accurately and in time with the metronome.
  4. Experiment with different subdivisions: Try playing different subdivisions (half-notes, quarter-notes, eighth-notes, etc.) to get comfortable with all types of rhythms.
  5. Use different metronome sounds: Some metronomes have different sounds that you can use to help keep time.

Metronome Practice Drills

Here are some metronome practice drills that you can use to improve your timing and rhythm:

ExerciseDescription
Single-stroke rollPlay a single-stroke roll at an even tempo with the metronome.
Double-stroke rollPlay a double-stroke roll at an even tempo with the metronome.
Paradiddle exercisePractice paradiddles with the metronome, increasing the tempo as you get comfortable.
Accent exercisePlay an accent exercise at an even tempo with the metronome, gradually increasing the tempo.

Using a metronome in your practice routine will help you improve your timing, build consistency, and enhance your creativity. Experiment with different subdivisions and practice drills to take your drumming to the next level.

5. Playing Along With Recordings

One secret tip to perfect drums is playing along with recordings. Listening and playing along with professional musicians can improve timing, rhythm, and overall performance. It’s a great way to learn new techniques and develop your own style.

Playing along with recordings is a great way to improve your drumming skills. It allows you to practice with a wide variety of music and learn from some of the best drummers in the world. In this section, we’ll explore the advantages of playing along to recordings, how to choose the right songs to play along with, and how to play along with a recording effectively.

Advantages Of Playing Along To Recordings

When you play along with recordings, there are several advantages. First, you get to hear and play along with professional drummers. This allows you to develop a better sense of timing and rhythm. Second, playing along with recordings lets you practice different styles of drumming. Third, it’s a great way to improve your ear training by listening closely to the music and trying to match the drumming.

Choosing The Right Songs To Play Along With

Choosing the right songs to play along with is crucial. You want to choose songs that are at your skill level and that you enjoy. Start with simple songs and gradually work your way up to more complex ones. It’s also a good idea to choose songs with a repetitive beat so that you can focus on playing along with the rhythm.

How To Play Along With A Recording Effectively

To play along with a recording effectively, you’ll need to start by listening to the song and getting a feel for the rhythm. Then, try to match the beat by playing along with the recording. It’s a good idea to start by playing along with the hi-hat or ride cymbal to get the rhythm down. Once you feel comfortable with the rhythm, you can start adding in the bass drum and snare drum. One important thing to remember when playing along with a recording is to listen closely and play in time with the music.

If you find yourself struggling to keep up with the beat, slow the music down or break it down into smaller sections. This will help you focus on the rhythm and master it before moving on to the next section. In conclusion, playing along with recordings is an effective way to improve your drumming skills. By choosing the right songs to play along with and practicing effectively, you can develop a better sense of timing and rhythm, learn new styles of drumming, and improve your ear training. So, grab your headphones, pick a song, and start playing!

Secret Tips To Perfect Drums

Credit: issuu.com

6. Dynamics And Tempo Variation

Perfecting your drumming skills involves mastering dynamics and tempo variations. Use a combination of accents, ghost notes, and effects to create a personalized style. Experiment with different techniques to find what works best for you.

Dynamics And Tempo For Perfect Drums

A drummer who can master dynamic and tempo variations can easily take their drumming to the next level. Playing at the same dynamic and tempo can make your drumming less interesting, but by varying these two elements, you can create a range of interesting sounds and add depth to your playing.

How To Control Dynamics Effectively

Controlling drum dynamics refers to the volume of the drum sounds. It’s essential to control the dynamics during your playing, mostly when you’re playing with other musicians. Here are some ways to control the dynamics effectively:

  • Change the way you hit the drum.
  • Use different types of sticks to play the drum.
  • Use a different playing technique, like mallets.

How To Incorporate Tempo Variation In Your Playing

Playing at the same tempo can be monotonous. It’s equally important to vary the tempo of your drumming to make it more engaging. Here is how you can incorporate tempo variation in your drumming:

  1. Slowly speed up the tempo over a period.
  2. Play faster or slower in response to the other musicians.

By incorporating dynamics and tempo variation in your drumming, you can create a unique sound and enhance the overall quality of your playing.

Frequently Asked Questions Of Secret Tips To Perfect Drums

How Do I Get Better At Drumming?

To get better at drumming, practice regularly and set achievable goals. Take lessons or watch online tutorials to improve your technique and learn new styles. Play with other musicians to improve your timing and rhythm, and listen to a wide range of music to develop your musical knowledge.

Remember to have fun and enjoy the process of improving your drumming skills.

How Can I Make My Drumming Sound Better?

To improve your drumming, there are a few things you can do: 1) Practice regularly to improve your technique 2) Make sure your drums are tuned properly 3) Experiment with different cymbals and drumsticks 4) Record yourself to identify areas for improvement 5) Learn from other drummers by watching online tutorials or attending workshops.

What Effects Make Drums Sound Better?

Drums sound better when they are tuned properly and have good quality drumheads. The material used to make the drums also affects sound quality. Different drumsticks and drumming techniques can also enhance the sound. Lastly, proper microphones and mixing tools can improve drum sound in recordings.

Conclusion

Perfecting drums takes time and effort, but with these secret tips, you can expedite your progress. From selecting the right drum set to mastering rhythms and techniques, these tips cover all aspects of drumming. Remember to be patient, consistent, and have fun while you practice.

Follow these guidelines, stay dedicated, and you’ll soon see the improvement in your drumming skills. So what are you waiting for? Start practicing today!

Categories
Archive

Eq Eight What It Is How To Use It

This guide covers Ableton EQ Eight in plain terms. EQ Eight is a digital equalizer used for audio mixing and mastering. Its interface comprises of eight fully parametric bands, high-pass and low-pass filters, and a real-time analyzer.

Also, to use it, one must first identify the areas that need adjustment in the audio track. Then, adjust the gain and frequency settings of each band to achieve the desired sound balance and equalization. EQ Eight is a favorite among music producers and engineers because of its flexibility and precision in affecting the tonal balance of a track.

Related reading: Equinox Progressive Melodic Techno Ableton Template and How To Set Up The Moog Subsequent 37 With Ableton Live.

Moreover, with its advanced features and ease of use, EQ Eight is an essential tool in the audio editing process.

Ableton EQ Eight – EQ Eight in Ableton: What It Is, How to Use It

Credit: www.productionmusiclive.com

What Is Ableton EQ Eight?

What is EQ Eight?

If you’re a music producer or audio engineer, then you probably have come across EQ or Equalization. Also, EQ is the process of adjusting the balance between frequency components of an audio signal. In addition, EQ Eight is an audio plugin designed for this purpose.

The Basics Of Eq Eight

Furthermore, EQ Eight is a built-in audio plugin in Ableton Live, a Digital Audio Workstation (DAW) software. In addition, the plugin enables music producers and audio engineers to adjust the balance of different frequency components in an audio signal. It gives you the flexibility to cut or boost certain frequencies in your audio, shaping it to fit your mix, and making it sound more professional.

Features And Functions Of Eq Eight

Additionally, EQ Eight offers a variety of features and functions that make it stand out. For example, below are some of the notable ones:

Frequency Spectrum DisplayDisplays the Spectrum of the audio signal, showing the volume of each frequency.
Eight bandsEight adjustable bands that allow you to cut or boost specific frequency ranges.
Gain per bandThe ability to adjust the gain (volume) of each EQ band.
Mid/Side processingAllows you to process either the center (Mid) or the side (Side) of the audio signal or both.
FiltersEQ Eight offers various filter modes such as high-pass, low-pass, band-pass, notch filters, and many more.
EQ graphIt displays the EQ curve, making it easier to visualize the adjustments made.

Also, these features and functions make EQ Eight an indispensable tool for music producers and audio engineers. As a result, it helps in achieving a more polished and professional sound. In conclusion, EQ Eight is a versatile and powerful tool designed to help you get the most out of your audio.

Ableton EQ Eight – EQ Eight in Ableton: What It Is, How to Use It

Credit: www.ableton.com

Setting Up Ableton EQ Eight

Moreover, to set up EQ Eight, open up the plugin and adjust the frequency bands to your liking using the controls provided. However, be sure to experiment with different settings to find the perfect sound for your audio.

In addition, EQ Eight is a powerful equalizer plugin that is included with Ableton Live. Then, setting it up is easy and can be done in a few steps. First, make sure that the plugin is installed and enabled in your DAW. Next, open EQ Eight and familiarize yourself with its interface.

Loading Ableton EQ Eight On A Track

Furthermore, EQ Eight is a versatile equalizer that can be used in any DAW that supports VST or AU plugins. In short, to use EQ Eight in your DAW, simply load it onto your channel strip or insert effects rack. From there, you can adjust the various parameters to fine-tune your sound.

Understanding The Ableton EQ Eight Interface

Additionally, EQ Eight’s interface is designed to be intuitive and easy to use. Similarly, the interface is divided into two main sections: the spectrum display and the parameter controls. The spectrum display shows the frequency response of your audio signal, while the parameter controls allow you to adjust the various EQ settings. At the top of the interface, you will find the mode selector, which allows you to choose between any of EQ Eight’s eight different modes. Each mode has a different number of bands and a different range of frequencies.

Below the mode selector, you will find the frequency controls, which allow you to adjust the frequency bands. Also, simply click and drag the handles to adjust the frequency range of each band. Finally, at the bottom of the interface, you will find the parameter controls. Here, you can adjust the gain, resonance, and other parameters of each band. Overall, EQ Eight is a powerful and easy-to-use equalizer that can help you achieve the perfect sound for your mix. With a little bit of practice, you can become an expert at using EQ Eight to shape your audio.

Ableton EQ Eight For Mixing

EQ Eight is an audio equalizer plugin that is used for mixing and mastering audio tracks. In addition, it allows you to adjust the frequency levels of your audio and EQ it in a more detailed and precise way. With EQ Eight, you can enhance the clarity, presence, and depth of your audio, making it sound more polished and professional.

Using Eq Eight To Shape Your Tracks

EQ Eight is a powerful tool for shaping tracks during the mixing process. For example, by adjusting the levels of different frequencies, you can bring out the best in each instrument and help them blend harmoniously together. To get the most out of EQ Eight, start by focusing on each individual track. Listen carefully to the instrument you want to adjust and pay attention to any issues with the tone or clarity of the sound. Once you’ve identified problem areas, use the EQ eight to adjust specific frequency ranges to shape the sound. For example, if a guitar sounds muddy, you can reduce the bass frequencies to give the guitar more clarity. Alternatively, if the guitar lacks warmth, you can boost the mid-range frequencies to enhance the overall tone.

Tonal Balance And Frequency Charting With Eq Eight

To get the most out of EQ Eight, you need to understand the tonal balance of your track. As a result, a tonal balance chart can help you visualize the levels of different frequency ranges in your mix. By analyzing this chart, you can identify any issues with the tonal balance and make adjustments with EQ Eight. To create a tonal balance chart, start by analyzing each track in your mix. Use the EQ Eight to isolate each instrument and identify the primary frequency ranges for that instrument.

Once you’ve done this for all tracks, you can create a chart that shows the overall tonal balance of the mix. However, with this information, you can use EQ Eight to adjust specific frequency ranges and ensure that each instrument is in its ideal range in the mix. This helps to avoid muddiness or other tonal issues that can detract from the overall sound quality.

In Conclusion

By using EQ Eight to shape your tracks and analyze the tonal balance of your mix, you can achieve a more polished and professional sound. Then, experiment with different levels of frequencies and pay attention to how the individual instruments and the mix as a whole respond. With enough practice, you’ll become an expert at using EQ Eight to achieve the perfect sound for your mix.

Ableton EQ Eight For Mastering

In the world of audio production, mastering is the final step to ensure your music sounds polished and professional. In short, one important tool for mastering is EQ Eight, an equalizer plugin in Ableton Live. EQ Eight for mastering is a versatile tool that can be used to achieve the desired tonal balance and clarity in your music. In this blog post, we’ll explore how to use EQ Eight for mastering, with a focus on adding clarity and presence with EQ Eight and mid-side EQing.

Using Eq Eight To Add Clarity And Presence

EQ Eight allows you to adjust the volume of specific frequencies in your audio signal. Similarly, this can help you achieve the desired tonal balance for your music. One common use of EQ Eight is to add clarity and presence to your mix.

To add clarity to your mix, start by analyzing the frequency spectrum of your audio signal using EQ Eight. Also, you can do this by opening EQ Eight on a track in Ableton Live and clicking on the “Show Analyzer” button. This will display a real-time frequency spectrum of your audio signal.

Next, identify any frequencies that are lacking clarity or presence in your mix. In addition, these frequencies may sound dull or muffled. To boost these frequencies, select the specific frequency range on EQ Eight and increase the volume using the gain slider. It’s important to be subtle with your EQ adjustments, as too much boost can result in an unnatural and unpleasant sound.

Mid-side Eqing With Eq Eight

Another powerful feature of EQ Eight for mastering is mid-side EQing. For example, this technique allows you to separately adjust the mid and side channels of your audio signal.

Mid-side EQing can be used to improve the stereo width and balance of your mix. To use mid-side EQing with EQ Eight, select the “M” or “S” buttons at the bottom of the plugin window. This will allow you to adjust the volume of the mid or side channels independently.

When using mid-side EQing, it’s important to be careful with your adjustments. EQ Eight has a high-quality filter design, which can result in a sharp and detailed sound. However, too much EQing in the mid or side channels can cause the mix to become unbalanced or distorted.

In conclusion, EQ Eight is a powerful tool for mastering in Ableton Live. By using EQ Eight to add clarity and presence and utilizing mid-side EQing, you can achieve the desired tonal balance and stereo width for your music.

Advanced Techniques With Ableton EQ Eight

EQ Eight is a versatile audio equalizer tool that provides advanced techniques for audio processing. With its intuitive interface, you can easily adjust settings like frequency, amplitude and more to enhance and perfect the audio quality.

Parallel Processing With Eq Eight

You can unlock EQ Eight’s full potential by using it in parallel with your other effects. Parallel processing is a simple technique used for achieving great sounds by blending different processing chains together. Here’s how you can use EQ Eight in parallel processing:

  1. Start by duplicating the track you want to process.
  2. Apply the EQ Eight plugin to one of the tracks.
  3. Now apply your other effects plugin to the other track.
  4. Mix those two channels together.

By blending these two channels, you can achieve a sound that is refined, polished, and customized to your taste.

Using Eq Eight In Creative Sound Design

EQ Eight is not just a standard mixing tool, it can also be used in creative sound design. Here are some ways to use EQ Eight to enhance your sound design:

  • Create Movement: EQ Eight can be automated to create movement and interest over time. This can help your sound design come to life.
  • Sound Design Layers: Use EQ Eight to create individual layers of your sound design by applying different frequencies. This will give you more control over the sound, which will help you stand out from the crowd.
  • Mix and Match: By using EQ Eight to change the frequencies and harmonics of each sound, you can easily mix and match sounds to create something unique. This can help give your productions a professional touch.

Using EQ Eight in creative ways can generate sounds that are both unique and memorable. Take the time to experiment with this powerful tool and elevate your sound design to the next level.

Ableton EQ Eight – EQ Eight in Ableton: What It Is, How to Use It

Credit: www.reddit.com

Frequently Asked Questions Of Eq Eight What It Is How To Use It

What Is The Difference Between Ableton EQ Eight And EQ Three?

The main difference between EQ Eight and EQ Three is the number of bands they have. EQ Eight has eight bands while EQ Three has only three bands. EQ Eight also offers more advanced features such as mid/side processing and a spectrum analyzer.

Is Eq Eight In Ableton Intro?

No, EQ Eight is not included in Ableton Intro.

How Do I Use An Equalizer In Ableton?

Using an equalizer in Ableton is easy. Open up the “Mixer” view and activate EQ control by selecting the desired track. Click the “EQ Eight” button and adjust frequency, gain, and resonance. Move the white dot up or down on each EQ band to make changes.

You can also save your EQ settings as presets.

What Is The Best Eq For Ableton?

Ableton offers EQ Eight, which is a versatile and effective EQ for shaping sound. It includes features such as a Spectrum Analyzer and EQ Match to make the process smoother. Additionally, there are many third-party EQ plugins available for Ableton, allowing for more options to suit individual preferences.

Conclusion

Incorporating EQ Eight in your music production is a smart move to improve sound quality and achieve a balanced mix. By understanding how the plugin functions and experimenting with its parameters, you can shape your sound to your liking. Remember to always use your ears as your ultimate guide and trust your instincts.

EQ Eight offers endless possibilities for enhancing your music and taking it to the next level. Start incorporating it into your workflow and see how it transforms your music!

For more background, see Ableton Live on Wikipedia. You may also like our guide: Using the Eq Eight in Ableton Live: Mastering Audio Essentials.

Categories
Archive

Best Vocal Frequencies To Eq

The best vocal frequencies to EQ are between 100Hz to 250Hz and 2kHz to 6kHz. These frequencies are crucial for clarity and warmth in a vocal mix.

EQing vocals can be a challenging task for any sound engineer. Knowing which vocal frequencies to EQ can make all the difference in the final mix. The best vocal frequencies to EQ are those that enhance clarity and warmth in the vocals.

These frequencies are typically found between 100Hz to 250Hz and 2kHz to 6kHz. We will dive deeper into these vocal frequencies and understand why they are essential for improving the quality of a vocal mix. Additionally, we will discuss the techniques used to EQ the vocals and make them stand out in a mix.

Best Vocal Frequencies To Eq

Credit: www.musicguymixing.com

Understanding Vocal Frequencies

Understanding vocal frequencies is essential when it comes to producing high-quality music. The best vocal frequencies to EQ are typically between 100-300 Hz, 1-2 kHz, and 5-7 kHz. Properly adjusting these frequencies creates a clear and crisp sound for vocals to sit perfectly in a mix.

Explanation Of Vocal Frequency Range

Vocal frequencies play a crucial role in music and audio production. Understanding vocal frequencies is vital to mixing and balancing tracks effectively. The vocal frequency range refers to the range of frequencies that the human voice can produce. The common range for a human voice is between 85 Hz to 255 Hz for the bass, 165 Hz to 255 Hz for the baritone, 195 Hz to 390 Hz for the tenor, and 300 Hz to 1 kHz for the alto or soprano.

Breakdown Of Frequencies That Make Up Vocal Tones

Vocal tones consist of a combination of frequencies. When mixing vocals, it is essential to understand the frequencies of each tone to balance the overall sound. The table below provides a breakdown of the different frequencies that form the seven primary vocal tones and their corresponding frequency range.

Vocal ToneFrequency RangePrimary Frequencies
Bass85 Hz – 255 Hz85 Hz, 100 Hz, 125 Hz, 160 Hz, 200 Hz, 250 Hz
Baritone165 Hz – 255 Hz165 Hz, 185 Hz, 200 Hz, 250 Hz
Tenor195 Hz – 390 Hz195 Hz, 245 Hz, 300 Hz, 350 Hz, 390 Hz
Alto or Soprano300 Hz – 1 kHz300 Hz, 350 Hz, 400 Hz, 500 Hz, 600 Hz, 700 Hz, 800 Hz, 900 Hz, 1 kHz
Mezzo-Soprano250 Hz – 1 kHz250 Hz, 300 Hz, 400 Hz, 500 Hz, 600 Hz, 700 Hz, 800 Hz, 900 Hz, 1 kHz
Contralto185 Hz – 1 kHz185 Hz, 250 Hz, 300 Hz, 400 Hz, 500 Hz, 600 Hz, 700 Hz, 800 Hz, 900 Hz, 1 kHz
Soprano390 Hz – 1 kHz390 Hz, 450 Hz, 500 Hz, 600 Hz, 700 Hz, 800 Hz, 900 Hz, 1 kHz

Using EQ to adjust vocal frequencies can help bring out the best in any vocal performance. Understanding vocal frequency ranges and the role each frequency plays can help achieve a balanced and pleasing vocal mix.

Best Vocal Frequencies To Eq

Credit: www.soundonsound.com

Identifying Problem Frequencies

Identifying problem frequencies is key when it comes to EQing vocals. By honing in on these frequencies, you can effectively remove unwanted sounds and enhance desirable tones, resulting in a clearer, more professional sound.

Common Problems That Can Be Found In Vocal Recordings

When it comes to recording vocals, the frequency response of the microphone, the room acoustics, and the vocal performance can all contribute to problematic frequencies. Some common issues that can be found in vocal recordings include:

  • Too much low-end rumble
  • Nasal or honky midrange
  • Harsh high frequencies
  • Sibilance or harsh “sss” sounds
  • Boxy or muddy low-mids

Techniques To Identify Problematic Frequencies

The first step in solving any EQ problem is to identify the problematic frequencies. Here are some techniques that can help:

  1. Use a spectrum analyzer to visualize the frequency content of the signal
  2. Sweep a narrow EQ boost across the frequency spectrum to locate resonant frequencies
  3. Listen critically to the vocal and make note of any frequency areas that sound harsh, boomy, or thin
  4. Compare the vocal recording to a reference mix that has a similar vocal sound

Once you have identified the problematic frequencies, you can use EQ to reduce or enhance them as needed. By following these techniques, you’ll be able to create a cleaner, more balanced vocal sound that sits well in your mix.

Equalizing Low Frequencies

A crucial part of equalizing vocals is adjusting the low frequencies. To obtain a crisp, clear sound, aim to reduce frequencies between 100-300 Hz, which can cause muddiness in the mix. Conversely, boosting frequencies around 2-4 kHz can add brightness and presence to the vocals.

The Impact Of Low Frequencies On Vocals

Low frequencies can add depth and warmth to vocals, but they can also make the vocals sound muddy and boomy. When not handled properly, low frequencies can affect the clarity and intelligibility of the vocals. Therefore, it’s crucial to understand the impact of low frequencies before EQing the vocals.

Best Practices For Cutting Or Boosting Low Frequencies

When EQing vocals, it’s best to start with cutting the low frequencies that are not necessary for the mix. By doing so, you can create more headroom and make the vocals sound cleaner and more defined. However, be careful not to cut too much as it can make the vocals thin and weak. After cutting, you can boost the low frequencies that add warmth and fullness to the vocals. This can help the vocals stand out in the mix and create a more rounded sound. However, be careful not to overdo the boost as it can result in a boomy and muddy sound. Here are some best practices for cutting and boosting low frequencies in vocals:

  • Cut the frequencies below 80 Hz to remove the rumble and low-end noise
  • Cut the frequencies between 100-300 Hz to remove the muddiness
  • Boost the frequencies between 100-250 Hz to add warmth and fullness
  • Use a low shelf EQ to boost or cut all frequencies below a certain point

Remember, EQing is subjective and depends on the individual track and mix. Therefore, it’s important to use your ears and trust your judgement when EQing the vocals.

Equalizing Mid Frequencies

Equalizing mid frequencies can greatly enhance the quality of vocal recordings. The best vocal frequencies to EQ lie between 1kHz and 6kHz, which can bring out clarity and help cut through the mix.

The Importance Of Mid Frequencies In Vocal Processing

Enhancing the mid frequencies of vocals during the equalization process is vital in achieving a well-balanced mix. Mid frequencies are responsible for the clarity and warmth of vocals. By giving mid frequencies more prominence in the mix, vocals become more intelligible and can cut through the mix easily, making it sound more natural and pleasant.

How To Control Mid Frequencies Using Eq

The process of controlling mid frequencies using EQ is simple. You need to identify the specific frequencies that need to be boosted or cut. A typical range of mid frequencies for vocals falls between 500 Hz and 2000 Hz, but isolated frequencies can also be present within or outside this range. Here are some steps to effectively control mid frequencies using EQ.

  • Start with the vocal EQ preset: Begin with a vocal EQ preset; start by boosting the mid frequencies slightly to give vocals more clarity and presence.
  • Listen to the vocal mix: Listen to the vocal mix first and identify the frequencies that need to be boosted or cut.
  • Apply EQ cuts: Remove unwanted frequencies first. Start by identifying the frequencies that sound harsh or overly pronounced, then cut them down with the EQ accordingly.
  • Apply EQ boosts: Boost mid frequencies that make the vocals sound warm and full, without making them too overpowering.
  • Use narrow EQ bandwidth: Use a narrow Q or bandwidth when adjusting mid frequencies to avoid affecting other vocal frequencies.
  • Compare the before-and-after: It is essential to compare the vocal mix before and after EQing the mid frequencies. This comparison will allow you to hear the changes you have made and make any further adjustments if necessary.

Conclusively, equalizing mid frequencies is critical when it comes to vocal mixing. By following the simple steps outlined above, you should be able to achieve a smooth and balanced vocal mix with enhanced clarity and presence.

Equalizing High Frequencies

To achieve a balanced and polished vocal mix, it is important to understand the best frequencies to EQ. When EQing vocals, it is recommended to focus on removing harsh, high frequencies to create a warmer and smoother sound. By carefully equalizing high frequencies, you can enhance the natural beauty of the voice and create a professional sounding recording.

As a content creator and vocal expert, you want your vocals to be crystal clear, distinct, and easy to listen to. One way to ensure that is by equalizing (EQ) your high frequencies. EQing high frequencies not only helps in enhancing the overall sound quality but also helps to reduce any harshness and sibilance in the vocals. Here, we will discuss the impact of high frequencies on vocal clarity and how to control high frequencies using EQ.

The Impact Of High Frequencies On Vocal Clarity

High frequencies can provide clarity and presence to your vocals. However, too much of it can cause harshness, hissing, and sibilance, making your vocals unpleasant to listen to and causing ear fatigue. Overemphasis on high frequencies can also result in a lack of clarity in the mid and lower frequency range. This is why finding the correct balance of EQ is essential for a well-rounded sound.

How To Control High Frequencies Using Eq

To EQ high frequencies, you need to identify the frequency range where your vocals start to sound too bright or harsh. This range varies depending on your voice and recording setup. In general, it falls between 2 kHz and 8 kHz. Here are some best practices to control high frequencies using EQ:

Frequency RangeControl
2 kHz to 4 kHzCut – reduces harshness and sibilance
5 kHz to 8 kHzCut or Reduce – reduces brightness and helps in achieving a balanced mix

To achieve a balanced sound, make sure not to cut too much from high frequencies. A slight reduction in the frequency range can help you achieve the desired sound. Furthermore, you can also use a de-esser plugin to control harsh S and T sounds, which might occur frequently in high-frequency ranges. In conclusion, EQing high frequencies is an essential aspect of improving the overall sound quality of your vocals. It helps in reducing harshness, sibilance, and ear fatigue. Identifying the correct frequency range for your voice and using best practices to control high frequencies will help you achieve a well-rounded sound in your recordings.

Best Vocal Frequencies To Eq

Credit: m.youtube.com

Using Eq To Enhance Vocal Effects

Enhancing vocal effects through EQ requires understanding the frequencies that bring out the best in a singer’s voice. By focusing on key frequencies like the high-mids and low-end, EQ can boost a vocal track’s presence and clarity.

Equalization or EQ is a fundamental tool used by sound engineers to manage the frequency balance and tonal quality of vocals. EQ provides more control over the audio output, significantly improving its clarity and intelligibility. To obtain optimal vocal performance, it’s crucial to choose the right EQ frequencies that complement the singer’s voice, the genre of music, and the desired effect. Here, we will discuss how to use EQ to enhance vocal effects and achieve the desired sound output.

Techniques For Applying Eq To Achieve Specific Vocal Effects

1. Reducing Muddiness To reduce muddiness or muffled vocal sounds, it’s essential to reduce the frequency range from 200 to 500 Hz. By cutting this midrange, the vocals become clearer and articulate, allowing for more pronounced sounds. 2. Boosting Presence To bring out the high-frequency range of a vocal performance, boosting the presence frequency range between 2kHz and 6kHz can help. This boosts the vocals’ clarity and intelligibility, making it easier to understand the words. 3. Emphasizing Richness and Depth To deliver a rich and full vocal sound, boosting frequencies between 100Hz and 250Hz helps to emphasize the depth of the vocals, adding a full and rich vocal tone to the music.

Examples Of Eq In Popular Music Production

1. Michael Jackson’s “Billie Jean” The song “Billie Jean” has been recognized for its impeccable production quality. EQ was used to boost the 2kHz to 4kHz range and cut the low-end to create a more present, clear and balanced vocal effect. 2. Adele’s “Rolling in the Deep” In Adele’s “Rolling in the Deep,” a prominent mid-range boost was used to focus on the vocals’ richness, depth and add clarity to the singer’s voice. In addition, a low-cut filter was utilized to remove the low-end frequencies, making the vocals more present and clearer. In conclusion, using the EQ effectively to enhance vocal effects is crucial to produce clear and articulate audio output. With the right techniques and EQ frequencies, it’s possible to create the desired vocal sound effect. The examples of EQ usage in popular songs mentioned above demonstrate the impact of EQ frequency management in enhancing vocal effects.

Frequently Asked Questions On Best Vocal Frequencies To Eq

What Is The Best Eq For Vocals?

The best EQ for vocals varies on the specific voice and the song style. However, common practice is to boost around 2 kHz to enhance clarity and presence, while reducing frequencies that muffle the sound, like 250 Hz and below.

Using a low-cut filter around 100 Hz can also remove unnecessary low-end rumble. Experimentation is key to finding the ideal EQ for vocals.

What Frequency Are Vocals In Eq?

The frequency range of vocals in EQ varies depending on the sound of the vocals. Generally, male vocals range from 85 Hz to 180 Hz, while female vocals range from 165 Hz to 255 Hz. However, the specific frequency range for vocals can be adjusted by using EQ to enhance their clarity and presence in a mix.

What Frequencies Should I Eq Out?

It depends on the specific audio material and your personal preferences. However, some frequencies that are commonly EQ’d out include low-end rumble, high-end hiss, and frequencies that clash with other instruments or vocals in the mix. It’s important to use your ears and EQ only what needs to be adjusted.

What Frequency Should I Boost My Vocals?

Boosting the vocal frequency depends on the singer’s unique voice tone. However, a recommended frequency range is 2k Hz to 6k Hz for adding clarity and 100 Hz to 200 Hz for warmth. But, keep in mind that over boosting can distort the sound, and it’s important to EQ according to the track’s mix.

Conclusion

EQing vocal frequencies can be a daunting task, but with these tips and tricks, you can achieve a balanced and polished sound. Remember to trust your ears and make adjustments based on the context of the mix. With practice and experimentation, you can find the perfect EQ settings for your vocals and elevate your overall production value.

Don’t be afraid to try new things and trust in the power of good EQing. Let your vocals shine!

Categories
Archive

Antares Auto Tune Access Review

Antares Auto-Tune Access is a straightforward and affordable pitch correction plug-in, perfect for both beginners and professionals. Antares Auto-Tune Access is a software plug-in for pitch correction.

It’s an affordable version of Antares’ popular pitch correction software that’s used by professionals worldwide. This software is designed to be simple and intuitive, perfect for beginners and intermediate level producers. The Auto-Tune algorithm has been improved to give smoother, more natural-sounding results.

Additionally, there are fewer controls to worry about, making the whole experience more streamlined. The software is available in VST, AU, and AAX formats, meaning that it can run in most digital audio workstations. In this review, we’ll take a closer look at Antares Auto-Tune Access and what makes it stand out.

Antares Auto Tune Access Review

Credit: www.soundonsound.com

Features Of Antares Auto Tune Access

Antares Auto Tune Access is a versatile and user-friendly vocal processing plugin that offers a range of powerful features. It features Auto-Key technology, which simplifies the key and scale detection process, as well as real-time pitch correcting and automatic formant control.

Antares Auto Tune Access is a plug-in designed for real-time pitch correction and upgrading vocals. It offers a range of features to help music producers, artists, and engineers enhance vocals, making the final mix sound professional. Here are the key features of Antares Auto Tune Access:

Real-time Pitch Correction

Antares Auto Tune Access allows you to fix any pitch inaccuracies in real-time during recording or performance. This feature helps to eliminate any off-key notes and corrects the pitch of the vocal. Additionally, it provides options for controlling the effect’s intensity, giving you the ability to produce a natural or robotic sound.

Low Latency Mode

With Antares Auto Tune Access, you get a Low Latency Mode that helps you run the plug-in in real-time without any latency issues. This feature ensures that you can work with the plug-in during recording, thereby delivering a smoother workflow.

Automatic Key Detection

Antares Auto Tune Access has an Automatic Key Detection feature that detects the key of the source material, making it easy to set the key signature for the pitch correction. With the automatic key detection feature, the plug-in auto suggests the key signature for the track, making the process less time-intensive.

Flex Tune Technology

Antares Auto Tune Access features Flex Tune Technology that provides a more natural and transparent pitch correction. This technology helps to preserve the singer’s natural pitch variations, ensuring they do not appear robotic.

Humanize Function

The Humanize Function in Antares Auto Tune Access helps to add more vibrato and life to the vocals, making the vocals sound more natural. This function helps to mitigate the loss of subtle pitch variations that can occur when overly tuning a vocal performance.

Midi Control

Antares Auto Tune Access offers a MIDI control feature that allows you to control the plug-in’s parameters through a MIDI controller. This feature offers greater control and flexibility, allowing you to make adjustments as you record or perform. With these features, Antares Auto Tune Access offers a range of tools and options for pitch correction and vocal enhancement. No matter your level of production experience, this plug-in can help deliver the perfect vocal sound for your mix.

Antares Auto Tune Access Review

Credit: macprovideo.com

Installation And Set Up

Antares Auto Tune Access is easy to install and set up, even for beginners. With its intuitive interface and comprehensive user manual, users can start using the program in no time. The software provides efficient pitch correction for vocals, making it an essential tool for music producers and engineers.

Antares Autotune Access is a software designed to help you correct pitch and timing problems in your vocal tracks. Proper installation and set up of the software on your DAW or computer are essential to achieve optimal performance. This article will guide you step-by-step through the installation and set up process, highlighting important points you need to take note of to ensure a successful installation.

System Requirements

Before downloading and installing Antares Autotune Access, it is vital to ensure that your computer meets the minimum system requirements needed to run the software. Here are the minimum specifications required for Antares Autotune Access:

  • Mac: macOS 10.13 or later and an Intel processor
  • Windows: Windows 8.1 or later, 2GB RAM, and an Intel or AMD Dual Core processor

Downloading And Installing

After confirming that your computer meets the minimum system requirements, you can proceed to download and install Antares Autotune Access. Here are the steps you need to follow:

  1. Go to Antares website and download the Antares Autotune Access installer
  2. Double-click on the downloaded installer to begin the installation process
  3. Follow the prompts and select the destination folder where you want to install Antares Autotune Access
  4. Wait for the installation process to complete

Authorization Process

After completing the installation process, the next step is to authorize Antares Autotune Access. Here is how to do it:

  1. Launch your DAW or your standalone version of Antares Autotune Access
  2. Enter your Antares account credentials to log in
  3. Follow the prompts to authorize Antares Autotune Access

Setting Up Audio Input And Output

The final step in the installation and set up process is to set up the audio input and output of Antares Autotune Access. To set up audio input and output, follow these simple steps:

  1. Select Antares Autotune Access as a plugin in your DAW
  2. Select the audio input device you want to use for the plugin
  3. Select the audio output device you want to use for the plugin
  4. Adjust the plugin settings to your preference, and you’re ready to start using Antares Autotune Access

In conclusion, Antares Autotune Access is an excellent tool for correcting pitch and timing problems in your vocal tracks. With the right installation and set up process, you can achieve optimal performance and take your music production to the next level.

Using Antares Auto Tune Access In A Daw

Antares Auto Tune Access is a powerful tool for correcting pitch in a Digital Audio Workstation (DAW). With its intuitive interface and real-time processing, it allows users to achieve professional-level pitch correction quickly and easily.

Antares Auto-Tune Access is a useful tool for musicians and producers who want to achieve pitch-perfect sound in their recordings. If you are using a DAW (Digital Audio Workstation), you can easily and seamlessly integrate Auto-Tune Access into your workflow. In this section, we will cover the steps involved in loading the plugin, setting up parameters, applying real-time pitch correction, using the Flex Tune and Humanize functions, and controlling Auto-Tune Access with MIDI.

Loading The Plugin

To use Auto-Tune Access in your DAW, you need to install the plugin first. The installation process is straightforward, and you can refer to the user manual to get started. Once you have installed Auto-Tune Access, you can load it as a plugin in your DAW. To do this, go to your DAW’s plugin folder, find Auto-Tune Access, and drag it onto an open track.

Setting Up Parameters

Once you have loaded Auto-Tune Access into your DAW, you can start setting up the parameters to achieve the desired sound. The plugin offers various options for tuning, such as key, scale, retune speed, and formant. You can adjust these settings to match the pitch and tone of your vocal or instrument. It is advisable to experiment with different settings to find the balance that works best for your sound.

Real-time Pitch Correction Examples

In a DAW, you can use Auto-Tune Access to apply real-time pitch correction to your recordings. This feature allows you to correct pitch errors on the fly, ensuring that your sound remains pitch-perfect. You can apply different levels of correction depending on your preference. For example, you can use moderate correction for a natural sound or use heavy correction for an effect-driven sound.

Applying Flex Tune And Humanize Functions

Auto-Tune Access offers two additional functions that can enhance the quality of your sound. The Flex Tune function allows you to adjust the timing of your notes, ensuring that they are perfectly in sync. The Humanize function, on the other hand, makes your sound more natural by introducing minor fluctuations in pitch and timing. You can apply these functions along with pitch correction to create a more polished sound.

Midi Control Tips

Finally, you can control Auto-Tune Access using your MIDI controller. This enables you to make real-time adjustments to your sound during a performance or recording. You can assign various parameters to different buttons or knobs on your controller, allowing you to tweak your sound quickly and easily. Just ensure that your MIDI controller is compatible with Auto-Tune Access before setting it up. In conclusion, Auto-Tune Access is an excellent plugin to have in your arsenal if you want to achieve pitch-perfect sound in your recordings. With easy integration into your DAW, real-time pitch correction, and additional features such as Flex Tune and Humanize, you can take your sound to the next level.

Pros Of Antares Auto Tune Access

Antares Auto Tune Access is a powerful tool designed for music producers and recording artists to take care of all their pitch correction needs. The software stands out for its many advantages, including:

Affordable Price Point

The first thing that stands out about Antares Auto Tune Access is its affordable price point. Unlike other expensive audio pitch correction software out there, Antares Auto Tune Access comes at a pocket-friendly price, making it accessible to anyone looking to improve the quality of their music.

Easy To Use Interface

Another advantage of Antares Auto Tune Access is its user-friendly interface. The software is straightforward and easy to navigate, making audio pitch correction a breeze, even for beginners. With Antares Auto Tune Access, you don’t need any prior experience with audio pitch correction software to get started.

Real-time Pitch Correction

Antares Auto Tune Access offers real-time pitch correction features, which help to improve performance quality considerably. This feature ensures that musical notes stay true to their original pitch, even when recording live performances.

Low Latency Mode

The software also comes with a low latency mode, which helps to reduce latency issues when recording. With this feature, you never have to worry about lag affecting your recording or performance.

Flex Tune Technology

Antares Auto Tune Access comes with Flex Tune technology, which helps to ensure that pitch correction is accurate, even when it comes to subtle nuances in performance style. This function is particularly useful for artists looking to create unique vocal styles while maintaining pitch precision.

Cons Of Antares Auto Tune Access

Antares Auto Tune Access has some cons that users should consider before purchasing the product. The interface is not user-friendly for beginners, and some users have reported software compatibility issues with certain DAWs.

Antares Auto Tune Access has become a popular software for pitch correction among singers and music producers. However, it also comes with some cons. Let’s take a closer look at the limitations of this software and see how it compares to other versions of Antares Auto Tune.

Limited Features Compared To Other Versions Of Auto Tune

Antares Auto Tune Access has many features that are missing compared to other versions of Auto Tune. For example, it doesn’t have the Auto Mode that is available in Auto Tune Pro and the Graph Mode in Auto Tune EFX+. Auto Mode is a popular feature that allows the software to automatically detect the key and scale of the music, and apply the necessary pitch correction. The Graph Mode, on the other hand, gives the users more control over the pitch correction process.

No Multi-track Editing Capability

Antares Auto Tune Access doesn’t support multi-track editing, which is another limitation of this software. Multi-track editing is a feature that is often required by music producers for more complex projects. Multi-track editing allows music producers to work on different layers of a song, making it easier to mix and master.

Less Precise Pitch Correction Compared To Professional Studios

While Antares Auto Tune Access is an effective software, it’s not as precise as professional studios. Antares Auto Tune Access uses a simplified algorithm that is less precise than the algorithm employed by the professional studios. As a result, the software may not correct all the subtle pitch inaccuracies. If you are working on a professional music project, you might want to consider using a more advanced version of Auto Tune. Overall, Antares Auto Tune Access has some limitations that you should be aware of when making a purchase decision. It’s important to evaluate your individual needs and assess whether the software provides all the features required for your music projects.

Comparison With Other Auto Tune Versions

If you’re looking for the best auto-tune software, you can’t go wrong with Antares Auto Tune Access. It has a lot of features that make it stand out from the competition, including its affordability, ease of use, and its compatibility with most DAWs. Though it is not as advanced as other versions like Auto Tune Pro or Auto Tune EFX+. However, Auto Tune Access does have some unique features that make it a great choice for beginners or those looking for a more streamlined experience.

Auto Tune Access Vs Auto Tune Pro

Auto Tune Pro is the more advanced version of Auto Tune, and it has all the features that you would expect from a professional-grade plugin. Some of the key differences between Access and Pro versions are:

FeatureAuto Tune AccessAuto Tune Pro
CompatibilityCompatible with most DAWsCompatible with all major DAWs
Flex-TuneLess customizableMore customizable
Harmony EngineNot availableAvailable
MIDI capabilitiesBasic MIDI capabilityAdvanced MIDI capability

Auto Tune Access Vs Auto Tune Efx+

Auto-Tune EFX+ is another version of Auto Tune, and it has some features that Access does not have. Some of the key differences between Access and EFX+ versions are:

  • Auto Tune EFX+ has more advanced MIDI capabilities
  • Auto Tune EFX+ includes a vocoder and other real-time effects
  • Auto Tune EFX+ has a wider range of pitch correction options

Overall, Auto Tune Access is a great choice for beginners or for those who don’t need all the features of Auto Tune Pro or EFX+. It’s also a great option for those who just want a simple and easy-to-use plugin without any extra frills or complications.

Antares Auto Tune Access Review

Credit: www.youtube.com

Frequently Asked Questions Of Antares Auto Tune Access Review

Is Auto-tune Access Any Good?

Auto-Tune Access can be good for those looking for a basic pitch correction tool. However, it may not have all the advanced features of other Auto-Tune versions. It ultimately depends on the user’s specific needs and preferences.

Is Antares Autotune Good?

Antares Autotune is a highly effective music tool for correcting pitch and tuning errors in vocal recordings. It allows you to easily edit and improve the quality of your music, making it a popular choice among musicians and producers. Overall, Antares Autotune is an excellent option for anyone seeking to enhance their recording and production capabilities.

What Is Antares Autotune Access?

Antares Autotune access is software used by professional singers and producers to correct pitch in vocal recordings. It can be accessed as a plug-in in various digital audio workstations (DAWs) such as Pro Tools, Logic Pro, and Ableton Live. Antares Autotune helps to ensure that a vocal performance remains in key and sounds polished and professional.

Can You Buy Antares Autotune Without Subscription?

No, Antares Autotune is only available through a subscription-based model. There is no option to purchase it without a subscription.

Conclusion

Overall, Antares Auto-Tune Access is a powerful tool for music producers looking to perfect their audio tracks. With its user-friendly interface and advanced pitch correction capabilities, this software offers a seamless experience for musicians and producers alike. The flexibility and customization options make it a valuable addition to any recording studio or home setup.

Get ready to take your music quality to a whole new level with Antares Auto-Tune Access!

More in our Gear reviews.