Categories
Archive

How To Mix And Master In Fl Studio

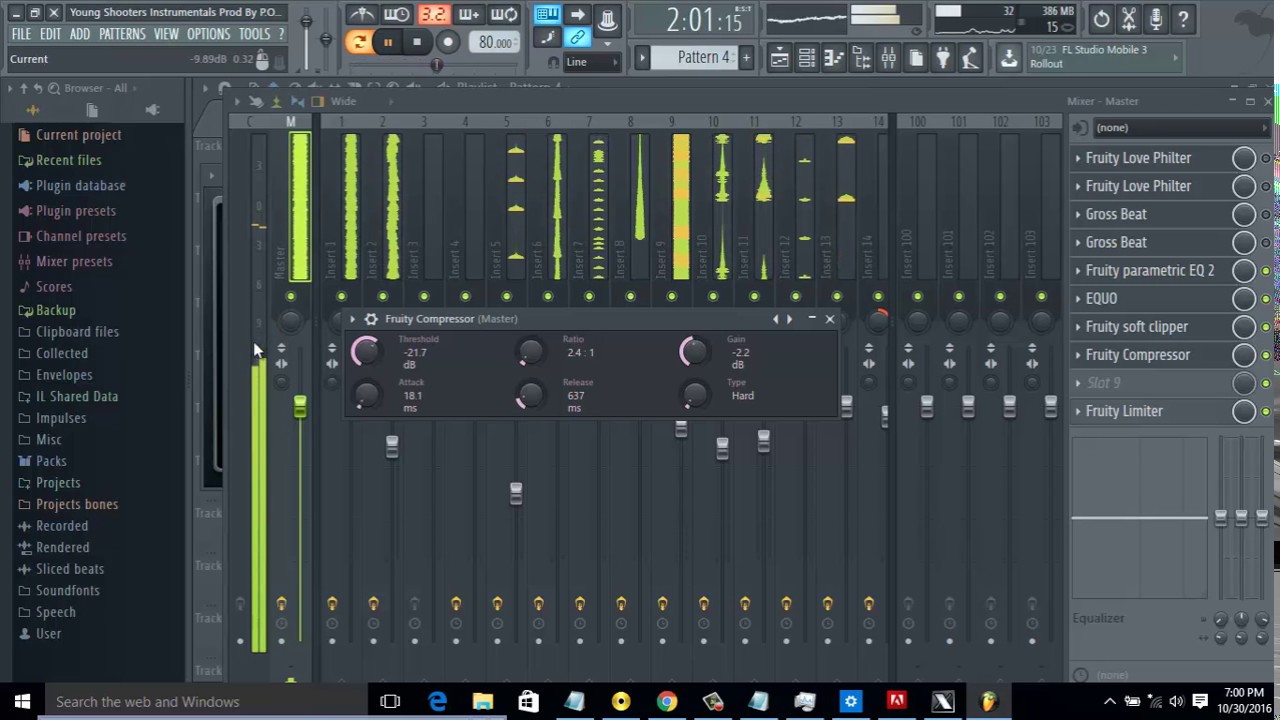
To mix and master in FL Studio, use EQ, compression, saturation, and limiters. Mixing is the process of balancing the different tracks, while mastering is the final stage of polishing and enhancing the mix.

With FL Studio, you can accomplish both tasks in a single software, making it a popular choice among producers and audio engineers. Whether you are working on a music project or a podcast, mastering your mix can help take the final product to the next level and make it stand out from the crowd.

We will explore some tips and tricks for mixing and mastering in FL Studio, as well as some essential plugins to help you achieve a professional sound.

Understanding The Mixing Process In Fl Studio

Understanding the mixing process is crucial when it comes to creating a professional sound in FL Studio. With the right tools and techniques, you can master the art of mixing and produce high-quality tracks. By adjusting levels, applying effects, and using EQ, you can create a balanced and polished final product.

As a music producer, mixing and mastering is a vital part of your music creation process. While recording can be exciting and inspiring, the key to making your music sound polished and professional rests on how you mix and master it. In this article, we will focus on the first part of the process – mixing. We’ll look into the basic tools and techniques required for mixing in FL Studio. So, let’s dive in!

Step-by-step Guide To Mixing In Fl Studio

Here is a quick rundown of the steps involved in mixing in FL Studio:

  1. Import and organize your audio clips in the Playlist
  2. Ensure your levels are balanced
  3. Add effects to each mixer track (EQs, compressors, reverb, etc.)
  4. Pan each mixer track in the stereo field
  5. Create automation clips for volume and effects
  6. Export your mix as WAV or MP3

Basic Tools And Techniques For Mixing In Fl Studio

For an effective mixing process, it is essential to have the right tools and techniques to bring out the best in your music. Here are some basic tools and techniques:

Tools:

  • Playlist: FL Studio’s main arrangement window.
  • Mixer: The mixer allows you to control the volume, panning, and effects of each track.
  • EQ: Used to adjust the frequency balance of a track to improve clarity and definition.
  • Compressor: Used to balance the dynamic range of a track.
  • Reverb: Used to add natural-sounding ambience to a track.

Techniques:

  • Gain-staging: The process of ensuring each mixer track is at the appropriate volume level.
  • Panning: Placing tracks in the left, right, or center position of the stereo field to create space and improve separation between instruments.
  • Automation: The process of changing a parameter over time, using clips or curves, to add interest and dynamics to your mix.
  • Mono compatibility: Ensuring that your mix sounds good in both mono and stereo can help avoid any phase cancellation issues when played through various playback devices.

By understanding the basic tools and techniques and following the steps outlined above, you can successfully create a well-balanced mix in FL Studio. Happy mixing!
How To Mix And Master In Fl Studio

Credit: www.youtube.com

Mastering In Fl Studio

Mastering in FL Studio is a crucial step in ensuring that your music productions sound professional and polished. With the right techniques and tools, you can effectively mix and master your music in FL Studio to achieve a high-quality final product that stands out in the industry.

The Role Of Mastering In Music Production

Mastering is the final process in music production where a finished mix is enhanced and optimized for distribution across various platforms. The goal of mastering is to ensure a consistent and polished sound, and to make sure that the track sounds great on all types of speakers. The mastering process can make a huge difference in the final output of a track, and can even elevate a good mix to the next level. Here are some tips and techniques for mastering in FL Studio.

Mastering Tips And Techniques In Fl Studio

1. Start with High-Quality Mix
Before mastering, make sure that the mix has been properly leveled, equalized, and compressed. It’s important to work on a high-quality mix to achieve the best possible sound in the final master. 2. EQ and Compression
In FL Studio, EQ and compression are the main tools used for mastering. Use EQ to make small adjustments to the frequency balance, while compression can help control the dynamics and add some final polish to the mix. Be careful not to overuse compression, as it can easily lead to a squashed and lifeless sound. 3. Use Limiters with Caution
Limiters are tools used to prevent clipping in the final master. However, using limiters too aggressively can lead to distortion and loss of dynamics. To avoid this, use limiters with caution and always keep an eye on the gain reduction meter. 4. Reference Your Mix
Always reference your mix against a commercially released track, especially one in a similar genre to yours. This will help you better understand how your track stacks up against industry standards and identify any areas that need improvement. 5. Don’t Overdo It
It’s important to remember that mastering should enhance the mix, not completely change it. Avoid over-processing and over-equalizing, as this can lead to a muddled and unnatural sound. Keep the mastering process simple and subtle, and let the mix speak for itself. By following these tips and techniques, you can achieve a professional and polished sound in your final mastering process in FL Studio. Keep practicing and experimenting until you find the right balance that works for your tracks.

Working With Effects

Learn the art of mixing and mastering in FL Studio with the use of different effects. By understanding the functions of each effect and how to adjust them, you can achieve a professional sound to your music.

Working with Effects When it comes to mixing and mastering in FL Studio, effects play an essential role in creating a clean, professional sound. In this article, we’ll go over how to apply effects to individual tracks and the master channel, as well as the most common effects used in FL Studio mixing and mastering. Applying Effects to Individual Tracks and the Master Channel Applying effects to individual tracks is a crucial step in creating a polished sound in FL Studio. Here are the key steps:

  1. Open the mixer window by pressing F9 on your keyboard
  2. Select the track you want to add effects to
  3. Click on one of the available mixer slots to open the plugin picker
  4. Select the plugin you want to use and adjust the settings
  5. Repeat steps 2-4 for each effect you want to add
  6. Adjust the levels of each effect by dragging the slider up or down

When it comes to applying effects to the master channel, the process is quite similar. The key difference is that any effects you add to the master channel will affect the final output, rather than just a single track. Here’s how to do it:

  1. Open the mixer window by pressing F9 on your keyboard
  2. Select the master channel at the top
  3. Click on one of the available mixer slots to open the plugin picker
  4. Select the plugin you want to use and adjust the settings
  5. Repeat steps 2-4 for each effect you want to add
  6. Adjust the levels of each effect by dragging the slider up or down

Common Effects Used in FL Studio Mixing and Mastering There are countless effects you can use in FL Studio for mixing and mastering, but these are some of the most common:

EffectDescription
EQAdjusts the levels of different frequencies within a track
CompressionReduces the dynamic range of a track, making it sound more cohesive
ReverbCreates a sense of space and adds depth to a track
DelayCreates an echo effect and can be used to add rhythm or texture to a track
SaturationAdds warmth and depth to a track by mimicking the sound of analog recording

By utilizing these effects and applying them in a strategic way, you can take your FL Studio mixing and mastering game to the next level. Remember to experiment with different combinations and settings to find the perfect sound for your track.
How To Mix And Master In Fl Studio

Credit: www.youtube.com

Equalization (eq) And Compression

Achieving a balanced mix and master in FL Studio requires understanding and using two essential techniques: EQ and compression. EQ allows you to adjust the frequency balance of individual tracks or the entire mix, while compression helps control the dynamic range of each track.

A proper application of these techniques can lead to a clear, cohesive, and professional-sounding final product.

Using Eq To Shape Your Sounds

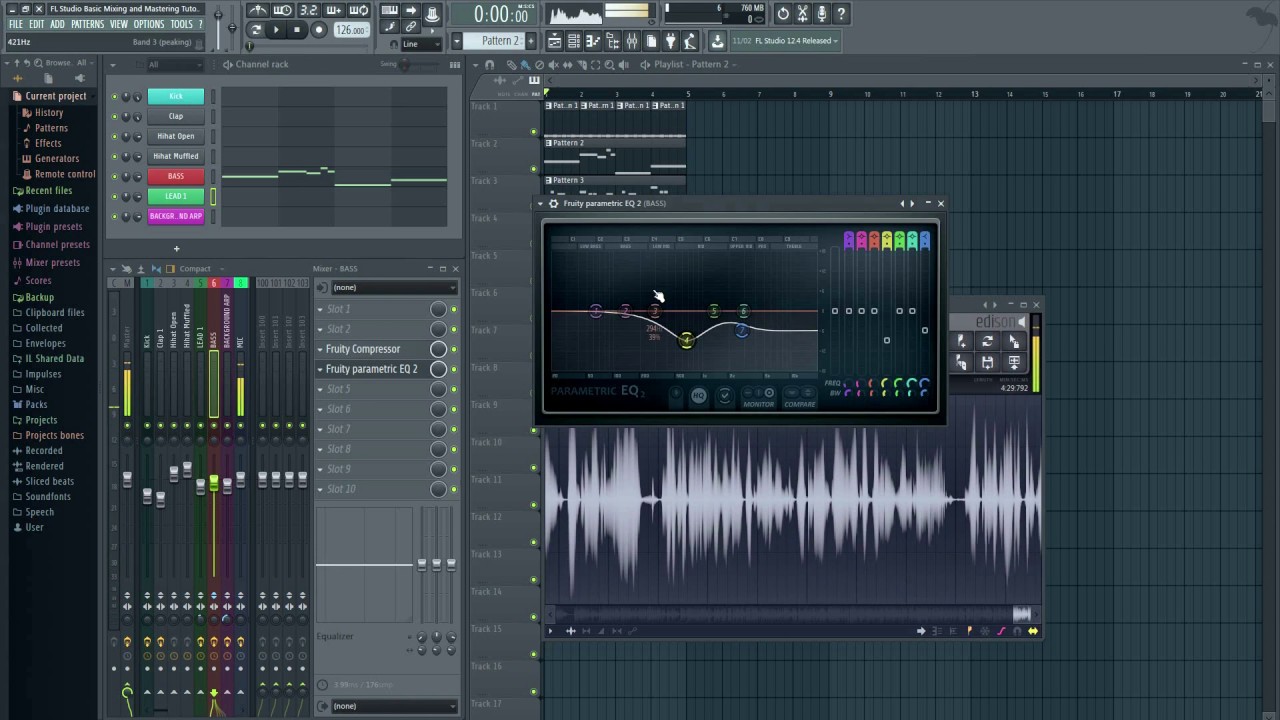
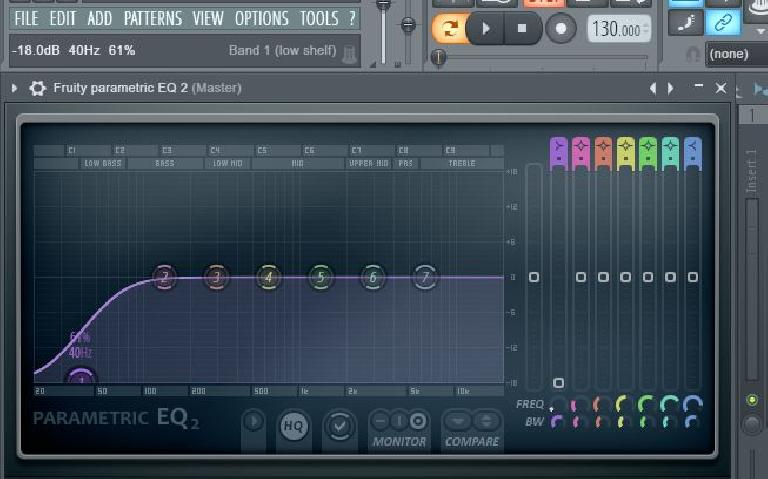
Equalization (EQ) is a powerful tool for shaping audio by boosting or cutting specific frequency ranges. If you want to bring out the brightness in a vocal recording, for example, you can use EQ to boost the higher frequencies. Conversely, if you want to make a drum loop sound more bass-heavy, you can boost the low frequencies. In FL Studio, there are several ways to apply EQ, including through the mixer channels and the Parametric EQ 2 plugin. When using EQ, it’s important to listen carefully and adjust the frequencies slowly to avoid harsh or muddy sounds.

Using Compression To Control Dynamics And Balance Levels

Compression is another fundamental tool in mixing and mastering. It works by reducing the dynamic range of an audio signal, which means that the loudest parts are reduced in volume while the quieter parts are brought up. This can help to balance out the overall levels of a track and make it sound more cohesive. In FL Studio, you can apply compression through the mixer channels or the Fruity Limiter plugin, among other options. When using compression, it’s important to set appropriate attack and release times to avoid making the audio sound too squashed or unnatural.

Other Tips For Mixing And Mastering In Fl Studio

In addition to using EQ and compression, there are several other techniques you can use when mixing and mastering in FL Studio. Some of these include:

  • Using reverb and delay effects to add depth and space to sounds
  • Applying automation to create dynamic changes throughout a track
  • Using saturation or distortion plugins to add warmth and character to sounds
  • Using panning and stereo imaging to create width in the soundstage

By experimenting with these techniques and learning to use the tools in FL Studio effectively, you can create professional-sounding mixes and masters that stand out.

Automation

Automation can greatly improve the mixing and mastering process in FL Studio. By utilizing tools such as macros, plugins, and presets, you can streamline your workflow and achieve professional-sounding results.

Automating Volume

Automating the volume is an essential technique to add dynamics to your mix. With FL Studio, automating the volume is a breeze. Simply right-click on the volume knob of the track you want to automate, and choose “Create automation clip”. A new automation clip will appear on your playlist, and you can now draw your volume automation by clicking and dragging on the clip. Tip: Don’t be afraid to experiment with different shapes and patterns for your volume automation. Smooth and gradual changes are great for creating a sense of depth, but sudden spikes and drops can add excitement and energy to your mix.

Automating Panning

Panning automation is another technique that can add life to your mix. With FL Studio, you can automate the panning of your tracks using the same method as volume automation. Simply right-click on the pan knob and create an automation clip. Tip: Experiment with automating the pan knob on individual sounds and instruments in your mix. You can create interesting stereo imaging effects by alternating the panning of sounds back and forth.

Automating Effects For A Dynamic Mix

Automating effects like reverb, delay, and filters can add a sense of movement and dynamics to your mix. With FL Studio, automating effects is easy. Simply create an automation clip for the effect parameter you want to automate, and draw your automation by clicking and dragging on the clip. Tip: Try automating effects on specific parts of your mix, like adding a touch of reverb to a snare hit or filtering out the high frequencies of a vocal to create a sense of intimacy.

Tips For Creative Automation In Fl Studio

– Start simple: Don’t feel like you need to automate everything in your mix. Start with a few key elements and build from there. – Experiment with different shapes and patterns for your automation. Smooth and gradual changes can create a sense of depth, while abrupt changes can add excitement and energy. – Don’t forget about MIDI automation: Many plugins and virtual instruments allow you to automate their parameters using MIDI. Experiment with using MIDI controllers to automate your mix. – Use automation to create tension and release: Automating the volume, panning, and effects of your mix can create tension and release that keeps your listeners engaged. In conclusion, automation is an essential technique for creating a dynamic and engaging mix in FL Studio. Whether you’re automating the volume, panning, or effects, experimenting with different shapes and patterns can take your mix to the next level. Remember to start simple and build from there, and don’t be afraid to get creative with your automation.
How To Mix And Master In Fl Studio

Credit: www.macprovideo.com

Exporting Your Mix And Master

Exporting your mix and master is the final step in creating a professional-quality track in FL Studio. After completing your mixdown and mastering, you can export your finished product to share with the world on various platforms.

Preparing Your Song For Export

Before exporting your mix and master, it’s important to make sure that your song is ready for the final stage of the production process. Firstly, ensure that all the tracks in your project are well-balanced and sound good together. Use EQ to adjust the levels of the individual tracks and panning to ensure that each sound sits nicely in the stereo field. Also, ensure that all the tracks are free from noise, clicks, and pops, which can be distracting to the listener.

Choosing The Right File Formats And Settings For Exporting

Exporting your mix and master in the right file format is crucial to ensure that your music sounds great on any platform. Firstly, choose the right file type – WAV or MP3, based on your needs. Exporting as a WAV file will ensure higher quality audio, while an MP3 file is smaller in size and better for streaming. In terms of settings, ensure that you export your song at the correct bit depth and sample rate. The bit depth and sample rate determine the quality of your audio. A bit depth of 16-bit is sufficient for MP3 encoding while 24-bit is ideal for WAV files. The sample rate should be 44.1kHz, which is the standard for CD quality audio. Once you’ve prepared your song and chosen the right file formats and settings for exporting, it’s time to actually export your mix and master. In FL Studio, simply go to the file menu and select ‘Export’. In the export window, choose your file type and settings as discussed earlier. Also, ensure that you name your file appropriately. Finally, hit the export button to render your audio file. Take a listen to the exported file and ensure that it sounds exactly as you intended. Once you’re satisfied with your export, you’re ready to distribute your music to the world!

Frequently Asked Questions On How To Mix And Master In Fl Studio

Can I Mix And Master With Fl Studio?

Yes, you can mix and master with FL Studio. It’s a popular and powerful digital audio workstation that offers advanced tools for mixing and mastering audio. You can use its various plugins, effects, and features to create professional-quality mixes and masters.

FL Studio is a great choice for both beginners and professionals in the music industry.

Is It Hard To Master Fl Studio?

No, it is not hard to master FL Studio. With its intuitive interface and wide range of tutorials and resources available online, users can quickly learn the basics and continually improve their skills over time. Many professional musicians and producers use FL Studio to create their music, demonstrating its flexibility and capability as a music production tool.

Can You Mix Professionally On Fl Studio?

Yes, you can mix professionally on FL Studio. It is an advanced digital audio workstation that provides a wide range of tools and features for mixing and mastering music. With its intuitive interface and powerful processing capabilities, FL Studio is an ideal choice for both beginners and professional musicians.

How Do I Mix And Master My Song?

To mix and master your song, follow these guidelines: adjust levels and pan settings for each track, apply EQ and compression to individual tracks and the overall mix, add reverb and delay for depth and ambiance, use automation to fine-tune the mix, and export the final mix for mastering.

Conclusion

Mixing and mastering in Fl Studio involves a combination of technical skills, creativity, and patience. With the right tools and understanding of the process, you can create professional-quality audio that is sonically balanced and optimized for any playback system. Remember to take breaks when you feel fatigued and trust your ears over your eyes.

Keep practicing and experimenting to find the right balance of technique and artistry for your unique sound. Happy mixing and mastering!

Categories
Archive

What Does Mixing Do to a Song

Mixing a song involves adjusting levels, panning, EQ, compression, and adding effects to create a balanced and cohesive sound. It enhances the individual elements within a track and creates a polished final product.

Great mixing can make all the difference between a mediocre and a professional-sounding song. As a critical aspect of music production, mixing requires technical skills, an impeccable ear, and creativity. It involves blending all the elements of a song in a way that emphasizes the unique qualities of each sound while still maintaining a consistent tone.

With the right approach, a mixing engineer can bring out the best in a song and make it stand out. We will explore the importance of mixing and how it can transform a raw recording into a masterpiece.

What Does Mixing Do to a Song

Credit: www.masteringthemix.com

The Mixing Process

The mixing process is an essential part of music production as it helps to balance each element of a song such as vocals, drums, and instruments. Mixing allows the producer to adjust the volume, tone, and effects to create a cohesive and pleasing sound that enhances the impact of the music.

Balancing Levels And Panning

The Mixing Process involves balancing levels and panning to ensure every instrument and vocal is heard clearly in the song. Balancing levels means adjusting the volume of each track, so they all blend well together. Panning refers to the placement of each track across the stereo field to create a sense of space. For example, vocals are usually placed in the center, while drums and bass are panned to the left and right sides.

Equalization

Equalization is the process of adjusting the frequency content of each track. It involves boosting or reducing certain frequencies to remove unwanted sounds and enhance desired ones. EQ is used to create a better separation between the different tracks and to balance the overall sound of the mix. For instance, too much bass can cause a muddy mix, and too much treble can lead to harshness.

Compression

Compression helps to control the dynamic range of each track. It reduces the volume of the louder parts while boosting the volume of the quieter sections. Compression can also add sustain and punch to individual tracks, making them sound fuller and more defined. For example, a snare can benefit from compression to give it a more prominent, consistent sound.

Reverb And Delay

Reverb and delay are used to add depth and space to the mix. Reverb simulates the natural reverberation that occurs in a room, while delay creates an echoing effect. Reverb is used to create a sense of space, while delay can be used to add interest and excitement to certain tracks. For example, a guitar solo can benefit from a delay effect to make it sound more atmospheric.

Automation

Automation involves adjusting the levels, panning, EQ, compression, and other effects over time. It allows for precise control and adds movement and dynamics to the mix. Automation can be used to create a build-up or breakdown in a song or highlight a particular instrument or vocal. For example, the volume of a guitar solo can be gradually increased as it reaches the climax of the song.

What Does Mixing Do to a Song

Credit: www.ipr.edu

The Goals Of Mixing

Mixing is an essential part of music production that involves combining various elements of a song to create a cohesive and balanced sound. From adjusting volume levels to fine-tuning individual tracks, mixing can significantly enhance the overall quality of a song, making it sound more polished and professional.

When it comes to music production, mixing is one of the most critical components that can make or break a song. Mixing is essentially the process of fusing all the tracks together into a cohesive and balanced final mix that sounds good. The primary objectives of mixing are to create separation and space, enhance emotional impact, maintain cohesion and consistency, and prepare for mastering. Let’s dive deeper into these goals.

Creating Separation And Space

One of the primary goals of mixing is to create separation and space between the various elements in a song so that they each have their place. If everything is piled up on top of each other, the song will sound cluttered and muddy, which can make it difficult for the listener to distinguish each instrument and vocal. The key to achieving separation and space lies in balancing the levels of each element and shaping their frequencies, so they each occupy their frequency range, allowing every element to shine through clearly.

Enhancing The Emotional Impact

Another primary goal of mixing is to enhance the emotional impact of the song. A well-mixed recording has the ability to evoke emotion from the listener. For instance, dynamics and effects such as reverb can add depth, warmth, and excitement to the song, creating a vibrant listening experience that engages the listener’s emotions. With a good mix, the song will be able to connect to the listener on a deeper level, drawing them in with every note.

Maintaining Cohesion And Consistency

A well-crafted mix should maintain cohesion and consistency throughout the entire song. Cohesion means that all the elements in the song should sound like they belong together and work in harmony. At the same time, consistency ensures that the mix should maintain the same level of quality from beginning to end, ensuring that there are no abrupt changes that might throw off the listener. Achieving cohesion and consistency requires attention to detail and a deep understanding of how each element interacts with the others.

Preparing For Mastering

Finally, the last goal of mixing is to prepare the song for mastering. Mastering is the process of taking the final mix and getting it ready for distribution, preparing it for digital release, vinyl production, or CD replication. A well-mixed song that has been prepared for mastering will translate well across different playback systems. The mastering engineer will be able to enhance the mix’s overall loudness, improve dynamics, and make sure that the final product is the best it can be. In conclusion, mixing is a complex process that serves many goals. Creating separation and space, enhancing the emotional impact, maintaining cohesion and consistency, and preparing for mastering are all essential aspects of any successful mix. With proper attention paid to each of these goals, a song can be taken to new heights, ultimately connecting with the listener in a powerful and meaningful way.

Mixing Techniques And Tips

Mixing is a crucial step in the music production process that involves taking several recorded tracks and blending them into a final stereo mix. Professional mixing can elevate a good song to a great song. However, the most common mistakes in mixing can lead to compromising the quality of the final product. Hence, good mixing techniques and tips should be used to give your song that punch, clarity, and depth it needs. Here are some of the essential mixing techniques you should know:

Gain Staging

Gaining staging is the process of optimizing each individual track’s gain before they get summed together. Proper gain staging will help avoid distortion and digital clipping during the mixing process. The general rule of thumb is to keep levels low and aim for a peak level of around -6db on each individual track.

Using Reference Tracks

When mixing a song, referencing other tracks can be an essential aid to match the sound quality. Listening to professional mixes and comparing them to your mix can help you identify areas that need improvements. It’s essential to note that the references’ primary purpose is to guide your ears, not to copy the reference mix entirely.

Avoiding Common Mistakes

  • Overuse of effects: Too much of anything can be harmful, and this is true for effects in mixing. Overusing effects can lead to muddy mixes and masked sounds.
  • Ignoring phase issues: In mixing, phase issues can create an out-of-phase sound, leading to weak and hollow sounds.
  • Overprocessing and incorrect EQ: Overprocessing tracks can make them sound unnatural. Using incorrect EQ can make them sound harsh or dull.

Mixing In Mono

Mixing in mono helps to check the balance of all elements in the mix. It also helps in determining whether sounds clash with each other. Once an ideal balance is achieved, the mix can be panned by using the stereo field to achieve a more defined stereo image.

What Does Mixing Do to a Song

Credit: www.izotope.com

Frequently Asked Questions For What Does Mixing Do To A Song

Does Mixing A Song Make A Difference?

Mixing a song definitely makes a difference. It’s the process of blending different instruments, tones and sounds to create an appealing musical track. A good mix can enhance the listening experience by making the song sound cleaner, polishing its dynamics and highlighting its hidden nuances.

Why Is Mixing In Music Important?

Mixing is important in music because it helps to balance and enhance various sounds, levels and frequencies. Without mixing, the music may sound cluttered, distorted or unclear. With appropriate mixing, the music becomes more cohesive and enjoyable for the listener.

Mixing also helps to create a professional sound and can make a difference in the success of the final product.

Why Do Songs Need To Be Mixed?

Songs need to be mixed to balance and enhance the different elements in the recording. Mixing involves adjusting the levels, panning, EQ, and effects of each track to create a cohesive and polished final product. A well-mixed song will sound better and be more enjoyable to listen to.

What Is The Purpose Of Sound Mixing?

Sound mixing combines multiple audio tracks into a cohesive and balanced final product. Its purpose is to enhance the quality of sound, ensure that dialogue is clear and audible, and create a realistic and immersive audio experience for the audience.

Conclusion

The art of mixing music has evolved over the years, but its importance remains constant. Mixing techniques improve the balance of the instruments and ultimately enhance the overall sound quality of the song. Experimenting with different mixing techniques can produce unique and creative sounds that can set your music apart from the rest.

With a deeper understanding of mixing, you can achieve a professional and polished sound that captivates your audience.

Categories
Archive

Defining Your Target Audience

Defining your target audience is one of the most important steps in building a music career. Without a clear picture of who your music is for, promotion becomes guesswork: you spend money on ads that don’t convert, post content nobody engages with and pitch to playlists that don’t fit. When you know your ideal listener, every decision gets easier, from your release plan to your social media and merch.

Why Musicians Need a Target Audience

“My music is for everyone” sounds generous, but it makes marketing much harder. Platforms and algorithms reward focus. When your releases, visuals and content consistently connect with a specific group of listeners, those listeners engage more. Streaming platforms and social apps then show your music to similar people.

A defined audience helps you:

  • Pitch to the right playlists, blogs and curators.
  • Target ads more efficiently.
  • Choose the right social platforms and content style.
  • Book relevant gigs and collaborations.
  • Design merch your fans actually want.

Step 1: Start With Your Music

Describe your music honestly: genre, subgenre, mood, tempo and influences. Which artists would sit next to you in a playlist? These “sounds-like” artists are your best clue to who will enjoy your music, because their fans are your potential fans.

Step 2: Build a Listener Profile

Create a simple profile of your ideal listener. Consider:

  • Age range and location. Where are they, and what stage of life are they in?
  • Listening habits. Which streaming platforms, playlists and radio do they use?
  • Social platforms. Where do they spend time: TikTok, Instagram, YouTube, X or Discord?
  • Interests and lifestyle. Gaming, fitness, fashion, anime, skating or nightlife?
  • Values and identity. What do they care about, and what does your music mean to them?

Step 3: Use Your Data

If you already release music, your analytics are a goldmine. Spotify for Artists, Apple Music for Artists, YouTube Studio and social media insights show:

  • Age and gender breakdown.
  • Top cities and countries.
  • Which songs and posts perform best.
  • Where listeners discover you, such as playlists, profiles or algorithmic recommendations.

Compare the data with your listener profile and adjust. Sometimes your real audience is different from the one you imagined.

Step 4: Research Similar Artists

Study artists at a similar or slightly higher level in your genre. Look at their comments, followers and the playlists they’re on. What content gets the most engagement? Which communities do their fans belong to? This shows where your audience already gathers.

Step 5: Test and Refine

  • Run small ad tests aimed at fans of different similar artists.
  • Try different content formats, such as studio clips, live performances and behind-the-scenes posts.
  • Track saves, shares, follows and comments, not just views.
  • Double down on what works and drop what doesn’t.

Using Your Audience Profile

Release Strategy

Plan releases around when and where your audience listens. Choose cover art and visuals that speak to them.

Content

Create content in the formats and tone your audience enjoys. Producer-focused fans may love breakdowns of your production process, while others want lifestyle or performance content.

Playlist Pitching

Target playlists your audience already follows, rather than the biggest playlists in a broad genre.

Live Shows and Merch

Book shows in cities where your data shows listeners, and design merch that fits your audience’s style.

For a deeper look at finding fans, read finding your target audience as a musician.

Common Mistakes

  • Targeting too broadly. Broad targeting wastes budget and attention.
  • Ignoring data. Assumptions are useful starting points, but data tells the truth.
  • Chasing trends that don’t fit. Content that doesn’t match your music attracts the wrong followers.
  • Never revisiting your profile. Audiences change as your music and career evolve.

Your Music Still Has to Deliver

A clear audience gets your music heard, but quality keeps listeners coming back. Polished mixes and masters that compete with other tracks on the same playlists help you turn first-time listeners into fans. Our mastering services can help your releases sound ready for streaming.

A Simple Audience Profile Example

Here’s how a profile might look for a melodic house producer. The core listener is 20–32, in larger cities in North America and Europe, and streams via Spotify and YouTube. They follow playlists built around deep, melodic and progressive house. They also listen to artists like the producer’s main influences, attend clubs and festivals, and discover music on Instagram, TikTok and SoundCloud.

With this profile, the producer knows to make short performance clips for social media, pitch to melodic house playlists, target ads to fans of similar artists and plan shows in cities where listeners are concentrated. Every decision becomes more focused, and the budget goes further.

Turning Listeners Into Fans

Reaching the right people is only the first step. Encourage listeners to follow you on streaming platforms, join an email list or community and come to shows. Reply to comments, share behind-the-scenes content and give fans reasons to return. A smaller, engaged audience is far more valuable than a large one that never listens again.

Frequently Asked Questions

How do I find my target audience as a new artist?

Start with artists who sound like you and study their fans. Then test content and small ads to see who responds.

Can I have more than one target audience?

Yes, but start with one core audience. Once you have traction, you can expand into related groups.

What data should I look at?

Check age, location, top songs, listening sources and engagement in your streaming and social analytics.

How often should I update my audience profile?

Review it every few releases or whenever your analytics show a clear shift.

Categories
Archive

Tips For Recording Acoustic Guitars

When recording acoustic guitars, choose the right microphone and placement for optimal sound quality. Recording acoustic guitars can be a challenging task, especially if you want to achieve professional-sounding results.

One of the key factors in recording acoustic guitars is selecting the right microphone. Moreover, the placement of the microphone also plays a crucial role in capturing the sound accurately. We will discuss some tips for recording acoustic guitars, including selecting the right microphone, placement techniques, and other useful tips to help you achieve excellent results.

By following these tips, you can be assured of capturing the unique characteristics and nuances of your acoustic guitar’s sound.

Choosing The Right Room

When it comes to recording acoustic guitars, choosing the right room is crucial for achieving excellent audio quality. The room you record in can have a significant impact on the acoustic properties of your recordings, so it’s important to select the right space.

Room Acoustics

The acoustics of the room you choose to record in will heavily influence the sound of your acoustic guitar recordings. Many professional studios have acoustically designed rooms with carefully treated walls, floors, and ceilings to minimize external reflections and standing waves.

While you may not have access to such a space, there are some things you can do to improve the acoustics of the room you choose. Here are some tips:

  • Choose a room that has a natural, warm sound. A room with lots of reflective surfaces, such as hard floors, walls, or ceilings, can result in a harsh, reverberant sound.
  • Add acoustic treatment to the room if possible. Acoustic panels, diffusers, and bass traps can help absorb reflections and tame standing waves, resulting in a more even and balanced acoustic environment.
  • You can also improvise by placing blankets or drapes on the walls to absorb some reflections.

Avoiding Background Noise

Another significant consideration when choosing a room to record in is background noise. Background noise such as traffic, computer fans, and air conditioning can significantly affect the quality of your recordings. Here are some tips to minimize background noise:

  • Choose a room in a quiet location, away from main roads or other sources of noise.
  • Turn off all unnecessary electrical equipment, such as fans, computers, or air conditioners, that can create background noise.
  • If you’re using a microphone, make sure it’s directional and placed close to the guitar to reduce the amount of background noise picked up.
  • If you’re using an audio interface, make sure it’s well away from any sources of electrical noise, such as power adapters or computer monitors.

By following these tips, you can significantly improve the frequency response and tonality of your acoustic guitar recordings, and eliminate unwanted background noise to achieve the best possible quality recordings.

Tips For Recording Acoustic Guitars

Credit: www.soundonsound.com

Proper Microphone Placement

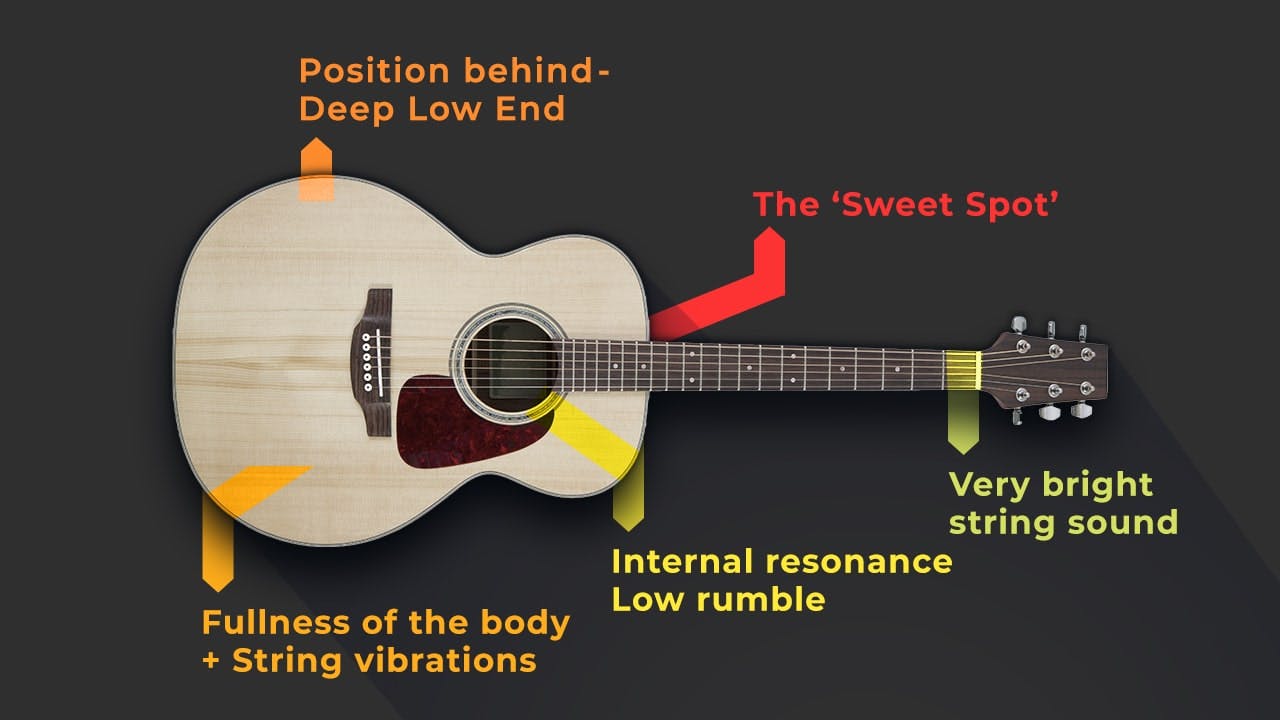
When recording acoustic guitars, proper microphone placement is crucial for a clean and balanced sound. To achieve the best results, place the microphone at the 12th fret of the guitar, use a cardioid or omni-directional microphone, and experiment with different distances and angles to find the sweet spot.

Selecting The Right Microphone

When it comes to recording acoustic guitars, selecting the right microphone is crucial to ensure clear, crisp sound. A condenser microphone would be an ideal choice due to its sensitivity and ability to capture high frequencies. Dynamic microphones, on the other hand, are better suited for live performances. It’s worth mentioning that there are many types of condenser microphones available in the market, from large-diaphragm to small-diaphragm ones, each with their distinct sound characteristics. Therefore, it’s advisable to experiment with different microphones to determine which one suits your acoustic guitar.

Positioning The Microphone

Positioning the microphone correctly is equally important as selecting the right one. Here are the three most common microphone placements for recording acoustic guitars:

PlacementProsCons
Sound HoleProduces a full-bodied soundMay result in boomy or muddy sound
FingerboardProduces a balanced soundMay lack warmth or low-end
Above the BridgeProduces a bright soundMay sound thin or harsh

While these are general guidelines, the actual positioning may depend on your acoustic guitar’s unique sound and your personal preference. Once you have identified the best placement, ensure that the distance between the microphone and guitar is consistent throughout the recording. In conclusion, proper microphone placement is crucial when it comes to recording acoustic guitars. By choosing the right microphone and experimenting with different placements, you can achieve a clear, crisp sound that captures the true essence of your guitar’s sound.

Preparation And Setup

Recording acoustic guitars can prove to be a daunting task, but with a few tips and tricks up your sleeve, you can ensure your recording turns out smooth and levelled-up. Proper preparation and setup is the key to a great recording session.

Warm Up The Guitar

Before hitting the record button, it’s important to warm up your guitar. This will help you gauge your guitar’s tone and ensure it is in the best condition to be recorded. Play some warm-up exercises and run through a few scales to get your fingers and your guitar ready.

Tuning

One of the most important aspects of recording an acoustic guitar is ensuring your guitar is in tune. Use an electronic tuner to ensure each string is in tune as even a slightly out of tune note can ruin the recording. However, keep in mind that an overly precise tuning can result in an unnatural recording. So, use your ear to ensure a balanced and natural sound.

String Noise Reduction

Many guitarists struggle with string noise while recording. Some common noises include squeaks, slides and scrapes. These noises can be quite audible and can hamper the quality of the recording. To avoid these noises, use proper finger positioning and pressure along with some string noise reduction techniques such as using a lighter touch, using your fingertips, and muting.

Recording Techniques

To capture the true sound of an acoustic guitar during recording, it’s important to choose the right microphone placement, use high-quality equipment, and adjust the room acoustics. Other tips include experimenting with different microphone types and positions, playing with fingerpicking techniques, and maintaining consistency throughout the recording process.

Acoustic guitars are versatile instruments that produce warm and organic sounds that can add character to any recording. However, capturing the best sound of an acoustic guitar can be a challenging task, especially if you are not familiar with the essential recording techniques. In this article, we will discuss the three essential recording techniques used to record an acoustic guitar: Mic Techniques, Playing Technique, and Multiple Mic Placement.

Mic Techniques

One of the critical components of recording acoustic guitars is mic placement. The placement of the microphone can significantly impact the sound quality and tone of the recorded instrument. When positioning the microphone, the rule of thumb is to aim at the 12th fret of the guitar. This spot is known to produce warm and balanced sound. If you want to capture the warmth and depth of the guitar, you can use a large diaphragm condenser microphone. If you prefer a brighter and sharper sound, use a small diaphragm condenser microphone. Additionally, you can try using dynamic microphones or ribbon microphones to add a natural and warm tone to the recorded sound.

Playing Technique

Playing technique is another factor that can affect the recorded sound of an acoustic guitar. The way you play your guitar will influence the sound quality, dynamics, and tonality of the recorded instrument. When recording an acoustic guitar, it is essential to consider the way you play your guitar and to adjust your approach according to the sound you want to achieve. For instance, if you want a softer and gentler sound, use fingerpicking technique. If you prefer a louder and brighter sound, strumming with a pick can deliver the desired results. Playing technique is an important factor in recording acoustic guitars, and it is something that should be considered carefully to attain the desired sound.

Multiple Mic Placement

When recording an acoustic guitar, using multiple microphones can provide a fuller and richer sound. Using multiple microphones, you can capture different aspects of the guitar’s sound, such as the body and string sound. To achieve this, you need to position the microphones strategically, either in an X-Y pattern, spaced pair pattern, or mid-side pattern. When using multiple mics, it is essential to consider the phase relationship between the microphones. If the microphones are placed too far from each other, it can result in phase cancellation, which can cause the recorded sound to be thin and hollow. In conclusion, recording an acoustic guitar requires a good understanding of the essential recording techniques. By using the right mic placement, playing technique, and recording setup, you can capture a warm and organic sound that can enhance your music recordings. With the tips discussed in this article, you can now experiment with different recording techniques to achieve the desired sound.

Post-recording Editing

To ensure the best possible acoustic guitar recording, post-recording editing is vital. Some tips to improve your acoustic guitar recordings include experimenting with mic placement, controlling the room’s acoustics, and using high-quality mics and preamps. Proper editing can enhance the guitar’s natural sound and make it stand out in the mix.

After recording your acoustic guitar, the next important step is to edit your recording for a polished, professional sound. Editing can make or break the final result, so it’s crucial to know what you’re doing. In this section, we’ll discuss two essential techniques for post-recording editing: equalization and compression, and effects and reverb. We’ll also cover common editing mistakes and how to avoid them.

Equalization And Compression

Equalization and compression are two studio staples that can help you perfect the sound of your recorded acoustic guitar. Equalization helps to balance the frequencies in your recording, making sure every tone is present and accounted for. Compression, on the other hand, helps to even out the dynamic range of your recording, ensuring that no notes or chords are lost in the mix. When using EQ and compression, keep the following in mind:

  • Be subtle with your adjustments – less is often more
  • Listen to your track as a whole and adjust accordingly
  • Don’t be afraid to experiment with different settings

Effects And Reverb

Effects and reverb can add depth and dimension to your acoustic guitar recording. Reverb, in particular, can make your recording sound like it was played in a space larger than the room it was recorded in. Effects like delay or chorus can add richness and texture to individual notes or sections of your recording. As with EQ and compression, it’s important to use effects and reverb sparingly and intentionally.

Editing Mistakes

Editing mistakes can ruin an otherwise great recording. Here are some common mistakes to avoid:

  • Over-editing – don’t edit the life out of your recording
  • Skipping EQ and compression – these tools are essential for a polished sound
  • Ignoring timing and tuning – make sure your recording is in time and in tune
  • Forgetting to save backups – always back up your original recording before editing

By understanding these common mistakes, you can avoid them and create a flawless recording.

Tips For Recording Acoustic Guitars

Credit: www.waves.com

Tips For Recording Acoustic Guitars

Credit: www.youtube.com

Frequently Asked Questions On Tips For Recording Acoustic Guitars

How Can I Record My Acoustic Guitar Better?

To record your acoustic guitar better, you can try these tips: use a microphone instead of a pickup, place the microphone at the right distance and angle, experiment with mic placement, use a pop filter to reduce plosives, consider using two microphones, and use a quality audio interface.

What Is The 3 To 1 Rule Acoustic Guitar?

The 3 to 1 rule for acoustic guitar refers to the ratio of the bass string diameter to the treble string diameter. The bass strings should have three times the diameter of the treble strings to achieve a balanced sound and avoid overpowering the higher strings.

Is It Better To Record Acoustic Guitar With Mic Or Direct?

It depends on the sound you want. Recording with a microphone captures the natural tone and character of the guitar, while direct input provides a cleaner sound. Experiment with both methods to see which works best for your project.

What Is The Best Equipment For Recording Acoustic Guitar?

The best equipment for recording acoustic guitar includes a good quality mic, a preamp, and an audio interface. A cardioid or condenser microphone works well to pick up the intricate sounds of the guitar. Using a preamp helps to reduce background noise and an audio interface transfers the sound to your computer for editing.

Conclusion

To sum it up, recording an acoustic guitar requires attention to detail and a combination of techniques. From choosing the right microphone to creating a suitable environment, every step is crucial. Paying attention to the different elements that contribute to the quality of the sound is important.

By following the tips discussed you can create an impressive recording that showcases the true potential of your guitar. Keep experimenting and always strive for excellence!

Categories
Archive

Best Pro Tools Shortcut Key Commands

The best Pro Tools shortcut key commands are essential for efficient audio editing. Here are some essential Pro Tools shortcuts: Pro Tools is a digital audio workstation software used in the music industry.

Also, it provides numerous features for editing, composing, recording, and mixing audio. However, to improve workflow and increase efficiency, key commands are essential to navigate the software more quickly. Also, utilizing shortcut key commands enables users to save time and easily navigate the interface.

Related reading: Import Audio Pro Tools and Pro Tools First Grid Mode. For background, see the Wikipedia article on Pro Tools.

Moreover, we will discuss some of the most useful keyboard commands, covering everything from selection to editing tools, zooming, track visibility, and navigation.

Basic Pro Tools Shortcut Key Commands

In addition, mastering basic key command key commands is crucial for saving time and streamlining your workflow. In addition, use these shortcuts to navigate between windows, adjust levels, and edit audio without having to reach for your mouse.

Furthermore, for any Pro Tools user, mastering the application’s shortcut key commands is essential for a smooth and productive workflow. These shortcuts enable quicker navigation, editing, and transport control of audio tracks and are vital when working on large projects. For example, in this blog post, we will focus on the Basic Pro Tools Shortcut Key Commands, organized into three categories: Navigation Commands, Editing Commands, and Transport Commands.

Navigation Commands

Additionally, Navigation Commands are essential to quickly move around the Pro Tools interface and select areas of your audio tracks. As a result, here are some basic Navigation Commands:

  • Tab – Moves your cursor to the next transient in the audio waveform.
  • Shift + Tab – Moves your cursor to the previous transient in the audio waveform.
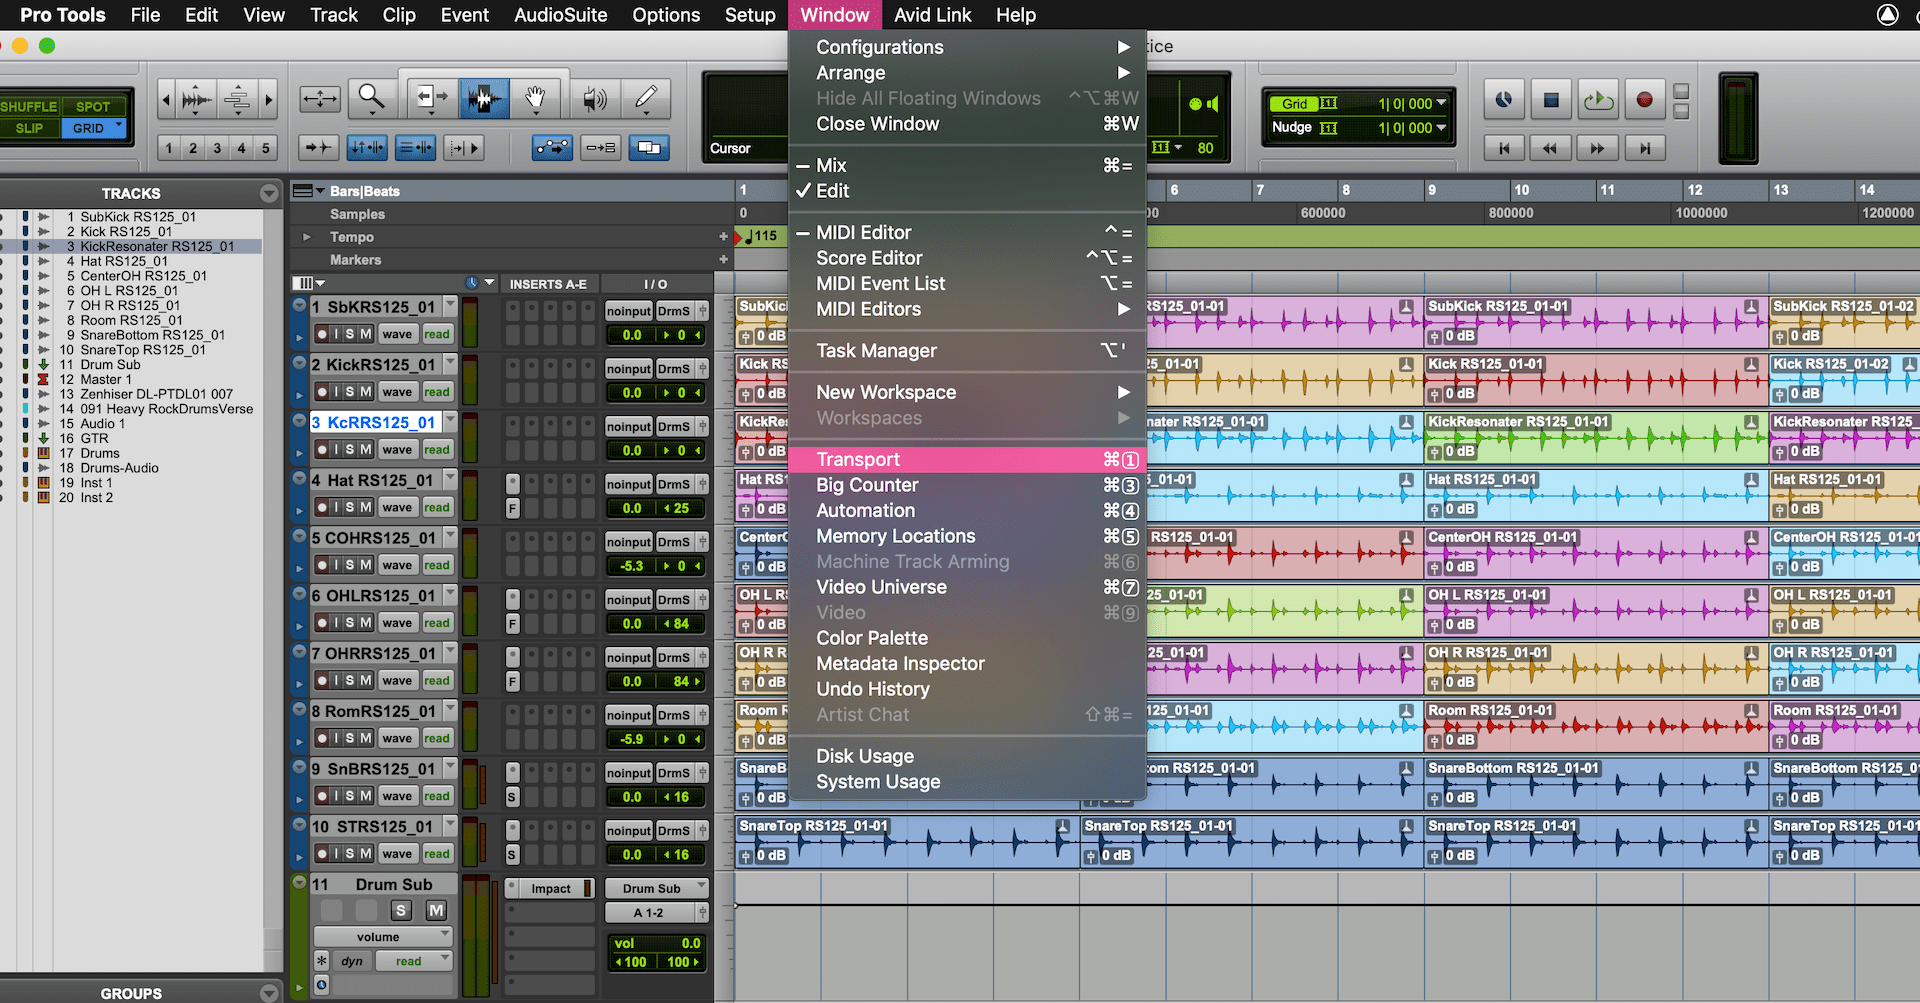
  • F12 – Opens the Mix window.
  • F3 – Opens the Edit window.

Editing Commands

Editing Commands are necessary to quickly perform basic functions, such as cut, copy, paste, and duplicate, among others. However, here are some Editing Commands:

  • Command + C – Copies a selected area of your track.
  • Command + V – Pastes the copied area into your track.
  • Command + B – Cuts the selected area of your track.
  • Option + Shift + 3 – Duplicates a selected area of your track.

Transport Commands

Furthermore, Transport Commands are crucial to play, stop, and rewind audio tracks quickly. Then, here are some Transport Commands:

  • Spacebar – Starts and stops your audio playback.
  • Return – Returns your cursor to the beginning of your track.
  • Command + [/] – Rewinds or fast forwards your track.
  • Option + Command + Click – Sets a marker at your cursor.

Mastering these Basic Pro Tools Shortcut Key Commands will elevate your workflow to the next level, saving you time and increasing your productivity. In short, by utilizing these shortcut key commands, you can work more efficiently and effectively within the Pro Tools interface.

Best Pro Tools Shortcut Key Commands

Credit: blog.prosoundeffects.com

Intermediate Pro Tools Shortcut Key Commands

Mastering intermediate Pro Tools shortcut key commands can take your editing to the next level. Similarly, from editing tracks to setting markers, these keyboard shortcuts can save time and improve workflow for any Pro Tools user.

As an intermediate Pro Tools user, you might want to speed up your workflow with some handy keyboard shortcuts. Also, these intermediate Pro Tools shortcut key commands for track controls, clip controls, and zooming and scrolling will help you work more efficiently and effectively. Here are some of the most important shortcut key commands under each category that you should know.

Track Controls Commands

Fast navigation and control of your tracks is essential when working on a complex Pro Tools project. In addition, here are some shortcut key commands for track controls that will make your workflow faster:

  • Shift + Command + N – Create a new track.
  • Shift + Command + Up/Down Arrow – Navigate to the next/previous track.
  • Option + Click – Duplicate a track.
  • Command + Option + Up/Down Arrow – Move your track up or down.

Clip Controls Commands

The ability to manipulate clips in Pro Tools is pivotal in the editing process. For example, here are some shortcut key commands to optimize your clip control workflow:

  • F7 – Separate clip at the insertion point.
  • F8 – Batch fade your clips.
  • Command + E – Edit your clip parameters.
  • Option + Up/Down Arrow – Nudge your clip up or down.

Zooming And Scrolling Commands

A fast and efficient zooming and scrolling workflow will help you focus on the task at hand. As a result, here are some shortcut key commands to make your zooming and scrolling workflows faster:

  • Option + Command + Up/Down Arrow – Zoom in or out vertically on your track.
  • Option + Command + Left/Right Arrow – Zoom in or out horizontally on your track.
  • Option + Click and drag left or right – Scroll horizontally across your session.
  • Option + Click and drag up or down – Scroll vertically through your session.

By using the aforementioned Pro Tools shortcut key commands, you will find yourself working more efficiently and effectively, as you navigate, edit, and manipulate tracks, clips, and zoom and scroll controls. However, don’t hesitate to commit these shortcuts to memory – ultimately, they will help you produce better quality work with greater efficiency.

Advanced Pro Tools Shortcut Key Commands

HTML Response:

If you’re a professional music composer or audio editor, you know the value of Pro Tools Shortcuts. Time is always of the essence, and shortcuts can significantly increase productivity and efficiency. Then, here are some excellent Advanced Pro Tools Shortcut Key Commands focusing on Automation, Mixing, and Plug-in & Instrument Commands.

Automation Commands

Automation Commands in Pro Tools accelerates workflow and allows you to edit or record automation data without taking your fingers off the keyboard. In short, here are some of the most productive Automation Commands to save your time:

  • Option + Command + [number] – Toggles automation playlist selection (1-5)
  • Option + Command + Arrow keys – Nudge automation vertically, -/+ by grid, /- by value
  • Option + Shift + Command + E – Edit Automation In, selecting two or more parameter values at once

Mixing Commands

The Mixing Commands help you streamline the mixing process, which is an integral part of the music production process. Similarly, Mixing shortcuts help to move faster, focus on creativity, and get the final mix faster. Here are the Top Mixing Commands you should know:

  • Command + F – Search for track names, comments, groups, and markers, etc.
  • Shift + Option + Command + “+” or “-“ – Adjust the track height in the mix window
  • Option+Click – Quickly open and close plug-ins in the insert area

Plug-in And Instrument Commands

The Plug-in and Instrument Commands in Pro Tools help you save time while editing, mixing, and recording audio tracks. Also, in this category, you can have a whole range of options from opening and manipulating plugins to saving presets more easily. These are the most crucial shortcuts:

  • Option + Command + N – Create new plug-in instance
  • Option + Command + R – Rename the selected plug-in
  • Shift + Command + P – Use the Selected Plug-in or the last used plug-in preset

Advanced Pro Tools Shortcut Key Commands make the music production workflow smoother, more productive, and allow you to focus on creativity rather than technicalities. In addition, use these to save time and get on with the task at hand. Keep experimenting with your own methods to find which shortcut works best for you, and streamline your workflow for ultimate productivity.

Custom Pro Tools Shortcut Key Commands

Custom Pro Tools shortcut keys can save precious time and help you handle the software like a pro. For example, you can create personalized key commands for the actions you use often, making editing sessions more efficient and streamlined.

Creating your own shortcut keys in Pro Tools is a great way to speed up your workflow and make the editing process more efficient. As a result, with custom commands, you can eliminate repetitive tasks and easily access the tools you use most often. In this section, we will discuss how to create your own shortcut key commands and provide examples of some popular custom shortcuts.

How To Create Your Own Shortcut Key Commands

To create your own Pro Tools shortcut key commands, follow these simple steps:

  1. From the Pro Tools menu, select “Preferences.”
  2. Click on the “Editing” tab and select “Shortcuts.”
  3. Click on the “+” sign to add a new shortcut command.
  4. Select the command category you want to create a shortcut for.
  5. Select the command you want to assign a shortcut to.
  6. Press the keys you want to assign to the command.
  7. Click “OK” to save your new shortcut.

It’s that easy! However, once you have created your custom shortcut keys, be sure to commit them to memory to speed up your editing workflow.

Examples Of Popular Custom Shortcut Key Commands

Here are some examples of popular custom Pro Tools shortcut key commands:

Shortcut Key CommandDescription
Option + Command + GCreate a Group
Option + Command + IImport Audio Files
Option + Command + PCreate a New Playlist
Option + Command + SSave As
Option + Command + TNew Track

While these custom shortcut key commands may work for some, it’s important to remember that everyone’s needs are different. Then, take some time to consider the tasks you perform the most and create your own custom shortcut key commands that will make your editing process more efficient.

Tips For Mastering Pro Tools Shortcut Key Commands

Discover the best Pro Tools shortcut key commands and take your audio editing to the next level. In short, mastering these shortcuts can speed up your workflow and improve your editing efficiency, making your audio projects a breeze. Don’t miss out on these time-saving tips!

If you’re a Pro Tools user, you know that there are dozens of shortcut key commands to help you navigate the software more quickly and efficiently. But with so many commands available, it can be tricky to know where to start. Similarly, in this post, we’ll give you some tips for mastering Pro Tools shortcut key commands.

Start Slow And Build Muscle Memory

One of the most important things to keep in mind when learning Pro Tools shortcut key commands is that you need to start slow and build muscle memory. It can be tempting to jump in and try to memorize all of the commands at once, but that’s not the best approach. Instead, start by focusing on a few key commands that you use frequently. Practice using them until they become second nature, and then gradually add more commands to your repertoire. Also, this approach will help you avoid getting overwhelmed and will allow you to build a solid foundation of muscle memory.

Focus On Commands You Use Most

There are dozens of Pro Tools shortcut key commands available, but you don’t need to memorize all of them. Instead, focus on the commands that you use most frequently. In addition, take a look at your workflow and identify the tasks that you perform repeatedly. Then, figure out if there are any shortcut key commands that could help you streamline those tasks. By focusing on the commands that you use most often, you’ll be able to maximize the benefits of using shortcut keys.

Take Advantage Of The Pro Tools Keyboard

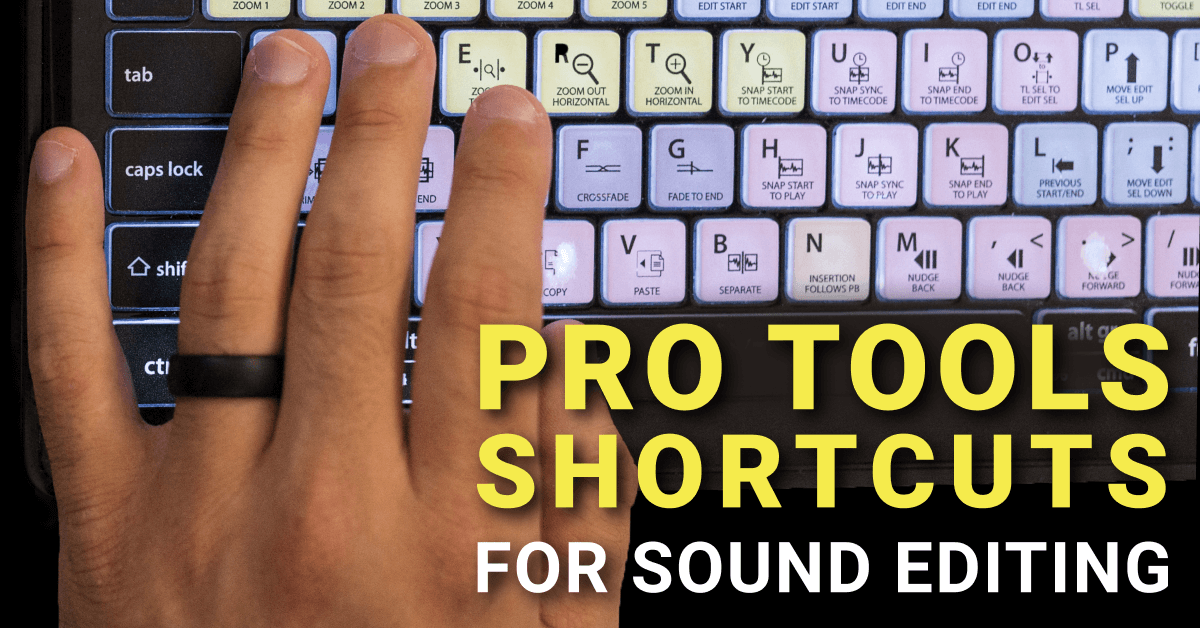
Did you know that Pro Tools has its own keyboard? For example, the Pro Tools keyboard is designed with all of the most commonly used commands right at your fingertips. If you’re serious about mastering Pro Tools shortcut key commands, investing in a Pro Tools keyboard could be a smart move. The keyboard is color-coded, so it’s easy to see which keys correspond to which commands. Plus, it’s designed with the Pro Tools user in mind, so the layout is optimized for maximum efficiency. In conclusion, mastering Pro Tools shortcut key commands takes time and practice, but it’s well worth the effort. By starting slow, focusing on the commands you use most, and taking advantage of the Pro Tools keyboard, you can become a faster and more efficient Pro Tools user.

Best Pro Tools Shortcut Key Commands

Credit: www.protoolstraining.com

Common Pro Tools Shortcut Key Commands You Should Know

Maximize your efficiency in Pro Tools by utilizing these essential shortcut key commands. As a result, mastering these best practices can save you time and make your workflow smoother, allowing you to focus on creating and producing high-quality audio projects.

Common Pro Tools Shortcut Key Commands You Should Know If you are a Pro Tools user, you may already know how essential keyboard shortcuts are to your editing and mixing process. However, it can save you a lot of time and effort, allowing you to focus on your creativity and productivity. Here are the most popular Pro Tools keyboard shortcuts you should know to speed up your workflow.

List Of Most Popular Pro Tools Shortcut Key Commands

Here are the most used Pro tools shortcut key commands you should know:

Key CommandsDescription
Command + SSave session
Command + ZUndo
Command + Option + ZRedo
Shift + Option + 3Create a new track
Command + Option + NCreate a new playlist
ESeparate clip at playhead position
FFit clips to the timeline
RRecord enable track
Option + clickCreate a fade in
Control + Option + clickCreate a fade out

These key commands can truly make your editing process faster and easier. Then, try memorizing them one at a time and start using them in your work. This will help you save time while keeping your editing process more efficient and accurate.

Conclusion

These are the most essential Pro Tools keyboard shortcuts that you should know to improve your editing and mixing workflow. Learning and using them can make a significant difference in your productivity and creativity. With continued practice, these key commands should become second nature to you.

Best Pro Tools Shortcut Key Commands

Credit: helpx.adobe.com

Frequently Asked Questions For Best Pro Tools Shortcut Key Commands

What Are Some Cool Ctrl Commands?

Some cool Ctrl commands include Ctrl+C to copy, Ctrl+V to paste, Ctrl+Z to undo, Ctrl+A to select all, and Ctrl+Shift+T to reopen the last closed tab in a web browser.

What Are The Shortcuts On Pro Tools?

Pro Tools offers numerous keyboard shortcuts that make navigation and editing more efficient. They include commands for editing, mixing, recording, and navigation, among others. Some popular keystrokes include “Ctrl+Shift+”N” for a new track, “Ctrl+Shift+”R” for track record enable, and “Ctrl+”E” for editing tools.

What Are The Best Shortcut Keys?

The best shortcut keys are ones that save time and effort while working on a computer. Some of the most commonly used shortcut keys include Ctrl + C (copy), Ctrl + V (paste), Ctrl + Z (undo), Ctrl + A (select all), and Ctrl + F (find).

These keys vary depending on the operating system and application being used.

What Does F8 Do In Pro Tools?

F8 is a shortcut key in Pro Tools used to display or hide the MIDI editor window. It’s a handy tool for editing and composing music.

Conclusion

To sum up, knowing the best Pro Tools shortcut key commands can significantly improve your productivity levels as a music producer or audio engineer. These key commands can save you time and effort, allowing you to focus on your creative work.

By mastering them, you can easily navigate Pro Tools and efficiently execute tasks with ease. Incorporate these shortcut keys into your workflow, and you’ll undoubtedly see a boost in your efficiency and overall quality of work. Keep learning and exploring to become a Pro Tools pro!

Categories
Archive

Why Mixing And Mastering Are Crucial

Mixing and mastering are crucial for achieving a professional, polished sound. As the final steps in music production, they ensure that the various elements of a track are blended together seamlessly and that the overall sound is optimized for listening on different playback systems.

Without proper mixing and mastering, a great song can fall flat and fail to reach its full potential. The mixing process involves adjusting levels, panning, and creating space in the audio spectrum for each instrument or vocal track. Mastering, on the other hand, is the process of applying final touches to the mix, such as equalization, compression, and limiting, to balance the sound and enhance its overall clarity and loudness.

In short, mixing and mastering are essential steps in bringing your music to life and making it stand out in the competitive world of music production.

The Importance Of Mixing

Mixing and mastering are critical steps in music production that help achieve a professional sound that makes listeners want to keep listening. Mixing involves balancing and enhancing individual tracks by adjusting their levels, panning, and effects to create a cohesive, harmonious mix. It is a crucial process that can make or break a song. Here are some reasons why the mixing stage is so important.

Balancing Audio Levels

The first step in mixing is to balance the levels of all the individual tracks. This means adjusting the volume levels so that each instrument, vocal, or sound effect is audible and clear, without overpowering the others. Proper balancing ensures that the listener can hear all the elements of the music and prevents any part from sounding too loud or too soft. Balancing audio levels is critical to achieving a well-crafted mix that sounds great on any system.

Combining Tracks Effectively

The second important aspect of mixing is combining tracks effectively. This means making sure that all the individual tracks work well together to create a cohesive sound. For example, the drums and bass should groove together, the vocals should be on top of the mix, and the lead instruments should stand out without overpowering the rest of the mix. The mixing engineer will use various tools such as EQ, compression, and reverb to blend the tracks and bring out their best qualities. When combining tracks effectively, the result is a polished, professional sound that engages the listener.

Overall, the mixing stage is a vital part of music production that can take a mediocre song and turn it into a masterpiece. By balancing audio levels and combining tracks effectively, the mixing engineer can create a mix that sounds great on any system. A well-executed mix can make all the difference, so it’s essential to ensure the mixing stage is given the attention it deserves.

The Significance Of Mastering

Mastering is an essential stage in the production of music as it gives the final polished touch to the audio track. It helps to balance and enhance different elements of the track, makes it sound clear, and emphasizes the intended emotions of the music.

Without proper mixing and mastering, a music track may not reach its full potential and fail to connect with the listeners.

Mastering is the final stage in the music production process. It involves the balancing, equalization, compression, and enhancement of the mix to ensure it sounds cohesive, polished, and sounds great on all sound systems. While mixing is important, mastering is what makes the difference between a good track and a professional-sounding one. Let’s dive deeper into why mastering is essential for any music production.

Bringing Cohesion To The Album

Mastering ensures that all the songs in an album have a consistent and cohesive sound. Without mastering, each track can sound different and out of place when played together. During mastering, the engineer ensures that each song has the same tonality, volume, and dynamic range, giving the album a sense of continuity and cohesiveness. It’s like putting the final piece of the puzzle.

Preparing For Distribution

When you plan to distribute your music online or offline, it’s crucial to ensure it is mastered correctly. Mastering ensures that the track is optimized to sound its best on different sound systems. Whether it’s streaming platforms like Spotify or Apple Music, radio stations, or CDs, mastering ensures that your music maintains its quality, punch, and clarity across all platforms. It will help your music stand out from the rest and make a lasting impression on your audience. In conclusion, the significance of mastering in music production cannot be emphasized enough. It brings cohesion to the album and prepares your music for distribution. Without mastering, your music may lack the professional touch it needs to be successful. Make sure you invest in a professional mastering engineer or use an AI-powered mastering service to deliver a polished and high-quality final product to your audience.

The Impact Of Poor Mixing And Mastering

Poor mixing and mastering can have a significant impact on the final sound quality of a recording. Properly mixing and mastering a track is crucial to achieving a clear and balanced sound, ensuring that all elements of the music are heard in the way they are intended to be heard.

The final mix can greatly impact the overall success of a song or album.

Mixing and mastering are crucial processes in music production that can make or break the quality of a final track. Poorly mixed and mastered music can have a negative effect on the final output, leaving it sounding unprofessional, unbalanced, and lacking in detail. In this section, we will discuss the impact of poor mixing and mastering, focusing on unbalanced sound levels, loss of detail and clarity, and inconsistent tone or pitch.

Unbalanced Sound Levels

When it comes to music production, sound levels are important. Poor mixing and mastering can lead to unbalanced sound levels, resulting in some instruments being too loud while others are too soft. This can be frustrating for listeners, as they will struggle to hear certain instruments, or worse, be subjected to loud and overpowering sounds. A common issue resulting in unbalanced sound levels is inexperienced mix engineers or producers not understanding how different instruments can affect each other in the mix. To solve this issue, it is essential to have an experienced engineer or producer handling the mixing and mastering process. They can ensure all instruments are properly balanced, creating a cohesive and enjoyable listening experience.

Loss Of Detail And Clarity

Without proper mixing and mastering, music can lose detail and clarity. Small nuances in the production, such as intricate guitar riffs or background vocals, can be lost in the mix. This can significantly affect the overall quality of the track, leaving listeners feeling unfulfilled. Additionally, not having the right amount of headroom in a track can lead to digital clipping, causing a distorted sound. To ensure detail and clarity are maintained, experienced mix engineers or producers can use various techniques like EQ, Multi-band Dynamics, Stereo Widening, and Limiting during mixing and mastering deliberately. This enhances the quality of the track, bringing out the intended details as and when needed.

Inconsistent Tone Or Pitch

One of the most significant impacts of poorly mixed and mastered music is inconsistent tone or pitch. Inconsistent pitch can make vocal tracks sound off-key and instruments sound out of tune. Inconsistent tone can make the track sound disjointed and difficult to enjoy. These issues can occur during the mixing phase when adjusting frequency bands and during mastering when adjusting dynamics processing. To avoid inconsistent tone or pitch, it is essential to have knowledgeable and skilled engineers or producers handling these processes. They can ensure that the track has consistent tonality and pitch from start to finish. In conclusion, mixing and mastering are crucial aspects of music production, and their significance cannot be overstated. Poor mixing and mastering can lead to unbalanced sound levels, loss of detail and clarity, and inconsistent tone or pitch. To ensure a high-quality final product, it’s essential to utilize the services of experienced engineers or producers who understand how to manipulate every stage of the process to achieve the best outcome.

Improving The Mixing And Mastering Process

Good mixing and mastering can drastically improve the quality of a song. Without proper mixing, instruments can clash and vocals can be overpowered. And without mastering, the final product can be quiet or lack energy. It’s crucial to pay attention to these stages of music production.

Improving the Mixing and Mastering Process Mixing and mastering are two different stages in music production, but they share a common goal: to make a track sound the best it can be. Mixing involves combining individual tracks into a cohesive whole, while mastering is the final step that ensures the track sounds good on all playback systems. Both are crucial to achieving a professional-sounding result. However, the process of mixing and mastering can be improved in several ways, from using professional tools and techniques to collaborating with skilled engineers. Using Professional Tools and Techniques Using professional tools and techniques to mix and master tracks can make a world of difference in the overall sound quality. Mixing tools like EQ, compression, and reverb can help balance the frequencies, dynamics, and spatial aspects of a mix, respectively. Moreover, mastering tools like limiters and multiband compressors help to balance the overall volume levels of a track. Collaborating with Skilled Engineers Collaborating with skilled engineers can bring a fresh perspective to the mixing and mastering process. They can offer new ideas and techniques that can add depth and quality to a track. Another advantage is that they can help artists avoid common mixing and mastering mistakes, like over-compressing or over-equalizing tracks. In essence, mixing and mastering are crucial stages for achieving a professional audio production, and improving these stages comes down to using professional tools, techniques, and collaborating with skilled engineers. By focusing on these areas, artists and producers can create tracks that stand out from the crowd.

Why Mixing And Mastering Are Crucial

Credit: blog.beatstars.com

Frequently Asked Questions For Why Mixing And Mastering Are Crucial

Does Mixing And Mastering Make A Big Difference?

Yes, mixing and mastering can make a significant difference in the overall quality and clarity of a recording. Proper mixing can ensure all elements of a track blend harmoniously, while mastering can enhance the overall sound and dynamics. A professional mix and master can significantly improve the final product.

What Is The Truth About Mixing And Mastering?

Mixing is the process of blending multiple audio tracks together into a single stereo track, while mastering is the process of preparing the final mix for distribution. Mixing balances the levels and adjusts the EQ and effects, while mastering prepares the mix for playback on different systems and ensures the overall sound is consistent and optimized.

Both are crucial steps in producing a high-quality recording.

Why Are Mixing Engineers Important?

Mixing engineers are important because they are responsible for ensuring that different sounds, instruments, and vocals are blended together perfectly for a high-quality audio output. They use their technical expertise, creativity and experience to adjust levels, EQ, effects and pan to make songs sound great.

A good mixing engineer can make all the difference in the final sound quality of a recording.

Does Mastering Improve Sound Quality?

Yes, mastering can improve the sound quality of audio recordings. This process involves adjusting and enhancing various elements such as volume, EQ, and compression to achieve a clearer, more balanced sound. It also helps to ensure that the audio is consistent and ready for distribution across different platforms.

Conclusion

Investing your time and resources on mixing and mastering is a wise decision for serious music producers. It is an integral part of music production that can make or break your final output. With today’s advancements in technology, there are now more affordable resources for musicians to enhance their music.

To make your music stand out, it’s important to take the time to get your mixing and mastering right. By doing so, your music will not only sound professional but also have a greater chance of getting noticed and appreciated by a wider audience.

Categories
Archive

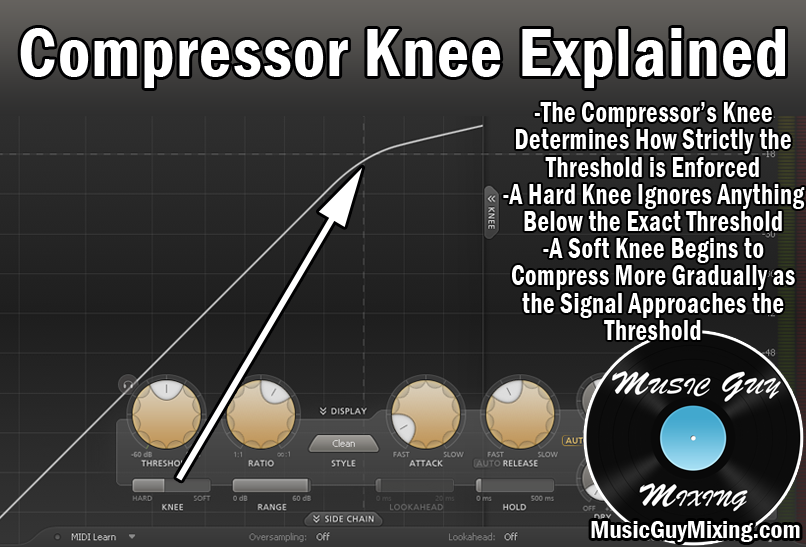
Knee Setting On A Compressor

Knee setting on a compressor is the process of adjusting the pressure switch to prevent the machine from overworking. With this setting, the compressor will automatically turn on and off at the desired pressure range.

When it comes to the world of pneumatic tools, compressors play a crucial role. These machines convert power into potential energy, allowing tools such as nail guns and paint sprayers to operate. However, if the compressor is not set up correctly, it may lead to ineffective performance.

This is where knee setting on a compressor comes into play. Essentially, the knee setting is adjusting the pressure switch to match the desired pressure range. This ensures that the compressor does not overwork, saving on energy costs and increasing the lifespan of the machine. We will discuss in detail the process of knee setting on a compressor.

Knee Setting On A Compressor

Credit: www.musicguymixing.com

What Is Knee Setting?

Knee setting on a compressor is the process of adjusting the air compressor’s pressure switch to control the cut-in and cut-out pressure of the compressor’s motor. This is important to ensure the compressor operates efficiently and safely, without risking damage to the system or injury to those working with it.

Knee setting is an important feature in air compressors and it is used to regulate the air output of the compressor. It involves setting the pressure at which the compressor will stop delivering air, and it is usually set lower than the maximum operating pressure.

Explanation

Knee setting is the point at which the compressor stops delivering air. The pressure is set at a specific point, which is usually below the maximum operating pressure. This is done to prevent the compressor from reaching its maximum pressure, which can cause damage to the compressor and the equipment it powers. Knee setting is adjustable and can be set to any pressure level within the compressor’s range.

Importance

Knee setting is an important feature to ensure optimal performance and efficiency of the air compressor. Setting the knee pressure will prevent the compressor from working at full capacity, which can lead to overheating, wear and tear, and eventual breakdown. Additionally, knee setting can prevent system leaks and reduce the amount of energy required for the compressor to maintain consistent pressure. By keeping the pressure level within the set range, the compressor runs at a more consistent level, which can also extend the life of the equipment. In summary, knee setting is an essential feature in air compressors that regulates the air output to ensure optimal performance, efficiency, and longevity of the equipment. It is a feature that needs to be set correctly to prevent damage to the compressor and its associated equipment.

How To Set Knee On A Compressor?

One of the important steps in setting up a compressor is adjusting the knee setting. To do this, start by turning off the compressor and checking the manufacturer’s instructions. Then, adjust the knee to the desired pressure range, making sure not to exceed the compressor’s maximum capacity.

Adjustment Procedure

To set the knee on a compressor, you need to take the following steps:

  1. First, switch off the compressor and unplug the power cord from the socket to avoid electric shock.
  2. Then, remove the belt guard cover to expose the crankshaft and belt drive system.
  3. Locate the knee, which is a lever mounted on the crankshaft, parallel to the compressor motor.
  4. Loosen the knee lock nut and adjust the knee’s position on the crankshaft by moving it up or down to set the desired pressure limit.
  5. Now, tighten the lock nut back to secure the knee’s position on the crankshaft
  6. Once done, test the compressor by turning it on and checking for the desired pressure limit.

Tips To Remember

While setting the knee on a compressor, the following tips will help you:

  • Make sure to read the manufacturer’s instructions and specifications before attempting to adjust the knee.
  • Keep your hands and tools away from the belt drive system to avoid any injuries.
  • Use protective gear such as gloves and goggles to avoid any accidents.
  • Always unplug the power cord from the socket while adjusting any components inside the compressor.
  • Regularly check and maintain the compressor’s belt drive system, knee, and other components to ensure their smooth functioning.

By following the above steps and tips, you can easily set the knee on a compressor, and ensure that it operates safely and efficiently. Remember to be cautious while handling any components inside the compressor and do not attempt to modify or adjust them beyond their specified limits.

Types Of Knee

Knee setting on a compressor is an essential feature that compressors must-have. It allows the compressor to maintain a consistent and stable flow of air. Knee settings help to regulate the compressor’s intake and exhaust valves, which directly impact the performance of the compressor. There are three main types of knee settings: fixed knee, adjustable knee, and swing knee.

Fixed Knee

A fixed knee setting on a compressor is a basic type of knee setting that maintains a constant airflow. The fixed knee setting is not adjustable for changing the compressed air requirements of the application. Thus, it can lead to wasted energy when compressed air demand is low, leading to increased power consumption. The fixed knee setting is suitable for applications that require a consistent air supply and do not have varying air demand.

Adjustable Knee

As the name suggests, the adjustable knee setting lets you adjust the knee point based on the compressed air demand. The knee point is the pressure point where the compressor adjusts its output, with the demand. The adjustable knee setting allows you to set the required pressure range at the knee, ensuring the compressor delivers compressed air accordingly. This feature ensures energy efficiency, as the compressor only supplies the required compressed air, depending on the needs of the application.

Swing Knee

A swing knee setting is the most advanced knee setting on a compressor as it allows you to adjust the knee point precisely depending on the compressed air demand. This feature allows you to maintain the required air pressure in your application with a lower amount of compressed air. The swing knee setting is ideal for applications that have varying air demand and require precise air pressure control.

Knee Setting On A Compressor

Credit: theproaudiofiles.com

Factors To Consider While Setting Knee

Knee setting refers to the point at which the compressor shuts off after reaching a particular pressure. This setting is crucial as it determines the life of the compressor, energy consumption and the output of the compressor. There are different factors to consider to get the right knee setting on a compressor:

Pressure Range

The first factor to consider while setting knee is the appropriate pressure range for your compressor. Each compressor is designed for a specific pressure range, and you should check the manufacturer’s manual for the recommended values. Notably, knee settings should range between 70% and 90% of the compressor cut-out pressure.

Material Type

The material type should also influence the knee setting for a compressor. Different materials require different pressure levels to achieve maximum efficiency. You do not want to go beyond the safe pressure level for your material; else, you risk damage to your equipment or inconsistency in output. Check your material specifications for the recommended pressure level and adjust the knee setting according to that.

Required Output

The required output should play a significant role in determining the knee setting. You must ensure you set the knee according to the output requirements to prevent overloading the compressor. A high output requirement translates to a higher knee setting, while a lower output requirement means you can set the knee at a lower pressure. Always ensure you measure your output accurately to set the knee setting correctly.

Setting knee compressors is essential to ensure high-efficiency operations and avoid damaging your compressors. Failure to set your compressors to the right knee point can lead to reduced productivity and increased wear and tear. By considering factors like pressure range, material type and required output, you can adjust your knee setting optimally.

Common Mistakes While Setting Knee

When it comes to knee setting on a compressor, there are some common mistakes that people tend to make. Some of these include not aligning the knee properly, using incorrect settings, or applying too much pressure. It’s important to take the time to properly set your knee to ensure optimal performance and avoid injury.

Setting the knee on a compressor is an essential step before operating it. The knee helps in regulating the pressure and ensures that the compressor runs efficiently. However, there are some common mistakes that people make while setting the knee on a compressor. These mistakes can result in damage to the equipment, safety issues, and reduced efficiency. Here are some of the common mistakes people make while setting the knee on a compressor:

Over Tightening

One of the most common mistakes people make while setting the knee on a compressor is over-tightening. Over-tightening can damage the equipment, lead to leaks, and result in reduced efficiency. It’s important to remember that the knee should be snug and not overly tightened. Tightening the knee too much can result in the compression ring getting deformed, or the seat getting damaged. Therefore, it’s important to read the manufacturer’s recommendations and follow them carefully.

Under Tightening

Another mistake that people make while setting the knee on a compressor is under-tightening. An under-tightened knee can result in leaks, which can lead to safety issues, equipment damage, and reduced efficiency. It’s important to make sure that the knee is tightened enough to prevent leaks but not excessively. An under-tightened knee can also cause the compressor to run at pressures below the required specifications.

Not Checking Before Use

One of the most common mistakes people make is not checking the knee before use. It’s important to check the knee before operating the compressor, as it ensures that it’s properly set and functioning correctly. It’s recommended that you check the knee before use each time, especially if you haven’t used the compressor in a while. A quick check can prevent potential issues that can cause delays, safety concerns, and reduced productivity. In conclusion, setting the knee on a compressor requires careful attention to detail to prevent common mistakes. Over-tightening, under-tightening, and not checking the knee before use are some of the most common mistakes people make while setting the knee. By avoiding these mistakes, you can ensure the compressor runs safely, efficiently, and without any issues.

Knee Setting On A Compressor

Credit: www.mixinglessons.com

Frequently Asked Questions On Knee Setting On A Compressor

What Is The Knee Control On A Compressor?

The knee control on a compressor is a feature that allows the compressor to operate at a range of pressures. When you adjust the knee control, it sets the range for the compressor’s output pressure. This means it will regulate air flow according to the level of demand, making it more efficient.

What Is The Knee Ratio For Compressor?

The knee ratio for compressor refers to the ratio of the minimum discharge pressure to the maximum allowable working pressure. It is used to determine the operating limits of the compressor and ensure that it operates within safe parameters.

What Is The Knee In Logic Compressor?

In a logic compressor, the knee is the point at which the compressor starts to operate on the incoming signal. It’s the spot where the ratio starts to take effect and signals above the threshold are compressed.

What Is The Knee Width Of A Compressor?

The knee width of a compressor varies depending on the type and model of the compressor. It’s important to check the specifications of the compressor for its specific knee width measurement.

Conclusion

Proper knee setting on a compressor is crucial for efficient and safe operation. By ensuring correct alignment and balance of forces, you can extend the life of your compressor and prevent costly downtime. Take the time to properly adjust your compressor’s knee settings, and don’t forget to regularly inspect and maintain all components.

Remember, a little preventative maintenance goes a long way in ensuring the longevity and reliability of your equipment.

Categories
Archive

Mixing Vocals Tricks For Great Sound

Mixing vocals for great sound requires proper EQ, compression, and reverb techniques. We will explore some tips and tricks to help you achieve a polished and professional sound when mixing vocals.

Vocals are one of the most crucial elements in a music production project. They carry the melody and the emotion of the song, and they have the power to make or break a track. Mixing vocals can be challenging, but with the right techniques, you can achieve a professional-quality sound.

We will provide some tips and tricks for mixing vocals that will help you achieve a polished and cohesive sound that complements the rest of the production. From proper EQ and compression settings to techniques for adding reverb and delay, we will cover everything you need to know to create great-sounding vocals in your mix.

Mixing Vocals Tricks For Great Sound

Credit: ravirayaudio.com

Start With A Great Recording

Vocals are the most important element of any song, and mixing them right is essential for a great sound. So, whether you’re a producer or a mixing engineer, knowing some mixing vocals tricks can take your tracks to the next level. Starting with a great recording is crucial for getting great-sounding vocals. Here are some tips to help you get started:

Choose Your Mic Wisely

The microphone you choose can make a significant difference in how your vocals sound. Dynamic mics are great for live shows, but they’re not always the best for recording. Condenser mics, on the other hand, are better suited for studio recordings. Large-diaphragm condensers are often the go-to mic for many studios, but they can be quite expensive. A small-diaphragm condenser is often a more budget-friendly option and can still produce quality recordings. Ultimately, choose a mic that suits the style of the vocals.

Get The Right Mic Placement

Where you place the microphone can have a huge impact on your recordings. Experiment with different placements to find the perfect spot. A common technique is to position the mic about six to eight inches away from the singer’s mouth and slightly off-center. This helps to avoid plosives and sibilance that can distort the sound. It’s also essential to use a pop filter to minimize unwanted pops and clicks that can ruin an otherwise great recording.

Use Proper Recording Techniques

Proper recording techniques are key to getting great-sounding vocals. Make sure to record in a quiet environment to avoid unwanted background noise. Ensure that your singer is comfortable and can sing with ease. Also, make sure to monitor the recording levels carefully. Recording at too low a level can result in a noisy recording, while recording at too high a level can cause distortion.

Following these tips can help you get a great recording, which is fundamental to mixing vocals for great sound. Always take your time and experiment to find what works best for your vocals.

Vocal Editing Techniques

Achieving the perfect vocal mix can be challenging, but with the right techniques, it’s possible to achieve a great sound. Using vocal editing techniques like EQ, compression, and reverb can help bring out the best in your vocals and make them sound polished and professional.

While recording, a good sound engineer will do everything possible to make sure the vocals are recorded as flawlessly as possible, but that’s not always the case. That’s where vocal editing techniques come in handy to rectify uneven performances, correct pitch issues, and smooth out any inconsistencies. In this post, we’ll discuss essential editing techniques that will help you produce perfect vocal tracks.

Comp And Edit Your Vocals

Compiling and editing are essential steps when dealing with vocals, particularly if the vocalist is not a seasoned performer. Here are some comp and editing tips to help you achieve great vocal tracks:

  • Listen to the vocals and identify the best takes.
  • Select section by section and compile the best parts.
  • Trim or crossfade between each section for an even flow.
  • Apply any necessary editing, like volume adjustments, noise reduction, or fade-ins/fade-outs.

These steps can result in a more consistent and polished vocal performance that’s ready for further editing.

Use Pitch Correction If Necessary

Pitch accuracy is vital in vocal performances, and even the slightest deviation can alter the quality of the recording. Fortunately, there are various pitch correction tools that can help you fix pitch issues in your vocals. Here are some tips to keep in mind when doing pitch correction:

  • Use pitch correction tools sparingly. Overloading sound with pitch correction tools can produce an unrealistic, metallic sound.
  • Automatic pitch correction tools are ideal for minor tuning, while manual correction tools are suited for extensive editing to preserve the natural sound of the recording.
  • When using manual correction tools, review each segment of the vocals and only make necessary corrections, such as correcting sharp notes or flat notes that sound off-key.
  • Be cautious when applying pitch correction on consonants or consonant-like sounds, such as “s” or “t”, as they affect the consonants’ natural sound.

Knowing how pitch correction tools work will help you produce a pitch-perfect vocal track that’s free from pitch anomalies. In conclusion, Vocal editing techniques play a crucial role in producing great sounding vocal tracks. Compiling and editing can help improve a vocalist’s performance, while pitch correction tools can help correct pitch inaccuracies, leading to more polished and professional vocals. By following these tips, you can achieve a top-quality vocal sound that’s perfect for your projects.

Use Eq To Enhance Your Vocals

The key to producing great vocal sound is knowing how to use various audio effects. One of the most important tools to use is EQ. Understanding how to adjust the EQ settings will help you enhance the vocals in your mix and produce a more professional sound. Here are some EQ tricks to improve your vocal mixing skills:

Cut The Muddiness

To prevent your vocal from sounding muddy or indistinct, you’ll need to make sure your vocals don’t clash with other instruments. Use EQ to find the frequency range where your vocal is competing with other instruments and reduce it using the EQ’s notch filter. Always remember to cut the lower midrange frequencies between 200Hz and 500Hz to remove the boxiness.

Boost The Presence

Boosting the presence of your vocal will help it stand out over the top of the rest of the mix. You can achieve this by boosting the frequencies between 3kHz and 6kHz. Be careful not to overdo it as too much presence boost can make the vocals sound piercing and harsh.

Add Some Air

Adding air or sparkle to your vocal will make it sound more natural and polished. To achieve this, you can add a high-shelf filter, starting at 10kHz or higher. Again, be cautious with this effect as too much air can make the vocals sound unnatural and unrealistic.

Remember, EQ is a powerful tool, but it’s important not to go overboard with your adjustments. Take some time to experiment by making small adjustments and listening to the changes in the sound. You’ll eventually develop an ear for what sounds best in the mix and achieve the perfect tone for your vocal track.

Mixing Vocals Tricks For Great Sound

Credit: m.youtube.com

Achieve Clarity With Compression

Achieving clarity in your vocal mixes is crucial for great sound. One trick to achieve this is through compression, as it helps even out the volume levels of vocal tracks. Proper compression settings and careful adjustment can do wonders for the overall sound of a mix.

Set The Threshold And Ratio

Compression is a common technique used in music production to reduce the dynamic range of vocal recordings. To start, set the threshold and ratio depending on vocal dynamics. Higher ratios can be used to limit louder parts of a vocal recording, while lower ratios are best suited for a less dynamic performance. The threshold should be set so that the quieter parts of the vocal performance are left untouched. Finding the right threshold and ratio can take some experimentation, so don’t hesitate to adjust until the desired effect is achieved.

Attack And Release Time

The attack and release time are two important parameters that determine how quickly compression is applied and released. The attack time should be set to allow the initial transient of the vocal performance to come through, while the release time should be adjusted to ensure that the compressor doesn’t release too quickly, creating an unnatural sound. A faster attack time will result in a more aggressive compression sound, while a slower attack time works well for smoother vocal performances.

Makeup Gain

After applying compression, the overall level of the vocal recording will be lower. The makeup gain should be adjusted to make up this loss in volume. Be cautious not to overdo it, as too much makeup gain can result in unwanted distortion. A good starting point is to adjust the makeup gain to make up for the amount of reduction applied by the compressor. By following these simple tricks to achieve clarity with compression, you can take your vocal recordings to the next level. So, next time when mixing vocals try adjusting the Threshold and Ratio, Attack and Release Time, and Makeup Gain for outstanding results.

Add Space And Atmosphere With Reverb

To create a spacious and immersive vocal sound, try using reverb. Adding reverb to a vocal track can help create depth and atmosphere, making it sound more professional and polished. Experiment with different reverb settings to find the perfect balance for your mix.

Vocals are the most crucial element of any song, and they should be given careful attention while mixing to create a professional-sounding mix. Mixing vocals with reverb is one of the easiest and most effective methods to add depth, space, and atmosphere to your mix. Using reverb creates a sense of space as if the vocalist is singing in a natural environment rather than a confined room. Here are some tricks for using reverb to mix vocals effectively.

Choose The Right Reverb Type

Choosing the correct reverb type is the first crucial step in adding depth to your vocals. Rooms, plates, halls, chambers, and cathedrals are different types of reverb. Select the type of reverb that gels well with the song’s genre and feel. For instance, if the song is a soft ballad, a hall reverb with a long decay time can add the right amount of space. In contrast, a short plate reverb may suit an electronic or pop track.

Adjust The Pre-delay, Decay Time, And Damping

After selecting the appropriate reverb type, it’s time to fine-tune the settings to create a precisely balanced vocal sound. Pre-delay is the gap between the original sound and the reverb tail, which must be adjusted to establish more space or to tighten the sound. Decay time controls how long the reverb lasts, and damping reduces high or low frequencies to create a more musical and cohesive sound.

Blend In The Wet Signal

The final blend between the dry and wet signal is necessary to achieve the desired vocal sound. If the wet signal is too high, it can overpower the dry vocal track and make it difficult to discern lyrics. On the other hand, if it’s too low, the vocals may sound too dry and lacking character. Using a mix knob to balance the dry and wet signal is recommended. In conclusion, using reverb while mixing vocals effectively can give your tracks depth and space, making them sound professionally mixed. Choose the right reverb type, adjust the necessary settings, and blend the dry and wet signals carefully to create a balanced vocal that sits well in the mix.

Creative Effects For Vocal Texture

Creating a good vocal mix can be the most challenging part of any recording. But with the right mixing techniques and tools, you can make your vocals sound professional and polished. One of the most effective ways to add depth and dimension to vocals is by incorporating creative effects that enhance their texture.

Create Vocal Doubles And Harmonies

Vocal doubling is a technique that involves recording the same vocal performance twice and panning each take to opposite sides of the stereo field. This technique creates a fuller, wider sound and adds richness to the vocals. To create harmonies, you can also record additional vocal parts that follow the main melody at different intervals. Experiment with different vocal arrangements to create a unique, layered sound.

Experiment With Delay And Echo

Delay and echo effects can add space and depth to vocals and give them a more atmospheric feel. By adjusting the delay time and feedback, you can create a range of effects from subtle echo to a pronounced, rhythmic delay. Use these effects sparingly to avoid overwhelming the vocals.

Use Distortion And Saturation

Distortion and saturation can be used to add grit and warmth to vocals, creating a more vintage or analog sound. Distortion introduces harmonic distortion that alters the waveform shape, while saturation soft clips the peaks of the waveform. Both can be used to add character and personality to vocals.

By incorporating creative effects for vocal texture in your mixing process, you can add depth and dimension to vocals and elevate them to the next level.

Mixing Vocals In The Context Of The Song

To achieve great vocals in a song mix, it’s important to stay conscious of the song’s context throughout the mixing process. The vocals should sit well with the instrumental and avoid clashing with other elements. Apply techniques such as compression, equalization, and reverb to achieve a cohesive sound.

Mixing vocals can be both fun and challenging. The key is to keep the vocals sounding great while making sure they fit perfectly within the song. One of the most crucial aspects of mixing vocals is finding the right balance with other instruments. Here are some tricks to make sure your vocals sound amazing.

Find The Right Balance With Other Instruments

When mixing vocals, it’s essential to take into account all the other instruments in the song. The vocals should complement the instrumentation, not compete with it. To achieve the right balance, use EQ to cut frequencies that clash with other instruments. Use panning to position the vocals in the stereo field. Compression helps to maintain a consistent volume level, ensuring that the vocals don’t get lost in the mix.

Make Space For The Lead Vocal

The lead vocal is the star of the show, so it needs to stand out. To make space for the lead vocal, reduce the volume of other instruments in the same frequency range. Eliminate unnecessary noise, such as breaths, pops, and clicks. Use reverb and delay effects to create depth and ambiance around the lead vocal.

Automate For Dynamics And Emphasis

Automation is a powerful tool for emphasizing certain parts of a vocal track. Use volume automation to increase the volume of specific words or phrases. Adjust the EQ, panning, and effects on a phrase-by-phrase basis to create variety and interest. Use compression with a high ratio to tame loud parts, and a low ratio to boost softer parts. Automating these settings helps to create dynamic and engaging vocal tracks. In conclusion, mixing vocals in the context of the song is essential to get a great sound. By finding the right balance with other instruments, making space for the lead vocal, and automating for dynamics and emphasis, you can achieve professional-sounding tracks. So, start experimenting with these tricks and create outstanding vocal mixes that stand out.

Mixing Vocals Tricks For Great Sound

Credit: m.youtube.com

Final Touches For A Professional Vocal Mix

Achieving a professional vocal mix requires attention to detail and effective use of mixing tricks. From EQ and compression to reverb and delay, utilizing these techniques can result in a great sound. Don’t forget about the importance of panning and volume levels to bring the vocals to the forefront of the mix.

De-essing And De-breathing

De-essing and de-breathing are essential techniques for achieving a professional vocal mix. Sibilance and breath sounds can be distracting and take away from the overall sound of the vocals. De-essing involves reducing or removing the harsh “s” and “sh” sounds that can be emphasized during recording. On the other hand, de-breathing involves removing or reducing the sound of breaths in the recording. These techniques can be done manually or with the help of plugins such as Waves DeEsser and FabFilter Pro-DS.

Tuning The Background Vocals

Background vocals add depth and dimension to a vocal mix, but they need to be in tune to be effective. Tuning should be done carefully to maintain the natural sound of the vocals. The easiest way to tune the vocals is to use pitch correction plugins such as Melodyne, Autotune, and Nectar. It allows for precise tuning, and you can adjust the pitch of individual notes seamlessly.

Cleaning Up The Noise And Mouth Clicks

Noise and mouth clicks can also be distracting while listening to the vocals. Editing out these sounds can improve the quality of the final mix. Noise, such as electrical hum, hiss, and static sounds can be reduced by using noise reduction plugins like iZotope RX. Mouth clicks are removed using a technique called automation. It involves using volume automation to reduce the level of the click sound in between words or phrases. In conclusion, the final touches are essential for a professional-sounding vocal mix, and these tips will take you closer to the desired result. De-Essing, De-Breathing, Tuning, and Cleaning up noise and mouth clicks are stages that help in achieving the outstanding vocal performance and get the perfect sound for the listeners. Practice these techniques diligently, and you will notice a significant improvement in the quality of your vocal recording mixes.

Frequently Asked Questions On Mixing Vocals Tricks For Great Sound

How Do You Get The Perfect Vocal Mix?

To get the perfect vocal mix, you need to follow these steps: 1. Properly EQ each vocal track. 2. Use compression to level out the dynamics and add warmth and thickness. 3. Apply reverb and delay to create space. 4.

Pan the vocals for a wider and deeper soundstage. 5. Use automation to fine-tune the levels and create a cohesive and balanced mix.

What Are The 6 C’s Of Vocal Mixing?

The 6 Cs of vocal mixing are clarity, consistency, cohesion, contrast, creativity, and care. These are important elements to consider when mixing vocals in order to produce a polished and professional sound.

How Do I Make My Vocals Sound Better?

To make vocals sound better, you can try the following techniques: proper breathing and posture, warm up exercises, finding the right microphone and microphone placement, using compression and EQ to adjust the sound, and adding effects like reverb and delay.

Additionally, consider working with a vocal coach or taking singing lessons to improve technique and control.

How Do You Fit Vocals Perfectly In Mix?

To fit vocals perfectly in a mix, follow these steps: 1) Use appropriate equalization and compression to achieve clarity and balance. 2) Make sure the vocal is in its right frequency range. 3) Apply reverb, delay, or a combination of both to add depth.

4) Use automation to emphasize and de-emphasize certain parts of the vocal. 5) Compare and contrast the mix with reference tracks to ensure clarity, balance, and excitement.

Conclusion

Mixing vocals to achieve great sound requires patience, attention to detail, and a willingness to experiment with different techniques. From properly setting levels to applying EQ and effects, there are numerous tricks that can help you take your vocal recordings to the next level.

With the tips outlined in this post, you can start to elevate your vocals and create mixes that truly stand out. So go ahead—get creative, and enjoy the process!

Categories
Archive

How To Use The Adsr Envelope

To use the ADSR envelope, set the attack time, decay time, sustain level, and release time for your audio signal. This will control the volume of your sound over time.

The ADSR envelope is a fundamental tool used in sound synthesis. It stands for Attack, Decay, Sustain, and Release and is used to shape the amplitude of an audio signal over time. By adjusting the parameters of the envelope, you can create a range of sounds, from sharp staccato notes to long sustained tones.

The attack time sets how long it takes for the sound to reach its maximum volume, the decay time controls how long it takes for the sound to decrease in volume, and the sustain level sets the volume at which the sound will remain as long as the key is held down. Finally, the release time sets how long it takes for the sound to fade out after the key is released. By understanding how to use the ADSR envelope, you can enhance your sound design skills and create unique and powerful sounds.

How To Use The Adsr Envelope

Credit: blog.native-instruments.com

How To Use The Adsr Envelope

Credit: skytracks.io

Frequently Asked Questions Of How To Use The Adsr Envelope

How Do You Use An Adsr Envelope?

An ADSR envelope is used to control and shape sound in music production. It stands for Attack, Decay, Sustain, and Release. The Attack controls how quickly the sound reaches its peak level, Decay sets how long it takes to reach the Sustain level, Sustain is the level at which the sound is sustained and Release controls how long it takes for the sound to fade away after the key is released.

How Does The Adsr Work?

ADSR stands for Attack, Decay, Sustain, and Release. It is a tool used in sound synthesis to control the volume envelope of an oscillator. The Attack sets how quickly the sound reaches its maximum volume, Decay adjusts how quickly the sound decreases to the Sustain level, and Release determines how quickly the sound fades out after the key has been released.

What Does It Mean To Have The Adsr Envelope Gated?

Gating the ADSR envelope means using a gate signal to control when the envelope is triggered. The gate signal determines when the attack, decay, sustain, and release stages of the envelope will be applied to the sound.

What Does Envelope Do On A Synth?

An envelope on a synth controls aspects of a sound’s volume over time, such as attack, decay, sustain, and release. It dictates how quickly or slowly a sound will rise or fall in volume, and how long it will sustain before fading away.

Conclusion

The ADSR envelope is an essential tool for shaping the sound of your music. The Attack, Decay, Sustain, and Release stages all contribute to the overall dynamic of a sound. Experiment with different settings to achieve the desired result, and don’t be afraid to get creative.

By mastering the ADSR envelope, you can take your music production to the next level.

Categories
Archive

Subtractive Eq Cutting Tips Tricks

Subtractive EQ cutting involves removing frequencies instead of boosting them, resulting in a cleaner and more natural sound. To master this technique, consider using narrow Q values, making smaller cuts, and listening critically.

Using Subtractive EQ cutting effectively can be the difference between a muddy mix and a clean, polished one. It involves removing certain frequencies that are causing unwanted resonance or clutter, rather than boosting others. This technique can help create a more natural and transparent sound.

To achieve optimal results, consider using narrow Q values, making smaller cuts, and listening critically to the changes. With practice, Subtractive EQ cutting can help you precisely and effectively shape your mix to create a more professional sound.

Subtractive Eq Cutting Tips Tricks

Credit: www.izotope.com

Identifying Problem Frequencies

To achieve a balanced mix in a track, identifying problematic frequencies is key. With subtractive EQ cutting techniques, you can effectively eliminate unwanted frequencies and leave a powerful and coherent mix. Try experimenting with different EQ settings to enhance your tracks further.

As a mixing engineer, it’s important to have an ear for identifying problem frequencies in a track. Problem frequencies are the frequencies that cause a track to sound muddy, cluttered or lack clarity. One of the essential skills of eq cutting is to identify and remove these frequency issues. In this article, we will discuss some tips and tricks for subtractive eq cutting and how to identify problem frequencies to create a clearer and defined mix.

Analyzing The Frequency Spectrum

Before we start eq cutting, it is essential to analyze the frequency spectrum of a track. The frequency spectrum shows the intensity of each frequency in a track and helps us to identify potential problem frequencies. We can use a spectrum analyzer to visualize the frequency spectrum, but it’s also important to listen to the mix with a critical ear. When analyzing the frequency spectrum, look out for frequencies that are too loud or too quiet. Identify which frequency ranges that need attention.

Listening To The Mix With A Critical Ear

Listening to the mix with a critical ear is the most important part of identifying problem frequencies. We need to train our ears to recognize frequencies that sound unpleasant or problematic. Often, these frequencies will sound harsh and piercing. We should use a high pass and low pass filters to isolate certain frequency ranges and focus on what we hear. It’s also vital to compare the mix to reference tracks to hear how they balance different frequencies. Once we identify the problem frequencies, it’s time to start eq cutting. Remember, it’s better to be subtle and use narrow cuts to avoid removing too much of the track’s sound. Eq cutting is a tedious and time-consuming process, but it’s essential for a professional and polished mix. Using these tips and tricks for subtractive eq cutting and identifying problem frequencies will help you create a mix with clarity, definition, and balance.

Subtractive Eq Cutting Tips Tricks

Credit: www.soundgym.co

Tips For Cutting Problem Frequencies

EQ cutting is a fundamental skill that every sound engineer should practice. It is an essential technique to fix problems like frequency buildup and interference in the mix. However, not every cut is created equal, and making the wrong move can cause more damage than good. In this post, we will share some practical tips for cutting problem frequencies.

Using Narrow Q Settings

The Q setting on the EQ determines how wide or narrow the frequency cut will be. When cutting problem frequencies, it’s essential to use a narrow Q setting to target the specific frequency range you want to remove. A broad Q setting may affect other frequencies, leading to a hollow sound. By using a narrow Q, you can pinpoint and remove the exact frequency range that is causing the problem.

Cutting Only A Few Db At A Time

When dealing with problematic frequencies, it’s often tempting to cut them aggressively. However, cutting too much can create a thin and unnatural sound. Instead, try cutting only a few dB at a time, then listen to the result. If there’s still a problem, make another slight cut and repeat the process until the problem is fixed. The goal is to achieve a natural sound that sounds good to your ears.

Aiming For A Natural Sound

It’s critical to aim for a natural and organic sound when cutting problem frequencies. As mentioned earlier, aggressive cuts can lead to an artificial and thin sound that doesn’t translate well to different sound systems. When making the cut, listen carefully, and make sure that the sound remains balanced and natural. Keep in mind that EQ cutting is just one part of the mix, and it’s crucial to maintain a harmonious balance throughout the whole spectrum.

Conclusion

By following these tips, you’ll be able to cut problem frequencies effectively and create a better sounding mix. Remember to use a narrow Q setting, cut only a few dB at a time, and aim for a natural sound that feels organic and balanced. With some practice and experimentation, you’ll be able to improve your sound engineering skills and create mixes that sound fantastic on any sound system.

Tricks For Enhancing The Mix With Subtractive Eq

Learn how to enhance your mix with subtractive EQ cutting tips and tricks. By carefully removing unwanted frequencies, you can create a cleaner and more balanced sound that complements your audio tracks. Use these techniques to take your music production to the next level.

HTML Response:

Subtractive EQ is an essential mixing technique that involves cutting and filtering frequencies that aren’t necessary for the final mix, resulting in a cleaner sound. This technique helps to carve out space for key elements and balance the mix while improving clarity and reducing muddiness. In this article, we’ll share some tricks for enhancing the mix with Subtractive EQ.

Cutting Unused Frequencies

The first trick for enhancing the mix with subtractive EQ is to cut the unused frequencies. When mixing audio, many frequencies in the track are usually not necessary for the final mix. These unnecessary frequencies can make the mix sound muddy and cluttered and can compete with other elements that should be emphasized. Use your EQ to eliminate the frequencies that you don’t need, and make room for the elements that define your track.

Carving Out Space For Key Elements

Carving out space for key elements is another technique you can use when mixing audio with Subtractive EQ. Every instrument has specific frequencies that define its sound, and you can use EQ to bring out these frequencies and make them prominent in your mix. For example, use EQ to cut the low end of a guitar track to make space for the bass guitar, or to cut the high end of a vocal track to make room for the cymbals in a drum kit.

Creating Contrast With Selective Cuts

Selective cuts help create contrast and make your mix sound more dynamic. Use your EQ to cut specific frequencies in one instrument while boosting it in another to create contrast and tension between the elements in your mix. For example, in a guitar solo, you can cut the low frequencies to make it stand out from the bass guitar track, which you can boost the bass frequencies in to create separation and space. This technique makes your mix more interesting and engaging.

Common Mistakes To Avoid

Subtractive EQ is the process of removing unwanted frequencies from an audio signal. It’s a powerful tool that every audio engineer should know how to use effectively. While it seems a simple process, there are a few common mistakes that people often make while cutting with subtractive EQ. In this section, we’re going to discuss some of the mistakes that you should avoid while using subtractive EQ.

Overdoing The Cuts

One of the most common mistakes people make with subtractive EQ is overdoing the cuts. It’s important to remember that subtractive EQ is not a complete solution. Cutting too many frequencies at once can make the sound thin and weak. So, it’s essential to listen carefully and only remove the frequencies that are not required in the mix.

To avoid overdoing the cuts, start with narrow cuts of the frequencies that are not needed and listen to how it’s impacting the sound. Repeatedly do it removing less or more until it sounds right. The idea is to make the sound clearer without hollowing out or thinning.

Cutting Without Listening To The Entire Mix

Another common mistake is cutting without listening to the entire mix. It’s not a good idea to cut EQ on soloed channels without listening to them in the context of the whole mix. You may end up cutting frequencies that might be needed for the song or even create phase issues with other channels. Therefore, it’s essential to listen carefully to the entire mix while making cuts before you zero in specifically on one track.

Ignoring Phase Issues

Phase issues are another mistake that people often make while subtractive EQ cutting. When you’re cutting out specific frequencies, it’s very easy to create phase issues with other tracks. This can often result in a weaker and less cohesive mix. You can easily fix phase issues using tools such as a phase correlation meter, which can help to ensure that the audio signals are in phase with each other. Ignoring phase issues may leave your mix lacking in punch and dynamics.

Mastery of the subtractive EQ process takes time and practice. It’s essential to avoid these common mistakes to ensure that your EQ cutting helps in making your mix sound cleaner and polished rather than worse. Ultimately, it’s essential to always listen carefully and trust your ears while using subtractive EQ to make sure you are creating a balanced and clear mix.

Subtractive Eq Cutting Tips Tricks

Credit: www.mixinglessons.com

Frequently Asked Questions Of Subtractive Eq Cutting Tips Tricks

What Frequency Should I Cut When Mixing?

When mixing, the frequency you should cut depends on the specific sound you want to enhance or diminish. In general, cutting frequencies below 100 Hz can help to reduce unwanted rumble and mud, while cutting frequencies in the midrange between 500-3000 Hz can help to reduce harshness and improve clarity.

Ultimately, the best approach is to use your ears and experiment with different frequency cuts to achieve the desired sound.

What Is The Opposite Of Subtractive Eq?

The opposite of subtractive EQ is additive EQ. Additive EQ involves boosting certain frequencies to enhance the sound without removing other frequencies.

What Is The Difference Between Subtractive Eq And Additive Eq?

Subtractive EQ removes frequencies, while additive EQ boosts them. Subtracting an EQ band reduces its frequency range, while adding it to a track rebalances the overall mix.

What Frequency Is Sibilance In Eq?

Sibilance in EQ typically falls in the mid to high frequency range, around 2-10kHz.

Conclusion

In essence, subtractive EQ cutting is an essential tool that every sound engineer should master. By following the above tips and tricks, you can enhance the quality of your sound recordings and ensure that they stand out from the rest.

Remember to always trust your ears when cutting frequencies, and don’t be afraid to experiment with different techniques. With time and practice, you will be able to achieve those perfect sounds that you’ve been striving for. Happy mixing!