Categories
Archive

A Good Mix Vs A Poor Mix Difference

A good mix involves a balance of audio elements while a poor mix has imbalanced elements. A mix refers to the levels and panning of each track, and determining the right balance is critical in achieving a good mix.

The EQ, compression, and effects placement can also affect the balance of the track. When done correctly, the song will sound natural, clear, and cohesive on different playback systems. In contrast, an inaccurate mix results in jarring, harsh or muffled audio that distracts from the music or project.

Related reading: Mixing: The Complete Guide Hub and Mixing Piano. For background, see the Wikipedia article on Audio mixing.

A poorly mixed track can turn off listeners, making them lose interest in the content. Therefore, understanding the significance of balancing audio elements is crucial for any content creators and producers alike.

What Is A Good Mix?

In a balanced song, you can hear every element clearly, and everything blends together seamlessly. A poor mix lacks balance, so some sounds get drowned out while others are too loud. A solid mix should complement the music, enhancing its impact on the listener.

A strong mix is a blend of sound elements in a song that seamlessly flow together to create a cohesive and pleasing listening experience. Achieving a balanced track requires balancing different aspects of the track to eliminate any element overpowering the others. In this section, we will explore the key components of a solid mix.

Balanced Frequency Spectrum for a Good Mix

Balanced frequency spectrum involves ensuring that each element of the track has its own frequency range and does not overlap with other elements. This results in a clear and balanced sound that is easier to listen to. To achieve a balanced frequency spectrum, consider using equalization to adjust the frequency levels of each instrument or element.

Clear And Defined Sounds for a Good Mix

Clear and defined sounds help in enhancing the overall quality of the track. If the sounds are too muddy or cluttered, it can lead to a poor mix. To ensure clear and defined sounds, the audio engineer should consider using effects like reverb, delay, and compression to bring out the natural tonality of each instrument.

Appropriate Instrumentation for a Good Mix

Appropriate instrumentation refers to using the right instruments and elements to support the theme and mood of the track. Each instrument should complement each other, and no instrument should stand out more than the others. Appropriate instrumentation ensures that all the elements blend harmoniously to create a strong mix.

Adequate Volume Levels

Adequate volume levels let you hear each instrument clearly and keep any element from being too loud or too soft. Audio engineers can consider using compression to even out the volume levels across the different elements of the track. In summary, a balanced song involves balancing different sound elements to create a cohesive and pleasing listening experience. This requires attention to details such as appropriate instrumentation, balanced frequency spectrum, clear and defined sounds, and adequate volume levels. Achieving a solid mix can take time and practice, but with these key components in mind, audio engineers can create a track that sounds great and leaves a lasting impression on the listeners.

What Is A Poor Mix?

A poor mix is a combination of audio tracks or instruments that are not balanced properly, resulting in an unpleasant sound. It lacks clarity, dynamics, and coherence. On the other hand, a strong mix is one that blends all the elements seamlessly, bringing out the best in each part and creating a well-defined, polished, and professional sound.

A poor mix is an outcome of poor sound mixing or audio engineering that results in an undesirable output. A mix is said to be poor when it lacks clarity, punch, volume, and balance. It is essential to understand the difference between a balanced track and a poor mix to ensure that your music production output gains success.

Muddy Frequency Spectrum

A muddy frequency spectrum is a characteristic of a poor mix that results in unclear sound and a lack of clarity. The track sounds as though someone recorded it underwater, with bass-heavy frequencies masking the rest of the sounds. The root cause of a muddy frequency spectrum is a poor balance between instruments and a lack of proper equalization.

Muffled Or Indistinct Sounds

Muffled or indistinct sounds occur when the sound sources are not well-defined. This results in a sound that is dull but with unclear high-end detail. Uncontrolled resonances and sound overshadows are the primary reasons for muffled and indistinct sounds. The song is poorly organized, and the sounds appear synthesized with minimal detail.

Overcrowded Instrumentation

An overcrowded instrumentation mix is when too many instruments are mixed together, resulting in a cluttered and chaotic sound. Musicians might add additional layers to their track. But it is crucial to avoid overloading the mix with too many sounds, as it harms the mix’s overall balance, volume, and clarity.

Irregular Volume Levels

Irregular volume levels occur when the volume of the song varies from one section to another. This creates a feel as if shifting gears from a car. It sounds as if one is continuously adjusting the volume control. The root cause of irregular volume levels is the incorrect setting of the audio levels that create inconsistencies in tracking. In conclusion, a poor mix is a shortcoming in music production that results in an unpleasant sound experience. It is crucial to ensure the audio engineer balances the track well while correcting any inconsistencies to ensure a quality and desirable mix.

Why Is A Good Mix Important?

A solid mix can make or break a song. It is the delicate balance of all the individual elements that come together to create a cohesive and impactful sound. A strong mix takes into consideration the characteristics of the song, the intended message. The emotions that the artist wants to convey. On the other hand, a poor mix can make a great song sound average or even worse, unlistenable.

Enriches Listening Experience

A well-mixed song enriches the listening experience of the audience. A balanced song enhances the clarity of each instrument and vocal. The listener can distinguish each element in the song. Their listening experience becomes more enjoyable as they appreciate each layer of the sound. A poor mix, on the other hand, can make the song sound muddy and unbalanced. It becomes difficult for the listener to decipher the individual elements and enjoy the song.

Achieves Intended Message

A solid mix achieves the intended message of the artist. The track sets the tone and mood of the song and brings out its emotional essence. When a track is done well, it can convey the message and emotion of the artist in an impactful way. However, if the song is done poorly, it can obscure the intended message and weaken the emotional impact of the song.

Guarantees Acceptance Of The Song

A strong mix guarantees acceptance of the song. The first impression of the song determines whether the listener will continue listening or skip it. A mix that’s done well draws the listener in and creates a connection with the song, ensuring acceptance. However, a poorly mixed song can make the listener lose interest and move on to the next song.

Prevents Listener Fatigue

A balanced song prevents listener fatigue. A song that is well-balanced with a clear structure is less fatiguing on the ears. The listener can enjoy the song for a longer duration without feeling exhausted or overwhelmed. In contrast, a poorly mixed song can cause listener fatigue with continuous listening as the listener gets frustrated with the lack of clarity and balance.

A Good MixA Poor Mix
Enhances clarity of each instrumentMakes the song sound muddy and unbalanced
Conveys the intended message and emotionObscures the intended message and weakens emotional impact
Draws the listener in and creates a connection with the songMakes the listener lose interest and move on to the next song
Less fatiguing on the earsCauses listener fatigue with continuous listening

In conclusion, a solid mix is essential for the success of a song. It enriches the listening experience, achieves the intended message, guarantees acceptance of the song, and prevents listener fatigue. A strong mix brings out the best in a song and ensures that the listener enjoys the music to the fullest.

Why A Poor Mix Is Problematic?

A mix refers to the process of putting together different audio tracks to create a balanced, cohesive sound. A well-mixed track is composed of the ideal balance of instruments, vocals, sound effects, and other elements that make up the final song. A poor mix, on the other hand, can diminish the listening experience, misconvey message, decrease song reception and provoke listener exhaustion. In this section of the blog post, we will discuss these issues in detail.

Diminishes Listening Experience

A poor mix can reduce the overall quality of the listening experience. Poorly mixed tracks can have numerous issues that detract from the beauty of the music. For instance, a poorly mixed song might have excessive volume and frequency imbalances. This leads to ear fatigue, loss of detail, and even pain. In this regard, a track that distorts the audio or creates popping or crackling sounds negatively impacts the listening experience, causing the listener to tune out or switch to another track.

Misconveys Message

A poorly mixed song can also misconvey the message that the artist is trying to depict. For example, a vocal track that is too low in the track may lead to difficulty in understanding the lyrics, while excessive instrumentation can overpower the vocals, causing words to be lost or muffled. In this regard, a flawed mix may negatively impact the message that an artist is attempting to communicate as listeners struggle to follow the message of the song.

Decreases Song Reception

A poorly-mixed song can also result in decreased song reception, leading to a lower probability of success for the track. If the song is too distorted, poorly balanced, or otherwise flawed, it might lead to a negative reception from the target audience. The listener may switch off the song or give negative feedback. This leads to decreased sales or streams, which can impact the success of the artist and the song in the competitive music industry.

Provokes Listener Exhaustion

A poorly mixed track can lead to listener exhaustion as listeners try to decipher harsh or distorted sounds. If multiple instruments or sounds are competing for the same frequency range, the track can become fatiguing or even downright challenging to listen to. This exhaustion can lead to switched-off listeners who are reluctant to invest time and effort into a poorly produced track.

Elements That Contribute To A Good Mix

A balanced song can make all the difference in the production quality of a music track. Elements such as instrument balance, EQ, and dynamic range are key factors contributing to the difference between a solid mix and a poor one.

Elements that Contribute to a Good Mix Producing a good music mix is more than just blending different sounds together. There are various elements that contribute to a strong mix, including EQ, sound compression, panning techniques, reverb, and delay effects. In this section, we will explore each of these elements in detail. Equalization (EQ) EQ plays a vital role in creating a balanced track. It enables you to adjust the volume of different frequencies in a track. A balanced song requires using EQ to eliminate any unwanted sounds and enhancing specific sounds.

Practical Tips for a Good Mix

For instance, boosting the bass frequencies can help the drums sound punchier, while increasing the treble can make the vocals cut through the song. Additionally, you can use EQ to create space and depth in the track. Sound Compression Sound compression is a technique that controls the dynamic range of a recording. This makes the loudest sounds quieter and the quietest sounds louder. Compression ensures that all instruments in the song can be heard without any drastic volume changes. It also helps to balance the sounds of different instruments by bringing the quieter instruments up and the louder instruments down.

Overall, compression smoothens out the track and makes it more enjoyable. Panning Techniques Panning refers to the placement of different sounds or instruments in the stereo field. Proper use of panning techniques can create a sense of space and depth in the song. For instance, you can pan the drums and bass to the center to create a solid foundation for the track, while panning the guitar and keyboard to the sides for a wider stereo sound. Moreover, panning can help you to separate different instruments, allowing each instrument to be heard clearly.

Putting It Into Practice for a Good Mix

Reverb and Delay Effects Reverb and delay effects are used to create a sense of space and depth in the song. Reverb makes the sound appear as though it’s in a specific room or space, while delay creates an echo or repeat of the sound. Both effects can give the track a more natural and organic feel. However, it’s important to use these effects in moderation as too much reverb or delay can make the song sound muddy and cluttered. In conclusion, creating a solid mix requires mastering the various elements that contribute to it.

EQ, sound compression, panning techniques, and reverb and delay effects play vital roles in creating a balanced, smooth, and enjoyable mix that is pleasing to the listener.

Overcoming Common Mix Mistakes

Overcoming common mix mistakes can make a significant difference between a strong mix and a poor mix. Attention to detail is crucial, and understanding the fundamentals of mixing can prevent mistakes. Balanced levels and frequencies, proper panning, and using quality tools can make a world of difference in achieving a professional sound.

Over-equalization

One of the common mix mistakes that producers make is over-equalization. Equalization is an essential tool for mixing as it modifies frequencies in a sound or music track, but overusing it can cause significant problems. Over-equalization can create a hollow sound that makes your music unnatural, unbalanced, and destroys its original quality. Moreover, excessive boosting of low-end frequencies can cause tracks to become muddy and overwhelming.

Poor Volume Balance

Poor volume balance is another mix mistake that producers make. If you fail to balance the volume of individual tracks, the result will be an unpleasant mix. Consequently, your listeners will find it difficult to hear all elements in the music clearly. Poor volume balance implies that some elements in the track dominate and overshadow others. Therefore, it is crucial to ensure that all tracks are within reach and are balanced with each other to ensure that the song sounds clear, impactful and enjoyable to the listener.

Inappropriate Use Of Compression

The inappropriate use of compression is an area where producers make a mistake when mixing music. Compression is an essential tool for controlling dynamics in music production, but it can lead to a track sounding lifeless. Over compressing causes your music to sound flat, as it removes the natural acoustic variation in the track. Therefore, it is vital to use compression carefully and avoid compressing each element of the track. For example, drums and bass lines should be compressed harder than lead sounds like vocals and synths for a balanced and natural sound.

Lack Of Clear Stereo Image

Lack of clear stereo image is a mistake that producers make when they mix music. Poor sound stereo image can cause a song to sound weak, flat, and unconvincing. A good stereo mix should have a clear sense of space, which creates a realistic sound that sounds three-dimensional. If elements are out of balance, the song can sound disorientating and cause fatigue to the listener. Therefore, ensure that pans are accurate, and all sounds find their proper place in the stereo field.

In conclusion, producing a balanced track involves getting all the elements of the music to work harmoniously together. To achieve this, it is essential to be mindful of common mix mistakes like over-equalization, poor volume balance, inappropriate use of compression and lack of a clear stereo image. By overcoming these challenges, you can create a balanced, natural, and enjoyable mix.

Frequently Asked Questions Of A Good Mix Vs A Poor Mix Difference

How Do You Tell If A Mix Is Good Or Bad?

To determine if a song is good or bad, listen to it on different sound systems and in various locations to ensure the balance is consistent. Check for a clear sound, good balance between instruments, appropriate volume levels, and minimal background noise or hiss.

Additionally, considering getting feedback from others in the industry or hiring a professional track engineer for an objective opinion.

What Makes A Good Mix?

A solid mix should have balanced levels of each instrument and sound clear and cohesive. The track should also match the intended style or genre of the music. It’s important to use appropriate effects and EQ adjustments to bring out the best in each track and create a sense of space and depth.

Communication and feedback between the mixer and artist are also important to ensure that the final product meets their expectations.

What Does A Good Mix Consist Of?

A strong mix consists of a balanced combination of different elements such as volume, tonal range, frequencies, and stereo image. It should also take into account the genre of the music and the intended audience. The key is to create a cohesive sound that enhances the overall listening experience.

What Does Bad Mixing Mean In Music?

Bad mixing in music refers to the improper balance of sound elements in a song. This results in an unpleasant listening experience. This can include issues such as vocals being drowned out by music or certain instruments being too prominent. A well-mixed song ensures that all elements are balanced and sound clear and distinct.

Conclusion

To summarize, understanding the difference between a balanced song and a poor mix is critical for any aspiring musician or sound engineer. By paying attention to elements such as balance, clarity, and consistency, you can create a mix that highlights the strengths of your music and resonates with listeners.

On the other hand, neglecting these key components can lead to a mix that falls flat and fails to capture the essence of your artistry. By staying mindful of these principles and continuously refining your skills, you can achieve a sound that reflects your vision and inspires others.
Categories
Archive

Cubase Sound Keeps Cutting Out

Cubase sound cutting out can be due to various technical glitches or hardware issues. Troubleshooting the problem may involve updating drivers, checking cables, or adjusting buffer settings.

Cubase is a music production software with a myriad of capabilities and features. It is known for its reliable performance but occasionally, users may encounter sound issues while using the software. There are several reasons why the sound on Cubase may keep cutting out.

It could be as a result of outdated drivers, incorrect audio settings or even a faulty cable connection. Identifying the underlying cause of the problem is the first step towards resolving it. We will explore some of the possible causes of this issue and provide solutions to help resolve it.

Possible Causes Of The Issue

Cubase sound cutting out can be caused by a variety of factors, such as an outdated driver, conflicts with other software or hardware, faulty cables or instrument, or incorrect audio settings. Troubleshooting each of these possible causes is the first step towards resolving the problem.

Possible Causes of the Issue: Cubase is one of the most popular digital audio workstations for music production. While it offers numerous features and functionalities, users may sometimes encounter issues such as the sound cutting out. This can be frustrating for any audio professional or beginner. In many cases, there are several reasons for the problem to occur. Here are the possible causes that can lead to Cubase sound cutting out: Audio Settings: The audio settings in Cubase play a crucial role in determining the quality of sound. If the settings are not configured correctly, it can lead to sound quality issues. To ensure that the audio settings are correctly configured, go to the ‘Devices’ menu and select ‘Device Setup.’ From here, you can view the audio settings and make any necessary changes to fix the problem. Buffer Size: Buffer size refers to the amount of data that can be processed at any given time. If the buffer size is too small, the sound may cut out. Similarly, if the buffer size is too large, it can cause latency issues. To fix this, go to ‘Device Setup’ and select the audio interface. From here, you can adjust the buffer size to a suitable level, which can help resolve this problem. CPU Overload: CPU overload is another possible cause of the Cubase sound cutting out issue. If your computer’s processor is struggling to keep up with the workload, it can lead to sound quality issues. To mitigate this problem, try closing any other programs that are running in the background and reduce the number of simultaneous tracks you are working on. Outdated Drivers: If you are using an audio interface, outdated drivers can lead to sound quality issues. To fix this issue, make sure you have the most recent drivers installed for your audio interface. You can download the latest drivers from the manufacturer’s website. Conflicting Third-party Plugins: Cubase supports third-party plugins for extended functionality, but they can also conflict with each other and cause issues such as the sound cutting out. Make sure that all third-party plugins you use are up-to-date and compatible with the version of Cubase you are using. If the problem persists, try removing the plugins temporarily to see if this resolves the issue. By identifying these possible reasons, you can troubleshoot the issue and fix it effectively. Keep experimenting with different settings until you find the solution that works best for your specific needs.

Cubase Sound Keeps Cutting Out

Credit: www.macprovideo.com

Troubleshooting Steps

If you’re a Cubase user, experiencing sound issues can be a frustrating experience, especially when the software keeps cutting out. However, don’t give up on your music production just yet! In this post, we will guide you through simple steps to troubleshoot the sound cutting out issue.

Check Audio Settings

First and foremost, check your audio settings to ensure that the software is set up correctly. These settings can often change by themselves, causing conflicts. Follow these steps to do it:

  1. Go to ‘Devices’ in the menu bar and select ‘Device Setup.’
  2. Select your audio interface in ‘VST Audio System.’
  3. Ensure that the ‘Audio Priority’ is set to ‘Boost’ and adjust the ‘Buffer Size’ according to your requirements.

Adjust Buffer Size

If your sound still keeps cutting out after checking your audio settings, try adjusting the buffer size. This step can help in reducing sound issues.

  1. Go to ‘Devices’ in the menu bar and select ‘Device Setup.’
  2. Select your audio interface in ‘VST Audio System.’
  3. Adjust the ‘Buffer Size’ to a higher value.

Reduce Cpu Load

Another potential cause of sound cutting out in Cubase is when the CPU is overloaded. If your Cubase project has too many tracks or plugins, it can lead to insufficient resource management. Here are some steps to alleviate the CPU load:

  • Try disabling any unnecessary plugins and closing unessential programs to free up resources.
  • Free up space on your hard drive for better computer performance.
  • Render tracks and silence audio regions that are not in use to reduce CPU utilization.

Update Drivers

In some cases, outdated drivers can cause your Cubase sound to keep cutting out. Make sure your audio interface and soundcard drivers are updated to the latest version. Contact the manufacturers or visit their websites to download the current drivers.

Remove Or Disable Plugins

Plugins are a great addition to Cubase, but sometimes they can cause conflicts. If all the above steps have not fixed your sound cutting out issue, try disabling or removing some plugins. Here are steps to disable plugins:

  1. Open your project.
  2. Go to the ‘MixConsole’ and click on the ‘e’ button for each channel to open the channel settings.
  3. Browse the list of inserts and remove the plugin by clicking the power button or click with the right button and choose ‘Remove Plugin.’

By following these troubleshooting steps, you should be able to resolve the sound cutting out problem in Cubase. Save your sanity, keep your workflow, and keep producing music.

Advanced Solutions

Advanced Solutions provides expert guidance to resolve issues with Cubase sound. Our team of professionals utilizes advanced techniques to identify and fix problems, ensuring that your sound never cuts out during recording or playback. Trust us to deliver reliable and effective solutions.

If you’re experiencing Cubase sound keeps cutting out, you’re likely feeling frustrated and anxious to get back to working on your music. While basic troubleshooting tips such as restarting your computer and checking your audio cables might work, it’s possible that more advanced solutions are needed to ensure continuous operation of Cubase. In this article, we’ll explore some of the advanced solutions to help you identify the cause of the problem and resolve it.

Reset Cubase Preferences

Sometimes, the cause of the Cubase sound cutting out could be due to corrupted application settings or preferences. Fortunately, Cubase has a built-in option to remove all the preferences, allowing you to start afresh with default settings. To reset Cubase preferences, follow these steps:

  1. Close Cubase and all its processes from Task Manager.
  2. Navigate to Users\\AppData\Roaming\Steinberg\Cubase in File Explorer.
  3. Rename the folder named after your Cubase version to something like “Cubase.old”.
  4. Re-launch Cubase and it will create new preferences.

Reinstall Cubase

If resetting the preferences doesn’t work, you may need to uninstall and reinstall Cubase. This process will delete all Cubase-related files and folders, including application settings and preferences, user settings, and templates. Make sure you’ve backed up any important files before proceeding with the reinstallation process.

Reinstall Operating System

If you’ve tried resetting the preferences and reinstalling Cubase and the problem persists, the issue may be related to your operating system. While it’s a drastic solution, reinstalling your operating system can help to identify and resolve software conflicts that could be causing Cubase sound to keep cutting out. Before you proceed, ensure that you’ve backed up all your important files and data, as the reinstallation process will erase all data on your hard drive.

In Conclusion

These advanced solutions are designed to fix the Cubase sound cutting out issue permanently. While it’s always best to ensure you’ve tried the basic troubleshooting steps before proceeding with more advanced solutions, when dealing with persistent issues, advanced solutions may be the only solution. By resetting the preferences, reinstalling Cubase, or reinstalling your operating system, you can ensure that Cubase operates seamlessly and doesn’t interrupt your music creation process.

Cubase Sound Keeps Cutting Out

Credit: www.reddit.com

Cubase Sound Keeps Cutting Out

Credit: forums.steinberg.net

Frequently Asked Questions For Cubase Sound Keeps Cutting Out

What Is Audio Dropouts?

Audio dropouts are interruptions in the audio signal during playback. It is a sudden loss of sound or a temporary audio distortion which occurs due to the loss of data or weak signal strength. They can be caused by many factors, including hardware issues, software malfunction, or interference from other electronic devices.

Why Is My Cubase Not Bringing Out Sound?

If Cubase is not bringing out sound, check your audio settings to make sure the correct audio device is selected. Ensure your speakers are connected and turned on, and check the volume levels on both your computer and Cubase. Also, check if there are any mute buttons activated.

If the issue persists, try restarting your computer and Cubase.

Why Is My Cubase Crackling?

Cubase may be crackling due to several reasons. Check if your audio interface is properly configured or if other applications are causing conflicts with Cubase. You can also try increasing your buffer size or disabling plugins to fix this issue.

Consult with a Cubase expert for a permanent solution.

How Do I Increase Buffer Size In Cubase?

To increase buffer size in Cubase, go to the Devices menu and select Device Setup. Click on VST Audio System, and then choose the ASIO driver for your audio interface. Under “Buffer Size,” increase the value to reduce latency. Make sure to also adjust any settings in your audio interface control panel to match.

Conclusion

Dealing with a Cubase sound cutting out can be frustrating, but there are various solutions available. From checking the cables to adjusting the buffer size, monitoring CPU usage, and updating the software, there are several troubleshooting steps to try. By following these steps, you can enjoy smooth, uninterrupted sound while using Cubase for recording, mixing, and producing music.

Don’t let technical issues interrupt your creative flow. Stay proactive and solve these issues quickly if they arise.

Categories
Archive

Setting Up A Tempo Based Reverb

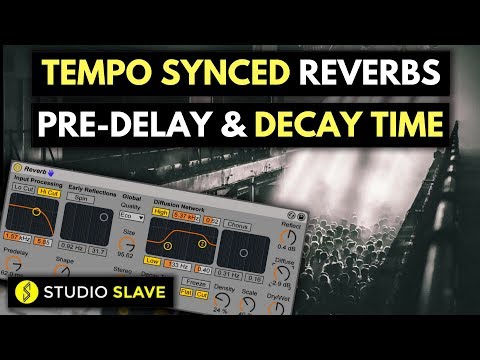
To set up a tempo-based reverb, first select a plugin with time-based parameters and adjust the tempo sync setting to match the project tempo. Then adjust the decay time and pre-delay to achieve the desired reverb effect.

Setting up a tempo-based reverb can add depth and ambience to your music tracks. It is a technique commonly used in professional music production to create a cohesive and polished sound. By syncing the reverb to the tempo of your project, you can create a seamless blend between the instruments and create a sense of space that enhances the overall sound quality.

We will explore the steps you can take to create a tempo-based reverb, including selecting the right plugin and adjusting key parameters like the decay time and pre-delay. Follow these steps to enhance your music production skills and take your tracks to the next level.

Setting Up A Tempo Based Reverb

Credit: m.youtube.com

Choosing The Right Plugin

Selecting the appropriate plugin when setting up tempo-based reverb is crucial. Make sure to research and choose a plugin that fits your specific needs and provides optimal results for your project.

Tempo-based reverb is an essential technique in music production to create depth and space in your mix. However, choosing the right plugin can be overwhelming with so many options available. Here are three crucial factors to consider while choosing a tempo-based reverb plugin.

Compatibility With Your Daw

The first and foremost factor to consider while choosing a tempo-based reverb plugin is compatibility with your DAW. Some plugins may not be compatible with your DAW or operating system. It’s crucial to check the plugin’s system requirements before purchasing it. Popular DAWs like Logic Pro, Ableton Live, Pro Tools, and FL Studio have different compatibility requirements for plugins, and it’s essential to read the documentation carefully before purchasing.

User Interface And Features

The second factor to consider is the user interface and features offered by the plugin. A user-friendly interface and essential features like preset management, routing, and customization options can make the plugin’s workflow seamless and productive. On the other hand, a confusing interface and lack of essential features can make it difficult to use the plugin effectively.

Pricing

Finally, the pricing of the plugin is a crucial factor to consider. While some plugins can be expensive, they may offer advanced features and high-quality sound. At the same time, some budget-friendly plugins can offer excellent value for money with basic features and decent sound quality. It’s essential to consider your budget, production needs, and the value offered by the plugin while deciding which one to purchase. In conclusion, choosing the right tempo-based reverb plugin requires careful consideration of compatibility, user interface and features, and pricing. By evaluating these factors, you can select a plugin that suits your production needs, workflow, and budget.

Setting Up A Tempo Based Reverb

Credit: www.soundonsound.com

Setting Up The Plugin

Setting up a tempo-based reverb plugin can be a game-changer in adding depth and texture to your audio. Incorporating a reverb effect that is synced to the tempo of your track can give it a cohesive and professional sound.

Inserting The Plugin On A Track

Before you can start setting up your plugin, you need to insert it onto the track you want to apply the effect to. To do this, simply navigate to your plugin menu and select the reverb plugin of your choice. Then, drag and drop the plugin onto the track where you want the effect to be applied.

Adjusting The Tempo Parameter

Once your plugin is inserted, you need to make sure that it is synced to your track’s tempo. This involves adjusting the tempo parameter setting. If you’re working in a digital audio workstation (DAW), you can find this setting in the plugin’s control panel.

To adjust the tempo parameter, simply match the plugin’s tempo setting with the tempo of your track. Most plugins will have a tap function that lets you tap the tempo in manually, or you can enter it in numerically if you know the exact tempo.

Selecting The Reverb Type And Settings

Now that your plugin is inserted and synced, it’s time to select the reverb type and settings that will work best for your track. Some common reverb types include hall, plate, spring, and room. Each type will have its own unique sound and characteristics.

Once you’ve chosen your reverb type, you can begin adjusting the settings such as decay time, pre-delay, and mix. Keep in mind that the ideal settings will vary depending on the tempo and style of your track, so don’t be afraid to experiment until you find the perfect sound.

Creating The Perfect Reverb Rhythm

A tempo based reverb can add depth and character to a track. To set it up perfectly, consider the tempo of your project and match the reverb decay and pre-delay time to create a natural, rhythmic effect.

Reverb Vs Dry Signal Levels

When setting up a tempo-based reverb, it’s important to consider the balance between the reverb and dry signal levels. The dry signal is the original sound source that you want to apply the reverb to, while the reverb is the effect that is applied to the dry signal. Finding the right balance between the two is crucial in creating the perfect reverb rhythm. To achieve the best balance, adjust the dry signal level first until it’s at a level where it sounds good without any reverb. Then, gradually increase the reverb level until it’s just right. If you increase the reverb level too high, it can overpower the dry signal and sound unnatural. On the other hand, if you keep the reverb level too low, it won’t be noticeable, defeating the purpose of adding the effect.

Adjusting Pre-delay And Decay Time

Another important factor to consider when creating the perfect reverb rhythm is adjusting the pre-delay and decay time. The pre-delay is the amount of time between the dry signal and the onset of the reverb, while decay time is the length of time the reverb persists after the dry signal has stopped playing. By increasing or decreasing pre-delay time, you can create a rhythmic space between the dry signal and reverb. Similarly, adjusting decay time can add depth and sustain to the reverb. Carefully tweaking these settings can make the difference between a mediocre reverb and an incredible one.

Using Sidechain Compression

Finally, using sidechain compression is an excellent tool to ensure that the reverb sits perfectly in the mix. Sidechain compression allows you to duck specific frequencies of the reverb when the dry signal is playing, which allows the dry signal to remain clear and audible while still giving the reverb space to breathe. To use sidechain compression, route the dry signal to a compressor on the reverb bus and use it to trigger a gain reduction on the reverb. Adjusting the sidechain EQ and threshold can help you tailor the effect to the specific mix. In conclusion, by finding the right balance between reverb and dry signal levels, carefully adjusting pre-delay and decay time, and using sidechain compression, you can create the perfect reverb rhythm. The key is to experiment until you find the perfect settings that complement your mix.

Top Tips For Using Tempo-based Reverb

If you’re a music producer or mixing engineer, you’re probably already familiar with the concept of reverb. Reverb adds depth and space to your tracks, making them sound larger than life. However, if you want to take your mixes to the next level, you should consider using tempo-based reverb. Tempo-based reverb is a type of reverb that syncs up with the rhythm of your track, creating a more cohesive and immersive listening experience. Here are some top tips for using tempo-based reverb:

Experiment With Different Reverb Types

When it comes to tempo-based reverb, there are a variety of different types to choose from. Some popular options include gated reverb, reverse reverb, and plate reverb. Each type of reverb has its own unique characteristics, so it’s worth spending some time experimenting to see which one works best for your track. For example, gated reverb works well for percussive elements like drums and synths, while plate reverb is great for adding space to vocals and guitars.

Keep The Reverb Rhythm In Sync With Your Track

One of the most important things to keep in mind when using tempo-based reverb is to make sure that the reverb rhythm is in sync with your track. This means that the decay time of the reverb should match the tempo of the song. For example, if you’re working on a slow ballad, you may want to use a longer decay time for the reverb to create a more atmospheric and dreamy effect. On the other hand, if you’re working on an up-tempo dance track, you may want to use a shorter decay time to create a tighter and more punchy effect.

Use Automation To Create Interesting Effect

If you want to take your tempo-based reverb to the next level, you should try using automation to create interesting effects. For example, you could use automation to gradually increase the decay time of the reverb during a build-up, creating a sense of tension and anticipation. Alternatively, you could use automation to create a “big room” effect, where the reverb swells and contracts in time with the beat of the music.

By following these top tips for using tempo-based reverb, you can take your mixes to the next level and create a more cohesive and immersive listening experience for your audience.

Common Mistakes To Avoid

When setting up a tempo-based reverb, there are common mistakes to avoid. It’s essential to adjust the decay time according to the tempo and maintain balance between the wet and dry signals. Focus on ensuring that the reverb fits well with the track, and avoid overdoing it to prevent muddiness.

When it comes to mixing music, setting up a reverb effect is essential to create a sense of space and depth in your track. However, there are certain common mistakes that many music producers make when setting up a tempo-based reverb effect. In this section, we will discuss some common mistakes to avoid and ensure that your reverb effect enhances the overall production of your track, instead of hindering it.

Overusing The Reverb Effect

Using too much reverb is a common mistake that many beginner music producers make. Overusing reverb can make the track sound muddy, blurred, and overall less defined. It’s important to use the reverb effect thoughtfully and sparingly to create just the right amount of depth and space in your track. Here are some ways to avoid overusing reverb: – Use reverb only on certain instruments or sections of the track, instead of applying it across the entire mix. – Set the duration of the reverb effect shorter for percussive and fast-paced instruments, and longer for slower and more melodic instruments. – Use a low-pass filter to reduce the high frequencies in the reverb effect, creating more space and depth without muddying up the mix.

Not Adjusting Reverb Settings To Fit The Track

Another common mistake that music producers make is not adjusting the reverb settings to fit the track. The reverb effect must be adjusted according to the tempo, mood, and overall style of the track, or else it might stand out as out of place or inappropriate. Here are some tips to adjust the reverb settings to fit the track: – Adjust the decay time of the reverb effect to match the tempo of the track. – Use a pre-delay effect to create a sense of depth and dimensionality in the track. – Adjust the wet/dry mix of the reverb effect to make sure it blends in well with the rest of the track.

Using The Wrong Reverb Type Or Plugin

Using the wrong reverb type or plugin can also be a common mistake that music producers make when setting up a reverb effect. Every reverb type or plugin has a specific purpose and usage, and using the wrong one can result in a poor quality and unprofessional mix. Here are some tips to use the right reverb type or plugin: – Use a convolution reverb for natural and realistic sounding spaces, such as a concert hall or cathedral. – Use a plate reverb for a brighter and more shimmering sound, such as for vocals or guitar solos. – Use a spring reverb for a vintage and retro sound, such as for a classic rock or blues track. In conclusion, setting up a tempo-based reverb effect requires careful consideration and experimentation. By avoiding these common mistakes, you can create a reverb effect that enhances the overall quality and production of your track, making it stand out in the crowded music industry.

Setting Up A Tempo Based Reverb

Credit: www.amazon.com

Frequently Asked Questions Of Setting Up A Tempo Based Reverb

How Do You Calculate Reverb Tempo?

Reverb tempo is calculated by using the pre-delay time and the decay time of the reverb effect. The pre-delay time is the time it takes for the original sound to begin to decay. The decay time is the time it takes for the sound to fade away completely.

Adding these times together gives you the total reverb time, which determines the tempo.

How Do I Set Reverb Time?

To set reverb time, adjust the decay time on your reverb plugin or hardware, longer decay times create more reverb. The type of space you’re trying to replicate will dictate the appropriate reverb time. Experiment with different settings to find the ideal reverb time for your mix.

How Do You Make Reverb Sound Realistic?

To make reverb sound realistic, use high-quality samples and emulate a space similar to where the sound would naturally occur. Adjust the decay time and pre-delay to match the size of the space and use EQ to cut any unwanted frequencies.

Consider adding modulation and early reflections for added depth.

What Is Predelay In Reverb?

Predelay in reverb refers to the time delay between the original source audio and the start of the reverb effect. It allows the listener to perceive the distance between the sound source and the reflective surface. Predelay can be adjusted to create a sense of space and depth in a mix.

Conclusion

Setting up a tempo-based reverb is a great way to add depth and texture to your productions. By understanding the fundamentals of reverb and how to apply it to your music at the right tempo, you can create spacious sounds that complement your tracks’ energy.

Experimenting with different reverb settings can help you achieve the perfect mix and add a professional touch to your music. So, why not give it a try? Add some reverb to your tracks and see how it can transform your sound.

Categories
Archive

Setting To Use When Bouncing Audio

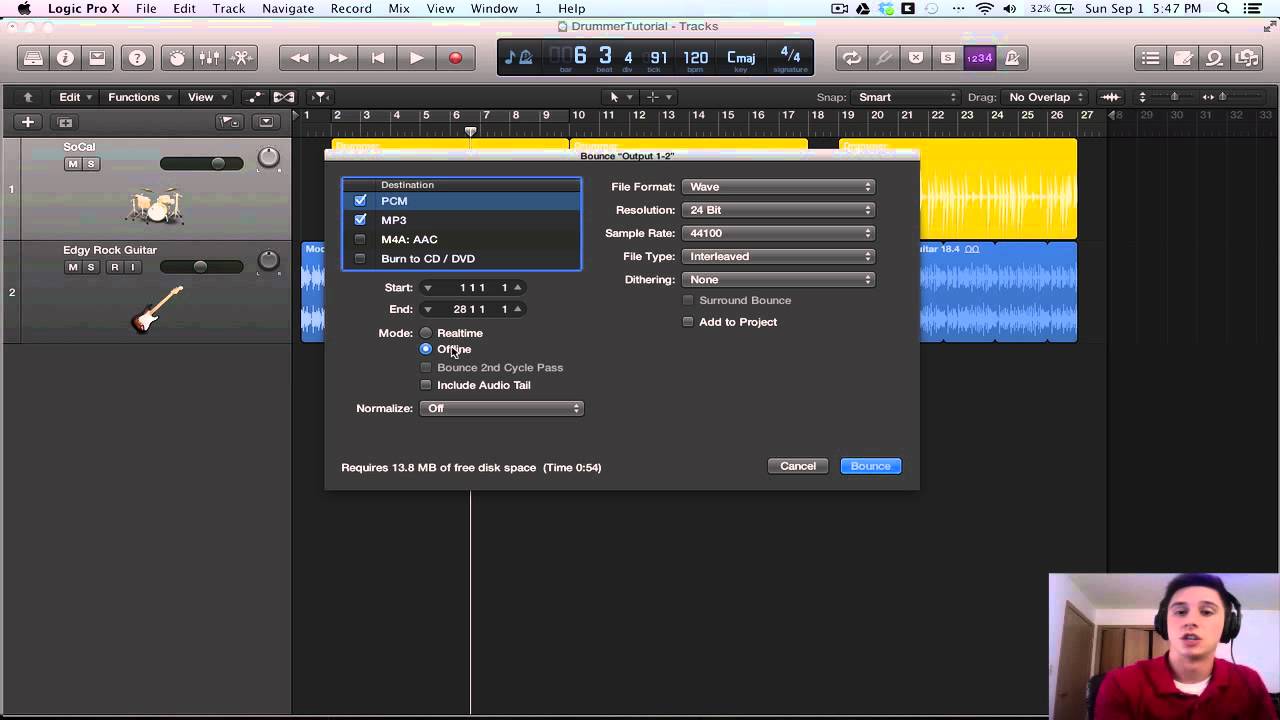
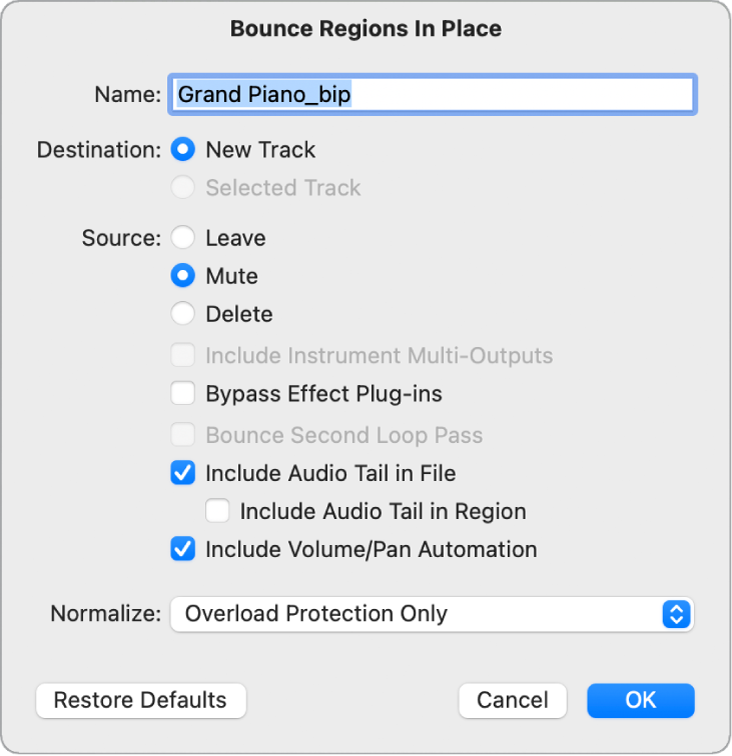
To properly bounce audio, select the appropriate settings for file format, bit depth, and sample rate. Bouncing audio is a common task in music production that involves exporting a mix or a single track as a new audio file.

When getting ready to bounce the audio, it’s essential to pay attention to the settings used. The file format selected should be appropriate for the intended use of the audio, whether it’s for streaming or a professional recording. Choosing the correct bit depth is vital, as higher bit depths will offer a greater dynamic range and decreased noise.

The sample rate determines the quality of the audio and the frequency response, and it’s essential to ensure that the sample rate selected matches the recording’s sample rate. By selecting the appropriate settings, you can ensure that your bounced audio is of high quality and meets the intended use.

Benefits Of Setting Before Audio Bouncing

Setting to use when bouncing audio brings numerous benefits such as a better mix and easier mastering process. Some of the key settings include sample rate, bit depth, dithering, and normalization. By setting these parameters correctly before bouncing, you can ensure a high-quality final product.

Audio bouncing is the process of exporting and rendering a mix to a single audio file. It is an essential step in the music production process. Before bouncing your audio, it’s crucial to set the right parameters to ensure that your mix is consistent and well-balanced.

Ensure Consistency

By setting the right parameters before bouncing your audio, you can ensure consistency in your mix. You can set the levels, panning, and apply EQ and compression to create a more balanced mix. This will result in a more polished and professional-sounding final product. Consistency is key in music production, and setting parameters before bouncing your audio is an excellent way to achieve it.

Save Time And Money

One of the main benefits of setting parameters before bouncing your audio is that it saves you time and money. If you don’t set your parameters correctly, you may end up with an unbalanced mix, which would require additional mixing and mastering. This will increase the time and money spent on the production process. By setting your parameters correctly, you can avoid having to go back and make changes, saving you valuable time and money.

Quickly Preview Mix, Ensuring Each

Another benefit of setting parameters before bouncing your audio is that it allows you to quickly preview your mix. You can listen to the mix and make sure that each element is well-balanced and that nothing is too loud or too quiet. By previewing your mix before bouncing, you can make any necessary adjustments to create a well-balanced and polished final product. In conclusion, by setting parameters before bouncing your audio, you can ensure consistency within your mix, save time and money, and quickly preview your mix to ensure that everything sounds great. It is a crucial step in the music production process that should not be overlooked.

Common Settings For Audio Bouncing

When bouncing audio, it’s important to use the right settings to produce the desired outcome. Common settings include selecting the file type, bit depth, sample rate, dithering, normalizing, and rendering options. These settings can affect the quality and compatibility of the final audio file.

Audio bouncing is an important step in the music production process. It is the process of mixing and rendering audio tracks into one final audio file. When bouncing audio, there are several settings that you need to be aware of to ensure that you get the best possible sound quality. In this blog post, we’ll discuss the most common settings that you should pay attention to when bouncing audio. The file format that you use when bouncing your audio is crucial. The two most common file formats that are used in the music industry are WAV and MP3. WAV files are uncompressed and offer the best quality, but they also have a large file size. MP3 files, on the other hand, are compressed and have a smaller file size, but the quality is not as good as WAV files. When bouncing your audio, you should choose the file format that best suits your needs. The bit depth of your audio file determines the dynamic range, which is the difference between the quietest and loudest parts of the audio. A higher bit depth means a larger dynamic range and better quality audio. The most common bit depths used in the music industry are 16-bit and 24-bit. For most applications, a 16-bit depth is sufficient, but if you want the highest possible quality, then a 24-bit depth is recommended. The sample rate of your audio file determines the frequency at which the audio is captured. A higher sample rate means that more audio is captured, resulting in a higher quality audio file. The most common sample rates used in the music industry are 44.1 kHz and 48 kHz. For most applications, a 44.1 kHz sample rate is sufficient, but if you are working on a project that requires the highest quality, then a 48 kHz sample rate is recommended. Dithering is a process that helps to reduce noise and distortion when converting audio from a higher bit depth to a lower bit depth. When bouncing your audio, you should always use dithering to help maintain the quality of your audio. There are several different types of dithering, but the most common is called “triangular” dithering. In conclusion, when bouncing your audio, you should pay close attention to the file format, bit depth, sample rate, and dithering settings. By using the right settings, you can ensure that your final audio file is of the highest possible quality.

File Format

When setting the file format to use when bouncing audio, it’s important to consider the quality of the final product as well as the compatibility with other devices. Using a lossless format such as WAV or AIFF can ensure high quality, while using a compressed format such as MP3 can save space and increase portability.

When it comes to bouncing audio, choosing the right file format is essential. Different file formats have different properties that can affect the final sound quality, compatibility, and file size. In this article, we will discuss the four most common file formats used for bouncing audio – WAV, AIFF, MP3, and AAC.

Wav

WAV (Waveform Audio File Format) is a popular uncompressed audio format that is widely used in recording studios. It preserves the original sound quality and is compatible with most digital audio workstations and media players. However, due to its uncompressed nature, WAV files can be very large in size, making them not ideal for sharing or streaming over the internet.

Aiff

AIFF (Audio Interchange File Format) is another uncompressed audio format that is popular among Mac users. It offers similar sound quality as WAV files but is more compatible with Mac-based applications and systems. Like WAV, AIFF files are also large in size.

Mp3

MP3 (MPEG-1 Audio Layer 3) is a compressed audio format that is widely used for sharing and streaming audio over the internet. It uses lossy compression, which means some audio information is lost during the compression process. This results in a smaller file size but lower sound quality compared to uncompressed formats. However, modern MP3 encoders can produce high-quality MP3 files with a bit rate of 320 kbps.

Aac

AAC (Advanced Audio Coding) is a compressed audio format that was designed to be the successor of MP3. It uses more advanced compression algorithms and can achieve higher sound quality with smaller file sizes compared to MP3. AAC is the default audio format used by Apple for its iTunes Store and Apple Music service. In conclusion, choosing the right file format when bouncing audio is crucial to ensure the best possible sound quality and compatibility. Consider the specific requirements of your project and the intended use of the audio file when deciding which format to use.

Setting To Use When Bouncing Audio

Credit: www.youtube.com

Bit Depth

Bit depth is an important setting to consider when bouncing audio. It determines the resolution of the audio and how much detail can be captured. Choosing the appropriate bit depth can result in higher quality audio.

When it comes to bouncing audio, one of the essential settings to keep in mind is the bit depth. Bit depth refers to the number of bits used to represent each sample of audio. This setting determines the dynamic range and signal-to-noise ratio of your audio file. Choosing the right bit depth can significantly affect the quality of your audio output.

16-bit

16-bit audio is the most common bit depth used for CD-quality audio files. This setting provides a good balance between file size and audio quality. With 16-bit audio, each sample of audio is represented by 16 bits, which gives 65,536 possible amplitude levels. This is sufficient for most music and audio recordings.

24-bit

If you want higher-quality recordings or plan to do a lot of post-processing on your audio files, 24-bit audio is the way to go. With 24-bit audio, each sample of audio is represented by 24 bits, which gives 16,777,216 possible amplitude levels. This allows for greater dynamic range and a higher signal-to-noise ratio, resulting in clearer and more detailed audio recordings.

32-bit Float

32-bit float audio is typically used for professional audio production and mixing. This bit depth provides an even greater dynamic range and signal-to-noise ratio than 24-bit audio. With 32-bit float audio, each sample of audio is represented by a floating-point number, which gives a virtually unlimited number of amplitude levels. This allows for extremely precise audio processing and mixing, resulting in optimal audio quality. In conclusion, selecting the appropriate bit depth setting for bouncing your audio is crucial to achieving high-quality sound. Whether you choose 16-bit audio for CD-quality recordings or 32-bit float audio for professional audio production, selecting the right bit depth setting is critical to ensuring your audio recordings sound their best.

Sample Rate

Set the sample rate to 44. 1kHz when bouncing audio for CD or digital distribution. For high-quality audio playback and professional applications, choose a higher sample rate of 96kHz or 192kHz.

When it comes to bouncing audio, there are several settings that need to be considered to ensure the highest quality output. One of the most critical settings is the sample rate, which determines the frequency at which the audio is sampled per second. Different sample rates can affect the clarity and quality of the audio output. Let’s take a closer look at the most commonly used sample rates and the scenarios in which they are used.

44.1khz

The 44.1kHz sample rate is the standard for the music industry and is used for CDs and most digital audio files. This sample rate is suitable for music and is capable of reproducing most of the human audible frequency spectrum ranging from 20Hz to 20kHz. It is also the most efficient and compatible with the majority of digital audio workstations.

48khz

The 48kHz sample rate is commonly used for video production, film, and television. The higher sample rate provides superior sound quality, which is essential for capturing the full range of frequencies and dynamics in soundtracks.

88.2khz

The 88.2kHz sample rate is used in high-quality audio production for situations where the audio quality must meet or exceed commercial recording standards. This sample rate is suitable for recording and mixing live concerts, classical music, and other highly dynamic recordings.

96khz

Finally, the 96kHz sample rate is reserved for the most demanding situations, such as mastering and professional audio production. This sample rate provides the highest level of detail and clarity, which is beneficial when working with complex audio content, intricate arrangements, or highly dynamic instrumentation. In conclusion, selecting the appropriate sample rate is crucial for producing high-quality audio content. The purpose, nature, and intended use of the audio material will dictate which sample rate to use. However, understanding the different sample rates and their specifications is the first step in achieving optimal audio quality.

Setting To Use When Bouncing Audio

Credit: www.soundonsound.com

Dithering

Dithering is a setting to use when bouncing audio, which helps reduce distortion, noise, and other sound artifacts. It works by adding a little bit of random noise to the signal, which helps smooth out the sound and makes it sound more natural.

When it comes to audio production, there are a lot of technical terms that might seem overwhelming. Dithering is one of these terms, and it’s an important one to understand. In simple terms, dithering is a process used when bouncing audio that can result in higher sound quality.

What Is Dithering?

Dithering is the process of adding random noise to audio signals during digital-to-analog conversion. This may seem counterintuitive, but it is actually an important step to maintain sound quality when converting digital audio to analog. The addition of random noise helps to prevent distortion by rounding off any distorted bits that might occur during the conversion process.

Why Dithering Is Needed

Dithering is needed because of the nature of digital audio. Digital audio is made up of a series of ones and zeros, and during the digital-to-analog conversion process, some of those digits can be lost or altered. Without dithering, these lost or altered digits can result in audible distortion. Dithering ensures that any lost or altered digits are rounded off, resulting in smoother and more natural audio.

Types Of Dithering

There are two types of dithering: noise shaping and triangular. Noise shaping is a more advanced form of dithering that involves adjusting the level of the added noise to specific frequencies in order to minimize the audibility of the noise added. Triangular dithering is a simpler form that adds noise evenly across all frequencies. In conclusion, dithering is an important step in the audio production process that can result in higher sound quality. Understanding what it is and why it’s needed can help you create better-sounding audio. In addition, being aware of the different types of dithering available can help you choose the best option for your specific project.

Setting To Use When Bouncing Audio

Credit: support.apple.com

Frequently Asked Questions Of Setting To Use When Bouncing Audio

Does Bouncing Reduce Audio Quality?

Bouncing an audio file involves consolidating multiple tracks into a single audio file. While it does not inherently reduce audio quality, repeated bouncing can result in a loss of quality over time. Factors such as bit depth and sample rate also affect the final audio quality.

What Does Bouncing Audio Do?

Bouncing audio combines multiple tracks into one, making it easier to manage and edit. It’s a process of exporting or rendering audio tracks to a single audio file, which can be imported into a new session. This is useful for finalizing a mix or creating stems for further processing.

What Sample Rate Should I Bounce For Mastering?

For mastering, it is recommended to bounce at the same sample rate and bit depth as the original recording. However, some mastering engineers prefer working at higher sample rates for better resolution. Ultimately, it depends on your preference and the requirements of the project.

What Should Be Done Before Bouncing Any Song Containing An External Gear?

Before bouncing any song containing an external gear, it is essential to ensure that all external gear is properly calibrated. This should include checking the input and output levels of all gear and ensuring that they are balanced and operating at optimal levels.

Additionally, it’s a good practice to double-check all connections and cables to ensure that they are properly linked and grounded.

Conclusion

Audio bouncing is an essential part of the audio production process, and using the right settings can make a world of difference. By adjusting the bit rate, sample rate, and dithering options, you can ensure that your audio sounds the best it possibly can.

Remember to experiment with different settings to find the one that works best for your project. With these tips, you can achieve a more professional sound and take your audio production skills to the next level.

Categories
Archive

Mixing Tip Secret About Human Ears

The secret to mixing tips is understanding how human ears work. Human ears are not linear and can perceive different frequencies in varying ways.

As a music producer or mixer, understanding how the human ear works is crucial to producing high-quality music. Our ears can detect different frequencies in different ways, meaning that some frequencies may sound louder or quieter than others even if they are at the same volume level.

This is due to the structure and sensitivity of the human ear. By using EQ and other mixing techniques, you can manipulate the sound and create a balanced mix that sounds good to the human ear. We’ll explore how the human ear works and how you can use this knowledge to improve your mixing skills.

Understanding Human Ears

If you are an audio engineer or a music producer, you probably know that mixing is an essential part of the process. Mixing tip secret about human ears can help you improve your mixes and make them sound more professional. One of the critical factors to consider is how we hear sounds. Understanding the anatomy of the ear and the limitations of human ears is crucial to achieving a well-balanced mix.

Anatomy Of The Ear

The human ear can be divided into three parts: the outer ear, the middle ear, and the inner ear. The outer ear consists of the pinna, ear canal, and eardrum. The middle ear contains three tiny bones – the malleus, the incus, and the stapes – also called the ossicles. These bones are responsible for transmitting sound from the eardrum to the inner ear. The inner ear includes the cochlea, which is responsible for processing sound and sending signals to the brain.

How We Hear Sounds

When sound waves enter the ear canal, they vibrate the eardrum, which in turn vibrates the ossicles. The movement of the ossicles sends waves through the cochlea, where tiny hair cells translate the vibrations into electrical signals that go to the brain. The brain then interprets these signals as sound.

Limitations Of Human Ears

While the human ear is a remarkable instrument, it has its limitations. Humans can only hear frequencies between 20 Hz and 20,000 Hz. Anything above or below that range is inaudible. Additionally, the human ear is not equally sensitive to all frequencies. For example, we tend to hear mid-range frequencies more prominently than high or low frequencies.

Furthermore, our ears have different sensitivities at different volumes. At low volumes, we are less sensitive to low frequencies, while at high volumes, we are less sensitive to high frequencies. This phenomenon is known as the Fletcher-Munson curve, and it is important to consider when mixing music.

Understanding the anatomy of the ear, how we hear sounds, and the limitations of human ears are crucial factors to consider when mixing music. By keeping these factors in mind, audio engineers and music producers can create well-balanced mixes that sound great on any system.

The Mixing Tip

The Mixing Tip is an essential aspect of music production, and it often comes down to how you use your ears. The human ear is an incredibly complex and sensitive instrument capable of detecting incredibly minute differences in sound. This makes it an invaluable tool when it comes to mixing music, as it allows you to hear and identify small nuances that can make or break the sound of a recording. In this blog post, we’ll share some recommended mixing tips that emphasize the importance of trusting your ears.

Trust Your Ears

As mentioned before, your ears are incredibly sensitive and capable of detecting very subtle sound differences. As such, it’s ideal that you trust your ears when mixing music. Remember, your ears are unique, and every individual has a different experience of sound, so use your ears as the final judgement.

Take Breaks

Mixing music often involves long hours of listening, and this can be exhausting for your ears. Listening fatigue can blur your perception, making it challenging to detect differences in sounds. Taking frequent breaks is essential, as it allows your ears to recover and ensures that they are always ready for action when you need them.

Listen At Different Volumes

A common mistake that most music producers make is mixing at a single volume level. Listening at different volumes gives you a more comprehensive view of how your music translates to different listening environments. This will allow you to mix a track that sounds great regardless of how high or low the volume is.

Use References

Using references when mixing can help you understand the sound that you are going for. These references can help avoid distractions that come from familiar sounds. Sensitizing your ears to particular frequencies through referencing other music can enhance your awareness and aid the decision-making process during mixing.

Avoid Ear Fatigue

Ear fatigue can negatively impact the mixing process, leading to mistakes that could ruin the quality of your mix. Consider taking some time off, exercising, or listening to something else before mixing again. Additionally, consider investing in headphones with a precisely-tuned frequency response that offers a natural sound to help minimize ear strain and fatigue.

Tools For Better Mixing

Effective mixing requires more than just having the right tools. One important tip is to remember that human ears perceive sound differently than machines, so it’s essential to rely on your own ears and trust what you hear while mixing.

Mixing is a crucial step in music production that can either make or break your sound. It involves combining different elements of a track to create a cohesive and balanced final product. Doing this well requires good ears and knowledge of the different tools available for the job. Here are some of the most important tools for better mixing.

Quality Headphones And Speakers

One of the most important tools for better mixing is a good pair of headphones or speakers. These enable you to hear the smallest details in your mixes and make informed decisions about how to balance different elements and make adjustments. When choosing headphones or speakers, it’s important to go for quality, not price. Cheaper options may give you a false sense of your mix’s quality, leading to issues when played on other systems.

Acoustic Treatment

How your room sounds can greatly affect your mixing decisions. If your room is too reflective or too dead, you may make errors in your adjustments. Acoustic treatment involves soundproofing your room and adding sound-absorbing materials to minimize unwanted reflections and resonance. This improves the accuracy of what you hear, enabling you to make better decisions when making adjustments.

Audio Plugins

Audio plugins are software-based tools that enable you to process your tracks in various ways. They come in different types, such as EQs, compressors, reverb, and more, and help you fine-tune your tracks to the desired sound. There are many free and paid options available in different formats, and it’s worth experimenting with different plugins to find what works best for you. In conclusion, to achieve better mixing, it’s important to have the right tools on hand. This includes quality headphones and speakers, acoustic treatment to improve your room’s sound quality, and audio plugins to help you make precise adjustments to your tracks. By investing in these tools, you’ll be able to create better, more polished mixes that are suitable for different listening environments.

Mixing Tip Secret About Human Ears

Credit: www.linkedin.com

Mixing Tip Secret About Human Ears

Credit: m.youtube.com

Frequently Asked Questions On Mixing Tip Secret About Human Ears

How Do You Make An Ear For Mixing?

To develop an ear for mixing, you should first listen to different recordings on different sound systems, such as headphones, speakers, and studio monitors. Train your hearing by focusing on specific elements, such as the vocals or the bass, and compare how they sound on different devices.

Practice regularly, and ask for feedback and advice from experienced mixers.

How Do You Get The Best In Ear Mix?

To create the best in ear mix, you must use a good pair of earphones, adjust the volume carefully, EQ your tracks, reduce ambient noise, and test your mix on multiple devices.

How Many Sounds Can The Human Ear Distinguish?

The human ear can distinguish about 400,000 different sounds, including variations in tone and pitch. The range of sounds that can be heard varies from person to person and can also be affected by factors such as age and exposure to loud noises.

How Do Ears Detect Sound And Eyes Detect Light?

Ears detect sound through tiny hair cells in the inner ear that convert sound waves into electrical signals sent to the brain. Eyes detect light through specialized cells called rods and cones in the retina that convert light into electrical signals sent to the brain.

Conclusion

To wrap up, understanding the human ear is crucial when it comes to mixing music. Knowing how our ears perceive sound can lead to more balanced and polished mixes. By following these mixing tip secrets, you can enhance the quality of your music productions and make sure that your mixes sound amazing on different playback systems.

Remember, the key is to strike a balance between your technical skills and your intuition as a musician. Happy mixing!

Categories
Archive

Stereo Width How Wide Is Too Wide

Stereo width should be balanced for an optimal mix. Too wide a mix can negatively impact mono compatibility and cause phase cancellation.

Stereo width is an important aspect of music production, allowing us to create spatial depth and spread in our mix. However, it’s important to maintain balance and avoid overdoing it, as an excessively wide mix can lead to phase cancellation and mono compatibility issues.

So, how wide is too wide? The answer varies depending on the genre, style, and context of the track. We’ll explore the concept of stereo width, the potential problems with extreme panning, and tips for achieving a well-balanced and mono-compatible mix. Whether you’re a producer, engineer, or mixing enthusiast, understanding stereo width is crucial for creating a professional-sounding mix.

The Importance Of Stereo Width

Stereo width is an essential element in the world of audio mixing. It refers to the distance between two speakers or channels through which sound is played. Appropriate stereo width is crucial for creating a balanced and mesmerizing sound experience for the listener. It helps in enhancing the overall quality of the music, providing depth, and making it sound more realistic and natural.

Impacts Of Appropriate Stereo Width

An optimal stereo width leads to a better listening experience by adding space and dimension to the music. Proper stereo imaging can create a sense of presence in a song, immersing the listener into the music. By placing instruments and sounds at different locations across the stereo field, a mix engineer can help the music sound wider, dynamic, and alive.

With the right stereo width settings, the tracks in a mix will sound well-organized, with each instrument occupying its own position on the sound stage. It helps retain the definition of individual instruments and vocals, making the mix sound clean and transparent.

Issues With Excessive Stereo Width

While stereo width is essential for creating great-sounding music, going overboard with it can have adverse effects. When stereo width is excessive, it can lead to phase cancellation, which causes some elements of the song to disappear, to make the mix sound muddy and distorted.

Moreover, if the stereo field is too wide, it can give a feeling of disorientation to the listener, creating a surrealistic effect that does not sound natural and musical. Excessive stereo width can also cause sound systems with unidirectional speakers to have an unbalanced mix, with some sounds being too weak or strong.

Therefore, striking a balance between stereo width and other elements such as volume, panning, equalization, and effects is crucial for creating a perfect mix.

Stereo Width How Wide Is Too Wide

Credit: sound-au.com

What Is Stereo Width?

Stereo width refers to the placement of audio signals across the stereo field. However, it’s important to not go too wide with the sound as it can negatively affect the overall quality. A balanced and natural stereo width creates a perfect soundstage, improving the listening experience.

Stereo width refers to the perceived spatial width of an audio signal. It is the difference between the left and right channels of a stereo mix and can be manipulated to create a wider or narrower soundstage. However, achieving the perfect balance of stereo width can be challenging as too much width can cause it to sound unrealistic and uncomfortable to the listener. In this article, we will explore what stereo width is, the factors that contribute to it, and how to achieve the right balance.

Definition

Stereo width, also known as stereo image or stereo spread, is how a listener perceives the separation of sounds in a stereo mix. It is controlled by panning audio elements to the left or right channels and can be widened or narrowed with various audio effects and techniques.

Factors That Contribute To Stereo Width

Several factors contribute to stereo width, including:

FactorsDescription
PanningPositioning audio elements to the left or right channel to create a sense of space.
EQAdjusting the frequencies of audio elements to prevent overlapping.
ReverbAdding spatial ambience to a mix to make it sound more natural.
Stereo Widening PluginsManipulating the stereo image using specialized plugins to create a wider soundstage.

Factors like the genre, style, and mood of the music may also affect the desired level of stereo width. For example, a classical piece may require a narrower soundstage to preserve the intimacy of the performance, while a modern pop track may need a wider soundstage to create an immersive listening experience. In conclusion, stereo width is an essential element in music production that can affect how listeners perceive a mix. Achieving the right balance can significantly enhance the listening experience while too much or too little stereo width can ruin it. With the factors above in mind, sound engineers and music producers can create a compelling, immersive, and enjoyable listening experience for their audience.

How To Control Stereo Width

Stereo width is an essential aspect of music production, which determines the perceived distance between the left and right speakers. It enhances the overall sound quality, giving it depth and dimension. However, having an overly wide stereo image can create problems when playing music on different sound systems. How do you control stereo width and avoid problems associated with it? Below are methods to help you maintain stereo width and improve your music production.

Using Panning Techniques

Panning is one of the most common techniques used to control the stereo width of a mix. It involves distributing different tracks across the stereo field, depending on their frequency content and musical role. For instance, keeping bass and kick drums at the center can help to maintain clarity and solidity, while panning guitars and other instruments to the left and right can create width and space. Here are a few panning techniques that you can use:

  1. Ping-Pong Panning: This involves sending a sound back and forth between the left and right speakers, creating an automated left-right shifting effect.
  2. Hard Panning: This involves sending a sound entirely to the left or right speaker, creating a sense of space and width.
  3. Moving Panning: This involves slowly moving a sound across the stereo field, creating a sense of movement and depth.

Using Mid/side Processing

Mid/Side processing is another method used to control the stereo width of a mix. It allows you to control the level and stereo image of the mid (center) and side (stereo) components of a mix separately. This gives you more control over the overall stereo width of your mix. Here are a few mid/side processing techniques that you can use:

  • Mid/Side EQ: This involves boosting or cutting certain frequencies in the mid or side components of a mix to create balance and clarity.
  • Mid/Side Compression: This involves compressing the mid or side signals separately to create a more balanced stereo image.
  • Mid/Side Reverb: This involves adding reverb to the mid or side components of a mix to create an immersive stereo image.

By using a combination of these methods, you can maintain stereo width and improve the overall quality of your music production. It’s essential to ensure that your music sounds great on different sound systems by monitoring their compatibility with your mix’s stereo width.

Stereo Width How Wide Is Too Wide

Credit: www.youtube.com

Optimizing Stereo Width For Different Genres

Stereo width is an essential aspect of music production, but it is not easy to determine the ideal stereo width for your track. The stereo effect is simply the distribution of the various elements of a track between the left and right speakers.

The width of your stereo field depends on the genre of music you’re producing. This article will guide you through optimizing stereo width for different genres, including rock/pop, electronic music, classical music, and jazz.

Rock/pop

Rock and pop music generally requires a wider stereo field. This genre often features big vocals and punchy drums. To optimize the stereo width for rock/pop music, try panning the lead vocals to the center and placing the guitars and backing vocals to the sides.

Additionally, if you want your mix to sound wider, try adding some reverb to guitars and drums, but avoid overdoing it as it may create unwanted muddiness.

Electronic Music

Electronic music is popularly known for its deep bass and heavy beats. To optimize the stereo width of electronic music, it is necessary to have a focused mix first. Try panning the different elements such as synths, drums, and bass across the stereo field.

You can also experiment with stereo widening plugins to enhance the width of your mix. However, be cautious and use them subtly as overusing stereo widening effects can lead to phase cancellation issues and a hollow sound.

Classical Music

Classical music is typically recorded in stereo, and the soundstage placement is crucial. The positioning of each instrument within the stereo field must be accurate, and the mix should be focused on the center while maintaining a warm and spacious sound.

To optimize stereo width for classical music, it is advisable to record each instrument separately, as this will allow you to position them accurately within the stereo field. You can use the panning technique to place each instrument in its respective stereo position, but it’s not always essential.

Jazz

When it comes to jazz music, a balanced stereo width is the key. Avoid extreme panning and focus more on maintaining a balanced stereo field. You can use the panning technique to place lead and solo instruments in the center while placing bass and drums narrower. You can also try using stereo reverbs or delay to enhance the stereo width.

In conclusion, optimizing stereo width for different genres plays a crucial role in enhancing the overall sound of your tracks. Consider the genre you’re producing, and experiment with different techniques to achieve the desired stereo width.

Developing A Balanced Stereo Image

Achieving a balanced stereo image is crucial for any producer or engineer, but it’s important to know how wide is too wide. Panning elements too far left or right can result in an overdone, unnatural sound, so finding the sweet spot is key.

Avoiding Cluttering The Mix

When creating a stereo image, it is important to avoid cluttering the mix. The mix refers to the combination of all the individual elements that make up the final audio. If too many elements are present in the mix, it can result in a crowded sound. To avoid clutter, it is necessary to consider which elements are essential for conveying the intended message and which can be removed or dialed back.

Using Eq To Create A Balanced Stereo Image

Using equalization (EQ) can help to create a balanced stereo image. EQ refers to the process of adjusting the levels of different audio frequencies, such as bass, midrange, and treble. Applying EQ to individual elements in the mix can help to remove any unwanted frequency buildup and ensure that each element is positioned in its own space within the stereo image. By using EQ to balance the levels of different frequencies, you can create a more dynamic and pleasant listening experience.

How Wide Is Too Wide

When considering stereo width, it is essential to ensure that the width is not excessive. Although a wider stereo image can be more engaging, too much width can lead to a distorted sound. Wide stereo should be used sparingly and in a way that complements the individual elements in the mix and the intended message. Balancing width with other essential mixing techniques, such as EQ and leveling, can help to create a more balanced stereo image. In conclusion, creating a balanced stereo image involves careful consideration of elements such as cluttering, EQ, and stereo width. By utilizing EQ and avoiding cluttering the mix, you can create a more pleasant listening experience. While it is important to consider stereo width, it should be balanced with other essential mixing techniques to avoid distortion. Remember, finding the right balance is the key to creating a perfect stereo image.

Examples Of Good Stereo Width In Popular Music

In popular music, there are many examples of good stereo width that enhance the overall listening experience. However, there is such thing as too much width, which can make the mix sound unnatural or uncomfortable. Careful consideration should be given to the balance of stereo width in a track.

Stereo width refers to the placement of instruments and sound within the stereo field. In some cases, too wide a stereo field can result in an unbalanced mix or a loss of clarity. However, when used effectively, stereo width can enhance the overall listening experience. Let’s take a look at some examples of good stereo width in popular songs.

Take On Me By A-ha

One of the most recognizable songs of the 80s, “Take on Me” by A-Ha features a variety of instruments positioned in different parts of the stereo field. The synthesizers are panned slightly to the left and right, giving the song a spacious feel. The drums are centered, anchoring the mix, while the vocals are placed front and center. This creates a balanced and immersive listening experience that perfectly suits the song’s nostalgic and romantic themes.

Come Together By The Beatles

The Beatles’ “Come Together” is another classic that makes great use of stereo width. The bassline is centered, but features a subtle delay effect that gives it a wider feel. The guitars are panned slightly to the left and right, while the drums are placed mostly in the right channel. This creates a dynamic and engaging mix that draws the listener in and keeps them hooked from start to finish.

Royals By Lorde

Lorde’s “Royals” is a great example of a modern song that uses stereo width effectively. The lead vocals are front and center, but they’re accompanied by a variety of other sounds placed throughout the stereo field. The drums are centered, while the synthesizers and other instruments are panned left and right. This creates a sense of space and depth that perfectly complements the song’s laid-back and introspective vibe. Overall, these songs demonstrate that there’s no one-size-fits-all approach to stereo width. By experimenting with different panning techniques and effects, you can create a mix that suits the specific needs of your song and helps bring out its unique character and personality.

Common Pitfalls To Avoid When Adjusting Stereo Width

Adjusting stereo width can enhance the listening experience, but it’s easy to go too far. Avoid the common pitfalls of making the mix too wide, losing mono compatibility, or causing listener fatigue by properly balancing the stereo image.

Adding Too Much Stereo Width

When it comes to adjusting stereo width, it’s important to strike a balance between widening the stereo image and overdoing it. While increasing the stereo width can add depth and dimension to your mix, adding too much stereo width can result in loss of clarity and focus. To avoid this, start small and increase the width incrementally until you find the sweet spot where the stereo separation enhances the mix without taking away from the overall clarity.

Mixing On Headphones Only

Mixing on headphones only can be a common pitfall when it comes to adjusting stereo width. Headphones can give a false impression of stereo image and depth as they don’t replicate the sound of actual physical space where speakers would be placed. Therefore, it’s important to regularly check and fine-tune your mix on multiple playback systems including studio monitors, car stereos, and portable speakers. This will help ensure that your stereo width settings translate well across various listening environments. In summary, adding too much stereo width and mixing on headphones only are two common pitfalls when it comes to adjusting stereo width. To avoid these issues, start small with width adjustments and check your mix on multiple playback systems to ensure that your stereo width settings translate well across different environments.

Stereo Width How Wide Is Too Wide

Credit: www.masteringthemix.com

Frequently Asked Questions Of Stereo Width How Wide Is Too Wide

Is Stereo Widening Necessary?

Stereo widening is not necessary, but it can be used to enhance the audio experience by creating a wider and more spacious sound. It is recommended to use it in moderation and only if it fits the context of the music or audio being produced.

Can A Mix Be Too Wide?

Yes, a mix can be too wide. When a mix is too wide, it can cause several issues like losing focus on the main elements of the mix, creating phase issues, and reducing the overall impact of the music. It’s recommended to keep the mix balanced and centered to avoid these problems.

How Wide Should A Mix Be?

The width of a mix depends on the genre and specific song. However, in general, a mix should not exceed a width of 60-70% to ensure that it sounds balanced and cohesive on different playback systems. It’s important to use panning and stereo imaging techniques to create a sense of space while maintaining a focused and centered sound.

What Is Wide Stereo Sound?

Wide stereo sound is a type of audio processing that creates a spacious and immersive sound experience. It enhances the width and depth of the stereo field, providing a more realistic and lifelike sound. This effect is achieved by manipulating the timing, phase and frequency of the audio signals.

Conclusion

In the world of music production, stereo width can be a powerful tool, but it’s essential to use it with intention. Too much width can lead to a lack of focus and a muddied mix. On the other hand, too little width can leave a mix feeling mono and uninteresting.

As with all mixing techniques, finding the right balance is key. By experimenting with stereo separation and being mindful of how it affects your mix, you can create a full and engaging sound that enhances the song’s emotional impact. Happy mixing!

Categories
Archive

How To Make A Beat With Ableton

To make a beat with Ableton, open the software and create a new MIDI track. Then, select a drum rack and begin programming your beat using the onscreen drum pads.

From there, you can add additional sounds and effects to enhance your beat. Ableton is a powerful software tool for producing and composing electronic music. Whether you’re a seasoned producer or just starting out, creating a beat in Ableton can be a fun and rewarding experience.

To get started, open the software and create a new MIDI track. Then, select a drum rack and begin programming your beat using the onscreen drum pads. You can adjust the pitch and velocity of each sound to create a unique beat that fits your style. From there, you can add additional sounds and effects to enhance your beat and bring it to life. With a little practice and experimentation, you’ll be well on your way to making great beats with Ableton.

How To Make A Beat With Ableton

Credit: www.productionmusiclive.com

Choosing Your Instruments

When it comes to making a beat with Ableton, choosing the right instruments is crucial. You want to create a unique sound that captures your style, and the best way to do that is by selecting the right drums and synth sounds. Let’s explore these two options a bit more:

Picking Drum Samples

The first step in making a beat with Ableton is selecting the right drum samples. This can be overwhelming, with so many options available, ranging from acoustic kits to electronic beats. It’s essential to decide which drum sounds will work best with your beat. Here are some tips on how to choose:

  • Consider the genre you’re working in – if you’re making a hip-hop beat, you’ll want to use heavier drum samples.
  • Think about the tempo – for a slower beat, you might want to choose a softer drum sample.
  • Experiment – don’t be afraid to mix and match different drum sounds until you find the combination that works best for you.

Selecting Synth Sounds

Once you’ve picked your drum samples, it’s time to select your synth sounds. Synths are powerful tools that help you create a distinctive sound. Here are some things to keep in mind as you choose:

  • Again, think about genre – the right synth sound can make or break a beat. If you’re working on a techno beat, choose a synth sound that complements your baseline.
  • Experiment with different sounds – Ableton has a massive library of synths, so make sure you explore all the options until you find what works best for your beat.
  • Consider layering – layering different synth sounds can take your beat to another level. Start with two or three layers and see how it goes.

By following these tips, you’ll be able to choose the right drums and synth sounds for your beat in Ableton. Remember, don’t be afraid to experiment, and take your time in making your beat sound unique.

How To Make A Beat With Ableton

Credit: www.productionmusiclive.com

Creating Your Drumbeat

Learn how to create a drum beat using Ableton software. With the right tools and techniques, you can take your music production to the next level. Follow our step-by-step guide and start making beats today.

Creating Your Drumbeat is an important aspect of producing music with Ableton. Without a strong drum beat, your music may lack the energy and rhythm needed to captivate listeners. In this section, we will guide you through the process of laying down the kick and snare, adding hi-hats and percussion, as well as adding fills and transitions. Laying Down the Kick and Snare The kick and snare are the backbone of most beats and are essential for creating a solid foundation for your track. To lay down the kick and snare, you can use the drum rack instrument in Ableton. Simply click on the “Drums” category, choose the drum rack instrument, and drag it onto a MIDI track. Once you’ve got your instrument loaded, you can start programming your kick and snare pattern. The kick usually falls on the first and third beat of the measure, while the snare falls on the second and fourth. You can experiment with different kick and snare patterns to find the right vibe for your track. Adding Hi-Hats and Percussion Adding hi-hats and percussion can add depth and complexity to your drum beat. Hi-hats are typically used to create a steady rhythm and can be played throughout the track. Percussion, on the other hand, can be used to create accents and add flavor to your drum beat. To add hi-hats and percussion, you can use the same drum rack instrument in Ableton. Simply select the hi-hat or percussion sound you want to use and start programming your pattern. You can add hi-hats on every beat or every other beat, depending on the vibe you’re going for. Percussion can be used sparingly or throughout the track to create interest and texture. Adding Fills and Transitions Fills and transitions are used to create excitement and movement in your drum beat. Fills are typically used at the end of a section, while transitions are used to move from one section of the track to another. To add fills and transitions, you can use drum fills or transitions samples, or create your own using the drum rack instrument in Ableton. Simply program the fill or transition at the desired point in your track. You can use a different fill or transition for each section to keep your track interesting and dynamic. In conclusion, creating a drum beat with Ableton is a creative and fun process. By following these steps, you can create a solid foundation for your track, add depth and complexity with hi-hats and percussion, and create excitement with fills and transitions. Experiment with different sounds and patterns to find the right vibe for your track. Happy beat making!

Building Your Bassline

Learn how to create a solid bassline for your beat using Ableton. Start by selecting the right instrument and experimenting with patterns before adding variation to keep it interesting.

When it comes to making a beat, establishing a solid bassline is crucial. The bass provides the foundation and groove for the entire track. With Ableton, there are several ways to create a bassline that stands out and complements the rest of your production. In this section, we’ll cover picking the right bass sound, creating a simple bassline, and enhancing your bassline with effects.

Picking The Right Bass Sound

To start building your bassline, the first step is selecting the right bass sound. Consider the style and genre of your track, and choose a sound that fits the mood and tone. Ableton Live has a wide range of built-in sounds and plugins to choose from, including analog synths, samples, and virtual instruments. Some popular options include the Ableton Operator and Analog synthesizers, which are known for their flexibility and versatility. Alternatively, you can incorporate sampled sounds or use a bass guitar plugin to create a more organic feel. Experiment with different sounds until you find one that works for your track.

Creating A Simple Bassline

Once you have your sound, it’s time to create a simple bassline. Start by focusing on the root note of the chords in your track, and build from there. A simple bassline can be just two or three notes, repeated in a rhythmic pattern. Use your MIDI controller or keyboard to play around with different note combinations. Try to keep the bassline in sync with the tempo of your track and maintain a consistent rhythm. You can also add variations to the pattern, such as jumping up an octave or adding a slide or glide effect.

Enhancing Your Bassline With Effects

To take your bassline to the next level, add some effects to enhance the sound. Ableton Live has a variety of built-in effects that you can use, such as EQ, compression, and distortion. Each effect can alter the tone and character of your bassline, so experiment with different settings to find what works best for your track. For example, you can use EQ to boost the low end frequencies, adding more punch to the bassline. Or, you can use compression to tighten up the sound and add sustain. Distortion can be used to add grit and dirt to the bassline, creating a more aggressive tone. In conclusion, building a solid bassline is essential for creating a great beat in Ableton Live. Ensure you pick the right bass sound, create a simple bassline focusing on the root notes, and enhance your bassline with the appropriate effects. Happy beat-making!

How To Make A Beat With Ableton

Credit: m.youtube.com

Adding Melodic Elements

After setting up a solid drum beat and a bassline, it’s time to explore the melodic elements of your track. Here are some tips on how to create engaging melodies using Ableton:

Writing Chord Progressions

Writing chord progressions is an important step when adding melodic elements to your track. With Ableton, you can use the built-in MIDI effects to help you create chord progressions. Start by selecting the chord MIDI effect and setting the scale. From there, you can use the chords to create a progression that fits the mood of your track.

Example Chord Progression:

ChordRoot NoteTiming
D minorD1 bar
C majorC1 bar
B flat majorBb1 bar
A minorA1 bar

Creating Melodic Hooks

Creating a melodic hook can be challenging, but it’s crucial in making your track memorable. One way to create a hook is to use Ableton’s MIDI effects like the arpeggiator, chord trigger, and scale MIDI effect. By layering these effects, you can create a unique and memorable melody for your track.

Example Melodic Hook:

Using an arpeggiator effect set to sync with the track’s tempo, you can create a melodic hook like this:

  1. Set the arpeggiator to the “Up” mode
  2. Choose a scale that fits the mood of your track (in this example, we use the C minor pentatonic scale)
  3. Play a chord progression using the scale
  4. Enable the arpeggiator and adjust the rate until you find a rhythm that’s catchy and fits your track

Using Arpeggiators And Other Tools

Besides the arpeggiator, Ableton provides several other MIDI effects that can help you to create unique melodic elements for your track. For example, the ‘Random’ MIDI effect can add variations to your melody, while the ‘Velocity’ MIDI effect can help to create dynamic expression in your melody. Play around with different MIDI effects and see what works best for your track.

Example Melodic Element with MIDI Effects:

To create a unique and evolving melody, you can combine the arpeggiator, random, and velocity MIDI effects:

  1. Start with a simple chord progression using the C major scale
  2. Apply the arpeggiator set to sync with the track’s tempo
  3. Apply the random MIDI effect to create variations in the melody
  4. Apply the velocity MIDI effect to add dynamic expression to the melody

With these tips and tools in Ableton, you can efficiently create engaging melodies and hooks for your track. Remember to experiment, be creative, and have fun with the process.

Arranging Your Beat

Learn how to arrange your beat with Ableton by creating different sections and arranging them into a cohesive and dynamic track. Utilize Ableton’s session view, automation, and effects to enhance your beat and create a unique sound.

Once you have created the basic beat, it is time to move on to arranging your beat. This process involves deciding on the structure of your song, creating changes and builds, and adding variation and interest.

Structuring Your Song

When structuring your song, keep in mind the typical song structure: intro, verse, chorus, bridge, and outro. However, don’t be afraid to experiment with different structures – the key is to keep things interesting and engaging for the listener. To begin, start with the basic beat and decide which section will serve as the intro. From there, decide on the length of the verse and chorus sections. A common structure is to have two verses, two choruses, and a bridge. Don’t forget to add in breaks between sections to help create separation and tension between different parts of the song.

Creating Changes And Builds

Creating changes and builds is an essential part of arranging your beat. This process helps to keep the listener engaged and interested in the song. One way to create changes is by adding or removing elements from the beat. For example, you could strip the beat down to just the kick and snare during the verse and add in other elements during the chorus to create a fuller sound. Builds are sections of the song where the tension increases, usually leading up to the chorus or a drop. An easy way to create builds is by gradually adding more elements to the beat, such as adding a hi-hat or cymbal over a few bars.

Adding Variation And Interest

Adding variation and interest to your beat is another crucial aspect of arranging your song. This process helps to keep the listener engaged and prevents the song from becoming repetitive. One way to add variation is by introducing a different melody or chord progression during the chorus or the bridge. You could also change the rhythm or tempo of the beat, or add in new sound effects or samples. When adding variation, be mindful not to overdo it. Too many changes can be overwhelming for the listener, so it’s essential to strike the right balance between variation and continuity. In conclusion, arranging your beat is a crucial step in making a great song. By structuring your song, creating changes and builds, and adding variation and interest, you can elevate your beat and create a dynamic, engaging song that will keep listeners coming back for more.

Mixing Your Beat

Learn how to produce high-quality beats with Ableton, a digital audio workstation known for its versatility and powerful features. From selecting the right sounds to creating your own loops, this guide will help you achieve the perfect blend for your music production needs.

Making a beat with Ableton is a fun and creative process. In the previous sections, we covered how to create and arrange sounds using Ableton’s built-in features. Now it’s time to give your beat a final touch by mixing it. Mixing is the process of balancing, equalizing and adding effects to your sounds to create a finished product that sounds great on any device. In this section, we’ll go over the essential steps to mix your beat like a pro.

Balancing Your Levels

Mixing your beat starts with balancing the levels of all the sounds in your project. The goal is to ensure that no sound is too loud or too soft, and they all blend seamlessly. To balance your levels, follow these steps:

StepAction
1Start with all your tracks at the same volume
2Listen to your beat as a whole, and identify any sounds that stand out too much
3Lower the volume of the sounds that stand out or increase the volume of the ones that are too soft
4Keep adjusting the volume of each sound until everything blends seamlessly

Eqing Your Sounds

Equalizing (EQing) is the process of altering the frequency content of your sounds to make them fit better together. EQing allows you to remove unwanted frequencies and enhance desired ones. Here are the steps to EQ your sounds:

  1. Open the EQ plugin on each track
  2. Identify the frequency range where each sound is prominent
  3. Reduce or boost the frequencies of each sound that conflict or complement each other
  4. Make sure that the sounds complement each other without creating a muddy or harsh sound

Adding Effects And Processing

After balancing and EQing your sounds, you can add effects and processing to enhance their quality and uniqueness. Effects can be reverb, delay, distortion, or any other plugins that can shape your sounds. Here are steps to follow when adding effects and processing:

  • Apply reverb, delay, and other effects to give your sounds a unique touch
  • Use panning to create space and movement in your beat
  • Compression can help glue your sounds together and create a more consistent volume level
  • Don’t go overboard with effects as it can ruin the balance and clarity of your beat

With these essential steps, you can now mix your beat like a pro and create a finished product that sounds great on any device. Remember to experiment and have fun with Ableton’s versatile features.

Mastering Your Track

Mastering is the final step in the beat-making process. It involves enhancing the sound quality of your track to make it sound professional and ready for distribution. In this section, we will discuss how to prepare your track for mastering, using compression and limiting, and adding the final touches.

Preparing Your Track For Mastering

Before you start mastering your track, you need to make sure that it is properly mixed. This means that every instrument and sound should be balanced in volume and frequency. Here are a few tips on preparing your track for mastering:

  • Make sure that all your tracks are properly leveled and panned.
  • Remove any unnecessary frequencies using EQ.
  • Ensure your track has headroom (at least -6dB) to avoid clipping during mastering.
  • Export your track in a lossless format like WAV and at a sample rate of 44.1kHz or higher.

Using Compression And Limiting

Compression and limiting are essential tools in the mastering process. Compression is used to reduce the dynamic range of a track, while limiting is used to prevent clipping and ensure the track stays within a certain loudness range. Here’s how to use compression and limiting:

  1. Add a compressor to your master track.
  2. Set the threshold so that it reduces the dynamic range but doesn’t sound too squashed.
  3. Add a limiter after the compressor to prevent clipping and boost the overall volume.
  4. Set the ceiling on the limiter to ensure that the track stays within a certain loudness range.

Adding The Final Touches

The final touches of mastering involve adding subtle enhancements to your track that make it sound fuller and more polished. Here are a few techniques:

  • Add some stereo width using a stereo widener plugin.
  • Add some reverb or delay to create a sense of space.
  • Add some harmonic excitement using a harmonic enhancer plugin.
  • Use a spectrum analyzer to ensure that your track is properly balanced in terms of frequency.

Exporting Your Beat

Learn how to export your beat created with Ableton to share with others. With this guide, you can easily save your work in different audio file formats, adjust quality settings, and add metadata for better optimization.

Once you’ve produced an amazing beat in Ableton, you’ll want to share it with the world. But before you do that, there are a few crucial steps you need to take to ensure the track is ready for export. This guide will take you through the process of exporting your beat, step by step.

Choosing The Right File Format

Choosing the right file format is crucial when exporting your beat, as it will determine the quality of the final product. Ableton allows you to export your tracks in a variety of formats, including WAV, MP3, and AIFF. WAV files are the highest quality, but they also take up a lot of space. MP3 files are compressed and take up less space, but their quality isn’t as high as WAV files. AIFF files are similar to WAV files and offer high quality, but they’re only compatible with Apple devices. When choosing a file format, consider the purpose of your track. If it’s for personal use, a smaller file size like MP3 might be more convenient. But if you plan on using the track for professional purposes, stick with high-quality formats like WAV or AIFF.

Preparing Your Track For Export

Before exporting your track, you need to ensure it’s prepared for the final product. Here are the steps you need to take:

  • Consolidate your track: This means making sure all of your audio files are in one place.
  • Clean up your track: Make sure there are no unwanted sounds or glitches.
  • Organize your track: Rename and organize your tracks and samples in a logical way.
  • Set your levels: Make sure your levels are balanced and not clipping.

Once you’ve completed these steps, you’re ready to export your track.

Sharing Your Beat With The World

After exporting your beat, the final step is to share it with the world. Here are a few ways you can do that:

  • Upload it to SoundCloud: SoundCloud is a popular platform for sharing and discovering music.
  • Share it on social media: Twitter, Instagram, and Facebook are all great platforms for sharing your music.
  • Submit it to music blogs: Music blogs are always looking for new content to feature.
  • Submit it to music libraries: If you’re looking to license your music, submitting it to music libraries is a great option.

Now that you know how to export your beat, you’re ready to share your music with the world. Remember to take your time and ensure your track is of high quality before exporting it.

Frequently Asked Questions On How To Make A Beat With Ableton

How Do You Make Beats For Beginners?

To make beats for beginners, you should start with a basic drum pattern and add melodies and chords on top of it. Use a Digital Audio Workstation (DAW) software like FL Studio or Ableton Live to create your beats. You can also watch YouTube tutorials, practice regularly, and experiment with different sounds and effects to develop your skills.

Can You Use Ableton To Make Music?

Yes, Ableton is a popular music production software used by many musicians and producers around the world to create and produce music. It offers a wide range of tools and features, including virtual instruments, effects, and audio processing capabilities.

Where Can I Get Sound To Make Beats?

You can get sound to make beats from various sources, including online sample libraries, software synthesizers, hardware synthesizers, and recording your own sounds. There are numerous websites and online stores where you can purchase or download free samples, loops, and sound effects that can be used for beat production.

How Do I Turn Audio Into Sample In Ableton?

To turn audio into a sample in Ableton, simply drag and drop the audio file into a new sample track. Then, you can adjust the start and end points of the sample and trim down the length as needed. You can also apply effects and processing to the sample to further manipulate the sound.

Conclusion

Mastering the art of making a beat with Ableton requires patience, practice, and creativity. With the tips and tricks outlined you can create unique beats that reflect your personal style. Remember to experiment with different sounds, samples, and effects, and don’t be afraid to step outside of your comfort zone.

With dedication and hard work, you can become a skilled beatmaker capable of creating music that resonates with your audience. So go ahead and start making those beats, and don’t forget to have fun in the process!

More in our Drums & beats guide.

Categories
Archive

Chandler Limited Curve Bender Eq

The Chandler Limited Curve Bender Eq is a high-end equalizer designed for mastering and mixing purposes. It is famous for its smooth and musical sound, featuring a 4-band EQ and low/high pass filters.

Also, the Chandler Limited EQ is a top-of-the-line equalizer that is renowned for its exceptional quality and sound. Also, it features a 4-band EQ, low and high pass filters, and is designed for both mastering and mixing applications. This premium EQ offers outstanding musicality, making it an excellent option for anyone seeking a superior audio experience.

Related reading: EQ: The Complete Guide Hub and Piano Eq.

Moreover, whether you’re a professional music producer, sound engineer, or audiophile, the Chandler Limited EQ is an outstanding choice that is sure to meet your high standards.

Chandler Limited Curve Bender Eq

Credit: chandlerlimited.com

Features

In addition, the Chandler Limited EQ is a high-end equalizer often used in music production. In addition, it features modern and vintage circuitry combinations that allow for precise, customizable sound shaping. The powerful device can work for a wide variety of professional audio applications.

Furthermore, Chandler Limited EQ is a powerful and versatile equalizer that is perfect for studio and live sound reinforcement applications. For example, it offers a range of features that make it an ideal choice for professional audio engineers and musicians. Here are some of the key features of this exceptional equipment.

Design And Layout

Additionally, the Chandler Limited EQ has been designed to offer maximum flexibility and ease of use to the user. As a result, it features a classic British EQ topology that allows for the use of a variety of sounds and subtle nuances. The EQ comes in a sleek and eye-catching design that is both stylish and functional.

Equalization

Also, the Chandler Limited EQ offers an unparalleled level of equalization. The EQ has a range of six bands, which allows for precise adjustments. The EQ can shape the sound of individual tracks or to fine-tune the overall mix of a song. It offers sweepable high and low-pass filters, as well as shelving and bell filters.

Routing And Connectivity for Curve Bender EQ

Moreover, the routing and connectivity options of the Chandler Limited EQ are one of its strongest suits. The EQ features balanced XLR inputs and outputs, as well as a stereo link option. You can use it as a standalone unit or integrate it into a larger mixing console setup. The unit also features bypass switches for each equalization band, allowing for easy A/B comparison of the equalization effects. Overall, the Chandler Limited EQ is a top-of-the-line EQ that offers a wide range of features and flexibility. Its classic British EQ topology, six-band equalization, and versatile routing options make it an excellent choice for any professional audio engineer or musician looking for an exceptional EQ solution.

Chandler Limited Curve Bender Eq

Credit: www.economik.com

Sound

Maybe you want an equalizer that is top quality and flexible enough to give you many options for shaping your sound. If so, you can’t go wrong with the Chandler Limited Curve Bender EQ. This legendary hardware EQ has made a name for itself with its exceptional sound quality. Many audio professionals consider it one of the best EQs of all time.

Use Of Components for Curve Bender EQ

The Chandler Limited Curve Bender EQ is built with high-quality components that ensure its sound is warm, detailed, and free from harshness. Chandler carefully selected every part of this EQ, from the transformers to the inductors and capacitors, to deliver the best possible sound. Moreover, the use of Elma rotary switches makes it easy to select the desired frequency points and boost/cut levels. Meanwhile, the conductive plastic potentiometers ensure accurate and smooth operation.

Versatility And Flexibility

The Chandler Limited Curve Bender EQ is a versatile equalizer with five broad bands of EQ, each with unique frequency and Q ranges that allow you to shape your sound precisely and creatively. You can switch the low and high bands between shelving and bell modes. Meanwhile, the three mid-bands offer a range of Q settings from 0.3 to 2.0. This EQ has a range of +/-18dB boost/cut and can work on individual tracks, buses, or during the mastering process.

Sonic Characteristics

The sonic characteristics of the Chandler Limited Curve Bender EQ are what set it apart from other EQs on the market. Its sound is thick, warm, and musical, with a smooth top end and a rich mid-range that adds warmth and character to any source. Moreover, the unique transformer-coupled output stage adds color and texture to the sound while keeping it open and transparent.

In conclusion, the Chandler Limited Curve Bender EQ is a must-have tool for any audio professional. It is an exceptional hardware EQ that delivers top sound quality. With its use of high-quality components, versatile features, and exceptional sonic characteristics, it is no wonder that this EQ has become a favorite among many audio professionals and studios worldwide.

Applications

The Chandler Limited Curve Bender Eq is an analog equalizer designed to deliver sonic euphoria to your audio signal. Top producers and engineers have embraced it for its versatility and uniqueness.

Mixing And Mastering for Curve Bender EQ

The Chandler unit is ideal for mixing and mastering audio tracks. With its low noise and high headroom, this equalizer allows you to boost or cut specific frequencies to achieve a well-balanced mix. Whether you want to add warmth, brightness, or clarity to your tracks, this EQ has got you covered. Its flexible filter section provides precise control over your audio signal. This makes it a valuable tool for mixing and mastering engineers.

Tracking And Recording for Curve Bender EQ

The Chandler Limited Curve Bender Eq is also great for tracking and recording audio. It can shape the tone of the source material before it is recorded. This gives you a better starting point for your mix. The Curve Bender’s high-pass filter can remove unwanted low-frequency noise. In contrast, the low-pass filter can add resonance to vocal recordings. Additionally, the Chandler unit’s dual-channel design allows you to process two audio signals at once. This makes it perfect for recording stereo instruments or drum overheads.

Live Sound And Broadcast

This EQ is not limited to the studio environment. Its robust build quality and ability to withstand extreme temperatures make it a great choice for live sound and broadcast applications. This equalizer can be used to fine-tune the sound of a live performance. This ensures that the audience hears a well-balanced mix. The Curve Bender’s flexible filter section also allows you to eliminate feedback frequencies on stage. This makes it an invaluable tool for live sound engineers.

Chandler Limited Curve Bender Eq

Credit: www.sweetwater.com

Comparison To Other Eqs

Chandler Limited Curve Bender EQ is widely regarded as a premium equalizer. But, how does it compare to other famous EQs in the music world? Let’s take a closer look.

Pultec Eqp-1a

One of the most well-known and influential equalizers is the classic Pultec EQP-1A. The Chandler unit, on the other hand, offers a more modern and versatile sound. Compared to the Pultec, the Chandler EQ has a tighter and more precise low-end, cleaner mid-range and more open high-end. Additionally, the Curve Bender is capable of more aggressive boosting and cutting than the Pultec.

Ssl G Series Eq

The SSL G Series EQ is another renowned equalizer among audio professionals. While the Curve Bender and SSL G Series share similar frequencies, the SSL EQ has a more colored and punchy sound. On the other hand, the Curve Bender offers a more transparent and natural tone, thanks to its pure Class-A signal path. The Chandler EQ lets you sculpt your sound more accurately and offers a more refined control over every frequency range.

Neve 1084 Eq

Many consider the Neve 1084 EQ as a “must-have” for any studio setup. Like the Curve Bender, the Neve 1084 EQ has a vintage sound and a broad frequency range. However, the Curve Bender goes further by offering cutting-edge features like bypassable EQ sections, adjustable Q control, and selectable high-pass filters. The Chandler EQ also has a more flexible and intuitive workflow, with dual concentric knobs and illuminated push-buttons.

Overall, while there are numerous iconic equalizers in the market, the Chandler Limited Curve Bender EQ stands out with its innovative design, Class-A analog technology, and exceptional sound quality. Whether you are looking to mix, master or enhance your tracks, Chandler Curve Bender EQ is a fantastic choice for any discerning audio professional.

Frequently Asked Questions For Chandler Limited Curve Bender Eq

What Is A Curve Bender?

A curve bender refers to a disruptive innovation or technology that creates a significant shift in an industry. This results in a change in the equilibrium of market players. It causes a dramatic shift in the way things are done, and those who fail to adapt are at risk of being left behind in the industry.

What Is A Mastering Equalizer?

A mastering equalizer is a tool used to adjust the frequency balance and tonal characteristics of a recording during the mastering process. It enables audio engineers to manipulate specific frequency ranges to achieve a balanced and cohesive sound across all playback systems.

Mastering equalizers are crucial for achieving a polished and professional-sounding end product.

What Is Chandler Limited Curve Bender Eq Used For?

Chandler Limited Curve Bender Eq is used in the mixing and mastering process to shape and fine-tune the equalization of audio signals, enhancing the overall sound quality and clarity.

What Are The Main Features Of Chandler Limited Curve Bender Eq?

The main features of Chandler Limited Curve Bender Eq include its ability to offer highly musical tone-shaping, excellent dynamic control options, and meticulously accurate reproduction of vintage analogue equipment.

Conclusion

After all of the analysis and testing, it’s clear that the Chandler Limited Curve Bender EQ is a top-of-the-line piece of gear for any studio. Its unique design and unparalleled sound make it a standout in the EQ market. Whether you’re a novice or a seasoned professional, the Curve Bender is a worthy investment for any studio looking to take their sound to the next level.

Categories
Archive

Manley Reference Cardioid Microphone

The Manley Reference Cardioid Microphone is a high-end condenser microphone that delivers exceptional sound quality with its precise cardioid polar pattern. It has a warm and natural sound that captures every detail of the performance. This makes it a popular choice among musicians and audio professionals.

As an Amazon Associate I earn from qualifying purchases.

Related reading: Ribbon Microphone and Dynamic Microphone. For background, see the official Manley website.

Also, its unique design ensures minimal proximity effect. This results in a consistent sound quality regardless of the distance between the microphone and the source. Manley builds this microphone to last, using only the finest materials and craftsmanship. Also, it is a versatile and reliable microphone that is perfect for recording vocals, acoustic guitars, drums, and more.

Moreover, its exceptional performance and durability make it an excellent investment for anyone serious about their audio recording needs.

Manley Reference Cardioid Microphone

Credit: www.prosoundgear.com

Design And Construction for Manley Reference Cardioid

In addition, the Manley Microphone is a must-have for any serious recording engineer. In addition, its thoughtful design and construction ensure incredible sound quality, consistency, and versatility. This microphone’s outstanding performance and reliability make it a go-to choice for top studios worldwide.

Manley Reference Cardioid Microphone, also known as the Manley Reference Gold Microphone, is an exceptional piece of equipment, designed to offer high-end audio recording capabilities. For example, Manley uses top-notch materials in the Reference Cardioid Microphone, from the body to the capsule and circuitry, to deliver exceptional sound quality.

Body

Furthermore, the body of the Manley Microphone is designed in an exceptionally sleek and robust manner. As a result, the microphone’s body is configured in a way that minimizes interference from external vibrations. This ensures that sound production remains accurate as possible. Manley has used premium materials in the construction of the body, such as machined brass, offering an elegant durable finish. The microphone comes with a shock mount that ensures there is no noise transmission from vibrations from external sources such as footsteps.

Capsule

Additionally, the capsule is the heart of the microphone as it converts sound into electrical signals. However, the Manley Microphone features a 1-inch-diameter capsule manufactured using pure gold. The gold capsule’s ability to conduct electricity better than other metals ensures that there is minimal distortion of the recorded sound. Additionally, the capsule can handle high sound pressure levels without overloading, keeping the recorded sound clean and smooth.

Circuitry

Also, the microphone features discrete Class A amplifiers that can withstand high sound pressure levels to deliver clear audio recordings. Manley Reference Cardioid Microphone also has an onboard impedance converter that delivers a balanced signal to the output transformer. Then, this capability ensures that there is minimal noise or interference on the recorded sound. The tube electronics combined with the transformers improve the audio material’s clarity and warmth. In conclusion, Manley Reference Cardioid Microphone’s design and construction are its top features that ensure exceptional sound production. The sleek and robust body, pure gold capsule, and high-quality circuitry work together to reduce vibration transmissions, minimize distortion, remove interference, and deliver clear and warm sound. It stands out from other microphones and remains a popular choice for high-end audio recording. This ensures that the user gets value for their money.

Technical Specifications for Manley Reference Cardioid

Moreover, the Manley Microphone boasts technical specifications that make it a popular choice among professionals. In short, with a frequency response of 10Hz to 30kHz, this microphone captures every detail of the sound source and offers a high output level that ensures clarity and depth in recordings.

When it comes to professional-level microphone performances, the Manley comes to mind. Similarly, this microphone is a top-of-the-line product for professionals who require a high-quality recording experience. The Manley is particularly loved for its technical specifications, which are second to none. In addition, this section will delve deeper into the various technical specifications of this microphone, including Frequency Response, Sensitivity, and Maximum SPL.

Frequency Response for Manley Reference Cardioid

Furthermore, the Manley has a frequency response range of 10 Hz to 30 kHz. This makes it a versatile microphone that can capture high and low frequencies clearly. Its excellent frequency response ensures that there is little to no distortion and that the sound remains as true as possible to the original source.

Sensitivity

With a sensitivity of 17mV/Pa, the Manley can detect even the slightest changes in volume with remarkable accuracy. This feature makes it ideal for recording vocals, which require a high level of sensitivity to capture the nuances in voice.

Maximum Spl for Manley Reference Cardioid

The maximum SPL of this microphone is 150dB. This means that it can handle extremely loud sounds without being overloaded or distorted. Therefore, the Manley is an ideal choice for recording music genres like heavy metal or rock that involve loud instruments such as drums or electric guitars. In conclusion, the Manley is a high-quality recording device that offers state-of-the-art technical specifications. Its frequency response, sensitivity and maximum SPL make it an ideal choice for recording a wide range of audio content.

Sound Quality

Engineers know the Manley Microphone for its high sound quality. It produces crystal clear recordings with exceptional depth and warmth. The following sections will discuss these aspects of its sound quality.

Clarity

The Manley Microphone produces clear and precise sound. It captures every detail of the sound source, making the recording sound as natural as possible. The microphone’s frequency response range is from 10Hz to 30kHz, which is wider than most microphones in its class. This wide frequency range ensures that all nuances of the sound source are captured, resulting in a more natural and clear recording. With this microphone, you can be sure that what you record is what you hear.

Warmth

The warmth produced by the Manley Microphone is what sets it apart from other microphones. The microphone’s unique design, which includes a dual-triode vacuum tube, produces a warm, tube-like sound that is highly sought after in the recording industry. This warmth gives recordings a natural and inviting sound that draws the listener in. The microphone is ideal for recording vocals, acoustic instruments, and anything that requires a warm and natural sound.

Depth

The Manley Microphone produces recordings with exceptional depth. The microphone’s large diaphragm condenser capsule captures sound from a wide area, resulting in a more expansive sound that feels immersive. The microphone’s cardioid polar pattern is particularly effective at reducing unwanted sounds and capturing sound from the front, resulting in a cleaner sound with more depth. With this microphone, you can be sure that your recordings will have exceptional depth and dimension.

Manley Reference Cardioid Microphone

Credit: www.manley.com

Comparisons To Other High-end Microphones

The Manley is a top-notch microphone with excellent quality. Compared to other high-end microphones, it provides better clarity and accuracy in capturing sound. Its unique design results in a warm and natural sound that is unmatched in the market.

Comparisons to Other High-End Microphones When it comes to high-end microphones, the Manley Reference Cardioid Microphone is often compared to other popular models like the Neumann U87 and the AKG C414. Let’s take a closer look at the differences between these microphones. Neumann U87 The Neumann U87 is another popular model among audio professionals. It has a wider frequency range than the Manley, ranging from 20Hz to 20kHz, which makes it suitable for capturing a wider range of sound.

However, the U87 is known to have a slightly boosted low-end response, which may or may not be desirable depending on the recording situation. The U87 also has a switchable polar pattern, allowing for more versatility in recording. AKG C414 The AKG C414 is a versatile microphone that offers multiple polar patterns, making it suitable for a wide range of recording situations. It also has a wider frequency response than the Manley, ranging from 20Hz to 20kHz. The C414 has a slightly brighter high-end response compared to the Manley, which can be useful when recording vocals or acoustic instruments.

Practical Tips for Manley Reference Cardioid

However, some users have found that the C414 can be a bit more sensitive to room acoustics and background noise. In conclusion, while the Manley Reference Cardioid Microphone may not have the widest frequency range or the most polar patterns, it has its own unique sound that has made it a favorite among many audio professionals. Whether you’re recording vocals, instruments, or anything in between, the Manley Reference Cardioid Microphone delivers exceptional clarity and warmth that is sure to impress.

Applications For The Manley Reference Cardioid Microphone

The Manley Reference Cardioid Microphone is the perfect choice for professional audio recording. It captures sound with exceptional detail and clarity and suits a range of applications. Whether you are recording vocals, acoustic instruments, or drum overheads, the Manley Reference Cardioid Microphone delivers outstanding results.

Vocals

Recording vocals requires a microphone that can capture the singer’s voice with clarity and detail. The Manley Reference Cardioid Microphone is an excellent choice for recording vocals. Thanks to its cardioid polar pattern, it minimizes background noise and captures the singer’s voice with exceptional clarity and detail. You can use the Manley Reference Cardioid Microphone to record everything from soft ballads to high-energy rock songs.

Acoustic Instruments

When it comes to recording acoustic instruments, you need a microphone that can capture the instrument’s natural tone and sound quality. The Manley Reference Cardioid Microphone is an excellent choice for recording acoustic guitars, mandolins, violins, and other stringed instruments. Thanks to its exceptional dynamic range and frequency response, it can capture the nuances of the instrument’s sound with remarkable accuracy.

Drum Overheads

When recording drums, using high-quality overhead microphones is crucial. The Manley Reference Cardioid Microphone is a great choice for drum overheads. It is capable of capturing the full range of frequencies produced by the drum kit, from the crispness of the cymbals to the deep thump of the bass drum. Whether you are recording a rock band or a jazz trio, the Manley Reference Cardioid Microphone will ensure that you get excellent results.

Manley Reference Cardioid Microphone

Credit: www.sweetwater.com

Frequently Asked Questions For Manley Reference Cardioid Microphone

What Is The Noise Of Manley Reference Cardioid?

The Manley has an extremely low noise floor with a maximum SPL handling capability of 150dB. The microphone produces a warm sound with smooth highs and articulate midrange. Its polar pattern helps to reject noise from the rear of the microphone.

What Is The Frequency Response Of The Manley Reference Cardioid Mic?

The frequency response of the Manley Reference Cardioid mic ranges from 10Hz to 30kHz.

Does Manley Reference Need Phantom Power?

No, the Manley reference does not require phantom power. This microphone has a dedicated power supply that must be used to provide the necessary voltage for operation.

What Are Cardioid Mics Best For?

Cardioid microphones are best for capturing sound from the front and blocking unwanted noise from the sides and back. They are ideal for recording vocals, podcasts, and instruments in live performances. Cardioid mics are also useful for sound reinforcement in rooms with high background noise levels.

Conclusion

To sum up, Manley Reference Cardioid Microphone is a quality product that can transform your recording experience. The microphone is designed to capture clear and rich sounds, making it perfect for professional studios and musicians. With its seamless integration with a range of audio equipment, you can easily incorporate this mic into your recording setup.

Upgrade your recording toolset with the Manley Reference Cardioid Microphone.

Categories
Archive

Creative Chord Writing Tips

Creative chord writing tips include experimenting with chord progressions, using inversions, adding extensions, and exploring unconventional chord voicings. Developing a unique sound and style through chord writing can be challenging, but with practice and creativity, it can lead to memorable and impactful music.

Chord writing is an essential part of music creation, and it can be both exciting and challenging. Whether you’re a beginner or an experienced musician, exploring new ways to create unique chord progressions can help you stand out as an artist.

We’ll explore some creative chord writing tips that you can apply to your music. From experimenting with chord progressions to using inversions and extensions, we’ll cover various techniques that can help you create exciting and unique chords. So, let’s get started!

Why Chords Matter

Chords are a crucial element in music composition as they lay the foundation for melodies and harmonies. With creative chord writing tips, you can add variety and dimension to your music by experimenting with chord progressions and inversions.

As a musician, you must have heard of the phrase “chords matter.” If you are wondering why they matter, then let me tell you that chords are the backbone of any song. They set the tone and the mood for the entire track. In this post, we will discuss the importance of chords and how they can help you in creating your own unique sound.

Establishing The Mood

The first reason why chords matter is that they establish the mood of the song. The chords you choose will give the listener an idea of what to expect from the song. For example, if you use minor chords, the song will have a sad and mournful feel, while major chords will give it a happy and upbeat vibe. Music lovers are often attracted to the type of mood a song can evoke, and chords play a vital role in creating these moods. Hence, it’s important to choose the right chords to set the desired mood.

Finding Your Own Sound

Another reason why chords matter is that they help you find your own sound. You can experiment with different chord progressions, and through this experimentation, you can create a unique sound that is distinctively yours. Finding your own sound is crucial for any musician because it’s what sets you apart from others and makes you stand out. It’s often a gradual process, but with patience and practice, you can get there. If you are struggling with chord progression, one great way to start is by understanding the basic rules about them. You can use these rules to build chord progression that suits your desired tone color. In conclusion, chords play a crucial role in creating music and help establish the tone and mood of a song. Learning how to utilize them creatively can help you develop a unique sound that sets you apart from others.

Playing With Voicings

Playing with voicings is an essential skill for creative chord writing. Experimenting with different chord structures and voicings can give your music a unique and fresh sound, allowing you to stand out from the crowd. With these tips, you can start crafting complex and interesting chord progressions that will captivate your listeners.

Playing with voicings can add a completely different dimension to your chord progressions. Voicings refer to the different ways in which notes of a chord are arranged and spread across different octaves. Playing with voicings can help you create unique harmonies and add a fresh twist to your existing chord progressions.

Exploration With Inversions

Inversions are an effective tool for changing the character and mood of your chord progressions. Inversions refer to the rearrangement of the notes of a chord so that a note other than the root becomes the lowest note. This results in different chord voicings and can give a completely different feel. To explore inversions, try inverting the lowest note of the chord, which is usually the root note, to create a first inversion, second inversion, or even third inversion. This can take a simple chord progression and add a touch of sophistication that can make your music sound more compelling.

Dissonance For Effect

Dissonance can also be used to create unique harmonies. It refers to the use of notes that clash with each other and create a sense of tension that can be resolved by moving to a consonant chord. Dissonant chords can add a sense of drama and intrigue to your music. To create dissonance, try adding notes that are a half step away from the notes in your chord. For example, you can add a major seventh or a minor ninth to a chord to create a dissonant sound that can be resolved by moving to a consonant chord. This technique can add complexity and interest to your music and can separate you from other songwriters. In conclusion, playing with voicings can be a great way to add some new flavors to your chord progressions. You can explore inversions and dissonance to create unique harmonies that can make your music sound more polished and sophisticated. Give these techniques a try and see how they can elevate your songwriting game.

Breaking The Rules

Discover innovative ways to elevate your chord writing game by challenging conventional practices. Experiment with unconventional chord progressions, modulations and inversions to create fresh, original soundscapes. Step outside your comfort zone and take risks to break the rules and broaden your creative horizons.

Using Unexpected Chords

Chord progressions are the backbone of any song, but sometimes sticking to the same old chords can lead to a predictable and uninspiring sound. One way to shake things up is by using unexpected chords, or chords that don’t traditionally fit within a particular key. For example, if you’re playing in the key of C major, you might throw in a Bb chord (which is not normally found in C major) to add some tension and interest to your progression. Not only does this make your music more interesting, but it also helps you stand out from the crowd.

Modal Interchange

Modal interchange is a technique that involves borrowing chords from parallel keys, or keys that share the same tonic note. For example, if you’re playing in the key of C major, you might borrow chords from the key of C minor to add some color and complexity to your progression. This technique works particularly well for creating emotional and evocative music, as you can use the borrowed chords to modulate between different modes and tonalities.

Conclusion

Instead of sticking to the same old chord progressions, try breaking the rules by using unexpected chords and modal interchange to add complexity and interest to your music. By incorporating these techniques into your creative chord writing, you’ll be able to create music that not only sounds unique and original but also captures the attention of your audience.

Creative Chord Writing Tips

Credit: tomhess.net

Layering Techniques

Layering techniques are an effective way to create depth and interest in your chord writing. By combining different chord progressions and adding layers of instrumentation, you can create a unique and dynamic sound that captures your audience’s attention. Experiment with adding and subtracting layers to find the perfect balance for your song.

Layering Techniques are a crucial aspect of Creative Chord Writing. By experimenting with different textures and harmonizing techniques, you can breathe fresh life into your compositions and produce more dynamic and exciting music. Two essential skills to accomplish this are adding texture with arpeggios and harmonizing with chord scales. Here are some tips to help you master these techniques and take your chord writing to the next level.

Adding Texture With Arpeggios

Arpeggios are a powerful tool to add depth and texture to your compositions. Rather than playing entire chords, you can break them down into individual notes and play them in a sequence. This technique can add complexity and interest to your music without making it sound cluttered or overwhelming. Here are some tips to help you use arpeggios to layer your chords effectively:

  • Experiment with different inversion techniques. Inverting your arpeggios can help to create different textures and moods within your music.
  • Try using different rhythms. Varying the rhythm of your arpeggios can help to create more interest and prevent your music from sounding too repetitive.
  • Use arpeggios to build tension and release. By playing arpeggios leading up to a chord change, you can create a sense of anticipation and excitement in your music.
  • Try layering multiple arpeggios together. Experiment with different combinations to create unique and interesting textures in your music.

Harmonizing With Chord Scales

Using chord scales is another fundamental technique that you can use to create a more complex and layered sound in your compositions. By harmonizing with chord scales, you can choose notes that work well together and produce a more cohesive and harmonic melody. Here are some tips to help you use chord scales to layer your chords effectively:

  1. Start with a basic scale. Choose a key and identify the corresponding scale that matches your chord progression.
  2. Identify the chords in your progression. Take the chords in your progression and match them to the notes in your scale.
  3. Create harmonies. Take the notes in your scale that match your chords and use them to create harmonies and counter-melodies.
  4. Use inversions. As with arpeggios, using inversions can help to create different textures and moods within your music.
  5. Experiment with different scales. Don’t be afraid to try different scales and modes to create unique and interesting tonalities in your music.

In conclusion, mastering layering techniques is a crucial component of Creative Chord Writing. By using arpeggios and chord scales, you can create more complex and harmonically interesting music that keeps your listeners engaged and captivated. Experiment with different techniques, rhythms, and scales to create music unique to you and your style.

Embracing Technology

The world today is constantly advancing in technology, and the music industry is no exception. With the numerous advances in technology, music creators can now explore newer ways to create music and sound that will capture the attention of their listeners. Embracing technology is essential for every artist who desires to keep up with current trends and advancements in the music industry.

Synthesizer Sound Design

Synthesizer sound design is an essential aspect of chord writing that cannot be overemphasized. It is a process that enables you to put your creativity to work by experimenting with different sound patches and settings. With a thorough understanding of your tools, you can select sounds that will complement your chord progressions.

Every chord you create on your instrument produces a sound. By embracing technology, you can alter this sound to suit your taste. Instead of sticking to traditional sounds, synthesizer sound design allows you to create unique and intriguing sounds that would set your music apart from others.

Loop-based Composition

Loop-based composition is another creative way to approach chord writing, which is made easier with technology. It is a process whereby you build your chords and melody around a pre-recorded loop or rhythm. The loop could be a drumbeat, guitar riff, or any other instrument/voice recording that has a steady groove and timing.

Loop-based composition is a fantastic technique, suitable for any music genre. It is an excellent way to ensure that your music has a consistent sound throughout the song. With loop-based composition, you can build your chords and melody around the pre-existing loop, ensuring that each section of your song is well-coordinated.

In conclusion, creative chord writing is vital for every music creator who wants to stand out in the industry. Embracing technology is an excellent way to unleash your creativity and introduce new sounds to your music. Synthesizer sound design and loop-based composition techniques are just a few ways to embrace technology and take your chord writing skills to the next level.

Collaborating With Others

Collaborating with others is an effective way to expand your creative chord writing skills. The exchange of ideas can help you develop new techniques, diversify your sound, and infuse fresh musical elements into your compositions. In this post, we will explore how different collaborations can enhance your creativity and chord-writing abilities, beginning with songwriting partnerships and working with producers or arrangers.

Songwriting Partnerships

Songwriting partnerships are a great way to work on creative chord writing together. Collaborating with someone who complements your musical style or has different strengths can help you produce music that is fresh and unique. When working in a partnership, it’s essential to approach the process with an open mind and be willing to compromise. This approach will ensure that each of you contributes significantly to the writing process.

Working With A Producer Or Arranger

Working with a producer or arranger is an effective way to improve the creative chord-writing process. They can provide an objective perspective on the song’s structure and suggest chord progressions that can elevate the composition. A producer or arranger can also introduce new instruments or sounds that you may not have initially considered. When working with a producer or arranger, ensure that you communicate your vision clearly, and don’t be afraid to ask for their input. This approach will drive collaboration and lead to better results.

Collaborating with others is an effective way to enhance your creative chord writing skills. Songwriting partnerships and working with producers or arrangers can infuse fresh musical elements into your compositions and help you diversify your sound. Remember to approach the collaboration with an open mind and communicate your vision effectively. These collaborative efforts can be a significant factor in improving your songwriting abilities.

Putting It All Together

Creating and experimenting with chords and chord progressions is an exciting part of the songwriting process. But once you have a grasp on the basic concepts, it’s time to put it all together and make your music stand out. Here are some tips to help you with putting all of your chord writing knowledge together:

Keeping A Chord Journal

One of the best ways to keep track of your chord progressions is to keep a chord journal. This can be done whether you’re using a recording software or a simple notepad. Jot down each chord progression you come up with in your journal so you can easily revisit and build upon them later. Additionally, keeping notes about the context in which the chords were created can help when trying to recreate a similar feeling later on.

Studying Your Favorite Artists

You can also gain inspiration from your favorite artists, but studying them can be especially useful. Listen to their music and try to identify the specific chords and progressions they used. Take note of the patterns and structures they employ, as they can provide inspiration for new chord variations.

Experimenting With Chord Variations

Once you have a good understanding of chord progressions, try experimenting with the variations – add and remove notes, try different tempos, and even experiment with time signatures. The possibilities are endless, and by tapping into your creativity, you can discover some amazing new chord progressions and come up with unique and exciting pieces.

Using Chord Inversions

Chord inversions are another way to add creativity to your chord progressions. A chord inversion will sound different and help to add unique flavor to your songwriting. Try inverting a chord and see what it adds to the progression, and experiment with different inversions to find the right fit for the sound you’re trying to achieve.

Conclusion

By implementing these tips, you can take your chord writing to the next level. Establishing a solid foundation in chord structures, paying attention to your favorite artists, experimenting with chord variations, and using chord inversions are all methods to help you create powerful and inspiring music. Don’t be afraid to try new things and be creative – the possibilities are endless.

Creative Chord Writing Tips

Credit: www.amazon.com

Frequently Asked Questions On Creative Chord Writing Tips

How Do You Write An Interesting Chord?

To write an interesting chord, try experimenting with unusual chord progressions or adding unexpected notes like extensions or alterations. Consider the mood and feel of the song or piece and choose chords that complement it. Use variations like inversions or arpeggios to create new sounds.

Don’t be afraid to break traditional rules if it sounds good to you!

How Do You Become Creative With Chords?

To become creative with chords, you can try experimenting with different chord progressions, altering chord inversions, and adding extensions or substitutions. You can also explore different genres and their chord structures for inspiration. Stay motivated, take a break when stuck, and practice playing with different chord combinations.

How Do You Write Chords Properly?

To write chords properly, start by learning the basics of music theory and understanding how chords are constructed. Use a chord chart or chord generator tool to help you create and label chords accurately. Practice playing chords on your instrument and experiment with different voicings to find what sounds best.

Finally, make sure to write down your chords in a clear and organized way, using standard formatting conventions.

What Is The Best Chord Progression For Songwriting?

There is no single best chord progression for songwriting. The most important thing is to choose chords that create a mood or feeling that fits the lyrics and melody of the song. Experimenting with different harmonies can help you find the right chords to convey the emotion you want to express.

Conclusion

To sum up, chord writing can seem like a daunting task at first, but it’s a skill that can be honed with practice and patience. By exploring different chord progressions, experimenting with inversions, and incorporating unique voicings, you can create music that is both creative and memorable.

Remember to trust your instincts and not be afraid to take risks, as some of the most innovative music comes from pushing the boundaries of what’s expected. With these tips in mind, you can unlock your creativity and take your chord writing skills to the next level.