Categories
Archive Audio Production

Easiest Way To Set Mix Levels For Mastering

Setting mix levels for mastering requires adjusting each track to achieve balanced volume and clarity. This ensures all elements blend harmoniously in the final mix, enhancing overall sound quality.


Mastering engineers typically use reference tracks and meters to set optimal levels, taking into account dynamics, frequency balance, and stereo width. By fine-tuning the mix levels with precision, mastering can elevate the sonic impact of a music production while maintaining consistency across different playback systems.


This process plays a crucial role in achieving professional-grade results that meet industry standards and resonate with listeners. Mastering is the final stage where mix levels are perfected, delivering a polished and cohesive sound ready for distribution and audience consumption.


Credit: www.youtube.com


The Importance Of Mix Levels In Mastering


Achieving the right mix levels in mastering is crucial to ensure a polished sound. Utilizing a reference track can help set levels accurately. It’s important to pay attention to the balance between different elements in the mix, ultimately leading to a well-mastered final product.

The Importance of Mix Levels in Mastering Setting the Foundation with Proper Mix Levels Mastering the Art of Balance In mastering, mix levels directly impact the quality and clarity of the final audio. Mastering the art of balance in mix levels is crucial for achieving a professional sound. Setting the foundation with proper mix levels ensures that each element of the song is clearly defined and contributes harmoniously to the overall sound. It optimizes the mastering process. Balancing the levels of different tracks creates a cohesive sound that enhances the listening experience. Precision in mix levels is key for a polished and dynamic final master.

Tools And Techniques For Setting Mix Levels

Tools and Techniques for Setting Mix Levels: Setting the correct mix levels for mastering is crucial for achieving a polished and professional sound.

Understanding Rms And Peak Levels

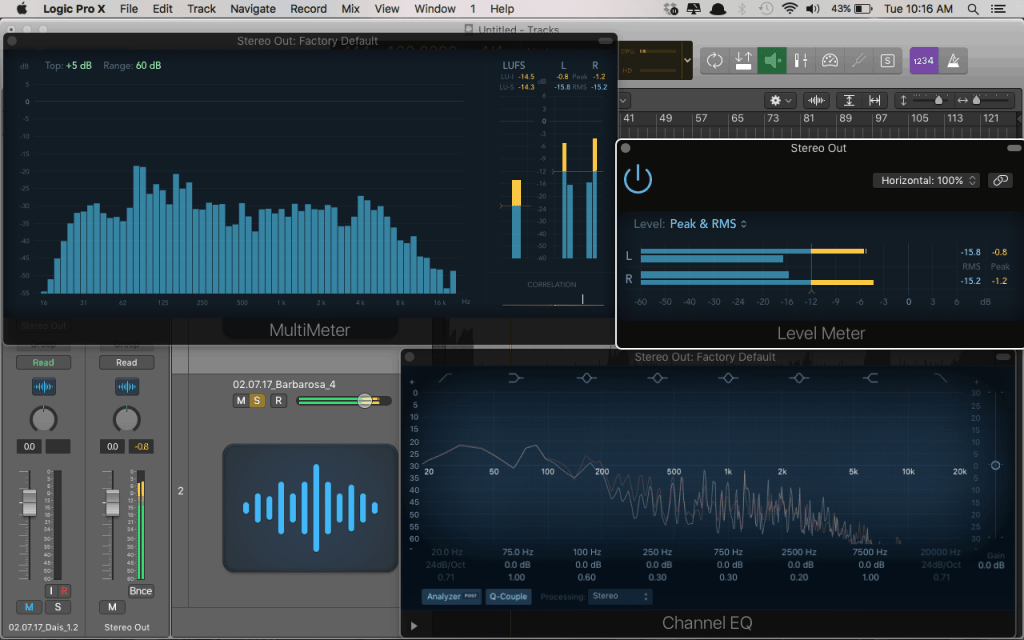
In mastering, RMS levels indicate the average volume of the mix, while peak levels show the highest volume peaks. Striking a balance between the two is key.

Utilizing Reference Tracks For Comparison

Reference tracks help you compare your mix levels with professionally mastered tracks. Use them to ensure your mix is in line with industry standards.

Practical Tips For Achieving Optimal Mix Levels

Practical Tips for Achieving Optimal Mix Levels are crucial for mastering music. It’s important to pay attention to various elements of the mix, including utilizing dynamic range processors, fine-tuning EQ and frequency balance, and other essential techniques that can elevate the overall quality of the final mix. By understanding and implementing these tips, you can achieve a balanced and professional sound that translates well across different audio systems and platforms.

Utilizing Dynamic Range Processors

One of the foundational elements of achieving optimal mix levels is the use of dynamic range processors. These tools, including compressors and limiters, help to control the dynamic range of the audio, ensuring that the volume levels are consistent and balanced. When setting mix levels, utilize compressors to tame any excessively loud peaks and apply limiters to prevent the volume from exceeding a certain threshold. By carefully adjusting these processors, you can ensure that the audio maintains a controlled and cohesive dynamic range throughout the mastering process.

Fine-tuning Eq And Frequency Balance

Another crucial aspect of achieving optimal mix levels is the careful adjustment of EQ and frequency balance. Work on fine-tuning the individual frequency bands to ensure that each element of the mix occupies its own space within the frequency spectrum. Use EQ to cut any frequencies that muddy the mix and boost essential frequencies to bring out the desired tonal characteristics. By paying attention to these finer details, you can achieve a more polished and balanced mix that translates well across different playback systems.

Mastering The Mix Levels For Different Genres


Discover the optimal mix levels for diverse music genres effortlessly with a streamlined mastering process. Achieve a balanced sound across tracks by adjusting levels with precision and ensuring a professional, polished final product.

When it comes to mastering your music, one crucial element that directly affects the quality of the final product is the mix levels. Properly setting the mix levels ensures that each instrument and element in your music is well-balanced and that the master will sound powerful and cohesive across different platforms and playback systems.

Adapting Mix Levels For Various Music Genres

It’s important to understand that different music genres require different approaches when it comes to mix levels. Here are some considerations to keep in mind:

1. Rock and Metal

Rock and metal genres are known for their heavy and energetic sound. To achieve a powerful mix, it’s crucial to emphasize the drums and guitars while maintaining clarity in vocals and other instruments. Pay close attention to the dynamic range, as rock and metal often utilize aggressive compression techniques.

2. Hip-Hop and RB

Hip-hop and R&B tracks rely heavily on the bass and drums to create a strong groove. It’s essential to ensure that the low-end elements cut through the mix without overpowering the vocals and other melodic elements. Carefully sculpting the frequencies and using sidechain compression techniques can help achieve a tight and punchy mix.

3. Pop and Electronic

Pop and electronic music often have a wide dynamic range and are known for their catchy melodies and intricate production. Achieving balance between vocals, synths, and drums is crucial to create a polished and radio-ready sound. Using automation to control the levels of different elements throughout the song can help maintain the listener’s interest.

Considerations For Mix Levels In Podcast And Speech Content

Mixing levels for podcasts and speech content require a different approach compared to music genres. The primary focus here is to ensure clear and intelligible speech without any distractions. Here are some considerations:

1. Vocal Clarity

When it comes to podcasts or any speech content, the vocals should take center stage. Ensure that the spoken words are clear and easy to understand by reducing background noises and applying gentle compression to even out the dynamics.

2. Background Music and Sound Effects

If you incorporate background music or sound effects in your podcast, make sure they do not overpower the speech. Strike a balance between the volume of the music/sound effects and the vocals, ensuring that the speech is always prominent.

3. Mixing for Different Listening Environments


  • Consider how your audio will be consumed by different listeners and choose appropriate mix levels accordingly. For example, if your podcast will be primarily listened to in a car, you may need to place more emphasis on the mid-range frequencies to cut through road noise.
  • Regularly check your mix on various playback systems, including headphones, speakers, and mobile devices. This will help you ensure that your podcast sounds balanced and consistent across different platforms.


Common Mistakes And How To Avoid Them

When it comes to audio mastering, setting the right mix levels is crucial for achieving a polished and professional-sounding result. However, many beginners and even experienced engineers make common mistakes that can negatively impact the final outcome. To help you avoid these pitfalls, let’s take a closer look at two key issues: over-processing and clipping.

Over-processing

Over-processing is a common mistake that occurs when too many effects or plugins are applied during the mastering process. While it may seem tempting to add multiple compressors, equalizers, and other processors to enhance the sound, excessive processing can lead to a loss of clarity, dynamics, and overall balance.

To avoid over-processing, adopt a less-is-more approach. Carefully select the necessary plugins and avoid using effects unnecessarily. Remember, the goal is to enhance the mix rather than overpower it. Take the time to critically listen to each processing element and make sure it contributes positively to the overall sound.

Clipping Issues

Another common mistake that can have a detrimental impact on your master is clipping. Clipping occurs when the audio signal exceeds the maximum digital or analog level, resulting in distortion and a loss of detail. This can happen if the mix levels are not properly adjusted before the mastering stage.

To prevent clipping, it’s essential to set appropriate mix levels during the mixing phase. Pay attention to the peak levels of each individual track and ensure that they don’t exceed the desired limit. Proper gain staging and using a limiter judiciously can help maintain the integrity of the audio and avoid clipping issues.

Ignoring mix levels can have several pitfalls that affect the overall quality of your master. By avoiding over-processing and clipping issues, you can ensure that your final mastered track maintains its dynamics, clarity, and sonic balance.

Easiest Way To Set Mix Levels For Mastering: Mastering the Art of Balance


Credit: www.avid.com


Easiest Way To Set Mix Levels For Mastering: Mastering the Art of Balance


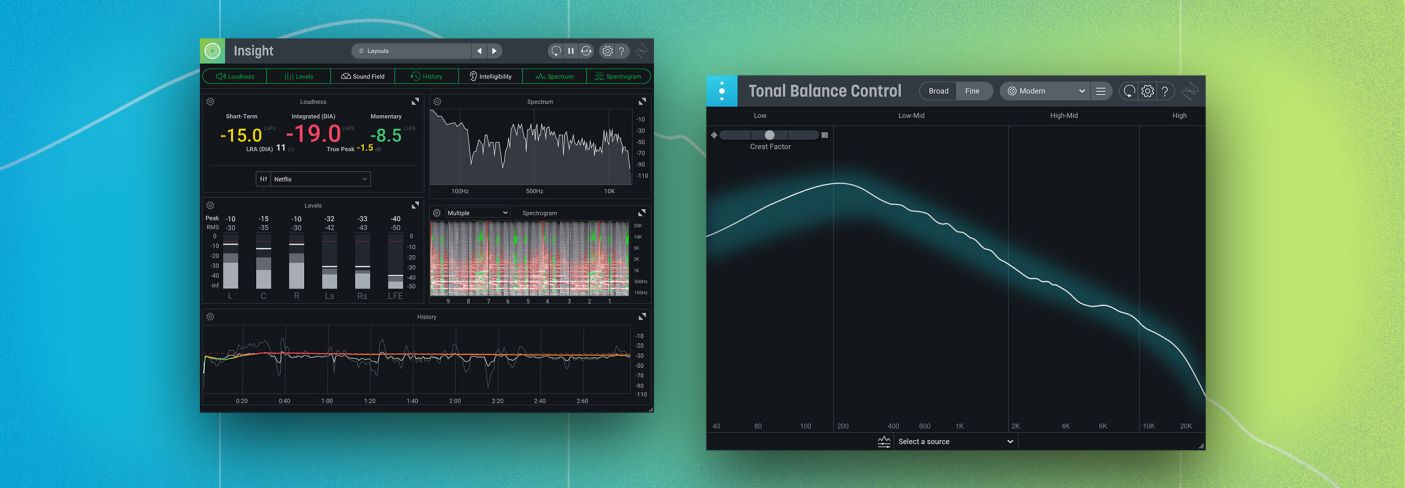
Credit: www.izotope.com


Frequently Asked Questions Of Easiest Way To Set Mix Levels For Mastering


How Do You Set Mix Levels For Mastering?


Setting mix levels for mastering involves adjusting the volume levels of different audio elements like vocals, instruments, and effects. It requires careful listening and balancing to achieve a cohesive and well-balanced sound. Professional mastering engineers often use tools like EQ, compression, and limiting to fine-tune the mix levels for a polished final product.


What Is The Purpose Of Setting Mix Levels For Mastering?


Setting mix levels for mastering ensures that all elements of a song are balanced and can be heard clearly. It helps in achieving a cohesive sound, maximizing the impact of the music, and creating a professional and polished final product.


Proper mix levels also prevent any audio elements from overpowering or getting lost in the mix.


Can Setting Mix Levels Improve The Overall Sound Quality?


Yes, setting mix levels is crucial for improving the overall sound quality of a music track. Well-balanced mix levels ensure that each audio element can be heard clearly and contributes to the overall sonic experience. It allows for better definition, clarity, and separation of instruments and vocals, resulting in a more professional, polished, and enjoyable final sound.


Conclusion


Mastering is a crucial step in music production. Proper mix levels can make or break a song. By following these tips, you can ensure that your mix levels are set correctly for mastering. With practice and patience, you can improve the quality of your final product and take your music to the next level.


Categories
Archive Audio Production

Troubleshooting VST Plugins: Ableton Not Showing

If VST plugins are not showing up in Ableton, check the plugin folder path settings. Verify plugin compatibility and try rescanning.


Experiencing issues with VST plugins not appearing in Ableton Live can be frustrating for music producers and audio engineers alike. Ensuring that your plugins are correctly installed and the plugin folder path is set up accurately is crucial for seamless integration within the Ableton software.


We will explore common reasons why VST plugins may not be showing up in Ableton Live and provide solutions to troubleshoot and resolve this issue. By following these steps, you can optimize your workflow and unlock the full potential of your music production endeavors.


Common Issues With Vst Plugins In Ableton Live


Having trouble seeing VST plugins in Ableton Live? This issue can arise due to incorrectly installed plugins or mismatched file paths. To resolve this, ensure that your plugins are installed correctly in the correct folders and try rescanning for plugins in Ableton Live to include any that may have been missed during the initial scan.

Compatibility With Ableton Live

Installation Problems

Common issues with VST plugins in Ableton Live can be frustrating for music producers. These issues often revolve around compatibility with Ableton Live and installation problems.

This Section Looks Into Two Key Areas Where Troubleshooting Becomes Essential:

Troubleshooting VST Plugins: Ableton Not Showing


Credit: forum.waves.com


Steps To Troubleshoot Vst Plugins In Ableton Live

Steps to Troubleshoot VST Plugins in Ableton Live

Check Plugin Compatibility

Make sure VST plugins are compatible with your version of Ableton Live to ensure smooth operation.

Verify Plugin Installation

Double-check installation of VST plugins in the correct folder to avoid any issues.

Rescan Plugin Folder

Ensure proper rescanning of the plugin folder in Ableton Live settings to detect any missing plugins.

Advanced Troubleshooting Techniques

Advanced Troubleshooting Techniques

Updating Audio Drivers

If you encounter VST plugins not showing up in Ableton Live, a common culprit could be outdated or incompatible audio drivers. Updating your audio drivers can often resolve this issue. Access the Device Manager on your computer and locate the audio drivers. Check for any available updates and install them to ensure compatibility with Ableton Live.

Resetting Ableton Live Preferences

Sometimes, inaccessible VST plugins in Ableton Live can be attributed to corrupted preferences or settings. Resetting Ableton Live preferences can help in resolving this issue. To do this, close Ableton Live and locate the Preferences.cfg file. After backing up the file, delete it from the folder. Upon reopening Ableton Live, a new Preferences.cfg file will be generated, potentially resolving the problem.

Community Recommendations And Resources

When it comes to VST plugins not showing up in Ableton, finding community recommendations and resources can be incredibly valuable. Online forums and communities, as well as additional troubleshooting guides, offer a wealth of knowledge and solutions from experienced users. Let’s explore these helpful resources and discover how they can assist you in resolving any issues you may be facing.

Online Forums And Communities

Online forums and communities are excellent platforms for connecting with fellow Ableton users who have encountered similar issues with VST plugins not appearing. Here are a few highly recommended online forums and communities:

  1. Ableton Forum: Known for its active community, the Ableton Forum is a go-to resource for troubleshooting and discussion related to Ableton Live. You can find specific threads dedicated to VST plugin issues, where experienced users share their insights and potential solutions.
  2. Reddit /r/Ableton: Reddit is a popular online platform with thousands of active communities. The /r/Ableton subreddit is a vibrant hub for Ableton users, offering a dedicated space for troubleshooting, sharing tips, and seeking assistance. The community’s collective knowledge can help you troubleshoot and address VST plugin visibility concerns quickly.
  3. KVR Audio: KVR Audio is a comprehensive news, information, and discussion platform for audio software and hardware. Its community forum is a treasure trove of information on VST plugins and related topics. By searching or posting in the appropriate sections, you can potentially find solutions or gain insights from industry professionals and experienced users.

Additional Troubleshooting Guides

Apart from online communities, various troubleshooting guides can provide step-by-step instructions on resolving VST plugin visibility issues in Ableton. These guides often offer detailed explanations and workarounds. Here are a few recommended troubleshooting guides:

  • Ableton Help Center: The official Ableton Help Center is a reliable resource for resolving common software issues. The center includes a comprehensive troubleshooting section specifically dedicated to resolving VST plugin problems. The step-by-step guides provided can lead you through the process of troubleshooting and resolving visibility issues.
  • Plugin Manufacturer’s Support: In many cases, plugin manufacturers offer dedicated support pages or forums. These resources provide troubleshooting guides tailored to their specific plugins. You can often find guides addressing plugin visibility issues alongside other common concerns. Many manufacturers also have responsive support teams ready to assist users in real-time.
  • YouTube Tutorials: YouTube is an excellent source for video tutorials on resolving VST plugin issues in Ableton. Many creators specialize in providing step-by-step demonstrations on troubleshooting plugin visibility problems. Visual walkthroughs can often be more intuitive for new users or those who prefer a more visual learning experience.

By leveraging these online forums, communities, and troubleshooting guides, you can tap into a vast pool of knowledge and experience. Remember, each issue may have multiple solutions, so it’s essential to explore different resources and consider multiple perspectives to find the solution that works best for you.


Final Tips For A Smooth Vst Plugin Experience

When it comes to using VST plugins in Ableton, it’s essential to ensure a smooth experience. While we have discussed troubleshooting methods for VST plugins not showing up, there are a few final tips to consider. By following these guidelines, you can prevent future issues and make the most of your VST plugins.

Regular Software Updates

Regular software updates are crucial for maintaining a seamless VST plugin experience. Developers frequently release updates to fix bugs, enhance performance, and introduce new features. It’s vital to stay up-to-date with both Ableton and your VST plugins to avoid compatibility issues and ensure optimal performance.

If you encounter plugins not showing up in Ableton, it’s worth checking if either the DAW or the VST plugins need updating. Updating your software can often resolve compatibility conflicts and resolve any missing plugin issues you may face.

Back Up Your Projects

Backing up your projects should be a regular practice, regardless of your VST plugin experience. While rare, unexpected issues or computer crashes can sometimes lead to data loss. Therefore, it is crucial to create backups of your projects to avoid any potential headaches.

To ensure you always have access to your VST plugins and their related settings, consider backing up both your Ableton project files and the associated plugin folders. By doing so, you can easily restore your projects and settings in the event of any errors or system failures, providing you with peace of mind.

In addition to backing up your projects regularly, it’s also recommended to keep a separate copy of your plugins’ installation files as an extra precaution. Should you need to reinstall your plugins for any reason, having the installation files readily available can save you time and effort.

By applying these final tips for a smooth VST plugin experience – regular software updates and backing up your projects – you can minimize potential issues and maximize your creative workflow. Remember, prevention is key when it comes to ensuring a seamless experience with your VST plugins in Ableton.

Troubleshooting VST Plugins: Ableton Not Showing


Credit: www.reddit.com


Troubleshooting VST Plugins: Ableton Not Showing


Credit: help.ableton.com


Frequently Asked Questions On Vst Plugins Not Showing Up In Ableton


Why Are My Vst Plugins Not Showing Up In Ableton?


There could be several reasons why your VST plugins are not appearing in Ableton. Firstly, ensure that you have installed the plugins correctly and they are compatible with your version of Ableton. Additionally, check if the plugins are properly scanned and located in the correct folder designated by Ableton.


Lastly, try resetting your VST plugin cache in Ableton’s preferences to resolve any potential issues.


How Can I Fix Vst Plugins Not Showing Up Issue In Ableton?


To troubleshoot the issue of VST plugins not appearing in Ableton, follow these steps:
1. Verify if the plugins are installed correctly. 2. Ensure the plugins are compatible with your version of Ableton. 3. Check if the plugins are scanned and located in the correct folder. 4. Reset the VST plugin cache in Ableton preferences. Following these steps should resolve the problem and make your VST plugins visible in Ableton.


Are There Any Known Compatibility Issues Between Ableton And Vst Plugins?


Yes, there can be compatibility issues between Ableton and certain VST plugins. It is essential to ensure that the plugins you are using are compatible with your version of Ableton. Check the plugin manufacturer’s website or support documentation to confirm compatibility.


In case of any compatibility issues, consider updating Ableton or reaching out to the plugin developer for further assistance.


Why Are Some Vst Plugins Visible While Others Are Not In Ableton?


If certain VST plugins are visible in Ableton while others are not, there may be a few reasons. Firstly, make sure that the plugins in question are installed correctly and scanned by Ableton. Additionally, check if the plugins are enabled or activated within Ableton’s preferences or plugin manager.


If the issue persists, try reinstalling the problematic plugins or contacting the plugin manufacturer for further support.


Conclusion


In solving VST plugin issues, troubleshooting and updating can make all the difference. Try restarting Ableton and your computer, or check the plugin location settings. Keep your plugins up to date and ensure they’re compatible with your software version. With these simple steps, you can get your VST plugins showing up in Ableton hassle-free.

Categories
Archive Audio Production

Common Mistakes Edm Producers Make When Producing: Avoid These Fatal Errors

Common mistakes EDM producers make include poor mixing, overusing effects, neglecting song structure, and avoiding feedback. These issues can hinder the overall quality and success of a track.


EDM production requires attention to detail, creativity, and a deep understanding of the genre’s specific requirements. By avoiding these common pitfalls and focusing on honing their skills, producers can elevate their music to new heights and stand out in the competitive EDM industry.


We will delve into the specific mistakes that EDM producers often make and provide actionable tips on how to avoid them, ultimately improving the quality of their productions and increasing their chances of success.

Common Mistakes Edm Producers Make When Producing: Avoid These Fatal Errors


Credit: www.aimm.edu


Skipping Music Theory

Skipping Music Theory: One of the most common mistakes EDM producers make is lack of foundational knowledge. This includes skipping music theory basics, which leads to inadequate melodic and harmonic development.

Lack Of Foundational Knowledge

Lack of foundational knowledge: Skipping fundamentals like music theory can hinder an EDM producer‘s growth. It leads to inadequate melodic and harmonic development, impacting the overall quality of the music.

Inadequate Melodic And Harmonic Development

Inadequate melodic and harmonic development: Without a strong understanding of music theory, producers struggle to create captivating melodies and harmonies. This limits the depth and complexity of their tracks.

Overusing Pre-made Samples

When producing EDM music, one common mistake many producers make is overusing pre-made samples. This can lead to a lack of originality and creativity in the final tracks.

Lack Of Originality

Using the same pre-made samples frequently results in songs sounding generic and uninspired.

Limited Creativity And Uniqueness

Relying heavily on pre-made samples can limit the potential for innovative sound design and unique musical elements.

Neglecting Sound Design

When it comes to electronic dance music (EDM) production, neglecting sound design is a common mistake that many producers make. Sound design is a crucial aspect of creating unique and impactful tracks, yet it is often overlooked in favor of other production elements. This can result in generic, uninspired sounds that fail to capture the listener’s attention.

Overreliance On Presets

Many EDM producers fall into the trap of relying too heavily on presets when creating their tracks. While presets can be a convenient starting point, overusing them can lead to generic, unoriginal sounds that lack character. Producers should strive to customize and tweak presets to create their own signature sound, rather than relying solely on out-of-the-box options.

Failure To Experiment With Synthesis

Another common mistake is the failure to experiment with synthesis. Producers may stick to familiar techniques and sounds, resulting in a lack of innovation and creativity. It’s essential for producers to explore various synthesis methods, such as subtractive, FM, and wavetable synthesis, to expand their sonic palette and create truly unique sounds that set their tracks apart.

Common Mistakes Edm Producers Make When Producing: Avoid These Fatal Errors


Credit: dowdenmusic.com


Ignoring Proper Mixing And Mastering

When it comes to producing electronic dance music (EDM), many producers tend to focus primarily on creating catchy melodies, intricate synth patterns, and hard-hitting beats. While these elements are undeniably important, there is one crucial aspect that is often overlooked: proper mixing and mastering.

Muddy Or Cluttered Mixes

A common mistake EDM producers make is producing muddy or cluttered mixes. A muddy mix is characterized by an excessive buildup of low-frequency sounds that can make the overall audio quality less clear and defined. This usually happens when multiple elements, such as basslines, kicks, and other low-end elements, occupy the same frequency range without proper EQing or leveling.

Mixing these elements correctly is essential to achieve a balanced and coherent sound. By using EQ techniques to carve out space for each sound, producers can ensure that every instrument and sound can be heard clearly in the mix. Additionally, panning and stereo imaging techniques can be employed to create separation and width, enhancing the overall sonic experience.

Inconsistent Sound Quality Across Tracks

Another mistake often made by EDM producers is inconsistent sound quality across tracks. Each track within an EP or album should have consistent sound characteristics to maintain a cohesive listening experience. Inconsistencies in sound quality can lead to a disjointed and unprofessional result.

To avoid this mistake, producers should pay attention to aspects such as volume levels, EQ settings, and dynamic range. Using reference tracks as a benchmark can be incredibly helpful in ensuring consistency across different songs. By meticulously fine-tuning these elements and comparing them to well-produced tracks, producers can achieve a balance that ties the entire project together.

Mastering, the final stage of the production process, is equally crucial in obtaining a professional and polished sound. It involves taking the final mix and enhancing it to sound its best across various playback systems. Ignoring the importance of mastering can result in weaker sound quality and an overall underwhelming listening experience.

Failing To Develop A Signature Sound


One of the common mistakes EDM producers make is failing to create a unique signature sound. It is essential to develop an individualistic style to stand out in the competitive music industry. By experimenting with different sounds and techniques, producers can carve their own distinct sonic identity, attracting a dedicated fan base.

Copying Trends Instead Of Innovating

One of the most common mistakes that EDM producers make is to fall into the trap of copying trends instead of innovating. When producers see a particular style or sound becoming popular, it’s easy for them to try and replicate it in the hopes of gaining success. However, this approach often leads to a lack of authenticity and originality in the music. It’s important for producers to remember that trends come and go, and what is popular today may not be tomorrow. By focusing too much on copying what’s already out there, they miss the opportunity to develop their own unique sound that sets them apart from the crowd.

Lack Of Personal Artistic Identity

Another common mistake EDM producers make is a lack of personal artistic identity. Many producers struggle to define who they are as artists and what kind of music they want to create. This often leads to a scattered and inconsistent body of work that lacks a cohesive identity. Developing a personal artistic identity is crucial for success in the EDM industry. It allows producers to have a clear vision of their sound and style, making their music more memorable and recognizable to listeners. Without a strong artistic identity, producers risk getting lost in the saturated market of EDM, making it harder for them to stand out and gain a loyal fanbase. In conclusion, failing to develop a signature sound is a grave mistake that can hinder the success of EDM producers. Copying trends may offer short-term gains, but it’s important for producers to focus on long-term growth by innovating and staying true to their own artistic vision. It’s also crucial for producers to develop a personal artistic identity to create music that is unique and reflective of who they are as artists. By avoiding these common mistakes, producers can increase their chances of achieving success in the fiercely competitive world of EDM.

Common Mistakes Edm Producers Make When Producing: Avoid These Fatal Errors


Credit: www.mcmachinery.com


Frequently Asked Questions On Common Mistakes Edm Producers Make When Producing


What Are The Common Mistakes Edm Producers Make When Producing?


Some common mistakes that EDM producers make when producing include not paying attention to mixing and mastering, overusing effects and plugins, and lacking originality in their sound. These mistakes can hinder the quality and uniqueness of their music.


Why Is Paying Attention To Mixing And Mastering Important In Edm Production?


Paying attention to mixing and mastering is important in EDM production as it ensures that all elements of the track blend well together and sound balanced. This process helps enhance the overall sound quality and allows the music to be enjoyed on different devices and platforms.


How Can Overusing Effects And Plugins Negatively Impact Edm Production?


Overusing effects and plugins can negatively impact EDM production by cluttering the mix and making it sound unnatural. It can lead to a loss of clarity and dynamics in the music. It’s important to use effects and plugins judiciously, focusing on enhancing the overall sound rather than relying on them excessively.


Why Is Originality Important In The Edm Music Scene?


Originality is important in the EDM music scene as it helps artists stand out from the crowd. It allows them to create a unique sonic identity, build a dedicated fan base, and attract the attention of industry professionals. Being original is key to success in a competitive industry like EDM.


Conclusion


In improving your EDM production, it’s essential to steer clear of common mistakes. By staying mindful of sound quality, arrangement, and mixing, you can elevate your music. Always remember to prioritize originality and innovation. Consistency with learning and practicing will help you stand out in the competitive EDM industry.


Keep honing your skills and continue creating exceptional music.


https://www.youtube.com/watch?v=y3i4pvUcr8g


Categories
Archive Audio Production

Does Learning Music Theory Hold Back Your Hip Hop Producer Skills?

Learning music theory does not necessarily make you a worse hip hop producer; in fact, it can enhance your production skills. Understanding fundamental music concepts can improve your compositions and arrangements, giving you a deeper appreciation of how different elements work together in a song.


However, like any skill, it’s not a one-size-fits-all approach, and some hip hop producers may thrive without formal music theory knowledge. Ultimately, it depends on how you apply your understanding of music theory to your unique style and creative process.


We will explore the relationship between learning music theory and hip hop production, highlighting the benefits and considerations for aspiring producers.


The Impact Of Music Theory On Hip Hop Producers

Exploring whether learning music theory has a negative effect on hip hop producers is a topic that often sparks debate. Some argue that understanding traditional music theory can hinder the creativity and authenticity of hip hop production, while others believe it can enhance the overall quality of the music produced. Let’s delve into the role of music theory in hip hop production and the challenges faced by hip hop producers when learning it.

The Role Of Music Theory In Hip Hop Production

Music theory provides a foundation that can help hip hop producers in crafting melodies, harmonies, and rhythms that resonate with the audience. Understanding scales, chords, and song structure can add depth and complexity to hip hop tracks, elevating the artist’s work to new levels of artistry.

Challenges Faced By Hip Hop Producers In Learning Music Theory

  • Complexity of Concepts: Hip hop producers may find traditional music theory concepts daunting initially.
  • Balancing Creativity: Striking a balance between applying music theory knowledge and preserving the raw, innovative sound of hip hop can be challenging.
  • Time Constraints: Learning music theory while managing the demands of producing music can be time-consuming.
  • Integration into Workflow: Incorporating newly acquired music theory skills into the production process can require adjustments and experimentation.
Does Learning Music Theory Hold Back Your Hip Hop Producer Skills?


Credit: www.edmprod.com


Creativity Vs. Constraints

When exploring the impact of learning music theory on hip hop production, a key consideration is the interplay between creativity and constraints. Let’s delve into how music theory influences creative expression and the delicate balance between technical knowledge and artistic freedom.

The Influence Of Music Theory On Creative Expression

Music theory can provide a solid foundation for hip hop producers to experiment with different sounds and structures.

  • Understanding chord progressions can spark new ideas for beats and melodies.
  • Knowledge of scales and harmonies enhances the depth of hip hop tracks.

Balancing Technical Knowledge With Artistic Freedom

While music theory offers valuable insights, it’s important for hip hop producers to maintain room for their unique style and creativity.

  1. Too much focus on theory can stifle innovation and limit experimentation.
  2. Embracing a blend of theory and intuition can lead to innovative and original hip hop productions.

Innovation In Hip Hop Production


Learning music theory may enhance a hip hop producer’s skills by providing a deeper understanding of melodies and harmonies. While some argue that formal training could limit creativity, others believe it can broaden the scope of musical experimentation. Ultimately, the impact of music theory on hip hop production varies among individual producers.

Innovation in Hip Hop Production In the world of hip hop, innovation is a cornerstone of success. As hip hop culture continues to evolve, producers are constantly seeking new ways to push boundaries and create unique sounds. Breaking Traditional Music Theory Norms Hip hop production often challenges traditional music theory norms. While learning music theory can provide a strong foundation, it’s equally important for producers to feel empowered to break musical rules in pursuit of creativity. This willingness to think outside the box has been a driving force behind some of the most groundbreaking hip hop hits. Exploring Unconventional Techniques and Soundscapes Hip hop producers are known for their inventive approach to crafting beats and soundscapes. By exploring unconventional techniques, such as sampling non-musical sounds or experimenting with atypical time signatures, producers can create truly one-of-a-kind sonic experiences for listeners. This willingness to embrace the unconventional has been a key factor in the genre’s enduring appeal. In the ever-evolving landscape of hip hop production, challenging traditional music theory norms and exploring unconventional techniques are essential for fostering innovation. Through this innovative approach, hip hop producers continue to shape the future of music.

Navigating The Learning Journey


Embarking on the learning journey of music theory raises questions about its impact on hip-hop production skills. Does knowing theory hinder creativity? Understanding the balance and potential intersections of these two musical realms is essential for aspiring producers navigating their creative paths.

Effective Ways For Hip Hop Producers To Learn Music Theory

Learning music theory may seem daunting for hip hop producers who thrive on creativity and intuition. However, it can actually enhance your skills and take your production to new heights. When it comes to learning music theory as a hip hop producer, there are several effective approaches you can take:

  1. Self-Study:
    Start by exploring beginner-friendly music theory resources such as online courses, books, and tutorials. Take advantage of various digital tools and apps designed specifically for learning music theory. By dedicating consistent time to self-study, you can gradually build a solid foundation.
  2. Mentorship:
    Find a mentor who is knowledgeable in both music theory and hip hop production. A mentor can guide you through the learning process, offer personalized feedback, and share practical insights from their own experiences. Their expertise can help you bridge the gap between theoretical concepts and real-world production techniques.
  3. Collaboration:
    Collaborating with musicians who have a strong understanding of music theory can be a valuable learning experience. Working together on projects allows you to observe their application of theory and incorporate it into your own productions. Through mutual exchange and experimentation, you can cultivate a unique musical style that merges theory and hip hop elements.
  4. Practice and Application:
    Knowledge gained through theory must be put into practice to fully internalize its concepts. Dedicate time to experimenting with various musical elements, such as chord progressions, melodies, and harmonies. By continuously applying music theory in your productions, you’ll refine your skills and develop a deeper understanding of how it complements hip hop.
  5. Analyzing Existing Tracks:
    Take the time to deconstruct and analyze well-crafted hip hop tracks that resonate with you. Identify the musical elements being used, such as scales, rhythms, and structures. This practice helps you recognize how theory has been applied in successful hip hop songs and provides inspiration for your own compositions.

Integration Of Music Theory With Hip Hop Production Workflow

Now that you’re familiar with effective ways to learn music theory, it’s crucial to understand the integration of theory into your hip hop production workflow. By seamlessly incorporating music theory principles into your creative process, you can elevate the quality and depth of your productions:

  1. Chord Progressions:
    Building a strong foundation in music theory enables you to create compelling chord progressions. Experiment with different chord voicings, inversions, and substitutions to add depth and emotion to your tracks.
  2. Melodies:
    Understanding scales, intervals, and melodic structures empowers you to craft catchy and harmonically pleasing melodies. Apply your knowledge of music theory to experiment with melodies that complement your chosen chord progressions.
  3. Rhythms and Grooves:
    Music theory provides a framework for understanding rhythm and groove. By studying rhythm theory, you can create intricate drum patterns, syncopated rhythms, and innovative grooves that enhance the overall energy and impact of your hip hop productions.
  4. Sampling and Arrangement:
    When sampling, music theory can guide you in selecting and manipulating samples that align with your desired mood and musical key. Additionally, your knowledge of theory can help you arrange your tracks in a cohesive and musically pleasing way, ensuring the different sections flow seamlessly together.
  5. Collaboration and Communication:
    If you’re collaborating with other musicians, having a solid foundation in music theory allows for smoother communication and collaboration. Being able to articulate musical ideas and discuss concepts using common terminology enhances the creative process and leads to more cohesive and well-rounded productions.


Success Stories And Perspectives

Success Stories and Perspectives:

Experiences Of Renowned Hip Hop Producers

Renowned hip hop producers worldwide have shared their experiences, showcasing how music theory shaped their success.

1. Dr. Dre: The legendary producer, Dr. Dre, attributes his immense success to his understanding of music theory. He firmly believes that knowing the basics of melody, rhythm, and harmony allows producers to create unique beats that resonate with audiences.

2. Timbaland: Timbaland, another influential hip hop producer, credits music theory for expanding his creativity and pushing the boundaries of his sound. Understanding the principles behind chord progressions and song structure enabled him to revolutionize the genre with his innovative production techniques.

3. Kanye West: Kanye West, known for his artistic vision, acknowledges the impact of music theory on his productions. He believes that having a solid understanding of music theory empowers producers to experiment with unconventional sounds while maintaining coherence and musicality.

Insights From The Hip Hop Community On Music Theory Impact

The hip hop community holds diverse perspectives on the impact of music theory on producing. Here are some intriguing insights:

1. Embracing Constraints: Some producers argue that a lack of formal music theory education encourages them to think outside the box. They believe that organic experimentation leads to unique and innovative sounds that define the essence of hip hop.

2. Enhancing Professionalism: On the other hand, many producers firmly believe that learning music theory adds a layer of professionalism to their craft. Understanding scales, chords, and key signatures allows them to communicate and collaborate more effectively with other musicians, resulting in higher-quality productions.

3. Expanding Creative Possibilities: Producers who have delved into music theory claim that it widens their creative possibilities. The knowledge of harmonization, counterpoint, and melodic structures allows them to create intricate arrangements and elevate their productions to new heights.

4. Personal Preference: Ultimately, the choice to study music theory remains individualistic. Some hip hop producers see it as a valuable asset, while others thrive on an intuitive approach. Both approaches can yield exceptional results, dependent on individual preferences and goals.

In conclusion, the impact of music theory on hip hop production remains a subject of debate. While renowned producers often credit their success to a thorough understanding of music theory, the broader hip hop community encompasses diverse perspectives. Whether it enhances creativity, professionalism, or imposes constraints, the decision to employ music theory in hip hop production lies in the hands of each producer.

Does Learning Music Theory Hold Back Your Hip Hop Producer Skills?


Credit: www.nytimes.com


Does Learning Music Theory Hold Back Your Hip Hop Producer Skills?


Credit: www.hooktheory.com


Frequently Asked Questions Of Does Learning Music Theory Make You A Worse Hip Hop Producer


Does Learning Music Theory Help In Becoming A Better Hip Hop Producer?


Yes, learning music theory can greatly enhance your skills as a hip hop producer. Understanding the fundamentals of music theory, such as chord progressions, scales, and melodies, can help you create more complex and harmonically rich beats. It also allows you to experiment with different techniques and styles, adding depth and originality to your productions.


Is It Necessary For Hip Hop Producers To Learn Music Theory?


While it’s not absolutely necessary for hip hop producers to learn music theory, it can definitely give you an edge in the industry. Having a solid understanding of music theory allows you to communicate more effectively with other musicians, collaborate on projects, and create unique and innovative beats.


It also helps you analyze and deconstruct popular songs, enabling you to incorporate elements from different genres into your own productions.


Can Learning Music Theory Limit Your Creativity As A Hip Hop Producer?


No, learning music theory does not limit your creativity as a hip hop producer. In fact, it provides you with a solid foundation to build upon and offers a plethora of creative possibilities. By understanding the rules of music theory, you can effectively break and bend them to create unique and unconventional sounds that set you apart from other producers.


Music theory acts as a tool to enhance your creativity rather than limit it.


Conclusion


In the end, music theory can enhance hip hop production skills by providing a deeper understanding of melody, harmony, and rhythm. It can inspire creativity and help producers elevate their music to new levels. It’s not about restricting creativity but rather empowering it with knowledge and understanding.


Embracing music theory can ultimately make you a better hip hop producer.

Categories
Archive Audio Production

How to Supercharge Your Music Production: Mastering VST Plugins in Logic Pro X

To use VST plugins in Logic Pro X, you simply need to install them in the correct folder. Once installed, open Logic Pro X and navigate to the preferences menu to enable the use of third-party plugins.


With this setup, you can access and use VST plugins within Logic Pro X seamlessly. Integrating VST plugins into Logic Pro X opens up a world of creative possibilities for music producers and enthusiasts. By following a few simple steps to install and enable these plugins, you can enhance your music production workflow and experiment with a wide range of sounds and effects.


In this guide, we will explore how to effectively use VST plugins in Logic Pro X, empowering you to take your music projects to the next level.


Choosing The Right Vst Plugins

When it comes to utilizing VST plugins in Logic Pro X, selecting the right plugins is crucial for enhancing your music production capabilities. Before diving into the vast array of options available, it’s essential to understand the different types of VST plugins and conduct thorough research to find the top recommendations that align with your specific needs.

Understanding Different Types

VST plugins come in various types, each serving a unique purpose in the music production process. It is important to familiarize yourself with these different categories to make informed decisions:

  • Instrument Plugins
  • Effects Plugins
  • Utility Plugins

Researching Top Recommendations

Researching top recommendations is essential to ensure you are investing in high-quality plugins that will enhance your music projects. Consider the following factors when selecting VST plugins:

  1. Compatibility with Logic Pro X
  2. Sound Quality and Performance
  3. Reviews and Ratings
  4. Price and Value for Money

Top Recommendations:

Plugin Name Type Rating
1. Slate Digital Virtual Mix Rack Effects 4.5/5
2. Spectrasonics Omnisphere Instrument 5/5
3. FabFilter Pro-Q 3 EQ 4.8/5

By understanding the different types of VST plugins and conducting thorough research on top recommendations, you can make informed choices that will elevate your music production in Logic Pro X.

How to Supercharge Your Music Production: Mastering VST Plugins in Logic Pro X


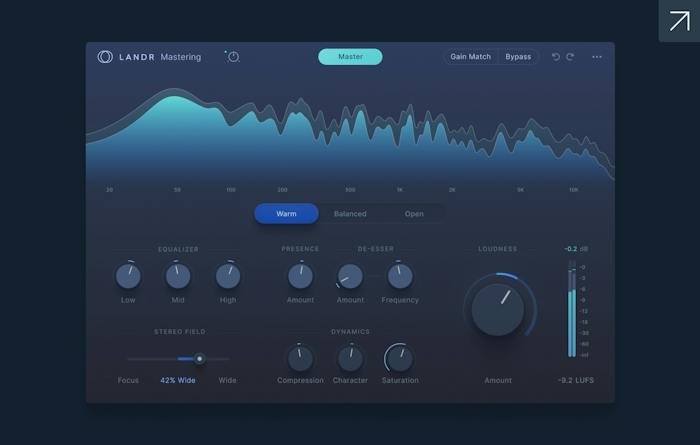
Credit: www.landr.com


Optimizing Workflow In Logic Pro X

In Logic Pro X, optimizing your workflow can significantly enhance your music production efficiency. By customizing the interface and utilizing keyboard shortcuts, you can streamline your process and focus more on the creative aspect of music-making.

Customizing Interface For Efficiency

To enhance efficiency, customize Logic Pro X’s interface based on your workflow. Organize windows and panels logically to access tools and features seamlessly.

Utilizing Keyboard Shortcuts

Assign custom keyboard shortcuts in Logic Pro X to perform tasks quickly. Memorize commonly used shortcuts to speed up your workflow.

Mastering Vst Effect Plugins

Mastering VST effect plugins can take your music production to the next level by adding depth, clarity, and character to your sound. Understanding the intricacies of signal flow and utilizing EQ, compression, and reverb effectively are crucial elements in achieving professional-grade mixes.

Understanding Signal Flow

In the context of using VST plugins in Logic Pro X, understanding signal flow is essential for efficient processing of audio signals. To ensure a smooth flow, set up the plugin chain in a logical sequence, allowing the audio signal to move seamlessly through each plugin, making necessary adjustments along the way.

Utilizing Eq, Compression, And Reverb

EQ, compression, and reverb are fundamental elements in shaping the sonic characteristics of your tracks. When using VST plugins in Logic Pro X, utilize EQ to sculpt the frequency spectrum, compression to control dynamics, and reverb to add ambience and depth to the sound.

How to Supercharge Your Music Production: Mastering VST Plugins in Logic Pro X


Credit: whylogicprorules.com


Advanced Sound Design Techniques

If you want to take your music production skills to the next level, then advanced sound design techniques are key. With Logic Pro X and its vast array of VST plugins, you have the tools at your fingertips to create truly unique and innovative sounds. In this blog post, we will explore two advanced sound design techniques: creating custom instrument and FX chains, and utilizing automation to enhance dynamics. Let’s dive in!

Creating Custom Instrument And Fx Chains

One of the most powerful features in Logic Pro X is the ability to create custom instrument and FX chains. This allows you to combine multiple VST plugins together to create complex and intricate sounds. Here’s how you can do it:

  1. First, open up the Channel Strip in Logic Pro X.
  2. Next, insert your desired VST plugins onto the Channel Strip.
  3. Arrange the plugins in the order you want to process the sound.
  4. Experiment with different settings and parameters for each plugin to achieve the desired sound.
  5. Save the custom instrument or FX chain for reuse in future projects.

By creating custom instrument and FX chains, you can add layers of depth and complexity to your music. This technique allows for endless possibilities and is a powerful tool in your sound design arsenal.

Utilizing Automation To Enhance Dynamics

Automation is a game-changer when it comes to enhancing dynamics in your music. It allows you to control specific parameters of your VST plugins over time, adding movement and expressiveness to your sound. Here’s how you can utilize automation in Logic Pro X:

Step Action
1 Select the parameter you want to automate.
2 Open the automation lane for that parameter.
3 Click and drag on the automation lane to create breakpoints.
4 Adjust the value of each breakpoint to control the parameter’s movement.
5 Repeat steps 3 and 4 to create a dynamic automation curve.

By utilizing automation, you can bring your music to life. Whether it’s adding subtle changes to a synth or creating dramatic sweeps and builds, automation is an essential tool for advanced sound design.

With these advanced sound design techniques, you can unlock a whole new level of creativity in Logic Pro X. Experiment, push boundaries, and let your imagination run wild. By harnessing the power of custom instrument and FX chains and utilizing automation, you’ll be able to create unique and captivating sounds that will take your music to the next level.

Mixing And Mastering Best Practices


Discover the best practices for mixing and mastering by leveraging VST plugins with Logic Pro X. Unleash the full potential of your music production with expert tips and techniques to optimize your sound quality and achieve professional results. Elevate your music to the next level with these essential strategies.

Balancing Levels And Panning

Maintaining a proper balance between different elements in your mix is crucial for achieving a professional-sounding track. When it comes to balancing levels in Logic Pro X, the key consideration is to ensure that no instrument or sound overpowers the others. Here are a few best practices for achieving a well-balanced mix:
1. Set Levels Mindfully: Start by setting the levels for each track at an appropriate level so that they are audible but not too loud or soft. Use your ears as your guide, and make adjustments as needed.
2. Use Panning: Panning allows you to position different audio elements in the stereo field, creating a sense of space and separation. Experiment with panning various tracks to different positions, and find the sweet spot where each instrument or sound occupies its own sonic space.
3. Automate Volume: Automation is a powerful tool to shape the dynamics of your mix. By automating the volume levels of individual tracks or specific sections, you can add energy, emphasis, and subtlety to your mix.

Using Mastering Chains For Polished Results

Once you have achieved the desired mix, it’s time to master your track, giving it a final polish and ensuring it translates well across various audio systems. Using mastering chains can help you achieve a cohesive and professional sound. Here are a few tips to get you started:
1. Choose the Right Plugins: Select high-quality mastering plugins that are known for their transparency, precision, and versatility. Utilize EQ, compression, limiting, and other plugins to enhance your mix’s overall tonal balance, dynamics, and loudness.
2. Set a Solid Foundation: Begin by using an EQ plugin to shape the tonal balance of your mix. Tame any unwanted frequencies or resonance and highlight the important elements of your track. Follow this up with compression to control dynamics and ensure consistency.
3. Enhance with Effects: Experiment with effects such as reverb, stereo imaging, and harmonic exciters to add depth, width, and sparkle to your mix. Be mindful not to overdo it, as subtlety is key.
4. Utilize Reference Tracks: Compare your mix to professionally mastered tracks that are similar in genre and style. This will help you identify any areas where your mix may need adjustments and provide a benchmark for achieving a polished sound.
By following these mixing and mastering best practices, you can elevate your tracks to a new level of sonic excellence in Logic Pro X. Balancing levels, panning, and implementing mastering chains are essential techniques that will greatly contribute to the overall professionalism and impact of your music.

How to Supercharge Your Music Production: Mastering VST Plugins in Logic Pro X


Credit: www.youtube.com


Frequently Asked Questions For How To Use Vst Plugins In Logic Pro X


How Do I Install Vst Plugins In Logic Pro X?


To install VST plugins in Logic Pro X, simply copy the plugin files into the appropriate folder on your computer. Once installed, open Logic Pro X, go to Preferences, select the Audio Units Manager, and make sure the plugin is enabled.


You can then access the plugin from the Audio Units menu in Logic Pro X.


Can I Use Third-party Vst Plugins In Logic Pro X?


Yes, Logic Pro X supports third-party VST plugins, allowing you to expand your creative possibilities. Simply install the VST plugins on your computer, enable them in Logic Pro X’s preferences, and you can start using them in your projects.


How Do I Load Vst Plugins Onto Tracks In Logic Pro X?


To load VST plugins onto tracks in Logic Pro X, select the track you want to add the plugin to, click on the plugin insert slot in the track inspector, and choose the VST plugin from the list. You can then customize the plugin settings and start using it in your project.


What Are The Advantages Of Using Vst Plugins In Logic Pro X?


Using VST plugins in Logic Pro X offers several advantages. Firstly, you have access to a wide variety of high-quality plugins created by third-party developers. Additionally, VST plugins allow you to achieve unique sounds and effects that may not be available in the built-in Logic Pro X plugins, enhancing your creative options.


Conclusion


Incorporating VST plugins into your Logic Pro X workflow can greatly enhance your music production experience. By following the tips and techniques outlined in this blog post, you can unlock the full potential of these powerful tools. With a better understanding of VST plugins, you’ll be able to create professional-sounding tracks with ease.


Categories
Archive Audio Production

Mixing And Mastering The Essential Steps: Achieving Pro-Level Sound

Mixing and mastering are crucial steps for achieving professional sounding music. They involve balancing and enhancing audio elements.


To enhance the quality of your music, mastering helps to bring out the best in your tracks. In the following sections, we will delve into the essential steps required for professional mixing and mastering. By following these techniques, you can elevate your music to a higher level and make it stand out in the competitive industry.


Stay tuned to learn how to achieve a polished and professional sound that will captivate your audience.


The Basics Of Mixing

Mixing is a critical step in creating professional-sounding music. Understanding levels and panning.

Understanding Levels And Panning

Levels determine the volume of each track while panning places them spatially in the stereo field.

Importance Of Eq And Compression

EQ shapes the frequency balance, and compression controls the dynamic range for a polished sound.

When mixing, check and adjust levels to avoid clipping and maintain a balanced sound.

  • Use panning to place instruments and vocals in different areas for clarity.
  • Apply EQ to remove unwanted frequencies and enhance the desired ones.

Compression helps in controlling the volume variations and adds cohesion to the mix.

Level Adjustments Panning Techniques
Prevent clipping by ensuring tracks are well balanced. Use panning to create a spacious mix.
Adjust levels to highlight important elements. Balance the mix by placing elements across the stereo spectrum.

In summary, mastering the basics of mixing through proper level adjustments, panning techniques, EQ, and compression is essential for achieving a professional sound.

Mixing And Mastering The Essential Steps: Achieving Pro-Level Sound


Credit: blog.bandlab.com


Techniques For Creating Depth

Using Reverb And Delay

Reverb and delay enhance spatial dimension and depth. Utilize reverb to add space and create a sense of environment. Delay can provide rhythmic interest and depth by echoing sounds.

Layering And Stereo Imaging

  • Layering sounds can add richness and depth to your music.
  • Stereo imaging widens the sonic landscape and creates a sense of space.

Mastering Process

When it comes to the mastering process of music production, it plays a crucial role in refining and enhancing the overall sound quality of a track. The mastering process involves a series of specialized techniques and tools aimed at optimizing the audio for various playback systems and ensuring a polished and professional sound.

Understanding Loudness And Dynamics

Understanding loudness and dynamics is essential in the mastering process. It involves managing the overall volume and intensity of the audio to ensure it is consistent and engaging. By carefully controlling the dynamics and loudness, a mastering engineer can create a more impactful and balanced sound, enhancing the overall listening experience for the audience.

Utilizing Equalization And Limiting

Utilizing equalization and limiting is a fundamental aspect of the mastering process. Equalization helps in adjusting the frequency balance of the audio, allowing for a more refined and balanced sound. Limiting involves controlling the peak levels of the audio, ensuring that it does not exceed a certain threshold, thereby enhancing clarity and preventing distortion.

Mixing And Mastering The Essential Steps: Achieving Pro-Level Sound


Credit: www.timelessrecordingstudio.com


Achieving Clarity And Balance


Achieving clarity and balance is crucial in the process of mixing and mastering music. By carefully adjusting levels, spatial positioning, and EQ settings, the music can achieve a professional sound. This attention to detail is essential for creating a polished and balanced final product.

When it comes to creating professional sounding music, achieving clarity and balance in your mix is essential. This not only ensures that every instrument and element is heard clearly, but also creates a cohesive and enjoyable listening experience for your audience. In this post, we will dive into the important steps of mixing and mastering, with a focus on achieving clarity and balance to elevate your music to a whole new level of quality.

Tips For Balancing The Mix

Creating a balanced mix is crucial for ensuring that every instrument, vocal, and sound element in your music is appropriately represented. Here are some tips to help you achieve a balanced mix:

  • Avoiding Clashing Frequencies: Carefully listen to each instrument and identify any frequencies that might clash or muddy the overall sound. Make use of EQ to carve out space and ensure each element has its own frequency range.
  • Setting Proper Levels: Experiment with adjusting the volume levels of each track to achieve a cohesive and well-balanced sound. Make sure no element is too overpowering or too buried in the mix.
  • Panning and Stereo Imaging: Utilize panning techniques to spread the different elements across the stereo field. This will create a sense of depth and width, enhancing the overall listening experience.
  • Using Automation: Employ automation techniques to add dynamic variation to your mix. This helps in highlighting important sections or elements, delivering a more engaging and impactful musical experience.

Improving Clarity With Multiband Compression

Multiband compression is a powerful tool that can significantly enhance the clarity and definition of your mix. Here’s how you can make the most out of it:

  1. Identify Muddy Areas: Listen to your mix and identify any frequency ranges that sound muddy or congested. These are the areas that could benefit from multiband compression.
  2. Set Thresholds: Set appropriate threshold levels for each frequency band in the multiband compressor, targeting the muddy areas. This ensures that only those specific frequencies are affected.
  3. Control Dynamics: Adjust the ratio and attack/release settings to control the dynamics of the affected frequencies. This helps in reducing muddiness and enhancing clarity, without affecting the other aspects of your mix.

By leveraging the power of multiband compression, you can effectively address frequency congestion and elevate the overall clarity of your music.

Common Mistakes To Avoid


Achieving professional sounding music requires careful mixing and mastering. Common mistakes to avoid include improper EQ settings, excessive compression, neglecting the dynamics, overlooking room acoustics, and not referencing on various audio systems for a well-balanced sound.

When it comes to mixing and mastering your music, it’s important to be aware of the common mistakes that can hinder your progress and prevent your music from sounding professional. By understanding and avoiding these mistakes, you can ensure that your music stands out from the crowd and captivates your audience. Let’s explore two of the most common mistakes: over-processing and excessive use of effects, and ignoring the importance of reference tracks.

Over-processing And Excessive Use Of Effects

One mistake that many aspiring musicians make is over-processing their tracks or going overboard with the use of effects. While it’s important to add depth and character to your music, using too many effects can result in a muddled and cluttered sound. Instead of enhancing your tracks, excessive effects can actually take away from the overall quality and cohesiveness of your music.

It’s crucial to find the right balance when it comes to effects. Experimenting with different settings and plugin combinations can easily lead you to overdo it. Remember, less can often be more when it comes to using effects. Evaluate each effect’s impact on your mix and only use them if they serve a specific purpose or add value to your music. By allowing the natural dynamics and essence of your music to shine through, you’ll create a more professional and polished sound.

Ignoring The Importance Of Reference Tracks

Another common mistake that artists and producers make is ignoring the importance of reference tracks in the mixing and mastering process. Reference tracks are professionally mixed and mastered songs that serve as a benchmark for the sound you want to achieve.

By listening to and analyzing reference tracks that fit within the same genre and style as your own music, you gain valuable insights into the professional standards and techniques that you should aim for. Pay attention to elements like the balance of instruments, the clarity of vocals, and the overall sound quality. Utilize these reference tracks as a guide to navigate the complexities of the mixing and mastering process.

Whether you’re a beginner or a seasoned musician, ignoring the importance of reference tracks can lead to misguided decisions and subpar results. Embrace reference tracks as a valuable tool that will help you achieve the professional sound you’re aiming for.

Mixing And Mastering The Essential Steps: Achieving Pro-Level Sound


Credit: www.avid.com


Frequently Asked Questions Of Mixing And Mastering The Essential Steps For Professional Sounding Music


How Important Is Mixing And Mastering In Music Production?


Mixing and mastering are vital in music production as they enhance the overall sound quality, balance the different elements, and ensure consistency across different playback systems. They can make a huge difference between a mediocre and professional sounding music track.


What Is The Difference Between Mixing And Mastering?


Mixing involves adjusting individual tracks, adding effects, and creating a balanced and cohesive sound. Mastering focuses on fine-tuning the overall mix, optimizing it for different playback systems, and adding the final polish to achieve a professional sound.


Why Should I Hire A Professional For Mixing And Mastering?


Hiring a professional ensures that your music reaches its full potential. They have the expertise, high-quality equipment, and trained ears to bring out the best in your tracks. Their objective perspective and industry knowledge can greatly enhance the sound and overall impact of your music.


Can I Mix And Master My Own Tracks?


Yes, you can. However, it requires a good understanding of audio engineering, a well-treated listening environment, and high-quality equipment. It takes years of practice and experience to develop the necessary skills. Hiring a professional is recommended if you want to achieve a truly professional sound.


Conclusion


In order to achieve a professional sounding music, mixing and mastering are essential steps. By understanding the importance of these processes and investing time and effort, your music has the potential to reach greater heights. Don’t underestimate the impact of proper mixing and mastering on the overall quality of your music.


It’s a crucial element that can make or break your music career.


Categories
Archive Audio Production

Revamp Your Sound: Best VST Plugins for Vocals Free Download!

Looking for the best VST plugins for vocals free download? Check out options like Tal-Reverb-4, Graillon 2, and Tyrell N6.


These plugins are popular for enhancing vocal performances and are available for free download. We will explore these plugins in more detail and discuss their features and capabilities in improving vocal recordings. Whether you are a seasoned producer or a beginner looking to enhance your vocal tracks, these free VST plugins can be a valuable addition to your audio toolkit.


Keep reading to discover how these plugins can take your vocal recordings to the next level without breaking the bank.

Revamp Your Sound: Best VST Plugins for Vocals Free Download!


Credit: www.productionmusiclive.com


Exploring Vst Plugins For Vocals

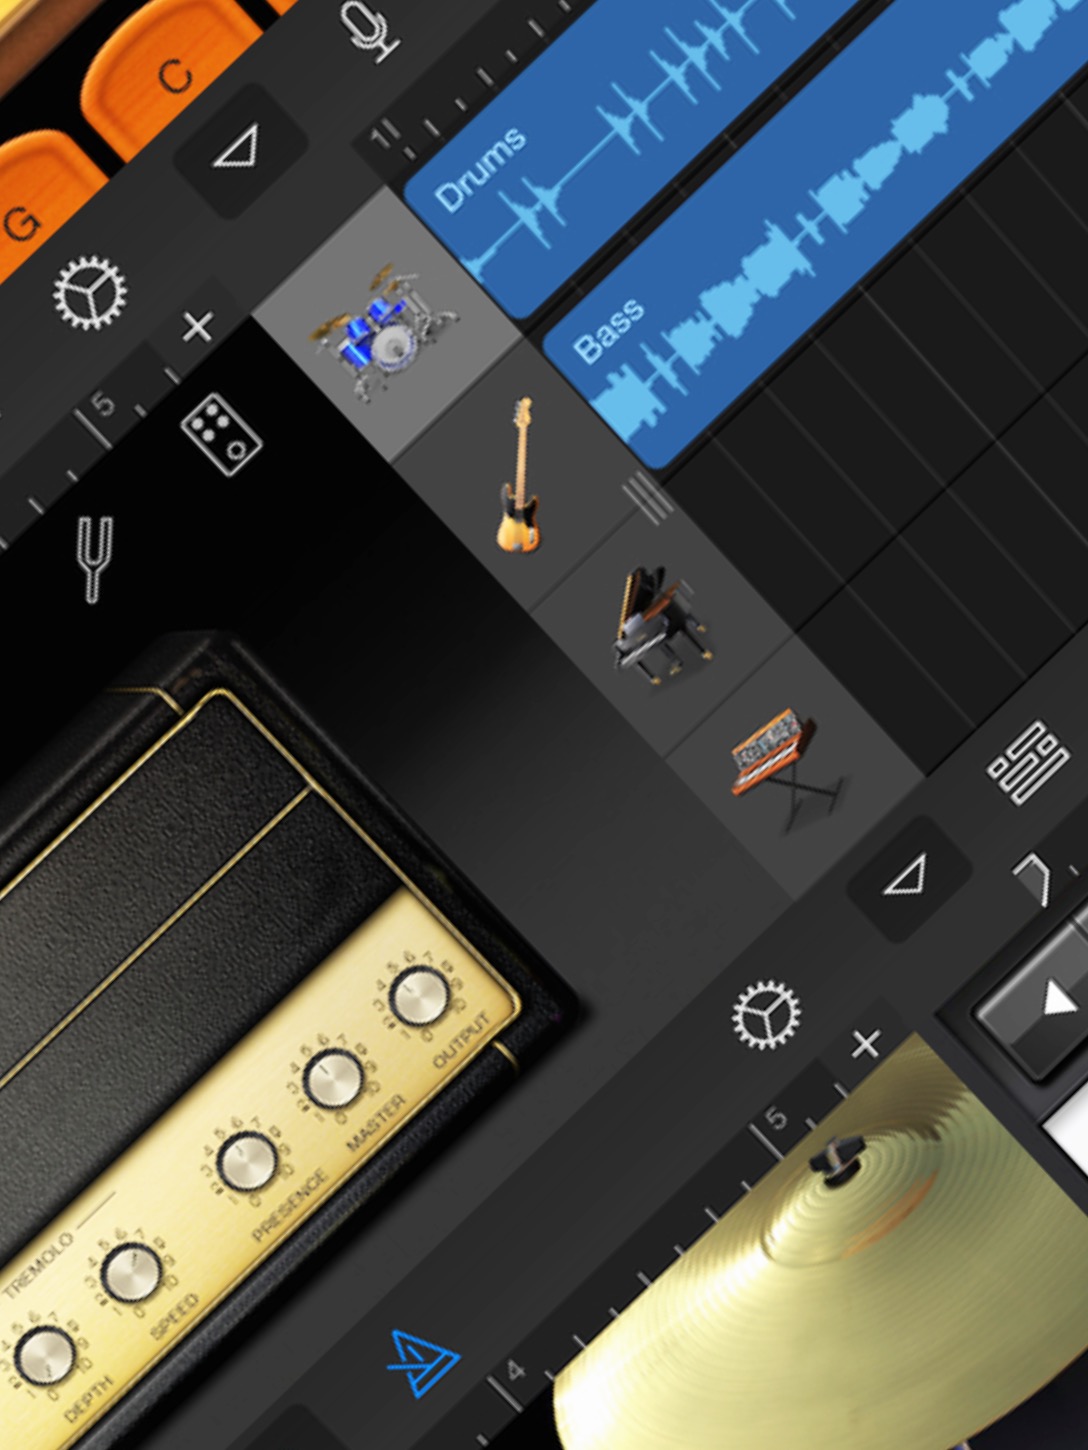
VST plugins offer a world of possibilities for enhancing vocal recordings. Let’s delve into how these plugins can take your vocals to the next level.
Benefits Of Using Vst Plugins

  • Enhance vocal clarity and tonal quality
  • Provide a wide range of effects and presets
  • Allow for precise control over various vocal parameters
  • Help in creating professional-sounding vocal tracks

Understanding How Vst Plugins Work

VST plugins act as virtual instruments or effects processors that can be integrated into your digital audio workstation (DAW). These plugins manipulate and process vocal recordings in real-time.

Top Free Vst Plugins For Vocals

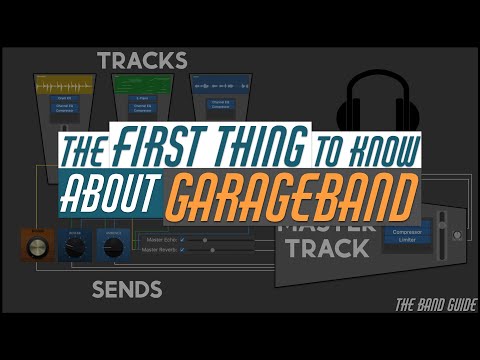
Enhance your vocal recordings with these top free VST plugins designed to take your vocals to the next level.
Overview Of Plugin 1

  • Enhances vocal clarity and presence
  • Provides versatile controls for customization

Overview Of Plugin 2

  • Adds depth and dimension to vocals
  • Offers a range of reverb effects for creative soundscapes

Overview Of Plugin 3

  • Smoothens dynamics for balanced vocals
  • Control threshold and ratio parameters for optimal compression
https://www.youtube.com/watch?v=tA9SBZ78P0k


Tips For Choosing The Right Vst Plugin

When it comes to finding the best VST plugins for vocals, it’s essential to consider various factors for a seamless and effective production process. From compatibility with your DAW to the plugin’s effectiveness for your vocal style, every aspect plays a crucial role in enhancing your audio recordings. Additionally, prioritizing a user-friendly interface can make the editing and mixing process more efficient. Here’s a breakdown of crucial tips to consider when choosing the right VST plugin for vocals:

Compatibility With Daw

Ensure that the VST plugin you choose is compatible with your Digital Audio Workstation (DAW). Confirm if it supports the specific DAW version you’re using. Incompatibility could lead to errors and hinder the seamless integration of the plugin with your production setup.

Effectiveness For Vocal Style

Evaluate the VST plugin’s effectiveness for your vocal style. Look for plugins that offer diverse effects and processing tools to suit different genres and vocal characteristics. Consider the specific enhancements you need for your vocals, such as pitch correction, reverb, or compression.

User-friendly Interface

Prioritize a VST plugin with a user-friendly interface. Choose a plugin that simplifies the editing and mixing process, allowing you to navigate and utilize its features efficiently. An intuitive interface can streamline your workflow and enhance overall productivity.

Optimizing Vocal Recordings With Vst Plugins

VST plugins have revolutionized the way we approach vocal recordings. With a plethora of options available for free download, these plugins offer unlimited possibilities for enhancing the quality and performance of vocals. In this post, we will explore how to optimize vocal recordings using VST plugins and unleash the true potential of your vocal tracks.

Using Vst Plugins In The Mixing Process

When it comes to mixing vocals, VST plugins are indispensable tools that can take your recordings to the next level. These plugins allow you to fine-tune the individual elements of your vocal tracks, including EQ, compression, reverb, delay, and more.
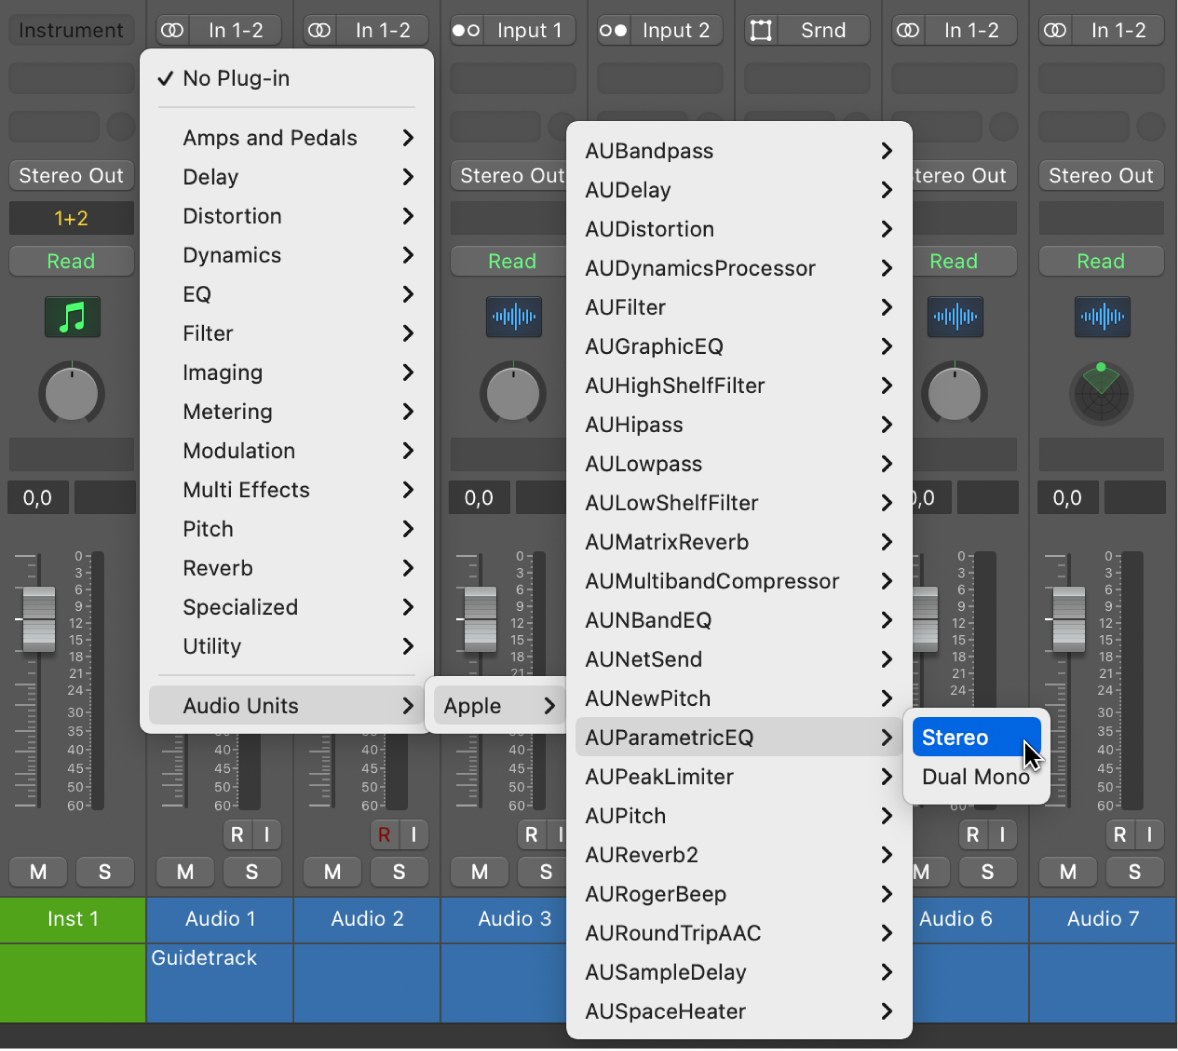
By using EQ plugins, you can shape the frequency response of your vocals, eliminating unwanted frequencies and emphasizing the desired ones. Compression plugins help in controlling the dynamic range of vocals, ensuring a consistent and balanced performance throughout the track. Reverb and delay plugins add depth and dimension, creating a rich and immersive vocal sound.

Moreover, VST plugins offer a wide range of creative effects, such as chorus, flanger, and vocoder, that can add unique textures and character to your vocals. These plugins allow you to experiment and explore different sonic possibilities, making your vocal recordings stand out in the mix.

Enhancing Vocal Clarity And Presence

One of the primary goals when working with vocal recordings is to achieve clarity and presence. VST plugins play a crucial role in achieving this by providing various tools specifically designed for vocal enhancement.

Firstly, de-esser plugins are essential for reducing sibilance and harshness in vocal recordings. These plugins target and tame the excessive “sss” and “shh” sounds that can distract the listener. By applying subtle de-essing, you can ensure that your vocals remain smooth and intelligible.

Secondly, vocal doubler plugins can add thickness and width to your vocals, creating a larger-than-life feel. These plugins replicate the singer’s voice and slightly detune it, providing a natural chorus-like effect. This technique adds depth to the vocals, making them stand out in the mix.

Lastly, limiter plugins help in controlling the peaks and loudness of vocals, preventing distortion and maintaining a consistent volume level. These plugins ensure that your vocals cut through the mix without overpowering other elements.

By carefully selecting and using the right set of VST plugins, you can optimize your vocal recordings to sound professional and captivating. These plugins offer endless possibilities for shaping and refining vocal tracks, allowing you to create compelling and memorable performances.

Maximizing The Potential Of Free Vst Plugins

Maximizing the potential of free VST plugins opens up a world of possibilities for aspiring vocalists and producers. While paid plugins can be expensive, the market offers plenty of high-quality free options that deliver amazing results. By learning how to effectively utilize these plugins, musicians can enhance their vocal tracks without breaking the bank.

Utilizing Presets Creatively

One of the advantages of free VST plugins is the wide range of presets they offer. Presets are pre-configured settings that provide instant solutions for different vocal effects. By exploring and experimenting with presets, you can achieve unique sounds and quickly find the perfect tone for your vocals. Whether you are looking for a warm vintage vibe or a modern and polished sound, the right preset can be a game-changer for your vocal tracks.

Experimenting With Layering And Effects

The power of layering and effects can’t be understated when it comes to maximizing the potential of free VST plugins. Layering involves combining multiple vocal tracks to create a rich and full sound. By recording various harmonies or doubling the main vocal line, you can add depth and dimension to your performance. Furthermore, free VST plugins offer a diverse range of effects, such as reverb, delay, and chorus, to enhance vocals. Adding these effects in moderation can lend a professional touch to your tracks.

In conclusion, free VST plugins can be a valuable resource for vocalists and producers. By effectively utilizing presets and getting creative with layering and effects, you can take your vocal tracks to a whole new level without spending a fortune. With a little practice and experimentation, these plugins can help you achieve professional-sounding results.

Revamp Your Sound: Best VST Plugins for Vocals Free Download!


Credit: www.waves.com


Revamp Your Sound: Best VST Plugins for Vocals Free Download!


Credit: www.magix.com


Frequently Asked Questions Of Best Vst Plugins For Vocals Free Download


What Are The Best Free Vst Plugins For Vocals?


The best free VST plugins for vocals include plugins like Gsnap, MeldaProduction Auto-Tune, and Tal-Reverb-4. These plugins offer features like pitch correction, reverb effects, and vocal harmonizing to enhance the vocal performance without breaking the bank.


How Do I Download And Install Vst Plugins For Vocals?


To download and install VST plugins for vocals, first, find a reputable website that offers free VST plugins. Next, download the desired plugin and save it to your computer. Then, extract the downloaded files and move them to your DAW’s plugin directory.


Finally, restart your DAW and the plugins will be available for use.


Can Free Vst Plugins Provide Professional-quality Vocal Effects?


Yes, free VST plugins can provide professional-quality vocal effects. While they may not have all the features of paid plugins, many free plugins offer a wide range of effects and features that can enhance vocal recordings. With proper knowledge and skillful use, you can achieve great results with free VST plugins.


Conclusion


These top-notch VST plugins can take your vocal productions to the next level. Their user-friendly interfaces and impressive features make them a must-have for any music producer or audio engineer. With their extensive range of effects and tools, these free downloads provide a professional touch to your vocal recordings.


Elevate your sound with these essential plugins today!

Categories
Archive Audio Production

How To Sell Your Music On Apple Music And iTunes: Maximize Profits

To sell your music on Apple Music and iTunes, you’ll need to use a distributor or become an Apple-approved direct seller. Next, upload your tracks, set a price, and publish them for purchase or streaming.


Entering the digital music marketplace is essential for independent artists looking to reach a broader audience. With platforms like Apple Music and iTunes, musicians can distribute their songs worldwide, offering fans easy access to their work. Navigating the setup process may seem daunting, but it’s a crucial step towards building a professional music presence online.


Selling music on these platforms not only provides potential revenue but also enhances visibility in a competitive industry. By understanding the mechanisms of digital distribution, artists can ensure their creations stand out and reach listeners who are eager to discover new tunes. Embracing the digital shift in music consumption empowers artists to control their careers and connect directly with their fan base through the power of technology.


Entering The Digital Marketplace

Welcome to the fast-paced world of digital music sales. It’s time to take your melodies to the masses.

The Rise Of Music Streaming

Artists today find a global audience faster than ever. This is mostly due to streaming. Services like Apple Music lead this digital revolution.

Listeners can access millions of songs anytime. Most importantly, they do this with a simple tap. It’s convenient and changes how we consume music.

Digital Stores Vs. Physical Sales

Remember CDs and vinyl? Some people still love them. But, digital stores outshine physical shops now.

  • Instant access
  • Less production cost
  • Broad reach

Clearly, selling your music on platforms like iTunes is key to a modern musician’s success.

Setting The Stage: Before Distribution

Before your music hits the digital shelves of Apple Music and iTunes, the groundwork must come first. Perfecting your craft, understanding the business side, and gearing up with promotional tools are key steps. Let’s set the stage so your music can play to the world.

Creating Professional Music Content

Top-notch audio quality is non-negotiable. Record with the best equipment you can access. Mix and master tracks for that polished sound. Ensure track metadata is accurate:

  • Artist name
  • Song titles
  • Album name
  • Genre details

Consistent quality across your discography builds trust with listeners and the platform.

Understanding Rights And Royalties

Know who owns what. Secure rights from co-creators if needed. Get clarity on how royalties will be split. You might use:

  1. Split sheets
  2. Publishing agreements

Register with PROs (Performance Rights Organizations) to collect earnings when your music is played.

Preparing Promotional Materials

Promotion starts with a captivating story. Craft a compelling artist biography. Create eye-catching album art and promotional graphics. Organize:

Material Description
Press Release Announce your release with key details.
Social Media Plan Schedule posts to engage fans.

Ready high-resolution photos and music videos for press and platforms. Your presentation can turn listeners into lifelong fans.

Choosing Your Distribution Path

As an artist, getting your music on Apple Music and iTunes is a smart move. It can help you reach millions of listeners worldwide. The choice is yours: work with a digital distribution service or take the direct upload route. Each option offers unique benefits designed to fit your needs as an artist.

Digital Distribution Services

Understanding digital distribution services is vital. These platforms handle the legwork of getting music into online stores and streaming services. Here are some things to consider:

  • Cost: Some take a fee per release or a yearly subscription.
  • Royalties: Many distributors allow artists to keep 100% of royalties.
  • Support: Quality customer service is essential.
  • Extras: Look for marketing and promotional tools.

Selecting the right distributor is critical. Compare features, fees, and user reviews to find the best fit for your music career.

Direct Upload Platforms Comparison

For artists preferring a hands-on approach, direct upload platforms offer control. Key differences include:

Platform Upload Fee Royalties User Control Accessibility
Apple Music for Artists Free Keep all High Easy
Other Direct Platforms Varies Varies High Depends on the platform

Comparing platforms helps in making an informed choice. Direct upload perks often attract independent artists aiming for maximum creative and financial control.

How To Sell Your Music On Apple Music And iTunes: Maximize Profits


Credit: routenote.com


Maximizing Visibility On Apple Music And Itunes

For music creators, selling your music on Apple Music and iTunes can be a game-changer. These platforms offer global reach and a user-friendly experience. But, getting noticed among millions of songs requires strategy. This section dives into how to maximize your visibility. With the right approach, artists can ensure fans find their music easily.

Optimizing Metadata For Discoverability

Metadata is key information that helps listeners find your music. Proper optimization makes your tracks searchable. Here’s what to focus on:

  • Track Titles: Use clear and exact names for your songs.
  • Album Names: Stick to memorable and unique titles for albums.
  • Artist Name: Ensure consistent spelling across all releases.
  • Genre: Select the most accurate genre to help the right audience discover your music.
  • Release Date: Use the actual release date for better cataloging.

Your music’s metadata helps algorithms understand and categorize your content. A well-defined structure improves search results and recommendations.

Crafting Effective Album Artwork

Album artwork isn’t just a visual hook; it’s crucial for first impressions. Follow these tips to make your cover art stand out:

  • High Resolution: Use images with a minimum resolution of 3000 x 3000 pixels.
  • Branding: Incorporate your unique style and branding for consistency.
  • Professional Quality: Invest in professional design to catch the audience’s eye.
  • Platform Guidelines: Adhere to Apple Music’s artwork guidelines for seamless integration.

Cover art can make or break a potential play. Engaging artwork invites clicks and listens.

Marketing Strategies For Success

Getting your music on Apple Music and iTunes is just the start. To climb the charts, you need smart marketing strategies. These methods help your tunes reach more ears. They turn listeners into fans. Here, we’ll dive into powerful tactics for selling your music online.

Building A Strong Online Presence

Start with a solid online base: your website. It’s your music’s home. Make it shine. Show off your brand and sound. Use search engine optimization (SEO) to help fans find you. Post regular updates and engage with visitors. A strong website attracts more fans and keeps them coming back for more.

Leveraging Social Media For Promotion

Use social media’s power to spread your music. Pick platforms your fans love. Post often but keep it quality. Share sneak peeks, stories, and behind-the-scenes looks. These create buzz and connection. Use targeted ads to reach potential fans. Engage with your followers to make them feel special.

Collaborating With Influencers And Playlists Curators

Collaboration broadens your reach. Team up with influencers who fit your music’s vibe. They can introduce you to their followers. Playlist curators can also be key allies. A spot on a popular playlist gets you instant listens. Reach out, network, and offer your music as a fresh addition to their collections.

Monetizing Your Music

Is your music ready for the world? Great! Now, let’s make sure it earns its keep. Selling music on Apple Music and iTunes is a smart move. These platforms can help you reach millions of listeners. Here’s how to get those tunes working for you.

Pricing Your Music Effectively

Choosing the right price for your music is key. It can mean the difference between a hit and a miss.

  • Know your audience: Fans have different budgets. Price with them in mind.
  • Check the competition: What are others charging? Aim to match or slightly undercut.
  • Bundle deals: Offer albums at a discount compared to buying singles.
  • Consider your costs: Make sure the price covers your production and distribution.

Understanding Apple Music And Itunes’ Payment Models

Apple Music and iTunes pay artists in specific ways. Know these to plan your earnings.

  1. Apple Music
    • Streaming service
    • Pays per play
    • Earnings vary by country and user plan
  2. iTunes
    • Sells your music outright
    • Pays per purchase
    • Offers singles and albums

Remember, Apple takes a cut. This percentage changes from time to time, so stay updated.

Ready to earn from your music? Set your pricing right and understand how Apple pays you. With these tips, you’re set to monetize your music like a pro!


Analyzing Performance And Adjusting Your Strategy

Selling music on Apple Music and iTunes marks just the beginning. Success in the digital music scene requires understanding your audience and performance. Insights guide your future marketing and production efforts. Let’s dive into sales and streaming data and customer feedback to hone your strategy.

Interpreting Sales And Streaming Data

Accurate data analysis is key to understanding your market position. Apple Music and iTunes provide rich insights. This data reflects listener preferences and patterns. Read on to see how this information fuels your music career growth.

  • Track downloads and streams: Monitor which songs have the highest downloads and streams. This shows your hits.
  • Analyze geographic information: See where your listeners are. Target these areas in your promotions.
  • Understand listener demographics: Know who listens to your music. Tailor your content to this audience.
  • Seasonal trends: Observe patterns during holidays or events. Release relevant content at these times.
Data Type What It Tells You Actionable Insight
Streams Popular tracks Consider a music video for these songs
Downloads Purchased songs Offer a bundle for these tracks
Listener Locations Where your fans are Plan tours in these regions
Demographics Age and gender of audience Create content that resonates

Learning From Customer Feedback

Customer feedback is a goldmine for improvement. Reviews and ratings on Apple Music and iTunes outline what fans love and what they don’t. Use this intel to refine your music and engagement approach.

  1. Analyze reviews: Identify common praises or complaints.
  2. Engage with fans: Respond to reviews. Show that you value their opinions.
  3. Take constructive criticism: Learn from critical feedback. Improve your future work.
  4. Encourage more feedback: Ask fans for their thoughts. Use surveys or social media prompts.

By keeping a close eye on performance data and customer feedback, you can craft a strategy that resonates with your audience. This approach is essential for any artist aiming to rise through the ranks on Apple Music and iTunes.

How To Sell Your Music On Apple Music And iTunes: Maximize Profits


Credit: www.chegg.com


Future-proofing Your Music Career

Artists today must navigate a digital landscape that’s always changing. To keep your music career thriving, consider digital distribution channels like Apple Music and iTunes. These platforms are critical for today’s musicians. Learn how to leverage them and secure your future in the industry.

Exploring Additional Revenue Avenues

Diversify your income to create a sustainable music career. Think beyond just selling tracks. Check out these ways to maximize your earnings:

  • Offer exclusive content for fans on Apple Music.
  • Sell digital booklets and band merchandise through iTunes.
  • Bundle music with interactive experiences.

Providing value-added content encourages fans to invest more in your work.

Keeping Up With Industry Trends

The music industry evolves with new technologies and listener habits. To stay relevant, align your strategies with these trends:

Trend Action Points
Streaming Growth Focus on playlists, algorithms, and streaming stats.
High-Quality Audio Release music in lossless audio formats on Apple Music.
Music Videos Create engaging visuals that fans can access on iTunes.

Use these insights to adapt your approach and stay ahead in the music game.

How To Sell Your Music On Apple Music And iTunes: Maximize Profits


Credit: support.apple.com


Frequently Asked Questions Of How To Sell Your Music On Apple Music And Itunes


Can Anyone Sell Music On Apple Music And Itunes?


Yes, independent artists can sell their music on Apple Music and iTunes. You’ll need to use an approved aggregator to upload your music. These services handle the licensing and distribution and pay your streaming royalties.


What Are The Costs Of Selling Music On These Platforms?


Selling music on Apple Music and iTunes typically involves a fee. Aggregators may charge an upfront cost, a yearly fee, or take a percentage of your royalties. Costs vary, so compare services to find the best fit for your budget and needs.


How Long Does It Take To Get Music On Apple Music?


After submitting your music through an aggregator, it can take anywhere from 24 hours to a week for your music to go live on Apple Music and iTunes. It’s best to plan your release schedule accordingly to avoid delays.


What Format Should Music Be In For Apple Music?


Music submitted to Apple Music and iTunes should be in a high-quality audio format. Apple recommends using a 16-bit, 44. 1kHz WAV file or a high-resolution master to ensure the best sound quality on the platforms.


Conclusion


Embarking on your musical journey with Apple Music and iTunes can be transformative. By following the outlined steps, you’ll not only boost your visibility but also potentially increase your earnings. Remember, success on these platforms is about consistency and engagement.


Start sharing your melodies with the world—your audience awaits.

Categories
Archive Audio Production

How To Spot A Legitimate Online Mixing Service

To determine if an online mixing service is legit, check for customer reviews and industry reputation. Rely on testimonials for valuable insights.


In the ever-evolving realm of music production, finding a trustworthy online mixing service is crucial for artists and musicians seeking professional sound quality. With countless options available, distinguishing between legitimate services and scams can be a daunting task. Understanding the key indicators that set reputable mixing services apart from fraudulent ones is essential in making an informed decision.


This article aims to provide insights into recognizing the legitimacy of online mixing services, offering tips and guidelines to help you navigate the digital landscape with confidence. Let’s delve into the essential factors that can help you identify whether an online mixing service is trustworthy and reliable.


Key Features Of Legitimate Online Mixing Services


Legitimate online mixing services offer clear pricing, secure payment options, and transparent policies. They provide detailed project timelines, sample works, and client testimonials, showcasing their reliability and credibility. Additionally, they may offer a satisfaction guarantee or free revision policy, ensuring client confidence in their professional services.

Professional Portfolio

Legitimate online mixing services showcase a professional portfolio that includes a diverse array of high-quality projects.

Clear Pricing Structure

Clear pricing structure ensures transparency, listing all services offered with corresponding costs upfront.

Positive Customer Testimonials

Positive customer testimonials reflect the satisfaction of past clients, highlighting the service’s reliability and quality.


Understanding Red Flags

Lack Of Transparency

Check for unavailable pricing or unclear communication about services offered.

  • Absence of clear examples of past work or satisfied clients.
  • Opacity in the mixing process or rates should raise concern.

Unrealistic Promises

Be cautious of claims of instant success or overnight results.

  1. Promises of making your song a hit without proper work might be deceptive.
  2. Unrealistic turnaround times or guaranteed fame are red flags.

Researching Potential Mixing Services

When it comes to hiring an online mixing service, it’s crucial to ensure their legitimacy and the quality of their work. Research plays a pivotal role in identifying potential mixing services that are reliable and capable of meeting your requirements.

Check Online Reviews

Checking online reviews is a significant step in evaluating the credibility of an online mixing service. Look for feedback on platforms like Google My Business, Yelp, or music production forums. Pay attention to both positive and negative reviews, and consider the overall sentiment and recurring themes in the feedback.

Request Sample Work

One effective way to gauge the expertise of an online mixing service is to request sample work. Ask for examples of their past projects or a sample of how they would handle your specific track. This allows you to assess the quality of their mixing, the attention to detail, and their ability to enhance the sound of the music.


Importance Of Communication And Collaboration


Effective communication and collaboration are vital when determining the credibility of an online mixing service. Transparent communication ensures clarity and trust, while seamless collaboration between clients and service providers guarantees a successful outcome. Prioritizing these aspects helps in identifying legitimate online mixing services.

Clear communication and collaboration play a pivotal role in ensuring the success of any endeavor, and the same goes for the online mixing process. When you entrust your music to an online mixing service, it’s vital to have open and transparent lines of communication between you and the service provider. This ensures that your vision and preferences are accurately understood and incorporated into the final mix. Strong collaboration fosters a seamless and productive working relationship where both parties are actively involved in the process, resulting in a high-quality end product.

Clear Communication Channels

A reputable online mixing service will have clear communication channels in place to facilitate effective and efficient interaction between you and the mixing engineer. These channels can include email, phone, video conferencing, or even a dedicated project management platform. The ability to communicate promptly and clearly allows you to convey your ideas, provide feedback, and address any concerns in a timely manner. With open communication, you can maintain a strong working relationship, asking questions and receiving updates throughout the mixing process.

Involvement In The Process

One of the indicators of legitimacy for an online mixing service is their willingness to involve you in the process. Collaborative mixing ensures that the mix aligns with your artistic vision and meets your expectations. Legitimate services will value your input and actively seek your feedback at various stages of the process. This involvement can range from discussing your goals and preferences at the initial stage to providing you with mix revisions based on your feedback. A transparent and inclusive approach demonstrates that the service is genuinely dedicated to delivering the best possible result for your music.

Securing Your Investment

When it comes to hiring an online mixing service for your music, it’s crucial to ensure that you are making a wise investment. With numerous services available, it can be challenging to determine which ones are legit and trustworthy. However, there are a few key factors to consider when securing your investment in an online mixing service.

Contracts And Agreements

One of the first steps in securing your investment is to establish clear contracts and agreements with the mixing service. Contracts protect both parties involved and outline the terms and conditions of the service. It is essential to thoroughly read and understand the contract before engaging with the service. Pay close attention to details such as delivery time, revision limits, and ownership of the final product.

Additionally, ensure that the mixing service offers a detailed agreement that outlines the cost of the service. This agreement should clearly state the payment terms, including any upfront fees or installments. Having a solid contract in place not only protects your investment but also ensures that both parties are on the same page.

Payment Protection

Another crucial aspect of securing your investment is ensuring payment protection. Trustworthy online mixing services will have secure and reliable payment systems in place. Look for services that offer payment options through well-known platforms such as PayPal or Stripe. These platforms provide an extra layer of security by offering buyer protection, ensuring that your payment is safe.

Furthermore, it’s important to inquire about the service’s refund policy. Legitimate mixing services will have a clear and reasonable refund policy that protects clients in case of dissatisfaction or unforeseen circumstances. Familiarize yourself with the policy and ensure that it aligns with your expectations.

When hiring an online mixing service, don’t hesitate to ask for references or testimonials from previous clients. This will give you insight into the service’s reliability, quality of work, and customer satisfaction. Reading reviews and testimonials can help you make an informed decision and further secure your investment.

In conclusion, securing your investment when hiring an online mixing service requires thorough research and attention to detail. By establishing clear contracts, ensuring payment protection, and considering client testimonials, you can confidently choose a legit and trustworthy service that will enhance the quality of your music.


Frequently Asked Questions For How To Tell If An Online Mixing Service Is Legit


How Can I Determine If An Online Mixing Service Is Legitimate?


To determine if an online mixing service is legitimate, check for customer reviews and testimonials. Look for any certifications or affiliations with reputable organizations. Consider the experience and reputation of the service provider. Additionally, ensure that the service has clear and transparent pricing and terms of service.


Trust your instincts and do thorough research before making a decision.


What Are The Signs Of An Unreliable Online Mixing Service?


Signs of an unreliable online mixing service may include poor communication, lack of professional website or branding, unresponsive customer service, ambiguous pricing, and unrealistic promises or guarantees. Be cautious if the company does not provide samples of their previous work or if there are numerous negative reviews or complaints from previous clients.


How Important Is Customer Feedback When Choosing An Online Mixing Service?


Customer feedback is crucial when choosing an online mixing service. Positive reviews and testimonials indicate satisfied customers and the service’s credibility. Check for reviews on multiple platforms to get a comprehensive view of the company’s reputation. Feedback from other customers can help you determine the quality of their work, communication, and overall satisfaction level.


Can I Trust Online Reviews For Online Mixing Services?


While online reviews can provide valuable insights, it’s essential to be cautious and do further research. Some reviews may be biased or manipulated, so consider reviews from multiple sources. Look for reviews that provide specific details about the service and its impact on the customer’s project.


Consider both positive and negative reviews to make an informed decision.


Conclusion


Verifying the online mixing service’s reputation is crucial for ensuring quality. Customer feedback, credentials, and portfolio are valuable indicators of legitimacy. Trust your instincts and take the time to research before making a decision. By following these steps, you can confidently identify and engage with a reputable online mixing service.


https://www.youtube.com/watch?v=QiBmQuz9yr4


Categories
Archive Audio Production

How to Master Vst Plugins in Garageband: Expert Tips

To use VST plugins in Garageband, simply install the plugins on your computer and then open the Garageband software to access and use them in your music projects. By following these steps, you can enhance your music production with a variety of sound effects and virtual instruments.


Garageband provides a user-friendly interface for integrating VST plugins seamlessly into your creative process. With the ability to customize and manipulate your sounds using VST plugins, you can take your music to the next level and create professional-sounding tracks. Explore the vast world of plugins available and experiment with different effects to find the perfect combination for your unique sound.


Mastering the use of VST plugins in Garageband will help you unlock endless possibilities for your music production journey.

How to Master Vst Plugins in Garageband: Expert Tips


Credit: www.groove3.com


Choosing The Right Vst Plugins

Researching Different Vst Options

Before diving into Garageband, research a variety of VST plugins

available. Compare features, pricing, and reviews to find

ones that suit your music production needs.

Considering Compatibility With Garageband

When selecting VST plugins, ensure they are compatible

with Garageband’s system requirements. Check for any

compatibility issues before making your final decision.

Optimizing Vst Plugin Performance

  1. Check tasks running in the background to lessen CPU load.
  2. Limit the number of active plugins simultaneously.
  3. Monitor CPU usage through the Garageband performance meter.
  • Automate parameter changes for evolving soundscapes.
  • Assign automation to plugin parameters for a seamless mix.
  • Experiment with automation curves for unique effects.

Creative Sound Design With Vst Plugins


Enhance your Garageband compositions with VST plugins for unparalleled sound design. Unleash your creativity by incorporating virtual instruments, effects, and synths to elevate your music production to new heights. With a wide array of VST plugins available, you can customize your sound and create unique tracks effortlessly.

Creative Sound Design with VST Plugins With VST plugins, Garageband users can expand their sound design possibilities and elevate their music production. Creative sound design is essential in producing unique and compelling music, and VST plugins offer a wide array of tools to achieve this. This guide will focus on leveraging these plugins in Garageband for creative sound design, particularly exploring layering and stacking techniques and utilizing modulation for unique textures. H3 headings: 1.

Exploring Layering And Stacking Techniques

2.

Utilizing Modulation For Unique Textures

Exploring Layering and Stacking Techniques Layering and stacking different sounds using VST plugins can add depth and richness to your music. By mixing and matching various instrument and effect plugins, you can create complex and dynamic sounds that stand out in your mix. Experiment with layering synthesizers, samplers, and virtual instruments to build up a multi-dimensional sonic landscape. Utilizing Modulation for Unique Textures Modulation is a powerful tool for adding movement and character to your sounds. VST plugins often include a range of modulation effects such as chorus, flanger, and phaser, which can be used to transform static sounds into evolving textures. By adjusting modulation parameters, you can create unique and interesting sonic textures that capture the listener’s attention. Embrace the versatility of VST plugins in Garageband to unlock a world of creative sound design possibilities. By understanding layering and stacking techniques and utilizing modulation for unique textures, you can take your music production to new heights, creating compelling and original sounds that set your music apart.

How to Master Vst Plugins in Garageband: Expert Tips


Credit: m.youtube.com


Midi Mapping And Customization

When it comes to using VST plugins in Garageband, understanding midi mapping and customization is crucial. Midi mapping allows you to assign parameters within a plugin to specific controllers on your MIDI device, giving you enhanced control and flexibility. Customization takes things a step further, allowing you to create personalized templates for different plugins and maximize your workflow efficiency.

Creating Custom Midi Mapping Templates

Creating custom midi mapping templates in Garageband is a straightforward process that can greatly enhance your productivity. By customizing your MIDI device to control specific parameters in your VST plugins, you can save time and streamline your workflow. Here’s a step-by-step guide:

  1. Open Garageband and create a new project.
  2. Navigate to the “Window” menu and select “Show MIDI Studio.”
  3. In the MIDI Studio window, click on your MIDI device to select it.
  4. Click on the “Configure…” button to open the Configure Device window.
  5. In the Configure Device window, click on the “Assignments” tab.
  6. Select the parameter you want to assign to a controller on your MIDI device.
  7. Move the desired controller on your MIDI device to assign it to the selected parameter.
  8. Repeat steps 6 and 7 for each parameter you want to assign.
  9. Once you have finished assigning all the desired parameters, click on the “Save As…” button at the bottom of the window.
  10. Enter a name for your custom midi mapping template and click “Save.”

That’s it! You have now created a custom midi mapping template in Garageband. Whenever you load your VST plugin, you can easily recall your custom template and start making music without spending time on repetitive manual assignments.

Maximizing Workflow Efficiency

To maximize your workflow efficiency with VST plugins in Garageband, here are a few additional tips:

  • Create multiple custom midi mapping templates for different plugins or different use cases. This way, you can quickly switch between templates depending on your needs.
  • Experiment with different controller assignments to find the most intuitive and efficient setup for your workflow.
  • Save your custom templates in a centralized location, like a dedicated folder, to ensure easy access.
  • Consider creating a cheat sheet or documentation for your custom midi mapping templates, especially if you use complex setups with multiple plugins.
  • Regularly review and refine your midi mappings to adapt to your evolving needs and preferences.

By utilizing these tips, you can take full advantage of midi mapping and customization features in Garageband, allowing you to work faster and more creatively with VST plugins.

Advanced Mixing And Mastering Techniques


Discover advanced mixing and mastering techniques using VST plugins in Garageband to enhance your music production. Learn how to leverage cutting-edge tools for professional-grade audio editing and production efficiency. Elevate your sound quality with expert insights into optimizing plugin usage within the Garageband platform.

Utilizing Vst Plugins For Professional Mixing

For musicians and producers looking to take their sound to the next level, leveraging VST plugins in Garageband can be a game-changer. By incorporating advanced mixing techniques, you can achieve professional-level results that rival those of a high-end studio. With the vast array of VST plugins available, you have the power to sculpt your sound with precision and finesse. One essential aspect of advanced mixing is EQ (equalization). This process involves adjusting the frequency levels of your audio tracks to ensure a well-balanced and cohesive sound. By utilizing EQ plugins, such as FabFilter Pro-Q or Waves SSL E-Channel, you can target specific frequencies, cut unwanted elements, and enhance the overall clarity and definition of your mix. Remember to be mindful of the frequency ranges of your instruments and make specific EQ adjustments accordingly. Another crucial step in the mixing process is compression. Compression plugins like Waves SSL G-Master Buss Compressor or Universal Audio LA-2A offer dynamic control by subtly leveling out the volume of your tracks, enhancing their punch and presence. By applying compression to individual tracks or the master bus, you can achieve a more consistent and polished sound. Experiment with different compression settings to find what works best for your mix. Reverb is an essential tool for creating depth and space within your mix. With reverberation plugins like Valhalla VintageVerb or Soundtoys Little Plate, you can add realistic and immersive reverberation to your tracks. Use different reverb types, such as rooms, halls, or plates, to give each instrument its own unique sonic environment. Adjusting the decay time, pre-delay, and wet/dry mix allows you to sculpt the perfect reverb settings for each track.

Mastering Tips For Polishing Your Tracks

Once you’ve achieved a well-balanced mix, it’s time to dive into the mastering process. Mastering adds the final polish to your tracks, ensuring they sound consistent and professional across different playback systems. Consider these tips to elevate your mastering game. One crucial step in mastering is achieving the right loudness level. Utilize mastering plugins like iZotope Ozone or FabFilter Pro-MB to balance the dynamic range, ensuring your tracks are loud enough without sacrificing clarity. Be careful not to overcompress or limit your tracks excessively, as this can result in a loss of dynamics and a “squashed” sound. Another essential aspect of mastering is stereo imaging. By utilizing plugins like iZotope Imager or Brainworx bx_control V2, you can widen or narrow the stereo field of your tracks, creating a more immersive and detailed sound. Experiment with different stereo imaging techniques to enhance the overall width and depth of your mix while maintaining a balanced center. When applying final equalization during mastering, focus on making subtle enhancements rather than drastic changes. Use EQ plugins like Waves SSL G-Master EQ or FabFilter Pro-Q to shape the overall tonal balance of your tracks. Tweak the low-end frequencies to ensure a solid foundation, enhance the clarity of the midrange, and smoothen any harshness in the high frequencies. Lastly, use a limiter plugin like FabFilter Pro-L or Waves L3 Multimaximizer to maximize the loudness of your tracks while preventing distortion and ensuring a competitive volume level. Adjust the threshold and output gain to achieve the desired loudness without compromising the integrity of your mix. Remember, the key to successful advanced mixing and mastering is experimentation. Each track is unique, and the plugins mentioned here serve as starting points for you to explore and discover your own signature sound. With practice and an understanding of these techniques, you’ll be well on your way to creating professional-quality mixes in Garageband using VST plugins.

How to Master Vst Plugins in Garageband: Expert Tips


Credit: support.apple.com


Frequently Asked Questions Of How To Use Vst Plugins In Garageband


How Do I Install Vst Plugins In Garageband?


To install VST plugins in Garageband, first, download the plugin files. Then, locate the Garageband plugins folder on your computer and move the downloaded files into this folder. Finally, open Garageband, go to the preferences menu, and enable the newly installed plugins in the audio/MIDI settings.


Can I Use Third-party Vst Plugins In Garageband?


Yes, you can use third-party VST plugins in Garageband. By default, Garageband supports Audio Unit (AU) plugins, but you can also use VST plugins with the help of a plugin host like JBridge or Blue Cat’s PatchWork.


How Do I Add A Vst Plugin To A Track In Garageband?


To add a VST plugin to a track in Garageband, select the track you want to add the plugin to and open the Smart Controls panel. Click on the Plugins button in the Smart Controls panel, select the desired VST plugin from the list, and adjust its settings according to your preferences.


Conclusion


VST plugins can greatly enhance your music production in Garageband. Embracing the powerful functionalities of VST plugins allows you to explore new sounds and effects, elevating the quality of your music. With the right approach and understanding, integrating VST plugins into your workflow can bring out the best in your creativity and musical expression.