Categories
Archive Audio Production

Discover the Hidden Secrets of Mixing Vs Mastering Music: What You Never Knew

Mixing is the process of balancing and blending individual tracks. Mastering is the final step in polishing the overall sound of a mix.


Music production involves two crucial stages: mixing and mastering. While both processes are essential for creating a high-quality final product, many people may not fully understand the difference between the two. Mixing involves adjusting individual tracks – such as vocals, drums, and guitars – to achieve a cohesive sound.


On the other hand, mastering focuses on refining the overall mix to ensure it sounds consistent across different audio systems. Understanding the nuances of mixing and mastering can help musicians and producers elevate the quality of their music and stand out in a competitive industry.


Credit: www.nytimes.com


The Difference Between Mixing And Mastering

In the world of music production, understanding the difference between mixing and mastering is crucial for creating a polished and professional sound.

Roles And Responsibilities

Mixing involves balancing and blending individual tracks to create a cohesive sound, adjusting levels, panning, and applying effects. Mastering focuses on optimizing the overall sound quality of a mix, ensuring it translates well on various playback systems.

Key Tools And Techniques

Mixing engineers utilize tools such as equalizers, compressors, and effects to enhance individual tracks. Mastering engineers use tools like limiters, stereo enhancers, and spectral analyzers to finalize the overall mix.

The Art Of Mixing Music

Balancing Tracks And Elements

Ensuring each element can be heard clearly without overpowering others.

Creating Spatial Depth

Placing instruments and vocals in different positions to create a sense of space.

Uncovering The Mysteries Of Mastering

Enhancing Overall Sound Cohesion

Mastering music is an intricate process that involves refining the overall sound and ensuring a cohesive blend of all elements. Mastering engineers use advanced techniques to optimize the tonal balance, stereo width, and dynamic range of the audio, making it sound consistent and balanced across different playback systems.

Applying Final Polish And Sheen

Once the mixing phase is complete, the mastering stage adds the final touch by applying polish and sheen to the tracks. Mastering engineers carefully enhance the clarity, depth, and overall sonic character of the music, elevating its quality and ensuring it stands out in various listening environments.


Credit: www.wsj.com


The Impact On Sound Quality


The impact on sound quality is significant in both mixing and mastering music. While mixing focuses on blending individual tracks, mastering enhances the overall sound and ensures consistency. Understanding the nuances of each stage is crucial to achieving the best results in music production.

Perceptual Differences

When it comes to understanding the impact of mixing and mastering on sound quality, it’s important to recognize the perceptual differences between these two processes. Mixing focuses on the individual elements of a track, such as the balance between instruments, the spatial positioning, and the overall tonal quality. On the other hand, mastering involves taking the mixed track and refining it further to enhance its overall sonic characteristics and ensure it translates well across different playback systems.

Listener’s Experience

The impact of mixing and mastering on sound quality directly influences the listener’s experience. A well-mixed track can create a sense of depth and clarity, ensuring that each instrument and element stands out while still working together harmoniously. This allows the listener to fully appreciate the intricacies and nuances of the music, resulting in a more immersive and enjoyable experience.

Mastering, on the other hand, adds the finishing touches to the track, making it sound polished and professional. It focuses on optimizing the overall volume and dynamic range, ensuring that the track doesn’t sound too loud or too soft. By carefully balancing the frequencies and applying various processing techniques, mastering can bring out the details and make the track more cohesive.

The listener’s experience is ultimately shaped by the quality of the sound they hear. A poorly mixed or unmastered track may sound muddy or disjointed, making it challenging for the listener to fully engage with the music. On the contrary, a well-mixed and mastered track can elevate the listening experience, capturing the listener’s attention and leaving a lasting impression.

Navigating The Mixing Vs. Mastering Debate

When it comes to music production, there’s an ongoing debate between mixing and mastering. Both are crucial stages in the music creation process, but they serve different purposes. Understanding the distinctions between mixing and mastering is essential for any musician or producer looking to create high-quality tracks.

There are several misconceptions and myths surrounding the mixing vs. mastering debate. Let’s debunk some of them:

  1. Mixing and mastering are the same things.
  2. If your mix sounds great, you don’t need mastering.
  3. You can’t mix your own music; you need a professional engineer for that.

These misconceptions often lead to confusion and hinder the production process. It’s important to dispel these myths and gain a clear understanding of the role each stage plays in creating a polished, professional track.

While mixing and mastering are distinct processes, finding the right balance between the two is crucial. Mixing involves combining individual tracks, adjusting levels, panning, and adding effects to create a cohesive and balanced sound. On the other hand, mastering is the final step, where the entire mix is optimized for playback across various devices and platforms.

Mixing Mastering
Individual track adjustments Optimizing the entire mix
Creating a cohesive sound Enhancing overall clarity and loudness
Adjusting levels and panning Ensuring the track sounds great everywhere

While it’s essential to have a well-mixed track before sending it off for mastering, the mastering process adds that final polish and ensures the track sounds its best on any platform or playback system.

  • Remember, the mixing stage focuses on individual track adjustments and creating a cohesive sound.
  • Mastering, on the other hand, enhances overall clarity, loudness, and ensures your track sounds great everywhere.
  • To achieve the best results, it’s crucial to strike a balance between these two stages.

So, whether you’re an aspiring musician or a seasoned producer, understanding the differences between mixing and mastering and finding the right balance between the two will help you create professional-quality tracks that resonate with your audience.

Discover the Hidden Secrets of Mixing Vs Mastering Music: What You Never Knew


Credit: www.facebook.com


Frequently Asked Questions On Mixing Vs Mastering Music What You Never Knew


What Is The Difference Between Mixing And Mastering Music?


Mixing involves balancing and adjusting the individual elements of a song, while mastering focuses on enhancing the overall sound and preparing the final mix for distribution.


Why Is Mixing Music Important?


Mixing music is important because it brings all the elements of a song together, ensuring a balanced and cohesive sound that is pleasing to the listener.


What Does A Mixing Engineer Do?


A mixing engineer is responsible for combining and adjusting the levels, frequencies, and effects of different audio tracks to create a polished and professional mix.


How Does Mastering Enhance The Sound Of A Song?


Mastering enhances the sound of a song by using techniques like equalization, compression, and stereo widening to make it sound more polished, balanced, and consistent across different playback systems.


Conclusion


Understanding the differences between mixing and mastering is crucial for producing high-quality music. Both processes are essential for achieving a professional sound, and they require specific skills and attention to detail. By recognizing the distinct roles of mixing and mastering, musicians and producers can elevate their music to the next level of excellence.
 

https://www.youtube.com/watch?v=OjQf9Fw6Bvw


Categories
Archive Audio Production

Should You Sign? Lessons from My Indie Label Deal

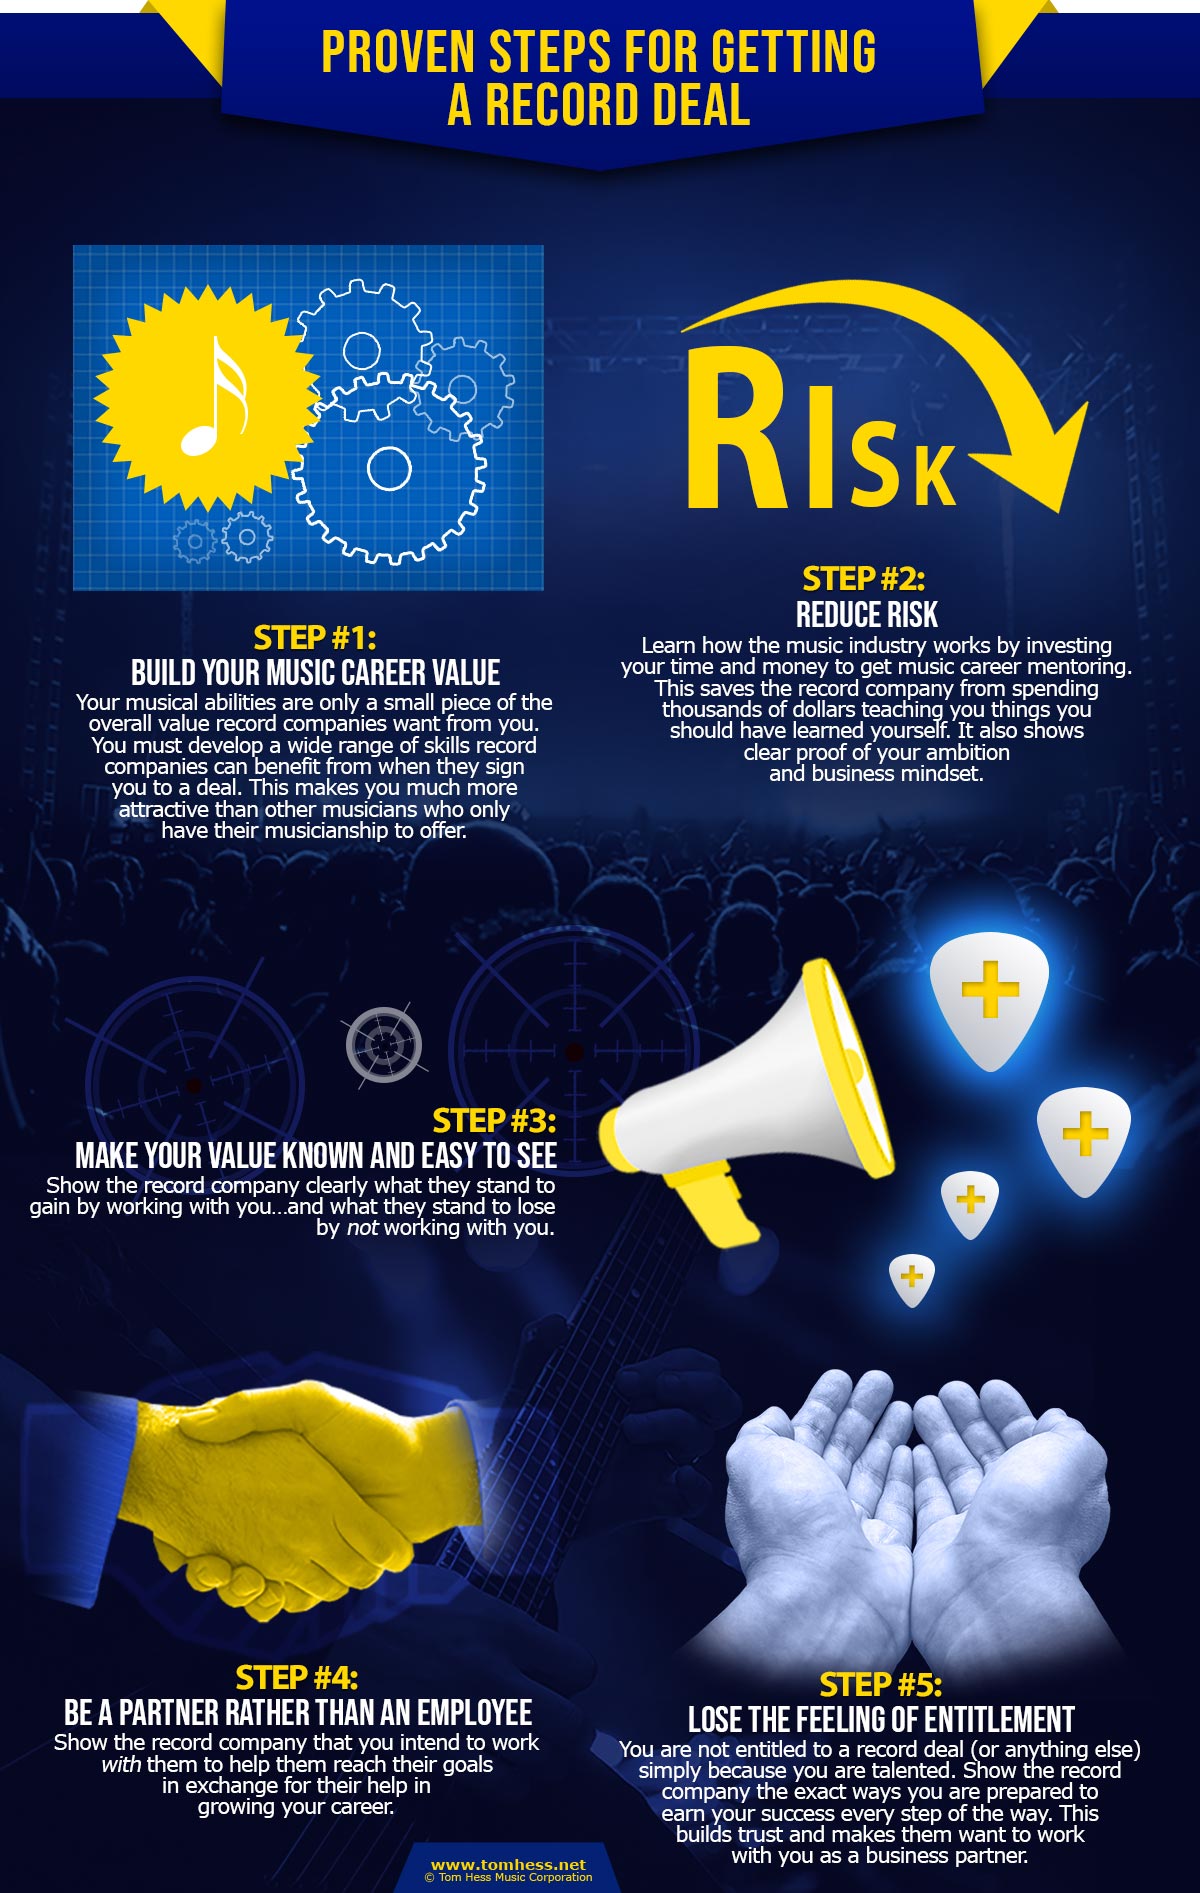
Signing a deal with an indie label can provide valuable opportunities, but careful consideration is necessary. Understanding the terms and implications of the agreement is crucial for your career’s success.


In my experience of signing a deal with an indie label, I gained insights that shed light on both the benefits and challenges of such partnerships. This article aims to provide a transparent perspective on what to expect when entering into a contract with an indie label.


By sharing my personal journey and learnings, you can make an informed decision on whether signing with an indie label aligns with your goals and aspirations in the music industry. It’s essential to weigh the pros and cons before committing to any agreement to ensure it aligns with your artistic vision and long-term objectives.

Should You Sign? Lessons from My Indie Label Deal


Credit: tomhess.net


The Indie Label Deal


When considering a deal with an indie label, it’s essential to weigh the advantages and disadvantages. Gaining exposure and support while retaining creative control can be beneficial, but it’s vital to carefully review the terms and potential limitations. Understanding the dynamics of an indie label deal is crucial before making a decision.

Understanding The Indie Label

An indie label deal involves a partnership between artists and smaller independent record labels.

Labels provide resources for music distribution, marketing, and promotion to help artists reach wider audiences.

It grants the label certain rights over music production and royalties, typically for a specified period.

Key Terms And Conditions

Artists should carefully review the terms of the contract, considering aspects such as royalty rates, copyright ownership, and contract duration.

The agreement may outline responsibilities regarding recording, touring, and merchandising.

Understanding the termination clauses in case of disputes or unsatisfactory performance is crucial.


Pros And Cons

Pros and Cons:

Advantages Of Signing

  • Access to industry connections and networking opportunities
  • Promotional support for your music and brand
  • Potential financial backing for recording and marketing

Potential Drawbacks

  • Lack of creative control over your music and image
  • Possible restrictions on when and where you can perform
  • Uncertainty about future ownership of your music and royalties

Lessons Learned

Navigating Rights And Royalties

“` As an independent artist navigating the music industry, I quickly realized the importance of understanding the complexities of rights and royalties. Negotiating a deal with an indie label opened my eyes to the significance of owning and protecting my music rights. It’s crucial to thoroughly review and understand the terms related to mechanical, performance, and synchronization rights. Additionally, understanding how royalties are calculated and distributed is essential in ensuring fair compensation for your work.

Building A Sustainable Career

“` Building a sustainable career in the music industry requires careful planning and strategic decision-making. Partnering with an indie label taught me the value of maintaining control and autonomy over my artistic endeavors. It’s important to prioritize long-term growth and sustainability, rather than opting for short-term gains. Embracing a multifaceted approach to the industry, including diversifying revenue streams and nurturing a loyal fan base, is essential for a successful and enduring career in music.

Should You Sign? Lessons from My Indie Label Deal


Credit: www.amazon.com


Making The Decision


Considering whether to pursue a deal with an indie label involves careful deliberation. Insights gained from others’ experiences can aid in making an informed decision and determining the potential benefits. It’s essential to thoroughly assess the terms and implications before committing.

If you’re a musician dreaming of taking your career to the next level, signing with an indie label can be an enticing prospect. However, before you make the leap, it’s important to thoroughly consider your options and seek legal advice. Let’s explore these crucial steps in detail:

Considering Your Options

When it comes to making the decision of whether or not to sign with an indie label, it’s vital to carefully evaluate your options. Take the time to weigh the potential benefits and drawbacks, considering factors such as:

  • Your long-term goals
  • The level of creative control you desire
  • The financial resources and support the label can provide
  • The label’s track record and reputation

By assessing these aspects, you can gain a better understanding of what the partnership may entail for your future.

Seeking Legal Advice

Before finalizing any deal, it is essential to seek legal advice from an experienced music attorney. They can help you navigate the complexities of contracts and ensure that your best interests are protected. A music attorney can:

  • Review the terms of the agreement
  • Identify any potential red flags or unfavorable clauses
  • Explain the implications of the contract on your career
  • Negotiate on your behalf to obtain more favorable terms

Remember, signing a deal without proper legal guidance can lead to potential pitfalls later on. So, it’s crucial to engage a professional who can provide the necessary expertise to safeguard your musical journey.

The Artist’s Perspective

The Artist’s Perspective:

Insights From Independent Artists

Being an independent artist means having full control over your music and career direction. Independent artists often prefer to stay away from major label contracts because they value their creative freedom and want to have a say in every aspect of their music.

When it comes to signing a deal with an indie label, it’s important to consider the insights from other independent artists who have gone through the experience. Here are some key takeaways:

Creative Freedom Vs. Support

One of the major concerns for independent artists when signing with an indie label is the balance between creative freedom and support. While being able to control the artistic direction of your music is important, it can also be beneficial to have a team of professionals supporting your career.

Insights from independent artists reveal that finding an indie label that understands and respects your artistic vision is crucial. They suggest looking for a label that allows you to retain creative control while providing guidance and support in areas such as marketing, promotion, and distribution.

Ultimately, it’s a delicate balance between maintaining your creative integrity and benefiting from the expertise and resources that an indie label can offer. Finding the right indie label can provide the perfect blend of artistic freedom and support, enabling artists to reach their full potential.

Some independent artists have shared their positive experiences, citing that signing with an indie label has opened doors to opportunities they would not have had access to on their own. These opportunities often include collaborations with other talented artists, exposure to a wider audience, and assistance with touring and live performances.

While creative freedom is undoubtedly valuable, having the support of an indie label can help artists navigate the music industry and stand out in a crowded market.

Pros Cons
  • Access to industry connections
  • Opportunities for collaboration
  • Expertise and guidance in marketing and promotion
  • Increase in exposure and fanbase
  • Potential loss of some creative control
  • Dependency on label for resources
  • Possibility of conflicting artistic visions
  • Less flexibility in decision-making

It’s essential for artists to weigh the pros and cons and carefully consider their goals and priorities before signing a deal with an indie label.

In conclusion, the artist’s perspective on signing with an indie label is highly individual and depends on each artist’s unique aspirations and values. While creative freedom is crucial, the support and opportunities provided by an indie label can help artists realize their full potential and thrive in the music industry.

Frequently Asked Questions For Should You Sign What I Learned From Signing A Deal With An Indie Label


What Are The Benefits Of Signing With An Indie Label?


Signing with an indie label can provide artists with more creative freedom, a chance to reach a wider audience, and access to industry expertise and resources that might not be available independently. Additionally, working with a smaller label can lead to a more personal and collaborative artist-label relationship.


How Does Signing With An Indie Label Differ From A Major Label?


Signing with an indie label often means retaining more control over your music and career decisions compared to a major label deal. While major labels offer larger budgets and established connections, indie labels prioritize artist development and artistic vision, giving artists more freedom to experiment and grow their fan base organically.


What Should I Consider Before Signing With An Indie Label?


Before signing with an indie label, artists should carefully review the terms of the contract, including revenue splits, marketing support, and ownership of masters. It’s important to consider the label’s track record, reputation, and ability to help you achieve your specific goals.


Seeking legal advice can also be beneficial to ensure you fully understand the terms and protect your interests.


How Can Signing With An Indie Label Impact My Music Career?


Signing with an indie label can have a significant positive impact on your music career. It can provide opportunities for exposure, collaboration with other talented artists, and access to industry professionals who can guide your artistic growth. Additionally, the credibility and support of an indie label can help you attract a larger audience and build a solid foundation for long-term success.


Conclusion


After navigating the world of indie labels, it’s clear that signing a deal has its pros and cons. Ultimately, the decision hinges on your unique goals and values. Research, negotiation, and clarity in communication are essential for a successful partnership.


No matter the choice, your passion for music should always lead the way.


https://www.youtube.com/watch?v=ATG18YKd_xE


Categories
Archive Audio Production

Does Louder Really Mean Better In Music Production? Discover the Raw Power of Volume

In music production, louder doesn’t always mean better. It’s more about achieving a balanced mix.


Creating a compelling music production involves striking the right balance between different elements such as volume, dynamics, and frequencies. While increasing the volume can add excitement and energy to a track, it’s crucial to avoid overpowering certain elements and causing distortion.


Skillful producers know that a well-mixed song relies on careful adjustments in levels and placement of sounds within the stereo field. By focusing on clarity, dynamics, and cohesion, rather than simply cranking up the volume, music productions can truly shine and engage listeners on a deeper level. Let’s explore how the art of balance and nuance in music production can elevate a piece of music to its full potential.


Credit: www.harley-davidson.com


The Impact Of Loudness War


The impact of loudness war in music production raises the question of whether louder really means better. This practice of pushing volume to the extreme can lead to loss of dynamics and distortion, affecting the overall quality of the music.


Achieving a balanced mix without sacrificing quality is crucial for a better listening experience.


History Of Loudness War

The practice of increasing the overall volume of music tracks emerged in the late 20th century.

Record labels believed that louder songs would attract more attention and sound better on the radio.

This trend led to music producers and artists engaging in a competition to make their tracks as loud as possible.

Effects On Music Quality

The obsession with loudness resulted in a phenomenon known as the Loudness War.

Excessive use of compression and limiting during mastering sacrificed dynamics and clarity.

Musical nuances and subtleties were often lost when prioritizing loudness over quality.

Listeners may experience fatigue and distortion when constantly exposed to overly compressed music.

Psychological And Emotional Impact

When it comes to music production, the psychological and emotional impact of volume cannot be understated. Louder music doesn’t always equate to better music. Let’s dissect the Psychological and Emotional Impact of sound intensity.

Perceived Intensity

The perceived intensity of music production is subjective and varies from person to person.

Emotional Response

Emotional response to music is deeply affected by the volume at which it is played. Loud music can evoke strong emotions.

It’s important to understand that the quality of music isn’t solely determined by its volume level.

Louder music may command attention but can also overwhelm the listener, leading to fatigue.

Soft music, on the other hand, can create a more intimate and calming atmosphere for the listener.

The emotional impact of music production goes beyond just the volume at which it is played.

It’s essential for music producers to strike a balance in volume to create the desired emotional response in listeners.

Remember, music is not just about how loud it is, but also about how it makes you feel.

https://www.youtube.com/watch?v=D4FMyeuVD78


Technical Considerations

When it comes to music production, there is an ongoing debate about whether louder truly means better. In this post, we’ll delve into the technical considerations behind this question, focusing on dynamic range, clipping, and finding the right balance between loudness and clarity.

Dynamic Range And Clipping

The dynamic range of a song refers to the difference between the softest and loudest parts. A wider dynamic range allows for more nuanced and realistic sound. On the other hand, clipping occurs when the signal level exceeds the maximum available headroom, resulting in distortion and loss of quality.

Balancing Loudness And Clarity

Balancing loudness and clarity is crucial in music production. While a louder mix can grab attention, it should not come at the expense of clarity and depth. Striking a balance ensures that the music remains engaging and retains its musicality while also delivering the desired impact.

Listener’s Experience

When it comes to music production, one commonly debated topic is whether louder truly means better. While some argue that a higher volume can enhance the listener’s experience, there are certain aspects that need to be considered. Ear fatigue and the impact on perception are two key factors that play a crucial role in determining the listener’s experience.

Ear Fatigue

One of the critical downsides of excessively loud music production is ear fatigue. When listeners are exposed to high volumes for extended periods, it can strain their ears and have detrimental effects on their overall listening experience. Constant exposure to loud music can lead to ear fatigue, resulting in decreased enjoyment and even potential hearing damage. It’s important to strike a balance between volume and quality to ensure a pleasant and comfortable listening experience for the audience.

Impact On Perception

The volume of a music production can significantly impact the listener’s perception of the sound. While it’s true that a louder presentation can create a sense of power and intensity, it doesn’t necessarily translate to a better overall experience. Excessive volume can distort the sound and drown out subtleties and nuances within the music. It’s important to consider the dynamic range and the intended emotional impact when determining the volume levels during music production.

Moreover, music is often intended to evoke different emotions, and the volume must align with the desired mood. Constant loudness throughout the entire track can lead to listener fatigue and monotony, robbing the music of its intended impact. By carefully managing the volume levels, music producers can create a dynamic and engaging experience that captivates the audience and enhances the emotional journey conveyed through the music.

Achieving Balance In Music Production


To achieve balance in music production, it’s crucial to acknowledge that louder doesn’t necessarily equate to better quality. Focus on optimizing overall sound dynamics for a more impactful and engaging listening experience. Strive for a harmonious blend of elements to elevate the final product.

Artistic Integrity

When it comes to music production, achieving balance is key to ensuring the quality and impact of a song. The idea that louder is better has long been ingrained in the industry, with the belief that a louder track will stand out and grab attention. However, it’s important to consider the concept of artistic integrity in the pursuit of balance.

Artistic integrity is about preserving the original intention and emotional message of a song. While it may be tempting to crank up the volume and make every element stand out, this approach can sometimes compromise the artistic integrity of the music. Instead, it’s important to strike a balance that allows the listener to experience the intended emotions and musical nuances.

Utilizing Dynamics

Utilizing dynamics is an essential aspect of achieving balance in music production. Dynamics refer to the variation in volume and intensity throughout a song. By carefully managing dynamics, producers can create a sense of tension, release, and ultimately, maintain a listener’s interest.

A well-balanced mix utilizes both soft and loud passages, allowing the music to breathe and evolve naturally. This requires careful attention to each element in the mix, ensuring that no instrument or vocal overpowers the others. By intentionally controlling the dynamics, producers can create a more engaging and immersive listening experience.

Does Louder Really Mean Better In Music Production? Discover the Raw Power of Volume


Credit: www.amazon.com


Does Louder Really Mean Better In Music Production? Discover the Raw Power of Volume


Credit: www.amazon.com


Frequently Asked Questions For Does Louder Really Mean Better In Music Production


Is Louder Always Better In Music Production?


No, louder is not always better in music production. While loudness can enhance certain elements of a song, it’s important to strike a balance. Overly loud music can lead to distortion and listener fatigue, compromising the overall quality of the production.


How Does Loudness Affect Music Quality?


Loudness can impact music quality by affecting the dynamics, clarity, and balance of the sound. Excessive loudness can cause compression and distortion, resulting in a loss of detail and dynamic range. It is important to ensure that loudness levels are appropriate in order to maintain the desired quality.


What Are The Disadvantages Of Focusing Solely On Loudness In Music Production?


Focusing solely on loudness in music production can have several disadvantages. It can lead to the loss of dynamics and musicality, making the music sound flat and fatiguing for the listener. It can also make it harder to achieve a balanced mix, as different elements may compete for loudness, resulting in a less enjoyable listening experience.


Conclusion


In sum, music production is not solely about being louder. It’s about finding the right balance and enhancing the overall listening experience. Understanding the nuances of dynamics and mixing is crucial for creating high-quality music. Ultimately, it’s not about volume, but about delivering a well-crafted and impactful sonic experience for the audience.

Categories
Archive Audio Production

The Ultimate Guide To Mixing And Recording Music: Master the Art of Sonic Wizardry

The ultimate guide to mixing and recording music offers essential techniques for achieving professional-quality sound. Learn proven methods for optimizing your music productions.


Are you a music enthusiast looking to enhance your mixing and recording skills? With the right knowledge and tools, you can elevate your productions to the next level. Understanding key concepts such as signal flow, equalization, and compression is crucial for creating polished tracks.


This comprehensive guide covers everything from setting up your home studio to mastering the final mix. Whether you are a beginner or seasoned musician, these tips and tricks will help you produce high-quality music that stands out in today’s competitive industry. Get ready to unleash your creativity and take your music to new heights!

The Ultimate Guide To Mixing And Recording Music: Master the Art of Sonic Wizardry


Credit: www.beatportal.com


The Basics Of Mixing And Recording Music

Mixing and recording music are essential skills for any aspiring musician or music producer.

Exploring The Fundamentals

Learning the basics of mixing and recording music lays a strong foundation for creating high-quality tracks.

Understanding The Importance Of Mixing And Recording

Mixing and recording music are crucial steps to ensure your songs sound professional and polished.

The Ultimate Guide To Mixing And Recording Music: Master the Art of Sonic Wizardry


Credit: www.levelsmusicproduction.com


Setting Up Your Home Studio

In the journey of mixing and recording music, setting up your home studio is a crucial step towards creating high-quality music right from the comfort of your own space.

Choosing The Right Equipment

Choosing the right equipment is key to achieving professional-sounding mixes.

Optimizing Your Recording Space

Optimizing your recording space is essential for capturing clean and clear audio.

https://www.youtube.com/watch?v=Zyi4HWFvhxQ


The Elements Of A Great Mix

In the world of music production, achieving the perfect mix is essential for creating a masterpiece. A great mix brings out the intended emotions and energy of the song, creating a captivating experience for the listeners. To achieve this, mastering the elements of a great mix is crucial. From balancing levels and frequencies to applying effects and processing, each component plays a significant role in shaping the final sound. Let’s delve into the essential elements that contribute to a remarkable mix.

Balancing Levels And Frequencies

When it comes to balancing levels and frequencies, achieving the right balance is key to crafting a professional and engaging mix. Properly setting the levels of individual tracks and adjusting frequencies allows each element of the song to shine through without overpowering others, resulting in a clear and cohesive sound. Utilizing techniques such as dynamic range compression, EQ adjustments, and panning can help in achieving a well-balanced mix.

Applying Effects And Processing

Applying effects and processing is where the magic happens in a mix. It involves shaping the overall sound using various tools and techniques. From reverb and delay to compression and equalization, these effects and processing tools can add depth, clarity, and dimension to the mix. By skillfully applying these effects and processing, you can take the mix from sounding good to sounding exceptional.

The Ultimate Guide To Mixing And Recording Music: Master the Art of Sonic Wizardry


Credit: www.levelsmusicproduction.com


Recording Techniques For Maximum Impact


Learn how to achieve maximum impact with these recording techniques in “The Ultimate Guide to Mixing and Recording Music. ” Discover expert tips for capturing the best sound and creating a powerful mix that resonates with your audience. Elevate your music production skills with these proven strategies.

Capturing The Perfect Takes

When recording music, capturing the perfect takes is essential in ensuring that your final product has maximum impact. A flawless and polished performance will elevate the quality of your music and engage listeners. Here are some effective techniques to help you achieve perfection:

  • Prepare your artist: Make sure your artist feels comfortable and prepared before recording, as it significantly affects their performance.
  • Use a metronome: Keeping time is crucial, so using a metronome during the recording process will help maintain a consistent tempo and rhythm.
  • Break down the parts: If a song has complex sections, consider recording each part separately to focus on achieving perfection.
  • Multiple takes: Encourage your artist to perform multiple takes of each section. This provides more options during the mixing stage and allows you to choose the best version.
  • Emphasize emotion: Encourage your artist to convey emotion through their performance. This adds depth and connection for the listener.

Utilizing Microphone Placement

The placement of microphones during the recording process plays a critical role in capturing the intended sound, tone, and ambiance. Here are some tips to make the most of microphone placement:

  1. Experimentation is key: Don’t be afraid to try different microphone positions to achieve the desired sound. Small adjustments can make a significant difference.
  2. Consider the sound source: Understanding the sound source will help you determine the best microphone placement. Experiment with distance and angles to capture the sound accurately.
  3. Room reflection: Take into account the room’s size, shape, and acoustic properties. Placing microphones strategically can minimize unwanted reflections and enhance the recorded sound.
  4. Proximity effect: Experiment with microphone proximity to the sound source. Moving the microphone closer or farther can alter the tone and dynamic of the recorded instrument or voice.
  5. Polar patterns: Familiarize yourself with different microphone polar patterns and their characteristics. Selecting the appropriate pattern for each instrument or vocalist will optimize the recording quality.

By implementing these recording techniques and paying attention to capturing the perfect takes and utilizing proper microphone placement, you’ll undoubtedly have a significant impact on the overall quality of your music.

Mastering Your Music For Professional Sound


Discover the essential techniques to perfect your music production process. This ultimate guide offers expert insights to elevate your mixing and recording skills for a top-tier professional sound. Unlock the secrets to mastering music like a seasoned pro in the industry.

Understanding The Mastering Process

Mastering your music is a crucial step in achieving that polished, professional sound that sets your tracks apart. It involves carefully fine-tuning your mix and making it sound consistent across different playback systems. Understanding the mastering process will empower you to take full control of your music’s final sound.

During the mastering process, a skilled audio engineer applies a range of techniques to enhance the overall quality of your music. This includes adjusting the levels, equalization, stereo imaging, and dynamics to make your tracks sound cohesive and balanced. They also ensure that your music meets specific technical requirements for different distribution platforms.

Mastering your music allows you to optimize the playback experience across various mediums, from streaming platforms to CD and vinyl. By carefully shaping the sound of your tracks, you make sure that your music translates well on any device or audio system.

Applying The Final Touches

When it comes to applying the final touches during the mastering process, attention to detail is key. The goal is to refine your mix without sacrificing its original character and artistic vision. Here are some essential steps that mastering engineers undertake:

  1. Listening and analysis: The mastering engineer listens critically to your mix, analyzing its strengths and areas that need improvement. They identify any potential issues and devise a plan to enhance the overall sound.
  2. Equalization and tonal balance: Through precise equalization, the engineer fine-tunes the frequency response of your mix, ensuring that each element sits harmoniously in the sonic spectrum. This step significantly impacts the perceived clarity, warmth, and depth of your music.
  3. Dynamic control: Balancing the dynamics of your mix is crucial for creating a professional sound. The engineer uses techniques such as compression and limiting to control the peaks and transients, achieving a more consistent and polished sound.
  4. Stereo imaging: By manipulating the stereo width and placement of different elements in your mix, the mastering engineer enhances the depth and spatial dimension of your music, giving it a more immersive and captivating feel.
  5. Adding final effects: Subtle effects like reverb, delay, and stereo enhancement may be applied to add the finishing touches to your music. These effects can enhance the overall ambience and depth of your mix, taking it to the next level.
  6. Optimizing for various formats: The mastering engineer ensures that your music sounds its best across different mediums and platforms. They pay attention to loudness levels and ensure your tracks meet the technical specifications required for streaming services, CDs, vinyl, and other formats.

When mastering your music, it’s crucial to work with experienced professionals who understand the intricacies of the process. Their expertise and objective perspective can elevate your tracks to the next level, giving them that polished and professional sound that captures the attention of your listeners.

Frequently Asked Questions Of The Ultimate Guide To Mixing And Recording Music


What Is The Purpose Of Mixing Music?


Mixing music is the process of combining and balancing individual tracks to create a cohesive and professional-sounding final mix. It’s essential for enhancing the clarity, depth, and overall impact of a song, ensuring that all elements work together harmoniously.


How Does The Recording Process Work?


The recording process involves capturing individual performances or sounds using microphones and other recording equipment. These recordings are then edited and manipulated to create the desired sound. Recording techniques, such as microphone placement and signal processing, play a crucial role in capturing high-quality audio.


Why Is It Important To Have Good Equipment For Mixing And Recording?


Good equipment is crucial for producing high-quality mixes and recordings. Quality microphones, speakers, audio interfaces, and software ensure accurate sound reproduction and precise control over the mix. Using professional-grade equipment helps achieve a polished and professional sound.


Conclusion


Incorporating the skills and techniques outlined in this guide can greatly enhance the quality of your music recordings. By understanding the fundamentals of mixing and recording, you can take your music to the next level and captivate your audience with professional-sounding tracks.


Elevate your sound and unleash your creativity with the insights shared in this comprehensive guide.

Categories
Archive Audio Production

Master Your EDM Tracks: Unleash the Power of Technique

Improve your EDM tracks with music mastering techniques for enhanced quality and clarity. Enhance your EDM tracks using effective music mastering techniques, such as EQ adjustments and dynamic processing.


Mastering is key to achieving professional sound quality and ensuring your music stands out in a competitive market. By implementing these techniques, you can elevate your EDM tracks to a higher standard, captivating listeners and making a lasting impression. Discover how simple yet impactful mastering techniques can make a significant difference in the overall quality of your EDM productions.


Start mastering your tracks with confidence and see the transformative results.

Master Your EDM Tracks: Unleash the Power of Music Mastering Techniques


Credit: www.amazon.com


The Art Of Music Mastering

Music mastering is the final and crucial step in the production process, where tracks are polished to perfection. This process is like the fine-tuning that enhances the overall sound quality and ensures consistency across the entire album or EP.

The Role Of Music Mastering

In music mastering, professionals use specialized tools to optimize the tracks. They focus on elements like balance, clarity, and dynamic range. The primary goal is to make the music sound the best it can across various playback systems.

Understanding The Impact Of Music Mastering

Music mastering can greatly impact how your EDM tracks are perceived by your audience. A well-mastered track can enhance the energy, clarity, and overall impact of the music. It ensures that your tracks stand out in a competitive EDM scene.

Key Elements Of Edm Tracks

`basslines And Low-end Frequencies`


`synths And Melodic Elements`


Essential Music Mastering Techniques

If you want to elevate your EDM tracks to a professional level, mastering is an essential step in the production process. This final stage of audio post-production polishes and enhances the sound of your music, ensuring it is ready for distribution. Here are some essential music mastering techniques that can make a notable difference in the quality of your EDM tracks.

Dynamic Range And Compression

Dynamic range and compression play a crucial role in music mastering. By carefully controlling the dynamic range of your tracks, you can ensure that softer and louder sections are balanced, resulting in a consistent, polished sound. Compression techniques help to further refine the dynamic range by reducing the volume of louder sounds and boosting the softer ones, creating a more uniform and impactful listening experience.

Equalization And Frequency Balancing

Equalization (EQ) and frequency balancing are vital components of mastering that help sculpt the overall tonal balance of your EDM tracks. Using EQ, you can adjust the levels of different frequencies, ensuring that each element of the track occupies its own sonic space and blends harmoniously with the rest of the mix. Careful frequency balancing can help bring out the clarity and energy in individual elements, ultimately contributing to a more cohesive and professional-sounding track.

Advanced Tips For Edm Mastering

Mastering is a crucial step in the production of electronic dance music (EDM) tracks. It involves fine-tuning and enhancing your songs to achieve a polished and professional sound. While there are many mastering techniques you can employ, this article will focus on two advanced tips that can take your EDM tracks to the next level: Stereo Imaging and Spatial Effects, and Limiting and Loudness Maximization.

Stereo imaging refers to the placement and perception of sound within the stereo field. In EDM, having a wide and well-balanced stereo image is essential for creating a captivating and immersive listening experience. Here are some techniques to enhance your stereo imaging:

  1. Use stereo widening plugins or techniques to give your tracks a wider soundstage. However, be careful not to exaggerate the effect, as it can lead to phase issues.
  2. Pan instruments and elements within the mix to create separation and clarity. This allows each element to be heard distinctly in its own space.
  3. Experiment with panning automation to create movement and interest in your tracks. For example, you can automate the panning of a synth pad from left to right to add depth and dimension.

In addition to stereo imaging, spatial effects can further enhance the sense of depth and three-dimensionality in your EDM tracks. Some popular spatial effects include:

  • Reverb: Adding reverb to certain elements can create a sense of space, as if the sound is coming from a specific location within the mix.
  • Delay: Using delays with different timings and feedback settings can give your tracks a sense of depth and echo, adding to the overall ambiance.
  • Modulation Effects: Effects like chorus, flanger, and phaser can add movement and interest to specific elements, making them feel alive and dynamic.

Remember, moderation is key when using stereo imaging and spatial effects. Always trust your ears and make adjustments accordingly to achieve the desired impact.

Once you have achieved a balanced and dynamic mix, it’s time to bring it to the desired loudness level to compete with other professional EDM tracks. This is where limiting and loudness maximization techniques come into play:

Limiting is a crucial step in the mastering process that helps control the dynamic range of your tracks and ensures they don’t exceed a certain loudness threshold. Here’s how you can effectively use limiting:

  1. Select the Right Limiter: Choose a limiter plugin that suits your needs and allows you to shape the sound according to your preferences. Some popular limiters include FabFilter Pro-L and Waves L3 Multimaximizer.
  2. Set the Threshold: Adjust the threshold settings to control the peaks and prevent clipping. Be cautious not to over-compress your tracks, as it can result in a loss of dynamics and a squashed sound.
  3. Make-up Gain: Use the make-up gain control to boost the overall loudness of your tracks after limiting. However, be mindful of maintaining a balanced mix without sacrificing clarity.

In addition to limiting, loudness maximization techniques can help bring your EDM tracks to commercial loudness levels without sacrificing audio quality. Some popular loudness maximization techniques include:

  • Multi-Band Compression: By applying compression to different frequency bands, you can control the dynamics and achieve a more balanced and consistent sound.
  • Parallel Compression: This technique involves blending a heavily compressed signal with the original signal to add punch and presence without sacrificing dynamics.
  • Clipping: Clipping can be used sparingly to add subtle saturation and loudness to specific elements or the overall mix. However, be cautious not to introduce unwanted distortion.

By mastering these advanced techniques of stereo imaging, spatial effects, limiting, and loudness maximization, you can elevate the quality and impact of your EDM tracks, ensuring they compete with the best in the industry. Remember to experiment, trust your ears, and continuously refine your mastering process to achieve your desired results.

Putting It All Together

Now that you are familiar with creating a mastering chain and refining your mastered EDM tracks, it’s time to put it all together and take your music to the next level. By combining the right techniques and utilizing the power of mastering, you can enhance the overall sound and quality of your tracks, making them stand out in the competitive EDM industry.

Creating A Mastering Chain

Before diving into refining your tracks, it’s crucial to set up a solid mastering chain. This involves a series of processors that help shape the sound of your music. Here is an example of a general mastering chain:

  1. Equalization: Use EQ to balance the frequency spectrum and remove any unwanted resonances.
  2. Compression: Apply compression to control the dynamic range and add consistency to your tracks.
  3. Saturation: Add subtle saturation to add warmth and depth to your sounds.
  4. Stereo Widening: Utilize stereo widening techniques to create a wider soundstage and enhance the stereo image.
  5. Loudness Maximization: Boost the overall volume of your track while maintaining clarity and preventing distortion.

Remember, this is just a starting point, and you can customize your mastering chain based on your preferences and the specific needs of each track you are working on.

Refining Your Mastered Edm Tracks

Once you have a solid mastering chain in place, it’s time to refine and polish your tracks to perfection. Here are some tips to help you in this process:

  • Listen critically: Take the time to listen to your tracks in different environments and pay attention to every detail. Identify any areas that may need improvement.
  • Balance the mix: Ensure that each element in your mix is well-balanced and that no instrument or frequency range overpowers the others.
  • Control dynamics: Use compression and other dynamic processing techniques to control the dynamic range and make your track sound more cohesive.
  • Enhance the stereo image: Experiment with stereo enhancement tools to create a wider soundstage and make your track sound more spacious.
  • Final touches: Apply the necessary EQ adjustments, stereo widening, and overall volume adjustments to achieve the desired sound for your track.

Remember, the key to refining your mastered EDM tracks is to trust your ears, be patient, and experiment with different techniques until you achieve the desired result. Don’t be afraid to make adjustments as needed.

By following these mastering techniques and putting it all together, you can significantly improve the quality and impact of your EDM tracks. Remember to always keep learning and experimenting to stay ahead in the ever-evolving world of music production.

Master Your EDM Tracks: Unleash the Power of Music Mastering Techniques


Credit: www.udemy.com


Frequently Asked Questions On Music Mastering Techniques To Improve Your Edm Tracks


What Are The Best Music Mastering Techniques To Improve Your Edm Tracks?


To improve your EDM tracks, try using EQ to balance frequencies, compression to control dynamics, and stereo imaging to create width. Additionally, use saturation and harmonic exciters to add warmth and presence, and don’t forget to use automation to create movement and interest throughout the track.


How Can Mastering Enhance The Quality Of Your Edm Tracks?


Mastering can enhance the quality of your EDM tracks by optimizing the overall sound, improving clarity and definition, and making the track sound more polished and professional. It can also help make the track sound louder and more impactful, ensuring it stands out in a crowded EDM landscape.


Is It Necessary To Use Reference Tracks During The Mastering Process?


Using reference tracks during the mastering process is highly recommended. They can provide a benchmark for how your track should sound in terms of overall balance, clarity, and loudness. Reference tracks can help you make informed decisions and ensure that your track is competitive and meets industry standards.


Conclusion


Mastering is a crucial step in enhancing your EDM tracks. These techniques can elevate the quality and impact of your music. By implementing the strategies discussed in this post, you can bring out the best in your tracks and captivate your audience.


Experiment and find the mastering techniques that work best for your unique sound.


Categories
Archive Audio Production

Mastering The Art Of DIY Album Artwork: Unleash Your Creative Power

Mastering the art of DIY album artwork involves creativity, digital skills, and attention to detail. By utilizing graphic design software and exploring artistic concepts, you can design unique and eye-catching album covers that reflect the essence of your music.


From selecting images and fonts to arranging elements in a visually appealing manner, DIY album artwork allows for complete creative control over the visual representation of your music. In this guide, we will explore tips and techniques to help you create professional-looking album art that resonates with your audience and complements your musical style.


Follow these steps to elevate your DIY album artwork and make a lasting impression with your audience.

Mastering The Art Of DIY Album Artwork: Unleash Your Creative Power


Credit: www.artofplay.com


Unleashing Creativity

Embracing DIY Album Artwork allows artists to infuse their personal touch into their music’s visual representation.

Embracing Diy Album Artwork

DIY Album Artwork enables musicians to craft unique visuals that resonate with their audience.

Exploring Your Creative Potential

Engaging in DIY Album Artwork encourages artists to push their boundaries and innovate creatively.

Benefits of DIY Album Artwork Ways to Unleash Creativity
  • Personalized visual representation
  • Cost-effective creativity
  • Direct artist-to-fan connection
  1. Experiment with mixed media
  2. Explore unconventional design elements
  3. Collaborate with artists from different backgrounds

Understanding Album Art Importance

Album artwork plays a crucial role in the success of a music release. It serves as the visual representation of the music within, acting as the first point of contact between the artist and the audience.

Impact On Branding And Identity

Create a cohesive brand image through consistent album art, reinforcing your identity as an artist in the eyes of your audience.

Connecting With Your Audience

Album art can evoke emotions, spark curiosity, and establish a personal connection with listeners before they even press play.

Essential Tools And Techniques

When it comes to mastering the art of DIY album artwork, understanding the essential tools and techniques is crucial. Creating compelling album artwork requires the right graphic design software, image editing tips and tricks, and knowledge of various techniques. Let’s delve into each of these essential aspects to help you elevate your DIY album artwork to the next level.

Graphic Design Software

The choice of graphic design software plays a pivotal role in creating stunning album artwork. Utilizing industry-standard software such as Adobe Photoshop or Illustrator can provide the necessary tools and features to bring your creative vision to life. These platforms offer a wide array of visual effects, filters, and design elements to enhance the overall aesthetic of your album cover. Moreover, utilizing advanced software allows for seamless integration with image editing tools, streamlining the design process.

Image Editing Tips And Tricks

Image editing is a fundamental aspect of crafting captivating album artwork. Implementing image editing tips and tricks can transform ordinary photographs into striking visuals that resonate with the essence of your music. Techniques such as color correction, layer blending, and typography integration can elevate the overall composition of your album cover. Additionally, understanding the nuances of image resolution and file formats ensures that your artwork is optimized for various digital and physical platforms.

Inspiration And Conceptualization

Creating captivating album artwork requires a deep understanding of the artist’s vision and the ability to translate it into a visually compelling design. This process begins with the crucial steps of drawing inspiration from personal experiences and researching different visual styles. By exploring these elements, you can successfully master the art of DIY album artwork. Let’s delve into these key aspects.

Drawing From Personal Experiences

When crafting album artwork, tapping into personal experiences can bring a unique and authentic touch to the design. By exploring your own emotions, memories, or life events related to the music, you can infuse the artwork with a deep sense of personal connection. Consider the following:

  1. Reflect on the overarching theme or story the album aims to convey.
  2. Think about moments, people, or places that resonate with the music.
  3. Identify symbols or metaphors that hold personal significance in relation to the music.

By incorporating personal experiences, you can create a visual narrative that resonates with both the artist and the audience, making the artwork more engaging and impactful.

Researching Visual Styles

Another crucial step in the inspiration and conceptualization process is researching various visual styles. This exploration will help you discover different artistic approaches and find the style that best aligns with the album’s theme and genre.

Consider the following tips to enhance your research:

  • Examine album artwork from diverse genres and time periods.
  • Pay attention to color schemes, typography, and overall composition.
  • Look for visual styles that evoke the desired emotions and aesthetics.

By immersing yourself in a variety of visual styles, you can expand your creative horizons and leverage various techniques to develop a unique and visually striking album cover.

When crafting your DIY album artwork, never underestimate the power of personal experiences and thorough visual research. By drawing inspiration from your own life while exploring a wide range of artistic styles, you can create an artwork that truly encapsulates the essence of the music and captivates listeners right from the start.

Navigating Copyright And Licensing

When it comes to creating your own album artwork, it’s essential to navigate the complex world of copyright and licensing. Properly understanding the legal aspects of using imagery is crucial to avoid potential legal issues and ensure that your artwork is original and fully compliant.

Using Original Imagery

One of the best ways to avoid copyright infringement is by using original imagery for your album artwork. Original artwork ensures that your design is unique and does not violate someone else’s intellectual property rights. Creating your own artwork allows you to have full control over the visual representation of your music.

Understanding Fair Use And Public Domain

Fair use and public domain are two concepts that can be valuable tools when seeking imagery for your album artwork. Fair use allows limited use of copyrighted material for specific purposes such as commentary, criticism, or parody. However, it’s important to note that fair use can be subjective and open to interpretation, so it’s wise to seek legal advice when using this defense.

On the other hand, the public domain consists of works that are not protected by intellectual property laws or whose copyright protection has expired. These works can be freely used by anyone without the need for permission or payment. When utilizing public domain content, it’s essential to verify the status of the work to avoid any unexpected legal issues.

Best Practices For Copyright Compliance

  • Obtain proper licenses and permissions when using copyrighted material.
  • Attribute sources if using someone else’s work to showcase proper recognition.
  • Consider commissioning artists or photographers to create unique artwork for your album.
  • Do thorough research to determine if your chosen imagery falls within fair use guidelines.
  • If in doubt about the legality of an image, consult with a lawyer specializing in intellectual property.

Conclusion

Making sure you understand the ins and outs of copyright and licensing is a crucial part of mastering the art of DIY album artwork. By using original imagery and being aware of the nuances of fair use and public domain, you can confidently create unique and legally compliant artwork that represents your music and vision.

Mastering The Art Of DIY Album Artwork: Unleash Your Creative Power


Credit: fox8.com


Mastering The Art Of DIY Album Artwork: Unleash Your Creative Power


Credit: www.pinstagram.co


Frequently Asked Questions Of Mastering The Art Of Diy Album Artwork


How Can I Create Album Artwork That Stands Out?


To create album artwork that stands out, focus on a unique concept, use bold colors and striking imagery, consider the overall tone of the music, and pay attention to composition and typography. Don’t be afraid to experiment and think outside the box to make your artwork visually interesting and captivating.


What Are The Essential Elements Of Diy Album Artwork?


The essential elements of DIY album artwork include the band/artist name, album title, imagery or artwork that reflects the music, typography that complements the style, and any additional information like tracklist or credits. These elements work together to create a cohesive and visually appealing representation of your music.


Can I Use Copyrighted Images For My Album Artwork?


Using copyrighted images for album artwork without permission can lead to legal issues. It’s best to use original artwork or seek permission from the copyright holder. Alternatively, you can use public domain or creative commons images that are free to use, or hire an artist to create custom artwork specifically for your album.


How Do I Choose The Right Typography For My Album Artwork?


Choosing the right typography for your album artwork involves considering the mood and style of your music. Experiment with different fonts that convey the desired emotions or themes of your music. Pay attention to legibility, readability, and how the typography complements the overall design of the artwork.


It’s recommended to limit the number of fonts to maintain visual consistency.


Conclusion


To sum up, mastering DIY album artwork is an exciting and creative process that allows you to showcase your unique style and vision. By following the techniques and tips shared in this blog post, you can create professional-looking album artwork that captures the essence of your music.


Let your creativity flow and enjoy the journey of bringing your music to life visually.


https://www.youtube.com/watch?v=MdBdxgXBebE


Categories
Archive Audio Production

How To Render Tracks For Mixing: Master the Perfect Sound

To render tracks for mixing, export each track individually as high-quality audio files. Ensure your DAW settings are optimized for export quality.


In the music production process, rendering tracks for mixing is a crucial step that involves exporting each track individually as audio files to prepare them for the mixing stage. By ensuring you have high-quality audio exports and the correct settings in your Digital Audio Workstation (DAW), you set yourself up for a seamless mixing process.


This initial phase of rendering tracks helps maintain the integrity of each individual element of a song, providing a clean canvas for mixing engineers to work their magic. Mastering this step is essential for achieving a professional-sounding mix that showcases the full potential of your music.


The Basics Of Track Rendering


Learn the essentials of track rendering for mixing to achieve professional sound quality. Understand the process and techniques of rendering tracks to optimize your mixing workflow and enhance the overall audio production. Mastering the art of track rendering is crucial for achieving polished and dynamic mix results.

Although it might sound technical, rendering tracks for mixing is an essential part of the music production process. For beginners, knowing the basics of track rendering can improve the overall quality of your music.

Preparing Your Daw

1. Open your DAW software. 2. Ensure all tracks are properly named. 3. Adjust the project settings accordingly. 4. Organize tracks in a logical order.

Setting Track Parameters

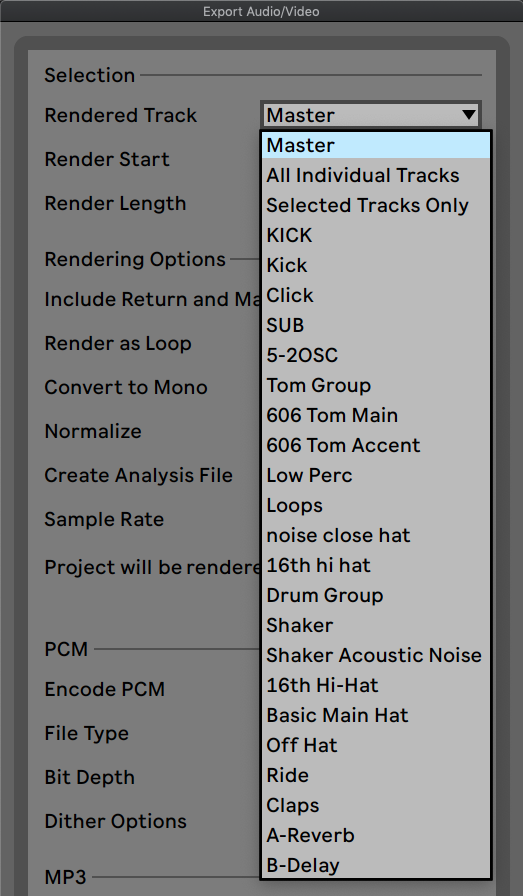
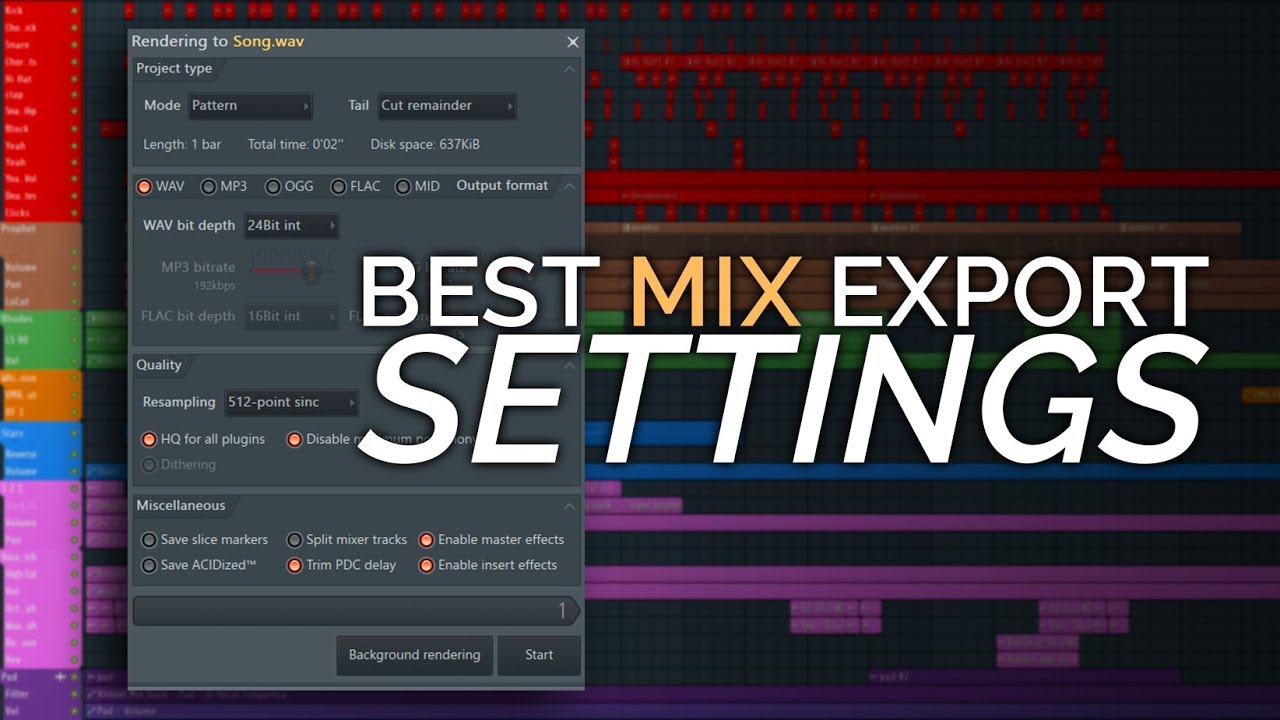
1. Select the track you want to render. 2. Adjust the start and end points. 3. Set the file format and bit depth. 4. Choose the desired rendering quality. By following these steps, you can effectively prepare and render your tracks for mixing.

How To Render Tracks For Mixing: Master the Perfect Sound


Credit: www.aulart.com


Optimizing Track Rendering

Utilize effects judiciously to enhance audio quality.

Automate parameters for consistency and precision.

Achieving The Best Sound Quality

When it comes to mixing and producing music, achieving the best sound quality is paramount. One crucial aspect of this process is rendering tracks for mixing. This step involves exporting audio files with the highest possible quality, ensuring that the mix engineer has the best material to work with. Understanding the various technical aspects related to rendering tracks is essential in achieving the best sound quality for your music.

Understanding Sample Rate And Bit Depth

Sample rate and bit depth are essential factors that influence the quality of audio recordings. The sample rate determines how often the audio is sampled per second, while the bit depth defines the dynamic range and resolution of the audio. Setting a higher sample rate and bit depth during the rendering process can capture more detail and nuances in the sound, ultimately resulting in higher quality audio.

Exporting In High-quality Formats

When exporting audio for mixing, it is crucial to choose high-quality file formats such as WAV or AIFF. These formats support uncompressed audio, retaining all the subtle nuances and sonic details in the music. Additionally, using lossless compression formats like FLAC can also ensure the preservation of audio quality during the rendering process.

Rendering Techniques For Different Instruments

When it comes to mixing a track, one crucial step is rendering the individual instruments. Rendering allows you to convert MIDI tracks into audio files, giving you more control over the final sound. Each instrument requires specific techniques to achieve the best results. In this post, we will explore rendering techniques for vocals and acoustic instruments, as well as electric and bass guitars.

Vocals And Acoustic Instruments

Rendering vocals and acoustic instruments involves capturing the essence and nuances of the performance to create a polished final mix. Here are some techniques to consider:

  1. Clean Up and Edit: Before rendering, ensure that vocals and acoustic instruments are properly edited. Remove any unwanted breaths, clicks, or noise that might distract from the performance.
  2. Signal Processing: Apply appropriate signal processing to enhance the sound. Consider adding EQ to shape the tone, compression to control dynamics, and reverb or delay for spatial effects.
  3. Panning and Placement: Place vocals at the center of the stereo field to ensure clarity and focus. For acoustic instruments, experiment with panning to create a sense of width and depth.
  4. Blend with the Mix: Pay attention to how vocals and acoustic instruments blend with other elements in the mix. Adjust levels and EQ to achieve a balanced and cohesive sound.

Electric And Bass Guitars

Rendering electric and bass guitars requires different techniques to bring out their unique characteristics and fit them seamlessly into the mix. Here are some techniques to consider:

  1. Amp Simulation: Use high-quality amp simulation plugins to achieve the desired guitar tone. Experiment with different amp models, cabinet simulations, and effects to find the perfect sound.
  2. Multitracking: Consider recording multiple guitar tracks with different settings and performances. This can add depth and thickness to the guitar sound during the rendering process.
  3. EQ and Compression: Apply EQ to shape the guitar tone and cut through the mix. Compression can help control dynamics and add sustain.
  4. Bass Guitar Focus: When rendering bass guitar, pay attention to its low-end presence and ensure it’s not overpowering other elements in the mix. Enhance the low frequencies while maintaining clarity.

By employing these rendering techniques for vocals, acoustic instruments, electric and bass guitars, you can take your mix to the next level. Remember to experiment, trust your ears, and make adjustments to achieve the desired sound for each instrument. Happy mixing!

https://www.youtube.com/watch?v=0rEnGUUJ5oA


Troubleshooting And Fine-tuning

When it comes to rendering tracks for mixing, troubleshooting and fine-tuning are crucial steps to ensure optimal results. In this section, we will cover two important aspects: dealing with latency issues and refining rendered tracks.

Dealing With Latency Issues

Latency can be a common problem when rendering tracks for mixing. It refers to the delay between playing a MIDI or audio signal and hearing it through your speakers or headphones. Latency can disrupt your workflow and make it challenging to mix tracks effectively. Here are a few tips to help you address latency issues:

  1. Adjust buffer size: Increasing the buffer size can reduce latency but may increase CPU usage. Experiment with different buffer sizes until you find the right balance.
  2. Optimize your computer: Close unnecessary programs and processes running in the background to free up CPU resources and minimize latency.
  3. Use direct monitoring: If your audio interface supports it, enable direct monitoring to bypass any latency introduced by software monitoring.
  4. Update drivers: Make sure your audio interface drivers are up to date. Outdated drivers can cause compatibility issues and increase latency.

Refining Rendered Tracks

Once you have successfully dealt with latency issues, it’s time to refine and fine-tune your rendered tracks. Here are some key steps to ensure the best possible mix:

  • Check for phase issues: Use a phase correlation meter to identify any phase cancellation or alignment problems between tracks. Adjust the phase or alignment to achieve a more cohesive mix.
  • Trim unnecessary audio: Clean up your rendered tracks by removing any unwanted silence, clicks, or pops. This will help create a cleaner and more professional mix.
  • Identify frequency conflicts: Use an EQ plugin to identify frequency clashes between tracks. Make necessary cuts or boosts to improve clarity and separation in the mix.
  • Apply subtle compression: Use compression to even out the dynamics of each track and enhance the overall balance. Avoid excessive compression that can lead to an unnatural sound.

By following these troubleshooting and fine-tuning techniques, you’ll be able to overcome latency issues and refine your rendered tracks for a polished and cohesive mix.

How To Render Tracks For Mixing: Master the Perfect Sound


Credit: m.youtube.com


How To Render Tracks For Mixing: Master the Perfect Sound


Credit: www.nextlevelsound.com


Frequently Asked Questions For How To Render Tracks For Mixing


How Do You Render Tracks For Mixing Effectively?


Rendering tracks for mixing is essential to ensure a smooth workflow and optimal sound quality. To do this effectively, start by selecting the tracks you want to render, consolidating any MIDI or virtual instruments into audio files. Then, export the tracks individually or as stems, ensuring they are in a lossless format.


Finally, organize the rendered files in a clear folder structure for easy access during the mixing process.


What Is The Purpose Of Rendering Tracks?


Rendering tracks serves multiple purposes in the mixing process. It helps to conserve CPU resources by converting MIDI and virtual instrument tracks into audio files. This allows for smoother playback and more efficient processing. Rendering also allows for exporting individual tracks or stems, which can be further edited or mixed in different DAWs or sessions.


Can I Make Changes To Rendered Tracks After Exporting?


Once tracks are rendered and exported, they become fixed audio files and cannot be modified directly. However, you can make changes by reverting to the original project file, adjusting the settings, and re-rendering the tracks. It’s important to keep backups of the project files to have the flexibility to make changes in the future if needed.


What Are The Recommended Settings For Rendering Tracks?


When rendering tracks for mixing, it’s important to use appropriate settings to achieve the desired sound quality. Generally, it is recommended to export in a lossless format like WAV or AIFF to preserve audio fidelity. Use a bit depth of at least 24 bits for better dynamic range, and a sample rate matching the original project’s settings (typically 44.


1kHz or 48kHz). Finally, rendering individual tracks with no effects or processing will provide maximum flexibility during mixing.


Conclusion


Understanding how to render tracks for mixing is crucial for achieving high-quality sound production. By applying the proper techniques and using the right tools, you can ensure that your tracks are well-prepared for the mixing process. This will ultimately result in a more polished and professional-sounding final product for your music or audio projects.

Categories
Archive Audio Production

How To Master Your Mixing Skills: Export Individual Tracks In Logic Pro X!

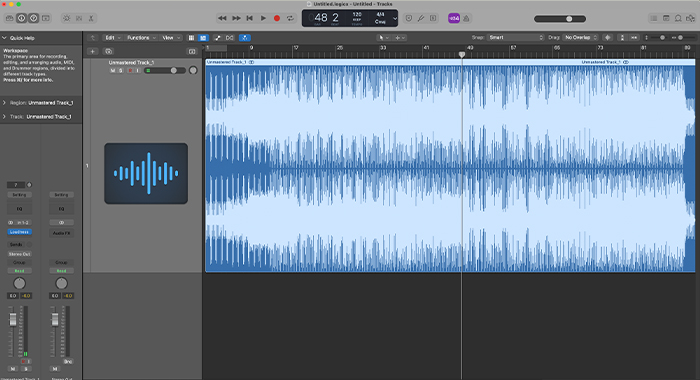
To export individual tracks in Logic Pro X for mixing, simply select the track you want to export, go to File > Export > Region as Audio File. This will create a separate audio file of the selected track.


Logic Pro X offers a user-friendly interface for exporting individual tracks, allowing you to seamlessly prepare your project for mixing. By following a few simple steps, you can efficiently extract specific tracks from your project to work on them individually.


This process is crucial for ensuring each track receives the necessary attention during the mixing stage, enhancing the overall quality of your music production. Understanding how to export individual tracks in Logic Pro X is essential for any producer or engineer looking to achieve professional results in their music projects. Let’s delve deeper into the detailed steps involved in this process.


The Importance Of Exporting Individual Tracks

Simplify Your Mixing Process

In Logic Pro X, exporting individual tracks allows you to simplify your mixing process by providing each track in a separate audio file.

Flexibility In Post-production

Having individual tracks exported gives you flexibility in post-production, enabling you to make precise adjustments to each element of your music.

Preparing Tracks For Export

Ensure each track has clear boundaries for easy identification.

Adjust volume levels and panning to achieve a balanced mix.

To prepare tracks for export in Logic Pro X, organize regions clearly and set track levels and panning for a polished mix.


Exporting Tracks In Logic Pro X

Are you looking to export individual tracks in Logic Pro X for mixing? Exporting tracks in Logic Pro X is a crucial step in the music production process, allowing you to prepare your tracks for mixing, collaboration, or sharing with others. This guide will walk you through the process of exporting individual tracks in Logic Pro X, including choosing file formats and adjusting export settings.

Choosing File Formats

In Logic Pro X, you have the option to export your individual tracks in various file formats, depending on your specific needs. When exporting tracks for mixing, it’s essential to choose a file format that preserves the audio quality and compatibility with other DAWs. Common file formats for exporting tracks in Logic Pro X include WAV, AIFF, and FLAC. These formats maintain high audio quality and are widely supported in professional audio software.

Adjusting Export Settings

Before exporting your tracks in Logic Pro X, it’s crucial to adjust the export settings to ensure that the exported files meet your specific requirements. Start by selecting the tracks you want to export and ensuring that the regions are properly trimmed to remove any unwanted silence or noise. Next, ensure that the export settings include the desired sample rate, bit depth, and dither options to maintain the highest audio quality during the export process. Lastly, double-check the export location and file naming conventions to keep your exported tracks organized and easily accessible.

How To Master Your Mixing Skills: Export Individual Tracks In Logic Pro X!


Credit: crumplepop.com


Managing Exported Tracks


Learn how to manage exported tracks in Logic Pro X by exporting individual tracks for mixing. Streamline your workflow and efficiently export individual tracks for seamless integration into your mixing process. Master the art of managing exported tracks to enhance your overall mixing experience and achieve professional-quality results.

Managing Exported Tracks Once you have successfully exported individual tracks in Logic Pro X for mixing, you now need to know how to effectively manage these tracks. Managing exported tracks is essential for maintaining an organized workflow and ensuring a seamless mixing process. In this section, we will explore two important aspects of managing exported tracks: importing into a new project and workflow optimization tips.

Importing Into A New Project

To import your exported tracks into a new project in Logic Pro X, follow these simple steps:

  1. Create a new project by selecting “File” from the menu bar, then “New” and “Project.” Alternatively, you can use the keyboard shortcut “Command” + “N”.
  2. Give your new project a name and choose the desired location to save it.
  3. In the new project, navigate to the “File” menu and select “Import.” Alternatively, you can use the keyboard shortcut “Command” + “I”.
  4. Locate the folder where you exported your tracks and select the ones you want to import. You can select multiple tracks by holding down the “Shift” key while clicking.
  5. Click “Open” to import the selected tracks into your new project.

Importing exported tracks into a new project allows you to maintain a clean separation between your recording and mixing sessions. It provides you with the flexibility to work on different projects independently and ensures that your workflow remains organized.

Workflow Optimization Tips

Optimizing your workflow is crucial for maximizing productivity and efficiency during the mixing process. Here are some tips to help you streamline your workflow when managing exported tracks in Logic Pro X:

  • Label and color-code your tracks: Assign meaningful labels and colors to your tracks to make them easily identifiable. This will save you time and prevent confusion during the mixing process.
  • Arrange tracks in a logical order: Once imported, arrange your tracks in a way that makes sense to you. You can group similar instruments together or arrange them in the order they appear in the song structure.
  • Use markers to mark important sections: Markers are a great way to highlight important sections of your song, such as verses, choruses, or solos. This will allow you to navigate through your project quickly and make precise adjustments.
  • Create submixes for easier control: If you have multiple tracks belonging to the same instrument or group, consider creating submixes. This will make it easier to process and control the overall sound of the group, saving you time and effort.
  • Save customized channel strip settings: Logic Pro X allows you to save your customized channel strip settings. Take advantage of this feature to save time by loading preset settings on multiple tracks with similar processing requirements.

By incorporating these workflow optimization tips, you can effectively manage your exported tracks and enhance your mixing experience in Logic Pro X. A well-organized and efficient workflow optimizes your productivity and allows you to focus on the creative aspects of mixing without unnecessary distractions.

Utilizing Exported Tracks In Post-production


Learn how to export individual tracks in Logic Pro X to enhance your post-production process by utilizing exported tracks effectively for seamless mixing. Ensure a streamlined workflow and optimized audio quality with this essential technique. Boost your editing capabilities by incorporating exported tracks into your project effortlessly.

Mixing In Another Daw

Once you have exported your individual tracks from Logic Pro X, you can easily utilize them in any other digital audio workstation (DAW) for further mixing and post-production. Exporting the tracks from Logic Pro X ensures that you have high-quality audio files that can be seamlessly integrated into your chosen DAW.

When it comes to choosing another DAW for mixing, options like Pro Tools, Ableton Live, and Reaper are popular among professionals. By importing your exported tracks into these DAWs, you can take advantage of their unique features and plugins to enhance the overall quality of your mix.

When mixing in another DAW, it is essential to organize your exported tracks properly. Create separate tracks for each exported audio file to maintain a well-structured session, making it easier to apply adjustments and effects. This organization ensures a smoother workflow and helps you keep track of the various elements of your mix.

Adding Effects And Automation

One of the key advantages of utilizing exported tracks in post-production is the ability to apply various effects and automation techniques to enhance the overall sound of your mix.

When working with exported tracks in another DAW, you have access to a wide range of plugins, allowing you to experiment with different effects such as EQ, compression, reverb, and delay. By applying these effects, you can ensure each element of your mix sits well within the audio spectrum, creating a balanced and professional sound.

Automation is another powerful tool you can use in post-production to add movement and dynamics to your mix. With exported tracks in another DAW, you can easily automate volume levels, panning, and various parameters of your plugins. This automation allows for precise control over the dynamics and transitions within your mix, adding depth and emotion to your final product.

Remember to experiment and trust your ears when applying effects and automation. Give each track the attention it deserves, making sure the changes you make contribute positively to the overall mix.

In conclusion, utilizing exported tracks in post-production opens up a world of possibilities for your mix. Whether you choose to mix in another DAW or add effects and automation, the flexibility and versatility provided by exported tracks will help you achieve a polished and professional sound.

How To Master Your Mixing Skills: Export Individual Tracks In Logic Pro X!


Credit: www.groove3.com


How To Master Your Mixing Skills: Export Individual Tracks In Logic Pro X!


Credit: www.aulart.com


Frequently Asked Questions For How To Export Individual Tracks In Logic Pro X For Mixing


How Do I Export Individual Tracks In Logic Pro X For Mixing?


To export individual tracks in Logic Pro X for mixing, simply go to the File menu, select Export, and then choose the option “All Tracks as Audio Files. ” This will export each track as a separate audio file, which you can then import into your preferred mixing software for further processing and editing.


Conclusion


Incorporating individual track exports in Logic Pro X is a valuable technique for enhancing the mixing process. By following the simple steps outlined in this guide, you can gain greater control over your mix and achieve professional-quality results. Make the most of this feature to refine your sound and elevate your music production endeavors.

Categories
Archive Audio Production

Vst Plugins Not Showing Up in Adobe Audition: Troubleshoot and Fix Now!

If VST plugins are not appearing in Adobe Audition, check the plugin folder location first. Rescan the plugin location in the preferences menu of Adobe Audition to locate and activate the missing VST plugins.


Having access to a variety of VST plugins can significantly enhance your audio production capabilities in Adobe Audition. However, it can be frustrating when plugins do not show up as expected. By following the simple steps outlined above, you can troubleshoot the issue and ensure that your plugins are correctly integrated into the software.


We will explore the common reasons why VST plugins may not be appearing in Adobe Audition and provide you with a step-by-step guide to resolving the issue.


Common Causes Of Vst Plugins Not Showing Up


VST plugins may not appear in Adobe Audition due to incorrect installation paths, outdated software, or compatibility issues. Checking the plugin folder location and updating the software can resolve the issue.

Incorrect Installation

Incompatibility Issues

Folder Path Errors

Common Causes of VST Plugins Not Showing Up When VST plugins do not appear in your Adobe Audition software, several common issues could be at play. Incorrect Installation, Incompatibility Issues, and Folder Path Errors are frequent culprits responsible for this frustrating problem. Incorrect Installation: This issue arises when plugins are not installed correctly. Ensure that you follow the installation instructions precisely to avoid complications. Incompatibility Issues: Sometimes, VST plugins may not be compatible with the version of Adobe Audition you are using, resulting in them not showing up. Make sure to check for compatibility before installing any plugins. Folder Path Errors: If the folder path where the plugins are installed is incorrect, Adobe Audition may not be able to locate them. Double-check the folder path to ensure it is accurate. By addressing these common causes, you can troubleshoot why your VST plugins are not showing up in Adobe Audition effectively.

Troubleshooting Steps

When VST plugins do not appear in Adobe Audition, you may need to troubleshoot the issue. Follow these steps to identify and resolve the problem:

Check Installation Location

  • Verify plugin installation in the correct directory.
  • Ensure plugins are placed in the designated VST folder.
  • Confirm plugins are properly installed with all files in place.

Verify Compatibility

  • Check if the VST plugins are supported by the version of Audition.
  • Ensure compatibility with your operating system.
  • Verify plugins are not corrupted and are up-to-date.

Update Folder Paths

  • Adjust folder paths within Audition settings.
  • Update the VST plugin folder location if necessary.
  • Rescan for plugins in the correct directories.
https://www.youtube.com/watch?v=-D7gKQ9V7mk


Fixing Vst Plugins In Adobe Audition

When VST plugins don’t show up in Adobe Audition, it can be frustrating for audio professionals. However, there are several simple steps you can take to fix this issue and get your plugins up and running smoothly again.

Reinstalling Vst Plugins

If your VST plugins are not appearing in Adobe Audition, try reinstalling them to ensure they are properly integrated with the software. Check for any updated versions of the plugins and follow the installation instructions carefully.

Adding Custom Plugin Paths

Another effective method for resolving VST plugin visibility issues in Adobe Audition is to add custom plugin paths. By specifying the location of your VST plugins within the software, you can ensure that they are accurately detected and available for use.

Updating Adobe Audition

Regularly updating your Adobe Audition software is crucial for maintaining compatibility with VST plugins. Make sure you are using the latest version of Adobe Audition to minimize the risk of any plugin-related issues and to benefit from essential performance improvements.

Vst Plugins Not Showing Up in Adobe Audition: Troubleshoot and Fix Now!


Credit: github.com


Utilizing Vst Management Tools

When it comes to using VST plugins in Adobe Audition, one frustrating issue that users may encounter is when the plugins fail to show up in the software. This can be a major roadblock for producers and sound designers who rely on these plugins to enhance their audio workflow.

Luckily, there are several VST management tools available that can help you address this issue and get your plugins up and running in no time. In this article, we will explore two effective methods to troubleshoot the problem: using plugin managers and rescanning VST folders.

Using Plugin Managers

If you find that some of your VST plugins are missing in Adobe Audition, a plugin manager can be a lifesaver. These handy tools are designed to streamline the process of managing and organizing your plugins, allowing you to quickly locate and activate them within your audio software.

One popular plugin manager that you can use is the Plugin Alliance’s Plugin Manager, which is compatible with both macOS and Windows operating systems. This user-friendly tool provides a comprehensive overview of all your installed plugins, allowing you to easily enable or disable them with just a few clicks.

By using a plugin manager like Plugin Alliance’s Plugin Manager, you can effectively solve the issue of missing VST plugins in Adobe Audition. With its intuitive interface and powerful features, this tool will ensure that all your plugins are properly installed and activated for seamless integration into your audio projects.

Rescanning Vst Folders

If utilizing a plugin manager doesn’t solve the problem, another method to consider is rescanning the VST folders in Adobe Audition. Sometimes, the software may not automatically detect new or relocated plugins, and rescanning the VST folders can help refresh the plugin list and make sure all plugins are visible in the software.

To perform a rescan of the VST folders in Adobe Audition, follow these simple steps:

  1. Open Adobe Audition and navigate to the “Preferences” menu.
  2. Select “Audio Plug-In Manager” from the dropdown menu.
  3. Click on the “Clear Cache” button to remove any cached plugin data.
  4. Next, click on the “Scan for Plug-Ins” button to initiate the scanning process.
  5. Wait for Adobe Audition to scan and detect the VST plugins in your folders.

By rescanning the VST folders in Adobe Audition, you can ensure that any missing plugins are detected and added to the software, alleviating the frustration of not finding your desired plugins when working on your audio projects.

Preventive Measures


To troubleshoot VST plugins not appearing in Adobe Audition, check plugin folder locations and rescan them. Update plugins and ensure compatibility with Audition’s version for seamless integration. Resolve conflicts by disabling incompatible plugins to optimize performance.

Encountering issues with VST plugins not showing up in Adobe Audition can be frustrating and disrupt your workflow. To minimize the occurrence of this problem, it is essential to take preventive measures to ensure that your plugins are always visible and accessible. By following these simple steps, you can avoid the headache of missing plugins and enjoy a seamless audio production experience.

Regular Plugin Maintenance

Regular plugin maintenance is crucial to keep your Adobe Audition running smoothly. Check for updates and install any available software patches or updates for both Adobe Audition and your plugins. Keeping both your DAW and plugins up to date ensures compatibility and minimizes the risk of plugins not appearing in your workspace.

Running Compatibility Checks

Compatibility issues can also lead to plugins not showing up in Adobe Audition. Before installing a new plugin, always verify its compatibility with your version of Audition. Check the system requirements and ensure that your operating system, processor, and RAM meet the specifications. Avoid installing plugins that are not compatible with your setup to prevent issues from arising.

Backup Vst Plugin Folders

Creating backups of your VST plugin folders is an essential preventive measure. In case of any unexpected issues or if plugins go missing, having backups ensures that you can easily restore them. Regularly saving and storing backups of your plugin folders provides additional security and allows for quick recovery to maintain your workflow without interruptions.

By implementing these preventive measures, you can significantly reduce the chances of encountering VST plugins not showing up in Adobe Audition. Regular plugin maintenance, performing compatibility checks, and backing up your plugin folders are simple yet effective steps to ensure a smooth audio production experience. Take the time to implement these measures, and save yourself the frustration and time wasted on troubleshooting missing plugins.

Vst Plugins Not Showing Up in Adobe Audition: Troubleshoot and Fix Now!


Credit: forum.blackmagicdesign.com


Vst Plugins Not Showing Up in Adobe Audition: Troubleshoot and Fix Now!


Credit: community.native-instruments.com


Frequently Asked Questions On Vst Plugins Not Showing Up In Adobe Audition


Why Are My Vst Plugins Not Showing Up In Adobe Audition?


There could be several reasons why your VST plugins are not showing up in Adobe Audition. First, ensure that the plugins are properly installed and compatible with your version of Audition. Additionally, check the plugin directories within Audition’s settings to make sure they are correctly set up.


If the issue persists, try reinstalling the plugins or contacting the plugin’s support team for further assistance.


How Can I Fix Vst Plugins Not Appearing In Adobe Audition?


To fix the issue of VST plugins not appearing in Adobe Audition, first, close Audition and reopen it to refresh the plugin list. If the plugins still don’t show up, go to Audition’s preferences and navigate to the VST Plug-In Sources section.


Make sure the correct directories are selected and click the “Scan for Plug-ins” button. If the problem persists, try reinstalling the plugins or updating Audition to the latest version.


What Should I Do If My Vst Plugins Are Not Loading In Adobe Audition?


If your VST plugins fail to load in Adobe Audition, start by checking if the plugins are compatible with your Audition version. Ensure they are installed in the proper directories and that Audition is scanning those directories for plugins. If the plugins still don’t load, try disabling any conflicting plugins, updating Audition, or reinstalling the problematic plugins.


If all else fails, reach out to the plugin developers for support.


How Do I Troubleshoot Vst Plugins Not Showing Up In Adobe Audition?


To troubleshoot the issue of VST plugins not showing up in Adobe Audition, try the following steps:
1. Ensure the plugins are properly installed and compatible. 2. Verify that the plugin directories are correctly set up in Audition’s settings. 3. Reopen Audition to refresh the plugin list. 4. Use the “Scan for Plug-ins” option in Audition’s preferences. 5. Disable any conflicting plugins or update Audition to the latest version. 6. Reinstall the plugins if necessary or contact the plugin’s support team for assistance.


Conclusion


In closing, troubleshooting VST plugins in Adobe Audition can be challenging. By following the steps outlined in this post, you can hopefully resolve the issue and get back to creating music without interruptions. Remember to regularly update your software and check for compatibility to avoid future problems.


With patience and persistence, you can overcome these technical obstacles and focus on your creative process.

Categories
Archive Audio Production

How to Supercharge Your Tracks with VST Plugins in Ableton

To use VST plugins in Ableton, simply place the plugins in the designated VST folder. Load Ableton, go to Preferences, select the File Folder tab, and direct Ableton to the folder containing your VST plugins.


In the world of music production, VST plugins play a crucial role in enhancing creativity and sound quality. Integrating VST plugins into Ableton Live opens up a treasure trove of possibilities, allowing users to experiment with a vast array of virtual instruments, effects, and sounds.


By following a few simple steps, you can easily harness the power of VST plugins within Ableton, taking your music production to new heights. Whether you’re a seasoned producer or a budding musician, understanding how to use VST plugins in Ableton can significantly elevate your audio projects.


Choosing The Right Vst Plugins


Choosing the right VST plugins for Ableton can enhance the overall sound and creativity of your music production. Look for plugins with versatile features and high-quality sound libraries. Ensure compatibility with Ableton and consider the specific needs of your music projects before making a selection.

Researching Vst Plugins

Understanding The Needs Of Your Tracks

When it comes to selecting the right VST plugins, researching is crucial for quality results.

Researching VST plugins involves looking into their features, reviews, and compatibility with Ableton.

By exploring online forums and websites dedicated to music production, you can gather valuable insights.

Make a list of potential plugins that align with the genre and sound you aim to achieve in your tracks.

Ensuring Each Heading Adheres To Html Syntax

Understanding the needs of your tracks requires you to identify the specific sound elements lacking in your music.

  1. Identify the areas needing improvement such as dynamics, EQ, or effects.
  2. Match these needs with the capabilities of VST plugins to achieve balanced production.
  3. Ensure that the chosen plugins complement and enhance the existing elements in each track.

In conclusion, choosing the right VST plugins entails thorough research and understanding of your music’s requirements.

How to Supercharge Your Tracks with VST Plugins in Ableton


Credit: blackoctopus-sound.com


Optimizing Your Workflow In Ableton

  • Arrange plugins by type for easy access
  • Use folders to categorize different plugins
  • Name plugins logically for quick identification
  • Build custom racks for frequently used combinations
  • Save presets to streamline future projects
  • Experiment with different settings to find your sound

Advanced Sound Design Techniques


Learn advanced sound design techniques by incorporating VST plugins in Ableton Live for dynamic music production. Enhance your tracks with innovative effects and synthesis to elevate your sound to the next level. Mastering these techniques can revolutionize your music creation process.

Layering And Blending Plugins

Layering and blending VST plugins is a powerful technique that allows you to create rich, complex sounds by combining multiple instruments and effects. By layering different sounds and processing them with various plugins, you can achieve a unique and dynamic sonic palette.

To layer and blend plugins effectively, start by selecting a combination of instruments and effects that complement each other. For example, you could layer a warm pad sound with a gritty bass and add a shimmering reverb effect to blend them together.

Experiment with different combinations and settings to find the perfect balance of frequencies and textures. Adjust the levels and parameters of each plugin to ensure they work harmoniously together, creating a cohesive and impactful sound.

By mastering the art of layering and blending plugins, you can elevate your sound design to new heights, giving your tracks depth and dimension.

Modulation And Automation

Modulation and automation are essential tools for adding movement and expression to your sounds in Ableton using VST plugins. By modulating parameters and automating changes over time, you can create evolving and dynamic sonic textures.

Using modulation, you can introduce movement to static sounds by applying changes to parameters such as pitch, filter cutoff, or amplitude. Experiment with different modulation sources, such as LFOs or envelope followers, to create expressive and evolving sonic textures.

Automation allows you to control and adjust parameters over time, adding nuanced changes to your sounds. Whether it’s creating sweeping filter sweeps, subtle volume fades, or intricate pitch shifts, automation empowers you to sculpt your sounds with precision.

By harnessing the power of modulation and automation, you can breathe life into your sound design, adding depth and character to your music through dynamic and evolving sonic elements.

How to Supercharge Your Tracks with VST Plugins in Ableton


Credit: pocketmags.com


Utilizing Vst Effect Chains

When it comes to creating professional-quality music in Ableton, VST plugins are a game-changer. They allow you to add a vast range of effects, instruments, and sounds to your tracks, enhancing the overall production value. One way to take your sound to the next level is by utilizing VST effect chains. These chains consist of multiple plugins that are connected in series, each contributing its unique sonic qualities to the sound. In this article, we will explore two powerful techniques for utilizing VST effect chains – applying parallel processing and creating unique sonic textures.

Applying Parallel Processing

Parallel processing is an excellent technique for adding depth and richness to your sound. It involves duplicating the audio signal and applying different effects to each duplicate. By blending the dry and processed signals together, you can achieve a more dynamic and engaging sound. Here’s how you can apply parallel processing using VST plugins in Ableton:

  1. Create a duplicate of the audio track you want to process.
  2. Insert a VST plugin on each duplicate track and adjust the settings to your desired effect.
  3. On the original track, set the plugin parameters to keep the sound relatively unprocessed.
  4. Use the track faders to adjust the balance between the dry and processed signals.
  5. Experiment with different combinations of plugins and parameter settings to find the perfect blend for your audio.

Creating Unique Sonic Textures

With VST effect chains, you can push the boundaries of creativity and create unique sonic textures that will make your tracks stand out. By combining various effects in a chain, you can sculpt the sound in ways that were previously unimaginable. Here are some tips for creating unique sonic textures using VST plugins:

  • Combine different types of effects, such as delays, reverbs, and filters, in a single effect chain.
  • Experiment with the order of the effects to achieve different sonic results.
  • Adjust the parameters of each effect to fine-tune the sound to your liking.
  • Try layering multiple effect chains on different layers of your track to create complex and evolving textures.
  • Don’t be afraid to think outside the box and try unconventional combinations of effects to achieve truly original sounds.

By utilizing VST effect chains in Ableton, you can take your music production to new heights. Whether you’re applying parallel processing or creating unique sonic textures, these techniques will help you bring out the best in your tracks. So dive in, experiment, and let your creativity run wild!

https://www.youtube.com/watch?v=bCqIpECBnGg


Finalizing And Mastering Your Tracks

Once you have finished arranging and mixing your tracks in Ableton, it’s time to take your music to the next level with the help of VST plugins. Finalizing and mastering your tracks play a crucial role in achieving a professional sound that is ready for release. In this section, we will explore how to use VST mastering plugins and the importance of balancing and fine-tuning your mix.

Using Vst Mastering Plugins

Mastering is the final step in the production process, where you optimize the overall sound of your track. VST mastering plugins are powerful tools that allow you to control and enhance various aspects of your music. These plugins typically offer a range of functions such as EQ, compression, stereo widening, and limiting.

When selecting VST mastering plugins for Ableton, consider those that align with the specific characteristics you want to emphasize in your music. Remember, the purpose of mastering is to enhance the sonic qualities of your entire track, ensuring it sounds cohesive and balanced across different listening environments and devices. It’s important to experiment with different plugins and settings to find the right combination that suits your track’s unique requirements.

Balancing And Fine-tuning Your Mix

Before applying VST mastering plugins, it’s crucial to ensure your mix is well-balanced and polished. Balancing refers to adjusting the relative volume levels of each element in your mix to create a harmonious sound and prevent any individual element from overpowering the others.

To achieve a well-balanced mix, start by carefully listening to each individual track. Pay attention to the levels of the different instruments, vocals, and effects. You can use the built-in EQ and volume controls in Ableton to adjust the levels, making sure each element sits well within the mix and contributes to the overall sound without clashing or causing muddiness.

Fine-tuning your mix involves making subtle adjustments to improve clarity, depth, and dynamics. This can include using compression to control the dynamic range, EQ to sculpt the frequency spectrum, and reverb to add space and depth to your mix. Each adjustment should serve the purpose of enhancing the overall sonic experience of your music.

Remember, the key to successful mastering lies in finding a balance between applying VST plugins and retaining the integrity of your mix. It’s essential to trust your ears, as well as employ a critical listening approach, to ensure your final product is sonically pleasing and meets your artistic vision.

How to Supercharge Your Tracks with VST Plugins in Ableton


Credit: pocketmags.com


Frequently Asked Questions For How To Use Vst Plugins In Ableton


How Can I Use Vst Plugins In Ableton?


To use VST plugins in Ableton, first, make sure you have the VST plugin installed on your computer. Then, open Ableton and go to the Preferences menu. Under the “File/Folder” tab, set the correct VST plugin path. After that, you can access your VST plugins in Ableton by opening the plugins menu in the browser.


Are Vst Plugins Compatible With Ableton Live?


Yes, Ableton Live supports VST plugins. You can use a wide range of VST plugins in Ableton to enhance your music production and sound design capabilities. Simply install the VST plugin on your computer and enable it in Ableton’s preferences to start using it in your projects.


How Do I Install Vst Plugins In Ableton?


To install VST plugins in Ableton, first, make sure you have downloaded the VST plugin file. Then, locate the plugin file on your computer and copy it to the correct VST plugin folder. In Ableton’s preferences, under the “File/Folder” tab, make sure the correct path to the VST plugin folder is set.


Restart Ableton, and the plugin should be available to use.


Can I Use Third-party Vst Plugins In Ableton Live?


Absolutely! Ableton Live allows you to use third-party VST plugins, giving you access to a vast library of virtual instruments, effects, and sound processing tools. By installing and enabling third-party VST plugins in Ableton, you can expand the sonic possibilities of your music productions and achieve professional-quality results.


Conclusion


Incorporating VST plugins in Ableton can greatly enhance your music production process. By following these simple steps, you can unlock a world of creative possibilities and elevate your sound to the next level. With an array of plugins available, the potential for experimentation and innovation is endless.


Embrace the power of VST plugins in Ableton and watch your music soar to new heights.