Categories
Archive

Online Mixing Lessons

Online mixing lessons provide precise and comprehensive instruction in audio mixing techniques. If you are an aspiring music producer or sound engineer, the path to success may seem daunting, but it doesn’t have to be.

Online mixing lessons provide a valuable resource in developing your audio mixing skills. With access to specialized instruction and practice material, you can elevate your mixes to a professional level. Whether you are looking to improve your current techniques or expand your skill set, online mixing lessons offer a convenient and effective way to achieve your goals.

This article will discuss the benefits of online mixing lessons and provide an overview of what you can expect to learn.

Benefits Of Online Mixing Lessons

Online mixing lessons offer a convenient and cost-effective way to improve music production skills from anywhere with an internet connection. Instructors with industry experience can provide personalized feedback, and students can learn at their own pace, making it a great option for those with busy schedules.

If you’re an aspiring music producer or someone who wants to enhance their mixing and mastering skills, online mixing lessons are the most convenient and cost-effective option available. Online mixing lessons provide numerous benefits that make them an appealing and worthy investment. Here are some of the most significant advantages of online mixing lessons.

Flexibility In Scheduling

One of the most significant advantages of online mixing lessons is the ability to schedule your sessions according to your convenience. Unlike traditional classroom settings, online mixing lessons enable you to learn and practice at your own pace without the pressure of time constraints. You can choose the best time that suits your schedule without worrying about missing a class.

Access To High-quality Instructors

Online mixing lessons provide access to some of the best instructors from across the world. With online classes, you can choose to learn from renowned mixing engineers and producers who might otherwise be inaccessible geographically. These experts offer a wealth of knowledge and experience that can help you build your skills and take your music production to the next level.

Learning From The Comfort Of Your Own Environment

Online mixing lessons allow you to learn from the comfort of your own environment without the need to travel to a physical location. This saves a lot of time, money, and energy that would have been wasted on commuting. Being in your own space allows you to focus more on your learning and be more productive. In conclusion, online mixing lessons offer the flexibility, access to high-quality instructors, and the ability to learn from the comfort of your own environment that traditional classroom settings often lack. With so many benefits and advantages, online mixing lessons are the preferred mode of learning for music producers who want to enhance their skills and career prospects.

Tools Required For Online Mixing Lessons

To begin online mixing lessons, you will need some essential tools. A computer or laptop, audio interface, headphones, and a digital audio workstation (DAW) are the primary requirements for successful mixing courses. With these tools, you can learn the art of mixing and master your skills in the world of music production.

Online mixing lessons are becoming increasingly popular due to their convenience and accessibility. To get started with online mixing lessons, the first thing you will need is the right set of tools. Here are the essential tools required for online mixing lessons.

Digital Audio Workstation (daw)

A Digital Audio Workstation, commonly known as DAW, is a software application used for editing, recording, and mixing music on a computer. It is the heart of any digital recording studio and the most important tool required for online mixing lessons. Some popular DAWs include Pro Tools, Logic Pro X, Ableton Live, and FL Studio.

Audio Interface

An audio interface is a hardware device that helps you to connect your computer to audio equipment. It allows you to convert analog signals to digital signals, which can then be processed by your DAW. An audio interface also ensures a higher quality sound recording and playback. Popular audio interface brands include Focusrite, Apogee, and Universal Audio.

Studio Monitors Or Headphones

To get the most out of your online mixing lessons, you need to ensure that you can hear your mix with accuracy and clarity. Studio monitors or headphones are essential tools for achieving this. They help you hear the details of your mix, such as tone, dynamic range, and stereo placement. Popular studio monitor brands include KRK, Yamaha, and JBL. For headphones, Sennheiser, Audio-Technica, and Beyerdynamic are popular choices. In conclusion, with the right set of tools, online mixing lessons can be an excellent way of improving your mixing skills from the comfort of your own home. Make sure you invest in a good DAW, audio interface, and studio monitors or headphones to ensure an enjoyable and productive learning experience.

Choosing The Right Online Mixing Course

Choosing the right online mixing course requires careful consideration of factors such as the course’s content, instructor’s expertise, and teaching style. Look for courses that offer practical lessons and allow you to practice your skills on actual projects, ensuring maximum learning.

Online mixing courses have become very popular lately and for good reason. By taking an online mixing course, musicians and producers of all levels can improve their mix techniques and learn new skills from the comfort of their own homes. However, with so many courses and instructors available, it can be tough to choose the one that best fits your needs. From researching potential courses and instructors to reading reviews and testimonials, there are some key considerations to keep in mind.

Researching Potential Courses And Instructors

When researching potential courses and instructors, there are some key factors to consider. Firstly, consider the experience and credentials of the instructor. Do they have a deep background in music and the techniques of mixing? Secondly, it is essential to consider the teaching style of the course. Does the teacher have the ability to explain technical jargon in a way that you can understand? Lastly, consider the price of the course. While the price shouldn’t be the primary consideration, you don’t want to invest a lot of time and money in a course that’s too expensive.

Reading Reviews And Testimonials

Before investing a significant amount of time and money in an online mixing course, it’s crucial to read reviews and testimonials from past students. With the prevalence of fake reviews these days, it’s essential to verify the credibility of these reviews. You can do this by checking out reviews on multiple websites or by reaching out to past students for feedback on their learning experience. This way, you can ensure that you get an accurate picture of the course’s quality.

Checking The Curriculum And Syllabus

When choosing an online mixing course, it is crucial to check out the course’s curriculum and syllabus. This will give you an insight into what you’ll learn in the class and whether the course will provide you with the knowledge and skills you need. Look for courses that offer comprehensive and structured learning materials. Remember, the right course should provide you with practical and technical skills for mixing, such as EQ, compression, panning, and soundstage. In conclusion, when choosing an online mixing course, consider researching potential courses and instructors, reading reviews and testimonials, and checking out the curriculum and syllabus. Taking the time to find the right course and instructor ultimately pays off, and you might end up with a new set of skills that can take your music production to the next level.

Fundamental Concepts Of Mixing

As an aspiring music producer, understanding the fundamental concepts of mixing is crucial to achieving professional-quality sound in your recordings. Online mixing lessons can provide you with the necessary tools and knowledge to take your productions to the next level.

Signal Flow

Signal flow refers to the path the audio signal takes from the source to the final mix. Proper signal flow ensures that each track is processed correctly, avoiding clipping and distortion in the final mix. This requires a basic understanding of audio interfaces, cables, and how to properly connect and configure them. In online mixing lessons, you will learn how to optimize signal flow through signal routing and gain staging techniques.

Frequency And Eq

The frequency range of a track determines its tonal quality and character. Understanding how frequencies interact with one another and how to manipulate them is essential to achieving balance and clarity in a mix. Equalization, or EQ, is the process of boosting and attenuating frequencies to shape the tonal balance of a track. Online mixing lessons will teach you how to use EQ to enhance the clarity and impact of each element in a mix.

Level Balancing And Panning

Level balancing is the process of adjusting the volume levels of each track in the mix to achieve a well-balanced sound. Panning refers to the positioning of each track within the stereo field. Proper level balancing and panning can create a dynamic and spatially immersive mix. In online mixing lessons, you will learn how to effectively balance levels and position tracks to create depth and dimension in your mixes.

Advanced Mixing Techniques

Online mixing lessons offer a wide range of benefits for aspiring music producers and sound engineers. Apart from learning the basics of mixing, you can also delve into advanced techniques and gain a more comprehensive understanding of the mixing process. One area that can vastly improve your mixing skills is learning advanced mixing techniques. Below are some of the essential mixing techniques you can learn in online mixing lessons.

Automation

Automation is considered a significant component of advanced mixing techniques. It enables the sound engineer to control different sound elements in a mix, such as volume, pan, and even plugin parameters, throughout the mix. It adds a dynamic range and movement to the mix and allows sound engineers to be more creative with their mixing. With online mixing lessons, you can enhance your techniques in automation through in-depth tutorials and hands-on mixing exercises.

Compression And Dynamics Processing

Compression and dynamics processing are essential mixing techniques that can affect the overall loudness and clarity of the mix. Essentially, they work by controlling the dynamic range of audio signals, which can help in leveling out the volume of individual audio tracks and enhancing their tonal qualities. Online mixing lessons offer a comprehensive guide to using compression and dynamics processing, its different types, and how to use them effectively to achieve a professional-sounding mix.

Reverb And Delay Effects

Reverb and delay effects can bring life to a mix by creating spatial depth and adding dimension to audio tracks. They can help in enhancing the stereo image and making the mix sound more natural. Using reverbs and delays may seem simple, but it requires a considerable amount of knowledge and skill to use them effectively. Online mixing lessons provide in-depth tutorials and hands-on exercises on how to use different types of reverb and delay effects and how to apply them to various audio tracks in a mix for maximum effect.

In conclusion, learning advanced mixing techniques through online mixing lessons can elevate your mixing skills and take your audio mixes to the next level. From automation to compression and dynamics processing, to reverb and delay effects, you will gain valuable knowledge and skills to create professional-sounding mixes.
Online Mixing Lessons

Credit: mrmixandmaster.com

Mixing For Different Genres Of Music

Getting the perfect mix of a track can be challenging. It takes a keen ear and years of experience to balance all the elements of a song. However, the approach to mixing varies based on the genre of music. For example, mixing a hip-hop track is completely different from mixing an EDM track. In this blog post, we will explore the key differences in mixing for various genres of music.

Hip-hop

Hip-hop music is all about the beat and the vocal delivery. The drums and bass are the foundation of the track, while the vocal should sit on top of the mix. The key to a good hip-hop mix is clarity and separation. The low-end should be tight and punchy, while the vocals should cut through the mix without sounding overly processed. To achieve a crisp and clear mix for a hip-hop track, you need to pay attention to the following:

  • EQing the low end
  • Enhancing the vocal with compression and EQing
  • Using automation to balance the levels
  • Adding reverb and delay to the vocals for space and depth

Rock

Rock music typically includes guitars, drums, bass, and vocals. The key to a good rock mix is to balance all these elements while maintaining the energy of the song. Unlike hip-hop, rock music has a lot of dynamic range. To create a dynamic and powerful mix, you need to focus on:

  • Balancing the levels of all instruments
  • Creating space with panning and reverb
  • Using compression to even out the dynamics
  • EQing to enhance the clarity of each instrument
  • Adding distortion, overdrive, and saturation for warmth and character

Electronic Dance Music

EDM is all about the energy and the groove. The kick and the bass are the foundation of the track, while the melody and the synths add excitement. The key to a good EDM mix is to create a wide and immersive soundscape that engages the listener. To achieve this, you need to focus on:

  • Balancing the levels of all elements
  • Creating space with panning and reverb
  • Using EQing to enhance the clarity and separation of elements
  • Adding compression and sidechain to create a pumping effect
  • Using automation to create movement in the mix

Collaborating Remotely With Artists And Producers

Remote collaboration with artists and producers is now more accessible than ever. Online mixing lessons allow you to work with top professionals from anywhere, at any time, so you can achieve the perfect sound for your projects.

Working with artists and producers remotely has become increasingly common in today’s music industry. With the rise of online mixing lessons, it is now possible to collaborate with your favorite artists and producers no matter where they are located. In this blog post, we will discuss how understanding the artist’s vision, communication and file-sharing tools, and workflow and project management helps in collaborating remotely with artists and producers.

Understanding The Artist’s Vision

As a mixing engineer, it is crucial to understand the artist’s vision for the project. By understanding what they want to achieve with the music, you can tailor your approach to best serve their needs. This involves a deep understanding of the genre, style, and overall vibe of the music. The more you know about the artist’s preferences, the better equipped you will be to deliver a final mix that meets their expectations.

Communication And File-sharing Tools

In order to collaborate remotely with artists and producers, you need to have access to the right communication and file-sharing tools. This includes email, video conferencing, messaging apps, and cloud storage platforms like Google Drive or Dropbox. These tools help you stay connected with the artists and producers throughout the project, making it easier to exchange files, give feedback, and discuss any concerns or questions that arise.

Workflow And Project Management

For effective remote collaboration, it is important to establish a clear workflow and project management system. This involves setting specific deadlines, defining roles and responsibilities, and regularly checking in with all team members to ensure that everyone is on the same page. A project management tool like Asana or Trello can help you track progress, delegate tasks, and stay organized throughout the mixing process. In conclusion, collaborating remotely with artists and producers requires a combination of understanding the artist’s vision, using the right communication and file-sharing tools, and establishing an efficient workflow and project management system. By mastering these skills, you can successfully collaborate with artists and producers from all over the world, and create amazing music together.

Online Mixing Lessons

Credit: ask.video

Building A Career As A Mix Engineer

If you have a passion for music and a desire to build a fulfilling career in the music industry, becoming a mix engineer can be a great choice for you. Mix engineers are responsible for blending together individual sound elements such as vocals, instruments, and effects to create a cohesive and compelling sound that can convey the emotion and message of the music.

Networking And Promoting Your Work

One of the most crucial aspects of building a successful career as a mix engineer is networking. You need to establish connections with other professional music producers, sound engineers, and studio owners. Social media platforms, online forums and communities, and music festivals and concerts are excellent places to network and promote your work. In this industry, your reputation matters a lot, and it largely depends on how well you can present your work, how well you can communicate with clients, and how effectively you can build and maintain relationships.

Staying Up To Date With Industry Trends And Technology

The music industry is always evolving, and with the rise of new technologies, the role of mix engineers continues to transform. Therefore, staying up to date with industry trends and technology is crucial to building and maintaining a successful career in music production. Keeping yourself informed about the latest music production software, hardware, and recording techniques can help you to deliver the highest quality of work to your clients and stay ahead of the competition.

Getting Relevant Experience And Building A Portfolio

To become a successful mix engineer, you need to have relevant experience in music production. One way to gain experience is by offering your services for free or at a low price to local bands, artists, and studio owners. This will help you gain practical experience, build your portfolio, and establish valuable relationships in the industry. Compiling a portfolio of your work is crucial as it is essentially a showcase of your skills, talent, and expertise. You can use your portfolio to present yourself and your work to potential clients and employers and showcase your range of abilities and potential.

Online Mixing Lessons

Credit: www.airgigs.com

Frequently Asked Questions On Online Mixing Lessons

How Do You Teach Yourself To Mix?

To teach yourself how to mix, you can start by practicing with simple tracks and experimenting with different levels and effects. Listen to professional mixes for inspiration and study the techniques used. It’s also helpful to read articles and watch tutorials from industry experts.

Consistency and patience are key, so stay motivated and keep practicing.

Where Can I Learn To Mix?

You can learn to mix by attending classes, workshops, and courses offered by music schools, colleges, and universities. You can also learn through online courses, video tutorials, and forums. Additionally, you can practice with different software and tools and connect with professional mixers for guidance and mentorship.

How Long Does It Take To Learn Audio Mixing?

Learning audio mixing can take a few weeks to a few years, depending on your dedication, experience, and learning methods. It requires study, practice, and patience to master the techniques and software. Factors like your musical background, ear training, and familiarity with digital audio workstations (DAWs) can affect the learning curve.

However, with regular practice and guidance, a beginner could start achieving professional-level results within a few months.

How Do I Get Better At Mixing?

To get better at mixing, you should practice regularly, pay attention to your speakers or headphones, use reference tracks for comparison, take breaks to avoid ear fatigue, and learn the fundamentals of EQ, compression, and other mixing tools through tutorials or courses.

Conclusion

After exploring online mixing lessons, it’s clear that there are numerous benefits to taking your mixing skills to the next level. From the convenience of learning from anywhere to the expertise of experienced professionals, there are plenty of reasons why online classes are a great option.

With the right course and dedication, you can improve your skills and create professional-level mixes that will impress your clients or listeners. So why wait? Start exploring your options and take your mixing skills to new heights today.

Categories
Archive

How To Record Clean Vocals

To record clean vocals, use a high-quality microphone and a quiet recording environment. Eliminate background noise and use proper microphone placement techniques.

Recording clean vocals is essential for anyone wanting to produce high-quality music. Vocals are often the centerpiece of a song, and their clarity and quality can make or break a recording. To ensure you capture the best sound possible, it is important to use a high-quality microphone and a quiet recording environment.

Eliminating background noise and using proper microphone placement techniques can also help. We will discuss some tips and tricks for recording clean vocals that sound professional and polished. Whether you are a seasoned recording artist or a beginner, these tips will help you achieve great results.

Choose The Right Microphone

To record clean vocals, it is vital to choose the right microphone for the job. A condenser is excellent for capturing delicate nuances, while a dynamic mic is ideal for power vocals. It all comes down to knowing your voice and selecting the right tool for the job.

When it comes to recording clean vocals, one of the most important decisions you’ll make is choosing the right microphone. There are two main types of microphones used for recording vocals: condenser and dynamic. In this section, we’ll go over the differences between these two types of microphones and what you need to consider when choosing the right one for your budget and recording environment.

Condenser Vs Dynamic Microphones

Condenser microphones are known for their sensitivity and ability to capture nuances in vocal performances. They are ideal for recording in quiet environments, as they pick up every little detail. On the other hand, dynamic microphones are better suited for recording in loud environments, as they are less sensitive and can handle high sound pressure levels. If you’re recording in a studio or a quiet room, a condenser microphone is the way to go. They produce a brighter sound and capture a wider frequency range, making vocals sound more full and dynamic. However, if you’re recording in a noisy environment, such as a live concert or a rehearsal space, a dynamic microphone will be a better choice. They help to reduce background noise and are less likely to cause feedback or distortion.

Consider Your Budget & Recording Environment

In addition to the type of microphone you choose, you should also consider your budget and recording environment. Higher-end condenser microphones can cost thousands of dollars, while budget-friendly dynamic microphones can be found for as little as $50. It all depends on what you can afford and what your recording goals are. If you have a limited budget, a dynamic microphone may be your best option. They are durable and can handle rough handling and abuse. However, if you’re serious about your recordings and have the budget for it, a condenser microphone will give you the best possible sound. When it comes to recording environment, you need to consider the amount of noise in the room and the type of sound you want to capture. If you’re recording in a bedroom or a living room, you may need to use a dynamic microphone to reduce background noise. However, if you’re recording in a professional studio, a condenser microphone will help you capture every little detail in your vocal performance. In conclusion, choosing the right microphone for recording clean vocals is crucial. Whether you choose a condenser or dynamic microphone, it’s important to consider your budget and recording environment. With the right microphone, you can capture clean, dynamic vocal performances that will stand out in any mix.

Prepare Your Recording Environment

To achieve clean vocals while recording, it is essential to prepare your recording environment. This involves finding a quiet space, eliminating outside noise, and controlling the room’s acoustics. Proper preparation can significantly improve the final audio quality of your vocals.

Before recording clean vocals, the most important thing you need to do is to prepare your recording environment properly. This involves several steps to minimize background noise and acoustically treat your recording space. Let’s dive into these steps below.

Minimize Background Noise

Background noise can significantly affect the quality of your vocal recordings. To minimize background noise, follow these tips:

  • Find a quiet space: Record in a room that is as quiet as possible. Avoid environments with traffic noise, people talking, or other sources of unwanted sound.
  • Turn off ambient devices: Turn off any devices such as air conditioners, fans, or refrigerators that produce background noise.
  • Use a pop filter: A pop filter helps reduce any plosives or popping sounds that can occur when pronouncing certain letters.
  • Get a quality microphone: Invest in a good quality microphone that has a good signal-to-noise ratio.

Acoustically Treat Your Recording Space

The way sound reacts with your recording environment has a major impact on the quality of your recording. By acoustically treating your recording space, you can reduce unwanted reflections, echoes, and standing waves, and get a clean recording. Here are some ways to treat your recording space acoustically:

  • Use sound-absorbing materials: Hang sound-absorbing materials such as foam panels or blankets on the walls of your recording space to reduce echoes and reflections.
  • Place furniture and carpets: Furniture such as couches and rugs can absorb reflections and reduce echoes.
  • Use a reflection filter: A reflection filter can help reduce the amount of sound that bounces off the walls and back into the microphone.
  • Invest in a reflection filter: A reflection filter can help to prevent the natural acoustics of the recording space from affecting the recording.

By following these tips, you’ll be able to record clean vocals with minimal background noise in an acoustically treated space, giving you a high-quality recording that you can be proud of.

Set Up Your Microphone

To record clean vocals, it’s important to set up your microphone correctly. Make sure you position it at the right distance from your mouth and adjust the levels to avoid distortion. Using a pop filter and recording in a quiet environment can also make a big difference in the quality of your recordings.

When it comes to recording vocals, the quality of the microphone you choose is crucial. However, setting up your microphone correctly is just as important. Here are some tips for ensuring that you are capturing clear, professional-sounding vocals.

Position The Microphone Correctly

The first step in setting up your microphone is to position it correctly. The microphone should be placed about 6-8 inches away from the singer’s mouth, and slightly off to one side. This helps to prevent “plosives,” which are loud, popping sounds produced by certain consonants like “p” and “b.” The microphone should also be angled slightly downward, so that the singer is projecting upward into it. This helps to capture a clear, natural-sounding vocal tone.

Use Pop Filters And Windscreens

Another important element of microphone setup is to use pop filters and windscreens. These accessories help to eliminate unwanted background noise and pops, and also protect the microphone from moisture and dust. Pop filters are specifically designed to reduce plosives, while windscreens are useful for outdoor recording or in situations where there may be wind or other environmental noise. Both of these accessories can be purchased inexpensively, and can make a big difference in the quality of your recordings.

Wrap Up

By following these simple tips, you can greatly improve the quality of your vocal recordings. Remember to position your microphone correctly, and to use pop filters and windscreens to eliminate unwanted noise. With practice and attention to detail, you can achieve professional-sounding vocals that will make your recordings sound polished and complete.

How To Record Clean Vocals

Credit: www.izotope.com

Adjust Input Levels

Achieving clean vocals during recording is crucial, and adjusting input levels can help with that. Properly adjusting these levels allows for a clear, balanced sound without distortion or unwanted background noise.

Adjust Input Levels One crucial aspect of recording clean vocals is to adjust input levels for better clarity and quality. Setting input levels will help you capture a clear and noise-free vocal track. Here are some tips on how to adjust input levels properly: Use a Preamp and Gain Settings Using a preamp will ensure that you have the right amount of gain to record your vocals correctly. Preamps are specialized amplifiers that can amplify the signal without adding noise or distortion. Once you’ve selected a suitable preamp, set the gain level to the right point to capture the perfect sound. Check for Clipping Clipping is an unpleasant distortion that happens when the recording input signal overloads the recording device. It results in an unpleasant sound that ruins the whole recording. Make sure to monitor your input levels to avoid clipping. It’s advisable to test your microphone before recording to achieve the correct levels. Here are some essential steps to take when checking for clipping: – Record a few seconds of vocals and then listen back to the recording. – If the recording has any crackling or distortion or is too hot, reduce the gain level. – Keep adjusting the gain in small increments until your vocals sound smooth and clear. Taking care of input levels is a fundamental step when it comes to recording clean vocals. Follow these tips to achieve a polished and professional sound that stands out from the rest.

Take Care Of Your Vocalist

To achieve clean vocals in a recording, it’s crucial to keep your vocalist healthy and comfortable. Ensure they stay hydrated, warm up properly, and avoid any irritants that can harm their voice. In addition, proper mic placement and use of pop filters can also contribute to recording clear vocals.

Recording clean vocals is a vital aspect of quality music production. However, it is not just about the equipment and technical know-how of the sound engineer. The vocalist is a critical part of the entire recording process and must be taken care of properly to achieve the best results. Here are some ways to take care of your vocalist.

Encourage Hydration

One of the simplest yet most effective ways to take care of your vocalist is to encourage them to stay hydrated. Drinking enough water helps to lubricate the vocal cords, reducing the strain on them during the recording process. Additionally, it keeps the body hydrated, improving the overall quality of the voice. Make sure to provide enough water or other hydrating fluids throughout the recording session.

Warm-up Exercises

Before recording, it is essential to get the vocals warmed up properly. Warm-up exercises help to prevent strain or injury to the vocal cords and enhance the quality of the voice. Some simple warm-up exercises include lip rolls, tongue trills, and humming exercises. Ensure that the vocalist takes enough time to warm up enough before starting the recording.

Keep The Environment Comfortable

The recording environment plays a significant role in the overall quality of the vocals. Ensure that the temperature is comfortable, free from noise, and impediments that can affect the voice. Additionally, providing a comfortable chair and sufficient lighting can significantly improve the vocal performance.

Avoid Straining The Vocal Cords

Straining the vocal cords can result in long-term damage to the voice. As such, the vocalist should avoid performing beyond their range or taking on songs that require too much energy or pitch variation. Encourage them to take breaks if necessary and avoid overexerting their voice.

Conclusion

Taking care of a vocalist is vital to recording clean vocals. Encourage hydration, warm-up exercises, provide a comfortable environment, and avoid straining the vocal cords to achieve the best results. Remember, a happy and healthy vocalist will ensure a much better and more enjoyable recording experience.

https://www.tiktok.com/api/img/?itemId=7116940857374182662&location=0&aid=1988

Credit: www.tiktok.com

Record Several Takes

To achieve clean vocals in your recordings, it’s helpful to record several takes. This allows you to choose the best performance and also gives you more options for mixing and editing. Don’t be afraid to experiment with different styles and techniques to find the perfect sound for your project.

Recording vocals can be a tricky process. It’s not uncommon to have to record several takes before you’re happy with the final product. In fact, recording multiple takes is a tactic used by many professional musicians and producers to ensure the best possible performance. Here, we’ll explore the importance of recording several takes to achieve clean, high-quality vocals and offer some tips and tricks to get the most out of your recording sessions.

Try Different Styles And Intensities

One of the most significant benefits of recording multiple takes is the opportunity to experiment with different styles and intensities in your vocal performance. This gives you the chance to find the sweet spot that suits the track you’re working on the best. Don’t be afraid to try out different approaches to find the sound that feels most natural to you. When recording multiple takes, it’s always a good idea to switch things up between takes. Take a break between takes – stretch your muscles and lungs and try again with a new energy. This way, you’ll have a wide range of takes to choose from, and you’ll be more likely to find the perfect one.

Edit And Comp The Best Takes

Once you’ve recorded several takes, it’s time to listen back and start selecting the best ones. Editing vocals can take some time, but it’s crucial to achieving high-quality, clean vocals. Eliminate takes that don’t fit, are not in tune, or that don’t have the right energy. Once you have your shortlisted takes, you can start comping them together. Compiling is a technique where you stitch together specific parts of different takes to make a single, perfect take. You can pick a phrase or part from one take and stitch it together with another take, and so on. This way, you can get the best elements of each take and compile them to create the perfect vocal take that fits precisely with your song.

Final Thoughts

Recording clean vocals takes time, effort, and persistence, but the final result is always worth it. Recording multiple takes gives you the opportunity to explore different styles, intensities, emotions, and play around with your voice. Once you have compiled the best bits of each take, you will end up with a polished and clean vocal for your masterpiece.

Mix And Master Your Vocals

Achieving a crystal-clear vocal recording involves finding a quiet space with minimal ambient noise, using a high-quality microphone, and fine-tuning the mic placement. Additionally, taking care of one’s voice through proper hydration and warm-ups can result in a cleaner sound.

Expert mixing and mastering techniques can further enhance the vocals for a professional finish.

Mixing and mastering vocals is crucial in order to achieve a polished and professional sound. Once you have recorded your clean vocals, it’s time to get to work on the post-production process. In this section, we will explore three important steps to help you mix and master your vocals – cut unwanted frequencies, apply compression and EQ, and add reverb and delay effects. Cut Unwanted Frequencies One of the first things you should do when mixing and mastering your vocals is to cut any unwanted frequencies. This includes low rumbling sounds, high-pitched hissing or popping noises, and any other background noise that might be present. It’s important to remove these unwanted frequencies before applying any other effects, as they can negatively impact the overall sound quality of your vocals. You can achieve this through the use of a high-pass filter or a notch filter. Apply Compression and EQ Next, you should apply compression and EQ to your vocals. Compression helps to even out the dynamics of your vocals, making the louder parts of the vocal track quieter and the quieter parts louder. This helps to create a consistent and balanced sound. EQ, on the other hand, allows you to adjust the levels of specific frequencies in your vocals to achieve the desired sound. For example, you might want to boost the mid-range frequencies to make the vocals sound more present and clear. Add Reverb and Delay Effects Finally, adding reverb and delay effects can really bring your vocals to life. Reverb adds a sense of depth and space to your vocals, making them sound like they were recorded in a larger room. Delay adds a repeating echo effect to your vocals, which can be used to create a sense of movement or to add emphasis to certain parts of the vocal track. When applying these effects, be sure to use them in moderation and adjust the settings to suit the style of music you’re producing. In summary, mixing and mastering your vocals is essential if you want to achieve a polished and professional sound. By cutting unwanted frequencies, applying compression and EQ, and adding reverb and delay effects, you can create a vocal track that stands out from the rest.

Listen To Your Final Mix In Different Environments

Recording clean vocals is essential if you want to produce a professional-sounding track. But finishing the recording is just half the battle. The other half is to ensure that your mix sounds great on different playback systems.

Test On Various Playback Systems

One of the most common mistakes that beginner producers make is that they only listen to their mix on one type of playback system. This is a big no-no, as it can lead to a mix that only sounds good on that system.

Instead, you should listen to your mix on various playback systems. Make sure that you test your mix on studio monitors, headphones, earbuds, and laptop speakers. This will give you a better idea of how your mix sounds in different environments and on different systems.

Make Adjustments As Necessary

Once you’ve tested your mix on different playback systems, you’ll likely notice some discrepancies. Certain elements of your mix might sound great on one system, but not on another.

This is where the real work begins. You’ll need to make adjustments to your mix to ensure that it sounds good on all playback systems. This might involve tweaking the EQ, compression, or saturation to ensure that the mix sounds consistent across all playback systems.

It’s important to take notes as you go through this process. Make note of the adjustments you make and the effect they have on your mix. This will help you make better mixing decisions in the future.

Conclusion

Listening to your final mix in different environments is crucial if you want to produce a professional-sounding track. By testing your mix on various playback systems and making adjustments as necessary, you can ensure that your mix sounds great on all systems.

How To Record Clean Vocals

Credit: www.youtube.com

Frequently Asked Questions For How To Record Clean Vocals

How Do You Record A Clean Voice?

To record a clean voice, you need to follow five basic guidelines. First, choose a quiet room with minimal background noise. Second, position your microphone appropriately. Third, speak clearly and at a consistent volume. Fourth, use a pop filter to eliminate plosives.

Finally, use audio editing software to remove any remaining unwanted sounds.

How Do You Record Vocals Clearly?

To record vocals clearly, you must first find a quiet recording environment. Next, use a high-quality microphone and ensure proper positioning. It’s also important to use a pop filter to reduce plosives and a shock mount to minimize vibrations. Finally, adjust levels and add effects as necessary to achieve the desired sound.

How To Do Clean Vocals?

To achieve clean vocals, practice proper breathing techniques, maintain good posture, use support from the diaphragm, and develop proper microphone techniques. Additionally, focus on pitch, tone, and enunciation, and avoid straining or pushing your voice to its limits. Remember to warm-up and rest your voice regularly to prevent damage.

How Do You Get Super Clean Vocals?

To achieve super clean vocals, you need to invest in a good microphone and a pop filter, use proper vocal technique, record in a quiet and acoustically treated room, edit out any unwanted noise or background sounds, and mix and master the vocals carefully for clarity and balance.

Conclusion

To sum up, achieving clean vocals is the key to producing a high-quality recording. By following these steps, you can ensure that your vocals stand out and are free from background noise, hiss, and other unwanted sounds. Remember to take the time to prepare your recording area, choose the right equipment, and experiment with recording techniques to find what works best for you.

With patience and practice, you can become a master at recording clean vocals that will impress your audience and take your music to the next level.

Categories
Archive

Sylenth1 Sound Design

Sylenth1 is a powerful software synthesizer that allows for extensive sound design. With its user-friendly interface, advanced modulation options, and vast library of sounds, Sylenth1 is a popular choice for electronic music producers.

Sylenth1 Sound Design

Credit: m.youtube.com

Getting Familiar With Sylenth1

Sylenth1 is a popular virtual analog synthesizer that has been a favorite among many music producers around the world. With its range of features and capabilities, Sylenth1 is the ultimate tool for anyone who is serious about sound design and music production.

Setting Up Your Daw And Sylenth1

Before you can start using Sylenth1, you need to set up your digital audio workstation (DAW) first. Make sure that your DAW is compatible with Sylenth1.

Once your DAW is ready, you can now proceed to download and install Sylenth1. Follow the instructions provided by the software vendor on how to install the plugin, and make sure it is installed in the correct folder.

Navigating The Interface

After installing Sylenth1, you can now open it in your DAW. The interface may look a bit daunting at first, but it’s relatively easy to navigate once you get the hang of it.

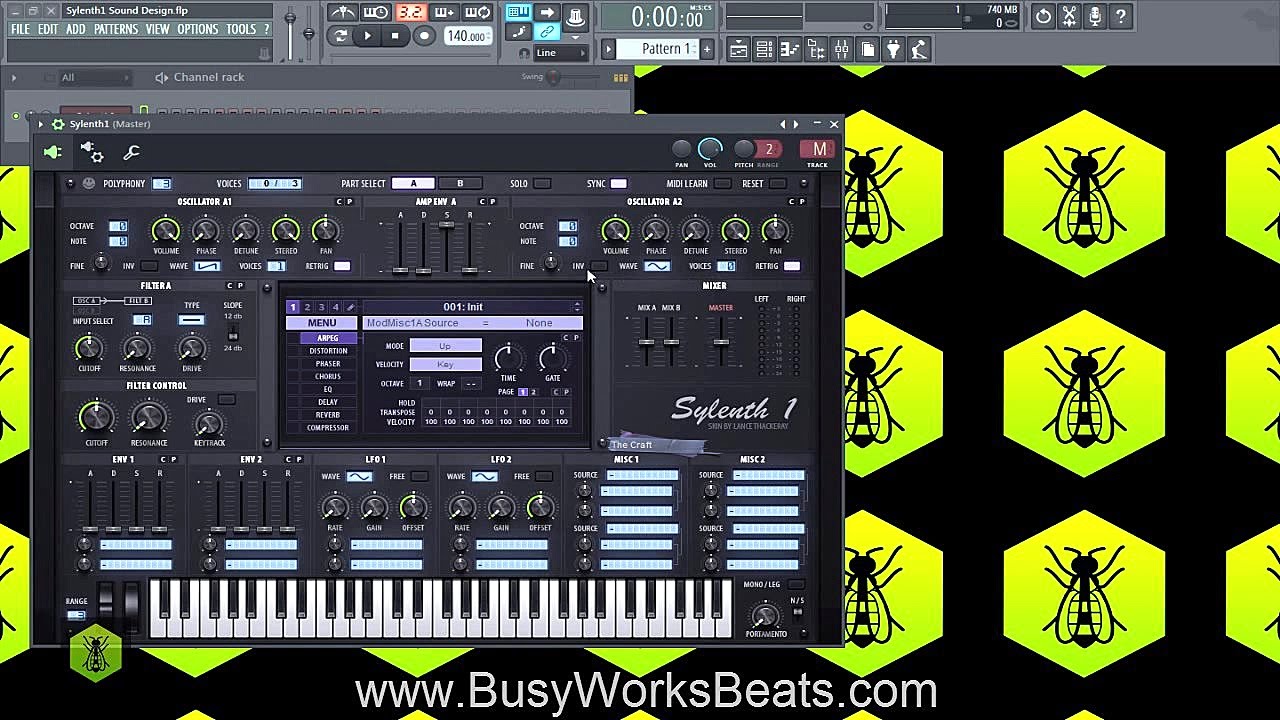
The main screen is divided into several sections, including the Oscillator section, Filter section, ADSR section, and FX section. Each section contains a range of controls that you can use to manipulate and fine-tune your sound.

To access any of the controls, simply click on the section where the control is located. Once you’ve opened a section, you can adjust the parameters by using the knobs, sliders, and buttons provided.

Take the time to explore each section and familiarize yourself with the various controls available. This will help you to create more complex and unique sounds with Sylenth1.

Conclusion

Sylenth1 is a powerful tool that can take your music production to the next level. By following the tips mentioned above, you can get familiar with the software and start creating amazing sounds in no time.

Sylenth1 Sound Design

Credit: www.youtube.com

Creating Your First Sound

Sylenth1 is a popular software synthesizer among music producers that helps create rich and unique sounds. The sound design feature of Sylenth1 is a great tool for creating your own sounds that can be used for any genre of music. To get started with the sound design, the first step is to create your own sound. In this post, we will discuss how to create your first sound using Sylenth1 sound design.

Understanding Oscillators

Oscillators are the primary components of a synthesizer that generates sound waves. In Sylenth1, there are four oscillators that can be used to create different types of sounds. Each oscillator has its own waveform which determines the sound that it produces. These waveforms include sine, square, saw, pulse, triangle, and noise. To create your first sound, you can begin by selecting a waveform from the oscillator section.

Using Filters And Envelopes

Filters are used to shape the sound produced by the oscillators. Sylenth1 has different types of filters including low-pass, high-pass, band-pass, and notch filter. In addition to filters, envelopes are also useful in creating your first sound. Envelopes shape the sound by controlling the changes in volume, pitch, and other sound parameters over time. To create your first sound, experiment with different filter types and envelope parameters to create unique and complex sounds.

Adding Effects

Adding effects is the final step in creating your first sound using Sylenth1 sound design. Effects like reverb, delay, and distortion can be used to enhance the sound and create different textures and atmospheres. Sylenth1 has a range of built-in effects to choose from and you can also add external plugins to create even more complex sounds. Remember to use effects sparingly and match them to the overall tone of the sound you are creating.

In conclusion, Sylenth1 sound design is a powerful tool for creating unique and complex sounds. Understanding the oscillator, using filters and envelopes, and adding effects are the key steps to creating your first sound. With practice and experimentation, you can unlock the full potential of Sylenth1 and create sounds that are unique to your style of music.

Advanced Sound Design Techniques

Advanced sound design techniques are essential in creating top-quality music tracks. If you are a music producer or sound designer, then you already know that Sylenth1 is one of the most popular software synthesizers out there. With its powerful sound engine, you can easily create the most complex sounds and take your production to the next level. In this post, we’ll be looking at some of the advanced sound design techniques in Sylenth1 that can help you create unique sounds that stand out.

Modulation

One of the most exciting ways to create a unique sound is through modulation. In Sylenth1, you can easily modulate almost every parameter using LFOs, envelopes, and step sequencers. Modulating the pitch, filter cutoff, or even the oscillator’s wave shape can generate an entirely different sound. With Sylenth1, you can modulate almost every parameter, and the possibilities are infinite!

Layering Sounds

Layering sounds is another advanced technique that can help you create complex sounds. With Sylenth1, you can layer up to four separate sounds, allowing you to mix and match different sounds until you get the perfect blend. By layering sounds, you can create more significant impacts, pads, and leads, adding layers of depth and complexity to your sound.

Creating Pads And Leads

One of the most common uses of Sylenth1 is to create pads and leads. Pads and leads are essential elements in music composition, and they help to give character to the music track. With Sylenth1, you can create a wide range of pads and leads using its advanced sound design features. Playing around with the oscillators and filters can help you create a tailor-made pad or lead sound that’ll work perfectly in your music track.

Tips And Tricks For Better Sound Design

Enhance the quality of your sound design skills with these useful tips and tricks for Sylenth1. Explore different techniques such as layering and utilizing various effects to create unique and customized sounds. Improve your overall sound production with these expert recommendations.

When it comes to sound design, Sylenth1 is a popular choice amongst musicians and producers. With its vast array of oscillators, filters, and effects, this software synth offers endless possibilities for creating unique sounds. However, it can be overwhelming for beginners to navigate through all of its features. In this post, we’ll be sharing some tips and tricks to help you improve your sound design using Sylenth1.

Experimenting With Different Waveforms

One of the most exciting features of Sylenth1 is its ability to generate various types of waveforms. By default, it starts with four oscillators that offer basic waveforms such as sine, saw, square, and triangle. However, you can change the waveform by selecting from the drop-down menu or by drawing your own using the built-in waveform editor. But how can you use this to your advantage? Tip: Try layering different waveforms to create complex and interesting sounds. For instance, you can stack a saw-wave with a square-wave to add harmonic richness and depth to a bass sound.

Using Lfos For Movement

LFOs or Low-Frequency Oscillators are another powerful tool in Sylenth1 that can add movement and modulation to your sounds. These waveforms operate at a lower frequency than any audible sound and can be assigned to modulate various parameters of the synth like pitch, filter, volume, and more. Tip: Use LFOs creatively to breathe life into your sounds. For instance, you can assign an LFO to modulate the cutoff frequency of a low-pass filter to create a wobbly bass sound that evolves over time.

Using Automation To Create Interest

Automation is a powerful technique in Sylenth1 that allows you to create variations within a sound over time. It lets you control any parameter of the synth using a virtual knob or slider and record the changes into your DAW timeline. This can create interest and movement in your music, such as volume fades, filter sweeps, and pitch bends. Tip: Experiment with automation to create dynamic sounds. For example, you can automate the panning of a sound to create a sense of movement from left to right or vice versa. You can also automate the rate of an LFO to slow down or speed up the modulation effect. In conclusion, Sylenth1 has a wide range of features that can give your sounds a unique character. By exploring different techniques such as layering waveforms, using LFOs, and automation, you can take your sound design skills to the next level. With a bit of creativity and experimentation, the possibilities are limitless!

Sylenth1 Sound Design

Credit: www.productionmusiclive.com

Frequently Asked Questions On Sylenth1 Sound Design

Is Sylenth Still Worth It?

Yes, Sylenth is still worth it. It remains a popular and reliable software synthesizer, loved by many music producers and sound designers for its high-quality sound and user-friendly interface. Despite the emergence of newer plugins, Sylenth continues to hold its own and is still considered an essential tool for electronic music production.

What Is Sylenth Good For?

Sylenth is a popular virtual synthesizer plugin used for producing electronic music. It is known for its high-quality sound, versatility and easy-to-use interface, making it a go-to choice for producers across different genres. It can be used to create a variety of sounds including basslines, leads, pads, and more.

What Is The Difference Between Massive Serum And Sylenth1?

Massive Serum and Sylenth1 are both popular software synthesizers used for music production. However, Massive Serum is known for its advanced wavetable synthesis capabilities, while Sylenth1 is known for its classic sound and ease of use.

What Is The Difference Between Serum And Sylenth?

Serum and Sylenth are both digital synthesizers used for music production. However, Serum has a more modern interface and a wider range of features, while Sylenth has a more classic sound. Serum offers wavetable synthesis, while Sylenth is a subtractive synthesizer.

Conclusion

Sylenth1 Sound Design is a versatile and powerful tool that can help music producers to unleash their creativity and produce high-quality sounds. With its intuitive interface and extensive library of presets, Sylenth1 is an excellent choice for beginners and experienced users alike.

By using the tips and tricks discussed in this post, you can take your sound design to the next level, and create unique and memorable tracks. With Sylenth1, the possibilities are endless!

Categories
Archive

Why Learn Music Theory

Learning music theory helps musicians understand the fundamental elements of music, including rhythm, melody, and harmony. Understanding these elements helps musicians improve their skills and become better performers and composers.

Music theory is an essential component of music education and training. It teaches musicians how to read and write music, understand musical notation, and develop proficiency in their instruments. But music theory is much more than just a set of technical skills.

It provides a deeper understanding of music, allowing musicians to appreciate its emotional and aesthetic qualities. By studying music theory, musicians can improve their creative abilities and develop their own unique musical style. Furthermore, learning music theory can help musicians communicate with other musicians and collaborate more effectively. This article will explore why music theory is important and how it can benefit musicians of all levels.

Developing Musicianship

Learning music theory is essential to developing musicianship, as it provides a deeper understanding of how music works. By understanding concepts like chords, scales, and melody, musicians can improve their composition skills and even become better performers.

Building A Foundation Of Musical Understanding

Learning music theory forms a strong foundation for developing exceptional musicianship. Music theory helps an individual to understand how music works. It teaches a person about the fundamental elements of music such as chords, scales, rhythm, melody, harmony, and more. With this knowledge, one can read, write, and understand music. The ability to read music opens the door to exploring a diverse range of music genres, playing with new instruments, and collaborating with other musicians.

Improving Performances

Music theory helps in improving performances by enhancing one’s understanding of music. It helps in interpreting musical compositions in a better way, improves the rhythmical accuracy, and assists in playing with more confidence and precision. A proper understanding of music theory enables one to improvise, adjust and adapt in real-time while performing. It is helpful in experimenting with techniques, harmonies, and new music styles. Professionals, who have a grasp of music theory, often have an edge over those who do not while delivering noteworthy performances.

Composing And Arranging Music

Music theory offers limitless opportunities for people interested in composing and arranging music. Knowing about the principles of major and minor scales, harmony and melody, chord progressions, chords, and the use of rhythm helps individuals create new music pieces with originality and finesse. With a good understanding of music theory, you can craft compositions for various genres and instruments. A thorough comprehension of music theory is an excellent tool for bringing new ideas to the table during music collaborations. In conclusion, music theory is critical for anyone passionate about becoming a great musician. It helps in building a strong foundational understanding of musical elements, improving performances, and composing and arranging music. With music theory in your tool kit, you can easily adapt music trends and connect with other musicians in the industry.

Why Learn Music Theory

Credit: www.gunnostudio.com

Exploring Different Genres

Learning music theory is crucial for exploring different genres as it equips musicians with the knowledge of chord progressions, melody, and harmony. With this understanding, musicians can create unique and diverse compositions.

Music is an art form that transcends cultures, lifestyles, and generations. As an aspiring musician, it’s essential not only to understand your preferred genre but explore various genres. Music theory is the backbone of every musical expression, and its application spans across various styles. In this post, we’ll explore how understanding music theory can enhance your experience in different genres.

Understanding The Elements Of Different Styles

Understanding the underlying music theory of different genres is crucial to appreciating the art form fully. Be it jazz, classical, blues, rock, or any other music style, theory concepts like harmony, melody, rhythm, and form are essential in creating and understanding the music.

Applying Theory To Jazz Improvisation

Jazz is a genre that heavily relies on improvisation. Jazz improvisation requires an in-depth understanding of music theory concepts like chord progressions, scales, modes, and phrasing. Knowing the theory behind jazz improvisation can help you develop a deeper understanding of the genre, allowing you to create your unique style.

Analyzing Classical Form And Structure

Classical music is known for its complex structures and forms. To understand classical music, you need to understand theory concepts like modulation, sonata form, and counterpoint. Analyzing classical pieces using music theory helps you appreciate the intricacies of the compositions and the composer’s intentions. In conclusion, learning music theory is essential to appreciate, understand and create music irrespective of the genre. Every genre has its unique aspects, and understanding the theory behind it broadens your musical abilities and opens up a world of possibilities.

Effective Songwriting

Learning music theory is crucial for effective songwriting. It provides a solid foundation for creating songs that have a strong melody, catchy rhythm and engaging harmony. Understanding the structure of a song and how to manipulate it allows for greater creative freedom, resulting in more dynamic and memorable compositions.

Music theory is commonly thought of as a complex and daunting subject, often reserved for advanced musicians and scholars. However, the knowledge and application of music theory can significantly enhance one’s songwriting abilities, leading to more effective and impactful music. In this article, we will explore how music theory can be utilized for effective songwriting, specifically focusing on melody-writing, chord progressions, and harmonic variations.

Using Theory To Write Better Melodies And Chord Progressions

The melody of a song is often what captures the audience’s attention and leaves a lasting impression. It is essential to have an understanding of melody-writing techniques and how to apply them effectively. Music theory provides a framework for understanding and creating melodies that are musical and pleasing to the ear. Additionally, chord progressions play a significant role in songwriting, providing a foundation for the melody to rest upon. Knowledge of chord progressions can help songwriters identify which chords will sound best together and how to build progressions that support the emotional content of the lyrics.

Creating Harmonic Variations

While repetition can be an effective tool in songwriting, too much of it can result in a monotonous and uninspired piece of music. Harmonic variation is a technique used to keep a song interesting by adding new and unexpected chord changes. Utilizing music theory to understand chord functions and relationships can help songwriters create new and exciting variations in their chord progressions, making their music more engaging and dynamic.

Utilizing Counterpoint Techniques

Counterpoint is the technique of composing two or more independent melodies that work together harmonically. By using counterpoint, songwriters can create more complex and intricate melodies that are more musically interesting. Understanding music theory concepts such as intervals, scales, and chord progressions can allow for the effective use of counterpoint techniques in songwriting. In conclusion, learning music theory can be a powerful tool for effective songwriting. It provides a framework for understanding melody-writing, chord progressions, harmonic variations, and counterpoint techniques, allowing songwriters to create more complex, interesting, and impactful music.

Elevating Music Production

Learning music theory is essential for elevating music production. It helps music producers understand the fundamentals of music composition, chord progression, and melody. By mastering these elements, producers can create memorable tracks that resonate with audiences.

Learning music theory is a valuable asset to any musician or aspiring music producer. It helps in creating more refined and professional soundtracks, elevating music production to a new level. With a comprehensive understanding of music theory, producers can create music that is not only appealing to the ears but also makes sense, whether it’s a solo piece or a full-fledged orchestra.

Designing Better Sounds With Synthesis And Sound Design

One of the essential aspects of music production is creating unique and innovative sounds. By understanding the basics of music theory, producers can use synthesis and sound design techniques to create better sounds. They can understand how different waveforms work and combine them to develop new sounds. With music theory knowledge, it becomes easier to create a sound that complements the melody, rhythm, and chords, leading to a well-crafted production.

Mixing Techniques With A Knowledge Of Eq And Dynamics

Mixing is a crucial aspect of music production that involves balancing all the different instruments and sounds. With a knowledge of music theory, producers can understand how different frequencies interact with each other and use EQ and Dynamics to balance them. By using the right mixing techniques, producers can create a well-structured production with a clear mix that allows each sound to stand out.

Mastering With A Musical Ear

Mastering involves making final adjustments to the mix and ensuring the final product is consistent and polished. With a knowledge of music theory, producers can listen to music with a musical ear and make the final tweaks that create a perfect balance of dynamics and levels. They can use their knowledge of chords, melody, and rhythm to make sure everything blends well, leading to a more satisfying and professional-sounding production. In conclusion, learning music theory can immensely elevate music production. It provides a solid foundation for creating unique sounds, balancing them properly, and making final tweaks that result in a professional-sounding production. With a good understanding of music theory, producers can create music that not only sounds good but also makes sense, and that’s what sets them apart.

Performing With Confidence

Learning music theory allows musicians to perform with confidence and precision. It provides a deeper understanding of how music works, allowing for more creative and effective compositions. With a background in music theory, musicians can communicate better with fellow performers and producers, and elevate their overall musical abilities.

Playing an instrument on stage or in front of a group of people can be nerve-wracking. Knowing your instrument or voice well is crucial, but performing with confidence requires more than just knowing the basics. Music theory knowledge is essential for a confident performance, and here’s why:

Improving Sight-reading Skills

Sight-reading is the ability to read and perform a piece of music from sheet music without any prior rehearsal. This is a valuable skill for any musician, but it is impossible without an understanding of music theory. When you know how to read the notes and rhythms on the page, you can interpret and perform the music accurately without errors. This skill is particularly useful when musicians need to play an unfamiliar piece of music on the spot.

Understanding Performance Directions In Sheet Music

Sheet music contains specific performance directions that are crucial for a successful performance. Directions such as tempo markings, dynamics, and articulations can significantly impact the overall performance. Without a proper understanding of the musical terms and symbols in sheet music, the musician may not perform the piece as the composer intended it to be played. Understanding music theory enables the musician to interpret the sheet music correctly, leading to a confident and accurate performance.

Adapting To New Chord Changes And Song Structures

When musicians come across new music, they need to be able to adapt quickly to the chord changes and song structures. Knowing basic music theory, such as key signatures and chord progressions, makes adaptation smoother. Experienced musicians with a solid understanding of music theory can analyze a song’s structure and make quick, accurate judgments when they encounter unfamiliar chord changes. This ability to adapt to new music with ease helps build the confidence that is crucial for a successful performance. In conclusion, learning music theory provides the essential foundation for any musician looking to perform with confidence and accuracy. From improving sight-reading skills to reading and interpreting sheet music, to adapting to new chord changes and song structures, the benefits of gaining a solid understanding of music theory are undeniable.

Why Learn Music Theory

Credit: guitarnutrition.com

Collaborating With Other Musicians

Learning music theory is essential for collaborating with other musicians. Understanding theory provides a common language for musicians to communicate and create together, resulting in stronger and more cohesive musical collaborations.

Collaborating with other musicians can be an incredible experience, but it can also be incredibly frustrating if you do not have a solid understanding of music theory. Music theory provides musicians with the tools they need to communicate their ideas and expressions effectively, avoid misunderstandings, and read and interpret lead sheets and arrangements. In this post, we will explore these benefits of music theory in depth.

Communicating Musical Ideas And Expressions

Music theory provides musicians with a shared vocabulary for describing and discussing music. With a solid understanding of music theory, musicians can communicate their ideas and expressions clearly and effectively. For example, if a guitarist wants to suggest a chord progression to a bassist, they can use the language of music theory to explain their idea in a way that the bassist can easily understand.

Avoiding Misunderstandings With Standard Terminology

Standard terminology is essential for avoiding misunderstandings in any field, and music is no exception. If musicians do not share a common understanding of terminology, they can easily become confused and frustrated. For example, if a drummer suggests playing a beat at 120 BPM, but the rest of the band understands BPM to mean beats per bar, there could be a lot of confusion and wasted time. However, if everyone has a solid understanding of music theory and standard terminology, they can avoid these types of misunderstandings.

Reading And Interpreting Lead Sheets And Arrangements

Musicians often need to read and interpret lead sheets and arrangements, particularly when collaborating with other musicians. A lead sheet is a simplified version of a piece of music that includes the melody, harmony, and lyrics. An arrangement is a more detailed version of a piece of music that includes specific instrumental parts. Understanding music theory can make it much easier to read and interpret these types of documents, as musicians will be familiar with chord progressions, key signatures, time signatures, and other essential musical concepts. In conclusion, learning music theory is essential for collaborating with other musicians effectively. Music theory provides musicians with the tools they need to communicate their ideas and expressions clearly, avoid misunderstandings, and read and interpret lead sheets and arrangements. Whether you are an aspiring musician or an experienced professional, investing time in learning music theory is undoubtedly worthwhile.

Why Learn Music Theory

Credit: m.youtube.com

Frequently Asked Questions Of Why Learn Music Theory

Why Do People Study Music Theory?

People study music theory to understand the principles and structure behind music. It helps them analyze, compose and perform music more effectively. Additionally, it can improve their overall musicianship and appreciation for different genres and styles of music.

Do You Really Need To Learn Music Theory?

Yes, learning music theory can greatly enhance your understanding and appreciation of music. It can improve your ability to read, write and play music. However, it is not absolutely necessary to learn music theory if you just want to enjoy playing music casually.

Does Music Theory Make You A Better Musician?

Knowledge of music theory can help you improve as a musician by giving you a deeper understanding of how music works. It can enhance your ability to read, write, and play music, and give you a more nuanced appreciation of different styles and genres.

However, it is not essential to becoming a great musician. Practice and passion are also important factors.

Why Does Music Theory Make Sense?

Music theory makes sense because it provides a system of understanding the structure and organization of music. It allows musicians to communicate, analyze, and create music with precision. Understanding music theory helps in composing, arranging, and improvising music.

Conclusion

Learning music theory is crucial for any musician who wants to improve their musical skills and understanding. Whether you are a beginner or already a seasoned player, learning about theory can open up a whole new world of musical possibilities.

By understanding the principles of melody, rhythm, harmony, and timbre, you can communicate with other musicians more confidently and create beautiful and unique pieces of music. So, if you’re looking to take your music to the next level, it’s time to start learning music theory!

Categories
Archive

How To Balance My Mix

To balance your mix, adjust each track’s volume and EQ levels to ensure they complement each other in the final mix. Achieving a balanced mix is crucial for a professional-sounding recording.

For any music producer, mastering the art of mixing is a must. A good mix is essential to make your music sound polished and commercial. It’s the final step before getting your music ready for distribution. Balancing your mix is an integral part of the process that ensures that each element of the track is blended together harmoniously.

It can be a challenging task, but it’s worth the time and effort. We will show you some useful techniques you can use to balance your mix like a pro. We’ll discuss the importance of leveling and EQing your tracks, which is the key to ensuring your music is well balanced. So, let’s dive in!

Understanding Eq

Balancing a mix requires understanding EQ, or equalization. By manipulating the different frequency ranges in each track, you can create a harmonious blend of all the sounds in your mix. With practice and attention to detail, you can master the art of EQ and create a professional-sounding mix.

Understanding EQ – The Key To Balancing Your Mix Balancing your mix can be a daunting task, especially if you’re just starting in the music industry. However, with the right knowledge and understanding of EQ (Equalization), you can easily create a balanced mix. Frequency Spectrum The first step in understanding EQ is to familiarize yourself with the frequency spectrum. The frequency spectrum refers to the range of frequencies that can be heard by humans. In music production, the frequency spectrum is divided into different bands, each with its own unique range of frequencies. Types of EQ There are different types of EQ that you can use to balance your mix. The most common types of EQ include: 1. Parametric EQ – This type of EQ allows you to adjust the frequency, bandwidth, and gain of a specific frequency range. 2. Graphic EQ – A graphic EQ is composed of different frequency bands that can be adjusted independently. 3. Shelving EQ – This type of EQ adjusts all frequencies above or below a specific frequency. 4. High-pass and low-pass filter – These filters allow you to cut out unwanted frequencies by boosting or reducing certain frequencies in the mix. Ensuring each H3 heading adheres to HTML syntax, here is an example of the headings in HTML format:

Frequency Spectrum

Types Of Eq

In conclusion, understanding EQ is essential in balancing your mix. By familiarizing yourself with the frequency spectrum and different types of EQ, you can easily create a balanced mix that sounds great.

How To Balance My Mix

Credit: www.audiomixingmastering.com

Setting Levels

Balancing a mix is crucial to ensuring all elements are heard equally. One way to achieve this is by setting levels, which involves adjusting individual track volumes to achieve a cohesive sound. It’s important to use your ears and trust your instincts when making these adjustments.

Setting Levels: Using Peak Meters

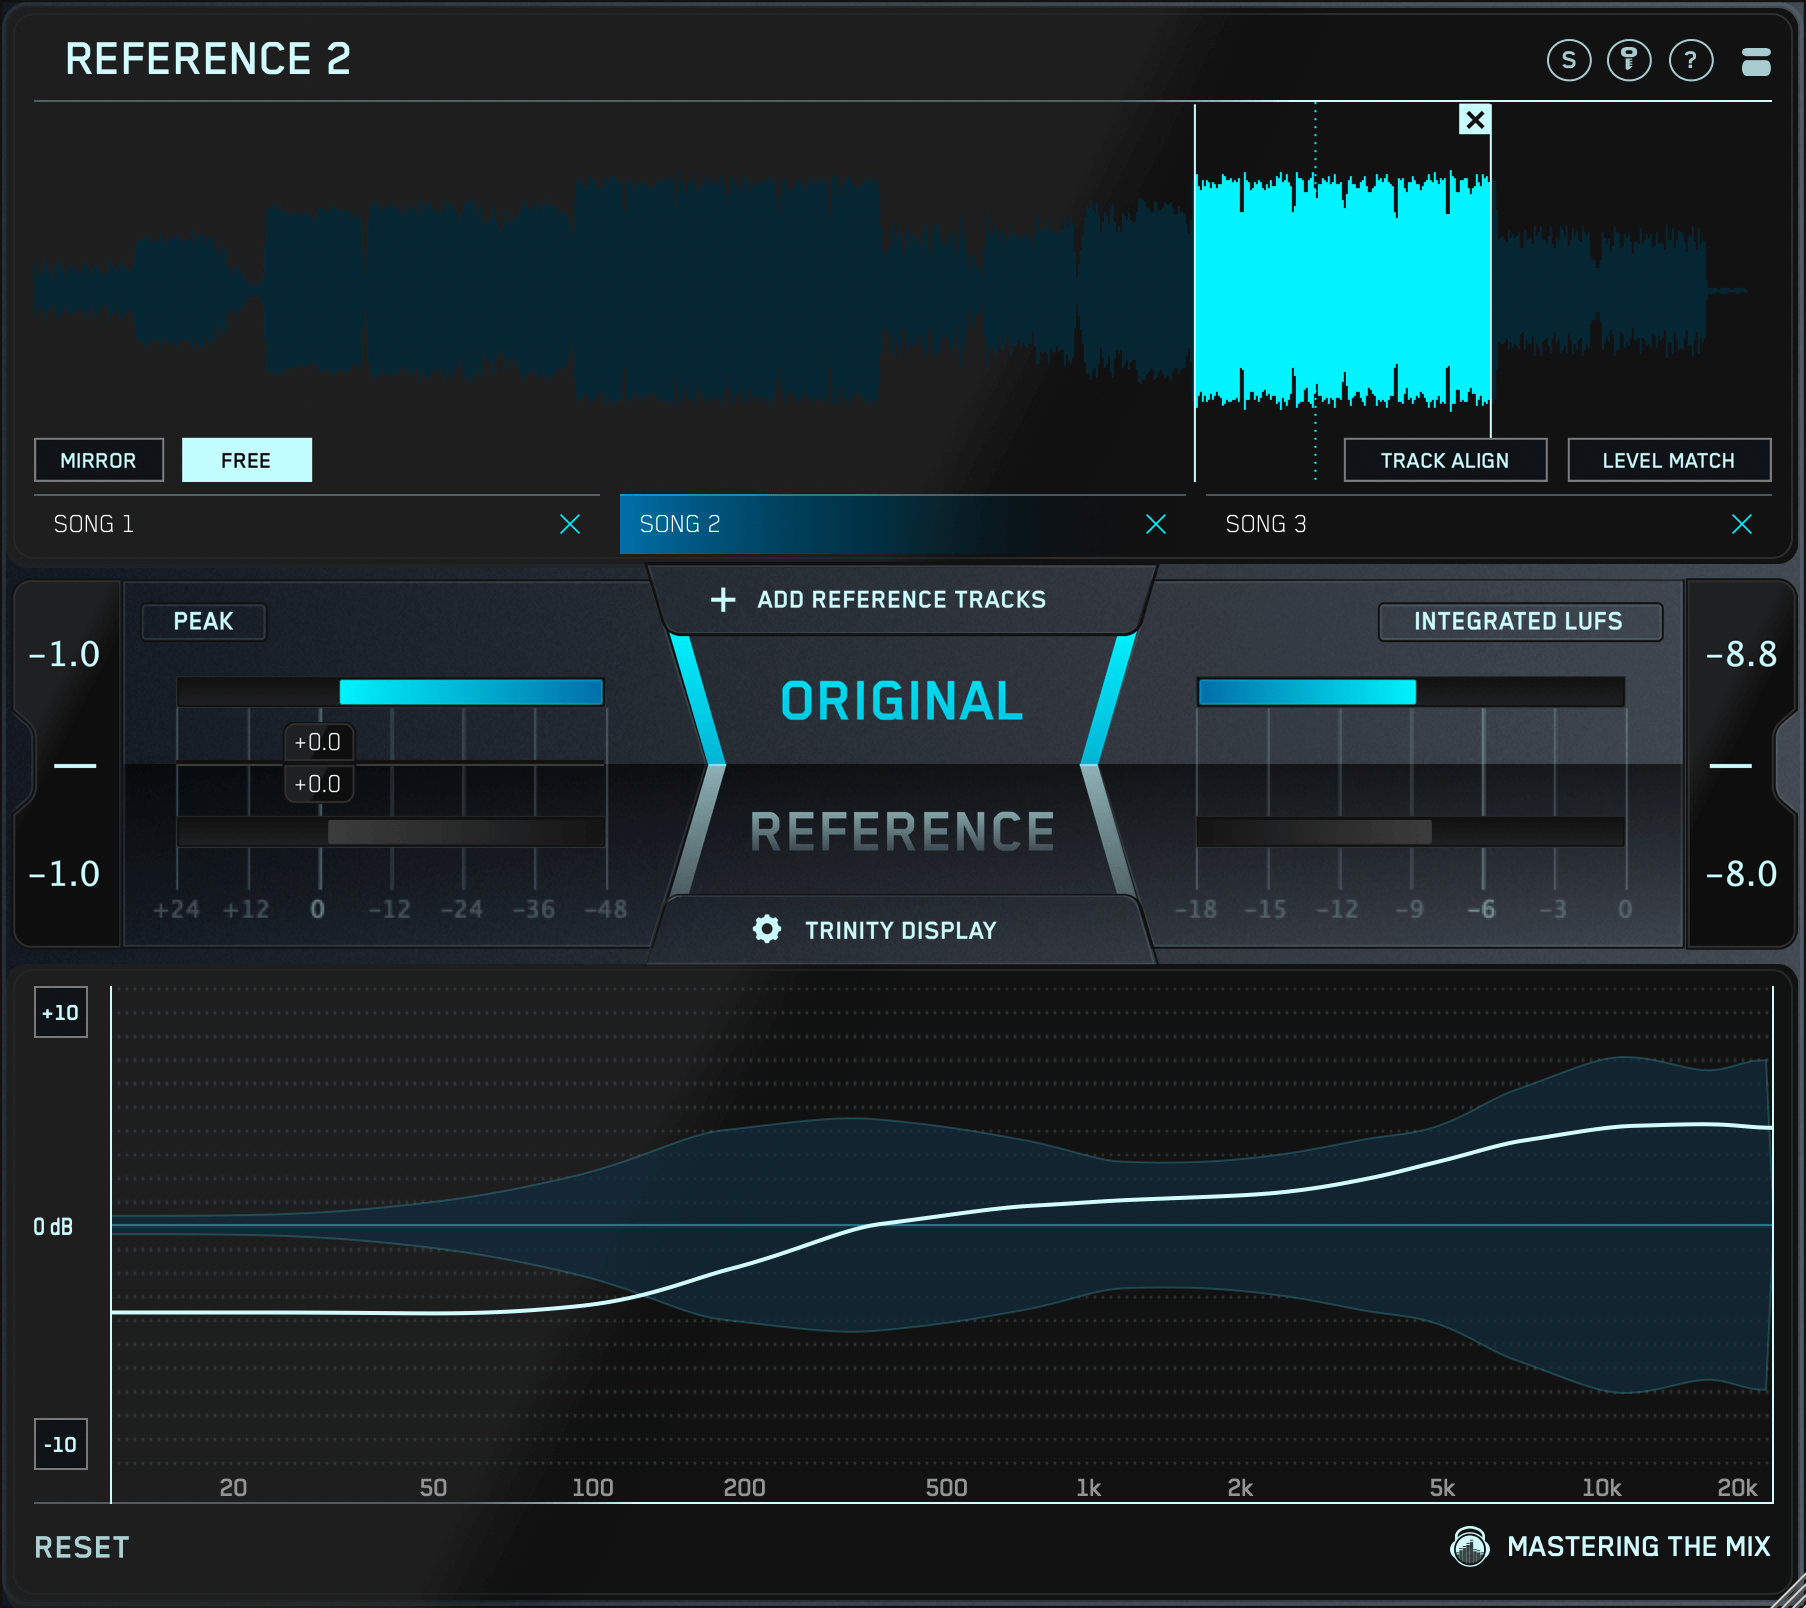
When it comes to setting levels in your mix, it’s essential to make use of your peak meters. Peak meters show you the highest point of any given signal and provide valuable information about the volume of your tracks. To use peak meters, make sure to set them to display the appropriate level for your project. For example, if you’re working on a project that will be distributed on a streaming platform, you should set your peak meter to -1dB. This level is the maximum allowed peak level for most streaming services, and exceeding it could result in distorted audio.

Setting Levels: Using Lufs Meters

In addition to peak meters, it’s important to use LUFS meters when setting levels in your mix. LUFS meters measure the perceived loudness of your tracks and are essential for ensuring that your mix is consistent and well-balanced. When using LUFS meters, be sure to set them to the appropriate level for your project. For example, if you’re working on a TV show or movie, you might want to aim for a level of -24LUFS. On the other hand, if you’re working on a music project, you might want to aim for a level of -14LUFS. Ultimately, the goal is to maintain a consistent level throughout your mix, so make sure to keep an eye on your LUFS meter as you work. Using both peak meters and LUFS meters together will give you a complete picture of the volume and loudness of your tracks. By paying close attention to these meters, you can ensure that your mix is well-balanced and ready for distribution.

Creating Space With Reverb

Creating space in your mix can be achieved by using reverb effectively. By balancing the amount of reverb on each instrument and vocal track, you can create a sense of depth and space without making your mix sound muddy or washed out.

This can help each element stand out and give your mix a professional-sounding polish.

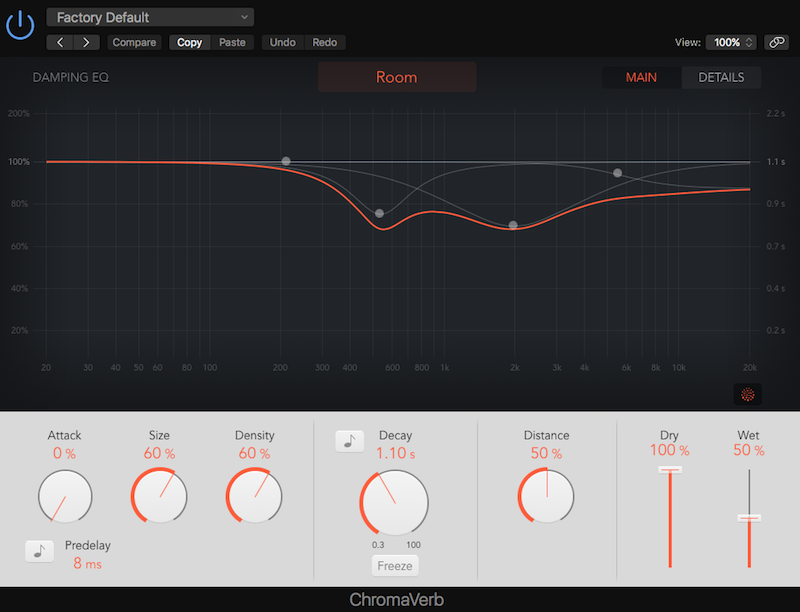
Dry Vs Wet Mix

To create a well-balanced mix, sound engineers use a combination of dry and wet signals. The dry signal is the original sound without added effects. On the other hand, the wet signal is the original sound with the added reverb. Balancing both signals is essential in creating a cohesive mix. One approach to balancing the dry and wet mix is by adjusting the levels of both signals. You can reduce the dry signal to make room for the wet signal or vice versa. Finding the right balance can give listeners the best listening experience.

Different Types Of Reverb

Reverb is not a one-size-fits-all effect. There are different types of reverb, and each serves a particular purpose. Understanding the different types of reverb can help you choose the right type of effect for your mix. Plate reverb is ideal for vocals and drums, while hall reverb is suitable for orchestral pieces. Chamber reverb is perfect for giving your mix a warm sound, while room reverb can make your mix feel bigger. Reverb is crucial in creating space in your mix. It can help in separating your instruments, creating depth, and adding an illusion of space. One way to use reverb effectively is by applying different levels of reverb to different instruments in your mix. For instance, you can add more reverb to the vocals to push them forward in the mix. Another technique is using the pre-delay function, which determines the delay between the dry signal and the onset of the wet signal. Adjusting the pre-delay time can create a sense of space. A longer pre-delay time can make the sound appear further away. In conclusion, balancing the mix using different types of reverb can create a listening experience that is both engaging and immersive. It is essential to experiment with different settings and techniques to find the right balance that works for your mix.

How To Balance My Mix

Credit: www.kvraudio.com

Panning Sounds For Width

To balance your mix, try using panning sounds for width. By strategically placing different elements of the mix in either the left or right stereo field, you can create a sense of space and clarity in your production. This can add a professional touch to your music and help make it stand out amongst the crowd.

Panning sounds is a classic technique used by audio engineers to create a sense of space in a mix. It involves moving sounds from the center of the stereo field to the left or right speaker. By adjusting the panning of different tracks, you can create a mix that sounds wider and more expansive.

Mono Vs Stereo Sounds

Before we look at panning techniques, it’s important to understand the difference between mono and stereo sounds. Mono tracks play the same audio signal out of both speakers, while stereo tracks have different signals for the left and right speakers. Stereo tracks are the ones you’ll use when panning sounds. You can also use stereo wideners to create a wider stereo image from mono tracks.

Panning Techniques

There are a few different panning techniques you can use to create width in a mix. Here are a few examples:

  • Hard panning: This involves panning a sound all the way to the left or right speaker. It can be effective for creating separation between elements in a mix.
  • Mild panning: This involves panning a sound slightly off-center, towards the left or right. It creates a more natural stereo image and can help fill out the mix.
  • Ping-pong panning: This is a common technique used with stereo delay effects, where the delayed signal is panned back and forth between the left and right channels.

It’s worth noting that not every element in a mix needs to be panned – sometimes sounds work best when they’re centered. Use your ears to decide what works best for each track.

In Conclusion

Mastering the art of panning sounds for width can take some practice, but it’s a valuable technique to have in your audio engineering toolbox. Experiment with different panning techniques and use your ears to decide what sounds best. By creating a wide, spacious mix, you can bring your music to life and make it sound bigger than ever.

Using Compression

To balance your mix, using compression is an essential tool. By controlling the dynamics of individual tracks and glueing them together, you can achieve a cohesive sound with greater clarity and consistency. Use compression sparingly and with intention to avoid over-processing and losing the natural feel of the music.

Mixing music is an art that requires a balance of all elements to produce a harmonious and polished final product. Sometimes, when mixing, certain components of the mix may overpower others, resulting in an uneven-sounding track. Compression is a tool used in the mixing process to control the level of dynamic range in audio. It helps to balance the mix by reducing the dynamic range and bringing out the subtle nuances of the composition. In this article, we’re going to explore different types of compressors and compressor settings.

Types Of Compressors

There are several types of compressors that can be used in mixing. Here are three common types:

Type of CompressorDescription
VCA CompressorThis type of compressor uses a Voltage-Controlled Amplifier to control the dynamic range of the audio signal. It’s known for its transparency and fast attack time.
Optical CompressorThis type of compressor uses a light source and a photoresistor to compress the dynamic range. It’s known for its smooth and warm sound.
FET CompressorThis type of compressor uses a Field-Effect Transistor to control the dynamic range. It’s known for its aggressive sound and fast attack time.

Compressor Settings

Once you’ve selected the type of compressor that fits your needs, you’ll need to adjust the settings to achieve the desired effect. Here are a few common compressor settings to consider:

  • Threshold: This sets the level at which the compressor starts to work. If the audio signal exceeds the threshold, the compressor will kick in and reduce the level accordingly.
  • Ratio: This setting determines how much the compressor reduces the dynamic range. For example, a ratio of 2:1 means that for every 2dB the signal goes over the threshold, the compressor will reduce the level by 1dB.
  • Attack and Release: The attack and release settings determine how quickly the compressor will start to work and how fast it will return to normal. A fast attack time can help to tame transients, while a slow release time can help to maintain the natural decay of the audio signal.
  • Makeup Gain: Since compressors reduce the dynamic range, you’ll need to compensate for the loss in level with makeup gain.

Using compression is an effective way to balance out the mix and achieve a professional sound. By understanding the different types of compressors and their settings, you can take your mixes to the next level.

Removing Unwanted Sounds

To balance your mix, consider removing unwanted sounds that clash with the track’s overall sound. Identify these sounds with careful listening and use tools like EQ and filters to eliminate them. This will help your mix sound more cohesive and professional.

As a music producer or sound engineer, achieving a balanced mix is essential for creating great audio. One crucial aspect of balancing your mix is removing unwanted sounds and ensuring that each element of your mix is heard clearly. In this section, we will discuss how to identify issues with your mix and eliminate problem areas to achieve a professional-sounding final mix.

Identifying Issues

Before you can remove unwanted sounds from your mix, you must first identify any problem areas. Some common issues to look out for include:

  • Clashing frequencies between instruments
  • Noisy recordings or background sound
  • Inconsistent volume levels
  • Muddy or dull sounding elements
  • Unpleasant resonances or sharp transients

To identify these issues, it’s important to listen carefully to each element of your mix. Use your ears and audio tools like EQ and compression to pinpoint any problem areas. Once identified, you can move on to eliminating them.

Eliminating Problem Areas

Eliminating unwanted sounds from your mix requires a combination of technical skill and creative decision making. There are several techniques you can use to address different types of issues:

Type of IssueTechnique
Clashing FrequenciesUse EQ to carve out space for each instrument and pan them accordingly
Noisy RecordingsUse noise reduction tools and envelope editing to remove unwanted sound
Inconsistent Volume LevelsUse compression and automation to level out volume discrepancies
Muddy or Dull ElementsUse EQ and/or saturation to bring out desired frequencies
Unpleasant Resonances or Sharp TransientsUse EQ to notch out problematic frequencies or transient shapers to soften sharp transients

By using these techniques, you can eliminate problem areas from your mix and create a sonically pleasing final product. Remember that these techniques should serve as a starting point, and every mix is different. Don’t be afraid to experiment and make creative choices to achieve the desired sound. In conclusion, removing unwanted sounds is crucial for achieving a balanced and professional-sounding mix. By identifying issues and using a variety of techniques to address them, you can create a mix that highlights each element of your production.

How To Balance My Mix

Credit: m.youtube.com

Frequently Asked Questions For How To Balance My Mix

How Do You Balance Elements In A Mix?

To balance elements in a mix, you can use a variety of techniques such as adjusting levels, panning, EQ, compression, and reverb. The key is to make sure that each element has its own space in the mix and is not overpowering or competing with other elements.

Experiment with different techniques to find the right balance for your mix.

What Does A Balanced Mix Look Like?

A balanced mix typically includes a variety of different types of content such as text, images, videos and links. The content should be relevant to the topic and offer value to the reader. Additionally, the mix should be well-organized, easy to navigate and optimized for search engines.

How Do I Level My Mix?

To level your mix, start by adjusting individual track levels. Ensure each instrument is well-balanced in relation to the others. Next, use panning and stereo imaging to separate tracks and create space. Finally, apply compression and EQ to each track to ensure consistency and clarity.

Test your mix on different audio systems to fine-tune levels.

How Do I Master My Mix?

Mastering your mix requires adherence to these 5 guidelines: 1. Properly balance your audio levels and frequencies. 2. Use equalization, compression, and other tools to adjust your tracks. 3. Make sure your mix translates well on multiple playback devices. 4. Listen to your mix critically and make adjustments as needed.

5. Consider hiring professional mastering services for the best results.

Conclusion

Achieving a balanced mix can be challenging, especially when dealing with multiple tracks, frequencies, and effects. However, by following the above tips, you can streamline your process and produce a well-mixed track that sounds great on any device. Remember to experiment with different techniques and workflows until you find what works best for your specific projects.

With practice and dedication, you can become a master at balancing your mixes and take your music to the next level.

Categories
Archive

Best Electric Guitar Vsts

The best electric guitar VSTs include Kontakt Player, AmpliTube 5, and Native Instruments Guitar Rig 6. These VSTs provide top-quality sounds and a wide range of features for guitarists and producers alike.

Electric guitars have been a staple in the music industry for decades, with their electrifying sounds providing character and depth to a wide range of musical genres. With advancements in digital technology, musicians and producers now have access to a wide range of virtual instruments and plugins that can recreate the sounds of electric guitars with stunning accuracy.

We will dive into some of the best electric guitar VSTs available in the market.

Best Electric Guitar Vsts

Credit: professionalcomposers.com

Top 5 Electric Guitar Vsts

Explore the top 5 electric guitar VSTs that provide realistic and high-quality sounds for your recordings and performances. Get ready to enhance your music production with these exceptional tools.

Are you a music producer or a guitar player who is looking for the best electric guitar VSTs? Look no further because we have done the research for you. In this article, we will be discussing the top 5 electric guitar VSTs that are currently available in the market. Each VST has its unique features and sound quality. Without further ado, let’s dive in.

Vst 1

“Ample Guitar T III”. It is a popular VST among producers because of its accurate and realistic sound. This VST features many articulations, including slides, hammer-ons, pull-offs, and bends, which gives it a more natural and authentic feel. The interface is user-friendly and easy to navigate, making it an excellent choice for both beginners and professionals.

Vst 2

“Strum GS-2 “ by Applied Acoustics Systems. This VST is perfect for those who are looking for a realistic and organic strumming sound. It features a MIDI loop library, which allows you to create your own unique guitar parts easily. The Strum GS-2 is versatile and can be used to make different music genres, including rock, pop, and country.

Vst 3

“Shreddage 3 Stratus” is our third VST on the list. If you’re looking for a heavier sound, this VST is perfect for you. It features six and seven-string guitars, which makes it ideal for metal and rock music. The Shreddage 3 Stratus has an intuitive and easy-to-use interface, which allows you to create your own unique sounds and explore new possibilities.

Vst 4

“Orange Tree Samples Evolution Strawberry”. This VST features a vast library of articulations, including palm mutes, harmonics, slides, and more. It provides a simple and intuitive user interface and comes with a powerful strumming engine. The Evolution Strawberry is perfect for those who want a wide range of realistic sounds and want to explore different guitar techniques.

Vst 5

“UVI Falcon”. This VST features a vast library of sounds, including electric guitars, which allows you to create unique and original sounds easily. The UVI Falcon features an excellent user interface, making it easy to create and modify sounds. It’s perfect for those who are looking for a versatile and powerful VST that can be used in different music genres. That concludes our list of the top 5 electric guitar VSTs that are currently available. We hope that this article has been helpful in guiding you to find the perfect VST for your music production needs.

Best Electric Guitar Vsts

Credit: m.youtube.com

Factors To Consider Before Choosing An Electric Guitar Vst

Choosing the best electric guitar VST is a complex process that requires one to consider several factors such as sound quality, compatibility, and ease of use. It’s important to do thorough research to find the right VST that will suit your music production needs.

Factors to Consider Before Choosing an Electric Guitar Vst If you’re looking to get the best sound out of your electric guitar, you need to invest in a quality virtual instrument. However, the process of choosing an electric guitar VST can be overwhelming. Before you make a decision, there are a few factors you need to consider, including compatibility, sound quality, effects and features, and cost.

Compatibility

When choosing an electric guitar VST, it’s important to consider compatibility. Ensure that the plugin is compatible with your DAW software and operating system. Check the system requirements of the VST before purchasing. This will save you from compatibility issues later on.

Sound Quality

The sound quality of your electric guitar VST is an essential factor. Ensure that it offers a realistic and high-quality sound that matches that of a real guitar. Before purchasing, listen to demos, reviews, and samples to make an informed decision. Additionally, the VST must be able to emulate a range of guitar sounds, including clean, distortion, and overdrive.

Effects And Features

Different electric guitar VSTs come with varying effects and features. Take into consideration your needs, the genre of music you produce, and the effects required to achieve it. Look for a VST that includes essential effects such as reverb, chorus, and delay. Versatility is important, so choose a VST that gives you the power to tweak and manipulate your sound to produce the desired effect.

Cost

Cost is an important consideration when choosing an electric guitar VST. However, it shouldn’t be the only factor to consider. Choose a VST that fits within your budget and meets your sound requirements. Be cautious of free VSTs, as they may be of lower quality and cause compatibility issues. In conclusion, when choosing an electric guitar VST, carefully assess its compatibility with your DAW software and operating system, sound quality, effects, features, and cost. By considering these factors, you’ll be able to choose a VST that meets your music production needs and preferences.

Reviews Of The Best Electric Guitar Vsts

Discover the top virtual electric guitar plugins with our expert reviews. Get incredible sounds and flexibility without spending a fortune on physical gear. Choose the best electric guitar VST for your music production needs.

If you are a music producer or home studio enthusiast looking to create authentic guitar sounds, you’ll understand the importance of having access to high-quality guitar VST plugins. With so many options available on the market, it can be challenging to know where to start. That’s why we’ve put together a list of the best electric guitar VSTs and provided detailed reviews for each to help you make an informed decision.

Detailed Review Of Vst 1

Vst 1 is a powerful plugin that offers a variety of electric guitar sounds and effects. It has a user-friendly interface, making it easy for even beginners to get started. The plugin includes a wide array of presets, from clean and jazzy tones to gritty and distorted rock sounds. You can also customize the settings to create your own unique sound.

Detailed Review Of Vst 2

Vst 2 is another great option for creating electric guitar sounds with ease. The software comes with a range of customization options, allowing you to tweak your sound to perfection. One of the standout features of this plugin is its realistic amp simulator, which provides an authentic tube amp sound. Whether you’re recording clean chords or rocking out with heavy distortion, this plugin has you covered.

Detailed Review Of Vst 3

Vst 3 is a versatile plugin designed for guitarists, producers, and sound designers. The plugin includes a collection of electric guitar samples and presets that can be easily edited and customized. It also offers a wide range of effects, including chorus, delay, and reverb, to add depth and dimension to your sound. The user interface is intuitive and straightforward, making it a breeze to navigate.

Detailed Review Of Vst 4

Vst 4 is a premium-quality plugin that offers a range of stunning electric guitar sounds. It includes a variety of pickups, amps, and effects, as well as the ability to blend and layer sounds to create your own custom tones. The plugin also offers advanced features like pitch and time shifting, making it a powerful tool for producers and sound designers. In short, this plugin is a must-have for anyone serious about producing high-quality guitar sounds.

Detailed Review Of Vst 5

Vst 5 is a feature-packed plugin that provides an authentic electric guitar playing experience. The plugin simulates the behavior of a real guitar, including string bending and feedback. It also offers a range of features like strumming patterns, chords, and rhythms, making it a great tool for songwriting and composing. The plugin’s user interface is intuitive and straightforward, making it easy to get started. In conclusion, the best electric guitar VST plugins offer a range of features and customization options, allowing producers and sound designers to create authentic guitar sounds with ease. Whether you’re after clean jazz chords or heavy distorted rock tones, there is a plugin out there to suit your needs. Use our detailed reviews to help you find the perfect plugin for your production style.

Best Electric Guitar Vsts

Credit: howtomakeelectronicmusic.com

Frequently Asked Questions On Best Electric Guitar Vsts

What Is The Best Guitar Effect Vst Ever?

It’s subjective and depends on personal preferences, but some popular guitar effect VSTs are Guitar Rig 5, Amplitube 5, and Bias FX 2.

What Is An Electric Guitar Plugin?

An electric guitar plugin is a software program that can simulate the sound of an electric guitar through a computer interface. It is used to modify and enhance the sound of recorded guitar tracks, and also as a standalone device for playing with a virtual guitar.

What Is The Best Plugin To Make Your Guitar Sound Like A Bass?

The best plugin to make a guitar sound like a bass would be the Waves Abbey Road Studios J37 Tape Saturation plugin. This plugin can simulate the warm analog sound of a bass guitar and enhance the low end frequencies of the guitar’s tone to mimic a bass guitar’s sound accurately.

What Is The Guitar Plugin In Fl Studio?

The guitar plugin in FL Studio is a software tool that allows users to simulate the sound of playing a guitar on their computer. It is a virtual instrument that can be used within the FL Studio software to add guitar sounds to music compositions without requiring a physical guitar.

Conclusion

Electric guitar VSTs have revolutionized the way musicians approach music production. The quality of sound produced by these virtual guitars has become almost indistinguishable from their physical counterparts. Choosing the right VST for your needs can make all the difference in the final output of a production.

With the options listed above, there is no doubt that the best electric guitar VSTs provide a range of sonic possibilities for any musical style. Start exploring and see what magic you can create.

Categories
Archive

What Are Stems In Music

Stems in music are submixes of individual instrument or vocal tracks that allow for more flexibility in remixing and editing. These can also be referred to as submixes, subgroups, or bounces.

Creating stems is a common practice in the music industry, particularly in electronic dance music (EDM) and pop music, where remixes and edits are frequent. By separating individual tracks, such as drums, bass, and vocals, into stems, producers and remixers have more freedom to manipulate and rearrange the elements of a song.

Stem files also make file sharing and collaboration between producers and artists more efficient. Additionally, stems are often used in live performances, allowing musicians to play along with pre-recorded elements of a song. Overall, stems are a powerful tool in modern music production, providing flexibility and creative possibilities.

What Are Stems In Music

Credit: www.epidemicsound.com

What Are Stems In Music?

Stems in music refer to separate audio tracks that make up a song, such as drums, bass, vocals, and synths. These individual tracks can be manipulated and mixed separately, allowing for greater control and creativity in music production.

Definition Of Stems

Stems are an audio file format that separates a music track into four or more individual parts, such as drums, bass, vocals, and melody. Each part or stem is a separate audio file that allows you to manipulate and adjust the sound of each individual instrument or vocal separately.

History Of Stems In Music

Stems have been around for quite some time now. They were first introduced in 2005 by a company called Native Instruments. Native Instruments developed a software program called Traktor DJ that allowed DJs to separate individual elements of a track to manipulate them on the fly. This concept soon expanded to other software programs, recording studios, and radio stations around the world.

Why Are Stems Important In Music Production?

Stems are essential in music production because they give the producer more control over the final outcome of the track. Separating a song into different stems makes it easier to edit and manipulate specific elements of the music. For example, by isolating the drum stem, you can adjust the tone, tempo, or even remove parts of the beat altogether, creating a unique sound. In addition, stems can be used for mashups, remixes, and live performances.

In Conclusion

Stems are an incredible tool that has revolutionized the way music is produced, edited, and performed. By having more control over individual stems, producers have opened up new possibilities for creativity and experimentation, resulting in more exciting and dynamic music.

What Are Stems In Music

Credit: bobbyowsinskiblog.com

Creating Stems

Stems in music are individual tracks that allow producers and DJs to manipulate and mix different parts of a song separately. Creating stems involves breaking down the original audio into smaller components such as vocals, drums, and synths. This process gives more control and flexibility to the user during live performances or studio production.

Creating Stems Stems are separate audio tracks that are derived from a complete music mix. These are commonly used by DJs for live performances or by music producers for remixing and arranging music. To create stems, you will need to select and prepare specific tracks from a full music mix and export them as individual audio files. Here’s a step-by-step guide on how you can create stems: Selecting Tracks for Stemming The first thing you need to do is to determine which tracks you want to stem. This involves listening to the entire music mix and selecting which tracks you want to separate from the rest. For instance, you may want to isolate the drums, vocals, leads, and bassline to create separate audio tracks. The key is to choose tracks that can be remixed or arranged independently while retaining their quality. Preparing Tracks for Stemming After selecting the tracks, the next step is to prepare them for stemming. The best way to do this is to make sure each track has a consistent level and EQ balance. It’s essential to go through each track and adjust the levels, so they match the overall mix. Use tools like EQ to remove unwanted frequencies that can interfere with other tracks. Also, make sure that each track has a clear beginning and end to prevent clipping and overlapping when exported as separate audio files. Exporting Stems The final step is to export the stems. In most digital audio workstations (DAWs), this can be achieved by soloing each track and exporting it as an individual audio file. Once you have exported all your stems, label them correctly so you can quickly identify them later. Additionally, some DAWs allow you to export stems in different formats, such as WAV, MP3, or AIFF. As a general rule, high-quality formats like WAV are recommended as they retain much of the original sound quality. In conclusion, creating stems is an essential skill for any DJ or music producer looking to remix music or enhance their performances. By selecting the right tracks, preparing them correctly, and exporting them in a suitable format, you can create high-quality stems that can be used for various applications.

Using Stems In Music Production

Stems in music production refer to individual components of a full track, such as drums, bass, and vocals, that can be isolated and manipulated separately. They give producers and DJs more creative control over the music they work with, allowing for unique remixes and mashups.

Are you a music producer or a sound engineer looking for a way to simplify your workflow and improve the quality of your productions? Look no further than stems. Stems are a powerful tool for modern music production, allowing you to work with individual parts of a song instead of the whole track. This not only speeds up the production process but also enables you to achieve a cleaner, more focused mix.

Benefits Of Using Stems In Music Production

There are several benefits to using stems in music production. Here are just a few:

  • Enhanced Control: Stems allow for individual control of the different parts of a song, which can help to achieve a cleaner, more focused mix
  • Efficiency: Working with stems can greatly speed up the music production process, as you don’t need to wade through heaps of data to find specific parts of the mix
  • Collaboration: With stems, it’s easier to collaborate with other producers or sound engineers. You can easily share individual parts of the mix rather than the entire track, making it easier to work together remotely.

How To Use Stems In Music Production

Working with stems is easy. Here’s how:

  1. Identify the different parts of a song that you want to work with and export them as stems. It’s essential to label each stem correctly to avoid mix-up.
  2. Import the stems into your DAW (digital audio workstation) and begin mixing and processing each stem individually.
  3. Once all the individual stems are processed, bring them together to create the final mix.

Tools For Working With Stems

Most DAWs support working with stems. However, some software is specially designed to enable more seamless and efficient stem editing and mixing. Below are a few examples:

Software NameFeatures
Native Instruments STEM Creator ToolFree tool for creating stems for Traktor DJ software
Izotope RX 8Advanced audio repairing and editing software
Ableton LiveAbleton Live supports the creation, mixing, and editing of stems

Examples Of Songs Produced With Stems

Many popular songs have been produced using stems. Here are a few examples:

  • Daft Punk’s “Get Lucky”
  • Kanye West’s “Ultralight Beam”
  • Taylor Swift’s “Love Story”

In conclusion, working with stems in music production can enhance your control, efficiency, and enable you to collaborate with other producers and sound engineers easily. To use stems, identify the different parts of the song, label correctly, import into your DAW, process each stem independently, and bring them together to create the final mix. Using different specialized software can increase the efficiency and accuracy of the process. Several popular songs have been produced using stems, including “Get Lucky” by Daft Punk, “Ultralight Beam” by Kanye West, and “Love Story” by Taylor Swift.

Stems In Live Performance

Stems in music refer to individual track parts within a song that are separated for remixing or live performance purposes. DJs, producers, and performers can manipulate the individual parts of a song to create unique versions and experiences for their audience.

Live performance has evolved from the traditional live band setup to using technology to enhance the musical experience. One such technological advancement is the use of stems in live performance. Stems are individual audio files that are grouped together to form a track. In this blog post, we will discuss the use of stems in live performance, including the differences between stems and full mix, setting up for using stems, advantages of using stems, and examples of artists who use stems in live performances.

Stems Vs. Full Mix In Live Performance

When it comes to live performance, the traditional method of playing back a full mix can limit creativity and flexibility. Stems, on the other hand, allow for more control over each individual sound, making it easier to manipulate them in a live environment. Stems create four or five separate tracks, depending on the mix, that are played back separately and mixed live to create the final sound.

Setting Up For Using Stems In Live Performance

Using stems in live performance requires some preparation and setup. The first step is to create four or five separate tracks that are grouped together to form a stem. These tracks should be properly labeled to ensure ease of use during the performance. Once the stems are created, they can be loaded onto a laptop or hardware controller. The hardware controller allows for easier control over the stems during the performance.

Advantages Of Using Stems In Live Performance

Using stems in live performance has several advantages. Firstly, stems allow for greater flexibility and control over each individual sound in a track. Secondly, stems take up less space compared to full mixes, making it easier to transport and set up. Furthermore, stems reduce the risk of technical failures during the performance, as each stem can be individually monitored and controlled.

Examples Of Artists Using Stems In Live Performance

Many famous musicians are using stems in their live performances. Some examples include Beyonce, who uses stems in her shows to create a more dynamic and interactive experience for the audience. Another example is Daft Punk, who used stems extensively in their 2007-2008 Alive tour. The use of stems allowed them to recreate their studio sound live on stage. In conclusion, the use of stems in live performance has forever changed the way performances are done. Stems offer greater control over each individual sound, making it easier to manipulate them in a live environment. Proper setup and preparation are essential when using stems, but the advantages of using stems in live performance make it well worth the extra effort.

What Are Stems In Music

Credit: www.masteringthemix.com

Frequently Asked Questions Of What Are Stems In Music

What Does Stems Mean In Music?

Stems in music refer to individual tracks containing different parts of the song, such as vocals, drums, or guitars. They are typically used by musicians, DJs, and producers to remix, edit, or enhance a track. Stems allow for greater flexibility and creativity in music production.

What Are Stems Vs Tracks?

Stems are individual components of a mix, such as the vocals or drums, while tracks refer to the final mixed recording. Stems are used for remixing and editing individual parts of a song, while tracks are used for final playback.

What Are The 4 Stems Of Music?

The four stems of music are melody, harmony, rhythm, and timbre. Melody is the main tune of a song, harmony is the combination of notes played together, rhythm is the beat and time signature of a piece of music, and timbre is the tone quality of the music instrument.

What Are Stems In Beats?

Stems in beats refer to separate audio files that make up a complete track. Each stem contains a specific instrument or sound, allowing for more detailed mixing and editing. Stems can be used for remixing, live performances, and creating different versions of a song.

Conclusion

Stems are an essential component of modern music production. They allow producers to have more control over the various elements and instruments used in a track. By understanding how stems work and how they can be optimized in production, artists can create more dynamic and engaging music.

Whether you’re an aspiring producer or a seasoned pro, taking the time to learn about stems can help take your music to the next level. So experiment, explore, and have fun with this powerful production tool!

Categories
Archive

How To Mix 808S That Bang

To mix 808s that bang, start by tuning them, adding distortion or saturation, and utilizing sidechain compression. Mixing 808s can be a challenge, but it’s an essential part of producing hip hop, trap, and electronic music.

The 808 is a fundamental bass sound that provides the backbone for many genres of music. A well-mixed 808 can make or break a track, so it’s important to get it right. We’ll discuss some tips and techniques for mixing 808s that bang.

We’ll cover everything from tuning your 808s to using distortion and saturation to make them stand out in the mix. Finally, we’ll explore the use of sidechain compression to ensure that your 808s don’t clash with other elements of your track.

Finding The Right Sample

Finding the right sample is crucial when mixing 808s for impactful beats. Start with a high quality recording and experiment with different processing techniques to achieve the desired sound.

Understanding The Different Types Of 808 Sounds

Before you can find the right 808 sample, you need to understand the different types of bass sounds that fall under the 808 category. The most common types of 808 sounds are:

  • Sine wave: This is the purest and most basic type of 808 sound, with a rich and smooth tone.
  • Square wave: This type of 808 sound has a harsher and more aggressive tone, making it ideal for harder styles of music.
  • Triangle wave: This type of 808 sound has a softer and more muted tone, making it ideal for R&B and hip-hop ballads.

Choosing The Right 808 Sample

Now that you understand the different types of 808 sounds, it’s time to choose the right sample for your mix. Here are some tips:

  • Match the key: Ensure your 808 sample is in the same key as your melody to prevent any clashing and dissonance.
  • Consider the genre: Different genres require different types of 808 sounds, so make sure your sample matches the genre you’re producing for.
  • EQ and Compression: Always consider the EQ balance and compression of your 808 sample to fit well in the mix.
  • Have a focus: The focus should be the kick and 808, thus, it is crucial to decide which one of them should sit on top of the other.

Conclusion

Finding the right 808 sample is essential to ensuring that your track’s bass hits hard and drives the mix. By understanding the different types of 808 sounds, choosing the right sample, and mapping out your mix, you can achieve a powerful and dynamic bassline that will get your listeners grooving.

How To Mix 808S That Bang

Credit: www.masteringthemix.com

Eqing The 808

The 808 is a staple in trap and hip-hop music. Its low-end frequency is what makes the track stand out. However, if not correctly EQ’d, it can lead to a muddy mix, resulting in an unpleasant listening experience. The first step is to identify problem frequencies.

Some problem frequencies in the 808 include:

  • Boxiness around 150-300Hz: This leads to a sound that can be overpowering and causes a muddy mix.
  • Mud around 200-400Hz: This leads to the 808 clashing with the other instruments in the mix.
  • Metallic sound around 4-6kHz: This leads to harshness in the top end, causing ear fatigue.
  • Weakness around 30-60Hz: This leads to an inadequate low-end, causing the 808 to sound weak and thin.

Once you have identified the problem frequencies in the 808, the next step is to EQ it correctly. Here are some EQ adjustments that you can make:

Cutting The Boxiness

To cut the boxiness, reduce the frequency around 200Hz. You can do this by using a bell filter with a Q factor of 1.5 to 2.

Reducing Mud

To reduce mud, cut around 400Hz. You can do this by using a bell filter with a Q factor of 1.5 to 2.

Removing Metallic Sound

To remove metallic sound, cut around 4-6kHz. Use a bell filter with a Q factor of 1.5 to 2.

Adding More Sub-bass

To add more sub-bass, boost around 30-60Hz. Use a bell filter or a low-shelf filter with a Q factor of 0.5 to 1.

Boosting Presence

To boost presence, increase the frequency around 1kHz. Use a bell filter with a Q factor of 2 to 3.

Remember, the key is not to overdo it. Use subtle EQ adjustments and trust your ears to achieve an 808 that hits hard and enhances the mix.

Saturation And Distortion

Achieving the perfect mix for 808s involves balancing saturation and distortion. Carefully EQing and compressing the low-end frequencies while adding just the right amount of saturation and distortion can help create 808s that really bang.

Saturation and distortion are two essential techniques for achieving fantastic 808 mixes that will make any listener move to the beat. The key to working with these effects, however, is to use them discreetly to avoid overloading or drowning out the mix.

Using Saturation To Add Warmth

Saturation is an excellent tool for enhancing the warmth and character of your 808s. Saturation plugins like FabFilter Saturn, Soundtoys Decapitator, and Waves NLS can be used to thicken up a mix by adding harmonic distortion to audio signals. Here’s how to apply saturation to your 808s:

  • Insert a saturation plugin on your 808 channel.
  • Tweak the plugin’s settings to add warmth to the mix without distorting it excessively. Keep the drive level low to avoid overloading the sound and use the wet/dry function to control the amount of saturation applied to the mix.
  • High-pass-filtering the low-end on the saturation plugin can help control any new problems with low-end distortion that might appear.
  • Positive Grid’s BIAS FX 2 has added a ton of options like different types of Vibrato, compressor/sustain, fuzz, and others.

Applying Distortion For Extra Grit

Distortion is an excellent technique for giving your 808s more grit without overpowering the mix. Soft clipping and saturation are some tools you can use to achieve a more natural distortion effect. Here are some steps to apply distortion onto your 808s:

  • Insert a distortion plugin onto your 808 channel.
  • Adjust the settings to add warmth without muddying up the mix in the process. To achieve more aggressive distortion, crank up the mix’s drive level.
  • If the distortion is too strong, adjust the wet/dry function until you find the right balance. You want enough grit to make the 808s stand out, but not so much that they overpower the mix completely.
  • Using a multi-band distortion plugin like FabFilter Saturn can allow you to add distortion to specific frequency ranges of your 808 without affecting other unrelated frequencies.

To Sum Up, adding saturation and distortion to your 808s can give them plenty of character and warmth and help them stand out in the mix. Always use these techniques with caution to avoid overloading the sound. Both soft clipping and saturation are often reliable go-to additives, but good plugins for Multi-band distortion like Saturn can allow you to achieve more attention-grabbing effects while keeping the mix intact.

How To Mix 808S That Bang

Credit: www.masteringthemix.com

Layering 808s

Layering 808s can create a rich and full-bodied sound that can help to take your tracks to the next level. In order to achieve the perfect layered 808 sound, you need to blend different types of 808s together and adjust their pitch and volume to create a cohesive mix. In this post, we’re going to explore the best ways to layer 808s to achieve a fuller sound.

How To Layer 808s For A Fuller Sound

The first step in layering 808s is to choose two or more complementary samples that have different characteristics. For example, you might choose a short, punchy 808 sample to provide the attack and a longer, sustained 808 sample to provide the body of the sound.

Once you have chosen your samples, it’s important to adjust the pitch and volume levels so that they blend together seamlessly. You can achieve this by using EQ and compression to shape the sound and create space for each sample to shine. Make sure to experiment with different pitch and volume levels until you find the right balance for your mix.

Blending Different Types Of 808s

When layering 808s, it’s important to choose samples that complement each other in terms of pitch, tone, and character. For example, you might layer a distorted 808 with a clean 808 to create a gritty, textured sound. Or, you might layer a sine wave 808 with a square wave 808 to create a complex, harmonically rich sound.

When blending different types of 808s, it’s important to keep your mix balanced and avoid cluttering your track with too many layers. A good rule of thumb is to stick to two or three layers and adjust their levels and frequencies until they blend together seamlessly.

Summary

  • Layering 808s can create a rich and full-bodied sound
  • Choose complementary samples with different characteristics
  • Adjust pitch and volume levels to create a cohesive mix
  • Use EQ and compression to shape the sound
  • Experiment with different types of 808s to create unique sounds
  • Avoid cluttering your mix with too many layers
Dos and Don’ts
DosDon’ts
– Choose complementary 808 samples with different characteristics
– Adjust pitch and volume levels to create a cohesive mix
– Use EQ and compression to shape the sound
– Experiment with different types of 808s to create unique sounds
– Keep your mix balanced
– Clutter your mix with too many layers
– Use 808 samples that clash with each other
– Neglect to adjust pitch and volume levels for each layer
– Skip using EQ or compression to shape the sound

Adding Harmonic Content

Now that you have gotten an idea of how to process and EQ your 808s, it’s time to move on to adding another important element: Harmonics. Harmonics are a powerful tool that add brightness and depth to your 808s, making them sound fuller and more interesting.

Using Harmonics To Add Brightness

One way to add harmonics is by using saturation plugins. Saturation plugins like Decapitator from Soundtoys or the Waves J37 tape emulator can help add grit and warmth to your 808s. By driving the input on these plugins, you can add harmonics that will make your 808s stand out in the mix.

You can also use harmonic exciter plugins like the Waves Aphex Vintage Exciter or Ozone’s Exciter module to add more top-end to your 808s. These exciter plugins work by adding extra harmonics to your sound, which can help bring out more clarity and brightness in your mix.

Creating Harmonics With Distortion Plugins

Another way to add harmonics to your 808s is through the use of distortion plugins like the Soundtoys Radiator or the Waves OneKnob Driver. By adding a bit of distortion to your 808s, you can add extra harmonics that will help your 808s cut through the mix.

Different distortion plugins can add new color and character to your 808s. Some can add midrange harmonic content, while others can create top-end harmonics.

Distortion PluginHarmonic TypeUnique Characteristics
Soundtoys DecapitatorMultibandAbility to add different harmonic content to different frequency bands
Waves OneKnob DriverEven HarmonicsSimple to use, adds a subtle warmth to your 808s
Izotope Trash 2Complex HarmonicsCan create a wide range of distortion sounds, from subtle to extreme

Adding harmonics can help make your 808s sound bigger and more interesting. Try experimenting with different plugins and techniques to find the right harmonic content for your mix. Remember, adding too much harmonic content can quickly muddy up your mix, so use your ears and make sure your 808s still have clarity and punch!

Enhancing The Low End

To mix 808s that bang, one effective way is to enhance the low end. This can be achieved by EQing, sidechaining, and choosing the right sounds to complement the 808. With the right techniques, the low end can give your mix the impact it needs.

Using Subharmonic Generators To Deepen The 808

When it comes to creating a mix that thumps, your 808 must be mixed perfectly. One way to beef up your 808 is by adding subharmonic generators. These generators not only deepen the low end but also enhance the overall impact of your mix. With subharmonic generators, you can add an extra layer of power to your 808, creating a more significant impact that resonates through the speakers.

Boosting Low End With A Maximizer Or Limiter

Another way to enhance the low end of your mix is by using a Maximizer or Limiter. These plugins work by increasing the overall level of your track, creating a more powerful impact for the low end. With a Maximizer or Limiter, you can ensure that your 808 stays consistent and powerful throughout the entire mix. By boosting the low end, you are creating more depth and power, adding an extra layer of complexity to your mix. To wrap it up, using subharmonic generators and maximizers or limiters are excellent ways to enhance the low end of your mix. These tools help to create a fuller, more rounded sound that will resonate through the speakers with fantastic power. So try experimenting with these techniques, and you’ll be amazed at the incredible results you can achieve.

How To Mix 808S That Bang

Credit: m.youtube.com

Frequently Asked Questions Of How To Mix 808s That Bang

How To Make 808s Bang?

To make 808s bang, you need to focus on the mix. EQ the kick, use a compressor and saturation to achieve a fuller, thicker sound. Experiment with pitch and processing effects like distortion and delay. Keep in mind the overall vibe and tonality of the track.

How Do You Get Punchy 808?

To get a punchy 808, start by selecting good samples and layering them for a fuller sound. Use distortion and saturation to add warmth and harmonics. Tune your 808 to your key and add envelopes to shape its attack and decay.

Finally, use sidechain compression to create space in the mix.

How Do You Mix 808s With Kick?

To mix 808s with kick, start by cutting the 808 frequencies that clash with the kick. Next, layer the two sounds and EQ them, emphasizing the low end of the kick and the thump of the 808. Use sidechain compression to create space for the kick while keeping the 808’s presence.

Finally, adjust the levels to make sure both sounds are balanced.

How Loud Should An 808 Be In A Mix?

An 808 should be loud enough to be heard but not overpowering other instruments in the mix. It should sit well with the bass, kick, and other low-frequency elements. The ideal volume may vary based on the genre and the intended effect.

Use your ears and adjust accordingly.

Conclusion

After learning how to mix 808s that bang, your production skills will surely level up. Remember to always trust your ears, experiment with different techniques, and don’t be afraid to take risks when creating music. With practice and patience, you’ll eventually develop your own unique style and sound that will make your music stand out.

By following the tips we’ve shared, you’ll surely be on your way to creating 808s that will make your listeners feel the bass in their bones. Happy mixing!

Categories
Archive

How To Mix With Reverb

To mix with reverb, start by using a send/return channel for the reverb, adjusting the decay time and wet/dry ratio to desired levels. Then, use EQ and compression to shape and control the reverb’s effect on the mix.

Mixing with reverb can add depth and texture to a mix, but it’s important to use reverb tastefully and avoid overdoing it.

How To Mix With Reverb

Credit: producelikeapro.com

Reverb 101

Reverb is a critical tool to create depth and space in a mix. It is the reflection of sound waves in a particular space, which can add character and create a sense of realism. In this article, we will be discussing the basics of reverb and how it affects mixes.

What Is Reverb?

Reverb is the reflection of sound waves that linger in a particular space after the sound source has stopped. This reflection creates a natural decay in the sound, making it sound natural and realistic. Reverb is the key to creating a sense of space and depth in a mix.

Different Types Of Reverb

There are various types of reverb, each with its unique characteristics. Plate reverb is the most popular type of reverb and is known for its smooth and warm sound. Spring reverb, chamber, and hall reverb are other popular types of reverb, each having its own characteristics that can help enhance a mix.

Types of ReverbCharacteristics
Plate ReverbSmooth and warm sound
Spring ReverbBrighter, metallic sound
Chamber ReverbTight, natural sound
Hall ReverbNatural and spacious sound

How Reverb Affects Mixes

Reverb can add dimension, depth, and space to a mix. Without reverb, a mix can sound flat and lifeless. When used correctly, reverb can create a sense of realism, making it sound like every instrument is in the same space. Too much reverb can make a mix muddy and indistinct, so it is essential to use it correctly and sparingly.

  • Reverb creates depth and space in a mix.
  • It adds realism to a mix by mimicking natural acoustics.
  • Using too much reverb can muddy the mix.
  • Using reverb sparingly can help create clarity in the mix.

Understanding the basics of reverb and how it affects a mix is essential to the production process. By experimenting with different types of reverb and using it sparingly, you can create a mix that is both dynamic and natural sounding.

Preparation

To achieve a quality mix with reverb, preparation is key. Start by selecting the right reverb plugin or hardware device and experiment with its different settings. It’s essential to EQ the reverb to avoid muddiness and control the amount of wetness gradually.

Putting reverb on a track can add depth, warmth, and ambiance to your mix. However, it’s crucial to choose the right type of reverb and set it up properly to avoid muddying up the mix. In this post, we’ll share some tips on how to mix with reverb effectively. Let’s start with what you need to do before you add reverb to your mix.

Choosing The Right Reverb

Choosing the right reverb for your mix depends on the genre of music you’re producing. Different types of reverb are suitable for different genres. For example, a plate reverb is great for adding clarity to vocals in a pop track, while a spring reverb is ideal for creating a vintage sound in a guitar track. When choosing a reverb, consider the following factors:

  • Type of music
  • Instrumentation
  • Mixing style
  • Personal preference

Setting Up Reverb Sends

Now that you’ve decided on the type of reverb you want to use, it’s time to set up your reverb sends. Here’s how to do it:

  1. Create a new auxiliary track and insert your chosen reverb plugin on it.
  2. Assign the output of your new auxiliary track to an unused bus.
  3. On the tracks you want to add reverb to, create a new send and set the output to the same bus you assigned your reverb track to.
  4. Adjust the send level to control how much reverb you want to add to each track.

By using a send, you’re creating a separate signal path for your reverb. This way, you can adjust the level of reverb on each track without affecting the original audio. Plus, it allows you to use the same reverb on multiple tracks, maintaining a consistent sound throughout your mix. That’s it for the preparation phase! In the next post, we’ll discuss how to tweak your reverb settings to achieve the perfect blend in your mix.

Mixing With Reverb

Learn how to effectively use reverb in your mix for a polished and professional sound. Adjusting the reverb’s parameters to match your track and creating a sense of space are key to achieving a balanced mix.

Mixing with reverb can transform your tracks and add depth and space to your sound. Reverb can provide a sense of cohesion to your mix, making it sound more natural and balanced. But how do you use reverb effectively in your mixing? Here are some tips for adding, setting, and using reverb in your mix.

Adding Reverb To Tracks

Before you start adding reverb to your tracks, it’s important to decide which tracks need it. Tracks that benefit most from reverb include vocals, drums, percussion, and guitars. You can also add reverb to your master bus to create a cohesive sound for your mix. To add reverb to a track in your DAW, create a reverb bus or insert a reverb plugin on the track. Then, send the track’s signal to the reverb bus or plugin and adjust the settings to your liking.

Setting Reverb Levels

When setting reverb levels, it’s essential to strike a balance between the wet and dry signal. Too much reverb can make your mix sound muddy and washed out, while too little can leave your tracks sounding flat and dry. To set reverb levels, use your ears and adjust the wet signal until it blends seamlessly with the dry signal. You can also use a reverb meter to check for clipping and avoid overload.

Using Reverb For Depth And Space

Reverb can add depth and space to your mix by creating a sense of distance and dimension. You can use reverb to create a sense of placement, such as a singer in a large hall or a guitar in a small room. To use reverb for depth and space, experiment with the decay time and pre-delay of your reverb settings. Longer decay times can create a sense of distance, while shorter decay times can add intimacy and warmth.

Creating A Sense Of Cohesion With Reverb

Using reverb can help tie your mix together by adding a shared sense of space and ambiance. You can use the same reverb settings on multiple tracks to create a cohesive sound that blends seamlessly. To create a sense of cohesion with reverb, try using the same reverb plugin or bus on multiple tracks. Adjust the settings to suit the individual track’s needs, but keep the overall sound consistent. In conclusion, mixing with reverb can enhance your tracks by creating depth, space, and cohesion. By adding, setting, and using reverb effectively, you can transform your mix into a professional-sounding production.

Advanced Techniques

Learn advanced techniques to create the perfect mix with reverb. Discover the principles and best practices used by professionals to achieve a polished and balanced sound.

Advanced Techniques:

Reverb is an essential tool for creating space and depth in audio mixes, but using it effectively can be a challenge. While basic reverb techniques can get you a long way, advancing your methods can take your mixes to the next level. Here are some advanced techniques for using reverb:

Using Reverb Automation:

A great way to enhance interest and complexity in your mix is using reverb automation. By automating the parameters of your reverb effect, you can create fills, build-ups, and exciting transitions. For instance, you can increase the reverb time and decay rate at the tail-end of a musical passage, enhancing the sense of space and creating a rich atmospheric feel. Alternatively, you can use a low-pass or high-pass filter as a plane transition by slowly increasing it to add or remove reverb gradually. Make sure to experiment with different shapes and patterns to find the ones that work best for your mix.

Creating Reverb Impulses:

If you want your mix to sound genuinely unique, try creating a custom reverb impulse. Impulse responses are sound recordings that capture the sonic characteristics of a physical environment. By creating your own, unique impulse responses, you can create a personalized acoustic space to enhance your mix. Capture the sound of a particular space, such as an abandoned factory or an empty church, then blend that sound with the instrument or vocal you want to apply it to using a convolution reverb plug-in.

Bouncing Reverb To Audio:

You can also create a mix with a unique reverb sound by bouncing reverb to audio. By converting the track with reverb effect to audio, you can process it further using EQ, compression, and other mix tools. Additionally, you can use the bounced track as a creative layer by reversing it, bouncing it at different lengths, or even blending it with other tracks.

Common Mistakes To Avoid

When mixing with reverb, avoid these common mistakes: using too much reverb, choosing the wrong type of reverb, not EQing the reverb properly, leaving the reverb too loud in the mix, using too many different types of reverb, and not checking the reverb in mono.

As a producer or mixer, one of the most important tools you have at your disposal is reverb. Reverb can add depth, space, and a sense of realism to your mixes. However, there are also a number of common mistakes that can be made when it comes to mixing with reverb that you will want to avoid. In this article, we will cover three of the most common mistakes to help you avoid them in your own mixes.

Using Too Much Reverb

One of the most common mistakes that people make when mixing with reverb is using too much of it. While it may seem like adding a lot of reverb can make your mix sound bigger and more expansive, in reality, it can have the opposite effect. Too much reverb can make your mix sound muddy or washy, and can also obscure important elements of the mix. To avoid this mistake, start by adding a small amount of reverb and gradually increase the amount until it sounds right. You can also use EQ to shape the reverb and make it fit better into the mix.

Using The Wrong Type Of Reverb

Another common mistake when mixing with reverb is using the wrong type of reverb. There are many different types of reverb, including plate, hall, room, and spring, each with its own unique sound. Using the wrong type of reverb can make your mix sound unnatural or boomy. To avoid this mistake, listen to different types of reverb and choose the one that best fits the style and mood of the song. Consider the size of the room or space you want to create and choose a reverb with the appropriate decay time. You can also experiment with combining different types of reverb to create a unique sound.

Not Considering Reverb Pre-delay

Finally, another common mistake when mixing with reverb is not considering the pre-delay. Pre-delay is the time between the initial sound and the onset of the reverb. Not adjusting the pre-delay can make the reverb sound unnatural and can also affect the clarity of the mix. To avoid this mistake, consider the tempo and groove of the song when adjusting the pre-delay. If the song has a fast tempo, a shorter pre-delay might work better, while a slower tempo might require a longer pre-delay. You can also use pre-delay to create a sense of space and depth, or to help certain elements of the mix stand out. In conclusion, mixing with reverb can be a powerful tool for creating a bigger, more expansive sound in your mixes. However, it’s important to avoid common mistakes such as using too much reverb, using the wrong type of reverb, and not considering reverb pre-delay. By being aware of these mistakes and taking steps to avoid them, you can create professional-sounding mixes that are full of depth and space.

How To Mix With Reverb

Credit: www.soundonsound.com

How To Mix With Reverb

Credit: blog.faderpro.com

Frequently Asked Questions On How To Mix With Reverb

Do You Put Eq Before Reverb?

It depends on personal preference and the specific situation. Some prefer to EQ before reverb to control the frequencies being sent to the reverb, while others prefer to add reverb before EQ to blend the sound. Experimenting with both options can help determine the best approach for your mix.

What Should You Add Reverb To?

You should add reverb to instruments and vocals in a musical mix. Reverb can help create a sense of space and depth, making the sound more natural and immersive. It’s especially useful for creating a sense of ambience and reverb-heavy effects in genres like ambient and shoegaze.

Should I Put Reverb On Whole Mix?

Adding reverb to the entire mix can make it sound muddy or unclear, so it’s not recommended. It’s best to apply reverb to individual tracks to create depth and space in the mix. This allows for better control and clarity of the mix as a whole.

What Is Reverb For Mixing Music?

Reverb is an effect used to simulate the sound of a space and create depth in a mix. It adds a sense of distance and spaciousness to individual tracks, making them sound like they were recorded in a larger room.

Reverb can be adjusted in various ways, including decay time, pre-delay, and EQ, to create different spaces and moods in a mix.

Conclusion

To conclude, mastering the craft of mixing with reverb takes time, practice, and a willingness to experiment with different techniques. By following the steps outlined you can transform your mixes by adding depth, ambience, and dimensionality to your tracks.

Remember to use reverb sparingly, apply EQ to your reverbs, and choose the right type of reverb for each instrument or vocal. With these tips in mind, you can take your mixing skills to the next level and create compelling and immersive tracks that captivate your listeners.

Categories
Archive

Online Beat Mixing Services

Online beat mixing services provide a convenient and affordable way for musicians and producers to get professional-level mixing for their tracks. As the music industry continues to evolve, technology has allowed for more affordable and accessible ways for artists to create and share their music.

One aspect of this is online beat mixing services, which provide a virtual platform for users to submit their tracks and receive high-quality mixing and mastering services from experienced professionals. With online beat mixing services, musicians and producers can save time and money by not having to physically attend studio sessions, while still maintaining the level of quality they need for their music to stand out.

We will dive into the benefits of online beat mixing services, how they work, and how artists can choose the best one for their needs.

Online Beat Mixing Services

Credit: mrmixandmaster.com

Advantages Of Online Beat Mixing Services

Online beat mixing services have become increasingly popular over the years, and it is easy to see why. Musicians can now easily access high-quality mixing services from the convenience of their homes. This post discusses the top advantages of using online beat mixing services.

Cost-effective

Traditional beat mixing services can be quite expensive, and this can be a hindrance for up and coming artists who are trying to keep their costs low. Online beat mixing services, on the other hand, are more cost-effective, making them ideal for independent artists, DJs, and producers who are on a budget.

Professional Quality Mixing

One of the biggest advantages of online beat mixing services is that you get access to professional quality mixing services. Most online mixing services employ experienced sound engineers who have worked with some of the biggest names in the music industry, so you can rest assured that your music will be of the highest quality.

Remote Collaboration

Online beat mixing services also make it easy for musicians to collaborate, regardless of their location. With the use of cloud-based technology, musicians can easily upload their tracks to the online mixing service, review and collaborate on the mix, and download the final product, all without ever having to leave their homes.

Convenient

Another significant advantage of online mixing services is the convenience that comes with it. Musicians can easily upload their tracks to the online mixing service and go on with their lives, knowing that their music is in good hands. This saves time and eliminates the need for physical meetings that can be time-consuming and expensive.

Quick Turnaround Time

It’s not uncommon for traditional beat mixing services to take a few weeks or even months to complete a project. In contrast, online beat mixing services offer a quick turnaround time, often completing projects within a few days. This is particularly useful for musicians who need their music mixed and mastered quickly to meet release deadlines.

Overall, there are many advantages to using online beat mixing services. From the convenience to the cost-effectiveness and quick turnaround time, online mixing services are suitable for musicians at all levels.

Online Beat Mixing Services

Credit: majormixing.com

How Online Beat Mixing Services Work

Online beat mixing services allow music producers or artists to upload their audio tracks online where professional sound engineers mix or master them to produce a high-quality, polished final version. These services offer an easy and cost-effective way for artists to get their music professionally mixed while collaborating with engineers all over the world.

Online beat mixing services offer music producers a cost-effective and efficient way to have their tracks mixed professionally. With these services, a producer can simply upload their raw audio files to a website, and a professional mixing engineer will take care of the rest. But how exactly does this process work? In this post, we’ll take a closer look at the steps involved in using an online beat mixing service.

Selecting A Service Provider

Before you can start using an online beat mixing service, you’ll need to choose a provider. There are many different options available, so it’s important to do your research and find a service that meets your specific needs. Look for providers with positive customer reviews and a track record of delivering high-quality mixes. Some providers may specialize in certain genres of music or offer additional services like mastering or stem mixing.

Uploading Raw Audio Files

Once you’ve chosen a service provider, the next step is to upload your raw audio files. This can typically be done through a simple drag-and-drop interface on the service provider’s website. You’ll need to provide all of the individual audio tracks that make up your song, such as drum tracks, guitar tracks, and vocal tracks. It’s important to make sure your files are high-quality and free from any errors or glitches.

Communicating Mixing Preferences

After you’ve uploaded your files, you’ll typically have an opportunity to communicate your mixing preferences to your engineer. This might include things like the overall sound you’re going for, specific effects or processing you want to be applied, or any particular parts of the mix that you want to be emphasized or de-emphasized. Be as specific as possible with your instructions to ensure that the engineer can deliver the mix you’re hoping for.

Monitoring Progress

Once your engineer starts working on your mix, you’ll likely be able to monitor their progress in real-time. This might include receiving updates on the status of your mix via email or being able to log into the provider’s website to see how things are coming along. Keep in mind that the length of time required to complete your mix will depend on a variety of factors, such as the complexity of your song and the amount of processing required.

Making Revisions

After your initial mix is complete, you’ll typically have the opportunity to request revisions if there are any aspects of the mix that you’d like to change. Most providers will allow you to make a certain number of revisions at no extra cost, though additional revisions may come with an additional fee. Once you’re happy with your mix, you’ll be able to download the final files and start sharing your music with the world.

Conclusion

Online beat mixing services are a great option for music producers who want to get their tracks mixed professionally without breaking the bank. By following the steps outlined above and choosing a reputable service provider, you can enjoy high-quality mixes that help take your music to the next level.

Factors To Consider When Choosing An Online Beat Mixing Service

Choosing the right online beat mixing service can be daunting. With numerous options available, you must consider factors such as pricing, quality, compatibility with your software, and customer support to make an informed decision.

Pricing

When it comes to choosing an online beat mixing service, pricing is a significant factor to consider. The cost of these services varies, and it is essential to find a platform that suits your budget. Some companies charge based on the duration of your project, while others have fixed rates. Before opting for any service, consider the quality of their work concerning the price they charge. Don’t go for cheaper options if it means compromising the quality of your music. Ensure that you prioritize quality to get value for your money.

Experience And Professionalism

Experience and professionalism play a crucial role in the quality of music produced. Choose a beat mixing service with years of experience in the industry. Experienced companies take pride in their work, and they always strive to give their clients the best quality. Professionalism is another significant factor. Look for companies with a professional team to ensure that your project is handled with utmost professionalism. Choose a team that communicates well, offers suggestions, and listens to your needs.

Range Of Services Offered

The services offered by an online beat mixing service are another factor to consider. Look for a service that offers a wide range of services to cater to your needs. For instance, they should be able to mix and master your music, provide instrumental production, and offer additional services such as audio editing and vocal tuning.

Reputation And Portfolio

Before settling on an online beat mixing service, ensure that you research their reputation in the industry. Look for customer reviews online or ask for referrals from colleagues and acquaintances. The reputation of the company should guide you on the quality of their work and customer service. Additionally, look at their portfolio to see the quality of work they have done in the past. A good portfolio should showcase a range of projects, including music from different genres.

Customer Support

Choosing an online beat mixing service with good customer support is crucial to the success of your project. The platform should have a responsive customer service team that is available to address your concerns and answer your questions. Before choosing a platform, test their customer support by reaching out with a few questions. A good customer support team should respond promptly and offer satisfactory solutions to your problems. In conclusion, choosing the right online beat mixing service could be the difference between a hit record and a forgettable one. Consider pricing, experience, range of services offered, reputation, and customer support before choosing a platform that suits your needs.

Popular Online Beat Mixing Services

Online beat mixing services have become increasingly popular in recent years, allowing musicians and producers to create high-quality tracks without the need for expensive equipment or professional studios. With options ranging from free to premium, there are numerous online beat mixing services available to cater to different budgets and skill levels.

If you are a music producer who’s looking for professional help to mix your beats, then you might want to consider hiring an online beat mixing service. With the advancement of technology in the music industry, you can now have your music mixed and mastered online, by professional sound engineers, from the comfort of your own home. In this article, we’ll talk about some of the most popular online beat mixing services available in the market today, including Service A, Service B, Service C, Service D, and Service E.

Service A

Service A offers professional online beat mixing and mastering services for music producers. They have a team of experienced sound engineers who specialize in electronic dance music, hip hop, rap, and pop music. Their prices are reasonable, and they offer unlimited revisions until you are satisfied with their work. Service A is a great option for producers who want professional beats and need a quick turnaround time.

Service B

Service B is another popular online beat mixing service, with a team of professional sound engineers who specialize in mixing and mastering beats for various genres. They offer a variety of mixing services for beat-makers, and they use the latest software and equipment to ensure that your music sounds amazing. Service B offers a money-back guarantee if you are not satisfied with their work, making it a risk-free choice for producers.

Service C

Service C is a professional online beat mixing and mastering service that caters to music producers of all genres. They have a team of experienced engineers who use top-quality equipment to deliver professional results. They offer various mixing packages, each of which includes unlimited revisions and a quick turnaround time. Service C is an excellent choice for producers who want their music to sound polished and professional.

Service D

Service D is a popular online beat mixing service that delivers high-quality mixing and mastering services to music producers worldwide. They have a team of skilled engineers who specialize in various genres, including electronic dance music, hip hop, and R&B. They offer affordable prices, unlimited revisions, and quick turnaround times, making them a reliable choice for producers who want their music professionally mixed and mastered.

Service E

Service E is an online beat mixing and mastering service that offers professional sound engineering services to music producers. They have a team of experienced engineers who specialize in various genres, including hip-hop, pop, and electronic dance music. They offer a quick turnaround time and affordable prices, making them a great option for producers who need their beats mixed and mastered fast. In conclusion, there are many online beat mixing services available in the market today, and it’s essential to choose the right one for your needs. Consider your budget, the turnaround time, and the type of music you produce before choosing an online beat mixing service. With a little research, you’ll find the perfect service that will help you take your music to the next level.

Online Beat Mixing Services

Credit: beatsuniversal.com

Frequently Asked Questions Of Online Beat Mixing Services

How Much Does It Cost To Mix A Beat?

The cost of mixing a beat can vary depending on the producer and their experience, studio fees, and song complexity. On average, prices range from $100 to $1000 or more. It’s best to shop around and find a producer that fits your budget and needs.

How Can I Mix Songs Online?

Online music mixing can be done using various free and paid online tools such as AudioJoiner, Soundation, Audacity, and more. These tools allow you to upload your desired songs or audio tracks, adjust the sound levels, sound effects, add filters, and merge them into one file.

Some online music mixing services even offer pre-built templates and samples to make it easier.

How Do I Find Someone To Mix My Music?

To find someone to mix your music, you can search online directories or ask for recommendations from other musicians or music industry professionals. Look for someone with experience in your music genre and whose mixing style aligns with your vision.

It’s also important to set a budget and communicate your needs clearly before hiring.

What Is The Website Where You Can Combine Songs?

One website where you can combine songs is “Online Audio Joiner. ” It’s a free web-based tool where you can upload and merge audio files into one track. It supports popular audio formats like MP3, WAV, and OGG, and is easy to use.

Conclusion

To sum it up, online beat mixing services have revolutionized the music industry. Not only are they cost-effective, but they also offer convenience, quality, and professionalism. Artists and producers can collaborate with talented mixers from anywhere in the world, saving time and money while still getting top-notch results.

With the rise of technology, there’s no limit to creativity and innovation. Choose from a variety of online mixing services and elevate your music production to another level. Give yourself the opportunity to turn your music dreams into a reality.