Categories
Archive

Creating Space In Your Mix

Creating space in your mix involves strategic EQ and panning adjustments. In a mix, the goal is to make sure each element can be heard clearly and contributes to the overall sound without competing for attention.

When mixing a project, there are a multitude of factors to consider in order to achieve a clean and balanced sound. It’s easy to get lost in the details, but one of the most essential aspects of the process is creating space in the mix.

This is all about ensuring each instrument or element has its own place in the sonic spectrum, without either overpowering or being drowned out by any other component. This can be accomplished through strategic use of EQ to boost or cut particular frequencies, as well as through panning adjustments to place each element in a specific location within the stereo field. In order to create a polished and professional sounding mix, careful attention to space and balance is crucial.

Creating Space In Your Mix

Credit: vintageking.com

Frequency Spectrum

One way to create space in your mix is by understanding the frequency spectrum. By analyzing and controlling the balance of frequencies within each instrument, you can avoid frequency clashing and achieve a clear and well-balanced mix.

Understanding The Frequency Spectrum

When it comes to creating space in your mix, it’s essential to understand the frequency spectrum. The frequency spectrum is the range of frequencies that humans can hear, from 20 Hz to 20 kHz. Each sound within a mix falls into a specific range within the frequency spectrum.

How To Identify Clashing Frequencies

Identifying clashing frequencies within a mix is crucial to creating space. When two sounds within a mix occupy the same frequency range, they clash and can muddy the overall mix. You can use a spectrum analyzer to visualize the frequency range occupied by each sound. This visualization makes it easier to spot clashing frequencies and make adjustments. To create space in your mix, you want to ensure that each sound occupies its own frequency range within the spectrum. For example, if you have a bass guitar and a kick drum, you want the bass guitar to occupy the lower frequencies, while the kick drum occupies the higher frequencies.

Creating Space In Your Mix

To create space in your mix, you need to identify the main elements of the mix and give each of them their own frequency space, ensuring they do not clash with one another. Table 1 shows the frequency range of common instruments in a mix. Table 1: Frequency Range of Common Instruments | Instrument | Frequency Range | | — | — | | Bass | 60-250 Hz | | Piano | 250-2000 Hz | | Guitar | 80-880 Hz | | Vocals | 1000-4000 Hz | | Cymbals | 4000-20000 Hz | Once you have identified the frequency range of each element, you can start making adjustments to create space. EQ is an essential tool to adjust the frequency range of an element. You can use a high-pass filter to remove unwanted low frequencies or a low-pass filter to remove unwanted high frequencies. In conclusion, understanding the frequency spectrum and identifying clashing frequencies are key to creating space in your mix. By giving each sound its own frequency range and using EQ to make adjustments, you can create a clean and balanced mix.

Creating Space In Your Mix

Credit: www.youtube.com

Arrangement

Arrangement is the foundation of any mix, and creating space through arrangement is an essential step for achieving a clean, balanced sound. When done correctly, arrangement can help ensure every element of the track has its own space to breathe, minimizing clutter and allowing each element to shine through. Let’s take a closer look at how to remove clutter from your arrangement to create space in your mix.

Creating Space Through Arrangement

To create space in your mix, you need to be intentional with your arrangement. A well-executed arrangement is not only about what elements are present in the track but also about where each element sits in the stereo field and how they interact with each other. To start, consider the following:

  • Group elements that belong together, such as drums or background vocals, and pan them accordingly, creating a wider and more spacious stereo field.
  • Use automation to bring elements in and out of the mix, making sure each element has its moment to shine while also giving them space to rest when necessary.
  • Avoid stacking similar-sounding elements on top of each other, such as layering multiple synths on the same frequency range, causing them to clash and muddy up the mix.
  • Blend contrasting elements carefully by paying attention to their frequency range. EQ and panning can be effective tools to keep elements from fighting for space in the mix.

Removing Clutter In Your Arrangement

Removing clutter is an essential part of creating space in your mix. With so many elements in a typical mix, it’s easy to overcrowd the mix with unnecessary sounds, creating chaos. Here are some tips to remove clutter:

  • Start with the essentials, such as the kick, snare, and lead instrument. Build the rest of the mix around them.
  • Eliminate elements that do not contribute anything essential to the mix, and mute them.
  • Be selective with your effects such as reverbs and delays. Too much reverb can make the mix sound cluttered and muddy. Dialing back on the effects can also create more space.
  • Use EQ and compression to clean up tracks that are clashing with each other, making each track sit in its own space.

By being mindful of your mix arrangement and eliminating unnecessary clutter, you can create a balanced and spacious mix that allows each element to shine. At the end of the day, the key is to know when to add elements and when to strip them down to achieve the desired sound. Remember, sometimes less is more.

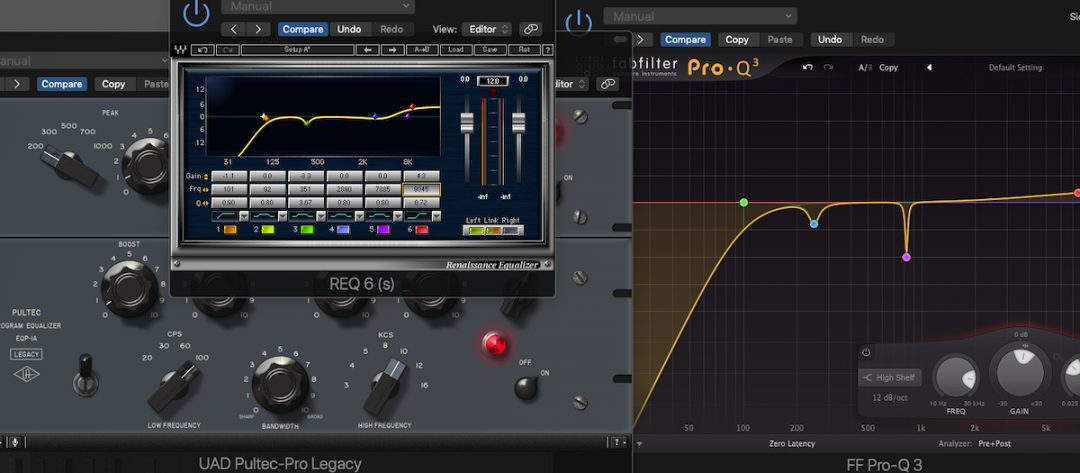
Eq

As a music producer or mixer, one of the most challenging aspects of creating a great mix is ensuring that each instrument has its own space in the sonic spectrum. In other words, you need to ensure that each sound has its own frequency range and sits well in the mix, without cluttering or overpowering the others. One of the best tools to achieve this is the equalizer, commonly known as EQ. It allows you to adjust the frequency content of each sound, making it easy to create space and balance in your mix. Here’s how to use EQ to create space:

Using Eq To Create Space

If you want to create space in your mix, you need to use EQ to tailor the frequency content of each instrument. EQ lets you boost or cut specific frequencies of a sound to make it stand out or blend in with the other instruments. For instance, you can cut the low frequencies on a guitar to give the bass guitar more room to breathe, or boost the high frequencies on the hi-hat to make it sound brighter and clearer.

Cutting Frequencies To Reduce Clutter

One of the most common problems when mixing is the cluttering of sounds in the same frequency range. This often happens when you have too many instruments occupying the same frequency spectrum, causing them to compete with each other and create a muddy or chaotic sound. The solution is to use EQ to cut frequencies that are not essential to a particular instrument. For example, you can cut the low frequencies on a vocal track to remove the hum or rumble, or reduce the mid frequencies on a guitar to make it sit better with the other instruments.

Conclusion

EQ is a powerful tool that allows you to create space and balance in your mix. By using this tool correctly, you can make each instrument sound clear and distinct, without clashing with the others. Remember to cut frequencies that are not essential to a particular instrument and boost the frequencies that give it character and personality. With a little practice and experimentation, you can create a mix that sounds professional and well-balanced.

Reverb

Creating space in your mix is essential to achieving a professional sound. Reverb is a powerful tool to help create depth and dimension in your mix by placing each instrument in its own unique space.

Reverb is a powerful tool for adding depth and dimension to your mix. It is used to simulate the sound of a space, whether that be a large concert hall or a small room. Using reverb effectively can make a huge difference in the overall sound of your mix. Below are some tips on how to use reverb to create a more cohesive and spacious mix.

Using Reverb To Create Depth

One effective way to use reverb is to create a sense of depth in your mix. Imagine a band on a stage: the guitarist is playing in the front while the drummer is located at the back. Applying different amounts of reverb to each instrument can create the illusion of depth, making it sound like the drummer is farther away from the listener than the guitarist. To achieve this effect, place the reverb send on the channel for the instrument you want to move backward. Adjust the reverb time and level until it sounds like the instrument is positioned behind the other instruments in the mix. Keep in mind that the reverb should be subtle and not overpowering, otherwise, it can muddy up the mix.

Modifying Reverb Settings For A More Cohesive Mix

While reverb can add depth to a mix, it can also make it sound messy and unbalanced. To prevent this, it’s important to modify the reverb settings to integrate it more smoothly into the mix. One way to do this is by adjusting the pre-delay time, which determines how long it takes for the reverb to kick in after the initial sound. A longer pre-delay can make the reverb feel like a more distinct element in the mix, while a shorter pre-delay can make it blend in more. Another way to modify reverb settings is to use EQ to shape the reverb sound. For example, if the mix sounds too muddy, apply a high-pass filter to the reverb to remove low frequencies. Or, if the reverb is too harsh, apply a low-pass filter to smooth out the high frequencies. In conclusion, reverb is a powerful tool for creating space and depth in your mix. By using reverb effectively, you can create a cohesive and spacious mix that sounds professional and polished.

Panning

If you’re looking to take your mix to the next level, then panning is a technique that you absolutely must master. Panning allows you to create a wide, spacious soundstage in your mix, giving each instrument its own unique space in the stereo image. In this post, we’ll take a look at how to use panning effectively in your mix, and how to balance the left and right channels to create a cohesive, professional mix.

Using Panning To Create A Wider Soundstage

When it comes to creating a wide, spacious mix, panning is your best friend. By assigning different instruments to different locations in the stereo field, you can create a sense of depth and width in your mix, giving each instrument its own space to breathe. This can help to add clarity and definition to your mix, and can make your tracks sound more exciting and immersive.

Balancing Left And Right Channels

One thing you’ll need to keep in mind when panning your tracks is the balance between the left and right channels. It’s important to ensure that each channel is balanced, so that your mix doesn’t sound lopsided or uneven. To do this, start by assigning the most important elements of your mix to the center of the stereo field; typically, this will be your lead vocal, bass, and drums. Then, start panning your other elements around these central elements, making sure that your mix sounds balanced and cohesive.

Overall, panning is a crucial technique for creating a wide, spacious mix that sounds professional and engaging. By using panning effectively, you can help to add clarity, definition, and excitement to your mix, and can take your tracks to the next level.

Automation

Automation is an effective way to create space in your mix and improve the overall sound quality. With the right automation techniques, you can balance the levels of individual tracks, adjust panning, and apply dynamic processing for a more fluid and cohesive mix.

Using Automation To Create Movement And Space

Automation is an excellent way to add a sense of movement and space to your mix. By automating certain parameters in your DAW, you can create subtle or dramatic shifts in the mix, making it more interesting for the listener. The key is to use automation in a targeted way that doesn’t distract from the overall musicality of the track.

Automating Effects For Buildup And Breakdowns

One effective way to use automation is to add effects during the buildup and breakdown sections of your track. By automating effects like reverb, delay, and filter sweeps, you can create a sense of tension and anticipation as the track progresses. This can make the eventual payoff even more satisfying for the listener.

Using Sidechain Compression For Space

Another automation technique to create space in your mix is sidechain compression. By sidechaining certain elements in the mix to the kick drum or bassline, you can create a pumping effect that gives the mix more groove and energy. This can also create space in the mix, as elements that might otherwise be too dense or cluttered are pushed back in the mix during the kick or bass hits.

Conclusion

In conclusion, automation can be an incredibly powerful tool for creating movement and space in your mix. Whether you’re automating effects during the buildup and breakdown sections of your track, or using sidechain compression to create a pumping effect, targeted automation can make your mix more interesting and engaging for the listener. So don’t be afraid to experiment with automation in your mixes and see how it can enhance your music.

Creating Space In Your Mix

Credit: www.masteringthemix.com

Frequently Asked Questions Of Creating Space In Your Mix

How Do I Make More Space In My Mix?

To make more space in your mix, you can consider the following tips: 1. Start with EQ: Cut out unnecessary frequencies to avoid clutter. 2. Apply compression: Helps control volume and avoid overlapping of sounds. 3. Use panning: Spread out elements in the stereo field to avoid congestion.

4. Experiment with reverb: Applying different levels of reverb to different tracks can create depth and space. 5. Remove unnecessary sounds: Eliminate any tracks that don’t add value to the mix.

How Do You Create Separation In A Mix?

To create separation in a mix, you can make use of panning, EQ, compression, reverb, and delay. Panning helps in placing the sounds correctly in the stereo field, while EQ can be used to boost or cut certain frequencies. Compression helps in controlling the dynamics of the sounds, and reverb and delay can be used to create space and depth in the mix.

How Do You Create A Space For An Instrument In A Mix?

To create space for an instrument in a mix, you need to use EQ to carve out its frequency range and pan it to a location in the stereo field. You can also adjust the volume levels, use reverb and delay effects, and consider the arrangement and timing of the other instruments in the mix to create a balanced and cohesive sound.

How Do You Carve Space In Mix?

To carve space in a mix, you need to use a combination of EQ, volume and panning techniques. EQ allows you to cut or boost specific frequencies for each instrument or vocal track. Volume helps create foreground and background elements.

Panning can provide spatial placement for each element. Using these techniques in a strategic manner will allow for a balanced and clear mix.

Conclusion

Creating space in your mix is crucial for achieving a professional and polished sound. By using techniques like EQ, panning, and reducing unnecessary frequencies, you can ensure that each element of your mix has its own space to breathe. Keep in mind that every song is different, and experimentation is key when it comes to finding the right balance for your mix.

By taking your time and paying attention to the details, you can create a mix that is both balanced and dynamic, allowing each individual element to shine.

Categories
Archive

Easy Vocal Mixing Tips

Easy vocal mixing tips include: adjusting levels, panning, EQing, and adding effects. With these tips, you can create a well-balanced, professional-sounding mix for your vocals.

Mixing is a crucial step in creating a polished and professional sound for your music. While there are many elements to consider, it can be helpful to focus specifically on vocal mixing. Whether you’re a beginner or an experienced producer, these easy tips can help improve the quality of your vocal tracks.

By adjusting levels, panning, EQing, and adding effects, you can create a blend that complements the instrumental tracks and highlights the vocals. We’ll explore each of these elements in depth and provide tips for getting the best results.

Setting Up The Mixing Environment

Creating an optimal mixing environment is crucial for achieving great vocal mixes. Pay attention to room acoustics, speaker placement, and monitor levels. Make sure to also use high-quality headphones for precise listening.

Noise Reduction

One of the most important aspects of setting up a mixing environment is noise reduction. Even small noises can affect the quality of your mix, and so it is essential to eliminate them as much as possible. To do this, start by finding a quiet room or space where you can work. Try to choose a room that is away from any noise sources, such as traffic or appliances.

Control Room Environment

The control room environment is another important factor when it comes to vocal mixing. The goal is to create a space that is acoustically neutral, which means that there is no unwanted resonance, reflections, or reverberation. To achieve this, you can do the following:

  • Use acoustic treatment: Consider using acoustic treatments like foam panels or bass traps to minimize sound reflections.
  • Position your monitors correctly: Place your monitors at an equal distance from the listener and aim them directly at your ears. This creates the most accurate stereo image and helps to reduce unwanted reflections.
  • Check for room modes: Room modes are resonant frequencies that can create unwanted bass buildup. Use a measurement microphone and software to identify any problematic frequencies and then use acoustic treatment to reduce them.

In Conclusion

By following these simple tips for setting up your mixing environment, you can ensure that your vocal mixes sound their best. Remember that noise reduction and creating an acoustically neutral environment are the keys to achieving a great mix.

Easy Vocal Mixing Tips

Credit: m.youtube.com

Understanding Vocal Mixing

To master vocal mixing, start by understanding the three main components: volume, EQ, and compression. Adjust levels and EQ settings until the vocals sit well in the mix, then use compression to tame volume inconsistencies. Finally, add effects like reverb or delay to enhance the vocals.

Vocal mixing is an art that requires a keen ear, an understanding of sound processing techniques, and a deep understanding of the importance of vocals in a mix. A mix that lacks proper vocal treatment can leave a bad impression on listeners, whereas a well-balanced mix can elevate a mediocre track to greatness. Let’s dive into some essential tips for vocal mixing to help you create that perfect mix.

Importance Of Vocal In A Mix:

Vocals are the most important element in the majority of modern music genres, and getting them right in a mix is crucial. They’re the centerpiece of a track, the element that draws the listener’s attention to the song, and the part that delivers the message and emotion in the lyrics. Without an adequately mixed vocal, even the most intricate backing track can fall flat. This is why it’s crucial to give your vocals special attention and ensure they are balanced with the instrumentation.

Factors Affecting Vocal Mixing:

Several factors go into getting a great vocal sound in a mix. These factors extend from the vocal recording process to the final mixing stage. For instance, the quality of the recording mic, the performance of the vocalist, and selection of gain levels can make a significant difference in quality and tone. Likewise, the second stage is software processing, which involves techniques like equalization, compression, reverb, and delay. The selection and implementation of these techniques can significantly impact the final sound.

Vocal Range And Tone:

Being aware of vocal range and tone quality is the foundation for getting an excellent vocal sound in your mix. Every vocalist has their unique vocal range, which refers to the notes that they can sing comfortably. It is important to choose the right instrumentation and key so that the vocalist can sing in their natural range. Additionally, understanding the tone of the vocalist and selecting processing techniques that complement it is essential. For example, certain genres demand a more compressed and processed vocal sound, while others require a more natural tone.

In Conclusion:

Understanding vocal mixing is key to achieving excellent sound quality in your music productions. It is important to keep in mind that it’s not only about the technical aspects but also knowing the characteristics of the vocals and the genre you’re working with. By following the tips discussed above and experimenting with your mixes, you’ll be sure to create perfect vocals that make your music stand out in the crowd.

Preparing The Vocals For Mixing

Preparing the vocals for mixing can be a daunting task, but these easy vocal mixing tips can make the process smoother. Ensure the vocal tracks are properly edited, compressed, EQ’d and de-essed before mixing to achieve a polished result.

When it comes to mixing a vocal track, the preparation process can make all the difference. By taking the time to edit, clean up, and carve the EQ of the vocals, as well as apply compression, reverb, and delay, you can create a crisp, polished sound that truly shines. In this blog post, we’ll take a closer look at each step of the vocal preparation process, so you can create professional-sounding vocal tracks that stand out from the crowd.

Vocal Editing

Before you start mixing your vocal track, you’ll want to make sure that the audio is as clean and polished as possible. Vocal editing involves removing any unwanted noise, breath sounds, clicks, and pops that can detract from the overall quality of the vocal recording. This can be done using a variety of audio editing tools, such as noise reduction plugins, volume automation, and manual editing techniques.

Cleaning Up The Audio

Once you’ve edited the vocal track, it’s time to clean up any remaining imperfections. This can involve removing background noise, equalizing the audio to create a more balanced sound, and applying de-essing to reduce harsh S and T sounds. By taking the time to clean up the audio, you’ll ensure that your vocal track sounds professional and polished.

Eq Carving

EQ carving involves adjusting the frequency range of the vocal track to create a clear and balanced sound. This can involve cutting out any frequencies that are muddying the sound, boosting the highs and lows to create more clarity, and using a multiband compressor to further refine the sound. By carving the EQ of the vocals, you’ll create a clear and dynamic sound that shines through the mix.

Compression

Compression is a key tool in vocal mixing, helping to smooth out any inconsistencies in the vocal performance and create a consistent and polished sound. This can involve using a gentle compression ratio to even out the dynamics of the vocal track, as well as applying sidechain compression to create more space in the mix for other instruments.

Reverb And Delay

Finally, adding reverb and delay to the vocal track can help to create depth and space in the mix, as well as give the vocal track a more polished and professional sound. This can involve using a variety of reverb and delay effects, such as plate, room, hall, and spring reverb, as well as tape delay, ping pong delay, and reverse delay. By following these easy vocal mixing tips, you can create professional-sounding vocal tracks that stand out from the crowd. With a little bit of editing, cleaning, EQ carving, compression, and reverb/delay, you’ll be able to create polished and dynamic vocal tracks that truly shine.

Mixing The Vocals Into The Mix

Mixing vocals into a mix can be a daunting task. However, there are some easy vocal mixing tips to try out. Start with EQing to clear out the muddiness in the vocals and then use compression to smoothen out any harshness.

Adjust the levels to fit the track and finally, add some reverb for a polished sound.

Mixing the vocal tracks into the mix can be a challenging task, but with the right techniques, it can be a breeze. In this section, we’ll cover easy vocal mixing tips for setting levels, panning, and automation to help you achieve a clear and balanced mix.

Setting Levels

The first step in mixing vocals is to set the levels to achieve balance within the mix. Keep in mind that vocals should be the focus of the mix, so it’s essential to set the levels accordingly. Here are some tips to set the levels:

  • Start with the lead vocal track and set the level to an appropriate volume.
  • Adjust the levels of the other vocal tracks relative to the lead vocal track.
  • Use a reference track to ensure the levels are balanced with other commercial tracks in the same genre.

Panning

Panning is another crucial aspect of vocal mixing. Panning vocals can create an immersive experience for the listeners. Here are some tips for panning vocals:

  • Pan the lead vocal track to the center to make it the focal point of the song.
  • Experiment with panning backing vocals to create a wider soundstage.
  • Use automation to create movement in the vocals from left to right.

Automation

Automation is a powerful tool in vocal mixing. It can be used to add dynamics to the vocals and create movement in the mix. Here are some tips for using automation:

  • Automate volume levels of specific words or phrases to make them stand out.
  • Use automation to create fade-ins and fade-outs for vocal tracks.
  • Automate panning to create movement within the mix.

In conclusion, mixing vocals into the mix requires a careful balance of different techniques to achieve a clear and balanced mix. Follow these easy vocal mixing tips for setting levels, panning, and automation, and you’ll be on your way to creating professional-sounding vocal mixes.

Working With Background Vocals

When working with background vocals, it’s important to ensure they blend well with the main vocals. Here are some easy vocal mixing tips to achieve this: adjust levels to balance the sound, use panning to create space, add reverb to create depth, and EQ to differentiate the vocals.

Separating Lead And Background Vocals

The first step in working with background vocals is to separate them from the lead vocals. This can be achieved by using panning and volume adjustments. You can pan the lead vocal to the center and pan the backup vocals to the left and right. This will create a sense of space and give each vocal a place in the stereo image.

Eq And Compression

EQ and compression are essential tools for achieving a polished and professional-sounding mix with background vocals. Start by using EQ to carve out space for each vocal. Boost the high frequencies of the lead vocal to make it stand out, and cut the low frequencies of the backup vocals to prevent them from competing with the lead vocal. After you’ve balanced the frequency ranges, use compression to tighten up the dynamics of the background vocals. This will help even out the performance and make it sound more cohesive.

Image Placement

Image placement refers to the positioning of the vocals within the stereo field. While panning is a great way to create space, you can also use more advanced techniques to enhance the stereo image of the vocals. You might try using stereo wideners, chorus, or doubling to create a wider and more immersive sound.

Reverb And Delay

Finally, you can use effects like reverb and delay to give the background vocals depth and dimension. A short, subtle reverb can help blend the vocals together, while a longer, more pronounced reverb can create a sense of space. Delay effects can be used to create echoes or rhythmic patterns that complement the music. When working with background vocals, it’s important to be patient and experiment with different techniques until you find the right balance. Remember, the goal is to enhance the lead vocal and create a cohesive sound that supports the song.

Easy Vocal Mixing Tips

Credit: www.youtube.com

Applying Creative Vocal Effects

Get creative with the vocal effects in your music by experimenting with techniques such as delay, reverb, and chorus. Adding these effects will enhance your vocal mixing and give your music a unique and professional sound.

Vocal Harmonies

Vocal harmonies are used to create richer and fuller sounds in vocals, and it can be achieved in a variety of ways. One of the best ways to create harmonies is by using a plug-in. There are several plug-ins available that allow you to add harmonies to your vocals with just a few clicks. You can create harmonies in thirds, fifths, or even add a choir effect to your vocals. Just make sure not to overdo it, as too many harmonies can make your vocals sound cluttered and messy.

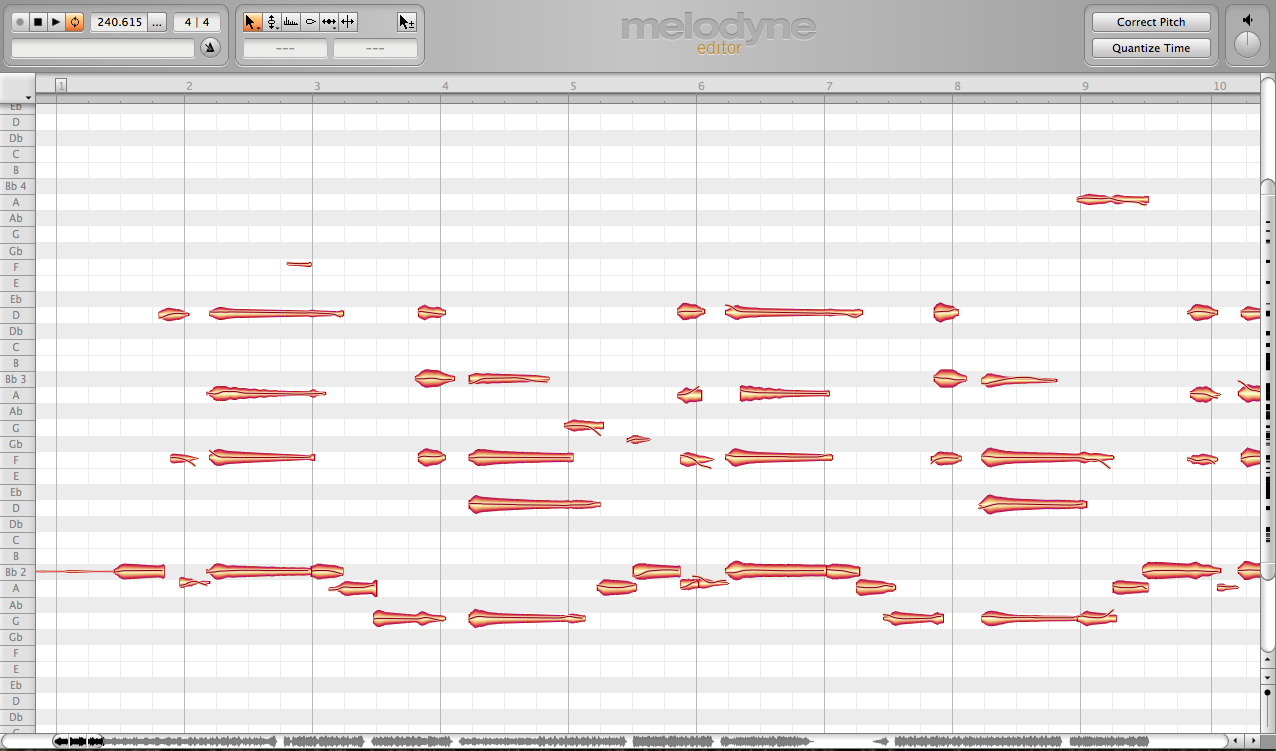
Pitch Correction

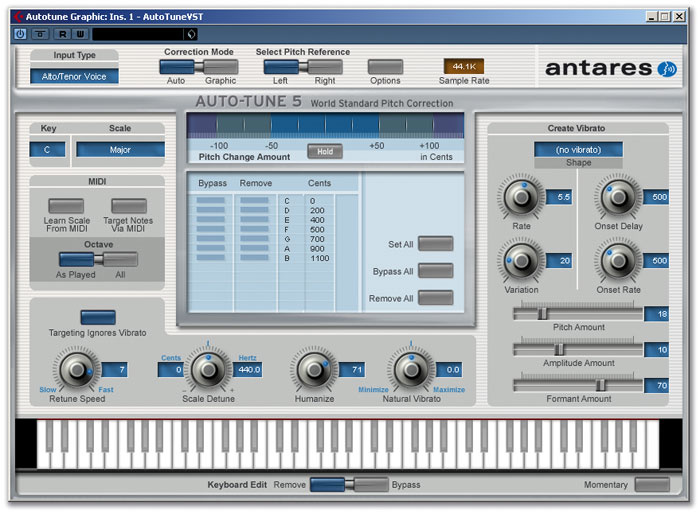
Pitch correction is a popular vocal effect that can be used to fix pitch issues or create robotic-sounding vocals. The most common tool used for pitch correction is Auto-Tune, which allows you to adjust the pitch of your vocals and make them perfectly in tune. While pitch correction can be helpful, it’s important not to rely on it too much. Perfectly in-tune vocals can sound unnatural and lack emotion.

Distortion

Distortion is a unique vocal effect that adds grit and edge to vocals, giving them a more aggressive and raw sound. There are several ways to add distortion to your vocals, and one of the easiest ways is by using a distortion plugin. When using distortion, make sure to experiment with your settings to find the right balance between distortion and clarity.

Modulation Effects

Modulation effects can be used to add depth and movement to your vocals, and they can create unique vocal effects like flanger and chorus. These effects work by duplicating the original vocal track and adding a slight pitch or timing variation to the duplicate tracks. By layering these tracks together, you can create a fully-realized vocal sound that sounds like multiple singers. Experiment with different settings and effect combinations to find the perfect modulation effect for your vocals.

In Conclusion:

With these easy vocal mixing tips, you can take your vocal tracks to the next level. Whether you’re looking to add harmonies, pitch correction, distortion, or modulation effects, there are plenty of tools available that can help you achieve the sound you’re looking for. Just remember to use these effects in moderation, and always listen to your vocals with fresh ears to make sure you’re achieving the right balance between effect and clarity.

Finalizing The Vocal Mix

Finalizing the vocal mix is the most important aspect of music production, as it can make or break the entire track. The vocal track is the centerpiece of any song, and it must be mixed and balanced perfectly to maximize its impact. Here, we’ve compiled a few easy vocal mixing tips that will help enhance the quality of your vocal mix. From comparing and referencing, fine-tuning the mix to automation adjustments, we’ve got you covered.

Comparing And Referencing

Comparing and referencing is key to achieving a great vocal mix. This process involves comparing your mix to other professionally mixed tracks in the same genre, listening to how each element sits in the featured tracks. By doing this, you can get a better understanding of the overall sound you’re trying to achieve and the characteristics that differentiate professional mixes.

Referencing is also crucial in identifying any flaws or imbalances in your vocal mix. A good practice is to A/B test your mix with other tracks and critically listen to the differences. Remember to keep the volume levels consistent when comparing tracks to ensure accuracy.

Fine-tuning The Mix

Fine-tuning your vocal mix involves making subtle adjustments to certain elements to achieve balance, clarity, and depth in your mix. One of the easiest ways to do this is by using EQ and compression. EQ can help you remove unwanted frequencies that mask the vocal while bringing out the natural characteristics of the singer’s voice. Compression, on the other hand, can help tame any erratic dynamics and keep the vocal track consistent in volume.

Another important factor in fine-tuning the vocal mix is using effects such as delay and reverb. These effects can help add depth and spaciousness to the vocal track, making it sound more natural and lively. Try experimenting with different amounts and types of effects to find the perfect balance for your mix.

Automation Adjustments

Automation is a powerful tool that can help you achieve a more dynamic and engaging vocal mix. This process involves making adjustments to the volume, panning, and effects of certain elements in your mix over time. By doing this, you can create a more natural and realistic sound, as well as emphasize important sections of the song.

For example, you can automate the volume of the backing vocals during the chorus to make them more prominent, or add a reverb tail to the last word of a phrase to make it sound more dramatic. Automation can be time-consuming, but it can have a significant impact on the quality of your vocal mix.

Finalizing the vocal mix requires patience, attention to detail, and a good set of ears. By following these easy vocal mixing tips, you can enhance the quality of your mix and achieve a professional sound that stands out from the crowd.

Easy Vocal Mixing Tips

Credit: producelikeapro.com

Frequently Asked Questions On Easy Vocal Mixing Tips

What Are The 6 C’s Of Vocal Mixing?

The 6 C’s of vocal mixing are clarity, consistency, coherence, compression, character, and creative effects.

How Can I Improve My Vocal Clarity Mixing?

To improve vocal clarity when mixing, use EQ to cut low frequencies that can muddy the vocals, boost high frequencies to add clarity, and use compression to even out the volume. You can also use effects like delay or reverb to help vocals stand out.

It’s important to do A/B testing and make small adjustments to find the right balance.

How Do I Get My Vocals To Sit Better In The Mix?

To improve the vocals in your mix, you can try the following techniques: adjust the EQ to reduce competing frequencies, use compression to even out levels, add reverb for depth, use panning to separate vocals from instruments, and consider adjusting the volume of the backing track.

How Do You Mix Crisp Vocals?

To mix crisp vocals, first ensure the recording is high-quality. Use EQ to remove harsh frequencies and boost clarity, then add compression to even out the levels. Apply reverb and delay as needed to add depth. Adjust the volume levels and panning to achieve balance and clarity.

Conclusion

To sum up, vocal mixing isn’t rocket science. By following these easy tips, anyone can improve their mixing skills and create studio-quality vocals. Make sure to balance the levels, use EQ to shape the sound, add effects carefully, apply compression, and don’t forget to automate.

Experimentation is key, so always test different settings to find what works best for your vocals. With these simple guidelines, you can turn any mediocre vocal into an impressive, polished track. So, go ahead and start mixing like a pro!

Categories
Archive

Best Earplugs For Musicians

The best earplugs for musicians are the Etymotic Research ER20XS. These earplugs reduce sound levels evenly while maintaining the clarity of music.

Musicians are exposed to high decibel levels on a regular basis. The constant exposure to loud noise can cause hearing loss and damage. The use of earplugs is an effective method for protecting delicate ears from the volume of amplifiers, drum sets, and loudspeakers.

However, not all earplugs are created equal. The ideal earplugs not only provide adequate protection but also preserve sound quality and accuracy. We provide comprehensive information on the best earplugs for musicians. We share the benefits and drawbacks of different types and models of earplugs to help musicians make informed decisions when it comes to buying the right earplugs.

Best Earplugs For Musicians

Credit: www.rollingstone.com

Factors To Consider When Choosing Earplugs For Musicians

Choosing the best earplugs for musicians requires considering various factors, including noise reduction level, comfort, fit, and sound quality. Musicians can benefit from specialized earplugs designed to attenuate harmful frequencies while maintaining sound clarity.

Type Of Earplug

There are three main types of earplugs: foam, silicone, and custom-molded.

Noise Reduction Rating (nrr)

Look for earplugs with a high NRR of at least 20dB to protect your hearing during loud performances.

Comfort And Fit

  • Ensure the earplugs fit snugly but comfortably in your ears.
  • Opt for earplugs with soft material that won’t cause discomfort during long hours of wear.
  • Check for different sizes or adjustable options to find the best fit for your ears.
  • Consider earplugs with filters for balanced sound reduction without distortion.
Best Earplugs For Musicians

Credit: www.sweetwater.com

Top Earplugs For Musicians

Discover the top earplugs for musicians and protect your hearing while still enjoying your performance. From custom-fit options to affordable and comfortable choices, find the best earplugs to suit your needs and keep your ears safe from damage.

As every musician knows, hearing protection is crucial to prevent hearing loss and damage while performing live. While typical foam earplugs can muffle the sound and interfere with your ability to hear music accurately, special earplugs can preserve the sound quality and provide protection. Here are our top picks for the best earplugs for musicians:

1. Etymotic Research Er20xs

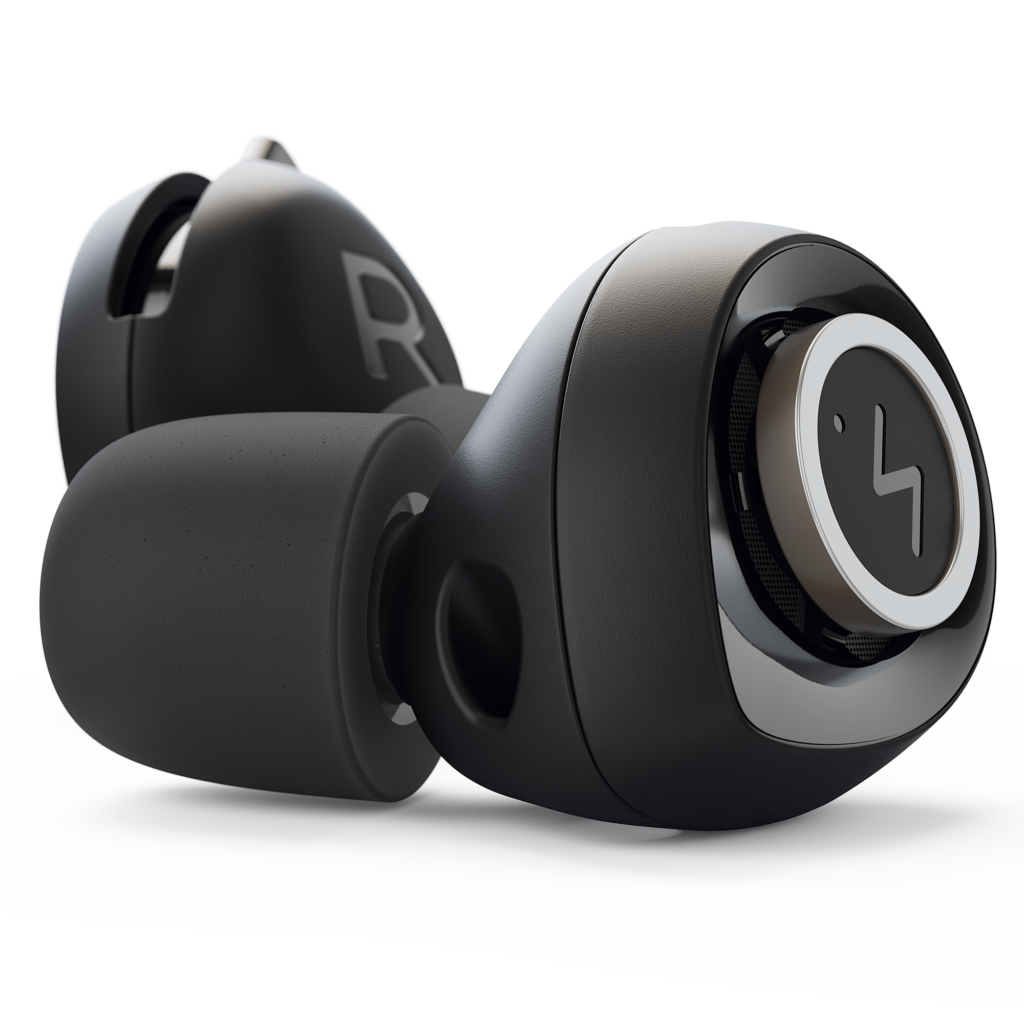
The Etymotic Research ER20XS earplugs are a popular choice for musicians, DJs, and sound engineers for their excellent noise reduction without sacrificing music clarity. Made of soft and comfortable silicone material, these earplugs have a flat attenuation response that lowers the sound evenly across all frequencies, maintaining the natural sound and tonal balance. They come with a neck cord and a carrying case for easy storage and transport.

2. Alpine Musicsafe Pro

The Alpine MusicSafe Pro earplugs feature three sets of interchangeable filters that offer different levels of attenuation – low, medium, and high – depending on the environment and sound volume. They are made of hypoallergenic and durable AlpineThermoShape material that adapts to the natural shape of the ear canal for a secure and comfortable fit. They also come with a carrying case and an extra earplug.

3. Earpeace Hd

Designed with a discreet and low profile, the EarPeace HD earplugs are perfect for musicians who want to protect their hearing without looking like they are wearing earplugs. Available in multiple colors, these earplugs come with three interchangeable filters that offer high-fidelity sound attenuation and a natural sound experience. They are made of hypoallergenic silicone that is soft and flexible, and they come with a compact aluminum case.

4. Vibes High Fidelity Earplugs

The Vibes High Fidelity Earplugs are engineered with a patented VibroFilter technology that reduces the decibel levels of sound without distorting the clarity and richness of music. They come with three sizes of interchangeable ear tips that fit snugly and comfortably in any ear shape. Made of durable and reusable materials, these earplugs also come with a portable case and a keychain attachment.

5. Surefire Ep4 Sonic Defenders Plus

The SureFire EP4 Sonic Defenders Plus earplugs are designed for musicians who demand high-performance hearing protection in loud and noisy environments. They feature a unique EarLock retention ring that secures the earplug in place and prevents it from falling out during intense movements. They also have a filter cap that can be inserted or removed to adjust the noise reduction level. Made of hypoallergenic and medical-grade polymer, these earplugs are comfortable and durable. They also come with a carrying case and a lanyard.

How To Properly Use And Care For Earplugs

Proper use and care for earplugs is crucial for musicians to protect their hearing. The best earplugs for musicians should fit comfortably and provide adequate noise reduction without compromising sound quality. Regular cleaning and replacement is also important to maintain effectiveness.

Insertion Technique

Inserting earplugs correctly is essential to ensure they provide maximum protection against hearing damage while still allowing the musician to hear themselves and other band members clearly. Here’s how to properly insert earplugs:

  1. Clean your hands to prevent the introduction of dirt and bacteria in the ear canal.
  2. Roll or twist the earplug into a small, narrow shape that can fit easily into your ear canal.
  3. With one hand, reach over your head and gently pull the ear up and out to straighten the ear canal.
  4. With your other hand, gently insert the earplug into the ear canal, and hold it in place until it expands and fits snugly.
  5. Test if it has formed a seal by rubbing your hands together, and listen for any reduction in sound clarity.

Cleaning And Maintenance

Regular cleaning and maintenance can extend the life of your earplugs and ensure they remain hygienic for every use.

  • Before cleaning the earplugs, check the manufacturer’s instructions to determine whether they can be washed or not.
  • If the earplugs are washable, use mild soap and water to remove earwax or other debris.
  • After washing, rinse thoroughly, dry completely, and store them in their protective case.
  • Never share your earplugs with anyone, as this increases the risk of bacterial or viral infection.
  • Inspect your earplugs regularly for signs of wear and tear, such as cracks or tears in the foam or other materials.
  • If there are any damages, replace them immediately to ensure continued protection.

Remember to always use and care for your earplugs properly to help prevent noise-induced hearing loss. By following these tips on insertion technique, cleaning, and maintenance, you can ensure your earplugs last longer and continue to provide effective hearing protection.

Best Earplugs For Musicians

Credit: www.soundbrenner.com

Frequently Asked Questions Of Best Earplugs For Musicians

What Earplugs Do Professional Musicians Use?

Professional musicians often use custom-made earplugs that are designed specifically for their ear canal. The most popular brands among musicians are ACS, Westone, and Etymotic. These earplugs provide noise reduction while maintaining the clarity and quality of the sound.

Are Musician Earplugs Worth It?

Yes, musician earplugs are worth it. They protect your hearing from loud music, reduce the risk of tinnitus or hearing loss, and can help preserve sound quality. They are designed to attenuate harmful frequencies while preserving sound clarity, ensuring that you can still hear music accurately without damaging your ears.

Are Loop Earplugs Worth It For Musicians?

Yes, loop earplugs are worth it for musicians. They can help reduce the risk of hearing damage caused by high noise levels in live performances, rehearsals, and recording studios. Loop earplugs are specifically designed to reduce harmful frequencies, while preserving the quality of sound.

For musicians, protecting their hearing is essential for their career and overall health.

Does Music Sound Better With Earplugs?

Using earplugs can cause a reduction in the overall volume of the music which can help reduce the risk of hearing damage. However, it may also affect the quality of the sound by reducing some of the high-frequency sounds which can make the music sound less clear or a bit muffled.

It is a matter of personal preference.

Conclusion

Musicians need the right earplugs to protect their hearing and ensure that they can continue making music for years to come. Whether you’re a professional musician or an amateur, choosing the right earplugs is essential. From the earplugs reviewed above, it’s evident that there are many options to choose from.

Regardless of your preferences, you are sure to find earplugs that suit your needs. Ensure to prioritize comfort, noise reduction level, and sound quality, and you’ll be good to go.

Categories
Archive

Lofi Effect Explained

The Lofi effect is a processing technique used in music production that seeks to recreate the sound quality of old recordings through the use of specific audio effects. This technique is done by adding noise, distortion, and filtering effects in order to produce a sound that is similar to that of vintage vinyl records or analogue tapes.

In recent years, the Lofi sound has become increasingly popular in the music world, with many artists using it to create a specific vintage or nostalgic vibe in their music. As a result, it has become a key production technique for many genres, including hip hop, Lo-Fi house, and chillwave.

We will explore the Lofi effect in more detail, looking at the techniques used to achieve it, and the impact it has had on modern music production. We will also look at the tools and software required to create a Lofi sound and provide some tips and tricks for getting the most out of this popular technique.

Lofi Effect Explained

Credit: m.youtube.com

What Is The Lofi Effect?

The Lofi effect is a music production technique that creates a vintage, low-fidelity sound. It involves adding imperfections such as hisses, crackles, and vinyl pops to audio, giving it a nostalgic and warm feeling. The Lofi effect is commonly used in genres such as hip-hop, lo-fi, and chillout.

A Brief History Of Lofi Music

Lofi music originated in the 1950s as a technique for recording music on a reel-to-reel tape. It became popular in the 1990s as a subgenre of hip-hop and has since evolved as an independent genre. Initially, it was used to create a gritty and raw sound that was characterized by imperfections and noise from the recording process. Lofi music became popular with its use in television shows, movies, and video games and has recently gained popularity among people seeking a relaxing and nostalgic music experience.

The Characteristics Of Lofi Music

Lo-fi music features a distinctive sound characterized by its use of imperfections, limitations, and noise in the recording process to create a vintage and nostalgic feel. The use of old technology such as vinyl records and cassette tapes is prevalent among Lofi artists. The beat in a Lofi track is slowed down, creating a relaxing and calming effect. This style of music also features samples from old jazz, soul, and funk records that add to the nostalgic feel. Vocals are often manipulated with effects such as reverb and delay to blend with the nostalgic sound. Lofi is also known for its chilled-out vibe, making it a great genre for creating a cozy atmosphere.

Conclusion

In conclusion, Lofi music is a genre that has grown in popularity because of its unique characteristics and ability to create a relaxed and nostalgic ambiance. With its roots in hip hop and jazz, Lofi has become a genre of its own. The use of vintage technology, slowed-down beats, sample-based production, and other effects, have allowed Lofi to create a unique sound. Whether you need background music while working or a soothing environment while relaxing, Lofi music is an excellent choice.

Lofi Effect Explained

Credit: www.groove3.com

How To Create The Lofi Effect

Learn how to create the Lofi effect and add a vintage, nostalgic feel to your music production. Use techniques like vinyl noise, distortion, and tape saturation to achieve the signature Lofi sound.

The Lofi effect is a popular music style that has been gaining traction in recent years. It creates a relaxed and nostalgic atmosphere by distorting the sound quality of a recording, producing a vintage vibe. The Lofi effect is commonly used in hip hop and indie music. In this post, we will teach you how to create the Lofi effect in your music production.

Tools Needed To Create Lofi Music

The production of the Lofi effect requires specific tools, including:

ToolDescription
DAW SoftwareMusic production software like FL Studio, Ableton Live, or Logic.
VST PluginsPlugins like RC-20 Retro Color, Vinyl, Izotope Vinyl, or any plugins that gives old, vintage sound effects.
SamplesCollection of Jazz, Soul, or Funky samples which can be acquired from sample packs.

Production Techniques Used In Creating The Lofi Effect

The production techniques used in creating the Lofi effect are:

  • Static and Noise: Adding background noise to your track will create an aged sound. To do this, you can add tape hiss or record static sounds.
  • Pitch Shifting: Altering the pitch of your sample can create a vintage feel. Using pitch modulation, you can create a natural, pitch-shifted sound.
  • Low-Pass Filtering: When you reduce the high frequency of your track, it creates a muffled sound that adds to the vintage effect.
  • Warping: Time-stretching or warping your samples will distort your track’s sound and result in a volume fluctuation that affects the vintage feel.
  • Sampling: Sampling involves taking a portion of an already-made track and making it as your own beat. Using samples allows you to incorporate different genres for a more distinct and unique sound.

Using these techniques in combination and experimenting with other settings will help you achieve the Lofi effect. With the right tools and skills, you can create music that sounds as if it was recorded on old vinyl records.

Examples Of Lofi Effect In Popular Music

Lofi Effect Explained

Credit: www.groove3.com

Impact Of The Lofi Effect

The Lofi music genre has been gaining popularity in recent years due to its unique sound and its ability to evoke feelings of nostalgia in listeners. The Lofi effect refers to the use of techniques like vinyl crackles, glitches, and other imperfections, added to music to create a vintage or classic feel. Its impact has been felt in various ways, including its influence on other genres and its appeal to younger generations. In this section, we will explore the rise in popularity of Lofi music in recent years and the influence it has had on other genres.

Rise In Popularity Of Lofi Music In Recent Years

One of the most notable trends in the music industry in recent years has been the growing popularity of Lofi music. This genre has seen a surge in popularity on streaming platforms such as Spotify, with fans drawn to its relaxing and comforting sounds. Lofi music is often used as background music for studying, relaxing, or working, and its mellow vibe makes it a popular choice for many listeners.

The rise of Lofi music can be attributed to various factors, including the increasing accessibility of music-making software, the ease of sharing music online, and its appeal to younger demographics. Its straightforward production style also makes it easier for artists to create and release music on a more frequent basis, leading to a proliferation of Lofi remixes and covers.

Influence Of Lofi Music On Other Genres

The influence of Lofi music extends beyond its own genre, as it has inspired and influenced artists in other genres. The Lofi effect has been used in hip hop, R&B, and electronic music, allowing these genres to experiment with different sounds and styles. The unique atmosphere created by Lofi sounds has become a staple in many contemporary genres, with artists incorporating vinyl crackles and other imperfections to create an organic and warm feel to their music.

Moreover, Lofi music has become a source of inspiration for many emerging artists, who use the genre’s low-fi and DIY approach to create their own music. The simplicity of the genre’s production style makes it accessible to newer artists, who can experiment with Lofi sounds without having to invest in expensive equipment.

In conclusion, the Lofi effect has had a profound impact on the music industry, inspiring newer artists and influencing established genres. Its growing popularity is a testament to its appeal to younger generations and its ability to evoke nostalgia in listeners. As the popularity of Lofi music continues to rise, it will be interesting to see how it continues to influence and shape the music industry in the years to come.

Benefits And Limitations Of The Lofi Effect

The Lofi Effect, characterized by its vintage sound and imperfections, has gained popularity in music production. Its benefits include enhancing warmth and creating a nostalgic feel, while its limitations may affect clarity and detail in a track.

If you are into music production, you might have heard of the Lofi effect. The Lofi effect is a type of audio effect that can make the music sound like an old record or cassette tape. It’s a popular technique used by many music producers to give their music a vintage and nostalgic feel. However, like any other audio effect, the Lofi effect has its benefits and limitations. In this post, we’ll take a closer look at the advantages and disadvantages of using the Lofi effect in music production.

Benefits Of Using The Lofi Effect In Music Production

Using the Lofi effect in music production can bring a unique and nostalgic atmosphere to the music. Here are a few benefits of using the Lofi effect in music production:

  • It can add warmth and depth to the sound
  • It can give the music a vintage feel
  • It can make the music sound more authentic and organic
  • It can enhance the overall mood and atmosphere of the music

Limitations Of Using The Lofi Effect In Music Production

While the Lofi effect can add a unique and vintage atmosphere to the music, it also has its limitations. Here are a few limitations of using the Lofi effect in music production:

  • The effect might not be suitable for all types of music genres
  • Overusing the effect can make the music sound lo-fi and low quality
  • It can be challenging to achieve a balance between a clear, high-quality sound, and a lo-fi, vintage sound
  • The effect might not work well with modern music production techniques

In conclusion, the Lofi effect can add a unique and nostalgic feel to the music. However, it’s essential to understand the benefits and limitations of using the effect in music production to achieve the desired results. Whether you decide to use the Lofi effect or not, it’s always important to experiment and find the right audio effect that blends well with your music genre and style.

Exploring The Future Of The Lofi Effect

The Lofi effect has been around for decades and has undergone many transformations. As technology advances, we can only anticipate its future evolution with excitement. From its humble beginnings as a vinyl crackle to today’s complex digital signal processing, the Lofi Effect continues to captivate music lovers worldwide.

Lofi music has evolved to become one of the most popular genres in contemporary music. The Lofi effect, which gives Lofi music its signature sound, has been around for decades and continues to grow in popularity. But what does the future hold for the Lofi effect and Lofi music? In this article, we will explore the future of the Lofi effect and its impact on the music industry.

Predictions Of Future Trends In Lofi Music

The future of Lofi music is bright, and there are several trends that we can expect to see in the coming years. One of the trends we can expect is the integration of Lofi music with other genres, such as hip-hop and jazz. This fusion will create a unique sound that appeals to a wider audience. Another trend that we can expect is the emergence of new Lofi sub-genres. These sub-genres will be developed by Lofi artists who will push the boundaries of the Lofi effect. We can expect to see the emergence of sub-genres such as Lofi hip-hop, Lofi jazz, and even Lofi rock.

New Innovations In Creating The Lofi Effect

The Lofi effect has remained relatively unchanged for decades. However, as technology continues to advance, we can expect to see new innovations in creating the Lofi effect. One of the innovations that we can expect is the use of artificial intelligence and machine learning to create Lofi music. We can also expect to see new software and plugins that will make it easier for artists to create the Lofi effect. These tools will allow artists to experiment with different sounds and effects, resulting in a more diverse range of Lofi music. Overall, the future of the Lofi effect and Lofi music is exciting. With the integration of other genres, the emergence of new sub-genres, and new innovations in creating the Lofi effect, we can expect Lofi music to continue to grow in popularity. If you’re a Lofi fan, the future looks bright!

Frequently Asked Questions Of Lofi Effect Explained

What Is The Lo-fi Effect?

The lo-fi effect is a technique used to create a low-fidelity or vintage sound using distortion, filters, and other audio effects. It is commonly used in music production to achieve a nostalgic or raw sound that is popular in genres such as hip-hop and indie.

How Does Lofi Affect The Brain?

Lofi music has a calming effect on the brain. It helps in reducing stress, anxiety and depression. The simple melodies and repetitive rhythms induce a meditative state that promotes relaxation, focus and creativity. It also stimulates the release of dopamine, a neurotransmitter that enhances mood and motivation.

Therefore, listening to lofi music can positively affect the brain.

How Do You Get The Lofi Effect?

The LOFI effect can be achieved by using techniques such as bit reduction, vinyl crackle, sample rate reduction, and EQ adjustments. You can also use plugins and processors designed specifically for LOFI effects to enhance your sound. Experiment with different combinations of these techniques to achieve the desired effect.

How Would You Describe Lofi?

LOFI is a genre of music with a warm, nostalgic sound that’s created using imperfections in songs, like vinyl crackles or hisses. It’s often characterized by its chill, low-key beats and laid-back vibe.

Conclusion

To summarize, the lofi effect is all about capturing the essence of vintage sounds in a modern way. By adding warmth, grit and noise to the recordings, producers can create a sense of nostalgia and authenticity that resonates with listeners across different genres.

Whether you are making lofi hip hop beats or ambient soundscapes, understanding how to use the lofi effect can greatly enhance the emotional impact of your music. With the right techniques and tools, you can achieve that desired lofi sound that stands the test of time.

Categories
Archive

Audio Signal Flow

Audio signal flow refers to the path that an audio signal takes from its source to its destination. It involves the devices that the signal passes through and the connections between them.

In the world of audio engineering, understanding signal flow is crucial to producing high-quality sound. Audio signal flow can be complex, involving a variety of components such as microphones, cables, mixers, preamps, and speakers. A solid grasp of signal flow enables an engineer to troubleshoot issues quickly and efficiently, as well as making informed decisions when selecting and placing equipment.

By following the signal flow carefully and ensuring that each component is working optimally, the engineer can produce clear, rich, and detailed sound that is faithful to the source material.

Audio Signal Flow

Credit: en.wikipedia.org

Physical Audio Signal Flow

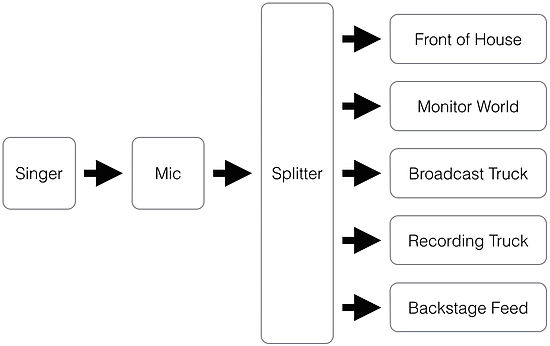
Audio signal flow refers to the path of an audio signal from the source to the output. Audio signal flow can be divided into two categories: physical and logical. Physical signal flow involves the physical components of the signal pathway such as wires, connectors, and the various audio devices that process the signal along the way. Logical signal flow refers to how a signal moves through a system in terms of processing, such as EQing, compression, and other digital audio effects.

Source

The source is where the audio signal originates. It could be a microphone, a CD player, or any other device that produces an audio signal. The audio signal is typically very weak and needs to be amplified to a useful level.

Processing

Processing refers to any manipulation of the audio signal; it can be as simple as adjusting the volume, or as complex as applying digital effects such as reverb, delay, and modulation. Processing is typically done by an analog or digital audio processor. Processors can be standalone units, or they can be built into mixing consoles, amplifiers, and other audio equipment.

Amplification

Amplification is the process of increasing the strength of the audio signal. An amplifier receives the audio signal and amplifies it to a level where it can drive a speaker or other output device. Amplifiers come in a wide range of types and sizes, from small headphone amplifiers to massive, high-powered amplifiers used in live music performances.

Output

The output is where the amplified and processed audio signal is sent for playback. This could be a pair of headphones, a speaker system, or any other device designed to reproduce audio. The quality of the output device can have a significant impact on the overall quality of the audio signal, so it’s essential to choose an output device that matches the desired quality level.

Audio Signal Flow

Credit: www.mixingmusiclive.com

Digital Audio Signal Flow

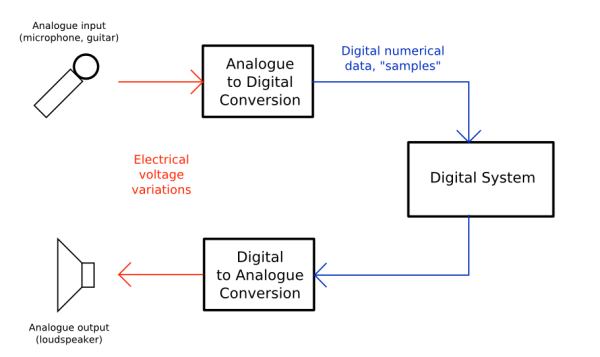
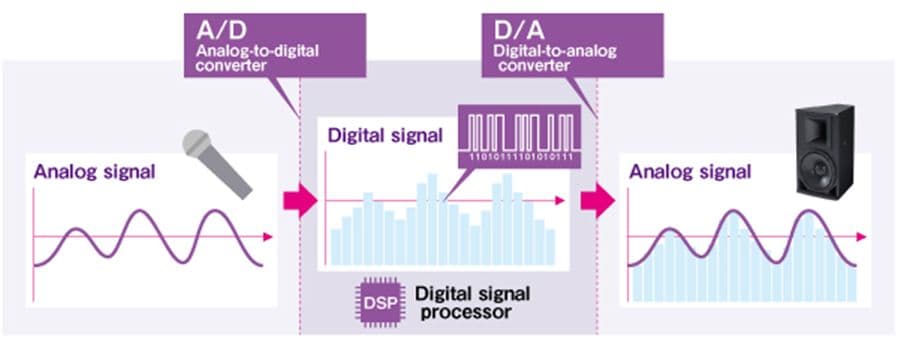
Understanding audio signal flow is vital for achieving high-quality sound recordings. It refers to the path of the audio signal from its source through processing to the final output. The digital audio signal flow relies on digital devices that transform the signal into digital data.

Digital Source

The audio signal flow originates from the source, which is usually digital in nature. The source can be a digital audio workstation, CD player, computer, or any device that produces a digital signal. The source digital signal is then sent to a digital signal processor (DSP) for processing.

Digital Signal Processor

The digital signal processor is the brain of the audio signal flow and is responsible for processing the digital signal. It performs the necessary operations such as equalization, compression, reverb, and mixing, among others. The processed signal is then sent to the digital-to-analog converter (DAC).

Digital-to-analog Converter

The digital-to-analog converter converts the digital signal into an analog signal that can be understood by speakers or headphones. It is an essential part of the digital audio signal flow as it ensures that the sound is of high quality and accurately represents the original signal.

Output

The output is the final stage of the digital audio signal flow, where the analog signal is sent to the speakers or headphones. It is crucial to ensure that the output device is of high quality to prevent any loss in sound quality.

Common Audio Signal Flow Techniques

Audio signal flow techniques are essential for any sound system operator, as they help to ensure that the audio signal travels through the system without any loss of quality or interference. The most common techniques include gain staging, EQ, compression, and reverb, which help to balance and enhance the sound.

Audio signal flow refers to the path sound takes from the source, through processing, to the final output. Understanding this flow is fundamental to creating great-sounding recordings. There are three main techniques used in audio signal flow that are essential to producing quality sound: equalization, compression, and reverb.

Equalization

Equalization, also known as EQ, is the process of adjusting the balance between frequency components of an audio signal. EQ is used to change the tone of a sound, and can be a crucial tool in crafting a specific type of sound. EQ can enhance the warmth and clarity of a vocal, for instance, by simply boosting the frequency bands that correspond to these qualities. Conversely, EQ can also be used to reduce undesirable frequencies that can detract from the overall quality of the sound.

Compression

Compression is used to reduce the dynamic range of an audio signal. In other words, it makes loud sounds quieter and quieter sounds louder, resulting in a more consistent sound level. Compression is ideal for taming peaks or controlling the dynamic range of an instrument or vocal. It can also help add sustain to guitar or bass tracks, making them sound fuller and warmer.

Reverb

Reverb refers to the effect of sound waves reflecting off surfaces and bouncing back to the listener. It adds depth and volume to a sound, making it sound more natural. Reverb is used to create a sense of space and atmosphere in a recording, and it can be adjusted to create everything from a small room to a large concert hall sound. In conclusion, mastering the use of equalization, compression and reverb in audio signal flow is essential for creating professional-sounding recordings. These common techniques are the building blocks of sound design, paving the way for countless creative possibilities.

Audio Signal Flow

Credit: en.wikipedia.org

Frequently Asked Questions On Audio Signal Flow

What Is The Correct Order Of The Audio Signal Flow?

The correct order of the audio signal flow is as follows: the audio source, the preamp, the EQ, the compressor, and the recorder or amplifier. Each component affects the signal in a specific way and is essential for a quality sound.

What Is The Basic Signal Flow In Audio?

The basic signal flow in audio starts at the source, travels through a preamp or mixer, then to the level control and EQ before being amplified by a power amplifier. The amplified signal then goes to the speakers.

What Is The Signal Flow Of A Sound System?

The signal flow of a sound system refers to the path that an audio signal takes from its source to the speakers. It starts with the audio source, which is then processed by the mixer or preamp, followed by amplification and finally output to the speakers.

What Is The Signal Flow Of An Audio Interface?

The signal flow of an audio interface begins with the analog or digital input, then goes through the preamp, AD converter, processing, DA converter, and finally output to the speakers. It’s important to ensure a high-quality signal flow to achieve optimal sound.

Conclusion

So there you have it – audio signal flow in a nutshell. Ensuring the proper signal path from start to finish can greatly enhance the quality of your audio output. Remember to keep these basic principles in mind: the input source should be the highest quality possible, avoid having multiple input levels, and always monitor your output.

By understanding and implementing these concepts, your audio projects are sure to sound better than ever before. So go ahead, experiment, and enjoy the results!

Categories
Archive

What Is Digital Sound

Digital sound refers to audio that a converter has turned into numbers, so computers can edit and store it as data. Specifically, a process called sampling creates it by converting analog waves into data.

In today’s world, digital audio has become an integral part of our daily lives. Today, you hear it in everything from music to movies to phone calls and video games. The use of digital audio has revolutionized the entertainment industry, allowing for higher quality audio and greater accessibility.

Related reading: Analog meets digital and Analog vs digital summing.

With the rise of digital technology, anyone can share and distribute audio across the world. This makes it easier than ever for people to connect and enjoy their favorite content. Moreover, understanding digital audio and its capabilities is essential for anyone looking to create or consume digital media.

What Is Digital Sound

The Evolution Of Sound

The Evolution of Sound is as fascinating as music or any other auditory arts. Overall, sound, which was first recorded in 1857, has come a long way today. From the simple phonographs to today’s digital audio, the quality of sound has improved tremendously. In this blog post, we will discuss the evolution of sound from analog to digital, and how it has impacted the way we listen to music today.

From Analog To Digital

In the early days, engineers recorded sound with analog technology. At first, this involved using a needle which would etch the sound waves onto a vinyl record. As the years passed, magnetic tape replaced this technology. Engineers could edit this tape easily, and it was more portable than the earlier method.

However, analog sound systems had certain limitations. As a result, the quality of sound would degrade with each subsequent copy. Additionally, analog sound picked up noise more easily, and wear or accidents could ruin it. These limitations gave rise to the need for a new technology that could overcome these drawbacks.

The Digital Revolution

The digital revolution in sound recording began in the 1970s. Later, digital audio recordings used computers to convert sound waves into binary code. Engineers could then edit it and store it on various digital media. The benefits of digital audio were numerous – it was cleaner, had higher fidelity, and engineers could edit it without quality loss.

With digital audio, new possibilities emerged. Furthermore, music production became more affordable, as one could record and edit music with a computer. Artists had more creative freedom to experiment as they could edit, rearrange and manipulate sounds as they wished. As a result, the music industry as we know it today was born.

The Impact Of Digital Sound

Over the years, digital audio has become the preferred choice of recording for the music industry. Also, the quality of sound has improved tremendously, and we can now listen to music in crystal-clear quality. Additionally, digital audio has paved the way for new ways of listening to music, from online streaming to portable music players.

Furthermore, digital audio has impacted other fields like movies and gaming. Today, 3D sound and surround sound technologies create immersive experiences that were once only a dream. In conclusion, the evolution from analog to digital audio has been a fascinating journey – and we can only hope that it will continue to progress.

Understanding Digital Sound

Digital audio is sound that a converter has turned into numbers. In addition, it is the representation of sound in the form of zeros and ones. Studios and listeners rely on it today because it delivers clean audio without added distortion or noise. Almost all music that people listen to today is in digital format as it is easy to store, distribute, and manipulate.

Definition Of Digital Sound

In short, digital audio is numerical data that devices can store, process, and transmit through digital channels. In simple terms, it is any audio that a converter has digitized, so electronic devices can move and edit it easily.

What Makes Sound Digital?

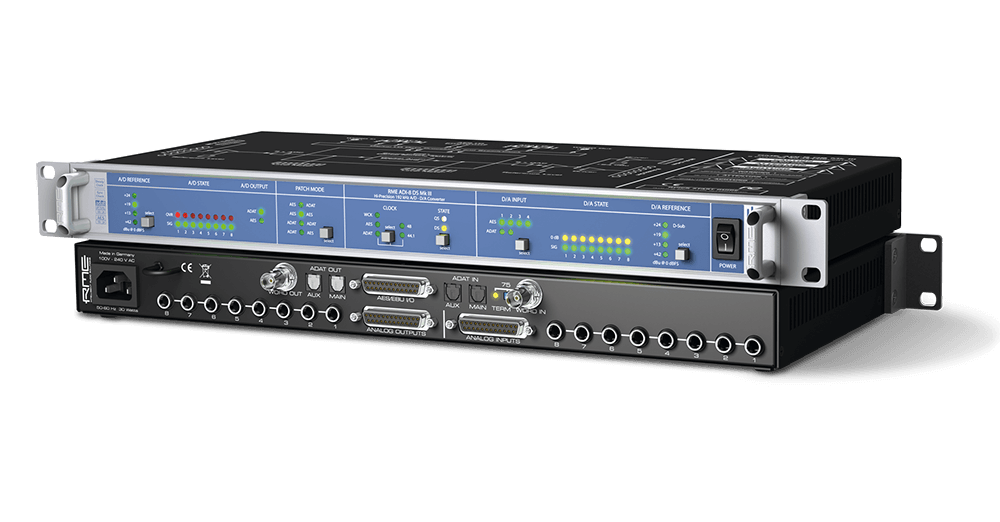
A process called digital audio conversion makes sound digital. Moreover, this involves converting an analog audio signal into a digital format using an analog-to-digital converter (ADC).

Once a converter digitizes the sound, devices transmit and store it as binary code made of zeros and ones. Furthermore, a computer or any other digital device can easily process and edit this binary code. This allows for various effects such as filtering, equalization, and compression, among others.

Digitally recorded sound is of higher quality and clarity than its analog counterpart. Digital recording allows for better signal-to-noise ratios, wider frequency responses, and greater dynamic range, all of which contribute to a more realistic and immersive listening experience.

Conclusion

Digital audio has revolutionized the way people listen to music and consume audio content. Understanding digital audio and its benefits is critical for anyone who wants to appreciate high-quality audio in today’s digital age.

Benefits Of Digital Sound

Digital audio is the process of converting analog sound waves into digital signals that improve the sound quality and clarity. With the benefits of clearer sound, wider frequency range, and higher fidelity, digital audio is becoming increasingly popular in various applications such as music recording, movie production, and streaming services.

Quality

Digital audio technology has revolutionized the way we listen to music, watch movies and play games. Unlike traditional analog recordings, digital audio recordings offer exceptional audio quality. The elimination of noise and distortion results in crystal clear sound that is both immersive and enjoyable.

Accessibility

The rise of digital audio technology has made it possible to access a wide range of music and audio content at the click of a button, from all around the world. With digital audio, you can conveniently stream or download your favorite tracks and play them on various devices such as smartphones, laptops, and mp3 players, anytime, anywhere.

Portability

Digital audio technology has shrunk the size of recording devices while increasing storage capacity. This has made it more convenient and practical to carry around vast libraries of music and other audio content within a single device. You can enjoy high-quality sound wherever you go, whether you’re working out, traveling, or just relaxing at home.

In conclusion, digital audio technology has transformed the way we experience sound. With its crystal clear quality, easy accessibility, and portability, we can enjoy immersive and enhanced audio experiences from almost any location.

How Digital Sound Works

Have you ever wondered how studios record music and play it back digitally? Well, in simple terms, a converter turns analog waves into binary code that a computer can read and reproduce. Sounds interesting, right? In this post, we will delve deeper into how digital audio works.

Recording Sound Digitally

The process of recording digital audio involves capturing analog sound waves using a microphone and converting them to digital signals using an analog-to-digital converter (ADC). The ADC samples the analog sound waves at regular intervals and converts them into a digital format. You can then store it on a computer or other digital device. The sampling rate and bit depth you choose for conversion set the quality of the digital recording.

Converting Analog To Digital

Converting analog sound into digital audio is a complex process that involves several steps. The first step is to sample the analog sound waves at a fixed rate, usually between 44,100 and 192,000 times per second. We call this the sampling rate. The higher the sampling rate, the greater the detail and accuracy of the digital audio.

The next step is to convert the analog sound waves into a series of binary digits using an ADC. The ADC essentially measures the amplitude of the analog sound wave at each sample point and assigns a binary code to represent that amplitude. We call the number of digits that represent each sample the bit depth. This determines the dynamic range of the digital audio. The more bits you use, the greater the dynamic range. This means that the digital audio can capture a wider range of volume levels.

Conclusion

Now that you understand how digital audio works, you can appreciate the technical wizardry that goes into recording and reproducing your favorite songs. Whether you’re mixing beats in a recording studio or streaming music from your phone, digital audio is an integral part of our modern lives.

Different Types Of Digital Audio Files

Digital audio comes in different file types, including MP3, WAV, AIFF, FLAC, and AAC. Each of these file types delivers unique audio quality and compression levels, making them suitable for specific purposes.

Different Types of Digital Audio Files Digital audio is sound that a converter has turned into numbers and saved on a device. Different types of digital audio files have emerged over the years, with varying properties that affect sound quality, compatibility, and storage size. In this article, we’ll take a closer look at lossy vs. lossless formats and the most common file formats used for digital audio.

Lossy vs. Lossless Digital Sound Formats

Lossy and lossless are two basic digital audio file formats. Of the two, lossy audio files save storage space by removing some of the audio data that matters less to the ear. This compression, however, results in a decrease in sound quality as some of the data that makes up the original sound signal is lost. Popular lossy audio formats include MP3, Ogg Vorbis, and AAC. In contrast, lossless audio uses a compression algorithm that preserves all of the original audio data.

This ensures that no audio information is lost, which minimizes any reduction in audio quality. FLAC, ALAC, and WAV are some examples of lossless audio file formats commonly used in digital audio production.

Common Digital Sound File Formats

Although many digital audio file formats exist, a few stand out as the most common. These formats include: – MP3: The most popular digital audio file format in the world, MP3 offers small files and works on a wide range of devices. – AAC: Developed as a successor to MP3, AAC provides better sound quality at lower bitrates, and streaming services rely on it. – FLAC: An open-source lossless compression format that provides CD-quality sound, FLAC is a popular choice among audiophiles. – WAV: An uncompressed lossless audio format, WAV suits professional audio production thanks to its superior sound quality. – AIFF: Developed by Apple, AIFF is a lossless audio format that macOS users often choose for high-quality audio.

In summary, choosing the right digital audio file format depends on various factors, including storage, compatibility, and sound quality. When it comes to choosing between lossy vs. lossless formats, it’s essential to weigh the need for storage space savings against the desire for superior sound quality.

Applications Of Digital Sound

Digital audio is the process of electronically recording, storing, and reproducing sound. Music, television, and film all rely on it because it sounds clean and is easy to edit. Digital audio technology has also enabled many new applications that were not possible with traditional analog audio systems.

In short, it is audio stored as numbers. As a result, computers can edit and reproduce it. With the advancement of technology, digital audio has become an essential part of various industries such as music, film and television, and video games. In this section, we will discuss the applications of digital audio in these industries.

In Music Production

Digital audio has revolutionized the music industry, transforming how artists record, produce, and distribute music. The use of digital audio workstations (DAW) has made it possible for musicians and producers to manipulate and edit sound with the help of software tools. The use of digital audio has also enabled the creation of electronic music, enabling musicians to create sounds that were not previously possible with analog technology.

In Film And Television

In the film and television industry, digital audio has replaced analog sound. This makes it easier to manipulate sound with precision and accuracy. Digital audio has made it possible to create immersive soundscapes that add to the overall cinematic experience. With surround technology, digital audio creates a sense of depth and space, giving the audience a more realistic viewing experience.

In Video Games

Digital audio has played a significant role in the development of video games, enabling developers to create immersive and realistic environments for players. With the use of digital audio, video game developers can create unique sound effects, background music, and voice acting, enhancing the overall gaming experience. Digital audio has also made it possible for games to provide directional sound. This allows players to locate enemies and object with greater ease. Overall, the applications of digital audio are vast and varied. It is clear that digital audio technology will continue to play a significant role in various industries in the future.

Future Of Digital Sound

In this digital age, sound technology is evolving at a rapid pace. The future of digital audio looks extremely bright, as we can witness advancements in audio technology that always brings better sound quality and listening experience. With this progress, we can assume that digital audio will become more accessible, clear, and immersive. In this article, we will explain how digital audio is evolving, and how it impacts various aspects of sound.

High-resolution Audio

High-resolution audio refers to audio files that have a higher sampling rate and/or bit depth than the standard CD quality. These files capture more of the original sound and offer a better listening experience. The demand for high-res audio is increasing because of its superior quality. This makes it one of the most significant trends in digital audio. Analysts expect the high-res audio market to keep growing. High-res audio offers an extensive range of options to music lovers and audiophiles, bringing them closer to the music they love.

Immersive Audio Technologies

Immersive audio technologies aim to give the listener an experience like they’re present in the performance venue. These technologies can position and transport sounds in 3D space, creating an immersive experience. With virtual reality and augmented reality gaining market share, the demand for immersive audio is growing too. The technology creates an experience where people can perceive sound, just like they perceive it in the real world. Immersive audio technologies are no longer limited to music; they are now used in movies, gaming, and even virtual events. With the evolution of this technology, the future of digital audio seems exceptionally promising.

Conclusion

Digital audio is the future, and it’s exciting to see how it’s evolving. From high-resolution audio to immersive audio, technology is making sound better, more realistic, and more accessible. In conclusion, digital audio has changed the way we listen to music. It seems we are yet to witness the full potential of digital audio. Exciting times await us!

What Is Digital Sound

Credit: brunoruviaro.github.io

What Is Digital Sound

Credit: usa.yamaha.com

Frequently Asked Questions On What Is Digital Sound

What Is Digitally Sound?

Digitally sound refers to the production, recording, and reproduction of high-quality audio using digital technology. It involves the use of digital devices and software to capture and process sound, resulting in better sound quality and clarity.

What Are The Examples Of Digital Sound?

Digital audio examples include MP3 files, internet streaming audio, CDs, and digital audio files used in movie soundtracks, video games, and television commercials.

What Is The Difference Between Analog And Digital Sound?

Analog sound is continuous, while digital audio uses discrete values. Analog sound converts sound waves into electrical signals and stores them in an analog format. Digital audio transforms sound waves into numerical codes and stores them in a digital format.

What Is The Difference Between Audio And Digital Audio?

Audio refers to sounds that we can hear with our ears. Meanwhile, digital audio converts sound into signals that electronic devices can store or edit. The key difference is that audio is analog, while digital audio turns it into quantized data.

Conclusion

In this age of technology, digital audio has become an integral part of our lives. It has revolutionized the way we create and listen to music, enjoy movies and communicate with one another. From its inception to the modern-day advancements, digital sound continues to push the boundaries of audio quality.

With the promise of better quality and convenience, the future of digital sound is undoubtedly fascinating. As we embrace the digital era, it’s safe to say that digital sound is here to stay.

For more background, see Digital audio on Wikipedia. You may also like our guide: How To Make A Digital Synth Sound Analog.

Categories
Archive Gear

How Music Mixing Works

Music mixing involves blending different audio tracks together in the desired manner to produce the final audio output. Music mixing is an integral part of the music production process and is done to create the desired sound balance and effects in a song.

It involves combining different audio tracks recorded for different instruments, vocals, and sound effects, and adjusting their level, volume, panning, and equalization to produce the final audio output. The mixing process is done by a mixing engineer who uses a mixing console or a digital audio workstation (DAW) to mix the tracks.

The engineer listens to the audio tracks carefully and decides the placement and volume of each sound component to create the desired image and effect. Compression, reverb, delay, and other sound effects are also used to blend the tracks together and enhance the overall sound quality. The end result is a polished and professional sounding audio track that is ready for mastering and final production.

The Music Mixing Process

The music mixing process involves blending, equalizing, compressing, and balancing multiple tracks to create a cohesive and professional sound. Through careful manipulation of individual elements within each track, a skilled audio engineer can create an immersive listening experience for the listener.

Music mixing is an essential process that gives a song its final sound. It involves combining and balancing various elements of a track, such as vocals, instruments, and effects, to create a coherent and polished final piece. In this blog post, we’ll delve deeper into the music mixing process, how it works, the tools used, and what techniques are applied to create a great mix.

Preparation

Before starting the mixing process, it’s crucial to have a properly recorded and arranged track. The mixing engineer needs to ensure that the recordings are clean, without any unwanted noise, and properly synced. Once the recordings are ready, the mixing process starts by importing them into a Digital Audio Workstation (DAW).

Mixing Techniques

There are several mixing techniques that a mixing engineer can use to achieve a great mix. Some of these techniques include:

  • Panning: Panning is the process of moving audio signals of various tracks to different speakers in a stereo or surround sound mix. This technique produces a sense of spaciousness and depth in the mix.
  • Equalization: Equalization is the process of adjusting the balance between frequencies in an audio signal. It’s used to remove unwanted frequencies and balance the mix better.
  • Compression: Compression is the process of reducing the dynamic range of an audio signal. It’s used to control louder audio peaks and to make the track sound more cohesive and polished.
  • Reverb and Delay: These are time-based effects used to add depth and space to a mix. Reverb simulates a room’s natural ambience, while delay repeats the signal, creating an echo-like effect.

Tools Used In Music Mixing

Mixing engineers use a variety of tools to achieve the desired results. Some of the most important tools used in music mixing include:

ToolDescription
DAWsDigital Audio Workstations are software programs used to record, edit, and mix audio. Some popular DAWs include Pro Tools, Logic Pro, and Ableton Live.
PluginsPlugins are software components used to add additional functionality to a DAW. They include equalizers, compressors, and reverb and delay effects.
MonitorsMonitors are specialized speakers used to playback audio signals accurately. They enable the mixing engineer to hear the subtle nuances in the mix.
HeadphonesHeadphones are used to monitor the mix without any external noise interference. They also help in isolating individual tracks in a mix.

In conclusion, the music mixing process involves combining various tracks and effects into a cohesive and polished final track. Several techniques and tools are used to create a great mix, including panning, equalization, compression, and reverb and delay effects. By following the right steps and using the right tools, a mixing engineer can produce an amazing soundtrack that stands out.

How Music Mixing Works

Credit: www.amazon.com

Factors That Affect Music Mixing

Music mixing is the process of blending individual audio tracks into a final stereo mix. Several factors affect music mixing, from the composition of the song to the quality of the recording. The primary goal of music mixing is to create a balanced and clear sound that enhances the overall listening experience. Here are some critical factors that affect music mixing:

Volume Levels And Balance

The volume levels of individual tracks are essential in music mixing, as they affect the overall balance of the mix. The volume level of the lead vocal track, for instance, should be higher than that of other tracks to make it more prominent. Balancing the volume levels of different tracks is crucial in achieving an even and clear sound that allows all the elements of the mix to be heard.

Eq And Frequency

The EQ or equalization is the process of adjusting the balance between frequency components within an audio track. It is crucial in music mixing as it helps to eliminate unwanted sounds and enhances the overall clarity and intelligibility of the mix. Proper equalization allows the individual tracks to blend seamlessly into the final mix without any muddiness or harshness. It also helps to create space and depth in the mix.

Panning Techniques

Using panning techniques in music mixing gives depth and width to the stereo field, creating a more realistic and immersive listening experience. Panning is a process that determines where the individual audio tracks are positioned in the stereo field, either on the left or right side, or somewhere in between. Proper panning ensures that each track has its place in the mix and does not clash with other tracks, creating a balanced sound that is pleasing to the listener’s ear.

Conclusion

In conclusion, these are some essential factors that affect music mixing. By paying close attention to these factors and using the right techniques, a music mixer can create a professional, balanced, and clear sound that enhances the overall listening experience.

Tips For Successful Music Mixing

Music mixing plays a crucial role in determining the overall quality of a song or track. With the advancement of technology, music mixing has become accessible to everyone. However, to achieve a pro-level music mixing output, you need to follow some key tips. Below are some practical tips that will help you to mix like a pro.

Listen Critically

The first tip for successful music mixing is, always listen critically to the mix. Properly listening to the mix will help you pick out any issues, such as vocal issues, clarity, and balance. In this process, it is critical to listen to the song in various environments like in your studio, in your car or phone speakers to help identify any consistent issues. You can also listen to other well-known songs in your genre and compare the loudness, clarity and balance with your track.

Take Breaks

Take breaks in between mixing is critical, especially if you’re working on a longer project. This helps you avoid ear fatigue and makes sure you maintain objectivity in your mix. Taking a break will help your ears to get refreshed and also help you listen to the music differently when you come back. You can also use the critical listening session as a brainstorming session and create notes about all the sounds that have to be adjusted after the break.

Collaborate With Others

The final tip for successful music mixing is collaboration with others. Collaborating with another mixing engineer, producer, or an artist can add a lot of value to your project. Collaboration provides an opportunity to learn, receive feedback and get new ideas for processing and mixing sounds. Collaborators can also bring fresh ears and unbiased opinions that elevate the mix.

These tips, like listening critically, taking breaks, and collaborating with others, can help you to achieve a professional-level music mix. Remember that every mix is unique and that what works for you today may not work for you tomorrow. Therefore, it’s essential to keep an open mind, use good communication skills and learn from your peers to refine your craft.

How Music Mixing Works

Credit: www.productionmusiclive.com

Types Of Music Mixing

Music mixing is the process of combining multiple tracks or elements to create a final audio product. There are different types of music mixing techniques, such as EQ mixing, compression, reverb, and delay, each serving a unique purpose in the overall sonic balance and aesthetic of the track.

Music mixing is the process of combining and adjusting different tracks to create a cohesive sound. There are three main types of music mixing: stereo mixing, surround sound mixing, and immersive audio mixing. Each type of music mixing has its distinct features and methods that produce different sounds and listening experiences. In the following sections, we will discuss each of these types of music mixing in detail.

Stereo Mixing

Stereo mixing is the most common type of music mixing. It involves mixing two audio channels, left and right, to create a balanced soundstage. The left channel represents the sound coming from the left side of the listener, and the right channel represents the sound from the right side. Stereo mixing is often used for music distribution on CDs, digital downloads, and streaming services.

Surround Sound Mixing

Surround sound mixing uses multiple speakers to create a more immersive music listening experience. It typically involves mixing six or more audio channels, including center, front left, front right, rear left, rear right, and subwoofer. Surround sound mixing is commonly used in movie theaters, concert halls, and home theater systems. It gives the listener a sense of being surrounded by the music and makes them feel like they’re in the middle of the sound.

Immersive Audio Mixing

Immersive audio mixing is the newest type of music mixing that uses advanced technology to create a three-dimensional sound experience. It involves mixing audio tracks in a way that the music appears to be moving around the listener’s head. Immersive audio mixing can be done with headphones, but it requires specific audio hardware, such as Dolby Atmos and DTS:X. Immersive audio mixing is a trend that is gaining popularity in the gaming industry and is also being used for music distribution on platforms like Tidal and Amazon Music HD. In conclusion, the type of music mixing used is determined by the listening experience that a musician or producer wants to create. While stereo mixing is the most common, surround sound mixing and immersive audio mixing offer more advanced and immersive listening experiences.

Famous Music Mixers In The Industry

Music mixing is a crucial process in music production that involves blending individual recorded tracks into a final stereo mix that sounds pleasant to the ears. It is an art that requires specialized technical skills and creative instincts. Music mixing can make or break a song, and that’s why top-notch mixers are in high demand in the music industry.

Phil Tan

Phil Tan is a Grammy Award-winning mixing engineer who has worked with renowned artists such as Rihanna, Mariah Carey, Michael Jackson, and Jennifer Lopez. His impressive mixing skills have earned him the status of one of the best in the industry.

Chris Lord-alge

Chris Lord-Alge, commonly known as CLA, is a renowned music mixer with over 30 years of experience. He has mixed music for top artists like Green Day, U2, and Muse. His signature sound is a combination of tight compression, explosive dynamics, and explosive effects.

Manny Marroquin

Manny Marroquin is an award-winning mixing engineer who has worked with high-profile musicians such as Beyoncé, Lady Gaga, and The Weeknd. He has a distinctive approach to music mixing, characterized by vibrant and punchy sounds that make the vocals stand out.

These famous music mixers are just a few examples of the top professionals in the music industry. Every mixing engineer has their own unique style and techniques that make their productions stand out. Their work behind the scenes is what makes music sound enjoyable to our ears.

How Music Mixing Works

Credit: www.linkedin.com

Common Mistakes To Avoid In Music Mixing

Learn the common mistakes to avoid in music mixing and improve the quality of your audio production. It is important to keep the volume level in check, avoid overprocessing, and pay attention to EQ and frequency balance. By taking these precautions, you can enhance the clarity and depth of your music tracks.

Music mixing is a crucial aspect of music production that involves blending various audio tracks into one cohesive sound. A well-mixed track can make or break the success of a song. However, there are common mistakes that most beginners make during the mixing process. In this section, we will discuss some of the common mixing mistakes to avoid and how to overcome them.

Overcompression

Compression is an essential tool used in music mixing to regulate the volume level of various audio tracks. However, overcompression can make a track sound flat and lifeless. Some beginners tend to overuse compression, which leads to a reduction in dynamic range and overall sound quality. To avoid overcompression, it’s essential to use compression only where it’s needed, and ensure that the compression ratio is not set too high. You can also try using parallel compression or multi-band compression techniques to achieve a more balanced sound.

Overuse Of Effects

Effects like reverb, delay, chorus, and others can add depth, texture, and character to a track. Using effects is vital, but overusing them can lead to a muddy and cluttered mix. It’s crucial to use effects sparingly and only when necessary to enhance the sound quality. Before adding an effect, ask yourself if it adds value to the track. If it does, then go ahead and add it, otherwise, avoid using it.

Mixing In A Bad Environment

Mixing in a poor acoustic environment can lead to inaccurate mixing decisions. The environment in which you mix your tracks greatly affects how you perceive sound. When mixing, it’s crucial to work in a well-treated environment that has good acoustic properties. It’s also important to use proper monitoring equipment, such as studio headphones or monitor speakers, to ensure that you can accurately hear what you are mixing. In conclusion, avoiding common mixing mistakes can help you achieve a better mix and enhance the overall sound quality of a song. Remember to use compression and effects sparingly, and try to work in a well-treated acoustic environment. By avoiding these common mistakes, you can achieve a more professional sound in your music production.

Frequently Asked Questions Of How Music Mixing Works

How Do You Mix A Song Properly?

To mix a song properly, you need to follow these 5 guidelines: 1. Balance the volumes of the different instruments and vocals. 2. Use EQ to adjust frequencies and remove unwanted sounds. 3. Achieve stereo width and depth with panning and reverb.

4. Control dynamics by using compression and limiting. 5. Ensure the final mix is at an appropriate loudness level and that all elements are audible.

How Is Sound Mixing Done?

Sound mixing is the process of combining multiple audio tracks into a final stereo, 5. 1 or 7. 1 mix. The mixers adjust levels, add effects, and balance the sounds to create a cohesive audio experience. This is done using specialized software and hardware in a control room.

What Do You Need To Start Mixing Music?

To start mixing music, you will need a computer with mixing software, a good quality pair of headphones or speakers, a sound card or audio interface, and music files to mix. It is also essential to have a basic understanding of the mixing process and some creativity to produce a good sound.

Is It Hard To Learn How Do You Mix Music?

No, it is not hard to learn how to mix music. With proper guidance, practice, and a good ear for music, anyone can learn how to mix and produce quality music. It takes time, effort, and patience to develop the necessary skills and techniques.

Conclusion

Music mixing is a fundamental component that makes or breaks a track, enhancing its quality, and offering a delightful experience to the listeners. It is a process that involves several technical aspects that must be skillfully blended to get the perfect mix.

From choosing the right equipment to adjusting the levels, everything is crucial. A skilled mixing engineer is an artist who knows how to bring a song to life. Embracing the process is the key to delivering enjoyable and gratifying music encounters.

Categories
Archive

Ad Da Converter

An ADC, or Analog-to-Digital Converter, is an electronic device that converts analog signals into digital signals. This conversion process makes it easier for computers and digital systems to process and manipulate the signal.

ADCs are used in a variety of applications, including audio recording, video processing, and industrial control systems. ADCs are an essential component of today’s digital world. They play a vital role in the conversion of real-world signals into the digital format, making it easier for computers and other digital systems to process the data.

An ADC takes a continuous analog signal and converts it into a series of digital values that can be processed and manipulated by digital devices. This allows for accurate and reliable measurements, as well as the ability to store and analyze data over time. ADCs are used in a wide range of applications, from medical and scientific research to industrial control systems and consumer electronics. With advancements in technology, the role of ADCs continues to expand, making them a critical component of modern digital systems.

What Is Adc?

Ad Da Converter (ADC) is a crucial electronic component that converts analog signals into digital signals in real time. It is commonly used in audio and video signal processing, measurement and control systems, and communication networks.

Introduction

ADC stands for Analog-to-Digital Converter, which is an electronic device that converts a continuous analog signal into a digital signal. ADCs are used in many applications, including data acquisition systems, control systems, and measurement systems. The conversion process is essential because digital devices, such as computers, store, process, and transmit digital signals, but most sensors and other devices produce analog signals. This post will explain the working principle of an ADC.

Working Principle

The working principle of an ADC is straightforward. It takes an analog signal and converts it into a series of digital values. The conversion process involves two steps: sampling and quantization.

Sampling

Sampling is the process of measuring the analog signal at regular intervals. The interval between samples is called the sampling rate and is measured in Hertz (Hz). The sample rate must be high enough to capture the essential features of the analog signal accurately. The Nyquist-Shannon sampling theorem states that the sample rate must be at least twice the highest frequency component present in the signal.

Quantization

Quantization is the process of assigning a digital value to each sample. The analog signal’s amplitude is divided into a series of discrete levels. The number of levels is determined by the ADC’s resolution. For example, an 8-bit ADC can divide the analog signal into 256 levels. Each level is assigned a unique digital value. ADCs can be categorized into two types: flash ADC and successive approximation ADC. Flash ADCs are fast and accurate but are expensive and power-hungry. Successive approximation ADCs are slow and less accurate but are inexpensive and require less power.

Conclusion

In conclusion, ADCs are essential electronic devices used to convert analog signals into digital signals. The conversion process involves sampling and quantization. The type of ADC chosen depends on the desired accuracy, speed, and cost.

Ad Da Converter

Credit: www.bhphotovideo.com

Types Of Adc

There are different types of ADC available in the market, each with its unique advantages and limitations. Understanding the different types of ADC can help you determine which one is best suited for your application. Here are three major types of ADC:

Flash ADC, also known as parallel ADC, is the fastest type of ADC available on the market. It is capable of processing the incoming signals at high speed and produces results in real-time.

Flash ADC works by comparing the incoming analog signal to a pre-defined voltage reference. It then generates a series of binary codes that represent the value of the input signal. The main disadvantage of Flash ADC is its high cost due to the large number of comparators and resistors required for its operation.

Dual-Slope ADC is a type of ADC that offers high accuracy and low noise in its operation. It works by integrating the input signal for a fixed period, then discharging it for a longer period to produce a ramp waveform with a slope proportional to the input signal.

The ramp waveform is then compared to a known reference voltage to produce a digital output. Dual-Slope ADC is relatively slow compared to Flash ADC but offers better accuracy and noise performance. It is commonly used in multimeter and other precision measurement applications.

Sigma-Delta ADC is a type of ADC that offers high accuracy, high resolution, and low noise in its operation. It works by oversampling the input signal at a high frequency and then applying a low-pass filter to produce a digital output.

Sigma-Delta ADC is commonly used in audio and other high-performance measurement applications due to its ability to produce high-resolution and low-noise output. The main disadvantage of Sigma-Delta ADC is its slower data conversion rate compared to Flash ADC.

Understanding the different types of ADC can help you choose the best one for your application. Flash ADC offers high speed at the cost of high complexity and cost, Dual-Slope ADC offers high accuracy and low noise at the cost of slower speed, and Sigma-Delta ADC offers high accuracy, high resolution, and low noise at the cost of slower speed.

Flash Adc

A Flash ADC, also known as a direct-conversion ADC, is a type of Analog-to-Digital converter that directly converts the analog input signal into a digital output signal without any intermediate frequency conversion stages. This results in high speed, low power consumption, and reduced complexity compared to other types of ADCs.

Flash ADC, also known as parallel ADC, is a type of Analog to Digital Converter that is used to convert analog signals into digital signals. This type of ADC is known for its accuracy, speed, and simplicity. In this section, we will explore the architecture, working principle, advantages, and disadvantages of Flash ADC.

Architecture

The architecture of the Flash ADC is based on a resistor ladder network. The resistor ladder network contains 2N resistors, where N is the number of bits. The input signal is fed into the resistor ladder network, and the output of each resistor is combined with a comparator. There are 2N – 1 comparators in the network. The comparators compare the input voltage with the reference voltage. If the input voltage is higher than the reference voltage, the comparator outputs a high signal. If the input voltage is lower than the reference voltage, the comparator outputs a low signal. The high and low signals produced by the comparators are combined to generate the digital output.

Working Principle

The working principle of Flash ADC is simple. The input voltage is divided into 2N sections by the resistor ladder network. The comparators compare the input voltage with the reference voltage, which is the midpoint of each section. The output of each comparator indicates whether the input voltage is higher or lower than the reference voltage. The output of all the comparators is assembled into a binary number, and this binary number is the digital output of the ADC. The Flash ADC is very fast but requires high-resolution resistors.

Advantages And Disadvantages

Flash ADC has several advantages, such as high speed, high accuracy, and simplicity. The conversion time is very short due to the parallel processing of the input signal. Flash ADC achieves high resolution without feedback techniques, making it simple in design and easy to implement. However, Flash ADC also has some disadvantages. One of the main disadvantages is its high cost due to the need for high-resolution resistors. Additionally, Flash ADCs have a limited resolution to their cost ratio, meaning that they are not well-suited for applications that require high resolution at a low cost. Moreover, the power consumption of a Flash ADC is high due to the presence of more components, including comparators.

Conclusion

In summary, Flash ADCs are excellent choices for applications where speed and accuracy are essential. Their simple architecture makes them easy to implement, but the high-resolution resistors required for the resistor ladder network also make them relatively expensive. They have their advantages and disadvantages, making them ideal for specific applications.

Ad Da Converter

Credit: www.bhphotovideo.com

Dual-slope Adc

Dual-Slope ADC: Architecture, Working Principle, Advantages, and Disadvantages

ADC or Analog to Digital Converter is an electronic device that converts the analog signals to digital signals. Among the various types of ADCs, the dual-slope ADC is widely used. It is a type of integrating ADC that offers high resolution and accuracy. In this blog, we will discuss the architecture, working principle, advantages, and disadvantages of the dual-slope ADC.

Architecture

The dual-slope ADC consists of a comparator, integrator, digital counter, and a reference voltage source. The integrator is a ramp generator that generates a ramp voltage, and the comparator compares the input voltage with the ramp voltage and produces the output pulse. The digital counter counts the number of pulses produced by the comparator, and the count is proportional to the magnitude of the input voltage. The reference voltage source provides a fixed reference voltage for the ADC.

Working Principle

The working principle of the dual-slope ADC is based on the principle of integration. The input voltage is integrated with a known reference voltage for a fixed time interval. The integrator generates a ramp voltage that is proportional to the input voltage. The comparator compares the ramp voltage with the input voltage and produces pulses. The duration of the pulse is proportional to the magnitude of the input voltage. The pulses are counted by the digital counter and converted into digital form.

Advantages And Disadvantages

AdvantagesDisadvantages
High resolution and accuracyLow circuit complexityLess sensitive to noiseEasy to implementSlow conversion rateHigh power consumption compared to other ADCsRequires a stable reference voltageInaccurate at high input frequencies

Overall, the dual-slope ADC offers high accuracy and resolution at the expense of a slower conversion rate and high power consumption. It is easy to implement with low circuit complexity and less sensitive to noise. However, it requires a stable reference voltage and inaccurate at high input frequencies.

Sigma-delta Adc

A Sigma-Delta ADC is a type of analog-to-digital converter that utilizes oversampling and noise shaping techniques to achieve high-resolution conversions with low noise levels. This type of ADC is commonly used in applications that require high accuracy and low distortion, such as audio and measurement systems.

Sigma-Delta ADC is one of the commonly used ADCs. It employs oversampling techniques to convert analog signals to digital signals. This type of ADC can be used for high-resolution and low-speed applications. In this section, we will discuss the architecture, working principle, advantages, and disadvantages of Sigma-Delta ADC.

Architecture:

Sigma-Delta ADC consists of mainly three components- input stage, modulator, and digital filter. The input stage amplifies and prepares the analog signal for the modulator. The modulator converts the analog signal into a high-frequency digital signal. The digital filter eliminates the high-frequency noise and decimates (reduces the frequency) the digital signal to achieve the desired resolution.

Working Principle:

Sigma-Delta ADC works by oversampling the analog signal. The modulator generates a digital signal that is a stream of 1s and 0s. The number of 1s depends on whether the analog signal is greater or less than the threshold level. The digital filter then reduces the high-frequency noise and decimates the digital signal. The final output is a stable digital value that represents the analog input signal.

Advantages:

Sigma-Delta ADC offers some significant advantages over other ADCs. It provides high-resolution conversion (up to 24 bits), low power consumption, and less sensitivity to input noise. This type of ADC also eliminates the need for external anti-aliasing filters.

Disadvantages:

Although Sigma-Delta ADC is useful, it also has some drawbacks. It produces a low conversion rate and is most suitable for low-speed applications. This type of ADC also requires a digital filter, which increases the processing time and complexity. Moreover, the output data is not instantaneous, and there can be a delay of several cycles. In conclusion, Sigma-Delta ADC is an effective approach for high-resolution and low-speed applications. It provides accurate analog to digital conversion, and its key advantages are its low power consumption, high-resolution conversion, and less sensitivity to input noise. Nonetheless, Sigma-Delta ADC also has some disadvantages, so careful consideration should be given to its selection for any design application.

Selection Of Adc

Selecting the appropriate ADC is crucial in ensuring reliable and accurate analog to digital signal conversion. Factors such as resolution, speed, power consumption, and cost must be considered when choosing the right ADC for a particular application.

Choosing the right ADC is critical to ensure the accuracy and reliability of your device. An ADC is responsible for converting analog signals into digital data that can be processed by a digital system. The selection of ADC involves considering various factors, including accuracy, conversion rate, resolution, and cost.

Accuracy

Accuracy refers to how closely the ADC measures the input signal’s actual value. In most cases, the accuracy ranges between +/- 1 LSB (least significant bit) and +/- 0.001 LSB. When selecting an ADC, we need to consider not only the accuracy, but also the overall system accuracy, which includes other components such as the signal source and the processing algorithm.

Conversion Rate

The conversion rate is the number of times per second an ADC can convert an analog signal to digital data. This rate is dependent on the ADC’s digital interface and the internal processing speed. ADCs are available with conversion rates ranging from a few hundred samples per second to several million samples per second. A higher conversion rate allows for faster data processing and is critical for systems requiring low latency.

Resolution

Resolution is the smallest change in input signal that an ADC can detect. It is measured in bits and determines an ADC’s sensitivity. Higher resolution ADCs provide more accurate data but at the cost of a lower conversion rate. The resolution also affects the dynamic range of the system, which is the range of input signals that can be accurately detected. ADCs with higher resolution have a wider dynamic range, enabling them to work with a wider range of signals.

Cost

Cost is a critical consideration when selecting an ADC. The price of ADCs can vary significantly based on the accuracy, conversion rate, and resolution. In general, higher accuracy and resolution ADCs are more expensive than lower accuracy and resolution ADCs. The overall system cost should also be considered, including any additional components required to interface the ADC with the system. In conclusion, selecting the right ADC is a crucial decision for any system design. The accuracy, conversion rate, resolution, and cost are all essential factors that need to be considered when selecting an ADC. By carefully evaluating these factors, we can ensure that the ADC we choose is the optimal choice for our system’s requirements.

Applications Of Adc

Ad Da Converter (ADC) is a crucial component in various fields, like telecommunications, audio systems, aerospace, and automotive. It converts an analog signal into a digital value to process, store, and transmit digital signals accurately. ADC plays a vital role in modern technology.

Applications of ADC: An Analog to Digital Converter (ADC) helps convert analog signals into digital form. The main advantage of an ADC is that it can process a variety of analog signals such as temperature, sound, light, and pressure, and convert them into a digital signal. This digital signal can be processed by the computer or programmed microcontroller, giving the system enough control over the inputs. This leads to a variety of applications for ADC in different fields, including: Audio Applications Many applications of ADC in the audio industry include the conversion of audio signals from analog devices such as microphones, electric guitars, and soundboards into digital signals so that they can be further processed, stored and transmitted. ADC allows fast and high-quality audio data conversion as well as ensuring minimal loss of the original sound source. Additionally, ADC is useful in the audio industry for providing high signal-to-noise ratios, leading to better and clearer audio quality. Temperature Monitoring ADC is also useful in temperature monitoring applications. In such applications, ADC is used to convert analog signals from temperature sensors into a digital form. This digital signal can then be processed by a programmed microcontroller, which can then provide accurate temperature readings. The use of ADC ensures high accuracy of temperature readings, fast response times, and compatibility with different temperature sensor types. Data Acquisition Systems ADC is also useful in data acquisition systems for retrieving and analyzing data from various input devices. ADC can be used in a variety of applications such as medical devices, environmental monitoring, industrial control, and consumer electronics to name a few. In such cases, ADC converts the analog signals from multiple sensors into digital readings that can be analyzed easily, leading to better understanding of the data. The use of ADC in data acquisition systems provides high a degree of accuracy and ensures the compatibility of different sensors with the data acquisition system. In conclusion, ADC is a versatile technique that can be applied in many fields such as audio industry, temperature monitoring, and data acquisition systems. The use of ADC ensures high accuracy of the analog signals, compatibility with different sensors, and the ability to convert analog signals into a digital form that can be easily processed, stored, and transmitted.

Ad Da Converter

Credit: www.rme-usa.com

Frequently Asked Questions Of Ad Da Converter

What Is Ad And Da Converter?

An AD (analog-to-digital) converter is a device that converts analog signals into digital signals, while a DA (digital-to-analog) converter converts digital signals into analog signals. These two converters are commonly used in audio and video equipment to allow analog signals to be captured and processed digitally and to play digital signals through analog output devices such as speakers.

What Is An Ada Converter?

An ADA converter, also known as an analog-to-digital converter, is a device that converts analog signals to digital signals. It is commonly used in audio recording to convert analog audio signals to digital format for processing and storage.

What Is The D To A Converter Circuit?

A D to A converter circuit is a device that converts digital signals to analog signals. It does this by using binary values to create an electric current, which can then be converted to the appropriate analog voltage level. This circuit is commonly used in digital audio equipment.

What Does Da As In Da Converter Stand For?

DA in DA converter stands for “Digital to Analog. ” The DA converter converts digital signals to analog signals, allowing them to be played through speakers or headphones.

Conclusion

As business and technology continue to evolve, so does the need for efficient and accurate data conversion processes. The AD converter does exactly that, ensuring that analog signals are converted into digital signals for better use and analysis. With its many benefits, including higher accuracy and precision, as well as improved transmission rates, it’s no wonder that AD converters have become a vital component of many industries today.

Whether you are in the medical, automotive, or telecommunications field, investing in quality and reliable AD converters will undoubtedly improve the efficiency and effectiveness of your operations.

Categories
Archive

Melodyne Vs Auto Tune

Melodyne and Auto-Tune are two popular pitch correction software used in music production. Melodyne and Auto-Tune are two heavyweights in pitch correction software.

The software is used by many music producers and engineers to correct or manipulate pitch in vocal and instrumental recordings. Melodyne is more versatile and allows for more in-depth editing of pitch, timing, and phrasing, while Auto-Tune is known for its automatic pitch correction capabilities.

Both tools have their own strengths and weaknesses and are widely used in the music industry. We will compare the two software and highlight their differences to help you decide which one is best for your needs.

Melodyne Vs Auto Tune

Credit: sundownsessionsstudio.com

Melodyne Vs Auto Tune

Credit: www.soundonsound.com

Frequently Asked Questions Of Melodyne Vs Auto Tune

What Is Better Auto-tune Or Melodyne?

Both Auto-Tune and Melodyne are popular pitch correction software. Auto-Tune is more suitable for real-time tuning, while Melodyne is better for detailed pitch and time editing. The choice depends on the user’s needs and preferences.

Do Most Singers Use Melodyne?

Melodyne is a popular tool for correcting pitch and timing in vocals. However, not all singers use it, as some prefer to maintain a more natural sound or use other methods for tuning. It ultimately depends on the preferences and needs of the individual singer and producer.

Is Melodyne Better Than Waves Tune?

Melodyne and Waves Tune are both excellent pitch correction tools, but which one is better than the other depends on individual preferences and requirements. Melodyne is more flexible and allows for more intricate pitch edits, while Waves Tune is simpler and more user-friendly.

Ultimately, it’s a matter of personal preference.

Do Professionals Use Auto-tune?

Yes, many professional musicians and recording artists use Auto-Tune to correct pitch errors in their recordings. Auto-Tune has become a popular tool in the music industry for polishing vocals and adding a unique sound to recordings.

Conclusion

All in all, Melodyne and Auto-Tune are both excellent vocal tuning software, but they have different features and capabilities. Depending on your needs and preferences, one may be better suited for you than the other. Melodyne offers more flexibility and control over vocal tuning, while Auto-Tune is perfect for achieving that signature T-Pain-esque sound.

It’s important to experiment and find which software works best for your music production. Remember that the ultimate goal is to enhance the quality of your music without losing the natural essence of the performance.

Categories
Archive Gear

Samson 7Kit Microphone

The Samson 7Kit microphone is a professional-grade drum mic set that includes seven specialized microphones for capturing each element of a drum kit with accuracy and clarity. With durable construction and versatile positioning options, the 7Kit is a top choice for both live performances and studio recording sessions.

As an Amazon Associate I earn from qualifying purchases.

Drum microphones are an essential component of any audio recording or live performance setup. However, finding the right set of mics that can accurately capture every aspect of a drum kit can be a daunting task. The Samson 7Kit microphone is designed to make this process simpler by providing seven specialized mics that have been optimized for different drum components.

We will take a closer look at the 7Kit mic set, discuss its features, and explore why it is a top choice for professional drummers and engineers.

Samson 7Kit Microphone

Credit: www.musicradar.com

Features

The Samson 7Kit microphone is a versatile and high-quality tool for recording vocals and instruments. With its seven piece set, including microphones and stands, it provides excellent audio capture for both live performances and studio recordings.

If you’re looking for a high-quality microphone for your recordings, the Samson 7Kit is a great option. This microphone set is perfect for recording vocals, acoustic instruments, drums, and more. Let’s take a closer look at its features.

Microphone Capsules

One of the standout features of this microphone set is the four microphone capsules that come with it. These allow you to record in a variety of different ways, from capturing a single sound source to recording an entire room. With these capsules, you can choose between cardioid, supercardioid, and omnidirectional pickup patterns, giving you maximum flexibility when it comes to recording.

Connectivity

The Samson 7Kit is incredibly versatile when it comes to its connectivity options. It features both XLR and USB connections, making it easy to connect to your computer or recording equipment. Additionally, it comes with a mic stand and a range of accessories, so you can get started recording right away.

Frequency Response

This microphone set has an impressive frequency response range of 20Hz to 20KHz, which allows you to capture a wide range of sounds with accuracy and detail. Whether you’re recording vocals, drums, or guitar, the Samson 7Kit will ensure that you get the full range of frequencies in your recordings.

Polar Patterns

The Samson 7Kit features four different polar patterns that allow you to tailor your recording to the specific sound source you’re working with. The cardioid pattern is perfect for recording vocals, while the omnidirectional pattern works well for capturing overall room sound. The supercardioid and figure-8 patterns are great for recording instruments and groups of musicians. Overall, the Samson 7Kit microphone set is an excellent choice for anyone looking to record high-quality audio. With its range of microphone capsules, connectivity options, and polar patterns, it’s incredibly versatile and perfect for a range of different recording environments.

Samson 7Kit Microphone

Credit: www.sweetwater.com

Build Quality

When it comes to purchasing a microphone, the build quality is a key factor to consider. The Samson 7Kit Microphone is a top-notch microphone that promises exceptional build quality and design features.

Construction Material

The Samson 7Kit Microphone is built to last. It is designed with high-quality materials that ensure durability and longevity. The casing of the microphone is made of rugged die-cast metal. This metal casing protects the internal components from damage due to external factors like falls and accidents. This ensures that the microphone remains intact even after years of use.

Design Features

Aside from the durable metal casing, the Samson 7Kit microphone is designed with several other features that promote its build quality. For example, the microphone has a swivel stand mount that guarantees stability and a perfect microphone angle. Additionally, the microphone features a foam-lined impact-resistant carrying case that ensures easy and secure transportation of the microphone.

Moreover, the microphone is designed with a gold-plated XLR connector, which ensures efficient and reliable signal transfer. The microphone also comes with a shock-mounted mic clip that protects against vibration and noise interference when recording. This makes the Samson 7Kit Microphone an excellent choice for recording sessions, live performances, and other applications.

Accessories

The Samson 7Kit Microphone is a must-have accessory for any music or podcast enthusiast. With seven high-quality microphones included in the kit, users can capture crystal-clear sound for any application. Whether you’re a professional musician or a beginner podcaster, the Samson 7Kit Microphone is an excellent investment in your sound quality.

Accessories play a significant role in enhancing the performance of a microphone. When it comes to the Samson 7Kit Microphone, it comes with a range of accessories and optional upgrades that make it a versatile and reliable option for all kinds of recording and live performance needs. Let’s take a closer look at the accessories included with the microphone and the optional upgrades you can consider to elevate your audio experience.

Included Accessories

The Samson 7Kit Microphone comes with a range of useful accessories that make it a comprehensive and practical choice for both amateur and professional use. Here are the accessories that come bundled with the kit:

AccessoriesDescription
Q7 Dynamic MicA premium quality dynamic microphone for clear, warm and detailed vocal performance
SR850 HeadphonesProfessional over-the-ear studio headphones with clear and accurate sound
Desktop Mic StandA sturdy and adjustable desktop stand for easy and hassle-free setup

Optional Accessories

Besides the included accessories, there are a number of optional accessories that can further enhance your audio recording and performance experience. Here are some of the optional upgrades you can consider:

  • SP01 Shock Mount: A shock mount that minimizes vibrations and external noise
  • MC18 XLR Cable: A high-quality cable that ensures low noise and distortion-free signal transfer
  • PS01 Pop Filter: A filter that reduces plosives and hisses during vocal recordings
  • BT30 Bluetooth Receiver: A wireless streaming receiver that enables audio playback from compatible devices such as smartphones and laptops

Overall, the Samson 7Kit Microphone is an excellent all-round microphone that comes with the necessary accessories to meet your recording and live performance needs. Additionally, the optional accessories available can further complement its capabilities and boost its overall performance. Whether you are a professional musician or an amateur podcaster, the Samson 7Kit Microphone is a must-have tool in your audio-recording arsenal.

Samson 7Kit Microphone

Credit: www.amazon.com

Performance

When it comes to recording music, podcasts or even voiceovers, the quality of the microphone is paramount to achieving a crisp and clear sound. The Samson 7Kit Microphone is a professional-grade microphone that is suitable for both novice and advanced users. Its superior quality and versatility are reflected in its performance, which is what we will be discussing in this article.

Recording Quality

The first thing to consider when choosing a microphone is the recording quality. The Samson 7Kit Microphone delivers high-quality sound, making it ideal for recording vocals, instruments, and even podcasts. It features a frequency response of 20Hz to 20kHz, ensuring that every detail in the audio is captured.

Sensitivity

The sensitivity of the Samson 7Kit Microphone is another aspect that sets it apart from other microphones in its class. With a maximum SPL of 140dB, it is highly sensitive and can pick up even the softest of sounds. This feature is particularly useful in recording acoustic instruments or vocals.

Noise Level

The Samson 7Kit Microphone has a low self-noise level of just 14dB, which makes it almost silent during recording. This means that ambient noise and unwanted interference are significantly reduced, resulting in a cleaner and clearer recording. This feature is particularly useful when recording in noisy environments.

In Conclusion, whether you are a budding musician, podcaster, or voiceover artist, the Samson 7Kit Microphone provides excellent performance, unmatched recording quality, high sensitivity, and low noise level. With this microphone, you can be assured of professional-grade sound quality that will take your recordings to the next level.

Applications

The Samson 7Kit Microphone is a versatile and high-quality microphone set suitable for a range of applications. Whether you’re recording vocals, instruments, or podcasts, this kit provides exceptional sound clarity and accuracy.

Applications The Samson 7kit microphone is a reliable microphone that is perfect for different applications ranging from home studio recording to live performances. It is a versatile and high-quality microphone that comes with different accessories that make it an ideal microphone for various settings. Let’s explore some of the applications of the microphone. Recording Studio The Samson 7kit microphone is an excellent choice for recording studios that require high-quality sound recording. It is built with high-quality materials that deliver crystal-clear audio that is perfect for vocals, drums, and acoustic guitars. With its super-cardioid polar pattern, it helps to reject off-axis sound and deliver highly directional output, making it ideal for studio recording. Live Performances The Samson 7kit microphone is designed to provide excellent sound quality for live performances, making it a perfect choice for singers, guitarists, and other performers. It comes with a handheld dynamic microphone and a tripod boom stand that allows you to move around the stage freely while performing. Additionally, the microphone features a low-cut filter switch that helps to reduce low-frequency background noise from the stage for clear vocal performances. Podcasting The Samson 7kit microphone is ideal for podcasting and online content creation. It comes with a USB cable that allows you to connect it to your computer or laptop easily. The microphone features a headphone output on the back that allows you to hear yourself when recording and adjust your voice volume accordingly. With its integrated preamp and 16-bit, 48kHz resolution, this microphone is perfect for creating high-quality podcast audio. In conclusion, the Samson 7kit microphone is a versatile and high-quality microphone suitable for recording studios, live performances, and online content creation. Its different accessories make it an ideal microphone for various settings, and its audio quality is unparalleled.

User Reviews

Samson 7Kit Microphone has received high praise from users for its impressive quality and versatile performance. Users appreciate the value for money and applaud its ability to capture sound with unmatched clarity and depth.

User reviews are essential for anyone contemplating purchasing the Samson 7Kit microphone. They provide valuable insights into the microphone’s performance and ease of use. Here’s what some users have had to say about the 7Kit microphone.

Positive Reviews

  • The Samson 7Kit microphone is an excellent choice for any musician or podcaster.
  • The clarity of sound produced by this model is top-notch, making it a great choice for recording vocals and instruments.
  • The included shock mount and pop filter are highly effective at reducing unwanted background noises and pops.
  • The microphone is easy to set up and use, even for those who are new to recording.
  • Overall, the Samson 7Kit mic is a fantastic value for the price, and it is sure to please anyone who values quality sound and ease of use.

Negative Reviews

  • One reviewer noted that the microphone’s bass response was not optimal and required some EQ adjustments to sound right.
  • Another reviewer noted that the included cables were not high quality and needed to be replaced to achieve the best sound quality.
  • Finally, one user had difficulty with the shock mount and found it unstable and prone to falling off of the microphone stand.

In summary, the Samson 7Kit microphone receives overwhelmingly positive reviews, with users praising its sound quality and ease of use. While there are some minor issues noted by a few users, these drawbacks do not seem to impact the overall quality of the microphone. Overall, the Samson 7Kit microphone is a great option for anyone looking for a high-quality and versatile microphone at a reasonable price.

Frequently Asked Questions Of Samson 7kit Microphone

Are Samson Mics Any Good?

Yes, Samson mics are good. Samson offers a range of quality microphones suitable for various purposes, including recording, live performances, and broadcasting. They are durable, reliable, and affordable, making them ideal for beginners and professionals alike.

Are Samson Drum Mics Any Good?

Yes, Samson drum mics are good. They are known for their durability and quality sound. They offer a wide range of options for various drum types and playing styles. The Samson Q2U and Q7X are among the popular choices for drum mics.

What Makes The Samson 7kit Microphone Unique?

The Samson 7Kit microphone is a high-quality, versatile microphone ideal for recording vocals and instruments. Its unique design incorporates multiple pickup patterns, allowing it to capture sound from different angles for a richer, more detailed recording.

What Is Included In The Samson 7kit Microphone Package?

The Samson 7Kit microphone package includes a large diaphragm cardioid condenser mic, a handheld dynamic microphone, a pair of small diaphragm condenser mics, and a pair of studio-level headphones. It also comes with a shock mount for the large diaphragm mic and a convenient carrying case.

Conclusion

Samson 7Kit microphone is a great choice for those who want to improve the quality of their recordings. This microphone has a wide frequency response and a tight cardioid pickup pattern, making it perfect for capturing clear and accurate sound.

Its versatility allows it to be used for a variety of applications including vocals, drums, and acoustic instruments. With easy setup and user-friendly features, the Samson 7Kit is an affordable and reliable option for anyone in need of a high-quality microphone.

Upgrade your recording game with the Samson 7Kit.