Categories
Archive

10 Music Production Mistakes To Avoid 1

When producing music, avoid these 10 common mistakes to create high-quality work. These mistakes include neglecting important EQ, using too many effects, overlooking gain staging, failing to reference tracks, forgetting about song structure, relying too heavily on loops, overcompression, ignoring room acoustics, using low-quality samples, and not taking breaks.

Music producers who take the time to avoid these pitfalls can produce polished tracks that are more likely to succeed. Music production is an art that can be perfected with time and practice. However, there are some common mistakes that even experienced music producers make.

These mistakes often compromise the quality of the final product and can result in the failure of the track. To ensure that you create high-quality music that stands out, it is essential to be aware of these mistakes and how to avoid them. We will explore the top 10 music production errors and provide helpful tips for avoiding them. Let’s dive in!

Starting With A Mix

Starting your music production with a mix can lead to a lot of mistakes. It’s essential to make sure you have all your elements recorded before you try and mix them all together. The proper organization and preparation can save you time, money, and frustration when producing your music.

Jumping Straight Into Mixing

Starting with a mix is a common mistake that music producers make. It can be tempting to jump straight into mixing without taking the time to properly prepare your session. However, this approach can lead to sloppy tracks and wasted time.

Why is starting with a mix a mistake?

It can limit your creativity. Starting with a mix can limit your creativity and prevent you from exploring different sounds and ideas. When you start with a mix, you are already thinking about how the final track will sound. This can prevent you from experimenting with different sounds and techniques. It can lead to an unbalanced mix. Starting with a mix can also lead to an unbalanced mix. If you haven’t properly prepared your session, you may find that certain elements of your track are too loud or too quiet. This can be difficult to fix later in the mixing process.

How to avoid jumping straight into mixing

To avoid this mistake, it’s important to take the time to properly prepare your session before you start mixing. This will allow you to focus on the creative process and ensure that your mix is balanced and polished. Here are some tips for prepping your DAW session:

  • Organize your tracks and group them together.
  • Remove unnecessary plugins and effects.
  • Clean up your audio files and remove any unwanted noise.
  • Set your levels and get a good balance between the different elements of your track.
  • Make sure your session is properly labeled and organized.

By taking the time to properly prep your session, you’ll be able to start mixing with confidence. You’ll have a solid foundation to build on and will be able to focus on the creative process without worrying about technical issues.

Not Prepping The Daw Session

Not prepping your DAW session is another common mistake that can lead to a sloppy, unbalanced mix. When you don’t take the time to properly organize your tracks, set your levels, and remove unnecessary plugins, you may find that your mix is difficult to work with and lacks polish.

Why is not prepping the DAW session a mistake?

It can lead to technical issues. Not prepping your DAW session can lead to technical issues that can be difficult to fix later on. For example, if you have multiple tracks that are too loud, it can be time-consuming to go back and adjust the levels after you’ve started mixing. It can slow down your workflow. Not prepping your DAW session can also slow down your workflow. If you’re constantly searching for files or trying to figure out which track is which, you’ll waste valuable time that could be spent on the creative process.

How to avoid not prepping the DAW session

To avoid this mistake, it’s important to take the time to properly prep your DAW session before you start mixing. Here are some tips for prepping your DAW session:

  • Organize your tracks and group them together.
  • Remove unnecessary plugins and effects.
  • Clean up your audio files and remove any unwanted noise.
  • Set your levels and get a good balance between the different elements of your track.
  • Make sure your session is properly labeled and organized.

By following these tips, you’ll be able to start mixing with confidence and avoid the common mistakes that many music producers make.

Technical Issues

Efficient music production is adversely affected by technical glitches ranging from poor microphone placement to failing to clean up sound samples. Success in music production lies in avoiding these common mistakes.

Music production is a complex and demanding process that requires considerable attention to detail. Even small technical mistakes can ruin a great recording and mix. In this article, we will highlight ten common technical issues that music producers often encounter while recording and mixing music. In particular, we will focus on how to avoid these mistakes and improve the overall quality of your music production.

Recording In Too Low Of A Bitrate

Recording in too low of a bitrate is a common mistake novice and aspiring music producers often make. For instance, recording at 16-bit depth instead of 24-bit can result in significant loss of audio quality. It is essential to record music at the highest bitrate possible to retain its original quality. When recording, make sure to set the bitrate to the maximum possible range; ideally, 24-bit, 48 kHz. This way, you can capture all the details and nuances of the tracks that you are recording.

Leaving Unused Tracks In The Mix

Another common mistake is including unused tracks in the mix. Although it may seem harmless, unused tracks can clutter the mix and make it sound less polished. Be sure to remove any unused tracks from the mix to help declutter your recordings and create more space for the remaining tracks. Additionally, it is essential to ensure that all recorded tracks are relevant to the song’s overall sound.

Avoid These Mistakes And Improve Your Music Production

In conclusion, technical mistakes are common in music production, and they can significantly impact the overall quality of your recordings and mix. Recording in too low of a bitrate and leaving unused tracks in the mix are just two examples that can be avoided through careful planning and attention to detail. Make sure to avoid these mistakes and strive for the highest possible audio quality to elevate your music production game.

Arrangement Issues

Arranging music can be a daunting task, even for professionals. Arrangement issues can make or break a track, impacting its ability to connect with listeners and achieve success. In this post, we’ll discuss the most common mistakes producers make when it comes to music arrangement and offer tips on how to avoid them.

Starting With Too Many Musical Elements

It’s tempting to throw everything into a song, but the more tracks you have, the more complicated the arrangement becomes. The result can be a cluttered and muddy mix that lacks focus. Start with a basic idea and build upon it slowly, making sure each element serves a purpose and complements the rest.

Ignoring The Importance Of Dynamics

Dynamics are the loudness and quietness of a song and can create a sense of tension and release, helping to keep the listener engaged. A song that remains at the same volume level throughout can quickly become boring. Consider playing with dynamics during different sections of the song to create musical interest.

Examples of dynamics include:

DynamicsDescription
Fortissimo (ff)Very loud
Forte (f)Loud
Moderato (m)Moderate
Piano (p)Soft
Pianissimo (pp)Very soft

Not Cleaning Up The Mix

A cluttered mix can be hard on the ears and make it difficult for individual elements to be heard. It’s important to remove any unnecessary or overlapping layers that may cause muddiness or conflict with other elements. Use equalization, panning, and volume adjustments to create a clean and balanced mix.

Not Balancing The Frequency Spectrum

The audio spectrum includes lows, mids, and highs, and each frequency range needs to be balanced for overall clarity and pleasant listening experience. With many elements competing to be heard, it’s essential to address frequency conflicts such as bass and kick drums competing for the same space. Use EQ to make room for each element and ensure that no frequency range dominates the mix.

Using The Same Sounds And Patterns

Repetitive patterns and sounds can quickly become tedious. While it may be tempting to stick with familiar patterns, it’s important to experiment with different sounds and rhythms to create interest and keep the listener engaged. Use variations and subtle changes to keep the mix fresh and exciting.

Not Considering Song Structure

Arranging a song is more than just throwing elements together; it’s about creating a structure that guides the listener through different sections. Consider using recognizable song structures such as intro, verse, chorus, bridge, and outro. This will help create a sense of familiarity while keeping the listener engaged.

Forgetting The Importance Of Silence

Music doesn’t always have to be playing. Space and silence are just as important for creating a sense of dynamics. Using silence wisely can help break up different sections and create a sense of anticipation. Don’t be afraid to use silence in your arrangement.

Not Emphasizing The Chorus

The chorus is typically the most memorable part of a song. It’s essential to ensure that the chorus stands out by adding dynamic contrast, vocal harmony, or instrumentation. This will help give the listener a sense of the song’s overall impression, making it more memorable.

Over-processing

It’s easy to get carried away with effects and production tools, but be mindful of how much processing each element needs. Over-processing can make a song sound unnatural and detract from the emotional impact. Be intentional with effects and processing, and use them to enhance the overall sound.

Ignoring The Importance Of Transitions

Transitions are a crucial aspect of arrangement, helping to move the listener smoothly through different sections. Consider using transitional elements such as breakdowns, risers, and fills to create a sense of flow and movement. This will help keep the listener engaged and create a memorable listening experience.
10 Music Production Mistakes To Avoid 1

Credit: www.productionmusiclive.com

Overusing Effects

One of the common music production mistakes to avoid is overusing effects. While it can be tempting to add various effects to create a unique sound, too much of it can actually ruin the overall quality of the music. It is important to strike a balance and use effects only when necessary.

When it comes to producing music, effects are like spices. In moderation, they can drastically enhance the flavor of your track, but when overused, they may ruin the whole recipe. Out of all the common music production mistakes, overusing effects is perhaps the easiest to commit. Here are some tips on avoiding some of the most common pitfalls.

Using Too Much Reverb Or Delay

Reverb and delay are popular tools for adding space and depth to your tracks, but too much of either effect can quickly turn your mix into a muddy mess. A general rule of thumb is to use reverb or delay only if it serves the purpose of the track. For example, a guitar solo may benefit from a soaring suspension effect, but a percussion track may need only a touch of reverb to sound less dry.

Overcompression On Tracks

Compression is a powerful tool for controlling dynamics and making individual tracks sound more cohesive. However, applying too much compression can smoosh your mix, making it sound flat and lifeless. To avoid overcompression, make sure to adjust the attack and release times to match the tempo and feel of the song. Also, listen carefully to the individual tracks and the overall mix to ensure that no part sounds excessively squashed.

Cluttering Effects On Master Bus

The master bus is the final stage where all the individual tracks are mixed together before mastering. Adding too many effects on the master bus can lead to a wide range of problems, like phase cancellation, frequency masking, and overly loud peaks or dips. Instead, focus on using only necessary mastering plugins like EQ, compression, and limiting to enhance overall clarity and loudness.

Not Considering Stereo Imaging

Stereo imaging refers to the spatial relationship between the left and right channels of a stereo track. Using too many stereo effects like stereo widening or panning can lead to an unbalanced or unnatural stereo image, which may cause phasing or mono compatibility issues. Make sure to double-check the stereo field of each track and adjust the stereo effects to taste and necessity.

Ignoring Latency Issues

Latency is the time delay between when a signal is processed and when it is heard. Effects like plugins and hardware processors can introduce latency, which may cause timing issues and make it harder to record or perform. To prevent latency problems, make sure to monitor your input signals as close to the source as possible, turn off any unnecessary processing, and optimize your audio interface settings.

Not Utilizing Eq Correctly

Not utilizing EQ correctly is a common mistake made by many music producers. EQ is a powerful tool that should be used to enhance the sound of each instrument or track, but it can also be overused, resulting in a muddy mix.

Not Utilizing Eq Correctly: 10 Music Production Mistakes To Avoid

As a music producer, using EQ correctly is a crucial aspect of ensuring that your tracks are compelling, well-balanced, and professional. EQ is a powerful tool that helps to shape the tonal character of individual sounds in your mix, and when used effectively, it can enhance the overall sonic quality of your tracks. However, many producers make mistakes when it comes to using EQ, and these errors can result in a weak or unbalanced mix. In this blog post, we will explore the top ten music production mistakes that you should avoid, with a specific focus on the subheading: Not Utilizing EQ Correctly.

Ignoring Frequency Clashes

One common mistake made by producers when utilizing EQ is ignoring frequency clashes. When multiple sounds are competing for the same frequency range, they can clash and create an unpleasant sound. This can result in a muddy mix that lacks clarity and definition. To avoid this, it’s essential to identify and address frequency clashes by using EQ to carve out space in the frequency spectrum for each instrument or sound.

Not Using Eq In Mix Down

Another mistake made by producers is not using EQ in the mix-down stage. EQing during mixing helps to achieve balance, clarity, and separation between sounds. When producers overlook this step, they risk leaving their tracks with a flat and unremarkable sound. Using EQ in the mix-down stage can help to shape each sound and bring out its inherent qualities, resulting in a more polished and professional mix. In conclusion, avoiding common EQ mistakes is key to achieving a professional quality mix in music production. By paying attention to frequency clashes and utilizing EQ in the mix-down stage, producers can ensure that their tracks sound clean, clear, and well-balanced.

Not Accounting For Headroom

“Not accounting for headroom” is one of the most common music production mistakes. Headroom is the amount of space between your audio signal’s highest peak and 0dB, and not leaving enough headroom can lead to distorted and unpleasant sound. Remember to leave at least 3-6dB of headroom when producing music.

Mastering Too Loud

When it comes to music production, it’s essential to avoid over-mastering your tracks to get the desired volume. Pushing all the master faders to their highest level to produce a louder track can lead to distortion and audio artifacts. This mistake can severely affect the listening experience and hurt your mix’s dynamic range. Mastering too loud is an issue that often arises when producers don’t account for headroom. Headroom is the space that separates the loudest peak in your mix from 0dB. It’s crucial to leave headroom to avoid overloading your mix with unnecessary peaks.

Not Using A Reference Track

Reference tracks are essential in music production, allowing you to compare your mix to a professional, finished commercial track. Not using a reference track can create confusion about the sound needed to achieve the expected final result. Professional music production usually has an ideal loudness range, dynamic range, and stereo image. Without a reference track, you might fall short of what’s needed for the final product to compete with other professional tracks.

Conclusion

In conclusion, accounting for headroom is vital in music production. Mastering too loud can lead to unnecessary distortion and affect the mix’s dynamic range. Using a reference track is also essential to get a final sound that competes with other professional tracks. By learning to account for headroom and using reference tracks, you can avoid these common music production mistakes and achieve professional results.

Forgetting The Importance Of Mastering

One common mistake in music production is forgetting the importance of mastering. Mastering is the final step that helps to balance and enhance the overall sound quality of a track. By neglecting this step, you risk producing subpar results that may not be competitive in today’s music industry.

Mastering is the final and crucial stage in the music production process. It’s where the final details of your song are polished and optimized for playback on different sound systems. Unfortunately, many producers often overlook the mastering stage, and this can lead to songs that fall short in quality and impact. This is why it’s essential to understand the importance of mastering and avoid these common mistakes:

Expecting Your Mix To Sound As Good As A Commercial Release Without Professional Mastering

Many producers assume that they can achieve the same level of sound quality as a commercial release by merely mixing their tracks. However, this couldn’t be further from the truth. It’s crucial to understand that commercial releases go through an extensive mastering process, involving highly skilled professionals using specialized equipment. Trying to achieve this level of quality without mastering your track is like trying to climb a mountain with one hand tied behind your back. It’s just not possible.

Thinking Mastering Is Just Making Your Track Louder

Another common mistake is assuming that mastering is merely about making your track louder. While loudness is an important part of mastering, it’s not the only consideration. Mastering also involves equalization, compression, stereo imaging, and many other factors that contribute to the overall sound and impact of your song. It’s essential to work with a professional mastering engineer who understands these complexities and can apply them to your music production. In conclusion, forgetting the importance of mastering can be a music production disaster, resulting in songs that lack quality, impact, and commercial appeal. Avoid the above mistakes, and work with a professional mastering engineer to ensure your music production stands out from the crowd.

10 Music Production Mistakes To Avoid 1

Credit: sound.krotosaudio.com

Frequently Asked Questions For 10 Music Production Mistakes To Avoid 1

What Not To Do When Making Music?

Avoid these critical mistakes when making music: 1. Neglecting to plan and organize your ideas. 2. Overcomplicating your composition with too many elements. 3. Focusing solely on technical aspects and neglecting the emotional expression. 4. Copying or imitating other artists without adding your personal touch.

5. Not practicing regularly to improve your skills.

Why Do Most Music Producers Fail?

Most music producers fail because they lack proper planning and execution, have low-quality productions, don’t have a defined target audience, and fail to market themselves effectively. Many also struggle with financial management, networking, and staying up-to-date with industry trends. It’s crucial to hone your craft, build a brand, and stay persistent and adaptable to succeed as a music producer.

What Problems Do Music Producers Face?

Music producers face various challenges, including production costs, limited access to recording facilities, limited networking opportunities, dealing with the changing music industry, and fierce competition. They must be creative, innovative, and flexible to succeed in the diverse and ever-changing music scene.

Why Am I Not Getting Better At Music Production?

Not getting better at music production can be due to several reasons such as lack of practice, not seeking feedback, not studying music theory, not investing in better equipment, and not learning from the professionals. Revisit your approach, identify the gap, and start working on it with patience, determination, and consistency.

Conclusion

Music production is a complex and challenging process that needs considerable attention to detail. By avoiding these 10 common mistakes, you can streamline your workflow, enhance the quality of your music, and produce a professional-grade sound. Keep practicing and experimenting with different production techniques and tools to stay ahead of the curve and take your music to the next level.

Remember, mistakes are a natural part of the learning process, and with a little bit of effort and dedication, you can grow and develop into a successful music producer.
Categories
Archive

How To Mix Rock Music Mixing Tips And Tricks

To effectively mix rock music, use compression, EQ, and volume automation. Adjust the levels of each instrument to create a balanced mix.

Mixing rock music is an art that requires both technical and creative skills. It involves blending different sounds, instruments, and vocals into a cohesive, balanced, and powerful final product. To achieve this, a mix engineer needs to use a range of tools and techniques such as compression, EQ, and volume automation.

Compression helps to control the dynamic range of instruments and vocals, while EQ allows you to shape the tonal qualities of each sound source. Volume automation ensures that each instrument is audible in the right places and at the right times. We’ll explore some essential tips and tricks for mixing rock music that will help you create a dynamic and engaging mix that rocks.

How To Mix Rock Music Mixing Tips And Tricks

Credit: m.youtube.com

Setting Up Your Session

Learn how to mix rock music with these helpful tips and tricks. Setting up your session is crucial for achieving the perfect sound. Make sure you follow these steps for a successful mixing experience.

Setting up your session is the first step to achieving a well-mixed rock song. This process involves selecting tracks, grouping tracks, and organizing channel strips. To make the most out of your mixing session, it’s essential to make sure that your session is set up properly. Let’s dive into each step in detail.

Selecting Tracks

The first step in setting up your session is selecting the tracks you want to work with. It’s essential to ensure that you have access to all the necessary tracks before you begin mixing. It’s also crucial to check whether each track is correctly labeled with the appropriate instrument or vocal type. Doing this is essential for efficient mixing.

Grouping Tracks

Grouping tracks is about assigning each track to a specific group. Doing this allows you to apply effects and processing to multiple tracks at once. You can group tracks based on the instrument type, the microphone used, or the location of the recording.

Organizing Channel Strips

The final step in setting up your session is organizing channel strips. Channel strips are where you apply effects, dynamics processing, and EQ. Organizing them includes making sure that each channel is set to the correct input/output, assigning the appropriate tracks to the channel strips, and setting up the routing of each channel. In conclusion, setting up your session is crucial to get the best out of your mix. Selecting tracks, grouping tracks, and organizing channel strips may seem like a daunting task, but it’s worth the effort in the long run. By following these tips, you’ll be on your way to producing a well-mixed rock song.

How To Mix Rock Music Mixing Tips And Tricks

Credit: www.masteringthemix.com

Preparing Your Mix

Learn how to mix rock music with these helpful tips and tricks. From setting levels to adding effects, preparing your mix requires attention to detail and a good ear. Master the art of mixing and create your best sound yet.

Preparing Your Mix: Preparing your mix is crucial to ensure that your rock music sounds great whether it’s being played out in a live event or recorded for an album. Follow these tips and tricks to prepare your mix the right way! Setting Levels: The first step to mixing your rock music is to set levels. This means adjusting the volumes of each track so that they are balanced and in harmony. You can adjust the volume using the faders in your DAW (Digital Audio Workstation). Start by setting the volume of the drum tracks and then adjust the bass, guitars, and vocals accordingly. Panning Your Tracks: Next, you need to determine the placement of each track in the stereo field. This is called panning. Make sure you place the instruments and vocals in a way that creates space and clarity. For example, you can pan the guitars slightly to the left and right, while having the bass and drums centered. By doing this, you’ll create a balanced sound that does not interfere with one another. Using EQ: Once you have set the levels and panning, it’s time to use EQ. EQ is the process of adjusting the frequency balance of your tracks. Make sure each instrument has its own space in the frequency spectrum. For example, you can use a high-pass filter on the guitar tracks to remove the lows and give more room for the bass. Also, use notch filters to remove any frequencies that clash with the vocals or other instruments. Take your time adjusting the EQ for each track. In conclusion, preparing your mix correctly is the most critical step in producing great rock music. Set the levels, pan your tracks accordingly, and use EQ to give each instrument its unique space for the best sound. Start with these tips and tricks, and you’ll be well on your way to producing great rock music!

Mixing Drums And Bass

When mixing rock music, drums and bass are an essential part of the sound. They are the foundation of the rhythm section and tie in the other instruments together. Mixing drums and bass is all about finding the right balance, cutting and boosting the right frequencies, and panning each element to give each instrument its space in the mix.

Balancing Drums Levels

The first step in mixing drums and bass is to balance the levels. You need to ensure that the kick, snare, and toms are not too loud or too soft. A good way to do this is to use a reference track with similar instrumentation and compare the levels. You can use meters such as the VU meter or the peak meter to ensure that none of the drums are peaking and causing distortion.

Boosting And Cutting Frequencies

Next, you need to make sure that each drum has the right frequency balance. For the kick, you can boost the low end frequencies to give it more weight. For the snare, you can usually boost the mid-range frequencies to give it more presence. For the toms, you can cut out the muddy frequencies and boost the higher frequencies to make them sound more defined.

Panning Drums And Bass

Panning is crucial in giving each instrument its own space in the mix. You can place the kick and bass in the center, while panning the snare slightly to the left or right to make it sound more dynamic. Toms can be panned to the left or right to spread them evenly across the stereo field.

Do’s & Don’ts Mixing Drums And Bass
Do’sDon’ts
Balance drum levels with referenceUse meter to ensure no distortionBoost low end for kick and mid-range for snareCut out muddy frequencies for tomsPan snare, kick and toms in their respective spacesForget to balance levelsOverlook distortion caused by peakingIgnore frequency balancePan everything to the centerPan drums and bass in the same space
How To Mix Rock Music Mixing Tips And Tricks

Credit: majormixing.com

Mixing Guitars

Mixing guitars in rock music can be challenging, but it’s crucial to ensure they don’t get lost in the mix. To get the right sound, use panning to separate the left and right channels, apply EQ to emphasize their unique tones, and use compression to ensure they sit well in the mix.

Guitar is one of the most important instruments in rock music. Mixing guitars can make or break a song. A well-mixed guitar can sound powerful and energetic, while a poorly mixed guitar can ruin the entire song. In this post, we will be discussing some essential tips and tricks for mixing guitars.

Tuning, Timing, And Editing Guitars

The first step in mixing guitars is to ensure that they are in tune and in time. Tuning the guitars well is essential to achieve a clear and powerful sound. Make sure that all the guitar tracks are in tune with each other and the rest of the instruments in the mix. Timing is also crucial as even a small timing difference can cause phasing issues. You can use beat detective or other editing tools to edit the timing of the guitar tracks.

Guitar Panning And Eq

Guitar panning and EQ also play an essential role in mixing guitars. Panning guitars can help create a wide stereo field and make the mix sound more immersive. For example, pan the rhythm guitar to one side and the lead guitar to another side for a more spacious sound. When it comes to EQ, use high-pass filters to remove low-frequency rumble and other unwanted noises. Boost the mids to give the guitar a more prominent presence in the mix. You can also use EQ to shape the tone of the guitars, making them sound brighter or darker.

Incorporating Effects

Effects such as reverb and delay can add depth and dimension to the guitar sound. Use a send/return track to add effects to the guitar tracks. This way, you can control the amount of effect that you add to the guitar tracks. You can also experiment with different types of reverbs and delays to find the perfect sound for your mix. Additionally, using distortion or overdrive can help make the guitars sound more aggressive and add some grit and character to the mix. In conclusion, mixing guitars requires a lot of attention to detail, but with these tips and tricks, you can achieve a well-balanced and powerful guitar sound. Remember to tune, time, and edit the guitar tracks, pan and EQ them effectively, and experiment with adding effects. With some practice and experimentation, you can create a guitar sound that perfectly fits your song and gives it the energy and power it needs to rock.

Mixing Vocals

Learn how to mix rock music vocals with these helpful tips and tricks. Ensure that vocals are balanced and sit well in the mix by using EQ, compression, and reverb to enhance their presence without overpowering the other elements of the track.

Volume Levels And Background Vocals

Getting the right volume levels for your vocal tracks can help you achieve a well-balanced mix. You’ll want to make sure that the vocals sit comfortably in the mix without overpowering the instruments or getting buried in the background. One effective way to achieve this is by using background vocals. These can add depth and dimension to your mix while also providing additional support to your lead vocalist. When mixing rock music, try doubling or tripling the lead vocal track and panning them hard left and right respectively. This can also help to fill out your mix and create a more immersive sound.

Eqing Your Vocal Tracks

EQing your vocal tracks can also help to create a more polished sound. Start by cutting any unwanted frequencies in the low and high end of the spectrum, such as rumble or hiss. Boosting the mid-range frequencies can help to bring out the clarity and presence of the vocals. To make your vocals stand out, try using a high-pass filter to remove any unwanted rumble or low-frequency sounds. Using an EQ plugin, you can adjust the frequencies with precision to give your vocals that extra edge.

Using Compression On Vocals

Compression is a powerful tool in the mixing process, and it can work wonders on your vocal tracks. It can help to smooth out any inconsistencies and bring the vocal track to the forefront of the mix. When compressing your vocals, be sure to place the compressor on the insert channel of the vocal track. Use a low ratio, high attack, and moderate to fast release times to achieve a smooth and natural sound. Depending on the genre, a small amount of distortion may add extra warmth and character to the lead vocal. By following these tips, adding your spin, and trusting your ears, you can mix rock vocals that shine in the mix. Mixing vocals is an intricate process that requires patience, attention to detail, and a good ear. But with the right techniques and tools, your vocal mixes will sound professional and polished, taking your rock music to the next level.

Adding Effects To Your Mix

If you want to take your rock mix to the next level, adding effects is an essential step. Effects can help to add depth, width, and character to your music, and there are a variety of options you can experiment with. Here are some tips to get you started.

Using Reverb To Create Space

Reverb is a commonly used effect in rock music mixing. Adding reverb to your mix can help to create the illusion of space within the audio. Think of reverb like an echo, it makes the audio sound like it’s coming from a bigger room or space than your speakers. You can use reverb to help a vocal track sound like it’s being sung in a concert hall or a guitar track sound like it’s being played in a spacious studio.

When using reverb, it’s important to experiment with different parameters like decay, predelay, and diffusion. Decay controls how long the reverb lasts while pre-delay controls the length of time between the direct audio signal and the start of the reverb. Diffusion controls how spread out the reverb is throughout the stereo image and helps create a sense of depth. Try experimenting with different combinations of these settings to find your desired sound.

Adding Delay And Echo To Your Mix

Delay and echo are two other effects that can be added to your rock mix to create a unique and interesting sound. These effects produce repetitions of the original audio signal, with the difference being how those repetitions are processed in terms of timing, feedbacks, and filters applied.

One way to use delay is to add a short slapback delay to a vocal track or a guitar riff to make it sound more prominent in the mix. Adding longer delays can help create an ambient soundscape that fills the sonic spectrum.

On the other hand, echo is more pronounced with long feedbacks and can be used to add a sense of space and depth to the mix. You can experiment with different types of delay effects, from tape to digital, to find the right combination of sound for your mix. Make sure to mix these effects subtly as too much of either one can quickly become overwhelming.

With these tips in mind, you can start to experiment with adding different effects to your rock mix. Remember, it’s all about finding the right balance and complementing the overall theme and sound of your music.

Mastering Your Mix

Learn how to mix the perfect rock track with our expert tips and tricks in ‘Mastering Your Mix. ‘ From EQ and compression to reverb and delay, we’ll guide you through the steps to achieve a professional sound.

Once you have completed the mixing process, it’s time to move onto the final stage of mastering your mix. This involves applying the finishing touches to ensure your mix sounds professional and polished. Some essential tips to help you master your mix include making final adjustments to volume levels, creating a balanced master with compression and limiting.

Final Adjustments To Volume Levels

The volume levels of your mix can make a significant difference in how it sounds. This is why it’s crucial to ensure that all the elements are mixed correctly and sitting at the right level to create a balanced mix. When making final adjustments to volumes, it’s vital to pay attention to the following:

  • Check your mix in mono to ensure that instruments do not disappear when played together.
  • Use an RMS meter to ensure that your mix has a consistent volume level.
  • Evaluate the overall volume with a volume limiter and ensure that it matches the desired output level.

Creating A Balanced Master With Compression And Limiting

Compression and limiting are key techniques you can use to create a balanced master for your mix. Compression can bring out hidden details in your mix, such as a muted snare or muted bass line, while limiting can ensure that your mix doesn’t clip or go over the desired volume output. When using these techniques, it’s advisable to:

  1. Use a multi-band compressor to handle different frequency ranges separately
  2. Set the attack and release settings to bring out the details in your mix
  3. Use a limiter to ensure that your mix doesn’t exceed the desired volume level

By following these tips, you can take your mix to the next level and craft a finished product that will leave your listeners asking for more.

Troubleshooting Your Mix

As you start mixing rock music, it is important to know that you will face some technical issues. Troubleshooting your mix is an essential step in getting the perfect sound. It includes identifying the common mixing mistakes and how to fix them. Besides, you need to have the right tools to help you solve any technical issue that might arise. In this section, we will discuss some of the common mixing mistakes and how to fix them. We’ll also provide you with some of the best tools you can use to troubleshoot your mix easily.

Common Mixing Mistakes And How To Fix Them

Mixing rock music can be challenging, and even the most experienced sound engineers make mistakes. Here are some common mixing mistakes you need to watch out for and how to fix them:

MistakeHow to Fix It
The mix sounds muddyReduce the low frequencies of instruments that compete for the same frequency range. Use EQ plugins to remove unwanted frequencies.
The mix sounds thin and lacks energyAdd some high frequencies to your mix, and ensure each instrument has its space in the frequency spectrum. Use reverb plugins to create depth and add energy to your mix.
The mix has no dynamicsUse compression plugins to balance the volume of each instrument. Add some automation to create variation and interest in the mix.

Tools To Help You Solve Technical Issues

When mixing rock music, technical issues can arise, and you need to be prepared to solve them efficiently. Here are some essential tools you need to have in your studio to troubleshoot your mix:

  • EQ Plugins – Use these plugins to adjust the frequency response of instruments.
  • Compression Plugins – Use these plugins to control the dynamic range of instruments and vocals.
  • Reverb Plugins – Use these plugins to create space and add depth to your mix.
  • Delay Plugins – Use these plugins to create a sense of space and add width to your mix.
  • Spectrum Analyzers – Use this tool to visualize and analyze the frequency content of your mix.

By having these tools in your studio, you will be able to solve any technical issue efficiently and create a perfect mix that sounds great.

Frequently Asked Questions Of How To Mix Rock Music Mixing Tips And Tricks

How Do You Mix Music To Make It Sound Good?

To mix music and make it sound good, there are some essential steps to follow. Firstly, keep the level balanced as per the frequency spectrum and ensure the sounds are not congested. Secondly, always record and mix at high-quality rates to maintain the sound throughout.

Thirdly, EQ each track to enhance clarity and give it its own space. Fourthly, add spatial effects like reverb to enhance tracks and finally, use compression to balance the level and add consistency.

How Can I Improve My Mixing?

To improve your mixing skills, you should focus on practicing regularly and listening carefully to the music. It’s important to learn how to use EQ, compression, and other effects effectively, as well as to understand the importance of balanced levels and panning.

Additionally, you can learn from other experienced mixers and seek feedback on your work to continue improving.

How Do You Master A Rock Track?

To master a rock track, you need to have the right equipment, software, and experience. Begin by mixing the tracks, using compression and EQ, and checking for any technical issues. Then, adjust the levels, stereo width, and add any necessary effects or plugins.

Finally, compare your mix to others and make any final adjustments before exporting the final product.

How Do You Make A Good Mix Of Songs?

To make a good mix of songs, consider the tempo, key, and energy level of each track. Start with an attention-grabbing song, then build the energy gradually. Avoid abrupt changes and mix songs with similar beats. Use transitions and effects to create a seamless flow between tracks.

Finally, practice and trust your instincts.

Conclusion

To sum up, mixing rock music requires patience, attention to detail and a deep understanding of the genre. From setting the right levels, to choosing the right effects and applying them in a way that enhances the song, the process of mixing is as much an art as it is a science.

By taking the time to experiment, listening carefully and not being afraid to try new things, you can hone your skills and create mixes that truly capture the essence of rock music.

Categories
Archive

Can Mastering Make Your Song Sound Better

Mastering can indeed make your song sound better, enhancing its overall quality, loudness, and clarity. As the final step in the music production process, mastering involves balancing individual tracks, adjusting levels, equalizing sounds, and preparing the final mix for distribution.

It also involves adding depth, dimension, and overall polish to the audio. Mastering can make a significant difference in how a song sounds, especially when it comes to commercial or radio play. Professional mastering can make a difference, even to an experienced musician, and can distinguish your track from others.

A polished master can make it stand out and have a greater impact on its listeners.

Can Mastering Make Your Song Sound Better

Credit: soundbetter.com

The Importance Of Mastering

Mastering is the final step in music production. It is the process of fine-tuning a raw audio mix, making it sound polished and professional. Mastering is important for improving the overall quality of a song. It involves adding depth and warmth to a track, balancing the volumes of individual instruments, and optimizing the overall audio quality. In this post, we will discuss the importance of mastering and how it can make your song sound better.

Mastering enhances the clarity and balance of a song. It allows the engineer to adjust the levels of individual elements in the mix, such as the vocals, drums, and guitars. By doing so, the different instruments will be more audible and the song’s overall sound will be more balanced. The engineer can also adjust the EQ, which can help to eliminate any unwanted noise and frequencies that are not necessary for the song. This process results in a clearer and more defined sound.

Mastering ensures that a song sounds consistent across different platforms. The mastering engineer optimizes the track for various playback formats, such as streaming, CD, vinyl, and radio. Each platform has its own set of requirements, and mastering ensures that the song sounds great on all of them. This consistency is important for maintaining the song’s integrity and ensuring that it’s heard as intended on any platform.

Mastering adds a level of professionalism to the sound of a song. It can help to make it sound more polished and refined. A well-mastered track will stand out from the crowd and make a lasting impression on the listener. This can be especially important for artists who are producing music for commercial purposes, such as licensing or distribution. Professional sound quality is essential for success in these areas, and mastering is one of the key elements that contribute to it.

Mastering optimizes the audio quality of a song. It ensures that the sound is at its best potential, without any unwanted noise or distortion. This process involves adjusting the levels and EQ, as well as applying compression and limiting. By optimizing the audio quality, mastering can make a song sound fuller, richer, and more dynamic. This results in a better listening experience for the audience.

Can Mastering Make Your Song Sound Better

Credit: www.basskleph.com

How Mastering Works?

When it comes to making your song sound professional, it all starts with mastering. But how does mastering work?

Professional Mastering Techniques

Mastering is the process of taking a finished mix and adding the final polish to ensure it sounds its absolute best. Professional mastering studios use a combination of techniques to achieve this, such as:

  • EQ (equalization), which adjusts the balance of frequencies in the mix to ensure clarity and fullness;
  • Compression, which helps control the dynamic range of the mix, making quiet parts louder and ensuring no distortion in the loudest parts;
  • Limiting, which is used to raise the overall volume of the track without causing any clipping or distortion.

These techniques are used in combination to address specific issues with the mix and bring out the best in each individual track.

The Role Of Eq, Compression, And Limiting

EQ is a critical tool in ensuring that each instrument in the mix has its own space and is not fighting for sonic real estate with other instruments. Compression helps to even out the dynamic range, ensuring that the quiet parts are loud enough to be heard and the loud parts are not too overpowering.

Limiting is the final tool in the mastering engineer’s kit, and it ensures that the final track can compete with other well-mastered tracks. Limiting raises the overall volume of the mix without causing any distortion or loss of audio quality.

The Importance Of Room Acoustics

One often overlooked aspect of mastering is the importance of the room in which it’s performed. A well-designed mastering studio with proper construction, acoustic treatment, and monitoring can make a world of difference in the final result. The room’s acoustics play a significant role in ensuring that the mastering engineer can accurately hear and evaluate the mix and make informed decisions.

The Role Of Playback Equipment

Equally important to the room’s acoustics is the playback system. A high-end monitoring system is critical for a mastering engineer to hear all the nuances of the mix and make informed decisions in the mastering process. These systems include a combination of high-quality speakers, a dedicated amplifier, and DSP (Digital Signal Processing) to ensure accurate sound reproduction.

In conclusion, mastering is the final step in making your song sound as professional as possible. By using a combination of techniques like EQ, compression, and limiting, a mastering engineer can bring out the best in each track. The importance of room acoustics and playback equipment cannot be overstated, as they directly impact the accuracy of what the engineer hears.

Mastering Vs Mixing

Music production can be a tricky business, and it’s essential to know the difference between mixing and mastering. Mixing is the process of combining all the individual tracks of a song into a cohesive and balanced final mix. The main goal of mixing is to balance the different elements of the song accurately, making sure that each part is audible and clear.

What’s The Difference?

Mastering, on the other hand, is the final step in the production process. It’s the process of fine-tuning the mix and preparing the final track for distribution. The main goal of mastering is to enhance the overall audio quality of the track, making it sound as polished as possible.

In other words, mixing is like putting the puzzle pieces together, whereas mastering is the final polishing that makes sure every puzzle piece is smooth and glitters.

Why You Need Both

Although mixing and mastering are two different steps, they are both equally important in the music production process. If you want your song to sound professional, you need to ensure that both steps are done correctly.

  • A well-mixed track will be easier to master
  • Mastering can provide the finishing touches and elevate the sound quality of the track
  • Mixing cannot fix poorly recorded audio or mistakes made during the recording process.

Ultimately, both mastering and mixing play significant roles in creating a polished and professional-sounding track.

Conclusion

Now that you know the difference between mastering and mixing and why you need both, it’s crucial to prioritize both steps in your music production process. Mastering can indeed make your song sound better, but only if the mixing has been done correctly in the first place.

Diy Mastering Vs Professional Mastering

Mastering is a crucial final step in producing music. It is what gives your song a polished and professional sound that is ready for commercial distribution. While some people choose to tackle the process of mastering their music on their own, others prefer to use the services of a professional mastering engineer. In this post, we will explore the pros and cons of DIY mastering vs professional mastering, the benefits of professional mastering, and how to choose the right mastering engineer.

The Pros And Cons Of Diy Mastering

DIY mastering can be done with readily available software on your computer and may seem like a cost-effective way to finalize your music, but it has its disadvantages. Here are some of the pros and cons of DIY mastering:

ProsCons
Cost-effectiveMay not have the necessary expertise
You have complete control over the final soundMay not have the necessary equipment
You can work at your own paceMay not have the proper listening environment

The Benefits Of Professional Mastering

Professional mastering is done by an experienced engineer who has the expertise, tools, and listening environment needed to enhance the overall sound of your music. Here are the benefits of professional mastering:

  • Your music will have a polished and professional sound
  • An experienced engineer will use their expertise to enhance the sound of your music
  • Professional mastering studios have high-quality equipment and a proper listening environment
  • Your music will be ready for commercial distribution

How To Choose The Right Mastering Engineer

Choosing the right mastering engineer can make a big difference in the final sound of your music. Here are some tips to help you choose the right mastering engineer:

  1. Ask for recommendations from other musicians or industry professionals
  2. Research the experience and portfolio of the mastering engineer
  3. Listen to examples of their previous work to get a feel for their style and expertise
  4. Communicate your vision and ask for their input and feedback
  5. Consider their pricing and availability

Overall, while DIY mastering may seem like a cost-effective option, professional mastering can give your music a polished and professional sound that is ready for commercial distribution. By choosing the right mastering engineer with the necessary experience, expertise, and tools, you can ensure that your music is the best it can be.

Can Mastering Make Your Song Sound Better

Credit: www.linkedin.com

Frequently Asked Questions For Can Mastering Make Your Song Sound Better

How Much Difference Does Mastering Make?

Mastering can make a significant difference in the quality of audio, but the impact varies based on the initial sound quality, the mastering engineer’s skills, and the intended delivery format. A professionally executed mastering process can enhance the overall sonic balance, loudness, and clarity of the audio recording, making it sound polished and ready for distribution.

Does Mastering Improve Vocals?

Mastering can improve vocal recordings by making them sound more polished and professional. It involves adjusting the levels and adding effects like compression and equalization to bring out the best in the vocals. However, it cannot fix major issues like pitch problems or poor mic technique.

So, it is best to record quality vocals before sending them for mastering.

Why Does My Song Sound Different After Mastering?

Mastering is the final stage of music production, where adjustments, enhancements, and optimizations are made to the audio mix so that it sounds good on different playback systems. Mastering can enhance certain aspects of the song which can make it sound different and better, giving it more depth, clarity, and overall quality.

Does Mastering Increase Volume?

Mastering can increase the overall volume of a recorded track, but it will not increase the volume of the individual elements within the mix. Instead, mastering will balance the levels and frequencies of the mix to make it sound more cohesive and consistent across different playback systems.

Conclusion

After considering all the factors, it is safe to say that mastering can indeed make your song sound better. It is a crucial step in the music production process that can enhance the overall quality of your track and make it stand out in a highly competitive industry.

Mastering can fix common issues such as volume imbalances, frequency clashes and improve the dynamics of your recording. By investing in the right mastering tools, you can unlock the full potential of your music and take your art to the next level.

Categories
Archive

How To Warp Or Cut A Track In Ableton Live

To warp or cut a track in Ableton Live, select the track and use the warp markers to adjust the timing or use the split function to cut the track into sections. Warping allows the track to be adjusted for tempo changes or to align with other tracks in a mix, while cutting can be useful for creating loops or removing unwanted sections.

Ableton Live provides powerful tools for precise audio editing, making it a popular choice for musicians and producers of all levels. With its intuitive interface and advanced features, Ableton Live is an essential tool in the modern music production workflow.

Whether you’re editing audio for a podcast, adding effects to a live show, or creating complex electronic compositions, Ableton Live is an indispensable tool for any creative professional.

How To Warp Or Cut A Track In Ableton Live

Credit: www.soundonsound.com

Understanding Warp And Cut

Warping and cutting tracks in Ableton Live are essential skills for any producer or DJ. The warp feature allows producers to sync tracks to each other, while cutting lets you chop up samples to create new sounds and rhythms. Learn how to master both techniques to take your productions to the next level.

Understanding Warp And Cut can be a daunting task for beginners who have just started using Ableton Live. However, this is an essential skill for anyone who wants to create music using Ableton Live. In this post, we will cover the basic concepts of Warping and Cutting and provide step-by-step guides to help you master them. Let’s dive in.

What Is Warping?

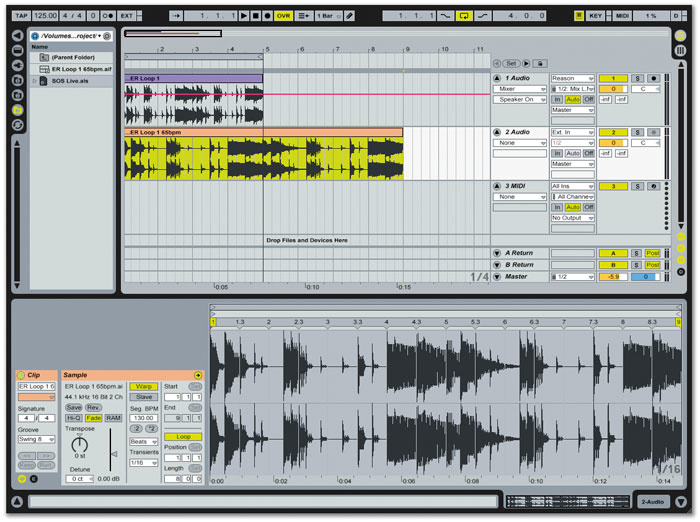
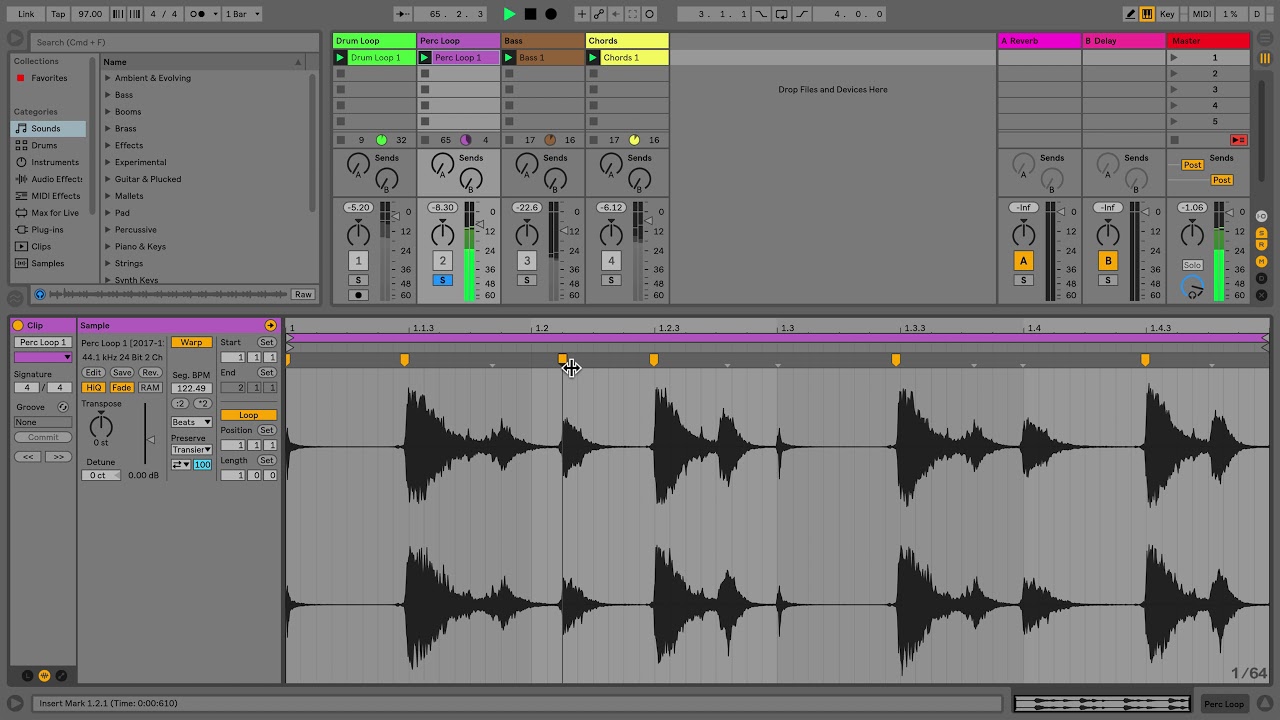
Warping is the process of adjusting the timing of an audio clip to match the tempo of your project. This is a crucial feature for DJs and producers as it allows them to synchronize different tracks and loops. Warping makes it possible to play tracks at different tempos without changing their pitch. To warp an audio clip in Ableton Live, you need to activate Warping mode. This can be done by clicking on the Warp button in the Clip View. Once Warping mode is activated, you will see a grid that represents the beats and bars of your project. To warp an audio clip, you need to align the beats on the grid with the beats in the audio clip. You can do this by creating Warp Markers. Warp Markers allow you to adjust the timing of individual beats in the audio clip.

What Is Cutting?

Cutting is the process of splitting an audio clip into multiple sections. This is useful when you want to rearrange different sections of a track or remove unwanted parts. To cut an audio clip in Ableton Live, you can use the Split command. This can be done by placing the cursor at the point where you want to split the clip and pressing the Command + E keys on a Mac or Control + E keys on a PC. You can also use the Slice to New MIDI Track command to convert a single audio clip into a series of MIDI notes. This allows you to play the different sections of the clip using a MIDI instrument. In conclusion, Understanding Warp And Cut is crucial for anyone who wants to create music using Ableton Live. Now that you have a basic understanding of Warping and Cutting, you can start exploring more advanced techniques. Happy producing!

How To Warp Or Cut A Track In Ableton Live

Credit: www.reddit.com

Warping A Track

Warping a track in Ableton Live is an essential skill every music producer should master. Warping is a process that enables you to change the tempo of an audio file to match the tempo of your project. It is also used to fix timing issues and to make remixes. In this tutorial, we’ll guide you on how to warp or cut a track in Ableton Live, with a focus on warping.

Importing Audio

The first step to warping a track in Ableton Live is to import the audio you want to warp. You can do this by dragging and dropping the audio file into the ‘Audio Track’ area of your Ableton Live session. This area is found at the bottom of Ableton Live’s interface.

Alternatively, you can go to the ‘File’ menu at the top of the screen and click ‘Import Audio/Video.’ This will open the Ableton Live browser where you can select the audio file you want to import. Once you’ve imported the audio file, it will appear in the ‘Audio Track’ area of your Ableton Live session.

Setting Warp Markers

Once you’ve imported your audio file, the next step is to set the warp markers. Warp markers are used to tell Ableton Live where the beats and bars are in your audio file, and are necessary for warping to work correctly.

You can set warp markers by double-clicking on the audio file in the ‘Audio Track’ area. This will open the audio file in the ‘Sample Editor’ window. In the ‘Sample Editor’ window, you can see the audio waveform and the grid lines that represent the beats and bars. To set a warp marker, simply double-click on a grid line where a beat or bar occurs.

Adjusting Warp Markers

Once you’ve set the warp markers, the next step is to adjust them. Adjusting warp markers allows you to fine-tune the timing of your audio file, ensuring that it matches the tempo of your project perfectly.

You can adjust warp markers by clicking and dragging them to the correct position. You can also delete warp markers by right-clicking on them and selecting ‘Delete Marker.’

After you’ve adjusted the warp markers, you can preview the warping by playing the audio file in your Ableton Live session. If the audio file sounds off-beat or doesn’t match the tempo of your project, you can go back and adjust the warp markers until it sounds perfect.

By following these steps, you can warp any audio file in Ableton Live with ease. The ability to warp tracks is an essential skill for any producer, and now that you’ve learned how to do it, you can take your music production to the next level.

Cutting A Track

Learn how to warp or cut a track in Ableton Live with ease. This handy guide provides step-by-step instructions to help you create the perfect track for your next project.

Cutting a track in Ableton Live can be a bit tricky, but it’s an essential skill for any music producer. In this section, we will explore two different methods for cutting clips in Ableton Live, using the Split Command and the Scissors tool, and arranging the cut clips. Let’s get started!
Using The Split Command:

One of the easiest ways to cut a track in Ableton Live is by using the Split Command. This method allows you to split a clip into two separate parts, making it easy to rearrange or remove certain sections of the track. Here’s how you can do it: 1. First, select the clip that you want to split by clicking on it. 2. Next, move the playhead to the point where you want to split the clip. 3. Once you have selected the point where you want to split the clip, you can either press “Cmd + E” (Mac) or “Ctrl + E” (Windows) on your keyboard or right-click on the clip and select “Split” from the dropdown menu. 4. Now you should see two separate clips. You can move them around or delete the section that you do not need.

Using The Scissors Tool:

Another way to cut a track in Ableton Live is by using the Scissors tool. This method allows you to make precise cuts by manually selecting the start and end points of a clip. Here’s how you can do it: 1. First, select the Scissors tool in the toolbar or by pressing “S” on your keyboard. 2. Next, move the playhead to the point where you want to make the cut. 3. Click on the clip at the start point of where you want to cut. 4. Move the Scissors tool to the point where you want to end the cut and click again. 5. Now you should see the clip divided into two separate parts. You can move and rearrange these clips as needed.

Arranging The Cut Clips:

Once you have cut your track using either the Split Command or the Scissors tool, it’s time to rearrange the clips to create your desired arrangement. Here are some tips to help you get started: – Use the Drag tool to move clips around. – Use the Quantize feature to align clips to the grid. – Use the Consolidate feature to group clips into one larger clip. – Use the Loop feature to create repeating patterns. – Use the Crossfade feature to smooth transitions between clips. By using these techniques, you can cut and rearrange your tracks in Ableton Live, creating endless possibilities for your music. Remember to experiment and have fun!

Warp Vs Cut: Which To Choose

In Ableton Live, deciding between warping or cutting a track depends on your desired outcome. Warping adjusts the tempo without affecting the pitch, while cutting separates a track into sections. Each method has its own advantages, so choose based on your creative needs.

When working with audio tracks in Ableton Live, you may need to adjust the timing of certain parts to get that perfect groove. This is where warping and cutting come in, but which one should you choose? Well, it depends on your specific needs and the nature of the audio you’re working with.

When To Use Warping

Warping is the process of adjusting the timing of a track to match the tempo of your project. This is particularly useful when working with loops or samples that weren’t originally recorded at the same tempo as your project. By warping the audio, you can ensure that it lines up perfectly with the rest of your tracks, creating a seamless mix. Warping is also useful when you want to create unique rhythmic patterns by stretching or compressing certain parts of a track. This can help you achieve that signature sound that sets your tracks apart from the rest.

When To Use Cutting

Cutting refers to the process of literally cutting a track into smaller pieces to rearrange or edit it. This is particularly useful when you want to create variations on a particular loop or sample. By cutting up the audio, you can rearrange the order of the individual pieces or apply different effects to each one, creating a completely new sound. Cutting is also useful when you need to remove certain parts of a track that don’t fit with the overall groove of your project. By cutting out the offending parts, you can ensure that the track flows smoothly and sounds cohesive. In conclusion, both warping and cutting are essential techniques for working with audio in Ableton Live. They each serve different purposes, but when used together, they can help you create tracks that sound professional and polished.

Tips And Tricks

Learn how to warp or cut tracks with ease in Ableton Live with these simple tips and tricks. With step-by-step instructions and clear explanations, you’ll be able to master these techniques in no time. Give your music the creative edge it deserves with these Ableton Live skills.

As a music producer, warping or cutting a track in Ableton Live is an essential technique. It allows you to create interesting edits and transform a plain track into a masterpiece. However, knowing a few tips and tricks can make all the difference between a good edit and a great one. In this post, we’ll explore how to avoid clicks and pops, use fades and crossfades, and create interesting edits in Ableton Live.

Avoiding Clicks And Pops

When warping or cutting a track, clicks and pops can become a major issue, especially in quiet parts of the track. To avoid these, you can use the following tips:

  • Zoom in on the audio waveform and identify where the clicks and pops occur.
  • Use the fade tool to create a fade-in and/or fade-out of the problematic area.
  • Adjust the fade length until the clicks and pops disappear.
  • If the issue persists, try adjusting the warp markers to create a smoother transition between the audio segments.

Using Fades And Crossfades

Fades and crossfades are another essential tool for warping and cutting tracks in Ableton Live. They help to create smooth and seamless transitions between audio clips. Here’s how you can use fades and crossfades:

  • To create a fade-in or fade-out, select the audio clip and use the fade tool to drag the fade handle inwards or outwards.
  • To create a crossfade, overlap two audio clips and use the fade tool to create a fade-in on one clip and a fade-out on the other.
  • Adjust the length of the fades and crossfades to create a smooth transition between the audio clips.

Creating Interesting Edits

Finally, using these tips and tricks, you can create some interesting and unique edits in Ableton Live. Here are a few creative ideas to get you started:

  • Incorporate audio effects to add interest and variation to your edits.
  • Cut up and rearrange different audio clips to create a new and unique composition.
  • Experiment with different warp modes to create unusual and creative effects.

Overall, warping and cutting tracks in Ableton Live is a powerful tool for music producers, but it can also be a challenging one. With these tips and tricks, you’ll be able to avoid clicks and pops, create smooth transitions, and unleash your creativity to create interesting edits.

How To Warp Or Cut A Track In Ableton Live

Credit: www.youtube.com

Frequently Asked Questions Of How To Warp Or Cut A Track In Ableton Live

How Do I Cut A Track In Ableton?

To cut a track in Ableton, follow these steps: 1. Zoom in on the audio clip where you want to make the cut. 2. Use the Split tool to split the clip at the desired point. 3. Delete the unwanted portion of the clip.

4. Adjust any fades or crossfades to smooth out the cut.

How Do You Warp In Ableton?

To warp in Ableton, simply select the audio clip and activate the Warp button. Then, adjust the start and end points of the clip, change the warp mode, and adjust the marker positions to match the desired timing. Finally, resize or drag the clip to fit the desired tempo and length of the track.

How Do You Warp Old Tracks In Ableton?

To warp old tracks in Ableton, select the track and turn on Warp in the Sample box. Then, set the correct BPM and adjust the markers to align the beats with the grid. Lastly, drag the Transient and Warp Modes to specify the track’s timing.

How Do You Slice Audio To Clips In Ableton?

To slice audio into clips in Ableton, select the section of audio you want to slice, right-click and select “Slice to New MIDI Track. ” Then, choose the settings for the new MIDI clips and hit “OK. ” The audio will now be sliced into individual clips on a new MIDI track.

Conclusion

Ableton Live provides a versatile set of tools to warp and cut tracks according to your production needs. With the Warp Marker and Slice modes, you can easily manipulate the timing, pitch, and rhythm of the audio files. The helpful shortcuts and hotkeys make the editing process seamless and efficient, allowing you to focus on your creative vision.

By mastering these techniques, you have the power to transform any song or sample into a unique masterpiece that reflects your musical style.

Categories
Archive

How To Make House Drum Patterns Beginners

To make house drum patterns as a beginner, use a digital audio workstation (DAW) and start with a basic kick-snare pattern. Creating your own house drum patterns is an essential skill for any producer wanting to create dance music.

A simple house track can be built around a solid drum pattern. While it may take some experience to create a truly unique drums sound, even beginners can get started with a simple DAW and a basic kick-snare pattern. We’ll guide you through the process of making your own house drum patterns.

From choosing the right sounds to creating swing and shuffle, we will provide a comprehensive guide to get you started. So let’s dive in and create some dope house drum patterns.

Understanding House Drum Patterns

Learning how to make house drum patterns as a beginner involves understanding the structure, rhythm, and sound of house music. By studying the basic components of percussion and exploring different patterns and styles, you can create dynamic beats that drive the energy and flow of your house tracks.

House music is all about the drums. Understanding how to create house drum patterns can take some time, but it is crucial to master if you want to make quality house music. House drum patterns can make or break a track, so it is important to get them right. In this article, we will cover the basic structure of house drum patterns and the commonly used drum sounds in house music.

Basic Structure Of House Drum Patterns

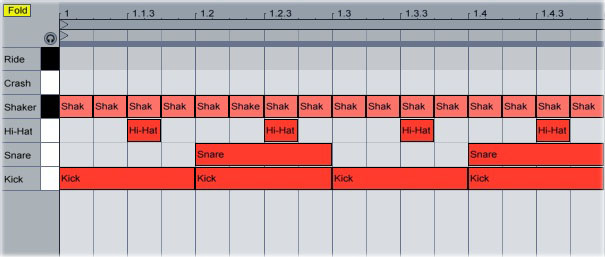
The basic structure of a house drum pattern is simple, yet effective. Every house track should have a kick drum, snare, and hi-hat. The kick drum usually falls on each downbeat, while the snare falls on the second and fourth beats of each measure. The hi-hat falls on every eighth note. To create a basic house drum pattern, start with a 4/4 time signature and lay down a kick drum on each downbeat. Then, add a snare on the second and fourth beats of each measure. Finally, add a closed hi-hat on every eighth note. This will give you a basic house drum pattern to build on.

Commonly Used Drum Sounds In House Music

There are several commonly used drum sounds in house music, besides the basic kick, snare and hi-hat. These drum sounds give house music its unique sound and energy. Some commonly used drum sounds in house music include:

  • Clap: adds an extra layer of percussive sound and can replace the snare in some patterns.
  • Ride: adds a sustained, metallic sound that can be used to accentuate different parts of the beat.
  • Percussion: adds a variety of different percussive sounds, such as shakers, bongos, and congas.
  • Toms: adds a lower, more resonant sound that can be used to fill out the beat.

Experimenting with different drum sounds and patterns is key to creating unique and interesting house music. Don’t be afraid to mix it up and try new things. With practice and experimentation, you can create your own signature house drum patterns that will keep the dance floor moving.

How To Make House Drum Patterns Beginners

Credit: m.youtube.com

Choosing The Right Drum Sounds

When it comes to making a great house drum pattern, choosing the right drum sounds is crucial. The drums are the backbone of any track and can make or break the entire composition. In this article, we’ll go over some tips for selecting the right drum samples and creating custom drum sounds to take your house tracks to the next level.

Selecting Drum Samples

The first step in creating a solid house drum pattern is selecting the right drum samples. There are many sample packs available online, with thousands of different drum sounds to choose from. Here are a few tips to help you choose high-quality samples:

  • Listen to the quality: Make sure you listen to the samples before you download them. If the quality doesn’t sound good, move on to another pack.
  • Go for variety: Look for packs that offer a range of different drum sounds, including kicks, snares, hi-hats, and percussion.
  • Choose sounds that fit your genre: Not all drum samples are created equal, and different genres have their own unique drum sound. For house music, look for samples that have a punchy, snappy quality.

Creating Custom Drum Sounds

While there are many great sample packs available, creating your own custom drum sounds can really set your tracks apart from the crowd. Here are a few tips for creating your own unique drum sounds:

  • Layer your sounds: Layering multiple drum sounds can give your drums extra depth and complexity. For example, try layering a kick drum with a deeper, more resonant kick sample.
  • Experiment with effects: Effects like distortion, reverb, and delay can add interesting textures to your drums. Just be careful not to overdo it!
  • Record your own samples: If you have access to a drumkit, recording your own drum samples can be a great way to add a personal touch to your tracks.

By selecting the right drum samples and creating your own custom sounds, you can create a unique and powerful house drum pattern that will keep your listeners dancing all night long.

Creating The Kick Drum Pattern

Creating a kick drum pattern is an essential part of making a great house beat. It is important to make sure that your kick drum not only sounds good but also anchors the rhythm of the track. Below are some tips for creating the perfect kick drum pattern for your house track.

Layering Different Kicks

Layering different kicks is a great way to create a unique and layered sound. Start by selecting two or three kicks that complement each other well. You can then layer them on top of each other to create a more complex sound. Try experimenting with different combinations until you find the perfect blend.

Programming A Basic Four-on-the-floor Pattern

A basic four-on-the-floor pattern is a great starting point for any house beat. This pattern consists of a kick drum hitting on every beat of the bar. Program your kicks in a simple pattern like: 1-2-3-4.

  • Start by selecting a kick drum sound that you like.
  • Open up your DAW and create a new MIDI track.
  • Set the tempo to the desired BPM.
  • Program the kick drum pattern: 1-2-3-4.
  • Listen to your pattern and adjust it until it sounds good.

Remember, the key to creating a great kick drum pattern is to keep it simple. Start with a basic pattern and then build on it by adding layers and variations. Don’t be afraid to experiment and try out new things until you find the perfect sound for your track.

Adding The Snare Drum

Adding the snare drum to your house beat can take your drum pattern to the next level. The snare drum provides the backbone of your beat, giving it a powerful punch that makes it easy to dance to.

Placing The Snare On The Two And Four

Placing the snare drum on the two and four is a common practice for house drum patterns. This creates a steady and consistent beat that allows the listener to easily follow and dance to the rhythm. To achieve this, simply place the snare drum hits on the second and fourth beats of each measure. Combine this with your kick drum hits, and you have the foundation for a solid house beat.

Exploring Variations On The Snare Pattern

While placing the snare drum on the two and four is a tried and true method, exploring variations on the snare pattern can add intrigue and interest to your beat. You can experiment with different rhythms, syncopations, and ghost notes to create a rhythm that is uniquely your own. By varying the snare pattern, you can create tension and release within your beat, making it more dynamic and engaging.

Here are some variations you can try:

Snare Pattern VariationDescription
Snare on the third beatPlace the snare drum hit on the third beat of each measure – this creates a syncopated rhythm.
Ghost note snare hitsAdd ghost notes – lightly played notes that fall in between the main snare drum hits – for a more complex and varied snare pattern.
Rolls and fillsAdd snare drum rolls and fills for moments of high energy in your beat.

With these variations, you can create a unique and engaging house drum pattern that keeps your listeners on their toes and always wanting more.

Incorporating Hi-hats And Cymbals

To create unique house drum patterns, it’s essential to incorporate hi-hats and cymbals effectively. Start by layering your rhythm, then experiment with different pattern variations to find the groove that works best for you. Accessing various drum samples can also help enhance your beats and get you started with making incredible house music.

If you’re new to creating house drum patterns, incorporating hi-hats and cymbals can add a whole new level of texture and movement to your beats. These elements can give your drums the energy and excitement needed to keep your listeners engaged. In this section, we’ll explore how to program basic hi-hat patterns and use cymbals to enhance your house beats.

Programming Basic Hi-hat Patterns

Creating a basic hi-hat pattern can be simple and effective. It’s essential to note that hi-hats usually play a steady rhythm throughout the entire track, so it’s ideal to choose a pattern that sounds good for long periods. One common hi-hat pattern is the “closed-open” pattern. In this pattern, you program the hi-hat to play every eighth note, alternating between a closed hi-hat and an open hi-hat. This pattern adds a groove to the beat and creates a basic rhythm that’s easy to build upon.

Using Cymbals To Add Texture And Movement

Cymbals can be used to add a lot of movement and texture to your house drum patterns. A crash cymbal can be played at the end of a phrase to mark a transition or add drama to a section. A ride cymbal can be used to keep the beat steady, with occasional hits to add accents and variation. Finally, a splash cymbal can be added to the pattern to create excitement in sections, such as the chorus. Here’s an example of how you can use cymbals in a house drum pattern:

  • Use a crash cymbal at the end of every 8 bars to mark a transition
  • Play a ride cymbal throughout the pattern to keep the beat steady
  • Add occasional hits on the ride cymbal to add accents and variation
  • Use a splash cymbal in the chorus to create excitement and energy

Adding hi-hats and cymbals to your house drum patterns is a great way to create interest and excitement in your productions. By programming basic hi-hat patterns and using cymbals to add texture and movement, you can create beats that groove and keep your listeners engaged.

How To Make House Drum Patterns Beginners

Credit: quadrophone.com

Introducing Percussion

Creating house drum patterns can be a challenge for beginners, but with the right techniques, anyone can learn. Introducing percussion is an important step in developing a solid foundation for drum programming, allowing for endless creative possibilities.

Percussion is a crucial element in creating a compelling house drum pattern. It adds depth and groove to the rhythm, and can transform a simplistic beat into a dancefloor filler. Percussive elements like bongos, congas, shakers, and handclaps are excellent ways to add variation to your tracks. In this post, we’ll explore how to incorporate percussion into your house drum patterns, including adding bongos, congas, and other percussive elements, and layering percussion for a more complex rhythm.

Adding Bongos

Bongos are a popular percussive instrument and can enhance the groove of your house drum pattern. To add bongos, you’ll need to create a separate track focused on bongo rhythm. You can use various loop libraries to find bongo patterns, or you can create your own using a MIDI controller or a percussive plugin. Once you have a bongo track, you can layer it with your drum pattern. Make sure that the bongo groove is not overpowering the overall rhythm and is blending well with the other percussive elements.

Adding Congas

Congas are another percussive element that can add a dynamic and organic feel to your drum tracks. Like bongos, create a separate track for congas to focus on its rhythm. Find conga patterns in loop libraries or create your own using a MIDI controller or plugin. Congas usually have a deeper sound compared to bongos, and they can bring a unique texture to your house drum pattern. When layering congas, make sure they complement the overall groove and not clash with other percussive elements.

Adding Other Percussive Elements

In addition to bongos and congas, there are other percussive elements you can add to your drum patterns, such as shakers, tambourines, handclaps, and cowbells. These instruments bring a more natural and diverse feel to the music, and they can elevate your track to the next level. Layering these instruments can be trickier, so try experimenting with different combinations and volumes to find the sweet spot.

Layering Percussion For A More Complex Rhythm

Layering percussion is an excellent technique to create a more complex and interesting rhythm. You can layer various loops or create your own patterns by merging different percussive elements. Layering can also help to create tension and dynamics in your tracks, making the music more exciting and compelling. When layering, try to keep the different elements in sync with each other and blend them well with the overall groove. In summary, adding and layering percussion can bring a unique and organic feel to your house drum pattern, making it more engaging and danceable.

Arranging Your Drum Pattern

If you’ve already set up your drum pattern, the next step is to arrange it. Arranging is where you take your drum pattern and turn it into a full-fledged song by experimenting with different sections and patterns. Here’s how you can do it:

Building A Basic Arrangement

The first step in arranging your drum pattern is to build a basic arrangement. A basic arrangement typically consists of four sections: an intro, a verse, a chorus, and an outro. Here’s how you can build each section:

  • Intro: The intro is the part of the song that comes before the verse or chorus. It’s usually a short section that sets the tone for the rest of the song. For your drum pattern, you can create a simple beat that gradually builds up to the verse or chorus.
  • Verse: The verse is the main part of the song that tells the story. For your drum pattern, you can create a simple beat that supports the melody or vocals.
  • Chorus: The chorus is the part of the song that’s repeated throughout. It’s usually the catchiest part of the song. For your drum pattern, you can create a more complex beat that adds energy and excitement.
  • Outro: The outro is the part of the song that comes after the chorus. It’s usually a short section that brings the song to a close. For your drum pattern, you can create a simple beat that gradually fades away.

Experimenting With Different Sections And Patterns

Once you’ve built a basic arrangement, you can start experimenting with different sections and patterns to make the song more interesting. Here are some ideas:

  • Breakdown: A breakdown is a section of the song where the drums drop out, leaving other instruments to play. For your drum pattern, you can create a simple beat that gradually fades away, leaving other elements to take over.
  • Fills: Fills are short drum patterns that are used to fill gaps between other patterns. For your drum pattern, you can create different fills to add excitement and variation.
  • Transitions: Transitions are used to connect one section of the song to another. For your drum pattern, you can create a simple beat that gradually builds up or fades away to transition between sections.
  • Bridge: A bridge is a section of the song that serves as a contrast to the verse and chorus. For your drum pattern, you can experiment with different patterns and rhythms to create a unique bridge.
How To Make House Drum Patterns Beginners

Credit: m.youtube.com

Frequently Asked Questions For How To Make House Drum Patterns Beginners

What Is The Easiest Way To Create Drum Tracks?

The easiest way to create drum tracks is by using specialized software programs or drumming apps. Some of them offer pre-built drum patterns, while others allow you to create your own beats by dragging and dropping various elements. Alternatively, you can hire a professional drummer or use drum loops from online libraries.

How Do You Make A House Drum Beat?

To make a house drum beat, start with a kick and snare pattern. Add hi-hats for rhythm and additional percussion elements for flavor. Experiment with different tempos and patterns until you find the one that works for your track. Use a drum machine or digital audio workstation to create and edit the beat.

What Is The Pattern Of House Music?

The pattern of house music is characterized by a 4/4 beat with a hi-hat on the off-beat, and a kick drum on the first and third beats. House music also often includes a bassline, synth stabs or chords, and vocals.

It originated in Chicago in the 1980s and has been a popular electronic music genre ever since.

What Is The First Drum Pattern To Learn?

The first drum pattern to learn is the basic rock beat, commonly known as the 4/4 beat. This pattern consists of hitting the bass drum on counts 1 and 3 and hitting the snare drum on counts 2 and 4.

It is fundamental to many popular music genres.

Conclusion

Creating house drum patterns as a beginner can seem intimidating, but with the right tips, tools, and practice, you can master it in no time. Remember to keep your patterns simple and focus on developing your phrasing and timing skills.

Utilizing a metronome, experimenting with different sounds and patterns, and listening to your favorite tracks for inspiration can all help you develop your own unique style. With enough practice and patience, you can become a skillful house drummer and create your own unique beats that will help define your sound and style.

Categories
Archive

Music Production Computer Requirements

Music production requires a computer with high processing power and memory capacity. To ensure a seamless workflow, music producers must have a computer that can handle the heavy demands of digital audio workstations (DAWs).

Also, the computer must have a fast processor, enough RAM, and sufficient storage to hold all the necessary software and files. Additionally, high-quality audio interfaces and monitors are essential for accurate sound reproduction. Also, with the right setup, music producers can create professional-grade music from the comfort of their own homes.

Related reading: How to Make Piano Music on Computer: Easy Melodic Guide and Music Production Services. For background, see the Wikipedia article on Digital audio workstation.

Moreover, we will explore the computer specifications required for music production and provide tips for building the optimal music production setup.

Importance Of Computer Requirements In Music Production

In addition, the right computer requirements are essential for producing high-quality music. In addition, in music production, the computer is the most important tool you will use to create amazing tracks. You can’t overlook computer requirements in music production. Music production requires a lot of processing power, storage, and memory. Therefore, having the right computer for the job is vital.

Efficiency Boost Through The Right Computer Requirements

Furthermore, by having the right computer requirements, you can improve your music production efficiency. For example, a computer with a powerful processor and enough memory enables quick and smooth running of Digital Audio Workstations (DAWs). This is the software used for music production. This means that you will spend less time on rendering, loading, and exporting files. Having a computer with the right specification invariably enhances your productivity and gives you more time to focus on your creativity.

Key Requirements For Music Production Computers

RequirementMinimum SpecificationRecommend Specification
Processor (CPU)Intel Core i5 or equivalent.Intel Core i7 or better.
RAM8GB16GB or more
Storage (Hard drive)256GB Solid State Drive (SSD)1 TB SSD or more.
DisplayMinimum of 13 inches.15 inches or more.
Graphics card (GPU)Integrated graphics card is sufficient for music production.A dedicated graphics card or an external GPU board is required for professional music production.

Conclusion

Additionally, your music production computer has a significant impact on the quality of your music. Your computer requirements can either significantly boost or hinder your music production efforts. As a result, having a computer with sufficient processing power, memory, storage. A display screen with good resolution will undoubtedly improve your music production and creativity.

Music Production Computer Requirements

Credit: www.logicalincrements.com

Main Components Of A Music Production Pc

Also, a music production computer must have a fast processor, sufficient RAM, a high-quality sound card, storage space, and a reliable interface. However, these components are crucial in running music production software and producing high-quality music.

When it comes to music production, having the right computer can make all the difference. A computer built for music production can enhance your workflow, sound quality and overall experience. Therefore, it is important to have a computer that meets the requirements of a music production studio. Then, there are several components to a music production PC, including the processor, RAM, storage, graphics card and audio interface.

Processor:

Moreover, the processor is the brain of the computer and is responsible for carrying out all of the operations. In short, a computer with a fast processor is essential for music production. Meanwhile, it allows you to run multiple applications at once and process large audio files quickly. AMD and Intel are the two main processor manufacturers on the market. Their latest processors such as AMD Ryzen 7 and Intel i9 are perfect for music production.

Ram:

In addition, RAM (Random Access Memory) is temporary storage where your computer loads data for faster access. Similarly, having enough RAM is essential for running large audio projects with multiple tracks and effects. A minimum of 8GB RAM is required for music production, while 16GB or higher is recommended for professionals.

Storage:

Furthermore, having enough storage space in your computer is crucial in music production as audio files tend to be large. Also, SSD or Solid State Drives are the fastest storage devices and are recommended for music production as they have faster data transfer rates. However, if you are on a budget, HDD or Hard Disk Drives with at least 1TB of storage space will suffice.

Graphics Card:

While graphics card is not of utmost importance for music production, it is still necessary to have one that can support multiple displays to increase productivity. A graphics card will also help in reducing the burden placed on the processor and RAM by some audio plugins and virtual instruments. In addition, it is recommended to use an Nvidia or Radeon card for optimal results.

Audio Interface:

Additionally, an audio interface is an external device that enables you to connect your computer to professional-grade microphones, instruments and studio monitors. It also converts the analog signals to digital signals and vice versa. Investing in a good quality audio interface is essential for achieving high-quality sound recordings. In conclusion, a music production PC should have a fast processor, sufficient RAM, ample storage, a graphics card that supports multiple displays. A good quality audio interface. These are the essential components that make up the best music production computers. Choose your components carefully and make sure they meet the system specifications before making the purchase.

Considerations When Choosing A Music Production Pc

Also, Music production is all about creativity and inspiration. Now, to put your ideas into a digital format, you need the best computer with the highest possible computing power. A music production PC should be able to handle high-end software and hardware without any hindrance. Here are some essential factors that you should consider when buying a music production PC:

Budget

Moreover, investing your money to buy a music production PC requires careful consideration. That way, you can make the most of your investment. The price of a music production PC can vary depending on the specifications you will need for your creative workflow. You do not necessarily require a high-end PC that costs a fortune to get started. However, investing in a slightly higher quality model can lead to long-term cost savings. Music technology advances fast. So choose a PC that balances high-end performance with a sensible budget.

Portability

Many music producers work on their projects while on the go or in different settings. In addition, that’s where portability comes into play. You may want to consider size, weight and battery life when choosing a portable PC. A music production PC with a portable design feature would allow you to work on your project anytime, anywhere without facing any limitations or breaking your bank. You never know when an idea will hit you, and having a portable music production PC can make sure that you’ll capture that inspiration as soon as possible.

Upgradeability

Furthermore, the rig you choose today might not meet your future needs. You’ll want a PC that lets you upgrade the peripherals and hardware when needed. Upgradeability ensures that you do not have to limit your creative endeavors with obsolete technology. A music production PC with an upgradable design offers you the autonomy to upgrade components such as RAM, storage, graphics, and even your processor. Choose a PC that makes it easy to carry out upgrades at a convenient time.

Compatibility With Software for Music Production Computer

Additionally, Digital Audio Workstation (DAW) is heart and soul of the music production world. It’s crucial to ensure the software you are using is compatible with the PC you have purchased. Not all music production PC works seamlessly with every DAW software. Before buying a music production PC, you should verify that it meets the software requirements and is compatible with industry-dominating software like Ableton, Pro Tools, Garageband, and Logic. Compatibility is essential as it avoids any frustrating and time-consuming issues such as system crashes, errors, and bugs.

Also, choosing the right music production PC requires an understanding of your needs, the software, and hardware requirements. We hope this guide has been helpful in highlighting the key aspects that you should consider when choosing the best music production PC. Remember, it’s not only your creativity and talent but also the right tools that come together to create extraordinary music.

Music Production Computer Requirements

Credit: m.youtube.com

Recommended Music Production Pcs For Different Purposes

Music production requires a high-performance computer to handle heavy software and that can balance the demands of processing speed, storage, and memory. Different purposes in music production require different computer specifications. Recommended music production PCs based on these different purposes include Mac Pro, HP ZBook Studio x360, and Asus ROG Strix G15.

Music production has evolved over the years, and today, we have a wide range of software and hardware that can enable us to create incredible music. However, not all computers are suitable for music production. In this section, we’ll look at the best music production computers for different purposes. Whether you’re a beginner, a professional studio owner, or a musician on the go, there’s a PC that’s perfect for your needs.

Best Pcs For Home Studios for Music Production Computer

If you’re just starting with music production and have a limited budget, then a PC for home studios should be your go-to. These PCs are perfect for recording demos, creating beats, and editing music without breaking the bank. Some of the best PCs for home studios include:

  • HP Envy Desktop – This PC is affordable and comes with an Intel Core i5 processor and a 1TB hard drive. It’s perfect for beginners and delivers great performance for music production.
  • Dell XPS Desktop – This PC is a bit pricier than the HP Envy, but it’s more powerful. It comes with an Intel Core i7 processor, 16GB RAM, and a 1TB SSD. This PC is perfect for those who require a little bit more processing power.

Top Laptops For Music Production On The Go

Musicians are always on the go, and if you’re one of them, you’ll need a laptop that’s powerful enough to handle your needs. These laptops are lightweight, portable, and come equipped with high-performance processors that can easily handle music production tasks. Some of the top laptops for music production on the go include:

  • MacBook Pro – Apple’s MacBook Pro is the top choice for most musicians. It’s powerful, lightweight, and comes equipped with a high-resolution display that’s perfect for editing music. The MacBook Pro features an Intel Core i7 processor and up to 16GB RAM. This makes it perfect for professional music producers.
  • Dell XPS 13 – The Dell XPS 13 is another great option for music producers on the go. It’s lightweight, portable, and features a powerful Intel Core i7 processor. The laptop also has a long battery life, making it ideal for long sessions.

Powerful Pcs For Professional Studios for Music Production Computer

If you own a professional music studio, you need a high-performance PC that can handle a wide range of tasks. These PCs are expensive, but they’re worth the investment. They come equipped with high-end processors, large amounts of RAM, and storage space. Some of the most powerful PCs for professional studios include:

BrandModelProcessorRAMStorage
AlienwareAurora R7Intel Core i716GB2TB HDD + 128GB SSD
AppleiMac ProIntel Xeon W32GB1TB SSD
HPZ2 Mini G4Intel Core i932GB512GB NVMe SSD

Investing in a high-performance PC for your professional studio will ensure that you have a powerful workstation that can handle all your music production needs.

Tips For Optimizing Music Production Pcs

Optimizing your music production PC is vital in ensuring a smooth workflow. Key factors to consider include selecting the right CPU and RAM, investing in a good quality audio interface, and optimizing your operating system for audio production.

Music production is a complex process that requires a computer with specific hardware and software. While a high-end computer is not always necessary to create music, optimizing your computer’s settings and regular maintenance can help maximize its performance and make the music production process more efficient. In this section, we will be discussing tips that can help you optimize your music production PC.

Customizing Settings To Maximize Performance for Music Production Computer

Customizing your computer’s settings can help optimize performance and make the music production process smoother. Here are some tips for customizing your settings:

  1. Bypass unnecessary applications and services – starting with windows startup programs, disable all the applications, and services which are not required for the music production work and running in the background that you don’t need. Meanwhile, they are taking space in RAM and processing power.
  2. Adjust the sound card settings – Optimize them for music production. Always use the latest stable drivers from the manufacturer’s website.
  3. Adjust the power settings – When you are working on music production, always keep the laptop or PC in high-performance mode, which positively impacts the CPU frequency. That improves the overall performance.
  4. Allocate more RAM to your DAW software – Choose DAW software that can take advantage of high RAM. If you have 8GB RAM, allocate at least 4GB to your DAW software.

Regular Maintenance To Keep Pcs Running Smoothly

Regular maintenance of a music production PC can prevent system crashes, improve performance, and extend the lifespan of the computer. Here are some maintenance tips for music production PCs:

  • Clear temporary files – Clear all temporary files from your system periodically. Meanwhile, they can accumulate over time and consume a considerable amount of memory.
  • Clean up the registry – Use a trusted and efficient registry cleaner to remove registry errors, as they can cause instability and affect performance.
  • Keep the hard disk clean – Always try to maintain enough storage space on your hard disk and use a hard disk cleaning tool to keep it in good condition.
  • Defragment your hard drive – Defragmentation is a process that puts all the separated files together, improves the read-write speed, and enhances overall performance.
  • Scan for malware and viruses – Use updated anti-virus software and scan your system periodically to detect and remove malware.

By following these tips, you can optimize your music production PC’s performance and ensure it runs efficiently. Consistent maintenance and customization of settings will help maximize your computer’s resources and make music production a smooth and enjoyable process.

Music Production Computer Requirements

Credit: www.starline.org.uk

Future Developments In Music Production Computer Requirements

The evolution of music production has led to higher computer requirements. As technology advances, music producers require computers with high-performance CPUs, graphics cards, and ample storage space for their project files. Keeping up with future developments in music production will require being mindful of these computer requirements.

As technology continues to advance at an unprecedented rate, music producers and sound engineers alike are constantly looking for more efficient and advanced tools to enhance their craft. In today’s era, music production relies heavily on technology, and having the right computer is paramount.

Impact Of New Technologies On Music Production

With rapid advancements in hardware and software technology, the music production landscape has significantly changed. The increase in processing power, coupled with advancements in cloud computing, have revolutionized how music is produced and distributed. This has brought about more innovative and advanced music production tools, which have significantly impacted music production. There is a greater need for audio software applications that are user-friendly and can efficiently integrate with Digital Audio Workstations (DAW). The extensive use of virtual instruments, effects plugins, and samples, among others, has led to an increased need and demand for efficient and powerful processors.

What The Future Might Hold For Music Producers

Based on current trends, the future of music production is expected to be more immersive and interactive. Virtual Reality (VR) and Augmented Reality (AR) let producers create immersive experiences. Listeners can engage with the music in a more personal way. Furthermore, AI and machine learning are also expected to change music production significantly. Future producers will need to keep up with changing technology and understand AI. They will also need to keep adapting.

Conclusion

In conclusion, as technology continues to develop at breakneck speeds, it is essential to keep in mind the impact it has on music production. All major changes in hardware and software technologies are expected to have a significant influence on the music production sector for the next few years. Therefore, in order to keep up with these changes, music producers and sound engineers need to have access to future-proof and high-performance computing solutions.

Frequently Asked Questions On Music Production Computer Requirements

What Computer Is Needed For Music Production?

For music production, a computer with high processing power and sufficient RAM is necessary. You must consider your budget and the requirements of your preferred music production software. A computer with solid-state drives and a good sound card is recommended.

A dedicated graphics card is not necessary. Overall, a computer with good specifications can handle music production efficiently.

Do You Need A Strong Pc For Music Production?

A strong PC is recommended for music production as it requires a lot of processing power. A high-performing CPU, sufficient RAM, and dedicated graphics card are key components. However, the exact specifications of your PC will depend on the complexity of your projects and the software you use.

How Much Ram Does A Computer Need For Music Production?

A computer needs at least 8GB RAM for music production. However, for optimum performance and seamless workflow, a minimum of 16GB is recommended. This will allow for smooth handling of multiple tracks, virtual instruments, plugins, and effects.

Is I5 Or I7 Better For Music Production?

For music production, i7 is better than i5. I7 processors have more cores and high clock speeds, making them better equipped to handle complex music software and plugins. Its Hyper-Threading technology and bigger cache size are ideal for multitrack recording and mixing.

Conclusion

It is important for music producers to invest in a high-performance computer that meets their specific needs. The right computer will allow you to work more efficiently and produce high-quality music. From the processor to the RAM and storage, there are several components to consider when selecting a music production computer.

By taking the time to carefully assess your requirements and budget, you can find a computer that meets all your needs and helps you achieve your music production goals. Remember to prioritize performance over aesthetics and choose a computer that can keep up with your creative demands.

Categories
Archive

How To Balance Your Mix For The Dance Floor

To balance your mix for the dance floor, pay attention to levels and EQ. Start by adjusting the volume of each track and then use EQ to carve out space for each element in the mix.

Also, creating a balanced mix for the dance floor is crucial for DJs and producers looking to keep the crowd engaged and dancing all night long. While there is no one-size-fits-all approach to mixing, there are some general guidelines to follow that can help achieve a balanced sound.

Related reading: How To Mix Dance Drums and Know The History Of Modern Dance Music. For background, see the Wikipedia article on Electronic dance music.

Moreover, one of the key elements to consider is the level of each track. A mix that is too loud or too quiet can disengage the crowd. So it’s important to find the sweet spot. Additionally, using EQ can help create space for each element to sit in the mix and prevent clashing frequencies. With some careful attention to levels and EQ, you can create a balanced mix that’s sure to get the dance floor moving.

How To Balance Your Mix For The Dance Floor

Credit: www.youtube.com

Understand The Basics

In addition, if you’re a DJ, you know that producing a well-balanced mix that gets people moving on the dance floor is the ultimate goal of any live set. To achieve this, understanding the basics of gain staging, equalization, and panning is crucial.

Gain Staging

Furthermore, the process of gain staging involves optimizing the levels of each track in your mix to prevent distortion and maintain clarity. Start by setting the peak levels of each track to -6 dB, leaving ample headroom for further processing. Once you’re happy with the balance of your mix, use a limiter to prevent any clipping or distortion when boosting the overall volume.

Equalization

Additionally, equalization is the process of adjusting the frequency balance of each track to create a cohesive mix. Use a spectrum analyzer to identify any frequency clashes and adjust accordingly by cutting or boosting frequencies using a parametric EQ. However, be careful not to over-correct, as this can strip the mix of its personality.

Panning

Also, panning refers to the distribution of stereo audio signals across the left and right channels of the mix. This is instrumental in creating depth and separation between different elements. Start by panning bass and kick drums to the center, and distribute other instruments evenly across the stereo field, leaving the vocal in the center for clarity.

Moreover, by understanding these basics of gain staging, equalization, and panning, you can produce a well-balanced mix that’s sure to keep the dance floor packed.

Focusing On The Low End for Dance Floor

In addition, to balance your mix for the dance floor, focusing on the low end is crucial. The bass and kick drum should be prominent, but not overwhelming, while the melody and vocals should still be clear. Use EQ and compression to achieve a balanced mix that gets the crowd moving.

When it comes to crafting a compelling dance floor mix that keeps the party going all night long, focusing on the low end is crucial. Furthermore, without proper attention to the bass and kick elements of your track, your mix can easily fall flat and fail to resonate with your audience. Here are a few key strategies to consider when working on your low-end mix.

Finding The Right Kick And Bass Balance

Additionally, to achieve a well-balanced low-end mix, it’s essential to carefully consider the relationship between your kick and bass elements. Ultimately, you want to strike a balance that allows each element to shine without overpowering the other. One effective way to accomplish this is to use EQ to cut any overlapping frequencies between the two elements. This allows each to occupy its own unique space in the mix.

Using Sidechain Compression for Dance Floor

Another valuable tool for balancing your low-end mix is sidechain compression. This technique involves using a compressor to automatically reduce the volume of one track when another plays simultaneously. In the context of a dance floor mix, you might use this technique to have the bass drop out slightly when a kick hits. Also, this creates a punchy and dynamic groove that keeps the energy flowing.

Getting Creative With Sub Bass for Dance Floor

Finally, don’t be afraid to get creative with your sub bass. While the fundamental bass element of your track provides the core foundation of the low end. Moreover, this adds interesting layers of sub bass can help keep things fresh and engaging for your listeners. Consider playing with different textures and rhythms to create complexity and movement in your low end, ultimately adding depth and dimension to your overall mix. Overall, a well-crafted low-end mix is essential for keeping the dance floor moving all night long. With the right balance of kick and bass, strategic use of sidechain compression. A little creativity when it comes to sub bass, you’ll be well on your way to crafting a compelling and engaging dance floor mix that keeps the party going.

Creating Space With Other Elements for Dance Floor

Creating space for other elements is crucial when it comes to balancing a mix for the dance floor. It involves using various techniques that help each element stay clear and distinct from one another. In addition, let’s take a look at some of the most effective ways to create space for other elements in your mix.

Using Reverb And Delay for Dance Floor

Furthermore, one effective way to create space for other elements in the mix is to use reverb and delay. Reverb can help create a sense of space and depth, and delay can add a sense of movement to the sound. Using these effects can help separate various elements in the mix and create a more cohesive, spacious sound.

Smart Automation

Smart automation can also help create space for other elements in the mix. Additionally, you can use it to control the levels of different elements in the mix. This makes sure they don’t clutter one another. For example, if you have a synth and a vocal track playing at the same time, you can use automation to lower the volume of the synth during the vocal parts and vice versa. This creates more space for each element to shine in the mix.

Chorus And Flanger

Chorus and flanger effects can also be effective in creating space for other elements in the mix. Also, these effects can help create a sense of width and depth to the sound. This can help separate various elements in the mix. They can also add a sense of movement and texture to the sound, making the mix more interesting and engaging.

Moreover, by using these techniques, you can effectively create space for other elements in your mix and balance it for the dance floor. Remember to experiment and play around with different techniques to find what works best for your mix.

Keeping The Energy Moving for Dance Floor

When it comes to keeping the energy moving on the dance floor, it’s all about striking the right balance. In addition, as a DJ, your primary goal is to keep the crowd engaged and dancing. That means knowing how to transition between tracks, use effects, and create a seamless mix that builds momentum as the night goes on.

Building Momentum With Fx for Dance Floor

Furthermore, using effects like filters, echoes, and reverbs can help to build tension and energy in your mix. For example, you might use a filter sweep to gradually cut the bass out of one track while simultaneously introducing it in the next. This creates a smooth transition that adds excitement to the dance floor. Flangers and phasers add movement and rhythm to your mix. They keep the energy flowing from one track to the next.

The Importance Of Transitions

Additionally, Transitions are essential to a successful mix, as they help to maintain the momentum and energy on the dance floor. One of the most effective techniques for transitioning between tracks is beatmatching. This involves syncing the tempo and rhythm of two tracks so that they can be mixed together seamlessly. Other techniques include using loops, drop-ins, and drop-outs to create a smooth transition from one track to the next.

Using Risers And Impacts for Dance Floor

Risers and impacts are another great way to keep the energy moving on the dance floor. Risers are typically long, sweeping sounds that gradually build in intensity and volume, while impacts are short, sharp bursts of sound that create a sense of anticipation and excitement. Also, by incorporating these elements into your mix, you can create a sense of drama and tension that keeps the crowd engaged and dancing all night long.

Overall, balancing your mix for the dance floor requires a combination of technical skill, musical knowledge. A good sense of timing. Use effects and transitions to keep the energy moving. Your mix will keep the crowd engaged and coming back for more.

Reference Tracks And Analysis

To balance your mix for the dance floor, using reference tracks and analysis can be helpful. By comparing your own mix with popular tracks in the same genre, you can adjust the levels and frequencies to create an optimal sound for dancing.

Finding The Right Reference Tracks for Dance Floor

Good reference tracks give you a benchmark for how your mix should sound on the dance floor. But, how do you choose them? Start by selecting music that is similar to your desired sound, and has been professionally mixed and mastered. You want tracks that are high-quality and have been played on many sound systems, preferably in a live environment. Don’t be afraid to ask professional DJs or sound engineers for recommendations, they can be a valuable source of information.

Analyzing Your Mix For Flaws for Dance Floor

Once you have your reference tracks, it’s time to analyze your mix. Listen critically for any flaws, such as muddiness, harshness, or imbalances in the frequency spectrum. Use visual aids such as spectrum analyzers or EQ plug-ins to pinpoint specific problem areas. Pay attention to the overall balance of your mix. This ensures that each instrument or element can be heard clearly without overpowering others. Remember, the goal is to create a cohesive sound that is pleasing to the ear and keeps people on the dance floor.

Adjusting For Different Soundsystems for Dance Floor

Different sound systems can affect the way your mix sounds. For example, a car stereo or home theater system might have different frequency responses than a club system. To ensure that your mix sounds great on any system, test it on as many different sound systems as possible. Make notes of any adjustments you need to make for specific systems, such as boosting the bass or cutting the treble. Be aware that some adjustments might be necessary, but you don’t want to compromise the integrity of your mix. With a little bit of practice and experimentation, you’ll be able to balance your mix for any soundsystem and keep the dance floor moving all night long.

The Importance Of Collaboration

If you’re a mixing and mastering engineer, you already know that the process of balancing a mix is a collaborative effort. The dance floor is a constantly evolving environment. It requires a mix which reflects the energy and preferences of the crowd. A mix which fails to engage the audience and work with DJs and artists is going to be forgettable, at best.

Working With Djs And Artists

Collaborating with DJs and artists is essential to ensure that your mix appeals to the audience. Understanding their musical preferences can help you to create a mix that resonates with the crowd. DJs are an invaluable resource, and they can provide valuable feedback, not just on their preferred tracks but also on the right mixing techniques.

The Role Of Your Audience

As a mixing and mastering engineer, you need to understand the role of the audience in the mix. The crowd is everything, and your mix should keep them engaged and entertained. The audience will give you cues on what works and what doesn’t. Pay attention to their response and adjust the mix to ensure that you keep them engaged.

Responding To Feedback

Feedback is an essential part of the mix balancing process, and it’s important to respond to it quickly. The feedback will come from DJs, artists, and the crowd itself. Responding effectively requires an open mind, a willingness to adjust the mix based on the feedback. A solid understanding of the technical aspects of mixing.

Quick Tips For Balancing Your Mix For The Dance Floor
1Collaborate with DJs and artists to ensure your mix resonates with the audience.
2Pay attention to the role of the audience in the mix and adjust accordingly.
3Respond effectively to feedback from DJs, artists, and the crowd itself.
4Stay up-to-date with the latest mixing techniques and trends.

Remember, balancing your mix for the dance floor requires a constant process of collaboration and feedback. But when done right, it can be an incredibly rewarding experience for both the engineer and the audience.

Mixing Techniques For Specific Genres

Learn essential mixing techniques for specific genres to perfectly balance your mix for the dance floor. Utilize effective EQ and compression settings, blend different layers of instruments, and boost energy levels with proper fx use.

Mixing is an art that requires the right balance of instruments, effects and volume. It is an essential skill for every DJ and producer to make sure that their tracks sound perfect on the dance floor. To achieve this, they use specific techniques for each genre. House, techno, hip hop, R&B, drum and bass and dubstep all differ. In this post, we will reveal some of the best mixing techniques that you can use to balance your mix for the dance floor.

House And Techno

Mixing house and techno tracks involves creating a smooth transition between the tracks without interrupting the beat. The first technique is to match the beats effectively by adjusting the tempo and using beatmatching tools. Also, EQing the tracks can help to remove unnecessary frequencies and create more room for the bassline. To make the mix flow seamlessly, DJs often use a technique called “mixing in key” to create harmonic blends between tracks.

Hip Hop And Rb

Hip hop and R&B tracks may have a different tempo than other genres. But the mixing techniques used are the same. One of the first techniques is to adjust the levels of each track to create a balanced and consistent sound. DJs often use scratching and crossfading to create smooth transitions between songs. Additionally, using effects like reverb, delay, and filters can help to add depth and character to the mix.

Drum And Bass And Dubstep

Mixing drum and bass and dubstep tracks requires a different approach than other genres. These genres have fast tempos and complex rhythms that can overwhelm the mix. DJs often use EQing techniques to remove the unwanted frequencies and create more space for the bass and drums. Also, they use techniques like phase shifting and delay to create trippy and mind-bending effects that add depth to the mix. In conclusion, balancing your mix for the dance floor involves using specific techniques for each genre. Whether it’s house and techno, hip hop and R&B, or drum and bass and dubstep, you need to know the right tools and techniques to achieve a perfect mix. By following the techniques outlined in this post, you will be able to create a mix that will keep the dance floor moving all night long.

Continuous Learning And Improvement

When it comes to DJing, the learning never stops. Continuous learning and improvement are key to staying relevant and successful in today’s ever-changing music industry. Here are a few tips to help you develop your ear and stay current with technology:

Developing Your Ear

One of the most important skills for a DJ is having a good ear. This means being able to identify different frequencies, timbres, and pitches in a song. By developing your ear, you’ll be able to hear the subtle differences between sounds and make better mixing decisions. Here are some ways to train your ear:

  • Practice beatmatching using your ears instead of relying on sync buttons.
  • Listen to a wide variety of music genres to expand your music knowledge.
  • Use a high-quality pair of headphones to hear every detail in a track.
  • Attend live DJ performances to observe other DJs’ techniques and styles.

Staying Up To Date With Technology

The music industry is constantly evolving, and so is technology. As a DJ, it’s important to stay up to date with the latest trends and tools to keep your skills sharp. Here’s how to stay current with technology:

  • Follow industry-leading blogs and websites to stay informed about the latest DJ equipment and software updates.
  • Try out new tools and software to expand your skillset and mix creatively.
  • Engage with other DJs in online communities to keep track of new tools and techniques.
  • Invest in high-quality equipment to ensure your mixes sound professional.

Studying From Experts

Learning from experienced DJs who have already navigated the music industry can be incredibly valuable. By studying from experts, you’ll gain new insights and techniques to apply to your own DJing. Here are a few ways to learn from experts:

  • Attend DJ workshops and conferences to learn from established DJs and industry professionals.
  • Watch online tutorials and courses from experienced DJs and producers.
  • Mentor with an experienced DJ in your local area.
  • Take feedback from your peers, this will help you improve even further.

Frequently Asked Questions Of How To Balance Your Mix For The Dance Floor

How Do You Get A Well Balanced Mix?

To achieve a well balanced mix, follow these steps: 1. Start by setting the levels of all the tracks correctly. 2. Use EQ to cut problem frequencies and boost desirable ones. 3. Use compression to even out the levels of the tracks.

4. Use reverb and delay to give depth and space to the mix. 5. Pan tracks left and right to create stereo width.

What Does A Balanced Mix Look Like?

A balanced mix should have a variety of different content types, including text, images, and videos. It should also include a mix of informative and entertaining content, as well as content targeted towards different stages of the buyer’s journey. The goal is to keep your audience engaged and interested in your brand without overwhelming them with too much of one type of content.

How Do You Fix Tonal Balance In A Mix?

To fix tonal balance in a mix, use EQ to balance the levels between the bass, mid, and treble frequencies. Start by adjusting the low frequencies, followed by the mid and high frequencies. Use frequency analysis tools to help identify areas that need adjusting.

Continuously monitor the changes as you make them to ensure a well-balanced mix.

How Do You Balance Instruments In A Mix?

Balancing instruments in a mix requires careful attention to volume levels, panning, EQ, compression, and effects. Adjusting each element individually and in relation to the others can create a cohesive and dynamic sound. Practice and experimentation are necessary for success.

Conclusion

To sum up, balancing a mix for the dance floor requires a combination of technical know-how and creative intuition. By taking into account the key elements of volume, EQ, panning, dynamics, and effects, you can craft a mix that not only sounds great on its own. But also gets feet moving on the dance floor.

Remember to experiment and trust your instincts, and keep in mind the needs and preferences of your audience. With practice and patience, you can become a master at mixing for the dance floor.

Categories
Archive

Best Tools Remote Music Collaboration

Remote music collaboration can be achieved through tools such as Soundtrap and BandLab. Soundtrap offers a suite of features for music production, while BandLab provides a comprehensive platform that encompasses music creation, collaboration, and distribution.

Also, as the world becomes more interconnected and remote work becomes increasingly common, musicians are turning to online tools to collaborate, create, and record music with other artists from around the world. Whether you are a songwriter, a producer, or a self-contained artist, there are a range of tools available to help you collaborate with others remotely.

Related reading: Music Theory for Producers: The Complete Guide Hub and Music Business, Distribution and Royalties: The Complete Guide. For background, see the Wikipedia article on Digital audio workstation.

These tools enable multiple contributors to work on a track simultaneously, or to share files and ideas to help create new music together. Moreover, we will discuss some of the best tools available for remote music collaboration and highlight their key features.

Best Tools Remote Music Collaboration

Credit: www.connollymusic.com

Online Daws for Remote Music Collaboration

In addition, Online DAWs prove to be the best tools for remote music collaboration. They provide a platform where artists can work together from different locations in real-time. These tools offer a wide range of features, from live recording to editing and mixing. This makes it easier for musicians to collaborate on music projects remotely.

Furthermore, in today’s digital age, music collaboration can happen irrespective of geographical barriers. With Online Digital Audio Workstations (DAWs), musicians can now collaborate remotely without any limitations. Online DAWs enable musicians to work on a project in real-time, edit each other’s work, and communicate effectively while working on a track. These cloud-based platforms have become increasingly popular, especially in the wake of the COVID-19 pandemic. The following section highlights cloud-based platforms and real-time collaboration features that make online DAWs the most preferred tools for remote music collaborations.

Cloud-based Platforms for Remote Music Collaboration

Additionally, cloud-based platforms for music production have changed the way musicians collaborate. They allow handpicked collaborators to access a project from anywhere around the world, all you need is internet connectivity. This flexibility has also reduced the cost of producing music as recording studios become less necessary. Notable online DAWs include Bandlab, Ohm Studio, Splice Studio, and Amped Studio, amongst others.

Real-time Collaboration Features

Also, real-time collaboration makes online DAWs the most preferred music collaboration tools worldwide. These features enable real-time transmission of audio and MIDI data between collaborators in different locations. With this feature, multiple users can work on a project simultaneously and communicate efficiently. BandLab, for instance, has a tool that enables musicians to invite collaborators to work on a project. Collaborators can edit the same project, listen to tracks, and communicate with each other in real-time. In conclusion, the beauty of being a musician is collaborating with other talented musicians no matter the location. Online DAWs have made that possible, making it easier to produce music. With more advancements in music production technology, we can expect even more innovative tools to emerge.

Best Tools Remote Music Collaboration

Credit: mixedinkey.com

Virtual Studio Plugins for Remote Music Collaboration

Moreover, virtual studio plugins are essential tools for remote music collaboration. With the best plugins available, you can work with other musicians from any location in the world. This provides seamless audio quality and a smooth collaboration experience. These tools provide everything you need to make incredible music remotely.

In addition, virtual Studio Plugins are a boon for remote music collaboration. These plugins make it easier for artists to collaborate, share, and mix tracks remotely. One of the most popular types of plugins for virtual studio collaborations is the Live Recording & Mixing Plugins. These plugins offer real-time recording and mixing capabilities that allow artists to work on tracks simultaneously. In this section, we will discuss some of the best Live Recording & Mixing Plugins available for remote music collaboration.

Live Recording & Mixing Plugins for Remote Music Collaboration

Furthermore, Live Recording & Mixing Plugins are essential for real-time collaboration and make remote recording sessions a breeze. Here are some of the most popular plugins that allow artists to record and mix tracks as if they were in the same room.

Plugin NameDescription
SoundGrid StudioAllows real-time processing and streaming of audio between different DAWs, enabling artists to collaborate remotely.
Ohm StudioOffers remote collaboration capabilities and allows for real-time editing, recording, and mixing of tracks.
ReaStreamAllows audio to be streamed between different applications and DAWs in real-time via ReWire or VST3 plugins.

Communication Tools for Remote Music Collaboration

Additionally, effective communication is crucial for remote music collaboration. Artists need to communicate with each other clearly and efficiently to ensure the best results. Here are some of the most useful communication tools for remote music collaboration.

  • Slack: A team messaging app that enables users to chat, share files, and collaborate in real-time.
  • Zoom: A video conferencing tool that allows multiple users to connect and collaborate in real-time.
  • Discord: A chat and voice app that allows users to create private channels and chat privately with other team members.

Virtual Studio Plugins make it possible for artists to collaborate and create music together despite their geographic locations. Live Recording & Mixing Plugins enable real-time recording and mixing, while Communication Tools allow for clear and efficient communication between team members. Furthermore, by leveraging these tools, artists can produce high-quality music remotely and enjoy the creative process with ease.

Project Management Tools for Remote Music Collaboration

Remote music collaboration requires project management tools that provide seamless communication, real-time updates, and task assignment options. Some of the best tools for remote music collaboration include Asana, Trello, Slack, Basecamp, and Monday. com. These tools increase remote collaboration productivity by streamlining communication channels and minimizing confusion among team members.

Task & Project Assignments for Remote Music Collaboration

When it comes to remote music collaboration, task and project assignments play a crucial role in ensuring efficient project management. Assigning tasks and monitoring progress can be challenging when working remotely, but fortunately, there are several tools that can make this process easier. Trello is a popular project management tool that allows users to create boards, lists, and cards to organize tasks. Basecamp is another useful tool that offers automated check-ins and progress updates. Asana offers a variety of project templates, making it easy to get started with task and project assignments.

File Sharing & Version Control for Remote Music Collaboration

File sharing and version control are other essential components of remote music collaboration. When working on a project from a remote location, the ability to share files easily and securely is crucial. Google Drive is a popular file-sharing tool that provides ample space for creatives to collaborate on projects. Dropbox is another file-sharing tool that offers version control, allowing multiple users to access and edit files simultaneously. GitHub is a tool that is commonly used by developers, but it can also be useful for musicians who want to track changes to their projects over time.

In conclusion, project management tools that offer task and project assignments, along with file-sharing capabilities and version control, can significantly improve remote music collaboration. By using these tools, remote teams can better collaborate and keep every team member on the same page, reducing the risk of miscommunication and misunderstandings.

Video Conferencing Platforms

Video conferencing platforms are necessary for remote music collaboration. There are several tools available such as Zoom, Teams, and Skype that can help musicians to perform, record, and share their music with each other in real-time.

In the wake of COVID-19, many musicians have shifted to remote collaboration. Thankfully, technology has made it possible for musicians to work together regardless of their geographical location. Video conferencing platforms provide musicians with the option to share ideas, collaborate, and even perform together, all while being in different places. In this article, we will discuss the best tools for remote music collaboration with a focus on video conferencing platforms.

High-quality Video & Audio Features

One important feature that musicians should look for in video conferencing platforms is high-quality video and audio. The platform should offer options for the best video quality possible with minimum lag and delay. The audio should also be clear to ensure that musicians can communicate, perform, and record with ease. Some of the most popular video conferencing platforms that offer high-quality video and audio include:

  • Zoom: Offers high-definition video and audio support for up to 100 participants in a single meeting.
  • Skype: Offers HD video and high-fidelity audio for up to 50 participants in a single meeting.
  • Google Meet: Offers up to 720p HD video and high-quality audio for up to 100 participants in a single meeting.

Screen Sharing Capabilities

Another important feature to look for in video conferencing platforms for music collaboration is the ability to share screens. This feature is essential for musicians to share their work, collaborate on songwriting, and even provide feedback to each other. Some of the most popular video conferencing platforms that offer screen sharing capabilities include:

  • Zoom: Offers screen sharing options to allow users to share anything from their computer, including music files, audio recordings and software.
  • Google Meet: Offers an easy to use screen sharing feature for music collaboration sessions.
  • Skype: Provides screen sharing and file sharing options for up to ten participants.

Collaborating remotely can be challenging for musicians, but with the right video conferencing platform, it is possible. These tools offer the opportunity to share ideas, create music and perform together seamlessly. With the above features, musicians can expect a more productive and efficient remote collaboration experience.

Collaborative Playlists

Collaborative playlists are an excellent tool for remote music collaboration, allowing multiple musicians to share and create playlists together in real-time. These tools offer an intuitive interface for remote collaboration and enable artists to work together despite physical distance.

Collaborative playlists are a great way for musicians to work together to create music, no matter where they are in the world. With the right tools, you can easily share ideas, collaborate on songs, and make sure that everyone has a say in the final product. Here are some of the best tools for remote music collaboration with a focus on collaborative playlists.

Real-time Additions & Edits

One of the biggest advantages of collaborative playlists is that they allow for real-time additions and edits. With tools like Spotify and Apple Music, multiple users can access the same playlist and add new songs or remove old ones in real-time. This means that everyone can contribute to the playlist, even if they are not working on the music itself. And with the ability to see who added what, it’s easy to keep track of everyone’s contributions.

Social Sharing Features

In addition to real-time additions and edits, collaborative playlists also come with social sharing features. This allows musicians to share their playlists on social media, email, or messaging apps, making it easy to collaborate with other artists around the world. With tools like Soundsgood, users can even share playlists across different streaming platforms like Spotify and Apple Music, giving them even more flexibility when it comes to remote collaboration. Overall, collaborative playlists are a powerful tool for remote music collaboration. With real-time additions and edits, as well as social sharing features, musicians can easily work together to create great music no matter where they are in the world. So if you’re looking to collaborate with other artists remotely, make sure to give these tools a try.

Best Tools Remote Music Collaboration

Credit: www.amuse.io

Cloud Storage Solutions

Cloud storage solutions have become indispensable for remote music collaboration. The best tools available in the market provide ample storage space with seamless accessibility, enabling musicians to share and work on their projects from anywhere in the world.

One of the significant challenges faced by remote music collaborators is the ability to store, edit, and share large music files seamlessly. In the past, collaborators used to store files locally, which was cumbersome and limiting. However, with the growth of cloud storage solutions, remote music collaboration has become much more efficient and effective. In this section, we will discuss the benefits of using cloud storage solutions for remote music collaborations.

Data Security & Privacy Measures

When it comes to remote music collaborations, data security and privacy are crucial. Fortunately, cloud storage solutions provide robust security measures to protect your music files from unauthorized access. Most cloud storage solutions encrypt data during transfer and storage, meaning no one can access your music files without proper authorization. Additionally, cloud storage solutions employ various authentication methods, including two-factor authentication, to prevent the breach of your music files.

Easy Integration With Other Tools

Cloud storage solutions provide easy integration with other music collaboration tools, making remote collaborations smoother and more effective. For instance, most cloud storage solutions integrate with popular audio editing software such as Ableton Live and Pro Tools, enabling seamless file sharing and collaboration. Moreover, cloud storage solutions also integrate with communication tools like Skype and Zoom, allowing collaborators to communicate and collaborate effectively in real-time.

Conclusion

In conclusion, cloud storage solutions are an essential part of modern remote music collaborations. They provide seamless storage, sharing, and editing of music files, ensuring that remote collaborators can work together efficiently and effectively. With robust security and privacy measures, easy integration with other tools, remote music collaborations are becoming the norm, and it’s no surprise that more musicians are embracing this trend.

Productivity & Communication Tools

Remote music collaboration demands seamless communication and efficient productivity. The absence of physical interaction requires creators to use web-based tools that enable frictionless collaboration. Here are some great productivity & communication tools for remote music collaboration. The following tools are designed to make remote music collaboration efficient and more productive for creators working from different locations:

Messaging & Chatting Applications for Remote Music Collaboration

  • Slack – With Slack, communication is easy. You can organize conversations into channels, send direct messages, and search for specific conversations. The app is ideal for group discussions and smooth messaging.
  • Microsoft Teams – Microsoft Teams, the go-to messaging & chatting application for music collaborations, offers text messaging, video calls, and file sharing functionalities. It also integrates with other Microsoft tools, such as SharePoint and OneDrive.
  • Discord – This application offers low-latency voice chat, text, and video chat. It’s popular among gamers but has been embraced by musicians and creators who need to communicate quickly and flawlessly.

Shared Calendars & To-do Lists

  • Google Calendar – Google Calendar is widely used in remote music collaboration. It enables work associates to coordinate schedules, track deadlines, and schedule virtual meetings. The app supports integrations with Zoom, hangouts, and Microsoft Teams.
  • Trello – Trello helps remote teams to manage projects with ease by using agile cards, lists, and boards. Users can organize projects, set deadlines, and track progress in real-time.
  • Asana – Asana is a task and project management tool that supports communication and collaboration across teams working remotely. The tool lets collaboratoors track their assignments, create to-do lists, and attach documents and links in one convenient place

Mobile Apps For Music Collaboration

Mobile apps provide the best tools for remote music collaboration. Musicians can easily collaborate on different devices and platforms by using apps such as BandLab, Splice, and Soundtrap.

As remote work becomes more prevalent, musicians also need to adapt to new ways to collaborate in producing music. One practical solution to ensure seamless music collaboration is to use mobile apps. Mobile apps have cross-platform accessibility, in-app music editing and sharing, and are user-friendly, making it easier for individuals or groups to create music, despite being in different parts of the world.

Cross-platform Accessibility

Mobile apps for music collaboration are designed to work on different platforms such as iOS, Android, and Windows. This means that musicians can use the same app regardless of the device they are using, a convenience that is beneficial when collaborating. Apps such as BandLab, Splice, and SoundTrap are some examples of cross-platform collaboration tools that musicians can use. By having cross-platform accessibility, musicians can focus on creating music rather than worrying about compatibility issues.

In-app Music Editing & Sharing

Apart from cross-platform accessibility, mobile apps for music collaboration provide in-app music editing and sharing features to enhance the music-making process. With in-app editing, musicians can adjust and make changes to sound levels, pace, and tempo. In-app sharing allows users to easily share their work without having to leave the app. This simplifies the collaboration process, as all members can access and work on the same project simultaneously. Some popular mobile apps that excel in in-app editing and sharing features include GarageBand, Pro Tools, and Cubase. Overall, Mobile apps for music collaboration continue to shape how musicians create and share their work globally. By embracing these apps, musicians can continue collaborating while producing high-quality and seamless music projects.

Frequently Asked Questions On Best Tools Remote Music Collaboration

How Do You Collaborate With Musicians Online?

Collaborating with musicians online can be done through various methods such as video conferencing, file sharing platforms, and communication apps. Online platforms like Splice, Soundtrap, and BandLab are great for remote collaboration. It’s important to establish clear communication, set expectations, and maintain consistent feedback to achieve a successful collaboration.

Is There An App For Musicians To Play Together?

Yes, there are several apps available for musicians to play together such as JamKazam, Jammr, and BandLab. These apps allow musicians to collaborate remotely, record and share their music with each other.

Is There A Collaborative Daw?

Yes, there are collaborative digital audio workstations (DAW) available that allow multiple users to work on a project simultaneously from different locations. Some popular collaborative DAWs include Soundtrap, Ohm Studio, and BandLab.

How To Write Music Remotely?

To write music remotely: 1. Choose a digital audio workstation (DAW) for your computer 2. Use online resources to share ideas and collaborate with your bandmates 3. Utilize file-sharing services to exchange audio files 4. Use online video conferencing tools to communicate and discuss your project 5.

Work on one section of the song at a time and then share your progress with the group.

Conclusion

In light of recent events, remote collaboration has become increasingly necessary in the music industry. Thankfully, there are many great tools available to make the process smoother and more efficient. From real-time collaboration platforms to virtual instrument plug-ins, the options are diverse enough to fit any musical genre.

With the right tools and a willingness to explore new ways of creating music, distance is no longer a barrier to creativity.

Categories
Archive

Can You Help Me Produce A Song From Scratch

Yes, I can help you produce a song from scratch. As an experienced music producer, I can guide you through the entire process from writing lyrics to mixing and mastering the final track.

Music production is a complex process that requires a combination of technical skills and creative vision. It involves selecting the right instruments, finding the right tempo, and creating lyrics that connect with your audience. As a music producer, my goal is to help artists bring their vision to life and create a track that resonates with their fans.

From composing music to recording vocals, I take care of every aspect of song production. Whether you are an aspiring singer or a professional musician, I can help you produce a song from scratch that showcases your unique style and talent.

Understanding The Song Production Process

Producing a song from scratch is a team effort that requires the skills and expertise of different professionals. Understanding the song production process is essential for anyone interested in creating high-quality, original music. In this article, we’ll cover the basics and roles in production to help you get started.

The Basics

The song production process typically begins with the creation of a demo or a rough recording of the song. This is usually done by the songwriter or producer and serves as the foundation for the final product. From there, the production team will work together to develop the song, refine its structure, and create a polished version.

During the recording process, the production team will work to capture the various musical elements of the song, including vocals, instruments, and any additional sounds or effects. Once everything has been recorded, the team will mix and master the song to ensure that each element is balanced and sounds cohesive.

Roles In Production

There are several key roles in song production that are critical to its success. These include:

  • Songwriter: The individual who creates the initial composition and lyrics for the song.
  • Producer: The person responsible for overseeing the entire production process and ensuring that the final product is of the highest quality.
  • Recording engineer: The person who operates the recording equipment and helps to capture the various musical elements of the song.
  • Mix engineer: The individual who takes the recorded tracks and mixes them together to create a final version of the song.
  • Mastering engineer: The final person in the production process who helps to balance and finalize the overall sound of the song.

Each member of the production team plays a critical role in the song’s creation and is essential to its success.

If you’re looking to produce a song from scratch, understanding the production process is critical to your success. By working with a skilled team of professionals and leveraging their expertise, you can create high-quality, original music that stands out in today’s crowded music landscape.

Conceptualizing Your Song

Conceptualizing your song is the first step towards producing a great track. This is the phase where you brainstorm your ideas and choose a theme that reflects your emotions and experiences. The process of creating a song from scratch can be challenging, but it can also be a lot of fun.

Brainstorming Ideas

When you start the brainstorming process, it’s important to jot down all your ideas, even if they seem silly initially. It’s better to have too many ideas than too few. You can always narrow down your options later on. Here are some tips to help you brainstorm your ideas:

  • Reflect on your personal experiences and emotions.
  • Think about what inspires you, such as a great book, a movie or a personal experience.
  • Consider your audience and what they would want to hear.
  • Collaborate with others and get their feedback on your ideas.

Choosing A Theme

After brainstorming your ideas, now it’s time to choose a theme for your song. A theme is the underlying message or meaning of your song. It can be about love, heartbreak, social change, or any other topic that resonates with you and your audience. Here are some tips to help you choose a theme for your song:

  1. Consider what’s currently happening in the world and how you can connect your song to that.
  2. Reflect on your experiences and choose a topic that you relate to on a personal level.
  3. Think about your target audience and what themes will appeal to them.
  4. Ask yourself what emotion you want to convey in your song.

Once you have chosen your theme, it’s time to start writing the lyrics. It’s important that your lyrics reflect your theme and convey the message you want to send to your audience.

Writing The Lyrics

Looking to produce a song from scratch? Let me help you with writing the lyrics. As an expert content writer, I can help create unique lyrics that resonate with your target audience and amplify your message. Let’s work together to produce a great song that speaks to the heart.

When it comes to writing a song, the lyrics will make or break it. It’s what listeners will connect to and remember. Writing lyrics can be a challenging task, but it’s also one of the most rewarding parts of songwriting. Here are some tips to help you get started on writing the lyrics of your song:

Choosing A Rhyming Scheme

Choosing a rhyming scheme is an important part of writing the lyrics for your song. A rhyming scheme is the pattern of rhymes at the end of each line. There are several different rhyming schemes to choose from, including:

  • AABB
  • ABAB
  • ABCB
  • AAA

The rhyming scheme you choose will depend on the style of your song and the message you’re trying to convey. Experiment with different rhyming schemes to find what works best for your song.

Structuring The Song

The structure of a song is also important when it comes to writing the lyrics. A typical song will have a verse, chorus, and bridge. The verse sets the scene and tells the story, the chorus is the part of the song that is repeated and is usually the catchiest part of the song, and the bridge provides a change of pace and adds depth to the song. Here is an example structure for a song:

Verse 1ChorusVerse 2ChorusBridgeChorus
Tell the storyCatchy chorusAdd more detail to the storyRepeat the catchy chorusProvide a change of paceRepeat the catchy chorus again

Remember, the structure of your song can be flexible and you can experiment until you find what works best for your song. With these tips, you can start writing the lyrics for your song from scratch.

Can You Help Me Produce A Song From Scratch

Credit: ads.spotify.com

Creating The Instrumental

Creating the instrumental is a crucial part of producing a song. The instrumental is the foundation upon which all other aspects of the song are built. As such, it is essential to choose the right genre and the right instruments and sounds. In this blog post, we will explore some tips to help you create an instrumental from scratch.

Selecting The Genre

The first step in creating an instrumental is to select the genre of music you want to produce. The genre you choose will largely determine the type of instruments and sounds you will need to use. Some popular genres include:

GenreDescription
PopUpbeat, catchy melodies, often with electronic or synthesized sounds.
RockHeavy guitar riffs, driving drums, and powerful vocals.
Hip-HopSimple drum beats, basslines, and repetitive hooks, often with rapping vocals.
ElectronicBeat-driven music with heavy use of synthesizers and electronic instruments.

When selecting a genre, it’s important to consider your target audience and the mood you want to convey through the song. Once you have chosen a genre, you can start selecting the instruments and sounds you want to use.

Choosing Instruments And Sounds

The instruments and sounds you choose will largely depend on the genre you have selected. However, there are some general guidelines you can follow to ensure your instrumental sounds polished and professional:

  • Start with a simple melody: A simple melody can be expanded upon and developed over time.
  • Layer your sounds: Adding layers can give your instrumental depth and complexity.
  • Use contrasting sounds: Contrasting sounds can add interest to your instrumental and keep it from becoming monotonous.
  • Think about the arrangement: Your instrumental should have a clear structure that builds and releases tension over time.

If you are struggling to come up with ideas, don’t be afraid to experiment with different sounds and instruments. You may be surprised at what you come up with!

Recording

Looking to produce a new song from scratch? Our recording team can help you take your idea and turn it into a fully produced song. We offer a range of services including songwriting, arranging, recording, mixing and mastering. Let us help you bring your musical vision to life.

Recording is an essential part of producing music. It involves capturing the vocals and instruments to create a sound that will make your song a hit. To ensure that your recording is of high quality, there are several things you need to do. In this section, we will discuss how to prepare your vocals and record your instruments.

Preparing The Vocals

Before recording your vocals, it’s essential to warm up your voice. This will help you hit the right pitch and prevent straining your vocal cords. Here are steps to follow to prepare your vocals:

  • Drink warm water to hydrate your throat.
  • Do some vocal exercises, like humming, to warm up your voice.
  • Record yourself singing to identify any weak points and work on them.

Recording Instruments

To record instruments, you need to make sure that they are appropriately set up and ready to be recorded. Here are the steps to follow when recording instruments in your song:

  1. Ensure the instruments are correctly tuned.
  2. Set up your microphone and audio interface properly.
  3. Record a test of each instrument to make sure you get the right sound.
  4. Record the final version of the instrument, ensuring that it syncs correctly with the vocals.

In conclusion, recording is an essential part of producing a song from scratch. By preparing your vocals and recording your instruments correctly, you will create high-quality music that will set you on the path to success.

Can You Help Me Produce A Song From Scratch

Credit: www.facebook.com

Mixing And Mastering

As a SEO friendly content writer expert, I can help you produce a song from scratch through the process of mixing and mastering. With my expertise, I can ensure that your song is polished and of the highest quality, ready to be shared with the world.

You’ve written the lyrics and composed the melody, but now you need to bring your song to life. That’s where the mixing and mastering process comes in. Mixing is the process of combining all the individual tracks of a song into one cohesive sound. Mastering, on the other hand, is the final step in the production process which prepares the mixed track for distribution on various platforms.

Balancing Levels

One of the most crucial aspects of mixing is balancing the levels of each track to create a harmonious and balanced sound. This involves adjusting the volume of each instrument or sound to ensure that they can be heard clearly and are not competing with each other. In order to achieve this, mix engineers use a variety of tools such as equalizers and compressors to shape the sound and ensure that everything sits nicely in the mix.

Applying Effects

Applying effects is another important step in the mixing process. Effects like delay, reverb, and distortion can help add depth and character to your song. They can be used to create a sense of space or to make a sound more interesting and unique. However, it’s important to use effects sparingly and to not overdo it as it can make the mix sound cluttered and muddy. In conclusion, mixing and mastering are essential in producing a high-quality song. Balancing levels and applying effects are just some of the techniques used in the process. If done correctly, your song will sound polished and ready for distribution on various platforms.

Finalizing And Releasing Your Song

Finalizing and releasing your song is a crucial process that requires attention to detail and careful consideration. After putting in the time and effort to produce your song from scratch, editing, distributing, and promoting it are essential steps that require your full focus. Here are some essential guidelines to follow as you finalize and release your song.

Editing The Song

Edit your song to ensure it is of high quality and free of errors. Use software tools for sound mixing, and ensure all vocals and instruments are well balanced. Also, listen to your song repeatedly to identify sections that may need trimming or adjustment. Your goal is to produce a clear and well-organized song that engages your audience.

Distributing And Promoting The Song

Distribution and promotion are critical steps to ensure that your song reaches your target audience. Share your song on social media, music streaming platforms like Spotify and iTunes, and your website or blog. You can also create a press release or a music video to boost visibility. Remember, the more platforms you use to promote your song, the more likely it is to go viral and gain popularity.

Creating an engaging and successful song from scratch can be an uphill task. However, with diligence, patience, and the right strategy, you can produce a masterpiece that resonates with your audience. Follow these steps to finalize and release your song, and watch it soar to new heights.

Frequently Asked Questions Of Can You Help Me Produce A Song From Scratch

How To Create A Song From Scratch?

Creating a song from scratch requires a few steps: start with a melody or chord progression, write the lyrics, arrange the song structure, and refine the instrumentation and production. To make your song stand out, it’s important to keep the lyrics relatable and the melody catchy.

Allow your creativity to flow and experiment with different elements until you find the right sound.

How Do I Start Producing Music From Scratch?

To start producing music, you need a computer, digital audio workstation software, MIDI keyboard, audio interface, and headphones or monitors. Learn the fundamentals of music theory and sound design. YouTube and online courses are great resources. Experiment, be creative, and practice regularly.

Collaboration with other musicians is essential for growth.

How Do I Produce My Own Song?

To produce your own song, you need to follow these steps: 1. Start with your idea or concept. 2. Write lyrics and compose a melody. 3. Record a demo of your song. 4. Hire a producer to help refine and produce your song.

5. Mix and master your song and then release it through distribution channels.

Is Producing A Song Easy?

Producing a song is not easy as it involves a lot of effort, time, and creativity. You need to have a good understanding of music theory, composition, arrangement, and technology. Moreover, you need to have excellent communication skills to work with musicians and vocalists.

It takes practice and determination to produce a great song, but with hard work and dedication, it can be achieved.

Conclusion

We hope this article has shed some light on the process of producing a song from scratch. While creating a song can seem daunting, working with a team of professionals can help bring your vision to life. By utilizing online resources and seeking out experts in the field, you can ensure that your song has the potential to be a hit.

Don’t hesitate to reach out and collaborate with others – the end result will be worth it!

Categories
Archive

How To Use Analog Gear With Fl Studio

To use analog gear with FL Studio, you need an audio interface that connects your analog gear to your computer. Then, set up a new audio track in FL Studio, choose your audio interface as the input source, and record your sound.

As analog gear becomes more popular in the music production world, it’s important to know how to incorporate it into your digital setup. Analog gear, such as synthesizers, compressors, and EQs, can add warmth and character to your digital productions.

However, integrating analog gear with digital software like FL Studio can be intimidating for some. In this guide, we’ll show you how to use analog gear with FL Studio in a few simple steps. Whether you’re a seasoned producer or just starting out, incorporating analog gear into your setup can take your productions to the next level.

Why Use Analog Gear With Fl Studio?

Adding analog gear to FL Studio can enhance the sound quality of your music production. The analog equipment’s warmth, depth, and character can add unique qualities to the digital sound. It also offers hands-on control and flexibility that might not be possible with virtual plugins alone.

Analog gear and FL Studio seem like two worlds apart. However, even with digital music production software, analog gear can play a vital role in enhancing the sound. Analog gear is equipment that processes sound through electrical signals and has been the backbone of the music industry for decades. Using analog gear with FL Studio can upgrade your music production game.

Benefits Of Analog Gear Over Digital Plugins

Analog gear offers many benefits that digital plugins can’t achieve. The warmth and punch that analog gear provides to sound are unmatchable. Although digital plugins have significantly improved over the years, analog gear is still superior. Analog gear gives a unique characteristic to sound that is difficult to replicate with digital plugins.

How Analog Gear Enhances Sound Quality

Analog gear can enhance sound quality by adding natural harmonics, fuller and richer tones, and dynamics. It can produce a more organic and authentic sound, which is vital for music production. Moreover, analog gear offers a hands-on tactile experience that digital plugins can’t provide. The creative process of turning knobs and faders can have a significant impact on the final sound outcome. Using analog gear with FL Studio might seem complex, but it is not as difficult as it seems. With the right analog gear, you can bring more warmth, depth, and texture to your music production. It is an excellent way to add a different dimension to your music.

How To Use Analog Gear With Fl Studio

Credit: www.audiomixingmastering.com

Getting Started With Analog Gear

Analog gear can enhance your music production with the warmth and character it provides. Using analog gear with FL Studio is easier than you may think – it just takes a little extra hardware and some setup.

If you’re a music producer looking to add some character and warmth to your digital recordings, using analog gear is a great way to achieve that. But, how do you go about using analog gear with FL Studio? In this blog post, we will guide you on getting started with using analog gear with FL Studio. We’ll cover how to choose the right analog gear, how to connect it to your computer, and how to set it up in FL Studio.

Choosing The Right Analog Gear For Fl Studio

Before you start buying analog gear, you need to think carefully about the type of sound you want to achieve. There are a variety of analog gear options available, including vintage synthesizers, compressors, equalizers, and more. Here are some factors to consider when choosing the right analog gear for FL Studio:

  • What kind of sound are you looking to achieve?
  • What is your budget?
  • Do you want to go for vintage or modern gear?
  • What kind of signal chain are you aiming for?

Once you have your answers, you can jump into buying the right analog gear for you.

Connecting Analog Gear To Your Computer

Connecting your analog gear to your computer involves getting the right cables and interfaces. Here are some tips for connecting your analog gear to your computer:

  • Make sure all your gear and cables are compatible with your computer’s operating system.
  • Check the specifications of your interface to ensure it’s compatible with your setup.
  • Ensure your audio interface is selected in FL Studio settings.
  • Adjust the levels for each input channel to avoid clipping
  • Connect any effects pedals to your interface using a DI box or a special pedal-to-USB interface.

Setting Up Your Analog Gear In Fl Studio

Now that you have your gear connected to your computer, it’s time to set it up in FL Studio. Here are the steps you need to follow:

  1. Go to the mixer window in FL Studio.
  2. Select an available mixer channel and set the input to the channel you want to use.
  3. Adjust the level and panning as desired.
  4. Record your audio into FL Studio.
  5. Edit your audio as desired.

Remember to experiment with different types of analog gear to find the combination that works best for you. With some practice and experimentation, you’ll be well on your way to achieving a unique and warm sound in your productions.

Using Analog Gear In Your Fl Studio Workflow

Integrating analog gear into your FL Studio workflow can enhance the quality of your productions. By using external synthesizers, compressors, and other analog equipment, you can achieve more warmth and character in your sound. Explore new creative possibilities and bring a unique touch to your music with these useful tips.

Analog gear has always been prized by music producers and mix engineers for its unique sound and character. However, integrating analog gear into a DAW-based workflow can be a daunting task. Thankfully, with FL Studio, it’s relatively easy to incorporate analog gear into your music-making process. In this post, we’ll explore how to use analog gear in your FL Studio workflow, looking specifically at how to use analog gear in your mixing process, incorporating analog gear in your sound design, and using analog gear to create unique effects.

How To Use Analog Gear In Your Mixing Process

If you’re looking to incorporate analog gear in your mixing process, the first thing you’ll need is an audio interface with multiple inputs and outputs. With this setup, you can route audio from FL Studio to your analog gear and back to FL Studio for further processing. One popular way to integrate analog gear is to use it for summing. This involves sending individual tracks to your analog summing mixer and then sending the summed signal back into FL Studio for further processing. This technique can add warmth and depth to your mix, giving it a more “analog” feel.

Incorporating Analog Gear In Your Sound Design

Analog gear is also great for sound design. For example, synthesizers like the Roland TB-303 or the Moog Minimoog can be used to create unique and distinctive sounds that are difficult to achieve with software alone. To incorporate analog gear in your sound design, you’ll need to record the audio from your analog gear into FL Studio. Once you have the audio recorded, you can manipulate and process it in FL Studio to create even more interesting and complex sounds.

Using Analog Gear To Create Unique Effects

If you’re looking to create unique effects, analog gear can be a great place to start. Devices like guitar pedals or tape delays can add a distinctive character to your music that is difficult to achieve with software alone. To use analog gear for effects, you’ll need to route audio from FL Studio to your effects unit and then back into FL Studio for further processing. This technique can be used to create interesting textures and atmospheres that add depth and complexity to your music. In conclusion, incorporating analog gear into your FL Studio workflow can be a creative and rewarding experience. Whether you’re looking to add warmth and depth to your mixes, experiment with sound design, or create unique effects, analog gear can help you achieve your goals. With the right setup and a bit of experimentation, you can take your music to new heights.

How To Use Analog Gear With Fl Studio

Credit: www.audiomixingmastering.com

Tips And Tricks For Using Analog Gear With Fl Studio

Discover how to incorporate analog gear into your FL Studio workflow with these helpful tips and tricks. Elevate your sound and add warmth and character to your digital productions with the right techniques and equipment.

As digital audio workstations have continued to evolve, analog gear seems to have taken a backseat. But, if you’re looking to add warmth and character to your tracks, there’s nothing quite like analog gear. Analog gear can help you add texture and depth to your music that software plug-ins simply can’t replicate. However, using analog gear with FL Studio can seem a bit daunting at first. That’s why we’ve put together this guide to help you optimize your analog gear settings, get creative with how you use them, and troubleshoot common issues that come up when using analog gear with FL Studio.

Optimizing Your Analog Gear Settings For Fl Studio

To get the most out of your analog gear when using it with FL Studio, you need to have your settings dialed in just right. Here are a few tips to help you get started:

  • Ensure that your audio interface is properly configured before connecting your analog gear.
  • Set the levels on your analog gear to match the levels of your other instruments and plugins to avoid clipping and distortion.
  • Use high-quality cables to avoid any unwanted noise or interference.
  • Take advantage of FL Studio’s routing options to send and receive audio signals to and from your analog gear.
  • Consider using a hardware insert to patch your analog gear into your mixing console or audio interface.

Creative Ways To Use Analog Gear In Fl Studio

Now that you’ve optimized your analog gear settings, it’s time to get creative. Here are a few ways you can use analog gear to add some unique character to your tracks:

  1. Use a tape machine as a preamp to add warmth and saturation to your vocals or instruments.
  2. Run a drum loop through a hardware compressor to add punch and depth.
  3. Use a hardware equalizer to shape the tone of individual tracks in your mix.
  4. Experiment with using guitar pedals as effects processors for synths and other instruments.
  5. Use a hardware reverb to add a sense of space and depth to a track.

Troubleshooting Common Issues When Using Analog Gear With Fl Studio

No matter how well you’ve optimized your analog gear settings, you may still encounter some issues when using it with FL Studio. Here are a few of the most common issues and how to troubleshoot them:

IssueTroubleshooting Steps
Low volume or weak signalCheck the cables and connections between your gear and audio interface. Make sure that your levels are set correctly and that your gear is properly calibrated.
Excessive noise or humCheck your cables and connections. Make sure that you’re using high-quality cables and that they’re properly shielded to avoid any unwanted noise or interference.
Latency issuesMake sure that your audio interface is properly configured and that you have the correct ASIO driver selected in FL Studio.
Compatibility issuesMake sure that your gear is compatible with FL Studio and that you have the correct drivers installed.

Using analog gear with FL Studio may seem intimidating at first, but with the right optimization, creative approach, and troubleshooting skills, you can take your music production to the next level. Experiment with different combinations of gear and software to create unique sounds that stand out from the crowd. Happy mixing!

How To Use Analog Gear With Fl Studio

Credit: m.youtube.com

Frequently Asked Questions Of How To Use Analog Gear With Fl Studio

How To Use Hardware With Fl Studio?

To use hardware with FL Studio, you need to connect your hardware audio interface or MIDI controller to your computer. Then, open FL Studio and go to Options > MIDI settings to configure your hardware. Once you have configured your hardware, you can use it to control the virtual instruments and effects within FL Studio.

What Is Analog Music Gear?

Analog music gear refers to any equipment or device that processes sound using analog circuits or components. This can include instruments, amplifiers, mixers, and effects pedals. Unlike digital gear, analog gear produces sounds through electrical signals rather than encoded data.

How To Add Plugins To Fl Studio?

To add a plugin to FL Studio, first ensure it is compatible with your version of the software. Then, go to Options and select Manage plugins. Click on the Add button and select the plugin from your computer’s files. Finally, enable the plugin in the Plugin Database and it will appear in the Channel Rack.

What Format Does Fl Studio Use For Instruments?

FL Studio uses its own proprietary file format for instruments, which is known as FL Studio SoundFont (*. fst). This format is used for sampling and can be customized and saved to suit the user’s preferences.

Conclusion

Overall, incorporating analog gear into your FL Studio workflow can add warmth, character, and depth to your productions. By using the proper cables, interfaces, and settings, you can seamlessly integrate analog equipment into your computer-based setup. While the learning curve may be steep for some, the payoff in sound quality and creativity is well worth the effort.

So experiment, have fun, and discover the unique sonic possibilities that come from combining analog and digital technologies.