Categories
Archive

Stereo Mastering An Electronic Pop Song

Stereo mastering an electronic pop song involves adjusting the overall EQ balance, dynamics, and stereo width to enhance the mix’s clarity, punch and depth. In electronic pop music, mastering is a crucial step in the production process that ensures the final mix translates well across different playback systems.

Stereo mastering is the process of adjusting the overall EQ balance, dynamics, and stereo width to enhance the mix’s clarity, punch, and depth. To achieve a professional and polished sound, mastering engineers utilize various tools like EQ, compression, limiting, and stereo imaging.

These tools help to address any frequency imbalances, level inconsistencies, dynamic issues, and enhance stereo width. A skilled mastering engineer can take a mix and elevate it to a new level by bringing out the best in every element of the track, making it sound cohesive and polished.

Preparing For Stereo Mastering

Preparing an electronic pop song for stereo mastering involves analyzing the track for any technical issues, such as frequency imbalances or phase cancellations, and making necessary adjustments. It also involves careful consideration of volume levels and dynamics to ensure the final master sounds cohesive and polished.

Mixing For Stereo Mastering

Before sending your electronic pop song for stereo mastering, make sure that it is properly mixed. Mixing involves blending all the individual tracks in your song into a final stereo mix. The mix should be balanced, clear and free from any artifacts or distortion. When mixing your song, take into consideration the frequency balance, dynamics and stereo width. Make sure that each instrument can be heard clearly and none is overpowering the others. You should also ensure that the volume levels are consistent throughout the song.

File Organization And Delivery

Organize your files before sending them for stereo mastering. This makes it easier for the mastering engineer to navigate through your tracks. Ensure that each track has a unique name and that all the files are in the same sample rate and bit depth. When delivering your files, you can use cloud storage platforms such as Dropbox or Google Drive. Alternatively, you can compress the files into a zip folder and email them. Ensure that your delivery is prompt and that you follow up with the engineer after delivery.

Making Use Of Reference Tracks

Reference tracks can help you gauge the quality of your mix before submitting it for stereo mastering. You can use them to compare your mix with a professionally mixed and mastered song in the same genre. When selecting a reference track, ensure that it has the same energy and instrumentation as your song. Use the reference track to listen to different aspects of your mix, such as the low end, mid-range and overall clarity. In conclusion, preparing for stereo mastering is crucial to ensuring that your electronic pop song sounds great on all playback systems. Mixing your song properly, organizing your files and using reference tracks can all help you achieve a polished final master.

Stereo Mastering An Electronic Pop Song

Credit: www.upwork.com

Key Techniques In Stereo Mastering

Stereo mastering an electronic pop song requires key techniques such as balancing the stereo image, applying equalization, compression, and limiting. Using high-quality monitoring equipment and creating a consistent loudness level are also important factors in achieving a polished final mix.

Stereo mastering is a crucial step in the production of electronic pop songs. It involves the manipulation of stereo width, dynamics, frequency spectrum, and overall tone. Mastering engineers use several techniques to ensure a cohesive, balanced, and impactful sound. In this article, we’ll discuss the key techniques in stereo mastering focusing on equalization (EQ), compression, stereo widening, limiting, and harmonic excitement.

Equalization (eq)

EQ is one of the most powerful tools in mastering. It enables the engineer to shape the frequency response of the entire mix or individual elements. In stereo mastering, EQ is used to balance the tonal balance of the track, remove unwanted frequencies, and enhance the desired ones. Typically, a mastering EQ will have a few bands, each with a different center frequency and bandwidth. The engineer will use it to create a smooth and balanced frequency spectrum that translates well on various sound systems.

Compression

Compression is another fundamental tool in mastering. It helps to control the dynamic range of the mix, making the quiet parts louder and the loud parts softer. In stereo mastering, compression is used to enhance the overall impact of the track, glue the elements together, and make them sound more cohesive. A mastering compressor is typically set with a low ratio, high threshold, and moderate attack and release times. The goal is to make the track sound loud, but not overly compressed.

Stereo Widening

Stereo widening is a technique used to create a sense of space and width in stereo recordings. In mastering, it can be used to make the mix sound more spacious and immersive. The engineer can use several methods to widen the stereo image, such as using reverb, delay, chorusing, or stereo enhancers. However, stereo widening must be used with caution, as it can lead to phase issues, mono compatibility problems, and ear fatigue.

Limiting

Limiting is the last stage of the mastering chain. It’s used to increase the overall level of the mix and make it sound louder, without introducing clipping or distortion. A limiter is typically set with a high output level, fast attack and release times, and a low threshold. The goal is to make the track sound competitive with other commercial releases, but still retain some dynamic range and clarity.

Harmonic Excitement

Harmonic excitement is a technique used to add warmth, saturation, and excitement to the mix. It can be achieved using harmonic distortion, saturation, tape emulation, or parallel processing. The goal is to make the mix sound more musical and pleasing to the ear. However, harmonic excitement must be used sparingly, as it can easily lead to harshness, distortion, or loss of clarity. In conclusion, stereo mastering is a complex and critical process that requires a skilled and experienced engineer. By using the key techniques, such as EQ, compression, stereo widening, limiting, and harmonic excitement, the mastering engineer can transform a good mix into a great one.

Challenges In Stereo Mastering Electronic Pop Songs

Mastering an electronic pop song requires a careful approach to achieve the perfect balance between the different elements in the mix. Stereo mastering, in particular, poses significant challenges that must be addressed to ensure that the final output is of the highest quality. In this article, we will discuss these challenges and how to handle them effectively.

Dealing With Sibilance And Harshness

Sibilance and Harshness, typically caused by vocals that have a lot of high-frequency energy, can be difficult to manage. To deal with sibilance and harshness, audio engineers often use EQ to tone down the upper frequencies, de-essers to manage problematic sibilance, and multi-band compression or multiband EQ to control loudness. However, care must be taken not to overdo it, as this can result in a lifeless and dull mix.

Balancing The Kick And Bass

The kick and bass are the foundation of electronic pop music, and the balance between the two plays a critical role in how the finished mix will sound. One of the main challenges in mastering electronic pop songs is to achieve the right balance between the kick and bass, ensuring that they complement each other instead of clashing. Audio engineers use EQ, compression, and limiting techniques to achieve a well-balanced mix, but it requires a lot of experience and skill to pull off successfully.

Maintaining Clarity And Energy In The Mix

Maintaining clarity and energy in the mix is crucial in mastering electronic pop songs. Maintaining the energy in the mix while making it sound clear and detailed can be a challenge, and so, audio engineers use techniques such as parallel compression to add energy to the mix and EQ to ensure that each element of the mix has its place in the frequency spectrum.

In conclusion, mastering an electronic pop song requires careful attention to detail and an understanding of the unique challenges that come with this type of music. Addressing the challenges of sibilance and harshness, balancing the kick and bass, and maintaining clarity and energy in the mix are key to achieving an excellent output of high quality.

Stereo Mastering An Electronic Pop Song

Credit: blog.native-instruments.com

Collaborating With The Mastering Engineer

If you’re an electronic pop artist, Stereo Mastering can be a great way to polish your final mix. However, this process requires collaboration and communication between you and your mastering engineer. In this post, we’ll explore how you can collaborate with your mastering engineer to ensure that your creative vision and goals are met.

Sharing Your Creative Vision And Goals

The first step in collaborating with your mastering engineer is to share your creative vision and goals for the track. Whether you’re looking for a punchier bassline or a brighter lead synth, it’s important to communicate this clearly to your engineer. This will help them understand your expectations and work towards your desired outcome.

Working With Notes And Feedback

Once your mastering engineer has received your mix, they’ll provide you with notes and feedback on what changes they feel need to be made. It’s important to work closely with them at this stage, taking their suggestions on board and giving your own suggestions where appropriate. This is a critical stage in the collaboration process and should not be rushed.

Communication And Decision Making

Throughout the mastering process, communication is key. Be clear and concise in your communication with your mastering engineer, and make sure to keep them in the loop on any changes you make to your mix. When it comes to decision making, it’s important to work together and find a balance between your creative vision and the professional opinions of your mastering engineer. Remember that the ultimate goal is to create a polished track that reflects your vision, and this can only be achieved through open and collaborative communication.

Tools For Stereo Mastering

Stereo mastering an electronic pop song involves the use of tools such as multiband compressors, stereo wideners, and EQs. These tools help to balance the frequencies, stereo image, and overall loudness of the mix, resulting in a polished and professional sound.

Stereo mastering an electronic pop song requires a few key tools to get the perfect sound. Mastering is the final stage of music production, ensuring the finished track sounds polished and professional. Here are some essential tools to achieve the desired sound:

Equalizers

Equalizers are essential for mastering as they balance the frequency spectrum of a track. They help to target and cut unwanted frequencies, boost specific frequencies and compensate for any deficiencies in the recording. EQ can be used to give warmth or brightness to a track and help the instruments stand out from one another. Some popular EQ plugins include FabFilter Pro-Q 3, Waves Q10 Equalizer, and Sonnox Oxford EQ.

Compressors

Compressors are used in mastering to smooth out any dynamic inconsistencies and bring consistency to the track. They can enhance the overall volume without causing distortion, balance the sound, and provide a dynamic range. Some popular compressor plugins include Waves SSL E-Channel, Universal Audio LA-2A, and FabFilter Pro-C 2.

Stereo Widener Plugins

Stereo widener plugins help to spread the sound across the stereo field and enhance the stereo image of the track. They provide an immersive listening experience by making the track sound wider and more spacious. Some popular stereo widener plugins include iZotope Ozone Imager, Waves S1 Stereo Imager, and MeldaProduction MMultiAnalyzer.

Limiters

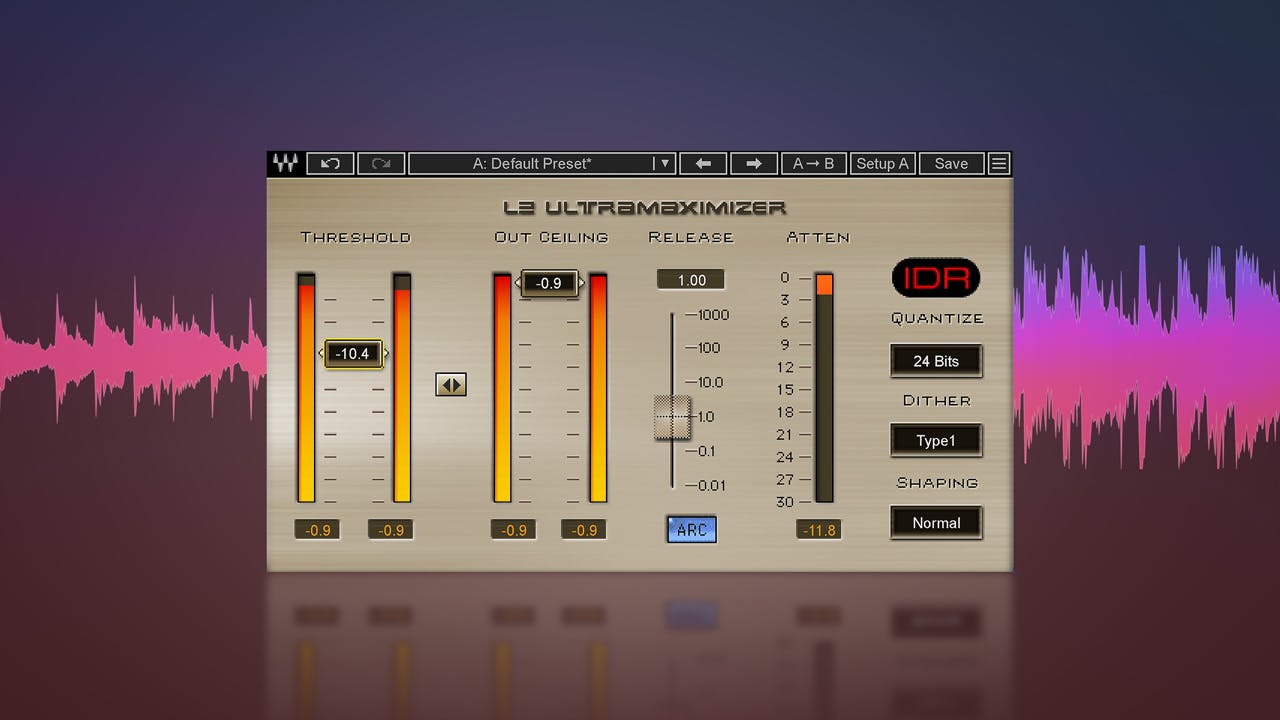
Limiters are used in mastering to increase the overall volume of the track while maintaining the dynamic range. They help to ensure that no part of the track is too loud, preventing unwanted distortion. Limiters like Waves L3 Maximizer, FabFilter Pro-L 2, and iZotope Ozone 9 maximize the loudness of the track without causing digital clipping.

Saturation Plugins

Saturation plugins add warmth and richness to the track, making it sound more organic. They can enhance the harmonics and make the track sound more pleasing to the ear. Some popular saturation plugins include Waves Abbey Road Saturator, Softube Tape, and Soundtoys Decapitator.

Reference Track Playback Tools

Reference track playback tools are used during mastering to compare the final mix to similar-sounding tracks. They help to ensure that the final track is well-balanced and matches the sound of other professional tracks. Reference tracks can be played through software like A/B Assist, Magic AB, and Sample Magic MagicAB 2. Mastering electronic pop songs requires some technical expertise and a few essential tools to achieve a polished sound. These tools, including equalizers, compressors, stereo widener plugins, limiters, saturation plugins, and reference track playback tools, can help to bring out the best in the track, making it stand out in the crowded music scene.

Stereo Mastering An Electronic Pop Song

Credit: open.spotify.com

Preparing Your Stereo Master For Release

When preparing your electronic pop song for release, it’s crucial to focus on the stereo mastering process. Attention to detail is essential, from balancing the volume levels to ensuring the overall sound quality is on point. With meticulous care, your song will sound polished and professional for listeners.

Preparing Your Stereo Master for Release Stereo mastering is an essential process for every music producer who wants to make their music sound the best it can be. One of the critical aspects of stereo mastering an electronic pop song is preparing the stereo master for release. This step involves quality control and testing, choosing the right audio file format, metadata and tagging, and submission to streaming platforms. Quality Control and Testing The first step in preparing your stereo master for release is quality control and testing. This process ensures that the final product is free from errors and meets the highest standards of quality. To achieve this, you need to listen to your stereo master several times and check for any glitches, distorted sounds, and other issues that negatively affect the overall quality of your music. Choosing the Right Audio File Format Choosing the right audio file format is an essential aspect of preparing your stereo master for release. The right audio file format directly impacts the quality and compatibility of your music with various devices and streaming platforms. Some popular audio file formats are WAV, AIFF, and FLAC. However, the choice of the audio file format ultimately depends on the requirements of the streaming platforms and distribution channels where you plan to release your music. Metadata and Tagging Metadata and tagging are critical components of your stereo master that can significantly impact how your music is discovered and streamed online. Metadata and tagging represent information about the song, such as the title, artist name, album name, and other details. Proper metadata and tagging ensure that your music is easily searchable, discoverable, and labeled correctly. Submission to Streaming Platforms Submitting your stereo master to streaming platforms is the final step in preparing your music for release. Streaming platforms have specific requirements that your music needs to meet to be accepted. Therefore, it is essential to do thorough research and adhere to all the publishing and distribution requirements. This step also involves encoding your stereo master with the right audio codec to ensure optimal playback quality and compatibility across various devices. In conclusion, preparing your stereo master for release involves quality control and testing, choosing the right audio file format, metadata, and tagging, and submission to streaming platforms. Ensure that you follow the best practices in each step to produce high-quality music that can be discovered and streamed online effortlessly.

Frequently Asked Questions On Stereo Mastering An Electronic Pop Song

How Much Does It Cost To Master A Song?

The cost to master a song can vary depending on the mastering engineer, studio, and the length of the track. Professional mastering services typically start at around $50 per song, but can go up to $300 or more for a full album.

Some online services also offer cheaper options but may not provide the same level of quality.

How Do You Master A Song Like A Pro?

Mastering a song like a pro requires attention to detail and following these key steps: 1. Start by ensuring that the mixing and arrangement of the song are perfect 2. Use high-quality studio monitors and check the song at different volume levels 3.

Use a reference track to ensure that the song matches the desired industry-standard 4. Use EQ, compression, and other mastering tools judiciously to polish the sound to perfection 5. Finally, get feedback from other professionals to hone your skills.

What Is The Difference Between Mixing And Mastering?

Mixing is the process of combining multiple audio tracks into one stereo track, adjusting levels, EQ, and effects. Mastering is the final step in the production process, where the stereo mix is enhanced for the best playback experience and made ready for distribution.

How Do I Get My Song Mastered?

To get your song mastered, you can hire a professional mastering engineer who can apply the final touches to your music and make it sound more polished. You can also use online mastering services that allow you to upload your tracks and receive them back fully mastered.

It is important to research and choose a reputable mastering service that fits within your budget and meets your specific needs.

Conclusion

Mastering an electronic pop song can be a challenging task, but with the right approach, it can take your music to the next level. By understanding the technical aspects of mastering, and utilizing the right equipment and techniques, you can achieve a high-quality professional sound that will impress your listeners.

Follow these tips and remember to trust your ears. With practice and perseverance, you can become a skilled stereo mastering expert.
Categories
Archive

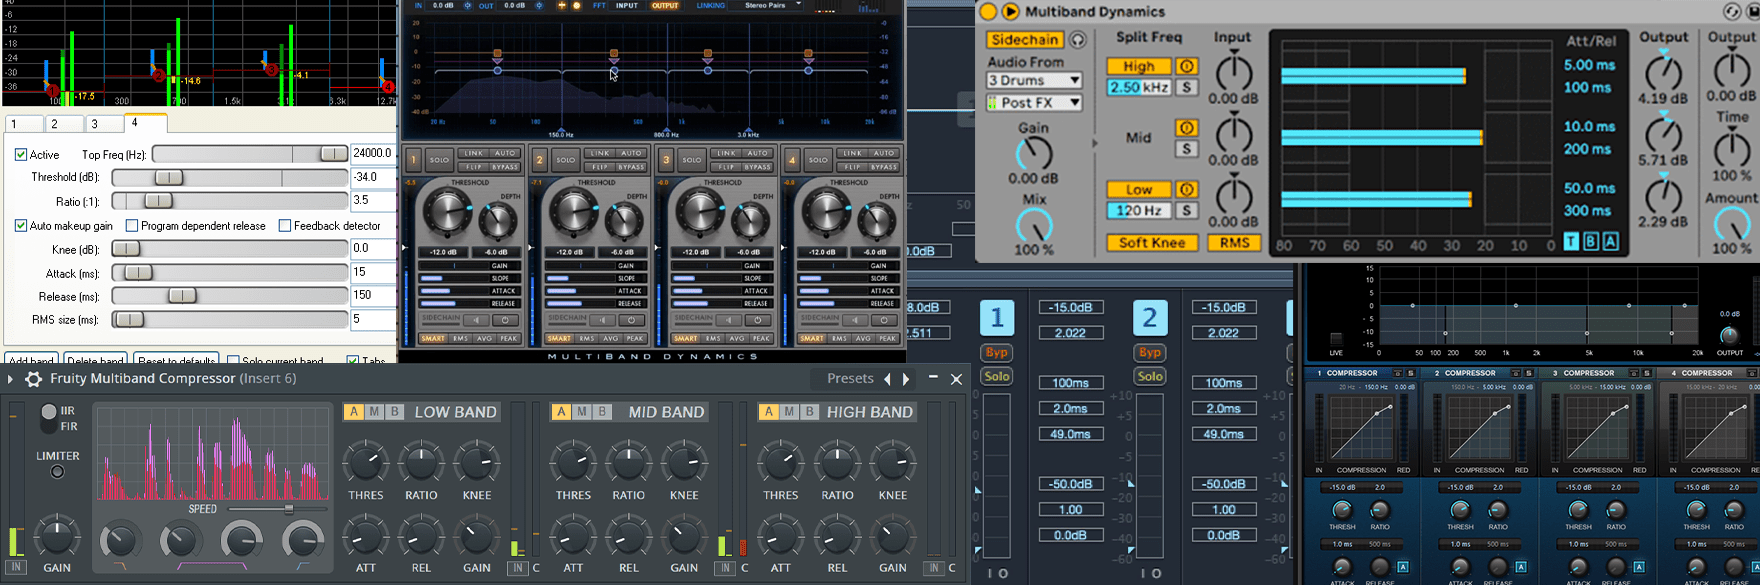
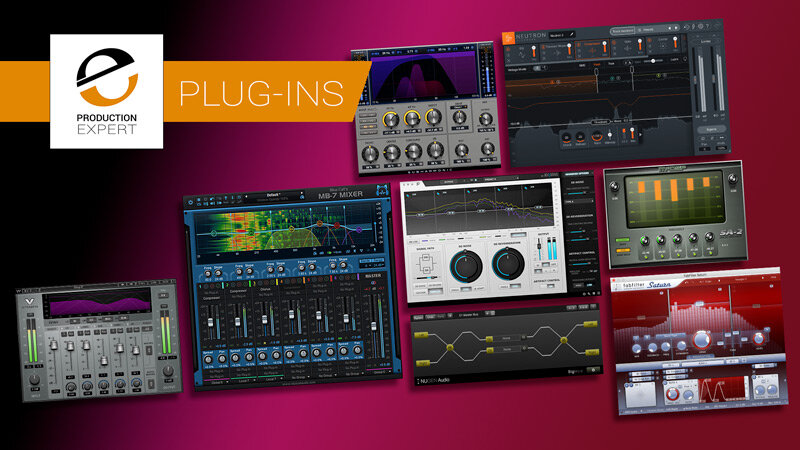
Best Multiband Compressor Plugins For Mixing

When it comes to the best multiband compressor plugins for mixing, FabFilter Pro-MB and Waves C6 are two popular choices. These plugins offer precise control over individual frequency bands, making them ideal for intricate mixing techniques.

FabFilter Pro-MB is known for its transparent sound and user-friendly interface. Meanwhile, Waves C6 offers dynamic EQ functionality and a range of presets for quick and easy mixing. Multiband compressors are essential tools for any serious mixing engineer. This allows for targeted control over specific frequency ranges in a mix.

Related reading: Use multiband compression vocals and Cubase pro 8 multiband envelope shaper. For background, see Dynamic range compression.

Whether you’re working on vocals, drums, or any other instrument, multiband compressors can help you achieve a more balanced and polished sound. We’ll take a closer look at some of the best multiband compressor plugins on the market, and discuss their features, strengths, and weaknesses.

Best Multiband Compressor Plugins For Mixing

Credit: majormixing.com

Top 3 Multiband Compressor Plugins For Mixing

Discover the top three multiband compressor plugins that are perfect for your mixing needs. These plugins are designed to help you achieve a professional sound and are user-friendly with a variety of customizable features. With their advanced capabilities, you’ll be able to take your mixing to the next level.

Mixing is an essential part of music production. A multiband compressor can be a game-changer in mixing as it is capable of controlling dynamics of various frequency bands. With the wide array of multiband compressor plugins out there, it can be challenging to choose the right one for your mixing projects. This article highlights the top three multiband compressor plugins for mixing.

Plugin 1: FabFilter Pro-MB

The first multiband compressor plugin on our list is the FabFilter Pro-MB. This plugin provides incredible versatility and precision for controlling dynamics in a mix with its up to six different bands. It’s reception has been fantastic thanks to it’s flexibility in handling stereo or mid/side processing. The Pro-MB allows an immediate estimate of the frequency spectrum from its stunning display and can isolate complex or specific frequency ranges. It gives an unbeatable user experience and is suitable for mixing different music genres and sound design.

Plugin 2: Waves Linear Multiband Compressor

Plugin 2 on our list of top multiband compressor plugins for mixing is the Waves Linear Multiband Compressor. This advanced plugin provides up to five frequency ranges, each with minimum-phase, zero-latency filters. What’s more, you can adjust attack, release, threshold, and ratio paramters easily. This makes it one of the simplest and most user-friendly tools available. The linear-phase crossover provides smooth and transparent transitions between bands, even when compressing signals with high levels of gain reduction. The Waves Linear Multiband Compressor is perfect for controlling dynamics in mix busses, mastering situations, and busses.

Plugin 3: McDSP ML8000

Last, but by no means least, on our list of top multiband compressor plugins for mixing is the McDSP ML8000. This plugin provides eight independent bands suitable for handling different frequency ranges. The ML8000’s ML1 and ML4 processors combine to give the most transparent and flexible audio output. There is also an option to control the width of each band. This feature is invaluable for sound designers, who can use it to create stereo and mono output simultaneously from single tracks.

Furthermore, the ML8000’s brick wall limiter setting promotes loudness while maintaining clarity. By using the right multiband compressor plugin, you can significantly enhance the mixing process. They give control over the mix buses, individual tracks, and even during mastering processes. The selected multiband compressor plugins in this post offer precision, flexibility and produce transparent results. With a little time, creativity, and patience, they can transform mixing into an effortless and seamless process.

Best Multiband Compressor Plugins For Mixing

Credit: www.production-expert.com

Comparison Of The Top Multiband Compressor Plugins

Multiband compressors are an essential tool for mixing engineers. The best multiband compressor plugins can enhance the clarity and punch of your audio tracks. Meanwhile, keeping them balanced and dynamic. In this article, we compare the top multiband compressor plugins to help you find the right one for your mixing needs.

If you’re a music producer, mixer, or mastering engineer, you know how important it is to get the best multiband compressor plugin for your mixing needs. With so many options available, it can be challenging to choose the right one for your specific requirements. In this article, we will compare the top three multiband compressor plugins for mixing. Without further ado, let’s dive into the comparison.

Plugin 1: Fabfilter Pro-mb

FabFilter Pro-MB is one of the most popular multiband compressor plugins over the years. It comes with an intuitive interface and advanced features that make it an excellent choice for mixing and mastering. The plugin allows you to adjust up to six bands independently, even with dynamic phase processing and smooth crossover.

Plugin 2: Waves C6 Multiband Compressor

Waves C6 Multiband Compressor is another top-quality multiband compressor plugin that professionals use for mixing and mastering. This plugin provides users with four crossover bands, each with a set of unique controls that allow for precision and flexibility in compression. The C6 plugin also features sidechain compression and vintage modes. This makes it ideal for those who prefer to achieve a vintage sound.

Plugin 3: Izotope Ozone 9 Multiband Compressor

iZotope Ozone 9 Multiband Compressor is an excellent plugin that comes with various mastering tools. This plugin provides users with up to four independently adjustable bands, each with its threshold, ratio, and attack controls. Ozone 9 also provides users with automatic gain compensation. This ensures that you can match the levels of your compressed and uncompressed audio. The Final Verdict In conclusion, the choice of multiband compressor plugin depends on your mixing and mastering requirements. All three plugins discussed in this article are excellent choices. But the FabFilter Pro-MB would be a perfect pick for those who prioritize intuitive interface and dynamic phase processing. The Waves C6 plugin is ideal for those looking to obtain a vintage sound. And the iZotope Ozone 9 would suit those who require various mastering tools.

How To Choose The Right Multiband Compressor Plugin

Choosing the right multiband compressor plugin can be overwhelming, but it’s important for achieving the desired sound in your mix. Look for plugins that offer precise control over individual frequency bands, a clear and intuitive interface, and a good reputation within the music production community.

If you are a music producer or content creator, you might have come across the term “multiband compressor plugin” while mixing your audio tracks. A plugin that is essential for balancing the levels and dynamics of various tracks to create a cohesive sound. However, with numerous options available on the market, choosing the right multiband compressor plugin can be overwhelming. In this article, we will discuss the key considerations for selecting the best multiband compressor plugin and understanding its controls and features.

Considerations For Your Mixing Needs

Before choosing a multiband compressor plugin, you must consider your mixing needs. Here are some essential factors you need to keep in mind:

  • Compatibility: Ensure that the multiband compressor plugin is compatible with your digital audio workstation (DAW) software.
  • Workflow: Choose a plugin that is easy to use and fits your workflow. Some plugins have more complex interfaces, while others are simple and user-friendly.
  • Genre: Consider the genre of music you are producing and select a plugin that can handle the demands of that music genre.
  • Budget: Price varies widely, so determine a budget and choose a plugin that provides the most useful features within your budget.

Understanding Plugin Controls And Features

Multiband compressor plugins come with a variety of controls and features. Understanding these will help you make an informed decision when selecting the right plugin. Here are the key controls and features you need to understand:

Control/FeatureDescription
Threshold:This controls the level at which the compressor starts acting.
Ratio:This determines the dynamic range reduction of the signal above the threshold.
Attack:This determines how quickly the compressor starts working after the threshold is reached.
Release:This determines how quickly the compressor stops working after the signal level drops below the threshold.
Makeup gain:This boosts the output of the compressed signal to match the original level.
Multiband:This splits the signal into several frequency bands and compresses each band independently, allowing for more precise control over the different frequency ranges.
Metering:This shows the visual display of the input and output level of the signal, allowing you to monitor the compressor’s effect on the audio track.

By understanding these controls and features, you will have a better idea of what multiband compressor plugin will suit your needs. In conclusion, selecting the right multiband compressor plugin is crucial for achieving a balanced and cohesive sound in your audio tracks. By considering your mixing needs and understanding the controls and features of the plugin, you can make an informed decision and select the best plugin for your production needs.

Best Multiband Compressor Plugins For Mixing

Credit: majormixing.com

Frequently Asked Questions For Best Multiband Compressor Plugins For Mixing

What Is The Best Use Of Multiband Compression?

Multiband compression is best used to control several frequency ranges separately. It can enhance sound quality, prevent distortion, and improve overall balance and clarity. Multiband compression is especially helpful when dealing with audio that has uneven volume or when mixing complex tracks.

What Are The Disadvantages Of Multiband Compression?

Multiband compression can lead to phase issues and artifacts if not set up correctly. It can also create an unnatural sound and reduce the overall dynamic range of the mix. Careful adjustment is needed to prevent over-processing and maintain the intended sound.

Is A Dynamic Eq The Same As A Multiband Compressor?

No, a dynamic EQ is not the same as a multiband compressor. While they both adjust frequency levels, a dynamic EQ modifies the levels of specific frequencies based on input signal levels. Meanwhile, a multiband compressor compresses a specific range of frequencies.

Does Studio One Have A Multiband Compressor?

Yes, Studio One includes a multiband compressor that can be used for a variety of audio applications, including mastering, tonal shaping, and dynamic processing. It allows users to split audio signals into different frequency bands and apply compression independently to each one.

Conclusion

In short, multiband compressors are essential for creating a polished and professional mix. The plugins mentioned offer unique features and capabilities that can take your mix to the next level. It’s important to choose the right plugin for your specific needs. But with this list, you’re sure to find the perfect multiband compressor for your mix.

Experiment with different options and techniques to find the perfect sound for your music. Happy mixing!

Categories
Archive

What Is A Ghost Producer And How To Become One

A ghost producer is an individual who creates tracks for artists anonymously. Becoming a ghost producer requires music production skills, professional equipment, and solid network connections within the music industry.

A ghost producer is a behind-the-scenes music producer who creates tracks for artists who then release them under their own name. This practice has gained popularity in the music industry, and many successful artists have used ghost producers to get ahead.

Ghost producers work on various genres, including EDM, hip-hop, and pop music. They are responsible for creating the entire musical composition, including arrangements, instrumentation, mixing, and mastering. To become a successful ghost producer, one must have strong music production skills and professional equipment. It is also important to have a solid network of connections within the music industry to land clients and build a successful career.

What Is A Ghost Producer And How To Become One

Credit: iamghostproducer.com

Defining A Ghost Producer

A ghost producer is a person who creates music for someone else to release under their name. To become one, you need to have exceptional production skills, the ability to craft tracks in various genres, and excellent communication skills to work well with clients.

A ghost producer is a music industry professional who produces music for another artist without being credited for their work. Ghost production can include producing beats, creating tracks, mixing, and mastering, among other things. Ghost producers are also known as “ghost writers” in the music industry. Ghost production has become increasingly popular among aspiring music producers, as it allows them to earn money while building a reputation without having to get the limelight.

Characteristics Of A Ghost Producer

A ghost producer is a music professional who works anonymously. They have the technical skills to produce high-quality music and bring their client’s vision to life. They also have a clean slate and do not have any public image or brand to maintain, making them flexible to work on different genres of music. Ghost producers are often efficient and capable of delivering on time as they aim to satisfy their clients and secure future business opportunities.

How A Ghost Producer Works

Ghost producers work discreetly with their clients, who may want their tracks to have a particular sound or style, but lack the technical skills to produce it on their own. The ghost producer takes in the client’s brief and works behind the scenes to bring their vision to life. The producer may work independently or collaborate with the artist, writing and composing music depending on the contract requirements. Once the production is completed, the client may have the right to release the music under their name and keep all the royalties.

Benefits Of Hiring A Ghost Producer

Hiring a ghost producer can provide numerous benefits for artists who want to focus on other aspects of music production or lack the technical skills to produce high-quality music. Some of these benefits include:

  • Access to high-quality productions at an affordable price
  • Improved workflow and time management
  • Network and business opportunities with the ghost producer
  • Ability to focus on the creative side of music production

In conclusion, a ghost producer is a music industry professional who works anonymously to produce music for clients who lack the skills or time to do it on their own. They have the technical ability to produce high-quality music and can work across a range of genres. Hiring a ghost producer can provide numerous benefits for artists looking to improve efficiency, quality, and workflow in their music production endeavors.

What Is A Ghost Producer And How To Become One

Credit: www.masteringthemix.com

The Music Industry And Ghost Production

Ghost production is a common practice in the music industry, where talented producers create tracks on behalf of established artists. Ghost producers often remain anonymous, and the artists take all the credit. To become a ghost producer, one must possess advanced music production skills, networking abilities, and know-how to navigate the competitive music industry.

The music industry can be a tough nut to crack, even for seasoned producers. Competition is fierce, and everyone is trying to make it big. To stay ahead of the game, many producers turn to ghost production. A ghost producer is a skilled musician who creates music for others, without getting any official credit.

History Of Ghost Production In The Music Industry

Ghost production is not a new concept in the music industry. In fact, it has been around for decades. Back in the 1950s and 60s, many musicians would hire ghostwriters to pen their lyrics. This practice helped to ensure that the songs were polished, catchy, and commercially viable. In the 1980s and 90s, ghost production became more prevalent in electronic dance music (EDM). Producers would often create tracks for famous DJs who lacked the time, skills, or inspiration to produce their own music.

Current Use Of Ghost Production In The Music Industry

Today, ghost production is more widespread than ever before. Many well-known DJs, including David Guetta, Tiësto, and Calvin Harris, have used ghost producers to create some of their biggest hits. Ghost producers can create high-quality tracks quickly and efficiently, leaving the official artist free to focus on their brand and live performances.

Controversies Surrounding Ghost Production

Not everyone is a fan of ghost production. Some people argue that the practice is unethical because it allows less talented artists to claim credit for music that they did not create. Others argue that ghost producers are taking away from the artistry of music and that the industry should focus on creating original and authentic content. Despite the controversies, ghost production remains a popular tool for many music producers. If you are interested in becoming a ghost producer, there are several key skills you will need, including experience with music software, a strong understanding of music theory, and the ability to work under tight deadlines. With the right skills and a bit of luck, you could find yourself creating hit songs for some of the biggest names in the industry.

Becoming A Ghost Producer

To become a ghost producer, one must have excellent producing skills and the ability to work anonymously. Ghost producers can earn a considerable amount of money producing music for others without receiving credit publicly. Building relationships with DJs, networking, and creating high-quality tracks are essential to becoming a successful ghost producer in the music industry.

Are you a music producer looking to showcase your talent but don’t want to be in the spotlight? Then ghost production might be the best option for you. As a ghost producer, you can create music for well-known artists, but your name will not appear on the final product. You might be wondering how to become a ghost producer. Here, we’ll discuss the requirements, how to get started, and the pros and cons of being a ghost producer.

Requirements To Be A Ghost Producer

The requirements for being a ghost producer vary from client to client. However, there are some general skills you must possess to succeed in the industry. To be a ghost producer, you need to:

  • Be a skilled music producer with a good understanding of music theory
  • Have an ear for a variety of music genres
  • Have access to the appropriate music software and hardware
  • Be knowledgeable in mixing and mastering audio tracks
  • Have excellent communication skills to understand clients’ requirements

Getting Started In Ghost Production

Starting in ghost production is not easy, but it’s not impossible either. Here are some steps you can follow to get started:

  1. Build an impressive portfolio of your work by creating music in various genres.
  2. Network with music artists, record labels, and production companies. You can attend music festivals, join professional music forums, and participate in music production competitions to get noticed.
  3. Market yourself as a ghost producer by creating a website to showcase your work. You can also use social media platforms like Soundcloud, Instagram, and LinkedIn to promote your services.
  4. Apply and work with ghost production agencies to collaborate with famous artists and earn money.

Pros And Cons Of Being A Ghost Producer

Like any other profession, ghost production has its pros and cons. Let’s take a look at them: Pros:

  • Financial rewards are higher as you can charge more as a ghost producer.
  • You can create music according to your preference and style, rather than adhering to clients’ demands and specifications.
  • You can work from home and have flexible working hours.
  • Networking opportunities with famous artists and music industry professionals that can increase your industry reach.

Cons:

  • You won’t receive credit for your work, which can be demotivating.
  • You won’t be able to promote your music under your name.
  • Collaborating with people who don’t have a good reputation in the music industry can tarnish your brand name.
  • Contracts can be tricky and dishonest clients can exploit you.

In conclusion, becoming a ghost producer is a good career choice for music producers who want to earn money while staying behind the scenes. Remember to adhere to clients’ demands, create a strong portfolio, and take measures to protect your brand name.

Finding Clients

Ghost producers create music tracks for clients who release them under their own name. To become a ghost producer, one needs to have a good understanding of music production software and create high-quality music. Freelance platforms such as Fiverr and Upwork are great places to find clients as a ghost producer.

Approaching Artists

Approaching artists directly is a common way to find clients. Reach out to artists whose music aligns with the genres you specialize in producing. Research the artists you are interested in working with and gather information on their current projects, management, and label. Once you have created a list of potential clients, craft an effective pitch that outlines your skills and relevant experience. Be sure to highlight how working with you will benefit the artist and their musical vision.

Networking With Industry Professionals

Networking with industry professionals is important in any music-related career. Attend music events, conferences, and connect with other professionals in the industry, such as managers, producers, and A&R representatives. Introduce yourself and let people know what you do and what type of clients you are looking for. Building relationships with these professionals can lead to future collaborations and referrals.

Using Online Platforms To Find Clients

Online platforms such as freelancer websites, social media, and music forums can help you find clients. Create profiles on these websites and showcase your portfolio of work. Utilize hashtags and engage with potential clients and industry professionals. Join online communities and participate in conversations to increase your visibility. When using online platforms, ensure your portfolio is up to date and easily accessible. Consider offering discounts or special rates for first-time clients to build trust and establish repeat business. In conclusion, finding clients as a ghost producer requires dedication, effort, and creativity. Approaching artists directly, networking with industry professionals, and using online platforms are effective ways to find clients and grow your business. By utilizing these strategies and continuously honing your craft, you can establish yourself as a successful ghost producer in the music industry.

Legal And Ethical Considerations

Becoming a ghost producer in the music industry raises some ethical and legal considerations. A ghost producer is someone who creates music on behalf of another artist and they are not credited publicly. While it can be a lucrative job, it is important to understand the music industry’s rules and regulations to protect oneself.

Legal and Ethical Considerations: When we talk about ghost production, it is important to consider the legal and ethical implications. As a ghost producer, you are operating in a gray area that requires careful attention to contracts, crediting, and ethical practices. Contracts and Agreements: Before beginning any ghost production work, it is crucial to have a contract or agreement in place. This contract should outline the terms and conditions of the work, including payment, deadlines, and specific details about what you will be creating. A well-drafted contract will protect you in case of any disputes, and it will ensure that both parties understand their responsibilities. Crediting and Attribution: Crediting and attribution are essential concepts in the music industry. As a ghost producer, you will not receive any public credit for your work. However, you can negotiate to receive credit in private. This agreement should be made clear in your contract. It is important to make sure that you will receive fair recognition for your contributions. Ethical considerations to keep in mind: As a ghost producer, it is your responsibility to maintain ethical standards. You must ensure that you are not infringing on any copyrights or committing any other unethical practices. It is important to ensure that you are creating original works and that you are not copying or stealing someone else’s work. Additionally, it is essential to work only with reputable clients that will respect your work and provide fair compensation. In conclusion, becoming a ghost producer requires careful attention to legal and ethical considerations. To become a successful ghost producer, it is essential to draft a well-drafted contract, establish a fair crediting and attribution agreement, and always maintain ethical practices.

Making A Living As A Ghost Producer

Ghost producers are anonymous music producers who create tracks for other artists. To become one, you need to have a solid production background, networking skills, and the ability to adapt to different music styles. Making a living as a ghost producer involves finding clients, negotiating contracts, and creating high-quality music that meets the client’s expectations.

Ghost production is a lucrative career option for many producers who enjoy working behind the scenes rather than being in the limelight. However, making a living as a ghost producer requires careful planning, strategic thinking, and flawless execution.

How Much To Charge For Ghost Production Work

Setting the right price for your services is crucial to sustain your ghost production business. While some ghost producers charge a flat fee for their services, others prefer to take a percentage of the royalties earned by the track they have produced. As a beginner in the industry, charging too high can deter clients, while charging too low can harm your credibility and undervalue your services. It is advisable to research the current market rates, evaluate your skills, experience, and the resources invested, and then set a reasonable price that aligns with industry standards.

Strategies For Building A Sustainable Business As A Ghost Producer

Building a successful ghost production business is not a one-time effort. It requires consistent efforts to maintain your credibility, build a loyal client base, and foster relationships with industry experts. Here are some strategies to help you build a sustainable ghost production business:

  • Developing a unique sound and style that distinguishes you from your competition
  • Building a website that showcases your portfolio, services, and testimonials from previous clients
  • Networking with industry professionals such as DJs, managers, and music label executives
  • Creating a strong social media presence by sharing your work, engaging with your followers, and participating in online communities
  • Collaborating with other artists to expand your reach and tap into new markets
  • Investing in high-quality equipment and software to deliver the best possible results

Scaling Your Ghost Production Business

As you grow your ghost production business, it is essential to scale your operations to meet the increasing demand for your services. Here are some ways to scale your ghost production business:

  • Hiring additional team members to help with tasks such as mixing, mastering, and sound design
  • Outsourcing non-core tasks such as social media management and website development to third-party service providers
  • Expanding your services to include other areas such as soundtracks for movies and TV shows, commercials, and video games
  • Partnering with music studios and production companies to tap into new markets and gain access to their resources

In conclusion, making a living as a ghost producer requires consistent effort, strategic planning, and flawless execution. By charging the right price, building a loyal client base, and scaling your operations, you can build a successful career as a ghost producer.

Frequently Asked Questions Of What Is A Ghost Producer And How To Become One

How Do You Become A Ghost Producer?

To become a ghost producer, you need to have excellent music production skills, as well as knowledge of marketing and networking. It’s important to establish yourself in the music industry, make connections, and build a reputation for producing quality music.

Additionally, it’s essential to maintain confidentiality and have a good understanding of legal contracts.

Do Ghost Producers Get Paid?

Yes, ghost producers do get paid for their work. Ghost producing is a legitimate profession, and many DJs and artists pay ghost producers to produce tracks for them. Ghost producers typically receive a flat fee or a percentage of the track’s profits.

What Is Ghost Producing?

Ghost producing is when a music producer creates content for an artist, but their name is not credited on the final product. The producer may work with the artist to create a song or album, but their involvement is kept secret.

The artist can then release the music as their own, without sharing the credit or profits with the producer.

Is It Legal To Ghost Produce?

Yes, ghost producing is legal as long as both parties involved agree to the arrangement and the ghost producer is compensated properly for their work. However, it is important to ensure that all legal and contractual agreements are in place to avoid any disputes in the future.

Conclusion

With the rise of electronic dance music and its high demand, ghost producing has become a popular option for aspiring producers. Ghost producing can offer a steady income while allowing producers to stay anonymous if that’s what they prefer. However, it requires dedication, persistence, and a lot of hard work to gain a good reputation in the industry.

To become a successful ghost producer, one must not only possess music production skills but also have a strong understanding of commercial trends, marketing, and the music industry as a whole. With enough proficiency and determination, becoming a ghost producer can be a rewarding career choice for music producers.

Categories
Archive

Hard Trap From Start To Finish In Ableton

Create a Hard Trap track in Ableton from start to finish by using aggressive sounds and heavy drums combined with distorted 808s. To make a Hard Trap sound, start by selecting the right tempo and creating a pattern for the drums, then layering them with various claps and snares.

Use distortion effects on your 808s to create a heavy, aggressive sound and add in some melodic elements to give the track depth. Finally, mix and master the track to achieve a professional sound. Hard Trap is a subgenre of Trap music that is known for its aggressive and hard-hitting sound.

It combines elements of electronic dance music with modern Hip-Hop, blending aggressive sounds and heavy drums with distorted 808s to create a unique and powerful sound. Creating a Hard Trap track requires an understanding of the genre’s characteristics, the right tools, and creativity. We will guide you through the steps to create a Hard Trap track in Ableton from start to finish, providing tips and techniques to help you achieve a professional sound.

Hard Trap From Start To Finish In Ableton

Credit: www.productionmusiclive.com

Getting Started

If you’re looking to make hard-hitting Trap beats, you’re in the right place. With Ableton Live, you can create a whole track from scratch within a single interface. This tutorial will guide you through the entire process of making a Hard Trap beat from start to finish.

Setting Up Ableton Live

First things first, you need to make sure Ableton Live is set up correctly. Here are the steps to follow:

  1. Download and install the latest version of Ableton Live
  2. Connect your MIDI controller (if you have one)
  3. Connect your studio monitors or headphones
  4. Configure the audio and MIDI settings in Ableton Live

Once you have set up Ableton Live, you’re ready to start creating.

Creating A New Project

Let’s create a new project and get started on making our Hard Trap beat:

  1. Open Ableton Live and create a new project
  2. Choose your desired tempo and time signature
  3. Create a new MIDI track
  4. Choose a Hard Trap drum kit or create your own
  5. Add a Hard Trap kick, snare, hi-hat, and percussion to the MIDI track
  6. Edit the MIDI notes to create a pattern for your beat

Congratulations, you’ve just created the foundation for your Hard Trap beat.

Choosing The Right Sounds

Choosing the right sounds is essential to creating a killer Hard Trap track. Here are some tips:

  • Choose sounds that are gritty and industrial
  • Use distorted basslines and 808s to add weight to your track
  • Experiment with different sound effects
  • Layer different sounds to create a unique sound

Remember, the key to creating a Hard Trap beat is to keep it simple and hard-hitting. Don’t be afraid to experiment and try new things.

That’s all for the Getting Started section of this tutorial. In the next section, we’ll dive into the specifics of creating a killer Hard Trap melody.

Hard Trap From Start To Finish In Ableton

Credit: www.productionmusiclive.com

Creating The Melody

Learn how to create a hard trap melody from start to finish in Ableton with our comprehensive tutorial. Follow along as we guide you through the process of creating a unique, standout melody that will elevate your trap productions.

Creating the melody is the backbone of any composition, and for hard trap, it is no different. Hard trap music is characterized by its complex and heavy melody lines, which are the lead instruments for the entire track. In this section, we will discuss how to create the melody for your hard trap track, step by step.

Using Midi Instruments

Before we dive into the process of designing a melody, it’s essential to choose the right MIDI instruments to work with. Generally, hard trap music relies heavily on synth sounds and digital instruments that can produce sharp and rich sounds. Therefore, it’s essential to pick the right MIDI instruments to achieve the desired sound. Here are some popular MIDI instruments for hard trap music:

MIDI InstrumentSound Type
MassiveHeavy Basses
SerumSharp Synths
Sylenth1Digital Synths

Designing A Melody

Once you’ve selected your MIDI instruments, it’s time to start designing the melody. It’s important to remember that the melody should be the focal point of your track. It should be catchy and memorable, so your listeners can immediately recognize it. Here are some steps to follow when designing a melody:

  1. Start by creating a four to eight bar loop; this will be the foundation for your melody.
  2. Use a pentatonic scale as the basis for your melody. These scales are widely used in hard trap music because they are easy to work with and create instant emotion.
  3. Experiment with different note sequences to find a catchy melody that you like. Often, simple melodies are the most effective in hard trap music
  4. Add some pitch bends, modulation, and portamento to make your melody more dynamic. These techniques can add variation and interest to your melody.

Adding Variation

The final step in creating the melody is to add variation. Variation is essential in hard trap music because it keeps the listener engaged and interested. Here are some ways to add variation to your melody:

  • Change the velocity of your notes to add some dynamics to your melody. This technique works well when you want to emphasize specific notes in your melody.
  • Use arpeggiators to create fast and complex sequences. These can be used to add variation to the sections of your melody and prevent it from becoming repetitive.
  • Experiment with different octaves to create a sense of movement in your melody. Shifting the melody to a lower or higher octave can create tension or release in your track.

By following these steps, you’ll be able to create a hard trap melody that’s catchy, dynamic, and memorable. Remember, the melody is the most crucial part of your hard trap track, so take the time to get it right.

Designing The Drums

Learn how to grind out hard trap beats from start to finish in Ableton with this step-by-step guide on designing the perfect drums. From creating the foundation to layering with effects, this tutorial will elevate your trap production game.

Crafting a catchy beat is the foundation of any Hard Trap track. Designing drums is a process that demands creativity, patience, and attention to detail. In this post, we’ll explore how to create a powerful Hard Trap drum sequence in Ableton Live, one of the most popular digital audio workstations (DAWs) out there. In this section, we’ll focus on selecting drum samples, building the kick and snare pattern, and layering percussion to add depth and impact to your track.

Selecting Drum Samples

Before diving into drum sequencing, you’ll need to select the right samples that define the sound of your track. Hard Trap drums need to be impactful and intense. Start by choosing a kick that packs a punch – look for samples that have a strong transient with a sharp attack and a long decay, around 20 to 50 Hz. Next, choose your snare sound – search for a snappy, punchy sample with a bright mid-range frequency. Also, remember that you can add multiple snares for a more complex and interesting sound. For the hi-hat and cymbals, focus on metallic sounds to add a shimmering edge to your track. Look for closed hi-hats, open hi-hats, and rides that complement your kick and snare sounds. Once you have the samples selected, create a drum rack in Ableton by dragging and dropping the samples you like.

Building The Kick And Snare Pattern

Now that you have your samples, it’s time to start building your kick and snare pattern. The typical Hard Trap beat follows a straightforward 4/4 rhythm, but there’s still room to create variation. For the kick, start with a basic pattern with the kicks landing on the first and third beats of the bars. For the snare pattern, you can add more variety to create a more interesting and complex beat. Experiment with placing the snares on the second and fourth beats, or add additional snares to create a rolling feel. You can also use a ghost snare on the off-beats to add extra rhythm to your beat.

Layering Percussion

Adding percussion to your beat adds depth and excitement to the track. Hard Trap drum patterns typically include a layer of percussion that complements the kick and snare. This layer could include shakers, tambourines, claps, or other percussive sounds. To layer percussion, create new tracks in Ableton and select percussion samples that complement your kick and snare sounds appropriately. It’s important to make sure each percussion sound fits in the frequency spectrum with other sounds without clashing. You can also experiment with panning and volume to create more space and movement in your track. Designing the drums is a critical step to creating a powerful and impactful Hard Trap track. With the right samples, building the kick and snare pattern, and layering percussion, you can create an excellent foundation for the rest of your production.

Adding The Bassline

Learn how to add a powerful bassline to your hard trap track in Ableton, in our comprehensive guide on producing hard trap from start to finish. Follow our step-by-step instructions and take your trap production skills to the next level.

Choosing The Right Bass Sound

The bassline is a crucial element of a hard trap track, and it is essential to choose the right bass sound for the genre. To get the right sound, you need to select the right plugin. You can use an 808-style bass or a distorted bass with a high-pass filter. Play around with different sounds until you find the one that fits the track.

Writing The Bassline

Now that you’ve chosen the right bass sound, it’s time to write the bassline. Start by making a new MIDI track and selecting the bass instrument. Keep in mind that the bassline should complement both the melody and drums, so it is important to listen to those elements while writing the bassline. Keep the bassline simple and repetitive. You can use the same pattern throughout the track, or you can introduce a variation at certain sections to add more interest.

Integrating It With The Melody And Drums

Once the bassline is ready, it’s time to integrate it with the melody and drums. To achieve a hard trap sound, you should keep the bass and drums in sync. You can do this by ensuring that the bass notes hit together with the kick drum. You can also use sidechain compression to carve out space for the kick drum in the mix. Make sure that the bassline and melody are in harmony with each other. You can add some pitch bends to the bassline to create more tension and interest. In conclusion, adding the bassline is an essential part of creating a hard trap track in Ableton. Choosing the right bass sound, writing a simple and repetitive bassline, and integrating it with the melody and drums are the key steps to get the desired result. With these tips, you can create a hard-hitting and catchy bassline that will keep the listener engaged throughout the track.

Mixing And Mastering

This tutorial covers the process of mixing and mastering a hard trap track in Ableton. From designing the sounds to arranging the composition, this step-by-step guide walks you through every aspect of creating a professional-sounding track.

When it comes to producing hard trap beats in Ableton, mixing and mastering are crucial steps that can make or break the quality of your final track. Balancing the levels, EQ and compression, adding effects, and mastering the track are important aspects of the mixing and mastering process that ensure a well-polished and professional-sounding beat.

Balancing The Levels

Balancing the levels is one of the most important steps in the mixing process. It involves adjusting the volume levels of each individual track in order to achieve a cohesive and balanced mix. You should aim for a mix where each element is audible without overpowering the others. A useful technique is to solo each track and listen to them individually and then compare them to each other to ensure the balance is perfect and the listener can hear every element.

Eq And Compression

EQ and compression are essential in the mixing process as they help shape the individual instrument and vocal sounds ensuring it’s clear and polished. You should use equalization to remove unwanted frequencies in your tracks and boost specific frequencies to enhance the sound. Compression can be used to increase the overall volume of individual tracks and make them more punchy and dynamic as well as making sure that the levels are consistent throughout the track.

Adding Effects

Adding effects such as reverb, delay, distortion, and filtering helps add depth and character to your beats. By using a combination of these effects you can create interesting and unique sounds. However, it’s important not to overdo the effects as it can cause the mix to sound muddy, cluttered, and unprofessional.

Mastering The Track

Mastering is the final step in the process that prepares the track for its commercial release. During mastering, you should use effects such as compression, limiting, and EQ to add final polish and get professional-sounding levels. The goal of mastering is to ensure the track sounds its best on any system. As you can see, mixing and mastering are essential skills for any producer. By following these steps, you can create professional-sounding hard trap beats in Ableton and take your music to the next level!

Arrangement

Learn how to create a hard trap track from start to finish in Ableton with this comprehensive arrangement tutorial. From building drum patterns to designing the perfect drops, this guide covers everything you need to know to create a powerful and impactful track that will impress listeners and get them moving.

Introducing Variation

When it comes to creating a hard trap track, introducing variation is crucial. Without variation, the track can become monotonous, causing the listener to lose interest. One way to introduce variation in your arrangement is by adding or removing elements from the track. For example, you can start with a few elements in the beginning and gradually add more as the track progresses. Similarly, you can strip away certain elements during the breakdown for a more minimalistic feel.

Creating Buildups And Drops

Buildups and drops are an essential part of any hard trap track. They create tension and release, which keeps the listener engaged. To create a buildup, you can start by gradually increasing the volume of the drums or adding more elements to the track. You can also use white noise or risers to create a sense of anticipation. When it comes to creating a drop, you can use a reverse cymbal or a snare roll to lead into the drop. Remember to keep the drop simple and impactful, so the listener can feel the release of tension.

Using Automation To Enhance The Track

Automation is a powerful tool in Ableton that can be used to enhance your hard trap track. You can use automation to create buildups and drops, add variation to the track, and create interest. For example, you can automate the low-pass filter on a lead synth during the buildup to create a sense of tension. Similarly, you can automate the volume of a sample during the drop to make it more impactful. Remember to be subtle with your automation, so it doesn’t become too distracting. Overall, arrangement is a crucial part of creating a hard trap track. By introducing variation, creating buildups and drops, and using automation, you can create a track that keeps the listener engaged from start to finish.

Hard Trap From Start To Finish In Ableton

Credit: www.productionmusiclive.com

Frequently Asked Questions For Hard Trap From Start To Finish In Ableton

Can You Make Trap Beats In Ableton?

Yes, Ableton can be used to make trap beats. Ableton has a variety of tools, like samplers, synthesizers, and MIDI control, that can be used to create complex and unique trap beats. With the right knowledge, anyone can make high-quality trap beats in Ableton.

How Do You Warp From Here In Ableton?

To warp from here in Ableton, select the clip and turn on warp mode. Then, add warp markers to adjust the timing of the clip. Use the stretch marker to adjust the overall length. You can also use the warp modes for different types of audio material.

How Do I Use Ableton Drum Bus?

To use Ableton drum bus, first create a new audio track and name it ‘Drums. ‘ Then, route all drum tracks to it by sending their outputs to the drum bus track. This allows you to control their volume and apply effects to them as a group.

Use the drum bus’ built-in compressor and EQ to finesse your drum sound.

What Is Hard Trap?

Hard Trap is a sub-genre of Trap music that features aggressive and heavy basslines, hard-hitting drums, and dark, ominous melodies. It’s often characterized by its use of distorted, gritty sound design and aggressive rap vocals.

Conclusion

Now that you have a clear understanding of creating a hard trap from start to finish in Ableton, it’s time to start producing your own unique tracks. By following the tips and techniques mentioned in this post, you can elevate your music production skills and become a successful hard trap producer.

Remember to keep practicing, experimenting, and evolving your sound to stand out from the competition. Happy producing!

Categories
Archive

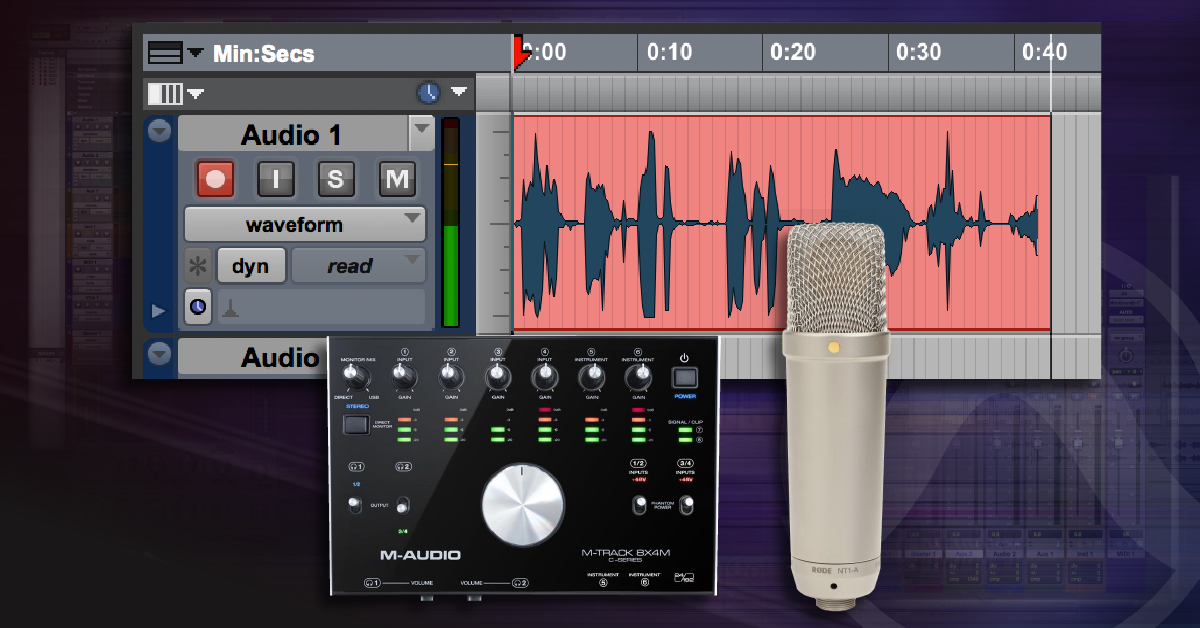
How To Set Recording Levels In Pro Tools

To set recording levels in Pro Tools, first adjust your input gain to capture the desired level without clipping. Then use Pro Tools’ metering tools to monitor and adjust levels throughout recording.

If you’re new to recording in Pro Tools, setting levels may seem like a daunting task. However, with the right approach, it can be a smooth and straightforward process that results in high-quality recordings. We’ll explore the steps you should take to set recording levels in Pro Tools, including how to adjust input gain and use metering tools to monitor and optimize levels.

We’ll also discuss some tips for ensuring your recordings sound as good as possible. So, let’s get started and learn how to set recording levels in Pro Tools!

Understanding Recording Levels

Understanding recording levels is vital when it comes to producing high-quality audio recordings. Recording levels refer to the measurement of the audio signal’s amplitude or volume level. It is the process of capturing audio in a way that it doesn’t clip or distort. Pro Tools offers a range of tools and features to help you set recording levels to produce an exceptional audio recording. This post will focus on explaining what recording levels are, why they are important in Pro Tools, and how to set them effectively.

What Are Recording Levels?

Recording levels refer to the strength or volume of the audio signal being sent to an audio interface or recorded in Pro Tools. It measures the amplitude of an audio signal, and it’s crucial to set it correctly during recording. Setting the recording levels too low will result in weak or low audio recordings, while setting it too high can cause distortion or clipping, ruining the entire recording.

Why Are Recording Levels Important?

Recording levels are essential for producing high-quality audio recordings. They determine how much digital information is captured and how well it can be manipulated. When recording, it’s crucial to ensure that the audio signal is strong enough to be captured without clipping or distortion. Setting the recording levels too low can result in audio that’s too quiet or that has noise. On the other hand, setting the recording levels too high can cause distortion, which can’t be fixed later in the mixing process.

One of the most important things to keep in mind when recording is to avoid clipping the audio signal. Clipping occurs when the audio signal exceeds the maximum input level of the system, resulting in distortion. Therefore, it’s crucial to set the recording levels low enough to avoid clipping but high enough to avoid noise.

In Pro Tools, setting the recording levels correctly can be challenging, especially if you’re dealing with multiple channels or microphones. However, with the right techniques, you can set the recording levels with ease and produce high-quality recordings.

Here are some techniques to help you set recording levels in Pro Tools:

  • Use preamps and adjust the gain accordingly.
  • Use the clip indicator in Pro Tools.
  • Use gain plug-ins on individual tracks.
  • Record a test take. Check the levels, adjust gain, and try again.
  • Use headphones to monitor for any distortion or clipping.

By using these techniques, you’ll be able to set recording levels effectively in Pro Tools and produce high-quality audio recordings that are free from distortion, noise, or clipping. Now that you understand the importance of recording levels and how to set them, you can produce high-quality audio recordings that sound professional and polished.

Preparing To Set Recording Levels

To set recording levels in Pro Tools, start by ensuring that your input source levels are properly calibrated. Next, adjust the level of your recording device to match the intended level of your recording. Use the Pro Tools metering system to monitor audio levels and achieve optimal recording levels.

Setting recording levels in Pro Tools can be a daunting task, especially if you are new to the software. However, with the right preparation and understanding, it can become a seamless process. A crucial part of setting recording levels is preparing adequately, and in this section, we will cover the three essential steps: the importance of headroom, selecting the right microphone, and choosing the right preamp.

Importance Of Headroom

Headroom refers to the space between the highest peak of your recording and the maximum level your hardware or software can handle. It is essential to have enough headroom to prevent clipping and distortion in your recording. As a general rule of thumb, it is best to aim for a peak level of -6 dB to -12 dB, leaving enough room for any unexpected peaks. It’s important to note that digital clipping can happen quickly and may not sound very pleasant. Thus, having sufficient headroom is critical when recording various instruments and signals.

Selecting The Right Microphone

The microphone you use will significantly affect the sound quality of your recording. When selecting the right microphone, consider its frequency response, sensitivity, and polar pattern. Choose a microphone that best suits the tone and character you want to achieve. For example, if you want a bright and crisp sound, a condenser microphone would be a good choice, while a dynamic microphone would be ideal for a warmer sound. The right microphone will make a significant difference in your recording quality.

Choosing The Right Preamp

A preamp amplifies the signal of a microphone, boosting the level to line level. The right preamp choice can add warmth, depth, and clarity to your recording. When selecting a preamp, consider your budget, the type of microphone and sound quality you are trying to achieve. A solid-state preamp can provide a clear and precise sound that is perfect for recording vocals, while a tube preamp may add warmth and depth to your recording. In conclusion, preparing adequately to set recording levels is crucial in achieving the best sound quality. Paying attention to headroom, selecting the right microphone, and preamp will go a long way in improving your recording quality. Remember, each piece of equipment you choose affects the final recording, so invest in quality equipment that is well-matched to your recording goals.

Setting Recording Levels In Pro Tools

Learn how to set recording levels in Pro Tools by first understanding how the gain structure works. Using proper gain staging techniques and metering tools can ensure the optimal recording levels for your audio tracks.

Creating high-quality recordings is essential for any musician or sound engineer. To achieve this, getting the right recording levels is crucial. In this post, we’ll guide you on how to set recording levels in Pro Tools, the most popular digital audio workstation. We’ll cover everything from creating a new session to using plugins to adjust levels. So let’s get started!

Creating A New Session

The first step in setting recording levels in Pro Tools is to create a new session. To do this, click on File > New Session. Choose the sample rate, bit depth, and other settings that match your project’s needs. It’s essential to set the correct session format since this will affect your recording quality. You can also select the number of tracks you want to create and name them according to your preference.

Setting Input Levels

Once you create your session and tracks, it’s time to set your input levels. This step is crucial since it determines the overall quality of your recording. To set input levels, click on the track’s recording input and then choose the input source. Ensure that the input signal is strong but not too high as this can cause distortion. Pro Tools’ meter can help you monitor input levels. The optimal range for input levels is between -18dbfs and -12dbfs.

Setting Trim Levels

After setting your input levels, the next step is to set your trim levels. Trim levels help to adjust the gain of the recorded signal to ensure consistency. To do this, click on the track’s fader, go to the mixer, and choose the trim plugin. Adjust the trim plugin to achieve the desired gain level. Trim levels should be set between -6db to 0db, depending on the recording’s dynamics.

Setting Clip Gain

Clip gain refers to adjusting the volume levels of specific clips in a track to ensure clarity. To set clip gain, click on the track’s clip gain utility and then choose the pencil tool. Use the pencil tool to draw lines on the clip gain waveform to increase or decrease volume levels. This step is crucial since it ensures that the overall mix sounds balanced and clean.

Using Plugins To Adjust Levels

Finally, you can use plugins to adjust your recording levels further. Pro Tools provides a wide range of plugins that can help you achieve the desired sound. Typically, you can use EQ plugins to shape the sound, compressors to control dynamics, and limiters to ensure consistency. Adjust the plugins to get the desired volume and tonal quality. In conclusion, setting recording levels in Pro Tools is crucial for producing high-quality audio recordings. By following the steps outlined above, you can achieve the desired sound with ease. Remember to monitor your input and trim levels using the meter and adjust them accordingly. Also, use plugins to refine your recordings further. Try implementing these tips and witness a significant improvement in your audio recordings.

Using Meters And Monitoring To Set Recording Levels

Setting recording levels in Pro Tools is crucial for producing quality audio. One way to ensure your levels are correct is by using meters and monitoring. Meters display the level of the audio signal and monitoring allows you to hear the audio and make adjustments. In this post, we will discuss different types of meters and how to use them for accurate recording levels in Pro Tools.

Understanding Different Types Of Meters

There are three main types of meters used in Pro Tools: Peak, RMS, and VU meters. Each type serves a different purpose, and understanding their differences is essential to recording quality audio.

Using Peak Meters

Peak meters display the highest point of the audio signal. In Pro Tools, peak meters are located on the channel strip and show the level of the input signal. To set recording levels using peak meters, start by playing the loudest part of the audio you will be recording. Adjust the input level until the peak meter is just below the red zone, ensuring that the audio does not clip.

Using Rms Meters

RMS meters measure the average level of the audio signal. In Pro Tools, RMS meters are located on the master track and indicate the level of the entire mix. To use RMS meters for recording levels, play the loudest part of the audio and adjust the input level, ensuring that the RMS meter does not go above -18 dBFS.

Using Vu Meters

VU meters measure the perceived loudness of the audio signal. In Pro Tools, VU meters are located on the channel strip and show the input level of the audio. To use VU meters for recording levels, play the audio and adjust the input level until the VU meter is at 0VU, indicating the optimum signal level.

Using Headphones For Monitoring

Monitoring the audio is another crucial step in setting recording levels. Headphones are an excellent monitoring tool as they allow you to hear the audio without any interference from the surrounding environment. To use headphones for monitoring, connect them to the output of your audio interface and adjust the volume so that you can hear the audio clearly without it being too loud or too soft.

Best Practices For Setting Recording Levels

Setting proper recording levels is crucial for achieving high-quality recordings in Pro Tools. Whether you’re recording vocals, guitars, drums, or any other instrument, it’s important to avoid clipping and leave enough headroom to avoid unwanted distortion. Following these best practices will ensure that your recordings sound clear, crisp, and professional.

Avoiding Clipping

Clipping occurs when the recording level is too high, causing the audio signal to distort. This can permanently damage your recordings and make them sound harsh and unpleasant. To avoid clipping, make sure that your recording levels are not consistently hitting the red on the meter. Instead, aim for levels that hover around -6 dB to -12 dB on the meter.

Leaving Headroom

Leaving headroom refers to leaving some space between the highest peak of your recording and the maximum level allowed before clipping occurs. This space is important because it prevents distortion and allows room for post-production processing. Aim to leave around 3-6 dB of headroom in your recordings to ensure clarity and avoid distortion.

Recording At A Consistent Level

Recording at a consistent level ensures that your recordings are well-balanced and easy to mix. Inconsistencies in recording levels can result in unbalanced tracks or require significant post-production processing to correct. To achieve consistent levels, use an external preamp or adjust the input gain on your interface to achieve a consistent level throughout the recording session.

Testing Recording Levels

Before starting any recording session, it’s critical to test your recording levels to ensure that they are set correctly. Use a test tone or a sound check to adjust your levels and verify that they meet your desired target. Additionally, periodically check your levels throughout the recording session to ensure that they remain consistent and free of clipping.

Using Compression And Limiting

Compression and limiting are processing tools that can help to control the dynamic range of your recordings and prevent clipping. These tools should be used sparingly and only when necessary, as overuse can result in unnatural-sounding recordings. Use compression and limiting to even out any volume inconsistencies and prevent clipping in your recordings.

How To Set Recording Levels In Pro Tools

Credit: m.youtube.com

Common Mistakes When Setting Recording Levels

Recording levels play a crucial role in the sound quality of a recording. Setting recording levels too high or too low can drastically affect the final outcome of your recording. In this article, we will discuss the common mistakes made when setting recording levels in Pro Tools and how to avoid them.

Recording Too Hot

Recording levels that are too high can cause distortion in your recording. This occurs when the level of the sound source exceeds the maximum level that the recording system can handle. It results in a fuzzy, unpleasant sound that is not fit for use.

To avoid recording too hot, it is important to monitor your levels carefully. Use a level meter to ensure that the levels do not exceed the maximum level. A good approach is to set your recording levels at -12 dB to -6 dB to allow room for headroom.

Not Leaving Enough Headroom

Headroom is the amount of space left between the recording level and the maximum level. When there is not enough headroom, you risk clipping the audio, which can result in unpleasant distortion of the sound.

It is important to leave enough headroom to avoid clipping. A safe level to set your recording levels is -12 dB to -6 dB. It allows for enough headroom while still capturing the audio signals at an optimal level.

Not Monitoring Levels Constantly

Monitoring levels is crucial to ensure that recording levels are set at the optimal level. Failure to monitor levels can cause fluctuations in the sound and volume, resulting in a recording that is not suitable for use.

It is important to monitor levels constantly during recording to ensure that levels are set at a constant level. Use a meter to monitor levels and adjust levels when necessary.

Using Incorrect Meters

Using incorrect meters can lead to inaccurate readings of the recording levels. This can result in levels that are either too hot or too low, leading to distortion or inaudible recordings.

Use meters that are designed for recording levels to ensure that levels are set at the optimal level for your recording. This can help you avoid issues such as clipping and distortion.

Overusing Compression And Limiting

Compression and limiting are useful tools in recording, but overusing them can lead to a recording that lacks dynamic range and sounds flat.

It is important to use compression and limiting sparingly and only when necessary. An over-compressed recording can be difficult to work with and often cannot be fixed in post-production.

Setting recording levels is a crucial part of the recording process. Avoiding the common mistakes that we have discussed can help you achieve a recording that sounds professional and is suitable for use in a variety of settings.

Troubleshooting Recording Level Issues

To troubleshoot recording level issues in Pro Tools, it’s important to set the levels correctly from the start. Use the Pre-Fader meter to set levels before recording and the Post-Fader meter to adjust levels during playback. Ensure that the signal never goes into the red, which can cause distortion.

Recording level problems can be frustrating for anyone working in Pro Tools. These problems can lead to distorted recordings, clipped signals, and overall subpar audio quality. Luckily, there are ways to troubleshoot these issues and ensure you get the best possible recording. In this article, we will cover the most common recording level issues and how to resolve them.

Identifying Distortion Problems

One of the most common recording level issues is distortion. Distortion occurs when the audio signal is too loud, causing it to clip and become distorted. To identify distortion problems, look for red indicator lights on your audio interface or monitors. Distortion can also be heard in the recording as a harsh, crackling sound.

Resolving Clipping Issues

Clipping occurs when the audio signal exceeds the maximum level of your recording system. To resolve clipping issues, you can lower the input gain on your audio interface or turn down the output level of your instrument or amplifier. You can also use a limiter plugin in Pro Tools to prevent clipping. A limiter will automatically reduce the level of audio that exceeds a specific threshold.

Adjusting Input And Output Levels

Adjusting the input and output levels in Pro Tools is crucial to achieving a clean and professional recording. To adjust the input level, use the gain control on your audio interface or microphone preamp. Be sure to set the gain level to a level that does not cause distortion or clipping. To adjust the output level, use the fader control in Pro Tools or the output level control on your audio interface.

Monitoring Critical Listening

Critical listening is essential for troubleshooting recording level issues. It involves using headphones or studio monitors to listen closely to the recorded audio and identify any problems. Be sure to listen for distortion, clipping, and overall audio quality. You can also use plugins in Pro Tools to analyze the frequency and dynamic range of your recorded audio. In conclusion, troubleshooting recording level issues in Pro Tools involves identifying distortion problems, resolving clipping issues, adjusting input and output levels, and monitoring critical listening. By following these tips, you can achieve high-quality recordings and avoid common recording level problems.

How To Set Recording Levels In Pro Tools

Credit: www.sweetwater.com

How To Set Recording Levels In Pro Tools

Credit: m.youtube.com

Frequently Asked Questions Of How To Set Recording Levels In Pro Tools

How Do I Change Audio Level In Pro Tools?

To change audio level in Pro Tools, you need to follow these simple steps: 1) Locate the track’s volume fader or pan; 2) Adjust the volume fader up or down; 3) Use the automation feature to create volume changes over time.

What Should Your Recording Level Be?

Your recording level should be at a consistent and optimal level throughout your recording. A good rule of thumb is to aim for levels to reach somewhere between -12dB and -6dB, with occasional peaks reaching a maximum of -3dB.

Where Do You Adjust The Count In When Recording In Pro Tools?

Adjusting the count in Pro Tools can be done in the Transport Window. You can choose the format and start value of the count, as well as set it to free run or continuous.

How Do I See Audio Levels In Pro Tools?

To see audio levels in Pro Tools, you can use the Mix window or the Edit window. In the Mix window, click on the “View” menu and choose “Mix/Edit Window View” followed by “Mix” or “Edit”. Then, select the track you want to view the audio levels for, and you should see a meter displaying the levels.

In the Edit window, click on the track and select “Show/Hide Track Controls”. From there, you can choose to display the audio levels meter.

Conclusion

Now that you are familiar with the basic recording level concepts, setting the correct recording level in Pro Tools is much easier. By following the recommended guidelines, you can produce high-quality audio recordings. Remember to adjust your gain staging properly, monitor your levels carefully, and keep your signal levels below the red zone.

Lastly, practice makes perfect, so keep experimenting with different levels until you find the perfect balance for your recordings. Happy recording!

Categories
Archive

Creating Your Own Gate Effect In Ableton Live

To create your own gate effect in Ableton Live, use the gate plugin provided in the software. With the help of the gate plugin, you can create a gating effect by controlling the level of a sound signal that passes through it.

Ableton Live is a versatile digital audio workstation that provides a wide range of plugins to create unique sound effects. One such effect is creating a gate effect. A gate effect allows you to control the level of a sound signal that passes through it.

You can create rhythmic stutter effects or remove unwanted noise from a track using a gate effect. Ableton Live has a built-in gate plugin that you can use to create your own gate effect. We will explore how to create a gate effect using Ableton Live’s gate plugin.

Understanding The Basics

Learn how to create your own gate effect in Ableton Live and add texture to your tracks with this simple tutorial. By understanding the basics of gating and using Ableton’s built-in tools, you can easily shape your sound and take your productions to the next level.

What Is Ableton Live?

Ableton Live is a powerful digital audio workstation that is widely used by music producers, DJs, and live performers. It is renowned for its user-friendly interface and ability to seamlessly integrate music production and performance. Live has two modes, the Arrangement mode, which is like a traditional timeline-based recording software, and the Session View mode, which enables you to create and perform musical ideas on the fly.

How To Set Up A New Project?

Setting up a new project in Ableton Live is quick and easy. After launching the software, click on “New Live Set” to start a new project. The default settings will give you a basic set-up with a tempo of 120 BPM and four audio tracks. However, you can customize the set-up depending on your preferences and project requirements. You can adjust the tempo, change the time signature, add more audio or MIDI tracks, and choose different effects presets. To create your own gate effect in Ableton Live, it’s essential to understand the basics of how the gate effect works. A gate effect allows you to control the volume of an audio signal based on a particular threshold level. Audio signals that fall below the threshold level will be attenuated or muted, while audio signals that exceed the threshold level will be unaffected. Using a gate effect, you can create rhythmic patterns, remove unwanted noises, and add dynamics to your mixes. In Ableton Live, you can use the Gate effect from the “Audio Effects” folder to create a gate effect. Once you’ve added the Gate effect to your audio track, you can adjust the settings, such as the threshold level, the release time, and the attack time, to achieve the desired effect. Experiment with different settings and automation to create unique and interesting gate effects that add texture and depth to your productions.

Creating Your Own Gate Effect In Ableton Live

Credit: elphnt.io

How To Create Your Own Gate Effect In Ableton Live?

Learn how to create your own gate effect in Ableton Live to add character and uniqueness to your tracks. With these simple steps, you can customize your sound and make your music stand out.

Creating your own gate effect in Ableton Live is one of the most exciting ways to add character and dynamics to your music track. With the help of the gate effect, you can shape and refine your sound in several ways. In this tutorial, we will guide you through the steps needed to create your own unique gate effect in Ableton Live that enhances the quality of your audio production.

Choosing Your Samples

Before you begin to create a gate effect in Ableton Live, you must choose the samples that you wish to process. A gate is a modulation effect that opens and closes based on the audio signal’s loudness, so it is vital to select samples that have clear and distinguishable amplitude variations. Percussion samples like drums, hi-hats, or snares are good examples as they present a sharp transient.

Adding The Gate Plugin

To begin, create a new audio track in Ableton Live, and drag the audio clip you want to apply the gate effect on to the track. Next, navigate to the audio effects folder on the left-hand side of the screen and drag the Gate plugin onto the audio track.

Adjusting The Threshold

For your audio clip to ‘gate,’ you need to set a threshold level for input volume above which the gate will open, and below which it will close. Adjusting the threshold is an essential part of creating the gate effect. You can do this by moving the threshold slider up or down, based on the range of your sound’s volume level.

Setting The Attack And Release

The attack and release controls are where the magic happens in gating. The attack determines how quickly the gate will open after the input level goes above the threshold. The release determines how quickly the gate will close after the input level drops back below the threshold. Try playing with these parameters to achieve the desired effect.

Playing With The Sidechain

Sidechain adds a fun and creative dimension to the gate effect. Sidechain enables you to apply the gate effect to one track based on an input from another track. It’s a great opportunity to create an effect that syncs with your track’s rhythm, adding groove and energy to the song. You can experiment with different sounds to find the right balance. In conclusion, creating your own gate effect in Ableton Live is all about experimenting, so don’t be afraid to experiment with different settings and samples to find the sound that works for you.

Advanced Techniques To Enhance Your Gate Effect

Enhance your Gate Effect in Ableton Live with advanced techniques to bring your music productions to the next level. By creating your own Gate Effect, you can enhance the rhythmic drive of your tracks and give them the extra boost they need to stand out.

With Ableton Live’s intuitive interface and powerful processing capabilities, you can take your music to the next level with ease.

Creating a gate effect in Ableton Live is a great way to clean up your mix and eliminate unwanted sounds. While the basic gate effect is useful, there are advanced techniques that you can use to take your sound to the next level. In this post, we will cover some advanced techniques that you can use to enhance your gate effect.

Modulating The Gate With Lfo

One way to enhance your gate effect is to modulate it with an LFO. LFO stands for Low-Frequency Oscillator, and it generates a repeating waveform that can be used to modulate various parameters in your track. By modulating the gate with an LFO, you can create rhythmic patterns that add movement to your sound. To do this in Ableton Live, you can use the Auto Filter device and select the LFO option. From there, you can adjust the rate and depth of the modulation to create the desired effect.

Experimenting With Different Shapes

Another way to enhance your gate effect is to experiment with different shapes. By default, the gate effect in Ableton Live uses a square-shaped waveform to open and close the gate. However, you can change the shape of the waveform to create different effects. For example, a sine wave shape will create a smoother opening and closing of the gate, while a triangle wave shape will create a more linear effect. To experiment with different shapes, you can use the Gate device in Ableton Live and select the shape option.

Creating A Pseudo Sidechain With Autopan

You can also create a pseudo sidechain effect with the Autopan device in Ableton Live. The sidechain effect is a popular technique that is used to create a pumping effect in electronic dance music. While the traditional sidechain effect uses a compressor, you can achieve a similar effect with the Autopan device. To do this, you can set the phase option to 0 degrees and adjust the rate and depth of the modulation until you achieve the desired effect.

Using Eq To Shape The Sound

Lastly, you can use EQ to shape the sound of your gate effect. By using EQ, you can enhance certain frequencies and cut out unwanted frequencies. For example, you can boost the high frequencies to add more sparkle to your sound, or you can cut out the low frequencies to remove unwanted rumble. To do this in Ableton Live, you can use the EQ Eight device and adjust the frequency bands until you achieve the desired effect. Using these advanced techniques will allow you to take your gate effect to the next level and add more creativity to your mix. Try experimenting with these techniques and see how they can enhance your sound.

Creating Your Own Gate Effect In Ableton Live

Credit: www.youtube.com

Tips And Tricks For A Better Gate Effect

Enhance your music production skills by creating your own gate effect in Ableton Live. By experimenting with different controls such as threshold and attack time, you can achieve a better sounding and more tailored result. Follow these tips and tricks for a better gate effect experience.

Creating a gate effect in Ableton Live is an incredibly useful tool to shape your audio recordings or live instruments. As with any audio effect, there are certain tips and tricks that you can use to make the most out of your gate effect. Here are a few things to keep in mind when creating your own gate effect:

Avoiding Clicks And Pops

One of the most common issues when using a gate effect is the presence of clicks and pops. These unwanted sounds can occur when the gate closes too quickly or when it opens too abruptly. To avoid clicks and pops, try adjusting the attack and release settings of the gate effect. This will smooth out the transition and create a more natural sound.

Setting The Gate To The Right Timing

Timing is everything when it comes to creating a gate effect. The gate needs to open and close at just the right moment to achieve the desired effect. To set the gate to the right timing, try experimenting with the threshold, hold, and release settings. These settings can help you fine-tune when the gate opens and closes.

Using Multiple Gates In Parallel

Using multiple gates in parallel is a great way to create complex gating effects. By using two or more gates at the same time, you can create unique sounds and rhythms that would be impossible with a single gate effect. To do this, simply add multiple gate effects to your track and adjust the settings to create the desired effect.

Automation For Dynamic Effects

Automation is a powerful tool for creating dynamic gate effects. By automating the gate effect parameters, you can create complex and evolving sounds that change over time. To automate the gate effect, simply right-click on the parameter you want to automate and select “show automation.” From there, you can draw in automation curves to create the desired effect. In conclusion, these tips and tricks can help you create a more effective and dynamic gate effect in Ableton Live. By avoiding clicks and pops, setting the gate to the right timing, using multiple gates in parallel, and automating the effect, you can take your gating to the next level.

Examples Of Famous Tracks That Use Gate Effect

Famous tracks like “Another One Bites The Dust” and “Billie Jean” utilize the gate effect to create rhythmic beats. With Ableton Live, you can easily create your own gate effect and add it to your tracks for a unique, professional sound.

Gate effect is an essential tool in the music industry, widely used for creating dynamic tracks that engage listeners. It is recognized for its ability to create short, percussive bursts and create an exciting, rhythmic feel. Here are some examples of famous tracks that use gate effect:

Queen – Another One Bites The Dust

Queen’s Another One Bites the Dust is renowned for its infectious bass groove, which was created using a gate effect. The effect gate-clipped the bass guitar’s sound, and then the sound is repeated in a rhythmic sequence. This produced the catchy bassline that the track is famous for.

Daft Punk – One More Time

Daft Punk’s One More Time is another track that uses the gate effect to create its memorable intro sequence. The effect fades in the opening notes, pump them up to full volume, and then reduce them once again, and repeat the cycle.

Metallica – One

Metallica’s song One is a classic example of gate effect used with a reverse reverb. The technique is used to create a pad of sorts for the song’s intro, which creates tension and anticipation for the listener. This makes the entrance of the full band hit harder, a technique often used in Metallica’s music. In conclusion, gate effect is an effective tool for creating dynamic, rhythmic music tracks. The technique has been used to great effect in numerous chart-topping hits across the years.

Creating Your Own Gate Effect In Ableton Live

Credit: www.productionmusiclive.com

Frequently Asked Questions Of Creating Your Own Gate Effect In Ableton Live

How Do I Make A Gate In Ableton?

To make a gate in Ableton, insert a gate plugin on the track of your choice and adjust the threshold and attack/release times according to your needs. You can also use Ableton’s built-in gate effect in the audio effects section of the browser.

Does Ableton Have A Gate?

Yes, Ableton Live includes a gate effect that can be used to cut off or reduce audio signals below a certain threshold. The gate can also be used to create rhythmic effects with audio signals.

Does Ableton Have A Noise Gate?

Yes, Ableton does have a noise gate feature. It is included in the audio effect rack and can be used to minimize unwanted background noise and improve the overall sound quality of your recordings.

What Is Gate Fx?

Gate FX is a signal processing technique used in audio mixing to remove unwanted sounds during recording. It helps reduce unwanted noise and improves the sound quality of the final product.

Conclusion

To sum up, by creating your own gate effect in Ableton Live, you can add a dynamic element to your tracks, making them more interesting and engaging. With the steps outlined in this post, you can easily experiment with different settings and achieve different outcomes depending on your needs.

Don’t be afraid to play around with the parameters and make it your own. Remember to save your settings as presets for future use. With a little creativity and experimentation, the possibilities are endless. Happy experimenting!

Categories
Archive

Creating Drakes Marvins Room Reverb Effect

Creating Drakes Marvins Room reverb effect can be achieved by using a combination of plugins and mixing techniques. To recreate the sound, you will need a reverb plugin, a compressor, and an EQ plugin.

Drake’s 2011 hit “Marvins Room” is an emotional ballad that is characterized by its distinct reverb effect. The song’s producer, Noah “40” Shebib, is known for his unique production style that often features a heavy use of reverb and other effects.

Recreating this effect can be challenging, but with the right tools and mixing techniques, it is possible. The key is to use a combination of plugins such as a reverb, compressor and EQ, while also making adjustments to the wet/dry mix and the pre-delay time. We will walk you through how to create Drakes Marvins Room reverb effect so that you can apply it to your own music productions.

Creating Drakes Marvins Room Reverb Effect

Credit: www.youtube.com

Understanding Reverb

Achieving the signature reverb sound on Drake’s Marvin’s Room can elevate your music production to the next level. Understanding reverb and its different parameters like decay time and pre-delay can help you achieve this effect. By experimenting with the right settings and plugins, you can create a rich and immersive sound that brings your music to life.

When it comes to creating a unique and original sound for your music, adding effects becomes a critical aspect. One of the most popular and widely used effects is reverb. Understanding reverb is essential for music production.

What Is Reverb?

Reverb is a type of audio effect that aims to replicate the natural reverberation of sound in a physical space. It refers to the persistence of sound after it has been produced. Reverb effect adds depth and spaciousness to your music.

Types Of Reverb

There are different types of reverb, some of which include plate, chamber, hall, and spring. Each type of reverb provides a slightly different sound, which means that choosing the appropriate type is necessary to achieve the desired effect.

Parameters Of Reverb

Understanding the parameters of reverb is crucial in manipulating the sound. The parameters include decay time, room size, pre-delay, diffusion, and many more. Each parameter plays a significant role in the sound produced, so getting them right is imperative. Whether you’re a beginner or a seasoned music producer, understanding reverb is essential in creating unique sounds. So, take the time to learn the different types of reverb and the parameters involved to create the best possible sound.

Creating Drakes Marvins Room Reverb Effect

Credit: www.youtube.com

Setting Up The Daw

To create Drake’s “Marvin’s Room” reverb effect, it is important to properly set up the DAW. This involves adjusting the input and output levels, choosing the right audio interface, and selecting the appropriate plugins for your project. With careful attention to detail, you can achieve the desired professional sound.

Selecting The Right Daw

Choosing the right DAW (Digital Audio Workstation) is the first and most crucial step towards creating the perfect Drake Marvin’s Room reverb effect. Some of the popular DAWs among music producers worldwide include Ableton Live, Cubase, Logic Pro X, and FL Studio. You should choose a DAW that you are comfortable with and has all the tools you need to achieve the desired sound effect.

Setting Up The Session

After selecting your preferred DAW, it’s time to set up your session. The session refers to the individual project files that contain all your recorded audio, MIDI, and effects. Follow these steps to set up your session:

  1. Create a new project and name it accordingly. Ensure that the project’s tempo matches the tempo of Drake’s Marvin’s Room song (80 bpm).
  2. Choose the project’s sample rate and bit depth, which will determine the audio quality.
  3. Choose your preferred audio input and output device. Ensure that they are set up correctly and can receive and send audio signals.
  4. Create a new audio track and set it to receive input from your microphone or external sound card. Ensure that the track is armed and ready to record.
  5. Set up your preferred audio effects, including EQ, reverb, delay, and compression, to create the Marvin’s Room reverb effect.

Following these steps will set up your DAW session for creating the perfect Drake Marvin’s Room reverb effect. Remember, the key is to experiment with your audio effects and create your unique sound.

Finding The Right Source Sound

To create a sound close to Drake’s Marvin’s Room reverb effect, start by finding the right source sound. In this article, we’ll discuss different techniques for recording audio to get the perfect sound for your reverb effect. Selecting the right sound is crucial as it serves as the foundation for the entire reverb. Here are a few things to keep in mind when selecting a sound for your reverb.

Selecting The Right Sound

To achieve the perfect reverb, you need to select a sound that is clean and has a good dynamic range. It should have enough clarity to allow the reverb to stand out. A good source sound will be a single source of sound, such as vocals with minimal background noise. The quieter the sound, the better it is for reverb as it gives more space to work with reverb effects.

Different Techniques For Recording Audio

When recording audio, capturing a good sound is the first step to producing a great reverb effect. Different recording techniques can help you achieve the desired result. Below are a few techniques for recording audio:

TechniqueDescription
X-Y Stereo Mic TechniqueThis technique involves placing two cardioid microphones next to each other with their heads positioned at a 90-degree angle. It’s ideal for recording a solo instrument such as a guitar or vocal.
Spaced Pair TechniqueThis technique involves spacing two identical microphones a few feet apart from each other. It’s ideal for recording ambience or multiple instruments.
Close-Mic TechniqueThis technique involves placing the microphone as close to the sound source as possible. It’s ideal for recording an instrument with less ambient sound.

Once you’ve selected the right sound and recorded it using the appropriate technique, the next step is to process it. Use plugins to add reverb and other effects that will enhance the quality of the sound. Remember to experiment with different techniques until you find the perfect reverb that suits your sound.

Creating The Reverb Effect

To achieve Drake’s Marvins Room reverb effect, start by layering a vocal track and duplicating it. Use a long reverb plugin with a short decay time and adjust the mix and EQ to create the desired effect. Experiment with adding delays and doubling the vocals for a richer sound.

Creating the reverb effect for Drake’s Marvin’s Room is a key element to achieving the atmospheric and moody vibe of the song. In this section, we will explore the steps to create the reverb effect using a plugin, adjusting the parameters, and adding automation to create movement. Using a reverb plugin: Firstly, select a reverb plugin that suits the tone of the vocals and the overall mood of the track. A plugin with a smooth tail, such as the Valhalla VintageVerb, is a popular choice for Drake’s Marvin’s Room reverb effect. Adjusting the parameters: Once the plugin is selected, adjust the parameters such as decay time, pre-delay, and high/low cut to achieve the desired reverb effect. Set the decay time to a longer duration if you want to create a larger space feel. Pre-delay will give a sense of space between the vocals and their reverb. High and low cut can be used to adjust the frequency range of the reverb effect. Using automation to create movement: Adding automation to the reverb effect can enhance it by creating movement between the vocal phrases to add interest. Use the automation to increase the reverb’s depth and wetness during specific lyric phrases, which will emphasize the emotions conveyed in the lyrics. Experiment with different automation patterns to bring your track to life. In conclusion, creating the reverb effect for Drake’s Marvin’s Room is critical to the overall tone of the song. With the right plugin, adjusted parameters, and automation techniques, you can create a moody, atmospheric reverb effect that captures the essence of the track.

Enhancing The Effect

If you’re a fan of Drake’s music, then you’ve probably heard the reverb effect used in his hit song, “Marvin’s Room.” This effect is commonly used by sound engineers to give vocals a sense of space, depth, and warmth. However, that doesn’t mean that you can’t create this effect too! In this post, we’ll take a look at how to create Drake’s Marvin’s Room reverb effect and then enhance it using EQ and compression to take it to the next level.

Adding Eq To The Effect

One way to enhance the reverb effect is to use EQ. This involves adjusting the levels of different frequencies in the signal to create a more balanced sound. For instance, boosting the lower frequencies will add warmth to the vocals, while cutting the higher frequencies will remove any harshness or sibilance.

Here’s how to add EQ to the reverb effect:

  1. Insert an EQ plugin on the vocal track that you want to add reverb to.
  2. Adjust the EQ settings to your preference. For example, you might want to boost the low frequencies by around 3dB and cut the higher frequencies by around 2dB.
  3. Insert a reverb plugin on the same track and adjust the reverb settings to your preference.
  4. Use the wet/dry mix to balance the amount of reverb applied to the signal, and adjust the EQ settings as needed to further enhance the effect.

Using Compression To Balance The Sound

Another way to enhance the reverb effect is to use compression. This involves reducing the dynamic range of the signal by attenuating the loudest parts and boosting the quietest parts. This helps to create a more consistent and balanced sound, making it easier to hear the reverb effect.

Here’s how to use compression to balance the sound:

  1. Insert a compressor plugin on the vocal track that you want to add reverb to.
  2. Adjust the compressor settings to your preference. For example, you might want to set a ratio of 2:1, a threshold of around -20dB, and a medium attack and release time.
  3. Insert a reverb plugin on the same track and adjust the reverb settings to your preference.
  4. Use the wet/dry mix to balance the amount of reverb applied to the signal, and adjust the compressor settings as needed to further enhance the effect.

In conclusion, adding EQ and compression to the reverb effect can help to create a more polished, professional sound. With a little bit of experimentation, you can use these techniques to take your music production to the next level and create a sound that’s uniquely your own.

https://www.tiktok.com/api/img/?itemId=7331445348453420331&location=0&aid=1988

Credit: www.tiktok.com

Applying The Effect To The Mix

To create the Drake’s Marvin Room reverb effect, applying the effect to the mix is an essential step. This involves using the right settings for the reverb effect and ensuring it blends seamlessly with the rest of the mix.

Determining Which Tracks Need The Effect

Before applying the Drake’s Marvin Room Reverb effect, you need to identify which tracks need it. This is an important step because applying the effect to the wrong track may result in a muddy and unpleasant mix. Usually, you will want to apply the effect to the vocals, but you can also experiment with applying it to other tracks such as the drums or guitar. To determine which tracks need the effect, listen to each track individually and then listen to the whole mix. If you find that a track sounds a bit dry compared to the other tracks, then it may benefit from the effect.

Effects On The Overall Mix

When applying the effect to the mix, it’s important to consider its effects on the overall sound. It can add depth and space to the mix, but it can also make it sound muddy if applied too heavily. One way to avoid this is to use the effect subtly and only apply it to the tracks that really need it. Another approach is to use a parallel processing technique, where you create a duplicate of the track and apply the effect to the duplicate only. By doing this, you can blend the original and duplicate tracks to achieve the desired effect without affecting the overall sound too much. In conclusion, applying the Drake’s Marvin Room Reverb effect can add depth and space to your mix, but it’s important to use it judiciously and only on the tracks that really need it.

Frequently Asked Questions On Creating Drakes Marvins Room Reverb Effect

Does Drake Use Reverb?

Yes, Drake does use reverb in his music to add depth and a sense of space to his vocals and instrumentals.

What Instruments Are Used In The Song Marvins Room?

The main instruments used in the song “Marvins Room” are a piano and drums with additional background vocals and synth effects.

How Do I Add Reverb To My Vocals?

To add reverb to your vocals, you can use a digital audio workstation (DAW) or a reverb pedal. In a DAW, simply add a reverb effect to the vocal track and adjust its parameters. With a reverb pedal, connect your microphone to the input and adjust the settings to your preference.

Who Is The Girl’s Voice In Marvins Room?

The girl’s voice in Marvins Room belongs to Ericka Lee, a singer and songwriter who co-wrote the song with Drake.

Conclusion

Creating the Marvins Room Reverb Effect used in Drake’s popular song can be achieved with the right tools and techniques. By understanding the principles of reverb and having access to quality plugins, you can effectively recreate this effect. With a little patience and experimentation, you can produce a similar sound that adds depth and emotion to your music.

By following these steps, you’ll be able to achieve a professional-sounding Marvins Room Reverb Effect in no time.

Categories
Archive

How To Add The Finishing Touches To A Final Mix

Adding the finishing touches to a final mix involves performing a thorough evaluation of the mix and making tweaks to achieve a polished sound. We’ll explore some essential tips for adding those final touches to your mix.

The final mix is the product of all the hard work put into recording, editing, and mixing a track. However, a great final mix can still be improved with the right finishing touches. It involves paying attention to the finer details and making small tweaks to enhance the overall sound and balance of the mix.

The process can be challenging, but it’s worth it to achieve a polished and professional sound. We’ll be sharing some essential tips for adding those final finishing touches to your mix.

Assessing Your Final Mix

When adding the finishing touches to a final mix, it is important to assess the overall sound quality and make adjustments where necessary. This includes listening for balance, clarity, and consistency throughout the track. With careful attention to detail, the final mix can truly shine and impress listeners.

After spending hours mixing audio tracks, it can be challenging to resist the temptation to call it a day and declare that your job is done. However, adding the finishing touches to a final mix is a crucial step in achieving the best possible outcome. Before submitting your final work, it is essential to assess your mix in its entirety to ensure that every aspect is perfect. Here are some simple steps to help you assess your final mix effectively.

Listen With Fresh Ears

The first step in assessing a final mix is to listen to it with as fresh ears as possible. Take a break for a few hours or days before you begin your assessment. This break time will allow you to hear the mix from a fresh perspective and identify any problem areas more easily. Make sure to get rid of all possible distractions when listening to your final mix. Turn off your phone, move to a quiet room, and put on some high-quality headphones or speakers to avoid any interference. Listen to your mix multiple times at different volume levels to ensure adequate balance.

Take Notes

It’s essential to take notes as you listen to your final mix. Pay close attention to every detail of the audio tracks, including the dynamics, clarity, balance, and overall feel. Write down everything that you think needs adjusting or improving. If you notice areas with unwanted noise, note what kind of noise it is and where it appears. Be specific when taking notes, allowing yourself to determine the necessary adjustments accurately.

Evaluate Dynamics

The dynamics of your final mix play a significant role in producing a professional-sounding end product. Evaluate the dynamics by focusing on the volume levels and the transitions between different parts of the mix. Ensure that every instrument is audible, and the overall mix doesn’t have any spots that are overpowering or inaudible. Also, pay attention to the stereo image and panning to ensure that the audio sits well in the stereo spectrum. Finally, give your final mix a quick listen, this time for any remaining issues. If there are none, congratulations – you’ve got your finalized mix. If there are improvements that can be made, take the time to work on them, following these processes again until you’re happy.

In Conclusion

With these simple steps, you can add the finishing touches to your final mix to create a masterpiece that you can be proud of. Remember, assessing your final mix is an essential part of the music production process and can take some time. Take your time, listen carefully, take notes, and evaluate each aspect methodically, until you can safely say that you’re satisfied with the result.

Equalization

Equalization is one of the final touches that can make a big difference to a mix. By balancing the frequency levels of each instrument and sound, you can create a more cohesive and professional-sounding track. With careful tweaking of EQ settings, you can bring out the best in each element of your mix and add a polished finish.

Sweep For Problem Frequencies

Before shaping the tone of your mix with equalization, you need to identify and remove any problem frequencies that might be causing issues. These can include unwanted noise, hums, or resonances that are muddying up your mix. One way to do this is by sweeping through the frequency spectrum with a parametric EQ, looking for any offending frequencies that you can cut or notch out.

Shape Tone With Eq

Once you have cleared up any problem frequencies in your mix, you can then use equalization to shape the tone to your liking. EQ is an incredibly powerful tool that can be used to enhance or reduce the character of individual instruments or tracks, as well as balance the overall mix. When shaping the tone of your mix with EQ, it’s important to approach it in a musical way. Rather than simply boosting or cutting frequencies based on a technical analysis of the mix, try to use your ears and make adjustments based on what sounds good to you. Here are some tips for using EQ to shape the tone of your mix:

  • Start by listening critically to your mix and identifying which instruments or frequencies need to be emphasized or reduced.
  • Use a gentle touch when boosting frequencies to avoid harsh or unnatural sounds.
  • Cut frequencies instead of boosting whenever possible to reduce muddiness and improve clarity.
  • Use broad Q settings for subtle tonal shaping, and narrow Q settings for surgical precision.
  • Employ a high-pass filter on tracks that don’t need low-end information to clean up your mix.

By using these techniques, you can carefully sculpt the tone of your mix and add the finishing touches that bring it to life. Don’t be afraid to experiment and trust your ears – with a little patience and practice, you can achieve amazing results with equalization.

Compression

When it comes to adding the finishing touches to a final mix, compression is a vital tool that can help balance levels, add punch and sustain to your mix. Compression has the ability to reduce the dynamic range of an audio signal, which makes loud sounds quieter and quiet sounds louder. It essentially evens out the levels of a track, making it sound more polished and professional.

Balance Levels

The first step in using compression is to balance the levels of all the tracks in your mix. By doing this, you’ll ensure that no track is too loud or too quiet, and that everything sits nicely within the mix. This can be accomplished by using a compressor with a low ratio and threshold, and then adjusting the settings until the levels of each track are balanced. Make sure that you don’t over-compress, as this can lead to a loss of dynamics and a dull-sounding mix.

Add Punch And Sustain

Once you’ve balanced the levels of your tracks, it’s time to add some punch and sustain to your mix. This can be achieved by using a compressor with a higher ratio and threshold. By doing this, you’ll be able to add some weight and thickness to your tracks, making them sound more powerful and impactful. For added sustain, you can also use a longer attack time, which allows the compression to kick in a bit later, and a longer release time, which lets the compression linger a bit longer.

Tip:When using compression, it’s important to use your ears and trust your instincts. Compression can be a subtle art, and it can take some time to develop an ear for it. Don’t be afraid to experiment and try different settings until you find the ones that work best for your mix.

Compression is a powerful tool that can take your mix to the next level. By using it to balance levels, add punch and sustain, you’ll be able to achieve a polished and professional sound that will impress even the most discerning listener.

Reverb And Delay

When it comes to audio mixing, Reverb and Delay are essential elements. They help in shaping the sound and add character to the music. In this post, we will discuss how to use Reverb and Delay to add the finishing touches to a final mix.

Create Space

Reverb is used to create space in the mix, making it sound like the music is played in a particular environment. To add Reverb to a track, insert a plugin in the effect chain and adjust the settings until you find the desired sound. You can choose from various types of Reverb, such as Plate, Hall, or Room.

Add Depth

Delay is an effect that adds a duplicate of the sound to the mix, delayed by a specific time period. This effect can help you add depth to a track that sounds flat. You can adjust the Time and Feedback controls to add more or less delay to the sound. Also, you can choose from various types of Delay, such as Analog, Digital, or Tape Delay.

Enhance Stereo Image

You can use Reverb and Delay to enhance the Stereo Image of a mix. By adding more Reverb to one side of the mix and less to the other, you can create a stereo spread effect. Also, by adding a small delay to one side of the mix, you can create a stereo widening effect.

Conclusion

Reverb and Delay are powerful tools that can add character and depth to your music. With the right settings, you can create a professional-sounding mix that stands out. Keep in mind that less is often more, and use these effects sparingly to avoid clashing or muddying the mix.

Stereo Enhancement

Adding stereo enhancement can bring the final mix to life by providing a wider and more immersive sound experience. By using techniques such as panning, EQ adjustments and reverb, you can give each instrument or vocal its own space in the mix and add depth and dimension.

Stereo enhancement is how you get your final mix to stand out. It creates a wider, more spacious sound that makes your tracks sound professional and polished. There are several ways to enhance your stereo mix, but two of the most popular are panning and widening effects.

Use Panning

Panning is an essential tool for stereo enhancement. It helps you to position sound sources within the stereo field. You can move sounds to the left, right, or anywhere in between to create a sense of space and depth. For example, you can pan your lead guitar to the right and your rhythm guitar to the left to create separation between the two. Make sure you don’t overdo it with panning. If you pan everything too much, your mix may sound unbalanced or even confusing. Use panning to create a natural-sounding stereo field.

Add Widening Effects

Another popular technique for stereo enhancement is to add widening effects. These effects create a sense of space by spreading the sound across the stereo field. Common widening effects include chorus, delay, and reverb. Chorus effect is a great tool for widening, which adds copies of the original sound, each with a slightly different pitch, time, and/or modulation level. It creates a lush, stereo sound that is perfect for guitars, vocals, and synths. Delay and reverb are other common widening effects, which create a natural-sounding stereo field by introducing reflections and echoes. They can add depth to your mix and create a sense of space. Stereo enhancement is crucial to creating a final mix that sounds polished and professional. Using panning and widening effects can help you create a sense of space and depth in your tracks. However, make sure you don’t overdo it. Use these techniques to create a natural-sounding stereo field that complements your overall mix.

Automation

Adding the finishing touches to a final mix is one of the most important stages of music production. Automation is a powerful tool that can help you make detailed adjustments and even create movement to take your mix to the next level.

Make Detailed Adjustments

Automation allows you to make detailed adjustments to specific elements of your mix. For example, you can automate the volume of a vocal track to make certain words or phrases stand out in the mix. You can also use automation to adjust the panning of individual elements to create a wider stereo image.

Examples of Detailed Adjustments with Automation
AdjustmentTechnique
VolumeAutomate the volume of individual elements to create a dynamic mix.
PanningAutomate the panning of individual elements to create movement and a wider stereo image.
EQAutomate the EQ of individual elements to create space and clarity in the mix.

Create Movement

Automation can also be used to create movement in your mix. By simply automating the volume, panning, or effects of specific elements, you can create a sense of movement and dynamics that can keep the listener engaged throughout the song.

  1. Automate the volume of a synth to create a sweeping effect throughout the mix.
  2. Automate the panning of a guitar to create a sense of movement from left to right.
  3. Automate a reverb or delay effect to create a sense of space and depth in the mix.

Automation is a powerful tool that can take your mix to the next level. By making detailed adjustments and creating movement, you can create a sense of depth and dynamics that can keep your listeners engaged throughout the song.

Finalizing Your Mix

Finalizing a mix is not as simple as it sounds. It is the process of putting on the finishing touches which can make all the difference to the quality of your music. In this section, we will discuss various techniques to finalize your mix. By following these techniques, you can give your tracks a professional finish that will impress your audience.

Eliminate Noise

Eliminating noise is an important step to make your mix sound clean and crisp. To do this, make sure all the tracks in your mix are free from unwanted background noise. Use noise reduction tools such as EQ, filters, and noise gates to remove any unwanted noise.

Check Phase

Checking the phase of your mix is often overlooked, but it is a crucial step to ensure the best possible sound quality. Make sure that all the tracks in your mix are in phase with each other. You can do this by flipping the phase of one track and listening to the result. If it sounds hollow or thin, then the tracks are out of phase. Correct any problems and ensure that all the tracks are in phase before proceeding further.

Sweeten With Mastering Effects

Now that you have eliminated noise and checked the phase, it is time to add some mastering effects to the mix to sweeten it up. Mastering effects such as equalizers, compressors, and limiters can help to enhance the overall sound of your mix. Use them wisely to add warmth, punch, and clarity to your tracks. However, be careful not to overdo it, as too much processing can ruin your mix.

By using the techniques mentioned above, you can create a high-quality final mix that is ready for mastering and distribution. Take your time, listen carefully to each step, and make sure that every element of your mix is perfectly balanced. With a little patience and practice, you can create a professional mix that will sound great on any sound system!

Frequently Asked Questions On How To Add The Finishing Touches To A Final Mix

What Is Adding Finishing Touches?

Adding finishing touches refers to the final steps taken to refine and enhance a text, design, or project. It involves revising, editing, and polishing the work to ensure that it meets the desired standards and objectives. Finishing touches may include proofreading for errors, adjusting formatting and layout, enhancing visual elements, and ensuring overall coherence and clarity.

How Do You Make A Song Sound Finished?

To make a song sound finished, focus on crafting a strong structure with a clear beginning, middle and end. It’s important to hone in on the lyrics and ensure they convey a clear message that connects with the listener. Consider the instrumentation and production, ensuring there is a cohesive sound throughout the song.

Finally, take the time to mix and master the track to bring out the full potential of the music.

How Do You Mix Tracks From Start To Finish?

To mix tracks from start to finish, you need to first set levels for the individual tracks, followed by pan and EQ adjustments. Then, add effects and automation to enhance the sound. Finally, export the mix and perform a final check for quality and consistency.

How Should A Mix Sound Before Mastering?

A mix should sound well balanced and have all elements audible without any being too loud or too soft. It should also be free of any clipping or distortion, and have a consistent volume throughout.

Conclusion

Achieving the perfect balance in a final mix is no easy feat, but with the use of the right tricks and techniques, it is definitely achievable. By following the steps outlined you can take your mix from good to great with just some finishing touches.

Remember to keep your ears peeled for any imperfections, and always experiment with new ideas to keep things fresh. With practice and perseverance, you will be able to deliver professional quality mixes for all of your musical projects. Time to get creative!

Categories
Archive

Make Your Songs Louder With A Limiter

A limiter can make your songs louder by compressing the dynamic range. Here’s how to use it effectively. For the bigger picture, see our tips for increasing loudness in a mix.

Also, using a limiting is one of the most common techniques used to make music sound louder and punchier. It’s a versatile tool that helps control the dynamics of audio signals. This ensures that the output signal doesn’t exceed a certain threshold level.

For background, see the Wikipedia article on Dynamic range compression.

This is especially useful for mastering and finalizing tracks for release. There, you want to maximize loudness without distorting the mix. We’ll go over the basics of how the limiter works, what it’s used for, and how to use it effectively. Whether you’re a producer, mixing engineer, or mastering engineer, this guide will help you get the most out of your limiting and make your songs sound louder and more professional.

Make Your Songs Louder With A Limiter

Credit: m.youtube.com

What Is A Limiter?

A limiting is a dynamic range compressor used in music production to control the levels of audio signals. By limiting a song’s peak amplitude, you can raise the volume for a louder, more balanced sound.

The limiter is a dynamic range compressor that limits the peak output level of an audio signal. It is an audio processor that prevents distortion and gives a more consistent sound.

How Does A Limiter Work?

A limiter works by reducing the gain of an audio signal that exceeds a certain threshold level. By doing this, it prevents the signal from exceeding a certain level. This can cause unwanted distortion and damage to the speakers or audio system. When the audio signal reaches the threshold, the limiting automatically adjusts the gain level to reduce the signal’s volume. This process is often referred to as “brickwall limiting”. That’s because it limits the signal’s level so that it cannot go any higher.

Why Use A Limiter?

Using the limiter is essential in the music production process. That’s because it helps ensure that the final output is of high quality. By preventing distortion and ensuring that the audio signal is consistent, a limiter helps make your songs sound louder and more professional. Additionally, using a limiting can also help prevent damage to your speakers or audio system. When an audio signal exceeds a certain level, it can cause the speakers to distort or even fail. A limiter prevents this and protects your equipment.

Difference Between A Limiter And A Compressor

While limitings and compressors are both dynamic range processors, there are some key differences between the two. A compressor reduces the dynamic range of a signal. It turns loud sounds down and, with makeup gain, brings quiet sounds up. A limiting, on the other hand, is used to prevent the audio signal from exceeding a certain level and causing distortion or damage. Whereas a compressor allows some peak levels to pass through, the limiter limits the signal entirely.

In conclusion, using a limiter is essential in the music production process. That’s because it helps ensure that the final output is of high quality. By preventing distortion and ensuring that the audio signal is consistent, you can make your songs louder and more professional. The difference between a limiting and a compressor lies in the way they process the audio signal, with limiters limiting the signal entirely and compressors allowing some peaks to pass through.

Make Your Songs Louder With A Limiter

Credit: www.waves.com

Setting Up Your Limiter

Setting up the limiter is essential to make your songs louder without causing distortion. By carefully adjusting the threshold and output gain, you can achieve a well-balanced mix that sounds professional and polished.

Setting up a limiter is a crucial step towards making your songs louder. A limiting is a compression tool that helps to control the dynamic range of your audio tracks. In order to get the best results, it’s crucial to understand the different parameters of the limiter and how they affect your audio. In this section, we’ll take a look at some of the most important parameters you need to keep in mind when setting up your limiting.

Threshold

The threshold is the level at which the limiting starts to kick in and reduce the volume of your audio. It’s important to set the threshold. That way, it doesn’t affect the parts of your audio that you want to keep at full volume. If the threshold is set too high, the limiter won’t be effective in controlling the dynamics. However, if it’s set too low, it can affect the quality of your audio. It’s important to find the right balance by tweaking the threshold until you achieve the desired results.

Ratio

The ratio is the amount of compression applied to your audio once it reaches the threshold. For example, a ratio of 2:1 means that for every 2dB of audio that goes above the threshold, only 1dB will come out. The higher the ratio, the more compression is applied to your audio. Setting the ratio too high can result in an over-compressed sound, while setting it too low can result in too much dynamic range. It’s important to experiment with different ratios to find the best setting for your audio.

Attack

The attack is how quickly a limiter responds when the audio level exceeds the threshold. A fast attack time will result in a more aggressive reduction of the audio level. Meanwhile, a slower attack time will result in a more natural sound. It’s important to find the right balance based on the type of audio you’re working with. For example, if you’re working with drums or percussive instruments, you may want a faster attack time to control their transient peaks.

Release

The release is how quickly the limiting stops reducing the audio level once it falls below the threshold. A fast release time will result in a more abrupt gain reduction. Meanwhile, a slower release time will result in a more gradual gain reduction. It’s important to find the right release time based on the type of audio you’re working with. For example, if you’re working with sustained instruments like pads or strings, you may want a slower release time to avoid unwanted artifacts.

In conclusion, understanding the different parameters of the limiter is crucial in order to make your songs louder while also maintaining their quality. By tweaking the threshold, ratio, attack, and release, you can achieve the desired level of compression and dynamic range for your audio. It’s important to experiment with different settings until you find the sweet spot that works for your specific project.

Tips For Using A Limiter

To make your songs louder with a limiter, adjust the threshold and ratio settings and know how to use the attack and release controls. Keep an eye on the peak levels and avoid over-limiting that can cause distortion.

Using a limiting in music production is an essential step to make your songs louder without sacrificing quality. However, like any tool, the limiter can also cause more harm than good if not used correctly. Here are some tips on how to use a limiter effectively.

Maintain Dynamic Range

One of the most important tips for using a limiting is to maintain the dynamic range of the song. The limiter is not designed to make everything as loud as possible without regard for the levels of individual tracks. Instead, it should control peaks and prevent them from clipping. Aim for a dynamic and balanced mix.

Avoid Clipping

Clipping occurs when the signal level of a track exceeds the maximum level that can be reproduced. It results in distorted and unpleasant sound. Therefore, it is crucial to avoid clipping using a limiter. Be careful when setting the threshold and ensure the limiting is only operating when and where you want it to.

Balance Levels

Balance is key when using the limiter. A limiter should even out levels in a mix, instead of making everything loud. Before adjusting the threshold, make sure all the tracks in the mix are balanced in sound. For example, if a vocal track is too loud compared to other tracks, use an EQ first to reduce its volume.

Use Multiple Limiters In Stages

Another effective way to use a limiting is to use multiple limiters in stages. Instead of having one limiting do all the work, use a series of limiters to gradually control the peaks and raise the volume levels. This way, you can achieve a more transparent and natural sound without sacrificing volume. In conclusion, using a limiter is an essential step in music production, and following these tips can help you achieve a louder, well-balanced sound without compromising on quality.

Popular Limiters In The Market

Popular limiters are essential tools for musicians, producers, and sound engineers who want to make their songs louder without sacrificing quality. With an extensive range of limiters in the market like FabFilter Pro-L 2, Waves L2, and Sonnox Oxford Limiter, you can achieve the perfect loudness for your music.

If you’re a music producer or recording artist, you understand the value of having a polished and professional sound. One of the tools that can help you achieve that is a limiter. A limiter is a dynamic processor that allows you to increase the loudness of your music while preventing clipping and distortion. There are many limiters available in the market. But in this section, we’ll focus on some of the most popular ones that you might want to consider.

Fabfilter Pro-l 2

FabFilter Pro-L 2 is a limiter plugin that offers many features to help you achieve a clear and impactful sound. With its sophisticated algorithms, you can maximize the loudness of your music while retaining its dynamics. The plugin also allows you to adjust the attack, release, and look-ahead settings. This gives you complete control over the limiting process. Additionally, FabFilter Pro-L 2 offers true peak limiting, oversampling, and dithering, making it a great all-in-one solution.

Waves L2 Ultramaximizer

The Waves L2 Ultramaximizer is another popular limiter that has been used by many professional musicians and producers. It offers two types of limiting – peak limiting and level limiting. Allows you to adjust the attack and release times. One of the advantages of the L2 is that it has a low latency mode. This makes it suitable for live performances. The plugin also includes a noise shaping feature that can help you reduce the noise floor of your tracks.

Izotope Ozone 9

iZotope Ozone 9 is a comprehensive mastering suite that includes a limiter among its many features. The limiter module in Ozone 9 offers a variety of modes, including IRC II. This is a transparent limiting mode that can help you retain the dynamics of your music. The plugin also includes a master assistant that can analyze your track and suggest settings for the limiter. This makes it easier for you to achieve the desired loudness level.

Tc Electronic Finalizer

The TC Electronic Finalizer is a hardware limiter that has been a staple in many professional studios for years. It offers a range of features, including multi-band limiting, analog and digital I/O, and 24-bit resolution. With its intuitive interface, the Finalizer allows you to quickly dial in the settings you need to achieve the desired loudness and clarity for your music. In conclusion, having a limiter in your toolkit can help you achieve a louder and more polished sound for your music. While there are many limiters available in the market, the ones we’ve discussed in this section are some of the most popular and feature-rich options to consider.

Mastering With A Limiter

Mastering with a limiter is a crucial technique for achieving louder and polished-sounding music. Using a limiter allows you to restrict the maximum level of your mix, avoiding distortion and giving your songs more clarity and presence. Most engineers place it last on the master bus, after EQ and compression.

Important Considerations Before Mastering

Before mastering your music using a limiter, there are a few essential things to keep in mind. First, make sure you have mixed your tracks correctly, which means your levels are balanced, and your mix doesn’t peak. Second, consider the style of music you are mastering and what you want to accomplish. Finally, ensure you have the right software and hardware to deliver high-quality sound. Taking these considerations into account will help you achieve desired results and produce outstanding music.

Mastering Your Mix With A Limiter

Mastering your music with a limiter can make your songs louder without sacrificing their quality. Many modern producers use limiters to increase the overall volume of their tracks without clipping or distortion. It’s an essential tool for achieving a polished and professional sound. A limiter works by setting a threshold volume level, and anything that exceeds that capacity is automatically compressed or limited. This allows you to increase the volume without compromising the dynamics of your music.

Using A Limiter In Tandem With Other Mastering Tools

Using a limiter alone may not always give you the desired results. Sometimes it may produce a sound that’s too harsh. It may not provide the warmth and depth you’re looking for in your mix. That’s where using a limiter in tandem with other mastering tools comes in. A combination of a limiter, EQ, reverb, and compression can help you achieve a balanced and well-rounded sound. However, it’s essential to use these tools in moderation, as overdoing it will lead to an unbalanced mix.

In conclusion, using a limiter in mastering can help you create an exceptional sound that is louder, clearer, and more polished. However, it’s crucial to use the limiter alongside other mastering tools to produce a balanced and professional mix. By considering the essential factors before mastering, you’ll be able to produce incredible music that stands out above the rest.

Make Your Songs Louder With A Limiter

Credit: www.youtube.com

Frequently Asked Questions For Make Your Songs Louder With A Limiter

How Do You Increase Volume With Limiter?

To increase volume with a limiter, you need to adjust the threshold level and the ratio. The threshold level determines when the limiter kicks in and starts reducing the volume. Meanwhile, the ratio determines how much the volume is reduced.

You should also make sure to avoid clipping and adjust the attack and release times based on the type of audio you’re working with.

How Can I Increase The Loudness Of A Song?

To increase the loudness of a song, you can use a compressor, maximize the volume slider, EQ the mix, and add distortion or saturation to the sound. However, be cautious as increasing the loudness can lead to sound quality and distortion issues.

Experiment carefully and use your ears to find the right balance.

Why Do Limiters Make Things Louder?

Limiters make things louder by preventing any part of the audio from exceeding a set maximum level, thus allowing the rest of the audio to be made louder without distortion. This process is called dynamic range compression and is used to make audio stand out in a crowded field.

Do Limiters Affect Sound Quality?

Yes, limiters can affect sound quality. Limiters prevent distortion and clipping by reducing amplitude. However, they can also add pumping, breathing and squashing that hurt the sound.

It’s important to use limiters judiciously and with caution to achieve the desired balance between loudness and sound quality.

Conclusion

Overall, a limiter is a powerful tool that can make your songs sound louder and more polished. With a simple adjustment of the threshold, you can control the dynamic range and prevent clipping distortion. By using a limiter effectively, you can enhance the impact and clarity of your music, without sacrificing its integrity or balance.

Whether you are producing EDM, hip-hop, or rock, a limiter can help you achieve a professional sound that stands out in a crowded market. Don’t be afraid to experiment and optimize your settings to find the perfect balance of loudness and clarity for your style.

Categories
Archive

Create Copyright Agreements Using Cosynd

Cosynd simplifies the process of creating copyright agreements. With Cosynd, you can create legally binding copyright agreements easily and quickly.

As a content creator, it’s essential to protect your intellectual property. Creating and managing copyright agreements can be a time-consuming and complicated process, especially if you’re not familiar with the legal jargon. Cosynd provides an online platform that simplifies this process so that you can focus on what you do best – creating content.

With Cosynd, you can create and sign legally binding agreements, customize templates to fit your needs, and manage all your agreements in one place. It’s the perfect solution for content creators who want to protect their work and ensure they’re getting the credit they deserve.

Create Copyright Agreements Using Cosynd

Credit: cosynd.com

Features Of Cosynd

Cosynd offers a feature to create copyright agreements for various types of creative work such as music, photos, and videos. With this platform, users can easily generate legally binding agreements, protect their intellectual property, and collaborate with others.

Cosynd is an online platform that simplifies copyright agreements. It offers various features that make creating and managing copyright agreements easy and convenient. Here are some of the notable features of Cosynd that help you protect your creative works from copyright infringement:

Ease Of Use

Cosynd makes the process of creating copyright agreements easy and streamlined. Users can create a copyright agreement in under 5 minutes using Cosynd’s step-by-step wizard. Additionally, it allows you to avoid the hassle of hiring legal professionals to draft your copyright agreement.

Customizable Templates

Cosynd offers customizable templates that enable you to create copyright agreements based on your unique situation. You can choose from several templates and customize them according to your needs. The templates include essential terms such as ownership rights, payment terms, and limitations of use, making the agreement ready-to-use.

Collaboration Tools

Cosynd’s collaboration tools enable multiple parties to collaborate on a single copyright agreement. This feature allows you to share the agreement with stakeholders, such as co-authors, producers, and publishers, and invite them to review and sign the agreement online. Additionally, Cosynd tracks all changes made to the agreement, making it easy to monitor and track the progress. Cosynd’s user-friendly platform, customizable templates, and collaboration tools make it an ideal platform for managing copyright agreements. Cosynd simplifies the process of creating agreements and helps keep your creative works protected.

Create Copyright Agreements Using Cosynd

Credit: musicbiz.org

How To Create A Copyright Agreement Using Cosynd

Create a copyright agreement using Cosynd, an online platform designed to make the process simple and easy. With Cosynd, you can establish ownership, terms of use, and more with just a few clicks.

Creating copyright agreements can be a daunting task, especially if you are not familiar with the legal aspects involved. Fortunately, with Cosynd, you can easily create a copyright agreement that protects your intellectual property from unauthorized use. In this blog post, we will walk you through the process of creating a copyright agreement using Cosynd, with step-by-step instructions and useful tips to ensure that you get it right. ### Step 1: Choose your template The first step in creating a copyright agreement using Cosynd is to choose a template that suits your needs. Cosynd offers a variety of templates that cover different types of copyright agreements, such as songwriting agreements, photography agreements, and more. To choose your template, go to the “Create Agreement” tab on your Cosynd dashboard and click on “Copyright Agreement.” You will then be directed to a page with different template options to choose from. ### Step 2: Add your information Once you have chosen your template, the next step is to add your information. This includes your full legal name, the name of your business (if applicable), and any other relevant details regarding the work being copyrighted. Make sure to provide accurate information, as this will be used to finalize the copyright agreement. If you are unsure about any details, consult a legal expert or use Cosynd’s “Ask an Attorney” feature. ### Step 3: Use collaboration tools to invite others (if necessary) If you are collaborating with others on the creation of the work, such as co-writers or co-creators, you can use Cosynd’s collaboration tools to invite them to participate in the copyright agreement. This ensures that all parties involved are legally protected and that everyone’s contributions are recognized. To invite others, simply click on the “Collaborate” tab on the copyright agreement page and enter their email addresses. ### Step 4: Review and finalize agreement The final step in creating a copyright agreement using Cosynd is to review and finalize the agreement. Make sure to carefully read the entire agreement and check that all details are correct. If the agreement requires any changes or updates, you can make them using Cosynd’s editing tools. Once you are satisfied with the agreement, you can finalize it by signing electronically. This ensures that the agreement is legally binding and that your intellectual property is protected. In conclusion, creating a copyright agreement using Cosynd is a straightforward process that offers peace of mind for creators. By following the steps outlined above and utilizing Cosynd’s tools, you can create a legally-binding agreement that protects your intellectual property and ensures that everyone involved is recognized for their contributions.

Faqs

If you’re interested in creating a copyright agreement, Cosynd is a reliable platform that can help you out. Here are some FAQs about creating copyright agreements using Cosynd:

What Is A Copyright Agreement?

A copyright agreement is a legal document that outlines the terms and conditions of how a copyrighted work can be used by others. It is created to protect the owner of the copyrighted work from others who may try to use or distribute the work without permission.

Why Use Cosynd Instead Of A Lawyer?

Cosynd is a cost-effective option for those who want to create a copyright agreement without having to pay high lawyer fees. Cosynd’s online platform offers a user-friendly way to create a legally binding agreement within minutes. Cosynd’s agreements are customizable, covering a wide range of scenarios, and are up-to-date with the latest copyright laws.

What Does Cosynd Cost?

Creating a copyright agreement on Cosynd varies in cost depending on your needs. Prices start at $25 per agreement for its basic package, which includes customizable templates, e-signature capabilities, and filing with the U.S. Copyright Office. Other packages with additional services, such as registration monitoring and dispute resolution, are also available at varying prices.

Create Copyright Agreements Using Cosynd

Credit: cosynd.com

Frequently Asked Questions On Create Copyright Agreements Using Cosynd

How Do I Secure Copyright In A Work I Create?

To secure copyright in a work you create, you must register it with the U. S. Copyright Office. This requires filling out a form, paying a fee, and providing a copy of the work. Copyright protection lasts for the creator’s lifetime plus an additional 70 years.

How Do I Copyright Something For Free?

Unfortunately, it is not possible to copyright something for free. In order to obtain copyright protection, you must file a registration with the US Copyright Office and pay the associated fees. However, there are some websites that claim to offer free copyright registration, but these are often scams and should be avoided.

Does Cd Baby Copyright Your Music?

No, CD Baby does not copyright your music. As the artist, you still retain ownership and control over your music and copyright. CD Baby merely acts as a distributor and provides services to assist with the registration and protection of your copyright.

Is Anything I Create Automatically Copyrighted?

No, not everything you create is automatically copyrighted. To be copyrighted, your work must meet certain criteria such as originality, creativity, and being fixed in a tangible form. Proper registration is also necessary to have legal rights to your work.

Conclusion

With Cosynd, creating a copyright agreement has never been easier. Save time and money by using their platform to create a legal agreement that meets your needs. From music to film, Cosynd provides templates and support to protect your intellectual property.

Don’t risk your creativity to theft or litigation, sign up with Cosynd today.