Categories
Archive

How Do I Find the Right Piano Teacher

To find the right piano teacher, research their qualifications and experience before scheduling a trial lesson. Learning to play the piano requires dedication, effort, and guidance from a qualified teacher.

With so many music instructors, choosing the right one can be a daunting task. However, taking the time to research potential teachers and their experience can help you find the right instructor. Look for piano teachers who have formal music education, specialize in your preferred music genre, and have positive reviews from past students.

To ensure that your learning style and personality match with the teacher, schedule a trial lesson before committing to regular lessons. With proper research and diligence, you can find the best piano teacher to help you fulfill your musical aspirations.

How Do I Find the Right Piano Teacher

Credit: www.hoffmanacademy.com

Determine Your Learning Goals

Finding the right piano teacher can be a challenging task, but it all starts with determining your learning goals. Before you start your search, you need to ask yourself what you want to achieve from your piano lessons. Everyone has different learning preferences and musical goals. Therefore, it is essential to identify what you want to learn, your musical interests and your skill level.

Consider Your Musical Interests:

Consider what type of music you would like to play on the piano. Are you interested in classical, jazz, pop, or rock? This is important because different piano teachers have different strengths and expertise. Some teachers may specialize in classical music, while others may specialize in jazz or pop. It is crucial to find a teacher that matches your musical interests.

Define Your Skill Level:

It is essential to determine your skill level before you look for a piano teacher. Are you a beginner, intermediate, or advanced player? Finding a teacher who can match your skill level is essential. A teacher who specializes in teaching beginners may not be suitable for an intermediate or advanced player. On the other hand, a teacher who works with advanced players may be too challenging for a beginner. Therefore, it is important to find a teacher who specializes in your skill level.

When you determine your learning goals, you can easily find a piano teacher that suits your preferences. Make sure to express your goals to your potential teacher and ask them how they can help you achieve them. Remember that finding the right piano teacher is crucial to your progress and enjoyment, so take the time to find the right fit.

Research Piano Teachers

Researching piano teachers is essential to finding the right fit for you. Look for teachers with experience, favorable reviews, and a teaching style that matches your needs. Consider scheduling a trial lesson before committing to ensure a good fit.

Ask For Recommendations

If you are new to the world of piano lessons, asking for recommendations is a great place to start. Ask your friends, family members, neighbors, or even colleagues if they know any reputable piano teachers in your area. Recommendations from people you know and trust can help you find a piano teacher who is reliable and knowledgeable.

Browse Music Schools And Studios

Another way to find a piano teacher is to browse music schools and studios in your area. Many music schools and studios offer private piano lessons with experienced instructors. Take a look at their website, read reviews, and check out their curriculum to see if they align with your goals and interests. Visiting the school or studio in person can also give you a chance to ask questions and see their overall teaching environment.

Search Online

In today’s digital age, searching online is one of the quickest and easiest ways to find a piano teacher. Start by searching for piano teachers in your area on search engines or directories. This can help you find independent piano teachers who may not be affiliated with a music school or studio. Make sure to read reviews and check out their website to ensure they are qualified and have the experience necessary to meet your goals. In conclusion, finding the right piano teacher can take some time and effort, but it’s worth it when you find an instructor that suits your needs. By asking for recommendations, browsing music schools and studios, and searching online, you can find a piano teacher who can help you develop your skills and achieve your goals.

Evaluate Potential Teachers

A great piano teacher can make all the difference in the development of your piano skills. In order to find the right piano teacher for you, it’s important to evaluate potential teachers carefully. Here are three key factors to consider:

Check Qualifications And Experience

When looking for a piano teacher, make sure to check their qualifications and experience. Qualifications like a music degree or certification from a prestigious music institution are indicators of a teacher’s level of knowledge and expertise. Experience working as a piano teacher is also important as it shows the teacher’s familiarity with teaching methods and ways of communicating with students.

Read Reviews And Testimonials

Reviews and testimonials from past students and their parents can give you valuable insights into a teacher’s teaching style and effectiveness. Look out for specific details about what the student learned, how the teacher was able to identify and address areas of weakness, and how flexible the teacher was to individual needs and goals.

Schedule A Trial Lesson

The best way to evaluate a potential piano teacher is to schedule a trial lesson. This allows you to experience firsthand their teaching style, their method of communication, and their overall vibe. During the lesson, observe how the teacher interacts with you, how they structure the lesson and how much focus they place on technique versus performance. Use this trial lesson to assess whether you feel comfortable with the teacher and whether their skills and qualifications align with your goals.

Ultimately, finding the right piano teacher will depend on your personal preferences and learning style. By checking their qualifications and experience, reading reviews and testimonials, and scheduling a trial lesson, you can make a well-informed decision.

How Do I Find the Right Piano Teacher

Credit: www.ashleydanyew.com

Consider Logistics

When searching for the right piano teacher, don’t forget to consider logistics. This includes the teacher’s location, availability, and teaching style to ensure a successful and convenient learning experience.

Consider Logistics: Finding the right piano teacher can be a daunting task, but when you consider logistics first, you are setting yourself up for success. Location, availability, schedule and cost are all important factors to consider. In this post, we’ll delve into each of these factors in detail. Location and Commute: Finding a piano teacher located near your home or workplace can significantly reduce your commute time, making it easier to stay committed to regular lessons. Consider searching for teachers within a 10-15 mile radius from your place of residence or work. This will ensure that your lessons fit into your busy schedule without taking up a large portion of your day or interfering with other activities. Availability and Schedule: It is important to find a piano teacher whose schedule aligns with yours. Ensure that you inquire about their availability and scheduling policies before you commit to lessons. Do they have weekend or evening slots? Can they work with your varying schedule? Knowing this information will help you plan your lessons around your weekly routine. Cost and Payment Options: The cost of lessons and payment options should also be taken into consideration. Piano lessons can be expensive, and it is important to ensure that you can afford the fees before committing. Inquire about the payment options and the frequency of payments. Some teachers may require payment at the beginning of each lesson while others may require payment for several lessons in advance. Knowing this information upfront can help you budget and plan accordingly. In conclusion, when considering logistics in your search for a piano teacher, ensure that you prioritize location, schedule availability, and cost. Doing so will help you find the right teacher that fits your individual needs and schedule, ultimately leading to a productive and enjoyable learning experience.

Communicate Expectations And Preferences

Finding the right piano teacher involves communicating your expectations and preferences clearly before starting the lessons. This will enable you and your teacher to work on the same page and achieve the desired results.

When looking for a piano teacher, it is crucial to find someone who is compatible with your learning style and goals. One way to ensure this is by communicating your expectations and preferences with potential teachers. By doing so, you can determine if the teacher is the right fit for you and avoid wasting time and money on lessons that may not meet your needs. Here are some ways to communicate your expectations and preferences effectively:

Discuss Learning Goals And Style

Before starting lessons with a new teacher, it is important to discuss your learning goals and style. This will help the teacher understand what you hope to achieve and how they can tailor their teaching approach to meet your needs. Some questions to consider when discussing your learning goals and style include:

  • What are your short-term and long-term goals?
  • What kind of music do you want to learn?
  • Do you prefer a structured or flexible learning environment?
  • Do you have any previous experience playing the piano?

By answering these questions, you can give the teacher a better understanding of your abilities, interests, and expectations.

Address Teaching Style And Methods

Another important aspect of finding the right piano teacher is understanding their teaching style and methods. Different teachers may vary in their approach to teaching, such as emphasizing technical skills or focusing on music theory. When discussing teaching style and methods with potential teachers, consider the following questions:

  • What is your teaching philosophy?
  • How do you structure your lessons?
  • What teaching materials do you use?
  • How do you provide feedback to students?

By discussing these factors, you can gain a better understanding of how the teacher approaches their lessons and whether it aligns with your preferences and goals. Overall, communicating your expectations and preferences with potential piano teachers is essential to finding the right fit. By discussing your learning goals, style, and the teacher’s approach to teaching, you can ensure that your lessons are effective, enjoyable, and meet your individual needs.

Commit To Consistency And Practice

Learning to play the piano is a significant investment of time and effort, and finding the right teacher can make all the difference between success and failure. However, once you have found a suitable teacher, it’s also essential to commit to consistency and practice.

Establish Lesson Frequency

One of the first steps in committing to your piano lessons is to establish the frequency of your lessons. Ideally, you should schedule weekly lessons to maintain regular progress and keep yourself accountable. However, depending on your availability and budget, you can discuss with your teacher whether bi-weekly or monthly lessons would work for you. Whatever frequency you choose, ensure that your teacher and you are on the same page.

Create Consistent Practice Schedule

Once you have established your lesson frequency, it’s equally important to create a consistent practice schedule. Determine how much time and when you can practice around your other commitments. It’s about making it part of your daily habit, like brushing your teeth. Consider setting a reminder or incorporating a routine so that you can develop a consistent practice schedule.

Practice Effectively

Lastly, ensure that you are practicing effectively. Consistent practice doesn’t mean logging in countless hours. Rather, it’s about maximizing the time you spend practicing by focusing on your goals or areas of improvement and working towards them.

Practice TipsExplanation
Break songs into sectionsIt’s easier to focus on smaller segments and helps build overall progress.
Record yourselfAllows you to review your progress and receive feedback from your teacher.
Stay presentFocusing on the present during practice is key to improving your playing ability.

Committing to consistency and practice, establishing a lesson frequency, creating a consistent practice schedule, and practicing effectively are all crucial for mastering the art of playing the piano. With dedication and commitment to these areas, you will be able to see progress and eventually achieve your goals as a pianist.

Track Progress And Reevaluate

Finding the right piano teacher can make all the difference in your musical journey. But the work doesn’t end once you’ve found a teacher that fits your needs. It’s important to track your progress and regularly reevaluate your learning process to ensure continued growth and success. Here’s how:

Set Learning Milestones

Setting learning milestones will help you stay focused and motivated. Think about what you want to achieve and create a plan with your teacher to get there. This could include mastering a particular technique, learning a specific piece, or preparing for an upcoming performance or exam.

Regularly Review Progress And Adjust

Regularly reviewing your progress will help you identify areas where you’re excelling and areas that may need more attention. Work with your teacher to adjust your learning plan accordingly. This could mean spending more time on difficult pieces, focusing on specific techniques, or incorporating new learning strategies. Remember, learning is a journey, and adjustments along the way are normal and expected.

Tracking your progress and regularly reevaluating your learning process can help you stay on track, stay motivated, and achieve your goals. Remember to communicate openly and regularly with your teacher, set achievable milestones, and stay focused on the journey. Happy playing!

Conclusion And Further Tips

To find the right piano teacher, consider factors such as experience, credentials, and teaching style. Don’t be afraid to ask for referrals and attend trial lessons to find someone who meets your needs. Keep in mind that finding the right teacher may take time and effort, but the payoff will be worth it in your musical journey.

Reiterate Importance Of Finding A Good Teacher

Investing time and money in the right piano teacher can make all the difference in your musical journey. The right teacher can keep you motivated, make learning fun, and tailor lessons to your learning style and goals. Whereas, a poor teacher can lead to frustration and wasted effort.

Remember, a good piano teacher is not just someone who can help you learn the basics, but someone who can guide you towards your potential as a musician, and help you develop your own unique style of playing.

Offer Additional Tips For Successful Piano Learning

Here are some additional tips that can help you get the most out of your piano lessons:

Create a practice schedule:

Set aside regular time slots for practising piano, and stick to them as closely as possible. Even 10-15 minutes per day can make a difference!

Find a practice space:

Create a dedicated practice space, whether it’s a corner of your room or a separate room entirely. Keep it free of distractions and noise.

Listen to music:

Listen to piano music, not just the pieces you are learning. The more you listen to the music, the more you will familiarize yourself with various musical techniques and styles. This can inspire you and enhance the quality of your practice.

Set goals:

Set achievable goals for yourself, and discuss them with your teacher. This will help keep you motivated and give you something to work towards.

Practice mindfully:

Practice mindfully, focusing on every note and technique. Avoid mindless repetition of passages and pieces, and instead take the time to understand what you are doing and why.

Ask questions:

Don’t be afraid to ask questions during your lessons or practice time. Your teacher is there to help, and asking questions can deepen your understanding and make the learning process more enjoyable.

By using these tips in combination with finding the right piano teacher, you are setting yourself on the path towards successful and enjoyable piano learning.

How Do I Find the Right Piano Teacher

Credit: www.ashleydanyew.com

Frequently Asked Questions Of How Do I Find The Right Piano Teacher

How Do I Choose A Piano Teacher?

Choose a piano teacher by considering their qualifications and experience, teaching style, location and availability, fees, and personal compatibility. Look for recommendations from friends or family, read reviews, and meet potential teachers before committing. Ensure that the teacher can teach the style of music you want to learn and has a strong track record of successful students.

How Do I Know If My Piano Teacher Is Good?

To know if your piano teacher is good, observe the following: 1. Effective communication – your teacher should be able to explain things simply. 2. Clear goals and expectations – you should know what you’re working towards. 3. Organized lessons – your teacher should have structured practices.

4. Positive attitude – positivity is essential to learning. 5. Material selection – they should provide appropriate material for your level.

How Do I Find The Right Music Teacher?

To find the right music teacher, start by defining your specific goals and preferences. Look for a teacher with experience and expertise in your chosen instrument or style. Ask for references and check their qualifications. Consider scheduling a trial lesson to see if the teacher’s teaching style and personality align with your learning style and needs.

Should I Get A Piano Teacher Or Teach Myself?

It is highly recommended to get a piano teacher if you want to learn efficiently and avoid bad habits. A teacher can provide personalized guidance, feedback and motivation. However, if you are disciplined, committed and have access to quality online resources, you can teach yourself and make progress.

Ultimately, it depends on your learning style, goals, budget and time availability.

Conclusion

Finding the right piano teacher requires effort and research, but the rewards are worth it. By considering your goals, budget, personality, and level of expertise, you can narrow down your options and choose a teacher who will challenge you, guide you, and inspire you.

Remember that learning an instrument is a journey, not a destination, and that the right teacher can make all the difference. Keep an open mind, stay committed, and enjoy the process of making beautiful music!


Categories
Archive

What Is The Job Of Audio Mixing Engineer

An audio mixing engineer is responsible for blending and adjusting recorded tracks to create a cohesive and polished final audio product. The audio mixing engineer is a critical member of the music production team, responsible for ensuring that all the individual tracks of a recorded song or piece of music come together seamlessly to create a cohesive and polished final product.

The mixing process involves blending and adjusting the various elements of a recording, including vocals, instruments, and effects, to ensure that each component is balanced and working together harmoniously. A skilled audio mixing engineer has a keen ear for detail, a deep understanding of music theory, and extensive technical expertise in using digital audio workstations and other mixing tools.

They must also be able to work collaboratively with the other members of the production team, including producers, musicians, and recording engineers, to achieve the desired sound and feel for the final product.

What Is The Job Of Audio Mixing Engineer

Credit: darkhorseinstitute.com

The Role Of An Audio Mixing Engineer

Audio mixing is one of the most critical aspects of audio production. It involves combining multiple audio sources into a cohesive and balanced mix, which is crucial to delivering high-quality audio content. That’s where the Audio Mixing Engineer comes in. This professional is responsible for ensuring that all individual audio elements are well balanced and synchronized to create an ultimate product that listeners will enjoy.

What Is Audio Mixing?

Audio mixing refers to the process of blending, balancing, and equalizing each recorded audio track so that all sound elements work together to produce a beautiful professional mix.

What Does An Audio Mixing Engineer Do?

An audio mixing engineer uses a mixing console or Digital Audio Workstation (DAW) software to adjust various audio channel levels, EQ, dynamics, and effects to ensure that all audio tracks are well balanced to create a perfect listening experience for the audience. In addition to mixing recorded sound, they may also add sound effects, adjust volume levels, fade tracks in and out, and create specialized effects and transitions between different recorded elements.

Who Works With Audio Mixing Engineers?

Audio Mixing Engineers typically work directly with producers, sound designers, and recording artists to understand their requirements and provide support in recording and editing sound. They may also work with other audio professionals, such as mastering engineers, to ensure that the mix meets professional standards.

What Are The Key Skills Needed For Audio Mixing Engineering?

Audio Mixing Engineers must have a diverse set of skills to perform their essential job functions effectively. These include:

SkillsDescription
Critical ListeningThe ability to hear nuances in sound and identifying problem areas that need correction or adjustment
Technical KnowledgeUnderstanding of digital audio workstations, audio effects, and other audio production software
Knowledge of Music TheoryUnderstanding of music structure and the ability to analyze and isolate specific instruments and vocals in recordings
CommunicationThe ability to understand and interpret producer, sound designer, or artist instructions, as well as provide feedback, suggestions, and solutions
Persistence and Attention to DetailPay attention to minute details in audio tracks, looking for imperfections or inconsistencies that may negatively impact the final mix.
What Is The Job Of Audio Mixing Engineer

Credit: www.careersinmusic.com

Importance Of Audio Mixing Engineer

The role of an audio mixing engineer is crucial in the music production process. They are responsible for balancing sound levels, adding effects and creating a polished final product that sounds professional and pleasing. Without their expertise, the quality of recorded music would be greatly compromised.

Why Is Audio Mixing Engineer Important In Music Production?

An audio mixing engineer is responsible for blending different elements of a piece of music into a cohesive and harmonious whole. This includes balancing levels, panning, applying effects, improving clarity, and more. The importance of an audio mixing engineer lies in their ability to transform a raw and unpolished recording into a professional-sounding masterpiece. Without an experienced audio mixing engineer, the final output of a music production may not have the desired impact.

What Impact Does Audio Mixing Have On The Final Output Of Music?

Audio mixing plays a vital role in determining the final output of a music production. A well-mixed track can make the difference between a mediocre sounding recording and a stand-out hit. A mixing engineer can add depth and dynamics to a track, enhance its overall impact and ensure that every element of the music is balanced and polished. By paying attention to details like equalization, compression, and spatial positioning, an audio mixing engineer can make a significant impact on the final output of a music production.

Why Is It Necessary To Have An Audio Mixing Engineer In A Recording Studio?

It is necessary to have an audio mixing engineer in a recording studio because of the technical expertise they bring to the table. They are trained in using complex software and hardware to improve sound quality, minimize background noise, and perfect the final mix. A mixing engineer knows how to tweak the EQ and compression to make the music sound crisp and clear. They can also work closely with the artist to ensure that the final output aligns with their vision. Ultimately, the presence of an audio mixing engineer can make the difference between a good recording and one that stands out.

Why Can’t Musicians Mix Their Own Tracks?

Musicians cannot mix their own tracks because it requires a completely different skill set from playing an instrument or singing. Mixing is a technical and artistic process that requires a lot of attention to detail. It often involves working with software that takes years to master and may also require specialized hardware. Musicians may know what they want their music to sound like, but they may not necessarily have the expertise to achieve it. A mixing engineer can bring an objective ear to the track and make it sound its best, leaving the musician free to focus on creating their music.

Audio Mixing Techniques

An audio mixing engineer has a crucial role in ensuring that a song or soundtrack receives the perfect balance of individual elements. They blend instruments, vocals, and sound effects to create a cohesive and polished final product. Using a combination of technical expertise and artistic skills, a mixing engineer can elevate a recording to its fullest potential.

Audio mixing is a crucial process in music production, where multiple tracks are combined to create a cohesive, balanced, and sonically pleasing final mix. To achieve this, audio mixing engineers employ various techniques that allow them to enhance the clarity, depth, and spatial positioning of each sound component in the mix. In this article, we’ll discuss some common audio mixing techniques and their role in creating a professional-sounding mix.

What Are The Techniques Used By Audio Mixing Engineers?

Audio mixing engineers use a variety of techniques to achieve a balanced and polished mix. Some of the most common ones include:

  • Panning: This is the process of positioning each sound element in a stereo image, with the aim of creating a spacious and immersive sound field. For example, lead vocals are usually panned to the center, while drums and bass are panned to the sides.
  • Equalization: Often shortened as EQ, this technique involves adjusting the frequency content of each sound element in the mix to ensure that they occupy their respective sonic space without clashing or overpowering each other.
  • Compression: This technique involves reducing the dynamic range of a sound element, making the quiet parts louder and the loud parts softer. This helps to make the overall mix sound more consistent and controlled.
  • Reverb and Delay: These effects are used to create a sense of space and depth in the mix. Reverb adds a natural-sounding ‘room’ ambience to sound elements, while delay creates an echo effect, which can add excitement and interest to certain elements.
  • Automation: This technique involves adjusting the level, panning, or effects of certain elements at specific moments in the song to create impact and dynamics. For example, bringing up the volume of a guitar solo during the chorus.

How Do They Combine Tracks To Create Perfect Harmonies?

One of the primary objectives of audio mixing is to create a harmonious relationship between all the sound elements in the mix. To achieve this, mixing engineers use various techniques such as:

  • Volume Balancing: This involves adjusting the levels of each sound element in the mix to ensure that they are audible and balanced with one another.
  • Frequency Separation: By using EQ, mixing engineers can ensure that each sound element in the mix has its own sonic space and is not clashing with other elements.
  • Panning: By positioning different sound elements in the stereo image, mixing engineers can create a sense of space and separation between each element.
  • Addition of Effects: Reverb, delay, and other effects can help to blend different elements into a cohesive whole. For example, adding reverb to a vocal track can help to place it in the same sonic space as the drum kit.

What Are The Different Instruments That Need To Be Mixed?

A typical music track contains several sound elements that need to be mixed to create a final product. These sound elements can include:

  • Vocals: Lead and background vocals are often the centerpiece of a song and need to be mixed carefully to ensure that they are balanced and present in the mix.
  • Drums: Drums typically consist of multiple elements such as kick, snare, hi-hats, toms, and cymbals, all of which need to be mixed to create a cohesive rhythm section.
  • Bass: The bass guitar or synth provides the low-end foundation for the song and needs to be mixed appropriately to ensure that it is present in the mix without overpowering other elements.
  • Guitars: Guitars provide the harmonic and melodic framework for the song and can consist of multiple layers that need to be mixed to create a cohesive and balanced sound.
  • Keyboards and Synths: These elements help to create ambience and texture in the mix and need to be mixed according to their role in the song.

What Is The Role Of Technology In Audio Mixing?

Technology plays a significant role in modern audio mixing, providing engineers with a range of tools and resources that make the process more efficient and precise. Some of the most common technologies used in audio mixing include:

  • Digital Audio Workstations (DAWs): Software platforms such as Pro Tools, Logic Pro, and Ableton Live provide mixing engineers with a range of tools for recording, editing, and processing audio.
  • Plugins: These are software tools that can be used within a DAW to perform specific processing tasks such as EQ, compression, and reverb.
  • Virtual Instruments: These are software-based emulations of real instruments, which can be used to create realistic-sounding parts in the mix.
  • Hardware: While digital technology has largely replaced analog hardware, some mixing engineers still prefer to use analog gear such as compressors, EQs, and reverbs to achieve a warmer, more natural sound.

In conclusion, audio mixing is a complex and challenging process that requires a combination of technical expertise, creative vision, and attention to detail. By employing the techniques and technologies discussed in this article, mixing engineers can create a professional-sounding mix that enhances the artistic vision of the song.

Challenges Faced By Audio Mixing Engineers

The audio mixing engineer’s job involves balancing, adjusting levels, enhancing and blending different sound sources to produce a cohesive sound. However, they face challenges such as inconsistent recordings, conflicting notes from clients, project delays and strict deadlines.

Audio mixing is an art that requires precision and technical skill. Audio mixing engineers have the responsibility of creating a balanced sound that is pleasing to the listener’s ears. However, this task is not without its challenges. In this section, we’ll discuss the common challenges faced by audio mixing engineers and how they deal with them.

What Are The Common Challenges Faced By Audio Mixing Engineers?

One of the main challenges audio mixing engineers face is dealing with poorly recorded tracks. When a track is poorly recorded, it can be challenging to create a decent mix without spending an unreasonable amount of time cleaning it up. Additionally, mixing multiple instruments together can be challenging if each track has its own distinct sound. Another challenge audio mixing engineers face is the lack of a reference point. Every song is unique, and there is no rulebook for how a song should sound. Therefore, it can be difficult for audio mixing engineers to decide precisely how to balance each track. Additionally, audio mixing engineers must take into account the listener’s preferences, which can vary widely.

How Do They Deal With The Technical Issues?

Audio mixing engineers deal with technical issues by understanding the equipment they use and how it functions. They must stay up-to-date with the latest technology and software to ensure that they can solve any technical challenges that arise. Additionally, audio mixing engineers must have a solid understanding of different sound systems, including their acoustics and limitations.

What Are The Common Mistakes Made By Audio Mixing Engineers?

One common mistake that audio mixing engineers make is overcompensating for technical issues. For example, if a track is too quiet, they may increase the volume too much, causing distortion. Another common mistake is failing to cut unnecessary frequencies or sounds that clash with other tracks, creating a muddy mix.

How To Overcome The Challenges That Arise During Audio Mixing?

To overcome the challenges that arise during audio mixing, engineers must have a deep understanding of how sound works and what is required for each track. They must listen to the tracks carefully and take the time to mix them correctly. Additionally, audio mixing engineers should listen to their mixes on different sound systems to ensure that it sounds good on all of them. In summary, audio mixing engineers face many challenges when trying to create a quality mix. They must be technically proficient and have a deep understanding of how sound works. Despite the challenges, audio mixing engineers can use their expertise to overcome these difficulties and create a mix that sounds great on all sound systems.

Job Market For Audio Mixing Engineers

Audio mixing engineers are responsible for blending different elements of audio recordings to create a cohesive final product. They are in high demand in industries such as music production, film, and television. A good audio mixing engineer must have a keen ear for detail and strong technical skills in using various mixing software and equipment.

What Is The Demand For Audio Mixing Engineers?

The demand for audio mixing engineers has been growing steadily over the years, thanks to the booming music and film industries. Audio mixing engineers work with music producers, recording artists, and filmmakers to create a balanced and high-quality sound that meets industry standards.

What Are The Available Job Prospects?

Audio mixing engineers have various job prospects in different industries. For instance, they can work in recording studios, radio and TV stations, concert venues, or film production companies. They can also work as freelancers, providing their services to clients on a project-by-project basis.

What Is The Career Path Of An Audio Mixing Engineer?

The career path of an audio mixing engineer usually starts with a degree in sound engineering or a related field. After graduation, they can secure entry-level jobs in recording studios or with independent music producers. With experience, they can advance to higher positions such as chief audio engineer or sound designer.

How Much Does An Audio Mixing Engineer Make?

The salary of an audio mixing engineer depends on factors such as experience, skillset, industry, and location. On average, an audio mixing engineer in the US makes around $50,000 to $60,000 per year. However, experienced engineers can make up to $100,000 or more annually. In conclusion, audio mixing engineering is a vital role in the music and film industries. The available job prospects, career paths, and salary are all dependent on the individual’s dedication, experience, and skill in the field.

What Is The Job Of Audio Mixing Engineer

Credit: www.travsonic.com

Frequently Asked Questions Of What Is The Job Of Audio Mixing Engineer

What Does An Audio Mixing Engineer Do?

An audio mixing engineer blends, edits, and manipulates recorded tracks, combining them into a final stereo mix. They use various tools and techniques to balance volumes, EQ, and effects, creating a cohesive and polished sound. The engineer may work with dialogue, music, or sound effects for film, television, or music projects.

What Skills Do You Need To Be A Mixing Engineer?

Being a mixing engineer requires essential skills such as good communication, a thorough knowledge of audio equipment, a keen ear for tone and balance, excellent technical skills, and proficiency in using mixing software.

Do Audio Engineers Make A Lot Of Money?

Audio engineers can make a good living depending on their level of experience and the industry they work in. The median annual salary for audio engineers is around $50,000, but experienced professionals can earn up to $100,000 or more per year.

Ultimately, their salary depends on their skills, location, and demand for their services.

How Do I Become An Audio Mixing Engineer?

To become an audio mixing engineer, you need to have extensive knowledge of sound equipment, music theories, and editing software. Learning these skills can be achieved through a formal degree in Audio Engineering or attending workshops and tutorials. You can also improve your chances by producing your own music, collaborating with other producers, and seeking internships with music studios to gain experience.

Conclusion

The audio mixing engineer is the one responsible for giving life to the music. With their technical skills and critical thinking abilities, they transform individual sound sources into a cohesive and polished audio masterpiece. It is an important job that requires a lot of experience and knowledge, and it is responsible for the final sound heard on recordings, videos, and live performances.

Audio mixing is a vital element of the music industry, and hiring a professional to handle the job is a wise decision for any musician or recording artist.

Categories
Archive

Mastering With Plugin Alliance Plugins

Mastering With Plugin Alliance Plugins can significantly improve the overall sound quality of your audio productions. We will explore how to get the most out of these powerful plugins.

Whether you are a beginner or an experienced audio engineer, mastering with Plugin Alliance Plugins is an essential skill to have. With a vast array of plugins available in their lineup, it can be overwhelming to know where to start.

We will discuss the best practices and techniques that will help you achieve your desired sound efficiently and effectively. From EQ and compression to reverb and saturation, we will cover everything you need to know to master your tracks like a pro. So let’s dive in and explore the world of mastering with Plugin Alliance Plugins.

Plugin Alliance Plugins For Mastering

Achieving a professional-level mastering sound has never been easier with Plugin Alliance Plugins. From EQ to compressors to exciting effects, their suite of plugins covers all the bases for mastering your music with precision and ease.

Plugin Alliance Plugins for Mastering are some of the most powerful audio mastering tools available. The Plugin Alliance is a collection of studio plugins from some of the world’s most renowned audio developers. These plugins are designed to help sound engineers and producers enhance the sound of their mixes by providing a wealth of dynamic processing, EQ and utility tools that are essential for mastering. Here, we’ll discuss the various Plugin Alliance Plugins available for mastering and how you can use them effectively.

What Plugins Are Available?

The Plugin Alliance offers an extensive range of plugins for mastering, including EQs, compressors, limiters, and other tools. Here are some of the most popular mastering plugins by Plugin Alliance:

  • Brainworx bx_masterdesk
  • bx_refinement
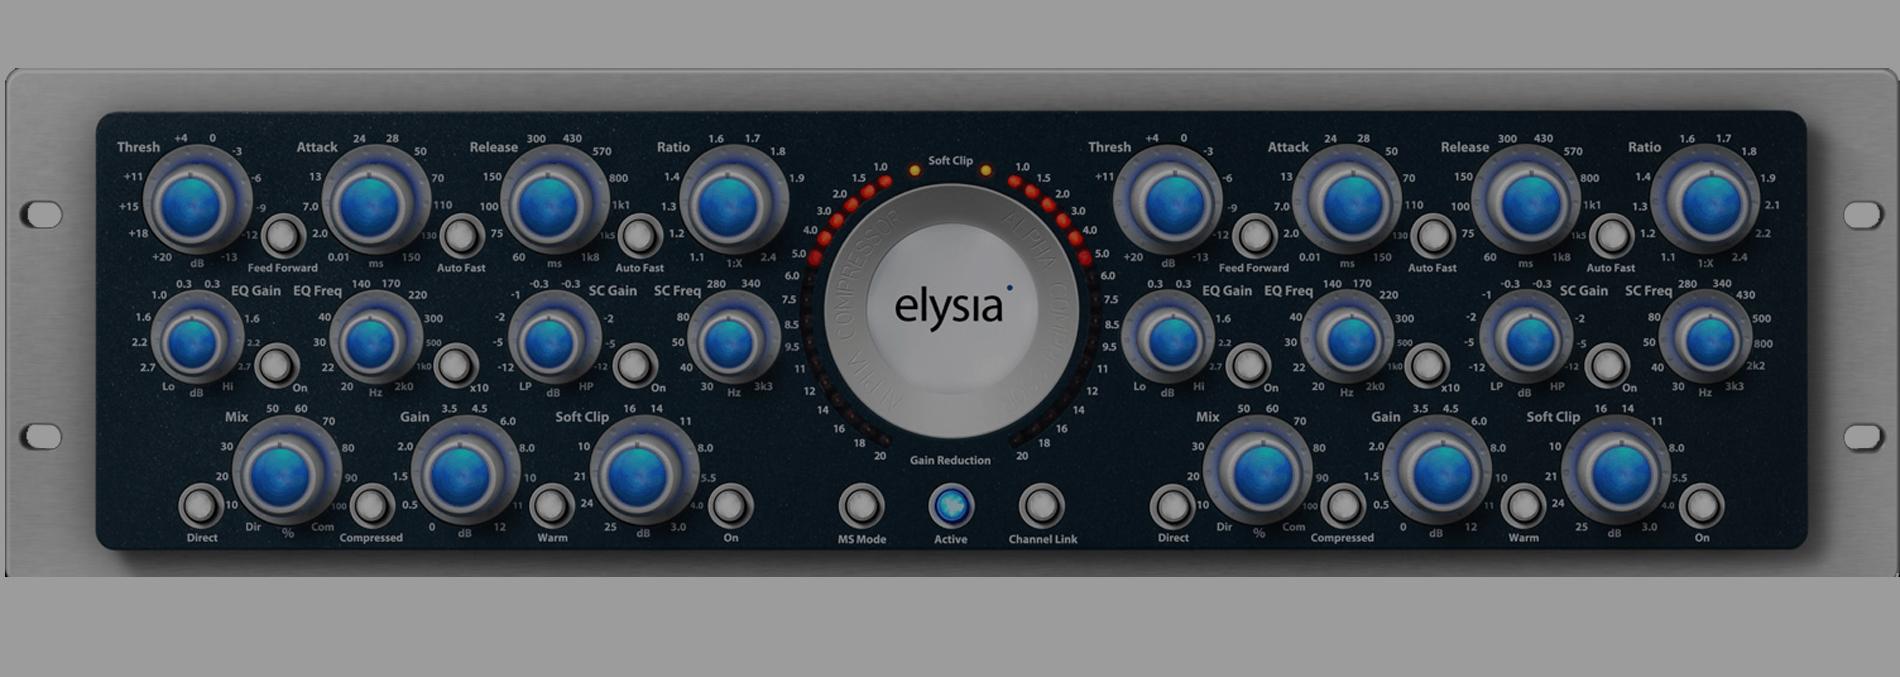
  • elysia alpha compressor
  • Maag EQ4 EQ
  • Millennia NSEQ-2 EQ
  • ProAudio DSP DSM V3
  • Shadow Hills Mastering Compressor
  • SPL De-Esser Collection
  • Vertigo VSC-2 Compressor

Features Of The Plugins

Plugin Alliance plugins come with a host of features that make them stand out, including:

  • Intuitive GUI: Plugin Alliance plugins have an easy-to-use graphical user interface that makes it simple to navigate the plugin settings and apply the effects you need.
  • Advanced controls: Plugin Alliance plugins come loaded with advanced controls and features, including sidechain processing, parallel processing, and more.
  • High-quality sound: Plugin Alliance plugins are designed to deliver high-quality sound with minimal noise and distortion.
  • Multiband processing: Many Plugin Alliance plugins offer multiband processing options, allowing you to apply dynamic processing at specific frequencies.
  • Compatibility: Plugin Alliance plugins are compatible with most major DAWs, making them a versatile tool for any mastering setup.

How To Use The Plugins Effectively

To get the most out of Plugin Alliance plugins, it’s important to start with a solid mix. Once you have a good mix, plugins can be used to enhance specific frequencies or to add depth and warmth to your mix. Here are some tips for using Plugin Alliance plugins effectively:

  • Start with a flat EQ: Before applying any effects, make sure you start with a flat EQ to get a clear picture of your mix.
  • Use compression sparingly: Compression is an essential tool for mastering, but it can also be overused. Use compression sparingly and only where necessary to avoid over-compression and a loss of dynamic range.
  • Be subtle: Small adjustments can make a big difference in mastering. Be subtle in your approach and make adjustments gradually to avoid over-processing.
  • Use multiple plugins: Don’t be afraid to use multiple plugins in your mastering chain. Combining different plugins can help you achieve the perfect sound for your mix.
  • Experiment: Mastering is an art form, so don’t be afraid to experiment with different effects and settings to achieve the sound you’re after.
Mastering With Plugin Alliance Plugins

Credit: www.bhphotovideo.com

Mastering Techniques

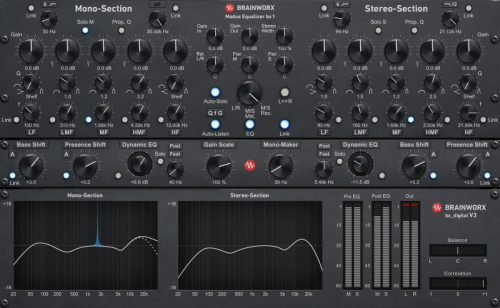
Mastering with Plugin Alliance plugins takes your music production to the next level. With their top-notch plugins such as bx_console SSL 9000 J, mastering EQ bx_digital V3, and dynamic EQ bx_dynEQ V2, you can achieve a professional sound with ease.

Mastering is the process of preparing a final audio product before its distribution. Effective mastering techniques can help to enhance the quality of the audio and attain a professional sound. In this article, we’ll discuss some basic and advanced mastering techniques along with how to apply these techniques with Plugin Alliance Plugins.

Basic Mastering Techniques

Basic mastering techniques include fundamental procedures such as volume adjustments, equalization, compression, and mastering reverb. One of the primary skills in mastering is to balance the frequencies of the track, which can be done through equalization. Compression helps to regulate the dynamic range of the track by reducing the loud parts and increasing the softer parts. Mastering reverb is used to make the track sound cohesive and bring together all of its elements.

Advanced Mastering Techniques

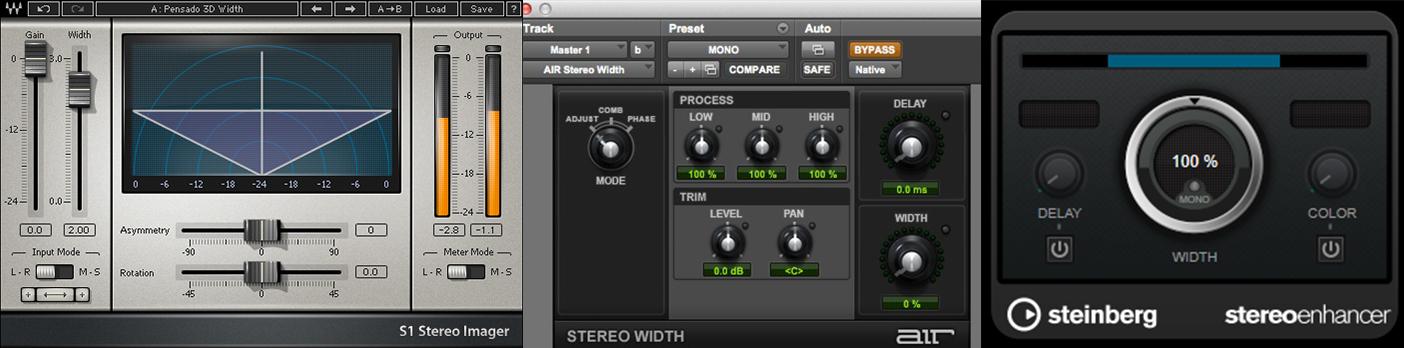
Advanced mastering techniques go beyond basic techniques and are used to attain a professional and unique touch to the audio. These techniques include mid-side processing, stereo widening, harmonic distortion, and saturation. Mid-side processing helps to adjust the levels of the mid and side portions of the audio signal, providing greater control over the stereo image. Stereo widening is used to create a wide stereo image for the audio. Harmonic distortion and saturation add more harmonics to the track, enhancing its warmth and making it sound fuller.

How To Apply Techniques With Plugin Alliance Plugins

Plugin Alliance Plugins offers a range of audio plugins that can help to achieve professional sound quality during mixing and mastering. Some of the plugins include bx_masterdesk, SPL Transient Designer Plus, and the Shadow Hills Mastering Compressor. The bx_masterdesk has all the essential mastering tools in one plugin, making the mastering process more efficient. The SPL Transient Designer Plus is a unique compressor that helps to adjust transient levels without affecting other aspects of the audio. The Shadow Hills Mastering Compressor is ideal for adding warmth and depth to the audio. In conclusion, mastering techniques are crucial to achieving a professional sound. Basic and advanced techniques, along with Plugin Alliance Plugins, can help to make the mastering process more effective and efficient.

Mixing Vs Mastering With Plugins

When it comes to audio production, the terms “mixing” and “mastering” are often used interchangeably, but they refer to two distinct phases of the audio production process. Mixing involves combining multiple audio tracks into a stereo or multichannel output. It is the process of balancing the instruments and sounds for the final mix. Mastering, on the other hand, is the final step in the audio production process, which involves preparing the final mix for distribution by applying a series of processing techniques such as compression, EQ, and limiting to ensure that the final mix sounds polished, consistent, and optimized for playback on different systems.

The Difference Between Mixing And Mastering

The main difference between mixing and mastering is their scope. Mixing involves balancing various tracks of an audio session to create a cohesive whole, whereas mastering involves processing a stereo or multi-channel mix-down of the finished mix to polish and enhance the final result. In other words, mixing is the process of making the different music elements work together, while mastering is the process of making the overall mix sound amazing and ready for distribution.

Benefits Of Using Plugins For Mixing

The use of plugins for mixing offers various benefits to producers and engineers. Firstly, plugins save time during the mixing process and provide a wide range of creative possibilities for enhancing the mix. They allow for precise and surgical EQ adjustments, compression, and reverb effects, making it possible to achieve a refined final mix. Additionally, using plugin for mixing also helps save money, compared to purchasing physical hardware, which could be expensive.

When To Use Plugins For Mixing And Mastering

Plugins can be used at different points of the mixing and mastering process. For mixing, they are best applied in the early stages of the process, after some basic tracks have been recorded. The benefits of using plugins in mixdown include the freedom to modify tracks without having to re-record them and the ease of use. It should be done in a way that complements the sound of the content, not in a way that takes away from its musicality. For mastering, plugins are used in the finishing stages of the production process, after the final mix is complete. Here, they can be applied at individual tracks or to the entire mix to help polish the final product.

Benefit of Plugins for MixingScopeApplication Stage
Provide infinite creative possibilities.MixingEarly stages of the process.
Save time and money.MixingEarly stages of the process.
Improve the final mix.MasteringFinishing the production process after the mixdown.

In conclusion, using plugins for mixing and mastering is an excellent way to enhance and add value to the audio production process. It provides a range of creative possibilities, helps save time, money and provides a polished final mix. When using plugins, it’s essential to apply them carefully to enhance the sounds, keeping the musicality of the content intact.

Mastering With Plugin Alliance Plugins

Credit: www.izotope.com

Other Mastering Tools

While Plugin Alliance plugins are a great choice for mastering, there are other tools you can use for the job. Here are some things to consider when looking beyond Plugin Alliance:

Analog Vs Digital Mastering

One factor to consider when choosing mastering tools is whether you want to work with analog or digital processing. Analog mastering often involves running audio signals through hardware equipment, while digital mastering uses software tools to manipulate the sound. Both methods have their benefits and drawbacks, and choosing between them may depend on your personal preferences and the specific project you’re working on.

Alternative Plugins For Mastering

There are many other plugins available for mastering besides Plugin Alliance. Some popular options include iZotope Ozone, FabFilter Pro-L 2, and Waves L2 Ultramaximizer. Each of these plugins offers its own unique set of features and benefits, so it’s worth testing out a few different options to see which ones work best for you.

How To Choose The Right Tool For The Job

When it comes to mastering, it’s important to choose the right tool for the job. Some things to consider when making this choice include:

  • The specific features and capabilities of the tool
  • The specific needs of the project you’re working on
  • Your own personal preferences and workflow

Ultimately, the right mastering tool for you will depend on a variety of factors. By considering your options carefully and testing out a few different plugins, you’re sure to find the perfect tools to take your mastering to the next level.

Mastering In Practice

Master the art of music production with Plugin Alliance plugins. Take your craft to the next level with tools and techniques mastered through in-depth practice. Streamline your workflow and enhance your creative output with this powerful suite of plugins.

Real-world Examples Of Mastering With Plugin Alliance Plugins

Mastering with Plugin Alliance Plugins allows audio engineers to take control of the production process and create high-quality masters. Some of the plugins that can make that possible include the bx_digital V3 and the SPL EQ Ranger Plus. With the bx_digital V3, for instance, you can manipulate the sound quality of your audio tracks to create a cohesive sound across the entire track. This plugin can enhance the low and high frequencies, correct phase problems and provide adequate control over the stereo width. Similarly, the SPL EQ Ranger Plus plugin provides a range of equalization options to adjust the tone of sounds in the mix.

Tips And Tricks For Successful Mastering

While using Plugin Alliance Plugins comes with some benefits, success is not automatic. Audio engineers need to apply some techniques and tips to achieve desirable results. For instance, an important tip is to have a proper gain staging method in place. Before applying mastering plugins, ensure the signal is not too hot or too low. Start by setting the gain level to ensure there is no clipping or distortion. Secondly, having the right speaker placement and acoustical treatment in the mixing room can make a big difference. The final mix can be affected by the room acoustics and speaker placement, therefore, invest in acoustic panels and place the speakers in the middle of the room.

Common Mistakes To Avoid

When doing audio mastering, making some mistakes is bound to happen. Yet, there are some common mistakes made by audio engineers that can be avoided. For instance, over-compression is a common mistake to avoid. It is tempting to use a lot of compression to bring out details in a mix. But using too much compression can result in a loss of dynamics. Another mistake is not taking breaks and ear fatigue. Long periods of listening to music can result in ear fatigue making it impossible to make appropriate judgments. Therefore, take breaks or switch to a different task, and come back with a fresh ear. In conclusion, mastering with Plugin Alliance Plugins like the ones discussed above opens up possibilities for audio engineers to create a cohesive and high-quality mix. Remember to use proper gain staging, speaker placement, and acoustical treatment and avoid common mistakes such as over-compression and ear fatigue. It takes time, patience, and practice to master the art of audio mastering.

Mastering With Plugin Alliance Plugins

Credit: www.recordingbootcamp.com

Frequently Asked Questions On Mastering With Plugin Alliance Plugins

What Plugins To Use For Mastering?

For mastering, the most recommended plugins include Izotope Ozone, Waves plugins, FabFilter Pro-L 2, T-Racks, and Sonnox Oxford. These plugins offer a variety of features, including EQ, compression, limiting, and stereo imaging, which help enhance your track’s overall sound quality.

What Are The Best Plugin Alliance Plugins?

The best Plugin Alliance plugins are the bx_console SSL 4000 E, Brainworx bx_digital V3, Lindell 354E, SPL Transient Designer Plus, and Millennia NSEQ-2. These plugins offer high-quality sound and advanced features for mixing and mastering.

Can You Transfer Plugin Alliance Plugins?

Yes, Plugin Alliance plugins can be transferred. However, there is a specific transfer process that needs to be followed. You need to contact the Plugin Alliance support team and provide them with the necessary information to initiate the transfer process.

Once the transfer is complete, the recipient will receive a new license key for the plugin.

What Is The Best Mastering Eq Plugin?

The best mastering EQ plugin is subjective and depends on personal preference. However, some of the most popular and highly rated ones include the FabFilter Pro-Q3, iZotope Ozone 9, and Waves API 550A.

Conclusion

Mastering music requires a combination of technical know-how and intuitive creativity. With Plugin Alliance plugins, achieving a professional-quality sound has never been easier. From compressors to equalizers, the digital tools provided by this company make for a robust and effective addition to any music producer’s toolkit.

By utilizing these plugins in your mastering process, you can take your music to the next level of excellence. So why wait? Give them a try and unlock your music’s full potential!

Categories
Archive

How to Solve Your Music Production Problems

Solve your music production problems by seeking expert advice and utilizing the right tools. Learn how to improve your music production techniques to create high-quality tracks that stand out.

From selecting the right software and equipment to mastering the art of mixing and arranging, there are several steps you can take to enhance your music production process. We will explore some practical tips and insights that can help you overcome common music production hurdles and achieve your creative goals.

Whether you are a beginner or an experienced producer, these strategies can help you create music that resonates with your audience and fulfills your artistic vision.

How to Solve Your Music Production Problems

Credit: twitter.com

Identifying Music Production Problems

As an aspiring or experienced music producer, it’s natural to encounter challenges during the production process. Some of these challenges can be technical, while others are creative. Identifying the specific music production problems you’re facing is the first step in finding solutions to them. In this blog post, we’ll discuss the most common music production problems and how to solve them. Let’s get started!

Technical Issues

Technical issues are common music production problems that can significantly hinder the creative process. They range from equipment malfunction to distorted sounds and poor audio quality. Here are some common technical problems you may encounter when producing music:

  • Equipment malfunction or compatibility issues
  • Latency or buffering problems
  • Distorted sounds or unwanted noise
  • Poor audio quality
  • Inconsistent volume or balance

Addressing technical issues requires a systematic approach. Start by checking your equipment, connections, and plugins. Ensure that they are compatible and configured correctly. Update your software, drivers and firmware if necessary. If you still can’t resolve the issue, seek help from technical support or a professional sound engineer.

Creative Challenges

Creative challenges are music production problems that can limit your artistic expression and compromise the quality of your music. These challenges may arise due to lack of inspiration, writer’s block, or simply feeling stuck. Here are some common creative problems that you may face when producing music:

  • Writer’s block or lack of inspiration
  • Difficulty in arranging or mixing elements in the song
  • Unsatisfactory progress or results
  • Difficulty in capturing the desired mood or emotion in the song
  • Fixing uninteresting or weak sections

The key is to identify the source of the problem and try a variety of techniques to overcome it. For instance, if you’re experiencing writer’s block, try brainstorming or setting a deadline to push yourself creatively. To improve your mixing skills, consider investing in training materials or seeking feedback from other producers. You can also try collaborating with other artists to gain new perspectives and fresh ideas.

How to Solve Your Music Production Problems

Credit: www.youtube.com

Improving Your Workflow

Improving your workflow as a music producer is essential to creating great music efficiently. While music production can be complex, improving your workflow can make the process smoother and less frustrating. Here are some tips to streamline your setup and optimize your workspace.

Streamlining Your Setup

Sometimes, the software and hardware you use can be more of a hindrance than a help. Consider minimizing your setup by removing any equipment you don’t use. Invest in a reliable DAW (digital audio workstation) and familiarize yourself with the shortcuts or hotkeys to access frequently used tools quickly. This will help you move smoothly through the production process and keep your creativity flowing.

If you use MIDI controllers, make sure they’re connected and working properly before starting your session. Ensure that your audio interface is set up correctly, so you don’t have to deal with connectivity issues mid-session.

Optimizing Your Workspace

Creating an organized workspace can help you work smarter, not harder. Here are some tips for optimizing your music production workspace:

TipDescription
1. ErgonomicsEnsure that your workspace is ergonomic. That means arranging your monitors and keyboard at comfortable heights. This will save you from any physical discomfort while you work.
2. MinimalismKeep your workspace clean and free of unnecessary items, so you have ample space to move around. This will prevent any accidents or damages to your equipment.
3. LightingLighting can significantly affect your mood when working. Ensure that your workspace is well-lit, preferably with natural lighting to reduce eye strain and create a calm atmosphere.

By making small changes to your setup and workspace, you can make significant improvements in your workflow and music production process. Follow these tips to boost your productivity, reduce frustration, and create music faster and more efficiently.

Utilizing Helpful Production Tools

To solve your music production problems, utilizing helpful production tools can be the key. With the right software and equipment, you can enhance your production capabilities and create high-quality music that meets industry standards. Embracing these tools and technologies can significantly improve your workflow and make your music production process more efficient.

Utilizing Helpful Production Tools Having issues with music production can be frustrating, but fortunately, technology has provided a solution. Utilizing helpful production tools has become essential in ensuring the delivery of high-quality sound with ease. Both software and hardware equipment are essential in enhancing music production. In this article, we will explore the various production tools, which include software plugins and hardware equipment that can help you solve your music production problems. Software Plugins Software plugins are digital processors that are installed in a computer program and can be used to enhance the music production process. They provide users with a wide range of features such as equalizers, compressors, and reverbs. Getting the right plugins can transform a mediocre music production into an outstanding one within no time. The best part is that you don’t have to purchase plugins that are very expensive; there is a whole range of free plugins available to download online. Hardware Equipment Another way to enhance your music production is by using hardware equipment. Although it might be more expensive than software plugins, hardware equipment provides a more realistic and tangible feel of music production. Some of the essential hardware equipment include audio interfaces, microphone preamps and dynamic processors, which help achieve desirable music production. Below is a list of hardware equipment that can be used to solve music production problems:

Hardware EquipmentUse case
Audio InterfacesConverts analog signals into digital signals making it easy to record and edit.
Microphone PreampsBoosts the signal input of a microphone before it gets processed, which enhances sound quality.
Dynamic ProcessorsUsed to compress, limit or expand sound dynamics which help in balancing sound levels.

In conclusion, it is essential to utilize helpful production tools to improve music production. Both software plugins and hardware equipment, when used correctly, can help you achieve your desired music production sound. If you’re looking to solve your music production problems, ensure that you invest in the right tools and you will be amazed by the outcome.

How to Solve Your Music Production Problems

Credit: www.educationandbass.online

Collaborating With Other Musicians And Producers

Music production can be a solitary endeavor, with producers and musicians often working in isolation. However, teaming up with another musician or producer can result in a better sound, fresher ideas, and a more cohesive final product. Collaboration can also help resolve any issues or problems that may have arisen in the production process.

Finding The Right Collaborator

Working with someone whose skills complement your own is important for a successful collaboration. Finding the right collaborator begins with identifying a person or group who shares your creative vision and has similar goals for the final product. Additionally, it’s important to choose someone who has strengths in areas where you may have weaknesses. For example, if you’re a skilled songwriter but struggle with mixing and mastering, it may be beneficial to collaborate with a producer who has a strong background in audio engineering.

When searching for a collaborator, it’s common for musicians and producers to network within their local music scenes or to find one through online forums or social media. However, it’s important to screen potential collaborators before committing to a project. Reviewing their portfolio or past work, holding a preliminary discussion, or even working on a small test project can help ensure that you’re partnering with someone who meets your requirements and has the same creative vision as you.

Maximizing The Benefits Of Collaboration

Collaborating with other musicians and producers can have numerous benefits, but it’s important to approach the project with an open mind and clear communication. To maximize the benefits of collaboration, consider the following:

  • Set clear goals and expectations: Before beginning a collaboration, it’s important to establish clear goals for the project and communicate your expectations with your collaborator. This will help ensure that everyone is on the same page and working towards a shared vision.
  • Assign roles and responsibilities: Determine who will be responsible for what tasks, and assign roles based on each person’s strengths and skillsets. This will help prevent duplication of effort and ensure that each person is contributing in a meaningful way.
  • Be open-minded: Collaboration often involves compromise and openness to new ideas. Be willing to listen to your collaborator’s opinions, and be open to experimenting and trying new things.
  • Communicate effectively: Clear communication is key to any successful collaboration. Regular check-ins, thorough feedback, and transparent communication can help ensure that everyone is on the same page and working towards the same goals.

Collaborating with other musicians and producers can be a rewarding experience that results in a better final product. Finding the right collaborator and maximizing the benefits of collaboration can help you overcome any production problems and take your music to the next level.

Developing Your Skills And Knowledge

Enhancing your skills and knowledge is essential in solving music production problems. Staying up-to-date with industry trends, attending workshops, reading blogs, and practicing regularly can help you overcome any challenges that come your way.

If you’re a music producer, you know that there are endless challenges that come with the job. Whether it’s struggling to come up with new melodies or trying to find the right mix, there’s always something that can get in the way of creating your best work. Fortunately, there are several ways to improve your skills and knowledge, helping you overcome these obstacles. Below are some H3 headings that can help you on your path:

Studying Music Theory

One of the best ways to improve your music production skills is to study music theory. With a solid understanding of music theory, you can more easily write melodies and chord progressions that sound great together. You can also use music theory to create more complex harmonies and melodies that will make your songs stand out. Some tips for studying music theory include:

  • Starting with the basics, such as learning about scales and chords
  • Practicing regularly, whether it’s through exercises or composing your own songs
  • Working with a teacher or online course to get feedback and guidance

Learning A New Instrument

Another way to improve your music production skills is to learn a new instrument. Even if you focus primarily on electronic music production, having a foundational knowledge of an instrument like the piano, guitar, or drums can help you create better melodies and rhythms. Some tips for learning a new instrument include:

  1. Choosing an instrument that interests you
  2. Finding a good teacher or online course to guide you
  3. Practicing regularly, even if it’s just for a few minutes each day

Continually Exploring New Music And Production Techniques

In addition to studying music theory and learning a new instrument, it’s also important to continually explore new music and production techniques. Whether you’re listening to new artists or trying out new software plugins, exposing yourself to a variety of influences can help you develop your own unique style. Some tips for exploring new music and production techniques include:

  • Following music blogs and publications that cover your favorite genres
  • Participating in online forums and groups to connect with other producers
  • Experimenting with new software plugins and production techniques

By developing your skills and knowledge through these techniques, you’ll be well on your way to overcoming your music production problems. Whether you’re just starting out or you’re a seasoned pro, there’s always room for improvement in music production.

Finding Inspiration And Overcoming Creativity Blocks

Feeling stuck in your music production can be frustrating. Finding inspiration and overcoming creativity blocks takes time and effort. Give yourself a break, listen to different genres, create a routine, and experiment with new techniques to reignite your spark and passion for music production.

Music production is a passion for many people. While producing music, you may come across creative blocks that stop you from creating music. These blocks can happen to anyone, but the key is finding inspiration and overcoming them. In this post, we will discuss some techniques for finding inspiration and breaking free from the production ruts that can cause creativity blocks.

Exploring Different Genres

One way to find inspiration is by exploring different genres. By listening to music outside your usual genre, you can find new sounds and techniques that can inspire you. You can also experiment with fusing different genres to create unique sounds that can set you apart from other producers. Additionally, attending concerts or music festivals can give you a chance to see how other artists incorporate different genres in their music.

Breaking Free From Production Ruts

Creative blocks can also happen when you get into a production rut. You may find yourself using the same chords, progressions, and samples that you have used before. To avoid this, try to break free from your usual patterns and experiment with different sounds, instruments, and software. Collaborating with other producers can also help you break free from your production rut. With fresh ideas and different perspectives, you can create new sounds that inspire you. In conclusion, finding inspiration and overcoming creativity blocks is an essential part of music production. By exploring different genres and breaking free from production ruts, you can find new sounds and techniques that can inspire you to create something unique. Keep experimenting and collaborating, and you will find that inspiration can come from the most unexpected places.

Reviewing And Improving Your Tracks

Improve your music tracks with these tips to enhance your music production. Solve common problems such as mixing, mastering, and composition to create a polished sound for your listeners. Review your tracks with a critical ear and make adjustments to move closer towards your desired musical vision.

As a music producer, reviewing and improving your tracks is an essential part of the production process. It allows you to identify any areas that need improvement and make the necessary changes to ensure that your final product is top quality. Below are some tips on how to review and improve your music production.

Receiving Feedback From Others

One way to improve your tracks is by getting feedback from others. This feedback can come from fellow producers, musicians, or anyone else who has experience with music production. You can also seek feedback online by posting your work on social media or music production forums.

Analyzing Your Own Recordings

Analyzing your own recordings is another effective way to improve your tracks. This involves listening to your own work carefully and taking note of any areas that need improvement. You can also compare your tracks with those of other producers in your genre to see how they differ.

Here are some steps to follow when analyzing your own recordings:

  • Listen to your tracks with fresh ears
  • Identify any problem areas
  • Take notes on areas that need improvement
  • Compare your work with similar tracks by other producers
  • Make the necessary changes to improve your tracks

Tips for improving your tracks:

  • Use high-quality samples and sounds
  • Ensure your mix and master are balanced
  • Take breaks and come back to your tracks with fresh ears

By following these tips and techniques, you can improve the overall quality of your music production. Remember, consistent practice and application of these techniques will eventually help you develop your own unique style and sound as a music producer.

Maintaining Your Equipment And Setup

Maintaining your equipment and setup is crucial for addressing music production problems. Regularly checking and cleaning your gear, updating software, and organizing your workspace can improve your workflow and prevent technical issues.

Maintaining Your Equipment and Setup is crucial for your music production process. Preventive maintenance and troubleshooting play an essential role in ensuring that you encounter minimal problems in your setup. This subheading holds tremendous importance in keeping your equipment functioning at its optimum level.

Preventive Maintenance

You can avoid several equipment and setup-related challenges through proactive care and maintenance. Regularly cleaning your equipment, checking for wear and tear on cables and connectors, and monitoring the state of your equipment can help you avoid more significant issues. Here are some tips:

  • Clean your setup regularly by wiping down your cables and connectors with a dry or slightly damp cloth.
  • Keep your cables and connectors in good condition by replacing them when they show visible signs of wear and tear.
  • Check your equipment regularly for any signs of rust, corrosion, or other damage.
  • Store your equipment and cables carefully to avoid kinks and other damage.

Troubleshooting

Despite preventive maintenance and care, there may still be times when your setup faces issues. Troubleshooting is the process of identifying and fixing these issues. You can try several approaches to troubleshoot your equipment, such as:

  1. Inspecting and testing individual components of your setup to determine which component is causing the issue.
  2. Resetting or rebooting your equipment, which can sometimes solve minor problems.
  3. Updating your software and drivers to the latest versions to ensure any known bugs or errors have been addressed.
  4. Consulting with a professional technician or your equipment’s manufacturer for technical support.

Maintaining Your Equipment and Setup is an essential aspect of managing a successful and functional music production process. Proper care, maintenance, and proactive problem-solving can help you avoid significant downtime and maintain the longevity of your investment.

Frequently Asked Questions Of How To Solve Your Music Production Problems

How Can I Improve My Music Production?

To improve your music production, start by investing in quality gear and software. Practice regularly and seek feedback from other musicians. Develop your skills through online tutorials, workshops, and courses. Collaborate with other artists to gain new perspectives and techniques.

Finally, listen critically to other music styles and genres to inspire and expand your creativity.

Why Am I Not Improving In Music Production?

To improve in music production, focus on learning music theory, practicing regularly, seeking feedback, collaborating with others, and using quality equipment. Be patient and persistent, and don’t be afraid to experiment and try new things. Consider taking courses or workshops to develop your skills further.

Remember, improvement takes time and effort.

Why Do Most Music Producers Fail?

Most music producers fail because they lack the necessary knowledge, skills, and perseverance needed to succeed in the competitive music industry. Some producers may have unrealistic expectations, while others may not be able to adapt to the constantly changing music trends.

It takes a lot of hard work, dedication, and networking to succeed as a music producer.

What Problems Do Music Producers Face?

Music producers face challenges like creative block, budget constraints, finding the right talent, market saturation, and keeping up with technological advancements. They also need to navigate legal issues related to copyrights and royalties.

Conclusion

Music production problems are common, but they can be solved quickly and effectively with the right tactics. Whether it’s focusing on the fundamentals, utilizing technology, or collaborating with others, there are many ways to overcome any obstacles in your music production journey.

Keep these tips in mind and keep pushing forward. The more you practice and refine your skills, the better equipped you’ll be to create the music you envision. So don’t give up, keep practicing and experimenting, and embrace the challenges that come your way.

Categories
Archive

Making A Track From Scratch In Ableton Live

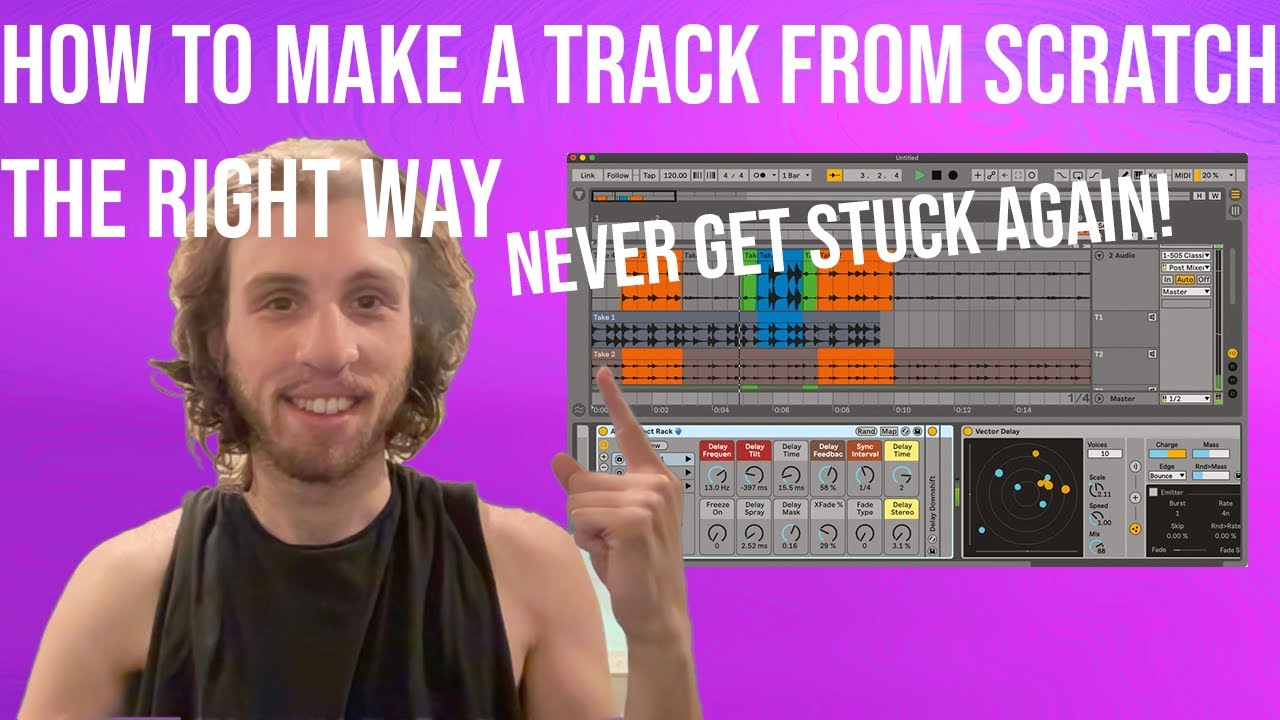
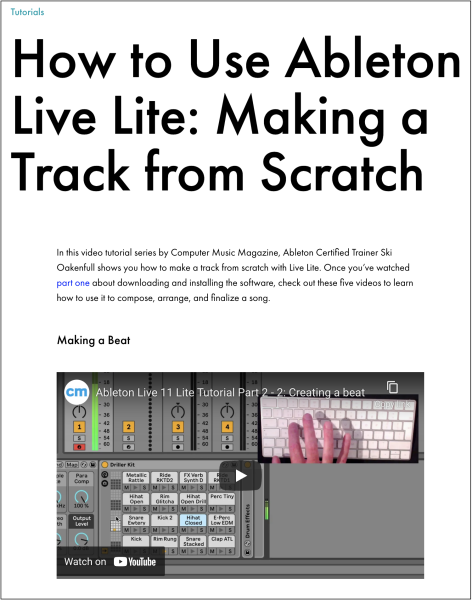
To make a track from scratch in Ableton Live, start by opening a new live set, dragging in audio clips or creating MIDI clips, and arranging them in the Session or Arrangement View. The process involves selecting sounds, creating patterns, and layering elements to build up a cohesive song structure.

Utilize Ableton’s built-in instruments, effects, and plugins or import external sounds to add variation and depth to the track. Experiment with automation, mixing, and mastering techniques to achieve a polished final product. With Ableton’s user-friendly interface and endless creative possibilities, anyone can easily create a track from scratch and bring their musical vision to life.

Making A Track From Scratch In Ableton Live

Credit: m.youtube.com

Getting Started

Learn how to create your own music track from scratch in Ableton Live. This beginner’s guide covers everything from setting up your session, using samples and loops, creating melodies and beats, and arranging your track for a polished final product.

Getting Started: Making a track from scratch can be a daunting task, especially for beginners. However, with a few tips and tricks, it can become an exciting and fulfilling experience. To start, you’ll need a Digital Audio Workstation (DAW), and Ableton Live is one of the most popular options available. In this guide, we’ll show you how to get started on making a track from scratch in Ableton Live.

Setting Up A New Project:

The first step in creating a track from scratch is setting up a new project in Ableton Live. To do this, launch Ableton Live, and then select “New Live Set” from the “File” menu. Alternatively, you can use the keyboard shortcut “Ctrl+N” (Windows) or “Command+N” (macOS) to create a new project.

Choosing The Right Tempo And Key:

Once you’ve set up your project, the next step is to choose the right tempo and key for your track. The tempo determines the speed of your track, and the key determines the overall tone and mood. Choosing the right tempo and key is important because it sets the foundation for the rest of your track. Here are some tips for choosing the right tempo and key:

  • Consider the genre of music you want to produce
  • Experiment with different tempos and keys to find what works best for your track
  • Use Ableton Live’s “Tap Tempo” feature to find the tempo of a reference track
  • Try to choose a key that matches the vocal range of your singer (if you’re planning on adding vocals to your track)

Once you’ve chosen the right tempo and key, you can start building your track by adding instruments, samples, and effects.

Creating A Basic Beat

In Ableton Live, creating a basic beat is the first step in making a track from scratch. Utilize the software’s drum rack to import and experiment with various drum sounds, adjust the tempo and add effects to create a rhythmic foundation for your track.

Creating A Basic Beat When it comes to producing a track in Ableton Live, the starting point is often creating a basic beat. This is the foundation upon which the rest of the track is built. In this article, we will go over the steps to create a basic beat in Ableton Live. H3: Working With Drum Samples The first step in creating a beat is to work with drum samples. Ableton Live comes with a variety of drum samples to choose from, and using these can be a quick and easy way to get started. Some popular options include the classic 808 and 909 drum machines. To work with drum samples, simply drag and drop them into a new MIDI track in Ableton Live. From there, you can use the MIDI editor to program patterns and adjust the timing and velocity of each drum hit. H3: Layering Beats For A Fuller Sound Once you have a basic rhythm programmed using drum samples, you can then layer additional sounds for a fuller sound. This can include adding shakers, hi-hats, or percussion instruments. To layer beats, you can create a new MIDI track and layer the sounds on top of your existing beat. You can adjust the timing and velocity of each sound to create a more complex pattern. H3: Adding Groove And Swing To add more interest and movement to your beat, you can add groove and swing. This creates a more human-like feel to your beat by adjusting the timing of each hit slightly. To add groove and swing, you can use Ableton Live’s groove pool. Simply drag and drop the groove you want to apply onto your MIDI track. You can adjust the amount of groove applied to your beat to get the perfect balance. In conclusion, by following these steps, you can create a basic beat in Ableton Live. By working with drum samples, layering beats, and adding groove and swing, you can create a solid foundation for your track.

Adding Melodic Elements

In Ableton Live, adding melodic elements to your track can elevate it to the next level. Whether you use virtual instruments or record live instruments, experimenting with melodies can bring your production to life.

Once you have created a solid beat and established the structure of your song, it’s time to add some melodic elements. This is where your creativity can truly shine, as you explore different sounds and ideas to create a memorable and engaging track. Here are some tips for adding melodic elements to your Ableton Live project:

Creating Simple Basslines

A strong bassline is essential to any electronic music production, providing the foundation for the rest of your melody. To create a simple bassline in Ableton Live:

  1. Select the Simpler or Sampler instrument in your audio effects rack.
  2. Choose a bass sound that fits your track’s genre and mood.
  3. Using your MIDI keyboard or the piano roll editor, create a simple bassline that follows the root notes of your chord progression.
  4. Add some variation to the bassline by changing the rhythm or adding accents on certain notes.

Designing Synth Melodies

Synth melodies are another essential element of electronic music, adding emotion and energy to your track. Here are some steps to create synth melodies in Ableton Live:

  • Select a synth instrument in your audio effects rack.
  • Experiment with different presets until you find a sound that fits your track.
  • Using your MIDI keyboard or the piano roll editor, create a simple melody that fits with your chord progression.
  • Add some variation to the melody by changing the rhythm, adding trills or slides, or using different octaves.

By focusing on creating strong basslines and synth melodies, you can add depth and emotion to your track in Ableton Live. Don’t be afraid to experiment with different sounds and techniques to find the perfect melody for your song.

Arranging Your Track

Learn how to arrange your track from scratch in Ableton Live with this step-by-step tutorial. Create a solid structure and flow for your music by utilizing the powerful tools and techniques of Ableton Live.

Arranging Your Track: Now that you have created the basic structure of your track and added some variations and interest, it is time to arrange your song. This is where you organize the different parts of your track to create a cohesive and engaging listening experience. Structuring Your Song: The arrangement of your song is a crucial part of the music-making process, as it is what keeps the listener engaged from beginning to end. It is important to structure your song in a way that makes sense and flows well. A standard structure for electronic music is an intro, verse, chorus, verse, chorus, breakdown, buildup, and outro. However, feel free to experiment and create your own unique structure. Building Variations And Breakdowns: Variations and breakdowns are essential elements to keep your listeners interested. One way to create variations is to add or remove certain parts of your track to create a different sound. Breakdowns are used to create anticipation before the build-up and drop, which is a common feature in electronic music. You can use effects like filters and reverbs to create tension in your breakdowns. Creating Transitions And Fills: Transitions and fills are used to move between different parts of your track, such as from the verse to the chorus. They help to keep the track flowing and add interest to the arrangement. One way to create a transition is to add a drum fill or a riser effect. Try experimenting with different sounds to find the perfect transition or fill that fits your track. In conclusion, arranging your track is not only about organizing your different parts but also about creating a cohesive listening experience for your audience. Don’t be afraid to experiment with different structures and use variations, breakdowns, transitions, and fills to keep your track interesting and engaging all the way through.

Mixing And Mastering

Learn the essential skills of mixing and mastering to produce high-quality tracks from scratch in Ableton Live. Whether you’re a beginner or a professional, this guide covers all the fundamental techniques and strategies required to take your tracks to the next level.

If you have followed along with the previous steps of making a track from scratch in Ableton Live, by now, you would have a produced an initial idea that is well constructed and has its basic arrangement. Now, it’s time to move on to one of the most critical aspects of creating a track – Mixing and Mastering. Mixing and mastering make a huge difference in how your music sounds, considering that you are preparing the track for release. Here are some tips to help you navigate this process.

Balancing Levels And Eqing

Balancing levels and EQing are two crucial techniques that you need to get right when mixing your track. The goal is to make sure that every element of the mix can be heard and sits well in the mix together. Balancing levels involves setting the relative volume of each audio element in your track, ensuring nothing is too loud or too quiet. EQing is the process of adjusting the frequency content of individual audio elements in your track to remove any unwanted frequencies.

Applying Effects And Processing

After balancing levels and EQing your track, it’s time to add effects and processing. Effects can help your track to sound more polished, and creative use of processing can make your song stand out. When applying effects, don’t overdo it. Less is sometimes more, and you should aim to enhance your track’s sound, not bury it.

Preparing Your Track For Release

Once you have mixed and added effects to your track, the final step is to prepare it for release. This encompasses making sure that your track meets the technical standards required by streaming platforms. You can use tools like Loudness Normalization, which checks that your track is not too loud or too quiet, ensuring that it is ready for the streaming platforms. Also, make sure that your track is exported to a file format that is widely accepted, such as WAV or MP3.

In conclusion, Mixing and Mastering are essential parts of the music production process. If done correctly, the results will be a professional sounding track that is ready to be shared with your audience. By balancing levels and EQing, applying effects and processing, and preparing your track for release, you can be confident that your track will sound great on any sound system or streaming platform.

Making A Track From Scratch In Ableton Live

Credit: www.skioakenfull.com

Making A Track From Scratch In Ableton Live

Credit: routenote.com

Frequently Asked Questions On Making A Track From Scratch In Ableton Live

How Do I Create A Track In Ableton?

To create a track in Ableton, go to the Session View and click on an empty slot in the column. A new audio or MIDI track will be created. From there, you can add instruments, effects, and start recording or programming your music.

How Do I Start Making A Song In Ableton?

To start making a song in Ableton, follow these simple steps: 1. Open a new project and create a MIDI track 2. Select a virtual instrument 3. Add clips to the timeline 4. Record or program MIDI notes 5. Arrange the clips in the session view or the arrangement view.

How Do I Cut A Track In Ableton?

To cut a track in Ableton, simply select the “slice” tool and click where you want to make cuts. Adjust the start and end points of each slice as desired, and then export the edited track.

How Do I Create A Return Track In Ableton?

To create a return track in Ableton, go to the “Add Track” button and select “Return Track” from the dropdown menu. Then, assign the track a name, audio inputs and outputs. Finally, drag and drop the effects and plugins you want to use onto the return track.

Conclusion

Creating a track from scratch in Ableton Live may seem daunting at first, but with the right tools and techniques, it can be a rewarding experience. Taking the time to master the software and experiment with different sounds and effects can result in a truly unique and personalized composition.

Remember to trust your instincts and let your creativity guide you. With practice and determination, you can achieve your desired sound and take your music production skills to the next level.

Categories
Archive

Mixing Fundamentals Labeling Files Studio One

When labeling files in Studio One, it is important to prioritize consistency and accuracy. By using a standardized naming convention and file structure, you can streamline the mixing process and avoid confusion or mistakes.

Mixing audio files can be a complex and time-consuming process, but with the right approach, you can achieve professional-quality results. One key element of efficient mixing is proper file labeling and organization within the Digital Audio Workstation (DAW) environment. When working in Studio One, a popular DAW option among audio engineers and producers, there are several best practices to follow for effective file naming and structuring.

We will explore some of the fundamental principles of labeling files in Studio One and how to optimize your workflow for seamless mixing.

Mixing Fundamentals Labeling Files Studio One

Credit: www.amazon.com

Fundamentals Of Mixing

Learn the fundamentals of mixing to produce high-end audio with Studio One. One essential tip is to label all files for easy reference and quick navigation.

Mixing music requires a lot of skill and technique for the end product to be of good quality. If you’re an audio engineer or a music enthusiast, then you’re familiar with the importance of mixing music and its role in enhancing sound quality to create an excellent final product. The mixing process involves several fundamental aspects, including gain staging, balancing frequencies and panning instruments. In this post, we’ll guide you on how to label files in Studio One Focusing on these essential aspects of mixing.

Understanding Gain Staging

Gain staging involves the proper setting of the volume levels at each stage of the mixing process. It pertains to how you set the levels of your tracks to get optimal levels, preventing unwanted distortion or clipping. One critical point to bear in mind is that adding gain to a track can increase the volume. Therefore, audio engineers need to ensure that the volume level is set appropriately by maintaining a balance between amplitude and headroom. A common technique is to set the gain level at -18dB, which allows for more headroom while also reducing the risk of distortion.

Balancing Frequencies

Another critical aspect of mixing is balancing frequencies. Balancing frequencies means to adjust each track’s frequency levels so that they blend harmoniously. Different instruments have varying frequency levels – for example, vocals and drums may have a different frequency range. EQ settings help correct any frequency imbalances. EQ settings are necessary to control the fundamental to the harmonic frequencies, making the sound more polished.

Panning Instruments

To ensure that all instruments in a mix are distinguishable from each other, you must pan them. Panning involves placing instruments in a particular space spectrum – the speaker’s width. Well panned sources create a sense of depth and movement in a mix. Panning strikes a balance between being too narrow and too wide; ideally, the sweet spot is between 70% and 100% on either the left or right side. For bass elements, it may be necessary to keep the sound in the central position. This technique is known as bass mono. In conclusion, these fundamental aspects of mixing music are critical to producing a quality final product. Gain staging, balancing frequencies, and panning instruments all come together to create an exceptional mix. By ensuring that each track has its own space, you can secure an enjoyable listening experience. With a bit of practice, a combination of these techniques will make it easier to create music that stands the test of time.

Labeling Files

Labeling files is an important aspect of mixing music in Studio One. By properly naming and organizing your files, you can easily navigate your sessions and save time in the editing process. Don’t overlook this crucial step in your mixing fundamentals.

Labeling files in Studio One is a fundamental part of mixing. Once you have recorded your tracks, the last thing you want is to have trouble finding them in the mixing session. By organizing tracks, creating meaningful names, and using color-coded groups, you can make your workflow more efficient. In this post, we’ll cover the basics.

Organizing Tracks

The first step in labeling files is organizing your tracks. You should group similar tracks together, such as drums, bass, and vocals. This will make it easier to work on specific parts of the mix. You can create folders for each group of tracks, and then drag and drop the tracks into the appropriate folders.

Creating Meaningful Names

Once your tracks are organized, you should give them meaningful names. This will help you identify each track quickly. Instead of using generic names like “Track 1” or “Audio 2,” try using descriptive names like “Kick Drum” or “Lead Vocal.” You can also include the name of the musician or instrument in the track name.

Creating Color-coded Groups

In addition to creating meaningful names, it’s helpful to use color-coded groups. This will help you quickly identify which tracks belong to which group. For example, you can use blue for drums, green for guitars, and red for vocals. You can also use different shades of the same color to indicate subgroups within each group. To create color-coded groups in Studio One, click the “Show Tracks” button in the track list, and then click the color swatch next to each track. You can also use the “Grouping” feature to create subgroups within each color-coded group. By following these labeling fundamentals in Studio One, you can save time and work more efficiently in your mixing sessions. With organized tracks, meaningful names, and color-coded groups, you’ll be able to navigate your mixing session with ease.

Studio One Workflow

If you are looking to streamline your mixing process, Studio One can be a powerful tool for your workflow as it provides you with a range of features to help you label, import and export, use plug-ins, and apply effects to your audio files. Here, we will guide you through Studio One’s fundamentals used for Mixing which includes labeling files, importing and exporting files, using plug-ins, and applying effects.

Importing And Exporting Files

Studio One provides an easy-to-use method of importing audio files into your project. You can import several audio tracks at once using the drag and drop feature or by using the file browser within the application. Once imported, you can export the audio files in various formats such as WAV, MP3, AIFF, and more. You can also choose whether to export the files with or without effects applied.

Using Plug-ins

Studio One offers a wide range of plug-ins that can be applied to your audio tracks. These plug-ins can be used for tasks like equalizing, compressing, adding reverb, and delay effects. With the drag and drop feature in Studio One, you can easily add these plug-ins to your audio tracks and adjust their settings to your liking.

Applying Effects

Studio One comes with various effects that can help you enhance your audio tracks to perfection. It offers various features that allow you to add audio loops, split and merge tracks, adjust track volume and pan, and apply effects to tracks. By using these effects, you can make your audio tracks sound like a professional production.

Studio One Workflow key points:
Studio One is a powerful tool for managing and editing audio tracks
You can easily import and export audio files in various formats
Studio One offers a variety of plug-ins that help in enhancing audio tracks
Applying effects to audio tracks in Studio One can help you achieve a professional-sounding mix
Mixing Fundamentals Labeling Files Studio One

Credit: www.crutchfield.com

Best Practices

Learn the best practices of mixing fundamentals, labeling files and using Studio One effectively. This will ensure your workflow is efficient, organized and professional, allowing you to focus on creating a great mix.

Mixing is an art that requires a keen ear, creativity, and technical expertise. One of the most important aspects of the mixing process is organizing and labeling files properly. Without a system in place, it can be challenging to navigate through hundreds or even thousands of audio files. In this blog post, we’ll provide you with the best practices for mixing fundamentals labeling files in Studio One, including backing up files, saving presets, and collaborating with others.

Backing Up Files

Backing up files is critical when working on a mixing project in Studio One. You can use a cloud-based storage solution, such as Dropbox or Google Drive, to save your files. Alternatively, an external hard drive is an excellent option for backing up your files. This ensures that you have a copy of your project files in the event of unexpected data loss, such as a hard drive failure. We recommend creating a backup of your files regularly, ideally at the end of every working session.

Saving Presets

Presets are one of the most time-saving features that Studio One offers. Every time you create a unique mixing setup, you can save it as a preset. You can then load that preset in future mixing sessions, saving you valuable time. When saving presets, we recommend naming them in a way that is easy to remember and identify for future use.

Collaborating With Others

Collaborating with others on a mixing project requires careful planning and execution. Studio One offers a feature called “Collaboration,” allowing multiple users to work on the same project simultaneously. Each user can create and edit their audio tracks, which can then be merged later. When collaborating, it’s important to ensure that everyone is working on the latest version of the project file. We recommend that one person is designated the “project manager,” responsible for managing file versions and assigning tasks to each team member. In conclusion, organizing and labeling files correctly is one of the essential aspects of mixing in Studio One. By following the best practices for backing up files, saving presets, and collaborating with others, you can ensure a seamless and productive mixing process.

Mixing Fundamentals Labeling Files Studio One

Credit: www.image-line.com

Frequently Asked Questions For Mixing Fundamentals Labeling Files Studio One

How Do You Use Markers In Studio One?

To use markers in Studio One, click on the timeline ruler and select “Add Marker. ” You can rename and move markers as needed, and use them to help you navigate your project and organize sections of your song.

How Do I Combine Audio Events In Studio One?

To combine audio events in Studio One, select the events to be combined and press the “Ctrl+G” keyboard shortcut or right-click and select “Group”. The events will be combined into a new event with a group name. You can then edit the group as a single entity.

How Do You Use Cue Mix In Studio One?

To use cue mix in Studio One, first create a mix with the desired tracks. Then, turn on the cue mix feature by clicking on the headphone icon. Adjust the levels of the mix as needed and use the cue mix knob to balance the mix with the studio sound.

Can You Master On Studio One?

Yes, you can master on Studio One. With its user-friendly interface and comprehensive tools, Studio One offers a complete solution for music production from recording, mixing, mastering to distribution. There are plenty of resources available online to help you learn Studio One and enhance your skills.

Conclusion

To sum up, labeling files in Studio One is fundamental for any audio project. It helps to easily navigate and organize your audio tracks, which saves time and increases productivity. Moreover, by following the tips and tricks we’ve discussed, you’ll be able to maximize the potential of your Studio One experience.

So, what are you waiting for? Start labeling those files and take your audio production to new heights. Happy mixing!

Categories
Archive

Kazrog Avalon 747 Plugins Vs Hardware

Kazrog’s Avalon 747 Plugins offer a cost-effective alternative to expensive hardware. While hardware may offer some advantages, such as tactile control, the plugins deliver highly accurate emulations with a lower price tag.

Audio engineers and producers have come to expect the warmth and character that hardware compressors and equalizers bring to their recordings. However, not all professionals can afford the luxury of acquiring expensive, high-end gear. That’s where Kazrog’s Avalon 747 Plugins come in.

In comparison to their hardware counterparts, these software-based plugins offer users a cost-effective and accessible solution. They are accurate emulations of the original hardware, designed to deliver the same level of warmth and character to recordings. While hardware continues to offer more tactile control, for many, the convenience and portability of software-based solutions make them the go-to choice in a digital world.

Kazrog Avalon 747 Plugins Vs Hardware

Credit: mixandmastermysong.com

Pros And Cons Of Kazrog Avalon 747 Plugins

Kazrog Avalon 747 plugins are dynamic processors that closely emulate their hardware counterparts. These plugins are known for their remarkable performance, giving users the flexibility of a digital interface while delivering the sound quality that is associated with analog hardware.

Pros Of Kazrog Avalon 747 Plugins

  • Easy to use with a simple interface that allows users to adjust the settings without much hassle.
  • Cost-effective alternative to hardware units, providing access to the same sound quality without the expensive price tag.
  • Flexible and versatile, giving users more control over the sound production process.
  • Low CPU usage, making it easy to run multiple instances of the plugin without affecting the computer’s performance.
  • Consistent sound quality, ensuring that the final mix sounds the same each time the plugin is used.

Cons Of Kazrog Avalon 747 Plugins

  • Not as authentic as the actual hardware unit. While the plugins simulate the sound of the hardware unit, it may not be able to fully replicate the sound of the original equipment.
  • No tactile interface, meaning users miss out on the hands-on experience of twisting knobs and sliders to achieve the desired sound.
  • Reliance on the computer’s processing power may mean that sound quality can be affected if the computer is not powerful enough to handle the plugin.
  • May not work with all DAW software, limiting access to users who work with specific programs.
  • Plugins require an upfront cost, which may be prohibitive for some users who are not willing to invest in the technology.

In conclusion, Kazrog Avalon 747 plugins offer a flexible and cost-effective alternative to hardware units, while simulating the sound quality. However, it is important to note the limitations of this technology, including the potential lack of authenticity when compared to the original hardware, and the reliance on the computer’s processing power.

Kazrog Avalon 747 Plugins Vs Hardware

Credit: m.youtube.com

Pros And Cons Of Hardware Eq

Hardware EQ like the Kazrog Avalon 747 Plugins offer a unique, analog sound that cannot be replicated by digital plugins. However, they come with a higher price tag, require physical space, and must be maintained. On the other hand, digital plugins are cost-effective, space-saving, and easy to use, but they lack the warmth and character of hardware.

Pros and Cons of Hardware EQ Hardware EQ, without a doubt, has been the most preferred choice of sound engineers and music producers for many years. However, with the introduction of digital plugins, they tend to pose a serious challenge to hardware EQs. Kazrog Avalon 747 plugin is one such example that offers a perfect combination of vintage analog sound and state-of-the-art digital technology. Here we discuss the Pros and Cons of Hardware EQ in comparison to Kazrog Avalon 747 Plugins.

Pros Of Using Hardware Eq

1. Analog Warmth: One of the biggest advantages of using hardware EQ is its ability to impart analog warmth to the sound. A hardware EQ offers a more natural and harmonious sound that cannot be achieved with digital plugins. 2. Better Precision: Hardware EQ provides better precision, accuracy, and control over the sound due to its physical nature. It allows users to make precise adjustments to the sound frequencies, which are often difficult to achieve in digital plugins. 3. Longevity: Hardware EQ has a significantly longer lifespan compared to its digital counterparts. Professional audio equipment can last decades if maintained properly. 4. Reliability: Hardware EQs are generally well-built and more reliable than digital plugins. They are less prone to crashes, data corruption, and other issues that can cause unwanted interruptions during recording sessions.

Cons Of Using Hardware Eq

1. Cost: One of the biggest drawbacks of using hardware EQ is its high cost, which often comes with additional expenses such as setup, maintenance, and repair costs. It is an expensive investment that can be a burden for smaller studios or home recording enthusiasts. 2. Limited Flexibility: Hardware EQ has physical limitations and is less flexible than digital plugins that offer many options and presets. Users are often limited to a few standard EQ modes and bands, which may not be suitable for all applications. 3. Portability: Hardware EQs are often bulky, heavy, and difficult to move around. They require a dedicated space and cannot be easily transported, making them unsuitable for remote recording applications. Conclusion: In conclusion, hardware EQs offer a warm and natural sound with better precision and longevity but come with high costs and limited flexibility. Kazrog Avalon 747 plugin provides a more affordable and flexible alternative without sacrificing sound quality or control. Ultimately, the choice between hardware EQ and digital plugins depends on personal preference, budget, and the intended application.

Kazrog Avalon 747 Plugins Vs Hardware

Credit: m.youtube.com

Frequently Asked Questions On Kazrog Avalon 747 Plugins Vs Hardware

What Is The Kazrog Avalon 747 Plugin?

The Kazrog Avalon 747 Plugin is a virtual compressor and equalizer that emulates the sound of the Avalon 747 hardware.

Is The Kazrog Avalon 747 Plugin As Good As The Hardware?

While the plugin does a great job at emulating the sound of the hardware, there may be slight differences in sound quality between the two.

How Can I Use The Kazrog Avalon 747 Plugin In My Productions?

The plugin can be used as a part of your mixing and mastering process on individual tracks or on the master bus of your mix.

What Are The Benefits Of Using The Kazrog Avalon 747 Plugin?

The plugin offers the same analog sound as the hardware, but is more accessible and affordable. It also provides the convenience of having the plugin in your DAW.

Conclusion

Overall, both the Kazrog Avalon 747 Plugins and hardware offer exceptional quality and performance. However, the final choice between the two will ultimately come down to personal preference and specific needs. It’s clear that the plugins offer a cost-effective and convenient solution for those who are looking for a professional sound without breaking the bank.

On the other hand, the hardware provides a tactile and nostalgic feel that cannot be replicated. Ultimately, both options are valid and capable of producing incredible results in the right hands.

Categories
Archive

How Many Keys are on a Music Keyboard

A standard music keyboard has 88 keys. The keys follow a pattern of white and black.

The music keyboard is a versatile musical instrument that has been and is still widely used in various music genres. Also, it is a crucial piece in classical music, jazz, pop, and rock music genres. To play the keyboard, a player needs to press the keys.

Related reading: Keys On The Piano and M-Audio Keystation Review. For background, see the Wikipedia article on Musical keyboard.

Moreover, the keys make a sound based on the pitch and tone of the selected sound. Modern-day keyboards come with various features such as MIDI connectivity and recording capabilities. However, the standard number of keys on a music keyboard remains unchanged. A standard keyboard has 88 keys, which consist of 52 white keys and 36 black keys. Understanding the keys’ arrangement is vital for any aspiring keyboardist as they embark on their musical journey.

How Many Keys are on a Music Keyboard

Credit: www.sagemusic.co

History Of Keyboard Instruments

In addition, Keyboard instruments have a long history, dating back to early monochords. Modern music keyboards typically have 88 keys, but there are variations, such as smaller keyboards with only 61 or 76 keys. The number of keys on a keyboard depends on the specific instrument and its intended use.

Furthermore, Keyboard instruments have been an important part of music for centuries. From the harpsichord to the modern-day piano, these instruments have evolved over time to produce beautiful music. In this section, we will discuss the history of keyboard instruments, including their introduction and evolution.

Introduction Of Keyboard Instruments

Additionally, the keyboard instrument was first introduced in the 14th century. The earliest form of the keyboard was the clavichord. It was a simple instrument that produced sound when a metal blade struck the strings. The clavichord was later replaced by the harpsichord, which used a mechanism to pluck the strings instead of striking them.

Evolution Of Keyboard Instruments

Also, bartolomeo Cristofori invented the piano around 1700. It used hammers to strike the strings, producing a louder and more dynamic sound than the harpsichord. The piano quickly became popular and replaced the harpsichord as the primary keyboard instrument. The modern-day keyboard instrument has 88 keys, but early pianos had as few as 60 keys. Over time, the number of keys on a keyboard has increased over time to allow for a wider range of notes to be played. The keyboard is also used in many other electronic instruments, such as synthesizers and digital pianos. In conclusion, the history of keyboard instruments is a rich and fascinating subject. From the clavichord to the modern-day keyboard, these instruments have evolved over time to produce beautiful music.

Types Of Keyboard Instruments

Moreover, a music keyboard can have a varying number of keys, depending on the type of instrument. The most common keyboard instruments include the piano, which has 88 keys, and the keyboard synthesizer, which can have as few as 25 keys.

In addition, other types of keyboard instruments include the harpsichord, clavichord, and organ, which can have a range of key numbers.

Furthermore, Keyboard instruments have been around for centuries and come in many different forms. From classical to modern music, keyboards have played a vital role in creating and producing music. There are many types of keyboard instruments available that can be categorized into two main groups: acoustic and electronic. Below we discuss each of these categories in detail.

Acoustic Keyboard Instruments

Additionally, acoustic keyboard instruments are those that produce sound without any electronic amplification. These instruments require a certain level of skill and practice to play because they rely on the player’s touch and technique. Here are some common types of acoustic keyboard instruments:

InstrumentDescription
PianoA large keyboard instrument that uses hammers to strike strings, producing sound.
HarpsichordAn early keyboard instrument that uses plucked strings to produce sound.
OrganA keyboard instrument with pipes that produce sound when air is pushed through them.

Electronic Keyboard Instruments

Electronic keyboard instruments, on the other hand, use electronic amplification to produce sound. These instruments have grown in popularity over the years because of their versatility and portability. Also, electronic keyboard instruments can replicate the sound of different acoustic keyboard instruments and have several additional features. Here are some common types of electronic keyboard instruments:

  • Portable keyboards
  • Synthesizers
  • Digital pianos
  • MIDI controllers

In conclusion, keyboard instruments have evolved significantly over the years and come in many different forms. Moreover, whether you prefer an acoustic keyboard instrument or an electronic one, there are many options available to suit your preferences and needs.

Parts Of A Music Keyboard

In addition, a music keyboard is an essential instrument for anyone looking to learn or play music. The instrument is made up of various parts, each with its unique role and function. In this article, we shall highlight the different parts of a music keyboard with a focus on the keys, black and white keys, and octaves.

Keyboard Keys Explained

Furthermore, the keys on a music keyboard are the most critical part of the instrument. These keys represent the different notes that make up a melody or a song. A typical music keyboard has 88 keys, representing 88 distinct notes. When pressed, the keys produce sounds that range from high to low pitches.

Black And White Keyboard Keys

Additionally, the keys on a music keyboard are divided into black and white keys. There are 52 white keys and 36 black keys. The white keys represent the natural notes; A, B, C, D, E, F, and G. The black keys represent the sharps and flats or the black notes. These keys produce sound that is a half-step higher or lower than the white keys, respectively.

Octaves Across The Keyboard Keys

Also, octaves are a group of eight notes on the keyboard. These eight notes include both black and white keys. Every time you reach the last key on the right side of the keyboard, you enter a new octave. Every time you reach the last key on the left side of the keyboard, you enter a lower octave.

Table Showing the Parts of a Music Keyboard
PartDescription
KeysRepresent the different notes that make up a melody or song
Black and White Keys52 white keys represent the natural notes while the 36 black keys represent the sharps and flats or black notes
OctavesA group of eight notes on the keyboard that include both black and white keys
How Many Keys are on a Music Keyboard

Credit: www.schoolofrock.com

Layouts Of Music Keyboards

Moreover, Music keyboards come in a variety of layouts, and each of these layouts has a unique configuration of keys. Whether you are a beginner or an advanced player, having a good understanding of these layouts can greatly enhance your experience with the instrument. So, let’s take a closer look at some of the most common layouts of music keyboards.

Standard Piano Keyboard Layout

In addition, the most widely recognized layout of music keyboards is the standard piano keyboard layout. This is a 88-key keyboard that has a total of 36 black and 52 white keys. The black keys are arranged in groups of two and three, with the two black keys representing the sharps and the three black keys standing for the flats. Each octave follows a stepped pattern, with each set of seven keys representing a complete octave. The standard piano keyboard is the foundation for all other keyboard layouts.

Other Keyboard Layouts

There are several other keyboard layouts that are commonly used, and each of these has a unique arrangement of keys that serves a specific purpose. Here are some of the most popular keyboard layouts:

  • 49-key Keyboard: This layout is very similar to the standard piano keyboard, except that it has fewer octave keys, making it a more compact design.
  • 61-key Keyboard: This is a popular choice for beginners and intermediate players who need a few more keys than the 49-key layout provides.
  • 76-key Keyboard: This layout has a larger range of keys than the 61-key layout, making it better suited for more advanced players who need the extra range.
  • 88-key Keyboard (Weighted): This keyboard is similar to the standard piano keyboard layout, but the keys are weighted to simulate the feel of a real piano.

Each of these keyboard layouts has its own benefits and drawbacks, so it’s important to choose the right one based on your specific needs and preferences. Whether you are looking for a compact keyboard for travel or a larger keyboard for advanced playing, there is a layout that will suit your needs.

Number Of Keys On A Standard Piano Keyboard

A standard piano keyboard typically has 88 keys, including 52 white keys and 36 black keys. These keys are arranged in groups of two and three, representing individual notes in the musical scale.

Sizes Of Standard Piano Keyboards

Piano keyboards come in different sizes, with the number of keys on the keyboard as the main determining factor of its size. The most common piano keyboard is the standard keyboard, which features 88 keys. However, some models feature fewer keys, with smaller keyboards having as few as 61 keys. In contrast, larger keyboards can have up to 96 keys. The standard piano keyboard is the most commonly used keyboard as it provides players with a full-featured set of keys. Typically, a standard piano keyboard comprises 88 keys, with 52 white keys and 36 black keys.

The keys range from A0, which is the lowest note on the piano, to C8, the highest note on the keyboard. The number of keys on a standard piano keyboard has remained the same since the 1880s. While technology has advanced, the standard keyboard’s size has remained fixed as it provides the full range of notes required by both classical and contemporary music styles. Playing without some keys may limit the music you can play, making the standard keyboard popular among pianists.

Practical Tips for Keyboard Keys

Besides musicians and pianists, many music teachers also recommend using a standard keyboard to ensure students learn all the essential musical notes. Given that piano is considered a foundational musical instrument, many pianists start by playing on smaller keyboards. The smaller keyboards are also recommended for those on a budget or who want a portable option.

Choosing The Right Keyboard For Your Needs

Whether you are a beginner or an experienced pianist, choosing the right keyboard for your needs is crucial. Smaller keyboards may be a great option for portable use or those learning the basics on a budget. However, for a full range of notes, a standard keyboard is the best option. Larger keyboards offer more advanced features, but they also come with a higher price tag. When choosing a keyboard, consider your budget, skill level, and playing style. Also, ensure you choose a high-quality keyboard that will last you for years. A quality keyboard will have better sound and touch, which will improve your playing experience.

How Many Keys are on a Music Keyboard

Credit: www.schoolofrock.com

Variations Of Keyboards

When it comes to playing musical instruments, the piano is undoubtedly one of the most versatile instruments around. A piano keyboard typically consists of 88 keys with 52 white keys and 36 black keys. But the question arises, are there any variations of musical keyboards? The answer is yes. From mini keyboards to other keyboard instruments, there are a few variations available for you to choose from based on your needs.

Number Of Keys On Other Keyboard Instruments:

Aside from the piano, many other keyboard instruments exist, ranging from organs to synthesizers. Each has a different number of keys based on their unique design. Here are a few examples:

Keyboard InstrumentNumber of Keys
Organ61 to 88
Harpsichord49 to 88
Accordion26 to 45

Keys On A Mini Keyboard

If you’re short on space or on a budget, a mini keyboard could be a great option. Mini keyboards, as the name suggests, are smaller than normal keyboards and come with fewer keys. While they tend to have a limited number of keys, they can still be used for learning purposes or in small performances. Some popular mini keyboard models include:

  • Casio SA-76 Keyboard
  • Alesis Melody 61 MKII Keyboard
  • Yamaha Piaggero NP-12 Keyboard

Uses Of Keyboards

Keyboards are versatile musical instruments commonly used for various purposes. Whether you’re creating music or playing live, the keyboard is an essential tool you can’t do without. The keyboard has a wide range of functionalities suitable for:

Music Performance for Keyboard Keys

Music performance is one of the most popular uses of keyboards. It is a handy tool for musicians who do not have the luxury of hiring a live band. Keyboards are available in various types, including the arranger keyboard, synthesizer keyboard, and workstations.

The arranger keyboard provides a range of voices to allow the solo musician to sound like an entire band. The synthesizer keyboard has the ability to create and manipulate sounds and effects to create complex soundscapes and mimics traditional and non-traditional instruments. Workstations, on the other hand, offer the most versatility and features, enabling you to record and sequence music and produce beats.

Composition And Production for Keyboard Keys

Electronic keyboards are versatile musical instruments that are widely used in music production. They are a vital tool for music producers and composers when creating music. Keyboards come with a wide range of sounds, from traditional instruments to synthesized sounds, which makes them the perfect choice for creating all kinds of music genres.

Furthermore, most keyboard models come with the capability to record MIDI data, which is the ideal way to capture musical ideas for future use. This feature makes the keyboard a favorite among music producers, who use the instrument as a MIDI controller for their music software. Using a keyboard, you can trigger drum samples or chord progressions, mix and match different sounds, and create entirely unique compositions.

Keyboards are essential instruments used in music production and performances, providing versatility and unlimited possibilities for musicians and music producers. With the right skills and equipment, the keyboard is an exceptional tool for creating, composing, and playing music with ease.

Choosing The Right Keyboard

When it comes to music keyboards, there are different types with varying numbers of keys. This makes buying the right keyboard quite tricky, especially if you are new to music. In this post, we’ll focus on the number of keys on a keyboard and how to choose one that suits your skill level, experience, budget, and purpose.

Skill Level And Experience for Keyboard Keys

The number of keys on a keyboard greatly affects its functionality. Generally, beginner keyboards have 61 keys, while advanced keyboards have 88 keys. It’s important to choose a keyboard with keys that match your skill level and experience.

Beginners should start with a keyboard that has fewer keys as it’s easier to learn, and you won’t be using the extra keys anyway. A 61-key keyboard will give you a good start. As you gain experience and your skills improve, you can switch to a more advanced keyboard with more keys.

If you’re an advanced player, an 88-key keyboard will be more suitable as it offers full range coverage and gives a better musical experience.

Budget And Purpose

Another factor to consider when choosing a keyboard is your budget and the purpose of the instrument. Different keyboards come with varying price tags based on their features and durability.

If you’re buying a keyboard for a child who’s just starting, you don’t want to spend too much money. A basic keyboard with about 61 keys and standard features will suffice. On the other hand, if you’re buying a keyboard that you or a band will be using for concerts, you’ll want one with more advanced features and durability, which can be quite expensive.

Consider the purpose of the keyboard before choosing one. If you’re only playing for fun or as a hobby, a simple keyboard will do. However, if you’re a professional, you’ll need a keyboard with more advanced features and higher quality sound.

Conclusion

Choosing the right keyboard might seem overwhelming, with the variety of options available in the market. However, by understanding your skill level, experience, budget, and purpose of the instrument, you’ll be able to choose a keyboard that works best for you.

Frequently Asked Questions On How Many Keys Are On A Music Keyboard

How Many Keys Can A Music Keyboard Have?

A music keyboard can have varying numbers of keys depending on the type of keyboard. The most common type of keyboard is the piano, which features 88 keys, while other keyboards may have 61, 76 or 49 keys. Ultimately, the number of keys on a keyboard varies based on its intended use and design.

Is 61 Keys Keyboard Enough?

Yes, a 61-key keyboard is enough for most musicians, especially those starting out. It covers five octaves and is portable, making it perfect for gigs or traveling. However, if you’re an advanced player or require more complex compositions, a keyboard with more keys might suit you better.

Should I Get A 61 Or 88-key Piano?

It depends on your needs and goals as a pianist. If you’re a beginner or don’t require the range of an 88-key piano, a 61-key option may suffice. However, if you plan on advancing your playing or need a wider range, the 88-key would be a better option.

Ultimately, it’s up to personal preference.

Can I Learn To Play Piano On A 61-key Keyboard?

Yes, you can learn to play the piano on a 61-key keyboard. However, keep in mind that a standard piano has 88 keys, so you won’t be able to play certain pieces. But for beginners, a 61-key keyboard is a good option to start with and learn the basics.

Conclusion

A music keyboard typically has 88 keys, though some models have more or fewer. The number of keys directly affects the range of notes a musician can play, and the layout of the keys can impact the ease of playing different musical styles.

Whether you are a beginner or a seasoned musician, understanding the number and layout of the keys on a music keyboard is essential for producing and playing music effectively.

Categories
Archive

How Loud Should My Mixes Be Before Mastering

Before mastering, mix loudness should be set around -6 dB to -3 dB. Adequate loudness creates a balanced track without distorting or clipping it.

Ensuring that your track is the correct loudness before handing it over for mastering is a crucial aspect of the mixing process. There are standards in the industry that dictate that a mix should be set to around -6dB to -3dB before it is sent for mastering.

Setting the loudness at this level allows for headroom during the mastering process, where additional processing can be applied without clipping or distorting the track. A mix that is too loud or too quiet can negatively impact the final product, hence understanding and implementing proper loudness levels is an essential part of producing a quality mix.

The Importance Of Mix Levels

Getting the mix levels of your audio tracks right is critical to achieving a high-quality final output that meets your expectations. Mix levels are the volume at which individual audio tracks in a song have been recorded and the relative volume they have been set at against the other tracks in the song. If you don’t pay enough attention to mix levels, the final audio output can be too quiet, drowned out, or noisy. Before you start mastering, it is important to ensure that the mix levels are optimal; accordingly, in this article, we will discuss the effect of mix levels on mastering and how to get your mix levels right.

How The Mix Level Affects The Mastering Process

The level of your mix will have a considerable impact on the mastering process. Mastering engineers mostly begin with setting the optimal levels to analyze the mix’s content and any possible issues with the mix. If the mix’s levels are too low, it can result in the mastering engineer trying to increase it in the mastering stage, resulting in a noisy output with little headroom to accommodate any further changes. On the other hand, when the mix levels are excessively high, the mastering engineer will struggle to fix a range of issues, including distortion and clipping, that could ruin the final audio output. So, during the mixing process, you need to set mix levels that are high enough for the output to sound full but low enough so that it doesn’t sound distorted or ruin the final product.

The Impact Of Mix Level On The Final Output

The mix level can have a considerable impact on the final output. If the mix levels are too low, this will result in the final output being too quiet, and if the levels are too high, it might lead to the final output being noisy or distorted. The final output should ideally have a consistent loudness and dynamic range that is maintained throughout the entire song. To achieve this level of consistency with your final output, you must ensure that the mix levels are appropriate when you begin the mastering process.

If you work with a mastering engineer, they will only be able to work with what they have been given. So that’s why it’s essential to get your mix levels right before you start mastering. Always make sure that you are providing the engineer with a mix that they can work with to produce a high-quality final output. The mix should be compressed, well-equalized, and with appropriate levels relative to each other. This will enable the mastering engineer to take your mix and make it sound even better.

How Loud Should My Mixes Be Before Mastering

Credit: majormixing.com

Understanding Lufs And True Peak

To get your mixes right before mastering, it’s important to understand Loudness Units Full Scale (LUFS) and True Peak. LUFS measures loudness levels in audio while True Peak is the highest value of the peaks in your audio. Achieving the right levels for both will help your tracks sound their best.

Understanding LUFS and True Peak When it comes to mixing music, one of the crucial aspects is getting the right loudness level before mastering. This is where you should take LUFS and True Peak into account. Understanding these two concepts can help you achieve optimal loudness levels without compromising the quality or clarity of the sound. In this post, we’ll discuss what LUFS and True Peak are, their significance, and tools for measuring them. H3: What is LUFS and its significance LUFS stands for Loudness Units relative to Full Scale. It is a measure of the perceived loudness of audio content and is used to ensure consistent loudness levels across different platforms and devices. LUFS takes into account the human ear’s sensitivity to different frequencies and adjusts for variations in frequency response. Maintaining a consistent LUFS level across your mix can ensure that your music sounds great on any platform. H3: What is True Peak and why it matters True Peak is another important aspect to consider when mixing music. It measures the highest peak level of a signal after digital-to-analog conversion and reconstruction, taking into account inter-sample peaks. These peaks can cause distortion in the output signal, especially when music is compressed or played back on different devices. To prevent clipping or distortion, it is essential to have a True Peak limiter in your mastering chain. Tools for measuring LUFS and True Peak There are various tools available for measuring LUFS and True Peak, some of which are free and some require a subscription. Some popular options include iZotope Insight and Waves WLM Plus. If you’re looking for a free option, you can use the Loudness Penalty website or the Youlean Loudness Meter. These tools analyze your music file and provide you with information about its loudness and True Peak levels. By using a meter, you can set your mix to the right loudness level before sending it for mastering. In conclusion, understanding LUFS and True Peak is essential for achieving optimal loudness levels in your mixes. Using the right tools can help you achieve consistent loudness levels across different platforms and devices and prevent distortion or clipping. With the right knowledge and tools, you can make your music sound great wherever it’s played.

Recommended Mix Levels

Achieving the right mix levels before mastering is crucial to ensure high-quality sound in your final product. It’s recommended to aim for a target of -6dB to -3dB on your master fader for optimal balance and headroom.

When it comes to mixing music, it’s important to get the levels just right. If your mix levels are too low, your tracks will sound weak and lifeless. If your levels are too high, you risk introducing distortion and other unwanted noise into your sound. So, what are the industry standard recommendations for mix levels, and how can you achieve optimal levels for different genres? Let’s take a closer look.

Industry Standard Recommendations For Mix Levels

While there is no one-size-fits-all approach to setting mix levels, there are some general guidelines that most music professionals follow. The recommended mix level for most genres is between -6dB and -3dB. This allows for peak headroom and gives the mastering engineer enough room to work with. However, some genres, like EDM and hip-hop, may require higher levels due to their emphasis on bass and overall loudness.

How To Achieve Optimal Mix Levels For Different Genres

The optimal mix level for your music will depend on the genre you’re working in. Here are a few tips to keep in mind when setting your mix levels:

  • For acoustic music like folk or jazz, aim for a more dynamic mix with peaks around -12dB to -8dB.
  • For rock or pop music, you may need to push the levels a bit higher, around -6dB to -3dB.
  • For electronic dance music or hip-hop, you can aim for even higher levels, up to around -2dB to 0dB.

Remember, it’s important to leave some headroom for the mastering engineer to work with. If your mix is too loud, it can be difficult to make any significant improvements during the mastering process.

Factors That Can Affect Recommended Mix Levels

There are several factors that can affect the recommended mix levels for your music, including the dynamic range of your tracks, the loudness of your individual instruments and vocals, and the overall genre or style of your music. It’s important to keep these factors in mind when setting your mix levels to ensure that your end product sounds polished and professional. Always trust your ears and use your best judgment when setting your mix levels. In conclusion, setting the right mix levels is crucial to achieving a professional, polished sound in your music. By following the industry standard recommendations and considering the genre and style of your music, you can achieve optimal levels and give your mastering engineer plenty of headroom to work with.

How Loud Should My Mixes Be Before Mastering

Credit: majormixing.com

Mixing For Streaming Services

Aiming for a loud mix before mastering can cause issues when streaming services compress audio. It’s best to keep your mixes at lower levels to ensure they translate well across all platforms, while still maintaining their clarity and punch.

As an audio engineer, it’s important to understand the dynamics of mixing music for streaming services. With each streaming platform having its own unique requirements, it can be challenging to find the perfect mix levels for your project. In this blog post, we’ll go over why mix levels are crucial for streaming, mixing considerations for different platforms, and how to avoid common mix problems when mixing for streaming.

Why Mix Levels Are Crucial For Streaming

The way we consume music is changing, and streaming services are now the most popular way to listen to and discover new music. With this shift in the way we consume music, it’s crucial to ensure that your mix levels are optimized for streaming platforms to ensure that your music sounds the best it can be when it’s streamed. When it comes to streaming music, loudness normalization is a critical factor to consider. This means that the streaming platform will adjust the loudness of your music automatically to ensure that it meets its loudness standards. Therefore, it’s essential to keep your mix levels in check to avoid any sound distortion or clipping that could affect the overall quality of your music.

Mixing Considerations For Different Streaming Platforms

Each streaming service has its unique requirements, and it’s crucial to consider these differences when mixing your music. Here are some considerations for some of the most popular streaming platforms:

  • Spotify: Spotify uses loudness normalization that targets a loudness of -14 LUFS. Therefore, when mixing for Spotify, it’s essential to keep your peak levels below -1 dBTP
  • Apple Music: Apple Music uses loudness normalization to target a loudness target of -16 LUFS. To avoid any sound issues, keep your peak levels below -1 dBTP
  • Tidal: Tidal also uses loudness normalization that targets -14 LUFS. For the best listening experience, it’s recommended that your peak levels should not exceed -1dBTP

How To Avoid Common Mix Problems When Mixing For Streaming

When creating your mixes, there are common mix problems that you should avoid to ensure that your music sounds the best it can when streamed. Here are a few tips:

  • Keep your levels in check and avoid sound distortion or clipping by setting your mix levels to an appropriate level below 0dBFS
  • Pay close attention to the dynamic range of your mix and ensure it meets the loudness normalization requirements for the streaming service
  • Avoid over-compression, as streaming services will compress your tracks
  • Pay attention to the EQ of your tracks, as some streaming services have built-in EQs that will affect the sound of your mix

In conclusion, mixing for streaming services requires a keen understanding of the unique requirements of each platform. By keeping your mix levels in check, ensuring your track meets the dynamic range guidelines, and paying attention to the EQ of your mix, you can produce music that sounds great when streamed on any platform.

Mastering Preparations

When preparing your mix for mastering, it’s important to consider the loudness levels. While there is no set decibel limit that your mix should reach, it’s generally advised to aim for -6 dBFS to -3 dBFS to allow room for the mastering engineer to make adjustments.

Before hiring a mastering engineer and sending across your mix, it is essential to prepare your mixes the right way. This helps your mastering engineer to add the final touches that bring out the best in your music. Thus, it is crucial to optimize your mixes before they are sent for mastering. Here are some steps to take before sending your mixes for mastering:

Steps To Take Before Sending Your Mixes For Mastering

  • Ensure that all tracks are bounced to the same sample rate and resolution.
  • Label each track properly, and leave enough headroom at the beginning and end to avoid clipping when mastered.
  • Avoid using limiters or maximizers on the stereo bus, as they can cause issues when it comes to mastering.
  • Check for phase issues, sudden spikes, clicks, pops, and any unwanted noise in your mix. These issues can distract from the master and cannot be fixed in the mastering stage.

Optimizing Your Mixes For Mastering

To optimize your mixes for mastering, ensure that your mix is balanced and sounds good on all playback systems. Consider the following tips to achieve this:

  1. Ensure that the mix has appropriate stereo width and doesn’t sound too narrow or wide.
  2. Make sure the frequency balance is proper, as mastering cannot fix mix issues related to frequency imbalances. You can use EQ or other corrective tools to fix these before mastering.
  3. Choose an appropriate limiter threshold that provides just enough loudness without compromising on the quality.
  4. Ensure that the mix is compressed appropriately, without an excessive amount of compression.

How To Communicate With Your Mastering Engineer, Ensuring Each Heading Adheres To Html Syntax

When communicating with your mastering engineer, it’s important to ensure you write clear instructions and understand their perspective. Apart from providing details about your mix, you can also share references that you feel might help your mastering engineer understand what you’re looking for. Here are some tips to help you communicate with your engineer during the mastering process:

DoDon’t
Be clear with your expectations and what you want from the master.Assume that your mastering engineer can read your mind.
Provide a reference track to guide your engineer.Expect your master to sound exactly like the reference track.
Provide your engineer with a detailed mix document listing all the details of your mix.Provide poor quality audio files that the engineer may have difficulty working with.

By following these steps and communicating effectively with your mastering engineer, you can produce a master that both sounds great and matches your vision.

Mastering Techniques For Volume

Achieving the perfect loudness for your mixes before mastering can be challenging. It’s important to strike a balance between preserving dynamic range and maintaining a competitive volume level. Aim for a peak volume of -6dB to -3dB, but always trust your ears and remember that the quality of the mix is more important than sheer loudness.

How Mastering Can Affect Volume

Mastering is the final stage of audio production that involves fine-tuning a mix in preparation for distribution. One of the main goals of mastering is to ensure the final mix has the desired volume level as it can greatly impact how it sounds on different playback systems. When it comes to mastering for volume, engineers use various techniques to achieve the desired loudness level while also maintaining the mix’s dynamic range and overall quality.

Techniques Used By Mastering Engineers To Achieve Optimal Volume

Mastering engineers use a combination of techniques to achieve optimal volume in their final mix. One of the most common techniques is equalization, which involves adjusting the balance of the frequencies in the mix to ensure that all elements are well represented at different volume levels while minimizing any unwanted resonances. They also use stereo imaging to maintain the mix’s balance and ensure that the sound is evenly distributed across the stereo field.

The Role Of Compression And Limiting In Mastering Volume

Compression and limiting are two crucial techniques used to control the volume in audio mastering. Compression is used to control the dynamic range of the mix and increase perceived loudness by reducing the difference between the loudest and quietest parts of the audio. Limiting, on the other hand, is used to prevent audio from exceeding a certain volume or “ceiling” by keeping peaks in check. These techniques work hand in hand to achieve the desired volume level while also preserving the mix’s transparency, balance, and overall quality. In conclusion, achieving optimal volume during mastering requires a careful balance of various techniques to ensure that the final mix is dynamic and not overly compressed or limited. With the right mix of these techniques, mastering engineers can achieve the desired loudness level while preserving the mix’s quality, clarity, and impact.

Preparing For Final Delivery

Before sending your mix for mastering, it is crucial to ensure that the level is balanced and not too loud. Aim for a peak level of around -6dB to leave enough headroom for mastering engineers to work their magic.

How To Properly Export Your Final Mix For Mastering

To prepare your final mix for mastering, it’s crucial to export it properly. This ensures that the mastering engineer has all the necessary information and the highest quality audio to work with. First, make sure to export your mix at the same sample rate and resolution that you recorded it in – typically 24-bit, 44.1kHz. Then, export your mix as a stereo file and leave at least 1dB of headroom. This allows the mastering engineer to adjust the overall loudness and dynamics during mastering without introducing any distortion or clipping.

Recommended File Formats For Mastering

When preparing your final mix for mastering, it’s important to choose the correct file format. The most commonly used file formats for mastering are WAV and AIFF. These are uncompressed formats, which means that they offer the highest sound quality and fidelity. MP3 and other lossy compression formats should be avoided, as they introduce artifacts and quality loss. Ensure that the exported file has a clear and identifiable name, with no special characters or spaces.

Common Mistakes To Avoid When Delivering Your Mixes For Mastering

To ensure a successful mastering process, it’s important to avoid common delivery mistakes. One of the most common mistakes is exporting the final mix too loud. This can result in unwanted distortion and clipping during mastering. Remember to leave enough headroom as previously mentioned. Also, ensure that no processing or effects are applied to the stereo bus, as this can limit the mastering engineer’s options. Finally, make sure to clearly communicate any specific requirements or preferences to the mastering engineer beforehand, to avoid any misunderstandings or surprises. In conclusion, preparing your final mix for mastering is an important step in the music production process. By following the guidelines outlined above, you can ensure that your mix is delivered to the mastering engineer in the highest quality possible, and with clear instructions and expectations.

How Loud Should My Mixes Be Before Mastering

Credit: mixandmastermysong.com

Frequently Asked Questions On How Loud Should My Mixes Be Before Mastering

How Do You Know When Your Mix Is Ready For Mastering?

To know when your mix is ready for mastering, listen to it on different devices and in different environments. Check for a balanced frequency range, clarity, and consistency. Ensure there is no distortion or clipping. Make sure each track is at the right level, and stereo imaging is correct.

What Is The True Peak Before Mastering?

The true peak refers to the highest point in a mix before undergoing mastering. It is the point where all elements of a track are at their maximum volume without distorting or clipping. Identifying the true peak is important to ensure that the final master has enough headroom for further processing.

How Many Db Should A Mastered Song Be?

The loudness of a mastered song is typically measured in decibels (dB) RMS, ranging from -14 dB to -8 dB. However, it ultimately depends on the genre, target audience, and personal preferences. It’s essential to ensure that the song maintains its dynamic range and doesn’t distort at high volumes.

What Is The Standard Loudness For Mastering?

The standard loudness for mastering is -14 LUFS for most streaming platforms and -16 LUFS for CDs. However, some platforms may have their own loudness requirements, so it’s important to check their guidelines before mastering.

Conclusion

Your mix’s loudness level is crucial before mastering, it can make or break your final output. While it’s important to consider various factors, including the genre and the platform on which the music will be distributed, aim for a loudness level of -6dB to -3dB without exceeding -1dB.

This will give a balance between loudness and dynamics, resulting in a polished output. Mastering engineers will appreciate well-mixed tracks they can work on, and your audience will appreciate listening to high-quality music.

Categories
Archive

How To Get A Wide Stereo Image When Mastering

To get a wide stereo image when mastering, use techniques such as panning, EQ, and reverb. These can widen the sound and create a more spacious and immersive listening experience.

Mastering engineers often use these techniques to give their mixes a wide stereo sound that fills the room. When it comes to mastering, one of the goals is to create a deep and immersive listening experience for the listener. A wide stereo image can help achieve this by making the sound seem larger than life and more immersive.

However, achieving a wide stereo image is not always easy, and it requires careful attention to detail during the mastering process. We will explore some techniques that engineers use to achieve a wide stereo image when mastering.

Start With A Good Mix

Get a wide stereo image when mastering by starting with a good mix. Paying attention to the panning, levels and EQ of each individual track will ensure a more spacious and cohesive sound.

Before you can get a wide stereo image in mastering, you need to start with a good mix. A mix with well-balanced levels and panning is more likely to result in a wider stereo image than a poorly mixed track. Therefore, it is important to take the time to get the mix right before attempting to widen the stereo image in mastering.

Check For Phase Issues

One of the first things you should do when aiming to widen the stereo image is to check for phase issues. Phase issues happen when two audio signals that are supposed to be identical are not perfectly aligned, and they can result in a weaker, narrower sound. To check for phase issues, you can use a plugin or a tool that lets you analyze the phase relationship between the left and right channels. If you detect phase issues, you can use phase inversion or time delay to address them.

Use Stereo Widening Techniques

There are several stereo widening techniques you can use in mastering to achieve a wide stereo image. One of the most common techniques is mid/side processing, which allows you to manipulate the stereo width of the mix. You can also use stereo widening plugins or tools that manipulate the stereo field, such as a stereo imager. However, it is important to use these techniques judiciously as too much processing can result in an artificial and unnatural sound. In conclusion, starting with a good mix and checking for phase issues before using stereo widening techniques is crucial to achieving a wide and natural stereo image in mastering. By applying these techniques thoughtfully, you can create a mix with a wide and immersive stereo image.

How To Get A Wide Stereo Image When Mastering

Credit: www.masteringthemix.com

Use Mid-side Processing

When mastering audio, a wide stereo image can make the music sound more immersive and dynamic. One effective way of achieving this is through the use of mid-side processing, which allows you to adjust the stereo width of the mix without affecting the level or tonality of the center channel.

Adjust The Width Control

The width control is the most basic tool for controlling the stereo width. It adjusts the volume difference between the left and right channels, which can make the stereo image wider or narrower. If the mix sounds too narrow, try increasing the width control to make it wider. Be careful not to make it too wide, though, as this can result in phase cancelations and a loss of focus in the center of the mix.

Consider The Center Channel

While widening the stereo image can be effective, it’s also important to consider the center channel. This is where the lead vocals, bass, and drums are typically located, and it’s essential that they remain clear and focused. If widening the mix causes any of these elements to become blurry or indistinct, try using a lower width setting or use EQ to make sure they stay centered and prominent in the mix.

Boost The Sides

If the mix still sounds too narrow even after adjusting the width control, try boosting the sides. This can be done with a mid-side EQ, which allows you to boost or cut specific frequencies in the left or right channels. Boosting the sides can make the stereo image wider and more immersive, but again, be careful not to overdo it and cause any phase issues.

By using mid-side processing and following these tips, you can achieve a wide and immersive stereo image in your mastering projects, creating a more engaging and dynamic listening experience for your audience.

Experiment With Reverb

One essential way to achieve a wide stereo image when mastering your audio tracks is by experimenting with reverb. Reverb is a natural-sounding effect that gives your tracks a sense of space and depth, making them sound more spacious and immersive.

Create A Sense Of Space

The key to using reverb to create a sense of space is to use it subtly and intelligently. Too much reverb can create a muddy and washed-out sound that can be overwhelming and confusing to the listener. On the other hand, if you use too little reverb, the mix can sound dry and lifeless. Therefore, finding the right balance is essential.

To create a sense of space, try using a long decay time reverb and keeping it low in the mix. This technique will add a sense of depth to the mix, making it sound more spacious and immersive.

Use Multiple Reverbs

Using multiple reverbs is an effective way to add more depth and dimensionality to your mix. You can use different reverbs on different instruments to create distinct sonic spaces and make them sound like they were recorded in different environments.

When using multiple reverbs, it’s crucial to keep the mix balanced and not let any one instrument dominate the mix. Using different reverbs also adds to the complexity of the mix, so be careful not to overdo it.

Experiment And Trust Your Ears

The key to achieving a wide stereo image when mastering your audio tracks is to experiment and trust your ears. There is no one “right” way to use reverb, and what works for one mix may not work for another.

Therefore, take the time to experiment with different types of reverbs, settings, and placements to find what works for your tracks. Play around with the dry/wet balance, decay time, and other parameters until you achieve the desired effect.

Remember, it’s essential to keep the mix balanced and not let the reverb overwhelm the other elements. Use your ears as your ultimate guide and make adjustments until the mix sounds wide, spacious, and immersive.

How To Get A Wide Stereo Image When Mastering

Credit: majormixing.com

Try Delay And Chorus Effects

To achieve a wider stereo image when mastering, try incorporating delay and chorus effects into your mix. These effects can create a sense of spaciousness and depth, enhancing the overall quality of your sound. Experiment with different settings and placements for optimal results.

Try Delay And Chorus Effects:

When it comes to creating a wide stereo image when mastering, using delay and chorus effects can be your secret weapon. These effects not only widen the sound but also add interest and depth to the audio. Here are two ways to use delay and chorus effects to achieve a wider stereo image.

Place Delays In Different Channels:

One effective technique for creating a wide stereo image is to use delays that are placed in different channels. By adjusting the timing and feedback of each delay, you can create a sense of space and depth in the audio. For example, you could place a delay with a short time in the left channel and a longer delay in the right channel. This will create a sense of movement that will lead the listener’s ear from left to right, resulting in a wider stereo image.

Use Chorus To Widen Sound:

Another technique for creating a wide stereo image is to use chorus effects. Chorus adds width by creating a doubled effect – adding a slightly delayed and pitch-shifted version of the original signal to the mix. This technique creates a richer, wider sound by adding a subtle shift in pitch and timing. It’s worth noting that too much of the chorus can result in a messy, undefined sound, so it’s important to use a light touch and adjust the effect to taste.

Pros of Using Delay and Chorus Effects:Cons of Using Delay and Chorus Effects:
-Enhances depth and width of the audio.-Overusing chorus can result in a messy, undefined sound.
-Adds interest and movement to the audio.-Too much delay can cause the signal to sound cluttered.
-Allows for creative experimentation with timing and feedback.-Delay and chorus effects can sometimes clash with other elements in the mix.

In conclusion, using delay and chorus effects can be an effective way to create a wide stereo image in mastering. By placing delays in different channels and using chorus to widen the sound, you can create a rich and interesting mix that engages the listener’s ears. Of course, as with any technique, it’s important to use a light touch and adjust the effect to taste so that it enhances the audio, rather than detracts from it.

Explore Panning Options

One crucial element in music production that can make or break a song is the stereo image. When mastering, you want to ensure that your mix sounds wide, full, and balanced. Fortunately, there are many options available that enable you to achieve this. In this section, we will explore panning options to help you create a wide and immersive stereo image for your tracks.

Use Automatic Panners

An automatic panner can be useful to simulate the effect of a sound moving from one side of the stereo field to the other. It can be helpful for creating a sense of movement and depth in your mix. One example of an automatic panner is the LFO (Low-Frequency Oscillator) plugin, which can automate the pan position of your tracks. It syncs the panning effect to the tempo of your track and enables you to adjust the speed and depth of the panning effect.

Create Multi-pan Configuration

Another technique you can use to achieve a wide stereo image is to create a multi-pan configuration. You can combine multiple tracks and pan them in different directions to create a more complex, wider, and dynamic mix. For example, you can pan the drums to the center, the bass to the left, and the guitars to the right, to create a balanced and spacious mix. You can also experiment with different pan positions and find the sweet spot that works best for your mix.

A multi-pan configuration can be particularly effective for creating a wide stereo image for instruments with similar frequency ranges like guitars, keys, or synths. By panning them differently, you can create a sense of separation and depth in your mix without crowding the same frequency range.

In Conclusion

Exploring different panning options can help you achieve a wide and immersive stereo image for your tracks. Using an automatic panner or creating a multi-pan configuration are just a couple of methods you can try. Don’t be afraid to experiment and find the right balance that works for your mix.

How To Get A Wide Stereo Image When Mastering

Credit: majormixing.com

Frequently Asked Questions For How To Get A Wide Stereo Image When Mastering

How Do You Make A Stereo Wider?

To make a stereo wider, you can use stereo widening plugins or effects in your audio software. These plugins can add more space and depth to the mix by widening the stereo image. Another way is to use stereo miking techniques during recording, or carefully panning instruments and sounds in the stereo field during mixing.

How Do You Add Width To Mastering?

To add width to mastering, you can use stereo widening plugins that spread the sound across the stereo spectrum. You can also pan elements of the mix to different spots in the stereo field. Another technique is to use EQ to enhance stereo separation and add reverb or delay effects to create a sense of space in the mix.

Experiment with these techniques to find the right balance for your track.

How Do You Widen Stereo Using Eq?

To widen stereo using EQ, you can boost the upper frequencies on one channel while decreasing them on the other. This creates a wider soundstage without compromising the overall balance. You can also add some reverb or delay to enhance the effect.

Experiment with different settings to find the perfect balance.

What Is Stereo Width In Mastering?

Stereo width in mastering is the extent to which the stereo image of a track expands or contracts. It is often adjusted during the mastering process to create a more balanced, immersive sound. This can be achieved using various techniques, such as widening the stereo image, narrowing it, or keeping it centered.

The ultimate goal is to create a cohesive, pleasant listening experience for the listener.

Conclusion

To achieve a wide stereo image in mastering is an intricate process that requires careful attention to detail and patience. You can utilize different techniques such as panning, equalization, and stereo widening plugins to create space and depth. Taking breaks and experimenting with different frequencies helps you obtain a balanced mix that translates well on different playback systems.

Mastering a wide stereo image takes time and commitment, and it’s essential to trust your ears and make decisions that align with your goals. Keep pushing your limits and honing your skills, and you’ll become a pro at creating an expansive stereo mix.