Categories
Archive

The Best Daw Control Surface

The best Daw Control Surface is the Avid Artist Mix. It is a compact, affordable and ergonomic control surface that offers professional-grade features and compatibility with most DAWs.

The Avid Artist Mix features eight touch-sensitive faders, eight touch-sensitive rotary encoders and 56 illuminated buttons, all fully customizable for a tailor-made workflow. The control surface also supports Eucon, a protocol that enables seamless integration with most major DAWs, including Pro Tools, Logic Pro X, Cubase, and many others.

The Avid Artist Mix is perfect for anyone looking to enhance their workflow and take their mixing skills to the next level.

Top 5 Best Daw Control Surfaces

Looking for the best DAW control surface? Look no further. We’ve compiled a list of the top 5 best DAW control surfaces based on user experience, functionality, build quality, and compatibility with various digital audio workstations. Whether you’re a beginner or a pro, these control surfaces will help you take your music production to the next level.

Needless to say, a DAW control surface is an essential piece of equipment for music production. Choosing the right control surface can make a huge impact on your mixing, editing, and automation workflow. In this post, we will be discussing the top 5 best DAW control surfaces available in the market today.

Avid S1

The Avid S1 is a compact and ergonomic DAW control surface that is perfect for small home studios or mobile recording setups. It features eight touch-sensitive motorized faders, touch-sensitive knobs, and a touch strip for easy automation control. The S1 integrates well with Avid’s Pro Tools, but it also works seamlessly with other DAWs like Logic Pro X, Cubase, and more.

Presonus Faderport

The PreSonus FaderPort is another excellent DAW control surface that is perfect for home studio users. It features a single touch-sensitive motorized fader, transport controls, and dedicated buttons for key functions like pan, mute, solo, and record. The FaderPort works well with most major DAWs, including Ableton Live, Studio One, and Pro Tools.

Behringer X-touch

The Behringer X-Touch is a feature-packed DAW control surface that offers incredible value for money. It boasts nine motorized faders, a high-resolution color display, and a plethora of knobs and buttons for complete control over your mix. The X-Touch works well with most major DAWs, including Logic Pro X, Cubase, and Pro Tools.

Mackie Control

The Mackie Control is a popular DAW control surface that has been used by professional engineers for many years. It features eight touch-sensitive motorized faders, a master fader, and a variety of transport and navigation controls. The Mackie Control integrates seamlessly with most major DAWs, including Ableton Live, Logic Pro X, and Pro Tools.

Ssl Uf8

The SSL UF8 is a high-end DAW control surface that is designed for professional studios and engineers. It features eight touch-sensitive motorized faders, a high-resolution color display, and a variety of encoders and buttons for complete control over your mix. The UF8 is compatible with most major DAWs, including Pro Tools, Logic Pro X, and Ableton Live. In conclusion, choosing the best DAW control surface depends on your specific needs and preferences. Whether you are a home studio user or a professional engineer, there is a control surface out there that will meet your requirements. We hope this list of the top 5 best DAW control surfaces has provided you with valuable insights and helped you make an informed decision.
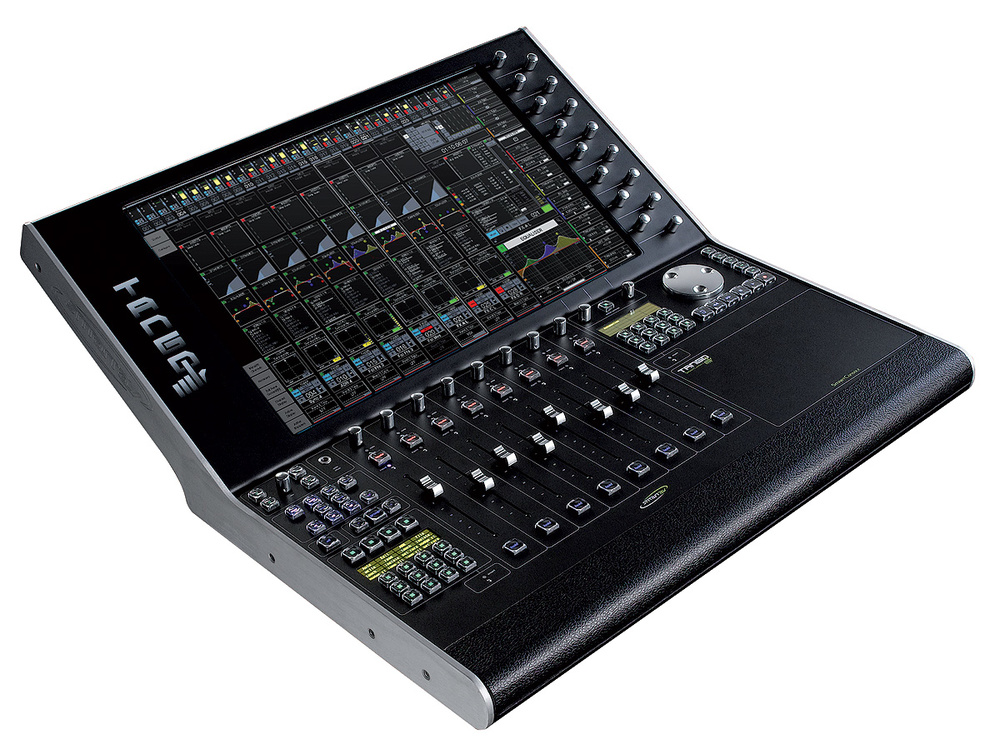
The Best Daw Control Surface

Credit: www.soundonsound.com

Factors To Consider Before Buying A Daw Control Surface

Before investing in a DAW control surface, there are several factors to consider. Consider your budget, the types of controls you need, and the compatibility with your software. Choosing the best DAW control surface will help you improve your workflow and create better music.

When it comes to working with digital audio workstations (DAWs), a control surface can really enhance your workflow. If you’re in the market for a DAW control surface, there are several factors that you should consider before making your purchase. This article will cover the most important factors to help you make an informed decision.

1. Compatibility

The first factor to consider when buying a DAW control surface is compatibility. Not all control surfaces work with all DAWs, so it’s important to make sure you choose one that is compatible with your specific software. Some control surfaces come with built-in support for multiple DAWs, while others require specific drivers or software to work, so be sure to do your research before making a purchase.

2. Workflow

Workflow is another important aspect to consider when selecting a control surface for your DAW. Depending on your preferences and style of working, different control surfaces may suit you better than others. Some control surfaces are designed for more tactile control, with faders and knobs that make it easy to adjust levels and settings. Others offer more visual feedback, with displays that show information like track names and levels. Consider your workflow and think about the tasks you perform most often when deciding on a control surface.

3. Size And Form Factor

The size and form factor of a control surface are also important considerations. If you have limited desk space, you may want to look for a compact control surface that can be easily integrated into your setup. On the other hand, if you require a large number of faders and knobs, you may need to invest in a larger control surface. Some control surfaces also come with built-in displays, which can add to the overall size and form factor of the device.

4. Customization

Customization is another factor to consider when selecting a control surface. Some control surfaces offer more customization options than others, allowing you to map controls to specific functions within your DAW. This can be especially useful if you have a unique workflow or if you want to streamline common tasks. Look for a control surface that offers ample customization options if this is a key consideration for you.

5. Budget

Finally, budget is an important consideration when purchasing a DAW control surface. Control surfaces can range in price from a few hundred dollars to several thousand dollars, depending on the features and capabilities offered. Determine your budget before shopping and look for a control surface that offers the features you need at a price point that works for you. In conclusion, there are several factors to consider when purchasing a DAW control surface, including compatibility, workflow, size and form factor, customization, and budget. Take the time to research and consider these factors before making your purchase to ensure you choose a control surface that meets your needs and enhances your workflow.

Advantages Of Using A Daw Control Surface

If you are a music producer or sound engineer, you know that the process of creating music is not a simple task. It requires a lot of effort, time, and hard work to produce the perfect track. However, using a DAW control surface can make this task easier and efficient. A DAW control surface is an external device that allows you to control your DAW software with physical knobs, faders, and buttons. In this article, we will discuss the advantages of using a DAW control surface in your production studio.

1. Enhanced Workflow

A DAW control surface enhances your workflow by allowing you to control your DAW software faster and more accurately. With physical controls, you can access your DAW software’s functions without using a mouse and keyboard. This means you can make changes to your mix in real-time, without interrupting your creative flow. You can adjust volume levels, pan your tracks, and tweak effects parameters with ease. A DAW control surface saves you from the tedious task of clicking through menus to access the same functions, which can be time-consuming and distracting.

2. Tactile Control

A DAW control surface provides you with tactile control over your music production, which gives you a more natural and intuitive feel when creating music. You can manipulate your software’s controls from a physical interface that feels more like a traditional mixing console. This makes it much easier to use the software’s functions, especially when you are dealing with multiple tracks and effects parameters.

3. Customizability

A DAW control surface also allows you to customize your workflow to suit your needs. You can assign different functions to different controls on your surface, which means you don’t have to use the default setup that comes with your software. This gives you more control over the way you work, and it can save you time by eliminating unnecessary steps in your workflow.

4. Improved Productivity

Using a DAW control surface can improve your productivity by allowing you to work faster and more efficiently. With physical controls at your fingertips, you can make changes to your mix in real-time, which means you can finish your projects faster. You can also reduce mistakes and errors that can occur when you are using a mouse and keyboard. This means you can spend more time focusing on the creative aspects of your music production.

In conclusion, using a DAW control surface in your music production studio can enhance your workflow, provide you with tactile control, allow you to customize your workflow, and improve your productivity. It is an essential tool for music producers and sound engineers who want to create high-quality music efficiently and effectively.

The Best Daw Control Surface

Credit: m.youtube.com

Disadvantages Of Using A Daw Control Surface

Using a DAW control surface can have some drawbacks. It may be expensive and require extensive setup time, and some users may prefer the hands-on experience of a physical controller while others might find it difficult to use due to its complexity.

However, choosing the best DAW control surface can greatly improve your workflow, so it’s important to weigh the pros and cons before making a decision.

1. Cost

DAW control surfaces come in different shapes and sizes, but they all have one thing in common – they can be expensive. Most control surfaces on the market are designed for professional use and come with a hefty price tag. If you’re an amateur recording artist or hobbyist, you may find the cost of a control surface prohibitive. Additionally, some control surfaces require specific software to operate, which can be an additional cost.

2. Learning Curve

Using a control surface can be a daunting task if you’re not familiar with the technology. Most control surfaces come with a plethora of features and can take a considerable amount of time to learn. If you’re not willing to invest the time to learn how to use a control surface, you may be better off sticking with a traditional mouse and keyboard setup.

3. Size

While some control surfaces are designed to be compact and portable, others can be quite large and heavy. This can be a problem if you have limited space in your studio or if you plan on taking your control surface on the road. The size and weight of a control surface can also affect its usability. A large control surface can be difficult to maneuver, while a small one may not have enough controls to suit your needs.

4. Compatibility Issues

Compatibility can be an issue when it comes to using a DAW control surface. Some control surfaces are designed to work only with specific DAW software, limiting your options if you decide to switch software in the future. Additionally, some operating systems may not be compatible with certain control surfaces. Before purchasing a control surface, be sure to check its compatibility with your DAW software and operating system. Overall, a DAW control surface can be a powerful tool for recording artists and producers. However, it’s important to weigh the pros and cons before making a purchase. Consider your budget, learning curve, space limitations, and compatibility issues before investing in a control surface.
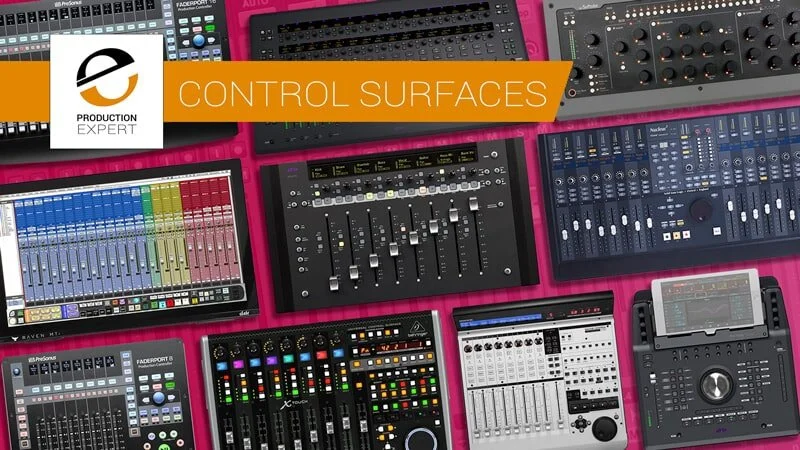
The Best Daw Control Surface

Credit: www.production-expert.com

Frequently Asked Questions Of The Best Daw Control Surface

Do I Need A Control Surface For My Daw?

While a control surface can enhance your workflow, it’s not necessary. A control surface allows you to physically control your digital audio workstation’s parameters, but most of them can be accessed with a mouse and keyboard. It ultimately depends on personal preference and the type of music or audio work you’re doing.

What Control Surfaces Work With Logic Pro?

Logic Pro works with a variety of control surfaces, including the Mackie Control, the Euphonix MC Control, the Yamaha 01V96 and the Avid Artist Mix. Additionally, Logic Pro supports HUI-compatible devices and can recognize any generic MIDI controller.

What Is The Difference Between Midi Controller And Control Surface?

In short, a MIDI controller is a device that generates MIDI data, while a control surface manipulates parameters on a software or hardware device, typically using MIDI messages. MIDI controllers are mostly used for music production, while control surfaces are common in live performances.

What Is A Control Surface In Music Production?

A control surface in music production is a device used to control software programs used in recording and mixing audio. It allows the user to manipulate the sound by physically adjusting settings such as volume, pan, and EQ. This type of device can come in various shapes and sizes with different functionalities, catering to different needs and preferences of music producers.

Conclusion

To sum up, a good control surface is an essential tool for music producers and sound engineers. We have examined some of the best control surfaces available on the market based on their functionality, compatibility, and price. Each of them has its own unique features that can meet the needs of different users.

Ultimately, the best control surface for you will depend on your budget and the specific requirements of your music workflow. Choose the one that matches your preferences and enjoy a more intuitive and efficient music production experience.

For more background, see Control surface on Wikipedia.

Categories
Archive

Chord Finder And Chord Identifier

Chord Finder and Chord Identifier help musicians to find and identify chords by name and structure. Whether you are a beginner or an experienced musician, finding and identifying chords can be challenging at times.

Fortunately, chord finder and chord identifier tools have been developed to make the process easy and effortless. Simply enter the notes or chord shape you are playing, and the tool will identify the chord for you. The tools also allow you to search for chords by name, making it easy to find chords even if you don’t know their structure.

These tools can be used online, as software or mobile apps, making them easily accessible to anyone, anywhere. With chord finder and chord identifier tools, musicians can save time while exploring new chords and improving their playing skills.

Types Of Chord Finders

If you are a guitar or piano player, then you know how difficult it can be to play a song that requires complex chords. This is where chord finders come in handy. There are two types of chord finders: online chord finders and mobile app chord finders.

Online Chord Finders

Online chord finders are websites that allow you to search for chords by either typing in the name of the chord or selecting the notes you want to use. These websites are free to use and are a great resource for both beginners and experienced players.

Advantages

  • Free to use
  • Easy to access from any device with internet connection
  • Large database of chords available

Disadvantages

  • Requires internet connection
  • Some websites may have pop-up ads
  • May not always be accurate

Mobile App Chord Finders

Mobile app chord finders are similar to online chord finders, but they are designed to be used on your mobile device. These apps are great for musicians who are on the go and need quick access to chords.

Advantages

  • Can be used offline
  • Easy to access on your mobile device
  • Some apps provide additional features such as tuning and metronome

Disadvantages

  • May require payment for full access
  • Requires storage space on your device
  • Some apps may have ads or in-app purchases

Both online chord finders and mobile app chord finders are great tools for any musician looking to improve their playing abilities. It’s important to find the right one that suits your needs and preferences.

How Do Chord Finders Work?

A chord finder is an essential tool for anyone looking to learn music, whether as a beginner or more experienced musician. With a chord finder, you can easily identify and play the chords to any song by simply inputting the relevant information. Chord finders are typically easy to use and can help you save time and improve your music playing skills.

Inputting Chord Information

The first step to using a chord finder is to input the chord information. This typically involves selecting the root note or the first note in the chord, the chord quality or type, and any additional notes that may be required, such as the chords inversion or octave. Most chord finders have an easy-to-use interface that allows you to input this information with a few clicks. You can also input the chord information using your computer keyboard or a musical instrument.

Visual Representation Of Chords

Once you have inputted the chord information, chord finders will usually provide a visual representation of the chords. This can be in the form of a chord diagram which shows the placement of each finger on the guitar fretboard or a piano roll which displays the notes on the piano keyboard. The visual representation of chords makes it easy for players to see how to play the chords and where to put their fingers.

Most chord finders also come equipped with audio samples of the chords being played, so you can hear how the chords should sound and how they fit into the song you are learning. With this feature, you can quickly identify and correct any mistakes you may be making while playing a particular chord.

In conclusion, chord finders are a useful tool for anyone looking to learn music. With their easy-to-use interface and visual representation of chords, chord finders allow players to quickly identify and play the chords to any song. Whether you’re a beginner or an experienced musician, chord finders can help you save time and improve your music playing skills.

Popular Chord Finders And Identifiers

Popular chord finders and identifiers are an invaluable resource for guitarists of all levels. These handy tools help to identify and locate chords quickly and easily, making it possible to play your favorite songs in no time. Whether you’re a beginner, intermediate or advanced guitarist, there are many chord finders and identifiers available to suit your needs.

Guitar Tab Finder

Guitar Tab Finder is a popular chord finder that allows you to search for and locate chords by name. This user-friendly tool enables you to find chords in a matter of seconds, whether you’re looking up a specific chord or trying to learn a new song. With a vast database of chords and a simple interface, Guitar Tab Finder is a reliable go-to tool for guitarists.

Chordu

ChordU is an innovative chord identifier that uses audio recognition technology to identify chords from YouTube videos. With ChordU, you can simply paste the URL of your favorite YouTube video, and the tool will do all the work for you. This tool is perfect for guitarists who struggle to pick up chords by ear and want to learn new songs quickly.

Ultimate Guitar Chords

Ultimate Guitar Chords is an extensive chord library that boasts over 1 million chords and tabs for guitar, bass, ukulele, and drums. This tool allows you to search for chords by name, artist, or popularity and includes a handy transpose feature for changing the key of a song. With Ultimate Guitar Chords, you can learn virtually any song, making it a must-have tool for guitarists of all levels.

Chord Finder And Chord Identifier

Credit: play.google.com

Chord Theory

Understanding chord theory is essential for any musician or songwriter. With the help of chord finder and chord identifier tools, it becomes easier to create harmonies that are melodious and appealing to the ears. These tools make it quick and hassle-free to find the chords that go well together, saving time and effort.

If you’re learning how to play the guitar, you are eventually going to run into a situation where you’ll need to find a particular chord. Understanding chord theory is a fundamental aspect of playing music, regardless of your level of expertise. Chords are the building blocks of music, and they are created using a combination of notes played simultaneously.

Major Chords

Major chords are built using a combination of the root note, the major third, and the perfect fifth. The root note is the note that the chord is named after. The major third is four half-steps above the root, and the perfect fifth is seven half-steps above the root. Major chords have a happy and uplifting sound, and they are used in many popular songs.

Minor Chords

Minor chords are often responsible for creating a more melancholic or somber mood. They are created by combining the root note, the minor third, and the perfect fifth. The minor third is three half-steps above the root, and the perfect fifth is seven half-steps above the root. Minor chords are often used in ballads and slow songs.

Diminished Chords

Diminished chords are created by combining the root note, the minor third, and the diminished fifth. The diminished fifth is six half-steps above the root. Diminished chords are often used in jazz and classical music.

Augmented Chords

Augmented chords are created by combining the root note, the major third, and the augmented fifth. The augmented fifth is eight half-steps above the root. Augmented chords are often used in jazz, classical, and modern music.

Conclusion

Understanding chord theory is essential if you want to play guitar or any other instrument. The ability to identify and name chords will make it much easier for you to play songs and create your music. With this knowledge, you can start experimenting with different chords and coming up with unique sounds.

Tips For Learning And Using Chord Finders

Learning and using chord finders can seem daunting at first, but with these tips, you’ll be a pro in no time! Start by understanding the basics of chord identification, then practice using a variety of chord finders to find the perfect sound for your music.

Remember, practice makes perfect!

As a beginner musician, the thought of learning chords can be overwhelming. However, chord finders and chord identifiers can help aid the learning process. They are user-friendly tools that can be accessed online to identify various chords and their positions on the fretboard. These tools can be used alone or in conjunction with music theory studies to enhance understanding. Here are some tips for making the most of chord finders:

Practice With Basic Chords

Start by practicing with basic chord progressions such as C, G, and D major. This helps to build a foundation for more complex chords and helps to train your ear. Chord finders can be used to identify the chord names and their respective positions on the fretboard, making it easier to memorize the finger positions.

Experiment With Chord Voicings

Chord finders can help identify different chord voicings and inversions to create unique sounds. Experimenting with different chord voicings can help create more dynamic arrangements. With chord finders, you can easily find the best combinations and the best ways to play them.

Use Chord Finders In Conjunction With Music Theory Studies

Music theory studies can be difficult for beginners, but chord finders can help simplify the process. Using a chord finder alongside music theory studies can help to solidify understanding by providing a visual representation of what is being learned. It’s important to note that chords are not just random finger combinations but can be explained scientifically. Learning music theory will help understand the reason behind the chords and their place in the key. In summary, chord finders can be an excellent tool for learning and mastering chords. By applying these tips, beginners can learn chords faster and more efficiently. By practicing with basic chords, experimenting with chord voicings, and using chord finders in conjunction with music theory studies, anyone can become proficient in playing chords.

Chord Finder And Chord Identifier

Credit: www.julieswihart.com

Frequently Asked Questions For Chord Finder And Chord Identifier

Is There An App That Can Identify A Chord?

Yes, there are many apps available on both Android and Apple app stores that can identify a chord by simply playing it or by analyzing an audio recording. These apps use advanced algorithms to identify the chord based on its frequency and sound waves.

Some popular apps include Chord Detector, Chordify, and Reverse Chord Finder.

How Can I Identify A Chord?

To identify a chord, you need to know the notes used in the chord. Look for the root note, count the number of half-steps between each note of the chord, and use a chord chart or app to determine the name of the chord.

Practice and familiarize yourself with the different chord shapes and patterns to identify chords quickly and accurately.

How Do You Identify Chords By Sight?

Identifying chords by sight requires practice and knowledge of chord shapes and patterns. Start by learning the basic chords, then practice recognizing them in different keys. Pay attention to the root note and the intervals between the notes in the chord.

Familiarity with music theory and notation can also aid in identifying chords quickly and accurately.

How Do I Find The Chord Of A Song?

To find the chords of a song, you can start by searching for the lyrics and chords online. You can also use chord recognition software or apps to identify the chords being played in a song. It’s important to practice and experiment with different chord progressions to find what sounds best for you.

Conclusion

Finding and identifying chords has never been easier with the help of chord finder and chord identifier tools. With just a few clicks, you can access a wealth of information and improve your music skills. Whether you’re a beginner or an experienced musician, these tools can help take your music to the next level.

So start exploring and discover the world of chords today!

Categories
Archive

Recording Vocals In Small Room

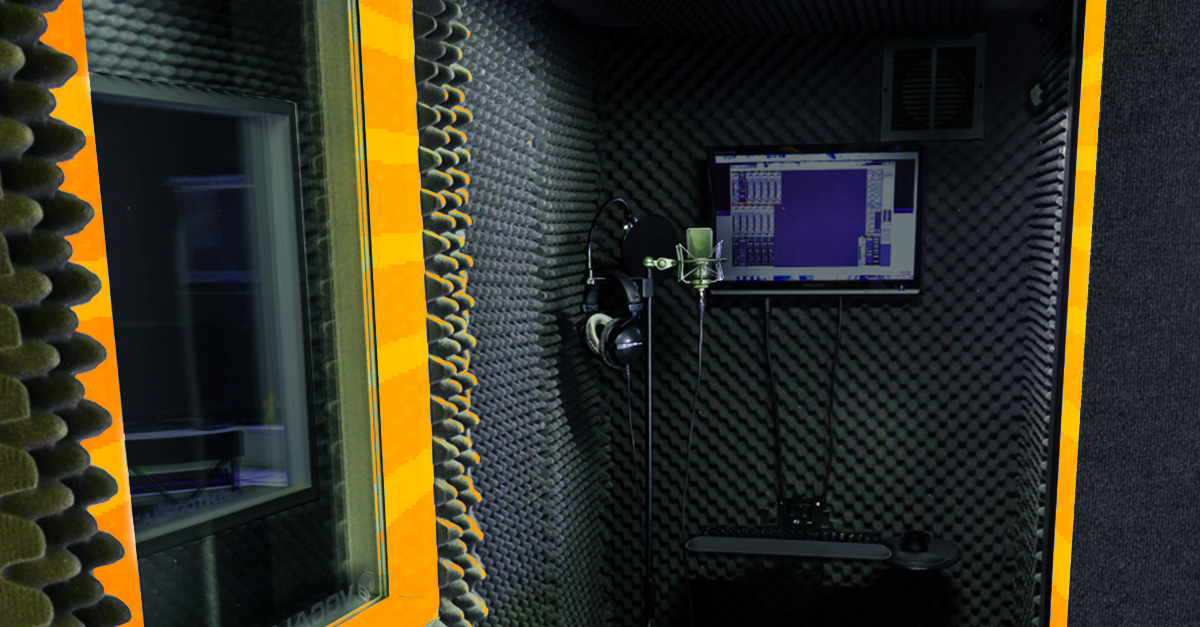
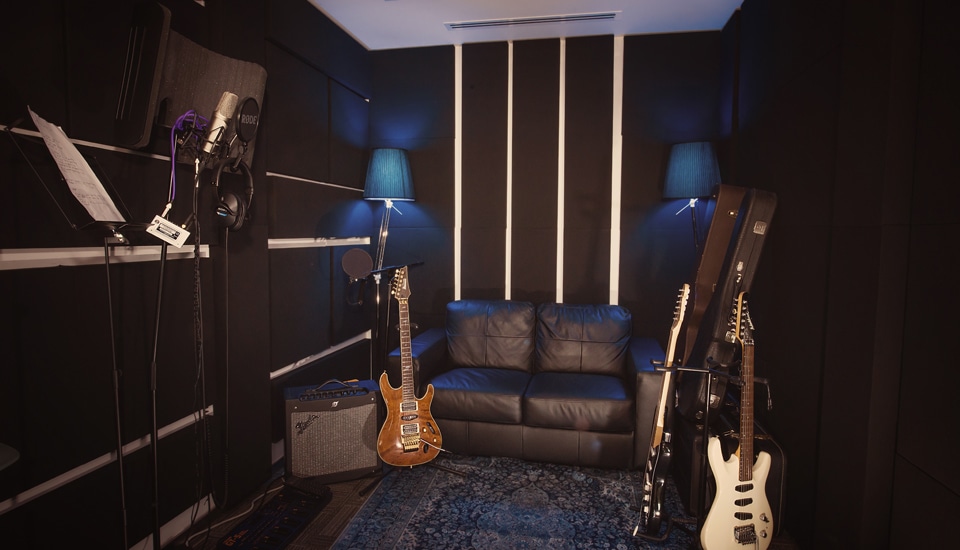
Recording vocals in a small room requires proper acoustic treatment and mic placement. In small rooms, sound tends to bounce around and cause unwanted reflections, leading to a subpar recording quality.

To ensure a high-quality recording, consider investing in acoustic panels or foam to absorb the sound and reduce reflections. Additionally, try positioning the microphone at the optimal distance and angle to capture the best sound. Experiment with different placements and techniques, and record in different parts of the room to find the best results.

With these tips, you can achieve a professional-sounding vocal recording even in a small space.

The Challenges Of Recording Vocals In Small Rooms

Recording vocals in small rooms can be challenging due to the lack of good acoustics. The sound waves tend to bounce off the walls and create unwanted echos. This can affect the clarity and quality of the vocals. Professional recording studios use soundproofing and acoustic treatment to create a controlled environment.

However, for those recording at home, there are some tips and tricks to improve the sound quality in a small room.

Recording vocals in a small room is one of the most challenging tasks for a recording engineer. The smaller the room, the more challenging it becomes to capture a clean and accurate sound. Small rooms are typically reflective, leading to unwanted frequency buildups and cancellations, which affect the overall sound quality. Therefore, a recording engineer needs to solve these problems before they start recording to ensure they get the best vocal recording possible.

Importance Of Good Acoustics

Good acoustics are essential for recording vocals in small rooms. The room must be acoustically treated to create a neutral and controlled recording environment. This treatment typically involves adding sound-absorbing panels and diffusers to the walls and ceiling of the room. Sound-absorbing panels help reduce unwanted reflections, while diffusers help scatter sound waves and provide a more natural-sounding recording environment.

Reflections And Resonances

Reflections and resonances are the main issues when recording vocals in small rooms. The sound waves reflecting off the walls, ceiling, and floor create resonances and standing waves, which can cause frequency buildups and cancellations. These reflections and resonances can be controlled by adding sound-absorbing materials and diffusers in strategic locations throughout the room. Also, using microphones that are directional can help eliminate unwanted reflections from the sides and back of the microphone.

Compromising On Control Room Space

One of the methods to overcome the challenges of recording vocals in small rooms is to compromise on control room space. The recording engineer may need to find alternative ways to monitor the recording without using a traditional control room setup. For example, using headphones can be an effective way to monitor the recording, or a portable recording setup, such as a laptop and audio interface, can be used. In conclusion, recording vocals in small rooms is a challenging task that requires proper planning and execution. Creating a neutral and controlled recording environment by acoustically treating the room, controlling reflections and resonances, and compromising on control room space can help achieve the best possible vocal recording.

Recording Vocals In Small Room

Credit: flypaper.soundfly.com

Preparing Your Small Room For Optimal Vocals Recordings

Optimizing a small room for recording vocals takes some planning. Furnishing it with soft surfaces such as curtains, carpet or foam tiles can help to reduce unwanted ambient noise. Additionally, experimenting with microphone placement and investing in noise-cancelling headphones can also improve the quality of your recordings.

Preparing Your Small Room for Optimal Vocals Recordings: Recording vocals in a small room can be a bit difficult as it can quickly become challenging to manage acoustics and the background noise. However, with the right techniques and preparation, it’s possible to get excellent recordings without breaking the bank. Here are a few tips to maximize your small room and get the best out of your recording. Treating Your Room Acoustics: The first and foremost thing to do is to consider room acoustics. Rooms with walls made of brick, wood, or concrete cause audio waves to bounce off them, leading to reverberation and an echo effect. One way to solve this problem is to place acoustic foam panels on your walls. The foam reduces sound reflections, leading to clearer sound recordings. Controlling Background Noise: Background noise is a common problem that can ruin your vocal recordings. Air conditioning, computer fans, traffic, and other unexpected noises can enter your microphone, leading to an undesirable recording. One way to reduce background noise in a small room is to soundproof it. Soundproofing the room involves using materials such as sound curtains or thick blankets to absorb sound. You can also place weather stripping on doors, which can help prevent sounds from leaking in or out. Locating the Ideal Mic Positioning: A Mic is one of the most important elements when it comes to vocal recordings. You should ensure that you have the appropriate microphone for the tone you are looking to capture. After you have installed acoustic foam and soundproofing materials, start experimenting with the positioning of your microphone. Finding the perfect position will depend on the size of the room, the acoustics, style of recording, and the microphone capabilities. As a general rule, the closer the mic is to the sound source, the less background noise you’ll pick up. Similarly, the further the mic is from the wall, the less sound reflections will be picked up. In conclusion, preparing your small room is crucial for optimal vocals recordings. Ensuring proper room acoustics, soundproofing, and ideal microphone positioning can make all the difference. With these tips in mind, you can produce excellent recordings without spending much, and your audience will enjoy listening to your well-recorded vocals.

Essential Equipment For Recording Great Vocals In A Small Room

Achieving great vocal recordings in a small room requires essential equipment. Invest in a high-quality microphone, pop filter, and a reflection filter to eliminate unwanted noises and echoes. These tools can make a big difference in your vocal recordings.

Recording vocals in a small room can be a tricky task, but having the essential equipment can make a big difference in the quality of the final recording. In this post, we will discuss the must-have equipment for recording great vocals in a small room.

Microphones For Small Room Recording

The quality of a vocal recording depends largely on the microphone used. For a small room recording, a condenser microphone is the best choice as it is highly sensitive and captures detailed nuances of the voice. Among condenser microphones, large diaphragm microphones are the go-to choice for capturing warm and crisp vocals.

Budget-friendly Alternatives To Stellar Mics

If you are on a tight budget, you don’t have to compromise on the quality of your vocal recording. There are budget-friendly alternatives available that can give stellar results. One such alternative is the dynamic microphone. Although it is not as sensitive as the condenser mic, it is great for capturing loud vocals and rejecting background noise. Another option is the USB microphone, which is easy to use, budget-friendly and can produce decent quality recordings.

Pop Filters And Reflection Filters

Pop filters and reflection filters are essential accessories for a small room recording setup. A pop filter prevents popping sounds caused by plosive consonants such as ‘p’ and ‘b’ and helps in producing a clear vocal tone. A reflection filter or a vocal booth is used to control the room reflections and echoes, which can negatively impact the recording quality. In conclusion, having the right equipment can make a huge difference when it comes to recording great vocals in a small room. Investing in a good quality microphone, pop filter and reflection filter can help you achieve professional-sounding vocal recordings, even in a small room setup.

Recording Vocals In Small Room

Credit: www.primacoustic.com

Tips And Tricks For Recording Vocals In A Small Room

Achieving high-quality vocal recordings in a small room can be a daunting task, but with the right approach, it’s possible. Tips and tricks such as selecting the right microphone, using acoustic treatment, and adjusting the positioning can significantly improve the overall sound of your recordings.

Recording vocals in a small room can be quite challenging for musicians and sound engineers alike. However, with the right tips and tricks, you can achieve a professional sound that matches that of big-budget studios. In this blog post, we’ll share some tips and tricks to optimize your recording quality and ensure your vocals sound great in a small room.

Choose The Right Vocal Performer

One of the most critical factors when recording vocals in a small room is choosing the right performer. A vocal performer who uses a gentle style of singing can help minimize issues like excessive room reflections that can occur in a small recording environment. Look for a versatile performer who can sing softly and forcefully and emphasize the right notes to create dynamics that complement the acoustics of the room. By choosing the right performer, you can help minimize drawbacks that stem from limited space in your recording room.

Use Headphones: Be The Performer

When recording vocals in a small room, it’s essential to counteract the adverse effects of acoustics by getting closer to the microphone. This means singing without worrying about how much your voice fills the room but instead focus on ensuring the vocals sound great in the microphone. One surefire way of achieving this is by using headphones to hear yourself better. By using headphones, you hear the sound you’re producing and keep adjusting until it matches the required quality. Moreover, headphones help reduce background noise from the room and enable you to focus on your performance.

Optimize Your Recording Techniques

In a small recording room, every little detail counts when it comes to recording techniques. Try to adjust your microphone settings and placement to minimize the room reflections and create a dry sound with a minimum amount of sounds from the room. Furthermore, try to use pop filters to prevent plosives, sibilance, and hissing sounds that may arise from consonants such as ‘s,’ ‘p,’ and ‘t.’ Additionally, placing a blanket or sound-dampening material on the floor and wall behind the singer can absorb the excess sound reflection and enhance the quality of the vocal recording. In conclusion, recording vocals in a small room requires attention to detail and optimal techniques that match the available space. By choosing the right performer, using headphones, and optimizing your recording techniques, you can achieve a professional sound that matches that of big-budget studios.

Post-production Tips For The Vocal Recordings

Learn how to make the most out of recording vocals in a small room with these post-production tips. With careful attention to noise reduction and EQ adjustments, you can achieve a professional-sounding vocal track that captures the emotion and character of the singer.

When it comes to recording vocals in a small room, post-production tips are essential to achieve a professional sound. The editing process can make a big difference in the quality of the final product. Below are some tips on how to effectively process and enhance the vocals for a polished and clean recording.

Eq And Compression

When recording vocals, it is important to have balance and clarity in the sound. EQ and compression are two essential tools to achieve this. EQ allows you to adjust the frequency levels of the vocals, while compression helps to even out the levels of the recording. When processing the vocals, start by using EQ to remove any unwanted frequencies that may be present in the recording. Then, apply compression to help even out the levels of the vocals. Be careful not to over-compress the vocals as this can result in an unnatural sound.

Adding Reverb To Enhance Space

Reverb is a great tool to create space in the vocals and add a sense of depth to the recording. When adding reverb, it is important to keep in mind the type of sound you want to achieve. A shorter reverb time works well for a more intimate sound, while a longer reverb time is better for a more spacious sound. Experiment with different reverb settings to find the perfect balance for your recording.

Additional Effects And Processing

In addition to EQ, compression, and reverb, there are other effects and processing techniques that can be used to enhance the vocals. These include adding delay, chorus, or distortion to the recording. However, it is important to use these effects sparingly as they can quickly become overpowering and detract from the overall quality of the recording. Experiment with different effects to find the perfect balance for your recording. In conclusion, post-production tips are essential when recording vocals in a small room. EQ, compression, and reverb are just a few of the tools that can be used to enhance the vocals and create balance and clarity in the sound. With practice and experimentation, you can achieve a polished and professional recording that is sure to impress.

Recording Vocals In Small Room

Credit: www.soundonsound.com

Frequently Asked Questions On Recording Vocals In Small Room

Should You Record Vocals In A Small Room?

Yes, you can record vocals in a small room. However, it’s vital to ensure the room is acoustically treated to avoid audio issues such as echoes and room noise. Additionally, using high-quality recording equipment and a pop filter can further improve the sound quality of the vocals.

Can You Record In A Small Room?

Yes, you can record in a small room, but acoustic treatment is important to minimize unwanted echo and reverberation. You can also use a portable vocal booth to create a more controlled recording environment.

How Do You Record Audio In A Small Room?

To record audio in a small room, you can follow these tips: 1. Choose a quiet room with minimal background noise. 2. Add sound-absorbing materials such as curtains or blankets to the room. 3. Use a directional microphone to capture clear audio.

4. Close all windows and doors to block out external noise. 5. Position the microphone close to the sound source for optimum recording.

What Size Room Is Best For Recording Vocals?

The best room size for recording vocals is around 10×10 feet with a ceiling that is at least 8 feet tall. A smaller room helps to prevent echoes and reverb while a higher ceiling allows for better ventilation and less sound reflections.

The room should also have good acoustics and be free of outside noise.

Conclusion

Creating a professional vocal recording in a small room requires careful consideration of the space, equipment, and techniques used. While it may seem challenging, with the right approach and a focus on improving recording quality over time, you can produce great vocal tracks.

By experimenting with positioning, acoustics, and investing in quality equipment, you can take your vocal recording to the next level. Remember to keep practicing and refining your techniques to achieve the best possible results.

Categories
Archive

What Makes Music Sound Louder

Sound waves with higher amplitude make music sound louder by creating more pressure on the eardrum. Louder music has a greater volume, which is the perceived loudness of the sound.

Several factors, including instrumental and vocal dynamics, equalization, and compression, can contribute to increasing the perceived loudness of music. The loudness of music is essential to creating a compelling audio experience, particularly for recordings played in a public space. As a result, sound engineers and music producers pay close attention to the technical elements that affect the auditory experience, carefully balancing the different components to create a polished and dynamic sound.

This article explores the factors that contribute to making music sound louder, offering insight into the techniques that audio professionals use to enhance the listening experience.

What Makes Music Sound Louder

Credit: www.wonderopolis.org

The Anatomy Of Sound

Sound is an intricate phenomenon that has captivated people since time immemorial. It’s a type of energy wave that travels through the air, and every single sound has its unique characteristics that make it distinguishable from the others. Understanding the anatomy of sound allows you to comprehend why a particular sound may sound louder than others. In this article, we’ll explore the factors that contribute to the perception of loudness, including sound waves, frequency and pitch, and the role of amplitude.

How Sound Waves Work

Sound is nothing more than a vibration that travels through the air. It moves in the form of a wave, with compressions and rarefactions being the high and low points in a wave, respectively. These waves travel through the air and are picked up by our eardrums, which converts them into signals sent to our brains that we perceive as sound. The louder a sound is, the larger the amplitude of the wave, and the more energetic the vibrations are when they reach our ears.

The Role Of Amplitude In Sound Perception

Amplitude is the measure of how high or low the waves are in terms of energy. Sound waves with high amplitude will produce more energy and are thus louder than sound waves with lower amplitude. When we experience loud sounds, it essentially means that the amplitude of the waves reaching our ear is large, with more energy and pressure applied to the eardrum. The more massive the vibrations are, the stronger the feeling of loudness we experience.

The Relationship Between Frequency And Pitch

Another essential consideration to understand when it comes to sound perception is pitch. Pitch is the characteristic of sound that enables us to identify sounds as high or low. Pitch is determined by frequency – the number of waves that formulate in a particular interval of time – with higher frequency producing higher pitches. Higher pitches are genuinely high-pitched sounds, while low pitches are resonating sounds. However, in cases like explosive noises, we may resonate with widely different sound frequencies that aren’t always congruent.

PitchFrequency Range (Hz)
Sub-sonicBelow 20Hz
Low frequency20Hz to 250Hz
Mid-frequency250Hz to 4000Hz
High-frequency4000Hz to 20000Hz
UltrasoundAbove 20000Hz

Knowing the anatomy of sound can help you like a sound engineer adjust the volume levels of different sound frequencies to create a well-balanced sound mixing. Understanding how pitch and amplitude work can help you appreciate music even more by identifying which frequencies are playing and how changing the amplitude of a particular frequency can affect the overall perception of sound.

What Makes Music Sound Louder

Credit: kids.frontiersin.org

Factors That Affect Loudness

Loudness in music is affected by multiple factors, including compression, equalization, volume levels, and mixing techniques. Compression and equalization can make a track more dynamic, while increasing the volume can make it sound louder. Mixing techniques like adding more layers or creating a fuller sound can also impact the perceived loudness of music.

Factors That Affect Loudness: Music is meant to be heard and enjoyed, and there is no denying that the volume plays a crucial role in this. The key question that arises here is: What makes music sound louder? The answer isn’t straightforward, as there are various factors that directly or indirectly impact the loudness of music. In this blog post, we will discuss the primary factors that affect loudness and help you understand how they impact the overall listening experience. The Power of The Sound Source: The power of the sound source is one of the most significant factors that determine how loud music sounds. The more powerful the sound source, the louder the music will be. It may seem obvious, but it’s not just about turning up the volume; the strength of the soundwaves that the source produces also play a crucial role. For instance, a powerful sound system can produce more robust sound waves than a cheap pair of earphones, resulting in louder music. The Distance From The Source: Another factor that affects loudness is the distance between the listener and the sound source. Sound waves tend to decrease in intensity as they travel further away from the source. Hence, the further away from the source you are, the lower the volume of the music will seem. It’s essential to note that this is not an issue when listening to headphones, as the sound source is located right next to the ear. The Acoustic Properties of The Environment: The environment where you listen to music also impacts the loudness of the sound. Sound waves tend to bounce off surfaces and produce echoes, which can lead to changes in volume. For instance, a room with hard surfaces like tiles and glass will produce more echoes than a carpeted room, resulting in louder music. This is something to keep in mind when choosing where to enjoy your favorite tunes. The Sensitivity of The Listener’s Ear: Everyone’s ears are unique, and the sensitivity of one’s ear is another crucial factor that affects loudness. Some people have more sensitive ears than others, meaning that they can hear sounds at lower volumes more clearly than others. Age is also a considerable factor, as our hearing tends to deteriorate as we grow older. It’s a good idea to keep this in mind when choosing how loud to play your music, as one person’s perfect volume could be painfully loud for another. In conclusion, these are some of the primary factors that impact the loudness of music. It’s essential to keep these factors in mind when enjoying your favorite tunes, whether it’s in a room with hard surfaces or while using a powerful sound system. Remember to take care of your ears, and always use a comfortable volume to ensure that you can keep enjoying music for years to come.

The Different Types Of Loudness

Different types of loudness in music can be achieved through various techniques such as compression, limiting, and equalization. These techniques amplify certain frequencies and compress others to create a more balanced and louder overall sound. With the right application, these techniques can enhance the quality of music and make it sound more impactful.

Perceived Loudness Vs. Actual Sound Level

Peak Vs. Rms Loudness

The Different Types of Loudness: When it comes to music, loudness is subjective and can be perceived differently by individuals. However, there are two different types of loudness – perceived loudness and actual sound level. Perceived loudness describes how loud a sound seems to the human ear, while actual sound level is the objective measure of the physical strength of sound waves. Another aspect of loudness that is important to consider is peak vs. RMS loudness. The peak loudness is the highest point of a sound wave, while the RMS (root-mean-square) loudness is a more accurate representation of the overall volume. RMS takes into account the duration and amplitude of the entire waveform, not just the peaks. Therefore, a song with high peak loudness but low RMS loudness may sound quieter than a song with low peak loudness but high RMS loudness. To further explain, the peak loudness is like the tallest person in a room, but it doesn’t necessarily mean they are the loudest. The RMS loudness is the average height of everyone in the room, representing the overall volume.

Perceived LoudnessActual Sound Level
– Influenced by factors such as frequency, duration, and amplitude– Measured in decibels (dB)
– Can differ between individuals and environments– Objective measure of the physical strength of sound waves
– Can be manipulated through mastering techniques– Used to comply with noise regulations

In conclusion, understanding the different types of loudness in music can help us achieve the desired sound and comply with regulations. While peak loudness may give a false impression of overall volume, RMS loudness is a more accurate representation of volume and can be improved through mastering techniques.

The Role Of Technology In Sound Enhancement

Technology plays a crucial role in sound enhancement, making music sound louder by controlling volume, equalization, and compression. With the advancement of sound engineering programs, producers can produce higher quality audio, resulting in a more enjoyable listening experience for music lovers.

When it comes to music, what makes it sound louder? It’s not just about turning up the volume; there’s a science behind it. Technology plays a vital role in enhancing the music listening experience. Various sound equipment and techniques are used to make the music sound more prominent and richer. Let’s take a closer look at the role of technology in sound enhancement with three subtopics: Amplifiers and EQsLimiters and CompressorsSoundproofing Techniques.

Amplifiers And Eqs

Amplifiers and EQs are the backbone of any sound system. Amplifiers increase the power of the incoming signal, while EQs (Equalizers) adjust the balance between bass, midrange, and treble frequencies. Amplifiers come in different shapes and sizes, and their power rating determines how much louder the music can get. EQs, on the other hand, can be hardware or software-based and provide the ability to fine-tune specific frequencies.

Limiters And Compressors

Limiters and compressors help prevent distortion and maintain a consistent volume level. They do this by limiting the peak volume and compressing the dynamic range of the music, making the loud parts softer and the soft parts louder. Limiters can be software or hardware-based and are often used in live performances. Compressors are commonly used in recording studios to help balance out the volume levels.

Soundproofing Techniques

Soundproofing techniques play a crucial role in controlling sound leakage, particularly in recording studios. A poorly designed or constructed room can ruin the sound quality. Soundproofing techniques include using specialized materials like acoustic foam, sound barriers, and bass traps, which absorb and deflect sound waves. Soundproofing ensures that the sound is contained within the room and doesn’t escape, resulting in a clearer, more defined sound. In conclusion, the role of technology in sound enhancement is essential. From amplifiers and EQs to limiters and compressors, and soundproofing techniques, the right combination of technology can make a vast improvement in the sound quality. These techniques are used by audio engineers, musicians, and music producers to create the perfect soundstage.

The Social And Emotional Impact Of Loud Music

The Social and Emotional Impact of Loud Music

Have you ever noticed how your mood changes when you listen to loud music? Loud music has a profound impact on our emotions and behavior, often making us feel more energized and excited. In this article, we will explore the psychology of loud music and its effects on our behavior and hearing.

The Psychology Of Loud Music

The human brain is wired to respond to loud sounds more intensely than soft ones. When we hear loud music, our brain releases endorphins, dopamine, and adrenaline, chemicals that are associated with pleasure, motivation, and arousal. This explains why loud music can make us feel more energetic and focused, especially when we are engaged in physical activities like exercising or dancing.

The Relationship Between Loud Music And Risky Behavior

Studies have also shown that loud music can increase our willingness to take risks. When we listen to loud music, we tend to feel more confident and impulsive, which can lead us to engage in behaviors that we might otherwise avoid. This effect is particularly evident in younger people, who are more likely to listen to loud music and engage in risky activities.

Risky Behaviors Associated with Loud MusicExamples
Reckless DrivingSpeeding, tailgating, racing
Substance AbuseDrinking, smoking
ViolenceFighting, arguing

The Effects Of Loud Music On Hearing

While loud music can be enjoyable and stimulating, it can also damage our hearing if we are exposed to it for long periods. Exposure to loud music can cause temporary or permanent hearing loss, tinnitus (ringing in the ears), and hyperacusis (sensitivity to loud sounds). The risk of hearing damage depends on the loudness level, duration of exposure, and individual susceptibility.

  1. Temporary hearing loss: when we are exposed to loud music for a short period, our hearing can become dull or muffled, but it usually recovers within a few hours.
  2. Tinnitus: when we are exposed to loud music for a prolonged period, we may experience a persistent ringing, buzzing, or humming in the ears, which can be distressing and affect our quality of life.
  3. Permanent hearing loss: when we are exposed to loud music for a long time, we may experience irreversible damage to our hearing, which can lead to communication difficulties, social isolation, and depression.

Therefore, it is important to protect our hearing by wearing earplugs or reducing the volume when listening to loud music.

What Makes Music Sound Louder

Credit: www.youtube.com

Frequently Asked Questions On What Makes Music Sound Louder

What Makes A Sound Louder?

Sound becomes louder when it has more energy and travels through a medium that allows it to spread more easily. The increase in energy causes the air particles to vibrate more intensely, resulting in louder sound waves.

How Does Music Get Louder?

Music gets louder when the volume or amplitude of sound waves increases. This can be achieved by amplifying the electrical signal that generates sound waves, by increasing the size or number of speakers, or by adjusting the equalizer to boost certain frequencies.

How Can I Increase The Loudness Of My Music?

To increase the loudness of your music, you can use compression and limiting techniques, adjust the EQ settings, maximize the volume levels, and consider mastering your track. However, be careful not to over-compress or distort the audio, as this can reduce quality and clarity.

How Can I Hear Music Louder?

To hear music louder, you can try increasing the volume on your device or use headphones or external speakers. Some devices may have a built-in equalizer to boost specific frequencies. Be careful not to raise the volume too high as it can damage your hearing.

Conclusion

To conclude, there are several factors that contribute to music sounding louder, including increasing volume and adjusting equalization settings. It is important to note, however, that excessive volume can lead to hearing damage and other health concerns. By understanding and utilizing the proper techniques, listeners can enjoy their music without compromising their well-being.

Ultimately, finding the right balance will lead to a more satisfying and enjoyable listening experience.

Categories
Archive

Tips For Mastering Pop Music

To master pop music, focus on song structure, melodies, lyrics, and production quality. Pop songs should have a strong hook and be easy to sing along to.

Pop music is the most popular genre of music globally. It’s known for its upbeat and catchy tunes played on various platforms like radios and live shows, among others. However, not everyone can produce excellent pop songs that wow listeners.

To dominate in the pop music industry, several aspects must be considered. First, understand the song structure, including the verse, chorus, bridge and pre chorus, and the composition of a pop song. Second, the melody should be memorable, easy to sing along to, and have a strong hook that sets it apart from other songs. The lyrics of the pop song should be relatable and have emotional depth. Lastly, a high-quality production is critical in producing a competitive pop song.

Tips For Mastering Pop Music

Credit: m.youtube.com

Establishing A Strong Foundation

Establishing a strong foundation is crucial when it comes to mastering Pop music. Whether you’re a beginner or an experienced musician, building a foundation of music theory, rhythm, and melody will set you up for success. In this blog post, we’ll discuss some tips on how to establish a foundation that will help you master Pop music.

Understanding Chord Progression

One of the essential components of Pop music is chord progression. The chord progression creates the harmonic structure of the song that accommodates the melody and rhythm. Understanding music theory and chord progressions is crucial when it comes to writing and playing Pop music. Practicing and mastering chord progressions will help you understand harmony and develop your musical ear.

Mastering Rhythms And Beats

Pop music is known for its catchy beats and rhythmic melodies. Developing a good sense of rhythm is crucial when it comes to mastering Pop music. Practice and experimentation are the keys to mastering rhythms and beats. Setting a metronome and playing along with different styles of music can help you develop a good sense of rhythm. Once you have the basics of rhythm down, you can experiment with different beats and patterns to create a unique pop sound.

Developing Your Melodic Sense

Creating a catchy melody is an essential part of writing Pop music. Developing your melodic sense will help you create memorable and engaging melodies. Practicing scales and learning to play melodies by ear can help you develop your melodic sense. Additionally, analyzing the melodies of other successful Pop songs can help you gain insight into what makes a great Pop melody. Remember, writing a melody is all about experimentation.

In conclusion, establishing a strong foundation is crucial when it comes to mastering Pop music. By understanding chord progressions, mastering rhythms and beats, and developing your melodic sense, you’ll be on your way to writing catchy and memorable Pop songs in no time. Keep practicing, experimenting, and most importantly, have fun!

Tips For Mastering Pop Music

Credit: www.masteringthemix.com

Crafting The Perfect Pop Song

Creating a pop hit that resonates with audiences and stays in their heads for days is every songwriter’s dream. Crafting the perfect pop song involves a lot of creative effort, but it is not unattainable. With a few specific tips, you can master the art of pop songwriting and produce timeless classics that fans will adore.

Hook Them In With A Memorable Chorus

The chorus is the crowning jewel of any pop song. It’s the part that listeners anticipate while singing along and is typically the most catchy and memorable part of the track. When writing your chorus, try to find the perfect balance between catchiness and repetition. The more memorable and appealing your chorus is, the easier it is for your audience to connect with and adore your pop hit.

Adding A Unique And Catchy Instrumental

It is difficult for a catchy tune to become an instant classic if it doesn’t have an excellent instrumental work. Crafting a unique and catchy instrumental is a crucial element in creating a hit pop song. You don’t have to stick to conventional sounds when making your instrumental. Instead, consider adding unique, unexpected elements to your tune to make it stand out from the crowd.

Write A Simple But Effective Structure

Simplicity wins when it comes to creating pop music. It is essential to keep your song structure simple and effective so that listeners can quickly catch on without any difficulties. Don’t worry about making your songwriting too complicated. Instead, focus on creating a structure that’s easy to follow and understand, making your hit pop song accessible to everyone.

TipDescription
Keep it relatableLyrics only connect with people when they can relate to them. Write about something universal or come up with a storyline that your audience can easily follow.
Short verses, catchy hooksKeep your verses short and sweet, allowing your chorus to take the center stage. Make your chorus a standout with unique elements that grab your listener’s attention.
Collaborate with othersCollaboration is the perfect way to expand your creativity while working with others who share your vision. Team up with other musicians to get inspired and take your songwriting to the next level.

By keeping these tips in mind, you can create the perfect pop hit that resonates with your audience and stands the test of time. Incorporate these tips into your songwriting process, and you’ll be well on your way to becoming a master of pop music!

Creating The Right Production

Maximizing the success of pop music production requires attention to key details that make the song stand out. This can include emphasizing catchy hooks, incorporating unique instrumentation, and achieving the right mix and mastering balance to make the track stand out across all listening devices and platforms.

Pop music is a genre that requires a specific approach to capture its essence successfully. Creating the right production that meets the standard of pop music requires combining the right tools, techniques, and skills. This post focuses on the crucial aspects of pop music production under the subheading of ‘Creating the Right Production.’

Selecting The Best Software And Equipment

Choosing the right software and equipment is the first step in creating the right production for pop music. The software you use should be able to handle the modern demands of producing pop music. For instance, Ableton Live and FL Studio are two popular software programs that can handle pop music production, whether you are a beginner or a seasoned producer. In addition, you should invest in quality hardware equipment such as MIDI controllers, headphones, monitors, and microphones. Your equipment should be capable of producing high-quality audio to create the perfect mix.

Get The Best Sound Out Of Your Instruments

Pop music tends to use a variety of instruments to create a dynamic sound. However, getting the best sound out of your instruments requires technical expertise. For example, understanding the right microphone placement for vocals and string instruments, drum tuning, and balancing audio levels are all essential techniques in creating the right sound for pop music. Using plugins such as compressors, equalizers, and reverb can also enhance the sound quality.

Make Use Of Modern Music Production Techniques

Modern music production techniques can help you achieve the perfect pop music production. These techniques include side-chaining, beat slicing, and parallel compression. Side-chaining is a technique where you use a compressor to control the volume of one track based on the volume of another track. Beat slicing is a technique used to manipulate drum loops to create different patterns. Parallel compression is a technique used to increase the perceived loudness of an audio signal without compromising the dynamic range. These techniques require an understanding of the software and hardware equipment. In summary, creating the right production for pop music requires selecting the best software and hardware equipment, getting the best sound out of your instruments, and making use of modern music production techniques. By following these tips, you can master pop music production and create top-quality pop music.

Tips For Mastering Pop Music

Credit: m.youtube.com

Polishing Your Sound

Learn the insider tips for mastering pop music and polishing your sound to perfection. From EQ and compression to finding the right mix balance, these techniques will help you achieve a professional sound for your pop records.

Using Effects And Automation To Add Depth

Adding effects and automation to your mix is crucial to add depth and texture to your sound. Whether it’s reverb, delay, or chorus, use these effects to enhance certain elements of your mix. For example, apply reverb to your vocals to create a sense of space or delay to your guitar to add a rhythmic element. You can also use automation to create movement and changes throughout your song, keeping the listener interested and engaged.

Master Your Tracks For The Best Possible Sound

Mastering your tracks is crucial to ensure that your final product is the best possible sound. This involves balancing the overall levels, EQ, and compression to achieve a cohesive, balanced mix that sounds good on different speakers and devices. Use reference tracks to compare your mix to professional tracks and make any necessary adjustments.

Getting Feedback And Continuously Improving

Getting feedback from others is crucial to improving your sound. Play your tracks for trusted friends, fellow musicians, or even take them to a professional audio engineer for a second opinion. Take their feedback on board and continuously work to improve your sound. Strive to make each new track better than the last. In conclusion, polishing your sound is essential to mastering pop music. By using effects and automation, mastering your tracks, and getting feedback, you can ensure that your music sounds its best and resonates with your audience. Keep working hard and making improvements and your music will continue to evolve and thrive.

Frequently Asked Questions For Tips For Mastering Pop Music

How Do You Master A Pop Song?

“Mastering a pop song involves a complex process of finalizing the mix by making technical adjustments to enhance the overall sound quality. This includes equalization, compression, volume adjustments, and noise reduction to achieve a consistent, clear and balanced sound. Utilizing specialized mastering tools and expertise is vital to produce a professional and high-quality finished product.

“

How Do You Make A Pop Song Successful?

To make a pop song successful, follow these steps: create a catchy chorus with a memorable melody, use relatable lyrics, create a strong hook, produce high-quality music and vocals, and promote the song through social media and other marketing channels.

What Is The Best Way To Master A Song?

To master a song, the best way is to use a professional mastering engineer or expert software. The mastering process involves applying EQ, compression, and other effects to achieve an optimal balance of frequency, volume, and dynamics. It’s important to listen on different sound systems and make adjustments accordingly.

Practice and experience are also key factors in mastering a song.

What Makes A Song Well Mastered?

A song is well mastered when it has balanced levels, full frequency range, proper stereo imaging, dynamic range, and appropriate loudness without exceeding the maximum level. A well-mastered song should sound clear, articulate and maintain tonal accuracy on various playback systems.

Conclusion

To conclude, mastering pop music can be a challenging but rewarding process. By following these tips, you can enhance your musical abilities and produce top-notch tracks that connect with your audience. Remember to stay true to your unique style, experiment with different sounds, and continuously strive for improvement.

With dedication, practice, and a willingness to learn, you can elevate your pop music game to new heights. Keep practicing, and never stop creating!

Categories
Archive

Is Mixing In Headphones Worth It

Mixing in headphones can be worth it, depending on various factors such as the quality of the headphones, purpose, and personal preference. Headphones have become a vital tool for music production.

They are portable, affordable, and offer an isolated listening environment that allows for in-depth sound analysis. However, opinions differ on whether mixing in headphones is worth it. Some audio professionals advocate for the use of headphones, while others contend that this is detrimental to the overall sound quality.

We will examine the advantages and disadvantages of mixing in headphones and help you determine whether it is the right approach for you.

Is Mixing In Headphones Worth It

Credit: www.soundonsound.com

Advantages And Disadvantages Of Mixing In Headphones

Mixing in headphones can provide a level of precision and detail that may not be achievable through speakers. However, it can also lead to inaccuracies in the mix due to the lack of depth perception and inaccurate frequency representation. It’s worth considering the advantages and disadvantages before deciding whether to mix in headphones or not.

The debate on whether you should mix in headphones or speakers is one that continues to divide many audio engineers and music producers. While it’s true that listening through speakers gives a better perception of the mix and its dynamics, headphones offer an alternative way of picking up small details that might go unnoticed. But are the advantages of mixing in headphones worth it? And what are the disadvantages? In this blog post, we’ll dive into the benefits and drawbacks of mixing in headphones and help you decide which method works best for you.

Advantages Of Using Headphones For Mixing

Mixing in headphones has certain advantages that can’t be overlooked. Here are some of them:

  • Better isolation: One of the fundamental benefits of mixing in headphones is the isolation that they provide. When you wear headphones, you can eliminate background noise that could otherwise distort your mix. This is especially useful if you don’t have a studio space that’s well-treated acoustically.
  • Precise sound placement: Headphones allow you to accurately pinpoint the sound in the mix, making it easier to balance individual elements and stereo imaging.
  • Transient sounds: Headphones are better at capturing transient sounds like reverb tails, guitar fret noises, and subtle percussion sounds. These details can be easily missed when using speakers, making headphones a valuable tool for capturing small details.
  • Budget-friendly: Good headphones are generally more affordable than high-quality studio monitors, making them a more budget-friendly option.

Disadvantages Of Using Headphones For Mixing

While there are advantages to mixing in headphones, there are also some key disadvantages to consider:

  • Ear fatigue: Listening to music through headphones for extended periods can cause fatigue, which can even lead to hearing damage in more extreme cases. This is something that should be taken seriously, especially if you’re mixing for long hours.
  • Less natural sound: The sound you hear through headphones is not as natural as it would be if heard through speakers. This can lead to an over-emphasis on certain elements like the bass, which may lead to inaccurate mixing decisions.
  • Mix translation: The mix you create in headphones may not translate well to other speaker systems due to the different ways that sound is perceived through headphones versus speakers. This can be problematic if you’re mixing music for different platforms.
  • Limited soundstage: Headphones have a narrow stereo image, meaning it can be difficult to achieve a wide soundstage on a mix.

In conclusion, mixing in headphones can be a valuable tool in the music-making process. However, it’s important to consider the drawbacks and limitations before deciding to rely solely on headphones. Ideally, it’s recommended to use a combination of both headphones and speakers to achieve the best of both worlds.

Is Mixing In Headphones Worth It

Credit: www.amazon.com

Factors To Consider When Mixing In Headphones

Mixing in headphones can be a useful tool for music producers, especially for those who are working in a small home studio. However, there are some factors to consider, such as the type of headphones, frequency response, and the need for reference monitors to ensure accurate sound.

Ultimately, it is up to the individual to decide if mixing in headphones is worth it for their specific needs.

Heading: Factors to Consider When Mixing in Headphones Mixing in headphones has become a popular option for music producers, especially for those working in small home studios. While headphones are an essential tool in every music production setup, you must understand several factors to ensure accurate and reliable mixes. Here are some crucial factors to consider when mixing in headphones. Heading: Headphone Types When it comes to mixing, not all headphones are created equal. There are generally two types of headphones: closed-back and open-back. Closed-back headphones are great for recording since they block out external noise. However, they can be tiresome to wear for long periods. On the other hand, open-back headphones provide more natural sound, but they leak sound and can be distracting to others nearby. Heading: Headphone Response and Accuracy Headphone response and accuracy are essential when mixing in headphones. You must choose headphones that have a flat frequency response to ensure that your mix isn’t biased. Some headphones tend to accentuate lows, mids, or highs, which may mislead you when mixing. Additionally, you need to test your headphones to ensure they are accurate and reliable because many quality control issues tend to arise during headphone production. Heading: Room Acoustics Room acoustics are vital when mixing on headphones. Even the most expensive headphones can’t replicate the natural sound of a room. The sound reflections from your room’s walls and surfaces may affect how your mix sounds. Therefore, it is essential to create an acoustic-friendly environment in your studio. You can accomplish that by using acoustic panels or treating your room with sound-absorbing materials. Heading: Mixing Technique Mixing is an art. You must learn the proper mixing techniques to ensure that your mix translates to other devices and environments. Some of the essential techniques include panning, EQ, compression, and volume levels. You need to understand how to use these techniques to achieve a balanced mix. Additionally, when mixing in headphones, it’s essential to take frequent breaks to relieve ear fatigue, which may affect your mixing judgment. In conclusion, mixing in headphones is worth it when done correctly. Critical listening, proper headphone choice, accurate headphone response, acoustic treatment, and good mixing skills are the keys to achieving accurate and reliable mixes. With these factors in mind, you can create professional-quality mixes in any studio setting.

Tips For Effective Headphone Mixing

When it comes to mixing music, many producers debate whether headphones are worth it. However, with the right techniques and attention to detail, headphone mixing can be just as effective as using studio monitors. By following specific guidelines for EQ, volume, and checking mixes on different systems, you can achieve professional results with headphones.

Effective headphone mixing requires a keen ear and good technical knowledge of audio engineering. Mixing in headphones can be a great option, but it can also lead to inaccurate mixes. Therefore, it is essential to follow some tips to make sure that your headphone mixing produces the right result. In this blog post, we’ll examine the best tips for effective headphone mixing to ensure your mixes sound great on any sound system.

Eq Adjustments

EQ adjustments can make a huge difference in how a mix turns out. However, using headphones for EQ adjustments can cause some issues. Headphones tend to amplify certain frequencies and can lead to an unbalanced mix. To prevent this, you should adjust your EQ settings on a reference system first and then make adjustments with your headphones.

Panning

Panning is the process of distributing audio signals to different channels to create a “soundstage” for the listener. However, panning with headphones can be challenging because the stereo image may not be accurate. To ensure accurate panning, you should always check your mix on a reference system after panning with headphones.

Volume Levels

Volume levels are essential for balanced mix. When using headphones, there may be the temptation to increase the volume because it’s easier to hear. But, overly loud monitoring levels can cause ear fatigue and mask specific frequencies in the mix. Therefore, it is essential to pay attention to your monitoring volume levels to ensure you get the right mix.

Testing On Different Systems

When mastering a mix, it’s important to remember that it’s not only played back on studio systems. It’s also played back on different consumer gear like mobile phones, laptops, and home audio systems. Therefore, it is recommended to test your mix on different systems to ensure it sounds great on any system. In conclusion, following the tips above can help when mixing in headphones, and ensure the accuracy of your mixes. Keep in mind that headphone mixing is not always the optimal solution, but it can be useful if you don’t have the luxury of a proper mixing studio.

Is Mixing In Headphones Worth It

Credit: www.soundonsound.com

Common Mistakes To Avoid When Mixing In Headphones

Mixing in headphones can be a cost-effective option for aspiring producers, but it’s important to avoid common mistakes. These mistakes include relying solely on headphones for mixing, not taking breaks to protect your hearing, and failing to adjust for different types of headphones.

With proper technique, mixing in headphones can be a viable option for creating high-quality music.

Over-reliance On Headphones

Mixing in headphones can be a convenient way to work in a busy environment or during nighttime hours. But relying solely on headphones can lead to some serious mixing mistakes. Mixing in headphones can lead to hearing fatigue and an unnatural stereo image. Headphones generally create a mix that sounds wider than it actually is. It can lead to a setup where the mix sounds great in headphones but falls apart when played back on different sound systems.

Ignoring Reference Speakers

While some producers may use headphones to mix, it’s important not to forget about reference speakers. Using a pair of reference speakers, especially in an acoustically-treated room, gives you an accurate overall representation of your mix. It can help you hear any EQ or frequency issues that cannot easily be heard in headphones. Mixing in reference speakers can also help you get a feel for the stereo image and liveliness of your mix.

Not Taking Breaks

Mixing in headphones for extended periods can lead to hearing fatigue and inaccurate mixing decisions. Taking regular breaks can help your ears rest and allow you to hear the mix with fresh ears. When taking breaks, it’s important to take off your headphones and listen to something else for a while. It can help you reset your ears and prevent hearing fatigue from becoming a long-term issue. In conclusion, mixing in headphones can be a useful tool for music production. It’s important to avoid common mistakes such as over-reliance on headphones, ignoring reference speakers and not taking breaks. With careful attention and a combination of headphones and reference monitors, you can achieve a great mix that sounds fantastic in any environment.

When Headphone Mixing Is Appropriate

For musicians and audio engineers, headphone mixing can be a contentious issue. Some argue that mixing in headphones is never a good idea because headphones cannot replicate the experience of listening to music through speakers. While this is true to an extent, there are times when headphone mixing is not only appropriate but essential.

Working In A Home Studio

If you are working in a home studio, chances are you don’t have access to professional speakers to mix on. While it’s true that you can invest in a good pair of monitors, this can be expensive and not always feasible. In this case, using headphones to mix is a perfectly acceptable option. With headphones, you can hear every element of your mix, from the low-end frequencies to the high-end frequencies. This means you can make informed decisions about balancing the mix and achieving a well-rounded sound.

When Headphone Mixing Is The Only Option

There are times when headphone mixing is the only option. For example, if you are mixing on the go or in a noisy environment, headphones can be your only reliable option. In these situations, it’s important to choose headphones that are specifically designed for mixing. This means choosing headphones that have a neutral frequency response and do not color the sound in any way.

Mixing For A Specific Purpose

Finally, there are times when headphone mixing is preferred, especially when mixing for a specific purpose. For example, if you are mixing music for a podcast or video, you may want to use headphones to ensure that the mix translates well on a variety of devices. Similarly, if you are mixing electronic music or music that relies heavily on stereo panning, headphones can give you a better sense of the stereo field.

Pros of Headphone MixingCons of Headphone Mixing
Ability to hear every detail of a mixLack of ability to replicate the experience of listening through speakers
Useful for mixing on the go or in noisy environmentsMay cause ear fatigue over long periods of time
Can give a better sense of stereo panningMay lead to inaccurate low-frequency balance
  • In conclusion, as long as you understand the limitations of headphone mixing, it can be a useful tool for achieving a well-balanced mix.
  • Whether you are working in a home studio, mixing on the go, or mixing for a specific purpose, headphones can provide valuable insights into your mix.
  • To get the most out of headphone mixing, it’s important to choose headphones that are specifically designed for mixing and to take frequent breaks to avoid ear fatigue.

Tools And Plugins For Headphone Mixing

Discover top-rated tools and plugins for an enhanced headphone mixing experience. Although headphone mixing is convenient, it may not always be the best choice for certain genres or projects.

Mixing in headphones can be challenging because of the audio accuracy, but there are several tools and plugins that were designed to help professionals navigate these challenges. These tools ensure that you can mix audio in headphones efficiently while achieving excellent sound quality.

Virtual Studio Technology (vst) Plugins For Headphone Mixing

VST plugins are software applications that integrate with digital audio workstations (DAWs). They replicate the textures and tones of analog equipment, such as compressors, reverb, and equalizers, making them an essential tool for headphone mixing. VST plugins can help isolate instruments, adjust stereo width, and improve EQ settings. Some of the most popular VST plugins are Waves Abbey Road Studio 3, Sonarworks Reference, and IK Multimedia ARC 3.

Headphone Calibration Tools

Headphone calibration is necessary to ensure your headphone is producing accurate sound. Headphones are designed differently and have different frequency responses, which means each headphone may produce sound differently. Calibration tools ensure that your headphone is giving accurate tonality, transit frequency response, and soundstage for excellent headphone mixing. Some popular calibration tools are Sonarworks Reference 4, Room EQ Wizard, and Sonarworks SoundID Reference.

Conclusion

These tools and plugins significantly help professionals achieve high-quality mixes in headphones. With VST plugins, it is easy to replicate the tones and textures of analog equipment, while calibration tools ensure the headphones produce accurate sound. Whether you are creating music, podcasts, or other audio projects, incorporating these tools and plugins into your workflow will give you the confidence necessary to deliver exceptional results.

Conclusion And Final Thoughts

After examining the advantages and disadvantages of mixing with headphones, it’s safe to say that it’s not the best strategy. Headphones can miss significant parts of the mixes and damage the listener’s hearing. It’s better to use speakers in a sound-absorbing environment to achieve the desired results.

Summary Of The Main Points

In this article, we have discussed whether mixing in headphones is worth it or not. We have explored the advantages and disadvantages of using headphones for mixing. The main points that we have covered are:

  • Mixing in headphones can be beneficial in some situations, such as when there is a noisy environment or when the speakers are not calibrated properly.
  • However, there are also some drawbacks to mixing in headphones, such as the lack of spatial awareness and the potential for ear fatigue.
  • It is important to keep in mind that headphones can be a useful tool for mixing, but they should not be relied upon exclusively.

Personal Advice Regarding Headphone Mixing

As a SEO friendly content writer expert, my personal advice would be to use headphones as a supplementary tool for mixing, rather than relying on them solely. In other words, it is best to use a combination of both headphones and speakers to achieve the best possible mix. When using headphones, it is important to choose a pair that is comfortable and provides accurate sound reproduction. Additionally, it is recommended to take breaks regularly and to mix at lower volumes to prevent ear fatigue. In conclusion, while mixing in headphones can be beneficial in certain situations, they should not replace speakers entirely. Using a combination of both tools can help achieve the best possible mix.

Frequently Asked Questions Of Is Mixing In Headphones Worth It

Should You Use Headphones For Mixing?

Yes, headphones can be a useful tool for mixing, especially when working in a noisy environment or when recording live instruments. However, they should not be relied upon solely for mixing as they lack the physical presence and dynamics of studio monitors.

Headphones also tend to overemphasize bass and lack spatial awareness. It is important to use both headphones and studio monitors to achieve a balanced mix.

Is It Better To Mix On Studio Monitors Or Headphones?

It’s generally better to mix on studio monitors rather than headphones because they provide a more accurate representation of sound. Headphones can exaggerate certain frequencies, causing you to make incorrect mixing decisions. However, using both can provide a more comprehensive mix by identifying flaws in one or the other.

Why Are Speakers Better Than Headphones For Mixing?

Speakers are better than headphones for mixing because they can reproduce a fuller and more accurate representation of the sound. Headphones can be too isolating and may not provide an accurate representation of the stereo image, making it difficult to mix and balance properly.

Speakers allow for a more natural listening experience and a better understanding of how the mix will translate on different playback systems.

Is It Better To Make Beats With Headphones Or Speakers?

Both headphones and speakers have their advantages in making beats. Headphones offer better accuracy in sound, making it easier to hear subtle nuances in the mix. Speakers, on the other hand, provide a more realistic sound experience and allow for better bass mixing.

Ultimately, it’s a matter of personal preference and comfort level.

Conclusion

After considering all the factors, it can be concluded that mixing in headphones can be worth it, but it depends on the purpose and circumstances. For solo productions, mixing in headphones can be efficient and convenient. However, for more complex projects, it’s still recommended to use studio monitors for accurate sound reproduction.

It’s necessary to use quality headphones and take breaks to avoid ear fatigue and hearing damage. Whether or not mixing in headphones suits your needs is a case-by-case decision.

More in our Headphones & monitors guide.

Categories
Archive

Leapwing Al Schmitt Plugin Review

The Leapwing Al Schmitt Plugin is a high-quality mixing tool that provides exceptional sound clarity and control. It is a game-changer for vocal mixing and perfect for any audio engineer looking to enhance their mixing capabilities.

Audio enthusiasts, engineers, producers, and gear lovers have long-awaited the arrival of this audio plugin, which has been designed to cater to the needs of music professionals and enthusiasts seeking top-quality mixes. Its release has sparked interest and excitement in the music industry, and many are already singing its praises.

The plugin boasts a range of unique features that make it stand out from other plugins in the market, making it a must-have for both beginners and professionals. This review provides a detailed analysis of the Leapwing Al Schmitt Plugin, outlining its features, performance, and benefits.

Leapwing Al Schmitt Plugin Review

Credit: mixdownmag.com.au

Features Of Leapwing Al Schmitt Plugin

Leapwing Al Schmitt Plugin provides a range of dynamic features for mix engineers, including expertly crafted presets for vocals, drums, and guitars. With its ability to add air and richness to audio recordings, this plugin is a popular choice for those who wish to master their craft.

Leapwing Al Schmitt is a powerful mixing and mastering plugin that has been designed to provide seamless audio processing for every audio engineer. With its advanced features, the plugin provides a new way of delivering a smooth, polished mix. Its features include advanced microphone positioning options, tailored EQ settings, adjustable stereo width and depth, real-time dynamic processing, and precise analog emulation. Let’s take a closer look at each of these features.

Advanced Microphone Positioning Options

Leapwing Al Schmitt offers a unique microphone positioning feature that allows you to replicate the sound of recording in different spaces. The plugin provides four different microphone positions: Close, Mid, Far, and Alternate. Each of these positions has been optimized for capturing sound in a specific location. With this feature, you can add depth, width, and ambiance to your mix.

Tailored Eq Settings

Leapwing Al Schmitt plugin has tailored EQ presets that help you clean up and enhance the sound of your mix. With its EQ settings, you can reduce harsh sound, boost the low-end frequencies, or even add sparkle to your mix. The plugin allows you to apply EQ settings to individual tracks or your entire mix, making it an indispensable tool for every mixing engineer.

Adjustable Stereo Width And Depth

With the adjustable stereo width and depth feature, Leapwing Al Schmitt plugin allows you to create a 3D soundstage by adjusting the stereo field of your mix. This feature helps you balance the panning of your tracks, and at the same time, enhance the width and depth of your mix. As a result, your music will sound more cohesive and compelling to the listener.

Real-time Dynamic Processing

Leapwing Al Schmitt plugin provides real-time dynamic processing that allows you to compress, limit, or de-ess your audio tracks. This feature ensures that your mix is always balanced and optimized for all playback systems. With real-time processing, you can fine-tune your mix and achieve a polished sound without tedious post-production editing.

Precise Analog Emulation

Finally, Leapwing Al Schmitt plugin provides precise analog emulation, ensuring that your mix has a warm, rich, and natural sound. With its meticulous attention to detail, the plugin is designed to replicate the characteristics of high-end analog equipment. As a result, your mix will sound more authentic, and your listeners will enjoy a better quality of music. In conclusion, the Leapwing Al Schmitt plugin is a versatile tool that provides the features every mixing engineer needs to create a polished and professional sound. Whether you’re working on a film score or a pop album, this plugin is sure to deliver the results you need. Try it out and see for yourself!

Installation And Setup

The Leapwing Al Schmitt plugin is a powerful tool for audio engineers and producers, offering easy installation and setup for a seamless workflow. Its intuitive interface and high-quality processing make it a valuable addition to any studio setup.

Installation and Setup: Leapwing Al Schmitt Plugin Review In the world of audio engineering, plugins have been a game-changer. They offer audio engineers the opportunity to enhance and polish their mixes with just a few clicks. One such plugin that has been making rounds is the Leapwing Al Schmitt Plugin, named after the legendary engineer Al Schmitt. In this review, we will focus on the installation and setup of the plugin to help you get started with it.

System Requirements

Before installing any plugin, it’s crucial to check if your system meets the hardware and software requirements. The Leapwing Al Schmitt Plugin runs on both Mac and Windows operating systems. It requires a minimum of 4GB RAM and a 2GHz processor. Moreover, the plugin requires 64-bit operating systems. Ensure your system meets these specifications to avoid any compatibility issues.

Plugin Activation

To install the Leapwing Al Schmitt Plugin, you need to purchase it from the Leapwing Audio website. After purchasing the plugin, you will receive an email with an activation code. Open your DAW and follow these steps:

  1. Click on the plugin menu, select the Leapwing Al Schmitt Plugin and drag it to your channel strip.
  2. Enter the activation code you received via email.
  3. Authorize the plugin via iLok, a digital rights management platform.
  4. Restart your DAW to complete the installation process.

Compatibility With Different Daws

The Leapwing Al Schmitt Plugin is compatible with various Digital Audio Workstations (DAWs). Here are some of the DAWs that support it:

  • Pro Tools
  • Logic Pro X
  • Ableton Live
  • Nuendo
  • Cubase
  • Studio One
  • Reaper
  • FL Studio
  • and many more.

Ensure your DAW is listed as a compatible software before purchasing the plugin.

How To Use The Plugin

Once you have installed the Leapwing Al Schmitt Plugin, you can begin using it. The plugin has four sections: EQ, Compression, Harmonics, and Saturation. Each section has various controls that allow you to fine-tune your mix.

  • EQ – You can use this section to adjust the EQ, Low and high-pass filter, and the shelf filter.
  • Compression – This section has a compressor with ratio, threshold, and attack and release controls. You can also adjust the mix of the wet and dry signal.
  • Harmonics – This section allows you to add or reduce the even or odd harmonics in your mix.
  • Saturation – You can use this section to add warmth and character to your mix.

In conclusion, the Leapwing Al Schmitt Plugin is a great addition to any engineer’s toolkit. Its user-friendly interface and intuitive controls make it easy to use. It’s compatible with various DAWs and offers you the opportunity to fine-tune your mixes efficiently.

Sound Quality

The Leapwing Al Schmitt Plugin provides unparalleled sound quality, bringing a professional grade recording experience right to your home studio. Experience the difference of industry-leading technology in your music production with this plugin.

When it comes to high-end mixing tools, Al Schmitt is a name that immediately comes to mind. The legendary engineer has won a mind-boggling number of Grammy awards and produced countless classic albums over his long and storied career. It’s no surprise then that when a plugin bears his name, it is expected to deliver. The Leapwing Al Schmitt Plugin is no exception. With a suite of processing tools designed to emulate the sound of Al’s famous mixing console, this plugin promises to bring a touch of his magic to your own productions. But does it live up to the hype? Let’s take a closer look at the sound quality.

Before And After Comparison

The best way to evaluate the sound quality of any plugin is to compare the audio with and without the processing applied. In the case of the Leapwing Al Schmitt Plugin, the difference is immediately apparent. The before and after comparison reveals a depth and dimensionality to the sound that was previously missing. The separation of the individual elements within the mix is clearer, while the overall tone is warmer and more natural. It’s as if a veil has been lifted from the speakers.

Expert Opinion

Of course, it’s not just our own ears that we can trust to evaluate the sound quality. The opinions of industry experts carry weight too. Al Schmitt himself has given his seal of approval to the plugin, commenting that “every time I use it, I’m amazed at how great it sounds.” High praise indeed.

User Reviews

But what about everyday users? Do they share the same enthusiasm for this plugin? The user reviews overwhelmingly tip the scales in favor of the plugin. Users have praised its easy-to-use interface and the improvement in sound quality that they’ve achieved with it. One user writes, “It’s like having Al Schmitt come and mix your tracks for you!” In conclusion, the Leapwing Al Schmitt Plugin certainly lives up to expectations when it comes to the sound quality. The combination of processing tools and Al Schmitt’s expertise has created a plugin that brings a professional touch to mixing for producers, engineers, and music makers of all levels.

Leapwing Al Schmitt Plugin Review

Credit: headlinermagazine.net

User Experience

The Leapwing Al Schmitt Plugin is a versatile plugin that caters to any user’s needs. Its user-friendly interface and customizable settings make it an effective way to enhance the audio quality without any hassle.

Plugin Interface And Controls

The plugin interface of Leapwing Al Schmitt is simple and intuitive. Upon installation, users can easily access the plugin, and its controls are straightforward. There is no need for any complex settings or adjustments, as the plugin interface is self-explanatory.

User-friendly Navigation

The plugin navigation system is uncomplicated, with everything laid out clearly for users to navigate. The user-friendly design makes it easy to find the specific settings required for a particular audio project. Users can browse through different options and presets to get the desired sound quality effortlessly.

Customizable Settings

Leapwing Al Schmitt Plugin comes with customizable settings, ensuring that each user can personalize their experience to suit their needs. Users can easily adjust different parameters such as compression, EQ, and other audio enhancements, without any difficulty.

H3 HeadingsHTML Syntax
Plugin interface and controlsPlugin interface and controls
User-friendly navigationUser-friendly navigation
Customizable settingsCustomizable settings
  • The Leapwing Al Schmitt Plugin is user-friendly and easy to use.
  • The plugin interface and controls are straightforward and intuitive.
  • Users can easily navigate through the plugin options.
  • The plugin comes with customizable settings that allow users to personalize their audio projects.
  • Leapwing Al Schmitt Plugin is an effective way to enhance audio quality without any hassle.

The Leapwing Al Schmitt Plugin is a must-have for any audio producer, sound designer, or audio engineer looking to enhance their audio quality and experience. Its user-friendly interface, straightforward navigation, and customizable settings make it a versatile and powerful tool for any audio project.

Leapwing Al Schmitt Plugin Review

Credit: musictech.com

Frequently Asked Questions Of Leapwing Al Schmitt Plugin Review

What Is The Leapwing Al Schmitt Plugin?

The Leapwing Al Schmitt Plugin is an audio plugin designed to bring Grammy-winning audio engineer Al Schmitt’s mixing techniques to your own recordings.

How Does The Al Schmitt Plugin Work?

The Al Schmitt Plugin works by using Schmitt’s preferred settings for EQ, compression, and more, allowing you to achieve a similar sound to his legendary mixes.

What Are The Key Features Of The Al Schmitt Plugin?

The Al Schmitt Plugin features EQ, compression, limiting, and harmonic distortion controls, all designed to give recordings a warm, analog sound.

Can The Al Schmitt Plugin Be Used On Any Kind Of Audio Recording?

Yes, the Al Schmitt Plugin can be used on any kind of audio recording, including vocals, instruments, and full mixes.

Conclusion

Overall, the Leapwing Al Schmitt plugin is a game-changer for anyone looking to take their mixing to the next level. With its AI-powered technology, it can help you achieve the sound you’ve been dreaming of with ease. The intuitive interface and realistic emulations of Al Schmitt’s iconic hardware make it an excellent investment for professionals and music enthusiasts alike.

By using this plugin, you can save both time and money while creating high-quality, polished tracks that will stand out in today’s competitive music industry. Don’t hesitate to try out this amazing plugin for yourself and elevate your mixing skills to new heights.

Categories
Archive

How Does Music Marketing Work

Music marketing works by promoting and selling music to a targeted audience through various channels and tactics. It involves building awareness, creating interest, generating demand, and ultimately driving sales and revenue for the music industry.

Music marketing is a vital component of the music industry, as it allows artists and labels to reach their target audiences effectively. By using various marketing tactics such as social media, email marketing, live events, and collaborations with key influencers, music marketers can connect with fans and create engagement with their creations.

The ultimate goal of music marketing is to drive sales and increase revenue by promoting the music to the right people at the right time. We will explore the different aspects of music marketing and how it works in today’s digital era.

Targeting A Specific Audience

Music marketing is a crucial element in the music industry, allowing musicians to promote their music to a wider audience. But how does music marketing work? One important aspect of music marketing is targeting a specific audience. Identifying a target audience and customizing marketing strategies can help musicians reach their desired audience and achieve their goals.

Identifying A Target Audience

Before starting a music marketing campaign, it is important to identify a target audience. This includes analyzing demographics, interests, and behaviors of potential fans. By knowing the target audience, musicians can create targeted and effective marketing strategies that resonate with their audience and increase engagement.

Audience DemographicsInterests and Behaviors
AgeFavorite music genres
GenderOnline behavior and social media usage
LocationConcert attendance behavior

Customizing Marketing Strategies

Once the target audience is identified, musicians can customize their marketing strategies to reach them effectively. This includes utilizing social media platforms, creating engaging content, and utilizing influencer marketing. By customizing marketing strategies, musicians can increase their online presence and build a strong connection with their audience.

  • Utilize social media platforms such as Twitter, Instagram, and YouTube to reach the target audience.
  • Create engaging content such as music videos, behind-the-scenes footage, and interviews to increase engagement.
  • Partner with influencers in the music industry to promote the music to a wider audience.

In conclusion, targeting a specific audience is an essential component of music marketing. By identifying and understanding their target audience, musicians can use customized marketing strategies to connect with their audience and achieve their goals.

How Does Music Marketing Work

Credit: soundcamps.com

Using Social Media

Music marketing on social media involves creating a strong brand image and engaging with the target audience through various platforms. This can be done by promoting music releases, sharing behind-the-scenes content, and collaborating with influencers and other artists. Utilizing targeted ads and analytics to track engagement is also key in the success of music marketing on social media.

Using Social Media Social media has become an integral part of our daily lives. From checking news updates to contacting friends and family, social media has made our lives easier. But, did you know that social media can also be a valuable platform for music marketing? In this section, we’ll explore how you can create a strong social media presence and engage with your followers to promote your music. Creating a Strong Social Media Presence To promote your music on social media, it’s essential to have a strong social media presence. This means creating a profile on various social media platforms such as Facebook, Twitter, Instagram, and others. Your profile should be engaging and must communicate your brand message clearly. When creating a social media profile for your music, consider the following tips:

  • Use a profile photo that accurately represents your brand.
  • Write a bio that details your music and what you have to offer.
  • Create a color scheme to make your brand more recognizable.
  • Add a call-to-action in your profile description to encourage your followers to take action, such as streaming your music or subscribing to your channel.
  • Make sure that all your handles and URLs are the same across all your social media profiles for consistency.

Engaging with Followers Engaging with followers is essential for growing your social media presence and promoting your music. By engaging with your followers, you can build a loyal fan base and create more buzz around your music. Here are some tips to engage with followers:

  1. Create a content calendar and share your posts regularly.
  2. Use social media analytics to determine the best time to post and reach a larger audience.
  3. Host a Q&A session to interact with your fans and answer their questions.
  4. Share behind-the-scenes content such as rehearsals and recording sessions to give your followers a glimpse into your creative process.
  5. Use user-generated content to promote your music. Share content from your followers that features your music, and encourage them to continue sharing.

In conclusion, social media can be a powerful tool for music marketing if used effectively. By creating a strong social media presence and engaging with your followers, you can promote your music to a vast audience and build a loyal fan base.

Collaborating With Influencers

Collaborating with influencers is a powerful tool in music marketing. By partnering with popular social media personalities, musicians can reach new audiences and engage with fans in a more personal way. These influencers can promote music through sponsored posts, live events, and other creative collaborations.

One of the most effective ways to build brand recognition and drive sales in the music industry is by collaborating with influencers. Influencers are people who have a large following on social media and can help to promote your brand to their audience. In this section, we will discuss how to find the right influencer for your music marketing campaign, negotiate partnerships, and ensure that your collaborations are successful.

Finding The Right Influencer

The first step in collaborating with influencers is to find the right person for your campaign. You want to look for influencers who have a large following in your target demographic and whose interests align with your brand. You can use social media tools such as Social Blade to research potential influencers and analyze their reach and engagement rates. When looking for influencers, it’s important to consider the type of content they produce and ensure that it aligns with your brand values. For example, if you are promoting rock music, you want to collaborate with influencers who have an interest in the genre and have a following of rock music fans.

Negotiating Partnerships

Once you have identified potential influencers, the next step is to reach out to them and negotiate partnerships. Influencers are often paid for their services, but the amount will depend on several factors such as their reach, engagement rates, and the scope of work involved. It’s important to be clear about your expectations and the responsibilities of each party. This includes the type of content the influencer will create, how often it will be posted, and the timeline for delivery. You should also agree on the payment method and ensure that you have a signed agreement in place before starting the collaboration.

Ensuring Successful Collaborations

To ensure that your collaboration with influencers is successful, you need to track the results and analyze the impact on your marketing campaign. You can use tools like Google Analytics to track website traffic, social media engagement, and sales. It’s important to have clear metrics in place to measure the success of your campaign and adjust your strategy accordingly. You should also stay in touch with your influencers and provide them with any necessary support throughout the campaign. This includes answering questions, providing feedback, and sharing their content on your social media channels. By building a good working relationship with your influencers, you can create a successful long-term partnership that benefits both parties. In conclusion, collaborating with influencers is a powerful way to promote your music brand to a broader audience and increase sales. By finding the right influencer, negotiating partnerships, and ensuring successful collaborations, you can create a successful music marketing campaign that delivers results.

How Does Music Marketing Work

Credit: rosswilsondrmetal.wordpress.com

Utilizing Streaming Platforms

Streaming platforms have transformed how music marketing works, giving artists the power to reach a worldwide audience like never before. By utilizing platforms like Spotify, Apple Music and Tidal, artists can reach fans directly with their latest releases, engage listeners through exclusive content and expand their fanbase using precise targeting algorithms.

Utilizing Streaming Platforms In today’s digital world, the music industry is rapidly evolving, and streaming platforms like Spotify, Apple Music, and Amazon Music have become the most significant channels for music marketing. Streaming platforms have revolutionized the way music is consumed worldwide, and music marketing strategies have evolved to utilize these platforms to reach a wider audience. If you are a musician, you need to have a solid strategy to promote your music on these platforms to reach your fans and grow your audience. Making music available on streaming platforms The first step in utilizing streaming platforms is to make your music available on them. To do this, you need to distribute your music to these platforms through a digital distributor. Examples of digital distributors include DistroKid, CD Baby, and TuneCore. These companies can help you upload your music to several streaming platforms around the world, ensuring that your music is available to all your potential listeners. Optimizing streaming platform profiles Once your music is available on these platforms, the next step is to optimize your streaming platform profiles. This means that you need to ensure that your profile is up-to-date and appealing to your potential listeners. Here are a few things you can do to optimize your streaming platform profiles: 1. Add a professional-looking profile picture. 2. Write an informative and compelling bio that tells your story and gives your listeners a reason to follow you. 3. Add links to your official website and social media accounts. 4. Create and share your playlists with your fans. By doing these things, you can provide your audience with a good user experience and encourage them to engage with your music. Utilizing streaming platforms is a crucial aspect of music marketing, and with the right strategy, you can increase your audience and grow your fan base. By making your music available on these platforms and optimizing your profiles, you can ensure that your music reaches your potential listeners and stands out in a crowded and competitive market.

Designing Compelling Visuals

Designing compelling visuals is crucial for music marketing success. Eye-catching graphics, engaging videos, and attention-grabbing album covers are all essential elements of a successful music marketing campaign. With effective visuals, musicians can connect with their audience and leave a lasting impression.

Designing compelling visuals is one of the crucial aspects of music marketing. It involves creating visual content that not only catches the attention of the audience but also conveys the artist’s message effectively. In today’s fast-paced digital world, where people often have limited attention spans and are bombarded with a constant stream of content, making stunning visuals is essential to stand out from the crowd. Creating album artwork and music videos: Album artwork and music videos are the primary visual assets of an artist, representing the creative expression of their music. It’s essential to create visuals that are unique and eye-catching, reflecting the artist’s values and style. Album artwork must be creative and visually appealing to entice people to click and listen. Similarly, music videos play a critical role in creating a lasting impression on the audience’s minds, showcasing the artist’s personality and creativity. Designing visuals for social media: Social media has become one of the most important marketing channels for musicians today. According to a survey, 70% of people discover new music on social media platforms. Designing visuals for social media platforms like Instagram, Twitter, and Facebook is crucial to capture the audience’s attention. Every social media platform caters to a different audience, and therefore, it’s important to create custom visuals tailor-made for each platform. To create visuals for social media, it’s important to keep in mind the dimensions, resolution, and format of each platform. Instagram, for example, allows users to upload square images and videos, while Facebook mostly prefers the landscape format. Therefore, designers should create visuals that are optimized for each platform and align with the artist’s branding. In conclusion, designing compelling visuals is a crucial component of music marketing, and it can significantly impact an artist’s success. From album artwork to social media visuals, each element should be designed to captivate the audience’s attention and convey the artist’s message effectively. The visuals are what draw people in and keep them connected to the music.

Hosting Live Events

Live events are an excellent way to promote music through marketing. By bringing artists together on stage, live events offer an opportunity for musicians to expand their fan base and reach new audiences. Hosting live events can help to drive interest in an artist’s work and build a following.

Live events are an effective way to promote music and engage with fans. Hosting live events is an integral part of music marketing. Whether it’s a small gig, an album launch or a large-scale music festival, live events can create a buzz and generate interest among fans. Here’s how musicians and record labels can organize concerts and shows and collaborate with other artists to maximize the benefits of music marketing.

Organizing Concerts And Shows

Organizing concerts and shows is a great way for musicians to reach new fans and increase their visibility. It requires careful planning and execution to create a memorable experience for the audience. Here are some steps to follow when organizing concerts and shows:

  1. Choose the right venue that suits the genre and target audience of the performance.
  2. Promote the event through various channels such as social media, email marketing, and posters.
  3. Ensure that the sound system, lighting, and other technical arrangements are in place.
  4. Offer VIP passes, merchandising, and other incentives to increase the revenue from the event.
  5. Collect feedback and reviews from the audience to improve the quality of future events.

Collaborating With Other Artists

Collaborating with other artists can add a new dimension to music marketing and increase the fan base. It can also create opportunities for cross-promotion and create a buzz among the audience. Here are some tips for collaborating with other artists:

  • Choose artists who complement the style and genre of the music.
  • Participate in joint concerts and shows to tap into each other’s fan base.
  • Create new music and leverage the collaborative effort to promote the music.
  • Offer value-added services such as meet and greets, backstage passes, and joint merchandise to incentivize fans.
  • Collaborate with other artists on marketing campaigns like social media takeovers, interviews, and guest posts to reach a wider audience.

In conclusion, hosting live events is an essential aspect of music marketing. It requires careful planning, execution, and collaboration with other artists. By following the best practices outlined in this article, musicians and record labels can leverage the power of live events to promote their music, reach new audiences, and build a loyal fan base.

Leveraging Public Relations

Music marketing is an essential aspect of promoting music to the masses and expanding your reach as an artist or music industry professional. One effective way to market music is by leveraging public relations to grab the attention of journalists, music bloggers, and other media outlets. PR can help you build brand awareness, generate buzz, and ultimately lead to more exposure and sales for your music.

Writing Press Releases And Pitches

Press releases and pitches are the backbone of any successful PR campaign. A press release is a written statement that highlights an event, product launch, or other news-worthy item and is distributed to various media outlets. A pitch, on the other hand, is a personalized message that you send to a journalist or blogger in hopes of getting them to cover your story or review your music.

  • Include a captivating headline that grabs attention and promises something newsworthy.
  • Write a concise and engaging summary that provides the most important details upfront.
  • Use quotes and other supporting details to make your release or pitch more compelling.
  • Be sure to proofread and edit your materials before sending them out.

Reaching Out To Music Journalists

The key to successful music PR is connecting with the right journalists who are interested in covering your story or music. Here are some tips for reaching out to music journalists:

  • Research your target journalists to find out what they typically cover and what kind of stories they are interested in.
  • Personalize your pitch by addressing the journalist by name and tailoring your message to their interests.
  • Follow up politely and professionally to make sure your message was received and to answer any questions they may have about your music or story.
  • Be patient and persistent. It may take several attempts to get the attention of a journalist, but don’t give up.

Leveraging public relations can be an effective way to promote your music and build your brand. By crafting compelling press releases and pitches and reaching out to music journalists, you can get your music in front of more people and increase your chances of success in the competitive world of music.

Measuring Success

Music marketing success can be measured through increased album sales, social media engagement, and brand partnerships. With strategic digital marketing campaigns and targeted audience segmentation, music artists can effectively reach and connect with their fans, ultimately driving business growth.

Using Metrics To Track Progress

Music marketing success is measured by several metrics, including website traffic, views, engagement rates, and more. The most commonly used metrics are sales and revenue, but other KPIs (Key Performance Indicators) are used to track progress. With the help of analytic tools like Google Analytics, it’s easy to track user behavior, page views, and conversion rates to see which marketing strategies work and which don’t.

Adjusting Strategies Accordingly

Marketing strategies must be adjusted according to the metrics tracked to ensure that they’re effective. Music marketers must consistently analyze data to find where they can improve their strategies to achieve the best results. Adjustments may include changes to social media platforms, email marketing campaigns, or content marketing efforts. The goal is to maximize engagement levels, improve traffic, drive sales and revenue, and reduce customer churn. Tracking and adjusting music marketing strategies is a continuous process. By analyzing results and improving the strategies based on the data, music marketers can achieve their goals and objectives. It’s part of building a sustainable brand that continues to engage and inspire fans over the long term. Success in music marketing depends on how well you can measure and adjust your strategies based on data, so stay focused on the metrics, and don’t be afraid to keep tweaking your efforts until you get the right results!

How Does Music Marketing Work

Credit: www.youtube.com

Frequently Asked Questions Of How Does Music Marketing Work

What Are The 4 P’s Of Music Marketing?

The 4 P’s of music marketing are Product, Price, Promotion, and Place. These elements help musicians develop and execute their marketing strategies to target their audience effectively. Product refers to the music itself, while Price refers to the cost of the music.

Promotion involves advertising and publicity, and Place concerns the distribution of the music.

How Do You Market Music Properly?

Properly marketing music requires targeted advertising on social media and other platforms, creating a strong online presence through regular content creation and engagement with fans, networking with industry professionals, using email marketing to connect with fans and promote upcoming events, and collaborating with influencers and other artists to expand audience reach.

How Does Taylor Swift Market Herself?

Taylor Swift markets herself through extensive social media presence, strategic collaborations with brands, targeted mailers, interactive websites, releasing teasers and behind-the-scenes footage, fan engagement, and live performances/concert tours.

How Much Does Music Marketing Cost?

The cost of music marketing varies greatly depending on the scope of the campaign. A DIY campaign may cost next to nothing, while working with a professional team could cost thousands of dollars or more. Factors like advertising, PR, social media, and content creation all contribute to the cost.

Conclusion

As we conclude, music marketing is a complex process that involves a targeted approach to reach potential listeners effectively. It requires a comprehensive understanding of the industry trends and a creative mindset to develop unique and compelling marketing strategies. With the right mix of techniques, tools, and a solid understanding of your audience, you can get your music heard and build a successful career as a musician.

Remember, it takes time, dedication, and patience to see results of your hard work and effort. Keep creating, sharing, and engaging with your fans to take your music to the next level.

Categories
Archive

Additive Eq Vs Subtractive Eq

Additive and subtractive equalization are two different methods of adjusting the frequency response of an audio signal. Additive EQ increases specific frequencies, while subtractive EQ cuts them.

EQ is an essential tool for audio engineers to shape sounds to fit the mix. Additive EQ involves boosting specific frequencies that are lacking in the original sound to improve the overall balance. In contrast, subtractive EQ involves cutting frequencies that are overpowering or clash with other elements in the mix.

Both methods have their place and can be used together for an even more precise final result. Moreover, each method requires a different approach; additive EQ requires careful consideration and subtle boosts, while subtractive EQ requires a critical ear and careful cuts. Ultimately, the goal of EQ is to create a balanced and polished sound that accurately represents the artist’s vision.

Additive Eq Vs Subtractive Eq

Credit: crashwaggonmusic.com

How Does Additive Eq Work?

Additive EQ and Subtractive EQ are two common types of equalizers used in music production. Additive EQ works by boosting frequencies to achieve a desired sound, while Subtractive EQ removes unwanted frequencies. Additive EQ can be useful for adding depth and character to a mix, but must be used carefully to avoid overloading the sound.

Additive EQ is a popular technique for equalizing sound because it allows you to boost the frequencies of an audio track without reducing others. Using the EQ controls, you can efficiently target specific areas of the sound spectrum, and add desired tonal qualities to the track to refine the music. In this post, we will delve into how Additive EQ works and how it can improve sound quality.

Boosting Frequencies

Additive EQ gives you control over the sound by increasing volume in certain frequency ranges. In simpler terms, by boosting the lower end of the bass levels, you can give more authority to drum, bass, or guitar tracks for added ‘punch.’ Similarly, boosting the higher end of the spectrum can enhance clarity and presence of vocals, tambourines, cymbals, or acoustic guitars. You can boost multiple frequency ranges together or individually, depending on your intentions and what sounds best to you. Use the EQ controls to shape the melody you want to highlight and boost them accordingly.

Adjusting Gain

Additive EQ is useful for targeting a specific frequency area for sound correction or enhancing tonality. With its finer granularity, you can boost or reduce up to a decibel for precise tuning. This helps in adjusting gain and accurately balancing the overall sound. Moreover, with Additive EQ, you can combine several frequency bands to create a custom EQ curve so that you get the exact sound you want.

Improving Sound Quality

Additive EQ can contribute to improving audio quality and making it sound smoother and more professional. EQ can cover up flaws of a recording, such as dull, muddy, or harsh sounds, and make it sound crisper and clearer. With Additive EQ, you can add a rich, full and more detailed sound to the track by boosting or adding desired tonal qualities. This helps to improve the overall sound quality, while making specific instruments or vocals more prominent in the mix. In conclusion, Additive EQ is an effective tool for sound equalization, especially when you want to achieve more precise and accurate tuning. With this technique, you can selectively boost frequencies and adjust the gain to enhance the overall sound quality. It’s a valuable approach to take your audio mixing skills to the next level and produce professional-sounding music.

How Does Subtractive Eq Work?

HTML response:

Subtractive EQ is one of the most versatile and effective ways to tweak audio levels in recording or mixing. It works by removing specific frequencies from an audio waveform, adjusting the sound and making it more polished and refined. Subtractive EQ is opposite to Additive EQ, which involves boosting certain frequencies to enhance the sound. Here, we will discuss the working of Subtractive EQ and its applications in various audio engineering contexts.

Cutting Frequencies

Cutting frequencies involves removing the problematic frequency ranges that can muddy the audio or make it less clear. In Subtractive EQ, the sound engineer identifies the offending frequencies and cuts them out to improve the sound quality. This process is particularly useful in live sound and recording, where unwanted sounds or top-end brightness can be a problem. For instance, if the audio track has too much bass, the sound engineer can remove some of the low frequencies to balance the audio.

Reducing Gain

In recording and mixing, gain refers to the level of amplification that is applied to the audio signal. Subtractive EQ can help in the case of overamplified, shrill or distorted audio. The sound engineer can reduce the gain on specific frequency ranges to get a well-defined and polished audio signal. Similarly, the reduction of gain can facilitate better blending with other tracks in a mixing scenario.

Removing Unwanted Noise

Subtractive EQ is extremely useful in removing unwanted noise from an audio track. In this case, the sound engineer identifies the frequency range where noise is present and cuts these frequencies out, resulting in a clean audio signal. This technique is commonly used in post-production, especially for podcasts, where background noise can make listening difficult. The technique can also be used in live sound where it can eliminate offending sounds such as feedback or hum.

In conclusion, Subtractive EQ is an essential tool for audio engineers to polish and refine audio signals. With the ability to cut frequencies, reduce gain and remove unwanted noise, sound engineers can determine the problematic elements in an audio track and rectify them in real-time. This technique has applications in live sound, post-production, mixing, and mastering, making it the go-to process for most professionals in the audio industry.

Comparison Of Additive Eq And Subtractive Eq

Additive EQ adds frequencies to a mix, while subtractive EQ removes them. Additive EQ is better for boosting weak or dull tracks, while subtractive EQ is ideal for cleaning up harsh or muddy sounds. Both techniques have their strengths and are useful for different situations.

Whether you are a beginner or an advanced audio engineer, it is essential to understand the differences between additive EQ and subtractive EQ to make the most of these powerful mixing tools. While both approaches aim to enhance or correct the frequency balance of a track, they have different strengths and weaknesses that can affect the overall sound and tone of the music.

Advantages Of Additive Eq

Additive EQ is a technique used to boost or increase the level of specific frequencies in a mix to achieve a desired sound. It is often used in conjunction with subtractive EQ to produce a well-balanced mix. The advantages of additive EQ include:

  • Ability to add richness and warmth to a track
  • Can bring out hidden or subtle details in a mix
  • Allows for creative experimentation and sound design
  • Can help to reduce masking or frequency conflicts between instruments

Advantages Of Subtractive Eq

Subtractive EQ, on the other hand, is a method of reducing or cutting problematic frequencies in a mix. It is used to remove unwanted or harsh sounds that can negatively impact the overall mix. The advantages of subtractive EQ include:

  • Reduces frequency conflicts and improves clarity of individual instruments
  • Eliminates resonances and ringing that can cause ear fatigue
  • Can reduce harshness or muddiness in a track
  • Helps to create a more natural and balanced mix

Limitations Of Additive Eq

While additive EQ can help to improve the overall sound of a track, it does have some limitations. These include:

  • Can easily result in over-processing or too much gain, leading to distortion or unwanted artifacts
  • May not be effective in fixing underlying issues in a mix, such as poor recording quality or improper mic placement
  • Can create phase issues or comb filtering that can affect the stereo image

Limitations Of Subtractive Eq

Similarly, subtractive EQ also has some limitations, including:

  • May result in a thin or weak sound if too much reduction is applied
  • Can create phase issues or comb filtering if too many cuts are made
  • May not be effective in fixing underlying issues in a mix, such as poor recording quality or improper mic placement
  • Can result in a dull or lifeless sound if not used in conjunction with additive EQ

In conclusion, both additive EQ and subtractive EQ are important tools in the audio engineer’s toolkit. By using them effectively and understanding their strengths and limitations, you can bring out the best in a mix and create a dynamic and compelling sound.

Additive Eq Vs Subtractive Eq

Credit: joeysturgistones.com

When To Use Additive Eq?

As a content creator, it’s important to have a good understanding of additive and subtractive EQ. Additive EQ adds frequency to a sound, making it brighter or warmer, while subtractive EQ removes frequency to make it less bright or warmer. There are times when you’ll want to use additive EQ, and certain scenarios in which it can be particularly effective.

Examples Of Additive Eq

  • Boosting vocals – When mixing vocals, it’s important to make sure they stand out from the other instruments in the mix. Boosting the midrange frequencies slightly with an additive EQ can give the vocals a clarity that they otherwise might not have.
  • Fattening up a kick drum – When mixing drums, the kick drum is often one of the most important elements. Adding some low-end boost via an additive EQ can help to give the kick more weight, and help it to cut through the mix effectively.
  • Brightening up cymbals – In a drum mix, cymbals can sometimes get lost in the mix. A boost in the high-end frequencies via an additive EQ can help to give them the clarity they need to sit nicely in the mix.

These are just a few examples of the types of scenarios in which additive EQ can be particularly effective. The key is to always listen to the track you’re working on and make adjustments accordingly. While there are certainly times when subtractive EQ is necessary for cleaning up a mix, there are also plenty of times when adding a bit of frequency can help to give a track that extra little bit of magic.

When To Use Subtractive Eq?

When it comes to audio mixing, equalization (EQ) is an essential tool to produce great sounds. There are two types of EQ: additive (boosting) and subtractive (cutting). While additive EQ adds certain frequencies, subtractive EQ removes them. This article will focus on the latter and when you should use it.

Examples Of Subtractive Eq

Subtractive EQ can be useful in various scenarios. Here are some examples:

Removing Boomy Frequencies In Bass Instruments

A common problem with bass instruments, such as drums and bass guitars, is that they can produce too many low frequencies, making them sound boomy. To fix this, you can use subtractive EQ to cut some of these frequencies, making the sound tighter and less muddy.

Reducing Harshness In Vocal Tracks

Sometimes, vocal tracks can have frequencies that sound harsh to the ears. This can be due to recording equipment, microphone placement, or poor room acoustics. By using subtractive EQ, you can remove some of these harsh frequencies, improving the overall sound quality.

Lessening Clashing Frequencies In Mixes

When you mix multiple instruments and sounds, there can be clashes between certain frequencies. This can result in an unpleasant listening experience, where some sounds dominate over others. By using subtractive EQ, you can identify and cut these clashing frequencies, allowing all the instruments to shine and have their own sonic space.

In conclusion, subtractive EQ is a powerful tool that can greatly improve your audio mixes. Knowing when to use it and in what scenarios can help you achieve a clear and balanced sound that is a joy to listen to.

Additive Eq Vs Subtractive Eq

Credit: joeysturgistones.com

Frequently Asked Questions Of Additive Eq Vs Subtractive Eq

What Is Additive And Subtractive Eq?

Additive EQ adds frequency to improve the sound quality, while subtractive EQ removes frequencies to reduce unwanted sounds. Additive EQ increases volume, while subtractive EQ decreases it. Both techniques are essential in audio production to achieve perfect sound quality.

What Is The Opposite Of Subtractive Eq?

The opposite of subtractive EQ is additive EQ. It involves boosting specific frequency ranges instead of cutting them. It can help to enhance the sound of a recording and give it more depth and clarity.

Why Add Eq?

Adding EQ helps to enhance the overall sound quality of audio recordings. It balances out uneven frequencies, makes vocals and instruments sound clearer, and can also add warmth or brightness to the sound. EQ helps to improve the listening experience for the audience and make the audio more enjoyable to consume.

Is Eq The Same As Mixing?

No, EQ is not the same as mixing. EQ is the process of adjusting the balance between different frequencies in a piece of audio, while mixing involves combining sounds and adjusting levels, panning, and effects. EQ is just one part of the overall mixing process.

Conclusion

Whether to use additive or subtractive EQ entirely depends upon the sound engineer’s preference and the song’s requirements. While additive EQ can boost specific frequencies, subtractive EQ can reduce unwanted noise and make room for other instruments. It is, therefore, crucial to understand the basics of both EQ types to bring out the best sound in a mix.

So, experiment with different EQs and trust your ears to achieve the desired results.

More in our EQ guide.

Categories
Archive

How To Find Chords For Any Melody

To find chords for any melody, determine the key of the melody and identify its scale. Then, build chords from the notes of the scale.

If you’re a musician or aspiring songwriter, you may have found yourself struggling with the process of finding chords that fit with a particular melody. Whether you’re composing a new song or trying to cover someone else’s, chords are a crucial element of any musical arrangement.

Without the right chords, even the most well-crafted melody can fall flat. But how do you find the right chords for your melody? We’ll explore the process of identifying the key and scale of your melody and using that information to build chords that fit seamlessly with it. With a bit of practice, you’ll be able to find the perfect chords for any melody in no time!

How To Find Chords For Any Melody

Credit: m.youtube.com

Start With The Melody

If you are a musician, you know that finding the chords for a melody can take a lot of time and effort. However, there are ways to simplify the process and make it much easier. In this blog post, we will discuss a simple method to find chords for any melody, starting with the melody itself.

Identify The Key

The first step in finding chords for a melody is to identify the key of the song. The key is the tonal center of the song, and it determines which chords will sound good when played together. To identify the key, you need to find the note that the melody resolves to. This note will usually feel like the ‘home’ note of the song, and it will be the starting and ending note of the song.

Listen For Chord Tones

Once you have identified the key of the song, the next step is to listen for chord tones in the melody. Chord tones are the notes that make up a chord, and they typically include the 1st, 3rd, and 5th notes of a scale. To identify the chord tones in the melody, you need to listen to the notes that are played when the melody is at its strongest points. These notes will usually be longer in duration and will be played on the downbeat of the measure.

Example:

Melody:D – E – F# – G – A – G – F# – E.
Key:A Major

In this example, the melody resolves to the note A, which is the starting and ending note of the melody. Therefore, the key of the song is A Major. The chord tones in the melody are A, C#, and E. These notes are played on the downbeat of the 1st, 3rd, and 4th measures respectively. So, the chords for this melody could be A Major, F# minor, and D Major.

Conclusion

Starting with the melody is a simple and effective way to find chords for any song. By identifying the key and listening for chord tones, you can quickly and easily determine which chords will sound good with the melody. With practice, you will become better at finding chords for any song, which will help you become a more skilled and versatile musician.

Determine The Chord Types

Discovering the chords for any melody is a crucial aspect of songwriting, and knowing how to do so can enhance your musical creativity. To determine the chord types, you’ll need to identify the melody’s key and notes and then use music theory to figure out which chords fit within that key.

When it comes to finding chords for any melody, one of the most important aspects is to determine the chord types. A chord is a group of notes played together and chord types can vary depending on the key of the song and the melody being played. There are a few different chord types that can be used to accompany a melody, including major or minor chords, and seventh chords.

Major Or Minor?

The first step in determining the chord types for any melody is to determine whether the melody is in a major or minor key. Major keys generally have a more upbeat and cheerful sound, while minor keys have a more somber feel. Once you have determined the key of the melody, you can then choose the appropriate major or minor chords to accompany it. For example, if you are playing a melody in the key of C major, you would use the chords C, F, and G major to harmonize the melody.

Seventh Chords?

Seventh chords are chords that include the 7th note of the scale in addition to the 1st, 3rd, and 5th notes. These chords can add a lot of interest and complexity to a melody and are commonly used in jazz and blues music. To determine whether to use seventh chords, it’s important to consider the style and feeling of the melody. If you’re playing a jazz standard, for example, using seventh chords can help create a more authentic and sophisticated sound. However, if you’re playing a simple and straightforward melody, using seventh chords may not be necessary or appropriate. In conclusion, determining the chord types for any melody is crucial for creating a harmonious and melodic accompaniment. By considering the key of the melody and the use of major or minor chords and seventh chords, you can create a unique and interesting harmonic progression that enhances the melody.

Experiment With Inversions

Experiment with inversions to find the perfect chord progression for any melody. Explore different chord inversions and their unique sounds to create harmonies that complement your melody.

Experimenting with inversions is a great way to find chords for any melody. Inversions are essentially different positions in which a chord’s notes can be played. This technique works by taking the melody’s notes and creating several different chords that fit those notes using inversions, until you find the right one that complements the melody perfectly.

Root Position

The root position refers to the starting point of a chord. In other words, it is the lowest note of the chord. Root position chords are generally the most stable sounding, and are often used to give a melody a sense of grounding. To use this technique, simply match the melody’s notes with a chord that contains those notes in its root position.

First And Second Inversions

First and second inversions refer to chords whose lowest note is not the root note. In the first inversion, the lowest note of the chord is the third, while in the second inversion it is the fifth. These chords are often used to create tension in a melody, and can be used to lead the listener towards a resolution. To use this technique, experiment with creating chords that have the melody’s notes in their first or second inversion until you find the right one that complements the melody perfectly. In conclusion, experimenting with inversions is a great way to find chords that complement any melody. By using different chord positions such as root, first, and second inversions, you can find the perfect chord progression that adds depth and emotion to your music.

How To Find Chords For Any Melody

Credit: jenslarsen.nl

Follow Chord Progression Rules

If you’re trying to find chords for any melody, it’s essential to follow chord progression rules. Understanding how to move from one chord to the next is vital in creating an enjoyable and harmonic melody that sounds good to the ears. There are a ton of chord progression rules, but we’ll focus on two critical concepts that will get you started on creating your chord progressions effortlessly.

Tonic-dominant Relationship

The Tonic and Dominant relationship is one of the essential chord progression rules. The Tonic chord is the first note in a scale, while the Dominant is the fifth note. A chord progression that follows this rule is referred to as a “Perfect Cadence.” It means that the melody is complete, and it feels like the song has come to an end. An example of this chord progression would be C major followed by G major, or F major followed by C major.

Circle Progressions

Another essential chord progression rule is Circle Progressions, also known as “Cycle Progressions.” It’s a sequence of chords moving in a circle around the Circle of Fifths. For instance, if you play the C chord, you’ll move to the G chord, then to the D chord, and so on until you land back at the C chord. This progression creates a sense of resolution and closure, making it a popular chord sequence in music.

By understanding the Tonic-Dominant relationship and Circle Progressions, you’ll have a solid foundation to build your chord progressions from. Keep in mind that these rules aren’t the only ones out there and shouldn’t limit you. They’re guidelines that you can bend to create unique chord progressions that sound great with your melodies. Happy music-making!

Look For Common Patterns

The process of finding chords for a melody can seem daunting and overwhelming, but there are ways to make it easier. By looking for common patterns in the melody, you can find the chords that will best accompany it. Here are some common chord progressions:

I-iv-v Progression

The I-IV-V progression is one of the most common chord progressions in music. It involves using the first, fourth, and fifth notes of the scale to create the chords. For example, in the key of C, the I-IV-V progression would be C-F-G. This progression is used in countless songs across multiple genres.

Iv-v-i Progression

The IV-V-I progression is another common chord progression. It involves using the fourth, fifth, and first notes of the scale to create the chords. For example, in the key of C, the IV-V-I progression would be F-G-C. This progression can be found in many classic rock songs and is used frequently in jazz music.

By looking for these common patterns in the melody, you can start to determine which chords will sound best with it. Use these chord progressions as a starting point and experiment with different variations to create your own unique sound.

Apply Your Own Style

Find the chords for any melody by applying your own unique style. Experiment with different chord progressions and add your own flare to create a personalized sound. With practice, you can easily find the perfect chords to bring any melody to life.

Finding the right chords for a melody is no easy feat. It requires a deep understanding of music theory, which can take years to master. However, once you have a basic understanding of chords and how they work, you can use your knowledge to make the music your own. By applying your own style, you can take a simple melody and transform it into a unique composition that reflects your personality and creativity. Here are two ways to do just that:

Add Chord Extensions

One way to apply your own style is to add chord extensions. Chord extensions are notes that are added to a chord to give it a richer, more complex sound. For example, a basic C major chord consists of the notes C, E, and G. To add an extension, you might add a D note to the chord. This creates a C major 9 chord, which has a more interesting sound than a basic C major chord. Here are some common chord extensions you can experiment with:

ExtensionSymbolNotes
Major 7Cmaj7C, E, G, B
Minor 7Cm7C, Eb, G, Bb
Major 9Cmaj9C, E, G, B, D
Minor 9Cm9C, Eb, G, Bb, D

Use Chord Substitutions

Another way to apply your own style is to use chord substitutions. A chord substitution is a chord that replaces another chord in a song. For example, if a song has a C major chord, you could substitute it with an A minor chord. This creates a different harmonic context that can add interest and depth to a melody. Here are some common chord substitutions you can experiment with:

  • iii chord for I chord
  • vi chord for IV chord
  • ii chord for V chord
  • V chord for vii° chord

By experimenting with chord extensions and substitutions, you can take any melody and make it your own. Don’t be afraid to try new things and take risks – that’s how you’ll discover your unique sound!

Use Chord-finding Tools

Chord-finding tools can be a great help in finding chords for any melody. These tools allow you to input the melody and receive a list of suggested chord progressions, making it easier to create a harmonious composition.

If you’re not familiar with music theory, finding chords for a melody can be challenging. Luckily, chord-finding tools can make the process a lot easier. These tools analyze the notes of a melody and recommend chords that will fit well with it. Here are two types of chord-finding tools that you can use.

Chord Generator Websites

Chord generator websites are online tools that help you find chords for a melody. Most of these sites work by allowing you to input the notes of a melody into a virtual piano or by simply typing the notes. The website then analyzes the melody and creates a list of chords that work well with it. Some popular chord generator websites include:

  • Chordify: This website is user-friendly and allows you to find chords for any song quickly. All you need to do is input the name of the song, and the website will do the rest.
  • Hooktheory: This website offers a unique way to find chords. It allows you to input a melody and then suggests possible chord progressions that will work well with it.

Mobile Apps

Another way to find chords for a melody is by using mobile apps. These apps are convenient because you can use them on-the-go. Most of these apps work similarly to chord generator websites by allowing you to input the notes of a melody. Here are some popular chord-finding apps:

  • Chordbot: This app is great for beginners because it has a simple interface. It also offers a wide variety of chord progressions to choose from.
  • ChordIQ: This app is useful because it provides you with a comprehensive list of chords that work well with a melody. It also shows you how to play each chord.

Finding chords for any melody can be a daunting task, but chord-finding tools can make it much easier. Whether you prefer using websites or mobile apps, there are plenty of options available. With a little practice, you’ll be able to find chords for any melody in no time.

How To Find Chords For Any Melody

Credit: www.fretdojo.com

Practice Often

To find chords for any melody, practice often is key. Play around with different chord progressions and experiment with different keys until you find what works best for the melody. Over time, you’ll become more comfortable with the process and be able to quickly identify the chords for any melody.

Finding chords for a melody can be a daunting task, especially for beginners. However, the key to success is to practice often. The more you practice, the easier it becomes. In this post, we will show you how to find chords for any melody and some of the practices that can help you improve.

Try With Different Melodies

To find chords for a melody, start by playing the melody on your instrument. Once you have a good grasp of the melody, start experimenting with different chords. You can start with the basic chords like C, G, D, and F. Try playing these chords along with the melody to see how they sound. If you feel these chords don’t fit, try different ones until you find the right combination. Also, consider the key the melody is in; each key has a set of chords that work well together.

Play With Other Musicians

Playing with other musicians is a great way to improve your chord-finding skills. You can ask them to play a melody, and you try finding the chords that fit. You can also play a melody for them and ask for their help in finding the right chords. Playing with others can help you learn new techniques and approaches you wouldn’t have thought of otherwise. Finding chords for a melody can be challenging, but practice makes perfect. Set aside some time each day to practice finding chords for different melodies. You can also practice changing chords quickly and smoothly, as this skill will come in handy when finding chords for a melody. The more you practice, the more comfortable you will become with chord progressions and the easier you will find it to find chords for your melodies. In conclusion, finding chords for any melody takes practice, patience, and experimentation. Remember to try with different melodies, play with other musicians, and above all, practice often. With time and practice, finding chords for any melody will become second nature, and you’ll soon be able to create beautiful music effortlessly.

Frequently Asked Questions For How To Find Chords For Any Melody

How Do You Find What Chords Go With A Melody?

To find chords for a melody, you need to consider the key of the melody and its notes. Chords that match the notes in the key are good options. You can use a chord dictionary or look up popular chord progressions used in similar songs.

Experimentation and musical knowledge will also help in finding the right chords.

How Do I Find The Chords To A Song?

To find the chords for a song, you can use websites or apps such as Ultimate Guitar or Chordify. Simply search for the song and the chords should be available for you to play along with. You can also try searching for tutorials on YouTube or asking a musician friend for help.

What Is The App That Finds Chords To Any Song?

The app that finds chords to any song is called Chordify.

How Do You Identify Chords In Music?

To identify chords in music, listen carefully to the notes being played to determine the root note. Then, identify the other notes in the chord based on their relationship to the root note. Look for common chord patterns and progressions.

With practice and knowledge of music theory, you can quickly identify chords in any music piece.

Conclusion

We hope that this guide on how to find chords for any melody has been helpful to you. By following the steps outlined in this post, you can unlock a whole new world of musical possibilities and create beautiful, harmonious compositions.

Remember to take your time, experiment with different chord progressions, and trust your ear. With practice, you’ll become a master at chord progression and be able to create captivating melodies effortlessly. Happy composing!