Categories
Archive Audio Production

Unleash Your Hip Hop Magic: Discover the Best VST Plugins!

The best VST plugins for hip hop production are Xpand!2, Nexus, Omnisphere, and Kontakt. These plugins offer diverse sounds and features that cater to the genre’s specific needs, making them essential tools for any hip hop producer.


Whether you’re looking for high-quality drum kits, intricate synths, or realistic instrument simulations, these VST plugins have you covered. With their user-friendly interfaces and extensive libraries, you can easily craft professional-sounding hip hop tracks with ease. Stay ahead of the game with these top VST plugins and take your hip hop production to the next level.


Give your music that extra edge it needs to stand out in today’s competitive industry.


Exploring Vst Plugins For Hip Hop Production


Uncover top VST plugins for crafting cutting-edge hip hop beats. Explore a diverse range of tools that elevate your music production, from dynamic drum kits to authentic synthesizers, delivering a unique and professional sound. Enhance your hip hop production with these essential VST plugins.

Introduction: Exploring VST Plugins for Hip Hop Production

The Power Of Virtual Studio Technology

Virtual Studio Technology (VST) plugins revolutionize music production by offering versatile tools.

Choosing The Right Vst Plugins

Selecting the best VST plugins is crucial for creating authentic hip hop sounds.

Must-have Vst Plugins For Hip Hop

When producing top-tier hip hop tracks, having the right VST plugins can elevate your music to the next level.

Drum Machines And Beat Making Plugins

Drum machines are the backbone of any hip hop production, providing crisp beats and rhythmic elements.

  • Superior Drummer 3: Offers realistic drum samples for creating authentic hip hop rhythms.
  • NI Battery 4: Features a vast library of sounds and intuitive interface for crafting dynamic beats.

Synths And Sound Design Vsts

Synths and sound design plugins are essential for adding unique textures and melodies to your hip hop tracks.

  1. Xfer Serum: Known for its versatility in sound creation and modulation capabilities.
  2. Native Instruments Massive: Ideal for producing bold basslines and cutting-edge synth sounds.

Effects And Processing Plugins

Effects plugins are crucial for adding depth and polish to your hip hop productions.

  • RC-20 Retro Color: Perfect for adding vintage flair and character to your beats.
  • Soundtoys Effect Rack: Offers a range of creative effects for shaping and enhancing your sound.

Tips For Optimizing Your Vst Workflow

When it comes to producing hip-hop music, having the right VST plugins can make all the difference in the world. However, it’s not just about having the most cutting-edge software – it’s about how you utilize them efficiently. Here are some tips for optimizing your VST workflow to take your hip-hop production to the next level.

Organizing Your Vst Library

Organizing your VST library is crucial for a smooth workflow. Create folders based on instrument type, such as drums, synths, and effects. Subdivide these categories further into subfolders for specific sounds or plugins. This makes it easier to locate the right VST quickly when inspiration strikes. Consider using a naming convention that includes the VST name, category, and characteristics, making them easy to identify at a glance.

Utilizing Vsts In Creative Ways

Utilizing VSTs in creative ways can elevate your hip-hop tracks. Experiment with unconventional sounds and effects to add uniqueness to your music. Rather than sticking to traditional presets, tweak the settings to create your own signature sounds. Layer multiple VSTs to craft complex and rich textures. Don’t be afraid to push the boundaries and explore the full potential of your plugins.


Unlocking The Potential Of Vst Plugins In Hip Hop Production

In the world of modern hip hop production, VST plugins have become an indispensable tool for producers looking to push the boundaries of their music. These virtual instruments and effects open up a world of possibilities, allowing artists to create unique sounds and textures, and integrate them seamlessly into their sample-based production.

Exploring Unique Sounds And Textures

One of the most exciting aspects of using VST plugins in hip hop production is the ability to explore and create unique sounds and textures. These plugins offer a vast array of virtual instruments and effects that can give your tracks a distinct flavor. From synthesizers that can mimic classic analog sounds to experimental effects that take your beats to a new dimension, the possibilities are endless.

By experimenting with different VST plugins, you can find that perfect sound that sets your track apart from the rest. Whether you’re looking for a gritty bassline, a lush pad, or an atmospheric texture, VST plugins provide the tools to bring your sonic vision to life. Additionally, many plugins offer customization options, allowing you to fine-tune and shape the sound to your liking.

Integrating Vsts In Sample-based Production

VST plugins are not only useful for creating unique sounds, but they can also enhance your sample-based production. With the right plugins, you can transform a simple loop into something entirely new and exciting. Whether you’re looking to add punch and character to your drums, manipulate vocal samples, or add subtle textures to your melodies, there’s a VST plugin out there that can help you achieve your desired result.

One popular way to integrate VSTs in sample-based production is to use them for effects processing. For example, adding a bitcrusher or distortion plugin to your drums can give them a gritty, lo-fi edge. Similarly, using a reverb or delay plugin can add depth and space to your samples, making them sound more immersive and atmospheric.

Another powerful feature of VST plugins is their ability to modify and manipulate samples. Whether it’s time-stretching, pitch-shifting, or slicing and rearranging, these plugins allow you to chop up and reshape your samples in creative ways. This opens up endless possibilities for creating unique and innovative beats.

Maximizing Your Hip Hop Productions With Vst Plugins

When it comes to creating compelling hip hop productions, incorporating VST plugins can take your music to the next level. VST plugins provide a wide range of virtual instruments, effects, and processors that can enhance the sound quality and creativity of your tracks. In this blog post, we will explore how you can maximize your hip hop productions with the best VST plugins available. From incorporating VSTs in mixing and mastering to pushing boundaries with experimental VST use, we will cover it all.

Incorporating Vsts In Mixing And Mastering

Mixing and mastering play a crucial role in achieving a polished and professional sound in hip hop music. By utilizing VST plugins, you can have better control over the individual elements of your mix and enhance its overall sonic quality. Here are some essential VST plugins that can greatly improve your mixing and mastering workflow:

  • EQ Plugins: Utilize EQ plugins to shape the tonal balance of your hip hop tracks. Adjusting frequencies can help bring out the desired characteristics of each element, such as deep and punchy basslines or crisp and clear vocals.
  • Compressor Plugins: Compressors are essential for controlling the dynamic range of your hip hop mixes. Use them to achieve consistent levels and add character or punch to individual elements, such as drums or vocals.
  • Reverb and Delay Plugins: Adding reverb and delay can create a sense of space and depth in your hip hop mixes. Experiment with different reverb and delay plugins to find the perfect balance of ambience and clarity for each element.
  • Saturation and Distortion Plugins: Saturation and distortion plugins are ideal for adding warmth, grit, and harmonics to your hip hop tracks. Use them to give your drums more impact, add grit to your basslines, or create unique textural elements.
  • Mastering Plugins: When it comes to mastering your hip hop tracks, having dedicated plugins can help you achieve professional loudness and clarity. Look for mastering plugins that offer comprehensive control over the final sound and can enhance the overall dynamics and tonal balance.

Pushing Boundaries With Experimental Vst Use

In hip hop production, pushing boundaries and exploring new sounds is essential for standing out from the crowd. VST plugins can be a valuable tool in creating unique and experimental elements in your tracks. Here are some ways you can push boundaries with VST plugins:

  1. Manipulating Sampled Sounds: Take advantage of granular synthesis plugins to slice, warp, and transform sampled sounds. This can lead to exciting and unexpected textures that add a fresh perspective to your hip hop productions.
  2. Creating Unique Sound Design: Experiment with modular synthesis plugins to create custom sounds that reflect your artistic vision. By combining different modules and tweaking parameters, you can generate unconventional sounds that make your hip hop tracks stand out.
  3. Applying Creative Effects: Explore unconventional effects plugins that offer unique sonic possibilities. Effects like glitch, stutter, or pitch-shifting can add an experimental and futuristic touch to your hip hop productions, taking them to new sonic territories.

By incorporating VST plugins in your mixing and mastering processes and pushing boundaries with experimental VST use, you can unleash your creativity and maximize the impact of your hip hop productions. Remember to explore different plugins, experiment with settings, and trust your ears to find the perfect sounds that resonate with your artistic vision.
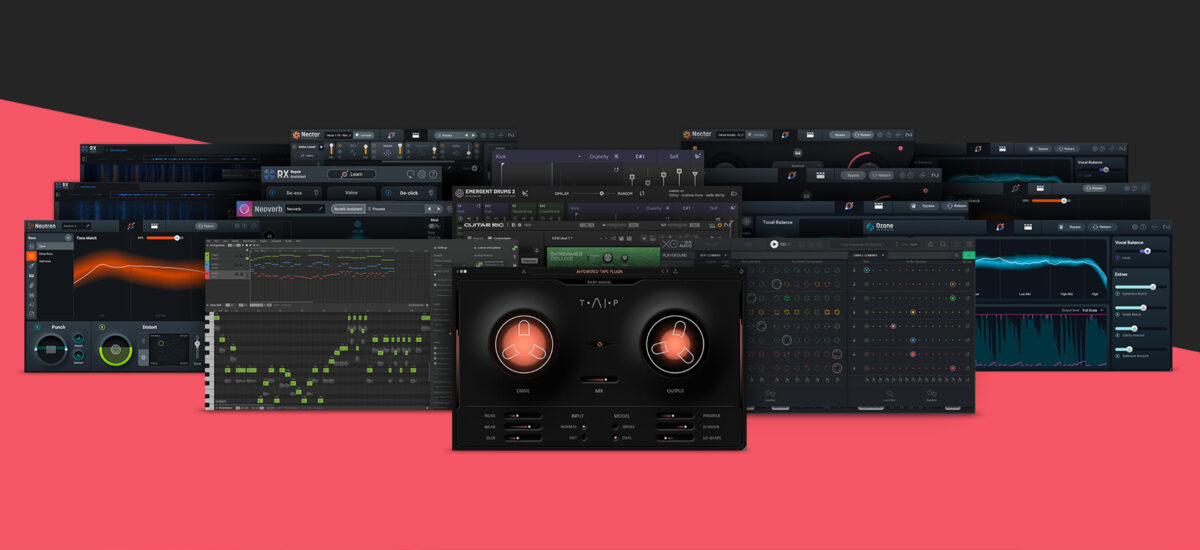


Unleash Your Hip Hop Magic: Discover the Best VST Plugins!


Credit: blog.native-instruments.com


Frequently Asked Questions For Best Vst Plugins For Hip Hop


What Are The Best Vst Plugins For Hip Hop?


The best VST plugins for hip hop include instruments like Native Instruments Massive, Xfer Serum, and Spectrasonics Omnisphere. These plugins offer high-quality sounds, customizable features, and a wide range of options to create unique hip hop tracks.


How Do Vst Plugins Enhance Hip Hop Production?


VST plugins enhance hip hop production by providing access to a wide variety of virtual instruments, effects, and samplers. These plugins allow producers to create realistic sounds, add unique textures and layers, and manipulate audio in ways that would be difficult to achieve with traditional hardware alone.


Can Vst Plugins Add Versatility To Hip Hop Tracks?


Yes, VST plugins can add versatility to hip hop tracks. With plugins like Waves CLA Vocals, Izotope Nectar, and FabFilter Pro-Q, producers can easily process vocals, shape the mix, and add professional polish to their hip hop tracks, enhancing their overall sound and appeal.


Conclusion


The best VST plugins for hip hop production can truly enhance your music. With a wide array of options available, it’s important to choose plugins that match your specific needs and style. By incorporating these plugins into your toolkit, you can take your hip hop tracks to the next level and stand out in the competitive music industry.


 

Categories
Archive Audio Production

How to Capture Exceptional Vocals: A Guide to Recording Good Quality

As an Amazon Associate I earn from qualifying purchases.

To record good quality vocals, use a high-quality microphone and a quiet, well-insulated recording space. When setting up, isolate the microphone, adjust input levels, and monitor for clear sound.


Proper microphone techniques and post-recording editing can further enhance vocal quality. Creating a comfortable atmosphere and using pop filters can minimize unwanted noise and ensure a crisp recording. By focusing on technical aspects and performance delivery, you can capture professional-sounding vocals for any project.


Overall, achieving good quality vocals hinges on equipment selection, recording environment, and attention to detail throughout the recording process. By following these tips, you can optimize your vocal recordings and produce polished results for your projects.


Selecting The Right Equipment

Choosing the Best Microphone

For vocals, consider a condenser microphone like the Audio-Technica AT2020. It captures detailed sound and is budget-friendly.

Selecting the Right Studio Monitors

Invest in quality studio monitors like the KRK Rokit series. These provide accurate sound reproduction for mixing vocals effectively.

How to Capture Exceptional Vocals: A Guide to Recording Good Quality


Credit: www.amazon.com


Optimizing The Recording Environment


To achieve high-quality vocal recordings, it is paramount to optimize the recording environment. Start by selecting a quiet space, reduce background noise, and minimize echo by using acoustic panels or blankets. Ensure proper microphone placement and invest in a pop filter to prevent plosives and sibilance.

Controlling Room Acoustics

Creating a makeshift vocal booth can improve sound quality. Add carpets, curtains, or acoustic panels to absorb echoes. Positioning the microphone away from walls reduces reflections.

Minimizing Background Noise

Ensure the recording area is isolated from external sounds. Shut windows, doors, and turn off fans or appliances during recording. Consider using noise-cancelling headphones or a noise gate effect. `

Setting Up Your Recording Session

Setting up your recording session is crucial for capturing good quality vocal recordings. From mic placement techniques to using pop filters and windscreens, every step in the setup process plays a significant role in achieving the desired results.

Mic Placement Techniques

Proper mic placement is essential to capture the best sound quality while minimizing unwanted noise and reflections. Placing the microphone at a distance of around 6-8 inches from the vocalist’s mouth helps to capture a rich and clear vocal tone.

Using Pop Filters And Windscreens

Pop filters are essential for reducing explosive sounds caused by ‘plosive’ consonants such as ‘p’ and ‘b’. Placing a pop filter in front of the microphone helps to diminish these sounds, resulting in a cleaner vocal recording. Additionally, using a windscreen can further minimize unwanted breath and wind noise, ensuring that the vocal recordings are free from any distracting elements.

How to Capture Exceptional Vocals: A Guide to Recording Good Quality


Credit: www.techsmith.com


Tips For Recording Outstanding Vocals

Proper Warm-Up and Vocal Exercises

Before hitting the record button, it’s crucial to warm up your vocals and perform some exercises to ensure optimal performance. This pre-recording routine helps prevent strain and allows you to deliver the best possible vocal performance.

  1. Start by stretching your body and gently warming up your vocal cords with lip trills or humming exercises.
  2. Take deep breaths and practice diaphragmatic breathing to support and control your voice.
  3. Perform vocal warm-up exercises like scales, arpeggios, and vocal sirens to gradually expand your vocal range and improve flexibility.
  4. Experiment with different vocal exercises to target specific areas of your voice, such as chest voice, head voice, or falsetto.

Remember, a proper warm-up and vocal exercises routine enhances your vocal tone, control, and overall performance during recording sessions.

Utilizing Vocal Effects and Processing

To add depth and character to your vocals, consider utilizing vocal effects and processing techniques during the recording process. Here are some tips to help you make the most out of these tools:

  • Experiment with EQ: Use equalization to shape your vocal sound by boosting or cutting specific frequencies to emphasize certain qualities or address any unwanted resonances.
  • Add Reverb and Delay: Apply reverb to create a sense of space, making your vocals feel larger than life. Delays can add depth and texture to your vocals, enhancing the overall listening experience.
  • Consider Compression: Compression helps control vocal dynamics, providing a more consistent and polished sound. It evens out volume spikes and ensures the vocals sit well in the mix.
  • Experiment with Vocal Doubling: Vocal doubling adds thickness to your vocals by duplicating and slightly altering the original recording. This technique can add dimension and make your vocals stand out.

Keep in mind that moderation is key when applying effects and processing to your vocals. Always listen to the final result and ensure it complements the overall sound of your recording.

Post-recording Techniques For Quality Vocals


Learn expert post-recording techniques to enhance vocal quality. Discover effective methods for recording top-notch vocals for professional sound production. Achieve superior audio results through optimized recording strategies.

Recording vocals is just the first step in achieving professional-sounding tracks. The real magic happens in the post-recording phase, where you can enhance and refine the vocals to ensure they sound polished and powerful. In this article, we will explore two important post-recording techniques for quality vocals: Editing and Cleaning Vocals, and Applying Reverb and Delay Effectively.

Editing And Cleaning Vocals

Editing and cleaning vocals is an essential step in the post-recording process. It involves removing unwanted noises, correcting imperfections, and ensuring a smooth and cohesive vocal performance. Here are some effective techniques to achieve this:

  • Use a high-quality audio editing software such as Adobe Audition or Pro Tools.
  • Start by listening to the vocal recordings and identifying any unwanted sounds or mistakes.
  • Trim and delete unnecessary parts, such as breaths, clicks, pops, or background noises.
  • Adjust the volume levels to ensure consistency throughout the performance.
  • Apply gentle compression to even out dynamics and make the vocals stand out.
  • Use equalization to shape the tone of the vocals, enhancing clarity and removing any harsh frequencies.
  • Consider adding subtle pitch correction if needed, but be cautious not to overuse it as it can sound unnatural.

Applying Reverb And Delay Effectively

Reverb and delay are powerful tools that can add depth and dimension to vocals. When used correctly, they can create a sense of space and enhance the overall audio experience. Here are some tips for applying reverb and delay effectively:

  • Choose the right type of reverb or delay that suits the genre and mood of the song.
  • Start with subtle settings and adjust the parameters to find the perfect balance.
  • Consider the size of the virtual room or environment you want the vocals to sound like.
  • Experiment with pre-delay to create a sense of distance between the vocals and the reverberation.
  • Avoid overusing reverb or delay, as it can make the vocals sound washed out or distant.
  • Find the sweet spot where the reverb or delay complements the vocals without overpowering them.

By mastering these post-recording techniques, you can take your vocals to the next level and ensure they sound clean, professional, and captivating. Remember, practice and experimentation are key to finding the perfect balance and achieving the desired effect. So, dive into post-recording techniques and bring out the full potential of your vocal recordings!

How to Capture Exceptional Vocals: A Guide to Recording Good Quality


Credit: www.ebay.com


Frequently Asked Questions For How To Record Good Quality Vocal


How Can I Improve The Sound Quality Of My Vocal Recordings?


To improve the sound quality of your vocal recordings, make sure you are using a high-quality microphone and pop filter. Find a quiet space with minimal background noise and use acoustic treatment to reduce echo. Experiment with microphone placement and adjust levels to get the best sound.


What Software Is Best For Recording Vocals?


There are several software options for recording vocals, but some popular choices include Pro Tools, Logic Pro, and Ableton Live. Each software has its own unique features, so it’s important to choose one that fits your specific needs and preferences.


How Do I Prevent Vocal Distortion In Recordings?


To prevent vocal distortion in recordings, make sure you are not overloading the microphone or preamp. Keep an eye on your levels and adjust accordingly. You can also use a compressor or limiter to control peaks and prevent distortion. Experiment with different settings to find the right balance for your vocals.


Conclusion


In sum, recording good quality vocals requires attention to detail and proper setup. By utilizing the right equipment and techniques, you can capture the true essence of your voice. Remember to create a comfortable environment, use quality gear, and focus on mic placement for optimal results.


With these tips, you can elevate your vocal recordings to new heights.


Categories
Archive

Licensing Christmas Music: Unlock the Joyful Melodies

Licensing Christmas music can be done through performance rights organizations and music licensing companies. It involves obtaining legal permission to use copyrighted holiday music for public performances or commercial purposes.


The holiday season is a time filled with festive cheer and joy, and what better way to enhance the atmosphere than with beloved Christmas music. However, businesses and individuals looking to play these tunes in public settings need to ensure they have the proper licenses in place to avoid copyright infringement.


Licensing Christmas music involves navigating the complexities of copyright laws and securing the necessary permissions to use popular holiday songs legally. By understanding the process and working with the right organizations, you can enjoy the magic of Christmas music while staying compliant with legal requirements. Let’s explore the ins and outs of licensing Christmas music and how you can ensure a harmonious holiday season for all.


The History Of Christmas Music Licensing

Exploring the captivating realm of the history of Christmas music licensing uncovers a rich tapestry of evolution and transformation in the music industry. From humble beginnings to the intricate web of modern practices, the journey of licensing Christmas music is a fascinating one.

Origins Of Christmas Music Licensing

The emergence of licensing Christmas music dates back to early 20th-century collaborations between music publishers and artists seeking revenue from the seasonal music craze.

Evolution Of Licensing Practices

Over time, the licensing landscape has shifted dramatically, with digital platforms and streaming services revolutionizing how Christmas music is accessed and monetized.

The Importance Of Licensing Christmas Music

Christmas music is a beloved tradition, spreading joy and cheer during the festive season. However, licensing Christmas music is essential to protect the rights of artists and ensure fair compensation.

Preserving Artist Rights

Artists pour their hearts into creating Christmas music, and licensing helps them retain control over their work. Protecting artist rights ensures they receive proper recognition and attribution for their creativity.

Ensuring Fair Compensation

By licensing Christmas music, artists are rightfully compensated for their talent and hard work. Proper licensing agreements guarantee that artists receive fair payment for the use of their music. Fair compensation is crucial to supporting artists and encouraging them to continue creating music.

Navigating The Licensing Process

When it comes to licensing Christmas music, understanding the intricacies of the licensing process is crucial. Navigating the legalities of licensing Christmas music can be complex, and it’s essential to ensure that all necessary permissions and copyrights are obtained. Here, we’ll delve into the key aspects of the licensing process, from comprehending copyright laws to securing proper permissions.

Understanding Copyright Laws

Copyright laws play a pivotal role in the licensing of Christmas music. Understanding these laws is imperative to avoid legal complications. It’s important to recognize that all Christmas music is protected by copyright, and obtaining the necessary license for each piece is mandatory.

Securing Proper Permissions

Securing the proper permissions for Christmas music is a detailed process that involves reaching out to the respective copyright owners or their designated agents. This may entail negotiating the terms of use and acquiring the appropriate license to use the music in specific contexts, such as commercial promotions, public performances, or digital distribution.

Impacts Of Unlicensed Christmas Music Use

Using Christmas music without the proper licensing can have several negative consequences, both legally and financially. It’s crucial for businesses and individuals to understand the potential ramifications of unlicensed music use during the holiday season. In this article, we will explore the legal implications and financial repercussions that come with using Christmas music without the necessary licenses.

Legal Ramifications

Using Christmas music without obtaining the necessary licenses can lead to various legal issues. The unauthorized use of copyrighted music infringes upon the rights of the music creators and owners. Copyright laws protect original works of authorship, including musical compositions, and individuals are required to obtain permission or licenses to use such protected music.

When it comes to Christmas music, the same rules apply. Artists, songwriters, and publishers hold the rights to these beloved holiday tunes, and businesses or individuals using these songs without proper licenses can face legal consequences. This includes hefty fines, legal proceedings, and potential damage to their reputation.

For instance, if you are a retail store playing unlicensed Christmas music, you are essentially publicly performing copyrighted material without permission. Performing rights organizations, such as ASCAP and BMI, actively monitor music usage and can take legal action against businesses found in violation. It’s important to note that ignorance of the law is not a valid defense, and businesses must be diligent in ensuring they have the appropriate licenses in place.

Financial Repercussions

Aside from the legal implications, using unlicensed Christmas music can also result in significant financial repercussions. Performing rights organizations strictly enforce licensing requirements to protect the financial interests of music creators and copyright owners.

Businesses using unlicensed music run the risk of facing hefty fines and penalties. Organizations like ASCAP and BMI have the authority to seek damages and pursue legal action against businesses found to be in violation of copyright laws. In addition to fines, businesses may also be required to pay retroactive licensing fees to cover the period during which the unlicensed music was used.

Besides potential legal fees and penalties, the negative publicity and damage to a business’s reputation can also lead to financial losses. Customers and clients may view businesses that engage in unauthorized music use as unprofessional or lacking integrity, which can ultimately result in declines in sales or relationships.

Overall, it’s clear that using unlicensed Christmas music comes with severe legal and financial consequences. Businesses and individuals must prioritize obtaining the necessary licenses from performing rights organizations to ensure compliance and protect themselves from potential legal action and financial hardships.

Maximizing The Festive Season With Licensed Music


Licensing Christmas Music | Maximizing the Festive Season with Licensed Music

Gearing up for the joyful holiday season is an exciting time for individuals and businesses alike. One crucial element that can make a significant impact on creating the perfect holiday atmosphere is the choice of music. Adding the right tunes to your celebrations can transport your audience to a world of merriment and jolliness. By licensing Christmas music, you can ensure that you are enhancing the holiday atmosphere, supporting artists and creativity, and creating an unforgettable experience for everyone.

Enhancing Holiday Atmosphere

Music has the ability to create an enchanting ambiance that brings people together and evokes feelings of happiness and nostalgia. By incorporating licensed Christmas music into your holiday festivities, you can amplify the holiday spirit and enhance the overall atmosphere. Whether you are planning a cozy family gathering, decking out your store in festive decorations, or hosting a lively holiday party, the right selection of licensed Christmas music can set the perfect mood and make the experience memorable for everyone involved.

Supporting Artists And Creativity

Choosing licensed Christmas music not only ensures that you comply with legal obligations but also supports the creativity and talent of the artists behind the music. When you obtain licenses for Christmas songs, you are directly contributing to the livelihoods of musicians, songwriters, and other creatives who work tirelessly to bring joy to the world through their art. By appreciating and compensating these artists for their work, you are fostering a sustainable and thriving music industry for future generations to enjoy.

Licensing Christmas Music: Unlock the Joyful Melodies


Credit: www.amazon.com


Licensing Christmas Music: Unlock the Joyful Melodies


Credit: www.theschoolmusicalscompany.com

Frequently Asked Questions On Licensing Christmas Music

What Does It Mean To License Christmas Music?

Licensing Christmas music refers to obtaining the legal rights to use and distribute copyrighted holiday songs. Licensing ensures that artists and composers receive fair compensation when their music is played or performed commercially.

Why Do I Need To License Christmas Music?

Licensing Christmas music is important as it allows you to legally use and share copyrighted songs without facing copyright infringement claims. It ensures that artists and composers are properly compensated for their creative work while giving you the freedom to use holiday tunes in your projects.

How Can I License Christmas Music?

To license Christmas music, you can reach out to music licensing agencies or platforms that offer a wide selection of holiday songs. They can guide you through the licensing process, providing the necessary permissions and usage rights for your specific needs.

Can I Use Christmas Music For Free?

No, using Christmas music for free without proper licensing is a violation of copyright laws. Even though holiday songs are popular, they are still protected by copyright. It is essential to obtain the necessary licenses to avoid legal consequences and respect the rights of artists and composers.

Conclusion

In wrapping up, licensing Christmas music is key for avoiding legal complications. Securing the appropriate licenses ensures that you can play your favorite festive tunes without worrying about infringement. Understanding the different types of licenses available enables you to make informed decisions for your specific needs.


Stay legal and jolly this holiday season!

Categories
Archive

Are You Getting All Your Royalties? Discover the Power of Maximizing Your Income

Ensuring you receive all your royalties is crucial for maximizing your earnings and protecting your intellectual property. Understanding the royalty rates, tracking revenue streams, and utilizing royalty collection agencies can help safeguard your income and ensure you are properly compensated for your creative work.

With the rise of digital platforms and varied revenue sources, staying vigilant about your royalties is more important than ever. We will explore key strategies and tips to help you navigate the complex world of royalty payments and ensure you are getting all the royalties you deserve.

Let’s dive in and empower you to take control of your financial rights as a content creator.

The Importance Of Maximizing Your Royalties

Maximizing your royalties is crucial for profiting from your creative work.

Understanding Your Royalties

Know the different types of royalties you are entitled to as a content creator.

Study your royalty agreements to ensure you grasp the specifics of your compensation.

  • 1. Lack of transparency in royalty reporting
  • 2. Difficulty in tracking digital sales and streaming royalties
  • 3. Unauthorized use of your content impacting royalty earnings

Common Challenges In Maximizing Royalties

Transparency issues and digital tracking hurdles often hinder royalty optimization.

Unauthorized content usage can lead to revenue loss, underscoring the need for vigilance.

Strategies For Maximizing Your Royalties

Utilizing Multiple Revenue Streams

As a content creator, maximizing your royalties involves diversifying income sources.

  • Explore opportunities in merchandising and licensing to broaden revenue streams.
  • Consider collaborating with brands or other artists to reach new audiences.

Negotiating Favorable Terms And Contracts

Effective negotiation is key to optimizing your royalties and securing your financial interests.

  1. Seek legal guidance to ensure contracts are fair and protect your rights.
  2. Ensure clear terms regarding royalties, exclusivity, and usage rights.

Leveraging Technology And Data Analysis

Leverage tech tools and data analysis to track earnings and identify growth opportunities.

  • Utilize analytics platforms to monitor sales trends and consumer behavior.
  • Implement automated royalty tracking systems for real-time insights.

Tools And Resources For Managing Your Royalties

When it comes to managing your royalties, it’s crucial to have the right tools and resources in place to ensure you’re getting all the income you deserve. Whether you’re a musician, author, or artist, knowing how to track and manage your royalties is essential for maximizing your earnings.

Royalty Tracking Software

One of the most efficient ways to manage your royalties is by using dedicated royalty tracking software. These programs are designed to help you keep track of your earnings from various sources, including streaming platforms, downloads, and licensing agreements. With features such as automated tracking, detailed reporting, and customized dashboards, royalty tracking software can simplify the process and provide you with accurate insights into your earnings.

Professional Support Services

For those who prefer personalized assistance, professional support services can be an invaluable resource for managing royalties. These services often include individualized assistance from experts in royalty management, who can help you navigate complex royalty structures, negotiate deals, and maximize your earnings. Whether you’re an independent creator or part of a larger organization, professional support services can provide the expertise and support you need to ensure you’re getting all your royalties.

Legal And Financial Considerations

When it comes to receiving royalties, it’s crucial to understand the legal and financial considerations associated with these payments. Royalty agreements can be complex, and failing to grasp the intricacies could result in missed opportunities and potential financial pitfalls. In this blog post, we will explore two key aspects of managing your royalties: Understanding Royalty Agreements and Tax Implications and Financial Planning.

Understanding Royalty Agreements

Before delving into the world of royalties, it’s essential to have a clear understanding of the agreements governing these payments. A royalty agreement is a legal contract between a content creator or intellectual property owner and a licensee, granting the licensee the right to use the content or intellectual property in exchange for royalty payments. It is crucial to carefully review and comprehend the terms and conditions outlined in the agreement to ensure that you are receiving all the royalties you are entitled to.

Here are a few key points to consider when understanding your royalty agreements:

  1. Terms and Conditions: Read the agreement thoroughly and pay close attention to the terms and conditions that dictate the royalties owed to you. Ensure that the agreement clearly defines the scope of the licensed content and the duration of the royalty payments.
  2. Royalty Calculation: Understand how the royalties are calculated to ensure accuracy. royalties can be based on various factors such as sales volume, usage, or a fixed percentage. It is important to verify that the calculations are executed correctly to avoid any discrepancies in your royalty payments.
  3. Payment Schedule: Familiarize yourself with the payment schedule outlined in the agreement. Ensure that it specifies when payments will be made, how often they will be distributed, and the method of payment. Having a clear understanding of the payment timeline will help you plan your finances effectively.

Tax Implications And Financial Planning

Receiving royalties may have implications on your taxes and financial planning. It is crucial to consider the following aspects:

  1. Taxation of Royalties: Royalties are generally considered taxable income, which means you may be required to report them to the tax authorities. Consult with a tax professional to understand your specific tax obligations and ensure compliance with the relevant tax laws.
  2. Financial Planning: Royalty payments can fluctuate, and it’s important to plan your finances accordingly. Consider setting aside a portion of your royalties for taxes, savings, and future investments. Developing a solid financial plan can help you mitigate financial risks and maximize the benefits of your royalty earnings.

Remember, legal and financial considerations are crucial when it comes to managing your royalties. Understanding your royalty agreements and staying informed about tax implications and financial planning can help you make the most of your earnings. By taking the time to educate yourself about these key areas, you’ll be well-equipped to ensure that you are getting all the royalties you deserve.

Case Studies Of Successful Royalty Maximization

One of the best ways to learn about effective strategies for maximizing royalties is by studying real-life examples. In this section, we will explore some case studies of successful royalty maximization from the industry. These examples will give you insights into the strategies used by industry leaders and the lessons you can learn from their success.

Real-life Examples Of Effective Strategies In Action

Example 1: Music Artist A

Music Artist A, known for their chart-topping hits, implemented a strategic approach to maximize their royalties. They focused on diversifying their revenue streams by not only releasing albums but also creating merchandise, partnering with brands, and licensing their music for commercials and films. By doing so, Music Artist A was able to tap into multiple income sources, thus increasing their overall royalties.

Effective Strategies Results
Merchandise creation Increased fan engagement and additional revenue
Brand partnerships Expanded reach and exposure for the artist
Music licensing Generated income from commercials and films

Example 2: Author B

Author B, a best-selling author, adopted a proactive approach to maximize their royalties from book sales. They leveraged social media platforms to build a loyal fan base and engage with readers. Additionally, Author B made smart use of email marketing campaigns to keep their audience informed about new releases and promotional offers. By nurturing a strong relationship with their readers, Author B was able to drive more sales, resulting in higher royalties.

Lessons Learned From Industry Leaders

  • Diversify your revenue streams: Instead of solely relying on one source of income, explore different avenues such as merchandise, partnerships, and licensing opportunities.
  • Leverage digital platforms: Utilize social media and email marketing to connect with your audience, build a loyal following, and drive sales.
  • Nurture customer relationships: Engage with your readers or fans, offer exclusive content, and keep them informed about new releases to encourage repeat purchases.
  • Stay adaptable: Keep up with market trends and be willing to embrace new strategies and technologies that can help maximize your royalties.
  • Collaborate: Seek out collaborations with other industry professionals, such as brands or fellow artists, to expand your reach and tap into new markets.

By studying these case studies and learning from industry leaders, you can gain valuable insights into effective strategies for maximizing your royalties. Apply these lessons to your own creative endeavors and take your royalty earnings to the next level!

Frequently Asked Questions On Are You Getting All Your Royalties

How Can I Ensure I Receive All My Royalties?

To ensure you receive all your royalties, make sure you register your works with a performance rights organization (PRO) and a mechanical licensing agency. Keep accurate records of your works, and regularly check your royalty statements for any discrepancies.

What Are Some Common Reasons For Missing Royalties?

Common reasons for missing royalties include unregistered works, incomplete or inaccurate song information, outdated contact information, and errors in the royalty distribution process. It is important to be proactive in ensuring your works are properly registered and your information is up to date.

How Can I Track My Royalty Payments?

You can track your royalty payments by monitoring your royalty statements from your PRO and mechanical licensing agency. Additionally, there are various digital platforms and services available that can help you track your streaming and download revenues from online platforms like Spotify, Apple Music, and Amazon Music.

Conclusion

In sum, ensuring you receive all your royalties is paramount for every creator. By staying informed, seeking legal advice, and utilizing technology, you can safeguard your rights and maximize your earnings. Remember, knowledge is power, and staying proactive is essential in protecting your intellectual property and ensuring you receive proper compensation for your work.

Categories
Archive

Why Master Audio : Unleash the Full Potential

Master Audio provides high-quality sound systems that enhance audio experiences for various events and venues. Master Audio’s products are known for their reliability and exceptional performance.


With a focus on innovation and customer satisfaction, Master Audio stands out in the audio equipment industry, making it a preferred choice for professionals and enthusiasts alike. Whether it is for concerts, conferences, or installations, Master Audio offers a wide range of products tailored to meet the diverse needs of its customers.


By prioritizing quality and cutting-edge technology, Master Audio continues to be a leader in the sound equipment market, ensuring that every audio experience is truly memorable and immersive.


The Power Of Mastering Audio

The Power of Mastering Audio:

Enhancing Sound Quality

By fine-tuning various elements, mastering audio elevates sound quality to its peak potential.

Balancing Audio Levels

Mastering ensures balanced audio levels across different tracks for a harmonious listening experience.

Understanding Audio Mastering Tools

Mastering audio is essential for achieving professional sound quality. Using mastering tools helps to refine the overall audio texture, enhance clarity, and balance the elements within a track. It ensures that the final sound is polished and consistent, ready for distribution across different platforms.

Understanding Audio Mastering Tools

Audio mastering is a crucial step in the music production process. Mastering tools like Equalization and Compression play a significant role in enhancing the overall sound quality of a track.

Equalization

Equalization allows for adjusting the balance of frequencies in a track, enhancing clarity, and tonal balance.

Compression

Compression helps control the dynamic range of a track, ensuring a more consistent and polished sound.

Utilizing these mastering tools effectively can elevate the quality and impact of your music.

Importance Of Audio Mastering

Audio mastering is a crucial step in the music production process, where the final mix is polished to enhance the overall sound quality. It plays a vital role in ensuring that the audio is consistent, professional, and optimized for different playback platforms. Understanding the importance of audio mastering is essential for any content creator or musician looking to deliver high-quality sound to their audience.

Professional Sound Production

Mastering audio contributes to a professional sound production by refining the mix and optimizing it for various playback systems. Through mastering, the audio engineer can address inconsistencies, adjust levels, and correct any imperfections present in the mix. This process results in a polished and cohesive sound, ensuring a high-quality listening experience for the audience.

Consistency Across Platforms

Mastering ensures consistency across platforms by tailoring the audio to meet the technical requirements of different mediums, such as streaming services, CDs, vinyl, and digital downloads. By optimizing the audio for these platforms, mastering helps maintain a consistent sonic identity regardless of where and how the music is being played, enhancing the overall listening experience.

Why Master Audio : Unleash the Full Potential


Credit: www.fullpatientperspective.com

Steps To Master Audio Effectively

Mastering audio is an essential step in creating a professional and polished sound for any audio project. Whether you’re working on a podcast, music track, or audio book, mastering audio can greatly enhance its quality. In this post, we will explore the steps to master audio effectively, ensuring that your final product sounds amazing and captivates your audience.

Preparation And Organization

Before you begin the audio mastering process, it’s important to prepare and organize your material. This will help streamline the process and ensure that you have all the necessary elements in place. Here are some steps you can take to effectively prepare and organize your audio:

  1. Gather all the audio files: Collect all the audio files that you will be working with and organize them in a dedicated folder. This will make it easier to access and work with the files during the mastering process.
  2. Review and clean up: Take the time to review each audio file and make any necessary edits or clean up any unwanted noise or artifacts. This can include removing clicks, pops, or background noise to ensure a clean and professional sound.
  3. Set the correct levels: Ensure that all audio files have appropriate levels to prevent distortion or clipping. Adjust the volume levels for consistency throughout the project, so that all audio elements blend together seamlessly.
  4. Organize your sessions: If you are using a digital audio workstation (DAW), organize your sessions by labeling tracks appropriately and creating folders for different audio elements. This will make navigation and editing much easier as you move through the mastering process.

Utilizing Reference Material

Using reference material during the audio mastering process can provide valuable insights and help you achieve the desired sound. Here are some tips for effectively utilizing reference material:

  • Select high-quality reference tracks: Choose reference tracks that are similar in genre, style, and sound to what you are working on. These tracks will serve as a benchmark for your own mastering process, allowing you to compare and modify your audio accordingly.
  • Analyze the frequency spectrum: Use spectrum analyzers or visualizers to analyze the frequency spectrum of your reference tracks. Pay attention to the balance of bass, midrange, and treble frequencies, and compare them to your own audio. Make adjustments as needed to achieve a similar frequency balance.
  • Pay attention to dynamics: Use the reference tracks to analyze the dynamics and overall loudness levels. This will help you ensure that your audio maintains a consistent and pleasing level of dynamics throughout.
  • Aim for a competitive sound: While it’s important to achieve a unique sound for your audio project, it’s also beneficial to reference commercially successful tracks in your genre. This will help you understand the industry standards and ensure that your audio stands out and competes with other similar productions.

By following these steps to master audio effectively, you can elevate the quality of your audio projects and captivate your audience with a professional and polished sound. Remember to always listen critically to your audio and make adjustments as needed to achieve the desired results. Happy mastering!

Common Audio Mastering Mistakes

Mastering audio is crucial for achieving professional sound quality. Common mistakes to avoid include improper EQ settings, over-compression, and lack of reference tracks for comparison. Take time to master your audio correctly to enhance its overall clarity and depth.

Over-processing

One of the most common audio mastering mistakes is over-processing the audio. The temptation to apply a multitude of effects and processors to achieve a “better” sound can be hard to resist. However, this often leads to a cluttered and unnatural-sounding mix.

When masters are over-processed, individual elements in the audio blend together, resulting in a loss of clarity and separation. This can make it difficult for listeners to distinguish between different instruments or vocals, ultimately diminishing the overall impact of the music.

To avoid this, it’s crucial to exercise restraint when applying effects and processors. Carefully consider the purpose of each tool and its impact on the sound. Remember, less is often more when it comes to audio mastering. Focus on enhancing the natural qualities of the audio, rather than overpowering them with excessive processing.

Neglecting Monitoring Environment

An often overlooked aspect of audio mastering is the monitoring environment. Neglecting to create an accurate and calibrated listening environment can result in inaccurate judgments about the audio and ultimately lead to poor mastering decisions.

When the monitoring environment is not properly set up, the frequency response of the speakers and the acoustics of the room can introduce coloration and inaccuracies. This means that the audio may sound different when played back on other systems, such as car speakers or headphones.

To ensure a consistent and accurate listening experience, it’s important to invest in quality studio monitors, position them appropriately, and employ acoustic treatment to minimize reflections and resonances. Regularly calibrating the monitoring system with tools like reference tracks and frequency response measurement software can also help maintain accuracy.

By addressing the monitoring environment, you can make more informed decisions during the audio mastering process, resulting in a final mix that translates well across a variety of playback systems.


Frequently Asked Questions For Why Master Audio

Why Should I Master Audio For My Projects?

Mastering audio is crucial for achieving professional sound quality in your projects. It ensures that the audio is balanced, polished, and optimized for different playback systems. By mastering audio, you can enhance clarity, dynamics, and overall impact, making your projects more enjoyable to listen to.

What Are The Benefits Of Audio Mastering?

Audio mastering offers several benefits, including improved sound quality, increased loudness, and enhanced overall balance. It also helps eliminate any potential issues like background noise, clicks, or pops. Furthermore, mastering ensures that your audio is compatible with different playback systems, guaranteeing a consistent and high-quality listening experience for your audience.

Is Audio Mastering Necessary For All Types Of Audio Recordings?

Yes, audio mastering is important for all types of audio recordings. Whether you’re working on music, podcasts, films, or any other audio project, mastering ensures that the final product is polished and sounds professional. It helps bring out the best qualities of your audio, regardless of the genre or content, resulting in an engaging and captivating listening experience for your audience.

Conclusion

Embracing mastering audio is crucial for a polished and professional sound. By understanding the importance of audio mastering, you can enhance the quality of your music or podcast, stand out in a competitive industry, and captivate your audience. It’s an essential step in achieving a professional and impactful audio production.

Categories
Archive

How to Win a Songwriting Competition: Unleash Your Creative Potential

To win a songwriting competition, focus on originality, emotional connection, strong lyrics, and memorable melodies. Crafting a unique song that resonates with listeners and showcases your talent is key to standing out in a competition.

Engaging with the audience’s emotions and creating a lasting impact through your music will increase your chances of success. Entering a songwriting competition can be a great opportunity to gain recognition for your artistic abilities. By following a few key strategies, you can enhance your chances of winning and making a name for yourself in the music industry.

In this guide, we will explore effective tips and techniques to help you excel in songwriting competitions and achieve your musical aspirations. Whether you’re a seasoned songwriter or a newcomer looking to break into the industry, these insights will help you create compelling and award-winning compositions. Let’s dive in and discover how you can elevate your songwriting skills and increase your chances of winning a songwriting competition.

Crafting Memorable Lyrics

When entering a songwriting competition, it’s crucial to focus on crafting memorable lyrics. To stand out, you need to capture emotions with vivid imagery and use catchy hooks and phrases that resonate with the listeners.

Capture Emotions With Vivid Imagery

  • Paint pictures with words to evoke feelings.
  • Use sensory language to create a connection.
  • Appeal to the audience’s emotions through storytelling.

Use Catchy Hooks And Phrases

  1. Create a memorable chorus that sticks in the mind.
  2. Repeat key phrases to reinforce the message.
  3. Infuse your lyrics with unexpected turns of phrase.
How to Win a Songwriting Competition: Unleash Your Creative Potential

Credit: namt.org

Melody And Harmony

Melody and harmony are fundamental elements in creating a winning song. Crafting a catchy melody and incorporating harmonious elements can set your song apart in a songwriting competition.

Create A Catchy Melody

  • Start by creating a simple, memorable tune that captures listeners’ attention.
  • Repeat and vary the melody to create a sense of familiarity and interest.
  • Consider the lyrics when crafting the melody to ensure they flow smoothly together.

Incorporate Harmonious Elements

  1. Choose complementary chords that enhance the mood of your song.
  2. Experiment with chord progressions to add depth and emotion to your composition.
  3. Balance melody and harmony to create a cohesive and impactful musical piece.

Structuring Your Song

When it comes to winning a songwriting competition, one of the most crucial aspects is the structure of your song. Properly structuring your song can make it stand out from the competition, capturing the judges’ attention and increasing the likelihood of winning. In this section, we will delve into the key components of structuring your song to give you the competitive edge you need to succeed.

Build Strong Verse-chorus Dynamics

Creating a captivating verse-chorus dynamics is essential to the success of your song in a competition. To achieve this, ensure that your verses and chorus have a clear distinction in terms of melody, lyrics, and emotional impact. The chorus should be the most memorable part of the song, with a catchy hook and strong emotional resonance. Verses, on the other hand, should build momentum and lead effectively into the chorus.

  • Distinct Melody
  • Memorable Lyrics
  • Emotional Impact
  • Catchy Chorus Hook

Create An Engaging Bridge

Introducing an engaging bridge can elevate your songwriting to the next level. The bridge acts as a refreshing break from the repetition of verses and choruses, adding depth and complexity to the song. When crafting the bridge, aim to introduce new melodies, lyrics, or a different emotional perspective that adds a fresh dimension to the overall composition.

  1. New Melodies
  2. Unique Lyrics
  3. Different Emotional Perspective
How to Win a Songwriting Competition: Unleash Your Creative Potential

Credit: www.facebook.com

Arrangement And Production

Arrangement and production are crucial elements when it comes to winning a songwriting competition. A well-polished arrangement can make your song stand out and leave a lasting impression on the judges. Additionally, a high-quality production can showcase your song in the best possible light, highlighting its strengths and capturing the attention of the audience. In this section, we will explore two essential aspects: polishing your arrangement and producing a high-quality demo.

Polish Your Arrangement

  • Start by analyzing your song’s structure and ensure it flows smoothly.
  • Consider the balance between verses, chorus, bridge, and other sections to create a captivating arrangement.
  • Experiment with different instrumentations and voicings to enhance the overall sound.
  • Focus on dynamics, ensuring that the song has contrasting moments to keep the listener engaged.
  • Simplify complex sections and eliminate any unnecessary elements that might detract from the song’s impact.
  • Pay attention to transitions between sections, making them seamless and coherent.

Produce A High-quality Demo

  • Invest in a good recording setup or consider working with a professional studio to achieve a polished sound.
  • Ensure that all instruments and vocals are recorded with precision and clarity.
  • Use suitable effects and processing techniques to enhance the overall sound without overpowering the song.
  • Mix your demo meticulously, ensuring that each instrument has its rightful place in the arrangement.
  • Pay attention to the overall balance, EQ, and levels to create a well-rounded and professional-sounding mix.
  • Master your demo to ensure it translates well across different playback systems and maintains its quality.

Performance And Delivery

In a songwriting competition, it’s not just about the lyrics and melody – performance and delivery play a crucial role in capturing the judges’ attention. Your ability to engage the audience and bring your song to life on stage can make all the difference. To help you stand out and leave a lasting impression, here are some tips to consider:

Embody Authenticity On Stage

To truly connect with your audience, it is essential to embody authenticity on stage. This means being genuine and true to yourself, allowing your emotions to shine through your performance. By immersing yourself in the song and expressing your personal experiences, you create a powerful connection with the listeners.

  • Be genuine: Tap into your own emotions and translate them into your performance.
  • Connect with your lyrics: Understand the meaning behind the words and convey that through your stage presence.
  • Show vulnerability: Don’t be afraid to expose your vulnerable side; it adds depth and relatability to your performance.

Master Stage Presence

Stage presence involves more than just standing on stage and singing; it’s about captivating the audience and keeping them engaged throughout your performance. Here are some key aspects to focus on:

  • Command the stage: Take ownership of the space, use the entire stage, and showcase confidence in your performance.
  • Use body language: Your body language can convey emotions and enhance the impact of your performance. Make use of gestures, facial expressions, and movements that complement the song.
  • Engage with the audience: Establish a connection with the listeners by making eye contact, interacting in between songs, and making them feel involved in your performance.
  • Work on your stage presence: Practice performing in front of a mirror or with friends to improve your stage presence and ensure you’re comfortable with your movements and expressions.

By embodying authenticity on stage and mastering your stage presence, you can create a captivating performance that resonates with both the judges and the audience. Remember, it’s not just about singing the song; it’s about delivering a memorable experience that leaves an impact.

How to Win a Songwriting Competition: Unleash Your Creative Potential

Credit: m.facebook.com

Frequently Asked Questions For How To Win A Songwriting Competition

What Are The Benefits Of Entering A Songwriting Competition?

Entering a songwriting competition can provide valuable exposure for your music, help you connect with industry professionals, and potentially open doors for career opportunities. It also allows you to receive feedback on your work, gain confidence as a songwriter, and measure your skills against other talented musicians.

How Do I Choose The Right Song To Enter In A Competition?

When selecting a song to enter in a songwriting competition, consider its originality, overall structure, and emotional impact. Choose a song that showcases your unique style and strengths as a songwriter. Pay attention to the competition’s guidelines and criteria to ensure that your chosen song meets their requirements.

What Should I Include In My Song Submission?

In your song submission for a competition, include a high-quality recording or performance of your song, well-written lyrics, and any additional information required by the competition organizers. Provide a brief biography highlighting your musical background and accomplishments. Make sure to follow the submission instructions carefully to increase your chances of success.

How Can I Improve My Chances Of Winning A Songwriting Competition?

To improve your chances of winning a songwriting competition, it’s important to continually refine your songwriting skills. Seek feedback from fellow musicians, attend workshops or songwriting classes, and learn from successful songwriters. Pay attention to past winners and analyze what makes their songs stand out.

Also, make sure to carefully read and follow the competition guidelines to maximize your chance of success.

Conclusion

Winning a songwriting competition begins with honing your craft and understanding the competition guidelines. By focusing on originality, emotional connection, and strong storytelling, you can set yourself apart from the competition. Remember, persistence and continuous improvement are key to achieving success in the music industry.

Good luck!

Categories
Archive

Unlock Your Music Success: 6 Strategies For Releasing Singles

Releasing singles involves strategies like promoting on social media and collaborating with influencers. It’s crucial to create engaging content and build anticipation for the release.


Crafting a strong marketing plan and leveraging platforms to reach a wider audience can increase the visibility of the single. Engaging with fans through interactive content and offering exclusive previews can generate excitement and build momentum leading up to the release date.


Building relationships with music bloggers and seeking out press coverage can also help drive attention to the single. By implementing these strategies effectively, artists can maximize the impact of their single release and increase chances of reaching a larger audience.


Crafting Compelling Singles

Creating singles that resonate with your audience is essential for a successful music release. By implementing effective strategies, you can captivate your listeners and make a lasting impression. Let’s delve into the key strategies for crafting compelling singles.

Identifying Your Audience

Understand the preferences and demographics of your audience to tailor your single to their tastes.

Choosing The Right Genre

Select a genre that aligns with your artistic vision and connects with your target listeners.


Credit: blog.bandlab.com

Building Anticipation

Excite your audience with these 6 effective strategies for promoting upcoming music releases. From engaging social media teasers to exclusive sneak peeks, build anticipation and generate buzz around your singles. Master the art of anticipation and keep fans eagerly awaiting your next hit.

Building Anticipation

Building anticipation for your singles release is crucial for a successful launch. Engaging with your fan base and creating teasers are effective strategies.

Creating Teasers

– Craft short video clips and snippets from the upcoming single to tease your fans.
– Utilize social media platforms to share sneak peeks and behind-the-scenes content.
– Keep the teasers concise and intriguing to spark curiosity among your audience.

Engaging with Your Fan Base

– Interact with your fans through social media polls, Q&A sessions, and contests.
– Provide exclusive updates and insights about the single to keep your fan base engaged.
– Collaborate with influencers or fan communities to expand your reach and create buzz.

Implementing these strategies will help generate excitement and anticipation for your singles release.

Strategic Release Timing

Strategic release timing is crucial for maximizing the impact of your single. Effective planning based on the audience’s behavior and market dynamics can significantly enhance the success of your release. Below are essential strategies to consider when determining the best time to release your single.

Identifying Peak Times

It’s essential to analyze data to identify peak times when your target audience is most active. Utilize analytic tools to understand the peak times when your audience engages with music. This can include studying streaming patterns, social media activity, and music consumption trends.

Leveraging Seasonal Trends

Capitalizing on seasonal trends can greatly impact the success of your music release. Consider aligning your single with festive seasons, holidays, or events that resonate with your audience. For example, releasing an upbeat, energetic single ahead of summer can enhance its appeal and relevance.

Unlock Your Music Success: 6 Strategies For Releasing Singles


Credit: amplifyyou.amplify.link

Optimizing Digital Platforms

When it comes to releasing your singles, optimizing digital platforms is crucial for reaching a wider audience and gaining attention in the competitive music industry. With so many talented artists vying for attention, it’s important to make sure your music stands out and reaches the right ears. This section will explore two key strategies for maximizing your reach and impact: maximizing streaming services and utilizing social media effectively.

Maximizing Streaming Services

Streaming services have revolutionized the way we consume music, making it easier than ever for artists to share their work with a global audience. To ensure your singles reach as many listeners as possible, it’s essential to optimize your presence on these platforms.

Here are some effective strategies to consider:

  1. Create compelling and eye-catching visuals for your streaming profiles. Use high-resolution album artwork, professional photos, and engaging banners to make a strong first impression.
  2. Make use of playlists to increase your exposure. Submit your singles to popular playlists within your genre or create your own playlist featuring your music alongside similar artists. Collaborating with curators and influencers can lead to more listens and followers.
  3. Regularly update your artist profile with new releases, behind-the-scenes content, and upcoming shows. Keeping your audience informed and engaged will help build a loyal fan base.
  4. Encourage your fans to follow you on streaming platforms. Include links to your profiles in your social media bios, website, and email newsletters.

Utilizing Social Media Effectively

Social media plays a crucial role in promoting and connecting with your audience. By utilizing these platforms effectively, you can boost the visibility of your singles and engage with your fan base on a more personal level.

Consider the following strategies:

  • Create a cohesive and visually appealing social media presence. Use consistent branding, such as your logo or album artwork, across all platforms to establish a strong and recognizable identity.
  • Engage with your audience by responding to comments, direct messages, and mentions. Showing genuine interest in your fans will strengthen your relationship with them and encourage them to continue supporting your music.
  • Promote your singles organically by sharing behind-the-scenes moments, sneak peeks of upcoming releases, and personal stories. This gives your followers a sense of exclusivity and keeps them excited about your music.
  • Collaborate with other artists and industry influencers to expand your reach. Engaging in cross-promotion or featuring other artists on your social media can introduce your music to new audiences and create valuable connections.

Promotion And Marketing

Promoting and marketing your singles is crucial for gaining visibility and building an audience. Effective promotion can make a significant impact on the success of your releases. To help you get started, here are some strategies you can implement:

Creating Visual Assets

Visual assets play a critical role in captivating your audience and promoting your singles. Creating eye-catching album covers, professional press photos, and engaging visuals for social media can make a lasting impression. Investing in high-quality visual content will make your singles stand out and attract potential listeners. Consider hiring a graphic designer or photographer to help you create compelling visuals that accurately represent your music.

Collaborating With Influencers

Collaborating with influencers can widen your reach and expose your singles to a larger audience. Identify influencers in your genre or niche who have a significant following and align with your brand. Partner with them to create content that promotes your singles, such as sponsored posts or shoutouts. Their endorsement can help establish credibility and trust among their followers, ultimately driving more traffic and streams to your music.

Unlock Your Music Success: 6 Strategies For Releasing Singles


Credit: blog.groover.co

Measuring Success

Measuring success is crucial for determining the impact of your single release. Analyzing data metrics and assessing audience feedback are two fundamental strategies for evaluating the success of your release.

Analyzing Data Metrics

Utilize data analytics tools to track and analyze key metrics such as streams, downloads, and listener demographics. Creating a spreadsheet to organize this data can help identify patterns and trends.

Assessing Audience Feedback

Engage with your audience through social media, surveys, and direct communication to gather valuable feedback. Incorporate this feedback to refine your future strategies and enhance the quality of your releases.

Frequently Asked Questions Of 6 Strategies For Releasing Singles

How Can I Effectively Release A Single As An Independent Artist?

Releasing a single as an independent artist involves planning, promotion, and strategic timing. Start by creating buzz around your release through social media and engaging with your audience. Utilize platforms like Spotify and SoundCloud to gain exposure. Consider collaborating with other artists or influencers to expand your reach.


Finally, don’t forget to plan a release date that aligns with your target audience’s preferences.

Is It Better To Release Singles Or Albums?

It depends on your goals and audience. Releasing singles allows you to consistently engage with your audience and build momentum. It’s a great strategy for gaining new fans and getting your music heard. On the other hand, albums allow you to showcase a more cohesive body of work and can establish you as an artist.


Consider your marketing strategy, audience preferences, and long-term goals when deciding whether to release singles or albums.

How Can I Promote My New Single?

Promoting your new single involves a multi-faceted approach. Start by utilizing social media platforms and engaging with your followers. Create captivating content, such as behind-the-scenes footage, lyric videos, or teasers. Collaborate with influencers, music blogs, and playlists to gain exposure.


Leverage email marketing to reach your existing fan base. Don’t forget to contact local and online radio stations for airplay opportunities.

Conclusion

Incorporating these strategies when releasing singles can significantly enhance your chances of success. Building a strong online presence, leveraging social media, and nurturing connections with your audience are vital for gaining momentum in the music industry. By embracing these tactics, you can effectively promote your singles and set the stage for greater recognition and success.

Categories
Archive Audio Production

How to Connect Pre Amp to Audio Interface USB: A Step-by-Step Guide

To connect a preamp to an audio interface via USB, simply plug the preamp outputs into the audio interface inputs. When setting up your audio equipment, connecting a preamp to an audio interface using a USB connection is a straightforward process that enhances the overall sound quality of your recordings.


By integrating the preamp with the interface, you can capture clean and clear audio signals with minimal interference or signal loss. This setup offers more flexibility and control over the sound input levels, allowing you to fine-tune your recordings to achieve professional-grade results.


In this guide, we will walk you through the steps to connect your preamp to the audio interface via USB for seamless integration and optimal performance.

How to Connect Pre Amp to Audio Interface USB: A Step-by-Step Guide


Credit: www.amazon.com


Choosing The Right Pre Amp


When connecting a preamp to an audio interface via USB, choose the right preamp that matches your interface’s input requirements and offers the desired sound quality. Ensure compatibility and optimal signal transfer by following the manufacturer’s guidelines and using appropriate cables for a seamless connection.

Considerations For Compatibility

ensurecompatible with your audio interface’s USB connection.

Understanding Input And Output Connections

input and output connections between the preamp and audio interface for proper functionality. Choosing the Right Pre Amp To connect a preamp to an audio interface via USB, selecting the correct preamp is crucial for optimal performance. When picking a preamp, it’s essential to ensure compatibility with your audio interface’s USB connection. Understanding input and output connections between the preamp and audio interface is key for seamless integration.

Connecting The Pre Amp To The Audio Interface


To connect a preamp to an audio interface via USB, simply use a USB cable. Plug one end into the preamp’s USB port and the other into the audio interface. Ensure both devices are powered on for successful connectivity.

Gathering The Necessary Cables

Gather a USB cable, TRS or XLR cables, and the audio interface with preamp.

Connecting The Inputs And Outputs

1. Connect XLR or TRS cables from preamp outputs to audio interface inputs.

2. Use a USB cable to connect the audio interface to your computer.

Setting Up The Audio Interface Software

Setting up the audio interface software is crucial for ensuring a seamless connection between your preamp and audio interface via USB. Proper configuration and adjustment within the software are essential to achieve high-quality audio recordings and monitoring capabilities. To optimize your setup, follow these steps to adjust input levels and configure monitor mixes effectively:

Adjusting Input Levels

Adjusting input levels is a critical step to ensure that the audio signal from your preamp is adequately captured by the audio interface. Follow these simple steps to set the input levels:

  1. Launch the audio interface software on your computer.
  2. Locate the input level controls within the software interface.
  3. Connect your preamp to the designated input channel on the audio interface.
  4. Gradually increase the input level while monitoring the audio signal’s amplitude.
  5. Avoid clipping by ensuring that the input level remains within the designated range.

Configuring Monitor Mixes

Configuring monitor mixes enables you to control the balance of input sources and playback audio, providing flexibility and control over what you hear during recording and playback. Follow these steps to configure monitor mixes:

  • Access the monitor mix settings within the audio interface software.
  • Adjust the levels of input sources and playback audio according to your preference.
  • Consider utilizing headphone outputs or separate monitor mix outputs, if available, for added flexibility.
  • Ensure that the monitor mix settings are optimized for your specific recording and monitoring requirements.

How to Connect Pre Amp to Audio Interface USB: A Step-by-Step Guide


Credit: bpmskills.com


Testing And Troubleshooting

Testing and troubleshooting are essential steps when connecting a preamp to an audio interface via USB. These steps ensure that the signal flow is proper and that any common issues are resolved to achieve the best audio quality. In this section, we will discuss how to check the signal flow and how to resolve common issues that may arise during the connection process.

Checking Signal Flow

In order to ensure that the signal flows correctly from the preamp to the audio interface, follow these steps:

  1. Check the connections: Make sure that the preamp is properly connected to the audio interface using the appropriate cables. Ensure that the USB cable is securely plugged in.
  2. Verify the power supply: Ensure that the preamp is turned on and receiving power. Check if the audio interface is also powered on.
  3. Adjust the gain levels: Set the appropriate gain levels on the preamp and audio interface to control the input signal. Ensure that the levels are not too low or too high, as this can result in poor audio quality.
  4. Test the signal: Play some audio through the preamp and monitor the input levels on the audio interface. Check if the levels are within the desired range. Adjust the gain levels if necessary.

Resolving Common Issues

While connecting a preamp to an audio interface via USB, you may come across some common issues. Here are some troubleshooting tips to resolve them:

Issue Solution
No sound or low volume
  • Check if the volume levels are set correctly on the preamp and audio interface.
  • Ensure that the audio source is playing and the output level is sufficient.
Audio distortion or noise
  • Check the cables for looseness or damage and try replacing them if necessary.
  • Ensure that the gain levels are set appropriately and not causing clipping or distortion.
USB connection issues
  • Try connecting to a different USB port on your computer to rule out any port-specific issues.
  • Make sure that the USB cable is not damaged and try using a different cable if available.
  • Update the drivers for both the preamp and the audio interface.

By following these steps and troubleshooting tips, you can confidently connect your preamp to an audio interface via USB. Remember to check the signal flow, adjust the gain levels, and resolve any common issues that may arise. This will ensure that you achieve the best audio quality for your recordings or music production.

https://www.youtube.com/watch?v=u_qCh3TIk8w


Optimizing Performance

Connecting a preamp to an audio interface via USB is a great way to enhance your sound recording capabilities. However, to truly optimize the performance of this setup, there are a few key considerations to keep in mind. By fine-tuning gain staging and exploring additional features, you can achieve the best possible audio quality and ensure a seamless recording experience.

Fine-tuning Gain Staging

Gain staging refers to the process of setting the appropriate gain levels at each stage of the signal chain to avoid unwanted distortion or noise. When connecting a preamp to an audio interface via USB, it’s crucial to pay attention to gain staging to achieve optimal results.

To fine-tune gain staging, follow these steps:

  1. Begin by setting the input gain on your preamp to a low level.
  2. Play your audio source and gradually increase the input gain until the signal reaches an optimal level without clipping.
  3. Next, adjust the output level on your preamp to ensure it matches the input level of your audio interface.
  4. Check the input level on your audio interface and make any necessary adjustments to avoid overloading the signal.
  5. Regularly monitor the signal’s level throughout your recording session to ensure consistent and distortion-free audio.

Exploring Additional Features

When connecting a preamp to an audio interface via USB, you may also have access to several additional features that can further enhance your recording setup. These features can vary depending on the specific preamp and audio interface you are using. Here are a few notable features to explore:

Feature Description
Phantom power Enable phantom power if you are using condenser microphones that require it to operate properly.
High-pass filter Activate the high-pass filter to eliminate low-frequency rumble or unwanted noise.
Pad Engage the pad option to reduce the input level when recording particularly loud sound sources.
Polarity switch Flip the polarity switch to correct phase-related issues and ensure a balanced sound.
Show-metering Utilize the metering options on your audio interface to monitor signal levels and avoid clipping.

How to Connect Pre Amp to Audio Interface USB: A Step-by-Step Guide


Credit: www.amazon.com


Frequently Asked Questions On How To Connect Pre Amp To Audio Interface Usb


How Do I Connect A Preamp To An Audio Interface Via Usb?


To connect a preamp to an audio interface via USB, simply connect the preamp’s USB output to one of the USB ports on the audio interface. Make sure both devices are powered on and check your computer’s audio settings to ensure the preamp is recognized as an input device.


What Is The Purpose Of Connecting A Preamp To An Audio Interface?


Connecting a preamp to an audio interface allows you to amplify and improve the quality of your audio signal. A preamp boosts the signal from microphones or instruments to line level, making it suitable for recording or mixing. This ensures cleaner, more professional sound recordings.


Can I Connect Multiple Preamps To An Audio Interface Via Usb?


Yes, most audio interfaces allow multiple preamp connections. Simply connect each preamp’s USB output to separate USB ports on the audio interface. Check the manufacturer’s specifications to ensure compatibility and make sure your computer’s processor can handle the additional inputs.


Do I Need A Preamp If My Audio Interface Already Has Built-in Preamps?


It depends on your specific needs and the quality of the built-in preamps. While many audio interfaces have decent built-in preamps, external preamps can offer superior audio quality and more control over sound shaping. Consider your recording goals and the types of microphones or instruments you plan to use.


Conclusion


Connecting a preamp to an audio interface via USB opens up a world of possibilities for capturing high-quality sound. With the right cables and settings, you can easily enhance your recording setup and produce professional-grade audio. Take your music production or podcasting to the next level with this simple yet effective method.

Categories
Archive

Hit Songwriting Formula: Unlock the Secrets of Creating Chart-Topping Hits

Want to craft a hit song? Start with catchy hook, relatable lyrics, and memorable melody.


Crafting a hit song requires a winning formula that combines catchy hooks, relatable lyrics, and a memorable melody. Understanding the key elements that make a song successful can significantly increase your chances of creating a hit. From the initial hook that grabs listeners’ attention to the infectious melody that sticks in their minds, each component plays a crucial role in the songwriting process.


By following a structured approach and incorporating these essential elements into your songs, you can increase your chances of creating a standout track that resonates with audiences. Let’s dive deeper into the hit songwriting formula to uncover the secrets behind crafting chart-topping hits.


The Anatomy Of A Hit Song

Crafting a hit song is an art that blends creativity and science seamlessly. Elements of a Chart-Topping Song are carefully orchestrated to captivate audiences and make a lasting impact. Let’s dissect the essential components that contribute to the success of a song.

Elements Of A Chart-topping Song

  • Memorable melody that sticks in the listener’s mind
  • Compelling lyrics that evoke emotion or tell a story
  • Catchy hook that grabs attention instantly
  • Strong and relatable themes that resonate with listeners

Structuring A Hit Song

Structuring a Hit Song involves arranging these elements in a cohesive manner to keep the audience engaged from start to finish. A well-crafted song typically follows a verse-chorus-verse-chorus-bridge-chorus pattern, ensuring a dynamic progression that builds tension and release.

Understanding The Music Industry

Delving into the intricate dynamics of the music industry reveals a captivating maze of hit songwriting formulas. Understanding the nuances of crafting a chart-topping song involves an amalgamation of lyrical prowess, infectious melodies, and resonating hooks. Unraveling the secrets to creating that perfect blend of artistry and commercial appeal unlocks boundless opportunities in the competitive realm of music.

Understanding the Music Industry

To create hit songs, it’s crucial to understand the music industry landscape. This involves recognizing trends and patterns in hit songs and grasping the significance of lyrics and melody in songwriting.

Trends And Patterns In Hit Songs

Analysis of trends and patterns in hit songs reveals common elements that resonate with audiences. Incorporating these aspects in your songwriting can increase the likelihood of creating a successful track.

The Role Of Lyrics And Melody

Lyrics and melody play a central role in crafting a memorable song. Compelling lyrics and catchy melodies can capture listeners’ attention and evoke emotions, making your music more impactful and engaging.

Crafting Memorable Lyrics

When it comes to crafting memorable lyrics, it’s crucial to write emotionally resonant content that connects with the audience. Creating catchy hooks and choruses can elevate a song to hit status, making it essential to nail down these aspects of songwriting. Let’s delve deeper into the Hit Songwriting Formula by focusing on the subheading: Crafting Memorable Lyrics.

Writing Emotionally Resonant Lyrics

Writing emotionally resonant lyrics is vital for creating a lasting impact on the listeners. The key is to convey genuine emotions through words, making the audience feel a deep connection to the message being portrayed.

Creating Catchy Hooks And Choruses

A catchy hook or chorus can make a song memorable and instantly recognizable. Crafting hooks that stick in the minds of listeners is a hallmark of successful songwriting. By utilizing simple yet powerful phrases, songwriters can create memorable and catchy hooks that resonate with the audience.

Hit Songwriting Formula: Unlock the Secrets of Creating Chart-Topping Hits


Credit: faroutmagazine.co.uk

Melody And Harmony

Discover the secret to crafting hit songs through the perfect blend of melody and harmony. By mastering this songwriting formula, you can create music that captivates audiences and stands the test of time. Embrace the power of melody and harmony in your songwriting journey.

Building Melodies That Stick

When it comes to crafting a hit song, a catchy melody is essential. A strong melody has the power to captivate listeners and leave a lasting impression in their minds. To build melodies that stick, there are a few key elements to consider:

  1. Simplicity: Keeping melodies simple and easy to follow allows them to be more memorable. Complex melodies can often be difficult for listeners to grasp, resulting in them quickly forgetting the tune.
  2. Catchy Hooks: Incorporating catchy hooks within the melody can instantly grab the listener’s attention. These hooks are memorable phrases or musical motifs that stick with the audience long after the song has ended.
  3. Repetition: Repetition is a powerful tool in songwriting. Repeating certain melodic phrases or motifs throughout the song helps to reinforce the melody in the listener’s mind, increasing its memorability.

By focusing on simplicity, incorporating catchy hooks, and utilizing repetition, you can create melodies that have the potential to become undeniable earworms.

Harmonizing For Impact

Harmony is the musical element that accompanies the melody, providing depth and emotional impact to a song. When harmonizing for impact, there are a few key techniques to consider:

  • Chord Progressions: Choosing the right chord progressions can enhance the emotional impact of the melody. Certain chord changes can create tension and resolution, evoking different moods and emotions within the listener.
  • Layering: Adding multiple layers of harmonies to the melody can create a rich and full sound. This can be achieved through the use of backing vocals, additional instrumental tracks, or even vocal harmonies.
  • Dynamics: Incorporating dynamic changes in the harmony can add excitement and interest to the song. Playing with volume, instrumentation, or chord voicings can create variations in intensity, keeping the listener engaged.

By carefully selecting chord progressions, layering harmonies, and incorporating dynamic changes, you can create harmonies that elevate your melodies to new heights and make a lasting impact on your audience.

Production Techniques For Hit Songs

Unveiling the coveted Hit Songwriting Formula involves mastering intricate production techniques that resonate with audiences. Crafting every element strategically leads to creating music that captivates and stands out in the crowded music industry landscape.

Introduction

When it comes to creating hit songs, production techniques play a crucial role in bringing the music to life and capturing the attention of listeners. The right instrumentation, along with skillful mixing and mastering, can give your songs that radio-ready sound that makes them stand out from the crowd. In this article, we will explore two essential production techniques for hit songs: choosing the right instrumentation and mastering for radio-ready sound.

Choosing The Right Instrumentation

Instrumentation forms the backbone of any song, and selecting the right instruments is key to creating a hit. Here are a few tips to consider:

  • Identify the genre: Different genres require different instrumentation. For example, a pop song might benefit from catchy synthesizers and upbeat drum beats, while a rock song might call for an electric guitar and powerful drumming.
  • Experiment with combinations: Don’t be afraid to mix and match instruments to create unique sounds. Combining traditional instruments with electronic elements can help your song sound fresh and captivating.
  • Consider the mood: The instrumentation should match the mood of your song. If you want to convey a sense of mysticism, you might opt for ethereal sounds like a flute or a celestial synth. Similarly, if you aim for an energetic vibe, electric guitars and punchy drums might be the way to go.

Mixing And Mastering For Radio-ready Sound

Mixing and mastering are crucial steps in the production process that ensure your song has that professional and polished sound. Pay attention to the following:

  1. Create a balanced mix: Each instrument and vocal should have its place in the mix, allowing them to be heard clearly and harmoniously. Keep in mind that a cluttered mix can be distracting and take away from the impact of your song.
  2. Use equalization (EQ) effectively: EQ helps to refine the tonal balance of your mix. Consider using EQ to eliminate any harsh frequencies or to highlight important elements in your song.
  3. Compress for dynamics: Compressors help control the dynamic range of your song, which is essential for radio-ready sound. Properly applying compression can make your song sound punchier and more consistent.
  4. Add tasteful effects: Reverbs, delays, and other effects can add depth and dimension to your mix. However, be careful not to overdo it. Using effects sparingly and purposefully can enhance the overall production quality of your song.
  5. Master with care: The final stage of production, mastering, ensures that your song sounds its best across different playback systems. Consider hiring a professional mastering engineer to fine-tune your mix and achieve that radio-ready sound.

By paying attention to these production techniques – choosing the right instrumentation and mastering for radio-ready sound – you can give your songs the extra edge they need to become hit sensations. Remember, practice and experimentation are key in finding what works best for your unique musical vision. So, grab your instruments, fire up your mixing software, and get ready to create that next chart-topping hit!

Hit Songwriting Formula: Unlock the Secrets of Creating Chart-Topping Hits


Credit: www.billboard.com


Hit Songwriting Formula: Unlock the Secrets of Creating Chart-Topping Hits


Credit: www.independent.co.uk

Frequently Asked Questions Of Hit Songwriting Formula

What Is The Hit Songwriting Formula?

The hit songwriting formula is a combination of catchy melodies, relatable lyrics, and a strong emotional connection with the audience. It involves studying successful songs, understanding song structures, and finding unique ways to express emotions and experiences.

How Can I Find Inspiration For Songwriting?

You can find inspiration for songwriting by observing the world around you, reflecting on personal experiences, reading books, listening to music, and exploring different genres. Collaborating with other songwriters and attending live performances can also spark creativity and offer fresh perspectives.

Is It Important To Know Music Theory For Songwriting?

While having knowledge of music theory can be helpful, it is not essential for songwriting. Many successful songwriters have created hit songs without formal music training. However, understanding basic concepts like chord progressions and song structures can enhance your songwriting skills and give you more creative options.

How Do I Write Catchy Melodies?

To write catchy melodies, focus on creating memorable hooks, using repetition and variation, and balancing familiarity with surprise. Experiment with different scales, intervals, and rhythms. Listen to popular songs in your genre to grasp the elements that make their melodies catchy, and try incorporating similar techniques into your own compositions.

Conclusion

Innovative creativity is vital for crafting memorable hit songs. By understanding the vital components of songwriting, incorporating personal experiences, and tapping into emotions, you can stand out in the competitive music industry. Utilize these proven strategies to create captivating songs that resonate with your audience and propel your music career to new heights.
Categories
Archive Audio Production

Using the Midi Mapping Function in Ableton Live : Mastering Music Production

Ableton Live is a popular digital audio workstation (DAW) that offers a range of powerful features for music production. One of the key features that sets Ableton Live apart is its MIDI mapping function. This function allows users to assign MIDI controls, such as knobs, buttons, and sliders, to various parameters in their music projects. In this article, we will explore how to use the MIDI mapping function in Ableton Live to enhance your workflow and creativity.

Step 1: Setting up your MIDI controller

The first step in using the MIDI mapping function is to ensure that your MIDI controller is properly connected and recognized by Ableton Live. Connect your MIDI controller to your computer via USB or MIDI cables, and make sure it is powered on. Open Ableton Live and go to the preferences menu, select the “MIDI” tab, and choose your MIDI controller from the list of available devices. Enable the input and output options for your controller to establish a bi-directional connection.

Step 2: Identifying the parameters you want to control

Once your MIDI controller is set up, you need to identify the parameters within Ableton Live that you want to control. These could be anything from volume levels, filter cutoff frequencies, or effect parameters. Familiarize yourself with the different elements of your Ableton Live project and make a note of the parameters you wish to map to your MIDI controller.

Parameter Description
Volume Controls the level of audio output for a specific track or channel.
Pan Adjusts the stereo position of the audio signal.
Filter Cutoff Determines the frequency at which the filter attenuates the audio signal.
Effect Amount Controls the intensity of an audio effect applied to a track or channel.

Step 3: Accessing the MIDI mapping mode

To start mapping MIDI controls to your desired parameters, you need to enable the MIDI mapping mode in Ableton Live. This can be done by clicking on the MIDI button located in the top right corner of the Ableton Live interface. Once enabled, the MIDI mapping mode will be active, and any MIDI input received from your controller will be recognized by Ableton Live for mapping.

Step 4: Mapping MIDI controls

With the MIDI mapping mode activated, you can now start mapping the controls on your MIDI controller to the desired parameters in Ableton Live. Simply click on the parameter you want to control, and then move the corresponding control on your MIDI controller. Ableton Live will automatically detect the MIDI signal and assign the control to the selected parameter. You can repeat this process for multiple parameters to create complex mappings.

Using the Midi Mapping Function in Ableton Live  : Mastering Music Production

Credit: pyramind.com

Step 5: Fine-tuning and editing mappings

Once you have mapped your MIDI controls, you may want to fine-tune and edit the mappings to suit your preferences. By clicking on the MIDI map button again, you can enter the MIDI mapping mode and make adjustments. To remove a mapping, simply right-click on the control in Ableton Live and select “Unmap.” This will remove the MIDI association and restore the parameter to its default state.

Credit: www.amazon.com

Step 6: Saving and recalling your MIDI mappings

After you have created your MIDI mappings, it is a good practice to save them for future use. Ableton Live allows you to save your MIDI mapping configurations as presets, which can be easily recalled whenever needed. To save a preset, go to the MIDI mapping menu and select “Save Mapping” or use the shortcut “Ctrl+S” (Windows) or “Cmd+S” (Mac). You can also load existing presets or create new ones to organize your MIDI mappings efficiently.

Frequently Asked Questions On Using The Midi Mapping Function In Ableton Live : Mastering Music Production


How Do I Use Midi Mapping In Ableton Live?


To use midi mapping in Ableton Live, first select the parameter you want to control, press Cmd+M, then move the MIDI controller knob or fader.


What Is The Purpose Of Midi Mapping In Ableton Live?


Midi mapping in Ableton Live allows you to control software parameters using an external MIDI controller, enhancing live performance and workflow efficiency.


Can I Assign Multiple Parameters To One Midi Controller?


Yes, you can assign multiple parameters to a single MIDI controller, enabling simultaneous control of different functions for seamless performance.


Are There Any Limitations To Midi Mapping In Ableton Live?


While midi mapping is a powerful tool, there are limitations on the number of parameters that can be mapped and the range of MIDI controllers supported.

Conclusion

The MIDI mapping function in Ableton Live is a powerful tool that enhances your music production workflow by giving you hands-on control over various parameters within your projects. By following the steps outlined in this article, you can easily set up your MIDI controller, identify the parameters you want to control, map your MIDI controls, and fine-tune the mappings to suit your needs. Take advantage of the MIDI mapping function in Ableton Live and unlock new levels of creativity and expressiveness in your music.

Remember to experiment with different mappings and explore how they affect your music. With practice, you’ll become adept at using the MIDI mapping function to create dynamic and engaging performances or studio recordings. Have fun exploring the possibilities of MIDI mapping in Ableton Live!