Categories
Archive

How To Save Mixdown In Reaper: Expert Techniques For Flawless Audio Preservation

To save a mixdown in Reaper, go to “File” menu, select “Render” and choose your desired file format. Saving your mixdown in Reaper is a simple process that allows you to export your audio project in various file formats.

By following a few easy steps, you can quickly save your mixdown to your desired location on your computer. Reaper provides options for customization, allowing you to set parameters such as file format, bit depth, sample rate, and more. This versatile software gives you the flexibility to save your mixdown in a way that suits your project needs.

In this guide, we will walk you through the steps to save your mixdown in Reaper efficiently and effectively.

Choosing Mixdown Settings

When saving a mixdown in Reaper, it’s crucial to select the right settings to ensure the best quality output. This involves making decisions on file format options and considering the bit depth for your mix. Let’s delve into each of these aspects in detail.

File Format Options

  • Choose between widely supported formats like WAV and MP3
  • Consider FLAC for lossless compression without compromising quality
  • Opt for OGG for smaller file sizes while maintaining decent quality

Bit Depth Considerations

  1. Decide between 16-bit and 24-bit based on desired audio fidelity
  2. Higher bit depth offers greater dynamic range and resolution
  3. Consider 16-bit for standard quality and 24-bit for more intricate mixes

Remember, the choices you make when saving your mixdown can greatly impact the final sound quality of your project. Take your time to consider the best options for your specific needs.

Setting Up Mixdown Parameters

When it comes to setting up mixdown parameters in Reaper, it’s important to ensure you have the right configurations in place for a smooth and efficient mixdown process. One key aspect of this setup is defining the mixdown parameters accurately to achieve the desired output quality.

Selecting Channels To Render

  • Choose the specific audio channels you want to render in the mixdown process.
  • Ensure that you only select the channels that you want to include in the final mix.

Adjusting Master Track Effects

  1. Review and adjust any effects applied to the master track before rendering the mix.
  2. Make sure the effects are optimized to enhance the overall sound of the mix.

When you have set up the mixdown parameters correctly in Reaper, the final output will reflect your intended sound and style. With the right selections and adjustments, your mixdown process will be efficient and effective.

Optimizing File Name And Location

If you are a Reaper user, it’s vital to understand how to efficiently save mixdowns in order to maintain an organized workflow. One essential aspect of this process is optimizing file name and location. This not only ensures streamlined accessibility but also simplifies the post-production phase. Let’s delve into this crucial step by exploring naming conventions for organization and choosing the right export folder.

Naming Conventions For Organization

When you save your mixdown in Reaper, it’s essential to follow naming conventions for organization. This allows for clear identification and easy retrieval of files. Consider including details such as the song title, version number, and revision date in your file name. This straightforward approach can prevent confusion and simplify collaborative processes.

Choosing The Right Export Folder

Equally important is selecting the right export folder. This location should be easily accessible and encompass your desired file structure. By organizing folders according to projects or clients, you can ensure a systematic arrangement of mixdown files, facilitating seamless navigation.
How To Save Mixdown In Reaper: Expert Techniques For Flawless Audio Preservation

Credit: www.yumpu.com

Utilizing Reaper’s Batch Processing

When it comes to mixing down your audio projects in Reaper, efficiency is key. Utilizing Reaper’s batch processing feature can streamline the export process and help you save time and effort. In this post, we will explore how to take advantage of this powerful tool to preserve consistent audio quality, making your mixdowns sound professional and polished.

Streamlining The Export Process

Reaper’s batch processing enables you to export multiple tracks or regions in a single command, saving you from the tedious task of exporting each file individually. To get started, follow these simple steps:

  1. Open Reaper and navigate to the Track Control Panel located on the left side of the main window.
  2. Select the tracks or regions you wish to export by holding down the Ctrl key (Cmd on Mac) while clicking on each item.
  3. Right-click on any selected track or region and choose “Render/Export” from the context menu.
  4. The Render/Export dialog box will appear, allowing you to customize your export settings.
  5. Specify the output directory and format for your exported files.
  6. Click on the “Add All Tracks” button if you want to include all tracks in the export, or select the specific tracks you wish to include.
  7. Adjust any additional settings such as sample rate, bit depth, and dithering options to meet your specific requirements.
  8. Click on the “Render” button to begin the batch export process.

By following these steps, you can export multiple tracks or regions with ease, saving you valuable time and effort. Whether you’re working on a large-scale project with numerous tracks or simply wanting to export different sections of a single track, batch processing offers a convenient solution.

Preserving Consistent Audio Quality

When exporting multiple tracks or regions, it’s crucial to maintain consistent audio quality across all files. Reaper’s batch processing feature ensures that your mixdowns sound consistent and professional by allowing you to apply the same effects, settings, and processing to each exported file.

To ensure consistent audio quality, consider these tips:

  • Check your settings: Double-check your export settings to make sure they match your project’s specifications. Pay attention to sample rate, bit depth, and any dithering options.
  • Apply effects and processing: If you have specific effects or processing chains applied to your tracks, make sure to enable them during the export process. This will ensure the same sound is maintained across all exported files.
  • Verify levels: Use metering tools or visual feedback to ensure consistent levels across your tracks. This will help prevent any discrepancies in volume during the export.

By following these guidelines and taking advantage of Reaper’s batch processing capabilities, you can achieve consistent audio quality in your mixdowns. This is essential for creating professional-sounding projects and maintaining a cohesive listening experience for your audience.

Ensuring Mixdown Integrity

When it comes to saving your mixdown in Reaper, ensuring the integrity of your final audio file is crucial. This ensures that your mix sounds its best and is free from any unwanted issues such as clipping or file corruption. In this guide, we will explore some essential steps to follow to verify the mixdown integrity to deliver professional-quality audio.

Checking For Clipping And Peaks

One common issue that can arise during the mixdown process is clipping. Clipping occurs when the volume of a track exceeds the maximum level of 0 dB. This can result in unpleasant distortion and lead to a compromised audio quality. To check for clipping and peaks in Reaper, follow these simple steps:

  1. Open your saved project in Reaper.
  2. Play through your mix and keep an eye on the track meters.
  3. If you notice that any track’s meter consistently exceeds 0 dB, it’s likely clipping is occurring.
  4. To address this, lower the volume of the affected track or apply compression to even out the levels.

By checking for clipping and peaks before the final mixdown, you can ensure a clean and distortion-free audio file.

Verifying File Integrity Post-export

After exporting your mixdown file in Reaper, it’s crucial to verify its integrity to ensure it doesn’t contain any errors or corruption. Here are a few steps to follow:

  1. Open the exported audio file in a media player.
  2. Listen to the file thoroughly, paying close attention to any potential audio artifacts or anomalies.
  3. If you notice any issues, consider exporting the file again to avoid delivering a compromised mix.

Additionally, you can use audio analysis tools or waveform visualization software to inspect the exported file for any abnormalities visually. This can help identify silent gaps, unexpected peaks, or other irregularities in the audio.

By verifying the integrity of your mixdown file post-export, you can confidently deliver high-quality audio that meets professional standards.

How To Save Mixdown In Reaper: Expert Techniques For Flawless Audio Preservation

Credit: www.scribd.com

How To Save Mixdown In Reaper: Expert Techniques For Flawless Audio Preservation

Credit: www.linkedin.com

Frequently Asked Questions On How To Save Mixdown In Reaper

How Do I Save A Mixdown In Reaper?

To save a mixdown in Reaper, go to the “File” menu, select “Render” and choose the options for your mixdown. Specify the format, folder, and file name, then click “Render” to save your mixdown.

Can I Save Mixdowns In Different File Formats?

Absolutely! Reaper allows you to save mixdowns in various file formats like WAV, MP3, FLAC, and more. Simply choose the desired format when saving your mixdown.

How Can I Ensure The Best Quality When Saving A Mixdown In Reaper?

To ensure the best quality when saving a mixdown in Reaper, make sure to use high-quality source files, adjust the render settings to desired specifications, and consider using lossless formats like WAV or FLAC for maximum audio fidelity.

Is It Possible To Save Multiple Mixdowns Simultaneously In Reaper?

Yes, Reaper supports saving multiple mixdowns at once. Use the batch rendering feature to select multiple project files and choose the options for each mixdown. Reaper will process and save them simultaneously.

Conclusion

Mastering the art of saving mixdown in Reaper is crucial for any music producer. By following the step-by-step guide provided in this blog post, you can streamline your workflow and improve the quality of your final audio product. Embracing these techniques will undoubtedly elevate your music production game in the digital age.

Categories
Archive

Song Writing Steps : Unleash Your Musical Creativity

To write a song, start with lyrics, create a melody, and structure the music accordingly. Incorporate emotion and personal experiences for authentic songs.

Crafting catchy hooks and refining the song’s arrangement will ensure a memorable final product. Understanding songwriting techniques and practicing regularly are key for songwriting success. Let’s dive into the steps involved in crafting a compelling and engaging song that resonates with listeners worldwide.

Whether you are a beginner or an experienced songwriter, mastering these steps will help you create music that speaks to the soul and leaves a lasting impact. By following these guidelines, you can unleash your creativity and produce songs that connect with your audience on a deep level.

Song Writing Steps  : Unleash Your Musical Creativity

Credit: songfancy.com

Exploring Inspiration

When writing a song, exploring inspiration is the first crucial step. This process involves delving deep into your emotions and observing the world around you to craft meaningful and impactful lyrics.

Deep Dive Into Your Emotions

Connecting with your emotions is essential in creating authentic and powerful lyrics. Start by reflecting on personal experiences and feelings to draw inspiration for your songwriting.

Observing The World Around You

Drawing inspiration from the world around you can spark creativity. Observe nature, interactions, and events to incorporate real-life elements into your lyrical content.

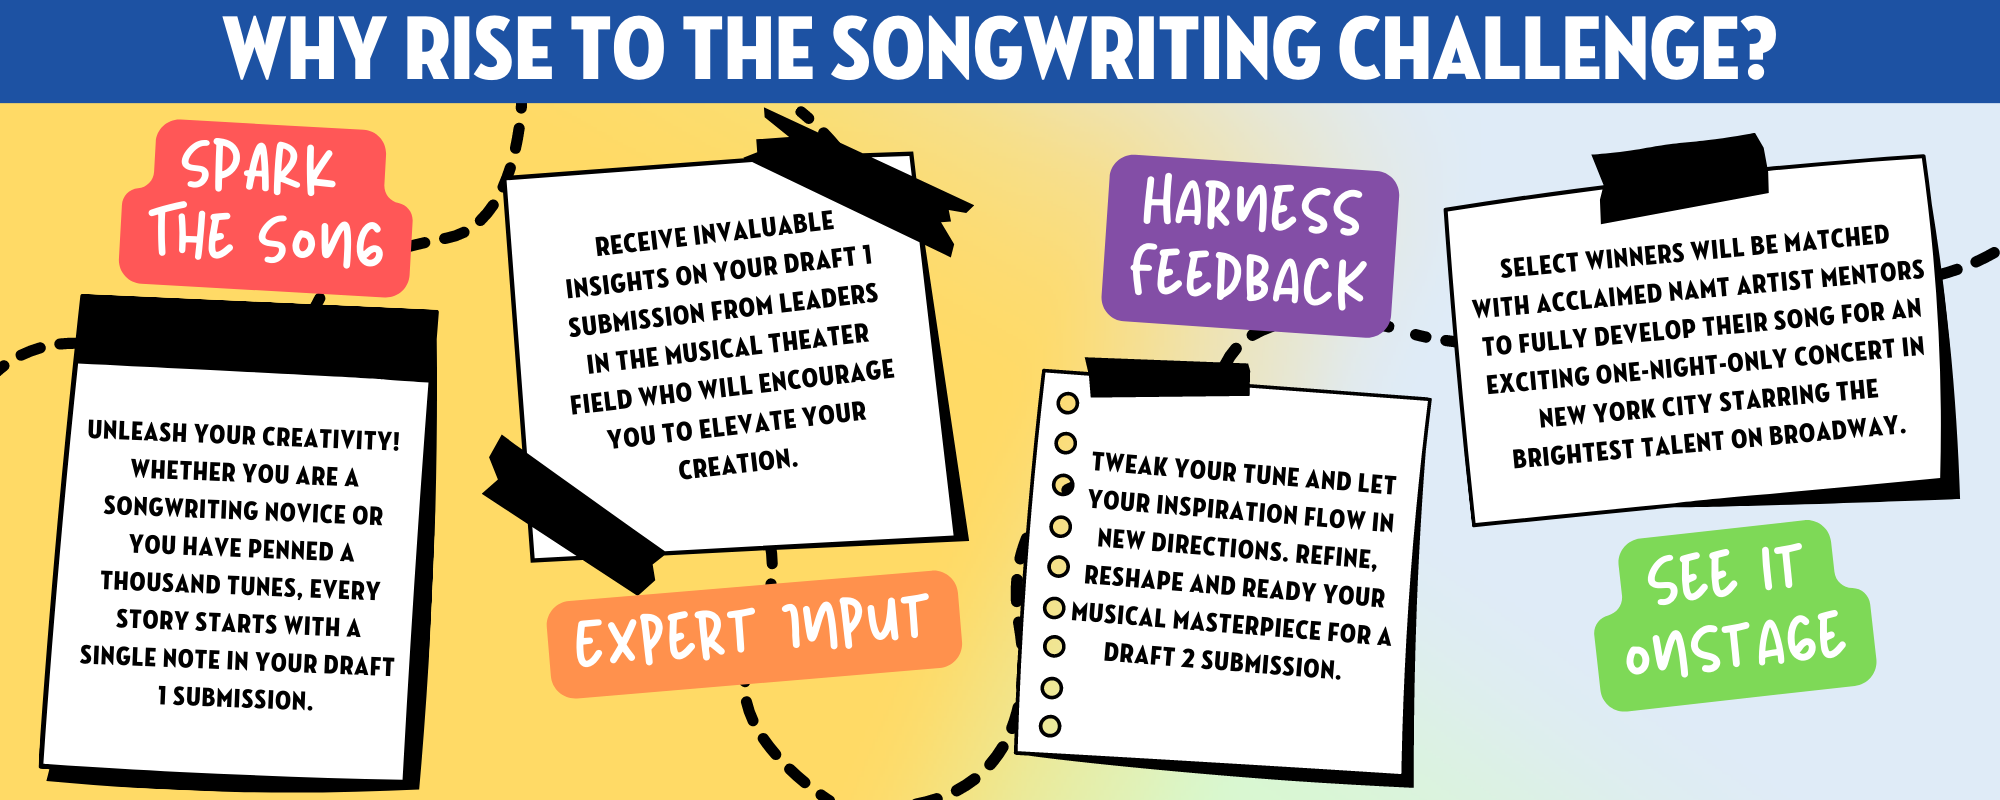
Song Writing Steps  : Unleash Your Musical Creativity

Credit: namt.org

Setting The Tone

Song Writing Steps – Setting the Tone

Setting the tone in a song is crucial as it establishes the mood and atmosphere for the listeners.

Choosing The Right Melody

A melody should complement the lyrics and evoke emotions in the audience.

Crafting Memorable Chords

Memorable chords enhance the musical experience and make the song catchy.

Lyric Crafting

When it comes to crafting compelling and relatable lyrics, one of the most effective approaches is to tap into personal experiences. Drawing inspiration from your own life experiences can lend an authentic and genuine quality to your lyrics, resonating with listeners on a deeper level.

From tales of heartbreak to triumphs of love and everything in between, find moments in your life that hold emotional weight and translate them into captivating verses. By infusing your own experiences into your songwriting, you can create a powerful connection with your audience, evoking genuine emotions and empathy.

Playing with rhyme and rhythm is an essential aspect of lyric crafting. By experimenting with different rhyme schemes and rhythmic patterns, you can add dynamic layers to your lyrics, making them engaging and memorable.

Whether employing a traditional ABAB rhyme scheme or embracing more unconventional approaches, exploring various rhyming patterns can bring a unique flair to your lyrics. Additionally, incorporating different rhythmic elements such as syncopation or alliteration can further elevate the musicality of your words, creating an enchanting flow that captivates your audience.

Structuring Your Song

Making sure your song has a solid structure is essential to creating a memorable and engaging musical journey for your listeners. The way you arrange the different sections of your song can have a significant impact on its overall impact. In this article, we will delve into the art of structuring a song and explore the three key elements: building a compelling intro, crafting captivating verses, and choruses.

Building A Compelling Intro

The introduction of your song is like a musical handshake, it sets the tone and creates anticipation for what’s to come. It is your chance to grab your listeners’ attention right from the start and make them want to keep listening. To build a compelling intro, consider the following:

  • Create a hook: Start with a catchy melody, a gripping rhythm, or an intriguing lyric that instantly captivates your audience.
  • Establish the theme: Introduce the main musical and lyrical ideas that will be developed throughout the song.
  • Build tension: Gradually increase the intensity, volume, or complexity of the music to create a sense of anticipation.

Crafting Captivating Verses And Choruses

Verses and choruses are the backbone of any song. They provide the structure and repetitive elements that make a song memorable. To craft captivating verses and choruses, keep the following tips in mind:

Captivating Verses

  • Paint a picture: Use vivid and descriptive language to tell a story or convey emotions that resonate with your listeners.
  • Create contrast: Provide a contrast between the verses and chorus to keep the song dynamic and engaging.
  • Develop a melody: Craft a melodic line that is memorable, easy to sing along with, and complements the lyrics.
  • Vary the phrasing: Experiment with different lengths and structures of phrases to add variety and keep your listeners interested.

Captivating Choruses

  • Make it catchy: Aim for a chorus that gets stuck in your listeners’ heads. Use repetitive hooks, memorable melodies, and simple, relatable lyrics.
  • Increase the energy: The chorus should be the most intense and impactful part of the song. Use powerful instrumentation, soaring vocals, or strong rhythmic patterns to elevate the energy level.
  • Create sing-along moments: Craft lyrics and melodies that are easy for your audience to remember and sing along with.

By following these songwriting steps, you’ll have a solid foundation for structuring your song and keeping your listeners engaged from start to finish. Remember, structure is not meant to be restrictive but rather a tool that helps you organize your ideas and evoke the desired emotions in your audience.

Refining Your Composition

Refining your composition is a crucial step in the songwriting process. It involves polishing your song’s arrangement and seeking feedback for revisions. By focusing on these aspects, you can take your song to the next level and ensure it resonates with your audience. In this article, we will explore two important steps in the refining process: Polishing Your Song’s Arrangement and Seeking Feedback and Revisions.

Polishing Your Song’s Arrangement

The arrangement of a song refers to how the different elements come together to create a cohesive and engaging piece. To polish your song’s arrangement, consider the following:

  • Structure: Ensure that your song has a clear and logical structure that captivates your listeners. This may involve organizing your verses, choruses, bridges, and other sections in a way that flows naturally.
  • Instrumentation: Experiment with different instruments and sounds to find the right combination that brings out the desired emotion. Pay attention to how each instrument interacts with the others and contributes to the overall sound.
  • Transitions: Smooth transitions between sections can add depth and interest to your song. Work on creating seamless transitions that guide your listeners through the journey of your composition.
  • Dynamics: Use dynamics, such as changes in volume and intensity, to create contrast and highlight the emotional moments of your song.

Seeking Feedback And Revisions

Seeking feedback from trusted sources is essential in refining your composition. The objective perspective of others can provide valuable insights and help you identify areas for improvement. Here are some tips for seeking feedback and implementing revisions:

  1. Share your song: Reach out to fellow musicians, songwriting communities, or mentors who can give constructive feedback on your composition.
  2. Listen attentively: When receiving feedback, listen attentively to understand different perspectives and opinions. Take note of both positive and negative feedback.
  3. Consider revisions: Analyze the feedback you receive and consider implementing revisions that align with your artistic vision. Trust your instincts while being open to suggestions that can enhance your song.
  4. Test your revisions: After making revisions, test your song again and seek further feedback. This iterative process allows you to refine your composition until you achieve the desired result.

Refining your composition through polishing the arrangement and seeking feedback and revisions can transform your song into a true masterpiece. Embrace the opportunity to enhance your work and connect with your audience on a deeper level.

Song Writing Steps  : Unleash Your Musical Creativity

Credit: www.activecampaign.com

Frequently Asked Questions For Song Writing Steps

What Is The First Step In Songwriting?

The first step in songwriting is to brainstorm ideas and come up with a concept for your song. This can include thinking about the theme, mood, or message you want to convey in the song.

How Do You Write Lyrics For A Song?

To write lyrics for a song, start by brainstorming ideas and jotting down key phrases or words that relate to your song’s theme. Then, start crafting your lyrics by using these ideas and expressing your emotions through storytelling or poetic language.

What Are Some Techniques For Writing A Catchy Chorus?

To write a catchy chorus, focus on creating a memorable hook or phrase that is repeated throughout the chorus. Use simple and relatable language, incorporate strong melodies, and consider adding contrasts or surprises to make the chorus stand out to listeners.

Conclusion

These songwriting steps are designed to guide and inspire you in your creative process. By embracing the power of storytelling, melody, and emotion, you can craft meaningful and impactful songs. With practice and perseverance, you can elevate your songwriting skills and produce music that resonates with others.

Keep writing, and let your unique voice shine through.


Categories
Archive

Branch Out With Your Music : Unlock Your Creative Potential

Branch out with your music by exploring different genres and collaborating with diverse artists. This can enhance your creativity and broaden your audience reach.


If you’re a musician looking to expand your horizons and make a mark in the music industry, diversifying your sound and collaborating with artists from various backgrounds can be a game-changer. By stepping outside your comfort zone and experimenting with new styles, you can bring freshness to your music and attract a wider fan base.


Embracing diversity in music not only opens up new opportunities for growth but also allows you to connect with a more diverse audience on a deeper level. So, don’t be afraid to branch out and embrace the possibilities that come with exploring different musical avenues.


Exploring Musical Genres

If you’re a music enthusiast, Exploring Musical Genres can be a captivating journey. Discovering New Sounds and Experimenting with Different Styles open up possibilities to Branch Out With Your Music.

Discovering New Sounds

Step beyond your comfort zone to encounter fresh beats and melodies. Dive into diverse genres like jazz, classical, or electronic to broaden your musical horizon.

Experimenting With Different Styles

Unleash your creativity by blending genres like rock with pop, or hip-hop with folk. Create a unique fusion that reflects your musical identity and captivates your audience.

Tapping Into Your Creativity

Unlocking your full potential as a musician involves Tapping Into Your Creativity. By exploring new avenues and pushing your boundaries, you can branch out with Your Music.


Embracing Inspirations

  • Draw inspiration from diverse sources
  • Try mixing genres for a unique sound
  • Experiment with different instruments

Breaking The Boundaries

  1. Challenge conventional music norms
  2. Blend traditional and modern elements
  3. Collaborate with artists from different backgrounds

Shake up your music routine—be bold, think outside the box, and let your creativity flow!

Expanding Your Skill Set

Expanding your skill set as a musician can open up a world of new creative possibilities. By learning new instruments and mastering music production tools, you can branch out into new genres, collaborate with other musicians, and enhance your overall musical competence.

Learning New Instruments

Learning to play a new instrument not only broadens your musical vocabulary but also challenges and strengthens your cognitive abilities. Embracing variety helps the brain develop problem-solving skills, enhances memory, and fosters a more profound understanding of music theory. Whether it’s the guitar, piano, or a unique instrument like the banjo or sitar, each new instrument unlocks a wealth of fresh musical ideas.

Mastering Music Production Tools

Mastering music production tools such as digital audio workstations (DAWs) and software instruments allows you to exercise complete creative control over your music. By familiarizing yourself with the latest technology, you can experiment with new sounds, arrange music more fluently, and produce high-quality recordings. Furthermore, understanding music production tools empowers you to collaborate effectively with other musicians and produce professional-grade music independently.

Branch Out With Your Music : Unlock Your Creative Potential


Credit: www.amazon.com

Collaborating With Others

Enhance your music by collaborating with other creatives. By branching out, you can expand your sound and reach new audiences, fostering a supportive artistic community. Embracing collaboration opens doors for fresh perspectives and opportunities for growth in your music career.

Collaborating with others in the music industry is an excellent way to branch out and expand your horizons. Working with other musicians, producers, and songwriters not only allows you to tap into their creativity and expertise, but it also provides an opportunity to learn and grow as an artist.

Creating Joint Projects

Creating joint projects with other musicians can result in unique and powerful music that you may never have created on your own. Collaborating allows you to bring different styles, genres, and perspectives together, resulting in a refreshing and innovative sound.

To start a joint project, find a like-minded musician or band whose style complements yours. Establish clear objectives and expectations, and be open to compromise and experimentation. This collaborative effort can lead to a more diverse and compelling music catalog, attracting a wider audience.

Networking And Building Connections

Networking plays a crucial role in the music industry. Building connections with other musicians, producers, and industry professionals opens doors to new opportunities and collaborations.

Attend music events and conferences to meet like-minded individuals who share your passion for music. Engage in conversations, exchange contact information, and follow up with potential collaborators. Building a strong network not only increases your chances of finding the right people to collaborate with but also creates potential for future gigs, performances, and exposure.

Here are a few tactics to help you network and build connections:

1. Attend industry events and conferences.
2. Join online music communities and forums.
3. Engage with other musicians on social media platforms.
4. Reach out to artists or producers whose work you admire.
5. Actively participate in music-related workshops and seminars.

Remember, collaboration is a two-way street. Be willing to contribute your skills and expertise to a project while respecting the creative input of others. Working well with others not only expands your musical abilities but also fosters a supportive and inspiring community within the music industry.

Conclusion

Collaborating with other musicians is a powerful way to branch out and expand your musical horizons. By creating joint projects and building connections, you can tap into new creative possibilities and elevate your music to new heights. Embrace collaboration, and watch as your music flourishes through the combined talents and shared vision of others.

Promoting Your Diverse Portfolio

In the competitive world of music, it’s crucial to stand out from the crowd and showcase your versatility. That’s why promoting your diverse portfolio is key to attracting new opportunities and reaching a wider audience. In this article, we’ll explore two essential strategies for promoting your diverse portfolio – showcasing your versatility and engaging with varied audiences.

Showcasing Your Versatility

When it comes to branching out with your music, it’s important to highlight your ability to adapt to different styles and genres. Showcasing your versatility not only attracts the attention of potential fans but also impresses industry professionals and opens doors to exciting collaborations and projects.

Here are a few effective ways to showcase your versatility:

  1. Produce a diverse range of tracks, incorporating different musical influences and styles. This demonstrates your ability to experiment and adapt.
  2. Create a portfolio website or an electronic press kit (EPK) that highlights your various musical projects and showcases your talent in an organized manner.
  3. Collaborate with artists from different genres or backgrounds. This not only allows you to explore new sonic territories but also introduces your music to their fan base, reaching a wider audience.
  4. Participate in music competitions or festivals that celebrate diversity. Winning or even participating in such events helps validate your versatility and introduces your music to industry professionals and fans alike.

Engaging With Varied Audiences

Engaging with varied audiences is crucial for expanding your reach and building a dedicated fan base. By connecting with listeners from different backgrounds and tastes, you’ll not only increase your exposure but also create meaningful connections that can drive your music career forward.

Here are a few effective strategies to engage with varied audiences:

  1. Regularly interact with your audience on social media platforms, such as Facebook, Twitter, and Instagram. Respond to comments, create polls, and share behind-the-scenes content to foster a sense of community.
  2. Collaborate with influencers or bloggers who cater to diverse audiences. This can help you tap into new fan bases and gain exposure in different music scenes.
  3. Consider translating your music or providing subtitles in different languages to engage with international audiences who may not be fluent in English.
  4. Perform at diverse venues and events that attract varied crowds, such as multicultural festivals, charity events, or even local community gatherings. This allows you to connect with people from different walks of life.

Remember, promoting your diverse portfolio is not only about reaching a wider audience – it’s also about expressing your artistic range and showcasing the unique qualities that set you apart. By showcasing your versatility and engaging with varied audiences, you’ll position yourself as a multifaceted artist ready to take on new challenges and opportunities.

Branch Out With Your Music : Unlock Your Creative Potential


Credit: medium.com

Frequently Asked Questions On Branch Out With Your Music

How Can I Expand My Music Repertoire?

To expand your music repertoire, you can try exploring different genres, attending live performances, collaborating with other musicians, or joining music workshops and classes. Additionally, you can also use online platforms and music streaming services to discover new artists and expand your musical horizons.

Is It Important For Musicians To Experiment With Different Musical Styles?

Yes, it is important for musicians to experiment with different musical styles. This can help you grow as a musician, inspire new ideas, and bring a fresh perspective to your music. Exploring different genres and styles can also help you connect with a wider audience and stand out in a competitive industry.

How Can Branching Out Musically Benefit Me As An Artist?

Branching out musically can benefit you as an artist in several ways. It can help you showcase your versatility and expand your fan base. It can also lead to collaborations and opportunities to work with artists from different genres. Branching out can enhance your creativity and make your music more unique and appealing to a diverse audience.

Conclusion

Diversifying your musical pursuits can open up new opportunities and creative avenues. By exploring different genres and reaching out to new audiences, you can grow as an artist and connect with a wider fanbase. Embrace the potential that lies outside your comfort zone and let your music flourish in unexpected directions.


Branch out and let your creativity soar.

Categories
Archive

Mixing Instrumental Or Beat Stems Better: Master Your Sound

To mix instrumental or beat stems better, carefully balance the levels and frequencies of each element. This ensures a cohesive and dynamic sound that enhances the overall mix.

Taking the time to adjust volumes, pan positions, and EQ settings can help create a well-balanced and professional-sounding mix. Properly blending the different elements of a track can make a significant difference in the clarity and impact of the final product.

By following best practices and using your ear to guide the process, you can create a polished mix that highlights the strengths of each instrument or beat stem. Mastering the art of mixing will elevate the quality of your music production and engage your audience effectively.

Mixing Instrumental Or Beat Stems Better: Master Your Sound

Credit: blackliteproductions.com

Choosing The Right Mixing Techniques

Balancing Instrumental Stems

Adjust volume levels of each instrument for a clear sound.

Enhancing Beat Stems

Apply EQ and compression to emphasize rhythm and groove.

Mixing Instrumental Or Beat Stems Better: Master Your Sound

Credit: aimixingmastering.com

Understanding The Role Of Eq And Compression

EQ Tips for Instrumental Stems:

  • Ensure each instrument has its unique frequency range.
  • Use parametric EQ to cut unwanted frequencies.
  • Boost frequencies to enhance specific instruments.

Compression Tips for Beat Stems:

  • Set a moderate compression ratio for drums.
  • Side-chain compression can help in clearing space for other elements.
  • Adjust attack and release times for the desired impact.

Utilizing Effects For Instrumental And Beat Stems

Enhance your instrumental or beat stems by utilizing effects creatively during the mixing process. Experiment with different effects such as reverb, delay, and compression to add depth and dimension to your tracks. By implementing these techniques, you can elevate the overall quality and impact of your music composition.

In the music production process, utilizing effects for instrumental and beat stems plays a pivotal role in achieving a professional and polished sound. Whether it’s adding depth and dimension to instrumental stems or enhancing the rhythm and dynamics of beat stems, implementing the right effects can elevate the overall quality of the mix. Let’s delve into the specific techniques and creative approaches for leveraging effects on instrumental and beat stems.

Reverb And Delay For Instrumental Stems

When it comes to instrumental stems, reverb and delay are essential effects that can transform the sound and create a sense of space. By applying reverb, you can introduce a lush ambience, giving instruments a more expansive and immersive quality. Additionally, using delay can add depth and a sense of movement to the instrumental elements, enhancing the overall texture of the mix.

Creative Effects For Beat Stems

When working with beat stems, exploring creative effects can inject a unique character and energy into the mix. From filter sweeps and stutter effects to bit-crushing and granular processing, there are countless ways to manipulate and reshape the beats, adding intricate layers and complexity to the rhythm. Experimenting with unconventional effects can yield innovative and captivating results, setting your mix apart from the rest.
Mixing Instrumental Or Beat Stems Better: Master Your Sound

Credit: www.masteringthemix.com

Creating Cohesiveness In The Mix

Mixing instrumental or beat stems can be a challenging task, requiring a delicate balance between individual elements to achieve a cohesive and harmonious sound. Blending instrumental and beat stems seamlessly is crucial to creating a professional-sounding mix. Consistency in levels throughout the mix is equally important and enhances the overall listening experience. In this article, we will explore how to properly blend instrumental and beat stems and achieve consistent levels to create a cohesive mix.

Blending Instrumental And Beat Stems

Blending instrumental and beat stems is the key to creating a rich and well-rounded mix. By following a few simple techniques, you can ensure that all elements work together harmoniously.

  1. Balance – When mixing instrumental and beat stems, it is important to find the right balance between these elements. Start by adjusting the volume levels of each stem, ensuring that no individual part overpowers the others. This will create a cohesive foundation for the rest of the mix.
  2. Panning – Panning is an effective way to add depth and width to your mix. By placing instrumental and beat stems in different areas of the stereo field, you can create separation and improve clarity. Experiment with panning different elements to find the sweet spot that works best for your mix.
  3. EQ – Equalization plays a vital role in blending instrumental and beat stems. Use EQ to carve out space for each element in the frequency spectrum. By identifying the frequency ranges occupied by different components, you can eliminate any unwanted frequency clashes and ensure that each stem has its own place in the mix.
  4. Compression – Compression helps to control the dynamics of your mix, ensuring that each stem sits consistently in the overall sound. Use compression to tame any excessive peaks and bring out the subtleties of each element. This will contribute to the cohesion of your mix and enhance its overall impact.

By employing these techniques, you can blend instrumental and beat stems effectively, resulting in a cohesive and balanced mix that captures the desired energy and emotion of your music.

Achieving Consistent Levels

Consistency in levels is paramount to creating a polished and professional mix. Here are some tips to help you achieve consistent levels throughout your mix:

  • Gain Staging – Proper gain staging at the beginning of your mix is crucial. Ensure that each stem is recorded or imported at an optimal level, neither too low nor too high. This will help maintain consistent levels throughout the process.
  • Fader Control – Use your faders to control the levels of individual stems. Make adjustments as needed to ensure that each stem is balanced with the others. Take the time to listen critically and make small, incremental adjustments to achieve the desired cohesiveness.
  • Automation – Automation is a powerful tool for achieving consistent levels. Use automation to control the volume of different elements within the mix. This allows for precise adjustments and ensures that each stem is heard clearly at the appropriate times.
  • Reference Tracks – A great technique for achieving consistent levels is to use reference tracks. Compare your mix to professionally mixed and mastered tracks that are similar in style to your own. This will give you a benchmark to aim for and help you identify any inconsistencies in your levels.

By implementing these strategies, you can maintain consistent levels throughout your mix, resulting in a cohesive and engaging listening experience for your audience.

Refining Your Sound With Automation

Automation is an invaluable tool when it comes to mixing instrumental or beat stems. By applying automation techniques, you can take your tracks to the next level, adding depth, dynamics, and creativity to your music. In this article, we will explore two essential types of automation that can help refine your sound: dynamic adjustments for instrumental stems and rhythmic automation for beat stems.

Dynamic Adjustments For Instrumental Stems

Dynamic adjustments play a crucial role in shaping the overall sound of your instrumental stems. By automating parameters such as volume, panning, and EQ, you can bring out the best in each individual track and create a more balanced mix. Here are some dynamic adjustments you can make:

  • Volume Automation: Use volume automation to smooth out any volume discrepancies between different sections of your instrumental stems. This ensures a consistent and seamless listening experience for your audience.
  • Panning: Experiment with panning automation to widen the stereo image of your instrumental tracks. By moving elements left or right, you can create a sense of spaciousness and enhance the overall width of your mix.
  • EQ Automation: Utilize EQ automation to shape the tonal balance of your instrumental stems. By automating EQ settings, you can emphasize certain frequencies during specific parts of your track, adding clarity and impact.

Rhythmic Automation For Beat Stems

Beat stems provide the rhythmic foundation of your music, and applying automation techniques can help add interest and variation to your beats. Here are some ways you can use rhythmic automation on your beat stems:

  • Filter Sweeps: Create dynamic filter sweeps by automating the cutoff frequency of a filter plug-in on your beat stems. This adds movement and excitement to your beats, giving them a more dynamic and evolving feel.
  • Delay and Reverb Throws: Use automation to introduce subtle or dramatic delay and reverb throws on specific beats or drum hits. This adds depth and space to your beats, making them more immersive for the listener.
  • Parameter Modulation: Experiment with automating various parameters, such as pitch, modulation depth, or decay time, on your beat stems. This allows for creative and unique rhythmic patterns that can elevate your beats to new heights.

By incorporating dynamic adjustments and rhythmic automation into your mixing process, you can refine your sound and make your instrumental or beat stems truly shine. Don’t be afraid to experiment and explore different automation techniques, as they can unlock endless possibilities for enhancing your music.

Frequently Asked Questions For Mixing Instrumental Or Beat Stems Better

How Do I Mix Instrumental Or Beat Stems?

To mix instrumental or beat stems, start by organizing your tracks and applying EQ and compression to each element. Then, adjust levels and panning to create a balanced mix. Experiment with effects like reverb and delay to add depth and character to your tracks.

Finally, listen to your mix on different systems to ensure it sounds great everywhere.

What Is The Purpose Of Mixing Instrumental Or Beat Stems?

The purpose of mixing instrumental or beat stems is to create a polished and professional sound. By adjusting the levels, EQ, and effects of each element, you can enhance the clarity, balance, and overall impact of your music. Mixing also ensures that your tracks sound good on different playback systems.

How Can Mixing Instrumental Or Beat Stems Improve My Music?

Mixing instrumental or beat stems can improve your music in several ways. It allows you to optimize the balance and clarity of each element, making them stand out in the mix. By applying effects, you can add depth and dimension to your tracks.

A well-mixed song will sound more professional and engaging to listeners.

Conclusion

Both mixing instrumental and beat stems have their advantages. It ultimately depends on the specific needs and preferences of the producer. Experimenting with both approaches can lead to creative and unique sounds. Regardless of the method chosen, having a clear vision and understanding of the desired outcome is crucial for a successful mix.

Categories
Archive

How Can A Rapper Get Discovered : Unveiling the Path to Stardom

To get discovered as a rapper, focus on building a strong online presence through social media platforms like Instagram, TikTok, and SoundCloud. Engage with your audience, collaborate with other artists, and use hashtags to increase visibility.

Additionally, attend open mics, network with industry professionals, and submit your music to blogs and playlists to expand your reach and increase chances of being noticed. Showcasing your unique style and personality will help you stand out and attract the attention of record labels and music executives, increasing your chances of getting discovered as a talented rapper ready to make your mark in the industry.

Crafting An Authentic Brand

Crafting an Authentic Brand is essential for a rapper looking to get discovered in today’s competitive music industry.

Establishing A Unique Identity

Craft a unique image and style.

  • Reflect your personality in your music.
  • Define what sets you apart from others.

Developing A Compelling Image

Create a visually appealing presence.

  • Incorporate distinctive visuals in your branding.
  • Consistency in image across platforms.
How Can A Rapper Get Discovered : Unveiling the Path to Stardom

Credit: www.amazon.com

Creating Exceptional Music

To get discovered as a rapper, creating exceptional music is key. Focus on developing a unique style, building a strong online presence, networking with industry professionals, and consistently releasing high-quality content. Engage with fans and collaborate with other artists to increase visibility and credibility in the music industry.

Mastering The Art Of Lyricism

In crafting exceptional music, lyricism plays a pivotal role. Rappers should focus on meaningful storytelling and wordplay.

Innovating With Production

Production quality can make or break a rapper’s success. Experiment with diverse beats and soundscapes to captivate listeners.

Creating Exceptional Music is crucial for a rapper’s career.
Mastering the Art of Lyricism involves storytelling and wordplay, while Innovating with Production means experimenting with diverse beats.

Building A Strong Online Presence

Rappers in today’s digital age have the incredible opportunity to enhance their visibility and potentially get discovered by building a robust online presence. With the right digital strategies, aspiring musicians can leverage the power of the internet to connect with fans, gain exposure, and attract industry attention.

Utilizing Social Media Effectively

Social media serves as a pivotal platform for rappers to showcase their talents and reach a global audience. By regularly posting engaging content on platforms such as Instagram, Twitter, and TikTok, artists can captivate followers and amplify their brand. Utilizing features like stories, live videos, and interactive posts can help rappers establish a strong online presence and foster a loyal fan base.

Engaging With Fans On Digital Platforms

In the digital landscape, connecting with fans on various platforms is crucial for building rapport and strengthening support. Whether it’s responding to comments, hosting Q&A sessions, or sharing behind-the-scenes insights, engaging with fans on platforms like YouTube, SoundCloud, and Facebook can cultivate a dedicated community and elevate a rapper’s online presence.

Networking With Industry Insiders

Connect with industry insiders to boost your chances of getting discovered as a rapper. Building relationships with key players can open doors to opportunities, exposure, and collaborations within the music industry. Embrace networking as a vital strategy in your journey to success.

Forging Relationships With Producers

One effective way for a rapper to get discovered is by forging relationships with producers in the industry. Producers play a vital role in the success of artists as they are responsible for creating and producing the beats and instrumentals that accompany the rapper’s lyrics. By networking with industry insiders such as producers, rappers can gain access to quality beats and collaborations that can elevate their music.

Connecting With Established Artists

In addition to building relationships with producers, another powerful networking strategy for rappers is connecting with established artists. Established artists have already made a name for themselves in the industry and have a wide network of connections. By collaborating with artists who are already established, rappers can tap into their fan base, gain exposure to new audiences, and learn from their experience and success.

Performing Live And Showcasing Talents

Performing live is an essential part of getting discovered as a rapper. It provides an opportunity to showcase your talents, connect with your audience, and build a fan base. In this section, we will discuss two important aspects of performing live and how they can help you gain recognition in the music industry.

Securing Gigs At Local Venues

To start performing live, it’s crucial to secure gigs at local venues. Here are some steps you can take to increase your chances of getting booked:

  1. Research local venues that host live music performances and have a suitable audience for your rap style.
  2. Contact venue owners or event organizers with a professional email or a phone call. Clearly communicate your interest in performing at their venue and provide them with links to your previous work or a short demo.
  3. Highlight your unique selling points and explain why you believe performing at their venue would be beneficial for both parties.
  4. Offer to take any time slot available, especially if you are just starting out. This will demonstrate your dedication and willingness to seize any opportunity to perform.
  5. Follow up with the venue after a week or two if you don’t receive a response. Persistence is key.
  6. Once you secure a gig, promote it through your social media channels, engage with potential attendees, and encourage your fans to come and support you.

Participating In Open Mic Events

Another effective way to showcase your talents is by participating in open mic events. Open mic nights provide a platform for artists to perform in front of diverse audiences, often consisting of fellow musicians, industry professionals, and music enthusiasts. Here’s how you can make the most out of these opportunities:

  • Research local open mic events and their schedule. Look for events that align with your rap style and target audience.
  • Prepare your performance by rehearsing your songs, ensuring your delivery is clear and confident.
  • Arrive early to sign up for a performance slot. Open mic nights can be quite popular, and signing up early increases your chances of securing a spot.
  • Support fellow performers by cheering them on and networking with them. Building connections within the local music community can lead to future collaborations and opportunities.
  • When it’s your turn to perform, give it your all and engage with the audience. Be confident, energetic, and showcase your unique style and vocal abilities.
  • After your performance, make yourself approachable to receive feedback and connect with people who showed interest in your music.

Showcasing your talents through live performances is an effective way for a rapper to get discovered. By securing gigs at local venues and participating in open mic events, you’ll create opportunities to connect with an audience, gain exposure, and catch the attention of industry professionals. Keep pushing yourself, honing your skills, and making unforgettable performances – the right opportunity may be just around the corner.

How Can A Rapper Get Discovered : Unveiling the Path to Stardom

Credit: www.tiktok.com

How Can A Rapper Get Discovered : Unveiling the Path to Stardom

Credit: www.wonderlandmagazine.com

Frequently Asked Questions Of How Can A Rapper Get Discovered

How Can A Rapper Get Discovered In The Music Industry?

To get discovered as a rapper, focus on crafting unique, captivating songs that showcase your talent and style. Build a strong online presence through social media channels and platforms like SoundCloud and YouTube. Collaborate with other artists and industry professionals to expand your network.

Perform at local shows and open mic nights to gain visibility and connect with potential fans and industry insiders.

What Are Some Effective Ways For A Rapper To Promote Their Music?

Promote your music by leveraging social media platforms to engage with your audience and share snippets of your tracks. Collaborate with other artists on songs or features, expanding your reach to their fanbase. Create visually appealing music videos and share them on platforms like YouTube and Vimeo.

Utilize streaming platforms like Spotify and Apple Music to distribute and promote your music to a wider audience.

How Important Is Networking For A Rapper’s Success?

Networking is crucial for a rapper’s success. Attend industry events, such as music festivals and conferences, to connect with other artists, producers, and music professionals. Establish genuine relationships and partnerships that can help you navigate the music industry. Collaborating with other artists can grant you access to new audiences and opportunities, ultimately boosting your chances of being discovered.

Is It Necessary For A Rapper To Have A Unique Style?

Having a unique style is essential for a rapper’s success. It sets you apart from the competition and helps you stand out in the music industry. Develop your own sound, flow, and delivery to create a memorable and distinct persona.

Experiment with different styles and influences to craft a unique identity that resonates with your audience and leaves a lasting impression.

Conclusion

To sum up, a rapper can increase their chances of getting discovered by consistently sharing their music on digital platforms, engaging with fans, networking with industry professionals, and creating a unique brand. By staying true to their art and continuously improving their skills, aspiring rappers can pave their way to success in the competitive music industry.


Categories
Archive

How Long Does It Take to Get Good at Music Production: Mastering the Art

To get good at music production, it generally takes around 1 to 2 years of consistent practice. This timeframe can vary based on individual dedication and learning pace.

Music production is a skill that requires time and effort to master, as there are various technical aspects to grasp, such as sound design, mixing, and mastering. Developing a good ear for music and understanding different production techniques are essential components of becoming proficient in this field.

By immersing yourself in the music production process and continuously honing your skills through practice and experimentation, you can steadily progress and improve your abilities. With patience and persistence, anyone can become proficient in music production and create high-quality tracks that resonate with audiences.

How Long Does It Take to Get Good at Music Production: Mastering the Art

Credit: www.yellowbrick.co

The Learning Curve

The Learning Curve: Mastering music production involves a unique journey of challenges and growth.

Starting Out

Learning the basics requires patience and consistent practice.

  • Understanding software functionality.
  • Experimenting with different sounds.
  • Grasping fundamental music theory.

Building Skills

Progressing to advanced levels demands dedication and continuous learning.

  1. Enhancing sound mixing techniques.
  2. Mastering audio editing skills.
  3. Developing a unique music production style.
Stage Timeframe
Beginner Level 6-12 months
Intermediate Level 1-2 years
Advanced Level 2-4+ years

Consistent dedication and a passion for learning are key to mastering music production.

Dedicated Practice

How Long Does It Take to Get Good at Music Production

Dedicated Practice: Mastering music production requires consistent effort and focused learning.

Consistent Effort

1. Practice regularly with a structured plan.

2. Spend time daily on experimentation and skill development.

Focused Learning

  1. Engage in online tutorials for specific techniques.
  2. Seek mentorship to gain insights and feedback.

Learning Resources

Learning resources play a crucial role in improving your skills as a music producer. Fortunately, there are various avenues through which you can enhance your knowledge and expertise. Here are some of the most effective learning resources for aspiring music producers:

Online Tutorials

Online tutorials are a valuable resource for aspiring music producers. These tutorials provide step-by-step guidance on various aspects of music production, including sound design, mixing, and mastering. Platforms like YouTube, Skillshare, and MasterClass offer a plethora of tutorials created by industry experts, allowing you to learn at your own pace and convenience.

Books And Courses

Books and courses are another excellent way to dive deep into the intricacies of music production. The Mixing Engineer’s Handbook by Bobby Owsinski and Dance Music Manual: Tools, Toys, and Techniques by Rick Snoman are highly recommended reads for budding producers. Additionally, enrolling in online courses on platforms like Coursera and Udemy can provide structured learning experiences to help you master music production fundamentals.

Developing Your Style

One of the most exciting aspects of music production is the opportunity to develop your own unique style. As you gain experience and technical skills, you’ll begin to discover what sets your music apart from others. Developing your style takes time and dedication, but it’s an essential part of becoming a successful music producer.

Experimentation

Experimentation is key in developing your style as a music producer. Trying new techniques, exploring different genres, and pushing the boundaries of your creativity will help you uncover new sounds and ideas. Don’t be afraid to step outside of your comfort zone and take risks. By experimenting with various elements such as tempo, instrumentation, and effects, you can create a distinctive sound that resonates with your audience.

Seeking Inspiration

Seeking inspiration is essential for nurturing your style and the growth of your music production skills. Listening to a wide range of music genres, attending live performances, and engaging with fellow musicians can spark your creativity and expose you to new possibilities. Take the time to study the work of your favorite artists and analyze their techniques and production choices. Additionally, collaborating with other musicians and producers can provide fresh perspectives and help you fine-tune your style.


Mastering The Craft

When it comes to music production, mastering the craft is crucial in order to become successful in the industry. Mastering the craft means acquiring the necessary skills and knowledge to create high-quality and professional-sounding music. It also involves constant refinement of techniques and seeking professional feedback to improve your skills.

Refining Techniques

To truly excel in music production, you must dedicate time and effort to refine your techniques. This involves practicing on a regular basis and experimenting with different software, equipment, and sound manipulation techniques. By continuously refining your techniques, you can enhance your ability to create unique and impressive music.

Some effective ways to refine your techniques include:

  1. Studying music theory and composition to gain a deeper understanding of the technical aspects of music production.
  2. Experimenting with different genres and styles to broaden your musical horizons and develop a versatile skillset.
  3. Learning from experienced producers and industry professionals through online tutorials, workshops, and mentorship programs.
  4. Keeping up with the latest trends and innovations in music production by staying updated with industry news and attending music conferences and events.
  5. Engaging in collaborations or working with other musicians to gain new perspectives and insights.

Professional Feedback

Seeking professional feedback is an essential step in the process of getting good at music production. By receiving feedback from experienced producers and industry experts, you can gain valuable insights into your strengths and areas for improvement. This feedback can guide you in honing your skills and identifying areas where you may be lacking.

Some ways to obtain professional feedback include:

  • Attending music production workshops and seminars where you can receive feedback from industry professionals.
  • Joining online forums and communities where you can share your work and receive constructive criticism from peers.
  • Participating in music competitions or talent showcases where judges provide feedback and evaluation.
  • Working with a music mentor or coach who can provide personalized guidance and feedback on your progress.

By actively seeking and implementing professional feedback, you can accelerate your growth as a music producer and reach new levels of proficiency.

How Long Does It Take to Get Good at Music Production: Mastering the Art

Credit: www.facebook.com

How Long Does It Take to Get Good at Music Production: Mastering the Art

Credit: www.levelsmusicproduction.com

Frequently Asked Questions Of How Long Does It Take To Get Good At Music Production

How Long Does It Take To Get Good At Music Production?

Becoming proficient in music production can vary depending on factors such as dedication, practice, and the complexity of the genre. Generally, it takes several months to years of consistent learning and hands-on experience to become skilled at music production. However, the journey is ongoing as new techniques and technology continuously emerge in this ever-evolving field.

Keep learning and experimenting to improve your skills over time.

What Skills Do I Need To Develop For Music Production?

To excel in music production, you need a combination of technical and creative skills. These include a solid understanding of music theory, proficiency in using digital audio workstations (DAWs), sound design, mixing and mastering techniques, and the ability to arrange and compose music.

It is also beneficial to develop a good ear for audio detail and have a grasp on various genres and production styles.

Can I Learn Music Production On My Own?

Yes, learning music production is possible on your own. With the abundance of online resources such as tutorials, courses, and forums, you can acquire knowledge and skills at your own pace. However, it requires discipline, persistence, and a willingness to constantly learn and practice.

Consider seeking guidance from experienced producers or joining online communities to enhance your learning journey.

Conclusion

Mastering music production takes time and dedication. With consistent practice and a growth mindset, you can improve your skills. Remember, everyone progresses at their own pace, so be patient. Stay motivated and keep experimenting. Embrace challenges as opportunities to learn and grow.

In no time, you’ll be creating music like a pro.

Categories
Archive

Izotope Vocal Doubler: Boost Your Vocals with This Powerful Tool

The Izotope Vocal Doubler is a free plugin that enhances vocals by adding depth and richness. It’s a must-have for audio production.

When it comes to enhancing vocal tracks, the Izotope Vocal Doubler plugin stands out as a top choice for producers and musicians. This versatile plugin offers an array of features to elevate vocals and create a dynamic sound. By adding depth, richness, and doubling effects, the Vocal Doubler enhances vocal performances and brings them to the forefront of any mix.

Whether you’re a seasoned pro or just starting out, this free plugin is a powerful tool to have in your arsenal. We’ll explore the features of the Izotope Vocal Doubler and how it can take your vocal tracks to the next level.

Free Plugin Series Izotope Vocal Doubler: Boost Your Vocals with This Powerful Tool

Credit: www.production-expert.com

Getting Started With Izotope Vocal Doubler

Discover the power of Izotope Vocal Doubler, a free plugin that enhances vocal tracks by adding depth and richness. Easily create realistic doubled vocals with this user-friendly tool.

Installation And Setup

Getting started involves a simple installation process.

First, download the plugin from the Izotope website. Then, unzip the file and run the installer.

Complete the installation by following the on-screen instructions. Launch your DAW and load the Vocal Doubler plugin.

Key Features Of Vocal Doubler

Vocal Doubler offers a range of features to enhance your vocal tracks.

Real-Time processing for instant doubling effects.

Adjustable Retune Speed for precise vocal pitch control.

Choose from three different modes to customize the vocal doubling effect.

Explore the Detune and Pan controls for added depth and width to your vocals.


Free Plugin Series Izotope Vocal Doubler: Boost Your Vocals with This Powerful Tool

Credit: www.izotope.com

Using Izotope Vocal Doubler In Your Productions

Vocal Doubler is a powerful plugin that can add depth and richness to your vocal tracks effortlessly.

Applying Vocal Doubler To Different Genres

  • Pop: Enhance vocal presence with subtle doubling for a polished sound.
  • R&B: Experiment with wider stereo spread to create a lush vocal texture.
  • Rock: Use Vocal Doubler to thicken vocals and make them stand out in the mix.

Tips For Maximizing Vocal Doubler’s Impact

  1. Adjust the ‘Detune’ and ‘Pan’ controls to find the perfect doubling effect.
  2. Layer Vocal Doubler with other effects like reverb or delay for added depth.
  3. Experiment with different settings to tailor the doubling effect to your specific track.

Advanced Techniques With Izotope Vocal Doubler

When it comes to creating professional-sounding vocal tracks, the Izotope Vocal Doubler plugin offers advanced techniques that can take your audio production to the next level. In this blog post, we’ll explore how to use the Vocal Doubler to create depth and space in vocals, as well as how to combine this powerful plugin with other effects for a truly unique and dynamic sound.

Creating Depth And Space In Vocals

To enhance the depth and space of your vocals, the Izotope Vocal Doubler provides a range of specialized controls. By adjusting the Widening and Amount parameters, you can achieve a natural and immersive vocal sound that complements the overall mix. Additionally, experimenting with the Detune and Pitch Variation settings can add an organic and rich sonic character to your vocals.

Combining Vocal Doubler With Other Effects

Combining the Izotope Vocal Doubler with other effects opens up a world of creative possibilities. By integrating reverbs, delays, and modulation effects, you can unleash a wide spectrum of sonic textures and atmospheres. Furthermore, utilizing EQ and compression in conjunction with the Vocal Doubler can sculpt the vocal tone and ensure it sits seamlessly within the mix, giving it a professional and polished finish.

Innovative Uses Of Izotope Vocal Doubler

Explore new creative possibilities in your music. This powerful free plugin provides innovative vocal effects, giving your tracks a professional edge. Elevate your sound with its intuitive features and take your music to the next level.

Vocal Doubler is not just your ordinary vocal doubling plugin. This powerful tool goes beyond its primary function and offers a range of innovative features that can take your vocal production to the next level. In this article, we will explore some innovative uses that can significantly enhance your vocal tracks and add creative effects.

Manipulating Vocals For Experimental Effects

With Izotope Vocal Doubler, you can transform ordinary vocal recordings into extraordinary soundscapes. The plugin provides various settings and parameters that allow you to manipulate vocals and create experimental effects that push the boundaries of conventional vocal production.

  1. By adjusting the ‘Wet Mix’ control, you can blend the original vocal signal with the doubled vocals to achieve unique textures and spatial effects.
  2. Experiment with the ‘Detune’ and ‘Spacing’ parameters to create subtle pitch variations and stereo widening, adding depth and dimension to your vocals.
  3. Use the ‘Stereo Position’ control to place the doubled vocals in different areas of the stereo field, giving your vocal tracks a wider and more immersive sound.

Expanding Vocal Production Possibilities

Izotope Vocal Doubler opens up a world of possibilities when it comes to vocal production. The plugin can not only be used for traditional vocal doubling but also offers a range of features that expand its versatility and creative potential.

  • Use as a creative tool to spice up vocal harmonies and create lush background vocals that complement the main vocal track.
  • Try applying to other elements in your mix, such as guitars or synths, to add interesting textures and layers to your arrangements.
  • Combine  with other plugins and effects to further enhance and customize the sound of your vocals. Experiment with different signal chains and processing techniques to achieve your desired artistic vision.

Overall, Izotope Vocal Doubler offers much more than just traditional vocal doubling. Its innovative features and capabilities allow you to manipulate vocals for experimental effects, expand your vocal production possibilities, and unleash your creativity in ways you never thought possible.


Free Plugin Series Izotope Vocal Doubler: Boost Your Vocals with This Powerful Tool

Credit: www.lalal.ai

Frequently Asked Questions

Can I Use Izotope Vocal Doubler On Any Daw?

Yes, Vocal Doubler is compatible with all major DAWs such as Ableton Live, Pro Tools, Logic Pro X, and more. It seamlessly integrates into your existing workflow, allowing you to enhance your vocal tracks with ease.

What Does Izotope Vocal Doubler Do?

Izotope Vocal Doubler is a free plugin that creates a natural-sounding doubling effect on vocal tracks. It adds richness and depth to vocals, making them stand out in the mix. With adjustable parameters and a simple user interface, it’s a valuable tool for adding professional polish to your vocal recordings.

How Do I Install Izotope Vocal Doubler?

To install Izotope Vocal Doubler, simply download the plugin from the Izotope website and run the installer. Follow the on-screen instructions, selecting the appropriate options for your computer setup. Once installed, you can find the plugin in your DAW’s plugin menu and start using it on your vocal tracks.

Conclusion

Izotope Vocal Doubler offers a convenient and high-quality solution for enhancing vocal tracks. Its user-friendly interface, versatility, and innovative technology make it a valuable addition to any music producer or audio engineer’s toolkit. Take advantage of this free plugin to effortlessly add depth and dimension to vocal recordings with just a few simple adjustments.

Categories
Archive

Musicians: Turbocharge Funding for Your Tour

To fund your tour as a musician, consider crowdfunding campaigns and sponsorships from brands in your niche. Another option is to secure grants from arts organizations and apply for performance opportunities at events and festivals.

Grabbing attention with social media marketing can also attract supporters. Building a strong online presence through engaging content can help expand your fan base and increase your chances of securing funding for your tour. With determination and strategic planning, you can effectively finance your musical endeavors and take your performances to new heights.

Showcasing your talent and passion for music can build a loyal fan base that is eager to support your journey as a touring musician.

Musicians: Turbocharge Funding for Your Tour

Credit: www.theguardian.com

Crafting A Compelling Narrative

Introductory paragraph about ‘Crafting a Compelling Narrative’

Crafting a compelling narrative is crucial for musicians looking to fund their tours effectively. By highlighting a unique story and showcasing a passion for music, artists can captivate their audience and attract the necessary support to take their music on the road.

First H3 heading – Highlight Your Unique Story

Highlight Your Unique Story

Bullet-point list highlighting the importance of showcasing a distinctive narrative
  • Share personal anecdotes that set you apart
  • Explain how your journey has shaped your music
  • Emphasize what makes your story memorable
Second H3 heading – Showcase Your Passion for Music

Showcase Your Passion For Music

Ordered list emphasizing the significance of demonstrating a deep love for music
  1. Express your enthusiasm through your music and interactions
  2. Demonstrate dedication to your craft in all aspects
  3. Connect with supporters by sharing your genuine love for music

Leveraging Social Media

To fund a tour, musicians can leverage social media’s reach and engagement to connect with fans and potential sponsors. By creating compelling content, running crowd-funding campaigns, and offering exclusive perks, artists can harness the power of platforms like Instagram, Facebook, and Twitter to generate financial support for their tours.

Leveraging Social Media Utilize Multiple Platforms Engage with Your Audience In the digital age, leveraging social media is crucial for musicians to fund their tours effectively. Utilize Multiple Platforms Ensure you’re present on various platforms like Facebook, Instagram, and Twitter for maximum reach. Engage with Your Audience Interact with fans through comments, polls, and live sessions to build a loyal community.

Exploring Alternative Funding Sources

When it comes to financing a music tour, exploring alternative funding sources opens up avenues for musicians to realize their dream of hitting the road. Diversifying funding streams ensures financial stability and reduces the burden of relying solely on traditional methods. From crowdfunding platforms to grants and sponsorship opportunities, musicians have access to a myriad of options to fund their tours.

Crowdfunding Platforms

Crowdfunding has become a popular choice for musicians seeking financial support for their tours. Platforms such as Kickstarter and Indiegogo allow artists to create compelling campaigns and reach out to their fan base for contributions. By offering different tiers of rewards, artists can incentivize fans to support their tour while also fostering a sense of community and engagement.

Grants And Sponsorship Opportunities

Grants and sponsorships offer another avenue for musicians to secure funding for their tours. Various organizations, such as arts councils and music foundations, provide grants to support touring initiatives. Sponsorship opportunities with brands or local businesses can also provide financial backing in exchange for promotional benefits, creating a mutually beneficial partnership.

Maximizing Merchandise Sales

Discover how musicians can boost tour funding by optimizing merchandise sales. Implement strategic pricing, diversified product offerings, and engaging promotions to increase revenue streams. Strengthening merchandise sales is key to financing successful tours and cultivating a loyal fan base.

Design Appealing Merchandise

To maximize your merchandise sales during a music tour, it’s crucial to design appealing merchandise that captures the attention and interest of your fans. Remember that your merchandise serves as a representation of your brand, so investing time and effort in creating eye-catching designs is essential.

Start by brainstorming unique and creative concepts that align with your style and music. Consider collaborating with talented graphic designers to bring your ideas to life. The key is to create merchandise that is not only visually appealing but also reflects the essence of your music and resonates with your fans’ tastes.

Choose colors and fonts that are consistent with your branding to maintain a cohesive visual presence. Incorporate your logo, album artwork, or song lyrics into the designs to make them instantly recognizable and memorable. Designing merchandise that fans will be proud to wear or showcase can substantially increase your sales.

Utilize Online And Offline Sales Channels

When it comes to maximizing your merchandise sales on a music tour, it’s crucial to make use of both online and offline sales channels. This approach allows you to reach fans who prefer either method of purchasing and enables you to tap into a broader audience.

Online Sales Channels

  1. E-commerce Platforms: Create a user-friendly online store on popular e-commerce platforms such as Shopify or WooCommerce. Display high-quality images of your merchandise and provide detailed descriptions to help fans make informed purchasing decisions.
  2. Social Media: Leverage your social media presence to promote your merchandise. Share captivating posts with product images, descriptions, and direct links to your online store. Consider partnering with influencers or running targeted ads to increase visibility.

Offline Sales Channels

  1. Concert Merchandise Booths: Set up merchandise booths at your concerts and gigs. Ensure they are well-organized and visually appealing, with clear signage displaying prices and product information. Engage with fans personally, which can enhance their overall experience and encourage impulse purchases.
  2. Local Retail Partnerships: Collaborate with local stores or boutiques that align with your brand to sell your merchandise. This can help you reach a wider audience and tap into existing customer bases that may be interested in supporting local artists.

By utilizing both online and offline sales channels, you can increase your merchandise sales significantly and cater to the diverse preferences of your fanbase. Ensure seamless integration between your online and offline presence to provide a seamless shopping experience for fans.

Securing Event Sponsorship

Securing event sponsorship is an essential aspect of funding a successful music tour. By partnering with sponsors, musicians can not only offset the expenses associated with touring but also gain valuable exposure and access to resources that can enhance their performances. In this section, we will explore strategies for identifying potential sponsors and crafting compelling sponsorship proposals.

Identify Potential Sponsors

When seeking event sponsorship, it’s crucial to identify potential sponsors that align with your music genre and target audience. Consider reaching out to local businesses, brands, and organizations that have an interest in music and cater to a similar demographic. Additionally, research music industry-specific sponsors such as record labels, instrument companies, and music streaming platforms.

Utilize the power of online databases and directories to find potential sponsors that fit your criteria. Websites like SponsorMyEvent and SponsorPitch can provide a wealth of information and contacts to help you in your search. Don’t limit yourself to large corporations; local businesses eager to support the arts may offer excellent sponsorship opportunities as well.

Crafting Sponsorship Proposals

Once you have identified potential sponsors, it’s time to create compelling sponsorship proposals that showcase the value of partnering with your music tour. Here are some key elements to include:

  1. Introduction: Start your proposal with a concise and engaging introduction that highlights your music, the purpose of your tour, and the benefits of sponsoring your event.
  2. Audience Analysis: Provide a detailed overview of your target audience, including demographics, buying power, and their affinity for live music. This information helps sponsors gauge the potential reach and impact of their sponsorship.
  3. Sponsorship Packages: Create tiered sponsorship packages with varying benefits, such as logo placement, social media promotion, VIP experiences, or product placement opportunities. Clearly communicate the value each package offers to attract sponsors of different sizes and budgets.
  4. Marketing and Promotion: Outline your marketing and promotion strategies, including social media campaigns, press releases, and collaborations with influencers or local media outlets. This demonstrates your commitment to maximizing exposure for your sponsors.
  5. ROI Evaluation: Offer measurable metrics and data-driven insights that help sponsors evaluate the return on investment (ROI) they can expect from supporting your tour. This can include estimated ticket sales, website traffic, social media reach, and post-event analysis.
  6. Partnership Benefits: Emphasize how a sponsorship partnership can mutually benefit both your music tour and the sponsor. Highlight the opportunity for brand association, increased brand visibility, and community engagement.

Remember to customize your sponsorship proposals for each potential sponsor, tailoring the message to match their brand identity and marketing objectives. Personalization is key to capturing their attention and increasing the chances of securing sponsorship for your music tour.

Musicians: Turbocharge Funding for Your Tour

Credit: www.forbes.com

Musicians: Turbocharge Funding for Your Tour

Credit: www.theguardian.com

Frequently Asked Questions Of Musicians How To Fund Your Tour

How Can Musicians Fund Their Tour?

Musicians can fund their tour by utilizing crowdfunding platforms, seeking sponsorships from brands, securing grants, applying for music scholarships, organizing fundraising events, and selling merchandise or tickets in advance.

What Are The Benefits Of Crowdfunding For Musicians?

Crowdfunding enables musicians to raise funds directly from their fans and supporters, creating a sense of community and loyalty. It also provides an opportunity for artists to showcase their work, gain exposure, and connect with new audiences beyond their immediate network.

How Can Musicians Attract Sponsorships For Their Tour?

Musicians can attract sponsorships for their tour by creating a compelling sponsorship proposal highlighting their audience reach, engagement, and alignment with brands. They should focus on building relationships with companies in relevant industries, offering exclusive perks, and demonstrating the mutual benefits of collaboration.

Are Grants Available For Musicians To Fund Their Tour?

Yes, there are various grants available for musicians to fund their tour. Musicians can research and apply for grants offered by music associations, foundations, government agencies, or private organizations that support the arts. It is essential to carefully review the eligibility criteria and submit a strong proposal outlining the tour’s artistic and cultural significance.

Conclusion

Funding a music tour requires careful planning and a strategic approach. By diversifying revenue streams, engaging with fans, and leveraging social media, musicians can successfully raise the necessary funds for their tours. Embracing creative solutions and staying persistent can lead to a successful and fulfilling tour experience.


Categories
Archive

What Is Dither: Unleashing the Power of Audio Optimization

Dither is a technique used in digital audio processing to improve sound quality by adding low-level noise. This noise helps reduce distortion and quantization errors in audio signals.

In the world of digital audio processing, dither plays a crucial role in enhancing the quality of sound output. By introducing a controlled amount of noise to the audio signal, dither minimizes the impact of quantization errors that can occur during the conversion of analog signals to digital format.

Understanding the concept of dither and its application in digital audio technology is essential for ensuring high fidelity sound reproduction. Let’s delve deeper into the significance of dither in audio processing and explore how this technique contributes to the overall audio quality.

What Is Dither: Unleashing the Power of Digital Image Optimization

Credit: fastercapital.com

The Basics Of Dithering

Dithering is a technique used to reduce quantization error in digital audio. Dither adds low-level noise to the signal, improving the overall sound quality. It helps to minimize distortion and create a more natural and pleasant listening experience.

Dithering is a technique used in digital audio and imaging to reduce quantization error and improve quality.

What Is Dithering?

Dithering is the process of adding low-level noise to a signal before quantizing it to a lower bit depth.

How Dithering Works

1. Dithering helps prevent distortions that can occur when reducing the bit depth. 2. Low-level noise added during dithering masks quantization errors. 3. Noise is carefully controlled to ensure it does not affect the overall quality of the signal. 4. Dithering is essential in maintaining smooth gradations in images and audio. 5. By adding noise, dithering allows for more accurate representation of subtle details. 6. The human ear and eye are less sensitive to random noise than to quantization errors. 7. Dithering is a crucial step in the digital conversion process.

Types Of Dithering Algorithms

Dithering is a technique used in digital imaging to reduce color banding and improve image quality. There are different types of dithering algorithms that help achieve this. Two popular algorithms include:

Ordered Dithering

Ordered dithering divides the image into a grid pattern and assigns specific colors to each grid cell to simulate additional colors.

Error Diffusion Dithering

Error diffusion dithering distributes color errors from each pixel to neighboring pixels, creating a more visually appealing dithered image.

Applications Of Dithering

Dithering is a technique used in various digital processes to improve the quality of digital images, audio, and printed materials. The applications of dithering are diverse, making it a vital tool in many industries.

Digital Imaging

Dithering plays a crucial role in digital imaging, especially when it comes to reducing the visual artifacts caused by limited color palettes. It helps in creating smooth transitions between colors, making images appear more realistic. By introducing noise, dithering minimizes banding and creates the illusion of additional colors, enhancing the overall visual quality of digital images.

Audio Processing

In audio processing, dithering is used to mask quantization noise, which occurs during the digitization of analog audio signals. By adding low-level noise, dithering reduces distortion and maintains the dynamic range, resulting in a more natural and transparent sound reproduction. It is particularly beneficial when converting high-resolution audio to lower bit depths.

Printing

Dithering is an essential aspect of printing, especially for devices with limited color capabilities such as inkjet and laser printers. By diffusing colors using patterns of dots, dithering enables printers to replicate a broader range of hues, creating the illusion of additional colors and improving the overall print quality. This technique is particularly valuable in producing detailed images and graphics with smoother color transitions.

Advantages And Limitations

Dither is a technique used to reduce quantization errors in digital audio. The advantages include improved audio quality and reduced distortion. However, dither adds a small amount of noise, which may not be desirable in certain situations.

Advantages Of Dithering

Dithering is a technique frequently used in digital images and audio to reduce banding and improve the visual or audio quality, making it an essential tool for professionals. There are several significant advantages to dithering that make it a valuable process in various industries.

Here are some key advantages of dithering:

  1. Noisy Pattern: Dithering introduces a random, low-level noise pattern to mask the discontinuities in a digital image or audio file. This noise pattern helps to reduce the noticeable color or sound errors. By incorporating this noise pattern, dithering effectively minimizes banding or quantization artifacts that may occur during the conversion process.
  2. Improved Smoothness: Dithering enhances the overall smoothness and gradient transitions in an image or audio file. By adding slight variations to the visual or audio elements, dithering creates a more pleasing and natural progression between colors or sounds, resulting in a smoother and more realistic output.
  3. Increased Bit Depth: Dithering allows for a perceived increase in the bit depth of an image or audio file. By distributing the quantization errors across a larger range, dithering effectively increases the apparent resolution and details in the final output, even if the actual bit depth remains the same.
  4. Preserving Details: Dithering helps in preserving fine details during the quantization process. Instead of losing minute details due to rounding errors, dithering redistributes the errors across adjacent pixels or samples, ensuring crucial details are retained.

Limitations Of Dithering

While dithering offers several advantages, it’s essential to consider its limitations to ensure its appropriate use. Understanding the limitations of dithering helps in determining when and how to apply this technique effectively.

Here are some notable limitations of dithering:

  • Increased Noise: Dithering introduces a certain level of noise into the image or audio file. While this noise is often imperceptible, it can become noticeable with certain compression or playback methods that amplify noise. Hence, dithering may not be suitable in situations where noise needs to be minimized, such as in some medical or scientific applications.
  • Processing Time: Implementing dithering can increase the processing time for converting or rendering digital files. The randomization and distribution of quantization errors require additional computational resources, especially for large or complex images or audio files. Therefore, it’s important to consider the trade-off between processing time and the desired quality improvement.
  • Color or Sound Accuracy: Dithering, while effective in reducing banding, may introduce some loss of color or sound accuracy. The random noise pattern added during the dithering process can slightly alter the original colors or sounds, particularly in highly sensitive applications such as scientific or professional color grading.

Best Practices For Dithering

When it comes to optimizing image quality, dithering plays a crucial role. Dithering is the process of adding noise or patterns to an image in order to reduce banding and create the illusion of more colors than what the image format supports. By strategically applying dithering techniques, you can achieve smoother gradients and enhance the visual appeal of your images. In this section, we will explore the best practices for dithering, including choosing the right technique and optimizing image quality.

Choosing The Right Dithering Technique

There are various dithering techniques available, each with its own strengths and weaknesses. It is essential to choose the right technique based on the specific requirements of your image. Here are a few popular dithering techniques to consider:

  • Ordered Dithering: This technique uses a pre-defined matrix of threshold values to distribute the error of color quantization. It creates a structured and predictable pattern, ideal for images with a high level of detail.
  • Error Diffusion Dithering: Unlike ordered dithering, error diffusion distributes the quantization error across neighboring pixels, resulting in smoother gradients and a more natural appearance.
  • Random Dithering: This technique introduces randomness into the dithering process, which can be useful for reducing pattern artifacts and achieving a more organic look.
  • Hybrid Dithering: As the name suggests, hybrid dithering combines the strengths of multiple techniques to create a custom dithering algorithm. This approach allows for fine-tuning and achieving the desired outcome.

Optimizing Image Quality

While dithering can enhance the visual appeal of your images, it is important to optimize the image quality to strike a balance between file size and visual fidelity. Here are a few best practices to keep in mind:

  1. Avoid excessive dithering: Applying too much dithering can result in a noisy and unnatural appearance. Use dithering sparingly and adjust the intensity based on the desired effect.
  2. Consider image format: Different image formats have varying support for dithering. For example, GIF and PNG-8 are well-suited for dithering, while JPEG and PNG-24 may not offer the same level of support. Choose the appropriate format accordingly.
  3. Experiment and preview: Dithering can sometimes introduce unexpected artifacts or color shifts. It is important to experiment with different dithering techniques and preview the results to ensure the desired visual outcome is achieved.
  4. Finalize with compression: After applying dithering, compress the image using appropriate compression techniques to ensure efficient file size without compromising image quality. This will help to reduce bandwidth and improve website load times.
What Is Dither: Unleashing the Power of Digital Image Optimization

Credit: www.etsy.com

What Is Dither: Unleashing the Power of Digital Image Optimization

Credit: www.pi-usa.us

Frequently Asked Questions On What Is Dither

What Is Dither And How Does It Work?

Dither is a technique used in digital imaging to reduce color banding and improve image quality. It works by adding random noise to smooth out gradients and create the illusion of more colors. Dithering helps to achieve smoother transitions between colors and make images appear more natural and visually appealing.

Why Is Dithering Important In Digital Graphics?

Dithering plays a crucial role in digital graphics by mitigating the limited color palette of display devices. Without dithering, images with subtle color gradients may appear blocky and suffer from color banding artifacts. By introducing noise, dithering enables smoother color transitions, resulting in better visual representation and avoiding distracting artifacts.

Can Dithering Be Customized For Specific Applications?

Yes, dithering can be customized to suit different applications and requirements. The level of dithering or the amount of noise introduced can be adjusted to achieve a desired effect. For instance, in situations where file size is a concern, minimal dithering may be applied, while high-quality printing may require more sophisticated dithering algorithms for optimal results.

Does Dithering Have Any Drawbacks?

While dithering improves image quality in many cases, it does have some limitations. Dithering adds random noise, which can introduce a grainy texture to the image. Additionally, the dithering process may slightly alter the original colors in order to smooth out gradients.

However, these drawbacks are generally outweighed by the benefits of reducing color banding and enhancing overall visual quality.

Conclusion

Understanding the concept of dither is essential for anyone involved in digital image or audio production. Its ability to reduce distortion and enhance the perception of quality makes it a valuable tool in the modern field. Mastering dithering techniques can lead to significant improvements in the final product’s overall performance and professional appeal.

Categories
Archive

How to Get a Power-Packed Wikipedia Page for Your Band

To get a Wikipedia page for your band, ensure you have significant coverage in reliable sources. Contact Wikipedia’s volunteer editors for assistance in creating and editing the page.

A Wikipedia page can enhance your band’s online presence and credibility, providing detailed information to fans and potential collaborators. It serves as a centralized source of information and can boost your band’s visibility in search engine results. With proper sourcing and adhering to Wikipedia’s guidelines, you can establish a reputable presence for your band on the platform.

Let’s explore the process of creating a Wikipedia page for your band and the benefits it can bring to your online presence.

How to Get a Power-Packed Wikipedia Page for Your Band

Credit: www.nytimes.com

Choosing The Right Content

When creating content for your band’s Wikipedia page, start by clearly defining your band’s unique identity. This includes your musical style, genre, and any defining characteristics.

Showcase your band’s notable achievements on your Wikipedia page. Include any awards, chart-topping hits, or significant milestones that capture the essence of your band’s success.

How to Get a Power-Packed Wikipedia Page for Your Band

Credit: en.wikipedia.org

Crafting Compelling Narratives

Crafting compelling narratives is essential for getting a Wikipedia page for your band. By highlighting your band’s history, achievements, and impact on the music industry, you can make a strong case for inclusion on Wikipedia. Engaging storytelling and verifiable information are key to successfully navigating the Wikipedia submission process.

Telling Your Band’s Story

Showcasing Musical Evolution

Crafting compelling narratives for your band’s Wikipedia page is crucial. Highlighting key moments in your band’s history and musical evolution will captivate readers. I. Start by outlining your band’s journey in a concise and engaging manner. II. Emphasize milestones such as album releases, tours, and collaborations. III. Utilize descriptive language to paint vivid images of your band’s growth. IV. Showcase influences that have shaped your band’s unique sound. V. Use storytelling techniques to engage readers and bring your band’s narrative to life.

Utilizing Reliable Sources

To secure a Wikipedia page for your band, ensure to cite credible sources for verification, boosting authenticity and legitimacy. Reliable references play a crucial role in establishing your band’s presence on the platform. Efforts to include accurate and verifiable information will enhance the likelihood of creating a successful Wikipedia page for your band.

Utilizing Reliable Sources When creating a Wikipedia page for your band, utilizing reliable sources is crucial to establish credibility and validity. Reliable sources lend authority to the content on your page, helping to bolster its accuracy and trustworthiness. The types of sources you use are a key factor in determining whether your page will be accepted by Wikipedia’s editors. Here are some tips for incorporating reliable sources into your band’s Wikipedia page.

Citing Established Publications

Citing established publications is essential for proving the notability of your band. Look for reputable, well-known sources such as major music magazines, newspapers, and music industry websites. These sources can include Billboard, Rolling Stone, Pitchfork, Spin, and other respected music publications. These sources help to establish the band’s significance and impact within the music industry, providing a solid foundation for your band’s Wikipedia page.

Incorporating Interviews And Reviews

Interviews and reviews provide valuable insights and perspectives on your band’s work. When including interviews, select reputable, recognized platforms known for their music coverage, such as MTV, NME, or reputable music blogs. Reviews from notable music critics, whether in print or digital media, can also serve as compelling sources for your Wikipedia page. These add depth to your page and validate the band’s impact through the opinions of industry professionals and journalists. In addition to interviews and reviews, consider incorporating awards, nominations, and significant performances as further evidence of your band’s notability. By carefully selecting and incorporating reliable sources such as established publications and interviews, you can enhance the credibility and trustworthiness of your band’s Wikipedia page. This will not only increase the likelihood of your page being accepted but will also provide a comprehensive and authoritative representation of your band’s achievements and significance within the music industry.

Adding Credible References

To get a Wikipedia page for your band, adding credible references from reputable sources is crucial. Include verifiable information about your music career and achievements to enhance your band’s notability. Engaging with fans and collaborating with music journalists can help in sourcing reliable references for your Wikipedia page.

When it comes to creating a Wikipedia page for your band, adding credible references is crucial. These references not only enhance the credibility of your page but also help to establish your band’s reputation online. In this section, we will explore two effective ways to add credible references to your Wikipedia page: including verified information and using primary sources.

Including Verified Information

One of the most important aspects of adding credible references to your Wikipedia page is including verified information from reliable sources. Verified information refers to facts, figures, and data that have been confirmed and supported by trustworthy sources.

The first step to including verified information is conducting thorough research on your band. Look for interviews, articles, and reviews published by reputable music websites, magazines, or newspapers. These sources often provide valuable insights into your band’s history, music style, achievements, and significant events.

Once you have gathered the necessary information, it’s essential to cite these sources properly. In accordance with Wikipedia guidelines, use the tag to create in-text citations and include a complete reference in the reference section at the end of the page. This ensures transparency and allows readers to verify the information.

Using Primary Sources

In addition to including verified information, incorporating primary sources can further strengthen the credibility of your Wikipedia page. Primary sources refer to original documents, firsthand accounts, or records created by individuals or groups directly involved in the events or topics being discussed.

Examples of Primary Sources
Primary Source Explanation
Band’s official website The band’s official website can provide firsthand information about their discography, latest news, upcoming events, and official statements.
Band members’ interviews or autobiographies Interviews or autobiographies of band members can offer unique insights into their personal experiences, creative processes, and the band’s journey.
Official social media accounts Social media accounts managed by the band can provide updates, behind-the-scenes content, and interactions with fans, showcasing the band’s authenticity.

When using primary sources, it’s important to be mindful of potential bias and ensure that the information is relevant and well-rounded. Combine primary sources with secondary sources (e.g., music critics’ reviews or industry experts’ analysis) to provide a comprehensive overview of your band’s impact and significance.

In conclusion, adding credible references to your Wikipedia page is essential for establishing your band’s online presence. By including verified information and utilizing primary sources, you can enhance the reliability and authenticity of your page, ultimately contributing to its overall credibility.

Optimizing Visual Elements

To get a Wikipedia page for your band, focus on optimizing visual elements to create a professional and engaging profile. Utilize high-quality images, relevant videos, and infographics to enhance the visual appeal and credibility of your band’s page, making it more appealing to readers and enhancing its online visibility.

Optimizing Visual Elements When it comes to creating a Wikipedia page for your band, optimizing visual elements plays a crucial role in grabbing the attention of readers and enhancing the overall user experience. Incorporating high-quality images and captivating multimedia can make your band’s page more engaging and visually appealing. In this section, we will discuss two important aspects of optimizing visual elements for your Wikipedia page: integrating high-quality images and incorporating captivating multimedia. Integrating High-Quality Images Integrating high-quality images is essential to add visual interest and authenticity to your band’s Wikipedia page. It is important to choose compelling images that accurately represent your band and its music. To optimize your images, follow these guidelines: 1. File Size and Format: Ensure that your images are properly sized and compressed to minimize load time. Use compressed formats such as .jpg or .png without sacrificing image quality. 2. Resolution and Clarity: Opt for high-resolution images that are clear and sharp. This will ensure that your band’s visuals look professional and visually appealing. 3. Unique and Relevant: Select images that are unique to your band and its story. Avoid using generic or stock photos, as they may dilute your band’s identity. 4. Alt Tags: Utilize alt tags to provide alternative text descriptions for your images. This helps improve accessibility for visually impaired users and allows search engines to understand the context of your visuals. Having visually appealing images will not only enhance your band’s Wikipedia page but also increase the chances of your page being shared and linked to from other credible sources. Incorporating Captivating Multimedia Apart from high-quality images, incorporating captivating multimedia can greatly enhance the overall user experience of your band’s Wikipedia page. Here are some tips to seamlessly integrate multimedia content: 1. Videos: Embed relevant and engaging videos such as music videos, live performances, or behind-the-scenes footage. This allows visitors to connect with your band’s music on a deeper level. 2. Audio: Include audio clips of your band’s music, interviews, or acoustic versions of your songs. This enables readers to experience your band’s sound firsthand. 3. Infographics: Visualize your band’s journey, milestones, or discography through eye-catching infographics. This breaks down complex information into a visually appealing and easy-to-understand format. 4. Social Media Integration: Showcase your band’s social media presence by embedding feeds or links to your official accounts. This enables users to connect with your band across different platforms. By incorporating captivating multimedia content, you can engage readers and provide them with a more immersive experience on your band’s Wikipedia page. In conclusion, optimizing visual elements on your band’s Wikipedia page is essential for creating a visually appealing and engaging user experience. By integrating high-quality images and captivating multimedia, you can effectively communicate your band’s story, music, and achievements. Remember to choose visuals that are unique, relevant, and of high resolution, and ensure that your multimedia content aligns with your band’s brand and message. With the right visual elements, your band’s Wikipedia page will stand out and attract more readers.
How to Get a Power-Packed Wikipedia Page for Your Band

Credit: www.nytimes.com

Frequently Asked Questions On How To Get A Wikipedia Page For Your Band

How Can I Get A Wikipedia Page For My Band?

To get a Wikipedia page for your band, you need to meet certain criteria. Firstly, gain significant coverage in reliable sources. Then, create a draft of your page with accurate and unbiased information. Finally, submit your draft through Wikipedia’s submission process for review and approval.

What Are The Benefits Of Having A Wikipedia Page For My Band?

Having a Wikipedia page for your band can offer several benefits. Firstly, it provides credibility and establishes your band’s presence in the industry. Additionally, it helps fans and industry professionals learn more about your band’s history, discography, and achievements. Moreover, a Wikipedia page can improve your band’s visibility in online search results.

What Information Should I Include On My Band’s Wikipedia Page?

When creating a Wikipedia page for your band, include information such as your band’s history, discography, notable performances, awards, and critical reception. It is important to provide accurate and up-to-date information, and avoid promotional language. Ensure that all content is supported by reliable, independent sources.

How Long Does It Take For A Wikipedia Page To Be Approved?

The approval process for a Wikipedia page varies, but it typically takes several weeks to months. It depends on the backlog of pending submissions and the accuracy and reliability of the information provided. It’s important to be patient and prepared to make necessary revisions as requested by Wikipedia editors.

Conclusion

In closing, getting a Wikipedia page for your band can be a game-changer. With persistence and a strategic approach, you can establish credibility and visibility for your music. By following the steps outlined in this guide, you can maximize your chances of having a successful Wikipedia presence for your band.