Categories
Archive

How To Get A Great Tonal Balance In Your Mix

To get a great tonal balance in your mix, pay close attention to your levels and use EQ effectively. Achieving the desired balance requires careful listening and making small adjustments as needed.

Also, balancing the tonal elements of a mix is crucial to create a polished and professional sound. A mix with too much low end can sound muddy and indistinct. Meanwhile, a mix with too much high end can be harsh and fatiguing.

Related reading: How To Balance My Mix and How To Balance Your Drums. For background, see the Wikipedia article on Audio mixing.

A balanced mix ensures that each instrument and element can be heard clearly and contributes to the overall sonic landscape. To achieve this ideal balance, you’ll need to focus on the levels of each element, as well as use EQ to cut or boost frequencies as needed. Effective use of panning and spatial effects can also help create a sense of depth and balance in your mix. Moreover, keep these techniques in mind as you work to achieve a great tonal balance in your mix.

How To Get A Great Tonal Balance In Your Mix

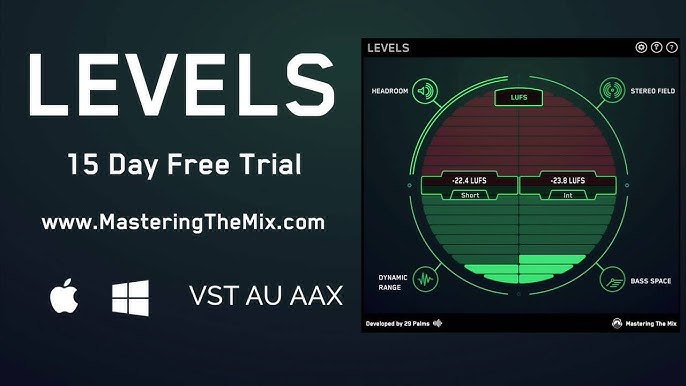
Credit: www.masteringthemix.com

Start With A Solid Foundation for Tonal Balance

In addition, getting a great tonal balance in your mixes is a fundamental aspect of producing quality music. However, this can be a challenging task for many producers and engineers. The tonal balance is the even distribution of frequencies across the audible spectrum, and if the balance is not right, it can impact the clarity and impact of your mix. One way to ensure a great tonal balance is to start with a solid foundation.

Choose Sounds That Complement Each Other

When selecting sounds for your mix, it is essential to choose sounds that complement each other. It is necessary to choose sounds that add value and contribute to the overall sound you want to achieve. Furthermore, using sounds that do not work well together can create conflicts in the frequency spectrum. This makes it harder to achieve a balanced mix.

DODON’T
Add sounds that work togetherAdd sounds that clash with each other
Use sounds that add valueUse sounds that don’t fit the mix
Choose sounds that contribute to the overall sound you want to achieveChoose sounds that don’t work with the rest of the arrangement
Set a foundation that allows every sound to shineOvercrowd the mix with too many sounds

Set Levels And Panning for Tonal Balance

Additionally, once you have chosen the right sounds, the next step to a solid foundation is to set levels and panning. Set levels so that each sound is audible, plays its part, and has the right amount of space in the mix. Panning can also help with creating space and width and adds more depth to the mix. This makes individual instruments easier to pick up.

  • Also, adjust the volume of individual sounds
  • Avoid clipping and distortion
  • Moreover, use panning to make each instrument sit nicely in the mix
  • Avoid panning everything hard left or hard right
  • Create a balance in the mix so every element sits correctly

Start with a solid foundation, complementary sounds and correct levels and panning. That puts your mix in a strong position from the start. With these fundamental steps done correctly, you will be on your way towards a great tonal balance in your mix.

Use Appropriate Eq

The appropriate use of EQ is crucial in achieving a great tonal balance in your mix. It helps you to shape the overall sound of your mix by cutting unwanted frequencies, boosting desired frequencies, and sculpting the sound. Let’s dive deeper into how you can use the different EQ techniques to get a well-balanced mix.

Cut Unwanted Frequencies

The first step towards achieving a great tonal balance in your mix is to identify and cut any unnecessary or unwanted frequencies. Use a high-pass filter to remove low-frequency rumble and a low-pass filter to cut off high-frequency noise. Notch filters can also be used to eliminate specific frequencies that are causing problems. Remember to cut only a few dBs at a time and use your ears to determine the optimal amount of cutting.

Boost Desired Frequencies

After cutting unwanted frequencies, your next step is to boost the frequencies you want to highlight. To do this, use a bell EQ curve to increase the gain of the desired frequency range. If you want to add some warmth to the mix, boost the low end. If you want to add some sparkle, boost the high end. You can also use a shelf EQ curve to boost or cut the frequencies above or below a certain point. Again, use your ears to determine the optimal amount of boosting.

Sculpt The Sound

The final step towards achieving a great tonal balance in your mix is to sculpt the sound. This involves using a combination of cutting and boosting to create a unique sound. For example, you can use a bell curve to boost the mid-range frequencies of a guitar to make it stand out in the mix. You can also use a combination of a high-pass and low-pass filter to make a vocal track sound clear and isolated. Remember, the key to successful sound sculpting is to rely on your ears to determine the optimal amount of cutting and boosting for each frequency range.

Utilize Dynamic Processing for Tonal Balance

To achieve a great tonal balance in your mix, it’s important to utilize dynamic processing. This involves using techniques such as compression, limiting. EQ to control the levels of different frequencies in your mix and bring them into balance.

By carefully applying these techniques, you can create a mix that sounds clear, balanced, and professional.

One of the key elements to getting a great tonal balance in your mix is to utilize dynamic processing. While a static mix might sound decent on its own, dynamic processing can help you refine the mix even further. This allows you to control the levels of individual tracks and achieve a smoother, more balanced sound.

Compress To Control Levels

One of the most effective dynamic processors for controlling levels is compression. By compressing a track, you can bring the quieter elements up to a more audible level while simultaneously reigning in any peaks that might be too loud. This allows you to balance out the levels of individual tracks and create a more cohesive mix overall.

Use Multiband Compression

If you’re looking to take your compression game to the next level, consider using a multiband compressor. Unlike a standard compressor, a multiband compressor allows you to control the levels of specific frequency ranges. This allows you to more precisely shape the sound of individual tracks. This can be especially useful when working with instruments that have a lot of harmonic content, such as vocals or guitars.

De-ess To Control Harshness

Finally, another useful dynamic processing tool you might consider is de-essing. As the name suggests, de-essing allows you to remove or reduce harsh “s” and “t” sounds in vocals. By controlling these harsh frequencies, you can create a more polished, professional-sounding mix that’s easy on the ears. Compression, multiband compression and de-essing take your tonal balance further. They help you create a polished mix that sounds great anywhere. Remember, the key is to experiment with different settings and find what works best for each individual track in your mix.

Apply Reverb And Delay for Tonal Balance

If you’re struggling to get a great tonal balance in your mix, applying reverb and delay can be the solution you’re looking for. Reverb and delay are two powerful tools you can use to add character, depth, and space to your mix. Here are some tips on how to use them effectively:

Create Space And Depth

Reverb can help you create space and depth in your mix by simulating the natural reflections that occur in a real environment. By adding a subtle amount of reverb on a track, you can make it sound like it’s in a bigger space than it actually is. This gives your mix a sense of depth and dimension. To achieve a natural-sounding reverb, adjust the reverb’s decay time, pre-delay, and wet/dry balance until it blends well with the other tracks in your mix.

Use Delays For Rhythm And Texture for Tonal Balance

Delays can be used to add rhythm and texture to your mix. By applying a short delay on a track, you can create a rhythmic pattern that complements the song’s tempo. You can also use delays to make a track sound more interesting by adding subtle variations in timing and feedback. To achieve a cohesive sound, make sure the delays are in sync with the other elements in your mix.

When using reverb and delay, it’s important to pay attention to their level and placement in the mix. Too much reverb can make your mix sound muddy and washed out, while too much delay can make it sound cluttered and messy. Always listen critically and make adjustments until you achieve the perfect balance. With practice, applying reverb and delay in your mix can become second nature. This helps you create tracks with a professional-sounding tonal balance.

Consider Automation

When it comes to mixing, achieving the right tonal balance is crucial to make sure that each instrument and sound will stand out and contribute to the overall sound of the track. One effective way to achieve a great tonal balance in your mix is to consider automation. Automation gives you the ability to control different parameters of the tracks, such as volume, panning, effects, and sends, among others, over time. Here are some tips on how to use automation to get a great tonal balance in your mix.

Automate Volume And Panning

The volume and panning of the tracks are two essential components that you can automate to get a perfect tonal balance. Automating volume can help you control the dynamics of the track. This makes sure that each instrument or sound has its rightful spot in the mix. By automating the panning, you can create a more interesting sonic landscape. This can add a lot of depth and dimension to your mix.

For example, you can automate the volume of the lead vocals to make them stand out during the chorus or automate the panning of the guitar to move it from left to right. This makes the track sound more dynamic.

Automate Effects And Sends

The effects and sends are two other parameters that you can automate to add more depth and interest to your mix. Effects such as delay, reverb, and chorus can make the track sound more spacious and lively. By automating these effects, you can make sure that they don’t overshadow the other parts of the track, especially during important parts of the song, like the chorus or bridge.

Sends are also an essential element in the mix. This allows you to add additional processing or effects to a particular track. By automating the sends, you can add more interest or change the feel of the track, like sending a drum track to a reverb bus to create a more atmospheric sound.

In conclusion, automation can be a powerful tool when it comes to mixing. This allows you to control different parameters over time and achieve a great tonal balance. By automating volume, panning, effects, and sends, you can make sure that each sound in the mix has its rightful place and will contribute to the overall sound of the track.

How To Get A Great Tonal Balance In Your Mix

Credit: bedroomproducersblog.com

Reference Your Mix

Mixing a song can be a daunting task. From fine-tuning each element to creating a cohesive whole, there are numerous factors to consider. One of the most essential aspects is getting a great tonal balance, which can make or break a mix. To achieve this, referencing your mix is crucial. Here’s how:

Use Reference Tracks for Tonal Balance

When mixing, it’s easy to get lost in the details and lose sight of the overall sound. This is where reference tracks come in. A reference track is a professionally mixed song in a similar genre or with a similar sound that you can use as a comparison to your mix. By listening to your mix alongside a reference track, you can better understand where your mix stands in terms of tonal balance, stereo width, and overall sound quality.

Reference tracks should be of high quality and chosen carefully, so they represent the sound you want to achieve. To use reference tracks, follow these simple steps:

StepAction
Step 1Choose a reference track that has a similar genre or style as your mix.
Step 2Compare your mix to the reference track by listening to them both alternately and noting the differences.
Step 3Adjust your mix accordingly to match or better the reference track.

Take Breaks And Listen With Fresh Ears

Another crucial factor to consider is how much time you spend in your mix. Listening to the same thing for hours on end can lead to ear fatigue and make it difficult to assess the tonal balance accurately. It’s essential to take regular breaks during your mixing process, so your ears can rest and reset before you resume.

When you come back to your mix, it’s essential to listen to it with fresh ears. To do this, consider the following tips:

  • Take a ten-minute break every hour to rest your ears.
  • Listen to your mix on different speakers or headphones, so you get varied perspectives on how it sounds.
  • Mute all the tracks except for the track you are working on. So you can focus on specific elements at a time.

By taking breaks and listening with fresh ears, you can ensure that your tonal balance is accurate and well-balanced.

Collaborate With Others

Collaborating with others is key to achieving a great tonal balance in your mix. Work with other professionals such as mastering engineers or musicians to achieve the sound you want. Communication and open-mindedness are key components of successful collaboration in music production.

Collaborating with others is key to getting a great tonal balance in your mix. Other engineers and artists bring fresh perspectives to your mix. They can help you reach a balance you might miss alone. Here are some ways to collaborate with others for a better tonal balance: ### Get Feedback From Other Engineers One way to collaborate with other engineers is to get feedback from them. This can be invaluable when it comes to achieving a great tonal balance in your mix.

Other engineers can offer fresh ears and different perspectives that can help you identify problem areas in your mix that you may have missed. Consider working with an engineer who has different specialties than you do. For example, if you specialize in mixing vocals, consider working with an engineer who specializes in mixing drums or guitars. This can provide a fresh perspective and bring out the best in all aspects of the mix. ### Collaborate With Artists Collaborating with artists is another way to achieve a great tonal balance in your mix.

Practical Tips for Tonal Balance

Artists often have a specific vision for their music, and their input can help you achieve the desired tonal balance. When collaborating with artists, start by having a conversation about their vision for the music and what they want to achieve. This can help you understand their goals and how to best achieve them through the mix. Consider asking for input on the mix from the artist throughout the process, rather than waiting until the end to get feedback. In conclusion, collaborating with others is a powerful tool for achieving a great tonal balance in your mix.

By working with other engineers and artists, you can gain fresh perspectives and insights that will help you achieve your goals. Whether you’re just starting out or a seasoned pro, collaborating with others is a great way to improve your skills and achieve better results.

Follow Your Instincts

Achieving a great tonal balance in your mix requires a combination of technical and artistic skills. Follow your instinct as you tweak levels, EQ, and compression to find that perfect sweet spot. Trust your ears and don’t be afraid to make bold choices in pursuit of a cohesive, balanced mix.

Trusting your instincts is key to achieving a great tonal balance in your mix. Remember that you are the final judge, and while you might not always be right, it’s important to rely on your ears and experience to guide you. When you’re mixing, it’s easy to get bogged down in details and start second-guessing yourself. However, if something sounds good, it probably is good. Trust your gut and go with it.

Trust Your Ears

Your ears are your most valuable tool when it comes to mixing. Be sure to take breaks often and give your ears a rest, so they don’t get fatigued. It’s also important to listen in a variety of environments to make sure your mix sounds good on different systems. Don’t rely too heavily on visual representations of sound, such as waveforms, as they can be misleading. Instead, close your eyes and focus on what you’re hearing.

Experiment With Different Techniques

Mixing is an environment that encourages experimentation. Keep an open mind and be willing to try new things, even if they feel counterintuitive. Every mix is different and requires different approaches. Here are a few techniques to try:

  • Use EQ sparingly. Instead of cutting frequencies, try boosting others to create more space.
  • Try using compression on individual tracks to create a more even mix.
  • Add reverb to create depth and space.
  • Pan individual tracks to create a sense of space and separation.
  • Use automation to create dynamic changes throughout the mix.

Remember, there’s no right or wrong way to mix. The most important thing is to trust your instincts and ears and to keep experimenting until you find what works for your mix.
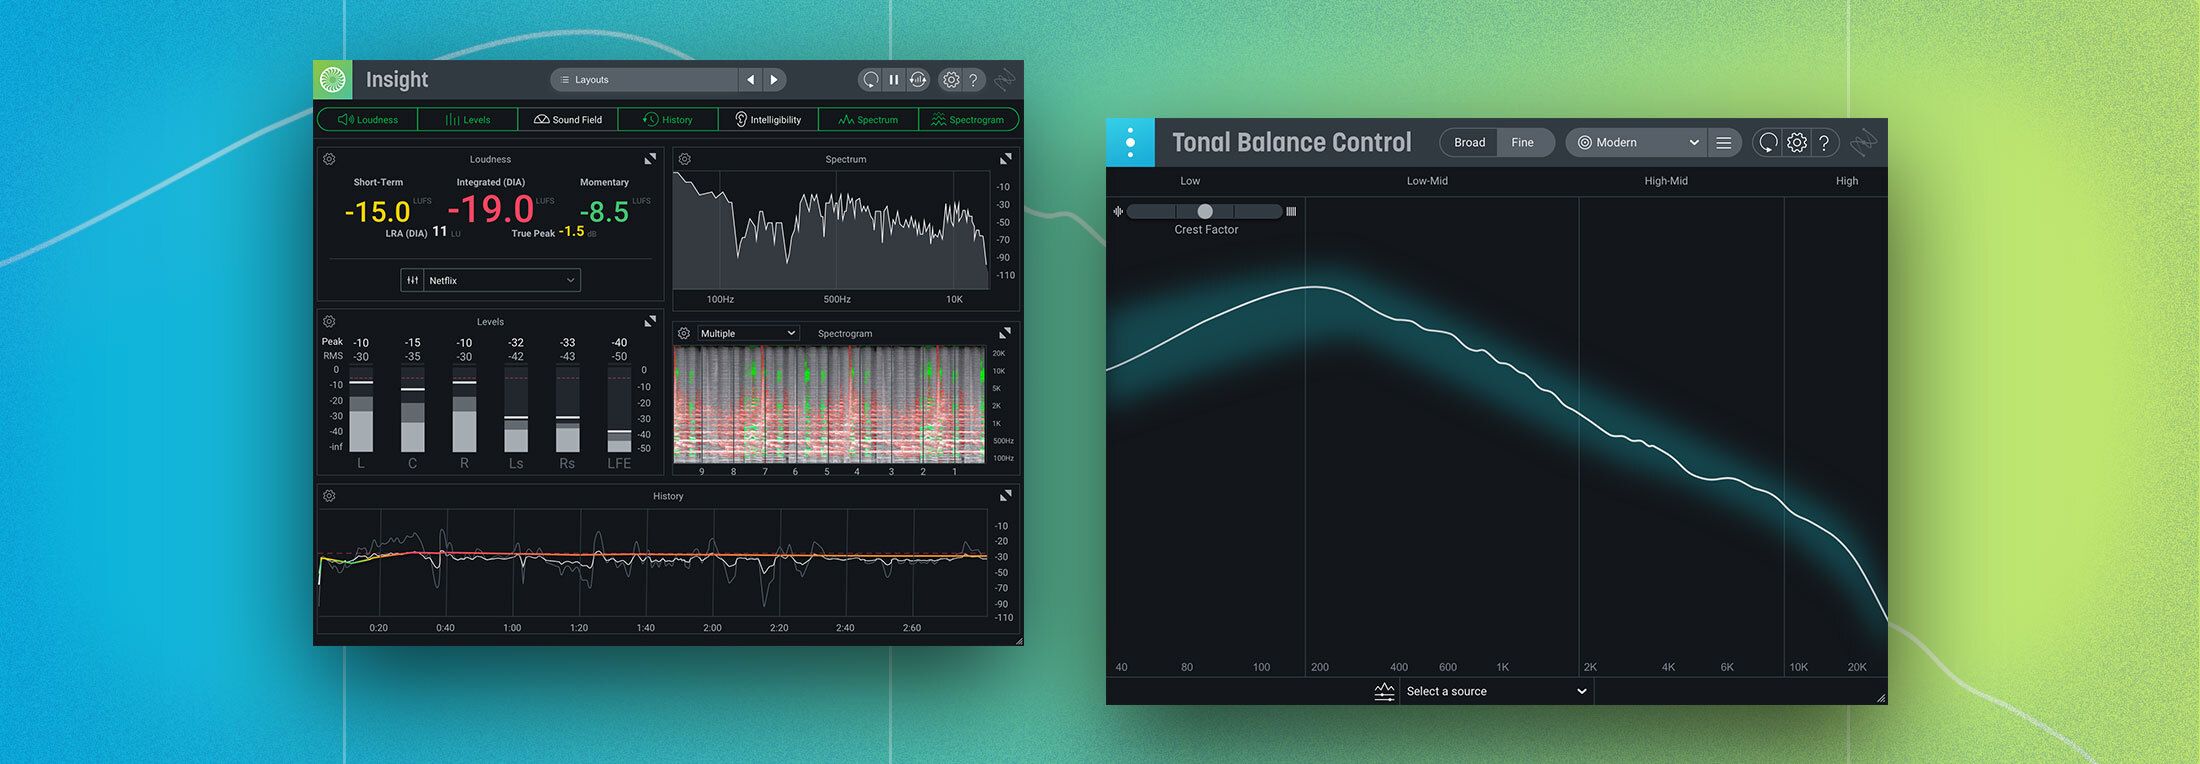
How To Get A Great Tonal Balance In Your Mix

Credit: www.izotope.com

Frequently Asked Questions For How To Get A Great Tonal Balance In Your Mix

How Do You Fix Tonal Balance In A Mix?

To fix tonal balance in a mix, use EQ to boost or cut specific frequencies and adjust volume levels. Start by identifying problem areas and focus on specific instruments or vocals that need adjusting. Use a reference track to help guide your decisions and listen on multiple systems to ensure a balanced mix.

How Do You Get A Good Mix Balance?

To get a good mix balance, you need to adjust the levels of each instrument and sound in the mix. Start by setting the levels for the most important elements, such as the vocals or lead instrument. Then, use equalization and panning to create space and separation between the different sounds.

Finally, apply compression and other effects to make the mix sound cohesive and polished. Continuously listen to the mix and make adjustments until it sounds balanced and clear.

What Is The Tonal Balance Of A Mix?

The tonal balance of a mix refers to the distribution of frequency ranges in a musical composition. It’s important to ensure that the different elements of the mix are balanced in terms of their volume, EQ and panning to create a cohesive and pleasing sound.

A well-balanced mix should have a good balance of lows, mids and highs and should be free from any harsh or overpowering frequencies.

What Does Good Tonal Balance Look Like?

Good tonal balance means that all of the different frequencies in a sound are present in the right proportions. It results in a clear and natural-sounding mix with no parts dominating over others. A good tonal balance produces an accurate representation of the recorded sound and allows all of the elements to be heard clearly.

Conclusion

Achieving a great tonal balance in your mix can make a significant difference in how your music is perceived by your audience. It takes time, patience, and the right tools to get it right. By using techniques like panning, EQ, and compression, you can bring out the best in each instrument and create a cohesive and balanced sound.

Remember, every track is different, so keep experimenting until you get the desired result. With practice and persistence, you can improve your mixing skills and make your music stand out. Happy mixing!
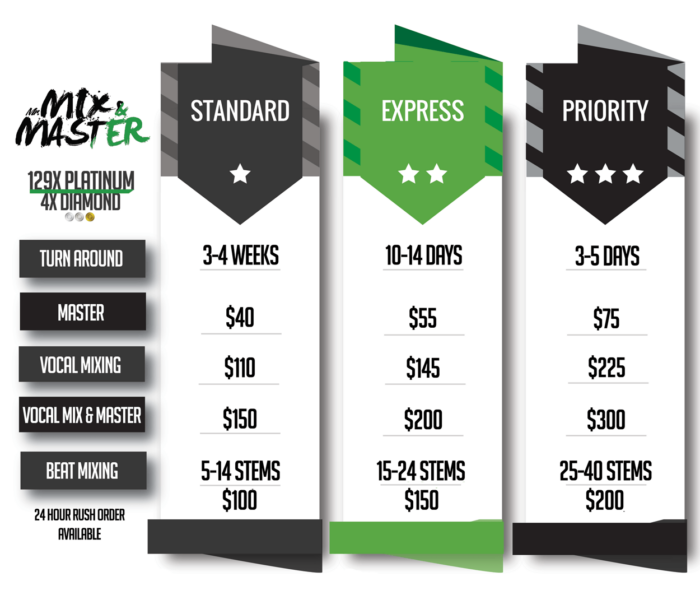
Categories
Archive

The Nuances Of Mastering Different Genres

Mastering different genres requires an understanding of their unique elements and techniques. Becoming adept at various genres requires practice and familiarity.

As a writer, you may find yourself drawn to a particular genre, but to be a versatile writer, it is essential to have a solid grasp of multiple genres. From romance to horror, each genre has its own set of rules, expectations, and nuances that can make the difference between success and failure in your writing.

To master different genres, you must put in the effort and time to research and study them. Analyze the works of successful authors within each genre to see how they accomplish their writing goals. By learning about the conventions and techniques unique to each genre, you can develop the skills necessary to write compelling and engaging stories across a variety of fields.

Understanding Genres

Mastering different genres requires understanding the subtle differences between them. Writers need to be familiar with the unique characteristics of each genre in order to master it and create compelling content. By delving into the nuances of each genre, writers can hone their skills and become experts in crafting content that resonates with their audience.

Definition Of Genres

Genres are classifications of literature, music, art, or any form of entertainment that share distinctive characteristics. The word genre comes from the French language, loosely translating to “type.” Each genre has its own set of conventions, themes, and structures that differentiate it from other genres. Genres can be broad, like non-fiction or fiction, or very specific, like paranormal romance or heavy metal.

Importance Of Knowing Genres

Knowing genres is vital for any artist or content creator. Understanding the conventions of each genre will help you determine its target audience and create works that appeal to them. Additionally, genres help create a framework to follow, enabling creators to create cohesive works that maintain a consistent tone throughout. Moreover, mastering one genre and moving on to another expands an artist’s range of skills and creativity while improving their ability to approach different styles of storytelling.

Mastering Different Genres

Mastering different genres involves identifying genre conventions, such as setting, plot, and theme, and incorporating those conventions into your work. It requires you to study different authors, artists, and musicians who have mastered these genres and learn to apply their techniques to your work. Moreover, it requires you to experiment with different styles and techniques and allow yourself to make mistakes to learn and grow creatively. By understanding the nuances of different genres, you can create works that captivate and engage audiences while expanding your skills and range of content.

Immersing Yourself In A Genre

Mastering different genres requires immersing yourself in them, learning the nuances that make each one unique. From the language used to the pacing of the story, every genre has its own conventions that must be studied and understood for successful writing.

When it comes to mastering different genres, it’s important to invest time and effort in understanding the intricacies of each one. Immersing yourself in a genre can help you gain a better perspective of what works and what doesn’t. In this post, we’ll explore the nuances of mastering different genres, focusing on the importance of immersing yourself in a genre.

Choosing A Genre To Master

Before you can immerse yourself in a genre, you need to choose one to master. There’s no one-size-fits-all approach to choosing a genre. It’s best to choose a genre that you’re passionate about. When you’re passionate about a genre, it’s easier to immerse yourself in it. Plus, your passion for the genre will translate into your writing, making it more engaging for your readers.

Reading And Watching Within The Genre

To truly immerse yourself in a genre, you need to read and watch everything within it. Whether it’s books, movies, or TV shows, make sure you’re consuming as much as possible. This will give you an idea of the typical themes, tropes, and character archetypes within the genre. Make sure you take notes on the elements that make the best stories within the genre.

Breaking Down And Analyzing The Elements Of The Genre

Once you’ve consumed enough content within the genre, it’s time to break down and analyze the elements that make it tick. This includes the plot structure, characters, pacing, and themes. By breaking down these elements, you’ll gain a better understanding of how to craft stories that fit within the genre. Take note of what works and what doesn’t work within the genre. In conclusion, immersing yourself in a genre is crucial when it comes to mastering it. By choosing a genre you’re passionate about and consuming as much content as possible, you’ll gain a better perspective of what works within the genre. Breaking down and analyzing the elements of the genre will also help you craft stories that fit within the genre.

Mastering The Craft

When it comes to writing, mastering different genres can be a challenging task. It requires a high level of versatility and skill to excel in different writing styles. Each genre has its own unique conventions, rules, and expectations. Writers must be adept at identifying and following them. At the same time, they must also be able to avoid cliches and bring a unique perspective to the table. It’s a delicate balancing act that requires patience, practice, and perseverance.

Learning The Conventions And Rules

Each genre has its own conventions and rules that must be adhered to. These could be as basic as the length of the work, the tone, setting, narrative structure, and character development. The key is to read extensively and understand these conventions in depth. Once a writer has a clear understanding of these elements, it becomes easier to craft a story that adheres to the genre’s traditions while also incorporating their style.

Identifying And Avoiding Cliches

Cliches in writing can be tricky to avoid, especially when dealing with well-established genres. However, it’s essential to identify and steer clear of overused plotlines, character tropes, and themes if you wish to create work that is unique and impactful. The easiest way to do this is by reading extensively and studying how other authors have handled the same themes. In doing so, you can find creative ways to push the boundaries while still adhering to conventions.

Experimenting Within The Genre

Once a writer is comfortable with the conventions and rules of a genre, it’s essential to start experimenting. Genre-bending is a popular trend in modern literature. It involves combining elements of different genres into a single work. This experimentation can lead to new and exciting sub-genres, opening up new possibilities for writers. Experimenting within a genre allows a writer to explore new paths, character arcs, and narrative structures.

Developing Your Unique Voice

One of the most crucial aspects of mastering different genres is developing a unique voice. Even though writers may be writing within the same genre, the style should be theirs. A writer’s voice is what sets them apart from others, making them memorable to readers. A unique voice allows a writer to infuse their personality, experiences, and beliefs into their work. It also establishes a connection between the writer and the reader.

In conclusion, mastering different genres is a challenging but rewarding process. It requires a keen eye for detail, patience, and ample practice. By learning the conventions and rules of a genre, avoiding cliches, experimenting within the genre, and developing their voice, writers can excel in creating works that are memorable and impactful.

Challenges Faced

As a writer, it is imperative to be able to master different genres to increase your versatility and expand your readership. However, mastering different genres comes with certain challenges that need to be addressed to deliver quality content.

Avoiding Stereotyping

One of the primary challenges when mastering different genres is avoiding stereotyping. Stereotyping refers to developing content that exhibits the conventional attributes of a particular genre. When you stereotype, you risk being predictable and uninteresting. To avoid this, it is necessary to infuse your unique style and perspective into each genre you write for.

Balancing The Old And The New

Another challenge when mastering different genres is finding the balance between the old and the new. It involves using elements of the traditional format of the genre while also introducing contemporary elements. When writing for a traditional genre, such as romance, it is essential to balance the traditional elements such as the classic conflict between the two protagonists while also including elements of current trends such as online dating.

Catering To The Audience

Catering to the audience is another crucial challenge when mastering different genres. You must understand what your target audience wants and deliver it in a way that resonates with them. For instance, when writing for a younger audience, you must use a simple and straightforward language that is easy for them to comprehend.

Avoiding Repetition And Formulaic Writing

Another significant challenge when mastering different genres is avoiding repetition and formulaic writing. It involves developing fresh content ideas that do not repeat similar themes or patterns. Writing with a predictable formula gets boring. It is essential to experiment with different ideas and themes to sustain the interest of your readers.

Mastering different genres comes with its unique challenges. However, by avoiding stereotyping, balancing the old and new, catering to the target audience, and avoiding repetition and formulaic writing, you can overcome these challenges and deliver quality content that resonates with your audience.

Tips For Mastering Different Genres

Mastering different genres requires a combination of careful observation and intentional practice. To truly understand the nuances of different styles, it’s important to listen closely to the music, read up on the history and background of each genre, and experiment with different techniques and approaches.

With time and dedication, you can become a versatile musician capable of crafting compelling and authentic performances in any style.

Mastering different genres as a writer is a challenging yet fulfilling endeavor. It requires a great deal of patience, discipline, and dedication. Here are some tips that can help you in your journey:

Reading Different Genres

Reading different genres is one of the best ways to master them. If you want to become a great romance writer, for example, you need to read as many romance books as you can. This will help you understand the nuances, tropes, and conventions of the genre. Similarly, if you want to write a sci-fi novel, you need to immerse yourself in the world of science fiction. Make a list of the best books in different genres and start reading them one by one. Take notes, analyze the structure of the plot, the character development, and the writing style. This will give you a solid foundation to build upon.

Writing Outside Your Comfort Zone

Writing outside your comfort zone is another great way to master different genres. It can be intimidating to write in a genre you are not familiar with, but it can also be liberating. It pushes you out of your comfort zone and challenges you to explore new ideas, themes, and styles. If you are used to writing romance novels, try your hand at a horror story. If you are a non-fiction writer, try fiction. You may discover a new passion and talent that you never knew you had.

Creating And Sharing Your Work

Creating and sharing your work is an essential part of mastering different genres. The more you write, the better you become. Don’t be afraid to share your work with others, whether it’s through a writing group, online community, or a professional editor. Receiving feedback can help you identify areas of improvement and refine your skills. It can also boost your confidence and motivate you to keep writing.

Going Back To Basics

Finally, going back to basics is crucial for mastering different genres. No matter how advanced you are as a writer, you need to have a solid foundation in grammar, punctuation, and syntax. These basic elements are the building blocks of good writing. Don’t underestimate their importance. Take online courses or read books on writing basics and practice them consistently. This will help you avoid common mistakes and elevate your writing to the next level. In conclusion, mastering different genres is a gradual process that requires time, effort, and commitment. Whether you are a novice writer or a published author, these tips can help you improve your skills and expand your repertoire. Remember to read widely, write outside your comfort zone, share your work, and go back to basics. With persistence and perseverance, you can become a versatile and proficient writer.

Frequently Asked Questions For The Nuances Of Mastering Different Genres

What Are The Different Types Of Mastering?

There are three types of audio mastering – analog mastering, digital mastering, and hybrid mastering. Analog mastering uses analog equipment to manage the sound, digital mastering uses software and technology to enhance the sound, and hybrid mastering is a combination of both analog and digital technology.

What Are The Fundamentals Of Mastering Music?

The fundamentals of mastering music include: technical proficiency in editing and equalizing, proper use of dynamics, consistent balance of tonality and volume, attention to detail, and accurate referencing of other music tracks.

What Is Dynamic Mastering?

Dynamic mastering is a type of audio mastering that utilizes automated and interactive processes to adapt to the varying elements of a track. It aims to optimize the balance of the sound and bring out its full potential. The result is a more consistent, louder, and fuller sound that is suitable for various mediums and platforms.

Why Is Mastering Separate From Mixing?

Mastering is separate from mixing because each process focuses on different aspects of sound production. Mixing is the process of combining individual tracks into a final mix, whereas mastering is the final step in the production process, where the final mix is balanced, polished, and prepared for distribution.

It involves optimizing the sound quality, improving clarity, making tonal adjustments, and ensuring the overall consistency of the audio.

Conclusion

Mastering different genres can be a challenging but rewarding experience for any content creator. As emphasized throughout this post, understanding the nuances of each genre is crucial to producing high-quality content that resonates with the audience. By taking the time to study and practice different techniques, writers can expand their skill set and hone their craft.

With a commitment to continuous learning, experimentation, and growth, anyone can become proficient in writing for varying genres and mediums. So, don’t be afraid to push yourself out of your comfort zone and try something new – the possibilities are endless.

Categories
Archive

The Best Online Mixing And Mastering Service

“The best online mixing and mastering service is Landr. They offer a high-quality, affordable and user-friendly platform for music producers and artists.”

As more and more artists and producers turn to online services to help them perfect their sound, it’s important to find a platform that delivers the best results. Landr is one such service, offering industry-level mixing and mastering at an affordable price.

Their user-friendly platform also means that even novices can create a professional-sounding track with ease. We’ll explore some of the key features of Landr’s mixing and mastering services and why they stand out in a crowded market. Whether you’re an experienced producer or just starting out, Landr is definitely worth considering for your next project.

The Best Online Mixing And Mastering Service

Credit: mrmixandmaster.com

Why Online Mixing And Mastering Services Are Essential

Online mixing and mastering services are essential for any musician or producer looking to take their tracks to the next level. The best online mixing and mastering service provides high-quality sound engineering and expert mixing to ensure the final product sounds professional and polished.

With the ability to work with a remote team, this service is accessible and convenient for musicians worldwide.

In the world of music production, the quality of the final mix and master is crucial. It determines how the audience perceives the work of the artist. However, not every artist or producer is equipped with the technical expertise to achieve the desired result. This is where online mixing and mastering services come in, providing an easy and affordable way to get professional-level results without breaking the bank.

Pros Of Using Online Mixing And Mastering Services

Using online mixing and mastering services offers many advantages, such as:

Cost-effective:Online mixing and mastering services are often more affordable compared to hiring a professional audio engineer.
Easy accessibility:You can access these services from anywhere and at any time, without the need to visit a physical studio.
Diverse options:There is a wide range of online mixing and mastering services available, catering to different budgets and needs.
Expertise:Such services allow artists to work with highly skilled audio engineers who have years of experience.

How Online Mixing And Mastering Services Works

Online mixing and mastering services work through a simple process. Once chosen, you’ll be required to upload your track, and then the engineer assigned to you will begin to work on it. Here is how it works:

  1. Choose a service: Select an online mixing and mastering service that suits your requirement and budget.
  2. Upload your track: Upload the individual tracks of your song in a high-quality format to the service provider.
  3. Communicate with the engineer: Have a discussion with the assigned engineer about the desired result and approve the final product.
  4. Get the final product: Once the final master is approved, you’ll receive the final stereo mix of your song.

In summary, online mixing and mastering services are an essential tool for any artist or producer looking to achieve professional-level results while keeping costs low. These services allow anyone to access highly skilled audio engineers, making it easy for your music to stand out and reach a wider audience.

The Best Online Mixing And Mastering Service

Credit: www.calmfrogrecording.com

Factors To Consider Before Choosing An Online Mixing And Mastering Service

Choosing the right mixing and mastering service can be a daunting task, especially since there are so many to choose from. Whether you’re an up-and-coming artist or an established musician looking to enhance your music, it’s important to know what factors to consider before committing to a service. To help with your decision-making, we’ve compiled a list of the most important factors to keep in mind when choosing an online mixing and mastering service.

Quality Of Service Offered

The quality of the service offered by an online mixing and mastering service is perhaps the most important factor to consider. You want to work with a service that has a proven track record of delivering high-quality mixes and masters. Look for testimonials and reviews from previous customers to get an idea of the quality of service offered.

Pricing

Pricing is another important factor to consider when choosing an online mixing and mastering service. You want to find a service that offers competitive pricing without sacrificing quality. Keep in mind that the cheapest service may not necessarily be the best option, and you may end up spending more money in the long run to fix a low-quality mix or master.

Turnaround Time

Turnaround time is also an important consideration when choosing an online mixing and mastering service. You want to find a service that can deliver your mix or master within a reasonable timeframe. Look for a service that provides clear information on their turnaround time and can work within your schedule.

Compatibility With Your Daw

Make sure the online mixing and mastering service you choose is compatible with your Digital Audio Workstation (DAW). This will ensure that you can easily upload and download files without any compatibility issues. Look for a service that provides clear instructions and support for different DAWs.

Engineer’s Expertise

Finally, it’s essential to consider the expertise of the engineer working on your mix or master. Look for a service that employs experienced and qualified engineers who specialize in your specific genre. This will ensure that you get the best possible sound for your music.

By keeping these factors in mind, you can choose the best online mixing and mastering service for your needs. Remember to do your research and take your time, and you’ll be well on your way to creating top-quality music.

Top Online Mixing And Mastering Services

Looking for the best online mixing and mastering service? Look no further than our top picks for the best audio engineering services available online. From professional sound mixing to high-quality mastering, these top services offer top-notch quality and affordable prices for all your audio needs.

The demand for professional mixing and mastering services is on the rise due to the surge in music production. In the digital era, there are plenty of online platforms that cater to these needs. The quality of mixing and mastering significantly impacts the overall sound quality of a track. Hence, choosing only the best service provider is critical. In this article, we’ll outline the top three online mixing and mastering services that offer the optimal blend of quality and affordability.

Service #1: Landr

LANDR is a reliable service provider that offers AI-based mastering and mixing solutions to music producers. It is widely popular among independent artists for its affordable pricing and user-friendly interface. The platform allows users to upload their tracks and get them mastered and mixed in a matter of minutes. LANDR’s integration with SoundCloud and Dropbox makes it easier for users to export their final tracks. The platform has a 4.5/5 rating on Trustpilot and has worked with major record labels such as Atlantic Records.

Service #2: Emastered

eMastered is another AI-powered online mixing and mastering platform that is known for its outstanding audio quality. It offers users the flexibility to choose from various genre-specific mastering options to suit their preferences. eMastered also provides users with a real-time preview of their tracks and allows them to download the final mastered version in the preferred file format. The platform has a 4.1/5 rating on Trustpilot and boasts of collaborations with prominent entities such as Forbes.

Service #3: Sweetwater

Sweetwater is a slightly expensive yet trustable service provider for professional mixing and mastering needs. The platform has a vast network of experienced sound engineers who work closely with clients to ensure their tracks are mixed and mastered to their satisfaction. Sweetwater offers users access to its online studio, which is equipped with high-quality software and hardware. Users can track their projects’ progress in real-time and receive personalized feedback from their audio engineers. Sweetwater has a 4.9/5 rating on its website and accolades from well-known industry players such as Billboard. In conclusion, these top three online mixing and mastering services offer optimum quality and affordability. Music producers and independent artists can rely on them to boost their track’s sound quality and take their music to the next level.

The Best Online Mixing And Mastering Service

Credit: www.audiomixingmastering.com

How To Prepare Your Tracks For Mixing And Mastering

Prepare your tracks for mixing and mastering with the best online service to achieve a professional sound. Ensure all individual tracks are properly leveled and free from noise or distortion, and arrange them in a logical order for easy mixing and editing.

With the right preparation, your music can sound its best.

Preparing your tracks for online mixing and mastering is vital to achieve the best possible outcome for your music. You want your tracks to be the best they can be, so they need to be as clean as possible before sending them to a mixing and mastering service. In this section, we look at the essential steps you need to take to prepare your tracks for online mixing and mastering.

Clean Up Your Tracks And Organize Them Properly

The first step to prepare your tracks for online mixing and mastering is to ensure they are organized properly. It would be best to rename your files so that they are easy to understand and identify. Keep your files in order, and ensure everything is named correctly. All the audio files should be in WAV or AIFF format and start at the same point. Also, ensure to remove any unwanted noises, pops, or hiss that can be distracting or affect the overall quality of the recording.

Provide A Clear Brief

Providing a clear brief to the mixing and mastering service you choose is crucial. Ensure that you mention all the essential details like the genre, tone, and style you’d like the song to have. This information will help the mixing and mastering engineers to deliver the desired sound for your music. Outline your expectations in terms of effects and additional production elements you require, this will ensure that you get exactly what you are looking for.

Leave Headroom

It is fundamental to leave some headroom when submitting your tracks for mixing and mastering. Ensure that your tracks are not clipped and don’t go over 0 dB as it can affect the overall sound quality and lead to distortion. Give your mixing and mastering engineer a few decibels of headroom to work with to get the best results.

Don’t Add Plugins To Your Mix Bus

Do not add any plugins to your mix bus as it can affect the quality of your mix. Also, it can be challenging to make changes to your mix, and it can limit the mixing and mastering engineer’s ability to make the necessary adjustments for best sound quality.

Ensure The Tracks Are Free Of Distortion And Clipping

It is necessary to check and ensure your tracks are free of distortion and clipping. The mixing and mastering process can enhance these unwanted sounds as they amplify the signal. Pay attention to levels and ensure that levels are not too loud; it’s best, to be honest with yourself. Another tip is to check the waveform of each audio file to ensure nothing is clipping. In conclusion, preparing your tracks for online mixing and mastering is crucial for achieving the desired sound quality. Follow these tips, and you’ll be well on your way to providing your mixing and mastering engineer with the best tracks to work with.

Frequently Asked Questions On The Best Online Mixing And Mastering Service

What Is The Best Online Music Mastering Service?

“LANDR is considered the best online music mastering service by many industry professionals. With automated mastering technology, affordable pricing and quick turnaround times, it’s a popular choice for musicians and producers looking to perfect their tracks. “

Which Software Is Best For Mixing And Mastering?

The best software for mixing and mastering depends on personal preferences, skill level, and budget. Some top options include Ableton Live, Pro Tools, Logic Pro X, FL Studio, and Studio One. It’s important to research and try out different software to find the best fit for your needs.

Is Landr Mastering Any Good?

Yes, LANDR is a good option for mastering your tracks. It offers high-quality mastering services with AI technology, fast delivery times, and affordable prices. Many musicians and producers have had positive experiences with LANDR mastering.

How Much Does It Cost For Someone To Mix And Master A Song?

The cost to mix and master a song ranges from $50 to $500, depending on the experience and quality of the audio engineer. Prices may also vary based on factors such as the complexity of the song and the number of revisions required.

Conclusion

After researching and testing numerous online mixing and mastering services, it’s clear that everymusician. com is undoubtedly the best option available. Their expertise in sound engineering, affordable pricing, and timely delivery of quality work is unmatched. With their professional touch, your music can reach its full potential and stand out in the saturated music industry.

Don’t settle for less, trust everymusician. com for all your mixing and mastering needs. With their reliable and efficient service, your music is sure to gain the recognition it deserves.

Categories
Archive

Best Way to Promote Your Music As a Rapper

The best way to promote your music as a rapper is to utilize social media and connect with fans on a personal level. As a rapper, your music is your brand, and promoting it effectively is a crucial part of gaining exposure and building your fanbase.

While traditional methods like radio play and in-person performances are still valuable, social media has become an essential platform for self-promotion in the music industry. By creating a strong presence on platforms like Instagram, Twitter, and YouTube, you can connect with fans directly, share new music and updates, and cultivate a loyal following.

Implementing targeted ads, collaborating with other artists, and engaging in online communities are also effective strategies for promoting your music to a wider audience. With the right approach, social media can be a powerful tool for any rapper looking to break into the music industry.

Developing Your Brand Identity

As a rapper, developing your brand identity is crucial in promoting your music. Establishing a unique image through visual branding, consistent messaging, and engaging with your audience on social media can help elevate your career to the next level.

Developing your brand identity is crucial as a rapper trying to promote your music. Your brand identity includes your unique image and sound, which sets you apart from the competition. It’s the one thing that connects you with your fans and makes them loyal to your music. In this blog post, we’ll discuss how to craft your unique image and define your sound.

Crafting Your Unique Image

Your image as a rapper is just as important as your music. It’s the first thing people see, and it needs to represent who you are and what you stand for. Here are some tips to help you craft your unique image:

  • Know your target audience and what they’re interested in.
  • Choose a style that reflects your personality and sets you apart from others.
  • Create a consistent image across all your social media platforms.
  • Stay true to yourself and don’t try to be someone you’re not.

Defining Your Sound

Every rapper has a unique sound that sets them apart from others. It’s important to define your sound and make sure it’s consistent across all your music. Here are some tips to help you define your sound:

  • Listen to a variety of music genres to find inspiration for your sound.
  • Create a consistent sound across all your music.
  • Work with music producers who can help you develop your sound.
  • Experiment with different sounds and try to create something unique.

In conclusion, developing your brand identity is crucial as a rapper trying to promote your music. It includes your unique image and sound, which sets you apart from others. By crafting your unique image and defining your sound, you can create a brand that connects with your fans and makes them loyal to your music.

Building Your Online Presence

As a rapper, building your online presence is crucial. The best way to promote your music is through social media platforms like Instagram, Twitter, and YouTube. Consistently sharing content, interacting with fans, and engaging with other artists can help you gain visibility and grow your audience.

As a rapper, building an online presence is critical for growing your fan base and promoting your music. In today’s digital age, having a strong online presence will help you reach a wider audience and connect with fans in real-time. There are several ways to establish your online presence, including creating a website or blog and establishing a social media presence.

Creating A Website Or Blog

A website or blog is an essential tool when it comes to building your online presence. It not only serves as a platform to showcase your music but also gives you complete control over your message and branding. When creating your website or blog, ensure that it is visually appealing, easy to navigate, mobile-friendly, and contains all the essential information about you and your music. Important elements to include on your website or blog:

  • A bio about you and your music
  • Links to your social media profiles
  • Your latest music releases and videos
  • Your upcoming events and tour dates
  • Contact information for fans

Establishing A Social Media Presence

In addition to having a website or blog, establishing a strong social media presence is vital for promoting your music and engaging with fans. Social media gives you an opportunity to showcase your personality, share behind-the-scenes moments, and interact with fans in real-time. When establishing your social media presence, choose the platforms that align with your brand and target audience. Ensure that your social media profiles are visually appealing and informative. Consistency is key when it comes to social media, so ensure that you post regularly and engage with your followers. Tips for building a strong social media presence:

  • Post regularly and consistently
  • Create engaging content that resonates with your audience
  • Interact with your followers by responding to comments and messages
  • Cross-promote your social media profiles on your website and other platforms
  • Use relevant hashtags to increase your visibility

In conclusion, building your online presence is critical for promoting your music as a rapper. By creating a website or blog and establishing a social media presence, you can connect with fans, showcase your music, and build a brand that resonates with your audience.

Marketing Your Music On Social Media

Promoting your music on social media is crucial for up-and-coming rappers. The best way to do it is by creating engaging content, being active on platforms like Instagram and TikTok, collaborating with other artists, and utilizing paid advertising. With the right social media strategy, you can grow your fanbase and make a name for yourself in the industry.

Aspiring rappers often struggle with getting their music out to the masses. Thankfully, with the advent of social media, it has become easier than ever before to promote your music and build a fanbase. In this blog post, we’ll take a closer look at how to promote your music as a rapper by using social media marketing techniques.

Promoting Your Music On Instagram

Instagram is an excellent platform for promoting your music, given its visual nature. Here are some tips on how to get started with Instagram music marketing:

  • Get a Business account: First and foremost, if you’re serious about promoting your music, you should convert your personal Instagram account into a Business account.
  • Use Hashtags: Hashtags allow your posts to be more discoverable by people interested in your content.
  • Partner with Influencers: Consider partnering with Instagram influencers in your niche to promote your music and reach a wider audience.

Leveraging Twitter For Music Marketing

Twitter is an excellent platform for music marketing, given its real-time nature and concise messages format. Here are some tips on how to leverage Twitter to promote your music:

  • Tweet consistently: Twitter moves fast, and if you’re not tweeting consistently, your tweets will quickly get lost in the shuffle.
  • Engage with your Fans: Engage with your fans by responding to their tweets, asking questions, and running contests to keep them excited and engaged.
  • Use Twitter Ads: Twitter Ads is an excellent way to promote your music to the right people and build a fanbase quickly.

In conclusion, by leveraging the power of social media, you can successfully promote your music as a rapper. By using Instagram and Twitter marketing techniques, you will not only create a loyal fanbase but also get your music out to the masses.

Best Way to Promote Your Music As a Rapper

Credit: www.youtube.com

Collaborating With Other Artists

Collaborating with other artists can be the best way to promote your music as a rapper. Connect with other musicians, producers, and singers to create powerful music that can attract more listeners. By working together, you can reach a wider audience and gain more exposure in the music industry.

Collaborating with other artists is one of the best ways to promote your music as a rapper. It can help you reach a wider audience, gain new fans, and increase your visibility in the music industry. Here are some effective ways to collaborate with other artists:

Releasing Collaborative Tracks

One of the most effective ways to collaborate with other artists is by releasing collaborative tracks. This can be done through featuring on each other’s songs, creating a joint album, or simply recording a track together. By collaborating with other artists, you can showcase your talents to their fan base, and vice versa. Collaborative tracks can also help you to create a unique sound and bring a fresh perspective to your music.

Building Relationships With Local Artists

Building relationships with local artists is another effective way to collaborate and promote your music. Attend local shows, open mics, and events to meet other artists and build connections. Reach out to them on social media, offer to collaborate on a track, or even perform together. By building a network of local artists, you can tap into the local music scene and gain exposure to new audiences that you may not have reached otherwise.

Conclusion

Collaborating with other artists is a powerful way to promote your music as a rapper. By releasing collaborative tracks and building relationships with local artists, you can expand your fan base, gain new exposure, and establish yourself as a unique and versatile artist. So, reach out to other artists, create new connections, and let your creativity flow!

Utilizing Music Streaming Platforms

Utilizing music streaming platforms is an excellent way for rappers to promote their music. With millions of users on platforms like Spotify, Apple Music, and Tidal, it’s easier than ever for artists to get their music in front of a wider audience and gain new fans.

Implementing proper SEO techniques can help boost visibility on these platforms.

As a rapper, promoting your music can be a daunting task. With the ever-increasing competition, standing out from the crowd is crucial. Fortunately, music streaming platforms provide an amazing opportunity for rappers to reach their target audience. Here are a few ways to make the most out of them.

Uploading Your Music To Spotify

Spotify is one of the most popular music streaming platforms in the world, boasting over 356 million active users. As a rapper, uploading your music to Spotify can help it reach a wider audience. Plus, by utilizing the platform’s playlist features, you can increase exposure to your tracks. To upload your music to Spotify, you’ll need to use a digital music distributor such as DistroKid or TuneCore. These services will take care of the distribution process and ensure your music gets onto Spotify and other streaming platforms like Apple Music, Amazon Music, and more.

Engaging With Fans On Soundcloud

Soundcloud is a music streaming platform that focuses on fostering a community of musicians and listeners. As a rapper, connecting with your fans is critical, and Soundcloud can help you do that. On Soundcloud, you can comment on tracks, follow other artists and fans, and share tracks directly with your audience. Additionally, Soundcloud offers features like reposts, which can help your music get in front of more people. Whether you’re just starting out or are an established rapper, utilizing music streaming platforms like Spotify and Soundcloud can help you take your career to the next level. Try implementing these tips, and watch your music reach new heights.

Best Way to Promote Your Music As a Rapper

Credit: blog.groover.co

Networking And Performing Live Shows

As a rapper, networking and performing live shows are essential to promoting your music. Building relationships with other musicians and industry professionals can lead to opportunities to showcase your talent on stage and gain more exposure. Performing live shows allows you to connect with fans and create a buzz around your music, helping to generate interest and build your following.

As a rapper, promoting your music is crucial to get your name out there and to connect with your audience. Two effective ways to promote your music are through networking and performing live shows. These methods can be used to connect with fans and industry professionals, ultimately helping to grow your fan base and advance your career.

Connecting With Fans At Live Shows

Live shows allow you to interact with your audience and connect with them in a personal way. Use this opportunity to showcase your talent and to build a relationship with your fans. Keep your energy high and engage with the crowd through call and response chants. Encourage them to sing along with you throughout your performance. In between your sets, take the time to greet your fans and take pictures with them. This will create a lasting impression and help you build a strong fan base.

Networking With Industry Professionals

Networking with industry professionals allows you to gain exposure and potentially land new opportunities. Make an effort to attend music events and showcases where you can connect with professionals in the industry. Use this opportunity to introduce yourself, share your story and your music. Have business cards on hand with your contact information to leave a lasting impression. Consider reaching out to other artists who you admire or professionals on social media to form a connection. In conclusion, by networking and performing live shows, you can connect with fans and industry professionals. Make the most out of these opportunities by showcasing your talent, building a strong fan base and forming valuable connections. Promote your music regularly to get your name out there and advance your music career.

Releasing Engaging Music Videos

One of the best ways to promote your music as a rapper is by releasing engaging music videos. Creating visually appealing and entertaining videos can increase your reach and help you connect with your audience on a deeper level. Incorporating your own personal style and brand can also make your videos stand out from the rest.

Your music video is one of the best tools to promote yourself as a rapper. As the first impression is the last impression, your music video needs to be engaging and creative enough to retain your viewers’ attention. With YouTube having more than 2 billion active monthly users, it’s time to take advantage of this platform to get your music in front of a vast audience. In this blog post, we’ll discuss some of the best ways to create unique and engaging music videos to promote your music.

Creating Unique Music Video Concepts

As a rapper, your music video should be a visual representation of your music style, thoughts, and creativity. Creating a unique music video concept requires brainstorming ideas that reflect who you are as a rapper. Your music video is an opportunity to tell a story that will captivate your audience. A great way to engage your audience is to add unique elements like special effects, animation, and personalized props.

Using Youtube As A Promotional Tool

With an internet connection and a smartphone or a camera, you can create and upload your music videos on YouTube. It is essential to optimize your YouTube content to reach the most potential viewers. To do this, you can add accurate metadata to your content such as a descriptive title, tags, and a detailed description. Also, add a call-to-action (CTA) at the end of your video to encourage your viewers to share your content with their network. Creating an engaging music video is crucial to promoting your music as a rapper. You can leverage your music videos to showcase your creativity, define your brand, and build a relationship with your audience. By using YouTube as a promotional tool, you can reach a vast audience and increase your fan base. With these tips, you can create music videos that will get you noticed, and people will continue to sharing and watching.

Best Way to Promote Your Music As a Rapper

Credit: blog.groover.co

Investing In Promotional Materials

Investing in promotional materials, such as flyers, stickers, and posters, can be the best way to promote your music as a rapper. Utilizing these items at shows, on social media, and around your community can help create a buzz and attract new fans to your music.

Investing in Promotional Materials can be a game-changer for a rapper who wants to stand out in a tough industry. In addition to putting out great music, having promotional materials can create a loyal fan base and help spread the word about your brand. In this post, we’ll explore the importance of Investing in Promotional Materials and delve into designing merchandise for fans, as well as printing business cards and flyers.

Designing Merchandise For Fans

Merchandise is not just a bonus for fans; it’s an essential part of brand-building. Designing merchandise such as T-shirts, hats, and posters can create a unique identity for your music. People love showing off their support for their favorite artists, and merchandise allows them to do so. So, investing in designing unique merchandise can be a smart move for building a powerful brand. Besides, it’s an excellent way to increase your revenue as well.

PROSCONS
Merchandise creates a unique identity for musiciansIt requires upfront investment
It creates brand visibility and awarenessMerchandise might not be the best option for small-scale artists
It is an excellent source of revenueThe cost of production needs to be considered

Printing Business Cards And Flyers

Business cards and flyers may seem like outdated marketing materials, but they still play a crucial role in promoting your music. Flyers and business cards are inexpensive, making them an excellent option for local shows and events. So, investing in a professional-looking promotional printing can be a great move.

  • Business cards provide a convenient way of sharing information with potential fans, promoters, or managers that you meet in person.
  • Flyers act as advertisements that can grab people’s attention and give them quick information about your music or shows.

Bear in mind that you don’t have to break the bank to get professional-looking promotional materials. You can use online graphic design tools to create impressive promotional designs at affordable prices. In conclusion, Investing in Promotional Materials is a smart move for rappers who want to stand out. Designing merchandise for fans and printing business cards and flyers are just some of the ways to make a lasting impression in the music industry. It’s essential to carefully consider the advantages and disadvantages of each option and decide what best suits your brand and budget.

Frequently Asked Questions On Best Way To Promote Your Music As A Rapper

How Do Rappers Promote Their Music?

Rappers promote their music by utilizing various marketing techniques, such as social media promotion, music videos, collaborations with other artists, live performances, and engaging with their fans through their music. They also opt for endorsement deals with brands to gain wider publicity and exposure.

How Do I Promote Myself As A Rap Artist?

To promote yourself as a rap artist, you can start by building a strong online presence through social media platforms like Instagram and Twitter. Collaborate with other artists, create engaging content, and stay active. Attend local events and perform whenever possible to gain exposure.

Use music distribution services to release your music on streaming platforms. Lastly, continue to hone your craft by practicing and releasing new tracks regularly.

How Do I Get My Rap Music Noticed?

To get your rap music noticed, you should focus on building a strong online presence by networking and promoting your music on social media platforms such as Instagram, Twitter, and YouTube. Collaborate with other artists and producers to broaden your audience.

Utilize music streaming platforms like Spotify and SoundCloud, and submit your music to popular playlists. Lastly, perform at local shows and events to build a grassroots following and gain new fans.

How Do Rappers Get Noticed?

Rappers can get noticed by creating high-quality music and promoting it on social media platforms. Collaborating with other artists, performing at local shows, and reaching out to industry professionals can also help to gain exposure. Building a strong fan base and consistently releasing new content while staying true to their own unique style can ultimately lead to success in the industry.

Conclusion

Promoting your music as a rapper takes a combination of hard work, creativity, and consistency. It’s important to have a strong online presence through social media platforms and utilize digital marketing strategies such as email marketing and PPC advertising. Collaborating with other artists and networking with music industry professionals can also help expand your reach and build a loyal fanbase.

By implementing these tips, you can increase your chances of success in the competitive music industry. Happy promoting!

Categories
Archive

How To Use A Limiter Whilst Mastering Audio

To use a limiter in mastering audio, set the threshold to your desired level and adjust the ratio. Use makeup gain to compensate for any loss in volume.

Limiter settings should be adjusted to prevent distortion but still allow the audio to be perceived as loud. When mastering audio, a limiter can be a crucial tool to ensure the overall volume is consistent and avoid any clipping or distortion.

It allows you to control the loudest parts of your audio and prevent them from exceeding a certain threshold. With the right settings, a limiter can help maintain the dynamics of your mix while still allowing it to be perceived as loud. We will discuss how to properly use a limiter during the audio mastering process.

How To Use A Limiter Whilst Mastering Audio

Credit: m.youtube.com

Understanding Limiters

When mastering audio, using a limiter can help prevent distortion and balance the levels of different tracks. A limiter works by setting a maximum output level, ensuring that no sound goes beyond that point. Understanding limiters is essential for achieving a clean and professional sound in your audio recordings.

Understanding Limiters: Audio mastering is an essential step for any musician or sound engineer that wants to ensure their final product has the desired punch and level for an optimal listening experience. Limiter is a tool used to achieve that level of consistency in audio mastering. In this post, we will explore what a limiter does, the different types of limiters available, and how to use them correctly. H3: What a limiter does A limiter is a dynamic range compressor that sets a maximum limit on the output level of an audio signal. Its primary function is to ensure that the loudest parts of the audio track don’t exceed a defined threshold or clip. By limiting the amplitude of the waveform, a limiter can help even out the dynamic range of a track, giving it an overall more consistent sound. Some limiters are designed to primarily prevent distortion, while others are designed to maximize the perceived loudness of a track. They are used in conjunction with other mastering tools like EQs and compressors to produce a final mix that is both sonically pleasing and technically exceptional. H3: Different types of limiters There are several types of limiters available; each has its unique characteristics and uses. Here are the most common types: Peak Limiters – These operate by detecting and reacting to peaks in the audio signal. They are used to prevent clipping and distortion as well as to increase the loudness of a track. Transparent Limiters – As the name implies, these limiters do not alter the sound of the audio significantly, making them an excellent choice for tracks that require a minimalistic approach. Multi-band Limiters – These divide the audio signal into multiple frequency bands, each with its limiters. This type is useful for tracks with complex arrangements and allows for greater control over the overall level of each frequency range. It is essential to choose the right type of limiter for your audio track as the wrong type may result in unwanted artifacts or an unnatural sound. In conclusion, using a limiter whilst mastering audio is crucial for achieving the desired level and consistency. Understanding how limiters work and choosing the right type for your track will help you achieve professional-sounding audio.

How To Use A Limiter Whilst Mastering Audio

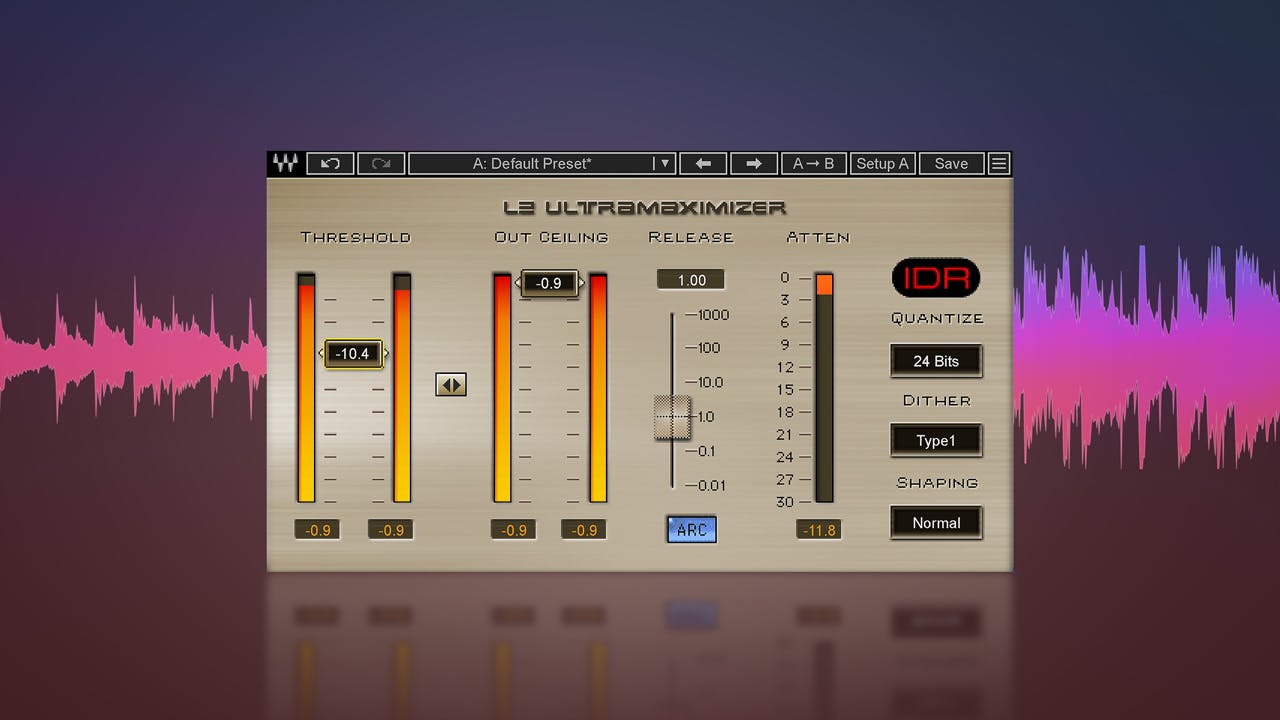
Credit: www.waves.com

Preparing Audio For Limiting

To prepare audio for limiting during mastering, it’s important to ensure the levels are consistent and avoid clipping. Use a limiter to control the peaks of the audio without sacrificing overall loudness or dynamics. Proper preparation will result in a polished and professional sounding final product.

Importance Of Gain Staging

When it comes to preparing audio for limiting, one of the most important steps is gain staging. This is the process of setting the levels of your tracks so that they are consistent and not clipping. Clipping occurs when the level of a track is too high and causes distortion in the signal. To avoid this, it’s essential to set the gain levels before applying any processing to the tracks. Some tips for gain staging include starting with the loudest track and setting its level first. Then, adjust the levels of the other tracks so that they balance with the loudest one. Use your ears to determine if the levels are too high or too low and adjust as needed.

Tips For Eq And Compression

After you’ve properly gain staged your tracks, it’s time to move on to EQ and compression. It’s important to note that these processes should be used sparingly and with intention. Too much EQ or compression can negatively affect the overall sound of the mix. When applying EQ, use it to remove any unwanted frequencies and enhance the good ones. Don’t boost the frequencies too much, as this can lead to an unnatural sound. Use your ears to determine what sounds good and what doesn’t. Compression should also be used judiciously. The goal of compression is to control the dynamics of the track and make the loud parts quieter and the quiet parts louder. This can help to achieve a more even overall sound. When setting the compression threshold, start with a low ratio and adjust as needed. Use a fast attack time for vocals and a slower attack time for instruments. By following these tips for preparing audio for limiting, you’ll be well on your way to achieving a professional-quality mix that is ready for mastering. Remember to take your time and use your ears to guide you in the process.

Setting Up The Limiter

Setting up the limiter is an essential part of mastering audio. The limiter helps you control the dynamic range of your audio, ensuring that it sounds polished and cohesive. Below, we’ll explore the key elements of setting up a limiter:

Threshold And Ratio

The threshold of the limiter determines at what point the limiter starts to compress your audio. The ratio, on the other hand, governs how much compression is applied. For example, a ratio of 2:1 means that for every 2dB that your audio goes over the threshold, the limiter will allow 1dB to pass through.

Generally, it’s best to set a low threshold so that the limiter will start compressing your audio earlier. A ratio of 1:1 is also a good starting point, as it will apply subtle compression without altering the overall character of your audio.

Attack And Release Time

The attack time of the limiter determines how quickly it will begin acting on your audio. A shorter attack time means that the limiter will react more quickly, which can be useful for limiting sudden peaks. However, using too short an attack time can result in a loss of transients and impact the overall clarity of your audio.

The release time governs how quickly the limiter will stop compressing your audio. A longer release time means that the limiter will let go of the compression gradually, which can be useful for preserving the natural decay of your sounds. On the other hand, a shorter release time means that the limiter will release compression more quickly, resulting in a tighter and more controlled sound.

Output Gain

The output gain of the limiter determines how much makeup gain is applied to your compressed audio. This is necessary because compression reduces the overall level of your audio. It’s important to apply just enough makeup gain to bring your audio back up to a suitable level without introducing any more distortion or noise.

In conclusion, setting up a limiter is a vital step in mastering audio. By adjusting the threshold, ratio, attack and release time, and output gain, you can ensure that your audio sounds polished, cohesive, and free from unwanted distortion or artifacts.

Using The Limiter In Context

The limiter is an important tool to use when mastering audio to help prevent distortion and control levels. Using it in context with other mastering tools can lead to a well-balanced and professional sounding final product.

When it comes to mastering audio, using a limiter can be an effective tool in achieving a polished and professional sound. A limiter, as the name suggests, limits the maximum level of a signal, preventing it from peaking and distorting. However, it’s important to use the limiter in context to ensure that it’s not overused and doesn’t negatively affect the mix. Here are some tips on how to use the limiter in context:

How To Compare With Reference Tracks

Compare your mix with a reference track in the same genre to get an idea of how it should sound. By doing this, you can determine if the levels are balanced and if the limiter is being used appropriately. A/B testing is also a great way to see how the limiter affects the sound. Start with the limiter off, then turn it on and adjust the settings until the desired effect is achieved.

Making Adjustments For Different Genres

Different genres have different requirements when it comes to mastering. For example, a dance track may require more compression and limiting to achieve a consistent and loud level, whereas a ballad may require less limiting to retain a dynamic range. It’s important to adjust the limiter settings accordingly and ensure that it’s not overused.

Summary

Using a limiter effectively requires a keen understanding of how it affects the mix. Compare your mix with reference tracks, make adjustments for different genres and always use the limiter in context to achieve a professional and polished sound. Remember, less is often more when it comes to limiting, and always trust your ears over the numbers on the meters.

Potential Pitfalls

While using a limiter whilst mastering audio can greatly enhance the quality of your music, there are certain potential pitfalls that you should be aware of. Without taking precautions, you may end up with audio that sounds distorted, or worse, completely ruined. Below are a few potential pitfalls and how you can avoid them.

Clipping And Distortion

One of the most common issues that arise when using a limiter is the possibility of clipping and distortion. Clipping occurs when the signal level is too high, and it gets cut off by the limiter. This can cause audible distortion and negatively affect the overall quality of your audio.

To avoid this, you should first ensure that the gain structure of your mix is optimized. This means that your levels must not exceed 0dB, and you should leave enough headroom for the limiter to operate without clipping. Secondly, set your limiter’s threshold and output gain levels appropriately. If the threshold is too low, the limiter will engage too often, causing unwanted distortion. The output gain level should also be set conservatively, as too much output gain can cause the limiter to clip the audio signal.

Overuse Of The Limiter

One of the most common mistakes that people make when using a limiter is overusing it. It can be tempting to crank the limiter up to make your audio as loud as possible, but this can potentially cause more harm than good. When a limiter is used too much, it can crush the dynamic range of your audio, making it sound flat and lifeless.

To avoid this, use the limiter sparingly, and balance it with other processing tools like EQ and compression. You should also consider reducing the overall level of your mix before using a limiter, as this will allow you to achieve a louder overall volume without overusing the limiter.

By following these simple steps, you can avoid the potential pitfalls of using a limiter whilst mastering audio. Remember, less is often more when it comes to processing audio, and a more conservative approach can often yield better results.

Advanced Techniques

When mastering audio, using a limiter can help to control levels and prevent distortion. However, it is important to use advanced techniques, such as multiband limiting and side-chain compression, to achieve a more professional sound. By carefully balancing the overall level and dynamics of the audio, you can achieve a full, clear and polished sound.

Multi-band Limiting

When it comes to advanced techniques for using a limiter while mastering audio, one of the most essential techniques is multi-band limiting. This technique involves breaking up the audio signal into different frequency bands, which allows for more precise control over each band’s dynamics. Multi-band limiting is particularly useful when working with complex, multi-layered audio tracks with different frequency ranges. To employ multi-band limiting, the first step is to use a spectrum analyzer to divide the audio signal into separate frequency bands. Each band can then be compressed and limited independently, allowing for better control over the overall sound of the audio. Be sure to set the threshold carefully for each frequency band, as too much compression can result in an unnatural sound.

Mid-side Processing

Another advanced technique to consider when using a limiter while mastering audio is mid-side processing. This technique allows for separate control over the center and side information of the audio signal. By using a separate limiter on each channel, you can add stereo width and depth to the audio, resulting in a more immersive listening experience. To employ mid-side processing, first, place a mid-side processor at the beginning of the mastering chain. Then, use a stereo limiter on the side channel, setting the threshold carefully to avoid overcompression. Finally, adjust the amount of stereo width by controlling the side volume.

Conclusion

Employing multi-band limiting and mid-side processing are advanced techniques to consider when using a limiter while mastering audio. With careful attention to each frequency band and channel, you can achieve a more polished and professional sound.

How To Use A Limiter Whilst Mastering Audio

Credit: m.youtube.com

Frequently Asked Questions Of How To Use A Limiter Whilst Mastering Audio

How Do You Use Limiter In Mastering?

A limiter is a type of dynamics processor used in mastering to control the peaks of a signal. It sets a maximum volume level that the signal can reach, preventing distortion or clipping. To use a limiter, adjust the threshold to the desired level and use the gain control to increase overall volume.

However, careful attention should be paid to avoid over limiting and losing dynamics in the mix.

Should I Put A Limiter On The Master Track?

Yes, adding a limiter on the master track can help control the overall volume and prevent distortion. However, it is important to use it judiciously and not depend solely on it to solve issues with mixing and mastering. The limiter should be used as a final tool in the mastering stage.

How Much Should You Limit Your Master?

Limiting the master in audio mixing depends on the type of project, genre of music, and personal preference of the engineer. However, it is generally recommended to keep the levels below 0 dB to prevent digital distortion and maintain dynamic range.

It is important to apply the right amount of limiting without sacrificing the overall sound quality of the mix.

Should Mastering Compressor Go Before Or After Limiter?

It depends on the type of sound you want to achieve. If you want your audio to sound more natural, use the compressor first before the limiter. But if you want to make sure that no peaks or overshoots occur, then use the limiter first before the compressor.

Ultimately, it’s a matter of preference and experimentation.

Conclusion

To sum up, using a limiter while mastering audio is a crucial part of the process, as it can help achieve a cohesive and consistent sound. By carefully setting the threshold and parameters, you can ensure that the track is not too loud or too quiet, and that it maintains its dynamic range.

It is important to remember that a limiter should be used sparingly and in conjunction with other mastering tools, as it can easily cause distortion and loss of quality. With practice and attention to detail, you can become an expert in using a limiter to enhance the overall sound of your mixes.

Categories
Archive

How To Make Synth Pad Sound More Interesting

To make synth pad sound more interesting, try adding effects and changing the rhythm. Experiment with delay, reverb, filters, and modulation to add depth and texture to the sound.

Synth pads are a staple in almost any electronic music genre. They provide a lush and atmospheric backdrop to your music, but sometimes they can feel a little bland and repetitive. If you want to make your synth pad sound more interesting, you need to get creative with your effects and rhythm.

One of the easiest ways to add interest to a synth pad is to experiment with delay and reverb. These effects can help create a sense of space and movement, making your pad feel more dynamic and engaging. You can also try adding a filter to your pad, which can help shape the tone and give you more control over the sound. Another way to make your synth pad more interesting is to change up the rhythm. Try adding a syncopated pattern or switching between different time signatures to keep things fresh. Modulation effects like chorus and phaser can also help add movement and interest to your pad sound. With a little experimentation and creativity, you can take your synth pad from bland to beautiful in no time.

How To Make Synth Pad Sound More Interesting

Credit: m.youtube.com

Add Layered Effects

Adding layered effects to your synth pad can make it sound more interesting. By experimenting with different textures, frequencies, and reverbs, you can create a unique sound that stands out in a mix.

If your synth pad is sounding a bit flat or dull, adding layered effects could be just what you need to make it more interesting. Layered effects can add depth and complexity to your sound, making it stand out in the mix and capturing the listener’s attention. In this section, we explore three types of layered effects that can take your synth pad to the next level.

Use Delay Or Reverb

One of the easiest ways to add depth to your synth pad is to use a delay or reverb effect. These effects simulate the sound of a space or room, making your synth pad sound bigger and more atmospheric. A delay effect works by repeating the sound at a set interval, while a reverb effect simulates the reflection of sound waves in a physical space. Try experimenting with different settings and variations to find the perfect balance of delay and reverb that suits your track.

Add Distortion Or Overdrive

If you’re looking for a more gritty or distorted sound, try adding a distortion or overdrive effect. These effects add harmonic distortion to your sound, making it more complex and interesting. Depending on the intensity of the effect, you can add anything from a subtle edge to full-blown fuzziness to your synth pad’s sound. However, be careful not to overdo it, as too much distortion can quickly become overwhelming and muddy the mix.

Experiment With Chorus

Chorus is another layered effect that can add depth and complexity to your synth pad. It works by splitting the sound into multiple copies and slightly delaying and detuning each copy. The result is a rich and shimmering sound that sounds like multiple instruments playing together. Be careful not to overuse the chorus effect, as it can quickly become overwhelming and disorienting. Start with a subtle effect and gradually increase the intensity until you find the right balance.

By adding layered effects like delay, reverb, distortion, overdrive, and chorus, you can make your synth pad sound more interesting and engaging, capturing the listener’s attention and adding depth and complexity to your track. Experiment with different settings and variations to find the perfect balance of effects that suits your sound and take it to the next level.

Play With The Envelope

To make synth pad sound more interesting, try playing with the envelope. Adjusting the attack, decay, sustain, and release settings can create a range of variations in sound, from sharp and percussive to soft and atmospheric. Experiment with different combinations to find the perfect texture for your desired effect.

If you’re a music producer or a synth enthusiast, you’re probably familiar with the term ‘envelope’. Envelopes are one of the essential components of a synthesizer, and they control how a sound behaves over time. By manipulating the envelope, you can turn a basic sound into something more complex and interesting. In this post, we will discuss how to make synth pad sound more exciting by playing with the envelope.

Adjust The Attack

The attack is the time it takes for a sound to reach its full volume. If you decrease the attack time, the sound will have a sharper attack, and if you increase it, the sound will have a softer attack. To make a synth pad more interesting, try experimenting with different attack settings. A shorter attack time can give your pad a more percussive feel, while a longer attack time can create a more gradual, evolving sound.

Adjust The Release

The release is the time it takes for a sound to fade away after you release the keys. By adjusting the release time, you can create a more natural, organic sound or a more abrupt, synthetic sound. A shorter release time can make your pad sound more staccato and choppy, while a longer release time can create a sense of sustain and decay.

Experiment With Sustain And Decay

The sustain and decay parameters control how a sound behaves after the initial attack and release phases. Sustain determines the level the sound will hold after the attack, while decay is the rate at which the sound fades away to silence. By adjusting the sustain and decay, you can create a range of different textures and timbres. A higher sustain level with a shorter decay time can give your pad a classic ‘plucked’ sound, while a lower sustain level with a longer decay time can create a more atmospheric, ambient sound. In conclusion, playing with the envelope is an excellent way to make your synth pad sound more interesting and dynamic. By adjusting the attack, release, sustain, and decay, you can customize your sound to fit your specific needs and preferences. Remember to experiment and don’t be afraid to try something new and different. With a little practice and creativity, you can create unique and exciting synth pads that stand out from the rest.

Experiment With Modulation

Experimenting with modulation is a great way to add interest and depth to synth pad sounds. By tweaking parameters such as LFO rate and depth, filter cutoff, and envelope settings, you can create dynamic changes in the sound that keep things fresh and engaging.

Experiment With Modulation:

Synth pads are a great way to fill out the sound of your tracks, but sometimes they can sound a little bit stale or one-dimensional. Fortunately, there are several ways you can make your synth pad sound more interesting. One such way is to experiment with modulation. Modulation involves altering a sound wave’s characteristics with various effects to achieve different results. In this section, we’ll explore three modulation effects you can use to enhance your synth pad sound.

Use A Vibrato Effect:

Vibrato is a modulation effect that creates a slight pitch variation by modulating the frequency of an audio signal. Using a vibrato effect on your synth pad can add a slight shimmering quality to the sound. To achieve this effect, use a low-frequency oscillator (LFO) to modulate the pitch of the synth pad up and down slowly. Adjust the rate and depth of the LFO until you achieve the desired effect.

Add A Phaser:

A phaser is another type of modulation effect that can make your synth pad sound more interesting. Like vibrato, it also uses an LFO to modulate the sound wave’s frequency. However, it adds phase-shifted copies of the audio signal to create a sweeping effect. This effect can be further enhanced by experimenting with the rate and depth of the LFO, along with the number of stages and feedback.

Try Flanger:

Finally, you can try using a flanger effect to add more interest to your synth pad. Flanger is similar to a phaser, but it creates a more pronounced sweeping effect by duplicating the audio signal and delaying it slightly. The delayed signal is then modulated with an LFO to create the flanging effect. Like the other modulation effects, the rate and depth of the LFO are important to achieve the desired sound. In conclusion, experimenting with modulation effects is an excellent way to make your synth pad sound more interesting and unique. Try different combinations of effects to achieve the perfect sound for your track.

Play With The Oscillator

When it comes to creating synth pads, playing with the oscillator is an essential step in making your sound more interesting. The oscillator generates the sound wave that the pad will produce, making it a crucial element to manipulate. Here, we’ll discuss ways to adjust the waveform, combine different oscillators, and add a sub-oscillator to add variety and depth to your synth pad.

Adjust The Waveform

One way to make your synth pad sound more interesting is to adjust the waveform of the oscillator. By default, most synths use a basic waveform such as a sawtooth or triangle. But tweaking the waveform can create a unique sound. For instance, try using a pulse wave, which can add a sharp, edgy quality to the pad. Alternatively, experiment with a sine wave, which can provide a smoother, softer texture to the sound.

Combine Different Oscillators

Combining different oscillators is another effective way to add depth to your synth pad. Many synths offer multiple oscillators, which can be combined to create a more complex sound. Try using two oscillators with different waveforms, such as a sawtooth and triangle, and adjust their volume to create a balanced, blended sound. You can also experiment with detuning the oscillators slightly to create a chorusing effect that can give your pad a more expansive quality.

Add Sub-oscillator

Add a sub-oscillator to your synth pad to give it more sub-bass depth. A sub-oscillator generates an octave or two below the main oscillator and can make your pad sound fuller. Most synths have a sub-oscillator option built-in, but if not, you can use a separate synth patch or plug-in to generate the sound and layer it with your main pad sound.

Conclusion

Playing with the oscillator is an excellent way to make your synth pad sound more interesting. Adjusting the waveform, combining different oscillators, and adding a sub-oscillator can help you create a more complex, layered, and unique sound. Experiment with these techniques to create your own signature synth pad sound.

Use Unconventional Samples

Adding synth pads to a track can elevate it to a whole new level. It can create a dreamy and atmospheric ambiance that can take the listener on a journey. However, just like any other element of a track, synth pads need to be interesting and engaging. To make your synth pads stand out and sound unique, you need to use unconventional samples. In this article, we will discuss three types of unconventional samples that you can use to make synth pad sound more interesting.

Try White Noise

White noise is a timeless classic that has been used in various genres of music for decades. It is a great way to add texture and depth to your synth pad and make it sound more interesting. Simply layer white noise with your synth pad to create a fuller and more atmospheric sound. You can adjust the volume, filter, and envelope of the white noise to create different variations of the sound.

Use Nature Samples

Nature samples are another type of unconventional sample that can add a unique touch to your synth pad. You can use samples of birds chirping, waves crashing, or rain falling to create an organic and atmospheric sound. Layering these samples with your synth pad can transform your track and create a truly immersive listening experience.

Use Vocal Samples

Vocal samples are a versatile and unique way to make your synth pad stand out. You can use spoken word samples or even record your own voice to create a custom vocal sample. Layer the vocal sample with your synth pad to create a dynamic and engaging sound. You can use effects like reverb and delay to create different variations of the vocal sample.

Using unconventional samples is a great way to make your synth pad sound more interesting and engaging. By adding layers of white noise, nature samples, or vocal samples to your synth pad, you can create a unique and immersive listening experience for your audience.

Try Different Playing Techniques

To make your synth pad sound more interesting, try using different playing techniques. Experiment with vibrato, pitch bends, and modulation effects such as chorus and flanger to add texture and depth. By incorporating these techniques, you can create a more unique and dynamic sound for your music.

Create Strumming Effect:

To make your synth pad sound more interesting, you can use different playing techniques. Creating a strumming effect can add variety to the sound. To achieve this, play chords in a rhythmic pattern, just like a guitar player would strum the strings. Vary the speed of the strumming by slowing down or speeding up. It adds a more natural, human touch to your synth pad.

Use Note Velocity To Add Dynamics:

Note velocity can also be used to add dynamics to the synth pad sound. By altering the note velocity, you can control the volume and intensity of each note. A softer touch will produce a quieter sound, while a harder touch will result in a louder, more pronounced note. You can experiment with changing the velocity of different notes in a chord to add depth and texture.

Add Glide Or Portamento:

Another way to make your synth pad sound more interesting is to add glide or portamento. Glide creates a sliding sound between two notes by pitching up or down, allowing for a smooth transition between notes. Portamento is similar to glide, but the effect is more pronounced. It smoothly glides between notes, and the pitch shift is more noticeable. It can be used to add a touch of elegance and sophistication to your synth pad sound. By trying out these different playing techniques, you can add variety and texture to your synth pad sound. By experimenting and playing around with different techniques, you can transform your synth pad into a more interesting and dynamic sound that will keep your listeners engaged and interested.

Combine With Other Instruments

One way to make synth pad sound more interesting is to combine it with other instruments. This will add variety to the sound and create a more complex, layered texture. Consider experimenting with different types of instruments, such as drums, guitar, or piano, to find the perfect combination.

To make your synth pad sound more interesting, you can try combining it with other instruments. By layering it with other sounds, you can create a fuller and more dynamic sound that will add depth and complexity to your music. Let’s take a look at some of the ways you can combine your synth pad with other instruments.

Layer With Piano

Layering your synth pad with a piano sound can produce a beautiful and expressive sound. The piano is an excellent choice due to its versatility and broad range of notes. When layering your synth pad with a piano, it is important to make sure that they are not competing for the same frequency range. You can achieve this by using EQ to cut certain frequencies on one or both instruments. Experiment with different sound combinations until you find the perfect balance.

Add Guitar Or Bass

Adding a guitar or bass to your synth pad can give it a more organic and natural feel. Both instruments have a warm and rich sound that can complement a synth pad nicely. By adding a guitar or bass, you can also create contrast, which will add interest to your music. Try playing around with different guitar or bass patterns until you find one that fits well with your synth pad.

Blend With Orchestra

Blending your synth pad with an orchestra can take your music to a whole new level. The combination of the electronic sound of the synth pad and the acoustic sound of an orchestra can be powerful and memorable. However, it is important to ensure that both instruments are not competing for the same sonic space. Consider using different sections of the orchestra to complement the synth pad and avoid overwhelming the sound. In conclusion, combining your synth pad with other instruments is an effective way to create a more interesting and dynamic sound. Whether you choose to layer it with a piano, add a guitar or bass, or blend it with an orchestra, experiment until you find the perfect sound and balance.

How To Make Synth Pad Sound More Interesting

Credit: www.productionmusiclive.com

Add Rhythmic Element

To make synth pads sound more interesting, try adding a rhythmic element to the track. This can be achieved by adding a simple drum pattern or using the LFO feature on the synthesizer to create a pulsing effect. Experiment with different rhythms and tempos to find the perfect combination for your track.

As a synth pad is a sustained chord or sound that often fades in and out slowly, it can become monotonous or dull over time. One way to add interest to your synth pad is by incorporating a rhythmic element. This can be done in several ways, including adding arpeggios, using LFO for rhythm, or creating a rhythmic pattern.

Add Arpeggio

One way to add rhythmic interest to your synth pad is to incorporate an arpeggio. An arpeggio is a musical technique where the notes of a chord are played in a sequence rather than simultaneously. This creates a rhythmic effect that can add depth and texture to your synth pad. To create an arpeggio, you can use a sequencer or arpeggiator built into your synth or use an external plugin.

Use Lfo For Rhythm

An LFO, or low-frequency oscillator, is a modulation source that is used to create a rhythmic effect by adding movement to your sound. You can use an LFO to modulate various parameters of your synth pad, such as pitch, filter cutoff, or amplitude. This creates subtle rhythmic variations that can add depth and interest to your sound.

Create Rhythmic Pattern

You can also create a rhythmic pattern by programming a sequence into your synth. This can be done using a step sequencer or piano roll editor built into your DAW. Experiment with different rhythms and patterns to create a unique and interesting sound. Additionally, you can layer multiple synth pads with different rhythmic patterns to create a more complex and dynamic sound. Incorporating a rhythmic element into your synth pad can take it from a dull background sound to a dynamic and interesting part of your mix. Whether you choose to add arpeggios, use LFOs for rhythm, or create a rhythmic pattern, be sure to experiment and have fun with it.

How To Make Synth Pad Sound More Interesting

Credit: www.ableton.com

Frequently Asked Questions Of How To Make Synth Pad Sound More Interesting

How Do You Make A Good Pad Synth?

To create a good pad synth, start with a basic waveform and layer multiple sounds to create depth. Adjust the attack and release of each layer to create a smooth, sustained sound. Use reverb and delay effects to add space and ambient texture.

Experiment with modulation effects like chorus and phaser to add movement to the sound.

What Does A Synth Pad Sound Like?

A synth pad produces a sustained, atmospheric sound used to add depth and warmth to music. It can be airy, lush, and ethereal, with a variety of tones and textures.

What Is A Lush Pad?

A lush pad refers to a luxurious and comfortable living space. It’s usually characterized by high-end amenities and lavish furnishings that make it a haven for relaxation.

What Effects Does A Synth Pad Have?

A synth pad can have various effects on a piece of music, depending on the context and usage. Generally, it provides a rich, sustained background texture by filling out the sonic space with harmonics. It can also add warmth, depth, and emotion to a melody or chord progression and create an atmospheric soundscape.

Conclusion

To sum up, making your synth pad sound more interesting is not rocket science. By using different modulation techniques, adding effects, layering sounds, and playing around with automation can transform it into something truly mesmerizing. As with any musical instrument, there are no limits to creativity.

Experimentation is the key to discovering new sounds and techniques that can help you stand out from the crowd. So, get creative and have fun! With these simple tips, you can easily elevate your synth pad sound and make it sound more captivating and engaging than ever before.

More in our Synth guides.

Categories
Archive

How To Recreate The Game Of Thrones Theme

Recreating the Game of Thrones theme requires using the main melody and incorporating different instruments for the desired effect. To compose a similar version, focus on the opening melody and utilize individual instruments for the tune’s main phrases.

How To Recreate The Game Of Thrones Theme

Credit: www.forbes.com

The Power Of Music

Recreate the epic Game of Thrones theme with the power of music. By using a mix of string instruments and percussion, you can transform any room into the Seven Kingdoms of Westeros.

Music has the power to transport us to different worlds and evoke strong emotions. The Game of Thrones theme is a perfect example of how music can enhance the mood and tone of a TV show. In this blog post, we will explore the history of music, its role in film and TV, and how to recreate the famous Game of Thrones theme.

A Brief History Of Music

Music has been an integral part of human culture for thousands of years. From the earliest forms of music created by banging rocks and sticks together, to the complex symphonies and pop songs of today, music has always been an essential element of expression and communication. It has the power to connect people and convey feelings in a way that words cannot.

The Role Of Music In Film And Tv

Music plays a vital role in setting the tone and atmosphere of film and TV shows. It can evoke strong emotions, build suspense, and enhance the overall viewing experience. The Game of Thrones theme is a perfect example of this. The combination of haunting vocals and powerful orchestration creates a sense of impending danger and epic battles to come. If you’re looking to recreate the Game of Thrones theme, it’s essential to understand the different elements of music, such as melody, harmony, rhythm, and instrumentation. You can use these elements to create a unique sound that fits the mood and tone of your project. In conclusion, music is an essential component of film and TV, and the Game of Thrones theme is a perfect example of how it can enhance the overall viewing experience. To recreate this theme, you’ll need to understand the different elements of music and use them to create a sound that fits the tone and atmosphere of your project.

How To Recreate The Game Of Thrones Theme

Credit: www.youtube.com

Anatomy Of The Game Of Thrones Theme

The iconic Game of Thrones theme is comprised of four main elements: melody, harmony, rhythm, and instrumentation. To recreate it, one must focus on each element individually and then blend them together seamlessly. By breaking down the components, anyone can learn to play this epic tune.

Anatomy of the Game of Thrones Theme: Game of Thrones theme is one of the most iconic compositions in the history of television, and it resonates with audiences worldwide. It’s distinctive and powerful, swelling with an authoritative sound and carrying an aura of medieval wisdom and fantasy. It’s a theme song that lent a mythical scale to the epic fantasy series, and it’s not surprising that you would want to recreate it yourself. But where to start? The most fundamental building blocks of the Game of Thrones theme are the tempo and time signature, harmony and chords, melody and rhythm. Let’s explore each of these elements to understand how they work together to create this unforgettable composition.

Tempo And Time Signature

The Game of Thrones theme has a tempo of 100 beats per minute. Its time signature is more complicated than you might expect, as it alternates between 6/8 and 9/8. The 6/8 time signature creates a steady, marching feel that represents the armies and rulers of the great seven kingdoms. The 9/8 time signature, on the other hand, creates a more chaotic, unpredictable feel that reflects the danger and intrigue lurking beneath the surface.

Harmony And Chords

The harmony and chords of the Game of Thrones theme are based on the iconic ostinato riff that forms the backbone of the piece. This riff is built on a cycle of fifths, which means that each chord is five steps up from the previous one. The chords themselves are simple and powerful, with a focus on minor keys and lots of dissonance. This creates a tense, ominous sound that captures the complex political landscape of the show.

Melody And Rhythm

The melody and rhythm of the Game of Thrones theme are built on top of the ostinato riff. The melody is relatively simple but effective, built around a descending minor scale that emphasizes the key notes of the chords. The rhythm is equally important, with the melody playing off the complex rhythms created by the shifting time signature. The result is a dynamic, driving sound that captures the epic scope of the show. Overall, the Game of Thrones theme is a masterpiece of music composition. By understanding its anatomy – tempo and time signature, harmony and chords, melody and rhythm – you can learn to recreate it for yourself and experience the thrill of this epic piece of television music.

Instruments Used In The Game Of Thrones Theme

To recreate the iconic Game of Thrones theme, a variety of unique instruments were used. This includes the haunting sound of the cello, the commanding tones of the French horn, the piercing quality of the piccolo, and the deep resonance of the bass drum.

By combining these distinct sounds, one can achieve a memorable and dramatic effect for their own compositions.

If you’ve ever watched the Game of Thrones, you know that the theme song is one of the most iconic pieces of music in television history. From the opening notes played on a solo instrument, the theme builds into an epic, sweeping melody that perfectly captures the high-stakes drama and intrigue of the show. In this section, we’ll take a closer look at the instruments used to recreate the Game of Thrones theme and how they all work together to create this unforgettable musical piece.

Strings

One of the most prominent groups of instruments used in the Game of Thrones theme are the strings. The violin and cello can be heard in many of the variations of the theme, providing a mournful and haunting quality that perfectly captures the drama of the show. The use of pizzicato strings, where the strings are plucked instead of bowed, adds a percussive element to the piece. In addition to traditional orchestral strings, the theme also features traditional folk instruments like the nyckelharpa, which add an authentic medieval feel to the music.

Percussion

Percussion plays a crucial role in the Game of Thrones theme, providing the driving rhythm and intensity that underpins the song. The inclusion of drums like the timpani and snare drum adds a sense of urgency and excitement to the piece, while the use of hand drums and other percussion instruments like the bodhrĂ¡n and tambourine enhances the folk music elements of the theme.

Brass

Few instruments can create a sense of grandeur and power quite like the brass section. The use of trumpets and horns in the Game of Thrones theme adds a regal and triumphant quality to the music that perfectly captures the epic scope of the show. The ominous and foreboding sound of the tuba adds a dark and brooding quality to the piece – almost reminiscent of an army marching off to war.

Winds

Last but not least, we have the woodwind instruments. Though not as prominent in the Game of Thrones theme as some of the other instrument groups, the use of instruments like the flute and oboe add a delicate and ethereal quality to the music. The pennywhistle, which is often used in traditional Irish and Scottish music, adds an authentic Celtic flair to the theme. In conclusion, the Game of Thrones theme is a masterful blend of instruments, rhythms, and melodies that perfectly captures the essence of the show. From the mournful strings to the powerful brass, each instrument plays a crucial role in the overall sound of the piece. If you’re looking to recreate this iconic song, understanding the unique role of each instrument is key to capturing that unforgettable Game of Thrones sound.

Breaking Down The Decomposition

Recreating the iconic Game of Thrones theme involves breaking down its instrumental parts. By identifying the melody, chord progressions, and rhythm, you can decipher how to play it on various instruments or recreate it digitally.

Do you ever find yourself humming the theme tune to Game of Thrones and wishing you could recreate it for yourself? Well, you’re in luck! In this article, we will break down the decomposition of the iconic Game of Thrones theme song and provide you with practical tips on how to recreate the music in your studio.

Identifying The Parts Of The Song

To recreate any piece of music, you must first identify the individual components that make up the composition. The Game of Thrones theme consists of several distinct parts that come together to create a memorable melody. These include:

  • The Main Melody: This is the central theme that runs throughout the piece and is the most recognizable part of the song.
  • The Bass Line: This gives the music its foundation and provides a rhythmic underpinning for the melody.
  • The Harmony: This refers to the chords and notes that support the main melody and enhance its emotional impact.
  • The Percussion: This includes the drums and other rhythmic elements that provide additional texture and energy to the music.

How To Re-create The Music In Your Studio

Now that you know the individual components that make up the Game of Thrones theme, it’s time to start recreating it in your studio. Here are some practical tips to get you started:

  1. Start with the main melody: Use your instrument of choice to play the central melody and get a feel for the pacing and timing of the tune.
  2. Add the bass line: Once you have the melody down, you can begin to layer in the bass line to provide a rhythmic foundation for the music.
  3. Experiment with harmony: Try adding in different chords and notes to support the main melody and to create a fuller, richer sound.
  4. Bring in percussion: Finally, add in percussion to enhance the overall energy of the song and give it a more dynamic feel.

Remember that recreating any piece of music takes practice and patience. Use the tips above as a starting point and experiment with different sounds and techniques until you find the perfect mix for your studio. With a bit of dedication and creativity, you’ll be well on your way to creating your own version of the iconic Game of Thrones theme.

Tips For Recreating The Game Of Thrones Theme

Learn how to recreate the epic Game of Thrones theme with these helpful tips. From mastering the iconic melody to incorporating unique instrumentals, these steps will guide you in creating an impressive rendition of the beloved tune.

Tips for Recreating the Game of Thrones Theme The Game of Thrones theme is instantly recognizable, thanks to its powerful melodies and haunting beauty. But how can you recreate this iconic piece of music? Whether you’re a beginner or an experienced musician, there are several tips you can use to perfect your version of the Game of Thrones theme. Learning and Practicing the Parts One of the most important aspects of recreating the Game of Thrones theme is understanding each individual part. This includes the melody, the harmony, and the rhythm. Take the time to learn each of these parts separately before attempting to play them together. Investing In High-Quality Sound Instrument Samples If you want your version of the Game of Thrones theme to sound professional, consider investing in high-quality sound instrument samples. These can help you recreate the sound of the original score and bring your music to life. Employing the Right Techniques and Effects Finally, it’s important to employ the right techniques and effects when recreating the Game of Thrones theme. This includes using sustained notes, vibrato, and tremolo to create the right mood and emotion. You can also experiment with different effects like reverb and delay to add depth and dimension to your performance. Overall, recreating the Game of Thrones theme can be a fun and rewarding experience. By following these tips and dedicating time to learning and practicing, you can create an amazing version of this iconic piece of music. So what are you waiting for? Get started today!

A Step-by-step Guide On How To Recreate The Theme

If you’re a die-hard Game of Thrones fan, you know that one of the most iconic parts of the show is its theme song. The powerful, epic feel of the music is instantly recognizable, and it’s no wonder that so many people want to recreate it. In this step-by-step guide, we’ll walk you through the process of recreating the Game of Thrones theme song, from pre-production to mastering the final product.

Pre-production

The first step in recreating the Game of Thrones theme is to plan out your project. This means deciding on the instruments and elements you want to include, as well as figuring out the tempo and key of the original song. Make sure you have all the necessary equipment, such as a computer, DAW, and any virtual instruments or plugins you’ll be using.

  • Choose the instruments and elements you want to include. Think about what makes the original song so powerful and impactful, and try to recreate those elements.
  • Listen to the original song and figure out the tempo and key. This will help you when it comes to recording and mixing.
  • Make sure you have all the necessary equipment and software. The Game of Thrones theme is a complex piece of music, so you’ll want to make sure you have everything you need to recreate it.

Recording Stage

Once you have your plan in place, it’s time to start recording. This is where you’ll be laying down all the individual tracks that will make up your final product.

  1. Start with the percussion. The drums and percussion are a key part of the Game of Thrones theme, so make sure they’re prominent in your mix.
  2. Add the strings and brass. These instruments give the song its dramatic, epic feel.
  3. Record any other instruments you’re using, such as piano or guitar.
  4. Consider adding vocals or a choir if you want to take your recreation to the next level.

Mixing Stage

With all your tracks recorded, it’s time to mix them together. This is where you’ll be adjusting the levels, panning, and EQing each individual track to create a cohesive sound.

  • Start with the drums and percussion. Make sure they’re sitting at a good level in the mix.
  • Add in the strings and brass, making sure they’re not overpowering the percussion.
  • Adjust the levels of any other instruments you’ve added.
  • Use EQ to make sure each instrument is sitting in the right frequency range.
  • Pan each instrument to create a sense of space and depth in the mix.

Mastering The Final Product

Once you have your mix just right, it’s time to master the final product. This is where you’ll be adding any final touches to create a polished and professional sound.

Add compression to even out the levels and add punchUse EQ to make sure the mix sounds balanced on all playback systems
Add reverb to create a sense of space and depthLimit the final mix to ensure it’s at a consistent volume

By following these steps, you’ll be able to recreate the Game of Thrones theme and impress all your fellow fans!

Frequently Asked Questions For How To Recreate The Game Of Thrones Theme

How Was The Game Of Thrones Theme Made?

The GoT theme was composed by Ramin Djawadi for the series’ opening and end credits. It is a mix of orchestral and traditional instrumentation with a pulsing beat to give an iconic feel. Djawadi was inspired by the show’s characters, locations, and themes to create a distinctive title sequence.

What Key Is Game Of Thrones Theme In?

The Game of Thrones theme is in the key of C minor.

Why Did They Reuse The Game Of Thrones Theme?

The Game of Thrones theme was reused in the final episode to symbolize the show’s legacy and to evoke nostalgia in fans. The decision was made by the showrunners to give closure to the viewers and to remind them of the journey they had been on for the past eight seasons.

What Genre Is The Game Of Thrones Theme Song?

The Game of Thrones theme song is classified as an orchestral and choral soundtrack, with elements of world music.

Conclusion

After reading this article, we hope you feel inspired to recreate your own version of the epic Game of Thrones theme song. With the right tools and techniques, you can add a touch of the Seven Kingdoms to your music portfolio.

By using the tips and tricks we’ve provided, you can impress your friends and family with your newfound music skills. Remember, practice makes perfect, so keep experimenting and tweaking your composition until you have your own unique spin on the iconic theme.

Winter is coming, so why not add some Game of Thrones flair to your music?

Categories
Archive

Top Free Sidechain Vst Plugins Windows Mac

Some of the top free sidechain VST plugins for both Windows and Mac include TrackSpacer, LFO Tool, and Kickstart. These plugins can assist with creating pumping and movement within your music by allowing one audio signal to control the level of another.

Sidechaining is a popular technique used in genres like EDM, hip-hop, and pop music. When it comes to music production, sidechaining is often used to create a pulsing rhythm or to create space for the kick drum. However, purchasing high-quality VST plugins can be a costly investment, especially for beginners.

Hence, we will recommend some of the top free sidechain VST plugins for Windows and Mac that can help budding musicians to create their desired soundscape without breaking the bank. In addition, we will discuss the features of each plugin to help you determine which is best for your project.

Top Free Sidechain Vst Plugins Windows Mac

Credit: www.productionmusiclive.com

Top Free Sidechain Vst Plugins For Windows

Discover the best free sidechain VST plugins for Windows and Mac to use in your music production projects. Improve your sound and add depth to your compositions with these top-rated plugins. Download now and start elevating your music!

Are you a music producer or sound engineer looking for the best free sidechain VST plugins for Windows? You’ve come to the right place! Sidechain compression is a popular technique used in electronic dance music production to achieve a pumping effect that creates a sense of rhythm and energy. In this article, we’ve compiled a list of the top free sidechain VST plugins for Windows that you can use in your productions to achieve that perfect pumping effect.

Plugin 1: Frontier

Frontier is a powerful and easy-to-use VST plugin that offers sidechain compression for Windows users. It comes with a simple interface that allows you to achieve that classic pumping effect with ease. Frontier supports up to 192 kHz sample rates, making it a great choice for professional music productions. It also features a wide range of controls, such as attack, release, sidechain frequency, and more.

Plugin 2: Lfo Tool

LFO Tool is a popular sidechain VST plugin for Windows that is perfect for electronic dance music producers. It comes with an intuitive interface that allows you to create complex sidechain patterns with ease. LFO Tool features a variety of controls, including attack, release, shape, and more. You can also drag and drop MIDI patterns into LFO Tool, which then uses them as sidechain triggers.

Plugin 3: Ott

OTT is a free sidechain VST plugin that is widely used by music producers around the world. It’s a multiband compressor that’s perfect for achieving that classic pumping effect in electronic dance music. OTT comes with a simple interface that offers a range of controls, including depth, time, and more. It also features a mix knob that allows you to blend the compressed and uncompressed signals. In conclusion, these are some of the top free sidechain VST plugins for Windows that you can use in your music productions. Each of these plugins has its unique features and benefits, so make sure to try them out and see which one works best for you. With these plugins, you can achieve that perfect pumping effect that will make your music stand out from the crowd.

Top Free Sidechain Vst Plugins Windows Mac

Credit: emastered.com

Top Free Sidechain Vst Plugins For Mac

Sidechain compression is a production technique used to create more space and balance in mixing tracks. By using a Sidechain VST Plugin, you can have more control over the dynamics of your tracks by compressing them selectively. Below are the top 3 free Sidechain VST plugins for Mac:

Plugin 1: Lfotool By Xfer Records

LFOTool is an extremely versatile VST plugin, packed with powerful features to sculpt your sounds. It’s designed to create smooth modulations and groove quantization effects with ease. With its sidechain capabilities, you can set up customized pumping effects to your liking. Available as an Audio Unit (AU) or VST plugin, LFOTool is compatible with most major DAWs on Mac.

Plugin 2: Kickstart By Nicky Romero

Kickstart is a sidechain plugin that focuses on dramatic volume shaping effects. Its simple and intuitive interface makes it a popular choice for beginners. You can create tight rhythmic patterns, fills, and drops with ease. Kickstart is available in Audio Units (AU) and VST formats.

Plugin 3: Cableguys Pancake 2

Cableguys PanCake 2 is a unique and powerful plugin designed for precise and creative sidechain control. It features a simple and intuitive interface, making automation and modulation of your sounds super easy. With its variable waveform shape control, you can create complex panning effects with ease. Available as an AudioUnit, VST, and RTAS plugin, this plugin is a must-try.

In conclusion

These are the top 3 free Sidechain VST plugins for Mac. They’re all easy to use, with powerful features that make them ideal for any music producer or sound engineer. Whether you’re a beginner or a pro, these plugins will provide you with the necessary tools to create professional-sounding tracks.

Top Free Sidechain Vst Plugins Windows Mac

Credit: bedroomproducersblog.com

Frequently Asked Questions Of Top Free Sidechain Vst Plugins Windows Mac

What Is The Best Sidechain Plugin?

The best sidechain plugin depends on your specific needs and preferences. Some popular options include LFOTool by Xfer Records, VolumeShaper 6 by Cableguys, and Kickstart by Nicky Romero. It’s important to try out different plugins and see which one works best for your production style.

What Is The Best Lfo Tool For Sidechaining?

The best LFO tool for sidechaining would be the LFOTool by Xfer Records. It’s a popular and versatile plugin that can shape and automate volume, panning, and filter frequencies.

What Is The Best Free Compressor?

The best free compressor is the one that suits your specific needs and preferences. Some popular options in the market include 7-Zip, PeaZip, and WinRAR. However, it’s crucial to assess the features and functionality that align with your requirements before selecting a compressor tool.

Can You Get Fl Studio Plugins For Free?

Yes, there are some FL Studio plugins that you can get for free. However, it’s essential to be cautious and only download plugins from trusted sources to avoid malware and security issues. One of the best places to find reliable free plugins is the official FL Studio website.

Conclusion

After looking at the different free sidechain VST plugins for Windows and Mac, it’s clear that there are plenty of options available for users. These plugins offer a range of features and functionality, from simple compression tools to more complex multi-band processors.

Ultimately, the right choice will depend on the user’s specific needs and the type of music they’re working on. Regardless of which plugin they choose though, they’ll appreciate the increased control they get over their mixes and the ability to create unique sounds without spending a dime.

Categories
Archive

The Difference Between Mono And Stereo Tracks

Mono tracks use a single channel while stereo tracks use two channels. Mono tracks output the same sound through both the left and right speakers, while stereo tracks separate the sound into left and right channels to create a stereo image.

When recording or listening to audio, it’s important to understand the difference between mono and stereo tracks. Mono tracks use one channel to deliver the sound, which means that the sound is the same across both speakers. Stereo tracks use two channels to deliver the sound, which allows for a more immersive listening experience with distinct left and right audio channels.

Understanding the difference between mono and stereo can help you make better decisions when recording audio or listening to music. We’ll explore the nuances of mono and stereo tracks and how they affect audio recordings and playback.

Mono Vs Stereo

Mono and stereo are two common types of audio tracks. The difference lies in the number of channels used to record and play sound. Mono uses one channel, while stereo uses two to give a more immersive sound experience.

Mono and Stereo tracks are important to understand for any audio enthusiast. They come with their own set of benefits and drawbacks. While one may suit a particular project, the other might not. Therefore, it is necessary to know the differences between Mono and Stereo tracks. Let’s delve into the topic and understand it better.

Definition Of Mono And Stereo

Mono tracks are recordings that use a single channel to create sound. It means there is only one audio signal, making it sound as if the audio is coming from a single source. Stereo tracks, on the other hand, use two channels (left and right) to create a sound that gives an illusion of varying sources. In Stereo tracks, the sound is spread out, making it wider, richer, and more natural.

Advantages And Disadvantages Of Each

Mono tracks may seem inferior when compared to Stereo tracks, but they also come with benefits. Let’s explore them in detail: Advantages of Mono tracks:

  • Less storage space required as only one audio channel is used
  • Less processing power needed as only one source needs to be mixed
  • Simpler to set up as the audio source is coming from a single channel

Disadvantages of Mono tracks:

  • Less engaging as there is no variation in audio signal making it less dynamic
  • May sound flat or dull as they don’t offer a natural sound
  • Unable to differentiate between different sources, as they all sound as if they are coming from the same place

Advantages of Stereo tracks:

  • Richer and fuller sound as the audio is coming from two channels
  • Gives an illusion of space and variety as the audio is coming from varying sources
  • Allows for more creative freedom as each channel can be manipulated separately

Disadvantages of Stereo tracks:

  • More storage space required as two channels are used
  • Requires more processing power as two sources need to be mixed
  • More complex to set up as two channels have to be taken into consideration

In conclusion, both Mono and Stereo tracks have their own advantages and disadvantages, and it is important to consider which one is suitable for your project. Mono tracks work best for simple recordings, while Stereo tracks are better suited to projects that require a more natural and multidimensional sound.

The Difference Between Mono And Stereo Tracks

Credit: weloty.com

Mono Tracks

Mono tracks contain only one channel of audio, while stereo tracks contain two channels. Mono tracks are often used for voice recordings, while stereo tracks offer a more immersive listening experience for music and other sound effects.

When it comes to audio recording, it’s important to understand the difference between mono and stereo tracks. Mono tracks are recordings that use a single channel to capture sound while stereo tracks use two channels to create a richer and more immersive experience for the listener. In this blog post, we’ll dive deeper into mono tracks and discuss their characteristics, when to use them, and more.

Characteristics Of Mono Tracks

Mono tracks are recordings that use a single channel to capture sound. This means that all audio is panned to the center of the track, resulting in a sound that comes from a single point. This type of recording is often used for speech, vocals, and other types of audio that don’t require a complex soundstage. Here are the characteristics of mono tracks:

Channels1 (mono)
PanningCentered
Sound QualityClear and concise
UsesSpeech, vocals, simple sound effects

When To Use Mono Tracks

Mono tracks are useful in a variety of situations. Here are some scenarios where you might want to use mono tracks:

  • Speech and vocals: If you’re recording a podcast, voiceover, or any other type of spoken word, mono tracks are a great choice. The clear and concise sound quality makes it easy for listeners to understand the content.
  • Simple sound effects: If you’re creating a sound effect that doesn’t require a complex soundstage, such as a door creaking or a pencil writing, a mono track will suffice.
  • Compatibility: Some devices and audio systems only support mono tracks, so if you want to ensure that your audio can be played on any device, including the ones with limited audio support, it’s best to use mono tracks.

Conclusion

Mono tracks are a simple and effective way to record audio. Their clear and concise sound quality makes them suitable for speech, vocals, and simple sound effects. They are also compatible with a wide range of devices and audio systems, making them a great choice for anyone looking to create audio that can be played on any device. In the next section, we’ll discuss stereo tracks and their characteristics.

Stereo Tracks

Stereo tracks have two channels of audio, offering a broader soundscape and depth to the listener. Mono tracks have a single channel of audio and are often used for podcasts, speeches, or vocals. The difference between the two is largely a matter of preference and depends on the intended use of the audio.

Characteristics Of Stereo Tracks

Stereo tracks have two separate channels that deliver sound to the listener’s ears. One channel for the left ear and the other for the right ear. This type of recording creates a more immersive listening experience that can reproduce the natural spatial placement of instruments and sounds. Stereo tracks can replicate sounds in a room or an outdoor space and convey a feeling of depth and presence that mono tracks cannot produce. The sound quality of stereo tracks depends on how well the instruments and vocals are mixed and panned to create a balanced and coherent soundstage.

When To Use Stereo Tracks

Stereo tracks are ideal for music genres such as jazz, classical, and orchestral pieces where the listener can distinguish each instrument’s placement. They are also great for immersive audio experiences like Foley sound design, soundscapes, and binaural recordings. Stereo tracks can be used in films and video games to produce realistic environmental sounds and dialogue. When recording interviews, stereo tracks can capture both the interviewer’s and the interviewee’s voices without any interference or noise.

Conclusion

Stereo tracks are the preferred choice for immersive listening experiences due to their ability to reproduce natural spatial placement of instruments and sounds. They may not be suitable for every application, but they offer significant advantages over mono tracks in terms of sound quality and perception. So, choose wisely!

The Difference Between Mono And Stereo Tracks

Credit: soundcertified.com

Recording Techniques

Mono tracks are recorded using a single microphone and produce a single sound channel, while stereo tracks use two or more microphones to create a richer, layered sound with distinct channels for left and right speakers. Choosing between mono and stereo depends on the desired effect and the type of recording being made.

Techniques For Recording Mono Tracks

Recording in mono is ideal for situations where you want a single audio source and a simple recording setup. This technique captures one sound channel and is a great way to produce tracks that retain their clarity and focus. Here are some techniques for recording mono tracks:

  • Use one microphone, positioned at the source of the sound.
  • Minimize background noise by choosing a quiet recording location.
  • Increase the volume of the sound source to make it stand out within the track.
  • Consider adding post-production techniques such as EQ, Dynamics and Reverb to enhance the mono recording further.

Techniques For Recording Stereo Tracks

Recording in stereo is suitable when you want to capture a soundstage, sound quality, ambiance and produce a more complex and layered recording. Stereo recording creates two channels of audio, which makes the overall sound much richer and creates a more immersive listening experience. Ensure that you utilize these techniques when recording stereo tracks:

  • Use two separate microphones, spaced at the location of the sound source such that it forms an angle between them.
  • Experiment with positioning of microphones, make them wider or closer, facing each other or away, or different angles to produce a unique sound stage.
  • Try different microphone patterns such as cardioid, omnidirectional and figure-eight to get a desired effect.
  • When mixing, ensure a balance between left and right channels, so that the stereo effect is not overbearing.
  • Also, consider post-production techniques such as EQ, Dynamics and Reverb to enhance the stereo recording further.

Conclusion

In conclusion, mono and stereo techniques offer different approaches to sound recording and can be utilized to produce unique effects and styles of audio. It is important to choose the appropriate technique based on the requirements of your project.

Playback Differences

Mono tracks have a single audio channel, while stereo tracks use two channels to give depth to sound. Stereo tracks use two speakers and are more immersive, making them ideal for music and movies.

How Mono And Stereo Tracks Differ In Playback:

When it comes to the difference between mono and stereo tracks, one of the most noticeable differences is the way in which they are played back. Mono tracks are played back through a single speaker, while stereo tracks use two speakers to create a more immersive listening experience.

Optimizing Playback According To Track Type:

To ensure that each type of track is played back optimally, it is important to understand the differences between the two. For mono tracks, it is best to play them through a single speaker. Stereo tracks, on the other hand, should be played through two speakers to get the full effect of the track. When playing back stereo tracks, it is important to make sure that the speakers are properly set up and placed for optimal listening. This may involve adjusting the balance between the left and right channels to get the desired effect. In addition, it is important to take into account the different formats in which tracks may be delivered. For example, some streaming services may deliver tracks in mono, while others may deliver them in stereo. It is important to be aware of these differences and make sure that the playback settings are optimized accordingly. In conclusion, understanding the differences between mono and stereo tracks is important for optimizing playback and getting the most out of your listening experience. By adjusting your playback settings and taking into account the different formats in which tracks may be delivered, you can ensure that you are getting the best possible sound quality and listening experience.

The Difference Between Mono And Stereo Tracks

Credit: www.blackghostaudio.com

Frequently Asked Questions On The Difference Between Mono And Stereo Tracks

Should I Use A Mono Or Stereo Track?

It depends on your specific needs. A mono track is ideal for a single source recording, whereas a stereo track is better for recordings with multiple sources or when you want to create a more immersive listening experience. Consider the type of content you want to create and the equipment you have available before deciding which track to use.

Which Is Better Mono Or Stereo Audio?

Mono audio is a single channel audio that delivers sound from a single source at the same level. Stereo audio provides sound from multiple sources where each source delivers sound from a distinct location. Although mono audio is simpler and less complicated, stereo audio provides a better listening experience as it offers spatial perception.

Is Music Better In Mono Or Stereo?

The answer to whether music is better in mono or stereo depends on personal preference. Mono offers a simpler sound, while stereo provides a fuller, wider soundstage. It ultimately comes down to the listener’s taste and the intended purpose of the music.

How Do You Tell If A Track Is Mono Or Stereo?

To tell if a track is mono or stereo, listen to it using headphones. If the track sounds like it’s coming from both the left and right sides of your headphones, it’s in stereo. If it sounds like it’s only coming from one side, it’s in mono.

You can also check the track’s file information or use software to analyze the frequency range.

Conclusion

From mono to stereo, there are numerous differences that affect both the recording and listening experience. As a sound engineer or music producer, it is crucial to understand the technicalities involved in creating each track type. Whether you are creating music or a podcast, the choice between mono and stereo tracks depends on your particular type of project.

Whatever your decision, take note of the unique benefits presented by both options and create an audio masterpiece that suits your intended listener.

Categories
Archive

How To Train Your Ears For Music Production

To train your ears for music production, listen critically and analyze the sounds, frequencies, and arrangements in music. In addition, take ear training courses and practice identifying intervals, chords, and melodies.

Music production requires a sharp ear, which can distinguish different frequencies and identify the nuances of sound. Therefore, it is crucial to train your ears to become more attuned to the various elements of a song. To improve your listening skills, you can start by actively listening to music, breaking down the components, and analyzing each sound.

Apart from that, taking ear training courses and practicing interval recognition, chord progressions, and melody identification can also help hone your listening abilities. We will discuss how to train your ears for music production, including some practical tips and exercises to improve your listening skills.

How To Train Your Ears For Music Production

Credit: www.renegadeproducer.com

Why Ear Training Is Important

Ear training is an essential skill for any music producer. It allows you to identify notes, chords, and rhythms more easily, which saves you time and improves the quality of your music. By training your ears, you will also be able to better understand and appreciate music in general.

Ear training is a crucial skill for any musician, especially for those interested in music production. As a producer, you need to have a critical ear for different sound elements, including tones, pitch, rhythm, and timbre. Training your ears to distinguish between various sounds is essential to producing high-quality tracks that sound professional and polished. Here are some reasons why ear training is important:

Developing A Better Sense Of Balance

As you train your ears, you develop a better sense of balance, which is especially critical in music production. You learn to balance different elements of a track, such as instruments, vocals, and effects while ensuring that each element is equally heard. Ear training helps you identify the areas of a track that might need more attention or mixing, allowing you to create a balanced mix that is pleasing to the ear.

Making Better Sound Decisions

Ear training enables you to make better sound decisions. As a producer, you need to decide which sounds to include in a track and which ones to leave out. With ear training, you can identify sounds that might not work well together, preventing mistakes and saving time in post-production. You also learn to make better decisions when it comes to processing sounds, such as equalizing, compressing, and adding effects.

Improving Communication With Other Musicians

Ear training improves your ability to communicate with other musicians, making the collaboration process smoother. With a critical ear, you can provide feedback and suggestions to other musicians, ensuring that all elements of a track are working harmoniously. Additionally, ear training helps you hear and understand different instruments and musical styles, making it easier to work with musicians from different backgrounds and genres. In conclusion, ear training is an essential skill for any music producer. It helps you create balanced tracks, make better sound decisions, and communicate effectively with other musicians. With consistent ear training, you can improve your music production skills, resulting in high-quality tracks that stand out from the rest.

How To Train Your Ears For Music Production

Credit: www.renegadeproducer.com

Types Of Ear Training Exercises

Ear training exercises are essential for anyone looking to improve their music production skills. There are various types of exercises available, including interval recognition, chord identification, and rhythm exercises, which can all help to refine your listening abilities and enhance your overall musical awareness.

Ear training exercises are essential for anyone looking to improve their musical skills. These exercises help develop your ability to identify pitch, recognize intervals, and discern harmonic progressions. Let’s take a closer look at each type.

Identifying Pitch

Pitch is one of the most important elements of music and is essential in identifying melodies, chords, and harmonies. Ear training exercises for identifying pitch involve listening to a note and identifying its precise pitch. These exercises help you develop perfect pitch, which is the ability to identify any pitch without a reference note.

Recognizing Intervals

Intervals refer to the distance in pitch between two notes. Ear training exercises for recognizing intervals involve listening to two notes and identifying the distance between them. This skill is important in identifying melodies and harmonies.

Discerning Harmonic Progressions

Harmonic progressions are a series of chords that create the harmony of a song. Ear training exercises for discerning harmonic progressions involve listening to a series of chords and identifying the progression of the harmony. This skill is important for understanding the structure of a song and predicting the progression of the chords.

Conclusion

Ear training exercises are essential for any musician or music producer looking to improve their skills. By developing perfect pitch, recognizing intervals, and discerning harmonic progressions, you can take your musical abilities to the next level.

How To Incorporate Ear Training Into Your Practice Routine

Training your ears is vital in music production. Incorporating ear training into your practice routine involves activities such as identifying intervals, chords, and rhythms, and analyzing songs. By consistently practicing ear training, you can enhance your music production skills and create great music.

If you are an aspiring music producer or musician, then you understand the importance of having excellent listening skills. One of the most effective ways to develop your listening abilities is to incorporate ear training exercises into your regular practice routine. Ear training exercises help you improve your ability to recognize and differentiate between various elements in music such as pitch, harmony, melody, and rhythm, among others.

Start With Easy Exercises

As a beginner, it’s important to start with simple ear training exercises to build your listening skills gradually. You can begin by listening to short musical excerpts, identifying different pitches, and intervals. You can also try clapping along with rhythms or listening to and imitating specific melodies. As you progress, you can increase the complexity of the exercises by introducing chord progressions, scales, and more complicated rhythmic patterns.

Do Ear Training Exercises Consistently

Like any other skill, consistent practice is essential when it comes to ear training. Allocate time in your daily practice routine for ear training exercises, and ensure you practice each day. With consistent practice, your listening skills will improve over time, and you will develop the ability to identify various elements of music almost effortlessly.

Use Ear Training Apps And Tools

An excellent way to incorporate ear training exercises into your practice routine is to use ear training apps and tools. These tools provide interactive exercises that cover a wide range of ear training skills, including pitch recognition, interval identification, chord recognition, and rhythm. Some popular ear training apps include Auralia, EarMaster, and Perfect Ear. To summarize, incorporating ear training exercises into your practice routine is essential for developing your listening skills as a music producer or musician. Begin with simple exercises gradually and consistently practice ear training exercises each day to improve your listening skills. You can also use ear training apps and tools to enhance your learning experience.

The Future Benefits Of Ear Training

Ear training for music production has numerous future benefits, including the ability to identify subtle nuances in sound, mix tracks more effectively, and enhance overall creativity. By honing this essential skill, producers can take their music to the next level and produce high-quality tracks that stand the test of time.

Ear training may seem like a tedious and challenging task, but the benefits that come from it are worth the effort. Music producers who take the time to train their ears develop a heightened sense of musical perception, which translates into a more refined and polished sound. In this blog post, we’ll be discussing the future benefits of ear training and how it can help you develop the ability to compose, become a better music producer, and expand your overall musicianship.

Developing The Ability To Compose

One of the most significant benefits of ear training is its ability to help you develop the ability to compose. By training your ears to identify different musical elements such as chords, intervals, and melodies, you’ll have a better understanding of how different musical ideas fit together. This knowledge will give you more creative freedom as a composer and allow you to experiment with various musical styles.

Becoming A Better Music Producer

Ear training can also help you become a better music producer. As a producer, your primary job is to create music that sounds good and meets the artist’s needs. A trained ear will enable you to hear details in the mix that others might miss. You’ll be able to identify problematic frequencies, poorly balanced volumes, and other issues that can affect the overall sound quality. This ability will enable you to correct those issues and produce a more professional-sounding mix.

Expanding Your Overall Musicianship

Training your ears can also expand your overall musicianship. By developing a deeper understanding of music, you’ll be able to appreciate different musical genres and styles. You’ll be able to identify and appreciate different nuances in the music, making you a more well-rounded musician. You’ll also be able to communicate and collaborate better with other musicians and producers, creating more meaningful and polished musical projects. In conclusion, ear training is an essential skill for anyone interested in music production. It helps you develop the ability to compose, become a better music producer, and expand your overall musicianship. These skills will ultimately give you a competitive edge in the music industry and help you produce better quality music.

How To Train Your Ears For Music Production

Credit: slidenest.com

Frequently Asked Questions Of How To Train Your Ears For Music Production

How Do You Train Your Ears For Music Production?

To train your ears for music production, you can start by practicing active listening. Focus on individual elements like melodies, basslines, and percussion. Use reference tracks, analyze spectrums, and experiment with different sounds and hardware. Consistent training and practice will improve your ability to discern and manipulate sound.

How Can I Improve My Ear For Music?

Improving your ear for music requires practice and exposure to various types of music. Active listening, focusing on different instruments and rhythms, and using tools like ear training exercises and music theory can also help. Consistency is key, so make sure to regularly engage with music and challenge yourself to identify and understand different elements.

Can A Musical Ear Be Taught?

Yes, absolutely. Musical ear can be taught through various methods such as ear training exercises, listening to different types of music, and practicing with various instruments. With consistent practice, anyone can develop their musical ear and improve their ability to differentiate between different pitches and sounds.

How Long Does It Take To Develop An Ear For Music?

It is difficult to determine an exact timeline for developing an ear for music. However, with consistent practice and exposure, one can begin to notice nuances in music over time. It also varies depending on the individual’s starting point and natural abilities.

Conclusion

It’s essential to train your ears as a music producer. It helps you to identify different elements of sound and helps you to produce better tracks. By following the above tips, you’ll be able to train your ears effectively. Try to practice listening to music every day, and don’t be afraid to experiment with different genres and sounds.

Keep your ears open, and you’ll undoubtedly see improvement over time. With consistent practice and dedication, you’ll be able to use your ears as a powerful tool for creating great music.