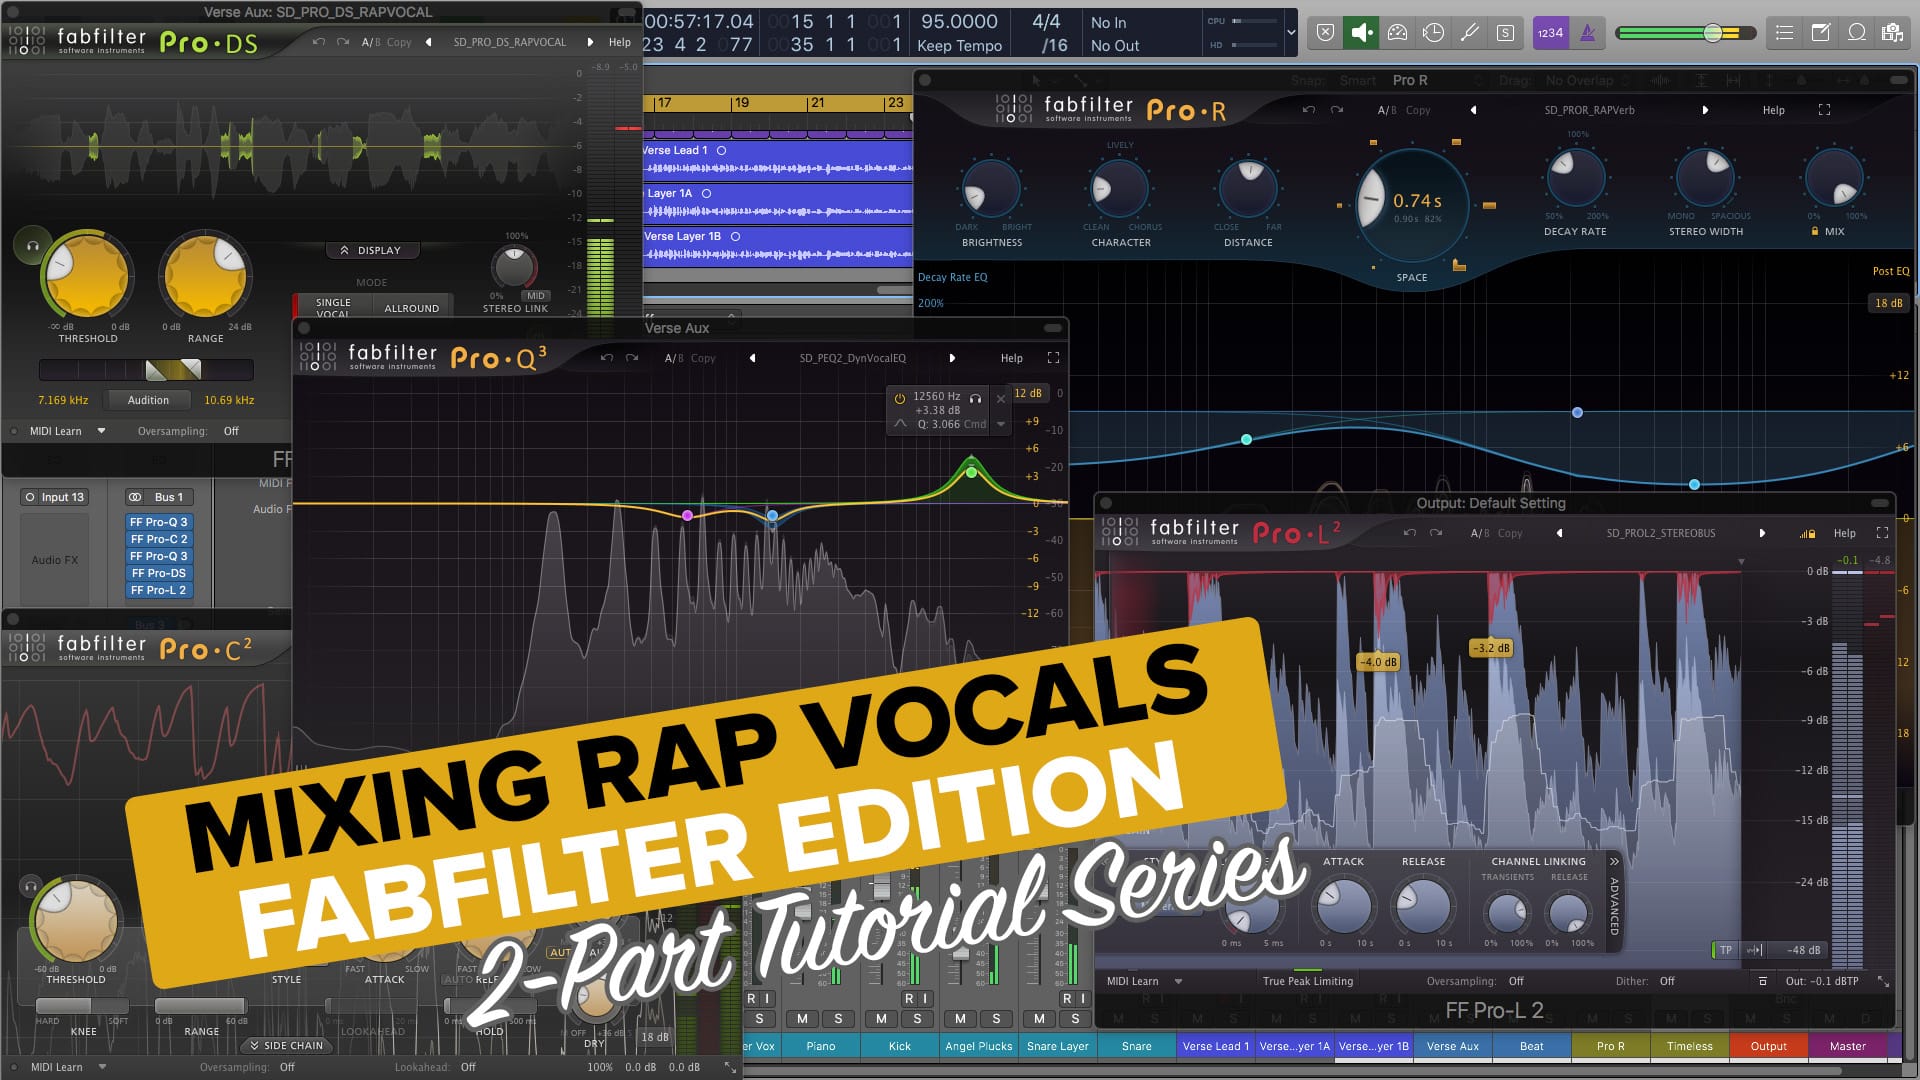
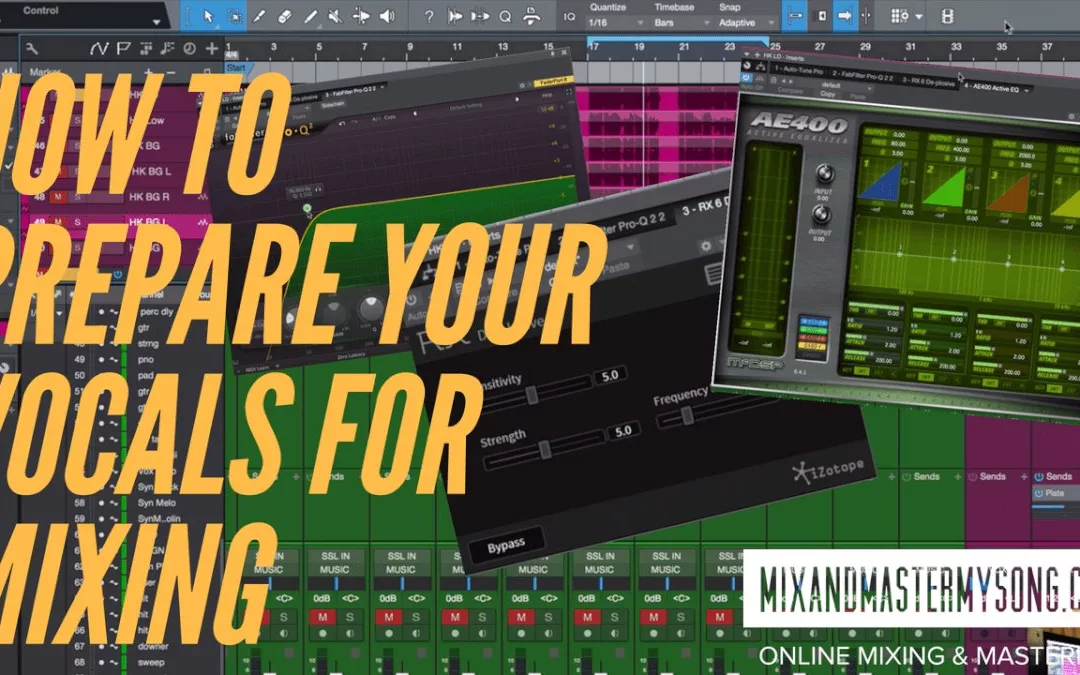
When mixing vocals with the Fabfilter Pro Q3, use dynamic EQ and frequency cuts to optimize clarity and eliminate harshness. The Fabfilter Pro Q3 offers a variety of tools to enhance the quality of vocals, allowing for refined control over every aspect of the track.
From controlling resonance to reducing sibilance, the Pro Q3 allows users to fine-tune and shape their vocals to perfection. With its highly intuitive interface, even beginners can utilize the powerful features of the Pro Q3 to achieve professional sound quality.
Whether you’re a seasoned mixing engineer or just beginning, the Fabfilter Pro Q3 is an essential tool for any vocal mix.
Basic Eq Techniques For Vocal Mixing
Learn how to use the Fabfilter Pro Q3 to enhance vocals in your mix with basic EQ techniques. This powerful plugin allows you to pinpoint specific frequencies and make precise adjustments, resulting in a clearer and more polished sound.
Mixing vocals can be a challenging task, especially for those new to audio engineering. However, by learning some basic EQ techniques, you can achieve impressive results with minimal effort. In this blog post, we’ll discuss some fundamental EQ techniques that you can use to make your vocals stand out in the mix. Using the Fabfilter Pro Q3, we’ll focus on reducing muddiness and enhancing presence in vocals.
Reducing Muddiness In Vocals
When mixing vocals, it’s common to encounter muddiness or excessive low-end frequencies that can make the vocals sound unclear and muddy. One way to address this is by using high-pass filtering, which allows you to remove any unwanted low-end frequencies in the vocal track. Start by inserting a Fabfilter Pro Q3 on the vocal track and setting the high-pass filter to around 100Hz. You can adjust the frequency until the low-end muddiness is reduced and the vocals sound clear and articulate.
Enhancing Presence In Vocals
Presence is an essential element in vocal mixing that helps the vocals cut through the mix and sound more present. One way to enhance presence is by using a bell filter to boost the midrange frequencies of the vocals. In Pro Q3, select the bell filter and set the frequency range to around 3kHz, then boost the gain to accentuate the midrange frequencies. Be careful not to overboost the frequencies, as this can lead to harshness or sibilance in the vocals. Another way to enhance presence is by using a low-cut filter to remove any unwanted low-end frequencies that can mask the vocal’s midrange frequencies. You can use the same steps as in the previous section to apply the low-cut filter and achieve an overall clean and present vocal sound. In conclusion, by applying these basic EQ techniques using the Fabfilter Pro Q3, you can achieve a clean and present vocal sound without compromising on quality. With patience and practice, you can become a master at vocal mixing, and your mixes will sound professional and polished.
Credit: m.youtube.com
Advanced Eq Techniques For Vocal Mixing
Discover how to take your vocal mixing skills to the next level with advanced EQ techniques using the powerful Fabfilter Pro Q3. With its unparalleled precision and flexibility, this plugin can help you achieve the perfect balance of clarity, warmth, and presence in your vocal tracks.
Using Dynamic Eq For Vocal Compression
Dynamic EQ, when applied correctly, is an incredibly useful tool that can solve several problems in a mix. Pro Q3 from FabFilter is a fantastic solution that allows you to work with both dynamic and static EQs. Instead of compressing an entire vocal track, you can use the Pro Q3 to compress specific frequency bands, resulting in a more natural-sounding vocal track. By using dynamic EQ, you can control frequencies that become too loud or too quiet in the mix without affecting the rest of the vocal. The Pro Q3 allows you to control the frequency, range, and threshold of the dynamic EQ. This way, your vocal track will sound balanced and punchy without losing its natural vibe.
Managing Resonances In Vocals
One of the biggest problems when mixing vocals is managing resonances. Every voice has resonant frequencies that can cause unpleasant ringing or harshness throughout the mix. The Pro Q3 makes it easy to manage these resonances without affecting the rest of the track. To do so, simply narrow down the bandwidth of the EQ and find the problematic frequency band. Then, use the dynamic EQ feature to reduce the volume of the resonating frequencies. You can also use FabFilter’s built-in spectrum analyzer to pinpoint the exact location of resonances and adjust the EQ accordingly. By using these techniques, you can create a clean and professional-sounding vocal that will sit perfectly in the mix. FabFilter Pro Q3 is undoubtedly one of the best EQ plugins available today. Its advanced features and intuitive interface make it the go-to choice for professional producers and mixers. By implementing these advanced EQ techniques, you can take your vocal mixing to the next level and create a polished, radio-ready sound.
Other Tips And Tricks
When it comes to mixing vocals with the FabFilter Pro Q3, there are a few other tricks that can take your vocal mixing to the next level. Let’s take a look at two of the most effective:
Using Sidechain Compression For Vocal Clarity
One of the biggest challenges when mixing vocals is getting them to sit perfectly in the mix without getting lost. One effective way to achieve clarity is to use sidechain compression. This technique involves using a compressor on an instrument or group and ducking it in response to another track, in this case, the vocals.
To use sidechain compression for vocal clarity:
Select the instrument or group you want to compress.
Open the FabFilter Pro Q3 and select the sidechain option.
Choose the vocal track as the sidechain input.
Configure the settings to compress in response to the vocals, using a fast attack and release.
Adjust the threshold and ratio to taste.
Adding Saturation And Harmonic Distortion To Vocals
If you want to add warmth and color to your vocals, saturation and harmonic distortion can be incredibly effective. This technique essentially mimics the harmonic distortion that occurs naturally in analog equipment, leading to richer, fuller, and more pleasant-sounding vocals.
To add saturation and harmonic distortion to your vocals:
Create a duplicate of your vocal track.
Open the FabFilter Pro Q3 on the duplicated track.
Choose the distortion type that works best for your mix.
Adjust the drive, mix, and output settings to achieve the desired effect.
By using both sidechain compression and saturation/harmonic distortion, you can take your vocal mixing to new heights with the FabFilter Pro Q3.
Credit: seandivine.com
Credit: m.youtube.com
Frequently Asked Questions Of Mixing Vocals With The Fabfilter Pro Q3
What Is The Best Eq For Vocals?
A parametric equalizer with a frequency range of 2kHz with +/- 3dB is considered best for vocals. It can enhance the presence of the vocals in a mix, remove unwanted frequencies and provide clarity and warmth.
At What Volume Should I Mix Vocals?
Mixing vocals at a volume level that compliments the overall song is crucial. The ideal volume for vocals varies depending on the genre, style, and arrangement of the track. It is recommended to mix the vocals at a level that blends them seamlessly with the instrumental elements of the song without overpowering them.
Consult with other professionals and reference popular tracks in your genre for guidance on optimal vocal levels.
What Frequency Should I Cut When Mixing Vocals?
Cutting frequencies of vocals depends on the context of the mix and individual vocals. However, problematic frequencies in the range of 150Hz to 400Hz should be cut to eliminate muddiness. Additionally, boosting between 2kHz to 6kHz can add brightness and clarity to the vocals.
Experimentation is recommended for finding the sweet spot.
What Is The Best Way To Mix Vocals?
The best way to mix vocals is to start with a well-recorded track, use EQ to remove unwanted frequencies, apply compression to balance the dynamics, add reverb and delay for depth, pan the vocals to create space, and adjust the levels to fit the mix.
It’s also important to keep the lead vocal front and center while supporting harmonies blend in the background.
Conclusion
To sum up, the Fabfilter Pro Q3 is an excellent tool for mixing vocals. It provides various features that allow any user to attain incredible results. From its unique interface to its large number of plugins and options, the Pro Q3 is a great investment for any mixing engineer out there.
With this tool, you can achieve a professional sound in no time, and take your music to the next level. So, if you’re looking for a mixing software that can deliver high-quality results, look no further than the Fabfilter Pro Q3!
To compose better and more frequently, establish a daily writing habit and write without editing or censoring yourself. Additionally, consider outlining your thoughts before writing and read widely to improve your writing skills.
Writing is a skill that requires practice and discipline. Whether you are a professional writer or someone who simply wants to improve their writing ability, there are steps you can take to compose better and more frequently. Establishing a daily writing habit can help you get into the flow of writing and produce more content.
To overcome writer’s block or self-censorship, try writing without editing yourself or setting a timer to write for a set amount of time. Outlining your thoughts before writing can also help you organize your ideas and achieve a more coherent piece of writing. Additionally, reading widely can expose you to different styles and techniques, helping you improve your writing skills.
Credit: www.linkedin.com
Create Daily Writing Goals
To compose better and more regularly, creating daily writing goals is a must. Set achievable targets that you can manage, start with small accomplishments, and slowly extend your writing time. Make writing a habit and track your progress to motivate yourself and boost your writing skills.
Are you struggling to compose better and more frequently? Do you often find yourself struggling to come up with new ideas or just simply don’t have the motivation to write? One of the keys to overcoming these challenges is to create daily writing goals.
Make Writing A Priority
If you want to write more frequently, the first step is to make writing a priority. Set aside a specific time each day to write, just as you might schedule time for exercising or cooking dinner. This time should be non-negotiable, just like any other important appointment on your calendar.
Establish A Reasonable Daily Word Count
Once you’ve established a writing routine, the next step is to determine a reasonable daily word count. This will vary from person to person, but the key is to set a number that feels achievable yet challenging. Consider starting with just 250 words per day and gradually increasing as you become more comfortable with the habit.
Track Your Progress
To help stay motivated, it can be helpful to track your progress toward your daily writing goals. Keep a log of the number of words you write each day, and celebrate when you reach milestones such as writing consistently for a week or hitting a certain word count. To ensure you’re able to focus during your designated writing time, eliminate distractions as much as possible. Turn off your phone, log out of social media, and find a quiet space where you can concentrate.
Conclusion
By creating daily writing goals, you’ll be more likely to compose better and more frequently. Remember to make writing a priority, establish a reasonable daily word count, track your progress, and eliminate distractions to ensure success.Start small with achievable goals and over time, you will see the results.
Eliminate Distractions
One effective method to compose better and write more frequently is to eliminate distractions. This can be achieved by setting up a designated workspace, putting away your phone, and avoiding browsing unnecessary websites while you write. By minimizing interruptions, you’ll be able to focus on your writing and produce content that is more comprehensive and engaging.
Writing is an art that can only be mastered through the practice of composing more frequently. However, distractions can be one of the biggest obstacles to becoming a better writer. Therefore, it is essential to eliminate them to increase productivity and stay on task.
Allocate A Designated Writing Space
One of the best ways to eliminate distractions is by allocating a designated writing space. This space should be used exclusively for writing. It could be a home office, a quiet corner of your home, or a specific desk in your workplace. Having a set space to write in will help you focus and make writing part of your routine.
Turn Off Notifications
Notifications can be a significant source of distractions. They can be a constant interruption, drawing attention away from the task at hand. Turn off notifications on your phone and computer while writing. This will help you stay on track and stop the urge to check your phone or social media every few minutes.
Use Productivity Apps
There are many productivity apps available that can help eliminate distractions and increase productivity when writing. Some of the best apps include Forest, which allows you to set time limits and lock your phone while writing. Other options include Focus@Will, which provides instrumental music to help focus, and Freedom, which blocks access to distracting websites. In conclusion, becoming a better and more frequent writer requires eliminating distractions. Allocate a designated writing space, turn off notifications, and use productivity apps to help keep you on-task. With these tips, you’ll be able to improve your writing skills and compose more frequently.
Develop A Writing Routine
Developing a writing routine is key to producing better content more frequently. Establish a dedicated time and space for writing, set goals, and eliminate distractions to maximize productivity. With consistency and practice, you’ll find it easier to compose high-quality material on a regular basis.
Developing a writing routine can improve your writing skills and help you write more frequently. It is a way for you to stay disciplined and focused on your writing goals. Here are some tips you can follow to establish a consistent writing routine:
Establish A Consistent Writing Time
The first step to developing a writing routine is to establish a consistent writing time. Set aside a specific time of day when you can write without interruptions. This could be early in the morning before everyone else wakes up, or after your kids have gone to bed at night. Whatever time you choose, make sure it’s a time when you feel most creative and productive.
Include Warm-up Exercises
Before you start writing, it’s important to warm up your writing muscles. Try doing some warm-up exercises to help you get into the writing groove. This could be brainstorming ideas, writing a journal entry, or doing a writing prompt. By doing these warm-up exercises, you’ll be able to get your creative juices flowing and prepare your mind for the task ahead.
End Each Session With A Plan For The Next Day
At the end of each writing session, make sure to plan for the next day. Write down what you want to accomplish, and set yourself a specific goal for your next writing session. By doing this, you’ll have a clear direction for your writing and you’ll be able to get started right away the next day. By developing a writing routine, you can improve your writing skills, overcome writer’s block, and write more frequently. Remember to establish a consistent writing time, include warm-up exercises, and end each session with a plan for the next day to keep your writing momentum going.
Read And Research Regularly
Writing regularly is a habit that every writer should develop. However, generating unique and engaging content could be a challenge, but one way to overcome this difficulty is by reading and researching regularly.
Read About Writing Techniques And Styles
An essential aspect of writing is learning from others. By reading books, articles or blogs from different writers, you can discover new techniques and styles that can help you develop your writing skills. Reading from others’ works can inspire you, offer you new ideas and perspectives, and help you understand different techniques, styles, and genres.
Research Topics You Want To Write About
Researching is vital since it helps you develop a solid understanding of the subject matter you want to write about. It helps you get new information, ideas and can help you target your writing to a specific audience better. When researching, you can use various credible sources such as books, academic journals, and other reliable online sources. Researching provides credibility to your content and supports your arguments with evidence-based claims.
Be Consistent In Your Reading And Researching
To make reading and researching part of your writing habit, commit to a schedule that you know you can follow consistently. You can dedicate some time in the morning or at the end of the day for research and reading. Consistency enhances your research and reading skills, making it more fluent, enjoyable and even more enlightening.
Conclusion
Reading and researching regularly will not only help you write better, generate new ideas and perspectives, and aid you to write engaging content, but also provide fascinating insights into the world around you. Therefore, make reading and researching part of your daily routine, and you will notice significant improvement in your writing skills.
Interact With Other Writers
Collaborating with other writers is a great way to improve your writing skills and become more productive. By interacting with other writers, you can get valuable feedback, learn new techniques, and get inspired to write more often. Join writer’s groups, participate in workshops, and engage with other writers online to enhance your writing abilities and stay motivated.
Interacting with other writers is an excellent way to improve your writing skills and increase productivity. Here are two ways you can interact with other writers to compose better and more frequently.
Join A Writing Group
Connecting with other writers can be beneficial for many reasons, and participating in writing groups is one of the best ways to do so. They usually feature a bunch of writers who share the same passion for writing as you and are committed to improving and developing their skills. Writing groups are exceptional at providing new perspectives and opinions on your work, which can help you recognize weak spots in your technique. Feedback from other writers gives a fresh pair of eyes on your written work, helps you connect with other writers, and improves your overall writing. Some writing groups meet in person while others are online, Google searches can help you find suitable writing groups to join.
Participate In Writing Events
You can participate in writing events as another excellent way to interact with other writers. Writing events provide numerous opportunities to get familiar with other writers, working with them, and, more significantly, refreshing your creative juices. Writing events can take the form of conferences, workshops, courses, and writing contests that gather writers from different backgrounds. Participating in these events allows you to interact with other writers, share writing tips, learn from other writers, and get motivation for writing in your free time. Some writing events are free, while others might come with an enrollment fee. Check out writing events that align with your genre of writing and budget to join. So, start interacting with other writers today to improve your writing, productivity and be inspired!
Embrace Editing
Embracing editing is the key to composing better and more frequently. Editing is the process of refining and improving a composition, and it requires patience and attention to detail. With editing, you can catch errors in spelling, grammar, and punctuation, as well as improve the clarity and effectiveness of your writing. The following are some steps you can take to embrace editing:
Allow Time Between Writing And Editing
It is essential to allow some time between writing and editing. This will help you approach your work with fresh eyes and a clear mind. When you have finished writing, take a break and engage in an activity that will distract you. Then, come back to your work later and read through it again, taking note of areas that need improvement. Doing this will enable you to notice errors and inconsistencies that you may not have seen previously.
Read Your Work Aloud
Another way to embrace editing is to read your work aloud. This helps you hear the rhythm and flow of your writing, making it easier to identify areas that sound awkward, convoluted, or unclear. Reading aloud can also help you check your sentence structure and ensure that the composition is easy to read and understand.
Get Feedback From Trusted Sources
Getting feedback is another vital part of the editing process. Share your work with trusted sources, such as writing groups, mentors, or friends, who will provide honest and constructive feedback. Feedback can help you identify areas that need improvement, as well as provide motivation and encouragement. It may also help you adopt new techniques for writing and editing in the future.
By embracing editing, you can improve the quality and quantity of your writing. These tips can help you edit your writing more effectively and efficiently, ultimately making you a better and more prolific writer.
Stay Inspired
Stay inspired and improve your composing skills by practicing regularly, exploring different writing styles, and reading diverse content. Encourage yourself to write by setting achievable goals, creating a peaceful writing environment, and seeking feedback from fellow writers. Use your experiences and emotions as inspiration to enhance your writing and connect with your audience.
Do you ever feel stuck or uninspired when it comes to composing? Whether you’re a professional musician or an amateur artist, we have all experienced those moments of creative block. However, there are ways to get your creative juices flowing again and stay inspired. Here are three helpful strategies:
Expose Yourself To Different Art Forms
Sometimes, the best way to unlock your creativity is to gain inspiration from other art forms. If you’re a musician, try watching a dance performance or visiting a museum to look at paintings. If you’re a writer, consider attending a poetry reading or watching a play. By exploring different art forms, you can gain new perspectives and ideas to incorporate into your compositions.
Keep A Journal Or Idea File
It’s easy to forget those fleeting moments of inspiration that come and go throughout the day. That’s why it’s important to keep a journal or idea file to jot down any creative thoughts or melodies that come to mind. This can be a physical notebook, a digital document, or even a voice memo app on your phone. By capturing your ideas in the moment, you can revisit them later and use them to fuel your compositions.
Take Breaks When You Need Them
It’s important to listen to your mind and body when it comes to composing. If you feel burnt out or stuck, take a break and do something that relaxes you. Whether it’s taking a walk, meditating, or reading a book, giving yourself space from your compositions can actually increase your productivity and creativity when you return. Don’t be afraid to take breaks when you need them. Incorporating these strategies into your routine can help you stay inspired and continue composing better and more frequently. Remember, creativity is a muscle that needs to be exercised and nurtured.
Celebrate Your Successes
Celebrating your successes is essential to composing better and more frequently. Acknowledging your achievements can motivate you to continue writing, boost your confidence, and help you identify areas for improvement. Whether big or small, celebrating progress can keep you motivated and inspired to create more high-quality content.
If you’re struggling to compose more frequently, it’s crucial to celebrate the progress you’ve made. It can be challenging to keep going when you don’t see immediate results, but taking the time to recognize your accomplishments can help you stay motivated. Here are some tips to help you celebrate your successes:
Track Your Progress And Accomplishments
One of the best ways to celebrate your progress is to keep track of it. Whether you’re using a spreadsheet, a journal, or an app, tracking your progress can help you see how far you’ve come. Writing down your accomplishments can also serve as a source of inspiration during times when you feel stuck. Be sure to write down everything, from completing a chapter to receiving positive feedback from a reader.
Reward Yourself Along The Way
Rewarding yourself for progress is an excellent way to keep yourself motivated. Treat yourself to something small but meaningful, such as a nice cup of coffee or a new book, after reaching a milestone. Additionally, rewarding yourself along the way can help make the journey more enjoyable.
Conclusion
In conclusion, it’s essential to celebrate your successes when composing to keep yourself motivated. Tracking your progress, recognizing your accomplishments, and rewarding yourself for reaching milestones are all great ways to stay on track. Celebrating every success – no matter how small – can help you stay motivated and continue to make progress in your writing endeavors.
Frequently Asked Questions Of How To Compose Better And More Frequently
How Do You Get Better At Composing?
Improving your composition skills requires practice, feedback, and learning from others. Start by setting aside regular time to write and try new techniques. Seek feedback from trusted sources and study the work of skilled writers. Keep expanding your vocabulary and grammar knowledge.
Finally, revise and edit your work to maximize impact.
How Can I Improve My Compositional Skills?
To enhance your compositional skills, begin by practicing regularly. Read widely, analyse literature, and incorporate new words into your vocabulary. Use active voice, avoid passive voice, and write in short, easy to read sentences. Review, revise and edit your work to ensure it is free from grammatical mistakes.
What Are The 4 Basics Of Music Composition?
The 4 basics of music composition are melody, harmony, rhythm, and timbre. Melody refers to the tune or notes that are played, while harmony is the combination of different notes. Rhythm is the pattern of beats that create a musical flow and timbre refers to the particular quality of sound created by each instrument or voice.
Why Is Composing Music Difficult?
Composing music is difficult because it requires creativity, skill, and dedication to create something unique and memorable. Musicians need to have a strong understanding of musical theory, the ability to use sophisticated software and equipment, and the patience to work on a piece for hours or even days.
Additionally, they must constantly come up with new ideas, experiment with different sounds, and adapt to changing trends in the music industry.
Conclusion
To sum up, composing better and more frequently requires discipline, hard work, and a strategic approach. By following the tips shared in this blog post, you can improve your writing skills and productivity. Remember to write for your audience and keep your content relevant and useful.
With consistent effort and a commitment to quality, you can become a better writer and reach your goals. Keep practicing and enjoy the journey!
The best standing desk for music production is the Uplift V2 Standing Desk. If you’re a musician or music producer, you know how important it is to have proper posture and ergonomics while working in the studio.
Sitting for hours on end can cause back pain, neck strain, and other issues that can hinder your creativity and productivity. That’s where standing desks come in. They provide an alternative to sitting all day. This allows you to adjust the height of your workspace and switch between sitting and standing positions as needed.
But with so many options on the market, it can be tough to choose the right one for your needs. Moreover, we’ll take a closer look at the Uplift V2 Standing Desk and why it’s the best option for music production. We’ll examine its features, benefits, and user reviews, as well as provide some tips on how to set up your standing desk for optimal comfort and productivity. So let’s dive in!
Health Benefits of a Standing Desk for Music Production
In addition, Standing desks offer numerous health benefits for music producers, including improved posture, increased energy, and reduced risk of obesity. Choosing the best standing desk for music production requires considering factors such as stability, adjustability, and comfort to ensure optimal performance and productivity.
Better Posture for Standing Desk for Music Production
Furthermore, Standing desks can help improve your posture, as sitting for extended periods can cause strain on your neck, back, and shoulders. Working at a standing desk encourages a more upright posture and engages core muscles. This can reduce discomfort and help you maintain good spinal alignment.
Burns Calories for Standing Desk for Music Production
Standing can also promote weight loss by increasing your daily calorie burn. Additionally, according to recent studies, standing for three hours each day can burn up to 144 extra calories. Over time, this can help you lose weight and improve your overall health.
Reduces Back Pain for Standing Desk for Music Production
Also, Back pain is a common problem among music producers who spend long hours sitting. Using a standing desk can help alleviate this pain by keeping your spine in a more natural position and taking pressure off your lower back. This can help prevent future back problems and improve your overall comfort and productivity.
Credit: musiea.com
Factors To Consider When Choosing A Standing Desk For Music Production
Selecting the best standing desk for music production can be challenging, but there are certain factors to keep in mind. Moreover, consider the desk’s height adjustability, stability, desk space, cable management options, and whether it provides a comfortable working experience to improve productivity and reduce strain.
As a producer or composer, you know how much a comfortable, ergonomic workspace matters during long sessions. In addition, a standing desk can provide an excellent option to keep you active and prevent the negative effects of prolonged sitting. However, when choosing a standing desk for music production, there are certain factors you need to consider to ensure that it meets your specific requirements.
Adjustability
Furthermore, the adjustability of your standing desk is of utmost importance if you want to create music comfortably. An adjustable desk will enable you to switch between sitting and standing positions with ease. This allows for better posture and reducing fatigue. Look for a desk that adjusts to your preferred height for custom comfort while working.
Stability
Stability is an essential feature of any standing desk, especially when you are working on music or audio equipment. Additionally, choose a desk with a stable base that can support your equipment and prevent it from wobbling. This will ensure you are safe and your equipment is secure. For better stability, you can consider purchasing a desk with a wider base, which provides more support.
Weight Capacity for Standing Desk for Music Production
If you have a lot of equipment or heavy speakers, choose a standing desk with a high weight capacity. This will ensure your desk can accommodate your music equipment without compromising its structural integrity. Before purchasing your desk, be sure to check the weight capacity and ensure it can handle the weight of your equipment.
Storage
A standing desk with a storage option can help you keep your workspace neat and tidy while providing adequate space for your music equipment. Look for a desk with under-desk storage options or shelving units that can accommodate your audio interface, MIDI controllers, and other equipment. This will not only keep your workspace organized but also provide quick and easy access to your equipment when you need it. In conclusion, a standing desk can provide the perfect solution for music producers who need a comfortable, flexible, and ergonomic workspace. When purchasing a standing desk for music production, ensure the desk is adjustable, stable, has a high weight capacity, and offers ample storage options. These features will provide comfort, security and functionality, enabling you to produce your best work.
1. Apexdesk Elite Series
The ApexDesk Elite Series is the best standing desk for music production thanks to its sturdy construction, spacious workspace, and adjustable height settings. With this desk, musicians can easily switch between sitting and standing positions to keep their creativity flowing.
The ApexDesk Elite Series is one of the best standing desks for music production. It is a perfect blend of quality and affordability. This adjustable height standing desk comes with a sturdy build and a great set of features that make it an ideal choice for music artists and producers.
Features
The ApexDesk Elite Series boasts of impressive features that make it a valuable asset for music production. Below are some of its top features:
Adjustable height: This desk is adjustable in height, making it easy to use whether you’re sitting or standing. It can be adjusted from 29″ to 48″ at 1″ per second.
Spacious surface: The desk has a spacious surface area that can accommodate multiple monitors, keyboards, and other accessories.
Easy to assemble: One of the significant advantages of this desk is that it is easy to assemble. The instructions are clear, and the parts are labeled for convenience.
Durable: The ApexDesk Elite Series has a sturdy build. The frame is made of steel and has a scratch-resistant finish.
3-stage dual motors: The desk has 3-stage dual motors that provide smooth and quiet operation.
Pros
The ApexDesk Elite Series has several advantages, including:
It has sufficient space to accommodate multiple monitors, accessories, and books.
The desk’s height can be easily adjusted. This makes it very comfortable for users to switch between a standing and sitting position.
It is built to last long, making it an ideal investment for music production.
The motors run smoothly and quietly, which means you can use it without disturbing your recording.
Cons
This great desk has a few drawbacks, including:
The desk is heavy, which may make it difficult to move around, especially if you’re working alone.
The desk’s control panel is not user-friendly, which may take some time to get used to.
In conclusion, the ApexDesk Elite Series is a great standing desk that is perfect for music production. It has excellent features, is affordable, and is built to last. Its pros outweigh its cons, making it a valuable investment for any music artist or producer.
Credit: www.autonomous.ai
2. Varidesk Pro Plus 36
If you prefer a converter desk, the VariDesk Pro Plus 36 is a popular option in the market. The desk comes fully assembled and is ready to use straight out of the box. It fits two monitors comfortably, an essential feature for music production.
Features
The VariDesk Pro Plus 36 is designed with the following key features:
Feature
Description
Two-tier design
The desk has two levels to accommodate a keyboard, mouse, and two monitors.
AirLift technology
The desk can be easily adjusted to the desired height using the built-in AirLift system.
Spacious work surface
The desk offers ample space to work on, allowing you to keep all your essentials within reach.
Sturdy construction
The desk is made from high-quality materials, making it durable and sturdy.
Pros
It comes fully assembled, so you can start using it right away.
The two-tier design lets you store your keyboard and mouse under the desk, freeing up more workspace on the top level.
Adjusting it is easy, which means you can change your working position as needed.
The desk offers ample space to work on and can accommodate two monitors. This makes it a great option for music producers.
The desk’s sturdy construction ensures it will last for a long time, even with regular use.
Cons
It is relatively heavy, which makes it difficult to move around.
The desk may be too large for smaller workspaces, so make sure you have enough space before purchasing it.
While the desk is durable, the constant movement may wear on the AirLift system over time.
The VariDesk Pro Plus 36 is a great choice for those who prefer a converter desk. Its sturdy construction, ample workspace, and ease of use make it an ideal option for music producers who spend long hours in front of a computer screen. However, make sure you have enough space to accommodate this desk, and if you plan to move around frequently, it may not be the best option for you.
3. Uplift V2 Standing Desk
The Uplift V2 Standing Desk is the best option for music production, with its adjustable height, spacious workspace and customizable design. Create the perfect ergonomic setup for your specific needs, whether you’re sitting or standing, and enjoy increased productivity while maintaining your health and comfort.
If you’re a music producer or content creator, you know how crucial it is to have a comfortable and adjustable workspace. One of the best solutions for this is getting a standing desk. There are plenty of options available in the market but one that stands out is the Uplift V2 Standing Desk. Let’s dive into its features, pros, and cons to help you decide if it’s the best fit for you.
Features:
The Uplift V2 Standing Desk boasts a myriad of features that make it an exceptional choice for music production. For starters, it has a height range of 25.5″ – 51.1″ (including desktop thickness) which means it suits individuals of all heights. This desk also has a lifting capacity of 355lbs which is more than enough for all your music equipment. Additionally, it comes with a programmable keypad that can save up to four height settings. The desk also features a dual motor system which is strong and quiet. This ensures that you can work uninterrupted without any distracting background noise.
Pros:
The Uplift V2 Standing Desk is a great investment for music producers and content creators. Here are some reasons why:
Adjustable Height Range: The height range of the desk suits individuals of all heights.
Sturdy: With a lifting capacity of 355lbs, this desk can hold all your music equipment.
Programmable Keypad: You can save up to four height settings, making it easy to switch between them quickly.
Quiet Dual Motor System: You can work without any distracting background noise.
Customizable: You can choose from a range of desktop sizes, materials, and colors.
Cons:
Like any product, the Uplift V2 Standing Desk isn’t perfect. Here are some things to consider before making your purchase:
Price: The desk can be a bit pricey, so it’s not the best option for those on a tight budget.
Assembly: The desk comes flat-packed and requires assembly, so it might take some time to set up.
Delivery Time: Depending on your location, the delivery time might take longer than expected.
In conclusion, the Uplift V2 Standing Desk is a great investment for music producers and content creators. Its features such as adjustable height range, sturdy lifting capacity, programmable keypad, and quiet dual motor system make it an exceptional choice. However, its price, assembly, and delivery time may not be suitable for some individuals. Before deciding on the Uplift V2 Standing Desk, consider your budget and workspace needs.
Credit: standdesk.com
Frequently Asked Questions For Best Standing Desk For Music Production
Is a Standing Desk for Music Production Good for Artists?
Yes, standing desks can benefit artists by promoting better posture, reducing back pain and improving focus. Standing while working can activate leg muscles, increase blood flow, and provide a change of scenery for the creative mind. However, it is important to switch between sitting and standing throughout the day to avoid strain and fatigue.
What Is The Best Height For A Music Studio Desk?
The best height for a music studio desk depends on the preferences and physical attributes of the user. A common height range is between 28-32 inches. However, it is important to consider the chair and height of monitors to prevent straining or discomfort.
Experimenting with different heights can lead to finding the perfect fit for maximum productivity and comfort.
How Deep Should a Standing Desk for Music Production Be?
A studio desk should be deep enough to comfortably accommodate the equipment and accessories needed for your work, typically between 24 to 30 inches. However, the ideal depth depends on personal preference, available space, and individual needs. It’s important to consider the ergonomics and functionality of the desk before making a final decision.
Is A Standing Desk Good For Productivity?
Yes, a standing desk can be good for productivity. It encourages more movement throughout the day, improves posture and energy levels, and reduces the risk of health problems associated with prolonged sitting. Standing desks can help boost productivity by promoting a healthier work environment.
Conclusion
After analyzing several standing desks for music production in the market, we have concluded that the FlexiSpot M3B Standing Desk is the best option. Its ergonomic design, wide workspace, and height adjustability are the perfect combination for music producers. Additionally, it ensures proper posture, reducing the risk of health problems in the future.
Give your working space a boost and invest in a great standing desk that will enhance your productivity and creativity.
The Prism Sound Maselec MLA-2 is a mastering compressor used by professionals for its high-quality sound. This compressor offers precise stereo image control and excellent transient response, making it a popular choice for mastering engineers.
The Prism Sound Maselec MLA-2 is a highly regarded piece of equipment within the audio mastering industry. Built to exacting standards, this compressor offers precision sound control to professionals who demand the very best from their equipment. One of the key features of the MLA-2 is its ability to provide accurate stereo image control, which allows mastering engineers to achieve a level of clarity and depth that is simply not possible with lesser compressors.
Additionally, the MLA-2 excels at handling transients due to its fast attack and release times, enabling it to handle even the most challenging material with ease. Overall, the Prism Sound Maselec MLA-2 is a top-of-the-line mastering compressor that is regarded as one of the very best in the business.
Features And Specifications
Features and Specifications: Prism Sound Maselec Mla 2 Mastering Compressor is a powerful tool for audio engineers and music producers. It is a full-band, dual-mono compressor that offers both peak and RMS compression. This mastering compressor combines the best of Prism Sound’s expertise in signal processing with Maselec’s knowledge of analog circuitry to achieve outstanding sound quality. Here, we will take a closer look at the design and construction, controls and settings, and audio specifications of this compressor.
Design And Construction:
The Maselec Mla 2 has a sturdy build quality with a compact and rack-mountable design. Its high-quality components and robust construction ensure reliable performance and longevity. The unit is designed and built in the United Kingdom, making it a reliable piece of equipment.
Controls And Settings:
The Mla-2 compressor has a user-friendly interface with easy-to-use controls. The front panel provides access to all essential settings, including threshold, ratio, attack, release, and gain. The compressor also features a side-chain EQ filter that allows fine-tuning of the compressor’s side-chain, increasing its effectiveness when dealing with complex frequency content. The Mla-2 is capable of delivering up to 20dB of boost, allowing for maximum control and flexibility. Its intuitive controls make it the perfect choice for any mastering situation.
Audio Specifications:
Frequency Response
20Hz-20kHz +/- 0.25dB
Stereo Crosstalk
>100dB @ 1kHz (typical)
Dynamic Range
120dB (A-weighted)
Maximum Input Level
+26dBu before clipping
Maximum Output Level
+26dBu
THD+N
0.001% @ 1kHz & +4dBu (typical)
Frequency Response
20Hz-20kHz +/- 0.25dB
Noise
-94dBu (22Hz-22kHz, A-weighted)
Dimensions
19″ (w) x 1.75″ (h) x 12″ (d)
Weight
9.5lbs (4.3kg)
How The Mla 2 Is Used In Mastering
The Prism Sound Maselec Mla 2 is a popular mastering compressor used to bring more clarity and warmth to audio tracks. With its advanced features and sophisticated design, the Mla 2 can enhance the overall quality of a recording by reducing unwanted noise and controlling dynamic range.
Mastering is a crucial process in creating high-quality recordings that meet professional standards and consumer demands. It involves taking the final stereo mix and fine-tuning it to ensure consistency, clarity, and overall sonic balance. The Prism Sound Maselec Mla 2 Mastering Compressor is an essential tool in the mastering process, providing precision and control to achieve the desired sound quality. In this section, we will dive deeper into the mastering process, where the Mla 2 fits in, and how it enhances the entire process.
Overview Of Mastering
Mastering is the final stage of music production, where an experienced audio engineer meticulously checks the final stereo mix before it gets released to the public. The main objective is to ensure that the final mix is sonically balanced, consistent across multiple playback environments, and prepared for distribution. Mastering tweaks can include adjusting EQ, compression, stereo imaging, and volume levels. The Mla 2 fits in the mastering process by providing a high level of control over dynamics and tone shaping, which is essential for creating a polished and professional-sounding final product.
Where The Mla 2 Fits In The Mastering Process
The Mla 2 is a mastering compressor that is typically used after the equalization stage of mastering. It can help to smooth out any inconsistencies in the mix and add a sense of fullness to the overall sound. As a compressor, the Mla 2 controls the dynamic range of the audio signal, which is the difference between the loudest and softest parts of the mix. Compression can help to add density and clarity to the mix, making sure that each instrument sits well in the overall balance.
How The Mla 2 Enhances The Mastering Process
The Mla 2 is an exceptional mastering compressor that enhances the entire mastering process. It offers precision and control over the audio signal, which helps the audio engineer to perfect the tonal balance of the mix. The Mla 2 provides a transparent compression that does not color the sound, which is critical, especially for classical recordings, where maintaining the natural sound of the original recording is crucial. Additionally, the Mla 2 has advanced metering, which allows the audio engineer to monitor the compression levels and make precise tweaks to achieve the desired sound quality. In summary, the Prism Sound Maselec Mla 2 Mastering Compressor is an essential tool in professional mastering, providing precision, control, and transparency in the compression process, which ensures a natural and polished final sound.
Expert Reviews Of The Mla 2
Expert reviewers highly recommend the Prism Sound Maselec Mla 2 mastering compressor for its exceptional sound quality and versatile features. With precision control over compression and dynamic range, this compressor is an essential tool for any mastering engineer.
Industry Experts Share Their Views
When it comes to high-end mastering compressors, the Prism Sound Maselec Mla 2 is definitely a popular choice among industry experts. In this section, we’ll take a look at what some of these experts have to say about the Mla 2 and why it’s considered a top-of-the-line compressor in the market.
Positive Feedback on the Sound Quality of the Mla 2
The Mla 2 has earned much praise for its remarkable sound quality, with many industry experts praising its sonic capabilities and wide range of features. According to one expert, “The Mla 2 is probably one of the most transparent compressors I’ve ever used. It has a very clean, clear sound that enhances the overall clarity and depth of the audio.” Another expert noted that “It has a very smooth, natural sound that doesn’t color the audio too much. The gain reduction is very smooth and musical, making it a great tool for mastering purposes.”
Expansive Control Options and Versatile Functionality
One of the key features that sets the Mla 2 apart from other compressors is its wide range of control options. Industry experts are particularly impressed with its versatile functionality and easy-to-use controls that allow for precise parameter adjustments. As one expert explained, “The Mla 2 has a lot of flexibility in terms of controlling the compression, with a range of attack and release settings, as well as variable knee and ratio controls. It also has a nice, responsive VU meter that makes it easy to monitor the gain reduction.”
Well-Designed Hardware and Build Quality
In addition to the Mla 2’s impressive sound quality and expansive control options, industry experts are also quick to point out the compressor’s substantial build quality and well-designed hardware. With its solid construction and attention to detail, the Mla 2 is a compressor that is built to last. One expert commented, “The build quality of the Mla 2 is top-notch. From the precision-machined knobs to the robust metal body, you can really feel the quality of the hardware. It’s a compressor that is built to last, and one that you can rely on for years to come.”
Credit: reverb.com
Comparing The Mla 2 To Other Mastering Compressors
If you’re an experienced sound engineer, you know that compressors are one of the most important tools you have when it comes to mastering any recording. When it comes to choosing the right mastering compressor for your audio projects, there are many options available on the market. In this article, we will focus on the Prism Sound Maselec Mla 2 Mastering Compressor and how it stacks up against other mastering compressors.
Compressor Roundup
Before we dive into the details of the Mla 2, let’s first take a quick look at other renowned mastering compressors available in the market:
Compressor
Description
Manley Variable Mu
A tube compressor that’s known for its rich tone and smooth compression abilities.
Shadow Hills Mastering Compressor
A tube-optical compressor that’s known for its natural sound and versatile tone shaping abilities.
API 2500
A VCA-style compressor that’s known for its precise and transparent compression abilities.
How The Mla 2 Stacks Up Against Other Mastering Compressors
The Mla 2 is known for its unique design that combines the best of both worlds: tube and solid-state compression. This results in a high-quality mastering compressor that can deliver unparalleled warmth, transparency, and clarity.
The Mla 2 offers a wide range of compression settings that allow you to dial in the perfect sound for any recording.
The Mla 2’s tube stage helps to add warmth and character to your recordings, while the solid-state circuitry ensures that the compression is precise and transparent.
The Mla 2 features a side-chain filter that allows you to fine-tune the compression to match the specific needs of your recording.
When compared to other high-end mastering compressors, the Mla 2 stands out for its unique combination of tube and solid-state compression, versatile compression settings, and high-quality sound. While other compressors might excel in certain areas, the Mla 2 offers a balance of warmth, transparency, and precision that can take your recordings to the next level.
Real-world Applications Of The Mla 2
Prism Sound is a British audio equipment manufacturer known for producing accurate and transparent studio equipment used in music production, broadcasting, and recording. The Prism Sound Maselec Mla 2 is a mastering compressor that has gained immense popularity due to its unique features and reliable performance. This compressor is known for its transparent sound, versatility, and easy-to-use approach, making it suitable for various real-world applications.
Real-life Mastering Cases Where The Mla 2 Was Used
The Mla 2 was used to master the iconic album “Sigh No More” by Mumford & Sons, where it was used for parallel compression, imparting warmth, and elevating the vocal presence.
The Mla 2 was also used to master Lorde’s Grammy award-winning album, “Pure Heroine.” The Mla 2 helped to tame the dynamic range and increase the perceived loudness while retaining the original tone and dynamics of the source material.
In Radiohead’s album “The King of Limbs,” mastering engineer Bob Ludwig used the Mla 2 to control the dynamic range and add a subtle warmth to the sound.
Comments From Professional Mastering Engineers On The Mla 2
Name
Comment
Ted Jensen
“I use the Maselec MLA-2 mainly as a tracking compressor, but it can work great on overall stereo bus compression too. What is also great about it is that it does not add any additional noise to the signal. The flexibility and sound make it a go-to compressor for me.”
Greg Calbi
“I use the Maselec MLA-2 a lot in mastering because of its clarity and versatility. It’s the Swiss Army Knife of dynamic processing compressors.”
Bob Ludwig
“When I have a stubborn mix that just won’t gel, the Maselec MLA-2 is my secret weapon. It allows me to bring up the excitement and the loudness without sacrificing tone and harmonic content.”
In conclusion, the Prism Sound Maselec Mla 2 is a mastering compressor that has become a staple in many professional mastering studios due to its versatile sound and applications. With each passing day, more and more top mastering engineers are adding the Mla 2 to their signal chains, making it clear that the Mla 2 is a future-proof device that can confidently handle any audio source without adding any unnecessary artifacts or harshness.
What Makes Prism Sound Maselec Mla 2 Stand Out In The Market?
Prism Sound Maselec Mla 2 is known for its versatile performance and ultimate sound quality. With precision mastering-grade controls, Mla 2 provides progressive compression to enhance the sound quality and give the final audio a polished finish.
How Can Prism Sound Maselec Mla 2 Benefit Musicians And Producers?
Prism Sound Maselec Mla 2 is an ideal tool for professionals in the music industry who need to maintain the integrity of the audio during mastering. Mla 2 ensures extremely low distortion, resulting in a clear and transparent audio signal.
What Are The Key Features Of Prism Sound Maselec Mla 2?
Prism Sound Maselec Mla 2 is designed with state-of-the-art compression technology, Class A gain stages, and an extended frequency range. With low noise and full stereo control, Mla 2 prioritizes the integrity of the audio signal while producing an expressive and responsive sound.
How Does Prism Sound Maselec Mla 2 Compare To Other Mastering Compressors?
Prism Sound Maselec Mla 2 stands out from other compressors due to its superior sound quality and precision controls. Unlike other compressors, Mla 2 provides a comprehensive range of compression techniques that are adaptive to various audio genres.
Conclusion
The Prism Sound Maselec MLA 2 Mastering Compressor is a remarkable piece of hardware that ticks all the boxes for mastering professionals. Its versatility, precision, and robustness make it stand out in a crowded market. With its combination of analogue warmth and digital accuracy, the MLA 2 offers exceptional control and transparency in a mastering environment.
Its unique features and superior sound quality make it a wise investment for any modern mastering studio.
Using one synth ensures consistency in your sound design and streamlines your workflow. It allows you to become intimately familiar with all the features of the synth, empowering you to create the sounds you hear in your head with ease.
Synthesis has become an integral part of modern music production. With an ever-increasing number of synths available, it can be tempting to use multiple synths to achieve the desired sound. However, this can lead to a disjointed and confusing workflow.
Mastering one synth could lead to unlocking all its unlimited possibilities. By limiting yourself to one synth, you can delve deeper into its features and create sounds more efficiently, as you become more familiar and adept in its programming. Additionally, the more you use your chosen synth, the more distinct and unique sounds you can create, leading to a signature sound that sets you apart from your peers.
Credit: m.youtube.com
Consistency Is Key
Consistency is key when it comes to producing high-quality music through a synth. It’s easy to get caught up in the endless possibilities and features of multiple synths, but sticking with one will ultimately lead to a more consistent and polished sound. By only using one synth, you can focus on mastering its capabilities and getting to know it intimately.
Getting To Know Your Synth Intimately
Before you start producing with a new synth, take the time to learn everything about it. Read the manual, watch tutorials, and experiment with all the features. Become familiar with its strengths and weaknesses, and find the perfect settings for your musical style.
By becoming intimately acquainted with a single synth, you’ll begin to understand what works and what doesn’t in different musical situations. This knowledge will help you to create a more consistent sound that’s true to your style.
Avoiding The Temptation To Constantly Tinker
It’s natural to want to experiment with different synths and plugins to find the perfect sound, but constantly tinkering with different equipment will only lead to inconsistencies in your music. When you’re focused on using only one synth, you’re forced to work with its limitations, which can spark creativity and lead to unique sounds.
By avoiding the temptation to constantly tinker with different synths, you’ll gain a deeper understanding of your chosen synth and be able to produce more consistently high-quality music.
Conclusion
When it comes to producing music through a synth, consistency is key. By getting to know your synth intimately and avoiding the temptation to constantly tinker with different equipment, you can create a unique and consistent sound that’s true to your style. Stick with one synth, master its capabilities, and start producing music that’s uniquely yours.
Streamlining Your Workflow
Streamlining your workflow is crucial in today’s fast-paced music industry. Time is of the essence, and the more efficient and effective you can be, the more successful you will become. One way to do this is by using only one synth in your music production process. This approach can help you reduce time spent switching between different synths and streamline your creative process.
Efficient Sound Design
By using one synth, you become intimately familiar with its parameters and controls, allowing you to create more efficient and effective sound designs. You can experiment with different settings and quickly arrive at the sounds you want to create. With less time spent on experimentation, you can focus more on the creative process, exploring ideas and pushing the boundaries of your sound palette.
Simplifying Your Mixing Process
When you use multiple synths, you’re likely to encounter issues with conflicting frequencies and tones. It can be time-consuming and challenging to blend and balance different sounds when you have several different plugins in use. Instead, using a single synth allows for smoother integration of sounds and simplifies the mixing process. You can achieve a cleaner, more cohesive mix, saving you valuable time and effort.
Optimizing Your Workflow
The benefits of using one synth extend beyond simplifying your sound design and mixing process. By streamlining your workflow, you can optimize your entire production process. For example, you can create preset sounds and settings that you can call upon quickly and easily in future projects. This approach allows you to maintain consistency and quality across different tracks while reducing the time spent on repetitive tasks.
Advantages of using one synth:
– Efficient sound design
– Simplifying your mixing process
– Optimizing your workflow
By using only one synth, you can:
– Focus on the creative process instead of switching between multiple plugins
– Achieve more consistent and higher quality output
– Save time and effort in both sound design and mixing stages
Overall, using one synth is a smart choice for the modern-day music producer. It streamlines your workflow, allowing you to be more efficient and effective in your music production process. Whether you’re a beginner or an experienced pro, this approach can help you achieve your creative goals and take your sound to the next level.
Mastering Your Sound
If you’re a music producer or a beginner musician, mastering your sound should always be at the top of your list. One of the key elements in achieving this goal is using only one synth for your production. Some may argue that using a variety of synths can open up a world of possibilities, but here we’ll explore why sticking to one synth can have a huge impact on your sound. Below are some reasons why becoming an expert in one synth is vital in mastering your sound.
Becoming An Expert In Your Chosen Synth
When you’re using one synth, you’re able to learn every nook and cranny of it. You become an expert in your chosen instrument. This knowledge is invaluable when you’re trying to create specific sounds that you’ve imagined in your head. When you know your synth inside and out, you’re able to create the sound you want without any limitations. You become more creative since you’re not limited by technicalities
Exploring The Full Sonic Potential Of Your Instrument
A single synth has a wide range of sonic possibilities waiting to be explored. When you only have one instrument available, you can discover all its sounds and create new ones. Exploring the full sonic potential of your instrument ensures that you’re getting the most out of it. Limiting yourself to one synth helps train your ears to recognize the nuances of different sounds, which ultimately will make you a better producer or musician.
In conclusion, sticking to one synth gives you the chance to truly master your sound and explore the full sonic potential of your instrument. Becoming an expert in one synth allows you to create the sounds you want with ease, and the more you use the instrument, the more you’ll be able to push its boundaries. So, choose wisely and commit to your chosen synth — the end result will be worth it.
Credit: www.youtube.com
Building A Unique Signature
Using multiple synths can be alluring, but if you want a unique signature sound, stick to using just one. By mastering the intricacies of one synth, you enhance your creativity and skill in producing quality music. Give yourself time to explore and familiarize yourself with just one synth to produce a truly distinct sound.
Building A Unique Sound Identity
As a music producer or songwriter, it’s important to have a recognizable sound that sets you apart from the rest. This is where using only one synth can be a game-changer. By limiting your sonic palette, you can focus on crafting a unique sound identity that becomes your trademark. Your signature sound can help you build a brand that fans will recognize and follow, which can lead to increased recognition and success.
Standing Out In A Crowded Music Landscape
The music industry is more saturated than ever, with new artists and releases popping up daily. To stand out in this crowded landscape, you need to be unique. Using only one synth can help you achieve that uniqueness. Instead of relying on multiple synths to create your sound, focus on mastering one. Spend time exploring its features and capabilities and discover new ways to manipulate it. This will give you an edge over others who are using the same synths but not exploring their full potential.
How To Build A Unique Signature With One Synth
To build a unique signature sound with one synth, start by experimenting with its parameters. Delve deep into the synth’s modulation options, filters, and effects. Don’t be afraid to experiment with different settings until you find a sound that resonates with you. Once you’ve found a sound you like, save it as a preset and use it as a starting point for future tracks. Over time, this sound will become your signature, and fans will recognize it as your own.
The Benefits Of Using One Synth
Limiting yourself to one synth can bring several benefits. It allows you to become more intimately familiar with the synth’s capabilities, making it easier to manipulate and use in your tracks. It also encourages creativity by forcing you to think outside the box and find new ways to use the synth. Additionally, it can streamline your workflow, making it easier and faster to create tracks.
In Conclusion
By using only one synth, you can build a unique sound identity and stand out in the crowded music industry. Spend time exploring the synth’s capabilities and developing a signature sound that represents you as an artist. Not only will this help you gain recognition, but it will also encourage creativity and streamline your workflow. So, if you’re looking to establish yourself in the music industry, consider using only one synth and let your sound speak for itself.
Getting Creative With Limitations
By limiting yourself to using only one synth, you may find yourself getting more creative with your music production. Not having an abundance of options can force you to explore new sounds and techniques, leading to unique and innovative compositions.
Expand your musical possibilities through limitations.
Embracing the limitations of a single instrument can seem counterintuitive to music production at first glance. However, utilizing one synthesizer during the production process can unlock creative possibilities. By limiting oneself to a single synthesizer, it forces the producer to think outside the box and craft new sounds from what they have. This process can result in unique sounds that may have been overlooked if multiple synths were used.
Forcing Yourself To Think Creatively
When producing with limitations, it is easy to fall into the trap of relying on presets or default settings. However, this mindset can limit creativity. It is essential to experiment with individual parameters to create new sounds and push the limits of the instrument. By creating something unique from a single synthesizer, producers can stand out in a world of overused presets and sample packs.
Experimenting With Sound Design
Experimenting with sound design can be a daunting process. However, when using a single synthesizer, it becomes more manageable and streamlined. Producers can focus on individual components of the synth, such as filters, envelopes, and oscillators, to create a unique sound. This process forces producers to dive deeper into the instrument’s capabilities, resulting in a better understanding and more familiarity with the synthesizer. In conclusion, embracing the limitations of a single synth can unlock creativity and result in unique sounds. It is essential to experiment with sound design and push the limits of the instrument. By continuously challenging oneself to create something unique, producers can stand out in a world oversaturated with music production.
Frequently Asked Questions For Why You Should Only Be Using One Synth
What Is The Rarest Synth In The World?
The rarest synth in the world is the Buchla 100. Only a handful were ever made, and they are highly coveted by collectors and musicians alike. The complex modular system was designed in the 1960s by Don Buchla and created unique sounds not possible with other synthesizers.
What Should Be My First Synthesizer?
Your first synthesizer should be based on your budget, skill level, and music style. Opt for a versatile synth that can produce different sounds and comes with a keyboard. Some popular affordable options include Korg Volca series, Arturia MicroBrute, and Novation MiniNova.
What Is The Easiest Synth To Learn?
The easiest synth to learn is subjective and depends on the individual’s experience level. However, some entry-level synths like Korg Volca series, Arturia MicroBrute, and Roland SH-01A are popular for their easy-to-use interfaces and affordability.
What Is A Synthesizer Person?
A synthesizer person is a skilled musician who specializes in creating music using a synthesizer. This electronic instrument uses various sound modules and effects to produce a wide range of sounds. Synthesizer persons can manipulate the sound using various settings and controls to create unique musical compositions.
Conclusion
To sum up, using multiple synths can be overwhelming and hinder creativity in music production. Focus on mastering one synthesizer and its capabilities; you will discover a multitude of branding options. This approach works well for music producers to refine their skills on a specific synth, without the weight of too many options.
Through this method, producers can explore the nuances of sound creation to create a unique sound signature that can define their work. Ultimately, it’s always better to have one clear voice instead of many small ones, and the same goes for synth selection.
Quality sounds and versatility define a great sample pack. As an essential tool in music production, a well-designed sample pack can inspire creators and elevate their productions to new heights.
Also, Sample librarys are a collection of audio recordings and one-shots provided for music producers and creators to use in their productions. They are often used for genres such as electronic dance music (EDM), hip hop, and pop. A great sample pack has sounds that are well recorded and edited, and covers a range of genres and moods.
Moreover, creators look for packs that offer many sounds from drums, bass, and melody loops to vocal chops and FX samples. In addition, a sound pack with clear labeling, metadata, and organization can greatly enhance the user experience.
Unique Sounds for Sample Pack
A sample library becomes great when it offers unique sounds that are not found in other packs. In addition, this creates value and sets the pack apart, making producers eager to use it in their music production.
Furthermore, creating a unique pack requires careful attention to detail, and the sounds included can make all the difference. While there are many factors to consider, one of the most important is the presence of unique sounds. In this post, we’ll explore this topic in more detail and explain why it’s so crucial when it comes to crafting a great sample pack.
Diverse Variety Of Sounds for Sample Pack
Additionally, one of the key aspects of a great sample pack is diversity. Users want access to a wide range of sounds, and if you limit your selection, you won’t be able to appeal to as many people. This is why it’s so important to include as many different sounds as possible, from acoustic instruments to synth patches, drum hits, and more. By offering a diverse selection of sounds, you’ll increase the chances that someone will find what they’re looking for in your pack.
Originality In Sound Design for Sample Pack
Another important factor to consider when creating a sound pack is originality in sound design. With so many packs on the market, it’s crucial to stand out from the crowd. Also, this means going beyond the typical presets and crafting sounds that people won’t find anywhere else. When a user is browsing through sample librarys, the last thing they want is more of the same old stuff. By offering something truly unique, you’ll be able to capture their attention and make a lasting impression.
Incorporate Real-world Sounds for Sample Pack
Another way to create unique sounds in your pack is by incorporating real-world sources. Moreover, this could mean recording sounds in nature, capturing unique samples from street musicians, or incorporating industrial noises like trains or construction sites. These sounds add realism and texture that synth patches alone can’t match. It’s also a great way to differentiate your pack from others on the market, and adding a unique touch that users will love.
Conclusion
In conclusion, there are many things to consider when creating a sound pack that stands out from the crowd. In addition, one of the most important is including unique sounds that users won’t find anywhere else. By focusing on diversity, originality, and incorporating real-world sounds, you’ll be able to craft a pack that users will love and come back to time and time again.
Ease Of Use in Sample Pack
Furthermore, a great sample pack should be easy to use, with clear labeling and organized files. It should also include helpful instructions for beginners and unique sounds for more experienced producers. An intuitive interface or folder structure can also be a bonus.
Additionally, Sample librarys are music production tools that contain a collection of audio files, presets. MIDI loops for producers and DJs to use in their productions. A great sample pack should be effortless to use, whether you are a beginner or a professional producer. Ease of use depends on several factors, including intuitive labeling, well-organized files and folders, and an excellent categorization system.
Well-organized Files And Folders
Also, a well-organized file structure is essential to ensure that producers can access the files they need with ease. A great sample pack should have a clear folder hierarchy that separates different types of files. For example, drum samples could be in a folder labeled “Drums,” while synth presets could be categorized within a separate folder. Well-organized files and folders enable users to stay organized and let them focus on creating music rather than sifting through vast collections of audio files.
Intuitive Labeling And Categorization
Moreover, Pack labeling and categorization can be a game-changer for producers. Producers need easy access to the specific samples they want without wasting time looking through irrelevant files. A great sample pack should have intuitive labeling indicating the type of sound, genre, and BPM. This makes it effortless for users to find the samples they need. Additionally, an excellent categorization system should be in place to group similar sounds, including instruments, soundscapes, and loops.
Summing Up for Sample Pack
In addition, an easy-to-use sound pack can streamline the music production process, allowing users to focus on composing high-quality music. A great sample pack should have a clear file structure, intuitive labeling, and excellent categorization to simplify the process and maximize creativity. Producers and DJs seek sample librarys that provide maximum flexibility, compatibility, and value to help them create chart-topping hits.
Sample Pack Compatibility
Furthermore, compatibility is one of the most crucial factors that make a pack great. The sound pack needs to work seamlessly with the production software and sound libraries for optimal results. A great sample pack should offer versatile file formats to ensure it works perfectly with any device.
Works With Popular Daws
Additionally, compatibility is one of the most important things that make a sample library great. For compatibility, first check whether the pack works with popular DAWs. These include FL Studio, Ableton Live and Logic Pro X. The best sample packs are ones that are designed to work seamlessly with these popular DAWs. This ensures a smooth and hassle-free workflow.
Compatible With A Wide Range Of Plugins
Having a sound pack that is compatible with various plugins is equally essential. Plugins are essential when it comes to enhancing the sounds produced by a sample library. Also, a pack that works with many plugins makes it easy to tweak the sounds into your own. Therefore, a sound pack that is compatible with plugins like Serum, Massive, Sylenth1, and many more is highly sought after.
Working With Great Tools for Sample Pack
When choosing a sample library, it is important to ensure the pack comes with the right tools. Moreover, great tools enable users to manipulate the sounds produced by the pack with ease. These tools should be user-friendly and efficient. In most cases, a sound pack that comes with dedicated toolkits like EQs, reverbs, and compressors will be a great package to work with.
High-quality Samples
Lastly, a great sample pack should contain high-quality samples. In addition, it should have unique and distinctive sounds, great loops, and unique one-shots that can add creativity to any music production. A sample library is only as good as the sounds it contains. So ensure that as you go through the pack, the samples’ quality is top-notch. With high-quality samples, it becomes easy to create great-sounding music.
Sample Pack Value For Money
A great sample pack should be a value for money. It should include many high-quality products that provide customers with an excellent experience and options to try out various products. The pack must offer an affordable price without compromising quality.
When you’re looking for a pack, you want to make sure you’re getting the best value for your money. With so many options on the market, it can be overwhelming to decide which one to choose. Here are some key factors to consider when evaluating a sound pack’s value for money:
Affordable price
A good sample pack should be affordable without sacrificing quality. Look for packs that offer a fair price for the number and quality of samples provided. If a pack is too expensive, it may not be worth the investment, and if it’s too cheap, the samples may not be of high quality.
Large selection of samples
To get the most out of your money, choose a sample library that includes a large selection of samples. The more samples provided, the more opportunities you have to experiment with different sounds and create unique compositions. Look for packs that cover many genres and include different types of sounds, such as drums, synths, and vocals. In addition, a great sample pack should feature unique and original sounds that are not easily found elsewhere. The samples should be of professional quality, giving you the ability to create professional-grade music. Here are some other things to consider:
Look for packs that feature samples created by well-known producers or artists.
Make sure the samples are royalty-free and can be used without any legal issues.
In conclusion, when you’re looking for a pack, focus on finding the best value for your money. Look for packs that offer a combination of affordability, variety, and professional quality. By doing so, you’ll be able to create the music you want without breaking the bank.
Sample Pack Versatility
One of the most important factors when selecting a sound pack is versatility. A great sample pack should be able to fit into different types of music genres and cater to different production styles. As such, it’s crucial for producers and sound designers to choose a sample library that provides flexibility in their creative process. In this post, we will take a closer look at how versatility makes a pack great and what to look out for when choosing one.
Suitable For Multiple Genres
One of the main reasons why versatility is crucial in a sound pack is. That’s because it allows producers to create various genres of music seamlessly. A great sample pack should contain many sounds and loops that can fit into different types of production genres. For instance, a sample library that provides drums and percussion loops, melodic samples, and basslines that can work for both house and hip hop productions is incredibly valuable.
Producers do not have to be limited to specific genres of music when they have a versatile pack at their disposal. They can experiment and create something new and exciting, which can help them stand out from the crowd.
Can Be Used For Different Purposes
Another reason why versatility is essential in a sound pack is. That’s because it allows producers to use it in different stages of their production process, from songwriting to mixing and mastering. A great sample pack should provide a variety of samples that can be used as a starting point for songwriting. This includes chord progressions, melodies, and drum loops.
However, a good sample pack should also provide useful tools for mixing and mastering, such as bass hits, drum one-shots, and vocal samples. These samples can add character and coherence to your mix, while also giving your track a polished and professional sound.
Examples Of Versatile Sample Packs
Sample Pack Name
Description
Ultimate Drums Vol.1
A versatile sample library that contains 300 drum loops and one-shots suitable for various genres, including house, techno, and hip hop. The samples are categorized into folders for easy access and include full beats, tops, percussion, and more.
Synthwave Sessions Vol.1
A pack that offers a variety of 80s-inspired samples, including analog synths, retro drum machines, and melodic loops. The pack contains samples that can fit into multiple genres, including synthwave, house, and pop.
Piano Textures
A sound pack that provides beautiful and emotive piano loops suitable for songwriters and producers of various genres. The loops are categorized into keys to help producers identify the right samples for their tracks.
Choosing a sample library with versatility is essential for producers and sound designers who are looking for flexibility in their creative process. A great sample pack should be able to fit into different types of music genres and cater to different production styles. This makes it easier for producers to experiment and create something unique.
Sample Pack Quality
In music production, packs are essential building blocks that provide producers with inspiration and materials for creating music. A sound pack is only as good as its quality. Besides the number of samples and the diversity of sounds, quality is a crucial factor that makes a sample library great. Let’s explore the different aspects of quality that contribute to making a pack great.
High-quality Recording
One of the essential aspects of creating a great sample pack is recording sounds of high quality. A pack recorded in a pro studio with high-end mics will have far more impact than poorly recorded sounds. Moreover, high-quality recordings of musical instruments such as drums, guitars, and pianos will enable producers to create better-sounding compositions.
Professional Mixing And Mastering
The mixing and mastering phase is critical for ensuring that the sounds in the sample library sound polished and professional. A well-mixed and mastered pack will make it easier for music producers to create final tracks that sound good on any device. Professional mixing and mastering ensure that each element within the sound pack is correctly balanced and sits perfectly in the mix. It ensures that the drums are at the right level, the synths are well EQ’d. The samples are appropriately processed, resulting in a clear and crisp sound.
Organisation And Structure
Another key aspect of quality in a sample library is careful attention to organisation and structure. A well-organised sample pack will help producers quickly find the sounds they need for their compositions. The samples should be correctly labelled, tagged, and categorised for easy searching.
Uniqueness And Variety
Finally, a great sample pack should offer a good variety of sounds that are unique and exclusive. The samples provided should inspire music producers to create something different and innovative that stands out amongst other music productions in the industry. Whether it’s an exclusive one-shot, a synth loop, or a unique sound effect, the sample pack must offer enough variety to keep producers engaged and motivated.
In conclusion, achieving quality in a sample pack requires a combination of high-quality recordings, professional mixing and mastering, organisation and structure, and unique and exclusive variety. These factors work together to make a sample pack great, inspiring music producers to create their best work.
Customer Support
A great sample pack for customer support should contain all the necessary information customers need to solve their issues. It should be easily accessible and user-friendly, containing clear instructions and helpful resources. Additionally, it should be regularly updated with the latest information to maintain its relevance.
Responsive Customer Service
Customer support is an important aspect when it comes to buying a sample pack. A great sample pack comes with the assurance of responsive customer service. The support team should be available 24/7 to address any questions and concerns raised by the customers. They should respond quickly to the queries via email or chat, ensuring the customer feels valued and cared for. A good example of responsive customer service is Spitfire Audio. There, the support team is quick to respond to any customer queries.
Helpful Documentation And Tutorials
Apart from responsive customer service, great sample packs also come with helpful documentation and tutorials. The documentation should be comprehensive and provide detailed information on how to use the sample pack. This could range from installation instructions to how to mix and match sounds. The tutorials should also be well-explained, easy to follow, and provide tips and tricks on getting the best out of the sample pack. Native Instruments is one such company that provides extensive documentation and tutorials with their sample packs. In conclusion, when buying a sample pack, you should consider the level of customer support and the availability of helpful documentation and tutorials. With a responsive support team and proper documentation, you can get the most out of your sample pack and create amazing music.
Bonus Content
Bonus content is one of the many things that can make a sample pack great and stand out from others. This extra content is like a cherry on top of a delicious cake. This provides more value for your money and giving you access to exclusive resources.
Extra Samples Or Presets
One example of bonus content that can make a sample pack great is extra samples or presets. These are additional sounds, loops, or synth patches that are not included in the regular pack. They can be a great addition to your music production arsenal. This provides you with a wider range of sounds to choose from and experiment with.
Besides, having more samples or presets can also save you time and effort in creating your own samples. You can simply use these ready-made sounds and tweak them to fit your music style, saving you the trouble of recording or synthesizing your own sounds.
Exclusive Access To Tutorials Or Webinars
Another type of bonus content that can make a sample pack great is exclusive access to tutorials or webinars. These are educational resources that can help you learn new techniques, tricks, and tips on how to use the samples or presets effectively.
By having access to these resources, you can learn from expert producers and improve your skills as a musician. You can also get insights into the creative process behind the sample pack. This can inspire you to make your own music.
Besides, these tutorials or webinars can also serve as a support system. This gives you access to a community of producers who share the same passion and interest as you do. You can ask questions, get feedback, and collaborate with other producers, making the learning process more engaging and fun.
In Conclusion
These are just some examples of bonus content that can make a sample pack great. Whether it’s extra samples or presets or exclusive access to tutorials or webinars, bonus content adds more value to your investment and helps you improve your music production skills.
Frequently Asked Questions Of Things That Makes A Sample Pack Great
What Makes A Good Sample Pack?
A good sample pack should have many high-quality samples that are relevant to the specific genre or style of music. It should also be organized, easy to navigate, and provide clear and concise instructions for use. Additionally, a good sample pack should offer value for money and be regularly updated with new samples or content.
What Do You Put In A Sample Pack?
A sample pack typically includes small portions of various products that a company offers. The contents may vary as per the type of the business and can include product brochures, price lists, product samples, discount vouchers, and more. It is designed to give customers a chance to try out the products before they purchase the full-sized products.
How To Be Creative With Samples?
To be creative with samples, try experimenting with different combinations and variations. Mix and match different elements to see what works best. Don’t be afraid to take risks and think outside the box. Use your imagination and creativity to come up with unique and interesting ideas.
Keep in mind your target audience and what they might be looking for.
Why Do People Use Sample Packs?
People use sample packs to try out new sounds, find inspiration, save time in sound design, and create unique music productions. Sample packs provide a variety of high-quality, pre-made sounds, loops, and instruments that can be easily incorporated into music compositions.
They offer a cost-effective way to access a vast library of sounds and styles.
Conclusion
A sample pack is an incredible way to display your product and entice more customers. Nevertheless, building a great sample pack takes careful thought and effort. It must be information-packed, visually appealing, and easy to use. Remembering to keep it short and sweet, use quality ingredients, and tailor it to your target market will ultimately result in a great sample pack.
Put in the hard work, and a great sample pack will be an outstanding selling tool for your brand.
Top free limiter VST plugins for Windows and Mac include LoudMax, Limiter No6, and W1 Limiter. These plugins provide reliable limiting capabilities to control dynamics and avoid distortion in audio production.
If you’re on a tight budget, these free limiter plugins are a great option to enhance your audio quality without breaking the bank. If you’re looking for a tool to maximize loudness and precision in your sound, a limiter plugin is the way to go.
Unlike compressors, limiters work to prevent audio distortion and keep the sound within a desired dynamic range. While there are plenty of paid options on the market, you don’t always need to spend big bucks to get high-quality plugins. We’ll explore some of the top free limiter VST plugins available for Windows and Mac.
Credit: www.productionmusiclive.com
Top Free Limiter Vst Plugins For Windows
Discover the top free limiter VST plugins for your Windows or Mac system today. These plugins offer a high level of functionality, controlling the dynamic range of audio signals to prevent clipping and distortion. Download and enjoy their benefits for all your audio mixing and mastering requirements.
Are you looking for high-quality limiter VST plugins that won’t cost you a penny? Look no further! Below are some of the best free limiter VST plugins for Windows that can help you achieve optimal level and loudness for your mixes.
Lvc-audio Limited-z
If you want a state-of-the-art limiter plugin, Limited-Z by LVC-Audio is a great option. It has a straightforward user interface, making it easy to use even for beginners. The plugin features a unique allows you to set a target loudness level, making it a great tool to achieve consistent loudness levels for your projects. Another great feature of the Limited-Z is its oversampling capabilities resulting in clean audio limiting, and it is available in 32- and 64-bit versions.
Tdr Limiter 6 Ge
The Tokyo Dawn Records Limiter 6 GE is another excellent limiter VST plugin that you should consider. It is an all-in-one, multiband compressor, clipper, and limiter. The TDR Limiter 6 GE also has a user-friendly interface that allows you to adjust the parameters quickly. It is easy to use and can limit volume peaks without distorting your mix.
Tokyo Dawn Records Kotelnikov
If you’re looking for a plugin that can handle gentle limiting that adds character rather than a flat reduction in the overall level, the Kotelnikov Transparent Limiter by Tokyo Dawn Records is the solution. The plugin has a transparent sound but lets you add character to your sound when needed. It offers excellent dynamic range and can limit your track while preserving its natural sound.
Conclusion
In summary, these limiter VST plugins for Windows are among the best in the market, and the best part is they’re all free of cost. Give them a try and see how they can enhance your audio mixes!
Credit: bedroomproducersblog.com
Top Free Limiter Vst Plugins For Mac
Discover the top free limiter VST plugins for Mac that can enhance your music production skills. Whether you’re a beginner or a professional, these plugins offer a variety of options to help you get the best sound quality for your tracks.
The plugins are easy to install and work with most music production software.
For audio professionals and music producers, incorporating limiters into their production processes is crucial. Limiters help in regulating audio levels to prevent clipping and distortion, especially during mastering. However, investing in extensive audio gear can be costly for budding producers. Fortunately, there are free VST plugins available for Mac users. Here are some of the top free limiter VST plugins for Mac that can help potential producers master and regulate their audio levels.
Waves L1 Ultramaximizer
The Waves L1 Ultramaximizer has become a favorite among producers for its transparent limiting capabilities. The plugin has a user-friendly interface, and once installed, it adds color to the waveform display allowing easy visualization of gain management. The L1 Ultramaximizer is great for giving mixes more bite and punch without introducing unwanted artifacts into the audio.
Limiter No6
Limiter No6 is another popular VST plugin that offers various features. The plugin has peak limiter and high-frequency limiter, which allows users to control the louder parts of the mix and prevents unwanted distortion. Limiter No6 also comes with a mastering mode, which is great for those that want maximum loudness without impacting the audio quality. The plugin features a clear and easy-to-use interface that can help users set up and monitor audio levels.
Loudmax
LoudMax is a free open-source plugin that offers great limiting capabilities. The plugin is popular because of its simplicity, and users can adjust the threshold, output gain, and “release” without any hassle. LoudMax is recommended for those who want to get into mastering audio or those looking for a simple limiter plugin that they can use to polish their mixes. In conclusion, while there are numerous paid options for limiters, the free alternatives listed above offer great performance and are available for Mac users. The Waves L1 Ultramaximizer, Limiter No6, and LoudMax are some of the best free limiter VST plugins that producers can use to get the most out of their audio mixes.
Credit: bedroomproducersblog.com
Frequently Asked Questions Of Top Free Limiter Vst Plugins Windows Mac
What Is The Best Free Limiter Plugin?
The best free limiter plugin is LoudMax. It’s open-source, has a natural-sounding limiter, and is compatible with Windows and Mac.
What Is The Best Master Limiter Plugin?
The best master limiter plugin is subjective to personal preference and specific needs. Some popular options include FabFilter Pro-L 2, Waves L3 Multimaximizer, and iZotope Ozone 9. It is important to consider factors such as price, features, compatibility, and user interface before selecting a plugin.
What Is The Most Transparent Vst Limiter?
FabFilter Pro-L 2 is considered the most transparent VST limiter. It offers precise control over the limiter’s algorithm and has a transparent sound that does not color the audio. Its interface is user-friendly, making it an ideal choice for beginners and professionals alike.
What Is The Best Limiter For Post Production?
The FabFilter Pro-L 2 is considered the best limiter for post-production due to its transparent sound, user-friendly interface, and versatile features like True Peak limiting and advanced dithering options. It is also loved for its exceptional precision, making it an industry standard for mastering engineers.
Conclusion
Overall, these top free limiter Vst plugins for Windows and Mac are excellent tools to add to your audio production arsenal. Each of them has its unique features, making them suitable for different types of projects. Whether you’re a professional or just starting in the industry, these plugins can help you achieve the desired sound quality for your music.
We hope this list can help you find the right one for your needs and enhance your audio production skills. So, feel free to explore them and take your music creation to the next level!
The best low budget studio microphone is the Audio-Technica AT2020. This cardioid condenser microphone offers high-quality sound and durability for a reasonable price.
As an Amazon Associate I earn from qualifying purchases.
If you are looking for a budget-friendly microphone that can provide excellent sound quality for your studio recordings, the Audio-Technica AT2020 is a great choice. This microphone features a large diaphragm and cardioid polar pattern, which effectively minimizes background noise and captures sound accurately.
The microphone also has a frequency response of 20Hz-20kHz, making it suitable for recording vocals, acoustic guitar, and other instruments. The AT2020 is also built with a durable metal body, ensuring that it can withstand frequent use in the studio. Overall, the Audio-Technica AT2020 is an excellent low-budget option for musicians and content creators who want a quality microphone without breaking the bank.
Credit: www.sweetwater.com
Condenser Microphones Vs Dynamic Microphones
Condenser microphones and dynamic microphones are two types of studio microphones that differ in their construction and sound recording capabilities. While condenser mics are highly sensitive and ideal for capturing detailed sounds, dynamic mics are more durable and suited for loud sources.
Shure SM58 and Audio-Technica AT2020 are two great low budget dynamic and condenser microphones, respectively, for a home studio setup.
When it comes to choosing the best low budget studio microphone, one of the biggest decisions you will face is whether to go with a condenser microphone or a dynamic microphone. Condenser and dynamic microphones are two different types of microphones, each with their own unique strengths and weaknesses. In this article, we’ll explore the differences between condenser and dynamic microphones, and help you determine which type of microphone is right for your needs.
Definition And Features
A condenser microphone is a type of microphone that uses capacitance to convert sound waves into an electrical signal. Condenser microphones are popular in studio settings because they are highly sensitive and produce detailed, clear recordings. They are also versatile enough to handle a wide range of audio sources, from vocals and guitars to drums and percussion. A dynamic microphone, on the other hand, uses a diaphragm and a coil to convert sound waves into an electrical signal. Dynamic microphones are known for their durability and ability to handle high-volume sounds without distortion. They are commonly used for live performances or recording instruments like guitar amps and drums.
Pros And Cons
Condenser Microphone Pros:
High sensitivity and detailed sound
Can handle a wide range of audio sources
Typically produce clearer recordings than dynamic microphones
Condenser Microphone Cons:
More fragile than dynamic microphones, making them less suitable for live performances
Require an external power source (phantom power)
May pick up background noise or room echoes if not used in a properly treated recording environment
Dynamic Microphone Pros:
Durable and able to handle high volume sounds without distortion
Less sensitive to background noise and room echoes than a condenser microphone
Can be used for live performances
Dynamic Microphone Cons:
Less sensitive than a condenser microphone, resulting in recordings that may lack some detail
Not as versatile as a condenser microphone, making them less suitable for recording a wide range of audio sources
May not produce as clear of a recording as a condenser microphone
In conclusion, both condenser and dynamic microphones have their own unique strengths and weaknesses. When choosing a low budget studio microphone, it’s important to consider the type of audio source you will be recording and the environment you will be recording in. Ultimately, the best microphone for your needs will depend on these factors and your personal preference.
Credit: majormixing.com
Best Low Budget Condenser Microphones
A low budget condenser microphone would be ideal for starters in music production. The top picks that offer high-quality sound with a relatively lower price are the Audio Technica AT2020, MXL 770, and Rode NT1-A. These microphones can bring your recordings to life without breaking the bank.
Are you on a tight budget but still want to achieve high-quality studio recordings? Look no further than these best low budget condenser microphones. These studio microphones are a great investment for beginners or musicians who are just starting their recording journey. We narrowed down the top three picks for you.
Microphone 1
The Audio-Technica AT2020 is a well-known, reliable option among many. This microphone is perfect for recording vocals and acoustic instruments, thanks to its cardioid polar pattern and frequency response. It has a sleek, rugged design, making it a durable option for long-term use. Plus, it comes at an affordable price point, making it accessible to anyone with a limited budget.
Microphone 2
The MXL 990 is another excellent choice if you’re on a tight budget. This microphone offers a warm, vintage sound that is perfect for recording guitar amps and drums. It comes with a shock mount, making it more accessible to set up and use. Plus, it has a stylish design that will make your home studio look and feel more professional.
Microphone 3
The Audio-Technica AT2035 is a versatile, high-quality condenser microphone option that won’t break the bank. It offers a switchable cardioid, omnidirectional, and figure-of-eight polar patterns. This feature lets you adjust the microphone’s sensitivity and capture different types of sound. It also has a high SPL handling and low self-noise, making it ideal for recording loud instruments, such as drums. Choosing the best low budget condenser microphone for your studio can be challenging, but these three options deliver excellent quality and affordability. No matter which one you choose, they all provide a great foundation for any home studio.
Best Low Budget Dynamic Microphones
If you’re a beginner in the world of audio recording, finding a low-budget studio microphone that sounds great can be a daunting task. Dynamic microphones are an excellent choice for recording vocals, guitar amps, drums, and other instruments. In this article, we’ll be discussing the top three best low budget dynamic microphones suitable for home studios, podcasting, and live performances.
Microphone 1
The first microphone on our list is the Shure SM48-LC Cardioid Dynamic Vocal Microphone, which is a reliable choice for both recording and live performances. This microphone provides a warm and clear sound with exceptional performance. It features a shock-mounted cartridge, a noise-reducing grille, and a cardioid polar pattern that isolates the main sound source while minimizing background noise.
Microphone 2
The second microphone on our list is the Audio-Technica PRO-41 Cardioid Dynamic Handheld Microphone. This versatile microphone is ideal for recording vocals, electric and acoustic guitars, and drums. It has a cardioid polar pattern that reduces pickup of unwanted sounds from the sides and rear. This microphone also comes with a durable metal construction and an on/off switch, making it a great choice for live performances.
Microphone 3
The third microphone on our list is the Sennheiser E835 Dynamic Cardioid Vocal Microphone. This microphone has a clear and natural sound that captures every detail of the performer’s voice. It has a cardioid pickup pattern that isolates the main sound source while reducing background noise. This microphone also has a shock-mounted capsule that eliminates handling noise, making it perfect for live performances.
Conclusion
Choosing the right microphone is crucial for producing quality audio recordings. With the above low budget dynamic microphones, you can easily achieve a professional sound without breaking the bank.
Factors To Consider When Choosing A Low Budget Studio Microphone
When selecting a low budget studio microphone, it’s essential to consider the type of microphone, its polar pattern, sensitivity, frequency response, and noise levels. The best low budget studio microphone will vary depending on your specific needs, but some good options to consider include the Audio-Technica AT2020, Shure SM7B, and Rode NT1-A.
When setting up a home recording studio on a low budget, choosing the right microphone can make all the difference. A good microphone captures sound accurately and delivers a clear, natural-sounding recording. But what factors should you consider when choosing a low budget studio microphone? Here are the key factors to consider:
Type Of Recording
The type of recording you plan to do will determine which microphone you should choose. If you’re recording vocals, you should look for a microphone with a cardioid polar pattern, which picks up sound from the front while rejecting sound from the sides and rear. If you’re recording instruments, you may need a different polar pattern, such as a figure-eight or omnidirectional pattern, depending on the type of instrument and the acoustics of your recording space.
Frequency Response
The frequency response of a microphone is the range of frequencies it can detect and reproduce accurately. For vocals, look for a microphone with a frequency response that emphasizes the midrange frequencies, which is where most of the vocal energy is concentrated. For instruments, you should choose a microphone with a frequency response that matches the natural sound of the instrument.
Polar Pattern
As mentioned earlier, the polar pattern of a microphone determines how it picks up sound. A cardioid pattern is the most commonly used for vocals, while a figure-eight pattern is useful for recording two singers or instruments facing each other. Omnidirectional patterns are useful for recording ambience or room sound.
Sensitivity
Microphone sensitivity refers to how well the microphone can pick up sound. For a low budget microphone, you should look for a sensitive microphone that can capture a wide range of dynamics. However, a microphone that is too sensitive can pick up unwanted noise and distortion, so it’s essential to strike a balance.
Compatibility
Finally, it’s important to consider the compatibility of the microphone with your recording setup. Check the microphone’s connection type, as well as the power requirements. USB microphones are popular for home recording setups and are a good option for those on a low budget, but they may not offer the same quality as XLR-connected microphones. In conclusion, when choosing a low budget studio microphone, you need to weigh up the different factors and decide which microphone is best suited to your recording needs. Keep in mind that a good quality microphone is an investment that will pay off in terms of the quality of your recordings.
Credit: m.youtube.com
Frequently Asked Questions For What Is The Best Low Budget Studio Microphone
What’s A Good Mic That’s Not To Expensive?
The Audio-Technica AT2020 is a great microphone that is affordable without compromising on quality. It has a cardioid polar pattern that captures audio from the front and reduces room noise from the back. It also has a large diaphragm that captures a wide range of frequencies.
What Is The Best Cheap Microphone For Recording Vocals?
The best cheap microphone for recording vocals is the Audio-Technica AT2020. It has a cardioid polar pattern and a frequency range of 20Hz to 20kHz. This microphone also has a high SPL handling capacity and a wide dynamic range. It is an ideal budget-friendly option for home recording studios and beginners.
What Type Of Mic Is The Best For A Studio?
A condenser microphone is the best type of mic for a studio as it offers high sensitivity and clear sound quality. It also provides a wide frequency response and low self-noise, making it suitable for recording vocals and acoustic instruments.
Can A Cheap Mic Sound Good?
Yes, a cheap mic can sound good depending on the intended use and quality of the microphone. Some cheaper microphones can provide decent sound quality, especially for casual use or beginners. However, for professional use and high-quality recordings, it is recommended to invest in a higher-quality microphone.
Conclusion
To sum up, choosing a low budget studio microphone does not mean sacrificing quality. With the availability of various options on the market, you can still find an excellent microphone that suits your needs within your budget. It is crucial to consider the factors mentioned in this post, such as the polar pattern, frequency response, and connectivity, to make the best choice for your recordings.
With these tips, you can produce professional-sounding audio without breaking the bank.
To prepare your vocals for mixing, record in a quiet environment, add compression and EQ, and use de-essing if necessary. A well-recorded vocal track can make or break a song.
It’s important to give your vocals the attention they deserve during the mixing process, to ensure that they shine through the mix and convey the intended emotion. There are several steps you can take during recording and post-production to prepare your vocals for mixing.
We’ll cover each step in detail and provide tips and best practices to ensure that your vocals are ready for the final mix. Whether you’re a seasoned professional or a beginner, these techniques will help you to achieve clean, clear, and impactful vocal tracks.
Credit: www.soundonsound.com
Importance Of Vocal Preparation
To achieve a polished final mix, it is vital to prep your vocals correctly. This involves proper warm-up techniques, careful selection of microphone and recording environment, and using the right processing tools during mixing. Vocal preparation is crucial because it improves the clarity, musicality, and overall quality of your tracks.
Preparing your vocals before mixing is crucial to achieving a high-quality output that meets professional standards. Whether you’re producing music for commercial purposes, personal projects, or mere hobby, vocal preparation is a non-negotiable aspect of the mixing process. The vocal track is usually the focal point of any song, and getting it right can make or break the entire production. This article covers the importance of vocal preparation, with a focus on the key subheading, “Clean Vocals is a Must.”
Clean Vocals Is A Must
Vocal preparation is not complete without ensuring clean, noise-free recordings. As a content creator, whether it’s podcasting, voiceovers, or music production, capturing clear and articulate vocals requires the elimination of any unwanted background noise. Even the slightest background noise could negatively impact the overall audio quality, which could further compound during the mixing stage. To obtain clean vocals, consider the following: – Use appropriate equipment: Use a high-quality microphone to record your vocals. This helps to minimize noise and increase clarity. – Record in a sound-treated space: Select a recording space with minimal background noise, such as a sound-treated room. – Use a noise gate: A noise gate is a technique used to reduce unwanted background noise while retaining the main vocal sound. It helps to clean up your recording and reduce unpleasant sounds.
Impact On The Mixing Quality
The quality of vocal preparation significantly affects the quality of your mix. It determines the level of editing required and overall quality of the end product. A well-prepared vocal eliminates most of the time spent on editing, refining, and time-aligning in the mixing stage. By ensuring clean vocals from the recording stage, the mixing process becomes easier, smoother, and faster. All vocal effects can be streamlined, and minor tweaks applied to improve the final mix. In conclusion, the importance of vocal preparation cannot be overemphasized. Whether you’re dealing with singing or speaking vocals, it is crucial to take the time to prepare appropriately. By focusing on clean vocals and understanding its impact on mixing quality, you can significantly improve the overall outcome of your audio production.
Credit: www.waves.com
Vocal Recording Preparation
Preparing your vocals for mixing is crucial in achieving a professional sound. Start by warming up and hydrating prior to recording, choose the right microphone, experiment with different singing styles and techniques, and don’t forget to use a pop filter to reduce unwanted noises and plosives.
Remember, a little preparation goes a long way in producing a polished and high-quality vocal recording.
Before hitting the record button, it’s essential to ensure that your vocals are prepared for mixing. Vocal recording preparation involves several critical steps to help you get the best possible sounding voice. In this post, we’ll go over some of the essential steps when it comes to preparing your vocals before mixing.
Warm-up Exercises
Before you start recording, it’s vital to warm up your vocal cords. This not only helps reduce strain on your voice but also improves the quality of your vocals. There are several warm-up exercises you can do, such as vocal sirens, lip trills, and humming. These exercises help loosen your vocal cords, increase blood flow, and develop better control over your voice.
Hydration Is Key
Staying hydrated is crucial both for your vocal cords’ health and the quality of your vocals. Drinking water helps lubricate your vocal cords, allowing them to vibrate more efficiently, and prevents your throat from becoming dry. Aim to drink at least 8-10 glasses of water a day, and avoid caffeine and alcohol, as they can dehydrate your body.
Avoid Smoking And Alcohol
Smoking and consuming alcohol can severely damage your vocal cords and affect the quality of your voice. Smoking causes inflammation and irritation of the vocal cords, leading to hoarseness and vocal fatigue. Alcohol, on the other hand, dries out your throat and affects your vocal cords’ ability to vibrate effectively. If you want to achieve the best possible sounding vocals, it’s crucial to avoid smoking and alcohol. In conclusion, vocal recording preparation is crucial to achieving the best possible sounding vocals. It involves warming up your vocal cords, staying hydrated, and avoiding smoking and alcohol. By following these critical steps, you can ensure that your vocals are prepared for mixing, and your final mix will sound professional and polished.
Vocal Editing And Tuning
To prepare your vocals for mixing, vocal editing and tuning is crucial. This involves tuning each pitch in your vocal track to ensure it’s in key, and editing for timing and rhythm consistency. A well-edited and tuned vocal will enhance the overall quality and clarity of your mix.
Preparing your vocals for mixing can be a challenging task. However, with the right techniques, it can be much easier to achieve a polished and professional sound. One such technique is vocal editing and tuning.
Removing Background Noise
Background noise such as hiss, hum, and pops can distract from the quality of your vocals. Therefore, it’s essential to remove them to ensure a clean sound. You can use noise reduction plugins in your DAW or manually edit out background noise between phrases.
Comping Vocal Takes
Comping is the process of selecting and combining the best parts of different vocal takes to create a seamless performance. It ensures that your vocals sound cohesive and polished. To comp vocal takes, you can use comping tools in your DAW or manually edit together the best parts of each take.
Pitch Correction
Pitch correction is a process that can make or break a vocal performance. It involves correcting pitch errors to ensure that each note matches the desired pitch. You can use pitch correction plugins in your DAW or manually edit pitch using the audio editor. However, be careful not to overcorrect and remove the natural-sounding imperfections in your vocal performance. In conclusion, vocal editing and tuning are essential steps in preparing your vocals for mixing. Removing background noise, comping vocal takes, and pitch correction are easy to use and accessible methods to achieve a polished and professional sound.
Credit: mixandmastermysong.com
Arranging And Comping
Arranging and comping are two crucial steps in vocal preparation for mixing, as they help to organize and refine the vocal tracks for a more cohesive sound. Here’s how you can use these techniques to get your vocal tracks ready for the mixing process.
Organizing Vocal Takes
Before arranging and comping your vocal tracks, it’s important to first organize them properly. This means labeling each take clearly and making sure that they are in the correct order. You may also want to color code the tracks to differentiate between the different takes.
Once you have your vocal takes organized, you can then begin the process of comping.
Melodyne And Auto-tune Tricks
Melodyne and Auto-Tune are two software tools that can be used in the arranging and comping process to help refine and tune your vocal tracks. Melodyne’s pitch detection algorithm makes it easy to identify and correct any pitch issues in the recordings, while Auto-Tune can be used to create a distinct vocal effect.
To use Melodyne and Auto-Tune effectively, it’s important to understand how they work and what effects they can produce. Experiment with different settings to find the sound that works best for your vocal tracks.
Creating Vocal Harmonies
Creating vocal harmonies is another important aspect of arranging and comping your vocal tracks. This involves layering multiple vocal tracks on top of one another to create a fuller, richer sound.
To create vocal harmonies, you can either record additional vocal takes or use software tools like Melodyne to duplicate and manipulate the existing tracks. Experiment with different harmonies and arrangements until you find the combination that works best for your music.
Conclusion
By using techniques like arranging, comping, Melodyne, Auto-Tune, and vocal harmonies, you can prepare your vocal tracks for mixing and achieve a more professional sound. Whether you’re a beginner or an experienced producer, these tips will help you take your vocal tracks to the next level.
Mix Prep And Setting Levels
To prepare your vocals for mixing, it is important to focus on mix prep and setting levels. This involves cleaning up any unwanted noise, adjusting the levels of each track to ensure they blend well together, and applying effects such as compression and EQ to enhance the overall sound.
Proper vocal preparation can make a huge difference in the final mix.
Setting Up Session For Mixing
To prepare your vocals for mixing, you need to start by setting up your mixing session. This involves creating a new session in your digital audio workstation, importing your vocal tracks, and organizing them accordingly. Make sure to keep track of each track’s unique name so you can identify them easily. It is recommended to keep all your tracks in a separate folder for ease of access and better organization.
Pan And Levels
After importing and organizing your vocal tracks, it’s time to set the pan and levels. Pan adjustment helps in creating a unique soundstage and gives your vocals space in the mix. It is followed by setting up the levels of each track to balance their loudness and maintain clarity. It is important to note that all the tracks should be audible, but none of them should overpower the others.
Grouping Vocal Tracks
Once you’ve set the pan and levels, the next step is to group your vocal tracks. Grouping your vocal tracks helps you to process them collectively, saving time and effort while maintaining a cohesive sound. You can group tracks based on their character, timbre, or even their intended usage. For example, you can group backing vocals separately from lead vocals. In summary, preparing vocals for mixing is an essential step in producing high-quality music. It involves setting up your session, adjusting pan and levels, and grouping tracks, all of which help you achieve a cohesive, balanced, and clear sound. Be sure to follow these steps to ensure your vocals are perfect for mixing.
Vocal Processing
One of the most crucial steps in preparing your vocals for mixing is vocal processing. This involves using different tools and techniques to ensure a clear and balanced sound. Equalization, compression, de-essing, saturation, reverb, and delay are the most commonly used vocal processing techniques.
Equalization And Compression
Equalization and compression are the two most important tools in a mixer’s arsenal for preparing vocals. Equalization helps to balance the frequencies in a vocal performance, while compression helps to control the dynamics and ensure a consistent volume throughout the track.
To equalize vocals, use a high-pass filter to remove unwanted low-end frequencies, and a low-pass filter to remove harsh, high-end frequencies. Then, adjust the frequency bands to bring out the best qualities of the vocals.
Compression, on the other hand, will help to keep vocals at a consistent volume. Apply a ratio of 2:1 or 3:1, with a threshold of around -6 dB to -12 dB. Attack time should be set lower for fast transients, and release time should be set between 100-400ms to maintain the natural sound of the vocals.
De-essing And Saturation
De-essing is the process of reducing the sharp “s” and “t” sounds that could cause problems during mixing. Using a de-esser plugin, you can target those sharp sounds and reduce them while preserving the overall quality of the vocals.
Saturation can add warmth and character to your vocals. This process involves adding harmonic distortion to the vocals, which creates a more natural and organic sound.
Reverb And Delay
Finally, adding reverb and delay can give your vocals depth and space. Reverb can be used to create a natural acoustic environment for the vocals, while delay can be used to add rhythmic elements to the track.
When adding reverb, make sure it doesn’t overpower the vocals. Use a shorter delay time for a slapback effect, or a longer delay time for a more spacious effect.
Overall, vocal processing is an art form, and it takes some experimentation to get it right. However, by following these tips and techniques, you can ensure that your vocals are ready for mixing and sound their best.
Automation
Preparing your vocals for mixing is a crucial step in ensuring that your final mix sounds polished and professional. One way to prepare your vocals for mixing is through automation. By automating various aspects of your vocals, you can create a dynamic and engaging vocal mix that captures the listener’s attention.
Volume Automation
One of the most important ways to use automation when preparing your vocals for mixing is through volume automation. Volume automation allows you to adjust the volume of your vocals throughout the song to create a more dynamic and engaging vocal mix. By automating the volume of your vocals, you can bring out the important parts of the vocals and ensure that they are heard clearly over other instruments.
Effects Automation
Effects automation is another useful way to prepare your vocals for mixing. Effects such as reverb, delay, and chorus can add depth and dimension to your vocals when used correctly. By automating these effects, you can create a more interesting and engaging vocal mix. For example, you could use reverb automation to create a wetter sound during the chorus or delay automation to create a more ethereal sound in the bridge.
Creating Dynamic Vocal Mix
To create a dynamic vocal mix, it is important to use both volume and effects automation together. By adjusting the volume of your vocals and automating effects, you can create a more engaging and dynamic vocal mix. For example, you could use volume automation to bring out the chorus vocals and add reverb automation to create a bigger sound.
By utilizing automation in your vocal mixing, you can create a professional and polished sound that captures the listener’s attention. Keep in mind that automation should enhance the vocals, not overpower them. With the right balance of volume and effects automation, you can prepare your vocals for mixing and ensure that your final mix sounds incredible.
Final Touches And Tips
After recording vocals for a song, the final touches and tips can take your mix from good to great. These touches include adding vocal effects, referencing and fine-tuning, and preparing vocal stems for mastering. Let’s look at each of these in more detail.
Adding Vocal Effects
Vocal effects can add flavor and character to your vocal tracks. Some common effects include reverb, delay, and distortion. When adding vocal effects, it’s important to keep it tasteful and not overdo it. You want the effect to enhance the vocal, not overpower it.
Keep in mind that different genres require different types of vocal effects. For example, a rock song may benefit from heavy distortion and slapback delay, while a ballad may require a more subtle reverb effect.
Referencing And Fine-tuning
Referencing your vocal mix against other well-mixed and mastered songs is an essential step in achieving a balanced and polished sound. By referencing, you can get a sense of the overall tonality, level, and balance of your mix. This allows you to make any necessary adjustments.
Fine-tuning involves adjusting individual vocal tracks to make sure they fit well together. You can use EQ, compression, and automation to achieve this. When fine-tuning, it’s important to listen critically and make decisions based on what sounds best for the song.
Preparing Vocal Stems For Mastering
Preparing your vocal stems for mastering involves exporting them in a way that makes them easy to work with during the mastering process. This includes exporting the stems in the appropriate format (such as WAV or AIFF) and naming them properly. You also want to make sure there are no artifacts or unwanted noise in the stems.
It’s important to note that mastering engineers prefer to work with raw, unprocessed stems. So, make sure any EQ, compression, or effects are removed from your vocal stems before exporting them for mastering.
Frequently Asked Questions Of How To Prepare Your Vocals For Mixing
How Do You Prepare Vocals For Mixing?
To prepare vocals for mixing, start with a clean, noise-free recording. Edit and tighten up the performance, removing any unwanted sounds or mistakes. Use EQ to enhance the vocals, cutting out low-end rumble and boosting high-end clarity. Apply compression to control dynamics and add warmth.
Finally, add reverb and/or delay to add depth and space.
How Do You Edit Vocals Before Mixing?
You can edit vocals before mixing by first removing any unwanted noise or hiss using a noise gate or de-esser. Next, adjust the volume levels and use EQ to enhance the vocals’ clarity and presence. You can also add effects like reverb or delay to create a desired ambiance.
Finally, use a compressor to even out the volume and control the dynamics.
How Do I Get My Vocals To Sit Better In The Mix?
To make your vocals sit better in the mix, try these tips: Use EQ to adjust the frequencies that clash with other instruments. Add some compression to even out the levels. Use reverb or delay to enhance the vocal’s presence.
Pan the vocals to the center for more clarity. Finally, adjust the volume levels carefully.
How Do You Get Vocals Upfront In The Mix?
To get vocals upfront in the mix, use EQ to boost the high frequencies, use compression to even out the vocal levels, and add reverb and delay effects for depth and presence. It’s also important to balance the other instruments in the mix and adjust volume levels accordingly.
Conclusion
Preparing your vocals for mixing requires some effort, patience, and expertise. By following the tips mentioned above, you can ensure that your vocals are well-prepared and ready for the mixing process. Keep in mind that a good performance during recording and proper mic placement can make a huge difference in how well your vocals mix.
Additionally, having a clear vision of how you want the final mix to sound can help you make better decisions during the mixing process. With these guidelines in mind, you’ll be on your way to creating a polished and professional sounding vocal track.
Music production has its fair share of insane but true facts, such as Mozart composing his first piece at the age of five and the Beatles’ White Album being recorded on four-track tape. These are just some examples of the fascinating history and techniques behind music production, which continue to evolve and inspire modern artists today.
Music production is an ever-evolving art form that has been around for centuries. From the earliest forms of music to the modern era, the production process has undergone countless changes and technological advancements. Along the way, there have been many fascinating and surprising facts about music production that have come to light.
Some of these include the fact that famed composer Mozart wrote his first piece of music when he was only five years old, and that the Beatles’ classic White Album was recorded using only a four-track reel-to-reel tape recorder. These and other amazing facts continue to inspire and inform musicians and music lovers around the world.
Credit: www.productionmusiclive.com
The Surprising History Of Music Production
Music has always been an integral part of human culture, but the production and recording process has come a long way since the early days. From hand-cranked phonographs to digital workstations, music production technologies have made it easier and faster to create and distribute music. Let’s take a look at some insane but true music production facts that highlight the surprising history of music production.
Early Recording Induced Sleep
Did you know that in the early days of recording, people believed that the mechanical process of recording would leave a permanent imprint on the physical or spiritual body of the performer? This led to concerns that too much recording could lead to physical or spiritual exhaustion, resulting in sleep-inducing sounds. Thus, it’s reported that many early recordings inadvertently had a soporific effect on listeners, which is hardly the effect most artists desire.
The Beatles’ Technical Genius
The Beatles were not just musical geniuses, but they were also at the forefront of music production. They pushed the limits of technology and explored new ways of recording and manipulating sound. It’s been reported that on their 1967 album, Sgt. Pepper’s Lonely Hearts Club Band, they used a technique called automatic double tracking, invented by Abbey Road engineer, Ken Townsend. This technique allowed them to create a double-tracked vocal effect without requiring the singer to sing the same part twice. The Beatles also experimented with tape manipulation, using tape loops, backward recording and other effects to create unique sounds and textures. Their technical prowess and experimentation helped redefine the possibilities of music production.
In conclusion, the history of music production is full of strange, innovative, and creative techniques that have helped to shape the music we know and love today. It’s fascinating to see how technology has evolved over time, allowing artists to be more creative and express themselves freely in the recording studio.
Weird Recording Techniques
Music producers have used some pretty weird recording techniques to achieve unique sounds. From recording in caves to using animal noises as instruments, there are some truly insane but true facts about music production that you may not know.
Have you ever wondered what goes into producing your favorite music? Well, music production is not all about the fancy recording studio and high-end equipment; there are also crazy and unconventional recording techniques used by producers to create unique sounds. In this article, we will explore some weird recording techniques that have resulted in some of the most iconic hits of all time.
Backwards Recording
One of the most bizarre recording techniques that have been used in music production is playing the audio track in reverse. This technique gained popularity in the 1960s, where artists like The Beatles and Jimi Hendrix created reverse sounds by flipping over tape reels. The reversed audio produced a surreal and otherworldly sound that added a new dimension to their music. This technique inspired some of the famous songs like Hendrix’s “Are You Experienced” and The Beatles’ “Rain.” Interestingly, “Rain” was the first song ever to feature reverse vocals, where Lennon sang backwards and then gave the tape to the engineers to reverse it.
Stethoscope Mic Recording
Another weird technique used in music production is the stethoscope microphone recording. This technique involves taking a stethoscope and attaching it to the body of the performer, effectively turning their heartbeat into a percussive instrument. This technique has resulted in some unique and haunting sounds in songs like Led Zeppelin’s “Whole Lotta Love” and Tom Waits’ “What’s He Building?” The stethoscope technique works by amplifying sounds from within the body, such as heartbeat, breathing, and stomach rumbling. When mixed with other instruments, it creates an eerie and unusual effect that is hard to replicate.
In Conclusion
These are just some of the many weird recording techniques used in music production. While most of these techniques may seem unconventional, their results are astounding. They have birthed some of the most iconic and timeless tracks that still inspire and influence many artists today. So, the next time you hear your favorite song, remember that it may have been produced using some insane but true recording techniques.
Unexpected Instruments
When it comes to music production, we often picture musicians playing popular instruments such as guitars, pianos, and drums. However, some artists have found creative ways to add peculiar sounds to their tracks by incorporating unexpected instruments. This has resulted in some of the most unique and captivating music pieces.
Recording With Vegetables
Believe it or not, vegetables have been used as instruments in music production. You might wonder how it is possible to create music from vegetables. Well, you can use the natural acoustics of vegetables to make some fascinating music. An artist named Joaquin Phoenix used carrots and celery to create percussion sounds in one of his tracks. Similarly, the band Radiohead recorded their song “All I Need” by using a leek played through a synthesizer to produce the baseline sound.
Vocals Recorded In A Bathtub
When we record vocals, we usually look for a soundproof room with high-quality microphones. But did you know that some artists have recorded their vocals in bathtubs? The unique acoustics produced by the bathroom walls and tiles help in creating exceptional sound quality. The band Arcade Fire recorded their album “The Suburbs” by recording some of the vocals in an empty swimming pool to achieve a similar effect.
Unexpected Instrument
Artist
Track
Vegetables
Joaquin Phoenix
Unknown Track
Leek
Radiohead
All I Need
Bathtub
Arcade Fire
The Suburbs
Vegetables have been used as percussion in music production
Bathroom walls and tiles work exceptionally well for recording vocals
Radiohead used a leek played through a synthesizer for one of their tracks
Arcade Fire recorded some of the vocals of their album in an empty swimming pool
In conclusion, unexpected instruments can bring a unique sound to your music. Whether it’s using vegetables for percussion or recording vocals in a bathtub, the possibilities to experiment with unconventional sounds are endless. By utilizing these extraordinary instruments, artists and music producers can create some insane but true music production masterpieces.
Credit: www.weareteachers.com
Unconventional Studios
Unconventional Studios: Music production has always been an exciting place to experiment with something new from time to time. While some artists prefer recording in conventional studios, others take it to the next level by choosing unconventional studios. These studios are unique, and they are designed to offer a unique atmosphere for musicians to record and produce music. In this section, we will discuss two unconventional studios that stand out from the rest – Stealth Bomber Studio and Underwater Recording Studio.
Stealth Bomber Studio
The Stealth Bomber Studio is located in the heart of California’s Mojave Desert. The studio is built inside an actual B-52 stealth bomber, which was used during the Gulf War. The studio’s owner, Mark, bought the plane and spent three years converting it into a music studio. The studio offers a unique recording experience like no other, allowing artists to record inside an aircraft, which is not something you could do in a traditional studio.
Underwater Recording Studio
Another unconventional recording studio is the Underwater Recording Studio in the Florida Keys. The studio is located 30 feet underwater, and recording is done inside a special recording chamber. The studio is designed for musicians who want to record music underwater. The chamber offers complete sound isolation and clarity, making it the perfect place to record songs that require unique underwater sounds. The studio is equipped with all the necessary recording equipment, including microphones, headphones, and speakers, all of which are designed to work efficiently underwater.
Bizarre Collaborations
The music industry has seen bizarre collaborations throughout history, from David Bowie and Bing Crosby singing together to Jack White producing music for Insane Clown Posse. These insane but true facts showcase the unexpected partnerships that can create unique and memorable music.
Music collaborations are fairly common in the industry, but some collaborations are so surprising that they leave us in disbelief. From pop stars and rappers to video game characters, collaborations have been formed in the most unexpected ways and places. In this section, we will delve into the bizarre collaborations of music production.
Sonic The Hedgehog X Michael Jackson
When it comes to strange musical partnerships, Sonic the Hedgehog and Michael Jackson take the crown. The late King of Pop was a fan of the popular video game series, and he proposed a collaboration with the game’s composer, Masato Nakamura. However, due to the complexity of working together from opposite sides of the world, the project was put on hold. In 1993, Jackson finally got his chance to collaborate with the Sonic team. The result was a game called Sonic the Hedgehog 3, which featured music created by Jackson and Nakamura. However, Jackson’s involvement in the project was kept secret at the time due to the child abuse allegations he was facing.
Recorded In Space
We’ve all heard about artists recording in unique locations such as studios in castles, caves, and even abandoned buildings. But what about recording in space? That’s right; Canadian astronaut Chris Hadfield recorded a song called “Jewel in the Night” while orbiting the Earth on the International Space Station. Hadfield’s collaboration with Barenaked Ladies’ frontman Ed Robertson resulted in a one-of-a-kind song that was out of this world, quite literally. The music video was also shot on the space station, making it the first music video to be filmed in space. In conclusion, strange collaborations can push music boundaries and lead to unprecedented creativity. These unusual partnerships are perfect examples of how music is a truly universal language that has the power to bring people and characters from all walks of life together.
Unusual Inspiration
Unleash your creativity with some insane but true music production facts that will inspire you to push your boundaries. From recording in unusual spaces to using surprising objects as musical instruments, there are no limits to the possibilities of music production.
Let your imagination run wild and see where it takes you.
Music production is a creative process that requires inspiration. Sometimes, that inspiration can come from the most unexpected places. In this article, we’ll explore some insane but true facts about unusual inspiration in music production.
Elephants In The Studio
Did you know that the legendary Beatles used an elephant’s voice as a background track for their popular song, “Tomorrow Never Knows”? The band had originally intended to record an actual elephant, but concerns about animal welfare led them to ask the sound effects technicians at Abbey Road Studios to create the sound instead. The result was a backmasked and heavily-treated recording of an elephant’s trumpet, adding a distinctive and unforgettable quality to the song.
Recording With A Live Snake
In the experimental world of music, pushing boundaries often means using unusual techniques. For instance, American jazz saxophonist Charles Lloyd once recorded a live album with a snake in the studio. The snake, named Algie, was a beloved pet of the sound technician who controlled its movement during the recording. Algie’s rhythmic movements were picked up by a microphone and added an organic and mysterious quality to the album.
In Conclusion
Music production is an ever-evolving art form, and it’s always fascinating to learn about the new and unusual ways that musicians find their inspiration. Whether it’s using animal sounds or inviting snakes into the studio, the pursuit of innovation is a hallmark of great music production.
Strange Musical Techniques
Unconventional musicians often employ strange techniques to create their unique sound. For instance, Captain Beefheart and His Magic Band used a technique called “freeway painting” to develop their music, which involved creating songs with the sound of traffic serving as the foundation.
Another strange technique is called “prepared piano,” which involves inserting various objects inside its strings to produce new sounds.
Music production is often more than just hitting the record button and letting the music flow. Some artists and producers have employed unique and borderline weird techniques to create their iconic tracks. Infrasound, ultrasound, and the Bradley Method are just a few examples of the strange musical techniques that have been used by musicians to produce their music.
Infrasound
Infrasound is a type of sound that is below the audible range of the human ear. This means that it operates at a frequency of less than 20 Hz. Surprisingly, infrasound has been used in music production to create eerie and almost supernatural sounds. This has been attributed to the fact that infrasound can trigger a feeling of unease and discomfort in humans. Consequently, infrasound has been used in genres such as horror music to create a chilling experience for the listener.
Ultrasound
Whereas infrasound is below the range of human hearing, ultrasound is above the range of human hearing. Ultrasound operates at a frequency higher than 20 kHz. It is sometimes used in music production to create sounds that can’t be heard by humans but that can be detected by animals such as dogs. Producers use this technique to add a new layer of complexity to their tracks that only animals can detect; this gives a sense of dimension to the music that human ears may miss.
The Bradley Method
Lastly, there is the Bradley Method. Contrary to the previous two techniques, this method doesn’t involve audio frequencies but instead focuses on the birthing process. The Bradley Method is a childbirth technique that emphasizes natural birthing. Music plays a crucial role in this method as it helps the mother to relax her muscles and focus her mind on the task at hand. The tempo of the music also works to help the mother synchronize her breathing and the contractions of her muscles. Although the Bradley Method has nothing to do with music production, its use of music is a testament to the power of music as a tool to influence human behavior. In conclusion, these strange musical techniques have helped producers and musicians to create some of the most unforgettable music of our time. From eerie infrasound to music that only animals can hear, and the Bradley Method, these methods demonstrate that there’s no limit to the power of music.
Credit: www.weareteachers.com
The Future Of Music Production
In music production, technology has come a long way, providing producers with amazing tools and incredible possibilities. Did you know that a song can now be produced entirely on a smartphone or tablet? And with machine learning, AI can even help create original music compositions.
These facts may seem insane, but they are true and show just how far music production has come – and where its future is heading.
Music production has come a long way since the days of analog recording and mixing, and with advancements in technology, the future of music production is looking more promising than ever. The music industry is evolving at an unprecedented pace, and music production is at the forefront of that evolution. Here are some Insane But True Music Production Facts about the future of music production:
Virtual Reality Recording
Virtual Reality (VR) is set to revolutionize music production, and it’s an exciting development for music producers and enthusiasts. Imagine creating music in a virtual space where you can visualize and interact with sounds in real-time. This technology gives producers the ability to create environments that would be impossible in the real world, providing them with unique opportunities to create new sounds, music, and experiences. With VR recording, a producer can create a 3D environment that mimics a real-life recording studio, complete with virtual recording equipment, soundproofing, and even the ability to move around the studio space. The result is a more immersive recording experience for the artist.
Ai Composition Assistance
Artificial Intelligence (AI) continues to play an increasingly important role in music production. In the future, AI could assist producers at every stage of the music production process, from songwriting to mixing and mastering. AI could use data from existing music to create new and unique compositions that incorporate different styles and sounds. This approach could help overcome common creative blocks that many producers face and allow them to try new ideas that they may not have thought of otherwise. AI technology also has the ability to analyze music to help with mixing and mastering. For example, an AI algorithm could analyze a track and make recommendations about areas that need improvement, such as lowering the volume of a particular instrument or applying more reverb. In conclusion, the future of music production looks set to be an incredibly exciting and innovative era. With advancements in VR and AI, producers can expect to have access to tools that were once considered impossible. It seems likely that the combination of these tools will help produce revolutionary music that will surprise and delight audiences for many years to come.
Frequently Asked Questions On Insane But True Music Production Facts
What Are Some Interesting Facts About Being A Music Producer?
Music producers have an exciting job that involves creativity, problem-solving, and collaboration. They can work with a wide range of artists and genres, and use technology to bring their vision to life. Many famous producers, such as Quincy Jones and Dr.
Dre, have had successful careers in the industry.
What Are 5 Interesting Facts About Music?
Music has been a part of human civilization for centuries. Here are five interesting facts about music: 1) Music can improve memory and cognitive abilities, 2) Listening to music releases “feel-good” chemicals in the brain, 3) Certain types of music can reduce stress and anxiety, 4) Music can increase exercise endurance and improve performance, and 5) Musicians have a better sense of hearing and can distinguish sounds better than non-musicians.
What Is The Hardest Thing About Music Production?
The hardest thing about music production is the complexity. It requires knowledge of multiple instruments, audio engineering, mixing techniques, and skill in using software. Additionally, it demands creative expression and mastery of digital tools to produce high-quality music. It takes years of experience to perfect the craft.
Why Is It So Hard To Make Music?
Making music can be difficult due to the complexity of the creative process, including composing, arranging and recording. It takes patience, practice, and a lot of trial and error to create something that is both original and appealing to an audience.
Additionally, the competition in the music industry can make it challenging to stand out and achieve success.
Conclusion
We hope this article has blown your mind with these insane yet true music production facts. These fascinating tidbits show that there is always something new to learn about the world of music production. From the first-ever computer-generated music to the use of household items as instruments, the possibilities of music creation are endless.
These facts prove that music production truly is an art form that takes creativity and innovation to the next level. Keep exploring the world of music production, and who knows what other incredible secrets you may uncover!