Categories
Archive

Why Does A Song Need To Be Mastered

A song needs to be mastered to achieve a cohesive and balanced sound across all playback devices. Mastering helps to enhance the overall quality and dynamics of the recording.

Mastering is the final step in the music production process that provides the finishing touches to a song. It involves preparing the final mix for distribution by ensuring that it sounds consistent across all playback systems, from headphones to high-end speakers.

Masters are also optimized for various audio formats, including digital downloads, CDs, and vinyl records. A skilled mastering engineer can improve the clarity, depth, and balance of a mix, highlight the important elements of a song, and create a cohesive and pleasing overall sound. In essence, mastering is the essential step that ensures the audio quality of a song remains high regardless of where or how it is played.

What Is Audio Mastering?

Audio mastering is the final step in the music production process that involves adjusting and optimizing the sound quality of a recording. It is necessary to ensure that the overall sound of a song is consistent and balanced across all playback systems.

Without proper mastering, the final output may lack clarity, volume, and fullness, ultimately affecting its commercial viability.

The Basics Of Mastering

Audio Mastering is the final step in music production. It involves the preparation and optimization of the final mix before it can be distributed and released to the public. During the mastering stage, the audio is refined to attain a consistent sound across multiple devices and create an immersive experience for the listener. The mastering engineer uses various tools to refine the sound, such as compression, EQ, stereo enhancement, and volume maximization. These tools help bring out the best in the track and ensure that it meets the sonic standards of the music industry.

Why Mastering Is Important

Mastering plays a vital role in music production and ensures that the final product is of high quality and consistent across various listening environments. The mastering stage helps to polish the track, making it sound professional and polished. Mastering also ensures that the audio has a consistent volume level and dynamic range. Inconsistent volume levels can be distracting to listeners, and thus the mastering engineer makes the final adjustments to ensure that the sound remains consistent throughout the track. Furthermore, mastering enhances the clarity and depth of audio. The process corrects any mix flaws and ensures every instrument or vocal is clearly audible, resulting in a cohesive final product that is easy on the ears. In conclusion, audio mastering is essential to the production of any song. It transforms the raw mix into polished and commercially viable audio that can be enjoyed by audiences worldwide.

Why Does A Song Need To Be Mastered

Credit: www.masteringthemix.com

The Benefits Of Audio Mastering

Audio mastering is a crucial step in the music production process that enhances the overall sound quality of a song. It helps in achieving uniformity in volume and tone, ensuring that the song sounds good on a variety of audio systems.

A mastered song also stands out and is more likely to be listened to by a wider audience, making it essential for any serious musician or producer.

Enhanced Sound Quality

A song is like a painting, and just like a painting, it needs to be polished to make it look more attractive. Audio mastering does the same to the song, it enhances its sound quality. During the mastering process, the audio engineer eliminates any distortions, unwanted noises, and ensures balance among the various sound levels. The result is a more polished and professional sound that is pleasing to the ear.

Better Playback On Different Devices

Mastering ensures that the audio sounds great across all platforms, devices, and mediums. Each device has different specifications and sound limitations, so it’s vital to ensure that the audio is mastered to sound great on all of them. When a song is not mastered correctly, it may not sound its best on certain devices or platforms, leading to an unsatisfactory listening experience for the listener.

Uniformity And Consistency

Another advantage of audio mastering is uniformity and consistency across a group of songs in an album or playlist. By ensuring all the songs have a uniform level of loudness and consistency in the sound, the listener can enjoy a smooth transition from one song to the other, without any abrupt changes in sound or volume. This uniformity also adds a level of professionalism to the album or playlist, making it more appealing to the target audience.

Increased Loudness And Clarity

One of the most important benefits of audio mastering is increased loudness and clarity. In today’s music industry, loudness is an essential aspect, and mastering helps to make the audio sound louder without distorting it. Mastering increases the perceived volume of the song without sacrificing the clarity of the individual sound elements, making it sound more powerful and impactful. In conclusion, audio mastering is a crucial step in the music production process that should not be overlooked. By enhancing the sound quality, ensuring uniformity and consistency, and increasing the loudness and clarity of the audio, mastering ensures a professional and polished end product that is pleasing to the listener’s ears.

The Mastering Process Explained

Mastering is an essential process in music production that enhances the overall sound quality and cohesion of a song. By adjusting levels, EQ, and compression, it ensures that the track sounds consistent across different devices and environments, making it sound polished and professional.

Have you ever wondered why your favorite songs sound so good? It’s not just about the artist’s talent or the quality of the production. The mastering process is the final step in producing a song and is responsible for making it sound polished and professional. In this post, we’ll explore the mastering process and its components.

Preparation Steps

Before the actual mastering process, there are several preparation steps that need to be taken. This includes selecting the tracks to be mastered, ensuring proper spacing between tracks, checking for any technical issues, and aligning the levels of the tracks.

Equalization

Equalization or EQ, is the process of adjusting the frequency balance of a song. It allows specific frequencies to be boosted or reduced, resulting in a more balanced sound. EQ can also be used to remove any unwanted sounds or enhance certain frequencies that make the song more enjoyable.

Compression

Compression is the process of reducing the dynamic range of a song. This means that the quieter sounds are brought up and the louder sounds are brought down, resulting in a more consistent volume throughout the song. Compression can also add warmth and character to the song.

Limiting

Limiting is similar to compression, but it’s used to prevent the loudest parts of a song from peaking and distorting. This allows for a louder overall sound without sacrificing the quality.

Final Touches

The final touches of the mastering process involve making sure the song is at the correct volume level, adjusting stereo width, and adding any final effects such as reverb or delay. The goal is to make sure the song sounds its best and is ready for distribution. In conclusion, mastering is a crucial step in producing a professional-sounding song. The preparation steps, equalization, compression, limiting, and final touches all contribute to a polished and balanced final product. As a content writer expert in SEO, it is essential to ensure that your content is optimized for search engines by using appropriate keywords and tags.

Why Does A Song Need To Be Mastered

Credit: www.izotope.com

How To Choose An Audio Mastering Engineer

When it comes to creating a polished and professional-sounding song, mastering is a critical step in the process. While mixing can balance sound levels and EQ, the mastering process is responsible for polishing the final product to make it sound its best across all listening devices. However, not all mastering engineers are created equal, and choosing the right one can make a significant difference in the final quality of your song. Here are some key factors to consider when choosing an audio mastering engineer:

Experience And Expertise

One of the most critical factors to consider when choosing an audio mastering engineer is their level of experience and expertise. Look for someone who has worked in the music industry for multiple years and has experience mastering songs in your specific genre. Ensure that the mastering engineer you choose has all the necessary skills to get the job done right.

Listening And Communication Skills

Another vital factor to consider is the mastering engineer’s listening and communication skills. The engineer must be able to actively listen to your song and communicate effectively with you throughout the process. This communication is essential to ensure that your vision for your song is executed properly.

Equipment And Software Used

The equipment and software used by the audio mastering engineer can make a significant difference in the final product. An experienced engineer will have high-quality equipment and software to produce the best possible sound. Ensure that the mastering engineer you choose has the right equipment and software to meet your needs.

Pricing And Turnaround Time

The final factors to consider are pricing and turnaround time. The cost of audio mastering can vary widely, so it’s essential to find an engineer who can work within your budget. Additionally, consider the turnaround time you need for your project. Some mastering engineers may be able to complete your project in a few days, while others may have a longer lead time. Ensure that the engineer you choose can deliver your final product in a timeframe that works for you.

Factors to Consider When Choosing an Audio Mastering Engineer
• Experience and Expertise
• Listening and Communication Skills
• Equipment and Software Used
• Pricing and Turnaround Time
  • Choose an audio mastering engineer with multiple years of experience in the music industry.
  • Ensure that the mastering engineer has experience mastering songs in your specific genre.
  • Consider the engineer’s listening and communication skills.
  • Ensure that the engineer has high-quality equipment and software to produce the best possible sound.
  • Choose an engineer who can work within your budget and deliver your project in a timeframe that works for you.

Tips For Preparing Audio Tracks For Mastering

Mastering is the final step in the music production process, which ensures the audio tracks are polished and ready for release. It helps to achieve a consistent and balanced sound across different listening devices and enhances the overall quality of the song.

Preparing audio tracks for mastering involves various tips and techniques to optimize the audio quality and ensure a professional result.

Mastering is the final crucial step in the music production process that ensures a song sounds the best it can be on all listening devices. Before mastering, it is essential to prepare your audio tracks adequately to get the best possible result. Here are tips to help you prepare audio tracks for mastering.

Organizing Your Tracks

When preparing your tracks, it is crucial to ensure they are correctly organized to avoid any mix-ups. You can do this by labeling each track with a unique name, eliminating unused tracks, and grouping your tracks into families, such as drums, guitars, vocals, etc. It would be best to ensure that all the tracks start at the same point and are aligned perfectly to prevent any timing issues during mastering.

Mixing Tips

Before exporting your tracks for mastering, it is essential to ensure that they are well-mixed to get the best possible sound quality. You can achieve this by balancing the levels of each track, using EQ and compression to adjust frequencies and dynamics, and ensuring that there is no distortion or clipping. Additionally, use equalization to refine every element of the mix and utilize reverb and delay to add depth and ambiance to the mix.

Exporting And Sending Your Tracks

Once your tracks are well-mixed, you can export them as high-quality .wav files with a bit depth of 24 or 32 bits. Before exporting, ensure you turn off all master bus processing and plugins. Once exported, you can send your tracks to a professional mastering engineer, making sure you provide clear instructions on the sound you are trying to achieve. It is also essential to check the deliverables and ensure that all your tracks are well-named and correctly organized. Preparing your audio tracks is a vital process that helps you get the best possible sound quality during mastering. By following these tips, you can ensure that your tracks sound amazing on all listening devices. Once your tracks are mastered, they are ready to be released into the world to be enjoyed by your audience.
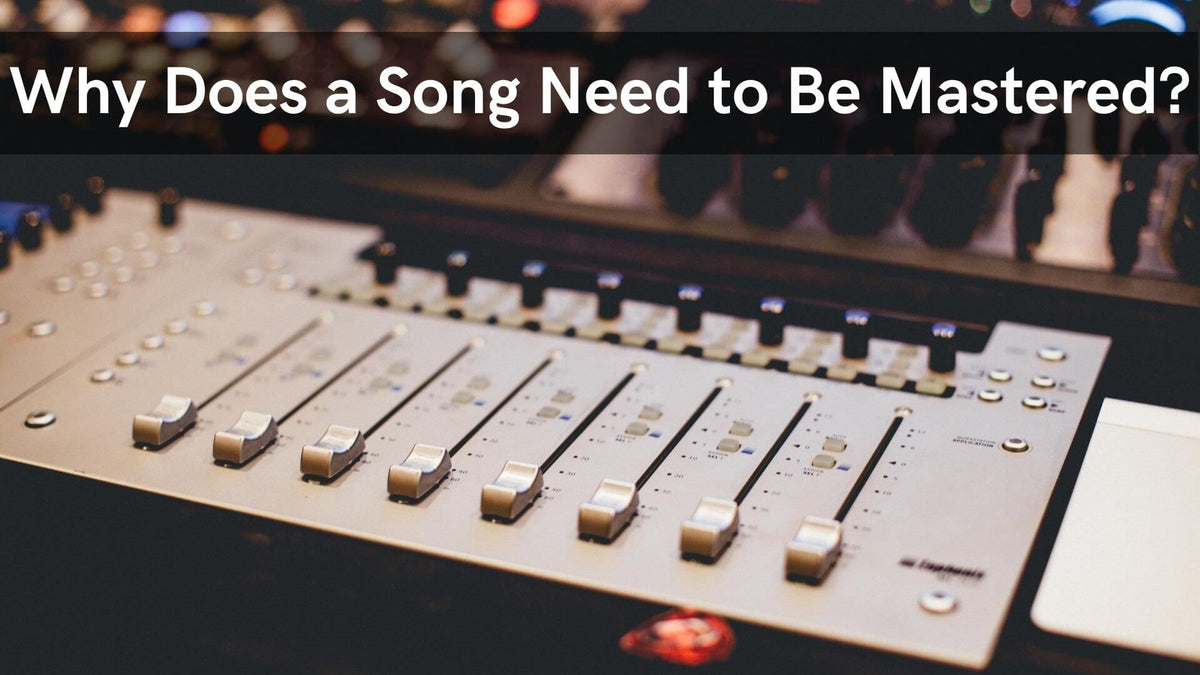
Why Does A Song Need To Be Mastered

Credit: www.masteringthemix.com

Common Misconceptions About Mastering

Misunderstandings about mastering audio have led to the misconception that it is an optional step in music production, yet it is just as crucial as recording or mixing to perfect the audio quality of a song. Mastering enhances the overall clarity, loudness and tonal balance, giving the track a professional sound that is pleasing to the ear.

Mastering is the last process a song goes through before it’s ready for release. However, there are some common misconceptions about mastering that need to be addressed. Some of these misconceptions include the belief that mastering can fix anything, mastering makes music louder, and mastering is only for major artists and labels. Let’s explore these misconceptions in more detail.

Mastering Can Fix Anything

One of the most common misconceptions about mastering is that it can fix anything. While mastering can certainly improve a song, it can’t fix everything. For example, if the original recording is poorly done, mastering can’t magically make it sound great. Mastering can enhance the quality of the song, but it can’t transform a poor-quality recording into a hit.

Mastering Makes Music Louder

Another common misconception about mastering is that it makes music louder. While it’s true that mastering can increase the overall volume of a song, it’s not the only goal of the mastering process. A skilled mastering engineer will balance the various elements of the song, making sure that everything sounds just right. They’ll enhance the dynamic range of the song, allowing the music to breathe and come to life.

Mastering Is Only For Major Artists And Labels

Finally, some people believe that mastering is only for major artists and labels. However, this couldn’t be further from the truth. Mastering is an essential part of the music-making process, regardless of the artist’s level of success or the intensity of the project. Whether you’re recording a demo in your bedroom or working on a professional studio album, mastering will take your music to the next level and make it sound much better. In conclusion, these common misconceptions about mastering are untrue and need to be cleared up. A skilled mastering engineer will help you achieve the sound you’re looking for and enhance the overall quality of the song. Whether you’re a major label or an independent artist, mastering is a crucial step in making your music sound its best.

Frequently Asked Questions Of Why Does A Song Need To Be Mastered

What Is The Point Of Mastering A Song?

Mastering a song is the final step in the music production process that ensures the overall sound quality and loudness is consistent with industry standards. It also aims to enhance the clarity, stereo width, and depth of the mix, correcting any balance issues and ensuring the track sounds great across different playback systems.

Why Does Music Have To Be Mastered?

Music needs to be mastered to ensure that the sound levels are balanced, the overall sound is consistent, and the tone is polished. Mastering also ensures that the music can translate well on different sound systems and platforms.

Does Mastering A Song Make A Difference?

Mastering a song can make a significant difference in its final sound quality. The process of mastering involves balancing different elements of the audio, making it sound better on different devices and improving its overall loudness. It can enhance the clarity, depth and punch of the song while making sure the music is consistent in its level and tone across all tracks.

Does My Song Need To Be Mastered?

Yes, your song should be mastered to sound its best on all types of audio systems. Mastering can enhance the overall audio quality, balance levels, and achieve a cohesive sound. It’s an essential step for professional-sounding music.

Conclusion

Mastering a song is essential to make it sound polished, balanced and professional. It is the final step in the music production process that brings all the elements together. Mastering makes the song audible across different platforms and enhances its overall quality.

It is a critical phase that should never be skipped to ensure the song meets the industry standards. Trustworthy and experienced mastering engineers can work with the artist to achieve the intended goals. A mastered song will leave a lasting impression on the listener and create a solid fan base for the artist.

Categories
Archive

How To Become An Edm Producer

To become an EDM producer, you need to learn music production software and techniques through online courses, tutorials, and practice. EDM production requires creativity, originality and innovation in blending different sounds to generate a track that attracts audiences.

As an EDM producer, you should have knowledge of synthesizers, digital audio workstations and virtual instruments; you require good listening skills, an understanding of music theory, attention to detail, patience and perseverance. EDM producers must be willing to constantly learn and evolve their craft to stand out in the music industry.

They should network and collaborate with other producers and artists to create unique sounds, and find opportunities to showcase their work. With dedication, passion and hard work, you can become a successful EDM producer and realize your dream of making music for a living.

Understanding The Basics Of Electronic Dance Music (edm) Production

To become an EDM producer, it’s important to understand the basics of electronic dance music production. This includes learning about sound design, music theory, mixing and mastering techniques, and software and hardware tools commonly used in the industry. With consistent practice and dedication, anyone can become a skilled EDM producer.

One of the most popular genres of modern music is Electronic Dance Music (EDM). EDM has a wide variety of sub-genres, including house, techno, trance, drum and bass, and many others. Becoming an EDM producer requires an understanding of the basics of EDM production, tools and equipment needed for production, and common techniques used in the industry. In this article, we’ll dive into these areas. ###Genres of Electronic Dance Music Before diving into the production process, it’s important to understand the various genres of EDM. Each genre has its characteristics, and it’s crucial to have a good understanding of them when creating EDM music. For instance, some genres like trance and techno focus on repetitive beats, while others like dubstep and trap may incorporate aggressive bass and synths. Understanding these different genres’ nuances can help you to develop your style as an EDM producer. ###Tools and Equipment Needed for EDM Production Having the right tools and equipment is essential in creating and producing high-quality EDM music. Some essential equipment includes a computer, studio monitors, audio interfaces, and software. Additionally, drum machines, synthesizers, and MIDI controllers can further enhance the production process. Having a good understanding of these tools and equipment can help you create and produce high-quality EDM music. ###The Role of a Digital Audio Workstation (DAW) A DAW is the primary tool used in EDM production. It is essentially a software application that enables you to edit and manipulate digital audio. DAWs like Ableton Live, FL Studio, and Logic Pro X have become an industry standard for EDM production. Using these tools, you can edit your music, add different effects, and also mix and master your final production. Understanding how to use DAWs effectively is essential in becoming a successful EDM producer. ###Common EDM Production Techniques Finally, it’s essential to understand some common production techniques in the EDM industry. The most common are compression, equalization, and side-chaining. Compression helps to balance the volume of different sounds in a track, while equalization helps to adjust the frequencies of different sounds. Side-chaining, on the other hand, creates a unique effect where instruments ‘duck’ out of the mix, creating a pumping effect. Using these techniques and others can help you to create that distinctive EDM sound and make your productions stand out. In conclusion, understanding the basics of EDM production is the foundation of becoming a successful EDM producer. Understanding the various genres, having the right tools and equipment, mastering the DAW, and implementing common production techniques can help you produce your favorite EDM tracks.

How To Become An Edm Producer

Credit: www.quora.com

Learning Music Theory

Learn music theory to become an EDM producer. Understanding chord progressions, scales, and sound design will help you create more complex and interesting tracks that will stand out in the competitive scene.

Aspiring EDM producers often wonder how they can improve their production skills and get better at making music. One crucial aspect of becoming a skilled EDM producer is learning music theory. It will help you understand how music works, which will ultimately enable you to create better tracks.

What Is Music Theory And Why It Matters?

Music theory is the study of music, which includes the basic principles of melody, harmony, rhythm, and form. It teaches you how to read and write music, understand musical notation and terminology, and analyze music. Understanding music theory is essential because it helps you create music that sounds great and is enjoyable to listen to. It provides a foundation for developing your musical ideas and expressing them through your productions.

Music Theory Fundamentals For Edm Production

To use music theory in EDM production, you must first learn music theory fundamentals. It includes learning about scales, chords, modes, and keys, as well as how to apply them in your tracks. Here are some essential music theory concepts that every EDM producer should know:

  • Understanding the different types of scales, including major, minor, and pentatonic.
  • Knowing how to construct and use chords, including triads and seventh chords.
  • Learning about modes and how to use them to create different moods and emotions in your tracks.
  • Understanding how to use keys and key changes to create tension and release.

Using Music Theory For Sound Design, Arrangement, And Composition

Once you have a good grasp of music theory fundamentals, you can start using them in your sound design, arrangement, and composition. In sound design, music theory helps you create sounds that fit well together harmonically. It means that you can create basslines, chords, and melodies that complement each other and create a cohesive track. When arranging your track, music theory helps you structure your song in a way that makes sense harmonically. It means that you can use chord progressions and key changes to create tension and release, and to keep your listener engaged in your track. Finally, music theory helps you compose melodies and harmonies that sound great and are enjoyable to listen to. It means that you can use music theory to come up with catchy hooks, memorable melodies, and beautiful chord progressions that will make your track stand out. In conclusion, learning music theory is an essential component of becoming a skilled EDM producer. It provides a foundation for creating music that sounds great and is enjoyable to listen to. So, if you want to take your EDM production skills to the next level, start learning music theory today!

Developing Sound Design Skills

To become an EDM producer, developing sound design skills is key. This involves learning about synthesis, choosing the right plugins, and understanding how to manipulate sound to create unique sounds and textures. It’s essential to have a strong understanding of sound design to stand out in the crowded EDM world.

What Is Sound Design In Edm Production?

Before diving into the world of sound design, it’s important to understand what it means. In the context of EDM production, sound design refers to the process of creating and manipulating electronic sounds to create a unique and identifiable signature style. With the ever-expanding electronic music landscape, standing out from the crowd has become an essential factor, and sound design plays a significant role in achieving that.

Types Of Synthesis Used In Sound Design

There are two primary types of synthesis in sound design: subtractive and additive. Subtractive synthesis involves starting with a complex wave and filtering out unwanted frequencies to create a sound. Additive synthesis, on the other hand, involves layering individual waveforms to create a more complex sound. Understanding and mastering both types of synthesis can be the key to unlocking limitless sonic possibilities.

Sound Design Techniques For Edm Production

One of the most accessible sound design techniques involves applying effects to existing sounds. Manipulating reverb, delay, and distortion can create entirely new sounds from previously recorded material. This technique, called sound manipulation, can be particularly useful when working with vocal samples or acoustic instruments. Another technique to explore is granular synthesis, which divides sounds into small fragments or grains, and then manipulates them in various ways. This technique is particularly effective when working with textures and ambient sounds.

Creating Your Own Signature Sound

Perhaps the ultimate goal of sound design is to develop a unique signature sound that instantly recognizable as your own. Finding your sound can be a long process of trial and error, but the rewards are worth it. To begin crafting your signature sound, start by experimenting with different synthesis methods and effects. Also, study the work of other producers and analyze their sound design techniques for inspiration. As you combine different sounds and effects, you’ll begin to develop your style, and with time, listeners will identify your music by its unique style and sound. In conclusion, developing sound design skills is a crucial aspect of EDM production. By mastering sound manipulation, granular synthesis, and other techniques, you can create a signature sound that sets you apart from other producers in a crowded field.

How To Become An Edm Producer

Credit: lolobx.com

Exploring Arrangement Techniques

In exploring arrangement techniques for EDM producers, it is important to consider the structure of the song and the different elements that make up the track. It is crucial to experiment with different sounds and patterns to create a unique and captivating composition that will stand out in the industry.

Electronic Dance Music tracks are all about arrangement – how the different parts of the song fit together to create a cohesive and exciting whole. As an EDM producer, mastering arrangement techniques is key to your success. In this article, we’ll take a look at the structure of electronic dance music tracks, some common arrangement techniques, and how to enhance your arrangements with automation.

The Structure Of Electronic Dance Music Tracks

The typical structure of an EDM track includes an intro, buildup, drop, breakdown, and outro. Each section serves a different purpose and creates the dynamic energy that keeps people dancing. Here’s a quick breakdown of what you can expect in each section:

SectionDescription
IntroSets the mood, builds anticipation for the main part of the track
BuildupGradually increases tension and energy
DropThe climax of the track, where all the energy is released
BreakdownGives the listener a moment to catch their breath and introduces new elements to keep things interesting
OutroBrings the track to a satisfying conclusion

Common Edm Arrangement Techniques

Once you have a solid understanding of the basic structure of an EDM track, you can start exploring different arrangement techniques to make your music more interesting and dynamic. Here are a few to get you started:

  • Drop Swapping – changing up the instruments or melodies in the drop to keep it fresh
  • Drum Fills – adding fills in between sections to create more energy and excitement
  • Risers and Downlifters – using white noise, riser sounds, or downlifter sounds to add tension and build-up to the drop
  • Filter Sweeps – gradually opening and closing filters to create a sense of momentum and anticipation

Enhancing Your Arrangements With Automation

Automation is a powerful tool that EDM producers can use to create complex, dynamic arrangements. As you become more comfortable with arrangement techniques, you’ll find that automation allows you to take your music to the next level. Here are a few ways you can use automation to enhance your tracks:

  1. Automating Filters – you can use automation to gradually open and close filters, creating interesting textures and movement in your tracks.
  2. Automating Reverb – adding or subtracting reverb at strategic points in your track can enhance the impact of certain sounds or sections.
  3. Modulating Synths – by automating the different parameters of a synth, you can create complex, evolving sounds that bring your track to life.
  4. Adding Delays – using delay on certain sounds can create interesting rhythms and textures, especially when automated.

By exploring arrangement techniques and using automation to enhance your tracks, you can take your EDM production to the next level and create tracks that keep people dancing all night long.

Mixing And Mastering Your Tracks

Learn how to become an EDM producer by mastering the art of mixing and mastering your tracks. This process involves utilizing various effects and techniques to shape and balance the sound of your music, ultimately making it sound professional and polished.

The Importance Of Mixing And Mastering In Edm Production

As an EDM producer, it’s important to understand the significance of mixing and mastering your tracks. Mixing is the process of adjusting the levels, panning, and effects of each element in your track to create a balanced mix. Mastering, on the other hand, is the final step in the production process where your mix is fine-tuned to enhance its loudness, clarity, and overall impact. Poorly mixed and mastered tracks can fall short of their true potential and lack the full impact you want them to have. Therefore, it’s crucial to master these skills to stand out in the competitive world of EDM production.

Balancing The Elements In Your Mix

When mixing tracks, it’s essential to balance each element to ensure they all complement each other. The primary components of a mix include drums, bass, synths, vocals, and effects. Each element plays a vital role and should be given proper attention to achieve a well-rounded, cohesive sound. You don’t want one element to overpower the rest, causing an imbalanced mix. Instead, aim to adjust the levels of each element to create a delicate harmony between all the sounds.

Applying Effects For Depth And Dimension

Applying effects can add depth and dimension to your tracks and make them stand out. Some popular effects include reverb, delay, distortion, and chorus. These effects can make the track sound larger than life and draw the listener’s attention. It’s important to experiment with different effects to get a sense of how they can improve your track. But always keep in mind that less is more, and over-effects can quickly detract from the quality of your music.

Mastering Techniques For Loudness And Clarity

Mastering your tracks is crucial to achieving loudness and clarity in your music. Compression, EQ, and limiting are some common mastering techniques used to balance and shape the sound of your final mix. When you start mastering, pay attention to small details like volume levels and overall tone. The goal is to make sure your mix sounds the best it can be and meets industry standards.

Preparing Your Tracks For Release

Once you’ve finished mixing and mastering your tracks, it’s time for release. But before you upload your music to streaming platforms, ensure it meets industry standards. Make sure the volume is consistent across all tracks, and there are no distortion or clipping issues. Double-check that all metadata is entered correctly, including track titles, artist name, album art, and release date. Finally, upload your music to your chosen platforms and promote it accordingly. In conclusion, as an EDM producer, mixing and mastering your tracks is vital to achieving a cohesive and impactful sound. Balancing elements, applying effects correctly, mastering techniques, and preparing your tracks for release are the crucial steps that will help you stand out in the competitive world of EDM production.

Building Your Brand As An Edm Producer

As an EDM producer, building your brand is crucial to success. Focus on building a social media following, creating a distinct sound, and collaborating with other artists to get your name out there. Continuously improve your skills and stay up-to-date with industry trends to stand out in a highly competitive field.

As an up-and-coming EDM producer, one of the most critical steps you can take to forward your career is to build a brand for yourself. Your brand will play a crucial role in helping you stand out from the crowd, attract fans, and ultimately, secure music gigs. Here are some tips to help you define your brand identity, create a strong online presence, network with industry professionals, and promote your music effectively.

Defining Your Brand Identity

Before creating a brand for yourself as an EDM producer, it’s essential to define your brand identity. You’ll need to consider what makes you unique and what sets you apart from other EDM producers. Think about your music, your image, and the values you stand for. Once you have established these elements, you can begin to build your brand around them.

Creating A Strong Online Presence

In today’s digital age, having a strong online presence is critical for every artist, and EDM producers are no exception. The first step to creating a strong online presence is to build a website that showcases your music, events, and current projects. You should also create profiles on all major social media platforms, e.g., Facebook, Twitter, Instagram, TikTok, etc. and keep them updated regularly with content that aligns with your brand image.

Networking With Industry Professionals

Networking with industry professionals is another vital step in building your brand as an EDM producer. Attending EDM events, festivals, and conferences is an excellent way to meet other producers, DJs, promoters, record labels, and other music industry professionals. You can also join professional organizations or online communities and forums where you can connect with like-minded individuals and gain valuable insights into the industry.

Marketing And Promoting Your Music

Finally, marketing and promoting your music is crucial to building your brand as an EDM producer. You can use various platforms for marketing and promoting your music, including social media, music blogs, and paid advertising campaigns. You can also use services like SoundCloud, Spotify, and Bandcamp to distribute and monetize your music. Collaborating with others, remixing popular tracks, and building a fan base are other effective ways to get your music out there. To become a successful EDM producer, it’s not enough to have talent. You also need to build an effective brand and promote your music effectively. By defining your brand identity, creating a strong online presence, networking with industry professionals, and marketing and promoting your music, you’ll be well on your way to achieving your goals as an EDM producer.

How To Become An Edm Producer

Credit: www.masteringthemix.com

Frequently Asked Questions For How To Become An Edm Producer

How Much Do Edm Producers Make?

EDM producers can make anywhere from thousands to millions of dollars per year, depending on their level of success and popularity within the industry. The top producers, such as Calvin Harris and David Guetta, can earn upwards of $50 million per year.

How Do I Start An Edm Producer?

To start an EDM producer career, begin by mastering the fundamental skills of creating electronic music. Invest in quality equipment and software, learn from industry professionals and peers, and release your work on popular platforms such as Soundcloud and Vimeo.

Regularly engage and build your fan base through performances and social media.

How Long Does It Take To Be A Edm Producer?

Becoming an EDM producer can take different amounts of time for each individual. It depends on factors such as natural talent, dedication, and access to resources. Some people can become proficient within a few months, while others may take years of consistent practice.

It’s a learning process that never really ends, so it’s important to keep learning and improving.

Is It Hard To Be An Edm Producer?

Being an EDM producer is challenging but not hard. It requires a passion for music, creativity, and knowledge of music production software. Learning techniques to create unique sounds and music arrangements may take time, but with dedication and practice, anyone can become a successful EDM producer.

Conclusion

It takes time, effort, and dedication to become a successful EDM producer. But with the right mindset and resources, anyone can learn how to produce high-quality electronic music that resonates with people. Remember to focus on improving your skills, networking with others in the industry, and staying up-to-date with the latest production techniques.

By following these tips and committing yourself to the craft, you can turn your dreams of becoming an EDM producer into a reality. Keep pushing yourself and always strive for perfection, and you might just be the next big name in electronic dance music.

Categories
Archive

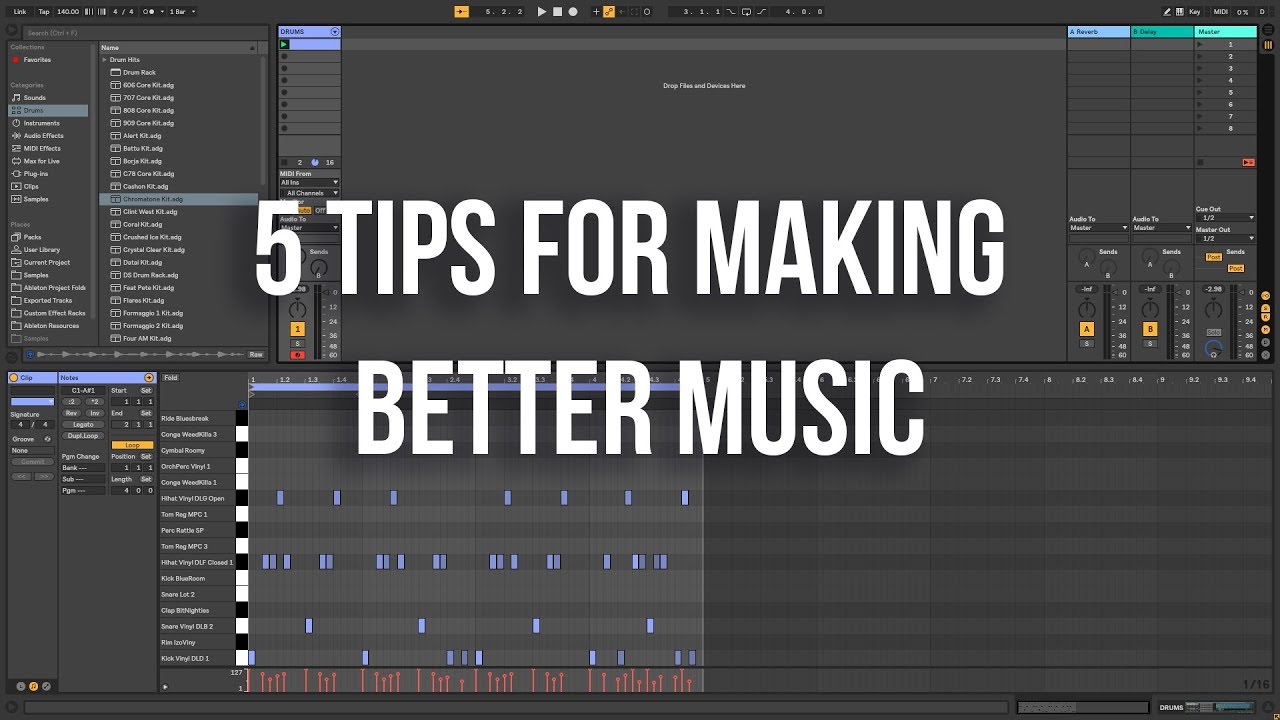
Tips On How To Make Better Music

To make better music, focus on improving your technical skills, exploring new sounds, staying passionate, and seeking feedback from others. Creating quality music relies on dedication and practice, but by committing to certain habits, you can enhance your abilities and produce more polished works.

One of the most important tips for improving your craft is to work on your technique regularly, whether that’s practicing instrument playing, refining your audio engineering knowledge or exploring new software and hardware. At the same time, don’t be afraid to push boundaries and experiment with new sounds and genres.

Rekindling your passion for music is essential to producing fresh and original work. Finally, getting constructive feedback from peers and industry professionals can help you hone your sound and identify areas for improvement. By following these tips, you’ll be on your way to taking your music to the next level.

Start With Clear Objectives

Before creating any piece of music, it is important to begin with clear objectives. This means identifying your goals and what you want to achieve with your music. This will require you to define your purpose in creating the music, what emotions you are hoping to evoke, and who your intended audience is. By doing this, you will have a clear direction and vision for your music, and it will also help you stay focused throughout the creative process.

Identify Your Goals

Identifying your goals will help you create a specific plan of action, which will guide your music making. It is important to be as detailed as possible when defining these goals so that you can track your progress and make any necessary adjustments along the way. Examples of goals might include:

  • Creating a full-length album
  • Producing a soundtrack for a film
  • Building a strong following on social media
  • Winning a music competition

What Do You Want To Achieve

Defining what you want to achieve with your music is crucial in creating a cohesive and impactful piece. You should consider what emotions or message you want to convey and how you will do so. Factors such as the genre of music, tone, and sound quality will all come into play here.

  • Do you want to create a fun, upbeat song?
  • Do you want to address a social issue through your music?
  • Do you want to create a song that will become an anthem for your fans?

Who Is The Intended Audience

Knowing who your intended audience is will also help you tailor your music to their tastes. It will guide you in creating music that resonates with your target listeners and helps build a fanbase. You should consider aspects such as genre preferences, age range, and geographic location.

  • Are you making music for teenagers who love pop music?
  • Are you making music for adults who appreciate classical music?
  • Are you targeting people in urban areas who like rap music?
Tips On How To Make Better Music

Credit: www.productionmusiclive.com

Music Theory

Learn music theory to enhance your music production skills. Tips such as understanding musical chords, key signatures and scales, rhythm, and melody can help in creating better music.

Music theory is an important aspect of creating better music. Knowing how to read and write music notation, understanding rhythm and time signatures, and learning about harmony and chord progressions can help elevate your music to the next level. In this post, we will focus on these three areas of music theory, providing tips and insights on how to incorporate them into your music making process.

Understanding Musical Notation

Understanding musical notation is crucial for any musician who wants to create better music. Notation is a system of symbols and markings that musicians use to indicate pitch, dynamics, tempo, and many other musical elements. Some tips for understanding musical notation include:

  • Learning the basics of music notation, such as the staff, clefs, notes, and rests
  • Practice reading music regularly to improve your skills
  • Use notation software to make writing and reading music easier

Study Rhythm And Time Signatures

Rhythm and time signatures are critical to creating a strong groove in your music. Understanding rhythm means having a good sense of timing and being able to create beats and patterns that are both interesting and consistent. Some tips for studying rhythm and time signatures include:

  1. Practice clapping and counting rhythms regularly
  2. Listen to and analyze music with different types of rhythms and time signatures
  3. Experiment with different rhythms and time signatures in your own music

Harmony And Chord Progressions

Harmony and chord progressions are the building blocks of music. Knowing how to use chords and create chord progressions can help add depth and emotion to your music. Some tips for understanding harmony and chord progressions include:

  • Learn the basic chords and how they relate to each other
  • Study common chord progressions and how they are used in different styles of music
  • Experiment with creating your own chord progressions

Overall, music theory is an essential aspect of creating better music. Understanding musical notation, studying rhythm and time signatures, and learning about harmony and chord progressions can help you take your music making skills to the next level.

Practice And Experimenting

Practice and experimenting are the key elements that can help you to improve your music skills. They enable you to identify the areas that need improvement and help you to develop your creativity.

Daily Practice Routine

Creating a daily practice routine can significantly improve your music skills. Devote at least an hour every day to practicing and perfecting your craft. Create a schedule that works best for you, whether it’s early in the morning or late at night. To make the most of your practice sessions, start with warm-up exercises and then move on to specific techniques or pieces you want to work on.

Learn From Other Musicians

Learning from other musicians can help you to expand your skills and gain new insights. Attend concerts and workshops, listen to different genres of music, and take online courses. This can help you to learn new techniques, develop your own style, and connect with other musicians.

Experiment With Different Techniques

Experimenting with different techniques can help you to explore new sounds and styles. Try out different instruments, experiment with different genres of music, and learn new techniques. This can enable you to create your unique sound and stay ahead of the crowd.

By practicing consistently, learning from other musicians, and experimenting with different techniques, you can dedicate yourself to making better music.

Creativity

Music is a reflection of human emotions, beliefs, and experiences. The ability to express oneself through music is a gift, and thus, every musician desires to enhance their skills. Creativity plays a fundamental role in creating good music, and it can be developed and improved upon through deliberate practice.

Develop Your Creativity

Every individual has a unique creative ability, and it can be developed through continuous practice. To improve your creativity, you need to set aside time to practice and experiment with different sounds, rhythms, and styles. This practice will help you unleash new ideas, improve your techniques, and give you the confidence to explore your unique style.

Think Outside The Box

One way to improve your creativity as a musician is to think outside the box. This means looking beyond the typical conventions and techniques used in your genre and exploring new styles and approaches. By exposing yourself to different types of music, you can stretch your creative muscles, and come up with unique and innovative sounds.

Identify And Develop Your Style

To make better music, you need to identify your unique style. This means understanding your strengths as a musician, discovering what sets you apart from other musicians, and perfecting that unique style. Developing your own style is a combination of practice and experimentation. It is vital to stay true to your style while continuously exploring and refining it.

Improving your creativity requires a mindset shift. It involves stepping out of your comfort zone, experimenting, and taking risks. By practicing and exploring new sounds, you can discover new styles and techniques that you can incorporate into your music. Creativity is not a talent that one is born with; it can be developed and honed over time through consistent practice.

Utilize Technology

Utilizing technology enhances the process of making better music. With the constant evolution of digital tools and software, musicians can manipulate sounds and produce music with ease. Therefore, you must understand the different music technologies available and how to use them to ensure your music stands out. Below are three must-have technologies for music production:

Music Production Software

Music production software helps in shaping, editing, and arranging musical ideas. With music production software, you can create high-quality tracks without needing expensive equipment. Some of the most popular software includes Ableton Live, Logic Pro X, and FL Studio. These programs provide music producers with various tools that allow them to produce amazing sounds and quality music that can compete with industry standards.

Digital Audio Workstations

Digital audio workstations (DAW) are essential tools for making better music. A DAW is a software used for recording, editing, and mixing audio. Recording studios used to be the only place one could access a DAW, but now they are commonly available as software for computers. A few examples of DAWs include Pro Tools, Cubase, and GarageBand. Utilizing a DAW ensures that you can record, edit, and produce high-quality music comfortably from your home or studio.

Virtual Instruments And Effects

Virtual instruments and effects software are crucial elements of music creation. They simulate different instruments such as pianos, guitars, drums, and even orchestra ensembles. Moreover, they provide musicians with various effects such as reverb, delay, chorus, and more. Some of the most popular virtual instruments and effects software include Native Instruments, Kontakt, and Omnisphere. Utilizing these tools gives producers and musicians the ability to create unique and realistic sounds that enhance the overall quality of music production.

Therefore, incorporating technology in music production is necessary for the best results. With music production software, digital audio workstations, and virtual instruments and effects, artists can create incredible sounds and high-quality music that stands out from the crowd.

Collaboration

Collaboration is a key aspect of making better music. When you collaborate with other musicians, you can learn new things, explore new genres, and ultimately improve your music. There are many ways to collaborate, from joining a band or ensemble to participating in music communities. Here are some tips to help you collaborate effectively:

Collaborate With Other Musicians

Collaborating with other musicians can help you expand your musical horizons. When you work with other musicians, you can learn new techniques, experiment with different styles, and develop new ideas. It’s important to find musicians who have skills that complement your own so you can create music that is truly unique. You can find other musicians to collaborate with by attending local music events, reaching out to musicians on social media, or joining online music communities.

Join A Band Or Ensemble

Joining a band or ensemble is another great way to collaborate with other musicians. When you join a band, you can learn to play with others, perform in front of an audience, and develop your stage presence. You can also get feedback on your music and learn how to work in a team. Look for bands or ensembles that play the type of music you’re interested in and attend their shows to see if you’re a good fit. You can also audition for open positions in local bands.

Participate In Music Communities

Participating in music communities is a great way to collaborate with other musicians online. You can join forums, social media groups, and online communities dedicated to music. This is a great way to network with other musicians, learn about new techniques and styles, and get feedback on your music. You can also collaborate on online projects with musicians from around the world. Look for communities that are active and have a positive and supportive atmosphere.

Collaborating with other musicians is an excellent way to improve your music. Whether you collaborate online or in person, you can learn new skills, explore new genres, and develop your musical style. Keep an open mind and be willing to experiment, and you’ll be well on your way to making better music.

Marketing And Promotion

Learn how to improve your music with these marketing and promotion tips. Utilize social media platforms to reach your audience, collaborate with other artists, and experiment with different promotional strategies to boost your exposure and get your music out there.

Marketing and Promotion play a critical role in the success of any music artist. It is essential to create a strong brand and image, use social media and digital platforms, and perform and showcase your music to gain more fans and followers. Let’s dive into the details on how to do this effectively.

Create A Brand And Image

Your brand and image are what you want to be known for as an artist. It is crucial to define your unique identity and style to attract and retain your audience. To create your brand and image: – Define your music genre and style – Create a logo and design that represents you – Develop a signature look – Have consistency across all your platforms Your brand and image should be distinct, memorable, and reflective of your music.

Use Social Media And Digital Platforms

In today’s digital age, social media and digital platforms are the most effective tools for any artist to connect with fans and promote their music. Here are some tips to leverage social media and digital platforms: – Create accounts on all social media platforms such as Facebook, Instagram, Twitter, and YouTube – Regularly post content that showcases your brand and music, including music videos, behind-the-scenes, and updates – Engage with your audience, respond to comments and messages – Collaborate with other artists and influencers in your genre to reach a broader audience Social media and digital platforms are free to use, making them accessible and affordable ways to promote your music.

Perform And Showcase Your Music

One of the most effective ways to market and promote your music is to perform and showcase it to a live audience. This strategy enables you to reach your fans, build connections, and gain more exposure. Here are some ideas to do this: – Perform at live gigs, concerts, and festivals – Collaborate with other artists and bands – Host your events, including live shows and listening parties – Use platforms like Soundcloud to share and promote your music Make sure to maximize each performance by promoting it on your social media platforms and engaging with the audience during and after the show. In conclusion, marketing and promotion are critical elements in making better music. Creating a strong brand and image, using social media and digital platforms, and performing and showcasing your music are powerful ways to gain more fans and followers. By leveraging these strategies effectively, you can achieve success as a musical artist.

Tips On How To Make Better Music

Credit: www.youtube.com

Continuing Education

Looking to improve your musical skills? Continuing education can help you turn your passion into a promising career. Stay up-to-date on the latest trends, techniques, and technologies to gain a competitive edge in the music industry.

Continuing Education: As a music artist, continuing education is an essential aspect that should never be overlooked. Learning how to make better music requires consistent and persistent education. Whatever level you are at the moment, there is always room for improvement. The more you learn, the better you hone your craft, the more likely you are to stand out in the industry. In this section, we will highlight some essential tips you should consider to keep learning and improving your music-making skills. Attend Workshops and Seminars: Attending workshops and seminars is an excellent way to learn from the best in the industry. It provides a platform for interaction with other music artists, ask questions, and share ideas. Workshops and seminars can be a great source of inspiration that can significantly influence your music-making skills. As you gain more experience and progress in your music career, attending relevant workshops and seminars can help keep you updated with the current industry trends. Take Music Lessons: Whatever level you are at, taking music lessons is a vital step towards improving your music. Engage a coach or enroll in music schools to learn music theory, instrument playing, voice lessons, and songwriting. The knowledge and experience you gain will help create a foundation, expose you to best practices, and improve your overall music-making skills. Never Stop Learning and Growing: As a music artist, you must never stop learning and growing. Improving your music-making skill is a continual process, and to stay ahead in the game, you must be willing to keep up with the ever-evolving industry trends. With technology and digital advancements, it is essential to devote time to understand new software, plugins, and music composition tools. Dedicate time to read music-related blogs, watch tutorials, and follow your favorite music artist to learn from their experiences. The more you learn, the more you grow, and the better you become at making music. In conclusion, continuing education is essential to improving your music-making skills. Whether it’s attending workshops, taking music lessons, or continually learning and growing, the process requires dedication and persistence. Learning is a continuous process that never ends. It helps to stay ahead of the competition, hone your craft, and create better music that stands out in the industry.

Tips On How To Make Better Music

Credit: www.youtube.com

Frequently Asked Questions Of Tips On How To Make Better Music

How Do You Get Better At Making Music?

To get better at making music, practice regularly, study music theory, listen to different genres of music, collaborate with other musicians, and seek feedback. Additionally, taking courses or workshops and experimenting with different software or instruments can also help improve your skills.

How Do I Make My Music Sound Better?

To make your music sound better, focus on improving the quality of your recordings, mixing, and mastering. Ensure you have high-quality equipment and acoustics for recording. Experiment with different EQ settings, effects, and panning during the mixing process. For mastering, address any issues with eq and compression, and ensure the mix translates well to various playback systems.

How Do You Make A Song Better?

To make a song better, consider the following tips: revise the lyrics for clarity and storytelling, enhance the melody and arrangement, and improve the overall sound quality with better recording techniques or instruments. Collaborating with other musicians or songwriters can also bring fresh ideas and perspectives on the song.

Finally, practicing and performing the song can help refine and perfect it over time.

How Can I Be Really Good At Music?

Practice regularly, listen to different genres, learn music theory, take lessons or courses from professionals, perform and collaborate with others in the music community. Consistency, dedication and passion are key to becoming really good at music.

Conclusion

To sum it up, making better music is a journey that takes time and effort. By practicing consistently, having a clear understanding of music theory, listening to a variety of genres, collaborating with others, and being open to new ideas, you can improve your production skills and create music that truly stands out.

Remember to stay true to your own creative vision, and never stop learning and growing as an artist. With dedication and patience, anyone can make their mark in the music industry. Keep learning and keep creating!

Categories
Archive

How To Write A Simple Bass Line

To write a simple bass line, start with a basic rhythm and build the melody around the root notes. Use repetition and small variations to create interest, and remember to stay in time with the rest of the band.

Now, let’s explore some tips for writing a compelling bass line. As a bass player, you have the power to bring an entire song together simply by playing the right notes at the right time. However, crafting a memorable and effective bass line can be challenging, especially if you’re new to the instrument or songwriting process.

We’ll break down the steps you can take to write a simple, but effective bass line that will make your music shine. Whether you’re playing in a band or writing your own solo compositions, these tips will help you create a solid foundation that supports the rest of your music. So, let’s dive in!

How To Write A Simple Bass Line

Credit: m.youtube.com

Step 1: Understand The Role Of Bass

To write a simple bass line, you must first understand the role of bass in music. The bass serves as the backbone of a track, providing the foundation for the melody and rhythm. By focusing on the root notes and maintaining a steady groove, you can create an effective bass line that enhances the overall sound of the song.

Bass is an essential component of any music. Without it, the music sounds incomplete and lacks depth. The bass is heard mostly through its low frequencies and helps in creating a groove and rhythm for a song. Understanding the role of bass is essential if you want to write a simple and effective bassline. In this section, we will cover the importance of bass lines and common elements of a bass line.

Importance Of Bass Lines

Bass lines are crucial in music composition as they hold the rhythmic foundation of a song. Bass lines can also complement the melody and harmony of a track by adding a subtle layer of complexity to the overall sound. They can create a sense of movement in the song and keep the listener engaged throughout. Bass lines can also be used to create tension and release in the music, adding emotion and depth to the overall composition.

Common Elements Of A Bass Line

When writing a simple bass line, it’s essential to focus on the key elements of the bassline. The bassline should complement the melody, chords, and drums of the song. Below are some common elements of a bass line that you should consider:

  • Bass notes – The fundamental aspect of a bass line is the selection of the bass notes. These notes must complement the chords and highlight the melody’s root notes.
  • Rhythm – The rhythm of a bass line should work in conjunction with the drumbeat. Simple and repetitive rhythms work well in many contexts.
  • Octaves – Octaves are often used to add depth to the bass line. By playing the same bass notes in different octaves, you can achieve a fuller and more complex sound.

In conclusion, understanding the role of bass is fundamental in writing a simple bass line. The bass is a key component of a song’s rhythm, melody, and harmony. By focusing on the common elements of a bass line, you can create a simple and effective bass line that complements the rest of the music.

How To Write A Simple Bass Line

Credit: blog.native-instruments.com

Step 2: Determine The Key And Chord Progression

To write a simple bass line, it is essential to determine the key and chord progression of the song. This will guide you in selecting the right notes that complement the melody and rhythm of the music. It is important to keep the bass line consistent with the overall mood and theme of the song.

In order to write a simple bassline, it is important to determine the key and chord progression of the song. This will help you to know which notes and chords to use in your bassline. Here are some basic music theory principles to keep in mind as you analyze the key and chord progression of a song:

Basic Music Theory

Music theory can seem overwhelming, especially for those who are new to playing an instrument or writing music. However, with a few key principles in mind, it is possible to begin understanding the concepts that are most important for writing a bassline. The most important concepts to understand when it comes to writing a bassline are key and chord progression. The key of a song is the tonal center of the piece, and the chord progression refers to the chords used in the song and their relationship to one another.

Analyzing Chord Progressions

Once you have an understanding of these basic concepts, you can begin analyzing the chord progression of the song in order to write your bassline. This involves identifying the chords used in the song and understanding their relationship to one another. For example, if a song is in the key of C major, the chords used in the song will be based on the notes in the C major scale (C, D, E, F, G, A, B). Common chords in the key of C major include the I chord (C major), IV chord (F major), and V chord (G major). Using this information, you can begin creating a bassline that uses the notes from the C major scale and follows the chord progression of the song. It may also be helpful to listen to the song and play along with it on your bass in order to get a better understanding of the chord progression and how your bassline fits into the song. In conclusion, understanding basic music theory principles and analyzing the chord progression of a song are essential in order to write a simple bassline. By identifying the key and chords used in the song, you can create a bassline that complements and supports the melody and harmony of the piece.

Step 3: Create The Rhythm

To create a simple bass line, step 3 is all about creating a rhythm. Start by choosing a tempo and determining the time signature. Once you have a basic rhythm in mind, experiment with different notes and patterns to create a catchy bass line that fits your song.

Now that you have established the melody and laid down the harmonic foundation, it is time to create the backbone of your bass line: the rhythm. This step is crucial in making the bass line catchy and memorable. Here are some tips on how to create the rhythm for your bass line:

Different Rhythmic Styles

There are various rhythmic styles that you can apply to your bass line, depending on the genre of music you are writing for. For example, in rock music, you might want to opt for a straight eighth-note or sixteenth-note groove. In funk music, the rhythm tends to be more syncopated. In reggae music, the bass line often emphasizes the off-beat.

Incorporating Rests And Syncopation

One way to make your bass line more interesting is to incorporate rests and syncopation into your rhythm. Rests can create tension and anticipation, making the next note more impactful. Syncopation refers to accenting off-beats or unexpected rhythms within a measure. This can add a playful or funky feel to your bass line. Here is an example of a bass line with rests and syncopation:

  • 1 & | 2 | 3 & | 4 |
  • G | – | A & | – |

In this example, the bass player plays the G note on the first beat, rests on the “and” of beat 1, plays the A note on the “2” beat, rests on the “3” beat, and plays the last note on the “4” beat. This creates a syncopated rhythm and adds a playful feel to the bass line. Remember, the rhythm of your bass line is just as important as the melody and harmony. Experiment with different rhythmic styles and incorporate rests and syncopation to make your bass line stand out.

How To Write A Simple Bass Line

Credit: hyperbits.com

Step 4: Choose The Scale And Notes

Now that you have decided on the rhythm and timing for your bass line, it’s time to choose the scale and notes that will create the melody. This is the step where you can experiment and try out different scales and notes to create a unique bass line that complements the song.

Types Of Scales

There are numerous types of scales that can be used for a bass line, but some of the most common ones include:

Scale TypeDescription
Major ScaleA happy, uplifting sound.
Minor ScaleA sad, darker sound.
Pentatonic ScaleA simple, bluesy sound.

Note Selection Strategies

When selecting notes for your bass line, there are several strategies you can use:

  • Root Notes: Use the root note of each chord in the song.
  • Chord Tones: Use the other notes in the chord.
  • Arpeggios: Play the chord notes one after another.
  • Scales: Use notes from a specific scale.
  • Passing Tones: Use notes that connect the other notes in the bass line.

By using a combination of these strategies and experimenting with different scales and notes, you can create a simple yet effective bass line that adds depth and character to the song.

Step 5: Experiment With Embellishments

To add depth and personality to your simple bass line, experiment with embellishments such as slides, hammer-ons, pull-offs, and vibrato. Incorporating these techniques can make your bass line stand out and give it a unique character.

Now that you have the basic foundation of your bass line, it’s time to add some flair. Embellishments can make a simple bass line sound interesting and dynamic. In this step, we’ll explore some common techniques you can use to add variations to your bass line.

Adding Fills And Variations

One way to add interest to your bass line is to incorporate fills and variations. Fills are short, improvised melodies or rhythms that are played in between the main bass line. Variations, on the other hand, are small changes to the main melody that keep the listener engaged. To create fills and variations, experiment with playing different notes or rhythms in between the main bass line. Try playing around with different scales or modes to see what sounds good. You can also try changing the timing or duration of your notes to add some variation.

Using Slides And Hammer-ons

Another way to add interest to a simple bass line is to use slides and hammer-ons. Slides involve sliding your finger up or down the fretboard to create a smooth transition between notes. Hammer-ons are when you pluck a string with one finger and then “hammer” down another finger on a higher fret to create a new note. To use slides and hammer-ons, try sliding between notes instead of playing each note separately. You can also experiment with hammer-ons to create a smoother, more fluid bass line. In conclusion, embellishments are a great way to enhance a simple bass line and keep your audience engaged. With these techniques in mind, you can experiment and find your own unique style.

Step 6: Listen And Refine

Congratulations on making it to the final step of writing a simple bass line! Now that you have gone through the first five steps, it is time to listen and refine your work. This step is critical in ensuring that your bass line stands out and complements the rest of the music.

Playing Along With The Band

The first thing you need to do is to play your bass line along with the band. While doing so, you should pay attention to how it fits in with the rest of the music. Does it stand out too much or is it being drowned out by the other instruments? Keep experimenting until you find a balance that works.

It is crucial to listen to the other instruments, especially the drums. The bass and drums are the foundation of any song, and they need to work well together. Make sure that your bass line and the drum pattern complement each other.

Refining The Bass Line

Once you have played along with the band, it is time to refine your bass line. Start by eliminating any notes that are not necessary. Your bass line should be simple and not overcrowded. Focus on playing the root notes of the chord progression.

Once you have simplified your bass line, it is time to add some personality to it. You can do this by playing with the rhythm, adding fills or slides. Be creative and experiment until you find something that works.

When refining your bass line, strive to make it memorable. Think about some of your favorite bass lines from famous songs. What makes them so unforgettable? Incorporate some of those elements into your bass line.

Tips for Refining Your Bass Line:
Eliminate unnecessary notes from your bass line.
Focus on playing root notes of the chord progression.
Experiment with rhythm, fills, and slides to add personality.
Make your bass line memorable.

Remember that writing a simple bass line is not a one-time process. Keep playing and experimenting until you find the perfect fit for the song. With practice and patience, you will be able to write bass lines that stand out and complement any music you play.

Frequently Asked Questions On How To Write A Simple Bass Line

How Do You Write A Bass Line?

To write a bass line, start by determining the key of the song and identifying the chord progressions. Choose a rhythmic pattern and play notes that correspond with the chord progression. Pay attention to the root notes of each chord and experiment with adding variations to create interest.

Practice and refine your bass line to fit the song’s style and feel.

What Is The Formula For The Simple Walking Bass Line?

The formula for a simple walking bass line involves playing notes on the 1st and 3rd beats of each bar, with typically one note per beat. The notes are usually the root and fifth of each chord being played in the music.

The bass line should have a smooth and consistent rhythm.

How Do You Make Catchy Bass Lines?

To make catchy bass lines, focus on creating a strong rhythm with the kick drum, and experiment with different scales and intervals. Use repetition and variation to keep the line interesting, and consider the context of the song as a whole.

Practice and experimentation are key to improving your bass line skills.

What Is The Easiest Bass Line To Play?

The easiest bass line to play would be “Seven Nation Army” by The White Stripes. The song only contains three notes and is a good option for beginners to learn.

Conclusion

Writing a simple bass line might seem like a challenging task, but with the right approach, anyone can create a catchy tune that drives a song forward. Keep in mind the importance of rhythm, melody, and harmony, and experiment with different techniques and styles.

Don’t be afraid to make mistakes and always be open to feedback. By following these tips, you can master the art of writing a simple bass line and take your music to the next level. So go ahead and start creating!

Categories
Archive

Are Cubase Stock Plugins Good

Cubase stock plugins are good enough for basic music production needs. However, third-party plugins are generally preferred for professional-grade output.

Cubase is a digital audio workstation (DAW) used in music production, and it comes equipped with a range of stock plugins to help musicians and producers create their sound. These plugins include a variety of virtual instruments, effects, and processors that can be used to manipulate and shape audio in different ways.

While these plugins are useful for basic production needs, they may not provide the same level of quality and depth as third-party plugins. Professional producers often prefer to use high-end plugins from companies like Waves, Native Instruments, and Soundtoys to achieve more advanced and intricate sound designs. However, for those just starting out or on a tight budget, Cubase stock plugins are a good starting point.

Quality Of Cubase Stock Plugins

Cubase stock plugins are recognized for their high quality and reliability. They come with a wide range of features and effects that allow users to enhance their sound and mix with ease. Whether you’re a beginner or a professional, Cubase plugins are an excellent choice for achieving exceptional audio quality.

Cubase is one of the top Digital Audio Workstations used by music producers and audio engineers. It offers a vast range of stock plugins, which can be accessed within the DAW. But, the question is, are the Cubase stock plugins good when compared to third-party plugins?

Variety Of Plugins Offered

Cubase offers an impressive variety of stock plugins, which includes Virtual Studio Technology (VST) instruments, effects, and MIDI plugins. From the HALion Sonic SE and Prologue synthesizers to the RoomWorks and Reverence reverbs, Cubase provides a broad range of plugins that cater to any music production needs. Moreover, Cubase’s stock plugins come with presets that can be adjusted and customized to fit the production requirements.

Ease Of Use

Cubase’s interface is user-friendly and easy to navigate, which makes it easier to use its stock plugins. The stock plugins are designed to be streamlined and straightforward, with control knobs and buttons labeled for easy understanding. Additionally, Cubase’s plugin manager makes it extremely easy to organize and search for the required plugin instantly.

Sound Quality

When it comes to sound quality, Cubase’s stock plugins are excellent. The plugins are designed to produce high-quality sound, suitable for professional productions. The stock plugins also use low CPU resources while maintaining the quality sound, making them ideal for music production on low-spec computers. In conclusion, Cubase stock plugins are an excellent addition to any music production project. They offer an impressive variety of plugins, are easy to use, and come with high-quality sound output. So, if you are looking for a reliable and diverse suite of plugins that won’t break the bank, Cubase’s stock plugins might be the way to go.

Are Cubase Stock Plugins Good

Credit: forums.steinberg.net

Comparison With Third-party Plugins

Cubase’s stock plugins are versatile and of high quality, making them a good choice for many users. While third-party plugins can offer additional features and sounds, Cubase’s stock plugins are a reliable starting point for any project.

When it comes to digital audio workstations (DAW) like Cubase, plugins play a vital role in music production. Cubase comes with a range of stock plugins that offers a variety of features to users. These stock plugins can be overwhelming for new users and can also make experienced users wonder whether they can compare to third-party plugins. Let’s explore the pros and cons of Cubase stock plugins compared to third-party plugins.

Pros And Cons

One of the biggest advantages of using Cubase stock plugins is that they are designed to work efficiently with the DAW. As a result, they integrate seamlessly within the DAW’s interface to provide a seamless user experience. Cubase stock plugins also come with a range of presets that can be tweaked to suit the user’s preferences and requirements. However, not all Cubase stock plugins are as powerful as third-party plugins, especially when it comes to multi-effects plugins. Third-party plugins, on the other hand, are designed to provide advanced features and functionality that are often not available in stock plugins. They can help users create unique sounds and provide more control over various aspects of music production. However, third-party plugins can be expensive and can consume a substantial amount of system resources, leading to performance issues.

Value For Money

When it comes to value for money, Cubase stock plugins are unbeatable. They are included with the DAW and do not require any additional investment. Additionally, Cubase users receive regular software updates that include new stock plugins, ensuring that the user’s investment in Cubase is always worthwhile. On the other hand, third-party plugins can come with hefty price tags, making them less accessible to users on a budget. Furthermore, third-party plugins often require additional investment in terms of system resources and compatibility, which can further increase the overall cost. In conclusion, Cubase stock plugins are a good starting point for beginners and those on a tight budget. However, experienced users often require more advanced plugins to achieve the desired level of control and customization. Ultimately, the decision to use stock plugins or third-party plugins depends on the user’s requirements and budget constraints.

Popular Cubase Stock Plugins

Cubase stock plugins are highly rated for their quality and versatility. Users can achieve professional effects for mixing, mastering and sound design within the DAW itself, all without leaving Cubase. Popular plugins include the multiband compressor, EQ, and channel strip.

If you’re a Cubase user, you’re probably already familiar with the vast array of plugins it offers. These plugins are quite powerful and versatile, and many of them can be used to create pro-level tracks. In this article, we’ll take a closer look at some of the most popular Cubase stock plugins that you can use right out of the box.

Virtual Bass Amp

The Virtual Bass Amp is a plugin that emulates a range of classic bass amps. It offers a myriad of controls that allow you to tweak the sound of your bass in a variety of ways. The interface is intuitive and easy to use, and the plugin comes with a number of presets that you can use as a starting point. Whether you’re trying to recreate a classic sound or create something new, the Virtual Bass Amp is definitely worth checking out.

Retrologue 2

Retrologue 2 is a powerful virtual analog synthesizer that emulates the sound of classic hardware synths. It features a range of advanced synthesis options, including comprehensive modulation options and a high-quality effects section. The interface is sleek and easy to navigate, and the extensive sound library makes it easy to get started right away. If you’re into analog synthesis, Retrologue 2 is definitely a plugin you should consider.

Revelation

REVelation is a premium reverb plugin that emulates the sound of high-end hardware reverb units. It features a modulated vintage plate algorithm that delivers a warm, lush sound that can add depth and dimension to your mixes. The interface is simple and easy to use, and the plugin comes with a range of presets that you can use as a starting point. If you’re looking for a high-quality reverb plugin, REVolation is definitely a top contender.

Padshop 2

Padshop 2 is a granular synthesizer that enables you to create complex, evolving sounds. It features a powerful granular engine and a number of advanced sound-shaping options. The interface is intuitive and easy to navigate, and the plugin comes with a range of presets that can be used as a starting point. Whether you’re interested in creating soundscapes, ambient textures, or evolving pads, Padshop 2 is a plugin that’s definitely worth exploring. Overall, Cubase’s stock plugins are quite capable and versatile, and offer a range of powerful sound-shaping options. Whether you’re new to Cubase or a seasoned pro, these plugins are definitely worth exploring.

Are Cubase Stock Plugins Good

Credit: forums.steinberg.net

Expert Opinions On Cubase Stock Plugins

According to experts, Cubase stock plugins are high-quality and offer a wide range of features for music production. With a variety of EQs, compressors, reverbs, and more, Cubase stock plugins can save producers both time and money by eliminating the need for third-party plugins.

Cubase stock plugins come packed with this popular digital audio workstation, allowing users to mix and master their music with these built-in tools. While some users may opt for third-party plugins, others prefer to stick with the ones included in Cubase. But the question remains: are Cubase stock plugins good enough to use on their own? Let’s explore this topic by looking at reviews from music professionals and an interview with an audio engineer who has experience with these plugins.

Reviews From Music Professionals

According to a review by MusicTech, Cubase stock plugins offer a wide range of tools that can cater to any producer’s needs. From the ample selection in the mixer to the variety of synths included, there is a lot to work with. MusicRadar notes that Cubase stock plugins are especially notable for their compressors and EQs, finding that they are very transparent and can shape audio with precision. Future Music echoes these sentiments, indicating that the plugins are well-designed and can provide a professional sound.

Interview With Audio Engineer

We also spoke with an audio engineer who regularly uses Cubase stock plugins. The engineer shared that while there are some plugins that they prefer to swap out for third-party options, there are still plenty that work very well. For example, the engineer finds the stock reverb and delay plugins to be “fantastic”, and often uses them in their mixes. They also appreciate the versatility of the EQs, which can be used for both surgical and broad shaping of frequencies. In conclusion, opinions on Cubase stock plugins vary, but reviews from industry professionals suggest that they are well-designed with transparent sound quality. As with any software, it’s important to experiment and decide what works best for your individual needs and preferences.

Are Cubase Stock Plugins Good

Credit: forums.steinberg.net

Frequently Asked Questions On Are Cubase Stock Plugins Good

Do Professionals Use Stock Plugins?

Yes, professionals do use stock plugins. They offer a fast and cost-effective way to achieve certain effects without having to create new software from scratch. However, it’s also important for professionals to be mindful of the limitations of stock plugins and to be able to customize them for specific projects as needed.

Can You Get A Professional Mix With Stock Plugins?

Yes, it is possible to get a professional mix with stock plugins. However, it requires skill and experience to use them effectively. It’s important to understand the limitations of stock plugins and supplement them with third-party plugins if necessary. Experimentation and a critical ear are essential in achieving a professional mix with stock plugins.

Why You Should Use Stock Plugins?

Using stock plugins can save you time, money and resources. They are pre-built tools that you can use to enhance your website’s functionality. Stock plugins can help you achieve your desired result without the need to build a custom solution from scratch.

Additionally, they are reliable, regularly updated, and supported by the community.

Does Cubase Come With Vst Instruments?

Yes, Cubase comes with a wide range of VST instruments including HALion Sonic SE, Groove Agent SE, and Retrologue. These instruments offer a variety of sounds and effects for music production.

Conclusion

Overall, Cubase stock plugins provide a solid foundation for creating professional-quality music. While they may not always be as versatile or customizable as third-party plugins, they make up for it in their ease of use and seamless integration with Cubase software.

Additionally, these plugins can help save time and money on purchasing third-party plugins. So, if you’re looking for reliable and efficient stock plugins, Cubase certainly delivers.

Categories
Archive

Automated Mastering Software

Automated Mastering Software is a technology that uses algorithms to automatically adjust the levels and frequencies of a music track to achieve a final master. This software enables music producers to save time and money on the mastering process.

Also, music mastering is an essential step in the music production process as it ensures that the final audio product is of high quality for distribution and sale. In the past, music mastering was done by human mastering engineers through the use of hardware and software equipment.

Related reading: AI Audio Mastering and Dolby Atmos Mastering.

However, as technology advances, automated mastering software is becoming a popular alternative for producing high-quality masters at a faster rate. Moreover, online mastering services uses algorithms to adjust the levels, equalization, compression, and limiting of a music track to achieve a final master. The software analyzes the audio track and makes adjustments based on its analysis. This technology has become increasingly popular as it reduces the time and cost of mastering while maintaining a high level of quality.

Automated Mastering Software

Credit: gearspace.com

Advantages Of Automated Mastering Software

In addition, these tools offers a variety of advantages over traditional mastering techniques. It provides a faster and more cost-effective way to master audio files while still producing high-quality results. With its user-friendly interface, anyone can use this software without requiring any technical know-how.

Furthermore, AI mastering is transforming the way we master audio. It is a powerful tool that is becoming increasingly popular among music producers, artists, and record labels. Online mastering services brings many advantages over traditional mastering processes. In this article, we will discuss the top three advantages in detail.

Improved Efficiency for Automated Mastering Software

Additionally, these tools takes just a fraction of the time taken by manual mastering. With AI mastering, mastering is done in a matter of minutes, while manual mastering can take several hours. One reason for this is the fact that automation eliminates the need for lengthy feedback loops. This means that producers can spend more time creating music rather than spending time on lengthy mastering processes.

Consistency In Quality

Also, online mastering services produces consistent quality with every use. This is because the software uses a set of algorithms and rules to produce the final mix. In contrast, manual mastering can lead to inconsistent results because the sound engineer’s level of expertise and perception can vary from day-to-day. These tools makes sure that every master is consistent, regardless of who is operating the software.

Cost-effectiveness

AI mastering is cheaper than manual mastering. It does not require an experienced sound engineer or a professional studio. Online mastering services can be used in a home studio with little-to-no experience. This drastically reduces the cost of mastering while still producing top-quality results. In conclusion, these tools is a game-changer for the music industry. It brings improved efficiency, consistency in quality, and cost-effectiveness. As the technology continues to improve, it is likely that AI mastering will become the go-to tool for audio mastering.

Automated Mastering Software

Credit: www.macprovideo.com

Disadvantages Of Automated Mastering Software

Online mastering services has gained popularity in recent times as it allows musicians and producers to master their tracks faster and at a lower cost. However, there are some drawbacks to using these tools that should be considered before choosing it as a solution to mastering needs. Let’s have a closer look:

Lack Of Human Touch

One of the major disadvantages of AI mastering is the lack of human touch. Even though the software may mimic what a mastering engineer would do, it is still a computer program and lacks the human element. Often, the mastering engineer listens to the song many times to ensure that each instrument is sounding its best. But, online mastering services cannot match the perceptive ear and in-depth experience of an actual human being.

Limited Customization

Another disadvantage of these tools is its limited customization options. Of course, the software has a range of presets, but the options for truly customizing the sound are more limited. Automated software cannot understand the producer’s intent or make adjustments based on a particular recording’s idiosyncrasies. Additionally, a mastering engineer can tailor the processing to highlight a particular instrument or genre-specific elements, which is challenging for automated software.

Lack of Human Touch vs Limited Customization
Lack of Human TouchLimited Customization
Automated software cannot match the perceptive ear and in-depth experience of an actual human being.Automated software cannot understand the producer’s intent or make adjustments based on a particular recording’s idiosyncrasies.
The mastering engineer listens to the song many times to ensure that each instrument is sounding its best.A mastering engineer can tailor the processing to highlight a particular instrument or genre-specific elements, which is challenging for automated software.

Conclusion:

In summary, AI mastering may seem like a quick and cheap solution, but it has its limitations. It lacks a human element, and customization options are limited. Customers or users have to decide whether they prioritize speed, simplicity, and lower costs over personalized services and high-quality results, which can only be achieved through a human mastering engineer’s expertise.

Factors To Consider When Choosing Automated Mastering Software

To ensure quality music production, it’s important to consider factors such as cost, sound quality, ease of use, compatibility with your digital audio workstation and genre-specific features when choosing online mastering services. With the right software, you can produce music that sounds professionally mixed and mastered.

Factors to Consider When Choosing Automated Mastering Software Automated mastering software has become a popular tool among audio mastering engineers. It has simplified the mastering process for those who lack the required technical skills and knowledge. However, with a wide variety of these tools available in the market, choosing the suitable one can be overwhelming. We have outlined four crucial factors to consider when choosing online mastering services, including pricing, features, compatibility, and ease of use. H3: Pricing One of the critical factors to consider when selecting AI mastering is pricing.

Several software options are available in the market, with varying pricing plans. Some software has a one-time fee, while others have monthly or yearly subscriptions. Ensure to select software that aligns with your budget and the level of mastering required. H3: Features The second factor to consider when choosing online mastering services is features. Every software comes with unique features that may be beneficial or detrimental to your mastering process. Ensure that you select software that caters to your specific audio needs, such as EQ enhancement, volume maximization, and stereo imaging.

Practical Tips for Automated Mastering Software

H3: Compatibility Compatibility is another crucial factor to consider when selecting AI mastering. Ensure that the software is compatible with your computer operating system and audio file formats. It is essential to check the necessary requirements before considering any automated mastering software. H3: Ease of Use The last factor to consider when selecting automated mastering software is ease of use. The software should be user-friendly, with a straightforward interface and easy-to-understand instructions. Consider software with tutorial videos or demos, allowing users to familiarize themselves with the software and its features. In conclusion, automated mastering software is an investment worth considerations.

Selecting the appropriate software with the right pricing, features, compatibility, and ease of use will significantly impact your mastering process. It is essential to take your time to research and compare different options before making a final decision.

Automated Mastering Software

Credit: majormixing.com

Top Automated Mastering Software On The Market

Automated mastering software makes the audio mastering process faster, more efficient, and cost-effective. This software allows your music to sound great on any device, ensuring that every listener enjoys your music as it is intended. Choosing the right automated mastering software is crucial in bringing out the best in your music. Here are the top three automated mastering software on the market:

Software A

Software A is a powerful automated mastering software that uses cutting-edge AI technology to enhance the sound quality of your music. This software offers a wide range of mastering styles to choose from, and each style is crafted by professional audio engineers. With Software A, you can achieve great results in a matter of minutes. The interface is user-friendly, and the software provides detailed feedback, enabling you to tweak the mastering to your liking.

Software B

Software B is a state-of-the-art automated mastering software that uses advanced algorithms to enhance the clarity and depth of your music. This software provides a range of mastering options to choose from, including EQ, compression, and stereo imaging. With Software B, you can master your music quickly and easily, and the results are always impressive. The software is easy to use, and the interface is intuitive, making it a great choice for both beginners and experts.

Software C

Software C is a reliable automated mastering software that offers a high-quality mastering experience at an affordable price. This software boasts an extensive library of mastering styles, from vintage to modern, ensuring that your music sounds great no matter the genre. Software C is easy to use, and the mastering process is fast and efficient. The software also provides detailed feedback, allowing you to fine-tune your tracks to perfection.

Choosing the right automated mastering software is key to enhancing the sound quality of your music. Whether you’re an aspiring musician or a seasoned professional, Software A, Software B, and Software C are excellent options that can help you achieve great results quickly and easily.

Frequently Asked Questions On Automated Mastering Software

What Is The Best Automated Mastering Service?

LANDR and iZotope Ozone are two of the best automated mastering services, offering high-quality outputs with AI-powered processing. LANDR offers unlimited mastering for a monthly or yearly subscription, while iZotope Ozone provides a one-time purchase option with advanced audio tools and features.

Both are worth checking out for their affordable prices and excellent results.

What Is Automated Mastering?

Automated mastering is the use of software to apply various mastering processes to audio tracks, creating a more polished and professional sound. It allows for consistent and efficient mastering, especially for large numbers of tracks.

Which Software Is Best For Mastering?

The best software for mastering depends on the type of music you’re working with and your own personal preferences. Some popular options include iZotope Ozone, Waves Abbey Road Collection, and IK Multimedia T-RackS. It’s important to do your research and test different options to find the one that works best for you.

Can Ai Master A Song?

Yes, AI can master a song. With the advancement of technology, AI-generated music has become more sophisticated and customizable. AI can analyze music patterns and generate new melodies, harmonies, and lyrics to create unique and original songs. However, it still lacks the emotional and creative depth of human musicians.

Conclusion

Mastering your music can be a daunting task, but with automated mastering software, the process has never been easier. From optimizing dynamics to enhancing stereo imaging, these tools offer a reliable solution for musicians looking to polish their tracks. Whether you’re a professional producer or a novice musician, automated mastering software can help you achieve that perfect mix.

With its affordability and convenience, it’s no wonder why many musicians are turning towards this innovative technology to streamline their mastering process. So why not take advantage of this opportunity and elevate your sound today?

For more background, see Audio mastering on Wikipedia.

Categories
Archive

How To Professionally Mix My Vocals

To professionally mix your vocals, start by recording in a quiet room with a high-quality mic and ensuring the audio levels are consistent. Use EQ to balance the frequencies, compress to control dynamics, and add reverb or delay for depth.

Also, as a recording artist or musician, vocals are arguably the most important aspect of any music production. However, recording them is only half the battle; mixing your vocals to create a polished final product is equally essential. Mixing vocals professionally involves a combination of technical skill and artistic interpretation.

Related reading: De Ess Vocals and Background Vocals. For background, see the Wikipedia article on Audio mixing.

Creating a smooth, harmonious blend of the vocals with the music while enhancing its overall quality requires an ear for detail and attention to specific techniques. Moreover, we will explore some tips on how to professionally mix your vocals and make them sound more well-rounded and professional.

Setting Up Your Vocal Mixing Space

In addition, to professionally mix your vocals, setting up your mixing space is crucial. Start by finding a room with good acoustics and invest in soundproofing. Choose the right equipment like a high-quality microphone and speakers, and optimize your space for optimal sound.

Furthermore, optimizing the room acoustics and investing in good quality speakers and headphones are crucial in creating a professional vocal mixing space. Proper setup can help you achieve a clean, balanced mix and prevent any unwanted audio issues. In this article, we’ll take a closer look at each of these factors and how you can optimize your space to achieve the best possible results.

Optimizing The Room Acoustics for Mix Vocals

Additionally, the room you’re mixing in can have a significant impact on the quality of your vocal mix. Identifying and treating sound reflections and echoes is essential to create an acoustically-neutral environment. Here are some tips you can follow to help optimize your room acoustics:

  • Also, place hi-density foam panels on the walls and ceiling to absorb sound reflection and minimize echoes.
  • Moreover, add thick rugs, curtains or other heavy fabrics to the windows and doors to minimize sound transmission to the surrounding areas.
  • In addition, use bass traps to absorb low-frequency sound reflection and provide a balanced sound.

Investing In Good Quality Speakers And Headphones

While it’s tempting to rely on cheap equipment when starting out, using high-quality speakers and headphones is key. Furthermore, good-quality equipment helps you hear all the nuances in your mix, letting you make informed decisions about levels, EQ, and effects. Here are some tips for selecting the right speakers and headphones:

Speaker TypeBest For
Nearfield MonitorsMixing in a small or medium-sized room.
Midfield MonitorsMixing in a large room or pro studio.
HeadphonesChecking details and effects in your mix.

Remember that good speakers and headphones aren’t cheap, but the investment is well worth it. Additionally, spend as much as you can afford to ensure the best possible results.

In Conclusion

Also, setting up your vocal mixing space properly is essential to creating a professional-sounding mix. Optimizing your room acoustics and investing in good-quality speakers and headphones may seem like a significant investment, but it’s well worth it to achieve a clean and balanced mix. Remember to follow these tips and take your time to create the best possible setup.

Preparing Your Vocals

Cleaning Up Your Vocal Recordings

Before you can start mixing your vocals, you need to ensure that your recordings are clean and free of any unwanted noise. Moreover, there are a few things you can do to make sure your vocal recordings are as clean as possible:

  • Record in a quiet room
  • In addition, use a pop filter to reduce plosives
  • Furthermore, avoid recording in a room with echo or reverb
  • Use a high-quality microphone

Compiling Vocal Takes

When you record your vocals, you will likely have multiple takes of each line or section. This is a good thing because it gives you more options to choose from when you are mixing. However, it can also be overwhelming if you have too many takes to go through. Additionally, here are some tips to help you compile your vocal takes:

  • Listen to each take and note down the best ones
  • Label each take with the corresponding section or line
  • Choose the best take for each section or line
  • Delete the unused takes to keep your project organized

How To EQ And Mix Vocals

Achieving a professional vocal mix involves equalizing your vocals to create a balanced sound. This can be achieved by using an equalizer to boost or cut certain frequencies and remove any unwanted frequencies. With careful EQ adjustments, your vocals can sound clear, present, and fit perfectly in the mix.

Equalizing your vocals is a crucial step in the process of mixing your vocals professionally. It helps to balance your vocal frequencies and improve the overall sound quality of your vocals. This process involves removing unnecessary frequencies that may interfere with the clarity of your vocals and enhancing the important frequencies that add warmth and depth to your vocals.

Removing Unnecessary Frequencies for Mix Vocals

When equalizing your vocals, one of the primary objectives is to remove unnecessary frequencies. These frequencies can cause muddiness, harshness, and other unpleasant sounds in your vocals. Here are a few steps to consider when removing unnecessary frequencies:

  1. Identify problem frequencies using a spectrum analyzer
  2. Eliminate high-pitched noises or low-frequency rumbles using a high-pass or low-pass filter
  3. Remove overlapping frequencies to avoid frequency masking
  4. Reduce unwanted frequencies using a notch filter

Enhancing Vocal Clarity

The next step in the equalizing process is to enhance vocal clarity. This helps your vocals to cut through the mix and sound more pronounced. Here are a few approaches to consider when enhancing vocal clarity:

  • Boost the frequency range between 1kHz-5kHz to enhance vocal presence and clarity
  • Enhance the sibilance by boosting the frequency range around 6kHz-10kHz, making vocals sound more pronounced
  • Accentuate the upper mid-range around 2kHz to enhance the vocals’ intelligibility
  • Remove any frequency ranges that may cause harshness in your vocals, typically between 2kHz to 5kHz

When it comes to equalizing your vocals, there are many techniques to consider. However, mastering these two primary techniques mentioned above will give your vocals a significant boost in quality and make them sound more professional.

Adding Effects To Your Vocals

Achieving a professional vocal mix requires adding effects to enhance your voice. Start by using compression to balance the levels and EQ to eliminate unwanted frequencies. Then, experiment with reverb and delay settings to create depth and space in your vocals.

As a professional in the music industry, you understand the importance of creating quality sound recordings. One of the keys to achieving that is knowing how to properly mix your vocals. Adding effects to your vocals is a crucial part of the mixing process that can help enhance your sound and make your recordings stand out from the rest. In this article, we’ll discuss how to apply different effects to your vocals, including using reverb and echo and applying compression.

Using Reverb And Echo

Reverb is an effect that adds depth and space to your vocals. It simulates the sound of singing in a large room and can help your vocals sound more natural. Similarly, the echo effect adds depth and dimension to your vocals by creating a repetition of the sound. When using reverb and echo, it’s important to use them in moderation. Too much can make your vocals sound muddy and unclear. Start with a small amount of reverb or echo, and then adjust to your desired level slowly.

Applying Compression for Mix Vocals

Compression is an effect that helps to even out the volume level of your vocals. It’s useful when the vocal performance has uneven dynamics or when different sections need to sound more consistent. When applying compression, it’s important to understand the difference between the threshold and the ratio. The threshold is the volume level where the compressor begins to work. The ratio is the amount of compression that is applied when the volume goes above the threshold. Start by setting the threshold to where your vocal level is the highest, and then adjust the ratio to your desired level.

It’s important to use compression subtly, as too much can make your vocals sound unnatural and artificial. Adding effects to your vocals can be a creative and exciting part of the mixing process. Whether you’re using reverb and echo to create depth or compression to even out dynamics, always use them in moderation and adjust slowly to achieve the desired effect. Happy mixing!

How To Mix Vocals With The Song

Professionally mixing your vocals with the song requires clear communication with your audio engineer, proper microphone technique, and a good recording environment. Proper EQ, compression, and reverb can help your vocal track blend seamlessly with the instrumental track for a polished final mix.

Balancing Vocals With Other Instruments

When mixing your vocals, it’s important to ensure they blend well with the other instruments in your song. One way to achieve this is by balancing the volume levels of each track. Start by bringing the instrumental tracks down to a level where they are audible but not overpowering. Then, gradually increase the volume of your vocals until they sit nicely on top of the mix. Another way to balance your vocals is by EQing the tracks. Use a high-pass filter to remove any low-end frequencies that may muddy up your mix. Then, use a low-pass filter to cut out any harsh high-end frequencies that could make your vocals sound too bright or piercing.

Adjusting Levels As You Mix Vocals

When it comes to adjusting the levels of your vocals in the mix, there are a few things to keep in mind. First, make sure that your vocals are the main focus of the song and that they are audible above all other instruments. You can achieve this by boosting the volume levels of your vocals slightly higher than the other tracks. Next, pay attention to the dynamics of your vocals. Use compression to even out any inconsistencies in volume levels and to bring out the nuances in your vocal performance.

Apply a light amount of reverb or delay to add depth and width to your vocals. When it comes to mixing your vocals with the song, there are a few factors to consider. Start by identifying the key elements of the song, such as the tempo, rhythm, and overall style. Then, ensure that your vocals match the vibe of the song. To do this, experiment with different EQ settings, compression levels, and effects until your vocals sound natural and blend well with the other tracks.

Practical Tips for Mix Vocals

Use panning to make your vocals sit nicely in the stereo field and to create a sense of space in the mix. In conclusion, by balancing vocals with other instruments, adjusting vocal levels, and mixing your vocals with the song, you can achieve a professional-sounding mix that highlights the best qualities of your vocal performance. With these tips, you’ll be on your way to creating a polished and cohesive final product.

Automation Techniques

One of the best automation techniques for mixing vocals like a professional is to use vocal processing plugins. These plugins can help to enhance and balance vocal tracks, control dynamics, and remove unwanted noise. Another useful technique is to use automation to adjust the level, panning, and EQ of vocal tracks throughout the song, ensuring a polished and cohesive sound.

As a music producer or audio engineer, getting your vocals to sound polished and professional is crucial. One of the ways to achieve this is through automation techniques. This involves controlling the volume, panning, and other effects throughout the track to create a seamless, cohesive mix, which is essential for the overall quality of the song. In this section, we will focus on some automation techniques that will help you to mix your vocals like a pro.

Creating Vocal Fades

Vocal fades are essential in music production to avoid harsh beginnings and endings that may damage the listener’s experience. A fade is simply a volume change over time, and it can be achieved using automation. To create a vocal fade, you need to select the section of the track that needs a fade-in or fade-out. Then, open the automation lane and draw a line from zero up to the desired volume level for the fade in, or from the initial volume down to zero for the fade-out. Remember to do this gradually for a smooth effect.

Using Volume Automation for Mix Vocals

Volume automation is another essential technique for mixing vocals professionally. This technique involves controlling the volume of a track at specific points in time to create emphasis, build tension, or provide quieter or louder moments. To use volume automation, select the automation lane for your volume knob and create points at any given time where you want the volume to change. Adjust each point to the desired volume level for that moment. This will help to create a well-balanced and dynamic mix.

Using Panning Automation

Panning automation is the process of changing the position of a sound, such as a vocal, from left to right in the stereo field. This technique can help create more depth and spacing between different elements of the mix. To pan, use the automation lane for the pan knob and create points at different times where you want to move the vocal from left to right, or vice versa.

Using Time-based Effects Automation

Time-based effects, such as reverb and delay, can help add depth to the mix and create a more immersive sound. To use time-based effects automation, use the automation lane for the effect knob and create points at different times where you want the effect to come in or out of the mix. Adjust each point to the desired level of effect for that moment.

Conclusion

In conclusion, automation techniques are essential for mixing vocals professionally and creating a well-balanced mix. Whether it’s creating vocal fades, using volume or panning automation, or adding time-based effects, these techniques will help you create a polished final product that’s sure to impress your audience.

Mastering Your Vocals

Learn how to professionally mix your vocals with these expert tips and techniques. Mastering your vocals is essential for producing high-quality recordings and music that stand out from the rest.

After recording a perfect take of your vocals, the next step is to mix and master the track. One significant aspect of doing this includes mastering your vocals. Mastering your vocals ensures that the vocals are sonically consistent and suit the style of the music. To accomplish this, there are specific techniques that you should apply. In this blog post, we will discuss how to professionally mix your vocals, with a particular focus on the subheading: Finalizing EQ and Compression. We will also cover the crucial step of applying limiting to achieve the perfect sound.

Finalizing Eq And Compression for Mix Vocals

Before you can move to apply limiting on your vocals, you need first to set the correct levels for EQ and compression. Here are the steps to take:

  1. Review the vocals
  2. Listen to the vocals and take note of areas where the vocals sound muddy or too bright. Identify specific problem points that require EQ adjustment.
  3. Apply EQ
  4. Use the EQ tool to eliminate specific EQ ranges that sound off. You can also use this tool to emphasize critical parts of the vocals. Ensure that you apply the EQ with a light hand to avoid coloring the sound too much.
  5. Apply Compression
  6. Compression is crucial in leveling off the vocals. Start by setting a moderate threshold and adjust it as necessary. The goal is to compress the vocals without losing their natural dynamics. Reduce the gain according to the amount of compression applied.
  7. Compare different settings
  8. After applying EQ and compression, compare the different settings with the dry vocal recording. Choose the settings that work best for the track.

Applying Limiting

The final step in the mastering process is applying limiting. Limiting ensures that the vocals do not go beyond a specific volume level. Here are the steps to follow:

  • Set the input gain
  • Use the input gain to increase the level of the vocals to the desired volume level. Set the gain so that the audio is below the clipping threshold.
  • Set the ceiling
  • The ceiling determines the maximum level the vocals can reach. Set the ceiling to the desired level.
  • Adjust the release
  • Release determines how quickly the limiter turns off. Adjust the release according to the style of music.

In conclusion, mastering your vocals is a crucial step in the mixing process. By following these tips and applying EQ, compression, and limiting, you will achieve professional-sounding vocals that are consistent with the track’s style.

How To Professionally Mix My Vocals

Credit: m.youtube.com

Listening To The Mix With A Fresh Perspective

Once you have spent some time mixing your vocals, it is easy to get lost in the details and lose sight of the bigger picture. That’s why it’s important to take a break and come back with fresh ears so you can hear the mix from a new perspective. Here are some tips for listening to the mix with a fresh perspective:

Taking Breaks

It is essential to take breaks every so often when mixing your vocals. Fatigue can set in quickly, and this can lead to poor decision-making when it comes to mixing. Take a short break every hour or so, step away from your workstation or DAW and do something else. When you come back, your ears and brain will be fresher, and you will be able to identify problem areas more quickly.

Testing The Mix On Different Sound Systems

Even if you have great monitors or headphones, they might not translate well to other listening environments. That’s why it’s essential to test your mix on different sound systems. Try listening to your mix on a laptop, a smartphone, or even a car stereo. This will help you identify any issues with the mix, such as muddiness or harshness, that you might not have noticed before.

Keep these tips in mind when listening to your vocal mix with a fresh perspective, and you will be well on your way to creating a polished, professional-sounding mix that will impress your audience.

How To Professionally Mix My Vocals

Credit: www.fiverr.com

Frequently Asked Questions On How To Professionally Mix My Vocals

How Do Professionals Mix Their Vocals?

Mixing vocals professionally involves using techniques such as EQ, compression, reverb, and delay to achieve clarity, presence, and balance. It also involves adjusting the levels of the different vocal layers to make sure they work well together. The goal is to create a cohesive and polished sound that enhances the emotion and message of the song.

How Do You Mix Vocals To Sound Professional?

To make your vocals sound professional, follow these tips: 1. Invest in good recording equipment and a quiet recording environment. 2. Warm up your voice before recording and practice proper microphone technique. 3. Use a pop filter and EQ to reduce unwanted noise and enhance clarity.

4. Edit and mix your vocals carefully, including compression and reverb. 5. Practice consistently and seek feedback from experts to improve your technique.

How Do You Fit Vocals Perfectly In Mix?

Fitting vocals perfectly in a mix requires attention to detail. Start with EQ and compression to enhance the vocals. Use reverb to add depth and dimension, and ensure the vocal level is fit with other instruments in the mix. Remember to adjust the pan and stereo imaging as needed to make the vocals stand out.

In What Order Do You Mix Vocals?

When it comes to mixing vocals, there is no specific order that works for everyone. However, there are some general guidelines that you can follow. Start by adjusting the levels, then add compression, EQ, and effects. Finally, listen to the vocals in context with the rest of the mix and make any necessary adjustments.

Conclusion

Mixing your vocals can be a daunting task, but following these steps can help you achieve a professional sound. Remember to make sure your vocal recording is top-notch, choose the right plugins, use EQ and compression effectively, add reverb and delay for depth, and finally, use automation to make adjustments where needed.

By carefully following each of these guidelines, you’ll be well on your way to creating high-quality vocals that stand out from the rest. Go ahead and give it a try!

Categories
Archive

Focusrite Scarlett How To Choose

Choosing a Focusrite Scarlett involves selecting a specific model based on your needs and requirements. In order to choose the appropriate Scarlett, you must identify your particular recording needs, such as the number of instruments or vocals you will be recording simultaneously or your desired audio quality.

Also, Focusrite Scarlett is a range of audio interfaces designed for professional and home studios. Scarlett interfaces come in various models, each with specific capabilities and features designed for different recording needs. Before buying a Scarlett, you need to consider factors like the number of input and output channels required and the types of audio connections needed.

Related reading: Scarlett Solo Vs 2I2 and Scarlett Solo 1st Gen vs 2nd Gen vs 3rd Gen: Ultimate Guide. For background, see the official Focusrite website.

Moreover, depending on your needs, you might pick one with a USB or Thunderbolt connection, additional mic preamps, headphone outputs, or even built-in effects. Understanding your needs and choosing the right Scarlett will ensure optimal recording quality and a seamless recording experience.

Focusrite Scarlett How To Choose

Credit: www.thomannmusic.com

What Is Focusrite Scarlett?

In addition, Focusrite Scarlett is a range of audio interfaces designed to enhance the recording and playback experience. With several models to choose from, it’s important to consider factors like the number of inputs and outputs, preamp quality, and compatibility with your software and operating system.

Introduction

Focusrite Scarlett is a range of audio interfaces designed to cater to the needs of professional and home recording studios. With a sleek and compact design, Focusrite Scarlett offers high-quality sound and functionality. Whether you are a beginner or a professional, Focusrite Scarlett has something to offer you.

Features

Focusrite Scarlett is known for its exceptional features that make it stand out among other audio interfaces available in the market. Here are some of the top features of Focusrite Scarlett:

  • Low-Latency: With a low-latency operating system, Focusrite Scarlett ensures that there is no delay in the signals, making it suitable for live performances and recording sessions.
  • High-Quality Sound: Focusrite Scarlett provides a clear and detailed sound with a high sample rate and resolution. This makes it useful for recording vocals, acoustic instruments, and other sound sources.
  • Compatibility: Focusrite Scarlett is compatible with both Mac and PC devices and can work with various recording software.
  • Inputs and Outputs: Focusrite Scarlett comes with multiple inputs and outputs, including XLR, TRS, and MIDI, allowing you to connect and record various instruments and sound sources.
  • Software Bundles: Focusrite Scarlett comes with a bundle of software, including Ableton Live Lite, Pro Tools, and plugins like Softube Time and Tone, making it an ideal package for recording studios and musicians.
  • Easy to Use: With a user-friendly interface, Focusrite Scarlett can be easily set up and used even by beginners.

Focusrite Scarlett offers a range of interfaces with different specifications, allowing you to choose one that best suits your needs. Whether you are looking for a compact interface for home recording or a larger one for professional studio use, Focusrite Scarlett has a model for you.

Choosing The Right Scarlett For Your Needs

Choosing the right Scarlett interface from Focusrite can be a daunting task, given the array of models available. However, taking into consideration your specific needs and budget can make the process more manageable. With different specifications, features and connectivity options, there’s a Scarlett for everyone- from beginner to professional musician or engineer.

If you are a music producer or a musician looking for high-quality audio interfaces, then the Focusrite Scarlett series is undoubtedly a top pick for you. With different models varying in functionalities and sizes, it can be daunting to choose the right Scarlett for your needs. This article will walk you through the essential factors to consider when selecting a Scarlett audio interface.

Consider Your Budget for Focusrite Scarlett

The Scarlett series comes in various models with different price ranges. Therefore, your budget will play a critical role when choosing the Scarlett that fits your needs. The price of Scarlett ranges from $109 to $849. If you are a beginner or a home studio owner, the Scarlett 2i2 or Solo models can be a perfect fit for you since they are budget-friendly and can deliver excellent sound quality.

Number Of Inputs And Outputs

Recording needs differ from one producer or musician to another. Therefore, it would be best to consider the number of inputs and outputs that will suit your recording needs. The Scarlett 2i2, for instance, comes with two inputs, while the Scarlett 18i20 model provides you with 18 inputs and 20 outputs. Therefore, if you’re planning to record a full band or have a more extensive recording setup, it’s best to opt for a higher input and output count.

Compatibility With Your Devices

You want to ensure that your Scarlett audio interface is compatible with your computer and other recording gear. It is essential to check the device’s connectivity options and compatibility before making a purchase. For instance, Scarlett interfaces use USB connectivity, and they are compatible with both Windows and Mac OS. However, suppose you are planning to connect other gears such as MIDI controllers or microphones. In that case, you should ensure that your Scarlett supports the necessary connectivity inputs like XLR or MIDI. In conclusion, when choosing the right Scarlett for your needs, considering your budget, the number of inputs and outputs, and compatibility with your devices should be top priority. Focusrite Scarlett audio interfaces will undoubtedly add value to your recording needs, making your music production journey stress-free and enjoyable.

Scarlett Solo Vs Scarlett 2i2 Vs Scarlett 4i4 Vs Scarlett 8i6

Choosing the right Focusrite Scarlett for your recording needs depends on the number of inputs and outputs required, with Solo having one input and two outputs, 2i2 and 4i4 both having two inputs and four outputs, while 8i6 has six inputs and eight outputs.

Consider the type of instruments, microphones, and connections needed to select the right Scarlett interface.

When it comes to choosing the perfect audio interface, the Focusrite Scarlett series should definitely be on your list. Among the popular models available today are Scarlett Solo, Scarlett 2i2, Scarlett 4i4, and Scarlett 8i6. However, with such similar names and designs, it’s easy to get confused and overwhelmed. In this article, we’ll compare these devices’ features, including their pros and cons, to help you in your decision-making process.

Comparison Of Features

The Scarlett Solo is the most basic among the series, featuring one XLR input and one ¼ inch TRS input, ideal for recording vocals or guitar. Scarlett 2i2 and Scarlett 4i4, on the other hand, feature two XLR inputs and two ¼ inch TRS inputs, perfect for recording two instruments or vocals simultaneously. Scarlett 8i6 provides four XLR inputs and two ¼ inch TRS inputs, suitable for recording an entire band or a complete drum set.

Pros And Cons

Scarlett Solo’s biggest advantage is its simplicity and ease of use, with its compact size and easy connection to your computer via USB. However, it cannot perform more complex production tasks, and it has limited sound quality compared to other models. Scarlett 2i2 and Scarlett 4i4 offer better options for home recording, with improved sound quality and control over gain, as well as the ability to direct monitor your recordings. Scarlett 8i6 has more extensive connectivity options, making it the ideal choice for professionals who handle music production tasks.

However, it is also the most expensive and may be overkill for home recording purposes. Overall, choosing the right Scarlett model will depend on your specific recording needs and budget. If you’re a solo artist looking for a basic and hassle-free recording setup, the Scarlett Solo is a good place to start. If you need more inputs for recording multiple instruments and vocals, Scarlett 2i2 or Scarlett 4i4 would be a better choice. For professional producers and engineers who seek the most versatile and complex features, the Scarlett 8i6 is the perfect device for you.

Setting Up Your Scarlett

If you’re a music producer, you know how important it is to have a good audio interface for recording and producing music. One popular choice is the Focusrite Scarlett, which offers high-quality sound at an affordable price point. But with multiple models to choose from, how do you know which Scarlett is right for you? And once you get it, how do you set it up to get the best possible results?

Connecting To Your Computer for Focusrite Scarlett

Before you can start using your Scarlett, you need to connect it to your computer. The exact process will depend on which model you have and what type of connection it uses, but in general, you’ll need to do the following:

  • Plug in the Scarlett using the supplied USB cable
  • Install any necessary drivers or software
  • Connect any instruments or microphones to the Scarlett’s inputs

Once you’ve connected everything, you should see the Scarlett as an available audio device in your computer’s settings.

Configuring Your Daw for Focusrite Scarlett

If you’re using a digital audio workstation (DAW) like Pro Tools, Logic, or Ableton Live, you’ll need to configure it to work with your Scarlett. Again, the steps will vary depending on your specific DAW, but you’ll generally need to:

  • Select the Scarlett as your audio device in the settings
  • Choose the correct inputs and outputs for your project
  • Set the buffer size to a low value for lower latency

If you’re having trouble getting your DAW to work with your Scarlett, check the Focusrite website for troubleshooting guides or contact their support team for further help.

Optimizing Sound Quality for Focusrite Scarlett

Once you’ve got your Scarlett set up and connected to your computer and DAW, you’ll want to make sure you’re getting the best possible sound quality. Here are a few tips to help:

  • Use high-quality cables to connect your instruments and microphones
  • Keep the Scarlett away from other electronics that could cause interference
  • Adjust the input gain levels to prevent clipping
  • Use headphones or monitor speakers to listen to your recordings
  • Experiment with different settings to find the ideal sound for your project

By following these tips, you should be able to get great results from your Scarlett and produce high-quality music that you can be proud of.

Tips And Tricks For Using Scarlett

Looking to choose the right Focusrite Scarlett audio interface for your needs? Here are some tips and tricks to help you make the best decision. From the number of inputs and outputs to the type of connection, there are several factors you should consider before purchasing a Scarlett.

Focusrite Scarlett audio interfaces are essential tools for recording musicians and music enthusiasts alike. Scarlett is easy to use, reliable, and compatible with most audio recording software. Whether you’re a beginner or a professional, there are tips and tricks that you can use to get the most out of your Scarlett interface. Let’s dive in!

Using Scarlett With Condenser Microphones

Condenser microphones are great for recording vocals and acoustic guitars. When using a condenser microphone with Scarlett, it’s important to ensure that you’re using the correct input. Scarlett interfaces have XLR and ¼ inch inputs, which can sometimes be confusing. The XLR input is designed for microphones, while the ¼ inch input is designed for line-level signals. Make sure you’re using the XLR input when recording with a condenser microphone. Another important tip is to ensure that the phantom power is turned on. Most condenser microphones require phantom power to operate correctly. Scarlett interfaces have a switch that enables phantom power. This switch is usually located on the front panel of the interface, and it’s clearly labeled.

Recording Electric Guitar for Focusrite Scarlett

Scarlett interfaces are also great for recording electric guitars. When recording an electric guitar, it’s important to use a direct input. Scarlett interfaces have a Hi-Z input, which is designed specifically for guitar and bass signals. This input has a higher impedance than the other inputs, which helps to reduce noise and interference. Another tip is to ensure that the input gain is set correctly. Input gain determines how loud the signal is before it’s processed by the interface. For electric guitars, you’ll want to set the input gain so that the loudest playing sounds good without clipping. Clipping occurs when the signal is too loud and distorts. Scarlett interfaces have LED lights that indicate when the signal is too loud, so make sure you’re monitoring these lights when setting the input gain.

Using The Mixcontrol for Focusrite Scarlett

The Scarlett MixControl is a software application that allows you to control the routing and settings of your Scarlett interface. It’s essential to ensure that you’re using the MixControl correctly to get the most out of your Scarlett interface. One tip is to experiment with the routing options. Scarlett interfaces have multiple inputs and outputs, which can be routed in a variety of ways. Experimenting with different routing options can help you to achieve the sound you’re looking for. Another important tip is to ensure that you’re using the MixControl to set your headphone mix.

The headphone mix is the mix that you hear in your headphones while recording. The Scarlett MixControl allows you to set the headphone mix separately from the main mix, which can be very useful when recording multiple performers simultaneously. In conclusion, Focusrite Scarlett interfaces are excellent tools for recording musicians and music enthusiasts. By following these tips and tricks, you can ensure that you’re getting the most out of your Scarlett interface. Whether you’re recording vocals, acoustic guitars, or electric guitars, Scarlett interfaces have the inputs and features you need to achieve your desired sound.

Focusrite Scarlett How To Choose

Credit: www.thomann.de

Troubleshooting Your Scarlett

Learn how to troubleshoot your Focusrite Scarlett to ensure optimal performance. With various models to choose from, it’s important to select the right one based on your needs and budget. Trust in the quality and reliability of Focusrite Scarlett interfaces for seamless audio recording and production.

If you’re experiencing issues with your Focusrite Scarlett, don’t worry, there are a few things you can do to troubleshoot the problem before seeking technical assistance. In this article, we discuss common issues related to the Scarlett and how you can fix them.

No Sound

One of the most common issues experienced by users of Scarlett is encountering no sound. This issue can arise due to a variety of reasons. Some of the common reasons are incorrect audio settings or faulty connections. Try the following steps to fix this issue:

  1. Check all the cables and connections between the Scarlett and your computer or other devices to ensure everything is correctly plugged in.
  2. Ensure that the gain levels on your input device are set correctly. Too low a gain may result in no sound.
  3. Go to your System Preferences and check your sound settings. Ensure that the audio output is set to Scarlett (or whatever your output device is) and the output volume is not set to zero or muted.

Latency Issues

Another common issue faced by Scarlett users is latency. This issue can occur when there is a delay between the audio input and output, leading to an unpleasant experience. Here are some ways to troubleshoot latency issues:

  • Ensure that your Scarlett driver is up-to-date. Updating your driver can help improve performance and reduce latency issues.
  • Try increasing the buffer size in your recording software, which can help eliminate latency in some cases.
  • Use the monitor mix feature on the Scarlett to achieve a perfect balance between the original sound and the output.

Updating Firmware

Updating your Scarlett’s firmware can improve performance and fix bugs. Follow these steps to update your device:

StepDescription
Step 1Go to the Focusrite website and download the Scarlett firmware update utility.
Step 2Connect your Scarlett to your computer using the USB cable.
Step 3Run the firmware update utility and follow the on-screen instructions to complete the process.
Step 4Once the update is complete, your Scarlett will restart, and you can start using it again.

In conclusion, troubleshooting your Scarlett can be a little tricky, but by following these steps, you should be able to fix most issues. Remember to stay patient and persistent, and always seek professional technical assistance if you cannot solve the problem on your own.

Final Thoughts

In conclusion, choosing the best Focusrite Scarlett for your recording needs can be a tough decision. With so many options and features to choose from, it’s important to do your research and make an informed decision. Here are some final thoughts to consider when choosing and using your Scarlett:

Choosing The Best Scarlett For You

When considering which Scarlett to purchase, think about the type of recording you plan to do. If you’re a singer/songwriter looking to record vocals and acoustic guitar, the Scarlett Solo or Scarlett 2i2 may be the best options for you. If you need more inputs for recording a full band, the Scarlett 18i20 is a great choice.

Another important factor to consider is the connectivity options. Do you need MIDI inputs and outputs for electronic instruments? Would you prefer Thunderbolt or USB connectivity? These are all factors to consider when choosing the best Scarlett for your recording needs.

Making The Most Out Of Your Scarlett

Once you’ve chosen your Scarlett, it’s important to optimize it for your recording setup. Make sure to install the necessary drivers and software, and customize the settings to fit your needs. Take advantage of the built-in features like the pad and phantom power switches to get the best sound possible.

Also, don’t forget to experiment with different microphones and instruments to find the best combination for your recordings. The Scarlett is a versatile tool, so don’t be afraid to get creative with your setups.

In conclusion, the Focusrite Scarlett is a top-of-the-line audio interface that can greatly enhance your recording capabilities. By choosing the best Scarlett for your needs and optimizing its settings, you can get the best sound possible and take your recordings to the next level.

Focusrite Scarlett How To Choose

Credit: www.sweetwater.com

Frequently Asked Questions For Focusrite Scarlett How To Choose

How Do I Choose The Best Audio Interface?

To choose the best audio interface, consider the number of inputs and outputs needed, connection type, driver compatibility, sample rate and bit depth, and budget. Research various brands and read customer reviews to make an informed decision.

What Version Of Focusrite Scarlett Do I Have?

To check which version of Focusrite Scarlett you have, look for the model number on the unit or its packaging. It should be listed as “Scarlett” followed by a number and letters, such as “Scarlett 2i2” or “Scarlett 18i20”. You can also check your device manager on your computer or the Focusrite Control software for more information.

Is Focusrite Good For Beginners?

Yes, Focusrite is a great brand for beginners because it offers affordable, high-quality audio interfaces that are easy to use. They also provide excellent support and a helpful online community. Whether you’re a new producer, podcaster or musician, a Focusrite interface is a reliable and solid starting point.

Is Focusrite Scarlett Professional?

Yes, the Focusrite Scarlett is a professional-grade audio interface that is widely used by musicians, podcasters, and content creators. Its high-quality preamps, low latency, and excellent sound quality make it a popular choice among professionals.

Conclusion

To sum up, choosing the right Focusrite Scarlett can make all the difference in your music production journey. It’s essential to consider important factors such as budget, intended use, and technical features to make an informed decision. By doing so, you can ensure that you’re getting the best value for your money without compromising on quality.

With a wide range of options available, you’re bound to find the perfect match that can help you unleash your creative potential.

Categories
Archive

How Much Does a Modular Synth Cost

A modular synth can range in price from a few hundred to tens of thousands of dollars. Modular synthesisers have been around for many years, but they have recently gained mainstream popularity.

They are used by musicians, producers, sound designers and enthusiasts. Modular synths differ from other synths on the market, where you can interchange specific components to create unique sounds and improve the overall sound quality. One of the most significant selling points for modular synths is their flexibility in creating a sound, making them one of the best choices for sonic experimentation in electronic music.

However, the price for a modular synth can widely vary, which depends on many factors that contribute to their sound quality and overall sound manipulation capabilities. We will discuss how much a modular synth costs and what factors impact the price.

How Much Does a Modular Synth Cost

Credit: ra.co

Cost Factors To Consider

HTML Syntax:

Modular synthesizers are a great investment for music enthusiasts and professionals alike. However, the cost of a modular synth can vary greatly depending on a number of factors. To help you understand the cost factors involved, we will review each one in detail.

Module Manufacturers

When it comes to modular synthesizers, there are numerous manufacturers to choose from, and each one has its own unique sound and design. Some popular manufacturers include:

Make NoiseIntellijelMutable Instruments
DoepferTipTop AudioErica Synths
Endorphin.esExpert Sleepers4MS Company

Depending on your preferences and budget, you may choose to purchase modules from multiple manufacturers or focus on a single brand.

Module Types

Module types are another significant factor when determining the cost of a modular synth. Some common module types include:

  • Voltage-Controlled Oscillators (VCOs)
  • Voltage-Controlled Filters (VCFs)
  • Voltage-Controlled Amplifiers (VCAs)
  • Envelopes
  • LFOs
  • Sequencers

Each module type has its own unique purpose and can add to the overall cost of a modular synth.

Module Sizes

Module sizes can also impact the cost of a modular synthesizer. Common module sizes include:

  • 1U
  • 2U
  • 3U
  • 4U

These sizes can determine how many modules you can fit into your case and can affect the price of both the modules and the case.

Number Of Modules

The number of modules you choose to purchase can significantly impact the cost of your modular synth. Some enthusiasts may choose to start with just a few modules and gradually build their collection over time.

Case And Power Supply

A modular synthesizer requires a case and power supply to operate. The cost of these components will depend on the number of modules you choose to purchase and the size of your case. Larger cases require more power, which can add to the overall cost.

Added Extras

Finally, there are numerous added extras that can impact the cost of your modular synth. These can include:

  • Patch cables
  • External processors
  • MIDI controllers
  • Effects pedals

While these extras aren’t necessary for a functional modular synth, they can enhance your sound and creativity.

Ultimately, the cost of a modular synth will depend on your personal preferences, budget, and purpose. By considering these cost factors and weighing your options, you can invest in a modular synth that suits your needs and inspires your creativity.

How Much Does a Modular Synth Cost

Credit: www.reddit.com

Popular Modular Synth Brands And Their Cost

Some popular modular synth brands and their cost include Make Noise, starting at around $300, and Mutable Instruments, starting at around $200. Other options like Intellijel, Pittsburgh Modular, and TipTop Audio also range in price from a few hundred to a few thousand dollars.

Modular synthesis has been gaining popularity over the years as musicians and sound designers seek more creative and customizable ways of shaping sound. Modular synthesizers can come in different shapes and sizes, and their prices can range from hundreds to thousands of dollars depending on various factors such as the brand, functionality, and build quality. In this article, we will focus on some of the popular modular synth brands and their cost to help you make an informed decision when considering purchasing one.

Intellijel – $200 To $2,000

Intellijel is a Canadian-based modular synth brand known for its innovative and visually appealing modules. Their modules range from effects processors, sequencers, oscillators, and more. The brand caters to different budgets with some of their entry-level modules like the Dixie II oscillator costing around $200, while high-end modules like the Shapeshifter oscillator can cost upwards of $2,000.

Make Noise – $200 To $1,500

Make Noise is a North Carolina-based modular synth brand known for its unique, experimental, and often bizarre-sounding modules. The brand’s founder, Tony Rolando, is an electronic musician and engineer who incorporates his unique musical and sonic vision into his designs. Make Noise modules cost anywhere from $200 to $1,500, with their most popular modules like the Maths and Morphagene sampler costing around $300 to $500.

Mutable Instruments – $100 To $600

Mutable Instruments is a French-based synth brand run by electronic musician and engineer Émilie Gillet. The brand is known for its open-source modular synth designs that allow users to modify and customize their modules. Mutable Instruments modules cost between $100 and $600, with their most popular modules like the Clouds granular processor and the Rings resonator costing around $300.

Expert Sleepers – $100 To $500

Expert Sleepers is a UK-based synth brand known for its integration of computer software with modular synths. Their modules allow users to interface their modular synth systems with computer software like Ableton Live, Max/MSP, and other music production software. Expert Sleepers modules cost between $100 and $500, with their most popular modules like the Disting MK4 module and ES-8 CV/audio interface costing around $200 to $400. In conclusion, the cost of modular synthesizers can vary significantly depending on the brand, functionality, and build quality. Popular brands like Intellijel, Make Noise, Mutable Instruments, and Expert Sleepers offer a wide range of modules catering to different budgets and sound design needs. When considering purchasing a modular synth, it’s essential to do your research and choose a model that best suits your musical and sonic preferences.

How To Save Money On A Modular Synth

Modular synths can range from pricey to astronomically expensive. However, there are ways to save money without sacrificing quality. Consider buying used or DIY kits, and prioritize the essential modules you need to start out.

Modular synths can be an expensive investment that requires a significant amount of money and patience. Fortunately, there are various ways to save money while building your dream modular synth setup. Here are a few tips to help you save money on a modular synth.

Buy Used Modules

One of the easiest ways to save money on a modular synth is to buy used modules. Used modules can be found in a variety of places, including online marketplaces like Reverb, eBay, and Craigslist. When purchasing used modules, be sure to carefully inspect the item to make sure that it’s in good working condition. It’s also important to research the module’s market value to ensure you’re getting a good deal.

Diy Modules

Another way to save money on a modular synth is to build your own modules. With DIY modules, you’ll have more control over the sound and functions of each module while also saving money. DIY kits can be found at various online retailers, and there are also many tutorials and forums available to guide you through the process. However, it’s essential to have a basic knowledge of electronics and soldering techniques before attempting to build your own modules.

Choose Fewer Must-have Modules

It’s important to carefully consider which modules you truly need and which ones you can do without. By choosing fewer must-have modules, you can save a significant amount of money in the long run. Consider prioritizing your modular synth setup by starting with a few basic modules and gradually adding more as your budget and needs allow.

Plan Ahead

Planning ahead can also help you save money on a modular synth setup. By carefully considering which modules you need and researching the best prices and deals, you can avoid impulse buying and overspending. It’s also important to keep an eye out for sales and discounts by subscribing to newsletters and following modular synth retailers on social media. In conclusion, there are several ways to save money on a modular synth setup. By buying used modules, building your own DIY modules, choosing fewer must-have modules, and planning ahead, you can build a high-quality modular synth setup without breaking the bank.

How Much Does a Modular Synth Cost

Credit: www.attackmagazine.com

Frequently Asked Questions Of How Much Does A Modular Synth Cost

How Much Does A Synthesizer Cost?

A synthesizer’s cost varies depending on its quality and features. Basic models can cost $100, while high-end ones can cost several thousand dollars. Generally, expect to spend a few hundred dollars for a decent synthesizer.

What Is The Best Modular Synth?

The best modular synth is subjective and depends on personal preferences. Some popular options are the Make Noise Maths, Mutable Instruments Clouds, and Intellijel Metropolis. Consider factors such as sound quality, features, compatibility, and budget when making a choice.

What Do I Need To Build A Modular Synth?

To build a modular synth, you will need a power supply, a case, modules such as oscillators, filters, and envelope generators, patch cables, and a mixer. It is important to research and choose high-quality components for a reliable and functional setup.

What Is The Point Of Modular Synths?

Modular synths offer the flexibility to create unique, complex sounds and effects by connecting various modules. Each module serves a specific purpose, such as generating sound or altering it in a specific way. This customization allows for endless possibilities and a hands-on approach to electronic music production.

Conclusion

The cost of a modular synth varies depending on its brand, availability, and complexity. You may opt to purchase a complete system or build your own. Although the investment may seem hefty, modular synths are valuable tools for sound design and experimentation.

In any case, it’s vital to spend within your means and prioritize the features you need to create your desired sounds.

Categories
Archive

Why Should I Get My Song Mixed

Getting your song mixed can enhance the overall sound quality and clarity of your music, making it more appealing to listeners. A well-mixed song allows for each instrument and vocal to be heard distinctly, creating a cohesive and professional final product.

When creating music, mixing is an important step in the production process that often gets overlooked. It involves balancing the different elements of a song such as the levels, EQ, effects, and panning to create a harmonious and polished sound.

Mixing not only improves the sonic quality but also helps to bring out the emotion and intention behind the music. A good mix grabs the listener’s attention and keeps them engaged throughout the entire song. Whether you’re a professional musician or just starting out, investing in a professional mix can take your music to the next level and help you stand out in a crowded market. Don’t underestimate the power of a well-mixed song and consider hiring a mixing engineer or taking the time to learn the skills yourself.

Why Should I Get My Song Mixed

Credit: www.youtube.com

Better Sound Quality

Getting your song mixed can make a huge difference in its sound quality. In fact, it can be the difference between a great song and a forgettable one. Mixing involves blending all the different elements of your track together to create a cohesive sound that is pleasing to the ear.

Eliminates Distortion

One of the biggest benefits of getting your song mixed is that it helps to eliminate distortion. Distortion occurs when the sound is too loud and begins to clip, causing an unpleasant buzzing or crackling sound. A good mix engineer will be able to identify these issues and fix them, resulting in a much cleaner and more pleasant listening experience.

Balances Audio Elements

Another important aspect of mixing is balancing the various audio elements. This involves adjusting the levels of each instrument or vocal track so that they blend together seamlessly. It also involves panning different tracks to create a sense of space and depth.

Adds Depth To The Sound

Finally, mixing can add depth to the sound of your recording. By applying various effects such as reverb and delay, a mix engineer can create a sense of space and ambiance that makes your song sound more professional. This can help to bring out certain elements of the track that may have been buried in a flat recording.

In conclusion, getting your song mixed is crucial if you want to achieve a high-quality sound that is professional and enjoyable to listen to. By eliminating distortion, balancing audio elements, and adding depth to the sound, you can take your music to the next level.

Why Should I Get My Song Mixed

Credit: www.masteringthemix.com

Compatibility

One of the main reasons why you should get your song mixed is compatibility. This refers to the ability of your song to be played on various systems and devices without any issues. The goal is to ensure that your listeners have the best possible experience, no matter where they are or what they are using to listen to your music.

Ensures Compatibility With Different Systems

When your song is mixed, it is optimized for different systems and devices. This means that it will sound great whether it is played on a smartphone, computer, car stereo, or any other device. The mixing process takes into consideration the different audio components of each system and adjusts them accordingly, so that your music sounds consistent and balanced across all platforms.

Adapts To Different Playback Environments

In addition to different systems, your music may also be played in various environments. For example, someone might listen to your song in a quiet room, while another person might listen to it in a noisy club. Mixing takes into account these different environments and adapts the sound to suit them. The goal is to ensure that your music can be enjoyed no matter where your listeners are or how they are listening.

The benefits of compatibility are numerous. For one, it ensures that your music is accessible to a wider audience. No matter what device or system your listeners are using, they will be able to hear your music as it was intended. Additionally, compatibility can help boost your credibility as an artist. When your music sounds good on all platforms, it shows that you are a professional who takes their craft seriously.

Overall, compatibility is an essential aspect of music production. It ensures that your music is accessible, enjoyable, and consistent across all platforms and environments. By getting your song mixed, you can take advantage of all the benefits that compatibility has to offer.

Professionalism

Getting your song mixed by a professional sound engineer ensures that the various elements of your track are synchronized, harmonious, and balanced. A professionally mixed song has the potential to stand out and become a hit, making it a worthwhile investment for any serious musician.

The professionalism of your song can be the difference between making it big in the music industry or going unnoticed. That’s why it’s essential to get your song mixed professionally. Mixing is the process of taking individual tracks and combining them into a stereo master track. This process can significantly improve the sound quality of your song. In this post, we’ll be discussing the benefits of a professionally mixed track under the subheading, Professionalism. Professional Sound The most obvious benefit of getting your song mixed professionally is that it will sound better. Professional sound engineers have the knowledge, skills, and tools to make your song sound balanced, polished, and clear. They can adjust the levels, panning, EQ, and effects to ensure that each instrument and vocal is heard clearly, and the overall sound is smooth and cohesive. A professional mix will elevate your song and make it stand out amongst the competition. Improved Marketability Another advantage of a professionally mixed song is that it can improve your marketability as an artist. A high-quality mix is essential for getting your music noticed by record labels, radio stations, and music supervisors. With so much competition in the music industry, having a polished and professional sound can make your music more appealing to potential listeners and industry professionals alike. A well-mixed song can even lead to more opportunities for gigs, collaborations, and more exposure. Better First Impressions First impressions are crucial, especially in the music industry. In a sea of songs, it’s essential to make a lasting impact on your listeners in the first few seconds. A poorly mixed song can turn off potential fans and cause them to skip to the next track. On the other hand, a professionally mixed song can capture the listener’s attention and keep them engaged throughout the entire track. A high-quality mix can set you apart from other artists and make a positive first impression that encourages listeners to explore your work further. In conclusion, a professionally mixed song can take your music to the next level. It can make your music sound more polished and clear, improve your marketability, and leave a better first impression on listeners. Don’t underestimate the benefits of a professional mix; it can be the difference between success and failure in the music industry.

Technical Expertise

Getting your song mixed by a technical expert is crucial to take your music to the next level. A skilled mix engineer can help balance the instruments, vocals, and effects, and make all the sounds work together in harmony. With the right mix, your song can sound professional and polished, making it stand out from the crowd.

Specialized Knowledge Of Audio Techniques

To get your song mixed in the best possible way, it requires specialized knowledge of audio techniques. The technical expertise required to mix a song is more than just adjusting the levels. It involves advanced understanding and techniques in EQ, dynamics, reverb, and spatial placement, to name a few. A good mixing engineer will know how to bring out the best in your music by using these techniques.

Experience With Industry Standards

Another important aspect of technical expertise is having an experience with industry standards. Knowing how to mix a song is not enough if the final product does not meet the industry standards. A mixing engineer with experience in the industry will have the necessary knowledge of how to make your song sound competitive with other songs in the market. They know what elements are important to make your song sound the best it can be.

Conclusion

Mixing a song is a technical process that requires expertise in audio techniques and knowledge of industry standards. By hiring a professional mixing engineer with specialized knowledge and experience, you can ensure that your song is mixed to the highest possible standards.

Cost-effective

As a musician, you may be wondering if it is worth the investment to get your song professionally mixed. In short, yes. Getting your song mixed can not only improve the overall quality of your sound, but it can also be cost-effective in the long run. Here are some reasons why:

Saves Time And Money

  • Better quality sound means less time spent on fixing issues in the recording process, saving valuable studio time and money.
  • By sending your music to a professional mix engineer, you can focus on your primary strengths as a musician and save time by delegating the mixing task.
  • A well-mixed song is often more likely to be picked up by labels or publishers, leading to more opportunities and potentially more revenue for your music career.

Prevents Costly Mistakes

  • A professional mix engineer can prevent the costly mistakes that can be made in the recording process, such as incorrect mic placement or improper EQ and compression settings.
  • By ensuring that all of the elements in the mix are balanced, a mix engineer can prevent the possibility of costly re-recording and remixing sessions, saving you both time and money.
  • Professional mixing can help identify and fix issues or irregularities within a recording, such as phase cancellation or noise reduction issues, that could potentially harm your song’s marketability or popularity.

In conclusion, while it may seem like an unnecessary expense, investing in a professional mix can actually be cost-effective in saving time, money and prevent potential costly mistakes. By delegating the mixing task to a professional, you can focus on your key strengths as a musician and move one step forward towards success in your music career.

Why Should I Get My Song Mixed

Credit: majormixing.com

Frequently Asked Questions On Why Should I Get My Song Mixed

Why Do Songs Need To Be Mixed?

Songs need to be mixed to ensure that all instruments, vocals, and elements of the song are blended together harmoniously. Mixing involves adjusting levels, panning, EQ, compression, and other techniques to achieve balance and clarity in the audio. Without mixing, the song may sound muddy, unbalanced, and unclear.

What Is The Purpose Of Mixing A Song?

Mixing a song is the process of combining and balancing all the individual elements of a recording, like instruments and vocals, into a final stereo mix. The purpose of mixing is to make sure that all of the elements in the song work together harmoniously and sound good together.

It’s an important step in the production process that can greatly affect the overall quality of the final product.

Should I Get My Song Professionally Mixed?

Yes, getting your song professionally mixed can greatly improve the overall quality of your music. Professional mixing can help balance the levels of each instrument and vocal track, add clarity and depth, and make your song sound more polished and radio-ready.

It’s worth considering if you want to take your music to the next level.

Why Should I Get My Song Mastered?

Getting your song mastered can significantly enhance its sound quality and overall impact. Mastering refines your mix and balances the frequencies, dynamics and stereo width. It improves clarity, loudness and consistency of your song, which is essential for professional releases, especially for radio or streaming services.

It also ensures that your music translates well across different platforms and audio systems. So, it’s worth investing in mastering to achieve the best possible sound for your music.

Conclusion

A well-produced song can captivate the audience and leave a long-lasting impression. Getting your song mixed by a professional can enhance its overall sound quality and make it radio-ready. This opens doors to new opportunities and helps establish yourself as a credible musician in the industry.

With the benefits of a refined sound and wider reach, it’s time to invest in professional sound mixing services for your passion project.