Categories
Archive

Algorithmic Reverb Vs Convolution

Algorithmic reverb is created through digital signal processing, whereas convolution reverb is created using impulse responses. Convolution reverb is considered more realistic because it is based on actual physical spaces, while algorithmic reverb can be more creative and flexible in its processing.

Reverb is an essential effect in music production, adding depth and space to a mix. When it comes to creating reverb, there are two main types: algorithmic and convolution. Algorithmic reverb is created through digital signal processing, whereas convolution reverb is created using impulse responses.

While both are effective in creating reverb, they differ in how they achieve the desired effect and the quality of sound they produce. Convolution reverb is considered more realistic because it is based on actual physical spaces, while algorithmic reverb can be more creative and flexible in its processing. We will explore the differences between algorithmic reverb and convolution reverb and how they are used in music production.

Algorithmic Reverb Vs Convolution

Credit: professionalcomposers.com

Algorithmic Reverb

Algorithmic reverb is a type of digital reverb that uses mathematical algorithms to create a realistic acoustic space. Compared to convolution reverb, which uses impulse responses to simulate real environments, algorithmic reverb is more versatile and offers more creative control.

Algorithmic reverb is a popular type of digital reverb that offers a wide range of sound design possibilities. Unlike convolution reverb, which works by processing audio recordings of physical spaces, algorithmic reverb uses mathematical algorithms to simulate the sound of different spaces and environments. In this section, we’ll explore how algorithmic reverb works, its pros and cons, and some examples of popular algorithmic reverb plugins.

How Does Algorithmic Reverb Work?

Algorithmic reverb works by using complex mathematical algorithms to simulate the acoustic properties of different spaces and environments. These algorithms are designed to mimic the way sound waves behave in real-world spaces, such as concert halls, cathedrals, and recording studios. The algorithm generates a series of reflections that simulate the way sound waves bounce off walls, floors, and ceilings in a real space. These reflections are then processed to create a reverb tail, which is the sustained sound that lingers after the initial sound has stopped.

Pros And Cons Of Algorithmic Reverb

Like any audio processing tool, algorithmic reverb has its advantages and disadvantages. Here are some of the most significant pros and cons of using algorithmic reverb: Pros: – Wide range of sound design possibilities – Can create unique and unconventional reverbs – Highly customizable with many parameters to tweak Cons: – Can sound artificial or “processed” if not used carefully – Limited realism compared to convolution reverb – Can be CPU intensive and demanding on system resources

Examples Of Algorithmic Reverb Plugins

There are many algorithmic reverb plugins available on the market, both free and commercial. Here are some examples of popular algorithmic reverb plugins:

NameDeveloperPrice
ValhallaRoomValhalla DSP$50
Reeverb 2Waves$249
AltiverbAudio Ease$595

Each of these plugins has its unique sound and features. ValhallaRoom, for example, is known for its lush and classic sound, while Reverb 2 has a more modern and clean sound. Altiverb is known for its high-quality convolution processing and accurate sound simulation.

Algorithmic Reverb Vs Convolution

Credit: m.youtube.com

Convolution Reverb

Convolution reverb is a type of digital reverb effect that is commonly used in audio production to create the impression of an acoustic space. Unlike algorithmic reverb, which generates artificial reflections and decay, convolution reverb recreates the sound of a specific space by convolving an impulse response of that space with the original audio signal. In this section, we will dive deeper into the workings of convolution reverb, its pros and cons, and some popular convolution reverb plugins.

How Does Convolution Reverb Work?

The core technology behind convolution reverb is impulse response. An impulse response is a mathematical representation of a space’s acoustic characteristics, including reflections, early reflections, and frequency response.

To create convolution reverb, a digital audio workstation (DAW) captures an impulse response by sending an audio pulse into a real-world space, like a concert hall or a cathedral. The audio pulse then bounces around the space and records its reflections using a microphone. The captured impulse response is then used to convolve a dry signal, such as a vocal track, to create a sense of space.

Convolution reverb can be used to create realistic reverberation that sounds like it was recorded in a particular physical space. The drawback to convolution reverb is that it can be resource-intensive, requiring a lot of processing power to convolve signals in real-time.

Pros And Cons Of Convolution Reverb

Here are some pros and cons of convolution reverb that you should consider before using it:

Pros:

  • Provides a realistic representation of a physical space’s acoustics.
  • Can be used to recreate unique and specific spaces.
  • Captures the nuances of the original space’s frequency response and early reflections.

Cons:

  • Requires a lot of processing power to convolve signals in real-time.
  • May not sound as lush or natural as algorithmic reverb.
  • Can be less flexible than algorithmic reverb as it cannot create artificial spaces.

Examples Of Convolution Reverb Plugins

Convolution reverb is available as a feature of many digital audio workstations, but there are also many third-party convolution reverb plugins available on the market. Some popular convolution reverb plugins include:

Plugin NameDescription
AltiverbA high-quality convolution reverb that features a vast library of impulse responses.
Waves IR-1A versatile convolution reverb plugin that offers a range of customization options.
Convology XTA free convolution reverb plugin that features a range of impulse responses.

While algorithmic reverb and convolution reverb have their pros and cons, convolution reverb continues to be a popular choice among audio engineers for its ability to create realistic spatial effects.

When To Use Algorithmic Reverb

Algorithmic reverb is the go-to option for a broad range of soundscapes, from subtle room simulations to larger-than-life effects. When compared to convolution, its flexible approach to audio processing offers greater control over time and frequency domains.

Algorithmic reverb and convolution reverb are the two primary types of digital reverbs. While convolution reverb is known for its realism, algorithmic reverb is more versatile and widely used in music production.

Music Genres Suited For Algorithmic Reverb

Algorithmic reverb is a predominantly artificial type of reverb that creates simulated echo effects using digital signal processing algorithms. Thus, it finds its ideal use in genres like electronic, pop, hip hop, and RnB, where the producer seeks a clean and artificial sound.

Use Cases For Algorithmic Reverb

Algorithmic reverb is perfect for creating specific effects and environments in a track. For instance, if a producer intends to create a chorus or a bridge within the song to set a different mood and tone, they may use algorithmic reverb to achieve this effect. Moreover, it also comes in handy while mixing vocals or acoustic guitars. Algorithmic reverb helps in adding life and depth to the vocals and making the guitar sound more natural. Algorithmic reverb is also perfect for creating surreal and otherworldly soundscapes where the producer intends to create a dreamy atmosphere or a sci-fi-inspired track. In conclusion, algorithmic reverb is a versatile tool that comes in handy in various music production environments. Although it may not offer the same level of realism as convolution reverb, its creative and versatile applications make it an essential tool in any producer’s toolbox.
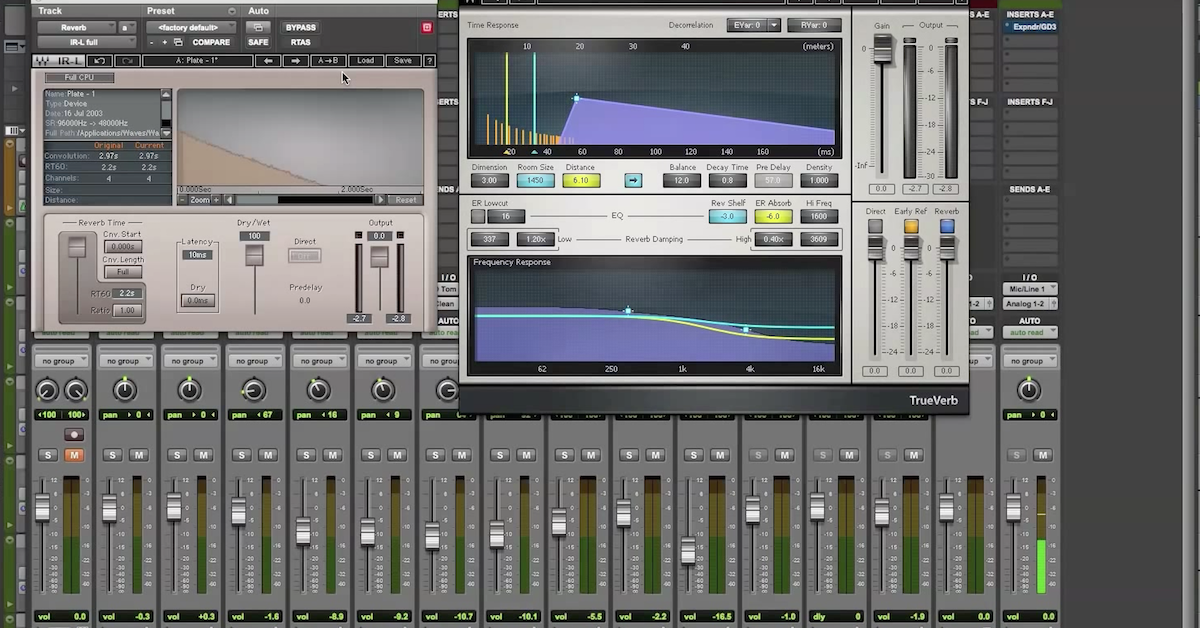
Algorithmic Reverb Vs Convolution

Credit: theproaudiofiles.com

When To Use Convolution Reverb

Convolution reverb is best suited for replicating real-world environments and is a useful tool for enhancing immersion in film-scoring and sound design. Although Algorithmic reverbs are easier to use and adaptable to any recording environment, Convolution Reverb creates a more realistic and accurate acoustic space.

Convolution reverb is a type of digital reverb that uses audio samples, known as impulse responses, to create a more realistic representation of a physical space. Convolution reverb works by capturing the sound of an acoustic space or device, such as a room, hallway, or speaker, and applying that sound to the original audio signal. While algorithmic reverb is capable of creating a wide range of sounds, convolution reverb is better suited for creating realistic and natural-sounding reverberation. But when should you use convolution reverb over algorithmic reverb?

Music Genres Suited For Convolution Reverb

Convolution reverb is best suited for genres of music that require a natural, authentic sound. It is especially effective for genres that are typically associated with acoustic instruments, such as jazz, classical, and folk music. Because convolution reverb is derived from real-world acoustic spaces, it works particularly well for music that is recorded in a natural setting. Convolution reverb can be used to simulate the sound of a concert hall, a cathedral, or even a small room, depending on the desired effect.

Use Cases For Convolution Reverb

Convolution reverb is particularly useful for creating a sense of depth and spatialization in a mix. It can be used to place individual instruments within a virtual acoustic space and to create the illusion of a cohesive performance. Convolution reverb can also be used to create special effects, such as the sound of a voice coming through a telephone or a guitar amp. Additionally, convolution reverb can be used to add realism to virtual instruments and software synthesizers, which are often lacking in natural reverb due to the fact that they are created digitally. In conclusion, convolution reverb is a powerful tool that can add depth, space, and authenticity to your mixes. While it may not be suitable for every music genre or application, it is an indispensable tool for anyone looking to create a natural and authentic sound. By understanding when and how to use convolution reverb, you can take your mixes to the next level and create a professional-quality sound that captures the true essence of your music.

Algorithmic Reverb Vs Convolution Reverb

Reverb is an essential aspect of audio mixing, helping to create a sense of space. Algorithmic reverb and convolution reverb are the two commonly used types of reverb. The algorithmic reverb is based on mathematical algorithms that simulate the sound of actual physical spaces, while convolution reverb is designed to replicate the reverb characteristics of a specific physical space.

Key Differences Between Algorithmic Reverb And Convolution Reverb

There are several key differences between algorithmic reverb and convolution reverb:

  • Algorithmic reverb is created using a mathematical algorithm, while convolution reverb is based on an impulse response.
  • Algorithmic reverb is more flexible and versatile than convolution reverb because you can adjust parameters such as room size, decay time, and reverb modulation.
  • Convolution reverb is more realistic and accurate in recreating a specific physical space.
  • Algorithmic reverb requires less processing power than convolution reverb since it doesn’t rely on lengthy pre-recorded impulse responses.

When To Use Algorithmic Reverb Over Convolution Reverb And Vice Versa

Knowing when to use algorithmic reverb over convolution reverb, or vice versa, is crucial for an excellent audio mix. Below are some of the scenarios where each type of reverb would fit well:

Algorithmic ReverbConvolution Reverb
When creating artificial spaces and environments.When replicating a specific physical space, such as a concert hall.
When there are the need for versatility and flexibility in adjusting reverb parameters.When there is no chance for signal degradation during processing.
When there are CPU or memory limitations since convolution reverb requires large impulse response files.When you need the most realistic, high-quality, and accurate reverb representation.

Choosing the best type of reverb depends on the specific requirements of the audio project. With these key differences, it is easy to make an informed decision and achieve the right mix of the characteristics.

Frequently Asked Questions For Algorithmic Reverb Vs Convolution

What Is The Difference Between Algorithmic Reverb And Convolution Reverb?

Algorithmic reverb uses digital algorithms to simulate the effect of a reverb space while convolution reverb captures the sound of an actual room and digitally reproduces it. Algorithmic reverb is more flexible and customizable while convolution reverb is more realistic and natural-sounding.

What Is Algorithm Reverb?

Algorithm reverb refers to a type of audio processing that simulates the way sound behaves in different environments, adding a sense of space and depth to recordings. This effect is commonly used by musicians, audio engineers, and podcasters to enhance the sound of their recordings.

What Is The Advantage Of Convolution Reverb?

Convolution reverb provides a more realistic and natural sound quality to audio recordings. It uses actual recordings of real-life spaces and environments, allowing for a more authentic and immersive listening experience.

What Is The Difference Between Convolution Reverb And Convolution Reverb Pro?

Convolution reverb is a standard reverb effect, while convolution reverb pro provides more advanced features, including the ability to use impulse responses as EQs. Convolution reverb pro also offers more customizable options.

Conclusion

Both algorithmic reverb and convolution are powerful tools in audio production. While algorithmic reverb is more versatile and can do much more than just reverb effects, convolution offers a more realistic and natural sound. Which one to choose ultimately depends on your specific needs, preferences, and the type of project you are working on.

In the end, whether you decide to use algorithmic reverb or convolution, the most important thing is to experiment and find what works best for you and your sound.
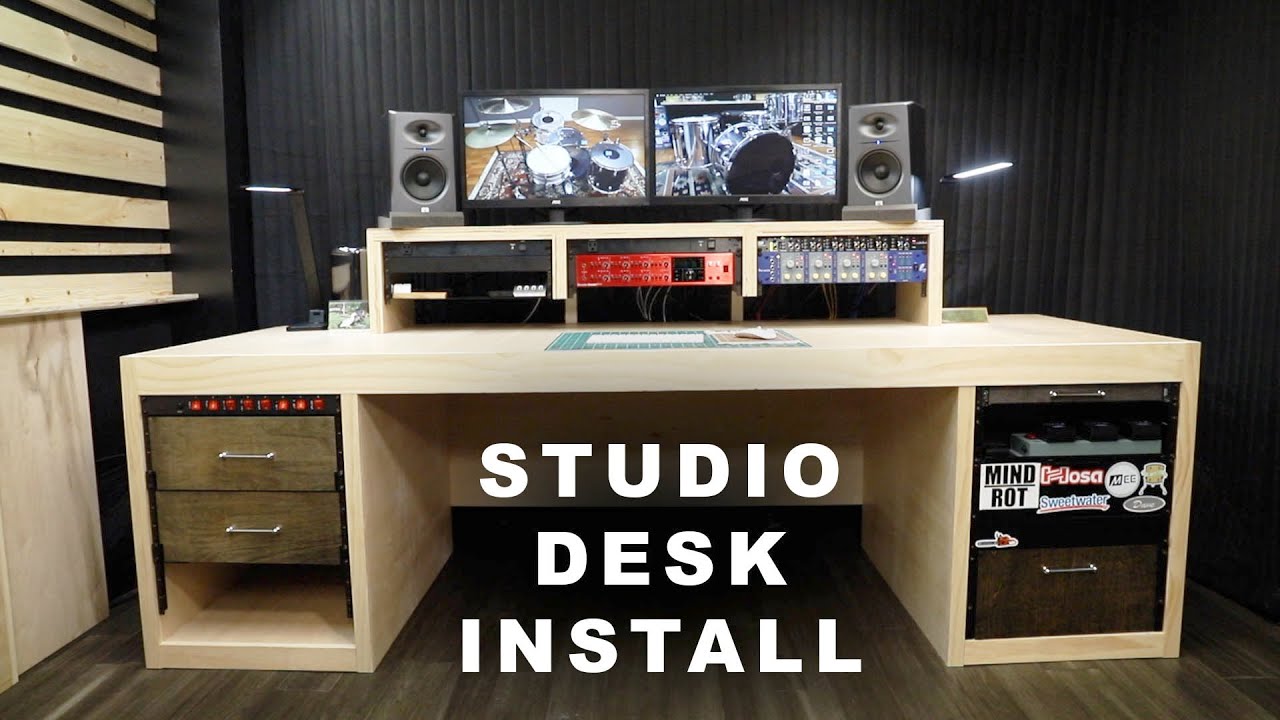
Categories
Archive

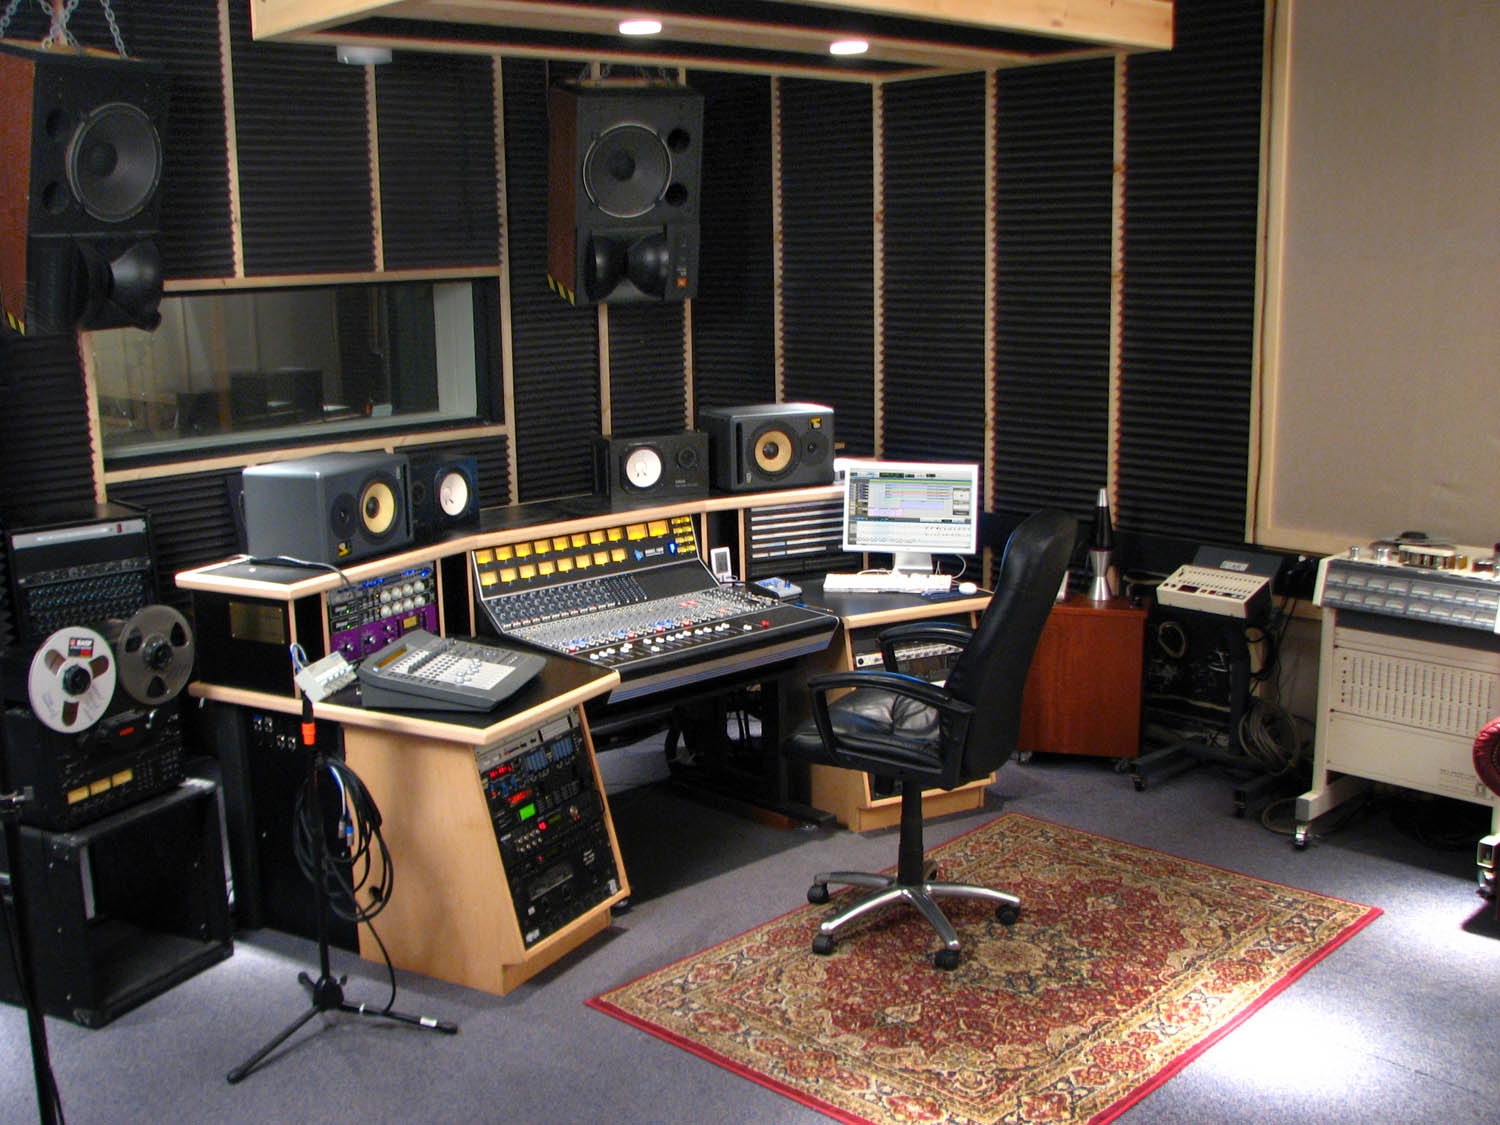
How to Build a Music Studio Desk

To build a music studio desk, first measure the space and gather materials such as wood, screws, and power tools. Then, follow step-by-step instructions to assemble the desk, making sure to include features that will enhance the recording experience.

A music studio desk not only provides a stable work surface for equipment but also helps with cable organization and sound isolation. Building a custom desk allows for a personalized touch and can save money compared to purchasing a pre-made option.

With a little patience and attention to detail, creating a functional and visually appealing music studio desk can be a rewarding DIY project.

Choosing The Right Design

Selecting the perfect design for your music studio desk can significantly impact your productivity. Consider your desired layout, the size of your room and the tools you require for recording or producing music. A well-designed desk can help you create music with ease and comfort.

Building a music studio desk is an exciting process that allows you to create a workspace that is tailored to your needs. Choosing the right design is essential because it will impact the functionality of your studio and your comfort while working. We will cover three important factors to consider when selecting a design for your music studio desk – ergonomic considerations, design style, and available space.

Ergonomic Considerations

Your music studio desk should be designed to promote comfort and good posture, especially if you spend long hours working at your desk. It’s essential to consider the height of your desk, monitor placement, keyboard and mouse placement, and equipment placement. An ideal desk height is one that allows your wrists and arms to rest naturally while typing or using musical equipment. Your monitor should be positioned at eye level to prevent neck strain, and the keyboard and mouse should be at a comfortable distance to avoid unnecessary tension in your shoulders and arms. Additionally, equipment placement should be considered to ensure easy access during your music production.

Design Style

The design style of your music studio desk is essential because it sets the tone for your workspace’s overall aesthetic. Music studio desks come in various styles, including modern, industrial, traditional, or minimalist. Modern desks are sleek and feature clean lines with unique materials like glass or metal. Industrial desks feature raw, natural materials like wood and steel. Traditional models are timeless and exude a classic, elegant feel. Minimalist desks are simple, streamlined, and decluttered, making them ideal for small spaces.

Available Space

The amount of space available in your studio plays a crucial role when choosing a music studio desk design. You do not want a desk that is too cramped or too big for your production room. Consider the available square footage and configure a design that maximizes the space’s potential. Many music studio desks come in L-shaped or U-shaped designs that are perfect for corners, while some models are designed for tight spaces and come with space-saving compartments. In conclusion, choosing the right design for your music studio desk involves considering ergonomic factors, design style, and available space. A good design will promote comfort, elevate your workspace’s aesthetic, and maximize the available space in your studio.

How to Build a Music Studio Desk

Credit: www.youtube.com

Gathering Materials And Tools

To build a music studio desk, the first step is to gather all the essential materials and tools. This includes measuring tape, saw, wood screws, drill, sandpaper, and wood glue. It’s important to have everything on hand to avoid any delays during the construction process.

Building a music studio desk can be an exciting and rewarding experience, especially when you have the right materials and tools at hand. Before you start, it’s important to gather all the necessary materials and tools to make the process smoother. Below are the required materials and tools you need to have before starting your music studio desk project.

Necessary Tools

To get started on building your music studio desk, you will need the following tools:

  • Electric drill and drill bits
  • Measuring tape
  • Screwdriver set
  • Circular saw
  • Jigsaw
  • Clamps
  • Sandpaper
  • Safety goggles and gloves

These tools will help you measure, cut, and shape the materials required for your music studio desk project. It’s important to invest in good-quality tools to ensure accuracy and safety while using them.

Wood And Hardware

The next step is to gather all the necessary materials, including wood and hardware. You will need:

MaterialsQuantity
2×4 Fir or Pine6 at 8ft long each
3/4 inch Plywood2 sheets (4ft x 8ft)
1 1/4 inch Pocket Hole Screws1 box (100 count)
2 1/2 inch Wood Screws1 box (100 count)
Wood glue1 bottle
Corner brackets4
Caster wheels4
Drawer slides4
Pull handles2

Make sure the wood you choose is straight, flat, and free of knots and cracks. The plywood should be thick and sturdy enough to support the weight of your equipment. You can also select your desired finish for the wood and hardware to match your studio’s aesthetic. Now that you have all the necessary materials and tools, it’s time to start building your music studio desk. The next step is to prepare the wood and hardware by cutting them to size and sanding them to achieve a smooth finish. Get ready to build a custom music studio desk that meets your specific needs and style!

Measuring And Cutting Wood

To build a music studio desk, measuring and cutting wood is essential. Use a tape measure, straight edge, and saw to cut the wood to the required size and shape for the desk’s frame and table surface. Measure twice and cut once to ensure the wood fits together precisely for a sturdy and reliable desk.

Taking Accurate Measurements

Before starting the process of cutting and building, it’s important to take accurate measurements of the studio desk. The desk must be functional, and the right measurements will ensure that the desk can accommodate the equipment without any issues. To take accurate measurements, use a measuring tape and measure the length, width, and height. Write these measurements down on a piece of paper so that you can use it as a reference when cutting the wood.

Cutting The Wood To Size

The next step is to cut the wood to the right size. This step is crucial as the wood pieces need to fit properly. Use a saw to cut the wood pieces to the correct length, width, and height. It’s essential to stay sharp, in order to get the best results. If you don’t have experience using a saw, it’s best to get help from someone who does.

Sanding And Finishing

After cutting the wood pieces to the right size, the next step is to sand the rough edges. Sanding can be done by using sandpaper to make the edges smooth and remove any splinters or rough areas before applying the finish. The finish can be applied in different ways, such as staining, painting, or using a clear coat. The finish not only adds visual appeal but also protects the surface from water damage and other elements that may harm the wood. To sum up, measuring and cutting the wood properly is key to ensure the desk fits all the equipment. In addition, sanding and finishing the surface provides protection and adds the desired visual appeal.

How to Build a Music Studio Desk

Credit: www.reddit.com

Assembling The Desk

Building a music studio desk is a fun and rewarding project. Begin by measuring the space and selecting the materials. Then, follow the instructions and assemble the pieces together to create a functional and comfortable desk that fits your specific needs.

Now that you have perfect measurements, cut the boards and sanded them. It’s time to start assembling the music studio desk. Here are the steps you need to follow:

Pre-drilling Holes

Before attaching any of the legs or supports, you should pre-drill holes in the legs’ bottom. You should drill holes according to the screws so that the legs can be attached to the desk without splitting. For this, use 1/8 size drill bits to drill holes.

Attaching Legs And Supports

After completing pre-drilling, attach the legs to the desktop with screws. First, place the legs under the desktop and align them perfectly, then drill in screws to firmly attach them. With the help of screws, attach the horizontal supports under the desk. Make sure that the support piece is evenly placed between the legs.

Securing The Desktop

Once the legs and supports are attached, carefully place the desktop on the supports. Makes sure that it is even and flush against the top edges of the supports. Using screws, attach the desktop to the horizontal supports. The screws should be placed at an angle to make sure the desktop is secure. If you plan to use drawers or shelves, now would be the time to attach them. Be sure to follow the instructions and measure precisely. Building a music studio desk is a perfect DIY project to make the most of your workspace. With these simple steps, assembling your music studio desk should be a breeze.

https://www.youtube.com/watch?v=p_0xHVmoh18

Adding Extra Features

Enhance your DIY music studio desk by adding extra features such as cable management, adjustable shelves, and workspace lighting. These improvements will not only make your desk more functional but also provide a welcoming environment for creativity and productivity.

Adding Extra Features: Keyboard Tray, Cable Management, and Monitor Mounts When building your own music studio desk, you might want to customize it to fit your specific needs. This is where adding extra features comes in handy. Here are some helpful suggestions for extra features you can add to your DIY music studio desk. Keyboard Tray One essential feature that can make a huge difference in your studio is a keyboard tray built into your desk. A keyboard tray can help you save space on your desk and place your keyboard at the ideal height for you to play comfortably. To add a keyboard tray to your DIY music studio desk, follow these steps: 1. Measure the width and depth of your keyboard. 2. Cut a piece of wood to fit those dimensions. 3. Attach drawer slides underneath the tray and make sure they are level. 4. Attach the tray to the slides and test it out before adding it to your desk. Cable Management Cable management is another important feature to consider when building a music studio desk. With all the wires and cables required for music production, having organized cables will keep your desk looking neat and tidy, and help prevent accidents from tripping over loose wires. Here are some tips for managing cables on your music studio desk: 1. Use cable ties to bundle cables together. 2. Use adhesive cable clips to secure cables to the underside of your desk. 3. Use a cable sleeve to hide and organize cables. Monitor Mounts Another useful feature to add to your DIY music studio desk is a monitor mount. A mount can help you free up desk space, adjust your monitor to the ideal height for your viewing comfort, and improve posture, which can reduce strain on your neck and eyes. Here are the steps to adding a monitor mount to your desk: 1. Choose a monitor mount that suits your specific needs. 2. Measure and mark the placement of the mount on your desk. 3. Drill holes in your desk for the mount’s screws. 4. Follow the mount’s assembly instructions and attach it to your desk. By adding a keyboard tray, cable management, and monitor mounts to your DIY music studio desk, you can improve functionality, organization, and comfort while producing music.

Customizing The Desk

Building a music studio desk is a fun and rewarding project that can help improve your music production experience. Customizing the desk to your specific needs and preferences can provide the perfect workspace for creativity and productivity.

Painting And Staining

To add a personal touch to your music studio desk, painting or staining is a great idea. It will not only give you the freedom to choose the color and style that will complement your studio but it also protects the desk from wear and tear. When painting or staining make sure to prepare the surface properly. Sanding the surface properly will not only smooth the surface but also helps the paint or stain to stick better. A primer will also help the paint or stain to adhere properly.

Adding Personal Touches

Adding personal touches to your desk is a great way to make it unique. You can add decals or stickers to the surface, or even spray paint designs. You can also add a personal touch by customizing the knobs and handles of the drawers or by adding a personalized nameplate. Another way to add a personal touch is by incorporating a photo collage on the desk surface or by using a unique fabric for the drawers or the chair cushion. These touches will make your studio desk truly one of a kind.

Incorporating Accessories

Incorporating accessories to your music studio desk not only makes it more functional but also adds a decorative touch. You can add a monitor stand to keep your monitor at eye level, or a keyboard tray to keep the keyboard at a comfortable level. You can also add a cable management system to keep the desk space clean and organized. A lamp or a desk fan can also be added to enhance the look. A plant can add a touch of greenery to the studio and can also positively impact the mood and productivity. By incorporating these accessories, you can create a studio space that is both functional and aesthetically pleasing.

Testing The Desk

Building a music studio desk requires testing its strength and durability to ensure it can hold the weight of equipment. Consider the layout and accessibility of the desk to determine the best design for your needs.

After building your own music studio desk, it’s important to test it properly to make sure it meets all your requirements and expectations. This step is crucial as it ensures that the desk is sturdy, comfortable, and functional. There are various aspects of the desk that need to be tested, and we will discuss them below.

Stability And Weight Capacity

One of the primary aspects that need to be tested is the stability and weight capacity of the desk. As you will be using heavy music equipment and machinery, you need to ensure that the desk is sturdy enough to support the weight of your equipment. Additionally, you don’t want the desk to wobble or shake as you work on it. To test the stability of the desk, place all of your equipment on it, and apply pressure from different angles to check if it can withstand the weight and pressure.

Ergonomic Comfort

Another essential aspect to test is the ergonomic comfort of the desk. Your studio desk is where you will spend most of your time, and you want to ensure that you can sit comfortably and work efficiently without hurting your back, neck, or arms. When testing the desk, sit in your chair and check if the desk is at a suitable height and if there is enough legroom. You should also check if the desk is at a proper depth and width, and your arms can rest comfortably while playing your instruments.

Functionality Of Extra Features

Apart from stability and comfort, you may have added some extra features to your music studio desk, such as drawers, shelves, cable management, and more. You need to test if these features are functional and serve their purpose. For example, you can check if the drawers slide-in and out smoothly without getting stuck. You can also check if the cable management system is efficient and keeps the wires organized and out of sight. Ensure that you test each feature individually and assess if it adds value to your desk. In conclusion, testing is a crucial part of building a music studio desk to ensure that the desk is sturdy, comfortable, and functional. By following the above steps and testing your desk, you can rest easy knowing that you have built a perfect work station that suits all your needs and enhances your productivity.

How to Build a Music Studio Desk

Credit: www.diymusicbiz.com

Final Thoughts And Tips

Before starting to build your own music studio desk, ensure you have a clear plan in place. Take note of the dimensions and materials required and don’t forget to leave some space for future equipment upgrades. With these important tips, you’ll be well on your way to creating a personalized workspace that suits your music production needs.

After following these steps for building your music studio desk, you should have a functional and stylish desk for all your music production needs. Here are some final thoughts and tips to keep in mind as you work on your desk:

Maintaining And Cleaning The Desk

To keep your music studio desk looking and functioning well, it’s important to keep it clean and maintained. Here are a few tips to help you do that:

  • Dust your desk regularly with a soft cloth or duster to avoid buildup.
  • Avoid using harsh cleaning chemicals, as they can damage the finish on your desk.
  • Use coasters or mats under drinks and other objects to avoid scratches and water marks.
  • If your desk gets a scratch or other damage, try adding a touch-up finish to restore its appearance.

Troubleshooting Common Issues

Even with the best build, you may run into a few issues with your music studio desk. Here are some common problems you may encounter, along with ways to troubleshoot them:

ProblemTroubleshooting Tips
Wobbling or unstable deskMake sure all screws and bolts are tight, adjust the feet or base legs, and check that the desk is level.
Scratches or other damageUse touch-up finish or wood filler, sand down rough spots, or add a protective layer to prevent further damage.
Inadequate cable managementAdd cable ties, clips, or raceways to organize cables and improve the desk’s appearance.
Not enough storage spaceAdd shelves, drawers, or other storage options to the desk or nearby area.

Enjoying Your New Music Studio Desk

After all your hard work building and troubleshooting your music studio desk, it’s time to enjoy it! Here are a few tips to help you make the most of your new desk:

  • Add personalized touches, like posters or pictures, to make the space your own.
  • Keep your desk organized with specific places for all your equipment and cables.
  • Treat your desk with care and respect to ensure it lasts a long time.
  • Show off your new desk to friends and fellow musicians to inspire others to build their own!

With these final thoughts and tips, you should now have all the knowledge you need to build, maintain, and enjoy your very own music studio desk. Happy building!

Frequently Asked Questions Of How To Build A Music Studio Desk

How Much Does It Cost To Build A Studio Desk?

The cost to build a studio desk varies depending on the size, materials used, and custom features. You can expect to spend anywhere from $100 to $3,000. It’s best to research and compare prices for materials and pre-made desks before starting your project to get the most accurate estimate.

What Is The Best Height For A Music Studio Desk?

A music studio desk should ideally be at a height that corresponds with the height of the chair and the individual who will be using it. This usually ranges between 25 to 29 inches from the ground. It’s important to consider ergonomics and comfort when choosing the right height for a music studio desk.

How Deep Should A Studio Desk Be?

A studio desk should ideally be at least 30 inches deep for accommodating your computer/screen, keyboard, and other equipment. However, the depth may vary depending on personal preference and equipment size. Remember to leave a little extra space for maneuverability and organizing cables.

How To Build Your Own Music Studio?

Building your own music studio requires careful planning, research, and investment. Choose a suitable space, plan the layout, invest in good-quality equipment and acoustic treatment, and ensure proper electrical wiring and insulation. Consider hiring a professional to assist with the build and obtain necessary licenses and permits.

Conclusion

After reading this guide on how to build a music studio desk, you’re ready to take on this exciting project. With the right tools, materials, and careful planning, you can create a custom desk that meets your specific needs and preferences.

Remember to consider factors such as ergonomics and functionality while designing your desk to ensure a comfortable and efficient workspace. Don’t be afraid to seek input and guidance from other music producers or DIY enthusiasts to make your dream studio desk a reality.

Categories
Archive

Best Place to Put Piano in House

The best place to put a piano in a house is in a room with minimal temperature and humidity changes, away from direct sunlight and exterior walls. A piano is not only a musical instrument but also a valuable investment that you want to preserve for a long time.

As such, choosing the right spot to place it is essential. The ideal location for your piano should provide a stable environment with minimal temperature and humidity changes to avoid damage to the instrument’s wooden parts. Sunlight can also cause damage to the piano’s finish, so you should avoid placing it near windows or patio doors.

Furthermore, placing the piano on an exterior wall can expose it to humidity, causing it to go out of tune or even damage the piano’s internal structure. We will explore the best locations in your home to put a piano, whether you reside in a small apartment or a spacious house.

Best Place to Put Piano in House

Credit: takelessons.com

Considerations For Choosing A Spot

Choosing the best spot for your piano in the house is crucial to maintain its quality and longevity. Consider placing it in a room with a stable temperature, away from direct sunlight and drafts. Also, ensure there is enough space around the piano for comfortable playing and maintenance.

Room Size And Layout

The size and layout of the room play a crucial role in determining the best place to put a piano in your home. An average-sized upright piano requires at least 5 feet of open space around it to ensure ease of movement while playing. A grand piano, on the other hand, requires even more space. So, ensure that you choose a location where the piano doesn’t obstruct any walkways or doorways. Additionally, the room should have good acoustics to enhance the sound quality of the piano.

Temperature And Humidity

Pianos are made up of wood, strings and felt, which are susceptible to changes in temperature and humidity. Hence, it’s crucial to choose a spot with consistently moderate temperature and humidity levels. Place your piano away from windows, doors, and heating/cooling vents to prevent exposure to extreme temperature fluctuations. Invest in a hygrometer to measure the humidity levels in the room regularly. Ideally, the humidity should be between 40-50% to prevent any potential damage to the piano.

Sunlight Exposure

Direct sunlight can be harmful to the piano, causing fading of its surface and damaging its internal components. Therefore, choose a spot that’s away from direct sunlight. If your preferred location is exposed to sunlight, consider adding curtains or blinds to protect the piano. You can also invest in a piano cover to protect the piano from dust, moisture and harmful UV rays. In conclusion, choosing the right spot for your piano requires careful consideration of several factors, including room size and layout, temperature and humidity levels, and sunlight exposure. By taking these factors into account, you can ensure that your piano remains in pristine condition and produces beautiful music for years to come.

Options For Placement

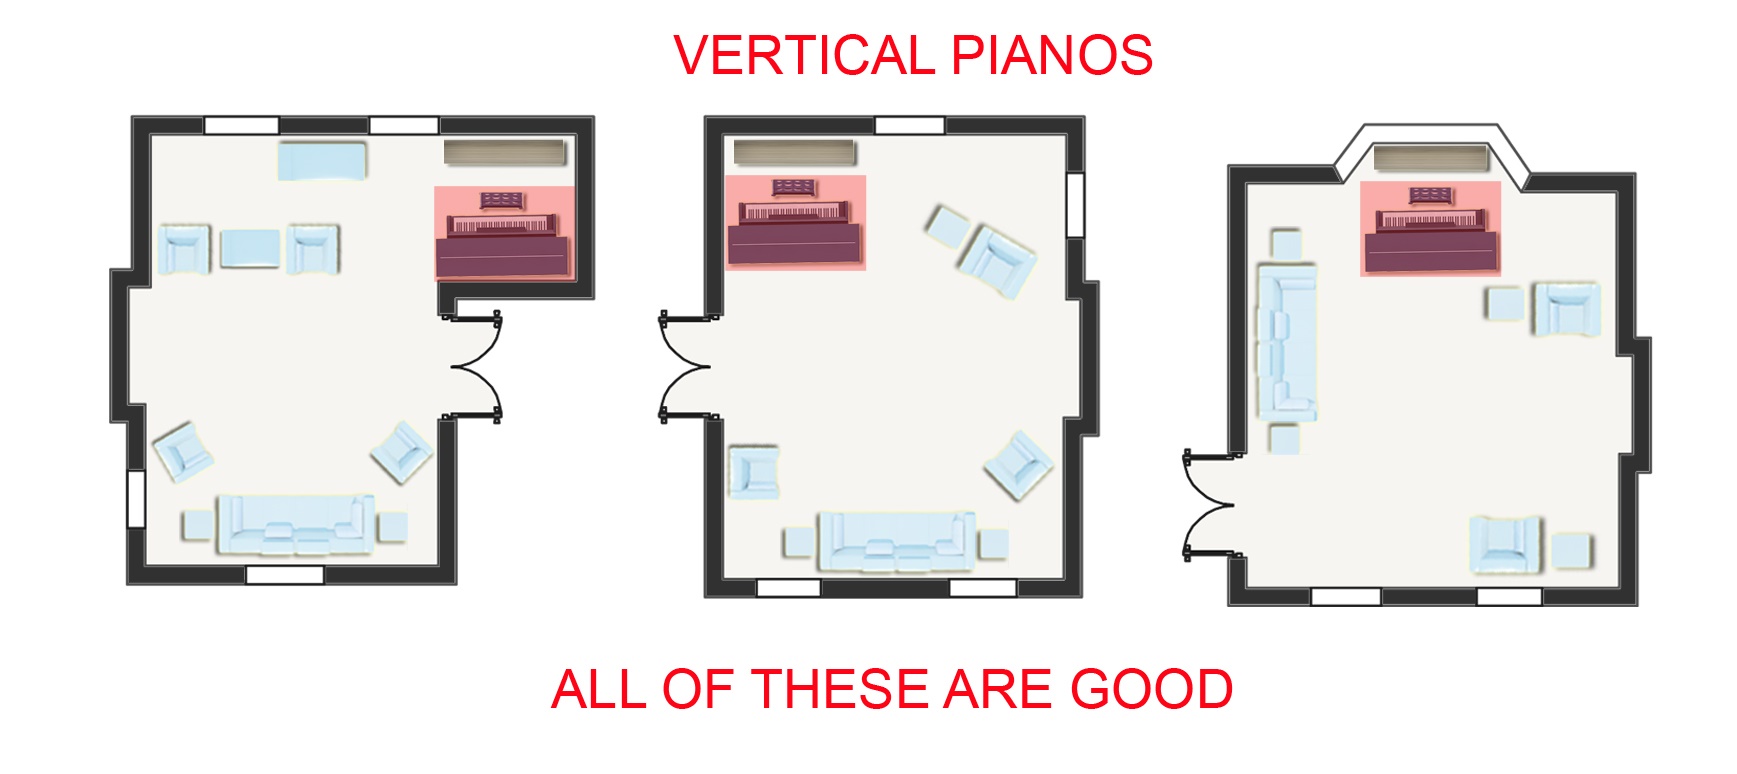
The best place to put a piano in a house depends on several factors such as room size and acoustics. Options for placement include the living room, music room, or a dedicated studio.

When it comes to deciding the placement of a piano in your home, various factors like space, aesthetics, and acoustics come into play. The piano is a prominent musical instrument, and its placement can have a significant impact on the overall look and feel of your home. In this article, we will discuss some of the best options for placing your piano in different rooms of your home.

Living Room

The living room is one of the most popular places to put a piano, and for a good reason. It is the room where you spend most of your time, and it’s also the place where you entertain your guests. Placing your piano in the living room can be an excellent way to showcase your musical talent while creating a cozy atmosphere. If you have a large living room, you can put your piano in the center of the room. However, if your living room is small, consider placing your piano against the wall to save space.

Music Room

If you have a dedicated music room, then placing your piano in this room makes perfect sense. A music room is a space where you can practice your music without disturbing others. It also allows you to create a soundproof environment, making it an ideal place for recording and rehearsing. You can also decorate the room with sound-absorbing materials to enhance the acoustics.

Bedroom

Placing a piano in the bedroom may not be the most common choice, but it can be a great idea if you have limited space in your home. If you have a larger bedroom, you can make it a multi-purpose room by placing your piano in one corner and your bed on the other. This way, you can enjoy music before sleep or have a morning musical session.

Basement

If you have a basement in your house, it can be an excellent location for your piano. Basements are typically more isolated, making them a perfect place for sound-sensitive musical instruments. You can also soundproof the basement walls to minimize noise pollution. However, before placing your piano in the basement, make sure it’s not prone to dampness or humidity, as it can damage the instrument’s wood. Choosing the best place to put your piano in your house depends on several factors. Consider factors like available space, sound quality, and aesthetics, and choose a location that works for you. Whether you decide to put your piano in the living room or the basement, by following the tips discussed in this article, you can create an environment that will inspire you to practice and enjoy music.

Pros And Cons Of Each Location

Selecting the right location to place a piano in your house involves weighing both pros and cons. Consider factors such as space, lighting, humidity, and acoustics to choose the most suitable area.

When it comes to placing a piano in your home, it is crucial to consider the pros and cons of each location. You should remember that a piano is a big and heavy instrument that needs to be placed in a stable location. Moreover, it should stay away from direct sunlight, humidity, and extreme temperature changes. In this post, we will discuss the pros and cons of each location – living room, music room, bedroom, and basement – to help you decide the best place for your piano.

Living Room

The living room is the most common location to place a piano in a house. It is the center of the house where most of the family members spend time together. Here are the pros and cons of keeping your piano in the living room:

  • Pros:
    • Easy access to play music for family and guests
    • A central location for your incoming and outgoing guests to admire
    • You can play music for the entire house to hear
  • Cons:
    • The living room may not be the most peaceful location in the house
    • The noise of the piano may be disruptive to others in the house
    • The constant foot traffic in the living room may cause unwanted vibrations

Music Room

If you have a separate room for music, it could also be an ideal location for your piano. Here are the pros and cons of placing your piano in a music room:

  • Pros:
    • The acoustics of a music room can enhance the sound quality of your instrument
    • A dedicated music room can provide a peaceful and relaxing environment for playing music
    • Less foot traffic means fewer vibrations and minimal disturbances
  • Cons:
    • A dedicated room for music may not be available for everyone
    • A music room could also limit your opportunities to show off your piano to guests

Bedroom

Some people prefer to place their piano in their bedroom to have easy access. Here are the pros and cons of keeping your piano in your bedroom:

  • Pros:
    • You can play music whenever you want without disturbing others in the house
    • It provides a place for practicing without the eyes or ears of others on you
  • Cons:
    • Limited space in most bedrooms
    • The vibrations from playing may disturb your sleep or that of others
    • The piano may not fit the aesthetic of the bedroom decor

Basement

The basement could also be an appropriate location for your piano, depending on the living situation. Here are the pros and cons of keeping your piano in the basement:

  • Pros:
    • A separate and quiet location for playing without any distractions or vibrations
    • Less susceptibility to fluctuating temperatures, sunlight, and humidity than the other locations
  • Cons:
    • May not have natural light available
    • The basement may be damp, which could damage the piano
    • The piano may not get much attention from family or guests
Best Place to Put Piano in House

Credit: www.total-piano-care.com

Preparing The Chosen Location

Finding the best place to put a piano in your house is crucial for having a great sound and an enjoyable playing experience. When preparing the chosen location, consider factors such as humidity, temperature, and placement away from direct sunlight or drafts.

Flooring

When it comes to choosing a suitable location to place your piano, the first thing you should consider is the flooring. Before you move your piano, check the flooring of the room where you want to place it. Make sure there are no gaps or cracks that can cause the piano to be unstable.

Acoustics

Acoustics are also an important factor to consider when choosing the best location for your piano. The sound of your piano can be affected by the shape and materials of the room. To get the best sound quality, you should choose a room with solid walls and a ceiling. Avoid placing the piano near large windows or open doors as the sound can be dispersed.

Lighting

Lighting is often overlooked when choosing a location for a piano. Natural light can affect the finish of the piano, causing it to fade over time. It’s best to choose a location that’s away from windows or direct sunlight. However, you can still highlight the piano by adding appropriate lighting to the room. In conclusion, preparing the chosen location for your piano is crucial for the safety and performance of your instrument. Pay attention to the flooring, acoustics, and lighting of the room to ensure the best placement for your piano.

Maintaining The Piano

Finding the best place to put your piano in the house is important for its maintenance. Choose a location away from direct sunlight and moisture, and ensure the room has consistent temperature and humidity levels. This will prolong the life of your piano and keep it in proper working condition for years to come.

Cleaning

To maintain the quality and longevity of your piano, you need to keep it clean from dust and other household debris. Regular cleaning will ensure a proper sound mechanism, and it will also help in preventing the dirt from accumulating and reducing the lifespan of the keys. You can start the cleaning process by dusting the instrument softly using a clean cloth. However, it is important to note that you need to avoid using liquid cleaners as they can damage the piano’s wood and other delicate materials.

Tuning

Tuning is an essential part of maintaining the piano and ensuring that it produces high-quality sound. You must contact a professional piano tuner and set a regular interval for tuning the piano. It can vary depending on factors such as the environment, frequency of use, and age of the piano. Regular tuning will give your piano a longer lifespan and allow you to enjoy quality sound. Professional piano tuners adopt different strategies such as pitch raising or lowering, voicing, and tuning to achieve optimal sound quality.

Protection

Another way to maintain your piano is by offering protection from climatic changes, direct sunlight, and moisture. Direct sunlight exposure can significantly impact the piano’s finish by bleaching the color. Moisture from the humidity can also cause the wood to swell, which can lead to tuning issues, and it can also cause corrosion to the strings and other metal parts. Therefore, it is recommended to place the piano against an interior wall with no direct sunlight and use a humidifier. You should also regulate the temperature and the level of humidity in the room where you keep the piano. In conclusion, regular maintenance is a critical aspect of ensuring that your piano functions optimally and has a prolonged lifespan. Cleaning, tuning, and providing protection are some of the ways you can maintain your piano to perfection.

Decorating Around The Piano

Proper piano placement can enhance the aesthetic appeal of your home. Consider placing your piano at focal points, like in your living room or conservatory, to draw attention to it and add a touch of elegance to your space.

Furniture Placement

When it comes to furnishing a room with a piano, you want to make sure that your furniture complements the piano. The ideal placement for the piano is in the center of the room, and you should arrange your furniture around it. For example, you can place your sofa facing the piano, or you can place two chairs on either side of the piano. Also, make sure that you place the piano on a sturdy and level surface to avoid any damage to the instrument.

Wall Art

One way to decorate around the piano is to add wall art. A large painting or a few framed pictures can add a pop of color and personality to the room. Make sure that the art you choose complements the color and style of the piano. Hang the artwork at eye level, so it is easy to view while seated at the piano.

Accessories

Another way to style your space around the piano is by adding accessories. You can opt for a floor lamp to give the room a warm and cozy feel while also providing additional lighting for reading sheet music. Indoor plants, decorative vases, and candles are other accessories that can add visual interest to your space. Again, make sure you select accessories that complement the color and style of your piano.

Conclusion

These tips will help you create a stylish and functional space around your piano. Remember to choose furniture, wall art, and accessories that complement the piano and not overshadow it. By decorating thoughtfully and carefully, you can create a beautiful and harmonious space that is centered around your piano.

Frequently Asked Questions For Best Place To Put Piano In House

Where Should A Piano Be Placed In The House?

Place your piano in a room with consistent temperature and humidity levels. Avoid placing it near windows, doors, or air conditioning vents, as the changes in temperature and humidity can damage it. Keep it away from direct sunlight and heavy traffic areas to prevent accidental damage.

Choose a spot where the piano sounds best and fits aesthetically in your home.

Where Should A Piano Be Placed In A House Feng Shui?

According to feng shui beliefs, a piano should be placed in a room’s commanding position and not directly facing the door. It should also not be placed in the basement or near the bathroom. The piano should be well-tuned and regularly played to keep positive energy flowing.

Where Is The Best Place In The Room For An Upright Piano?

The best place for an upright piano is against a sturdy wall, preferably one that doesn’t face direct sunlight or extreme temperatures. Make sure the piano is placed on a level surface, away from windows or other sources of vibration.

It’s important to keep the instrument away from moisture, heat sources, or drafts that can damage the internal components.

Can You Put A Piano Against A Window?

No, it is not recommended to put a piano against a window. The fluctuating temperature and humidity levels can damage the piano, the direct sunlight can fade the color and affect the tuning, and the noise can disturb neighbors. It is best to place the piano in a controlled environment away from windows.

Conclusion

Ultimately, finding the best place to put your piano in your house requires careful consideration of various factors such as acoustics, space, and traffic flow. Taking time to assess your needs, preferences, and limitations will ensure that you make the most of your piano and enjoy playing it to the fullest.

Whether you opt for a living room, a music room, or a dedicated space, make sure that it is comfortable, inspiring, and inviting for you and your audience. By following these guidelines, you’ll be able to create a harmonious atmosphere in your home and enjoy making music for years to come.

Categories
Archive

How to Fix Piano Roll in Fl Studio

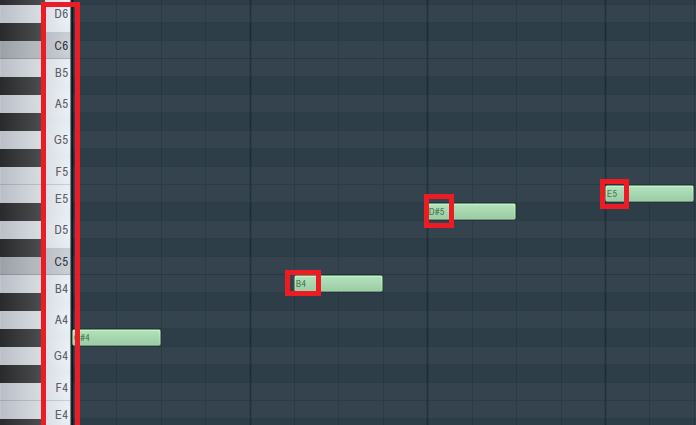
To fix Piano Roll in FL Studio, simply right-click the piano roll, select “Helpers” and then “Fix Note Lengths.” This will automatically correct any notes that are not aligned properly.

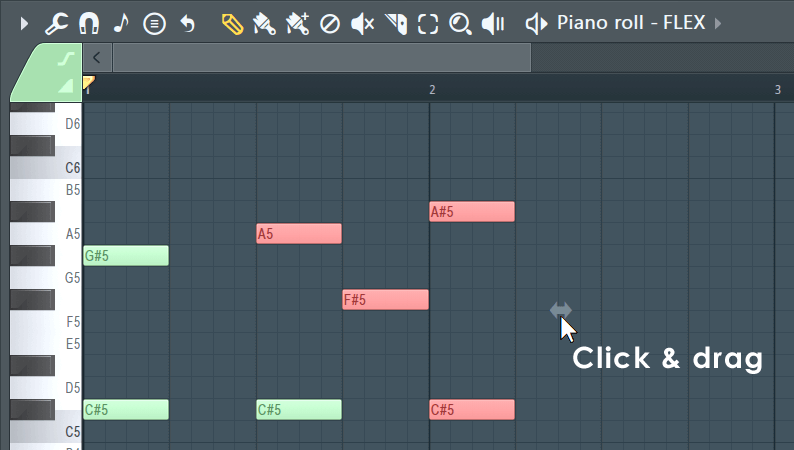
FL Studio is a popular digital audio workstation used by music producers to create beats, melodies, and entire songs. One of its key features is the Piano Roll, which allows users to compose melodies using a keyboard interface. However, sometimes notes in the Piano Roll may not be aligned properly or may be overlapping, making it difficult to create a polished sound.

We will discuss how to fix Piano Roll in FL Studio to ensure that all notes are correctly spaced and aligned. By following our simple steps, you can create a professional-sounding melody using FL Studio’s Piano Roll.

How to Fix Piano Roll in Fl Studio

Credit: www.image-line.com

Understanding The Issue

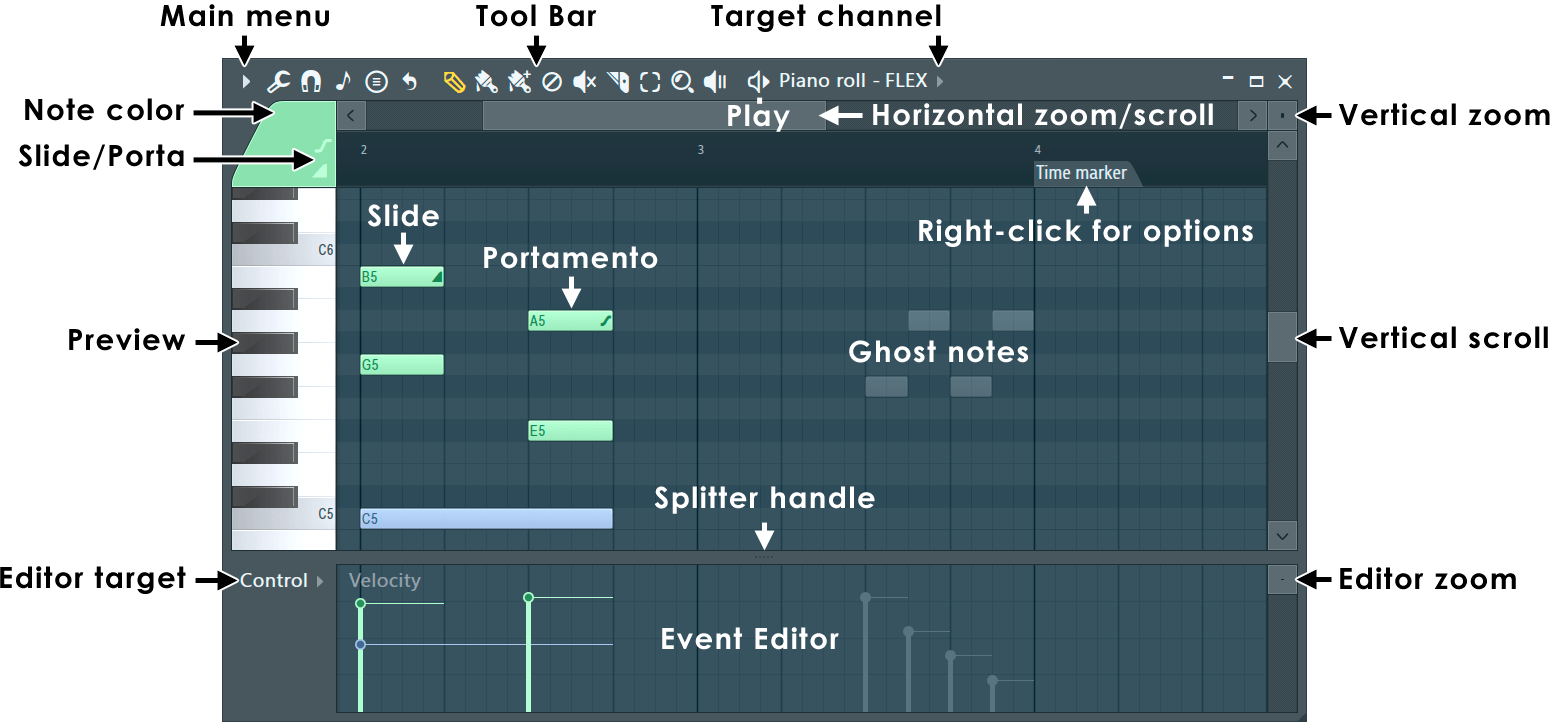
If you are a music producer, you know that piano roll is an essential tool in FL Studio. It is used to input and edit MIDI notes, chords, and automation data. However, there are times when the piano roll malfunctions, and notes don’t play as intended. This can be frustrating, especially when you have an important project. In this post, we will go over common problems with piano roll, causes of piano roll malfunction, and how to fix them.

Common Problems With Piano Roll

Here are some common issues you may encounter with the piano roll:

  • Notes not playing when the piano roll is dragged
  • Random double notes or chords appearing
  • Notes not playing when the play button is hit
  • Glitches in the piano roll interface

Causes Of Piano Roll Malfunction

Now that we’ve identified common problems, let’s look at the causes:

CauseSolution
Corrupted FL Studio installationReinstall FL Studio
Unsigned MIDI driversInstall proper drivers or update existing drivers
Outdated user dataDelete old user data and reset to default settings
Large or complex projectsTry splitting projects into smaller parts or simplifying MIDI data

Ensuring you have a clean and up-to-date installation, along with proper drivers, can go a long way in preventing issues with the piano roll in FL Studio.

Next, we will discuss how to fix piano roll issues in FL Studio. Stay tuned!

How to Fix Piano Roll in Fl Studio

Credit: forum.image-line.com

Basic Troubleshooting

Fixing the piano roll in FL Studio can be a frustrating experience, but basic troubleshooting techniques can help. Check for any conflicting plugins, adjust note velocity and ensure correct MIDI settings to resolve piano roll issues.

Checking For Software Updates

To ensure that FL Studio is performing at its best, it’s always important to keep it up to date with the latest software updates. To check for software updates in FL Studio, follow these easy steps: 1. Go to the Options menu located at the top of the screen. 2. Select the “General” tab, then click on the “About” button. 3. This will display a screen showing the current version of FL Studio you are using. Click on the “Check for updates” button to see if there are any updates available. 4. If there are updates available, click on the “Download” button to download the latest version of FL Studio.

Restarting Fl Studio

Sometimes, the simplest solution is the best solution. If you’re experiencing problems with FL Studio’s piano roll, it might be worth trying to restart the program. Follow these steps to restart FL Studio: 1. Close FL Studio. 2. Open the task manager on your computer. 3. Find the process named “FL Studio” and click on it. 4. Click on the “End Task” button to close the process. 5. Reopen FL Studio and see if the problem persists.

Checking Audio Device Settings

If you’re still having problems with the piano roll in FL Studio, it’s worth checking your audio device settings to ensure they are correctly configured. To check your audio device settings in FL Studio, follow these simple steps: 1. Go to the Options menu located at the top of the screen. 2. Scroll down and select “Audio Settings” from the drop-down menu. 3. On the Audio Settings screen, you can select your audio device from the list of available devices and adjust the buffer size, sample rate, and input/output settings. 4. Make any necessary adjustments and click “Save” to apply your changes. By following these basic troubleshooting steps, you can fix any issues you may be having with the piano roll in FL Studio. Don’t let technical problems hold you back from creating the music you love.

Advanced Troubleshooting

Fixing the piano roll in FL Studio can be an advanced troubleshooting task. To do this, you may need to check the settings and preferences, verify if the MIDI controller is connected properly, and also try resetting the plugin database.

Advanced Troubleshooting As a producer or musician, encountering issues with your software can be frustrating and time-consuming. But fear not – advanced troubleshooting can solve even the most complex problems in FL Studio’s Piano Roll. Here are some crucial steps to follow if you encounter any issues: Checking for conflicting plugins Conflicting plugins can cause major problems with FL Studio and its various features. It’s essential to identify and remove any plugins that may conflict with the Piano Roll. To do this, simply go to the “Plugin Manager” and check for any conflicts with the plugins. If there are any, it’s best to remove them immediately. Resetting MIDI settings If you’re experiencing issues with the MIDI settings, resetting them can help solve the problem. Go to “Options” and select “MIDI settings.” Then click on “Reset MIDI devices” and “Reset MIDI banks.” This will reset all MIDI devices and banks to the standard settings. Deleting corrupted files Sometimes, the issue may be with corrupted files. It’s essential to delete any corrupted files that may be affecting the Piano Roll. To do this, go to the “Browser” and locate the folder where the files are stored. Then select the corrupted files and delete them. In Conclusion These are just a few of the many ways you can troubleshoot issues with the Piano Roll in FL Studio. By following these steps, you can quickly get back to producing music without any issues. Remember, it’s crucial to identify and solve any problems as soon as possible to prevent further complications.

How to Fix Piano Roll in Fl Studio

Credit: github.com

Optimizing Piano Roll Performance

Optimizing Piano Roll performance in FL Studio can be a daunting task, but by following these simple tips, you can fix it easily. Firstly, ensure that you have enough RAM on your computer to handle the workload. Secondly, consider using ASIO drivers to reduce latency.

Lastly, try using the DirectWave plugin for MIDI playback.

If you are an Fl Studio user and you frequently use the Piano Roll feature, you might have noticed that certain functions of the Piano Roll can slow down or even bring your DAW to a halt. In this guide, we will be focusing on optimizing the performance of your Piano Roll by exploring ways to adjust buffer lengths, limit CPU usage and increase RAM for Fl Studio.

Adjusting Buffer Length

The buffer length refers to the amount of data that is cached before it is played back. Adjusting the buffer length can help increase the performance of your Piano Roll, especially when you are working with large projects. It is important to ensure that the buffer length is set to the optimal level for your system.

Limiting Cpu Usage

Fl Studio is a CPU-intensive program, which means that it can consume a lot of processing power. One way to improve the performance of your Piano Roll is to limit the CPU usage of your computer. You can do this by setting the maximum number of CPU cores that Fl Studio is allowed to use.

Increasing Ram For Fl Studio

Increasing the amount of RAM available to Fl Studio can help improve the performance of your Piano Roll. By default, Fl Studio is set to use a maximum of 4GB of RAM. If you have more RAM available, you can increase this limit by navigating to the ‘Options’ menu and selecting ‘Memory Management.’ From here, you can adjust the maximum memory limit for your DAW. By adjusting the buffer length, limiting CPU usage and increasing the RAM available to your Fl Studio, you can optimize the performance of your Piano Roll. This will ensure that you have a smoother and more efficient music production process.

Working With Support

Fixing the piano roll in FL Studio can be tricky, but with support from online forums and tutorials, it’s possible to master. From adjusting the grid size to using snap-to-grid controls, there are various techniques that can help fix the piano roll and create amazing music.

When it comes to using FL Studio’s piano roll, there may be times when you experience issues. One of the most common issues is encountering errors and bugs that can prevent you from working efficiently. Fortunately, FL Studio has a support team available to help you troubleshoot and resolve any technical problems. In this section, we’ll explore how to work with FL Studio support and troubleshoot your issues effectively.

Contacting Fl Studio Support

The first step in fixing any piano roll issues in FL Studio is to contact their support team. This can be done by going to the FL Studio website and clicking on the support tab. Here you will find a variety of resources to help you with common issues, including a searchable knowledge base (FAQ), manuals, and user forums. If these resources do not help, you can submit a support ticket for more personalized assistance.

Providing Error Logs

When contacting FL Studio support, it’s essential to provide as much information as possible about the issue you’re experiencing. One way to do this is to provide error logs, which can help identify the root cause of the issue. FL Studio has a built-in log system that automatically records errors and warnings. To access the log file, go to the options menu, select General Settings, and then click on the Diagnostic tab. From there, you can choose to enable logging, which will create a log file in your FL Studio directory.

Troubleshooting With Support

Once you’ve contacted FL Studio support and provided any necessary error logs, the next step is to troubleshoot the issue with their team. This may involve discussing the problem in detail via email or phone or even sharing your piano roll project file with them for analysis. Be prepared to answer questions about the issue and provide additional details as needed to help support team diagnose the issue and identify a solution. Conclusion By following these steps, you can work effectively with FL Studio support to troubleshoot and fixing any issues with the piano roll. Remember to provide as much information as possible when contacting support, so the team can diagnose and resolve the issue quickly. If you still experience issues, you can always refer back to FL Studio’s resources and community forums for additional support.

Frequently Asked Questions On How To Fix Piano Roll In Fl Studio

How Do You Control A Piano Roll In Fl Studio?

To control a piano roll in FL Studio, select the appropriate channel rack and access the piano roll editor. Use the mouse or MIDI keyboard to input notes and adjust velocity. Manipulate note properties, such as length and pitch, using the toolbar.

Access shortcut commands for efficient navigation.

Why Can’t I Hear My Piano Roll In Fl Studio?

The reason why you can’t hear your Piano roll in FL Studio could be due to various factors. You should check that your MIDI keyboard is properly connected to your system and that the correct MIDI channels are selected. Also, ensure that the Piano roll is not muted, and that your audio settings are optimized.

How Do I Resize A Piano Roll In Fl Studio?

To resize a Piano roll in FL Studio, simply use the mouse wheel to zoom in or out. Additionally, you can press and hold the Alt key while scrolling with the mouse wheel to vertically resize the Piano roll. You can also resize the Piano roll horizontally by dragging the edges with the mouse.

How Do You Reverse A Piano Roll In Fl?

To reverse a Piano roll in FL, select the notes you wish to reverse, then right-click and choose “Tools” – “Playback” – “Reverse. ” The selected notes will now play in reverse order.

Conclusion

To summarize, fixing the piano roll in FL Studio is a crucial step towards producing high-quality music. Whenever you encounter any issues, don’t panic. Instead, follow the steps outlined in this guide and you’ll be on your way to creating amazing tunes in no time.

Remember to pay attention to details and consistently practice. With enough patience and dedication, you’ll become a pro in no time.

Categories
Archive

How To Master Your Track For Spotify

To master your track for Spotify, use a loudness target of -14 LUFS and ensure it sounds good on all devices. If mastering is not your strong suit, consider hiring a professional.

In the ever-evolving digital age, streaming platforms like Spotify have become a crucial aspect of the music industry, presenting artists with a vast audience and numerous opportunities. To get the most out of the platform, mastering your tracks for Spotify has become increasingly important.

Mastering is the process of enhancing the overall sound quality of your track to give it a professional and polished sound. It encompasses a range of techniques such as EQ, compression, limiting, and stereo imaging. Mastering your tracks for Spotify involves adhering to specific loudness standards, equalizing the stereo image, and ensuring it sounds good on all playback systems. We’ll provide you with tips to help you master your tracks for Spotify and make your music sound its best on the platform.

What Is Mastering For Spotify?

Mastering for Spotify involves optimizing your track to meet the platform’s loudness standards and ensuring your sound is balanced and clear across various devices. To master your track for Spotify, it’s crucial to use specific tools and techniques, including proper EQ, compression, and limiting.

Mastering is the process of preparing a finished audio track for distribution. When it comes to Spotify, mastering is particularly important because the platform streams music at a consistent volume. If your track is not mastered properly, it may sound lower in volume compared to other songs on the platform.

Explanation Of Track Mastering

Mastering is the final step in the music production process. It involves enhancing the final mix of a track to make it sound as good as possible. The process can involve a number of different techniques, such as adjusting levels, EQ, compression, and limiting. The goal of mastering is not to change the track but to bring out the best in it and make it sound as polished and professional as possible.

How It Differs From Other Mastering Processes

Mastering for Spotify specifically has some unique features when compared to mastering for other platforms. Spotify uses a loudness normalization process that sets every song to the same volume level. This means that it’s essential to pay attention to the overall loudness of your track during the mastering process. Additionally, it’s important to ensure that your track sounds good at a lower volume level, as Spotify’s normalization process can cause tracks to sound quieter if they are not properly mastered.

Key Takeaways

  • Mastering is the process of preparing a finished audio track for distribution.
  • Mastering for Spotify specifically involves ensuring that your tracks sound good at a consistent volume level.
  • The goal of mastering is to bring out the best in your track and make it sound polished and professional.
  • It’s important to pay attention to the overall loudness of your track during the mastering process for Spotify.

By following these tips, you can ensure that your tracks sound great on Spotify and stand out in a crowded marketplace.

How To Master Your Track For Spotify

Credit: www.kits.ai

Understanding The Requirements For Spotify

To master your track for Spotify, understanding the requirements is essential. This includes meeting their loudness targets, choosing the correct file format, and optimizing your metadata. Following these steps will improve your chances of having your music discovered and streamed by more people on the platform.

Congratulations on getting your track finished! But, before you hit the upload button to Spotify, it is important to understand the requirements for distributing your music on this platform. Spotify has some strict guidelines for audio quality, loudness normalization, and file formats. In this blog post, we will discuss these requirements in detail to help you master your track for Spotify.

Spotify’s Loudness Normalization

One of the critical aspects of mastering a track for Spotify is understanding its loudness normalization process. Spotify applies this process to adjust the volume of all tracks to a consistent level, making it easier for listeners to enjoy their playlist without unwanted volume changes. The loudness normalization system uses LUFS (Loudness Units relative to Full Scale), a measurement of loudness that measures an audio file’s perceived loudness in decibels (dB). Spotify recommends that your tracks have a -14 dB LUFS integrated loudness with a -2 dB true peak maximum to sound optimal on their platform.

Spotify’s File Format And Quality Requirements

Spotify only accepts audio files in .mp3, .m4p (unless it contains video), and .mp4 formats. These file formats allow for the highest quality audio while keeping file sizes manageable. Spotify’s required audio quality is a bit-rate of 320 kbps, which provides superior audio quality compared to a lower bit-rate. It is essential to note that the file size of a track depends on several factors, but it is recommended to keep it under 10 MB for quicker streaming. In conclusion, mastering your tracks for Spotify can seem like a daunting task. Still, as long as you follow the platform’s guidelines for loudness normalization, file format and quality, your tracks will sound great. Once you’ve mastered your tracks, you can upload them to Spotify and get your music heard by millions of people worldwide.

Preparing Your Mix For Mastering

To prepare your mix for mastering on Spotify, it’s important to ensure that it’s balanced and free from any clipping, distortion or noise. You should also consider using a reference track to compare and make necessary adjustments to your mix.

Finally, export your mix in the highest quality available for mastering.

Preparing your mix for mastering is an essential step to make your track sound the best it can on Spotify. Correcting mixing issues, preparing stems for mastering, and ensuring the overall quality of your mix are all crucial components of the process. Correcting mixing issues: Before you finalize your mix, you need to detect and correct any mixing issues. Any problematic frequencies, imbalances in stereo width, or excessive noise in-between tracks must all be addressed. Make sure the vocals are sufficiently audible and can be heard easily. Use a spectrum analyzer to identify any loud spots and cut these frequencies down. Preparing stems for mastering: Once you have your mix corrected, you need to prepare your stems for mastering. Stems are individual instruments or groups of instruments that have been mixed down to a single track. Make sure to name each stem correctly and export them at the same sample rate and bit depth as your original project. This step will make it much easier to work in the mastering phase. Mastering: Mastering is the final step of preparing your track for Spotify. Your track will undergo a final mixing process to ensure that it sounds consistent and professional. Dynamics, frequency response, equalization, and stereo image enhancement will all be implemented to enhance the overall sound and impact. In conclusion, mastering your track for Spotify will significantly enhance its overall quality, and by ensuring you prepare your mix correctly, you’ll be well on your way to mastering your track like a pro!

Emphasizing Your Track’s Strengths

If you want to make the most out of your music track on Spotify, it’s essential to emphasize your track’s strengths. One way to do this is by balancing frequency levels to highlight key elements. Another important technique is using dynamic range compression to ensure that your track sounds great on all playback devices. In this post, we’ll discuss both of these methods to help you master your track for Spotify.

Balancing Frequency Levels To Highlight Key Elements

When you’re mastering your track, it’s important to balance frequency levels to highlight the most important elements. This involves adjusting the volume of each frequency range so that the most critical parts of your track stand out. For example, if you have a great hook in your track, you’ll want to adjust the frequency levels to make it more prominent.

A great way to balance frequency levels is to use a spectrum analyzer. This tool will show you the frequency range of your track and allow you to adjust each frequency’s volume. You can then adjust the frequencies until the elements you want to highlight are the loudest.

Dynamic Range Compression

Dynamic range compression is another critical technique for emphasizing your track’s strengths. This technique involves adjusting the volume of your track to ensure that the quietest parts of your track are audible, and the loudest parts don’t distort.

Dynamic range compression works by reducing the difference between the quietest and loudest parts of your track. This technique is particularly important for Spotify since the platform normalizes tracks to ensure they play at a consistent volume. If your track has too much dynamic range, it can sound quiet compared to other tracks on the platform.

To use dynamic range compression, you’ll need to use a compressor plugin. This plugin will allow you to adjust the volume of your track automatically. You can then adjust the compression settings until your track sounds great on all playback devices.

Conclusion

Emphasizing your track’s strengths is crucial if you want to make a great impression on Spotify. Balancing your frequency levels and using dynamic range compression are just two of the many techniques you can use to achieve this goal. With these techniques in mind, you’ll be well on your way to mastering your track for Spotify.

Tools And Techniques For Mastering On Spotify

Achieving top-quality sound on Spotify is crucial for any artist hoping to make it big. With the right tools and techniques, mastering your track for Spotify is easier than you think. From optimizing levels to adjusting spectral balance, fine-tune your music to get noticed on this popular streaming platform.

Mastering a track for Spotify is a crucial step to ensure that your music sounds the best it can be on the platform. With millions of songs available on Spotify, mastering can help your track stand out and reach more listeners. In this blog post, we will discuss the tools and techniques for mastering on Spotify, including choosing the right mastering tools and understanding LUFS and true peak levels.

Choosing The Right Mastering Tools

Choosing the right mastering tools is essential to achieve the best results when mastering for Spotify. Here are some tools you can use:

  • Digital audio workstation (DAW) – A DAW is a software application used for recording, editing, and producing audio files. Popular DAWs include Ableton, Logic Pro, and Pro Tools.
  • Mastering plugins – You can use various mastering plugins to shape the sound of your track. Some popular mastering plugins include iZotope Ozone, Waves SSL E-Channel, and FabFilter Pro-C 2.
  • Reference tracks – Using reference tracks from well-mastered songs can help you understand how your track should sound on Spotify.

Understanding Lufs And True Peak Levels

LUFS (Loudness Units Full Scale) and true peak levels are essential when mastering for Spotify. Here’s a brief explanation of each:

TermDescription
LUFSLUFS measures the perceived loudness of a track. Spotify requires tracks to be mastered to -14 LUFS integrated to ensure consistent playback across different devices.
True peak levelsTrue peak levels measure the highest point in the waveform and ensure that there is no distortion when the track is converted to different formats. Spotify requires tracks to have a true peak level of -2 dBTP (decibels true peak).

Mastering for Spotify requires a mix of both technical expertise and creativity. By understanding the tools and techniques discussed in this blog post, you can master your track for Spotify and reach more listeners.

How To Master Your Track For Spotify

Credit: www.audiomixingmastering.com

Mastering For Different Genres On Spotify

To master your track for different genres on Spotify, start by analyzing the volume levels and frequency balance of successful tracks in your desired genre. Make sure your mix is optimized for streaming and pay attention to details such as maintaining consistency across all your tracks.

Lastly, preview your track on different playback systems to ensure its compatibility across devices.

Mastering your track for Spotify is crucial to ensure that it sounds great on all devices and stands out among the vast array of competition. However, when it comes to mastering your track for different genres on Spotify, it can be challenging to know where to start. In this post, we will explore mastering for EDM and pop genres, as well as mastering for acoustic and vocal-heavy tracks.

Mastering For Edm And Pop Genres

EDM and pop tracks are all about energy and impact, and mastering is an essential part of achieving those qualities. The primary goal is to make sure that your track sounds as loud and clear as possible without distorting or becoming harsh. Here are some tips for mastering your EDM and pop tracks:

  • Use a limiter to ensure maximum loudness, but be careful not to overdo it
  • Pay attention to the low end, as it can become muddy and overpowering in EDM and pop tracks
  • Use multiband compression to control the dynamics of different frequency ranges
  • Add excitement and interest with effects such as reverb, delay, and distortion

Mastering For Acoustic And Vocal-heavy Tracks

Mastering acoustic and vocal-heavy tracks requires a different approach than EDM and pop tracks. The primary goal is to ensure that the track sounds natural and balanced without any harshness or muddiness. Here are some tips for mastering acoustic and vocal-heavy tracks:

  • Pay attention to the dynamic range and avoid over-compressing
  • Use EQ to balance the frequency ranges and remove any harshness or muddiness
  • Apply gentle compression to smooth out any inconsistencies in the volume
  • Use effects such as reverb and delay to add depth and warmth to the track

In conclusion, mastering your track for different genres on Spotify requires attention to detail and careful consideration of the specific challenges for each genre. By following the tips provided above for mastering for EDM and pop genres and mastering for acoustic and vocal-heavy tracks, you can achieve the best possible sound for your track on Spotify.

Collaborating With Mastering Engineers For Spotify Success

Collaborating with mastering engineers can greatly improve your chances of success on Spotify. Proper mastering ensures the best sound quality for streaming, which can help boost your track’s popularity on the platform.

When it comes to releasing music on a platform like Spotify, mastering is one of the most critical steps in the process. Mastering not only ensures that your music sounds polished and professional but also makes it sound consistent across all playback devices. Collaborating with a mastering engineer can help you bring out the best in your music. In this article, we look at the benefits of hiring a professional mastering engineer and how to choose the right one for your project.

Benefits Of Hiring A Professional Mastering Engineer

Mastering is for a musician what the final touch is for a painter. It can take a decent mix to a professional level. Here are some of the benefits of hiring a professional mastering engineer for your Spotify project:

  • Makes your music sound balanced, polished, and consistent across all devices
  • Enhances the clarity, depth, and overall sound quality of your music
  • Helps you achieve a commercial-standard loudness level for your tracks
  • Provides an objective and fresh perspective on your music
  • Can help identify problems in your mix that you might not have noticed otherwise
  • Increases the chances of your music being featured in Spotify playlists and being discovered by new listeners

Choosing The Right Mastering Engineer For Your Project

With so many mastering engineers available online, choosing the right one for your project can be overwhelming. Here are some key factors to consider when selecting a mastering engineer:

FactorConsideration
Experience and credentialsLook for engineers with a proven track record, references, and testimonials from satisfied clients.
SpecializationChoose an engineer who specializes in your genre or type of music.
Communication skillsEnsure the engineer communicates effectively and is responsive to your queries and concerns.
CostFind an engineer whose rates fit your budget without compromising on quality.
Sample workReview previous work done by the engineer to see if it aligns with what you’re looking for.

Remember, mastering is a collaborative process. It’s essential to provide clear instructions and feedback to your mastering engineer to ensure that your vision is achieved. By working with a professional mastering engineer, you can take your music to the next level on Spotify and increase your chances of success.

How To Master Your Track For Spotify

Credit: www.fiverr.com

Finalizing Your Mastered Track For Spotify

To ensure your mastered track sounds the best it can on Spotify, follow these steps. Use a true peak limiter to avoid distortion, set the right loudness level, and check for any clipping or unwanted noise.

After spending countless hours perfecting your final mix, it’s time to take your audio to the next level by mastering it for Spotify. This process involves enhancing the sonic details and overall quality of your track to make it sound great on all devices and platforms. In this article, we’ll share some tips on how to master your track for Spotify and complete the final quality checks before exporting your audio in the appropriate format.

Completing Final Quality Checks

Before exporting your mastered audio, it’s essential to complete some final quality checks to ensure your track has an optimal level of loudness, dynamic range, and tonal balance. Here are some tips to help you through the process:

  1. Check your loudness levels: Ensure that your track’s peak level does not exceed -1dBFS (decibels relative to full scale). Your integrated loudness level should fall between -14LUFS and -9 LUFS, which avoids distortion and maintains the consistency of loudness levels across all Spotify tracks.
  2. Assess dynamic range: Ensure your track has an acceptable balance of dynamic range, which refers to the difference between the loudest and quietest parts of your audio. Too little dynamic range can make your music sound monotonous, while too much can sound overpowering. A dynamic range of 8-14dB is ideal for most music genres.
  3. Check tonal balance: Use a spectrum analyzer to identify any frequency imbalances in your track. Ensure that each instrument, vocal, and sound element has enough space in the frequency range to avoid masking effects and ensure clarity.
  4. Complete a listening test: Finally, make sure to listen to your track on multiple devices and listening environments such as headphones, speakers, and car stereos to ensure your track sounds great across different playback systems.

Exporting Your Mastered Track In The Appropriate File Format

Once you’ve completed the final quality checks, it’s time to export your mastered audio in the appropriate file format compatible with Spotify. Here’s how to do it:

  1. Export as WAV or AIFF format: Choose either 16-bit or 24-bit depth and 44100 Hz sampling rate. These are the standard specifications used by Spotify, and anything above 24-bit depth and 48000 Hz will not be recognized by the platform.
  2. Tag your audio files: Ensure your audio files are tagged correctly with metadata such as the track name, artist name, album name, track number, and album art.
  3. Organize your assets: Organize your audio files and assets as a single ZIP folder and upload them to your Spotify dashboard. Your track should now be available for distribution on Spotify.

In conclusion, mastering your track for Spotify requires paying attention to the finer details and completing the necessary quality checks to ensure that your audio sounds great on all devices and playback systems. By following these tips, you can produce professional-sounding tracks that stand out on Spotify and engage your audience.

Frequently Asked Questions On How To Master Your Track For Spotify

What If My Song Is Too Loud For Spotify?

To avoid having your song being too loud on Spotify, ensure that your track is properly mastered and meets Spotify’s loudness guidelines. The recommended loudness level is -14 LUFS integrated, with a true peak of -1 dBTP. Check your levels with a loudness meter and make adjustments accordingly to ensure that your music is played back at the optimal level for streaming.

How Do I Master My Own Track?

To master your own track, you need to follow 5 guidelines. First, keep sentences under 20 words. Second, write in SEO friendly, unique and easy to understand language. Third, avoid starting sentences with specific phrases and words. Fourth, ensure your writing passes AI writing detection and sounds human.

Fifth, summarize the answer in 50 words or less.

Do You Need To Master For Spotify?

No, mastering is not necessary for Spotify. Mastering can improve the quality of your music, but it is not required for distribution on the platform. However, it is a good practice to ensure that your music sounds its best and stands out among the competition.

What Is The Best Mastering For Spotify?

The best mastering for Spotify is to keep your music dynamic so that it stands out among other tracks. Avoid over-compressing your audio and use a loudness level of -14 LUFS to maximize volume and clarity. Focus on creating a balanced and consistent sound that will sound great on any device.

Conclusion

Achieving the perfect sound for your music can be a challenging process, but mastering your track is a crucial step towards making it stand out on platforms like Spotify. By following the tips outlined in this post, including investing in high-quality mastering tools and carefully adjusting your levels, you can create a polished track that captures the attention of listeners.

While it may take some trial and error to find the right balance, mastering is an essential part of the music creation process that can make all the difference in your success as an artist.

Categories
Archive

How To Write Catchy Vocal Parts

To write catchy vocal parts, start by studying the melody and lyrics of the song and experimenting with different rhythms and phrasing. From there, focus on creating memorable hooks and adding vocal embellishments that enhance the emotional impact of the lyrics.

Keep the melody simple but catchy and leave room for improvisation and ad-libs. Remember to stay true to the vibe and message of the song and to convey the emotion of the lyrics through your vocal performance. With these tips in mind, you can create compelling and unforgettable vocal parts that elevate any song.

Start With A Memorable Melody

Creating a great vocal melody can be a daunting task, especially if you’re not sure where to start. However, the most important factor is to begin with a memorable melody that can hook listeners and make them sing along.

Create A Simple Melody

Remember that simplicity is key when it comes to writing a catchy melody. It should be easy to sing and easy to remember. Begin by writing a simple three or four-note melody and experiment with various intervals. Try to keep things simple, yet interesting. You can also write your melody to match the lyrics, making it more memorable.

Hum It Out

Once you’ve created a simple melody, try humming it to see how it sounds. You can also record yourself humming and play it back to see if it’s catchy enough. It’s also essential to consider how it will sound with the rest of the instrumental and how it will match the song’s mood. Take your time and experiment until you find something you’re happy with.

Add Emotional Depth

Aim to add emotional depth to your melody by using different dynamics, pitch, and rhythm. Think about the message or theme of your lyrics and try to express it through your melody. Experiment with different vocal techniques, such as vibrato, falsetto, and runs to add additional emotion. Adding emotional depth can ultimately make your melody more memorable and impactful.

Follow these steps to achieve a memorable vocal melody that can hook listeners. Remember, Keep it simple yet interesting and give it some emotion, and you’re on your way to writing catchy vocal parts.

How To Write Catchy Vocal Parts

Credit: www.reddit.com

Craft Engaging Lyrics

Crafting engaging lyrics is essential for any vocalist, whether you’re writing for yourself or for someone else. Lyrics are the backbone of any song and can make or break its success. To write catchy vocal parts, you need to use simple language, highlight emotions, create contrast, and tell a story. Let’s dive into each of these elements in more detail.

Use Simple Language

When it comes to writing catchy vocal parts, it’s important to use simple language that is easy for listeners to understand and relate to. Avoid using overly complicated words or industry jargon that only a small subset of people will understand. Simple language allows your lyrics to reach a wider audience, making them relatable and memorable.

Highlight Emotions

Great lyrics evoke emotions from listeners, and the same goes for vocal parts. When writing lyrics, focus on highlighting emotions such as love, heartbreak, happiness, or sadness. Emotions are universal, and when you can tap into them, you create a connection with your audience. Use vivid descriptions and similes to make your vocal parts more engaging and relatable.

Create Contrast

Contrast can add depth and complexity to your vocal parts. Contrasting words and phrases can create a dynamic tension that captures listeners’ attention and keeps them engaged. You can create contrast through variations in tone, volume, phrasing, and content. Be creative and experiment with different contrasts until you find a combination that works for your song.

Tell A Story

Vocal parts should tell a story that listeners can relate to or empathize with. A story can be a great way to connect with listeners’ emotions and create a memorable experience. You can tell a story through a series of vignettes, a single narrative, or a metaphorical journey. Don’t be afraid to get personal or vulnerable in your storytelling, as this can deepen the emotional connection with your listeners.

Explore Vocal Techniques

“Explore Vocal Techniques” is a subheading that screams innovation and creativity; it has been seen that the use of catchy vocal parts in music can hold the audience’s attention for longer duration. While writing catchy vocal parts, it is important to experiment with different techniques, rhythms, and tones. This not only helps in creating something unique but also in making the lyrics memorable. One way to make vocal parts catchy is to add variation in phrasing, harmonies, and adlibs. Let us explore these vocal techniques one by one.

Experiment With Vocal Range

Vocal range refers to the distance between the highest and the lowest notes that a singer can produce. Experimenting with a vocal range enables a musician to create something new and different. By pushing the boundaries of the vocal range, a singer can create variations in pitch and tone, making the lyrics more musical. Moreover, by adding different rhythm to the lyrics, a singer can also experiment with the pace at which the song is sung.

Add Variation To Your Phrasing

Adding variation to the phrasing of a song can elevate it to the next level. By varying the length of phrases, you can give the lyrics a sense of momentum or release. By using unpredictable phrasing, a singer can create a sense of tension and interest, making the listener curious about what comes next. Moreover, a clever use of repetition and silence can also make lyrics more memorable. To summarize, adding various phrasing techniques can help create something unique and catchy.

Use Harmonies

Harmonizing is when two or more notes are played or sung at the same time to create a distinct sound. Using harmonies in vocal parts can produce interesting results, such as creating tension, excitement, or a sense of calmness. A singer can also add harmonies to highlight certain phrases, lending weight to the lyrics. By experimenting with different harmony combinations, a musician can create something that is truly unique and memorable.

Incorporate Adlibs

Adlibs are spontaneous additions to a song, often used to highlight or accentuate important parts. Incorporating adlibs into the lyrics can create something fresh and innovative. Adlibs can be used to add impact, emotion, or humor to a song. A well-placed adlib can become an instant hook for the listener, making the song unforgettable. A musician can experiment with different adlibs and utilize them in their lyrics to create something entirely their own.

How To Write Catchy Vocal Parts

Credit: www.schoolofrock.com

Consider The Instrumental Track

When writing vocal parts, consider the instrumental track as your foundation. Listen carefully to the melody and rhythm of the instrumental and use it to inspire and guide your vocal melodies. Experiment with different phrasings and harmonies until you find the perfect fit for the track.

Writing catchy vocal parts is not an easy task but with the right process, it can be done effectively. One of the most important steps in writing catchy vocal parts is considering the instrumental track. Before getting started with writing a vocal melody, it’s critical to understand the musical landscape upon which the melody will reside. Here are the steps you can take to ensure you get this aspect right.

Listen To The Track

The first step is to listen to the instrumental track multiple times to get a feel for the song’s rhythm and melody. Try to pick out the instruments that are most prominent in the mix, whether it’s the guitar, bass, or drums. Take note of the structure of the song, paying particular attention to the hook or chorus. A well-crafted instrumental track will provide an excellent framework for your vocal part.

Determine The Key And Chord Progression

Once you have a good understanding of the song’s structure, you can determine the key and chord progression. The key will help you find notes that fit with the melody, which is critical for a catchy vocal part. The chord progression will give you a roadmap for how the song is moving harmonically, and knowing that will allow you to make informed choices about your vocal melody.

Find The Groove

Once you know the key and chord progression, it’s time to find the groove. The groove is the pattern of notes that provides the foundation for your vocal melody. The groove of the song will determine the rhythm and timing of your melody, so it’s essential to find a groove that complements the instrumental track.

Complement The Music

Finally, it’s time to create a vocal melody that complements the music. It’s important to remember that the vocals are just another instrument in the song. They should complement and enhance the overall sound. Look for melodies that fit well with the chord progression and groove and try to stay within the key of the song. Writing catchy vocal parts takes time and effort, but it’s worth it when the end result is a great song. By putting in the effort to consider the instrumental track, you can create a vocal part that fits perfectly with the music and captures the listener’s attention.

Think About The Structure Of The Song

When writing catchy vocal parts, it is important to think about the structure of the song. Consider where the verse, chorus, and bridge sections will be and how the vocals will flow between them. Focus on creating a memorable melody and lyrics that fit seamlessly into the overall song structure.

When it comes to writing catchy vocal parts, one of the most important things to consider is the structure of the song. A well-structured song can retain the listener’s attention and make your vocal parts stand out. Here are some key elements that can help you write catchy vocal parts:

Create A Hook

The most memorable vocal parts often have a catchy hook that sticks in your head. A hook is a short and memorable phrase or melody that repeats throughout the song to grab the listener’s attention. It can be a simple word or a sing-along chorus. To write an effective hook, you need to understand the theme and mood of the song and craft a phrase that reflects it. Keep in mind that the hook doesn’t have to be complicated, just catchy.

Build To A Climax

A strong song structure should build to a climax that leaves the listener wanting more. The climax can be a powerful chorus or a vocal solo that showcases your voice’s range and intensity. To build the song to a climax, you can use dynamics, arranging, and instrumentation to create a sense of tension and release. Ensure that your vocal part leads up to the climax and that it is strong enough to stand on its own.

Include A Bridge Or Breakdown

A bridge or breakdown is a section in the song that provides contrast to the main melody and adds variety to the structure. It can be a soft interlude or a brief departure from the main melody before returning to it. The bridge or breakdown can also provide an opportunity for your vocal part to shine and show off your versatility. It’s important to keep the bridge or breakdown short and strategic, so it doesn’t detract from the main melody’s impact. In conclusion, when writing catchy vocal parts, it’s crucial to consider the structure of the song and integrate elements like a hook, climax, and bridge. These elements can engage the listener and make your vocal parts stand out. Remember to keep your vocal parts simple, effective, and memorable to make sure that they leave a lasting impression on your audience.

How To Write Catchy Vocal Parts

Credit: blog.stageagent.com

Pay Attention To Phrasing And Delivery

If you want your vocal parts to stand out, paying attention to phrasing and delivery is crucial. Not only does it ensure that your lyrics have the flow and rhythm they need, but it also makes your performance more engaging and memorable. To help you achieve this, here are some tips on how to match phrasing to the melody, use dynamics to create interest, and connect with your audience.

Match Phrasing To The Melody

When writing vocal parts, it’s essential to match the phrasing to the melody. This means deciding where to put your pauses and breaths, and how to emphasize certain words or syllables in each line. By doing this, you create a natural flow that enhances the meaning of your lyrics and makes them more accessible to your listeners.

Some ways to match phrasing to the melody include:

  • Starting and ending each phrase on a strong note
  • Making sure that your longer phrases are followed by shorter ones for variety
  • Using repetition and variation of syllables to keep the melody interesting

Use Dynamics To Create Interest

Dynamics are essential in any performance, and this is especially true for vocal parts. By incorporating variations in volume, pitch, and intensity, you can create interest and make your lyrics more engaging. It’s essential to avoid singing in the same tone and volume throughout the entire song, as this can make it sound monotonous and uninspiring.

Some ways to use dynamics in vocal parts include:

  • Varying the volume between different phrases and sections of the song
  • Adding crescendos and decrescendos to create anticipation and release
  • Experimenting with pitch to add emphasis and emotion to specific lyrics

Connect With The Audience

Finally, when writing vocal parts, it’s important to connect with your audience. This involves finding a balance between expressing your emotions and engaging with your listeners. If you’re too focused on your own performance, you risk alienating your audience. On the other hand, if you’re too passive, you may fail to make a strong impression.

Some ways to connect with your audience include:

  • Making eye contact with your listeners
  • Using body language to express your emotions
  • Interacting with your audience during breaks in the song

By paying attention to phrasing and delivery, you can make your vocal parts more memorable and engaging. Remember to match your phrasing to the melody, use dynamics to create interest, and connect with your audience. With practice, your vocal parts will become more refined, and your performances will become more unforgettable.

Collaborate With Others

If you’re struggling to come up with a unique vocal melody or need help refining your lyrics, collaborating with others can be the answer to your problem. Working with other creative minds can push you outside of your comfort zone and lead to fresh ideas that you never would have thought of on your own. Here are some tips for collaborating with different types of music industry professionals:

Work With Lyricists

If you’re struggling with writing lyrics, partnering with a skilled lyricist can give your vocal parts a much-needed boost. A lyricist can help you convey your message more clearly and poetically. Collaborating with a lyricist can also help you craft lyrics to fit a particular theme or mood. When selecting a lyricist, make sure to choose someone whose style complements your own.

Partner With Other Vocalists

If you’re working on harmonies or need backup vocals, partnering with other vocalists can take your music to another level. Bringing in another voice can create depth and texture that a single vocal track could never achieve on its own. Additionally, collaborating with another vocalist can provide an opportunity for you to learn from each other’s vocal styles and techniques.

Collaborate With Music Producers

Music producers can offer valuable insights into how to shape and refine your vocal parts. They understand how to create an overall sound that complements the vocals and instrumentation. A good producer can help you identify the strengths and weaknesses of your vocal performance and offer advice on how to improve it. When you choose to work with a producer, look for someone whose style and aesthetic aligns with your own.

Collaborating with others can be a challenge, but finding the right partner can pay off in a big way. Keep an open mind, be willing to compromise, and always communicate your ideas clearly. A successful collaboration can result in catchy vocal parts that elevate your music to new heights.

Practice Regularly

Practice makes perfect when it comes to writing catchy vocal parts. You need to make time for consistent practice if you want to become skilled at writing compelling vocal parts that resonate with your audience. Here are a few tips you can use to make your practice sessions more productive.

Warm Up Before Singing

Before starting your practice session, it’s important to warm up your vocal cords. This can help you avoid vocal strain and ensure that your singing voice is in top condition. Start by performing some simple vocal exercises, like lip trills and humming, to gently warm up your voice.

Practice Breathing Exercises

Good breathing techniques are important for singing and writing catchy vocal parts. You need to be able to control your breath to sustain long notes and deliver more complex melodies. Practice breathing exercises every day to help strengthen your diaphragm and improve your control over your breath.

Record Your Practice Sessions

Recording your practice sessions is a great way to track your progress and identify areas where you need to improve. Listen back to your recordings and analyze your performance, identifying any weak spots or areas where you could improve your vocal writing skills. This will allow you to focus on specific areas during your next practice session and make steady progress towards your goals.

Frequently Asked Questions For How To Write Catchy Vocal Parts

How Do You Make Something Sound Catchy?

To make something sound catchy, use short and punchy sentences. Its essential to keep your writing SEO friendly, unique and plagiarism free while also being easy for humans to understand. Avoid starting your sentences with certain words and phrases and avoid writing in the passive voice.

Additionally, ensure your writing passes AI writing detection and sounds natural. Keep your answer to 50 words or less.

How Do You Write A Good Vocal Line?

To write a good vocal line, consider the melody and lyrics together, create a catchy hook, and use appropriate phrasing and dynamics. Consider the genre and audience, and add your unique vocal style. Experiment with different melodies and rhythms, and practice singing to refine the final product.

How Do You Write A Catchy Melody?

To write a catchy melody, focus on creating a memorable hook or melody that grabs the listener’s attention. Start by experimenting with chords and progressions and finding a melody that fits. Use repetition, variation, and contrast to make the melody stand out.

Keep it simple but not too predictable, and make sure it fits the mood and lyrics of the song. With practice and experimentation, you can create a catchy and memorable melody.

How Do You Write A Pop Melody?

To write a pop melody, start by focusing on a catchy and memorable hook. Keep the melody simple with a clear and easy-to-follow structure. Incorporate repetition, rhythmic patterns, and contrast in dynamics to keep the melody interesting. Experiment with different chord progressions to find the perfect fit for your melody.

Finally, make sure the lyrics are relatable and easy to sing along to.

Conclusion

Creating catchy vocal parts is an essential skill for any singer-songwriter. It can be challenging to craft something unique and memorable, but following these guidelines can make the process easier. Remember to focus on the lyrics, find the right melody, and experiment with different vocal techniques.

It’s essential to think about your target audience and find ways to connect with them through your vocals. Finally, practice and never settle for anything less than your best effort. Keep working on your craft, and you’ll soon be writing catchy vocal parts that people will love to sing along to.

Categories
Archive

How To Start Making Music In Ableton

To start making music in Ableton, first, download and install the software, then familiarize yourself with the interface and basic functionalities. Ableton is a popular digital audio workstation that provides comprehensive tools to create, record, edit and produce music.

Its user-friendly interface makes it an ideal choice for beginners to learn and get started with music production. The software offers innovative features and plugins to enhance music-making capabilities. It is essential to understand the functions of various instruments, effects, and techniques before proceeding with creating music.

With Ableton, you can start composing your music by experimenting with the basic building blocks of beats, melodies, and chords. Explore the possibilities, unleash your creativity and bring your musical ideas to life with Ableton.

Setting Up Ableton

If you’re a music enthusiast or a beginner who wants to produce music, Ableton is one of the best digital audio workstations (DAW) to start with. It comes with a plethora of features, instruments, and effects that can help you bring your creative ideas to life. In this article, we’ll cover the essential steps to get you started on how to set up Ableton.

Install And Activate Ableton

Before diving into Ableton, you need to install and activate the software:

  1. Visit the official Ableton website and download the software.
  2. Run the installer and follow the prompts.
  3. Once the installation is complete, launch Ableton.
  4. Activate the software by entering your Ableton serial number.

Configure Audio Preferences

Configuring your audio preferences is essential to ensure that Ableton works seamlessly. Here are the steps to configure your audio preferences:

  1. Go to the “Options” menu and select “Preferences.”
  2. Under the “Audio” tab, select your audio interface from the drop-down menu.
  3. Set the sample rate and buffer size to match your audio interface settings.
  4. Once you’ve finished configuring your audio preferences, click “OK.”

Learn Navigation Basics

Before starting to produce any music, it’s crucial to learn the basics of Ableton’s navigation. Here are some essential navigation tips:

  • Explore the session and arrangement view.
  • Familiarize yourself with the browser to find effects, instruments, and samples.
  • Use shortcut keys to speed up your workflow.
  • Learn how to use MIDI and audio clips effectively.

By following these steps, you’re off to a great start in making music in Ableton. Remember, practice makes progress, and experimentation is key to create unique sounds. Keep exploring and having fun with Ableton!

Creating Your First Project

If you’re new to Ableton, creating your first project can seem overwhelming. However, with Ableton’s user-friendly interface and helpful tutorials, starting to make music is easier than you may think. Begin by exploring the software’s various features and tools, experimenting with different sounds and effects, and gradually building your skills and confidence.

Creating your first music project in Ableton can seem like a daunting task, but with the right guidance, it can be a breeze. In this guide, we’ll go over the essential steps to create your first project in Ableton, from choosing a project template to recording your first sounds.

Choose A Project Template

Before you start creating your first project, you need to choose a project template. Ableton provides a variety of project templates to choose from, including templates for electronic music, hip hop, and acoustic. Once you’ve selected a template, Ableton will automatically set up a project window with pre-made tracks and instruments related to the genre you selected. This can save you valuable time and allow you to focus on creating your music.

Add Tracks And Instruments

After choosing a project template, it’s time to add tracks and instruments to your project. Ableton’s Session View allows you to add audio and MIDI tracks, which you can use to add drums, bass, vocals, and other elements to your project. To add a track, navigate to the “Add Track” button at the bottom of the screen and select the type of track you want to add. Ableton also provides a wide range of built-in instruments that you can use to create your music, or you can import external software instruments if you prefer.

Record Your First Sounds

Once you’ve selected your project template and added your tracks and instruments, it’s time to dive in and start recording your first sound. To record audio in Ableton, simply arm the track you want to record on and hit the record button. You can record sounds from external sources like microphones or instruments, or you can use Ableton’s built-in software instruments or virtual synths to create new sounds. If you’re recording MIDI data, you can use a MIDI controller or your computer keyboard to input notes and record your sequence. With these essential steps, you’re well on your way to creating your first project in Ableton. Whether you’re an experienced musician or just getting started, Ableton provides a user-friendly interface that makes it easy to start making music right away.

Basic Music Theory

Learn the basics of music theory to start making music in Ableton. Understanding chord progressions and scales can help you create melodies and harmonies for your tracks. Get started with some online tutorials or music theory references.

If you’re looking to start making music on Ableton, then understanding basic music theory is a must. Although it is not necessary to know music theory to start making music, having a basic understanding will help you create better musical pieces and improve your workflow. In this section, we will cover the foundational aspects of music theory that are essential for creating music in Ableton.

Understanding Rhythm And Tempo

The rhythm and tempo are two fundamental aspects of music that dictate its pace and feel. Rhythm refers to the pattern of notes played in a piece of music. Whereas tempo refers to the speed at which the notes are played. In Ableton, you can set the tempo of your project by adjusting the BPM (beats per minute). This setting determines the speed at which each track in your project will play.

Piano Roll Basics

The piano roll is one of the essential features in Ableton that enables you to create and edit MIDI notes. MIDI notes are the building blocks for creating melodies, harmonies, and rhythms in your music. In the piano roll, you can draw and edit MIDI notes that represent the pitches and timing of your musical piece. You can also adjust the velocity of each note to create dynamics and expressiveness in your music.

Introduction To Chords And Harmony

Chords and harmony are the backbone of most musical pieces. A chord is a group of three or more notes played simultaneously, whereas harmony is the combination of chords played together. Chords and harmony add depth and emotion to your music and are essential for creating hooks and memorable melodies. In Ableton, you can create and edit chords using the “Chord” MIDI effect. This feature allows you to play complex chords using a single MIDI note, making it easier to create beautiful harmonies for your music. In conclusion, having a basic understanding of music theory is essential for creating great music in Ableton. Understanding the rhythm, tempo, piano roll, chords, and harmony will help you get started on creating music and making better musical pieces.

How To Start Making Music In Ableton

Credit: m.youtube.com

Arranging Your Track

Arranging your track is an important step when it comes to making music in Ableton Live. It involves putting all your ideas together in an organized and structured way that creates a cohesive and engaging musical experience for your listeners. Here are some important factors to consider when arranging your track:

Structure And Form

The structure and form of your track refer to how you organize the different sections of your song. This includes the introduction, verse, chorus, bridge, and outro. To create an engaging track, you need to ensure that you follow a structure and form that makes sense and keeps your listeners interested. Keep in mind that there is no one-size-fits-all approach to structuring your track. However, a common arrangement formula used across various genres is:

SectionDescription
IntroThe intro sets the mood for your track and hooks your listeners.
VerseThis is the section where the main melody, lyrics and themes are introduced
ChorusThis is the section where the main hook and catchiest part of the song is sung
BridgeThis section acts as a break between the main verses and chorus. It is typically where the song shifts harmonies and introduces a new element
OutroThe outro is where you start to bring the track to a close

Transition Techniques

Transition techniques are used to smoothly move from one section of your track to another. Abrupt transitions can leave your listeners feeling disoriented, and so it’s important to use effective transitions that keep the flow of your music constant. Transition techniques could include:

  • Filter sweeps
  • Reverse cymbals
  • Risers and downlifters
  • Automated panning

Dynamic Changes

Dynamic changes refer to how the volume and energy of your track change over time. This keeps your listeners interested throughout the track and creates a more engaging experience. Dynamic changes can be added by:

  1. Adding or removing instruments
  2. Increasing or decreasing the volume
  3. Using automation to add effects such as reverb or delay

When it comes to making music in Ableton, arranging your track is one of the most important steps to creating a complete and engaging musical experience. By following the tips outlined in this blog post, you can ensure that your track is well-structured, complete with smooth transitions, and dynamic changes that keep your listeners engaged.

Mixing And Mastering Techniques

Learn how to start making music in Ableton by mastering mixing and mastering techniques. Create a professional sound by utilizing EQ, compression, reverb and other effects to enhance your music to its fullest potential.

Are you new to Ableton and eager to start making music? One of the most important skills to learn is mixing and mastering your tracks. In this section, we’ll cover some essential techniques to help you achieve a polished, professional sound. Let’s dive in!

Balancing Levels

The first step in mixing your track is to balance the levels of each element. This means adjusting the volume of each track so that they sit well together in the mix. Start by soloing each track and setting the fader to its default level. Then, un-solo and listen to all of the tracks together, making small adjustments until everything sounds balanced.

Equalizing Your Sounds

Equalization (or EQ for short) is the process of adjusting the frequency content of your tracks. This can help to remove unwanted frequencies and bring out the best in your sounds. In Ableton, you can use the EQ Eight device to adjust the frequency range of each track. Try cutting the low end on non-bass tracks to make more room for the kick and bass, or boost the high end on a vocal track to add clarity and presence.

Using Effects And Audio Processing Tools

Adding effects and processing to your tracks can take your mix to the next level. Ableton comes with a vast array of built-in tools to sculpt your sounds, including compressors, reverbs, delays, and more. Experiment with different effects to find the right sound for each track. But remember, less is often more – try to use effects sparingly and with intention. In conclusion, mixing and mastering is a critical step in the music production process. By using these techniques, you’ll be well on your way to creating professional-sounding tracks in Ableton. Keep experimenting and refining your skills, and soon you’ll be making music that sounds amazing.

How To Start Making Music In Ableton

Credit: www.productionmusiclive.com

Collaborating And Sharing Your Music

Starting your music journey in Ableton can feel daunting. However, collaborating and sharing your music can help you grow and improve as an artist. Start small by reaching out to fellow producers and sharing your partial tracks to get feedback, and work on building a network in the music community.

Collaborating and Sharing Your Music is one of the most exciting aspects of making music in Ableton. Whether you’re working on a project with another musician or you want to share your work with the world, Ableton makes it easy to collaborate and publish your music. In this article, we’ll cover how to work with other musicians using Ableton Link, as well as exporting and publishing your music for others to enjoy.

Working With Other Musicians

Ableton Link is a powerful tool that allows musicians to sync their music-making devices and software together over a wifi network. This means that you can collaborate with other musicians in real-time, even if you’re not in the same physical location. To get started with Ableton Link, simply enable it in your Ableton settings and connect with other musicians who are also using Ableton. Alternatively, you can use the “Export Audio/Video” feature to share your work with other musicians. This allows you to bounce your tracks or stems as audio files, which can then be shared with other musicians for collaboration. To export your files, simply select the “Export Audio/Video” option from the File menu, and choose the settings that are most appropriate for your project.

Using Ableton Link

Ableton Link is a powerful tool that allows musicians to sync their music-making devices and software together over a wifi network. This means that you can collaborate with other musicians in real-time, even if you’re not in the same physical location. To get started with Ableton Link, simply enable it in your Ableton settings and connect with other musicians who are also using Ableton. Alternatively, you can use the “Export Audio/Video” feature to share your work with other musicians. This allows you to bounce your tracks or stems as audio files, which can then be shared with other musicians for collaboration. To export your files, simply select the “Export Audio/Video” option from the File menu, and choose the settings that are most appropriate for your project.

Exporting And Publishing Your Music

Once you’ve finished your project, it’s time to export and publish your music for others to enjoy. Ableton makes this easy with the “Export Audio/Video” feature. To export your tracks or stems, simply select the “Export Audio/Video” option from the File menu, and choose the settings that are most appropriate for your project. When exporting your music, it’s important to choose the right file type and quality settings. If you’re exporting your tracks for use in a DAW or other music-making software, you’ll want to export them as uncompressed WAV files. If you’re sharing your work online or with others, you may want to export your tracks as compressed MP3 files to save space and make them easier to share. Once you’ve exported your music, it’s time to publish it. There are many ways to share your music online, including SoundCloud, Bandcamp, and YouTube. Each platform has its own unique features and benefits, so it’s important to choose the right one for your needs. In conclusion, collaborating and sharing your music in Ableton can be a fun and rewarding experience. With Ableton Link and the “Export Audio/Video” feature, you can work with other musicians and share your work with the world. So why wait? Start making music in Ableton today!

Frequently Asked Questions On How To Start Making Music In Ableton

How Do I Start Music Production In Ableton?

To start music production in Ableton, you need to follow these steps: 1. Install and open Ableton on your computer. 2. Create a new project and import or record audio. 3. Choose and customize sounds using plugins or samples. 4. Arrange your sounds on the timeline to create your composition.

5. Mix and master your final output for optimal sound quality.

How Do I Start Making A Song In Ableton?

To start making a song in Ableton, follow these steps: 1. Open the program and create a new project. 2. Choose your preferred tempo and time signature. 3. Add a new audio or MIDI track. 4. Use Ableton’s instruments and effects to create your sounds.

5. Arrange your clips on the timeline to create your song.

Is Ableton Easy For Beginners?

Yes, Ableton can be easy for beginners due to its intuitive interface, drag and drop features, and vast library of pre-made samples and instruments. However, like any software, it will require practice and dedication to fully grasp and utilize all of its features and capabilities.

Is Ableton A Good Daw For Beginners?

Ableton is a great DAW for beginners due to its easy-to-use interface, intuitive workflow, and its ability to work with both MIDI and audio. It is also versatile and widely used in the music industry, which provides ample resources for learning and troubleshooting.

Overall, Ableton is an excellent choice for those new to music production.

Conclusion

To conclude, starting to make music in Ableton can feel overwhelming, but by following these steps, you can begin your journey with confidence. Remember to start slow and take your time, as the learning curve for music production can be steep.

By experimenting with Ableton’s features and utilizing resources such as online tutorials, you can hone your skills and create your own unique sound. Keep practicing, stay creative, and enjoy the process of making music in Ableton!

Categories
Archive

How To Mix And Master A Trap Song

To mix and master a trap song, use EQ, compression and reverb. First, adjust the levels and panning of the individual tracks, then apply processing to the entire mix to achieve a cohesive sound.

Trap music has gained immense popularity in the last decade and has become a staple in the music industry. It is a sub-genre of hip hop that originated in the Southern United States and is characterized by its hard-hitting 808 drums, ominous melodies, and aggressive lyrics.

With its hard-hitting beats and booming basslines, trap music is known for its emphasis on mixing and mastering. To achieve a professional-sounding mix, you need to know how to use the right tools and techniques. We’ll discuss how to mix and master a trap song, step by step. Whether you’re a producer or an aspiring artist, this guide will provide you with the essential knowledge to take your music to the next level.

How To Mix And Master A Trap Song

Credit: www.airgigs.com

Preparation

Learn how to effectively mix and master a trap song with proper preparation. This involves organizing your files, setting levels, and applying effects to create a polished final product that will stand out in the competitive trap music industry.

Organizing Tracks And Files

The first step in mixing and mastering a trap song is to organize your tracks and files. Make sure all of your audio files are in the same folder, named correctly, and labeled with their corresponding instruments or vocals. This will make it easier to navigate and find specific tracks as you mix. Additionally, it’s important to have your session labeled with the correct BPM and key, so that you can easily add effects and plugins that will sound good together.

Gaining Proper Levels

When mixing a trap song, it’s important to have your levels set correctly. Make sure that your individual tracks are balanced in terms of volume, so that no one instrument or vocal overpowers the others. Use a metering plugin to help guide you and ensure that each track is sitting at the appropriate level. It’s also crucial to keep an eye on your master fader and make sure that it’s not going over 0 dB, which can cause clipping and distortion.

Cleaning Up Audio Clips

Before you start mixing, take the time to clean up your audio clips. This includes removing any unwanted background noise or clicks and pops, and ensuring that there are no dropouts or gaps in your audio. One way to do this is to use a noise reduction plugin to get rid of any low-level noise in your tracks. It’s also a good idea to listen through each individual track and make sure that there are no unwanted sounds or glitches that could cause problems during the mixing process.

How To Mix And Master A Trap Song

Credit: www.fiverr.com

Mixing

Learn how to effectively mix and master a trap song with these expert tips. From EQing to compression, discover the techniques to make your trap song sound professional and polished.

Mixing is the process of combining all the individual tracks of a song to create a final mix that sounds balanced and cohesive. When mixing a trap song, it is essential to ensure that each element of the track, such as the drums, bass, vocals, and instruments, should sound clear and distinct.

Balancing Tracks

The first step to achieve a great mix is balancing the levels of each track in the session. This step is fundamental because it sets the foundation for all other mixing processes making sure that none of the elements are overpowering any of the other elements of the track. To balance tracks, listen to each track with all the other tracks muted and adjust the fader level until it sounds good and doesn’t overpower other tracks. Do this for every track in the session to achieve a perfect balance.

Eqing To Create Space

The next step is to EQ the individual tracks to create sonic space and remove any unwanted frequency. EQ also helps to distinguish each element in the mix, giving them their own character and space in the frequency spectrum. Using a parametric EQ, locate and remove any harsh or muddy frequency ranges that hinder the elements in the mix from popping out. After that, boost frequencies that add presence and clarity to each element. Subtle EQ moves can make a huge difference in the overall audio quality of a track.

Creating Depth With Reverb And Delay

Reverb adds depth to the mix, while delay helps to create a sense of space and movement. By adding reverb and delay, tracks can be made to sound like they were recorded in a real space or environment. To use reverb and delay, try sending a portion of each track to a reverb or delay effect. Start with small amounts and gradually increase to avoid drowning the track in excessive reverb or delay. Too much of either effect can make the mix sound muddy and confusing. Ensuring that each element in the track has its own space in the mix is vital to achieving a polished, professional sound in your trap song. Remember to balance each track, use EQ to create sonic space and use reverb and delay to create depth. By following these simple steps, you can create a well-balanced trap track that keeps your listeners hooked.

Mastering

Learn how to mix and master a trap song with these expert tips. From equalizing to compressing, this guide will take you through the steps to achieve a professional sound.

Mastering is the final step in mixing a trap song, where the focus shifts from balancing and polishing the individual elements of the track to perfecting the overall sound and preparing it for distribution. To achieve a professional-sounding master, it’s crucial to pay attention to preparing for mastering, compressing to glue the mix, equalizing for final tone, and creating separation with stereo imaging.

Preparing For Mastering

Before beginning the mastering process, it’s essential to take a break from the mix and come back to it with fresh ears. Once you’ve done that, it’s time to ensure that the mix is in the correct format, with all useless parts trimmed, such as excessive silence or inappropriate noise. A helpful tip is to use a spectrum analyzer on the master channel to pinpoint any issues that may need to be addressed during mastering.

Compressing To Glue The Mix

To get the kick and bass to hit harder and sound more cohesive, it’s crucial to use compression. By compressing elements of the mix, you can pull the sounds closer together without losing dynamic range. For most trap songs, it’s best to use moderate compression settings on multiple elements to bring the mix together and create a cohesive sound. As such, it’s best to set the release time and release value of the compressor to match the BPM of the song.

Equalizing For Final Tone

EQing is a significant part of the mastering process as it helps cut any frequency imbalances in the mix. Although it’s easy to overdo it, you should have set up your mix so that individual elements such as the kick, snare, and hi-hat aren’t stepping on each other. As a result, when applying EQ during mastering, the primary objective is to make minimal cuts and boosts, refine sounds, and achieve a more consistent tone and balance.

Creating Separation With Stereo Imaging

Stereo imaging is the final stage of mastering that helps achieve an even more polished and professional sound. You can create separation with stereo imaging by focusing on the frequency range of the mix instead of the pan position. For Instance, you can use a stereo widener plugin to spread harmonics that aren’t present in the center of the mix out to the sides. Overall, mastering is a crucial part of the mixing process, and with the right approach, it can take your trap song from sounding good to sounding professional. By preparing for mastering, compressing to glue the mix, equalizing for final tone, and creating separation with stereo imaging, you can achieve a high-quality master that sounds great on any sound system.

Advanced Techniques

Learn advanced techniques for mixing and mastering your trap song like a pro with these tips and tricks. From EQ and compression to reverb and delay, get the perfect balance and sound for your next hit.

After finalizing the basic mixing and mastering of the track, it’s time to add that extra “oomph” to take your trap song to the next level. These advanced techniques will help you achieve the perfect balance and energy in your mix.

Creating Trap-specific Effects

To make your trap song stand out, it’s essential to add some trap-specific effects. Using plugins like Gross Beat or Cableguys Halftime, you can create half or double-time effects on your sound. Distortion and saturation can also give your 808s and other instruments a gritty and distorted sound. Automated pitch bending can add variation and movement to the track.

Using Automation To Keep The Track Engaging

Automation can add dynamics to your track, making it more engaging for the listener. You can automate volume, panning, and filters to create buildups and drops. Automating the reverb and delay on specific instruments can also help them cut through the mix and add depth. Don’t be afraid to experiment with automation to create tension and release throughout the track.

Adding Final Touches To The Mix And Master

The final touches can make all the difference in achieving a polished and professional sound. Use a multiband compressor to make sure the levels of the individual frequency ranges are balanced. You can also use a stereo widener to make the mix sound wider and more spacious. Ensure the final output level is neither too loud nor too quiet, and the overall tonal balance is consistent throughout the track. By utilizing these advanced mixing and mastering techniques, you can make your trap song stand out and capture the energy of the genre. With practice and experimentation, you can perfect your craft and create incredible sounding tracks suitable for any trap music enthusiast.

How To Mix And Master A Trap Song

Credit: fr.fiverr.com

Frequently Asked Questions For How To Mix And Master A Trap Song

How Do You Mix A Trap Song?

Mixing a trap song involves balancing the different elements such as the vocals, drums, and bass to create a cohesive and impactful sound. The process includes applying EQ, compression, and effects to enhance the overall mix. It is important to pay attention to the dynamics and frequencies to ensure clarity and balance throughout the song.

How Do You Structure A Trap Song?

A trap song can be structured with a mixture of 16-bar verses and 8-bar hooks. Often, a song will begin with an intro, followed by a verse, chorus, verse, chorus, bridge, and final chorus. During each section, the instrumentals can change to enhance the listener’s experience and maintain interest.

The structure allows for a repetition and pattern, while still allowing for creativity in each section.

How Do I Start Making Trap Music?

To start making trap music, you’ll need beat-making software, a MIDI keyboard, and trap music samples. Learn the fundamentals of music theory and sound design. Follow trap music producers on social media to keep up with new trends. Practice mixing and mastering your tracks.

Collaborate with other artists to expand your network.

What Makes A Song A Trap Song?

Trap music typically features heavy bass and percussion, with a slow tempo and 808 drum machine. The lyrics often focus on crime, drug use, violence, and partying. Trap songs also often contain rapid-fire hi-hats and use of samples, especially from vocal ad-libs.

Conclusion

In a trap song, mixing and mastering play a crucial role in the final output. It is essential to understand the technical aspects and creative techniques to create an excellent sounding track. A disciplined approach, being patient, and applying the discussed tips would add value to your mix.

With time, you can develop your unique style. So, keep practicing and experimenting to create your masterpiece. Happy Mixing!!! !

Categories
Archive

Managing Your Mixing Sessions

Managing your mixing sessions requires proper preparation and attention to detail. In order to ensure the desired outcome, you should stay focused on the task and utilize the appropriate techniques throughout the process.

When it comes to music production, mixing is a crucial stage that can make or break the final product. It involves combining different sound elements to create a cohesive and balanced sound. However, it can be a daunting task, especially if you are new to music production or lack experience in mixing.

We will provide you with some essential tips on how to manage your mixing sessions effectively. By following these guidelines, you can improve the quality of your mixes and achieve the sound you envision for your music.

Preparation For Mixing Session

Before starting the mixing session, it is important to properly prepare your workspace and materials. This includes organizing your audio files, setting up your equipment, and creating a plan for the session. By being well-prepared, you can ensure a smooth and efficient mixing process.

Preparing for a mixing session is crucial to ensure a successful result. Being a meticulous task, it requires comprehensive preparation for smooth execution. Setting goals and expectations, organizing tracks and files, and assessing and cleaning up tracks are some of the essential steps that need attention. In this post, we’ll discuss each of these steps in detail, so let’s dive in.

Setting Goals And Expectations

The first step towards a successful mixing session is establishing your goals and expectations. During this phase, it’s vital to have a clear understanding of the purpose of the mix, the target audience, and the intended emotions that the song aims to evoke. Allowing these objectives to guide your mixing decisions will enable you to create a more cohesive and defined mix. Additionally, reference tracks can help you create a benchmark and compare your work with other similar tracks.

Organizing Tracks And Files

Organizing tracks and files is another critical step in preparation for a mixing session. Keeping files and tracks organized allows you to save time and work efficiently, ensuring that nothing is missed along the way. Start by labeling and color-coding each track, making it easier to identify each element in the session. You can group similar tracks and create submixes at this stage, streamlining the mixing process.

Assessing And Cleaning Up Tracks

The final step of preparation for a mixing session is assessing and cleaning up tracks. This stage requires a keen ear to identify any problematic tracks and eliminate them to avoid unwanted interference in the mix. Ensure that all tracks are noise-free, no clipping or distortion exists and get rid of any unwanted background noise. Grouping and balancing individual tracks at this stage also makes the mixing process smoother. In conclusion, preparation is the foundation of a successful mixing session. Setting goals and expectations, organizing tracks and files, and assessing and cleaning up tracks are essential steps that ensure you’re well-prepared to mix like a pro. Taking the time to prepare adequately will save time, energy, and resources in the mixing process while ensuring a coherent and professional-sounding mix.

Managing Your Mixing Sessions

Credit: www.thebeachhousestudios.com

Optimizing Your Mixing Environment

Optimizing your mixing environment is crucial for managing your mixing sessions efficiently. Creating an organized and distraction-free work area helps you focus on your music and sound production, resulting in better outcomes. From arrangement to EQing, a correctly optimized mixing environment can enhance your workflow and creativity.

Optimizing Your Mixing Environment is crucial for producing a high-quality recording. The environment plays a vital role in providing accurate sound in your mixing sessions. Here are three important steps to take when it comes to optimizing your mixing environment.

Setting Up Your Mixing Space

The first step to optimize your mixing environment is to set up your mixing space. Choose a room that is well-insulated and free from external noise. Make sure the room is large enough to accommodate your equipment and has no resonance issues. A smaller room will typically have more resonance issues, so acoustic treatment is often necessary to avoid any bass buildup in the room. You can use acoustic panels, diffusers, and bass traps to improve your room’s acoustics.

Calibrating Your Monitors

Setting up your monitors in the right way is essential for achieving an accurate mix. The first thing you need to do is to position your monitors correctly. Set them at an equal distance from each other and at a 60-degree angle from your mixing position. The tweeter of your monitor should be at ear level with your head. Once the monitors are in place, it’s time to calibrate them. Use a pink noise generator to send a sound signal to your monitors and calibrate them to the same level. If you’re using a subwoofer, calibrate it with the main monitors for consistency.

Avoiding Acoustical Problems

Acoustical issues can significantly impact the accuracy of your mix. After setting up the monitors, you need to address any acoustical problems in your mixing space. Using acoustic treatment, you can eliminate any early reflections, standing waves, or flutter echo that may interfere with your mix. Once you’ve treated your room, check for any external noise that can still affect your mix. A well-insulated room should prevent external noise from seeping in. Additionally, using closed-back headphones while mixing can help you identify issues that may not be audible on your monitors. Optimizing your mixing environment is critical for achieving a high-quality mix. By following these three steps, you can create an environment that allows you to hear accurate sound, ensuring your mix is well-balanced and professional.

Working With Levels And Panning

When it comes to mixing audio, there are several elements you need to consider, including levels, panning, EQ, and compression. Working with levels and panning is especially important because they help you create a clear and well-balanced mix. In this post, we will explore some tips and techniques for managing your mixing sessions using levels and panning.

Setting Initial Levels

Before you start working on your mix, it’s important to make sure all your channels are set to the right levels. A good starting point is to set all the faders at their unity gain (0dB). From there, you can adjust each channel’s volume so that it sits well in the mix. You can also use group faders to control the overall level of a particular group of channels.

Using Eq To Create Space

EQ is a powerful tool for creating space and separation between each channel in your mix. You can use EQ to cut out the unwanted frequencies from each channel, so they don’t clash with one another. For example, you can cut out the low end of a guitar to make room for the bass guitar to sit better in the mix. Similarly, you can cut out the high end of a vocal to make room for the cymbals and other high-frequency sounds.

Working With Pan To Add Depth And Width

Panning is an essential tool for adding depth and width to your mix. By placing sounds in different parts of the stereo field, you can create a sense of space and separation between each channel. For example, you can pan the guitar to the left and the piano to the right to make them sound like they are coming from opposite sides of the stage.

In conclusion, managing your mixing sessions using levels and panning is crucial to creating a well-balanced, professional-sounding mix. By setting the initial levels, using EQ to create space, and working with pan to add depth and width, you can create a mix that sounds great on any sound system.

Processing Individual Tracks

When managing your mixing sessions, processing individual tracks is a key step in achieving a professional sound. By focusing on each track separately, you can apply specific effects and adjustments to optimize their sound and create a cohesive final product.

Working With Dynamics Control

Processing individual tracks is vital to creating a polished and professional mix. One crucial aspect of this process is dynamics control. When working with dynamics control, the goal is to even out the volume of each track to create an overall balanced sound. Compression is the most commonly used tool for dynamics control, but other techniques such as volume automation and limiting can also be beneficial. When using compression, it’s important to consider the attack, release, and ratio settings to achieve the desired effect.

Using Eq To Shape The Sound

Another essential tool in processing individual tracks is EQ. EQ can be used to shape the sound of each track to fit perfectly within the mix. EQ can be used to cut unwanted frequencies or boost desired ones. When using EQ, it’s important to listen carefully to the track and make small adjustments until it sounds just right. It’s essential to avoid over EQing, which can make the mix sound thin or unnatural.

Applying Creative Processing

Lastly, applying creative processing to individual tracks can add an extra layer of interest and depth to the mix. This can include techniques such as saturation, distortion, or modulation effects. However, it’s important to be mindful of not overdoing it with creative processing, which can distract from the overall mix. The key is to use creative processing to enhance the sound and create a unique and engaging mix. Processing individual tracks is a crucial part of creating a polished and professional mix. Working with dynamics control, using EQ to shape the sound, and applying creative processing will help each track fit perfectly within the mix and create a balanced and engaging sound. Remember to take your time, listen carefully, and make small adjustments to achieve the best possible result.

Creating The Stereo Mix

Creating the stereo mix is the final stage in the mixing process where all the individual sonic elements come together as a cohesive whole. It provides balance, clarity, and depth to a song while ensuring that all elements work together to deliver the intended message.

Creating A Balanced And Cohesive Mix

To create a well-balanced and cohesive mix, it is important to adjust the levels of individual tracks to ensure they do not conflict with each other. The idea is to give each instrument its necessary space to breathe and stand out.

A useful technique is to use a frequency analyzer tool to identify frequency clashes and cut or boost accordingly. EQ can be used to carve out the unnecessary frequencies, and panning can be used to create a wide stereo image.

Using Automation For Dynamic Changes

Automation is used to add depth and dynamic changes to a mix. It involves adjusting volume, panning, and effects as the song progresses to keep it engaging. It is the process of automating the changes in the mix over time.

A good way to use automation is to add effects such as reverb and delay to specific sections of the song, like the chorus or bridge. This helps to create a sense of space and depth to the mix. Another good use of automation is to add volume changes or filter sweeps to keep the arrangement evolving.

Applying Mastering Techniques

Mastering is the final stage of the mix process. It is the process of preparing a final mix for distribution by adding the final touches to the mix, such as EQ, compression, limiting, and stereo enhancement.

One technique used in mastering is to add EQ to the mix to enhance the tonal balance. Compression is used to control the dynamic range of the mix, while limiting is used to ensure that the final mix is at a consistent volume. Stereo enhancement techniques are used to widen the stereo image and add depth to the mix.

Creating a stereo mix is an essential part of music production. It requires careful listening, good decision making, and a solid understanding of the technical aspects of mixing. By using balancing techniques, automation, and applying mastering techniques, you can create a professional-sounding stereo mix that showcases your musical talents.

Managing Your Mixing Sessions

Credit: www.mixinglessons.com

Troubleshooting And Quality Control

Managing your mixing sessions requires a strong focus on troubleshooting and quality control. From identifying technical issues in your equipment to ensuring proper levels and tone, managing the sound of your mix is essential to producing high-quality content. Trust your ears, and stay vigilant throughout the process to achieve the best results.

Identifying And Fixing Common Issues

Mixing sessions can be complex, and it’s common to encounter different problems along the way. Fortunately, most issues have straightforward fixes. Some of the most common problems to watch out for during mixing sessions include harsh frequencies, muddy mixes, plosives and sibilance, and too many overlapping sounds. Identifying these issues is half the battle. Once you know what the problem is, you can work to fix it. Here are some tips for fixing common mixing issues:

  • Use EQ to cut harsh frequencies
  • Use panning to separate sounds and reduce muddiness
  • Use de-essers to tame plosives and sibilance
  • Use automation to reduce overlapping sounds

Managing Phase And Mono Compatibility

Phase cancellation and mono compatibility are important considerations when mixing. Phase cancellation occurs when two identical sound waves are out of phase with each other, causing the waves to cancel each other out. Mono compatibility issues can also arise when a stereo mix is converted to mono and some elements disappear or are reduced in volume. To manage these issues, here are some tips for you:

  1. Use phase meters and correlation meters to monitor and avoid phase issues
  2. Use stereo wideners and plugins to add width without causing phase issues
  3. Check your mix in mono regularly to ensure that it sounds good in both mono and stereo
  4. Use mid/side EQ and compression to tame any issues with mono compatibility

Preparing For Delivery

Once you have completed your mixing sessions, the next step is to prepare your mix for delivery. This ensures that they sound their best on different playback systems and platforms. To do this effectively, you should take care of the following:

  • Ensure that the mix levels are consistent and none of the elements are clipping
  • Export multiple versions of the mix – in WAV and MP3 format, at different bitrates
  • Include at least 3 seconds of silence at the start and end of each mix
  • Add appropriate metadata such as artist name, track title, and artwork
  • Test the mix on different systems to ensure that they sound good

By implementing these quality control measures, you can ensure that your mixing sessions sound their best and are well-suited for different kinds of playback systems and platforms. In addition, identifying and resolving any common issues that arise during mixing will help you stay productive and focused on your work.

Collaboration And Communication

Collaboration and communication are crucial in managing your mixing sessions with your team. It is important to establish clear communication channels, assign specific roles and responsibilities, and regularly check in with team members to ensure that everything runs smoothly.

Collaboration and communication are critical components of every mixing session. When working with clients and artists, it’s essential to foster effective communication and ensure everyone is on the same page. Miscommunication can lead to frustration, delays, and a poor end product.

Working With Clients And Artists

As a mixing engineer, you’ll likely work with a variety of clients, from independent artists to established labels. Each client will have their own unique needs and expectations, making communication key. When starting a new project, take the time to get to know your clients’ goals, style, and preferences. This information will help you tailor your mixing approach and deliver a final product that meets their needs.

Developing Effective Communication

To develop effective communication, it’s important to establish clear channels of communication early on in the project. This might include regular check-ins via phone or email, using online collaboration tools like Dropbox or Google Drive, or setting up in-person meetings. As the project progresses, provide frequent updates to keep all parties informed about the mixing process.

Managing Revisions And Feedback

Once you’ve delivered a draft of the mix, it’s important to manage revisions and feedback effectively. Ensure that your clients and artists are aware of any deadlines for revisions, and provide clear guidelines for providing feedback. Consider using a feedback form to capture specific feedback points, and be open to addressing any concerns or issues that arise. With effective communication and collaboration, you can ensure that the final product meets everyone’s expectations. In conclusion, Collaboration and communication are the foundation of every successful mixing session. By working closely with clients and artists, developing effective communication channels, and managing revisions and feedback, you can deliver a final product that meets everyone’s needs.

Continuing Your Growth As A Mixing Engineer

As a mixing engineer, managing your mixing sessions is crucial in continuing your growth. Utilize effective communication with clients and artists, prioritize organization and efficiency, and continuously learn new techniques and tools to improve your workflow and final product.

As a mixing engineer, it’s important to continually grow and improve your skills to stand out in a competitive industry. This involves developing your knowledge, seeking professional development opportunities, and building relationships with others in the field. Below we’ll delve into three areas that can help you achieve these goals.

Building Your Skills And Knowledge

To become a successful mixing engineer, it’s essential to build a solid foundation of skills and knowledge. This includes understanding the fundamentals of audio, such as acoustics, microphones, and signal flow. As you progress, it’s important to learn about different mixing techniques for various genres, as well as mastering and post-production. Online courses, books, and tutorials are great resources for developing your knowledge.

Finding Professional Development Opportunities

Professional development opportunities are crucial for staying up to date with the latest trends and technologies in the industry. Attending conferences, webinars, and training sessions can help you stay current and build knowledge in niche areas. Additionally, certifications and degrees from accredited universities can help solidify your expertise and increase your value as a mixing engineer.

Networking And Building Relationships

Networking and building relationships in the industry can help you gain valuable knowledge and opportunities. Networking events, social media groups, and online communities provide great platforms for meeting and connecting with other professionals. Collaborating with other mixing engineers and producers can also provide valuable learning experiences and insights. In conclusion, continuing your growth as a mixing engineer involves building skills and knowledge, seeking professional development opportunities, and networking with others in the industry. By investing in these areas, you can stay current, expand your expertise, and become a sought-after mixing engineer.

Frequently Asked Questions On Managing Your Mixing Sessions

How Do You Prepare For A Mixing Session?

To prepare for a mixing session, gather all necessary equipment, such as speakers, headphones, and cables. Ensure that your studio or mixing space has good acoustics and is noise-free. Familiarize yourself with the music to be mixed and organize all audio files.

Check your levels and make any necessary adjustments. Prepare any presets or effects ahead of time. Finally, take breaks to avoid ear fatigue.

How Do I Organize My Mix?

Organize your mix by following these steps: 1. Set clear goals for your mix 2. Start with a strong foundation of drums and bass 3. Use EQ and compression to balance your mix 4. Pay attention to panning and stereo imaging 5.

Use effects like reverb and delay sparingly and intentionally.

How Long Should A Mixing Session Be?

The duration of a mixing session depends on various factors like the simplicity or complexity of the project, your expertise level, the number of tracks, etc. However, a standard mixing session can last from a few hours to a few days.

It’s essential to give yourself enough time to complete the project to your satisfaction.

How Do I Make My Mix Sound Professional?

To make your mix sound professional, focus on the following: 1. A balanced mix with EQ, compression, and reverb. 2. Use high-quality samples and sounds. 3. Avoid too much processing and keep it simple. 4. Pay attention to levels and panning.

5. Reference tracks and make adjustments to compare your mix to professional mixes.

Conclusion

To sum up, managing your mixing sessions can be a daunting task, but by following these simple steps, you can make the process much smoother. It all starts with having the right mindset, organizing your tracks, setting levels, EQing, using effects sparingly, and taking breaks.

Remember to trust your ears, experiment, and most importantly, have fun. With practice, you can become a master mixer and take your music to the next level. Keep on mixing!

Categories
Archive

How To Find The Auto Tune Key

To find the auto tune key, use a tuner or plugin to identify the note played by the singer. Once the note is identified, input it into the auto tune plugin and adjust the settings to achieve the desired effect.

Auto tune is a popular tool used to correct pitch and create unique vocal effects in modern music. However, finding the correct key can be a challenging task for some. For those who are just starting to learn about using auto tune software, understanding how to discover the right key is crucial.

We’ll discuss various methods that can help you locate the auto tune key with ease. Whether you’re a beginner or an experienced producer, these techniques will come in handy.

How To Find The Auto Tune Key

Credit: m.youtube.com

The Importance Of Auto Tune Key

The Importance of Auto Tune Key cannot be overstated, especially for music producers. Auto Tune Key is a crucial tool that helps in correcting pitch issues, modifying voices and enhancing the overall quality of sound produced during recording. Getting the right Auto Tune Key is essential for excellent sound quality in music production. Below are some of the various ways to find the right Auto Tune Key.

How Auto Tune Key Works

Auto Tune Key is an algorithm that corrects pitch problems in vocal recordings, making them seem more synchronized and in tune. It functions by comparing the incoming pitch to the proper pitch and making adjustments accordingly, which is why it is so important to choose the correct Auto Tune Key. The software also comes with an interface that allows users to select the key of a recording for more precision in pitch correction.

Benefits Of Using Auto Tune Key

The benefits of using Auto Tune Key are numerous. Firstly, the tool helps music producers achieve high-quality sounds, thereby enhancing recording quality. Secondly, it improves pitch accuracy and reduces overall recording time, especially for individuals with pitch shortcomings. Thirdly, Auto Tune Key comes with a graphical interface that allows users to visualize pitch changes in real-time. Finally, using Auto Tune Key is a time and cost-efficient method for achieving pitch accuracy, which would otherwise be a time-consuming and expensive process.

With the information above, finding the right Auto Tune Key is crucial for excellent sound quality in music production. Make sure to select the right key and explore the diverse benefits of using Auto Tune Key in your music recordings.

How To Find The Auto Tune Key

Credit: routenote.com

Understanding Auto Tune Key Detection

Auto Tune Key Detection is an important feature in music production today. It helps to correct pitch issues and bring out the best in a vocal performance. Understanding Auto Tune Key Detection is crucial in getting the desired results and creating professional-sounding music. In this article, we will delve into the basics of Auto Tune Key Detection and how it works to help you improve your music production skills.

What Is Auto Tune Key Detection?

Auto Tune Key Detection is a feature in modern music software that is used to detect the key of a piece of music. The key is the root note of the scale used in the song. Knowing the key is essential because it helps the producer to know the pitches to use when correcting any vocals in the song.

How Auto Tune Key Detection Works?

Auto Tune Key Detection works by analyzing the audio file of the music to determine the pitch of each note. It then compares these pitches to a database of scales and keys to determine the key of the song. Once the key is determined, the producer can use this information to set the pitch correction parameters for the Auto Tune effect.

Auto Tune software uses a graphical interface that shows the pitch of each note in the song. The producer can then adjust the pitch correction settings to match the desired sound. The software also provides options to adjust the speed of correction and the depth of correction. These parameters help the producer to create a natural-sounding correction that enhances the music rather than detracting from it.

Auto Tune Key Detection is an essential tool for modern music production. It is easy to use and can help improve the quality of your music. By understanding the basics of Auto Tune Key Detection, you can take your music production skills to the next level and create professional-sounding music that will impress your listeners.

Tools For Finding Auto Tune Key

Finding the auto tune key is made easier with various online tools such as the Auto-Key plugin, Mixed In Key, and Keyfinder. These tools analyze the audio file to determine the key and provide suggestions for corrections, saving time and effort for musicians and producers.

As an aspiring musician or seasoned music producer, you may have heard of auto-tune software and its ability to enhance pitch accuracy in recordings. However, you may have faced difficulty trying to find the auto-tune key of a song. Fortunately, there are various tools available to help you find the auto-tune key of any song. In this post, we will discuss three popular tools you can use to find the auto-tune key. These tools include auto-tune software, online key detector tools, and digital audio workstations. Let’s dive right in!

Auto Tune Software

Auto-tune software is a popular tool used in music production to correct the pitch of vocal recordings. It can also be used to adjust the vocal performance’s tonality, style, and pitch modulation. Auto-tune software, such as Auto-Tune Pro, Waves Tune Real-Time, and Melodyne, can be installed on your computer or used as a plugin within your digital audio workstation (DAW). By using these auto-tune software, you can accurately detect the auto-tune key of a song. Here are some ways you can identify the key using auto-tune software:

  • Open the audio file in your auto-tune software of choice
  • Ensure your auto-tune plugin is set to the correct key detection mode
  • Scan the audio file using the auto-tune software
  • After scanning, the detected key will be displayed in the auto-tune software

Online Key Detector Tools

Another tool you can use to find the auto-tune key is online key detector tools. Using these tools is quite simple; all you need to do is upload the song to the website, and they’ll detect the key for you. Some popular online key detector tools include TuneBat, AudioKeychain, and Song Key Finder. These tools can accurately identify the auto-tune key of a song by analyzing its frequency, pitch, and tempo.

Digital Audio Workstations

Modern digital audio workstations can also be used effectively to detect and determine the auto-tune key of any song. Most popular digital audio workstations, such as Ableton Live, Logic Pro, Cubase, and Pro Tools, have built-in plugins that can automatically detect the key of an audio file. In some cases, the process may require some manual input, such as inputting the tempo and the pitch note. In conclusion, finding the auto-tune key of a song is now easier and more convenient due to the availability of reliable tools such as auto-tune software, online key detector tools, and digital audio workstations. By following the simple processes illustrated above, you’ll be able to detect the auto-tune key of any song with ease and efficiency.

How To Find The Auto Tune Key

Credit: mixandmastermysong.com

Steps To Finding Auto Tune Key

To find the right auto tune key, first determine your song’s key. Use a piano or software to identify each note and chords used in the song. Match the correct auto tune key to the pitch of your vocals.

Steps to Finding Auto Tune Key Auto Tune is a coveted tool in the music industry that helps singers and music producers create pitch-perfect vocals. However, to achieve the best results, you need to know the key of the song you are working on. In this section, we’ll take a look at some of the steps you can take to find the Auto Tune key of a song. Import Audio into your Auto Tune Software The first step in finding the Auto Tune key of a song is to import the audio file into your Auto Tune software. This will give you a visual representation of the song and make it easier for you to identify the key. Auto Tune software like Antares Auto-Tune Pro, Waves Tune Real-Time, or Melodyne lets you see the pitch of each note, making it easy to detect the key. Use Online Key Detector Tools If you don’t have access to Auto Tune software, you can use online key detector tools to find the key of a song. Popular key detector tools like Tunebat, Mixed In Key, or Keyfinder can help you determine the key of a song quickly and easily. All you need to do is upload the audio file to the website, and the tool will analyze it and provide you with the key information. Manually Detect the Key of a Song If you don’t have Auto Tune software or access to online key detector tools, you can manually detect the key of a song. This may take a bit longer, but it can be just as effective. To manually detect the key, you can use a piano or keyboard to play along with the song. Start by playing the C major scale and listen to which note of the scale sounds the same as the first note of the song. Once you have identified the first note, you can use the other notes of the scale to determine the key of the song. In conclusion, finding the Auto Tune key of a song is crucial for achieving the best results with your vocals. Whether you have access to Auto Tune software, online key detector tools, or prefer to do it manually, there are several steps you can take to find the key. Remember, once you have identified the key, you can use Auto Tune to create pitch-perfect vocals that will take your music to the next level.

Tips For Efficiently Finding Auto Tune Key

To efficiently find the auto tune key, start by identifying the key of the song you want to edit. Next, use a tuning plugin or software to determine the key. You can also try using your ears to match the pitch and find the correct key.

With these tips, you’ll be able to easily find the auto tune key for your projects.

Auto-Tune is a popular audio processing tool used to correct pitch and intonation issues in a singer’s performance. Before using Auto-Tune, it’s important to find the key of the song. Knowing the key will help you achieve the desired pitch correction effect and produce a polished final product. In this post, we’ll share some tips for efficiently finding the auto tune key.

Correctly Adjusting Your Auto Tune Key Settings

Once you’ve loaded your audio file into Auto-Tune, the first step is to adjust the key settings. This is a critical step for achieving the desired pitch correction effect. In the key settings, you can specify the key of your song and set the scale type. The most common scale types used in western music are major and minor.

Listening To The Melody Of The Song

To determine the key, you need to listen to the melody of the song. It’s important to listen carefully to identify the root note. The root note is typically the note that sounds the most stable and provides a sense of resolution. After identifying the root note, you can determine the key of the song.

Reference The Original Song Key

If you’re unsure about the key, you can reference the original song key. You can find the key of a song by searching for it online or using a software that can analyze the audio file. Once you know the original key, you can adjust your Auto-Tune settings accordingly. In conclusion, these tips will help you efficiently find the auto tune key. By correctly adjusting the Auto-Tune key settings, listening to the melody of the song, and referencing the original song key, you can easily find the key of your song and achieve the desired pitch correction effect.

Common Mistakes To Avoid When Finding Auto Tune Key

Avoid common mistakes when searching for the auto tune key, such as assuming all songs are in a standard key, not checking for key changes within a song, and relying solely on auto tune software. Take the time to properly identify the key before applying any adjustments.

Finding the right auto tune key is a crucial step in the music-making process. But while trying to perfect the sound, there are some common mistakes that musicians often make that can harm the overall quality of their work. In this section, we will discuss some of these mistakes you should avoid when finding the auto tune key. ## Over-relying on Auto Tune Software Using auto tune software to correct your vocals is convenient, but it’s important not to rely solely on it. The software can only do so much, and your voice’s natural tone must be taken into account. Depending solely on the software can lead to a false sense of security, and the end result may sound unnatural. Instead, make sure to use auto tune as a tool and not a crutch. Take the time to tune your vocals manually as well, using the right key that fits with your voice and brings out its unique character. ## Mixing Up Major and Minor Keys Another common mistake made when finding the auto tune key is mixing up major and minor keys. The interval between notes is different in major and minor keys, and they have distinct sounds. Picking the wrong one could make your music sound off-key or discordant. So, make sure you know which key matches the melody of your song. If you’re unsure, you can use a piano or any instrument to check which note progression sounds better for your song. ## Forgetting to Reference the Original Key When working with pre-recorded tracks or collaborating with other musicians, it’s easy to forget the original key. Forgetting the original key can make it difficult to match the pitch and melody of the song. If you have access to the original track, make sure you reference it often while finding the auto tune key. This way, you can stay on course and avoid straying off pitch. Additionally, you can use a spectrum analyzer or a tuner to determine the right key for your vocals. In conclusion, finding the auto tune key is essential to creating good music. By avoiding these common mistakes, you can refine the sound and produce a better-quality piece of music. Remember not to over-rely on auto tune software, mix up major and minor keys, or forget to reference the original key. With these tips in mind, you can effectively find the right auto tune key and bring your music to life.

Benefits Of Finding The Right Auto Tune Key

Auto tune is a popular tool used in music production. It allows producers to correct the pitch of vocals and instruments, producing a more polished and professional sound. But did you know that finding the right auto tune key can provide even more benefits? Here are some key advantages:

Improved Music Production

Finding the right auto tune key can greatly improve the overall quality of your music production. When you use the correct key, it ensures that the vocals and instruments are properly pitched. This leads to a smoother, more cohesive sound, and reduces the need for excessive editing and mixing. In turn, this allows for faster and more efficient music production.

More Accurate Vocal Processing

Auto tune is most commonly used for vocal processing. When you find the right key, it allows for more accurate vocal processing. It ensures that the vocals are in tune with the track, producing a more harmonious sound. More accurate vocal processing also means less time spent correcting pitch mistakes, allowing for a more streamlined recording and mixing process.

Increased Artistic Freedom

When you find the right auto tune key, it also gives you more artistic freedom. It provides you with the opportunity to experiment with different vocal styles and ranges. Without the constraints of incorrect pitch, you can explore new and creative ways to express yourself musically. This can lead to a more unique and memorable sound that sets you apart from other artists.

In conclusion, finding the right auto tune key is crucial for music production. It offers many benefits, including improved production quality, more accurate vocal processing, and increased artistic freedom. By taking the time to find the right key, you can elevate your music to the next level.

Frequently Asked Questions Of How To Find The Auto Tune Key

How Do I Find The Autotune Key Of A Song?

To find the autotune key of a song, you can use a software like Melodyne or Antares Auto-Tune. Simply upload the track and the software will detect the key for you. Additionally, you can listen for the prominent note or chord progression in the song to determine the key manually.

What Is Auto Key For Auto Tune?

The auto key feature in auto tune automatically detects and sets the key of the input audio. This helps users apply pitch correction in the correct key to achieve a more natural-sounding result.

Does Auto Tune Pro Come With Auto Key?

Yes, Auto Tune Pro does include a feature called Auto-Key. This feature automatically detects the key of the song and sets the pitch correction accordingly.

How Do I Know If I Have Autotune?

You can check if you have autotune by looking for it in your music software or DAW. Autotune is a plugin that allows you to correct vocal pitch and can be found in the effects section of your software. If you don’t have it, you can purchase it from an online store or download a free trial version.

Conclusion

Now that you know the different methods of finding the auto-tune key, you can take your music production skills to the next level. Whether you choose to use a piano, a website, or a special plugin, always remember that practice makes perfect.

With time and patience, you’ll develop a knack for finding the key faster and easily. Happy music-making!