Categories
Archive

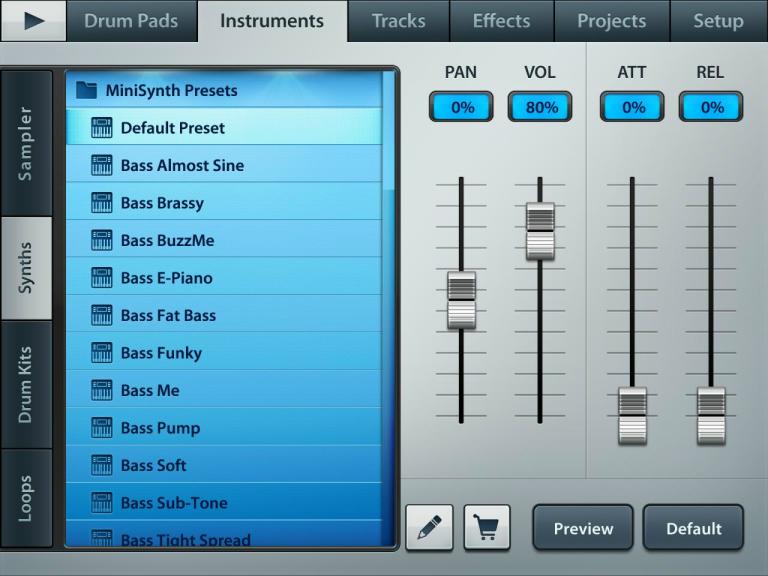
Is It Ok to Use Synth Presets

Yes, it is perfectly fine to use synth presets. It can save you time and effort in designing your own sounds, and can also be a great starting point for customization.

As a musician or producer, one of the most important decisions you can make is choosing what sounds to use in your music. While some purists may argue against using synth presets, there is no denying that they can be an incredible asset.

Not only can they save you time and effort in designing your own sounds, but they can also be a great starting point for customization. However, it is important to keep in mind that using presets alone may result in your music sounding generic or unoriginal. It is also important to understand how to edit and manipulate presets to create your own unique sound. Ultimately, using synth presets can be a valuable tool for any musician or producer.

Is It Ok to Use Synth Presets

Credit: m.youtube.com

The Controversy

Synth presets have been a controversial issue for some musicians and producers. While some argue that it’s beneficial and time-saving to use presets, others believe that it’s not okay as it lacks originality. Ultimately, it depends on the individual’s preference and intended use of the music.

Synthesizers have emerged as a prominent tool in creating modern-day music. With technology advancements, synth presets have become a game-changer in the music industry. However, the use of synth presets has been a topic of controversy in the music community. Some musicians argue that utilizing presets is a shortcut to creating music and that it stifles creativity. On the other hand, some musicians defend the use of synth presets as they speed up the production process and offer a level of consistency in sound quality. In this blog, we shall explore both sides of the debate and help you decide whether to utilize synth presets or not.

The Debate Over Using Synth Presets

The use of synth presets in music production has been a contentious topic. Both critics and advocates of synth presets have raised arguments to support their views. Here are some of the most common arguments:

Arguments Against Using Presets

  1. Presets limit creativity: Some musicians feel that presets restrict their creativity since they use pre-recorded sounds, narrowing their creative choices.
  2. Unoriginality: Critics argue that using presets makes music production generic and unoriginal since many artists use the same sounds.
  3. Cheating in Music Production: Some individuals regard using presets as cheating in music production as it implies using shortcuts instead of putting in the effort and taking the time to create original sounds.

Arguments In Favor Of Using Presets

  1. Saves time: Synth presets accelerate the music-making process since one can select a sound and begin to build the track around it.
  2. Saves money: Creating an original sound incurs additional costs in studio rentals, sound design, and sometimes hiring sound engineers. Utilizing synth presets may save money, especially for music producers working under tight budgets.
  3. Beginner-friendly: Using presets helps new musicians produce quality music by offering guidance and providing a reference point to create music.
  4. Sound consistency: Presets ensure consistent sound quality across different tracks hence making it easier to maintain certain sound characteristics throughout an album.

In conclusion, using synth presets has advantages and disavantages. It is up to an individaul artist to chose whther to use them or not in their music productioon. While some artists prefer to create everything from scratch, others find synth presets to be a useful tool in their production process. Ultimately, the decision on whether to use synth presets or not is a personal choice, one that should be based on personal preferences as well as the factors stated in this article.

Pros And Cons Of Synth Presets

Synth presets can save you time and provide inspiration, but they can also hinder creativity and lead to unoriginal sound. It’s up to you to weigh the benefits against the drawbacks and decide if using presets aligns with your artistic vision.

Introduction: Synthesizer presets have been a topic of discussion amongst music producers for quite some time now. While some argue that using them is a great way to speed up the production process, others believe it’s a shortcut that stifles creativity. In this blog post, we will delve into the pros and cons of using synth presets, and learn how to overcome their limitations.

Advantages Of Using Synth Presets:

One of the main advantages of using synth presets is that they save a lot of time. Instead of spending hours tinkering with a synth to get the sound just right, you can simply browse through the presets and select one that fits your needs. This is great for producers who work under tight deadlines or those who want to quickly jot down ideas before they slip away. Another advantage is that using presets can help beginners learn how to create specific sounds. By examining the way presets are constructed, beginners can get a better understanding of how to create their sounds from scratch.

Disadvantages Of Using Synth Presets:

Despite their benefits, synth presets also come with some drawbacks. One major disadvantage is that presets can easily become overused, leading to a lack of originality in the music. This can lead to music sounding generic or stale. Another disadvantage is that presets may not always fit the needs of a specific track. Each track requires a unique sound, and a preset may not always be the best option. In these situations, having an understanding of sound design is crucial.

How To Overcome The Limitations Of Presets:

To overcome the limitations of presets, producers should use them as a starting point rather than the final destination. By tweaking and modifying presets, producers can create entirely new sounds that are unique to their tracks. It’s also important to use presets sparingly and to supplement them with original sounds. Producers who use presets should also invest time in learning sound design. By doing so, they can create their sounds from scratch and have greater control over the final sound. This also allows for greater originality and ensures that each track has a unique sound. Conclusion: In conclusion, synth presets have their pros and cons. While they can be a great time-saver, they can also lead to music sounding generic. To overcome the limitations of presets, producers must use them as a starting point, learn sound design, and use presets sparingly to supplement original sounds. With these tips, producers can use presets effectively and create unique sounds that stand out in today’s music industry.

Creating Your Own Presets

Creating your own synth presets can add personalized flair to your music. While using presets is acceptable, blending them with original creations can make your tracks stand out. Experiment and customize to make your music unique.

The Benefits Of Creating Your Own Presets

Creating your own presets provides a host of benefits for music producers. Firstly, it allows for the creation of unique sounds that cannot be found in pre-existing presets. This is crucial for music producers hoping to stand out from the crowd. Additionally, it allows producers greater control over the sounds they create, which can significantly enhance the quality of their music.

Choosing The Right Synth For Custom Presets

Before creating your own presets, it’s important to choose the right synthesizer. Each synthesizer has its unique features and sound properties that are crucial in creating custom presets. For instance, FM synthesizers are useful for creating metallic and bell-like sounds, while subtractive synthesizers are great for creating bass and lead sounds.

Step-by-step Guide To Creating Your Own Presets

Creating your own presets can seem daunting at first, but with the right approach, it can be a straightforward process. Here’s a simple step-by-step guide to creating your own presets:

  1. Choose a starting point: Start by choosing an existing preset that is similar to the sound you want to create, and use it as a starting point for your own preset.
  2. Adjust parameters: Start adjusting individual parameters, such as oscillators, filters, and envelopes until you achieve the desired sound.
  3. Experiment with modulation: Modulations such as LFO’s, envelopes, and modulation matrix are an excellent way to introduce movement and expressiveness to your sound.
  4. Refine your sound: Continue working on your preset until it’s polished enough to use in a track.
  5. Save your preset: Finally, save your preset in a safe location to use it later on.

Creating your own presets is an essential skill for anyone who aims to make a name for themselves in the music industry. While it does require time and patience, the effort spent creating unique sounds will undoubtedly pay off in the long run.

Is It Ok to Use Synth Presets

Credit: www.reddit.com

Getting The Most Out Of Synth Presets

Maximizing the usability of synth presets is a common practice in music production, but some may question its authenticity. While creating original sounds is ideal, presets can be a helpful starting point for crafting unique sounds by tweaking and manipulating the settings.

Using synth presets is an effective way to speed up the music production process. It saves you time and effort in designing sounds from scratch. However, getting the most out of synth presets requires some knowledge on how to use them effectively. In this post, we’ll explore tips on how to make the most of synth presets and tweak them to fit your track.

Tips For Using Presets Effectively In Your Production

Using presets in your music production can inject some creativity into your tracks. Here are some tips on how to use presets effectively in your production:

  • Experiment with different preset packs to find the ideal sound for your track
  • Make minor adjustments to the preset to fit your track
  • Use presets as starting points for creating unique sounds
  • Try combining different presets to create a new sound that fits your track
  • Use presets to learn and understand how different sounds are created

How To Tweak Presets To Fit Your Track

Tweaking presets is an essential skill that every music producer should possess. It allows you to customize presets to fit your track’s unique sound. Here’s how to tweak presets to fit your track:

  1. Adjust the filter cutoff and resonance to fit the track’s frequency range
  2. Change the envelope settings to suit the track’s rhythm and dynamics
  3. Add effects like delay, reverb, and distortion to make the preset more interesting
  4. Alter the LFO settings to add movement and rhythm to the sound
  5. Adjust the ADSR envelope to change the sound’s attack and decay time

Creating Unique Sounds By Layering And Modifying Presets

Layering and modifying presets is an excellent way to create unique sounds that fit your track. Here’s how to create unique sounds by layering and modifying presets:

StepAction
Step 1Select two or more presets that complement each other
Step 2Layer the presets on top of each other
Step 3Adjust the volume, panning, and phase of each layer for a fuller sound
Step 4Modify the presets by adjusting the filter, envelope, and LFO settings
Step 5Add effects like delay, reverb, and chorus to enhance the sound

In conclusion, using presets is an effective way to speed up the music production process. However, getting the most out of synth presets requires some knowledge on how to use them effectively. Follow these tips, tweak presets to fit your track, and create unique sounds by layering and modifying presets to take your music production to the next level.

Presets Vs. Originality

One of the age-old debates among music producers and sound designers is whether it’s okay to use synth presets or if one should always strive for originality. While there are valid arguments on both sides, it’s important to find the right balance between presets and originality. In this section, we’ll explore the pros and cons of using presets, how it can impact your creativity, and when it’s best to create your own sounds.

Can Using Presets Hinder Your Creativity?

There’s no doubt that presets can save you time and effort when producing music or designing sounds. They give you a quick starting point and can be a useful tool for beginners who are still learning the ropes of sound design. However, using presets exclusively can hinder your creativity and prevent you from exploring new sonic territories. By relying on presets, you may miss out on discovering unique sounds that can set your music apart from others.

On the flip side, presets can also inspire you to create something new and unique. For instance, you might tweak a preset to make it fit your specific needs, adding your own personal touch to it. By doing so, you’ll create something that’s unique to your style and vision.

Balancing Presets And Originality In Your Productions

The key is to find the right balance between using presets and striving for originality. There’s no right or wrong answer, as it depends on your personal preferences and goals. However, it’s important to keep in mind that presets should be seen as a tool and not a crutch. Instead of relying solely on presets, try to mix them with your own sounds and samples, creating a unique palette that reflects your artistic vision.

One approach is to start with a preset and tweak it to make it more personal. For example, you might adjust the filter cutoff, envelope settings, or LFO modulation to create something that’s unique to you. Alternatively, you might layer multiple presets together, creating a new sound that’s greater than the sum of its parts.

When To Use Presets And When To Create Your Own Sounds

Knowing when to use presets and when to create your own sounds is also crucial. As mentioned earlier, presets can be a time-saver and a useful tool to get you started. There’s no shame in using them, especially if you’re under a tight deadline or if you’re collaborating with others. However, if you want to stand out from the crowd and showcase your sound design skills, you should consider creating your own sounds from scratch.

Ultimately, it’s up to you to decide how much emphasis you put on originality versus using presets. Remember that there’s no right or wrong approach, and it’s okay to experiment and find what works best for you.

Is It Ok to Use Synth Presets

Credit: modeaudio.com

Frequently Asked Questions Of Is It Ok To Use Synth Presets

Is There Anything Wrong With Using Presets?

No, there is nothing inherently wrong with using presets. Presets can save time and improve the overall quality of your work, but they should be used as a starting point rather than a final product. It’s important to customize presets to fit your specific needs and style, and to avoid relying too heavily on them to ensure your work remains unique and original.

Are Synth Presets Copyrighted?

Yes, synth presets are generally copyrighted. Any original sound recording or musical composition can be protected under copyright law, including digital sound presets. It is important to obtain the proper licensing and permissions before using any copyrighted material.

Is It Okay To Use Serum Presets?

Yes, it is perfectly fine to use serum presets. They can save time and increase efficiency in the music production process. Just be sure to use them creatively and modify them as needed to make your own unique sound.

Do Musicians Use Presets?

Yes, musicians use presets. Presets are preconfigured settings that can be saved and applied to musical instruments or software. They help musicians achieve consistent sound, save time and effort in adjusting settings, and provide a starting point for creativity. Musicians can use presets for various instruments such as guitars, synthesizers, and drums.

Conclusion

Using synth presets is a great way to create music efficiently without compromising its quality. It can provide a solid base to build upon or a quick way to achieve a desired sound. However, it is important to use them wisely and be willing to modify them to suit your unique sound.

Ultimately, the choice to use synth presets or not is up to the individual and their specific needs. As with any tool, it’s about how you use it!
Categories
Archive

5 Workflow Mistakes To Avoid

These 5 workflow mistakes to avoid are among the biggest reasons music producers struggle to finish tracks. Talent and good plugins matter, but how you work, from organizing sessions to deciding when a song is done, has a huge effect on your output. Fixing your workflow means more finished songs, better mixes and less frustration.

Mistake 1: Starting From Scratch Every Time

Opening an empty project and spending the first 30 minutes loading instruments, routing buses and setting up effects kills creative momentum. By the time you’re ready to make music, the idea has faded.

The Fix: Build a Template

Create a default song template with your go-to drums, bass, synths, buses, reverb and delay sends, and a reference track slot. Color-code and name everything. Our guide to setting up a quick-start default song template walks you through it step by step.

Mistake 2: Mixing While You’re Writing

It’s tempting to tweak EQ, compression and effects while you’re still writing. Switching between creative and technical thinking slows you down and often leads to an endless 8-bar loop.

The Fix: Separate the Stages

Split your work into clear phases: writing, arranging, sound design, mixing and mastering. When writing, focus on ideas and use quick, decent-sounding presets. Save detailed mixing for later, ideally in a fresh session with fresh ears. For a structured mix stage, read our DAW workflow for mixing sessions.

Mistake 3: Getting Lost in Sound Selection

Scrolling through thousands of kicks or synth presets can eat whole sessions. Too many options lead to decision fatigue and unfinished tracks.

The Fix: Curate Your Library

  • Build a favorites folder of your best kicks, snares, hats and presets.
  • Set a time limit for choosing a sound, such as two minutes.
  • Commit to a sound and move on. You can swap it later if needed.
  • Learn a small number of synths and plugins deeply rather than many on the surface.

Mistake 4: Messy, Unorganized Sessions

Tracks named “Audio 14” and “Serum 3,” no colors and no buses make it hard to find anything. It slows mixing and makes collaboration painful.

The Fix: Organize as You Go

  • Name tracks clearly as you create them.
  • Color-code by group: drums, bass, music, vocals, effects.
  • Route groups to buses for easier mixing.
  • Delete or hide unused tracks.
  • Use markers for song sections like intro, verse, chorus and drop.

Mistake 5: Never Finishing Tracks

Many producers have hard drives full of loops and half-finished ideas. Perfectionism and the fear that a track isn’t good enough stop songs from being finished and released.

The Fix: Set Deadlines and Finish Rough

  • Set a deadline for each track.
  • Arrange the full song quickly, even if sections are rough.
  • Use a reference track to guide your arrangement and mix.
  • Accept that each finished song teaches you more than endlessly polishing one loop.

Bonus Workflow Tips

Learn Keyboard Shortcuts

Shortcuts for common actions like splitting, duplicating, quantizing and zooming save hours over time.

Use Hardware Controllers

A MIDI controller with faders and knobs can speed up recording, mixing and sound design. You can even use one to jump to your reference track instantly.

Take Breaks

Ear fatigue leads to poor mixing decisions. Short breaks help keep your judgment accurate.

Back Up Your Work

Save versions often and back up projects to an external drive or cloud storage. Losing a session is the ultimate workflow disaster.

Building a Workflow That Lasts

The best workflow is the one you’ll actually use. Start by fixing one mistake at a time, such as building a template this week and organizing sessions next week. Small, consistent improvements compound into much faster, more confident production.

How to Tell If Your Workflow Is Working

A good workflow shows up in your results. Ask yourself a few questions every month:

  • Am I finishing more tracks than before?
  • How long does it take to go from an idea to a full arrangement?
  • Do I spend more time making music than setting up, searching or fixing technical problems?
  • Can I open an old project and understand it quickly?

If the answers are improving, keep going. If not, look for the stage where you lose the most time and focus on fixing that first.

Workflow Habits of Productive Producers

Productive producers tend to share a few habits. They work in regular sessions rather than waiting for inspiration. They start each session with a clear goal, such as finishing the arrangement or recording vocals. They also finish sessions by bouncing a rough mix so they can listen with fresh ears away from the studio. These small habits keep projects moving forward.

Finally, review your workflow every few months. As your skills and setup change, the bottlenecks change too, so the fixes that helped last year may not be the ones you need now.

Frequently Asked Questions

What is the biggest workflow mistake producers make?

Not finishing tracks. Many producers loop ideas endlessly instead of arranging and completing songs.

Should I mix as I write music?

Basic balancing is fine, but detailed mixing is usually better saved for a separate stage so it doesn’t slow down your creativity.

How do templates improve workflow?

Templates load your favorite instruments, routing and effects instantly, so you can start making music right away.

How can I finish more songs?

Set deadlines, arrange full songs early, limit sound searching and accept imperfection. Finished tracks teach you more than unfinished loops.

Categories
Archive

How To Do Parallel Compression

To do parallel compression, duplicate a track, apply heavy compression to the duplicate, then blend the compressed track with the original. Parallel compression is an effective mixing technique that can add body and sustain to individual tracks or the entire mix.

Also, New York compression blends two different versions of the same track. One version receives heavy compression while the other stays uncompressed, which retains the dynamics. The compressed track is then blended in with the original track to add fullness without sacrificing the original dynamics.

Related reading: Compression Meters and What is Audio Compression?.

Moreover, we will discuss the steps to do parallel processing in detail.

Setting Up Parallel Compression

In addition, this technique is a popular technique used in audio mixing to enhance the dynamics of a track. Also, to set up parallel processing, start with duplicating the audio track, adding a compressor to the duplicated track, and blending it with the original track to achieve a fuller sound without losing the original dynamics.

Furthermore, Parallel processing is a widely used technique in music production that involves duplicating a track to create a separate channel for processing. In addition, this allows you to apply heavy compression to the duplicate track without affecting the original signal. Moreover, in this way, you can achieve a more balanced and dynamic mix. In this post, we’ll cover the basics of setting up parallel processing, including choosing the right audio, preparing your DAW, and creating a parallel compression channel.

Choosing The Right Audio

Before you begin the process of setting up New York compression, it’s important to choose the right audio. For example, this means selecting the track or mix bus that you want to process. Additionally, typically, you’ll want to choose a track or bus that has a broad dynamic range and that you want to bring forward in the mix. Drums, bass, and vocals are common choices for parallel processing.

Preparing Your Daw

Also, once you’ve selected the track or mix bus that you want to process, it’s time to prepare your DAW. This involves setting up your session so that you can easily create this technique channel. As a result, here’s how to do it:

  • Moreover, create a new auxiliary channel in your DAW.
  • In addition, insert a compressor plugin on this new channel.
  • Furthermore, set the compressor to a high ratio and fast attack and release times.
  • Adjust the threshold so that the compressor is heavily reducing the signal.
  • Additionally, set the output gain of the compressor to unity gain.
  • Also, send the audio from the original track to the new auxiliary channel.
  • Adjust the send level to mix the processed and unprocessed signals to taste.

Creating A Parallel Compression Channel

Now that you have set up your DAW, it’s time to create the New York compression channel. However, here’s how to do it:

  1. Duplicate the original track and send the duplicate to the auxiliary channel with the compressor.
  2. Mute the duplicate track so that you only hear the compressed signal from the auxiliary channel.
  3. Adjust the compressor settings on the auxiliary channel to taste.
  4. Unmute the duplicate track and adjust the send level to mix the compressed and unprocessed signals to taste.

By following these steps, you’ll be able to set up New York compression in your DAW. Then, remember to experiment with different settings and find what works best for your mix. Happy mixing!

How To Do Parallel Compression

Credit: www.hairballaudio.com

Adjusting Parallel Compression Settings

This technique can add depth and power to your mixes. In short, adjust your settings carefully to control the amount of compression applied to your tracks, making sure to balance the wet and dry signals for maximum impact.

Adjusting Parallel Compression Settings is an essential part of getting the most out of your audio production. Similarly, once you have set up your New York compression chain and have a basic understanding of what is actually happening, you can start to make adjustments to tailor the sound to your preferences. Here are a few key areas to focus on when adjusting parallel processing settings:

Setting The Correct Ratio

The ratio in this technique refers to the difference between the uncompressed and compressed signals. A higher ratio will result in more compression, making quieter sounds louder, and louder sounds quieter. For New York compression, a ratio of around 2:1 or 3:1 is a good starting point. Finding the right ratio will depend on the type of audio you are processing and the effect you are looking to achieve.

Choosing The Attack And Release Times

Attack and release times determine how quickly the compressor kicks in once the sound reaches the set threshold and how quickly it stops compressing once the sound falls below the threshold again. A shorter attack time means the compressor will start working sooner, whereas a longer attack time will let more of the transients through before the compression kicks in. A longer release time will let the compressor slowly release the sound back to its original dynamics, whereas a shorter release time will make the sound bounce back quicker.

Maintaining The Right Mix

It’s important to blend the parallel processing track with the original track carefully. A common mistake is to add too much of the parallel compressed track, leading to a distorted or over-compressed sound. Aim to get the right balance between the original and compressed signal, listening carefully to the effect that each adjustment is having. The goal is to make the sound fuller and more dynamic, without sacrificing clarity or balance. It may take a few tweaks to find the sweet spot, but the results are worth it.

Things to Consider When Adjusting Parallel Compression Settings:
Ratio:Aim for around 2:1 or 3:1 to start with
Attack Time:Shorter attack times lead to quicker compression
Release Time:Longer release times result in a slower return to the original dynamics
Mix:Aim for a perfect balance between the original and compressed signal

By adjusting the settings for this technique, you can achieve better control over the dynamics of your audio recording. Start by choosing the right ratio, then move on to adjusting the attack and release times to fine-tune the effect. Finally, balance the mix to achieve a more dynamic and fuller sound. With practice, you can soon become an expert in adjusting New York compression settings to enhance the quality of your audio production.

When To Use Parallel Compression

Parallel processing is best utilized when you want to add more punch or sustain to your mix without losing transparency. By sending a copy of your signal to this technique bus, you can apply heavy compression to the bus while keeping the original signal untouched.

This technique is particularly useful for drums, vocals, and bass.

Parallel compression, also known as New York compression, is a technique used in audio mixing to add depth, body, and energy to recordings. This technique works by blending the compressed signal with the original unprocessed signal. Producers widely use New York compression, especially in pop, rock, and hip hop. But, when should you use parallel processing? Below are some scenarios where parallel processing can be useful.

Mixing Drums

Drums are a critical part of music production, and they need to sound punchy and alive. Using New York compression on drums can help them stand out in a mix without sounding over-compressed. It can bring out the mid and low-end frequencies, enhancing the drum’s sound. Here’s how you can add parallel processing to your drum mix:

  1. Route your drum audio tracks to a bus.
  2. Insert a compressor plugin on the bus.
  3. Set your compressor to a high ratio, fast attack, and medium release.
  4. Add some gain to the compressed signal.
  5. Blend the compressed signal with the original unprocessed signal.

Adding Depth To Vocals

Vocals are the primary element of most musical productions, and they need to be well-balanced, present, and clear. This technique can help make vocals sound more upfront, without cluttering the mix. It can also add smoothness and depth to the vocals. Here’s how you can apply New York compression to your vocal mix:

  1. Duplicate your vocal track.
  2. Route the duplicate track to a bus.
  3. Insert a compressor plugin on the bus.
  4. Set your compressor to a high ratio, fast attack, and medium release.
  5. Add some gain to the compressed signal.
  6. Blend the compressed signal with the original vocal track.

Balancing Multiple Instruments

When you’re mixing multiple instruments, it can be hard to balance them in a way that makes them sound cohesive. Parallel processing can help glue the instruments together, making them sound like they belong together. Here’s how you can use this technique to balance multiple instruments:

  1. Route all your instruments to a bus.
  2. Insert a compressor plugin on the bus.
  3. Set your compressor to a high ratio, fast attack, and medium release.
  4. Add some gain to the compressed signal.
  5. Blend the compressed signal with the original unprocessed signal.

Tips And Tricks For Better Parallel Compression

This article provides valuable tips and tricks for achieving better New York compression in your audio production. Learn how to effectively apply parallel processing techniques to your tracks and achieve a fuller, more dynamic sound.

This technique is an essential mixing technique used by music producers and engineers to blend together dry and compressed signals resulting in a balanced and cohesive sound. Here are some tips and tricks to improve your parallel processing technique:

Experiment With Different Settings

The key to getting the perfect parallel compression sound is experimentation. Adjust the threshold, attack, release, and ratio settings to achieve the desired effect. For instance, a longer attack time can emphasise the attack of a sound and a longer release can sustain the tail.

Use Multiple Instances Of Parallel Compression

You can use more than one instance of parallel compression to achieve a denser sound. Use different settings for each instance to create a nuanced and interesting blend of sounds. For example, one instance can emphasise the attack of the kick drum, while another can add character to the overall mix.

Blend In Parallel Compression Gradually

Gradually blending in the compressed sound can result in a more natural-sounding mix. You can automate the dry/wet knob on the parallel compressor plugin to blend in the parallel compression gradually. Additionally, you can use a gain plugin or fader to raise or lower the volume. This technique helps prevent sudden jumps in volume, which can be jarring to the listener. In conclusion, using these tips and tricks will enable you to achieve better results when using parallel compression in your music production and mixing. Experiment with different settings, use multiple instances of parallel compression and blend in gradually to achieve a more cohesive sound.

Examples Of Parallel Compression In Popular Music

Parallel compression, also known as New York compression, is a technique used in music production to enhance the dynamics of a track. Popularized in the 1990s in New York, it’s widely used in different genres such as pop, hip hop, and rock. The principle behind parallel compression is simple; mix the compressed and uncompressed signals from a single source and blend them for better control of the dynamic range of the track. The result is a fuller and more defined sound that sits well in the mix.

Pop Music

In pop music, producers commonly use parallel compression to make vocals sound bigger and brighter. For example, pop engineers often blend parallel compression into lead vocals for presence and polish. The technique was also used on the drums in Lady Gaga’s “Poker Face” to give them more punch and clarity.

Hip Hop

Parallel compression is an essential technique in hip hop production. It’s used to achieve the characteristic punchy and aggressive sound of the genre. Hip-hop mixers often add parallel compression to drums for power and drive. They also use it on bass and vocals so both cut through the mix.

Rock

In rock, engineers use parallel compression to make guitars and bass sound bigger. Rock mixers use it on guitar tracks to make them bigger and more aggressive. On drums, the technique adds weight and depth.

Parallel compression is a powerful technique that can work in different genres of music production. By blending compressed and uncompressed signals, you can achieve a fuller, more defined sound that sits well in the mix. Whether you’re producing pop, hip hop, or rock, parallel compression is a must-know technique that can take your tracks to the next level.

Frequently Asked Questions For How To Do Parallel Compression

How Do You Do Parallel Compression?

You can do parallel compression by sending one track to two separate buses. One bus will have a compressed version of the track, while the other will have the dry, uncompressed track. These two buses are then mixed back together to create a balanced, punchy sound that retains the dynamics of the original track.

What Is The Ratio For Parallel Compression?

The ratio for parallel compression is typically 50/50 or 70/30, depending on the desired effect. The aim is to combine the uncompressed sound and the compressed sound to create a fuller, more dynamic sound.

Is Parallel Compression Worth It?

Yes, parallel compression is worth it as it allows for greater control and enhancement of the dynamic range of a mix without losing the natural dynamics of the individual tracks. It can add depth and sustain, improve clarity, and increase overall loudness while still maintaining a natural sound.

Should Parallel Compression Be Pre Or Post Fader?

Set parallel compression post fader, so you control how much of it reaches the overall mix. Post fader, the compressed signal drops as you turn the main signal down, which keeps the blend balanced.

Conclusion

Overall, parallel compression is a great tool for adding depth and character to your mix. The technique can work in a variety of ways, from adding warmth to drums and guitar tracks, to creating a more dynamic vocal sound.

With a little experimentation, anyone can master parallel compression and take their mixes to the next level. Remember to use it sparingly and always trust your ears. Happy mixing!

For more background, see Parallel compression on Wikipedia. You may also like our guide: compressing just the kick drum.

Categories
Archive

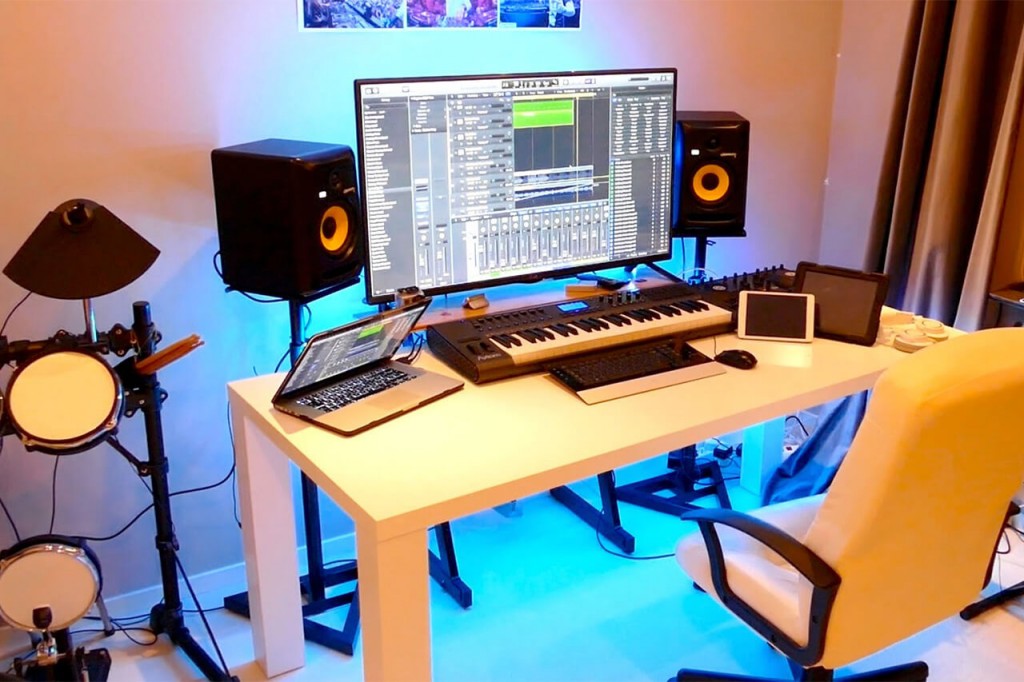
How To Set Up Your Home Studio

To set up your home studio, choose a dedicated space and gather necessary equipment. Creating a home studio is a great way to pursue your passion for music, podcasting, or other audio-related activities.

However, setting up a home studio can be a daunting task, especially if you are new to the world of audio recording. To make the process easier, you need to consider a few factors, such as choosing a dedicated space and gathering the necessary equipment.

These include microphones, an audio interface, headphones, a computer, and software. We’ll guide you through each step of setting up your own home studio and offer some tips for getting the most out of your gear.

How To Set Up Your Home Studio

Credit: www.hauteresidence.com

Choose The Right Space

Choosing the right space is crucial when setting up your home studio. Look for an area with good acoustics, minimal sound leakage, and natural light. It’s also important to consider the size of the space and how it will fit all your equipment.

When it comes to setting up a home studio, choosing the right space is crucial. The space you choose will affect the quality of your recordings, and it’s important to consider a few key factors when making your decision.

Consider The Acoustics

One of the most important factors to consider when choosing a space for your home studio is the acoustics. You want a space that will help you achieve the best possible sound quality, and that means avoiding spaces with hard floors, walls, and ceilings. If you’re working with a smaller budget, consider investing in sound-absorbing materials like acoustic foam or a sound barrier curtain. You can also look for a space with soft furnishings like carpets and curtains, which will help to absorb sound.

Look For A Space With Minimal Noise

Next, consider the amount of noise in your chosen location. You want to avoid any spaces that are near busy roads, train tracks, or other sources of noise pollution. This will help you to get the cleanest possible recordings. If it’s not possible to find a space without any outside noise, consider investing in soundproofing materials like double-paned windows or a heavy door to help keep noise out.

Make Sure Your Space Has Enough Room

Finally, make sure the space you choose is large enough to accommodate your equipment and any other items you need for your studio. You don’t want to feel cramped or overcrowded in your space, as this can make it difficult to focus on your work. Consider measuring the space and visualize where you’ll store your equipment and how you’ll set up your work area. This will help you make the best decision for your home studio setup. By carefully considering acoustics, outside noise, and space requirements, you’ll be able to choose the ideal location for your home studio. A well-chosen workspace will help you achieve the best possible recordings and make your work more enjoyable.

Get The Necessary Equipment

To set up your home studio, it’s important to get the necessary equipment. This includes a computer or laptop, audio interface, headphones, microphone, and recording software. Having the right tools is essential for capturing high-quality recordings for your projects.

Setting up a home recording studio can be an exciting endeavor, but it can also be overwhelming, especially when it comes to deciding on what equipment to purchase. In this section, we will go over the essential gear you need to start building your at-home studio. Here are the important pieces of equipment you will need:

Computer Or Laptop

The first thing you will need is a computer or laptop. Most of the digital recording gear today works seamlessly with both Mac and Windows computers. When shopping for a computer, it’s best to look for one with a fast processor, a decent amount of RAM, and storage space for your digital audio projects. You can consider getting a desktop computer or a laptop, but make sure it has enough power to handle your recording needs.

Digital Audio Workstation (daw)

A Digital Audio Workstation (DAW) is the most important tool you will need for recording, mixing and mastering music. A digital audio workstation is software that enables you to record, edit, and produce your music projects on your computer. There are various DAW options you can choose from, including FL Studio, Logic Pro, Ableton Live, Pro Tools, and Cubase. Make sure to choose the one that is best suited for your budget, recording needs, and workflow.

Microphones

Microphones are essential for recording vocals, live instruments, and amplifiers. You might also use them for recording band rehearsals and songwriting sessions. There are various types of microphones available in the market, including condenser mics, dynamic mics, and ribbon mics. If you are just starting, a good-quality condenser or dynamic microphone will suffice.

Audio Interface

To connect your microphones, instruments, and other external audio gear to your computer, you will need an audio interface. An audio interface is a piece of hardware that allows you to convert analog signals into digital signals and vice versa. Most audio interfaces come with a built-in preamp, which amplifies the microphone or instrument signal before converting it into a digital format for your computer to record.

Studio Monitors

Studio monitors are specially designed speakers that are used to listen to the recorded audio with accuracy and clarity. When selecting the right studio monitor, make sure to look for one that reproduces the natural sound of your audio. Avoid getting speakers with too much bass or treble boost, as it can affect your mixing decisions.

Headphones

Headphones are another essential piece of equipment in your home studio. They are great for recording and editing audio tracks, especially when you can’t use your studio monitors. When shopping for headphones, make sure to look for ones with a flat frequency response, as it will help you hear the audio track accurately.

Cables And Stands

Finally, you will need various cables and stands to connect and support your audio equipment. Make sure to have enough XLR cables for your microphone and audio interface, and also get a decent mic stand, boom stand and pop shield. You will also need instrument cables for your guitar or bass, and speaker cables if you decide to get a separate monitor speaker. In conclusion, getting the necessary equipment for your home studio can be challenging, but knowing what you need makes the process more manageable. Remember, always choose quality equipment that best fits your recording needs and budget.

Setting Up The Studio

Setting up a home studio can be a daunting task for beginners. However, once the equipment and furniture are in order, you’re ready to start creating and producing content. Setting up a studio involves arranging furniture and equipment, treating the room with acoustic panels and managing cables and connections. To ensure a smooth setup process, we’ll take a closer look at each of these steps below.

Arrange The Furniture And Equipment

The first step towards setting up your studio is arranging furniture and equipment. Arranging the furniture in a tidy and orderly manner will allow you to utilize the space efficiently. Place your desk against a wall, preferably one with electrical outlets and network ports so that you can connect all of your equipment easily.

When it comes to selecting equipment, invest in high-quality products that meet your needs and budget. Your equipment list should have a computer, monitor, audio interface, microphones, headphones, and speakers. If you’ve got a webcam, make sure you’ve placed it at the right height where you’re facing the camera directly.

Treat Your Room With Acoustic Panels

Acoustic panels are essential in-home studios to improve sound quality. They absorb sound waves that would otherwise bounce off walls and create reverberation or echo, resulting in a much more natural and clear sounding audio. You can buy acoustic panels from online marketplaces such as Amazon, or create them at home using commonly available materials like fiberglass and foam. Place the panels appropriately in strategic positions throughout your workspace to ensure your voice sounds excellent with no echo or unwanted noise.

Manage Cables And Connections

Cables and connections are the backbone of any home studio. Proper cable management ensures that you don’t have loose cables lying around and tangles. Start by labelling your cables and creating a system for keeping them organised. You can use zip ties or velcro for keeping cables together. Also, make sure that power outlets and surge protectors are located close to your equipment, so there aren’t cables running from all over the room. As much as possible, run cables along walls and under carpets to avoid any trip hazards.

Quick Cables Management Checklist:
Label your cables
Use zip ties or velcro to keep cables together
Place power outlets near the equipment
Run cables along walls and under carpets

Setting up a home studio can be time-consuming, but it’s crucial for a quality product. Following the basic steps of arranging the furniture and equipment, treating your room with acoustic panels, and managing cables and connections will go a long way in ensuring your home studio is conducive to your work and production. Now that your studio is set up, you are ready to start creating and producing terrific content.

How To Set Up Your Home Studio

Credit: audient.com

Peripherals And Accessories

Peripherals and accessories are essential elements to consider while setting up a home studio. They are integral to ensuring that you have a quality recording experience. When it comes to peripherals and accessories, there are quite a few items that you will require to ensure that your recordings are of top quality. Here are some of the essential peripherals and accessories that you need for your home studio:

Midi Keyboard

A MIDI keyboard is an essential tool that will make your recordings sound more professional. It allows you to play and record different musical inputs into your computer or digital audio workstation (DAW) through a USB connection. A MIDI keyboard is convenient because it provides you with different control functions that you can use to play, record, and edit your music. You can choose from a wide range of MIDI keyboards in the market based on your requirements and budget.

Controller

If you are looking to create electronic music, a controller will come in handy. A controller is a device that gives you the ability to blend, sequence, and manipulate sounds. It is an essential tool that is used to program, control, and modify different synthesizers, drum machines, and other recording gear. You will find several types of controllers such as drum pads, mixers, and faders that will make your recording experience more satisfying.

Pop Filter

A pop filter is a device that is used to prevent popping sounds or plosives while you are recording vocals. It is a simple circular mesh that is placed between your mouth and the microphone. Pop filters are inexpensive and are easy to set up. They are an important accessory that should not be overlooked, as it can have a significant impact on your recordings.

Shock Mount

A shock mount is used to prevent vibrations that can disrupt your recordings. It is a device that isolates your microphone from external factors such as footsteps, vibrations, and other noise that can affect the quality of your recording. Generally, a shock mount will have a cradle that your microphone sits in, allowing it to isolate the vibrations from your desk or stand.

Microphone Stand

A microphone stand is an essential accessory to have in your home studio. It allows you to adjust your microphone’s height and position, making it convenient for you to capture the sound you desire. A microphone stand prevents vibrations, making it easier for you to get clean and clear sound.

Create A Comfortable Environment

Creating a comfortable environment in your home studio is important to help you produce high-quality content. Choose a quiet and well-lit space, invest in comfortable furniture, and ensure proper ventilation and temperature control to help you work for long hours without distractions.

Creating a comfortable environment is key to setting up your home studio. It’s important to ensure your space is not only functional but also supports your physical and mental well-being. Here are some tips to create a comfortable environment for your home studio setup.

Ergonomic Desk And Chair

Investing in a good quality ergonomic desk chair can make all the difference in your comfort level while working in your home studio. Choose a chair that supports your spine and encourages good posture. Pair your chair with an adjustable desk that allows you to change the height to suit your needs. This will help prevent eye strain and poor posture from working in an uncomfortable position for long periods.

Proper Lighting

Natural light is ideal for working in your home studio, but that isn’t always possible. The right lighting is essential for avoiding eye strain and headaches. Consider investing in a desk lamp with adjustable brightness settings to reduce glare, or add soft overhead lighting for a cozy feel. It’s important to balance the light in your room so you don’t experience any stress in your eyes when facing the computer screen.

Temperature Control

Ensure you can adjust the temperature in your home studio so you can maintain a comfortable working temperature. If your space is too cold, you’ll find it hard to concentrate, but if it’s too hot, you could feel sluggish. If you’re someone who gets cold easily, consider adding a space heater. Identify the optimal temperature that works for you and maintain it throughout your workday.

Refreshments

It’s essential to stay hydrated and nourished while in your home studio. Keep a water bottle near you so you can sip water regularly throughout the day. Keep some healthy snacks within reach and indulge in them whenever you feel the need for a quick pick-me-up. This will help you save time getting refreshments outside. Also, consider having some plants or bringing some artwork to add to your space to provide an aesthetic variety for your eyes. By following these tips for creating a comfortable environment, you’ll find it easier to focus on your work and achieve your goals in your home studio set-up.

Start Recording

To start recording in your home studio, you need to select the right equipment such as microphones, audio interfaces and a DAW software. Make sure to choose a space with good acoustics and minimal background noise. Set up your equipment and test your setup before starting to record.

Start recording Now that your home studio is set up and ready to go, it’s time to start recording! The recording process can seem overwhelming, but by following a few simple steps, you will be on your way to producing high-quality tracks in no time. Here’s how to get started: Set up recording tracks and levels The first step in setting up your recording tracks is to choose which instruments or vocals you want to record. Create a new track for each instrument/vocal and adjust the input levels to ensure that the sound is not too quiet or too loud. Use the gain knob to increase or decrease the input level and ensure that the recording meter does not exceed the red section, as this will result in distortion. Adjust EQ and effects Once you have recorded your tracks, it’s time to adjust EQ and add effects to make your vocals/instruments sound their best. Adjust the EQ to make sure that each instrument/vocal has its own space in the mix. Use effects like reverb, delay, chorus, and compression to enhance the sound. Don’t overdo it, though – adding too many effects can clutter the mix and make it sound unnatural. Mix tracks With each instrument/vocal recorded and EQ’d, it’s time to mix them all together. Start by panning each track to the left or right to create a stereo image. Then, adjust the volume levels of each track so that they blend nicely together and create a balanced mix. Master final tracks The final step in the recording process is mastering your tracks. This involves adjusting the overall volume levels, EQ and adding final touches to your songs. Ensure your tracks have the same volume levels, and use EQ to ensure your tracks sound cohesive when listened to in succession. Then add a limiter to ensure no loud parts of the tracks are too quiet. By following these simple steps, you’ll be on your way to producing high-quality tracks in no time!

Promote And Share Your Work

Learn how to set up your home studio properly with these step-by-step guidelines. Promote and share your work by showcasing your professional-quality creations online and building a strong online presence in your field.

Promoting and sharing your work is an essential step in setting up your home studio. You may have put in hours of effort in creating your music, but without proper promotion and sharing, your work will be left unheard. It’s important to get your music out there and reach your target audience. Here are some ways to promote and share your music:

Create A Website Or Social Media Page

Creating a website or social media page allows you to showcase your work and engage with your fans. Your website or social media page should be visually appealing and easy to navigate. Make sure to include your bio, images, and links to your music on different platforms. This will provide your visitors with a better understanding of who you are and what you create. Post regular updates on your website and social media pages, which will keep your fans engaged with your work.

Collaborate With Others

Collaborating with other artists or producers is a great way to get your music heard by a wider audience. You can collaborate with other artists on tracks, remixes, or mixes. It’s a great way to showcase your skills and build relationships with other musicians.

Post Your Work On Music Sharing Platforms

Posting your work on music sharing platforms is an excellent way to get your music seen by new fans and grow your audience. There are many music sharing platforms available, such as SoundCloud, Bandcamp, and YouTube. Don’t forget to tag your music with relevant keywords, which will help improve your visibility on search engines. In conclusion, promoting and sharing your music is an essential step in building your brand as an artist. Creating a website or social media page, collaborating with others, and posting your work on music sharing platforms are all great ways to get your music heard by new fans and grow your audience.

Upgrade And Improve

Upgrading and improving your home studio is an ongoing process that requires continuous attention and effort. Staying updated with the latest technology and gear is essential to ensure that you are producing high-quality content that stands out from the competition.

Stay Updated With Latest Technology And Gear

Technology and gear are constantly evolving, and it’s important to keep up with the latest trends and advancements. This means staying up-to-date with new software, hardware, and other technologies that can enhance your home studio setup.

When it comes to audio equipment, investing in high-quality microphones, headphones, and speakers can make a huge difference in the overall sound quality of your recordings. You should also consider upgrading your computer hardware and software to ensure that it’s powerful enough to handle your creative projects.

Experiment With New Techniques And Styles

As an artist, it’s important to experiment with new techniques and styles in order to grow and develop your skills. This can involve trying out new software or hardware, exploring different genres of music, or experimenting with different recording techniques.

One way to stay inspired and motivated is by listening to other artists and producers who work in your genre. This can give you new ideas and perspectives on how to improve your own work. You can also attend workshops, conferences, or webinars to learn from other professionals in your field.

Remember, creating a successful home studio is all about finding the right balance between experimentation and consistency. By staying updated with the latest technology and gear, and experimenting with new techniques and styles, you can continue to evolve and grow as an artist.

How To Set Up Your Home Studio

Credit: mastering.com

Frequently Asked Questions For How To Set Up Your Home Studio

How Do I Set Up A Basic Home Studio?

To set up a basic home studio, you need a quiet room, a computer, an audio interface, a microphone, headphones, and recording software. Choose a designated area with proper acoustics, eliminate any background noise, and position your microphone correctly. Adjust your settings, record, and edit your audio as needed.

Practice and experiment until you achieve the desired results.

How Do I Organize My Home Studio?

Organizing your home studio can be simple if you follow these steps: 1. Declutter and get rid of anything you don’t use 2. Invest in storage solutions for your equipment and supplies 3. Use labeling systems to easily locate items 4.

Arrange your workstation in a way that is convenient and functional 5. Routinely clean and maintain your space to prevent clutter from accumulating again.

How Can I Turn My Home Into A Studio?

To turn your home into a studio, designate a specific area for your workspace and ensure it has adequate lighting, ventilation, and storage. Purchase equipment such as a desk, chair, and computer, along with any tools or materials specific to your craft.

Create a schedule that maximizes productivity and minimizes distractions. Finally, consider soundproofing or acoustic treatment if necessary.

How To Start Your Own Studio?

To start your own studio, you need to follow these steps: 1. Determine your niche and specialty. 2. Establish a business plan, including funding, marketing, and operations. 3. Obtain legal permits and licenses. 4. Find a suitable location and set up your space.

5. Build your team, acquire equipment, and launch your studio.

Conclusion

With a little bit of patience, research and investment, setting up a home studio is a simple and rewarding process. A space where you have complete creative control and can work on your art in peace is truly invaluable. Whether you’re a musician, podcaster or voiceover artist, following these steps will help you set up a functional and efficient home studio that will take your craft to the next level.

So what are you waiting for? Get started on building your very own home studio today!

Categories
Archive

How to Use Synths in Fl Studio

To use synths in FL Studio, open the plugin window, select the synth you want to use, and start playing or programming your melody. FL Studio offers various synths, including Harmor, Sytrus, and Serum, to create unique sounds and enhance your music productions.

Synthesizers are essential tools for music production in FL Studio. They can be used to create unique and captivating sounds that can take your music to the next level. FL Studio comes with many built-in synths that can be used to shape your tracks’ sounds, such as Harmor, Sytrus, and Serum.

Additionally, third-party plugins can be integrated into FL Studio to expand your synth library. Learning how to use synths in FL Studio will enable you to design sounds, create melodies, and add textures to your tracks, providing a vast and exciting playground for your music productions. We will discuss how to use synths in FL Studio and explore the different synthesizers available in FL Studio.

How to Use Synths in Fl Studio

Credit: www.youtube.com

Getting Started With Synths

Learn how to effortlessly incorporate synths into your music production by using FL Studio. With its user-friendly interface and diverse range of features, FL Studio can help you create unique and captivating sounds that will bring your music to life.

If you’re new to the world of synthesizers and music production, it can be overwhelming to know where to start. However, with a few basics in mind, you’ll be creating amazing sounds in no time. In this article, we’ll cover the essentials on how to use synths in FL Studio, beginning with getting started.

Setting Up Your Midi Controller

Before you can start using synths in FL Studio, you’ll need to set up your MIDI controller. This device will allow you to play and control the synth sounds in your DAW (digital audio workstation). To do this in FL Studio, simply connect your MIDI controller to your computer via USB and ensure that it’s powered on. Then, click on Options > MIDI Settings in the FL Studio menu. Here, you’ll need to ensure that your MIDI controller is recognized by FL Studio and that it’s selected as an input device.

Choosing The Right Synth

Once you have your MIDI controller set up, it’s time to choose the right synth for your project. This will largely depend on what kind of music you’re producing and the sound you’re aiming for. FL Studio comes with a range of built-in synths, such as Harmor, Sytrus, and 3xOsc, which are great for beginners and experts alike. Additionally, there are countless third-party synths available online that you can purchase or download for free. When choosing a synth, consider the type of synthesis it uses (such as subtractive or FM), the range of sounds it can produce, and how easy it is to use.

Getting Familiar With Synth Controls

Once you’ve chosen your synth, it’s time to get familiar with the controls. Each synth will have its own set of parameters that you can adjust to create different sounds, such as oscillators, filters, envelopes, and LFOs. Experiment with different combinations of these controls to create unique sounds and find what works best for your project. Remember, there’s no right or wrong way to use synths in FL Studio – it’s all about experimenting and finding what sounds best for you. With these basics in mind, you’ll be creating amazing music in no time.

Understanding Synth Parameters

To use synths in FL Studio, understanding synth parameters is key. By adjusting parameters such as oscillators, filters, and envelopes, you can create unique and dynamic sounds for your music productions. Take time to learn each parameter and experiment with different settings to unlock the full potential of your synths.

If you’re just starting with Synths on Fl Studio, understanding the parameters can be a bit daunting, but with a little practice and guidance, you’ll get a hang of it. Knowing the basics of parameters will help you understand how the sound is produced and how to manipulate it to create your desired effect. In this article, we will focus on three essential synth parameters – oscillators, filters, and envelopes.

Oscillators

Oscillators are the building blocks of sound waves. They are responsible for creating the primary sound. Fl Studio offers many types of oscillators, including square waves, sine waves, sawtooth waves, and more, each with its unique sound. These waves are generated at specific frequencies and have different harmonics. You can create complex sounds by mixing and matching different oscillators.

Filters

Filters help in shaping the sound by removing unwanted frequencies. With filters, you can remove unwanted harmonics, cut off the high or low frequencies, and add resonance to your sound, giving it a unique character. Fl Studio provides different types of filters such as Low Pass, High Pass, and BandPass, which you can use to create your desired sound.

Envelopes

Envelopes control the parameters of the Synth’s sound over time. They determine how the sound will behave over time. With envelopes, you can change the volume, pitch, or timbre of a sound over a specific time frame. Fl Studio offers four types of envelopes – ADSR, AHDSR, 8-point envelope, and 2-point envelope. Each envelope type represents particular parameters, and you can modify them to create different sounds. To create a great sound, each of these parameters must be used correctly. You can start with a basic sound, tweak each parameter, and experiment, resulting in a new and unique sound. By understanding these parameters, you’ll be able to create complex sounds and kick start your music production journey.

Sound Design With Synths

Explore the world of sound design with synths in FL Studio and learn how to use them to create unique sounds for your music productions. With their endless possibilities, synths can help you achieve a variety of effects, from simple melodies to complex compositions, and take your music to the next level.

Creating Basslines

Basslines are the backbone of electronic music. They propel the track forward and create a sense of movement. To create a bassline with a synth, start by selecting a synth with a warm, rich tone. Then, adjust the oscillators to create a deep, full sound. Use the ADSR envelope to shape the sound, making it punchy at the attack and sustaining it at the decay and release. Experiment with different filter settings until you find the perfect balance between low-end weight and harmonic content.

Making Leads

Leads can take many forms in electronic music, from bright and soaring to gritty and distorted. To create a lead with a synth, start by selecting a synth with a clean, bright tone. Then, adjust the oscillators to create a sound that cuts through the mix. Use the ADSR envelope to shape the sound, making it sharp at the attack and decaying quickly to create a staccato effect. Experiment with different filter settings until you find the perfect balance between brightness and warmth.

How to Use Synths in Fl Studio

Credit: www.image-line.com

Advanced Synth Techniques

If you’re a music producer using FL Studio, then you know how important synthesizers can be for creating amazing sounds. However, just using basic synth sounds can get boring after a while. That’s where using advanced synth techniques comes in handy. In this post, we will cover some advanced techniques to help you take your synth game to the next level.

Using Automation To Add Movement

One of the best ways to make your synth sounds more interesting is to add movement. This can be achieved using automation. Automation is simply the process of changing a parameter over time. In FL Studio, you can right-click on any parameter and select “Create Automation Clip”. This will create a new track that you can use to automate that parameter. You can then use the pencil tool to draw in the automation.

Layering Sounds For Depth

Layering sounds is another great way to add depth and complexity to your synth sounds. This involves using multiple synth sounds together to create a richer, more interesting sound. To do this in FL Studio, simply load up multiple synth plugins and start experimenting with layering them together. You can also use effects like reverb and delay to blend the sounds together and create a more cohesive sound.

Overall, these advanced synth techniques can help take your music production game to the next level. Use them to create more interesting and dynamic synth sounds that will set your music apart from the rest.

Manipulating Synth Effects

Manipulating synth effects in FL Studio is a crucial part of creating unique sounds. With the use of filters, envelope controls and LFO settings, you can get the desired result. Take your time to experiment with these features and you’ll be surprised at the exciting sounds you can produce.

After creating some mesmerizing synth sounds, it’s time to enhance them with some effects. Fortunately, FL Studio offers a plethora of effect plugins that you can use to manipulate your synth sounds and create something extraordinary. In this guide, we’ll discuss some of the essential synth effects that you can use in FL Studio.

Delay And Reverb

Delay and reverb are two essential effects that can add depth and space to your synth sounds. In FL Studio, there are numerous delay and reverb plugins available, each with its unique sound. The delay effect creates an echo effect by repeating the sound over a set amount of time, while the reverb effect simulates the sound of an acoustic space, such as a room or hall. To use the delay effect in FL Studio, simply add the plugin to your synth track and adjust the time, feedback, and mix settings to create the desired effect. The reverb effect works in the same way, allowing you to adjust the decay, size, and mix settings to create a spacey and ambient sound.

Flanger And Phaser

Flanger and phaser effects add a unique and hypnotic quality to your synth sounds. The flanger effect creates a sweeping sound by delaying and mixing a copy of the original sound, while the phaser effect creates a swirling sound by phase-shifting the frequencies of the sound. To use the flanger and phaser effects in FL Studio, add the plugin to your synth track and adjust the rate, depth, and mix settings to get the desired sound. You can also experiment with different presets to see what works best for your synth sound. In conclusion, manipulating synth effects is a crucial step in creating unique and captivating synth sounds in FL Studio. With the right combination of plugins and settings, you can take your synth sounds to new heights and bring your music to life.

Creating Synth Patches From Scratch

Creating synth patches from scratch is a powerful way to add unique, custom sounds to your music. With FL Studio’s extensive synth capabilities, you can create everything from classic analog-style leads and basses to bright, modern pads and textures. Here are some tips for creating killer synth patches from scratch in FL Studio.

Starting With A Blank Canvas

One of the first things to do before creating a synth patch is to start with a blank canvas. This means loading up a basic synth sound with no effects or processing applied. FL Studio’s default synth, 3xOsc, is a great starting point for this.

Once you have a basic sound loaded up, start experimenting with the synth’s parameters and settings. This includes things like adjusting the oscillator waveform, filter cutoff frequency, envelope settings, and more.

Experimenting With Sound Design

Sound design is a crucial aspect of creating synth patches from scratch in FL Studio. This involves experimenting with different synth parameters and settings until you find the perfect sound for your track. Here are some tips for effective sound design:

  • Get familiar with the synth’s parameters and settings: Before you start designing your sound, make sure you understand the different parameters and settings available in your synth. This will help you create more nuanced and complex patches.
  • Use modulation: Modulation is the art of changing multiple parameters over time to create evolving and interesting sounds. FL Studio’s powerful modulation capabilities enable you to do this with ease. Experiment with things like LFOs, envelopes, and automation to add movement and interest to your patches.
  • Layer sounds: Layering multiple sounds is another effective way to create complex and unique patches. Try layering different oscillators, effects, or even different synths to create a sound that’s truly one-of-a-kind.
  • Think outside the box: Sometimes the best sound design happens when you take risks and try something unconventional. Don’t be afraid to experiment with unusual settings or parameters to see what you come up with.

By following these tips and experimenting with different synth parameters and settings, you can create amazing synth patches from scratch in FL Studio. With a little practice, you’ll be able to create custom sounds that perfectly complement your music and make your tracks stand out from the crowd.

Using Synths In A Mix

Using synths in a mix is a popular technique used by music producers and composers alike. FL Studio offers a plethora of synth options to choose from, allowing you to create unique sounds and textures to elevate your music. In this section, we’ll look at two important aspects of using synths in a mix – complementing other instruments and arranging your synth parts. Let’s dive in.

Complementing Other Instruments

When using synths in a mix, it’s crucial to ensure they complement the other instruments in the arrangement. Synths can add depth and dimension to a track, but they can also clash if not used correctly. Here are some tips to ensure your synths complement the other instruments:

  • Choose a synth sound that complements the main melody or chords of your track.
  • Identify the frequency range of the other instruments and adjust your synth accordingly. You may need to EQ your synth to cut through the mix.
  • Use panning to create space in the mix. You may want to pan your synths to the left or right to create a wider stereo field.

Arranging Synth Parts

Arranging your synth parts effectively can make all the difference in your mix. Here are some tips to ensure your synth parts are arranged properly:

  • Start with a simple synth melody or chord progression. Then, build upon it with additional synth layers.
  • Consider the dynamic of your track and where the synths can add impact. Is there a chorus or drop that can benefit from a powerful synth sound?
  • Don’t be afraid to experiment with different synth sounds and textures. FL Studio offers a wide variety of synths that can add depth and uniqueness to your mix.
  • Avoid overusing synth sounds. Space out your synth parts to create moments of impact throughout the track.

Using synths in a mix can enhance your music and take it to the next level. Remember to choose sounds that complement the other instruments in your arrangement, and arrange your synth parts effectively for the best results. With these tips, you can create unique and impactful synth-driven music in FL Studio.

Common Synth Mistakes To Avoid

Synthesizers are powerful tools that can add a unique touch to your FL Studio productions. However, there are some common mistakes that beginners often make when using synths. To avoid those mistakes, it’s important to take your time, experiment with different settings, and learn the basics of sound design.

If you’re a music producer, you know the importance of using synths in your compositions. However, without the right knowledge, it’s possible to make some common mistakes that can hinder the potential of your music. Here, we’ll focus on some of the most common synth mistakes to avoid when using synths in Fl Studio.

Overcomplicating Sound Design

One of the biggest mistakes beginners make is overcomplicating their sound design. It’s easy to fall into the trap of endlessly tweaking parameters and effects, but this can lead to a cluttered and dissonant sound. Keep it simple and try to achieve the sound you want with just a few adjustments. Instead of layering too many sounds, try using fewer sounds and balancing them properly to create a fuller texture.

Clashing Frequencies

Another pitfall that new producers must beware of is clashing frequencies. It’s crucial to understand how different frequencies interact with each other and make sure that they are properly balanced in the mix. Low frequencies can muddle the mix if they’re not handled properly, while high frequencies can be harsh and grating if they’re too loud or the resonance is too high. Therefore, always analyze the frequency spectrum of your mix to make sure that each element has its own space and doesn’t interfere with any others.

Not Experimenting Enough

Finally, it’s essential to experiment with your synths and the effects you use. Many producers fall into the trap of using the same synth presets or effects on every track they produce. While it’s always good to have a go-to sound, not experimenting enough can lead to predictable and uninspiring music. So, don’t be afraid to try new combinations and effects to see what works best for your music. In conclusion, if you avoid these common synth mistakes, you’ll be able to create impressive and unique music that stands out from the crowd. By keeping your sound design simple, balancing your frequencies, and experimenting with different approaches, you’ll unlock the full potential of your synths in Fl Studio.

How to Use Synths in Fl Studio

Credit: www.image-line.com

Frequently Asked Questions For How To Use Synths In Fl Studio

How Do You Make A Synth Sound On Fl Studio?

To make a synth sound on FL Studio, open a new channel and choose a synth plugin. Use the synth’s oscillators, filters, envelopes, and effects to create your desired sound. Adjust the parameters and use automation to add texture and movement to your sound.

Finally, mix and master your track.

How Do I Connect My Midi Synth To Fl Studio?

To connect your MIDI synth to FL Studio, follow these steps: 1. Connect your synth to your computer via USB 2. In FL Studio, go to Options > MIDI Settings 3. Select your MIDI input device 4. Enable MIDI input on any channels you want to use 5.

Play your synth and it should be detected by FL Studio.

Does Fl Studio Have Synths?

Yes, FL Studio does have synths. FL Studio has a range of synthesizers that allow users to create a variety of sounds and styles, including Harmor, Sytrus, and GMS.

How To Layer Synths In Fl Studio?

To layer synths in FL Studio, first create a new instance of the synth plugin you want to layer. Then, create a new MIDI channel and assign it to the same synth plugin. Use different settings for each channel to create a layered sound.

You can also add effects and adjust levels to fine-tune your sound.

Conclusion

To sum up, synths in Fl Studio are an extremely flexible tool that can greatly enhance the sound of your music. With features like automation, modulation, and layering, the possibilities are virtually endless. Whether you’re a seasoned producer or just starting out, understanding how to use synths in Fl Studio is a skill worth mastering.

Don’t be afraid to experiment and try new things, as the best sounds often come from unexpected places. With practice, patience, and a little bit of creativity, you’ll be able to create amazing music using synths in Fl Studio.

More in our Synth guides.

Categories
Archive

Drum Programming With Ableton Live

Drum programming with Ableton Live is an easy process that allows users to create drum patterns and loops. With an intuitive interface and various features, users can easily program drums in a variety of styles using a range of sounds and effects.

Also, Ableton Live is a popular Digital Audio Workstation (DAW) that is widely used by music producers and artists worldwide. Also, the software is feature-packed and offers a range of tools that allow users to create beats, melodies, and more. One of the key features of Ableton Live is its this step-by-step Ableton beat tutorial capability, which allows users to create intricate and complex drum patterns and loops with ease.

Related reading: Drum Recording and How To Reverb Drums. For background, see the official Ableton website.

Moreover, we will explore the various drum programming features of Ableton Live and explain how to use them to create professional-sounding drum tracks. In addition, whether you are a beginner or an experienced musician, this guide will help you get started with drum programming in Ableton Live.

Setting Up For Drum Programming

In addition, setting up for drum programming in Ableton Live involves selecting the right drum samples. For example, this creates a MIDI clip, and programming patterns using the step sequencer or MIDI editor. With Ableton’s powerful drum rack and automation features, you can easily create dynamic and unique drum tracks for your music productions.

Before we start with drum programming in Ableton Live, we need to set up our computer and MIDI devices to establish a seamless connection. As a result, here are the three necessary steps to set up for drum programming in Ableton Live.

Installing Ableton Live for Drum Programming

Furthermore, the first step in drum programming is installing Ableton Live on your computer. If you haven’t already done so, head over to the Ableton website and purchase the latest version of the software. However, after that, follow the instructions on the website to complete the installation process.

Connecting Midi Devices

Additionally, once Ableton Live is installed, the next step is to connect your MIDI device. In Ableton Live, MIDI devices are used to send signals to the computer, which then triggers the sounds of the drum samples. Then, to connect your MIDI device, connect the MIDI cable from your MIDI device to the MIDI In port on your audio interface. Make sure all the connections are firmly attached.

Selecting Drum Samples

Also, after connecting your MIDI devices, the next step is to select the drum samples you want to use in your project. In short, Ableton Live comes with a pre-set library of drum samples. But you can also purchase additional samples from third-party providers or record your own. Once you have selected the samples you want to use, you can start programming your drums.

In conclusion,

Moreover, setting up your computer and MIDI devices to work with Ableton Live is an essential step in drum programming. By following the above three steps, you will be equipped to program drums effortlessly. Similarly, with the right tools and resources, producing fantastic drum sounds and rhythms is a breeze.

Drum Programming With Ableton Live

Credit: www.productionmusiclive.com

Creating Drum Patterns

In addition, mastering drum programming with Ableton Live requires a keen ear for rhythm and a creative approach. Also, experiment with different sounds, patterns, and effects to bring your beat to life. With Ableton Live’s intuitive interface and built-in effects, you can easily craft compelling drum patterns that elevate your music production.

Furthermore, Drum programming is a vital part of producing electronic music. In addition, it’s crucial to create drum patterns that are engaging, exciting, and perfectly synced with your track. In this blog post, we’ll be focusing on creating drum patterns using Ableton Live.

Choosing A Tempo And Time Signature

Before creating a drum pattern, it’s essential to choose the tempo and time signature of your track. The tempo sets the speed of the track, while the time signature controls the rhythm. For example, Ableton Live makes it easy to choose the tempo and time signature by providing a dedicated section in the transport bar. Additionally, here’s how to set the tempo and time signature in Ableton Live:

  1. Click on the ‘1/4’ icon in the transport bar to access the tempo and time signature menu
  2. Enter your desired tempo in the ‘BPM’ field or use the up and down arrows to adjust the tempo in small increments
  3. Select your desired time signature from the drop-down menu. You can choose from standard time signatures like 4/4, 3/4, 6/8, or create your own custom time signature

Drum Programming A Basic Loop

Once you’ve set the tempo and time signature, it’s time to create a basic drum loop. As a result, a drum loop is a repeating pattern of drum sounds that form the backbone of your track. Here’s how to create a basic drum loop in Ableton Live:

  1. Drag a drum kit onto an empty MIDI track
  2. Double-click on the MIDI clip to open the MIDI editor
  3. Select the pencil tool from the toolbar and draw in your drum pattern on the grid
  4. Click on the play button to hear your drum loop

Adding Variations And Fills for Drum Programming

Once you’ve created a basic drum loop, it’s time to add some variations and fills to make the pattern more interesting. Variations are subtle changes in the pattern, while fills are short, intense patterns that add emphasis to specific points in the track. However, here’s how to add variations and fills in Ableton Live:

  1. Duplicate the original drum pattern to create a new clip
  2. Add or remove drum hits to create variations in the pattern
  3. Program fills by adding short, intense patterns at the end of a measure or before a breakdown
  4. Use automation to add effects like filter sweeps or pitch changes to the drum pattern

In conclusion, creating drum patterns with Ableton Live is easy and fun. By following these steps, you’ll be able to create engaging, dynamic, and perfectly synced drum patterns that will take your tracks to the next level.

Editing Drum Patterns

Editing your drum patterns is crucial to getting your beats just right. Then, it allows you to tweak individual hits and develop a unique sound that sets you apart as a producer. With Ableton Live, drum programming has never been easier. Here’s how to get started with editing your drum patterns.

Using Ableton Live’s Editing Tools

Ableton Live’s editing tools make it easy to manipulate your drum patterns. In short, Use the pencil tool to draw in hits, or the eraser tool to remove them. The cut tool lets you slice up your drum patterns, so you can rearrange them or create new rhythms altogether. You can also copy and paste patterns to duplicate them or use them as a starting point for something new. These tools can take some time to master, but once you get the hang of them, you’ll be able to make your beats sound exactly the way you want them to.

Adjusting Quantization And Groove Settings

Quantization and groove settings are essential to creating a tight and groovy beat. Similarly, Quantization allows you to snap your hits to a specific rhythmic grid, ensuring a precise and consistent sound. Adjusting the groove setting allows you to add swing and shuffle to your patterns. This makes them feel more organic and human-like. Don’t be afraid to experiment with different settings to find the perfect groove for your beat.

Applying Swing And Humanization for Drum Programming

Adding swing and humanization to your drum patterns is a great way to give your beats a more natural feel. Swing refers to the subtle deviation of rhythm that occurs when playing drums. In Ableton Live, you can use the “swing” feature to add that same human-like feel to your patterns. Humanization refers to the randomization of hit velocity and timing, making your patterns sound less robotic and more authentic. By applying these techniques, your beats will sound more dynamic and less rigid.

With these techniques, you can take your drum programming to the next level. By using Ableton Live’s editing tools, adjusting quantization and groove settings, and applying swing and humanization, you can create beats that stand out and capture your unique sound.

Drum Programming With Ableton Live

Credit: www.ableton.com

Manipulating Drum Samples

One of the most important aspects of drum programming is the ability to manipulate your drum samples. With Ableton Live, you have a ton of tools at your disposal to shape your drums and create unique sounds that can take your tracks to the next level.

Using Effects And Processing

One of the most effective ways to manipulate your drum samples is by using effects and processing tools. Ableton Live comes with a wide variety of effects to choose from, including EQ, compression, distortion, and reverb.

For example, you could use EQ to boost the low-end frequencies of a kick drum. This gives it more weight and power. Or you could use distortion to add grit and edge to a snare drum. This makes it cut through a mix more effectively.

When it comes to processing, you can use techniques like parallel compression to bring out the best in your drum samples. This involves duplicating your drum track, compressing one copy heavily and leaving the other uncompressed, and then blending the two together for a thicker, punchier sound.

Layering Samples

Another way to manipulate your drum samples is by layering them together. This involves taking multiple drum samples and blending them to create a single, more complex sound.

For example, you could layer a snappy snare drum on top of a longer, more sustained snare to create a unique hybrid sound. Or you could layer multiple kick drums together to create a bigger, more powerful kick sound.

Layering can be a great way to make your drums stand out and add more personality to your tracks.

Pitching And Filtering for Drum Programming

Finally, you can also manipulate your drum samples by adjusting their pitch and filtering them. This can help you create unique and interesting sounds that stand out from the crowd.

For example, you could pitch down a snare drum to create a deep, resonant sound. Or you could filter out the highs of a hat sample to create a more muted, aggressive sound.

Experimenting with pitching and filtering can be a great way to find new and interesting sounds for your tracks.

Advanced Drum Programming Techniques

Advanced Drum Programming Techniques:

Drum programming can be a challenging task for many producers, but with Ableton Live, you can create complex rhythms with ease. In this article, we will focus on some advanced drum programming techniques that will take your beats to the next level.

Creating Complex Rhythmic Patterns:

One of the most exciting parts of drum programming is creating intricate and complex rhythms. With Ableton Live, you can create unique patterns by using the Drum Rack’s step sequencer or by drawing MIDI notes directly on the Clip View. Additionally, you can use the Random MIDI Effect to generate unpredictable rhythms.

To further enhance the complexity of your rhythms, you can utilize the Velocity MIDI Effect to adjust the strength of each hit, as well as the Probability MIDI effect to control the chance of a note being played. These tools help you create even more intricate patterns that will make your tracks stand out.

Using MIDI Effects:

Another way to achieve advanced drum programming in Ableton Live is to make use of the numerous MIDI effects available. The arpeggiator, for instance, is a popular tool that can help you create complex patterns by arpeggiating incoming notes and adding swing to your beat.

Practical Tips for Drum Programming

The MIDI Gate Effect can be used to chop up your drum loops, creating intricate patterns that add variety and excitement to your track. Additionally, the Chord MIDI Effect can help you create chord progressions and harmonies, adding a unique vibe to your drums.

Integrating Live Drumming:

To make your drum programming even more advanced, you can also integrate live drumming into your tracks. Ableton Live makes this process seamless with its built-in audio to MIDI conversion feature, allowing you to turn any audio file into a MIDI clip.

You can also trigger samples or loops using a MIDI pad or drum machine, creating a more natural and human feel to your beats. By layering these live drums with your programmed beats, you can create unique and dynamic grooves that will take your track to the next level.

With these advanced drum programming techniques, you can create unique and complex rhythms that will keep your listeners engaged and excited. Whether you choose to draw MIDI notes directly on the Clip View or incorporate live drumming into your tracks, Ableton Live has the tools you need to create advanced beats that stand out from the crowd.

Drum Programming Tips And Tricks

Drum programming is an essential part of making electronic music. It’s a creative process that allows you to create unique drum patterns that fit your music style. In Ableton Live, you have a wide range of tools and features that can help you take your drum programming skills to the next level. In this article, we will explore some tips and tricks that will help you create amazing drum patterns in Ableton Live.

Organizing Drum Samples In Ableton Live

Organizing your drum samples is crucial when it comes to creating music. A well-organized sample library can save you a lot of time and help you find the right sounds quickly. In Ableton Live, you can organize your samples in the ‘Places’ section of your browser.

Example:

Folder NameDescription
KicksContains all the kick drum samples
SnaresContains all the snare samples
HatsContains all the hi-hat samples

Using Drum Racks For Drum Programming

Drum Racks are a powerful tool in Ableton Live that can help you organize and control your drum sounds. A Drum Rack is a container for multiple drum samples that you can play using your MIDI controller or computer keyboard. You can add effects, automate parameters, and use MIDI effects to manipulate the sounds in your Drum Rack.

To create a Drum Rack in Ableton Live:

  1. Drag and drop your drum samples onto an empty MIDI track.
  2. Select all the samples on the track.
  3. Right-click and select ‘Group Tracks’.
  4. Choose ‘Drum Rack’ from the available options.

Maximizing Cpu And Memory

When working on complex projects, you may encounter performance issues due to high CPU and memory usage. To optimize your workflow and prevent crashes, follow these tips:

  • Freeze tracks that are not in use.
  • Turn off plugins or effects that you are not using.
  • Use the ‘Reduce latency when monitoring’ option to minimize latency while recording.
  • Use the ‘Warp’ feature only on the tracks that require it.

By following these tips, you can ensure that you get the best performance out of Ableton Live while working on your drum programming projects.

Drum Programming With Ableton Live

Credit: m.youtube.com

Frequently Asked Questions On Drum Programming With Ableton Live

Can You Program Drums In Ableton?

Yes, Ableton has a built-in Drum Rack feature that allows you to program drums using MIDI or audio samples. You can also use the step sequencer or play in real-time with a MIDI controller.

How Do You Program Drum Fills In Ableton?

To program drum fills in Ableton, first, select the drum pattern where you want to insert fills. Then, create a new MIDI clip and insert it into the drum track. Next, select a drum fill that you like and drag it to the clip.

Finally, adjust the length of the fill to fit the space where you want it to go.

Does Ableton Have A Drum Machine?

Yes, Ableton has a built-in drum machine called ‘Drum Rack’ which allows users to create and customize their own drum kits using their own samples or those provided by Ableton.

How Do I Make My Drums Sound Real In Ableton?

To make your drums sound real in Ableton, adjust velocity, add humanization, use swing and groove, layer samples, and use effects like reverb and delay. Take advantage of Ableton’s built-in features like Multiband Dynamics and Drum Buss to create a real drum sound.

Conclusion

As a music producer, you already know how valuable a drum programmer tool like Ableton Live can be. Learning how to program drums effectively can enhance your productions, allowing you to create unique and professional-sounding tracks. With the essential tips shared in this post, you’re now equipped with the knowledge to create dynamic grooves, manipulate drum samples, and expand your creativity.

Keep practicing and experimenting, and you’ll see your drum programming skills elevate to the next level.

Categories
Archive

Best Marketing for Music Promotion

The best marketing for music promotion is a combination of social media engagement and targeted advertising. To reach a wider audience, utilizing SEO tactics and collaborating with industry influencers can also be effective.

Also, Marketing is an essential component for any successful music promotion strategy. Also, in today’s digital age, social media platforms have become essential tools for promoting music. However, simply posting content on social media does not guarantee success. In addition to sharing content, engaging with your audience is crucial for building a dedicated fanbase.

Related reading: Where Do I Promote My Music and Where Should I Promote My Music. For background, see the Wikipedia article on Music industry.

Targeted advertising is another effective way to reach a wider audience and drive traffic to your music. In addition, by utilizing SEO tactics to optimize your content, you can ensure that your music is more easily discoverable online. Collaborating with industry influencers can also help you reach new fans. By following these marketing tips, you can promote your music effectively and stand out in a crowded industry.

Best Marketing for Music Promotion

Credit: m.youtube.com

Social Media Marketing

Moreover, social media marketing has become the top choice for music promotion. For example, this provides a cost-effective and targeted way to reach a wider audience. With platforms such as Facebook, Twitter, Instagram and TikTok, musicians can connect with fans and share their music with the world.

In addition, social media platforms have revolutionized the way musicians market their music. As a result, social media marketing is one of the best ways to promote music in today’s digital era. It is a cost-effective way to reach a wide audience and promote music to fans all around the world.

Targeting Fans Through Facebook Ads for Music Promotion

Furthermore, Facebook is the biggest social media platform, with 2.8 billion monthly active users. However, it is an effective platform for musicians to promote their music to a targeted audience. Facebook Ads is a powerful marketing tool that allows musicians to target fans based on their location, age, interests, and other factors. To create a successful Facebook Ads campaign, musicians should first identify their target audience and create ad content that resonates with them. It is important to keep the content engaging and informative while promoting the music.

Engagement On Instagram

Instagram is another popular social media platform with 1 billion active users. Then, Musicians can use Instagram to show off their creative side, engage with fans, and promote their music. Additionally, instagram’s visual-centric platform allows musicians to showcase their music visually through pictures and videos. To increase engagement on Instagram, musicians should use hashtags and collaborate with other musicians and influencers. Regular posting is also key to building a strong presence on Instagram and keeping fans engaged.

Twitter Hashtag Campaigns

Also, Twitter is a fast-paced social media platform that is popular among music fans. In short, Musicians can use Twitter to promote their music and engage with fans through hashtag campaigns. Twitter hashtags allow musicians to reach a wider audience and promote their music to fans who are interested in similar music. To create a successful Twitter hashtag campaign, musicians should choose a unique and memorable hashtag that resonates with fans. They should also engage with fans who use the hashtag and retweet their posts. This will encourage fans to promote the music to their followers.

In conclusion, social media marketing can be a powerful tool for musicians to promote their music and reach a wider audience. Similarly, by targeting fans through Facebook Ads, engaging on Instagram, and using Twitter hashtag campaigns, musicians can build a strong online presence and promote their music to fans around the world.

Search Engine Optimization

Moreover, Music promotion can be greatly enhanced through search engine optimization techniques that aim to improve visibility and ranking on search engine results pages. Also, by optimizing for relevant keywords and creating valuable content, artists can increase their online presence and attract more fans to their music.

Optimizing Website For Search Engines for Music Promotion

In addition, to promote music online, optimizing your website for search engines is crucial. This means taking necessary steps to ensure your website can be easily searched, crawled, and indexed by search engines like Google and Bing. Here are some effective ways to optimize your website for search engines that can increase traffic to your music site.

  • Furthermore, start by using relevant keywords in content, meta description, and tags to increase visibility.
  • Create high-quality content that is keyword-rich but not spammy.
  • Additionally, make sure your site structure is easy to navigate, with clear headings and subheadings.
  • Also, use alt tags on images and videos to make them search engine friendly.
  • Moreover, optimize the page speed of your website to ensure faster loading times.

Keyword Research For Music Promotion

In addition, keyword research is the process of finding the right keywords for your music website to drive targeted traffic. Conducting keyword research can help develop a content strategy that establishes a strong online presence. Here are some of the best practices for keyword research:

  1. Furthermore, start by researching the most searched music-related keywords by your target audience to get better insight on the language they use to search.
  2. Additionally, use online tools like Google Keyword Planner to select keywords that have low competition and high search volume.
  3. Optimize your content based on the keywords selected. Ensure that the content features keywords in a natural way.

Backlink Strategies For Musicians

Backlinks are links that direct traffic to your website from other websites. Search engines view backlinks as “votes of confidence” that your website is a trustworthy source of information. Musicians can use the following strategies to build effective backlinks:

  • Pitch your music to relevant bloggers, journalists, and content creators to earn backlinks.
  • Collaborate with other musicians and cross-promote with them on social media to get backlinks.
  • Create high-quality, shareable content that other people would want to link to.
  • Create profiles on social media and other music-related websites and link back to your website from them.

In conclusion, implementing these search engine optimization techniques will increase the visibility of your music website and help you get noticed by your target audience. By optimizing your website with relevant keywords and link-building strategies, you can take advantage of Google’s ranking algorithms to improve your search engine ranking and ultimately, drive more traffic to your website.

Email Marketing For Music Promotion

Email marketing is among the best ways for music promotion. It allows direct communication with the audience and allows the artist to showcase their music and related content. This leads to increased engagement and loyal fanbase. Building an email list is essential for successful music marketing.

Email Marketing Email marketing is a cost-effective and great way to reach out to your fans or customers and promote your music. By creating a targeted email list, artists and musicians can directly communicate with their fans, promote their music, and increase their sales. In this section, we will discuss the importance of building an email list. This creates email campaigns with call-to-actions, and personalizing email content to fans.

Building An Email List for Music Promotion

The first step in a successful email marketing campaign is building your email list. This involves collecting email addresses from your fans or customers through sign-up forms on your website, through social media, or at live events. To increase your sign-ups, offer incentives such as exclusive access to pre-released music, special discounts, or VIP experiences. You can also run a targeted social media ad campaign to reach out to potential fans who might be interested in your music.

Creating Email Campaigns With Call-to-actions for Music Promotion

Once you have built your email list, the next step is creating email campaigns with clear call-to-actions (CTAs). CTAs encourage fans to take action, such as purchasing your music or attending your concerts. The key to creating effective email campaigns is to keep them simple and visually appealing. Use eye-catching subject lines, personalize the email with the recipient’s name, and include a clear CTA with a deadline to create a sense of urgency.

Personalizing Email Content To Fans for Music Promotion

Personalizing email content to your fans is essential to make them feel valued and appreciated. Use their name in the subject line or greeting, and segment your email list to target specific groups of fans. Include exclusive content such as behind-the-scenes stories or early access to exclusive content to make fans feel special. You can also use data such as their location or past purchases to personalize the email and increase the chances of conversion. In conclusion, email marketing can be an effective tool to promote your music and engage with your fans. By building an email list, creating email campaigns with clear CTAs, and personalizing email content to fans, you can effectively reach out to your target audience and increase your sales and fanbase.

Collaborations

Collaborations offer some of the best marketing opportunities for music promotion. By teaming up with other artists or brands, musicians can expand their audience and exposure, increase credibility, and create exciting and innovative content that resonates with fans. With the right partners and strategy, collaborations can take music marketing to the next level.

Collaborations are an integral part of music promotion and are the quickest way to gain new fans and expand your reach. Partnering with bloggers and influencers, collaborating with other musicians, and cross-promotion on streaming platforms- these are all effective strategies for promoting your music. Let’s dive into how each of these collaborations can help boost your music career.

Partnering With Bloggers/influencers For Music Promotion

Partnering with bloggers and influencers with a large following can significantly increase your music promotion efforts. Bloggers and influencers are always looking for new and exciting content to share with their audience. This provides a great opportunity for you to increase your reach. Partnering with them can be as simple as sending your music to them for review, or as in-depth as putting together an Instagram campaign to show your music to their followers. Regardless of the approach, it’s important to make sure that the person you’re partnering with is aligned with your music’s brand and image.

Collaborating With Other Musicians To Promote Each Other

Collaborating with other musicians is another effective way to promote your music. By working together, you can cross-promote your music to each other’s fans and reach a wider audience. This can be done through a variety of methods, including live performances, social media takeovers, or even by releasing a joint EP or album. When collaborating with other musicians, it’s important to find artists with a similar fan base and style of music. This will help to ensure that your collaboration is well-received by both sets of fans and that it aligns with your overall brand and image.

Cross-promotion On Streaming Platforms

Cross-promotion on streaming platforms is a crucial part of music promotion in the digital age. By collaborating with other artists and playlist curators, you can increase your visibility on platforms like Spotify and Apple Music. One way to do this is to work with curators to include your music in their playlists. You can also collaborate with other artists to release a joint album or EP. This can help to increase your visibility on these platforms. Additionally, actively promoting your music on social media and other channels can help to drive more traffic to your streaming profiles.

In conclusion, collaborations are an essential part of music promotion and can help you expand your reach and gain new fans quickly. By partnering with bloggers, influencers, other artists, and playlist curators, you can create a powerful network of promoters that will help you reach your music career goals.

Content Marketing For Music Promotion

Content marketing is the best approach for promoting music. It involves creating valuable and engaging content that captures and retains the attention of potential fans. By leveraging social media platforms and email marketing, artists can reach a wider audience, build their brand, and increase their fanbase.

When it comes to music promotion, content marketing plays a crucial role in engaging your audience and building your fan base. By creating high-quality content that is both entertaining and informative, you can establish a strong online presence and attract new fans to your music. Here are some effective content marketing strategies that you can use to promote your music:

Creating Engaging Music Videos

Music videos are a powerful tool for promoting your music online. Not only do they allow you to showcase your music and lyrics visually. But they can also help you tell a story and create a connection with your audience. When creating music videos for your songs, it’s important to focus on creating engaging visuals that capture the essence of your music and complement the lyrics. Be creative and don’t be afraid to experiment with different styles and themes to make your videos stand out.

Podcast Interviews As A Marketing Tool

Podcasts have become increasingly popular in recent years and can be a great way to reach new audiences and promote your music. By appearing on podcasts that cater to your target audience, you can share your music and story with a wider audience. When preparing for a podcast interview, make sure to focus on providing valuable insights and information that listeners will find interesting.

Be authentic and engaging, and don’t be afraid to share your personal experiences and challenges as a musician.

Blogging For Music Promotion

Blogging can be a powerful tool for music promotion and can help you build your online presence and establish yourself as an expert in your field. By creating high-quality blog posts that provide valuable information to your audience, you can attract new fans to your music and strengthen your relationship with existing fans. When creating blog posts, make sure to focus on topics that are relevant to your audience and provide practical tips and advice that they can use in their own lives. Be authentic and engaging, and don’t be afraid to share your personal experiences and challenges as a musician. In conclusion, content marketing can be a powerful tool for promoting your music online and engaging your audience. By creating high-quality content that is both entertaining and informative, you can establish a strong online presence and attract new fans to your music. Whether it’s creating engaging music videos, appearing on podcasts, or creating blog posts, make sure to focus on providing value to your audience and building strong relationships with your fans.

Live Performance Marketing

Live performance marketing is one of the best ways to promote music. Through live events, artists can interact with their audiences, gain new fans, and create a memorable experience. This type of marketing is effective in promoting music and building a fan base.

Marketing Live Shows To Fans

When it comes to promoting your music, there is no better marketing than live performance marketing. Your live shows give your fans a chance to connect with you and your music, which makes them loyal. A loyal fan base is the key to the success of any musician. The question is, how can you market your live shows? Well, the first step is to let your fans know about the upcoming shows. Use your social media platforms to make the announcement and keep them posted on any changes to the schedule.

Partnering With Venues For Promotion

One of the best ways to market your live shows is by partnering with venues. Venues have existing loyal customers who trust and rely on them to provide good entertainment. You can benefit from that trust, as the venue will help you to promote your music. The more people you can get to attend your show, the more you expose your music to potential fans. You’ll also increase your chances of selling merchandise and getting your music to a broader audience.

Creating Targeted Facebook Events

Facebook events are powerful tools that you can use to promote your live shows. You can create targeted events that will reach your preferred audience. For instance, if you are performing at a jazz festival, you can create an event that targets jazz enthusiasts. It’s also essential to add clear details to your Facebook events. Include information about venue location, timings, and ticket prices. Ensure that the event has a compelling title and an attractive cover photo.

Live Show Marketing Takeaways

By marketing your live shows, you’re not only promoting your music, but you’re also creating a loyal fan base. You can market your live shows by partnering with venues, announcing the shows on social media, and creating targeted Facebook events. These tips will help you to improve your live performance marketing, increase attendance at your shows, and grow your music career.

Merchandising

Merchandising can be one of the best marketing techniques for music promotion. Artist merchandise can increase brand recognition and provide an additional revenue stream, while also connecting fans to the music in a tangible way. Properly executed, merchandising can enhance the overall fan experience and cultivate a loyal following.

Merchandising has become a popular marketing tool for musicians to promote their music and gain more exposure. It not only helps generate revenue but also gets fans more involved with their music. Here are some effective ways musicians can use merchandising for marketing their music.

Branded Merchandise As A Marketing Tool

One great way to promote your music is by using branded merchandise as a marketing tool. Branded merchandise can include t-shirts, hats, buttons, keychains, posters, and much more all with your band’s name or logo on them. These items can help create brand recognition and encourage fans to wear or use them to promote your music.

Selling Merchandise At Live Shows

Live shows can be a great place to sell merchandise. They put fans face-to-face with you and give them the opportunity to see and touch your merchandise. Attractive displays and promotional pricing can help sell merchandise and increase revenue. Not only that, but getting your fans to wear or use your merchandise can act as a walking advertisement for your music.

Partnering With Online Clothing Retailers

Partnering with online clothing retailers can help you reach a wider audience and generate increased revenue. Websites like Teespring and Redbubble offer musicians the opportunity to create their own merchandise and set their prices. These websites are great for musicians because they handle everything from production to shipping, leaving the musician to focus on music creation. In conclusion, merchandising is a great way for musicians to market their music. Branded merchandise, selling merchandise at live shows, and partnering with online clothing retailers are all effective ways to promote your music. So, get creative and get your fans excited about your music by utilizing merchandising as a marketing tool.

Best Marketing for Music Promotion

Credit: www.wiseband.com

Paid Ads For Music Promotion

Paid advertising is one of the best marketing strategies for promoting music. With precision targeting, platforms like Facebook and Instagram ads can help reach the right audience at the right time. Additionally, Spotify and YouTube ads can be effective for promoting music to listeners.

Paid advertising is one of the most effective ways to promote your music and get it in front of a wider audience. With the right advertising strategies, you can increase your exposure and grow your fanbase. There are many platforms to choose from, each with its strengths and weaknesses. Here are some of the best paid advertising options for music promotion.

Google Adwords For Music Promotion

Google AdWords is a popular advertising platform that lets you reach potential fans who are actively searching for music online. AdWords uses a pay-per-click model, where you only pay when someone clicks on your ad. You can target your ads based on keywords, location, and demographics. If you’re new to AdWords, it can be overwhelming. But there are a lot of resources available to help you get started. Google provides a free certification program that covers the basics of AdWords and best practices for creating effective campaigns.

Spotify Advertising For Music Artists

Spotify is one of the most popular streaming platforms and offers a range of advertising options for artists. With ads on Spotify, you can reach potential fans while they listen to music. One of the most popular advertising options on Spotify is the Sponsored Song ad. This allows you to promote your music to users who are likely to enjoy it based on their listening habits. You can also target your ads based on location, age, gender, and language.

Youtube Advertising Strategies

YouTube is a powerful platform for music promotion, with over 2 billion monthly active users. With ads on YouTube, you can reach a wide audience while they watch videos. There are several types of ads on YouTube, including display ads, overlay ads, and sponsored cards. But the most effective type of ad for music promotion is the in-stream ad. This is a video ad that plays before the user’s chosen video. You only pay when someone clicks on your ad or watches it for more than 30 seconds.

When creating YouTube ads, it’s important to have a clear message and a strong call-to-action. You should also make sure your ad is visually engaging and captures the user’s attention in the first few seconds. In conclusion, paid advertising is an essential part of any music promotion strategy. By using platforms like Google AdWords, Spotify, and YouTube, you can reach a wider audience and grow your fanbase. Remember to target your ads strategically and make sure they have a clear message and call-to-action.

Best Marketing for Music Promotion

Credit: blog.groover.co

Frequently Asked Questions For Best Marketing For Music Promotion

What Is The Best Way To Market My Music?

The best way to market your music is to create a strong online presence by leveraging social media platforms, streaming sites, and music blogs. Network with other musicians and collaborate with them to expand your audience. Use paid advertising to target your ideal fan base and showcase your live performances at local venues.

Always be authentic and stay true to your unique musical style.

What Is The Best Music Promotion Platform?

The best music promotion platform depends on your goals and budget. Popular options include Spotify, YouTube, SoundCloud, and Bandcamp. Each platform has its own features and audience, so it’s important to research and choose the one that matches your needs.

What Are The 4 P’s Of Music Marketing?

The 4 P’s of music marketing are Product, Price, Place, and Promotion. The product refers to the music itself, while the price is the cost of the music. Place refers to the distribution channels, and promotion refers to advertising and marketing efforts.

These elements are crucial in creating an effective music marketing strategy.

Where Is The Best Place To Advertise Music?

The best place to advertise music depends on your target audience. Consider platforms that cater to music lovers, such as Spotify, Soundcloud, and YouTube Music. Social media ads on Instagram, Twitter, and Facebook can also be effective in reaching a wider audience.

Don’t forget about music blogs and websites that feature new and emerging artists.

Conclusion

Music promotion has never been easier due to the availability of various digital marketing tools. By utilizing a combination of social media, influencer marketing, live events, email campaigns, and SEO strategies, musicians can effectively promote their music. It is essential to consider your audience and goals in crafting a marketing plan that suits your specific needs.

Whether you’re an independent artist or part of a music label, a well-executed marketing strategy can make a significant difference in the success of your career. Invest in your music, invest in your brand, and watch your music soar.

Categories
Archive

Tutorial For Sound Design In Serum

In this tutorial, you will learn how to do sound design in Serum. Serum is a popular soft synth that is known for its flexibility and versatility.

With its powerful wavetable synthesis engine, you can create a wide range of sounds, from complex pads to aggressive basses. In this tutorial, we’ll cover the basics of sound design in Serum and show you how to create your own sounds.

We’ll start with an overview of the interface and then move on to creating a simple patch. From there, we’ll delve into more advanced topics such as modulation and effects processing. By the end of this tutorial, you’ll have a solid understanding of how to design your own sounds in Serum.

Tutorial For Sound Design In Serum

Credit: www.youtube.com

Navigation Of Serum

Learn how to navigate and optimize the Serum plugin synth with this tutorial for sound design. With step-by-step instructions and detailed examples, you’ll be able to create your own unique sounds and add depth to your music production.

Tutorial For Sound Design In Serum: Navigation of Serum When it comes to creating unique and professional sounds, Serum is one of the most popular software synthesizers. This is due to its versatile features, ranging from advanced wavetable synthesis to excellent modulation capabilities. However, understanding and effectively navigating the Serum interface can be overwhelming for someone new to sound design. In this article, we will explore the various components of Serum’s interface for better navigation. ### Interface Overview The Serum interface may look complex at first glance, but it is highly organized and designed for ease of use. The interface comprises several critical sections, including the oscillator, filter, and effects sections, which we will explore in subsequent headings. The central display presents the wavetable editor and the envelope editor, which can be accessed by clicking on the tabs located below the display. ### Oscillator Section The oscillator section is the most important part of the Serum interface, primarily because it is where the sound generation happens. Here, you can choose from various waveforms, such as saw, square, triangle, and sine, for creating your sound. You can also adjust the wave position and frequency with the knobs and the display. Additionally, the oscillator section features a sub-oscillator for providing extra depth and weight to your sound. ### Filter Section The filter section comes after the oscillator section and is responsible for shaping the sound based on your requirements. The filter section features various filter types like low-pass, high-pass, band-pass, and notch filters. You can adjust filter parameters such as cutoff, resonance, and slope using the knobs provided. These controls help fine-tune the sound to fit within a specific frequency range. ### Effects Section In the effects section, you can add various effects to the sound to create a unique, polished, and richer sound. Here you can add effects such as distortion, flanger, reverb, chorus, delay, and more. The effects section is highly versatile, and it offers a wide range of effects that can add excitement and depth to any sound. Overall, Serum’s navigation can be daunting but is manageable with some practice. By understanding the various components of the interface, you can easily navigate and create professional-grade sounds with ease.

Sound Design Basics

Learn the sound design basics for Serum with this easy-to-follow tutorial. Develop your skills in creating unique and professional quality sound effects with Serum’s powerful features.

Are you ready to take your sound design skills to the next level? Look no further as we guide you through the basics of creating your unique sounds using Serum. From understanding wavetables to using envelopes, this tutorial will provide you with all the necessary tools and techniques needed to achieve your desired sound.

Understanding Wavetables

Wavetables are at the heart of sound design in Serum. They contain a collection of pre-made wave shapes that can be manipulated to produce unique sounds. Understanding wavetables is essential to creating interesting and complex sounds in Serum. To get started, select a wavetable from the list and explore the wave shapes it contains. Each wave shape can be further manipulated by adjusting its position, phase, and symmetry. Experiment with different combinations to create your unique sound.

Creating Basic Wave Shapes

Creating basic wave shapes is a crucial skill when it comes to sound design. In Serum, this can be done by using the oscillator section. Begin by selecting a basic waveform, such as a sine wave. From there, adjust the waveform by adding harmonics and shaping its characteristics. For example, adding distortion to a sine wave can create a sawtooth wave. By adding more or fewer harmonics, you can produce different sounds that are unique to your taste.

Using Envelopes

Envelopes are an essential tool for sound design as they control the characteristics of a sound over time. In Serum, there are four different envelopes – amp envelope, filter envelope, aux envelope, and global envelope. The amp envelope controls the volume of the sound, while the filter envelope controls the cutoff frequency of any applied filter. The aux envelope can be assigned to various parameters, such as the pitch or the wavetable position. Finally, the global envelope controls the overall level of the sound and can be used to add effects such as reverb or delay. To use envelopes effectively, experiment with different attack, decay, sustain, and release times to shape the sound to your liking. In conclusion, understanding sound design basics such as wavetables, creating basic wave shapes, and using envelopes is fundamental to creating unique sounds in Serum. By mastering these techniques, you’ll be able to unlock the full potential of Serum and create sounds that are unique and innovative.

Advanced Sound Design Techniques

Get ready to take your sound design skills to the next level with this tutorial for sound design in Serum! Learn advanced techniques that will help you create unique and professional-sounding sounds for your music production.

Serum is a powerful wavetable synthesizer that can create a wide range of sounds. However, mastering the software’s basics is not enough to design the most sophisticated and nuanced sounds. In this tutorial, we will focus on advanced sound design techniques for Serum that can help you create truly unique sounds. Specifically, we will explore the Unison and Voices function, the Modulation Possibilities, and the possibilities of LFOs.

Unison And Voices

Unison and Voices are two essential features of Serum that can significantly impact the sound design. Unison refers to the number of oscillators that play simultaneously, and Voices refer to how many instances of a sound can be played at the same time. By using multiple instances of the same sound and playing them simultaneously, you can create a bigger, richer, and more complex sound.

Modulation Possibilities

Modulation refers to the dynamic changes in a sound that can alter its pitch, volume, or any other parameter. Serum offers several powerful modulation possibilities, such as envelope modulation, which is the ability to change the sound over time. Another powerful modulation feature of Serum is the ability to change one parameter based on the value of another. This function can be used to create unique and complex sounds.

Lfos And Their Possibilities

Low-Frequency Oscillators (LFOs) can control a parameter of sound over time by oscillating the value of that parameter at a low frequency. For example, LFOs can be used to automate a knob on Serum and create an evolving sound. Serum offers various LFO shapes, including sine, square, and sawtooth. Using the right LFO shape and applying the correct amount of LFO can help you create a perfect sound. In conclusion, Serum is a powerful synthesizer that offers several advanced functionalities that can be used to create unique and nuanced sounds. By exploring these features, such as Unison and Voices, Modulation Possibilities, and LFOs, you can expand your sound design creativity beyond the basics.

Tutorial For Sound Design In Serum

Credit: www.groove3.com

Creating Presets From Scratch

Learn how to create your own presets from scratch with this tutorial for sound design in Serum. This step-by-step guide will help you build unique sounds for your music productions.

Creating Presets from Scratch Serum is one of the most popular software synthesizers used in the music production industry. Under the hood of Serum lies a powerful sound engine capable of producing a wide range of sonic textures and timbres. However, understanding the basics of sound design in Serum can be a daunting task for beginners. In this tutorial, we will explore some techniques that can be used to create presets from scratch, allowing you to unleash your creativity and bring your musical ideas to life. Starting with a Basic Sound When creating a new preset in Serum, it’s important to start with a basic sound. This can be achieved by selecting a waveform from the oscillator section and adjusting the settings to create a simple sound. It is essential to get the right balance of harmonics in your sound. The higher the harmonic content, the brighter the sound will be. The lower the harmonics, the more subby and bassy it will become. Once you have your basic sound, you can start to explore layering techniques. Layering Techniques Layering is one of the most effective ways to create complex sounds in Serum. By stacking multiple sounds on top of each other, you can create unique textures and timbres. To layer sounds in Serum, simply add another oscillator to your sound and adjust the settings to create a harmonically complementary sound. Layering allows you to create unique sounds that stand out in the mix. Incorporating Effects Effects processing plays a significant role in shaping the final sound of your preset. Effects such as distortion, chorus, reverb and delay can be used to add texture, depth, and character to your sound. Serum comes with a wide range of built-in effects that you can use. However, you can also use third-party plugins to enhance your sound design. Be mindful of how much processing is being applied to your sound. Too much processing can lead to a less cohesive sound. Conclusion Creating presets from scratch in Serum can be a fun and rewarding experience. By understanding the basic principles of sound design in Serum and using creative layering and effects processing techniques, you can create unique sounds that differentiate your music from others. Experiment with different settings in Serum and explore how different modulation sources can affect your sound. With some practice, you’ll be creating professional-quality presets in no time.

Tips And Tricks

Learn how to create unique and professional sounds with Serum through this comprehensive sound design tutorial. From basic editing to advanced techniques, this tutorial covers all the tips and tricks you need to take your tracks to the next level.

Are you looking for tips and tricks for sound design in Serum? Look no further! In this article, we’ll cover some of the most useful tips and tricks to take your sound design to the next level. From automation techniques to external modulation to combining multiple instances, we’ve got you covered. So, let’s dive in!

Automation Techniques

Automation is a powerful tool for sound design in Serum. Here are some tips for using automation in Serum:

  • Use LFOs and envelopes to create automated modulation for various parameters
  • Map macros to specific parameters to create complex automation and sound variation
  • Draw in automation curves in the Serum matrix for precise control over modulation

External Modulation

External modulation can add complexity and depth to a sound. Here are some tips for using external modulation in Serum:

  • Use sidechain compression to create rhythmic modulation
  • Use audio inputs to modulate parameters based on an external audio source
  • Route MIDI from an external controller to modulate parameters

Combining Multiple Instances

Using multiple instances of Serum can create rich, layered sounds. Here are some tips for combining multiple instances of Serum:

  • Use different wavetables to create complex and varied sounds
  • Use different filter types for each instance to create unique frequency shaping
  • Use the unison mode to create thick, detuned sounds
  • Use panning and volume automation to create a wide stereo image

In conclusion, these tips and tricks are just a small sample of what is possible with sound design in Serum. By experimenting with these techniques and applying them creatively, you can create truly unique and interesting sounds. So, get out there and start designing!

Tutorial For Sound Design In Serum

Credit: www.youtube.com

Frequently Asked Questions Of Tutorial For Sound Design In Serum

How Do You Get Sound Into Serum?

Sound can be imported into Serum by clicking on the oscillator tab, then selecting a wavetable option. From there, click “edit” and select “import audio” to choose the desired sound file to load into Serum’s wavetable oscillator.

How Do You Make A Sound Glide In Serum?

To make a sound glide in Serum, first choose a wavetable oscillator and adjust the Glide knob to your preferred value. You can also adjust the Voices and Unison knobs to add more depth and character to the glide. Experiment with the different settings to create the desired sound.

How Do You Make Organic Sounds On Serum?

Organic sounds on Serum can be created by using waveforms of natural sounds such as human voice or animal noises, applying filters to mimic environmental effects, and using LFOs and envelopes to manipulate the sound. Experimenting with different effects and techniques can produce unique and realistic organic sounds.

How Do I Get Better At Serum?

To get better at Serum, practice regularly using tutorials, experimenting with different presets and sounds, and exploring its various features. Don’t be afraid to think outside the box and make your own unique sounds. Collaborating with other producers and sharing your work for feedback can also help improve your skills.

Keep learning and experimenting to become a master of Serum.

Conclusion

To sum up, learning sound design in Serum is a must for any music producer out there who wants to create unique and professional-sounding tracks. With the tips and tricks provided in this tutorial, you can unlock the full potential of this powerful synthesizer and take your music to the next level.

Keep experimenting and practicing to craft your own signature sound, and remember to have fun along the way! Happy producing!

Categories
Archive

Pro Ableton Audio Effect Tricks

Ableton audio effect tricks can enhance your music production skills. Learn various techniques like glide effect, gating, and sidechain compression for creating unique sounds.

Ableton has become the go-to DAW for music producers across the globe. Its ease of use, versatility, and high-quality sound effects are just a few reasons why Ableton is a favorite among musicians. We will explore some of the best audio effect tricks that Ableton has to offer.

These tricks can help you produce unique sounds and add spice to your music. We will cover techniques such as glide effect, gating, sidechain compression, and many more. By the end of this article, you’ll be able to add these tricks to your repertoire and take your music production to the next level.

Pro Ableton Audio Effect Tricks

Credit: www.productionmusiclive.com

Create Interesting Audio Effects Using Ableton

If you are looking to add some interesting audio effects to your tracks, Ableton can be a great tool to help you achieve this goal. Ableton offers various audio effect tricks you can use to create unique sounds. Here are a few tips to get you started:

Utilize The Audio Effect Rack

The Audio Effect Rack is one of the most powerful tools in Ableton. It allows you to stack multiple effects together into a single rack, which you can then manipulate using macro controls. By using the Audio Effect Rack, you can create complex effects that would be difficult to achieve with individual effects.

To use the Audio Effect Rack, simply drag and drop the effects you want to use into the rack. Once you have added your effects, you can assign controls to them by clicking the “Configure” button. This will open a window where you can map controls to your effects, making it easy to control multiple effects at once.

Learn How To Use The Chain Selector

The Chain Selector is another powerful tool in Ableton. It allows you to switch between multiple chains of effects with a single knob, creating different variations of your audio effects. Using the Chain Selector can help keep your tracks interesting and dynamic.

To use the Chain Selector, you first need to create multiple chains of effects within the Audio Effect Rack. Once you have your chains set up, you can assign each one a number using the “Chain Select” button. This will allow you to switch between chains using a single knob or slider.

Use Automation For Dynamic Effects

Automation is a key feature in Ableton that allows you to create dynamic effects in your tracks. By automating parameters such as volume, panning, and effect levels, you can add movement and interest to your tracks.

To automate a parameter, simply click the “show/hide automation” button and select the parameter you want to automate. This will create a new lane in the arrangement view where you can draw in your automation data using your mouse.

Overall, by utilizing Ableton’s tools such as the Audio Effect Rack and Chain Selector, as well as using automation creatively, you can take your audio effects to the next level and create interesting and unique sounds that will set your tracks apart.

Pro Ableton Audio Effect Tricks

Credit: m.youtube.com

Audio Effects You Can Achieve With Ableton

Explore new frontiers of music production and learn how to use Ableton’s audio effects to add depth, texture, and character to your music. Discover pro tricks that allow you to create unique sounds while saving valuable production time.

Are you looking to enhance your music production with unique audio effects? There are plenty of audio effect tricks you can achieve with Ableton, which can take your music tracks to the next level. In this post, we’ll explore some of the most exciting audio effects you can create with Ableton.

Create A Granular Delay Effect

Imagine the ability to manipulate the sound of your music track granularly. This is where the granular delay effect comes into play. With Ableton, you can easily create a granular delay effect that adds an extra layer of texture to your music. To create this effect, open up an audio track in Ableton and add a delay effect. Next, add a granulator plugin and adjust the parameters accordingly. Play around with the various settings, and you’ll be able to create some truly unique granular delay effects for your music tracks.

Simulate Vinyl Crackle And Noise

Do you want to achieve a vintage sound for your music tracks? With Ableton, you can simulate vinyl crackle and noise to give your tracks an old-school feel. To create this effect, simply add a vinyl distortion plugin into your audio track and tweak the settings until you achieve the desired sound. This effect is perfect for producers looking to create a nostalgic vibe for their music tracks.

Design A Wobble Bass Effect

Are you hoping to create a wobble bass effect for your music tracks? With Ableton, it’s easier than you think. To achieve this effect, use an LFO (low-frequency oscillator) to modulate the pitch of a sine wave. You can also use a filter to shape the sound of the wobble bass and add more depth to the effect. Experiment with different parameters and settings until you achieve the perfect wobble bass sound.

Create A Chorus Effect Using Resampling

The chorus effect is a popular effect used by music producers to create a rich and full sound. With Ableton, you can create a chorus effect using resampling. Firstly, record a part of your audio track that you want to add chorus to. Next, duplicate the track and adjust the pitch and timing slightly. Repeat this step several times while adjusting the parameters, and then mix all the tracks together. This will result in a chorus effect that adds more depth and richness to your music track. In conclusion, Ableton offers plenty of tricks and techniques to achieve unique audio effects. With the techniques explored in this post, you can add an extra layer of texture and depth to your music tracks, making them stand out and keeping audiences wanting more.

Advanced Tips And Tricks For Ableton Audio Effects

Learn how to take your Ableton audio effects to the next level with advanced tricks and techniques. Discover pro-level tips for manipulating and transforming your audio, making your tracks stand out from the crowd.

Creating unique sounds and adding depth to your tracks can elevate your music production game. Ableton Live’s audio effects offer a wide range of possibilities to experiment with different sounds. Advanced tips and tricks for Ableton audio effects can help you create complex, intricate sounds and take your music to the next level. Below are some of the most effective tips and tricks.

Use Multiple Effects For Complex Sounds

Using multiple effects can create complex, layered sounds. Experimenting with different effects can lead to exciting results. For instance, using a flanger and delay together can create a unique sound, especially when combined with reverb. By adjusting the parameters on each effect, you can achieve sounds that are impossible to recreate with a single effect.

Experiment With Sound Design Techniques

Sound design is a crucial aspect of music production. Ableton Live’s audio effects provide numerous sound design possibilities. Take some time to experiment with different sound design techniques. One effective technique is resampling. Try resampling a sound with different effects to create new and unique sounds. Another technique is to use modulation effects like chorus, phaser, and flanger to add subtle movement to a sound.

Create Spatial Effects With Reverb And Delay

Reverb and delay are powerful tools that can create a sense of space and depth in your tracks. Using reverb and delay together can create complex and intricate spatial effects. For example, using a short delay with a long reverb can create a sense of depth and space that makes your sound appear larger.

Add Movement To Sounds With Lfos

Low-frequency oscillators (LFOs) can add movement and variation to your sounds. Ableton Live’s audio effects offer numerous ways to use LFOs. For instance, using LFOs with filter effects like auto-filter can create a unique moving filter sound. Another example is using an LFO with the pitch effect to create a vibrato effect. In conclusion, by incorporating these advanced tips and tricks for Ableton audio effects, you can create unique and complex sounds that elevate your music production to a whole new level.

Maximize Your Workflow With Ableton Audio Effects

Maximize the potential of Ableton Live with expert tips on audio effects processing. Elevate your workflow and sound production with pro tricks for an enhanced audio mixing experience.

Maximize Your Workflow with Ableton Audio Effects Ableton Live is a popular Digital Audio Workstation (DAW) that has been known for its extensive range of audio effects. With its latest version, Ableton Live 11, the software offers more complex and versatile audio processing capabilities. Using its audio effects with proficient skills can maximize your workflow and enhance the quality of your music production. Here are some Ableton audio effect tricks that will take your music production to the next level. Use Keyboard Shortcuts to Save Time Using keyboard shortcuts to access Ableton audio effects is crucial for time management. The ability to use keyboard shortcuts saves valuable time that you can use to focus on improving your music productions. In Ableton, all audio effect plugins have their unique keyboard shortcuts that allows you to call them up quickly without having to search through your VST list. For example, pressing the ‘Ctrl + F’ key opens up the search bar where you can type the first few letters of your preferred effect, then select it using the arrow keys, and hit enter to add it to the audio track. Create Custom Audio Effect Racks Using Ableton’s built-in audio effect racks, you can create custom audio effect chains. Creating custom audio effect racks is beneficial because it enables you to access chains of effects with a single button instead of adding each to a track individually. Additionally custom audio effect racks offer more control and flexibility, you can adjust chains of effects to control the signal flow within your chain. You can also create variations of racks, and save them as presets to reuse on future projects. Learn How to Chain Multiple Effects Ableton audio effects can be chained one after the other in different series and parallel configurations. Chaining multiple audio effects is essential to creating complex, layered and enriched sounds. Using Ableton’s audio effect rack, you can chain effects in parallel, for example, multiple delays on a single instrument or chain effects in a series configuration like a looper followed by a distortion or chorus effect. Use Color Coding for Quick Visual Cues Color coding is a quick and efficient way to recognize your audio effects and different tracks. It helps to simplify your workflow and saves your time. You can color-code your tracks, audio effects, and effects racks to create a clear visual representation of the audio signal flow in your track. Conclusion In conclusion, expanding your knowledge on the Ableton audio effects will enable you to use the software better and more proficiently. This will significantly impact the quality of your music productions. Practice the above-discussed tips to accelerate your workflow, craft complex sounds, and elevate your productions to the next level.

Pro Ableton Audio Effect Tricks

Credit: cymatics.fm

Frequently Asked Questions On Pro Ableton Audio Effect Tricks

How Do I Make My Voice Sound Better In Ableton?

To make your voice sound better in Ableton, try using EQ to boost the frequencies that make your voice sound clear and cutting out any muddiness. You can also use compression to even out the volume levels and add reverb to create depth and space.

Experiment with different settings until you find the right sound for your voice.

How Do I Use Sound Effects In Ableton?

To use sound effects in Ableton, first, import the desired sound into the Audio Track. You can do this by dragging and dropping the sound file into Ableton. Then, add an audio effects rack by clicking on the “Audio Effects” option in the left-hand side panel.

Drag and drop the desired audio effect onto the rack to modify the sound.

Does Ableton Have Voice Effects?

Yes, Ableton has voice effects that you can use to enhance your vocals. You can find various voice effects in Ableton’s Audio Effects menu, such as EQ, compression, reverb, and delay. Additionally, Ableton also offers third-party plugins that provide a wide range of vocal processing capabilities.

What Is Redux In Ableton?

Redux in Ableton is a feature that allows you to store and recall different versions of your project. It tracks changes you make and lets you go back to previous versions easily. This can be useful for experimentation and for doing multiple takes of a particular idea in your music production.

Conclusion

To sum up, the Ableton audio effect tricks discussed in this post are just the tip of the iceberg when it comes to the endless possibilities of audio manipulation in this amazing software. By utilizing these tips and experimenting with others, you can create unique, dynamic, and professional-sounding audio tracks that are sure to impress.

So go ahead and dive into the world of Ableton – the possibilities are endless!

Categories
Archive

Presonus Studio One 5 Review

Presonus Studio One 5 is a powerful yet user-friendly DAW that offers a seamless experience for both beginners and professionals. In this review, we’ll dive deeper into the features that make Studio One 5 stand out from the rest and determine if it’s worth the investment.

Presonus released its latest version of Studio One in May of 2020, and it has been a game-changer for music producers ever since. This DAW offers an array of impressive features that can seamlessly produce, mix, and master audio tracks.

With its intuitive and user-friendly interface, Studio One 5 has become a popular choice for both beginners and professionals. This review aims to highlight the features, benefits, and drawbacks of the software to help you determine if it’s worth investing in this DAW.

Presonus Studio One 5 Review

Credit: www.youtube.com

User Interface

Presonus Studio One 5 review reveals an intuitive user interface with drag and drop functionality, allowing for easy navigation and customization of the workspace. With a clear and polished design, Studio One 5 offers a user-friendly experience for both beginners and professionals in music production.

The user interface of a digital audio workstation is an essential aspect that can make or break a user experience. The latest release of Presonus Studio One 5 has undergone a significant revamp, focusing heavily on improving the user interface. In this article, we will review the changes made to the interface, and how they have improved the workflow of the software.

New Layout

Presonus Studio One 5 boasts an all-new interface layout that provides a more intuitive experience for both new and experienced users. The new layout provides a modern, simple, and elegant design that makes it easier to navigate and work with. The new layout includes a scalable vector-based interface with high-resolution graphics that work seamlessly with displays of different resolutions. The new layout has a more refined color palette, with a focus on making it more visually appealing while reducing eye strain. The color scheme can also be customized, allowing users to set their preferred color theme according to their preferences.

Simplified Navigation

Navigation is an essential aspect of any digital audio workstation, as it affects the user’s workflow and productivity. With Presonus Studio One 5, navigation has been significantly simplified, making it more straightforward and intuitive. The navigation menu has been reorganized, and key elements have been grouped together to improve discoverability. The new navigation features an all-new start page that provides quick access to various functionalities, including recent projects, projects, songs, mastering, and more. The start page also gives users the option to launch external applications or open templates to get started quickly.

Enhanced Workflow

One of the primary goals of the Presonus Studio One 5 user interface redesign was to enhance the workflow of the software. The new design has numerous features that help streamline workflow, including drag-and-drop capabilities, the ability to copy and paste tracks or channels, and more. The new interface also features customizable workflow shortcuts, making it easier to access and use your most frequently used tools and options. The customizable shortcuts are a valuable feature for experienced users, as they can save time and increase efficiency when fine-tuning music projects.

Conclusion

Presonus Studio One 5’s user interface redesign places a significant emphasis on usability, functionality, and aesthetics. The new layout, simplified navigation, and enhanced workflow features provide a much-improved user experience that helps improve productivity and workflow efficiency. These changes give Presonus Studio One 5 an edge over its competitors, making it an indispensable tool for music producers and recording engineers alike.

Presonus Studio One 5 Review

Credit: musictech.com

Editing Features

Presonus Studio One 5 offers a range of editing features that allow for easy manipulation of audio and MIDI tracks. With drag-and-drop functionality, users can quickly rearrange clips and events, while the built-in groove and quantization tools help to tighten up timing and rhythm.

The software also includes advanced pitch correction and time-stretching capabilities.

Editing is a crucial aspect of any music production, and with the latest release of Presonus Studio One 5, the editing features have been taken to the next level. The software comes packed with some impressive features to help you achieve your desired sound quality. In this article, we will be looking at some of the key editing features of the Presonus Studio One 5.

New Event Inspector

The New Event Inspector is one of the most significant additions to the editing features of Presonus Studio One 5. This feature enables you to access all event-based editing options from a single interface. It is easy to navigate, and it allows you to make changes to several events simultaneously. The New Event Inspector gives you more control over your music production, and it eliminates the need to switch back and forth between different editing windows.

Improved Midi Editing

MIDI editing has been a part of Presonus Studio One for years, and its editing capabilities have been improved even further with the new release. The software comes packed with an array of new features that make it easy to compose and edit MIDI tracks. The improved MIDI editing capabilities include a new Drum Editor, which allows you to edit drum parts using a standard drum notation. Additionally, the Note Actions feature enables you to perform several actions on MIDI notes simultaneously.

Other Editing Features

Presonus Studio One 5 comes packed with many other editing features that take your music production to the next level. Some of these features include:

  • The new Audio Bend feature that allows you to manipulate audio in new ways
  • The Studio One Remote app that enables you to edit your tracks from anywhere in your studio
  • The Arranger track that allows you to quickly rearrange your tracks

In addition to these new editing features, Presonus Studio One 5 also comes with a streamlined user interface that makes it easier to navigate through the software. Whether you are a beginner or an experienced music producer, the editing features of Presonus Studio One 5 will provide you with all the tools you need to achieve your desired sound quality.

Recording Capabilities

Presonus Studio One 5’s recording capabilities are top-notch with its flexible recording features and advanced automation options. Its intuitive interface makes recording and mixing sessions enjoyable and efficient. It also features improved MIDI editing and the ability to record directly into the arranger track.

Presonus Studio One 5 is one of the most sought-after software among music producers, thanks to its user-friendly interface, features, and more notably the recording capabilities. This software offers an all-in-one solution for recording, editing, mixing, and mastering music.

Multiple Take Comping

One of the standout features of Presonus Studio One 5 is its multiple take comping ability. With this feature, you can record as many takes as you want and then combine the best bits of each take. In other words, you can create the perfect take by selecting the best parts of each recording, leading to a more polished and professional sound. The feature saves you time and effort that could have been used redoing the entire take.

Enhanced Vocal Tuning

Presonus Studio One 5 also offers enhanced vocal tuning capabilities. This feature corrects vocal pitch and timing issues making them sound proficient. The software identifies and corrects off-key notes while maintaining the vocal’s natural sound. This feature also lets you adjust the pitch and timing of individual notes in a recording with incredible accuracy.

Other Recording Capabilities

Presonus Studio One 5 also offers other recording capabilities like real-time audio stretching, low-latency monitoring, and unlimited audio tracks. Additionally, the software offers high-quality sampling, automation, and instrument plugins, making it easier to create professional-quality music. In conclusion, Presonus Studio One 5 is a perfect software for any music producer or sound engineer who wants to enhance their recording capabilities. Its exceptional features, including multiple take comping, enhanced vocal tuning, and many other recording capabilities, make it the number one choice for music production professionals.

Mixer Improvements

Presonus Studio One 5 Review has introduced several notable improvements in its Mixer, which has enhanced its performance to a whole new level. Here are the incredible Mixer improvements that come with Studio One 5.

New Effects

The new version of Presonus Studio One comes with added effects such as Chorder, Bitcrusher, and Note Repeater. These effects provide users with an easy way to add enhancements to their sounds and beats. With these effects, users can easily shuffle their beats while maintaining the sound quality

Channel Strip Enhancements

Studio One 5 has expanded its Channel Strip functionalities, and now includes new filters, performance monitor, and extended EQ. These improvements have made it easier to mix, EQ, and control audio signals, ensuring better audio quality and better organization in the mixer.

Third-party Integrations

The Presonus Studio One 5 has come up with a lot of exciting features including an updated intuitive interface, new composition tools, and other enhancements that make it stand out from other DAW software. One of the significant upgrades in version 5 is the third-party integrations. It has added a lot of new plugins and has improved ARA support, allowing users to work swiftly and seamlessly. In this section, we will have a detailed look at the third-party integrations and the new features added in Studio One 5.

New Plugins

The Presonus Studio One 5 comes with a plethora of brand-new plugins that allow users to accomplish more things than ever before. Some of the notable new plugins are:

Plugin NameDescription
Score ViewAllows you to view and edit the music score in a notation view.
Show PageOffers an easy way to create and manage live performances.
Audio Batch ConverterEnables you to convert batches of audio files quickly.

Improved Ara Support

The Presonus Studio One 5 has significantly improved its ARA (Audio Random Access) support. ARA is a technology that enables seamless integration between DAWs and plugins, allowing users to share information seamlessly between them and cutting down workflow times. Studio One has made several enhancements to the ARA technology, including:

  • Improved audio stretch and pitch modification
  • Better tracking of timing and tempo changes
  • Seamless integration with Melodyne, one of the industry-standard plugins for pitch correction and timing.

Compatibility with ARA technology ensures that Presonus Studio One 5 remains one of the best DAW software on the market.

Performance And Stability

Presonus Studio One 5 is a popular digital audio workstation that has gained a reputation for its versatile features and user-friendly interface. The latest version of this software comes with several improvements designed to enhance its performance and stability, making it a better choice for music producers, composers, and sound engineers who demand excellence.

Improved Cpu Usage

One of the most significant improvements in Presonus Studio One 5 is its enhanced CPU usage. The software has been optimized to work more efficiently, allowing users to work on large projects without experiencing crashes or lagging issues. This is a major advantage for users who work with multiple tracks, virtual instruments, and effects, as it enables them to work faster and more efficiently than before.

Presonus Studio One 5’s improved CPU usage is also evident in its ability to run smoothly on different computer configurations. Whether you are using a high-performance desktop computer or a lightweight laptop, you can be sure that the software will work seamlessly without causing any compatibility issues.

Better Compatibility

In addition to its improved CPU usage, Presonus Studio One 5 also comes with better compatibility with third-party plugins and virtual instruments. This means that users can use their favorite plugins and instruments without worrying about compatibility issues. The software also supports the VST3 format, which is essential for modern music production.

Presonus Studio One 5’s better compatibility is not limited to plugins and virtual instruments. The software can also integrate smoothly with other hardware and software tools, which makes it a great choice for anyone who wants to work with a wide range of tools and equipment.

Conclusion

In conclusion, Presonus Studio One 5’s performance and stability have been significantly improved, making it a great choice for anyone who wants to work on large projects without worrying about crashes or compatibility issues. Whether you are an experienced music producer or a beginner, this software has everything you need to produce high-quality music and sound.

Presonus Studio One 5 Review

Credit: www.soundonsound.com

Frequently Asked Questions Of Presonus Studio One 5 Review

Is Studio One 5 Good?

Yes, Studio One 5 is a great digital audio workstation with a user-friendly interface and advanced features suitable for musicians, producers and engineers. It offers excellent plugin support, MIDI editing, and automation tools.

What Are Some Weaknesses Of Presonus Studio One?

PreSonus Studio One has a few weaknesses, such as limited third-party plugin support, lack of advanced audio editing features, and occasional stability issues. Users have also reported difficulty with the software’s workflow and learning curve.

Is Studio One 5 Better Than Pro Tools?

Both Studio One 5 and Pro Tools have their own unique features and benefits, making it difficult to determine which one is better. It ultimately depends on the individual user’s needs and preferences.

Is Studio One 6 Better Than Studio One 5?

Yes, Studio One 6 is better than Studio One 5 as it comes with updated features such as improved comping, MIDI editing, multi-device support and more. The new version also comes with enhanced support for 3rd party plugins and a revamped user interface.

Conclusion

Presonus Studio One 5 is a powerful digital audio workstation that offers seamless functionality and ease of use. With its extensive sound library, advanced editing tools, and intuitive interface, Studio One 5 is a must-have for both beginners and professionals.

The software’s new features, including the Show Page and Score View, make it even more versatile and flexible. Overall, Presonus Studio One 5 is a game-changing tool for music producers and it’s certainly worth the investment.