Categories
Archive

How To Sample Vinyl In Ableton Live

To sample vinyl in Ableton Live, drag your audio waveform into a new audio track and set the start and end points of your sample. From there, slice and map your sample to a drum rack or sampler instrument.

Sampling vinyl can be a great way to add unique textures and sounds to your compositions in Ableton Live. By taking a small section of a vinyl recording and turning it into a sample, you can manipulate and incorporate it into your own music.

We will guide you through the process of sampling vinyl in Ableton Live. We will cover everything from selecting and setting up your recording equipment to editing and manipulating your samples. Whether you are a seasoned vinyl enthusiast or just starting in music production, this guide will provide you with everything you need to know to start sampling vinyl in Ableton Live.
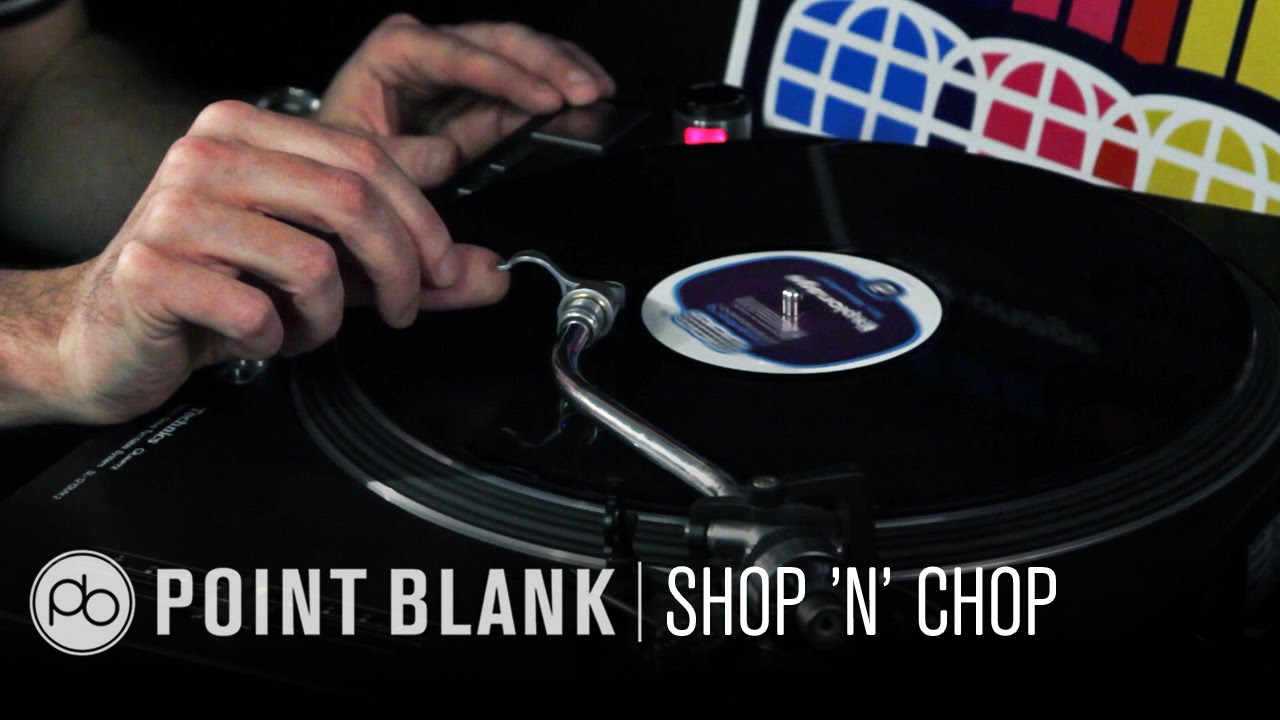
How To Sample Vinyl In Ableton Live

Credit: m.youtube.com

Preparing Record Player

Preparing a record player for sampling vinyl in Ableton Live requires attention to detail. Begin by cleaning the record and stylus, setting the tracking force, and adjusting the equalizer settings to achieve high-quality, accurate sound. Finally, connect the turntable to your computer and adjust input levels for optimal recording.

Preparing Record Player: Before sampling vinyl in Ableton Live, it’s essential to prepare your record player as it plays a vital role in determining the quality of sound captured. Preparing your record player involves the following three aspects: Cleaning Vinyl Record: Ensure your vinyl record is clean before you place it on the record player. If you use a dusty or dirty vinyl record, the sound quality will be poor, and it may even cause damage to your record player and needle. To clean the record, use a carbon-fiber brush to remove any dirt particles or dust. Alternatively, you can use a record cleaning solution or a microfiber cloth to clean it thoroughly. Speed Adjustment: Once your vinyl record is clean, you need to adjust the speed on your record player correctly. Typically, most records play at a speed of 33 1/3 RPM or 45 RPM. Hence, it is crucial to ensure that your record player is set at the appropriate speed to avoid any unpleasant sound during your sampling process. To adjust the speed, locate the speed selector switch on your record player and select the appropriate speed. Placing Needle on Record: After cleaning and adjusting the speed of your record player, it is time to place the needle on the vinyl record. Be sure to handle the vinyl record carefully to avoid any unnecessary damage. Gently place the needle on the record at the start of the track you intend to sample. Ensure that the needle sits firmly and accurately on the edge of the groove. Following these three steps to prepare your record player correctly, ensures that you get a quality sound when you start sampling your vinyl in Ableton Live.
How To Sample Vinyl In Ableton Live

Credit: www.johntype.com

Recording The Vinyl Sample

Recording a vinyl sample is an amazing way to add original and unique sounds to your Ableton Live projects. In just a few simple steps, you can capture the warmth and nostalgia of vinyl records and use them to complement your digital productions. Here’s how.

Setting Up Ableton Live

The first step is to open up Ableton Live and create a new project. You can do this by selecting “File” from the top menu, and then selecting “New Live Set”. Once you have your new project open, you’ll need to create a new audio track by clicking on “Create” and choosing “Audio Track”.

Connecting Audio Interface

The next step is to connect your audio interface to your turntable. You’ll need to use a set of RCA cables to connect the turntable’s audio output to the audio interface’s input. Once you have the cables connected, you’ll need to make sure that your audio interface is selected as the audio input device in Ableton Live’s preferences. You can access the preferences menu by selecting “Options” from the top menu and then choosing “Preferences”.

Recording The Sample

Once you have everything set up and connected, you’re ready to start recording the vinyl sample. Press the “Record” button on the audio track in Ableton Live and start playing the vinyl record on your turntable. Make sure to record for a few seconds before the music starts to give yourself some extra space at the beginning of the sample.

When you’ve recorded the sample, you can stop the recording by pressing the “Stop” button on the audio track. You’ll now see the sample waveform displayed in Ableton Live’s Session View, where you can edit and manipulate it to your heart’s content.

Final Thoughts

Recoding a vinyl sample in Ableton Live is an easy way to add a unique texture to your digital productions. With just a few simple steps, you can capture the essence of vinyl records and use them to create something new and exciting. So, get out there and start sampling!

Editing The Sample

To sample vinyl in Ableton Live, editing the sample is crucial for achieving a unique sound. Using Ableton Live’s built-in tools, you can adjust the length, pitch, and overall quality of your sample to create a customized and professional sound.

Editing a vinyl sample in Ableton Live can help you create a unique sound and vibe. Once you have sampled your vinyl, the next step is to edit the sample to suit your taste. In this section, we’ll look at some basic edits you can perform on your vinyl sample in Ableton Live to enhance your music production.

Trimming The Sample

Trimming your vinyl sample will remove any unwanted sounds or empty space at the beginning and end of the sample. This process will help you isolate a specific phrase or portion of the sample for looping or recoding. To trim the sample, highlight the section you want to keep using the loop brace tool, right-click and choose Crop Sample. The excess audio before and after the sample will be deleted, and you’ll be left with only the highlighted section.

Adding Fades

Adding fades is a useful technique when transitioning between two different sections of your music production. It will help eliminate clicks and pops, which could result from sudden changes in volume. To fade in, place a cursor at the beginning of your sample, and select the Fade-in option from the audio view window. You can also add fade-outs at the end of your sample using the same approach.

Adjusting Volume And Eq

Adjusting volume and EQ is a crucial part of music production since it will help you balance and fine-tune the sound you’re trying to create. To adjust volume, click on the Gain section in the audio view window and drag the slider to increase or reduce the volume. To adjust EQ, click on the EQ section in the audio view window, and you’ll see a graphical representation of the frequency spectrum. From there, you can move the frequency bands to boost or cut frequencies, depending on your preferences. In conclusion, editing a vinyl sample in Ableton Live is a straightforward process that can elevate the quality and uniqueness of your music production. Trimming the sample, adding fades, adjusting volume and EQ are some of the basic edits you can perform to create a unique sound.

Applying Effects

Learn how to sample vinyl in Ableton Live and add effects to create a unique sound. By using the Simpler instrument and warping techniques, you can manipulate the vinyl sound and take your music production to the next level.

Adding Reverb

One of the easiest and most effective ways to apply an effect to a vinyl sample in Ableton Live is by adding reverb. This effect can be used to create a sense of space and depth in your sample, making it sound more like a recording in a live environment. To add reverb, simply select the sample you want to affect and go to the “Audio Effects” section of the program. From there, choose a reverb plugin and adjust the settings until you achieve the desired effect.

Delay

Another popular effect to apply to vinyl samples is delay. This effect can be used to create an echo-like effect that can add interest and depth to your sample. To add delay, simply select the sample you want to affect and go to the “Audio Effects” section of the program. From there, choose a delay plugin and adjust the settings until you achieve the desired effect.

Creating Unique Effects Chains

While reverb and delay are both great effects to use on vinyl samples, it’s important to remember that there are many other effects to choose from. By creating unique effects chains, you can experiment with various combinations of effects and create entirely new sounds. Try layering different effects on top of each other, adjusting the settings, and playing around with the order of the effects to see what works best for your sample.

Incorporating Into A Track

To sample vinyl in Ableton Live, start by incorporating the vinyl track into your project. This involves importing the audio and creating an audio track for it, then adjusting the volume and EQ settings to achieve the desired sound.

Incorporating into a Track: After you have sampled a vinyl track in Ableton Live, the next step is incorporating it into a track. This is where you get to flex your creativity and experiment with different techniques to produce a unique and captivating sound. Using the Sample in a Beat: One popular approach is to use the sampled vinyl track in a beat. You can start by identifying the drum breaks in the vinyl track and looping them. You can then layer the loop with other drum samples to create a cohesive rhythmic foundation. Adding in other sampled elements will help to enhance the track’s complexity. Chopping and Rearranging the Sample: Another technique that you can use is chopping and rearranging the sample. This involves cutting the sample into several sections and rearranging them in a new sequence. You can apply different effects to each section to create a dynamic sound. This technique is particularly useful when you want to create a build-up section in a track. Experimenting with Different Genres: One of the best things about sampling vinyl in Ableton Live is that you can experiment with different genres. Start by listening to tracks in different genres and find elements that inspire you. For example, you can sample a jazz track and chop it up to create a unique hip-hop beat. Similarly, you can sample a blues track and use it as a base for a techno track. Experimentation is key, and there are no limits to the sounds you can create. In conclusion, sampling vinyl in Ableton Live is a great way to add creativity and originality to your tracks. By incorporating the sample into a beat, chopping and rearranging the sample, and experimenting with different genres, you can create an infinite number of unique sounds. Remember to let your creativity guide you, and have fun exploring the limitless possibilities of sampling vinyl in Ableton Live.

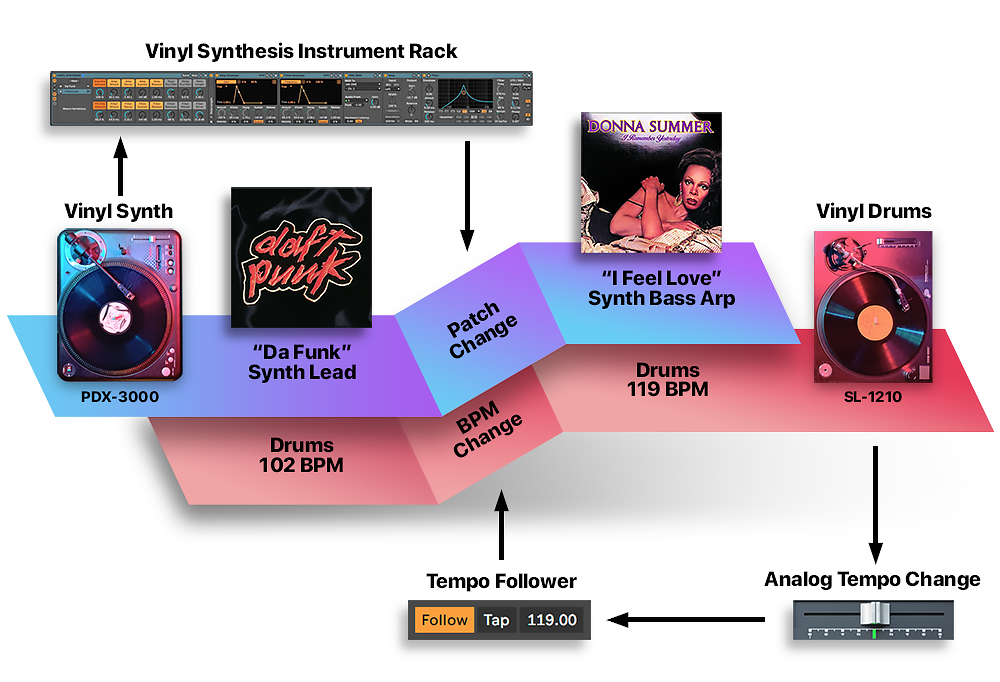
How To Sample Vinyl In Ableton Live

Credit: djtechtools.com

Frequently Asked Questions Of How To Sample Vinyl In Ableton Live

Can You Sample With Ableton Live?

Yes, Ableton Live allows you to sample audio using its dedicated “Sampler” instrument. You can import your audio files and manipulate them in various ways, including time-stretching, slicing, and looping. This makes it a powerful tool for music producers and DJs who want to create their own unique sounds and tracks.

How Do You Sample Vinyl Records?

To sample vinyl records, you need a turntable connected to a computer. Use audio editing software like Audacity to record the vinyl’s audio output as a digital file. Then, trim and edit the file to create a sample. Proper equipment and a careful approach to sampling will ensure the best results.

How Do I Turn Audio Into Sample In Ableton?

To turn audio into a sample in Ableton, you can use the “simpler” instrument or the “sampler” instrument. First, drag and drop the audio file into a new MIDI track. Then, right-click the audio clip, choose “Slice to New MIDI Track”, select “Simpler” or “Sampler” from the dropdown menu, and adjust the settings as desired.

Finally, you can play the sample using a MIDI controller.

How Do You Transfer Vinyl To Digital?

To transfer vinyl to digital, you need a turntable, a preamp, and an analog-to-digital converter. Connect the turntable to the preamp, then the preamp to the converter, and finally, the converter to your computer. Use software like Audacity to record the vinyl and edit the tracks before saving as digital files.

Conclusion

Sampling vinyl in Ableton Live is no longer a daunting task with the tips and techniques discussed in this post. You can experiment and have fun with the sounds of yesteryear, extracting the soul of old vinyl into your modern music.

Adding an authentic touch, breathing life into your tracks and creating something special has never been easier. Explore and enjoy!

Categories
Archive

Tips To Make Your Bass Sound Better

To make your bass sound better, adjust the EQ settings, use compression, consider your playing technique, and experiment with pedals. Improving the sound of your bass guitar can greatly enhance the overall quality of your music.

With the right adjustments and techniques, you can achieve a rich and dynamic bass tone that complements your music perfectly. By tweaking the EQ settings, you can balance the frequencies and achieve a fuller sound. Compression can help control the volume and dynamics of your bass, while also adding sustain and clarity.

Adjusting your playing technique and experimenting with pedals can also provide a unique and distinctive sound. Follow these tips to elevate your bass sound and enhance your music.

Tips To Make Your Bass Sound Better

Credit: www.practical-music-production.com

Choose The Right Pickups

Choosing the right pickups can make a significant difference in the sound of your bass. Consider factors such as the type of music you play and the tone you want to achieve when selecting pickups. With the right pickups, you can improve the overall sound quality of your bass and take your playing to the next level.

Choosing the right pickups is crucial when working on the sound of your bass guitar. Pickups are the electronic components that capture the sound produced by your instrument’s strings and then transmit it to your amplifier or recording device. There are different types of pickups available, and choosing the right one can make a significant impact on the overall sound of your bass.

Active Vs Passive Pickups

Active pickups have an onboard preamp that amplifies and shapes the sound of your bass before it’s sent to your amp. They require an external power source, usually a battery. On the other hand, passive pickups don’t have an onboard preamp, meaning they transmit the raw sound of your bass to your amp. They don’t require a power source and are considered more reliable compared to active pickups.

Single Coil Vs Humbucker Pickups

The single-coil pickup is known for producing bright and articulate sounds. It’s commonly used by players who prefer playing jazz, blues, and country music on their bass. Humbucker pickups are designed to reduce the hum and buzzing sound associated with single-coil pickups, making them an excellent option for players who want a richer, warmer sound. They’re also commonly used for playing rock and heavy metal music. When choosing the right pickups for your bass, you need to consider its intended use. Are you playing jazz, blues, or country music? Or are you playing rock and heavy metal? Understanding the differences among the pickup types will enable you to make an informed decision on what works best for your bass.

Tips To Make Your Bass Sound Better

Credit: www.practical-music-production.com

Adjust Your Action

Want to improve your bass sound? One key tip to try is adjusting your action. High action can lead to unwanted string noise, while low action may cause buzzing. Experiment with different distances between your strings and fretboard to find the perfect balance for your sound.

Adjusting the action of your bass guitar can have a significant impact on the sound it produces. Action refers to the distance between the strings of the bass and the fretboard. With a high action, the strings are further from the fretboard, creating a louder and brighter sound. On the other hand, a low action produces a softer and mellower sound. In this section, we will discuss what action is and how to adjust the action of your bass to get a better sound.

What Is Action?

Action refers to the height of the strings above the fretboard and affects the playability and sound of a bass guitar. A high action may make it hard to press the strings down, while a low action may cause unwanted buzzing.

How To Adjust Action

Adjusting the action of your bass guitar is easy and can be done in a few simple steps. Here’s how:

  1. Loosen the strings by turning the tuning pegs.
  2. Locate the truss rod adjustment either at the headstock or near the neck pickup.
  3. Using an Allen wrench, turn the truss rod clockwise to decrease the amount of relief and lower the action. Turn it counterclockwise to increase the amount of relief and raise the action. Be careful not to over-tighten the truss rod.
  4. Check the intonation by fretting the string at the 12th fret and comparing it to the open string. Adjust the saddle accordingly.
  5. Tune the strings back up and test the action by playing on different frets. Make small adjustments as needed.

Adjusting the action can take some time to get right, but a low action can make playing your bass comfortable and enjoyable, while a high action can make it harder to play for longer periods. Experimenting with adjusting the action can also help you find your desired sound and make your bass sound better.

Experiment With Strings

Looking to make your bass sound better? Experimenting with different types of strings can have a significant impact on your bass’s overall tone. Try out different materials, gauges, and brands to find the perfect fit for your sound.

When it comes to playing the bass guitar, having the right strings can make all the difference. If you want to improve your sound, experimenting with different types of strings can be extremely helpful. Here are some things to keep in mind:

Types Of Strings

There are countless types of bass guitar strings out there, so it’s important to do your research before making a purchase. Here are some common types of bass guitar strings:

  • Roundwound Strings: These strings have a brighter tone and are great for slap bass playing.
  • Flatwound Strings: These strings have a warmer tone and are often preferred by jazz and blues guitarists.
  • Halfwound Strings: These strings offer a balance between the brightness of roundwound strings and the warmth of flatwound strings.

Coated Vs Uncoated Strings

Another factor to consider when choosing your bass guitar strings is whether to go with coated or uncoated strings. Coated strings have a thin layer of material (usually made of polymer) that protects the string from rust and grime. Here are some pros and cons of each type:

Coated StringsUncoated Strings
Pros: Last longer, less finger noise when playing, less likely to rust or corrode.Pros: Have a more natural sound, often less expensive than coated strings.
Cons: More expensive than uncoated strings, may not feel as “natural” to play.Cons: May rust or corrode over time, require more frequent replacement.

In conclusion, experimenting with different types of strings is an essential step towards finding the perfect sound for your bass guitar. Whether you go with roundwound, flatwound, halfwound, coated, or uncoated strings, make sure to do your research and choose the strings that feel and sound best to you.

Find The Right Eq Settings

To make your bass sound better, it’s important to find the right EQ settings. Experiment with boosting or cutting frequencies to achieve a well-balanced sound. Don’t be afraid to try different EQ settings until you find the one that works best for your music.

Whether you’re a beginner or an experienced bass player, finding the right EQ settings can make all the difference in the sound of your bass. EQ, or equalization, is the process of adjusting the levels of different sound frequencies to make them sound good together. In this section, we’ll explore how you can find the right EQ settings for your bass to make it sound better than ever before.

Bass Eq

The bass EQ settings are responsible for controlling the low-frequency sound of your bass. These settings can be used to adjust the punch, boom, and depth of your bass sound. Sounds like the bass drum, bass guitar, and even the low end of your vocals can be enhanced. To give your bass sound more power and impact, increase the bass EQ level. Alternatively, a decrease in the bass EQ can help to clear up the sound and reduce the rumble.

Mid Eq

The mid EQ settings control the mid-range frequencies of your bass. These frequencies directly impact the clarity and tonality of your bass sound. The mid EQ will determine how your bass sound is perceived by the listener and help it cut through the mix. To make your bass sound richer and fuller, increase the mid EQ. A reduction in the mid EQ will thin out the sound and give it more space in the mix.

Treble Eq

Treble EQ settings are responsible for the high-frequency sound of your bass, including the attack and brightness. Adjusting the treble EQ can affect the tone and overall presence of your bass sound. Increasing the treble EQ can make your bass sound more aggressive and emphasize the playing style and technique. Reducing the treble EQ can make the sound more mellow and well-suited for slower, smoother songs.

Boosting Vs. Cutting Eq

When adjusting the EQ settings, it’s important to consider whether to boost or cut the frequencies. Boosting a frequency can help to bring out the natural characteristics of the sound. For example, boosting the mid EQ can make your bass sound fuller and richer. On the other hand, cutting a frequency can help to remove any unwanted or harsh frequencies that may be hindering the overall sound quality. Some sounds may need both boosting and cutting depending on the song and playing style. In conclusion, finding the right EQ settings takes time, patience, and experimentation. By understanding the basics of bass EQ and how it can affect the sound, you can create a customized sound that’s unique to your playing style. Take the time to explore different EQ settings and combinations to enhance the sound of your bass and bring your music to life.

Play With Your Fingers

Enhance the sound of your bass by playing with your fingers. Experiment with different finger techniques such as plucking and slapping. Adjusting your hand position and angle can also have a significant impact on the sound quality.

If you’re a bass player, you’re probably looking for ways to make your bass sound better. There are many techniques you can use to improve your bass playing, but one of the most important is playing with your fingers. When you play with your fingers, you can achieve a warmer, more natural tone than you can with a pick. In this post, we’ll explore some tips and techniques for playing bass with your fingers.

Fingerstyle Vs Pick

There are two main techniques for playing bass: fingerstyle and using a pick. Fingerstyle playing involves plucking the strings with your fingers, while using a pick involves using a small plastic or metal tool to strike the strings. Both techniques have their pros and cons, but playing with your fingers is generally preferred for achieving a more natural and warm tone.

Techniques For Fingerstyle Playing

If you’re new to playing bass with your fingers, it can take some time to get used to the technique. Here are some tips to help you get started:

  • Keep your fingers relaxed and use your fingertips to pluck the strings.
  • Practice using different fingers to pluck the strings. Typically, the index and middle fingers are used most often, but the ring finger and pinky can also be used.
  • Experiment with different attack angles to achieve different tones. Plucking the strings perpendicular to the bass will produce a brighter tone, while plucking from an angle will produce a softer tone.
  • Use your thumb to anchor your hand and provide stability while playing.
  • Practice playing scales and arpeggios to develop your finger strength and dexterity.

Playing with your fingers is a great way to add warmth and nuance to your bass playing. With practice and experimentation, you can improve your fingerstyle technique and take your bass playing to the next level.

Try Different Playing Styles

To make your bass sound better, try experimenting with different playing styles. Play with your fingers, a pick, or even slap the strings to discover what works best for you and your instrument. This can add depth and versatility to your bass playing and enhance your overall sound.

Looking to improve the sound of your bass playing? One effective way to achieve this is by trying out different playing styles that can give your music a unique spin. Here are some playing styles that can help breathe new life into your bass sounds.

Slap Bass

Slap bass is a playing style that involves using the thumb to hit the strings and the slap of the finger to produce an attack. This technique adds a percussive element to the bass sound and is widely used in funk and rock music. To properly execute this technique, it’s important to get your hand positioning right and strike the string with the right amount of force.

Tapping

Another playing style that can help take your bass sound to the next level is tapping. Tapping is a technique that involves using both hands on the fretboard to tap out notes and create melodies. This playing style creates a unique sound and opens up new possibilities for exploring different genres of music. To execute this technique correctly, ensure that your finger positioning on the fretboard is accurate while tapping with your other hand.

Double Thumb

The double thumb technique is a more advanced playing style designed to give your bass sound added texture. This technique involves using the thumb to simultaneously pluck two notes on the bass guitar continuously. This style creates a rhythm that gives the bass sound a distinct flavor and is perfect for genres such as jazz or fusion. To properly execute this technique, position your hand in a way that’s comfortable for you, and work on syncing both thumbs to pluck the notes at the same time.

Bonus Tip:

Apart from these playing styles, there are other ways to add flair to your bass sound. Experiment by playing around with your tone and chord structures. An exciting bass sound can do wonders for your music. Keep practicing different playing styles and techniques to add variety and depth to your music.

Choose The Right Amp

Choosing the right amp is crucial if you want to make your bass sound better. Look for an amp that matches the power rating of your bass, has a versatile EQ section, and suits your playing style. With the right amp, you can enhance your bass’s tone and expressiveness.

Choosing the right amp is crucial when it comes to enhancing the sound quality of your bass. There are various types of amps available, ranging from Tube to Solid State for you to choose from. In this article, we will explore the different types of amps, so you can make an informed decision on which one will work best for you.

Tube Vs Solid State Amps

Tube amps offer a warm and pleasant sound, which is preferred by professionals. However, they are expensive and could require regular maintenance. Solid-state amps, on the other hand, are cheaper and reliable but may not have the same natural warmth as tube amps. Before you make a choice between the two, think about your budget and your overall goal.

Combo Vs Head And Cabinet

The next factor you need to consider is the type of amp setup you want. Combo amps are more common and are a perfect choice for beginners or for those who want an all-in-one option. They come with the speaker cabinet already built into the head. Head and cabinet amps, on the other hand, require that you purchase the two separately. They are more versatile and offer you the ability to mix and match different cabinets and heads to create your ideal sound. Consider what you’ll be using your bass for before making a decision.

In Conclusion

Choosing the right amp can significantly impact the sound quality of your bass, so it’s important to invest time and effort in research. Understanding the different types of amps will enable you to make an informed decision on which style is right for you. Remember, always prioritize your preferences when making these choices.

Consider Effects Pedals

Effects pedals are an excellent way to improve the sound quality of your bass. These pedals add different effects to your bass, making it sound richer and fuller. However, with so many effects pedals available, it can be challenging to decide which one to use. This blog post will focus on two of the essential effects pedals for bass: overdrive and distortion, and delay and reverb.

Overdrive And Distortion

Overdrive and distortion pedals are often used together to create a warm, distorted sound. These pedals are perfect for rock and metal bass players who want a more aggressive sound. The overdrive pedal adds a warm, richer sound to the bass, while the distortion pedal creates a fuzzy, distorted sound with sustain. When using overdrive and distortion pedals, it’s essential to balance the levels to avoid excessive distortion that can muddy the sound.

Delay And Reverb

Delay and reverb pedals create a sense of space and depth in your bass sound. These effects are perfect for ambient and atmospheric music. The delay pedal repeats the bass notes with varying time intervals, creating an echo-like effect. The reverb pedal adds depth to the sound by simulating the sound of a room or space. Both pedals can be used separately or together to create a fuller and more spacious sound.

When choosing effects pedals, it’s essential to consider the type of music you play and the sound you want. With the right effects pedals, you can create a unique and distinctive sound that sets you apart from other bass players.

Tips To Make Your Bass Sound Better

Credit: m.youtube.com

Frequently Asked Questions On Tips To Make Your Bass Sound Better

How Can I Make My Bass Speaker Sound Better?

To improve the sound quality of your bass speaker, here are a few tips: 1. Check your speaker placement and make sure it’s not too close to the wall 2. Adjust your bass levels in the equalizer 3. Use high-quality audio cables 4.

Ensure your amplifier is compatible with your speaker 5. Consistently maintain and clean your speaker for longevity.

How Do I Get The Best Live Bass Sound?

To get the best live bass sound, you should consider using high-quality bass equipment and optimal room acoustics. Additionally, proper microphone placement, EQ settings, and playing technique can all contribute to achieving a great sound. Experimentation and listening carefully during soundcheck can also go a long way in fine-tuning the sound.

How Do I Get The Best Sound Out Of My Bass Amp?

To get the best sound out of your bass amp, follow these guidelines: 1. Ensure the volume is at a reasonable level to prevent distortion. 2. Experiment with different EQ settings to find the right sound. 3. Use a high-quality instrument cable and avoid using wireless systems.

4. Position the amp correctly and in an ideal room to prevent acoustical issues. 5. Practice proper maintenance, such as cleaning the speakers and amp regularly.

How Do You Get A Twangy Bass Tone?

To get a twangy bass tone, you can use a bass with a single coil pickup or adjust your EQ settings to emphasize the midrange frequencies. Playing with a pick can also produce a twangy sound. Additionally, experimenting with different types of strings and amplifiers can also impact the overall tone.

Conclusion

To conclude, bass is one of the most important elements in any song and making it sound better can take your music to new heights. By following the tips discussed in this post, you can ensure that your basslines are not only powerful but also clean and well-defined.

Remember to use EQ, compression, and other techniques to your advantage while keeping the fundamentals of rhythm and timing in mind. With some practice and experimentation, you can achieve a polished sound that perfectly fits your music style. Cheers to better bass!

Categories
Archive

Choosing The Best Audio Mixer

Choosing the best audio mixer requires considering the inputs needed for your setup and the features required to achieve the desired sound. An audio mixer is a vital component of music production and live sound reinforcement.

Its function is to blend multiple audio signals into a single output, allowing you to create a cohesive sound. With so many audio mixers on the market, it can be challenging to choose the right one for your needs. Factors such as channel count, input type, connectivity, and effects processing should be considered when choosing an audio mixer.

We will explore these factors in detail and provide recommendations for the best audio mixers for various applications.

An Introduction To Audio Mixers

Audio mixers play a critical role in producing quality sound, making it essential to choose the best one for your needs. When picking an audio mixer, consider factors such as the number of input channels, effects, and connectivity options.

What Is An Audio Mixer?

An audio mixer, also known as a mixing console, is an electronic device that is used to blend and route audio signals from various sources. It combines different audio channels to create a finished mix or recording. Audio mixers are commonly used in music production, live sound reinforcement, and broadcast applications.

Why Do You Need An Audio Mixer?

Whether you are creating music in a studio or recording a live event, an audio mixer is imperative for producing high-quality sound. Here are some reasons why you need an audio mixer:

  • It allows you to control the levels and balance of different audio sources, ensuring that each instrument or voice is heard at the right volume.
  • You can add effects like reverb or delay to enhance the sound quality.
  • An audio mixer also provides the ability to route signals to different outputs, such as speakers or recording devices.
  • It helps reduce unwanted sounds, such as feedback or noise.

There are different types of audio mixers available, each with different features and capabilities.

TypeDescription
Analog mixerUses physical knobs and faders to manipulate audio signals
Digital mixerUses digital signal processing to manipulate audio signals, providing more precise control and flexibility
Powered mixerAn all-in-one unit that includes a mixer, amplifier, and speakers
Portable mixerA small, lightweight mixer that is ideal for on-the-go recording or small gigs
Rackmount mixerA mixer that is designed to fit into a standard equipment rack

Choosing the right type of audio mixer for your needs is essential to achieving the desired sound quality. With the appropriate mixer, you can create a mix that will excite and engage your audience, whether it’s a studio recording or a live performance.

Key Factors To Consider When Choosing An Audio Mixer

Key Factors To Consider When Choosing An Audio Mixer

Choosing an audio mixer can be challenging, especially if you are new to the audio industry. The process involves details that can be difficult to understand, and making the wrong choice can affect your sound quality during recording. To help make this process easier, there are key factors that need to be considered when selecting an audio mixer. These include the number of channels, frequency range, effects, and signal processing.

Number Of Channels:

The number of channels refers to the number of sound sources that can be plugged into the mixer simultaneously. The channels will determine the overall sound quality and the number of instruments that can be accommodated. It is crucial to choose an audio mixer that has enough channels to meet your recording needs. For example, if you are recording with a band that has five members, you will need an audio mixer with at least five channels. Consider an audio mixer that has extra channels if you plan to add more instruments or microphones in the future.

Frequency Range:

The frequency range is the range of sound frequencies that the audio mixer can handle. Different audio mixers have different frequency ranges. It is essential to choose an audio mixer with the frequency range that suits your recording needs. The wider the range, the more clarity you’ll get in the recorded sound. To give an idea of the frequency range, a typical human voice ranges from 85 Hz to 255 Hz, and a guitar ranges from 82 Hz to 988 Hz.

Effects And Signal Processing:

First-rate audio mixers come with built-in signal processing effects, which add quality and clarity to your sound. These effects include equalizers, compressors, limiters, and reverbs. It is essential to choose an audio mixer with the right balance of processing features to ensure quality sound for your recording. Make sure the audio mixer has multiple aux inputs and outputs, which help modify the level of the sound signals and balance the audio signal mix.

Types Of Audio Mixers

To choose the best audio mixer, it’s important to understand the types available. Analog mixers offer warm sounds but limited features, while digital mixers provide more options but can sound cold. Hybrid mixers blend the two. Decide on your needs and budget before making a choice.

When it comes to choosing the best audio mixer, it’s important to know the types available in the market. Audio mixers come in different shapes and sizes and each type comes with its own set of advantages and disadvantages. In this blog post, we’ll discuss the three most common types of audio mixers: analog mixers, digital mixers, and hybrid mixers.

Analog Mixers

Analog mixers are the traditional type of mixer and have been the industry standard for many years. They use electrical signals to mix and process the audio and are known for their warm and natural sound. Analog mixers are simple to use, affordable, and reliable. They are perfect for small studios, live performances, and home recording setups. However, analog mixers have limitations when it comes to signal processing and advanced features.

Digital Mixers

Digital mixers have become increasingly popular in recent years. They use digital signal processing to mix and process the audio and offer a wide range of effects, EQ, and dynamics processing. Digital mixers offer better precision, flexibility, and advanced features than analog mixers. They are perfect for larger studios, live sound systems, and touring bands. However, digital mixers can be complex to use and expensive.

Hybrid Mixers

As the name suggests, hybrid mixers combine both analog and digital processing. They offer the best of both worlds – the warmth and simplicity of analog and the flexibility and precision of digital. Hybrid mixers come in various configurations, and each one can be tailored to suit specific needs. They are perfect for recording studios, live performances, churches, and schools. Hybrid mixers can be expensive, but they offer great value for money. In conclusion, choosing the right type of audio mixer depends on your needs, budget, and level of expertise. Analog mixers are perfect for beginners and those on a tight budget, while digital mixers are suitable for advanced users and those looking for advanced features. Hybrid mixers offer the best of both worlds and are ideal for those who want a versatile and flexible mixing solution.

Choosing The Best Audio Mixer

Credit: legacy.presonus.com

Comparing Audio Mixer Brands

Audio mixers are essential for any music producer or sound engineer. When choosing the best audio mixer, it is important to compare different brands and consider factors such as the number of channels, ease of use, sound quality, and budget.

Some popular audio mixer brands to compare include Behringer, Allen & Heath, and Mackie.

Choosing the right audio mixer can make all the difference when it comes to recording quality audio. However, with so many brands on the market, it can be difficult to know which one to choose. In this section, we’ll take a closer look at three of the most popular brands of audio mixers: Behringer, Mackie, and Yamaha.

Behringer

Behringer is a well-known brand in the world of audio mixers. They offer a range of mixers at varying price points, making them an accessible choice for both professionals and beginners. The Behringer Xenyx Q502USB is one of the most popular models in their range and is ideal for small recording studios or podcasting setups. It features a built-in USB/audio interface, making it easy to record directly into your computer. Overall, Behringer mixers are known for their durability and ease of use.

Mackie

Mackie is another popular brand of audio mixer, known for their high-quality sound and innovative design. The Mackie ProFXv3 series is a favorite among musicians and audio engineers. It features a range of connectivity options, including USB recording and playback, and a powerful effects engine. Another standout feature of Mackie mixers is their built-in wireless mixing capabilities, allowing you to control your sound from your phone or tablet.

Yamaha

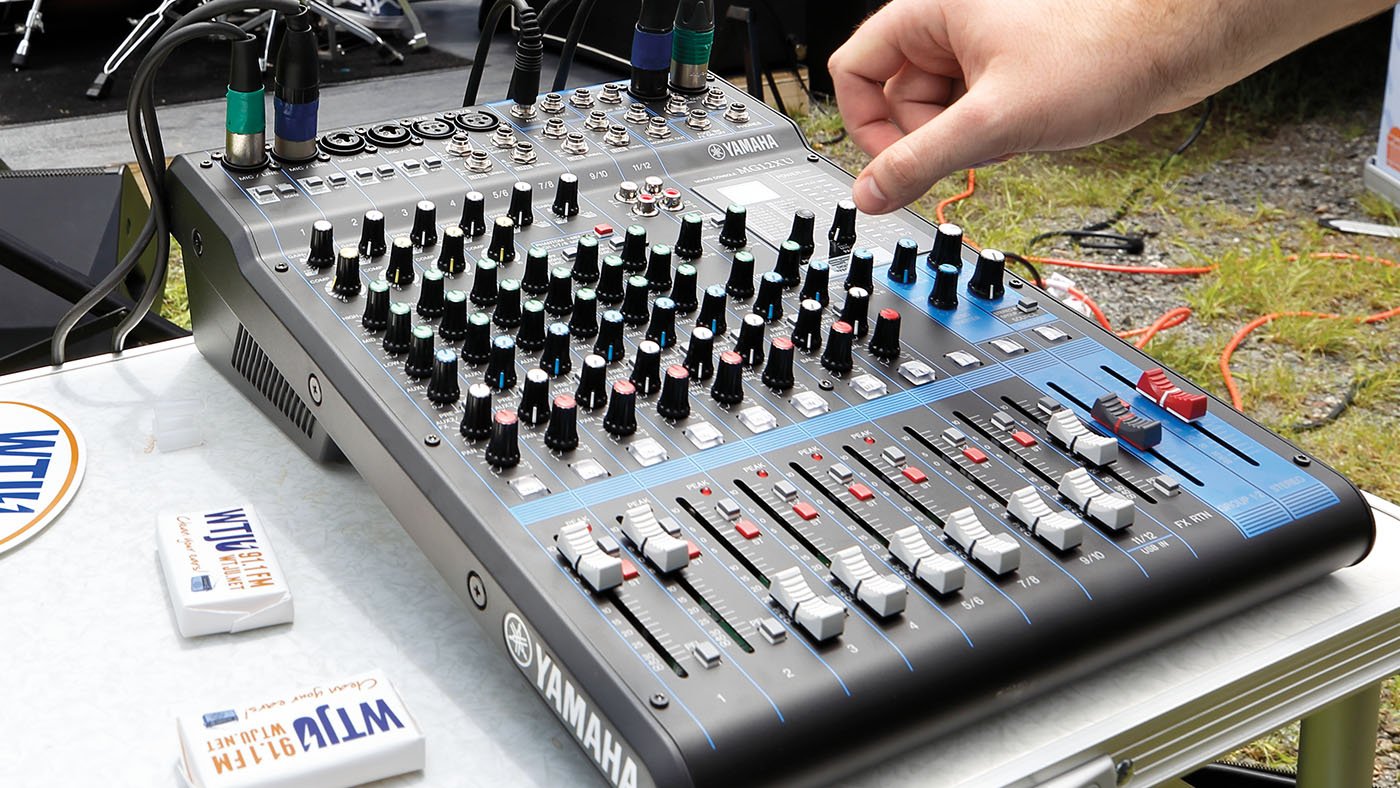
Yamaha is a trusted name in the world of audio equipment, and their mixers are no exception. The Yamaha MG10XU is a popular choice for podcasters and small studios. It features built-in effects and a high-quality microphone preamp. Yamaha mixers are also known for their intuitive design and user-friendly interface. Whether you’re recording music or hosting a conference, Yamaha mixers are a reliable choice. In conclusion, when it comes to choosing an audio mixer, it’s important to consider your specific needs and budget. Each of these brands offers a range of options to accommodate a variety of recording setups. Have you used any of the brands above? Let us know your experience in the comments below!

Understanding Audio Mixer Specifications

If you want to produce high-quality audio, then an audio mixer is an essential tool to have. However, with so many different options available, choosing the right one can be daunting. One crucial factor to consider when choosing an audio mixer is understanding its specifications. Here are some essential specifications that you should consider when selecting the best audio mixer for your needs.

Frequency Response

The frequency response of an audio mixer is the range of audio frequencies that it can handle accurately. This is an important factor to consider as it affects how your audio will sound. The frequency response of an audio mixer is typically measured in Hertz (Hz). Ideally, you want an audio mixer with a flat frequency response, which means it can handle all frequencies equally. However, a slight deviation from a flat response is acceptable and can add character to your audio.

Total Harmonic Distortion

Total Harmonic Distortion (THD) is another essential specification to consider. THD is a measure of the amount of distortion added to the original audio signal. The lower the THD, the less distortion your audio will have, resulting in higher audio quality. A high THD can cause your audio to sound harsh and unpleasant.

Signal-to-noise Ratio

The Signal-to-Noise Ratio (SNR) is a measure of the level of the audio signal to the level of the background noise. A high SNR means that your audio will be clear and free from any unwanted noise. On the other hand, a low SNR means that your audio will be noisy, which can be distracting and annoying to listeners. A good audio mixer should have a high SNR, which ensures that your audio is clean and of high quality.

Understanding the specifications of an audio mixer is crucial when choosing the best one for your needs. In addition to the above specifications, other factors that you should consider include the number of channels, inputs/outputs, and connectivity options. By considering all of these factors, you can choose an audio mixer that will meet your needs and produce high-quality audio.

Choosing The Best Audio Mixer

Credit: www.backstage.com

Setting Up Your Audio Mixer

Setting up an audio mixer can be a daunting task, especially if you’re new to the game. A mixer is an essential piece of equipment in any sound system and can make or break your sound quality. In this section, we’ll cover some basic steps to help you set up your audio mixer properly.

Connecting Inputs And Outputs

The first step in setting up your audio mixer is to connect the inputs and outputs. This will allow you to connect your microphones and other audio sources to the mixer and then send the mixed output to your speakers or recording device.

Most mixers have a variety of input and output options, including XLR, TRS, and RCA connectors. Make sure you choose the right cables for your devices and connect them to the appropriate inputs and outputs on the mixer.

If you’re working with a larger system, you may need to use sub-snakes or stage boxes to connect everything. In this case, label your cables to avoid confusion and make troubleshooting easier.

Adjusting Levels And Eq

Once everything is connected, it’s time to adjust the levels and EQ to achieve the desired sound. Start by setting the gain levels for each input channel, making sure the volume doesn’t distort when the loudest sound is produced.

The next step is to adjust the gain structure, which helps balance all the inputs and outputs. This is also where EQ comes into play, allowing you to adjust the frequency levels of each channel to get the desired tone.

Take your time with this step, as it can make a significant difference in the overall sound quality. Once you’ve set the levels and EQ for your audio mixer, test it out to make sure everything sounds balanced and clear.

Conclusion

Setting up your audio mixer doesn’t have to be complicated. Follow these basic steps for connecting inputs and outputs and adjusting levels and EQ, and you’ll be well on your way to achieving a great sound.

Troubleshooting Audio Mixer Issues

Audio mixer issues can be frustrating, but choosing the right one can prevent them. When selecting an audio mixer, consider the number of channels, inputs and outputs, and any additional features.

As a professional audio mixer, there are times when you might run into issues with your audio mixer. Some common issues include hissing and noise, feedback, and distortion. In this section, we will take a look at each of these issues in detail and provide you with some quick and easy solutions to troubleshoot them.

Hissing And Noise

Hissing and noise are often caused by poor grounding or interference from other electrical devices. Here are some quick solutions to help eliminate hissing and noise:

  • Check all cables and connections to ensure they are secure and properly connected.
  • Make sure that all audio equipment is properly grounded.
  • Try using a noise reduction plugin or filter to eliminate hissing and noise during post-production.

Feedback

Feedback occurs when the audio signal is routed back into the mixer and amplified again. This can cause a loud, annoying squeal that can damage speakers and harm hearing. Here are some quick solutions to help eliminate feedback:

  • Reduce the overall volume level of the audio mixer or microphone.
  • Move the microphone or audio equipment further away from the speakers to prevent the sound from being amplified again.
  • Use a graphic equalizer to eliminate feedback frequencies that can cause the problem.

Distortion

Distortion occurs when the audio signal is too loud and causes the audio equipment to overload. This can cause unwanted noise and can damage the speakers. Here are some quick solutions to help eliminate distortion:

  • Reduce the volume level until the distortion is eliminated.
  • Check the gain levels and adjust if necessary.
  • Use a limiter to prevent the signal from exceeding the maximum level and causing distortion.

In summary, troubleshooting audio mixer issues is an important part of being a professional audio mixer. By following these quick and easy solutions, you can eliminate common issues like hissing and noise, feedback, and distortion and ensure that your audio sounds the best it can.

Choosing The Best Audio Mixer

Credit: www.crutchfield.com

Frequently Asked Questions Of Choosing The Best Audio Mixer

Who Makes The Best Quality Audio Mixers?

It’s difficult to say who makes the best quality audio mixers, as it largely depends on personal preference and specific needs. Some top brands to consider are Yamaha, Behringer, Mackie, Allen & Heath, and Soundcraft. It’s important to do your own research and read reviews before making a purchase.

How Do I Find A Good Mixer?

To find a good mixer, consider your budget, which type of mixer you need, its power and capacity, speed settings, and additional features like attachments and ease of cleaning. Research reviews and ratings online and seek recommendations from friends or experts in the field.

Does Audio Mixer Affect Sound Quality?

Yes, an audio mixer can affect the sound quality because it controls and adjusts various components of the audio signal, such as volume, equalization, and effects. Choosing a high-quality mixer with good components can improve the sound quality of your audio recordings or live performances.

What Are The 3 Types Of Mixing Consoles?

The three types of mixing consoles are analog, digital, and hybrid. Analog consoles use physical components to amplify sound and alter sound quality, while digital consoles use software to achieve the same results. Hybrid consoles use a mix of both technologies.

Conclusion

Overall, choosing the right audio mixer is crucial for ensuring clear and cohesive sound in any recording or live event. With so many options available, it’s important to consider your specific needs and budget before making a decision. Whether you’re a professional sound engineer or just starting out, taking the time to do your research and invest in a quality audio mixer can make all the difference in the final product.

So don’t settle for less than the best, and start exploring the wide range of audio mixers available today!

Categories
Archive

How Loud Should My Master Be

Your master should typically be between -6dB to -4dB for a solid and secure volume level. Striving for any louder than that could lead to issues with sound quality, such as distortion and digital clipping.

Mastering, the final hurdle in the music production process, is all about providing tracks with that ‘wow’ factor. By ensuring they sound as strong and as clear as possible, a professional master gives your music the best chance of performing well across a variety of different platforms.

But it can be tough manoeuvring this steep learning curve if you’re new to the game. No fear, though – we’ve put together a comprehensive guide on measuring, fine-tuning, and assessing your level. So grab your headphones and buckle up – we’re about to take a deep dive into the art of mastering.

Importance Of Mastering Levels

As a music producer or a musician, you have probably heard questions like how loud your tracks should be or what mastering levels are. Mastering is an essential aspect of music production that helps to prepare your music for commercial consumption. It is the final stage of quality control before your tracks are ready for distribution. Achieving the perfect loudness level is one of the most critical aspects of mastering. In this post, we’ll focus on the importance of mastering levels, and examine how to achieve a balanced mix, preserve dynamics, and ensure a consistent loudness across all tracks.

Achieving A Balanced Mix

Mastering levels are essential for developing a well-balanced mix that will sound great on all devices. By ensuring that the levels of each track are equalized, you can prevent certain instruments from being drowned out by others. Balancing the mix also significantly affects the overall loudness of the music. Trying to increase the volume of one track in a poorly balanced mix without affecting the other instruments can be challenging and change the sound of the music.

Preserving Dynamics

One of the main challenges of mastering is achieving the perfect balance between loudness and dynamics. Dynamics in music refer to the variations in volume levels. Some music types require dramatic changes between loud and soft passages, while others focus on a more subtle approach. Mastering levels help to preserve the dynamics of each track, ensuring that the music still has a realistic range of sound without being overcompressed or distorted. It is crucial to monitor peak levels and ensure that no clipping occurs during the mastering process.

Consistency In Loudness

One of the main reasons mastering levels are essential is to ensure that all tracks have consistent loudness. If every track on an album has different levels of loudness, it can make the listening experience uncomfortable for the audience. Consistent loudness across all tracks helps listeners to enjoy music without having to adjust the volume on their device constantly. Additionally, mastering at the correct levels ensures that the music sounds great on any device or platform.

Mastering levels are an important aspect of music production that should not be overlooked. Achieving a balanced mix, preserving dynamics, and ensuring a consistent loudness will make your music stand out and be ready for commercial distribution. Keep in mind that these are just guidelines, and each track needs a careful ear to identify the correct levels during mastering.

Understanding Loudness

Mastering audio is an essential step in producing high-quality tracks that capture the listener’s attention. However, determining how loud your master should be can be tricky. When you jump into the world of mastering, it’s essential to understand the difference between loudness and volume to help you make informed decisions on how to master your tracks.

Differentiating Loudness And Volume

Volume and loudness are two terms that are often used interchangeably in audio production. Volume refers to the physical amplitude of sound waves, while loudness describes how loud a sound seems to the human ear. Interestingly, two sounds can be at the same volume but have different perceived loudness. This is because loudness is subjective and varies from person to person.

So, when it comes to mastering audio, you need to think about the balance between volume and loudness. Making a track super loud might get it noticed, but it will tire out the listener’s ears quickly. Therefore, considering perceived loudness is crucial when determining how loud your master should be.

Measuring Loudness Levels

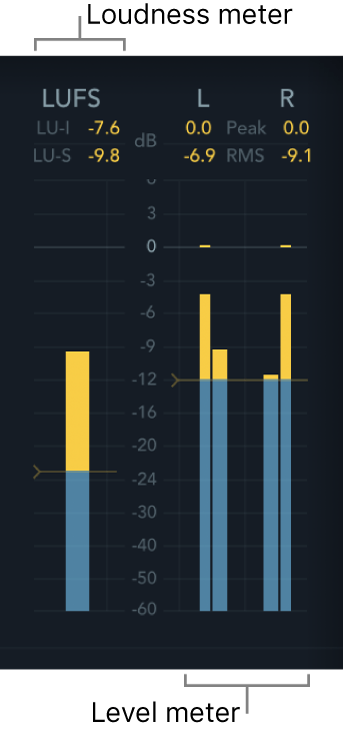
Measuring loudness levels is essential when it comes to mastering audio as it allows you to create a uniform standard. Using a loudness meter, you can measure the overall loudness of your track and ensure that it adheres to the loudness levels of other professional tracks. There are different loudness measurement standards, such as LUFS (Loudness Units Full Scale) and RMS (Root Mean Square), that give you a measurable, reproducible level of perceived loudness.

When measuring loudness levels, it’s essential to take into account the music’s dynamic range. Dynamic range refers to the difference between the quietest and loudest parts of a song and is an essential component of how the song will sound. Depending on the genre of the song, you might want to adjust the dynamic range to make it more impactful and memorable.

In Conclusion

Determining how loud your master should be is an essential part of the mastering process. Understanding the difference between volume and loudness, and measuring loudness levels is key to creating high-quality, professional tracks that will stand out. So, take the time to master the art of loudness, and you’ll be well on your way to creating tracks that sound great across a variety of devices and platforms.

The Loudness War

When it comes to mastering audio, one question that often arises is, “How loud should my master be?” This is a crucial point to consider as the loudness of a track can significantly impact its impact and overall quality. However, it is essential to understand the relationship between loudness and audio quality, which has led to what is known as “The Loudness War.”

Definition Of The Loudness War

The Loudness War is a phenomenon that has been ongoing for several decades but gained significant momentum around the early 2000s. At its core, it is a competition between music producers to create the loudest and most impactful recordings. The primary goal is to make a track sound as loud as possible without compromising too much on audio quality. In many cases, however, this compromise is significant, leading to a significant reduction in sound quality.

Effects On Audio Quality

The effects of the Loudness War on audio quality are well-documented. When producers push tracks to the limits of loudness, they often have to make compromises in other areas. For instance, dynamic range is typically reduced to ensure that the track remains loud throughout. This can result in a squashed and compressed sound, making the music less appealing to the ears.

Moreover, the Loudness War has also led to the “loudness penalty,” where streaming platforms such as Spotify and Apple Music reduce the volume of loud tracks. This is because their algorithms are designed to level out tracks, so they play at a consistent volume. Thus, the louder a track is, the more it gets penalized, resulting in a subpar listening experience for the end-user.

In conclusion, while loudness is an essential aspect of music production, it is crucial to keep in mind that louder isn’t always better. Producers should aim to strike a balance between loudness and audio quality, ensuring that their tracks stand out while maintaining a pleasant listening experience.

How Loud Should My Master Be

Credit: majormixing.com

Factors To Consider

When determining how loud your master should be, it’s important to consider factors such as the genre of music, target audience, and sound equipment being used. These factors can affect the overall sound quality and impact of your final product.

When it comes to mastering, one of the most significant considerations is how loud your master should be. There is no right answer, as it depends on several factors such as genre, target audience, and platform. So, let’s look at these factors in more detail.

Genre And Target Audience

The genre and target audience of your music play an important role in determining the loudness of your master. For instance, if you produce dance music, your audience will expect louder masters compared to classical music fans. Similarly, if your target audience listens to music on the radio, you may want to consider louder masters to cut through the noise.

Platform And Medium

Another crucial factor to consider when deciding how loud your master should be is the platform on which it will be listened. Different platforms have different loudness standards, such as streaming services and physical media. For example, streaming services like Spotify and Apple Music have specific loudness targets, and if your master exceeds these targets, it may be turned down, resulting in a lower volume than you predicted.

Similarly, the medium you choose to release your music can affect the loudness of your master. Vinyl records, for instance, require lower loudness levels compared to CDs, as vinyl has inherent limitations compared to digital audio formats.

It is crucial to understand that the decision of how loud your master should not be taken lightly. A few mistakes can compromise the quality and the impact your music has on your listeners. Hence, it is essential to work with an experienced mastering engineer who can help you make informed decisions and maximize your audience’s listening experience.

Professional Standards

If you are a music producer or a sound engineer, you may have wondered, “how loud should my master be?” A well-mastered track should be loud enough to stand out, but not too loud to cause distortion or clipping. Understanding professional standards is important when it comes to mastering your tracks.

When it comes to mastering for broadcast, it is important to adhere to specific loudness targets. The European Broadcasting Union (EBU) has set a standard of -23 LUFS (Loudness Units Full Scale) for TV and radio broadcasts. Many broadcasting companies in the US follow the ATSC A/85 standard of -24 LUFS. It’s important to keep these targets in mind when mastering your tracks for broadcast.

Streaming platforms such as Spotify and Apple Music have their own loudness normalization systems. This means that if your track is too loud, it will be automatically turned down by the platform. The platforms have set their targets at around -14 LUFS with a true peak of -1dBTP (True Peak). To ensure the best playback quality on these platforms, mastering your tracks to match the loudness target is essential.

By understanding professional standards, you can ensure that your mastered tracks are of high quality and meet industry standards for broadcasting and streaming. Keep in mind the specific loudness targets for each platform and aim to master your tracks to match those targets. In doing so, your tracks will sound their best and stand out among the competition.

Tools For Mastering Levels

Mastering levels involves finding the right balance between loudness and sound quality. Tools like loudness meters and limiters can help you ensure that your master is at the appropriate volume without sacrificing its dynamic range.

As a beginner, getting the perfect mastering level can be quite challenging. However, with the right tools, the process can be made simpler and quicker. Here are some of the essential tools you can use to get your mastering levels right.

Mastering Software

Having the right mastering software can help you achieve the perfect levels for your music. Software such as iZotope’s Ozone, Waves Mastering Bundle, and IK Multimedia’s T-RackS 5 are some of the popular options. These software options come equipped with a range of features that can help you accurately measure and adjust your mastering levels.

Metering Tools

Metering tools help you measure the loudness levels of your music. One common tool used for this is the LUFS (Loudness Units relative to Full Scale) meter. This tool measures the volume of your music relative to the maximum level, ensuring your music isn’t too soft or too loud. Some popular metering plugins include the Waves WLM Plus Loudness Meter, iZotope Insight 2, and the Waves Dorrough Surround. When choosing a metering plugin, look for one that offers a clear, easy-to-read display of your loudness levels. This will help you make accurate adjustments to your mastering levels.

Conclusion

Having the right tools to measure and adjust your mastering levels is crucial if you want to achieve a professional-sounding final product. With these software and metering tools, you can easily achieve the perfect level for your music.

Techniques For Optimal Mastering Levels

Mastering levels are crucial for achieving the perfect sound. However, deciding on the optimal loudness is a complex process that depends on various factors, such as genre, personal preference, and delivery method. Finding the right balance between loudness and dynamic range is essential for creating a dynamic and engaging listening experience.

Mastering is one of the most crucial steps in music production. It helps to enhance the sonic quality of the music and make it sound polished and more refined. However, mastering can also be a bit tricky, especially when it comes to deciding how loud the master should be. In this section, we will explore some techniques for optimal mastering levels, including the use of compression and limiting, and applying EQ.

Using Compression And Limiting

Compression and limiting are essential tools in mastering as they help to control the dynamics of the music. Compression helps to tame the peaks of the music, while limiting ensures that there are no sudden volume spikes. When it comes to optimal mastering levels, it is essential to use compression and limiting effectively to strike a balance between loudness and dynamic range.

Compression tips for optimal mastering levels:

  • Use a moderate compression ratio to avoid over-compression
  • Adjust the attack and release times to preserve the transients
  • Apply a parallel compression technique for added loudness

Limiting tips for optimal mastering levels:

  • Set the output ceiling to avoid clipping
  • Use a true peak limiter to ensure compliance with various streaming platforms
  • Avoid excessive gain reduction to maintain a good dynamic range

Applying Eq

EQ is another vital tool in mastering that helps to balance the frequency spectrum of the music. When used correctly, it can enhance the clarity and detail of the mix, making it sound more polished. However, excessive EQ can also lead to phase issues and cause the mix to sound unnatural. Here are some tips for applying EQ in mastering:

  • Use EQ to remove harsh frequencies that can cause ear fatigue
  • Avoid boosting frequencies excessively, which can lead to masking issues
  • Use linear phase EQ to avoid phase issues

In conclusion, mastering requires a delicate balancing act between loudness and dynamic range. It is essential to use compression and limiting effectively, and apply EQ with care to achieve optimal mastering levels.

How Loud Should My Master Be

Credit: m.youtube.com

Finding The Right Balance

When it comes to mastering your tracks, finding the right balance in terms of loudness can be a challenging task. It’s a delicate balancing act between having a track that’s loud enough to stand out, but not so loud that it’s unpleasant to listen to. In this article, we’ll explore some tips on how to find the sweet spot and strike the perfect balance for your master.

Critical Listening

The first step in finding the right balance for your master is critical listening. Put on your headphones and listen to your track. Is it too quiet? Too loud? Listen carefully and try to identify the specific areas of the song that need to be boosted or lowered. It’s important to listen with fresh ears, so take breaks if needed to come back with a clear mind.

Once you’ve identified the problematic areas, it’s time to start tweaking the levels. Start by reducing or increasing the volume by small increments until it sounds right. Remember, it’s more about finding the right balance than achieving a specific loudness number.

Experimentation And Iteration

It’s important to remember that finding the right balance for your master is a process that requires experimentation and iteration. Take your time and don’t be afraid to try different things. Iterate on your mix by trying out different EQ settings, compression levels, and limiting options to bring out the best in your tracks.

Analyze your track with a frequency analyzer to determine if any frequencies are too loud or too quiet. Then, try to make adjustments to any problematic frequencies to strike the perfect balance.

Final Thoughts

Remember, finding the right balance for your master is a subtle process that requires patience and experimentation. Take the time to critically listen to your tracks and make adjustments as needed. Don’t be afraid to try new things and iterate on your mix. By following these tips, you’ll be well on your way to finding the perfect loudness balance for your master.

How Loud Should My Master Be

Credit: majormixing.com

Frequently Asked Questions For How Loud Should My Master Be

How Loud Should My Master Track Be?

The loudness of your master track should be between -6 dB and -3 dB RMS, with a peak level no higher than -0. 3 dBFS. However, it ultimately depends on the specific genre and style of music you are producing.

It’s best to trust your ears and reference commercial tracks to achieve a competitive loudness while maintaining clarity and dynamics.

What Is The Best Loudness For Mastering?

The best loudness for mastering will depend on the specific genre of music and intended audience. However, a good starting point is -14 LUFS for streaming platforms and -12 LUFS for CDs or vinyl. It’s important to ensure that the audio is balanced and dynamic, with no distortion or clipping.

What Is The Standard Db For Mastering?

The standard dB level for mastering varies depending on the type of audio content being produced. Generally, for most audio content, the recommended dB level for mastering is around -14 dB to -16 dB LUFS (Loudness Units Full Scale) for streaming platforms.

However, it’s always best to consult with a professional audio engineer for specific recommendations.

Is 10 Lufs Too Loud?

Yes, 10 LUFS is considered too loud for mastering audio. It is recommended to target a loudness level between -16 LUFS and -14 LUFS for music or -24 LUFS for podcasts or audiobooks. However, the optimal loudness level may vary based on the content type and target platform.

Conclusion

Finding the right loudness for your master is key in delivering a balanced and professional-sounding audio. It requires time, patience, and experimentation to achieve optimal results. Make sure to always reference industry standards, your target audience, and the platform where your music will be distributed.

Remember that a well-mastered audio should enhance the emotional impact of your music and not detract from it. By following these tips, you will be on your way to achieving a master that will capture your listeners’ attention and keep them coming back for more.

Categories
Archive

Eq Before Or After Compression

Whether to put EQ before or after compression depends on what you want to fix. EQ, or equalization, typically comes before compression in the audio signal chain. EQ adjusts the frequency balance of the audio, while compression controls the dynamic range.

Good recording and mixing practices consider the order of these processes carefully. Audio engineers use a variety of processing tools to shape the sound of a recorded track, including EQ and compression. However, the order of these processes can have a significant impact on the final sound.

Related reading: Compression Meters and What is Audio Compression?.

EQ allows engineers to control the frequency balance of a sound, while compression controls its dynamic range. We’ll explore the reasons why engineers may choose to apply EQ before or after the compressor, and how this decision can affect the final sound of a mix. We’ll also look at some best practices for using EQ and compression together to achieve the desired result.

Eq Before Or After Compression

Credit: m.youtube.com

Understanding The Signal Flow

Understanding the signal flow in music production is crucial in achieving a great mix. When it comes to placing EQ before or after the compressor, it ultimately depends on the desired effect. Starting with pre-compression EQ can reduce unwanted frequencies, while EQ after can enhance specific elements of the sound.

When it comes to signal flow, EQ first is the most common technique used in recording and mixing sound. EQ adjusts the tonal balance of the sound and fixes problems in the recording. Compression, on the other hand, controls the dynamic range of the sound. This makes the louder parts softer and the softer parts louder. Using pre-compression EQ allows you to shape the sound before you apply compression. This ensures that the compressor is only affecting the parts of the sound that you want to control.

Compressing first is a less common technique used in recording and mixing sound. This technique involves compressing the sound before it is equalized. This can result in a different tonal balance than EQ first. When compressing first, it is important to make sure that you are not over-compressing the sound, as this can result in a loss of dynamics and a squeezed sound.

Practical Tips for EQ Before Compression

When it comes to understanding the signal flow in recording and mixing sound, it is important to understand the role that EQ and compression play in shaping the sound. EQ adjusts the tonal balance of the sound, while compression controls its dynamic range. By using pre-compression EQ, you can shape the sound before you apply compression. This ensures that the compressor is only affecting the parts of the sound that you want to control. However, it is also important to understand that compressing first can result in a different tonal balance. That you need to be careful not to over-compress the sound. Whether you choose to EQ first or compress first, understanding the signal flow is crucial to achieving your desired sound.

Eq Before Or After Compression

Credit: www.youtube.com

Eq Before Compression

When it comes to audio production, EQ (equalization) is one of the most important tools at your disposal. It allows you to adjust the frequency balance of a sound, making it sound more balanced and polished. You should apply before discussing whether EQ before or after the compressor, let’s first focus on pre-compression EQ.

Pros

  • Helps to sculpt a more natural sound by removing unwanted frequencies
  • Allows for more precise frequency control since there is no interference from the compressor
  • Can improve the overall clarity and definition of the sound
  • Can help to reduce unwanted resonances and harsh sibilance

Cons

  • May result in an increased dynamic range, making it more difficult to balance the levels
  • May result in a loss of some of the original character or vibe of the sound
  • Does not address any level inconsistencies in the sound

Overall, applying EQ first can be an effective technique to help improve the overall sound quality of your audio recording. However, it is important to be aware of the potential downsides and to use your ears to determine whether applying pre-compression EQ is the right choice for your specific situation.

Compression Before Eq

Also, Compression and EQ are two techniques used in music production to adjust the sound quality of audio recordings. Compression controls the dynamic range of a recording, while EQ adjusts the tonal balance. Although compression and EQ are often used together, one may wonder whether compressing first is a better option or not. Here we will discuss the pros and cons of Compression Before EQ.

Pros:

  • Reduces unwanted resonances: By compressing before EQ, you can reduce the resonances that amplify particular frequencies, and may lead to clipping and distortion. Compression can help bring the higher level frequencies more in line with the lower level frequencies.
  • Produces smooth sound: Compression reduces audio level variations, making it easier to listen to by achieving a smooth sound. This is beneficial to modern music production, which is characterized by high volume audio recordings. When the louder and softer parts of your recording have the same level of sound, the experience is much more pleasing to the listener.
  • Allows more precise control: Compressing before EQing allows for more precise control over the audio recording. By using compression on the audio recording ahead of tasks such as equalization, you can get the audio coming more consistently from the source.

Cons:

  • Doesn’t work for all instruments: Although the compression before EQ technique has its advantages, it is less effective when it comes to instruments with complex overtones. For example, compression may change the natural sound of drums by flattening their transients before EQ has the chance to boost their frequencies.
  • Limits sound: Compression can limit the natural sound of audio recordings, resulting in a lifeless music production devoid of natural dynamics. When compressing first, you run the risk of limiting the sound too much. This can cause a lot of clicks or distortion, making the music sound unnatural.
  • May create phase distortions: Changing timbre too much with EQ after compressing can lead to phase distortions. This is especially true when applying heavy EQ boosts of over 6 dB. This can affect the time relationship of the various frequencies in your music production, leading to a loss of fidelity.

Ultimately, the decision to compress first depends on the specific audio recording and the sound preferences of the producer. Understanding the pros and cons of this technique will help you make an informed decision and achieve better results with your music productions.

Eq Before Or After Compression

Credit: www.waves.com

How To Choose The Right Order

One of the most common concerns when it comes to EQ and compression is the order in which to apply them to achieve the desired sound. Should you EQ first or after the compressor? There’s no one-size-fits-all answer, as it ultimately depends on your end goal. In this section, we’ll explore some factors to consider when deciding which order to use.

What Sound Are You Going For?

The first consideration in choosing the order of EQ and compression is the sound you are trying to achieve. If you’re going for a more natural sound or minimal processing, it may be best to apply pre-compression EQ. This allows the compressor to act more transparently and results in a cleaner sound. On the other hand, if you’re looking for more aggressive shaping of the sound with distinct tonal changes, EQ after the compressor may be the way to go.

What Instruments Are You Using?

The instrument you record also plays a role in the order of EQ and compression. For example, drums and vocals may benefit from EQ first to control specific frequencies, while guitars and bass may benefit from EQ after the compressor to add coloration and character to the sound. Experimentation is key in finding the right order for each specific instrument.

What Genre Of Music Are You Recording?

The genre you record can also affect the order of EQ and compression. For instance, in genres like EDM and hip hop, where a heavy emphasis is placed on the low-end frequencies, it may be beneficial to apply EQ after the compressor to boost those low-end frequencies and add energy to the track. Alternatively, in genres like jazz and classical where a more natural sound is desired, pre-compression EQ may be the better option to preserve the integrity of the original sound.

By considering these factors and experimenting with different orders of EQ and compression, you’ll be able to determine which works best for each specific project. Ultimately, the order you choose should compliment and enhance the natural qualities of the sound rather than detract from it.

Frequently Asked Questions For Eq Before Or After Compression

Should I Do Compression Or Eq First?

It depends on what you want to achieve. If you want to control levels, compression is first. If you want to adjust tonality, EQ is first. But it’s best to experiment and listen to which order works best for your specific situation.

Should Eq Go Before Or After Compression Kick?

EQ should come before the compressor on the kick drum. EQ can shape the sound before compression while compression controls the dynamic range. This allows for a cleaner signal and better control of the kick drum sound.

Should Additive Eq Come Before Or After Compression?

Additive EQ should typically come before the compressor in the signal chain. This allows for precise shaping of the audio before it is compressed and can help mitigate any unwanted tonal imbalances.

Should Surgical Eq Go Before Or After Compression?

In general, surgical EQ should go before compression in the signal chain. This is because EQ affects the tonal balance and can help shape the sound before it is compressed. Compression, on the other hand, controls the dynamic range and evens out the volume levels after EQ.

However, there may be instances where it makes sense to reverse the order based on the specific needs of the mix.

Conclusion

Finding the right order of EQ and compression can make a huge difference in your audio production quality. While some prefer to EQ first to remove unwanted frequencies, others prefer to compress first to control dynamics. Ultimately, it depends on your personal preference and the specific effect you are going for.

Experimenting with different orders and finding what works best for you is key. Keep in mind that EQ and compression are powerful tools, and should be used thoughtfully to achieve a balanced and polished sound.

For more background, see Equalization (audio) on Wikipedia. You may also like our guide: Saturation: Before or After Compression?.

Categories
Archive

How To Write Better Melodies

Melodies can be improved by using repetition, variation, and creating a strong hook. To write better melodies, start with a simple motif and build upon it by adding variation and contrast.

Avoid using too many notes or complex rhythms, and focus on creating a strong and memorable hook. Also, Melodies are the core of every good song, and crafting a strong and memorable one is crucial to captivating your audience. Also, a great melody can linger in people’s minds long after the song is over, and can even become an earworm that they cannot shake.

Related reading: the five-finger songwriting method and an easy tune-writing walkthrough. For background, see the Wikipedia article on Melody.

However, writing a catchy melody is not always easy, and many songwriters struggle to come up with something that truly stands out. In addition, we will explore some techniques that can help you write better melodies, including using repetition, variation, and creating a strong hook. Moreover, by using these strategies, you can take your songwriting to the next level and create memorable melodies that will resonate with your audience.

Importance Of Melodies

In addition, Writing captivating melodies is crucial for captivating your audience and making music memorable. For example, incorporating repetition, contrast, and variation within your melodies, along with utilizing creative phrasing and rhythm can help you achieve this goal and ultimately create better music.

Why Better Melodies Matter

Furthermore, Melodies are the backbone of any great song. As a result, they are the memorable parts that get stuck in your head, the parts you sing along to, the parts that make a song stand out. Without a great melody, even the best lyrics can fall flat. Also, a well-crafted melody can make all the difference in the success of a song, from engaging an audience to making it a hit on the charts.

What Makes A Great Melody

Additionally, there are many factors that contribute to a great melody. However, here are just a few:

FactorDescription
CatchinessA great melody should be easy to remember and catchy enough to get stuck in your head.
EmotionA great melody should evoke emotion, whether it be joy, sadness, or anything in between.
VariationA great melody should have enough variation to keep it interesting, but not so much that it becomes confusing.
RhythmA great melody should have a strong sense of rhythm that is easy to follow.
OriginalityA great melody should be unique and stand out from other songs.

While these factors are important, it’s important to remember that there is no one-size-fits-all formula for writing a great melody. What works for one song may not work for another, and experimentation is key. Then, in conclusion, melodies are a crucial component of any great song. A well-crafted melody can make all the difference in the success of a song, from engaging an audience to making it a hit on the charts. Understanding the factors that contribute to a great melody is important, but ultimately it’s up to the songwriter to experiment and find what works best for their particular song.

How To Write Better Melodies

Credit: www.youtube.com

Elements Of A Melody

Moreover, to write better melodies, one must understand the essential elements of a melody. In short, these include pitch, rhythm, meter, tempo, key, and harmony. By mastering these elements, you can create catchy and memorable tunes that will resonate with your audience.

Elements of a Melody: When it comes to writing better melodies, there are several key elements that must be considered. Similarly, these elements include note choice, rhythm, and melodic contour. By understanding each of these components and how they relate to one another, you can create more compelling and memorable melodies. In addition, note Choice: One of the most important elements of a melody is the notes that are chosen. The selection of notes will greatly impact the overall feel and mood of the melody.

Furthermore, some tips to keep in mind for note choice include: – Start with a strong melodic idea and build from there. – Use repetition and variation to create a memorable melody. – Consider the intervals between notes and how they contribute to the overall sound. Rhythm: Another crucial component of a melody is rhythm. Also, rhythmic patterns and accents shape how listeners hear a melody. Some tips for working with rhythm include: – Experiment with different rhythmic patterns to find what works best. – Use syncopation to add interest and complexity to the melody. – Pay attention to the placement of accents within the melody. In addition, melodic Contour: The final element of a melody is its contour or shape. This includes the range of notes used, the direction the melody moves in, and the overall “shape” of the melody. Additionally, some tips for working with melodic contour include: – Consider the emotional impact of the contour of a melody. – Use contour to create tension and release within the melody. – Experiment with different shapes to find what works best for your melody.

Also, by considering these three key elements of melody – note choice, rhythm, and melodic contour – you can create more compelling and memorable melodies that will capture and hold the attention of your listeners.

Crafting A Memorable Melody for Better Melodies

Moreover, crafting a memorable melody is an essential part of writing music. For example, to write better melodies, one should focus on creating a strong hook, using repetition, playing with rhythm and harmony, and making use of silence and dynamics to create interest and anticipation for the listener.

In addition, implementing these techniques will help you craft a melody that will stay in the listener’s mind long after the song has ended.

Furthermore, crafting a memorable melody is the heart of songwriting. As a result, it’s the primary element that catches listeners’ attention and keeps them coming back for more. While the definition of a good melody may differ from one person to another, it consistently resonates with the listener. In this article, we’ll discuss some crucial tips you can implement to improve your songwriting skills and create memorable melodies.

Start Simple for Better Melodies

While it’s important to create a unique and complex melody, starting with a simple melody is a great way to begin. Additionally, often, the most famous melodies are the simplest ones. Simple melodies are easy to remember and leave a lasting impact on the listener. So, start by playing around with a few notes, and don’t be afraid to repeat them.

Explore Different Scales And Modes for Better Melodies

Another way to craft a memorable melody is to experiment with different scales and modes. Also, scales and modes are the fundamental building blocks of music, and every scale or mode has a unique mood or emotion. So, try to play around with different scales and modes and see how they impact the melody. For instance, the major scale can create happy and uplifting melodies, while the minor scale can create melancholic and sad melodies.

Experiment With Rhythmic Variations

Moreover, rhythm is just as important as melody, and experimenting with different rhythmic variations can add interest and variety to your melody. Try to play around with different rhythms, including syncopation, triplets, and dotted notes. Mixing up the rhythm can enhance the melody and make it more memorable.

Use Repetition And Variation for Better Melodies

In addition, Repetition and variation are essential techniques in creating a memorable melody. Repetition refers to repeating certain melodic motifs or patterns throughout the song. It’s a great way to reinforce the main melody and make it more memorable. On the other hand, variation involves changing the melodic motif or pattern, so it doesn’t become repetitive and boring.

Incorporate Chord Progressions

Chord progressions play a significant role in creating a memorable melody. The combination of melody and chord progression can create a unique and memorable sound that captures the listener’s attention. Try to experiment with various chord progressions and see how they interact with your melody. Keep in mind that every chord has a different emotion or vibe, so choose chords that complement your melody. In conclusion, crafting a memorable melody requires a lot of practice, patience, and experimentation. Remember to start with a simple melody, experiment with different scales and modes, play around with rhythmic variations, use repetition and variation, and incorporate chord progressions that complement your melody. With these tips, you’ll be well on your way to creating memorable melodies that stick in your audience’s mind.

Techniques To Enhance Melodies

Enhancing melodies is a crucial aspect of writing music, and there are various techniques to do so. Experimenting with different note progressions, adding harmony and counterpoint, and breaking out of predictable patterns can all help in creating unique and memorable melodies.

Melodies are the heart of any great song. They are responsible for hooking listeners and keeping them engaged. But coming up with a compelling melody can be challenging. That’s why it’s essential to have a few techniques up your sleeve to enhance your melodies. In this post, we’ll discuss some methods to take your melody writing to the next level, including adding harmony, integrating counterpoint, creating contrast, and using dynamics and articulation.

Adding Harmony for Better Melodies

Adding harmony to a melody is an effective way to enhance it. Harmony refers to the chords that support the melody. When adding harmony, it’s important to choose the right chords that complement the melody. You can use simple triads or more complex chords like seventh chords or ninth chords to add depth and complexity to the harmony. For instance, if your melody is in the key of C major, you can add a G major or F major chord to harmonize the melody.

Integrating Counterpoint for Better Melodies

Counterpoint is the technique of writing two or more melodies that complement each other. When integrating counterpoint into your melody, you can come up with more complex and interesting melodies that work well together. One way to do this is to create a second melody that moves in the opposite direction of the first melody. This creates a pleasing musical tension that can hook listeners.

Creating Contrast for Better Melodies

Creating contrast in your melody is another effective way to enhance it. One way to do this is to vary the melody’s rhythm. For instance, you can have a fast-paced melody followed by a slower melody section. You can also use contrasting dynamics, which refers to the loudness or softness of the melody. By using dynamic contrast, you can create a more dynamic and engaging melody.

Using Dynamics And Articulation for Better Melodies

Dynamics and articulation are essential tools for enhancing a melody. Dynamics refer to the loudness or softness of a melody, while articulation refers to how the melody is played. By using a mix of loud and soft dynamics, you can create a more engaging melody. Articulation can also help to create a more interesting melody. For instance, using staccato notes can add a more playful feel to the melody, while legato notes can create a more flowing and connected feel. In summary, these techniques can help you enhance your melodies significantly. By adding harmony, integrating counterpoint, creating contrast, and using dynamics and articulation, you can create more compelling and engaging melodies that will hook listeners.

Avoiding Common Melodic Pitfalls for Better Melodies

To write better melodies without falling into common pitfalls, it is important to focus on creating unique and memorable phrases. A good melody should vary in rhythm, note length, and contour to keep it interesting. Experimenting with different scales and chord progressions can also lead to new and creative melodic ideas.

If you want to write better melodies, it’s important to avoid common melodic pitfalls that can make your music sound generic or dull. Here are some of the most common mistakes to avoid:

Overusing Cliches

One of the biggest mistakes you can make when writing melodies is to rely too heavily on cliches. Cliches are overused melodic patterns that have become tired and uninteresting. While they may have been popular at one time, using them now can make your music sound dated and uninspired. To avoid this pitfall, try experimenting with more unique melodic ideas. You can do this by listening to a wide variety of music and paying attention to the melodies that stand out to you. Don’t be afraid to try something new or take risks with your melodies.

Neglecting The Importance Of Phrasing for Better Melodies

Another common mistake is neglecting the importance of phrasing. Phrasing refers to the way that you structure your melodies, including the length of your phrases, the rhythms you use, and the way you transition between them. To write better melodies, it’s important to pay attention to your phrasing and make sure that it supports the emotional content of your music. This means that you need to take the time to experiment with different phrasing structures and find the ones that work best for your music.

Forgetting About The Listener’s Experience

Finally, it’s important to remember that your melodies are ultimately about the listener’s experience. If you’re only focused on writing melodies that sound good to you, you may be missing out on opportunities to connect with your audience. To avoid this pitfall, try to put yourself in the listener’s shoes when you’re writing melodies. Ask yourself what emotions you want to evoke and how you can best do that with your music. By focusing on the listener’s experience, you can write more powerful and impactful melodies that resonate with your audience.

In conclusion, if you want to write better melodies, it’s important to avoid common melodic pitfalls like overusing cliches, neglecting phrasing, and forgetting about the listener’s experience. By taking the time to develop your melodic skills and experiment with new ideas, you can create music that is truly unique and memorable.

Tips For Finding Inspiration

Finding inspiration for better melodies can be a challenging task for any musician. To overcome this obstacle, try listening to different genres of music, experimenting with new techniques, collaborating with other artists, taking breaks when needed, and exploring your emotions and life experiences to create truly unique and memorable melodies.

Writing a great melody is both an art and a science. It can be challenging, but with practice, you can develop the skills to become a master melodist. One of the keys to writing better melodies is finding inspiration. Fortunately, there are several practical steps you can take to find inspiration for your next melody.

Listening To Other Composers

One of the most important things you can do to find inspiration for your next melody is to listen to other composers. Listening to a wide variety of music can help you develop an ear for what makes a great melody. Pay attention to the way other composers structure their melodies, and think about how you can apply these techniques to your own music.

Studying Your Favorite Songs

Another great way to find inspiration for writing better melodies is to study your favorite songs. Choose a song that has a memorable melody and analyze the structure of the melody. Look for patterns and repetition in the melody, as well as any interval patterns or chord progressions that you can use in your own music. Understanding how your favorite songs are constructed can help you create stronger melodies of your own.

Drawing From Personal Experience

Finally, one of the most effective ways to find inspiration for your melodies is to draw from your own personal experiences. Think about the emotions and feelings you’ve experienced throughout your life and try to express them through your music. Whether it’s the triumph of a personal achievement or the sadness of a loss, using your personal experiences can help you create more meaningful and powerful melodies. In conclusion, finding inspiration for your melodies can be challenging, but with the right approach, it can also be incredibly rewarding. By listening to other composers, studying your favorite songs, and drawing from your personal experiences, you can become a better melodist and create more powerful music.

Tools And Resources For Melodic Development

If you want to improve your melodic skills, there are many tools and resources available to help you. Here are some options to consider:

Music Theory Books And Courses

Studying music theory can be an important step in improving your melodic abilities. There are many books on music theory available, such as “Music Theory for Dummies” by Michael Pilhofer and Holly Day or “The Complete Idiot’s Guide to Music Theory” by Michael Miller.

If you want more in-depth study, there are online courses, like “Fundamentals of Music Theory” on Coursera or “Music Theory Comprehensive Complete” on Udemy. These options can help you develop your understanding of melody and music fundamentals.

Exercises for Writing Better Melodies

Practice is crucial for writing better melodies. You can find plenty of melody-writing exercises on different music blogs or books. A few renowned melody writing exercises are:

  • Starting with the rhythm: set a rhythmic pattern and hum a melody over it.
  • The sing-and-play method: Sing a new melody and try to play it on your instrument.
  • The chord progression exercise: Play a simple chord progression and try to create a melody.
  • The variation exercise: Modify an existing melody.

Melody-generating Apps And Tools

Thanks to technology, there are various melody-generating apps and tools available to assist you in writing better melodies. Some of the leading melody-generating apps are:

Tool NameFeatures
HookpadVirtual Songwriter helps in melody and chord progression composition.
Amper MusicArtificial Intelligence-based melody generator tool and royalty-free music samples.
Audionamix Xtrax StemsFor audio extraction, beat detection, and melody generator.

Using such tools, you can experiment with different chords and melodies and create exciting and innovative music compositions.

How To Write Better Melodies

Credit: blog.discmakers.com

Practice And Persistence

Writing great melodies may seem like a natural talent that only a few musicians possess. However, the truth is that writing a beautiful melody requires time, effort, and experimentation. In this article, we’ll discuss how practice and persistence can help you write better melodies.

Regular Practice And Writing Habits

Regular practice is essential to develop your skills. The more you write melodies, the better you will become at it. Set a routine and stick to it. Choose a time every day or a few times per week to sit down and focus on writing melodies. Use this time to experiment with different chord progressions, melodies, rhythms, and tempos.

Create writing habits that work for you. For example, you can set a goal to write a new melody every day. Challenge yourself to write a melody with only four notes or create a melody using a specific mode or scale. These exercises will help you explore different possibilities and improve your skills.

Analyzing And Reflecting On Your Own Melodies

One of the best ways to improve your skills is to analyze and reflect on your own work. Record every melody that you create and listen to them later. Analyze the structure of the melody, the chord progression, and the rhythm. Identify the strengths and weaknesses of each melody.

By analyzing and reflecting on your work, you can identify what works and what doesn’t. This can help you develop your skills and create better melodies in the future.

Collaborating With Other Musicians

Collaborating with other musicians can give you fresh perspectives, new ideas, and different approaches. Working with other musicians can help you learn from their experiences, gain new insights, and develop your skills.

You can collaborate with other musicians by writing a melody together, jamming, or sharing your work. Listen to their feedback and suggestions. Incorporate their ideas into your work to create something unique and beautiful.

Remember that writing great melodies takes practice, experimentation, and perseverance. Use these tips to develop your skills and create music that inspires you and others.

How To Write Better Melodies

Credit: www.masterclass.com

Frequently Asked Questions Of How To Write Better Melodies

How Can I Make My Melody Sound Better?

To make your melody sound better, focus on the following: 1. Pay attention to the rhythm and timing 2. Use varying note lengths and intervals 3. Experiment with chord progressions 4. Add dynamics and emotion through volume and expression changes 5.

Consider adding counter-melodies or harmonies.

What Creates A Good Melody?

A good melody is created by combining the right notes and rhythms that flow together smoothly and harmoniously. It should also be memorable, simple, yet catchy enough to linger in the listener’s mind. Additionally, emotion and mood play an essential role in creating a good melody.

Crafting a melody that matches the lyrical content can also enhance its overall impact and appeal to the listeners.

What Is A Well Written Melody?

A well-written melody is a memorable and catchy sequence of musical notes that is easy to sing or hum along to. It should have a clear and consistent structure, with a strong melody line that is easy to follow and provides emotional impact.

A good melody should also match the lyrics and overall feeling of the song, while also being unique and original.

What Makes A Melody Appealing?

A melody’s appeal depends on its rhythmic and melodic structure, as well as its harmony and lyrics. A good melody will be easy to sing, have a memorable hook, and follow a pleasing chord progression. It may also evoke emotions and have a cultural or personal significance to the listener.

Conclusion

After reading this blog post, you have learned different techniques and guidelines to help you write better melodies. Remember to experiment with different chord progressions, utilize rhythm, and pay attention to the contour of your melodies. Keep in mind the importance of repetition and variation, and never be afraid to let your creativity shine.

By following these steps and continuously practicing, you will be able to create and recognize great melodies that leave a lasting impact on your listeners. Now, go out there and make some amazing music!

Categories
Archive

Do You Need Audio Interface

Yes, you need an audio interface if you want to record high-quality audio on your computer. An audio interface acts as a middleman between your computer and your microphone or other audio devices, helping to improve the sound quality and reduce latency issues.

It allows you to connect professional-grade microphones, instruments, and other audio gear to your computer for recording and producing music or podcasts. Depending on your needs, you can choose a simple entry-level interface that enables basic recording or a more advanced interface that provides additional features such as audio effects and MIDI connectivity.

We’ll explore what an audio interface is, how it works, and what benefits it provides for recording audio at home.

Do You Need Audio Interface

Credit: www.recordingden.com

Why Do You Need An Audio Interface?

An audio interface is a must-have for anyone serious about recording high-quality audio on their computer. Not only does it provide better sound quality than your computer’s built-in sound card, but it also allows you to connect professional microphones and other audio equipment to your computer.

The result is a more professional-sounding recording that will impress your listeners.

If you’re a musician, podcaster, or content creator and you’re wondering whether you need an audio interface, the short answer is yes, you do. An audio interface is a device that allows you to record and playback audio on your computer, providing a high-quality signal path between your instruments, microphones, and computer. In this blog post, we’ll explore the reasons why having an audio interface is essential for anyone serious about recording high-quality audio.

Improved Audio Quality

Using an audio interface guarantees a higher quality of sound compared to the built-in sound card of your computer. The sound card that comes with your computer cannot handle audio at a professional level. An audio interface, on the other hand, is designed to capture, process, and playback sound at a higher quality than the built-in sound card in your computer. By using an audio interface, you’ll be able to produce higher quality audio recordings, resulting in a better end product.

Latency Reduction

Latency is a delay in the time it takes for sound to travel from your instrument or microphone into your computer, then back out through your headphones or speakers. This delay can be a big problem when trying to record live audio or play virtual instruments in real-time. An audio interface can help solve this problem by reducing latency, allowing you to record and play back audio with minimal delay. This can be especially important when recording multiple tracks at once, where latency can build up and cause issues when trying to synchronize the tracks.

Xlr Inputs For Microphones

An audio interface typically offers XLR inputs that are designed for microphones. XLR connections are essential for professional microphones since they offer a balanced signal, reducing noise and interference from other equipment. When it comes to recording vocals or acoustic instruments, having a microphone with an XLR connection is a must, and an audio interface provides an easy way to connect it to your computer.

Phantom Power For Condenser Mics

If you’re using a condenser microphone, which is a type of microphone typically used for vocals and acoustic instruments, you’ll need a source of phantom power. This power is used to charge the microphone’s diaphragm, which requires a higher voltage than other microphones. An audio interface provides phantom power, making it easy to use a condenser microphone with your computer.

Multiple Input And Output Options

An audio interface typically offers multiple input and output options, allowing you to connect several pieces of equipment to your computer at once. This is important when recording multiple channels, such as a band or a podcast with multiple guests. An audio interface also provides various output options, including headphones, speakers, and studio monitors, providing flexibility in mixing and playback options. In conclusion, an audio interface is an essential piece of equipment for anyone seriously interested in producing high-quality audio recordings. Using an audio interface means better sound quality, reduced latency, XLR inputs for microphones, phantom power for condenser mics, and multiple input and output options.

Do You Need Audio Interface

Credit: www.renegadeproducer.com

When Do You Need An Audio Interface?

Audio interfaces are external sound cards that enhance the quality of sound production, recording and playback, providing better sound quality than the built-in sound cards in some devices like laptops. As a result of their portability and easy accessibility, they have become popular among musicians, podcasters, and streamers who desire high-quality sound. However, the question remains – When Do You Need an Audio Interface? This section highlights some scenarios when an audio interface is essential.

Recording Music At Home

If you are an aspiring musician, and you want to start recording your music, an audio interface is mandatory. It eliminates the noise and distortion that might come from your device’s built-in sound card. An audio interface cleans up the audio, making it crispier and more professional, ensuring that the sound produced is satisfactory. With an audio interface, you can capture the best sound quality, making your music more appealing to your listeners.

Streaming Or Podcasting

Streaming and podcasting require excellent sound quality, and an audio interface provides just that. Viewers or listeners might quickly tune off if the sound quality is below par, which could diminish the credibility of your content. The audio interface helps minimize background noise and ensures that your voice is crystal clear. Thus, if you want to conduct an excellent stream or podcast, an audio interface serves as a perfect tool.

Professional Recording Or Mixing

If you are a sound engineer or a music producer, you need an audio interface to carry out your work effectively. With a professional-grade audio interface, you can easily record or mix high-quality sound that meets industry standards. An audio interface offers different input and output options in terms of analog and digital connections that allow you to connect different equipment. This flexibility is necessary for audio experts, who often work with a range of sound equipment.

Use Of High-end Microphones

If you own high-end microphones, an audio interface is necessary to achieve the best results. A high-end microphone produces high-quality sound and picking the sound requires a powerful recording device like an audio interface. It helps ensure that you capture every detail and nuance of the sound produced by your microphone. Moreover, it ensures that the sound produced is of professional quality.

Recording With Midi Controllers

If you love producing music with MIDI controllers, you need an excellent audio interface to improve sound quality. MIDI controllers can easily connect to an audio interface, which helps capture the best sound. You can easily record sound through different channels, use different effects, and mix the sound to obtain the desired quality.

Types Of Audio Interfaces

When it comes to recording audio, an audio interface serves as a bridge between your computer and microphone or other audio input devices. It offers superior sound quality and more features than the built-in sound card of your computer. There are several types of audio interfaces available, each best suited to specific recording goals.

Usb Audio Interfaces

One of the most commonly used types of audio interfaces is the USB Audio Interface that connects to your computer via a USB port. These are affordable, easy-to-use, and perfect for home-studio setups and podcasting. They provide a decent number of inputs and outputs, along with preamp and phantom power to avoid hiss and hum in your recordings.

Moreover, USB audio interfaces are popular among musicians who prefer working on laptops as they are lightweight, portable, and can run on a battery pack. If you are a beginner or someone who needs basic recording facilities, then a USB audio interface is a great starting point.

Firewire Audio Interfaces

FireWire Audio Interfaces are similar to USB audio interfaces, but they connect to your computer through a FireWire port. They are fast and offer more bandwidth, making them suitable for larger, project studio recordings. FireWire audio interfaces are a bit more expensive than USB audio interfaces, but if you are looking to capture high-quality recordings without any delays or latency issues, they are worth considering.

Thunderbolt Audio Interfaces

Thunderbolt Audio Interfaces are relatively new, but they are quickly gaining popularity among professionals. They offer a faster, more reliable, and lower latency connection than USB or FireWire interfaces. Thunderbolt interfaces provide a high-quality digital-to-analog converter and microphone preamps, ideal for recording high-quality tracks and live performances. They are perfect for professional studios, home studios, and musicians who are always on the go.

Pcie Audio Interfaces

Finally, PCIe Audio Interfaces are internal sound cards that go into your computer’s motherboard. These high-performance audio interfaces offer low latency, high sample rates, and more inputs, making them popular in professional recording studios. PCIe interfaces are not portable like USB or Thunderbolt interfaces, but they offer superior sound quality and significant processing capability.

Types of Audio Interfaces at a Glance
InterfaceConnectionSuitable for
USB Audio InterfaceUSBBeginners, home-studio
FireWire Audio InterfaceFireWireProject studios, larger recordings
Thunderbolt Audio InterfaceThunderboltProfessional studios, home studios, and mobile musicians
PCIe Audio InterfaceInternalProfessional studios

Factors To Consider When Buying An Audio Interface

Considering to buy an audio interface is a big decision for music producers, audio engineers, and musicians alike. Key factors to consider are the type of connection compatibility with your existing equipment, the number of channels required, and budget. An audio interface is necessary for producing a high-quality sound, so invest your money wisely.

If you are a musician, podcaster, or a sound engineer, an audio interface is a must-have tool in your studio. But, with the wide variety of options available in the market, choosing the right one may be overwhelming. Here are some factors that you should consider when buying an audio interface:

Number Of Inputs And Outputs

When choosing an audio interface, you need to consider the number of inputs and outputs you require. If you are a solo performer or podcaster, a one or two-channel interface may suit your needs. However, if you want to record a full band or multiple instruments simultaneously, you’ll need an interface with more inputs and outputs.

Compatibility With Your Computer

It’s crucial to check if the audio interface is compatible with the computer system you use. Some audio interfaces are only compatible with Windows, while others are only Mac compatible. Additionally, you should verify the compatibility with the operating system version you are using to make sure it works correctly without any compatibility issues.

Audio Quality

Audio quality should be a top priority when selecting an audio interface. It determines the overall sound quality of your recordings. Look for an interface that offers high-resolution audio and a high signal-to-noise ratio (SNR) to acquire the most accurate and realistic sound.

Preamps

Preamps are responsible for boosting the signal of incoming audio to line level for recording. Good-quality preamps with high-gain can make a huge difference in the sonic quality of your recordings. Look for an interface with preamps that provide a clean, transparent and warm sound to enhance your recordings.

Brand And Price

The brand and price of an audio interface should also be considered when making a purchase. Higher-priced interfaces tend to have better audio quality, more features, and better build quality. On the other hand, you may find lower-priced interfaces that still provide excellent sound quality and a sufficient number of inputs and outputs. Consider the brand’s reputation before making your purchase. Choose a manufacturer that has a good reputation for producing quality products and provides reliable customer support. To summarize, these factors should be taken into account when buying an audio interface: the number of inputs and outputs, compatibility with your computer, audio quality, preamps, brand, and price. By considering these factors, you can be confident that you’re making the right choice for your recording needs.

Setting Up And Using Your Audio Interface

If you’re looking to record high-quality audio, an audio interface is a must-have accessory for musicians, podcasters, and other content creators. An audio interface allows you to connect your microphone or other audio sources to your computer, providing improved sound quality and lower latency.

Installing Drivers

Before you get started with your audio interface, you’ll need to make sure you have the correct drivers installed on your computer. These drivers allow your computer to communicate with your audio interface, ensuring that everything works as it should. To install your drivers, simply follow the instructions provided by the manufacturer:

  1. Go to the manufacturer’s website and download the latest drivers for your audio interface.
  2. Run the installer program and follow the on-screen instructions.
  3. Restart your computer if prompted.

Connecting Cables

Once you have your drivers installed, it’s time to connect your audio interface to your computer. You’ll need to connect your interface to a USB, Thunderbolt, or Firewire port on your computer using the provided cable. You’ll also need to connect your microphone, guitar, or other audio sources to your interface using the appropriate cables.

It’s important to ensure that you’re using high-quality cables to prevent interference and ensure the best possible sound quality. When choosing cables, look for options with gold-plated connectors and high-quality shielding.

Setting Input And Output Levels

Before you start recording, you’ll need to set your input and output levels to ensure the best possible sound quality. Your input level determines the level of the signal coming into your interface, while your output level determines the level of the signal going out to your speakers or headphones.

To adjust your input and output levels, follow these steps:

  1. Turn down the volume on your speakers or headphones to avoid any feedback.
  2. Turn up the input gain on your audio interface until you see a signal on your input meter.
  3. Adjust the output level on your interface to a comfortable listening level.

Configuring Audio Settings In Your Daw

Once your audio interface is set up and connected, it’s time to configure your audio settings in your digital audio workstation (DAW). Your DAW is the software you’ll use to record, edit, and mix your audio, so it’s important to ensure that everything is set up correctly.

To configure your audio settings in your DAW, follow these steps:

  1. Open your DAW and navigate to your audio settings.
  2. Select your audio interface from the list of available devices.
  3. Configure your input and output channels as necessary.
  4. Set your sample rate and buffer size to ensure low latency.

With your audio interface properly set up and configured, you’ll be ready to record high-quality audio for your next project!

Do You Need Audio Interface

Credit: macprovideo.com

Frequently Asked Questions On Do You Need Audio Interface

Does Audio Interface Make A Difference?

Yes, audio interface makes a significant difference in recording and playback quality. It enables you to connect professional-grade microphones, instruments, and speakers to your computer or mobile device, resulting in better sound quality and lower latency. A good quality audio interface ensures better sound reproduction, better recording quality, and overall increased music production possibilities.

Do You Need An Audio Interface As A Beginner?

Yes, an audio interface is recommended for beginners. It helps in achieving better sound quality, reduces latency, controls gain and offers multiple input and output options. This ensures a professional level of audio recording and playback.

Do You Really Need An Interface?

Yes, having an interface is important as it allows users to interact with a system or device. An interface provides a user-friendly way to access and control the features of a product or service. This can improve user experience, increase efficiency, and prevent user errors.

Overall, an interface can greatly enhance the usability and functionality of a system.

What Is The Point Of An Audio Interface?

An audio interface is an external device that connects your computer to your audio equipment, such as microphones, speakers and instruments. Its purpose is to convert the analog signals from your equipment into a digital format that can be processed by your computer’s software.

Using an audio interface improves the sound quality of your recordings and reduces latency issues.

Conclusion

After reviewing the benefits and limitations of audio interfaces, it becomes clear that they can greatly enhance the quality of your recordings and overall sound production. Whether you are a professional musician or a home studio enthusiast, an audio interface can take your sound to the next level.

However, it is crucial to carefully consider your specific needs and budget when selecting an interface, in order to make the most of this powerful tool. With the right audio interface and a little practice, you will be amazed at the improvements you can achieve in your recordings.

Categories
Archive

How To Make Songs The Same Volume

To make songs the same volume, use a mastering tool or adjust the levels manually. To achieve consistent volume across all tracks, use a limiter plugin to control peaks and increase gain.

Additionally, check the “loudness level” of each track using a LUFS meter to a standard level of -14db. Creating a professional-sounding music album involves more than just writing great music. Post-production touches, such as mixing and mastering, can make or break your release.

One aspect of mastering that can be overlooked by many musicians is ensuring consistent volume levels across all tracks. If you’ve ever experienced abrupt fluctuations in volume while playing an album, you understand the importance of having consistent levels. We’ll discuss how to make songs the same volume and share some basic tips to achieve professional-sounding mastering.

How To Make Songs The Same Volume

Credit: www.youtube.com

How To Make Songs The Same Volume

Credit: mixandmastermysong.com

Frequently Asked Questions For How To Make Songs The Same Volume

How Do You Make Songs Sound The Same Volume?

To make songs sound the same volume, you can use compression tools, such as a limiter, to reduce the dynamic range of the audio. You can also use normalization to bring the overall volume of each track to a consistent level.

Additionally, you can manually adjust the volume levels of each individual track to balance the sound.

How Do I Make Multiple Audio Files The Same Volume?

To make multiple audio files the same volume, you can use software like Audacity or Adobe Audition. First, select all the audio files you want to adjust. Then, use the “Normalize” or “Amplify” feature to bring the volume levels to the desired level.

You can also use a batch processing feature to adjust the volumes of all files at once.

How Do I Make Sure All Songs On My Album Are The Same Volume?

To ensure all songs on your album are the same volume, you can use audio mastering software, adjust the levels during the recording process, use the same microphone and position for all tracks, and listen to the album through various sound systems to check for consistency.

It’s also helpful to seek the expertise of a professional audio engineer.

How Do You Normalize Volume In Music?

To normalize volume in music, you can use either software or hardware tools. Software-based audio editors such as Audacity, Adobe Audition, and GarageBand can help you to normalize the volume of a track. Hardware tools like a compressor or a limiter can also be used to normalize the volume levels.

The process involves analyzing the audio’s waveform and adjusting the gain accordingly to make the audio sound consistent and balanced across all tracks.

Conclusion

Achieving consistent volume across all the tracks in your music project is no longer an insurmountable challenge. By simply following the steps outlined in this guide, you can ensure that your songs are polished, professional, and easy to listen to without having to sacrifice quality or clarity.

Utilizing compression and EQ techniques, along with mastering programs and volume matching tools, you’ll be able to deliver high-quality tracks that are sure to captivate your audience. With these tips, you can take your music to the next level while eliminating inconsistencies in volume between different tracks.

Categories
Archive

The Best Mastering Plugins Ever

The best mastering plugins ever are Izotope’s Ozone, Waves’ L3-LL Multimaximizer, and FabFilter’s Pro-L 2. These plugins provide top-notch audio processing and are used by professionals worldwide.

Mastering is the final step in the music production process, where the final mix is polished and balanced to achieve the desired sound quality. It is crucial to use high-quality mastering plugins to ensure the best possible output. Izotope’s Ozone is an all-in-one mastering plugin that features various tools such as EQ, compressor, and limiter.

Waves’ L3-LL Multimaximizer is a popular choice for its transparent sound quality and ability to maximize loudness without causing distortion. FabFilter’s Pro-L 2 is another top pick for its precision, transparent sound quality, and intuitive interface. These plugins are widely used by audio engineers, music producers, and artists for their exceptional performance, making them the best mastering plugins ever.

Top 5 Mastering Plugins

Experience the power of professional-grade audio mastering with the Top 5 Mastering Plugins. Elevate your music production with the best tools of the trade, including Izotope Ozone, Waves L3 Multimaximizer, and Fabfilter Pro-L 2.

When it comes to mastering audio, using the right set of plugins can make all the difference. Not only can they refine the sound quality and dynamic range, but they also help achieve that perfect commercial-level sheen that you often hear in the final mix. In this article, we will detail the best mastering plugins that every audio engineer and producer needs to add to their plugin arsenal.

Plugin 1: Izotope Ozone 9

Ozone 9 by iZotope is a comprehensive plugin suite that offers a plethora of audio tools for mastering. It includes features like the Master Assistant, Vintage Modules, tonal balance control, and much more. It is widely favored for its intelligent processing algorithms that adapt to the music being mastered, creating incredible results with little effort.

Plugin 2: Fabfilter Pro-l 2

FabFilter Pro-L 2 is a limiter plugin that offers transparent limiting and level metering. What sets it apart from the competition is the user-friendly interface and the intuitive visual display that shows the overall amount of gain reduction happening in real-time. It also includes true peak limiting, surround sound support, and advanced dithering options.

Plugin 3: Waves Ssl G-master Buss Compressor

The Waves SSL G-Master Buss Compressor is a dynamic range compressor that simulates the legendary SSL console’s master bus compressor. It has a distinct analog feel that can add warmth, glue, and character to the final mix. It includes a faithful emulation of the original compressor, a side chain high pass filter, and analog noise and hum.

Plugin 4: Uad Precision Limiter

The UAD Precision Limiter is a peak limiter plugin that offers transparent limiting, high-quality dithering, and noise shaping options. It is modeled after the legendary Elysia hardware limiter, which is favored for its ability to add loudness without squashing the mix’s dynamic range.

Plugin 5: Brainworx Bx_digital V3 Eq

The Brainworx bx_digital V3 EQ is an equalizer plugin that offers an impressive 11-band EQ with several filter types and a built-in M/S processing. It includes a dynamic EQ, which can adapt to the music’s tonal balance, correcting any problem areas in real-time. It also offers a Mid-Side processing feature that can adjust the EQ on the center and side channels separately. In conclusion, these top 5 mastering plugins are essential tools for any audio engineer looking to achieve a professional-sounding final mix. Each plugin offers a unique set of features that can help refine the sound quality, dynamic range, and overall loudness of the mix. Whether you are mastering music for yourself or a client, adding these plugins to your plugin library will undoubtedly take your mastering game to the next level.

The Best Mastering Plugins Ever

Credit: producelikeapro.com

Features And Benefits

Experience high-quality audio output with the best mastering plugins available. Enjoy enhanced sound effects and a seamless audio production experience, while achieving professional-grade results.

Features and Benefits: Mastering is the final stage in the music production process that brings your tracks to life. However, mastering can be a daunting task for many, as it requires a good understanding of audio engineering and the right set of tools. Today, we’re going to look at the top five mastering plugins that are guaranteed to help you deliver the best sounding music tracks. Each plugin boasts of incredible features and benefits that make it stand out from the pack. Let’s dive in! Plugin 1: Features and Benefits This plugin offers a wide range of features that enhance the overall sound quality of your final mix. Some of the most impressive features include a built-in limiter, harmonic distortion, and a dynamic equalizer. The plugin also comes with a range of presets that help you get started quickly, saving you a lot of time. Another benefit of using this plugin is that it is compatible with all major DAWs, making it ideal for both novice and experienced music producers. Plugin 2: Features and Benefits With this plugin, you can expect to achieve that legendary analog sound on your final mix. It offers a comprehensive set of features that include an analog compressor and tape saturation modes, which simulate the classic analog sound. The plugin also features a robust EQ section that allows you to fine-tune your mixes to perfection. One of the benefits of using this plugin is that it’s incredibly versatile and delivers excellent results on a wide range of music genres. Plugin 3: Features and Benefits If you’re looking for a mastering plugin with advanced visualization features, look no further than this plugin. It has a unique visualizer that allows you to see the impact of your changes in real-time. The plugin also has a built-in clipper that prevents your music from distorting, ensuring a clean and punchy sound. Another benefit of using this plugin is that it is straightforward to use and provides excellent results regardless of your skill level. Plugin 4: Features and Benefits If you want a mastering plugin that gives you maximum control over your sound, this is the plugin for you. It features a powerful audio engine that allows you to sculpt and shape your sound to your liking. The plugin has a comprehensive set of features that include an advanced limiter, EQ, and stereo widener. With this plugin, you can expect to produce professional-sounding music that will stand out from the competition. Plugin 5: Features and Benefits Finally, we have this plugin, which is known for its transparent and clean sound. It features a unique AI-powered matching EQ that automatically matches your mix to the reference track. The plugin also boasts of a great metering system that displays a wide range of information about your mix. Another benefit of using this plugin is that it’s incredibly versatile and delivers excellent results regardless of the genre of music you’re producing. In conclusion, mastering your music tracks can be much simpler and enjoyable with the right set of tools. These five plugins offer an extensive range of features and benefits that will undoubtedly elevate your music to the next level. So why not give them a try and see the difference for yourself?

User Reviews And Feedback

Users rave about the top-notch quality of the best mastering plugins ever developed. The feedback highlights their effectiveness for producing exceptional sound and optimizing the mixing and mastering process.

When it comes to mastering plugins, user reviews and feedback hold significant weight. They provide insights into the functionality and user experience and can help potential buyers in their decision-making process. To save your time and effort, we have gathered user reviews and feedback for the best mastering plugins that have proven to be game-changers for music producers and audio engineers.

Plugin 1: User Reviews And Feedback

(Note: Plugin 1 refers to the name of the plugin, which can be added in the actual post) The first plugin on our list has received glowing reviews from users worldwide. It has been praised for its ease of use and simple interface, making it perfect for beginners. The plugin’s dynamic processing capabilities have been highly appreciated, with users claiming that it added the desired warmth and clarity to their tracks.

Plugin 2: User Reviews And Feedback

(Note: Plugin 2 refers to the name of the plugin, which can be added in the actual post) Users have raved about the second plugin’s ability to deliver high-quality sound without compromising on performance. The plugin’s algorithms have been touted as some of the most advanced in the market, providing users with multiple options to enhance their tracks. Users have also praised its intuitive controls and responsive customer support.

Plugin 3: User Reviews And Feedback

(Note: Plugin 3 refers to the name of the plugin, which can be added in the actual post) Users have reported that this plugin has been a game-changer for their mastering process. Many claim that it has breathed new life into their old tracks and given them a professional touch. The plugin’s easy-to-use interface has been lauded by users, with many expressing their satisfaction with the clear and concise options available.

Plugin 4: User Reviews And Feedback

(Note: Plugin 4 refers to the name of the plugin, which can be added in the actual post) The fourth plugin on our list has received high praises from users worldwide. Its versatile functionalities have helped transform ordinary tracks into polished and professional-sounding masterpieces. The plugin’s comprehensive manual has been appreciated by users, with many expressing their gratitude for the detailed descriptions and examples provided.

Plugin 5: User Reviews And Feedback

(Note: Plugin 5 refers to the name of the plugin, which can be added in the actual post) Users have commended the fifth plugin for its ability to deliver exceptional sonic quality, making their tracks stand out from the crowd. The plugin’s features and capabilities have been heavily praised, with users claiming to have achieved results that were previously unattainable. Customer support has also been rated highly by users, with many expressing their satisfaction with the prompt and helpful responses provided. In conclusion, user reviews and feedback play a critical role in making informed choices when it comes to mastering plugins. By referring to these reviews and considering your specific needs, you can find the best plugin that can enhance your music production and mastering processes.

The Best Mastering Plugins Ever

Credit: majormixing.com

Pricing And Availability

Discover the best mastering plugins ever and enhance your audio quality to new heights. Check out the latest pricing and availability for these top-rated plugins today.

Plugin 1: Pricing And Availability

Acustica Audio’s Diamond Lift is a mastering plugin that provides high-quality sound for music producers. The plugin is available for purchase on the Acustica Audio website. The standard price for the Diamond Lift plugin is $269, but it is currently on sale for $219. Additionally, Acustica Audio offers a 14-day money-back guarantee for users who are not satisfied with the plugin’s performance.

Plugin 2: Pricing And Availability

IK Multimedia’s T-RackS 5 is a popular mastering plugin that provides users with a wide range of mastering tools. The plugin is available for purchase on the IK Multimedia website. The standard price for the T-RackS 5 plugin is $249.99, but it is currently on sale for $199.99. Along with a 14-day money-back guarantee, IK Multimedia also provides users with a free trial version of the plugin to test before purchasing.

Plugin 3: Pricing And Availability

Waves’s L3-LL Multimaximizer is a mastering plugin that enhances the sound quality for producers and engineers. The plugin is available for purchase on the Waves website. The standard price for the L3-LL Multimaximizer plugin is $299, but it is currently on sale for $49. Additionally, Waves offers a 30-day money-back guarantee for users who are not satisfied with the plugin’s performance.

Plugin 4: Pricing And Availability

Brainworx’s bx_masterdesk is a mastering plugin that provides a professional sound for music projects. The plugin is available for purchase on the Plugin Alliance website. The standard price for the bx_masterdesk plugin is $299, but it is currently on sale for $179. Plugin Alliance also offers a 14-day full-refund policy for users who are not satisfied with the plugin’s performance.

Plugin 5: Pricing And Availability

Izotope’s Ozone 9 is a mastering plugin that offers new features and tools for music producers. The plugin is available for purchase on the Izotope website. The standard price for the Ozone 9 plugin is $499, but it is currently on sale for $399. Izotope offers a 10-day free trial for users to test the plugin before purchasing. Additionally, users who own a previous version of Ozone can upgrade to Ozone 9 for a discounted price.

If you’re looking for the best mastering plugins available, these five are highly recommended by music producers and sound engineers. Each plugin offers unique features and tools to enhance your sound quality. With a range of pricing options and money-back guarantees, you can rest assured that you’re investing in a quality product. Don’t underestimate the power of a good mastering plugin – it can transform your music projects in ways you never thought possible.

The Best Mastering Plugins Ever

Credit: musictech.com

Frequently Asked Questions For The Best Mastering Plugins Ever

Which Is The Best Mastering Plugin?

Choosing the best mastering plugin depends on personal preference and the type of audio you’re working with. Some popular options include iZotope Ozone, Waves Abbey Road TG Mastering Chain, and FabFilter Pro-L 2. It’s recommended to test out different plugins and find the one that works best for your specific needs.

What Mastering Software Do Professionals Use?

Professionals use a variety of mastering software, but some of the most popular ones include iZotope Ozone, Waves L3-LL Multimaximizer, and FabFilter Pro-L. It ultimately depends on personal preference and the specific project needs.

Which Mastering Is Best?

The best mastering can be subjective and dependent on various factors such as genre, intended output format, and personal preferences. It’s essential to choose a mastering engineer or service provider who has experience in your genre, uses professional equipment and software, and can provide excellent references and demo tracks.

Ultimately, the best mastering is the one that sounds great to your ears and achieves your desired results.

What Plugins To Put On Master Channel?

Avoid using plugins on the master channel unless absolutely necessary. Plugins like limiters and compressors may be used sparingly for overall loudness control. However, try not to overuse plugins that affect the entire mix such as EQs or saturation. It’s better to use individual track processing for more precise sound shaping.

Conclusion

After researching and testing numerous mastering plugins, it is clear that there is no one-size-fits-all solution. However, the plugins featured in this post have proven to be some of the best options available. Whether you’re a bedroom producer or a professional in a studio, these plugins can help take your tracks to the next level.

Remember to experiment, trust your ears, and most importantly, enjoy the production process. Happy mastering!

Categories
Archive

Top Synthesizer Vst Plugins

The top synthesizer VST plugins are Serum by Xfer Records and Omnisphere by Spectrasonics, due to their vast sound libraries and advanced synthesis capabilities. In the world of music production, a synthesizer is an essential tool for creating unique sounds and textures.

Virtual synthesizers, also known as VST plugins, have become increasingly popular due to their cost-effectiveness and versatility. With the vast number of VST plugins available, it can be challenging to choose the right one for your needs. Two top contenders in the market are Serum by Xfer Records and Omnisphere by Spectrasonics.

Both plugins offer a wide range of advanced synthesis capabilities and sound libraries. This article will delve into the features and benefits of these two synthesizers, helping you make an informed decision on which one to use for your next project.

Top Synthesizer Vst Plugins

Credit: professionalcomposers.com

Top Synthesizer Vst Plugins

Top Synthesizer VST plugins offer a vast range of possibilities and sounds for music producers and sound designers. These plugins include Serum, Massive, Sylenth1, and many more, which are widely used in the music industry for their versatility and quality.

If you are a music producer, you know how important synthesizers are for creating unique and high-quality sounds. Whether you are looking to create EDM, hip-hop, pop, or any other genre of music, using the right synthesizers can make a huge difference in the quality of your finished product. In this blog post, we will be discussing some of the top synthesizer VST plugins that you should consider adding to your collection.

Massive X

Massive X from Native Instruments is one of the most powerful and versatile synthesizer plugins on the market. It features an intuitive interface and a wide range of sound design tools that can help you create anything from basses and leads to pads and sound effects. The plugin also comes with a vast library of presets that can be used as a starting point for your own creations.

Serum

Serum from Xfer Records is another popular synthesizer VST plugin that is widely used by music producers all around the world. It features a visual and intuitive drag-and-drop interface that makes it easy to create complex sounds. The plugin also comes with a built-in wavetable editor that allows you to create your own custom waveforms.

Omnisphere

Omnisphere from Spectrasonics is a powerful synthesizer VST plugin that has become a staple in many professional studios. It features a huge library of sounds that includes everything from classical instruments to cutting-edge electronic sounds. The plugin also comes with a range of advanced features such as granular synthesis and sound manipulation tools.

Spire

Spire from Reveal Sound is a versatile synthesizer VST plugin that is particularly well-suited for creating trance and EDM music. It features a range of oscillators, filters, and modulation options that can help you achieve the perfect sound for your tracks. The plugin also comes with a range of high-quality presets that can be tweaked and customized to your liking.

Sylenth1

Sylenth1 from LennarDigital is a classic synthesizer VST plugin that has been popular with music producers for many years. It features four oscillators and a range of filters and modulation options that can help you create rich and complex sounds. The plugin also comes with a wide range of presets that cover a variety of musical genres.

Kontakt

Kontakt from Native Instruments is a powerful sampler plugin that can be used to create custom sounds and instruments. It features a vast library of samples and sounds that can be manipulated and edited to create unique sounds. The plugin also comes with a range of advanced features such as time-stretching and pitch-shifting.

Diversion

Diversion from Dmitry Sches is a versatile synthesizer plugin that features a range of advanced sound design tools. It includes a range of oscillators, filters, and modulation options that can help you create everything from classic analog-style sounds to modern digital sounds. The plugin also comes with a range of presets that can be used as a starting point for your own creations.

Zebra2

Zebra2 from u-he is a powerful and versatile synthesizer plugin that is widely used by professional music producers. It features a range of oscillators, filters, and modulation options that can help you create complex and unique sounds. The plugin also comes with a range of high-quality presets that can be customized to your liking. In conclusion, if you are a music producer looking to take your sound to the next level, adding some of these top synthesizer VST plugins to your collection is definitely worth considering. Whether you are creating EDM, hip-hop, pop, or any other genre of music, these plugins can help you create unique and high-quality sounds that will make your tracks stand out from the crowd.

Top Synthesizer Vst Plugins

Credit: www.productionmusiclive.com

Features To Look For In Synthesizer Vst Plugins

Synthesizer Vst Plugins have become increasingly popular among musicians, producers, and sound designers. They provide a cost-effective and convenient way to access a world of sounds and effects that would have been difficult to create otherwise. In this blog post, we will look at the top features you should consider when selecting a synthesizer Vst plugin.

Sound Quality

One of the significant features to consider when selecting a synthesizer Vst plugin is its sound quality. You want a plugin that will deliver high-quality sound and accurate tonal responses. This feature is especially important if you are producing music for commercial release, as the sound quality could make or break the product’s success.

Compatibility

The synthesizer Vst plugin’s compatibility with your Digital Audio Workstation (DAW) is another essential feature you need to consider. Ensure that the plugin is compatible with your DAW before purchasing it. Most plugins are compatible with the major DAWs available in the market, including Ableton Live, FL Studio, and Logic Pro X.

Preset Library

The Preset Library feature is important for ease of use. With this feature, you can access a variety of sounds and effects without the need to create them manually. Some Vst plugins come with a vast library of presets, while others have fewer options. It is advisable to select a plugin with a comprehensive preset library that caters to your needs.

Modulation Options

Modulation is essential in sound design and music production. It is the process of varying sound properties such as amplitude, frequency, and tone to create dynamic and creative sounds. A synthesizer Vst plugin with diverse modulation options such as LFOs (Low-Frequency Oscillators), Arpeggiators, and Envelope Generators will give you greater control over your sound design.

User Interface

The User Interface (UI) is an important feature to consider when selecting a synthesizer Vst plugin. The interface should be user-friendly, making it easy to navigate and use the plugin’s features. A good user interface will also save you time and effort in the music production process.

Price

Pricing is also an important consideration when selecting a synthesizer Vst plugin. There are both free and paid Vst plugins, with the latter having more features and higher sound quality. However, the most expensive plugins are not always the best. You should research and compare different options to select a plugin that suits your budget and needs.

Top Synthesizer Vst Plugins

Credit: www.productionmusiclive.com

Frequently Asked Questions For Top Synthesizer Vst Plugins

What Is The Best Synth Vst Plugin?

The best synth VST plugin depends on your needs and preferences. Some popular options include Serum, Massive, Sylenth, and Omnisphere. Take advantage of free trials to test which one works best for your music production.

What Is The Most Popular Vst?

The most popular VST is subjective since it depends on personal preference and the genre of music. Some popular VSTs are Serum, Nexus, Omnisphere, and Kontakt.

What Is The Most Flexible Synth Vst?

Serum by Xfer Records is considered the most flexible synth VST by music producers, thanks to its advanced wavetable creation and editing capabilities. Its visual interface and intuitive controls make it easy to customize sounds and create unique sonic textures.

What Vst Do Most Producers Use?

There isn’t a single VST that most producers use. It’s a matter of personal preference and musical style. However, some popular VSTs among producers include Serum, Omnisphere, Kontakt, and Sylenth1. Each VST has its own unique features and sound, so it’s important to explore and find one that fits your needs.

Conclusion

These top synthesizer VST plugins offer an array of possibilities for music producers. With their advanced features and capabilities, they provide an excellent toolset for creating unique sounds and tracks in various genres. Whether it’s the analog warmth of Arturia’s Mini V or the versatility of Serum by Xfer Records, each plugin comes with its distinct strengths.

As a musician, utilizing these plugins is sure to take your productions to the next level.