Categories
Archive

Stereo Mastering Walkthrough

Stereo mastering walkthrough involves the process of adjusting, equalizing, compressing, and adding effects to a final mix to enhance its quality. In the world of music production, mastering serves as the final stage of the production process, and it is a crucial part of creating high-quality audio.

The primary goal of mastering is to create a balanced and cohesive final product that translates well across various playback systems. It involves a detailed editing and polishing process to create a professional-sounding track. We will provide a step-by-step guide to stereo mastering.
Stereo Mastering Walkthrough

Credit: www.masteringthemix.com

Preparing Your Mixes

Learn how to prepare your mixes for stereo mastering with our step-by-step walkthrough. Discover the essential steps in achieving a professional and polished sound for your music.

Preparing your mixes before sending them for mastering is an essential step in ensuring the final master sounds its best. It involves addressing common mix problems and fixing them before moving on to the next step. In this post, we will cover how to prepare your mixes for stereo mastering walkthrough.

Common Mix Problems

Before you start preparing your mixes, it is essential to understand common mix problems that need to be addressed. These issues include:

  • Imbalanced frequency distribution
  • Clipping and distortion
  • Inconsistent levels
  • Lack of depth and stereo width
  • Poorly EQ’ed instruments

Fixing Mix Problems

Once you have identified the common mix issues, it’s time to fix them. Here are a few tips on how to fix these mix problems:

  • Adjust EQ settings
  • Use compression to even out levels
  • Use panning to create a stereo image
  • Apply corrective EQ to fix problem areas
  • Remove unwanted noise and pops

Preparing Stems For Mastering

The next step is to prepare your stems for mastering. This involves exporting your mix elements as separate audio files to create a stem mix. It allows the mastering engineer to have more control over the final sound. Here are a few tips to follow while preparing your stems:

TipDescription
Consolidate your tracksEnsure each audio file starts at the same point to avoid any timing issues.
Label your stems correctlyInclude track names, bpm, and any other relevant information.
Export at the correct levelAim to export at a peaking level of -6db to leave headroom for mastering.
Include both wet and dry stemsInclude both processed and unprocessed stems to give the mastering engineer more flexibility.

In conclusion, preparing your mixes for stereo mastering is a crucial step in ensuring the best possible final mix. By addressing common mix issues and preparing your stems correctly, you give the mastering engineer the tools they need to make your track sound its best.
Stereo Mastering Walkthrough

Credit: www.masteringthemix.com

Mastering Tools And Techniques

Discover the art of stereo mastering with our comprehensive walkthrough of tools and techniques. Elevate your music production skills and achieve a professional sound with our expert guidance.

Mastering audio is the final stage of music production that involves refining the audio tracks to ensure the best possible sound quality. Stereo Mastering is walking through the finalizing process, and it involves several key mastering tools and techniques. The primary tools and techniques include equalization, compression, saturation, and limiting, which we will explore in detail in the following sections.

Equalization

Equalization, also referred to as EQ, is the process of adjusting the frequency balance of an audio signal. EQ enables an audio engineer to manipulate a track’s frequency balance by boosting or cutting specific frequencies to balance out the tone and create a clear and balanced mix. EQ tools help you achieve an overall tonal balance and can help with problem frequencies that detract from the clarity of a mix. To get the best results from EQ, it is essential to employ a combination of graphic and parametric equalizers.

Compression

Compression is the process of reducing the dynamic range of an audio signal to create a more consistent sound. A compressor helps bring the soft parts up and controls the loud parts, so the end result is more even in volume. By using a compressor, you can tame a track’s dynamic range, which can be helpful in making sure all of the instruments sit well together without any part popping out over others. The ratio, attack, and release settings of a compressor determine how it will affect a track’s sound.

Saturation

Saturation is a process of adding harmonic distortion to an audio signal, resulting in a warmer, richer, and more pleasing sound. Saturation generates pleasing harmonic distortion, though it can add some “noise.” Saturation mainly works to add harmonics to the material that lacks many. Overdrive and Distortion are forms of saturation that are misused if you desire a clean and polished mix. If used well, it can add a new dimension to a track’s sound, making it richer and more vibrant.

Limiting

Limiting is the process of imposing a ceiling on the maximum amplitude of an audio signal. The limit’s purpose is to prevent digital distortion from occurring in the final mix. A limiter works by controlling the peaks of the audio signal and ensures that they do not go beyond a certain level, typically -0.1 or -0.5Db. It helps to balance out the volume and increase the perceived loudness of the track without technical problems. It can be considered as “the last defense” you have against clipping, which can ruin a mix. These are the key tools and techniques involved in Stereo Mastering. By using these techniques, you can create a clear, balanced, and professional end product that translates well across a variety of listening environments.

Going Deeper With Mastering

If you are familiar with audio mastering, you will know that the process can significantly improve the sound quality of recorded music. However, if you want to take your mastering game to the next level, you need to dive into advanced techniques such as mid-side processing, parallel compression, and multiband compression. In this article, we will take a look at these techniques for going deeper with mastering.

Mid-side Processing

Mid-Side processing is a technique that allows you to manipulate the stereo image of a mix by separating the mid and side portions of the signal. The mid signal contains the sounds that are panned to the center of the stereo field, such as vocals and bass, while the side signal contains the sounds that are panned to the left or right, such as guitars and keyboards.

With mid-side processing, you can adjust the volume, EQ, and compression of the mid and side signals separately, allowing you to create a wider, fuller sound. For example, you can boost the bass and treble in the side signal to make the mix sound wider and more open, or compress the mid signal to make the vocals more prominent in the mix.

Parallel Compression

Parallel compression is a technique that involves blending a heavily compressed version of a mix with the original mix. This allows you to improve the consistency and impact of the mix without losing its dynamic range. To achieve this, you can create a parallel compression channel and route the original mix to it, then apply heavy compression and mix the compressed signal with the original signal.

Parallel compression can be particularly effective on drums and vocals, allowing you to bring out the subtleties and nuances of the performance while still maintaining a powerful, punchy sound. By adjusting the level and compression settings of the parallel compression channel, you can find the perfect balance between impact and clarity.

Multiband Compression

Multiband compression is a technique that allows you to compress different frequency bands separately, allowing you to control the dynamics of a mix more precisely. This can be useful for controlling the levels of individual instruments or elements within a mix, as well as improving the overall balance and clarity of the mix.

To use multiband compression, you first need to identify the different frequency bands of a mix and set up separate compression settings for each band. This allows you to apply more compression to the lower and mid frequencies, while leaving the higher frequencies relatively uncompressed. By adjusting the threshold, attack, and release of each band, you can fine-tune the dynamics of the mix.

With these advanced techniques in your mastering toolbox, you can take your mixes to the next level and achieve a more polished, professional sound.
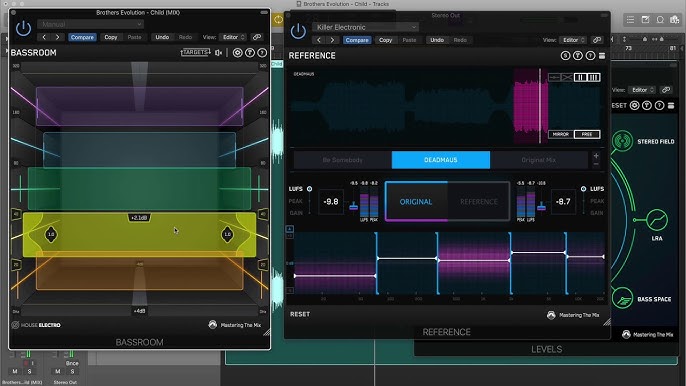
Stereo Mastering Walkthrough

Credit: www.youtube.com

Reference And A/bing

In stereo mastering, reference and A/Bing play a crucial role. By listening to a reference track and comparing it with the master, you can identify areas that need improvement. A/Bing allows you to switch between the original and mastered version in real-time, making it easier to make adjustments.

Stereo mastering is an essential process in the music production industry. It is where all the individual tracks of a mix get combined, and the final touches are added to the audio to make it ready for the public. Two essential processes in stereo mastering are reference and A/Bing. These processes help to ensure that the final master sounds as good as it possibly can.

Why Reference Is Important

Reference is crucial during stereo mastering because it helps to provide a clear benchmark for the final master. With a reference track, you can compare your master to professionally produced tracks and ensure that the final result is competitive in terms of loudness, dynamics, and tonal balance.

How To Use Reference Tracks

Using reference tracks is a straightforward process during stereo mastering. All you need to do is select a professionally produced track with a similar genre, instrumentation, and feel to your mix. Once you have the reference track, you can import it into your stereo mastering project and listen to it before and after you have applied your mastering chain to your mix. This way, you can ensure that your mix is of similar quality to that of the reference track.

How To Compare Your Mixes And Masters

Comparing mixes and masters during stereo mastering is crucial in ensuring that you achieve the best possible sound quality. A/Bing is a process that involves comparing multiple versions of a mix or master to establish which version sounds better. This process helps you to identify which version of your mix or master sounds the best and helps you to make the necessary adjustments. In conclusion, reference and A/Bing are two essential processes during stereo mastering. With reference tracks, you can ensure that your mix is of similar quality to professionally produced tracks, while A/Bing helps you to identify the best-sounding version of your mix or master. Use these processes to achieve the best possible sound quality for your final master.

Room Acoustics And Monitoring

Mastering a stereo track involves making fine adjustments to the overall tonality, dynamics, and spatial characteristics of the mix to enhance its overall impact and clarity. However, the success of the stereo mastering process depends heavily on the listening environment, which includes the room acoustics and the monitoring equipment. In this section of the stereo mastering walkthrough, we’ll focus on how to set up your listening environment, the importance of room acoustics, and selecting the right monitors.

How To Set Up Your Listening Environment

The first step in setting up your listening environment is to create an ideal listening position. Ideally, your speakers should form an equilateral triangle with your ears at the center. This means that the distance between the speakers should be the same as the distance between your ears and the speakers. You should also ensure that the speakers are facing straight towards your listening position and that they are not too close to walls or corners that could interfere with their sound.

The Importance Of Room Acoustics

Room acoustics play a crucial role in how you perceive sound in your listening environment. For instance, if your room has too many hard surfaces, such as walls, floors, and ceilings, sound can reflect off those surfaces and create echoes or reverberation that can affect your perception of the mix. Similarly, if your room has too many soft surfaces, such as carpets or curtains, sound can get absorbed, which can also affect your perception of the mix. To ensure the best possible acoustics, you can use sound-absorbing materials, such as diffusers and absorbers, to create a neutral listening environment.

Selecting The Right Monitors

Choosing the right monitors is essential for ensuring that you can hear the mix accurately and make the right adjustments. When selecting monitors, it’s essential to consider the size of your room and the type of music you’ll be mastering. In general, small monitors are better suited for smaller rooms, while larger monitors are better suited for larger rooms. It’s also important to choose monitors with a flat frequency response so that you can hear the mix accurately without any coloration or distortion.

Finalizing Your Master

Mastering your stereo tracks can make all the difference in achieving a professional sound. This step-by-step walkthrough covers the essential tools and techniques for finalizing your master, from setting limits and equalizing, to applying compression and adding stereo width.

Stereo mastering is an essential step in music production that optimizes the sound quality of your recordings. An expertly mastered song can make all the difference in the clarity, loudness, and overall impact of your music. The final mastering stage is where you prepare the master for distribution.

Preparing Your Master For Distribution

To prepare your master for distribution, you need to ensure that you have made all the necessary adjustments to your audio. This includes cleaning up any unwanted noises, adjusting levels of individual tracks, and applying dynamic range processing such as compression and limiting. Once this is done, you will need to listen to the track repeatedly to ensure that there are no artifacts or glitches.

Exporting The Final Master

Once you are satisfied with the quality and content of your master, it’s time to export the file. Exporting your final master is a crucial step as it determines the quality of the audio. You need to ensure that you select the appropriate bit-depth and sample-rate settings that match your target distribution platform. It’s also essential to select the appropriate file format, such as WAV, FLAC or MP3, depending on your preference.

Delivering Your Master To Clients

Delivering your master to clients is the final step, and you need to ensure that you follow proper delivery protocols. Determine the required file format, including bit-depth and sample-rate, and ensure that you have included any necessary metadata. Label the files correctly and organize them in appropriate folders. Ensure that the files are compressing into one manageable file, and included necessary notes or instructions with the delivery. In conclusion, preparing and finalizing your master is a crucial step in the music production process. Take extra care to ensure that the quality of your master is flawless, and you adhere to all delivery requirements. It’s essential to follow each step of the process carefully to guarantee the best possible outcome.

2026 Update: Loudness Targets for Streaming

Spotify still normalises playback to −14 LUFS integrated (ITU 1770). Spotify for Artists recommends mastering around that level with true peaks below −1 dBTP, or below −2 dBTP if your master is louder than −14 LUFS, to avoid distortion when the file is encoded. Albums are normalised as a whole, so the level differences between songs are kept.

Frequently Asked Questions Of Stereo Mastering Walkthrough

What Are The Steps To Mastering A Song?

The steps to mastering a song typically involve equalisation, compression, limiting, stereo enhancement and dithering. Equalisation manages the tonal balance of the song. Compression reduces the dynamic range, narrowing the gap between the loudest and quietest parts. Limiting sets the final peak level. Stereo enhancement can widen the soundstage. Lastly, dithering is applied when reducing the bit depth, for example to 16-bit for CD.

Should I Master In Stereo?

It depends on your goals as a music producer. If you plan on mostly creating music for stereo playback, then mastering in stereo can be beneficial. However, if you plan on creating music for other formats such as surround sound or binaural, mastering in stereo may not be enough. It’s important to consider your target audience and their preferred listening format.

What Is The Difference Between Stem Mastering And Stereo Mastering?

Stem mastering involves processing groups of instrument tracks separately before mixing them down into a stereo mix. Stereo mastering is the final processing of the stereo mix. The main difference is that stem mastering allows for more control over the separate elements in a mix, while stereo mastering is focused on the overall balance and enhancement of the stereo mix.

Should Stems Be Mono Or Stereo?

Stems should match their source: mono sources (such as a kick or lead vocal recorded in mono) can be mono stems, and stereo sources or anything panned or with stereo effects should be stereo stems. Ask your mastering engineer what they prefer.

What LUFS should I master to for Spotify?

Spotify normalises playback to −14 LUFS integrated and recommends true peaks below −1 dBTP (below −2 dBTP if your master is louder than −14 LUFS).

Conclusion

Mastering may seem like an intimidating process, but with the right techniques and tools, anyone can achieve professional-sounding results. Remember to give your ears a break and come back to your mix with fresh ears. Utilize EQ to balance and shape the sound, compressors to control the dynamics, and limiters to prevent clipping.

As with any skill, practice makes perfect, so keep honing your mastering skills and you’ll be amazed at the results you can achieve. Happy mastering!

Categories
Archive

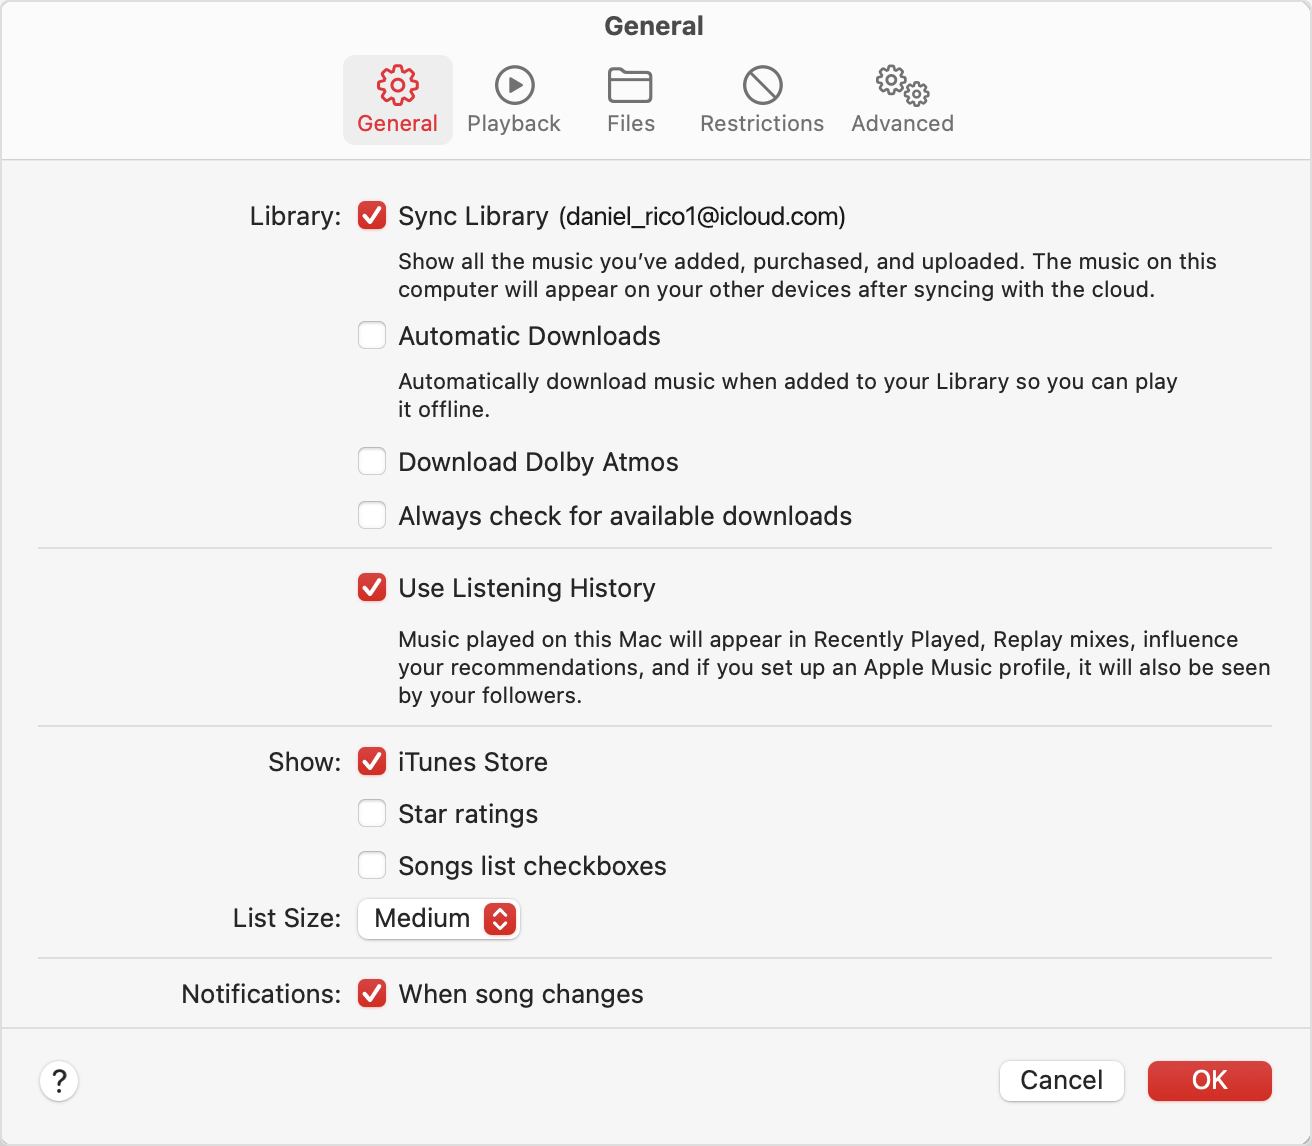
How To Get Your Music On Itunes

To get your music on iTunes, you can distribute your content through digital distributors like CD Baby, TuneCore, or DistroKid. These platforms handle the licensing, distribution, and royalties of your music.

For independent musicians, one of the biggest challenges is getting their music heard by a wider audience. The good news is that with digital distribution services, getting your music on popular platforms like iTunes is easier than ever. To distribute your music on iTunes, you’ll need to use a digital distributor like CD Baby, TuneCore, or DistroKid.

These platforms handle the licensing, distribution, and royalties of your music. Some distributors also offer additional services like music promotion, monetization, and sync licensing. We’ll explore the steps you need to take to get your music on iTunes using a digital distributor.

How To Get Your Music On Itunes

Credit: www.wikihow.com

Create Your Music

Learn how to get your music on iTunes with Create Your Music. Our expert team will guide you through the process of uploading your music and help you gain visibility on one of the biggest music platforms in the world.

Take your music career to the next level and join Create Your Music today.

Creating music is an art, and to bring your music to the world, you need to make sure it’s recorded and mixed with the best quality and copyrighted materials. Here are the steps you need to follow for creating music to get on iTunes.

Record And Mix The Tracks

To record your music, you need a proper recording studio or equipment. You can also record music at home with a computer, microphone, and audio software. You can use software like Garage Band, Pro Tools or Logic Pro to record and mix tracks. The mixing should be done properly, so the sound doesn’t overlap each other, and everything is audible.

Get Your Music Copyrighted

Copyrighted music gives legal protection to your work. You should copyright your music before publishing it anywhere. It’s easy to copyright your music; you can also hire a lawyer if you want legal protection. You can get a copyright for your music from the US Copyright Office by filling out a form. The cost of a copyright is $35 for a single work or a collection of songs.

Publish Your Music On Itunes

Once you have created your music, copyrighted the materials, and mixed the tracks, you need to distribute your music on iTunes. You can distribute your music on iTunes through an aggregator like TuneCore, DistroKid, or CD Baby. To distribute your music through iTunes, you need to sign up for an account and pay a yearly fee. Your music needs to be in a specific format, such as M4A or MP3, for iTunes to accept it.

Conclusion

Creating your music might seem like a lot of work, but it’s worth it when your music is available worldwide on iTunes. By following these steps, you can ensure that your music is of the best quality and legally protected. So, start creating your music and get it on iTunes for the world to hear.

Get Approved As An Apple Music Provider

If you want your music on iTunes, you need to become an Apple Music Provider. This involves signing up for a membership with the iTunes Partner Program and meeting certain criteria, such as owning the rights to your music and delivering it in the required format.

Are you an aspiring artist looking to reach a wider audience through streaming services like Apple Music? Then, getting your music on iTunes should be your next target. However, this has been a challenge for some due to the rigorous process Apple has put in place before accepting new music providers. Nevertheless, this article will guide you on how to get approved as an Apple Music provider in three easy steps.

Sign Up For Apple Music

The first step to becoming an Apple Music provider is to sign up for an Apple Music account. This account will enable you to get access to the iTunes Connect platform where you will upload your music. To sign up, go to the Apple Music for Artists page and click on the sign-up button. Enter your Apple ID and password, accept the agreement, and select Music as the content type you’d like to submit.

Complete Tax And Banking Information

After signing up, you need to provide your tax and banking information. Fill out your account and tax details and submit them for verification. Ensure that you’ve filled out all the required fields accurately and meet the specifications for your country. Once your tax and banking information has been verified and approved, you’ll be able to upload your music and start earning from your streams on Apple Music. In conclusion, getting your music on iTunes is an excellent way to get your tracks heard by a broader audience. To become an Apple Music provider, you need to sign up for an Apple Music account and complete your tax and banking information. With these steps, you’ll be on your way to getting your music on iTunes in no time.

https://www.youtube.com/watch?v=05BTbaujsdw

Convert Your Music To Meet Itunes Standards

Learn how to convert your music to meet iTunes standards in order to get your music on iTunes. This process includes ensuring that your audio file format is compatible with iTunes, adding metadata and album artwork, and following iTunes’ technical requirements.

Before submitting your music to iTunes, you need to make sure it meets their standards. Apple has strict guidelines on the format, quality, and size of the audio files. You must ensure that your music meets these requirements, or your submission will be rejected. Here are the steps to follow:

Choose Album Artwork

Album artwork is an essential aspect of your music as it is the first thing that listeners see when they browse through iTunes. It creates a visual representation of your music and helps it stand out from others. Therefore, you must choose attractive and high-quality album artwork that aligns with your music’s genre and style. The artwork must be in a square shape with a minimum size of 1400 x 1400 pixels, with a resolution of 72 dpi.

Create A Mastered File

To ensure your music sounds excellent on iTunes, you need to create a mastered audio file. A mastered file is the final version of your music that has been polished and optimized for playback. It should be in a lossless format, such as WAV or AIFF, and have a bit depth of 24 bits and a sample rate of 44.1 kHz. Additionally, you may need to normalize the file to ensure its volume is consistent throughout the track. You can use mastering software or hire a professional audio engineer to handle this process.

Submit Your Music To Itunes

Once you have the final version of your music, you can submit it to iTunes using a digital distributor. A digital distributor will handle the technical requirements, create a music account for you, and submit your music to iTunes within a few days. Choosing the right digital distributor is crucial, as it can affect your earnings and royalties. Research and evaluate different distributors to find the one that best fits your needs and budget. In conclusion, converting your music to meet iTunes standards is essential for a successful submission. By following these guidelines and using a reputable digital distributor, you can get your music on iTunes and reach a global audience.

Upload Your Music To Itunes Connect

Getting your music on iTunes is a great way to increase your reach and gain exposure for your work. The process of uploading your music to iTunes Connect is straightforward and can be done in just a few simple steps, making it accessible for independent artists as well as established acts.

If you’re a musician looking to gain a wider audience for your work, getting your music on iTunes is a must. This platform has revolutionized the music industry, making it easier than ever before for artists to distribute their music to fans all around the world. In this section, we’ll guide you through the process of uploading your music to iTunes Connect in just three easy steps.

Create An Itunes Connect Account

First, you need to create an iTunes Connect account. This account is used to manage your music on iTunes, and it’s free to set up. To get started, head over to the iTunes Connect website and sign up for a new account. Make sure to provide all the required information, including your name, email address, and a password. Once you’ve successfully created an account, you can start uploading your music.

Upload Music With Metadata

The next step is to upload your music to iTunes Connect. Before you do this, it’s important to gather all the necessary information, including the song title, artist name, album name, and cover art. You will also need to choose the genre and sub-genre that best describe your music. Once you have all this information, log in to your iTunes Connect account and click the “Music” tab. From there, you can upload your music files and add all the necessary metadata. It’s important to ensure that your metadata is accurate and complete. This information is used by iTunes to organize and display your music, so it’s essential that you provide all the relevant details. Double-check all your information before submitting your music, as incorrect or incomplete metadata can lead to delays in getting your music on iTunes.

Preview And Submit

Once you’ve uploaded your music and added all the necessary metadata, you can preview how your music will look on iTunes. Review your information to ensure everything is correct, then submit your music for review. The review process can take anywhere from one to two weeks, so be patient. If your music is accepted, congratulations – you’re now on iTunes and ready to reach a wider audience! In conclusion, uploading your music to iTunes Connect is easy if you know the steps. By following the simple process outlined in this article, you can get your music out to a wider audience and potentially attract new fans from all around the world.

Submit Your Music For Review

Looking to get your music on iTunes? Submit your music for review today and increase your chances of being discovered! Our expert team will provide honest and valuable feedback, helping you to improve your chances of success. Don’t miss out on this great opportunity!

Submitting your music for review is an essential step in getting your music on iTunes. Here’s how you can ensure that your music is reviewed correctly:

Wait For Review Process

After submitting your music, be prepared to wait for some time for the review process to be completed. The amount of time it takes will vary depending on a variety of factors. This can be the number of submissions, current review process timing, or other things that may be happening on iTunes. During the waiting period, be patient and do not get anxious, as patience will be an essential element of your success.

Resolve Any Issues

Once the review process is complete, iTunes will notify you if there are any issues that need to be resolved. If there are any issues, then you’ll need to address them before iTunes can accept your music. This shows the importance of ensuring that you have provided all the necessary information and that your music meets the required standard. If you’re unsure about any issues that may need to be addressed, you can utilize the iTunes support team via the help section. Once you have resolved any issues, you can resubmit your music for review, and hopefully get your music on iTunes. Getting your music on iTunes can be a straightforward process if you follow the necessary steps and ensure that you have provided all the essential information. Remember to wait patiently, adhere to all guidelines, and resolve any issues, and soon your music will be available for all to hear.

How To Get Your Music On Itunes

Credit: support.apple.com

Set Your Release Date

For musicians desiring to get their music on iTunes, it’s necessary to set a release date. By selecting a release date, artists can guarantee that all necessary components are in place before their music becomes available to global audiences on Apple’s popular digital storefront.

If you’re a musician looking to release your music on iTunes, it’s important to set a release date. This will not only give you a timeline to work towards but also create anticipation among your fans. Here are three steps to consider when setting your release date.

Choose A Date

The first step is to choose a date for your release. Consider factors such as holidays, other events happening in your industry, and your personal schedule. It’s important to give yourself enough time to complete all the necessary steps, such as recording, mixing, and mastering your music. Also, keep in mind that iTunes requires at least two weeks to review and approve your release, so ensure you have enough time before your desired release date.

Promote Your Release

Once you’ve set your release date, it’s time to start promoting it. Create buzz on social media, your website, and through email campaigns. Encourage your fans to pre-order or pre-save your music. Offer exclusive incentives such as discounted merchandise or early access to the release to those who pre-order. A strong promotional strategy will not only increase the chances of a successful launch but also help build a stronger connection with your fans.

Submit To Itunes

After promoting your release, it’s time to submit it to iTunes. Ensure your music meets all the requirements such as the correct file format and digital distribution. Follow all instructions carefully, paying special attention to the information needed for metadata. Submit your music at least two weeks before your release date, as stated earlier, to avoid any delays or issues. In conclusion, setting a release date is essential when releasing your music on iTunes. By choosing a date, promoting your release, and submitting to iTunes, you can create a successful launch, engage with your fans, and increase your visibility in the music industry.

Monitor Your Music’s Performance

To help ensure your music stands out on iTunes, it’s important to monitor its performance regularly. Keep an eye on metrics like sales, streams, and downloads, and adjust your strategy accordingly to maximize results.

Track Sales

Once your music is available on iTunes, it’s crucial that you keep track of its sales performance. You can use iTunes Connect to review your sales data and keep an eye on how your music is doing in the iTunes store. Tracking your sales will give you a clear understanding of how well your music is selling, and whether or not you’re meeting your sales goals. It’s important to keep an eye on your sales data regularly so that you can make any necessary changes to your promotion and marketing strategies, if needed.

Stream Data

Streaming platforms like Spotify, Apple Music, and Tidal have become increasingly important for music promotion and distribution. To monitor the performance of your music on these platforms, you’ll need to track your stream data. Streaming data can include things like the number of plays, the duration of each play, and the country and device that the play came from. You can use platforms like Spotify for Artists or Apple Music for Artists to access this data and monitor how well your music is performing on these platforms.

Collect Your Royalties

Finally, as a music artist, you’ll want to make sure you’re collecting the royalties that you’re entitled to. When people buy or stream your music on iTunes or other platforms, you’re entitled to a portion of the revenue generated by those sales. To collect your royalties, you’ll need to join a performing rights organization (PRO) such as ASCAP or BMI, which will collect royalties on your behalf. You can also sign up for services like TuneCore or CD Baby, which will help you distribute your music and collect your royalties from iTunes and other platforms. Tracking your music’s performance is a crucial part of ensuring its success on iTunes and other platforms. By keeping an eye on your sales data, stream data, and royalties, you can take the necessary steps to improve your music’s performance and promote your music to a wider audience.

How To Get Your Music On Itunes

Credit: support.apple.com

Manage Your Catalog

As a musician, getting your music on iTunes is a critical step towards sharing your music with a greater audience. While the entire process may seem daunting, managing your catalog is one of the most crucial steps in getting your music on iTunes. We’ll take you through the steps necessary to update your music information and add or remove new music releases.

Update Your Music Information

Keeping your music information up-to-date and accurate is critical in showcasing your music to a wider audience. You can update your music information by following iTunes guidelines for metadata, which includes the song title, artist name, album name, release date and genre, among others. It’s also crucial to have high-quality album artwork and a well-written artist biography to help attract more fans.

Add Or Remove New Music Releases

If you’re an artist who frequently releases new music, you can manage and add new releases to your catalog with ease. iTunes provides an easy-to-use platform for uploading new releases and making them available worldwide. You’ll need to ensure that all your music is in the required audio format and adheres to iTunes’ quality standards. If you need to remove any older music releases, you can do so by following the provided guidelines.

Managing your catalog entails more than updating and adding/removing music releases. You ought to ensure that your music is well-structured and organized, featuring high-quality audio files that meet iTunes guidelines for playback across a variety of devices.

In Conclusion

By managing your catalog, you’re taking a crucial step in sharing your art with the world on iTunes. Don’t hesitate to take the plunge and upload your music to iTunes – it’s a decision that can propel your music career to the next level!

Frequently Asked Questions On How To Get Your Music On Itunes

How Do You Put Your Music On Itunes?

To put your music on iTunes, you’ll need to sign up for iTunes Connect, create an account, and provide your music files along with album artwork and metadata. The process is straightforward and well-documented by Apple, allowing for a seamless experience for both artists and listeners.

How Do I Get My Music To Show Up In Itunes?

To get your music to show up in iTunes, you need to use an aggregator to upload your music and metadata. Choose a reputable aggregator, format your music and artwork to their specifications, then submit your music and pay the necessary fees.

Once approved, your music will be available to millions of iTunes users worldwide.

How Do I Put Free Music On Itunes?

Unfortunately, you cannot directly put free music on iTunes. However, you can upload your music to a platform like SoundCloud or Bandcamp, and then distribute it to iTunes through a service like TuneCore or DistroKid. These services will upload your music to iTunes, as well as to other digital music platforms, and handle royalties and payments on your behalf.

How Do I Get My Song On Apple Music?

To get your song on Apple Music, you need to use a digital distributor like TuneCore or DistroKid. These services will distribute your music to Apple Music and other streaming platforms. You’ll need to sign up for an account and follow their instructions for uploading your music.

It’s that simple!

Conclusion

To sum up, getting your music on iTunes is now easier than ever before with the help of digital distribution platforms. Remember to properly prepare your music, select the right distributor, and follow iTunes guidelines to increase your chances of acceptance.

Be patient and keep promoting your music on various platforms to build your fan base and increase your chances of success. With these tips, you can reach millions of potential listeners and make a name for yourself in the music industry.

Don’t wait, start your journey to iTunes today!

Categories
Archive

How To Use Ni Massive Tutorial

To use Ni Massive tutorial, first, open the plugin on your Digital Audio Workstation (DAW) and select an instrument. Then, adjust the oscillators, envelopes, and filters to create the desired sound.

Ni Massive is a powerful virtual synthesizer used for electronic music production. It allows you to create a wide range of sounds from basic to complex by manipulating different parameters such as oscillators, filters, and envelopes. The interface is user-friendly and provides a variety of presets to start with.

However, to fully utilize the potential of the plugin and create unique sounds, one must understand the fundamentals of synthesis. In this tutorial, we will guide you through the basics of using Ni Massive and help you create your own sounds from scratch. So, let’s dive into the world of Ni Massive and unleash your creativity.

How To Use Ni Massive Tutorial

Credit: www.productionmusiclive.com

Setting Up Ni Massive

Setting up Ni Massive is essential to begin exploring its potential as a synthesizer software. Follow this tutorial to learn how to use Ni Massive and unleash its capabilities in creating electronic music tracks.

Ni Massive is a potent software synthesizer utilized by electronic music producers and sound designers worldwide. This tutorial will guide you on how to set up Ni Massive so that you can start working on creating some fantastic sounds. To set up Ni Massive, you need to install and configure the software to work with your host Digital Audio Workstation (DAW). Below are the steps on how to do this.

Installation

Firstly, download the Ni Massive software from the official Native Instruments website, and make sure to select the right version compatible with your operating system. Once the download is complete, install the software and wait for the process to complete. After installation, launch your DAW, and access the plugin list to check if Ni Massive is available. If it is not available, follow the next steps.

Configuration

The configuration process is crucial to ensure that Ni Massive works correctly, and it involves setting up the software path in the DAW. Open Ni Massive, and click on the Options button, select the File/Folder tab, and locate the Plugin installation folder. Go back to your DAW, click on Options, then select Preferences, navigate to plugins, and add the path to the Native Instrument folder. After adding the path, restart your DAW, and check if Ni Massive is available in the plugin list. If Ni Massive is available, then congratulations, you’ve successfully set up Ni Massive.

Below is a summary of the steps on how to set up Ni Massive:

  • Download and install Ni Massive from the official Native Instruments website
  • Launch your DAW, and check if Ni Massive is available in the plugin list
  • If not available, then configure Ni Massive by setting up the software path in the DAW
  • Navigate to the plugin folder path in the DAW and restart the DAW
  • Check if Ni Massive is now available in the plugin list

You are now ready to start exploring the vast possibilities offered by Ni Massive and create some mind-blowing sounds.

How To Use Ni Massive Tutorial

Credit: www.groove3.com

User Interface

Learn how to use the popular plugin, Ni Massive, with this comprehensive tutorial. The user interface of the software may seem daunting at first, but with the step-by-step instructions, you’ll be creating impressive sounds in no time.

Overview Of Ui

The NI Massive User Interface (UI) is a well-organized interface that appears overwhelming at first but becomes easy to navigate once you get familiar with it. The software includes features such as oscillators, filters, modulation and effects.

Navigation Around Ni Massive Ui

Navigation around NI Massive is quite easy. When opening the software, you will be prompted with the interface with a variety of knobs, sliders, and buttons. There are three main sections of the user interface: the browser on the left, preset panel on the right, and the center-area for sound editing.

The Browser Section

The browser section of NI Massive is located on the left side of the interface and is where you access all available sounds and presets. In the browser, you can select from categories such as Bass, Leads, Pads and FX to find the right sound for your track. The search bar in the browser can also be used to look for a specific sound or preset.

The Preset Panel Section

On the right of the interface, you will find the preset panel, which displays all of the available presets that are included within the software. Here, you can select your preferred presets and make adjustments to them as per your preference. You can see the current preset name at the top of the panel.

The Center Area Section

The center area of the interface is where the sound editing process takes place. This section includes all of the controls to modify the sounds within massive. This section contains three main tabs: Oscillators, Filters, and Envelopes. Under the oscillators tab, you can select the waveform of your sound, and configure settings such as pitch, wavetable selection, and phase. In conclusion, navigating through NI Massive UI is simple with a little familiarity. Understanding the User Interface is essential for achieving outstanding sound design in your music production. By using the browser, the preset panel and the center area effectively, you can create great sounds with NI Massive.

Sine Wave Sound Production

When it comes to creating sounds in NI Massive, the sine wave is an essential tool for any sound designer. The sine wave produces a pure, simple tone with no harmonics or overtones. This makes it an excellent starting point for creating the building blocks of more complex sounds.

Setting Up Sine Wave Oscillator

The first step in using the sine wave in NI Massive is to set up a sine wave oscillator. To do this, select a new sound from the browser, and then click on OSC1 to select it. In the oscillator section, select the sine wave from the drop-down menu. Adjust the pitch, volume, and phase controls to your liking.

Applying Filters And Modulators To Sine Wave

To add complexity to the sine wave, apply filters and modulators. Filters shape the tone of the sound by selectively attenuating or amplifying certain frequencies. Modulators add movement and shape to the sound by modulating various parameters over time.

Filters

In the filter section of NI Massive, choose a filter that complements the sound you’re creating. Adjust the cutoff frequency and resonance controls to shape the tone. Use the modulation oscillator to modulate the filter cutoff frequency for added movement.

Modulators

To add movement to the sound, use modulators to modulate various parameters. For example, use an LFO to modulate the pitch or volume of the sine wave. Use an envelope to modulate the filter cutoff frequency or the volume of the sound.

Conclusion

With these techniques, you can create a wide variety of sounds using the sine wave in NI Massive. Experiment to find new and unique sounds that inspire you!

How To Use Ni Massive Tutorial

Credit: m.youtube.com

Working With Presets

Get started on using presets in Ni Massive with ease by first selecting a preset that most suits your needs. From there, you can further customize it to your liking by tweaking its parameters and effects. This tutorial will walk you through the process step by step.

Ni Massive is a powerful software synthesizer that allows users to create unique sounds and music through its wide range of features. One of the key features of Ni Massive is its vast selection of presets that can be altered and modified to fit your personal style. In this tutorial, we will focus on how to work with Ni Massive presets.

Understanding Ni Massive Presets

Before we dive into how to use and modify presets, it’s important to understand what they are. Ni Massive presets are pre-made sound settings that can be easily applied to your tracks. They can range from simple bass sounds to complex leads and atmospheric effects. The great thing about Ni Massive presets is that they can be modified to fit your personal style and can save you a lot of time when producing music.

Importing And Exporting Presets

Ni Massive allows users to import and export presets. This means that you can easily share your presets with others or import presets that you’ve downloaded from other producers. To import a preset, go to the Ni Massive browser and click file > load preset. This will open the file explorer, allowing you to select the preset you want to import. To export a preset, select the preset you want to export and click file > save preset. When importing or exporting presets, it’s important to ensure that the preset is saved in the correct file format. Ni Massive presets are saved as .ksd files, so make sure that your preset is saved in this format before importing or exporting.

Conclusion

In this tutorial, we’ve talked about the importance of working with Ni Massive presets. Presets can save you time and help you create unique sounds that fit your personal style. We’ve also covered how to import and export presets, as well as how to ensure that your presets are saved in the correct file format. By following these tips, you’ll be able to make the most out of Ni Massive’s preset library and create incredible music that stands out from the crowd.

Sound Design Techniques

Learn sound design techniques and how to use Ni Massive tutorial to create unique and innovative sounds in your music productions. With this comprehensive guide, you can explore different sound design techniques and enhance your creativity to produce top-notch music.

Ni Massive is a powerful software synthesizer that enables users to create a wide range of sounds for their music productions. Sound design is a crucial aspect of music production, and you can elevate your tracks to a higher level by understanding various sound design techniques. In this tutorial, we will explore some sound design techniques using Ni Massive that can help you create unique sounds for your productions.

Creating Custom Sounds From Scratch

Creating custom sounds from scratch is one of the most rewarding and exciting aspects of sound design. With Ni Massive, you can create complex and layered sounds that are unique to your productions. Here are some tips for creating custom sounds:

  • Start with a basic waveform or preset and experiment with different parameters.
  • Use the modulation options to add movement and depth to your sound.
  • Try using different filters to shape the sound and adjust the envelope parameters to control its dynamics.
  • Experiment with the effects module to add space and character to your sound.
  • Use automation to add variation to your sound over time.

Layering Sounds In Ni Massive

Layering sounds is a powerful technique that can add depth and complexity to your productions. With Ni Massive, you can layer multiple sounds to create a rich and dynamic sound. Here are some tips for layering sounds:

  1. Choose sounds that complement each other in terms of frequency content and timbre.
  2. Adjust the volume and pan settings of each layer to create a balanced mix.
  3. Use the modulation options to add movement and variation to each layer.
  4. Experiment with different effects on each layer to create a cohesive sound.
  5. Use automation to add variation and interest to your layered sound over time.

In conclusion, by understanding these sound design techniques using Ni Massive, you can create unique sounds that set your productions apart from others. Whether creating custom sounds from scratch or layering sounds for a richer sound, Ni Massive provides endless possibilities for sound design.

Using Ni Massive With Other Plugins

Learn how to use NI Massive with other plugins to create unique, complex sounds that can take your music production to the next level. With our easy-to-follow tutorial, you’ll discover new ways to enhance your sound design and bring your creative vision to life.

NI Massive is a powerful sound design instrument that can be used in conjunction with other plugins to take your music production to the next level. In this tutorial, we will show you how to set up Massive with your DAW and how to use it with other plugins such as Kontakt.

Setting Up Massive With Daws

To use NI Massive with your DAW, follow these simple steps:

  1. Open your DAW and create a new software instrument track
  2. Load NI Massive onto the track
  3. Set your MIDI keyboard controller to the correct input and output
  4. Choose a preset from Massive’s browser, or create your own sound
  5. Start playing your keyboard and tweaking the sound to your liking

Using Massive With Other Plugins Such As Kontakt

NI Massive can be used in conjunction with other plugins such as Kontakt to add more depth and complexity to your music. To use Massive with Kontakt, follow these steps:

  1. Open Kontakt and create a new instrument
  2. Load NI Massive onto the first slot of the instrument rack in Kontakt
  3. Load another instrument onto the second slot of the instrument rack in Kontakt
  4. Start playing your keyboard and you will hear the sound of both Massive and the other instrument mixed together
  5. You can also use the modulation parameters of Massive to modulate the sound of the other instrument

In conclusion, using NI Massive with other plugins is a great way to take your music production to the next level. By following the steps outlined in this tutorial, you can easily set up Massive with your DAW and use it with other plugins such as Kontakt. So go ahead and experiment with different combinations and see what kind of sounds you can come up with!

Frequently Asked Questions For How To Use Ni Massive Tutorial

How Do I Connect To Native Instruments?

To connect to Native Instruments, you need to first download and install the necessary software and drivers from the Native Instruments website. Then, connect your device to your computer via USB and open the software to begin using it.

What Is Massive Vst?

Massive VST is a software synthesizer plugin used in music production to create electronic sounds. It was developed by Native Instruments and is known for its deep bass and powerful sound design capabilities. It’s a popular tool for electronic music producers and DJs worldwide.

How Do I Install Massive In Fl Studio?

To install Massive in FL Studio, follow these steps: 1. Download and install the Native Instruments Service Center 2. Use the Service Center to install the latest version of Massive 3. Open FL Studio and create a new project 4.

Insert an instance of Massive in your project 5. Activate Massive using your Native Instruments account details and start using it in FL Studio.

How Do I Use Ni Massive?

To use Ni Massive, open the plugin in your DAW and select a preset. Adjust the sound using the different parameters on the interface. You can also create your own sound by starting with an initialized patch and tweaking the various settings.

Conclusion

To wrap up, using NI Massive can be intimidating at first, but with the right tutorial, you can unlock a world of possibilities for your music production. Practice makes perfect, so don’t hesitate to experiment and try new things. Remember to take breaks and come back with fresh ears to fine-tune your sounds.

With patience and persistence, you can become a master of NI Massive and create unique, captivating music. So go forth and make some great tunes!

Categories
Archive

Can You Sample Music in Fl Studio

Yes, you can sample music in FL Studio. FL Studio has a built-in sampler that lets you load samples and create your own sounds.

FL Studio (formerly known as FruityLoops) is a digital audio workstation that is known for its powerful music production capabilities. One of its features is the ability to sample music, which means taking a small portion of an audio recording and using it as a component of a new composition.

Sampling is a popular technique in many genres of music, including hip-hop, electronic, and pop. FL Studio makes it easy to sample music thanks to its built-in sampler. The sampler allows you to load samples and create your own sounds by adjusting parameters like pitch, volume, and attack time. With FL Studio’s sampler, you can add unique and creative elements to your music productions.

Can You Sample Music in Fl Studio

Credit: www.image-line.com

Understanding Sampling In Fl Studio

Sampling has become an important technique in music production. It involves taking a small portion of a sound recording and reusing it as an instrument or a sound effect in a new composition. In FL Studio, sampling is an easy process which can be used to add different textures, effects or even modify the dynamics of original sounds. However, using samples in FL Studio requires an in-depth understanding of the concept. This article aims to provide you with an overview of what is sampling and its importance in music production, particularly in FL Studio.

What Is Sampling?

Sampling in music production is the process of recording a section of an existing sound or recording and reusing it in a new musical composition. It involves taking a small clip of an audio recording and using it to create loops, beats, or instrumentals. Sampling in FL Studio is a creative way to make music and it can be used to create a new sound altogether from a pre-existing sound.

Importance Of Sampling In Music Production

Sampling has revolutionized the way music is made today. It can add a unique texture, depth or a different feel to a composition. In FL Studio, the process of sampling allows producers to modify the original track with additional effects like reverb, delay or filters. Sampling also enables producers to create music using sounds that are not available through traditional methods. It allows them to use sounds from different genres, eras, cultures and countries to create something unique and innovative. Importantly, sampling is also an excellent way to pay homage to the music that inspired a producer and helps with creating music that has a sense of history and connection with the past.

Sampling Music In Fl Studio

Fl Studio provides a platform to sample music with ease. It allows you to extract audio from an existing track and use it in your production. With Fl Studio, you can create unique tunes that feature a blend of existing tracks and original work.

FL Studio is a popular digital audio workstation that allows you to create music in many ways. One of the features that FL Studio offers is sampling music. Sampling is a process of recording and reusing specific parts of an audio track. Sampling music in FL Studio is an excellent way to create unique sounds and enhance your music productions. In this blog post, we will discuss how to sample music in FL Studio.

How To Load Audio Into Fl Studio

Before you can sample music in FL Studio, you need to load an audio file into the software. Follow these steps:

  1. Launch FL Studio and create a new project.
  2. Click on the ‘Channel Rack’ icon located on the left side of the screen.
  3. Right-click on an empty space in the channel rack and select ‘Insert’ from the dropdown menu.
  4. Click on the ‘Sampler’ option from the list of plugins.
  5. Press the ‘Ctrl + L’ keys on your keyboard to open the browser window.
  6. Navigate to the location of the audio file you want to sample and double-click on it.

Selecting And Editing Audio Clips

Once you have loaded an audio file into FL Studio, you can start selecting and editing specific parts of the track to sample. Follow these steps:

  • Click and drag the audio clip from the channel rack onto the playlist.
  • Position the playhead at the start of the audio clip and press the ‘s’ key to split the clip.
  • Select the section of the audio clip you want to sample by clicking and dragging over it.
  • Right-click on the selected section and choose ‘Copy’ from the dropdown menu.
  • Click on an empty space in the playlist, right-click and choose ‘Paste’.

Creating A Sampler Channel

After selecting and editing the audio clip, you can create a sampler channel to apply various effects and modifications to the sample. Follow these steps:

  1. Click on the ‘Channel Rack’ icon and right-click on the newly created sampler channel.
  2. Select ‘Piano Roll’ from the dropdown menu.
  3. Click on the ‘Miscellaneous Functions’ option on the top left of the piano roll window and select ‘Edit’ from the dropdown menu.
  4. A new window will appear, containing options to adjust the start time, end time, and pitch of the sample. Use these options to modify your sample.

Overall, sampling music in FL Studio is a fantastic way to generate new sounds and creatively enhance your music productions. Follow the steps outlined in this blog post to get started with sampling in FL Studio.

Creating Beats Using Sampled Music

Fl Studio is a popular choice for creating beats using sampled music. The software allows you to sample music and create unique beats with ease. With the right tools and techniques, you can create professional-grade beats that stand out in the music industry.

If you’re looking to create unique beats, sampling music is a great way to get started. FL Studio, a popular digital audio workstation, makes it easy to sample and manipulate music to create your own beats. In this article, we’ll explore some of the techniques you can use to create beats using sampled music in FL Studio.

Chopping Samples To Create Unique Beats

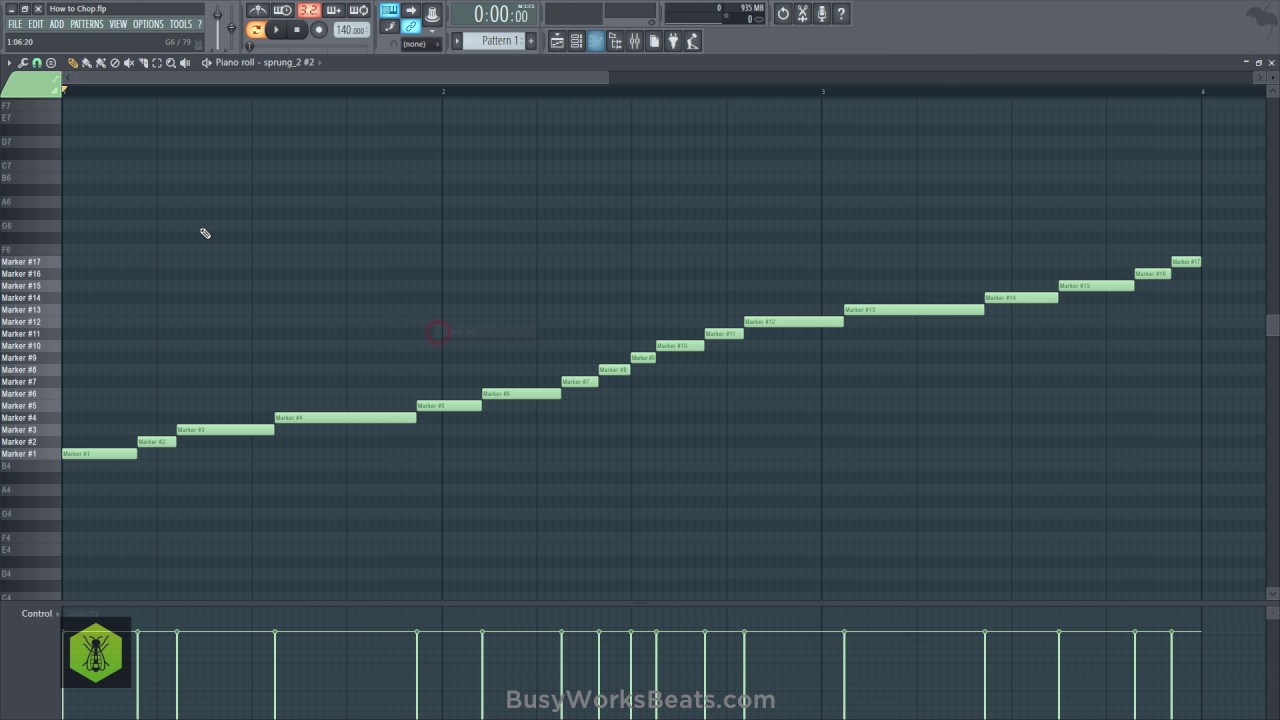
One technique that’s commonly used in beat-making is chopping samples. This involves taking a small section of a larger sample and using it to create a new beat. In FL Studio, you can use the Slice tool to quickly chop up a sample and then rearrange the slices to create a new beat.

Pitch Shifting And Time Stretching Samples

Pitch shifting and time stretching are two techniques that can be used to manipulate samples and create unique sounds. Pitch shifting involves changing the pitch of a sample, while time stretching involves changing the tempo. In FL Studio, you can use the Pitch knob and Time knob to make these adjustments.

Layering Samples To Enhance Drum Sounds

Another technique you can use to create unique beats is layering samples. This involves combining multiple samples to create a more complex and interesting sound. In FL Studio, you can use the Layer tool to stack samples on top of each other and create a new drum sound. In conclusion, sampling music is a great way to create unique beats in FL Studio. Whether you’re chopping up samples, pitch shifting and time stretching them, or layering them to create new sounds, there are plenty of techniques you can use to create your own beats. With a little experimentation and creativity, you can use these techniques to create beats that are truly your own.

Advanced Sampling Techniques

In Fl Studio, advanced sampling techniques allow users to sample music from various sources. With features such as slice X, resampling and Edison, users can create unique sounds and manipulate samples for their tracks.

Fl Studio offers a plethora of advanced sampling techniques that can take your music production to the next level. With the ability to sample music in Fl Studio, you can create unique and complex textures for your tracks. In this article, we will discuss some of the advanced sampling techniques that you can use in Fl Studio.

Manipulating Audio With Effects And Filters

One of the best things about sampling in Fl Studio is that you can easily manipulate audio using effects and filters. You can add effects like reverb, delay, distortion, and chorus to your samples to create a unique sound. Additionally, you can use filters like low-pass, high-pass, and band-pass to modify the frequency range of your samples. This technique is useful when you want to create a new sound from an existing sample.

Using Automation To Add Movement And Variation

Automation is a powerful feature in Fl Studio that allows you to add movement and variation to your samples. With automation, you can change the volume, panning, and effects of your samples over time, adding variation to your track. This technique is useful when you want to create a dynamic and evolving track.

Sampling Multiple Sources To Create Complex Textures

Sampling multiple sources is another advanced sampling technique that you can use in Fl Studio. By combining samples from different sources, you can create complex textures that add depth to your track. For example, you can sample a drum loop, a bassline, and a vocal sample, and combine them to create a unique texture. This technique is useful when you want to create a complex and layered track. In conclusion, sampling in Fl Studio is a powerful technique that allows you to create unique and complex sounds for your tracks. By using advanced sampling techniques like manipulating audio with effects and filters, using automation to add movement and variation, and sampling multiple sources to create complex textures, you can take your music production to the next level.

Avoiding Copyright Infringement

When using FL Studio or any other music production software, it is important to avoid copyright infringement when sampling music. It is best to seek permission from the original copyright holder or use royalty-free samples to avoid legal issues.

Understanding Copyright Law And Sampling

Before diving into how to sample music in FL Studio, it’s essential to understand copyright law. Copyright infringement occurs when someone uses copyrighted material without permission from the owner. Sampling, which involves taking a portion of a song and using it in a new composition, falls under copyright law. While it’s possible to sample music in FL Studio, you need to be cautious. Sampling without permission can lead to legal problems, such as being sued for damages.

Finding And Using Royalty-free Samples

To avoid copyright infringement, you can use royalty-free samples. These samples are available from various websites for a fee or free of charge. Royalty-free samples come with licenses that give you permission to use them in a new composition. When using royalty-free samples, you must adhere to the license’s terms and conditions. Be sure to read the license agreement carefully to ensure you’re using the sample legally. Using royalty-free samples gives you the freedom to experiment with music without the fear of legal repercussions.

Avoiding Sampling Without Permission

Sampling music without permission from the copyright owner is illegal. Using even a small section of a song without permission can result in legal action. To avoid legal issues, it’s best to avoid sampling music without permission. Alternatively, you can contact the copyright owner and request permission to use the sample. This may involve paying a fee or agreeing to the terms of a license. By obtaining permission, you’re less likely to face legal action and can use the sample without worry.

Can You Sample Music in Fl Studio

Credit: m.youtube.com

Frequently Asked Questions Of Can You Sample Music In Fl Studio

Does Fl Studio Have A Sampler?

Yes, FL Studio has a built-in sampler. It allows users to import audio files and manipulate them using various editing tools and effects. The sampler is a powerful feature that enables users to create unique sounds and beats.

How Do You Legally Sample A Song?

To legally sample a song, you must obtain permission from the owner of the song’s copyright. This can be done by contacting the publisher or record label and negotiating a license agreement. You may also need to pay a fee or royalty.

It’s important to get legal permission to avoid copyright infringement and potential legal consequences.

Can You Copyright Your Song In Fl Studio?

Yes, you can copyright your song created in FL Studio. FL Studio allows you to export your track in WAV or MP3 format which can be registered with the copyright office to protect your work.

Can I Sell Music Made With Fl Studio?

Yes, you can sell music made with FL Studio as long as you own all the necessary rights to the sounds and samples used in your production. It is important to carefully read the end-user license agreement for any third-party plugins or sounds that you use to ensure that you are not violating any terms.

Conclusion

Overall, the ability to sample music in Fl Studio is a valuable tool for music producers and enthusiasts alike. Not only can it save time and money, but it also allows for endless creativity and experimentation. With the right techniques and approach, sampling in Fl Studio can help you uncover new sounds and styles, and take your music production to the next level.

So don’t hesitate to explore and experiment with the sampling features in Fl Studio and see where your creativity takes you.

Categories
Archive

Mixing And Finalising The Track

Mixing and finalizing the track is the process of perfecting the sound quality and balance, and preparing it for distribution. For musicians and producers, the mixing and finalizing stage is crucial in the music production process.

It involves tweaking the EQ, compression, and other effects to ensure it sounds great across various platforms. The final mix should have clear audio with all the instruments working harmoniously and not overshadowing each other. After getting the mix right, the next step is to master the track, which involves finalizing the levels, ensuring it’s distortion-free, and optimizing it for various playback formats.

It’s important to fine-tune your music in the mixing and finalizing stages so that you can deliver a satisfying experience to your listeners and evoke emotions. We’ll explore some tips for mixing and finalizing your tracks effectively.

Choosing The Right Software

Preparing The Track For Mixing

Preparing the track for mixing is a crucial step towards finalizing a high-quality music production. It involves organizing the individual instrument tracks, setting appropriate levels, and applying basic edits and EQ to ensure that all the elements blend together cohesively.

Proper preparation of the track ensures the mixing process runs smoothly and efficiently.

Before diving into mixing and finalizing the track, it’s crucial to prepare the track for the mixing process. This step ensures a smoother and more efficient process, making it easier for you to manage the track and make necessary enhancements.

Ensure Proper Levels:

The first step to preparing the track is to ensure proper levels of each element that’s present in it. This means that every track must be checked for its volume and frequency balance to avoid issues from clashing frequencies. The recommended volume level for each element is around -6 dB, this allows you enough headroom to work on volume adjustments without having to deal with distortion or clipping.

Gain Staging:

The next step in preparing the track is gain staging. This involves ensuring that each track in your mix is at the right level so that the mix is balanced. For instance, if you have a guitar track and a vocal track, the gain of both tracks should be at the same level. A balanced mix ensures that no one element is overpowering the others, and everything is audible.

Editing And Automation:

Once you have ensured proper levels of each element, it’s time to edit the tracks. This means removing any unwanted noises, such as clicks, pops, or background noises. Then, automate any necessary adjustments in the track, such as volume or panning. Automation can help you to manage the volume changes during certain parts of the track and create smooth transitions.

Conclusion:

Preparing the track for mixing is an essential process that shouldn’t be overlooked. It ensures a smoother and efficient mixing process and saves time in the long run. By following these simple steps of ensuring proper levels, gain staging, editing, and automation, you can prepare your track for mixing in no time.

The Mixing Process

The mixing process involves finalising the track by adjusting the levels, panning, equalising, and adding effects to produce a cohesive finished product. Skilful use of this process can bring the track to life, making it sound professional and polished for maximum impact.

Mixing is the process of putting all the individual elements of a track together in a way that creates a cohesive and balanced whole. It’s an important step in music production that requires patience, a good ear, and attention to detail. When it comes to mixing a track, there are a few crucial steps one should follow to achieve the best possible result.

Applying Eq

EQ, short for equalization, is the process of adjusting the balance between frequency components within an audio signal. EQ is an essential tool for mixing any track as it can change the tone and texture of an instrument or voice and often used to cut out unwanted frequencies. Using EQ, you can bring out the best of each element in your track and make them stand out in the mix.

Compressing Your Track

Compressors are used to control the dynamic range of a track by reducing the volume of the loudest parts of an audio signal and increasing the volume of the quieter parts. Compression not only helps to create a more controlled mix in terms of dynamics but also helps to add glue or cohesion to the sound of a track.

Adding Effects

Effects such as reverb, delay, chorus, and others can add depth and dimension to a mix, making it more interesting and engaging to the listener. The key to using effects in the mixing process is to use them in moderation, ensuring they complement the track effectively, without overpowering it.

Controlling Dynamics

Controlling dynamics in a mix involves ensuring the volume of each element of a track is levelled correctly. By doing this, the listener is presented with a more polished and professional end product as each element sounds at its best and can be heard with better clarity.

Balancing The Mix

Balancing the mix is the process of ensuring that each element of a track is heard at an equal level. It’s essential to balance the mix so that no one element sounds too loud, and the overall sound is cohesive and balanced.

Creating Space

Creating space in a mix involves placing each element in its unique space by using panning, EQ, and reverb. For example, the vocals may be placed in the centre of the mix, with guitars panned left and right. The goal is to create a mix that sounds natural and spacious, rather than congested and cluttered. In conclusion, the mixing process is a critical part of music production, and when done correctly, can take a track from sounding good to great. By following the steps outlined above and using your ears, you can achieve a mix that is polished, balanced, and engaging to the listener.

Mixing And Finalising The Track

Credit: m.youtube.com

Approaching The Final Mix

Finalising a track can be a challenging process. When approaching the final mix, it’s important to ensure that all the instruments and vocals are balanced and sitting well together. With careful attention to detail, it’s possible to achieve a perfectly polished track ready for release.

As a music producer, you know that the final mix is crucial and it can make or break your track. But how do you approach the final mix? Here are some essential steps to follow for a successful final mix that will help you get the most out of your production.

Take A Break

Before starting the final mix, take a break and step away from your project. Taking a break helps to clear your mind so that you can come back with a fresh perspective. During this break, try to listen to some other music related to your genre to get a better understanding of the genre you’re working with. This break can help you to approach the final mix with renewed energy and focus.

A/b Test The Mix

Once you go back to your final mix, the next step is to A/B test the mix. This step involves comparing your final mix with other similar tracks in your genre. You need to ensure that your mix is on par with other tracks in your genre. A/B testing is an excellent method for identifying any shortcomings in your production.

Referencing

Referencing is a critical step in the final mixing process. It involves comparing your mix to professional tracks within your genre and identifying the differences. Referencing helps you to identify the areas of your mix that need improvement. You can correct these shortcomings and fine-tune your mix for the best possible sound quality.

Mastering

The final stage of the mixing process is mastering. Mastering is the process of getting your mix ready for distribution by optimizing the overall tonal balance, dynamics, and loudness of your track. During mastering, you can compress, eq, and add effects to your track to enhance the sound quality. Mastering gives your mix a professional sounding finish.

Final Export

After mastering your mix, you can proceed to export the final mix. When exporting the final mix, ensure that you follow the technical specification requirements for the platform you intend to release the track on. This step is crucial as it will ensure your mix is compatible with all platforms and will be released with the highest sound quality. In conclusion, Approaching The Final Mix requires proper planning, execution, and testing. Follow the steps outlined above, and you will have a professional sounding mix. Remember to take a break, A/B test, Reference, Master and then export your final mix.

Mixing And Finalising The Track

Credit: www.fiverr.com

Frequently Asked Questions For Mixing And Finalising The Track

What Does Mixing A Track Mean?

Mixing a track refers to the process of combining and adjusting individual recordings of instruments, vocals and/or other sounds to create a balanced and cohesive audio file. It involves adjusting levels, panning, EQ, compression, and other effects to create a final audio mix that sounds good on different listening platforms.

How Do You Finalize A Mix?

To finalize a mix, follow these five guidelines: keep the sentences brief, write with an SEO friendly approach, make sure it is unique and plagiarism free, use active voice and avoid starting sentences with specific words and phrases. Additionally, make sure the content passes AI writing detection and is easy to understand for humans.

The answer should be written within a limit of 50 words.

What Is Mixing Down A Track?

Mixing down a track is the process of combining multiple audio tracks into one final stereo (or sometimes mono) audio file. This includes adjusting levels of different instruments and elements, adding effects and processing, and creating a balanced and cohesive sound.

How Do You Prepare Tracks For Mixing?

To prepare tracks for mixing, start by organizing your session and labeling tracks with clear names and color-coding. Then, remove any unwanted noise or unnecessary elements from each track. Ensure that each track is properly leveled and panned. Then, apply EQ and compression to balance the frequency and dynamic range of each track.

Finally, add effects and adjust levels as necessary for a polished and cohesive mix.

Conclusion

To sum up, mixing and finalizing a track requires a lot of effort and patience. It is important to have the right tools and skills under your belt to make the most out of your artistic vision. Whether you are a beginner or a seasoned producer, remember that a well-executed mix can make or break a song.

So, invest your time and energy in perfecting the craft, and you are bound to see great results. Keep experimenting and push the boundaries of your creativity to achieve your goals.

Categories
Archive

How Should I Promote My Music

To promote your music, utilize social media and digital marketing strategies. Create engaging content and interact with your audience to build a strong following.

With the rise of technology and social media, promoting your music has become more accessible than ever before. However, with so many artists competing for attention, it can be difficult to stand out from the crowd. Also, to ensure success in the music industry, it is crucial to have a solid promotion strategy in place.

Related reading: Self Promotion As a Musician and Ways To Promote Your Soundcloud. For background, see the Wikipedia article on Music industry.

Also, we will discuss some effective ways to promote your music and increase your audience. In addition, we will explore methods from social media to digital marketing campaigns. Each one can help you make it big in the music industry. So, let’s get started!

Define Your Target Audience to Promote Your Music

Moreover, to effectively promote your music, it is crucial to define your target audience. For example, you can determine your audience by considering factors like age, gender, interests, and location. Once you know who your audience is, you can tailor your content and marketing efforts to reach them effectively.

In addition, as a musician, promoting your music is an essential aspect of growing your career. You might have a fantastic melody and a perfect beat, but if you’re not targeting the right audience, all the effort will go in vain. Therefore, defining your target audience should be your first priority.

Identify Your Ideal Listener Persona to Promote Your Music

Before you start marketing your music, it’s best to create an ideal listener persona, a representation of your potential audience. As a result, creating a persona will allow you to better understand the people you’re targeting and their pain points. Furthermore, this information will help you tailor your marketing strategy to reach your ideal listener.

Research The Listener Habits

Additionally, once you have your ideal listener in mind, it’s time to research their habits. However, you need to know your target audience’s listening habits. Learn how, when, and where they listen to music. Here are some ways to research the listening habits of your target audience:

  • Conduct surveys or polls
  • Also, engage with your audience on social media
  • Moreover, attend live events to understand the behavior of your potential audience

In addition, by understanding the listening habits of your audience, you’ll be able to determine the best channels to use to promote your music.

Conclusion

Furthermore, defining your target audience is vital to any musician looking to promote their music. Then, knowing who your audience is and what they like will allow you to focus your marketing efforts in the right places. By identifying your ideal listener persona and researching their listening habits, you’ll be well on your way to building a successful career as a musician.

Create A Brand Image to Promote Your Music

Additionally, creating a brand image is a crucial step in promoting your music. In short, your brand image is the perception that people have of you and your music. It’s a reflection of your values, style, and personality. A unique brand identity and consistent branding across channels help you stand out. They also leave a lasting impression on your audience.

Develop A Unique Brand Identity to Promote Your Music

Also, your brand identity should be unique and memorable. Similarly, it should reflect your music style, personality, and values. Choose a name, logo, and color scheme that will represent you and your music. Your brand identity should be consistent across all your marketing materials, from your website to your merchandising. Consider hiring a graphic designer to create a professional brand identity for you.

Create Consistent Branding Across All Channels to Promote Your Music

Moreover, Consistent branding across all channels is essential for building trust and recognition with your audience. Also, your brand identity should be present on your website, social media, and other marketing materials. Use the same images, logo, and color scheme across all channels. This creates a cohesive and professional image of your brand and ensures that your audience can easily recognize you across all touchpoints.

Channels to consider for consistent branding:
Social media profiles (Facebook, Instagram, Twitter, etc.)
Website
Email marketing campaigns
Merchandise

To sum up, creating a brand image is a critical step in promoting your music. In addition, a unique brand identity with consistent branding across all channels helps you stand out. It also builds recognition and trust with your audience. In addition, remember to choose a unique and memorable name, logo, and color scheme for your brand image and use it consistently across all channels.

Leverage Social Media Platforms to Promote Your Music

Furthermore, one effective way to promote your music is to leverage social media platforms. Utilize channels such as Facebook, Twitter, Instagram, and YouTube to share your music, engage with your fans, and build a following. For example, remember to use relevant hashtags and post consistently to keep your audience interested.

Additionally, in today’s digital age, social media platforms have proven to be powerful tools for promoting music. As a result, by using social media as a marketing tool, musicians can reach a broader audience, build their brand, and connect with fans worldwide. Here are the three essential strategies artists need to follow to leverage social media platforms effectively.

Choose The Right Platforms to Promote Your Music

Not all social media platforms are created equal, so it’s crucial to identify the ones that best suit your music and your target audience. However, if you’re a musician looking to promote your music, consider platforms like Instagram, Facebook, YouTube, and Twitter. Instagram has become one of the most popular platforms for music promotion, particularly for visual content. Also, Facebook is great for reaching out to a broader audience and building a community through groups. YouTube is ideal for sharing music videos, and Twitter is the go-to platform for real-time engagement.

Optimize Your Social Media Profiles

A well-optimized social media profile is a crucial factor for your music promotion campaign’s success. Then, here are a few tips to optimize your social media profiles:

  • Use high-quality visuals, such as professional photos and high-resolution album art.
  • Include links to your official website, streaming services, and online merch stores.
  • Use keywords in your bio and captions to help your profile appear in searches.
  • Use hashtags to increase your visibility and discoverability.

Engage With Your Followers to Promote Your Music

Engagement with your followers is essential to build a community of loyal fans. In short, you can do this by responding to comments, sharing behind-the-scenes footage, and asking questions. By interacting with your fans regularly, you’ll build a deeper connection, increasing the likelihood that they will share and recommend your music to their friends. In conclusion, social media platforms represent a potent promotional tool for musicians worldwide. By following these essential strategies, you can build a strong social media presence, connect with fans, and promote your music successfully.

Collaborate With Others In The Industry

Collaborating with other industry professionals through social media can be an effective way to promote your music. Collaborations not only help spread your music to new audiences but also boost credibility and enhance your image as an artist.

Collaborating with others in the music industry is a great way to promote your music and gain exposure. Similarly, by working with other artists, bloggers, and influencers, you can reach a wider audience and build relationships with key players in the industry. Here are some effective ways to collaborate with others and promote your music.

Reach Out To Similar Artists

Networking with similar artists in your genre can be a fantastic way to promote your music. Also, reach out to them via social media or email and propose collaborations such as remixes, joint performances, or even EP albums. Ensure that collaborations are mutually beneficial and can help both parties grow their reach. This is a great way to build a strong network, discover new opportunities and gain entry to the fast-paced music world

Work With Bloggers And Other Influencers

Bloggers and influencers can help spark interest in your music. In addition, look for bloggers and social media influencers that focus on your genre of music and pitch them about collaborating. You could create exclusive music sessions that they can share with their followers or invite them to feature your music on their websites. An influential blogger can reach a larger audience and does not only provide a window into the music world but also helps to create broader brand awareness.

Participate In Music Festivals And Conferences

Music festivals and industry conferences are the ideal environment to meet other professionals in the industry and gain more recognition. For example, whether you participate in the performance or presentation aspect of the event, it’s a great opportunity to network, make contacts, and get your music heard. Keep a stack of CDs or business cards with you to give out to musicians, industry executives, and potential collaborators. This helps in increasing your visibility and connecting with the right people. Collaborating with others in the music industry is an excellent way to gain more listeners and grow your fanbase. It also helps to introduce you to new opportunities, expand your creative network, and allow you to learn from others in the industry. Remember, the music industry is all about building relationships and forming alliances, so take advantage of every opportunity to collaborate!

Use Streaming Services

One effective method to promote your music is through using streaming services such as Spotify, Apple Music, and Tidal. As a result, these platforms have a wide audience reach, allowing you to gain exposure for your music by getting on popular playlists and increasing your monthly listeners.

Are you struggling with promoting your music? If yes, then using streaming services is the best way to showcase your talent. Streaming platforms like Spotify, Apple Music, and SoundCloud have a massive user base, and getting your music on them will boost your exposure. Here are some ways to use streaming services to your advantage.

Get Your Music On Popular Streaming Platforms

To start promoting your music, the first step is to get it on popular streaming platforms such as Spotify, Apple Music, and Google Play Music. These platforms have made it easy for independent artists to distribute their music to a global audience. You can either upload your music yourself or use a distributor to do it for you. Once you get your music on these platforms, make sure to optimize your profile, bio, and album art to make it more attractive to the audience.

Create Playlists And Cross-promote

One of the best ways to gain exposure on streaming platforms is through playlists. Create a playlist featuring your music and songs from other artists with similar music styles. Once you’ve curated the playlist, promote it on social media and other channels to attract more listeners. You can also collaborate with other musicians to create cross-promotion playlists, where you promote each other’s music on your channels. This way, you reach out to each other’s audiences, and everyone benefits.

Engage Your Audience

On streaming platforms, engagement is crucial for success. Actively engage with your audience, reply to their comments, and encourage them to share your music with their friends. You can also use the platforms’ features such as stories and live sessions to connect with your fans. This interaction will help build a dedicated audience for your music and increase your plays on streaming platforms.

Conclusion

Using streaming services to promote your music is essential in today’s digital age. By getting your music on popular platforms, creating playlists, and engaging with your audience, you can increase your exposure and grow your fan base. With the right strategy, you can leverage these platforms to showcase your talent and build a successful music career.

How Should I Promote My Music

Credit: blog.groover.co

Offer Exclusive Content And Experiences

One effective way to promote your music is by offering exclusive content and experiences to your fans. This can include behind-the-scenes footage, limited edition merch, meet and greets, and more. By creating a sense of exclusivity, fans will feel valued and more likely to engage with your music.

Today, there are many different ways to promote your music. Offering exclusive content and experiences to your fans can be a great way to create loyal followers, increase engagement, and attract new listeners. Creating unique experiences for fans, offering exclusive merchandise, and providing early access to new music are all great ways to offer exclusive content and experiences to your fans.

Create Unique Experiences For Fans

Creating unique experiences for your fans can be a great way to stand out from the crowd and create a loyal following. You can offer personalized concerts, backstage experiences, or even meet-and-greets with your fans. Another great way to create unique experiences is to offer exclusive content, such as live recordings or acoustic performances.

Offer Exclusive Merchandise

Exclusive merchandise can be a great way to offer something unique to your fans and generate additional revenue. You can offer limited merchandise, such as t-shirts or posters, to fans who attend specific shows or events. Additionally, exclusive merchandise can create a sense of community among your fans. They will feel part of an exclusive group.

Provide Early Access To New Music

Providing early access to new music is a great way to create excitement and anticipation among your fans. You can offer early access to your new album or single to your fans through social media or email marketing. Additionally, you can offer exclusive tracks or remixes to your most loyal fans as a reward for their support. In conclusion, offering exclusive content and experiences to your fans can be a great way to promote your music and create a loyal following. Creating unique experiences, offering exclusive merchandise, and providing early access to new music are all great ways to offer something special and unique to your fans.

Submit To Music Blogs And Playlists

Promoting your music is essential for success, and submitting to music blogs and playlists is a great way to gain exposure. By sharing your music with relevant audiences, you increase your chances of getting discovered and building a fanbase. Be sure to research blogs and playlists that align with your genre and style to maximize the impact of your submission.

If you are an aspiring musician, you know that getting your music heard is not easy. One of the most effective ways to promote your music is to submit it to music blogs and playlists. This will give you more exposure and increase the chances of your music being heard by potential fans. In this post, we look at how to research relevant music blogs and playlists. We also cover how to craft pitches and press releases that grab their attention.

Research Relevant Music Blogs And Playlists

The first step in promoting your music through blogs and playlists is to research relevant ones. This will help you to identify the ones that are most likely to appreciate your music and give you the exposure you need. Start by using search engines and social media to discover blogs and playlists that feature music similar to yours. You can also look at the blogroll of blogs that you are already familiar with to find other blogs that may be interested in your music. Additionally, you can use tools like Hype Machine and SubmitHub to search for relevant blogs and submit your music.

Craft Compelling Pitches And Press Releases

Once you have identified relevant blogs and playlists, you need to craft compelling pitches and press releases. A good pitch or press release is concise, informative, and persuasive. It should give the blogger or curator all the information they need to decide whether they want to feature your music. Your pitch should include a link to your music, information about your background, and anything else that might make your music stand out. Make sure you personalize each pitch, so that it resonates with the recipient and shows that you have done your research.

Here are some tips to keep in mind:

  • Keep your pitch short and sweet, no more than three paragraphs.
  • Keep it professional, but also let your personality shine through.
  • Make sure you include a link to your music and any relevant artwork or press materials.
  • Follow up with the blogger or curator after a few days to see if they are interested in featuring your music.

By following these two steps, you can increase the visibility of your music and give yourself a better chance of success. Remember to stay focused, be persistent and be proactive in your approach to promoting your music. Good luck!

How Should I Promote My Music

Credit: m.youtube.com

Invest In Paid Advertising

Investing in paid advertising can be an effective way to promote your music. Platforms like Facebook, Instagram, and Spotify offer options for targeted advertising to reach your desired audience and increase visibility for your music.

Investing in paid advertising is an essential aspect of promoting and growing your music career. By employing different strategies, you can increase your reach and attract more fans to your music. Two effective techniques for paid advertising are social media and search engine advertising, and working with music promotion companies.

Explore Social Media And Search Engine Advertising

Advertising through social media and search engines helps you target specific audiences and demographics that are most likely to enjoy your music. Social media advertising can be done through platforms like Facebook, Twitter, Instagram, and LinkedIn. You can create sponsored posts, run ad campaigns, and target individuals with specific interests. Similarly, search engine advertising allows for precise targeting of users who are searching for specific keywords or phrases related to your music.

Work With Music Promotion Companies

Music promotion companies are experts in the industry and can help you reach new listeners. They offer various services such as playlist placement, influencer marketing, and email marketing campaigns. These services are beneficial to increase your reach and visibility in the music industry. Investing in paid advertising is a great way to promote your music. Working with music promotion companies and exploring social media and search engine advertising are cost-effective ways of increasing your reach and gaining more fans. Utilize these strategies effectively to see the most significant impact!

How Should I Promote My Music

Credit: appinstitute.com

Frequently Asked Questions For How Should I Promote My Music

How Can I Promote My Own Music?

To promote your own music, use social media to build your fan base and share your songs. Collaborate with other musicians and reach out to music blogs for reviews and features. Play live shows to grow your audience, and use platforms like SoundCloud and YouTube to share your songs and videos.

How Do I Get My Music Noticed?

To get your music noticed, you need to: 1. Create a strong online presence by being active on social media and uploading your music to streaming platforms. 2. Collaborate with other artists and producers to expand your network. 3. Leverage music blogs, playlists and online communities to showcase your talent.

4. Engage with your audience, and seek feedback to improve your craft. 5. Stay persistent and remain dedicated to your music.

How Do I Attract Listeners To My Music?

To attract listeners to your music, you need to focus on promoting your music on various social media platforms and music streaming services. Engage with your audience and build relationships through live performances, collaborations, and networking. Use targeted marketing strategies and create high-quality content.

Submit your music to music blogs, magazines, and online playlists to gain exposure. Consistency and persistence are key.

Where Is The Best Place To Promote My Music?

The best place to promote your music is online. Utilize social media platforms such as YouTube, Instagram and Facebook to share your music, collaborate with other artists and engage with your fanbase. You can also use streaming services like Spotify, Soundcloud and Bandcamp to distribute your music and gain exposure to a wider audience.

Conclusion

As a musician, it’s important to understand the importance of promotion for your music and how it can impact your success. Through utilizing various marketing tactics such as social media, email marketing, and collaborations, you can increase your visibility and reach your target audience.

It’s important to stay consistent with your promotion efforts and analyze the impact of your tactics to continue improving. Remember to also value genuine connections with your fans, as they play a significant role in your success. Keep promoting, connecting, and pursuing your passion for music.

Categories
Archive

Where Does Fl Studio Save Projects

FL Studio saves projects in the ‘FLProjects’ folder by default. The folder is located in the ‘Documents’ folder of the user’s computer.

Producing music can be a fun and rewarding experience, but it requires skill, patience, and creativity. FL Studio, formerly known as FruityLoops, is one of the most popular digital audio workstations (DAWs) for producing electronic music. Also, it offers a variety of features like sequencing, mixing, and arranging audio. Also, this allows users to create unique tracks and even full albums.

Related reading: Does Fl Studio Autosave and Save Mixer Preset: Unlock the Hidden Power of FL Studio!. For background, see the Wikipedia article on FL Studio.

However, one question that beginners and experienced producers often ask is where FL Studio saves project files. In addition, this is important information, as it helps users keep their projects organized and easy to access. Moreover, we’ll explore where FL Studio saves project files and how users can change the default save location.

Manual Project Save Location

When you are working on a project in FL Studio, it’s always a good idea to save your progress regularly to avoid losing your hard work. FL Studio is designed to automatically save your project files but it is always recommended to save manually when making critical changes to your music project to avoid losing the data.

Choosing A Specific Location for FL Studio Projects

In addition, FL Studio allows you to choose a specific location to save your project. For example, this feature can be helpful if you want to keep all of your music projects organized in a particular folder or drive. To choose a specific location for your FL Studio project, follow these simple steps:

  1. Select “File” from the menu.
  2. Furthermore, click on “Save” or “Save As”.
  3. Additionally, navigate to the location where you want to save your project.
  4. Also, give your project a name and click “Save”.

Changing The Default Save Location for FL Studio Projects

FL Studio saves your project files to the default location on your computer’s hard drive. As a result, if you want to change the default save location, follow these easy steps:

  1. Open FL Studio preference settings by clicking on the “Options” menu and select “File settings.”
  2. In the “General” tab, find the section labeled “File Storage.”
  3. Click the “Browse” button to choose the new default save location.
  4. Once you have selected the new location, click “OK” to save your changes.

You can now enjoy the convenience of your music projects being saved to the new default location every time you save a project.

Where Does Fl Studio Save Projects

Credit: howtomakeelectronicmusic.com

Backup Project Saves

FL Studio saves project files in the “Backup Project Saves” folder, which can be found in the program’s file settings. However, it is important to regularly save and backup projects to avoid losing important work in case of a system malfunction or crash.

How Often Does Fl Studio Create Backup Saves?

FL Studio is a digital audio workstation that is popularly used for music production, mixing, and editing. Then, one of the most important aspects of using this software is saving your projects frequently to prevent data loss. FL Studio automatically creates backup saves for project files every five, ten, or fifteen minutes, depending on your settings. You can also change the frequency of the backup saves in the “File” tab, under “General Settings.”

Where Are The Backup Saves Located In Fl Studio?

It is crucial to know where your backup saves are located in case you need to restore a previous version of your project. In short, by default, FL Studio saves backup projects in a dedicated folder called “Backup” in your your FL projects folder. You can locate it on your computer by navigating to “File,” then “Open Recent” and selecting the “Backup” folder. Alternatively, you can go directly to the folder path in your computer’s file explorer. This is usually located at “C:\Users\UserName\Documents\Image-Line\FL Studio\Backup.”

In Conclusion

In summary, backup project saves are essential for protecting your work against unexpected power outages, computer crashes, or software malfunctions. It is critical to know where your backup saves are located, so you can access them if needed. Similarly, FL Studio’s automatic backup saves feature is a handy tool that can help you recover previous versions of your project. You can customize it to your preferred frequency.

Managing Your Projects In Fl Studio

FL Studio saves project files in a specific folder that can be found on your computer’s hard drive. Also, by default, the software creates a directory called “Projects” where all the saved audio files, samples, and plugins are stored for easy access.

FL Studio, a popular digital audio workstation, is widely used by music producers worldwide. Once you start recording, your projects start piling up, and managing them can be overwhelming. Luckily, FL Studio provides useful features for managing projects. In this post, we’ll discuss where FL Studio saves projects and how to manage them using various options such as opening a saved project, sharing your project with other users, and exporting your project as a ZIP file.

Opening A Saved Project In Fl Studio

FL Studio saves all your projects in the “these project files” folder located in your computer’s documents. When you’re ready to work on a saved project, open FL Studio, click on “File” in the top menu bar, select “Open,” and locate your saved project. Alternatively, you can use the “Browser” feature in FL Studio to search for and load your project quickly.

Sharing Your Projects With Other Users

Collaboration is essential in music production. FL Studio allows you to share your projects with other users quickly. You can share your project by exporting it as a zipped loop package, which includes all necessary project files, and sharing it via a cloud storage service or email. Alternatively, you can use the “Save As” option and save your project to a shared network location accessible to your collaborators.

Exporting Your Project As A Zip File

You can export your FL Studio project as individual audio files or as a zipped loop package. The latter contains all necessary files, including samples, effects, and plugins, making it easier for other users to work on the project. To export your project, click on “File” in the top menu bar, select “Export,” and choose either “Zipped loop package” or “WAV file.” You can also choose the specific location and file format for exporting your project. In conclusion, managing your your FL projects is crucial for efficient music production. Knowing where FL Studio saves projects, opening saved projects, sharing your projects with others, and exporting your projects correctly can take your music production to the next level.

Where Does Fl Studio Save Projects

Credit: www.youtube.com

Where Does Fl Studio Save Projects

Credit: www.image-line.com

Frequently Asked Questions For Where Does Fl Studio Save Projects

Where Are The Fl Studio Files Located?

The FL Studio files are stored in the installation folder on your computer. By default, they are typically located in the “Program Files (x86)” folder on a Windows computer. However, you can change the location of the files when you install the software.

Where Does Fl Studio Autosave Files?

FL Studio autosaves files in the Backup folder located within the FL Studio folder in your computer.

How Do I See All My Projects In Fl Studio?

To see all your projects in FL Studio, simply click on the “File” option in the top left corner of the screen. From there, select “Recent Projects” to view a list of all your recent projects. If you don’t see the project you’re looking for, click “Open” to browse your files and locate the project.

Where Does Fl Studio Save Recordings?

FL Studio saves recordings in the project folder by default. However, you can choose to save them in a separate folder designated specifically for your recordings. Simply go to “Options” > “Project General Settings” > “Folder for recordings” to customize your settings.

Conclusion

Knowing where FL Studio saves projects can save you a lot of time and headache when it comes to locating and sharing them. By default, FL Studio saves projects in the “Projects” folder, but you can change the default save location to a different folder or even an external drive.

Keeping your projects organized and backed up is essential for any producer or musician using FL Studio for their music production needs.

Categories
Archive

How To Get More Streams On Spotify

To get more streams on Spotify, focus on getting playlist placements and engaging with your fans. With over 300 million active users, Spotify is one of the most popular streaming platforms in the world.

However, with so much content available on the platform, it can be difficult to stand out and get your music heard. One of the most effective ways to increase your streams on Spotify is through playlist placements. This involves getting your music included on popular playlists that are curated by Spotify or other users.

Additionally, it’s important to engage with your fans on the platform by promoting your music on social media and encouraging your followers to add your tracks to their own playlists. By following these strategies, you can increase your visibility on Spotify and grow your fan base.

How To Get More Streams On Spotify

Credit: blog.groover.co

Create A Catchy Profile

Creating a catchy profile is crucial in getting more streams on Spotify. Make sure to use a unique and engaging bio, add a professional profile picture, and use relevant keywords for your music genre to attract potential listeners.

Creating a catchy profile is essential to getting more streams on Spotify. Your profile is a representation of yourself as an artist. It is the first thing people see before they start listening to your music. Therefore, it is necessary to create a profile that stands out from the crowd. A catchy profile can help you gain more followers, more plays, and ultimately more streams. Here are a few tips for creating a catchy profile on Spotify.

Use A Professional Profile Picture

Your profile picture is the first visual that users notice on your Spotify page. It is important to use a professional and eye-catching photo that matches the theme of your music. A profile picture that reflects your personality and music genre can spark the interest of the listener to dive deeper into your profile. Make sure the photo is of high quality and in line with your brand image.

Write A Compelling Bio

Your bio is your chance to introduce yourself to the world. It should be written in a way that represents who you are, what genre of music you create, and what makes you unique. Avoid generic descriptions and aim for something that connects with your audience on a personal level. Use bio to showcase your skills and why people should listen to your music. Keep it short, sweet, and informative.

Include Links To Your Social Media Accounts

It’s important to promote yourself beyond just Spotify. Provide links to your social media accounts, like Facebook, Instagram, Twitter, and YouTube, to give your listeners more ways to engage with you. Social media is an effective way to keep your followers updated with your new releases, performances, and any upcoming events. By creating a catchy profile with links to your social media accounts, you can boost your online presence and attract more streams.

How To Get More Streams On Spotify

Credit: blog.groover.co

Collaborate With Other Artists

Collaborating with other artists is a great way to increase your streams on Spotify. Working with other musicians can help you reach new audiences and expand your fan base. By creating a sense of community and cross-promoting each others’ work, you can increase your visibility on the platform and attract more listeners.

Collaborating with other artists on Spotify is an excellent way to not only increase your streams but also create new connections in the music industry. By working together with other musicians, you benefit from their audience, and they benefit from yours. Here are some of the best ways to collaborate with other artists on Spotify.

Work With Artists In A Similar Genre

One of the most effective ways to collaborate with other artists is to work with those who share a similar genre. This is because their fans are more likely to be interested in your music as well. For example, if you are a hip-hop artist, try working with other rappers or producers. If you are an electronic artist, collaborate with other DJs or electronic music producers. This will help you gain exposure to the right audience and potentially bring in new fans.

Feature Other Artists On Your Tracks

Another way to collaborate with other artists on Spotify is to feature them on your tracks. This can be a win-win situation for both parties as the featured artist gains exposure to your fan base, and you get to tap into theirs. Make sure to choose an artist that complements your sound and adds something unique to the song. This will keep your listeners engaged and potentially bring in new fans who are interested in the featured artist.

Participate In Collaborative Playlists

Collaborative playlists are a great way to gain exposure on Spotify. By participating in these playlists, you can connect with other artists and potentially have your music included in the playlist. This will help you gain exposure to a wider audience and potentially bring in new fans. Make sure to participate in playlists that are relevant to your genre and style. This will increase your chances of getting your music noticed and potentially added to the playlist. In conclusion, collaborating with other artists on Spotify is an excellent way to gain exposure, increase your streams and potentially bring in new fans. Make sure to collaborate with artists in a similar genre, feature other artists on your tracks, and participate in collaborative playlists. By doing this, you will be on your way to growing your music career on Spotify.

Promote Your Music On Social Media

Want to increase your Spotify streams? Utilize social media! Share your music on Instagram, Twitter, and Facebook. Engage with your followers and promote through ads. Remember, the more visibility you have, the better chance of gaining new listeners.

Social media can be a powerful tool for promoting your music and growing your fan base on Spotify. With millions of users active on social media platforms like TikTok, Instagram, and Twitter, it’s essential to capitalize on this opportunity to expand your reach.

Use Hashtags To Increase Visibility

Hashtags are an excellent way to increase the visibility of your music on social media platforms. Adding relevant and specific hashtags to your posts can make it easier for fans to find your music. Do some research on the popular hashtags in your genre, and include them in your posts on platforms like Instagram, Twitter, and Facebook. You can also create your own unique hashtag to identify all your content and encourage your audience to use it.

Engage With Your Fans And Other Artists

Engaging with your fans and other artists on social media can strengthen your relationship and foster a sense of community around your music. Replying to comments and direct messages from your fans, sharing their content, and thanking them for their support can help build a loyal following. Collaboration with other artists can also be an effective way to expand your audience and build relationships with other creators in your genre.

Create Eye-catching Visuals

Creating eye-catching visuals can grab the attention of potential fans scrolling through their social media feed. High-quality images, videos, and graphics can help to communicate your message and brand effectively. Ensure that your visuals are consistent with your brand and create a unique identity for your music. In conclusion, promoting your music on social media requires consistency, creativity, and engagement. By using hashtags, engaging with your fans and other artists, and creating attention-grabbing visuals, you can increase your visibility and grow your fan base on Spotify.

Advertise On Spotify

The easiest way to increase the number of streams on your Spotify account is to advertise on the platform. Creating a targeted ad campaign, setting a reasonable budget, and choosing the right ad format are three key factors to consider when advertising on Spotify.

Create A Targeted Ad Campaign

Targeted advertising is an effective way to ensure that your ad is reaching the right audience. With Spotify, you can create a targeted ad campaign based on user demographics, music genres, and listening habits. By targeting your audience in this way, you increase the chances of your ad being heard by people who are interested in your music.

Set A Reasonable Budget

Setting a reasonable budget is essential when advertising on Spotify. You can choose between a cost-per-click (CPC) or cost-per-impression (CPM) model, depending on your budget and goals. It’s important to ensure that your budget is in line with your expected return on investment (ROI).

Choose The Right Ad Format

Spotify offers a range of ad formats to choose from, including audio, video, and display ads. Audio ads are played in between songs, while video ads can be displayed within the app on a user’s device. Display ads are typically shown on the right-hand side of the screen. Knowing your audience and the type of message you want to convey will help you choose the right ad format.

With the right targeted ad campaign, a reasonable budget and the appropriate ad format, advertising on Spotify can help increase your streams and grow your audience.

Optimize Your Track Titles And Descriptions

One of the key factors that can affect the number of streams your track gets on Spotify is the title and description of your track, which can impact whether listeners can find your music and encourage them to listen to your track.

Include Relevant Keywords

When it comes to optimizing your track titles and descriptions, you should include relevant keywords that describe your track’s genre, mood and theme. This can help your track appear in search results when users are searching for specific keywords on Spotify. You can also check the keywords that other popular tracks in your genre use on Spotify and incorporate them into your track titles and descriptions.

Make Sure The Titles And Descriptions Are Easy To Read

It is important to use clear and concise language when writing your track titles and descriptions. Avoid using complicated vocabulary or long sentences. You can also use bullet points or short sentences to highlight the main features of your track, such as the instruments used, vocals, genre, or mood. Additionally, you should also ensure that your track titles and descriptions are free of grammar and spelling errors, as this can affect your credibility as an artist.

Highlight Your Important Track Features

When optimizing your track titles and descriptions, you should emphasize your track’s unique features. This can be anything from the use of a specific instrument to the style of singing or rapping. By highlighting your track’s unique qualities, you can grab the listener’s attention and encourage them to hit the play button. You can also include links to your social media profiles or website in your track descriptions to help promote your music and gain more followers.

In conclusion, optimizing your track titles and descriptions is a simple yet effective strategy for increasing the number of streams your tracks get on Spotify. By including relevant keywords, writing easy-to-read descriptions, and highlighting your track’s important features you can attract more listeners, improve your visibility on the platform and start getting more plays on your music.

Release Music Consistently

Spotify is a popular streaming platform that enables millions of users to discover new music every day. Whether you’re an emerging artist or an established performer, if you want to achieve success on the platform, you need to make sure that your music reaches as many ears as possible. One way to do this is by releasing music consistently.

Stick To A Regular Release Schedule

When releasing music on Spotify, it’s essential to stick to a regular release schedule. Consistency is crucial because it helps to build expectations among your audience. If your fans know that you release a new track every month, they will be eagerly waiting for your next release, and this can help to boost your streams.

You can plan your release schedule by creating a spreadsheet or a document that outlines your upcoming releases. This way, you can make sure that you’re on track and that you’re releasing music consistently.

Release Singles Instead Of Albums

Another strategy to boost your streams on Spotify is by releasing singles instead of albums. This is because singles tend to have a higher chance of being added to playlists, which can help to increase your visibility and your streams.

When you release a single, you can also create a cover art that is tailored to the track. This can help to make your release more memorable and can also increase your chances of being discovered on the platform.

Release Music During Peak Listening Hours

If you want your release to be successful on Spotify, it’s essential to release it during peak listening hours. This is because most users tend to listen to music during specific times of the day, such as during their commute or while working out. By releasing your music during these hours, you can increase your chances of being discovered and played on the platform.

Additionally, you can use the data provided by Spotify to determine the best time to release your music. This data includes information such as the most popular genres in your region and the most active users, which can help you to tailor your release schedule accordingly.

Share Your Music With Music Bloggers And Influencers

If you’re a musician, your primary focus is probably on making great music. But, if you want to get more streams on Spotify, you need to get your music in front of more people. One way to do that is by sharing your music with music bloggers and influencers. Here are some tips on how to do that effectively:

Research Blogs And Influencers In Your Genre

Before you start reaching out to anyone, you need to research the blogs and influencers in your genre. You want to find the ones that are most likely to be interested in your music. Make a list of these blogs and influencers, along with their contact information.

Example: If you’re a hip-hop artist, you might want to target bloggers who write about hip-hop music or influencers who have a large following among hip-hop fans.

Reach Out To Them With A Personalized Message

Once you have your list, it’s time to start reaching out to these bloggers and influencers. But don’t just send a generic message to everyone on your list. Take the time to craft a personalized message for each person.

Example: Start by addressing them by name and mentioning why you specifically chose them to reach out to. Then, tell them a little about yourself and your music. Finally, ask if they would be interested in checking out your music.

Offer Them Something In Return

No one likes to feel like they’re being used, so it’s important to offer something in return for their help. This could be anything from a shoutout on social media to a free download of your album.

Example: If you’re a new artist, you might offer to write a guest post for their blog in exchange for them featuring your music. Or, you could offer to promote their blog or social media accounts to your fans.

The key is to be sincere and genuine in your offer. Don’t just offer something because you feel like you have to.

How To Get More Streams On Spotify

Credit: dittomusic.com

Use Analytics To Learn About Your Audience

One effective way to get more streams on Spotify is to use analytics and learn about your audience. By understanding their listening habits and preferences, you can tailor your content to better suit their needs and increase engagement. Keep track of metrics such as listener demographics, location, and behavior to help guide your content strategy.

One of the best ways to get more streams on Spotify is to understand your audience’s preferences and behaviors. That’s where analytics comes into play. By leveraging the data provided by Spotify, you can gain insight into who your listeners are and what they like.

Track Your Stream Count And Listener Demographics

To start, you should track your stream count and listener demographics. This will help you understand how many people are listening to your music and who they are. Spotify provides detailed information on your audience’s age, gender, location, and listening habits. For example, if you notice that your listeners are mostly based in a particular city or country, you can tailor your promotions to that location. Or if you find that your audience is primarily young adults, you can create content that appeals to this age group.

See What Songs Are Performing The Best

Next, you should evaluate which songs are performing the best. Spotify’s analytics provide you with information on each song’s total play count, as well as the number of daily streams. This can help you identify which songs are resonating with your audience and which ones need more attention. You can also check which playlists your music is featured on, and which users are sharing your tracks on social media. By measuring these metrics, you can identify potential collaborations or sponsorship opportunities and focus on creating more of the content that resonates with your audience.

Adjust Your Strategy Based On What You Learn

Finally, based on what you learn from your analytics, you can adjust your strategy to increase your streams. For example, if you discover that certain songs are outperforming others, you can prioritize your promotion efforts on these tracks. You can also experiment with different marketing techniques to attract more listeners. These may include running social media campaigns, collaborating with other artists or curators, or optimizing your Spotify profile for search. Overall, using analytics to learn about your audience is a crucial step in increasing your streams on Spotify. By understanding who your listeners are, what they like, and how they engage with your music, you can tailor your strategy to boost your success on the platform.

Frequently Asked Questions On How To Get More Streams On Spotify

How Do I Increase The Number Of Streams On Spotify?

To increase the number of streams on Spotify, you can engage with your existing fans through social media and playlists, collaborate with other artists, and release new music regularly. Utilizing paid promotion and targeting specific demographics can also grow your stream count.

Keep your profile up-to-date and user-friendly to attract new listeners.

How To Get 1,000 Streams A Day On Spotify?

To get 1,000 streams a day on Spotify, you need to focus on creating high-quality content, including a strong marketing plan to promote your music. Engage with your followers, collaborate with other musicians, and stay active on social media platforms.

Also, make sure your tracks are optimized for playlists, and don’t forget to utilize Spotify for Artists to gain insights into your audience and adjust your strategy accordingly.

How Do I Get My Streams Up On Spotify?

To get your streams up on Spotify, you need to distribute your music through a digital distributor that partners with Spotify. Some popular options include DistroKid, TuneCore and CD Baby. Once your music is distributed, it will be added to Spotify’s library for listeners to discover and stream.

How Do People Get So Many Streams On Spotify?

Artists get a lot of streams on Spotify by updating new content frequently, promoting their music through social media and other platforms, submitting their music to playlists, collaborating with other artists, and performing at live events. They can also work with music promotion companies and utilize targeted advertising to reach new audiences.

Conclusion

To sum up, getting more streams on Spotify requires strategic planning and consistent effort. Utilizing social media, collaborating with other artists and curators, optimizing your profile and track tags, submitting your music to playlists, and keeping track of your stats are all effective ways to increase your visibility and attract more listeners.

By implementing these tips, you’re more likely to stand out and gain more streams on Spotify. Happy streaming!

Categories
Archive

Best Free Autotune Vst Plugins

The best free autotune VST plugins for recording and editing music are GSnap, MAutoPitch, and Graillon 2. These plugins offer various features to help improve pitch and tone for better overall sound quality.

Autotune can be a valuable tool for music creators and producers looking to enhance their recordings but may not have the budget for premium software. Autotune has become increasingly popular in music production in recent years, used by artists across various genres to help correct pitch and improve overall vocal performance.

While premium autotune software can be expensive, there are several free VST plugins that provide similar features and functions. We will discuss three of the best free autotune VST plugins available: GSnap, MAutoPitch, and Graillon 2. Whether you are a beginner or experienced music producer, these plugins can help take your recordings to the next level.

Best Free Autotune Vst Plugins

Credit: m.youtube.com

Top 3 Free Autotune Vst Plugins

Discover the top 3 free autotune VST plugins that boast high-quality pitch correction for recording your best vocals. Enhance the sound quality, adjust the tune, and enjoy the benefits of these exceptional plugins without breaking the bank.

Whether you’re a professional music producer, singer or an amateur musician, you will most likely want to polish your vocal performances to sound pitch-perfect. One of the ways to achieve that is to use autotune VST plugins that can do wonders to your vocals with just a few clicks. However, not everyone has the budget to invest in expensive autotune software. That’s why we’ve rounded up the top 3 free autotune VST plugins in this article to help you enhance your vocal tracks without breaking the bank. Plugin 1: GSnap GSnap is a great and straightforward plugin that is easy to use and perfect for beginners. It corrects pitch inaccuracies while preserving the natural timbre of the singer’s voice. Additionally, it has a MIDI control mode, which makes it possible to use it with an external MIDI controller, giving you more flexibility and control over your vocal performance.

Plugin 2: Mautopitch

MAutoPitch is another excellent free autotune VST plugin, which offers advanced features for users who want more control over their vocal performances. With MAutoPitch, you can adjust the correction speed, smoothness, and scale. It also comes with a spectrum analyzer and a pitch display to help you see the changes made to your vocal tracks in real-time.

Plugin 3: Kerovee

KeroVee is a unique autotune VST plugin that uses frequency shifting instead of traditional pitch-shifting methods. This results in a more natural-sounding pitch correction without sacrificing the clarity and character of the original vocal performance. KeroVee has a straightforward interface that is easy to navigate, making it another great option for beginners. In conclusion, with the help of these free autotune VST plugins, you don’t have to spend a fortune to achieve the perfect pitch when recording music. Experiment with these plugins to find the one that suits your needs, and watch your vocal performances improve dramatically.

Best Free Autotune Vst Plugins

Credit: cymatics.fm

Tips For Using Autotune Vst Plugins

Autotune VST plugins have become an essential tool for recording artists. Here are the best free Autotune VST plugins to ensure that your vocals are pitch-perfect: GSnap, MAutoPitch, KeroVee, Auto-Tune Evo, Tal-Vocoder-2, and Graillon 2. Tips for using these plugins effectively include adjusting the speed, key, and accuracy settings.

If you are new to the world of music production, autotune is a technology that corrects and adjusts pitch in vocals or instruments. Autotune VST plugins enhance the quality of vocal tracks, save time, and add efficiency to your workflow. Here are some tips for using autotune VST plugins.

Tip 1: Choose The Right Vst Plugin

Before diving into using an autotune VST plugin, choose the right one for your needs. There are several free VST plugins available, but not all of them offer the same features and functions. Select a plugin that satisfies your music production’s exact needs and is compatible with your DAW. Some popular autotune VST plugins include Graillon 2, GSnap, and MAutoPitch, to name a few.

Tip 2: Set The Correct Key

One of the most important steps when using an autotune VST plugin is setting the correct key. Choosing the incorrect key can produce unpleasant sounding pitches, which can ruin your vocal track. Some VST plugins have an automatic key detection function, but it is always advisable to double-check and change the key manually.

Tip 3: Use It Sparingly

While autotune VST plugins can enhance the quality of vocals, it is always best to use it sparingly. Overusing autotune in a track can produce an unnatural and robotic sound, which might not be what you desire. Use autotune subtly to add a natural pitch correction to your vocals and maintain the essence of your track. In conclusion, using autotune VST plugins can help you create high-quality vocal tracks for your music production. However, remember to choose the right VST plugin, set the correct key, and use it sparingly to avoid an unpleasant, unnatural sound. Start experimenting with autotune today to take your music to the next level!

Best Free Autotune Vst Plugins

Credit: bedroomproducersblog.com

Frequently Asked Questions On Best Free Autotune Vst Plugins

What’s The Best Free Auto-tune Plugin?

The best free Auto-Tune plugin is GSnap, a popular pitch correction plugin. It provides good results for basic pitch corrections and is easy to use. GSnap works with both Windows and Mac operating systems and is compatible with different DAWs, including FL Studio and Audacity.

Is There A Free Version Of Auto-tune?

Yes, there is a free version of Auto-Tune available. It is called Auto-Tune Access and it is a simplified version of the software that provides basic pitch correction features. You can download it for free from the Antares website.

What Auto-tune Do Pros Use?

Professional singers and music producers primarily use Antares Auto-Tune Pro. It is one of the most popular and widely used pitch correction plugins, providing precise and customizable pitch correction.

What Plugin To Use For Auto-tune?

For Auto-Tune, the plugin you can use is the Antares Auto-Tune. It’s one of the most popular and commonly used plugins by music producers and audio engineers alike.

Conclusion

The world of music production has been revolutionized with the help of autotune VST plugins. From correcting pitch to achieving unique vocal effects, they have become an essential tool for any musician or producer. With the options of free autotune VST plugins available, there is no need to break the bank to access highly functional software.

From the comprehensive list above, finding the best autotune VST plugin that works for you is now just a few clicks away. Happy music making!

Categories
Archive

How To Make Your Mixes Sound Loud

Add saturation to individual tracks and use a limiter on the master track to make your mixes sound loud. Getting the mix of your track just right can be a daunting challenge when you’re getting started with music production.

However, there’s nothing more frustrating than finally getting the levels right, mixing everything perfectly, and then realizing your track sounds weaker and quieter than other tracks when you play it back. The good news is that with a few simple techniques, you can make your mixes sound louder without sacrificing the quality of your track.

We’ll explore some tips and tricks to help you bring your mixes to life and ensure they stand out in the crowd by sounding bright, punchy and full of power.

The Importance Of A Loud Mix

To stand out in today’s music industry, it is important to master the art of loud mixing. Techniques such as careful EQ and compression, parallel processing, and limiting can help bring your mix to life and give it the necessary volume to compete with other tracks.

When it comes to producing music, a loud mix is often seen as an essential aspect of the process. In fact, it is not merely about volume, but rather the impact of loudness on overall sound quality. Achieving a loud mix requires aligning multiple elements of a track, such as equalization, compression, and limiting, to create a cohesive, powerful sound. In this post, we explore the importance of a loud mix and the impact of loudness on perception.

Why Loudness Matters

Loudness is the perceived level of volume of a track. Therefore, when mixing a track, it is essential to consider the desired volume level and ensure it is consistent throughout the track. A loud mix is crucial for standing out in a competitive, overcrowded market. Louder tracks often attract more attention of listeners and listeners are more likely to gravitate towards songs that sound louder. A loud mix can also help to enhance a track’s energy and dynamics.

The Impact Of Loudness On Perception

Perception plays an essential role in how a track is received by listeners. A track with multiple loud parts can alter the way a listener perceives the sound quality. Undoubtedly, a loud mix can shift the balance and can make some elements stand out while others may be unnoticed. A skilled producer can use loudness as a tool to create excitement and enhance the listener’s emotional response to a track. However, if the loudness is too high or not uniform throughout the track, it may lead to ear fatigue and make the track unlistenable. The key takeaway: a loud mix can be a powerful tool in a producer’s toolkit. However, it is imperative to consider the impact of loudness on the overall sound quality and ensure that it is consistent throughout the track.

How To Make Your Mixes Sound Loud

Credit: www.levelsmusicproduction.com

Loudness Vs. Volume

Loudness and volume are two different things when it comes to music production. To make your mixes sound loud, you need to focus on increasing loudness without sacrificing dynamic range. Use compression, limiting and other techniques to achieve a balanced and powerful sound.

Understanding The Difference

When it comes to mixing music, one of the most common goals is to make the final product sound loud. However, it’s important to note that loudness and volume are not the same thing. Understanding the difference between the two is crucial when it comes to mastering your mixes.

Why Volume Isn’t Everything

While it may seem logical that increasing the volume would make your track sound louder, this isn’t necessarily the case. Volume refers to the amplitude or level of a waveform, while loudness is a perception of how loud something sounds to the human ear. So, even though two tracks may have the same volume, they can still sound different in terms of loudness. This is because loudness is influenced by factors such as frequency balance, dynamics, and even the listening environment. To make your mixes sound louder, you need to focus on improving their perceived loudness rather than simply increasing the volume level.

Tips For Increasing Loudness

There are several strategies you can use to boost the perceived loudness of your mixes:

  • Use compression to reduce the dynamic range of individual tracks and create a more consistent overall sound.
  • Use EQ to balance the frequency spectrum of each track and ensure that no particular frequency range dominates the mix.
  • Use saturation or distortion to add harmonic content and increase perceived loudness.
  • Use limiting to prevent peaks from exceeding a certain level and create a louder overall sound.
  • Reference your mixes on a variety of playback systems to ensure that they sound good across different listening environments.

By implementing these tips and focusing on improving the perceived loudness of your mix rather than just its volume, you can create mixes that sound loud, impactful, and professional.

Preparing Your Mix For Loudness

To make your mixes sound loud, you should pay attention to the levels of each element in the mix to avoid distortion and clipping. Utilize volume automation to give certain parts of the mix more energy and excitement without sacrificing dynamic range.

Lastly, consider using mastering plugins to enhance the overall volume of the mix without altering its tonal balance.

Preparing Your Mix for Loudness If you want your mixes to sound loud and punchy, it’s essential to prepare your mix correctly right from the start. In this section, we will discuss the various techniques you can use to help you achieve a louder mix without sacrificing quality or dynamics. The best way to begin this process is to focus on proper gain staging, use compression to control dynamics, and equalize for clarity and definition. Proper Gain Staging One of the most crucial factors to achieve a loud mix is to ensure proper gain staging. Maintaining an optimal signal-to-noise ratio throughout the mixing process by balancing your levels will prevent clipping or overloading any of the audio channels. Additionally, gain staging is crucial for preparing your mix for mastering. Ensure that the levels of each track are balanced and consistent throughout the mix. Using Compression to Control Dynamics Compression is another effective tool to control the dynamics of your mix and make it louder. By compressing parts of your mix that have higher dynamic ranges, you can bring the peaks and valleys of the audio levels closer together. Doing so will help to prevent clipping and overloading while pushing your mix to higher levels. Remember, compression is not a cure-all tool, and it should only be used where necessary. Equalization for Clarity and Definition Equalization is an essential tool to shape the frequency balance of your mix, ensuring that each part of it is clear and well-defined. Through EQing, you can ensure that the different elements of your mix, including vocals, instruments, and drums, stand out and cut through the mix. Bear in mind that too much EQ can cause distortion and noise in your mix, so use this tool with care. In conclusion, by focusing on proper gain staging, compression, and equalization, you can prepare your mix for loudness while ensuring that it still sounds crisp and clear.

Tools For Loudness

To make your mixes sound loud, there are several tools you can use. Compressors, limiters, EQs, and maximizers are all helpful for achieving a louder sound without sacrificing quality. Experiment with different settings to find the perfect balance for your mix.

To make professional-sounding loud mixes, you need to have the right tools. Using the right tools can help you achieve loudness without compromising the quality of your mix. Here are some commonly used tools for achieving loudness in your mix.

Maximizers And Limiters

Maximizers and limiters are essential tools for loudness. They work by boosting the overall level of your mix and setting a maximum peak level. Maximizers increase the volume of your mix until it reaches the desired level without clipping, while limiters prevents the mix from exceeding specified levels. Using a combination of maximizers and limiters can help push the overall loudness of your mix while keeping it within acceptable levels.

Multiband Compression

Multiband compression is another tool that can help you achieve loudness in your mix. It’s a type of compression that works on different frequency bands within a mix. This allows you to lower the levels of the louder parts of the mix while keeping the quieter parts of the mix audible. By compressing different frequency ranges of the mix, you can achieve a more balanced and fuller sound while still achieving loudness.

Saturation And Distortion

Saturation and distortion are audio effects that help add warmth and harmonics to your mix. When used in moderation, they can help to add a pleasant and musical distortion effect on your mix and make it sound more natural. By adding saturation and distortion, you can also increase the perceived loudness of your mix. However, it’s important to use these tools with care as excessive use can lead to an overly distorted or muddy mix. Overall, using tools like maximizers, limiters, multiband compression and saturation can help you achieve loudness in your mix while still maintaining its quality. Experimenting with various combinations of these tools can help you achieve the desired sound that you’re looking for.

Mastering For Loudness

Mastering for Loudness is a crucial skill for any music producer looking to make their mixes sound powerful and impactful. By utilizing compression, limiting, and EQ techniques, you can create a sonically pleasing mix that sounds loud without sacrificing dynamics or musicality.

Mixes that sound weak and limp not only sound unimpressive but also fail to grab listeners’ attention. That’s where mastering for loudness comes into play. Mastering is the process of preparing and transferring recorded audio from a source that contains the final mix to a data storage device, known as the master. It is done to achieve a balanced and cohesive sound throughout an album. Mastering for loudness involves processing the audio to make it sound as loud and punchy as possible without compromising its quality. It is a technique that can help your music stand out in today’s loudness war.

The Role Of The Mastering Engineer

The mastering engineer is the person responsible for ensuring that the final mix of a song or album sounds polished and balanced. Their job is to analyze the mix, make adjustments to its frequency balance, dynamics, and stereo image to make it sound better. Mastering engineers use a combination of hardware and software tools to achieve the desired sound. Their primary job is to make sure that the sound is consistent throughout the whole album.

The Importance Of Balanced Eq

Balanced EQ is a crucial part of mastering for loudness. The mastering engineer must ensure that the frequency response of the track is smooth and balanced. They do this by correcting any imbalances and resonances that can cause muddiness or harshness in the mix. Using an EQ, the mastering engineer can enhance the low and high ends of the mix to make it sound more exciting and engaging. EQing is a fine art and should be done carefully to avoid any over-processing and artifacts.

Using Limiters To Boost Volume

Limiters are used to increase the overall volume of a track while controlling the peak levels. They are the secret weapon of loudness in mastering. A limiter works by compressing the dynamic range of the track, limiting the maximum output level. By controlling the peaks and increasing the volume of the track, the limiter can make it sound more impactful and louder. However, it is essential to use limiters in moderation and avoid over-compression as it can lead to loss of dynamics, distortion, and unwanted artifacts. In conclusion, mastering for loudness is a complex and delicate process that requires precision, expertise, and attention to detail. Using a combination of EQ, compression, and limiters, the mastering engineer can achieve the desired loudness while maintaining the quality and balance of the mix. Remember that mastering is the final stage of the recording process, and it is the last chance to make an impression on the listener. So, master your tracks for loudness to make them stand out and compete in today’s competitive music industry.

How To Make Your Mixes Sound Loud

Credit: www.businessinsider.com

Common Mistakes To Avoid

When trying to make your mixes sound louder, there are some common mistakes you should avoid. One of them is overcompressing your tracks, which can make them sound flat and lifeless. Instead, focus on using EQ and volume automation to achieve a balanced and impactful sound.

Making your mixes sound loud is an essential aspect of music production. While it may seem like an easy task, there are common mistakes you must avoid to achieve the desired result. Overlooking these mistakes might result in a frustrating mix that lacks balance and dynamic range. In this blog post, we’ll discuss some of the most critical mistakes to avoid, including overusing compression and limiting, ignoring dynamics and musicality, neglecting the importance of a clean mix, and pushing levels too far.

Overusing Compression And Limiting

Compression and limiting are two essential tools that every producer should learn to use. However, the overuse of these tools can cause more harm than good to your mix. Overcompressed tracks tend to sound flat, lifeless, and dull, causing ear fatigue to the listener. Similarly, limiting pushes the mix to the extremes, resulting in harsh, distorted sounds that lack musicality. Therefore, it’s crucial to use compression and limiting sparingly and appropriately, allowing the natural dynamics of the track to shine through.

Ignoring Dynamics And Musicality

Dynamics and musicality are the heart and soul of music production. However, many producers overlook these elements in pursuit of making their mixes sound loud. Ignoring dynamics leads to a flat, emotionless mix, resulting in listener fatigue. Similarly, overlooking musicality by pushing the mix too far can result in an unpleasant, overproduced sound. As a producer, you should strive to balance the loudness levels with the natural dynamics and emotional impact of the track.

Neglecting The Importance Of A Clean Mix

A clean mix is a foundation for achieving a loud, balanced sound. Neglecting to create a clean mix congests the mix, making it challenging to achieve proper balance and separation of instruments. It’s crucial to remove any unwanted frequencies, pops, clicks, and background noise before applying any processing to the mix. A clean mix allows for better control and enhancement of the desired frequencies, leading to a balanced, clear, and loud mix.

Pushing Levels Too Far

Pushing levels too far in pursuit of making your mix sound loud is perhaps the most common mistake producers make. It’s essential to note that loudness is not everything, and overly loud mixes are often fatiguing to the listener. Pushing levels too far overloads the mix, causing distortion, which ruins the natural dynamics and overall musicality of the track. As a result, it’s crucial to use proper gain-staging techniques and avoid pushing the levels beyond the mix’s natural limits. While making a loud mix is a desirable goal, overdoing it can result in a frustrating and unpleasant sound. By avoiding these critical mistakes discussed in this blog post, you can achieve a loud, balanced mix that keeps the listener engaged from beginning to end.

The Future Of Loudness

The Future of Loudness in music production is an ever-evolving and polarizing issue. On the one hand, sound engineers and producers strive to make their mixes sound as loud and impactful as possible in a bid to stand out. On the other hand, there is a growing concern about the negative effects of loudness on sound quality and listening experience. 

The Loudness Wars And The Move Towards Dynamic Range

For years, the music industry has been embroiled in a “Loudness War,” a competition to create the loudest track possible. In the past, artists and producers would push the volume levels as high as possible, compressing and limiting the audio signal to give the impression of loudness. The result was often a distorted and harsh sound, lacking in dynamic range. 

However, in recent years, there has been a move towards promoting dynamic range in music, with the aim of creating a more natural and transparent sound. This shift has been motivated in part by growing concerns over listener fatigue and hearing damage caused by excessive loudness. 

The Emergence Of New Loudness Standards

To address these concerns, new standards and guidelines for loudness have emerged over the years such as LUFS (Loudness Units Full Scale) which helps maintain a consistent loudness level across different mediums and devices. This move towards more transparent and balanced sound has given rise to the concept of “loudness normalisation,” where the overall loudness of a track is standardized to a specific level for a given medium or platform. This has resulted in a more level playing field for artists and producers, who can now focus on the musicality and artistic intention of their mix rather than just how loud it is. 

Balancing Loudness With Musicality And Artistic Intention

Although there is a growing emphasis on making tracks sound good and loud, it is important to ensure that this is not done at the expense of musicality and artistic intention. The ideal goal should be to create a mix that sounds natural and transparent, rather than simply “loud” for the sake of it. This can be achieved through careful and selective use of compression and limiting, equalization, and other digital processing tools. In the end, a well-balanced mix with good musicality and dynamic range will always be more enjoyable to listen to, regardless of its overall loudness level. 

How To Make Your Mixes Sound Loud

Credit: www.soundonsound.com

Frequently Asked Questions On How To Make Your Mixes Sound Loud

How Do People Get Their Mixes So Loud?

Mixes are made louder through a process called mastering. This involves using various techniques such as compression, equalization, and limiting to increase the volume while preserving the dynamics and clarity of the music. High-quality equipment, experienced engineers, and careful attention to detail are all essential for achieving a loud, balanced mix.

Why Can’t I Get My Mixes Loud?

To get your mixes loud, you need to take a few steps. Firstly, ensure that your recordings are not clipping and that they have enough dynamic range. Secondly, use proper EQ and compression techniques. Thirdly, use limiters and maximize the volume to achieve a loud, consistent sound without distortion.

Finally, ensure that your playback system is of high quality.

How Can I Increase The Loudness Of My Sound?

To increase the loudness of your sound, you can try adjusting the volume settings on your device or use external speakers or headphones with higher volume capabilities. Additionally, you can increase the input levels on your recording device or use audio editing software to amplify the sound post-recording.

How Do You Make Your Mixes Sound Good?

To make your mixes sound good, there are several things to keep in mind: 1) Good mixing requires careful balancing of frequencies and volumes. 2) Proper use of EQ, compression, and reverb can enhance the mix. 3) Pay attention to panning and stereo imaging.

4) Use high-quality monitors or headphones when mixing. 5) Finally, regular practice and experimentation can help you develop a good mix.

Conclusion

Loudness is often associated with quality in the music industry. Using the right techniques to make your mixes louder can give you an advantage in the constantly evolving music market. Achieving a loud mix takes a combination of experience, knowledge and experimentation.

Using the tips shared in this post can help you take your mixes to the next level and achieve a competitive sound. Keep practicing!