Categories
Archive

Best Speakers For A Home Studio

The best speakers for a home studio are those that provide accurate and clear sound reproduction. It’s important to choose speakers that have a flat frequency response and a high dynamic range.

In order to create the best possible sound in a home studio, it’s important to have the right equipment. When it comes to speakers, there are a number of factors to consider, including sound quality, frequency response, dynamic range, and overall value.

The speakers you choose will have a big impact on the sound of your recordings, so it’s crucial to make an informed decision. We will discuss some of the best speakers for a home studio, including options for those on a budget as well as high-end options for professionals. No matter what your needs and budget are, there is sure to be a set of speakers on this list that will suit your requirements.

Top Picks For Home Studio Speakers

Discover the top picks for home studio speakers that deliver exceptional sound quality and accuracy. These best speakers for a home studio come in different sizes and designs to suit different preferences and budget levels. Get powerful and immersive sound for your music productions, podcasts, and videos with these top-rated home studio speakers.

Before diving into the top picks for home studio speakers, let’s discuss the difference between active and passive speakers. Active speakers have a built-in amplifier and do not require an external amplifier, making them more convenient for home studios. Passive speakers, on the other hand, require an external amplifier to function. While selecting the speaker size for your home studio, consider the size of your studio and the type of work you will be doing. A larger studio may require larger speakers for better sound coverage. However, if you will be focusing on mixing and mastering, a smaller set of speakers may suffice. The frequency response range determines how low and high a speaker can reproduce sound. A wider frequency range means the speaker can reproduce a wider range of frequencies, resulting in clearer and more accurate sound. It is recommended to choose a speaker with a frequency response range of at least 20Hz to 20kHz, which covers the full range of human hearing. Wattage and power handling are essential factors to consider when selecting home studio speakers. Wattage is the amount of power a speaker can handle, while power handling describes the maximum power the speaker can handle without distortion. It is recommended to choose a speaker with a power handling capacity that exceeds the output of your amplifier to prevent distortion and potential damage to the speakers. Last but not least, sound quality and clarity are the most crucial factors to consider when choosing home studio speakers. It is essential to select speakers that produce clear, accurate, and balanced sound across all frequencies. It is also essential to choose a speaker with a flat frequency response that accurately reproduces the source material without any coloration. In conclusion, when selecting home studio speakers, consider the speaker size, frequency response range, wattage, power handling, and sound quality and clarity. By investing in the right set of speakers, you can achieve better sound quality and create high-quality audio content in your home studio.

Best Speakers For A Home Studio

Credit: www.pinterest.com

Active Speakers Vs Passive Speakers

Active speakers are best for a home studio setup as they have built-in amplifiers and require less equipment. Passive speakers, on the other hand, require an external power source and are better for larger spaces. Understanding the differences between the two can help you make an informed decision when selecting the best speakers for your home studio.

Creating a suitable home studio setup requires careful consideration of each element, especially when it comes to selecting the best speakers. In general, there are two types of speakers: active and passive. Both types have their pros and cons, and choosing between them can be challenging. In this article, we will discuss the advantages and disadvantages of active and passive speakers, to help you make an informed decision.

Pros And Cons Of Active Speakers

Active speakers, also known as powered monitors, have a built-in power amplifier, which means they do not require any additional equipment to operate. Here are some pros and cons of active speakers:

ProsCons
Easy to set upUsually more expensive than passive speakers
Require less spaceLess flexibility when it comes to customization
Built-in amplifier eliminates the need for extra equipmentPotential for amplifier interference with speaker sound quality
Can be used straight out of the boxLess control over individual component quality

Pros And Cons Of Passive Speakers

Passive speakers rely on separate amplifier components, which means they require additional equipment to operate. Here are some pros and cons of passive speakers:

ProsCons
More control over individual component qualityRequire additional equipment to operate
Less expensive than active speakersCan take up more space than active speakers
Greater flexibility when it comes to customizationCan be more complex to set up (require matching amplifiers)
Potential for better sound quality due to greater control over componentsNot as plug-and-play as active speakers

Which Is Best For Your Home Studio?

While both passive and active speakers have unique advantages and disadvantages, ultimately, the decision of which type of speaker to choose comes down to personal preference and the specific needs of your home studio. Before making a decision, consider factors such as budget, available space, required sound quality, and customization needs. In conclusion, both active and passive speakers can be suitable for a home studio setup, but it’s important to weigh the pros and cons of each before making a decision. Whatever you choose, make sure to test your chosen speakers in your home studio to ensure they meet your requirements and preferences.

Choosing The Right Size

If you’re setting up a home studio, the speakers you choose can make a big difference in the final sound quality of your recordings. One important factor to consider when selecting speakers is size. The right size for your needs will depend on your studio space and the amount of bass response you require.

Small (4-5 Inch)

If your studio is on the smaller side, or if you’re working primarily with acoustic instruments or vocal recordings, small speakers may be a good choice. These speakers typically have a smaller woofer, which means they may not reproduce the lowest frequencies as accurately as larger speakers. However, they can still provide good overall sound quality and can be a cost-effective option.

Medium (6-7 Inch)

If you have a larger studio space or are working on music with more bass-heavy production, medium-sized speakers may be a better fit. These speakers usually have a larger woofer than small speakers, allowing them to produce more low-end frequencies. This can be helpful for bass-heavy genres like hip hop and EDM.

Large (8 Inch And Above)

If you need the most accurate representation of low-end frequencies, then you may want to opt for larger speakers. These typically have an even larger woofer than medium-sized speakers, which allows them to produce even more bass response. However, they can be more expensive and may be overkill if you’re not working on music that requires a lot of bass.

Consider Your Studio Space

When choosing the right size speakers for your home studio, it’s important to consider your studio space. Small speakers may be a better choice if you have limited space or are on a tight budget. However, if you have a larger studio space and plan to work on music that requires more bass response, you may want to consider medium or large-sized speakers.

Speaker SizeIdeal for
Small (4-5 inch)Acoustic instruments and vocals, smaller studio spaces
Medium (6-7 inch)Bass-heavy music production, medium studio spaces
Large (8 inch and above)Accurate low-end frequency reproduction, larger studio spaces

Choosing the right size speakers for your home studio can make a big difference in the final sound quality of your recordings. Consider your studio space and the type of music you’ll be working on when selecting your speakers, and you’ll be well on your way to creating great-sounding music.

Frequency Response Range

For the best speakers in a home studio, opt for those with a wide frequency response range for accurate sound reproduction. This ensures that every detail of your music is heard and facilitates critical listening.

If you are setting up a home recording studio, getting the right pair of speakers is crucial. There are many factors to consider when choosing speakers, including wattage, sensitivity, driver size, and more. But one of the most important factors to consider is the frequency response range. In this post, we will explore what frequency response is, why it is important, and how to choose the best frequency response range for your home studio setup.

What Is Frequency Response?

In simple terms, frequency response refers to the range of frequencies that a speaker can reproduce. Every speaker has a frequency response range, usually measured in Hertz (Hz). The range typically starts at the lowest frequency the speaker can reproduce and ends at the highest frequency it can reproduce. For example, a speaker might have a frequency response range of 50Hz-20kHz, meaning that it can reproduce frequencies between 50Hz and 20,000Hz.

Why Is Frequency Response Important?

The frequency response of a speaker is important because it determines how accurately the speaker can reproduce different frequencies. If a speaker has a limited frequency response range, it may not be able to reproduce some frequencies accurately. This can result in the music or audio you are producing sounding distorted, muffled, or otherwise inaccurate.

Choosing The Best Frequency Response Range For Your Studio

When choosing speakers for your home studio, you should consider the type of music or audio you will be producing. Different genres of music have different frequency ranges, and you will want speakers that can accurately reproduce the frequencies most common in your genre. For example, if you primarily produce bass-heavy music like hip-hop or EDM, you will want speakers that can reproduce low frequencies accurately. A frequency response range of 20Hz-20kHz or lower might be ideal for you. On the other hand, if you produce music that is more focused on vocals or acoustic instruments, you may want speakers that can reproduce higher frequencies with more accuracy. A frequency response range of 60Hz-20kHz or higher might be a good choice. In addition to the type of music you produce, you should also consider your budget and the size of your recording space. Larger spaces may require speakers with a wider frequency response range to fill the room with sound. Keep in mind that while a wider frequency response range is generally better, it can also increase the cost of speakers. Overall, choosing speakers with the right frequency response range is crucial to producing high-quality audio in your home studio. Take the time to research different options and consider your specific needs before making a purchase.

Wattage And Power Handling

Selecting the right speakers can improve audio clarity in a home studio. Wattage and power handling are important factors to consider. Choose speakers with a high wattage for a larger room, and those with power handling that can accommodate your sound system’s power output to avoid damage to the speakers.

What Is Wattage And Power Handling?

In simple terms, wattage refers to the amount of power that is required to drive a speaker and produce sound. Power handling, on the other hand, refers to the maximum power capacity that a speaker can handle without getting damaged. These two factors are crucial when shopping for speakers for your home studio.

Why Is Wattage And Power Handling Important?

It’s important to note that wattage and power handling are not the same. A speaker with high wattage doesn’t necessarily mean it has a high power handling capacity. When speakers receive more power than their handling capacity, they can get damaged, and this can affect the quality of the sound they produce. Choosing speakers with insufficient wattage or power handling capacity may lead to distortion and eventually damage.

Choosing The Best Wattage And Power Handling For Your Studio

When shopping for speakers, it is essential to pick those with the appropriate wattage and power handling capacity for your home studio. For most home studios, studio monitors with at least 50 watts of power and a power handling capacity of 100 watts are ideal. However, several factors may affect your choice, including the size of your home studio and the type of music you produce. It is recommended to consult with experts or experienced sound engineers to ensure that you get the best speakers that will suit your studio’s needs.

Conclusion

Selecting the best speakers for your home studio can be a daunting task, but understanding wattage and power handling can make the process easier. Always ensure that the speakers you choose have the appropriate wattage and power handling capacity for your studio to avoid distortion and damaging your equipment.

Best Speakers For A Home Studio

Credit: www.youtube.com

Sound Quality And Clarity

To achieve the best sound quality and clarity in your home studio, it’s important to invest in high-quality speakers. Look for speakers with a flat frequency response and good sensitivity to accurately reproduce the sound of your music. Speakers from brands like KRK, Yamaha, and JBL are popular choices for home studio setups.

Factors Affecting Sound Quality And Clarity

Sound quality and clarity are the most crucial factors to consider when deciding on the best speakers for a home studio. The quality of sound highly depends on the size and shape of the room, listening position, and speaker placement. A speaker that sounds excellent in one room might not work effectively in another environment.

  1. The Room – The room’s size, shape, and construction materials significantly affect the sound quality and clarity of the speakers. The perfect room for a studio should have a rectangular shape as this ensures even sound distribution and less bass buildup in corners.
  2. Speaker Placement – Correct speaker placement is crucial to achieve the best sound quality. You should position the speakers at an equal distance from the listening position, and they should be angled to point directly at the ears. Moreover, speakers should be at least one foot away from the back wall to avoid reflection and echo.
  3. Listening Position – The prime position of the listener should form an equilateral triangle with the speaker. This triangle ensures that the listener is at the perfect balance point between the left and right speakers and equidistant from them.

Finding The Ideal Sound Quality And Clarity For Your Studio

When finding the ideal sound quality and clarity for your home studio, you need to consider your studio’s size and acoustic properties. You must invest in high-quality speakers that deliver accurate sound without distortion at high volumes.

  • Choose the right type of speaker – Different types of speakers are suitable for different music genres. For example, bookshelf speakers are ideal for classical music.
  • Listen before buying – Always listen to the speakers before purchasing them. You can bring your favorite track to the store to test the speakers to ensure they meet your home studio’s sound and clarity.
  • Speaker Control – Your chosen speaker should have tone control and volume adjustment features. You can use these features to fine-tune the sound and clarity of your speakers to suit your preferences perfectly.

Sound Quality Vs Price

When selecting speakers, it’s essential to balance your budget with sound quality. You should choose the best speakers your budget allows but ensure that the sound quality and clarity match the cost of the speaker.

Low BudgetMedium BudgetHigh Budget
Creative Pebble 2.0Edifier R1280TYamaha HS8 Studio Monitor
Bose Companion 2 series IIPreSonus Eris E4.5Adam Audio A7X
JBL Professional 305P MkIIMackie CR5BTFocal Trio6 BE

Other Factors To Consider

Besides the sound quality, there are other factors to consider when choosing the best speakers for a home studio. Factors such as size, price, and compatibility with other studio equipment are important to think about before making a purchase.

Other Factors to Consider When it comes to setting up a home studio, purchasing the right speakers is critical. In addition to the sound quality, there are other important factors to consider before making a purchase decision. It’s important to consider your budget, the reliability and quality of the brand, and any additional features and accessories that may be included. Let’s dive deeper into each of these factors.

Budget

When considering speakers for a home studio, it’s important to determine your budget. Keep in mind that there are speakers in a range of prices and it’s important not to overspend on your speakers. While higher-end speakers may provide better sound quality, it’s important to make sure that your budget aligns with your specific needs. Consider the various options and features available at your price point and make the right purchasing decision.

Brands And Reviews

There are a number of brands to choose from when selecting speakers for your home studio. Make sure to do your own research to determine which brands are reliable and offer quality products. Look out for customer reviews and feedback from other home studio owners to get a good idea of what to expect from specific speaker models. This information helps you make a more informed decision and ensures you invest in the right speakers for your specific needs.

Additional Features And Accessories

When looking at different speaker models, it’s important to consider the additional features and accessories that may be offered. For example, some speakers come with built-in EQ controls, which are important for tweaking the sound quality to match your specific preferences. Additionally, some models have built-in Bluetooth connectivity, which allows for seamless playback of music from your phone or other devices. It is crucial to ensure that any accessories offered meet your needs and align with your budget. In summary, when selecting speakers for your home studio, it’s important to consider your budget, the reliability and quality of the brand, and any additional features and accessories that may be offered. By taking these factors into account, you can make an informed decision and invest in speakers that will provide you with the sound quality and features needed to take your music production to the next level.
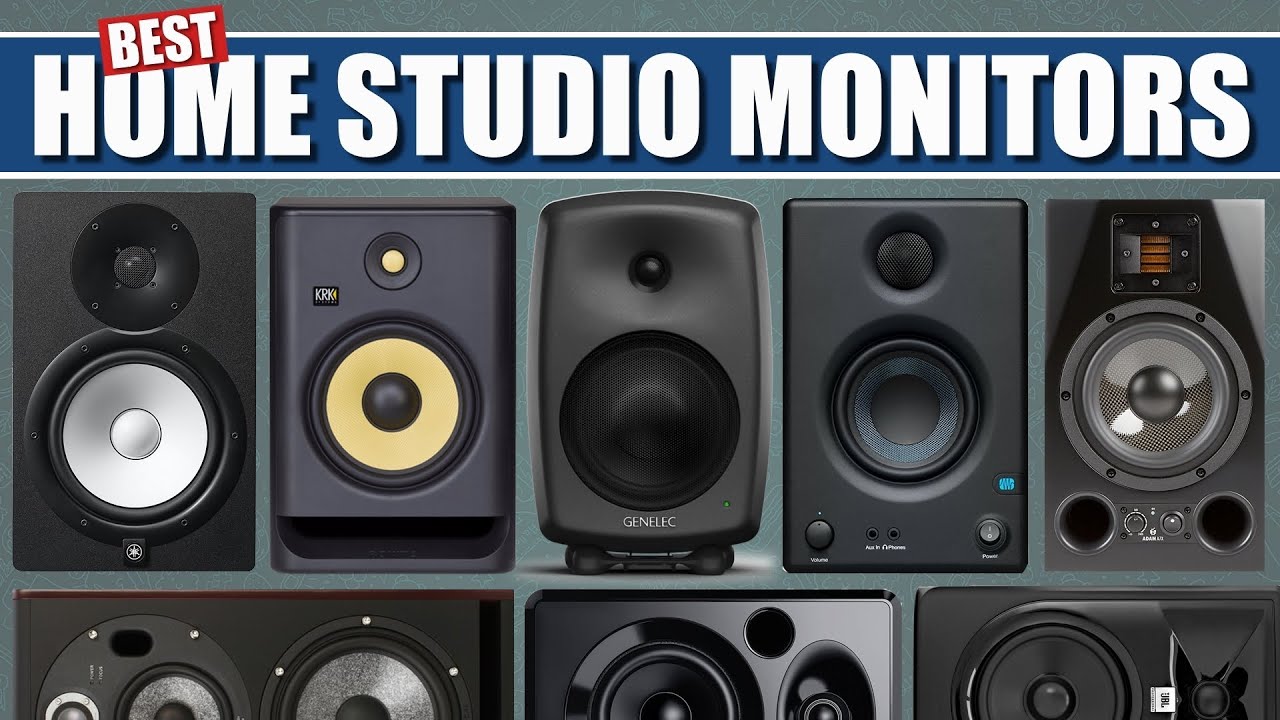
Best Speakers For A Home Studio

Credit: www.youtube.com

Frequently Asked Questions For Best Speakers For A Home Studio

What Speakers Should I Get For My Home Studio?

Choose studio monitors that are designed for accurate sound reproduction with flat frequency response and low distortion. Look for speakers that fit your budget, room size, and acoustic treatment. Brands like Yamaha, KRK, JBL, and Genelec are popular among music producers and engineers.

It’s best to test and compare speakers in person before making a purchase.

What Speakers Do Recording Studios Use?

Recording studios use studio monitors or reference speakers as they offer a flat and neutral response without any coloration. These speakers enhance the sound quality and reveal any inconsistencies in the recordings. Some popular brands used in recording studios are KRK, Yamaha, Genelec, and JBL.

What Makes A Good Studio Speaker?

A good studio speaker should have accurate and clear sound quality, the ability to reproduce a wide frequency range, a neutral sound without coloration, and a flat frequency response. It should also have a high power handling capacity, be durable, and suit the size of your studio space.

What Are The Top 5 Speakers?

Top 5 speakers are Sonos One, Amazon Echo Dot, Google Nest Mini, Apple HomePod Mini, and Bose SoundLink Revolve+.

Conclusion

To sum up, choosing the right speaker system is essential for any home studio. By carefully considering your specific needs and budget, you can find the perfect set of speakers that will enhance your sound quality and make your music production experience even better.

Whether you opt for bookshelf speakers, monitors, or a full-fledged surround sound system, always keep in mind your goals and priorities to make an informed decision. So, go ahead and invest in the best speakers for a home studio today!

Categories
Archive

Best Reverb Settings For Drums

For the best reverb settings for drums, start with a short decay time and adjust to taste. Adding a pre-delay can also help create a natural sound.

When setting up your reverb, ensure it complements the genre, style and arrangement of your drum track. Experiment with different reverb types, such as plate, room, or hall, and adjust the wet/dry mix for balance and clarity. It’s important not to overdo it with reverb as it can quickly swamp the mix and make the drums sound washed out.

Finding the sweet spot for reverb can take some time, but with careful adjustments, you can create a sense of space and ambience that enhances your drum sound and lifts your mix to the next level.

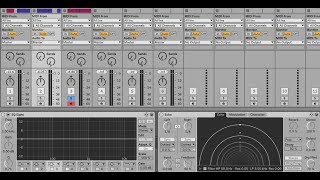
Best Reverb Settings For Drums

Credit: howtomakeelectronicmusic.com

Types Of Reverb

For the best reverb settings for drums, it’s important to consider the various types of reverb available, such as hall, plate, room, and chamber. Depending on the style of music and desired sound, experimenting with different settings and combinations can enhance the overall drum mix.

When it comes to recording drums, reverb can be a game-changer. Reverb can add depth, space, and character to your drum sound. However, with so many different reverb types and settings available, it can be challenging to know where to begin. In this post, we’ll explore the three most common types of reverb and share our recommendations for the best reverb settings for drums.

Hall Reverb

Hall reverb is a classic reverb type used in many recording studios. It simulates the sound of a large concert hall or chamber, giving a spacious and natural sound. To use hall reverb, start with a decay time of around 2 seconds for a warm and natural sound. You can increase the decay time for a more dramatic effect. Adjust the pre-delay to add clarity, and lower the high-frequency damping to prevent harshness or sibilance.

Plate Reverb

Plate reverb is another classic reverb type that creates a denser and more artificial sound than hall reverb. Plate reverb was first used in the 1950s and is still popular today. To use plate reverb, try a decay time of 1.5 seconds for shorter and more distinct reflections. Adjust the low-frequency decay to add weight, and use a moderate high-frequency damping to reduce the brightness.

Room Reverb

Room reverb simulates the sound of a small or medium-sized room, which can be perfect for adding a sense of space and natural ambience to your drum sound. To use room reverb, start with a decay time of around 1 second for a realistic sound. Adjust the pre-delay to add clarity, and increase the high-frequency damping to avoid excessive brightness. Overall, the best reverb settings for drums depend on the genre and style of music you’re recording. Experiment with different types of reverb and settings until you find what works best for your sound.

Best Reverb Settings For Drums

Credit: www.levelsmusicproduction.com

Choosing The Right Reverb

Drums are the backbone of any music production, and reverb is an essential tool to add depth and space to the sound. However, choosing the right reverb can often be a daunting task. In this section, we will analyze the factors that affect the choice of reverb settings for drums, ensuring that you can achieve the best results possible.

Analyzing The Mix

Analyzing the mix is essential to select the right reverb for drums. You need to understand how the drums fit into the mix to determine the type of reverb and its settings. If the mix is heavily layered, a dense reverb with a long decay time may overpower the drums. In contrast, a sparse mix may require a more extended, natural-sounding reverb to fill the space.

As a rule of thumb, try different reverb settings to determine the ones that complement the mix best. It’s also crucial to assign each drum track to its own reverb before routing it to the main reverb bus. This way, you can isolate the drums’ reverb if you need to adjust them later.

Matching The Genre

Matching the genre is essential when choosing the right reverb for drums. Different genres have distinct reverb characteristics that contribute to their sound. For example, rock songs tend to have shorter, brighter reverbs that emphasize the drums’ transients, while slower ballads may require longer, more ambient reverbs that give the drums a more prominent sound.

It’s essential to research the most common reverb settings for your chosen genre and experiment with them until you find the right ones for your mix. Keep in mind that there are no strict rules when it comes to choosing reverb for drums – it’s all about finding the ones that sound most pleasing to your ear and fit the music you’re producing.

Putting It All Together

Choosing the right reverb for drums is a crucial step in any music production. Ultimately, the best way to achieve the desired sound is through experimentation and practice. Be open to trying different reverb types, settings, and placement until you find the ones that suit your music’s style and mood best.

Remember to analyze your mix and genre to determine the appropriate reverb for your drums, and always experiment with different settings until you find the ones that sound right. With patience and practice, you can achieve incredible-sounding drums that enhance the overall quality of your music production.

Drum-specific Reverb Settings

Achieving the best reverb settings for drums is vital for creating a high-quality sound. Drum-specific reverb settings include adjusting decay time, pre-delay and room size to enhance the overall sound of the drums.

When it comes to drum mixing, reverb is an essential tool that can take your sound to the next level. However, finding the right reverb settings for your drums can be a daunting task. In this blog post, we will be focusing on drum-specific reverb settings, including snare, kick, and tom settings. By the end of this post, you will have a better understanding of how to use reverb to make your drums sound more professional.

Snare Reverb Settings

The snare drum is an integral part of any drum set, and the right reverb setting can make all the difference in your mix. For snare reverb settings, a short decay time works best. A decay time of around 0.2-0.5 seconds will add a sense of space and depth to your snare without overwhelming the mix. Additionally, a high-pass filter can be used to filter out low frequencies and clean up the sound. Experiment with different room sizes and decay times until you find the perfect balance for your mix.

Kick Reverb Settings

The kick drum is the backbone of any drum set, and adding reverb can help create a sense of space and depth. However, too much reverb on a kick drum can make the mix sound muddy and unfocused. For kick reverb settings, a low decay time of around 0.1-0.3 seconds works best. Additionally, a high-pass filter can be used to filter out low frequencies and create a clean, punchy sound. Experiment with different room sizes and decay times until you find the right balance for your mix.

Tom Reverb Settings

Tom drums are often overlooked when it comes to reverb settings, but they play a vital role in the overall sound of a drum set. Tom reverb settings can vary depending on the size of the tom and the desired sound. For larger toms, a longer decay time of around 0.5-0.7 seconds can add a sense of depth and space. Conversely, smaller toms can benefit from a shorter decay time of around 0.3-0.4 seconds. Experiment with different room sizes and decay times until you find the perfect balance for your mix. In Conclusion In conclusion, drum-specific reverb settings can take your drum mix to the next level. Remember to experiment with different room sizes and decay times to find the perfect balance for your mix. With the right reverb settings, your drums will sound more professional and polished.

Creating A Natural Sound

To achieve a natural sound, the best reverb settings for drums require adjusting the decay and pre-delay. Shorter decay times work for tighter sounds, while longer decay times help create a more ambient feel. Experimenting with settings can help find the perfect balance for the desired sound.

Creating a Natural Sound When it comes to creating a natural sound for your drums, one of the most important elements is reverb. While reverb can enhance the overall sound of your drums, it’s often difficult to know where to start. In this post, we’ll be focusing on the best reverb settings for drums, specifically how to create a natural sound. H3: Adjusting Decay Time The first step to creating a natural sound for your drums with reverb is to adjust the decay time. Decay time is the length of time it takes for the reverb to fade out after the original sound. If the decay time is too short, the reverb can sound unnatural and abrupt. On the other hand, if it’s too long, the reverb can sound muddy and indistinct. A good rule of thumb is to start with a decay time of around 1.5 seconds and adjust from there. H3: Setting Pre-Delay In addition to adjusting the decay time, setting the pre-delay can also help create a natural sound. Pre-delay refers to the time between the initial sound and the onset of the reverb. By setting the pre-delay to a value that’s similar to the decay time, you can create a more natural sound. For example, if your decay time is 1.5 seconds, you might set the pre-delay to around 150-200ms. H3: Adjusting EQ Finally, adjusting the EQ can help ensure that the reverb blends well with the rest of your mix. When adjusting the EQ, you’ll want to focus on the frequency range of the reverb, rather than the original sound. To create a natural sound, try cutting the low frequencies and boosting the mid-range slightly. You’ll want to avoid boosting the high-end too much, as this can make the reverb sound harsh. In conclusion, creating a natural sound for your drums with reverb takes a bit of experimentation. By adjusting the decay time, setting the pre-delay, and adjusting the EQ, you can create a sound that enhances the overall mix while sounding natural and organic.

Advanced Techniques

Reverb is an essential part of any drum mix. To take your drum mixes to the next level, you can use advanced techniques to create a fuller and more natural sound. In this article, we will cover two advanced techniques for mixing drums with reverb: creating ambience with reverb sends and parallel processing with reverb.

Creating Ambience With Reverb Sends

Using reverb sends can help you create a sense of space and depth in your drum mix. To do this, send a small amount of the drum signal to a reverb bus and adjust the reverb settings to taste. This will give your drum mix a natural and immersive quality.

  • Start with a short reverb time and a low decay to avoid muddiness.
  • Try using different types of reverb such as plate, hall, and room to see which works best for your mix.
  • Use EQ to shape the reverb and remove any unwanted frequencies.
  • Add a compressor to the reverb bus to help blend the reverb with the dry signal.

Parallel Processing With Reverb

Parallel processing allows you to blend a heavily processed signal with the original signal to create a unique and powerful sound. Parallel processing with reverb can add depth and warmth to your drums without making them sound too muddy.

StepDescription
1Create a copy of the drum track and send it to a separate bus.
2Add a heavy reverb to the bus and blend it with the dry signal to taste.
3Use EQ to shape the reverb and remove any unwanted frequencies.
4Apply compression to the reverb bus to help blend the signal with the original track.

Using these advanced techniques can help you create a more natural and immersive drum mix. Experiment with different types of reverb and EQ settings and find what works best for your mix.

Best Reverb Settings For Drums

Credit: www.izotope.com

Avoiding Common Mistakes

In creating the best reverb settings for drums, it’s important to avoid common mistakes such as overusing reverb, not paying attention to the room size, and not EQ’ing the reverb itself. By following these tips and experimenting with different settings, you can achieve a well-balanced and natural-sounding reverb for your drum tracks.

Overusing Reverb

When it comes to adding reverb to your drum track, it’s important to find the right balance. Overusing reverb can lead to a muddy and washed-out sound, making it difficult to distinguish individual drum hits. To avoid this common mistake, start by dialing in a small amount of reverb and gradually increase it until you find the appropriate level that gives your drums some space without drowning out their natural sound. Remember, less is often more when it comes to reverb.

Using Presets Without Adjusting

One of the biggest mistakes drummers make is using presets without adjusting them to fit their specific mix. While it’s tempting to use a preset that sounds great in isolation, it might not be the best fit for your track. Instead of relying solely on presets, take the time to tweak the reverb settings to fit your drums. Adjust the decay time, pre-delay, and dampening until you find the right sound. This will help you create a unique sound that complements the rest of your mix.

Conclusion

By avoiding these common mistakes, you can achieve a professional-sounding drum track that is well balanced and sits perfectly in your mix. Remember to experiment with different reverb settings until you find the perfect sound. Whether you’re going for a natural ambience or a more dramatic effect, finding the right reverb settings can take your drum track to the next level.

Frequently Asked Questions On Best Reverb Settings For Drums

What Is A Good Reverb Setting For Drums?

A good reverb setting for drums can be achieved by using a short decay time, low-mid frequency damping, and pre-delay settings. Experiment with various algorithms and presets until you achieve the desired sound. It’s recommended to keep the reverb level subtle and avoid overdoing it.

How Much Reverb Do You Put On Drums?

The amount of reverb you put on drums depends on the sound you want to achieve. It’s recommended to start with a small amount of reverb and gradually increase it until you achieve the desired effect. Experimentation is key to finding the perfect balance of reverb for your mix.

How Do You Get Reverb On Drums?

To get reverb on drums, you can use a combination of microphones and effects processors. Place microphones at different distances and angles around the drum kit to capture the sound in different ways. Then, use a reverb effect to add a sense of space and depth to the sound of the drums.

Adjust the settings until you find the right balance of reverb and clarity.

Should Drums Have Mono Or Stereo Reverb?

Drums can have both mono and stereo reverb depending on the desired effect and personal preference. Mono reverb creates a cohesive sound, while stereo reverb adds depth and width. Experiment and choose what works best for your musical production.

Conclusion

To sum up, achieving the perfect reverb setting for your drums can take some experimentation, but the results are worth it. Always keep in mind the type of music you’re creating and the emotion you want to convey. Don’t be afraid to try different reverb types and settings until you find the one that works best for your drum sound.

By implementing these tips, you can take your drum tracks to the next level and create a truly remarkable sound experience for your listeners.

Categories
Archive

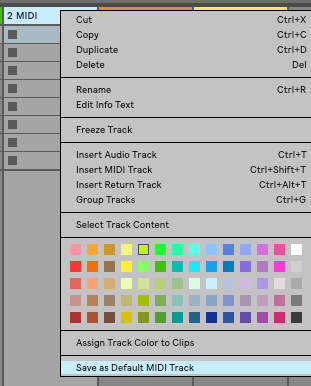
How To Create Default Midi Track

To create a default MIDI track, simply go to the track menu and click “Create Default MIDI Track.” This will create a blank MIDI track with the default settings.

MIDI tracks are a crucial component of digital music production, allowing creators to bring their compositions to life with virtual instruments and software. Creating a default MIDI track can save time and streamline the creative process. By having a go-to template with standardized settings, you can focus on the music without worrying about technical details.

Moreover, customizing your default MIDI track can help you develop a signature sound and style. Whether you’re a beginner or an experienced producer, understanding how to create a default MIDI track is a fundamental skill in modern music production. Follow these simple steps to start making your own digital masterpieces.

How To Create Default Midi Track

Credit: www.productionmusiclive.com

Creating A Default Midi Track

To create a default MIDI track, simply go to your DAW’s preferences or settings, navigate to the track section, and choose the option to create a default MIDI track. This will ensure that every time you open a new project, a MIDI track will automatically be created with your preferred settings and instruments.

Creating a default MIDI track can save you plenty of time while working on your next project. A digital audio workstation (DAW) allows you to customize various sound settings, including drum kits, piano sounds, and synth instruments. This guide will walk you through the steps of creating a default MIDI track, so you always have your preferred instrument readily available.

Step 1: Open Your Digital Audio Workstation

Open your DAW and create a new project or open the one you’re currently working on. Once loaded, ensure that you have a blank slate to work with, i.e., no tracks present.

Step 2: Adding A New Track

On the software interface, you should spot an option to add a new track, usually located at the top of the screen. Click it and select ‘MIDI’ to create a new MIDI track.

Step 3: Selecting The Midi Instrument

Next, you need to choose the instrument of your liking. Your DAW should have numerous choices you can select from, such as a grand piano, guitar, synth, or even a whole orchestra. Choose your instrument and ensure the track’s ‘input’ is set to the software instrument you just selected.

Step 4: Setting Default Midi Track

Once you have named your track and tweaked the instrument and input settings, it’s time to set the MIDI track as your default on the DAW. For example, on Logic Pro X, you can go to the preferences window and indicate the default settings for your MIDI track. Ensure you save the settings so that the next time you start a new project, the MIDI track of your liking is instantly available. Creating a default MIDI track is a simple yet effective timesaver that can impact your productivity and creativity positively. By repeating the steps shared in this guide for your preferred DAW, you can improve your workflow efficiency and devote more time to music-making.

How To Create Default Midi Track

Credit: forums.steinberg.net

Customizing Default Midi Track

Customizing the default MIDI track is easy. Start by opening your DAW and creating a new MIDI track. Then, customize the track by selecting the desired instrument, adjusting the volume levels, and adding any necessary effects.

Music is a form of art that expresses emotions and tells a story. With the creation of MIDI, music production has become easier and more accessible. However, to produce good music, one needs to have a thorough understanding of MIDI and its functionalities. In this blog post, we will teach you how to customize default MIDI track like a pro in three simple steps.

Step 1: Choosing A Default Sound

The first thing to do is to select a default sound that meets your music production requirements. By default, most MIDI tracks use a standard piano sound. However, there are other sound options that you can explore, such as drum kits, guitar, and bass among others. To choose your default sound, you can follow these simple steps:

  1. Open your MIDI station
  2. Select the “Preferences” option
  3. Navigate to the “Audio” section and choose “General” settings
  4. Select your preferred sound from the “Default MIDI Track” dropdown menu

Step 2: Adjusting The Tempo And Time Signature

The tempo and time signature are critical aspects of music production that determine its feel and rhythm. In some cases, the default settings might not be suitable for a specific track. In such an instance, you might need to customize them to fit your needs. Here is how:

  • In the MIDI station, go to the “Preferences” section
  • Navigate to the “General” settings section
  • Select “Time Display” to adjust the tempo to your preferred value
  • Go to the “MIDI” section and adjust time signature accordingly

Step 3: Recording Your First Midi Sequence

After customizing your default MIDI track to adjust to your requirements, the next step is to record your first MIDI sequence. This is where the magic begins. You can record your sequence by following these steps:

  • Ensure your MIDI device is connected to the computer
  • Create a new track
  • Select your customized default sound
  • Click on the “Record” button and start playing

In conclusion, customizing your default MIDI track is a simple and effective way to enhance your music production skills. By choosing a preferred default sound, adjusting the tempo and time signature, and recording your first MIDI sequence, you will be able to take your music production skills to the next level.

Bonus Tips

Learn how to create default MIDI tracks with these bonus tips. Improve your music production skills and save time by setting up your own default settings for MIDI tracks.

Bonus Tips Midi tracks are fantastic musical instruments that allow you to record and play music digitally. They are also versatile in terms of creating musical notes and tunes. However, if you really want your Midi track to sound professional, consider using virtual instruments and Midi plugins and effects. Here are some Bonus Tips to help you create default Midi track: Tip 1: Experiment with Different Virtual Instruments Virtual instruments are computer-generated sound making programs that allow you to generate sounds and music that are impossible with traditional instruments. You can find a wide range of virtual instruments, including synthesizers, samplers, drum machines, and more. Experimenting with various virtual instruments can help you find the ones that work best for your Midi track. Tip 2: Use MIDI Plugins and Effects MIDI plugins and effects are software programs that can be used to manipulate and process Midi data. They can be used to shape the sound of your tracks, whether you want to add reverb, delay, or other effects. This will give your music a professional touch and make it stand out. Using Midi plugins and effects is simple; all you need to do is download the plugin that suits your needs and add it to your Midi track. In conclusion, creating a default Midi track is not that difficult if you use virtual instruments and Midi plugins and effects. These tips should help you create a track that stands out from the rest and sounds professional. By experimenting with different virtual instruments and using Midi plugins and effects, you can create unique and memorable tracks that will impress your audience.

How To Create Default Midi Track

Credit: help.ableton.com

Frequently Asked Questions Of How To Create Default Midi Track

How Do I Save Midi Track As Default?

To save a MIDI track as default, you must first open the Preferences menu and go to the MIDI tab. Then, select the MIDI track you want to save as default and click on the “Set Default” button. Finally, click on “OK” to save the changes.

How Do I Set Midi As Default In Ableton?

To set MIDI as your default in Ableton, go to “Preferences” from the “Options” menu. Select “MIDI Sync” and choose “Track” or “Remote” for your MIDI output. Finally, click “OK” to save your changes.

How Do I Change The Default Audio Track In Ableton?

To change the default audio track in Ableton, go to the Browser tab and locate the default audio folder. Right-click on the audio file you want to set as the default and select “Set as Default Audio Track. ” Now, every new audio track you create will automatically use the selected file as its default.

How Do I Save Midi Presets In Ableton?

In Ableton, you can save MIDI presets by creating a new MIDI track, configuring it to your desired settings, and then saving it as a preset. You can also save a preset for your MIDI controller by configuring the controller to your desired settings and saving it as a user preset.

Conclusion

Creating a default MIDI track is a simple process that can help save time and improve your workflow. By following the steps outlined in this guide, you can easily create a template that includes all of your preferred settings, making it easy to start new projects without having to configure everything from scratch each time.

Remember to experiment with different settings and customize your default track to suit your specific needs. With just a bit of practice, you’ll be able to create high-quality MIDI tracks quickly and efficiently, allowing you to focus on your creative process.

Categories
Archive

How To Mix Big Punchy Rock Drums

To mix big, punchy rock drums, focus on the kick and snare while balancing the entire kit. Start by properly tuning the drums and applying compression, EQ, and reverb to enhance their natural sound.

Rock music is all about powerful drums that pack a punch. But getting that big sound can be challenging, especially if you’re new to mixing rock music. To create the perfect mix, you have to get the drums sounding just right.

That means focusing on the kick and snare, while also balancing the entire drum kit. In this guide, we’ll take you through the steps you need to follow to mix big, punchy rock drums. We’ll show you how to tune the drums, apply the right compression, EQ, and reverb, and make every hit sound big and powerful.

Choosing The Right Drum Samples

When it comes to mixing big punchy rock drums, choosing the right drum samples is crucial. Look for samples that have a natural and dynamic sound with a good balance of attack and sustain. Experiment with layers and processing to create a larger-than-life sound for your mix.

Selecting Drum Samples That Fit Your Mix

When it comes to mixing big punchy rock drums, choosing the right drum samples is crucial. The right drum samples can add a lot of power and energy to your mix. When selecting drum samples, you need to consider the genre, the overall vibe of the mix, and the individual elements of the drum kit. Here are some tips for selecting the right drum samples:

  • Listen carefully to the raw tracks and identify which elements of the drum kit need enhancement.
  • Choose samples that complement the existing drum sounds and fit the genre. For example, if you’re mixing a classic rock track, you may want to choose samples that have a vintage feel.
  • Consider the dynamics of the song. Choose samples that have a similar dynamic range as the rest of the track.

Layering Samples To Create More Impact

Layering multiple samples can give your mix more impact and energy. Layering works best when you choose samples that complement each other and add depth and character to the mix. Here are some tips for layering drum samples:

  • Choose samples that have different characteristics, such as different attack, sustain, and decay times.
  • Layer samples to accentuate certain elements of the drum kit. For example, you can layer multiple kick drum samples to enhance the attack.
  • Use EQ and compression to blend the samples together seamlessly.
  • Try adding some reverb or delay to the layered samples to create a sense of space.

In conclusion, choosing the right drum samples and layering them effectively can make a big difference in the impact and energy of your rock drum mix. Spend some time experimenting and fine-tuning your samples to achieve the desired sound and feel for your mix.

How To Mix Big Punchy Rock Drums

Credit: www.youtube.com

Microphone Placement For The Perfect Sound

Microphone placement is a vital part of achieving the perfect sound when recording rock drums. Proper placement can make a huge difference in the overall sound of the recording. In this post, we’ll take a look at how to select the right microphones and where to place them to achieve that big, punchy, rock drum sound.

The Art Of Selecting Microphones

Choosing the right microphones for your drum kit can be a daunting task, especially if you’re new to recording. There are dozens of options to choose from, but a few rules of thumb will help you make the best selection.

  • Select dynamic mics – Dynamic microphones are ideal for recording drums due to their high SPL handling and ability to capture the attack and impact of the drum hits.
  • Use large diaphragm condenser mics for overheads – Large diaphragm condensers are great for capturing the overall sound of the kit as well as the cymbals.

Mic Placement For Kick, Snare And Toms

DrumMic TypePlacement
KickDynamicInside the drum, pointing at the beater, approximately 2-4 inches away
SnareDynamicAbove the rim, pointed at the center of the drum
TomsDynamicPositioned approximately 2-3 inches above the drum, pointing towards the center of the head

Placing the microphones in the right position is crucial to achieving a punchy, dynamic sound. For the kick drum, place the microphone inside the drum, pointing at the beater, approximately 2-4 inches away. For the snare drum, place the microphone above the rim and pointed at the center of the drum, while for the toms, position the microphones approximately 2-3 inches above the drum, pointing towards the center of the head.

Overhead And Room Microphone Placement

  • Overheads – Consider using a stereo pair of large diaphragm condenser microphones for overheads. Position them approximately 3-4 feet above the kit, angled towards the center of the kit.
  • Room Mics – Place dynamic microphones a few feet away from the drum kit to capture the natural ambience of the room. Experiment with placement and distance to achieve the desired effect.

Overhead and room microphones are crucial for capturing the overall sound of the kit and adding depth and dimension to the recording. For overheads, consider using a stereo pair of large diaphragm condenser microphones positioned approximately 3-4 feet above the kit, angled towards the center of the kit. For room mics, place dynamic microphones a few feet away from the drum kit to capture the natural ambience of the room.

Experimenting To Get Your Perfect Sound

Microphone placement is just one part of achieving the perfect rock drum sound. Don’t be afraid to experiment with different microphones, placement, and EQ settings to achieve the sound that works best for your specific situation.

Try different mic placements, move the mics around the room, add and subtract microphones, and adjust EQ settings to get that perfect sound. Remember that every drum kit is unique and will require different techniques to record it properly.

Equalizing Your Drum Tracks

Equalization plays a significant role in mixing rock drums, and it is vital to understand its principles. It involves adjusting the frequency balance of each drum track to give it prominence in the mix and ensure that it sits well with other instruments. The process helps to remove unwanted frequencies and harmonics that can cause a muddy or boomy mix.

The Importance Of High Pass Filters

The high pass filter is a crucial tool in equalizing drums as it helps to remove the low-end rumble and unwanted noise. It is used to cut frequencies below a certain point, usually around 20Hz to 60Hz. Applying a high pass filter to the kick drum and other drum tracks can significantly help to clean up the mix and provide clarity.

Eq Techniques For Kick, Snare, Toms And Overheads

Kick drum EQ settings are subjective, but it is generally recommended to cut some of the low-mids and boost the high frequencies to provide more attack. Snare EQ is all about bringing out the snap and body of the drum while removing the boxiness. Toms are EQ’d differently according to their size and tuning, but generally, they require a boost in the low and high-mids frequencies. Overheads need EQ to create space and give a stereo image, and a technique called mid-side processing can be employed for better control of the cymbals.

  • Use high-pass filters to remove low-end rumble and noise.
  • Cut low-mids and boost high frequencies for kick.
  • Bring out the snap and remove boxiness for snare.
  • Boost low and high-mids for toms.
  • Employ mid-side processing for a stereo image of cymbals.

When equalizing your drums, it is important to listen carefully and make gradual adjustments. Use your ears as the ultimate guide and aim to create a balanced and punchy mix.

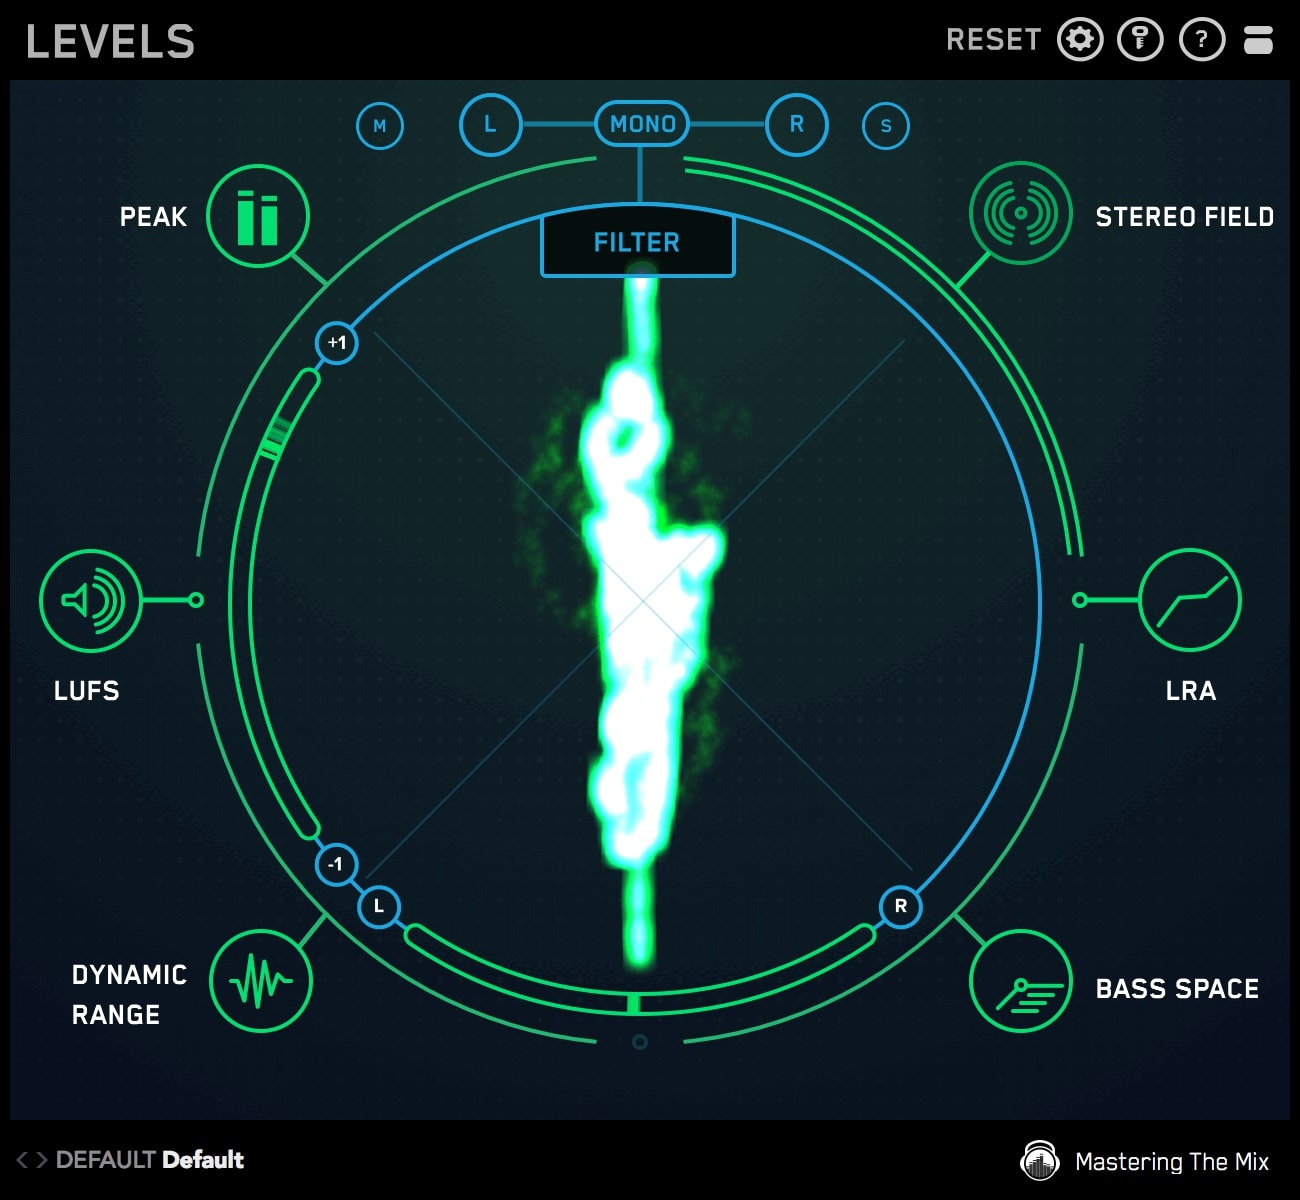
How To Mix Big Punchy Rock Drums

Credit: www.masteringthemix.com

Creative Use Of Compression

When it comes to mixing rock drums, compression can make a significant difference in the sound. It can help control the dynamic range, add some punch, and make the drums sound bigger and more cohesive. However, compression can be tricky, and if not used correctly, it can ruin the sound instead of improving it.

Using Compression To Control Dynamic Range

One of the main benefits of compression is to control the dynamic range of the drums. By reducing the level of the loudest hits and increasing the level of the quietest hits, the drummer can achieve a more consistent sound throughout the performance. This is especially important in genres like rock, where the drums need to be powerful and in-your-face. To use compression to control dynamic range:

  1. Insert a compressor on the drum bus or on each individual drum track.
  2. Set a low threshold, a high ratio, and a short attack time.
  3. Adjust the release time to fit the song’s tempo and the drummer’s playing style. A faster release time will make the drums sound tighter, while a slower release time will make them sound more natural.
  4. Use the makeup gain control to maintain the original level of the drums.

Parallel Compression For Big Rock Drums

Another technique that can make the rock drums sound bigger and more powerful is parallel compression. This involves blending a heavily compressed signal with the original signal to create a thicker and punchier sound. To use parallel compression:

  1. Send the drum bus or each drum track to a separate auxiliary track.
  2. Insert a compressor on the auxiliary track and set a high threshold, a low ratio, and a long attack time.
  3. Blend the compressed signal with the original signal using the auxiliary track’s fader.
  4. Adjust the level and tone of the compressed signal to taste.

Conclusion

Using compression creatively can make a significant difference in the sound of rock drums. By controlling the dynamic range and adding some punch, the drums can sound bigger, more powerful, and more cohesive. However, compression is just one tool in the mix engineer’s toolbox, and it should be used in conjunction with other techniques, such as EQ, reverb, and panning, to create a balanced and dynamic mix.

Adding Reverb And Other Effects To Your Drums

To produce big punchy rock drums, adding reverb and other effects is crucial. Experiment with different types of reverb and delays to create depth and space in the mix. Compression and EQ can also help to shape and enhance the sound.

Reverb and effects are crucial to creating that big, punchy rock drum sound that every producer wants to achieve. By applying reverb and other effects to your drums, you can create depth, texture, and ambiance. Let’s take a deeper look at how you can use reverb, delay, and other effects to enhance your rock drum mixes.

Using Reverb To Create Depth In Your Mix

Reverb is a tool used to emulate the sound of a room or other space, giving your drums a sense of depth and space. By adjusting the decay time and the wet/dry mix, you can create a varying degree of reverb. For rock drums, a large room reverb with a long decay time works perfectly.

Delay And Other Effects To Add Texture To Your Drums

In addition to reverb, there are other effects that can be used to add texture and interest to your rock drum mix. For example, by using a delay effect, you can create interesting rhythmic patterns that add movement and excitement to your drum sound. Other effects like distortion, saturation, and compression can be used to add a gritty or compressed sound, which is perfect for rock drums. Remember, less is often more when it comes to using effects on your drum mix. In conclusion, applying reverb and other effects to your rock drum mix is an essential aspect of creating a dynamic and attention-grabbing sound. By using reverb to create depth and other effects to add texture, you can produce a rock drum sound that is big, punchy, and full of character.

Mixing Your Drum Tracks Together

When it comes to mixing big punchy rock drums, one of the most important steps is blending all the individual drum tracks together. This can be quite challenging, but with some tips and techniques, you can make your drum mix sound huge and powerful.

Balancing Your Drum Levels

The first step in mixing your drum tracks is balancing the levels of each individual track. You want to make sure that each drum element is audible and sitting nicely in the mix.

Typically, you’ll have separate tracks for the kick drum, snare drum, toms, and cymbals. You’ll want to listen to each track in isolation and adjust the volume levels until they sound balanced.

A good starting point is to set the kick drum and snare drum levels at the same volume and then bring in the other elements around them. Just make sure that each element is audible without overpowering the others.

Making Sure Each Drum Element Works Together

In addition to balancing the levels, you’ll want to make sure that each drum element works well together. This means paying attention to things like phase, frequency masking, and overall tone.

You may need to experiment with things like EQ, compression, and other processing to get the drums to sit together properly. Keep in mind that every mix is different, so there’s no one-size-fits-all solution.

Using Panning And Other Techniques To Create Space In Your Mix

Finally, you can use panning and other techniques to create space in your mix and make the drums sound even bigger. For example, you might pan the toms slightly to the left and right to create a wider stereo image.

You could also use techniques like parallel compression or adding a touch of reverb to give the drums more depth and dimension.

Remember, the key to mixing big punchy rock drums is to experiment and be mindful of the overall balance between all the drum elements. Keep tweaking until you find the perfect blend for your mix.

How To Mix Big Punchy Rock Drums

Credit: www.youtube.com

Frequently Asked Questions Of How To Mix Big Punchy Rock Drums

How Do You Mix Big Rock Drums?

To mix big rock drums, start by ensuring that each drum is individually miked and properly tuned. EQ each drum with focus on its unique shape and size. Use compression to control dynamics, and add reverb to enhance the overall sound.

Finally, balance the levels of each drum to achieve a cohesive mix.

How Do You Mix Punchy Drums?

To mix punchy drums, start by using the kick drum as the foundation. Then, add in the snare and adjust the levels to create balance. Use EQ to enhance the overall sound and compression to control levels. Consider adding various effects, such as reverb or delay, to add depth and dimension to the sound.

How Do You Mix Big Drums?

To mix big drums, start by balancing the levels of each drum and adding EQ to enhance their individual characteristics. Use compression to even out the drum sound and add reverb and other effects to create depth and space. Experiment with panning to create a wider sound stage.

Finally, adjust the overall volume level and check the mix on different playback systems.

How Loud Should Drums Be In A Rock Mix?

Drums are a vital part of a rock mix, but their sound level can vary based on the specific song, recording, and overall musical vision. Generally, drums should be loud enough to drive the rhythm section, but not overpowering or drowning out other instruments or vocals.

It ultimately comes down to achieving a balanced and cohesive sound for the track.

Conclusion

Rock music has the power to uplift and inspire a whole generation, but it all starts with drums that pack a punch. By following these tips for mixing big, punchy rock drums, you can ensure that your tracks have the right sound to get people moving.

From focusing on your EQ settings to dialing in the right compression and reverb, a few simple tweaks can make all the difference. Remember to keep experimenting and finding what works best for your tracks – and with a little practice, you’ll be rocking the studio like a pro.

Categories
Archive

How to Work in a Music Studio

To work in a music studio, start by gaining experience and knowledge through music production courses or internships. These opportunities can lead to job openings as production assistants, studio engineers, or producers, all of which require technical, creative, and organizational skills.

As an Amazon Associate I earn from qualifying purchases.

It’s important to network within the industry, collaborate with artists and producers, and continually update your skills in music technology and software. A passion for music and a strong work ethic are crucial for success in a constantly evolving field like music production.

When equipped with these qualities, you will have the opportunity to work with some of the top recording artists, audio engineers, and producers in the industry.

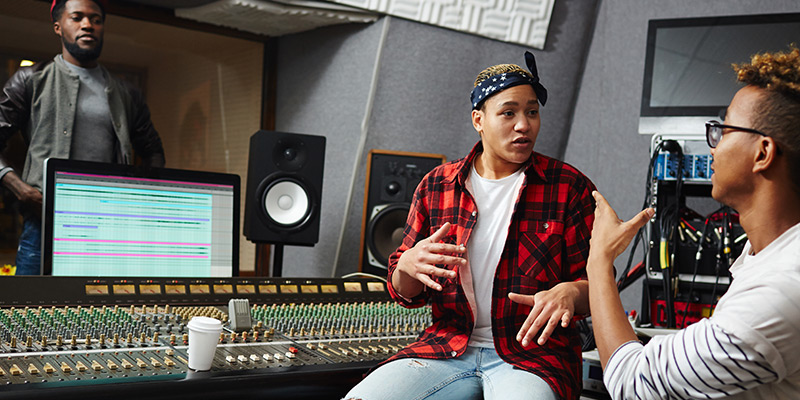
How to Work in a Music Studio

Credit: www.production-expert.com

Setting Up Your Workspace

To work effectively in a music studio, it is crucial to set up a workspace that suits your needs. Consider the layout, lighting, equipment, and furniture in the studio to create a comfortable and efficient setup that supports your creativity and productivity.

Before starting any work in a music studio, the first thing you need to do is to set up your workspace. This includes designing your studio layout and selecting and installing equipment. The proper setup of your workspace is crucial for creating a comfortable and productive environment for your work. Here’s how to set it up:

Designing Your Studio Layout

Designing your studio layout is an essential task if you want to work efficiently in your music studio. Your layout should be arranged in such a way that everything is accessible and within reach. You should have the equipment that you use frequently closest to you so that you don’t have to move around a lot during a recording session. Your studio layout should include the following:

  • A desk or table for your computer and other equipment
  • A comfortable chair to sit on
  • A mixing desk
  • Sufficient space to accommodate your instruments
  • Proper ventilation to ensure comfortable temperature and good air circulation

Selecting And Installing Equipment

When selecting and installing equipment for your music studio, make sure that you have the best quality equipment you can afford. This includes instruments, microphones, speakers, and recording software. You should also consider the acoustics of your studio when selecting and installing equipment. Make sure that you have the right equipment and software installed and configured correctly. Here’s what you need:

EquipmentDescription
InstrumentsA guitar, keyboard, drum kit, or any other musical instrument you need for your work
MicrophonesCondenser microphones are best for recording in a music studio. You may also need dynamic microphones for recording drums and loud guitar amps.
SpeakersChoose the best quality speakers within your budget, and ensure they are correctly positioned for optimal acoustics
Recording SoftwareInvest in a quality recording software to record and edit your music.

Setting up your workspace is a crucial step when working in a music studio. Proper studio layout and high-quality equipment improve productivity, reduce clutter, and create a comfortable environment to work in. By following the steps outlined above, you can optimize your workspace and achieve your desired music production goals.

How to Work in a Music Studio

Credit: www.gettyimages.com

Preparing For A Recording Session

When it comes to recording music, preparation is crucial. A well-prepared musician or band can make the recording process much smoother. Before heading to the studio, there are a few things you need to do to ensure a successful recording session. In this post, we will take a closer look at how to prepare for a recording session and what to expect when you get to the studio.

Preparing Equipment And Instruments

Before you head to the recording studio, you need to make sure that your equipment and instruments are in good working condition. This includes checking your guitars, amps, pedals, and any other gear you plan to use during the session. Ensure that your equipment is clean and all necessary maintenance is up-to-date to avoid issues during the recording process.

In addition, be sure to bring any necessary cables, strings, or picks that might be needed. It’s better to overprepare than to not have something you need during the session.

Testing Acoustics And Setting Levels

The acoustics of the recording space can have a significant impact on the final outcome of your recording. Before you start the session, it’s important to test the acoustics of the room and make necessary adjustments. This will help ensure the sound quality is optimal.

Furthermore, you’ll need to set levels for each instrument and microphone that’s being used. This will help ensure that everything is balanced and that no one instrument or voice is overpowering the others.

Other Preparations

In addition to the above, there are a few other things you can do to help prepare for your recording session. These include:

  • Preparing your music in advance, including any sheet music or chord charts you might need.
  • Mentally preparing yourself for the session and staying focused throughout the process.
  • Communicating with your sound engineer or producer about your expectations for the session.
  • Bring snacks, water, and anything else you might need to stay comfortable during the recording process.

By preparing for your recording session in advance, you can help ensure a smooth and successful recording process. When it’s time to start recording, you’ll be able to focus on the music and not worry about any technical issues or missing equipment.

Working With Artists

Working with artists in a music studio takes careful planning and communication to ensure a successful collaboration. From setting up equipment to managing the creative process, a seamless workflow is essential. Familiarity with music production software and technology is also crucial for a smooth and efficient production experience.

Working with artists is a crucial part of working in a music studio. Every artist has a unique creative process, and as a studio personnel, you need to create an environment that supports their process. In this article, we will highlight some essential tips to help you work effectively with artists in a music studio.

Creating A Comfortable And Productive Environment

The creative process of an artist needs to be supported by the environment they work in. As a studio personnel, it’s your responsibility to ensure that the studio is set up in a way that enhances the artist’s creativity. Here are some tips to help you accomplish that:

  • Make sure the studio is clean and organized
  • Ensure that the room temperature is comfortable for the artist
  • Providing comfortable chairs or couches for the artist to relax in between takes
  • Play calming background music to reduce stress and anxiety
  • Use proper lighting to create a cozy atmosphere

Creating a comfortable and productive environment not only benefits the artist but also improves the quality of the recording.

Communicating Effectively And Managing Expectations

Communication is key when working with artists in a music studio. You need to establish a clear line of communication between the artist and the studio personnel to ensure that everything runs smoothly. Here are some tips for effective communication:

TipExplanation
Discuss the creative process upfrontEstablish the goals and expectations before starting the recording process to ensure everyone is on the same page.
Give clear instructionsProvide the artist with precise information on what you want them to achieve; this will help them focus on what needs to be done.
Manage time efficientlySchedule ample time for each recording session and stick to the plan to ensure that you can capture the best performance from the artist.
Provide constructive feedbackIf the artist struggles to achieve a particular sound or performance, give them constructive feedback to help them grow and improve as an artist.

Managing expectations and communicating effectively with the artist will not only build trust but also lead to a successful recording experience. In conclusion, working with artists in a music studio requires patience, proper communication, and creating a comfortable environment that supports their process. By following these tips, you can provide an excellent experience for the artist, which will result in a great musical creation.

Recording Techniques

Learn how to work in a music studio by mastering recording techniques. From mic placement to equalization, recording techniques involve many critical factors that can affect the sound quality of your music production. Whether you’re a beginner or a seasoned professional, check out the techniques that can help you record the perfect track.

Recording music in a studio can be a daunting task, especially for beginners. Recording techniques are vital to producing quality tracks, and it involves the proper handling of equipment and software. In this post, we will discuss essential aspects of recording in a music studio, with a specific focus on microphone placement and selection as well as recording and mixing techniques.

Microphone Placement And Selection

Choosing the right microphone for your recording session will significantly impact your sound quality. Each microphone has its unique sound signature, and getting the perfect match for your voice or instrument is essential. Some popular microphones used in most recording studios include Shure SM7B, Neumann U87, and AKG C414. It’s essential to find the optimal microphone position as well. The closer the mic is to the sound source, the cleaner and louder it will be, which can be beneficial for recording a solo instrument or voice. When recording a band, you should adjust the placement of the microphone to adequately capture all instruments.

Recording And Mixing Techniques

Recording and mixing techniques involve the proper handling of digital audio workstations, recording software, and signal processing. To record a track, you need to set your levels correctly to avoid peaking and distortion. You can use your headphones to monitor the sound quality and adjust the levels accordingly. When mixing the recorded tracks, it’s essential to use eq, compression, and reverb to enhance the sound quality. You should start with eq to remove any unwanted frequencies, then use compression to balance the volume levels, and reverb to add depth to the sound. Make sure not to overprocess the tracks as it can negatively affect the sound quality. In conclusion, recording techniques are vital to producing quality tracks in a music studio. Proper microphone placement and selection, as well as recording and mixing techniques, have a significant impact on the sound quality of a track. By following these simple tips, you can create high-quality music that will stand out in the industry.

Editing And Post-production

To successfully work in a music studio, it is crucial to have a strong understanding of editing and post-production. This involves tasks such as mixing, mastering, and ensuring the overall sound quality is top-notch. Taking the time to perfect these skills will help you stand out in this competitive industry.

Cleaning Up Audio And Removing Mistakes

Now that you have recorded your music, it’s time to begin the editing and post-production process. This stage involves cleaning up the audio, removing any mistakes, and making sure that all instruments and vocals are in sync with one another. To begin the cleanup process, it’s essential to start listening to your tracks with a critical ear. Use editing tools such as noise reduction plugins to remove unwanted background noises such as hums, hisses, and clicks. You can also use equalization to balance the overall tonality of your mix and remove any frequency that may interfere with other instruments. When editing, it’s essential to pay close attention to timing and rhythm. Use a metronome to ensure that all of your tracks are in sync. Similarly, keeping an eye on the waveforms can help you identify and remove any misplaced notes and mistakes.

Mixing And Mastering Your Tracks

Once you have cleaned up all of your audio, it’s time to start mixing your tracks. Mixing involves adjusting individual levels, panning, and adding various effects to create a cohesive final product. Use automation to create movement in your mix and give depth through panning. Similarly, set clear volumes for each instrument to separate them and create balance. When mastering your tracks, it’s essential to make sure they have an overall consistent sound and volume. Use compression and limiting to ensure that your tracks are not too loud or too quiet. Finally, apply equalization to balance your tracks’ tonality and ensure that they sound great on different playback systems. In conclusion, editing and post-production are a crucial part of producing music in a studio. Cleaning up your audio, removing mistakes, and mixing and mastering your tracks will take your music to the next level. Use the right tools and techniques, and you’ll create a high-quality music product that people love to listen to.

Marketing And Networking

To work in a music studio, marketing and networking are essential for success. Connect with industry contacts and promote your services through social media and local events to build your reputation and secure clients. Joining music associations and attending conferences can also expand your network.

When it comes to working in a music studio, marketing and networking are the keys to success. It is essential to attract clients, build a good reputation, and collaborate with other professionals in the industry. In this post, we will discuss some tips on how to succeed in marketing and networking as a music studio professional.

Attracting Clients And Building Your Reputation

One of the most important aspects of working in a music studio is attracting clients. Here are some tips to help you do that:

  • Create a website showcasing your services and portfolio.
  • Utilize social media to promote your studio and interact with potential clients.
  • Offer promotions or discounts to first-time clients.
  • Attend music industry events and networking opportunities.
  • Provide excellent customer service to your clients and encourage them to spread the word about your studio.

Building your reputation is equally important. Consider these tips:

  • Produce high-quality recordings and provide excellent studio experiences to your clients.
  • Encourage client reviews and testimonials on your website and social media.
  • Collaborate with talented musicians and other professionals in the industry to expand your network and improve your skills.

Collaborating With Other Professionals

Collaborating with other professionals in the music industry can help you expand your network, improve your skills, and attract new clients. Here are some tips:

  • Attend music industry events and network with other professionals.
  • Partner with musicians, producers, engineers, and other professionals to offer comprehensive services to your clients.
  • Collaborate on creative projects to expand your portfolio and showcase your skills.
  • Offer referral discounts to other professionals who refer clients to your studio.

In conclusion, marketing and networking are essential components of working in a music studio. By attracting clients, building your reputation, and collaborating with other professionals, you can succeed in this competitive field.

Staying Up To Date With Technology

Remaining current with advancements in music technology is crucial for anyone working in a music studio. From recording equipment to software and hardware devices, keeping up-to-date will help you produce high-quality music and remain ahead of competitors.

In today’s music industry, recording technology is advancing every year, and the key to running a successful music studio is staying up to date with it. With technology continuously changing, it’s important to keep up with the latest software and equipment to provide the best quality recordings to clients. In this blog post, we will discuss how to stay up to date with technology by exploring new software and equipment and adapting to the industry changes.

Exploring New Software And Equipment

To keep a music studio relevant, it’s important to explore new software and equipment as it becomes available. There is a constant influx of innovative technology aimed at improving the recording process, and having access to these advancements can help differentiate your studio from others. To keep a studio equipped with the latest software and equipment can be an expensive process, but it can be a worthwhile investment for staying competitive. Consider setting aside a certain budget every year to invest in new technology, such as plug-ins, virtual instruments, microphones, and other recording equipment.

Adapting To Industry Changes

The music industry is continually evolving, and to stay ahead, music studios must be able to adapt to these changes. As a studio owner, it is important to keep up with industry trends by attending music conferences and conventions to stay knowledgeable and informed about the direction of the industry. Moreover, networking with industry professionals can expose music studios to new opportunities, which may come with new equipment and software requirements. By adapting early, a music studio can take advantage of emerging trends in the industry and grow its clientele.

Conclusion

Getting and keeping up with the latest technology and industry changes is vital in the music industry. By staying up to date with new software and equipment emerging, and adapting to industry changes, a studio can diversify its services, grow its clientele, and become a key player in the industry.

Continuing Education And Personal Growth

Working in a music studio requires constant improvement and honing of skills as the music industry is continually evolving. Creative professionals need to keep up with the latest developments and expand their knowledge base continually. Continuing education and personal growth play a crucial role in achieving long-term success in the music industry. Below are some essential factors to consider for staying ahead in the industry.

Taking Courses And Attending Workshops

A well-rounded education in music production is a vital aspect of building a successful career in the industry. Musicians and music technicians can benefit from enrolling in courses and workshops offered by reputable institutions and seasoned professionals. This option helps them to acquire new skills, brush up on existing techniques and learn about the latest technology trends in the music production process. Courses and workshops are an excellent way to build on the knowledge gained in music school or through self-study.

Networking With Other Professionals And Finding Mentors

Networking is crucial for building a name and reputation in the music industry. Professionals in the music industry must connect with others to expand their network and find opportunities to collaborate. By reaching out to other industry professionals, musicians and technicians can harness the power of referrals to find new clients. It is also crucial to find mentors who can guide you through the challenging times and impart knowledge gained from years of industry experience. Mentors are excellent sources of inspiration and can provide invaluable advice on navigating the music industry.

In conclusion, achieving success in the music industry requires continuous learning, growth, and networking. To stay relevant, professionals need to keep up with the latest techniques, sharpen their skills, and build relationships with peers in the industry. By actively pursuing continuing education, networking, and finding mentors, professionals in the music industry can stay ahead and achieve their career aspirations.

Frequently Asked Questions On How To Work In A Music Studio

How Do You Get Into Music Studios?

To get into music studios, you need to build relationships with studio owners and producers, demonstrate your skill and professionalism, and network within the music industry. Attend industry events, join music communities, and create a strong online presence to showcase your work.

Seek out internships and apprenticeships to gain experience and make connections in the industry.

What Can You Do In A Music Studio?

In a music studio, you can record, mix, and produce music. It’s a creative space where musicians, singers, and producers work together to create a sound that inspires and entertains. With the right equipment and techniques, you can create professional-quality music that captures your artistry and vision.

How Do I Get Work Experience In A Recording Studio?

To gain work experience in a recording studio, you can start by interning or volunteering. Reach out to studios and inquire about any openings or opportunities to shadow professionals. Attend networking events and build connections within the industry. Consider taking courses or getting certified in audio engineering.

Keep learning and refining your skills to increase your chances of getting hired.

What Does A Music Studio Assistant Do?

A music studio assistant helps in the day-to-day running of a recording studio. They ensure that all equipment is set up, maintain a clean environment, make appointments, and help artists and producers with any issues that may arise during recording sessions.

Conclusion

Working in a music studio can be an exciting and fulfilling experience for anyone who loves music and has a passion for creativity. From setting up and troubleshooting equipment to recording and mixing tracks, there is no shortage of opportunities to learn and grow in this dynamic industry.

By following the steps outlined in this post, you can become a valuable asset to any music studio and advance your career in music production. Whether you are just starting out or have years of experience, there is always something new to discover and more to learn in this exciting field.

So, roll up your sleeves and get ready to get to work in the music studio.

Categories
Archive

Ik Multimedia T Racks 5 Review

IK Multimedia T-Racks 5 is a powerful mixing and mastering software with a wide range of features and tools. Featuring an intuitive user interface and high-quality audio processing, it is a popular choice for professional audio engineers and producers.

IK Multimedia T-Racks 5 is a comprehensive all-in-one mixing and mastering software for audio professionals. With its user-friendly interface and advanced features, it is capable of providing high-quality audio processing for any type of project. This review will cover the features, performance, and user experience of T-Racks 5, highlighting its strengths and weaknesses.

Installation And Compatibility

Ik Multimedia T Racks 5 Review – The installation process for T Racks 5 is straightforward, with no issues reported. The software is also compatible with most systems, making it an accessible option for all music producers looking to enhance their tracks.

Installation Process

Installing IK Multimedia T-Racks 5 is a breeze, taking just a few minutes to complete. After purchasing the software, you’ll receive a link to download the installer on your computer. Once you’ve downloaded the installer, simply double-click on it to begin the installation process. Follow the on-screen prompts to complete the installation and start using T-Racks 5.

System Requirements

To run T-Racks 5, your computer needs to meet the following system requirements:

  • Windows 7 or later (64-bit only)
  • OS X 10.9 or later (64-bit only)
  • Intel Core 2 Duo or higher
  • 4 GB of RAM (8 GB recommended)
  • Minimum screen resolution of 1024 x 768

Supported Formats

T-Racks 5 supports a wide range of audio formats, including:

FormatBit DepthSampling Frequency
WAVUp to 32-bit floatUp to 192 kHz
AIFFUp to 32-bit floatUp to 192 kHz
MP3Up to 320 kbpsUp to 48 kHz
FLACUp to 24-bitUp to 192 kHz

So, if you’re working with any of these audio formats, you can be sure that T-Racks 5 will be able to handle them. Overall, IK Multimedia T-Racks 5 is a powerful audio mastering software with an easy installation process, flexible compatibility, and extensive format support. Its user-friendly interface, vast collection of tools, and excellent sound quality make it an excellent choice for audio engineers and music producers alike.

Ik Multimedia T Racks 5 Review

Credit: www.musicradar.com

Interface And Features

Ik Multimedia T Racks 5 boasts an intuitive, user-friendly interface and a range of powerful features suitable for music production at any level. With 38 high-quality audio processors and up to 16 channels of audio processing capability, this software offers a powerful set of tools for mixing and mastering audio tracks.

IK Multimedia’s T-Racks 5 is a powerful mixing and mastering tool with an intuitive interface packed full of features. Whether you’re a seasoned professional or just starting out, you’ll appreciate the clean layout and ease of use. In this review, we’ll take a closer look at T-Racks 5’s interface and features, including customization options, modules and effects, and the Master Match feature.

Overview Of The Interface

T-Racks 5’s interface is highly responsive and easy to use, with a dark color scheme for optimal contrast and readability. The main window consists of two panes, the top showing the selected module and its settings, and the bottom providing a live waveform display of the audio input. The top pane also includes undo and redo buttons, a bypass button for quick A/B comparisons, and a drop-down menu for selecting different modules.

Customization Options

One of the standout features of T-Racks 5 is the level of customization available to the user. You can re-order the order of the modules to customize the signal path, drag and drop modules to different positions, and resize the window to your liking. The interface also allows you to create and save custom presets, so you can quickly apply your preferred settings to a track without having to manually adjust each module. You can even personalize the interface with a range of color schemes.

Modules And Effects

T-Racks 5 comes with an impressive collection of 38 high-quality modules and effects, ranging from EQs and compressors to reverbs and limiters. Each module features a range of presets that provide a quick and easy way to dial in a variety of sounds. However, the real power of T-Racks 5 lies in its ability to combine multiple modules to create complex signal chains. The built-in chain presets offer a wide range of starting points for any given task, and you can further customize each chain by adjusting the settings of individual modules.

Master Match

Master Match is a powerful feature that analyzes the tonal balance and stereo image of a reference track and applies it to your mix. It’s a great way to ensure that your final master matches the sound of other commercially released tracks. The feature is easy to use and can be applied to individual tracks or your entire mix. With Master Match engaged, T-Racks 5 automatically adjusts the settings of the EQ, stereo field, and compression modules to match the reference track. You can then make further adjustments to fine-tune the sound to your liking. In conclusion, T-Racks 5’s interface and features make it an excellent choice for mixing and mastering any genre of music. The range of customization options offers users complete control over their signal paths and the ability to create unique sounds. With its intuitive interface and powerful tools, T-Racks 5 is a must-have for any audio engineer or producer looking to take their mixes and masters to the next level.

Sound Quality

Ik Multimedia’s T Racks 5 is a powerful mixing software that provides high-end sound quality for music producers and engineers. The software offers a suite of tools for mastering audio, including EQ, compression, and limiting. With its intuitive interface and advanced features, T Racks 5 is a top choice for audio professionals.

Overview Of T Racks 5’s Sound Quality

Ik Multimedia’s T Racks 5 is a powerful mastering software used by both professionals and amateurs. The latest version, T Racks 5, boasts improved sound quality and a range of new features. The sound quality of T Racks 5 is exceptional, thanks in part to the advanced algorithms and high-quality processing that goes into mastering each audio track.

Comparison To Other Mastering Plugins

When compared to other mastering plugins, T Racks 5 stands out for its superior sound quality and efficiency. Unlike other mastering plugins, T Racks 5 offers a wide range of presets and customization options that allow you to create unique soundscapes with ease. Some of its unique features include dynamic EQ, de-essing, stereo imaging, and saturation.

T Racks 5 Sound Quality In Practice

In practice, T Racks 5 offers exceptional sound quality and is incredibly versatile. For example, when used with vocals, T Racks 5 can help to smooth out harsh vocal tones and add warmth to the overall sound. Similarly, when used with instruments such as guitars or drums, T Racks 5 can help to enhance the clarity and depth of each sound. Overall, T Racks 5 is a must-have for anyone who is serious about audio production and wants to achieve the best possible sound quality.

Ik Multimedia T Racks 5 Review

Credit: m.youtube.com

Ease Of Use

When it comes to music production, having the right tools is essential to achieving a professional sound. Ik Multimedia’s T Racks 5 has been praised by many for its ability to bring new life to mixes, and the ease of use is one of the main reasons why. In this review, we will look at how T Racks 5’s user-friendly interface, ease of navigation, and short learning curve make it a top choice for music producers and sound engineers.

User-friendly Interface

The first thing you’ll notice when opening T Racks 5 is the clean and well-organized interface. The intuitive design makes it easy to find the tools you need and understand what each one does. The black background and white text give it a professional look, making it perfect for use in any studio environment. Plus, the resizable interface allows for greater flexibility so that you can work the way you want to.

Ease Of Navigation

T Racks 5’s interface makes it easy to navigate between different modules. The clear labeling and color-coding of the modules allow you to quickly find the effect you’re looking for. Once you select a module, you will be presented with a streamlined interface that includes only what you need for that specific effect. The ability to bypass effects with the click of a mouse is especially useful for quick A/B comparisons.

Short Learning Curve

T Racks 5’s straightforward interface and excellent documentation make it easy to learn and use. The manual is well-written, easy to understand, and includes many helpful tips and tricks. The drag and drop functionality allows you to quickly and easily rearrange modules to find the perfect sound. Moreover, T Racks 5’s presets are a great starting point for beginners, and advanced users can create and share their presets with others to speed up their workflow.

In Summary

Ik Multimedia T Racks 5 is a powerful music mixing and mastering suite that has become a go-to tool for many music producers and sound engineers. Its user-friendly interface, ease of navigation, and short learning curve make it a popular choice for anyone who wants professional-sounding mixes with minimal effort. Whether you’re a beginner or a seasoned pro, T Racks 5 has everything you need to take your music to the next level.

Pros And Cons

When it comes to music production, having the right tools is essential to achieving a professional result. One such tool is the Ik Multimedia T Racks 5, a well-known and widely used mastering software. It has gained a reputation for its remarkable sound quality and overall functionality. However, as with any software, it’s essential to weigh the pros against the cons.

Benefits Of T Racks 5

The benefits of T Racks 5 are numerous and significant. Here are some of the key advantages:

ProsExplanation
Excellent Sound QualityT Racks 5 offers an outstanding sound quality that makes it a top choice for professionals.
Intuitive InterfaceThe software’s user interface is easy to navigate, making it straightforward to get started even if you’re a beginner.
Wide Range of Processing ModulesT Racks 5 provides an extensive range of processing modules, allowing you to achieve the exact sound you want.
FlexibilityWhether you’re working with a single track or an entire album, T Racks 5 offers flexibility to match your needs.
Customizable ChainsThe software comes with customizable chains, allowing you to save your preferred settings which can be reused later.

Potential Drawbacks To Consider

While T Racks 5 is undoubtedly a great software, there are a few cons that you should keep in mind before purchasing:

  • Cost – T Racks 5 is not cheap, and it may not be affordable for beginners or home producers on tight budgets.
  • Heavy on CPU – The software requires a lot of processing power and may result in slowing down your computer, especially if it’s an older model.
  • No Undo/Redo Option – T Racks 5 does not provide the Undo/Redo option, which can be inconvenient when dealing with large amounts of data.

Overall, T Racks 5 is a sound investment for any music producer serious about producing professional results. The advantages of this software are plenty and will vastly outweigh the cons, enabling you to produce high-quality music quickly and efficiently.

Ik Multimedia T Racks 5 Review

Credit: www.icmp.ac.uk

Price And Value

Ik Multimedia T Racks 5 is an impressive mixing and mastering software bundle that boasts a variety of features. Its price tag may seem steep but its value is worth every penny, making it a must-have for music producers seeking versatility and quality.

Overview Of Pricing Tiers

IK Multimedia T-Racks 5 offers a range of pricing tiers that caters to different user needs. The pricing structure is straightforward, allowing users to pick and choose which modules they want to purchase, or they can opt for the complete bundle. The ‘Custom Shop’ option allows users to buy individual modules, starting at $49.99. Whereas, the ‘Standard’ option provides a selection of modules at a discounted price of $359.99. It’s worth noting that the ‘Max’ bundle, which includes all the available modules, is priced at $999.99.

Value For Money Compared To Other Plugins

Compared to other similar plugins on the market, T-Racks 5 offers excellent value for its price. While some plugins may offer a lower price point, they may not provide the same level of customization and features. On the other hand, some of the more expensive plugins provide even more features but do not justify the added expense for the average user. T-Racks 5’s pricing and features strike a balance that gives users an excellent value for money.

Conclusion

In conclusion, T-Racks 5 offers a range of pricing tiers that cater to all levels of users. The pricing structure is simple and provides excellent value for money compared to other plugins on the market. Whether you opt for the complete bundle or just a few modules, T-Racks 5 is an incredible addition to your audio production toolset that will undoubtedly impress you.

Frequently Asked Questions On Ik Multimedia T Racks 5 Review

Is T-racks 5 Max V2 Worth It?

Yes, T-RackS 5 Max v2 is worth it if you are a music producer or audio engineer looking for a comprehensive suite of plugins to enhance your mixing and mastering abilities. With over 40 processors and analog modeled gear emulations, T-RackS 5 Max v2 provides high-quality sound and versatility that makes it a valuable investment in your workflow.

Is T-racks Good For Mastering?

Yes, T-RackS is a good mastering tool for audio professionals. It offers a wide range of features and flexibility to enhance the audio quality. Its intuitive interface allows easy tweaking and customization of tracks to achieve a professional sounding mix.

Is Tracks 5 Good?

Yes, Tracks 5 is good.

What Comes With T-racks 5?

T-RackS 5 comes with a collection of 38 high-end audio processors including EQs, compressors, limiters, reverbs, delays, and more. The package also includes a convenient standalone mastering workstation application and plug-in suite for use with major DAWs on macOS and Windows.

Conclusion

To sum up, IK Multimedia’s T-Racks 5 is a comprehensive mixing and mastering software that is perfect for both amateurs and professionals. It offers a range of modules including compressors, EQs, limiters, and more. The interface is user-friendly and intuitive.

The signal chain feature allows you to visually map out your entire mix and the metering section provides detailed readings. With T-Racks 5, you can achieve a professional sound without breaking the bank.

More in our Gear reviews.

Categories
Archive

Elephant Room Reverb Review

The Elephant Room Reverb is a high-quality, premium-grade reverb pedal that delivers top-notch performance for both live and studio use. This pedal comes packed with an impressive array of features that allow you to dial in your ideal reverb tone.

Also, this reverb is a must-have pedal for any guitarist. Also, it suits touring professionals and hobbyists who want to take their sound to the next level. With its impressive range of features, high-quality construction, and beautiful tone, this pedal is sure to become a favorite in your pedalboard.

Related reading: Creating Drakes Marvins Room Reverb Effect and Reverb Types. For background, see the Wikipedia article on Reverberation.

Moreover, it works on stage and in the studio. In addition, the plugin has all the tools you need to create the perfect reverb sound. In this review, we’ll take a closer look at what makes this pedal so special and why it’s worth adding to your collection.

Elephant Room Reverb Review

Credit: www.kvraudio.com

Frequently Asked Questions For Elephant Room Reverb Review

What Is The Elephant Room Reverb And How Does It Work?

In addition, this reverb is a high-quality reverb pedal that creates classic reverb sounds with ease. For example, it works by taking the incoming guitar signal and using digital algorithms to simulate the sound of room reverb.

What Kind Of Reverb Sounds Can You Expect From It?

The plugin can produce a wide range of reverb sounds, including spring, plate, and hall reverb. As a result, each mode has its own character. You can adjust the level, decay, and tone controls to suit your playing style.

Is The Pedal Easy To Use?

Yes, this reverb is straightforward to use. However, it features three easy-to-use controls for level, decay, and tone. Additionally, there’s a toggle switch that lets you select between three reverb modes (spring, plate, and hall), making it simple to dial in the perfect sound.

Does It Work Well With Other Effects Pedals?

Yes, it works well with other effects pedals. It can sit comfortably on your pedalboard among your other pedals and produce great-sounding reverb effects that complement your other pedals.

Conclusion

Overall, this reverb is an exceptional device that adds depth and warmth to any sound. Its unique features allow for endless experimentation and creativity, while its user-friendly interface makes it accessible to both beginners and professionals. Whether you’re a guitarist, producer, or simply someone looking to enhance your sound quality, the plugin is definitely worth considering.

Give it a try and see for yourself how it can elevate your music to the next level.

Categories
Archive

History of Mixing And Mastering

Mixing and mastering are post-production processes that the music industry has used for decades. These processes aim to produce high-quality sound recordings that are balanced, clear, and pleasing to the ear.

Mixing and mastering are crucial stages of music production that have undergone significant changes since their inception. Mixing involves blending all the tracks of a song into a cohesive whole, while mastering refers to the process of fine-tuning the mix. This makes it sound clear, balanced, and polished.

Related reading: AI Audio Mastering and Dolby Atmos Mastering. For background, see the Wikipedia article on Audio mixing.

Originally, mixing and mastering were done manually using analog equipment, but with the advent of digital audio workstations, these processes have become more accessible and efficient. Today, mixing and mastering are critical components of audio production. A well-mastered track can make all the difference in the success of a song.

History of Mixing And Mastering

Credit: www.masteringbox.com

Early Methods Of Mixing

Mixing and mastering processes have come a long way since their early methods. Back then, engineers recorded on wax cylinders and physically moved horns and tubes to adjust sound levels. Today, digital audio workstations allow for precise and efficient editing.

In the early days of recording music, mixing and mastering weren’t as easy or sophisticated as they are today. Before modern technology, engineers mixed music by hand to balance the sounds and create a better listening experience. Let’s take a closer look at some of the early methods of mixing and how they have evolved over the years.

Manual Mixing Techniques

Manual mixing techniques are exactly what they sound like – mixing music by adjusting knobs and levers by hand. Back then, music was recorded on analog tape, which was then fed through a mixing desk to balance the levels of each instrument and vocal. The engineer had to use his ears to mix the music, listening carefully to each element to get the perfect balance. These manual mixing techniques took a lot of time, effort, and skill, and engineers would spend hours perfecting their mix.

Adding Effects for Mixing and Mastering

Another early method of mixing was adding effects. Engineers added effects such as reverb, delay, and compression to give the music a more polished sound. However, engineers also did this by hand, using external machines such as tape echo or spring reverb. These effects were often added in real-time during the mix, which meant that engineers had to be quick on their feet and have a good ear for how the effects would impact the music.

Conclusion

Despite the limitations of early mixing and mastering techniques, recording artists and engineers still found ways to produce great music. Today, technology has made the process much easier and more accessible. But the principles of balancing levels and adding effects still apply. Understanding the history of mixing and mastering helps us appreciate the complexities of music production and the skill required to create a great sounding track.

Advancements In Mixing Technology

Mixing and mastering have come a long way throughout the history of music production. From analog consoles to digital audio workstations, advancements in mixing technology have enabled producers to achieve cleaner, more precise mixes with greater ease and efficiency.

Introduction Of Multitrack Recording for Mixing and Mastering

Multitrack recording was a major breakthrough in music production. Before its introduction, engineers recorded all instruments and vocals on a single track. This makes it difficult to adjust individual elements without affecting the entire recording. The introduction of multitrack recording in the mid-1950s allowed for separate recording of each instrument and vocal track. This enables engineers to adjust the levels of each track independently. This opened up a whole new world of possibilities in mixing and mastering.

Digital Audio Workstations (daws) for Mixing and Mastering

The introduction of Digital Audio Workstations (DAWs) revolutionized the way music was mixed and mastered. DAWs allowed engineers to access more sophisticated mixing tools like EQs, compressors, and reverb plugins. This makes it easier to achieve high-quality audio. DAWs also brought the benefits of non-destructive editing, enabling engineers to make edits without altering the original audio file. The widespread use of DAWs in modern music production has made it easier for producers to achieve professional sound quality without the need for costly studio equipment. Advancements in mixing technology have significantly improved the quality of music production.

In the early days of music production, engineers mastered with analog equipment, such as tape machines, compressors, and EQs. However, modern technology has brought digital mixing and mastering tools that are much more precise and efficient. Today’s digital mixing technology allows engineers to precisely control the details of a recording, such as panning, volume, and tone. Advancements in mixing software have made it easier for audio engineers to create complex mixes with an increased level of automation and accuracy. In conclusion, the history of mixing and mastering has seen significant advancements in technology.

From multitrack recording to digital audio workstations, audio engineers now have access to a wide range of powerful tools to create high-quality sound. As technology continues to improve, we can expect even more exciting developments in the future of music production.

Influence Of Mastering On Music

The history of mixing and mastering in music has had a significant influence on the art form. Mastering is the final step in the production process, enhancing audio quality and increasing loudness. This results in a polished, professional track. Mix engineers and mastering engineers play a crucial role in the creation of a music masterpiece.

Music has come a long way since the early days of vinyl records and magnetic tapes. With the advent of digital technology and the rise of streaming platforms, the art of music production has evolved significantly. One crucial aspect of this evolution is the role of mixing and mastering. Mixing engineers are responsible for balancing and blending the individual tracks of a song, while mastering engineers take the final mix and polish it to enhance its overall sound quality. In this blog post, we will explore the significance of mastering and its impact on music.

Role Of Mastering Engineers

Mastering is the final step in the music production process before its release. The primary role of mastering engineers is to ensure that the final mix is optimized for the intended delivery format. This could be for radio play, digital downloads, CDs, or vinyl records. Mastering also involves equalization, compression, limiting, and stereo enhancement to create a cohesive sound across an album. The mastering engineer also ensures that the songs on an album have consistent sound quality and volume levels. Mastering usually happens in specialized rooms with superior acoustics and high-end equipment.

Impact On Sound Quality

Mastering plays a crucial role in the overall sound quality of a song. The final mix, when passed through the mastering stage, helps the sound engineer to tighten up the little flaws and errors that may have gone unnoticed in the mix. Mastering can enhance the tonal balance of a recording, making it sound more polished, clear, and professional. It can add warmth, depth, and space to a mix that could have previously sounded flat and lifeless. Poor mastering can result in a distorted, compressed, or muffled sound.

Mastering also plays a vital role in setting the overall loudness of a song. This makes it sound competitive with other tracks on playlists or radio. In conclusion, mastering enhances the overall sound quality of a song. This makes it sound professional, polished, and competitive with other songs in the industry. The role of the mastering engineer is crucial in the creation of a cohesive sound across an album, setting the tone and feel of the songs.

The evolution of mastering technology and techniques has made it possible for the delivery of better and more sophisticated music products, contributing to the unending progress of the music industry.

History of Mixing And Mastering

Credit: www.sonarworks.com

The Evolution Of Mastering Techniques

Mastering techniques have come a long way since the first commercial recording studios in the early 1900s. Previously, mixing and mastering occurred simultaneously, but as technology and industry demand evolved, mastering techniques have become a crucial step in achieving professional sound quality.

Today, mastering tools and techniques incorporate digital technology that allows sound engineers to achieve even more control and precision than ever before.

Audio production has drastically evolved over the last few decades. One area that has seen significant changes is mastering. For a long time, mastering relied exclusively on analog equipment. However, with technological advancements, digital mastering has gained popularity. In this article, we will take a look at the history of mixing and mastering, with a particular focus on the evolution of mastering techniques.

Analog Vs Digital Mastering

Until digital technology arrived, all mastering relied on analog gear. Early analog mastering involved cutting a vinyl record directly from the master tape, which involved a lot of trial and error. Eventually, mastering engineers began using equalization and compression to fine-tune the sound further. However, it was a laborious process that required a lot of skill and experience. With the advent of digital technology and the introduction of digital audio workstations, digital mastering became more accessible. Digital mastering involves capturing an audio signal in a digital format, editing it using software, and then converting it back to an analog signal for distribution. The advantage of digital mastering is that it allows engineers to work with a much wider range of processing tools. This makes the process quicker and more efficient than analog mastering.

The Loudness War

The Loudness War refers to the practice of increasing the overall level of a recording to make it sound louder than its competitors. While this technique can make a recording stand out, it can be detrimental to the quality of the music. The practice of extreme loudness compression began in the 1990s and became more widespread with the rise of digital music distribution. The problem with this practice is that it eliminates the natural dynamics of the music. This results in a compressed, distorted sound.

Finally, in recent years, mastering engineers have become increasingly conscious of the detrimental effect of the Loudness War. They are now more likely to prioritize sound quality over loudness levels when mastering, resulting in better-sounding music. To conclude, the history of mixing and mastering has seen significant changes over the years. With the advent of digital technology, mastering has become more accessible and efficient for engineers. However, the Loudness War highlights the need for mastering engineers to prioritize sound quality over volume levels.

Modern Mixing Trends

Mixing and mastering have come a long way since its inception. The history of mixing and mastering shows us how modern mixing trends have evolved over time. From analog to digital, modern mixing is about using technology to produce a high-quality sound that listeners will love.

Mixing For Streaming Services

The advancement of technology has brought forth the emergence of new technologies. Every year, streaming platforms like Spotify, Apple Music, and Tidal continue to evolve. Audio engineers now need to be aware of the different formats and requirements of each platform. For instance, Spotify requires music to be uploaded in Ogg Vorbis format, while Apple Music prefers files in AAC format. Audio engineers must also keep in mind that mastering for streaming services require different techniques than mastering for CDs.

The Importance Of Headroom

Headroom refers to the difference between the loudest and softest parts of a mix. The audio levels should not max out, leaving a small amount of headroom. Leaving space allows for mastering engineers to maximize the audio loudness without causing distortion. Therefore, it is important to know how to balance the levels of different tracks before exporting the mix. In conclusion, modern mixing trends have brought forth new techniques and requirements that audio engineers need to understand. For instance, mixing for streaming services requires the knowledge of different audio formats and how to master for these different platforms. The importance of headroom cannot be overemphasized as it can significantly impact the quality of the final mix.

Future Of Mixing And Mastering

Mixing and mastering have come a long way over the years as technology continues to advance. With the evolution of digital processing, the future of mixing and mastering seems limitless, allowing for more precision and creativity in audio production.

Artificial Intelligence In Mixing And Mastering

Artificial Intelligence (AI) has taken over the world by storm, and the music industry is no exception. AI technology is being used to automate various functions in the music production process, including mixing and mastering. The use of AI algorithms can help in automating the process, reducing errors, and providing more accurate results. Machine learning algorithms now analyze various elements of a mix and make real-time adjustments. Moreover, AI can help in generating recommendations on how to improve the mix and provide insights to the mixing engineer on how to improve the sound quality. Developers are creating AI-based plug-ins that help users with EQ, compression, reverb, and other effects. With time, AI will only become more sophisticated and capable of handling even more complex tasks.

New Techniques And Technologies

Mixing and mastering techniques have evolved significantly over time, and new technologies are emerging every day to help shape the future of the industry. One of the new techniques is immersive audio, which creates a three-dimensional sound field around the listener. This technique is being used in virtual and augmented reality experiences to provide a more realistic and immersive listening experience. Similarly, new technologies such as stem mastering and cloud-based mastering are allowing producers to work remotely and collaborate with others around the world. As technology continues to evolve, the future of mixing and mastering will undoubtedly involve even more advanced techniques and technologies.

Conclusion

As we can see, the future of mixing and mastering is expected to be increasingly dominated by technology. AI will continue to play a vital role in automating and optimizing various aspects of the process, while new techniques and technologies are emerging to help producers achieve their desired sound. It’s exciting to see where the industry is headed, and we can look forward to an even brighter future in the world of music production.

History of Mixing And Mastering

Credit: spatialmastering.co.uk

Frequently Asked Questions For History Of Mixing And Mastering

When Did Mixing And Mastering Start?

Mixing and mastering have been around since the beginning of recorded music. The first known commercial recordings in the late 1800s were mixed and mastered before release. The techniques and technology used have evolved over time, but the concept remains the same.

What Is The Truth About Mixing And Mastering?

Mixing and mastering are two distinct processes in the music production. Mixing involves blending different audio tracks together to create a cohesive sound, while mastering focuses on fine-tuning the overall sound quality for distribution. Both are crucial steps in creating a professional-sounding track.

When Did Digital Mastering Start?

Digital mastering started in the late 1980s as music production moved towards digital technology. It allowed audio engineers to manipulate sound recordings more precisely and achieve better sound quality in the final product.

Does Mixing Or Mastering Come First?

You should do mixing before mastering. During mixing, the different tracks of a recording are balanced, adjusted and processed to create a cohesive sound. Mastering is the final step where an expert applies post-production techniques to ensure consistent levels and tonal balance across all tracks.

Mixing is the foundation, and mastering adds the final sparkle.

Conclusion

Mixing and mastering have come a long way since the early days of music production. As technology has evolved, so have the techniques used to create high-quality recordings that meet market standards. The history of mixing and mastering is a testament to human ingenuity and persistence in the pursuit of excellence.

As we continue to push boundaries and experiment with new approaches, we can expect even more exciting developments in this field. Whether in music or any other industry, the journey of progress is never-ending.

Categories
Archive

Cubase Won’T Play Through Headphones

Cubase won’t play through headphones due to incorrect audio settings or faulty hardware. Check audio settings and connect the headphones properly.

If you are a music producer or audio engineer, you may have experienced issues with audio playback on your Cubase software. One common problem is when Cubase won’t play through headphones even though your headphones are properly connected. This can be frustrating, especially if you need to review your work discreetly or need to hear the music and effects more clearly.

We’ll discuss the main causes of this problem and how to fix them. We’ll also provide some general troubleshooting tips to help you get your audio playback working properly, allowing you to focus on the creative process.

Cubase Won'T Play Through Headphones

Credit: forums.steinberg.net

Verify Connection And Settings

To play Cubase through headphones, verify the connection and settings. Check the device connections and ensure that the headphones are connected properly. Then, go into the audio settings and adjust them accordingly. This will allow you to hear your music through your headphones.

If you’re experiencing an issue when playing back audio on Cubase, there could be a number of reasons why the sound will not play through your headphones. One of the most common culprits is incorrect headphone connection or setting. Here are three troubleshooting steps to ensure proper verification of connection and settings related to your headphones.

1. Check Headphone Jack Connection

First, check the connection between your headphones and the device that you are using. If your headphones are wireless, ensure they are properly paired and have battery power. If you are using a wired connection, check that the plug is firmly and fully inserted into the device’s headphone jack. In some cases, the issue may simply be a loose connection.

2. Ensure Headphones Are Selected As Output

Adjusting the Output settings is essential in troubleshooting your Cubase playback issue. Ensure that the correct output device is selected. In Cubase, select the ‘Devices’ menu and then ‘Device Setup.’ Check that the correct audio device is selected, and that the headphones are selected as the output device under ‘VST Audio System’ and ‘ASIO Driver’ tabs.

3. Check Volume Levels

The volume level could be another factor contributing to your headphones not playing audio in Cubase. Check the volume settings in your operating system and within Cubase itself. The audio may be playing, but the volume may be turned down too low. If your operating system volume is set to a low level, make sure to increase it to an appropriate level. Additionally, in Cubase, you can adjust the volume according to the track settings, as well as your mixer. By following these three steps, you’ll be able to troubleshoot why your headphones will not play audio in Cubase. Ensure that your headphone jack connection is secure, that the headphones are selected as output and that the volume levels are not too low. By correctly following these steps, you’ll be able to enjoy uninterrupted playback audio for your projects.

Adjust Audio Device Settings

To adjust audio device settings in Cubase, follow these steps: first, go to ‘Devices’ in the top menu, then select ‘Device Setup’. Next, choose your audio interface from the list and ensure that the correct driver is selected. Finally, check your VST connections and make sure they are set up properly.

If Cubase still won’t play through headphones, try updating your audio drivers or using different headphones.

Adjust Audio Device Settings: If you are a producer or musician, then you may be familiar with the software Cubase, a popular digital audio workstation. Sometimes, you may encounter an issue where your audio won’t play through your headphones. This can be frustrating, but thankfully there are some ways to adjust your audio device settings to solve this problem. In this post, we will discuss how to configure audio device in Cubase and also check the sample rate and bit depth settings. Configure Audio Device in Cubase: The first thing you want to do is to configure your audio device settings in Cubase. To do this, you will need to open Cubase and go to the Devices menu. Then, select Device Setup and navigate to the VST Audio System tab. Here, you can select your preferred audio device from the ASIO Driver dropdown menu. Check Sample Rate and Bit Depth Settings: If you have made sure that your audio device settings are set up correctly in Cubase, then the next thing to check is your sample rate and bit depth settings. This can sometimes be the reason why your audio won’t play through your headphones. To check these settings, go to the Devices menu again and this time select Audio Settings. Under the Sample Rate and Bit Depth section, make sure that the settings match your audio interface’s specifications. In conclusion, adjusting your audio device settings is a simple solution to fix the issue of Cubase not playing through headphones. Follow these steps to configure your audio device in Cubase and check your sample rate and bit depth settings. You should now be able to enjoy your music without any audio playback issues.

Repair Or Update Audio Drivers

If you are having issues with Cubase not playing through your headphones, one solution is to repair or update your audio drivers. Audio drivers are software components that allow your computer to communicate with audio devices, such as headphones and speakers. If your audio drivers are old or incompatible, it can cause issues with audio playback.

Install Latest Audio Drivers

The first step is to install the latest audio drivers for your computer. You can download these drivers from your computer or audio device manufacturer’s website. Be sure to select the latest driver version that is compatible with your operating system. Once downloaded, install the driver and restart your computer to ensure the changes take effect.

Check For Driver Conflicts

If you have installed the latest audio driver and are still having issues with Cubase not playing through your headphones, it’s possible that there is a conflict with another driver on your system. To check for conflicts, follow these steps:

  1. Click on the Start menu and type “Device Manager” in the search box.
  2. Click on the “Device Manager” option that appears.
  3. Find the “Sound, video, and game controllers” option and click the arrow next to it to expand the list.
  4. Look for any drivers that have a yellow exclamation mark or red “X” icon next to them. These indicate driver conflicts.
  5. Right-click on the conflicting driver and select “Update driver” to install the latest version.

By following these steps, you can repair or update your audio drivers to resolve any issues with Cubase not playing through your headphones. Whether you need to install the latest driver or check for conflicts with other drivers, taking steps to ensure your audio drivers are functioning properly can help you get back to creating and enjoying music with Cubase.

Cubase Won'T Play Through Headphones

Credit: m.youtube.com

Reset Cubase Preferences

Resetting Cubase Preferences can be a solution if your Cubase software is not playing through your headphones. This process will help the software recognize your default audio device, allowing you to play audio through the headphones.

Resetting Cubase preferences can be an effective solution to fix issues with audio playback through headphones. If you are struggling to play audio on your headphones through Cubase, following the below steps to reset Cubase preferences can help you resolve the issue. ### Navigate to Preferences Folder To reset Cubase preferences, first navigate to the preferences folder. Here’s how you can find the preferences folder: 1. Open Cubase on your computer. 2. Click on the “File” menu at the top of the screen. 3. Select “Preferences” from the dropdown menu. 4. From the preferences window, select “General” from the left-hand side menu. 5. Click on the “Show Preferences File” button. This will open the preferences folder that contains all the settings and configurations for Cubase. ### Rename Preference Files Now that you have located the preferences folder, you need to rename the preference files to reset Cubase preferences. Follow these steps: 1. Quit Cubase if it is running. 2. In the preferences folder, locate the files named “defaults.xml” and “preferences.xml”. 3. Rename both these files by adding “.old” at the end of their filenames. For example, rename “defaults.xml” to “defaults.xml.old”. By renaming the preference files, you are forcing Cubase to create new preference files when you open the software next time. This will wipe out any potential corrupt settings or configurations that could be causing the audio playback issue. Once you have completed the above steps, launch Cubase and try playing audio through your headphones. You should now be able to hear audio playback without any issues.

Contact Manufacturer Support

If you are experiencing trouble with Cubase not playing through your headphones, it is recommended to reach out to the manufacturer’s support team for assistance. They can provide troubleshooting steps and potential solutions to resolve this issue.

Contacting manufacturer support is the best way to troubleshoot the issue of Cubase not playing through headphones, if you have tried all other methods. Customer support teams are highly trained in identifying possible causes and providing you with step-by-step instructions to resolve your problem. Here are two options you can consider when contacting manufacturer support:

Troubleshooting With Customer Support

Reaching out to the manufacturer through customer support is a great option to try and troubleshoot the issue of Cubase not playing through headphones. The customer support team will guide you through a series of steps to identify the issue and then resolve it. They may ask you to check if your headphones are properly connected and if the Cubase software settings are configured correctly. Do not hesitate to ask questions or clarify uncertainties during the call, as customer support is there to help you. After following these steps, if the problem persists, they may recommend sending your Cubase software for repair or replacement.

Request Service Or Replacement

If the issue still persists after troubleshooting with customer support, then requesting service or replacement may be the next step. Your Cubase software may have a hardware issue, which means that it needs to be repaired or replaced. Reach out to the manufacturer’s support team to request service or replacement of the software. They may also provide warranty programs that cover the cost of repair or replacement, depending on the issue and its severity. After requesting the service, the manufacturer will schedule an appointment with you to resolve the issue. In conclusion, contacting manufacturer support when encountering issues in Cubase software is the best way to resolve the problem. Troubleshooting with customer support and requesting service or replacement are two options that you can consider when facing the problem of Cubase not playing through headphones.

Cubase Won'T Play Through Headphones

Credit: www.amazon.com

Frequently Asked Questions On Cubase Won’t Play Through Headphones

How Do I Get Cubase To Recognize My Headphones?

To get Cubase to recognize your headphones, connect them to your computer and make sure they are set as the default audio device. In Cubase, go to Devices > Device Setup, and select your headphones in the dropdown menu for the audio device.

Make sure to save your changes and restart Cubase for the new settings to take effect.

Why Is My Audio Not Coming Through My Headphones?

There are several reasons why your audio may not be coming through your headphones. It could be due to loose connections, faulty headphones, or incorrect audio settings. Try checking your connections, adjusting settings, and testing your headphones on other devices to troubleshoot the issue.

Why Is Music Not Playing Through My Headphones?

If music is not playing through your headphones, it could be due to several reasons – the headphone jack is not properly plugged in, the headphones are not turned on, the volume is too low, or there could be a problem with the audio source.

Check these things and try again.

How Do I Set Audio Output In Cubase?

To set audio output in Cubase, go to “Devices” and select “Audio Device Settings. ” Choose your desired audio output device from the drop-down menu under “Device Port. ” Finally, click “Apply” and “OK” to save the changes.

Conclusion

To sum up, the issue of Cubase not playing audio through headphones can be caused by a number of reasons ranging from incorrect audio device selections to outdated drivers. Before getting into more technical solutions, always double-check the basics like the audio settings and cables.

Taking the time to troubleshoot these issues can save you both time and money. With proper attention, you can get back music playback functionality in no time.

Categories
Archive

Audio Compression Easy To Understand

Audio compression reduces the size of digital audio files without sacrificing sound quality, making it easier to store and transmit audio data. Compression algorithms use mathematical techniques to remove redundant or irrelevant audio data from the file while preserving the essential parts, resulting in a smaller file size.

Audio compression is a crucial component of digital audio technology that has revolutionized the way we store, share, and transmit audio data. With compression, we can store a vast library of music on a portable device or stream high-quality audio over the internet in real-time.

We’ll explore the fundamentals of audio compression, the different compression algorithms commonly used in the industry, and the pros and cons of compression on audio quality. We’ll also answer common questions about compression, such as how it works, the impact of compression on file size and sound quality, and how to choose the right compression settings for your audio needs.

What Is Audio Compression?

Audio compression is the process of reducing the dynamic range of an audio signal. This allows for more consistent levels and saves storage space. By compressing a recording, you can make sure that the quiet parts are audible, and the loud parts are adjusted to a reasonable level, without overloading the audio.

Explaining Audio Compression

Audio compression is a process used to reduce the size of digital audio files, making them easier to store and transmit. It involves compressing the dynamic range and removing unnecessary data from an audio signal. By doing this, audio files can be made smaller without compromising on sound quality. Audio compression can be either lossless or lossy. Lossless compression preserves the quality of the original audio file despite its smaller size. On the other hand, lossy compression achieves smaller file sizes by “throwing away” some of the data in the audio signal, which can result in a slight loss in sound quality.

Benefits Of Audio Compression

There are many benefits to using audio compression, including:

  • Smaller file sizes: compressed audio files take up less space on your computer or mobile device.
  • Reduced bandwidth usage: compressed audio files can be transmitted more quickly over networks with limited bandwidth.
  • Better streaming performance: by reducing the size of audio files, they can be streamed more smoothly.
  • Easier to share: compressed audio files can be shared more easily via email, social media, or other online platforms.
  • Improved sound quality: while lossy compression may result in a slight reduction in sound quality, most listeners can’t tell the difference.

Audio compression has become an essential tool in the creation and distribution of digital audio content. It allows for more efficient storage, smoother streaming, and easier sharing of audio files. Whether you’re a musician, podcaster, or music lover, audio compression can help you get more out of digital audio technology.

Audio Compression Easy To Understand

Credit: www.youtube.com

Types Of Audio Compression

Types of audio compression are used in music, film, and other forms of audio productions to control the dynamic range of sound. Lossless and lossy compressions are the two major types of compression techniques. Both help reduce the file size while maintaining sound quality to an extent.

Audio compression is the process of reducing the size of digital audio files so they take up less storage space while still retaining the quality of the original recording. There are two main types of audio compression: Lossless Audio Compression and Lossy Audio Compression. Both types have their own characteristics that make them suitable for different purposes.

Lossless Audio Compression

Lossless audio compression is a method of reducing file size without losing any data from the original recording. In this process, the audio file is compressed and then decompressed, resulting in exactly the same file as the original. This means that the audio quality is not compromised in any way. Lossless compression is widely used in audio recording and editing, where every detail of the original recording is important, and no data loss is acceptable.

Lossy Audio Compression

Lossy audio compression is a method of reducing file size that involves discarding some data from the original file. This process reduces the quality of the audio but typically results in a much smaller file size. Lossy compression is widely used in music streaming services and digital audio distribution, where small file size is essential to reduce bandwidth usage and improve the user experience. The amount of data discarded depends on the level of compression chosen, with higher compression levels resulting in smaller file sizes but lower audio quality. In summary, the choice of audio compression method depends on the intended use of the audio file. If quality is essential, lossless compression is the best choice, whereas lossy compression is more suitable for scenarios where small file sizes are necessary.

How Audio Compression Works

Audio compression is the process of reducing the size of digital audio files while maintaining audio quality. Compression works by removing parts of the audio file that are less important to the listener’s perception of sound. This process allows for faster transmission of the file over the internet and helps reduce storage space. In this section, we will discuss the basics of audio compression algorithms and the difference between hardware and software compression.

Basics Of Audio Compression Algorithms

The purpose of audio compression algorithms is to reduce the size of audio files by removing redundant data while retaining the quality of the sound. There are two types of audio coding algorithms: lossy and lossless. The lossy algorithms remove the audio data that is less important to the listener, while the lossless algorithms only remove the data that is not necessary for reconstructing the original audio signal.

Lossy AlgorithmLossless Algorithm
MP3FLAC
AACALAC
Ogg VorbisMonkey’s Audio

Lossy algorithms are used more frequently since they produce smaller files that are easier to transmit and download over the Internet. Most popular audio file formats like MP3, AAC, and Ogg Vorbis use lossy algorithms.

Hardware Vs. Software Compression

Hardware-based compressors are dedicated devices that provide real-time processing to control the dynamics of audio signals. Software compressors, on the other hand, work on digital audio signals and can be run on any device capable of running audio software. Software-based compressors are widely used in music production, while hardware compressors are used more in live sound situations.

  • Hardware-based compressors can provide analog warmth to audio signals, while software compressors can achieve perfect precision.
  • Hardware-based compressors are more expensive, while software compressors are available for free or at a lower cost.
  • Hardware-based compressors have physical controls, while software compressors are controlled through a computer interface.

In conclusion, audio compression is an essential tool for reducing the size of digital audio files while maintaining quality. Lossy and lossless compression algorithms are vital in achieving this, and hardware and software compressors each offer their unique advantages in music production and live sound situations.

Common Audio Compression Formats

Audio compression formats are used to reduce the size of digital audio files without compromising sound quality. Some common audio compression formats include MP3, AAC, and Ogg Vorbis. These formats make it easier to store and share music files online.

Audio compression formats are used to reduce the size of audio files, making it easier and faster to transfer and store them. There are several audio compression formats available, each with its own features and uses. In this section, we’ll discuss some of the most common audio compression formats.

Mp3

MP3 is the most widely used audio compression format. It’s a lossy format, which means that some information is lost when the audio is compressed. However, the level of compression can be adjusted, allowing you to balance file size and sound quality. MP3 files can be played on almost any device, making them a popular choice for music distribution.

Aac

AAC is another widely used audio compression format. Like MP3, it’s a lossy format, but it typically provides better sound quality at the same level of compression. AAC files are often used for streaming audio and video content online, as well as for digital music downloads.

Flac

FLAC is a lossless audio compression format, meaning that no information is lost when the audio is compressed. This results in higher-quality sound than lossy formats like MP3 and AAC. FLAC files are significantly larger than other compression formats, but they’re often used by audiophiles and music enthusiasts who demand the highest possible sound quality.

Alac

ALAC is a lossless audio compression format developed by Apple. It’s similar to FLAC in that no information is lost when the audio is compressed. ALAC files are typically used on Apple devices and within the Apple ecosystem, but they can be played on other devices as well.

Wav

WAV is a common uncompressed audio format that doesn’t use compression at all. This results in the highest possible sound quality, but at the cost of file size. WAV files are often used by professionals who need to work with high-quality audio. They’re also a popular choice for music production and mastering. In conclusion, there are several audio compression formats available, each with its own benefits and drawbacks. Whether you’re a music enthusiast, a professional, or just looking to store or transfer audio files, it’s important to choose the right format for your needs.

Factors To Consider When Choosing An Audio Compression Format

When it comes to choosing a compression format for your audio files, it’s important to consider a few factors to ensure that you choose the best option for your needs. The three main factors that you should consider are the quality vs. file size, compatibility, and application.

Quality Vs. File Size

One of the main decisions that you’ll need to make when choosing an audio compression format is whether you prioritize quality or file size. If you want to maintain the highest possible audio quality, you’ll need to choose a format that doesn’t compress the file too much. However, this will result in larger file sizes. On the other hand, if you need smaller file sizes, you’ll need to choose a format that compresses the audio more, but this may result in some loss of quality.

Compatibility

Another important factor to consider when choosing an audio compression format is compatibility. Not all formats are compatible with all devices and software, so if you plan to share your files or use them on multiple devices, it’s important to choose a format that is widely supported. Some popular audio compression formats that are widely supported include MP3, WAV, and AIFF.

Application

The third factor to consider when choosing an audio compression format is application. Depending on how you plan to use your audio files, you may need to choose a specific format to ensure compatibility. For example, if you’re creating audio for a podcast, you may need to choose a format that is optimized for streaming, while if you’re creating audio for a video production, you may need to choose a format that is compatible with the video editing software that you’re using.

Overall, when choosing an audio compression format, it’s important to consider the quality vs. file size, compatibility, and application to ensure that you choose the best option for your needs.

Audio Compression Easy To Understand

Credit: www.musicguymixing.com

Tools For Audio Compression

When it comes to audio compression, there are a variety of tools available to help you get the job done. Whether you prefer to use an audio editing software or an online compression tool, it’s important to choose the right tool based on your needs and level of expertise. Let’s take a closer look at some of the top tools for audio compression.

Audio Editing Software

If you’re looking to edit your audio files before compressing them, an audio editing software may be the way to go. With an editing software, you can manually adjust the settings to achieve the desired sound quality and compression ratio.

Some popular audio editing software options include:

SoftwarePriceFeatures
AudacityFree– Cross-platform
– Open-source
– Easy to use
Adobe Audition$20.99/month– Advanced editing tools
– Multi-track mixing
– Integration with other Adobe software
Logic Pro X$199.99– Professional-grade mixing and mastering
– Built-in effects and instruments
– Mac-only

Online Audio Compression Tools

If you’re looking for a quick and easy way to compress your audio files without the need for specialized software, an online audio compression tool may be the right choice for you.

Here are some popular online audio compression tools:

  • AudioAlter: Free, easy to use, no need to sign up.
  • YouCompress: Free, supports a wide range of audio file types, simple and user-friendly interface.
  • Online Audio Converter: Free, supports batch conversion, allows you to adjust audio settings.

Whether you choose an audio editing software or an online compression tool, it’s important to experiment with the settings to find the optimal compression for your audio files. With the right tools and a bit of practice, you can achieve professional-quality results and take your audio projects to the next level.

Best Practices For Audio Compression

Audio compression is the process of reducing the file size of an audio file without losing its quality. However, applying too much compression can cause distortion and artifacts. That’s why applying compression is an art that requires following certain best practices. Here, we have listed some essential guidelines for audio compression that will help you preserve the audio quality while reducing its size.

Choosing The Right Compression Format

Choosing the right compression format is essential for audio compression. Different formats use different algorithms to compress audio. Lossy compression formats like MP3, AAC, and Ogg Vorbis remove some data from the audio file to reduce its size. On the other hand, lossless formats like FLAC and WAV use complex algorithms to compress an audio file without losing any data. While lossy formats sound good, they can cause some loss of quality. Therefore, it is important to choose the right format depending on your requirements.

Applying Compression Settings

After choosing the right compression format, the next step is to apply the compression settings carefully. Compression settings include bit rate, sample rate, and codec type. This is where you can control how much compression is being applied to the audio file. Keep in mind that lower bit rates or sample rates result in smaller file sizes, but they also reduce the audio quality. Therefore, it is crucial to apply the compression settings carefully to get the desired file size without losing the audio quality.

Preserving Audio Quality

While compressing audio files, it’s essential to preserve the audio quality. This can be achieved by avoiding excessive compression, applying the compression settings carefully, and using a high-quality compression codec. You can use some tools like sound editors and dynamic range processors to reduce the peak levels of the audio file before compressing it. This will help maintain the audio quality, making it sound more pleasant to the listeners.

By following these best practices, you can compress your audio files to a smaller size without losing its quality. Keep in mind that proper audio compression requires attention to detail and careful consideration of all the aspects related to it.

Audio Compression Easy To Understand

Credit: producelikeapro.com

Frequently Asked Questions Of Audio Compression Easy To Understand

What Is Audio Compression In Simple Terms?

Audio compression is a method of reducing the size of digital audio files without significantly affecting their quality. It is achieved by removing unnecessary data or using algorithms to minimize the amount of information stored. This allows for more efficient storage and faster transmission of audio files.

How Do You Explain Compression?

Compression is the process of reducing the size of a file or data without losing any significant information. It is achieved by removing redundant, irrelevant or unused data from the file or data which results in a smaller size. This makes it easier to transmit or store the file or data, making it faster and more efficient to use.

What Are The Advantages Of Audio Compression?

Audio compression improves data storage, network bandwidth, transmission speed, and enhances sound quality by reducing unnecessary or redundant bits in an audio signal. Compression also allows more audio files to fit into a smaller storage space without losing quality.

What Is The Common Technique To Compress Audio?

The most common technique to compress audio is through the use of lossy algorithms such as MP3 or AAC. These algorithms discard some of the audio data that is perceived as less important by the human ear, resulting in smaller file sizes without significant loss in quality.

Other techniques include lossless compression and dynamic range compression.

Conclusion

Audio compression is an essential tool for any audio engineer or producer. It allows for a better sonic experience and enables the listener to hear all aspects of the music. Understanding the principles of compression and how to use it effectively is key to achieving a high-quality sound.

Experiment with different settings and listen carefully to your results until you find the perfect balance for your project. With this guide, you now have the knowledge to master the art of audio compression and create amazing music.