Categories
Archive

Mixing And Mastering Courses

Mixing and mastering courses teach audio engineers how to correctly balance and enhance the various elements of a song for optimal sound quality. Aspiring music producers and audio engineers seeking to take their skills to the next level can benefit from mixing and mastering courses.

These courses teach the technical skills necessary to properly balance and enhance the various elements of a song, resulting in a professional-sounding production. By mastering the art of mixing, students learn how to adjust elements such as volume, equalization, panning, and effects to create a cohesive and balanced sound.

Mastering, on the other hand, involves the final touches that bring out the full potential of a track, including finalizing volume levels and applying equalization, compression, and other effects to ensure consistent playback across different devices. With these skills, students can pursue careers as music producers, audio engineers, or other related fields in the music industry.

Introduction To Mixing And Mastering

Discover the art of Mixing and Mastering with our comprehensive courses that cover everything from sound engineering techniques to the creation of a professional finished product. Our experts offer tailor-made training programs for beginners and advanced users alike. Whether you are looking to learn the basics of audio mixing or master the nuances of music production, we have a course that is perfect for you.

The music industry is highly competitive, and to make your music stand out, it needs to be mixed and mastered to a professional level. Mixing and mastering are the two separate and essential processes that prepare the music for release. Although different, they work together to give the music its final finishing touch.

What Is Mixing And Mastering?

Mixing is the process of combining different tracks, sounds, and instruments to create a final audio mix. It involves adjusting the volume levels, EQ, panning, and effects to create a balanced, cohesive, and polished sound. Mixing is often compared to painting, where each color is a different sound that needs to blend seamlessly with the others to create a beautiful picture. Mastering is the process of taking the final mixed audio and preparing it for distribution. It involves a series of technical adjustments, such as compression, equalization, and stereo enhancement. Mastering ensures that the audio sounds consistent and professional when played on multiple platforms, such as speakers, headphones, and car systems.

Why Is It Important?

Mixing and mastering are critical because it can make or break the success of your music. A poorly mixed track can have inconsistencies, balance issues, lack of depth, and a weak overall sound. A bad master can cause distortion, loss of dynamics, and poor quality on different platforms. On the other hand, a professionally mixed and mastered track can have a significant impact on the listener and increase the chances of getting noticed by industry professionals. It can also improve the overall sound quality, clarity, and loudness of the track, making it stand out from the millions of songs available today. In conclusion, mixing and mastering are essential processes that require technical expertise, an understanding of music theory, and excellent listening skills. Professional mixing and mastering can elevate the quality of your music to new heights and increase your chances of success in the industry.

Mixing Techniques

Learn professional mixing techniques and gain mastery over your music with our Mixing and Mastering Courses. Our comprehensive courses cover everything from EQ, Compression, Reverb, and Delay to achieve the perfect mix that sounds great on any platform.

Mixing your tracks can be a daunting task, even for experienced musicians and audio engineers. That’s where mixing and mastering courses can be incredibly valuable for anyone looking to improve their skills. In this post, we’ll focus on some of the essential mixing techniques, including EQ, Compression, Reverb, and Delay.

Eq:

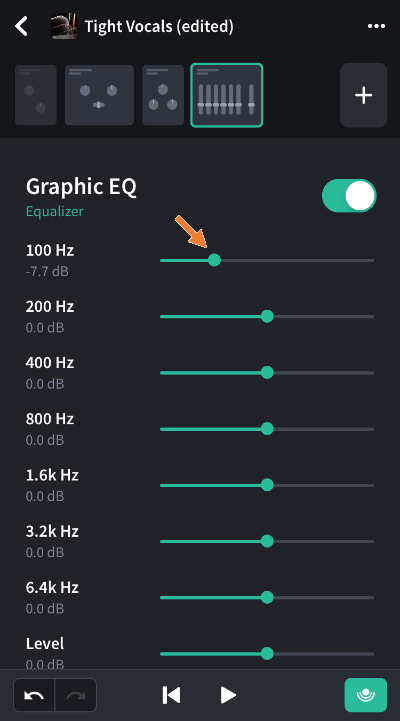
EQ or equalization is an essential audio tool used in mixing. It allows you to adjust the frequency balance of your track by boosting or cutting specific frequency ranges. In a mixing course, you’ll learn how to use EQ to clean up muddy tracks, add warmth and presence to your instruments, and balance the mix.

Compression:

Compression is another crucial tool used in mixing. It helps control the dynamic range of your track and ensures the volume remains consistent throughout. As you learn from a mixing course, you will understand how to use compression to add punch and clarity to drums, smooth out vocals, and achieve a cohesive and balanced mix.

Reverb:

Reverb is used to create a sense of space and depth in your mix. It simulates the sound of an instrument playing in a particular environment, such as a concert hall, or a small room. In a mixing course, you’ll learn how to use reverb to add dimension to your tracks and create a more cohesive and natural-sounding mix.

Delay:

Delay is an effect that creates echoes in your mix. It’s used to add depth and dimension to your tracks, as well as create interesting rhythmic patterns. Learning how to use delay effectively is critical in any mixing course because it allows you to enhance the impact of your tracks and draw the listener in. In conclusion, mastering these essential mixing techniques can take years of practice and experimentation. With the help of mixing and mastering courses, you can fast-track your learning and achieve professional-sounding mixes in less time.

Mastering Techniques

Achieve the perfect sound in your mixes and masterings with our extensive courses on techniques. Learn from industry professionals and take your productions to the next level in no time.

Mastering is the final step to perfecting the sound of your music. It involves preparing the final mix for distribution by enhancing and optimizing each element of the track. A well-mastered track will have smoother transitions, greater clarity, and overall improved sound quality.

Equalization

Equalization or EQ is an important step in mastering your music. It involves adjusting the tonal balance of your track using filters, boosting and cutting specific frequencies to achieve the desired sound. EQ can be used to remove unwanted frequencies, shape the sound of individual instruments, and make sure the mix is balanced across the frequency spectrum.

Compression

Compression is an essential tool in mastering, allowing you to control the dynamic range of a track. It works by reducing the volume of loud parts of the track and boosting the volume of quieter parts. This creates a more consistent overall volume and can enhance the energy of a track. Compression can also be used to add warmth and character to a track, shaping the sound of individual instruments and bringing out the best in the mix.

Limiting

Limiting is a type of compression that is used to increase the overall volume of a track while preventing clipping. It works by setting a maximum threshold for the volume level, limiting the peaks of the waveform to protect against distortion. Limiting can give your track a louder and more polished sound, making it stand out in a crowded marketplace.

Stereo Imaging

Stereo imaging involves manipulating the width of the stereo field to create a more immersive and engaging listening experience. This can be done by panning individual elements of the mix, using stereo widening techniques to create a sense of space, and ensuring that the balance between left and right channels is optimal. Good stereo imaging can make a huge difference in how a track is perceived, allowing the listener to fully engage with the music and enjoy it to the fullest extent.

Best Practices

This ‘Best Practices’ guide outlines key considerations for anyone interested in mixing and mastering courses. From selecting the right online course to understanding the importance of hands-on practice, these tips will help you make the most of your learning experience and become a better audio engineer.

If you are looking for tips and tricks to improve your mixing and mastering skills, then enrolling in a mixing and mastering course can be very helpful. Besides, following the best practices for mixing and mastering can make a huge difference in the quality of your work. Here are some of the best practices to keep in mind while taking mixing and mastering courses.

Gain Staging

Gain staging is a process of setting levels to achieve optimal signal levels without noise or distortion. Proper gain staging is an essential element of the mixing and mastering process. In a mixing and mastering course, you will learn how to set the gain levels of instruments and avoid clipping. Clipping happens when levels exceed the maximum threshold of the audio signal, resulting in distortion. Maintaining a proper gain structure from the beginning can save time later on when you start mixing and mastering the tracks.

Reference Tracks

Listening to reference tracks is an effective way to ensure that your mix is on the right track. A reference track is a song that has a similar sound and vibe to the track you are working on. In a mixing and mastering course, you will learn how to analyze a reference track and compare it to your mix. The goal is to achieve a similar frequency balance, dynamic range, and spatial positioning. A/B testing your mix with a reference track can help you make informed decisions and improve your skills.

Headroom

Headroom refers to the amount of space between the highest peak of the audio signal and the ceiling of the digital audio workstation. Adequate headroom is necessary to prevent clipping and distortion. In a mixing and mastering course, you will learn how to leave enough headroom in your track to allow for dynamic range compression and other mastering effects. Typically, a headroom of -3dB to -6dB is ideal for mastering.

Listening Environment

The listening environment is crucial for accurate mixing and mastering. A well-treated and calibrated listening environment can provide a better and more accurate representation of the sound. In a mixing and mastering course, you will learn how to optimize your listening environment, including acoustic treatment, monitor placement, and room calibration. An optimal listening environment can help you avoid common mixing and mastering problems and improve the overall quality of your work. In conclusion, mixing and mastering courses are an effective way to improve your skills, and following the best practices can help you create professional-quality mixes and masters. Keeping these practices in mind can save you time and effort in the long run, and set you up for success in the music industry.

Tools And Software

In today’s digital age, music production has been made easy with the introduction of various tools and software. It is no longer necessary to have a full-fledged studio setup to produce music, as many of these tools can now be accessed on your computer. Mixing and mastering courses teach you how to use these tools and software to enhance the sound quality of your music.

Digital Audio Workstations (daws)

Digital Audio Workstations (DAWs) are software programs that are used for recording, editing, and mixing audio. They provide various features and functionalities that enable users to create professional-sounding music tracks. Some of the popular DAWs used in mixing and mastering courses include:

DAWDescription
Ableton LiveAbleton Live is a digital audio workstation that is used for live performances and music production. It is commonly used for EDM and electronic music production.
Logic Pro XLogic Pro X is a popular DAW for Mac users. It comes with a variety of plugins, sounds, and samples, making it a versatile tool for music production.
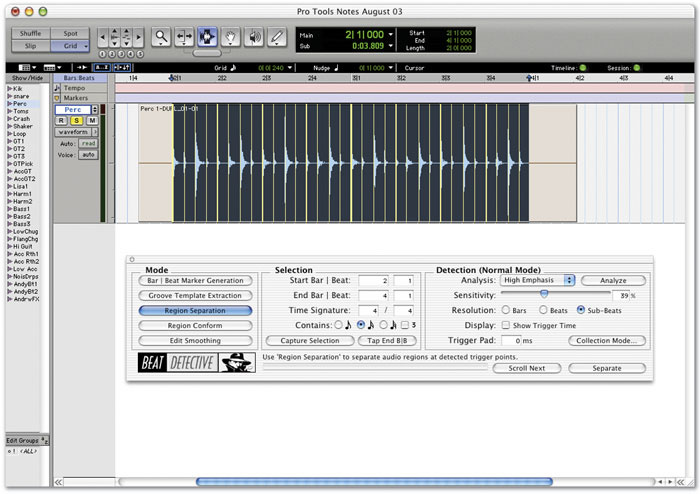
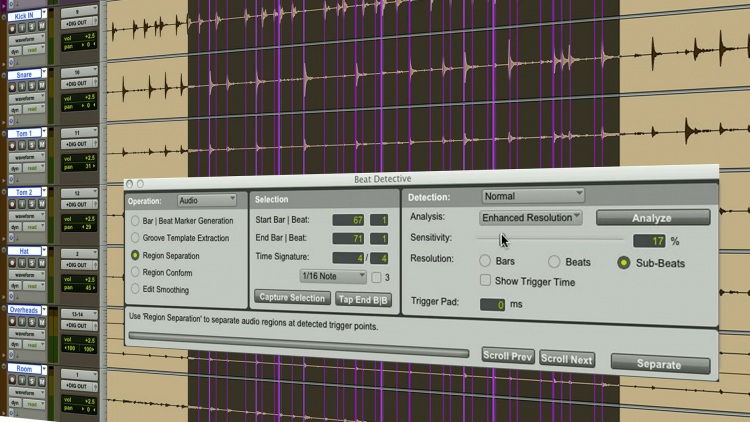
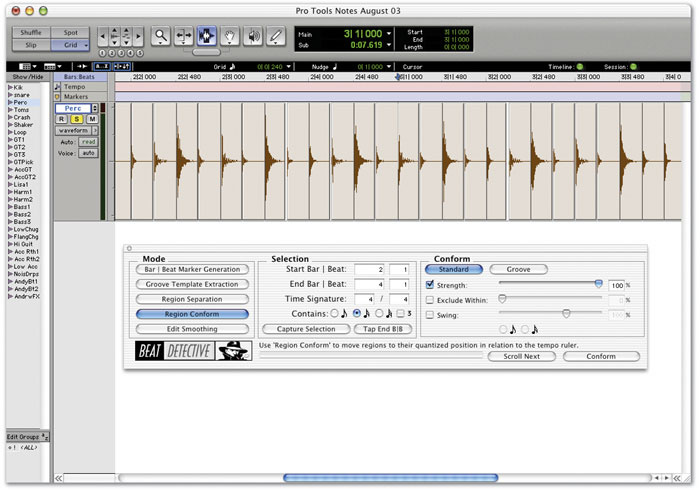
Pro ToolsPro Tools is an industry-standard DAW that is used by music professionals worldwide. It is known for its powerful audio editing and mixing capabilities.

Audio Plugins

Audio plugins are software programs that can be added to a DAW to enhance its functionalities. Plugins are used in mixing and mastering courses to add effects and manipulate audio. Some of the popular audio plugins used in music production include:

  • EQ plugins – used to balance the frequencies in an audio track
  • Compressor plugins – used to control the dynamic range of an audio track
  • Reverb plugins – used to add a sense of space to an audio track
  • Delay plugins – used to create echoes and other time-based effects

There are numerous audio plugins available in the market, with some being free and others being paid. It is important to select plugins that suit your specific needs and budget.

In conclusion, mixing and mastering courses equip you with the knowledge and skills needed to effectively use DAWs and audio plugins. With the right tools and software, you can create high-quality music tracks that stand out from the rest.
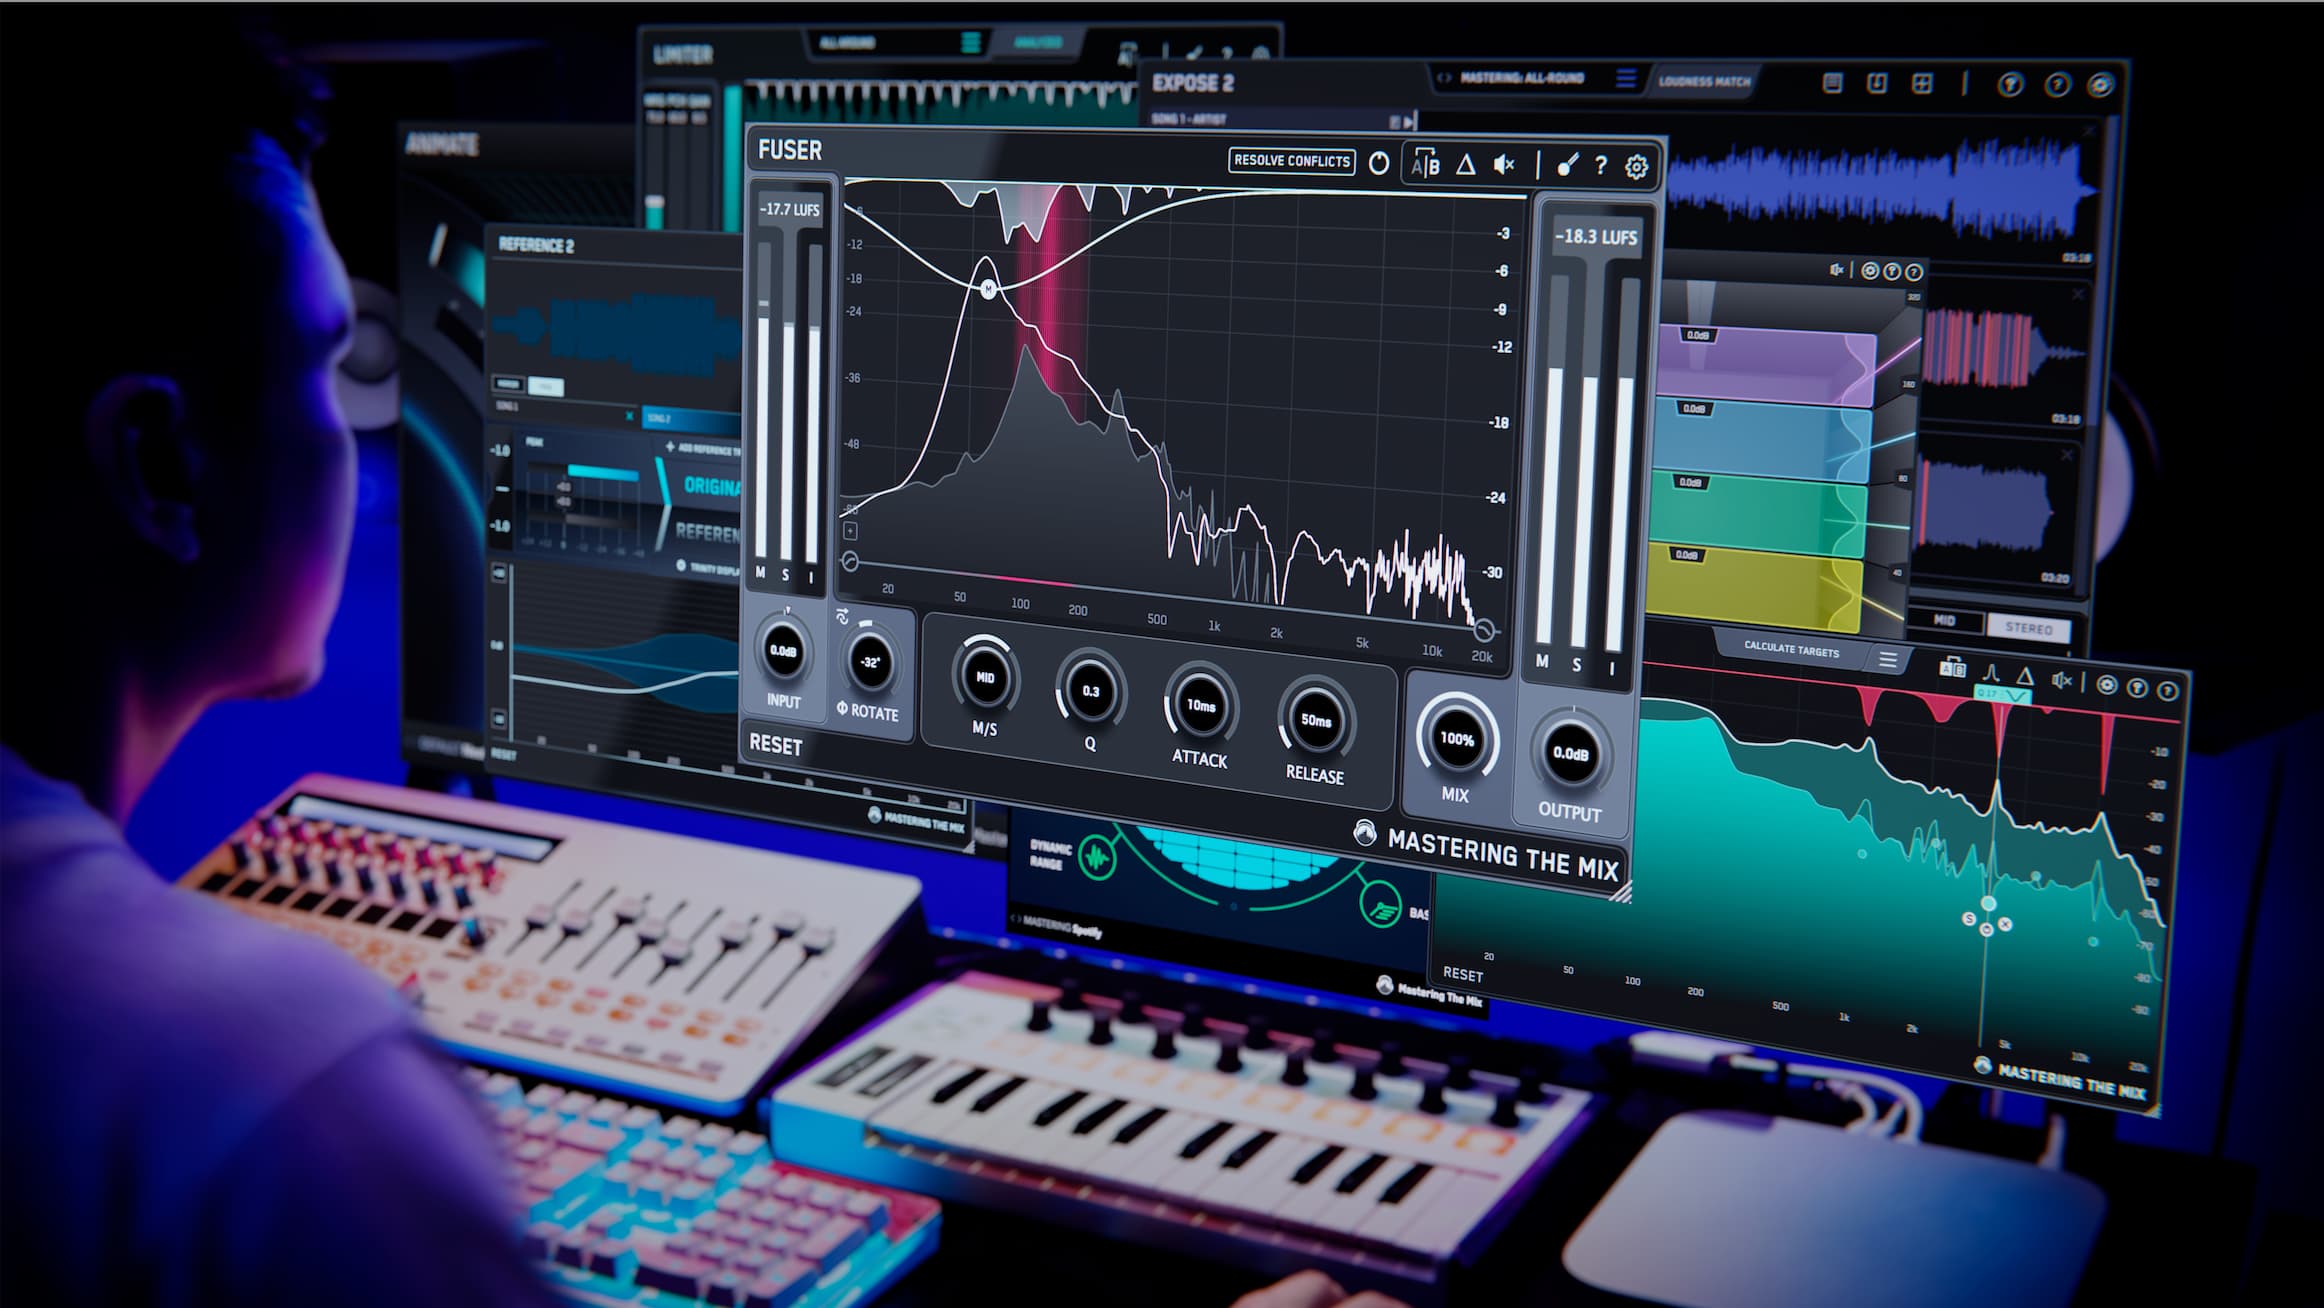
Mixing And Mastering Courses

Credit: www.masteringthemix.com

Online Courses And Tutorials

Take your music production to the next level with online mixing and mastering courses. These tutorials will teach you the techniques used by industry professionals to polish your tracks, giving them a professional sound that will stand out from the crowd.

If you are an aspiring music producer looking to hone your mixing and mastering skills, online courses and tutorials are an excellent option to consider. With the help of online courses, you can learn from experienced professionals, at your own convenience, and at a fraction of the cost of traditional learning methods. Moreover, online courses and tutorials offer a wealth of resources, including video tutorials, theoretical lessons, case studies, and forums, where you can interact with peers and industry experts.

Benefits Of Online Learning

Online learning offers several benefits over traditional learning methods. Here are some of the key advantages of learning mixing and mastering online:

  • Convenience: Online courses allow you to learn at your own pace, from anywhere, and at any time.
  • Affordability: Online courses are often more affordable than traditional courses, making it accessible for everyone.
  • Flexibility: Online courses give you the ability to choose from a wide range of courses, programs, and specializations.
  • Access to Industry Experts: With online learning, you get access to industry experts who share their knowledge and experience with you.
  • Interactive Learning: Online courses allow you to interact with your peers and instructors, provide feedback and collaborate to achieve the best possible results.

Top Online Mixing And Mastering Courses

Here are some of the best online courses for learning mixing and mastering:

Course NameProviderLevelDuration
Mixing and Mastering Course with Waves BundleUdemyBeginner to Intermediate26 hours
MasteringBOX Online MasteringMasteringBOXBeginner to AdvancedVaries
Pro Mix Academy Mixing and Mastering CoursesPro Mix AcademyBeginner-Intermediate to AdvancedVaries
Audio Mastering Essential TrainingLinkedIn LearningBeginner to Intermediate2 hours

These courses are ideal for anyone looking to learn the ins and outs of mixing and mastering and want to take their music to the next level. It’s worth spending some time researching what each course entails, as well as reviews by other students. In conclusion, if you are serious about learning mixing and mastering in the music production industry, online courses and tutorials can offer excellent learning opportunities. With affordable fees, a diversity of course options, and the ability to interact with industry experts, online courses and tutorials have revolutionized the music education industry. Choose a course that suits your experience level and learning style, and get started today.

Career Opportunities

Learn the art of music production with our mixing and mastering courses designed to equip you with the necessary skills to take your career to the next level. Our expert guidance and practical training can help you turn your passion into a successful profession in the music industry.

Job Roles In The Music Industry

If you are considering a career in music, you will be pleased to know that there are numerous job roles you can fill with a background in mixing and mastering. As a graduate of a mixing and mastering course, you can venture into roles such as sound engineer, mixing engineer, mastering engineer, record producer, and audio technician. The music industry is an ever-evolving one, and it requires the services of professionals with varying skill sets to give amazing music to their fans.

Salary Expectations

The music industry offers a promising career for mixing and mastering graduates. According to Payscale, the average salary for a sound engineer in the US is $50,497 per year. A mixing engineer’s average salary stands at $61,575, and a mastering engineer’s average salary is $60,598 per year. Although the salary may vary depending on location, experience, and company, the music industry offers you the chance to turn your passion into a rewarding career.

Tips For Success

If you want to make the most of your mixing and mastering career, you must do more than excel in your course. You need to remain committed, disciplined and build a portfolio that showcases your proficiency in the craft. Below are tips to help you thrive in your music career:

  • Stay updated with the latest equipment and software in the music industry.
  • Develop your skillset by working with different genres of music.
  • Attend music conferences and workshops to learn from professionals in the field.
  • Network and collaborate with other professionals in the industry to gain more experience and exposure.
  • Constantly work on building your portfolio and using social media to showcase your work.

As you embark on a career in mixing and mastering, keep in mind that the music industry is highly competitive. Therefore, your success is hinged on your dedication, passion, and willingness to improve your skills continually.

Mixing And Mastering Courses

Credit: www.icmp.ac.uk

Mixing And Mastering Courses

Credit: ask.video

Frequently Asked Questions On Mixing And Mastering Courses

What Is The Best Way To Learn Mixing And Mastering?

The best way to learn mixing and mastering is by studying online resources, taking courses, and working with experienced professionals. Practice regularly with different styles of music to develop your skills and expertise. It’s essential to have a good understanding of audio processing tools, signal flow, and EQ concepts.

How Long Does It Take To Learn Mixing And Mastering?

Learning mixing and mastering can take anywhere from a few months to a few years, depending on how much time and effort you put in. Consistent practice, seeking guidance from experts and experimentation are key to improving your skills. It is a continuous learning process and requires dedication and patience.

Is It Harder To Mix Or Master?

Mixing and mastering are both crucial elements of music production, but they have different challenges. Mixing involves balancing individual tracks and making them work together, while mastering involves optimizing the final mix for distribution. Both require a certain level of skill and experience, so it’s difficult to say which is harder.

It ultimately depends on the individual engineer and the project at hand.

Can You Learn Mixing And Mastering Online?

Yes, you can learn mixing and mastering online through various platforms that offer courses, tutorials, and workshops. Online learning has become increasingly popular and effective due to the convenience, affordability, and accessibility it offers. You can learn at your own pace, access valuable resources, and connect with industry professionals from anywhere in the world.

Conclusion

Mastering and mixing are integral parts of music production and require specialized knowledge. Taking courses can provide a comprehensive understanding of these techniques and help you develop your skills. From learning how to use EQ and compression to creating a balanced final mix, the possibilities are endless.

If you’re serious about music production, taking these courses can make all the difference in your career. With the right mix of knowledge and expertise, you can create amazing sounds that capture the hearts of your audience. So don’t wait any longer, enroll in a course and take the first step towards becoming a master at mixing and mastering music.
Categories
Archive

Compressor Threshold Setting

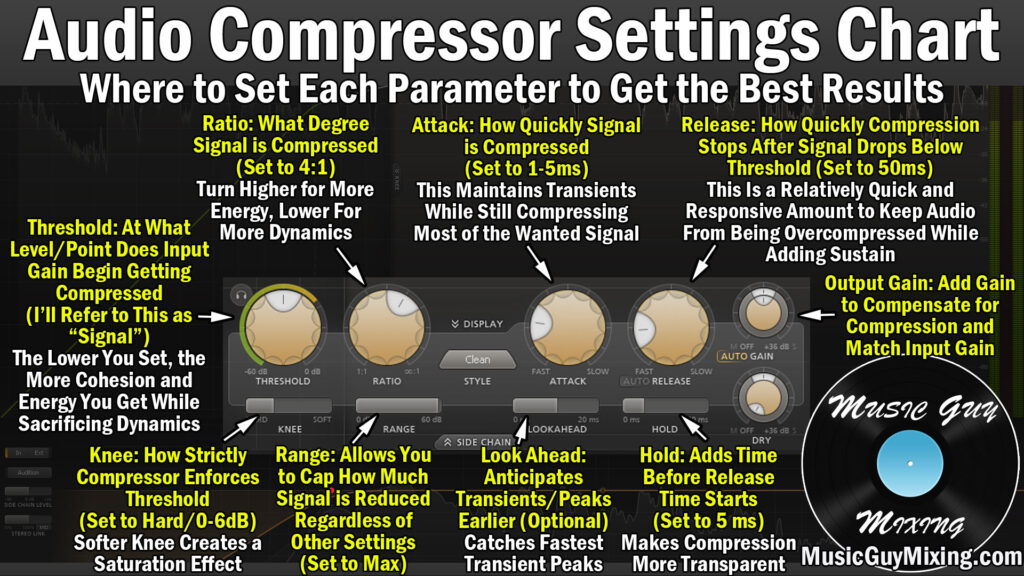
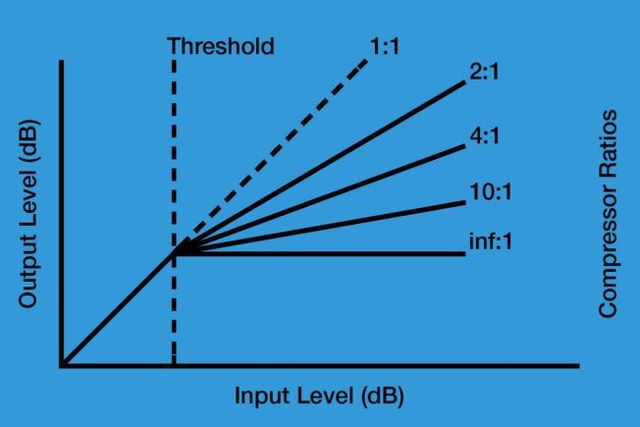
The compressor threshold setting determines the level at which the compressor begins reducing the dynamic range. Compressor threshold setting is critical to achieving optimal levels of compression.

Compressors are essential tools in music production and audio engineering used to level off and reduce the dynamic range of audio. Compressors work by reducing the level of the audio signal when it exceeds a certain threshold level. The compressor threshold setting determines the level at which the compressor begins reducing the dynamic range.

Setting the threshold too high can lead to distortion, while setting it too low can result in less compression. The threshold setting must be carefully adjusted to achieve optimal levels of compression, ensuring the audio sounds balanced and professional. We will discuss compressor threshold setting, how it works, and how to set it correctly.

Factors Affecting Compressor Threshold Setting

Compressor threshold setting is affected by various factors such as input signal, desired output level, attack, and release times, and the type of compressor used. Adjusting these settings can significantly impact the compression level, dynamic range, and overall quality of the audio being produced.

Compressors are essential tools in the music industry and are often used to even out the dynamics of a track. However, choosing the right compressor threshold setting is crucial in ensuring that the track sounds balanced and professional. Several factors can affect compressor threshold setting, including signal type, genre of music, compression ratio, attack and release time.

Signal Type

The type of signal being processed can greatly affect compressor threshold setting. For example, a heavily compressed signal may require a higher threshold setting than a lightly compressed signal. Similarly, signals with a lot of low-frequency content may require a lower threshold setting to avoid pumping and breathing effects.

Genre Of Music

Different genres of music require different compressor settings. For example, a heavy metal track may require a faster attack and release time compared to a ballad. Similarly, a hip-hop track may require a higher compression ratio compared to a jazz track. Therefore, it is important to consider the genre of music when setting the compressor threshold.

Compression Ratio

Compression ratio refers to the amount of gain reduction applied by the compressor. Setting the compression ratio too high can result in an overly compressed track, while setting it too low may result in a track with uneven dynamics. Therefore, it is essential to strike a balance by setting the compression ratio at a level appropriate for the track and the desired effect.

Attack And Release Time

Attack and release times determine how quickly the compressor begins to work and how quickly it stops working, respectively. Faster attack times can help to control transient peaks in a signal, while slower attack times can help to preserve the natural dynamics of the track. Similarly, faster release times can help to reduce gain reduction artifacts, while slower release times can result in a smoother overall sound. In conclusion, several factors can affect compressor threshold setting, including signal type, genre of music, compression ratio, attack and release time. It is important to consider each of these factors carefully when setting the compressor threshold to ensure that the track sounds balanced, professional, and suitable for the intended genre.

Compressor Threshold Setting

Credit: www.musicguymixing.com

Steps To Set Compressor Threshold

Setting compressor threshold is an important step to optimize the sound quality of your audio recordings. Follow these necessary steps to set the compressor threshold accurately: define the target level, adjust the input gain, set the ratio, adjust the attack time, tweak the release time and adjust the makeup gain.

Steps to Set Compressor Threshold Setting the compressor threshold is an essential step to achieving a balanced and polished audio mix. It involves identifying the loudest part of the audio signal, determining its dynamic range and setting the threshold level accordingly. Here are the steps to set the compressor threshold:

Identify The Loudest Part Of The Audio Signal

The first step is to identify the loudest part of the audio signal. This is the portion of the audio that dominates the mix and may cause distortion or clipping. One way to identify the loudest part of the audio signal is to use a metering plugin like the Waves VU meter. The VU meter displays the audio level in decibels and allows you to pinpoint the loudest part of the signal with precision.

Determine The Dynamic Range Of The Audio Signal

Once you’ve identified the loudest part of the audio signal, the next step is to determine its dynamic range. Dynamic range refers to the difference between the loudest and softest parts of the signal. You can measure the dynamic range using a plugin like the Waves Vocal Rider. The Vocal Rider analyzes the audio signal and automatically rides the levels, ensuring a consistent dynamic range throughout the mix.

Set The Threshold Level

After determining the dynamic range of the audio signal, the next step is to set the threshold level. The compressor threshold is the level at which the compressor begins to reduce the gain of the audio signal. It’s essential to set the threshold carefully to avoid too much compression, which may lead to a lifeless and dull mix. You can use a plugin like the Waves SSL G-Master Buss Compressor to set the threshold. The SSL G-Master Buss Compressor has a user-friendly interface, making it easy to set the threshold accurately. In conclusion, setting the compressor threshold is an important step to achieving a balanced and polished audio mix. By identifying the loudest part of the audio signal, determining its dynamic range and setting the threshold level, you can achieve a consistent and powerful audio mix that’s pleasing to the ears.

Common Mistakes To Avoid In Compressor Threshold Setting

When it comes to compressor threshold setting, there are common mistakes that should be avoided. These include setting the threshold too high or too low, not considering the dynamic range of the material being compressed, and not adjusting attack and release times appropriately.

It is important to understand these factors to achieve the desired sound and avoid unwanted artifacts.

When it comes to compressing audio, setting the right threshold is crucial. This is because threshold determines when the compressor kicks in, thereby affecting the overall sound quality. However, there are common mistakes that content creators make when setting the compressor threshold. In this section, we explore these mistakes, how to avoid them, and their impact on your audio.

Setting The Threshold Too Low

Setting the compressor threshold too low appears to be a natural choice for those who want their audio to sound louder. However, this can ultimately lead to poor sound quality and distortion. When the threshold is too low, the compressor attempts to reduce the volume of everything, including the noise floor, which causes background noise to become increasingly noticeable. To avoid this mistake, set the threshold at a point where the compressor only kicks in when the audio reaches a specific loudness level.

Setting The Threshold Too High

On the other hand, setting the threshold too high can result in decreasing the overall loudness. This can occur when the compressor fails to engage, leaving much of the audio unprocessed. In essence, the volume of the audio remains unchanged. This leads to a track that comes across dull and lacks punch, defeating the purpose of using a compressor in the first place. The best approach is to set the threshold at a level that balances the audio levels and prevents the compressor from being overly severe.

Not Considering The Mixing Context

While threshold setting is essential, it is crucial to consider the mixing context when setting up the compressor threshold. Typically, the compressor threshold should be in line with other elements in the mix, such as drums, guitars, and vocals. Failure to do so will result in an unbalanced mix, which could affect the overall quality of the audio. Therefore, it is vital to work collaboratively with other elements in the mix for the best results. In conclusion, understanding how to set a compressor threshold is crucial for audio content creators. It is essential to avoid common mistakes such as setting the threshold too low, too high, or not considering the mixing context. By practicing the right compression techniques, you can enhance and refine the audio output, and improve the overall sound quality.

Compressor Threshold Setting

Credit: www.iconcollective.edu

Tips For Effective Compressor Threshold Setting

Effective compressor threshold setting is crucial for achieving the best sound quality. It involves finding the right balance between boosting low-level sounds and preventing distortion. To achieve this, it’s essential to consider factors like the type of sound source, the desired dynamic range, and the intended audience.

Compressor threshold setting can make or break your audio project. It determines how much gain reduction is applied to your signal and ensures the balance between loud and quiet sounds. Effective compressor threshold setting is essential to achieve a polished, balanced, and professional sounding mix. Here are some tips to get the most out of your compressor threshold.

Use Your Ears

The key to successful compressor threshold setting is to use your ears. While there are general guidelines for threshold setting, every mix requires a different approach. Use your ears to listen to the track and adjust the compressor threshold accordingly. You can start by setting the threshold to the level where the compressor starts to slightly reduce the gain. Then, adjust the threshold until you achieve the desired level of compression.

Experiment With Different Settings

Don’t be afraid to experiment with different settings until you find the sweet spot. Too much compression can kill the dynamics of your track, while too little can make it sound weak and unbalanced. Play around with the attack and release settings to fine-tune the compressor’s response. Begin with fast attack and release times and gradually increase or decrease it, depending on your audio material.

Consider Using A Reference Track

A reference track is a professionally mixed track that you can use as a benchmark for your mix. It can give you an idea of how compression should sound in your mix and help you make informed decisions about your compressor settings. Find a reference track that has a similar genre, instrumentation, and style as your mix. Adjust your compressor threshold until your mix compares well to the reference track.

Conclusion

In conclusion, compressor threshold setting is a crucial step in achieving a polished and professional-sounding mix. Use these tips to find the right threshold, experiment with different settings, and use a reference track to ensure you’re on track to success. With a little practice and patience, you’ll be able to achieve the perfect compressor threshold for your mixes.

Compressor Threshold Setting

Credit: www.greatchurchsound.com

Frequently Asked Questions Of Compressor Threshold Setting

What Should Compressor Threshold Be Set At?

The compressor threshold should be set according to the volume of the audio signal. Typically, it should be set at a level where it reduces the dynamic range of the signal without causing unwanted distortion or artifacts. It’s recommended to set it at around -20dB to -16dB for vocals and -10dB to -6dB for drums and other instruments.

However, this can vary depending on the context and personal preference.

What Does Threshold Mean On Compressor?

The threshold on a compressor is the level at which the compressor starts reducing the volume of sound. It’s the point at which the compressor’s gain reduction begins to work. A lower threshold means more compression, while a higher threshold means less compression.

What Is The Best Compression Setting?

The best compression setting depends on the specific needs of your project. It’s important to consider factors such as file type, desired quality and file size, as well as the device or platform it will be viewed on. Experiment with different settings to find the optimal balance for your project.

What Is The Threshold On A Guitar Compressor?

The threshold on a guitar compressor is the level at which the compressor begins to reduce the volume of the sound signal. It’s where the compressor starts to kick in and reduces the peaks in the guitar’s sound. The threshold is adjustable, based on the level at which you want to start compressing the signal.

Conclusion

Setting the compressor threshold correctly is essential in achieving optimal sound quality. It allows you to control the dynamic range and ensure your audio isn’t too loud or too quiet. It’s a delicate process that requires your attention to detail and careful calibration of the different settings.

While there is no one size fits all approach, following these guidelines will help you produce great sounding audio. So, experiment with different threshold levels, understand your audio signal, and remember to practice using your compressor regularly.

Categories
Archive

Get A Song Professionally Mixed

To get a song professionally mixed, you can hire a mixing engineer or use an online mixing service. These options are available at different prices and with varying levels of quality, but they can both provide a polished and balanced final mix for your song.

Mixing is an essential part of the music production process. It involves balancing the volumes, frequencies, and effects of all the individual tracks in a song to create a cohesive and impactful final mix. While some musicians prefer to mix their own music, others may lack the skills, equipment, or time to do so.

In these cases, hiring a professional mixing engineer or using an online mixing service can be a good option. Mixing engineers are experienced professionals who can provide personalized attention to your music, whereas online mixing services usually offer a more affordable and streamlined process. Ultimately, choosing the right option depends on your budget, needs, and preferences.

Get A Song Professionally Mixed

Credit: www.beatdemons.com

Why Professional Mixing Matters

When it comes to creating a song, amateur mixing can only take you so far. Professional mixing makes a huge difference in the final product. Here’s why:

Achieving High-quality Sound

Professional mixing engineers have years of experience and a trained ear for sound. They understand how to achieve a high-quality sound that can’t be replicated with amateur mixing. With access to advanced tools, such as specialized microphones and digital audio workstations, they can enhance the overall sound of your song to perfection.

Creating A Cohesive Sound

A professional mixer knows how to blend the different instruments and vocals to create a cohesive sound. They can control the levels and equalization to ensure that each part complements the others, creating a beautiful and harmonious sound. Without this level of expertise, your song may sound disjointed and unprofessional.

Maximizing Each Instrument’s Potential

A professional mixer understands the potential of each instrument and how to maximize it. They know how to bring out the best in your vocals, such as adding effects that enhance the emotion and tone of your voice. They can also highlight the unique strength of each instrument so that everything works together seamlessly.

Overall, professional mixing is a crucial part of creating a high-quality song. Investing in a professional mixer will take your song to the next level, making it stand out from the crowd, and sound like it was made by a seasoned professional.

Get A Song Professionally Mixed

Credit: www.upwork.com

How Professional Mixing Works

If you want your song to sound professional and polished, you need to have it mixed by a professional mixing engineer. Professional mixing involves the process of blending all of the individual elements of a song – such as vocals, instruments, and effects – into a cohesive and balanced final product. In this blog post, we’ll take a closer look at how professional mixing works, including how to choose a mixing engineer, how to prepare your track for mixing, and how to communicate effectively with your mixing engineer to ensure the best possible outcome.

Choosing A Mixing Engineer

Choosing the right mixing engineer is crucial for achieving the desired sound for your song. You’ll want to find an engineer with experience in your genre and who understands your creative vision. Look for engineers who have a portfolio of previous work that you admire, and check reviews or testimonials from previous clients. Don’t be afraid to ask for references or to chat with the engineer to get a sense of their communication style and workflow.

Preparing The Track For Mixing

The better your track sounds before it goes to the mixing engineer, the better the final product will be. This means that you should take care of any tuning or timing issues in your individual tracks before sending them to the mixing engineer. It’s also important to make sure that each track is levelled correctly, has no clipping or distortion, and is free of any unwanted noise or hums. Organise your files in a clear and understandable manner for the mixing engineer.

Communication With The Mixing Engineer

To ensure the best possible outcome, it’s important to communicate effectively with your mixing engineer. Be specific and clear about what you want to achieve with your song, and provide references or examples of other songs that have the sound you’re aiming for. Provide the mixing engineer with all the necessary information about your song such as the tempo, key, and desired delivery format. It’s important to keep the lines of communication open throughout the mixing process, so the engineer can ask any questions and you can provide feedback and constructive criticism.

The Mixing Process

To get a song professionally mixed, the mixing process involves adjusting individual tracks, adding effects, and optimizing levels to achieve a cohesive and balanced sound. A skilled mix engineer can transform a raw recording into a polished and radio-ready track that captures the intended vibe and emotion of the song.

If you’re looking to get your song professionally mixed, it’s essential to understand the mixing process. Mixing is the process of blending and enhancing the individual tracks of a song to create a cohesive and balanced final mix. It involves adjusting levels, panning, equalization, and adding effects to make the song sound great.

Balancing Track Levels

The first step in the mixing process is to balance the levels of each track. This involves adjusting the volume of each track to make sure that they are all at the appropriate level in relation to one another. The goal is to ensure that no track is louder than the others and that they all work together to create a balanced sound.

Equalizing Instruments

Equalization is the process of adjusting the frequency balance of each track to create a pleasing overall sound. This involves adjusting the levels of different frequencies in each track to achieve the desired balance and tone. For example, if a guitar sounds too bright, the engineer may lower the high frequencies to balance it out.

Adding Effects And Dynamics Processing

The final step in the mixing process is to add effects and dynamics processing to enhance the sound of the mix. This includes adding reverb, delay, compression, and other effects to make the mix sound more polished and professional. Dynamics processing is used to control the dynamic range of the track, so it doesn’t get too loud or too quiet. In conclusion, understanding the mixing process is critical to getting the best results for your song. A professional mixing engineer will take care of all these steps to make sure that your song sounds great. By balancing levels, equalizing instruments, and adding effects and dynamics processing, your mix will sound polished, professional, and ready for release!

Fine-tuning The Mix

Looking for a professional to fine-tune your song mix? Getting a song professionally mixed is essential for a high-quality sound and can make the difference when it comes to standing out in the music industry. Trust an expert to bring your music to life.

As a musician, you pour your heart and soul into creating the perfect sound for your latest song. However, to take it to the next level, you need a professional mix. This is where fine-tuning the mix comes in. If you aren’t familiar with mixing, it can seem overwhelming, but don’t worry – by evaluating the mix, adjusting levels and effects, and providing feedback to the mixing engineer, you can ensure that the final product is exactly what you envisioned.

Evaluating The Mix

First things first, you need to take a step back and evaluate the current state of your mix. This involves listening closely to each instrument and vocal track individually, as well as the overall sound of the song. Make a list of notes to address during the fine-tuning process. Using this evaluation as a guide, you’ll be able to fine-tune the mix with precision.

Adjusting Levels And Effects

Once you have evaluated the mix, it’s time to start making adjustments. This includes adjusting volume levels, panning, and applying effects such as reverb or compression. Use your notes from the evaluation stage to guide you in making these adjustments. It’s important to listen carefully as you make changes to ensure that the overall sound remains balanced.

Providing Feedback To The Mixing Engineer

If you’re working with a mixing engineer, it’s important to provide feedback throughout the process to ensure that the final product meets your expectations. Be specific in your feedback, referencing specific parts of the song and describing what changes you would like to see. This collaboration is critical to achieving your desired sound and ensuring that the mix is perfected. In conclusion, fine-tuning the mix requires careful evaluation, adjustment, and collaboration with a mixing engineer. By following these steps, you can ensure that your song is mixed to perfection, capturing the essence of your artistic vision.

Benefits Of Professional Mixing

Hire a professional mixer to get your music sounding its best. A professional mix can enhance the clarity and balance of your audio, bringing out the best in your tracks and giving them the punch they need to stand out.

It’s a worthwhile investment for any serious musician.

When it comes to music production, every element plays a vital role in creating an engaging and entertaining piece. A song with high-quality music production can stand out in the industry, reaching greater heights. That’s where professional mixing comes into the picture, playing a crucial role in enhancing the overall quality of the music.

Improved Sound Quality

The sound quality of the song is one of the most important factors that can decide its success in the industry. Professional mixing can improve the sound quality of individual tracks and blend them in a way that creates an engaging and compelling piece. With the help of the latest mixing tools and techniques, professional mixers can enhance the elements of the track, such as EQ, compression, and reverb, to create a sound that is more polished, clear, and impactful.

Greater Listener Engagement

Engagement is the key to the success of any music producer. An engaging track can keep the audience hooked and create a long-lasting impression. Professional mixing can increase the engagement level of the track by creating a balanced sound and adding interest with the panning, automation, and other effects. With a professional mixer’s expertise, the track can sound more dynamic, exciting, and enjoyable, making the listeners want to hear more.

Increased Marketability

One of the significant benefits of professional mixing is that it can increase the song’s marketability. A well-mixed track can appeal to a broader audience, creating a greater impact on the listener and differentiating it from other tracks in the market. Moreover, a professionally mixed song can stand out on various music platforms, leading to greater exposure and audience engagement. In conclusion, professional mixing plays a vital role in enhancing the quality of the track and ensuring its success in the industry. With improved sound quality, greater listener engagement, and increased marketability, professional mixing can take the music production to greater heights.

Get A Song Professionally Mixed

Credit: www.beatdemons.com

Choosing The Right Mixing Engineer

When it comes to producing a high-quality music track, getting it professionally mixed is key. A good mixing engineer can transform a raw, unpolished recording into a refined and balanced piece of music that will impress your listeners. But how do you choose the right mixing engineer for your project? Here are the three important factors to consider:

Reviewing Credentials And Experience

One of the most important factors to consider while choosing a mixing engineer is their credentials and experience. You want to work with someone who has a proven track record in the industry and a vast portfolio of successful projects under their belt. Do some research on their website and check out their previous work samples. This will give you an idea of their style and whether their work aligns with your vision for your own project.

Assessing Communication Skills

Effective communication is the key to a successful collaboration between the mixing engineer and the artist. You want to work with someone who is willing to listen to your ideas and needs and can provide feedback and suggestions to improve your track. Furthermore, they should be responsive and transparent in their communication. Be sure to have a phone or video call with them before you start working together to ensure you have good chemistry.

Considering Budget

Finally, while choosing a mixing engineer, it’s important to consider your budget. Prices can vary significantly based on the experience and demand of the mixing engineer. Decide on the budget beforehand and look for someone who can work within that range. Keep in mind that quality comes at a price, so make sure you don’t compromise on quality in favor of a lower price tag.

Preparing Your Track For Mixing

Before getting your song professionally mixed, it’s important to prepare your track. This includes organizing your files, labeling tracks, and ensuring the recording quality is adequate. By doing so, you can help to ensure a smoother mixing process and a higher quality final product.

Before you send your tracks to be professionally mixed, you need to take some time to prepare them. This preparation will help ensure that your mixing engineer has everything they need to create a great mix. Here are some steps you can take to prepare your tracks for mixing.

Cleaning Up Tracks

Cleaning up your tracks involves removing any unwanted noise, clicks, pops, or silence. This will help ensure that your mixing engineer can focus on the important parts of your tracks and create a clear, polished mix. Some tips to help you clean up your tracks include using noise reduction plugins, trimming silence at the beginning and end of each track, and removing any unnecessary tracks.

Providing Reference Tracks

Providing reference tracks is an important step in preparing your tracks for mixing. This helps your mixing engineer understand the sound you are trying to achieve and how your tracks should fit together in the final mix. When providing reference tracks, be sure to choose songs that have a similar style or sound to what you are trying to achieve. You can also include notes or comments about specific elements that you want to highlight or downplay in the mix.

Preparing Session Files

Preparing your session files involves making sure that each track is labeled correctly and that all of your files are organized in a logical way. This will help your mixing engineer find the files they need quickly and easily. Some tips for preparing your session files include labeling each track with the instrument or part that it represents, grouping similar tracks together, and removing any unused or unnecessary tracks. By following these steps, you can ensure that your tracks are ready for professional mixing. Taking the time to prepare your tracks will help your mixing engineer create a great, polished mix that truly showcases your music.

Frequently Asked Questions For Get A Song Professionally Mixed

How Much Does It Cost To Get A Song Professionally Mixed?

The cost of professionally mixing a song varies depending on the complexity of the track, the level of experience of the engineer, and the studio’s hourly rate. Generally, the cost can range from $150 to $1000 per song. It’s best to get a quote from the studio or engineer you’re interested in working with.

Should I Get My Song Professionally Mixed And Mastered?

Yes, getting your song professionally mixed and mastered can greatly improve its quality and increase its chances of success. A professional mix and master can enhance the overall sound, clarity, and balance of your song, making it sound more polished and radio-ready.

This can also help your song stand out in a competitive market and potentially attract more listeners and opportunities.

Can I Pay Someone To Mix My Song?

Yes, you can pay someone to mix your song. There are professional audio mixing services available that offer their expertise to enhance the quality of your music. However, it is important to choose a reputable audio engineer with a proven track record to ensure that you get the best results for your investment.

How Do I Find Someone To Mix My Song?

To find someone to mix your song, you can start by asking for recommendations from friends or musicians. Additionally, you can search online for mixing services, read reviews and check the portfolios of mixing engineers. Another option is to attend local music events and meet with industry professionals who may offer mixing services.

Conclusion

Getting your song professionally mixed is the best way to ensure that your music will be heard at its best. Whether you’re looking to break into the music industry or just want your songs to have a polished sound, a professional mix can make all the difference.

With the right tools and expertise, a skilled mixer can help you achieve the sound you’ve always dreamed of. Invest in your music and give it the professional touch it deserves. Trust us, you won’t regret it.

Categories
Archive

How To Stem Master Your Own Music

To stem master your own music, use a digital audio workstation (DAW) and separate your mix into individual stems for editing and mastering. Mastering each stem separately can help improve the overall sound quality and make it easier to create a final mix down.

Mastering your own music can seem like a daunting task, but with the right equipment and software, it can be done easily. One of the first steps is to use a digital audio workstation (DAW) to separate your mix into individual stems.

This process allows you to edit and master each stem separately, giving you greater control over the final sound of your music. We’ll explore the steps you can take to stem master your own music and create a professional-sounding final mix.

Choose Your Daw

Learn how to stem master your own music by choosing the right Digital Audio Workstation (DAW). Experiment with different DAWs and find the one that suits your needs and workflow best to achieve a professional sound.

When it comes to mastering your own music, the choice of Digital Audio Workstation (DAW) can make all the difference. There are a plethora of options available, from free and open-source to premium, industry-standard tools. But how do you choose the right one for your needs? Here’s what you need to keep in mind:

Find Your Preferred Daw

The first step in choosing a DAW is to find one that suits your style and workflow. Some popular options include:

  • Ableton Live: A versatile DAW that’s popular among electronic music producers for its live performance capabilities.
  • FL Studio: A beginner-friendly DAW with a colorful interface and a wide range of built-in sounds and effects.
  • Logic Pro: A macOS-only DAW that’s favored by many professional producers and audio engineers for its powerful mixing and mastering tools.

Of course, these are just a few examples — there are many other DAWs out there that might be a better fit for you. The key is to experiment with a few different options until you find one that works well for your unique needs and preferences.

Learn The Interface

Once you’ve chosen your DAW, the next step is to become familiar with its interface. Every DAW is different, so it’s important to spend some time exploring the various menus, buttons, and settings. Here are some things to keep in mind:

  • Navigation: Learn how to navigate around your DAW, including how to create new tracks, import audio files, and add effects.
  • Playback: Familiarize yourself with the playback controls, including play, pause, loop, and tempo adjustments.
  • Mixing: Understand the basics of mixing, including adjusting volumes, panning, and using EQ and compression.
  • Mastering: Learn how to master your tracks, including adding limiting and EQ to ensure they sound their best.

Learn Basic Editing Tools

Finally, it’s important to master the basic editing tools of your DAW. These include:

  • Cutting and Trimming: Learn how to cut and trim audio clips to remove unwanted sections or create new ones.
  • Fading: Add fades to your audio clips to create smooth transitions between different sections.
  • Crossfading: Use crossfades to blend different audio clips together seamlessly.
  • Quantizing: Quantize your MIDI tracks to ensure that they’re perfectly in time with the rest of your project.

By mastering these basic editing tools, you’ll be able to create polished, professional-sounding tracks that stand out from the crowd. Whether you’re a hobbyist or a professional musician, choosing the right DAW and learning to use it effectively is essential for mastering your own music.

How To Stem Master Your Own Music

Credit: www.masteringthemix.com

Learn The Art Of Mixing

Learn the art of mixing and take your music to the next level by stem mastering your own tracks. This process involves creating separate audio stems for different elements of your music, giving you more control over the final sound and making it ready for distribution.

Gain the skills and knowledge necessary to produce professional-grade music.

Mastering your own music can be a challenging task, but with a little bit of patience, practice, and knowledge, you can achieve great results. One of the essential skills to improve your music is learning the art of mixing. Mixing involves taking individual tracks and blending them together into a cohesive and polished final mix. In this post, we will discuss the steps you need to take to make your next mixing project successful.

Import Your Stems

The first step in the mixing process is importing your stems into your DAW (Digital Audio Workstation). Stems are individual tracks that make up your song, such as vocals, guitar, drums, and bass. By importing them, you can work on them individually and adjust each track’s balance and overall sound. Once you have imported all your stems, you can begin routing them.

Route Your Audio

Routing your audio allows you to organize and control the flow of your tracks. You can route them to different outputs, busses, or effects. For example, you can route all your drum tracks to a single bus and apply compression, EQ, and reverb to them as a group. This technique can help glue together your mix and make it sound more cohesive.

Use Eq And Compression

Equalization (EQ) and compression are two of the most fundamental tools you can use in mixing. EQ adjusts the frequency balance of your tracks, and compression controls the dynamic range. You can use EQ to remove unwanted frequencies, boost specific instruments, and create separation between tracks. Compression can tighten up your drums, control the level of your vocals, and make your mix sound more polished.

Understand Plugins

Plugins are software tools used in mixing that can emulate analog hardware, provide unique sound effects, and improve your workflow. Understanding plugins is vital because they can significantly enhance your mixing skills. There are plugins for EQ, compression, reverb, delay, and many more. Knowledge of each plug-in’s functionality and how to use them will save you time and frustration and make your mix sound better.

Add Effects

Once you have balanced your tracks and applied EQ and compression, you may want to add effects to enhance your mix’s overall sound. Effects like reverb, delay, and chorus can create depth and spaciousness, while distortion and saturation can add warmth and character. However, it’s crucial to use them sparingly and in moderation to avoid over-processing your tracks. In conclusion, mixing is an essential skill that requires patience, practice, and knowledge. With the right tools and techniques, you can transform your raw tracks into a polished and professional mix. Remember to take your time and experiment with different approaches until you find what works best for your music.

Mastering Basics

To successfully stem master your own music, mastering the basics is crucial. Understand the fundamentals of EQ, compression, and reverb to enhance your music’s clarity and depth. With practice and experimentation, you’ll be able to take your music to the next level.

When it comes to music production, mastering is a crucial step before releasing your music. It is the process of preparing the final stereo mix for distribution, ensuring the song is consistent and polished with a perfect balance between all the elements. So, how can you master your own music? Here are some basic steps to get you started.

Add Final Touches

Once you have your mix ready, it’s time to add some final touches before mastering. This step involves removing any unwanted sounds, adjusting fades between tracks, and trimming the beginning and end of tracks to avoid any clicking or popping sounds. You can also correct any remaining issues and balance the sound with an equalizer.

Use Limiter

The next step is to use a limiter, which helps increase the overall volume without increasing the peaks and clipping the audio. The limiter essentially ensures that the audio stays under a certain ceiling by reducing the dynamic range of the audio. However, be careful not to overdo it, as this can cause compression and distortion in the audio.

Make Final Adjustments

Now that you have used a limiter, it’s time to make some final adjustments to your mix. This step involves fine-tuning your EQ settings, ensuring that the bass, mid, and high frequencies are well balanced and working together nicely. You can make some final adjustments to your compression and limiting settings, checking the overall level and dynamic range of your mix.

Export Final Mix

Once you are satisfied with your mastering, it’s time to export your final mix. This involves selecting the correct format, sample rate, and bit depth. You can also add metadata to your track, such as artist name, album title, and release date. Ensure that you test your final export to make sure the quality is consistent across different systems and platforms. In conclusion, mastering your own music is an essential process in music production. With these basic mastering steps, you can ensure that your music sounds professional and polished. So, go ahead and give it a shot, and let us know your thoughts in the comments below.

Eq Techniques

Achieving optimal sound quality in your music production depends largely on the EQ techniques employed in the stem mastering process. With proper EQ adjustments, you can shape the tone, clarity, and balance of each element in the mix, resulting in a polished final product that sounds great across a range of listening environments.

Understanding EQ techniques is essential to master your own music. EQ or the equalization process is used to alter or balance the frequency content of a track. By applying EQ techniques correctly, you can shape your sound to your liking and fix any problems with your mix. Two primary EQ techniques are corrective EQ and creative EQ.

Understand How To Identify Frequency Ranges

Identifying frequency ranges is crucial before you start with the EQ process. You need to understand which frequency areas need to be emphasized or reduced. Each frequency range has its particular sound character, and by identifying it, you can use it to your advantage. Here’s a table that describes the frequency range and its characteristics:

FrequencyCharacteristics
20 Hz – 60 HzThis frequency range handles bass and sub-bass sounds.
60 Hz – 250 HzThis frequency range controls bass and mid-bass sound.
250 Hz – 500 HzThis frequency range handles the presence of vocals, snare, and guitars.
500 Hz – 2 kHzThis frequency range controls the sharpness or dullness of sounds.
2 kHz – 4 kHzThis frequency range affects the clarity and crispness of vocals and guitars.
4 kHz – 6 kHzThis frequency range adds shine to your mix and handles the sibilance of vocals.
6 kHz – 20 kHzThis frequency range controls the sparkle and brilliance of your mix.

Corrective Eq

Corrective EQ is used to alter specific frequencies to fix any problems with the mix. It helps remove any unwanted sound and frequency masking between different instruments. If a particular instrument is overpowering another’s sound, corrective EQ can help reduce that frequency to bring it back to balance. It’s crucial to apply corrective EQ at the right stage of production to avoid making your mix sound unnatural.

Creative Eq

Unlike corrective EQ, creative EQ is used to enhance certain frequencies and shape your mix’s character. By boosting specific frequency ranges, you can create a particular sound character that symbolizes your music style. Creative EQ must be used in moderation, and it’s essential to prioritize your mix’s balance over creating unique sounds. In conclusion, applying the right EQ techniques can help you master your own music and create a professional-sounding mix. By understanding how to identify frequency ranges, applying corrective and creative EQ, you can create a balanced mix with excellent sound quality.

Compression Techniques

One important technique in stem mastering your own music is the use of compression. Compression can help even out the levels of different tracks in your mix and bring out details that the naked ear may not pick up on.

However, it is important to use compression sparingly and with precision to avoid overcompressing or ruining the dynamics of your music.

As a music producer, understanding how to master your own music is a necessary skill. Mastering involves tweaking various elements of the final mix to make it sound polished and professional. One key technique in mastering is compression. Compression helps balance the audio levels and ensures that no part of the mix is too loud or too soft.

Understand How Compression Works

Compression works by automatically reducing the volume of audio peaks that exceed a certain threshold. By doing this, it brings up the quieter parts of the mix, resulting in a more consistent volume level. To get the best results, aim for a compression ratio of around 2:1 to 4:1. If the ratio is too high, it can make the mix sound squashed and unnatural.

Adjusting Attack And Release

Attack and release refer to the time it takes for the compressor to activate and deactivate. Adjusting these settings can drastically affect the sound of the mix. If the attack is too fast, it can squash the transients and make the mix sound lifeless. Similarly, if the release time is too slow, it can cause the compressor to pump and breathe, resulting in a distorted sound. Aim to set attack and release times to match the tempo and rhythm of the track.

Parallel Compression, Ensuring

Parallel compression involves blending the compressed and uncompressed versions of the mix. This technique helps preserve the dynamics while still keeping the mix under control. To use parallel compression, route a copy of the mix to a separate track and apply compression to this track. Blending this track with the original mix helps achieve a balanced sound. By applying these compression techniques properly and experimenting with different settings, you will be able to master your own music with ease and achieve a professional sound.

How To Stem Master Your Own Music

Credit: www.cubasetemplates.com

Stereo Enhancement

Stereo enhancement is an essential process in stem mastering. By widening the stereo field and adding depth and dimension to the track, your music can sound fuller and more immersive. With the right techniques and tools, you can easily stem master your own music and achieve a professional sound.

Adjust Panorama

A crucial step in stereo enhancement is adjusting panorama. This technique helps to define the overall width of the stereo image and ensures that each element within the mix has its place within the image. To achieve this, you adjust the pan position of each track to get the desired stereo spread.

Widening Techniques

Widening techniques are an essential part of stereo enhancement. These techniques use various effects to push the stereo image wider, giving your mix more depth and clarity. The following are some popular stereo widening techniques:

  • Using a stereo imaging plugin like Waves S1 or PAZ Analyzer
  • Duplicating the tracks and delaying one of them
  • Using mid-side processing to separate the center and side channels and apply separate processing

Ensure Perfect Stereo Alignment

When you’re applying widening techniques, it’s crucial to ensure perfect stereo alignment. Otherwise, your mix can sound blurry and unfocused. You can use the correlation meter to ensure that the stereo image is in phase and that the center is aligned.

Creative Effects

Learn how to stem master your own music with Creative Effects. By following these simple steps, you can take your music production to the next level and create professional sounding tracks that stand out from the rest. Mastering your own music can also save you time and money in the long run.

Creative Effects When it comes to mastering your own music, adding creative effects can make all the difference between a plain, boring track and a dynamic, professional-sounding one. In this post, we’ll go over some essential creative effects, including adding reverb and delay and using ducking and volume automation. Adding Reverb and Delay Reverb and delay are classic effects that can add depth, atmosphere, and space to your music. Reverb can give your tracks a sense of place, while delay can create a sense of movement or a bouncing effect. When adding reverb or delay, consider the type of room or space you want to emulate and adjust the settings accordingly. For example, a small room will have a shorter reverb time than a large hall. In addition, you can experiment with stereo width and EQ settings to further shape the sound. Ducking and Volume Automation Ducking and volume automation are techniques used to control the levels of different elements in your mix. Ducking is the process of reducing the volume of one track when another track is playing, which can help create more space and clarity in the mix. Volume automation, on the other hand, involves adjusting the volume of individual tracks over time. This can be helpful to bring out certain elements and create a more dynamic mix. Both of these techniques require careful attention and experimentation to get just right. In conclusion, creative effects are essential tools in mastering your own music. Adding reverb and delay, and using ducking and volume automation can help add depth and clarity to your tracks, and make all the difference in creating a professional-sounding mix. Experiment with these techniques, and don’t be afraid to push the boundaries of what’s possible. With a bit of practice and creativity, you can create music that truly stands out.

Mastering Your Monitors

Learn how to stem master your own music by mastering your monitors. Understanding the technical aspects of your studio monitors and taking proper care of them can greatly improve the accuracy and clarity of your mixes.

When it comes to mastering your own music, one of the most important steps is to ensure the final mix sounds great on a variety of playback devices, such as speakers or headphones. This is where the importance of monitor speakers comes in. In this article, we’ll discuss how to choose the right monitor speakers and how acoustic treatment can improve your mastering process.

Choosing The Right Monitor Speakers

It’s essential to choose the right pair of monitor speakers, as they are the most crucial pieces of equipment for mastering your tracks. However, with so many options available in the market, it can be daunting to make a decision. Here are some factors to consider when choosing the right monitor speakers:

  1. Frequency response: Look for a speaker that has a broad and flat frequency response to ensure an accurate representation of your mix.
  2. Size and configuration: The size and configuration of the monitor speaker determine the sound output. Pairing a subwoofer with your speakers can help improve the bass response.
  3. Budget: Monitor speakers can be expensive, so consider your budget before making a purchase. However, keep in mind that the cost could determine the quality and accuracy of the sound output.

Acoustic Treatment

Acoustic treatment is an essential step in any mastering process. It helps in controlling the sound reflections and ensures that the sound you hear is as accurate as possible. Here are some ways on how to improve your acoustic treatment:

  • Invest in acoustic treatment panels: These panels help absorb sound reflections and enhance the accuracy of what you hear.
  • Check speaker placement: Ensure that your speakers are not against a wall or in a corner, as this can cause excessive bass and affect your judgment of the overall mix.
  • Use bass traps: Bass traps help control low frequencies and improve the acoustics of your room.

In conclusion, mastering your monitors is crucial to ensuring an accurate and well-balanced mix. Choosing the right monitor speakers, along with proper acoustic treatment, can enhance the accuracy of what you hear and improve the overall quality of your music.

How To Stem Master Your Own Music

Credit: emastered.com

Frequently Asked Questions Of How To Stem Master Your Own Music

How Do I Master My Own Music?

To master your own music, you need to have a good understanding of the technical aspects of sound engineering and be equipped with the right tools. You can use software such as EQ and compression to adjust the levels and tone of the audio.

You will also need to have a good listening environment and reference tracks to compare your work. Practice and experimentation are key to mastering your music effectively.

Should You Master Your Own Music?

Yes, mastering your own music can be a cost-effective solution and offers complete control over the final product. However, it requires a certain level of expertise and knowledge in audio engineering. It’s recommended to seek professional help if you lack the necessary skills or experience.

Do You Need Stems To Master A Song?

No, you do not necessarily need stems to master a song. However, having access to the individual tracks can provide greater flexibility and control over the final result of the master. Ultimately, it depends on the specific needs and preferences of the mastering engineer or producer.

How Much Does It Cost To Master A Song?

The cost to master a song varies based on the experience and skill level of the mastering engineer, the complexity of the song, and the length of the track. On average, expect to pay around $50 to $150 per song.

However, some may charge up to $1,000 or more. It is recommended to research and compare prices before selecting a mastering engineer.

Conclusion

After reading this guide, you now have the necessary knowledge to start mastering your own music. Remember to have patience with the process and take the time to listen to your tracks carefully. Investing in quality mastering equipment and software can also make a difference in the final result.

With these tips and techniques, you can ensure that your music sounds professional and ready for the world to hear. Keep practicing and refining your skills, and you’ll soon master the art of music mastering.

More in our Mastering guide.

Categories
Archive

How to Mix Vocals for Beginners

To mix vocals for beginners, adjust volume levels and use equalization to enhance the clarity of the vocal track. As a beginner, it is important to start with the basics of vocal mixing before moving on to more advanced techniques.

Mixing vocals requires a good ear and an understanding of the different aspects that go into creating a great vocal mix. We will cover some essential tips for beginners on how to mix vocals and achieve a professional sound. We will cover techniques related to equalization, compression, and other effects that can be added to enhance the vocals.

With these tips, you can take your vocal mixing skills to the next level and create professional-quality vocal tracks.

How to Mix Vocals for Beginners

Credit: emastered.com

1. Setting Up Your Mixing Environment

To achieve the desired vocal mix, it is imperative to set up the right environment. Most seasoned audio engineers and producers will tell you that getting a great mix is 50% environment and 50% technical skills. Below are some tips to help you set up your mixing environment.

Create A Dedicated Mixing Space

The first step to achieving a great vocal mix is creating a dedicated mixing space. This space should be exclusively designed for mixing music to minimize distractions and external noises. Set up your mixing console, computer, and other mixing tools in this space.

Ensure Proper Speaker Placement

The placement of your speakers matters a lot when mixing vocals or any other instrument. Your mixing speakers should be placed in a way that optimizes the soundstage and imaging. Ideally, the center of the speakers should be at the same distance from where you sit, forming an equilateral triangle.

Choose High-quality Monitoring Devices

Your monitoring devices are one of the most critical pieces of equipment to consider when mixing vocals. Choosing high-quality speakers, headphones, or a combination of both is essential to achieving a good vocal mix. Cheap or poor-quality monitoring devices can lead to wrong tonal balances, which can affect the mixing process.

In conclusion, setting up a suitable environment for mixing is crucial in achieving great vocal mixes. By creating a dedicated space for mixing, optimizing speaker placement, and choosing high-quality monitoring devices, you can be sure of getting the best out of your vocal mixing process.

2. Preparing Your Vocals For Mixing

To prepare your vocals for mixing as a beginner, make sure to start by recording clean and quality audio. Next, identify any unwanted background noise or breaths and remove them. Then, adjust the volume and EQ of each track to create a balanced sound.

Preparing your vocals for mixing is an essential part of the music production process. It requires careful attention to detail and proper organization to ensure that the final mix is of high quality. Here are some H3 heading that will make your work easier on the subtopic ‘Preparing Your Vocals for Mixing.’

Essential Tools For Vocal Editing

Before you start mixing your vocals, it is important to have the right tools at your disposal. This includes a digital audio workstation (DAW) such as Logic Pro or Ableton Live, a microphone, and an audio interface. You also need plugins such as EQ, compression, and reverb to shape the sound of your vocals and create a professional mix.

Organizing And Naming Your Vocal Tracks

To avoid confusion and streamline your workflow, it’s important to organize and name your vocal tracks properly. Start by labeling each track with the name of the vocal part, such as lead vocals, backing vocals, and harmonies. You can also color-code each track to make it easier to identify them. Additionally, it’s important to label your regions in the arrangement window with the same names to stay organized.

Cleaning Up Your Vocal Tracks

Cleaning up your vocal tracks is another crucial step in preparing your vocals for mixing. This includes removing any unnecessary noises such as clicks, pops, and breaths. You can also use EQ to reduce any unwanted frequencies and make sure each track cuts through the mix. It’s important to listen carefully to your vocals and edit out any issues. When you are done recording, you can use a noise reduction software to reduce unwanted background noise. In conclusion, preparing your vocals for mixing requires proper organization, attention to detail and the right tools. Make sure you have everything you need before you start, and don’t forget to organize and clean up your vocal tracks. With these steps completed, you are ready to move onto mixing!

3. Understanding Eq And Compression

To effectively mix vocals, beginners should understand and utilize EQ and compression. EQ helps to balance the frequencies and tone of the vocals, while compression helps to control the dynamics and make the vocals sound more polished. It’s important to use these techniques in moderation and to constantly listen and adjust as needed.

As a beginner mixing vocals, understanding EQ (equalization) and compression is vital. EQ is a tool that you use to adjust the tonal balance of your vocals. Meanwhile, compression is a process that helps even out the dynamics in your vocals. In this section, we’ll take a closer look at how these two tools work hand in hand to produce great vocal mixes.

How Eq Affects Your Vocal Sound

EQ is used to adjust the frequencies in your vocals, making them sound clearer and more defined. It’s essential to start by identifying the frequency ranges that your vocal recording needs. For instance, if your vocal recording lacks clarity in the high-frequency range, you’ll need to boost the treble frequencies. Conversely, if your recording sounds muddy and lacks presence, you’d want to cut some of the low frequencies. It’s worth noting that you should avoid over-boosting or cutting any frequency, as it can negatively impact your vocal recording. Always aim for subtle adjustments, typically in the range of ±3dB or less.

Applying Compression To Your Vocals

Compression helps control the vocal dynamics, making them sound more balanced and consistent. When applied correctly, compression can enhance the overall sound of your vocal recording and make it stand out from the mix. Every compressor has different settings, and it’s essential to understand what each setting does and how it affects your vocals. The most crucial settings to pay attention to are the threshold, ratio, attack, release, and makeup gain. For instance, the threshold determines the level at which the compressor starts to apply gain reduction. The ratio, on the other hand, controls the amount of gain reduction, and the attack and release settings control how quickly the compressor begins and stops compressing.

Setting Up Parallel Compression For Your Vocals

Parallel compression, also known as New York compression, is when you blend the original uncompressed vocal recording with a heavily compressed copy. This technique is useful as it retains the dynamics and depth of the original recording, while the compressed track adds thickness and weight to the vocals. To set up parallel compression, first duplicate your vocal track, then apply a significant amount of compression to one of the tracks. Then blend the two tracks, adjusting the volume and panning to taste. Remember to keep the compressed track lower in volume than the original to avoid over-compressing your vocals. In conclusion, understanding EQ and compression is crucial to achieve a great vocal mix. Remember to use EQ to adjust the tonal balance of your vocals subtly. Additionally, use compression to control the dynamics of your vocals, and finally, leverage parallel compression to add thickness and depth to your vocals.

How to Mix Vocals for Beginners

Credit: m.youtube.com

4. Working With Effects On Your Vocals

Learn how to add effects to your vocals and enhance your mix with this beginner’s guide. Discover techniques for creating a polished sound using tools like reverb, delay, and compression.

In the world of music production, mixing vocals can be an intimidating process, especially for beginners. However, by understanding the basics of effects processing, you can elevate your vocal recordings to a higher level of quality. This fourth section of our guide on mixing vocals for beginners focuses on working with effects on your vocals. We’ll cover how to use effects like reverb, delay, chorus, and flanger in your vocal mix. So, let’s dive in!

Using Reverb To Create A Vocal Ambience

Reverb is an effect that simulates the natural echo and sustain of a sound in a physical space. In vocal mixing, reverb can add depth and dimension to a vocal recording. To use reverb in your vocal mix, follow these steps:

  • Create a new reverb track or insert a reverb plugin on your vocal track.
  • Adjust the reverb length, decay time, and wet/dry mix to your desired settings. A longer decay time will create a larger sense of space, while a shorter decay time will create a smaller space.
  • Adjust the pre-delay to create a gap between the original vocal and the reverb effect.
  • Use EQ to filter out unwanted frequencies in the reverb.

Applying Delay For Added Texture

Delay is an effect that creates repeating echos of a sound. In vocal mixing, delay can add texture and interest to a vocal recording. To use delay in your vocal mix, follow these steps:

  • Create a new delay track or insert a delay plugin on your vocal track.
  • Adjust the delay time and feedback settings to your desired settings. A longer delay time will create a greater sense of space between the original vocal and the repeated echos. A shorter delay time will create a tighter sense of space.
  • Use EQ to filter out unwanted frequencies in the delay.

Using Chorus And Flanger For Your Vocals

Chorus and flanger are effects that create a sweeping, modulating sound by manipulating the pitch and timing of a sound. In vocal mixing, chorus and flanger can add a unique and interesting quality to a vocal recording. To use chorus and flanger in your vocal mix, follow these steps:

  • Create a new chorus or flanger track, or insert a chorus or flanger plugin on your vocal track.
  • Adjust the rate and depth settings to your desired settings. A higher rate and depth will create a more pronounced effect.
  • Use EQ to filter out unwanted frequencies in the effect.

By following these steps, you can effectively use reverb, delay, chorus, and flanger to add depth, texture, and interest to your vocal mix. Experiment with different settings to find the perfect sound for your vocals, and remember to use these effects tastefully to enhance, not detract from, the quality of your recordings.

5. Balancing Your Vocals In The Mix

Balancing vocals is a crucial step in mixing for beginners. It involves adjusting the volume levels of different vocal tracks to achieve a smooth and clear sound. Make sure to use EQ and compression techniques to enhance the vocals and make them stand out in the mix.

Balancing your vocals in the mix is key to ensuring that they sit in the right place in relation to the other instruments and musical elements in your track. There are a few important techniques you should consider when balancing your vocals, including avoiding conflicting frequencies, panning your vocal tracks for balance, and setting up automation for dynamic changes.

Avoiding Conflicting Frequencies

When mixing your vocals, it is important to keep an ear out for any frequencies that might be conflicting with other elements in your track. This can happen when different instruments or elements in your mix occupy the same frequency range, causing them to clash and create a muddy or cluttered sound. To avoid this, try using EQ to carve out space for your vocals in the frequency spectrum, while also dialing back elements that might be competing for the same sonic space.

Panning Your Vocal Tracks For Balance

Another great technique for balancing your vocals in the mix is to use panning to position them in the stereo field. By panning your vocal tracks to different positions, you can create a sense of depth and space that helps give your mix a more dynamic and immersive quality. For example, you might pan your lead vocal straight up the middle, while panning backing vocals slightly to the left and right to create a wider stereo image.

Setting Up Automation For Dynamic Changes

Finally, when you are balancing your vocals in the mix, it is important to consider how you want to control their volume and other parameters over time. One of the best ways to do this is by setting up automation for dynamic changes that can help accentuate different parts of your vocal performance. For example, you might use automation to gradually increase the volume of your vocals during a chorus or outro, or to add subtle effects like reverb or delay that help create a sense of space and dimension in your mix. By keeping these techniques in mind when balancing your vocals, you can create a mix that sounds clear, dynamic, and well-rounded, with vocals that sit in just the right place in your overall production. So, experiment with these tips and see how they can help bring your vocals to life in your next mix!

How to Mix Vocals for Beginners

Credit: m.youtube.com

6. Getting Your Vocal Mix Ready For Mastering

Learn how to get your vocal mix ready for mastering with these tips for beginners. Ensure a polished and professional sounding final product by following these guidelines for mixing vocals.

Once you have mixed your vocals and you are happy with the result, the next step is to get your vocal mix ready for mastering. This is a crucial step in the process of producing high-quality vocals, and it involves making a few tweaks to your mix before sending it off for mastering. Here are some tips to help you get your vocal mix ready for mastering.

Using A Reference Track For Comparison

Using a reference track can help you compare your vocal mix to a professionally mixed and mastered track. This can help you identify any areas where your mix may be lacking or areas where it is too loud. To use a reference track, choose a song that has similar instrumentation, dynamics, and overall feel to your mix. Make sure the reference track is of high quality and listen to it using the same speakers or headphones that you used to mix your vocals.

Adjusting Loudness Levels With Limiters

Adjusting the loudness levels of your vocal mix is important for a consistent and cohesive sound. One way to do this is by using limiters. A limiter will prevent your audio from going beyond a certain volume threshold, ensuring that it doesn’t clip or distort. This can give your vocals a more professional sound and help them stand out in the mix.

Using Eq For Final Touches On Your Vocal Mix

Equalization (EQ) can be used for final touches on your vocal mix. EQ can help you refine your vocals to sound more clear, focused, and polished. Use EQ to remove any frequencies that are causing muddiness or harshness, and boost frequencies that add warmth and presence to your vocals. Keep in mind that subtle EQ adjustments can make a big difference, so take your time when making these final touches. In conclusion, taking the extra time to get your vocal mix ready for mastering can make a huge difference in the overall quality of the final product. By using a reference track, adjusting loudness levels with limiters, and using EQ for final touches, you can ensure that your vocals sound professional and polished. Remember to take your time and make subtle adjustments until you are happy with the result.

Frequently Asked Questions On How To Mix Vocals For Beginners

How Do You Start Mixing Vocals?

To start mixing vocals, first listen to the recorded vocals and create a plan for how to approach the mix. Use EQ to remove any unwanted frequencies and enhance the desired ones. Experiment with compression to balance the overall sound and add effects such as reverb or delay to add depth.

Finally, ensure the vocals sit well in the overall mix.

How Do You Fit Vocals Perfectly In Mix?

To fit vocals perfectly in a mix, use EQ to remove unwanted frequencies and enhance the vocals, compress to control the dynamics, adjust levels for balance, use reverb or delay to create space, and use automation to adjust the levels and effects throughout the song.

At What Volume Should I Mix Vocals?

Mix vocals at a volume that allows them to sit comfortably in the mix without overpowering other elements. There is no one-size-fits-all answer, as it depends on the style of the music and personal preferences. Strive for clarity and balance, and use reference tracks as a guide.

Why Do My Vocals Sound Boxy?

Boxy vocals can be caused by a number of factors including poor microphone placement, room acoustics, and EQ settings. To fix it, try adjusting the EQ levels to remove excess frequency buildup in the lower-mid range, or consider using a different microphone or recording space.

Conclusion

To sum it up, mixing vocals can be a daunting task for beginners, but it doesn’t have to be. By following the guidelines outlined such as starting with a clean and organized session, using EQ and compression, and paying attention to levels, panning, and effects, you can achieve a professional-sounding vocal mix.

Remember to use your ears and trust your instincts, and don’t be afraid to experiment and try new things. With practice and patience, you can become a skilled vocal mixer in no time.

Categories
Archive

What Is Eq In Music Production

EQ or Equalization in music production is the process of adjusting, boosting, or cutting specific frequencies in a sound recording. It balances different elements of sound and enhances the overall quality of a recording.

Also, in simpler terms, EQ allows a producer or engineer to make certain instruments louder or softer, adjust the tone of a recording, and remove unwanted sounds or frequencies. EQ is an essential tool in music production, allowing engineers to fine-tune recordings and create a polished final product.

Related reading: Music Production Services and Best Music Production Forums. For background, see the Wikipedia article on Equalization.

Moreover, without EQ, recordings may sound dull, muddy, or unbalanced. EQ can work on a variety of elements in a recording, such as vocals, drums, guitars, and keyboards, to create a cohesive and well-balanced mix. As an SEO-friendly content writer expert, it is important to explain technical terms like EQ in a simple and understandable way to engage the audience.

Defining Eq

In addition, EQ, short for equalization, is a tool that allows music producers to adjust the balance between different frequencies in a recording. By boosting or cutting specific frequencies, producers can create a more balanced and polished sound. Understanding how to use EQ is crucial for achieving high-quality music production.

Furthermore, EQ, short for Equalization, is a fundamental tool in music production used to manipulate and adjust the frequency balance of audio recordings. In simple terms, EQ enhances or cuts certain parts of an audio signal to make it fit better in a mix. By tweaking the EQ settings, you can alter the tone, clarity, and balance of an audio track.

Types Of Eq

Additionally, there are two main types of EQ: graphic and parametric EQs.

  1. Graphic EQ: A graphic EQ typically consists of several bands of fixed frequencies that you can boost or cut. This type of EQ is often used in live sound systems or audio playback devices to enhance or remove certain frequencies.
  2. Parametric EQ: A parametric EQ provides the user with much more precise control than a graphic EQ. It allows you to choose the specific frequency of the EQ and then adjust the gain and bandwidth of that frequency. This type of EQ is used for more delicate mixing and mastering tasks where accuracy is crucial.

Conclusion

In conclusion, EQ is an essential tool in the music production process. By using EQ, you can shape the tone and texture of an audio track, giving it life, character. An edge that stands out in the mix. Knowing the different types of EQ is essential to get started, and experimenting with different settings is key to discovering what works best for your sound.

How Does Eq Work?

Equalization, commonly known as EQ, is the process of adjusting the balance between different frequency components of an audio signal. In simpler terms, it is the tool that allows you to shape sound by controlling its frequency response. EQ can remove unwanted frequencies, boost certain sounds, or enhance clarity and presence.

Frequency Spectrum for EQ in Music Production

The frequency spectrum is the range of audible frequencies that human ears can hear. The spectrum ranges from low frequencies (20 Hz) to high frequencies (20,000 Hz). EQ works by selectively boosting or cutting specific frequencies in this spectrum.

Audio signals are made up of several frequency components that contribute to the overall sound. EQ allows you to adjust the volume of each component to achieve the desired sound. For example, if you want a bass guitar to stand out in a mix, you can boost its low frequencies.

Adjusting Eq

You make EQ adjustments with frequency bands that correspond to specific areas of the spectrum. You can adjust each band to raise or lower the frequencies within that range. Common types of EQ bands include:

  • High-pass filter: Cuts off low frequencies below a certain threshold. Useful for removing unwanted low-frequency noise.
  • Low-pass filter: Cuts off high frequencies above a certain threshold. Useful for reducing harshness or sibilance.
  • Parametric EQ: Allows for precise adjustments of frequency, frequency range, and Q (sharpness of the filter curve).
  • Graphic EQ: Allows for adjustments to several fixed frequency bands simultaneously.

It is important to note that excessive use of EQ can result in a loss of audio quality and even introduce unwanted artifacts. It is always best to start with minor adjustments and use EQ to enhance, not replace, the audio.

Using Eq In Music Production

EQ or Equalization in music production refers to the process of adjusting the balance between different frequencies of an audio signal. This is done to ensure that the music sounds good across various devices and environments. EQ can also enhance specific instruments or parts of the audio track.

If you’re a music producer, then you will know that EQ is a crucial tool for shaping the sound of your productions. EQ, or equalization, is a process used to adjust the frequency response of an audio signal to improve its tonal balance and clarity. Producers use EQ to enhance instrumentation, mixing, and mastering. In this blog post, we will explore how EQ can work in these three areas and provide tips on how to get the best results.

Enhancing Instrumentation for EQ in Music Production

EQ can enhance the sound of individual instruments in your mix. For example, you can boost the bass frequencies of a kick drum to make it more prominent in the mix, or cut the harsh high frequencies of a guitar to make it sound warmer and more natural. EQ can also fix frequency problems in individual tracks, such as removing unwanted bass rumble from a vocal recording. When using EQ on individual tracks, it’s important to remember that every instrument will have its own unique frequency range. Boosting or cutting the wrong frequencies can lead to a muddy or thin sound. It’s best to use a spectrum analyzer to identify the frequencies that need to be boosted or cut and then adjust accordingly.

Mixing

EQ is also an essential tool for mixing. During the mixing process, EQ balances the frequency content of each track in the mix. For example, you can use EQ to cut the bass frequencies of a piano track to make it sit better with the bass guitar track. You can also use EQ to create space in your mix by cutting the frequencies of one track that are clashing with another. This allows each track to be heard more clearly. When mixing with EQ, it’s important to consider the overall balance of the mix. Boosting or cutting too much in one track can affect the overall balance of the mix. It’s best to use subtle EQ adjustments and make small changes to each track until the mix sounds good as a whole.

Mastering

EQ is also used in the mastering stage to finalize the tonal balance of a song. During mastering, EQ balances the frequency content of the entire mix for a cohesive sound. For example, you can use EQ to boost the high frequencies of a mix to add sparkle and energy, or cut the low frequencies to remove any unwanted rumble. When mastering with EQ, it’s important to use a high-quality EQ plugin and make subtle adjustments. Overuse of EQ during mastering can lead to a squashed and lifeless sound.

It’s best to use a reference track to compare the tonal balance of your mix to a professionally mastered track and make small adjustments until the two tracks sound similar in tonal balance. In conclusion, EQ is an essential tool for music producers. It can enhance the sound of individual instruments, balance the frequency content of a mix, and finalize the tonal balance during mastering. By using EQ, you can create professional-sounding productions that stand out from the crowd.

What Is Eq In Music Production

Credit: blog.native-instruments.com

Advanced Techniques for EQ in Music Production

EQ or equalization helps balance different frequencies in a track, and it’s an essential aspect of music production. Advanced EQ techniques can elevate the quality of your music by bringing out specific sounds and eliminating unwanted noise. This results in a more refined and polished sound.

In music production, EQ or equalization is one of the most critical tools used to tweak and shape sounds. It enables a producer to boost or reduce volume levels of specific frequencies to alter the sound character. While basic EQ techniques can be easy to learn, advanced EQ techniques can be more challenging. In this blog post, we will discuss two advanced EQ techniques that producers can use to achieve better-sounding mixes.

Surgical Eq

Surgical EQ is a technique for making precise cuts and boosts on certain frequencies. It involves isolating frequencies that clash with other instruments or vocals and surgically reducing or removing them. In doing so, it clears up sonic space and makes room for other instruments to breathe. Producers can also use surgical EQ to reduce harshness or increase the brightness of a sound. Surgical EQ is best applied through a parametric EQ. A parametric EQ allows a producer to zero in on specific frequencies and adjust the bandwidth or Q-factor around it. By narrowing the Q-factor, a producer can isolate and remove unwanted frequencies without affecting the surrounding sounds.

Parallel Processing for EQ in Music Production

Parallel processing refers to the technique of duplicating a track and manipulating one of them differently from the other. In the case of EQ, this means boosting or cutting certain ranges of frequencies. By doing this, a producer can create a unique and fuller-sounding mix. To use this technique, producers will need to duplicate a track and apply an EQ differently to each of them. For instance, if the original track sounds dull, a producer can boost the high frequencies on the duplicated track. They can then blend the two tracks together, achieving a brighter and fuller sound. In conclusion, EQ is a vital tool in music production. Producers can use surgical EQ and parallel processing to more precisely sculpt their mixes. By using these techniques, they can achieve more nuanced and polished sonic textures.

Common Mistakes When Using Eq

EQ, or equalization, is an essential tool in music production that allows you to adjust the levels of different frequencies in a sound. However, common mistakes like overusing EQ or not properly understanding how it works can actually harm your mix.

It’s important to use EQ sparingly and with intention, while also taking the time to learn how to properly use it in your mixes.

EQ or equalization is an essential tool in music production that allows you to adjust the tonal balance of a track by boosting or cutting specific frequencies. It enhances certain elements of a mix and gives a more balanced sound. But like any tool, EQ needs to be used properly to avoid common pitfalls and mistakes that can compromise the quality of your mix.

Over-equalizing

One of the most common mistakes when using EQ is overdoing it. While it may be tempting to keep tweaking the EQ, too much of anything can be bad. Overusing EQ can lead to an unnatural sound that is harsh on the ears and lacks clarity. To avoid over-equalizing, start by making small adjustments, and listen to the changes as you go. Always trust your ears and use EQ only when necessary. Remember, not every track requires EQ, and sometimes it’s better to leave things as they are.

Not Listening Closely

Another mistake that producers often make is not listening closely enough to their tracks. It’s easy to get carried away by tweaking parameters without really understanding what the track needs. To avoid this mistake, take the time to listen to your mix as a whole. Pay attention to how each instrument fits into the mix and what changes need to be made to achieve a balanced and cohesive sound. If you’re not sure what needs to be done, try taking a break from the track and come back to it with fresh ears.

Conclusion

Avoiding common mistakes when using EQ can take some practice, but once you get the hang of it, you’ll be able to achieve a more natural and polished sound in your mixes. Remember to take small steps, listen closely, and trust your ears. With time and practice, you’ll be able to use EQ to its full potential, and take your mixes to the next level.

What Is Eq In Music Production

Credit: blog.bandlab.com

Eq Plugins And Hardware

EQ plugins and hardware are essential tools used by music producers to control and balance the frequency content in their mixes. They allow for adjustments to be made to specific frequency ranges, resulting in a more polished and refined sound.

If you’re looking to produce music that sounds professional, then you need to understand the importance of equalization (EQ) in music production. EQ is the process of adjusting the balance between frequency components within an audio signal. EQ plugins and hardware are two options that music producers have at their disposal to achieve a balanced mix.

Types Of Eq Plugins

EQ plugins are software-based tools that help producers to modify and adjust audio frequency levels within their digital audio workstation (DAW). There are different types of EQ plugins available, including:

  • Graphic EQ: This plugin offers a graphical interface, which allows producers to adjust different frequencies using sliders on a graph. Each slider represents a particular frequency range, and producers can change the levels of the frequencies by dragging the sliders up or down.
  • Parametric EQ: This plugin is more advanced than graphic EQ and allows producers greater control when adjusting frequency levels. Producers can adjust various parameters such as frequency, gain, and bandwidth to achieve a more surgical EQ.
  • Dynamic EQ: This plugin is similar to parametric EQ. But it also includes a dynamic section, which allows producers to adjust the EQ based on the input signal.

Hardware Eq

In addition to using EQ plugins, music producers can also use hardware EQ to achieve a desired sound. Hardware EQ is a physical device that allows producers to fine-tune audio frequencies using dedicated analog controls. Hardware EQs come in different shapes, sizes, and configurations, including:

TypeDescription
Graphic EqualizerThis hardware EQ is similar to graphic EQ plugins, and it has multiple bands with adjustable sliders.
Parametric EqualizerSimilar to parametric EQ plugins, this hardware EQ allows producers to adjust frequency, gain, and bandwidth with dedicated knobs.
Shelf EqualizerThis hardware EQ adjusts all frequencies above or below a certain point using a shelf control.

While hardware EQs can provide a unique analog sound, they can be expensive and time-consuming to use for every track in a production. EQ plugins are a more cost-effective solution for most producers, offering precise control and flexibility within their DAW. In conclusion, EQ plugins and hardware are two powerful tools that music producers can use to achieve professional-level audio quality. Which type to use depends on individual preference, budget, and the desired sound outcome.

What Is Eq In Music Production

Credit: www.levelsmusicproduction.com

Frequently Asked Questions For What Is Eq In Music Production

How Do You Use Eq In Music Production?

EQ in music production is used to adjust the frequency balance of a sound source. It can boost or cut certain frequencies to enhance the clarity and presence of instruments or vocals. EQ is essential in mixing and mastering processes to create a balanced and polished sound.

Does Eq Make Music Sound Better?

Yes, EQ or equalization can make music sound better by adjusting the levels of different frequencies in the audio. By enhancing or reducing specific frequencies, you can improve the clarity, balance, and overall quality of the sound. However, it’s important to use EQ properly and not overdo it, as excessive equalization can lead to sound distortion and other issues.

What Is An Example Of Eq In Music?

EQ is short for equalization, which is the process of adjusting sound frequencies. An example of EQ in music is when a sound engineer uses an EQ plugin to boost or reduce certain frequencies of a vocal or instrument to make it sound more balanced or prominent in a mix.

What Is The Best Eq Setting For Music Production?

The best EQ setting for music production depends on the specific track and the sound you want to achieve. However, a general rule of thumb is to start by cutting any frequencies that are not needed and boosting the desired sound.

Ensure that there is no frequency masking or too much resonance. Experiment with different settings and trust your ear for the final decision.

Conclusion

Knowing about EQ in music production is an essential skill to possess for any aspiring music producer. Understanding EQ helps in achieving a balanced and harmonious mix. By simply utilizing EQ, it is possible to achieve clarity in the vocals, balance within the instruments, and make the overall sound more professional.

Always remember to experiment with EQ, trust your ears and always tweak it until it sounds just right. With the proper mix, your tracks will stand out and be recognized amongst the talented crowd of musicians.

Categories
Archive

Sound Design Tips Xfer Serum

Sound Design Tips for Xfer Serum include using the LFO, noise oscillator, and wavetables creatively. Serum allows for precise sound shaping and automation for impressive sound design.

Also, Xfer Serum is a powerful synthesizer plug-in that is used to create unique and original sounds. Also, the plug-in has become popular among music producers for its ability to produce high-quality sounds with ease. With Xfer Serum, sound design is streamlined and efficient, allowing producers to focus more on creativity than technicality.

Related reading: Serum Preset Bundle and Serum Presets Ultra. For background, see the official Xferrecords website.

Moreover, this guide will explore some sound design tips to help you make the most of Xfer Serum’s features. In addition, we will look at how you can use the LFO, noise oscillator, and wavetables creatively to develop new sounds and explore the vast possibilities of this synthesizer.

Sound Design Tips Xfer Serum

Credit: www.productionmusiclive.com

Tip 1: Exploring Pre-built Wave Tables

In addition, to add depth to your sound design in Xfer Serum, try exploring pre-built wave tables. For example, these tables provide a great starting point for creating unique and complex sounds that can enhance your production and take it to the next level.

Furthermore, as a sound designer, exploring pre-built wave tables can save you a lot of time and effort. As a result, Xfer Serum comes with numerous wave tables that you can import into your project. The process of importing wave tables into Serum is simple and straightforward.

Import Wave Tables Into Serum

Additionally, to import a wave table into Serum, simply click on the drop-down menu labeled “Menu” and click on “Show Serum Presets Folder.” After that, open the folder labeled “Tables” and drag and drop the wave table you want to import into Serum.

Selecting The Right Wave Table for Xfer Serum

Also, choosing the right wave table can make the difference between a bland sound and an angelically rich one. However, with hundreds of wave tables available in Xfer Serum, it can be overwhelming to choose the right one for your project. A good place to start is by listening to the various wave tables that come with Serum, and choosing the one that best fits the mood and style of your project. Moreover, you can experiment with different wave tables to find unique and compelling sounds.

Angelically Rich Sound With Choral Voice Wave Table

Moreover, one of the most useful wave tables for creating ethereal and angelic sounds is the Choral Voice wave table. Then, this wave table contains the harmonics of a choir. When modulated correctly, it can create a heavenly pad or choir-like sounds. You can experiment with different harmonic tables in conjunction with the Choral voice wave table to create unique and inspiring sounds. In conclusion, exploring pre-built wave tables is a great way to save time and effort in sound design. Selecting the right table and modulating it creatively can give you satisfying results.

Sound Design Tips Xfer Serum

Credit: www.cfa-sound.com

Tip 2: Independent Filters

In addition, using independent filters is a great way to create unique and distinctive sound designs in Xfer Serum. In short, by separating the filters, you can manipulate them independently, resulting in textures and tonalities that are not possible with a single filter. This tip can help you take your sound design to the next level.

If you are looking to create unique and interesting sounds while using Xfer Serum, then this tip is for you. Furthermore, independent filters are a powerful feature in Xfer Serum that can help you produce some truly amazing results.

Identifying Filters for Xfer Serum

Before you can apply independent filters, it’s important to understand the different types of filters available in Xfer Serum. Additionally, there are four main filter types: low-pass, high-pass, band-pass and notch filters. Each filter type has its unique characteristics that can help you achieve different sound effects.

Applying Distortion Filters for Xfer Serum

Also, once you have identified the filters you want to use, adding distortion can help bring your sounds to life. You can apply distortion filters to your sounds by adjusting the distortion knob on Xfer Serum’s distortion filter. This will add harmonics to your sound, making it more complex and interesting.

Extending The Glue With Filter Separation for Xfer Serum

To make your sound even more dynamic and unique, you can use the filter separation feature in Xfer Serum. This feature allows you to separate the filter cutoff from the filter resonance, enabling you to create sounds that are more complex and layered. You can accomplish this by right-clicking on the filter cutoff knob and selecting ‘enable separation’. By taking advantage of Xfer Serum’s independent filters feature, you can create sounds that are truly one-of-a-kind. By identifying filters, applying distortion, and using filter separation, you can add depth and complexity to your sound design. Start experimenting with these tips today and see what you can create!

Tip 3: The Power Of Modulation Control

Modulation control is a powerful tool in sound design with Xfer Serum. By adjusting parameters such as LFO rate and depth, filter cutoff, and oscillator phase, you can create unique and dynamic sounds that add depth and character to your music.

Tip 3: The Power of Modulation Control As you continue to learn sound design in Xfer Serum, it’s important to keep in mind the power of modulation control. This is one of the key features of Serum that sets it apart from other synthesizers. In this section, we’re going to explore how you can utilize modulation control to create truly unique and expressive sounds. Global View of Xfer Serum Modulation Potential Before we dive into the specifics of modulating filters, effects, and oscillators, it’s important to get a global view of Xfer Serum’s modulation potential.

Practical Tips for Xfer Serum

Serum offers a wide range of modulation sources and destinations that can be assigned to various parameters. You can even use modulation to control other modulators! Take some time to experiment with the various options and get familiar with the overall modulation capabilities of Serum. Explore Serums Four Envelopes Now that you have a general understanding of Serum’s modulation potential, let’s explore the four envelopes that are available. These envelopes can be used to modulate various parameters such as filter cutoff, amplitude, and more. Experiment with different envelope shapes and rates to create unique and expressive sounds.

Remember to think creatively and try modulating different parameters to see how it affects the overall sound. Using LFOs for Creating Random and Expressive Sounds LFOs (Low Frequency Oscillators) are another powerful modulation source in Serum. They can be used to create random and expressive sounds by modulating parameters such as filter cutoff, pitch, and even effects like reverb. Experiment with different LFO shapes and rates to find the perfect modulation for your sound. Don’t be afraid to get creative and try modulating multiple parameters with a single LFO for even more expressive sounds. With the power of modulation in Xfer Serum, the possibilities are truly endless!

Tip 4: Dimension Expand Button And Effects Rack

Tip 4: Dimension Expand Button & Effects Rack

If you want to take your sound design in Xfer Serum up a notch, then Tip 4 is just for you. With the Dimension Expand button and Effects Rack, you can achieve a distinct sound that makes your music stand out.

Optimizing Serum With Dimension Expand Button

One of the key features of Xfer Serum is the Dimension Expand button, which allows for widening the stereo field. By selecting the button on any oscillator, you can create a wide and immersive sound that occupies the entire frequency spectrum. With this feature, you can achieve a bigger and fuller sound compared to regular stereo widening plugins.

To optimize the dimension expand button for better sound design, try experimenting with different settings, such as the size, mix, and width controls. You can further enhance the stereo field by applying LFO and modulation effects to the dimension expand button.

Effects Rack Overview for Xfer Serum

The Effects Rack is another powerful feature in Xfer Serum that allows you to apply a combination of effects to your sound. From reverb and delay to distortion and filtering, the effects rack offers a wide range of options to achieve that unique sound you’ve been looking for.

With the Effects Rack, you can also create complex signal chains by combining different effects and applying them to specific parts of your sound, such as the filter or the mod wheel. This provides greater flexibility and control over your overall sound design.

Distinct Sound Design With Combinations Of Effects

To get the most out of the Effects Rack, try experimenting with different combinations of effects. By layering different effects on top of each other, you can create a complex and unique sound that stands out from the crowd.

For instance, combining distortion with reverb and delay can create a gritty and atmospheric sound, while pairing filtering with modulation effects can produce a more experimental sound. The possibilities are endless with the Effects Rack, so don’t be afraid to try out different combinations.

Tip 5: Easier Modulation Routing

To make modulation routing easier in Xfer Serum, assign specific parameters to the Macro Control and set the Modulation Depth to a desired range. This allows for easy modulations without the need to manually adjust each parameter.

Xfer Serum has impressed sound designers and electronic music producers since its launch. In this post, we’ll discuss Tip 5 for easier modulation routing in Xfer Serum, unlocked through its powerful Modulation Matrix.

Creating Destination Or Sources For Modulation for Xfer Serum

The first step towards easier modulation routing is knowing the Matrix and how it creates the modulation. You can use the Sources section to set up LFOs, Random, Velocity, and other modulators. On the other hand, the Destinations section allows you to select the parameters to modulate through the matrix. Here is how you can use this section:

  • Right-click on the parameter that you want to modulate.
  • Click “Assign Mod Source” in the context menu.
  • In the Sources section, select the modulator that you want to use.
  • You can set up multiple modulation sources in the mixer window.

Accessing The Modulation Matrix for Xfer Serum

Once you have your sources and destinations set up, you can head over to the Mod Matrix section in Serum to create the modulation routing:

  1. Click on the Mod Matrix tab below the oscillators.
  2. At the top of the Modulation Matrix section, you’ll find the Source and Destination panels.
  3. You’ll see a bunch of tabs representing sources and destinations.
  4. To create a modulation, click on the Source tab and drag a slot to the Destination slot.
  5. You can adjust the intensity of the modulation using the Intensity slider on the right.
  6. You can also use the Target A and Target B tabs to select multiple destinations for your modulation.

That’s it. Now you can use the matrix to easily create complex modulation routings for your synth patches. Experiment with different sources and destinations to create unique sounds that stand out in your electronic music productions.

Sound Design Tips Xfer Serum

Credit: www.cfa-sound.com

Tip 6: Serum Presets

Maximize your sound design potential with Xfer Serum’s preset library. Experiment with different presets and customize them to create unique sounds for your music productions. Tip 6: Serum Presets can take your sound design skills to the next level.

When it comes to sound designing, Xfer Serum is a powerful tool every music producer should have in their arsenal. A few simple tweaks and adjustments within Serum can have your music sounding unique and professional. However, many overlook the option of using Serum presets. These pre-built sound configurations can save you time and give you a head start on your music production. In this section, we will be exploring the benefits of inbuilt Serum presets and using third-party Serum presets.

Inbuilt Serum Presets

Serum comes loaded with a wide variety of inbuilt presets which come in handy for beginners as well as seasoned producers. Each inbuilt Serum preset is designed to cater to a specific musical genre, giving you the flexibility to choose the one that best fits your requirements. Using the Serum presets is straightforward – simply cycle through the options and select the one that suits your needs. With the Serum presets, you don’t have to worry about building a sound from scratch every time, which is particularly useful if you are working with a tight deadline.

Using Third Party Serum Presets

In addition to the inbuilt Serum presets, there are also numerous third-party presets that you can download to enhance your sound design. These presets are designed by experts in the industry and can be easily integrated into Xfer Serum. Third-party Serum presets provide an opportunity to explore new sounds that offer diversity to your music. They can be tweaked and edited to meet your specific production needs. However, it’s important to note that not all third-party Serum presets are equal. Before downloading a preset, ensure that it’s of good quality and compatible with your version of Xfer Serum.

Conclusion

Overall, Serum presets are an incredible resource for sound design, and utilizing them can save you precious time and provide you with new musical opportunities. Inbuilt Serum presets can give you a head start on your music production process, while third-party Serum presets offer a wider variety of sounds and options. By using Serum presets, you can focus your energy on other aspects of music production, such as song arrangement and mixing. Give Serum presets a try, you may be surprised at the difference they make in your music.

Frequently Asked Questions On Sound Design Tips Xfer Serum

How Do I Get Better At Sound Design Serum?

To get better at sound design in Serum, practice regularly and experiment with the synthesizer’s various features. Watch tutorials and learn from other sound designers, and try recreating sounds from your favorite songs. Join online communities to get feedback from others and share your own creations.

Keep learning and exploring new techniques to improve your skills.

Why Is Serum Vst So Good?

Serum VST is a top-quality virtual instrument-plugin that is used worldwide by music producers and composers. It is so good because of its intuitive interface, high-quality sound, and immense versatility in terms of sound design. The plugin offers a vast library of presets and advanced features that make it one of the best tools for music production.

Is Xfer Serum Worth The Money?

Yes, Xfer Serum is worth the money. It’s a powerful and versatile synthesizer that provides a wide range of sounds. With its intuitive user interface, great presets and the ability to create custom wavetables, it’s a great investment for any music producer or sound designer.

How Do I Make My Serum Sound More Analog?

To make your serum sound more analog, you can use techniques like adding noise, distortion, and saturation. Experiment with analog-inspired presets or plugins, adjust the filter settings, and tweak the envelope and modulation parameters. Additionally, combining different synthesis methods like wavetable, FM, and subtractive can help you achieve a warmer and more organic sound.

Conclusion

To sum up, sound design is an essential component of music production where every detail matters. Xfer Serum offers endless possibilities to create unique and innovative sounds, but it requires creativity and attention to detail. With these tips, you can elevate your sound design skills and add a unique touch to your music.

Keep experimenting, exploring and developing your unique sound palette to create something truly remarkable. Happy producing!

Categories
Archive

How to Mix Vocals on Bandlab

To mix vocals on Bandlab, use the mixer panel and adjust the volume, pan and EQ of each track. Vocal tracks should be compressed to even out the levels and reverbed for added depth.

Bandlab is an online music platform that provides free digital audio workstations (DAWs) for users to create and record music. Mixing vocals can be a challenging task that requires careful attention to detail. It involves balancing the volume and the stereo position of each vocal track, as well as applying equalization (EQ) and reverb effects.

We will outline the steps to mix vocals on Bandlab using the mixer panel and various effects. Whether you’re a professional producer or a beginner, this guide will help you achieve a professional-sounding vocal mix.

How to Mix Vocals on Bandlab

Credit: magnussvanfeldt.se

Preparing The Vocals

To prepare vocals for mixing on Bandlab, make sure to properly record and edit the vocals before adding any effects or enhancements. Use equalization and compression to balance the sound and ensure clarity.

Preparing the vocals is a crucial part of mixing. It involves several steps that ensure the vocals are ready for processing. These steps include recording, cleaning up, and comping the vocals. In this blog post, we will cover these steps in detail to help you mix vocals on BandLab like a pro. Recording Vocals The first step in preparing the vocals is recording. Ensure that you have a good microphone and a quiet recording space to achieve the best sound quality. Additionally, position the microphone correctly to capture the singer’s voice accurately. Record several takes to ensure you have enough material to work with in the comping stage. Cleaning up the Vocals Cleaning up the vocals refers to removing unwanted noises such as pops, clicks, and background noise. This step is essential as it ensures the vocals are as clear as possible. One way of achieving this is to use a noise gate to cut out any unwanted noise during pauses in the recording. Additionally, you can use a de-esser to remove harsh ‘s’ and ‘t’ sounds that can be distracting. A noise reduction tool can also help to remove background noise effectively. Comping Vocals Comping vocals is the process of selecting the best parts of each recording and combining them to create the perfect take. Begin by identifying the best sections of each take and trimming them accordingly. Use the track comping feature on BandLab to combine the best parts seamlessly, ensuring that there are no gaps or overlaps. In conclusion, preparing the vocals involves recording, cleaning up, and comping the vocals. Each step is crucial for achieving the best sound quality. Take your time in each step, and do not rush the process. With these tips, you can successfully mix vocals on BandLab.

How to Mix Vocals on Bandlab

Credit: blog.bandlab.com

Setting Up The Mixer

Learn how to set up the mixer to mix vocals on Bandlab. Properly adjusting the levels, panning, and effects can make all the difference in achieving a professional sound. Follow these steps to create a well-balanced mix.

Creating Tracks

Before you start mixing vocals on BandLab, you need to create tracks for different elements of the mix. To create a new track, click on the “+” sign on the left-hand side of the mixer. This will open up a menu where you can choose the type of track you want to add, such as a vocal track, drum track, or guitar track. You can add as many tracks as you need for your mix.

Setting The Levels

Once you have created the tracks, it’s time to set the levels. This means balancing the volume of each track so that they blend together seamlessly. To do this, you can adjust the fader on each track by clicking and dragging it up or down. You should aim to keep all the tracks at a similar volume to prevent any one element from overpowering the mix. You can also use the panning controls to place each track in the stereo field.

Adding Effects

With the levels set, you can now add effects to enhance the vocals. BandLab’s mixer comes with built-in effects such as reverb, delay, and EQ. To add an effect, click on the “FX” button on the track you want to apply it to. This will open up a menu where you can choose the effect you want to use. You can adjust the settings of each effect by clicking on the “Edit” button.

Final Thoughts

Setting up the mixer is the first step to mixing vocals on BandLab. By creating tracks, setting the levels, and adding effects, you can create a professional-sounding mix. Remember to experiment with different effects to find the right sound for your vocals. With a little practice, you’ll be able to create stunning vocal mixes using BandLab’s powerful mixer.

Mixing The Vocals

Vocals play a critical role in any audio track, and mixing them is both crucial and challenging. By mixing the vocals well, you can make sure that your listeners can hear every word crystal-clear. In this article, we’ll cover how to EQ the vocals, add compression and reverb, and delay.

Eqing The Vocals

Equalizing the vocals can help to eliminate unwanted frequencies and bring out the best parts of the recording. Start by cutting frequencies that don’t contribute to the overall sound of the vocals. Hiss and hum are common issues, and you can use a high-pass filter to eliminate the low-end rumble.

You can boost the frequencies that make the vocals sound more pleasing and natural, typically somewhere between 2 kHz and 6 kHz is a good place to start. The vocals should sound well-balanced once you finish EQing, and not too thin or harsh.

Adding Compression

Compression helps to balance out the levels of the vocal recordings. Compression is an essential technique for smoothing out any volume inconsistencies and bringing all aspects of the vocals together.

You can begin by setting the threshold of the compression to kick in with the loudest parts of the recording but try to keep the impact minimal. The vocals should sound even and smooth throughout the whole track with no sudden increases in volume or prominence.

Adding Reverb And Delay

Reverb and delay help to add depth and space to the vocals. Reverb helps to make the vocals sound like they were recorded in a large space, whereas delay adds an echo effect.

When you add reverb, keep it subtle, and find the right balance for the track. Generally, you’ll want to use a short decay time and low-level settings for a natural sound. For delay, it’s essential to adjust the timing and feedback to avoid overcrowding the mix.

By following these steps, you can mix the vocals to create a polished and professional-sounding track. Take time to apply each technique gradually and make changes that complement the overall sound of the vocals. Keep practicing and experimenting to find the perfect mix for your next recording.

Adjusting The Mix

Learn how to mix vocals on Bandlab by adjusting the levels of each track, EQ, compression, and reverb. Use filters to remove unwanted noise and ensure your vocals are clear and crisp in your final mix. With these tips, you’ll be able to create professional-sounding vocal mixes on Bandlab.

Adjusting the mix is the final step in mixing vocals on Bandlab. At this stage, you’ll be balancing the levels, applying automation to add movement, and making final adjustments. Let’s go through each of these steps in detail, so you can ensure your vocals sound their best. Using Automation Automation is a powerful tool when it comes to mixing vocals. It allows you to add movement to your mix, creating interest and helping the vocals to stand out. To use automation in Bandlab, click on the automation icon (which looks like a square wave) in the track editor. You can then create automation points by clicking and dragging on the line. Experiment with different shapes and speeds to find the right automation for your vocals. Balancing the Levels Balancing the levels is all about getting the right balance between the vocals and the backing track. To do this, adjust the faders for each track until the vocals sit comfortably against the music. You can also use panning to create space in the mix. For example, pan the backing track slightly to the left and the vocals slightly to the right. Making Final Adjustments The final stage of adjusting the mix is all about making small tweaks to ensure everything sounds perfect. This could include adding a touch of reverb to the vocals to create depth, or using EQ to boost or cut certain frequencies. You might also want to use compression to even out the volume of the vocals, or add some saturation to make them sound warmer. In conclusion, adjusting the mix is the final step in mixing vocals on Bandlab. By using automation, balancing the levels, and making final adjustments, you can ensure your vocals sound professional and polished. So, experiment with these techniques and see what works best for your mix.

Collaborating And Sharing

Collaborating and Sharing is by far one of the best features in BandLab, and it’s what makes it an ideal platform for producing vocal mixes. With BandLab, you can easily collaborate with other creators and share your work without any hassle.

Collaborating With Others On Bandlab

The good thing about BandLab is that it allows you to collaborate with other creators in real-time. You can edit, mix, and share your projects with other people, even if they are in a different location.

To collaborate with other creators on BandLab, follow the simple steps below:

  1. Open your project on BandLab.
  2. Click on the “Collaborate” button, which is located on the top left corner of your screen.
  3. Enter the email address of the person you want to collaborate with.
  4. Add a message if you want, then click on the “invite” button.

Once you’ve invited someone to collaborate with you, they will receive an email notification. Clicking on the link in the email notification will take them to the shared project where they can start working with you.

Exporting And Sharing Your Vocal Mix

Once you’ve finished your vocal mix, the next step is to export and share it with the world. BandLab makes it easy to export and share your vocal mix, and you can do it in just a few clicks.

To export and share your vocal mix on BandLab, follow the simple steps below:

  1. Click on the “Export” button, which is located on the top right corner of your screen.
  2. Select the format you want to export your mix in. You can choose from WAV, MP3, OGG, and FLAC.
  3. Select the quality you want to export your mix in. You can choose from 64kbps to 320kbps.
  4. Enter the title and description of your vocal mix.
  5. Click on the “Export” button and wait for the process to finish.

Once your vocal mix has been exported, you can share it with your friends and fans by clicking on the “Share” button. You can share your mix on social media platforms like Facebook, Twitter, and Instagram.

Tips For Better Vocal Mixing

Achieving a balanced vocal mix is crucial for any music production, and using Bandlab can make it easier. Some tips for better vocal mixing include adjusting levels, using EQ and compression, and adding effects like reverb and delay to enhance the vocals.

If you are a music producer who uses Bandlab, then you know that mixing vocals can be a challenging task. Getting the right balance between vocals and instruments is crucial to produce a great music track. In this section, we will discuss some tips that can help you achieve better vocal mixing on Bandlab.

Working With The Room

The room where you mix your vocals has a significant impact on the sound quality. When mixing vocals, make sure you are in a room with good acoustics. A well-treated room can help you achieve a more natural and open sound. If your room has hard surfaces that reflect sound, try to put some soft furnishings like curtains, carpets, or foam panels. These materials can help absorb excess sound and prevent reflections.

Using High-quality Plugins

Using high-quality plugins is critical when mixing vocals. In Bandlab, you have access to a broad range of plugins that can help you enhance the sound quality of your vocals. From EQs to compressors, reverbs, and delays, using the right plugins can make a massive difference in your vocal mixes. Make sure you try different plugins and learn how to use them effectively to achieve the desired sound.

Listening Critically

Listening critically is essential when mixing vocals. Make sure you pay attention to details like the volume, panning, and effects levels. Listen to your vocal mixes in different environments with different playback systems. This technique can help you identify issues that you may not have noticed before. If possible, get an unbiased opinion from another person. A fresh pair of ears can help you identify issues that you may have missed. In conclusion, achieving better vocal mixing on Bandlab requires patience, practice, and attention to detail. Follow these tips, work on refining your skills, and you will be well on your way to producing great vocal mixes.

How to Mix Vocals on Bandlab

Credit: m.youtube.com

Frequently Asked Questions On How To Mix Vocals On Bandlab

How Do I Make My Voice Sound Better On Bandlab?

To make your voice sound better on BandLab, try adjusting the equalizer settings to enhance your voice’s clarity and remove background noise. You can also try using effects like reverb or chorus to give your voice a professional touch. Experiment with different settings until you find the perfect sound for your voice.

What Is The Best Way To Mix Vocals?

The best way to mix vocals is to first clean up the tracks and remove any unwanted background noise. Then, use EQ to enhance the vocals’ clarity and remove unwanted frequencies. Compression can help to even out the levels of the vocals, while reverb and delay can be added to enhance the vocals’ space and create a more cohesive mix.

Finally, make sure to check the mix in different playback environments to ensure it sounds good everywhere.

How Do You Mix And Master With Bandlab?

Mixing and mastering with BandLab requires the following steps: upload your audio, use the mix editor to adjust levels and add effects, then use the mastering editor to finalize the sound. It’s easy and intuitive, with plenty of customization options to create your ideal sound.

What Is The Best Eq For Bandlab?

The best EQ for BandLab is subjective and depends on your individual needs and preferences. However, BandLab’s built-in EQ features can be used for basic adjustments, or you can import third-party EQ plugins for more advanced processing. Experiment with different options and find the one that works best for your specific project.

Conclusion

After following these simple steps, you’ll find mixing vocals on BandLab to be an effortless task. The key is to understand the importance of each tool and how to use it effectively. With practice, you will be able to find the perfect balance between vocals and the instrumental track.

By providing your listeners with clear, crisp vocals, you can enhance the overall sound of your music and create a memorable experience. So, go ahead and experiment with these techniques and let your creativity soar.

Categories
Archive

How To Use Pro Tools Beat Detective

To use Pro Tools Beat Detective, first select a rhythmic section you want to edit, then choose the desired rhythmic feel and let the software do the rest. Pro Tools Beat Detective is a powerful tool that allows you to quantize audio and tightens the timing of your music.

With the tool’s various features, you can quickly analyze rhythmic inconsistencies and correct them with precision. Whether you want to tighten up a drum performance or create a more consistent bassline, Beat Detective can help. We’ll explore the different functions of Pro Tools Beat Detective and how you can use them to improve your audio production.

How To Use Pro Tools Beat Detective

Credit: www.soundonsound.com

The Basics Of Beat Detective

Learn how to effectively use Pro Tools Beat Detective with these basic tips. From identifying the beat to making edits, this tutorial will guide you through the process.

Installation And Setup

Before delving into the workflow, you need to understand the installation process, which is quite straightforward. To get started, you will require a Pro Tools system with the Beat Detective feature installed. Once you have it, activate it by following these steps:

  1. Go to the “Event” menu and click on “Beat Detective”.
  2. Select “Analysis” and then choose “New Analysis”.
  3. Choose the audio file you want to analyze, set the audio analysis options you require, and click “Analyze”.

After installation, the feature itself is straightforward to find and activate. Now that you have the Beat Detective up and running, it’s time to move on to understanding the workflow.

Understanding Beat Detective Workflow

Beat Detective is a dynamic feature that requires alertness throughout the workflow. Here is a step-by-step guide to help you navigate the process:

  1. Locate the “Beat Detective” option in the “Event” menu and click on it to open the Beat Detective window.
  2. Choose the audio regions you want to apply the Beat Detective feature on. You can select multiple non-contiguous regions on different tracks or all-time selection regions.
  3. Select the task you want to perform; make sure to choose the task that matches the issue you want to solve: Adjust Timing, Create Groove Template, or Find Tempo.
  4. Set the appropriate criteria in the “Selection” box. The criteria include Threshold, Clip Separation, and Analysis Type.
  5. Click “Capture” to analyze and select audio elements based on the defined criteria.
  6. Review the results in the “Results” window to ensure they match your expectations.
  7. Apply the desired editing task by choosing the relevant “Tasks” option box.
  8. If you are satisfied with the results, commit the changes, and continue your editing. If you are unhappy with the outcome, click “Undo” to restore the original state.

Beat Detective is a powerful tool that highlights how important audio editing is in the music creation process. If you master the workflow, you will not only save time but also enhance the quality of your audio productions.

How To Use Pro Tools Beat Detective

Credit: www.production-expert.com

Beat Detection

Learn how to use Pro Tools Beat Detective, a powerful tool for musicians and music producers for quickly detecting beats and transients in audio recordings. With its advanced features and user-friendly interface, you can easily match the groove of your tracks and create perfect transitions.

Source Material Preparation

Before using Pro Tools Beat Detective, it is crucial to prepare your source material correctly. Make sure that the audio file is clean and has no extraneous noises, pops, or clicks. The recording should be a straightforward and stable audio take. If there are dynamic changes in the music that you want to preserve, record them in a separate take. Once you’ve polished your audio material, and it’s free from noise, you’re ready to move on to the beat detection process.

Detecting Beat Boundaries And Groove Templates

The beat detection process is where Pro Tools Beat Detective shines the most. The software can identify the transient elements in the music, automatically detecting its beat boundary regions. To begin with, one needs to select the audio region, define a region that you want to analyze, and select any portion of that region that represents the groove of the music. After analyzing the groove, the software will produce a “groove template,” the rhythmic map of your music. The groove template is a vital tool to help you alter the rhythm of the music while keeping its timing and tempo intact.

Groove Templates

After groove detection, the next step is to edit the audio file to achieve the desired rhythm for the music. Groove Templates allow you to manipulate the timing of the music without changing its overall tempo. Once you’ve created your groove and made necessary edits, the “apply groove” function helps you align your source audio with the desired rhythm. With this function, you can quantize audio for timing correction purposes and obtain the desired timing groove.

Conclusion

When it comes to changing a rhythm in music, Pro Tools Beat Detective is a fantastic tool to use. By accurately detecting beat boundaries and groove templates, Pro Tools Beat Detective ensures that the timing of your music remains intact throughout the editing process. Source material preparation is critical, and by following the guidelines above, you’ll be well on your way to achieving a great rhythm for your music.

Editing With Beat Detective

Learn how to effectively use Pro Tools Beat Detective to edit your music tracks with precision. This powerful tool can help you easily align and adjust beats, saving you time and ensuring a professional-quality sound.

Beat Detective is an incredibly powerful tool in Pro Tools that can help you quickly fix timing issues in your audio recordings. Whether you need to align your audio to the grid or quantize it for a tighter feel, Beat Detective can get the job done quickly and easily. In this section, we’ll take a closer look at how to use Beat Detective for editing.

Aligning Audio To The Grid

One of the most common uses for Beat Detective is to align audio to the grid. This is especially useful when working with recordings that were captured without a click track or with a live band. Here’s how to align your audio to the grid using Beat Detective:

  1. Select the audio region you want to edit and open Beat Detective.
  2. Choose the type of edit you want to perform, in this case, “Bar|Beat Detective” for aligning to the grid.
  3. Adjust the sensitivity settings to capture the transients and beats in your audio region.
  4. Select the area you want to edit, and click “Capture Selection” to analyze the audio.
  5. Once the analysis is complete, choose the “Separate” command to split the audio into regions.
  6. Select the regions you want to edit and choose the “Quantize” command to align them to the grid.
  7. Preview the results and make any necessary adjustments before committing to the edit.

Quantizing Audio

Another useful feature of Beat Detective is the ability to quantize audio for a tighter feel. This is especially important when working with rhythmic material like drums or percussion. Follow these steps to quantize your audio using Beat Detective:

  1. Select the audio region you want to edit and open Beat Detective.
  2. Choose the type of edit you want to perform, in this case, “Bar|Beat Detective” for quantizing audio.
  3. Adjust the sensitivity settings to capture the transients and beats in your audio region.
  4. Select the area you want to edit, and click “Capture Selection” to analyze the audio.
  5. Once the analysis is complete, choose the “Separate” command to split the audio into regions.
  6. Select the regions you want to quantize and choose the “Quantize” command to snap them to the grid.
  7. Preview the results and make any necessary adjustments before committing to the edit.

Fixing Timing Issues

Beat Detective can also be used to fix more complex timing issues in your audio recordings. This is especially useful when dealing with performances that were recorded without a click track or with multiple musicians playing together. Follow these steps to fix timing issues using Beat Detective:

  1. Select the audio region you want to edit and open Beat Detective.
  2. Choose the type of edit you want to perform, in this case, “Region” and “Events” for fixing timing issues.
  3. Adjust the sensitivity settings to capture the events and transients in your audio region.
  4. Select the area you want to edit, and click “Capture Selection” to analyze the audio.
  5. Use the editing tools to correct any timing issues in your audio recordings.
  6. Preview the results and make any necessary adjustments before committing to the edit.

In conclusion, Beat Detective is a powerful tool that every Pro Tools user should know how to use. Whether you need to align your audio to the grid or fix timing issues in your recordings, Beat Detective can save you time and effort while producing professional results. With these tips, you’ll be well on your way to mastering Beat Detective and taking your audio editing skills to the next level.

Advanced Techniques

Pro Tools Beat Detective is a powerful tool for editing drums, and it can be used for much more than just basic rhythm correction. With advanced techniques, you can use Beat Detective for drum replacement and remixing. In this article, we’ll explore these techniques in detail, so you can take your drum production to the next level.

Using Beat Detective For Drum Replacement

Drum replacement is a common technique used in music production to replace poorly recorded or poorly played drum tracks with samples. Pro Tools Beat Detective offers an accurate and efficient way to perform drum replacement. Here’s how to do it:

  1. Import your drum recording into Pro Tools.
  2. Open the Beat Detective window.
  3. Select the “Capture” mode and set the parameters for the capture.
  4. After the capture is complete, use the “Separate Regions” mode to split the drum recording into its individual hits.
  5. Drag and drop your preferred drum samples onto the separate regions in the session.
  6. Adjust the volume and timing of the sample hits to match the original recording.

Using Beat Detective For Remixing

Remixing is another common use of Beat Detective. With this tool, you can extract the rhythmic elements of a song and use them in a new remix. Here’s how to do it:

  1. Import your song into Pro Tools.
  2. Open the Beat Detective window.
  3. Select the “Conform” mode and set the parameters for the analysis.
  4. After the analysis is complete, use the “Separate Regions” mode to split the song into its individual hits.
  5. Drag and drop the separate regions onto new tracks in the session.
  6. Mute the original tracks and rearrange the separate regions to create your remix.

Tips And Tricks

Learn how to use Pro Tools Beat Detective like a pro with these helpful tips and tricks. From setting up the software to accurately detecting and correcting timing issues in your recordings, this guide has everything you need to optimize your workflow and produce high-quality music.

If you’re working on music production, you must be aware of the importance of beat detection. Pro Tools Beat Detective is an intelligent tool that helps musicians and producers to identify and fix rhythmic issues in their productions in no time. In this blog post, we’ll be focusing on the tips and tricks that will help you get the most out of Beat Detective.

Working With Complex Rhythmic Material

Working with complex rhythms can be a challenging task for music producers. However, with the help of Pro Tools Beat Detective, this task can be accomplished with ease. To get started, import the audio material you want to work on in Pro Tools. Next, select the desired region, and right-click on the highlighted area. Now choose the “Analysis” option from the menu, followed by “Beat Detective.” In the Beat Detective window, select the desired option that suits your needs. You can choose between options like “Detect Transients,” “Groove Template,” or “Bar/Beat Marks.” Once you’ve selected the desired option, hit the “Capture” button to analyze the audio material. The Beat Detective tool will automatically identify the rhythmic issues and create markers on the timeline. You can now make rhythm corrections by removing or adding beats. You can also shift the audio material to match the desired tempo or groove feel.

Editing Multiple Tracks With Beat Detective

If you want to edit multiple tracks simultaneously with Beat Detective, the process is simple. First, select all the tracks you want to edit and highlight them. Next, select the “Edit” option from the menu, followed by “Beat Detective.” This will open the Beat Detective window. In the Beat Detective window, choose the desired option from “Separate Clip” or “Separate Region.” This will split the audio track into smaller regions, making it easier to edit. Now choose the appropriate rhythmic correction option from the Beat Detective menu. Once you’ve made the changes, you can now merge the clips or regions back into a single track by selecting them and using the “Consolidate” option. This will create a new file with the edited audio material in it. In conclusion, these tips and tricks will help you to use Pro Tools Beat Detective with more flexibility and efficiency. By mastering this tool, you’ll be able to produce music with a more precise and professional touch.

Common Pitfalls

Learn how to avoid common pitfalls when using Pro Tools Beat Detective. With careful execution, you can quickly and accurately edit your audio tracks to create polished, professional-quality music.

Introduction: Pro Tools Beat Detective is an essential tool that helps the users to analyze audio and modify the recorded tracks for perfection. However, even the expert users tend to encounter some common pitfalls while using this tool that might create glitches. Therefore, it’s crucial to be aware of these pitfalls to ensure the smooth working of Beat Detective. In this section, we’ll discuss a few common pitfalls while using Pro Tools Beat Detective and the ways to overcome them. H3: Overreliance on Beat Detective The most common mistake users make is overrelying on Beat Detective to fix things that could have been recorded correctly in the first place. Beat Detective is an excellent tool, but it shouldn’t be used as a substitute for a good recording session. Users should take the time to record the tracks accurately rather than relying on Beat Detective to correct everything in post-production. H3: Avoiding Artifacts and Glitches When using Pro Tools Beat Detective, users might encounter some glitches or artifacts that can negatively impact the quality of the recorded tracks. These glitches occur when the Beats and or the Grids don’t align correctly. To avoid these issues, users should ensure that the Beats and Grids are correctly aligned before applying any correction. Moreover, an incorrect selection of the audio region can also lead to artifacts and glitches. Users should double-check their audio regions and select the correct regions before applying any correction. Conclusion: In conclusion, using Pro Tools Beat Detective can be a game-changer, but only if it’s used correctly. Overreliance on Beat Detective can negatively impact the quality of the recording, and incorrect selection or application can lead to glitches and artifacts. Therefore, keep the above points in mind while using Pro Tools Beat Detective, and enhance your audio recording process.

How To Use Pro Tools Beat Detective

Credit: www.soundonsound.com

Frequently Asked Questions For How To Use Pro Tools Beat Detective

How Does Beat Detective Work In Pro Tools?

Beat Detective in Pro Tools automatically analyzes audio tracks and identifies any timing inconsistencies. It can split, move, and align audio clips to the grid to fix any timing issues, thus creating a tighter, more polished performance. The software provides a plethora of customizable settings and tools to fine-tune the editing process.

What Is The Shortcut For Beat Detective In Pro Tools?

The shortcut for Beat Detective in Pro Tools is “Command + 8” (Mac) or “Control + 8” (Windows).

What Mode Should Be Used To Make Selection For Beat Detective?

Use the “Separate” mode to make selection for Beat Detective.

How Do I Use Identify Beat In Pro Tools?

To identify a beat in Pro Tools, you need to use the “Spot” function. Simply place the cursor at the beginning of the beat and press the “Spot” button to create a marker. Repeat this process for each beat of the track.

You can then use these markers for tasks like aligning tracks and setting tempo.

Conclusion

To sum it up, Pro Tools Beat Detective is an amazing tool that every music producer and sound engineer should know how to use. It will save you countless hours while editing and aligning your tracks. Remember, timing is everything in music and with the Beat Detective, you can ensure that all your tracks are played at the right time.

With this guide, you’re now well-equipped to confidently use this powerful editing tool. Go ahead and try it out, and let us know your experience in the comments below!

Categories
Archive

Great Reverb Plugin D16 Toraverb Vst

D16 Toraverb Vst is a great reverb plugin that offers high-quality sounds with a range of parameters for shaping the sound. With its versatile and intuitive controls, D16 Toraverb Vst is a top choice for producers and audio engineers looking to enhance their mix with unique and customizable reverb effects.

D16 Toraverb Vst is a powerful and popular reverb plugin used by producers and audio engineers globally. Known for its high-quality sounds, it offers a range of parameters for shaping the sound, making it a great choice for any music genre.

Its intuitive controls allow users to adjust the reverb time, diffusion, and other parameters to create unique custom reverb effects. Whether you’re mixing drums or vocals, D16 Toraverb Vst delivers great results every time. Its versatile and easy-to-use interface sets it apart from other reverb plugins on the market, making it a favourite for professionals and beginners alike.

Great Reverb Plugin D16 Toraverb Vst

Credit: www.kvraudio.com

Features Of D16 Toraverb Vst

D16 Toraverb VST is a great reverb plugin with versatile features. It offers a wide range of reverb types, including lush halls, smooth plates, and glitchy reverse reverbs. The plugin also includes a number of advanced parameters for detailed sound sculpting.

Features of D16 Toraverb VST: Customizable Room Size and Length D16 Toraverb VST offers a plethora of features for audio professionals, but one of the most notable is its customizable room size and length options. This allows users to create a unique and personalized sound that perfectly fits their project’s needs. Whether you’re looking for a large and spacious sound or a tight and intimate one, D16 Toraverb VST has you covered. High-Quality Classic Reverb Algorithms With D16 Toraverb VST, you can rest assured that you’re getting high-quality classic reverb algorithms that are designed to deliver the most natural and realistic sound possible. This plugin utilizes cutting-edge technology to create reverb that accurately mimics the sound of real-life spaces. Whether you need a subtle touch of reverb or a room-filling sound, D16 Toraverb VST delivers with ease. Modulation and Feedback Controls D16 Toraverb VST doesn’t just stop at customizability and high-quality algorithms. This plugin also features modulation and feedback controls that allow users to add depth, texture, and complexity to their reverb sound. With the ability to tweak both the speed and depth of modulation, you can create a rich and dynamic sound that is sure to impress. Pre Delay and Diffusion Options In addition to its modulation and feedback controls, D16 Toraverb VST also offers pre-delay and diffusion options. These features are designed to help you achieve a more refined and precise sound by allowing you to control the timing and spacing of your reverb. With D16 Toraverb VST, you can easily adjust the pre-delay and diffusion to get the perfect balance between clarity and ambience. Additional Filtering and EQ Settings Another standout feature of D16 Toraverb VST is its additional filtering and EQ settings. This plugin makes it easy to fine-tune your reverb sound, whether you’re looking to brighten things up or add a little extra warmth. With easy-to-use controls and intuitive settings, D16 Toraverb VST is the perfect plugin for anyone looking to take their reverb sound to the next level.

Ease Of Use And Compatibility

D16 Toraverb VST is a great reverb plugin that boasts ease of use and compatibility. It provides users with high-quality sound and can be used on a variety of platforms, making it a versatile option for music producers.

Ease of Use and Compatibility are two crucial factors that all music producers look for while choosing a reverb plugin. And, when it comes to Toraverb VST by D16, it ticks both boxes with ease. Its user-friendly interface, compatibility with various DAWs and operating systems, and CPU-friendly performance make it the go-to choice for many producers.

User-friendly Interface

Toraverb VST boasts a sleek and straightforward interface, making it easy for both beginners and experienced producers to navigate. Each feature is placed intuitively, enabling users to access them quickly. Its color-coded graphic interface offers easy-to-read displays, enabling users to intuitively identify each module and control.

Compatibility With Various Daws And Operating Systems

Toraverb VST is compatible with all major DAWs, including Ableton Live, Logic Pro, FL Studio, Pro Tools, and Cubase, to name a few. It is available as a 32-bit and 64-bit plug-in, ensuring easy compatibility with various ABLETON, Logic Pro, and other DAW systems.

Cpu-friendly Performance

Producing music can be CPU-intensive, and installing resource-draining plugins can hinder performance. Toraverb VST is designed to be CPU-friendly, ensuring that it doesn’t add unnecessary load on your system. As it’s a VST plugin, it integrates with the DAW to offer instant performance without the need for external drivers or software. In conclusion, Toraverb VST by D16 is undoubtedly one of the best reverb plugins in the market. With its user-friendly interface, compatibility with various DAWs and operating systems, and CPU-friendly performance, it’s a must-have for any music producer.

Versatility And Creativity

Versatility and Creativity:

If you are looking for a great reverb plugin that is flexible, versatile, and designed to inspire creativity, then look no further than the D16 Toraverb Vst. It delivers a wide range of high-quality reverb effects, making it a go-to choice for sound designers, music producers, mixing engineers, and film scorers. Whether you are creating ambient soundscapes, lush pads, complex textures, or realistic spaces, this plugin has everything you need to achieve your goals.

Ideal For Sound Design And Film Scoring:

One of the biggest advantages of D16 Toraverb Vst is its ability to create unique and immersive soundscapes suitable for sound design and film scoring. With its advanced algorithms, you can create a wide range of reverbs including room, hall, plate, spring, and more, all of which can be shaped and modulated to fit your creative vision. Whether you want to create a realistic acoustic environment or a surreal sonic landscape, the D16 Toraverb Vst has got you covered.

Useful For Mixing And Mastering:

The D16 Toraverb Vst is not only useful for sound design and film scoring but is also an excellent tool for mixing and mastering engineers. With features such as pre-delay, damping, early and late reflections, modulation, and more, you can enhance the clarity and depth of your mixes, add character and texture to individual tracks, and achieve the perfect balance between wet and dry signals. Whether you are working on electronic, acoustic, or hybrid music, this plugin can help you achieve a professional-sounding mix and master.

Integration With Other Plugins And Effects:

Another advantage of the D16 Toraverb Vst is its seamless integration with other plugins and effects. Whether you want to use it as a send effect with delay, chorus, or distortion plugins, or as an insert effect with EQ, compressor, or saturation plugins, this plugin can work smoothly with other tools, enhancing their functionality and sonic possibilities. With its low CPU usage and easy-to-use interface, you can create complex and dynamic effects chains without compromising your computer’s performance or workflow.

Great Reverb Plugin D16 Toraverb Vst

Credit: www.groove3.com

Reviews And Testimonials

Reviews and testimonials play a vital role in understanding the performance of any product or service. D16 Group’s Toraverb Vst, a premium reverb plugin, is no exception. Its exceptional features and functionality make it a reliable product for music producers and sound engineers. Toraverb has received positive feedback from the music industry professionals and users from different online forums and communities. Let’s have a look at some of these reviews and testimonials to get a better idea of Toraverb’s effectiveness:

Positive Feedback From Music Industry Professionals

Several music professionals have praised D16 Toraverb for its outstanding features and performance. According to Sound on Sound, “The level of control is impressive, and the algorithms sound great, The resulting reverbs are vivid and detailed.” Legendary music producer, John Robbins, says “Toraverb is one of the most versatile reverb plugins I’ve used. It saves me a lot of time and enables me to produce the best music possible.”

User Reviews And Ratings From Online Forums And Communities

WebsitesReview/Rating
KVR Audio4.7/5
Gearslutz4.9/5
Plugin Boutique4.8/5

Toraverb has also received excellent user reviews and ratings on popular online forums and communities. On KVR Audio, users love the plugin’s ease of use, high-quality sound, and reasonable price. Many users on Gearslutz have praised Toraverb’s versatility and its ability to work with different genres of music. Plugin Boutique has also received several positive reviews highlighting Toraverb’s excellent features and performance. In summary, users from different online platforms have highly rated D16 Toraverb Vst.’

Competitor Comparison

D16 Toraverb Vst is an exceptional reverb plugin that stands out among its competitors due to its powerful features and user interface. Its unique sound and extensive controls make it a top choice for music producers and sound designers alike.

How Does D16 Toraverb Vst Compare To Other Reverb Plugins?

When it comes to reverb plugins, there are many to choose from. However, D16 Toraverb VST stands out from the competition with its unique features and sound quality. Here is a comparison of Toraverb VST with some of its competitors:

Reverb PluginToraverb VSTComparison
Valhalla RoomMore affordableToraverb VST has a more complex sound
Waves Abbey Road PlatesSimilar sound qualityToraverb VST has more versatility and features
Lexicon PCM Native Reverb BundleHigher price pointToraverb VST offers unique modulated reverb modes

What Sets D16 Toraverb Vst Apart From The Competition?

One of the standout features of Toraverb VST is its ability to create modulated reverb. This unique feature allows users to add movement and texture to the reverb sound. Additionally, Toraverb VST offers a high-pass and low-pass filter to shape the reverb’s tone. Another feature is the Dry/Wet Mix slider, which allows for easy blending of the dry and wet signals. The plugin also has a user-friendly interface that makes it easy to navigate and adjust settings. Overall, D16 Toraverb VST offers a unique and versatile reverb sound that sets it apart from other plugins.

Pricing And Availability

The highly acclaimed D16 Toraverb Vst is now available at an affordable price, making it accessible to a broader audience. The great reverb plugin is perfect for musicians, producers, and sound engineers looking to elevate their music production to the next level.

Finding the right reverb plugin can make all the difference in your music production. If you’re looking for a plugin that offers versatility and high-quality sound, D16 Toraverb Vst is a great choice. This plugin is gaining popularity in the music industry, thanks to its numerous features and benefits. But what about its pricing and availability? Let’s take a closer look.

Different Pricing Options And Packages

D16 Toraverb Vst offers various pricing options and packages to cater to different customer needs. Firstly, there is a discount for those who purchase more than one plugin. You can save up to 20% when you buy two or more plugins at once. Secondly, there’s a package deal that includes all of the D16 plugins at a discounted price. This package deal is perfect for those looking to expand their plugin collection. Lastly, there are occasional sales and discounts that you can take advantage of to get D16 Toraverb Vst at a lower price.

Availability Through Official Website And Resellers

One of the best things about D16 Toraverb Vst is that it is widely available through official channels. You can purchase this plugin directly from the D16 website. It is also available through various resellers, including popular online platforms like Plugin Boutique and Sweetwater. Furthermore, the plugin is available in both Mac and Windows versions, ensuring that you can use it across different platforms.

Free Trial And Demo Versions

D16 Toraverb Vst also offers a free trial and demo version, ensuring that you can try it out before you buy it. The demo version comes with a limit on some of its features, but it’s still a good way to test drive the plugin and see if it suits your production needs. The free trial version, on the other hand, allows you to use the plugin fully for a specific period, offering ample time to test it out. In conclusion, D16 Toraverb Vst offers numerous pricing options and packages, making it accessible to different customer needs. You can purchase this plugin directly from the official D16 website or through various resellers. Furthermore, the free trial and demo versions enable you to test the plugin before you buy it. Overall, it is a versatile plugin that is worth considering if you’re looking to enhance your music production.

Great Reverb Plugin D16 Toraverb Vst

Credit: www.adsrsounds.com

Frequently Asked Questions On Great Reverb Plugin D16 Toraverb Vst

What Makes D16 Toraverb Vst A Great Reverb Plugin?

D16 Toraverb Vst is a combination of advanced sound algorithms that make it a great reverb plugin. Its unique algorithms reproduce natural space and provide an improved sound that makes it one of the best plugins in the market.

Can I Use D16 Toraverb Vst With Other Vsts?

Yes. You can use D16 Toraverb Vst with other VST instruments and plugins. You can add the plugin as an insert on the mixer’s channel or as an effect on an audio track.

How Easy Is It To Use D16 Toraverb Vst?

D16 Toraverb Vst is very easy to use. With a simple interface, creating reverbs becomes effortless. The layout is simple and offers intuitive controls that help you create complex sounds without much effort.

What Kind Of Music Genres Is D16 Toraverb Vst Best For?

D16 Toraverb Vst is suitable for a variety of music genres. Whether you produce electronic pop, hip hop, or heavy metal, the plugin can add depth and dimension to your audio. With its unique sounds, your music will stand out.

Conclusion

Overall, D16 Toraverb VST is a great reverb plugin that offers unique features, flexibility, and versatility. With its intuitive design, exceptional sound quality and various presets, it helps musicians and producers add a distinctive character to their music tracks and mix.

Whether you’re working on electronic, ambient or any other genre, Toraverb is a go-to plug-in for adding excellent spatial effects to your mix. It’s definitely a recommended plugin for any musician, sound designer, and producer who is looking for a powerful reverb tool.