Categories
Archive

The Art Of Mixing And Mastering

The art of mixing and mastering involves fine-tuning and balancing a music track to achieve its optimal sound quality. Mixing involves combining and adjusting individual tracks, while mastering involves enhancing the overall sound of the mix.

Music production is a complex and artistic endeavor that requires technical knowledge and skills. One crucial aspect of music production is mixing and mastering. Mixing involves blending individual tracks to create a unified sound, while mastering polishes and enhances the final mix.

The process requires a keen ear, attention to detail, and proficiency with audio software tools. Successful mixing and mastering can make a world of difference in the final sound quality of a music track, creating a balance of all components and enhancing its overall impact on the listener. This article delves into the essential techniques and approaches for artists, producers, and audio engineers to achieve optimal results in the art of mixing and mastering.

What Is Mixing

Mixing and mastering in music production refer to the art of perfecting the sound quality of a recorded track. This is an intricate process that involves balancing and blending various instrument tracks and vocals to create a final product that is coherent, consistent, and enjoyable to the listener.

By applying various techniques and effects like equalization, compression, and reverb, mixing and mastering experts aim to create a cohesive and polished sound that captures the essence of the music.

Mixing Explained

Mixing is the art of bringing different audio elements together to create a final, polished product. It involves taking individual tracks, adjusting their levels, panning them in the stereo field, adding EQ and effects, and creating an overall balanced mix that sounds great on any playback system. Mixing can be done with a variety of tools, from simple software plugins to expensive studio hardware, but the most important factor is the mixer’s skill and experience in making the right critical decisions.

Process Of Mixing

The process of mixing starts with preparing the tracks to be mixed. This involves cleaning up the audio files, trimming the start and end points, and aligning any timing issues. Once everything is prepped, the mixer can then begin adjusting the relative levels of each track so they all blend together seamlessly. This involves taking into account the overall dynamics and balancing different frequency ranges. Next, the mixer will use panning to place each track in the stereo field. This can help create a sense of space and separation between the different elements. After panning, the mixer can add EQ and effects like reverb, compression, and delay to bring out the best in each track and create a cohesive whole. Throughout the process, the mixer will need to constantly listen critically and make adjustments to ensure everything sounds as good as possible. It’s not uncommon for a mixer to spend multiple hours adjusting every fader and knob to achieve the desired sound. Finally, once the mix is complete, it’s time to move on to mastering – but that’s a topic for another time.

In Conclusion

Mixing is a crucial step in the music production process. It’s the point where all the individual elements come together to create a cohesive, polished final product that’s ready for listeners to enjoy. Practicing the art of mixing takes time and experience, but with the right tools and techniques, anyone can produce great-sounding mixes. Remember to listen critically and make adjustments along the way, and you’ll be well on your way to producing professional-quality music.

Techniques Of Mixing

The art of mixing and mastering involves a range of techniques such as equalization, compression, and stereo imaging. Skilled audio engineers use these techniques to balance and enhance the sound of a recording, creating a polished final product that sounds great on any playback system.

Mixing is the art of bringing all the different musical elements together to create a cohesive and balanced sound. It is a crucial process in music production that requires attention to detail and a good ear for what works and what doesn’t. Here are some essential techniques of mixing:

Levels And Panning

One of the most important elements of mixing is getting the levels right. This involves adjusting the volume of each track so that it sits well within the mix. The aim is to achieve a balance between the different elements, so none of them overpower the others. Panning is also an essential tool for creating space and separation within the mix. By placing different elements to the left, right, or center, you can create a stereo image that gives the music depth and interest.

Equalization

Equalization, or EQ, is the process of adjusting the frequency balance of each track within the mix. By cutting or boosting certain frequencies, you can create a more balanced and pleasing sound. For example, cutting the low frequencies of a guitar track can make space for the bass and kick drum to come through. Boosting the high frequencies of a vocal track can give it more clarity and presence.

Compressing

Compression is a powerful tool for controlling the dynamics of each track in the mix. By reducing the dynamic range of a track, you can make the quiet parts louder and the loud parts quieter. This can help to keep the overall volume more consistent and improve the clarity of the mix. Compression can also add character and warmth to certain elements, such as drums or vocals.

Reverb And Delay

Reverb and delay are essential effects that can add space and depth to the mix. Reverb simulates the natural reflections of sound in a space, while delay creates echoes that can add rhythm and interest. These effects can be used to place different elements within a virtual space that gives the music a sense of realism and dimension. In conclusion, the techniques of mixing are essential for creating a well-crafted and professional-sounding mix. By using tools such as levels, panning, EQ, compression, and effects such as reverb and delay, you can achieve a balanced and polished sound that enhances the music and engages the listener.

What Is Mastering

Mastering is the final step in the music production process. It involves carefully adjusting the levels, EQ, compression, and other effects to bring out the best possible sound quality for a song or album. This art of mixing and mastering is crucial in delivering a professional, polished, and well-balanced sound that can stand out in today’s competitive music industry.

Mastering Explained

Mastering is the final stage in the production process for audio recordings. It refers to the practice of taking a final stereo mix and processing it to ensure that it sounds as polished and professional as possible. The process includes a variety of techniques, such as equalization, compression, stereo widening, and limiting, among others.

Process Of Mastering

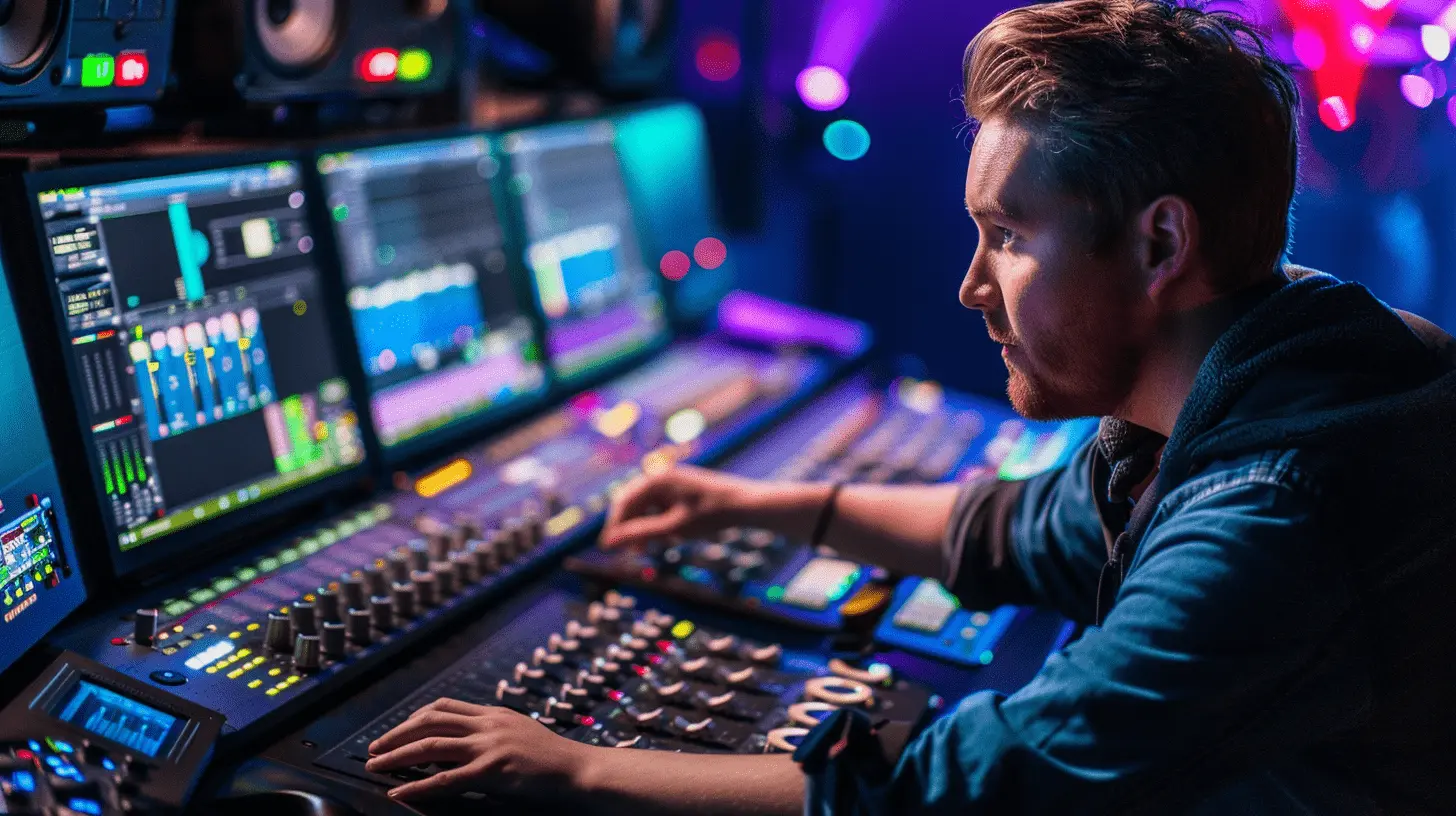
The process of mastering can be broken down into several stages. First, the mastering engineer will generally listen to the mix and make notes on any areas that require improvement. Next, they will begin processing the mix, using techniques like EQ to balance the frequencies and ensure that the mix sounds good on a range of audio systems. Compression, stereo widening, and other tools may also be used to enhance the mix. Once the mix has been processed, the mastering engineer will listen to it again and make any final tweaks as necessary. This may include adjusting the overall level of the track, applying limiting to ensure that the track does not clip or distort, and making any last-minute adjustments to the EQ or other processing. Overall, the goal of the mastering process is to create a final mix that sounds as good as possible and translates well to a range of playback systems. A skilled mastering engineer can bring out the best in a mix and make it sound professional and polished, helping to enhance the overall listening experience.
The Art Of Mixing And Mastering

Credit: lwks.com

Techniques Of Mastering

The art of mixing and mastering music requires mastering various techniques including EQing, compression, and limiting. To achieve a polished and balanced sound, it is important to have a comprehensive understanding of these techniques and how to use them effectively.

Mastering is the final stage of music production, where the audio is enhanced to achieve its full potential. The term refers to the process of shaping, refining, and polishing a mixed track to make it sound more professional. While there are many techniques involved in mastering, some of the most common ones include equalization, compression, limiting, stereo enhancement, and harmonic excitement.

Equalization

Equalization, or EQ, is the process of adjusting the balance between different frequency components in a mix. With EQ, you can boost or cut specific frequencies to achieve the desired tonal balance. For example, if a mix sounds too muddy with too much bass, you can use EQ to cut some of the low frequencies to make it sound clearer. Similarly, if a mix lacks warmth and body, you can use EQ to boost the mid-range frequencies to give it more depth.

Compression

Compression is the process of reducing the dynamic range of a mix by attenuating the loud parts while boosting the soft parts. Compression can help tame harsh transients and make the mix sound more cohesive and polished. It can also increase the perceived loudness of the mix without clipping or distorting. However, overcompression can lead to a flat and lifeless mix, so it’s important to use it judiciously.

Limiting

Limiting is a type of compression that is used to prevent clipping and distortion by imposing a ceiling on the peak level of a mix. The limiter acts as a safety net for the mix, preventing any stray spikes from exceeding the maximum level and causing digital distortion. While limiting can help make the mix sound louder and punchier, it can also cause pumping and breathing artifacts if overused.

Stereo Enhancement

Stereo enhancement is the process of widening the stereo image of a mix using various techniques such as panning, delay, reverb, and stereo widening plugins. Stereo enhancement can improve the spatial depth and clarity of the mix, making it sound more immersive. However, excessive stereo widening can lead to phase cancellation and mono compatibility issues, so it’s important to use it sparingly.

Harmonic Excitement

Harmonic excitement is the process of adding upper harmonics to a mix to make it sound brighter, richer, and more musical. This can be done by using various plugins such as harmonic exciters, saturation plugins, and tape emulations. Harmonic excitement can help add sparkle and energy to a mix, but it can also introduce unwanted artifacts if overdone. In conclusion, mastering is an art form that requires a combination of technical skills and artistic sensibility. By using techniques such as equalization, compression, limiting, stereo enhancement, and harmonic excitement, you can give your mix the final polish it needs to stand out from the crowd. However, mastering is not a one-size-fits-all process, and it requires careful listening and experimentation to achieve the desired results.

The Art Of Mixing And Mastering

Credit: blog.beatstars.com

Frequently Asked Questions On The Art Of Mixing And Mastering

What Is The Best Way To Learn Mixing And Mastering?

The best way to learn mixing and mastering is by practicing and experimenting on your own, attending workshops and online courses, and learning from experienced mentors or professionals in the industry. It requires a combination of technical knowledge, ear training, and creativity to achieve a polished and balanced sound.

Keep mastering your craft and staying updated on new technologies and techniques.

Is It Harder To Mix Or Master?

Mixing and mastering both have their own challenges and require different skills. However, it can be generally said that mastering is more complex and requires more experience and attention to detail. While mixing focuses on balancing and shaping individual elements, mastering ensures a cohesive and consistent sound across the entire track or album.

What Is The Truth About Mixing And Mastering?

Mixing is the process of combining individual audio tracks into a stereo or multichannel mix, while mastering involves taking that mix and preparing it for distribution. In mixing, the goal is to create a balanced and cohesive sound, while mastering involves making subtle adjustments to the overall sound to ensure it sounds great on different playback systems.

Mixing and mastering are essential elements of the music production process, and both require specific skills and knowledge to achieve professional results.

How Many Hours Does It Take To Mix And Master A Song?

The time it takes to mix and master a song depends on various factors such as the length of the track, the complexity of the project, and the skill level of the engineer. On average, it can take 5-10 hours to mix a song and 3-5 hours to master it.

However, it can vary greatly and may take longer or shorter depending on the project’s requirements.

Conclusion

To sum it all up, the art of mixing and mastering is crucial to producing a high-quality audio track. It requires skills, knowledge, and experience to balance different elements of sound, enhance clarity, depth, and loudness, and eliminate any flaws or issues.

With the right tools and techniques, anyone can learn and improve their mixing and mastering skills. By following the tips discussed you can elevate your tracks to the professional level and stand out in the competitive music industry.

Categories
Archive

The Power Of Transient Shapers

Transient shapers are powerful audio tools used for dynamic control. They shape the transients in audio signals, affecting the attack and sustain of each sound.

Transient shapers have become an essential tool for audio engineers and music producers alike. They allow for precise dynamic control in music production and sound design. By manipulating the transients of audio signals, transient shapers offer the ability to enhance or reduce the attack and sustain of sounds, resulting in a more defined and cohesive mix.

Whether used for drums, percussion, vocals, or any other instrument, transient shapers provide an unmatched level of control and versatility in modern music production. Additionally, the intuitive interface of many transient shaper plugins makes it easy for both beginners and professionals to use them effectively in their projects. As a result, the power of transient shapers is undeniable in the audio industry today.

What Are Transient Shapers?

Transient shapers are powerful tools used in music production to control the dynamics of sound. They work by manipulating the transients, which are the short bursts of energy at the start of a sound. Transient shapers can be used to enhance or reduce the impact of the transients, providing more control over the overall sound of a track.

Transient shapers have become increasingly popular among music producers over recent years. These tools enable music producers and audio engineers to control the dynamic range of an audio signal by modifying its transient response. In simpler terms, transient shapers are audio processing tools used to shape sound. They can help emphasize or de-emphasize the attack or release portions of an audio signal, resulting in a better mix.

How Do Transient Shapers Work?

Transient shapers work by analyzing the envelope of an audio signal. The envelope is the shape of the sound wave over time and is made up of four parts: attack, decay, sustain, and release. A transient shaper uses specialized algorithms that analyze this envelope to independently adjust the transient and sustain portions of the audio signal. This manipulation can lead to a much tighter, focused sound and allows music producers to selectively shape individual tracks in a mix.

Types Of Transient Shapers

There are two main types of transient shapers: hardware and software. Hardware transient shapers are stand-alone units that are usually designed for studio use and are often used in mastering. Software transient shapers are plugins that can be used in Digital Audio Workstations (DAWs) like Ableton, Logic Pro, and Pro Tools. Software versions are more versatile and can be used to shape individual tracks or the entire mix. Transient shapers are powerful tools that can help take your mixes from good to great. Whether you’re working on a pop song or an EDM track, transient shapers can provide that extra level of control over your tracks’ dynamics that you need to get the sound you’re after. If you’re new to transient shapers, we suggest starting with software plugins like the Waves Trans-X or Soundtoys’ Little AlterBoy. With a little practice, you’ll be able to create a more polished and professional mix in no time!

The Power Of Transient Shapers

Credit: www.bhphotovideo.com

Applications Of Transient Shapers

Transient shapers can be used in a variety of ways in music production and audio engineering. They are powerful tools that enable engineers and producers to manipulate the attack and sustain components of a sound, which can drastically change the overall character and impact of a track.

Whether used to enhance drums, shape vocals, or add energy to synths and basslines, transient shapers have become an increasingly essential tool within modern music production workflows.

Transient shapers have become an indispensable tool for music producers and sound engineers in recent years. With their ability to manipulate the transient signals of audio, they offer powerful sound design capabilities. Here are some of the primary applications of transient shapers in music production:

Drums And Percussion

Transient shapers can bring out the attack of a snare or kick drum, making it cut through the mix more effectively. This effect can help to create a punchier, more energetic sound that works well in genres like rock or EDM. On the other hand, reducing the attack on a cymbal or hi-hat can help to reduce harshness or sibilance in the high frequencies.

Bass And Guitars

In bass and guitar tracks, transient shapers can help to emphasize the pick attack or plucking of the strings. This effect can help to make the instrument sound more present and expressive. Similarly, reducing the attack can create a softer sound that works well in ballads or acoustic tracks.

Vocals

On vocals, transient shapers can help to bring out the consonants and percussive sounds, making the lyrics easier to understand. At the same time, it can help to de-emphasize sibilance or plosives that can sound harsh or distorted.

Mixing And Mastering

Transient shapers are also used in the mixing and mastering process to shape the overall sound and dynamics of the track. They can help to create a more cohesive and polished sound by balancing the levels and attack of different elements in the mix. By emphasizing or reducing certain frequencies, they can create an effect similar to multiband compression. Using transient shapers requires some experimentation and an ear for detail, but with practice, they can become a powerful weapon in the music producer’s arsenal.

Top Transient Shapers In The Market

Transient shapers are powerful tools that allow for precise control over the attack and sustain of audio signals. The top transient shaper plugins available in the market today provide versatility and flexibility to enhance drums, bass, vocals, and more, for a more polished and professional sound.

Transient shapers have become an essential tool for music producers and sound engineers in the fast-paced world of music production. These plug-ins allow you to manipulate the attack and release of audio signals, allowing you to enhance or reduce the level of the transient in the source signal. The market is filled with various transient shapers, but here are the top-rated products that stand out:

Product 1

One of the most popular transient shapers in the market is the SPL Transient Designer Plus. This plug-in allows you to shorten or lengthen the attack and sustain of any audio signal, giving you full control over the transient response. The user-friendly interface and the various presets available make it easy for beginners to use. SPL Transient Designer Plus is compatible with most DAW’s like Pro Tools, Cubase, and Logic Pro.

Product 2

The Waves’ Trans-X is another versatile transient shaper that has been widely used in the audio industry. It features saturation and harmonic distortion controls that allow you to add warmth and character to the signal, while the built-in clipper prevents any peaks from clipping. This plugin is highly responsive and works well with both drums and soft synths. It can work on Windows and Mac platforms and be integrated with major DAW’s like Studio One, Ableton Live, and FL Studio.

Product 3

The Sonnox Oxford TransMod is a powerful transient shaper that has become a favorite for many professional sound engineers. It has a unique adaptive algorithm that analyzes the audio and creates an individual processing for each transient, giving you the most precise control over the attack and sustain. Its multi-band feature allows you to target specific areas of the frequency spectrum, making it perfect for drums, guitars, and vocals. Sonnox Oxford TransMod is compatible with most DAW’s, including Pro Tools, Logic Pro, and Ableton Live.

Conclusion-

These are the top-rated transient shapers in the music industry. Whether you’re a beginner or a professional, these products can help you achieve the desired sound you’re looking for, regardless of the audio source. Choose the one that fits your budget and preferences and start enhancing your music today!

The Power Of Transient Shapers

Credit: www.izotope.com

How To Use Transient Shapers In Your Mix

Transient shaping is an effective technique that can transform your mix. It provides you with the ability to emphasize or reduce the impact of individual sound events, such as drum hits, guitar strums, and vocal phrases, within your mix. Transient Shapers can shape the attack and sustain characteristics of a sound to create a balanced and punchy mix. In this post, we’ll discuss how to use Transient Shapers in your mix and explore the various parameters that you need to adjust to achieve desired results.

Identify The Problem

Before getting started with transient shaping, it’s essential to identify the problem in the mix. Sometimes the drums might sound dull, or the guitars might lose their impact, or the vocals might be veiled in the mix. Transient Shapers can be especially useful in these situations. They can help you to bring out the clarity and definition of individual sounds without affecting other elements of the mix.

Choose The Right Transient Shaper

Choosing the right Transient Shaper is crucial to achieving the desired results. There are several Transient Shapers available in the market, both hardware and software. You can pick the one that suits your budget and workflow. Some of the popular ones are Waves Trans-X, SPL Transient Designer, and Sonnox Oxford TransMod. Each of these has different algorithms and characteristics, and it’s essential to spend enough time experimenting with them to find the right one for your mix.

Adjusting The Parameters

After selecting the right Transient Shaper, the next step is to adjust the parameters to achieve the desired results. The two crucial parameters in a Transient Shaper are Attack and Sustain. Attack is the initial transient of a sound, and sustain is the tail part. You can increase or decrease the attack to emphasize or reduce the impact of a sound. If you want the sound to have more punch and presence, increase the attack. If you want the sound to blend better with the mix, reduce the attack. Similarly, you can adjust the sustain to control the tail part of the sound. Transient Shapers also have side-chain filters that can help you isolate specific frequency ranges and shape them accordingly.

Overall, Transient Shapers can be an essential tool in your mixing arsenal. They provide you with the ability to shape individual sounds and create a cohesive and balanced mix. With the right technique and practice, Transient Shapers can take your mix to the next level.

Tips And Tricks You Should Know

Discover the power of transient shapers and how they can enhance the quality of your audio recordings. By shaping the envelope of each sound, transient shapers allow you to add punch, clarity and definition to your instruments and vocals. With these tips and tricks, you’ll be able to take full advantage of this powerful tool in your music production.

Transient shapers are dynamic processors that focus on the transient and sustain components of sound. These tools can be used to enhance and shape the attack, sustain, and release of sounds. In this section, we’ll explore tips and tricks that will help you get the most out of your transient shapers.

Using Transient Shapers With Parallel Compression

One of the most popular ways to use a transient shaper is with parallel compression. This technique allows you to add punch to your drums without sacrificing the dynamics. Here’s how to do it:

  1. Create a send/return channel in your DAW.
  2. Insert the transient shaper on the return channel.
  3. Set the attack and sustain controls to taste.
  4. On the original drum channel, add a compressor with high ratios and low thresholds.
  5. Send some of the drum signal to the return channel.
  6. Blend the compressed and uncompressed signals to taste.

This technique allows you to add transient control to the signal while maintaining the natural dynamics of the original sound.

Creating Punchy Drums

Transient shapers are particularly useful for creating punchy drums. By reducing the sustain and increasing the attack of a drum sound, you can make it sound more focused and impactful. Here are some tips:

  • Start by reducing the sustain of the sound.
  • Gradually increase the attack until the desired punch is achieved.
  • Use EQ to shape the sound to taste.

It’s important to note that transient shapers work best when used in moderation. Too much transient control can lead to an unnatural, over-processed sound.

Sustain Enhancement

Transient shapers can also be used to enhance the sustain of a sound. By increasing the sustain and reducing the attack, you can create a more sustained, ethereal sound. Here’s how to do it:

  1. Start by increasing the sustain of the sound.
  2. Gradually reduce the attack until the desired sustain is achieved.
  3. Use EQ to shape the sound to taste.

This technique is particularly useful for creating ambient textures and pads. In conclusion, transient shapers are powerful tools for shaping the transient and sustain components of sound. By using them in conjunction with other processing techniques, you can create punchy drums, enhance sustain, and add character to your mixes. Remember to use them in moderation and trust your ears when making adjustments.

Challenges You Might Face

If you are familiar with mixing music, you might already know how transient shapers can enhance the quality of your tracks. They allow you to adjust the attack and release of any sound, giving you more control over its volume and intensity. However, despite their many benefits, using transient shapers can also come with a few challenges that you need to be aware of to avoid compromising the overall sound of your mix.

Overuse Of Transient Shapers

One of the most common issues people face when using transient shapers is overdoing the effect. When applied excessively, transient shapers can make your sound unnaturally punchy, resulting in an unpleasant listening experience. Therefore, it is essential to use caution and moderation when working with these tools. Remember that the goal is to enhance your sound, not to completely transform it.

Phase Issues

Another challenge you might come across when using transient shapers is phase issues. Because these tools affect the dynamics of the sound, they can create phase cancellations if not used properly. When phase cancellations happen, two or more sounds that should be complementary end up clashing and causing an unwanted effect. To avoid this issue, you should always check the phase relationship of your tracks before and after applying a transient shaper.

Lack Of Clarity

Finally, you might experience a lack of clarity when using transient shapers. This can happen if you apply too much gain reduction or if you set the attack and release times inappropriately. When using these tools, it is crucial to maintain the natural character of the sound and preserve its essential elements. Always ensure that the adjustments you make do not compromise the intelligibility, brightness, and warmth of the sound.

The Power Of Transient Shapers

Credit: www.bhphotovideo.com

Frequently Asked Questions Of The Power Of Transient Shapers

What Does A Transient Shaper Do?

A transient shaper is an audio processor that enhances the dynamics of a sound. It allows you to adjust the attack and release of a signal, emphasizing or reducing certain parts of the sound, such as the initial punch or sustain.

It’s commonly used in music production to shape drums, guitar, and vocal sounds.

Is Transient Shaper Worth It?

Yes, Transient Shaper is worth it if you are looking to enhance and control the attack and sustain of your audio signals. It is a powerful tool that lets you shape the transient response of your audio and helps you achieve a more balanced and professional sound.

Is Transient Shaper Just A Compressor?

No, a transient shaper is not just a compressor. While both affect volume and dynamics, a transient shaper focuses on the attack and release of a sound, rather than just overall volume. It allows for precise shaping of individual sounds in a mix.

What Does Transient Designer Do?

A transient designer adjusts the attack and sustain of a sound independently, allowing for more control over the shape of the sound. It can be used to add punch to drums or soften the attack of a guitar, amongst other things.

Conclusion

Transient shapers are incredibly powerful tools that can give music producers and audio engineers the ability to shape and control sounds like never before. Whether you’re looking to enhance the attack of a kick drum or smooth out the release of a snare, transient shapers offer a level of flexibility and control that was once impossible.

By understanding the basics of transient shaping, including how to set attack and release times and how to shape the gain envelope, you can take your music production skills to the next level. Don’t underestimate the power of transient shapers, they have the ability to transform any sound to meet your desires.

Categories
Archive

Best Free Saturation Plugins

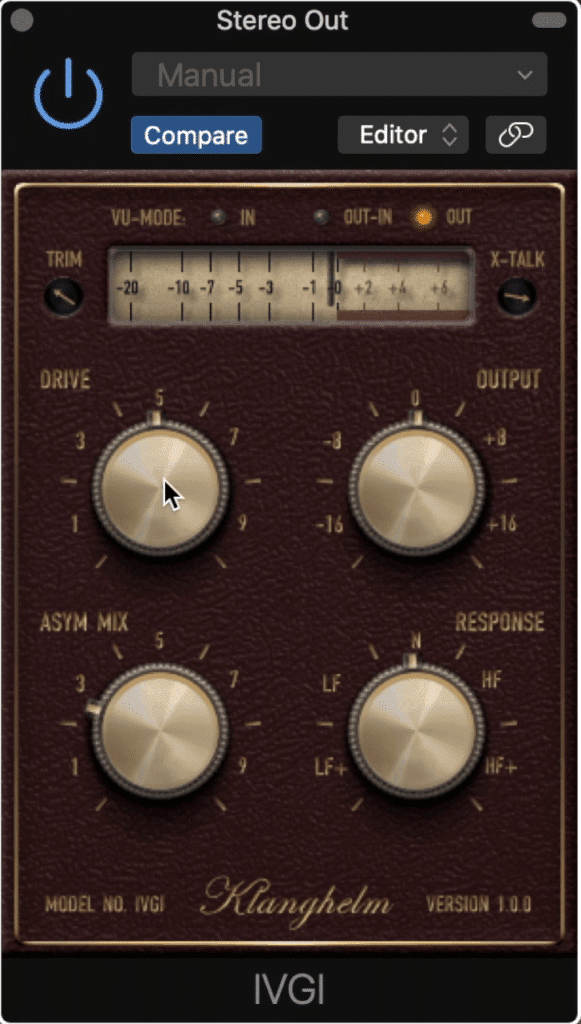
Two of the best free saturation plugins are the TDR SlickEQ and the Klanghelm IVGI 2. They both provide excellent saturation and distortion effects, as well as other useful features.

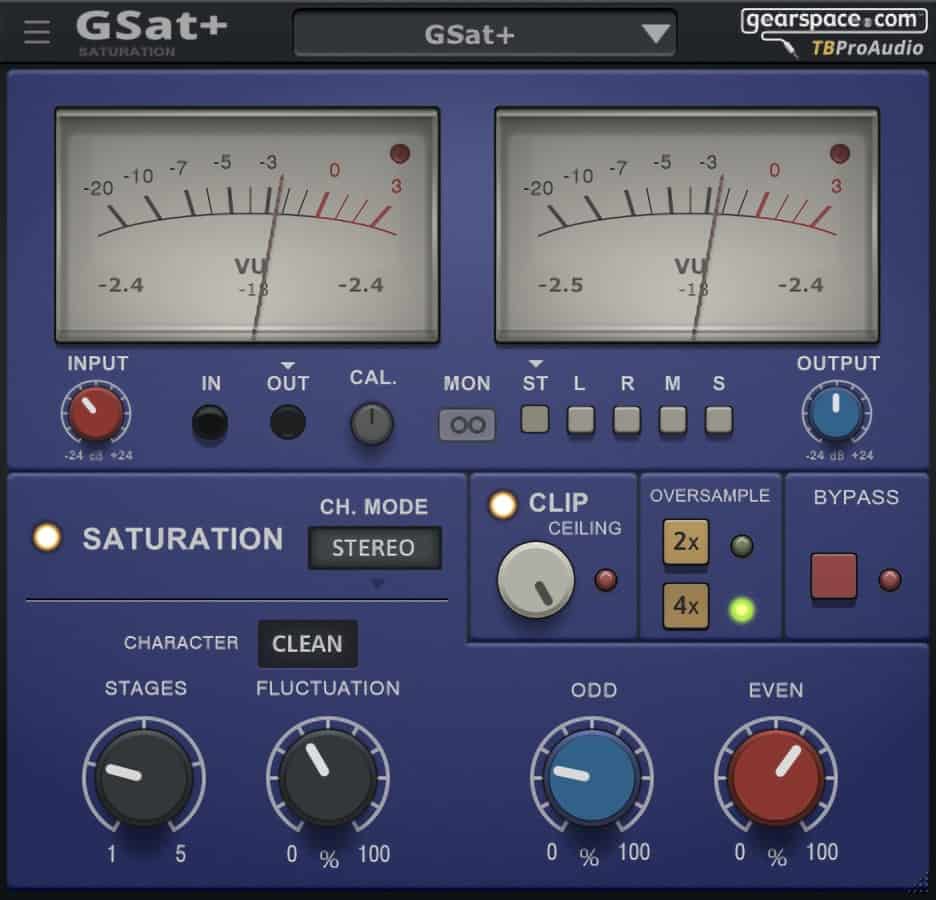
Saturation plugins are essential for music producers and mixing engineers who want to add warmth, grit, and harmonic character to their sound. However, with a plethora of saturation plugins available in the market, finding the right one that fits your needs and budget can be a daunting task.

Luckily, some of the best saturation plugins can be obtained for free. We’ll take a closer look at two of the best free saturation plugins available: the TDR SlickEQ and the Klanghelm IVGI 2. We’ll also discuss what to consider when choosing a saturation plugin and how to use them in your music productions.

1. Top 5 Best Free Saturation Plugins

Whether you’re a beginner or a professional, finding the best free saturation plugins can make a huge difference in your music production. We’ve compiled a list of the top 5 free saturation plugins, which includes options such as Ferric TDS, IVGI, and Saturation Knob.

Are you looking for plugins to add warmth and depth to your mix? Look no further than saturation plugins! These plugins can help enhance your tracks by adding subtle harmonics, analog-style distortion, and tape-like warmth. To help you out, we have put together a list of the top 5 best free saturation plugins available in the market. Continue reading to find out which ones made the cut.

Plugin 1: Ferric Tds By Variety Of Sound

If you’re looking for a free plugin that accurately emulates tape saturation, Ferric TDS may be what you need. It offers a range of tape saturation modes and a variety of controls to fine-tune your sound, including drive, bias, and curve. Ferric TDS can add warmth to vocals, drums, and virtually any track you want to add some analog vibe to.

Plugin 2: Thrillseekervbl By Variety Of Sound

Thrillseeker VBL is another excellent saturation plugin from Variety Of Sound, which can add some analog warmth to your mixes. This plugin is modeled after a vintage broadcast limiter, and features two modes for different levels of saturation. The VBL mode adds subtle distortion, while the FAT mode provides more aggressive saturation.

Plugin 3: Softube Saturation Knob

The Saturation Knob by Softube is a simple yet effective plugin that can add warmth, distortion, or grit to your tracks. It offers three distinct modes: Keep High, Neutral, and Keep Low, allowing you to apply saturation to just the highs, mids, or lows of your sound.

Plugin 4: Density Mk Iii By Variety Of Sound

Density MK III is yet another quality saturation plugin from Variety Of Sound. This plugin can help add analog warmth to your mix by emulating the sound of vintage tube saturation. It features a simple interface with controls for input, output, and drive, allowing you to easily dial in the desired amount of saturation.

Plugin 5: Ivgi By Klanghelm

IVGI by Klanghelm is a free saturation plugin that can add some harmonic distortion to your sound. It features a simple interface with four knobs for drive, character, output, and mix. IVGI allows you to add some edge and grit to your tracks, making it a great tool for adding some character to vocals or drums. These are our top 5 picks for the best free saturation plugins. However, this list is by no means exhaustive, and there are many other excellent plugins available. Try them out and see which ones work best for your mix!

Best Free Saturation Plugins

Credit: www.sageaudio.com

2. Pros And Cons Of Saturation Plugins

Saturation plugins are a popular choice for adding warmth and color to music recordings. Pros include improved harmonics and perception of loudness, while cons include decreased headroom and distortion. Some great free options for saturation plugins include FerricTDS and Softube Saturation Knob.

Saturation plugins are powerful tools that are widely used by music producers and audio engineers to add warmth, depth, and character to their mixes. However, like any other plugin, saturation tools come with their own set of advantages and disadvantages. In this section of the blog post, we will take a closer look at these pros and cons, helping you make a more informed decision about using saturation plugins in your music production projects.

Advantages Of Saturation Plugins

Saturation plugins offer several benefits that make them a must-have tool in any audio engineer’s arsenal. Here are some of the advantages of using saturation plugins:

  • Enhanced Harmonics: Saturation plugins add harmonics to an audio signal, making it sound richer and fuller. This increased depth and warmth can be especially useful when working with digital instruments and plugins.
  • Better Compression: Saturation plugins can help to bring out the best in compressors, allowing you to achieve a more natural and transparent compression effect. This is because saturating the audio signal before compression helps to reduce peaks and improve the overall dynamic range.
  • Improved Tone: By adding saturation to a track or mix, you can enhance the overall tone of the audio. This can make a big difference, especially when working with older recordings or samples that have a less than ideal sonic profile.

Disadvantages Of Saturation Plugins

Despite the many advantages that saturation plugins offer, they also come with some potential drawbacks to consider. Here are some of the disadvantages of using saturation plugins:

  • Potential Distortion: While adding saturation can enhance the sound of an audio signal, too much saturation can lead to distortion. This can be especially problematic if you’re working with a mix that already has a lot of elements and tracks.
  • Increased Noise: Saturation plugins can also add noise to an audio signal, particularly in the higher frequency ranges. This means that you need to be careful when using saturation plugins on tracks that already have a lot of noise or hiss.
  • May Not Be Suitable for Every Genre: Saturation plugins can be a great option for many types of music, but they may not be suitable for every genre. For example, if you’re mixing a classical piece, adding saturation may alter the character of the music in a way that’s not desirable.

Overall, saturation plugins offer a range of advantages that make them a valuable tool for any audio professional. However, it’s essential to be aware of the potential drawbacks and use these plugins judiciously to achieve the desired results.

3. Tips And Tricks For Using Saturation Plugins Effectively

Discover the secrets to using free saturation plugins effectively with these three expert tips. Get the most out of your audio tracks and elevate your sound quality with these simple tricks.

Saturation plugins are incredibly versatile and powerful tools that can enhance the sound of different audio sources. However, using them correctly, requires a bit of expertise. Here are some tips and tricks that can help you use saturation plugins effectively and make your audio stand out.

Know The Purpose Of Saturation

Saturation is defined as the process of adding harmonic content to an audio signal, which can add warmth, depth, and presence to the sound. The key to using saturation plugins effectively is to understand their purpose and when to use them. Each saturation plugin has a unique sound, and you should use the appropriate one for your specific audio source. Whether you want to add warmth to a vocal track or make a guitar riff sound grittier, always make sure that the purpose of adding saturation aligns with your goal for the audio.

Pay Attention To Input Gain

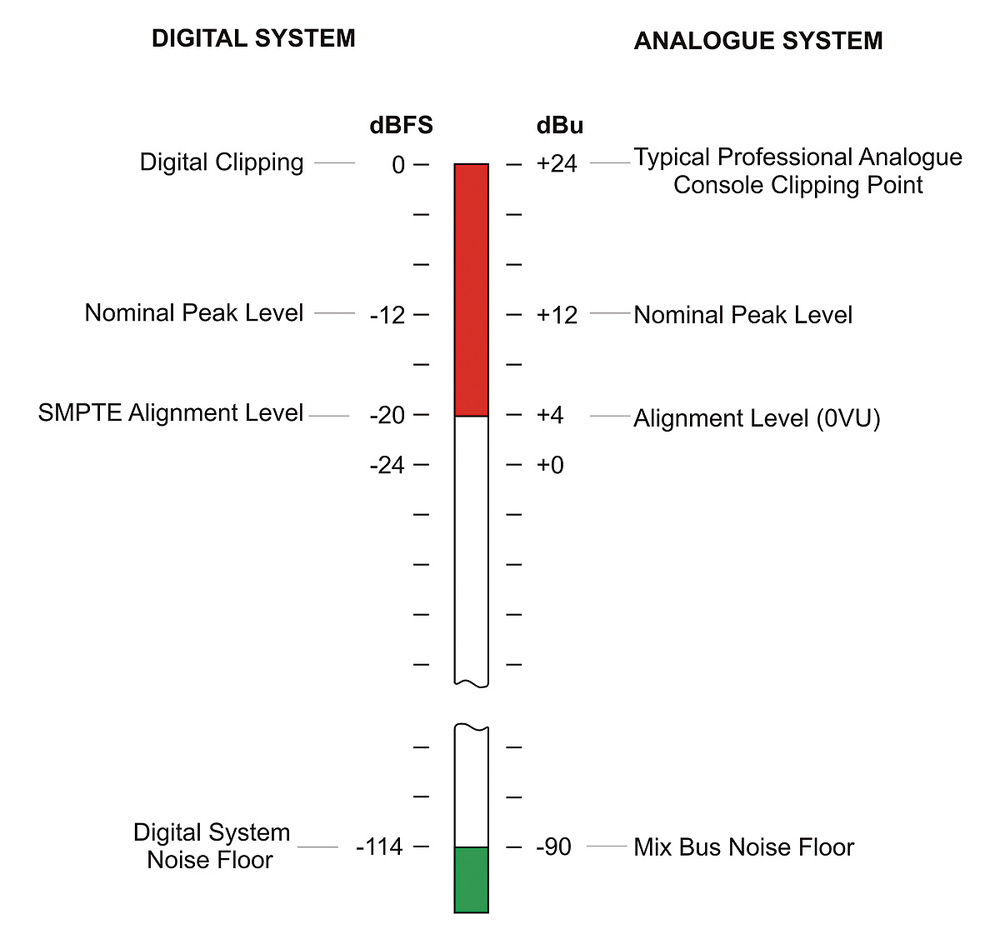
One crucial factor to consider when using saturation plugins is input gain. In simple words, input gain is the amount of signal coming into the plugin, which will determine the amount of saturation being applied to it. The rule of thumb here is to set the input gain to a level where the plugin sounds effective, but without any unwanted distortion. Make sure to monitor the input levels to avoid clipping and ensure that you’re using the correct amount of saturation.

Add Saturation To Enhance Specific Sounds

Saturation plugins are not a magic tool that can make everything sound better. As discussed earlier, using it for the correct purpose is significant, but so is using it only on specific sounds. For instance, you can apply subtle saturation on a vocal’s high-end frequencies to help cut through the mix. Similarly, you can add a bit of saturation on snares or kick drums to add punch. The key is to use saturation sparingly on specific parts of the audio where it will add some character.

Don’t Overdo It

While saturation can add warmth and character to your audio, it’s easy to overdo it, leading to an unpleasant and distorted sound. Therefore, it’s essential to use saturation in moderation and avoid applying it too heavily. A little goes a long way in the world of saturation plugins. Try experimenting with subtle amounts, monitoring the input gain, and always adjust the levels to make the sound as natural as possible. In conclusion, using saturation plugins can take your audio to the next level when done correctly. Understanding the purpose of saturation, paying attention to input gain, adding saturation to specific sounds, and avoiding overuse will help you create an effective audio mix. Incorporate these tips and tricks into your mixing projects, and you’ll be well on your way to producing professional-sounding audio.

Best Free Saturation Plugins

Credit: bedroomproducersblog.com

Best Free Saturation Plugins

Credit: www.productionmusiclive.com

Frequently Asked Questions On Best Free Saturation Plugins

Is Saturation Knob Free?

Yes, Saturation Knob is a free plug-in offered by Softube. It is designed to enhance the warmth and presence of your audio tracks and is compatible with most digital audio workstations.

Does Studio One Have A Saturation Plugin?

Yes, Studio One has a saturation plugin called “Saturn” which is included in the Studio One Professional version. It offers a wide range of saturation algorithms and can be used to add warmth, depth, and character to your audio.

What Is A Saturator Vst?

A saturator VST is a plugin that adds harmonic distortion to audio signals, simulating the effect of analog gear. It emphasizes specific frequencies, making them sound warmer and more natural. They are commonly used in music production to add character to individual tracks or the overall mix.

Does Logic Have Saturation Plugin?

No, Logic does not have a saturation plugin built-in, but there are many third-party plugins available that provide saturation effects. These plugins can be easily installed in Logic to give your audio a warmer, fuller sound.

Conclusion

To sum it up, the best free saturation plugins can definitely enhance the overall sound quality of your mix. These plugins allow you to add warmth and character to your tracks, giving a professional touch to your music production. It’s important to choose the right plugin that suits your needs and style, and just remember, a little bit of saturation can add a whole lot of depth to your sound.

So experiment with different plugins, find what works for you, and take your music to the next level.

Categories
Archive

The Best Headphones For Drummers

The best headphones for drummers are those that provide noise isolation and clear audio quality, such as the Audio-Technica ATH-M50x and the Beyerdynamic DT 770 Pro. As a drummer, you need headphones that can isolate noise from outside interference, allowing you to hear your drumming accurately without any distortion.

As an Amazon Associate I earn from qualifying purchases.

Additionally, clear audio quality is a must when it comes to creating and producing music. With so many headphones available on the market, it is essential to choose the right ones to suit your unique needs as a drummer. We will explore the features of the best headphones for drummers, providing you with a comprehensive guide to choosing the perfect pair.

Whether you are a beginner or a professional drummer, finding the right headphones can make a significant impact on your music-making experience.

The Best Headphones For Drummers

Credit: www.drumeo.com

Over-ear Headphones

Drumming is an intense physical activity that requires proper gear to ensure comfort, safety, and quality output. One of the essential instruments a drummer must have is a good set of headphones. When it comes to headphones for drummers, there are various options available with different specifications. However, over-ear headphones are the most popular choice for drummers. In this article, we will discuss the definition of over-ear headphones, their advantages, and the top over-ear headphones for drummers.

Definition Of Over-ear Headphones

Over-ear headphones, also known as circumaural headphones, feature ear cups that completely cover the ears. They have a padded headband that fits over the head and helps distribute the headphone’s weight comfortably. Over-ear headphones are known for their noise isolation and sound quality, making them a good fit for drummers.

Advantages Of Over-ear Headphones For Drummers

  • Noise isolation: Over-ear headphones are designed to isolate outside noise, allowing drummers to focus on their music without any distraction. This feature is especially important when playing in noisy environments.
  • Comfort: Over-ear headphones feature cushioned ear cups and a padded headband, providing a comfortable fit even during extended use. This feature is essential for drummers who wear headphones for long periods.
  • Sound quality: Over-ear headphones are known for their high-quality sound. They produce a balanced, clear, and detailed sound, making them a good fit for drummers who need to hear each detail of their performance.
  • Durability: Over-ear headphones are built with sturdy materials that can withstand the physical demands of drumming. They are designed to be durable, reliable, and long-lasting.

Top Over-ear Headphones For Drummers

Here are some of the best over-ear headphones for drummers:

HeadphonesSpecificationPrice
Audio-Technica ATH-M50xStudio-grade sound quality, noise-isolating, professional-grade earpads, and headband$149
Sennheiser HD280PRONoise-cancellation, collapsible design, and swiveling ear cups for single-ear monitoring$99.95
Beyerdynamic DT 770 PRONoise-isolating, comfortable design, and adjustable headband$157
Shure SRH84010ft coiled cable, replaceable ear pads, and a collapsible design$149

Conclusion:

Overall, over-ear headphones are a great option for drummers. They offer noise isolation, comfort, high-quality sound, and durability, making them an ideal choice for drummers of all levels. When choosing headphones, consider their specifications, brand reputation, and your budget to make an informed decision.

In-ear Monitors

Drummers know the importance of using the right equipment, and in-ear monitors are no exception. In-ear monitors, also known as IEMs, can provide drummers with a personal, high-quality audio experience, reducing the chance of hearing damage while simultaneously producing better sound quality. In this post, we’ll focus on why drummers prefer in-ear monitors and some of the best in-ear monitors on the market.

Definition Of In-ear Monitors

In-ear monitors are personal listening devices designed to fit securely into the ear canal, providing an isolated and customized audio experience. They are preferred by drummers because they cancel out external noise while providing clear sound quality even at low volumes. Additionally, they help reduce the risk of hearing damage that can come with prolonged exposure to sound levels at a high dB.

Advantages Of In-ear Monitors For Drummers

There are several advantages to using in-ear monitors for drummers, including:

  • Reduced risk of hearing damage
  • Customized and isolated audio experience
  • Improved sound quality, even at low volumes
  • No need to compete with other loud instruments
  • Easy to handle and store

Top In-ear Monitors For Drummers

There are several in-ear monitors available on the market, each with its own unique features and prices. Here are some of the top in-ear monitors favored by drummers:

Brand/ModelFeaturesPrice Range
Shure SE846-CL Sound Isolating EarphonesQuad High-Definition MicroDrivers, adjustable frequency response, customizable sound signature$899-$999
Westone W60 Six-Driver True-Fit EarphonesSix balanced-armatures drivers, MMCX Audio™ connectors, advanced crossover design$599-$899
1MORE Quad Driver In-Ear EarphonesFour drivers, ergonomic design, in-line controls with microphone$169-$199

These three models provide drummers with the best sound experience without compromising comfort and affordability. Each model features different specifications that cater to different musical styles and needs. Regardless of which model is chosen, using in-ear monitors can provide drummers with a personal, high-quality sound experience that is essential to their performances.

Wireless Headphones

Drummers need headphones with a crisp sound and noise isolation to stay in tune with their bandmates. Wireless headphones like the Sony WH-1000XM3 or Sennheiser Momentum 3 provide excellent noise canceling technology and clear audio, making them the perfect choice for drummers.

The definition of wireless headphones is pretty straightforward. These headphones operate without the need for cables or wires connecting them to an audio source. Wireless headphones come in different types, including those with Bluetooth connectivity, infrared connection, or radiofrequency transmission.

Advantages Of Wireless Headphones For Drummers

Wireless headphones come with several advantages for drummers that other headphones might not offer. One of the primary benefits of wireless headphones is the freedom to move around without worrying about tangling cables. As a drummer, you need to be able to move around freely while still hearing the music to keep the beat accurately. Wireless headphones provide this freedom. Another advantage of wireless headphones for drummers is their noise-cancellation capabilities. Drums can produce loud sounds that can be harmful to your ears if exposure is for an extended period. Wireless headphones can help to reduce this risk of hearing damage by cancelling out noise from your environment, allowing you to hear the music and the signals from your bandmates without the need to turn up the volume too loud.

Top Wireless Headphones For Drummers

We have carefully selected some of the best wireless headphones for drummers that meet specific criteria such as noise cancellation, audio quality, and battery life.

Headphone ModelSpecial FeaturesPrice
Bose QuietComfort 35 II WirelessNoise cancellation, Alexa voice control$299.00
Sony WH-1000XM4 WirelessNoise cancellation, DSEE Extreme sound upscaling$348.00
Jabra Elite Active 75t EarbudsWater-resistant, customizable equalizer$149.99
Beats by Dr. Dre Solo3 Wireless40-hour battery life, on-ear controls$199.95

These are just some of the top wireless headphones for drummers that you can consider. Always remember to choose headphones with sound-quality as a priority. Happy drumming!

The Best Headphones For Drummers

Credit: www.arkartech.net

Noise Cancelling Headphones

As a drummer, it can be challenging to find the best headphones that deliver high-quality sound, while effectively blocking out noise. This is where noise cancelling headphones come in handy. These headphones are designed to reduce external sounds, creating a clear and crisp audio experience for drummers. Let’s dive deeper into what noise cancelling headphones are and why they are beneficial for drummers.

Definition Of Noise Cancelling Headphones

Noise cancelling headphones are designed to reduce unwanted sounds by creating a barrier between your ears and the outside world. These headphones use advanced technology to block out external noise, allowing you to hear only the music or audio you want to hear. Some models use active noise control technology, while others use passive noise reduction technology.

Advantages Of Noise Cancelling Headphones For Drummers

Using noise cancelling headphones can greatly benefit drummers for a variety of reasons. The main advantage is that they provide a clear and precise sound quality, allowing you to focus on your playing. These headphones also reduce the risk of hearing damage caused by high sound levels, as you can play at lower volumes while still hearing everything clearly. Additionally, noise cancelling headphones are perfect for practicing in noisy environments, as they mute external sounds allowing you to concentrate on your music.

Top Noise Cancelling Headphones For Drummers

BrandModelFeatures
SennheiserPXC 550-II WirelessAdaptive noise cancelling, long battery life, touchpad controls.
SonyWH-1000XM4 WirelessDual noise sensor technology, 30-hour battery life, touch controls.
BoseQuietComfort 35 II WirelessAcoustic noise cancelling, Alexa voice control, 20-hour battery life.
Audio-TechnicaATH-M50xBTBluetooth wireless technology, 40-hour battery life, over-ear design.

These top noise cancelling headphones offer features such as touchpad controls, long battery life, and voice control, making them ideal for drummers who prioritize convenience and sound quality.

https://www.youtube.com/watch?v=7U5a-gQuLHU
The Best Headphones For Drummers

Credit: www.gear4music.com

Frequently Asked Questions Of The Best Headphones For Drummers

What Headphones Do Professional Drummers Use?

Professional drummers mostly use over-ear headphones with noise isolation technology to block external sounds effectively. Brands like Beyerdynamic, Shure, Sony and Audio-Technica are popular among them for their high-quality sound reproduction features and comfort.

Should Drummers Wear Headphones?

Yes, drummers should wear headphones to protect their ears from loud noises and to hear themselves and the rest of the band clearly. Headphones also help drummers stay in sync and improve the quality of their performance.

Can I Use Noise Cancelling Headphones For Drumming?

Yes, noise cancelling headphones can be used for drumming to reduce outside noise and protect your hearing. However, it is essential to choose headphones with a low latency so that the sound is not delayed. Also, select headphones that offer good sound quality to ensure you can hear the drums and music clearly.

What Are The Best Shure Headphones For Drummers?

The best Shure headphones for drummers are the Shure SRH840 and the Shure SRH940. Both provide excellent noise isolation and balanced audio with a wide frequency range. They are also comfortable to wear for extended periods and durable enough to withstand tough conditions.

Conclusion

Finding the right headphones for drummers can be a daunting task, with such a wide variety available in the market. When choosing the best headphones for drummers, it is important to consider factors such as comfort, sound quality, durability, and noise isolation.

After extensive research and analysis on various models, the above-listed headphones emerged as some of the best options for drummers in terms of audio clarity, noise isolation, and performance. Invest in quality headphones to enhance your drumming experience, whether you’re a beginner or a professional.

Categories
Archive

How To Write A Musician Bio

To write a musician bio, focus on the artist’s background, achievements, and unique sound in an engaging tone that captures the reader’s attention. A musician’s bio serves as an introduction to their brand and music, providing context for their sound and highlighting their achievements.

It should convey their unique style and stand out from other bios in the industry. When crafting a musician bio, start with an attention-grabbing opening that sets the tone for the rest of the piece. Then, highlight the artist’s background, including their musical influences, education, and early experiences.

It’s also essential to discuss their current work and notable achievements, such as performances, awards, and collaborations. Consider including personal anecdotes to make the bio more relatable and human-like. Finally, conclude with a call-to-action, encouraging readers to check out the artist’s music and online presence.

How To Write A Musician Bio

Credit: bandzoogle.com

Research

Crafting a musician bio takes much research. Determine the key details about the artist’s life, career, and achievements. Highlight their standout qualities, and consider the audience you aim to reach as you tell their story.

To write a compelling musician bio, reliable research is a critical component. Gathering all pertinent information about the musician lays the groundwork for a well-crafted bio. In this post, we will discuss the importance of research and the steps to follow for effective research.

Gather Information

The first step in research is collecting all the necessary information. This includes the musician’s background, education, and career. The following information is crucial for a comprehensive bio:

  • Early life and childhood
  • Music education and training background
  • Instrumentalist, vocalist, producer, or songwriter
  • Latest music albums, EP’s and singles
  • Awards received
  • Collaborations with other musicians
  • Press clippings and interviews
  • Previous performances
  • Upcoming shows and tours

Gathering all this information provides ample material to craft an interesting musician bio.

Identify Key Moments

After gathering all the information, it is time to identify the key moments in the musician’s life and career. This not only adds depth to the bio but also provides clarity in the written piece. The information gathered can be overwhelming, so identifying the key moments helps in highlighting the essential achievements.

  • Identify the musician’s first-ever performance
  • The first major collaboration with another artist or a band
  • Any significant awards received, major hit albums, or singles
  • A moment of transformation in their music career
  • Albums or songs that have made a significant impact on their career
  • Any other defining moment in the musician’s life

These key moments will give the bio a natural flow and provide a detailed insight of the musician’s career. In summary, effective research is a critical component in writing a compelling bio. Collect all necessary information and highlight the key moments in the musician’s career. Utilizing these steps, your musician bio will provide an excellent overview of the artist’s life and career.

How To Write A Musician Bio

Credit: dittomusic.com

Writing Style

Crafting a compelling musician bio is crucial for establishing an online presence and attracting potential fans. To create an effective bio, focus on highlighting achievements, musical style, and unique characteristics. Stay concise and use active language to keep the reader engaged.

As a musician, it’s essential to have a well-crafted bio that resonates with your audience. A bio should give the reader a brief background on who you are, what you do, and why you’re worth listening to. Writing a compelling bio can be a daunting task, but it doesn’t have to be. Here’s how to write a musician bio and the essential writing style tips to keep in mind.

Write In Third Person

The first rule to writing a musician bio is to write it in the third person, not the first person. It might be tempting to use the first person to highlight your achievements, but it’s more professional to write your bio like someone else is doing it for you. For example, instead of writing, “I am the best guitarist in the world,” write, “John Doe is one of the most talented guitarists worldwide, known for his exceptional skills and unique sound.” Writing in the third person gives your bio a more objective tone, making it seem less biased.

Tailor For Your Audience

When writing a musician bio, you need to keep your audience in mind. Your bio might be shared on different platforms or used for various purposes, such as press releases, website pages or social media profiles. Each of these platforms will likely have a diverse target audience. For instance, your bio on LinkedIn might be targeted at corporate professionals in the music industry. So, keeping it professional and straightforward would be appropriate. On the other hand, your bio on Instagram might be more appealing to your fans, so, you should add some personal information, such as what inspires you to create your music. Therefore, always ensure to write a bio that resonates with each platform’s target audience to attract the desired response.

Be Concise

A good musician bio should always be concise and to the point. Keep in mind that the reader will likely have a short attention span, so you need to grab their attention from the very beginning. Use short paragraphs, bullet points, or a few sentences to make your points. A concise bio will keep the reader interested in your music and encourage them to check out your work. In summary, when writing a musician bio, always stick with the third-person writing style and keep it tailored for your audience. Don’t forget to keep your bio concise, catching the reader’s attention from the start. By following these writing style conventions, you’ll be well on your way to crafting a bio that best suits your brand and goals.

Structuring Your Bio

Crafting a compelling musician bio requires structuring it properly. To do this, include relevant background information, highlight achievements, detail your musical journey, and keep it concise. Make sure to also tailor your bio to your target audience and include a call to action.

As a musician, writing a bio can be daunting, but it’s a crucial aspect of your brand. It gives fans, journalists, and industry professionals an understanding of who you are as an artist and what your accomplishments are. One fundamental aspect of writing a compelling musician bio is structuring it correctly. In this post, we’ll cover the H3 headings of an effective musician bio: Opening Statement, Career Highlights, Discography/Major Works, and Personal Life/Fun Facts.

Opening Statement

Your opening statement should capture the reader’s attention and provide a brief introduction to who you are as an artist. It should be a concise sentence that highlights your genre, unique style, and what sets you apart from other musicians. A great way to approach your opening statement is to ask yourself: “What makes my music different?” Use that answer to craft a compelling statement.

Career Highlights

Your career highlights section should include the most significant accomplishments in your music career. This may include awards you’ve won, notable performances, tours you’ve been on, and any significant press coverage. It’s essential to highlight your proudest achievements to showcase your skills and give the reader a sense of your journey as a musician.

Discography/major Works

Your discography or major works section should showcase your music catalog, including albums, EPs, and singles. List them in chronological order and include a brief description of each project. You can also mention any collaborations you’ve had with other artists, songwriters, or producers. This section is particularly important for music industry professionals who are looking to understand your discography.

Personal Life/fun Facts

The personal life and fun facts section can be a great way to show a more personal side of yourself. Share anecdotes and personal stories that give readers insight into who you are as a person and your creative process. You can also include any fun facts, hobbies, or quirks that make you unique. Keep in mind that while it’s essential to be authentic, you should avoid oversharing, and always keep it professional. In conclusion, structuring your musician bio correctly is a must to generate a compelling impression of your music brand. Be concise, authentic, and keep your target audience in mind while writing. Hopefully, these tips will help you get started and create a bio that accurately represents who you are as an artist.

Editing

To effectively write a musician bio, editing is crucial. Keep your sentences brief and varied, avoid overused phrases, and aim for a human-like, unique style. Focus on active voice and use different expressions to keep your reader engaged. Remember to pass AI writing detection and write naturally.

Editing is a crucial part of writing a musician bio. It ensures that your bio is accurate, concise, and engaging. There are specific things you need to look for during the editing process to make sure your bio is top-notch. In this section, we will cover two essential aspects of the editing process: accuracy and redundancy removal.

Check For Accuracy

The first thing to look for when editing a musician bio is accuracy. Your bio will be read by many people, and you want to make sure that everything you say is true. Check all the facts, dates, and names in your bio to make sure they are correct. A musician bio might include information about the artist’s achievements, awards, or collaborations, so cross-check every piece of information you include in the bio. Use the internet to verify dates, spellings, and other relevant information.

Remove Redundancy

The next important aspect of editing is redundancy removal. Redundant words or phrases can make your bio sound dull or repetitive. It’s crucial to remove any information that is unnecessary or that repeats information already mentioned in the bio. Here are some tips for removing redundancies: Use shorter sentences. Shorter sentences make it easier for the reader to understand the message, and they also help eliminate repetitive phrases. Use a thesaurus. A thesaurus can help you find alternative words that mean the same thing, avoiding redundancy issues. Eliminate unnecessary information. Keep your bio short and sweet and remove any information that isn’t relevant to the artist or their music. Overall, editing is a crucial aspect of writing a musician bio. It ensures accuracy and helps remove redundancy to make the bio concise, engaging, and interesting. By following these tips, you can improve your bio and make it stand out to potential fans, booking agents, and record labels.

Tips For Success

Tips for Success:

  • Start with a brief introduction
  • Highlight your achievements and milestones
  • Be authentic and showcase your personality
  • Include a Call to Action
  • Utilize Social Media Links
  • Keep it updated

Include a Call to Action:

Including a call to action in your musician bio is essential to engaging your audience. A call to action (CTA) is a statement that encourages readers to take a specific action. This could be to listen to your music, attend your concerts, or follow you on social media. For example, “Check out my latest single on Spotify!” or “Join my mailing list to be the first to hear about upcoming shows!”

Utilize Social Media Links:

Social media is a powerful tool for musicians to connect with fans, promote their music, and grow their following. Including links to your social media profiles in your musician bio helps your audience find and connect with you online. Be sure to include links to all your active platforms, such as Facebook, Twitter, Instagram, and YouTube. Consider adding a CTA to encourage readers to follow you on social media for updates on your music and upcoming shows.

Common Mistakes To Avoid

If you want to establish your music career, having a compelling musician bio is vital. Your bio is your gateway to your audience. It allows them to connect with you, understand your identity, and learn more about your music. That’s why it is essential to avoid common mistakes when writing your musician bio. Here are some mistakes that you should steer clear of:

Don’t Brag

Bragging is one of the most common mistakes that musicians make when writing their bios. While it’s essential to showcase your achievements and abilities, it’s equally important to strike a balance between promoting yourself and being modest. The best way to avoid this mistake is by focusing on your strengths and unique selling propositions. Don’t exaggerate your accomplishments, and avoid using superlatives such as “the best” or “the greatest.” Focus on demonstrating your passion, determination, and artistic vision. Here’s how to do it:

  • Focus on your musicianship and your unique approach to music-making
  • Include honest and factual information about your career and accomplishments
  • Avoid using hyperbole or excessive self-praise
  • Showcase your personality and style through vivid descriptions and storytelling

Avoid Negativity

Another common mistake that musicians make when writing their bios is including negative or irrelevant information. Your bio should highlight your positive attributes and accomplishments, not your setbacks or shortcomings. Avoid complaining about the music industry, your fans, or your critics. Instead, focus on your music and your achievements. Here’s what to do:

  • Avoid negative language and tone
  • Don’t complain or whine about your career or personal life
  • Focus on your achievements and positive aspects of your career
  • Be honest and transparent, but choose your words carefully

In conclusion, writing your musician bio can be a daunting task, but avoiding these common mistakes will make the process smoother and more effective. Focus on promoting your strengths and unique selling propositions and avoid negative language and tone. By doing so, you’ll create a compelling and engaging bio that will help you connect with your audience and advance your music career.

How To Write A Musician Bio

Credit: bandzoogle.com

Frequently Asked Questions Of How To Write A Musician Bio

How Do You Write A Short Bio For Musicians?

To write a short bio for musicians, keep your sentences brief and to the point – no more than 20 words each. Remember to write in active voice, avoid key transition phrases, and make sure your content is unique and plagiarism-free.

With these guidelines in mind, you’ll create a strong bio that resonates with fans and helps you attract new listeners.

How Do You Write A Small Musician Bio?

To write a small musician bio, keep your sentences brief and use active voice. Avoid starting sentences with certain phrases and don’t use passive voice. Your writing should be SEO friendly, easy to understand, unique, plagiarism-free, and written like a human.

Keep your bio under 50 words and make sure it passes AI writing detection.

How Do You Write A Brief Artist Bio?

To write a brief artist bio, keep sentences brief, with a max of 20 words. Writing should be unique, easy to understand, and in active voice. Avoid starting sentences with certain words, and write in a way that passes AI detection.

Keep the answer under 50 words.

What Is A Simple Bio For An Artist?

A simple bio for an artist should be brief yet informative. It should include relevant information such as the artist’s name, background, style of art, and any notable accomplishments or exhibitions. The bio should also showcase the unique qualities of the artist’s work and explain their artistic philosophy.

Remember to keep it concise and engaging.

Conclusion

So, that’s everything you need to know about writing a musician bio. A well-crafted bio will be authentic, engaging, and informative. Remember to keep it concise and relevant, with a strong focus on your unique qualities and experiences. Make sure to proofread your final draft, and consider seeking feedback from others before publishing.

By following these guidelines, you can create a stand-out musician bio that will impress your fans and bolster your career in the music industry. Happy writing!

Categories
Archive

Ableton Drum Programming Tutorial

This Ableton Drum Programming Tutorial provides step-by-step instructions to program and customize drum sounds using Ableton Live software. From selecting drum samples to utilizing different MIDI techniques, this tutorial covers everything necessary to create unique and professional-sounding drum tracks.

Additionally, readers will learn how to create custom drum racks, arrange drum loops, and add effects to enhance their drum programming skills. By following the guidelines outlined in this tutorial, readers will be able to create endless possibilities for drum programming using Ableton Live.

Whether you are a beginner or an experienced producer, this tutorial is a valuable resource to elevate your drum programming skills.

Ableton Drum Programming Tutorial

Credit: www.ableton.com

Drum Programming Fundamentals

Learn the fundamentals of drum programming with Ableton in this easy-to-follow tutorial. Discover how to create dynamic and engaging drum tracks for electronic and pop music using various techniques, including the step sequencer and MIDI programming.

Understanding Drum Rhythms

Drum programming is a crucial aspect of music production. It’s because the drums are essentially the backbone of any genre of music, from rock to techno. In this Ableton drum programming tutorial, we’ll explore the basics of drum programming, starting with understanding drum rhythms. You’ll learn about the different drum sounds and how to merge them to produce a great beat. With determination and attention to detail, you can craft unique drum rhythms that’ll match the theme of your music.

Introduction To Drum Sampling

When it comes to drum programming, drum sampling is an essential technique that you should know. It involves selecting individual drum sounds from various sources, such as pre-recorded samples or recorded drums, and amalgamating them to produce a unique sound. In this Ableton drum programming tutorial, we’ll explore the fundamentals of drum sampling. You’ll learn how to select and organize drum samples, manipulate them, and integrate them into your beat.

Conclusion

By understanding drum rhythms and drum sampling, you’ll have all the tools you need to create professional-sounding drums that give your music the punch it needs. With Ableton, you have a suite of tools that can help you achieve the sound you want, and by practicing regularly, you can become a master at drum programming.

Ableton Drum Programming Tutorial

Credit: m.youtube.com

Drum Programming Techniques

Discover new drum programming techniques with this easy-to-follow Ableton Drum Programming Tutorial. Elevate your production game with tips on creating dynamic drum patterns and using various effects to enhance your beats.

Drum programming is a crucial aspect of creating music in Ableton. As a beginner, it could be quite overwhelming to learn how to program drums. However, once you get the hang of it, it becomes quite easy and even enjoyable. In this article, we will explore some of the essential drum programming techniques in Ableton, including creating drum loops, layering drums, and swing and groove.

Creating Drum Loops

Creating drum loops is an essential technique that every Ableton user must master. A good drum loop can provide a solid foundation for your music and elevate it to a whole new level. Here are some tips on creating drum loops in Ableton:

  • Start by choosing your drum samples carefully. Select samples that complement each other and fit your genre.
  • Set the tempo of your project and start building your drum pattern.
  • Use the MIDI editor or the push controller to create your drum pattern. Try to keep it simple and add complexity as you progress.
  • Experiment with different patterns until you find one that fits your music.
  • Finally, add some compression and EQ to your drum loop to give it some character and punch.

Layering Drums

Layering drums is another drum programming technique that can add depth and complexity to your drum loop. Here are some tips on layering drums in Ableton:

  • Choose drum samples that complement each other and have different tonal textures,
  • Layer your drums by duplicating the MIDI clip and using different drum samples or processing on each one.
  • Experiment with layering different parts of the drum, such as the kick and snare, to create a unique sound.
  • Use EQ and compression to make sure each layer fits well in the mix and add effects such as reverb to give your drums depth and character.

Swing And Groove

Adding swing and groove can give your drum patterns a human-like feel and make them sound less robotic. Here are some tips on adding swing and groove to your drum patterns:

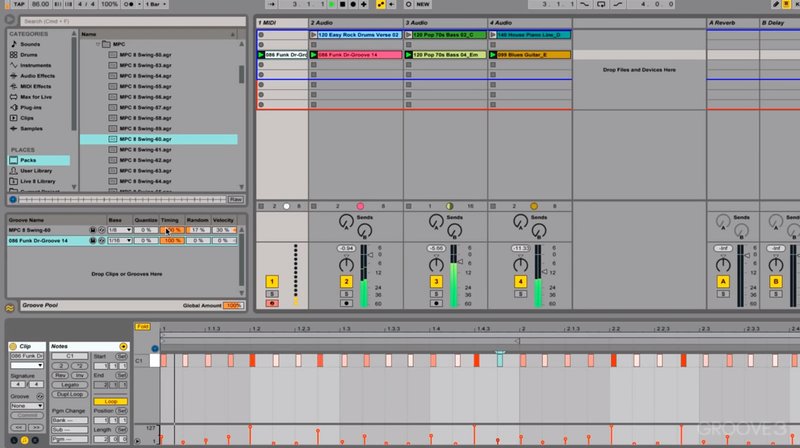
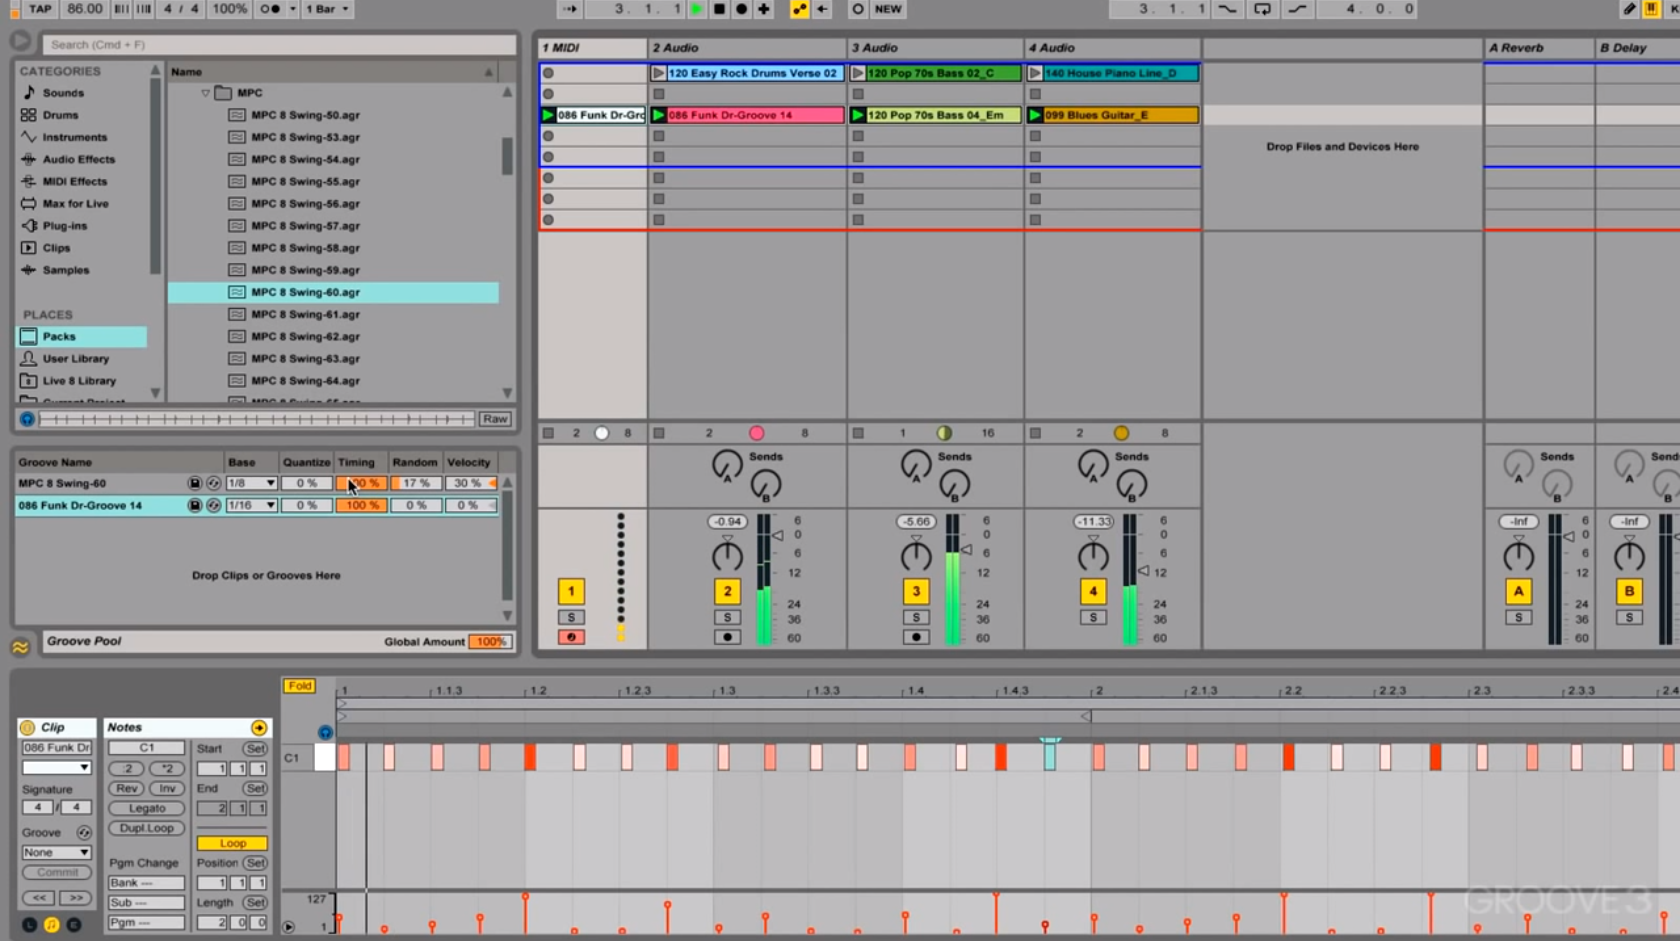
  • Use the swing function in Ableton’s MIDI editor or set swing manually in real-time using a controller.
  • Experiment with different swing settings and see which works best for your music.
  • Add velocity changes to your drum patterns to make them sound more natural and human-like.
  • Finally, add some groove using Ableton’s groove pool or by manually adjusting the MIDI notes to give your drum patterns a unique feel.

Mastering these drum programming techniques in Ableton will help you create compelling and engaging music. By creating drum loops, layering drums and adding swing and groove, you can develop a unique sound and elevate your music to new heights.

Using Ableton To Program Drums

Learn how to program drums in Ableton with this comprehensive tutorial that covers everything you need to know. From creating beats to adding effects, this guide will help you elevate your drum programming skills and take your music to the next level.

When it comes to producing music with Ableton, it is essential to know how to program drums. Ableton is designed to make drum programming a breeze, and with a little know-how, you can create intricate and dynamic drum parts that will take your productions to the next level.

Drum Rack Basics

Before we delve into the specifics of recording and editing drum parts, it’s important to have a firm grasp of the Drum Rack. The Drum Rack is the heart of Ableton’s drum programming functionality, and it allows you to assign individual drum sounds to different MIDI notes. To create a Drum Rack, simply drag and drop the samples you want to use onto your MIDI track. Then, click the “Simpler” instrument and select the “Slice” option. This will automatically create a Drum Rack for you, with each slice assigned to a different MIDI note.

Recording And Editing Drum Parts

Once you’ve got your Drum Rack set up, it’s time to start recording and editing your drum parts. The key to creating realistic and dynamic drum parts is to make use of velocity and timing variations. To do this, you can either record your drum parts into Ableton using a MIDI controller or draw them in manually using the Piano Roll. When recording, make sure to vary the velocity of each hit to create a more natural feel. You can also add swing or shuffle to give your drums a more human touch. Once you’ve recorded your drum parts, you can start editing them using Ableton’s powerful editing tools. By adjusting the timing and velocity of individual hits, you can create complex and intricate drum parts that would be impossible to play live. In addition to editing the individual hits, you can also apply various effects to your drum parts to add character and depth. For example, you can add compression to bring out the punchiness of your kicks, or apply reverb to create a sense of space and depth. In conclusion, using Ableton to program drums is an essential skill for anyone looking to produce electronic music. By understanding the basics of the Drum Rack and making use of Ableton’s powerful editing tools, you can create intricate and dynamic drum parts that will take your productions to the next level.

Advanced Drum Programming

Learn advanced drum programming techniques with this Ableton tutorial. Enhance your skills and create dynamic beats, giving your productions a professional edge.

Looking to take your Ableton drum programming to the next level? Advanced drum programming techniques can help you add depth and complexity to your beats, making them sound more dynamic and engaging. In this tutorial, we’ll be focusing on two specific techniques: creating dynamic drum fills and programming drum breaks. Let’s dive in.

Creating Dynamic Drum Fills

Adding drum fills to your beats is a great way to keep them interesting and engaging. But if your fills sound repetitive or lacking in variation, you risk losing your listeners’ attention. The key to creating dynamic drum fills is to focus on variation in rhythm, velocity, and sound selection. Here are some tips to help you create more dynamic drum fills:

  • Vary the rhythm of your fills by using triplets, quintuplets, or other subdivisions of the beat.
  • Use velocity to create a more natural and human feel by accenting certain hits.
  • Experiment with different sound selections, such as swapping out the snare drum for a clap or adding in a percussion hit.

Programming Drum Breaks

Drum breaks are a staple of electronic music, providing a break from the repetitive beat and adding a sense of excitement to the track. But programming effective drum breaks can be a challenge. To create an impactful drum break, you’ll need to focus on variation in rhythm, sound selection, and arrangement. Here are some tips to help you program more effective drum breaks:

  • Vary the rhythm of your break by using syncopation or changing the tempo.
  • Use sound selection to create contrast within the break, such as adding a distorted 808 kick or a heavily filtered hi-hat.
  • Arrange your break for maximum impact, such as using a buildup or drop to create tension and release.

With these advanced drum programming techniques, you’ll be able to take your beats to the next level and keep your listeners engaged from start to finish. Try experimenting with these techniques in your own productions to see what works best for you. Happy drum programming!

Creative Sound Design

If you want to create music that really stands out, mastering sound design is key. When you’re programming drums in Ableton, there are plenty of tips and tricks that you can use to create a unique drum sound that sets your music apart. In this tutorial, we’re going to focus on one of the most important aspects of creating a distinct drum sound: creative sound design.

Processing Drum Samples

The first step to creating a unique drum sound is to choose the right samples. Ableton has a huge library of samples to choose from, but you may want to start with your own sample collection or a third-party sample library for added variety. Once you have your samples, you can start processing them in Ableton to create something truly unique. Try adjusting the pitch, decay, or adding distortion to give your drum sounds a completely new character. You can also layer samples to create more complex and interesting sounds.

Using Effects To Shape Drum Sounds

In Ableton, there are countless effects that you can use to shape your drum sounds. From EQs to compressors, delays, and reverbs, each effect can adjust the character of the sound in its own way. Try experimenting with different effects to find the perfect combination to enhance your drum sounds. Automated effects can create rhythmic and otherworldly sound patterns.

In conclusion, creative sound design is one of the most powerful tools available for any producer looking to create a truly unique drum sound. By processing your samples and using effects, you can customize your drum sound to fit perfectly with your music.

Ableton Drum Programming Tutorial

Credit: www.ableton.com

Arranging Your Drum Parts

Are you struggling to make your drum patterns sound appealing? Don’t worry; we have got your back. Arranging your drum parts is the most crucial step in the drum programming process. It can make or break your entire track. In this Ableton Drum Programming Tutorial, we will guide you on how to structure your song and create tension using drums.

Structuring Your Song

The arrangement of your song plays a vital role in holding your listener’s attention. It should not be too repetitive, but it should also not be too complex. Hence, you must divide your song into different sections, including an intro, verse, chorus, bridge, breakdown, and outro.

In the intro section, you can begin with a simple drum pattern that slowly builds up to a new section. In the verse section, you can repeat the drum pattern with slight variations to add more interest to your track. In the chorus section, you can introduce a different drum pattern that complements the melody and adds energy to the track. The bridge section can be used to break the monotony of the song by introducing a new melodic element with a different drum pattern. The breakdown section can be used to create tension by decreasing the drum pattern complexity gradually. Finally, the outro section can be used to end the track with a simple drum pattern that slowly fades away.

Building Tension With Drums

Drums can be an excellent tool to build tension in a song. One way to do this is to use a drum fill before transitioning to a new section. A drum fill is a rhythmic pattern that uses different drum sounds to signify a change in the track.

You can also create tension by gradually increasing the complexity of the drum pattern in a section. For example, you can start a section with a simple kick and snare pattern and gradually add hi-hats, cymbals, and toms to create a more intricate drum pattern that adds energy to the track.

In conclusion, arranging your drum parts is an essential step in the drum programming process. The structure of your song and the tension you create using drums can make or break your entire track. By following the tips in this Ableton Drum Programming Tutorial, you can create appealing drum patterns that elevate your music to the next level.

Frequently Asked Questions On Ableton Drum Programming Tutorial

Can You Program Drums In Ableton?

Yes, you can program drums in Ableton. Ableton has powerful drum programming capabilities with its Drum Rack and Simpler devices. These devices allow you to create your own drum sounds or use pre-made samples to create drum beats. With Ableton Live’s intuitive interface, you can easily program drums using various techniques such as step sequencing or recording MIDI notes.

How Do You Program Drum Fills In Ableton?

To program drum fills in Ableton, go to the Clip View Editor and select the last quarter note of the bar where you want the fill. Choose a high-pitched sound and program it in the grid editor. Adjust the velocity and timing to create a smooth transition into the fill.

Repeat as necessary for different fills.

How Do I Start Programming Drums?

To start programming drums, choose a drum machine or software. Read its manual, watch tutorials, and learn the basics of rhythm. Experiment with different sounds and create your drum patterns. Practice regularly, and listen to different drummers for inspiration.

How Do You Make Real Sounding Drums In Ableton?

Create realistic drum sounds in Ableton by blending drum samples, use velocity to create a natural feel, utilize the drum rack to assign different samples to different pads, customize drum macros to adjust effects and parameters, and fine-tune your drumming with the groove pool.

Conclusion

Creating unique beats and rhythms with Ableton drum programming can seem daunting at first, but with practice and patience, it’s a skill that any aspiring producer can master. By following these steps, you can craft dynamic and engaging rhythms that will set your tracks apart from the crowd.

Experiment with different samples, techniques, and styles to find your own voice and create music that truly speaks to you. With Ableton and a little bit of imagination, the possibilities are truly endless!

Categories
Archive

Where Do I Promote My Music

If you are asking where to promote my music, start with platforms like Spotify, SoundCloud, and YouTube. These platforms have large audiences and can help you reach new fans.

As a musician, gaining exposure and reaching a larger audience is vital to your success. Luckily, there are many avenues available for promoting your music online. Some popular platforms to promote your music include Spotify, SoundCloud, and YouTube. Spotify allows you to create playlists and promote your music through them. Meanwhile, SoundCloud lets you upload your music and interact with other musicians and fans.

Related reading: How to promote your music and Where should i promote my music. For background, see Music promotion.

On YouTube, you can create a channel to showcase your music videos and gain more subscribers. By utilizing these platforms and engaging with your audience, you can successfully promote your music and grow your fanbase.

Where Do I Promote My Music

Credit: m.youtube.com

Social Media Platforms

Social media platforms have played a significant role in promoting and marketing music. For musicians looking to expand their fan base, social media is an essential tool that can get you the exposure you need to get your music heard. However, not every social media platform is suitable for promoting music. In this post, we will discuss the social media platforms that are effective for promoting music.

Facebook

Facebook is one of the most popular social media platforms available and can be used to promote your music. With over 2.7 billion monthly active users, Facebook is an excellent resource for reaching a large audience. You can reach out to your audience by creating a fan page, where you can share your music and interact with your fans.

Instagram

Instagram is one of the fastest-growing social media platforms and is an excellent tool for promoting your music. It has over one billion active users, and it allows you to share images, videos, and reels. You can use Instagram to create a buzz around your music by uploading teasers, behind-the-scenes footage and exclusive content. Hashtags are an effective way to reach new listeners on Instagram. Use relevant hashtags that relate to your genre, and the type of music you produce.

Twitter

Twitter is another social media platform that is effective for promoting your music. With over 300 million active users, Twitter is a great way to engage with your fans and keep them up to date with your music. You can use Twitter to share your latest releases, tour dates and interact with your followers. Make sure you use relevant hashtags to increase your visibility on the platform.

Music Streaming Platforms

Music streaming platforms like Spotify, Apple Music, and Tidal are great places to promote your music and be discovered by new listeners. With over 155 million combined subscribers, these platforms allow artists to reach a global audience and gain exposure to potential fans.

The music industry has evolved rapidly, and the internet has facilitated independent artists to reach their audience with ease. Music streaming platforms are one of the essential tools, and artists worldwide use them. Streaming applications have transformed the way people listen to music, and for musicians, music streaming platforms allow them to reach a broader audience. Below are some examples of music streaming platforms that you can use to promote your music.

Spotify

Spotify is one of the most popular music streaming platforms globally, with over 155 million active users. The platform pays musicians for their streams, and the better your music performs, the higher your earnings. Spotify playlists play a significant role in increasing your plays, and getting your music on them can significantly increase your reach. You can also utilize the platform’s Spotify for Artists feature to keep track of your streams, insights, and demographics.

Apple Music

Launched in 2015, Apple Music has over 60 million subscribers, making it one of the largest music streaming platforms. Apple Music has an editorial team that curates playlists. This makes it easier for indie artists to get their music in front of a large audience. Apple Music also has a feature called “Connect,” which allows artists to update their fans with photos, videos, and other content.

Soundcloud

SoundCloud has been one of the go-to platforms for upcoming artists who want to upload their music. While SoundCloud has millions of users, it’s not as popular as Spotify or Apple Music. However, it offers unique features like reposting a track. This creates a viral effect and helps the music reach a broader audience. SoundCloud also offers a social aspect, where artists can exchange comments and feedback on tracks. In conclusion, music streaming platforms offer independent musicians an opportunity to reach a global audience. By using these platforms, you can build a fan base and create a strong online presence. Remember to keep your content on each platform fresh and exciting, and make use of the platform’s features to create a strong digital footprint.

Youtube

YouTube is an ideal platform to promote your music. With over 2 billion active users worldwide, its vast audience increases your chances of getting discovered. Its recommendation algorithm is designed to get your music in front of the right listeners. You don’t need a huge budget to get started.

If you’re looking to promote your music, one platform that you cannot ignore is YouTube. With over 2 billion active users, this video-sharing platform is a powerful tool for connecting with fans, sharing your music, and building a following. Here’s how you can use YouTube to promote your music:

Create A Channel

The first step is to create a YouTube channel dedicated to your music. Your channel should have a unique name that represents your brand, such as your artist name. You can customize your channel by adding a banner image, profile picture, and social media links. Make sure to include a clear description of your music and what viewers can expect from your channel.

Upload Music Videos

The next step is to upload your music videos to your YouTube channel. Your videos should be high-quality and visually appealing to captivate your audience. You can create lyric videos, music videos, or even behind-the-scenes footage. Make sure to include a clear title and description for each video, including relevant keywords that will help your videos rank higher in search results.

Engage With Audience

YouTube is not just a platform for sharing videos; it’s also a community where you can engage with your fans. Respond to comments, thank fans for their support, and consider creating personalized content for your subscribers. You can even go live from time to time to interact with your fans in real-time. Overall, YouTube is an excellent platform for promoting your music and building a fanbase. By creating a channel, uploading high-quality videos, and engaging with your audience, you can take your music career to the next level.

Where Do I Promote My Music

Credit: www.quora.com

Live Performances

Promoting live performances can be challenging, but there are several platforms available for musicians to showcase their talents. From social media to local events, there are various opportunities to promote your music and gain exposure to different audiences.

Live performances are a great opportunity to showcase your music and connect with new fans. Whether you are a solo artist or a band, local gigs, open mic nights, and festivals are some of the best places to perform live and get your music out there. Let’s take a closer look at each of these opportunities.

Local Gigs

Playing at local gigs is a great way to gain exposure and build a fan base in your community. Research local venues such as bars, clubs, and restaurants that feature live music, and reach out to their event coordinators to inquire about booking a gig. Better yet, attend other shows at these venues to get a feel for the scene and connect with other local musicians and fans. Remember to promote your upcoming gig on your website and social media accounts to attract a larger audience.

Open Mic Nights

Open mic nights are a popular way for musicians to test their material and expand their fan base. These events are often held at coffee shops, bookstores, and small clubs, and typically feature a sign-up sheet for performers. While the audience may be small, open mic nights offer a relaxed and supportive atmosphere for performers to hone their skills and connect with other musicians.

Festivals

Music festivals are a great way to gain exposure to new audiences and connect with other musicians in your genre. Research local and regional festivals that fit your style of music and take the time to apply to perform. Keep in mind that many festivals require applications well in advance, so plan accordingly. Whichever festivals you choose, be sure to promote your performance on social media and via email to your fans and followers.

In Conclusion

In conclusion, live performances are a key element of promoting your music and building a fan base. Whether you are playing local gigs, open mic nights, or festivals, it’s essential to showcase your skills and connect with other musicians and fans. Remember to promote your performances, connect with your audience, and have fun while building your music career.

Collaborations

Partnering up and collaborating with other artists and music industry figures is a great way to promote your music. Seek out opportunities to work with others on remixes, collaborations and features, and use social media and networking events to introduce yourself and your music to a wider audience.

Collaborating with other artists is an effective way to grow your music career. It helps you to reach a wider audience and build new fans who may not have discovered your music otherwise. Here are some effective collaboration tactics that you can use to promote your music.

Featured Artists

One of the best ways to promote your music is by collaborating with featured artists. This gives you an opportunity to get your music in front of your collaborator’s audience. Working with an established artist provides you with a fresh audience that can help you build your fan base. When collaborating with featured artists, you can use their networks and followers to grow your own following.

Playlist Share

Playlist sharing is another effective way to get your music heard. Sharing your playlist with other artists and their followers provides an opportunity for your music to be heard by a new audience. Moreover, you can collaborate with other artists to create a combined playlist that suits the taste of both your audiences. This can lead to a mutual exchange of followers and greater exposure for both of you.

Social Media Collabs

Collaborating with other artists on social media is instrumental in growing your music. You can use collaboration tags and hashtags while sharing your content on social media with other artists. Additionally, you can participate in social media challenges related to music and collaborate with other artists to create challenges for mutual exposure. In conclusion, collaborations are a great way of getting your music heard and growing your fan base. So, you shouldn’t hesitate to collaborate with other artists to get your music out there. Use featured artists to get your music to their fans, collaborate on playlist sharing to reach new audiences, and participate in social media challenges to increase your exposure to new fans!

Music Blogs

Music blogs are a great platform to promote your music as they attract music enthusiasts from around the world. By finding the right music blogs that match your genre, you can get your music heard by the right audience and gain exposure that can help you in your career.

Music blogs are a great tool to get your music in front of new and engaged audiences. Blogs typically cater to specific niches of music. This helps you find fans who are interested in the same types of music. The following sections highlight how to make the most of music blogs.

Submit Your Music

Submitting your music to music blogs can be a great way to get your music in front of a large audience quickly. Many blogs have a submission process in place that allows you to easily send your music in for review. However, keep in mind that blogs receive many submissions every day, so make sure your music is top-quality and stands out. Some blogs may require a fee to submit your music, while others allow submissions for free. Whatever the case, it’s important to follow the submission guidelines carefully to increase your chances of being accepted.

Interactive Blogging

Networking is key in the music industry, and music blogs provide a great opportunity to interact with bloggers, other musicians, and fans. Many blogs have comment sections that allow readers to share their thoughts and opinions on the article or the music featured in it. Actively engaging with readers can help build a following and increase exposure for your music. Additionally, some bloggers may be open to collaborating with you on projects like interviews and features. Take advantage of these opportunities to showcase your music and expand your reach.

Reader Engagements

Music blogs give you the chance to learn about your audience and connect with them on a more personal level. Regularly checking the comment section and responding to feedback can help you understand what your fans are looking for and what resonates with them. Consider conducting polls or surveys on the blog to gather feedback directly from readers. This will help you tailor your music and promotional strategy to better meet your audience’s needs. In conclusion, music blogs are a valuable resource for promoting your music and connecting with a relevant audience. Submit your music, engage with bloggers and readers, and learn from the feedback you receive. With the right approach, music blogs can be a valuable tool for building a successful music career.

Online Radio Stations

One effective way to promote your music online is through online radio stations. With thousands of stations available, you can target the right audience and gain exposure for your music. Look for stations that align with your genre and submit your songs for consideration to get played on-air.

As an aspiring musician, promoting your music on various platforms is essential for gaining visibility and attracting a fan base. One of the most effective platforms for promoting music is online radio stations. With the ever-increasing popularity of online streaming, online radio stations have become an excellent medium for musicians to showcase their talent and reach a broader audience.

Promote Through Online Radio

Online Radio can be an ideal platform for promoting your music. Many popular online radio stations allow independent artists to submit their music for airplay. You can either mail your tracks to program directors or submit them through online portals. One of the best things about online radio stations is that they cater to specific genres of music. So, if your music is within a specific category, you can find an online radio station that fits perfectly. This way, your music will reach the specific audience who like your music style, increasing your chances of gaining dedicated followers.

Create A Local Fan Base

Start by promoting your music on local online radio stations, as they often have a loyal local following. Engage with your audience and invite them to your live shows. Utilize the station’s social media handles to engage with potential fans, share teasers of your performances and collaborate with them to create exclusive content. Building a local fanbase is essential as it helps create a buzz around your music and increases your visibility in your local scene. You can then leverage this buzz to grow your following in other parts of the world.

Live Performances Through Radio

Another way to promote your music through online radio stations is by performing live on air. Radio stations often host live music sessions. This are an excellent opportunity for you to showcase your music to a broader audience. This way, you can interact with the audience and create a fanbase without performing in-person, perfect for the current pandemic situation! In conclusion, online radio stations are an excellent platform to promote your music. By utilizing them correctly, you can gain exposure to a wider audience, build a local fan base and even perform live shows, all of which can help elevate your music career. Reach out to online radio stations that cater to your genre and submit your music or request live sessions. Don’t forget to engage with your audience and build a strong online presence.

Where Do I Promote My Music

Credit: m.youtube.com

Music Licensing

Promoting your music can be overwhelming, but music licensing can help. By contacting music supervisors and sync licensing companies, you can get your music placed on popular TV shows, films, and commercials– ultimately promoting your art while earning money at the same time.

If you are a musician or a band, you know how hard it can be to get your music heard by the right people. One of the best ways to get your music in front of a large audience is through music licensing. Licensing your music means that you allow someone to use your music in their production in exchange for payment. This can include TV shows, movies, commercials, and more. In this section, we will discuss how to submit your music to music libraries, audio libraries for film/TV, and music for advertisements.

Submit Music To Music Libraries

One way to license your music is by submitting it to music libraries. Music libraries are a great resource for music supervisors, production companies, and directors looking for music to use in their productions. Music libraries will often take a cut of your licensing fee. But they can help get your music in front of the right people. To submit your music to a music library, you can either send them a CD or upload your music to their website.

Audio Libraries For Film/tv

Another way to license your music is through audio libraries for film/TV. These libraries specialize in providing music for TV shows and movies. They work with music supervisors to create the perfect soundtrack for their productions. To submit your music to an audio library, you will need to create a profile on their website and upload your music. Make sure to include all the necessary information, including the genre, tempo, and mood of your music.

Music For Advertisements

Finally, you can license your music for use in advertisements. This can be a lucrative way to get your music heard by a large audience. Advertisers are always looking for music that will grab people’s attention and help sell their products. To get your music licensed for advertisements, you will need to work with a music licensing agency. They will help you find the right opportunities and negotiate the best deal for you. In conclusion, music licensing is a great way to get your music in front of a wider audience. Whether you choose to submit your music to a music library, an audio library for film/TV, or for use in advertisements, make sure to include all the necessary information and work with a reputable agency. With a bit of effort and some luck, you could see your music on the big screen or hear it on TV or radio!

Frequently Asked Questions On Where Do I Promote My Music

Where Is The Best Place To Promote My Music?

The best place to promote your music depends on your target audience. Social media platforms like Instagram, TikTok and Twitter are popular for reaching a young audience. Meanwhile, Spotify and SoundCloud are popular for streaming. You should research your target audience and see where they are most active to promote your music effectively.

How Can I Promote My Own Music?

Promote your music by creating an online presence. Utilize social media platforms like YouTube, Soundcloud, Instagram, and Facebook. Collaborate with other artists and reach out to music bloggers for coverage. Plan out your marketing strategy and engage with your audience.

Look for gigs, play live shows, and attend events to network.

How Do I Get My Music Noticed?

To get your music noticed, you need to focus on creating high-quality content and promoting it through various channels, such as social media and music streaming platforms. Build your online presence through a website and email list, and collaborate with other artists and music industry professionals.

Don’t forget to engage with your audience and consistently produce new music.

Can I Promote My Music For Free?

Yes, you can promote your music for free by leveraging social media platforms, posting on music forums. This creates a website or email list, collaborating with other artists, and submitting your music to local radio stations and blogs.

Conclusion

In a nutshell, promoting your music requires a multifaceted approach. Utilize social media platforms and engage with your audience to increase your reach and build a loyal fanbase. Collaborate with other artists and leverage live performances to create buzz. Don’t forget to utilize online music promotion services and connect with music bloggers and influencers.

With perseverance and a strategic approach, you can successfully promote your music and take your career to the next level. So start promoting today!

Categories
Archive

What to Do When a Piano Key Sticks

When a piano key sticks, clean under it with a soft cloth and use a key leveler to adjust its position if needed. A sticking key can cause frustration during piano practice or performance, but luckily, fixing it can be a simple process.

Also, a piano key can stick for many reasons, including debris or dirt buildup, a misaligned key, or issues with the key’s mechanism. Ignoring a sticking key can cause damage to the instrument and impair the quality of sound produced. Therefore, it is important to identify the cause and take necessary steps to fix the problem.

Related reading: Keys On The Piano and All Notes On The Piano : Mastering Every Key. For background, see the Wikipedia article on Piano.

Moreover, this article will discuss common reasons why a piano key sticks and guidelines for simple fixes. Whether you’re a beginner or an experienced pianist, these tips can help keep your piano in top shape.

What to Do When a Piano Key Sticks

Credit: m.youtube.com

How To Tell When A Piano Key Sticks

In addition, one common issue with pianos is a sticking key, which can be caused by a variety of factors including dirt or moisture buildup. To fix this problem, identify the sticking key and try cleaning it with a cloth or lubricating the key with a specialized product designed for pianos.

Why A Piano Key Sticks: Common Causes

Furthermore, some common reasons why piano keys may stick are:

  • Additionally, dirt and debris accumulated in the piano action
  • Also, changes in the humidity levels that cause wood to expand or contract
  • Worn out or damaged piano parts such as the hammer, shank, or whippen

How To Test For A Sticking Key

When testing for a sticking piano key, follow these steps:

  1. Press the key down gently to feel if there is any resistance or if it feels heavier than usual. Moreover, this can indicate a sticking key.
  2. Listen for any strange sounds such as buzzing or rattling, as they can indicate that there is something wrong with the key.
  3. In addition, observe the key as it is lifted up to see if it moves smoothly or if it gets stuck at any point.

If you notice any of these signs, it is important to address the issue before it causes further damage to your instrument. Furthermore, cleaning the action, regulating the action, or replacing faulty parts can be done by a professional piano technician. In conclusion, identifying a sticking piano key can be done by understanding the common causes and following simple steps to test for it. Make sure to address any issues with a professional to ensure your piano remains in top condition.

What to Do When a Piano Key Sticks

Credit: www.thepiano.sg

How To Prevent A Piano Key That Sticks

Preventing piano keys from sticking is a common challenge that every piano player faces. Sticking keys can be frustrating and can potentially ruin a performance. So, it’s important to take measures that can limit sticking keys. Let’s discuss some essential tips that can help in preventing piano keys from sticking.

Piano Maintenance Tips

Piano maintenance is key in preventing keys from sticking. Regular maintenance can improve the overall performance of the piano and also prevent sticking keys.

Here are some practical piano maintenance tips:

  • Clean your piano keys with a soft cloth regularly
  • Use a humidifier to maintain the right level of humidity in your piano room
  • Tune your piano regularly
  • Keep your piano away from direct sunlight or heat

Proper Playing Technique

Proper playing technique is critical in preventing sticking keys. Applying too much force on the keys can cause them to stick. The appropriate technique ensures the correct strike, causing the key to return promptly to its original position.

Here are some proper playing techniques:

  • Relax your shoulders and arms while playing
  • Strike keys using your fingers instead of your arms or wrists
  • Maintain a consistent playing pressure

Conclusion

Preventing piano keys from sticking can make a tremendous difference to your playing experience. By taking proper care of your piano and playing with the correct technique, you’ll be able to avoid sticky keys challenges. Implement these simple tips, and you’ll be able to focus on making beautiful music.

DIY Fixes When A Piano Key Sticks

When piano keys stick, it can be frustrating. There are some DIY fixes you can try, such as cleaning the key with a damp cloth or using a pencil eraser to remove dirt buildup. If these methods don’t work, it may be time to call a professional piano technician.

Having a piano key that sticks can be frustrating for musicians. Often, a piano key sticks due to a buildup of dirt, dust, or debris that becomes trapped between the keys and the action parts, hindering its movement. Fortunately, there are simple DIY fixes that can help resolve this issue. In this article, we’ll discuss three easy-to-follow methods: using piano lubricants, adjusting piano action parts, and fixing broken keys.

Using Piano Lubricants

Lubricants can help reduce friction between the piano keys and action parts, which moves more smoothly with adequate lubrication. To use this method, you’ll need to follow these simple steps:

  1. Clean the area around the sticking key with a soft, dry cloth.
  2. Apply a small amount of a dry lubricant, like graphite powder, to the affected key.
  3. Press the key up and down to distribute the lubricant.

Adjusting Piano Action Parts

If your piano still has sticky keys after lubrication, then you may need to make some adjustments to the action parts. This process is more involved but can be done by following these steps:

Step 1Remove the piano’s front bottom board to access the action mechanism.
Step 2Find the action assembly that corresponds to the stuck key.
Step 3Loosen the screws holding the rail and the flange, gently set the key straight and then tighten them up until the key works smoothly.

Fixing Broken Keys

If neither lubrication nor adjustment fixes the sticky key, it may be necessary to replace the key or repair the damaged parts. Here’s how you can repair broken keys easily:

  1. Remove the key cap and the key slip.
  2. Examine the key: if it’s just dirty, clean it with a cloth. If it’s broken, glue or replace the affected parts.
  3. Replace the key slip and the key cap.

In conclusion, a sticky key can be a frustrating problem for piano players but, with the help of the discussed DIY fixes, it can be resolved. Using these methods can return your piano to its proper functioning and save you money on repair costs.

Call A Pro When A Piano Key Sticks Repeatedly

Playing the piano is an enjoyable experience. However, when your piano key sticks, it can be frustrating. A stuck key can make playing the piano impossible and even discourage you from practicing. While fixing a stuck piano key can be a simple task, there are instances when it’s best to seek professional help to avoid causing further damage to your beloved instrument.

Signs Of Serious Piano Damage

While a few stuck keys may not be a significant issue, some symptoms may indicate severe damage to your piano. Here are a few signs to look out for:

Signs of Damage:Action Required:
Multiple sticky keysSeek professional help to avoid further damage
Keys are sluggish or unresponsiveConsult a qualified piano technician for diagnosis
Keys are uneven when pressedSeek immediate professional help to avoid causing further damage

Finding A Qualified Piano Technician

When you notice severe damage to your piano, it’s best to hire a qualified piano technician. Here’s how to find one:

  1. Get a referral from a music teacher or a professional musician in your area
  2. Search for qualified piano technicians online
  3. Check reviews and ratings before making contact
  4. Ask for credentials and certifications before hiring
  5. Compare costs and services before hiring

Remember, fixing a stuck key requires some level of experience and expertise. Don’t hesitate to seek professional help when you notice severe damage to your piano to avoid causing further damage.

What to Do When a Piano Key Sticks

Credit: www.youtube.com

Frequently Asked Questions On What To Do When A Piano Key Sticks

Can A Piano Key That Sticks Be Fixed?

Yes, a piano technician can fix a piano key that sticks. The cause of the sticking key should be diagnosed and repaired, which can range from something as simple as a foreign object lodged in the key to a more complex mechanical issue.

It is important to address sticking keys promptly to prevent further damage to the piano.

How Do You Fix A Sticking Key?

To fix a sticking key, you can try removing the keycap and cleaning underneath it. Use compressed air or a soft brush to remove any debris or dirt. If the problem persists, the keyboard may need to be professionally cleaned or repaired.

How Much Does It Cost To Fix A Sticky Piano Key?

The cost to fix a sticky piano key usually ranges from $100-$300, depending on the severity of the issue and the experience of the technician. It is recommended to have a professional assess and repair the key to ensure proper functioning of the piano.

How Do You Remove Stickiness From Piano Keys?

To remove stickiness from piano keys, gently rub a soft cloth dampened with a solution of one part vinegar to two parts water over the keys. Wipe the keys dry with a separate dry cloth, and repeat the process as needed.

Avoid using any harsh cleaners or excessive moisture, which can damage the keys.

Conclusion

After reading this guide, you now know what to do when a piano key sticks. Remember to always check the key, the hammer, and the balance rail pins as they are the most common culprits. If the issue persists, it’s best to seek professional help as soon as possible to avoid further damage to the instrument.

Don’t let a stuck key ruin your piano playing experience. With the right approach and maintenance, you can keep your piano in top shape for years to come.

Categories
Archive

Trinnov St2 Pro Vs Sonarworks

Trinnov St2 Pro and Sonarworks are two competing high-end room correction systems aimed at improving audio clarity and quality. Room correction systems have become a staple for audio professionals in recent years, as they help negate the unwanted impact of a recording space on audio quality.

Trinnov St2 Pro and Sonarworks are two such choices, and both offer excellent audio processing and calibration. However, they differ in their approach: the Trinnov St2 Pro is an advanced system that employs a computer algorithm to analyze the room’s sound to adjust it to the listener’s preferences.

Sonarworks, on the other hand, produces a set of equalization settings based on the listener’s input. As such, each option might appeal to different users depending on the particularities of their space and workflow. In the following sections, we will compare and contrast the features of both systems.

Trinnov St2 Pro Vs Sonarworks

Credit: m.youtube.com

Overview Of Trinnov St2 Pro

Trinnov St2 Pro and Sonarworks are popular digital room correction systems built to provide optimal acoustic treatment and calibration for professional audio production. While Sonarworks software is more affordable and popular, Trinnov St2 Pro offers advanced features and improved sound quality for high-end studios and sound engineers.

Trinnov St2 Pro is an advanced digital room correction processor that offers a range of features to improve the acoustic performance of any sound system. It is designed for home theaters, studios, and high-end audio systems, and it enables you to achieve the best possible sound quality by optimizing the frequency response and time-domain behavior of your speakers.

Features

Trinnov St2 Pro comes with a wide range of features that are designed to enhance the sound quality of your audio system. Here are some of the most notable features of Trinnov:

  • Advanced room correction: Trinnov St2 Pro utilizes advanced algorithms to correct the frequency response in your room, ensuring that the sound is as natural and accurate as possible.
  • 3D optimization: The device also offers 3D optimization, which means it can optimize the soundstage, imaging, and depth perception of your system to improve your overall listening experience.
  • Flexible inputs and outputs: Trinnov St2 Pro offers a range of inputs and outputs, including both digital and analog connections, and it supports up to 16 channels of audio.
  • Customizable settings: The device allows you to customize settings to match your room, speakers, and personal listening preferences, and it can store up to 30 presets.

Pros And Cons

Like any audio product, Trinnov St2 Pro has its advantages and disadvantages. Here are some of the pros and cons of Trinnov:

Pros

  • High-quality room correction: Trinnov St2 Pro is known for its high-quality room correction capabilities, making it ideal for those who want the best possible sound quality.
  • Flexible inputs and outputs: The device offers a range of inputs and outputs, making it easy to connect to a variety of audio sources.
  • Customizable settings: Trinnov St2 Pro allows you to customize settings to match your room, speakers, and personal listening preferences, making it a versatile choice for audiophiles.

Cons

  • High price: Trinnov St2 Pro is an expensive device, which may not be within the budget of every audiophile.
  • Complex setup: The device requires a certain level of technical expertise to set up and optimize, which may be intimidating to some users.
  • No remote control: Trinnov St2 Pro does not come with a remote control, which can be inconvenient if you want to make adjustments from across the room.

Overall, Trinnov St2 Pro is a high-end audio product that is designed to deliver the best possible sound quality for discerning audiophiles. While it may not be suitable for everyone, it is a great choice for those who want the most advanced room correction capabilities available.

Trinnov St2 Pro Vs Sonarworks

Credit: mixandmastermysong.com

Overview Of Sonarworks

Sonarworks is a software company that specializes in creating digital tools to help music producers, sound engineers, and podcasters achieve the best sound possible. One of their most popular software products is the Sonarworks Reference 4, a plugin that corrects the frequency response of your studio speakers or headphones to deliver a flat, accurate sound. The company has invested a lot of time in developing their software, and it shows in the features they offer, the good sides, and the bad sides that come with using their plugin.

The Sonarworks Reference 4 is an excellent plugin for any sound engineer who wants to optimize their studio setup. Below are some of the notable features:

  • The plugin corrects the frequency response of your studio speakers or headphones to deliver a flat sound, which makes it easier to make accurate mixing decisions.
  • The plugin comes with multiple calibration profiles for different headphones and speakers, which ensures that you can get the best possible sound quality from your equipment no matter what you’re using.
  • The software is compatible with most major DAWs and works as a plugin, which makes it easy to integrate into your workflow.
ProsCons
The software corrects the frequency response of your speakers or headphones, which can help you achieve a more accurate mix.The software can be expensive, which might be a turnoff for some users.
The software comes with multiple calibration profiles, which ensures that you can get the best possible sound quality from your equipment.The software might add an extra layer of complexity to your workflow.
The plugin is compatible with most major DAWs, which makes it easy to integrate into your workflow.The plugin might not be necessary for every user, especially those who already have a well-calibrated studio setup.

In conclusion, Sonarworks Reference 4 is a great plugin for those who want to achieve the most accurate sound possible from their studio equipment. The software has numerous features that are beneficial to any user, but it comes with some downsides that might not appeal to everyone. Regardless, it’s definitely worth checking out if you’re serious about music production or sound engineering.

Comparing Trinnov St2 Pro And Sonarworks

Both Trinnov St2 Pro and Sonarworks are popular audio correction systems that provide quality sound. In this section, we will compare the two products in terms of Audio Quality, Ease of Use, Compatibility, and Price.

Audio Quality

Trinnov St2 Pro offers better audio quality than Sonarworks. Trinnov has a larger processor and can carry out more advanced audio analysis, hence providing more detailed correction for audio imperfections. In contrast, Sonarworks deals with fewer frequency ranges, making it unable to correct subtle errors in sound.

Ease Of Use

Regarding ease of use, Sonarworks beats Trinnov St2 Pro due to its simplicity. Sonarworks offers a clear user interface with friendly instructions, making it easy to navigate, install and use. Trinnov St2 Pro, on the other hand, comes with a complex user interface, requiring technical knowledge to navigate and operate.

Compatibility

Trinnov St2 Pro is more versatile regarding compatibility with other equipment. Trinnov can support any two-channel output devices, and it is compatible with several plug-ins. Sonarworks, on the other hand, is mostly compatible with specific studio monitors and headphones, which could limit its use.

Price

Trinnov St2 Pro is more expensive than Sonarworks, making it less available to the average consumer. Trinnov is an advanced system that is mostly affordable to professional audio engineers. Sonarworks, on the contrary, offers a more affordable solution if you are looking to enhance your sound quality on a budget.

Overall, the choice between Trinnov St2 Pro and Sonarworks comes down to the user’s priorities: detailed audio correction or easy usability. If you are a professional audio engineer looking for advanced correction, Trinnov St2 Pro may be the better choice. However, if you want a user-friendly system that comes at an affordable price point, consider choosing Sonarworks.

Trinnov St2 Pro Vs Sonarworks

Credit: m.youtube.com

Frequently Asked Questions For Trinnov St2 Pro Vs Sonarworks

What Is The Latency Of Trinnov Nova?

Trinnov Nova has a low latency rate of 2. 3ms, making it a popular choice for audio processing in live events.

What Does Trinnov Do?

Trinnov produces audio and video processors that optimize the delivery of sound and image in a variety of settings. It offers professional-grade tools for recording studios, cinemas, and homes, as well as commercial and industrial spaces. Their products are known for their precision, adaptability, and ease of use.

What Is Trinnov Nova?

Trinnov Nova is a high-end digital signal processor designed for optimizing audio quality in professional sound systems. It uses advanced algorithms to analyze and correct audio signals in real-time, providing improved clarity, balance, and accuracy. It is widely used in recording studios, cinemas, and live sound applications.

What Are The Main Differences Between Trinnov St2 Pro And Sonarworks?

Trinnov ST2 Pro concentrates on room correction and optimizing acoustics, while Sonarworks focuses on frequency response flattening. ST2 Pro provides an advanced 3D microphone system and a range of input/output options, whereas Sonarworks has several features for studio mastering.

Conclusion

After comparing the Trinnov ST2 Pro and Sonarworks, we can conclude that both of these audio devices offer excellent sound calibration solutions. Although the Trinnov ST2 Pro is more expensive, it comes with a wider range of features and better sound optimization capabilities than the Sonarworks.

However, the Sonarworks is more budget-friendly and suitable for people who require basic sound optimization. Regardless of which option you choose, your ears will definitely thank you for investing in one of these top-notch audio calibration devices.

Categories
Archive

Proper Audio Recording Levels

Proper audio recording levels are crucial for achieving high-quality sound. Having optimal recording levels is vital to prevent distortion and maintain clarity.

Recording audio is an art that requires skill, precision and the right tools. The recording process begins with setting proper audio recording levels, which are the foundation of high-quality audio. The levels determine the strength of the signal that is being recorded and must be carefully monitored during the recording process.

Proper recording levels help prevent distortion, noise, and other unwanted artifacts that can compromise the overall quality of the recording. The ideal recording level varies from one recording situation to another and depends on the type of sound source, the microphone used, and the desired outcome. We will explore the importance of proper recording levels and provide tips on how to achieve the best results.

Proper Audio Recording Levels

Credit: www.lennyb.com

Understanding Decibels

Recording audio is a vital part of creating high-quality content, and setting the proper audio levels is crucial for getting the best results. To get a more detailed understanding, it’s essential to start with the basics, particularly understanding decibels. Decibels are a unit of measurement used to calculate the power, intensity or loudness of sound or audio.

What Are Decibels?

Decibels, or dB, are a logarithmic unit of measurement that express the ratio between two values. In the context of audio, dB is used to measure a sound’s intensity or volume in relation to the threshold of hearing, on a scale from zero to about 194. However, the human ear’s threshold of pain usually occurs around 120dB.

How Are Decibels Used To Measure Audio Levels?

When recording audio, decibels represent the level of sound energy, and a proper reading needs to be taken while recording to obtain the ideal level. Decibel readings range from -60dB, which represents the sound of leaves rustling, to 0dB, the maximum level that audio recordings should ever reach.

Typically, recordings average between-18dBFS and -6dBFS, which means that the loudest sounds that were recorded fell somewhere between -18dB and -6dB. This range is known as the optimal range and ensures that the sound quality isn’t compromised while still preventing distortion.

When recording sound, the best option is to aim for -12dBFS, as this ensures a consistent level of sound quality throughout the recording. However, some circumstances might require a level slightly higher or lower to achieve the desired outcome. Setting the recording levels too high can lead to distorted audio, while setting them too low can result in low-quality audio.

Understanding decibels and how they are used to measure audio levels is essential in getting the best results when recording audio. By keeping the levels within the optimal range, you can ensure that your audio sounds great and doesn’t compromise the overall quality of your content.

Proper Audio Recording Levels

Credit: www.mixinglessons.com

Ideal Audio Recording Levels

Recording audio at the proper levels is crucial for achieving high-quality sound. Set the gain level so that sound isn’t too low while avoiding distortion caused by levels that are too high. Ensure that the audio levels are consistent throughout the recording.

What Are The Ideal Audio Recording Levels?

Proper audio recording levels are essential to produce high-quality audio output. The ideal audio recording levels refer to the amount of audio signal being captured by the recording device, such as a microphone or digital audio workstation (DAW). The right recording levels will provide the best signal-to-noise ratio, maintaining the audio’s integrity without introducing unwanted noise and distortion. In general, the ideal recording levels for audio should be between -12dB and -6dB. This range offers ample headroom for post-production and ensures that the signal level does not peak or distort, which can cause irreparable damage to the audio quality.

How To Set The Right Audio Levels?

Setting the proper audio recording levels requires a few steps to ensure optimal performance. Follow the steps below to set the right audio levels:

  1. Connect your microphone or audio source to your recording device.
  2. Open your DAW and set the input levels. This can be done with the Input Gain or the Trim control on your audio interface.
  3. Record a test track to check the levels. Start with low-level sounds and gradually increase the volume until it peaks around -6dB.
  4. Adjust the input levels if necessary and repeat the test until you achieve the desired audio levels.

If your audio source has a preamp or amplifier, ensure that it is set to an appropriate level to avoid overloading the signal.

What Are The Risks Of Setting Levels Too High Or Too Low?

Setting the audio levels too high or too low can significantly affect the audio quality. If the levels are set too low, it can introduce background noise and unwanted electrical interference to the recording, making the audio difficult to hear. On the other hand, if the levels are set too high, it can cause distortion, clipping, and other audible artifacts that can compromise the audio’s overall quality. This could lead to irreparable damage and affect the overall performance of the final output. Therefore, it is essential to set the audio recording levels correctly and consistently to ensure high-quality audio production.

Tools For Setting Audio Levels

Proper audio recording levels are essential to producing high-quality recordings. There are a variety of tools available to help set and maintain these levels, including audio meters, gain controls, and limiter/compressors.

As a content creator, the last thing you want is for your audience to be distracted by poor audio quality. One of the essential steps in audio recording is setting the proper audio levels. The right audio level ensures that your audio is clear and consistent. However, finding the right audio level can be a bit challenging without the help of tools. In this section, we’ll go through the necessary tools for setting audio levels and how to use them correctly.

What Tools Are Necessary?

To set your audio levels, you will need the following tools:

  1. Headphones
  2. Audio Interface
  3. Recording Software

Using headphones allows you to monitor the audio recording in real-time, ensuring that you get the best quality. The audio interface is an essential tool that converts the analog signals to digital signals, making it easy to record and edit on your computer. Your recording software is another essential tool that lets you record and edit your audio.

How To Use These Tools?

Here are the steps to follow when setting your audio levels:

  1. Connect your headphones to your audio interface.
  2. Connect your microphone to the audio interface.
  3. Open your recording software.
  4. Set the audio interface as your input/output device within the recording software.
  5. Test your microphone to ensure that the levels are not too high or too low.
  6. Start recording while monitoring the sound with your headphones.
  7. Watch the peak meters on your audio interface to ensure that the levels are not too high.
  8. Adjust the gain accordingly to ensure that the levels are right.
  9. Save your recording and edit accordingly.

In conclusion, setting proper audio recording levels is crucial in creating high-quality audio content. With the right tools and knowledge, you can achieve the best results. Ensure that you use headphones, an audio interface, and recording software to set the proper audio levels. By following these guidelines, you’ll be well on your way to producing excellent audio content.

Tips To Maintain Proper Audio Levels

Maintaining proper audio levels is crucial for high-quality audio recordings. It’s important to ensure that the input levels are at the ideal range, avoiding distortion and noise in the recording. Proper gain staging, monitoring, and calibration can all help achieve consistent and clear audio levels.

Recording audio can be a tricky job, especially when it comes to ensuring the proper audio levels. Maintaining proper audio levels helps in attaining high-quality audio that is pleasant to listen to, easy to understand, and professional. In this blog, we will provide some useful tips to maintain proper audio levels while recording.

How To Monitor Audio Levels While Recording?

Monitoring audio levels while recording is a crucial step to maintain proper levels. The best way to monitor audio levels is to use headphones and check the audio metering available on your recording device. Adjusting the input level between -12db and -6db will help you get a clean and clear audio recording. Make sure to monitor the levels throughout the recording and make adjustments when necessary.

Eliminating Background Noise While Recording

Background noise can ruin an otherwise perfect audio recording. To avoid this, choose a quiet location, use a high-quality microphone, and turn off all other devices in the recording area. Engage in soundproofing the room to further eliminate background noise. Placing a rug, curtains, or foam panels on walls, ceilings, and floors can help reduce the unwanted echoes and reverberations.

Importance Of Pre-production And Post-production In Maintaining Levels

Pre-production and post-production processes play a vital role in maintaining proper audio levels. Pre-production includes planning, setting up, and testing the equipment and the recording environment, while post-production includes editing, cleaning, and mastering the audio. In pre-production, make sure to choose the right equipment, test the microphone levels, and eliminate any background noise. In post-production, adjust the levels, remove noise, add necessary effects, and master the audio to get a polished final product. In conclusion, maintaining proper audio levels while recording is crucial to ensure high-quality audio. Use headphones and the audio metering available on your recording device to monitor the levels. Eliminate background noise by choosing a quiet location, using a high-quality microphone, and soundproofing the room. Finally, pay attention to both the pre-production and post-production processes to attain a professional and polished audio recording.

Common Mistakes When Setting Audio Levels

When setting audio levels, there are common mistakes people make that can affect the overall quality of the recording. Some of these mistakes include not using headphones, not checking for background noise, and setting levels too high or too low.

It’s important to follow proper guidelines to achieve the best recording possible.

What Are The Common Mistakes Made While Setting Audio Levels?

When it comes to recording audio, it is crucial to get the levels right. There are many common mistakes that people make while setting audio levels, which can negatively impact the quality of the recording. Below mentioned are some of the most common mistakes that people make:

  • Recording levels too high or too low: One of the most common mistakes is setting the recording levels too high or too low. If the levels are too high, it will cause distortion and clipping, resulting in poor audio quality. On the other hand, if the levels are too low, it may lead to a weak signal, which will make it hard to hear the audio clearly.
  • Not using a Pop filter: Another common mistake is not using a pop filter. The pop filter helps to reduce popping sounds that occur when pronouncing certain letters such as “P” or “B.” This can help to improve the audio quality and make it easier to listen to.
  • Not monitoring the audio: Failure to monitor the audio during recording can also lead to poor audio quality. It is essential to use headphones or speakers to monitor the sound and make necessary adjustments in real-time.
  • Not paying attention to the environment: Recording audio in an improper environment can also lead to poor audio quality. Background noise can cause interference and make it difficult to hear what is being said. It is essential to record in a quiet environment to improve the clarity of the audio.

How To Avoid These Mistakes?

Avoiding these mistakes is critical to getting high-quality audio recordings. Below mentioned are some tips to help avoid these mistakes:

  • Use a limiter: A limiter is a device that helps to prevent distortion caused by high levels. It is important to set a limiter to ensure that the levels do not go beyond the desired range.
  • Set levels correctly: Properly setting audio levels is crucial for high-quality recordings. It is essential to set levels based on the loudest sound, ensuring it doesn’t go beyond 0 dB.
  • Use a pop filter: A pop filter can significantly reduce popping sounds that may interfere with the audio quality. It is an affordable solution that can make a big difference.
  • Monitor the audio: It is essential to monitor the audio while recording to avoid any issues in real-time. Use headphones or speakers to monitor the sound and make necessary adjustments if required.
  • Use the right environment: The environment plays a crucial role in the quality of the audio. Recording in a quiet space can help avoid background noise that can impact the audio quality.

Recording proper audio levels is essential for producing high-quality audio recordings. Avoiding these common mistakes and following best practices can help to produce exceptional sound quality.

Proper Audio Recording Levels

Credit: www.soundonsound.com

Frequently Asked Questions For Proper Audio Recording Levels

What Is A Good Audio Level For Recording?

The ideal audio level for recording is between -12 and -6 decibels (dB) on your recording device. This range ensures that the sound is not too quiet and not too loud, allowing for clear and balanced audio. It’s important to avoid recording levels above 0 dB, as this can cause distortion and a poor listening experience.

What Are The Optimum Levels For Recording Audio Between?

Optimum levels for recording audio usually range from -18 dBFS to -12 dBFS. However, it ultimately depends on the equipment being used and the type of audio being recorded. It’s best to consult with the equipment manufacturer or a professional audio engineer for specific recommendations.

How Proper Recording Levels Are Set?

Proper recording levels are set by adjusting the gain levels of the recording equipment to avoid clipping or distortion. It is best to start at a lower gain level and gradually increase it until the desired volume is achieved. It is also important to monitor the levels during recording and adjust as necessary.

What Level Should Vocal Recording Be?

The ideal vocal recording level is typically between -18 and -12 decibels, which ensures the recording has enough headroom for post-production editing without introducing distortion or clipping.

Conclusion

Maintaining proper audio recording levels is a crucial factor to keep in mind for achieving clear and high-quality recordings. Neglecting to pay attention to the recording levels can result in poor sound quality, and lead to the loss of important information in the audio.

Always use the right equipment, ensure that all levels are set correctly, and regularly monitor the levels to obtain the best results. By following these guidelines, you’ll be on your way to producing content that sounds professional and polished. Happy recording!