Categories
Archive

Mixing Vocals And A Two Track Beat

In mixing vocals and a two-track beat, use EQ, compression, and reverb to blend them together. Vocal levels should be center panned while beat levels should be stereo panned.

Mixing vocals with a two-track beat can be a daunting process, but the key is to use EQ, compression, and reverb appropriately. One important tip is to center pan the vocal tracks while stereo panning the beat tracks. This allows for better separation of the two elements and can enhance the overall sound of the mix.

Additionally, it’s crucial to ensure that the volumes of all elements are balanced, so that the vocals are not drowned out by the beat. By using these techniques and taking the time to perfect the mix, you can create a polished and professional-sounding final product.

Preparing For The Mix

Achieving a balanced mix when combining vocals and a two-track beat requires careful preparation. Begin by selecting the right plugins and EQ settings to highlight the vocals, and then fine-tune the levels to create a cohesive sound.

Preparing for the Mix: Preparing for the mixing process can make a huge difference in the final outcome of a track. One of the main challenges in mixing vocals and a two-track beat is to ensure that they both are well-balanced and complement each other. Here are some essential steps to take before you start mixing: Organizing tracks and files: It’s crucial to have all the required files and tracks in place. Ensure the files are in the right format and also keep them well-organized. Create a separate folder for each project with sub-folders for different sections like vocals, beats, and sound effects. This process will help you stay focused and avoid confusion when mixing the tracks. Cleaning up audio files: Cleaning up audio files is a vital step for preparing the audio for the mixing stage. This step includes removing unwanted noises or clicks, adjusting levels and fades, and other post-production tasks. Taking the time to clean up your audio files will make the mixing process more comfortable and help improve the final sound quality. Once you have organized and cleaned up your tracks, you are ready to mix your vocals and two-track beat. Mixing is a delicate balance of equalizing, compressing, and making other adjustments to ensure that your sound is polished and well-balanced. Stay focused, take breaks regularly, and trust your ears to achieve the best results.

Mixing Vocals And A Two Track Beat

Credit: m.youtube.com

Setting Up The Mix

To get the best sound quality and achieve a professional mix, it’s important to properly mix vocals and a two-track beat. Start by adjusting the levels and panning of each element, and then add EQ and compression to enhance the clarity and balance of the track.

Finally, use effects like reverb and delay to add depth and character to the mix.

Setting Levels

The first step in setting up a mix is setting the levels. The vocal should be the focus of the mix, so start by setting the level of the vocal track. Then, adjust the level of the two-track beat so it sits nicely with the vocal. Use your ears to find the right balance between the vocal and the beat. You don’t want the beat overpowering the vocal or vice versa.

Adding Effects

Once you have the levels set, it’s time to add effects. Start by EQing the vocal to make it stand out in the mix. Cut any unnecessary low-end frequencies to make room for the beat. You can also add some compression to the vocal to even out the levels and make it sound more polished. Next, add some reverb to the vocal to give it some space. Start with a short decay time and a low wet/dry mix, then adjust to taste. Be careful not to overdo it, as too much reverb can make the vocal sound washed out. For the two-track beat, consider adding some compression to make it sound fuller and more cohesive. You can also add some stereo widening to make it sound wider.

Organizing Tracks

Make sure to keep your tracks organized in your DAW. You can do this by color-coding the tracks, renaming them, and grouping them together. This will make it easier to navigate the mix and make adjustments as needed.

Finalizing The Mix

Once you have the levels and effects set up, listen to the mix to make sure everything sounds balanced. Adjust the levels and effects as needed. You can also use automation to make adjustments throughout the song. When you’re happy with the mix, it’s time to export it. Make sure to export it at a high-quality resolution and in a format that is compatible with your desired platform. Setting up a mix can be a time-consuming process, but taking the time to do it right will make a huge difference in the overall quality of your track.

Mixing Vocals

Mixing vocals with a two-track beat can be a challenging task, especially if you are new to audio production. Fortunately, with the right tools and techniques, you can create a professional sound that will make your music stand out from the crowd. One of the most important aspects of mixing vocals is ensuring they are clear, crisp and balanced with the beat. That’s where pitch correction, equalization, compression, and reverb & delay come into play.

Pitch Correction

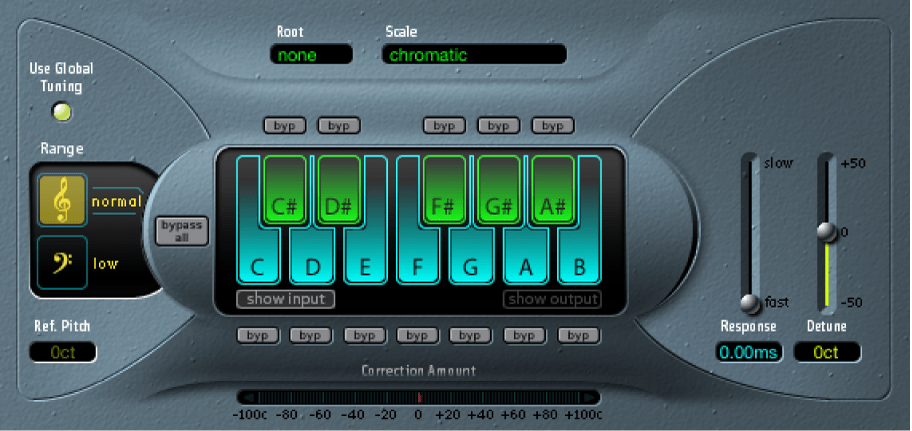
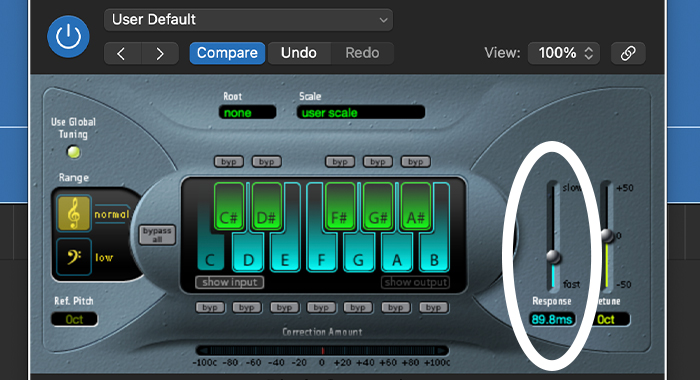
Pitch correction is a technique used to fix any out-of-tune vocals. It helps ensure that your voice sounds in harmony with the rest of the track. By using tools like Auto-Tune or Melodyne, you can correct any pitch errors and make sure your voice sounds perfect. However, it’s essential to use this technique sparingly as over-correction can lead to an unnatural sound.

Equalization Of Vocals

Equalization can be used to remove any unwanted frequencies from your vocals. You can use an equalizer to emphasize the frequencies that enhance your vocals, increasing the clarity, and reducing muddiness. This technique is crucial in achieving a balanced mix, allowing your vocals to shine without being overpowered by other instruments.

Compressing The Vocals

Compression is a crucial technique in mixing vocals, as it helps control the dynamic range of your vocals. By using a compressor plugin, you can smooth out any loud or sudden sounds, ensuring that your performance sits perfectly within the mix. Be cautious not to over-compress or you may lose the natural sound of your voice.

Adding Reverb & Delay

Adding reverb and delay can give your vocals space and depth. Reverb simulates the sound of a room, while delay adds an echo. By tweaking the parameters of your reverb and delay plugins, you can create a unique ambiance that enhances your vocals’ overall sound. However, don’t overdo it, too much reverb or delay can drown out your voice and create a muddy mix.

Mixing vocals can be a daunting task, but by using pitch correction, equalization, compression, and reverb and delay, you can create a professional sound that makes your music stand out in a crowd. Remember, it’s much easier to mix vocals if they are recorded well in the first place; however, with these techniques, you can transform your vocals and create a beautiful harmony with your two-track beat. Keep practicing and experiment with different combinations to find your perfect sound!

Mixing A Two-track Beat

When mixing vocals with a two-track beat, it’s essential to know how to balance the vocals with the beats without losing the energy, feel, and vibe of the track. The two-track beat refers to a stereo mix of a song that already has a pre-mixed instrumental track with no separate stems.

Equalization Of The Beat

The first step while mixing a two-track beat is to analyze the frequency spectrum of the instrumental track and adjust the equalization. The aim is to clean up the track and make it sound better. Remove any frequency build-up, cut any unnecessary frequencies, and boost the track’s frequencies that give it excitement, width, and clarity.

The key here is to use the right equalizer plugin that allows you to have precise control over the frequencies. Use the low-cut filter to eliminate the unnecessary low-end frequencies and high-cut to remove the unwanted high-end. Additionally, you can use a dynamic equalizer to clean up the frequency clashes between the vocal and instrumental tracks.

Adjusting Levels

The next step is to adjust the levels of the beat. It’s essential to ensure that the beat sits well below the vocals without competing for dominance. In this step, a good pair of headphones is essential to help you listen and make the right call while mixing.

To adjust the levels, set the vocal track as the loudest component of the mix and drop the instrumental track volume until the mix becomes balanced. Then, tweak the instrumental track volume up or down to make it sit well with the vocal track. Often a slight volume reduction of the instrumental track between the verses and chorus can help keep the elements in check.

Adding Effects

Finally, to add depth, excitement, and texture to the mix, add effects to the instrumental track. Adding effects will help the instrumental track stand out while still allowing space for the vocal tracks.

You can add reverb to the instrumental track to complement the vocals. By adjusting the reverb rate, the spatial position of the instrumental track in the mix can be altered. You can also use delay effects and subtle modulation, panning effects, and subtle saturation to add excitement to the instrumental track.

In conclusion

Mixing a two-track beat requires precision and patience. With the right tools, you can get a polished mix that maintains the energy and vibe of the track. Start by analyzing the beat’s frequency spectrum, adjust the levels, and add effects to complement the vocals. With these tips, you can create a perfect mix that showcases both the vocals and the instrumental.

Balancing The Mix

When it comes to mixing vocals and a two-track beat, balancing the mix is one of the most crucial steps to achieving a polished sound. This process involves ensuring that each element of the mix is audible and sits well in the frequency spectrum. Here are some tips for balancing your mix:

Panning

Panning is an essential tool for creating space in your mix. It involves placing sounds in the stereo field between the left and right speakers. When mixing vocals and a two-track beat, it’s important to give each element its own space. For example, you can pan the vocals in the center, the beat in the middle, and any additional instruments on either side.

Automation

Automation is the process of changing the volume, panning, or other settings of a track over time. It’s a great way to add movement and dynamics to your mix. When mixing vocals and a two-track beat, you can use automation to adjust the levels of the elements as the song progresses. For example, you can lower the volume of the vocals during the verses and bring them up during the chorus.

Mix Buss Processing

Mix buss processing involves applying effects to the master track of your mix. It’s a great way to add cohesion and glue everything together. When mixing vocals and a two-track beat, you can use mix buss processing to enhance the overall sound. For example, you can add a gentle compressor to glue everything together, a subtle EQ to balance the frequency spectrum, or a stereo enhancer to widen the sound.

By following these tips, you can create a balanced mix that sounds great on any sound system. Remember to experiment and trust your ears, as there are no hard and fast rules when it comes to mixing vocals and a two-track beat.
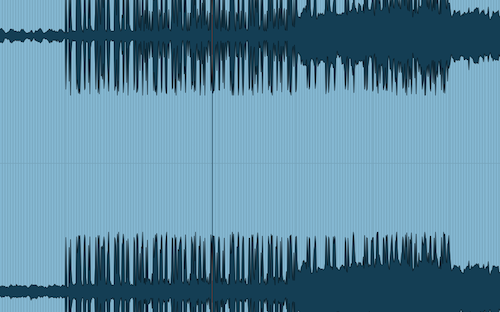
Mixing Vocals And A Two Track Beat

Credit: producelikeapro.com

Mastering The Mix

Mastering the Mix shares valuable tips on how to effectively mix vocals and a two-track beat, ensuring that both elements come together seamlessly. Learn how to create a balanced mix and enhance the overall sound of your music production with the expert advice provided.

If you’re a music producer or sound engineer, mixing vocals and a two-track beat can be a daunting task. You have to find a way to make the vocals blend seamlessly with the beat while still retaining their clarity and impact. However, with the right approach, you can create a polished and professional sound that showcases the best of both elements. In this post, we’ll explore key techniques for mastering the mix when combining vocals and a two-track beat.

Preparing For Mastering

Before you start mixing, it’s essential to prepare for mastering. This involves ensuring that both the vocals and the two-track beat are recorded and mixed to a high standard. Make sure to monitor the levels and EQ of each track to ascertain that there is minimal clipping, distortion, or unwanted hiss in the audio files. To prepare for mastering, ensure that the vocals are well-recorded and free from any background noise or unwanted sounds. Make sure the two-track beat is produced to an optimal level. Additionally, check the vocal tracks are in sync with the beat and perfect the timing to suit the beat.

Mastering Effects

Mastering vocals alongside a two-track beat usually involves applying a wide range of mastering effects. Such effects provide control over the dynamics of the vocals and beat, enabling seamless integration of both elements. When applying mastering effects, ensure all edits are sensitive to the tonal balance and overall sound. Popular effects used in this scenario include EQ, compression, reverb, and delay, among others. These effects should be applied in moderation to create a balanced yet powerful sound.

Finalizing The Mix

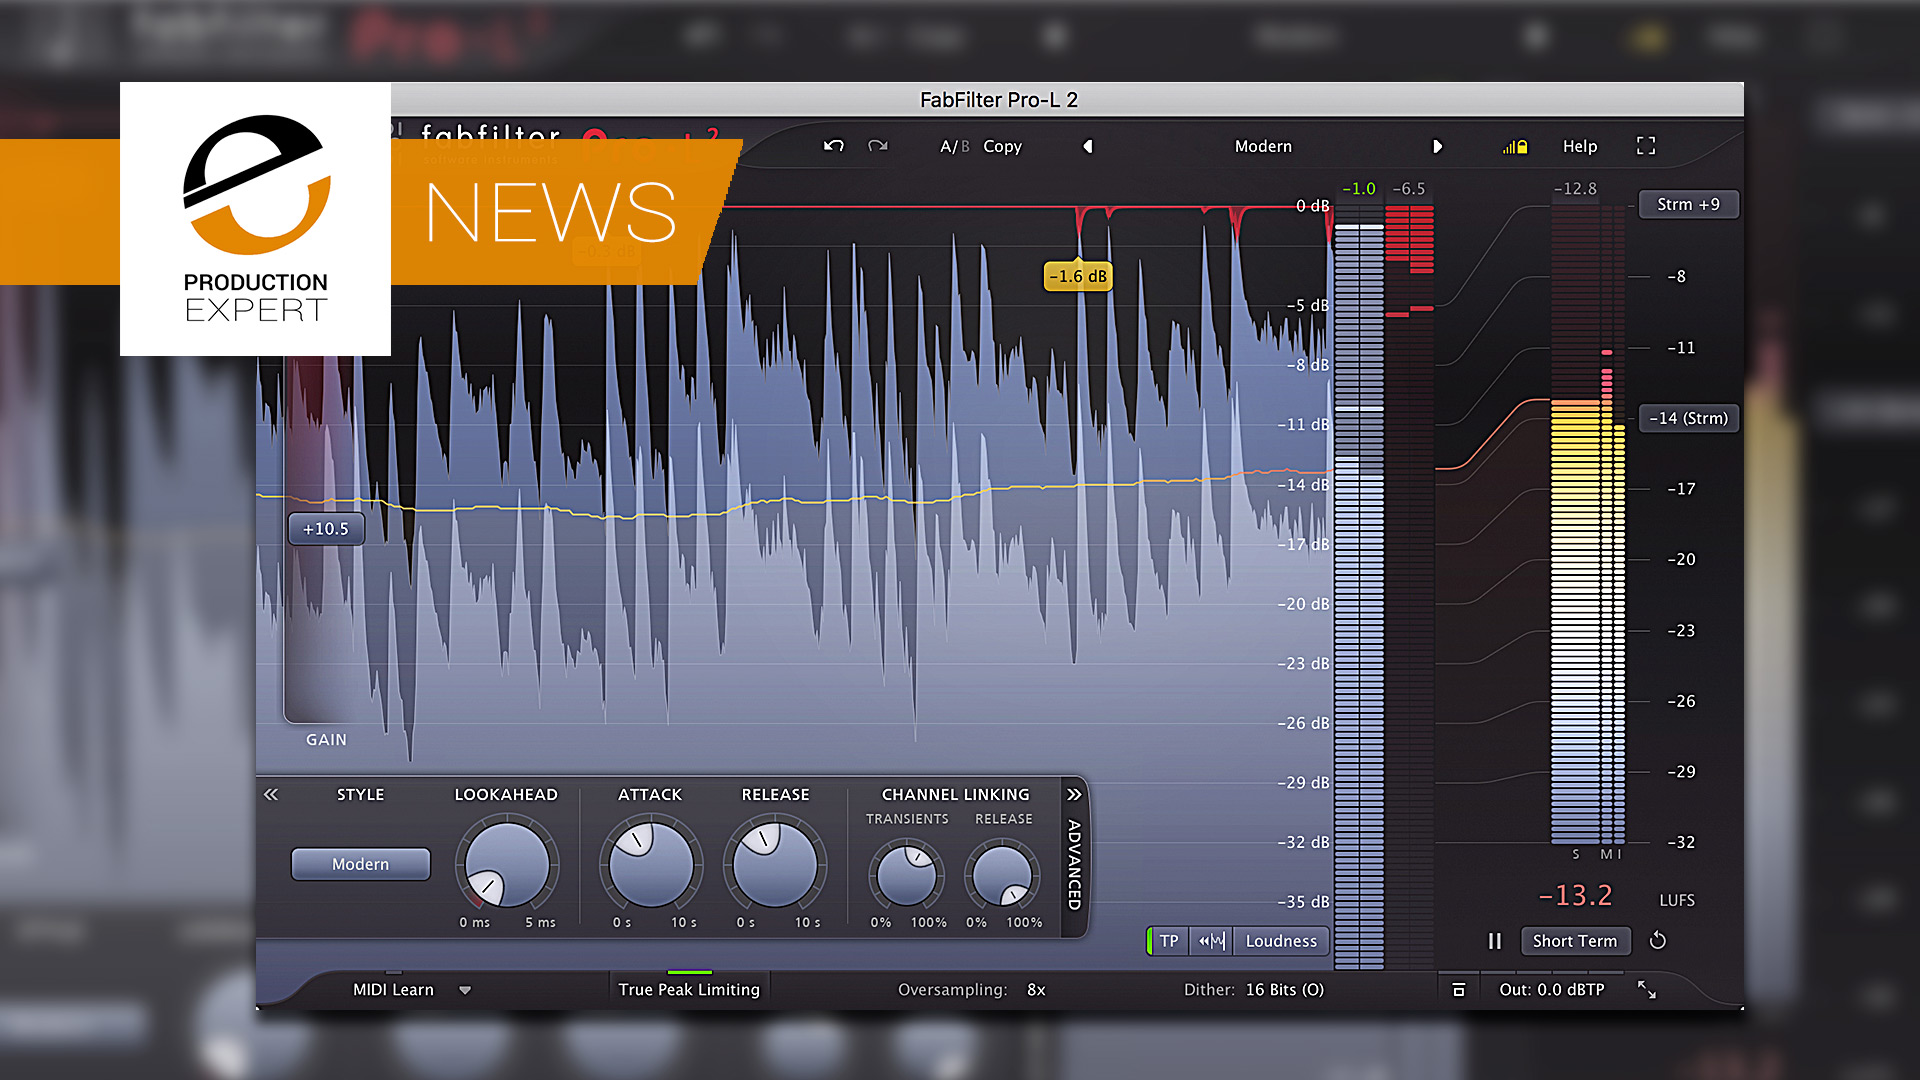
To finalize the mix, ensure that the vocals and two-track beat are blended cohesively. That involves making sure each element cuts through the mix-adroitly using EQ and balancing the tracks. Further, it’s crucial to ensure the overall volume is consistent throughout to minimize conflicts between the two. To achieve this, use a limiter to ensure the final mix won’t clip or distort when played at different volumes. In conclusion, mastering the mix when combining vocals and a two-track beat can be overwhelming. However, by following these techniques as you prepare to master, applying mastering effects sensitively, and finalizing the mix, you can strike a balance between the two elements and produce an impressive sound.

Frequently Asked Questions On Mixing Vocals And A Two Track Beat

Should I Mix Beat With Vocals?

Yes, mixing beats with vocals is essential in music production. Professional music producers mix beats with vocals to create a perfect balance between the sounds and maximize the impact of the song. By doing so, the final product sounds more polished, dynamic, and energetic.

How Do You Mix Beat And Voice?

To mix beat and voice, use software like GarageBand or Audacity. First, import your beat and vocal tracks into the software. Then, adjust the levels of each track so that they blend together seamlessly. Use effects like EQ, compression, and reverb to polish your sound.

Finally, export your finished track.

Can You Mix Vocals With Instrumentals?

Yes, vocals can be mixed with instrumentals to create a complete and harmonious music track. In fact, mixing both elements properly results in a balanced and professional-sounding music piece. The key is to adjust the levels, EQ, and effects of each track to complement each other and achieve an overall cohesive sound.

What Is A Two Track Mix?

A two track mix is a recording that only contains two audio tracks, typically used in stereo recordings or in mixing for film and video. These tracks usually contain the left and right channels of sound.

Conclusion

To attain a well-mixed track, blending vocals and a two-track beat is crucial. This process requires a lot of patience, creativity, and precision. However, it is achievable if you follow the right techniques, such as working on the levels, proper EQing, panning, and compression.

The result of this process is undoubtedly worth it, as it creates a cohesive and balanced sound that brings out the artist’s message. Therefore, take your time, experiment, and enjoy the process of mixing your vocals and a two-track beat!


Categories
Archive

The Secret To Sounding Great

The secret to sounding great is to practice regularly and take care of your voice. To improve your speaking or singing voice, you need to engage in vocal exercises regularly and avoid straining or damaging your vocal cords.

Additionally, maintaining good posture and staying hydrated can also make a difference in the quality of your voice. Whether you are a public speaker, singer or podcaster, sound quality can affect how your message is received. Therefore, it’s important to take the necessary steps to sound your best.

We’ll explore some tips and techniques to help you enhance your voice and improve your overall sound quality.

The Importance Of Vocal Tone

When it comes to effectively communicating with others, it’s easy to overlook the importance of vocal tone. However, understanding the power of your voice and the impact of your tone on communication can make a significant difference in how you are perceived and received by others. In this post, we will explore The Secret To Sounding Great, with a focus on the subheading: The Importance of Vocal Tone.

The Power Of Vocal Tone

Have you ever paid attention to how a simple change in tone can completely alter the message you’re trying to convey? That’s because vocal tone holds significant power in communication. It can evoke emotion and influence how others interpret your words. Your voice can be used to encourage, command, inspire, or comfort. Recognizing the power of your tone and learning how to use it intentionally can help you become a more effective communicator.

Impact Of Tone On Communication

The impact of tone on communication cannot be overstated. It’s not just what you say that matters, but how you say it. Your tone can influence the mood of the conversation, affect how information is received, and impact the overall effectiveness of communication. People are more likely to listen and respond positively to a message delivered in a friendly, warm tone than in a harsh or condescending one. Being aware of the impact of your tone on communication can help you improve relationships, avoid misunderstandings, and achieve better outcomes in both personal and professional settings.

  • Vocal tone holds significant power in communication
  • Your voice can be used to encourage, command, inspire, or comfort
  • Being aware of the impact of your tone on communication can help you improve relationships, avoid misunderstandings and achieve better outcomes

If you want to sound great and become a more effective communicator, recognizing the power of your tone and its impact on communication is crucial. Practice using your voice intentionally and experiment with different tones to find what works best for you. By doing so, you can unlock the secret to sounding great and build more meaningful connections with those around you.

Elements Of Great Sounding Voice

Want to sound great? Focus on the elements of a great sounding voice. From breathing to enunciation, intonation, and pacing, attention to these details can make a world of difference in how you come across to others.

When it comes to effective communication, having a great sounding voice can make all the difference. A voice that is clear, well-enunciated, and expressive can captivate an audience and convey your message with impact. If you’re wondering what sets great sounding voices apart from the rest, it all comes down to three key elements: clarity and enunciation, pitch and intonation, and pausing and phrasing.

Clarity And Enunciation

Clear, precise pronunciation and enunciation are essential for conveying your message effectively. To sound great, you need to articulate each word correctly, so your message is easy to understand. Focus on bringing attention to the beginning, middle, and ends of words and pronouncing them with a crisp, sharp emphasis. Keep an eye on your rate of speech-if you speak too fast, your message can become garbled and unclear. Practice emphasizing key words in your speech, and be mindful of your tone and pacing.

Pitch And Intonation

Pitch and intonation are essential elements of great sounding voices. The pitch refers to the frequency level of your voice, while intonation involves the rising and falling tones you use when speaking. As you communicate, try to use different tones and stresses to give your message more depth and meaning. You want to sound passionate about what you’re saying, so don’t be afraid to show your enthusiasm through your voice.

Pausing And Phrasing

Pausing and phrasing help to break up your speech and give it more rhythm and flow. When you speak, take time to pause and breathe naturally between phrases, so your message is easy to digest. Use pauses to highlight key points or build up to a climactic moment. It’s also important to vary your tone and pacing as you speak, so your message doesn’t become monotonous or repetitive. In conclusion, to sound great and convey your message with impact, you need to focus on clarity and enunciation, pitch and intonation, and pausing and phrasing. Practice these elements to help improve your voice and enhance your communication skills. Try to be expressive and engage your audience naturally, and your voice will sound great in no time.

Tips To Improve Your Tone

The secret to sounding great lies in your tone. Improve it by avoiding commonly overused words and phrases, keeping sentences brief, using a variety of phrases, and ensuring your writing is SEO-friendly, easy to understand, and unique. Remember to skip the conclusion paragraph and write in an active, human-like voice.

As a speaker, your tone plays a vital role in ensuring that your words convey your intended message. Irrespective of the platform, the way you sound has a significant impact on how people perceive you and your message. The good news is that you can improve your tone by following a few tips. Here are some ways to enhance the way you speak:

Practice Proper Breathing Techniques

Improving your breathing techniques can help you gain more control over your tone. Whenever you speak, the voice produced results from the air coming out of your lungs. Therefore, a great way to have better tone control is by practicing deep breathing exercises. Deep breathing fills your lungs with air, which gives you more control over the tone and volume of your voice. You should practice belly breathing to increase the amount of air you take in while speaking.

Learn To Control Pitch And Tone

Pitch is the high or low sound of a voice, while tone refers to the feeling, emotion, or attitude put into words. To sound great, you need to learn how to control your pitch and tone consciously. One way to gain mastery over your pitch and tone is by listening to yourself while speaking. Record your speeches and playback to evaluate yourself, identify the areas you need to work on, and adjust your pitch and tone accordingly.

Use Visualization Techniques

Visualization techniques are incredibly beneficial in improving your tone. You can use images to create a mental picture of your ideal tone and work towards achieving it. For instance, you can visualize talking to a close friend or an audience that is receptive to your message. This visualization provides you with the confidence and calm required to improve your tone. In conclusion, sounding great is not only about speaking confidently but also about having a good tone. By practicing proper breathing techniques, controlling pitch and tone, and using visualization techniques, you can improve your tone and convey your message more effectively. Try incorporating each of these tips into your speaking routine, and you will notice an improvement in the way you sound.

The Secret To Sounding Great

Credit: www.nytimes.com

The Role Of Confidence In Sounding Great

Confidence plays a crucial role in sounding great. Whether it’s giving a speech or singing a song, self-assurance boosts performance and captivates the audience. The secret to sounding great is to believe in oneself and deliver with conviction.

In today’s world, communication plays a vital role in our daily lives. It is always good to be confident when communicating with others, especially when it comes to sounding great. Confidence is not only about speaking effectively but also about having personal faith in your abilities. This article outlines the importance of self-confidence and how it plays its role in sounding great.

Challenging Negative Beliefs

Before we can adopt confidence, it is crucial to challenge negative beliefs that may impede our self-confidence. It is essential to identify and eliminate any limiting beliefs that may prevent us from being confident when we speak. You can start by creating a list of negative beliefs about your ability to communicate effectively, followed by a list of counterstatements that challenge these beliefs. By doing this, we can create a mental shift that allows us to build confidence.

Adopting A Confident Mindset

Adopting a confident mindset is about focusing on our strengths and building self-esteem. One of the ways we can achieve this is through positive self-talk. Rather than focusing on weaknesses, we should concentrate on our strengths and view them as assets to our communication skills. This approach allows us to approach communication in a manner that does not rely on perfection but rather, on being aware of our strengths and using them to our advantage. Another way to adopt a confident mindset is by practicing beforehand. Preparation is key to confidence, and by doing so, we reduce the chances of unexpected obstacles that may challenge our confidence. In conclusion, confidence plays a significant role in sounding great when communicating with others. By challenging negative beliefs and adopting a confident mindset, we can improve our communication skills and build a positive image of ourselves. Remember, communication is an acquired skill, and with practice and a confident attitude, we can sound great when communicating with others.

The Importance Of Warm-ups And Exercises

A proper warm-up routine and exercises are essential for sounding great while singing. These help to prepare your voice and body for your performance, improving your breath support, pitch control, and overall vocal quality. Incorporating these into your practice sessions can make a significant difference in your vocal abilities.

Warm-ups and exercises are essential for any singer who wants to sound great. They help to prepare your voice, making it more flexible, and increase your lung capacity. The best time to do warm-ups and exercises is before you start singing. This way, you’ll be able to use your voice more effectively and avoid damaging your vocal cords.

Breathing And Vocal Exercises

Breathing exercises are an excellent way to improve your lung capacity. They can help you control your breathing and enable you to sing for longer periods without getting out of breath. Vocal exercises strengthen your voice and improve your range. Here are some breathing and vocal exercises to try:

  • Breathing Exercise: Take a deep breath through your nose and exhale through your mouth, making a hissing sound. Repeat this exercise several times.
  • Vocal Exercise: Humming is an excellent vocal exercise. Hum along with your favorite song or try humming different notes.
  • Breathing Exercise: Place your hand on your stomach and take a deep breath, pushing your stomach out. Hold your breath for a few seconds and exhale slowly. Repeat this exercise several times.
  • Vocal Exercise: Sing scales, starting with low notes and moving up to high notes. Try to sing each note clearly and smoothly.

Tongue Twisters And Articulation Drills

Tongue twisters and articulation drills help you to enunciate words more clearly. They also help to improve your diction and pronunciation. Here are some tongue twisters and articulation drills to try:

  • Tongue Twister: She sells seashells by the seashore.
  • Articulation Drill: Say the following words slowly and clearly, making sure to pronounce each word correctly – red, blue, green, yellow, purple.
  • Tongue Twister: How can a clam cram in a clean cream can?
  • Articulation Drill: Say the following sentence out loud, making sure to enunciate each word clearly – The quick brown fox jumps over the lazy dog.
The Secret To Sounding Great

Credit: www.walmart.com

Common Pitfalls To Avoid

To ensure your writing sounds great, there are several common pitfalls to avoid. Start by avoiding overused phrases and keeping sentences brief. Use a variety of phrases at the beginning of paragraphs and write in an engaging, human-like, and easy-to-understand style.

Remember to skip the conclusion paragraph, and aim to pass AI writing detection by writing like a human.

Speaking is a natural skill that we all possess, but sounding great while speaking is an art that requires practice. There are a few common pitfalls to avoid in order to sound great and make your words impactful. In this blog, we will discuss some of the most common pitfalls that people encounter when it comes to delivering their words and how to avoid them.

Speaking Too Quickly

Speaking too quickly is a common pitfall that can have a negative impact on your message. It can make it difficult for your audience to understand what you are saying, and can also make you come across as nervous or unprofessional. To avoid speaking too quickly, try practicing speaking at a slower pace and focusing on pausing between your sentences. This will give your audience a chance to absorb your message and ensure that you sound clear and composed.

Mumbling Or Slurring Words

Mumbling or slurring your words is another common pitfall that can make it difficult for your audience to understand what you are saying. This can be due to many factors such as nervousness, tiredness, or a lack of articulation. To avoid this, try speaking with more clarity and taking your time when speaking. Also, practicing the enunciation of certain words can help improve clarity and make it easier for your audience to understand what you are saying.

Lack Of Vocal Variety

A lack of vocal variety is another common pitfall that can make your speech sound monotonous and uninteresting. Speaking in a monotone voice can be boring for your audience, and can make it difficult for them to stay engaged. To improve your vocal variety, try varying the pitch and tone of your voice to keep your audience interested. Use emphasis and variations in tone to highlight important points in your speech. In conclusion, avoiding common pitfalls like speaking too quickly, mumbling or slurring words, and a lack of vocal variety can help you master the art of sounding great while speaking. With practice and persistence, you can improve your speaking skills and deliver impactful messages that resonate with your audience.

The Secret To Sounding Great

Credit: www.amazon.com

Frequently Asked Questions For The Secret To Sounding Great

What Is The Secret Of Good Voice?

The secret of a good voice involves proper training, regular exercise to strengthen vocal cords, and taking good care of the throat. You should avoid smoking and unhealthy drinks, rest your voice when needed, and speak from the diaphragm to improve the tone and pitch of your voice.

What Can I Do To Make My Voice Sound Better?

To make your voice sound better, practice good posture, engage in regular breathing exercises, hydrate yourself properly, avoid smoking, and warm up your voice with vocal exercises before speaking.

What Can I Drink To Clear My Throat For Singing?

Drinking warm water with honey and lemon can help clear your throat for singing. It soothes the throat and reduces inflammation, making it easier to sing. Avoid drinking cold or dairy-based beverages, as they can lead to mucus and throat irritation.

Stay hydrated with room temperature water throughout the day.

What Is The Thyroid Tilt Technique?

The thyroid tilt technique is a method used to diagnose hypothyroidism, a condition in which the thyroid gland is underactive. This technique involves tilting the patient’s head back and checking for any swelling or enlargement in the thyroid gland located in the neck.

It is a simple and non-invasive way to detect thyroid problems.

Conclusion

Achieving great communication skills is not an impossible feat. The secret is in practicing the art of active listening, speaking clearly and confidently, and taking the time to think before speaking. Great communicators understand that communication is a shared responsibility.

They take accountability for their words and actions, and they inspire others to do the same. Lastly, they are always working to improve their communication skills. By following these guidelines, you too can become a powerful communicator and unlock new opportunities in both your personal and professional life.

Categories
Archive

Aspects Of Good Music You Must Know

Good music should have quality melody, engaging lyrics, catchy rhythm and effective dynamics. In order to create good music, you must remember to incorporate each of these aspects into your music effectively.

When all of these elements work together harmoniously, you will be able to create a piece of music that is compelling, captivating, and memorable. Creating good music takes effort, creativity, and vision. As a musician, you need to respect the rules while simultaneously breaking them in order to create something new and fresh.

Good music should connect people, express emotions, and tell stories. Additionally, it should be memorable, thought-provoking, and enjoyable to listen to. To achieve this, you must master each aspect of music-making, from composing and arranging to mixing and mastering. In this post, we will delve deeper into each aspect of good music-making, providing you with tips and strategies to help you create music that resonates with your audience.

Catchy Melodies

Good music must have catchy melodies that captivate the listeners. The right combination of rhythm and harmony creates a unique sound that the audience enjoys and remembers. Understanding the importance of melodies is crucial for creating excellent music that leaves a lasting impression.

Music has the power to transport us to another dimension with its catchy melodies. They are the driving force behind every hit song, making us want to tap our feet, nod our heads, and sing along. Catchy melodies can be defined as a musical phrase or a hook that sticks in our minds and makes us want to repeat it again and again. There are three aspects of a catchy melody that every musician and listener must know.

Simple Yet Unique

Simple melodies are easy to remember, but they may not necessarily be unique. A unique melody stands out and makes the listener take notice. The key to creating a great melody is finding a balance between simplicity and uniqueness. Simple melodies are easy to remember and sing along to, while unique melodies catch the listener’s ear and create a memorable experience.

Memorable Rhythms

Rhythm is an essential element in music that gives it a flow. A memorable rhythm is one that is catchy, easy to dance to, and enhances the melody. The rhythm of a song can get stuck in our heads long after the song is over, adding to the catchiness of the tune. Here are some tips to create a memorable rhythm:

  • Use repetition to create a familiar pattern
  • Add unexpected pauses to create tension
  • Vary the tempo to keep the rhythm interesting

In conclusion, catchy melodies are what make a song popular and unforgettable. Simple yet unique melodies with memorable rhythms create an instant connection with the listener and make the song stand out.

Lyrics That Connect

Music connects people, evokes emotions, and tells stories. A good melody alone can make a song enjoyable to listen to, but what sets exceptional music apart from the rest is lyrics that connect to the audience. Lyrics that resonate with listeners can make a song more impactful and memorable. Let’s dive deeper into the various aspects of lyrics that make them so important in music.

Meaningful Message

Lyrics with a meaningful message can have a powerful impact on listeners. These types of songs have a clear and direct message that can invoke feelings of hope, inspiration, and motivation. For example, Bob Marley’s “Redemption Song” delivers a powerful message about overcoming slavery and injustice. The song encourages listeners to overcome their struggles and fight for their own redemption. Songs like these can leave a lasting impression on listeners and inspire them to make positive changes.

Relatable Emotions

Emotions are a universal language, and music is a medium to express them. Lyrics that tap into humans’ common emotions can make songs relatable, emotional, and even therapeutic. When people feel emotionally connected to a song, it can help them understand themselves better. For example, Adele’s “Someone Like You” is a song that touches on heartbreak and loss. The lyrics are written with a deep understanding of the emotions someone feels after a breakup and can connect with listeners who have gone through the same experience.

Quality Production

Understanding the elements of good music is crucial to producing quality productions. Important aspects to consider include melody, harmony, rhythm, timbre, and dynamics. With a thorough understanding of these elements, you can create music that resonates with your audience and stands the test of time.

Quality Production: Balanced Sound Mix

A good musical composition requires a balanced sound mix, which is achieved when each element of the music is audible to its intended level. In the production phase, this requires the sound engineer to make adjustments to individual tracks to ensure that none of them stand out too much. Instruments and vocals must be balanced, drums should provide consistent and complementary rhythm, and other effects should be tastefully incorporated to add to the overall sound. A poorly balanced sound mix can ruin an otherwise good song.

Quality Production: Professional Engineering

Professional engineering is key to creating a high-quality sound mix. Sound engineers use their technical expertise to ensure that the mix is clean and clear. They must have a keen ear for music and good technical knowledge of the production software and hardware. They work to eliminate unwanted sounds and refine the sound being produced. This can take hours of skillful blending and adjusting, but the result provides a much richer sound experience for the listener. A song that is poorly engineered can lack clarity, produce annoying background noises and distortion, and make the song hard to listen to.

Quality Production: Mixing And Mastering

Mixing and mastering are the final stages of the production process. Mixing involves combining all of the individual instrument and vocal tracks into a single, balanced mix. This phase ensures that all the elements complement each other and that they do not overlap or sound muddled. Mastering takes the mixed song and prepares it for distribution by tweaking the final sound to optimize it for different playback systems. Engineers use compression, equalization, and other processing techniques to bring out the full potential of the song. In short, mixing and mastering compliments the entire production process, turning good music into great music. A music production must have good sound quality for it to be a success. Quality production is a result of a good balance between the sound mix, professional engineering work and the final mixing and mastering stage. When carried out correctly, each aspect of the production process leads to an enjoyable and engaging music experience for the listener.

Proper Structure

Proper structure is an essential aspect of good music that you must know. A well-organized musical piece can stir up emotions, convey a message and captivate the listener’s attention. Understanding musical structure can help you appreciate music better and create compelling compositions.

Good music has several key aspects that make it enjoyable and memorable. The proper structure of a song is one of those key aspects. A well-structured song can enhance the listener’s experience and keep them engaged throughout the duration of the song.

Clear Intro

A clear and well-executed intro is critical to the success of any song. It is the first impression that the listener gets, and it sets the tone of the entire piece. An ideal introduction should be crisp, concise, and interesting enough to grab the listener’s attention. It should give a clear idea of what the song is about and offer a glimpse into the melody and the feel of the song. A perfect intro makes the listener anticipate the rest of the song.

Progressive Buildup

The progressive buildup is a crucial element of song structure because it helps to maintain the interest of the listener. In a well-structured song, there should be a gradual increase in intensity as the song progresses. This increase in energy and emotion should be subtle but noticeable, building up to a peak that gets the listener excited and fully engaged. This progressive rise can be in the form of a gradual building of the instrumentation and dynamics, or it can be a rise in the intensity of the performer’s voice or the lyrics’ theme. Whatever form it takes, the ideal song structure requires that it leads to a satisfying conclusion.

Satisfying Conclusion

The conclusion of the song is the climax and should provide a sense of resolution to the listener. It should be a satisfying end, whether it is a sudden stop or a gradual fade-out. This conclusion should tie in with the song’s theme and message, leaving the listener feeling fulfilled and contented. A good conclusion makes the listener want to press the replay button and experience the song all over again. In conclusion, the proper structure of a song is crucial to its overall success. A clear introduction, progressive buildup, and satisfying conclusion are all critical components that help to create a memorable listening experience. If you’re a musician or songwriter, paying attention to these musical aspects can help you create great music that resonates with your target audience.

Authenticity

Authenticity is a crucial aspect of good music that you must know. It refers to the genuine, original and honest expression of the artist through their lyrics, melody, and style. Authentic music is appreciated and valued by listeners who want to connect with the emotions and soul of the artist.

Personal Touch

Music is a form of expression, and a genuine expression is what sets musicians apart from each other. Authenticity in music is achieved when the artist puts their personal touch on the music. By sharing their experiences and feelings through their music, they create a connection with their audience. Listeners want to feel as if they know the artist personally, and including a personal touch in music is what makes that possible.

Originality

Originality in music is the act of creating something unique, or something that has never been done before. A musician who does not rely on copying or imitating other artists creates music that is truly unique. Originality in music makes it stand out and gives it the potential for commercial success.

Conclusion

Authenticity is an essential aspect of good music. Adding a personal touch and originality creates a connection between the artist and the audience. Musicians who are true to themselves and their experiences create music that stands out and can lead to commercial success. With these aspects in mind, aspiring musicians should strive to create authentic music that resonates with others.

Aspects Of Good Music You Must Know

Credit: www.productionmusiclive.com

Innovation

Get to know the key elements of good music to enhance your listening experience. Aspects such as melody, harmony, and rhythm can greatly impact the way music affects us emotionally and physically. Keep these aspects in mind to appreciate music at a deeper level.

Fresh Perspective

Innovation in music refers to the ability to create a fresh perspective on existing ideas and concepts, or even better, to innovate entirely new ideas. When it comes to music, listeners are always looking for something unique, and there is no better way to achieve it than providing a fresh perspective on the existing norms. Through innovation, musicians can invigorate their work and make it more appealing to audiences. Something as simple as blending two or more genres of music can give rise to something truly outstanding. Such an approach towards music-making requires creativity and a lot of experimentation.

Creative Experimentation

Creative experimentation is essential for good music. Musicians who seek innovation are often not afraid to try different approaches to music-making. They experiment with new sounds, rhythms, melody, and instrumentation to create something that stands out from the rest. Innovation might involve blending two or more genres to produce something unique, or it could mean introducing new arrangements or instrumentation into existing genres. This creative experimentation should never stop, as it is the foundation upon which innovation thrives.

Code Experimentation

Similarly, innovation in music can be achieved through code experimentation. Musicians and producers are always looking for new ways to enhance the quality of their music with technological advancements. Whether it’s through new digital tools, software, or innovative hardware, the tech industry is always innovating, and musicians should take advantage of it. For instance, synthesizers have revolutionized electronic music, and drum machines have dominated pop music. This is the result of code experimentation, and it’s only going to get better with time. The best part is that there’s always something new to experiment with, which is why innovation in music is forever a work in progress. In conclusion, innovation is key to producing good music. Fresh perspectives and creative experimentation are two critical elements that are required to achieve this goal. However, one should always be open to experimentation with new technological advancements to produce further improvements.

Universal Appeal

In the world of music, there are certain aspects that make a piece of music stand out from others. One of the key elements of good music is its universal appeal. A good piece of music should have the ability to connect with people from diverse cultures and backgrounds. Below are some aspects of good music you should know, focusing on the subheading: Universal Appeal.

Cross-cultural Appeal

A good piece of music should be able to evoke emotions that transcend cultural boundaries. This means that no matter where you come from, you should be able to relate to the music. Music that has cross-cultural appeal can be enjoyed by people from different parts of the world, regardless of their cultural background. An example of music with cross-cultural appeal is Despacito by Luis Fonsi and Daddy Yankee. The song incorporates Latin music with pop and has become a global hit.

Timelessness

A good piece of music should stand the test of time. Timeless music has a beauty that doesn’t diminish with age. It can be enjoyed by people from different generations. An example of timeless music is Bohemian Rhapsody by Queen. The song was released in 1975 but is still popular today. Its popularity has even increased in recent years, thanks to the release of the biopic Bohemian Rhapsody.

Good music should have universal appeal and be able to connect with people from diverse cultures and backgrounds. It should also be able to stand the test of time and be enjoyed for many years to come. These aspects are what make a piece of music great.

Aspects Of Good Music You Must Know

Credit: www.nccih.nih.gov

Performance Mastery

Performance mastery is a vital aspect of good music. It involves technical proficiency and expressive delivery, which are essential for creating an extraordinary musical experience. As a musician, improving your performance mastery skills can help set you apart and enhance your connection with your audience.

Technical Proficiency

Technical proficiency refers to the level of mastery a musician has over their instrument or voice. It involves developing skills in areas such as intonation, rhythm, and tone. A musician who has reached technical proficiency can perform challenging pieces with ease and accuracy.

To enhance technical proficiency, a musician should:

  • Practice scales and exercises to improve technique and muscle memory
  • Focus on accuracy and consistency
  • Develop efficient practice habits
  • Take lessons from a skilled and experienced teacher or mentor
  • Listen to recordings of accomplished musicians to learn from their techniques and styles

Expressive Delivery

Expressive delivery involves bringing emotion, feeling, and personality to a piece of music. It is the ability to evoke a response from an audience by creating a connection through the music. A musician with excellent expressive delivery can take a piece of music to a new level, making it memorable and enjoyable for listeners.

To enhance expressive delivery, a musician should:

  • Listen to and understand the emotions and feelings the music conveys
  • Develop a personal connection with the music
  • Experiment with different tempos, phrasing, and dynamics to bring out the emotion of the piece
  • Take risks and be vulnerable in their performances to connect with their audience
  • Record and listen to their performances to identify areas for improvement

Mastering performance mastery skills takes time, practice, and dedication, but the results are well worth the effort. By improving technical proficiency and expressive delivery, a musician can create a unique, unforgettable musical experience for their audience.

Aspects Of Good Music You Must Know

Credit: www.copyright.gov

Frequently Asked Questions For Aspects Of Good Music You Must Know

What Are The Qualities Of Good Music?

Good music should have melodious tune, meaningful lyrics, catchy rhythm, emotional appeal and connect with the audience. It should evoke emotions and leave a lasting impression. Music that is well-structured, technically sound and has a unique sound also makes for good music.

What Makes Good Music Good?

Good music is subjective and varies from person to person. However, some elements that make music good include well-written lyrics, a catchy melody, skilled musicianship, emotional connection, and unique qualities that set it apart from other music. Ultimately, good music is enjoyable and resonates with the listener.

What Is The 7 Element Of Music?

The 7 elements of music are melody, harmony, rhythm, dynamics, timbre, texture, and form.

What Is The Most Important Aspect Of Music?

The most important aspect of music is subjective and varies from person to person. For some, it may be the lyrics or melody, while for others, it may be the emotional connection it creates. Overall, music has the power to evoke different feelings and emotions in individuals and has the ability to bring people together.

Conclusion

To sum up, good music is a combination of different aspects that come together to create an enjoyable experience. It’s not just about the melody, but also about the lyrics, emotions, and the way it resonates with the listener. Understanding these elements can help us appreciate and connect with music on a deeper level.

By paying attention to these aspects, we can learn to appreciate all genres of music and enjoy them in their purest form. So, the next time you listen to music, pay attention to these elements and see how it enriches your experience!

Categories
Archive

Control Tempo Meter Protools

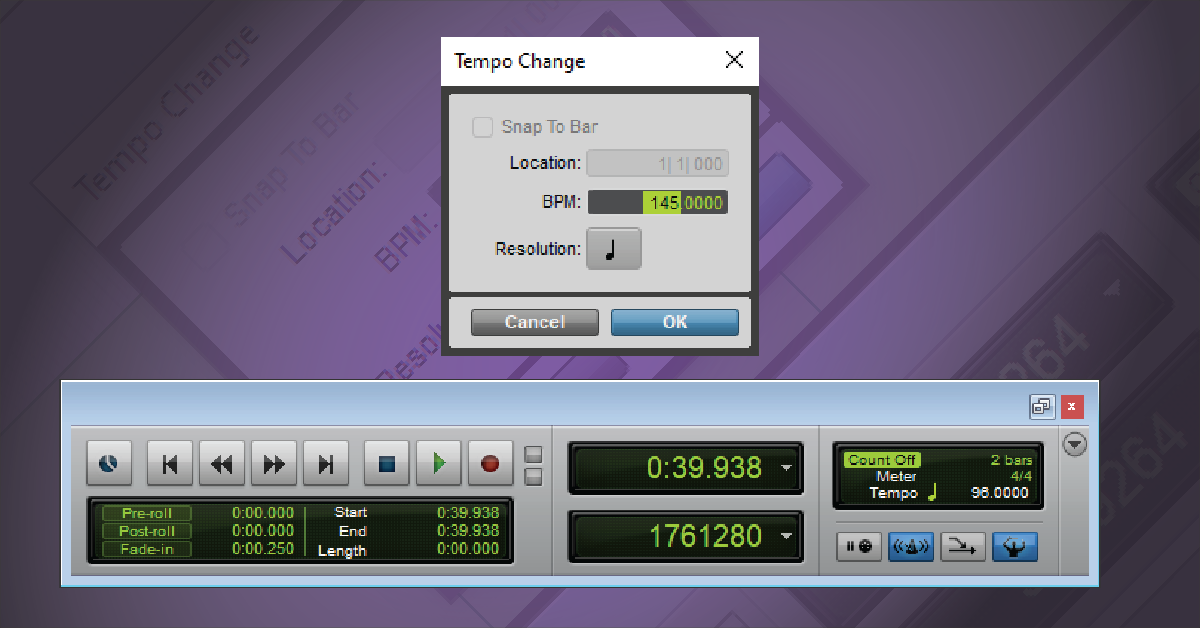
To control tempo meter in Protools, use the Tempo ruler and Add Tempo Change option. Protools allows you to change the tempo of your session, automate tempo changes, and set a tempo for imported audio files.

Tempo is an important aspect of any musical production, and it can be a challenge to keep everything in sync. Fortunately, Protools provides a simple and efficient way to control the tempo of your session using the Tempo ruler. By adding tempo changes to your session, you can create a dynamic and engaging musical experience for your audience.

Whether you’re producing a pop song or a film score, Protools allows you to manage the tempo meter with ease. With this feature, you can easily make changes to the tempo of your session, automate tempo changes, and set a tempo for imported audio files. We’ll explore how to control tempo meter in Protools and empower you with the necessary skills to create a professional-sounding track.

Control Tempo Meter Protools

Credit: m.youtube.com

How To Use Tempo Meter In Protools

Learn how to control tempo meter in Protools with ease. Use the ruler, snap settings, and other tools in Protools to adjust and edit your track’s tempo in real time.

Protools is a popular digital audio workstation used for recording, editing, and mixing music. One of its many features is the Tempo Meter, which helps musicians and producers stay in sync with their music projects. In this section, we’ll discuss how to use the Tempo Meter in Protools, covering topics such as setting it up, changing the tempo, and syncing audio files.

Setting Up The Tempo Meter In Protools

Before you can start using the Tempo Meter in Protools, you’ll need to set it up correctly. Here are the steps you need to follow:

  1. Open your Protools session and click on the “Window” menu.
  2. Select “Tempo” from the drop-down menu.
  3. Click on the “Tap Tempo” button to activate it.

Once you’ve completed these steps, you’re ready to start using the Tempo Meter.

Changing The Tempo In Protools Using Tempo Meter

One of the primary uses of the Tempo Meter is to change the tempo of your music in Protools. Here’s how you can do that:

  1. Tap the “Tap Tempo” button in time with the beat of your music project.
  2. Protools will automatically calculate the tempo based on your taps.
  3. The tempo will be displayed in the Tempo Meter window.
  4. You can adjust the tempo by dragging the slider or typing in a new value.

Using the Tempo Meter to change the tempo in Protools makes it easier to keep your music in time and prevents any tempo inconsistencies.

Using Tempo Meter To Sync Audio Files In Protools

Another valuable use of the Tempo Meter is syncing audio files in Protools. Here’s how you can do that:

  1. Import the audio files you want to sync into your Protools session.
  2. Start playing one of the audio files in Protools.
  3. Tap the “Tap Tempo” button in time with the beat of the audio file.
  4. Protools will automatically calculate the tempo based on your taps.
  5. Repeat this process for each audio file you want to sync.

Once you’ve synced all your audio files using the Tempo Meter, you can edit and mix them seamlessly in Protools. In conclusion, the Tempo Meter is a valuable tool for anyone working in Protools. Whether you’re a musician, producer, or audio engineer, the Tempo Meter can help you stay in sync and create high-quality music projects. By following these easy steps, you can start using the Tempo Meter in Protools today.

Control Tempo Meter Protools

Credit: www.mixinglessons.com

Tips And Tricks For Using Tempo Meter In Protools

When it comes to creating music in Protools, Control Tempo Meter Protools is an essential tool that can help you maintain a consistent tempo of your track. However, there are some hidden tips and tricks that can make your workflow more efficient and effective. In this blog post, we will discuss some of the useful tips and tricks for using Tempo Meter in Protools that every music producer should know. Let’s get started!

Using Beat Detective In Conjunction With Tempo Meter

One of the coolest tricks you can do with Protools is using Tempo Meter in conjunction with Beat Detective to analyze the rhythmic patterns in an audio file. To do this, select the region you want to analyze, and then activate Beat Detective by clicking on the “Beat Detective” button in the toolbar. Then, choose “Tempo Analysis” from the Beat Detective window, and Protools will automatically calculate the tempo of the audio file and adjust the tempo of your session accordingly. This trick is useful when you’re trying to match the tempo of a beat to a pre-existing track or when you’re remixing an old song with a new tempo.

Creating Click Tracks With Tempo Meter

Another trick you can use Tempo Meter for is creating click tracks for your session. Click tracks are essential when recording a live performance or when exporting MIDI data for different tracks in your project. To create a click track using Tempo Meter, open the Tempo Ruler at the top of the Protools window and set the desired tempo for your click track. Then, choose “Click” from the menu and select “Output to MIDI Click” to create a MIDI track with the click sound. You can customize the sound and pattern of the click track according to your preference.

Using Tempo Meter For Film Scoring In Protools

Are you composing music for a film or television show in Protools? If so, Tempo Meter can be your best friend. Film scoring requires precise synchronization of the music with the on-screen action, and Tempo Meter can help you achieve that perfectly. Set your tempo markers according to the visual cues in the video and use different tempos for different scenes to create an emotional impact. The Grid mode in Tempo Meter can particularly come in handy when you’re scoring an action scene or a suspenseful sequence.

Summary of tips and tricks for using Tempo Meter in Protools
No.Tip/Trick
1Use Beat Detective in conjunction with Tempo Meter for analyzing rhythmic patterns.
2Create click tracks using Tempo Meter for live recordings or MIDI exports.
3Use Tempo Meter for film scoring in Protools by setting tempo markers and using different tempos for emotional impact.

Common Issues You May Encounter When Using Tempo Meter

Controlling the tempo meter in Protools can be challenging, and many users face common issues while doing so. Some of these issues include playback clicking, unwanted tempo changes, and incorrect tempo detection. However, knowing how to troubleshoot these issues can help you maintain control of the tempo and ensure a seamless recording experience.

Using a tempo meter in Protools is essential for ensuring that your music sounds polished and professional. However, you may come across a few common issues when using a tempo meter, which can affect the accuracy of your music timing. In this blog post, we will discuss the three most common issues Protools users encounter when using a tempo meter.

Inconsistent Click Track Timing

One of the most common issues that you may encounter when using a tempo meter in Protools is inconsistent click track timing. This problem can arise when the click track timing is not set correctly, resulting in an irregular rhythm. This can make it challenging for musicians to stay in sync with the music, leading to a chaotic and unprofessional sound. To fix this issue, ensure that your click track timing is set accurately to the tempo of the song. You can do this by using the ‘Tempo Ruler’ feature in Protools, which allows you to set the tempo for each section of the song, including tempo changes. By setting the tempo correctly, you can ensure that the click track timing is consistent and helps your musicians stay in rhythm.

Tempo Changes Not Registering In Protools

Another common issue that you may encounter when using a tempo meter in Protools is that tempo changes are not registering correctly. This can make it challenging to change the tempo at specific sections, resulting in a disjointed and unprofessional sound. To fix this issue, ensure that you have set the tempo changes correctly using the ‘Tempo Ruler’ feature. Additionally, ensure that your click track is set to the correct tempo using the ‘Tempo tapper’ feature, which allows you to tap the tempo of the song manually.

Incorrect Tempos Provided By Tempo Meter

Lastly, you may also encounter the issue of incorrect tempos provided by the tempo meter in Protools. This usually happens when the tempo meter is not calibrated correctly or when it doesn’t take into account minor tempo variations in the music. To fix this issue, ensure that your tempo meter is calibrated correctly, and you take note of minor tempo variations in the music. Additionally, you can try adjusting the tempo manually using the ‘Tempo ruler’ or ‘Tempo tapper’ feature to ensure that you get the correct tempo for the song. In conclusion, using a tempo meter in Protools is crucial for ensuring that your music sounds professional and polished. However, you may encounter a few common issues when using a tempo meter that can affect the accuracy of your music timing. By following the tips mentioned in this blog post, you can troubleshoot these issues and ensure that your music sounds great.

Control Tempo Meter Protools

Credit: www.sweetwater.com

Best Practices For Using Tempo Meter In Protools

Learn how to easily control the tempo meter in Protools with these best practices. From adjusting the tempo in real-time to using tap tempo, these tips will help you create a smoother workflow and achieve precise timing in your music production.

Tempo mapping is an essential part of music production. The use of the tempo meter in Protools ensures that the timing and rhythm of the song are accurate. However, to get the most out of this tool, there are certain best practices that you need to follow. In this article, we will discuss these practices in detail, starting with the importance of double-checking your tempo with a metronome.

Double Checking Your Tempo With A Metronome

While Protools’ tempo meter is an excellent tool for mapping out the rhythm of a song, it is always advisable to double-check your tempo with a metronome. A metronome provides an accurate sense of timing, ensuring that the pace of the song stays consistent throughout. To double-check your tempo with a metronome, follow these steps:

  1. Set the metronome to the same tempo as your Protools session.
  2. Play back your session while simultaneously playing the metronome.
  3. Listen to the metronome and track the timing of your session.
  4. If the timing is off, adjust the tempo in Protools until it synchronizes with the metronome.

Using Multiple Tempo Mappings To Ensure Accuracy

Protools allows you to create multiple tempo maps for your session. This feature is useful for when you have a song with changes in tempo and rhythm. By creating multiple tempo maps and switching between them, you can ensure that your song is accurate and flows smoothly. To use multiple tempo mappings in Protools, follow these steps:

  1. Create a tempo map for each section of the song.
  2. Switch between the maps when needed to match the timing of the music.
  3. Make note of the changes in your session to ensure accuracy when editing.

Saving Your Tempo Maps For Future Projects

Once you have created your tempo maps and finalized your song, it is essential to save your work for future projects. Saving your tempo maps allows you to quickly and easily create new projects with the same tempo and rhythm as your previous work. To save your tempo maps in Protools, follow these steps:

  1. Click on the ‘File’ menu in Protools.
  2. Select ‘Save as Template’.
  3. Name your template appropriately.
  4. Save your template for future use.

Following these best practices while using the tempo meter in Protools will ensure that your music is accurate and flows smoothly. Incorporate these practices into your music production process to achieve the best results.

Frequently Asked Questions Of Control Tempo Meter Protools

How Do I Turn On The Tempo Ruler In Pro Tools?

To turn on the tempo ruler in Pro Tools, go to the “View” menu, select “Edit Window Views,” and then check the box next to “Tempo Ruler. ” The tempo ruler will then appear at the top of your Pro Tools session for you to use.

How To Do Tempo Automation In Pro Tools?

Tempo automation in Pro Tools can be done by accessing the “Tempo” menu and selecting “Enable Tempo Events. ” Afterward, use the “Tempo Ruler” to insert tempo changes or use the “Beat Detective” tool to automatically detect and adjust tempo changes.

Finally, adjust the “Tempo View” to see the changes in the timeline.

How Do I Check Tempo In Pro Tools?

To check tempo in Pro Tools, select the “Tempo” window and choose “Tap Tempo” to manually tap in the tempo or select “Conductor” to set a specific tempo. The tempo can also be adjusted by using the tempo ruler or by enabling “Tempo Detection” to automatically detect tempos in imported audio files.

How Do I Set Meters In Pro Tools?

To set meters in Pro Tools, open the mix or edit window, select “Options” from the menu bar, then click “Metering. ” Here you can customize meter preferences, such as peak or RMS, meter type, color, and more.

Conclusion

Overall, controlling tempo meter in Protools can be a crucial aspect of producing an exceptional piece of music or audio. With the techniques mentioned above, including using the grid and changing meters, users can easily manipulate tempo to create a unique and personalized sound.

The ability to control tempo meter is one of the most important toolsets in a modern music producer’s arsenal. By mastering these techniques, Protools users can craft polished, professional-sounding tracks that stand out in today’s highly competitive market.

Categories
Archive

A Step By Step Guide To Mixing Drums

Mixing drums is a crucial part of music production. To achieve a balanced and professional sound, follow these step by step instructions.

Drum mixing is a fundamental component of music production. It’s vital for creating an impactful sound. If you want to make sure your drums are a forceful part of your music, you need to get the mixing right. Equalization, panning, and compression are just some of the techniques used to make your drums sound their best.

In this guide, we will walk you through the steps to achieving high-quality drum mixing. Let’s get started!

Preparing The Tracks

Learn how to mix drums like a pro by carefully preparing the tracks with this step by step guide. From setting levels to EQing, these tips will help you achieve a polished drum sound.

Preparing The Tracks: Mixing drums is an essential part of music production, and it requires a lot of attention and care to get the perfect mix. One of the crucial steps in mixing drums is preparing the tracks. This includes organizing and naming the tracks, editing and trimming the tracks, and so on. In this article, we’ll focus on the steps you need to follow to prepare your tracks for mixing drums. Let’s begin with the first step- naming and organizing tracks.

Naming And Organizing Tracks

Naming and organizing the tracks are important for keeping the session clean and managing files effectively. It’s easy to get lost in a long list of tracks without proper naming and organization. Here are some tips to help you:

TipsDescription
Keep it SimpleUse simple names that reflect the sound of the instrument you are recording. For example, ‘Kick’, ‘Snare Top’, ‘Overhead Left’, and so on.
Use Color CodesAssign a specific color to each track to make it easier to identify and distinguish among them. For example, the color purple to the kick drum, blue to snare, and green to hi-hat.
Group Similar Instruments TogetherGrouping similar instruments helps to manage and control the mix quickly. For example, group all the tom-tom tracks together, or all the overheads together.

Editing And Trimming The Tracks

Now that the tracks are organized and named, the next step is to edit and trim them. This process involves getting rid of any unwanted noise or silence at the beginning or end of the tracks. Here are some tips for editing and trimming the tracks:

  • Cut out Silence: Remove any unwanted silences at the beginning or end of the tracks using the fade-in and fade-out tools.
  • Trimming: Trim the excess track at the start and end of the recording to ensure a clean start and finish.
  • Aligning: Align all the tracks to start at the same point to avoid any timing issues later during the mixing process.

In conclusion, preparing the tracks is a significant part of mixing drums. Properly organizing and naming the tracks, and editing and trimming them will not only help manage and control the mix but also make it easier to navigate and collaborate with others. So, take your time and ensure everything is in order before moving to the next step.

Getting The Levels Right

If you want to make your drums sound great, you need to get the levels right. This means ensuring that the volume of each drum track is balanced with the others. If one drum track is too loud, it will drown out the others and make your mix sound muddy. Conversely, if one track is too quiet, it will be lost in the mix and not be heard.

Mixing Instruments Separately

Before you start adjusting levels, it’s important to mix each instrument separately. This means adjusting the EQ, compression, and other effects for each drum track separately. Once you have each track sounding great on its own, you can begin to balance the levels with the others.

Setting Levels For Each Track

To set the levels for each drum track, start by soloing one track at a time. Listen to the track and adjust the volume fader until it sounds balanced with the others. You want to be able to hear each individual track clearly, but not have any track be too loud or too quiet.

Once you have set the levels for each track, listen to the mix as a whole. If any track still sounds too loud or too quiet, adjust the faders accordingly. Keep doing this until you have a balanced mix where each track can be heard clearly.

Remember, getting the levels right is just the first step in mixing drums. There are many other factors to consider, such as panning, reverb, and overall EQ. But by getting the levels right, you’ll be well on your way to a great-sounding drum mix.

Applying Eq

Learn how to mix drums like a pro with this step-by-step guide, using EQ to balance and shape each element of the kit. From kick and snare to cymbals and toms, you’ll discover the essential techniques for achieving a professional sound in your mixes.

Identifying Frequency Conflicts

The first step in applying EQ to your drum mix is identifying frequency conflicts. Start by soloing each drum track to determine which frequencies are clashing with other elements in the mix. Common frequency conflicts include the snare and hi-hat competing in the high frequencies, or the kick drum and bass guitar fighting for space in the low frequencies. Once you’ve identified the problem frequencies, you can use EQ to carve out space for each element.

Sculpting The Sound With Equalization

Next, it’s time to sculpt the sound with equalization. Begin by applying a high-pass filter to the kick drum to remove any unnecessary low-end rumble and make room for the bass guitar. Then, use a parametric EQ to boost or cut specific frequencies on each drum track. For example, you might boost the attack of the snare drum around 5kHz to make it cut through the mix, or cut the muddy midrange frequencies on the toms to clean up the sound.

Using Compression To Control Dynamics

After applying EQ, it’s a good idea to use compression to further shape the sound of your drums. Compression can be used to control the dynamic range of each drum track, making the quiet parts louder and the loud parts quieter. This can help to even out the sound of each drum and make them sit together more cohesively in the mix. By following these steps, you can achieve a professional-quality drum mix that is balanced, clear, and punchy.

A Step By Step Guide To Mixing Drums

Credit: www.masteringthemix.com

Adding Compression

Adding compression is an essential step in mixing drums. It helps to even out the dynamics and bring the drums to life. Here is a step-by-step guide on how to effectively add compression to your drum mix.

Understanding Compression

Compression is an essential tool in mixing drums. It helps control the dynamic range of the drums, bringing up the quiet parts and bringing down the louder parts. In simple terms, it reduces the dynamic range of the audio signal. This means that the quiet parts are boosted and the loud parts are attenuated.

Applying Compression To The Drum Tracks

To apply compression to the drum tracks, you need to start by identifying the drum track that needs compression. This could be the kick, snare, or overheads. Once you have identified the drum track, you need to set the threshold, ratio, attack, and release. To set the threshold, you need to listen to the drum track and adjust the threshold until the compressor starts to work. This means that the compressor will start to reduce the volume of the drum track when the signal goes above the threshold. The ratio determines the amount of compression that is applied to the signal. The higher the ratio, the more compression will be applied. A good starting point is a ratio of 4:1. The attack and release controls how quickly the compressor starts to work and how quickly it stops working. The attack controls how quickly the compressor starts working, and the release controls how quickly the compressor stops working. Overall, adding compression to your drum tracks can make a huge difference in your mix. It can help control the dynamic range of the drums and bring out the nuances of the performance. Experiment with different settings until you find the right balance that works for your mix.

Adding Reverb And Delay

Achieving a well-mixed drum sound can be challenging, but adding reverb and delay can help create depth and dimension. Start by selecting the appropriate types of reverb and delay, experiment with different settings, and use them in moderation to enhance the overall sound of the drums.

Adding Reverb and Delay can take your drum mix to the next level. Reverb and Delay add depth and space to your drum sound, making it sound fuller and more professional. In this section of the guide, we will cover everything you need to know about choosing the right reverb and delay and applying them to your drum tracks.

Choosing The Right Reverb And Delay

When choosing the right Reverb and Delay for your drum mix, you need to consider the type of music you are mixing. Different genres of music require different types of Reverb and Delay effects. There are various types of Reverb and Delay effects to choose from, such as Room Reverb, Plate Reverb, Hall Reverb, Tape Delay, and Digital Delay. Here are some tips on choosing the right Reverb and Delay for your drum mix:

  • Choose a Reverb and Delay that matches the genre of music you’re mixing.
  • Experiment with different Reverb and Delay plugins to find the perfect fit.
  • Try to use the same Reverb and Delay on all your drum tracks to create a cohesive sound.

Applying Reverb And Delay To The Drum Tracks

Now that you have chosen the right Reverb and Delay for your drum mix, it’s time to apply it to the drum tracks. Here are the steps you should follow:

  1. Insert a Reverb and Delay plugin on your drum bus.
  2. Adjust the settings to achieve the desired effect. Start with small amounts of Reverb and Delay and gradually increase until you get the desired sound.
  3. If you’re using different Reverb and Delay plugins on individual drum tracks, make sure they all blend together well.
  4. Adjust the Reverb and Delay settings on individual drum tracks if necessary. For example, you may want to add more Reverb to the snare drum or more Delay to the hi-hats.
  5. Make sure the Reverb and Delay effects don’t overpower the dry sound of the drums. The effect should be subtle and add to the overall sound, not take away from it.

In conclusion, adding Reverb and Delay can make a huge difference in your drum mix. With the right Reverb and Delay plugins and settings, you can create a professional, polished sound that enhances the music. Follow these simple tips to achieve the perfect Reverb and Delay sound on your drum tracks.

A Step By Step Guide To Mixing Drums

Credit: www.masteringthemix.com

Finalizing The Mix

In this step-by-step guide to mixing drums, finalizing the mix is crucial in achieving a professional and polished sound. It involves fine-tuning the EQ, compression, and effects on each individual drum track and ensuring the overall balance and coherence of the drum sound.

Balancing The Mix

Once you have EQ’d and compressed each drum track, it’s time to balance them to create a cohesive and well-rounded sound. Start by soloing the kick drum and adjusting the fader until it’s at the desired level. Then, slowly bring in the snare drum and balance the two until they sit well together. Continue this process for each drum track, making sure to adjust levels as you go to maintain a well-balanced mix.

Identifying And Fixing Problem Areas

Despite your best efforts, there may be some problem areas that need to be addressed. Listen carefully to your mix from start to finish and take note of any parts that sound off. Use EQ to remove harsh or muddy frequencies, and consider using automation to bring up any parts that are getting lost in the mix. If you’re having trouble with a particular drum track, try adjusting the timing or using a different sample until it sits well in the mix.

Final Considerations

Once you’ve balanced your drum mix and addressed any problem areas, it’s time to listen to your mix in the context of your entire song. Make sure the drums are not overpowering any other instruments, and that everything sits well together in the mix. Adjust levels and make any final tweaks until you’re happy with the overall sound. Remember, the key to a great drum mix is patience and attention to detail. Take your time, and keep experimenting until you achieve the sound you’re after.

A Step By Step Guide To Mixing Drums

Credit: www.masteringthemix.com

Frequently Asked Questions On A Step By Step Guide To Mixing Drums

How Do You Mix Drums Step By Step?

Mixing drums involves these steps: 1. Organize individual tracks, pan them and adjust volume levels for each drum. 2. Use Equalization to enhance the characteristics and remove any unwanted frequencies. 3. Apply compression to even out the drum hits and sustain levels.

4. Use reverb to create space around the drum kit. Adjust decay time and mix levels. 5. Finally, verify your mix by listening on various devices at diverse volume levels.

What Order Should You Mix Drums?

When it comes to mixing drums, follow these guidelines for best results: 1. Start with the kick drum, 2. add the snare, 3. add high-hat and cymbals, 4. add toms and other percussion, 5. adjust EQ and compression. Remember to experiment and trust your ears.

How Do You Balance Drums In A Mix?

To balance drums in a mix, ensure the levels are consistent, but also focus on the dynamics and frequencies. Use EQ to shape the sound and avoid overlapping frequencies with other instruments. Consider panning the drums and using compression to control the dynamics.

Lastly, use reverb and other effects sparingly and strategically.

What Level Should Drums Be In A Mix?

Drums should be mixed at a level that complements the overall feel of the song. However, a good rule of thumb is to keep the drums slightly lower than the lead instruments and vocals, but higher than the bassline. It’s important to monitor the volume levels and eq settings to ensure a balanced and cohesive sound.

Conclusion

Mixing drums can seem like a daunting task, but with these step-by-step guidelines, you can achieve a professional-sounding mix. Remember to prioritize balance, EQ, and compression to create a cohesive and dynamic drum sound. Don’t forget to experiment with different settings and techniques to find what works best for your specific mix.

Follow these tips and you’ll be well on your way to achieving the perfect drum mix for your song!

Categories
Archive

Free Lo Fi Processing Vst Plugins

Free Lo-Fi processing VST plugins are available for download. These plugins emulate the vintage lo-fi sound.

Lo-fi processing is a technique that makes your audio sound distorted, low-quality, or gritty. Lo-fi sounds have become trendy in recent times, and many musicians, producers, and sound designers are using them in their music to add warmth and character.

Lo-fi VST plugins can help you achieve this sound without having to buy expensive hardware or recording equipment. Fortunately, there are many free lo-fi processing VST plugins available that can be used to achieve this sound. These plugins can be used in a wide range of music genres, such as hip hop, lo-fi, chillwave, and more. We will discuss some of the best free lo-fi VST plugins available for download.

Free Lo Fi Processing Vst Plugins

Credit: www.youtube.com

Advantages Of Free Lo-fi Processing Vst Plugins

Lo-fi processing VST plugins have a unique sound that comes from downsampling, bit-crushing, and distortion. Free lo-fi processing VST plugins are affordable and easy to use, which makes them a great choice for producers who want to create vintage-style music. In this post, we will look at the advantages of free lo-fi processing VST plugins in the music production industry.

Easy To Use

Free lo-fi processing VST plugins are simple to install, and most DAWs support them. They are also easy to use, making them ideal for beginners who want to experiment with lo-fi effects. These plugins usually come with a user-friendly interface, which eliminates the need for complex settings. As a result, producers can add lo-fi processing to their music without spending too much time on the technical aspects of using an effect.

Affordable

Free lo-fi processing VST plugins are popular among music producers because they are free. Unlike paid plugins that can be expensive, free lo-fi processing VST plugins offer producers access to quality effects without any cost.

Vintage Sound Production

Lo-fi processing VST plugins are essential in creating vintage-style music. These plugins provide the warm, fuzzy, and distorted sound that characterizes vintage recordings. Using free lo-fi processing VST plugins in modern music production creates an organic sound that is unique from the clean-cut sound of digital music. By using lo-fi processing plugins, producers can add depth and warmth to their productions.

Different Types Of Distortion Effects

Free lo-fi processing VST plugins come with different types of distortion effects, such as sample rate reduction, bit-crushing, and saturation. Some plugins also allow producers to combine different types of distortion effects, creating a wide range of sounds that is unique. With free lo-fi processing VST plugins, producers can experiment with different types of distortion effects to add character to their music.

Top Free Lo-fi Processing Vst Plugins

Discover the top free Lo-Fi processing VST plugins to add a vintage and warm sound to your music. These plugins can help you achieve a lo-fi tape, vinyl, or cassette sound with just a few clicks, and are perfect for producers looking for that old-school vibe.

Lo-fi music has been making a comeback in recent years and for those looking to create that vintage, old-school sound, the right VST plugins can be a game-changer. Here are some of the top free lo-fi processing VST plugins that can help you achieve the perfect sound.

Tal-dub-x

TAL-Dub-X is a great lo-fi plugin that simulates a tape delay effect. It offers a range of vintage-style parameters for you to tweak, from the delay time to the feedback, and even saturation controls to add warmth to your sound.

Izotope Vinyl

Izotope Vinyl is a classic lo-fi effect plugin that emulates the sound of vintage vinyl records. With controls for mechanical noise, electrical noise, wear, and dust, it can help you create an authentic vintage sound that is unmistakable.

Rough Rider 2

Rough Rider 2 is a dynamic compressor designed to add grit and saturation to your audio. It can help you reduce dynamic range while adding presence and character to your sound, making it ideal for lo-fi and vintage styles of music.

Krush

Krush is a bit-crushing plugin that can help you add that signature lo-fi sound to your recordings. It allows you to reduce the bit depth and sample rate of your audio, adding character and grit to your sound.

Fuzzplus 3

FuzzPlus 3 is a distortion and fuzz effect plugin that can add warmth and saturation to your sound. It’s especially useful for guitar and bass sounds, but can also add character to other types of audio.

Rc-20 Retro Color

RC-20 Retro Color is a comprehensive lo-fi plugin that allows you to add vintage-style effects to your audio. From tape emulation to distortion, noise, and tone shaping, this plugin has everything you need to create a lo-fi sound quickly and easily. Whether you’re creating lo-fi hip hop, indie or electronic music, these free VST plugins can help you achieve a vintage, old-school sound that is full of character and warmth. Try them out and see how they can enhance your productions.

How To Install And Use Free Lo-fi Processing Vst Plugins

Install and use free Lo-Fi processing VST plugins by downloading and extracting the plugin files. Then, load the plugin into your audio editing software and adjust the parameters to achieve the desired Lo-Fi sound for your music production.

Lo-fi processing has become tremendously popular among music producers, thanks to its ability to create a vintage or retro sound. This technology can make your tracks sound like it is coming from old cassette tapes or vinyl records. However, using these plugins requires that you know how to install and use them. This article will be taking you through how to find free Lo-fi processing VST plugins, their installation, and how to use them on your tracks.

Finding And Downloading Free Lo-fi Processing Vst Plugins

Finding and downloading free Lo-fi Processing VST Plugins is pretty easy. Several websites host these plugins, and all you need to do is search for them on a search engine. After a successful search, you can find several free Lo-fi Processing VST Plugins to choose from. It is essential to download these plugins from a reputable site to avoid any malicious software infecting your computer.

Installing Lo-fi Processing Vst Plugins On Your Daw

After downloading the Lo-fi Processing VST Plugins, the next step is installation. The process depends on which DAW (Digital Audio Workstation) you are using, but in most cases, it is seamless. Here are the general steps to follow:

  1. Locate your VST plugins folder
  2. Extract the downloaded plugin files to the VST folder
  3. Open your DAW and have it scan for the newly added plugins
  4. Once the plugins are scanned, you can use them in your tracks.

Using Lo-fi Processing Vst Plugins On Your Tracks

The fun part of having Lo-fi Processing VST Plugins is incorporating them into your tracks. Once you have installed the plugins in your DAW, the next step is to open them on your tracks. You can do this through the plugin list in your DAW. Choose the plugin you want to use and drag it over to your track. From there, you can adjust the plugin’s settings to achieve the desired Lo-fi sound. Experiment with the different settings until you find the best sound for your track, and voila! you have transformed your ordinary track into a retro masterpiece. In conclusion, using Lo-fi Processing VST Plugins can add a unique vintage feel to your tracks. Installing and using these plugins are easy and can be done with minimal technical expertise. With this guide, you can now add Lo-fi processing to your production process and take your tracks to the next level.

Tips For Using Free Lo-fi Processing Vst Plugins

Enhance your music with free Lo-Fi processing VST plugins. Follow these tips to get the most out of them: experiment with different settings, layer effects, and use them in moderation. Add character and vibe to your tracks with ease!

Lo-fi processing is a popular technique used by music producers and sound engineers to create a vintage, warm, and gritty sound. VST plugins are a great way to achieve the lo-fi sound, and the fact that there are free lo-fi processing VST plugins available online makes it easier for everyone to experiment with this technique. In this post, we’ll look at some tips for using free lo-fi processing VST plugins to get the best results.

Start With Small Changes

When using lo-fi processing VST plugins, it’s best to start with small changes and gradually build up the effect. The plugin might have several parameters that you can adjust, so it’s best to experiment with each of these parameters one at a time. For example, you could start with reducing the sample rate or bit depth to create a subtle lo-fi effect, and then gradually increase the effect by adding other parameters like distortion and compression. Starting with small changes will help you to achieve a more natural-sounding lo-fi effect.

Try Different Combinations Of Plugins

There are several free lo-fi processing VST plugins available online, and each of them has its own unique sound. To get the best results, it’s best to experiment with different combinations of plugins. For example, you could use a plugin that reduces the sample rate combined with a plugin that adds tape hiss to create a vintage sound. Trying different combinations of plugins will help you to find the ones that work best for your desired sound.

Blend With Different Effects

Lo-fi processing doesn’t have to be the only effect in your sound. You can blend your lo-fi effects with other effects like reverb, delay, or chorus to create a unique sound. For example, blending a lo-fi effect with a reverb effect can create an otherworldly sound that’s perfect for atmospheric music. Experimenting with different effects and blending them together will help you to create a unique sound that stands out.

Experiment With Different Parameters

Finally, it’s important to experiment with different parameters when using lo-fi processing VST plugins. Each plugin has its own set of parameters that can be adjusted, and it’s important to find the ones that work best for your desired sound. For example, you could experiment with the distortion parameter to create a gritty, distorted sound, or the compression parameter to create a more compressed sound. Experimenting with different parameters will help you to achieve the exact lo-fi sound that you’re after.

Conclusion

Using free lo-fi processing VST plugins is a great way to experiment with the lo-fi technique without breaking the bank. By following these tips, you’ll be able to achieve the best possible results with your lo-fi processing plugins. Remember to start with small changes, try different combinations of plugins, blend with different effects, and experiment with different parameters to create a unique and vintage lo-fi sound that stands out.

Different Techniques To Achieve Lo-fi Sound With Plugins

Achieving a Lo-Fi sound can be done with free VST plugins that give your music a vintage feel. Various techniques such as bit-crushing, downsampling and sample rate reduction can be applied to achieve the desired effect.

Lo-fi or low fidelity is a music production technique that adds warmth and character to a track. The use of plugins can help to achieve the desired lo-fi sound. In this post, we will explore different techniques to achieve lo-fi sound with plugins, which include adding noise, sample rate reduction, bit depth reduction, saturation, and distortion.

Adding Noise

Adding noise is a common technique used to achieve lo-fi sound. This is because real-life sound is not completely free of noise. Plugins like Izotope Vinyl and Waves J37 Tape Saturation provide hiss, hum, and other noise options that can be added to a track to make it sound like it was recorded in a vintage setting.

Sample Rate Reduction

Sample rate reduction is a technique used to replicate the sound of old vinyl records. It reduces the number of samples taken per second, resulting in lower audio quality. Plugins like Waves Abbey Road Vinyl and iZotope Vinyl can replicate this effect, producing the lo-fi sound that music producers crave.

Bit Depth Reduction

Bit depth reduction is similar to sample rate reduction. Still, instead of the number of samples per second, it reduces the number of bits used to store each sample of audio data. This decrease in bit depth creates a digital distortion that can add character to music tracks. The Waves Abbey Road Vinyl plugin is an excellent example of a plugin that can achieve this effect.

Saturation And Distortion

Saturation and distortion plugin adds warmth and character to a track. The subtle distortion created by plugins like Waves J37 Tape Saturation and Soundtoys Decapitator can replicate the sound of vintage analogue equipment. This technique can also be used to enhance the bass and eliminate harsh frequencies in a track. In conclusion, different plugins and techniques can help music producers achieve lo-fi sound. Adding noise, reducing sample rate and depth, and adding saturation and distortion can create a vintage feel and give that imperfect warmth.

Free Lo Fi Processing Vst Plugins

Credit: www.productionmusiclive.com

Who Can Use Free Lo-fi Processing Vst Plugins

Free Lo-Fi processing VST plugins can be used by anyone who wants to create a vintage, warm, and fuzzy sound in their music. These plugins are particularly useful for lo-fi hip-hop and beatmakers, bedroom producers, and experimental musicians who want to add a unique texture to their tracks.

Musicians Aspiring To Make Lo-fi Music

Lo-Fi music has been growing in popularity over the years, and musicians looking to create that vintage, warm sound can benefit from using lo-fi processing VST plugins. These plugins can easily add texture to your tracks, giving it that signature lo-fi sound that many listeners enjoy.

Audio Engineers And Producers

As an audio engineer or producer, you’re always on the lookout for new tools to expand your sound library, and lo-fi processing VST plugins can do just that. These plugins can add character to dull-sounding tracks and make them more engaging and atmospheric.

Podcasters

Podcasters are always looking for ways to make their podcast more engaging and entertaining. Using lo-fi processing VST plugins can add background music that matches the tone and mood of your podcast. These plugins can also help reduce noise interference improving sound quality.

Sound Designers

Sound designers can use lo-fi processing VST plugins to create unique soundscapes and special effects. These plugins can add texture, warmth, and distortion to sound effects that would otherwise sound flat and uninteresting to listeners.

Here are some of the best free lo-fi processing VST plugins you can use:

Plugin NameDescription
TAL-BitcrusherSimple but effective bitcrusher that can add grit and distortion to your tracks.
izotope VinylWidely used plugin with a vinyl record effect that can add warmth, saturation, scratches and reduce high-end frequencies.
Audiodamage Rough RiderA compressor with a vintage 90s stompbox design that can add analog feel to your audiotracks.
  • Free lo-fi processing VST plugins can add warmth, saturation, distortion and other effects to audio tracks compiling a vintage sound
  • They are useful for musicians aspiring to make lo-fi music
  • Audio engineers, podcasters, and sound designers can also benefit from using lo-fi processing VST plugins to improve sound quality
  • TAL-Bitcrusher, izotope Vinyl, and Audiodamage Rough Rider are some of the top free lo-fi processing VST plugins

Frequently Asked Questions On Free Lo Fi Processing Vst Plugins

How Do I Make My Audio Lo-fi?

To make your audio Lo-Fi, you can adjust the EQ settings and add effects such as vinyl noise or distortion. Use plugins or software like Ableton Live or Audacity to achieve the desired Lo-Fi effect. Also, recording with analog gear and techniques can also achieve a Lo-Fi sound.

What Software Does Lo-fi Use?

Lo-Fi uses a variety of software programs for music production such as Ableton Live, FL Studio, Logic Pro X, or Reason. These programs allow Lo-Fi producers to create their signature sound through sampling, mixing, and editing.

What Is Lo-fi Plugin?

Lo-Fi plugin is a software tool that adds a retro or vintage sound effect to audio files. It reduces the quality and bitrate of the sound, creating an authentic lo-fi feel. The plugin can be used in music production, video editing, or any other audio-related work.

How To Make Any Song Lo-fi?

To make any song lo-fi, reduce the frequency response of the track, add vinyl crackles and pops, distort the sound, use vintage effects, and add subtle background noise. Lowering the sampling rate and bit depth can also contribute to a lo-fi sound.

Conclusion

Lo-fi processing has been an integral part of the music production process, enabling musicians and producers to add a touch of vintage warmth and character to their recordings. With the free Lo-fi processing VST plugins available today, inspirations are limitless.

The above-stated plugins add a new dimension to your creative toolbox without costing you a dime. Your music production process can be enhanced and made more creative with access to these free tools!

More in our Plugin guides.

Categories
Archive

Acustica Audio Ruby Tutorial

Acustica Audio Ruby Tutorial covers the basics of using Acustica Audio’s plugin, Ruby, for audio mixing. In this tutorial, you will learn how to use various features and functions of Ruby to produce high-quality audio mixes.

Acustica Audio’s Ruby is a game-changer for audio mixing. The plugin offers a unique approach that emulates the vintage analog gear used by sound engineers. This tutorial will help you understand the fundamentals of Ruby and how to incorporate it into your audio mixing workflow.

You will learn about the various controls, parameters, and features that Ruby has to offer. With this knowledge, you can take your audio mixing skills to the next level and produce professional-quality mixes that sound great. So, let’s dive in and discover the world of Acustica Audio’s Ruby!

Acustica Audio Ruby Tutorial

Credit: m.youtube.com

Installation And Setup

Acustica Audio Ruby is a powerful plugin that requires proper installation and setup before use. This tutorial will guide you through the process, ensuring that you get the most out of this software.

Acustica Audio Ruby is a powerful plugin that models the audio signal path of tube-based devices. It offers a variety of features that can enhance the mixing and mastering process. In this section, we will guide you through the installation and setup process of Acustica Audio Ruby.

Downloading The Software

Before we dive into the installation process, you need to download the software. Acustica Audio Ruby is available on the official website. You can purchase it or try the demo version. The demo version comes with some limitations but allows you to test the plugin’s functionality before buying it.

Installation Process

Installing Acustica Audio Ruby is a straightforward process. Here are the steps you need to follow:

  1. Double-click on the installer file you downloaded.
  2. Follow the instructions on the screen.
  3. Launch your DAW and rescan for plugins.
  4. Insert Acustica Audio Ruby on an audio track.

Mandatory System Requirements

To ensure Acustica Audio Ruby functions correctly, you need to fulfill the following system requirements:

  • Operating Systems: Windows 7 or higher, Mac OS 10.10 or higher
  • CPU: Intel Core 2 Duo 2GHz, AMD Athlon 64 or equivalent
  • RAM: 4GB or higher
  • Disk Space: 1GB or higher
  • Plugins Format: VST, AAX, AU

Make sure your system meets these requirements before purchasing or installing Acustica Audio Ruby. In conclusion, the installation and setup process of the Acustica Audio Ruby plugin is quite simple. Download the software, follow the installation instructions, and ensure your system meets the mandatory requirements. With Acustica Audio Ruby, you can transform your mixes and take your sound to the next level.

Acustica Audio Ruby Tutorial

Credit: mixandmastermysong.com

User Interface

Acustica Audio Ruby Tutorial showcases a sleek user interface that makes it intuitive for beginners to navigate and operate the software. The UI has well-labeled controls, high-resolution graphics, and customizable skins for a personalized user experience.

Acustica Audio has earned a great reputation among the users with its innovative and intuitive audio plugins. They have once again come up with an amazing creation, the Acustica Audio Ruby plugin. Ruby is a highly versatile and powerful plugin that can produce quality sound and has a user interface that is not difficult to navigate. In this blog post, we will dive deep into the user interface of the Acustica Audio Ruby Plugin. Let us explore the essential details that we need to know about the UI of Ruby.

Overview Of The Workspace

The Acustica Audio Ruby plugin interface is designed to provide a simple and convenient user experience. It has a streamlined interface with a dark color scheme that is easy on the eyes. The overall layout of the interface is simple, straightforward, and customizable. The plugin features a centrally located graphical display area that shows the current active preset. This section contains several sections that are instrumental in guiding the user.

Explanation Of Each Section

The user interface of the Ruby plugin offers logical control sections such as Channel Strip, Harmonics, Compression, EQ, Stereo Controls, Post FX, and Limit. These sections are easy to access, and each section has its unique settings, knobs, and parameters. The Channel Strip section, for instance, contains every knob and parameter necessary to shape the sound of a single channel that is to be processed by the plugin. The Harmonics section, on the other hand, offers various models of distortion and saturation. The Compression section provides various types of dynamic control. The EQ section offers flexible equalization, and stereo controls is useful in dealing with the stereo image of the audio. The Post FX category includes a flexible delay and a high-quality reverb. The Limit section, as the name implies, provides full control over the limiter part of the plugin.

Customizing The Interface

The user interface of Acustica Audio Ruby plugin is customizable. Every user has different preferences; this makes the customizable UI feature a significant advantage. Users can choose the appearance of the plugin by selecting from the available options, like changing the color combination or creating custom skin. Moreover, the plugin can be resized as per the user’s liking, and it is possible to disable all graphical elements of the plugin, and use only numerical parameters available in each section. In conclusion, the user interface of the Acustica Audio Ruby plugin is designed to provide a seamless user experience. It is intuitive, customizable, and user-friendly. The plugin features essential control sections that can be accessed easily, and each section has its adjustable parameters. With Ruby’s user interface, users can have a convenient, accessible, and enjoyable audio plugin experience.

Using Acustica Audio Ruby

Acustica Audio Ruby is a virtual plugin that provides a user-friendly interface for manipulating audio signals. It features a professional-grade EQ and compression controls that can be used to enhance the quality of your audio files. Using this plugin can be a bit overwhelming if you are a beginner, but with a little bit of practice, it can become your go-to tool for audio processing.

Loading The Virtual Plugin

Before you can start using the Acustica Audio Ruby plugin, you need to load it into your digital audio workstation (DAW). This can be done by following these steps:

  1. Open your DAW and create a new audio track.
  2. Load the Acustica Audio Ruby plugin on the track.
  3. Load the audio file that you want to process on the track.

Signal Flow And Routing

Understanding the signal flow and routing of the Acustica Audio Ruby plugin is essential if you want to achieve the desired results. The signal flow of the plugin is as follows:

SectionFunction
InputControls the volume level of the incoming audio signal
EQAdjusts the frequency response of the incoming audio signal
CompressionControls the dynamic range of the incoming audio signal
OutputControls the volume level of the output signal

You can adjust the signal routing and order of the sections by dragging and dropping them in the desired order.

Adjusting Input And Output Levels

The input and output sections of the Acustica Audio Ruby plugin allow you to control the volume levels of the incoming and outgoing audio signals. You can use these controls to avoid clipping or distortion in your audio files. The input level control should be set so that the loudest part of the audio signal does not exceed 0 dBFS. The output level control can be adjusted to match the level of the processed audio with the level of the original audio file.

Manipulating The Eq And Compression Controls

The EQ and compression controls are the most important features of the Acustica Audio Ruby plugin. The EQ section allows you to adjust the frequency response of the audio signal by boosting or cutting specific frequencies. The compression section allows you to control the dynamic range of the audio signal by reducing the volume of the loudest parts of the signal.

  • Adjust the EQ controls by selecting a frequency band and adjusting the gain (dB) and width (Q) of the band.
  • Adjust the compression controls by setting the threshold, ratio, attack, release and makeup gain.

Tips And Tricks

When it comes to using the Acustica Audio Ruby plugin, knowing a few tips and tricks can take your mixing game to the next level. In this section, we’ll dive into three specific techniques you can use to get the most out of this plugin: applying different presets, combining multiple instances, and using sidechain techniques.

Applying Different Presets

If you’re new to the Acustica Audio Ruby plugin, the sheer number of presets available can be overwhelming. However, taking the time to explore and experiment with different presets can help you achieve the perfect sound for your mix. Some useful tips to keep in mind when applying different presets include:

  • Look for presets that are specifically designed for the type of sound you’re trying to achieve.
  • Pay attention to the settings and adjustments made in the presets – you can use these as a starting point for your own tweaks.
  • Don’t be afraid to mix and match presets to create a customized effect that suits your needs.

Combining Multiple Instances Of The Plugin

One of the benefits of the Acustica Audio Ruby plugin is that you can use multiple instances of it within the same mix. This gives you greater flexibility when it comes to shaping the sound and achieving a specific tonal balance. Here are some things to keep in mind when combining multiple instances:

  1. Experiment with different combinations of instances. For example, you might use one instance for a bass guitar track and another for a lead vocal track.
  2. Adjust the settings for each instance to create a cohesive sound across the mix.
  3. Consider using automation to create subtle changes in the level or frequency response of different instances at different points in the track.

Using Sidechain Techniques

Finally, when working with the Acustica Audio Ruby plugin, it’s worth exploring the use of sidechain techniques to create a more dynamic and interesting mix. Some tips to keep in mind when using sidechain include:

TipExplanation
Use a compressor on a synth track to create a pumping effect that follows the rhythm of the kick drum.This can create a sense of energy and movement in the mix.
Use sidechain compression on a bass guitar track to make it more prominent during specific parts of the song.For example, you might use sidechain compression to make the bass more noticeable during the chorus.
Try using sidechain EQ to create space for a lead vocal in the mix.This technique involves using EQ to duck the volume of other tracks when the vocal is audible.

Advanced Features

Learn how to get the most out of the advanced features of Acustica Audio’s Ruby plugin with our comprehensive tutorial. Discover new ways to enhance your music production and improve your audio mixing skills today.

Acustica Audio Ruby Tutorial is a powerful tool for audio mixing and mastering. With its advanced features, users can achieve high-quality sound production. In this post, we will explore the advanced features of Acustica Audio Ruby Tutorial under three main headings: Sampling rate conversion, Offline rendering, and Using external sidechain sources.

Sampling Rate Conversion

Ruby has a feature that allows users to convert the sampling rate of audio files. This feature makes it possible to resample audio files without losing quality. Resampling can be done either by upsampling or downsampling the audio file. The upsampling increases the sampling rate of an audio file, while downsampling decreases it. With the Ruby’s sampling rate conversion feature, users can achieve seamless integration between different sample rates.

Offline Rendering

Ruby has an offline rendering feature that makes it easy to export audio files. This feature is useful for users who want to export audio files to various formats, such as WAV, MP3, or FLAC. With offline rendering, users can export audio files without having to play the entire project in real-time. This feature not only saves time but also ensures that the exported audio is of the highest quality possible.

Using External Sidechain Sources

Ruby has a feature that allows users to use external sidechain sources for mixing. This feature is useful for users who want to use an external input source such as a MIDI controller or another audio channel as the sidechain input. This feature ensures that each audio channel is mixed in a precise manner, and users can achieve a more refined and polished sound production. In conclusion, the advanced features of Acustica Audio Ruby Tutorial provide users with a wide range of options to achieve high-quality sound production. Whether it’s the sampling rate conversion, offline rendering, or the use of external sidechain sources, users have access to powerful tools that can help them to achieve the best possible sound production.

Acustica Audio Ruby Tutorial

Credit: www.kvraudio.com

Frequently Asked Questions Of Acustica Audio Ruby Tutorial

What Is Acustica Audio Ruby?

Acustica Audio Ruby is a plugin that emulates vintage analog gear to create an analog sound. It is a channel strip that includes EQ, compression, and saturation. It is famous for its clarity, warmth, and precision and is suitable for both mixing and mastering.

How Do I Use Acustica Audio Ruby?

You can use Acustica Audio Ruby as a plugin in your DAW. First, you need to load it into a channel strip. Then, you can adjust the EQ, compression, and saturation to your liking. It is also possible to use it as an insert on a bus channel for additional processing.

What Are The System Requirements For Acustica Audio Ruby?

Acustica Audio Ruby requires a 64-bit operating system and a CPU with at least 2. 5 GHz. You also need at least 8 GB of RAM and a screen resolution of 1280 x 800 pixels or higher. It is compatible with Mac OS X and Windows OS.

Is Acustica Audio Ruby Suitable For Live Performances?

Acustica Audio Ruby is not specifically designed for live performances, but it can be used in live situations. However, it requires a powerful computer and a stable audio interface. It is more commonly used in the studio for mixing and mastering.

Conclusion

Overall, the Acustica Audio Ruby plugin is a powerful tool for producers and engineers looking to bring warmth and character to their mixes. Whether you’re working with vocals, drums, guitars, or anything in between, Ruby can help you achieve a rich and detailed sound that stands out from the crowd.

With its intuitive controls and extensive collection of high-quality impulses, this plugin is a must-have for anyone serious about achieving professional-level mixes. Give it a try and see for yourself why so many producers rave about Acustica Audio Ruby.

Categories
Archive

Fabfilter Pro L2 For Mastering

FabFilter Pro L2 is a professional mastering plugin that delivers transparent, precise, and dynamic loudness. This powerful plugin offers ultimate control over the audio with innovative features and an intuitive interface.

FabFilter Pro L2 is a popular choice for mastering engineers and mixers who require a reliable and versatile tool for loudness management. The plugin includes eight different limiting algorithms, true peak limiting, and extensive metering options for accurate loudness analysis.

The advanced features, including a unique DC offset filter and a mix control for parallel compression, make it one of the leading plugins in the industry. FabFilter Pro L2’s transparent sound quality and user-friendly design ensure that mastering tracks with this plugin is both enjoyable and effective.

Fabfilter Pro L2 For Mastering

Credit: www.fabfilter.com

Key Features Of Fabfilter Pro L2

Fabfilter Pro L2 is a high-quality limiter plugin that offers a wide range of features to help you master your audio tracks with precision. Let’s dive into the key features that make this plugin stand out from others in the market.

Transparent True Peak Limiting

Fabfilter Pro L2 offers transparent true peak limiting, which ensures that your audio tracks are never clipped and that the final mix is free of any distortion. With this feature, you can be confident that your tracks will always sound great, no matter the platform they are played on.

Multiband Processing

The plugin also offers multiband processing, which allows you to work on specific frequency bands separately, giving you greater control over your final mix. You can adjust the threshold, release, and gain for each band, ensuring that your audio tracks are well balanced and dynamic.

Advanced Metering Options

Fabfilter Pro L2 comes with advanced metering options, including customizable level meters, correlation meters, and loudness meters. These features allow you to monitor the levels of your tracks in real-time, ensuring that you can make adjustments on the fly to achieve the desired sound.

Professional Dithering And Noise Shaping

With built-in professional dithering and noise shaping algorithms, Fabfilter Pro L2 ensures that you get the highest quality audio output possible. These algorithms help to reduce any quantization noise that may be present in your tracks, resulting in a cleaner and more natural sound.

Customizable Interface

The plugin also offers a customizable interface, allowing you to adjust the size and layout of the controls to suit your workflow. You can choose between different color schemes, and even save your own presets, making it easier to work on your projects quickly and efficiently.

Fabfilter Pro L2 For Mastering

Credit: www.production-expert.com

How To Use Fabfilter Pro L2 For Mastering

HTML FORMATTING:

Fabfilter Pro L2 is a powerful tool that can help you create professional-sounding masters in a matter of minutes. In this section, we’ll explore how to use Fabfilter Pro L2 for mastering.

Setting Up Your Project

  • Open your DAW and load your final mixdown.
  • Create a new track for your master.
  • Set the master track’s output to your audio interface or soundcard.

Loading Fabfilter Pro L2

  • Load Fabfilter Pro L2 on your master track.
  • Make sure the limiter and maximiser sections are activated.

Overview Of The Interface

  • The interface contains various sections such as the transient display, gain reduction meter, output meter, and more.
  • Take some time to familiarize yourself with the interface and its features.

Setting The Limiter And Maximiser

  • Start by setting the limiter’s threshold to prevent clipping and distortion.
  • Adjust the maximiser’s gain to achieve the desired loudness.

Adjusting The Release And Lookahead Times

  • Release time controls how long it takes for the limiter to release the gain reduction.
  • Lookahead time allows the limiter to anticipate peaks before they occur.
  • Adjust these parameters to balance between loudness and transparency.

Using The Multiband Processing Options

  • Fabfilter Pro L2 also allows you to process individual frequency bands separately.
  • Use the multiband options to tame any frequency imbalances in your mix.

Applying Dithering And Noise Shaping

  • When reducing the bit depth of your master, dithering and noise shaping can help prevent quantisation distortion.
  • Apply dithering and noise shaping in the output section before exporting.

Useful Tips For Achieving A Professional Master

  • A/B compare your master with a reference track to ensure it’s competitive.
  • Use spectrum analysers to identify frequency imbalances.
  • Avoid excessive limiting and maximising as it can compromise dynamics and clarity.

With these tips and techniques, you can use Fabfilter Pro L2 to create a professional master that will stand out on any platform.

Fabfilter Pro L2 For Mastering

Credit: www.youtube.com

Frequently Asked Questions On Fabfilter Pro L2 For Mastering

What Does Fabfilter Pro L2 Do?

FabFilter Pro-L2 is an advanced mastering limiter plug-in that offers precise control over the output levels of your mix. With its transparent processing, high-quality sound, and innovative features, it helps you achieve maximum loudness and clarity for your tracks. Additionally, it provides true peak limiting, extensive metering options, and advanced algorithms for maximum sound quality.

How Much Limiting Is Mastering?

Mastering can be limiting if it involves excessive use of limiting techniques such as compression and limiting. However, if done correctly, mastering can enhance the overall quality and sound of the audio. Proper use of mastering can help optimize the audio for different playback systems or formats without losing its original character and dynamics.

What Is The Output Level Of Fabfilter Pro L?

The output level of FabFilter Pro L maximizes the loudness of your audio signal without compromising its sound quality.

Is Fab Filter The Best Eq?

FabFilter is highly regarded as one of the best EQs available in the market due to its user-friendly interface, robust features, and excellent sound quality. Its advanced algorithm allows for precise control over audio frequencies, making it a top choice for professional audio engineers and producers.

Conclusion

Fabfilter Pro L2 is an excellent tool for mastering. With its detailed visual feedback and transparent sound, it is easy to use and delivers exceptional results. You can customize the limiter to suit your unique requirements or choose from its presets.

Pro L2 is not only suitable for mastering but also mixing. You can try it out and experience the difference in your audio productions. Happy mastering!

Categories
Archive

How To Auto Tune Using Logic Pro X

To auto-tune using Logic Pro X, select the audio track and then the Pitch Correction plugin. In the plugin, set the key and scale, adjust the retune speed, and adjust the amount of tuning.

Also, Auto-tuning is a popular method used to correct pitch in vocals and instruments. It can also be used creatively as an effect. Logic Pro X has a built-in Pitch Correction plugin that makes it easy to auto-tune audio tracks. We’ll go through the steps to auto-tune using Logic Pro X and provide tips for getting the best results.

Related reading: Autotune Pro Tutorial and Logic Pro X Vs Cubase. For background, see the official Antarestech website.

Moreover, whether you’re a professional producer or just starting, this guide will help you achieve the desired pitch and tone for your audio recordings.

Setting Up Your Project

In addition, learn how to set up your project properly in Logic Pro X for autotune. Follow these step-by-step instructions to ensure a smooth and efficient process.

Creating A New Project:

In Logic Pro X, before you start auto-tuning, you need to create a new project. Once you launch Logic Pro X, go to the File menu, click New, and then select New Project. Furthermore, alternatively, use the keyboard shortcut Command + N. A dialogue box will appear, where you can choose to create a project from scratch or select from one of the pre-made project templates. Select your desired option, name the project and click Create.

Choosing The Right Key And Tempo:

Before you start editing your vocals, it’s crucial to choose the right key and tempo for your project. Additionally, this will ensure that your vocals blend seamlessly with the other sounds in your mix. To choose your desired key and tempo in Logic Pro X:

  1. In your new project, navigate to the toolbar and select the Key Signature and Project Tempo options.
  2. Moreover, choose the key and tempo that you want for your project.
  3. Hit the Return key to confirm your selections.

It is important to note that if you don’t know the key or tempo of your song, Logic Pro X can detect it for you by following the steps below:

  1. Go to File and select Import Audio File.
  2. Select the audio file that you want to import and click Open.
  3. Enable the Tempo Detection and Flex and Follow options and click OK.
  4. Logic Pro X will then detect and display the existing key and tempo information.

Following these steps will ensure that each element in your project fits harmoniously, resulting in a well-balanced and professional-sounding track.

How To Auto Tune Using Logic Pro X

Credit: majormixing.com

Using Auto-tune In Real-time

Learn the art of auto-tuning in real-time using the popular digital audio workstation Logic Pro X. With a simple set-up, you can enhance your vocal tracks and achieve that perfect pitch for your music project.

If you’re looking to correct pitch in real-time during a vocal recording session, auto-tuning is a popular method. Logic Pro X offers built-in auto-tuning functionality with its Flex Pitch and Pitch Correction plugins. In this article, we will focus on how to use the auto-tuning feature in real-time.

Enabling Flex Pitch for Auto-Tune in Logic Pro X

First, we need to enable Flex Pitch to make use of the real-time auto-tuning feature. To do this, follow these steps:

  1. Select the track you want to auto-tune
  2. Click on the “Track Inspector” button located on the left side of the screen
  3. Under the “Audio FX” section, click on the “Flex Pitch” plugin to enable it

Once you have enabled the Flex Pitch plugin, you can start using the auto-tuning feature.

Selecting The Auto-tune Effect

To select the auto-tune effect, you need to add the Pitch Correction plugin to the track. Follow these steps to do so:

  1. Click on the “Inserts” button located on the left side of the screen
  2. In the search bar, type “Pitch Correction” and select the plugin from the list of options
  3. The Pitch Correction plugin will be added to your track’s plugin chain

Now that you have added the Pitch Correction plugin, you can select the type of auto-tuning effect you want to apply. The plugin comes with a variety of presets that you can choose from, or you can customize the settings to your liking. By following these simple steps, you can use Logic Pro X’s auto-tuning feature in real-time during vocal recording sessions. This can save time and effort in post-production, allowing you to achieve a polished and professional sound.

Fine-tuning Your Vocals for Auto-Tune in Logic Pro X

Learn how to fine-tune your vocals using the auto-tune function in Logic Pro X. With step-by-step instructions, you can achieve pitch-perfect vocals in your recordings with ease.

After you have auto-tuned your vocals in Logic Pro X, it’s time to fine-tune them to perfection. This stage of the process involves making small adjustments to the retune speed and pitch correction for the most natural sound. Here are the steps to follow:

Adjusting The Retune Speed for Auto-Tune in Logic Pro X

The retune speed controls how quickly the pitch correction is applied to the vocal track. A faster speed will sound more robotic, while a slower speed will sound more natural. Here’s how to adjust the retune speed:

  1. Click on the “Track” header for the vocal track you want to adjust.
  2. Select “Flex Pitch” from the drop-down menu.
  3. Click on the bottom right corner of the note blob to access the note’s settings.
  4. Use the “Retune” slider to adjust the speed until it sounds natural.

Correcting Pitch Manually for Auto-Tune in Logic Pro X

While auto-tune can fix most pitch issues, there may be some notes that require manual correction. Here’s how to manually correct pitch in Logic Pro X:

  1. Select the vocal track you want to adjust.
  2. Click on the “Flex Pitch” button in the track header.
  3. Find the note you want to adjust and click on it to access its settings.
  4. Use the “Semitones” dial to adjust the pitch until it’s in tune.
  5. Use the “Formant” dial to adjust the vocal timbre if necessary.

Final Words for Auto-Tune in Logic Pro X

With these simple steps, you can fine-tune your vocals in Logic Pro X and achieve a polished and professional sound. Remember to keep the adjustments subtle and natural-sounding for the best results. With some practice, you can become a pro at auto-tuning your vocals. Happy mixing!

How To Auto Tune Using Logic Pro X

Credit: crumplepop.com

Advanced Techniques

Learn how to use the auto tune feature in Logic Pro X for advanced music editing. These techniques allow you to create a polished and professional sound in your recordings.

Advanced Techniques: Auto-Tune is an incredible tool that can help you achieve the perfect pitch while recording vocals. But, did you know that there are advanced techniques that you can use to take your auto-tuning to the next level? In this section, we will focus on two specific techniques: Creating harmonies with Auto-Tune and Using MIDI to control pitch. Creating harmonies with Auto-Tune: Creating harmonies with Auto-Tune is an excellent technique to add depth and texture to your vocals. To get started, you’ll need to open up the Auto-Tune plugin and create a second instance of it.

Next, you’ll want to apply the Auto-Tune effect to the second track, ensuring that it’s in a different key than the first. Now, when you record your vocals on the second track, the Auto-Tune effect will create a harmony alongside your original vocals. This technique can take your recordings to another level, adding an extra dimension of sound that can really impress your listeners. Using MIDI to control pitch: Another advanced technique for auto-tuning is using MIDI to control pitch. This technique involves connecting a MIDI keyboard to your computer and setting up Logic Pro X to recognize it.

Practical Tips for Auto-Tune in Logic Pro X

Once you’ve done this, you can use the keyboard to control the pitch of your vocals in real-time. To set up this technique, open up the Auto-Tune plugin and navigate to the MIDI tab. From here, you can select which MIDI channel you want to use and adjust the settings to suit your needs. Once you’ve done this, you’ll be able to use your MIDI keyboard to control the Auto-Tune effect, allowing you to adjust the pitch of your vocals as you sing.

In Conclusion: By implementing these advanced techniques into your auto-tuning process, you can take your recordings to the next level. Whether you’re looking to add depth and texture with harmonies or use MIDI to control pitch, these techniques are sure to impress your listeners and take your music to new heights. So why not give them a try today?

Mixing And Mastering With Auto-tune

Learn how to easily auto-tune your vocals using Logic Pro X. With its built-in Auto-Tune tool, you can adjust the pitch of your recordings and achieve the desired sound quality for your mixes and masters.

Mixing and Mastering with Auto-Tune is a crucial aspect of music production. It can enhance the quality of vocals and turn an average track into a hit. In order to achieve the desired sound, you need to apply the Auto-Tune plugin and master it in the right way. This article will guide you through the process of auto-tuning using Logic Pro X, and then give you a step-by-step guide for balancing the vocal mix.

Applying Auto-tune As A Plugin

The first step in using Auto-Tune is to apply it as a plugin in Logic Pro X. Here are the steps to follow:

  1. Open Logic Pro X and create a new project.
  2. Select the track you want to apply Auto-Tune to.
  3. Go to the “Audio FX” section on the channel strip and click on “AU plugins” to select Auto-Tune.
  4. Choose the type of correction you want to apply, whether it is subtle or extreme.
  5. Play the track and adjust the settings accordingly until you achieve the desired sound.

Balancing The Vocal Mix for Auto-Tune in Logic Pro X

After applying the Auto-Tune plugin, the next step is to balance the vocal mix. It involves managing the levels, panning, and other aspects of the vocals to ensure they integrate well with the rest of the track. Below are the steps to follow:

  • Start by establishing the vocal track’s position within your mix’s frequency range.
  • Next, adjust the volume levels of the vocal track so that they are consistent throughout the entire song.
  • Use equalization to brighten or darken the vocal depending on the track’s overall sound.
  • Consider panning the vocal track to ensure that it sits well in the stereo mix.
  • Use reverb and delay to create space around the vocal track.
  • Finally, use automation to control the vocal track’s levels and effects to make the audio mix stand out.

In conclusion, Auto-Tune is an essential tool for mixing and mastering your tracks. Its ability to correct pitch inaccuracies while maintaining the vocal’s natural sound makes it an invaluable asset in music production. By following the steps in this article, you can achieve perfectly refined vocals in your tracks using Logic Pro X.

Common Auto-tune Mistakes To Avoid

To achieve smooth, natural-sounding vocals with Logic Pro X’s Auto-Tune, it’s important to avoid common mistakes. Some tips are to use a lighter touch, adjust the pitch manually if necessary, pay attention to timing, and use the correct key signature.

By following these tips, you can create professional-sounding vocal tracks.

Auto-tune is a powerful tool, but it’s important to use it properly to achieve the desired effect. Since its invention, the use of auto-tune has become more prominent than ever before. While there is nothing inherently wrong with using auto-tune, it can be misused, leading to disastrous results. Here are some common mistakes to avoid when auto-tuning using Logic Pro X.

Overuse Of Auto-tune

Overuse of auto-tune is a common mistake to avoid. While auto-tune is a versatile tool that can quickly rectify minor pitch issues, it’s an issue when used to rectify poor vocal performances. Over-reliance on auto-tune can completely distort the natural sound of the voice, making it robotic and unauthentic. To avoid overusing auto-tune, go for subtlety and individuality.

Neglecting Other Vocal Processing

Another common mistake to avoid when auto-tuning using Logic Pro X is neglecting other vocal processing. It’s recommended to use other processing tools such as compression, reverb, delay, and equalization in conjunction with auto-tune on vocals to give a more defined and natural sound. When you combine the tools, it gives you a more subtle sound effect enhancing the quality of your vocal track. To avoid common mistakes when using auto-tune, it’s important to have proper planning and understanding of how to use it. Remember, auto-tune can either enhance or ruin a vocal performance, depending on how you use it. Over-reliance on the tool and neglecting other processing tools can lead to poor results. By exercising restraint and balance, you can achieve the perfect pitch-corrected sound without compromising on the natural timbre of the voice.

How To Auto Tune Using Logic Pro X

Credit: www.charlescleyn.com

Frequently Asked Questions For How To Auto Tune Using Logic Pro X

How Do I Auto-tune In Logic Pro X?

To Auto-Tune in Logic Pro X, first select the audio track you want to use. Then go to the “Audio Effects” and select “Pitch” and then “Pitch Correction”. Adjust the settings to your preference, including the key and scale. Finally, apply the effect to your track and you’re done.

How Do I Tune In Logic Pro X?

To tune in Logic Pro X, you can use the built-in tuner plugin or an external tuner device connected to your computer. Simply play the note you want to tune and adjust until it matches the desired pitch. Make sure to also check your tuning settings in the preferences menu and use a reference pitch if necessary.

How Do I Hear Auto-tune While Recording Logic?

To hear Auto-Tune while recording in Logic, insert the Auto-Tune plugin on the desired track and make sure the plugin is in “auto” mode. Play your instrument or sing into the microphone to hear the Auto-Tune effect in real-time during recording.

Does Logic Pro Have Pitch Correction?

Yes, Logic Pro has a built-in pitch correction tool called Flex Pitch. It allows users to easily manipulate and adjust the pitch of audio recordings.

Conclusion

Auto-tuning can transform an average vocal recording into a studio-quality track in a few clicks by using Logic Pro X. With proper understanding and application, you can enhance your vocals to the next level. Besides, the key to successful auto-tuning is to maintain just the right amount.

Logic Pro X’s Flex Pitch can significantly contribute to perfecting vocal tracks by rectifying minor inaccuracies. Overall, Logic Pro X pinpoints many different changes needed to improve an audio track, making it a game-changing tool for any producer, singer or audio enthusiast.

Categories
Archive

Best Audio Interface For Vocals

The best audio interface for vocals is the Focusrite Scarlett 2i2. It offers high-quality sound, easy-to-use features, and compatibility with various software and devices.

As an Amazon Associate I earn from qualifying purchases.

Related reading: The Best Audio Interfaces and Do You Need Audio Interface. For background, see the Wikipedia article on Audio interface.

Also, if you’re a singer or a content creator who needs to record vocals, you’ll understand the importance of having a great quality audio interface. However, with so many options available, it can be a bit overwhelming to choose the right one.

Moreover, an audio interface is a crucial piece of equipment that allows you to record and process high-quality audio signal from a microphone or any other sound source. We’ll dive into the best audio interface for vocals, its features, and why it’s the perfect choice for your recording needs.

Best Audio Interface For Vocals

Credit: www.voclio.com

Factors To Consider in an Audio Interface for Vocals

When searching for the best audio interface for vocals, there are several factors to consider. In addition, you need to think about the number of inputs, preamp quality, connection type, compatibility, and budget. Investing in a quality audio interface can make a significant difference in the recording quality of your vocals.

When it comes to recording vocals, the quality of audio interface you use can significantly impact the final sound. Therefore, it is crucial to select an audio interface that accurately captures the nuances of your singing voice. Here are some factors to consider when choosing the best audio interface for vocals.

Connectivity Options in an Audio Interface for Vocals

One of the essential factors to consider when selecting an audio interface for vocals is the connectivity options. Furthermore, ensure that the audio interface you choose can support your recording setup. If you use a laptop or a desktop computer, you might prefer a USB audio interface that is easy to use. However, if you want to integrate other studio equipment, a FireWire or PCI audio interface may be more suitable.

Preamp Quality in an Audio Interface for Vocals

A preamp is an essential feature in an audio interface that amplifies the microphone signal before it is recorded. A quality preamp can significantly enhance the sound quality of your recording, making it sound more natural and warm. Additionally, look for an audio interface that has a good quality preamp to capture the full range of your vocal performance.

Input And Output Channels

Also, the number of input and output channels on an audio interface determines how many microphones and other equipment you can connect to it. This may not be essential for a solo vocalist, but if you record a group or band, you might require more channels. Consider the number and type of input and output channels you need for your recording setup and choose an audio interface that accommodates your needs. In conclusion, when selecting an audio interface for vocals, consider its connectivity options, preamp quality, input and output channels. Choosing an audio interface that meets your recording needs can significantly improve the quality of your vocal recordings.

Best Audio Interface For Vocals

Credit: www.electronicshub.org

Top Audio Interfaces For Vocals

Moreover, experience high-quality recordings with the top audio interfaces for vocals. These devices offer exceptional sound capture and processing capabilities, making them the best fit for recording studios and music enthusiasts.

In addition, as a singer, songwriter, or podcaster, finding the right audio interface can greatly impact the quality of your recordings. The audio interface is an important part of any recording setup, as it serves as the bridge between your microphone and your computer. It allows you to capture your voice accurately and process it digitally for professional-quality recordings. If you are looking for the best audio interface for your vocal recordings, check out our top picks below! The Focusrite Scarlett 2i2 is a popular choice for many singers and podcasters due to its reliable performance and affordability.

Furthermore, it features two XLR inputs, allowing you to record two vocals at once, and two instrument inputs for guitar or bass. The 2i2 also comes with high-quality preamps and 24-bit/192kHz conversion for excellent sound quality. For professional-quality recordings, the Universal Audio Apollo Twin MKII Duo is a top-of-the-line choice. It features two Unison-enabled mic preamps, which can model classic analog designs for authentic sound. The Apollo Twin also comes with built-in UAD-2 processing, allowing you to add high-quality effects and EQ to your recordings.

Practical Tips for an Audio Interface for Vocals

The Audient iD14 MKII is another highly recommended audio interface, known for its high-quality microphone preamp and converter. It features two Class-A microphone preamps, which offer warm and natural sound, as well as Burr Brown AD/DA converters for excellent audio quality. The iD14 also comes with a software bundle that includes plugins and a virtual console for added versatility. The Presonus AudioBox iTwo is a compact and portable audio interface that is perfect for mobile recording setups.

Also, it features two combo inputs, which can be used for vocals or instruments, and comes with high-quality preamps and converters for excellent sound quality. It also comes with a software bundle that includes Studio One Artist and the Studio Magic Plugin Suite. In conclusion, finding the right audio interface for vocals is important for achieving professional-quality recordings. Our top picks are the Focusrite Scarlett 2i2, Universal Audio Apollo Twin MKII Duo, Audient iD14 MKII, and Presonus AudioBox iTwo. One of them should suit your needs and budget.

Focusrite Scarlett 2i2

If you are in search of a high-quality audio interface specifically designed for vocal recording, then the Focusrite Scarlett 2i2 is worth considering. Moreover, this highly-rated interface has been a fan favorite for many years. Its reputation is justified due to its exceptional recording capabilities, robust build quality, and ease of use. Below, we have examined some features, pros, and cons of the Focusrite Scarlett 2i2.

Features

In addition, the Focusrite Scarlett 2i2 is a 2-in/2-out interface that offers incredibly low latency, making it ideal for recording vocals. The interface features two of Focusrite’s award-winning preamps, which provide a clean, warm, and accurate sound. It also boasts a high-quality 24-bit/192kHz resolution, which ensures excellent audio clarity.

Another feature of the Scarlett 2i2 is a Direct Monitor switch, which allows you to listen to your vocal recording with no delay. The interface is compatible with Windows, Mac, and most recording software, including Ableton Live, Pro Tools, and Logic Pro X.

Pros And Cons

ProsCons
Exceptional sound qualityEasy to use and navigateSturdy build qualityLow latency and Direct Monitor switch for real-time monitoringComes with a suite of software including Pro Tools, Ableton Live Lite, and Focusrite ControlSlightly more expensive compared to other entry-level interfacesOnly two inputs, which limits multi-microphone recording

The Focusrite Scarlett 2i2 is an excellent choice for those looking for a high-quality audio interface for vocal recording. Its exceptional sound quality, ease of use, and robust build quality make it a top consideration. The drawbacks are the price and the inputs. It costs slightly more than other entry-level interfaces, and two inputs are not ideal for recording multiple microphones. Overall, the Focusrite Scarlett 2i2 is a highly recommended interface for anyone serious about their vocal recording.

Universal Audio Apollo Twin Mkii Duo

The Universal Audio Apollo Twin MKII Duo is the best audio interface for vocals. Its high-quality preamps and converters provide a professional sound for recording vocals, while its real-time UAD processing allows for accurate monitoring and mixing.

The Universal Audio Apollo Twin MKII Duo is a highly efficient and versatile audio interface fit for vocals. This audio interface offers high-quality sound output, which makes it a great choice for home studios and even professional recording studios.

Features

The Universal Audio Apollo Twin MKII Duo is a high-performance audio interface. Its impressive features make it a favorite among sound engineers and music producers. Some of its notable features include:

  • Real-time UAD processing
  • Improved A/D and D/A conversion
  • Unison™ technology
  • Two channels of mic/line preamps
  • High-quality headphone amp
  • Digital connectivity via Thunderbolt
  • 20-ins/22-outs

Pros And Cons

Like every audio interface, the Universal Audio Apollo Twin MKII Duo has its fair share of pros and cons. Knowing these can help you make an informed decision when choosing an audio interface suitable for your needs. Pros:

  • High-resolution audio
  • Flexible routing options
  • Real-time processing
  • Compact and portable
  • Stylish design

Cons:

  • Expensive
  • Requires Thunderbolt port
  • Not expandable
  • Sometimes has compatibility issues

In summary, the Universal Audio Apollo Twin MKII Duo is a top-quality audio interface suitable for recording vocals and instruments. Its impressive speed, flexibility, and audio quality make it an excellent choice for both home-based and professional studios. However, its high price tag and compatibility issues may be a drawback for some.

Audient Id14 Mkii

The Audient iD14 MKII is a top-rated audio interface for vocals thanks to its pristine sound quality and easy-to-use software. With two high-performance microphone preamps and high-quality digital converters, this interface will help take your recordings to the next level.

The Audient iD14 MKII is a high-quality, 2-in/4-out audio interface that is perfect for recording vocals. Its compact design and user-friendly interface make it a great option for musicians and producers, while its impressive features ensure professional-grade recordings. Let’s delve into the features, pros, and cons of this top-of-the-line audio interface.

Features

The Audient iD14 MKII boasts an array of impressive features. For starters, it has two world-class Audient console mic preamps that deliver pristine, detailed recordings. These mic preamps have impressive clarity, making them perfect for capturing the nuances of a singer’s voice. Additionally, the iD14 MKII has Burr-Brown AD/DA converters that ensure a precise, transparent reproduction of any vocal recording. Another standout feature is its JFET DI input, which allows you to record guitars and basses with a warm, natural tone. With its high-performance headphone amp and powerful monitoring options, the iD14 MKII is guaranteed to give you the best recording experience possible.

Pros And Cons

Pros: – High-quality mic preamps and AD/DA converters ensure professional-grade recordings – User-friendly interface and compact design make it a great option for musicians and producers – JFET DI input allows for the recording of guitars and basses with a warm, natural tone – Powerful monitoring options ensure accurate playback and easy zero-latency tracking Cons: – Only has two mic preamps, limiting the number of simultaneous vocal recordings – Might be pricey for some musicians and beginners In conclusion, the Audient iD14 MKII is a top-of-the-line audio interface that is ideal for recording vocals.

Its impressive features, including high-quality mic preamps and AD/DA converters, make it a great option for musicians and producers. The only downside is that it may be a bit pricey for some musicians. Its limited number of mic preamps might also be an issue if you record multiple vocals at once. Nonetheless, if you can afford it, the Audient iD14 MKII is an excellent investment that is sure to deliver a professional-grade recording experience.

Best Audio Interface For Vocals

Credit: www.stockmusicmusician.com

Presonus Audiobox Itwo

If you’re looking for a reliable and high-quality audio interface, the Presonus AudioBox iTwo is a top choice for most musicians and sound enthusiasts. It’s a versatile device that can work flawlessly with any recording software, including Windows, Mac OS X, and iPad. The AudioBox iTwo offers excellent preamps, outstanding sound quality, and is well-priced compared to other audio interfaces on the market.

Features

The Presonus AudioBox iTwo packs plenty of features that can make recording even better. Firstly, there is the 2-channel USB audio interface that provides 24-bit rate resolution and 96KHZ sampling rates, which creates high-quality and crystal-clear sound recordings. The device offers MIDI in/out ports that you can use to connect your keyboard, drum machine, or any other MIDI device for recording.

The AudioBox iTwo also comes with a stereo headphone output with a dedicated knob that allows for level adjustment, making it easy to precisely monitor your recordings. The device has a rugged metal construction that makes it durable and easy to carry when on the go. Additionally, the AudioBox iTwo comes with Studio One Artist recording software that lets you record, edit, and produce amazing music.

Pros And Cons

ProsCons
– High-quality preamps that allow for clear sound recordings
-Optimized for use with recording software
-2-channel USB audio interface
-MIDI In/Out ports for MIDI devices
-Stereo headphone output with dedicated volume control knob
-Comes with Studio One Artist recording software
– Limited analog inputs if you want to connect multiple microphones
– No Phantom Power Switch
– No physical power switch
  • The AudioBox iTwo is an excellent option for people looking for high-quality sound recordings.
  • The device comes with MIDI In/Out ports that allow for connecting MIDI devices easily.
  • Despite its few cons, AudioBox iTwo is a versatile device suitable for both beginners and professionals.

To sum up, the Presonus AudioBox iTwo should be on top of your list. It is a reliable, versatile audio interface with crystal-clear, professional sound quality.

Frequently Asked Questions On Best Audio Interface For Vocals

Which Audio Interface Is Best For Vocals?

For recording vocals, we recommend the Focusrite Scarlett 2i2 or the PreSonus AudioBox USB 96. These audio interfaces provide high-quality preamps and AD/DA converters, ensuring crisp and clear vocal recordings. Additionally, they are both affordable and user-friendly.

Does Audio Interface Improve Vocal Quality?

Yes, an audio interface can improve vocal quality. It provides high-quality sound recording and playback, reducing background noise and distortion. It also offers more precise control over the input gain, which allows singers to adjust the balance between their voice and the instrumentals.

Ultimately, using an audio interface can result in clearer, more professional-sounding vocal recordings.

Do You Need An Audio Interface To Record Vocals?

Yes, you need an audio interface to record vocals. An audio interface helps to convert the analog signal from your microphone into digital format that can be recorded by your computer. Without an audio interface, your recordings may have poor quality and noise.

Therefore, an audio interface is necessary for high quality vocal recordings.

Is Scarlett 2i2 Good For Vocals?

Yes, Scarlett 2i2 is an excellent choice for recording vocals due to its high-quality preamps and low-latency performance. It also has a compact design, making it easy to transport and use in various recording settings.

Conclusion

If you’re a vocalist, you know the importance of having a reliable and high-quality audio interface. After researching and testing multiple options, we have narrowed down the best audio interface for vocals to the Focusrite Scarlett Solo. Its compact size, simplicity, and outstanding sound quality make it the ideal choice for any aspiring or professional vocalist.

With its easy set up and affordable price point, there’s no reason not to take your vocal recordings to the next level. Invest in the Focusrite Scarlett Solo today and elevate your vocal performances.