Categories
Archive

Cheap Mixing And Mastering Services

Cheap mixing and mastering services can compromise on quality and result in poor sound production. It is crucial to choose affordable mixing and mastering services that still uphold professional standards.

A music production’s quality depends heavily on the mixing and mastering stages. In order to achieve a crisp and polished sound, producers, musicians or podcasters must entrust their work to experienced and professional engineers. However, the cost of high-quality mixing and mastering services can reach thousands of dollars.

For this reason, many artists and producers seek affordable options. Nevertheless, it is essential to do thorough research and pay attention to the quality of service offered because cheap services most of the time have a negative impact on the final sound. We will delve into the benefits and drawbacks of cheap mixing and mastering services and how to find affordable yet professional sound engineers.

The Importance Of High-quality Mixing And Mastering

When it comes to music production, the importance of high-quality mixing and mastering cannot be overstated. Cheap mixing and mastering services may save you money initially, but they can ultimately damage your final product. Investing in professional mixing and mastering will ensure that your music sounds polished and professional, giving it the best chance at success.

Flawless Audio, Professional Sound, and customer satisfaction are directly related to the importance of mixing and mastering. You can buy the most expensive recording equipment, but without proper mixing and mastering, your music remains incomplete. The process of mixing involves combining recorded tracks together, adjusting the levels of each track so that they blend well. Mastering, on the other hand, is the process of taking the final mix and enhancing it to sound more polished and uniform.

Flawless Audio

The process of the perfect mix starts with flawless audio. The sound quality of each track should be clean, free from hissing noise or distortion, and recorded at the optimum level. Mixing done with flawed tracks can lead to an unpleasant listening experience. Mixing and mastering also involve editing out unnecessary noises that detract from the overall quality of the recording.

Professional Sound

A skilled mixer/mastering engineer regulates the equalization, compresses, and applies effects to shape the overall tone of the music, making it sound professional. The process significantly improves the music’s quality, spatial balance, and clarity, making it sound more engaging and professional. Mixing and mastering services are essential when releasing music, to ensure that the final master is the best it can be.

Importance Of Mixing And Mastering

The Importance of mixing and mastering cannot be overstated as it affects what the audience hears and the overall quality of the music. Investing in high-quality mixing and mastering ensures that your music sounds top-notch across multiple devices regardless of the listener’s device, be it headphones or speakers. Making sure your music hits the market with the best quality possible can be the difference between success and obscurity. In conclusion, Cheap Mixing and Mastering Services can be a great option for saving on music production costs. However, music producers should bear in mind that quality mixing and mastering services are critical when it comes to producing high-quality music that will resonate with their audience, stand the test of time and make a mark in the music industry.

Cheap Mixing And Mastering Services

Credit: dopeboykits.com

Affordable Alternatives To Professional Studios

Get professional quality sound without breaking the bank. Low-cost options for mixing and mastering services are available for those on a budget. Don’t let high studio prices hold back your creativity, explore your options today.

The Cost Of Professional Studios

Professional studios can cost a substantial amount of money, making them out of reach for many musicians looking to record and produce their music. A standard recording session at a professional studio can range anywhere from $100-$300 per hour, with additional costs for mixing and mastering. This can quickly add up and become unaffordable for independent musicians who are just starting out in the music industry.

Benefits Of Cheap Alternatives

Fortunately, there are affordable alternatives to professional studios that can help musicians create high-quality recordings without breaking the bank. Cheap mixing and mastering services provide an excellent option for those who want professional-quality sound without paying the high prices of a professional studio. In most cases, affordable services use the same equipment, techniques, and software as pro studios, but at a fraction of the cost.

Why Choose Cheap Services

There are several reasons why you may want to choose cheap mixing and mastering services over a professional studio. Firstly, affordability is usually the most important factor. You can save a considerable amount of money using cheaper services, which can be put back into other aspects of your music production. Secondly, cheap services often provide a more personalized experience, with a focus on building a relationship with the artist and helping them achieve their desired sound. In conclusion, cheap mixing and mastering services are a great affordable option for musicians who want high-quality sound without paying the high prices of a professional studio. These services provide a personalized experience and use the same equipment and techniques as pro studios. By choosing affordable services, you can save money and put it towards other aspects of your music production.

Finding The Right Cheap Mixing And Mastering Services

Looking for cheap mixing and mastering services can be daunting, but doing thorough research and checking reviews can help you find a service that’s affordable and effective. Make sure to communicate your specific needs and preferences to get the best results.

If you’re an upcoming artist or musician, you might feel the pressure to finish your music projects as soon as possible, but at a budget-friendly cost. In that case, finding the right cheap mixing and mastering services can be a daunting task. With so many options available, it can be confusing to know where to start. In this article, we will guide you through the process of finding the right cheap mixing and mastering services for your music projects.

Researching Your Options

The first step is to search for cheap mixing and mastering services online. You can use search engines such as Google to find websites that offer these services. The key is to understand the services that these websites offer and at what rates. Some websites may offer cheap services but might not give you the quality you’re looking for. It’s better to spend a little more on quality services than to compromise the quality of your music projects.

Listening To Samples

To ensure that the cheap mixing and mastering services you’re considering are of good quality, it’s important to listen to their samples. Most websites will provide audio samples of their work, allowing you to gauge their sound quality. Listen to the samples carefully to determine if they meet your expectations. You should prefer services that provide samples of music genres similar to yours.

Reading Reviews

Lastly, it’s essential to read reviews from other customers who have used the cheap mixing and mastering services you’re considering. Reviews will give you an idea of how the service performs and if they are reliable. Look for websites that have many positive reviews and ratings. Don’t base your decision on a single review, but read and analyze a few to make a well-informed decision. In conclusion, finding the right cheap mixing and mastering services requires research, listening to samples, and reading reviews. By following these steps, you can select a service provider that is affordable and offers the quality you’re looking for. Remember, compromising on quality may harm your music project in the long run. Therefore, it’s important to make a wise decision, not only based on cost but also service quality.

Tips For Maximizing Your Results

If you are searching for an inexpensive way to get your music tracks sounding the way you want them to, then cheap mixing and mastering services may be the perfect solution for you. With that being said, just because these services are affordable doesn’t mean that you can take shortcuts and expect excellent results. Here are some tips to help you maximize your results when using cheap mixing and mastering services.

Preparing Your Tracks

Before sending your tracks to the mixing and mastering engineer, ensure that they are adequately prepared to create the best possible results. Here are some things you can do to ensure that:

  • Remove any background noise or distracting sounds that may interfere with the mix.
  • Ensure all of the tracks are fully edited and polished before sending them to the engineer.
  • Organize your tracks and label them correctly so that the engineer can easily locate and identify them.

Communication With The Engineer

Communication is key when you’re working with any type of service provider, and cheap mixing and mastering services are no exception. To ensure that the engineer has a clear understanding of what you want, it’s important to communicate effectively with them. Here’s how:

  • Provide the engineer with specific instructions on what you want the final mix to sound like.
  • Let them know which tracks are most important to you.
  • Ask questions if you’re uncertain about certain aspects of the mixing or mastering process.

Providing Feedback

Once you have received the first mix from the engineer, listen to it carefully to identify any issues or areas that need improvement. Then, provide feedback to the engineer so that they can make the necessary adjustments. Here are some things to keep in mind:

  • Be specific when providing feedback, and make sure that you clearly identify the areas that need improvement.
  • Don’t be afraid to request multiple iterations of the mix until you are satisfied with the sound quality of your tracks.
  • Remember that the more feedback you provide, the better the final result will be.

Following these tips when using cheap mixing and mastering services will help you to get the best possible results for your money. With a little bit of effort, you can achieve professional-sounding tracks that will impress your fans and listeners alike.

The Pros And Cons Of Cheap Mixing And Mastering Services

The Pros And Cons Of Cheap Mixing And Mastering Services

If you’re a musician on a budget, you might be considering cheap mixing and mastering services. While these services can help you save money, they also come with their own set of pros and cons. In this blog post, we’ll explore the benefits and drawbacks of cheap mixing and mastering services.

Pros: Cost, Convenience, Speed

Cheap mixing and mastering services are often a cost-effective option for musicians looking to create high-quality recordings without breaking the bank. Here are some of the benefits of using cheap mixing and mastering services:

ProsDetails
CostOne of the most significant benefits of cheap mixing and mastering services is their affordability. These services are usually much cheaper than hiring a professional audio engineer to do the work.
ConvenienceCheap mixing and mastering services are often very convenient. You can upload your tracks to a website or send them via email, and the service provider will take care of the rest. You don’t have to worry about scheduling meetings or traveling to a studio.
SpeedCheap mixing and mastering services can be very fast. Some providers offer a turnaround time of just a few days, which is much quicker than the weeks or months that it might take a professional audio engineer to complete the work.

Cons: Quality, Communication Issues, Limited Revisions

While cheap mixing and mastering services can be a great way to save money, they also come with some downsides. Here are some of the cons of using cheap mixing and mastering services:

  • Quality: Cheap mixing and mastering services may not provide the same level of quality as a professional audio engineer. You may end up with subpar recordings that don’t sound as good as you had hoped.
  • Communication Issues: Since cheap mixing and mastering services are often provided online, communication can be a challenge. You may have trouble getting in touch with the service provider or conveying your creative vision.
  • Limited Revisions: Cheap mixing and mastering services may offer only a limited number of revisions. If you’re not satisfied with the final product, you may have to pay extra for additional revisions.

Overall, cheap mixing and mastering services can be a great option for musicians on a budget. However, it’s important to weigh the pros and cons before making a decision. Consider your budget, your timeline, and your creative vision when deciding whether to use a cheap mixing and mastering service.

Understanding The Process Of Mixing And Mastering

When it comes to producing quality music tracks, mixing and mastering services play a vital role. Whether you are a budding musician or an established one, adding these services to your music production process can elevate the overall sound quality of your tracks.

The Mixing Stage

During the mixing stage, audio engineers focus on balancing different elements of the recording such as vocals, instruments, and sound effects. They apply various techniques to tweak the audio frequencies to create a cohesive and smooth sound. Mixing is often considered an art form as it requires a keen ear and innovative techniques to bring out the best in a track.

  • Audio engineers enhance the overall sound quality by removing unwanted sounds and background noises.
  • They adjust the volume levels to ensure that all sounds are at an appropriate level and are audible.
  • They use equalization to balance the tonal qualities of each sound, ensuring that the mix doesn’t sound too bright or dull.
  • The sound is also panned to create a sense of space and depth, making the tracks sound more natural.

The Mastering Stage

The mastering stage focuses on the final touches of the mixing stage to produce a polished track. Audio engineers use various techniques and tools to enhance the overall sound quality to achieve a professional and commercial sound.

  • Audio engineers check the audio quality of each track in depth.
  • They use stereo wideners to create a bigger soundstage and make the tracks sound spacious.
  • The tracks are compressed to make the audio sound louder and more uniform in volume.
  • Audio engineers also use limiters to control the volume levels from exceeding safety limits.

The Role Of The Engineer

The role of the engineer is critical in mixing and mastering services as they need to use their experience and expertise to bring out the best in your tracks. The engineer can make or break your music production process, which is why it’s essential to hire someone experienced and skilled in their craft.

In conclusion, mixing and mastering services are essential for producing professional-quality tracks. The process can be daunting but hiring an experienced and skilled audio engineer can help you achieve the desired sound.

Common Misconceptions About Cheap Services

Cheap mixing and mastering services have a bad reputation for being low quality. However, this is not always the case. Many affordable services can deliver professional results while providing a great value for your money. Don’t make the mistake of assuming that cheap equals bad.

Do your research and find reputable providers who offer excellent services at affordable prices.

Affordable mixing and mastering services are often considered to be lesser in quality and more prone to errors. Such misconceptions create a scenario where many people opt for expensive services, while disregarding cheaper alternatives. In reality, there are many cheap mixing and mastering services that offer the same quality as their expensive counterparts. In this section, we will take a look at some of the common misconceptions about cheap services.

Believing Quality Is Sacrificed

One of the most common misconceptions about cheap mixing and mastering services is that they sacrifice quality to cut costs. This is not always the case. Cheap services can offer the same level of quality as their more expensive counterparts. The difference is in the pricing strategy and overhead costs. Expensive services will charge more due to their relatively high overhead costs, which include rent, utilities, and staff salaries. Cheap services, on the other hand, might operate with fewer staff, lower rent, and lesser utilities, which allows them to offer the same level of quality at a lower price.

Thinking It’s Too Good To Be True

Another common misconception is that cheap services are too good to be true. This is often due to the mindset that “you get what you pay for.” However, there are many mixing and mastering services that offer great quality at affordable prices. There are also many online services that outsource their work to countries where the cost of living is lower, making it possible to offer quality services at a lower price. Therefore, it is important to do your research and check the reviews and portfolio of the service to make sure they offer quality work.

Assuming All Cheap Services Are The Same

Assuming that all cheap mixing and mastering services are the same is another misconception. Just like with any industry, there are differences in skill level and quality among different services. It is important to do thorough research before engaging a mixing and mastering service. Checking reviews, portfolios, and testimonials can help in making an informed choice. It is also important to understand what you want to achieve with the mixing and mastering service and communicate that to the service provider to ensure that they understand your needs and can deliver accordingly. In conclusion, while it is important to be cautious when investigating cheap mixing and mastering services, it is essential not to ignore them altogether. Cheap services can offer the same level of quality as expensive ones, and it is important to do your research and check the reviews, portfolio, and testimonials of the service before engaging them.

Cheap Mixing And Mastering Services

Credit: soundcloud.com

Cheap Mixing And Mastering Services

Credit: www.audiomixingmastering.com

Frequently Asked Questions For Cheap Mixing And Mastering Services

How Much Do People Charge For Mixing And Mastering?

The cost of mixing and mastering varies depending on factors such as genre, length of the track, and the experience of the audio engineer. Prices can range from less than $50 to several hundred dollars per track.

Should I Pay Someone To Mix And Master?

Yes, you should pay someone to mix and master if you want your music to sound professional and competitive. A skilled professional can bring out the best in your recordings by balancing levels, adding effects, and creating a cohesive sound.

It’s worth the investment to ensure your music is the best it can be.

How Much Are Mastering Services?

Mastering services cost can vary depending on the service provider, the number of tracks, and the complexity of the music. On average, mastering services can range from $50 to $500 per track. It’s essential to research and compare prices from different providers to ensure the best quality and value for your money.

How Do I Find Someone To Mix And Master My Music?

To find someone to mix and master your music, you can search for professional audio engineers online or ask for recommendations from musicians or producers in your network. Some popular websites for finding audio engineers include SoundBetter, Fiverr, and Upwork.

It’s important to review their portfolio, rates, and availability before hiring someone to ensure they’re the right fit for your needs.

Conclusion

Finding affordable mixing and mastering services doesn’t mean compromising on quality. With a little research, you can discover reliable studios that offer excellent services without breaking the bank. It’s essential to work with experienced professionals who can enhance your music and ensure it meets industry standards.

By incorporating these budget-friendly services into your production workflow, you can take your music to new heights. Remember, choosing the right studio is a crucial step in bringing your artistic vision to life.

Categories
Archive

Should You Bounce At 32 Bit Float

No, you should not bounce at 32-bit float. Bouncing at 32-bit float can cause compatibility issues with certain DAWs and plugins.

However, it is important to understand the benefits and drawbacks of different bounce formats to ensure high-quality audio production. When it comes to audio production, bouncing is the process of taking multiple tracks and rendering them into one stereo or mono audio file.

Bouncing at 32-bit float may seem like the best choice because of its high dynamic range and precision. However, it can cause compatibility issues for certain plugins or DAWs that do not support this format. There are also other considerations when it comes to bouncing, such as file size and potential for bit-depth reduction. We will explore the different formats for bouncing, their benefits and drawbacks, and tips for optimizing your bounce.

Should You Bounce At 32 Bit Float

Credit: www.youtube.com

What Is Bouncing?

Are you an audio engineer or a music producer? If so, you must have heard of the term “bouncing”. Bouncing is a crucial part of the audio production process that involves rendering a mix so that it can be played on various audio devices or shared with others. But the question is, should you bounce at 32 bit float?

Definition And Explanation

Bouncing is the process of rendering a mixdown of your digital audio project to a stereo audio file. It’s called “bouncing” because the audio is being bounced down from multiple tracks to a stereo file. This file can then be played on various devices or shared with others.

32 bit floating-point audio is an audio encoding method that uses a floating-point representation of audio samples. It provides a high level of precision for recording, mixing, and mastering. However, not all audio devices support 32 bit floating-point audio. Most devices support only 16 or 24 bit audio.

Importance Of Bouncing In Digital Audio

Bouncing is a critical part of the digital audio production process. Without bouncing, it would be impossible to share your audio projects with others or play them on various devices. Bouncing is also essential for mixing and mastering processes. The bounced file is used as a reference to ensure that the final mix is of high quality and consistent across different playback systems.

Bouncing at 32 bit float offers a high level of precision and dynamic range. However, if the final destination for your audio mix is a device that only supports 16 or 24 bit audio, bouncing at 32 bit float will not be necessary. It will only add unnecessary file size and may not result in any noticeable improvement in audio quality.

In conclusion, the decision to bounce at 32 bit float or not depends on the destination for your audio mix. If it’s going to be played on devices that only support 16 or 24 bit audio, bouncing at 32 bit float is not necessary. However, if you’re working on a project that requires the highest level of precision and dynamic range, bouncing at 32 bit float can be beneficial.

32 Bit Float: An Overview

When it comes to audio engineering, one of the most critical decisions you’ll have to make is whether to bounce your tracks at 32-bit float. Bouncing refers to the process of rendering all your tracks into a final, composite mixdown. Bouncing at 32-bit float is a hotly debated topic in the music production community and can have a significant impact on the quality of the finished product.

What Is 32 Bit Float?

32 Bit float is a type of digital audio file format that stores audio data with a much higher level of precision than typical 16 or 24-bit files. This higher level of precision allows for greater dynamic range, resulting in a smoother and more accurate sound. Additionally, 32-bit float files are capable of handling high amounts of gain without clipping, making them ideal for complex digital signal processing.

Advantages And Risks Of Using 32 Bit Float

Advantages:

  • Greater dynamic range
  • Higher precision and accuracy
  • Better signal-to-noise ratio
  • Reduced risk of clipping during processing

Risks:

  • Larger file sizes, which can be more difficult to manage and store
  • Requires more processing power, which can slow down your system
  • May not be compatible with all software and hardware

Ultimately, the decision on whether to bounce at 32-bit float comes down to your personal preference and the specific needs of your project. While there are certainly advantages to using this format, there are also potential risks and downsides to consider. It’s important to weigh these factors carefully and make an informed decision based on your own unique situation.

Bouncing At 32 Bit Float: Pros And Cons

Bouncing at 32 bit float provides the advantage of higher headroom and greater dynamic range for mixing engineers. However, it may also increase the size of audio files, which can be problematic for storage and streaming purposes. Consider the pros and cons before deciding whether to bounce at 32 bit float.

Are you looking to create high-quality music without any compromise on sound quality? Then, bouncing at 32 bit float might be the right choice for you. This technique helps music producers to create professional-quality music with improved dynamic range and clarity.

Benefits Of Bouncing At 32 Bit Float

Bouncing at 32 bit float brings many benefits, such as:

  1. Better Dynamic Range: Bouncing at 32 bit float offers a wider dynamic range compared to 16 bit or 24-bit audio files. This means there is a greater difference between the softer and louder sounds, leading to improved clarity and depth.
  2. Reduced Clipping: Clipping is a common problem that occurs when the amplitude of the audio signal exceeds the maximum level. Bouncing at 32 bit float allows producers to reduce clipping and ensure that the music remains distortion-free.
  3. Improved Resolution: With a higher bit depth, 32 bit float files offer superior resolution compared to 16 or 24-bit files. This results in better sound quality and more precise audio data.

Possible Issues With Bouncing At 32 Bit Float

While bouncing at 32 bit float offers many advantages, there are some potential issues that you might face, such as:

  • Increased File Size: Since 32 bit float files contain more data, they tend to have larger file sizes. This can lead to storage problems and longer load times.
  • Incompatibility: Some devices or software may not support 32 bit float files, which could cause compatibility issues when sharing your music.
  • More Processing Power: Bouncing at 32 bit float requires more processing power than 16 or 24-bit audio files, which can lead to longer rendering times.

Overall, bouncing at 32 bit float provides an excellent opportunity to enhance your music’s quality and clarity. However, it’s important to be aware of the potential issues to make the right decision for your music productions.

Should You Bounce At 32 Bit Float

Credit: www.bhphotovideo.com

When Should You Bounce At 32 Bit Float?

Bouncing at 32 Bit Float has become a hot topic among music producers and sound engineers lately. Bouncing at 32 Bit Float means that your digital audio workstation (DAW) will capture your audio data with greater resolution and precision, resulting in a higher-quality final mix. However, deciding when to use this method requires an understanding of the factors involved and best practices to ensure the best audio quality. In this article, we will explore the factors to consider and best practices for bouncing at 32 Bit Float.

Factors To Consider

Before bouncing at 32 Bit Float, it is essential to consider the following:

  • Audio quality: If you want to deliver a professional-level mix, bouncing at 32 Bit Float could be the way to go. It captures a wider dynamic range, providing more headroom to make level adjustments in the mix.
  • Compatibility: Check if the device on which you will play the mix supports 32 Bit float files. Most modern devices and DAWs support it, but some might not, making it crucial to ensure compatibility before exporting the final mix.
  • Workflow and timeline: Bouncing at 32 Bit Float increases the file size, thereby taking up more disk space and taking longer to export. It’s important to perform a cost-benefit analysis to decide if it’s worth it based on the project’s deadline.

Best Practices For Bouncing At 32 Bit Float

Here are some best practices to keep in mind when you’ve decided to bounce at 32 Bit Float:

  • Use 32 Bit Float processing throughout: Ensure that your entire mixing and mastering chain operates in 32 Bit Float, including any plugins or processors used.
  • Normalize to -1 dBFS: This ensures that your track won’t clip when exported, and maintaining the 32-bit float resolution used throughout the mixing process.
  • Label file names accurately: Label the file name accurately to specify that it’s a 32 Bit Float file format. It can help avoid compatibility issues in the future.
  • Verify compatibility: Verify that the combination of file format and bit depth is compatible with the hardware or software used for playback before exporting the final file.
  • Use dithering: Dithering is the process of adding low-level noise to a recording that is too quiet compared to the signal’s quantization noise. This helps to preserve the integrity of the signal while reducing artifacts created by bit-depth downgrading.

Deciding when to bounce at 32 Bit Float requires an understanding of the factors involved and best practices to ensure the best audio quality. Consider the audio quality, compatibility, workflow, and timeline before deciding to bounce at 32 Bit Float. When you’ve decided to bounce at a higher bit-depth, make sure to use 32 Bit Float processing throughout, normalize to -1 dBFS, label file names accurately, verify compatibility, and use dithering to reduce artifacts.

Alternatives To Bouncing At 32 Bit Float

When it comes to bouncing audio at 32-bit float, there are alternatives to consider. Whether or not you should bounce at this setting is a subjective decision based on your individual workflow and preferences. Other options may include bouncing at a lower bit depth or utilizing real-time rendering.

Other Formats To Consider

Bouncing audio at 32-bit float is an excellent way to prevent loss of quality for high-resolution audio files. However, there are other formats available that you can consider when bouncing your mix. A 24-bit file can also retain a high level of sound quality and resolution, while also taking up much less storage space.

Comparing The Alternatives To 32 Bit Float

Here’s a quick rundown of the other formats and how they compare to bouncing at 32-bit float.

24-bit:

  • High-quality audio resolution
  • Takes up less storage space than a 32-bit float file
  • A great alternative if you’re not concerned about absolute maximum quality.

16-bit:

  • Standard CD audio format
  • Loses some audio data compared to 24-bit and 32-bit float
  • Great for uploading your music to streaming services or burning onto CD.

8-bit:

  • Often used for game audio and sound effects
  • Low-quality compared to higher bit depth formats
  • A great way to save space if you’re including lots of sound effects or are working on a project with lots of audio cues.

Remember, the choice of format to bounce your mix is dependent on your preferred usage and target audience. Always consider the purpose of your mix and the intended application before making a final decision on the format to bounce.

Should You Bounce At 32 Bit Float

Credit: www.soundonsound.com

Tools And Techniques For Bouncing At 32 Bit Float

Bouncing at 32 bit float allows you to retain all the detail and dynamics in your mixes. But should you do it? It depends on your workflow and the tools you are using. Some programs may not support it, so be sure to research before making a decision.

Whether you’re a professional mixing engineer or just starting out in music production, you may have come across the term “32 bit float” when bouncing your tracks. Bouncing at 32 bit float is a technique that allows you to export your audio files with a higher level of precision and accuracy, resulting in better sound quality. In this article, we’ll explore the tools and techniques you can use for bouncing at 32 bit float, including DAW-specific tools and third-party plug-ins and software.

Daw-specific Tools And Techniques

Most popular DAWs now have built-in features that allow you to bounce at 32 bit float. For instance, in Logic Pro X, you can choose the 32 bit float option when you export your audio files. This option is available under the “Export” menu, and it will export your audio files with a higher level of precision and accuracy. Another DAW-specific tool you can use is the floating-point engine. This engine allows you to work with audio signals that have more than 24 bits of resolution. It uses a mathematical algorithm to process the audio signals with more accuracy, resulting in better sound quality.

Third-party Plug-ins And Software

Apart from the built-in tools available in your DAW, you can also use third-party plug-ins and software to bounce at 32 bit float. One of the most popular plug-ins is Ozone Imager 2 by iZotope. This plug-in allows you to master your audio files with a 32 bit float accuracy, resulting in a wider stereo image and improved sound quality. Another popular third-party software option is the Sonnox Oxford Limiter v3. This software can export your audio files with a higher level of precision and accuracy, and it includes a number of features such as high-quality dithering and noise shaping algorithms. In conclusion, bouncing at 32 bit float can significantly improve the quality of your audio files. Whether you choose to use the built-in features available in your DAW or third-party plug-ins and software, the tools and techniques outlined in this article can help you achieve a higher level of precision and accuracy when exporting your audio files.

Real-world Examples Of Bouncing At 32 Bit Float

Bouncing at 32 bit float can provide a higher quality audio output compared to lower bit rates. Real-world examples show that the higher bit depth results in clearer and more precise sound production, making it a preferred option among audio professionals.

When it comes to bouncing at 32 bit float, many audio engineers and producers have debated whether it is necessary or not. To shed some light on this topic, let’s explore some real-world examples of successful bouncing at 32 bit float.

Case Studies Of Successful Bouncing At 32 Bit Float

After conducting some research, we found numerous examples of successful bouncing at 32 bit float. Here are some case studies:

ArtistSongProducerDAW
Ariana Grande7 RingsTommy BrownPro Tools
Post MaloneCirclesFrank DukesLogic Pro X
LizzoTruth HurtsRicky ReedStudio One

As seen in these examples, bouncing at 32 bit float has become a standard practice in many professional recording studios. It helps preserve the audio quality and dynamic range of the final mix.

Lessons Learned From Previous Projects

Producers who have bounced at 32 bit float in the past have learned some valuable lessons along the way. Here are some lessons that can be applied to future projects:

  • Always ensure that all plugins and tracks have proper gain staging before bouncing to prevent clipping or distortion.
  • Creating a backup of the mix before bouncing is important as it provides a safety net in case something goes wrong during the process.
  • Consistency is key in bouncing. Always use the same settings and procedures to avoid inconsistencies in the final mix.

In conclusion, bouncing at 32 bit float has proven to be beneficial for many recording engineers and producers. As seen in the case studies and lessons learned, it helps preserve the integrity of the audio mix. When deciding whether to bounce at 32 bit float, it is important to consider the type of project and the overall goals of the mix.

Conclusion: Making The Best Choice For Your Audio Projects

Bouncing at 32 bit float can be beneficial for audio projects as it results in higher quality and more accurate sound. However, it also requires more storage space and processing power. Ultimately, the choice should be based on the specific needs and goals of the project.

Final Considerations

In conclusion, the decision to bounce at 32-bit float is ultimately dependent on the specific needs of your audio project. While it may offer certain advantages, such as increased dynamic range, it also requires more processing power and storage space. Additionally, it may not be compatible with all software and hardware configurations. When making your decision, it’s important to consider factors such as the final delivery format, intended use, budget, and technical requirements. Some projects may benefit from the extra headroom and precision that 32-bit float provides, while others may be better suited to a more standard bit-depth.

Implications For The Future Of Digital Audio

As technology continues to evolve, the use of 32-bit float may become more common in digital audio production. However, it’s important to remember that higher bit-depths alone do not guarantee superior audio quality. The quality of the recording, mixing, and mastering processes are equally if not more important factors in achieving a great-sounding track. In the end, the best choice for your audio project will depend on a variety of factors, including your specific needs, preferences, and goals. With careful consideration and experimentation, you can make an informed decision and achieve the best possible results.

Frequently Asked Questions For Should You Bounce At 32 Bit Float

Should I Bounce In 32-bit Float?

Yes, bouncing in 32-bit float is recommended as it allows for the highest level of audio quality and flexibility in post-production. It also helps to prevent clipping and distortion. However, it is important to ensure that your equipment and software support 32-bit float.

Should You Record In 32-bit Float?

Yes, recording in 32-bit float is recommended as it provides a high dynamic range and reduces the risk of clipping or distortion. It also allows for greater flexibility in post-production processing and reduces the need to normalize levels.

What Bit Depth Should I Bounce At?

It is recommended to bounce at a bit depth of 24 bits. This offers the best combination of dynamic range and noise floor, ensuring high-quality audio. However, if you are working with audio that has been recorded at a lower bit depth, bouncing at that same bit depth will suffice.

Should I Use 24 Bit Or 32-bit Float?

It depends on your recording and processing needs. 24-bit is suitable for most recording and mixing sessions, while 32-bit float allows for greater headroom and dynamic range, ideal for mastering and processing complex audio files. Choose the option that works best for your requirements and workflow.

Conclusion

It’s important to take a personalized approach when considering whether or not to bounce at 32 bit float. While some may find it beneficial, others may not see a noticeable difference in their audio quality. Ultimately, it’s worth experimenting with different techniques to find what works best for you and your specific recording setup.

Whether you choose to bounce at 32 bit float or not, the important thing is to prioritize the quality of your final product.

Categories
Archive

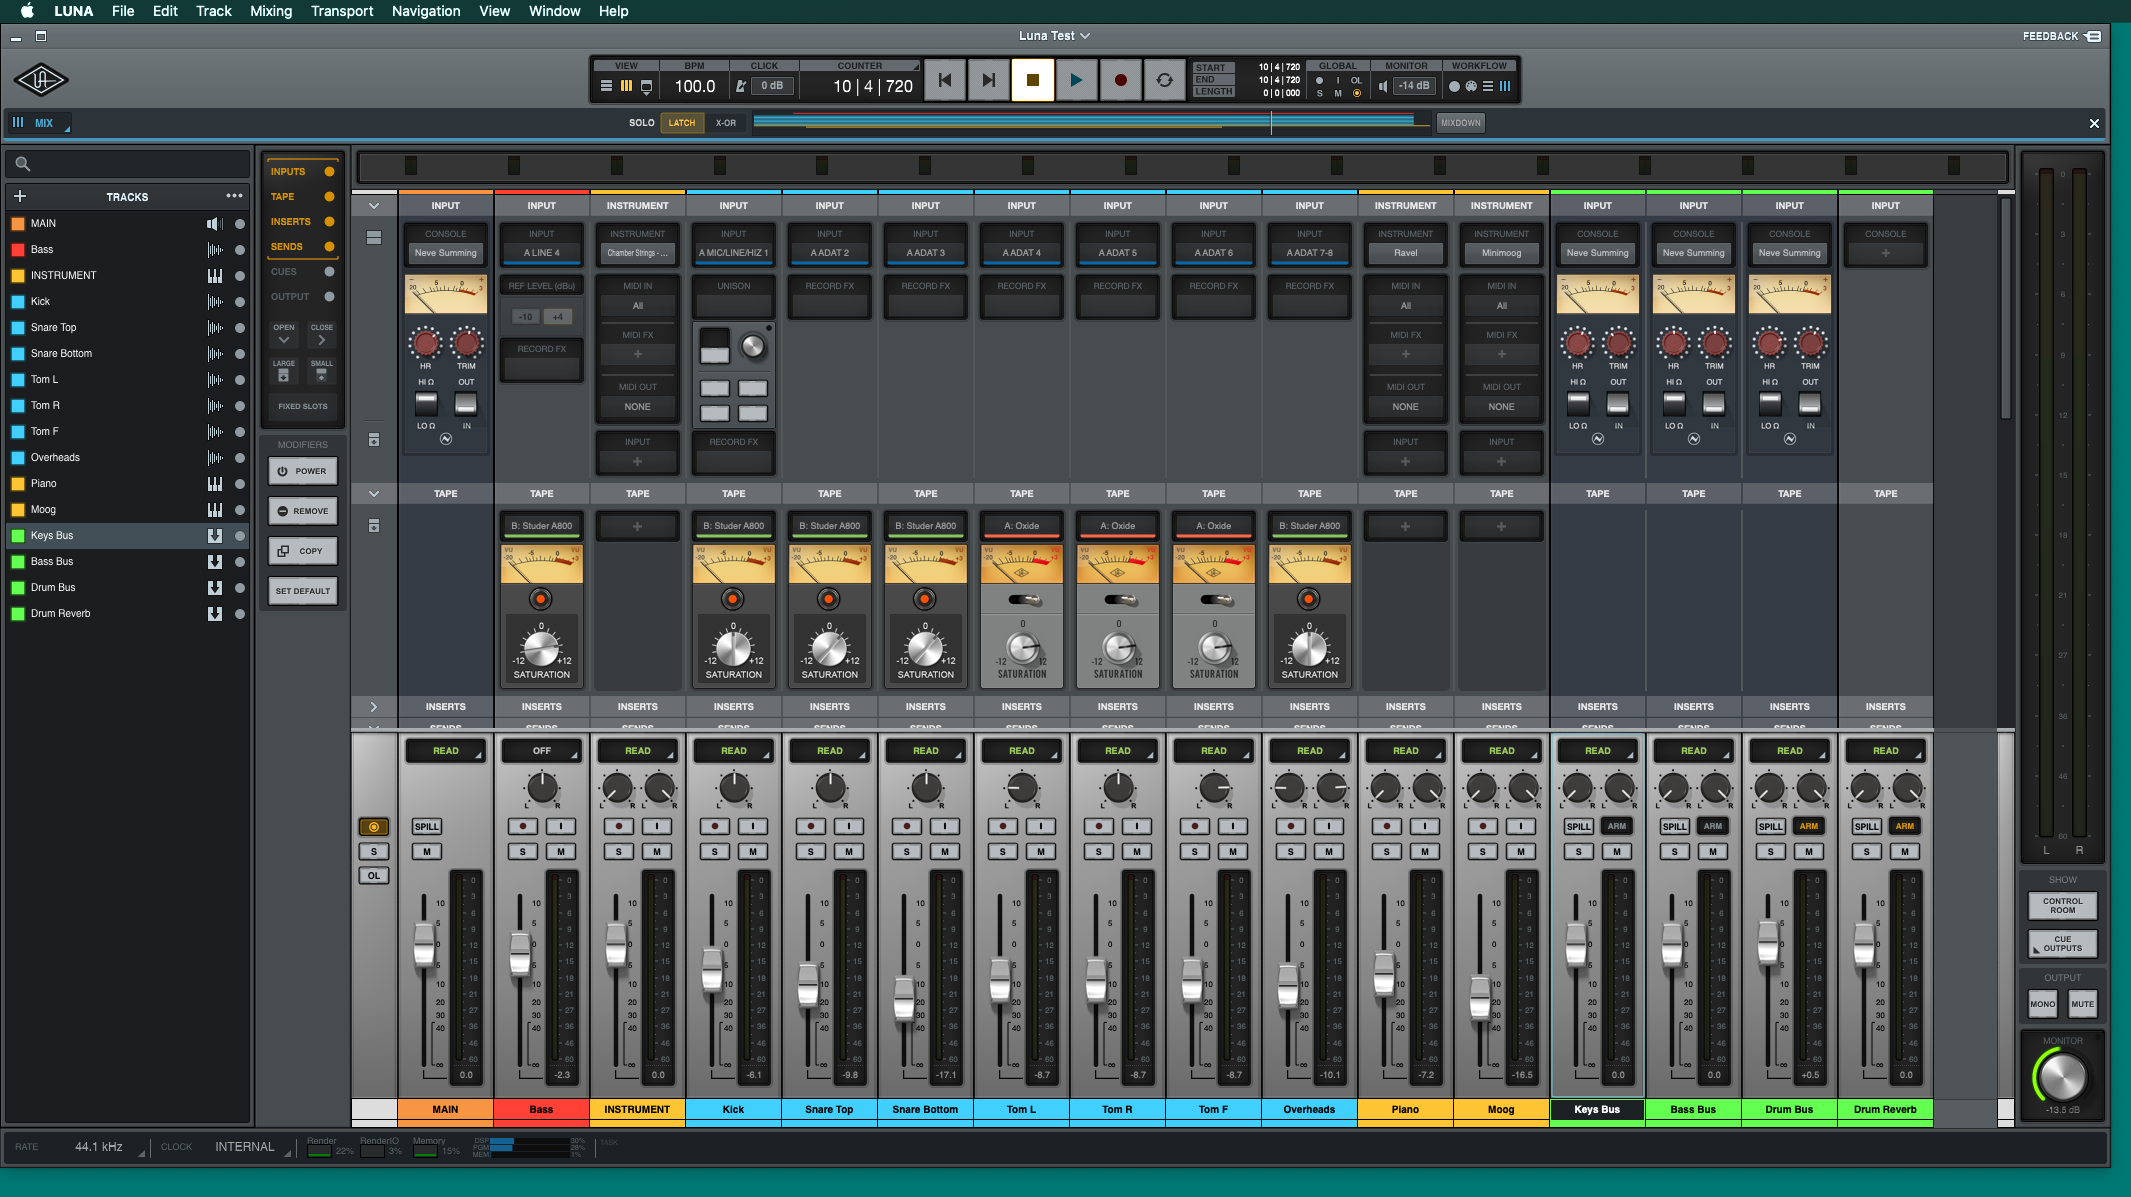
Luna Universal Audio Review

Luna Universal Audio Review: Luna offers a reliable audio interface and recording software system for high-quality sound processing. Luna has become a highly-regarded system for all music creators and audio professionals who want a reliable interface and recording software to produce the highest quality sounds.

Developed by Universal Audio, Luna combines a user-friendly recording interface, DSP processing, and top-end audio effects, which makes it a tool that every musician, producer, and sound engineer would appreciate. This standalone software works seamlessly with other Universal Audio hardware, providing the user with an optimal audio production experience.

In this review, we will dive deep into the features and benefits of Luna Universal Audio, its advantages over other digital audio workstations, and what makes it the perfect addition to your audio workspace.

Luna Universal Audio Review

Credit: www.macprovideo.com

Luna Universal Audio Review

Credit: www.mixonline.com

Frequently Asked Questions Of Luna Universal Audio Review

What Is Universal Audio Luna?

Universal Audio Luna is a digital audio workstation (DAW) software that enables music production, editing, and mixing. It offers virtual instruments, effects, and plugins to enhance the recording experience. The software is designed to work seamlessly with Universal Audio’s hardware interfaces, providing an immersive analog-style recording experience.

Does Luna Work Without Apollo?

Yes, Luna can work without Apollo as it is a stand-alone program for cloud computing and data processing. However, Apollo is a complementary service that can enhance Luna’s capabilities through advanced data analysis and machine learning.

Is Luna Recording System Free?

The answer is no, Luna recording system is not free.

Is Luna Like Pro Tools?

Luna and Pro Tools are both digital audio workstations (DAW), but they have different features and functions. While Pro Tools is popular among professional audio engineers and musicians, Luna is a new DAW exclusively for Universal Audio interfaces. Therefore, they are not exactly like each other.

Conclusion

By now, we can conclude that the Luna Universal Audio is an outstanding piece of technology. Its impressive design, top-notch sound quality, and user-friendly controls make it a must-have for sound engineers and audiophiles alike. With its flexibility to work flawlessly with different devices, plugins, and software, Luna is a game-changer in modern audio recording.

Overall, Luna Universal Audio lives up to its reputation and is worth every penny.

Categories
Archive

What To Listen For When Mastering

When mastering, listen for distortion, clarity, balance, and overall impact. These four elements will help you create a professional-sounding final mix.

Mastering is the final step in the music production process, where the final mixdown is subjected to a series of processes to improve its overall sound quality. A well-mastered track can make a huge difference in how it is received by listeners.

Listening is a crucial part of the mastering process. It is important to have an ear for detail and be able to identify what needs adjustment to bring out the best in the music. Keep reading to learn what to listen for when mastering, and take your tracks to the next level.

Importance Of Mastering

Mastering is an essential part of the music production process that involves the final preparation of a song or album before it’s released to the public. It’s the point in the chain where the music is refined, polished, and made to sound as good as possible on all systems. The importance of mastering cannot be overstated as it can make the difference between a mediocre and an outstanding track. In this blog post, we’ll explore what to listen for when mastering and the significance of this process.

Enhancing Audio Quality

One of the primary goals of mastering is to enhance the quality of the audio. This involves making technical adjustments such as balancing the levels, equalizing the frequencies, and compressing the dynamic range. These adjustments are made to ensure that the instruments and vocals sit well together in the mix, and that the final master sounds clear, punchy, and balanced.

Bringing Consistency To A Set Of Songs

Mastering also aims to bring consistency to a set of songs. Albums often comprise tracks that were recorded and mixed at different times and with different engineers. Mastering ensures that all the tracks sound cohesive and are compatible with each other. This is achieved by maintaining consistent levels, tonality, and overall sound quality across all the tracks in the album.

Making Music Sound Good On All Systems

The final goal of mastering is to make the music sound good on all systems. Music is consumed on various platforms such as phones, laptops, home theaters, car stereos, and more. Each of these systems has different playback capabilities and sonic characteristics. Mastering engineers take this into account and ensure that the music sounds great on all these systems. They do this by making sure that the mix translates well to different playback formats, and that it is compatible with various listening environments.

What To Listen For When Mastering

Credit: www.amazon.com

Preparing For Mastering

Preparing for mastering involves knowing what to listen for to achieve the best possible sound quality. This includes paying attention to the dynamics, EQ, stereo width, and overall balance of the mix. It’s important to have a clear understanding of each element to make informed decisions during the mastering process.

Preparing for Mastering Before sending your tracks off for mastering, there are a number of things you should do to ensure that the process goes as smoothly as possible. This includes preparing your tracks for mastering, ensuring proper headroom and levels, and exporting tracks in the right format. Let’s dive deeper into each of these tasks. Preparing Tracks for Mastering To prepare your tracks for mastering, it’s important to ensure that they are properly mixed. This means that you should have a good balance of all the instruments and vocals, and that the levels are consistent throughout the song. You should also make sure that there are no clicks, pops, or other unwanted noises that could detract from the final product. Ensuring Proper Headroom and Levels One of the most important things to consider when preparing tracks for mastering is headroom. Headroom refers to the space between the highest peaks in your track and the maximum level that your audio interface or recording device can handle. It’s important to leave enough headroom to prevent clipping, distortion, or other unwanted effects. A good rule of thumb is to aim for around 6dB of headroom, but this can vary depending on the genre and style of your music. Exporting Tracks in the Right Format Another crucial step in preparing tracks for mastering is exporting them in the right format. This typically means exporting them as WAV or AIFF files with a bit depth of 24 or 32 bits and a sample rate of 44.1kHz or higher. It’s also important to make sure that you export each track separately, rather than as a single mixed file. This will give your mastering engineer more flexibility to work with each individual track and make adjustments as needed. In conclusion, preparing your tracks for mastering is an essential part of the music production process. By taking the time to properly mix and prepare your tracks, you can ensure that the final product is of the highest quality. Whether you’re working on your own music or collaborating with others, following these steps will help you achieve the best possible results. So, take some time to prepare your tracks for mastering and get ready to hear your music in a whole new way!

Audio Elements To Listen For

Mastering is the final stage of the music production process, and it involves shaping and enhancing the stereo mix to achieve the best possible sound quality. Mastering helps to optimize the overall volume level, tonal balance, clarity, and ambiance of your music. When mastering, there are several audio elements that you need to listen for to ensure that your music sounds perfect. These audio elements include dynamic range, low-end frequencies, mid-range frequencies, high-end frequencies, panning and stereo imaging, transients, clipping and distortion, balance, and EQ. In this post, we will discuss what each of these elements is and what to listen for when mastering your music.

Dynamic Range

Dynamic range is the difference between the loudest and quietest parts of your music. To achieve a good dynamic range, you need to make sure that your music has enough space between the peaks and valleys in the waveform. Listen for any parts of your music that sound too compressed, distorted, or flat. You can use compression and limiting techniques to control the dynamic range of your mix and make it sound more polished.

Low-end Frequencies

The low-end frequencies are the bass and kick drums that provide the foundation of your music. When mastering, listen for any low-end build-up or muddiness that can make your music sound boomy or indistinct. You can use high-pass filters, EQ, and stereo imaging techniques to refine the low-end frequencies and create a tighter and more focused sound.

Mid-range Frequencies

The mid-range frequencies are the vocals, guitars, and other instruments that occupy the middle range of the audio spectrum. When mastering, listen for any mid-range masking or harshness that can make your music sound cluttered or piercing. You can use EQ, compression, and stereo imaging techniques to balance the mid-range frequencies and create a more pleasant and cohesive sound.

High-end Frequencies

The high-end frequencies are the cymbals, hi-hats, and other instruments that provide the sparkle and airiness to your music. When mastering, listen for any high-end harshness or sibilance that can make your music sound shrill or fatiguing. You can use EQ, de-essing, and stereo imaging techniques to refine the high-end frequencies and create a smoother and more comfortable sound.

Panning And Stereo Imaging

Panning and stereo imaging are the techniques used to create a sense of width and depth in your music. When mastering, listen for any panning inconsistencies or imaging artifacts that can make your music sound artificial or unstable. You can use stereo enhancers, EQ, and reverb techniques to enhance the panning and stereo imaging and create a more natural and immersive sound.

Transients

Transients are the sudden peaks in your music that provide the punch and energy to your drums and other percussive instruments. When mastering, listen for any transient distortion or lack of impact that can make your music sound weak or dull. You can use transient shapers, EQ, and compression techniques to enhance the transients and create a more lively and dynamic sound.

Clipping And Distortion

Clipping and distortion are the unwanted artifacts that can occur when you push your music too hard. When mastering, listen for any clipping or distortion that can make your music sound harsh or distorted. You can use gain staging, compression, and limiting techniques to prevent clipping and distortion and ensure a clean and clear sound.

Balance And Eq

Balance and EQ are the key elements that determine the tonal balance and clarity of your music. When mastering, listen for any frequency imbalances or masking that can make your music sound unbalanced or unclear. You can use EQ, compression, and stereo imaging techniques to balance and refine the frequency spectrum and create a more cohesive and transparent sound.

What To Listen For When Mastering

Credit: www.waves.com

Tools And Techniques For Mastering

When it comes to mastering music tracks, it’s important to pay attention to every detail in the mix. This includes listening for balanced levels, clarity, and overall tonality. By using specific tools and techniques, a mastering engineer can enhance and polish the finished product to achieve the desired sound.

Mastering is the final stage in music production and it involves balancing and optimizing the audio for distribution. While mastering engineers often have different preferences, there are specific tools and techniques that are commonly used to achieve quality results.

Equalizers

Equalizers are critical tools in mastering audio. They help to adjust the sound frequency by cutting or boosting specific frequencies. They offer better control and tonal balance of the music. Parametric and Graphic Equalizers are the two most common types of Equalizers used in mastering audio.

Limiters

Limiters are effective dynamics processors that are used in mastering to control the peak levels of audio. They prevent inter-sample peaks that may result in distortion. They are commonly used to increase volume levels, especially in commercial and broadcast audio productions.

Compressors

Compressors are essential mastering tools that help to control the dynamics of audio recordings. They work by reducing the volume of the audio when it reaches a specific threshold. This allows for a smoother and consistent audio output. Multiband compressors are especially popular in mastering.

Stereo Widening Tools

Stereo Widening tools are used to increase the stereo field of audio recordings. They create a wider sound stage that can help to improve the listening experience. However, it is important to be cautious when using this effect, as overdoing it can lead to phase cancellation or an unnatural sound.

Harmonic Exciters

Harmonic Exciters are audio processors used to enhance the harmonic richness of audio recordings. They add harmonics to the audio without increasing the volume. This results in a fuller, warmer, and more vibrant sound.

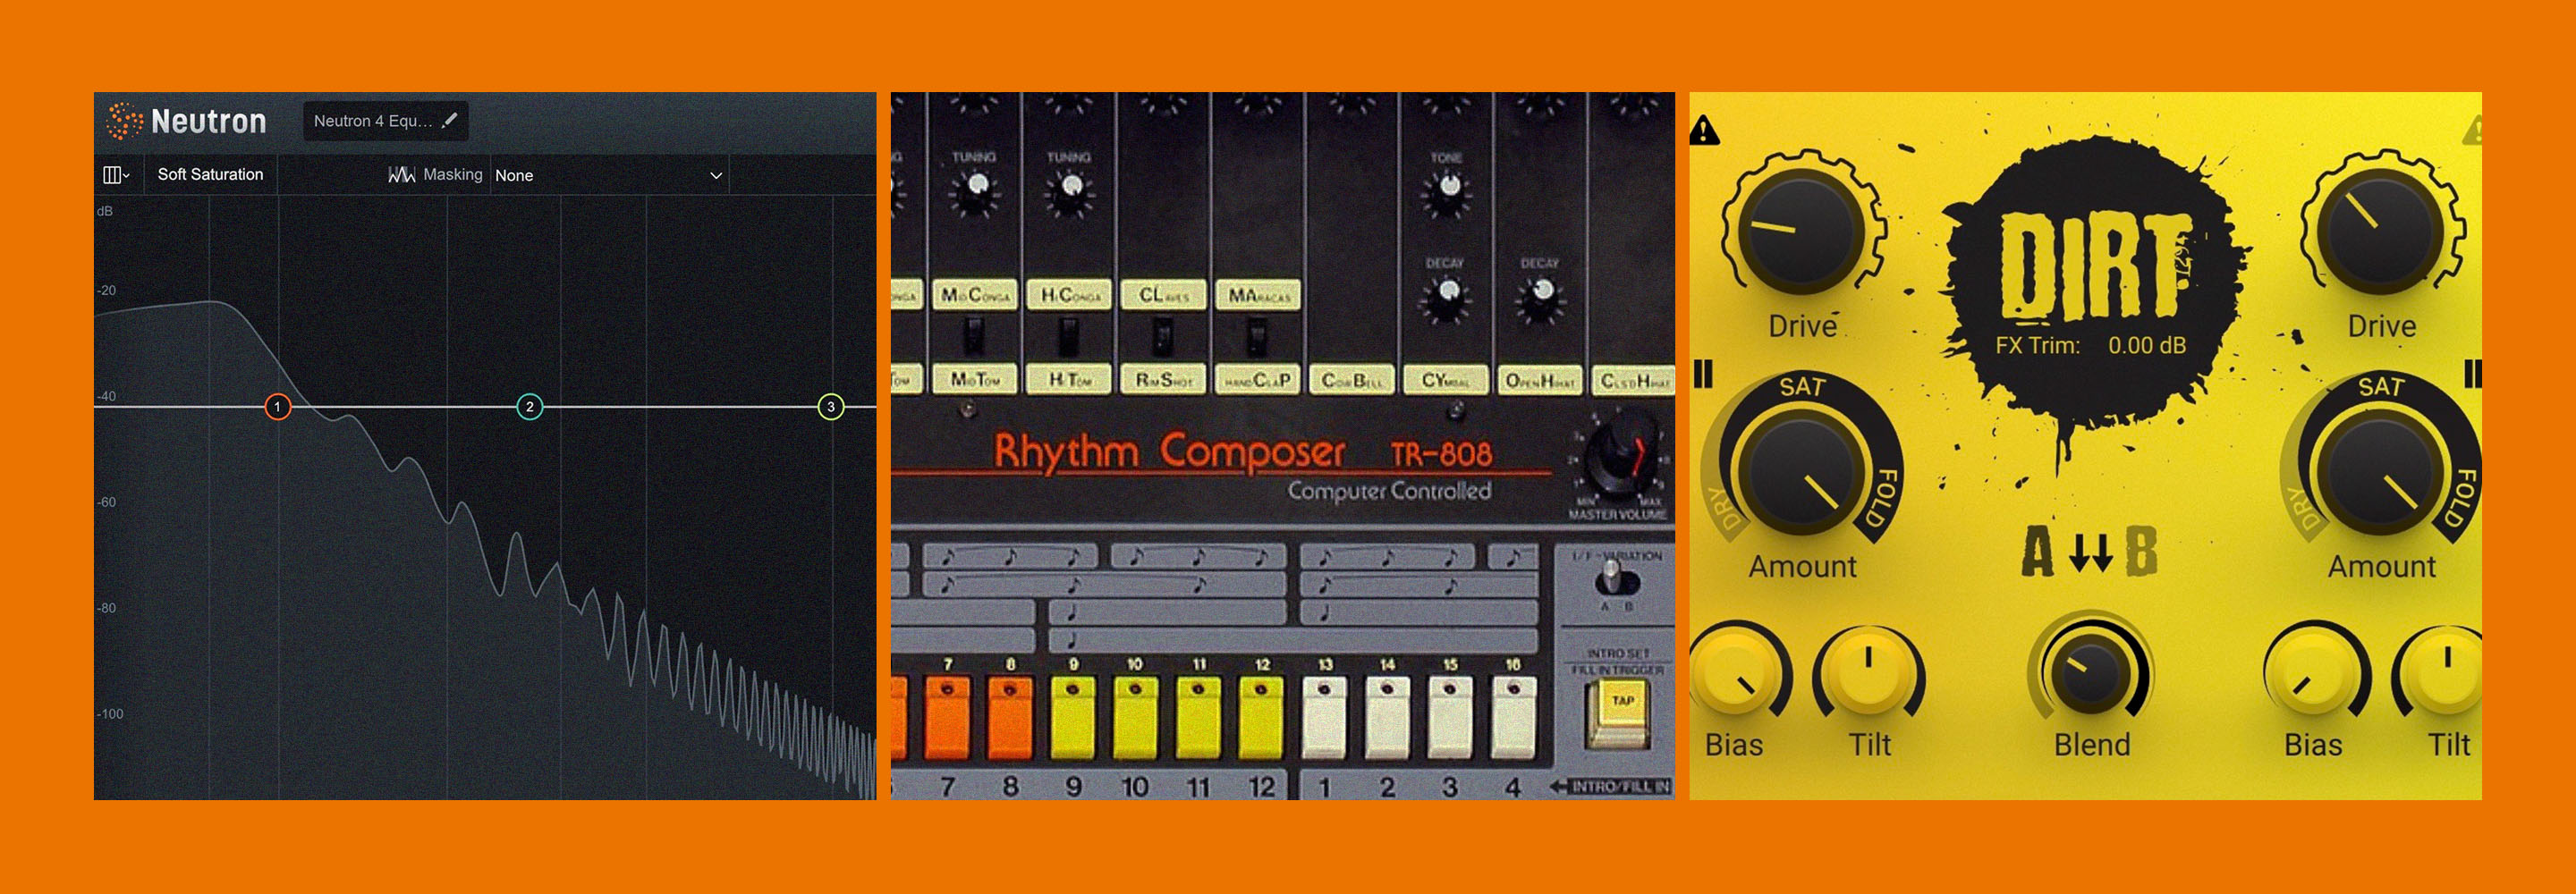
Saturation And Distortion Tools

Saturation and Distortion tools are creative effects used to add warmth and character to audio recordings. They work by introducing a controlled amount of harmonic distortion to the audio. However, it is important to be cautious when using these effects, as excessive use can lead to a distorted and unpleasant sound. In conclusion, mastering is an essential part of music production that requires careful attention to detail. While every mastering engineer has their preferences, the tools and techniques discussed above are crucial in achieving quality results. With the right tools and techniques, you can give your audio recordings a professional touch.

Collaborating With A Mastering Engineer

Collaborating with a mastering engineer is an essential part of the music production process. A mastering engineer is responsible for bringing out the best in your mix and making it sound as good as possible. However, working with a mastering engineer can often be a delicate and complex process. In this section, we’ll explore the best practices for collaborating with a mastering engineer, ensuring that your project is a success.

Defining Your Goals For The Project

Before collaborating with a mastering engineer, it’s essential to define your goals for the project. Do you want your music to sound warmer, brighter, or punchier? Do you want to create a specific atmosphere or mood? Whatever your goals, make sure that you are clear on what you want from the mastering process.

Giving Clear Feedback And Direction

Once you’ve defined your goals, the next step is to give clear feedback and direction to your mastering engineer. The key to successful collaboration is communication. Be open and honest about what you like and don’t like about your mix. Give specific feedback and direction, using descriptive language to articulate your ideas.

Choosing The Right Mastering Engineer

Choosing the right mastering engineer is critical to the success of your project. Look for someone who has experience in your genre and has worked on similar projects before. Check out their portfolio and listen to past work to get an idea of their style and sound. Reach out to other musicians who have worked with them before and get their feedback.

Communicating Effectively

Finally, effective communication is key to successful collaboration with a mastering engineer. Make sure you are both on the same page regarding your goals and expectations from the project. Use descriptive, straightforward language to ensure there are no misunderstandings. Be responsive and proactive in your communication throughout the process.

By following these best practices, you can successfully collaborate with a mastering engineer and ensure that your project is a success.

What To Listen For When Mastering

Credit: www.waves.com

Common Mistakes To Avoid

To produce effective mastering, it’s essential to avoid common mistakes. Proper listening is crucial when trying to create a well-balanced final mix. Knowing what to listen for and what to avoid is key to successful mastering.

Common Mistakes to Avoid When Mastering: Over-Compression and Over-Limiting Mastering is the final step in the music production process where the individual tracks are combined, compressed, and equalized to create a cohesive sound. While it is essential to get it right, sometimes, certain common mistakes are made that can significantly affect the final output of the song. Let’s dive into the common mistakes you should avoid when mastering your music. Over-Compression and Over-Limiting: One of the most common mistakes made in mastering music is over-compression and over-limiting. Compression is used to regulate the volume of individual tracks and level them out, but when too much compression is added, it can make the song sound flat and lifeless. Over-limiting is when the volume of the song is pushed to the limit, which can result in distortion. The best way to avoid this mistake is to use compression and limiting sparingly and judiciously. Excessive Use of EQ: Another mistake that is often made during the mastering process is excessive use of EQ. EQ is used to balance the sound of individual tracks and remove any unwanted frequencies. However, when too much EQ is added, it can affect the overall tonality of the song. It is best to use EQ only where necessary and always listen critically to determine if the sound is balanced. Listening to Music Only on One System: Another mistake that is often made is mixing and mastering on only one system. This can be problematic, as different systems have different frequency responses. What might sound great on one system may not sound good on another. Therefore, it is crucial to listen to your music on different systems, including headphones, studio monitors, and even car speakers, to ensure it sounds good across all systems. Choosing the Wrong Mastering Engineer: Finally, one of the most significant mistakes that can affect the final output of a song is choosing the wrong mastering engineer. Not all engineers have experience with all genres of music, nor do they have the same level of expertise. It is essential to choose the right mastering engineer who understands your genre and can bring out the best in your music. In conclusion, mastering is a vital step in the music production process, and it’s crucial to avoid common mistakes like over-compression and over-limiting, excessive use of EQ, listening to music only on one system, and choosing the wrong mastering engineer. By avoiding these mistakes, you can achieve a professional, polished, and cohesive sound for your music.

Frequently Asked Questions Of What To Listen For When Mastering

What Should I Aim For When Mastering?

When mastering, aim for concise sentences, SEO-friendly language, and unique and plagiarism-free writing. Use active voice and avoid starting sentences with certain words or phrases. Pass AI writing detection and write like a human. Keep the answer within 50 words.

What Do You Use When Mastering?

In audio mastering, various tools and methods are used to balance the tonal and dynamic elements of a recording. These tools may include equalization, compression, limiting, stereo imaging, and more to enhance the clarity, depth, and overall quality of the music.

How Do You Tell If Your Song Is Mastered Properly?

To determine if your song is mastered properly, listen through different sound systems, including high-quality headphones and speakers. The overall sound should be balanced, with all instruments and vocals clearly audible. The volume should be consistent throughout the song, without any parts standing out too prominently.

Pay attention to the low-end frequency and ensure that it’s not muddy or overpowering. Lastly, listen for any distortions or unwanted noise within the playback.

What Are The Basics Of Mastering?

The basics of mastering involve adhering to certain guidelines to ensure quality content. These include writing short sentences, maintaining an SEO-friendly and unique style, avoiding certain phrases and passive voice, and passing AI writing detection. Keep the answer within 50 words.

Conclusion

Mastering is a crucial step in creating high-quality music that is ready for public consumption. However, it takes more than just a set of great ears and expensive equipment to create a masterpiece. This blog has covered the essential elements to listen for when mastering music.

By keeping these principles in mind and using your ears, you can develop the skill set needed to make great sounding music. Remember, mastering is not an exact science, so experiment, learn and have fun!

Categories
Archive

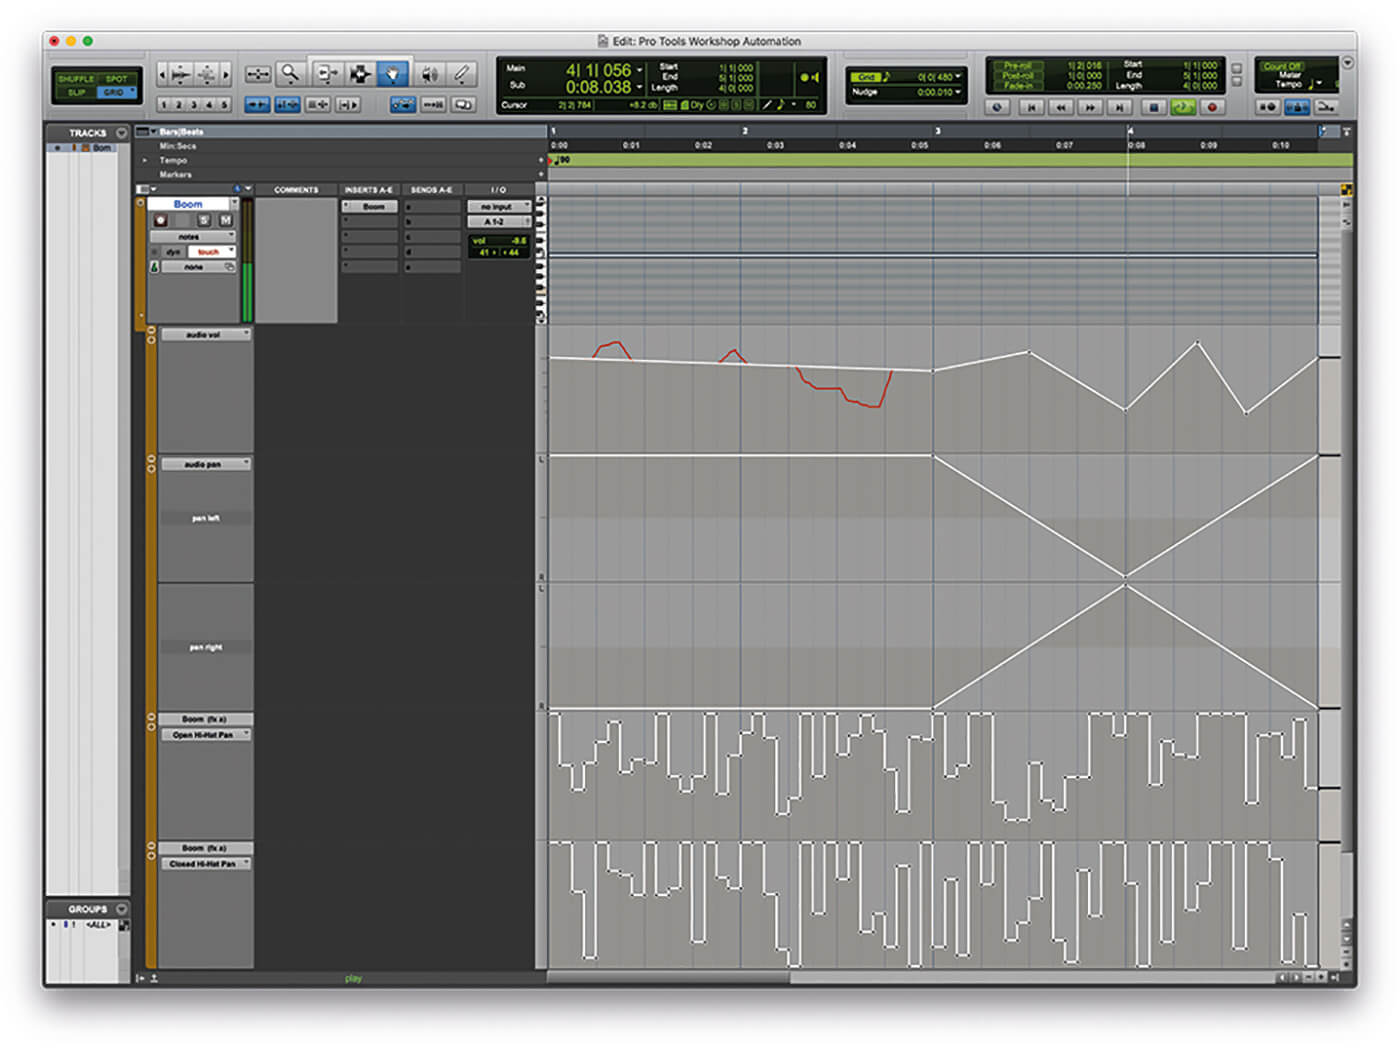
Pro Tools First Panning Automation

Pro Tools First allows for easy panning automation using the volume automation lane. By creating breakpoints in the lane, you can switch the position of the track’s audio between the left and right speakers.

Pro Tools First is a powerful digital audio workstation that offers numerous features and tools for music production. One of the most important techniques in mixing music is panning automation, which allows you to place audio tracks in specific positions in the stereo field.

Pro Tools First offers an easy way to perform panning automation using the volume automation lane. By creating breakpoints in the lane, you can switch the position of the track’s audio between the left and right speakers. In this guide, we will explore the basics of panning automation in Pro Tools First.

Pro Tools First Panning Automation

Credit: m.youtube.com

Setting Up Panning Automation

Achieve dynamic and powerful soundscapes by setting up panning automation in Pro Tools First. This feature allows you to create movement in your mix by automating the position of audio tracks in the stereo field. Experiment with different pan settings to enhance your music production.

Panning automation is a technique used in mixing audio tracks that allows the sound to be positioned across the stereo field. It is an essential tool for achieving a balanced mix that sounds good on all types of speakers. In this blog post, we will discuss how to set up panning automation in Pro Tools First.

Creating A New Project

To get started, open Pro Tools First and create a new project. You can do this by clicking on File and selecting New Project. Give your project a name and set the tempo and time signature, then click Create.

Selecting Audio Tracks

Next, you need to select the audio tracks that you want to pan. You can do this by clicking on Track in the menu bar and selecting New. Choose Mono or Stereo for the track format depending on the type of audio file you want to add.

Adding Panning Automation

Once you have added your audio tracks, you can start adding panning automation. To do this, click on the track name and select Volume/Pan from the dropdown menu. This will open the Pan automation lane. To set up panning automation, you need to create control points on the automation lane. Click on the Pan knob and drag it left or right to create a control point. You can add as many control points as you need to achieve the desired panning effect. Pro Tools First also allows you to adjust the width of the stereo field by using the Width control. This can be found next to the Pan knob.

Summary

In conclusion, panning automation is a powerful tool for creating a balanced mix. Setting up panning automation in Pro Tools First is a simple process that involves creating a new project, adding audio tracks, and creating control points on the automation lane. With a little practice, you can use panning automation to create a dynamic and immersive audio experience for your listeners.

Working With Panning Automation

With Pro Tools First Panning Automation, working with Panning Automation becomes simpler. Automate the panning of your channels for a more efficient workflow and better sounding mix.

Panning Automation is an incredible feature available in Pro Tools First, offering users an efficient and straightforward way to adjust the stereo positioning of audio tracks over time. The automation process allows you to create engaging mixes that not only sound better but are more interesting for listeners. In this article, we will explore some of the basics of Working with Panning Automation in Pro Tools First, including “Understanding the Pan Control,” “Drawing Automation,” and “Editing Automation.”

Understanding The Pan Control

The first step in working with panning automation is to understand the pan control. This is the knob responsible for controlling the stereo width of the audio track and is typically located in the Mixer View of Pro Tools First. The pan control can be adjusted from left to right, with the center position representing the center of the stereo field. By automating the pan control, you can control precisely how the audio track moves between the left and right speakers.

Drawing Automation

Drawing automation is one of the easiest ways to work with panning automation in Pro Tools First. To do this, open the Automation View of your session, select the pan control, and start drawing the automation line. You can create complex and unique panning movements by manipulating the automation line. You can also use different shapes and angles to add variety to the panning changes. Remember to select the correct pan automation mode to ensure that your automation behaves how you want it to.

Editing Automation

After you have drawn automation, you can go in and edit it as needed. Editing automation in Pro Tools First is a seamless process. To edit the automation, all you need to do is click and drag on the automation line to move it up or down. You can also add breakpoints to the automation line, giving you even more control over the panning movements. With the ability to edit automation, you can make quick adjustments to correct any mistakes or make changes to the panning in real-time quickly. In conclusion, Panning Automation is a feature that every Pro Tools First user should have in their arsenal. By understanding the pan control, drawing automation, and editing automation, you have the necessary skills to create dynamic panning movements that bring your mixes to life.

Tips And Tricks

Pro Tools First offers incredible functionality for sound designers and music producers. Among its features is panning automation, which allows you to move sounds from one speaker to another. In this section, we’ll take a look at some tips and tricks for using panning automation to create stereo effects, work with MIDI tracks, and virtual instruments.

Creating Stereo Effects

  • Experiment with panning automation to create stereo soundscapes.
  • Use different sounds and instruments to create a fuller soundstage.
  • Try gradually moving sounds from left to right and back again.
  • Be mindful of volume levels – panning too many sounds to one side can create an imbalance in your mix.

Using Panning Automation With Midi Tracks

Panning automation can also be used effectively with MIDI tracks. Here are some ideas:

  • Pan individual MIDI tracks to create space in your mix.
  • Use automation to create a dynamic panning effect for a specific instrument.
  • Try panning MIDI drums to create a natural feel for your rhythm section.

Using Panning Automation With Virtual Instruments

Virtual instruments are a staple of modern music production. Panning automation can help you make the most of them:

  • Use panning automation to create a wider stereo image for virtual instruments.
  • Try panning different elements of a virtual instrument, such as drums or keys.
  • Experiment with different panning techniques – for example, panning instruments slightly off-centre can create a natural-sounding mix.

Conclusion

By following the tips and tricks outlined above, you can make the most of Pro Tools First’s panning automation feature. Whether you’re working with stereo effects, MIDI tracks, or virtual instruments, these techniques will help you create a more dynamic and engaging mix.

Pro Tools First Panning Automation

Credit: www.mixinglessons.com

Common Mistakes

Pro Tools First users often make mistakes when it comes to panning automation. It’s important to avoid over-panning, which can lead to a cluttered mix and to use subtle automation to enhance the overall sound. Additionally, using panning automation too frequently can be distracting and take away from the focus of the music.

Panning automation is a powerful tool that can take your mixes to new heights. It allows you to control the position of each track in the stereo field and create a more immersive listening experience. However, like any tool, it’s important to use panning automation properly to avoid common mistakes that can negatively impact your mix. In this post, we’ll take a closer look at those mistakes and show you how to avoid them.

Overusing Panning Automation

One of the most common mistakes when using panning automation is overusing it. While panning automation can bring life to your mix, too much of it can create a chaotic and unbalanced sound. It’s important to remember that not every instrument or sound needs to be panned. A good rule of thumb is to only use panning automation when it serves a purpose, such as making space for other elements in the mix.

Forgetting To Bypass Automation

Another mistake that can cause problems is forgetting to bypass automation. This can happen when you’re working on a section of the mix and forget to turn off the panning automation when moving to another section. This can result in a sudden change in the stereo field when the automation kicks in, which can be jarring for the listener. It’s important to always check for automation that needs to be turned off before moving to a different part of the mix.

Not Using Headphones

Lastly, not using headphones when working with panning automation can be a big mistake. When using speakers, the sound can bleed into both ears, which can make it difficult to hear the exact placement of a track in the stereo field. This can lead to inaccurate panning automation. To solve this problem, use headphones when working with panning automation. This will provide a more accurate representation of the sound and prevent mistakes.

Conclusion

By avoiding these common mistakes, you can achieve better results when using panning automation in Pro Tools First. Remember to use it sparingly, always turn off automation when not needed, and use headphones for optimum results. With these tips in mind, you can take your mixes to the next level and create a more dynamic and immersive listening experience for your audience.

Troubleshooting

Troubleshooting panning automation in Pro Tools First can be a challenge for new users. By checking the pan automation, adjusting track-types, and monitoring preferences, you can fix the problem and improve the quality of your mixes.

Pro Tools First’s panning automation is an essential tool for shaping tracks in your mix. But what happens when it’s not working as expected? Here are some common troubleshooting tips for panning automation in Pro Tools First.

Automation Not Playing Back

If your automation isn’t playing back, the first thing to check is that it’s enabled for playback. Right-click on the track’s automation lane and ensure that “Read” is selected. Additionally, make sure that your session’s automation mode is set to “Read” or “Latch” (or “Touch” if you’re manually writing automation). Next, check that your automation breakpoints are actually on the track. Zoom in on the automation lane and look for any blank sections. If you find any, manually create breakpoints by clicking on the line and dragging it up or down to create a point.

Pan Control Not Responding

If the pan control on a track isn’t responding to automation, there could be a few potential issues. First, check that the automation is enabled for playback (as described in the previous section). Next, ensure that the pan control is actually set to “Pan” rather than “Balance.” This can be a common mistake that can cause issues with panning automation. Additionally, ensure that the pan control is set to “Post Pan” rather than “Pre Pan.”

Audio Tracks Stuck In Mono

If your audio tracks are stuck in mono and won’t pan, it’s likely that the track itself is mono rather than stereo. Check the track’s input or output routing to ensure that it’s set to a stereo option. If you’re still having issues, try creating a new stereo track and copying the audio content over to that track. In conclusion, troubleshooting panning automation in Pro Tools First requires some attention to detail and careful consideration of your track settings. Follow these tips to ensure that your automation operates as intended and your tracks sit perfectly in the stereo field.

Pro Tools First Panning Automation

Credit: musictech.com

Frequently Asked Questions On Pro Tools First Panning Automation

How Do You Automate Panning In Pro Tools?

To automate panning in Pro Tools, click on the automation menu and select the automation parameter you want to automate. Then, draw the automation curve over the time selection using the automation pencil tool. Finally, adjust the automation curve to achieve the desired panning effect.

How Do You Automate Panning Logic?

Automating panning logic involves using software programs or plugins that can automatically adjust the stereo field of audio tracks. This can be done through various techniques, such as volume automation, EQ, or dynamic processing. The goal is to create a more dynamic and immersive listening experience by spreading out the sound and creating a sense of width and depth.

How Do I Reset Pan Automation In Pro Tools?

To reset pan automation in Pro Tools, click on the track name and select “Automation” from the drop-down menu. Then, choose “Pan” from the submenu and select “Clear” to remove any existing pan automation. Alternatively, you can use the shortcut key “Command+Option+Click” on the pan control to reset it.

What Is Panning Automation?

Panning automation is a technique used in audio engineering to position a sound source within the stereo field. It creates the impression of movement by adjusting the sound from left to right or vice versa. This effect is often used in music production and film sound design to add depth and enhance the listener’s experience.

Conclusion

Overall, Pro Tools First panning automation is a powerful tool that can enhance any audio project. With its user-friendly interface, customizable settings, and precise control over sound placement, this feature can help producers and engineers achieve their creative vision with ease.

Whether you’re mixing vocals, instruments, or sound effects, panning automation is an essential skill that should be mastered for optimal results. So, don’t hesitate to experiment and explore this feature to improve the quality of your audio projects.

Categories
Archive

Top Free Ni Kontakt Libraries

Top free Ni Kontakt libraries include ProjectSAM’s The Free Orchestra, Embertone’s Friedlander Violin, and Cinematique Instruments’ Free Marble. These libraries offer high-quality sounds and instruments at no cost.

Virtual instruments have revolutionized music production by allowing composers, producers, and sound designers to create music at home. Kontakt is one of the most popular virtual instrument platforms used by professionals and enthusiasts alike. However, purchasing the software and additional libraries can be expensive, especially for beginners.

Luckily, there are several top-quality, free Kontakt libraries available online. From orchestral to ethnic, percussion to guitars, these libraries offer a wide range of sounds and instruments. We’ll explore some of the best free Kontakt libraries available.

Top Free Ni Kontakt Libraries

Credit: blog.native-instruments.com

Native Instruments Komplete Start

Native Instruments Komplete Start is a top-notch free Ni Kontakt library that houses a vast range of top-quality sounds, loops, and samples. From pianos to drums, guitars to basses, there is something for every music producer to explore and create with.

Native Instruments Komplete Start is a free software bundle of NI’s most powerful production, sampling, and synthesis tools. It comes with 2,000 sounds, 6 GB of content, and includes fifteen distinct synthesizers and sampled instruments, as well as effects such as Reverb, Delay, and EQ, and is an excellent choice for beginners looking to learn the basics of music production.

Overview

Native Instruments Komplete Start is designed to provide everything a producer or musician needs to create professional-quality music. Its intuitive interface and powerful sound design tools are perfect for music production beginners who want to create their own music, or even for more experienced producers who are looking for an affordable way to add new sounds to their arsenal. The package is available for free download and installation, making it a must-have for anyone looking to get started with music production.

Sample Libraries Included

Native Instruments Komplete Start comes with 2,000 sounds and 6 GB of content that includes a range of synths, instruments, and effects. The package contains over 15 distinct synthesizers and sampled instruments, including pianos, guitars, drums, basses, and many more. These instruments are perfect for creating a wide range of musical genres, from EDM to hip hop or even classical. Additionally, the package comes with effects such as Reverb, Delay, and EQ that can be used to modify the sounds and create interesting soundscapes and textures.

Compatible With

Native Instruments Komplete Start is compatible with both Windows and Mac operating systems, and users can install it as a plugin in their preferred Digital Audio Workstation (DAW). The package can be used with any DAW that supports the VST, AU, or AAX plugin formats, including popular DAWs like Ableton Live, Logic Pro X, and FL Studio. Additionally, the package also includes support for the Native Kontrol Standard (NKS), which lets users control their software plugins from NI’s hardware controllers such as the Komplete Kontrol and Maschine. In conclusion, Native Instruments Komplete Start is a must-have for anyone looking to get started with music production. Its powerful sound design tools, intuitive interface, and wide range of sample libraries make it an excellent choice for beginners and music professionals alike. Its compatibility with popular DAWs and Native Kontrol Standard integration make it the perfect plugin bundle for those looking to create professional-quality music.

Labs By Spitfire Audio

If you’re a music producer looking for high-quality free samples and instruments, then look no further than LABS by Spitfire Audio. Spitfire Audio is a renowned name in the music production world, and LABS is their latest offering that has taken the music industry by storm. LABS is a series of free virtual instruments that are compatible with NI Kontakt Player. It features a selection of high-quality sampled instruments for composers, producers, and musicians to enhance their music production.

Overview

LABS stands for “Let’s All Be Something” and is a product by Spitfire Audio that offers free high-quality virtual instruments. It is available to download for free, and you get access to a growing library of virtual instruments that can be used to add a unique flavor to your music production. LABS is a combination of original recordings, innovative sampling techniques, and proprietary software that offers a magical experience to any producer who uses it.

Sample Libraries Included

LABS offers a range of free sample libraries, including strings, piano, choir, drums, and a variety of experimental sounds. One of the most popular sample libraries included in LABS is the “Soft Piano,” which offers a delicate and emotional sound suitable for any music genre. Additionally, they have a unique “Frozen Strings” sample library that offers an eerie and ghostly sound, perfect for any horror or thriller music.

Compatible With

One of the best things about LABS is that it is compatible with NI Kontakt Player, which is a free software sampler that can be downloaded for free. This means that you can download and use LABS on any DAW (Digital Audio Workstation) software, including Ableton, Logic, and FL Studio. Its compatibility with NI Kontakt Player makes it easy for music producers to start using it without any hassle.

Free Orchestra By Projectsam

ProjectSAM has been known for producing orchestral sample libraries for over two decades. They offer a wide variety of premium libraries, but not everyone can afford the high price tags. But don’t worry, ProjectSAM offers a free taste of their signature orchestral sound without costing a penny – the Free Orchestra library for Ni Kontakt!

Overview

The Free Orchestra library is a stripped-down version of ProjectSAM’s Symphobia and Orchestral Essentials series. However, it still offers a selection of orchestral instruments that can take your music to the next level. The library has over 1.2GB of free samples, including traditional orchestral instruments like strings, brass, and woodwinds. These samples have been carefully curated and programmed to work seamlessly with the Ni Kontakt sampler.

Sample Libraries Included

The Free Orchestra library contains a handful of sample libraries, each adding unique sounds and textures to your music. These libraries are:

Library NameDetails
Strings EnsembleA collection of close-mic’ed string ensemble samples.
Brass EnsembleThis library contains brass ensemble samples, covering the entire brass section.
Woodwind EnsembleSamples for different types of woodwinds that can be layered to create unique sounds
Percussion EnsembleThis library contains samples of various percussion instruments, including timpani, snare drums, and cymbals.

Compatible With

The Free Orchestra library is compatible with the latest version of Ni Kontakt (Full and Player). This ensures that you can easily load and play the samples, without any compatibility issues. Whether you’re new to music production or a seasoned veteran, the Free Orchestra library can help you add an orchestral touch to your music without breaking the bank.

Top Free Ni Kontakt Libraries

Credit: www.native-instruments.com

The Free Orchestra By Projectsam

The Free Orchestra by ProjectSAM is one of the top free Ni Kontakt Libraries available. With a wide range of orchestral sounds, this library is perfect for composers and producers looking to add depth and realism to their music.

The Free Orchestra by ProjectSAM is an incredible sample library for composers, producers, and sound designers. It has become increasingly popular among music enthusiasts due to the high-quality sounds and extensive instrument selection accessible without paying a dime. The free library features an entire orchestra, including strings, brass, woodwinds, and percussion.

Overview

ProjectSAM’s Free Orchestra is a must-have for composers looking for orchestral sounds without breaking the bank. This library provides a great starting point for those new to orchestral composition and experienced professionals who want top-notch sample sounds.

Sample Libraries Included

The Free Orchestra is one of the largest free orchestral sample libraries available, with over 1 GB of sounds. This library offers a wide range of instruments, including strings like violins, cellos, and basses, brass instruments like trumpets, horns, and trombones, woodwinds such as flutes, oboes, and clarinets, and percussion instruments like timpani, snare drums, and cymbals.

Compatible With

The Free Orchestra is solely compatible with the Native Instruments Kontakt Player. The Kontakt Player is a free version of NI’s Kontakt software that allows users to play back Kontakt libraries without owning the full version of Kontakt. Therefore, this sample library is accessible to nearly all composers and producers regardless of their setup, making it a top pick for many users. Overall, The Free Orchestra by ProjectSAM is an outstanding all-round orchestral sample library, with plenty to choose from. It’s a fantastic starting point for any composer, no matter the experience level, and it’s completely free.

Decent Samples

Decent Samples provide some of the best free NI Kontakt libraries in the market that you can use for your music production projects. These sample libraries are created by professional sound designers who have years of experience in the music industry.

Overview

If you are starting with music production or looking to enhance your existing library, Decent Samples has some great options for you. Their libraries cover a variety of genres, including orchestral, electronic, and ethnic. All of their libraries are created with high-quality sounds that can add depth and richness to your music.

Sample Libraries Included

Decent Samples offer different libraries, including:

Library NameDescription
Etherealwinds HarpOrchestral harp library with a celestial, angelic tone
JC HarmonicaChromatic harmonica with playful, soulful tone
Keyzone ClassicA versatile piano library with many sound options
PercussionLibrary with a wide range of percussion instruments from around the world

Compatible With

Decent Samples libraries are compatible with NI Kontakt Player and NI Kontakt Full Version 5.6.8 or later versions. This makes them universally accessible and suitable for all music production software programs.

These libraries are a great addition to your music production toolkit, providing you with high-quality sounds that are versatile and easy to use. With Decent Samples, you can create amazing music projects without spending any money on sound libraries.

Piano In 162

‘Piano in 162’ is a top free Ni Kontakt Library that features a beautifully sampled grand piano and is perfect for classic and contemporary styles. This high quality and detailed virtual instrument is a must-have for piano enthusiasts who want to add a realistic touch to their compositions.

Overview

Piano in 162 is a free sample library of a Steinway Model B grand piano. It is a beautifully sampled piano with a unique character and sound. This sample library was created by Ivy Audio and has become popular among music producers and composers alike. Piano in 162 is a premium quality sample library available for free download, and it has been praised for its exceptional sound quality.

Sample Libraries Included

Piano in 162 has 10 dynamic levels per note, which makes it one of the most expressive piano sample libraries available for free. It has a total of 68 samples per note and over 3000 samples in the entire library. The library offers both sustain and staccato notes, which are ideal for creating realistic piano tracks. The samples were recorded with two microphone positions, which gives the user flexibility in achieving a desired sound. Piano in 162 is compatible with both Mac and Windows operating systems.

Compatible With

Piano in 162 works with Native Instruments Kontakt version 5.5.1 or higher. Kontakt is a popular software sampler used by music producers and composers all over the world. It is a versatile program that allows users to manipulate and shape sounds in a variety of ways. Piano in 162 is also compatible with Ableton Live, Logic Pro, and other digital audio workstations. In conclusion, Piano in 162 is an exceptional free sample library for music producers and composers looking for a high-quality piano sound. It has a unique character and sound that sets it apart from other sample libraries. The library offers excellent dynamic range and is compatible with popular digital audio workstations. With these features, it is no surprise that Piano in 162 has become one of the most popular free Ni Kontakt Libraries available.

Top Free Ni Kontakt Libraries

Credit: www.productionmusiclive.com

Frequently Asked Questions For Top Free Ni Kontakt Libraries

How To Get Kontakt Libraries For Free?

Unfortunately, getting Kontakt libraries for free is illegal and can lead to consequences. Instead, consider investing in legal libraries or use the free ones offered by Native Instruments.

Which Kontakt Library Is Best?

It depends on your specific needs and preferences. Some popular Kontakt libraries are Action Strikes, Session Strings Pro, and Damage. It’s best to research and try out demos before determining which library is best for you.

What Is The Best Free Guitar Library For Kontakt?

There are a number of free guitar libraries available for Kontakt. Some popular options include Ample Guitar M Lite II, Orange Tree Samples Free Electric Guitar, and Impact Soundworks Shreddage 3 Stratus Free. All offer high-quality samples and realistic sound.

Ultimately, the best library will depend on individual preferences and needs.

Which Kontakt Is Free?

Kontakt Player is the free version of Kontakt. It provides access to a limited selection of Kontakt libraries. However, the full version of Kontakt offers more features and access to a wider range of libraries.

Conclusion

As you can imagine, there are countless free Kontakt libraries out there, each with their unique sounds and features. In this post, we’ve outlined some of the top libraries that we believe are worth checking out. Whether you’re a producer, composer, or just a lover of music, these libraries offer a wealth of creative possibilities that can take your productions to the next level.

Remember, the world of Kontakt libraries is always expanding, so keep your eyes peeled for even more amazing options.

Categories
Archive

What Is Dither And Does It Matter

Dither is a technique used in digital audio processing to prevent distortion or noise. It matters because it can minimize the negative effects of quantization errors in digital audio.

The advancement of technology in recent years has led to remarkable growth in digital audio processing. With the widespread use of digital audio technology, the problem of quantization errors has gained more attention. Dithering is one of the techniques used to reduce the negative impact of quantization errors in digital audio.

We will discuss what dither is, how it works, and why it matters in the world of digital audio. Additionally, we will look at the different types of dithering techniques and their applications. By the end of this article, you will have a better understanding of dither and its essential role in digital audio processing.

What Is Dither And Does It Matter

Credit: www.masteringthemix.com

What Is Dither?

Dither is a process of adding random noise to an audio signal to reduce distortion. It is commonly used in digital audio to improve the quality of sound. Whether it matters or not depends on the specific context and requirements of the audio project.

What is dither? Dither is an image processing technique that is used to minimize or eliminate quantization errors, thereby improving the overall quality of digital images. Essentially, dithering involves adding small amounts of noise to an image to smooth out the transitions between pixels and reduce the appearance of banding. But there’s more to it than that. Let’s explore a clarification on the definition of dither and some examples of dither in action.

A Clarification On The Definition Of Dither

Dither is often described as a process of adding noise to an image to improve its quality. However, this oversimplification can be misleading. Dither does involve adding noise, but it’s not just any noise. The noise is carefully generated and applied in a way that minimizes visual artifacts and improves the overall appearance of the image. Additionally, dither is not a one-size-fits-all solution. The type and amount of dither used will depend on the specific requirements of the image and the context in which it will be used.

Examples Of Dither In Action

To better understand the role of dither in image processing, let’s look at some examples of dither in action.

BeforeAfter (with dither)
A noisy gradient without ditherThe same gradient with dither

In the example above, you can see the effect of dither on a gradient. Without dither, the gradient is blocky and exhibits visible banding. However, adding dither to the image smooths out the transitions between colors and makes the gradient appear much smoother.

Summary

In summary, dither is an image processing technique that involves adding carefully-generated noise to an image to improve its quality. While it may seem counterintuitive to add noise to an image, dither can actually help to smooth out pixel transitions and reduce visual artifacts like banding. By carefully selecting the type and amount of dither applied, you can achieve better-looking images that are better suited for their intended use.

What Is Dither And Does It Matter

Credit: www.masteringthemix.com

Why Does It Matter?

If you work with audio, you may have come across the term “dither.” Dither is a technique used to reduce quantization errors, which occur when digital audio signals are converted from analog to digital. But why does it matter?

The Problem With Quantization Error

When an analog signal is converted to digital, the signal is divided into a series of binary numbers called “samples.” The samples are then quantized to a specific bit depth, which determines the number of possible values that each sample can have. For example, a 16-bit audio signal has 65,536 possible values per sample.

The problem with quantization is that it can introduce errors into the audio signal. This is because each sample can only have one of a limited number of values, so there will always be some rounding error or “quantization noise” as the signal is converted from analog to digital.

How Dither Reduces Quantization Error

Dither is a technique used to reduce quantization errors by adding a small amount of noise to the signal before quantization. This noise is carefully chosen to be random and uncorrelated with the original audio signal, so it effectively masks the quantization noise and makes it less audible.

The idea behind dither is that by adding a small amount of noise to the signal, the quantization errors become less noticeable to the human ear. This means that the audio signal sounds smoother and more natural, even though it has been digitally processed.

The Audible Difference

So, does dither actually make a noticeable difference? The answer depends on a few factors, such as the bit depth of the audio signal and the dynamic range of the content. In general, dither can help to improve the quality of audio recordings, especially when they are being reduced in bit depth or dynamically compressed.

However, it’s worth noting that dither is not a magic solution that can fix all audio problems. It’s just one tool in the audio engineer’s toolbox, and it should be used judiciously and with knowledge of its effects.

The Science Behind Dithering

Dithering is a technique used to reduce the impact of quantization errors when converting digital signals to analog. It adds random noise to a signal to create a more natural and smoother sound or image. While its impact may not be noticeable to everyone, certain professionals such as audio engineers rely on it for high-quality outputs.

Dithering is the process of adding noise to a signal to mask distortion that can occur during digital processing. While it might sound counterintuitive to add noise to a signal, it’s actually crucial to achieving high-quality audio. The science behind dithering involves a combination of mathematics, physics, and psychoacoustic research.

How Noise Shaping Works

When a signal is encoded to digital, there is a finite number of bits available to represent the signal, resulting in quantizing errors. Noise shaping is a technique that redistributes the quantization error to frequency regions that are less audible to the human ear. Essentially, it shifts the distortion to where it’s less noticeable, creating a more pleasing sound. This technique relies on dithering to be effective.

Different Types Of Dither

There are various types of dither available, including simple dither, shaped dither, and noise-shaped dither. Simple dither is pure noise added to the signal, while shaped dither uses a predetermined pattern of noise that can reduce the audibility of artifacts. Noise-shaped dither is more advanced and utilizes psychoacoustic models to calculate the amount and shape of the noise added to the signal. Each type of dither has its own benefits and drawbacks, and knowing which to use in a particular situation is crucial to achieving optimal results.

When To Use Dithering

Dithering is a technique used in digital audio and visual processing to reduce color banding and distortion. It is mainly used when converting digital signals with a lower bit depth into a higher bit depth, as it adds a small amount of noise that masks any quantization errors caused by the conversion process.

Different Scenarios Where Dither Is Beneficial

Dither is a technique used in digital image processing to minimize distortion and increase the quality of digital audio or visual signals. While dithering is not necessary in every scenario, it is beneficial in some situations. Here are some different scenarios where dithering is beneficial:

  • Low-bit Depth Audio: Dithering is used when the final output of the digital audio contains fewer bits than during processing. Examples include 16-bit audio files converted to 8-bit or when a 24-bit audio file is played on a 16-bit playback system.
  • Image processing: Dithering can help to minimize the visual artifacts or banding which may appear in images, particularly when the image is encoded with fewer bits than may be needed for high-quality output.
  • Video processing: In low bit-rate video, dithering can be used to reduce unwanted visual artifacts in gradients or singular color patches throughout the video.

When Not To Use Dither

While dither is useful in some audio and visual scenarios, it’s not necessary in all circumstances. Dithering is not recommended when:

  • Audio recordings are already high-quality, lossless or have enough bits depth for high-resolution output, such as 24-bit audio files or when the production environment is high-end and high quality.
  • In video production, dithering should be avoided in high-resolution formats such as 4K when the playback system where it is going to be played is high-end.
  • In image processing, dithering should be avoided when the final output is printed and when the image has enough bits depth to render the image with a high resolution.

Conclusion

Dithering is an important technique that can help to improve the quality of digital audio and visual signals. However, it should only be used in certain scenarios and not applied universally. By understanding when dithering is beneficial and when it’s better to avoid, you can optimize the quality of your digital outputs.

Tools For Dithering

Dithering is a technique that adds artificial noise to audio recordings before they get converted into a digital format. The human ear can’t pick up those small variations, but they are essential for creating a high-quality digital sound. Dithering tools ensure that the audio remains clean and consistent, getting rid of any noise or distortion that might distort the sound.

Dither is a technique used to minimize artifacts while converting audio from one bit depth to another. It helps to maintain the sound quality when reducing the bit depth, making it a crucial part of the music industry. There are various tools available for dithering, including software and hardware options.

Software Options For Dithering

There are various software options to choose from when it comes to dithering, each with its unique features. Among the software tools for dithering are Waves L3 Multimaximizer, iZotope Ozone, and FabFilter Pro-L 2. These software tools offer high-quality dithering and allow the user to customize the dithering settings according to their needs.

Hardware Options For Dithering

Hardware options for dithering include standalone units like the Weiss Saracon and the Crane Song HEDD. These units provide high-quality dithering solutions, and some are equipped with advanced features like sample rate conversion. Additionally, some audio interfaces have built-in dithering capabilities, like the Universal Audio Apollo series.

In Conclusion

Dithering is an essential technique in the world of audio engineering, and it ensures that the sound quality remains consistent when converting audio from one bit depth to another. With the software and hardware options available for dithering, audio engineers can choose the best tool that suits their needs and preferences.

What Is Dither And Does It Matter

Credit: wavmonopoly.com

Frequently Asked Questions For What Is Dither And Does It Matter

Is It Necessary To Dither?

Dithering is not always necessary but can be used in certain situations. It is a technique used to minimize potential color banding in digital images and music. Dithering adds random noise to smooth out the gradient transition and create a more natural-looking image or sound.

Its use depends on the intended application, such as high-quality photography or music production.

Does Dithering Make A Difference?

Dithering can make a difference in certain situations. It helps to reduce color banding and produces smooth tonal transitions. However, in some cases, it may not be necessary or noticeable, especially on high-quality displays.

Does Dithering Improve Quality?

Yes, dithering can improve the quality of images and audio. It adds noise to the signal which reduces the noticeable effects of some types of errors, leading to smoother and more accurate reproduction.

What Is Dithering And Why Is It Important?

Dithering is the process of adding noise to a digital signal to improve its overall quality. It’s important in digital audio, photography and video to minimize color banding and distortion. By adding random noise, dithering can improve the accuracy and smoothness of gradients and fine details in a digital file, resulting in a higher-quality end product.

Conclusion

To conclude, dither is an essential technique that is used to minimize the distortion of digital signals at low amplitudes. It works by adding random noise to the signal, which helps to create the illusion of higher precision. While it may not be necessary for everyday use, dither is crucial when it comes to high-quality audio or visual work.

So, the next time you’re working on a project that requires top-notch quality, make sure to keep dither in mind.

Categories
Archive

Producing A Beatport Charting Track

To produce a Beatport charting track, focus on creating a unique sound, prioritizing the arrangement and mixing, and engaging with your audience through social media and networking. These elements help you stand out in the competitive world of electronic music. They also raise the chances that your track gains traction and makes the charts.

Creating a successful Beatport track is certainly no easy feat. Also, it requires a combination of creativity, technical skill, and business savvy to make it onto the charts and gain recognition within the electronic music scene. Also, whether you are a seasoned producer or a newcomer, these tips can help. They show you how to create a track that stands out and reaches a wider audience.

Related reading: Finalising A House Track and How To Finish You Tracks. For background, see the official Beatport website.

Moreover, focus on your own unique sound and prioritize arrangement and mixing. In addition, engage with fans through social media and networking, and you position yourself for success on Beatport.

Find Your Sound for Beatport Charting Track

Learn the secrets of producing a Beatport charting track with ‘Find Your Sound’. For example, this blog offers valuable insights and tips to enhance your music production skills and help you create a masterpiece that tops the charts.

Explore Different Genres for Beatport Charting Track

Furthermore, to produce a Beatport charting track, the first and the most important step is to find your own unique sound. As a result, this requires exploring different genres and understanding the music that resonates with you the most. By listening to different genres, you can identify the elements that catch your attention and the ones that you enjoy the most. This can help in developing your own sound by combining different elements from different genres and creating something new and fresh.

Identify What Inspires You for Beatport Charting Track

Additionally, inspiration comes from within, and to create something that truly speaks to you, it’s important to understand what motivates and inspires you. However, identifying what inspires you the most can help you tap into your creativity and create something truly unique. It could be a personal story, a life experience, or even a sound or a rhythm that you find interesting. Whatever it is, make sure to incorporate it into your music to give it that personal touch.

The Importance Of Your Sound

Also, your unique sound is what sets you apart from the rest and helps you stand out in today’s saturated music industry. Then, it’s important to develop your own signature sound. Experiment with different genres, identify what inspires you, and add your own personal touch to your tracks. This can take time and effort, but by staying true to your own style and sound, you can create music that truly speaks to your soul. In conclusion, finding your own unique sound is the first step towards producing a Beatport charting track. By exploring different genres, identifying what inspires you, and adding your own personal touch, you can create something that’s fresh, unique, and truly yours. So go ahead, find your sound, and let your creativity flow!

Producing A Beatport Charting Track

Credit: m.youtube.com

Craft Your Melodies for Beatport Charting Track

Moreover, craft Your Melodies offers valuable tips for producing a chart-topping track on Beatport. In short, this guide covers every step, from selecting the right sounds to arranging the perfect melody. The goal is a track that stands out in the competitive world of electronic music.

In addition, crafting an impressive melody is a crucial aspect of producing a Beatport chart-topping track. A melody is what hooks listeners and captivates them to keep listening to your track till the end. It’s why it is so important to experiment with different melodic hooks and chord progressions while producing.

Experiment With Melodic Hooks

When producing music, one should always aim to create something unique and memorable. Similarly, the melodic hook is one of the best ways to do that. Furthermore, it’s a short and catchy phrase that can capture the essence of your track, and make it stand out in a crowded market. Try experimenting with different types of hooks, including vocal melodies, lead riffs, or synth lines. These different hooks can help you find the perfect combination to make your track a hit.

Utilize Chord Progressions for Beatport Charting Track

Additionally, Chord progressions are the harmonic structure that supports a melody. Also, choosing the right chord progression can make a significant impact on how your melody feels to the listener. The chords you choose can create tension, suspense, and resolution or convey emotions such as happiness, sadness, or anger. Experimenting with different chord progressions will help you find the perfect match for your melody. While crafting your melodies, it’s essential to stay organized and keep track of your ideas. Consider working with a digital audio workstation (DAW) that allows you to easily sketch out different ideas and layer them together.

A DAW also allows you to see notes and chords visually, which can help you better understand how each element complements the others in your track. In addition, keep experimenting and honing your skills. Also, over time, you will create memorable, chart-topping melodies that keep listeners engaged throughout your track.

Design Your Sounds

‘Design Your Sounds’ offers valuable insights for producing a Beatport charting track. Moreover, discover techniques and tips for creating unique sounds that stand out in the crowded electronic music industry.

Producing a Beatport charting track requires more than just a catchy melody and a solid beat. It also entails designing unique and captivating sounds that can set your music apart from the competition. In addition, this section explores how to create unique sounds and mix and match them. New combinations can add depth and personality to your music.

Create Unique Sounds for Beatport Charting Track

Furthermore, creating unique sounds is a crucial step in producing a Beatport charting track. One of the best ways to achieve this is by using a combination of synthesis, sampling, and sound design techniques. With synthesis, you can create entirely new sounds by manipulating waveforms, filters, and envelopes. Sampling, on the other hand, involves recording and manipulating real-world sounds to create something entirely new. Finally, sound design involves taking existing sounds and shaping them to suit your needs. When using these techniques, it’s important to experiment with different settings and parameters to create sounds that have personality and character. Don’t be afraid to push boundaries and try new things. Remember, the ultimate goal is to create a sound that stands out and complements your track.

Mix And Match To Discover New Combinations

Once you have created unique sounds, the next step is to mix and match them to create new combinations. This involves layering sounds on top of each other, manipulating different parameters, and experimenting with different effects. Layering sounds can add depth and texture to your music while also making it more dynamic. For example, you might layer a warm, analog synth with a crisp digital piano to create a unique sound with both warmth and clarity. Manipulating parameters such as filters, envelopes, and LFOs can also create new combinations that sound unique and intriguing.

Experimenting with effects like reverb, delay, and distortion can also transform your sounds into something new and exciting. For example, adding a touch of reverb to a dry synth sound can make it sound more spacious and atmospheric. In conclusion, designing unique sounds and mixing and matching them to discover new combinations is a crucial step in producing a Beatport charting track. Experiment with synthesis, sampling, and sound design techniques, and use effects and mixing tools. That way, you can create sounds that are unique, memorable, and captivating.

Create Groove And Rhythm for Beatport Charting Track

To produce a Beatport charting track, it’s crucial to create groove and rhythm that keep the listeners hooked. Use varied percussion samples, design unique melodies, and apply the correct EQ and compression. This helps a track stand out and gain recognition in the industry.

Creating a chart-topping track on Beatport requires a perfect blend of various music elements including groove and rhythm. The right combination of these elements keeps the listener hooked. It can engage them enough to get them onto the dance floor. Here are some effective ways to create the perfect groove and rhythm in your track.

Focus On Percussion for Beatport Charting Track

Percussion is the backbone of any dance track. Choosing the right percussion elements and placing them correctly will determine the pace and feel of your track. When selecting percussion, remember to choose elements that complement each other and work well together. Experiment with different percussion sounds and place them in different places in the arrangement to create a unique groove that will make your track stand out.

Achieve Complexity Through Layering

Layering is a great way to add complexity and depth to your track’s groove. By layering different percussion elements, you can create a complex rhythm that will keep the listener engaged. Experiment with different rhythmic patterns and combine them to create something new. Layering also gives you the ability to add variation to different parts of your track, keeping it interesting for the listener.

Utilize Groove Templates for Beatport Charting Track

Creating a groove template is an efficient way to create a solid foundation for your track’s rhythm. Start by selecting a reference track and analyzing its groove pattern. Then, use that groove as a base for your own track. By utilizing a groove template, you can ensure that your track’s rhythm is consistent and impactful throughout. Moreover, you can use different techniques such as changing the velocity or modulation of different aspects of the template to add your own unique feel to it. By focusing on percussion, achieving complexity through layering, and utilizing groove templates, you can create a solid groove and rhythm for your Beatport chart-topping track. Keep experimenting and don’t be afraid to try out new techniques to create a unique sound that stands out from the crowd.

Arrange And Structure Your Track

Structuring your track is vital for producing a Beatport charting track. Ensure to arrange your track in a way that flows naturally, with a well-structured intro, verse, chorus, bridge and outro. Add innovative effects and transitions to make your track unique and exciting.

As a producer, the arrangement and structure of your track can make a huge difference in achieving a charting track on Beatport. This is because the arrangement and structure of a track can significantly impact its energy and overall effectiveness in captivating the target audience. Therefore, it is crucial to pay close attention to this aspect of music production. Here are a few tips to structure and arrange your track to ensure it stands out and appeals to your target audience.

Vary Your Arrangement for Beatport Charting Track

The first step is to vary your arrangement to keep the listener engaged throughout the entire track. This can be achieved by introducing new sounds, creating breaks, and avoiding excessive repetition. For instance, you can use multiple melodies, basslines, and percussion to keep the listener engaged and add a new layer of depth to the track. Additionally, having a clear intro and outro with a consistent and well-crafted melody can leave a lasting impact on the listener.

Create Bounce With Drops And Transitions

Great music should have a palpable energy and bounce, and this is especially true for dance music tracks. To achieve this, it’s essential to build and release tension in the track, and the best way to do this is by using drops and transitions. By cleverly creating pauses, breaks, and drops in the track, you can create moments of high-energy and impact that will keep the listener engaged. Additionally, automation can be used to gradually increase or decrease the volume or intensity of the track, further adding to its dynamics. To sum up, arranging and structuring your track should be done with the listener in mind. Vary your arrangement, create energy with drops and transitions, and pay attention to the details. Then your track stands a chance of reaching the top of the Beatport charts.

Mix And Master Your Track

Producing a Beatport Charting Track requires a lot of effort and skills. When you’re done creating a basic melody and beats, the next thing you need to do is mix and master your track. Mixing and mastering are two crucial aspects of music production that can make or break the success of your track. Here’s how you can properly mix and master your Beatport Charting Track.

Equalize And Balance Your Mix

Mixing is the process of combining individual tracks into a single stereo track. During this process, you’ll adjust the levels of each track and apply different effects to create a balanced and cohesive sound. One important step in mixing is equalizing your mix. Equalization or EQ can help you enhance the frequency balance of your track. This process involves boosting or cutting certain frequencies to make individual elements sit well together.

Moreover, you should consider balancing your mix. To do this, you need to ensure that no individual track overpowers another. You can do this by adjusting levels, panning tracks, and applying compression. Compression is a tool that can control the dynamic range of your track and make it sound more consistent. It’s important to balance your mix to create a clear and well-defined sound.

Fine Tune Your Mastering Settings

Mastering is the final step in the music production process. During this process, you’ll enhance the overall sound of your mix and prepare it for distribution. To start with, you can apply some basic processing like EQ and compression. You can apply EQ to the overall mix to ensure that it’s balanced and sits well on different sound systems.

Additionally, you can fine-tune your mastering settings to bring out the best in your track. This includes using tools like multiband compression and stereo widening. Multiband compression helps you control individual frequency bands, while stereo widening can make your track sound wider and more interesting.

By following these tips, you can mix and master your Beatport Charting Track like a pro. Always keep in mind that good mixing and mastering can make all the difference in the success of your track.

Promote Your Track

Are you looking to produce a Beatport charting track and promote it? Then you need to carefully plan your production, master your track, and use effective marketing to get your music noticed. With attention to detail and dedication, you can reach the heights of success in the music industry.

Once you’ve created a chart-topping track, you need to promote it properly if you want to achieve success in the market. This involves reaching out to music blogs, DJs, and creating a press release. Utilizing social media is another important aspect of promoting your track.

Create A Press Release

Writing a press release can help you promote your track to the media and increase its reach. Your press release should include information about your track and any upcoming events or releases. Ensure that you include a link to your track on Beatport to make them easily accessible to readers.

Submit To Music Blogs And Djs

One of the most effective ways to promote your track is to reach out to music blogs and DJs who specialize in your genre. Send them a copy of your track and request that they feature it on their site, podcast, or radio show. Make sure to research and identify the right outlets and DJs who are likely to take an interest in your music.

Utilize Social Media Marketing

Utilizing social media platforms such as Facebook, Instagram, Twitter, and YouTube is an essential part of promoting your track. Share your track and any new releases, events, or merchandise on your social media platforms and encourage your followers to share it. Engage with your followers and respond to their comments and messages. In addition, consider creating paid advertising campaigns on social media to target people who are interested in your genre of music or other related groups. This can help you increase your reach and gain new followers. In conclusion, promoting your Beatport charting track requires a strategic approach that includes utilizing social media, reaching out to DJs and music bloggers, and creating a press release. By following these tips, you can make the most of your track and increase its visibility in the market.

Monitor And Maintain Chart Position

Monitoring and maintaining your chart position is crucial to a Beatport charting success. Once your track charts, it’s essential to keep track of its performance and make necessary adjustments to achieve maximum success.

Track Sales And Analyze Data

The first step to a successful Beatport charting track is tracking its sales and analyzing data regularly. Keeping an eye on sales and downloads will help you determine how well your track is performing. Check your Beatport stats to stay up-to-date with all track popularity metrics, including sales, streams, and overall play count.

Metrics to trackDescription
SalesTrack purchases made by listeners.
StreamsThe number of times your track is played across various platforms on Beatport.
Play countThe number of plays received on Beatport charts.

Once you have a clear understanding of how your track is performing, use this data to refine your marketing and promotion strategies. Identify your most successful marketing tactics and focus on maximizing those efforts as much as possible.

Engage With Fans And Followers

Engaging with your fans and followers is another essential step to monitor and maintain your track’s chart position. Your followers can quickly assist you in promoting your track through social media shares and word-of-mouth promotion. Building a genuine relationship with your followers is crucial to success in the Beatport music industry.

  • Engage with followers on social media platforms regularly
  • Reply to comments on your music posts
  • Encourage followers to share your music with their network

When you build a strong relationship with your followers, they are more likely to promote your music and share it with their network. By keeping their support, you can improve your Beatport success chances and increase your chart position.

Producing A Beatport Charting Track

Credit: www.productionmusiclive.com

Frequently Asked Questions Of Producing A Beatport Charting Track

How Do You Make A Beatport Chart?

To make a Beatport chart, you need to create an account on their website, upload your music, and then promote it to a larger audience. You must make sure your track gets enough sales to chart, and it’s essential to engage with your fans to boost visibility.

To increase your odds of charting, work on improving your marketing skills.

How Do I Submit A Track To Beatport?

To submit a track to Beatport, you must create an account on their website and upload your music through their platform. Your track must meet their specific file format and quality requirements, and you will need to provide detailed information about the release.

You can then submit the track for approval and await a response from the Beatport team.

How Do You Release A Track On Beatport?

To release your track on Beatport: 1. Sign up for a label or distributor account. 2. Choose the format of your release. 3. Upload your audio and artwork. 4. Enter metadata and decide on pricing. 5. Submit your release for review and approval by Beatport.

How Does Beatport Charts Work?

Beatport charts rank the most popular tracks and artists in different genres of electronic dance music (EDM). This is based on sales, downloads, and streams. It is updated weekly and is considered a significant influence on the global dance music scene.

Artists and labels can use Beatport to track their success in the industry.

Conclusion

Producing a Beatport charting track takes dedication, hard work, and a strategic approach. By following the tips outlined you can improve your chances of creating a hit track that resonates with your target audience. Remember to focus on honing your sound design skills, collaborating with other producers, and constantly promoting your music to gain visibility on the platform.

With the right mindset and approach, you can achieve your dreams of success in the competitive world of electronic music production.

Categories
Archive

Best Vst Plugins For Mixing Bass

The best VST plugins for mixing bass are Waves Renaissance Bass and Native Instruments Bassline. When it comes to mixing bass in music production, having the right tools is essential.

Using VST plugins can help you achieve powerful, clear and defined bass sounds that cut through the mix. Waves Renaissance Bass is a versatile plugin that provides deep and rich bass tones while maintaining clarity and definition. On the other hand, Native Instruments Bassline is a popular plugin for creating dynamic and punchy basslines that can add energy and drive to any track.

As a content writer, it’s important to provide concise and accurate information that caters to your audience’s needs and interests. We will delve deeper into these plugins and explore why they are the best for mixing bass.

Best Vst Plugins For Mixing Bass

Credit: www.productionmusiclive.com

Eq Plugins For Mixing Bass

Discover the top VST plugins for mixing bass that can enhance the quality of your music. These EQ plugins come with a range of features, including adjustable frequency bands and dynamic EQ modes, to create a perfect mix for your bass.

Mixing bass can be a tricky business, and getting that perfect sound takes a lot of effort and time. Luckily, with the right EQ plugins, you can make the process easier and achieve amazing results in less time. EQ is a great tool to use when you want to control the frequency of a bass track. In this blog post, we will talk about the top EQ plugins for mixing bass: FabFilter Pro-Q3 and Waves SSL E-Channel.

Fabfilter Pro-q3

FabFilter Pro-Q3 is undoubtedly one of the best EQ plugins available in the market. It is packed with tons of features that make mixing bass a breeze. The plugin offers a high degree of flexibility, and it is easy to use. With its advanced visualizations, you can easily pinpoint problematic frequencies and fine-tune your mix to perfection. One of the best features of FabFilter Pro-Q3 is the dynamic EQ. This feature allows you to control problematic frequencies in real-time, which can be incredibly helpful when dealing with dynamic material.

Waves Ssl E-channel

The Waves SSL E-Channel is another top EQ plugin for mixing bass that deserves a mention. This plugin has been modeled after the famous SSL 4000 series console, giving it an authentic analog sound. The SSL E-Channel combines four powerful EQ modules that help you shape your sound in a way that no other plugin can achieve. With its wide range of sonic options, you can achieve anything from a clean, modern low end to a vintage, warm tone. In conclusion, using the right EQ plugins is key to achieving a professional-sounding bass mix. FabFilter Pro-Q3 and Waves SSL E-Channel stand out among other EQ plugins for their innovative features and unique sound capabilities. Try experimenting with these plugins and find the one that works best for your music style.

Best Vst Plugins For Mixing Bass

Credit: www.izotope.com

Compression Plugins For Mixing Bass

If you are producing music, mixing bass is an essential element that could take your track to the next level. However, mixing bass can be tricky as different frequencies need to be handled with care to produce a clean and balanced sound. Compression plugins play a crucial role in achieving the perfect bass mix.

Waves Cla-76

The Waves CLA-76 is a well-known emulation of the Universal Audio 1176, a classic compressor that is popular among bass producers. This plugin provides a fast attack and release time, making it perfect for controlling bass transients and adding punchiness. The simple interface of the CLA-76 plugin makes it easy to dial in the desired compression settings for your bass track.

Uad La-2a

The UAD LA-2A is another classic compressor that has been used for decades. It is a tube compressor that has a slower response than the CLA-76. The UAD LA-2A is perfect for adding warmth and character to the bass track. This compressor is not designed for transparent compression. Instead, it adds its unique color to the sound, which could be desirable for some music styles.

Native Instruments Solid Bus Comp

The Native Instruments Solid Bus Comp is a versatile compressor that is excellent for controlling and shaping the low-end of the bass track. This plugin provides four different compression modes, including punch, glue, jump, and mix. Each mode offers unique compression characteristics that can add depth and richness to the bass tone. The Solid Bus Comp plugin also features a side-chain filter, which allows you to control the compression frequency range.

Saturation Plugins For Mixing Bass

If you’re a music producer and want your bass tracks to sound more vibrant and full, then you should consider using saturation plugins for mixing bass. Saturation plugins can add warmth, depth, and richness to your bass sound. In this post, we’ll cover some of the best saturation plugins you can use to mix bass.

Waves J37 Tape Saturation

The Waves J37 Tape Saturation is an excellent plugin for adding warmth and harmonic richness to your bass tracks. Based on the famous tape machine used at Abbey Road Studios, this plugin can add vintage analog tones to your sound. It also comes with a range of controls, including input, saturation, and output, allowing you to customize the amount of saturation you want to add.

Softube Saturation Knob

If you want a simple but effective saturation plugin for mixing bass, then the Softube Saturation Knob is a great option. This free plugin is incredibly easy to use, with just

Best Vst Plugins For Mixing Bass

Credit: www.masteringthemix.com

Subharmonic Plugins For Mixing Bass

Bass is an essential element in many music genres, and mixing it correctly is crucial to get the desired sound. Subharmonic plugins are an effective way to enhance the bass in your mixes, adding depth, and power without overwhelming the rest of the track. Waves Maxx Bass and Waves Rbass are two of the best subharmonic plugins available in the market. Let’s explore each of them in detail.

Waves Maxx Bass

Waves Maxx Bass is an excellent subharmonic plugin that provides a unique combination of harmonics and subharmonics that can enhance the perceived bass frequencies. It provides users with excellent control over the harmonics and subharmonics. This plugin helps to increase the perceived loudness of the bass without necessarily increasing the volume level, resulting in a clean and powerful bass sound. Waves Maxx Bass is suitable for a wide range of audio applications, including music production, mastering, and post-production.

Waves Rbass

Waves Rbass is another popular subharmonic plugin that has been a favorite among sound engineers and producers for many years. It works by adding harmonics and subharmonics to the bass frequencies, thereby increasing their perceived loudness. Waves Rbass provides an excellent balance between the subharmonics and higher harmonics, resulting in a full, rich, and powerful sound. It’s also easy to use, making it ideal for beginners who want to enhance the bass without having to spend too much time tweaking their settings.

In conclusion, Waves Maxx Bass and Waves Rbass are two of the best subharmonic plugins for mixing bass. Whether you’re a seasoned sound engineer or a beginner, these plugins provide excellent control over the bass frequencies, resulting in a powerful, rich, and clean bass sound. Try them out today and take your bass mixing abilities to the next level.

Frequently Asked Questions For Best Vst Plugins For Mixing Bass

How Can I Make My Bass Sound Better In Mix?

To make your bass sound better in the mix, you can follow these tips: 1. Choose the right bass sound that complements the song. 2. EQ the bass to make it stand out without overpowering other instruments. 3. Properly compress the bass to control dynamic range.

4. Avoid excessive reverb or delay on the bass. 5. Mix the bass at the appropriate volume level.

What Is The Best Mixing Plugin?

The best mixing plugin varies depending on personal preferences and goals of the user. Some popular options are FabFilter Pro-Q 3, Waves SSL E-Channel and Neutron 3. It is recommended to research and test various plugins to find the perfect fit for individual needs.

How Do You Mix Bass Into A Song?

To mix bass into a song, you need to start by listening to the track carefully and identifying where the bass should sit in the mix. Ensure that the bass is audible but not overpowering, and that it doesn’t clash with other elements of the song.

Experiment with EQ, compression, and other effects to find the perfect balance.

What Is A Bass Plugin?

A bass plugin is a software program that can be added to a digital audio workstation (DAW) to enhance the bass sound of recorded music. The plugin can offer a variety of effects and tools to adjust the frequency, tone, dynamics, and other aspects of the bass sound, making it more powerful and defined.

Conclusion

To sum up, choosing the right VST plugins for mixing bass is essential to produce a high-quality track. With the various options available in the market, it’s crucial to find the ones that cater to your needs. Whether you want to add warmth, depth, or clarity to your bassline, the plugins mentioned in this post can help you achieve your desired sound.

Remember, it’s all about experimenting and finding the ones that work best for you. Happy Mixing!

Categories
Archive

How To Reduce Latency In Ableton

For reducing latency in Ableton, adjust buffer size and sample rate. Latency can cause delay in live performances and recording, so optimizing these settings can improve overall performance.

Latency can significantly impact the quality of your Ableton experience, especially during live performances and recording sessions. Fortunately, there are several ways to reduce latency and improve performance. A simple but effective way to do this is by adjusting the buffer size and sample rate in Ableton.

By changing these settings appropriately, you can reduce latency and improve the overall quality of the sound. Another way to minimize latency is by optimizing your computer’s resources, such as closing unnecessary apps and background processes. Taking these steps can ensure a smooth and seamless experience while using Ableton, allowing you to focus on creating music.

How To Reduce Latency In Ableton

Credit: help.ableton.com

Latency 101

Reduce latency in Ableton by adjusting the buffer size and sample rate, optimizing your computer’s performance, and minimizing CPU usage. Additionally, disabling unnecessary plugins and audio effects, using the freeze function, and simplifying your workflow can help improve overall latency performance.

What Is Latency?

Latency in music production means the time delay between your input and the output sound. It can be caused by various factors such as hardware, software, and audio interface settings. Latency is a common challenge that music producers face while recording, mixing or editing their audio projects.

Effects Of Latency On Music Production

Latency in music production can lead to several issues like incorrect timing, poor synchronization, and inaccuracies in the sound output. It can result in delayed response time between the user’s input and the software’s output, leading to frustration and decreased productivity. This can be especially frustrating for live performances, where the timing of each element needs to be precise.

Reducing Latency In Ableton

Reducing latency in Ableton is important to achieve optimal performance while recording, mixing or editing your music projects. Here are some tips to reduce latency in Ableton:

  • Use an audio interface with a low-latency driver.
  • Adjust buffer size settings to the lowest possible setting without causing crackling or audio dropouts.
  • Free up your computer’s processing power by closing other programs.
  • Use audio effects that have a lower processing load on your computer.

With these tips, you can effectively reduce latency in your Ableton project and improve your music production experience. Remember to prioritize the quality of your audio projects by ensuring low latency and exceptional sound output.

Identifying The Source Of Latency

Identifying the source of latency in Ableton is crucial for reducing delays and improving audio quality. By analyzing your system and settings, you can pinpoint the root cause of latency issues and make the necessary adjustments to optimize your workflow.

Identifying the Source of Latency Latency is a common frustration among music producers and performers, as it can lead to timing issues and disrupt the creative process. Fortunately, reducing latency in Ableton is possible when you understand the sources of latency. Here are three factors that commonly contribute to latency in Ableton: the computer’s hardware and software, the audio interface and drivers, and plugin processing and buffer size. Let’s explore these factors in more detail. Computer’s hardware and software The performance of your computer’s hardware and software can greatly impact Ableton’s ability to process audio with low latency. Some particular hardware components that may cause latency are the CPU, RAM, and hard drive speed. Similarly, certain software programs running in the background can also contribute to latency issues. If you’re experiencing latency, consider closing unnecessary applications, or upgrading your computer’s hardware if needed. Audio interface and drivers Your audio interface and its drivers play a crucial role in determining the latency of your system. Audio interface drivers are used to communicate between your hardware and Ableton. Outdated or poorly optimized drivers can cause significant delays, especially if you’re using a USB interface. Therefore, it’s essential to utilize up-to-date drivers for your audio interface and configure Ableton’s audio preferences to utilize your driver’s optimal settings. Plugin processing and buffer size The audio processing that occurs within Ableton plugins is another source of latency. The greater the number of plugins and processing you have occurring, the more latency you will likely experience. Additionally, the size of your buffer determines the amount of audio data processed by your computer at once. Higher buffer sizes require more time to process, leading to increased latency. To reduce latency, consider reducing the number of plugins in use and decreasing the buffer size. Conclusion By addressing these three sources of latency, you can reduce the latency in your Ableton setup and improve your overall performance and creativity. Whether you invest in up-to-date computer hardware, optimize your audio interface, or adjust your buffer size and plugin usage, getting to the root of the problem is essential for a seamless music production experience.

Optimizing Your Computer’s Performance For Ableton

Optimizing your Computer’s Performance for Ableton is essential if you want to reduce latency and ensure smooth and efficient music production. Ableton is a powerful digital audio workstation used by many music producers worldwide. While Ableton is a great tool, it requires a lot of processing power from your computer to run smoothly. This processing power can cause latency, which can negatively affect your live performances, recording sessions, and overall workflow. In this blog post, we will take you through some steps that you can follow to reduce latency in Ableton by optimizing your computer’s performance.

Close Unnecessary Applications

The first step to optimizing your computer’s performance for Ableton is by closing all unnecessary applications. Any additional programs running in the background consume your system resources and slow down your computer. It is essential to close all applications that you are not using, especially if they are internet browsers, games, or media players.

You can use the Windows Task Manager to monitor the list of running applications in the background. On a Mac, you can use the Activity Monitor to monitor the list of running applications. Before you start using Ableton, ensure that all unnecessary applications are closed.

Adjusting Settings For Maximum Performance

The second step to optimizing your computer’s performance for Ableton is by adjusting the necessary settings to ensure maximum performance. You can start by disabling all visual effects like drop shadows, animations, and transparency. These visual effects consume a lot of resources, leaving little to no processing power for Ableton.

You can also set your computer’s power plan to ‘High Performance’. This setting allows your computer to allocate more processing power to Ableton, resulting in reduced latency. In Ableton’s preferences, you can adjust the buffer size to lower values to reduce latency. However, lower buffer sizes demand more processing power.

You can optimize your computer’s performance even further by increasing your RAM and using an SSD. Increasing your RAM ensures that your computer has enough memory for Ableton to run smoothly. On the other hand, an SSD improves the speed of your computer, increasing the overall processing power available for Ableton.

By following these steps, you can optimize your computer’s performance for Ableton and reduce latency during recording, live performances, and day-to-day use. A well-optimized computer ensures that music production is efficient and seamless, letting you focus on creating great music rather than worrying about latency issues.

Configuring Your Audio Interface

To reduce latency in Ableton, configure your audio interface properly. Make sure to select the lowest possible buffer size, and adjust the sample rate to suit your project. This will help minimize latency and improve the overall recording and playback experience.

Reducing latency in Ableton is essential for producing high-quality audio tracks. One of the primary ways to reduce latency is to configure your audio interface correctly. This post will guide you through the process of selecting the right audio interface, optimizing buffer size, and ensuring that your drivers are up to date.

Selecting The Right Audio Interface And Drivers

Choosing the right audio interface is the first step to reducing latency in Ableton. There are a few factors to consider when selecting an audio interface, like the number of inputs and outputs, the connectivity options, and the overall quality of the device. Make sure to choose an audio interface that provides low-latency performance and has drivers that are compatible with your computer’s operating system. Drivers are critical components of your audio interface, and they play a significant role in reducing latency. Ensure that you have installed the latest drivers for your audio interface. You should also periodically check for driver updates and install them promptly.

Optimizing Buffer Size

Your audio interface’s buffer size can also impact latency. Choosing an optimal buffer size is essential to get the best possible performance from your audio interface. Keeping it at a lower value can help reduce latency, but the lower the buffer size, the more CPU it will use.

How to Optimize Buffer Size:

  • Open Ableton and go to preferences.
  • Select the ‘Audio’ tab and adjust the buffer size accordingly.
  • Lower the buffer size to reduce latency but keep it high enough to avoid audio glitches and hiccups.
  • Keep testing and adjusting the buffer size to find the sweet spot.

Remember that optimizing buffer size is a trial-and-error process. There is no one-size-fits-all solution, and the optimal buffer size may vary depending on your computer’s specifications and the complexity of your project. In conclusion, reducing latency in Ableton is not an easy task, but configuring your audio interface correctly can go a long way in achieving low-latency performance. Follow the steps outlined in this post, select the right audio interface and drivers, and optimize the buffer size to achieve the best performance possible.

Troubleshooting Latency Issues

One effective way to reduce latency in Ableton is by adjusting the buffer size. This can be done in the audio preferences menu. Another option is to deactivate all unnecessary channels and plugins to free up CPU resources.

Reducing latency in Ableton can be a challenging task for music producers and recording artists. Delay problems can be caused by hardware, software or plugin issues. Identifying the root cause of latency is the first step towards reducing it. This section will cover several troubleshooting techniques and solutions to common issues that will help you reduce latency in Ableton.

Debugging Techniques

Before jumping on solutions, it’s important to understand how to identify the root cause of latency in Ableton. Here are some debugging techniques to help you debug latency issues:

  • Start by checking if there’s a hardware problem. Check your audio interface and cables to make sure they’re working correctly.
  • Check your CPU usage in Ableton. High CPU usage can cause latency issues. You can also identify the plugins causing high CPU usage.
  • Try disabling any external software, anti-virus, or firewalls. These can cause latency issues.
  • Inspect Ableton’s audio settings. Make sure the sample rate and buffer size are correct.
  • Check if your computer meets the minimum requirements for Ableton.

Solutions For Common Issues

Here are some solutions for common issues that can cause latency in Ableton:

IssueSolution
High CPU usageFreeze or bounce audio tracks, use plugins with lower CPU usage, increase buffer size or reduce sample rate.
Plugins with high latencyUse plugins with lower latency or use them only when needed.
Buffer underruns/overrunsIncrease buffer size or reduce sample rate, close non-essential background applications.
Driver issuesUpdate your audio interface driver.

Code Optimization

Optimizing your code can also help in reducing latency in Ableton. Here are some tips:

  1. Use audio clips that match Ableton’s sample rate and bit depth to avoid unnecessary sample rate conversion.
  2. Use plugins with lower latency. Look for plugins that have “low-latency mode” or use native Ableton plugins.
  3. Freeze tracks that use plugins with high latency. This will render the plugin to audio and reduce CPU usage.

By applying these techniques and solutions, you can debug and reduce latency in Ableton and improve your overall music production workflow.

Best Practices For Latency-free Recording And Mixing

Learn how to reduce latency in Ableton for seamless recording and mixing with these best practices. By optimizing your settings and implementing helpful tools like direct monitoring, you can achieve latency-free recording and a smooth mixing experience.

Monitoring Tracks

When recording in Ableton, monitoring tracks is essential to ensure latency-free recording. Monitoring tracks are essential for real-time monitoring of the input signal and the recorded signal. It allows musicians to hear what they are playing and record it without any delay. To ensure that you have latency-free monitoring, you can use the direct monitoring feature on your audio interface. This feature allows you to monitor the input signal without going through your computer, minimizing any latency issues.

Recording At Low Buffer Size

Recording at a low buffer size can significantly reduce latency. The buffer size determines the amount of data that is processed by your computer before it is sent to your audio interface. The lower the buffer size, the lower the latency. However, it is important to note that recording at a low buffer size can put a strain on your computer’s resources. You should only use this technique if you have a powerful computer.

Freezing Tracks And Using Parallel Processing

Another way to reduce latency in Ableton is by using the freeze tracks option and parallel processing. Freezing tracks allows you to convert virtual instruments and effects into audio files, reducing the processing power needed to run them. Parallel processing allows you to split your audio into multiple channels and process them separately, reducing latency. You can use this technique to process your audio in real-time while still keeping the latency low. In conclusion, by using these best practices for latency-free recording and mixing in Ableton, you can ensure that you have a smooth and seamless recording experience. By monitoring your tracks, recording at a low buffer size, and using freezing tracks and parallel processing, you can minimize latency and record high-quality audio.

Latency-reducing Techniques For Live Performances

Reducing latency in Ableton can enhance live performances. Some techniques include optimizing buffer size, disabling unnecessary plugins, and using Direct Monitor. These subtle adjustments can make a significant difference in the quality of the sound produced.

Latency is an annoying issue that can often be encountered when recording audio with Ableton. It can be caused by any number of factors and can negatively impact the overall quality of your live performances if left unchecked. Fortunately, there are several techniques that can be employed to reduce latency and improve the overall quality of your performances. In this article, we will explore some of the most effective latency-reducing techniques for live performances.

Minimizing Effects Processing

One of the most effective ways to reduce latency is to minimize the amount of processing that is applied to your audio. This can be achieved by using fewer effects and plugins during performances. By reducing the amount of processing that is applied, the overall processing time is decreased, resulting in a reduced latency.

Using Dedicated Hardware

Another effective technique to reduce latency is to use dedicated hardware. Using dedicated hardware can greatly reduce the latency of your system, as it circumvents any processing that may occur on your computer. By using hardware instead of software, you can minimize the amount of processing that occurs, which results in a significantly reduced overall latency. In summary, reducing latency in Ableton can greatly improve the quality of your live performances. By minimizing effects processing and using dedicated hardware, you can significantly reduce latency and ensure that your performances are always of the highest quality. By implementing these techniques, you can be confident that your live performances will always be smooth, seamless, and responsive to the needs of your audience.

How To Reduce Latency In Ableton

Credit: www.youtube.com

How To Reduce Latency In Ableton

Credit: www.attackmagazine.com

Frequently Asked Questions Of How To Reduce Latency In Ableton

How Do I Stop Latency In Ableton?

Decrease latency in Ableton by adjusting the buffer size to reduce the amount of time it takes for audio to be processed. Additionally, optimize your computer’s performance and turn off any unnecessary plugins or processes. Use an external audio interface or switch to a faster hard drive for better results.

Does Ableton Have Low Latency Mode?

Yes, Ableton does have a low latency mode. It helps minimize the delay between receiving and processing an audio signal. This results in a more responsive and real-time playback experience, especially for live performances.

Why Does Ableton Lag So Much?

Ableton can lag due to various factors such as software bugs, outdated hardware, insufficient RAM, and overloaded CPU. It is important to optimize your computer’s settings and hardware, update Ableton regularly, and adjust your session settings and plugins to reduce CPU usage.

What Buffer Size For Ableton Live Latency?

The recommended buffer size for Ableton Live’s latency settings is 256 samples, according to Ableton’s official documentation. However, the optimal buffer size can vary depending on your specific hardware setup and the complexity of your projects. It’s recommended to experiment with different buffer sizes to find the best balance between latency and processing power.

Conclusion

Reducing latency in Ableton requires a combination of optimizing your computer’s settings and adjusting certain preferences within the software itself. By utilizing the tips outlined in this blog post, such as disabling unnecessary plugins and increasing buffer size, you’ll be able to achieve a smoother and more responsive workflow.

Remember, reducing latency isn’t a one-time fix; it’s an ongoing process that requires regular maintenance to ensure optimal performance. So, keep experimenting and adjusting until you find the right balance for your unique setup. Happy producing!