Categories
Archive

Vocal Chopping And Editing Tutorial

Vocal chopping and editing allow you to slice and manipulate vocal recordings to create a rhythmic and dynamic feel to your music. In this tutorial, we will explore the techniques and tools necessary to achieve this effect.

Vocal chopping and editing is a popular technique used in modern music genres like trap, hip hop, and electronic dance music. It involves slicing up vocal recordings into small snippets or “chops” and rearranging them to create a new melody or rhythm.

By using tools like time-stretching, pitch-shifting, and effects like reverb and delay, you can create unique and dynamic vocal performances. In this tutorial, we will guide you through the process of vocal chopping and editing, from selecting the right recording to finalizing your chopped and edited vocals. Whether you’re a novice or a seasoned producer, this tutorial will help you take your music to the next level.
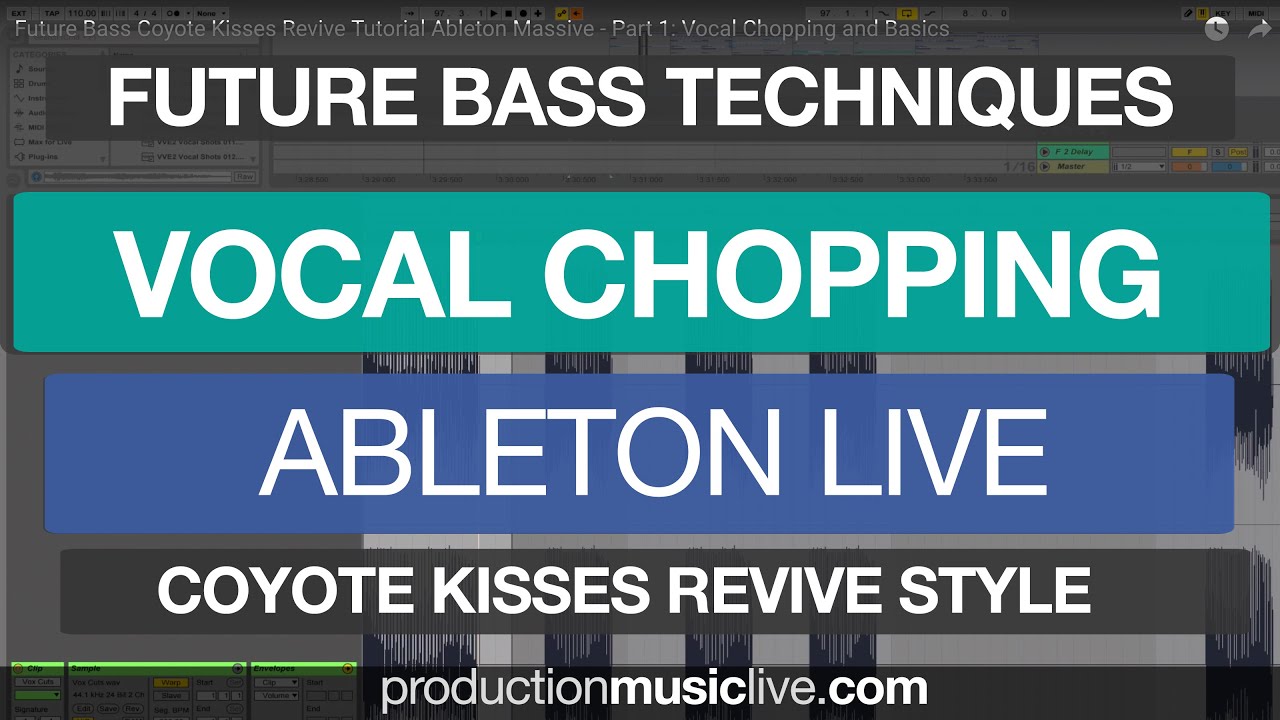
Vocal Chopping And Editing Tutorial

Credit: www.youtube.com

Preparation Before Vocal Chopping

Before starting the vocal chopping process, it’s important to prepare the audio tracks properly. This includes cleaning up any unwanted noise, removing any breaths or background vocals, and ensuring that the timing is synced correctly. By doing this, you’ll be able to create a more polished and professional final product.

When it comes to creating a great piece of music, vocal chops can add a unique flair to the mix. Vocal chopping has gained popularity over the years and is now commonly used in various genres of music. Vocal chop is the process of taking a small portion of a vocal sample and creating a melody or rhythm from it. If you are a beginner, this vocal chopping and editing tutorial will help you learn the basics of the technique.

Choose The Right Sample

The first step to vocal chopping is choosing the right sample. Whether you choose a solo or a group vocal, you should avoid using a sample with too much background noise. A clean sample with a clear vocal tone will create a better result. You can also look for a sample with a bit of breathing or foley sound as it adds more depth to the sample.

Select The Right Editing Tools

Once you have the perfect vocal sample, the next step is to choose the right editing tools. There are several editing tools out there, including free software, but it is always best to invest in high-end software. Adobe Audition and Ableton Live are two of the most popular software for vocal chopping. If you are looking for a free option, Audacity is the best choice. After deciding on your software, you should familiarize yourself with the tools. You will typically be working with the cut, paste, and trim tools. However, some software comes with unique features such as time-stretching, pitch-shifting, and equalizing.

ProsCons
Using a clean vocal sample will give a desired resultIt can be challenging to find the right sample
Investing in high-quality software will give better resultsHigh-end software can be expensive
It is recommended to familiarize yourself with editing toolsSome editing tools can be tricky to use

Now that you’ve learned about preparing the vocal chops let’s move on to the next section: How To Create Rhythms With Vocal Chops.

Vocal Chopping And Editing Tutorial

Credit: www.groove3.com

Vocal Chopping Techniques

Learn essential vocal chopping techniques to elevate your music productions with this comprehensive vocal chopping and editing tutorial. Explore various creative ways to manipulate vocal samples and construct unique rhythms that add depth and character to your music tracks.

Vocal chopping has become a popular technique in modern music production, particularly in electronic dance music. The technique involves taking vocal recordings and chopping them up into smaller, more manageable pieces that can be arranged and manipulated to create new melodies, rhythms, and textures.

Chopped Phrases

One of the most common ways of using vocal chops is by taking a longer vocal phrase and chopping it up into smaller sections. These sections can then be rearranged to create a new melody or rhythm. It is important to choose a phrase that has a clear pitch and rhythmic pattern to make it easier to chop and manipulate.

One-shots

Another useful vocal chopping technique is using the one-shot method. This involves cutting individual notes or syllables from a vocal recording and using them as single samples. One-shots can be played like an instrument or sequenced to create new melodies and harmonies.

Melodic Vocal Chops

Melodic vocal chops are created by taking a vocal recording and using it to create a melody. This can be achieved by chopping up different notes from the recording and arranging them to create a new melody. Alternatively, a single note can be used and then pitched up or down to create a melody. Using these vocal chopping techniques can add depth and interest to any track. Experimenting with different chopping methods and combining them with other production techniques can lead to unique and exciting results.

Step By Step Vocal Chopping And Editing Tutorial

Learn how to chop and edit vocals like a pro with this step-by-step tutorial. From slicing to processing, this guide covers everything you need to know to create unique and polished vocal samples.

Are you interested in learning how to edit vocals like a pro? Vocal chopping is a popular technique used by music producers to create dynamic and unique sound effects. In this tutorial, we will guide you through the step by step process of vocal chopping and editing. This tutorial is perfect for both beginners and advanced producers who want to improve their editing skills. So, let’s get started!

Step 1: Adding The Vocal Sample To The Daw

The first step in vocal chopping is to add your vocal sample to your Digital Audio Workstation (DAW). You can choose any vocal sample you like or record your own. Once the sample is loaded into your DAW, you can adjust the tempo and pitch to match the tempo and key of your project. This ensures that the vocal sample fits perfectly with the instrumental track.

Step 2: Adjusting The Timing

The next step is to adjust the timing of the vocal sample. This is important to ensure that the vocal chop follows the rhythm of your track. To adjust the timing, you can use the Time Stretch feature in your DAW. This allows you to stretch or shrink the sample to fit the rhythm and tempo of your project.

Step 3: Chopping The Vocal Sample

Once the timing is adjusted, it’s time to start chopping the vocal sample. This can be done manually or with the help of a plugin. To manually chop the vocal sample, simply identify the parts that you want to use and cut them out. You can use the Split or Cut tool in your DAW to achieve this. Alternatively, you can use a plugin specifically designed for vocal chopping, such as the Slicex plugin in FL Studio.

Step 4: Arranging The Vocal Chops

After you have chopped the vocal sample, it’s time to arrange the vocal chops in a pattern that fits your track. You can use your DAW’s playlist or arrangement view to achieve this. Experiment with different arrangements until you find the perfect one. This is where your creativity comes into play!

Step 5: Applying Effects

Finally, it’s time to apply effects to the vocal chops. This enhances the sound and adds depth to your track. Some popular effects used in vocal chopping include reverb, delay, and distortion. Experiment with different effects until you find the perfect combination for your track. Once you are satisfied with the final product, save your project and export the track. In conclusion, vocal chopping is a fun and creative technique used by music producers to create unique sound effects. By following this step by step tutorial, you can master the skill of vocal chopping and take your productions to the next level. So, what are you waiting for? Start chopping today!
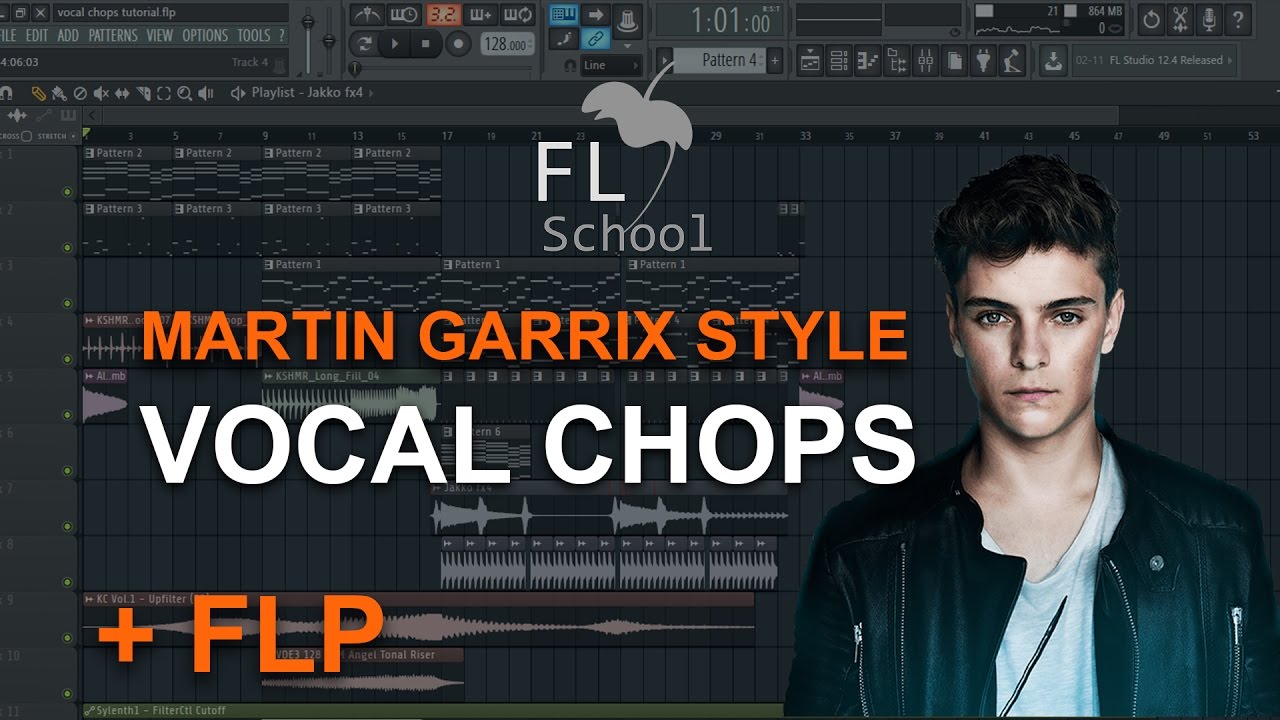
Vocal Chopping And Editing Tutorial

Credit: www.youtube.com

Advanced Editing Techniques

Advanced Editing Techniques:

Vocal chopping is an effective technique that adds uniqueness and depth to any track. But did you know that you can take vocal chops to the next level by using advanced editing techniques? In this vocal chopping and editing tutorial, we will discuss the top advanced editing techniques that you can use to create versatile and engaging vocal chops that stand out.

Reverse Vocal Chops

If you want a unique twist on your vocal chops, consider using reverse vocal chops. This technique involves flipping a vocal chop and reversing it to create a reverse effect. Reverse vocal chops can add a haunting or eerie atmosphere to your track and can be used to create buildup or tension.

Glitch Vocal Chops

Glitch vocal chops are a trendy technique that involves adding stutter and glitch effects to a vocal chop. This technique creates a robotic or futuristic atmosphere, and creates a unique bounce to your track. To create a glitch vocal chop, use effects such as stutter, glitch, and delay.

Pitch Shifting Vocal Chops

If you want to create a melody with your vocal chops, pitch shifting is a great technique to use. Pitch shifting vocal chops involve changing the pitch of a vocal chop to create melodic movements. This technique can add a dynamic atmosphere to your track and can create a catchy hook. To pitch shift a vocal chop, use a pitch shifter effect and experiment with different pitches and patterns.

By implementing these advanced editing techniques, you can take your vocal chops to the next level. Remember to experiment with different effects and techniques to create your unique sound. Use what you have learned in this tutorial to enhance your tracks and take your music production to the next level.

Common Mistakes To Avoid

Avoid common errors when vocal chopping and editing by taking your time and being deliberate. Don’t rush through the process, and make sure to properly slice and arrange your samples. Additionally, avoid overusing effects and make sure your final product is well balanced and cohesive.

Using Too Much Reverb

One of the most common mistakes while creating vocal chops and editing is overusing reverb. While reverb is an essential tool in creating a sense of space and depth, too much can drown out the vocals and make the track sound washed out and muddy.

While it may be tempting to add reverb to every vocal chop, this can quickly become overwhelming, leading to a “wall of sound” effect that can obscure the vocals entirely. A good rule of thumb is to use reverb sparingly and only on specific chops that need a little extra depth.

Overusing Vocal Chops

Another common mistake is overusing vocal chords in a track. Vocal chops can sound great when used sparingly, but too many can quickly become monotonous and tiresome.

One way to avoid this mistake is to create a melody from the vocal chops, rather than simply layering them on top of each other. Turning vocal chops into a melody can take time, but it can also add a new level of creativity to your track.

Not Paying Attention To Timing

Vocal chops are an excellent way to add rhythm to your track, but if you don’t pay attention to timing, they can quickly become out of sync with the rest of your instruments. This can lead to an overall messy sound.

When creating vocal chops, take the time to carefully line them up with the beat of the track. This will help ensure that they don’t sound out of place and will help maintain the overall rhythm and flow of the track.

Avoiding these common mistakes when creating vocal chops and editing can take your production to the next level. By being mindful of reverb use, avoiding overuse of vocal chops, and paying attention to timing, you can create a track that is both complex and cohesive.

Frequently Asked Questions Of Vocal Chopping And Editing Tutorial

How Do You Do Vocal Chops?

To do vocal chops, you need to first choose the vocal sample you want. Next, you should chop the sample into small, loopable sections and assign those sections to different keys on a sampler or MIDI controller. Finally, use your sampler or controller to play back the chopped vocal sections in a melody or pattern.

How Do I Edit Raw Vocals?

To edit raw vocals, you need to first listen to them carefully and identify the areas that need improvement. You can use audio software such as Audacity or Adobe Audition to adjust the volume levels, remove unwanted background noise, and add various effects like reverb and EQ.

It is also important to pay attention to the timing and rhythm of the vocals.

What Is A Chopped Vocal?

A chopped vocal is a technique used in music production to manipulate a recorded vocal by slicing it into small pieces and rearranging them in a different order or sequence. This creates a new melody or rhythm that can be used as a background or foreground element in a song.

How Do I Crop Vocals In Fl Studio?

To crop vocals in FL Studio, use the “Edison” tool to select the portion of the vocal track that you want to keep. Right-click and choose “Crop Sample. ” This will remove everything outside of the selected area.

Conclusion

A vocal chop could be a stand-alone creative tool or a supplementary instrument in a production. While it isn’t the easiest technique to master, this tutorial provided some valuable insights and tips on how to approach vocal chopping in a way that elevates your production to the next level.

It’s crucial to experiment and find the right combination of sampling, editing, and processing tools to get the sound you’re looking for. With enough practice, vocal chopping could become your go-to technique for creating interesting and unique music.

Categories
Archive

Fl Studio Mixer Effects Not Working

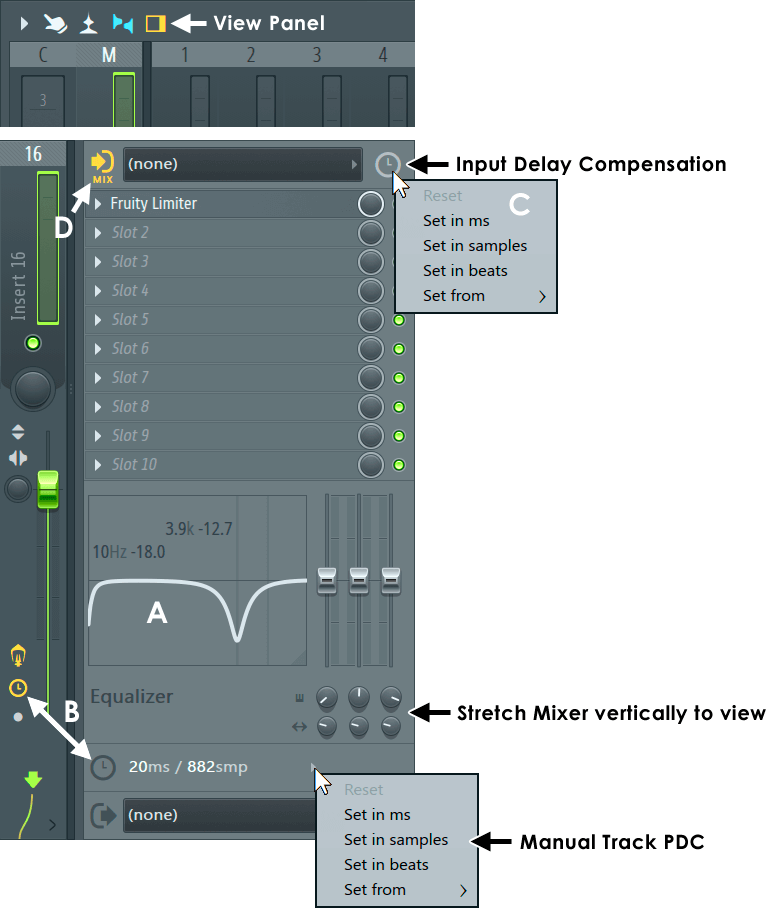
To resolve Fl Studio Mixer Effects Not Working, ensure that the effects are turned on and routed properly. Check if the mixer track routing is correct and if the effects are enabled in the mixer track.

Fl Studio Mixer Effects Not Working is a common issue that can occur when using the digital audio workstation. It can be frustrating when the effects fail to function, but there are several troubleshooting steps that you can take to fix the problem.

One of the most common causes of this problem is incorrect routing. You should ensure that the effects are enabled in the mixer track, and the routing is correct. This guide will explain the different steps you can take to resolve this issue and ensure that your Fl Studio Mixer Effects are working correctly.

Fl Studio Mixer Effects Not Working

Credit: www.reddit.com

Common Mixer Effects Issues

If you are an FL Studio user, you may have come across mixer effects not working properly. This can be frustrating when you are in the middle of a project and suddenly, the mixer effects stop functioning. The good news is that most of these issues are easy to fix with minimal effort. Let’s take a look at some common mixer effects issues and how to solve them.

Effect Plugins Not Installed Properly

If you are experiencing problems with your mixer effects, it could be that they are not installed properly. Sometimes, during installation, the default location of the plugin may not be selected. To solve this issue, you need to check if the plugin is installed in the correct folder. FL Studio comes with a default folder for plugin installation, known as the VST plugins folder. If you have installed the plugin in a different location, you will need to direct FL Studio to the folder where it is located.

Track Volume Muted Or Set Too Low

Another common cause of mixer effects not working is the volume of the track being muted or set too low. To solve this issue, you need to check the track’s volume settings to ensure that it is not muted or set too low. You can do this by going to the mixer and checking the fader settings for the problematic track. Ensure that the volume is set at an optimal level where the mixer effects can function effectively.

Track Sends Not Routed Correctly

Track sends are an essential component of FL Studio’s mixing process. When not routed correctly, they can cause mixer effects not to work. To solve this issue, you will need to check if the track that the effect is applied to is routed to the intended destination via the sends. FL Studio has an inbuilt routing system that allows you to route several tracks to a single destination. To ensure that the effect is working correctly, you need to ensure that the track is routed through the intended send channel.

Effect Plugin Not Inserted Into Mixer Chain

Lastly, if your mixer effects are not working, it is possible that the plugin is not inserted correctly into the mixer chain. To solve this issue, confirm that the effect plugin is inserted into the correct mixer channel. FL Studio provides a mixer insert feature, enabling you to add effects to individual tracks or groups of channels. By default, plugin effects are inserted into the effect slot of the intended channel. Ensure that the effects slot is not empty or replaced by other plugins, as this may cause mixer effects not to work.

Fl Studio Mixer Effects Not Working

Credit: www.image-line.com

Troubleshooting Mixer Effects

FL Studio is a powerful music production software, but at times, you may encounter problems with the mixer effects not working as they should. The mixer is an essential part of the software and is used to apply various effects to your tracks, including compression, equalization, reverb, and delay. In this article, we will discuss some troubleshooting steps you can follow to get your FL Studio mixer effects back up and running.

Checking Effect Plugin Installation

The first step in troubleshooting your mixer effects is to check if the effect plugin is installed correctly. To do this, you need to go to the plugin manager and see if the plugin is listed under the effects tab. If it is not, you need to install the plugin and rescan for plugins. Make sure to follow the installation instructions carefully. Also, ensure that the plugin version is compatible with your FL Studio version.

Adjusting Track Volume And Sends

The track volume and sends play an essential role in applying mixer effects. If the track volume is too low, the effect applied may not be noticeable. On the other hand, if the track volume is too high, it may result in distortion. Similarly, if the send volume is too high or low, it may affect the effect’s overall performance. Adjust the volume levels and sends to optimal levels to get the best results.

Inserting Effect Plugin Into Mixer Chain

Another reason why mixer effects may not be working is that the effect plugin is not inserted into the mixer chain. To insert the effect plugin into the mixer chain, click on the effect slot in the mixer and choose the effect plugin from the list. Make sure to turn on the effect processing button for the channel to apply the effect. Also, ensure that the effect plugin is not bypassed by mistake.

Resetting Mixer Settings

Finally, if all the above steps fail to work, you can try resetting the mixer settings. To do this, open the mixer options and choose the reset mixer option. This will reset the mixer’s settings to default and may help to fix any issues that may be causing the mixer effects not to work.

By following these steps, you can troubleshoot any issues you may have with FL Studio mixer effects not working. Remember to save your project before making any changes and to double-check the mixer settings before rendering your project.

Advanced Troubleshooting

If you’re experiencing issues with your FL Studio mixer effects, don’t worry. There are ways to troubleshoot and fix the problem. Start by checking your audio settings and making sure the correct audio interface is selected. Then, try resetting or reloading your mixer effects and plugins.

Still having trouble? Reach out to the FL Studio community for additional support and advice.

If you have been using FL Studio for a while, you may have experienced some mixer effects not working. This can be quite frustrating especially if you are in the middle of a production project. Thankfully, there are some advanced troubleshooting techniques that can help you fix the issue. Below are some solutions that you can try.

Updating Fl Studio And Plugins

One of the first things you can do when troubleshooting FL Studio mixer effects is to check for updates for both the software and any plugins you have installed. Outdated plugins can cause compatibility issues leading to mixer effects not working as expected. To check for updates, go to the ‘Help’ menu and select ‘Check for updates.’ For plugins, you’ll need to visit the website of the plugin manufacturer and download any available updates from there.

Checking For Conflicting Plugins

Plugins can conflict with one another, causing mixer effects to stop working properly. To check if this is the case, disable all plugins and start enabling them one by one until you find the one that is causing the conflict. Once you identify the conflicting plugin, you can either remove it or try updating it to the latest version.

Repairing Or Reinstalling Fl Studio

If updating your FL Studio and plugins or disabling conflicting plugins doesn’t fix the mixer effects problem, you may need to repair or reinstall the software. To do this, go to the ‘Control Panel’ on your computer and select ‘Programs and Features.’ Find FL Studio, right-click on it, and select ‘Repair’ or ‘Uninstall.’ If you choose to uninstall, ensure that you also delete any leftover files before reinstalling FL Studio.

Contacting Fl Studio Support

If all else fails, you can always contact FL Studio support. They have a team of technical experts who can help you with any issues you may be experiencing with FL Studio and its mixer effects. You can find their contact information on the Image-Line website. Don’t hesitate to reach out to them for help in resolving any issues that you may be facing. In conclusion, there are several advanced troubleshooting techniques you can use to fix FL Studio mixer effects not working issue. Follow these solutions one by one until you identify the cause of the problem.

Frequently Asked Questions For Fl Studio Mixer Effects Not Working

How Do I Open Mixer Effects In Fl Studio?

To open mixer effects in FL Studio, click on the mixer icon at the top of the screen or press F9 on your keyboard. This will bring up the mixer window where you can adjust settings for individual tracks and add effects to your mix.

How Do I Reset My Mixer Settings In Fl Studio?

To reset mixer settings in FL Studio, click on Options and then choose ‘File Settings’. Next, click on ‘Manage extra search paths’ and then select ‘Reset’. The Mixer Channels will then reset to their default state in FL Studio.

Why Are My Plugins Not Working Fl Studio?

Your plugins may not be working in FL Studio due to various reasons such as compatibility issues, incorrect installation, outdated versions, or conflicts with other plugins or software. Check for updates, re-install the plugins or FL Studio, and make sure they are compatible with your system.

Why Is There No Output On My Fl Studio Mixer?

There may be several reasons why you’re not receiving any output from your FL Studio mixer. Ensure that the audio input and output devices are selected correctly, the mixer tracks are armed, and the master fader is not muted. Additionally, check if there are any plugins or effects that may be causing the issue.

Conclusion

Troubleshooting FL Studio mixer effects can be a daunting task, but it’s essential to uncover and fix any issues to create high-quality music. By following the steps we outlined, you can resolve most problems and get back to creating your art.

Don’t forget to update your software and plugins regularly to avoid any compatibility issues. If you still experience trouble, reach out to the FL Studio community for additional assistance. Keep experimenting and making music!

Categories
Archive

Free Vst Effects For Creative Mixing

There are several free VST effects plugins available for creative mixing, such as TDR Nova, Reviber, and Tal Reverb 4. As a music producer, engineer or mixing enthusiast, you know that equally important as having top level plugins, is having access to some quality free VST effects for mixing in your DAW software.

Working with a tight budget can be a hurdle for both beginners and pros in the music production industry but finding the right free VST effects that will enhance your mixes is always a good idea. We will explore some popular plugins that can help take your mixes to the next level without breaking your bank account.

From the parametric equalizer TDR Nova to the Reverb Tal Reverb 4, and more, we will also examine some of the pros and cons of each software. So, let’s get started!

Free Vst Effects For Creative Mixing

Credit: www.productionmusiclive.com

Top 5 Free Vst Effects For Creative Mixing

If you’re a music enthusiast looking to take your mixing game to the next level, then you’ve come to the right place. Mixing is a crucial aspect of music production, and utilizing the right VST effects can make all the difference in achieving the sound that you’re after. In this post, we’ll be sharing our top 5 picks for free VST effects that will help you take your mixing to the next level. Whether you’re a recording artist, producer, or an audio engineer, these VST effects are sure to inspire your creativity and enhance your sound.

Mda Talkbox

One of the most fun VST effects, MDA Talkbox, is a must-have for any mixing enthusiast. This free VST emulates the effect of a talkbox, which allows you to use your mouth to shape the sound of the musical instrument. This effect can be achieved using any musical instrument and can help you produce unique sounds that stand out from the crowd.

Tal Reverb 4

TAL Reverb 4 is a high-quality reverb plugin that holds its own against some of the most expensive reverb plugins out there. This plugin features a straightforward interface and allows you to create smooth, natural-sounding reverbs that can help bring your mix to life. The plugin also features a range of controls that allow you to fine-tune your reverb settings to achieve the desired effect.

Voxengo Oldskoolverb

Voxengo OldSkoolVerb is a classic reverb plugin that is perfect for those looking to create a vintage effect. This free VST has a simple interface that allows you to adjust the decay time, pre-delay, and stereo width of the reverb effect. The plugin also comes with a range of presets that you can use to get started, making it a great choice for beginners.

Spitfish Deesser

SPITFISH DeEsser is a useful plugin for anyone looking to get rid of harsh sibilants in their mix. This free VST comes with an intuitive interface that allows you to adjust the threshold and depth of the DeEsser effect. The plugin also features a range of presets that you can use to get started, making it a great choice for beginners.

Ott Compressor

OTT Compressor is a free multiband compressor plugin that is perfect for those looking to add brightness and clarity to their mix. This plugin features a simple interface that allows you to adjust the amount of compression, release time, and makeup gain. The plugin also comes with a range of presets that you can use to get started, making it a great choice for beginners.

Free Vst Effects For Creative Mixing

Credit: blog.native-instruments.com

Free Vst Effects For Creative Mixing

Credit: process.audio

Frequently Asked Questions Of Free Vst Effects For Creative Mixing

What Are The Best Plugins For Mixing Vocals Free?

There are several plugins available for mixing vocals for free. Some of the best options include Tal Reverb, OrilRiver, Mautopitch, and GVerb. Each of these plugins offers unique features and effects that can enhance the quality of your vocal mixes.

What Are The Best Plugins For Mixing?

Some of the best plugins for mixing are Waves SSL E-Channel Strip, Izotope Alloy 2, FabFilter Pro-Q 3, Soundtoys 5’s Radiator and Decapitator, and Universal Audio UAD SSL 4000 G Bus Compressor. These plugins provide powerful tools for equalization, compression, and dynamic control to help achieve a polished and professional mix.

Are There Any Free Vst?

Yes, there are numerous free VSTs available online. Many companies offer a selection of free VST plugins with limited features, while others offer completely free versions. Some popular sites where you can find free VSTs include VST4Free, Bedroom Producers Blog, and Plugin Boutique.

Is The Halftime Plugin Free?

Yes, the HalfTime plugin is not free. But it comes with a 3-day free trial, after which you’ll have to purchase it for $12. 97. It’s a time-stretching plugin that halves the speed of audio playback and creates a halftime effect.

Conclusion

There are plenty of free VST effects available in the market that can bring your music mixing to the next level. Whether you are a beginner or a professional, using these tools can enhance your creativity and boost your productivity.

With so many options to choose from, you can experiment with different effects until you find the perfect sound for your music. Remember to always keep an eye out for new plugins and updates to ensure that your music sounds fresh and unique.

Happy mixing!

Categories
Archive

Music Streaming Royalties Calculator

The Music Streaming Royalties Calculator calculates royalties earned from music stream services in two steps. Firstly, select the streaming’s service and tier of income.

Subsequently, insert the number of streams and unit price to determine the earnings. Streaming royalties are payments earned by artists and songwriters based on the number of times their recorded or written music is played on various digital platforms. In the era of the digital age, music streaming has become the dominant mode of music consumption.

As a result, calculating streaming royalties has become an essential aspect of any musician or record label’s financial management. The Music Streaming Royalties Calculator is a digital tool developed to assist artists and music industry professionals in better understanding how much they will earn in royalties from various digital channels. This calculator works by taking into account the number of times a song was streamed and multiplying it by the average payout rate of the chosen streaming service. This tool offers transparency and clarity regarding royalty payments, making it easier for creators, songwriters, and producers to plan and budget their earnings.

Music Streaming Royalties Calculator

Credit: www.cinemasound.com

Frequently Asked Questions For Music Streaming Royalties Calculator

How Much Royalties From $1 Million Spotify Streams?

For $1 million Spotify streams, you can earn around $4,000 to $7,000 in royalties. The final amount depends on several factors, such as the country, artist-aggregator deal, and individual agreement.

How Are Music Streaming Royalties Calculated?

Music streaming royalties are calculated based on several factors, including the subscription fee and each song’s total number of plays. The total revenue from the streaming service is divided among the rights holders based on their percentage of plays. The amount of royalties varies between services and depends on the popularity of the artist and song.

How Many Music Streams To Make $1,000?

To make $1,000 from music streams, it depends on the streaming platform and the royalty rates being paid per stream. Generally, it takes around 250,000 streams on Spotify and 100,000 streams on Apple Music. But keep in mind that these values are estimates and subject to change.

How Much Money Is 2 Million Streams On Spotify?

2 million streams on Spotify can earn anywhere between $4,000 to $40,000 depending on several factors like location, genre, and the streaming revenue share. The average payout per stream is about $0. 003 to $0. 005.

Conclusion

Calculating music streaming royalties can be a daunting task for artists and music industry professionals alike. By utilizing a music streaming royalties calculator, you can easily identify and analyze your earnings to make informed decisions and negotiate fair deals. With features such as multi-platform support and customizable parameters, these calculators are an essential tool for anyone looking to maximize their streaming revenue.

Streamline your royalty calculations today and take control of your music career.

Categories
Archive

Kiive Audio Nfuse Vs Analog Hardware

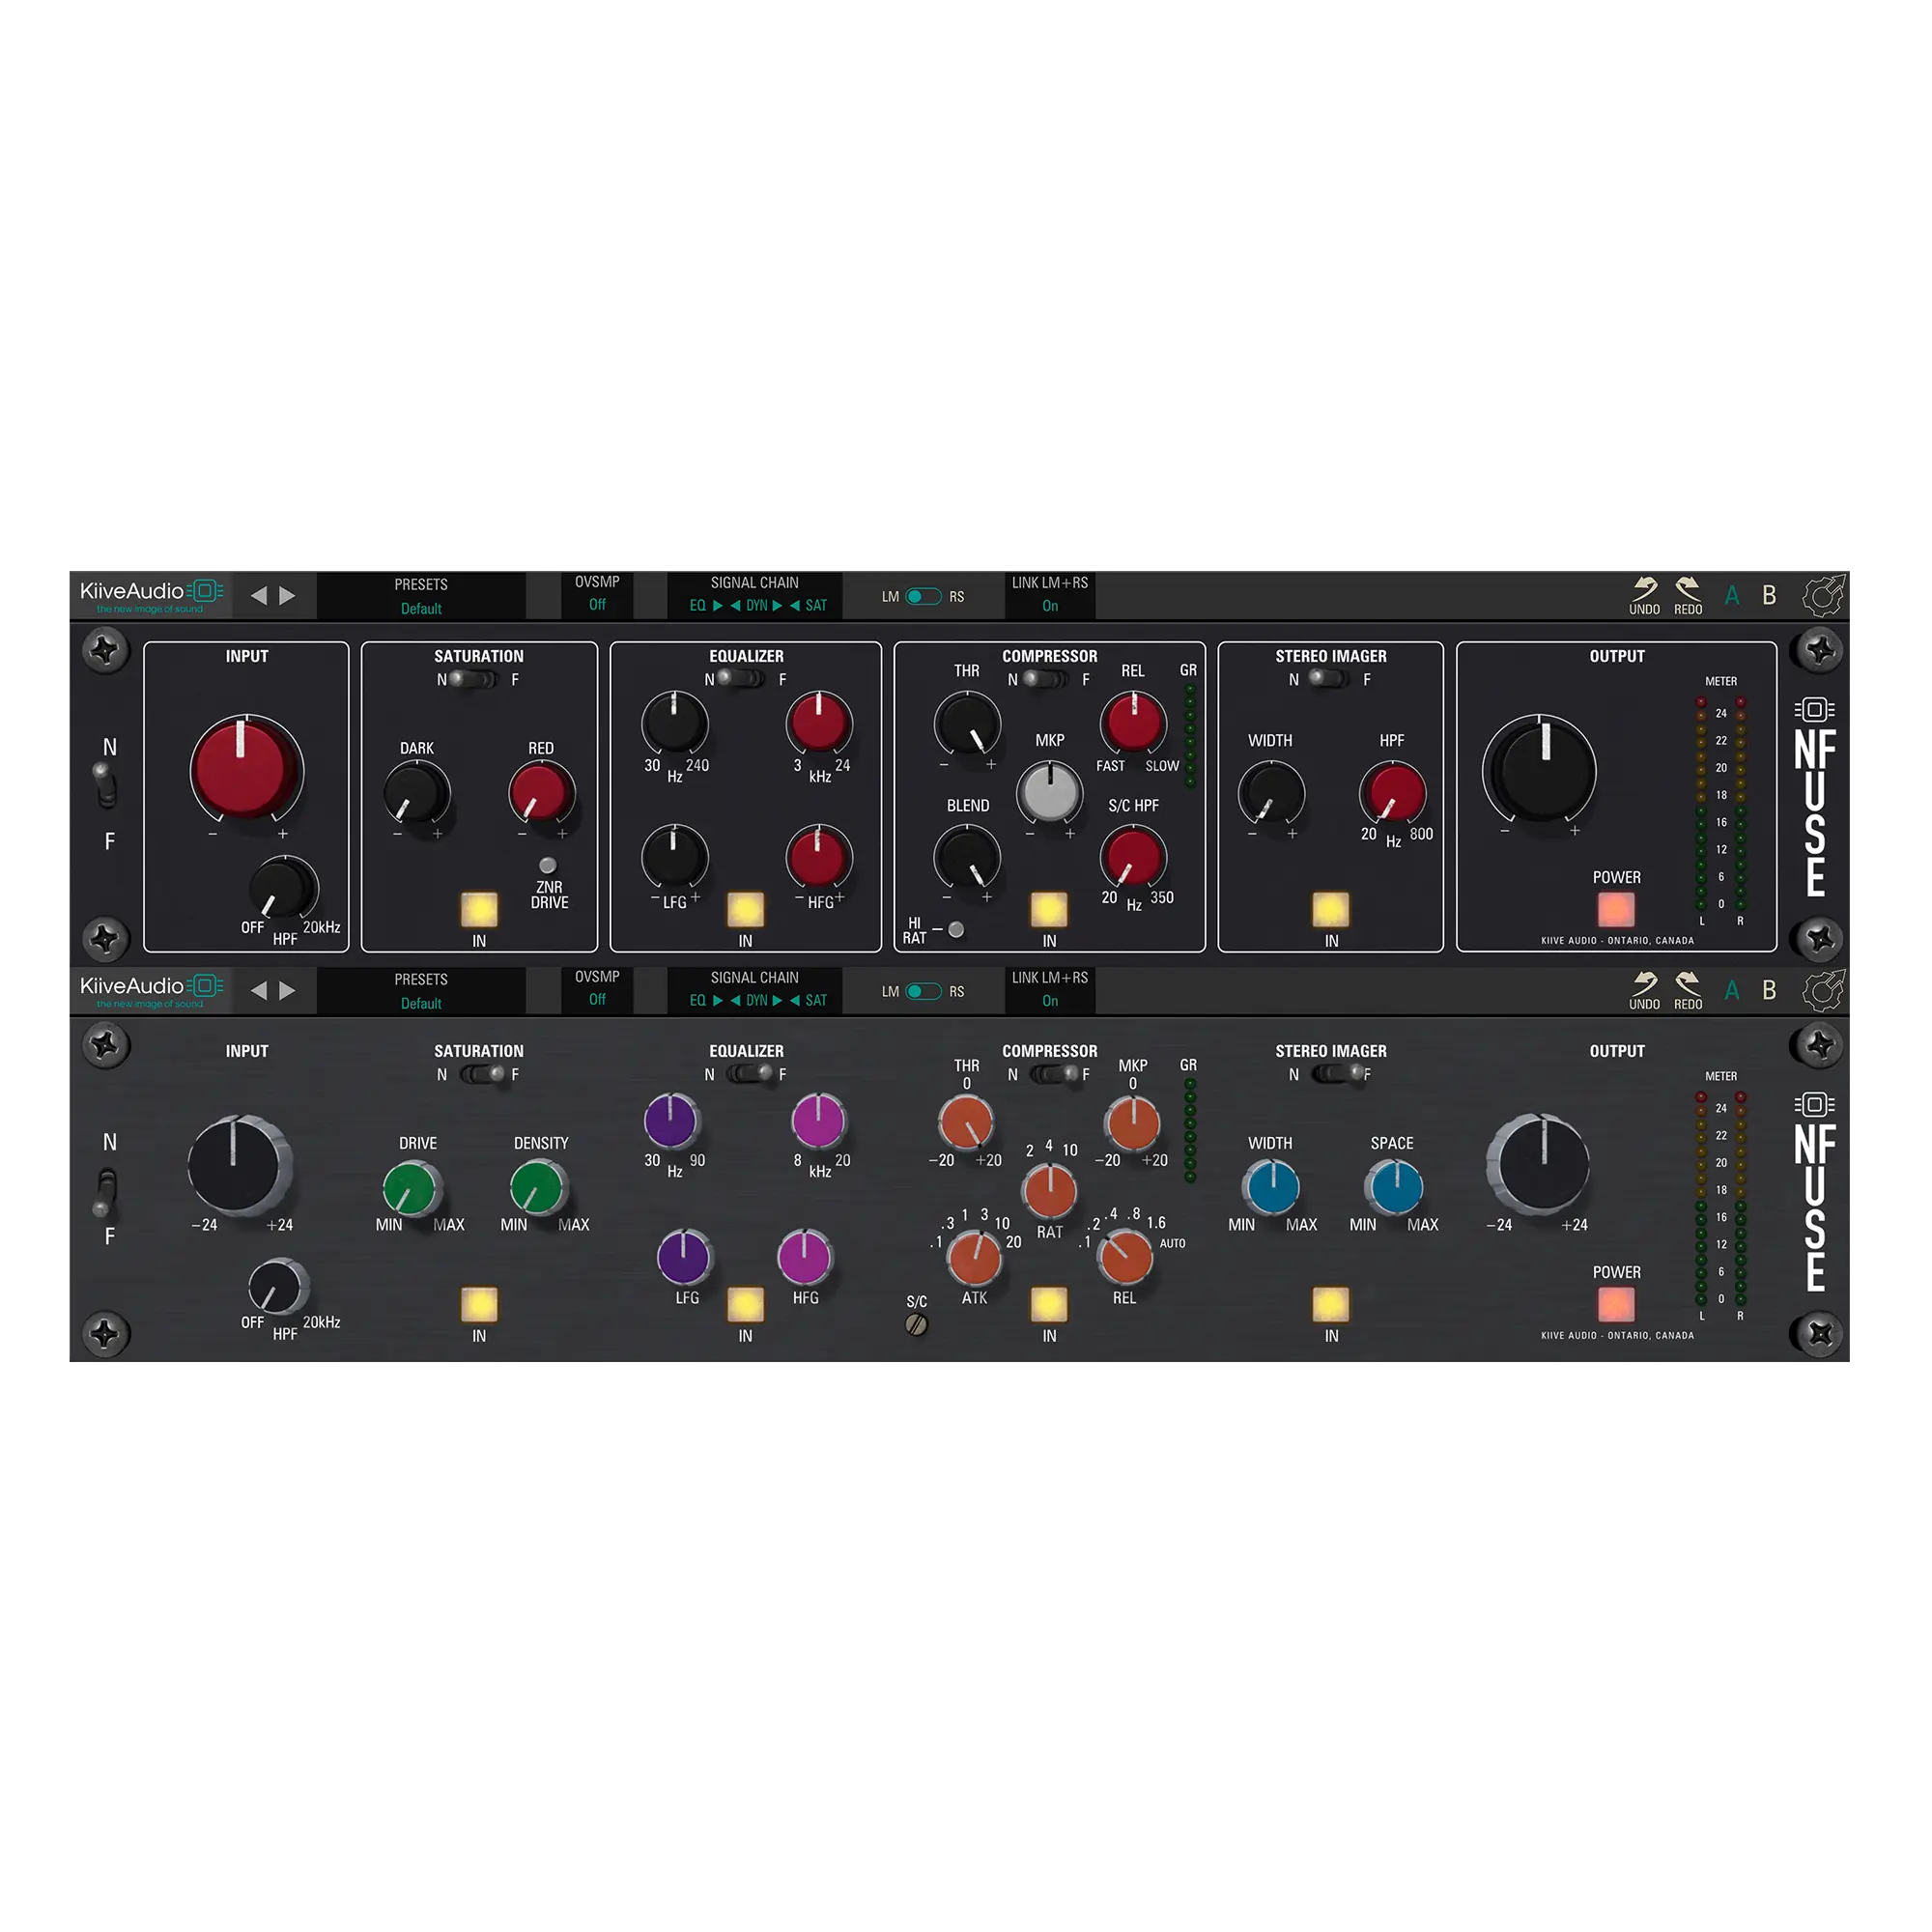
Kiive Audio Nfuse provides the user with emulated analog sound, while Analog Hardware provides true analog sound. Kiive Audio Nfuse is a plugin that provides emulated analog sound to digital recordings.

On the other hand, Analog Hardware provides true analog sound through the use of physical devices and equipment. Whether to use plugins or physical hardware can be a controversial topic in the audio production community. While some prefer the convenience and flexibility of using plugins, others believe that the warmth and character of analog hardware cannot be fully replicated.

We will explore the differences between Kiive Audio Nfuse and Analog Hardware to help you make an informed decision on which to choose for your audio production needs.

Kiive Audio Nfuse Vs Analog Hardware

Credit: m.youtube.com

Kiive Audio Nfuse

Kiive Audio Nfuse offers exceptional audio quality to compete with analog hardware. With its advanced algorithms and precise digital processing, Nfuse is a perfect alternative to analog hardware, providing quality sound for your audio projects.

What Is Kiive Audio Nfuse?

Kiive Audio Nfuse is a software plug-in that is designed for digital audio workstations (DAWs) to simulate analog hardware. It allows audio engineers to add analog sound to digital recordings for a more natural, warm, and dynamic audio experience. Using advanced algorithms, Kiive Audio Nfuse accurately imitates classic analog gear, including mic preamps, compressors, equalizers, and more.

Features Of Kiive Audio Nfuse

Kiive Audio Nfuse comes with a host of features that make it an excellent choice for digital music producers. Some of the notable features include:

  • High-quality algorithms that simulate classic analog hardware
  • User-friendly interface and intuitive controls
  • Easy to switch between different analog gear simulations
  • Allows you to blend the wet/dry signal to achieve the desired sound
  • Can be used on individual tracks or on the master mix for an overall analog feel

Pros Of Using Kiive Audio Nfuse

The advantages of using Kiive Audio Nfuse are numerous. Here are a few pros of using this software:

  • It saves you a lot of money as you don’t have to spend on actual analog gear
  • Kiive Audio Nfuse can be used on any DAW, making it universally compatible
  • It is lightweight and takes up minimal processor resources, ensuring smooth performance
  • It has unlimited instances, which means you can use as many plug-ins as your computer can handle
  • The software provides endless customization options, tweaking the signal easily to your preference

Cons Of Using Kiive Audio Nfuse

Like every other software, Kiive Audio Nfuse has a few drawbacks. Here are some cons of using this software:

  • It can be challenging to get the same exact sound as a particular analog hardware every time
  • Although the software is lightweight, it can still take up considerable processing resources when multiple instances are in use.
  • The software can be relatively expensive compared to other plug-ins, although the cost is still significantly lower than actual analog gear.

In conclusion, Kiive Audio Nfuse is an innovative software plug-in that can help music producers achieve analog sound from digital recordings. While it may not entirely replace actual analog gear, it is a much cheaper and convenient option without sacrificing much of the sound quality.

Kiive Audio Nfuse Vs Analog Hardware

Credit: www.kiiveaudio.com

Analog Hardware

Kiive Audio’s Nfuse plugins are a popular alternative to traditional analog hardware, offering users the ability to achieve a similar sound without the heavy expense and maintenance that comes with using physical equipment. However, some audio engineers still prefer the warmth and depth that can only be achieved through analog hardware.

What Is Analog Hardware?

Analog hardware refers to equipment that processes electrical signals in the form of analog waves to reproduce sound. It is a traditional form of audio processing that has been used for decades and is still preferred by many professionals in music production. Unlike digital hardware, which processes signals in binary code, analog hardware operates on a continuous signal. This gives analog hardware a unique sound that cannot be replicated by digital hardware.

Different Types Of Analog Hardware

There are several types of analog hardware used in music production, including:

  • Equalizers
  • Compressors
  • Tube preamps
  • Analog mixing consoles

Pros Of Using Analog Hardware

Analog hardware provides a warm, rich sound that is often preferred by audiophiles and music producers. The equipment has a unique tonality that is not possible to simulate digitally. Analog hardware can also be used to achieve a specific sound that can be difficult to produce with digital equipment. The equipment is also incredibly durable and long-lasting, making it a reliable investment.

Cons Of Using Analog Hardware

Analog hardware is expensive and requires a significant amount of upkeep. The equipment is also bulky and can take up a lot of space. The processing power of analog equipment is limited compared to digital hardware. Additionally, analog hardware is often difficult to find and may require specialized maintenance, which can result in longer downtime for repairs or replacements.

Comparison

When it comes to audio production, finding the right tools is crucial to achieving the desired results. The debate between digital and analog audio production has been ongoing, with both methods having their pros and cons. In this article, we will compare Kiive Audio Nfuse and Analog Hardware in terms of Sound Quality, Connectivity and Compatibility, Cost, Convenience, Workflow, Flexibility, Learning Curve, and Reliability.

Sound Quality

One of the most significant aspects of audio production is the sound quality. Analog hardware is known to produce warm, natural sounds that can be hard to replicate through digital means. However, Kiive Audio Nfuse uses advanced algorithms to recreate analog warmth and character, providing high-quality sound without the need for expensive analog hardware.

Connectivity And Compatibility

Analog hardware usually requires specialized cables and connectors, making it challenging to connect to digital audio workstations. In contrast, Kiive Audio Nfuse connects easily through USB, making it compatible with a wide range of DAWs and other audio equipment.

Cost

Analog hardware can be expensive, with prices ranging from hundreds to thousands of dollars. Kiive Audio Nfuse provides high-quality analog emulation at a more affordable price, making it a great option for those on a tight budget.

Convenience

Analog hardware can take up a lot of space and require regular maintenance. Kiive Audio Nfuse is compact and requires no maintenance, making it a convenient and practical choice for home studios and small production spaces.

Workflow

One advantage of Kiive Audio Nfuse is its ability to save presets and recall them instantly. Analog hardware requires manual adjustments and can be time-consuming to set up and tweak. With Kiive Audio Nfuse, you can speed up your workflow and focus on being creative.

Flexibility

Kiive Audio Nfuse provides a range of analog emulation options, giving you the flexibility to choose the sound that best suits your needs. Analog hardware, on the other hand, provides a fixed sound and can be limiting in terms of the types of sounds it can produce.

Learning Curve

Using analog hardware requires a certain level of experience and knowledge. Kiive Audio Nfuse, on the other hand, is easy to use and requires no special training or expertise. It is a great option for beginners who want to achieve professional-sounding results without the hassle of learning analog production techniques.

Reliability

Analog hardware is vulnerable to wear and tear and can break down over time. Kiive Audio Nfuse is digital and does not suffer from the same issues, making it a reliable and long-lasting option for audio production.

Kiive Audio Nfuse Vs Analog Hardware

Credit: www.youtube.com

Frequently Asked Questions For Kiive Audio Nfuse Vs Analog Hardware

How Does Kiive Audio Nfuse Compare To Analog Hardware?

Kiive Audio Nfuse is a digital audio plug-in that accurately models the sound of analog hardware. Analog hardware is renowned for its warmth and character, but it can be expensive and difficult to maintain. With Nfuse, you can enjoy the benefits of analog modeling in a digital format without the hassle and cost of traditional analog equipment.

What Are The Benefits Of Using Kiive Audio Nfuse?

Kiive Audio Nfuse provides users with the rich, warm sound associated with analog hardware. Unlike traditional analog hardware, Nfuse is easy to use and doesn’t require regular maintenance. Additionally, Nfuse offers users the ability to customize and fine-tune their sounds, allowing for greater creative control.

Can Kiive Audio Nfuse Be Used In A Live Setting?

Yes, Kiive Audio Nfuse can be used in both live and studio settings. The plug-in is compatible with most digital audio workstations and can be used with a variety of hardware, such as audio interfaces, mixers, and controllers.

Is Kiive Audio Nfuse Affordable?

Compared to traditional analog equipment, Kiive Audio Nfuse is an affordable alternative. The plug-in offers the same warmth and character as analog hardware without the high cost of purchasing and maintaining traditional gear. Additionally, Nfuse can be used on any computer with a compatible digital audio workstation, eliminating the need for expensive additional hardware.

Conclusion

After comparing Kiive Audio Nfuse with Analog Hardware, it can be concluded that both have their own unique set of advantages and disadvantages. Nfuse provides convenience and affordability, while Analog Hardware offers a more authentic and dynamic sound. The choice ultimately depends on the user’s needs and preferences.

However, it is important to remember that no matter what system is used, the key to great sound is a combination of proper equipment, technique, and balance.

Categories
Archive

Where Should You Start Your Mix

Start your mix by finding the focal point and building the sound around it. The first and most important step in creating a great mix is finding the focal point, which can be the lead vocal or the main instrument.

When creating music, mixing is crucial to the final product. A good mix can make or break a great song, especially in today’s music industry where technology advancements have made sound quality and mixing more important than ever before. The challenge comes in knowing how and where to start when mixing, as the process can be overwhelming for beginners and professionals alike.

We’ll explore where you should start your mix, tips and tricks for successful mixing, and some common mistakes to avoid. So, let’s dive in!

Understanding The Mix

When it comes to mixing, it’s easy to feel overwhelmed with where to start. Understanding the mix is crucial for a successful final product.

What Is A Mix?

A mix is a combination of individual audio elements that are blended together to create a cohesive and balanced sound. It involves adjusting the levels, panning, and frequency balance of each element to create a polished final product.

The Elements Of A Mix

There are four main elements of a mix:

  • Balancing: adjusting the levels of each element so they are audible, and no single element is too dominant.
  • Panning: distributing each element in the stereo field to create width and depth.
  • Frequency Balance: adjusting the frequency response of each element to ensure they sit well together and don’t clash.
  • Effects: adding complementary effects such as EQ, reverb, and compression to enhance the overall sound.

To start your mix, it’s important to focus on balancing the levels of each element. This allows you to hear all the individual parts and make sure they’re working together harmoniously.

The Importance Of Starting Your Mix Correctly

When it comes to creating great audio, a lot of people focus on what happens at the end of the mix, once everything is recorded and they’re doing their final adjustments. However, starting your mix correctly is just as important as anything else – if not more so. By starting your mix off on the right foot, you’ll be able to create a better final product in less time, with fewer mistakes.

How Starting Your Mix Affects The Final Product

Starting your mix in the correct way is crucial to achieving a final product that sounds great. If your mix starts off poorly, then it’s going to be much harder to fix your mistakes later on. There are a few key ways in which starting your mix properly can benefit you in the end:

Starting your mix correctlyMistakes later on in the mix are avoided
Properly balanced levelsClipping and distortion are avoided
Good panning decisionsOver-crowded mixes are avoided
Effective use of EQ and CompressionLess need for drastic adjustments later on

Common Mistakes To Avoid

Now that we’ve established the importance of starting your mix well, it’s important to consider which mistakes to avoid. Here are some of the most common pitfalls to keep an eye out for:

Starting with the volume too high

If you start with the volume at full blast, you’re going to have a much harder time making sure the balance between instruments and overall volume is to your liking.

Poor leveling decisions

It’s important to make sure that each instrument has its own space within the mix, and that they’re not all fighting for attention.

Poor panning decisions

If you don’t pan your instruments properly, you could end up with a mix that’s crowded and hard to make sense of. Taking the time to properly place each instrument makes for a much better final product.

Ineffective use of EQ and Compression

These are powerful tools, but it’s important to use them sparingly and effectively. Applying too much EQ or compression can make for an over-processed and unappealing final product.

In conclusion, to create a great-sounding final product, make sure you start your mix off on the right foot. Pay attention to your levels, panning, and use of EQ and compression, and avoid the common mistakes discussed here. Doing so will make a world of difference in the end!

Preparing Your Tracks

When it comes to preparing your tracks, deciding where to start your mix is crucial. Look for a section of the song that has a clear beat and consistent energy as starting off on the wrong foot can impede your entire mix.

Being mindful of your starting point can make all the difference in creating a seamless and well-crafted mix.

Organizing Your Tracks

Before starting the mix, it’s essential to organize the tracks in a way that makes sense to you. This includes renaming your files to something recognizable, grouping similar tracks together, and color-coding them for easy identification. A well-organized track list will save you time while mixing and help you stay focused on the task at hand.

Cleaning Up Your Tracks

Cleaning up your tracks involves editing out any unwanted sounds, such as silence, noise, or pops. This process is crucial because it sets the foundation for the overall sound of your mix. Use your ears and listen for any distracting sounds that may detract from the overall quality of the mix. Make sure to also remove any effects, EQ, or compression that have been added to the tracks as these will interfere with the mixing process.

Using Gain Control

Adjusting the gain of your tracks will help bring them to the same level, which makes the mixing process smoother and more professional. Use a gain plugin or volume control on each track to adjust the levels accurately. This also helps prevent clipping or distortion, which can occur if levels are not balanced correctly.

Creating A Rough Mix

Creating a rough mix will help you establish a foundation for the final mix. Start with the most important and significant tracks and add in the remaining ones as you go. Be sure to balance the levels of each track and pan them appropriately to create a cohesive sound.

Conclusion

Preparing your tracks is an essential step in creating a successful mix. Organize your tracks correctly, remove any unwanted sounds, adjust the gain, and create a rough mix to set the foundation for the final mix. Taking the time to prepare your tracks will help create a more professional mix, save you time, and make the mixing process smoother.

Where Should You Start Your Mix

Credit: www.youtube.com

Setting Levels And Panning

When starting your mix, it’s important to set appropriate levels and panning. Begin by balancing your levels, making sure no instrument is too loud or too soft. Then, pan your tracks to achieve a wide stereo image.

When it comes to mixing music, setting levels and panning are two of the most important tasks to tackle. Setting levels refers to adjusting the volume of each track so that they all blend together harmoniously, without any notes standing out too much from the rest. Panning, on the other hand, refers to placing each track in a different location of the stereo image, so that they all have their own space and don’t clash with each other.

Adjusting Track Levels

To adjust the levels of your tracks, start by soloing each individual track and making sure that it sounds good on its own. Once you’re happy with the sound of each track, start bringing them in one by one and adjusting their volume so that they all blend well together. Make sure to listen to the track as a whole and not focus too much on any one instrument or note. It’s important to keep in mind the overall feel and balance of the mix.

Creating A Basic Panning Landscape

Panning is all about creating a three-dimensional soundscape that allows each instrument to stand out in its own space. To create a basic panning landscape, start by panning drums and bass centrally, as they are the foundation of the mix. Then pan the rest of the instruments to the left or right, depending on their position in the stereo field. It’s important to keep in mind that panning is not just about placing instruments in a particular location, it’s also about creating separation between the tracks. In conclusion, setting levels and panning are essential tasks that should not be overlooked in the mixing process. Taking the time to adjust the levels and create a basic panning landscape will result in a well-balanced mix where every instrument has its own space. So, dive in and work on these tasks to bring out the best in your music mix.

Applying Eq And Compression

When it comes to mixing, there are many factors to consider, but EQ and compression are two of the most important tools in your arsenal. EQ (Equalization) allows you to adjust the balance of frequency content in your mix, while compression helps control dynamics, ensuring a consistent volume level throughout your track.

The Basics Of Eq

  • EQ can be used to boost or cut specific frequencies to bring out or reduce certain elements of a track.
  • Low-pass filters remove high-frequency content, while high-pass filters remove low-frequency content.
  • Parametric EQ allows you to adjust specific frequencies with greater precision than graphic EQ.

Using Compression To Control Dynamics

Compression helps balance the volumes of different parts of your track, ensuring everything remains audible and doesn’t get lost in the mix. Here are some basic principles to keep in mind:

  • Threshold: Determines the level at which the compressor starts functioning
  • Ratio: Controls the amount of gain reduction relative to the input signal
  • Attack: Determines how quickly the compressor starts functioning
  • Release: Determines how quickly the compressor stops functioning

By adjusting these parameters, you can create a more balanced mix that sounds professional and polished. Remember to use your ears and make adjustments based on what sounds good to you!

Where Should You Start Your Mix

Credit: www.youtube.com

Adding Effects

When it comes to adding effects to your mix, a common question is where to start. The best practice is to begin with the most important elements of the mix, such as the lead vocals or melodic instruments, then gradually add effects to other elements to create a cohesive sound.

When it comes to mixing audio, adding effects is a crucial step to achieve a polished and professional sound. However, knowing where to start can be overwhelming, especially for beginners. One common mistake is to add too many effects or use them in the wrong order, resulting in a muddled mix. To avoid this, it’s essential to follow a systematic approach and apply effects in a logical manner. In this article, we will discuss where you should start your mix when adding effects, with a focus on two essential effects, reverb, and delay.

Reverb

Reverb is a time-based effect that simulates the sound reflections of a physical space, creating a sense of depth, dimension, and realism. It can make a dry sound more spacious or blend the different elements of a mix together. However, too much reverb can muddy the mix and make it hard to distinguish the individual elements. Therefore, it’s crucial to start with a subtle to moderate amount of reverb and adjust to taste.

Delay

Delay is another time-based effect that creates an echo or repeat of the original sound. It can add texture, rhythm, and movement to a mix, especially for vocals, guitars, and drums. Like reverb, delay can quickly become overwhelming, especially if used excessively or with a fast tempo. To avoid this, start with a short delay time and feedback level and gradually increase them until you achieve the desired effect.

Time-based Vs. Modulation Effects

It’s important to note that reverb and delay are time-based effects, meaning that they manipulate the time and space of the original sound. Other commonly used effects are modulation effects, such as chorus, flanger, and phaser, which alter the frequency and phase of the sound wave. While they can add color and excitement to a mix, they are usually applied after the time-based effects. Therefore, when adding effects, it’s recommended to start with reverb and delay before moving on to modulation effects. In conclusion, adding effects is a crucial part of mixing audio, but it can also be challenging, especially for inexperienced producers. Remember to start with a subtle to moderate amount of reverb and delay, adjust to taste, and then move on to other effects. By following a systematic approach, you can achieve a balanced and polished mix that sounds great on any system.

Frequently Asked Questions For Where Should You Start Your Mix

Where Do You Start In A Mix?

Start in a mix by setting the levels and organizing the elements. Begin with the basic levels and work your way up to the more complex elements. Use EQ and compression to address any issues. Finally, utilize effects to add depth and space.

What Should I Start With When Mixing?

To start with mixing, follow these 5 guidelines for SEO-friendly content writing. First, keep your sentences brief with a maximum of 20 words each. Second, write in active voice and avoid starting sentences with certain words or phrases. Third, avoid passive voice and write in a human-like style.

Fourth, ensure that your writing passes AI writing detection. Lastly, keep your answer within 50 words.

What Order Should You Mix In?

Mix ingredients in the order specified in the recipe. Follow the instructions carefully and ensure you have all the ingredients on hand before beginning. Taking shortcuts or deviating from the recipe can result in an unsuccessful outcome.

How Do You Mix Music For Beginners?

To mix music for beginners, first learn the basics of music production and the mixing process. Get familiar with the necessary tools and software, and practice experimenting with different levels to create a balanced and cohesive sound. Listen to other tracks for inspiration and learn from experienced producers.

Practice regularly to develop your skills and improve your mixing.

Conclusion

It’s clear now that where you decide to start your mix is a crucial decision. Every audio engineer has their own methodology for mixing, but the main goal is to achieve a balanced and polished sound. As you go through different techniques and use various tools, always bear in mind the final purpose of your mix.

To achieve the best outcome possible, approach your mix thoughtfully and systematically, and experiment with different approaches until you find one that works for you. Remember, sometimes a small change or an unconventional technique could lead to a surprisingly good result.

Categories
Archive

Tunecore Review The Honest Truth

Tunecore provides artists with a platform to distribute their music on streaming services like Spotify, Apple Music, and Amazon Music. Overall, Tunecore has positive reviews with users praising their customer service team and ease of use.

As an independent artist, it can be challenging to get your music noticed. There are many platforms available to distribute music, but Tunecore has been around since 2005 and has helped many artists get their music in front of a larger audience.

In this review, we will take a closer look at Tunecore and see if it’s worth using as a platform to distribute your music in 2021. We will examine Tunecore’s pricing, features, and customer service to give you an honest assessment of this music distribution platform. So, without further ado, let’s dive into our Tunecore review.

How Does Tunecore Work?

Tunecore is a platform that enables independent music artists to distribute their music on various streaming services like Spotify and Apple Music. After signing up, artists can upload their music, set a release date, and Tunecore will handle the distribution, royalties, and payments.

If you’re a musician looking to distribute your music and earn revenue, Tunecore may be a viable option. Tunecore is an online platform that allows artists to distribute their music to various digital music stores and streaming services like Spotify, iTunes, and Amazon. In this article, we’ll take a closer look at how Tunecore works and what it has to offer for aspiring musicians.

Creating An Account

To start using Tunecore, you’ll need to create an account on their website. The signup process is relatively straightforward and requires basic information like your name, email, and a password. Once you’ve created your account, you’ll be directed to the Tunecore dashboard, where you can start uploading your music.

Uploading Your Music

To upload your music to Tunecore, you’ll need to create a new release and provide some essential details about your music, such as the release date, genre, and tracklist. You’ll also need to upload high-quality audio files and cover art for your release. Tunecore offers various digital distribution packages with different features and pricing, so you’ll need to choose the one that suits your needs and budget.

Distributing Your Music

Once your music is uploaded and ready to go, Tunecore will distribute it to various digital music stores and streaming services worldwide. Some of the popular platforms include Spotify, Apple Music, Tidal, and Deezer. Tunecore offers various promotional tools that can help you increase your music’s visibility and reach a wider audience.

Earning Revenue

Tunecore allows musicians to earn revenue from their music through streaming and download royalties. Every time someone streams or downloads your music on any of the digital music platforms, you’ll earn a certain percentage of revenue based on the platform’s royalty rates. Tunecore also offers detailed analytics that enables artists to track their music’s performance and revenue generated. In conclusion, Tunecore is an excellent option for independent musicians looking to distribute their music and earn revenue. With its easy-to-use platform, various distribution packages, and promotional tools, Tunecore can help you take your music career to the next level.

Tunecore Pricing

Tunecore offers pricing plans for music distribution on platforms such as Spotify, Amazon Music, and Apple Music. With various packages available, Tunecore provides an affordable way for independent artists to distribute their music globally while keeping all rights and royalties.

When it comes to music distribution services, Tunecore is a popular option for DIY musicians and indie artists. One of the most important factors when choosing a music distribution service is pricing. Tunecore pricing is transparent and straightforward, with no hidden fees. In this Tunecore review, we will be taking a closer look at the pricing structure of Tunecore, including album and single distribution pricing as well as additional services pricing.

Album Distribution Pricing:

If you’re looking to distribute an album, Tunecore offers a one-time fee option for both digital and physical distribution. Digital distribution pricing for an album starts at $29.99 for the first year and $49.99 per year after that. For physical distribution, the pricing starts at $39.99 for the first year and $49.99 per year after that. Tunecore’s album distribution pricing is affordable and competitive in comparison to other music distribution services in the market.

Single Distribution Pricing:

For those who want to distribute a single, Tunecore offers a simple fee structure. You can distribute a single for $9.99 which includes distribution to over 150 digital music stores and streaming services. Tunecore also offers additional options such as pre-orders, instant gratification tracks, and ringtone distribution for additional fees.

Additional Services Pricing:

Apart from distribution, Tunecore also offers additional services that can help independent musicians grow and promote their music. Tunecore’s additional services include music publishing administration, YouTube monetization, and sync licensing. The pricing for these services varies according to the service and type of usage. For example, Tunecore’s music publishing administration service starts at $75 upfront and takes 10-20% commission on royalties earned. In conclusion, Tunecore’s pricing structure is transparent, affordable, and competitive. With no hidden fees, Tunecore’s pricing is clear and easy to understand, making it an excellent choice for independent musicians and DIY artists looking to distribute, grow, and promote their music.

Pros Of Using Tunecore

Tunecore is an excellent platform for independent musicians to distribute their music to various digital stores and streaming services worldwide. With no fee to sign up and an easy-to-use dashboard, you can keep 100% of your earnings and stay in control of your music distribution.

Full Control Of Your Music

Tunecore offers musicians the convenience of being in full control of their music with no intermediaries involved. By using Tunecore, you get to retain the rights to your music and get the final say over all distribution channels, pricing, and promotional efforts. This is a massive advantage for independent musicians who want to retain creative freedom and control over their music.

No Ongoing Fees

Another significant advantage of using Tunecore is the absence of ongoing fees. Unlike other digital music distribution platforms, Tunecore doesn’t charge any yearly fees or renewals to keep your music on their platform. The only cost you’ll incur is the upfront fee to distribute your music for the first time, meaning that you can focus on your music and promotional efforts without worrying about hidden fees.

Access To Detailed Analytics

Tunecore provides artists with a range of detailed analytics that’s useful in tracking the success of their music every step of the way. These analytics include extensive statistics about your streams, downloads, and how people are consuming your music. You can use these metrics to optimize your marketing strategies, plan future events, and determine where to focus your promotional efforts.

Large Distribution Network

Tunecore’s vast distribution network ensures that your music is distributed to all the major digital stores, including Spotify, Apple Music, and Amazon. This means that you won’t have to worry about missing out on any potential revenue streams from these platforms. Additionally, Tunecore also offers distribution services to over 150 stores in over 200 countries, providing musicians with a global reach to their potential audience. In conclusion, Tunecore is an incredible platform that provides musicians with full control of their music, access to detailed analytics, and a large distribution network, all without incurring any hidden fees. By using Tunecore, you can stay focused on your music and put your best effort into promoting your art to the world.

Tunecore Review The Honest Truth

Credit: twostorymelody.com

Cons Of Using Tunecore

One of the cons of using Tunecore is the cost associated with their services. While they offer a platform that helps independent musicians distribute their music to major streaming services, Tunecore charges fees for each release. Additionally, the lack of personalized support for users can prove to be a frustrating experience for some.

No Free Distribution Options

Tunecore offers a platform for musicians to distribute their music to multiple digital stores and streaming services worldwide. However, one of the major drawbacks of using Tunecore is that they do not offer a free distribution option to their users. This means that musicians have to pay a fee for every release they distribute through Tunecore. The fees can be hefty for independent and upcoming musicians who cannot afford to pay for every release.

No Promotion Or Marketing Included

Another major con of using Tunecore is that they do not offer any promotion or marketing services to their users. Musicians have to promote and market their music on their own, and Tunecore does not assist with this aspect of the music industry. This can be a daunting task for some musicians, especially the ones who are just starting out and have limited knowledge and resources when it comes to marketing their music.

No Physical Distribution Options

Unlike some of its competitors, Tunecore only offers digital distribution of music. This means that musicians cannot distribute physical copies of their music through Tunecore. While physical music distribution may seem outdated in the current digital age, some musicians still prefer to sell their music in physical formats such as CD or vinyl. Tunecore does not offer this option, which can be a disadvantage for some musicians who want to explore this avenue. To sum up, while Tunecore is a great platform for musicians to distribute their music worldwide, it does have a few drawbacks that can make it less appealing to some users. The lack of free distribution option, promotion/marketing services, and physical distribution options can be a major deterrent for some musicians.

Tunecore Alternatives

Explore other music distribution services as Tunecore alternatives, including DistroKid and CD Baby. Tunecore offers a wide range of services to help independent musicians, but these alternatives can also provide unique benefits and features for different needs and goals.

As an independent artist, it’s essential to choose the right digital distribution platform to get your music out there. Tunecore is undoubtedly one of the most popular choices, but it’s not the only one. In this Tunecore review, we’ll take a look at some of the best Tunecore alternatives available today. Let’s dive in and explore the following:

Distrokid

DistroKid is a popular platform that prides itself on being the most straightforward way for artists to get their music on streaming platforms. It allows you to upload unlimited songs for a yearly fee, so it’s great for independent artists who want full control over their music. Plus, DistroKid doesn’t take a cut of your earnings, making it a more profitable option.

Cd Baby

CD Baby is another popular digital distribution platform that’s been around since 1998. It’s an affordable and straightforward option that offers various distribution packages that cater to the needs of individual artists. With CD Baby, you also get access to helpful features like YouTube monetization, sync licensing, and more.

Tunecore Vs Distrokid: Which Is Better?

While both TuneCore and DistroKid are popular and well-regarded digital distribution platforms, there are some key differences to consider. TuneCore is a more established platform that’s been around for longer and offers more comprehensive services. However, DistroKid is more affordable, simpler to use, and doesn’t charge additional fees for add-on features like TuneCore does. If you’re an artist on a tight budget or just starting, DistroKid is an excellent option to get your music on major streaming platforms quickly and affordably. On the other hand, if you want a more comprehensive suite of tools and are comfortable paying additional fees, TuneCore might be the better choice for you. Ultimately, it comes down to your needs as an artist and what you’re looking for in a digital distribution platform.

Tunecore Review The Honest Truth

Credit: dontsleepgfx.ca

Is Tunecore Worth It?

Tunecore may be worth it for independent musicians looking to distribute their music to major platforms. However, it may not be the best option for artists seeking additional promotion or marketing services. Ultimately, it depends on the individual’s specific goals and needs.

Tunecore is a digital distribution service that allows musicians and artists to sell their music online. It offers a lot of attractive features, but the question remains, “Is Tunecore worth it?”

Considerations Before Using Tunecore

Before deciding whether Tunecore is worth it, there are some things to consider. Firstly, it’s important to note that Tunecore charges an annual fee for each album or single. This means that if you have a large number of songs, the fees can quickly add up. Additionally, Tunecore takes a percentage of the sales made through its platform, meaning that you’ll be sacrificing a portion of your revenue. However, Tunecore does offer some advantages. For example, it allows artists to keep 100% of their rights and royalties, and it provides useful analytics to help artists keep track of their sales. Additionally, Tunecore has a strong customer support team that can help answer any questions or concerns you may have.

Final Verdict

Overall, whether Tunecore is worth it depends on your individual needs and priorities. If you have a large number of songs to distribute, the fees may be prohibitive, but if you value having control over your rights and royalties, Tunecore could be a good option. Ultimately, it’s up to you to weigh the pros and cons and determine if Tunecore is the right choice for you.

Frequently Asked Questions Of Tunecore Review The Honest Truth

What Is The Downside To Tunecore?

TuneCore charges a yearly fee and takes a percentage of revenue with no guarantee of success. Additionally, some artists have reported issues with customer support and difficulty withdrawing earnings.

Is Tunecore Publishing A Good Idea?

Yes, TuneCore publishing can be a good idea for independent musicians looking for a way to get their music onto major streaming platforms and collect royalties. TuneCore offers affordable distribution and publishing services that can help musicians increase their visibility and earn revenue from their music.

What Famous Artists Use Tunecore?

TuneCore is a music distribution service used by various famous artists such as Jeff Bernat, Jess Moskaluke, and Alex Day, among others.

How Much Does Tunecore Pay Per 1,000 Streams?

TuneCore pays about $6. 00 per 1,000 streams.

Conclusion

Tunecore is a reliable platform for independent artists to distribute their music globally while retaining complete control and ownership. It offers various promotional and monetization tools such as social media publishing and YouTube monetization. While it may not be as affordable as other distribution services, Tunecore’s comprehensive features and dedicated customer support make it a worthwhile investment for serious musicians.

Overall, Tunecore is an ideal choice for artists who prioritize quality and reliability over affordability in the competitive world of music industry.

Categories
Archive

Can Cubase Read Music Notation

Yes, Cubase can read music notation. Cubase has a comprehensive scoring editor that can import graphical notation data in various formats, including MusicXML, MIDI files, or even scanned sheet music.

Also, it uses an intelligent fretboard display system to assist in inputting guitar tabs and creates intricate orchestral scores. Also, it can translate between standard and drum notation, allowing composers to write music for percussion. The scoring editor includes a complete set of clefs, key signatures, time signatures, and other musical symbols, making it easier for composers to write notation that can be read by performers.

Related reading: Is Cubase Easy to Use? Simplify Your Music Production! and Why Do Composers Use Cubase: Unlocking Musical Mastery. For background, see the official Steinberg website.

Cubase also allows users to connect MIDI devices and input data directly into the score editor from any MIDI keyboard controller.

Music Notation File Formats

Moreover, if you’re a musician or composer, you might be wondering whether Cubase, a popular digital audio workstation software, can read scores. The answer is yes! In addition, Cubase can import different sheet music file formats. In this article, we’ll dive into the different notation file formats and see which ones Cubase can read.

Standard Midi Files

Standard MIDI Files (SMFs) are a popular notation format that contains digital sheet music instructions in a standardized format. For example, Cubase can import SMFs, allowing you to convert them to MIDI tracks that you can edit, mix, and arrange.

ProsCons
Widely used and supported by most music softwareLimited to 16 channels of MIDI data
Small file sizeDoesn’t support advanced sheet music features like lyrics or complex time signatures

Musicxml Files

Furthermore, MusicXML is a standard notation file format that can capture the nuances of different instruments and voices in a composition. As a result, Cubase can open MusicXML files, which contain detailed information about the scores, including the notes, rhythms, time signatures, and lyrics. This makes it easier to import sheet music from other software into Cubase.

  • Additionally, supports various features like lyrics, chords, and rhythm notation
  • Also, can capture complex musical compositions with various instruments and voices
  • Large file size

Capella Files

Moreover, Capella is a proprietary sheet music software that is primarily popular in Germany. Capella files can be opened and edited using the specialized Capella software, but Cubase can also import Capella files to convert them into MIDI tracks.

  1. In addition, supports various features like lyrics, chords, and rhythm notation
  2. Furthermore, can capture complex musical compositions with various instruments and voices
  3. Additionally, Capella software is not as well-known or widely used as other notation software

So there you have it! Cubase can read various notation file formats, including SMFs, MusicXML files, and Capella files. Also, depending on your needs, you can choose the best file format to import your sheet music into Cubase and create your own digital music compositions.

Can Cubase Read Music Notation

Credit: forums.steinberg.net

Importing Music Notation To Cubase

Cubase has the ability to read and import sheet music from other programs such as Sibelius and Finale. This can save time when transferring compositions to Cubase for further editing and production.

Importing notation to Cubase is a useful feature that allows users to work with musical notes in a more straightforward manner. Cubase is a popular digital audio workstation, but can it read scores? The answer is yes, Cubase can read sheet music, and that too with ease. Then, this article will guide you through the process of importing notation to Cubase, providing recommended settings and troubleshooting tips to get you started.

Step-by-step Guide

Importing scores to Cubase is a breeze. In short, follow these simple steps to import MIDI files to Cubase:

  1. Open Cubase and create a new project.
  2. Select “Import” from the “File” menu.
  3. In the Import window, choose the MIDI file you want to import.
  4. Select “Import as MIDI” from the “Import Options” pop-up menu.
  5. Choose the tracks you want to import and click “OK”.
  6. Now your MIDI file has been imported to Cubase.

Recommended Settings

To ensure that your sheet music imports smoothly into Cubase, we recommend the following settings:

  • Ensure that your MIDI file is saved in Standard MIDI file format (.mid).
  • Make sure that the MIDI file you are trying to import is compatible with Cubase.
  • Use the “Import as MIDI” option to import the file.
  • Always check the import settings before you import the MIDI file.
  • If you are importing multiple MIDI files, make sure the tracks are named correctly.

Troubleshooting Tips in Music Notation

Despite the straightforward process for importing notation to Cubase, you may still encounter some issues. Similarly, here are some troubleshooting tips that may help:

  • Ensure that your MIDI file is saved in a format that is compatible with Cubase.
  • Double-check your import settings before importing the MIDI file.
  • If you encounter an error message, try importing the MIDI file to a new project.
  • Moreover, if the imported track sounds off, check if your MIDI device is calibrated correctly.
  • If you are still experiencing issues, try searching for solutions in the Cubase forum or contact Cubase customer support.

In conclusion, importing scores to Cubase is a fantastic option that can save you time and effort. Also, we hope this guide has provided you with a clear understanding of how to import sheet music to Cubase, recommended settings, and troubleshooting tips. With these tips in mind, you’ll be able to get started with using Cubase for notation in no time.

Exporting Music Notation From Cubase

Cubase has the ability to read scores, and exporting it is a breeze. In addition, with just a few clicks, you can easily export your sheet music to a variety of formats, such as PDF, MIDI, and XML, making your music production process much smoother.

Cubase is well-known for its advanced MIDI capabilities. You can input notes using a MIDI controller or your computer keyboard, and then edit the notation using the software’s powerful editing tools. But what if you want to export that score to share with other musicians or print it? For example, can Cubase read sheet music, and how do you go about exporting it? In this article, we’ll explore exporting notation from Cubase using supported file formats, step-by-step guides, and recommended settings.

Supported File Formats

Cubase supports several file formats for exporting scores, including MusicXML, MIDI, and PDF. As a result, MusicXML is the most flexible format, as it can be imported into other music notation software programs like Finale and Sibelius. MIDI files are widely supported and can be used to transfer music notation to other DAW software programs. PDF files are best for printing music notation, and they are easily shareable with other musicians.

Step-by-step Guide

Exporting music notation from Cubase is a straightforward process. Follow these simple steps:

  1. Select the MIDI track or part that has the music notation you want to export.
  2. Click “File” in the top menu and select “Export” from the dropdown menu.
  3. Select the file format you want to export your music notation to (e.g., MusicXML, MIDI, PDF).
  4. Choose the location and file name where you want to save the exported file.
  5. Click “Export.”

Recommended Settings

To ensure your exported music notation file is in the best quality and optimal for other software programs to read, it’s important to make sure you have the recommended settings in Cubase. However, here are our recommended settings:

  • For MusicXML, make sure to select the option to “Include note and controller data.”
  • In addition, for MIDI, make sure to select the option to “Include MIDI format 1.”
  • For PDF, make sure to set the page size to match your paper size and select the option to “Include notation.”

Exporting music notation from Cubase is an essential task for those who want to share their music compositions with other musicians or print sheet music for their own use. Then, Cubase makes it easy to export music notation in several popular file formats. Follow our step-by-step guide and recommended settings for the best results.

Can Cubase Read Music Notation

Credit: www.youtube.com

Advanced Music Notation Features In Cubase

Cubase offers advanced music notation features that allow for the reading of music notation. With its comprehensive score editor, Cubase can not only read music notation but also provide various articulations, dynamics, and symbols to enhance the musical expression of your compositions.

Advanced Music Notation Features in Cubase Cubase is one of the most popular digital audio workstations, designed for professional musicians and composers. It is a powerful tool that allows users to record, edit, mix, and master their music. One of the standout features of Cubase is its advanced music notation capabilities. With its built-in Score Editor, Key Editor, and Drum Editor, Cubase makes it easy for musicians and composers to create and edit music notation. Score Editor The Score Editor in Cubase is a powerful tool for creating and editing music notation.

It allows users to create sheet music, lead sheets, and guitar tablature. The Score Editor features a wide range of notation symbols, including clefs, key signatures, time signatures, notes, rests, and more. Users can also add text, lyrics, chord symbols, and guitar chord diagrams to their scores. Key Editor The Key Editor in Cubase is another powerful tool for music notation. It allows users to edit MIDI notes and create and edit music notation. Users can create and edit notes, as well as adjust velocity and duration.

Practical Tips for Music Notation

The Key Editor also features a wide range of tools for editing and manipulating MIDI data, such as quantization, transposition, legato, and more. Drum Editor The Drum Editor in Cubase is designed specifically for drum programming. It allows users to create and edit drum patterns using a graphical interface. Users can create patterns by clicking on the grid, or by using a MIDI controller. The Drum Editor also features a range of tools for editing and manipulating drum patterns, such as quantization, swing, velocity adjustment, and more.

In conclusion, Cubase is a powerful music production tool that offers advanced music notation features for professional musicians and composers. Its built-in Score Editor, Key Editor, and Drum Editor make it easy for users to create and edit music notation. Whether you are creating sheet music, editing MIDI data, or programming drums, Cubase has the tools you need to bring your musical vision to life.

Tips And Tricks For Music Notation In Cubase

Cubase is capable of reading and writing music notation which saves a lot of time for music composers. Music notation is vital to record music, generate printed sheet music, and facilitate communication between music performers. Here are some tips and tricks on how to effectively utilize music notation in Cubase.

Cubase is a top choice for many composers and music producers, as it offers a wide range of features and options to create quality recordings. One of the most important aspects of music production is notation. With Cubase, you have the option to notate your music quickly and easily. In this blog post, we will explore tips and tricks for music notation in Cubase, including customizing score layout, using key commands for quicker notation editing, and utilizing Cubase’s MIDI editing capabilities.

Customizing The Score Layout for Music Notation

Cubase offers a range of options to customize the layout of your score. You can configure the layout settings and adjust the size and position of elements, such as staff lines, bar numbers, notes, and rests. This can help you create a well-structured score that is easy to read and interpret. In addition, Cubase enables you to set up specific score elements for printing, such as headers, footers, and page numbers, so that your printed score looks professional.

Using Key Commands For Quicker Notation Editing

Key commands are a powerful tool in Cubase that can save you a significant amount of time when editing notations. With a bit of practice, you can memorize key commands for common editing tasks, such as adding and removing notes, adjusting note length and position, and zooming in and out of the score. You can also customize your own key command shortcuts, which can further boost your workflow efficiency.

Utilizing Cubase’s Midi Editing Capabilities

Cubase’s MIDI editing capabilities enable you to fine-tune your notations with precision. You can adjust velocity, pitch, and timing of the notes to create a more expressive and realistic performance. Cubase also provides a range of MIDI editing tools, such as the logical editor, the drum editor, and the score editor, which can help you achieve various notational effects and techniques. Using these tools, you can edit multiple notes at once, quantize your notes, and transpose your entire score, among other things. Overall, Cubase’s music notation features offer a powerful set of tools for composers and music producers. By customizing the score layout, using key commands for quicker notation editing, and utilizing Cubase’s MIDI editing capabilities, you can create high-quality scores with minimal effort.

Can Cubase Read Music Notation

Credit: www.youtube.com

Frequently Asked Questions Of Can Cubase Read Music Notation

Does Cubase Do Notation?

Yes, Cubase software includes notation functionality to create, edit, and print music scores. It allows you to compose and arrange music using standard notation symbols, along with various tools for handling complex scores.

How Do You Read Musical Notes?

To read musical notes, first learn the basics of music notation. Know the different symbols and their corresponding values. Each note represents a specific pitch and duration. Notes can also be grouped into measures with a time signature to indicate the rhythm.

Practice reading sheet music by playing or singing music while matching the notes on the page.

What Is The Score Editor In Cubase Pro?

The score editor is a feature found in Cubase Pro that allows users to view and edit music notation directly on their computer. It is a powerful tool that allows musicians to create, edit, and print sheet music for their compositions.

How Do You Learn Staff Notation?

To learn staff notation, you need to start with the basics such as understanding the musical notes and their time values. Practice reading sheet music, memorize the symbols and study the structure of the staff. Take online courses or hire a music tutor to guide you through the learning process.

Consistent practice is key.

Conclusion

After analyzing the features and capabilities of Cubase, we can conclude that it is a powerful tool for music production and notation reading. Its MusicXML import and export features allow for seamless collaboration with other software applications and ensure that the intricate details of compositions remain intact.

Additionally, Cubase’s intuitive interface and extensive support for MIDI controllers make it an ideal choice for musicians, composers, and producers. Cubase delivers what it promises and is a versatile and reliable software for all your music production needs.

Categories
Archive

Creating Space In Your Mix Using Eq

To create space in your mix using EQ, consider cutting frequencies that aren’t necessary for the specific instrument or track. EQ can help eliminate muddiness and allow for each element to stand out in the overall mix.

When crafting a successful mix, EQ can be a crucial tool for creating a balanced and dynamic sound. However, it can be easy to fall into the trap of overloading the mix with too many frequencies, resulting in a muddy and cluttered sound.

In order to combat this issue, it’s important to understand and utilize space within the mix. By carefully applying EQ to cut frequencies that aren’t necessary for each specific instrument or track, you can create more space and clarity in the overall mix, allowing each element to stand out. We’ll dive into the specifics of creating space in your mix using EQ.

The Importance Of Creating Space In Your Mix

Creating space in a mix is the process of carving out frequencies for different instruments or elements so that they can be heard more distinctly. Essentially, it’s the art of balancing all the elements of a mix. The goal is to create an arrangement that is pleasing to the ear and conveys the intended emotions to the listener.

What Is Mix Space?

Mix space refers to the distance between the various elements in a mix. Creating space in the mix involves dividing up the frequency spectrum so that each instrument has its designated place in the mix.

Why Is Mix Space Important?

Without proper mix space, the overall sound can become muddy and indistinct, and certain elements may be drowned out by others. When instruments are competing for the same frequencies, they can clash and create distortion and unwanted noise.

Creating space in a mix can also improve clarity and definition. By separating the different elements and carving out space for them, you can enhance the presence of each instrument and ensure that every part of the mix can be easily heard.

How Eq Can Help Create Mix Space

Equalization (EQ) is a valuable tool for ensuring that each instrument has its own space in the mix. By using EQ to cut or boost specific frequencies, you can make each instrument sound clearer and more distinct. For example, you may want to cut some of the low end from a guitar to make room for the bass or carve out some space in the mid-range to let the vocals shine through.

Additionally, using panning and stereo effects can also help create space in a mix. By placing different elements in different areas of the stereo field, you can further separate them and create a more spacious overall sound.

In Conclusion,

Creating space in your mix is essential for achieving a balanced sound that conveys the intended emotions. With EQ, panning, and other mixing techniques, you can ensure that each instrument has its place in the mix and that nothing gets lost in the clutter. By taking the time to create space in your mix, you can elevate your productions and make them stand out from the crowd.

Creating Space In Your Mix Using Eq

Credit: mastering.com

Understanding Eq

Using EQ to create space in your mix is crucial for achieving a balanced and polished sound. By applying EQ to different elements of your mix, you can carve out frequency ranges and prevent elements from clashing, resulting in a more defined and clear mix.

Understanding EQ EQ or Equalizer is a tool that modifies the balance between different audio frequencies. It plays a significant role in creating space in your mix, making your music sound clear and well-defined. The basic idea behind EQ is to cut or boost specific frequencies to achieve a better balance, which helps in eliminating muddiness and conflicts in your mix. In this blog post, we will discuss the basics of EQ, frequency bands in EQ, and how to apply EQ in your mix. What is EQ? EQ is an audio tool that controls the tonal balance of an audio signal. An EQ can either cut or boost specific frequencies, allowing you to sculpt your sound and manipulate the frequency spectrum of your mix. When you boost or cut a frequency, you change the perceived loudness of that frequency, affecting the overall sound of your mix. Frequency Bands in EQ Before understanding how to apply EQ in your mix, it is essential to understand the frequency bands in EQ. There are three primary frequency bands in EQ: low, mid, and high. The low frequency ranges from 20 Hz to 250 Hz and controls the bass and warmth of the music. Low frequencies need to be balanced well to prevent muddiness in the mix. The mid-frequency ranges from 250 Hz to 6 kHz. This range controls the presence of the vocal and instrumental elements. It is essential to strike a balance in the mid-range to prevent masking effects in your track. The high-frequency ranges from 6 kHz to 20 kHz, controlling the presence and brightness of your music. A proper balance in the high frequency helps in giving a clear and defined sound to your mix. Applying EQ in Your Mix Using EQ is all about balancing the frequencies to make your mix sound well-defined, clear, and balanced. Here are some tips to help you apply EQ in your mix: 1. Start by using a low-cut filter to eliminate unnecessary rumble and mud in your track. 2. Address problematic frequency ranges. For example, a small boost in the mid-range can add clarity to a vocal track. 3. Cut frequencies that clash with other elements. For instance, if the guitar and vocals are competing for the mid-range, cut the guitar in that range. 4. Experiment with EQ and take breaks to refresh your ears and prevent ear fatigue. In conclusion, understanding EQ is crucial for creating space in your mix. By knowing the frequency bands in EQ and applying EQ in your mix, you can take your music to the next level.

Creating Space Using Eq Techniques

To create space in your mix using EQ, focus on using EQ to sculpt each element in your mix. By cutting frequencies that aren’t needed and boosting important ones, you can create separation between different tracks and make your mix sound more defined.

Use high-pass and low-pass filters to remove unnecessary frequencies and consider using mid-side EQ techniques for more precise control.

Creating Space Using EQ Techniques EQ is a powerful tool for manipulating the frequency spectrum of your mix. By boosting or cutting certain frequencies, you can shape the tonal balance of individual tracks, carve out space for each element, and create a sense of depth and dimensionality. In this guide, we’ll show you how to use EQ to create space in your mix. We’ll cover identifying frequency conflicts, the subtractive EQ approach, the additive EQ approach, and using EQ to create depth and width in your mix. Identifying Frequency Conflicts Before you start EQ’ing, it’s important to identify any frequency conflicts in your mix. A frequency conflict occurs when two or more tracks occupy the same frequency range, causing them to mask or compete with each other. This can lead to a muddy or indistinct mix. To identify frequency conflicts, sweep a narrow boost across the frequency spectrum of each track and listen for any areas where the track clashes with others. Once you’ve identified these areas, you can use EQ to fix the conflicts and create more space in your mix. The Subtractive EQ Approach The subtractive EQ approach involves cutting problematic frequencies from a track to reduce masking and create space. To use this approach, identify the frequency range where the track conflicts with other elements in the mix, and then cut the offending frequencies with a narrow Q. For example, if a bass guitar and kick drum are competing for space in the low end, you could cut a narrow band around 250 Hz. This would reduce the overlap between the two instruments and create more space for each to sit in the mix. Subtractive EQ can be a powerful tool for cleaning up your mix and creating a more defined sound. The Additive EQ Approach The additive EQ approach involves boosting certain frequencies to bring out the character of a track and create more space in the mix. This approach works well for tracks that need to stand out or have a unique tonal quality. To use this approach, identify the frequency range that you want to enhance, and then boost it with a gentle Q. For example, if a lead guitar needs to cut through the mix more, you could boost a band around 2-4 kHz. This would bring out the harmonics of the guitar and make it more audible in the mix. Additive EQ can be a powerful tool for creating space and clarity in your mix. Using EQ to Create Depth and Width in Your Mix In addition to creating space for individual elements, EQ can also be used to create depth and width in your mix. To create depth, you can use EQ to enhance the tonal qualities of tracks in the mid and high frequency ranges, while reducing the energy in the low end. This creates a sense of distance and space between instruments. To create width, you can use EQ to enhance the stereo field of tracks, by boosting certain frequencies in one channel and cutting them in the other. This creates a wider, more spacious sound. In conclusion, EQ is a powerful tool for creating space in your mix. By using the techniques we’ve outlined – identifying frequency conflicts, the subtractive EQ approach, the additive EQ approach, and using EQ to create depth and width – you can clean up your mix, create more space for individual elements, and give your tracks a sense of dimensionality and clarity. With some practice, you’ll be able to use EQ to create the perfect mix for any project.

Creating Space In Your Mix Using Eq

Credit: www.masteringthemix.com

Advanced Eq Techniques For Creating Space

Advanced EQ techniques are a vital part of creating a professional-sounding mix. Among those techniques are those that help create space in the mix. Using EQ to create space in the mix means separating the different instruments and sounds so that each element has its sonic place. In this post, we will discuss three powerful and effective advanced EQ techniques for creating space in your mix, including mid-side EQ processing, parallel EQ processing, and automating EQ changes over time.

Mid-side Eq Processing

One way to achieve a powerful and full-bodied mix is to use mid-side EQ processing. Mid-side allows you to EQ the center and side signals of an audio signal separately. This allows you to make more subtle corrections to the levels of your mix.

In practical terms, mid-side processing allows you to increase the midrange while reducing the sides. This technique is useful in situations where you need to focus the listener’s attention on the lead vocal, guitar, or other elements in the center of the mix.

Parallel Eq Processing

Parallel EQ processing is one of the most effective ways to create space in the mix. This technique involves duplicating the audio signal to two separate channels. The original signal goes through a low-pass filter, while the duplicated signal goes through a high-pass filter. The two signals then get mixed together, creating a unique sonic texture.

Parallel EQ processing is ideal for creating space in your mix because it allows you to keep the original sound intact while removing unwanted frequencies. What’s more, the high-pass filter used on the duplicated signal can be used to isolate specific frequency bands, making it easier to EQ each element in the mix independently.

Automating Eq Changes Over Time

Automating EQ changes over time is the final technique we will discuss in this post. This technique involves using EQ automation to make changes to the frequency range of different elements in your mix over time. For example, you may want to increase the presence of a background vocal during the chorus. By automating the EQ, you can make the necessary changes, giving the vocal the additional presence it needs without affecting the overall mix.

Automation is a powerful tool in mixing because it allows you to make changes to your mix dynamically. With the right automation tools, you can automate the EQ, volume, panning, and other elements in your mix to create a polished and professional mix.

Mixing Tips And Tricks Using Eq

EQ is a powerful tool for creating space in your mix. Through careful tweaking of frequencies, you can carve out room for each element of your track to shine. Use EQ to cut the lows on non-bass instruments, boost mid-range elements, and roll off highs on background sounds for a balanced and spacious mix.

Mixing Tips and Tricks Using EQ EQ or Equalization is a powerful tool used in music production to adjust the frequency balance of an audio signal. When used properly, EQ can help create space in your mix and make it sound balanced and polished. However, improper use of EQ can lead to a muddy and cluttered mix. In this post, we will discuss some essential Mixing Tips and Tricks Using EQ to help you achieve a clear, balanced, and professional-sounding mix. Avoid EQing in Solo When you’re mixing, it’s essential to avoid EQing in solo. EQing in isolation can create a false sense of balance and make your mix sound unbalanced when combined with other tracks. Instead, listen to your mix in context when EQing. Solo the track you intend to EQ and listen to the entire mix. Make your adjustments based on how the track fits into the context of the mix as a whole. Using EQ to Blend Sounds Using EQ to blend or combine sounds is an essential Mixing Tips and Tricks Using EQ. When different instruments share the same frequency range, they can quickly become cluttered and muddy, making it difficult to distinguish each instrument’s identity in the mix. This is where EQ comes in handy. By cutting or boosting certain frequency ranges, you can create space and separation between instruments, making them more easily distinguishable in the mix. Using EQ in the Mastering Process Mastering is the final step of the production process, where a mix is enhanced for its intended playback format. Using EQ in the mastering process can help balance the frequency spectrum of the entire mix and enhance its clarity and depth. Mastering engineers use EQ to make subtle adjustments to the overall mix’s tonality, removing any unwanted resonances and boosting certain frequency ranges to improve the mix’s overall impact and loudness. Avoiding Overuse of EQ Lastly, avoiding overuse of EQ is critical. It’s easy to get carried away and start EQing every track in your mix, trying to make it sound perfect. However, over EQing can lead to a thin or artificial-sounding mix. To prevent this, it’s essential to listen to your mix critically and use EQ only when necessary. Consider starting with a flat EQ and make subtle adjustments only when required. In conclusion, Mixing Tips and Tricks Using EQ is an essential aspect of music production. Whether you’re a beginner or an experienced producer, mastering EQ can take your mixes to the next level. By avoiding EQing in solo, using EQ to blend sounds, using EQ in the mastering process, and avoiding overuse of EQ, you can create a clear, balanced, and professional-sounding mix.

Creating Space In Your Mix Using Eq

Credit: create.routenote.com

Frequently Asked Questions Of Creating Space In Your Mix Using Eq

How Do You Create Space In A Mix With Eq?

To create space in a mix with EQ, you can boost certain frequencies in one sound and cut them in another. This technique is called frequency masking. By doing this, you can highlight the important elements of each sound and give them their own space in the mix.

How Do You Create Distance With Eq?

To create distance with EQ, use EQ adjustment techniques such as cutting out or reducing specific frequencies or bands in the audio signal. For example, if an instrument’s frequency range overlaps with another instrument’s, reducing or cutting out that frequency range can create distance between them.

Additionally, using reverb, delay, or other spatial processing can also create a sense of distance in the mix.

How Do You Create Distance In A Mix?

To create a sense of distance in a mix, you can adjust certain elements such as panning, EQ, reverb, and volume. For example, try panning certain instruments to one side and others to the opposite side, use more reverb on distant sounds, or lower the volume of certain elements to make them sound further away.

Experiment with these elements to achieve the desired effect.

How Do You Space An Instrument In A Mix?

Space an instrument in a mix by adjusting its frequency range, panning, and reverb. Use EQ to carve out its own space in the frequency spectrum. Pan the instrument to sit in the stereo field. Add reverb to create depth and space.

Adjust levels to ensure balance and clarity.

Conclusion

Creating space in your mix using EQ is a delicate but essential process. By using EQ to enhance instruments’ frequencies and give them room to breathe, you can create a more dynamic and balanced mix. EQ can add warmth, clarity, and depth to your mix, ensuring that each instrument has a place to shine.

Remember to use your ears and experiment to achieve the perfect sound. By following these tips, you can create a more professional and polished mix that will elevate your music to the next level!

Categories
Archive

Technique For Using Acoustic Sounds

You can use acoustic sounds as a technique for relaxation and stress relief. By focusing on the sound of your breath or a calming acoustic melody, you can reduce anxiety and improve your mood.

When it comes to managing stress and improving mental health, there are a variety of techniques available. Also, one effective technique you can easily add to your daily routine is listening to acoustic tones. This can include listening to calming music, focusing on the sound of your breath during meditation, or even experimenting with sound therapy like singing bowls.

Related reading: Acoustic Guitar Eq and Mixing The Acoustic Guitar. For background, see the Wikipedia article on Field recording.

These techniques can help reduce anxiety, lower blood pressure, and improve overall mood. Additionally, research has shown that the use of natural sounds can even improve cognitive performance and help with conditions like insomnia and chronic pain. So next time you’re feeling stressed or overwhelmed, consider incorporating the power of acoustic recordings into your self-care routine.

Understanding Acoustic Sounds

Moreover, learn how to master the technique of using acoustic tones and improve your understanding of the different types of sounds they produce. By experimenting with various methods, you can train your ear to recognize the nuances and subtleties of these sounds. This allows you to create unique and beautiful music.

In addition, acoustics is the interdisciplinary study of mechanical waves, including sound, vibration, ultrasound, and infrasound. When it comes to music production and sound design, natural sounds play a crucial role in creating a sonic landscape that is both natural and immersive.

Properties Of Acoustic Sounds

Acoustic recordings are physical waves that travel through mediums such as air, water, and solids. Furthermore, they are characterized by several properties that affect how we perceive them, including:

  • Frequency: The number of cycles or vibrations per second (measured in Hz).
  • Amplitude: The amount of energy carried by the sound wave (measured in decibels).
  • Wavelength: The distance between successive peaks or troughs of a wave.
  • Speed: The rate at which the wave travels through the medium.

Understanding these properties can help us create more convincing and realistic acoustic tones in our productions.

Types Of Acoustic Sounds

Natural sounds can be broadly categorized into two types: pitched and unpitched. Pitched sounds have a definite frequency and can be perceived as musical notes. In contrast, unpitched sounds have an indefinite frequency and are often perceived as noise.

PitchedUnpitched
Strings (guitar, bass, violin, etc.)Percussion (marimba, xylophone, etc.)Brass (trumpet, trombone, etc.)Woodwinds (clarinet, flute, etc.)White noiseBrown noisePink noiseCymbalsSnaresCrashes

By incorporating both pitched and unpitched sounds into our productions, we can create a diverse sonic palette that can convey different moods and emotions.

Benefits Of Using Acoustic Sounds

Acoustic recordings can have numerous benefits in enhancing meditation, relaxation, and calming the mind. By using techniques like Tibetan singing bowls or the sounds of nature, one can achieve a deeper state of relaxation, stress reduction, and improve overall well-being.

Acoustic tones have been used for centuries to promote relaxation, concentration and overall well-being. As a result, natural sounds have garnered immense popularity in recent years. Through research, many studies have shown that acoustic recordings provide a number of benefits, both physically and mentally.

Mental And Physical Health Benefits

Acoustic tones have a calming effect on the mind and body. This can promote relaxation, reduce stress and lower anxiety levels. In addition, natural sounds can help improve sleep quality, reducing the risk of chronic fatigue and improving overall cognitive function. Studies have shown that listening to acoustic recordings can also reduce blood pressure, decrease muscle tension and improve cardiovascular health. It can also lead to an increase in the production of natural endorphins, which boost mood and provide a sense of well-being.

Increased Productivity

Using acoustic tones in the workplace can lead to increased productivity. This is because it helps to reduce distractions, increase focus and improve cognitive function. Natural sounds can also help to enhance creativity and problem solving skills. Furthermore, listening to acoustic recordings during physical activity can help improve endurance levels by reducing the perception of physical exertion. This can lead to longer and more effective workout sessions. In conclusion, acoustic tones provide a range of benefits, including mental and physical health benefits and increased productivity. Incorporating natural sounds into your daily routine can significantly enhance your overall well-being.

Technique For Using Acoustic Sounds

Using acoustic recordings is a technique that can enhance the overall production quality of music. Acoustic instruments, such as guitars and pianos, can add depth and texture to a song; while ambient sounds, like nature’s sounds, can evoke mood and emotion.

Employing this method requires strategic placement and layering of sounds, resulting in an immersive listening experience.

Are you tired of using traditional methods to relax your mind and body? Look no further than acoustic tones as a natural and effective way to reduce stress and improve focus. Incorporating natural sounds into your daily routine provides a calming, soothing effect on your mind, body, and soul.

Choosing The Right Sounds

The effectiveness of acoustic recordings depends on the type of sound being used. Choose sounds that have a therapeutic effect, such as waves crashing, birds chirping, rain falling, or forest sounds. These sounds are capable of inducing deep relaxation, reducing stress, and improving the quality of your sleep. Select sounds that you enjoy listening to and have a calming effect on you.

Creating A Sound Environment

Creating a sound environment is crucial to the effectiveness of acoustic tones. Ensure you are listening to the sounds using comfortable headphones or speakers, particularly if you are in a noisy environment. Find a quiet and comfortable space where you can enjoy the sounds without interruptions. The space should be welcoming and free from any distractions that could ruin the calming effect of the sounds.

Incorporating Sounds Into Daily Routine

Incorporating natural sounds into your daily routine is easy. Whether you are at work, home, or on a commute, you can listen to sounds that help you relax and stay focused. If you are feeling stressed at work, take a short break and listen to your favourite acoustic sounds. You can also listen to acoustic sounds during meditation, yoga, or just before bedtime. Ensure you set aside some time to listen to these sounds, so you can achieve maximum benefits.

Conclusion

In conclusion, acoustic sounds are a natural and effective way to relieve stress, reduce anxiety, and improve your mental and emotional wellbeing. Incorporating soothing sounds into your daily routine is an easy and practical technique that can help you achieve inner peace and tranquillity. Choose the right sounds, create a sound environment, and incorporate acoustic sounds into your daily routine and experience the many benefits they offer.

Tools For Using Acoustic Sounds

Tools for using acoustic sounds are essential for musicians and sound engineers. Techniques for using acoustic sounds include microphone placement, EQ, compression, and reverb. With the right tools and technique, you can achieve the perfect sound for your recording or live performance.

Using acoustic sounds is an age-old technique that has been used for various purposes, including relaxation, meditation, and sound therapy. There are different ways to use acoustic sounds, from listening to white noise to playing calming music. The good news is that technology has made it easier than ever before to access and use acoustic sound tools. Here are some popular tools for using acoustic sounds:

White Noise Machines

White noise machines are a popular tool for creating a relaxing atmosphere. These machines produce a sound that is a combination of different frequencies, which helps to reduce background noise and promote relaxation. They are commonly used for sleep, but they can also help to reduce stress and anxiety during the day. Some popular white noise machines include:

  • Marpac Dohm Classic White Noise Machine
  • LectroFan High Fidelity White Noise Machine
  • Adaptive Sound Technologies LectroSound Classic White Noise Sound Machine

Sound Apps

Sound apps are an excellent tool for using acoustic sounds because they are easily accessible on smartphones and tablets. There are numerous sound apps available, each with different sounds and features. Sound apps offer a flexible way to customize the sounds, choosing the duration and volume levels. They are perfect for a quick relaxation session at work or to help you sleep. Some popular sound apps include:

  • Relax Melodies
  • White Noise Lite
  • Calm

Music Playlists

Music playlists can be an effective way to use acoustic sounds for relaxation or focus. Choosing the right music is essential since different types of music evoke different emotions. Classical music is known for promoting relaxation, while pop music can be uplifting and energetic. You can create your own music playlists or access pre-made playlists on music streaming platforms. Here are some music genres that are good for relaxation and focus:

  • Classical
  • Ambient
  • Nature sounds
  • Instrumental

Using acoustic sounds is a simple and effective technique that can benefit your mental wellbeing. Whether you choose to use white noise machines, sound apps, or music playlists, make sure to choose sounds that resonate with you and help you relax or focus.

Examples Of Using Acoustic Sounds

Acoustic sounds can impact the brain positively in numerous ways. Listening to acoustic sounds on a daily basis can enhance our memory capacity, help us relax, and improve our focus. Below are some examples of how acoustic sounds can help during various activities:

Relaxation And Meditation

Relaxation and meditation are essential stress-relievers for many people. By incorporating acoustic sounds, the process becomes even more effective. The soothing sound of water droplets or the calming sound of birds can provide a comforting atmosphere to the listener, aiding in relaxation and enabling better meditation.

Studying And Concentration

For most, studying or working in silence can be quite a challenge. The incorporation of music with relaxing acoustic sounds can help improve concentration and productivity. Slow-paced and calming acoustic sounds with lower beats per minute, such as forest sounds, can reduce anxiety and stress and aid in better concentration.

Sleep Aid

Acoustic sounds can also serve as an effective sleep aid. The monotonous and comforting sound of rain or ocean waves can provide a calming effect, making it easier for the listener to fall asleep. Moreover, it can help improve the quality of sleep and reduce sleep disturbances, thereby promoting overall wellness.

With the proven benefits of acoustic sounds, one can undoubtedly incorporate them into their daily routine to improve overall well-being.

Technique For Using Acoustic Sounds

Credit: whisperroom.com

Research On The Effectiveness Of Acoustic Sounds

Acoustic sounds have been proven effective in reducing stress, anxiety, and promoting relaxation. While many people have experienced the therapeutic benefits firsthand, scientific research has also been conducted to validate these claims. Here are some of the findings:

Scientific Studies

Studies conducted by various researchers have shown that acoustic sounds have a calming effect on the human mind and body. A study published by the Journal of Advanced Nursing found that listening to relaxing music significantly improved the sleep quality of patients in a critical care unit. Another study by the National Institute of Health found that gentle rainfall sounds induced a relaxation response in individuals and lowered their stress levels.

The use of acoustic sounds has also been found to be effective in reducing symptoms of anxiety, depression, and PTSD. A research study published by the Journal of Traumatic Stress found that exposure to music significantly reduced anxiety levels in patients with PTSD. Another study conducted by the American Music Therapy Association found that music therapy was effective in reducing depression in elderly patients.

Reviews And Case Studies

In addition to scientific studies, there are also many reviews and case studies that support the effectiveness of acoustic sounds. Many individuals have reported experiencing deep relaxation and reduced stress after listening to calming music or nature sounds. There are also numerous testimonials from individuals who have benefitted from using sound therapy to reduce depression, anxiety, and PTSD symptoms.

One notable case study involved a patient with severe depression who was resistant to conventional treatment methods. The patient reported significant improvement after undergoing music therapy, which included listening to calming music and playing musical instruments.

Overall, the research on the effectiveness of acoustic sounds suggests that they can be a valuable tool in reducing stress and promoting relaxation. Whether it is through listening to calming music or nature sounds, or undergoing music therapy, the use of acoustic sounds can have a positive impact on mental health and wellbeing.

Technique For Using Acoustic Sounds

Credit: www.bigrentz.com

Frequently Asked Questions For Technique For Using Acoustic Sounds

What Are The Methods Of Acoustic Treatment?

You can achieve acoustic treatment through methods such as adding sound absorbers like acoustic foam and panels, diffusers, bass traps, and wall and ceiling construction techniques like double walls and staggered studs. These methods aim to reduce reverberation, eliminate standing waves, and improve overall sound quality in a given space.

What Is The Acoustic Treatment Theory?

Acoustic treatment theory refers to the process of controlling the sound waves in a room to improve the acoustic quality for the listener. By using sound-absorbing materials or diffusers, the treatment helps to reduce echoes, unwanted noise reflections, and standing waves, resulting in better sound quality.

How Do You Acoustically Treat A Listening Room?

To acoustically treat a listening room, use a combination of absorbers, diffusers, and bass traps to improve sound quality and reduce unwanted reflections. Check the room’s dimensions to make sure they’re not causing standing waves, and position speakers and listening position for optimal sound.

Why Use Acoustic Treatment?

Acoustic treatment improves the sound quality in a room by reducing unwanted echoes, reflections, and reverberations. It creates an optimal listening environment and enables precise recording, mixing, and mastering of audio.

Conclusion

To sum up, using acoustic sounds is an effective technique for creating unique and natural sounds to enhance your music or audio production. The processes of recording, manipulating and layering these sounds, can produce some amazing results. You can use a variety of acoustic sources such as percussion, strings or even your own voice to create a range of sounds that are all organic and unique.

By incorporating these sounds into your music or production, you can give your work an added depth and emotion that cannot be achieved through synthetic sounds alone. Incorporating acoustic sounds is an excellent way to elevate your creative work.