Categories
Archive

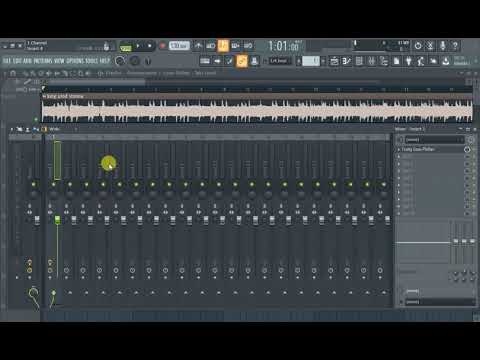
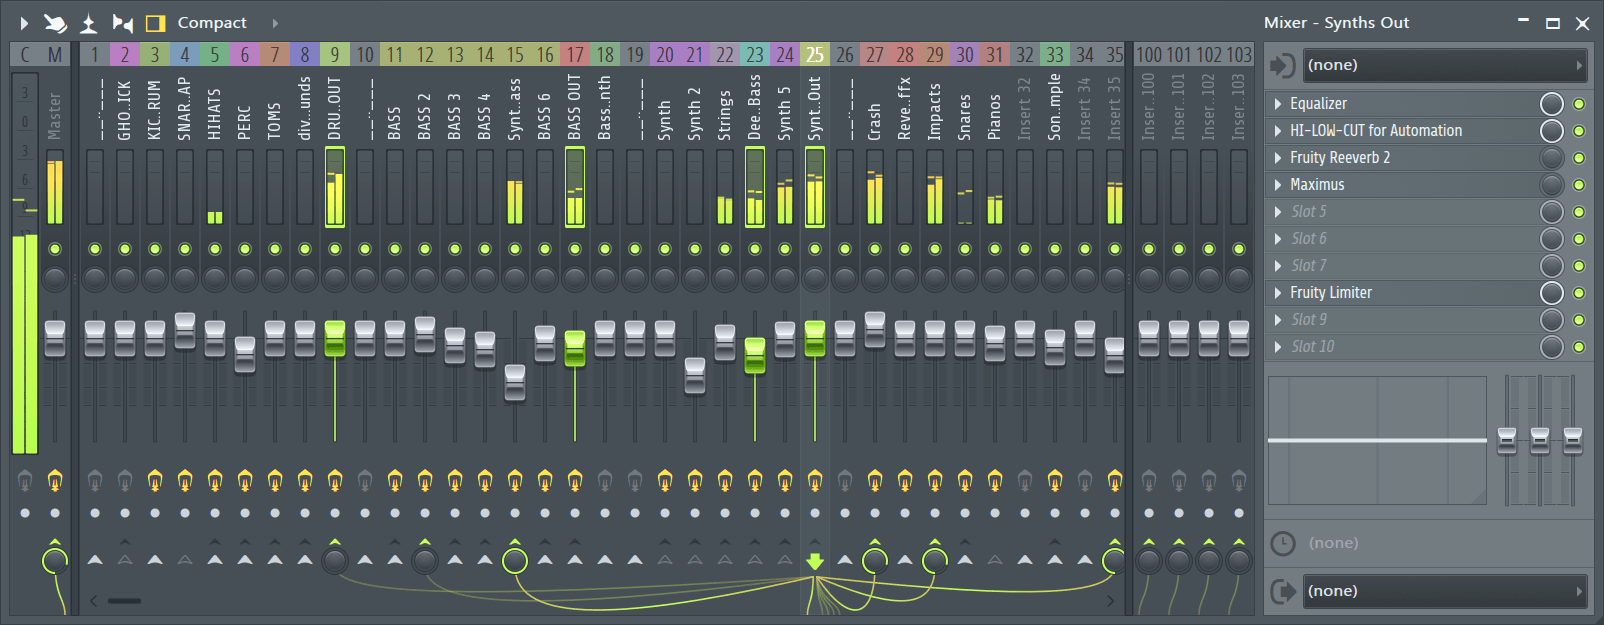
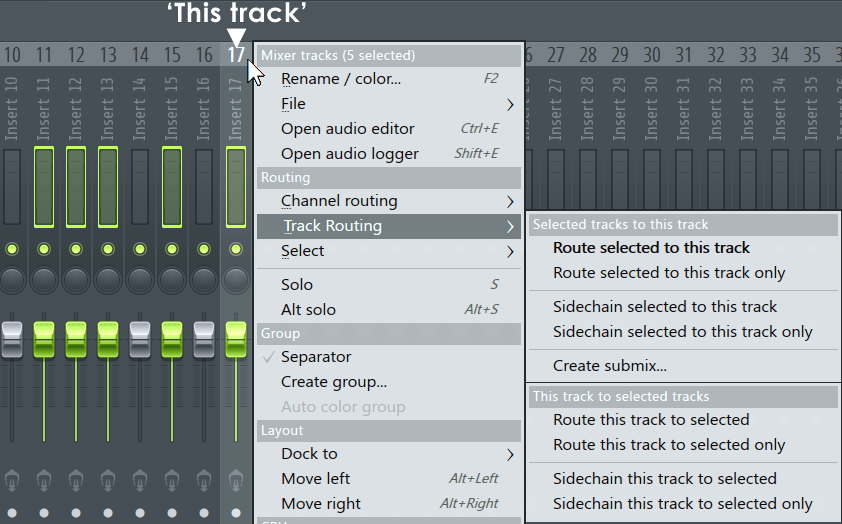
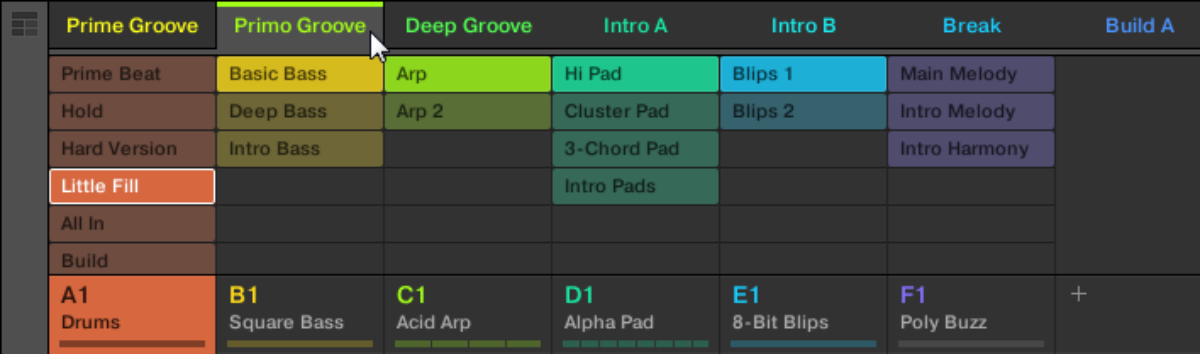
Best Mixing Plugins Fl Studio

The best mixing plugins for FL Studio are Waves SSL, FabFilter Pro-Q3, and Izotope Ozone. These plugins offer high-quality sound, versatility, and user-friendly interfaces.

FL Studio is one of the leading digital audio workstations (DAW) that offers a vast range of features for music producers and audio engineers. To enhance the mixing process, an array of mixing plugins is crucial. The right plugins streamline workflow, offer greater precision, and enable producers to manipulate audio more creatively.

Waves SSL, FabFilter Pro-Q3, and Izotope Ozone are commonly used in the music industry and have received critical acclaim. Apart from their pristine sound quality, they offer an extensive set of features like EQ, compression, limiters, and more. We will dive deep into the best mixing plugins for FL Studio.

1. Izotope Ozone 9

When it comes to mixing plugins for FL Studio, izotope Ozone 9 is the gold standard. This powerful plugin has everything you need to polish your tracks and make them sound professional.

Overview

izotope Ozone 9 is an all-in-one mastering plugin that allows you to fine-tune every aspect of your mix. It features an intuitive interface that makes it easy to use, even for beginners. With izotope Ozone 9, you can use various modules to adjust the EQ, dynamics, stereo imaging, and more.

Features

izotope Ozone 9 is packed with features that allow you to achieve the perfect mix. Some of its key features include:

  • Master Assistant that helps you make quick adjustments based on your mix
  • Tonal Balance Control for adjusting the tonal balance of your mix
  • Match EQ that allows you to match the sound of your mix with a reference track
  • EQ Match that matches the tone of your mix to another track
  • Vintage modules that add a warm, analog sound to your mix

Pros

Here are some of the pros of using izotope Ozone 9:

  • Comprehensive all-in-one mastering plugin
  • Intuitive interface makes it easy to use
  • Powerful modules for fine-tuning your mix
  • Master Assistant makes it easy to get a quick, professional sound

Cons

Despite its many benefits, there are a few cons to using izotope Ozone 9:

  • Expensive compared to other plugins
  • Requires a powerful computer to run
  • May take some time to learn how to use it effectively

If you’re willing to invest in a high-quality mixing plugin, izotope Ozone 9 is definitely worth considering. Its powerful features and intuitive interface make it a top choice for many professional producers and engineers in the music industry.
Best Mixing Plugins Fl Studio

Credit: modeaudio.com

2. Fabfilter Pro-q 3

FabFilter Pro-Q 3 is one of the best mixing plugins for Fl Studio. It offers excellent sound quality, flexible routing options, and a unique Natural Phase mode, making it an essential tool for any audio engineer.

Overview

FabFilter Pro-Q 3 is a premium equalizer plugin that offers a wide range of features to enhance the mixing experience in FL Studio. With its user-friendly interface and powerful tools, it has become a favorite among producers of all levels.

Features

The feature set of FabFilter Pro-Q 3 is unmatched. Here are some notable features:

  • Resizable interface
  • Context-dependent help
  • High-quality spectrum analyzer
  • Up to 24 EQ bands
  • MID-SIDE processing
  • Linear phase mode
  • EQ match feature
  • Full-screen mode

Pros

There are plenty of benefits of using FabFilter Pro-Q 3, such as:

  • Intuitive interface for easy use
  • Precise parameter control for detailed mixing
  • High-quality sound output
  • Wide range of features to cater to different mixing needs
  • Context-dependent help for quick assistance

Cons

While there are many advantages to using FabFilter Pro-Q 3, there are a few downsides to keep in mind, such as:

  • Slightly expensive
  • May require a learning curve for beginners
  • Requires high processing power

Overall, FabFilter Pro-Q 3 is an excellent equalizer plugin for FL Studio that can help take your mixing to the next level. Its powerful feature set and user-friendly interface make it a popular choice among producers.

3. Waves Ssl G-master Buss Compressor

The Waves SSL G-Master Buss Compressor is a top-rated mixing plugin that stands out in Fl Studio. With its advanced features, outstanding performance, and exceptional sound quality, it is a highly recommended tool for enhancing your audio mixing experience.

Overview

Waves SSL G-Master Buss Compressor is a mixing plugin that was developed in collaboration with Solid State Logic. It is specifically designed for the SSL G Series console and incorporates the classic SSL sound into your mix. This plugin is one of the most popular and widely used in FL Studio mix sessions.

Features

The Waves SSL G-Master Buss Compressor has several distinctive features that make it stand out from other mixing plugins. Here are some of the top features:

  • It includes a wide range of threshold, ratio, attack, and release settings, which allow you to tweak your mix to perfection.
  • The compression effect is incredibly smooth, transparent, and natural, making it perfect for mastering purposes.
  • The plugin offers both mono and stereo models, so you can adjust your mix accordingly.
  • It is also equipped with a handy sidechain filtering feature, allowing you to choose which frequencies get compressed.
  • The G-Master Buss Compressor also includes an auto-release feature, which adapts quickly to changing input levels and dynamics.

Pros

There are several reasons why the Waves SSL G-Master Buss Compressor is considered one of the best mixing plugins in FL Studio. Here are some of its biggest advantages:

  • It delivers a classic SSL sound that is hard to replicate with other mixing plugins.
  • The plugin is incredibly versatile and can be used for a wide range of applications, from mixing individual tracks to mastering an entire song.
  • The compression effect is incredibly smooth, transparent, and natural, making it perfect for mastering purposes.
  • The wide range of threshold, ratio, attack, and release settings allow you to fine-tune your mix with precision and accuracy.

Cons

While the Waves SSL G-Master Buss Compressor has many benefits, it also has a few drawbacks that are worth noting. Here are some of the biggest disadvantages:

  • The G-Master Buss Compressor is quite expensive, so it may not be the best option for those on a tight budget.
  • It can be a bit overwhelming for beginners to use, as it offers a wide range of advanced features that require a certain level of expertise to utilize fully.
  • The plugin can be quite CPU-intensive, which means it may not be suitable for older computers or laptops with less processing power.

Overall, the Waves SSL G-Master Buss Compressor is an excellent mixing plugin that is well-suited for both amateur and professional use. Its ability to deliver a classic SSL sound combined with its advanced features and ease of use make it a reliable and popular choice for FL Studio mix sessions.

4. Soundtoys Decapitator

The Soundtoys Decapitator is one of the best mixing plugins available for FL Studio. With its analog saturation and distortion effects, it can add warmth and character to any track, making it sound more natural and polished.

Overview

Soundtoys Decapitator is a high-quality distortion plugin that can add depth, warmth, and grit to your mix. The plugin is designed to emulate analog saturation and distortion, making your tracks sound like they were recorded on vintage equipment. Whether you’re working on a rock song or a pop track, Soundtoys Decapitator can help you achieve the perfect sound.

Features

Soundtoys Decapitator is packed with features that make it one of the best mixing plugins for FL Studio. Some of its key features include:

  • Drive, Tone, and Mix controls that allow you to fine-tune your sound
  • Five different saturation modes to choose from, including sixties and tape
  • The ability to add subtle warmth or intense distortion to your tracks
  • Compatibility with both Windows and Mac operating systems

Pros

Soundtoys Decapitator has many advantages that make it one of the best options for FL Studio users. Here are some of the benefits of using this plugin:

  • High-quality analog emulation that adds warmth and depth to your tracks
  • Intuitive interface that makes it easy to use
  • Compatible with a wide range of DAWs, including FL Studio, Ableton Live, and Pro Tools
  • Provides five different saturation modes for a wide range of tonal options

Cons

While Soundtoys Decapitator is an excellent plugin, it does have a few potential downsides to consider:

  • It can be a little expensive compared to other plugins
  • It may not be ideal for those looking for more subtle effects
  • It may not be suitable for very specific genres that require a very clean sound

In summary, Soundtoys Decapitator is an excellent plugin that can add a unique character to your tracks. Its high-quality analog emulation and intuitive interface make it a great choice for FL Studio users and producers in general. While it may not be suitable for every project or style, it’s definitely worth considering as a versatile mixing tool.

5. Izotope Neutron 3 Advanced

IZotope Neutron 3 Advanced is one of the best mixing plugins for Fl Studio. It offers a wide range of features, including a powerful EQ, compressors, and an interactive visual mixer. With its advanced technology, it helps in achieving professional-level mixing outcomes.

Just getting started with mixing? Look no further! iZotope Neutron 3 Advanced is an all-in-one mixing suite that offers advanced control over every element of your mix. This plugin is ideal for both beginners and professionals alike and has quickly become one of the most popular mixing plugins in FL Studio.

Overview

The iZotope Neutron 3 Advanced is a mixing plugin that comes equipped with an assortment of tools to help you perfect your mix. Hailed as one of the best mixing plugins for FL Studio, this all-in-one plugin offers an impressive range of features including track assistant, visual mixer, and an improved interface.

Features

  • Track assistant to help set levels, EQ, and compression
  • Visual Mixer for a more intuitive mixing experience
  • Improved interface for easy navigation
  • Improved masking meter to identify overlapping frequency ranges
  • Modular processing chains to customize your sound

Pros

  • All-in-one mixing solution
  • Easy to use interface
  • Powered by machine learning to assist with mixing
  • Customizable modular processing chains
  • A wide range of tools for every mixing scenario

Cons

  • May come with a steep learning curve for beginners
  • May be a bit pricey
  • Resource-intensive and may require higher memory and processor requirements

The iZotope Neutron 3 Advanced is an excellent all-in-one mixing plugin for FL Studio. Its innovative features make the mixing process less tedious and more enjoyable. This plugin offers advanced control over every element of your mix, from EQ to compression, as well as an intuitive interface and highly customizable processing chains. While it may come with a steep learning curve and a higher price point, its advanced features make it an excellent and powerful tool for both beginners and professionals.
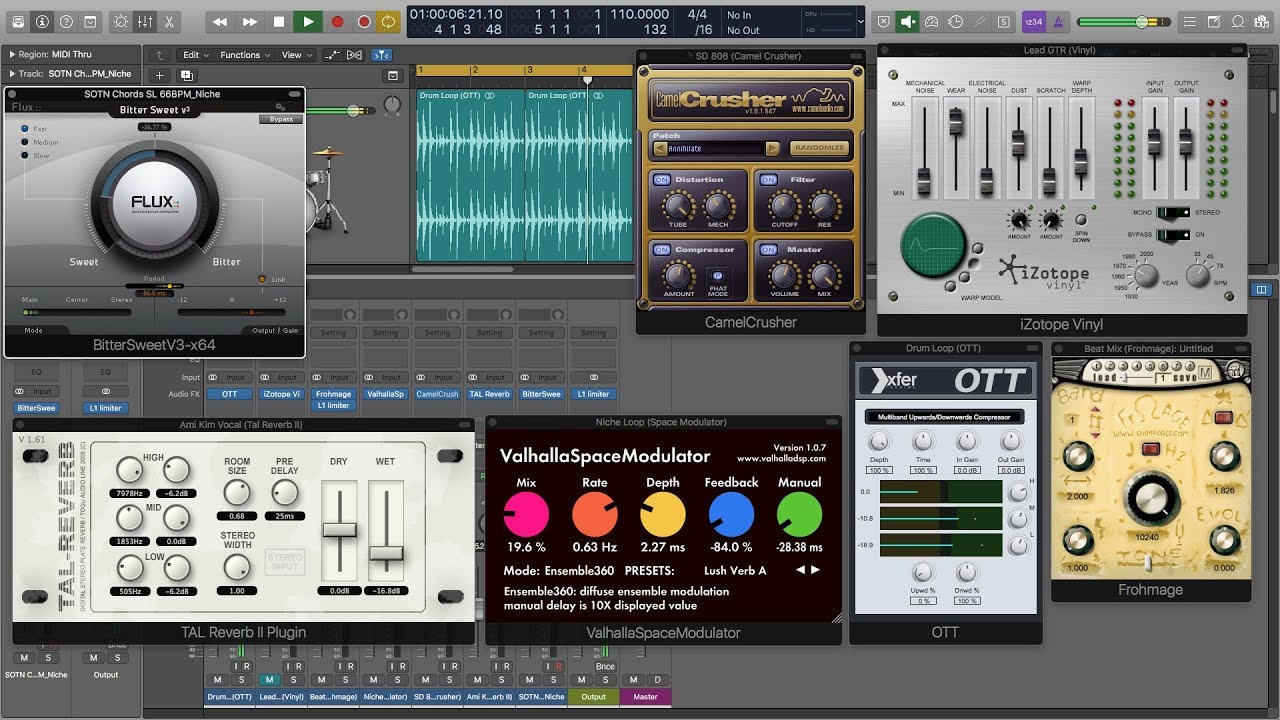
Best Mixing Plugins Fl Studio

Credit: m.youtube.com

6. Waves H-delay Hybrid Delay

The Waves H-Delay Hybrid Delay is a top choice for mixing plugins in FL Studio. With its unique vintage sound and wide range of customization options, this plugin is perfect for adding depth and character to your tracks.

Overview

For any music producer, having access to quality mixing plugins is essential to create professional-sounding music. As one of the best plugins on the market, 6. Waves H-Delay Hybrid Delay is a unique and versatile plugin that’s worth considering. This plugin offers numerous features that make it a popular choice among music producers.

Features

One of the most notable features of 6. Waves H-Delay Hybrid Delay is that it combines both analog and digital delay signals, allowing you to create rich and complex echoes that can enhance your tracks significantly. This plugin offers various delay types, including ping-pong delays and slap-back echoes, enabling you to experiment with different effects. It also has a tempo-based feature that enables you to adjust delays based on the tempo of your track. Other exciting features included in this plugin are filtering, LFO modulation, and feedback damping.

Pros

One of the most significant advantages of 6. Waves H-Delay Hybrid Delay is that it can be used on various instruments, including vocals, drums, guitars, and synths. The plugin’s interface is user-friendly, making it easy for both beginners and experienced producers to navigate. The hybrid delay feature of this plugin makes it unique as it combines both analog and digital delay signals, enabling you to create complex echoes that can elevate your mixes.

Cons

The only setback of 6. Waves H-Delay Hybrid Delay is that it’s a bit expensive compared to other mixing plugins available in the market. However, the cost is worth it considering the plugin’s comprehensive features and the significant difference it can make in your tracks. If you’re serious about producing professional-quality music, investing in quality mixing plugins such as 6. Waves H-Delay Hybrid Delay is a must. This plugin offers a unique and comprehensive set of features that can elevate your tracks to the next level!

Best Mixing Plugins Fl Studio

Credit: www.blackghostaudio.com

Frequently Asked Questions For Best Mixing Plugins Fl Studio

What Are The Best Plugins For Mixing?

The best plugins for mixing are dependent on your personal preferences and the type of mixing you’re doing. However, some popular choices include FabFilter Pro-Q3 for EQ, Waves SSL E-Channel for channel strip, and iZotope Ozone for mastering. Other notable options include Soundtoys 5, Slate Digital Virtual Mix Rack, and UAD plugins.

What Is The Most Popular Fl Studio Plugin?

The most popular FL Studio plugin is the Fruity Reverb 2. It is a versatile and high-quality reverb plugin that has become a staple in the music production industry. Its intuitive interface and wide range of adjustable parameters make it a favorite among FL Studio users.

Can Fl Studio Be Used For Mixing?

Yes, FL Studio can be used for mixing. It includes a powerful mixer with various effects and plugins to enhance the sound quality. FL Studio is known for its extensive mixing capabilities and is widely used in the music production industry.

What Plugins To Use For Mixing Vocals?

For mixing vocals, some of the most popular and effective plugins used by professionals are Antares Auto-Tune, Waves Tune Real-Time, SSL E-Channel Strip, FabFilter Pro-Q 3, and iZotope Nectar 3.

Conclusion

To sum up, choosing the best mixing plugins for FL Studio requires a bit of research and testing. However, with the vast array of options available, we have highlighted the top plugins for you to consider. Whether you are a beginner or an experienced producer, these plugins will undoubtedly enhance your mixing process and take your music production to the next level.

Don’t hesitate to try out these plugins and let your creativity flow. Happy mixing!

Categories
Archive

How To Make Melodies The Easy Way

To make melodies the easy way, start with a simple chord progression and build your melody based on the notes in those chords. With practice, adding embellishments and variations will come naturally.

Melodies are an integral part of music creation, setting the tone and atmosphere of a song. However, for many aspiring musicians and producers, the idea of creating a melody can be daunting, leading to creative blocks and frustration. The good news is that there are easy and efficient ways to create melodies, even for those new to music production.

With a few simple steps and techniques, anyone can create a catchy and memorable melody that will leave a lasting impression on listeners.

Find Inspiration

Discover simple techniques to create catchy melodies effortlessly with our “Find Inspiration” guide. Learn how to tap into your creativity and develop memorable tunes with ease, even if you have little to no musical knowledge or experience.

If you want to make beautiful melodies, first you need inspiration. Inspiration can come from anywhere- a bird’s chirp, a traffic sound, or even the sound of rain. Here are some ways to find inspiration for your melodies.

Listen To Music Regularly

One of the easiest ways to find inspiration for your melodies is to listen to music regularly. Listen to different genres of music, including those you might not typically listen to. Every genre will provide you with a different perspective and inspiration. When listening, pay attention to the melody, rhythm, harmony, and instrumentation. You can also try to identify what you like about the melody and how it helps you feel.

Experiment With Different Genres

If you want to create a unique melody, experiment with different genres of music. Crossing genres and combining them in your melody can create unique sounds that have never been heard of before. Try combining classical music with electronic music or mixing hip hop beats with jazz harmonies. While experimenting, make sure you are still keeping the melody in mind and not just adding random notes.

Use Nature As Inspiration

Nature is an incredible source of inspiration. Sit outside and listen to the sounds of nature- the bird’s chirp, the sound of leaves rustling in the wind, the raindrops hitting a metal roof. You can use these sounds to create a melody. The natural world is full of inspiration, from the melody of a bird’s song to the melodic rhythms of a babbling brook. Don’t be afraid to experiment with sounds that the nature can provide you.

Collaborate With Other Musicians

Collaborating with other musicians can be an excellent source of inspiration. You can learn from other musicians’ perspective on melodies and how they create their own. When collaborating, listen to each other’s melodies, and come up with new melodies together. A great melody can come from working with another musician. In conclusion, finding inspiration can help you create beautiful melodies easily. Listen to different genres of music, experiment with different sounds and collaborate with musicians to create a unique melody. Don’t hesitate in drawing inspiration from nature sounds, as it can also work wonders in your melody.

Choose A Key

When it comes to creating melodies, choosing a key is an essential step that sets the foundation for the entire composition. Choosing the right key will help you create a melody that is pleasant to the ear and harmonious to listen to. Understanding what a key is and selecting the key that suits your track are important aspects of making melodies the easy way.

Understand What A Key Is

A key is a set of pitches that form the basis of a melody. Every song has a key signature that indicates which pitches are included in the melody and which ones are not. The key signature consists of sharps (#) or flats (b) that are placed at the beginning of the music staff, right after the clef.

For example, if the key signature has one sharp, it means that the melody will include the pitches of F#, C#, G#, D#, and A#. If the key signature has two flats, it means that the melody will include the pitches of Bb, Eb, Ab, Db, and Gb.

Select A Key That Suits Your Track

Once you understand what a key is and how it works, it’s time to select a key that suits your track. The key you choose will depend on the style of music you’re creating, the instruments you’re using, and the overall mood you want to convey.

If you’re creating a track in a major key, you can choose from keys such as C Major, G Major, D Major, A Major, or E Major. These keys are well-suited for creating happy and upbeat melodies.

If you’re creating a track in a minor key, you can choose from keys such as A Minor, E Minor, B Minor, F# Minor, or C# Minor. These keys are well-suited for creating sad or melancholic melodies.

Major KeysMinor Keys
C MajorA Minor
G MajorE Minor
D MajorB Minor
A MajorF# Minor
E MajorC# Minor

When choosing a key, you should keep in mind that certain keys work better with certain instruments. For example, a song in the key of E Major may sound better on a guitar, while a song in the key of F# Minor may sound better on a piano. It’s a good idea to experiment with different keys and see which one works best for your track.

In conclusion, choosing a key is an essential step in creating melodies. By understanding what a key is and selecting the key that suits your track, you can create a melody that is both harmonious and pleasant to the ear.

Create A Chord Progression

Want to learn how to make melodies the easy way? Creating a chord progression is the perfect place to start. With a few simple adjustments, you’ll be able to develop catchy and memorable melodies that will make your music stand out.

Creating a chord progression is an essential part of making melodies. It can seem intimidating at first, but with some basic music theory knowledge and experimentation, you can hone your skills in no time.

Use Chords That Are In The Key

When creating a chord progression, it’s important to select chords that are in the same key as your melody to ensure they harmonize well. To determine which chords are in the key, you can use a chord chart or music theory resources online.

Experiment With Chord Inversions

Chord inversions can add depth and complexity to your chord progressions. Instead of playing the root note as the lowest note in the chord, you can move it to different positions, such as the third or fifth. This can create different textures and moods in your melody. Here are some tips to help you experiment with chord inversions:

  • Try first inversion chords (root note moved to the third) to create a brighter sound.
  • Second inversion chords (root note moved to the fifth) can create tension and a darker tone.
  • Experiment with different inversions to see which ones work best for your melody.

Creating a chord progression may take time and practice, but it’s worth the effort to make your melodies stand out. So, be patient, experiment and have fun with it!

Add Rhythm And Percussion

Adding rhythm and percussion to your melodies is an easy way to take them to the next level. Not only will it enhance the groove, but it will also give your melodies a new depth that keeps them interesting to listen to. In this section, we will go over some simple tips to help you add rhythm and percussion to your melodies.

Choose A Simple Beat

The first step is to choose a simple beat that will serve as the foundation of your melody. Keep in mind that the beat you choose will determine the overall feel of your melody. For example, if you want your melody to have a laid-back, relaxed feel, you might choose a slower, more mellow beat. On the other hand, if you want your melody to have an upbeat, energetic feel, you might choose a faster, more lively beat.

Add Percussion To Enhance The Groove

Once you have your beat selected, the next step is to start adding percussion to enhance the groove. Percussion instruments can include anything from drums to shakers to tambourines, and they can be used to add texture and complexity to your melody.

  • Start by adding a simple percussive element, such as a hi-hat or a snare. These instruments are typically used to keep the beat, and they can help to give your melody a structured feel.
  • Next, experiment with adding more complex percussion elements, such as congas, bongos, or tambourines. These instruments can help to add a sense of movement and dynamics to your melody.
  • Be mindful of the volume and emphasis of your percussion. You want to make sure that it complements, rather than overpowers, the melody.

Overall, adding rhythm and percussion to your melodies can be a simple yet effective way to make them more engaging and interesting to listen to. By following these tips, you can easily create a catchy and dynamic melody that will keep your listeners coming back for more.

The Melody-making Process

Creating melodies doesn’t have to be complicated. Follow these easy steps to make melodies effortlessly. Start by selecting a key, coming up with a chord progression, and then filling in the gaps with simple and catchy melodies.

Creating a melody can seem like a daunting task, especially if you’re new to music production. However, with some knowledge and practice, anyone can make an attention-grabbing melody. The process of making melodies can be a fun and rewarding journey. In this blog post, we’ll discuss some tips to help you make melodies the easy way.

Start With Simple Melodies

When it comes to melody-making, simplicity can be the key to success. Starting with a simple melody can help you focus on the basics, such as rhythm and structure. For example, you can start creating a basic melody by playing a few notes on a piano or any other instrument. Then, try to hum a few notes to match the melody. Once you have a simple melody, you can add more layers and complexity.

Layer Multiple Melodies Together

Layering multiple melodies can add depth and complexity to your music. By layering melodies, you can also create a unique sound. To layer melodies, start by creating a basic melody as a foundation, and then add additional melodies on top. Ensure that each melody works together and does not clash. You can also experiment by adding different instruments and sounds.

Organize your layers:

  • Start with a basic melody
  • Add another melody that complements the first melody
  • Experiment with adding different instruments and sounds
  • Ensure each melody works well together

Making melodies can be a fun and creative process. With these tips, you can start making attention-grabbing melodies that will enhance your music production skills. Remember to start with simple melodies and then layer multiple melodies together to create interesting and unique sounds.

How To Make Melodies The Easy Way

Credit: m.youtube.com

Use Music Theory Techniques

Incorporating music theory techniques is an easy way to make melodies. By understanding the fundamentals of music and applying them, you can create unique and memorable melodies that resonate with listeners. Whether you are a beginner or a seasoned musician, utilizing music theory can help you in the songwriting process.

Understanding music theory can be daunting for beginners, but it is an essential aspect of creating melodies. With some knowledge of music theory, you can compose melodies easily and with confidence. In this post, we’ll cover how to use music theory to make melodies the easy way.

Add Passing Notes

One technique that can be used to create interesting melodies is the addition of passing notes. These are notes that connect two other notes, often belonging to different chords. By adding a passing note, you can create a smooth transition between chords and make your melody flow better. For example, let’s say you’re composing a melody in the key of C major and your chords are C, F, and G. To add a passing note, you could play an A note in between the G and F notes. This A note does not belong to the chord of F, but it creates a musical connection between the G and F chords.

Utilize Chord Tones

Another useful technique is to use the chord tones of the chords you’re playing. Chord tones are the notes that make up a particular chord and using them in your melody will ensure that it sounds harmonious. For example, let’s say you’re composing a melody using the chords of C major and G major. The notes that make up these chords are C, E, G, and G, B, D respectively. By using these notes in your melody, you can create a strong and stable foundation for your composition. In summary, learning some music theory techniques can help you create melodies that are both pleasing to the ear and easy to create. Adding passing notes and utilizing chord tones will give your melodies a unique and professional sound. With practice, you’ll be able to use these techniques with ease while making your melodies stand out.

Experiment And Improvise

Experimentation and improvisation are key to making melodies the easy way. Don’t be afraid to try new things and let your creativity flow. By exploring different sounds and techniques, you can discover your own unique style and create memorable melodies.

Making melodies requires patience, practice, and an innate ability to create something beautiful. While some gifted musicians can create melodies effortlessly, many others struggle to come up with catchy tunes. This is where experimentation and improvisation come into play. By trying out different scales, modes, and taking creative breaks, you can come up with melodies that are unique and captivating. In this post, we’ll discuss the various ways you can experiment and improvise to make melodies the easy way.

Try Different Scales And Modes

One way to experiment with melodies is to try out different scales and modes. Scales are essentially sequences of notes played in a specific order. While most people are familiar with the major and minor scales, there are many others that you can try out. Modes are similar to scales but have a different starting note and sequence of intervals. By experimenting with different scales and modes, you can create melodies that have a unique sound. Some scales and modes you can try out include:

ScalesModes
Blues scaleDorian mode
Pentatonic scalePhrygian mode
Harmonic minor scaleLydian mode

Take Breaks And Come Back To The Track Later

Making melodies can be taxing on the brain, and sometimes creativity needs a break. If you’re feeling stuck or frustrated, take a break, and come back to your track later. This break will allow you to clear your mind and gain a fresh perspective, which might help you come up with new ideas. You can use this time to listen to other music, play a game, or take a walk. When you come back to your track, you’ll have a renewed energy and focus, which might help you make the breakthrough you need. In conclusion, experimenting and improvising are essential ingredients for making melodies the easy way. By trying out different scales and modes and taking creative breaks, you can come up with catchy and unique tunes that will captivate your audience. So, don’t be afraid to break the rules, and let your creativity flow!

How To Make Melodies The Easy Way

Credit: www.productionmusiclive.com

Polishing The Melody

Learn how to make melodies effortlessly with the simple technique of “Polishing the Melody. ” By focusing on the foundation of your melody and refining it through repetition and experimentation, you can create captivating and memorable music with ease.

After creating a melody, it’s time to polish it to make it sound even better. Polishing the melody involves simplifying it if necessary and adding dynamics and expression to it. Here’s how to do it:

Simplify The Melody If Necessary

Sometimes a melody may be too complicated, making it challenging to remember and sing along to. Simplifying the melody can make it more memorable and pleasant to listen to. To simplify the melody, focus on the essential notes and remove any unnecessary ones. For instance, if the melody has a lot of notes, identify the most important ones and get rid of the others. You can also simplify the melody by changing the rhythm, making it slower and easier to follow. Remember, a simple melody is more comfortable to remember and sing along to, making it more effective.

Add Dynamics And Expression

Dynamics and expression can bring a melody to life, making it more exciting and entertaining. Dynamics involve adding variation in sound, creating contrast between soft and loud notes. Expression, on the other hand, involves conveying emotions and feelings through the melody. To add dynamics to the melody, focus on the volume of each note, making some louder and others softer. You can also add accents to some notes, emphasizing them. To add expression, focus on the rhythm, phrasing, and articulation of each note. Pay attention to the feeling you want to convey and adjust the melody to match it. In conclusion, polishing a melody involves simplifying it if necessary and adding dynamics and expression. A well-polished melody is more comfortable to remember, sing along to and more exciting to listen to. Use these tips, and you’ll be on your way to creating great melodies the easy way.

How To Make Melodies The Easy Way

Credit: www.productionmusiclive.com

Frequently Asked Questions On How To Make Melodies The Easy Way

How Do You Make Melodies Easier?

To make melodies easier, start by focusing on simple chord progressions. Keep your melodies simple and memorable, and try using common scales and intervals. Practice regularly to build your skills and experiment with different approaches to see what works best for you.

How Do You Make A Melody For Beginners?

To make a melody as a beginner, start by playing basic notes and experimenting with different combinations. Try to come up with a simple, catchy melody that can be built upon. Use repetition and variations to establish a foundation for your melody.

Don’t be afraid to play around with different rhythms and tempos. Practice consistently and gradually build your skills.

How Do You Make A Simple Catchy Melody?

To create a simple, catchy melody, start by identifying the key and keeping your melody within that scale. Start with a simple rhythm and natural flow, using repetition and variation to make it memorable. Keep the melody within a comfortable vocal range and try to incorporate hooks or memorable phrases.

Practice, refinement, and feedback are also essential to perfect your catchy melody.

What Makes A Melody Easy To Sing?

A melody that’s easy to sing has a clear and simple structure with repeating patterns that are easy to remember. It should also have a comfortable melody range that doesn’t require excessive effort to sing. Catchy rhythms and lyrical phrasing can also make a melody easier to sing and more memorable.

Conclusion

If you are struggling to create melodies for your music, don’t worry – the easy way has arrived! By following the methods mentioned in this blog post, you can create catchy and memorable melodies in no time. Remember to start with a simple melody and build upon it, use your intuition to guide the creative process, and always keep your audience in mind.

With these tips and tricks, you can take your music to the next level and create melodies that will have your listeners humming along. Happy composing!

Categories
Archive

How to Open Fl Studio Mixer

To open FL Studio Mixer, click on the Mixer icon or press F9. FL Studio Mixer is a powerful mixing tool that can blend several audio sources into a single track.

It is a multi-functional mixing console that allows you to route different channels, activate audio effects plugins, and make adjustments to the volume, panning, and equalization of your audio sources. Whether you are mapping out your next big hit or fine-tuning your latest project, the FL Studio Mixer offers a fast and efficient way to get the sound you want.

We will show you how to open FL Studio Mixer and explore its features in more detail. So, let’s get started with the basics!

How to Open Fl Studio Mixer

Credit: www.youtube.com

Methods To Open Mixer In Fl Studio

To open the mixer in FL Studio, click the “mixer” button on the top toolbar or press “F9” on your keyboard. You can also right-click any mixer track and select “Insert” to add a new channel.

In FL Studio, mixer is considered to be one of the most important tools for music production. It allows you to adjust volume levels, panning, and apply effects to your sounds. In this post, we will discuss different methods to open mixer in FL Studio.

Method 1: Keyboard Shortcut

Using keyboard shortcut is the quickest and easiest method to open mixer in FL Studio. Simply press ‘F9’ on your keyboard and it will instantly open the mixer. You can toggle between the mixer and the main window by pressing ‘F9’ again.

Method 2: Menu Bar

The second method to open mixer in FL Studio is by using the menu bar. Go to ‘View’ from the menu bar and select ‘Mixer’ from the dropdown menu. This will open the mixer in a new window.

Method 3: Toolbar Option

The third method is by using the toolbar option. On the toolbar, you can find the ‘Mixer’ button. Simply click the button and it will open the mixer in a new window. Overall, these three methods to open mixer in FL Studio are very convenient and easy to use. Choose the method that suits your workflow the best and get started producing high-quality music.

Detailed Steps For Each Method

To open the Fl Studio Mixer, first click on the Mixer button, or press F9 on your keyboard. Alternatively, you can use the Mixer option from the View menu or press Alt + 4. Once you have opened the mixer, you can adjust the levels, EQ, and effects for each track in your project.

Are you having trouble opening Fl Studio Mixer? Do you wish to learn how to do it yourself? In this section of the blog post, we will be providing you with a detailed guide to open Fl Studio Mixer with various methods. So, let’s get straight into it.

Step-by-step Guide For Method 1

Method 1 involves opening Fl Studio Mixer from the Menu Bar. Here is a quick step by step guide for you:

  1. Launch Fl Studio on your computer.
  2. Locate the Menu Bar on the top left corner of the interface.
  3. Select the `View` option from the Menu Bar.
  4. From the dropdown menu, select `Mixer`. Alternatively, you can also use the keyboard shortcut `F9` to open the Mixer.
  5. Voila! You have successfully opened Fl Studio Mixer in method 1.

Step-by-step Guide For Method 2

Method 2 involves opening Fl Studio Mixer from a Channel Rack. Here is a quick step by step guide for you:

  1. Launch Fl Studio on your computer.
  2. Locate the Channel Rack on the left-hand side of the interface.
  3. Click on the icon with three horizontal lines on the Channel Rack title bar.
  4. Select `Mixer` from the dropdown menu.
  5. Tada! You have successfully opened Fl Studio Mixer in method 2.

Step-by-step Guide For Method 3

Method 3 involves opening Fl Studio Mixer from the Toolbar. Here is a quick step by step guide for you:

  1. Launch Fl Studio on your computer.
  2. Locate the Toolbar on the top of the interface.
  3. Click on the `Mixer` icon in the Toolbar.
  4. Alternatively, you can use the keyboard shortcut `F9` to open the Mixer.
  5. Amazing! You have successfully opened Fl Studio Mixer in method 3.

In conclusion, opening Fl Studio Mixer with any of these methods is super easy and convenient. Mastering these simple steps will make your production experience more efficient. We hope this section of the blog post has helped you to open Fl Studio Mixer effortlessly, and should you encounter any trouble, feel free to refer back to this post.

Additional Tips And Tricks For Mixer In Fl Studio

Learn how to open FL Studio mixer with these additional tips and tricks. From keyboard shortcuts to customizing your mixer channels, mastering the mixer in FL Studio will help you take your music production to the next level.

Additional Tips and Tricks for Mixer in FL Studio Congratulations! You have learned how to open FL Studio Mixer. Now that you have access to this versatile mixing tool, it’s time to explore other tips and tricks to enhance your production process. Configuring Mixer Options One way to optimize your Mixer workflow is by customizing its options. Here, you can tweak the layout, functionality, and other parameters to suit your preferences. To access the Mixer options, go to the Menu Bar and click Options > General Settings. Under the Audio tab, you can adjust settings like the Buffer Length, Sample Rate, and Driver type. You can also enable or disable features like PDC (Plugin Delay Compensation), Auto Close PDC windows, and more. To further customize your Mixer, you can use the Layout tab. Here, you can rearrange the channels, insert gaps between them, add separator lines, and customize the track width, height, and colors. Customizing Mixer Colors Speaking of colors, did you know that you can also change the Mixer’s color scheme? This can help you organize your tracks according to color-coding systems or simply make the Mixer look more visually appealing. To customize the colors of your Mixer, go to Options > General Settings, and click the Skin tab. Here, you can select from a list of built-in color schemes or create your own by clicking the Edit button. From here, you can choose the colors for different Mixer elements, including the background, text, shadows, and more. In addition to these options, you can also explore other features of the Mixer, such as grouping, routing, and effects. With these additional tips and tricks, you can unlock the full potential of your FL Studio Mixer and take your music production skills to the next level.

How to Open Fl Studio Mixer

Credit: www.image-line.com

How to Open Fl Studio Mixer

Credit: www.image-line.com

Frequently Asked Questions On How To Open Fl Studio Mixer

What Is The Shortcut For Mixer Track In Fl Studio?

To create a quick shortcut for a mixer track in FL Studio, you can simply select the mixer track and press Ctrl+L on your keyboard. This shortcut will remember the selection and allow you to easily access the track in the future.

How Do I Dock My Mixer In Fl Studio?

To dock your mixer in FL Studio, simply left-click and drag the mixer to the top or bottom of the screen until it snaps into place. You can also dock it to the left or right side by dragging it to the desired edge.

How Do I Move My Mixer To The Left In Fl Studio?

To move your mixer to the left in FL Studio, you simply need to click on the mixer track and drag it to the left side of the mixer. You can also use the scroll bar at the bottom of the mixer window to move it horizontally.

How Do I Use Fl Studio Mixer Presets?

To use FL Studio mixer presets, first open the Mixer window and ensure the track you want to apply the preset to is selected. Right-click the mixer track you wish to add a preset and select ‘Browse presets’. Choose the relevant category and select the desired preset.

You can then adjust the settings and parameters to your liking.

Conclusion

Opening Fruity Loops (FL) Studio Mixer might seem daunting, but it’s actually a simple process. Follow the step-by-step guidelines carefully and enjoy complete control over your music production. With Mixer, you can adjust the audio levels, add effects, and create the perfect mix that suits your preferences.

So, don’t hesitate to explore this powerful tool that’ll take your music production to the next level!

Categories
Archive

Arrangement Structure in a Song

The arrangement structure in a song refers to the organization of different sections within the piece, typically following a verse-chorus-bridge pattern. It impacts the overall flow and coherence of the music, and can greatly influence the listener experience.

As a songwriter, understanding the basics of arrangement structure can help you create more powerful and engaging tracks that are well-balanced and emotionally impactful. By manipulating the length, order and content of each section, you can create a sense of tension and release that guides listeners through the song.

We’ll explore the key elements of arrangement structure and offer some tips and tricks to help you craft your own dynamic and memorable songs.

Arrangement Structure in a Song

Credit: blog.native-instruments.com

Common Parts Of An Arrangement Structure

An arrangement structure in a song is composed of common parts, each playing a significant role. The intro sets the mood, while verses tell the story and the chorus delivers the message. The bridge ties it all together, making the structure complete.

As a songwriter, it’s crucial to understand the fundamentals of arrangement structure, which involves organizing different parts of a song into a cohesive whole. Generally, a song arrangement structure consists of an intro, verse, chorus, bridge, pre-chorus, and outro. Each of these parts plays a unique role in delivering the song’s message effectively, making it essential to know how to use them correctly.

Intro

The introduction is an essential aspect of a song since it serves as the foundation on which the rest of the song is built. It’s the first thing listeners hear, and it should grab their attention while setting the mood for the rest of the song. An ideal intro should be short, catchy, and captivating enough to motivate listeners to keep listening.

Verse

After the intro, the song moves to the verse, which tells the story of the song. Most songs have several verses, each with a distinct melody and lyrics. The verses usually progress the story, building up to the chorus, and generating anticipation in the listener’s mind. An excellent verse should be captivating, easy to sing along with, and express the song’s message effectively.

Chorus

The chorus is perhaps the most critical part of the song structure since it’s the most memorable part of the song. It is the central point to which everything else leads, and it should be catchy enough to stick in the listener’s mind. It’s usually where the main message of the song is repeated, allowing listeners to sing along and remember the song effortlessly.

Bridge

The bridge is a part of the song that provides contrast to the other parts of the song. It’s an opportunity for the songwriter to take a break from the usual song structure and try out something different. A bridge often introduces a new melody, lyric, or chord progression, providing a change of pace that captures the listener’s attention. It’s crucial to use the bridge effectively to prevent song monotony.

Pre-chorus

The pre-chorus, also known as the lift, is a transitional section between the verse and the chorus. It usually comes after the second verse and before the chorus, building anticipation and making the chorus more impactful. The pre-chorus’s role is to provide a unique contrast to the verse and set the stage for the chorus, creating expectations for the listener.

Outro

The outro is the final section of the song, and its role is to bring closure to the song. It generally involves repeating the chorus or a variation of it while gradually diminishing the instrumentation until the song fades away. An excellent outro should be satisfying, bringing closure to the song and leaving the listener with a feeling of completeness. Understanding the common parts of an arrangement structure is critical when it comes to creating effective and memorable songs. By using the six common parts of an arrangement structure – Intro, Verse, Chorus, Bridge, Pre-chorus, and Outro – songwriters can create music that delivers unique messages effectively.

The Role Of Production In Arranging A Song

Production plays a vital role in arranging a song, particularly in its arrangement structure. It involves selecting suitable instruments, creating transitions between sections, balancing sound levels, and adding effects to enhance the overall sound quality. A well-arranged song can elevate the listener’s experience and make the music more memorable.

Arranging a song is a crucial aspect of music production that involves organizing its different parts into a cohesive structure. The arrangement structure of a song refers to the order and combination of different sections like the intro, verse, chorus, bridge, outro, etc. A properly arranged song has a clear and logical progression that keeps the listener engaged from the beginning to the end. The role of production in arranging a song is essential because it helps a producer to create the right arrangement structure, choose the suitable instrumentation, apply recording techniques, and make arrangement choices based on genre.

Developing The Arrangement Structure

Developing the arrangement structure of a song is one of the most crucial aspects of music production. The arrangement structure determines how the different parts of a song fit together to create a cohesive whole. A producer must have a clear vision of how the different sections of the song should work together before beginning the arrangement process. To develop the arrangement structure, a producer may sketch out a rough arrangement, experiment with different ideas, and rearrange sections to create the right flow.

Adding Instrumentation

Once a producer has developed the arrangement structure, the next step is to choose the right instrumentation to support the song’s mood, style, and genre. Adding instrumentation involves selecting the right sounds, instruments, and layers that complement the song’s melody, harmony, and rhythm. A producer must consider the balance between different instruments and sounds to avoid overcrowding the mix.

Recording Techniques

Recording techniques play a critical role in music production because they determine how the sound is captured and processed. A producer must apply the right recording techniques to ensure that the instruments and vocals are captured accurately, recorded at the right volume, and processed to enhance the overall mix. Some of the key recording techniques include mic placement, EQ, compression, reverb, and delay.

Arrangement Choices Based On Genre

Different genres of music have specific arrangement conventions that a producer must consider when arranging a song. For instance, a dance song may have a longer intro and outro to allow for DJs to mix it, while a ballad may have a shorter intro to quickly capture the listener’s attention. A producer must understand the arrangement choices for each genre to create a song that resonates with its intended audience. In conclusion, production plays a crucial role in arranging a song. By creating the right arrangement structure, selecting the suitable instrumentation, applying recording techniques, and making arrangement choices based on genre, a producer can produce a song that connects with its audience and stands out in the music industry.

Tips For Arranging A Song

Proper arrangement of a song is crucial for its success. A well-structured song arrangement can improve the overall listener experience. The arrangement should support the song’s story and create a seamless flow from start to finish.

Arrangement structure is essential in composing an engaging and memorable song. A well-structured arrangement can make a song stand out and resonate with the audience long after they have listened to it. Here are some tips on how to arrange a song in a way that captures your audience’s attention:

Start With A Hook

Your listener’s attention should be grabbed right from the beginning of the song. A hook is a catchy and memorable chord progression, melody, or lyric that sticks in the listener’s mind. It creates an emotional connection to the music and keeps them engaged throughout the song.

Create An Outline

Creating an outline is crucial to ensure your arrangement is well-organized. It helps to arrange the song’s structure into clear sections with a logical flow. You can use an introduction, verse, chorus, bridge, and outro to arrange your song in a way that flows naturally.

Utilize Dynamics

The dynamics of a song refer to the variation in volume and intensity throughout a song’s arrangement. It helps to create an emotional journey for the listener and keep the song from sounding monotonous. By strategically using volume, intensity, and instruments, you can create dynamic shifts in the song that capture the audience’s attention.

Think About Transitions

Transitions play a significant role in maintaining the song’s momentum. It helps to smoothly move from one section of the song to another, keeping the listener engaged. You can use drum fills, guitar strums, and other techniques to mark transitions between different sections or phases of the song.

Eliminate Unnecessary Parts

Eliminating unnecessary elements from the song can make the arrangement more cohesive and engaging. It’s essential to critically evaluate each element of the song and determine whether it’s serving a purpose. Elements such as long intros, repetitive choruses, or lengthy solos can bore the listener and detract from the song’s overall impact. In conclusion, arranging a song takes practice and patience. By implementing these tips, you can ensure that your arrangement structure is engaging and memorable.

Arrangement Structure in a Song

Credit: www.learnhowtoproducemusic.com

Arrangement Structure in a Song

Credit: www.youtube.com

Frequently Asked Questions Of Arrangement Structure In A Song

What Is The Arrangement Of Parts In Music?

The arrangement of parts in music is called music form. It refers to the structure of a piece of music, which includes intro, verse, chorus, bridge, and conclusion. The form of a song or composition is outlined based on repeating and contrasting sections that create a sense of musical coherence.

What Does Arrangement Mean In Music?

Arrangement in music refers to the process of adapting a piece of music for a specific purpose or performance. It involves altering the instrumentation, harmony, rhythm, and melody of a composition to create a new version with a distinct sound and style.

What Is The Structure Of The Song Called?

The structure of a song typically consists of verses, choruses, bridges, and possibly a pre-chorus or post-chorus. These components are arranged in a specific order to create the song’s overall structure.

What Are 3 Main Sections Structure Within A Song?

The 3 main sections structure within a song are the verse, chorus, and bridge. The verse tells the story and provides context. The chorus consists of the repeating section that is the main hook of the song that is easy to remember.

The bridge adds variety and transitions between the verse and chorus.

Conclusion

To sum up, the arrangement structure in a song is an essential element that can make or break a song’s success. As a songwriter, understanding the basic arrangement structure is crucial to ensuring that your music connects with your audience on a deeper level.

By utilizing intros, verses, choruses, bridges, and endings effectively, you can create a song that resonates with your listeners. By implementing the tips and techniques outlined in this blog post, you can take your songwriting skills to the next level and create music that stands out from the crowd.

Categories
Archive

How to Use Synths in Logic Pro X

To use synths in Logic Pro X, open the software and create a new software instrument track, choose a synth and explore its settings. Now, let’s dive deeper into how to use synths effectively in Logic Pro X.

Logic Pro X is a popular digital audio workstation (DAW) used by music producers to create sounds and music. One of the most important features of Logic Pro X is the ability to use synths. Synths can create a wide range of sounds, from warm analog tones to futuristic digital sounds.

However, using synths can be daunting for beginners. This is where Logic Pro X comes in, it offers an intuitive and user-friendly interface for using synths. We’ll explore the basics of using synths in Logic Pro X to create unique, interesting sounds that will take your music to the next level.

Overview Of Synths In Logic Pro X

If you are an aspiring music producer or professional music composer, you know that Logic Pro X is a go-to digital audio workstation (DAW) to create music seamlessly. Logic Pro X has rich features and tools that allow music enthusiasts to create amazing music tracks effortlessly. Synthesizers are one of the most crucial tools in this DAW that bring exceptional value to all music producers. To assist you in getting the most out of the Synths in Logic Pro X, it’s incredibly important that you understand some of the fundamental concepts of Synths in Logic Pro X. In the next sections, we will introduce Synths, types of Synths available in Logic Pro X, and provide related insights that will help you take your music production skills a notch higher.

Introduction To Synths

Synthesizers refer to sound-generating instruments that produce a wide range of audio signals. They are either virtual or hardware-based. Virtual synthesizers are software-based and come inbuilt in the Logic Pro X DAW. They contain diverse functions that allow music producers to create unique sounds that resonate with their creative ideas. Hardware-based synthesizers, on the other hand, include actual machines that a producer can interface with and play. In this post, we will only focus on the inbuilt software-based synthesizers in Logic Pro X.

Types Of Synths Available In Logic Pro X

SynthDescription
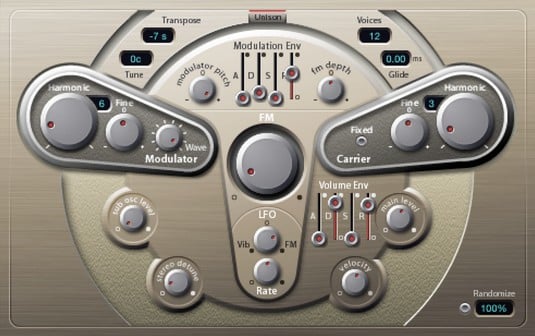
AlchemyAlchemy is a sample manipulation synthesizer that offers a wide range of granular and spectral synthesis capabilities.
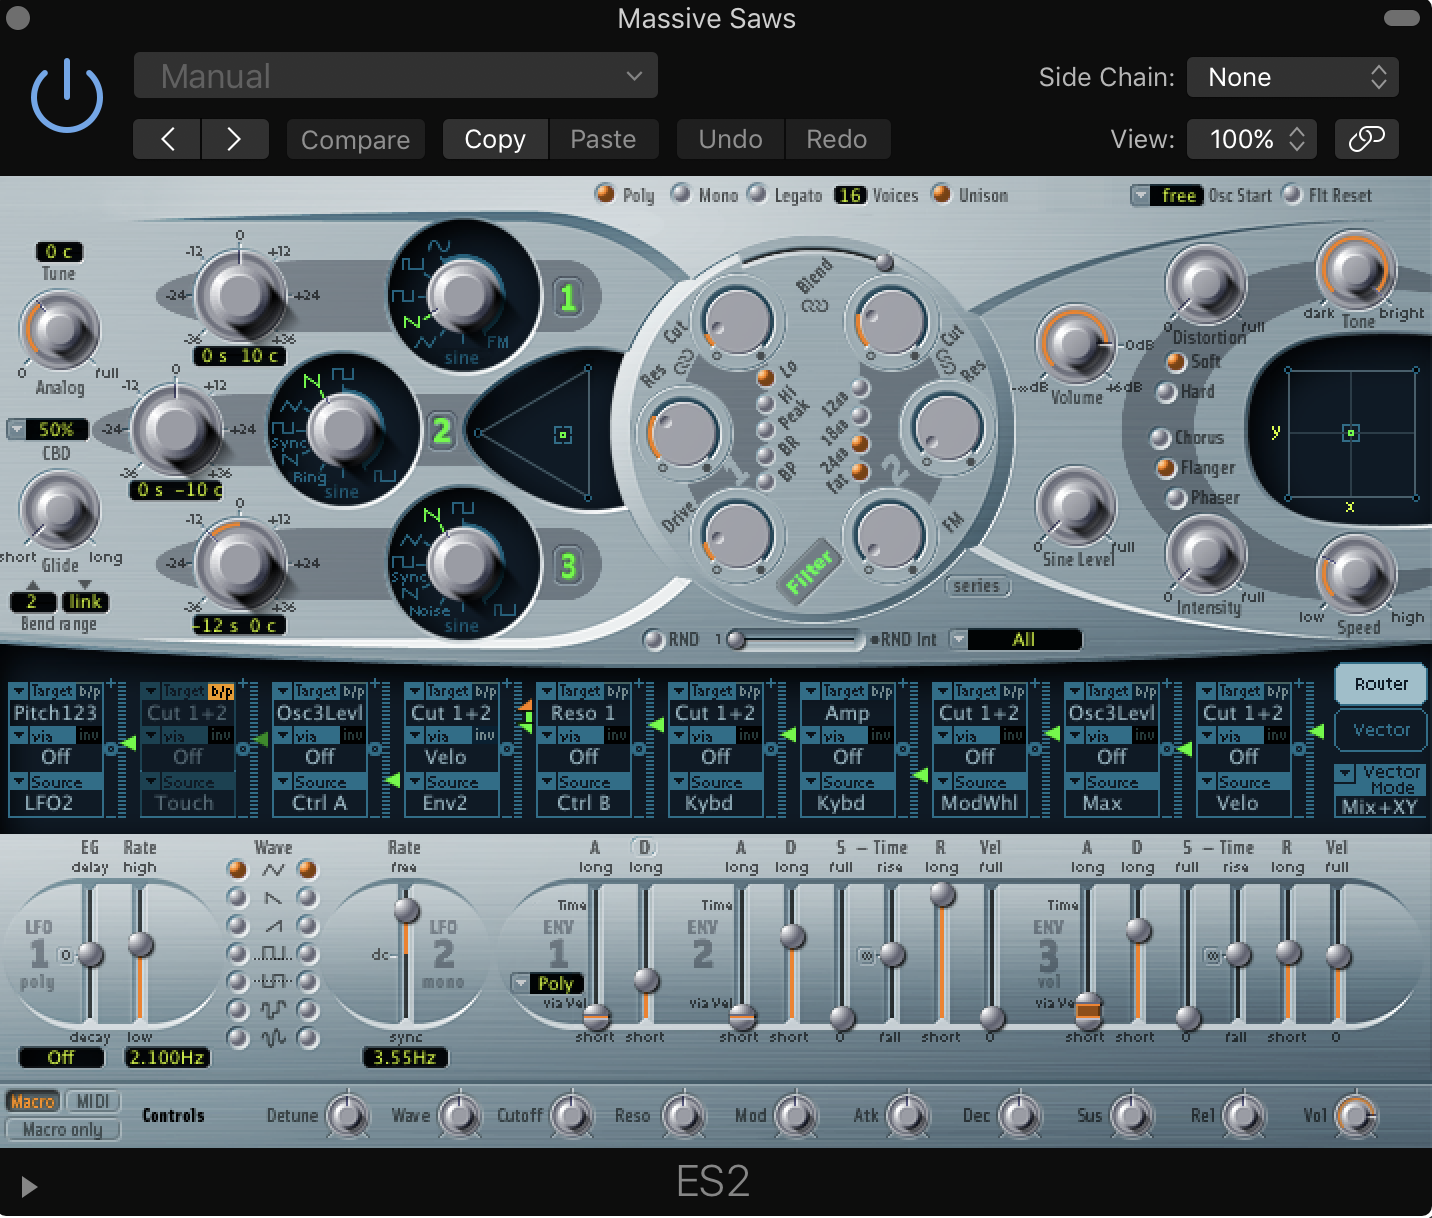
ES2ES2 is a versatile synthesizer designed to deliver sublime sound quality, inspiring modulation and incredible flexibility in music production.
EVB3EVB3 is an Electronic Virtual Body Organ, simulating legendary Hammond B3 Tone wheel and Leslie rotary speaker.
EVP88EVP88 is an authentic-sounding electric piano designed to create a classic ’70s and ’80s soundscape.
ESMESM is a monophonic synth that features a single overtone oscillator, sweeping filter, and LFO for modulation.

Choosing the right synthesizer for your style of music is crucial. Logic Pro X offers a range of Synths each with its unique characteristics. For example, Alchemy is a granular and spectral synthesizer that’s perfect for creating rich pads and evolving soundscapes. On the other hand, the ES2 Synthesizer is built for fat and aggressive electronic sounds, making it perfect for producing classic dance beats. Understanding these differences can help you to identify the Synthesizer that suits you best.

In conclusion, Synthesizers are an essential tool in creating new and unique sounds that can enhance the quality of your music production and take your tracks to the next level. Knowing the different types of Synths available in Logic Pro X and their capabilities can help you to understand which one best suits your music style and create music effortlessly. Start exploring Logic Pro X’s Synth capabilities and bring your creative ideas to life!

How to Use Synths in Logic Pro X

Credit: flypaper.soundfly.com

Setting Up Synths In Logic Pro X

Learn how to set up synths in Logic Pro X and begin creating your own unique sounds. With this comprehensive guide, you’ll be able to easily navigate the software and start making music like a pro.

If you’re a producer or a music enthusiast, Logic Pro X is an excellent digital audio workstation to create and produce music. One of the most crucial elements of music production is using synthesizers to create unique sounds. Synth plugins in Logic Pro X are an essential tool to create amazing sounds. In this blog post, we will discuss how you can set up synths in Logic Pro X.

Creating A New Software Instrument Track

To utilize synths in Logic Pro X, you need to create a new software instrument track. You can create a new software instrument track by following these easy steps:

  1. Click on the “+” button located in the top left corner of the Logic Pro X interface.
  2. Select “software instrument” and click “create.”
  3. Choose a sound library from the provided list or select “external” if you have a plugin installed.

Adding A Synth To The Track

Once you have created a new software instrument track, it’s time to add a synth to the track. Follow these simple steps to add a synth to your track:

  1. Click on the “library” button.
  2. Search for the synth plugin you want to use.
  3. Click and drag the plugin to your software instrument track.

It’s essential to ensure the output of the synth is set to the software instrument track you have created. You can ensure this by checking if the output is set to the relevant track in the mixer. In conclusion, using synths in Logic Pro X is a vital tool in creating exceptional music, and it all starts with setting up software instrument tracks and adding plugins. So, follow the steps above to start using synths in your Logic Pro X tracks today!

Exploring Synth Parameters

One of the most exciting aspects of using synths in Logic Pro X is their wide range of parameters that can be tweaked and manipulated to create unique sounds. In this post, we will explore the key synth parameters – oscillators, filters, envelopes, LFOs, and arpeggiators – and how they can be used to enhance your productions.

Oscillators

Oscillators generate the basic soundwave of a synth patch. They can be adjusted to produce different waveforms, such as sine, square and sawtooth, which impacts the character of the sound. In Logic Pro X, there are a variety of different oscillator types to choose from, including analog, digital and physical modeling. By experimenting with oscillator settings, you can create everything from simple lead sounds to complex pads and textures.

Filters

Filters shape the tone of a synth patch by removing or accentuating certain frequencies. In Logic Pro X synths, filters come in various types, such as low-pass, high-pass, and band-pass. They can be adjusted using parameters like cutoff, resonance and drive to create subtle or drastic changes to the sound. Filters can be used to add warmth, brightness, or to create a more aggressive tone.

Envelopes

Envelopes control how a sound evolves over time by modulating different synth parameters. The four most common envelope settings are attack, decay, sustain, and release (ADSR). In Logic Pro X synths, envelopes can be applied to parameters like filter cutoff, amplitude, and pitch. By adjusting envelope settings, you can create long, sustained sounds, short percussive hits, or anything in between.

Lfos

LFOs stand for low-frequency oscillators and generate repeating waveforms at a much slower rate than audio oscillators. They can be used to introduce movement and modulation to a sound by controlling various synth parameters. In Logic Pro X synths, LFOs can be applied to parameters such as filter cutoff, oscillator pitch, and amplitude. You can use LFOs to create pulsing rhythms, swirling textures, or subtle modulation that adds depth to a sound.

Arpeggiators

Arpeggiators are tools that automatically play a sequence of notes from a chord in a rhythmic pattern. They are ideal for creating complex, layered melodies that would be difficult to play manually. Logic Pro X synths come equipped with arpeggiators that can be customized to fit your needs. They can be adjusted to play specific scales, keys, and rhythms, and can be synced to your project tempo.

Creating Patches With Synths

By using synths in Logic Pro X, creating patches becomes a breeze. With the ability to manipulate a variety of sounds, you can generate unique, personalized patches that are perfect for your music production needs.

One of the most exciting elements of Logic Pro X is its range of synths, which enable you to create unique, original sounds that add depth and personality to your music. If you’re new to working with synths, it can be challenging to know where to begin, but it’s worth persevering and experimenting until you find patches that suit your style. In this post, we’ll explore how to create patches with synths, including choosing sounds and settings, customizing patches, and saving and loading patches.

Choosing Sounds And Settings

When it comes to creating patches with synths in Logic Pro X, the process begins with choosing your sounds and settings. The software comes with a vast range of synth options, and it’s essential to spend time getting to know what each one does and how it works. Spend time experimenting with the different synths to determine which ones are best suited to your needs and demands. Once you’ve chosen a synth, take the time to adjust the settings to your liking, whether that’s tweaking the oscillators, modulators, or filter settings. Logic Pro X makes it easy to adjust all of these settings, so play around with them until you find the perfect configuration.

Customizing Patches

Once you have your basic patch set up, it’s time to customize it to suit your specific musical style and vision. This step requires a bit of experimentation and creativity, but it’s worth exploring different effects and modulation techniques to achieve unique and interesting sounds. For example, try adding a bit of reverb, delay, or distortion to your patch to give it extra depth and texture. Alternatively, you can experiment with modulation techniques such as using LFOs or envelope generators that can make your patch sound more dynamic and less straightforward.

Saving And Loading Patches

Once you’ve created a patch that you’re happy with, you should save it so that you can access it quickly and easily in future sessions. Logic Pro X makes it straightforward to save and load patches, and you can save them in a variety of different folders and locations. When you save a patch, you have the option to name it, add descriptions and tags, and organize it into different categories, making it easy to find and open when you need it. Additionally, you can also share your patches with other Logic Pro X users, which is a great way to get feedback and collaborate with other musicians.

Conclusion

Creating patches with synths is a fun and rewarding way to add depth and personality to your music. Whether you’re a seasoned producer or a beginner, Logic Pro X’s range of synths and customization tools makes it easy to create unique and interesting sounds. Spend time experimenting and exploring, and you’ll soon discover a whole new world of sonic possibilities.

Using Synths In Music Production

Logic Pro X provides an extensive range of synthesizers that can comprehensively aid you in music production. From classic synthesizers to modern ones, Logic Pro X offers a variety of tools that can create a wide range of sounds, melodies, basslines, and textures. In this blog post, we will explore how to use synths in Logic Pro X for creating top-notch music.

Creating Melodies With Synths

The synth tools in Logic Pro X allow users to create melodies with ease. Simply open the synth tool, choose a suitable preset, and start playing around with the MIDI keyboard. One great way of creating melodies in Logic Pro X is by recording your improvisations.

  • Open the synth tool
  • Choose a suitable preset
  • Start playing around with the MIDI keyboard
  • Record your improvisations

Once you have recorded your improvisations, you can edit them by adjusting the notes, length, and velocity. You can also add effects like reverb and delay to create a more immersive sound.

Designing Basslines With Synths

Synths can also be used to create basslines for your music production. The process for creating basslines is similar to that of creating melodies. The only difference is the choice of sounds.

  • Open the synth tool
  • Choose a bass preset
  • Start playing around with the MIDI keyboard
  • Record your improvisations

When designing basslines, it’s essential to ensure the kick and bass frequencies do not intersect. This way, you can achieve a clean and punchy sound that is perfect for any music production.

Adding Texture With Synths

Synths can also be used to add texture to your music production. Textures help give your music a unique signature that distinguishes it from others. In Logic Pro X, there are several ways to add texture to your music using synthesizers.

  • Use the arpeggiator to create unique patterns
  • Add modulation effects like chorus and phaser
  • Incorporate ambient sounds like pads and atmospheres

By utilizing the above methods, you can elevate your music production to an entirely new level, making it stand out from others.

How to Use Synths in Logic Pro X

Credit: www.dummies.com

Advanced Techniques For Synth Manipulation

Learn advanced techniques for synth manipulation in Logic Pro X, including modulation, layering, and automation. With these tools, you can create unique and complex sounds to enhance your music production.

Utilizing Automation

Automation is a powerful tool in Logic Pro X that can help you to create unique synth sounds. You can use automation to adjust any parameter of the synth over time. For instance, you can create sweeping filter effects by automating the cutoff frequency. Or, you can create pulsing rhythm by automating the synth’s LFO rate. To use automation in Logic Pro X, go to the Tracks area, select the synth track, and then select the parameter you want to automate. Click on the “A” button next to the parameter to enable automation, and then draw in the automation curve using the Automation tool.

Working With Midi Controllers

MIDI controllers are another great way to manipulate synths in Logic Pro X. You can use any MIDI controller to adjust parameters such as filter cutoff, resonance, and envelope settings in real-time. Logic Pro X supports all major MIDI controllers, including keyboards, drum pads, and control surfaces. To set up a MIDI controller, go to the Control Surfaces section of the Preferences window, and select the desired controller from the list. You can then map the controller’s knobs, faders, and buttons to various synth parameters using the Learn function.

Layering Multiple Synths

Layering multiple synths is a powerful way to create complex, rich sounds in Logic Pro X. By layering synths, you can blend different waveforms, filters, and effects to create a unique sound that is greater than the sum of its parts. To layer synths in Logic Pro X, simply create multiple synth tracks and route them to the same bus or output. You can then adjust each synth’s settings until you achieve the desired sound. Be careful not to overdo it, though – too many layers can result in a muddy, cluttered sound that lacks clarity. In conclusion, these are some advanced techniques for synth manipulation in Logic Pro X. By utilizing automation, working with MIDI controllers, and layering multiple synths, you can create truly unique sounds that stand out from the crowd. With a little experimentation and practice, you’ll be able to unlock the full potential of your synths and take your music to the next level.

Troubleshooting Synth Issues In Logic Pro X

Ensure seamless synth production with these tips to troubleshoot synth issues in Logic Pro X. Maximize the potential of Logic Pro X’s synths by gaining deeper insights into the software’s features and functions with a few simple techniques.

Using synths in Logic Pro X can help to create dynamic and captivating soundscapes. However, sometimes synth issues can occur, which can be frustrating and time-consuming. To help you resolve any issues that you may encounter, we have compiled some common synth problems and solutions.

Common Synth Problems

Here are some issues you may encounter when using synths in Logic Pro X:

  1. Sound is distorted or crackling
  2. No sound is produced
  3. Latency issues
  4. Audible clicks and pops
  5. Unresponsive synth controls

Solutions To Synth Problems

Here are some solutions to the common synth problems:

Sound is distorted or crackling

If the sound produced by the synth is distorted or crackling, try the following:

  • Check the sample rate and bit depth settings of the session
  • Ensure that the synth’s level is not too high
  • Check that the synth is not clipping or overdriven by lowering its volume

No sound is produced

If no sound is produced by the synth, try the following:

  • Check that the synth is receiving MIDI signals
  • Check the track’s output routing
  • Ensure that the synth’s volume is not set to zero or muted

Latency issues

If you are experiencing latency issues, try the following:

  • Open the Audio MIDI Setup and adjust the buffer size
  • Lower the sample rate and bit depth of the session
  • Disable any unused plugins or instruments

Audible clicks and pops

If you hear audible clicks and pops, try the following:

  • Check the sample rate and bit depth settings of the session
  • Decrease the buffer size
  • Disable any unused plugins or instruments

Unresponsive synth controls

If the synth’s controls are unresponsive, try the following:

  • Restart Logic Pro X and the synth plugin
  • Check that the track is not locked or frozen
  • Disconnect and reconnect the synth to the MIDI controller

In conclusion, synth issues can be frustrating, but with these solutions, you’ll be on your way to producing the perfect sounds. Keep this guide handy for quick reference when troubleshooting synth issues in Logic Pro X.

How to Use Synths in Logic Pro X

Credit: m.youtube.com

Frequently Asked Questions On How To Use Synths In Logic Pro X

Does Logic Pro Have Synthesizer?

Yes, Logic Pro has several built-in synthesizers, such as the ES2, Retro Synth, and Sculpture, that allow users to create various types of electronic sounds and music.

How Do You Mix Synths In Logic Pro X?

To mix synths in Logic Pro X, start by panning each instrument in the stereo field. Adjust the EQ to add clarity and separate the sounds. Use compression to control the dynamics of each track. Adjust the volume levels to balance the mix.

Finally, add reverb and delay to create space and depth.

What Is The Best Synth In Logic Pro X?

The best synth in Logic Pro X is subjective and depends on personal preferences. Some popular options among users are Retro Synth, Alchemy, and ES2. Each synth has unique features and capabilities, making it essential to experiment and find the best fit for one’s musical needs.

How Do I Open Retro Synth In Logic Pro X?

To open Retro Synth in Logic Pro X, go to the “New Track” option and select “Software Instrument”. Then, click on the drop-down menu and select “Retro Synth” to add it as a track.

Conclusion

Using synths in Logic Pro X is easy and fun. With various features and tools, it allows you to create unique and engaging music. By following the steps mentioned above, you can make the most of your synth experience. Besides, experimenting with different sounds and techniques can help you discover new approaches to synthesizing in Logic Pro X.

So, keep practicing and exploring, and see where it takes you!

More in our Synth guides.

Categories
Archive

Tips For Mixing With Drum Samples

To mix drum samples effectively, consider the genre, desired sound, levels, and EQ adjustments. These factors will help you achieve a balanced and polished mix.

Drum samples can be a game-changer when it comes to producing music. They provide high-quality sounds and eliminate the need for recording live drums. However, integrating drum samples into your mix can be challenging. Mixing them effectively can elevate the overall quality of your mix.

To produce a compelling mix, it’s critical to consider the genre and intended sound. Keep in mind the overall levels, ensuring that each element has its place in the frequency spectrum. EQ adjustments are also crucial, as they allow each sample to stand out while fitting seamlessly into the mix. We will discuss tips for mixing with drum samples to help you achieve a polished and professional sound.

Start With Good Quality Samples

Drum samples can be a great addition to your tracks. They can add impact, complexity, and depth to your mixes. However, not all drum samples are created equal. To achieve the best possible end result, you need to start with good quality samples.

Choose Samples That Fit Your Mix

When choosing drum samples, it is important to consider your entire mix, not just the drums. The samples you choose should complement the other elements in your mix and support the overall vibe of the song. If you are going for a vintage, warm sound, you may want to use samples that are recorded in an old-school way or feature analogue equipment. For a clean, modern sound, you may want to use samples that are more precise and digital-sounding.

To ensure that your samples blend well with the mix, make sure they are in the same key as the rest of the track.

Avoid Overused Samples

It can be tempting to use popular drum samples that have been used in hit songs, but overused samples can make your track sound generic and predictable. Instead, try to find unique, less commonly heard samples that fit the vibe of your track. You can also experiment with layering different samples to create your own unique sound.

Using high-quality, unique drum samples is an important part of creating a professional-sounding mix. By taking the time to choose the right samples, you can add depth, complexity, and impact to your tracks.

Tips For Mixing With Drum Samples

Credit: www.izotope.com

Prepare Your Samples

When it comes to mixing with drum samples, preparing your samples is crucial for optimal results. Make sure to organize and label your samples effectively, adjust volume levels, EQ as needed, and experiment with layering to achieve the desired sound.

When it comes to mixing with drum samples, one of the most important steps is to properly prepare your samples. This means organizing your samples, and normalizing and tweaking them to ensure they fit seamlessly into your mix. Let’s take a closer look at each step.

Organize Your Samples

Before you dive into mixing with drum samples, it’s important to organize your samples in a way that makes sense for your workflow. This means creating folders for different types of samples, such as kicks, snares, and hi-hats. You can even create subfolders for variations of each type of sample. By organizing your samples in this way, you’ll save time searching for the right sample and keep your workflow efficient.

Normalize And Tweak Your Samples

Once your samples are organized, it’s time to normalize and tweak them for the best sound possible. Normalizing your samples ensures that they are all at the same volume, which is crucial for creating a cohesive mix. Tweak them further by adjusting the attack, decay, sustain, and release (ADSR) settings or applying EQ or compression. This can help your drum samples fit seamlessly into your mix and even add unique character to your sound.

Benefits of preparing your drum samples:
Efficient workflow
Consistent volume
Seamless integration into your mix
Unique character added to your sound

In conclusion, preparing your drum samples is a crucial step in successful mixing. By organizing your samples and normalizing and tweaking them, you’ll ensure an efficient workflow, consistent volume, seamless integration into your mix and even add a unique character to your sound for a more polished final product.

Layer Your Samples

If you want your drums to be powerful and dynamic, you should process them differently and create various layers. Layering your samples is an effective technique that creates a fuller, more complex sound in your mix. This method involves blending several drum samples together, each with its own unique tone, to produce a rich and dynamic sound. The following are some tips to help you layer your samples more effectively.

Add Depth And Complexity To Your Mix

To give your mix depth and complexity, you should layer the different drum samples. For instance, you can use one sample for the kick drum, another for the snare, hi-hats, and so on, creating a unique space for every instrument. Layering your samples will provide the track with a unique texture, making it sound denser and more spacious.

Blend Different Samples Together

Once you have selected the drum samples that you want to layer, mix them to create a cohesive sound. Blend the sounds of each sample by adjusting the volume levels, tuning the samples, or even applying some effects. Mixing drum samples may be tricky, so take your time and experiment with different mixing techniques until you find the sound that works best for your track.

Make sure to place each drum sample in the correct position in the track’s stereo field. For example, you can place the kick drum sample in the center to create a solid foundation for the track while panning the hi-hats to the left or right to provide a sense of width.

In Conclusion

Layering your drum samples can take your track to the next level. By using this approach, you can create a unique and dynamic sound that adds depth and complexity to your mix. Experiment with different samples, mixing techniques, and effects until you find the perfect blend. Remember to place each sample in its appropriate position in the stereo field, and you’ll be on your way to creating a professional-sounding mix.

Balance Your Mix

Balance Your Mix when using drum samples is crucial to achieving a clear and dynamic sound. Start by selecting high-quality samples, setting appropriate levels and panning, applying EQ and compression, and adding effects as needed. Aim for a cohesive mix that accents the strengths of each element and supports the musical vision.

When it comes to producing high-quality music, it’s important to get the mix right. Mixing with drum samples can be tricky, so it’s crucial to find the right balance in your mix. Here are some tips on how to balance your mix when using drum samples.

Eq Your Drum Samples

EQing your drum samples is one of the essential parts of balancing your mix. It enables you to control the frequencies of your drum samples to eliminate muddiness and conflict with other elements in your mix. Ensure you analyze each drum sample to see where there is overbearing frequency content. Then, use EQ to reduce or boost these frequencies to make each sample sit well in the mix.

Apply Panning Techniques

Another way to balance your mix is by using panning techniques. With drum samples, you can distribute each sound across the stereo field to create a sense of space and depth. Ensure that each drum sample is panned differently to prevent audio clashes, giving each sound its position in the mix. For example, you can pan the kick and snare drum samples to the center and pan the cymbals and hi-hats to the left and right sides of the stereo field.

Use Dynamics Processing

Dynamics processing can also help balance your mix by controlling the dynamic range of each drum sample. You can use a compressor to reduce the difference between the loudest and quietest parts, then apply limiting to prevent clipping or distortion. In addition, you can use side-chain compression to attenuate the drum samples’ level in the mix when other instruments or sounds conflict. In conclusion, balancing your mix is crucial when producing music with drum samples. By using EQ, panning techniques, and dynamics processing, you can achieve a balanced and cohesive mix that sounds great. Remember to analyze each drum sample, experiment, and trust your ears.

Add Effects To Your Mix

Add effects to your mix to enhance and blend your drum samples seamlessly. Apply reverb, compression, and equalization to create a cohesive and polished final mix. Experiment with different effects to find the perfect balance for your track.

Adding effects in a mix is a crucial step in achieving the desired sound. Effects help your drum samples sound more polished and professional. By adding effects, you can change the sound of your drum samples, making them sound unique and different. In this section, we will discuss how you can apply reverb and delay and experiment with other effects to your drum sample mix.

Apply Reverb And Delay

Reverb and delay are the most commonly used effects in a mix. Reverb adds a sense of space to your drum samples, making them sound bigger and more ambient. Delay creates an echo effect that adds depth and dimension to your mix. Here’s how you can apply reverb and delay to your drum samples:

  • Start by applying a small amount of reverb to your drum samples.
  • Listen to how it sounds and adjust the amount until it sounds right.
  • Set the decay time to match the length of the reverb you want.
  • Apply a small amount of delay to your drum samples, adjusting it until it sounds right.

Experiment With Other Effects

There are other effects you can use to enhance your drum sample mix. Here are some effects you should experiment with:

  • Compression – helps even out the dynamics of your drum samples
  • EQ – helps adjust the tonal balance of your drum samples
  • Saturation – adds warmth and character to your drum samples
  • Distortion – adds grit and dirt to your drum samples
  • Gating – helps remove unwanted noise from your drum samples

When experimenting with other effects, it’s important to keep in mind that less is more. Applying too many effects can make your mix sound cluttered and busy. It’s best to start with a few effects and gradually add more as needed.

Tips For Mixing With Drum Samples

Credit: recordingstudiorockstars.com

Mix On Quality Monitors

Mixing with drum samples requires a quality monitor that reflects the intricacy of drum sounds. Focus on choosing good sample libraries, ensuring consistency throughout levels, and keeping an ear out for the “pocket” or groove.

If you’re mixing with drum samples, it’s crucial to have a reliable set of quality monitors. Mixing on poor-quality headphones or speakers can result in a skewed perception of your mix. Therefore, invest in a good pair of monitors, and you won’t regret it.

Choose Good Quality Monitors

When choosing a pair of monitors, keep your budget in mind, but don’t compromise on quality. Consider factors such as frequency response, sound sensitivity, power, and size. For instance, larger monitors provide more accurate low-frequency sounds than smaller ones. Consider the sound specifications of different models, and choose the monitors that align with your mixing style. It’s always worthwhile to test different monitors in person to hear how they perform in your mixing environment.

Turn Your Room Into A Better Mixing Environment

Even with quality monitors, the mixing environment can influence your mix’s overall sound. Firstly, ensure that the room’s acoustics are suitable for mixing. Add acoustic panels or treatment to minimize the room’s sound reflections, and create a neutral sound environment. Additionally, position the monitors appropriately in the room, away from walls and corners, to minimize any sound coloration. Your head and monitors should form an imaginary equilateral triangle, with the top of the triangle facing your ears. In conclusion, with quality monitoring and a proper mixing environment, mixing with drum samples becomes more accurate and enjoyable. Take the time to research and test different monitor models that align with your budget and mixing style. Moreover, ensure your mixing room has suitable acoustics to create a neutral sound mix.

Experiment And Trust Your Ears

Mixing is an art form, and mixing with drum samples is not an exception. It can be challenging, but with the right approach, you can create a drum mix that sounds great. One of the essential elements to keep in mind when mixing with drum samples is to experiment and trust your ears. This approach means that you should try different things until you find the sound you are looking for, and you should rely on your ears to guide you on this journey.

Try Different Approaches

The first step in mixing with drum samples is to try different approaches. There are several ways to mix drums, so experiment with different techniques until you find one that works for you. You can start with the traditional approach of eq, compression, and panning. Another method is to use parallel compression to bring out different aspects of the drum sound. Additionally, you can use saturation and distortion to give the drum samples more character. The important thing is to try different things until you find what works for the track you’re mixing.

Keep Adjusting Until It Sounds Right

After trying different approaches, you will need to keep adjusting until it sounds right. This process can be tedious, but it is essential to ensure that the drum mix is balanced and sits well in the overall mix. Once you have found the sounds you are looking for, you can make small adjustments to improve the overall balance and tonality of the drums. Continuously refer to the track’s reference mix or other mixes you have, compare them, and keep making adjustments until it sounds right.

With these tips, you can take your drum mixing skills to a new level. Remember to experiment, trust your ears, try different approaches, and keep adjusting until it sounds right. Take your time, listen critically, and don’t be afraid to start over if you need to.

Tips For Mixing With Drum Samples

Credit: recordingstudiorockstars.com

Use A Reference Track For Comparison

When mixing with drum samples, using a reference track for comparison can be helpful for achieving a cohesive sound. By comparing your mix with a track that has a similar style and feel, you can identify areas that may need improvement and make necessary adjustments.

Choosing drum samples and mixing them to perfection is a critical skill for any music producer. The quality of your drum mixes can make or break the song, and that’s why it’s essential to compare your mixes with the professionally done ones. Comparing your mix with a reference track equips you with a lot of insights on how to improve your mix.

Choose A Mix That You Like

To find the perfect reference track, you need to identify an already mixed song that you love. You must choose a song that aligns with your music style. If you are mixing an R&B song, it would be best to find a reference track that has the same vibe. It’s better to choose a high-quality track, so you have a clear idea of what the elements of the mix sound like.

Compare It To Your Mix

Once you have selected your ideal reference track, it’s time to start comparing it to your mix. The goal of this comparison is to identify the differences between your mix and the reference track. You can use this information to understand where you might have gone wrong in your drum mixing process. A proper comparison is only possible if you have the right tools like reference headphones. When comparing the two tracks, listen to the overall sound and the individual drum elements. You should check how the kick and snare drums sound in the reference track compared to yours. Are they placed well in the mix? You should also listen to the panning and reverb effects to determine how to improve your mix.

In Conclusion

Using a reference track can significantly improve your drum mixing skills. It helps you identify the weaknesses in your mix and gives you a clear idea of the direction you need to go. It’s essential to choose a high-quality reference track to get the most benefit. With enough time and practice, you can achieve the perfect balance of drum samples and mix them like a pro.

Frequently Asked Questions On Tips For Mixing With Drum Samples

How Do You Mix Drum Samples?

To mix drum samples, start by adjusting the volume and panning of each sample. Use EQ to enhance the desired frequency ranges and add effects like reverb, compression, and delay to create depth and dimension. Consider layering the samples for a fuller sound.

Experiment with different settings and listen carefully to achieve the desired mix.

How Do You Make Drum Samples Sound Good?

To make drum samples sound good, you can apply EQ, compression, and reverb to enhance the sound. Also, pay attention to the arrangement and playing style to ensure an engaging beat. Experiment with different effects and techniques to find what works best for your tracks.

Finally, consider the quality of your samples to ensure they sound professional.

Do You Need To Eq Drum Samples?

Yes, drum samples need to be EQed to achieve the desired sound. EQing helps to remove any unwanted frequencies, enhance the desired frequencies, and balance the overall sound. By doing so, you can make sure that the drum tracks add depth and clarity to the mix.

Should You Compress Drum Samples?

Yes, compressing drum samples can be beneficial in achieving a more balanced and polished sound. Drum samples can benefit from compression because it smooths out the peaks and valleys in the transient response. However, it is important to use compression in moderation and with careful consideration to avoid over-compressing and losing the natural dynamics of the samples.

Conclusion

To sum up, mixing drum samples requires a keen ear, attention to detail, and technical know-how. By following the tips we’ve shared, you can improve the overall sound quality of your mixes, regardless of genre. Remember to keep experimenting, trust your instincts, and most importantly, enjoy the process.

With these guidelines and your creativity, your drum mixes are bound to be a hit. Happy mixing!

Categories
Archive

Mastered For Itunes Explained

Mastered for iTunes (MFiT) is a process developed by Apple to deliver high-quality audio for music streaming and downloads. MFiT involves optimizing the audio files during the mastering process to ensure they sound the best they can on Apple platforms.

Mastered for iTunes is a process that involves optimizing audio files during the mastering process to ensure high-quality sound on Apple platforms. Developed by Apple, this process has gained popularity among music producers worldwide. The optimized files are then delivered to Apple for distribution and sale on iTunes.

While mastering for iTunes doesn’t necessarily mean better sound quality on other platforms, it ensures that the audio is optimized for Apple’s AAC format. This optimizes sound quality, reduces artifacts and other decoding issues associated with the compression algorithms. We’ll go over everything you need to know about the Mastered for iTunes process.

Mastered For Itunes Explained

Credit: www.npr.org

What Is Mastered For Itunes?

Mastered for iTunes is a process that optimizes music files for the best possible sound quality on Apple platforms. It involves careful adjustments to the mastering process, such as higher resolution and reducing distortion, resulting in a better listening experience.

If you’re a music lover, you’ve probably heard of the term Mastered for iTunes (MFiT) before, but do you know what it is? Simply put, MFiT is a mastering process used to enhance the audio quality of music available on the Apple Music platform. It allows for better sound quality while using less data. In this post, we’ll be discussing everything you need to know about Mastered for iTunes.

The Basics Of Mfit

MFiT involves a mastering process where audio engineers optimize and prepare the music’s sound for digital distribution, taking into account the specific requirements needed for Apple devices. This process is not just about maximizing loudness, but rather about creating a dynamic and balanced sound that enhances the listener’s experience.

How Does Mfit Work?

The process of Mastered for iTunes involves several steps that are taken to optimize the audio quality. Here are the steps below:

  • Preparing the mix: The audio engineer analyzes the mix to determine what changes are necessary to make it sound better on digital platforms like Apple Music.
  • Optimizing the audio: The audio is processed through a suite of high-quality digital signal processing tools to achieve a better sound.
  • Review: The audio engineers review the optimized audio to ensure that it is the best version of the song
  • Encoding: Audio is encoded as high-resolution 24-bit/96kHz or higher files suitable for digital distribution on Apple Music.

MFiT has become a popular tool used by music producers and artists who want to deliver high-quality sounds to their listeners. With MFiT, music lovers can enjoy rich, dynamic audio that is free from distortion and unnecessary noise, and apple music lovers get the best out of their experience without using up too much storage space or data.

Mastered For Itunes Explained

Credit: www.youtube.com

Why Is Mastering For Itunes Important For Artists?

Mastering for iTunes (MFiT) is crucial for artists when it comes to releasing their music on iTunes. It’s a set of guidelines and requirements that Apple has provided to audio engineers to improve the quality of music tracks sold on the platform. In this article, we’ll explain how mastering for iTunes impacts music quality, increases chances of discovery, and meets industry standards and expectations.

The Impact On Music Quality

By adhering to MFiT standards, artists can significantly improve the quality of their music on iTunes. Mastering engineers follow specific guidelines while creating masters for iTunes, such as producing a 24-bit/96 kHz resolution, allowing greater dynamic range compression, adjusting the equalization curves to meet the frequency response of Apple’s playback electronics, and using gapless playback for albums. All of these go a long way in ensuring the music sounds its best on Apple’s platform.

Increased Chances Of Discovery

When an artist’s music is mastered for iTunes, it becomes more discoverable to users on the platform. This is because iTunes uses an algorithm to select the best-sounding audio master from the available options. When an artist’s music is professionally mastered and submitted as an MFiT master, it has higher chances of being selected by Apple’s algorithm. This increases the chances of the artist’s music getting discovered by new listeners, leading to more sales and streams.

Industry Standards And Expectations

Mastering for iTunes meets industry standards and expectations for digital music distribution. Apple has set certain requirements that must be met before a piece of music can be sold on iTunes. By adhering to the MFiT guidelines, artists can ensure their music is up to industry standards and will be accepted for sale on the platform. Those who do not follow the guidelines risk having their music rejected, causing delays and additional expenses to remix and remaster tracks to meet Apple’s requirements.

In conclusion, Mastering for iTunes is an important process that artists should consider to ensure their music is of the highest quality, is more discoverable, and meets industry standards and expectations. By adhering to the MFiT guidelines, artists can ensure their music stands out on iTunes and reaches a wider audience.

The Mastering Process For Itunes

Mastering audio for iTunes requires a unique process that ensures the sound quality of the music is optimized for digital distribution. Mastered for iTunes means that the audio source has been carefully prepared for playback on Apple devices, delivering a superior listening experience for the user.

If you’re an aspiring music artist or producer, you surely want to produce high-quality tracks that sound great to listeners across various platforms, including iTunes. Apple Music’s “Mastered for iTunes” (MFiT) initiative ensures that your music tracks sound their best on the platform. The initiative involves making a few adjustments to the mastering process to optimize the audio’s sound quality for streaming on iTunes. Let’s delve into the mastering process and how to prepare your mix for MFiT.

Preparing The Mix For Mastering

Before commencing the mastering process for iTunes, you need to prepare your audio mix for mastering. Firstly, ensure that your mix has sufficient headroom to apply processing required during mastering. Aim for an average level of -6dB to prevent distortion caused by over-compression. Also, it’s vital to listen to your mix on various devices, including speakers, headphones, and earbuds, to ascertain that your audio mix sounds good on different devices and sound systems.

Selecting The Right Tools And Equipment

Choosing the right software and equipment for mastering your audio mix is crucial. When it comes to selecting a digital audio workstation, popular options include Pro Tools, Logic Pro and Ableton Live. For plugins, you can use tools like EQs, compressors, limiters, and stereo imagers, among others. Perfecting your mix can be challenging, but with the right selection of tools and equipment, the process can be less daunting.

Utilizing Best Practices In Audio Mastering

It’s essential to keep certain best practices when mastering your audio mixes for iTunes. Begin by ensuring that your track has a clear and consistent level while controlling peaks and increasing its overall loudness. Additionally, give your tracks a balance between the elements, such as vocals, drums, and other instruments. Finally, ensure that your track is compatible with all devices and platforms, including streaming services like iTunes, ensuring that the audio sounds its best across all devices. Overall, implementing the Mastered for iTunes initiative can considerably enhance the sound quality of your audio tracks. By adhering to best practices in audio mastering, selecting the right equipment and software, and preparing your mix beforehand, you can create high-quality tracks that sound excellent across various devices and platforms.

The Technical Side Of Mastering For Itunes

If you are a music artist or producer, you may already know about Mastered for iTunes (MFiT). It is a way to enhance the audio quality of your music for listeners on Apple Music and iTunes. In this post, we will focus on the technical side of MFiT, including the file format requirements, how to avoid common issues, and optimizing audio for different playback devices.

File Format Requirements

To ensure your music is MFiT, you need to follow Apple’s file format requirements. This means your audio files must be in a specific format, which is the Apple Lossless audio codec (ALAC) with a bit rate of 16-bit or higher and a sample rate of 44.1kHz or higher. It is also recommended that you use the Mastered for iTunes Droplet tool to encode your audio files properly.

How To Avoid Common Issues

One common issue with MFiT is the use of excessive compression during mastering. This can result in a loss of dynamic range, making the music sound unpleasant to the listener. To avoid this issue, it is recommended that you keep the level of compression as low as possible while still achieving the desired sound.

Another issue is the use of peak limiting during mastering, which can cause distortion in the audio. To avoid this, it is recommended that you use transparent limiting techniques that do not cause distortion.

Optimizing Audio For Different Playback Devices

Finally, it’s important to optimize your audio for different playback devices to ensure your music sounds the way you intended on various devices. As different devices have different sound systems, it’s crucial to test your audio on various devices such as headphones, speakers, and car stereos. You can also use specialized software tools designed to optimize audio for various playback devices.

Mastering For Itunes Vs. Traditional Mastering

Mastering for iTunes is a process designed to optimize audio specifically for digital distribution. Traditional mastering is aimed at preparing audio for physical formats such as CDs and vinyl. Mastering for iTunes helps music sound great across a wide range of devices and platforms that listeners use today, such as iPhones, tablets, and laptops.

Mastering for iTunes and traditional mastering have their own approaches when it comes to producing high-quality audio for digital distribution. Mastering for iTunes refers to a set of guidelines that Apple has established to ensure sound quality across all devices, while traditional mastering involves producing a high-quality mix for physical formats such as CDs or vinyl records. In this post, we are going to explain the key differences between these two methods and the pros and cons of each approach.

Key Differences Between The Two Methods

Mastering for iTunes has some key differences from traditional mastering. The primary difference lies in the types of files used. When mastering for iTunes, Apple’s guidelines require the creation of Mastered for iTunes (MFiT) audio files, which are optimized for digital distribution. MFiT files use a higher quality encoder and a different dithering algorithm, ensuring that all the subtle nuances of the recording are captured and reproduced as accurately as possible across all Apple devices. Traditional mastering, on the other hand, typically involves creating a final mix for physical formats such as CDs, vinyl records, and cassette tapes. The process involves using industry-standard equipment and techniques to create a final mix that sounds great when played back on these formats.

Pros And Cons Of Each Approach

There are pros and cons to both Mastering for iTunes and traditional mastering. Here are a few of them:

Mastering for iTunes

  • Pros:
    • Optimized for digital distribution, ensuring high-quality reproduction across all Apple devices
    • Uses a higher quality encoder and a different dithering algorithm to capture more subtle nuances of the recording
    • Can help ensure your music sounds great on Apple Music and other digital platforms
  • Cons:
    • May not produce the same quality sound on other platforms or devices, which can be a problem if your audience is not exclusively on Apple devices
    • Can be costly if you don’t have the right equipment or expertise to produce MFiT files
    • Some audiophiles argue that MFiT files can compromise the sound quality of the final mix

Traditional Mastering

  • Pros:
    • Industry-standard techniques and equipment ensure a high-quality final mix
    • Physical formats can produce warmer, richer, and more dynamic sound, which some audiophiles prefer
    • Can be more cost-effective if you are producing physical formats as well as digital
  • Cons:
    • May not optimize for digital distribution, which can result in poor sound quality on certain platforms or devices
    • Requires expertise and specialized equipment which may not be accessible to all
    • Creating physical formats such as CDs, vinyl, etc. can be expensive and time-consuming

Overall, which approach you choose will depend on your goals and budget, and the preferences of your audience. In some cases, you may choose to utilize both approaches, optimizing for both digital and physical formats. By understanding the key differences between Mastering for iTunes and traditional mastering, you’ll be better equipped to make the right choice for your next project.

Mastered For Itunes Explained

Credit: www.npr.org

How To Release Mastered For Itunes Music

To release Mastered for iTunes music, you need to follow Apple’s guidelines to ensure the highest quality sound for listeners on their devices. This involves mastering your music to Apple’s specific requirements, including providing the correct file format and encoding settings.

With these steps, you can release your music in the best possible quality for iTunes users.

Mastered For iTunes (MFiT) is a technical specification created by Apple that helps to ensure the quality of your music on their platform. If you want to release your music on Apple Music, you need to ensure that your tracks are mastered to MFiT standards. In this post, we will explain everything you need to know about how to release Mastered for iTunes music, including how to submit your music to Apple Music and retrieve your MFiT files from their platform.

Submitting Your Music To Apple Music

To submit your music to Apple Music, you will need to use a digital aggregating service, such as TuneCore, CD Baby or DistroKid. These services will also handle the MFiT encoding process for you. Here’s a step-by-step guide on how to submit your music to Apple Music:

  1. Choose a digital aggregating service and sign up for an account.
  2. Upload your music tracks in a high-res format like WAV or AIFF.
  3. Provide all the necessary metadata for your tracks, including the track title, artist name, album title, release date, and artwork.
  4. Opt for MFiT encoding. Most aggregators will offer this service for an additional fee.
  5. Review and approve the final files before they are submitted to Apple Music.
  6. Wait for the aggregator to confirm that all your music is live on Apple Music.

Retrieving Your Mfit Files From Apple Music

If you have already released your music on Apple Music but didn’t request MFiT encoding at the time, don’t worry. You can still retrieve your MFiT files from Apple Music, provided that you have access to the original high-resolution audio masters. Here’s how to go about it:

  1. Log in to iTunes Connect and navigate to the “Resources and Help” section.
  2. Click on “iTunes Producer” to download the app.
  3. Install and open the iTunes Producer app.
  4. Enter your Apple ID and password to sign in.
  5. Choose the album or track you want to retrieve the MFiT files for and click on “Manage”.
  6. Click on “Request MFiT Master” and follow the on-screen instructions.
  7. Wait for Apple to process your request. This typically takes a few days.
  8. Download your MFiT files from iTunes Connect.
  9. Review and use the MFiT files to distribute your music.

In conclusion, releasing Mastered for iTunes music is a crucial step for any artist looking to distribute their music on the Apple Music platform. By following the above steps, you can ensure that your music meets the MFiT specification and sounds its best on all Apple devices.

Frequently Asked Questions On Mastered For Itunes Explained

What Does Mastered For Itunes Mean?

Mastered for iTunes is a process of preparing music files for distribution on the Apple Music platform. This process involves optimizing the sound quality of the tracks, so they sound better on Apple devices, using high-resolution masters and advanced encoding techniques.

What Happens When A Recording Is Mastered?

Mastering is the final stage of music production, where audio tracks are reviewed, and adjustments are made to the overall sound. This process ensures that the final product sounds consistent, professionally mixed, and ready for distribution on various platforms. Mastering helps to achieve maximum loudness, clarity, and depth, making the recording sound its best potential.

What Are The Requirements For Itunes Mastering?

To meet iTunes mastering requirements, your audio file should be in a high-resolution format, have a bit depth of 24-bits, a sample rate of 44. 1 kHz, and a peak level of -1dB. Your file should also have adequate headroom and be free from clipping and distortion.

What Is A Mastered Version Of A Song?

A Mastered version of a song is the final version of a track that has been polished and refined by a mastering engineer. This process enhances the overall quality of the audio by balancing levels, equalizing frequencies, and adding clarity and depth.

The mastered version is usually the one that gets released for public consumption.

Conclusion

As the music industry continues to evolve, mastering your content for iTunes is essential for success. A Mastered for iTunes label ensures your music is optimized for digital distribution and provides an enhanced listening experience for your audience. By following the technical guidelines and working with reputable mastering engineers, you can elevate your music to the next level and stand out in a competitive market.

Don’t underestimate the importance of mastering for iTunes, as it can ultimately make or break the success of your music career.

Categories
Archive

Progress In Music Production

Music production has progressed significantly with advancements in technology and software. There is now a vast range of tools available for producers to create polished and professional-sounding tracks.

Music production refers to the process of creating music from scratch, starting from the earliest stages of inspiration to recording and mixing tracks. The digital revolution has fueled the progress in music production immensely, with advancements in software, plugins, and hardware.

Today, musicians and producers are no longer constrained by the limited options and capabilities of analog instruments, but instead can create music using a vast range of tools available to them. With digital audio workstations, they can manipulate sounds with precision and ease, add virtual instruments and effects, and collaborate with other artists from anywhere in the world. These developments have undoubtedly democratized music production, allowing many aspiring artists to create their own songs and share them with the world.

Digital Audio Workstations (daws)

Digital Audio Workstations (DAWs) have revolutionized music production, allowing musicians to record, edit, mix, and master music digitally. With today’s advanced technology, DAWs provide unlimited creative possibilities for music producers to achieve high-quality audio production.

Overview

Digital Audio Workstations (DAWs) have been around for quite some time now, but in recent years, they have become increasingly popular. These software applications are designed to help music producers record and edit music on their computers. DAWs have revolutionized the music industry by making it possible for anyone with a computer and an internet connection to create professional-quality music. In this article, we will take a look at some of the features that make DAWs such a useful tool for music production.

Features

DAWs offer a wide variety of features that make them an essential tool for every music producer. They allow producers to create, edit, mix, and master music all in one place. Some of the features offered by DAWs include:

  • MIDI sequencing
  • Audio editing and manipulation
  • Sampling and looping
  • Virtual instruments and effects
  • Full mixing and mastering capabilities

These features, along with many others, make it possible for music producers to create complex and intricate productions that were once thought impossible.

Popular Daws

There are many different DAWs available on the market today, each with its own unique set of features and benefits. Some of the most popular DAWs include:

DAWOperating System
Ableton LiveWindows and macOS
FL StudioWindows and macOS
Logic Pro XmacOS
Pro ToolsWindows and macOS
Studio OneWindows and macOS

Ableton Live is a popular choice for electronic music producers, while Logic Pro X is favored by many songwriters and composers. Pro Tools is a go-to for professionals in the music industry due to its industry-standard status. FL Studio and Studio One are also popular among music producers, mainly for their user-friendly interface and affordable pricing. In conclusion, DAWs have revolutionized the music industry by making it possible for music producers to create professional-quality music using just a computer and an internet connection. The variety of features offered by DAWs, as well as the different popular DAWs available, make them an essential tool for every music producer.

Progress In Music Production

Credit: www.researchgate.net

Virtual Instruments And Sampling

Virtual instruments and sampling have greatly enhanced the music production sector by allowing artists to create a variety of sounds with ease, versatility and accuracy. These tools offer endless creative possibilities, reproducing real-life instruments with remarkable accuracy for a more dynamic, authentic sound.

Virtual Instruments and Sampling have revolutionized the music industry. They have changed the way music producers create and manipulate sound. Virtual instruments are software emulations of traditional instruments, while sampling involves capturing and using pre-recorded audio samples. In this article, we’ll explore these two music production techniques. Let’s dive in!

Types Of Virtual Instruments

There are several types of virtual instruments available, including:

  • Sample-based virtual instruments
  • Physical modeling instruments
  • Analog emulations
  • Hybrid instruments

Sample-based virtual instruments use pre-recorded audio samples to create a realistic-sounding instrument. Physical modeling instruments use algorithms to recreate the physics of an instrument. Analog emulations mimic the sound of vintage analog equipment. Hybrid instruments combine different types of synthesis to create unique sounds.

Sampling Vs. Synthesis

Sampling and synthesis are two techniques used to create virtual instruments. Sampling involves recording and using real-world sounds to create a virtual instrument. Synthesis, on the other hand, involves creating a sound wave from scratch using oscillators and filters. Sampling is often used to create realistic-sounding virtual instruments, while synthesis is used to create unique and experimental sounds. However, modern music production often combines both techniques to create hybrid instruments that offer the best of both worlds.

Top Virtual Instrument Plugins

There are countless virtual instrument plugins available, but here are a few of the most popular:

PluginDeveloper
KompleteNative Instruments
OmnisphereSpectrasonics
KeyscapeSpectrasonics
MassiveNative Instruments
Sylenth1LennarDigital

These plugins offer a wide range of sounds and features, and are trusted by countless musicians and producers around the world. Whether you’re looking for classic analog synth sounds, realistic piano samples, or experimental soundscapes, there’s a virtual instrument plugin out there for you. In conclusion, virtual instruments and sampling are essential tools in modern music production. They allow musicians and producers to create sounds and music that would have been impossible just a few decades ago. Whether you’re an aspiring producer or a seasoned pro, it’s worth investing in high-quality virtual instruments and sampling tools to take your music to the next level.

Mixing And Mastering

Mixing and mastering have undergone significant progress in music production over the years. With advanced technology and software, music producers have access to more tools and techniques to polish their final product for optimal sound quality.

Importance Of Mixing And Mastering

Mixing and mastering are two essential steps in the music production process that helps in polishing the final product and delivering a high-quality sound. Mixing is the process of blending different parts of a song to create a cohesive sound while mastering is the process of refining the final mix by adjusting levels, equalization, compression, and other effects. Proper mixing and mastering ensure that the song sounds good on every device – a phone, car stereo, or even in a live performance.

Tools For Mixing And Mastering

Mixing and mastering requires the use of various tools and software to achieve the desired sound quality. Digital Audio Workstations or DAWs are essential software for mixing and mastering. They provide multiple options to manipulate different tracks and create a cohesive final mix. Other tools include equalizers, compressors, and limiters to modify track frequency, gain, and dynamics. Tools like stereo wideners, reverb, and delay can be used to create a sense of depth in the final product.

Mixing Techniques

Advanced mixing techniques can be used to improve the sound quality of a song. Separating each instrument or vocal track into its individual “space” using panning, EQ, reverb, or delay, help in creating wide soundscapes. Compression can be used to improve the balance between dynamic range and volume, achieving a modern and punchy sound. Other techniques include side-chaining and parallel processing to improve track separation, and volume automation to create dynamic mixes that capture the emotional feel of the song.

Mastering Techniques

Mastering is the final polish of the mix. It involves techniques such as loudness maximization, harmonic balancing, and stereo enhancement to achieve the desired sound quality. Mastering EQ is used to adjust the overall frequency balance of the song, making sure it sounds good on different sound systems. Compression is used to control dynamic range, and limiters can be used to ensure that the final mix doesn’t clip. Stereo enhancement techniques are used to widen the sound, making it more spacious. So, with these tools and techniques, mixing and mastering can improve the quality of the music production and give it a professional touch. These techniques help create a unique sound that will stand out from others in the music industry.

Progress In Music Production

Credit: www.mixinglessons.com

Collaboration In Music Production

Effects And Processing

Music production has seen massive progress in recent years, with advancements in technology allowing for better effects and processing options. This has led to more creative possibilities and freedom for musicians and producers alike.

Music production has come a long way since the days of analog recordings. With the advancement of technology, music producers can now use a wide variety of effects and processors to enhance the sound quality of their recordings.

Types Of Effects And Processors

There are various types of effects and processors that music producers use to get the desired sound quality. Some of the most commonly used types are:

TypeDescription
EqualizersUsed to alter the tone of an audio signal by boosting or reducing specific frequency ranges.
CompressorsUsed to even out the dynamic range of an audio signal by reducing the volume of louder sounds and increasing the volume of softer sounds.
ReverbsUsed to add a sense of space or depth to an audio signal by simulating the reflections that occur in a physical space.
DelaysUsed to create an echo-like effect by delaying a copy of the original audio signal and playing it back after a set amount of time.

Using Effects And Processors In Music Production

Music producers use effects and processors to modify the sound quality of a recording in various ways. These modifications can include adjusting the tone, adding effects such as reverb or chorus, and fixing any issues with the audio quality. Here are some ways in which effects and processors are used in music production:

  • Equalizers are used to adjust the levels of specific frequency ranges to create a more balanced sound.
  • Compressors are used to control the dynamic range of an audio signal, which helps to improve clarity and overall sound quality.
  • Reverbs are used to create a sense of space or depth in a recording, making it sound more natural and realistic.
  • Delays are used to create an echo or doubling effect, which can add interest and depth to a recording.

Popular Effects And Processors

There are several popular effects and processors that music producers rely on to create high-quality recordings. Some of the most commonly used ones are:

  1. Universal Audio LA-2A Compressor: A classic analog compressor that has been used on countless recordings.
  2. Eventide H3000: A versatile effects processor that can create a wide variety of sounds, including delays, reverbs, and pitch shifting effects.
  3. Lexicon 480L: An iconic digital reverb processor that has been used on many classic recordings.
  4. Waves SSL E-Channel: A plugin that emulates the sound of the SSL 4000 console, which is known for its warm and punchy sound.

In conclusion, the use of effects and processors has revolutionized music production, allowing producers to create high-quality recordings that were once only possible with expensive analog equipment. By understanding the different types of effects and processors, and how they are used, producers can create recordings that sound professional and polished.

Music Production In The Cloud

Music production has come a long way since the days of tape recording and analog mixing consoles. With the vast advances in technology in recent years, musicians and producers now have access to a range of digital tools and software that make the recording and production process faster, easier, and more versatile than ever before.

Cloud-based Music Production Services

One of the most exciting developments in music production technology is the emergence of cloud-based music production services. These services allow users to access an array of tools and resources for music production directly from the cloud, rather than relying on software installed on local computers.

Cloud-based music production services offer a range of features and functionality, including virtual instruments, effects, and mixing tools that are all accessible from a web browser. Some of the most popular cloud-based music production services on the market today include Soundtrap, BandLab, and Splice.

Advantages Of Cloud-based Music Production

There are several advantages to using cloud-based music production services for your music projects. One of the most significant benefits is the ability to collaborate and share files with others remotely. With all of your music production tools and files stored in the cloud, you can work with collaborators from around the world without ever leaving your home studio.

Another significant advantage of cloud-based music production is the flexibility it offers. Cloud-based services can be accessed from any device with an internet connection, allowing musicians and producers to work from anywhere. This means you can work on your music projects while on vacation, during a long commute, or even in a coffee shop.

Finally, cloud-based music production services can save you time and money. You don’t need to invest in expensive hardware or software to produce professional-quality music. Instead, you can access everything you need from the cloud for a low monthly subscription fee.

In Conclusion

In conclusion, cloud-based music production is a game-changer for musicians and producers worldwide. With easy access to an array of tools and resources from anywhere, at any time, the possibilities for creating professional-quality music are endless.

Progress In Music Production

Credit: www.renegadeproducer.com

Frequently Asked Questions Of Progress In Music Production

What Are The 5 Stages Of Music Production?

The 5 stages of music production are: recording, editing, mixing, mastering, and distribution. Each stage involves different processes and techniques to create a polished and professional sound. Recording captures the initial performance, editing refines the recorded tracks, mixing blends all the elements together, mastering prepares the music for commercial release, and distribution gets the music to the consumer.

How Music Production Has Evolved?

Music production has evolved significantly over the years. From analog recording techniques to digital audio workstations and software. The availability of advanced technology has made it easier to produce music with high-quality sound, effects, and samples. Collaborating and sharing music with others is also more convenient than ever before.

As a result, the modern music industry has become more accessible and diverse, with a wider range of music being produced and enjoyed globally.

What Are The Steps To Becoming A Music Producer?

To become a music producer, follow these steps: 1. Learn music theory and production software. 2. Practice composing and producing music regularly. 3. Network and collaborate with other musicians and producers. 4. Gain hands-on experience through internships or assistant positions.

5. Continuously learn and grow your skills by attending workshops, seminars, and mastering new production tools.

How Long Does It Take To Get Better At Music Production?

The time it takes to improve at music production varies depending on the person’s skill level and learning capabilities. However, with consistent and deliberate practice, it is possible to see significant improvement within a few months to a year.

Conclusion

It’s no secret that technology has revolutionized the world of music production. From Electronic Dance Music to Hip-Hop, emerging artists are pushing boundaries and creating sounds never heard before. With recent advancements in music production, it’s easier than ever for anyone to become a producer, and express themselves creatively in ways that were once unimaginable.

The future of music production looks brighter than ever, and we’re excited to see what emerging artists will do next with these powerful tools at their disposal.

Categories
Archive

How to Blend Your Voice With Music

To blend your voice with music, adjust the volume of your voice and the music so they are balanced. Then, experiment with EQ settings to get the right sound.

When creating audio content, one of the most important factors to consider is how to blend your voice with the accompanying music. Whether you’re recording a podcast, creating a video, or producing a song, striking the right balance between your voice and the music can significantly affect the impact your content will have on your audience.

Achieving the perfect blend can be a bit tricky, but a few simple adjustments can go a long way. We will explore some tips on how to blend your voice with music to create professional, high-quality audio content.

Why Blending Your Voice With Music Is Important

Whether you’re a professional singer or an amateur, blending your voice with music is crucial to a successful performance. It isn’t just about sounding good; it’s about creating an emotional connection with your audience. When your voice and the music meld seamlessly, the performance becomes more impactful and memorable.

Increasing Emotional Connection With Audience

The purpose of music is to evoke emotions. When you present a song, you want the audience to feel the depth of your emotions. Blending your voice with music amplifies that emotion and makes it more relatable to the audience. People want to feel connected to the music they are hearing, and blending your voice with music can help to increase that connection.

  • Blend your voice in such a way that it fits well with the music.
  • Ensure that your melody and lyrics are in sync with the instrumental track.
  • Use appropriate vocal techniques to personalize the song.

Enhancing The Overall Sound Quality Of The Performance

The sound quality of a performance is the result of how well the different elements of the music blend together. Blending your voice with an instrumental track is a fundamental requirement for any singer to create a great-sounding performance. This not only enhances the quality of your singing, but it also improves the overall sound quality of the performance. Proper mixing of vocals and music elements is necessary to ensure that the vocals do not clash with the instrumental track.

Tips for Enhancing the Overall Sound Quality
Smoothly fade vocals in and out of the mix, so they don’t overpower the music.
Use appropriate EQ to enhance the frequency response of the vocals and instrumental track.
Avoid any audio clipping or distortion that may damage the overall sound quality of the performance.

Blending your voice with music is an essential part of creating a successful performance. When done correctly, it can increase your emotional connection with the audience and enhance the overall sound quality of the performance.

How to Blend Your Voice With Music

Credit: www.wikihow.com

Understanding The Elements Of A Song To Effectively Blend Your Voice With Music

To blend your voice with music effectively, it is important to understand the different elements of a song such as melody, harmony, rhythm, and lyrics. By taking note of these elements, you can adjust your vocal delivery to match the overall vibe of the music and create a cohesive sound.

Practice and experimentation are key in finding the perfect blend between your voice and the music.

As a singer, there’s nothing more rewarding than performing a song that truly speaks to your soul. However, to make the performance truly magical, you need to blend your voice with the music. But how do you do it? It’s all about understanding the key elements of a song. In this post, we’ll discuss melody and harmony, as well as rhythm and beat – two critical components that combine to create a perfect musical blend.

Melody And Harmony

Melody and harmony form the backbone of every song. Melody refers to the tune of the song, while harmony refers to the chords behind the melody. While melody is often present in the vocals, harmony can be worked into both the vocals and instruments. To blend your voice with music, you need to listen to the melody and pick out the notes that complement your voice. Similarly, you must pay attention to the harmony and ensure that your vocals fit in with the chords playing behind.

Rhythm And Beat

Rhythm and beat are incredibly important when it comes to blending your voice with music. They set the pace and the tone of the song, making it easier for you to find the perfect groove. When performing, you must pay close attention to the rhythm of the song and ensure that your vocals fit in with the tempo. You should also try to match the beat of the song with your voice, allowing yourself to blend in seamlessly with the instruments.

Conclusion

In conclusion, blending your voice with music is all about understanding the elements of the song. By paying attention to melody and harmony, as well as rhythm and beat, you can create a perfect blend that will leave your audience in awe. Remember, it takes practice and patience to master this skill, but with enough dedication, you can become a true musical artist.

Matching Your Voice To The Key And Tempo Of The Music

Blending your voice with music is an art that requires practice, patience, and skill. One of the critical components of blending your voice with music is matching your voice to the key and tempo of the music. As a singer, it is essential to understand the song’s key and tempo to create harmony and syncopation with the music.

Identifying The Key Of The Song

The key of a song is the central tone that creates the melody and harmony in the music. Identifying the key is crucial to blend your voice with the music. To identify the key, you can listen to the chords played in the song and find the root note. You can also use the melody to determine the key of the song. Once you’ve identified the key, you can start practicing the song in that key to match your voice with the music.

Adapting Your Voice To The Song’s Tempo

The tempo of a song is the speed at which the music is played. Adapting your voice to the song’s tempo is crucial to create rhythm and syncopation with the music. To adapt your voice to the tempo, you can start by listening to the song several times to get a feel for the beat. Once you’ve familiarized yourself with the beat, you can start practicing the song at a slower tempo and gradually increase the speed until you can match the song’s original tempo and rhythm. It is important to pay attention to the timing and phrasing while you are singing to create harmony with the music.

Matching your voice to the key and tempo of the music takes time and practice. However, with dedication and patience, you can learn to blend your voice with any music and create a unique and dynamic sound.

Techniques For Blending Your Voice With Music

Blending your voice with music can help elevate your performance and create a more memorable experience for your audience. Knowing the right techniques for blending your voice with music can make all the difference. Here are some tips:

Using Dynamics To Emphasize Key Parts Of The Song

By using dynamics, you can add variation to your singing, emphasizing the key parts of the song. This can help you express the emotions that the song is trying to evoke. Using dynamics doesn’t just refer to changes in volume, but also changes in tone, pitch, and rhythm. Some tips for using dynamics:

  • Vary the volume of your singing throughout the song, rather than keeping it at the same level
  • Use different tones to convey different emotions. For example, a softer tone can convey sadness, while a louder and brighter tone can convey happiness
  • Experiment with adding slight variations to the pitch and rhythm of your singing during each verse and chorus

Proper Breathing Techniques To Control Your Vocal Power

Breathing plays a crucial role in singing. Proper breathing techniques can help you control your vocal power and blend your voice with music more effectively. Some tips for controlling your breathing:

  • Stand up straight with your shoulders relaxed and take deep breaths into your diaphragm instead of shallow breaths into your chest
  • Exhale slowly and steadily, using your abdominal muscles to control the release of air
  • Avoid lifting your shoulders or straining your neck while breathing

Vocal Control And Matching The Intensity Of The Music

Matching the intensity of the music can help you blend your voice with the music seamlessly. This requires vocal control in terms of pitch, tone, and rhythm. Some tips for matching the intensity of the music:

  • Listen carefully to the music and pay attention to the changes in volume, tempo, and instrumentation
  • Match your vocal intensity to the music, increasing or decreasing volume and tone as needed
  • Practice vocal exercises to improve your range, enabling you to better match the intensity of the music

Finding The Right Balance Between Your Voice And The Music

In music, blending your voice with the accompanying melody is crucial for creating a harmonious composition. Achieving the perfect balance between your voice and the music can be challenging, but with practice, it can be mastered. Below we discuss three key ways to achieve this, namely:

Knowing When To Increase Or Decrease Vocal Power

One of the most critical aspects of blending your voice with music is knowing when to increase or decrease your vocal power. The music will provide a guide on when to use your voice at different levels, making sure it blends in seamlessly with the melody. When the music gets louder, you might need to increase your volume and intensity to match the energy, while a softer melody might require you to tone down your vocals so that they do not overpower it.

Adjusting Your Pitch To Match The Music

Another essential skill in blending your voice with music is the capability to adjust your pitch to match the song’s melody. Singing flat or sharp notes can ruin the whole composition. You must get your pitch right for every note and chord. Ensure you practice the song’s melody and understand the key notes that require your particular attention. This will not only help you achieve the right pitch but also boost your confidence when performing the song.

Striking A Balance Between Different Elements Of The Song

Lastly, music is a combination of different elements that come together to create a beautiful piece. Finding a balance between the various elements of a song is vital when trying to blend your voice with music. You must ensure that the melody, harmony, rhythm, and lyrics blend in well with your singing. Do not allow any particular element to stand out too much and ruin the overall composition.

In conclusion, blending your voice with music requires practice, patience, and an ear for detail. It’s important to stay flexible and adjust your singing to the song’s varying elements, including melody, pitch, volume, and other aspects. With enough practice and dedication, you can achieve the perfect balance between your voice and the music you’re singing to.

How to Blend Your Voice With Music

Credit: www.topsingingsecrets.com

Tackling Common Challenges While Blending Your Voice With Music

Blending your voice with music can be a challenging task, but it’s important to maintain balance between the two. Avoid overpowering the music or getting overshadowed by it. Remember to adjust your volume, pitch and tone, depending on the music’s tempo and melody, and practice singing along with the music regularly to perfect the blend.

Blending your voice with music can be a challenging task, even for experienced singers. Several factors can affect the outcome, including technical issues, maintaining consistent tone, and nervousness or stage fright. It’s crucial to identify these challenges and create a plan to overcome them. In this article, we’ll focus on three significant hurdles that many singers encounter while blending their voice with music: dealing with technical issues such as feedback and microphone jitters, maintaining consistency of your tone while singing over different parts of the song, and overcoming nervousness and stage fright.

Dealing With Technical Issues Such As Feedback And Microphone Jitters

Feedback and microphone jitters are common technical issues that singers face when blending their voice with music. Feedback occurs when sound from the speakers is picked up by the microphone and then amplified, which can lead to a high-pitched noise or screeching sound. Microphone jitters, on the other hand, occur when the singer holds the microphone too close to their mouth or moves too vigorously while singing, causing unwanted noise. Here are some tips to handle technical issues:

  • Position the microphone at a proper distance from your mouth
  • Use a microphone with a cardioid or supercardioid polar patterns to reduce feedback
  • Use a microphone with an anti-shock mount to prevent microphone jitters

Maintaining Consistency Of Your Tone While Singing Over Different Parts Of The Song

Maintaining the consistency of your tone while singing over different parts of the song can be challenging. It’s essential to ensure that your voice is balanced with the music throughout the song, even during rapid changes that may occur in tempo or style. To achieve this, you must practice different techniques such as control over pitch, voice vibrato, and emotion. Here are some tips to maintain your tone and blend well with music:

  1. Practice singing along with the instrumentation to develop your sense of timing.
  2. Understand the structure of the song, including verses, choruses, and bridges.
  3. Use different vocal styles and techniques, including vibrato, high notes, and falsetto, to add variety to your voice.

Overcoming Nervousness And Stage Fright

Overcoming nervousness and stage fright is essential to achieve a remarkable performance. Nervousness and stage fright can affect your voice and performance when blending your voice with music. Anxiety can cause shaky hands, a quivering voice, and even memory loss. However, with practice, it is possible to overcome these feelings and deliver an outstanding performance. Here are some tips to overcome stage fright and nervousness:

  1. Practice in front of others before your actual performance to minimize anxiety.
  2. Visualize a successful performance and focus on positive thoughts.
  3. Use breathing exercises and relaxation techniques to reduce physical symptoms of anxiety.

Tackling common challenges when blending your voice with music requires practice, focus, and preparation. With these tips, you will be able to troubleshoot technical issues, maintain consistency of your tone while singing over different parts of the song, and overcome nervousness and stage fright. Remember, practice makes perfect, and the more you practice, the more comfortable you will feel blending your voice with music.

Practicing Techniques To Perfect Your Blending

Blending your voice with music can be a daunting task for many new singers. The secret to blending your voice with music is practice and more practice. Along with practice, there are certain techniques you can use to perfect your blending and make your singing stand out.

Recording And Listening To Your Singing

Recording your singing is a great way to hear how you sound and pick up on any areas that need improvement. When listening back to your recordings, pay attention to your tone, pitch, and volume. Identify any areas that need work and practice on those specific areas until they are fully improved.

Using Online Vocal Lesson Resources And Feedback Tools

Online vocal lesson resources and feedback tools are plentiful and can be incredibly helpful when it comes to practicing blending your voice with music. These resources can help you with everything from breathing techniques to identifying your vocal range. By dedicating some time each week to using online resources, you can quickly improve your blending skills.

Collaborating With Other Musicians And Practicing In A Group Setting

Collaborating with other musicians and practicing in groups is one of the best ways to improve your blending skills. When practicing with others, pay attention to their singing style and try to match their tone and pitch. This will not only enhance your blending skills but also your ability to harmonize with others.

In conclusion, blending your voice with music is a skill that takes time and dedication to perfect. By regularly practicing these techniques and using available resources, you can quickly enhance your ability to blend your voice with music.

How to Blend Your Voice With Music

Credit: www.youtube.com

Frequently Asked Questions Of How To Blend Your Voice With Music

How Do You Blend Vocals With Music?

Blending vocals with music requires careful attention to balance and EQ. The first step is to ensure that the volume of the vocals is consistent throughout the song. Next, use EQ to make the vocals sit well in the mix.

Finally, consider adding compression and reverb to enhance the overall sound. It’s important to listen critically and make adjustments as needed.

How Do You Mix Voice Over With Music?

To mix voice over with music, adjust the music track’s volume level to be lower than the voiceover. Consider using EQ to adjust the frequency of each within the mix so they sit harmoniously together. Use a fade-in or fade-out on the music at the beginning and end of the voiceover.

Export and listen to the final mix.

How Do You Combine Voice In Music?

To combine voice in music, you need to mix the vocal tracks with the instrumental tracks. Begin by adjusting the volume levels of each track. You can then add effects such as reverb or compression. Make sure to EQ the vocals to ensure they cut through the mix.

Finally, pan the vocal tracks to create a stereo image.

How Can I Make My Voice Sound Better In Music?

Improving your voice in music requires daily practice and vocal techniques like breathing exercises, posture, and vocal warm-ups. Develop your control over pitch, tone, and volume. Experiment with different singing styles to find your own unique sound. Consider taking lessons from a vocal coach to receive personalized feedback and guidance.

Conclusion

Blending your voice with music is an art that requires patience, practice, and persistence. By following the tips we’ve discussed, you’ll be able to create a perfect balance between your vocals and the melody. Remember, the key is to experiment and find your unique style.

Whether you’re an aspiring musician or an established artist, mastering this technique is crucial for success. With the right approach, skills, and tools, you’ll be able to produce top-quality music that resonates with your audience. So, start practicing today and unleash your creative potential!

Categories
Archive

How to Use Synth One in Garageband

To use Synth One in Garageband, download the Synth One app and open a new project in Garageband. From there, add a new software instrument track and select Synth One as the plugin.

Garageband is a powerful music production software that allows you to create high-quality music easily and efficiently. One of the most popular plugins used in Garageband is Synth One, a free synthesizer app available on iOS devices. With its intuitive interface and extensive sound library, Synth One makes it easy to create complex and unique sounds for your music.

To start using Synth One in Garageband, simply download the app and open a new project in Garageband. Then, add a new software instrument track and select Synth One as the plugin. With Synth One, you can add depth and variety to your music productions and take your music-making to the next level.

How to Use Synth One in Garageband

Credit: www.reddit.com

Downloading And Installing Synth One

To use Synth One in Garageband, you need to first download and install it. You can do this by searching for it on the App Store and then tapping the install button. After installation, you can access it in Garageband and start creating music.

Synth One is a powerful and free virtual synthesizer plugin created by AudioKit. It’s an excellent tool for music producers who want to expand their sound library and create unique sounds. Using Synth One in Garageband is easy if you follow a few simple steps, beginning with downloading and installing the plugin.

Setting Up Audio Units In Garageband

Before you can use Synth One in Garageband, you need to set up your Audio Units preferences.

  1. Open Garageband, go to “Garageband” in the toolbar, and select “Preferences.”
  2. Click on the “Audio/MIDI” tab and select “Audio Units.”
  3. Make sure the box next to “Audio Units” is checked.
  4. Close the preferences window.

Installing Synth One

Once you have set up Audio Units, it’s time to download and install Synth One.

  1. Go to the AudioKit website and click on the “Download Synth One” button.
  2. Select “Mac Audio Unit” and then click “Download.”
  3. Double click the downloaded file to unzip it.
  4. Move the Synth One file to your Mac’s Library/Audio/Plug-Ins/Components folder.

That’s it! You have successfully downloaded and installed Synth One. Open Garageband and start creating unique sounds with this powerful plugin!

Using Synth One In Garageband

Learn how to add Synth One to your Garageband tracks for a unique sound. Experiment with different settings and effects to enhance your music production skills.

Using Synth One in Garageband If you are a Garageband user and looking to enhance your music production, Synth One is a great plugin to try out. Synth One is a highly customizable software synthesizer with endless creative possibilities. In this article, we will guide you through using Synth One in Garageband. Creating a new software instrument track Before we start using Synth One, we need to create a new software instrument track in Garageband. To do this, click on the “+” button in the top left corner of the Garageband interface and select “Software Instrument” from the menu. Then, select a virtual instrument from the list and click “Create”. Now, we are ready to open the Synth One plugin. Opening the Synth One plugin To open the Synth One plugin, click on the “Plugins and EQ” button in the top right corner of the Garageband interface and select “Audio Units” from the dropdown menu. Then, locate the “AudioKit Synth One” plugin in the list and click on it to open it. Now, we can start exploring the Synth One interface. Exploring the Synth One interface Once you have opened Synth One, you will see a complex interface with many different options and controls. The interface is split into different sections, each with its own set of controls. Here is a breakdown of some of the key sections and controls: – Oscillators: This section is where you can configure the sound generators for your synthesizer, including selecting waveforms, adjusting pitch, and applying modulation. – Filters: This section is where you can shape the sound by filtering out certain frequencies. Synth One includes a powerful set of filter options, including low-pass, high-pass, band-pass, and more. – Envelopes: This section is where you can control the volume, pitch, and other aspects of the sound over time. Synth One includes four different envelopes for different parts of the sound. – Effects: This section is where you can add various effects to your sound, including reverb, delay, distortion, and more. By experimenting with these different sections and controls, you can create a virtually infinite variety of sounds that are unique to your music production. Remember to always save your projects as you work, so you can come back and edit them later. Overall, using Synth One in Garageband is an excellent way to expand your music production capabilities. Whether you are a beginner or an experienced producer, the endless creative possibilities of Synth One can help take your music to the next level.

Adjusting Synth One Presets

To adjust Synth One presets in GarageBand, simply select the instrument and click on the preset menu. From there, you can browse and select different presets and adjust them to your liking using the Synth One controls.

Garageband has an extensive library of virtual software instruments, which includes Synth One, packed with fully customizable sounds that allow you to create your unique compositions. Synth One presets are pre-configured sound settings that enable you to set your synthesizer to sound like a specific instrument, effect, or style. However, to create your personal sound, you might need to adjust the preset settings to meet your requirement. In this blog, we will guide you through the process of browsing and customizing Synth One presets to get started with the GarageBand software effectively.

Browsing Presets In The Synth One Library

Synth One’s library is a collection of presets that you can access to select sounds suitable for your project. Here’s how you go about it:

  • Launch Garageband and click on the ‘Synth One’ software instrument to load the synth.
  • Click on the drop-down menu next to the preset number to view the preset library.
  • Browse through the library to find presets that you’d want to use in your project.
  • You can preview each preset by clicking on it.
  • Select a preset and adjust the parameters to your liking.

Customizing And Saving Synth One Presets

Customizing a Synth One preset allows you to create something that’s entirely unique to your project. The software allows you to adjust each preset by altering knobs, sliders, and other parameters to create the sound that you desire. Here’s how you go about customizing and saving Synth One presets:

  1. Select a preset from the Synth One library that you want to adjust.
  2. Adjust the parameters of the preset using the knobs, sliders, and other controls until you get the desired sound.
  3. To save the preset, click on the “Save” button in the top corner of the Synth One window.
  4. Choose a name for your preset and click “Save.”
  5. You can now use the modified preset in your track and save the project.

In conclusion, Synth One presets offer an excellent starting point for sound editing in GarageBand. However, you can modify and customize each preset to create your unique sound suitable for your project requirements. By following the steps mentioned above, you’ll be creating and using custom Synth One presets in your projects in no time!

How to Use Synth One in Garageband

Credit: www.reddit.com

Using Synth One Effects

Using Synth One Effects: Synth One is a powerful tool that can help you produce music, and the effects section is one of the reasons why. Understanding how to apply and customize effects is essential to help you achieve your desired sound in Garageband. In this article, we will cover everything you need to know about using the effects section in Synth One. We will guide you through the process of understanding the FX section, applying and customizing effects, and creating and saving FX presets.

Understanding The Fx Section

The Effects section in Synth One consists of eight different types of effects that you can apply to your sound. The effects column displays the different effect modules you can use, and each effect has a drop-down menu that displays its settings. By clicking on the effect module, you can access its settings, which you can customize by turning each knob to the right or left. The level control allows you to determine the amount of effect mix in your sound.

Applying And Customizing Effects

To apply an effect, simply click on an effect module and adjust the settings you desire. You can adjust different settings for each effect to create unique sounds. To customize effects, use the bypass button to hear the effects without, then slowly add different effects to create your desired sound.

You can use the Arpeggiator and the Modulation effects settings to adjust the sound of your Synth One. Arpeggiator allows you to adjust the speed and style of the effects, while the Modulation settings allow you to create different variations of sound using the additional settings.

Creating And Saving Fx Presets

The FX Presets section is where you can save all your customized effects settings. Simply click the “Add” button and enter your desired name for your effect. Then, press “Save” to save your effect settings for future use. You can also rename, delete, or share your effects with others using Garageband. This feature allows you to apply the same settings to other Synth One projects, making the process of creating a better audio experience easier and faster.

Creating and managing your Synth One Effects in Garageband has never been easier. With the great features that Synth One offers, you can create the perfect sound for your next music project. Try experimenting with each effect’s settings and customization options for a unique and personalized sound.

Advanced Techniques With Synth One

Learn advanced techniques for using Synth One in Garageband, including using the arpeggiator, adjusting filter cutoff, and creating custom sounds. With these tips, you can create unique and high-quality tracks using this powerful software.

Advanced Techniques with Synth One Garageband’s Synth One is an impressive virtual analog synthesizer, offering a wide range of customizable parameters, high-quality sound, and ease of use. While exploring its features, you can create simple sounds with a few tweaks, but to get the most out of it, you must know the advanced techniques. Creating Complex Patches with Multiple Oscillators Synth One comes with three oscillators, each capable of producing a different waveform. By mixing the oscillator signals, you can create sounds with complex harmonic structures and rich tone quality. To create complex patches, use the mixer section of Synth One and assign each oscillator to a different channel. You can then adjust the volume, pan, and other parameters for each channel independently. Using LFOs and Envelopes to Modulate Parameters Synth One provides various modulation sources, such as LFOs and envelopes, which can be used to modulate different parameters. LFOs can be used to create rhythmic variations, while envelopes can be used to shape the dynamics and tonal characteristics of a sound. To use LFOs and envelopes, go to the modulation section of Synth One and assign a modulation source to a target parameter. You can then adjust the modulation depth, rate, and other parameters to achieve the desired effect. Tips and Tricks for Achieving Unique Sounds With Synth One, you can easily create sounds that stand out in a mix. Here are some tips and tricks to get you started: – Experiment with different oscillator waveforms, filter types, and modulation sources to create unique sounds. – Use the arpeggiator and step sequencer to create rhythmic patterns and sequences. – Try layering multiple instances of Synth One and panning them for a wider stereo image. – Record automation of different parameters to add movement and interest to your sounds. Conclusion Now that you know about the advanced techniques of Synth One, try to implement them in your music production workflow. Remember that experimentation is the key to discovering new sounds, so don’t be afraid to try out something different. With its intuitive interface and powerful features, Synth One is a great tool for any music producer looking to create unique, professional-quality sounds.

How to Use Synth One in Garageband

Credit: m.youtube.com

Frequently Asked Questions Of How To Use Synth One In Garageband

Does Garageband Have A Synthesizer?

Yes, Garageband has a synthesizer. The software comes with a range of virtual instruments, including synthesizers such as Alchemy and Retro Synth, that allow users to create electronic music and unique sounds.

Does Garageband Have Alchemy?

Yes, Garageband has Alchemy. It is a virtual synthesizer that comes pre-installed in Garageband. You can use it to create different sounds for your musical compositions.

What Is Audiokit?

AudioKit is an open-source audio development platform that allows developers to create powerful audio apps for iOS, macOS, and tvOS. With a wide range of features and tools, AudioKit makes it easier to create high-quality music apps that deliver exceptional user experiences.

How Do I Add Synth One To Garageband?

To add Synth One to Garageband, you need to download and install the Synth One app from the App Store. Once the app is installed, connect your device to your computer and open Garageband. Under the Sound Library, select the Synth One instrument and start producing music!

Conclusion

Synth One in Garageband is a powerful virtual synth with a wide range of features that can give your tracks a unique and professional sound. Whether you’re a beginner or an experienced musician, this plugin is easy to use and can take your productions to the next level.

With its sleek interface, customizable settings, and high-quality sounds, Synth One is a must-have for any Garageband user. So why wait? Download Synth One and start creating music that stands out from the crowd!