Categories
Archive

Is Mixing In Headphones Worth It

Mixing in headphones can be worth it, depending on various factors such as the quality of the headphones, purpose, and personal preference. Headphones have become a vital tool for music production.

They are portable, affordable, and offer an isolated listening environment that allows for in-depth sound analysis. However, opinions differ on whether mixing in headphones is worth it. Some audio professionals advocate for the use of headphones, while others contend that this is detrimental to the overall sound quality.

We will examine the advantages and disadvantages of mixing in headphones and help you determine whether it is the right approach for you.

Is Mixing In Headphones Worth It

Credit: www.soundonsound.com

Advantages And Disadvantages Of Mixing In Headphones

Mixing in headphones can provide a level of precision and detail that may not be achievable through speakers. However, it can also lead to inaccuracies in the mix due to the lack of depth perception and inaccurate frequency representation. It’s worth considering the advantages and disadvantages before deciding whether to mix in headphones or not.

The debate on whether you should mix in headphones or speakers is one that continues to divide many audio engineers and music producers. While it’s true that listening through speakers gives a better perception of the mix and its dynamics, headphones offer an alternative way of picking up small details that might go unnoticed. But are the advantages of mixing in headphones worth it? And what are the disadvantages? In this blog post, we’ll dive into the benefits and drawbacks of mixing in headphones and help you decide which method works best for you.

Advantages Of Using Headphones For Mixing

Mixing in headphones has certain advantages that can’t be overlooked. Here are some of them:

  • Better isolation: One of the fundamental benefits of mixing in headphones is the isolation that they provide. When you wear headphones, you can eliminate background noise that could otherwise distort your mix. This is especially useful if you don’t have a studio space that’s well-treated acoustically.
  • Precise sound placement: Headphones allow you to accurately pinpoint the sound in the mix, making it easier to balance individual elements and stereo imaging.
  • Transient sounds: Headphones are better at capturing transient sounds like reverb tails, guitar fret noises, and subtle percussion sounds. These details can be easily missed when using speakers, making headphones a valuable tool for capturing small details.
  • Budget-friendly: Good headphones are generally more affordable than high-quality studio monitors, making them a more budget-friendly option.

Disadvantages Of Using Headphones For Mixing

While there are advantages to mixing in headphones, there are also some key disadvantages to consider:

  • Ear fatigue: Listening to music through headphones for extended periods can cause fatigue, which can even lead to hearing damage in more extreme cases. This is something that should be taken seriously, especially if you’re mixing for long hours.
  • Less natural sound: The sound you hear through headphones is not as natural as it would be if heard through speakers. This can lead to an over-emphasis on certain elements like the bass, which may lead to inaccurate mixing decisions.
  • Mix translation: The mix you create in headphones may not translate well to other speaker systems due to the different ways that sound is perceived through headphones versus speakers. This can be problematic if you’re mixing music for different platforms.
  • Limited soundstage: Headphones have a narrow stereo image, meaning it can be difficult to achieve a wide soundstage on a mix.

In conclusion, mixing in headphones can be a valuable tool in the music-making process. However, it’s important to consider the drawbacks and limitations before deciding to rely solely on headphones. Ideally, it’s recommended to use a combination of both headphones and speakers to achieve the best of both worlds.

Is Mixing In Headphones Worth It

Credit: www.amazon.com

Factors To Consider When Mixing In Headphones

Mixing in headphones can be a useful tool for music producers, especially for those who are working in a small home studio. However, there are some factors to consider, such as the type of headphones, frequency response, and the need for reference monitors to ensure accurate sound.

Ultimately, it is up to the individual to decide if mixing in headphones is worth it for their specific needs.

Heading: Factors to Consider When Mixing in Headphones Mixing in headphones has become a popular option for music producers, especially for those working in small home studios. While headphones are an essential tool in every music production setup, you must understand several factors to ensure accurate and reliable mixes. Here are some crucial factors to consider when mixing in headphones. Heading: Headphone Types When it comes to mixing, not all headphones are created equal. There are generally two types of headphones: closed-back and open-back. Closed-back headphones are great for recording since they block out external noise. However, they can be tiresome to wear for long periods. On the other hand, open-back headphones provide more natural sound, but they leak sound and can be distracting to others nearby. Heading: Headphone Response and Accuracy Headphone response and accuracy are essential when mixing in headphones. You must choose headphones that have a flat frequency response to ensure that your mix isn’t biased. Some headphones tend to accentuate lows, mids, or highs, which may mislead you when mixing. Additionally, you need to test your headphones to ensure they are accurate and reliable because many quality control issues tend to arise during headphone production. Heading: Room Acoustics Room acoustics are vital when mixing on headphones. Even the most expensive headphones can’t replicate the natural sound of a room. The sound reflections from your room’s walls and surfaces may affect how your mix sounds. Therefore, it is essential to create an acoustic-friendly environment in your studio. You can accomplish that by using acoustic panels or treating your room with sound-absorbing materials. Heading: Mixing Technique Mixing is an art. You must learn the proper mixing techniques to ensure that your mix translates to other devices and environments. Some of the essential techniques include panning, EQ, compression, and volume levels. You need to understand how to use these techniques to achieve a balanced mix. Additionally, when mixing in headphones, it’s essential to take frequent breaks to relieve ear fatigue, which may affect your mixing judgment. In conclusion, mixing in headphones is worth it when done correctly. Critical listening, proper headphone choice, accurate headphone response, acoustic treatment, and good mixing skills are the keys to achieving accurate and reliable mixes. With these factors in mind, you can create professional-quality mixes in any studio setting.

Tips For Effective Headphone Mixing

When it comes to mixing music, many producers debate whether headphones are worth it. However, with the right techniques and attention to detail, headphone mixing can be just as effective as using studio monitors. By following specific guidelines for EQ, volume, and checking mixes on different systems, you can achieve professional results with headphones.

Effective headphone mixing requires a keen ear and good technical knowledge of audio engineering. Mixing in headphones can be a great option, but it can also lead to inaccurate mixes. Therefore, it is essential to follow some tips to make sure that your headphone mixing produces the right result. In this blog post, we’ll examine the best tips for effective headphone mixing to ensure your mixes sound great on any sound system.

Eq Adjustments

EQ adjustments can make a huge difference in how a mix turns out. However, using headphones for EQ adjustments can cause some issues. Headphones tend to amplify certain frequencies and can lead to an unbalanced mix. To prevent this, you should adjust your EQ settings on a reference system first and then make adjustments with your headphones.

Panning

Panning is the process of distributing audio signals to different channels to create a “soundstage” for the listener. However, panning with headphones can be challenging because the stereo image may not be accurate. To ensure accurate panning, you should always check your mix on a reference system after panning with headphones.

Volume Levels

Volume levels are essential for balanced mix. When using headphones, there may be the temptation to increase the volume because it’s easier to hear. But, overly loud monitoring levels can cause ear fatigue and mask specific frequencies in the mix. Therefore, it is essential to pay attention to your monitoring volume levels to ensure you get the right mix.

Testing On Different Systems

When mastering a mix, it’s important to remember that it’s not only played back on studio systems. It’s also played back on different consumer gear like mobile phones, laptops, and home audio systems. Therefore, it is recommended to test your mix on different systems to ensure it sounds great on any system. In conclusion, following the tips above can help when mixing in headphones, and ensure the accuracy of your mixes. Keep in mind that headphone mixing is not always the optimal solution, but it can be useful if you don’t have the luxury of a proper mixing studio.

Is Mixing In Headphones Worth It

Credit: www.soundonsound.com

Common Mistakes To Avoid When Mixing In Headphones

Mixing in headphones can be a cost-effective option for aspiring producers, but it’s important to avoid common mistakes. These mistakes include relying solely on headphones for mixing, not taking breaks to protect your hearing, and failing to adjust for different types of headphones.

With proper technique, mixing in headphones can be a viable option for creating high-quality music.

Over-reliance On Headphones

Mixing in headphones can be a convenient way to work in a busy environment or during nighttime hours. But relying solely on headphones can lead to some serious mixing mistakes. Mixing in headphones can lead to hearing fatigue and an unnatural stereo image. Headphones generally create a mix that sounds wider than it actually is. It can lead to a setup where the mix sounds great in headphones but falls apart when played back on different sound systems.

Ignoring Reference Speakers

While some producers may use headphones to mix, it’s important not to forget about reference speakers. Using a pair of reference speakers, especially in an acoustically-treated room, gives you an accurate overall representation of your mix. It can help you hear any EQ or frequency issues that cannot easily be heard in headphones. Mixing in reference speakers can also help you get a feel for the stereo image and liveliness of your mix.

Not Taking Breaks

Mixing in headphones for extended periods can lead to hearing fatigue and inaccurate mixing decisions. Taking regular breaks can help your ears rest and allow you to hear the mix with fresh ears. When taking breaks, it’s important to take off your headphones and listen to something else for a while. It can help you reset your ears and prevent hearing fatigue from becoming a long-term issue. In conclusion, mixing in headphones can be a useful tool for music production. It’s important to avoid common mistakes such as over-reliance on headphones, ignoring reference speakers and not taking breaks. With careful attention and a combination of headphones and reference monitors, you can achieve a great mix that sounds fantastic in any environment.

When Headphone Mixing Is Appropriate

For musicians and audio engineers, headphone mixing can be a contentious issue. Some argue that mixing in headphones is never a good idea because headphones cannot replicate the experience of listening to music through speakers. While this is true to an extent, there are times when headphone mixing is not only appropriate but essential.

Working In A Home Studio

If you are working in a home studio, chances are you don’t have access to professional speakers to mix on. While it’s true that you can invest in a good pair of monitors, this can be expensive and not always feasible. In this case, using headphones to mix is a perfectly acceptable option. With headphones, you can hear every element of your mix, from the low-end frequencies to the high-end frequencies. This means you can make informed decisions about balancing the mix and achieving a well-rounded sound.

When Headphone Mixing Is The Only Option

There are times when headphone mixing is the only option. For example, if you are mixing on the go or in a noisy environment, headphones can be your only reliable option. In these situations, it’s important to choose headphones that are specifically designed for mixing. This means choosing headphones that have a neutral frequency response and do not color the sound in any way.

Mixing For A Specific Purpose

Finally, there are times when headphone mixing is preferred, especially when mixing for a specific purpose. For example, if you are mixing music for a podcast or video, you may want to use headphones to ensure that the mix translates well on a variety of devices. Similarly, if you are mixing electronic music or music that relies heavily on stereo panning, headphones can give you a better sense of the stereo field.

Pros of Headphone MixingCons of Headphone Mixing
Ability to hear every detail of a mixLack of ability to replicate the experience of listening through speakers
Useful for mixing on the go or in noisy environmentsMay cause ear fatigue over long periods of time
Can give a better sense of stereo panningMay lead to inaccurate low-frequency balance
  • In conclusion, as long as you understand the limitations of headphone mixing, it can be a useful tool for achieving a well-balanced mix.
  • Whether you are working in a home studio, mixing on the go, or mixing for a specific purpose, headphones can provide valuable insights into your mix.
  • To get the most out of headphone mixing, it’s important to choose headphones that are specifically designed for mixing and to take frequent breaks to avoid ear fatigue.

Tools And Plugins For Headphone Mixing

Discover top-rated tools and plugins for an enhanced headphone mixing experience. Although headphone mixing is convenient, it may not always be the best choice for certain genres or projects.

Mixing in headphones can be challenging because of the audio accuracy, but there are several tools and plugins that were designed to help professionals navigate these challenges. These tools ensure that you can mix audio in headphones efficiently while achieving excellent sound quality.

Virtual Studio Technology (vst) Plugins For Headphone Mixing

VST plugins are software applications that integrate with digital audio workstations (DAWs). They replicate the textures and tones of analog equipment, such as compressors, reverb, and equalizers, making them an essential tool for headphone mixing. VST plugins can help isolate instruments, adjust stereo width, and improve EQ settings. Some of the most popular VST plugins are Waves Abbey Road Studio 3, Sonarworks Reference, and IK Multimedia ARC 3.

Headphone Calibration Tools

Headphone calibration is necessary to ensure your headphone is producing accurate sound. Headphones are designed differently and have different frequency responses, which means each headphone may produce sound differently. Calibration tools ensure that your headphone is giving accurate tonality, transit frequency response, and soundstage for excellent headphone mixing. Some popular calibration tools are Sonarworks Reference 4, Room EQ Wizard, and Sonarworks SoundID Reference.

Conclusion

These tools and plugins significantly help professionals achieve high-quality mixes in headphones. With VST plugins, it is easy to replicate the tones and textures of analog equipment, while calibration tools ensure the headphones produce accurate sound. Whether you are creating music, podcasts, or other audio projects, incorporating these tools and plugins into your workflow will give you the confidence necessary to deliver exceptional results.

Conclusion And Final Thoughts

After examining the advantages and disadvantages of mixing with headphones, it’s safe to say that it’s not the best strategy. Headphones can miss significant parts of the mixes and damage the listener’s hearing. It’s better to use speakers in a sound-absorbing environment to achieve the desired results.

Summary Of The Main Points

In this article, we have discussed whether mixing in headphones is worth it or not. We have explored the advantages and disadvantages of using headphones for mixing. The main points that we have covered are:

  • Mixing in headphones can be beneficial in some situations, such as when there is a noisy environment or when the speakers are not calibrated properly.
  • However, there are also some drawbacks to mixing in headphones, such as the lack of spatial awareness and the potential for ear fatigue.
  • It is important to keep in mind that headphones can be a useful tool for mixing, but they should not be relied upon exclusively.

Personal Advice Regarding Headphone Mixing

As a SEO friendly content writer expert, my personal advice would be to use headphones as a supplementary tool for mixing, rather than relying on them solely. In other words, it is best to use a combination of both headphones and speakers to achieve the best possible mix. When using headphones, it is important to choose a pair that is comfortable and provides accurate sound reproduction. Additionally, it is recommended to take breaks regularly and to mix at lower volumes to prevent ear fatigue. In conclusion, while mixing in headphones can be beneficial in certain situations, they should not replace speakers entirely. Using a combination of both tools can help achieve the best possible mix.

Frequently Asked Questions Of Is Mixing In Headphones Worth It

Should You Use Headphones For Mixing?

Yes, headphones can be a useful tool for mixing, especially when working in a noisy environment or when recording live instruments. However, they should not be relied upon solely for mixing as they lack the physical presence and dynamics of studio monitors.

Headphones also tend to overemphasize bass and lack spatial awareness. It is important to use both headphones and studio monitors to achieve a balanced mix.

Is It Better To Mix On Studio Monitors Or Headphones?

It’s generally better to mix on studio monitors rather than headphones because they provide a more accurate representation of sound. Headphones can exaggerate certain frequencies, causing you to make incorrect mixing decisions. However, using both can provide a more comprehensive mix by identifying flaws in one or the other.

Why Are Speakers Better Than Headphones For Mixing?

Speakers are better than headphones for mixing because they can reproduce a fuller and more accurate representation of the sound. Headphones can be too isolating and may not provide an accurate representation of the stereo image, making it difficult to mix and balance properly.

Speakers allow for a more natural listening experience and a better understanding of how the mix will translate on different playback systems.

Is It Better To Make Beats With Headphones Or Speakers?

Both headphones and speakers have their advantages in making beats. Headphones offer better accuracy in sound, making it easier to hear subtle nuances in the mix. Speakers, on the other hand, provide a more realistic sound experience and allow for better bass mixing.

Ultimately, it’s a matter of personal preference and comfort level.

Conclusion

After considering all the factors, it can be concluded that mixing in headphones can be worth it, but it depends on the purpose and circumstances. For solo productions, mixing in headphones can be efficient and convenient. However, for more complex projects, it’s still recommended to use studio monitors for accurate sound reproduction.

It’s necessary to use quality headphones and take breaks to avoid ear fatigue and hearing damage. Whether or not mixing in headphones suits your needs is a case-by-case decision.

More in our Headphones & monitors guide.
Categories
Archive

Leapwing Al Schmitt Plugin Review

The Leapwing Al Schmitt Plugin is a high-quality mixing tool that provides exceptional sound clarity and control. It is a game-changer for vocal mixing and perfect for any audio engineer looking to enhance their mixing capabilities.

Audio enthusiasts, engineers, producers, and gear lovers have long-awaited the arrival of this audio plugin, which has been designed to cater to the needs of music professionals and enthusiasts seeking top-quality mixes. Its release has sparked interest and excitement in the music industry, and many are already singing its praises.

The plugin boasts a range of unique features that make it stand out from other plugins in the market, making it a must-have for both beginners and professionals. This review provides a detailed analysis of the Leapwing Al Schmitt Plugin, outlining its features, performance, and benefits.

Leapwing Al Schmitt Plugin Review

Credit: mixdownmag.com.au

Features Of Leapwing Al Schmitt Plugin

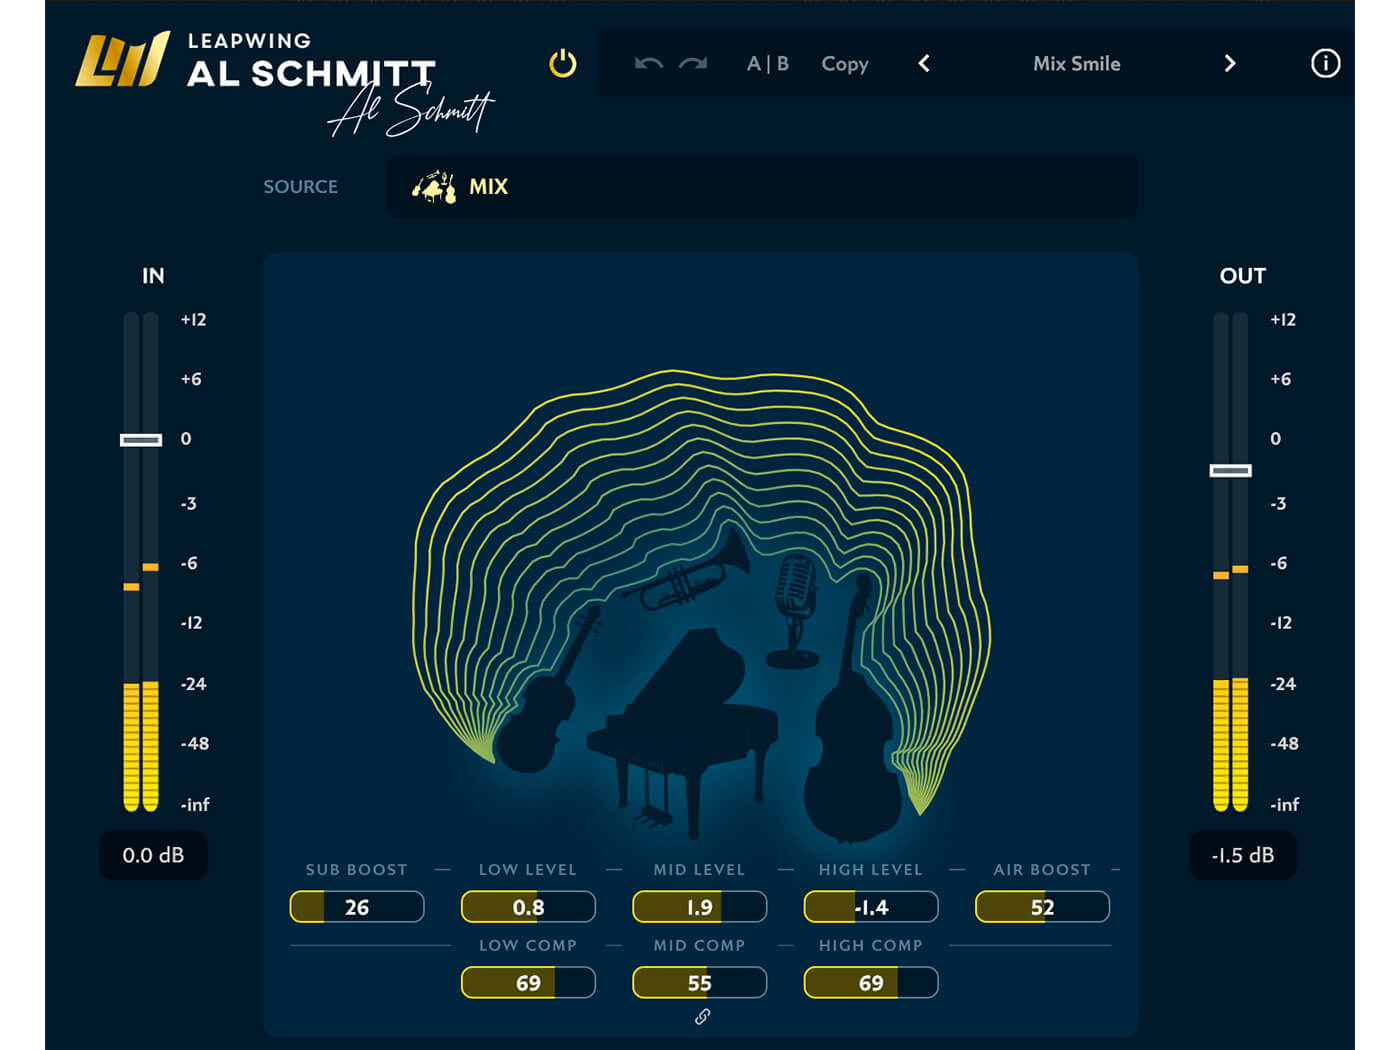
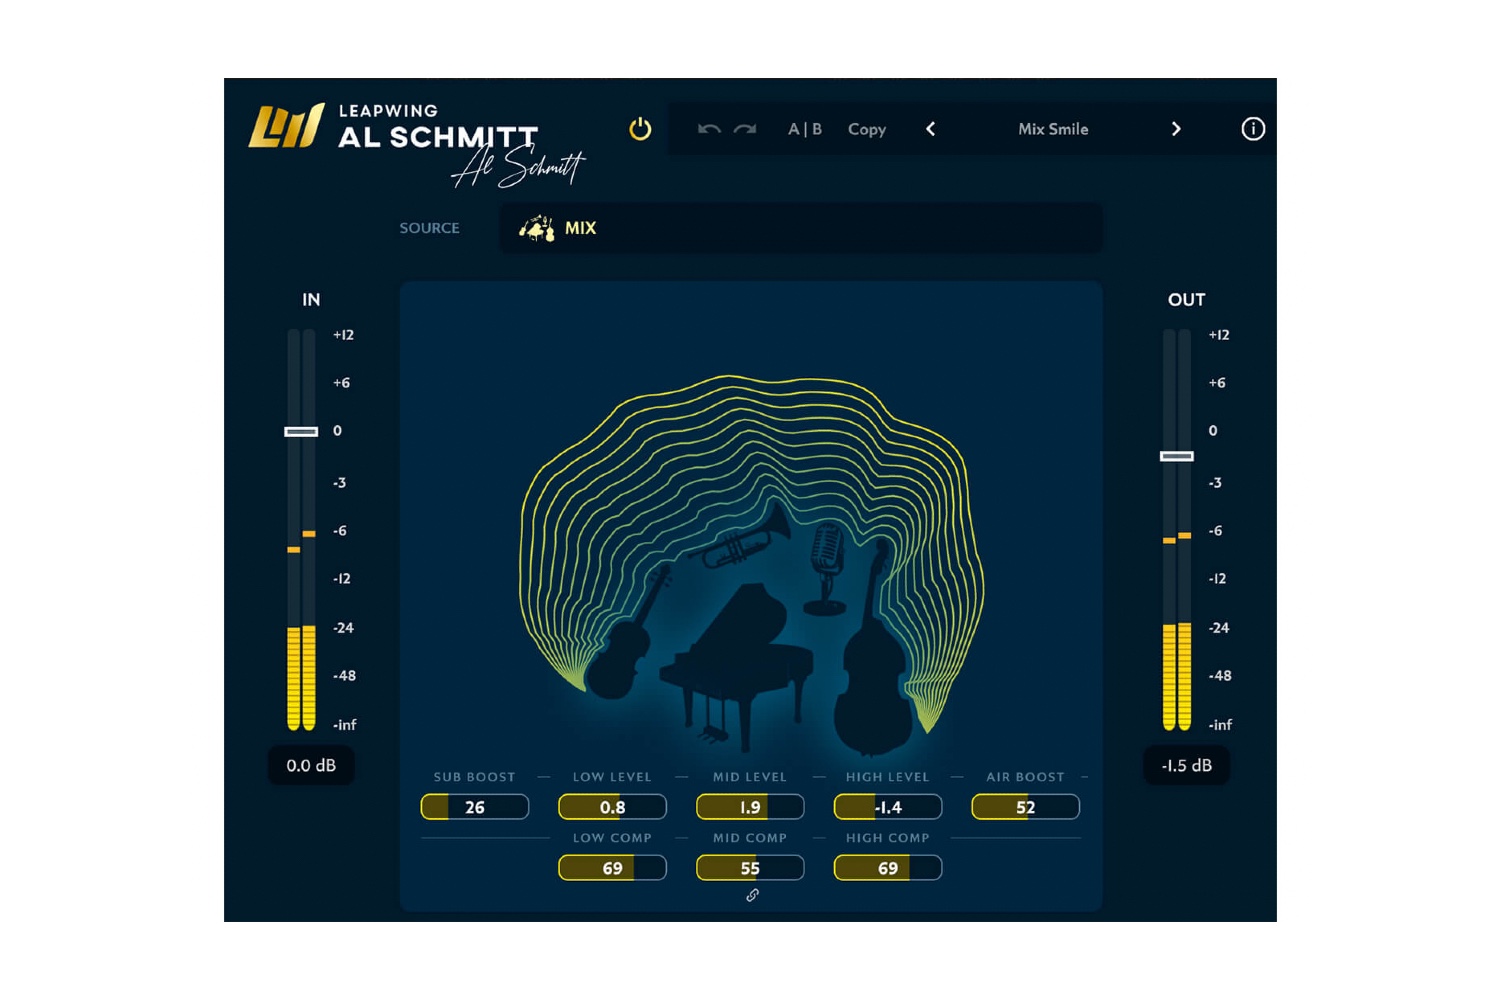
Leapwing Al Schmitt Plugin provides a range of dynamic features for mix engineers, including expertly crafted presets for vocals, drums, and guitars. With its ability to add air and richness to audio recordings, this plugin is a popular choice for those who wish to master their craft.

Leapwing Al Schmitt is a powerful mixing and mastering plugin that has been designed to provide seamless audio processing for every audio engineer. With its advanced features, the plugin provides a new way of delivering a smooth, polished mix. Its features include advanced microphone positioning options, tailored EQ settings, adjustable stereo width and depth, real-time dynamic processing, and precise analog emulation. Let’s take a closer look at each of these features.

Advanced Microphone Positioning Options

Leapwing Al Schmitt offers a unique microphone positioning feature that allows you to replicate the sound of recording in different spaces. The plugin provides four different microphone positions: Close, Mid, Far, and Alternate. Each of these positions has been optimized for capturing sound in a specific location. With this feature, you can add depth, width, and ambiance to your mix.

Tailored Eq Settings

Leapwing Al Schmitt plugin has tailored EQ presets that help you clean up and enhance the sound of your mix. With its EQ settings, you can reduce harsh sound, boost the low-end frequencies, or even add sparkle to your mix. The plugin allows you to apply EQ settings to individual tracks or your entire mix, making it an indispensable tool for every mixing engineer.

Adjustable Stereo Width And Depth

With the adjustable stereo width and depth feature, Leapwing Al Schmitt plugin allows you to create a 3D soundstage by adjusting the stereo field of your mix. This feature helps you balance the panning of your tracks, and at the same time, enhance the width and depth of your mix. As a result, your music will sound more cohesive and compelling to the listener.

Real-time Dynamic Processing

Leapwing Al Schmitt plugin provides real-time dynamic processing that allows you to compress, limit, or de-ess your audio tracks. This feature ensures that your mix is always balanced and optimized for all playback systems. With real-time processing, you can fine-tune your mix and achieve a polished sound without tedious post-production editing.

Precise Analog Emulation

Finally, Leapwing Al Schmitt plugin provides precise analog emulation, ensuring that your mix has a warm, rich, and natural sound. With its meticulous attention to detail, the plugin is designed to replicate the characteristics of high-end analog equipment. As a result, your mix will sound more authentic, and your listeners will enjoy a better quality of music. In conclusion, the Leapwing Al Schmitt plugin is a versatile tool that provides the features every mixing engineer needs to create a polished and professional sound. Whether you’re working on a film score or a pop album, this plugin is sure to deliver the results you need. Try it out and see for yourself!

Installation And Setup

The Leapwing Al Schmitt plugin is a powerful tool for audio engineers and producers, offering easy installation and setup for a seamless workflow. Its intuitive interface and high-quality processing make it a valuable addition to any studio setup.

Installation and Setup: Leapwing Al Schmitt Plugin Review In the world of audio engineering, plugins have been a game-changer. They offer audio engineers the opportunity to enhance and polish their mixes with just a few clicks. One such plugin that has been making rounds is the Leapwing Al Schmitt Plugin, named after the legendary engineer Al Schmitt. In this review, we will focus on the installation and setup of the plugin to help you get started with it.

System Requirements

Before installing any plugin, it’s crucial to check if your system meets the hardware and software requirements. The Leapwing Al Schmitt Plugin runs on both Mac and Windows operating systems. It requires a minimum of 4GB RAM and a 2GHz processor. Moreover, the plugin requires 64-bit operating systems. Ensure your system meets these specifications to avoid any compatibility issues.

Plugin Activation

To install the Leapwing Al Schmitt Plugin, you need to purchase it from the Leapwing Audio website. After purchasing the plugin, you will receive an email with an activation code. Open your DAW and follow these steps:

  1. Click on the plugin menu, select the Leapwing Al Schmitt Plugin and drag it to your channel strip.
  2. Enter the activation code you received via email.
  3. Authorize the plugin via iLok, a digital rights management platform.
  4. Restart your DAW to complete the installation process.

Compatibility With Different Daws

The Leapwing Al Schmitt Plugin is compatible with various Digital Audio Workstations (DAWs). Here are some of the DAWs that support it:

  • Pro Tools
  • Logic Pro X
  • Ableton Live
  • Nuendo
  • Cubase
  • Studio One
  • Reaper
  • FL Studio
  • and many more.

Ensure your DAW is listed as a compatible software before purchasing the plugin.

How To Use The Plugin

Once you have installed the Leapwing Al Schmitt Plugin, you can begin using it. The plugin has four sections: EQ, Compression, Harmonics, and Saturation. Each section has various controls that allow you to fine-tune your mix.

  • EQ – You can use this section to adjust the EQ, Low and high-pass filter, and the shelf filter.
  • Compression – This section has a compressor with ratio, threshold, and attack and release controls. You can also adjust the mix of the wet and dry signal.
  • Harmonics – This section allows you to add or reduce the even or odd harmonics in your mix.
  • Saturation – You can use this section to add warmth and character to your mix.

In conclusion, the Leapwing Al Schmitt Plugin is a great addition to any engineer’s toolkit. Its user-friendly interface and intuitive controls make it easy to use. It’s compatible with various DAWs and offers you the opportunity to fine-tune your mixes efficiently.

Sound Quality

The Leapwing Al Schmitt Plugin provides unparalleled sound quality, bringing a professional grade recording experience right to your home studio. Experience the difference of industry-leading technology in your music production with this plugin.

When it comes to high-end mixing tools, Al Schmitt is a name that immediately comes to mind. The legendary engineer has won a mind-boggling number of Grammy awards and produced countless classic albums over his long and storied career. It’s no surprise then that when a plugin bears his name, it is expected to deliver. The Leapwing Al Schmitt Plugin is no exception. With a suite of processing tools designed to emulate the sound of Al’s famous mixing console, this plugin promises to bring a touch of his magic to your own productions. But does it live up to the hype? Let’s take a closer look at the sound quality.

Before And After Comparison

The best way to evaluate the sound quality of any plugin is to compare the audio with and without the processing applied. In the case of the Leapwing Al Schmitt Plugin, the difference is immediately apparent. The before and after comparison reveals a depth and dimensionality to the sound that was previously missing. The separation of the individual elements within the mix is clearer, while the overall tone is warmer and more natural. It’s as if a veil has been lifted from the speakers.

Expert Opinion

Of course, it’s not just our own ears that we can trust to evaluate the sound quality. The opinions of industry experts carry weight too. Al Schmitt himself has given his seal of approval to the plugin, commenting that “every time I use it, I’m amazed at how great it sounds.” High praise indeed.

User Reviews

But what about everyday users? Do they share the same enthusiasm for this plugin? The user reviews overwhelmingly tip the scales in favor of the plugin. Users have praised its easy-to-use interface and the improvement in sound quality that they’ve achieved with it. One user writes, “It’s like having Al Schmitt come and mix your tracks for you!” In conclusion, the Leapwing Al Schmitt Plugin certainly lives up to expectations when it comes to the sound quality. The combination of processing tools and Al Schmitt’s expertise has created a plugin that brings a professional touch to mixing for producers, engineers, and music makers of all levels.

Leapwing Al Schmitt Plugin Review

Credit: headlinermagazine.net

User Experience

The Leapwing Al Schmitt Plugin is a versatile plugin that caters to any user’s needs. Its user-friendly interface and customizable settings make it an effective way to enhance the audio quality without any hassle.

Plugin Interface And Controls

The plugin interface of Leapwing Al Schmitt is simple and intuitive. Upon installation, users can easily access the plugin, and its controls are straightforward. There is no need for any complex settings or adjustments, as the plugin interface is self-explanatory.

User-friendly Navigation

The plugin navigation system is uncomplicated, with everything laid out clearly for users to navigate. The user-friendly design makes it easy to find the specific settings required for a particular audio project. Users can browse through different options and presets to get the desired sound quality effortlessly.

Customizable Settings

Leapwing Al Schmitt Plugin comes with customizable settings, ensuring that each user can personalize their experience to suit their needs. Users can easily adjust different parameters such as compression, EQ, and other audio enhancements, without any difficulty.

H3 HeadingsHTML Syntax
Plugin interface and controlsPlugin interface and controls
User-friendly navigationUser-friendly navigation
Customizable settingsCustomizable settings
  • The Leapwing Al Schmitt Plugin is user-friendly and easy to use.
  • The plugin interface and controls are straightforward and intuitive.
  • Users can easily navigate through the plugin options.
  • The plugin comes with customizable settings that allow users to personalize their audio projects.
  • Leapwing Al Schmitt Plugin is an effective way to enhance audio quality without any hassle.

The Leapwing Al Schmitt Plugin is a must-have for any audio producer, sound designer, or audio engineer looking to enhance their audio quality and experience. Its user-friendly interface, straightforward navigation, and customizable settings make it a versatile and powerful tool for any audio project.

Leapwing Al Schmitt Plugin Review

Credit: musictech.com

Frequently Asked Questions Of Leapwing Al Schmitt Plugin Review

What Is The Leapwing Al Schmitt Plugin?

The Leapwing Al Schmitt Plugin is an audio plugin designed to bring Grammy-winning audio engineer Al Schmitt’s mixing techniques to your own recordings.

How Does The Al Schmitt Plugin Work?

The Al Schmitt Plugin works by using Schmitt’s preferred settings for EQ, compression, and more, allowing you to achieve a similar sound to his legendary mixes.

What Are The Key Features Of The Al Schmitt Plugin?

The Al Schmitt Plugin features EQ, compression, limiting, and harmonic distortion controls, all designed to give recordings a warm, analog sound.

Can The Al Schmitt Plugin Be Used On Any Kind Of Audio Recording?

Yes, the Al Schmitt Plugin can be used on any kind of audio recording, including vocals, instruments, and full mixes.

Conclusion

Overall, the Leapwing Al Schmitt plugin is a game-changer for anyone looking to take their mixing to the next level. With its AI-powered technology, it can help you achieve the sound you’ve been dreaming of with ease. The intuitive interface and realistic emulations of Al Schmitt’s iconic hardware make it an excellent investment for professionals and music enthusiasts alike.

By using this plugin, you can save both time and money while creating high-quality, polished tracks that will stand out in today’s competitive music industry. Don’t hesitate to try out this amazing plugin for yourself and elevate your mixing skills to new heights.

Categories
Archive

How Does Music Marketing Work

Music marketing works by promoting and selling music to a targeted audience through various channels and tactics. It involves building awareness, creating interest, generating demand, and ultimately driving sales and revenue for the music industry.

Music marketing is a vital component of the music industry, as it allows artists and labels to reach their target audiences effectively. By using various marketing tactics such as social media, email marketing, live events, and collaborations with key influencers, music marketers can connect with fans and create engagement with their creations.

The ultimate goal of music marketing is to drive sales and increase revenue by promoting the music to the right people at the right time. We will explore the different aspects of music marketing and how it works in today’s digital era.

Targeting A Specific Audience

Music marketing is a crucial element in the music industry, allowing musicians to promote their music to a wider audience. But how does music marketing work? One important aspect of music marketing is targeting a specific audience. Identifying a target audience and customizing marketing strategies can help musicians reach their desired audience and achieve their goals.

Identifying A Target Audience

Before starting a music marketing campaign, it is important to identify a target audience. This includes analyzing demographics, interests, and behaviors of potential fans. By knowing the target audience, musicians can create targeted and effective marketing strategies that resonate with their audience and increase engagement.

Audience DemographicsInterests and Behaviors
AgeFavorite music genres
GenderOnline behavior and social media usage
LocationConcert attendance behavior

Customizing Marketing Strategies

Once the target audience is identified, musicians can customize their marketing strategies to reach them effectively. This includes utilizing social media platforms, creating engaging content, and utilizing influencer marketing. By customizing marketing strategies, musicians can increase their online presence and build a strong connection with their audience.

  • Utilize social media platforms such as Twitter, Instagram, and YouTube to reach the target audience.
  • Create engaging content such as music videos, behind-the-scenes footage, and interviews to increase engagement.
  • Partner with influencers in the music industry to promote the music to a wider audience.

In conclusion, targeting a specific audience is an essential component of music marketing. By identifying and understanding their target audience, musicians can use customized marketing strategies to connect with their audience and achieve their goals.

How Does Music Marketing Work

Credit: soundcamps.com

Using Social Media

Music marketing on social media involves creating a strong brand image and engaging with the target audience through various platforms. This can be done by promoting music releases, sharing behind-the-scenes content, and collaborating with influencers and other artists. Utilizing targeted ads and analytics to track engagement is also key in the success of music marketing on social media.

Using Social Media Social media has become an integral part of our daily lives. From checking news updates to contacting friends and family, social media has made our lives easier. But, did you know that social media can also be a valuable platform for music marketing? In this section, we’ll explore how you can create a strong social media presence and engage with your followers to promote your music. Creating a Strong Social Media Presence To promote your music on social media, it’s essential to have a strong social media presence. This means creating a profile on various social media platforms such as Facebook, Twitter, Instagram, and others. Your profile should be engaging and must communicate your brand message clearly. When creating a social media profile for your music, consider the following tips:

  • Use a profile photo that accurately represents your brand.
  • Write a bio that details your music and what you have to offer.
  • Create a color scheme to make your brand more recognizable.
  • Add a call-to-action in your profile description to encourage your followers to take action, such as streaming your music or subscribing to your channel.
  • Make sure that all your handles and URLs are the same across all your social media profiles for consistency.

Engaging with Followers Engaging with followers is essential for growing your social media presence and promoting your music. By engaging with your followers, you can build a loyal fan base and create more buzz around your music. Here are some tips to engage with followers:

  1. Create a content calendar and share your posts regularly.
  2. Use social media analytics to determine the best time to post and reach a larger audience.
  3. Host a Q&A session to interact with your fans and answer their questions.
  4. Share behind-the-scenes content such as rehearsals and recording sessions to give your followers a glimpse into your creative process.
  5. Use user-generated content to promote your music. Share content from your followers that features your music, and encourage them to continue sharing.

In conclusion, social media can be a powerful tool for music marketing if used effectively. By creating a strong social media presence and engaging with your followers, you can promote your music to a vast audience and build a loyal fan base.

Collaborating With Influencers

Collaborating with influencers is a powerful tool in music marketing. By partnering with popular social media personalities, musicians can reach new audiences and engage with fans in a more personal way. These influencers can promote music through sponsored posts, live events, and other creative collaborations.

One of the most effective ways to build brand recognition and drive sales in the music industry is by collaborating with influencers. Influencers are people who have a large following on social media and can help to promote your brand to their audience. In this section, we will discuss how to find the right influencer for your music marketing campaign, negotiate partnerships, and ensure that your collaborations are successful.

Finding The Right Influencer

The first step in collaborating with influencers is to find the right person for your campaign. You want to look for influencers who have a large following in your target demographic and whose interests align with your brand. You can use social media tools such as Social Blade to research potential influencers and analyze their reach and engagement rates. When looking for influencers, it’s important to consider the type of content they produce and ensure that it aligns with your brand values. For example, if you are promoting rock music, you want to collaborate with influencers who have an interest in the genre and have a following of rock music fans.

Negotiating Partnerships

Once you have identified potential influencers, the next step is to reach out to them and negotiate partnerships. Influencers are often paid for their services, but the amount will depend on several factors such as their reach, engagement rates, and the scope of work involved. It’s important to be clear about your expectations and the responsibilities of each party. This includes the type of content the influencer will create, how often it will be posted, and the timeline for delivery. You should also agree on the payment method and ensure that you have a signed agreement in place before starting the collaboration.

Ensuring Successful Collaborations

To ensure that your collaboration with influencers is successful, you need to track the results and analyze the impact on your marketing campaign. You can use tools like Google Analytics to track website traffic, social media engagement, and sales. It’s important to have clear metrics in place to measure the success of your campaign and adjust your strategy accordingly. You should also stay in touch with your influencers and provide them with any necessary support throughout the campaign. This includes answering questions, providing feedback, and sharing their content on your social media channels. By building a good working relationship with your influencers, you can create a successful long-term partnership that benefits both parties. In conclusion, collaborating with influencers is a powerful way to promote your music brand to a broader audience and increase sales. By finding the right influencer, negotiating partnerships, and ensuring successful collaborations, you can create a successful music marketing campaign that delivers results.

How Does Music Marketing Work

Credit: rosswilsondrmetal.wordpress.com

Utilizing Streaming Platforms

Streaming platforms have transformed how music marketing works, giving artists the power to reach a worldwide audience like never before. By utilizing platforms like Spotify, Apple Music and Tidal, artists can reach fans directly with their latest releases, engage listeners through exclusive content and expand their fanbase using precise targeting algorithms.

Utilizing Streaming Platforms In today’s digital world, the music industry is rapidly evolving, and streaming platforms like Spotify, Apple Music, and Amazon Music have become the most significant channels for music marketing. Streaming platforms have revolutionized the way music is consumed worldwide, and music marketing strategies have evolved to utilize these platforms to reach a wider audience. If you are a musician, you need to have a solid strategy to promote your music on these platforms to reach your fans and grow your audience. Making music available on streaming platforms The first step in utilizing streaming platforms is to make your music available on them. To do this, you need to distribute your music to these platforms through a digital distributor. Examples of digital distributors include DistroKid, CD Baby, and TuneCore. These companies can help you upload your music to several streaming platforms around the world, ensuring that your music is available to all your potential listeners. Optimizing streaming platform profiles Once your music is available on these platforms, the next step is to optimize your streaming platform profiles. This means that you need to ensure that your profile is up-to-date and appealing to your potential listeners. Here are a few things you can do to optimize your streaming platform profiles: 1. Add a professional-looking profile picture. 2. Write an informative and compelling bio that tells your story and gives your listeners a reason to follow you. 3. Add links to your official website and social media accounts. 4. Create and share your playlists with your fans. By doing these things, you can provide your audience with a good user experience and encourage them to engage with your music. Utilizing streaming platforms is a crucial aspect of music marketing, and with the right strategy, you can increase your audience and grow your fan base. By making your music available on these platforms and optimizing your profiles, you can ensure that your music reaches your potential listeners and stands out in a crowded and competitive market.

Designing Compelling Visuals

Designing compelling visuals is crucial for music marketing success. Eye-catching graphics, engaging videos, and attention-grabbing album covers are all essential elements of a successful music marketing campaign. With effective visuals, musicians can connect with their audience and leave a lasting impression.

Designing compelling visuals is one of the crucial aspects of music marketing. It involves creating visual content that not only catches the attention of the audience but also conveys the artist’s message effectively. In today’s fast-paced digital world, where people often have limited attention spans and are bombarded with a constant stream of content, making stunning visuals is essential to stand out from the crowd. Creating album artwork and music videos: Album artwork and music videos are the primary visual assets of an artist, representing the creative expression of their music. It’s essential to create visuals that are unique and eye-catching, reflecting the artist’s values and style. Album artwork must be creative and visually appealing to entice people to click and listen. Similarly, music videos play a critical role in creating a lasting impression on the audience’s minds, showcasing the artist’s personality and creativity. Designing visuals for social media: Social media has become one of the most important marketing channels for musicians today. According to a survey, 70% of people discover new music on social media platforms. Designing visuals for social media platforms like Instagram, Twitter, and Facebook is crucial to capture the audience’s attention. Every social media platform caters to a different audience, and therefore, it’s important to create custom visuals tailor-made for each platform. To create visuals for social media, it’s important to keep in mind the dimensions, resolution, and format of each platform. Instagram, for example, allows users to upload square images and videos, while Facebook mostly prefers the landscape format. Therefore, designers should create visuals that are optimized for each platform and align with the artist’s branding. In conclusion, designing compelling visuals is a crucial component of music marketing, and it can significantly impact an artist’s success. From album artwork to social media visuals, each element should be designed to captivate the audience’s attention and convey the artist’s message effectively. The visuals are what draw people in and keep them connected to the music.

Hosting Live Events

Live events are an excellent way to promote music through marketing. By bringing artists together on stage, live events offer an opportunity for musicians to expand their fan base and reach new audiences. Hosting live events can help to drive interest in an artist’s work and build a following.

Live events are an effective way to promote music and engage with fans. Hosting live events is an integral part of music marketing. Whether it’s a small gig, an album launch or a large-scale music festival, live events can create a buzz and generate interest among fans. Here’s how musicians and record labels can organize concerts and shows and collaborate with other artists to maximize the benefits of music marketing.

Organizing Concerts And Shows

Organizing concerts and shows is a great way for musicians to reach new fans and increase their visibility. It requires careful planning and execution to create a memorable experience for the audience. Here are some steps to follow when organizing concerts and shows:

  1. Choose the right venue that suits the genre and target audience of the performance.
  2. Promote the event through various channels such as social media, email marketing, and posters.
  3. Ensure that the sound system, lighting, and other technical arrangements are in place.
  4. Offer VIP passes, merchandising, and other incentives to increase the revenue from the event.
  5. Collect feedback and reviews from the audience to improve the quality of future events.

Collaborating With Other Artists

Collaborating with other artists can add a new dimension to music marketing and increase the fan base. It can also create opportunities for cross-promotion and create a buzz among the audience. Here are some tips for collaborating with other artists:

  • Choose artists who complement the style and genre of the music.
  • Participate in joint concerts and shows to tap into each other’s fan base.
  • Create new music and leverage the collaborative effort to promote the music.
  • Offer value-added services such as meet and greets, backstage passes, and joint merchandise to incentivize fans.
  • Collaborate with other artists on marketing campaigns like social media takeovers, interviews, and guest posts to reach a wider audience.

In conclusion, hosting live events is an essential aspect of music marketing. It requires careful planning, execution, and collaboration with other artists. By following the best practices outlined in this article, musicians and record labels can leverage the power of live events to promote their music, reach new audiences, and build a loyal fan base.

Leveraging Public Relations

Music marketing is an essential aspect of promoting music to the masses and expanding your reach as an artist or music industry professional. One effective way to market music is by leveraging public relations to grab the attention of journalists, music bloggers, and other media outlets. PR can help you build brand awareness, generate buzz, and ultimately lead to more exposure and sales for your music.

Writing Press Releases And Pitches

Press releases and pitches are the backbone of any successful PR campaign. A press release is a written statement that highlights an event, product launch, or other news-worthy item and is distributed to various media outlets. A pitch, on the other hand, is a personalized message that you send to a journalist or blogger in hopes of getting them to cover your story or review your music.

  • Include a captivating headline that grabs attention and promises something newsworthy.
  • Write a concise and engaging summary that provides the most important details upfront.
  • Use quotes and other supporting details to make your release or pitch more compelling.
  • Be sure to proofread and edit your materials before sending them out.

Reaching Out To Music Journalists

The key to successful music PR is connecting with the right journalists who are interested in covering your story or music. Here are some tips for reaching out to music journalists:

  • Research your target journalists to find out what they typically cover and what kind of stories they are interested in.
  • Personalize your pitch by addressing the journalist by name and tailoring your message to their interests.
  • Follow up politely and professionally to make sure your message was received and to answer any questions they may have about your music or story.
  • Be patient and persistent. It may take several attempts to get the attention of a journalist, but don’t give up.

Leveraging public relations can be an effective way to promote your music and build your brand. By crafting compelling press releases and pitches and reaching out to music journalists, you can get your music in front of more people and increase your chances of success in the competitive world of music.

Measuring Success

Music marketing success can be measured through increased album sales, social media engagement, and brand partnerships. With strategic digital marketing campaigns and targeted audience segmentation, music artists can effectively reach and connect with their fans, ultimately driving business growth.

Using Metrics To Track Progress

Music marketing success is measured by several metrics, including website traffic, views, engagement rates, and more. The most commonly used metrics are sales and revenue, but other KPIs (Key Performance Indicators) are used to track progress. With the help of analytic tools like Google Analytics, it’s easy to track user behavior, page views, and conversion rates to see which marketing strategies work and which don’t.

Adjusting Strategies Accordingly

Marketing strategies must be adjusted according to the metrics tracked to ensure that they’re effective. Music marketers must consistently analyze data to find where they can improve their strategies to achieve the best results. Adjustments may include changes to social media platforms, email marketing campaigns, or content marketing efforts. The goal is to maximize engagement levels, improve traffic, drive sales and revenue, and reduce customer churn. Tracking and adjusting music marketing strategies is a continuous process. By analyzing results and improving the strategies based on the data, music marketers can achieve their goals and objectives. It’s part of building a sustainable brand that continues to engage and inspire fans over the long term. Success in music marketing depends on how well you can measure and adjust your strategies based on data, so stay focused on the metrics, and don’t be afraid to keep tweaking your efforts until you get the right results!

How Does Music Marketing Work

Credit: www.youtube.com

Frequently Asked Questions Of How Does Music Marketing Work

What Are The 4 P’s Of Music Marketing?

The 4 P’s of music marketing are Product, Price, Promotion, and Place. These elements help musicians develop and execute their marketing strategies to target their audience effectively. Product refers to the music itself, while Price refers to the cost of the music.

Promotion involves advertising and publicity, and Place concerns the distribution of the music.

How Do You Market Music Properly?

Properly marketing music requires targeted advertising on social media and other platforms, creating a strong online presence through regular content creation and engagement with fans, networking with industry professionals, using email marketing to connect with fans and promote upcoming events, and collaborating with influencers and other artists to expand audience reach.

How Does Taylor Swift Market Herself?

Taylor Swift markets herself through extensive social media presence, strategic collaborations with brands, targeted mailers, interactive websites, releasing teasers and behind-the-scenes footage, fan engagement, and live performances/concert tours.

How Much Does Music Marketing Cost?

The cost of music marketing varies greatly depending on the scope of the campaign. A DIY campaign may cost next to nothing, while working with a professional team could cost thousands of dollars or more. Factors like advertising, PR, social media, and content creation all contribute to the cost.

Conclusion

As we conclude, music marketing is a complex process that involves a targeted approach to reach potential listeners effectively. It requires a comprehensive understanding of the industry trends and a creative mindset to develop unique and compelling marketing strategies. With the right mix of techniques, tools, and a solid understanding of your audience, you can get your music heard and build a successful career as a musician.

Remember, it takes time, dedication, and patience to see results of your hard work and effort. Keep creating, sharing, and engaging with your fans to take your music to the next level.

Categories
Archive

Additive Eq Vs Subtractive Eq

Additive and subtractive equalization are two different methods of adjusting the frequency response of an audio signal. Additive EQ increases specific frequencies, while subtractive EQ cuts them.

EQ is an essential tool for audio engineers to shape sounds to fit the mix. Additive EQ involves boosting specific frequencies that are lacking in the original sound to improve the overall balance. In contrast, subtractive EQ involves cutting frequencies that are overpowering or clash with other elements in the mix.

Both methods have their place and can be used together for an even more precise final result. Moreover, each method requires a different approach; additive EQ requires careful consideration and subtle boosts, while subtractive EQ requires a critical ear and careful cuts. Ultimately, the goal of EQ is to create a balanced and polished sound that accurately represents the artist’s vision.

Additive Eq Vs Subtractive Eq

Credit: crashwaggonmusic.com

How Does Additive Eq Work?

Additive EQ and Subtractive EQ are two common types of equalizers used in music production. Additive EQ works by boosting frequencies to achieve a desired sound, while Subtractive EQ removes unwanted frequencies. Additive EQ can be useful for adding depth and character to a mix, but must be used carefully to avoid overloading the sound.

Additive EQ is a popular technique for equalizing sound because it allows you to boost the frequencies of an audio track without reducing others. Using the EQ controls, you can efficiently target specific areas of the sound spectrum, and add desired tonal qualities to the track to refine the music. In this post, we will delve into how Additive EQ works and how it can improve sound quality.

Boosting Frequencies

Additive EQ gives you control over the sound by increasing volume in certain frequency ranges. In simpler terms, by boosting the lower end of the bass levels, you can give more authority to drum, bass, or guitar tracks for added ‘punch.’ Similarly, boosting the higher end of the spectrum can enhance clarity and presence of vocals, tambourines, cymbals, or acoustic guitars. You can boost multiple frequency ranges together or individually, depending on your intentions and what sounds best to you. Use the EQ controls to shape the melody you want to highlight and boost them accordingly.

Adjusting Gain

Additive EQ is useful for targeting a specific frequency area for sound correction or enhancing tonality. With its finer granularity, you can boost or reduce up to a decibel for precise tuning. This helps in adjusting gain and accurately balancing the overall sound. Moreover, with Additive EQ, you can combine several frequency bands to create a custom EQ curve so that you get the exact sound you want.

Improving Sound Quality

Additive EQ can contribute to improving audio quality and making it sound smoother and more professional. EQ can cover up flaws of a recording, such as dull, muddy, or harsh sounds, and make it sound crisper and clearer. With Additive EQ, you can add a rich, full and more detailed sound to the track by boosting or adding desired tonal qualities. This helps to improve the overall sound quality, while making specific instruments or vocals more prominent in the mix. In conclusion, Additive EQ is an effective tool for sound equalization, especially when you want to achieve more precise and accurate tuning. With this technique, you can selectively boost frequencies and adjust the gain to enhance the overall sound quality. It’s a valuable approach to take your audio mixing skills to the next level and produce professional-sounding music.

How Does Subtractive Eq Work?

HTML response:

Subtractive EQ is one of the most versatile and effective ways to tweak audio levels in recording or mixing. It works by removing specific frequencies from an audio waveform, adjusting the sound and making it more polished and refined. Subtractive EQ is opposite to Additive EQ, which involves boosting certain frequencies to enhance the sound. Here, we will discuss the working of Subtractive EQ and its applications in various audio engineering contexts.

Cutting Frequencies

Cutting frequencies involves removing the problematic frequency ranges that can muddy the audio or make it less clear. In Subtractive EQ, the sound engineer identifies the offending frequencies and cuts them out to improve the sound quality. This process is particularly useful in live sound and recording, where unwanted sounds or top-end brightness can be a problem. For instance, if the audio track has too much bass, the sound engineer can remove some of the low frequencies to balance the audio.

Reducing Gain

In recording and mixing, gain refers to the level of amplification that is applied to the audio signal. Subtractive EQ can help in the case of overamplified, shrill or distorted audio. The sound engineer can reduce the gain on specific frequency ranges to get a well-defined and polished audio signal. Similarly, the reduction of gain can facilitate better blending with other tracks in a mixing scenario.

Removing Unwanted Noise

Subtractive EQ is extremely useful in removing unwanted noise from an audio track. In this case, the sound engineer identifies the frequency range where noise is present and cuts these frequencies out, resulting in a clean audio signal. This technique is commonly used in post-production, especially for podcasts, where background noise can make listening difficult. The technique can also be used in live sound where it can eliminate offending sounds such as feedback or hum.

In conclusion, Subtractive EQ is an essential tool for audio engineers to polish and refine audio signals. With the ability to cut frequencies, reduce gain and remove unwanted noise, sound engineers can determine the problematic elements in an audio track and rectify them in real-time. This technique has applications in live sound, post-production, mixing, and mastering, making it the go-to process for most professionals in the audio industry.

Comparison Of Additive Eq And Subtractive Eq

Additive EQ adds frequencies to a mix, while subtractive EQ removes them. Additive EQ is better for boosting weak or dull tracks, while subtractive EQ is ideal for cleaning up harsh or muddy sounds. Both techniques have their strengths and are useful for different situations.

Whether you are a beginner or an advanced audio engineer, it is essential to understand the differences between additive EQ and subtractive EQ to make the most of these powerful mixing tools. While both approaches aim to enhance or correct the frequency balance of a track, they have different strengths and weaknesses that can affect the overall sound and tone of the music.

Advantages Of Additive Eq

Additive EQ is a technique used to boost or increase the level of specific frequencies in a mix to achieve a desired sound. It is often used in conjunction with subtractive EQ to produce a well-balanced mix. The advantages of additive EQ include:

  • Ability to add richness and warmth to a track
  • Can bring out hidden or subtle details in a mix
  • Allows for creative experimentation and sound design
  • Can help to reduce masking or frequency conflicts between instruments

Advantages Of Subtractive Eq

Subtractive EQ, on the other hand, is a method of reducing or cutting problematic frequencies in a mix. It is used to remove unwanted or harsh sounds that can negatively impact the overall mix. The advantages of subtractive EQ include:

  • Reduces frequency conflicts and improves clarity of individual instruments
  • Eliminates resonances and ringing that can cause ear fatigue
  • Can reduce harshness or muddiness in a track
  • Helps to create a more natural and balanced mix

Limitations Of Additive Eq

While additive EQ can help to improve the overall sound of a track, it does have some limitations. These include:

  • Can easily result in over-processing or too much gain, leading to distortion or unwanted artifacts
  • May not be effective in fixing underlying issues in a mix, such as poor recording quality or improper mic placement
  • Can create phase issues or comb filtering that can affect the stereo image

Limitations Of Subtractive Eq

Similarly, subtractive EQ also has some limitations, including:

  • May result in a thin or weak sound if too much reduction is applied
  • Can create phase issues or comb filtering if too many cuts are made
  • May not be effective in fixing underlying issues in a mix, such as poor recording quality or improper mic placement
  • Can result in a dull or lifeless sound if not used in conjunction with additive EQ

In conclusion, both additive EQ and subtractive EQ are important tools in the audio engineer’s toolkit. By using them effectively and understanding their strengths and limitations, you can bring out the best in a mix and create a dynamic and compelling sound.

Additive Eq Vs Subtractive Eq

Credit: joeysturgistones.com

When To Use Additive Eq?

As a content creator, it’s important to have a good understanding of additive and subtractive EQ. Additive EQ adds frequency to a sound, making it brighter or warmer, while subtractive EQ removes frequency to make it less bright or warmer. There are times when you’ll want to use additive EQ, and certain scenarios in which it can be particularly effective.

Examples Of Additive Eq

  • Boosting vocals – When mixing vocals, it’s important to make sure they stand out from the other instruments in the mix. Boosting the midrange frequencies slightly with an additive EQ can give the vocals a clarity that they otherwise might not have.
  • Fattening up a kick drum – When mixing drums, the kick drum is often one of the most important elements. Adding some low-end boost via an additive EQ can help to give the kick more weight, and help it to cut through the mix effectively.
  • Brightening up cymbals – In a drum mix, cymbals can sometimes get lost in the mix. A boost in the high-end frequencies via an additive EQ can help to give them the clarity they need to sit nicely in the mix.

These are just a few examples of the types of scenarios in which additive EQ can be particularly effective. The key is to always listen to the track you’re working on and make adjustments accordingly. While there are certainly times when subtractive EQ is necessary for cleaning up a mix, there are also plenty of times when adding a bit of frequency can help to give a track that extra little bit of magic.

When To Use Subtractive Eq?

When it comes to audio mixing, equalization (EQ) is an essential tool to produce great sounds. There are two types of EQ: additive (boosting) and subtractive (cutting). While additive EQ adds certain frequencies, subtractive EQ removes them. This article will focus on the latter and when you should use it.

Examples Of Subtractive Eq

Subtractive EQ can be useful in various scenarios. Here are some examples:

Removing Boomy Frequencies In Bass Instruments

A common problem with bass instruments, such as drums and bass guitars, is that they can produce too many low frequencies, making them sound boomy. To fix this, you can use subtractive EQ to cut some of these frequencies, making the sound tighter and less muddy.

Reducing Harshness In Vocal Tracks

Sometimes, vocal tracks can have frequencies that sound harsh to the ears. This can be due to recording equipment, microphone placement, or poor room acoustics. By using subtractive EQ, you can remove some of these harsh frequencies, improving the overall sound quality.

Lessening Clashing Frequencies In Mixes

When you mix multiple instruments and sounds, there can be clashes between certain frequencies. This can result in an unpleasant listening experience, where some sounds dominate over others. By using subtractive EQ, you can identify and cut these clashing frequencies, allowing all the instruments to shine and have their own sonic space.

In conclusion, subtractive EQ is a powerful tool that can greatly improve your audio mixes. Knowing when to use it and in what scenarios can help you achieve a clear and balanced sound that is a joy to listen to.

Additive Eq Vs Subtractive Eq

Credit: joeysturgistones.com

Frequently Asked Questions Of Additive Eq Vs Subtractive Eq

What Is Additive And Subtractive Eq?

Additive EQ adds frequency to improve the sound quality, while subtractive EQ removes frequencies to reduce unwanted sounds. Additive EQ increases volume, while subtractive EQ decreases it. Both techniques are essential in audio production to achieve perfect sound quality.

What Is The Opposite Of Subtractive Eq?

The opposite of subtractive EQ is additive EQ. It involves boosting specific frequency ranges instead of cutting them. It can help to enhance the sound of a recording and give it more depth and clarity.

Why Add Eq?

Adding EQ helps to enhance the overall sound quality of audio recordings. It balances out uneven frequencies, makes vocals and instruments sound clearer, and can also add warmth or brightness to the sound. EQ helps to improve the listening experience for the audience and make the audio more enjoyable to consume.

Is Eq The Same As Mixing?

No, EQ is not the same as mixing. EQ is the process of adjusting the balance between different frequencies in a piece of audio, while mixing involves combining sounds and adjusting levels, panning, and effects. EQ is just one part of the overall mixing process.

Conclusion

Whether to use additive or subtractive EQ entirely depends upon the sound engineer’s preference and the song’s requirements. While additive EQ can boost specific frequencies, subtractive EQ can reduce unwanted noise and make room for other instruments. It is, therefore, crucial to understand the basics of both EQ types to bring out the best sound in a mix.

So, experiment with different EQs and trust your ears to achieve the desired results.

More in our EQ guide.

Categories
Archive

How To Find Chords For Any Melody

To find chords for any melody, determine the key of the melody and identify its scale. Then, build chords from the notes of the scale.

If you’re a musician or aspiring songwriter, you may have found yourself struggling with the process of finding chords that fit with a particular melody. Whether you’re composing a new song or trying to cover someone else’s, chords are a crucial element of any musical arrangement.

Without the right chords, even the most well-crafted melody can fall flat. But how do you find the right chords for your melody? We’ll explore the process of identifying the key and scale of your melody and using that information to build chords that fit seamlessly with it. With a bit of practice, you’ll be able to find the perfect chords for any melody in no time!

How To Find Chords For Any Melody

Credit: m.youtube.com

Start With The Melody

If you are a musician, you know that finding the chords for a melody can take a lot of time and effort. However, there are ways to simplify the process and make it much easier. In this blog post, we will discuss a simple method to find chords for any melody, starting with the melody itself.

Identify The Key

The first step in finding chords for a melody is to identify the key of the song. The key is the tonal center of the song, and it determines which chords will sound good when played together. To identify the key, you need to find the note that the melody resolves to. This note will usually feel like the ‘home’ note of the song, and it will be the starting and ending note of the song.

Listen For Chord Tones

Once you have identified the key of the song, the next step is to listen for chord tones in the melody. Chord tones are the notes that make up a chord, and they typically include the 1st, 3rd, and 5th notes of a scale. To identify the chord tones in the melody, you need to listen to the notes that are played when the melody is at its strongest points. These notes will usually be longer in duration and will be played on the downbeat of the measure.

Example:

Melody:D – E – F# – G – A – G – F# – E.
Key:A Major

In this example, the melody resolves to the note A, which is the starting and ending note of the melody. Therefore, the key of the song is A Major. The chord tones in the melody are A, C#, and E. These notes are played on the downbeat of the 1st, 3rd, and 4th measures respectively. So, the chords for this melody could be A Major, F# minor, and D Major.

Conclusion

Starting with the melody is a simple and effective way to find chords for any song. By identifying the key and listening for chord tones, you can quickly and easily determine which chords will sound good with the melody. With practice, you will become better at finding chords for any song, which will help you become a more skilled and versatile musician.

Determine The Chord Types

Discovering the chords for any melody is a crucial aspect of songwriting, and knowing how to do so can enhance your musical creativity. To determine the chord types, you’ll need to identify the melody’s key and notes and then use music theory to figure out which chords fit within that key.

When it comes to finding chords for any melody, one of the most important aspects is to determine the chord types. A chord is a group of notes played together and chord types can vary depending on the key of the song and the melody being played. There are a few different chord types that can be used to accompany a melody, including major or minor chords, and seventh chords.

Major Or Minor?

The first step in determining the chord types for any melody is to determine whether the melody is in a major or minor key. Major keys generally have a more upbeat and cheerful sound, while minor keys have a more somber feel. Once you have determined the key of the melody, you can then choose the appropriate major or minor chords to accompany it. For example, if you are playing a melody in the key of C major, you would use the chords C, F, and G major to harmonize the melody.

Seventh Chords?

Seventh chords are chords that include the 7th note of the scale in addition to the 1st, 3rd, and 5th notes. These chords can add a lot of interest and complexity to a melody and are commonly used in jazz and blues music. To determine whether to use seventh chords, it’s important to consider the style and feeling of the melody. If you’re playing a jazz standard, for example, using seventh chords can help create a more authentic and sophisticated sound. However, if you’re playing a simple and straightforward melody, using seventh chords may not be necessary or appropriate. In conclusion, determining the chord types for any melody is crucial for creating a harmonious and melodic accompaniment. By considering the key of the melody and the use of major or minor chords and seventh chords, you can create a unique and interesting harmonic progression that enhances the melody.

Experiment With Inversions

Experiment with inversions to find the perfect chord progression for any melody. Explore different chord inversions and their unique sounds to create harmonies that complement your melody.

Experimenting with inversions is a great way to find chords for any melody. Inversions are essentially different positions in which a chord’s notes can be played. This technique works by taking the melody’s notes and creating several different chords that fit those notes using inversions, until you find the right one that complements the melody perfectly.

Root Position

The root position refers to the starting point of a chord. In other words, it is the lowest note of the chord. Root position chords are generally the most stable sounding, and are often used to give a melody a sense of grounding. To use this technique, simply match the melody’s notes with a chord that contains those notes in its root position.

First And Second Inversions

First and second inversions refer to chords whose lowest note is not the root note. In the first inversion, the lowest note of the chord is the third, while in the second inversion it is the fifth. These chords are often used to create tension in a melody, and can be used to lead the listener towards a resolution. To use this technique, experiment with creating chords that have the melody’s notes in their first or second inversion until you find the right one that complements the melody perfectly. In conclusion, experimenting with inversions is a great way to find chords that complement any melody. By using different chord positions such as root, first, and second inversions, you can find the perfect chord progression that adds depth and emotion to your music.

How To Find Chords For Any Melody

Credit: jenslarsen.nl

Follow Chord Progression Rules

If you’re trying to find chords for any melody, it’s essential to follow chord progression rules. Understanding how to move from one chord to the next is vital in creating an enjoyable and harmonic melody that sounds good to the ears. There are a ton of chord progression rules, but we’ll focus on two critical concepts that will get you started on creating your chord progressions effortlessly.

Tonic-dominant Relationship

The Tonic and Dominant relationship is one of the essential chord progression rules. The Tonic chord is the first note in a scale, while the Dominant is the fifth note. A chord progression that follows this rule is referred to as a “Perfect Cadence.” It means that the melody is complete, and it feels like the song has come to an end. An example of this chord progression would be C major followed by G major, or F major followed by C major.

Circle Progressions

Another essential chord progression rule is Circle Progressions, also known as “Cycle Progressions.” It’s a sequence of chords moving in a circle around the Circle of Fifths. For instance, if you play the C chord, you’ll move to the G chord, then to the D chord, and so on until you land back at the C chord. This progression creates a sense of resolution and closure, making it a popular chord sequence in music.

By understanding the Tonic-Dominant relationship and Circle Progressions, you’ll have a solid foundation to build your chord progressions from. Keep in mind that these rules aren’t the only ones out there and shouldn’t limit you. They’re guidelines that you can bend to create unique chord progressions that sound great with your melodies. Happy music-making!

Look For Common Patterns

The process of finding chords for a melody can seem daunting and overwhelming, but there are ways to make it easier. By looking for common patterns in the melody, you can find the chords that will best accompany it. Here are some common chord progressions:

I-iv-v Progression

The I-IV-V progression is one of the most common chord progressions in music. It involves using the first, fourth, and fifth notes of the scale to create the chords. For example, in the key of C, the I-IV-V progression would be C-F-G. This progression is used in countless songs across multiple genres.

Iv-v-i Progression

The IV-V-I progression is another common chord progression. It involves using the fourth, fifth, and first notes of the scale to create the chords. For example, in the key of C, the IV-V-I progression would be F-G-C. This progression can be found in many classic rock songs and is used frequently in jazz music.

By looking for these common patterns in the melody, you can start to determine which chords will sound best with it. Use these chord progressions as a starting point and experiment with different variations to create your own unique sound.

Apply Your Own Style

Find the chords for any melody by applying your own unique style. Experiment with different chord progressions and add your own flare to create a personalized sound. With practice, you can easily find the perfect chords to bring any melody to life.

Finding the right chords for a melody is no easy feat. It requires a deep understanding of music theory, which can take years to master. However, once you have a basic understanding of chords and how they work, you can use your knowledge to make the music your own. By applying your own style, you can take a simple melody and transform it into a unique composition that reflects your personality and creativity. Here are two ways to do just that:

Add Chord Extensions

One way to apply your own style is to add chord extensions. Chord extensions are notes that are added to a chord to give it a richer, more complex sound. For example, a basic C major chord consists of the notes C, E, and G. To add an extension, you might add a D note to the chord. This creates a C major 9 chord, which has a more interesting sound than a basic C major chord. Here are some common chord extensions you can experiment with:

ExtensionSymbolNotes
Major 7Cmaj7C, E, G, B
Minor 7Cm7C, Eb, G, Bb
Major 9Cmaj9C, E, G, B, D
Minor 9Cm9C, Eb, G, Bb, D

Use Chord Substitutions

Another way to apply your own style is to use chord substitutions. A chord substitution is a chord that replaces another chord in a song. For example, if a song has a C major chord, you could substitute it with an A minor chord. This creates a different harmonic context that can add interest and depth to a melody. Here are some common chord substitutions you can experiment with:

  • iii chord for I chord
  • vi chord for IV chord
  • ii chord for V chord
  • V chord for vii° chord

By experimenting with chord extensions and substitutions, you can take any melody and make it your own. Don’t be afraid to try new things and take risks – that’s how you’ll discover your unique sound!

Use Chord-finding Tools

Chord-finding tools can be a great help in finding chords for any melody. These tools allow you to input the melody and receive a list of suggested chord progressions, making it easier to create a harmonious composition.

If you’re not familiar with music theory, finding chords for a melody can be challenging. Luckily, chord-finding tools can make the process a lot easier. These tools analyze the notes of a melody and recommend chords that will fit well with it. Here are two types of chord-finding tools that you can use.

Chord Generator Websites

Chord generator websites are online tools that help you find chords for a melody. Most of these sites work by allowing you to input the notes of a melody into a virtual piano or by simply typing the notes. The website then analyzes the melody and creates a list of chords that work well with it. Some popular chord generator websites include:

  • Chordify: This website is user-friendly and allows you to find chords for any song quickly. All you need to do is input the name of the song, and the website will do the rest.
  • Hooktheory: This website offers a unique way to find chords. It allows you to input a melody and then suggests possible chord progressions that will work well with it.

Mobile Apps

Another way to find chords for a melody is by using mobile apps. These apps are convenient because you can use them on-the-go. Most of these apps work similarly to chord generator websites by allowing you to input the notes of a melody. Here are some popular chord-finding apps:

  • Chordbot: This app is great for beginners because it has a simple interface. It also offers a wide variety of chord progressions to choose from.
  • ChordIQ: This app is useful because it provides you with a comprehensive list of chords that work well with a melody. It also shows you how to play each chord.

Finding chords for any melody can be a daunting task, but chord-finding tools can make it much easier. Whether you prefer using websites or mobile apps, there are plenty of options available. With a little practice, you’ll be able to find chords for any melody in no time.

How To Find Chords For Any Melody

Credit: www.fretdojo.com

Practice Often

To find chords for any melody, practice often is key. Play around with different chord progressions and experiment with different keys until you find what works best for the melody. Over time, you’ll become more comfortable with the process and be able to quickly identify the chords for any melody.

Finding chords for a melody can be a daunting task, especially for beginners. However, the key to success is to practice often. The more you practice, the easier it becomes. In this post, we will show you how to find chords for any melody and some of the practices that can help you improve.

Try With Different Melodies

To find chords for a melody, start by playing the melody on your instrument. Once you have a good grasp of the melody, start experimenting with different chords. You can start with the basic chords like C, G, D, and F. Try playing these chords along with the melody to see how they sound. If you feel these chords don’t fit, try different ones until you find the right combination. Also, consider the key the melody is in; each key has a set of chords that work well together.

Play With Other Musicians

Playing with other musicians is a great way to improve your chord-finding skills. You can ask them to play a melody, and you try finding the chords that fit. You can also play a melody for them and ask for their help in finding the right chords. Playing with others can help you learn new techniques and approaches you wouldn’t have thought of otherwise. Finding chords for a melody can be challenging, but practice makes perfect. Set aside some time each day to practice finding chords for different melodies. You can also practice changing chords quickly and smoothly, as this skill will come in handy when finding chords for a melody. The more you practice, the more comfortable you will become with chord progressions and the easier you will find it to find chords for your melodies. In conclusion, finding chords for any melody takes practice, patience, and experimentation. Remember to try with different melodies, play with other musicians, and above all, practice often. With time and practice, finding chords for any melody will become second nature, and you’ll soon be able to create beautiful music effortlessly.

Frequently Asked Questions For How To Find Chords For Any Melody

How Do You Find What Chords Go With A Melody?

To find chords for a melody, you need to consider the key of the melody and its notes. Chords that match the notes in the key are good options. You can use a chord dictionary or look up popular chord progressions used in similar songs.

Experimentation and musical knowledge will also help in finding the right chords.

How Do I Find The Chords To A Song?

To find the chords for a song, you can use websites or apps such as Ultimate Guitar or Chordify. Simply search for the song and the chords should be available for you to play along with. You can also try searching for tutorials on YouTube or asking a musician friend for help.

What Is The App That Finds Chords To Any Song?

The app that finds chords to any song is called Chordify.

How Do You Identify Chords In Music?

To identify chords in music, listen carefully to the notes being played to determine the root note. Then, identify the other notes in the chord based on their relationship to the root note. Look for common chord patterns and progressions.

With practice and knowledge of music theory, you can quickly identify chords in any music piece.

Conclusion

We hope that this guide on how to find chords for any melody has been helpful to you. By following the steps outlined in this post, you can unlock a whole new world of musical possibilities and create beautiful, harmonious compositions.

Remember to take your time, experiment with different chord progressions, and trust your ear. With practice, you’ll become a master at chord progression and be able to create captivating melodies effortlessly. Happy composing!

Categories
Archive

How To Export Stems In Ableton Live

To export stems in Ableton Live, click on File, then choose Export Audio/Video. From there, select the tracks you want to export and adjust any necessary settings.

Ableton Live is a popular digital audio workstation used by producers and engineers for music creation. It is known for its intuitive interface and innovative features. Exporting stems from Ableton Live is a necessary step for sharing your music or collaborating with other artists.

Stems refer to individual audio tracks that are usually grouped together based on instrument or effect. Exporting stems allows for greater flexibility in mixing and mastering, as well as easier collaboration with other musicians. We will discuss the steps needed to export stems in Ableton Live.

How To Export Stems In Ableton Live

Credit: m.youtube.com

Preparing Your Project

To prepare your project for exporting stems in Ableton Live, first make sure all elements are organized and properly labeled. Then select the individual tracks you want to export as stems and adjust the levels and effects accordingly. Finally, use Ableton’s Export Audio/Video function and select the “Stems” option to export each track as a separate audio file.

Preparing Your Project: Before exporting stems in Ableton Live, it’s important to prepare your project thoroughly to ensure a seamless and efficient process. The following steps outline how to best prepare your project for exporting stems in Ableton Live. Consolidating Tracks: The first step in preparing your project for exporting stems in Ableton Live is to consolidate your tracks. This involves merging multiple audio clips into one audio file, which not only saves disk space but also ensures that all clips are in sync. To consolidate tracks in Ableton Live, simply select the tracks you want to consolidate, right click, and select “Consolidate”. Alternatively, use the shortcut key “Ctrl + J” on Windows or “Cmd + J” on Mac. Naming Tracks: Next, you should ensure that each track is named correctly. This makes it easier to identify each stem during the exporting process and saves time in the long run. To rename a track in Ableton Live, simply double-click on the track name and type in the desired name. Setting Individual Levels: Lastly, set the individual levels for each stem. This ensures that each stem is exported at the desired volume, and prevents any clipping or distortion. To adjust individual track levels in Ableton Live, simply use the volume fader on each track. By following these steps, you can ensure that your project is well-prepared for exporting stems in Ableton Live. This will save time, prevent any potential issues, and ultimately lead to a better end result.

How To Export Stems In Ableton Live

Credit: loopcommunity.com

Export Settings

To export stems in Ableton Live, navigate to the Export Settings. Here, you can select the type of file, quality, and channels to export your stems. It’s essential to have correctly exported stems for better mixing and mastering of your music productions.

Selecting The Right File Type

Before exporting stems in Ableton Live, it is important to select the right file type. This decision depends on the project’s intended use and your personal preference. The following are the common file types that you can use to export stems in Ableton Live:

  • WAV
  • AIFF
  • MP3

WAV and AIFF are lossless audio formats that retain all the audio data from the original file. On the other hand, MP3 is a compressed audio format that discards some of the audio data for a smaller file size. However, MP3 files are compatible with most media players, making them a good choice for sharing or streaming your mixes.

Choosing Bit Depth And Sample Rate

When exporting stems in Ableton Live, you also need to choose the bit depth and sample rate. Bit depth refers to the number of bits used to represent each sample of audio. The higher the bit depth, the greater the dynamic range and the better the sound quality. Sample rate, on the other hand, refers to the number of samples per second. The higher the sample rate, the more detail and accuracy in the audio. Here are the recommended settings for exporting stems in Ableton Live:

File TypeBit DepthSample Rate
WAV / AIFF24 bit44.1 kHz
MP316 bit44.1 kHz

Considerations For Mastering

When exporting stems for mastering, there are a few things to consider. Firstly, it is important to leave enough headroom in the mix to allow the mastering engineer to make adjustments without causing distortion. Secondly, you can export multiple versions of the same stems with different EQ settings, allowing the mastering engineer to choose the best version for your project. Lastly, you should communicate any specific requirements or preferences to the mastering engineer beforehand to ensure the best outcome for your project. Exporting stems in Ableton Live is an essential skill for any producer or musician. By selecting the right file type, choosing the appropriate bit depth and sample rate, and considering the requirements for mastering, you can ensure that your stems are of the highest quality and ready for any application.

Exporting Stems

To export stems in Ableton Live, simply select the tracks you want to export and then choose “Export Audio/Video” from the “File” menu. From there, you can select your export settings and file format, and choose whether to export each track as a separate stem or all stems together.

It’s a quick and easy way to get high-quality individual tracks for mixing and mastering.

Exporting stems in Ableton Live is an essential technique every producer should know. Stems are individual audio files that contain a specific group of sounds within a track. Exporting stems is particularly useful for those who collaborate with other producers or for those who want to prepare their project for mixing and mastering. In this article, we will show you how to export individual tracks and groups in Ableton Live.

Exporting Individual Tracks As Stems

To export individual tracks as stems, take the following steps:

  1. First, make sure that the track you want to export is soloed.
  2. Head to the beginning of the track and set the left and right locators to the beginning and end of the track, respectively.
  3. Right-click on the track that you want to export in the Arrangement view and select “Freeze Track.” This process will render the track into an audio file.
  4. Right-click on the frozen track and select “Flatten.”
  5. Finally, right-click on the flattened track and choose “Export Audio/Video.” Select the location where you want to save the file on your computer, and you’re done.

Exporting Groups As Stems

Exporting groups as stems is similar to exporting individual tracks as stems. The process is as follows:

  1. First, make sure you have grouped the tracks you want to export.
  2. Head to the beginning of the track and set the left and right locators to the beginning and end of the track, respectively.
  3. Right-click on the group track and select “Freeze Track.” This process will render the tracks within the group into an audio file.
  4. Right-click on the frozen track and select “Flatten.”
  5. Finally, right-click on the flattened track and choose “Export Audio/Video.” Select the location where you want to save the file on your computer, and you’re done.

In conclusion, exporting stems in Ableton Live is an easy process once you get the hang of it. Whether you’re exporting individual tracks or groups, you’ll have the flexibility and ease of sharing your projects.

How To Export Stems In Ableton Live

Credit: help.ableton.com

Organizing And Sharing Your Stems

Learn how to export stems in Ableton Live and keep them organized and easy to share with others. This can save time and stress when collaborating with other musicians or sending files to clients.

If you’re an Ableton Live user, you already know that exporting stems can be a critical aspect of working on a track or project. Whether you want to share your stems with collaborators, send them to a mixing and mastering engineer, or just back them up for safekeeping, knowing how to export stems in Ableton Live is essential.

Naming And Tagging Stems

Before you export your stems, it’s essential to name them correctly. Choose descriptive and straightforward names to help you and anyone else who will be working with your stems remember what they are. Consider using consistent naming conventions across all of your tracks to keep things organized and easy to find. In addition to naming your stems, you can also tag them with specific attributes to make them easier to organize and search. For instance, you could use tags to designate certain stems as “drums,” “bass,” or “vocals,” making it easy to search for and find those elements later.

Creating Folders

Organizing your stems into folders is another great way to keep things organized. You could create a folder for each track, or group stems together based on their function (e.g., drums, bass, synths, etc.). Folders make it easy to find and access specific stems when you need them and keep things neat and tidy.

Sending Stems For Mixing And Mastering

When it’s time to send your stems out for mixing and mastering, it’s essential to follow a few best practices to ensure everything goes smoothly. Firstly, be sure to communicate with your mixing and mastering engineer to ensure they understand what you’re looking for. You can also provide notes or a reference track to help them get an idea of your vision. When exporting your stems, be sure to export them at the highest possible quality. Aim for 24-bit/48kHz or higher, and export each stem with a consistent level and normalization setting. This helps ensure that all of your stems have a consistent volume level and will sound balanced when mixed together. In Conclusion, organizing and sharing stems is a vital part of any Ableton Live workflow. By naming and tagging your stems, creating folders, and following best practices when exporting your stems, you can ensure that your project runs smoothly and sounds great when it’s finished.

Frequently Asked Questions Of How To Export Stems In Ableton Live

How Do I Export Stem Files From Ableton?

To export stem files from Ableton, simply go to the “File” menu and select “Export Audio/Video”. From there, choose the individual tracks or groups you want to export as stems, set your desired parameters, and click “Export”. Your stems will be saved in the designated folder.

How Do I Export Stem?

To export a stem, you need to select the track containing the stem, click on “File,” then select “Export. ” Choose the desired file format, name the file and select the destination folder. Finally, click “Export” to complete the process.

How Do You Bounce Down Stems In Ableton?

To bounce down stems in Ableton, select the audio track you want to bounce down, then go to “File” and click “Export Audio/Video. ” Choose the desired settings for the stem, then click “Export” to create a new audio file of the stem.

Repeat the process for each audio track you want to bounce down.

How Do I Export Selected Tracks In Ableton?

To export selected tracks in Ableton, first select the tracks you want to export. Then go to the “File” menu and choose “Export Audio/Video”. In the Export Audio/Video window, select “Selected Tracks Only” from the “Rendered Track” drop-down menu. Adjust your settings as desired, then click “Export”.

Conclusion

Exporting stems is an essential skill for musicians, producers, and sound engineers who want to create professional music. In Ableton Live, stem exporting is an essential feature that helps you to collaborate with other musicians and work on your projects.

By following the guidelines mentioned above, you can easily export your tracks in Ableton Live and share them with other producers and sound engineers. So go ahead and try it for yourself! The world is waiting for your music.

Categories
Archive

Your First Drum Beat In Ableton Live

The first drum beat in Ableton Live can be created by inserting a drum rack and using the step sequencer or triggering samples. Ableton’s library also offers a range of pre-made drum kits to choose from.

Mastering the skill of creating drum beats is crucial for any music producer. Also, Ableton Live is one of the most popular Digital Audio Workstations (DAWs) for music production. With its user-friendly interface and powerful features, Ableton offers endless possibilities for creating unique and exciting drum beats.

Related reading: How to sidechain in ableton and Drums in ableton guide. For background, see Instrument drum and effect racks.

Whether you choose to use the step sequencer, triggering samples, or pre-made drum kits, the key is to experiment with different sounds and patterns to create a beat that suits your style. In addition, we will explore different approaches to creating your first drum beat in Ableton Live.

Getting Started With a Drum Beat in Ableton Live

Getting started with Ableton Live can be a little intimidating at first. But once you get the hang of it, it becomes a very powerful tool. In this post, we’re going to take you through the process of creating your first drum beat in Ableton Live!

Setting Up Ableton Live

The first thing you need to do is set up Ableton Live on your computer. First, if you haven’t done this already, head over to the Ableton website and download the latest version of the software. Once you have it downloaded, go ahead and install it on your computer.

Creating A New Project

Now that you have Ableton Live installed on your computer, it’s time to create a new project. Next, open Ableton Live and choose “New Live Set” from the options menu. This will create a new, blank project for you to work with.

Understanding The Drum Rack

Now that you have a new project open in Ableton Live, it’s time to start working with the Drum Rack. Also, the Drum Rack is a powerful tool that allows you to create and edit drum beats with ease. To access the Drum Rack, simply click on the “Drums” icon in the sidebar.

Once you have the Drum Rack open, you’ll see a grid where you can assign different drum sounds to different pads. For example, to assign a sound to a pad, simply drag and drop the sound onto the pad you want to assign it to. You can then use the pads to create your drum beat.

Now that you know how to set up Ableton Live, create a new project, and use the Drum Rack, it’s time to start creating your first drum beat! Experiment with different sounds, rhythms, and patterns until you find something you like. Moreover, once you have your drum beat created, you can start adding other instruments and effects to create a full track.

Choosing The Right Drum Samples

Choosing the right drum samples is essential for creating your first drum beat in Ableton Live. Furthermore, you can experiment with different sounds and find the ones that fit your style and genre. Remember to keep it simple and focus on creating a groove that makes people dance.

Every music producer knows the importance of selecting the right drum samples for their track. A single drum kit can alter the overall sound of the beat. Also, this is why it’s crucial to invest some time and effort in finding suitable samples. In this section, we’ll guide you through the process of selecting the perfect samples for your first drum beat in Ableton Live.

Selecting The Drum Kit

Begin by selecting the right drum kit for your track. In addition, Ableton Live is equipped with a range of drum kits, each with its unique sound and flavor. Choosing the right kit depends on the music genre you’re creating and personal preference. For example, if you’re going for a pop sound, the ‘Studio Acoustic’ kit could be an excellent starting point. In contrast, the ‘Drum Machines’ kit is perfect for electronic music. The key is to experiment with different kits until you find the sound you’re looking for.

Adding Samples To The Drum Rack

Once you’ve selected the drum kit, it’s time to add some samples to your drum rack. Moreover, a drum rack is a collection of drum sounds that can be played using your MIDI controller. In Ableton Live, you can use the drag-and-drop method to add samples to your drum rack. The software supports various sample formats, such as WAV, AIFF, and MP3. Ensure the samples you choose complement each other and fit within the context of your track. If you’re creating a slow tempo track, you may want to select samples that are more laid-back, such as a low-velocity snare and a smooth hi-hat. However, if you’re going for a faster tempo, you may want to opt for punchier samples, such as a clap or kick with high velocity. The key is to experiment with different samples and focus on creating a cohesive sound.

Conclusion

In conclusion, selecting the right drum samples is an integral part of creating a drum beat in Ableton Live. Admittedly, the process may seem daunting at first. But with time and practice, you’ll develop a better understanding of what works best for your music genre. Remember to experiment with different kits and samples until you find the perfect match.

Programming Your First Drum Beat in Ableton Live

Learn how to program your first drum beat in Ableton Live with these step-by-step instructions. Also, from selecting your drum kit to creating patterns and adding effects, this tutorial will give you the tools to make your own beats in no time.

Creating your first beat in Ableton Live can be an exciting experience, especially if you’re new to music production. In this section, we’ll cover how to program your first beat in Ableton Live, step by step. Adding a MIDI track: First things first, we need to add a MIDI track to the Ableton Live session. To do this, simply navigate to the “Create” menu and select “MIDI Track”. Alternatively, you can use the shortcut “CMD+Shift+T” (Mac) or “Ctrl+Shift+T” (Windows) to create a new MIDI track. Using the Piano Roll to program beats: Once you’ve added a MIDI track, it’s time to open up the Piano Roll. For example, you can do this by clicking on the MIDI clip in the Arrangement or Session view and pressing the “E” key. The Piano Roll is where you will program your beats.

A Basic Kick-Snare Drum Beat in Ableton

To create a basic kick-snare pattern, use your mouse to click and drag on the Piano Roll grid to create MIDI notes. First, add a kick drum on beat one and a snare drum on beat three. Repeat this pattern for a few bars to create a basic loop. Adding hi-hats and cymbals: Now that you have a basic kick-snare pattern, it’s time to add hi-hats and cymbals. Use the Piano Roll to create 16th notes on the off-beats (between the kicks and snares) for the hi-hats. You can also add cymbals on the downbeats (beats one and three) to add some variety to your beat.

In conclusion, by following these steps, you should now have a basic drum beat programmed in Ableton Live. Remember, the key is to experiment and have fun with your drum programming. Furthermore, try out different patterns, velocities, and sounds to create something unique and exciting. With some practice and creativity, you’ll be well on your way to creating amazing beats.

Your First Drum Beat In Ableton Live

Credit: www.levelsmusicproduction.com

Editing Your Drum Beat in Ableton

Learn how to edit your first drum beat in Ableton Live to create unique and custom sounds. Also, with simple steps and customized tools, you can enhance your drumming skills to produce remarkable tracks and beats.

Adjusting Velocity

Adjusting the velocity of your drum beats can bring an entirely new dimension to your music. In Ableton Live, it’s straightforward to do this. You can start by clicking on the “clip view,” and then select the pencil tool to draw on the beat you want to edit. In addition, to adjust the velocity, select the grid area representing your drum beat, and raise or lower the velocity to achieve your desired result. This technique can help you perfect some key drumbeat patterns.

Using Quantization To Tighten Up Timing

Quantization is another quick way to tighten up your timing and make your drum beat sound professional. To do this, highlight the region you want to use quantization on, open the ‘Quantization’ dropdown menu and choose the desired quantization setting. This setting ranges from 1/32 to 1/4 notes. After applying quantization, you should listen to your drum beat again and assess if you’re satisfied with the timing.

Adding Variation To Your Ableton Drum Beat

Adding variation to your drum beat helps your music sound more interesting and engaging. To do this, you can use things like fills, ghost notes, and substitutions. Furthermore, you can use fills to break the monotony of your drum beat. Ghost notes can be used to add complexity and enhance rhythm. Substitutions help you replace drum beats with a new beat to give a certain part of the beat a different feel. By experimenting with these different techniques, you can add variety to your drum beat. This makes your music more vibrant and exciting. By adjusting velocity, using quantization, and adding variation to your drumbeat, you not only improve your timing. But you also achieve new and exciting drum beat patterns that add value to your music. Play around with this method and see how it works out for you!

Adding Elements to Your Ableton Drum Beat

Enhance your first drum beat in Ableton Live by adding additional elements such as shakers, hi-hats, and percussion. Also, experiment with different samples and loops to create a unique sound and add depth to your track.

Adding Additional Elements in Ableton Live drum beats is a crucial step towards creating an outstanding and professional beat. In addition, once you’ve laid the foundation and created the primary beat, you can explore the exciting world of percussion, fills, and transitions that bring depth and uniqueness to your tracks. In this blog post, we will discuss how to add different elements to your drum beat in Ableton Live, including percussion, transitions, and effects.

Adding Percussion to Your Ableton Drum Beat

One of the essential elements you can add to your drum beat in Ableton Live is percussion. Percussion instruments can range from shakers, claves, cowbells, and congas to tambourines and maracas. To add percussion to your beat, you need to create a new MIDI track by clicking on “Insert a new MIDI track.” Once you have the MIDI track, drag and drop the percussion sample you want to use onto the new track. Besides percussion, you can add other elements such as a bassline, chords, and melody to your beat. Adding these elements involves creating a new MIDI track and selecting the instrument of your choice. Ensure that you select a sound that complements the drum beat and does not overpower it.

Creating Transitions With Fills and Effects

Using fills and effects is an excellent way to create smooth transitions between different sections of your drum beat. In Ableton Live, you can use the built-in automation tools to create these effects. For example, you can automate the filter and delay effects to create a transition between the intro and the chorus sections of your beat. Fills are also an excellent way to create transitions between different drum patterns and sections of your beat. Moreover, a drum fill is typically a one-bar embellishment that bridges the gap between two different patterns.

To create a fill, you can use various percussion instruments or drum samples to create a unique rhythm that complements the primary beat. Conclusion Adding additional elements to your drum beat in Ableton Live is a critical step towards creating a professional and polished sound. By experimenting with percussion, fills, and effects, you can create unique and memorable beats that stand out from the rest. Remember to keep your overall rhythm cohesive and use different elements to complement your primary beat, not overpower it. With practice and experimentation, you can elevate your drum beats to the next level.

Arranging Your Drum Beat in Ableton Live

Learn how to arrange your first drum beat in Ableton Live with ease. Overall, this beginner’s guide will provide step-by-step instructions on setting up and programming a basic drum pattern to kick-start your music production journey.

After creating your first drum beat in Ableton Live, the next step is to arrange it like a pro. Also, arranging your beat is essential as it enables you to create different sections in your arrangement, apply automation to add interest and build tension and release in your beat. Here are some practical tips to get you started:

Creating Sections In Your Arrangement

Creating sections in your beat arrangement is essential as it helps to keep your listeners engaged and interested in your music. In addition, sections are like chapters in a book; they help to create structure and transition between different parts of your song. Here are some of the main sections you should include in your drum beat arrangement:

  • Intro: The beginning of your beat, where you introduce your main melody or rhythm.
  • Verse: The main body of your beat, where you establish the main groove and melody.
  • Chorus: The part of the song that repeats and is easy to sing or dance along to.
  • Bridge: A section that connects two different parts of your song, often used to add contrast to the melody or rhythm.
  • Outro: The end of your beat, where you fade out or finish with a bang.

Using Automation To Add Interest

Automation is a great tool to add interest and variation to your drum beat arrangement. Moreover, as the name suggests, automation involves changing the parameters of your sounds or effects over time. For example, you could apply automation to your filter cutoff or reverb decay to create a sense of movement or space in your beat. To apply automation in Ableton Live, follow these steps:

  1. Select the parameter you want to automate (e.g., filter cutoff).
  2. Click on the “automation” button in the clip or track view.
  3. Draw in your automation curve by clicking and dragging on the automation line.
  4. Adjust the curve shape and timing to your liking.

Building Tension And Release

Building tension and release is a crucial aspect of any drum beat arrangement. Tension refers to the “build-up” or anticipation in your song. Meanwhile, release refers to the “pay-off” or resolution of that tension. Here are some tips to help you build tension and release in your beat:

  • Vary the intensity: Change the volume, velocity, or complexity of your sounds to create a sense of dynamism.
  • Add silence: Insert moments of silence to create suspense and anticipation.
  • Use effects: Apply effects like risers, white noise, or sweeps to create tension and transition.
  • Change the rhythm: Experiment with different rhythms and time signatures to create surprise and contrast.

By following these tips, you can take your drum beat arrangement to the next level and create a compelling, well-structured song. Good luck and happy beat-making!

Mixing Your Drum Beat in Ableton

Learn how to create your first drum beat in Ableton Live by properly mixing your drum sounds. By adjusting the levels, panning, and EQ, you can achieve a clean and balanced sound that will set the foundation for your music production.

After creating your first drum beat in Ableton Live, it’s time to take your production to the next level by mixing your drum beat. Mixing is the process of adjusting the levels, panning and adding effects to your individual tracks to create a balanced, cohesive and exciting final mix. Here are some tips to help you mix your drum beat like a pro.

Balancing Levels Of Different Elements

The first step to mixing your drum beat is to balance the levels of each individual drum element in your mix. This is important to ensure that no single element overpowers the others and that they all play well together. A useful way to do this is to turn off all your other drum tracks and listen to each element one by one. Adjust the volume of each element, so it sits comfortably within the mix when all the other elements are playing.

Panning Drums Within The Stereo Field

Panning is another technique you can use when mixing your drum beat. This involves placing different drum elements at different positions within the stereo field. A useful guideline when panning drums is to pan the kick drum and bass instrument to the center to create a solid foundation for your mix. Then, pan the other elements like Hi-hats, cymbals, and percussion to the left or right of the center to create width and depth.

Adding Effects To Create Depth And Excitement

Adding effects like reverb, delay, and distortion can enhance your drum beat and make it more exciting. A reverb effect can create a sense of space and make your drums sound like they were recorded in a large room. A delay effect can add depth and create an echo effect. Distortion can add character and make your drums sound gritty and aggressive. Be careful not to overdo it with the effects, as they can quickly muddy up your mix. In conclusion, mixing your drum beat is an essential part of any production process. By balancing levels, panning drums and adding effects, you can create a professional-sounding mix that will make your listeners move to the rhythm!

Your First Drum Beat In Ableton Live

Credit: m.youtube.com

Exporting Your Drum Beat From Ableton Live

Exporting your beat is a crucial step in the music production process in Ableton Live. It is the final step in making sure your project can be played beyond the application and in any media player. Here’s a step-by-step guide on how to export your creation.

Preparing To Export Your Mix

Before exporting your beat, it is important to ensure that your track is ready to be shared with the rest of the world. Check that your levels are correct, and no instruments are too loud or too quiet. Make sure that you have automated your levels where necessary. As sound is subjective, listen to your creation closely, and make sure that you are happy with how it sounds.

Using File Export To Save Your Beat

Once you are done preparing your mix for export, you can proceed to export your beat. Start by clicking ‘File’ on the menu bar, followed by ‘Export Audio/Video.’ From there, you will have various options to select the export format, bitrate, and sample rate for your file. For best results, it is recommended that you export your beat in a lossless format like WAV. This will ensure that the audio quality of your creation is not compromised.

Sharing Your Creation With Others

After exporting your beat, you should test it on different media players to ensure that it plays back correctly and at the same level. If you experience issues, you can go back and tweak your mix to achieve the desired playback. Once you are satisfied with your beat’s overall sound and playback quality, you can share your creation by uploading it to a music platform or sending it directly to someone via email or another sharing platform.

Exporting your beat in Ableton Live is a straightforward process that can be done in just a few clicks. By following these steps, you can share your musical creation with the world. Enjoy making music and keep creating!

Your First Drum Beat In Ableton Live

Credit: flypaper.soundfly.com

Frequently Asked Questions For Your First Drum Beat In Ableton Live

How Do You Make A Drum Beat In Ableton?

Making a drum beat in Ableton is easy. Simply create a new MIDI clip in the Session View, choose a drum kit, and place the notes where you want them in the grid. Adjust the velocity and timing as desired, and you’re good to go!

How Do I Make My Drums Sound Real In Ableton?

Create natural sounding drums in Ableton by using realistic samples, adding groove and velocity variations, adjusting EQ and compression, and incorporating realistic room and reverb effects. Utilize Ableton’s built-in drum racks and plugins, or invest in higher quality third-party plugins or drum libraries for more realistic and dynamic drum sounds.

How Do You Sequence Drums In Ableton?

To sequence drums in Ableton, first create a MIDI clip. Next, select the drum rack and input notes into the clip using the piano roll. Adjust the velocity, timing, and duration of each note to create the desired rhythm. Use automation to add variation and interest.

Finally, refine the mix and export the track.

How Do You Use Drum Samples In Ableton?

To use drum samples in Ableton, first open up a new session. Next, drag the drum sample into a MIDI track. Then, select a drum rack from the instruments folder, and drag the drum sample into the corresponding slot. Finally, play the drum sample using a MIDI controller or computer keyboard.

Conclusion

Creating your very first drum beat in Ableton Live can feel intimidating, especially if you’re new to the software. However, thanks to Ableton’s user-friendly interface, you’ll be able to start creating music in no time. With a bit of patience and practice, you’ll soon find your groove and be able to create beats that you’re proud of.

So, what are you waiting for? Begin experimenting with Ableton Live today and let your creativity flow!

More in our Drums & beats guide.

Categories
Archive

Mixing a Song from Start to Finish

Mixing a song from start to finish involves balancing levels, setting EQs, applying compression, adding effects, and creating a stereo image. It’s the process of making all the individual tracks in a song blend together in a cohesive way.

As a music producer or sound engineer, mixing is one of the most important aspects of a recording project. It’s the art of combining all the elements of a song together to create a final mix that sounds great on any speaker system.

The mixing process involves various techniques, such as balancing levels, setting EQs, applying compression, adding effects, and creating a stereo image. We’ll take you through the steps involved in mixing a song from start to finish, covering everything from organizing your tracks to mastering your final mix. So, let’s dive in and learn how to mix a song like a pro!

Mixing a Song from Start to Finish

Credit: www.audio-issues.com

Preparation

Preparing to mix a song from start to finish involves organizing and labeling the tracks, setting levels and panning, and cleaning up any unwanted noise or hiss. This initial preparation can save time and frustration later in the mixing process, resulting in a more polished final product.

Choosing The Right Tools And Plugins

Before you start mixing a song, it’s essential to have the right tools and plugins. Choose your Digital Audio Workstation (DAW) and make sure you have the necessary plugins installed. The right tools and plugins will help you achieve a professional sound and make the mixing process easier. You can choose from a wide range of free and paid tools, so make sure you pick the ones that fit your budget and needs.

Setting Up Your Workspace

Your workspace must be set up in a way that suits your workflow and makes the mixing process more efficient. Make sure you have a comfortable chair, good monitors or headphones, and the right lighting. Adjust your screen brightness, font size, and color scheme to avoid eye strain. Organize your cables, keyboard, and mouse for easy access. A well-arranged workspace will allow you to focus on mixing and avoid distractions.

Importance Of Organization

Organizing your project files and tracks is crucial when mixing a song. Make sure each track is labeled and named appropriately. Color code your tracks to help you identify them visually. Group your tracks by instrument or type to help you make decisions about levels, EQ, and effects. Save your presets and settings for easy recall. Retain notes and comments about the mix for future reference. In conclusion, preparation is vital when mixing a song. Choosing the right tools and plugins, setting up a comfortable workspace, and staying organized will make the mixing process smoother and more enjoyable. By putting in the time and effort to prepare, you’ll be well on your way to creating a professional-sounding mix.

Mixing a Song from Start to Finish

Credit: www.youtube.com

Mixing Fundamentals

Learn the mixing fundamentals and mix a song from start to finish with expert guidance. From setting levels to balancing frequencies, this guide covers all the essential steps for achieving a professional-sounding mix.

Mixing a song is an art that takes time, practice, and patience to perfect. Before diving into advanced techniques, it is crucial to master the fundamental aspects of mixing. These include balancing your levels, using EQ techniques for clarity and separation, and creating space with reverb and delay. Let’s take a closer look at these essential concepts.

Balancing Your Levels

Balancing levels means adjusting the volume of each track so that they blend well together. This step is critical for achieving the right balance in your mix. One way to do this is to listen to your mix at a low volume level and adjust each track’s volume until you can hear every instrument clearly. Another way is to use a fader to adjust each track’s volume and ensure that they are not clipping or distorting. Spending time on leveling will help you create a balanced and clear mix.

Eq Techniques For Clarity And Separation

Equalization (EQ) is the process of adjusting the balance of frequencies in a mix. Using EQ, you can eliminate unwanted frequencies, enhance the desired ones, and add clarity to your mix. For example, you can use EQ to cut out some low frequencies from the bass to avoid overlapping with the kick drum. Additionally, you can boost some frequencies on the vocal track to make it stand out from the mix. Experiment with different EQ techniques to find the ones that work best for your mix.

Creating Space With Reverb And Delay

Reverb and delay add depth and dimension to your mix. They help to create a sense of space and distance and can make your mix sound more lively and immersive. You can use reverb to simulate different room sizes or to add a natural ambiance to your mix. Delay, on the other hand, can create an echo effect or add rhythmic interest to your mix. Use these effects sparingly and thoughtfully to avoid creating a cluttered or muddy mix. Mixing a song can be a complex and layered process, but mastering these fundamental concepts will set you on the right path. Understanding how to balance your levels, use EQ techniques for clarity and separation, and create space with reverb and delay will help you achieve a well-crafted, professional-sounding mix that will captivate your audience.

Advanced Techniques

Learn advanced techniques from professional audio mixers in order to achieve a polished product. From selecting the right effects to fine-tuning individual tracks, these techniques will help you create a cohesive sound when mixing a song from start to finish.

Advanced Techniques Mixing a song from start to finish can be a tricky task, but with a few advanced techniques, you can make your mix stand out and grab the listener’s attention. In this section, we’ll cover three essential techniques that can help you achieve a professional-sounding mix. Parallel Compression for Punch and Glue Parallel compression is a technique used by sound engineers to add more depth and dimension to the mix. It involves duplicating the track and compressing it heavily, then blending it with the original track to create a more punchy and cohesive sound. Here’s how to do it: 1. Duplicate the track you want to compress and name it “Parallel Compression.” 2. Apply heavy compression to the duplicated track. A compression ratio of 4:1 or 6:1 is a good place to start. 3. Blend the compressed track with the original track using the fader. The compressed track should be barely audible, just enough to add more punch and glue to the original track. Using parallel compression will give your mix more depth and punch, making it sound full and professional. Automation for Dynamic Variation Automation is one of the most important techniques for achieving a dynamic mix. It involves adjusting the level, panning, EQ, and other parameters of each track throughout the song to create variation and interest. Here’s how to do it: 1. Identify the parts of the song that need automation, such as the chorus, verse, or bridge. 2. Use the automation function in your DAW to adjust the parameters of each track in real-time. 3. Experiment with different automation techniques, such as volume rides, panning, and EQ sweeps, to create dynamic interest throughout the song. Using automation will keep the listener engaged throughout the song, making it feel like a journey with different highs and lows. Working with Multiple Takes and Overdubs When recording a song, it’s often necessary to record several takes of each part to achieve the desired sound. This technique is called overdubbing, and it can help create a more polished and professional sound. Here’s how to do it: 1. Record multiple takes of each part, such as vocals, guitar, or drums. 2. Use the best take as the main track and use the others to fill in any gaps or correct mistakes. 3. Blend the multiple takes together using volume, panning, EQ, and other parameters to create a cohesive sound. Using multiple takes and overdubs will help you achieve a more polished and professional sound, making your mix stand out and grab the listener’s attention. In conclusion, mixing a song from start to finish can be challenging, but with these advanced techniques, you’ll be able to create a professional-sounding mix that grabs the listener’s attention. Using parallel compression, automation, and working with multiple takes and overdubs, you’ll be able to add depth, dynamism, and polish to your mix, making it stand out and shine.

Mixing a Song from Start to Finish

Credit: www.izotope.com

Tackling Common Problems

As a music producer, you’ll come across several issues while mixing a song from start to finish. Some of the common problems include muddiness, harshness, phase issues, timing, and pitch problems. Tackling these issues can be challenging, but it’s essential to ensure that you produce the best quality mix possible. So, here’s how to solve these problems and take your mix to the next level.

Dealing With Muddiness And Harshness

Muddiness and harshness are the most common problems in mixes, and they can make the song sound unbalanced and messy. The main reason for muddiness is because of the low-frequency elements in the mix, such as the bassline, kick, and toms. To tackle this problem:

  • Try using a high-pass filter to cut out the low frequencies from the less important sounds.
  • Surgical EQ is a great tool that can help you isolate the problems and fix them precisely, so you should use it to pinpoint the muddy frequencies and boost or cut them accordingly.
  • You can use a de-esser on vocal tracks to reduce harshness in the high-frequency range.

Solving Phase Issues

Phase issues are common when you use multiple microphones to record one source, such as drums or guitar amps. The phase differences can cause cancellation of frequencies, which can result in a thin or hollow sound. Here’s how to remedy phase issues:

  • Check the phase correlation meter in your DAW or plug-ins such as the Waves InPhase, which can help you align the phase of two or more tracks.
  • Move the microphones slightly or use a different microphone placement to prevent phase problems from occurring.
  • If you don’t have the option to adjust the phase, you can try EQing the tracks to avoid overlapping frequencies.

Fixing Timing And Pitch Problems

Timing and pitch problems can occur during recording or editing, and they can make a song sound out of tune or out of sync. To fix these issues:

  • Use a time correction tool such as Elastic Audio or Flex Time to align the tracks with the beat.
  • You can use tuning plug-ins such as Melodyne or Auto-Tune to correct pitch problems. However, be careful not to overuse them as they can make the song sound robotic.
  • If you’re dealing with vocal tracks, you can also try adjusting the timing and pitch manually to retain the natural feel of the performance.

By following these tips, you’ll be able to tackle the most common problems that arise when mixing a song from start to finish. Remember, a clean, balanced mix is essential for a professional-sounding track.

Preparing Your Mix For Mastering

Preparing your mix for mastering is an essential and delicate task. A well-mixed song sets the foundation for a successful mastering process. It’s crucial to balance the levels of all individual tracks and ensure that they blend together cohesively to produce a polished, professional-sounding final song.

Preparing Your Mix for Mastering is a crucial step in the music production process. It involves a series of techniques and methods that help achieve a polished and professional-sounding mix. Before submitting your mix for mastering, it’s essential to follow a few guidelines to ensure a seamless and efficient mastering process. In this article, we’ll discuss the H3 headings: Setting Proper Levels, Preparing Your Session for Export, and Creating Alternate Mixes, which are fundamental aspects of preparing your mix for mastering. H3: Setting Proper Levels One of the critical aspects of preparing your mix for mastering is setting proper levels for your tracks. It’s important to ensure that all the tracks are appropriately balanced, with no individual track being too loud or too soft. The goal is to achieve a cohesive and balanced mix where every element can be heard clearly without overpowering other elements in the mix. Here are a few tips to help you set proper levels: – Use an RMS meter to visualize the loudness of each track and ensure that they are consistent with each other. – Solo individual tracks and listen to them carefully to determine the appropriate level. – Avoid adding too much gain in the mastering process as it can cause distortion and affect the overall sound quality. H3: Preparing Your Session for Export Once you’ve set proper levels for your tracks, the next step is to prepare your session for export. It involves creating a final mix that’s ready for mastering. Here are a few steps to follow: – Consolidate all your tracks into a single session to ensure that the mastering engineer has access to all the tracks. – Remove any unnecessary tracks, such as muted or unused tracks, to reduce the size of the session and ensure a faster and smoother export process. – Clean up and organize your session, ensuring that all the tracks are labeled correctly and are easy to identify. H3: Creating Alternate Mixes Creating alternate mixes is an essential part of the mixing process, and it can help you achieve a better sounding mix. It involves creating different versions of your mix, such as instrumental versions, acapellas, or radio edits. Here are a few reasons why creating alternate mixes is important: – It provides more options for the mastering engineer, allowing them to choose the best version to work with. – It gives you more opportunities to showcase your music in different contexts, such as in radio stations or TV commercials. – It can help you identify any flaws in the mix and improve the overall sound quality. In conclusion, preparing your mix for mastering requires attention to detail and a willingness to invest time and effort in the process. By following the H3 headings: Setting Proper Levels, Preparing Your Session for Export, and Creating Alternate Mixes, you can ensure that your mix is of the highest quality and is ready for the mastering process.

Frequently Asked Questions For Mixing A Song From Start To Finish

How Do You Master A Song From Start To Finish?

Mastering a song from start to finish involves several steps, including preparing the mix, ensuring proper levels, EQ and compression, utilizing subtle imaging techniques, and referencing other tracks. It’s important to work in a high-quality listening environment and to make detailed and precise adjustments.

Ultimately, mastering is about optimizing the mix for different playback scenarios and delivering a balanced, polished final product.

How Do You Mix Songs Step By Step?

To mix songs step by step, follow these basic steps: 1. Ensure your equipment is set up correctly 2. Adjust the volume levels of each track 3. Match the beats or adjust the tempo to make them sync 4. Use crossfading to smoothly transition between tracks 5.

Practice and experiment to improve your skills

What Is It Called When You Mix Songs Together?

Mixing songs together is called DJing.

What Is The Process Of Mixing A Song?

Mixing a song is the process of combining and balancing all the individual tracks from a recording to create a cohesive and polished final product. This involves adjusting levels, panning, EQ, compression, and other effects to make sure all the elements of the song work together and sound good on different playback systems.

Conclusion

To sum up, mixing a song from start to finish is a crucial step in music production that requires both technical skills and creative intuition. By following the right workflow, using the right tools, and keeping in mind the overall aesthetic vision, you can achieve a pleasing and polished result that will captivate your audience.

Remember, mixing is not a one-size-fits-all process, and you can always experiment with different techniques and approaches to find the one that best suits your style and genre. So, go ahead and unleash your potential as a mixing artist!

Categories
Archive

How To Export Stems In Garageband

To export stems in Garageband, select the tracks you want to export and choose File > Export > All Tracks as Audio Files. Now, let’s explore the process of exporting stems in Garageband, a digital audio workstation designed for Mac users.

Stems are individual audio tracks of a song that are exported separately, allowing for greater control during the mixing and mastering stages. Whether you’re a budding producer or an experienced musician, learning to export stems in Garageband can help you achieve a professional sound and streamline your workflow.

We’ll provide you with step-by-step instructions for exporting stems in Garageband, as well as some tips for maximizing the quality of your exported audio files.

Understanding Stems

Are you a Garageband user looking to improve your music production skills? If so, then understanding how to export stems in Garageband is an essential skill to have. Stems are an important element in music production, allowing you to export individual tracks for mixing and post-production processing. In this guide, we dive into what stems are, the reason you need them in Garageband, and how to export them with ease.

What Are Stems?

Stems refer to individual tracks that make up a music project, such as drums, bass, guitar, and vocals. Exporting stems means extracting each track independently, allowing for more precise control during the mixing process. Stems are essential in the music production process since they enable mix engineers and producers to work on different elements of the music project independently. Overall, this process ensures that the project sound quality is the best it can be and fits the intended music genre before it gets released to the audience.

Why Do You Need Stems In Garageband?

Gaining control over a project’s individual tracks is crucial when it comes to Garageband production techniques. When you export stems in Garageband, you gain several benefits as a producer. Firstly, exporting stems enables you to perform any post-production processing more efficiently. Secondly, it leaves you with numerous options, such as remixing the song, quickly adjusting volumes, or creating instrumental versions or acapellas of the track. Lastly, it simplifies the mixing process because you can work on specific elements of the song.

Now that you know what stems are and their importance, it’s important to learn how to export them in Garageband. Exporting stems is a straightforward process that you can do with ease, so stay tuned for our next article.

Preparing For Export

In simple terms, exporting stems refers to the process of separating a multi-track recording into individual audio files. This makes it possible to mix and master the tracks on a professional-grade digital audio workstation (DAW) or share the files with other producers for further editing. However, before you can export stems in Garageband, you need to prepare the tracks accordingly.

Selecting The Tracks

The first step in preparing for export is selecting the tracks you want to export. In most cases, it’s advisable to export all the tracks to ensure that you have complete control over the final mix. To select all the tracks, press “Command+A” on your Mac keyboard. Alternatively, you can select specific tracks by holding down “Shift” and clicking on them individually.

Organizing The Tracks

Once you have selected the tracks, the next step is to organize them in a way that makes sense for the final mix. This may involve rearranging the tracks by dragging and dropping them in the timeline or adjusting the volume and panning to create a balanced mix. Moreover, it’s crucial to label each track accordingly to avoid confusion during the export process.

Applying Effects And Plugins

Before exporting the tracks, you may want to apply effects and plugins to enhance the overall sound quality. Garageband provides a wide range of built-in tools such as EQ, reverb, and compression. You can access these tools by clicking on the “Smart Controls” button located in the top-left corner of the Garageband interface. Alternatively, you can use third-party plugins for more advanced processing.

If you follow these steps carefully, you should be able to export stems in Garageband without any hassle. Remember to save the project before exporting to avoid losing any changes. Happy exporting!

Exporting Stems

Exporting stems is a crucial step in the music production process as it allows you to export individual tracks or groups of tracks in your Garageband project. This gives you the flexibility to work on them further in another DAW or send them to a collaborator for further editing. Here are the steps for successfully exporting stems in Garageband.

Choosing The Format

The first step to export stems in Garageband is choosing the format for your audio files. You can select from a variety of formats like AIFF, WAV or MP3. AIFF and WAV provide high-quality audio files but are bigger in size, while MP3 provides compressed audio files with lower quality but smaller file sizes. To choose the format, go to the “File” menu, click on “Export” and select “Stems” from the dropdown options. Then, under “Format”, choose your preferred audio format.

Adding Metadata

It is essential to add metadata while exporting stems in Garageband, as it helps with organizing and identifying files in the future. Metadata is information like Artist name, Song Title, and specific track information like tempo and key. You can add metadata by clicking on the “Options” button while exporting stems and fill in the relevant information in the dialog box that appears.

Setting The Output Parameters

Next, you need to set output parameters for your stems. This includes selecting the start and end points, the bit depth, and the sample rate. In Garageband, you can set the output parameters in the Export Stems dialog box. By default, Garageband selects the start time and end time based on the regions’ start and end points in the timeline. You can choose to export the whole audio or a specific time range by selecting “All Tracks” or “Custom Range” under “Export Section”. Additionally, you can set the bit depth and sample rate under the “Audio Resolution” option.

Summary

In summary, exporting stems is a simple yet crucial step in the music production process. By following the above steps and carefully choosing the format, adding metadata, and setting the output parameters, you can successfully export your stems and work seamlessly with your collaborators or editing in a different DAW.

Post-export Actions

Exporting stems in Garageband is an easy process that allows you to have more control over your mix. However, the process isn’t complete without taking post-export actions. These actions are crucial and help to ensure that the exported files are of high quality, correctly named, and adequately stored. In this section, we will look at the three post-export actions:

Checking For Quality

Before you start renaming or storing your exported stems, it’s essential to check them for quality. This step helps you identify any errors or glitches that may have occurred during the export process. Play each stem, listening carefully for any pops, hisses, or distortion. You can also use software like Audacity or Adobe Audition to check each stem’s quality. If you identify any errors, go back and re-export the stem until you get a flawless version.

Renaming The Files

The next step after checking for quality is to rename the stem files. This action is vital, especially when working on large projects with many tracks. Renaming each stem file helps you identify and locate each track quickly. It’s recommended that you use descriptive names that reflect the content of each stem. For instance, if you have a drum kit, name the exported stem “Drums” instead of “Track 1”. This action not only makes it easy to locate each track but also saves time during mixing.

Storing The Stems

The final post-export action is to store the stems in a safe and easily accessible location. Create a new folder on your computer’s hard drive and name it after the project you’re working on. Save all the stem files in this folder for easy access during mixing and editing. It’s also crucial to create a backup of the exported files in case of an unexpected computer crash or loss of data. You can save the backup files on an external hard drive or cloud storage such as Dropbox or Google Drive.

Using Stems In Other Applications

Using stems in other applications is a great way to make the most of your Garageband project. Once you have your stems exported, there are a variety of ways to use them in other digital audio workstations (DAWs) and even for mastering. Here are some quick and easy ways to use your Garageband stems in other applications:

Importing Stems Into Other Daws

One of the main reasons for exporting stems is to use them in other DAWs. Garageband is a great music creation tool, but there are many more advanced features available in other software. To import your stems into another DAW:

  1. Open your DAW of choice and create a new project.
  2. Select import audio or import stems from the file menu.
  3. Select your exported stems and import them one by one.
  4. Once all the stems are imported, you can use them just like you would in Garageband.

Creating A Remix

If you are a remixer or DJ, then creating a remix using Garageband stems is a great option. Here are some quick steps for creating a remix:

  1. Load your stems into another DAW.
  2. Arrange the stems in a new order or mixing them differently.
  3. Experiment with effects and automation to create a unique remix.
  4. Export the new mix and share it with your listeners.

Using Stems For Mastering

Exporting stems is also useful for mastering, which is the final stage of music production. Using stems for mastering gives you more control over the process, allowing you to adjust the levels of individual tracks to achieve a balanced mix. Here are some steps for using your stems for mastering:

  1. Load your stems into a dedicated mastering software.
  2. Adjust levels, EQ, compression and limiting for each stem track.
  3. Export the final mastered mix to create a radio-ready version of your track.

In conclusion, exporting your Garageband stems opens up new possibilities for creativity and allows you to use your tracks in a variety of applications.

How To Export Stems In Garageband

Credit: www.youtube.com

Frequently Asked Questions Of How To Export Stems In Garageband

How Do I Export Vocals From Garageband?

To export vocals from GarageBand, go to “Share” in the top menu and select “Export Song to Disk”. Choose the file format and options, then hit “Export” and locate the saved file on your computer.

Does Garageband Have Stems?

Yes, GarageBand does have stems. A stem is an isolated track, usually a specific instrument or vocal, that can be exported separately from the rest of the project. GarageBand allows users to export individual tracks as stems in order to make editing, remixing or mastering easier.

How Do I Export Individual Files From Garageband?

To export individual files from GarageBand, first select the track you want to export, then go to “Share” in the top-right corner, and choose “Export Song to Disk”. From there, you can select a file format and location to save the exported file.

Can You Bounce Tracks In Garageband?

Yes, you can bounce tracks in GarageBand. This allows you to combine and mix multiple tracks into a single track, creating a final version of the project. To bounce tracks, simply select the tracks you want to bounce and then choose “Share” from the menu options.

Select “Export Song to Disk” and choose your desired audio format and location.

Conclusion

Exporting stems in Garageband is a simple and essential task for any musician or producer. With the steps provided, you can now easily create and share individual tracks and components of your project. By exporting stems, you give yourself and others the flexibility to edit and mix specific parts of your composition, making the overall sound more polished and professional.

With this newfound knowledge, you can now take your music to the next level. Happy exporting!

Categories
Archive

Different Types Of Spotify Playlists

Spotify offers several types of playlists, including custom playlists, algorithmically generated playlists, and editorially curated playlists. Spotify has become one of the most popular music-streaming services globally.

It is no secret that playlists are an excellent feature that Spotify offers to its users. Playlists help to make streaming music more personalized, easy to navigate and a chance to discover new artists. There are different types of playlists offered by Spotify, namely custom playlists, algorithmically generated playlists, and editorially curated playlists.

Spotify’s custom playlists are curated by the users themselves according to their mood, genre, activity, or preference. Algorithmically generated playlists are created by Spotify’s algorithm based on the user’s listening activities. Lastly, editorially curated playlists are curated by Spotify’s editorial team based on industry trends, cultural events, and popular music. Knowing and understanding the types of playlists available can help you maximize the music streaming experience.

Editorial Playlists

Editorial playlists on Spotify are curated by the platform’s editorial team, featuring tracks across various genres. These playlists are regularly updated and provide a great platform for new artists to gain exposure.

If you are looking for fresh and curated content on Spotify, you can never go wrong with Editorial Playlists. These are playlists made and updated by Spotify’s team of experts. Editorial playlists are composed of the best tracks of the day, week, and month in different genres, moods, and themes. In this article, we will explore the different types of editorial playlists Spotify has to offer.

Official Playlists By Spotify

Official playlists by Spotify include the most popular playlists curated by the streaming platform. These playlists are compiled by Spotify’s team based on different themes and genres. Some of the most popular official playlists by Spotify include the likes of Today’s Top Hits, which includes all the latest chart-toppers, and the Rap Caviar, which is exclusively for hip-hop lovers.

Guest Playlists By Spotify

Guest playlists are playlists curated by renowned musicians, celebrities, and influencers. Spotify provides these people with the option of making their playlists public, which can then be accessed by any Spotify user. Some of the celebrities who have made their playlists public include Michelle Obama, Lana Del Rey, and Barack Obama. These playlists reflect the personalities of these celebrities, and they often include tracks that align with their personal interests.

Genre Playlists By Spotify

Spotify offers a wide range of genre playlists curated by their team of experts. These genre playlists include music from different parts of the world and are perfect to discover new and upcoming talent. Some of the most popular genres in Spotify include pop, hip-hop, rock, and jazz. Users can easily browse and access these playlists, making it easier for them to discover new artists and music.

Mood Playlists By Spotify

Mood playlists are playlists curated based on different moods and emotions. These playlists are perfect when you want to center your mind, relax, unwind or even help you study. Spotify’s team of experts handpick tracks that they believe will fit the playlist’s mood. Some of the most popular mood playlists include Calm Vibes, Chilled Covers, and Feelin’ Good. In conclusion, Spotify has an excellent range of editorial playlists that cater to various music tastes and preferences. The streaming provider offers an excellent opportunity for everyone to explore new and upcoming artists, discover different genres, and dive deep into different themes and moods.

Different Types Of Spotify Playlists

Credit: www.pinterest.com

Personal Playlists

Create a bespoke soundtrack to accompany any activity or mood on Spotify with personal playlists. From workout tunes to calming melodies, the platform offers various kinds of playlists to fit every occasion.

If you’re a music lover, you know how crucial playlists are. Spotify playlists are customized to cater to individual preferences and moods. In this blog post, we’ll explore different types of Spotify playlists, starting with personal playlists. Personal playlists consist of different types, including your library playlists, created playlists, and liked songs playlists.

Your Library Playlists

Your Library is a subsection on Spotify where you save your favorite songs, artists, and playlists. It’s the home of all your music. Your Library playlists consist of playlists saved on your Library. Whenever you save the same playlist multiple times, Spotify doesn’t create duplicate playlists. It merely adds it to your Library playlists, where you can access it anytime you want.

Created Playlists

Created Playlists are the most common types of personal playlists on Spotify. Users create personal playlists based on their preferences, moods, or events. When creating your playlist, you can choose your theme and add or remove songs you don’t like. You can create as many playlists as you wish, and they’ll be available on your Spotify account all the time.

Liked Songs Playlist

Liked Songs Playlist is another type of personal playlist on Spotify. Whenever you like a song or add it to your playlist, the Liked Songs Playlist is automatically created. This playlist contains all the songs you’ve ever liked from the time you created your Spotify account. In conclusion, personal playlists are designed to cater to individual preferences and moods. Your Library playlists, Created Playlists, and Liked Songs Playlist are the most common types of personal playlists on Spotify. You can create, edit, and save as many playlists as you like, depending on your music preferences.

Collaborative Playlists

Spotify offers a variety of playlist options that cater to different preferences, moods, and music genres. One of the most exciting features of Spotify is the ability to create, share, and collaborate on playlists with friends and family. Collaborative playlists are a great way to bond with loved ones over music, share your favorite tracks, and discover new music. Here are some different types of collaborative playlists you can create on Spotify.

Collaborative Playlists With Friends

Collaborating with your friends on a playlist is a fun way to share your music tastes and discover new music. Here’s how to create a collaborative playlist with your friends on Spotify.

  1. Choose a topic or theme for the playlist.
  2. Create a new playlist and give it a catchy name that reflects the theme.
  3. Click on the “…” button located next to the playlist’s name and select “Collaborative Playlist.”
  4. Share the playlist link with your friends, and invite them to add their favorite tracks.
  5. Each person can add, remove or reorder tracks on the playlist, making it a group effort to create the perfect playlist.

Collaborative Playlists By Spotify

Spotify also has its own collaborative playlists, created by either the company or its users. These playlists have become very popular since they cater to a wide range of music genres and moods. Here are some of the Spotify’s popular collaborative playlists.

Playlist NameDescription
Get Pysched!A playlist that features songs to pump you up and keep you motivated
Songs to Sing in the ShowerA feel-good playlist that you can sing along to while getting ready for your day
Mood BoosterA collection of uplifting and happy songs that are sure to brighten your day

Collaborative playlists on Spotify are an excellent way to share your musical taste with your friends and followers and discover new music. Whether you’re collaborating on a new playlist with friends or finding inspiration from Spotify’s playlists, it’s always good to vibe with your favorite music.

Different Types Of Spotify Playlists

Credit: www.stereofox.com

Algorithmic Playlists

Spotify offers several types of playlists, including algorithmic playlists. These playlists are curated using a user’s listening habits to provide personalized recommendations. Other types of playlists include editorial playlists curated by Spotify’s team and user-generated playlists created by listeners.

When it comes to music streaming, Spotify is one of the best platforms for discovering and listening to new music. Their algorithmic playlists use machine learning to generate personalized playlists for each of their users. The three main algorithmic playlists on Spotify are Discover Weekly, Daily Mix, and Release Radar.

Discover Weekly

Discover Weekly is a playlist that updates every Monday with 30 new songs that are chosen based on your listening habits and the listening habits of those with similar music tastes. Spotify’s algorithms analyze data like the songs you’ve listened to, the genres you seem to enjoy, and the artists you follow to select a new playlist each week. Discover Weekly is a great way to find new music tailored to your interests.

Daily Mix

Daily Mix is another personalized playlist that is created based on your listening habits. Unlike Discover Weekly, Daily Mix is updated every day and is comprised of songs that you’ve listened to recently as well as similar songs that you haven’t heard before. There are up to six Daily Mix playlists available, each representing a different music genre or mood.

Release Radar

Release Radar is a playlist that updates every Friday with new music from artists that you follow. Spotify’s algorithms scan new releases to find new music from artists you listen to frequently, and add it to your Release Radar playlist. This makes it easy to keep track of new music from your favorite artists and discover new releases from similar artists. In conclusion, algorithmic playlists are a great way to discover new music that is tailored to your interests and listening habits. They are constantly updated to stay fresh, and the personalized nature of these playlists means that you’re likely to find something that you like. Give these algorithmic playlists a try and see how they can help you discover new music.

Customized Playlists

Customized playlists on Spotify cater to a wide range of user preferences, from mood-based playlists to personalized ones curated by the user. Whether you want to discover new music or revisit old favorites, Spotify has a playlist for you.

As the name suggests, customized playlists are tailored explicitly to individual preferences and music tastes. This kind of playlist is the perfect way to curate a collection of songs tailored to a specific mood or occasion. Spotify has been applying a variety of methods to optimize personalized music recommendations through its playlist features. Let’s take a closer look at different forms of customized playlists on Spotify.

Automatic Personalized Playlists

One of the most powerful features of Spotify is that it generates automatic personalized playlists based on individual listening behavior. These playlists are also called “made for you” playlists because they are unique to each user. Spotify analyzes user data, such as location, time of day, and listening history, to create personalized playlists. These playlists are automatically updated and refreshed daily, containing new songs and artists tailored to the user.

Customized Playlists By Third-party Applications

In addition to Spotify’s own automatic playlist generation feature, there are third-party playlisting apps that allow users to create customized playlists with their preferred tracks. These apps integrate with Spotify, enabling users to create and listen to their playlists without leaving the Spotify app. They also have some advanced features, enabling users to generate playlists based on specific genres, artists, moods, or even lyrics.

Conclusion

Customized playlists are an excellent way to enhance one’s listening experience by curating and organizing the music based on individual preferences. From Spotify’s automatic personalized playlists to third-party music playlisting apps, there are numerous ways to create customized playlists and enjoy the music one loves effortlessly.

Frequently Asked Questions Of Different Types Of Spotify Playlists

What Are The 3 Types Of Playlists On Spotify?

The 3 types of playlists on Spotify are user-generated playlists, Spotify-curated playlists, and algorithm-generated playlists. User-generated playlists are created by users themselves, while Spotify-curated playlists are created by Spotify editors. Algorithm-generated playlists are automatically created by Spotify’s algorithms based on user listening history.

What Spotify Playlists Are There?

Spotify offers a vast collection of playlists for all genres, moods, and occasions. Some popular options include Today’s Top Hits, RapCaviar, and Feel Good. Users can also create their custom playlists based on their preferences.

What Kind Of Spotify Playlist Should I Make?

Make a Spotify playlist based on your personal interests, such as favorite genres or artists. Consider themes or moods for the playlist, and ensure it’s cohesive. Make it unique and specific to your tastes, while keeping in mind your audience’s preferences.

Why Are Spotify Playlists Different?

Spotify playlists are different because they are curated by different users or algorithms based on various factors like your listening history, location, time of day, and mood. The service offers personalized playlists, as well as playlists created by friends, artists, and music experts.

Conclusion

To sum up, Spotify playlists offer a variety of options for music lovers to explore and enjoy. There are playlists for every mood and occasion, including workout playlists, study playlists, and even ones specifically curated for road trips. Users can also create their own personalized playlists or follow popular playlists curated by Spotify.

With so many options available, everyone can find their perfect music match on Spotify. Keep exploring and enjoying music with Spotify playlists.