Categories
Archive

Fl Studio Mixer Not Showing Effects

Fl Studio Mixer Not Showing Effects can occur due to several reasons, including issues with plugin compatibility, incorrect routing, and configuration problems. To resolve the issue, check the plugins’ compatibility with your mixer, ensure the correct routing, and configure the settings properly.

If you’re experiencing the issue and are unsure how to proceed, this guide will provide you with some insight into what might be causing the problem and how to fix it. Fl Studio is a popular digital audio workstation (DAW) that allows users to create professional-level sound production.

However, sometimes users may encounter issues with mixer effects not being displayed. This can be frustrating; fortunately, there are methods to resolve the problem. We will discuss some common reasons for the Fl Studio mixer not showing effects and how to fix them.

Symptoms Of Fl Studio Mixer Not Showing Effects

FL Studio mixer not showing effects can be a frustrating issue for both amateurs and professionals. Symptoms of this problem include audio signals not being affected by mixer plugins, lack of feedback when adjusting knobs and faders, and inability to hear any changes made to the track.

If you’re using FL Studio for music production and your mixer is not showing effects, it can be a frustrating experience. The mixer is the heart of your production process, and without it, you won’t be able to get the sound you want. There are several symptoms of FL Studio mixer not showing effects that you may encounter. These include greyed-out effects in the mixer, effects not loading in the mixer and more.

Greyed-out Effects In Mixer:

One of the common symptoms of FL Studio mixer not showing effects is the greyed-out effects in the mixer. If you have inserted an effect into the mixer, but you cannot see it, and it appears greyed-out, it means the effect has been disabled. This issue can happen if the effect is muted or has been bypassed. To fix this issue, make sure that the effect is enabled, and check that it’s not bypassed.

Effects Not Loading In Mixer:

Another common issue you might encounter when your mixer is not showing effects in FL Studio is the effects not loading in the mixer. This issue can happen if the effect is not correctly installed, or the plugin file is corrupted. Check that the plugin is installed correctly, and that you have the version compatible with your FL Studio. You can also browse to the plugin file location, and see if there is anything unusual with the file.

Other Symptoms:

There are other symptoms of FL Studio mixer not showing effects that you may encounter. For example, the mixer may not be displaying any colors, or you may not be able to right-click on the mixer track. If you experience these symptoms, the issues may be related to a problem with your graphics card or video driver. Updating your software drivers can help resolve this issue. In conclusion, there are several symptoms of FL Studio mixer not showing effects that you may encounter when producing music in FL Studio. Greyed-out effects, effects not loading, unresponsive mixer, etc., are some of the common problems that you may face. Troubleshooting these issues might involve checking your plugins, updating software drivers, or verifying that everything is enabled and not bypassed. By addressing these issues, you can get back to creating fantastic music with FL Studio.
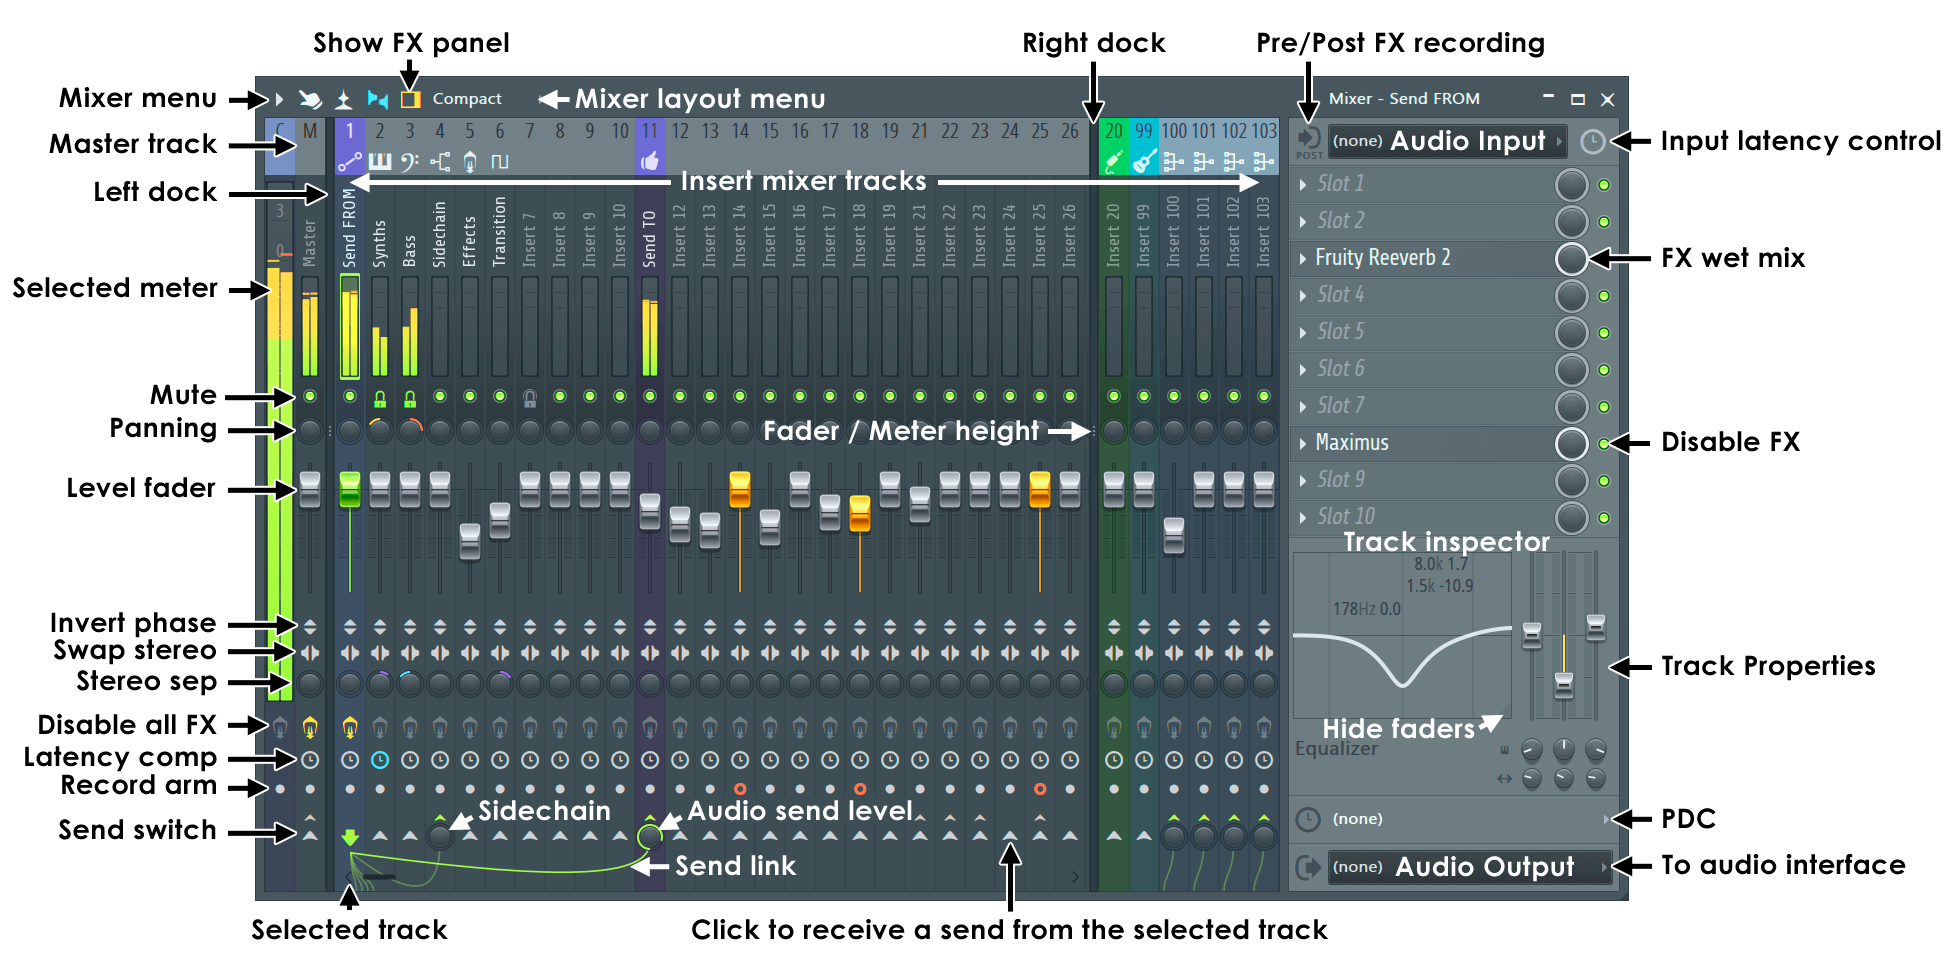
Fl Studio Mixer Not Showing Effects

Credit: www.image-line.com

Causes Of Fl Studio Mixer Not Showing Effects

FL Studio Mixer may not show effects due to a number of reasons, such as incorrect routing, wrong mixer channel selection, or incompatible plugins. Double-checking the settings and ensuring the right plugins are selected can help troubleshoot this issue.

If you’re a music producer using FL Studio, you might have come across a problem with your mixer not showing any effects. This issue can be frustrating and can halt your workflow. In this section, we will discuss the common causes of FL Studio mixer not showing effects and how to troubleshoot them.

Old Fl Studio Version

Using an old version of FL Studio can be a reason why the mixer is not showing any effects. The newer updates of FL Studio come with bug fixes and improvements that might affect your mixer’s performance. If your version of FL Studio is outdated, it’s recommended to update it to the latest one.

Corrupted Fl Studio Installation

A corrupted installation or wrong installation of FL Studio can also cause the mixer not to show effects. This could happen due to incomplete or interrupted installation of the software. It’s recommended to uninstall and re-install FL Studio to ensure that it’s installed correctly and fix any corrupted files.

Missing Or Corrupted Plugins

Missing or corrupted plugins can also prevent the mixer from showing effects. Ensure that the plugins you are using are compatible with your FL Studio version. A plugin might not load if it’s not installed correctly or if it’s outdated. Check to make sure that all your plugins are installed correctly and up-to-date. In conclusion, having an updated version of FL Studio, a correct and complete installation, and ensuring all your plugins are up-to-date will ensure your mixer doesn’t face issues when showing effects. Troubleshooting these problems will allow you to continue creating music without any interruptions.

How To Fix Fl Studio Mixer Not Showing Effects

If you have been using FL Studio for a while, you might have come across a situation where the mixer is not showing effects. This can be frustrating, especially when you have spent hours working on a project. The good news is that this issue can be fixed with a few simple steps.

Updating Fl Studio To The Latest Version

The first thing you need to do if you encounter this issue is to check if you are using the latest version of FL Studio. Updating to the latest version can fix many bugs and issues, including the one where the mixer is not showing effects. To update FL Studio to the latest version, follow these steps:

  1. Go to the Image-Line website and log in to your account.
  2. Download the installer for the latest version of FL Studio.
  3. Run the installer and follow the instructions to update FL Studio.

Reinstalling Fl Studio

If updating to the latest version did not fix the issue, the next step is to reinstall FL Studio. This might seem like a drastic solution, but it can fix many issues, including the one where the mixer is not showing effects. To reinstall FL Studio, follow these steps:

Step 1:Uninstall FL Studio from your computer.
Step 2:Delete any remaining files and folders related to FL Studio.
Step 3:Download the installer for the latest version of FL Studio.
Step 4:Run the installer and follow the instructions to reinstall FL Studio.

Reinstalling Plugins

If reinstalling FL Studio did not fix the issue, the next step is to reinstall plugins. This is because plugins play a crucial role in the functioning of FL Studio, and a corrupt or damaged plugin can cause various issues, including the one where the mixer is not showing effects. To reinstall plugins, follow these steps:

  1. Go to the VST plugins folder in FL Studio.
  2. Delete the folder for the plugin that is causing the issue.
  3. Download and install the latest version of the plugin.
  4. Add the plugin to the plugin database in FL Studio.

Following these steps should fix the issue where the mixer is not showing effects in FL Studio. If the issue persists, you can contact the Image-Line support team for further assistance.

Fl Studio Mixer Not Showing Effects

Credit: www.youtube.com

How To Prevent Fl Studio Mixer Not Showing Effects

If you are facing the issue of FL Studio mixer not showing effects, there are a few steps you can take to resolve the problem. Firstly, ensure that the mixer channels are not routed to the wrong mixer track. Secondly, make sure that the effects you are using are compatible with your version of FL Studio.

Lastly, check that your mixer is not in “mute” mode or that your effects channels are not disabled.

If you are encountering the problem of FL Studio Mixer Not Showing Effects, you are not alone. This issue can be frustrating and may lead to a lack of productivity. Fortunately, there are a few easy steps to avoid this problem and keep your mixer running smoothly. In this blog post, we explore some practical tips for preventing FL Studio Mixer Not Showing Effects.

Regularly Updating Fl Studio And Plugins

One of the key reasons that FL Studio Mixer Not Showing Effects is that the software is outdated or requires an upgrade. Therefore, it is crucial to update both the FL Studio mixer and any plugins regularly. The updates can fix various bugs and compatibility issues, ultimately improving the performance of the software. You can also set your FL Studio to automatically check for and install updates.

Backing Up Fl Studio Settings And Files

Another essential step to prevent FL Studio Mixer Not Showing Effects is to back up your FL Studio settings and files regularly. This ensures that if any data is lost or corrupted, you can easily recover it. To backup FL Studio, go to the Options menu, then General Settings, and select the option to save a preset. You can also consider backing up your data on an external hard drive or cloud storage for added security.

Checking Audio And Plugin Settings

Sometimes, the problem of FL Studio Mixer Not Showing Effects can be due to the wrong plugin settings or audio routing. Therefore, it is crucial to double-check all the settings and ensure they are correct. For example, you should ensure that your effects plugin is correctly routed to the mixer channel, and that the channel is visible in the mixer. Additionally, ensure that the plugin is not bypassed or disabled.

Final Thoughts

In conclusion, encountering FL Studio Mixer Not Showing Effects can be frustrating, but with the tips described above, you will be able to prevent this issue. Remember to regularly update FL Studio and plugins, backup your settings and files, and double-check your audio and plugin settings. By following these steps, you can keep your FL studio mixer running smoothly and continue producing high-quality music.

Frequently Asked Questions Of Fl Studio Mixer Not Showing Effects

How Do I Open Mixer Effects In Fl Studio?

To open mixer effects in FL Studio, you can either click on the mixer button on the toolbar or press F9 on your keyboard. Once the mixer is open, select a track and choose an effect from the drop-down menu on the right.

Why Are My Plugins Not Showing Up In Fl Studio?

Plugins may not be showing up in FL Studio due to various reasons such as installation errors, missing installation of the plugin, or outdated versions. Make sure to install the plugins correctly in the correct folder and check for updates.

How Do I Show Effects In Fl Studio?

To show effects in FL Studio, you need to route your audio to an effects plugin. Open the mixer, select the channel(s) you want to add effects to, click on an empty insert slot, and select the desired effect from the list.

Adjust the effect parameters to your liking.

How Do I Reset My Mixer Tab In Fl Studio?

To reset your mixer tab in FL Studio, simply right-click on the horizontal mixer and select ‘Reset All’ from the drop-down menu. This will reset all the mixer channels, inserts, and sends to their default settings.

Conclusion

To sum up, the FL Studio mixer not showing effects can be a frustrating issue for music producers, but with a few simple steps, the problem can be easily solved. By checking the mixer routing, ensuring the effects plugins are properly installed and activated, and adjusting the mixer track settings, users can regain control over their sound.

Remember to always troubleshoot and stay informed with the latest updates and helpful tips to optimize your FL Studio experience. Keep creating and happy producing!

Categories
Archive

Chord Progressions Theory In Fl

Chord progressions theory in FL Studio involves selecting and arranging different chords to create an engaging harmonic structure. Chord progressions are a crucial aspect of music production, as they help to convey emotion, build tension and create a memorable melody.

In FL Studio, you have access to a wide range of virtual instruments, plugins and effects, which can be used to experiment with different variations of chord progressions. Understanding music theory basics like chord types, interval relationships and key signatures can give you the language to create and communicate musical ideas more effectively.

We will explore the key concepts of chord progressions theory in FL Studio, including how to create and analyze chord progressions, identify the seven diatonic chords, and use them to create interesting melodies and harmonies in your music productions.

Chord Progressions Theory In Fl

Credit: www.productionmusiclive.com

The Basis Of Chord Progressions

In music theory, chord progressions are the foundation of any song or composition. A chord progression is a sequence of chords played in a specific order that forms the harmony of a song. Understanding chord progressions is essential for any musician, regardless of their instrument or genre of music. In this article, we will discuss the basics of chord progressions, with a specific focus on major and minor keys and the circle of fifths.

Understanding Major And Minor Keys

Before delving into chord progressions, it is important to understand the concept of major and minor keys. A key is a collection of notes and chords that form the basis of a song. In Western music, there are 12 keys, each of which is centered around a specific note of the chromatic scale.

Major keys are often described as bright, happy, and triumphant, while minor keys have a darker, sadder, or more atmospheric sound. The difference between major and minor keys lies in the intervals between the notes that form the scale.

The Circle Of Fifths

The circle of fifths is a visual representation of the relationship between the 12 keys in Western music. It is a circle that starts with the key of C major and moves clockwise in ascending fifths. Each key is represented by a letter, and the circle shows the number of sharps or flats in each key signature.

KeySharps/FlatsRelative Major/Minor
C0–
G1 sharpE minor
D2 sharpsB minor
A3 sharpsF# minor
E4 sharpsC# minor
B5 sharpsG# minor
F#6 sharpsD# minor
C#7 sharpsA# minor
F1 flatD minor
Bb2 flatsG minor
Eb3 flatsC minor
Ab4 flatsF minor

The circle of fifths is an important tool for understanding chord progressions. Chords that are next to each other on the circle are closely related and share many notes in common. For example, the chords in the key of C major (C, F, and G) are neighboring chords on the circle.

Chord Progressions Theory In Fl

Credit: theoryandsound.com

Common Chord Progressions In Pop Music

Popular music frequently uses common chord progressions in different keys and octaves. Understanding the theory behind chord progressions in FL Studio can help producers create catchy and memorable songs. With various combinations of chords from the I, IV, V, and vi chords, experimentation can lead to new and exciting sounds.

As a music producer or enthusiast, understanding chord progressions is crucial for creating catchy, memorable songs. Chord progressions are a series of chords played in a specific order to create a harmonic structure in a song. In pop music, certain progressions have become staples that are used over and over again. These progressions are generally simple and easy to remember, making them perfect for creating catchy and memorable songs.

I–v–vi–iv Progression

One of the most common chord progressions in pop music is the I–V–vi–IV progression. This progression is used in countless songs and is instantly recognizable to many listeners. The progression consists of four chords: the tonic (I), the dominant (V), the relative minor (vi), and the subdominant (IV).

ChordNumber
I1
V5
vi6
IV4

The I–V–vi–IV progression has been used in hit songs by artists like The Beatles, Ed Sheeran, and Taylor Swift. It has a poppy, uplifting feel and is perfect for creating catchy hooks and choruses.

I–v–iv Progression

Another common chord progression in pop music is the I–V–IV progression. This progression is similar to the I–V–vi–IV progression but omits the relative minor chord. The I–V–IV progression has been used in countless hit songs, including “Wild Thing” by The Troggs and “Louie Louie” by The Kingsmen.

ChordNumber
I1
V5
IV4

The I–V–IV progression has a classic, timeless sound and is often used in rock and roll and country music.

I–iv–v Progression

The I–IV–V progression is one of the simplest and most common chord progressions in music. It is used in a wide range of genres, from rock and roll to blues to country. The progression consists of three chords: the tonic (I), the subdominant (IV), and the dominant (V).

ChordNumber
I1
IV4
V5

The I–IV–V progression has been used in countless hit songs, including “Johnny B. Goode” by Chuck Berry and “Twist and Shout” by The Beatles. It has a classic, nostalgic sound that still resonates with listeners today.

Chord Extensions And Alterations

Chord extensions and alterations are essential elements in creating rich and complex chord progressions in FL studio. These techniques involve adding extra notes or changing certain notes in a chord, allowing for more creative and unique chord progressions in your music production.

Chord extensions and alterations are essential components of creating exceptional chord progressions. In FL Studio, understanding the subtopics of chord extensions and alterations such as adding seventh chords, using suspended chords, and applying tritone substitution can help take your music to the next level.

Adding Seventh Chords

Seventh chords are perhaps the most commonly used chord extension in music. These chords are constructed by adding an extra note to a triad that is the seventh note apart from the root. In FL Studio, adding seventh chords can be achieved by selecting the chord and opening the Chord Selector, then selecting the seventh chord from the dropdown menu.

Using Suspended Chords

Suspended chords are unique in a way that they lack the third note, which adds to their mysterious and suspended characteristics. In FL Studio, using suspended chords is as simple as selecting the chord and choosing the suspended chord option from the Chord Selector dropdown menu. Suspended chords add an exciting flavor to your chord progressions and create a unique sound.

Applying Tritone Substitution

Tritone substitution is a chord substitution technique common in jazz and blues music. It involves replacing a dominant chord with another chord that is a tritone away. For instance, if the original chord is ‘G7’, you replace it with a ‘Db7’ chord. This technique is useful in creating tension and unpredictability in your chord progressions, making them stand out. In FL Studio, applying tritone substitution is easy; all you need to do is select the dominant chord and insert the tritone chord in its place. Chord extensions and alterations such as adding seventh chords, using suspended chords, and applying tritone substitution are effective ways of elevating your chord progression game. With FL Studio, integrating these concepts has never been easier.

Creating Original Chord Progressions

Chord progressions are the backbone of any musical composition. With the help of chord progressions, musicians can create an emotional impact by changing the underlying harmony while keeping the melody unchanged. As a musician or producer, it’s essential to know how to create original and captivating chord progressions to make your music stand out. In this blog post, we’ll discuss a few techniques for creating original chord progressions in FL Studio.

Experimenting With Chord Inversions

Chord inversions refer to the rearrangement of the notes in a chord, resulting in a new harmonic structure. Experimenting with chord inversions can help to create original and interesting chord progressions. For example, you can try to use the second inversion of a chord as a passing chord between two chords. Doing so can create a smooth transition between two chords in a progression.

Another approach is to use inversions to create tension and release. Try to start with an inverted chord and then move to its root position. This technique can create a sense of resolution and make your chord progression feel complete.

Using Borrowed Chords From Parallel Keys

Another technique for creating original chord progressions is to borrow chords from parallel keys. Parallel keys are keys that share the same tonic note but have different scales and chords. By using chords from these keys, you can introduce unexpected and unique harmonic elements to your music.

For example, if you’re in the key of C Major, you can borrow chords from C Minor to create a unique chord progression. The C Minor scale has three unique chords (Eb, Ab, Bb), which are not present in the C Major scale. Incorporating these chords can add an emotional depth to your chord progression.

Utilizing Secondary Dominants

Secondary Dominants are chords that belong to a key other than tonic but have a dominant function in the current key. These chords can create tension and lead to a resolution, making them an effective tool for creating original chord progressions.

For example, if you’re in the key of C Major, you can use the V7 chord of the IV chord (F Major) to create a secondary dominant. The V7 chord of F Major is C7, which can be used to create tension before resolving to the IV chord.

Conclusion

By experimenting with chord inversions, borrowing chords from parallel keys, and utilizing secondary dominants, you can create original and captivating chord progressions in FL Studio. Remember, the key to creating original music is to keep experimenting with different techniques and approaches until you find a sound that resonates with you.

Chord Progressions Theory In Fl

Credit: www.productionmusiclive.com

Frequently Asked Questions Of Chord Progressions Theory In Fl

How Do You Make A Chord Progression In Fl Studio?

To make a chord progression in FL Studio, first select a chord to start with. From there, choose other chords that complement the initial chord and combine them to create a progression. You can use the piano roll to input and adjust your chords, and experiment with different sounds and rhythms until you find the desired progression.

What Is The Theory Behind Chord Progressions?

Chord progressions are based on the relationship between chords within a key or scale. They follow a sequence of chords that create a harmonic structure and provide a sense of tension and resolution to the listener. Understanding the theory of chord progressions helps musicians to create effective and emotive compositions.

What Is The 2 5 1 Music Theory?

The 2 5 1 music theory is a common chord progression used in jazz and other music genres. It refers to the chords built on the second, fifth, and first notes of a major or minor scale, respectively. This progression is often used as a building block for improvisation and songwriting.

How Do You Find Chords In Fl?

In FL, you can find chords by opening the piano roll and selecting the chords tab. There are pre-set chords you can use or you can create your own. You can also use the chord generator tool to create chords and experiment with different chord progressions.

Conclusion

Understanding chord progressions is crucial for any musician or producer looking to create polished and professional sounding tracks. In FL Studio, the possibilities are endless when it comes to exploring different chord progressions and finding the perfect sound for your project.

By taking the time to learn the theory behind chord progressions, you open up a world of creative possibilities and ensure that your music has a solid foundation. Keep practicing, experimenting, and taking advantage of the resources available to you to continue honing your skills and creating amazing music.

Categories
Archive

Best Way to Learn Piano Music Theory

The best way to learn piano music theory is through private lessons with a qualified piano teacher or through online courses and tutorials. Learning piano music theory can be a challenging but rewarding journey.

Understanding the basics of music theory can help you improve your playing, composing, and improvisation skills. One of the most important aspects of learning piano music theory is developing a strong foundation of music notation, scales, chords, and progressions. This can be achieved through private lessons with a qualified piano teacher or by using online courses and tutorials.

Finding a learning method that works for you and regularly practicing will help you become proficient in piano music theory. Whether you are a beginner or an experienced player, investing time and effort in learning piano music theory can only enhance your overall musicianship.

Why Piano Music Theory Is Important

Knowing Piano Music Theory is essential to become a skilled pianist. It helps practitioners to read music easily, understand the composition, and play diverse genres of music efficiently. The Best Way to Learn Piano Music Theory is to find a qualified teacher, practice regularly, and broaden your knowledge with online resources.

Developing A Deeper Understanding Of Music

Learning piano music theory is crucial as it aids in developing a deeper understanding of music. Understanding music theory gives you more insight into the basic structure of music and how melodies and chords are formed. When you understand piano music theory, you can recognize patterns that exist within different types of music, which allows you to break down musical pieces into smaller, manageable parts. By understanding the fundamental principles behind the music, you can improvise and experiment with creating new melodies and chord progressions. This helps you to develop a more cohesive, expressive, and meaningful musical style.

Enhancing Technical Skills

Learning piano music theory is beneficial as it enhances your technical skills. Piano music theory helps you to understand how to read sheet music, leading to a better appreciation of the piece. By gaining an understanding of music theory such as rhythms, time signatures, and key signatures, you will learn how to sight-read effectively and quickly. Additionally, piano music theory will introduce you to various forms of notation, such as chords and scales. These techniques will help you to become a proficient pianist with excellent technical skills.

Improving Performance And Interpretation

Piano Music theory is essential as it bolsters your ability to interpret the music and deliver a better performance. The ability to interpret music is critical to ensuring that it appeals to the audience emotionally. Understanding music theory helps you uncover the different layers of a musical piece, such as melody, harmony, and rhythm. With this knowledge, you can create a well-balanced performance that captures the essence and feeling of the music. Additionally, understanding music theory allows you to add your unique touches on a piece, making it more personalized and distinctive. To sum up, learning piano music theory is critical for anyone who wants to improve their piano-playing skills significantly. It forms the foundation for developing a deeper understanding of music, enhancing technical skills, and improving performance and interpretation. By spending time studying music theory, you will become a better pianist with the ability to play and interpret different styles of music.

Best Way to Learn Piano Music Theory

Credit: www.reddit.com

Essential Music Theory Concepts For Piano Players

Learning music theory is an important aspect of becoming a successful piano player. It helps you understand the language of music and how to read and write it effectively. If you are new to music theory, there are several important concepts you should learn to help you master the piano. Below are three essential music theory concepts for piano players.

Note Reading And Identification

Note reading is one of the most fundamental aspects of piano playing. You cannot play the piano if you do not know which key corresponds to which note. Therefore, it is crucial to learn how to read notes and identify them on the keyboard. One way to do this is to use flashcards that show the notes on a staff and their corresponding keys on the piano. Another way is to practice sight-reading exercises regularly.

Scales And Chord Progressions

Scales and chord progressions are the backbone of music theory. They help you understand how chords and melodies work together to create harmony and structure in a piece of music. Learning scales and chords is essential for improving your playing skills and composing music of your own. Some of the most important scales for piano players to learn include major and minor scales, pentatonic scales, and blues scales.

Rhythm And Time Signatures

Rhythm and time signatures are also crucial elements of piano playing. Rhythm refers to the duration and accentuation of musical notes, while time signatures indicate the number of beats in a measure. Understanding rhythm and time signatures helps you play with precision and stay in time with other musicians. Some common time signatures in piano music include 4/4, 3/4, and 6/8 time.

By mastering these essential music theory concepts, you will be well on your way to becoming a skilled piano player. Whether you plan to perform, compose, or simply play for pleasure, learning music theory is a key part of achieving your musical goals.

Tips For Learning Piano Music Theory Efficiently

Learning piano music theory efficiently may seem challenging, but it can be done through regular practice and dedication. Start by understanding the basics, such as notes, scales, and chords, and gradually build your knowledge. Additionally, find a trustworthy teacher or use online resources to help you stay motivated and focused on your goals.

Practice Regularly

Regular practice is essential when it comes to learning piano music theory efficiently. It helps you to retain what you’ve learned and progress more quickly. Set aside a specific time slot each day for practice and stick to it. You can start with a practice session of 20-30 minutes and gradually increase its length as you get more comfortable. A consistent and disciplined approach to practice will help you improve your piano playing skills.

Start With Basics

To master piano music theory, it’s essential to start with the basics. Begin with the fundamentals of music theory, including the musical alphabet, chords, scales, and intervals. Establishing a strong foundation in music theory will help you better understand advanced concepts. Focus on learning one concept at a time, and don’t move on to the next until you have a solid understanding of the first.

Seek The Guidance Of A Music Teacher

It’s always a good idea to get guidance from an expert when it comes to learning music theory. A music teacher can help you design a structured learning plan tailored to your needs and offer feedback on your performance. They can also answer any questions you have and help you overcome any challenges. A teacher can help you progress at a faster pace than if you were learning alone.

Use Online Resources And Apps

There are numerous online resources and apps that are specifically designed to help learners in their quest to master music theory. Look for reliable sources that offer interactive lessons, tutorial videos, aural training, and exercises. Apps such as Simply Piano, Piano Marvel, and Playground Sessions are popular choices. These digital resources can provide a fun and engaging way to learn piano music theory.

Enjoy And Have Fun While Learning

Music theory can be challenging at times, but it’s essential to remember that learning should always be enjoyable. Playing the piano is a creative outlet, and it’s important to have fun while you learn. Find music that inspires you and motivates you to practice more. Experiment with different styles and genres to keep things fresh and exciting. Enjoying the learning process will help you stay motivated and engaged.

Best Way to Learn Piano Music Theory

Credit: www.youtube.com

Best Books For Piano Music Theory

Discover the best books for mastering piano music theory. With titles covering every level from beginner to advanced, these books provide in-depth explanations of theory concepts such as scales, chords, and harmony, along with exercises and practical applications to help you become a better pianist.

Best books for Piano Music Theory Learning music theory is crucial for becoming a successful pianist. Studying through some best books would be a convenient and effective way to understand music theory. Let’s explore some of the popular books for piano music theory. Alfred’s Essentials of Music Theory One of the most popular books widely used by schools and universities is Alfred’s Essentials of Music Theory. This book teaches the fundamentals of music theory, including note reading, time signatures, intervals, scales, and chords, in an easily understandable way. It contains exercises and ear-training examples to help students develop their skills. Moreover, it provides quick quizzing and review options to measure the progression of the learner. The Complete Idiot’s Guide to Music Theory The Complete Idiot’s Guide to Music Theory is an excellent resource for beginners who want to learn about music theory from scratch. This book is written in straightforward language that anyone can understand, and it is also very concise. It covers everything from basic musical notation to advanced harmony and chord progressions. The Complete Idiot’s Guide to Music Theory also includes a CD that contains examples of the musical concepts in the book. Piano Adventures – Theory Book Piano Adventures – Theory Book is a top-rated book that is designed to help students learn music theory effectively. It covers all the essential topics, including note reading, intervals, chord progressions, and scales. The book provides numerous exercises that help learners to develop their skills, including ear training exercises, technique builders, and scale explorers. It is colorfully illustrated, which makes it a visually appealing book. In conclusion, all of the books mentioned above are considered some of the best books for learning piano music theory. Choosing one depends on the learning goals and current skill level. These books can be used individually or in combination with other resources to help learners develop their music theory skills better.

Top Online Piano Music Theory Courses

Discover the best way to learn piano music theory online with top-rated courses. With interactive lessons and expert guidance, gain a strong understanding of music theory and improve your piano skills from the comfort of your home.

Top Online Piano Music Theory Courses: Learning piano music theory is an important aspect of playing the piano. It helps musicians understand the structure of the music they play, and how to read sheet music. Whether you are looking to learn the basics of piano music theory or to refine your existing knowledge, there are plenty of online courses available. Here are some of the top online piano music theory courses: Udemy’s Piano Music Theory Comprehensive Course: Udemy’s Piano Music Theory Comprehensive Course is designed to help you learn music theory fundamentals and apply them on the piano. The course covers everything from basic music concepts to more advanced topics like chord progressions, harmony, and melody. The course includes over 60 lectures, 15 quizzes, and 15 downloadable resources. You can learn at your own pace and have lifetime access to the course material. Piano with Willie – Jazzedge: Piano with Willie – Jazzedge is an interactive online course that takes you step-by-step through the fundamentals of playing the piano. The course teaches you how to play chords, improvise, and read sheet music. You can choose from a variety of courses, including beginner, intermediate, and advanced levels. There are also specialized courses on topics like blues piano and jazz piano. MusicTheory.net’s Piano Lessons: MusicTheory.net’s Piano Lessons is a comprehensive online course that teaches you everything you need to know about piano music theory. The course covers topics like scales, chords, inversions, and progressions. The course includes interactive lessons and exercises, as well as printable worksheets, to help reinforce your learning. You can learn at your own pace, and the course is suitable for beginners as well as more advanced students. Overall, these online courses offer a great way to learn piano music theory in a structured and engaging way. Whether you’re a beginner or an advanced student, these courses offer something for everyone.

Music Theory Exercises For Piano Players

Learn to master music theory with these effective exercises designed for piano players. Understanding basic concepts such as chords, scales and intervals will help you improve your musical skill, and with regular practice, you’ll be able to unlock your full potential and creativity as a pianist.

Learning piano can be a rewarding experience, but mastering music theory can be a challenge. However, with consistent practice and the right exercises, piano players can improve their knowledge of music theory and elevate their playing skills. In this article, we will explore some of the best music theory exercises for piano players, including identifying notes on piano keys, playing scales and arpeggios, and practicing different time signatures.

Identifying Notes On Piano Keys

One of the most fundamental aspects of music theory is identifying notes on the piano keys. By doing this, piano players can understand how different notes sound and how they relate to other notes in a piece of music. One way to practice this is to use flashcards that show the notes on the piano keys. Another way is to play different notes on the piano and try to identify them by ear. By practicing regularly, you can quickly improve your ability to identify notes on the piano keys.

Playing Scales And Arpeggios

Another important exercise for piano players is playing scales and arpeggios. These exercises help players to understand the relationships between different notes and to develop finger dexterity and speed. Major and minor scales and arpeggios are particularly useful for piano players, as they are commonly used in many pieces of music. You can practice playing scales and arpeggios by starting slowly and steadily increasing the tempo over time.

Practicing Different Time Signatures

Practicing different time signatures is another way to improve your music theory skills. Time signatures are used to indicate how many beats are in each bar of music. Common time signatures include 4/4, 3/4, and 6/8. By practicing different time signatures, piano players can learn how to count and play different rhythms and develop a stronger sense of timing. To practice this, you can start by clapping or tapping different rhythms before trying to play them on the piano. In conclusion, practicing music theory exercises is essential for developing strong piano skills. By identifying notes on piano keys, playing scales and arpeggios, and practicing different time signatures, piano players can improve their understanding of music theory and become better musicians. Whether you are a beginner or an experienced player, incorporating these exercises into your practice routine can help you take your piano playing to the next level.

Advanced Piano Music Theory Topics

Discover advanced piano music theory topics to take your playing to the next level. Learn the best practices for mastering complex chord progressions, scales, and arpeggios, and get tips on how to incorporate them into your playing seamlessly.

Once you have a solid grasp on the basics of piano music theory, it’s time to elevate your skills to an advanced level. At this stage, you’ll need to learn more intricate concepts such as chord substitution techniques, advanced chord progressions, modal interchange and improvisation.

Chord Substitution Techniques

Chord substitution is the process of replacing a particular chord or set of chords in a progression with another chord or set of chords that possess similar harmonic qualities. This technique helps to create more unique and interesting chord progressions. For example, you can replace a basic chord like a major or minor chord with an extended chord like a 6th, 7th, or 9th chord.

Advanced Chord Progressions

Advanced chord progressions involve using more complex chord sequences such as jazz chords and blues progressions. These types of chord progressions can add a lot of depth and complexity to your music. For example, you can try using a ii-V-I progression which is commonly used in jazz music.

Modal Interchange

Modal interchange is the process of borrowing chords from a parallel key or mode. This technique helps to create a more interesting and dynamic harmonic progression. For example, you can use a chord from the parallel minor key in a major key song to create a more melancholic or dramatic feel.

Improvisation

Improvisation is the art of creating music on the spot without any preconceived ideas or plan. Advanced piano players often use improvisation to showcase their skills and creativity. You can start by practicing simple improvisations using scales and arpeggios and gradually move on to more complex improvisations using chords and chord progressions. In conclusion, once you’ve mastered the basics of piano music theory, it’s time to move on to more advanced concepts to elevate your piano playing skills. Chord substitution techniques, advanced chord progressions, modal interchange, and improvisation are some of the essential techniques you’ll need to learn to become a master pianist.

Best Way to Learn Piano Music Theory

Credit: everyguitarchord.com

Importance Of Practical Application

Learning piano music theory is an integral part of becoming a proficient pianist. However, understanding the concepts of music theory is not enough. It is essential to apply these concepts practically to enhance one’s piano playing abilities. Without practical application, music theory remains purely theoretical, limiting the pianist’s ability to apply their knowledge to create music that connects with the audience.

Applying Music Theory To Different Genres

Applying music theory to different genres of music helps pianists to develop a diverse musical palette. Practical application enhances the understanding of how music theory influences a particular genre and its unique characteristics. This knowledge helps pianists to create their music style, experiment with different genres, and develop new musical ideas. For example, a jazz pianist’s understanding of music theory is vastly different from a classical pianist’s, yet both owe their success to practical application.

Jazz PianoClassical Piano
Improvise new melodies, harmonies, and rhythmsPerform pieces with strict adherence to written music
Use chordal voicings, harmonies, and substitutions to enhance their performanceStrictly follow traditional music practices and adhere to music rules
Jazz pianists use different time signatures, meter, and rhythmClassical pianists principally use the classical canon of western music

Playing Piano Pieces With Advanced Music Theory Concepts

Practical application of advanced music theory concepts on the piano is essential to create intricate, complex, and nuanced music pieces. Pianists that incorporate advanced music theory concepts into their playing style, such as using non-diatonic chords, unconventional scales, and chord progressions, distinguish themselves from their peers.

Performing And Recording Music

Performing and recording music is an advanced level of practical application that highlights the importance of music theory application. Pianists that compose their music and perform it in front of an audience or record it for others to hear require a deep understanding of music theory. The ability to apply music theory in a practical sense helps pianists to produce a more refined interpretation of music pieces and connect with the audience more effectively.

  • Practical application aids in making music more enjoyable and appealing
  • Enhances musical ability and proficiency of a pianist
  • Helps pianists to create new and extraordinary music pieces
  • The connection between music theory and practical application is crucial in becoming a successful pianist
  • The knowledge and practice of music theory, combined with the practical application, result in accomplished pianists.

Frequently Asked Questions On Best Way To Learn Piano Music Theory

Where Do I Start With Piano Music Theory?

To start with piano music theory, begin with the basics such as learning the notes on the keyboard, the staff, and key signatures. From there, progress to intervals, chords, scales, and progressions. Practice regularly and consult resources such as music theory books, online courses, and tutorials to deepen your understanding.

How Long Does It Take To Learn Music Theory For Piano?

Learning music theory for piano can take anywhere from a few months to a few years, depending on the individual’s dedication to studying and practicing. Consistent effort and focus on the fundamentals can help progress quickly, but acquiring a deep understanding of music theory can take years of dedicated study.

Should I Learn Music Theory Or Piano First?

Learning piano first is recommended as it helps to grasp the basic concepts of music theory. Piano lessons provide hands-on experience and helps in developing a solid foundation of musical understanding. However, simultaneous learning of both piano and music theory is also possible.

How Can I Learn Music Theory Efficiently?

To learn music theory efficiently, follow these steps: 1. Start with the basics such as notes, scales, and chords. 2. Practice regularly and use online resources for assistance. 3. Apply what you learn to your instrument or vocals. 4. Experiment and create your own compositions.

5. Find a mentor or tutor for personalized guidance.

Conclusion

Learning piano music theory can be a game-changer for aspiring pianists. It can take your playing skills to the next level and help you understand the language of music. Start by getting familiar with the basics, practice consistently, join music communities, and take online courses to reinforce your knowledge.

With time and effort, you will see a significant improvement in your playing technique and creativity. Keep practicing and never stop learning.

Categories
Archive

Best Music Production Forums

The best music production forums are Music Production Forums: Gearslutz and Music Production Forums: Future Producers, offering comprehensive discussion forums, tips, and resources for aspiring producers and professionals alike. Whether you’re just starting out or looking to enhance your skills and knowledge, these forums provide a wealth of information from experienced industry professionals.

Also, these forums are an excellent resource for learning new skills, gaining insights from industry professionals, and connecting with other music producers. With so many online music production forums available, it can be tough to know where to start. Two of the best music production forums are Gearslutz and Future Producers.

Related reading: Music Production Services and Progress In Music Production.

Moreover, gearslutz boasts over 1 million registered users and provides comprehensive discussion forums, tips, and resources covering everything from mixing and mastering to music business and career development. Future Producers is another great online community offering a wealth of information and resources for aspiring music producers. Both forums offer opportunities to connect with like-minded individuals, share your work, get feedback, and learn new techniques from experienced professionals. Whether you’re just starting out or a seasoned pro, Gearslutz and Future Producers are must-visit resources for any music producer looking to enhance their skills and knowledge.

Gearslutz

In addition, gearslutz is a top-ranking music production forum, offering advice and discussion on everything related to music-making, sound engineering, and equipment. With a vast community of members, it’s the go-to destination for producers and artists looking to share, learn, and connect.

Furthermore, gearslutz is a renowned community that has been popular amongst recording engineers, musicians, and producers for around two decades. This online forum offers an extensive variety of content that includes discussions, reviews, tutorials, and news relating to music production equipment. The web page design might seem outdated, but it is still a goldmine for people who seek the latest information on gear and music production techniques.

Features

Additionally, gearslutz is famed for being one of the most active forums in the music production sphere. Due to its active user base, it remains up to date with current trends. Regular visitors to Gearslutz will know that the forum does not only limit conversations to music gear, but it also highlights current news and trends related to music everywhere. Users can find both practical and theoretical knowledge regarding the latest and vintage synthesizers, compressors, and other hardware. Furthermore, there are dedicated sections for topics like the music industry, DIY projects, and reviews of popular software. One of the highlights of Gearslutz, are the frequent AMA (ask me anything) sessions with industry veterans. These sessions provide a unique opportunity for registered members to ask experienced music producers and professionals specific questions about the industry.

Membership Options

Registering as a new member to Gearslutz is a straightforward process that takes less than five minutes. Also, members can create their profiles, post threads, and engage in conversations. Furthermore, creating a new thread is a good way to become a part of the community and seek new information. Moreover, Gearslutz offers a premium membership option with extra perks like a badge that signifies their premium status, ad-free browsing, and increased private message storage. The premium membership fee is reasonable and definitely worth the investment for serious musicians and enthusiast producers. In conclusion, Gearslutz is an excellent music production community that provides valuable information and resources to people who take their craft seriously. Whether you are a beginner or an experienced professional, there is always something new to learn from the vast pool of information available on Gearslutz.

Best Music Production Forums

Credit: unison.audio

Future Producers

Moreover, future Producers is the perfect website for anyone who is interested in these forums. Here, music producers of all types can connect with others in the industry, learn new production techniques, and get feedback on their music from fellow musicians.

In addition, aspiring music producers always look for a place where they can learn, share their knowledge, and get feedback from others. Future Producers is one such platform that offers a community of music enthusiasts where you can discuss anything about music production. It’s a place where beginners and professionals unite to share their passion for music.

Community Features

Furthermore, future Producers has a vast community of music producers, DJs, and sound engineers who share their knowledge and experiences in music production. It’s a great place to ask for advice, get feedback on your music, or collaborate with others. You can also find discussions on music software, plugins, and gear, along with tips and tricks to improve your music production skills.

Resources Available

Additionally, apart from the community discussions, Future Producers offers an extensive range of resources for music production enthusiasts. There are tutorial videos, articles, and guides available for anyone who wants to improve their skills. You can also find recommended reading and listening lists, as well as software and hardware reviews. The resources provided by Future Producers are a great way to elevate your music production expertise. Overall, Future Producers is a forum that offers an excellent platform for music producers to learn, connect and collaborate with peers from all over the world. Whether you’re a beginner or a seasoned professional, this community is the perfect place to improve your skills and share your passion for music production.

Music Production Forums: Kvr Audio

Also, KVR Audio is one of the best music production forums, where producers and enthusiasts share their knowledge, ideas and solve problems related to music production. It offers a wide range of topics, including software, hardware, and industry news, making it a hub for music makers.

Moreover, KVR Audio is one of the best music production forums and a hub for producers and sound designers. With a vast community of over 1 million registered members, KVR Audio provides an ideal platform for music enthusiasts, all seeking to improve their craft. At KVR Audio, members get to share and exchange knowledge, experiences, and ideas on music production tools, techniques, and trends. One of the best features of KVR Audio is its forum and community features.

Forums & Community Features

KVR Audio provides an active forum where members can interact with like-minded individuals, share their music, seek collaborations, ask questions, and find answers to their queries. The community features of KVR Audio make it easier for members to keep track of their favorite topics and members, join groups, participate in challenges, and reward programs. With a user-friendly platform, KVR Audio makes it easier for members to have conversations, share files, and collaborate on projects.

Marketplace

KVR Audio also offers a marketplace where members can find music production software, plugins, and sound libraries from various developers. The marketplace is an excellent place for members to discover new products, engage with developers, and participate in promotional offers. The marketplace also offers members an opportunity to buy and sell used music production gear, which can be a great way to upgrade or clear space for new equipment. In conclusion, KVR Audio is undoubtedly one of the most active, interactive, and engaging music production forums out there. Its community features, forum, and marketplace make it easier for members to learn, create, collaborate, and grow. If you are looking for a reliable source of music production knowledge and a community of like-minded individuals, KVR Audio is one of the best options out there.

Music Production Forums: Music Radar

Discover the ultimate music production forums on Music Radar, where you can connect with producers and musicians from around the world. Get expert advice, feedback, and cutting-edge insights on all aspects of music creation, from software and hardware to mixing and mastering.

Forum Structure

Music Radar is a popular website home to many music forums, providing a platform for music producers of all levels to connect with one another and share knowledge on various aspects of music production. The site offers a varied range of forums, from general music production to software-specific forums for DAWs such as Ableton Live, Logic Pro, and FL Studio. Each forum has a specific topic, giving users a chance to find relevant threads easily. Users can create discussion topics, post comments and replies, ask questions, and seek help from other users. This community-based approach makes Music Radar an excellent source for getting answers to difficult music production questions. Additionally, the forums are moderated, ensuring that posts are relevant and useful to other community members. Moderators also help keep the conversations organized and encourage users to follow the expected etiquette.

Site Resources

Music Radar forum provides an abundance of resources for music producers starting from articles about all aspects of music production, hardware reviews to interviews with musicians and sound engineers, making it the go-to destination for all music production-related discussions. One of the most well-known features of the site is its monthly feature, where it focuses on a specific music software or hardware and provides an in-depth guide on its features and creative ways of using it. They review the instrument’s quality and provide insights into its overall functionality.

The site also allows users to upload and share their music tracks, making it easy to receive feedback from the community. This feature is particularly useful for beginners, allowing them to get constructive criticism from experienced music producers. Music producers can also sell their samples and loops through the site, giving them a platform to monetize their music production skills. Overall, if you’re in the music production industry or trying to build a music production career, Music Radar forums offer valuable resources and a means of connecting with other like-minded professionals.

Music Production Forums: Sound On Sound

Sound on Sound is one of the best music production forums where producers and audio engineers can discuss various topics related to music production. Get answers to your queries, share your knowledge, and collaborate with like-minded individuals from all over the world.

Forum Rules

Before diving into Sound on Sound forums, it’s important to understand the community guidelines to ensure a respectful and productive discussion. The moderators strictly enforce the rules to prevent spamming, trolling or any discriminatory behavior. It’s mandatory to sign up before posting a question or response.

Community Members

Sound on Sound has a thriving community of music producers, engineers, and enthusiasts from all over the world. You’ll find everyone from novices to professionals, all eager to share their knowledge and experience. It’s truly a collaborative platform that encourages learning and supporting each other.

Music Production Forums: The Benefits Of Sound On Sound

One of the biggest benefits of Sound on Sound forums is that it covers an extensive range of topics and genres. There are sub-forums dedicated to every aspect of music production, from recording, mixing, and mastering to gear reviews and recommendations. You can expect to find detailed and insightful discussions on the best plugins or the latest Pro-Tools update. Moreover, the community members are extremely helpful and responsive. If you’re stuck on a particular problem, post it on the forum, and you’ll get several responses within hours.

You can also browse through the archives to find answers to previously discussed questions. In conclusion, Sound on Sound is undoubtedly one of the most valuable resources for music producers. By following the simple forum rules and engaging with the community members, you can learn a lot and take your music production skills to the next level.

Best Music Production Forums

Credit: unison.audio

Additional Resources

Discover the best music production forums online with our additional resources. These forums are an excellent source of information, advice, and feedback from fellow music producers. Join the discussion today to take your skills to the next level.

Looking to hone your music production skills or searching for the best forums to connect with other music producers? Our previous blog post, ‘Best Music Production Forums’ listed top online forums that offer great insights, tips and resources for music production enthusiasts. However, the forums listed are just a start, there are plenty more sources of valuable information for music producers to explore. In this post, we will provide additional resources including home studio set-up and producing tips and tricks to help aspiring music producers create great music.

Home Studio Set-up

To create great music, it’s essential to have a good home studio set-up to help you record and produce. Here are some helpful resources to check out:

  1. How to set up a home recording studio: 10 essential tips (MusicRadar)
  2. The Ultimate Home Recording Studio Setup for Beginners (eHomeRecordingStudio)
  3. The Home Studio Handbook – 10 Steps to Professional Recording At Home (LedgerNote)

Producing Tips And Tricks

Great music production requires creativity, a keen ear for sound and a good set of skills. Here are some of the best resources that can help you improve your production skills and techniques:

With these additional resources, you can take your music production skills to the next level. So, which of these resources will you check out first?

Best Music Production Forums

Credit: create.routenote.com

Frequently Asked Questions For Best Music Production Forums

What Is The Best Music Production Website?

The best music production website is subjective and depends on individual preferences. However, some of the popular ones are Ableton, Logic Pro, FL Studio, Pro Tools, and Studio One. Compare features, pricing, and user reviews to find the right one for your needs.

Where Is The Best Place For Music Production?

The best place for music production is subjective and depends on personal preferences, equipment, and budget. However, some popular options include home studios, commercial recording studios, and online recording platforms. Choose the option that fits your needs and budget the best.

Where Can I Meet Music Producers?

You can meet music producers at various events such as music industry conferences, workshops, and showcase events. Social media platforms like Instagram and Twitter can also be used to connect with producers and industry professionals. Networking with other musicians and attending local music venues may also lead to producer connections.

What Is The Best Music Production Course?

The best music production course depends on your skill level, preferred genre, and budget. Some popular choices include courses from Berklee College of Music, Icon Collective, and Point Blank Music School. Consider online versus in-person options and read reviews before making a decision.

Conclusion

So, there you have it, the best music production forums on the internet! These forums are excellent resources for anyone interested in diving into the music production world or looking to take their skills to the next level. From beginners to seasoned professionals, there is something for everyone on these forums.

By connecting with other like-minded individuals, you can gain valuable insights, advice, and support that will help you grow as a musician. So, what are you waiting for? Start exploring these top forums today and take your music production journey to the next level!

Categories
Archive

Cd Baby Distribution Review

Cd Baby Distribution offers independent musicians low-cost digital distribution services and has been accredited as one of the industry’s top distributors. Cd Baby Distribution is a digital music distributor that offers independent artists seamless digital access to their music through platforms such as Spotify, Amazon Music, and Apple Music.

With more than 20 years of experience in the music industry, Cd Baby has been able to build a vast network that supports artists in their music distribution journey. Also, in this review, we will delve into the features of Cd Baby, their pros and cons, pricing and customer support, the ease of use, and more.

Related reading: What Is Music Distribution and Horus Music Distribution Review. For background, see the Wikipedia article on CD Baby.

Cd Baby Distribution Review

Credit: blog.baseformusic.com

What Is Cd Baby?

Also, CD Baby is a digital music distribution platform that helps independent artists distribute their music to popular online stores. With CD Baby, artists can get their music onto major platforms like Spotify, Apple Music, and Amazon Music, and keep control of their rights and royalties.

Moreover, CD Baby is an online music distribution platform that has been in the business for over 20 years. In addition, it is an independent music store that offers artists a chance to distribute their music globally. In this section, we’ll look at the history and mission of CD Baby and how CD Baby works.

The History And Mission Of Cd Baby

In addition, started as a hobby by musician Derek Sivers in 1998, CD Baby became a platform for musicians to sell their music online. Since then, it has expanded to become the world’s largest online distributor of independent music. For example, their mission is to provide tools and services that will help musicians sell their music globally without compromising their independence and musical identity.

How Cd Baby Works

Furthermore, CD Baby offers a variety of services to musicians, including music distribution, publishing, and marketing. As a result, here are the steps on how CD Baby works:

  1. Additionally, sign up: Artists can sign up and create an account.
  2. Also, upload music: Musicians can upload their music and create albums, tracks, and artwork.
  3. Distribution: CD Baby distributes music through online streaming and download stores such as Apple Music, Spotify, Amazon, and more.
  4. Sales: Artists earn money from each sale, and the profits are directly deposited to their accounts.
  5. Marketing: CD Baby offers various marketing tools, such as social media promotion and email campaigns, to help artists promote their music.

CD Baby offers a user-friendly platform and easy-to-use tools that ensure a musician’s music is distributed worldwide effectively. However, this provides each artist with complete control over their music. In conclusion, Cd Baby is a platform that offers independent artists a chance to distribute their music globally while maintaining their independence and musical identity. It is an excellent choice for any artist looking to sell and market their music online.

Cd Baby Distribution Services

CD Baby is a well-known music distribution service that provides independent musicians with the opportunity to sell their music online. Then, the platform provides various features, including album distribution to major streaming platforms, promotional tools, and sales analytics. CD Baby’s user-friendly interface and personalized support make it a popular choice for emerging artists.

The Significance Of Distribution In The Music Industry

Distribution is a crucial aspect of the music industry that helps artists reach a wider audience. Without it, even the most talented artists would struggle to get their music heard by more than a few people. Distribution ensures that music is made available on popular streaming services, such as Apple Music, Spotify, and Amazon Music. This not only helps artists reach new listeners but also ensures they earn revenue through streams. In short, in today’s highly competitive music industry, distribution is vital to the success of any artist.

Why Cd Baby Distribution Is Unique

CD Baby is a distributor that has been operating since 1998 and is known for its unique approach to distribution services. Unlike most distributors that take a cut of an artist’s earnings, CD Baby offers a flat fee distribution service. Similarly, this ensures that artists have control over their earnings and can earn more from their music. CD Baby also offers a range of tools and resources to help artists market their music and grow their fan base. It’s a one-stop-shop for distribution and promotion, making it an appealing option for many independent artists.

Types Of Cd Baby Distribution Services

CD Baby offers a range of distribution services that cater to the unique needs of different artists. Also, let’s take a look at the different types of CD Baby services.

ServiceDescription
Standard DistributionThis is CD Baby’s basic distribution service that allows artists to distribute their music to over 150 digital music platforms. The service includes free UPC and ISRC codes, worldwide distribution, and real-time sales analytics.
Pro DistributionCD Baby’s Pro Distribution service offers additional features, such as YouTube monetization, sync licensing for TV and film, and radio promotion. This service is ideal for artists looking to expand their reach and monetize their music in various ways.
Print on DemandThis service allows artists to create physical copies of their music on demand. Instead of having to order a large batch of CDs, artists can use CD Baby’s Print on Demand service to create CDs one at a time as they are ordered.

CD Baby distribution services are a game-changer for independent artists looking to distribute their music without sacrificing their earnings or control. With a wide range of services and tools, CD Baby is a reliable partner that can help artists reach new fans and monetize their music in various ways.

Cd Baby Music Promotion

CD Baby is a popular music distribution platform for independent artists. With their music promotion services, they can help you grow your fanbase and reach new listeners on platforms like Spotify, Apple Music, and more.

CD Baby is an online distribution platform that helps independent musicians distribute their music worldwide. Apart from distributing music, CD Baby offers a range of music promotion services to help artists reach out to their target audience. Music promotion plays a crucial role in making an artist’s music successful. In this blog post, we will discuss the importance of music promotion and how CD Baby’s promotion services can help artists.

The Importance Of Music Promotion

Music promotion is vital for any artist to reach their target audience and achieve success in their music career. Promoting music helps artists to build their fan base, increase their visibility, and increase their streams and downloads. Promotion creates awareness of the music, increases its popularity, and ultimately helps in generating revenue. Without proper promotion, even the best music can remain undiscovered.

Cd Baby’s Music Promotion Services

CD Baby offers various types of music promotion services such as social media promotion, email marketing, playlist promotion and advertising, music video promotion, and sync licensing. With CD Baby’s music promotion services, artists can get their music in front of their target audience via popular social media platforms, email, playlists and other advertising options. CD Baby also provides artists with an opportunity to get their music placed in TV shows, movies, video games and other media via Sync Licensing.

How To Optimize Your Cd Baby Promotion

Here are some steps to optimize your CD Baby Promotion:

  • Ensure your music is of the best quality for streaming and downloading
  • Optimize your CD Baby artist profile by adding a professional bio, photos, and links to your website and social media
  • Share your music promotion links on social media to get more visibility
  • Interact with your fans, respond to their feedback, and ask for their support
  • Use CD Baby’s promotion tools to create ads, build an email list, and get your music on playlists

In conclusion,

CD Baby provides a range of music promotion services to help independent artists reach their target audience. Music promotion is crucial for any artist to succeed in their music career. Artists must focus on optimizing their promotion efforts to reach the maximum potential audience and generate revenue. With CD Baby’s services, artists have access to a worldwide distribution platform and expert music promotion tools.

Cd Baby Distribution Review

Credit: m.youtube.com

Is Cd Baby Distribution Worth It?

Are you an independent musician looking to distribute your music on various streaming platforms and online music stores? The platform, the largest distribution company for independent artists in the world, might be a great option for you. However, before you decide to go with them, let’s take a deeper look at the pros and cons of CD Baby.

The Pros And Cons Of Cd Baby Distribution

CD Baby Distribution is a company that offers independent musicians an easy way to get their music on popular streaming platforms like Spotify, Apple Music, and Pandora, as well as on online music stores like Amazon and iTunes. Here are some of the pros and cons to consider before signing up:

Pros and Cons of this distributor
ProsCons
Easy and affordable distribution to over 150 streaming platforms and online music stores.The platform has a one-time fee for each release rather than an annual fee.
CD Baby offers great customer service with a dedicated support team.CD Baby takes a cut of all profits earned for each album sold.
Artists retain 100% of their rights and royalties.CD Baby’s royalty payment process can be complicated to understand.
The service also offers various promotional tools and resources to help artists succeed.CD Baby’s pricing doesn’t suit everyone.

Success Stories And Testimonials

Many independent artists have found success through CD Baby. One example is indie-rock band The Lumineers, who released their first album through CD Baby and went on to become a Grammy-nominated group. Other successful CD Baby artists include Grammy-nominated jazz pianist Taylor Eigsti and the indie-folk duo The Weepies. CD Baby’s website features numerous testimonials from happy artists who have benefited from the company’s services.

Alternatives To Cd Baby Distribution

While CD Baby is a great option for many independent artists, it’s not the only distribution service available. Other options include DistroKid, TuneCore, and Symphonic Distribution. These platforms each have their own pros and cons when it comes to pricing, distribution, and overall customer service. It’s important to research and compare these services before deciding which one is right for you.

Cd Baby Distribution Review

Credit: www.charlescleyn.com

Frequently Asked Questions On Cd Baby Distribution Review

Is Cd Baby A Good Distributor?

Yes, CD Baby is a good distributor for independent artists and labels looking to get their music on digital platforms like Spotify and Apple Music. They offer reasonable rates, helpful resources, and personalized support to help artists succeed.

What Are The Downsides Of Cd Baby?

Some reported downsides of CD Baby include its high commission fees and lack of advanced marketing tools compared to other distribution services. Additionally, customer service can be slow at times and there have been occasional technical glitches reported.

How Long Does Cd Baby Take To Distribute?

CD Baby typically takes 1-3 days to distribute music to streaming platforms and 3-7 days to distribute to physical retail outlets. However, the distribution process can take longer if there are issues with the release or if additional verification is required.

Is Cd Baby Better Than Distrokid?

Both CD Baby and DistroKid are great platforms for music distribution. However, the choice between the two depends on the individual needs and goals of the artist. CD Baby provides more personalized services, while DistroKid is a more affordable option with faster release times.

Ultimately, it’s up to the artist to decide which platform suits them best.

Conclusion

This distributor offers an excellent platform for independent artists to distribute their music globally. The platform provides various useful features like publishing, distribution, and promotion. CD Baby also supports artists with an extensive resource library and live expert support whenever needed.

Its transparent pricing structure, no annual fees, and quick release time, making it a highly recommended choice for budding musicians. With its user-friendly interface and exceptional customer service, the platform is a reliable and efficient platform to distribute music online.

Categories
Archive

The Best Daw Control Surface

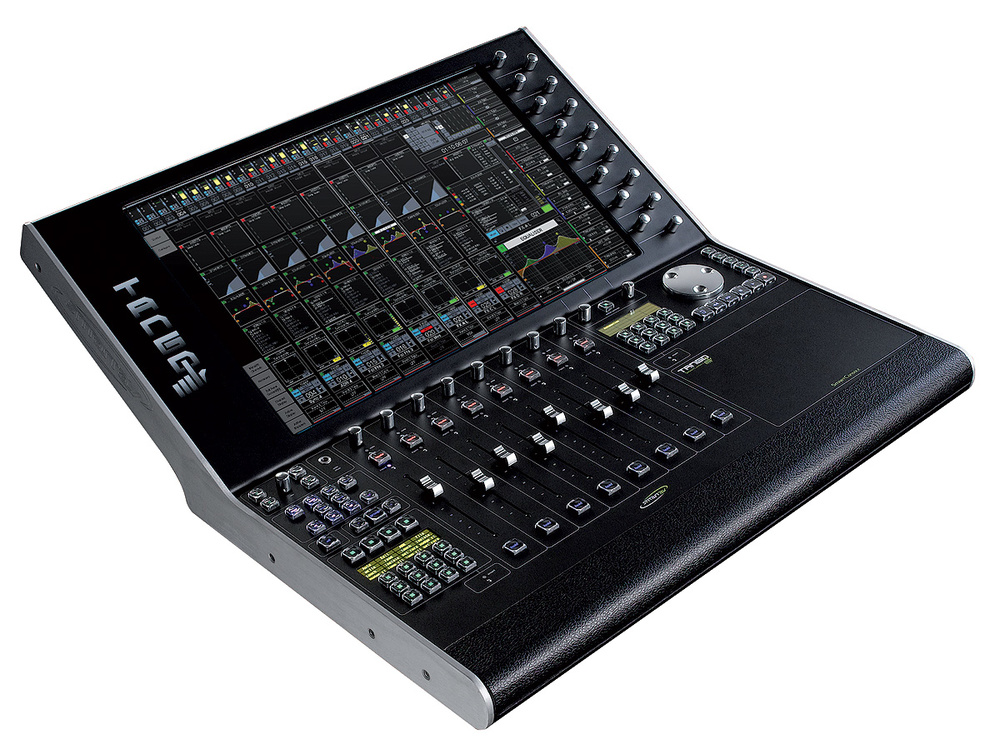
The best Daw Control Surface is the Avid Artist Mix. It is a compact, affordable and ergonomic control surface that offers professional-grade features and compatibility with most DAWs.

The Avid Artist Mix features eight touch-sensitive faders, eight touch-sensitive rotary encoders and 56 illuminated buttons, all fully customizable for a tailor-made workflow. The control surface also supports Eucon, a protocol that enables seamless integration with most major DAWs, including Pro Tools, Logic Pro X, Cubase, and many others.

The Avid Artist Mix is perfect for anyone looking to enhance their workflow and take their mixing skills to the next level.

Top 5 Best Daw Control Surfaces

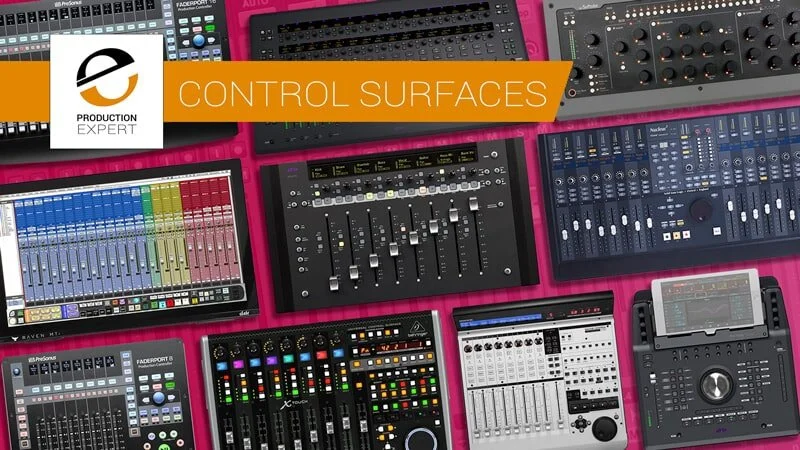
Looking for the best DAW control surface? Look no further. We’ve compiled a list of the top 5 best DAW control surfaces based on user experience, functionality, build quality, and compatibility with various digital audio workstations. Whether you’re a beginner or a pro, these control surfaces will help you take your music production to the next level.

Needless to say, a DAW control surface is an essential piece of equipment for music production. Choosing the right control surface can make a huge impact on your mixing, editing, and automation workflow. In this post, we will be discussing the top 5 best DAW control surfaces available in the market today.

Avid S1

The Avid S1 is a compact and ergonomic DAW control surface that is perfect for small home studios or mobile recording setups. It features eight touch-sensitive motorized faders, touch-sensitive knobs, and a touch strip for easy automation control. The S1 integrates well with Avid’s Pro Tools, but it also works seamlessly with other DAWs like Logic Pro X, Cubase, and more.

Presonus Faderport

The PreSonus FaderPort is another excellent DAW control surface that is perfect for home studio users. It features a single touch-sensitive motorized fader, transport controls, and dedicated buttons for key functions like pan, mute, solo, and record. The FaderPort works well with most major DAWs, including Ableton Live, Studio One, and Pro Tools.

Behringer X-touch

The Behringer X-Touch is a feature-packed DAW control surface that offers incredible value for money. It boasts nine motorized faders, a high-resolution color display, and a plethora of knobs and buttons for complete control over your mix. The X-Touch works well with most major DAWs, including Logic Pro X, Cubase, and Pro Tools.

Mackie Control

The Mackie Control is a popular DAW control surface that has been used by professional engineers for many years. It features eight touch-sensitive motorized faders, a master fader, and a variety of transport and navigation controls. The Mackie Control integrates seamlessly with most major DAWs, including Ableton Live, Logic Pro X, and Pro Tools.

Ssl Uf8

The SSL UF8 is a high-end DAW control surface that is designed for professional studios and engineers. It features eight touch-sensitive motorized faders, a high-resolution color display, and a variety of encoders and buttons for complete control over your mix. The UF8 is compatible with most major DAWs, including Pro Tools, Logic Pro X, and Ableton Live. In conclusion, choosing the best DAW control surface depends on your specific needs and preferences. Whether you are a home studio user or a professional engineer, there is a control surface out there that will meet your requirements. We hope this list of the top 5 best DAW control surfaces has provided you with valuable insights and helped you make an informed decision.

The Best Daw Control Surface

Credit: www.soundonsound.com

Factors To Consider Before Buying A Daw Control Surface

Before investing in a DAW control surface, there are several factors to consider. Consider your budget, the types of controls you need, and the compatibility with your software. Choosing the best DAW control surface will help you improve your workflow and create better music.

When it comes to working with digital audio workstations (DAWs), a control surface can really enhance your workflow. If you’re in the market for a DAW control surface, there are several factors that you should consider before making your purchase. This article will cover the most important factors to help you make an informed decision.

1. Compatibility

The first factor to consider when buying a DAW control surface is compatibility. Not all control surfaces work with all DAWs, so it’s important to make sure you choose one that is compatible with your specific software. Some control surfaces come with built-in support for multiple DAWs, while others require specific drivers or software to work, so be sure to do your research before making a purchase.

2. Workflow

Workflow is another important aspect to consider when selecting a control surface for your DAW. Depending on your preferences and style of working, different control surfaces may suit you better than others. Some control surfaces are designed for more tactile control, with faders and knobs that make it easy to adjust levels and settings. Others offer more visual feedback, with displays that show information like track names and levels. Consider your workflow and think about the tasks you perform most often when deciding on a control surface.

3. Size And Form Factor

The size and form factor of a control surface are also important considerations. If you have limited desk space, you may want to look for a compact control surface that can be easily integrated into your setup. On the other hand, if you require a large number of faders and knobs, you may need to invest in a larger control surface. Some control surfaces also come with built-in displays, which can add to the overall size and form factor of the device.

4. Customization

Customization is another factor to consider when selecting a control surface. Some control surfaces offer more customization options than others, allowing you to map controls to specific functions within your DAW. This can be especially useful if you have a unique workflow or if you want to streamline common tasks. Look for a control surface that offers ample customization options if this is a key consideration for you.

5. Budget

Finally, budget is an important consideration when purchasing a DAW control surface. Control surfaces can range in price from a few hundred dollars to several thousand dollars, depending on the features and capabilities offered. Determine your budget before shopping and look for a control surface that offers the features you need at a price point that works for you. In conclusion, there are several factors to consider when purchasing a DAW control surface, including compatibility, workflow, size and form factor, customization, and budget. Take the time to research and consider these factors before making your purchase to ensure you choose a control surface that meets your needs and enhances your workflow.

Advantages Of Using A Daw Control Surface

If you are a music producer or sound engineer, you know that the process of creating music is not a simple task. It requires a lot of effort, time, and hard work to produce the perfect track. However, using a DAW control surface can make this task easier and efficient. A DAW control surface is an external device that allows you to control your DAW software with physical knobs, faders, and buttons. In this article, we will discuss the advantages of using a DAW control surface in your production studio.

1. Enhanced Workflow

A DAW control surface enhances your workflow by allowing you to control your DAW software faster and more accurately. With physical controls, you can access your DAW software’s functions without using a mouse and keyboard. This means you can make changes to your mix in real-time, without interrupting your creative flow. You can adjust volume levels, pan your tracks, and tweak effects parameters with ease. A DAW control surface saves you from the tedious task of clicking through menus to access the same functions, which can be time-consuming and distracting.

2. Tactile Control

A DAW control surface provides you with tactile control over your music production, which gives you a more natural and intuitive feel when creating music. You can manipulate your software’s controls from a physical interface that feels more like a traditional mixing console. This makes it much easier to use the software’s functions, especially when you are dealing with multiple tracks and effects parameters.

3. Customizability

A DAW control surface also allows you to customize your workflow to suit your needs. You can assign different functions to different controls on your surface, which means you don’t have to use the default setup that comes with your software. This gives you more control over the way you work, and it can save you time by eliminating unnecessary steps in your workflow.

4. Improved Productivity

Using a DAW control surface can improve your productivity by allowing you to work faster and more efficiently. With physical controls at your fingertips, you can make changes to your mix in real-time, which means you can finish your projects faster. You can also reduce mistakes and errors that can occur when you are using a mouse and keyboard. This means you can spend more time focusing on the creative aspects of your music production.

In conclusion, using a DAW control surface in your music production studio can enhance your workflow, provide you with tactile control, allow you to customize your workflow, and improve your productivity. It is an essential tool for music producers and sound engineers who want to create high-quality music efficiently and effectively.

The Best Daw Control Surface

Credit: m.youtube.com

Disadvantages Of Using A Daw Control Surface

Using a DAW control surface can have some drawbacks. It may be expensive and require extensive setup time, and some users may prefer the hands-on experience of a physical controller while others might find it difficult to use due to its complexity.

However, choosing the best DAW control surface can greatly improve your workflow, so it’s important to weigh the pros and cons before making a decision.

1. Cost

DAW control surfaces come in different shapes and sizes, but they all have one thing in common – they can be expensive. Most control surfaces on the market are designed for professional use and come with a hefty price tag. If you’re an amateur recording artist or hobbyist, you may find the cost of a control surface prohibitive. Additionally, some control surfaces require specific software to operate, which can be an additional cost.

2. Learning Curve

Using a control surface can be a daunting task if you’re not familiar with the technology. Most control surfaces come with a plethora of features and can take a considerable amount of time to learn. If you’re not willing to invest the time to learn how to use a control surface, you may be better off sticking with a traditional mouse and keyboard setup.

3. Size

While some control surfaces are designed to be compact and portable, others can be quite large and heavy. This can be a problem if you have limited space in your studio or if you plan on taking your control surface on the road. The size and weight of a control surface can also affect its usability. A large control surface can be difficult to maneuver, while a small one may not have enough controls to suit your needs.

4. Compatibility Issues

Compatibility can be an issue when it comes to using a DAW control surface. Some control surfaces are designed to work only with specific DAW software, limiting your options if you decide to switch software in the future. Additionally, some operating systems may not be compatible with certain control surfaces. Before purchasing a control surface, be sure to check its compatibility with your DAW software and operating system. Overall, a DAW control surface can be a powerful tool for recording artists and producers. However, it’s important to weigh the pros and cons before making a purchase. Consider your budget, learning curve, space limitations, and compatibility issues before investing in a control surface.

The Best Daw Control Surface

Credit: www.production-expert.com

Frequently Asked Questions Of The Best Daw Control Surface

Do I Need A Control Surface For My Daw?

While a control surface can enhance your workflow, it’s not necessary. A control surface allows you to physically control your digital audio workstation’s parameters, but most of them can be accessed with a mouse and keyboard. It ultimately depends on personal preference and the type of music or audio work you’re doing.

What Control Surfaces Work With Logic Pro?

Logic Pro works with a variety of control surfaces, including the Mackie Control, the Euphonix MC Control, the Yamaha 01V96 and the Avid Artist Mix. Additionally, Logic Pro supports HUI-compatible devices and can recognize any generic MIDI controller.

What Is The Difference Between Midi Controller And Control Surface?

In short, a MIDI controller is a device that generates MIDI data, while a control surface manipulates parameters on a software or hardware device, typically using MIDI messages. MIDI controllers are mostly used for music production, while control surfaces are common in live performances.

What Is A Control Surface In Music Production?

A control surface in music production is a device used to control software programs used in recording and mixing audio. It allows the user to manipulate the sound by physically adjusting settings such as volume, pan, and EQ. This type of device can come in various shapes and sizes with different functionalities, catering to different needs and preferences of music producers.

Conclusion

To sum up, a good control surface is an essential tool for music producers and sound engineers. We have examined some of the best control surfaces available on the market based on their functionality, compatibility, and price. Each of them has its own unique features that can meet the needs of different users.

Ultimately, the best control surface for you will depend on your budget and the specific requirements of your music workflow. Choose the one that matches your preferences and enjoy a more intuitive and efficient music production experience.

For more background, see Control surface on Wikipedia.

Categories
Archive

Chord Finder And Chord Identifier

Chord Finder and Chord Identifier help musicians to find and identify chords by name and structure. Whether you are a beginner or an experienced musician, finding and identifying chords can be challenging at times.

Fortunately, chord finder and chord identifier tools have been developed to make the process easy and effortless. Simply enter the notes or chord shape you are playing, and the tool will identify the chord for you. The tools also allow you to search for chords by name, making it easy to find chords even if you don’t know their structure.

These tools can be used online, as software or mobile apps, making them easily accessible to anyone, anywhere. With chord finder and chord identifier tools, musicians can save time while exploring new chords and improving their playing skills.

Types Of Chord Finders

If you are a guitar or piano player, then you know how difficult it can be to play a song that requires complex chords. This is where chord finders come in handy. There are two types of chord finders: online chord finders and mobile app chord finders.

Online Chord Finders

Online chord finders are websites that allow you to search for chords by either typing in the name of the chord or selecting the notes you want to use. These websites are free to use and are a great resource for both beginners and experienced players.

Advantages

  • Free to use
  • Easy to access from any device with internet connection
  • Large database of chords available

Disadvantages

  • Requires internet connection
  • Some websites may have pop-up ads
  • May not always be accurate

Mobile App Chord Finders

Mobile app chord finders are similar to online chord finders, but they are designed to be used on your mobile device. These apps are great for musicians who are on the go and need quick access to chords.

Advantages

  • Can be used offline
  • Easy to access on your mobile device
  • Some apps provide additional features such as tuning and metronome

Disadvantages

  • May require payment for full access
  • Requires storage space on your device
  • Some apps may have ads or in-app purchases

Both online chord finders and mobile app chord finders are great tools for any musician looking to improve their playing abilities. It’s important to find the right one that suits your needs and preferences.

How Do Chord Finders Work?

A chord finder is an essential tool for anyone looking to learn music, whether as a beginner or more experienced musician. With a chord finder, you can easily identify and play the chords to any song by simply inputting the relevant information. Chord finders are typically easy to use and can help you save time and improve your music playing skills.

Inputting Chord Information

The first step to using a chord finder is to input the chord information. This typically involves selecting the root note or the first note in the chord, the chord quality or type, and any additional notes that may be required, such as the chords inversion or octave. Most chord finders have an easy-to-use interface that allows you to input this information with a few clicks. You can also input the chord information using your computer keyboard or a musical instrument.

Visual Representation Of Chords

Once you have inputted the chord information, chord finders will usually provide a visual representation of the chords. This can be in the form of a chord diagram which shows the placement of each finger on the guitar fretboard or a piano roll which displays the notes on the piano keyboard. The visual representation of chords makes it easy for players to see how to play the chords and where to put their fingers.

Most chord finders also come equipped with audio samples of the chords being played, so you can hear how the chords should sound and how they fit into the song you are learning. With this feature, you can quickly identify and correct any mistakes you may be making while playing a particular chord.

In conclusion, chord finders are a useful tool for anyone looking to learn music. With their easy-to-use interface and visual representation of chords, chord finders allow players to quickly identify and play the chords to any song. Whether you’re a beginner or an experienced musician, chord finders can help you save time and improve your music playing skills.

Popular Chord Finders And Identifiers

Popular chord finders and identifiers are an invaluable resource for guitarists of all levels. These handy tools help to identify and locate chords quickly and easily, making it possible to play your favorite songs in no time. Whether you’re a beginner, intermediate or advanced guitarist, there are many chord finders and identifiers available to suit your needs.

Guitar Tab Finder

Guitar Tab Finder is a popular chord finder that allows you to search for and locate chords by name. This user-friendly tool enables you to find chords in a matter of seconds, whether you’re looking up a specific chord or trying to learn a new song. With a vast database of chords and a simple interface, Guitar Tab Finder is a reliable go-to tool for guitarists.

Chordu

ChordU is an innovative chord identifier that uses audio recognition technology to identify chords from YouTube videos. With ChordU, you can simply paste the URL of your favorite YouTube video, and the tool will do all the work for you. This tool is perfect for guitarists who struggle to pick up chords by ear and want to learn new songs quickly.

Ultimate Guitar Chords

Ultimate Guitar Chords is an extensive chord library that boasts over 1 million chords and tabs for guitar, bass, ukulele, and drums. This tool allows you to search for chords by name, artist, or popularity and includes a handy transpose feature for changing the key of a song. With Ultimate Guitar Chords, you can learn virtually any song, making it a must-have tool for guitarists of all levels.

Chord Finder And Chord Identifier

Credit: play.google.com

Chord Theory

Understanding chord theory is essential for any musician or songwriter. With the help of chord finder and chord identifier tools, it becomes easier to create harmonies that are melodious and appealing to the ears. These tools make it quick and hassle-free to find the chords that go well together, saving time and effort.

If you’re learning how to play the guitar, you are eventually going to run into a situation where you’ll need to find a particular chord. Understanding chord theory is a fundamental aspect of playing music, regardless of your level of expertise. Chords are the building blocks of music, and they are created using a combination of notes played simultaneously.

Major Chords

Major chords are built using a combination of the root note, the major third, and the perfect fifth. The root note is the note that the chord is named after. The major third is four half-steps above the root, and the perfect fifth is seven half-steps above the root. Major chords have a happy and uplifting sound, and they are used in many popular songs.

Minor Chords

Minor chords are often responsible for creating a more melancholic or somber mood. They are created by combining the root note, the minor third, and the perfect fifth. The minor third is three half-steps above the root, and the perfect fifth is seven half-steps above the root. Minor chords are often used in ballads and slow songs.

Diminished Chords

Diminished chords are created by combining the root note, the minor third, and the diminished fifth. The diminished fifth is six half-steps above the root. Diminished chords are often used in jazz and classical music.

Augmented Chords

Augmented chords are created by combining the root note, the major third, and the augmented fifth. The augmented fifth is eight half-steps above the root. Augmented chords are often used in jazz, classical, and modern music.

Conclusion

Understanding chord theory is essential if you want to play guitar or any other instrument. The ability to identify and name chords will make it much easier for you to play songs and create your music. With this knowledge, you can start experimenting with different chords and coming up with unique sounds.

Tips For Learning And Using Chord Finders

Learning and using chord finders can seem daunting at first, but with these tips, you’ll be a pro in no time! Start by understanding the basics of chord identification, then practice using a variety of chord finders to find the perfect sound for your music.

Remember, practice makes perfect!

As a beginner musician, the thought of learning chords can be overwhelming. However, chord finders and chord identifiers can help aid the learning process. They are user-friendly tools that can be accessed online to identify various chords and their positions on the fretboard. These tools can be used alone or in conjunction with music theory studies to enhance understanding. Here are some tips for making the most of chord finders:

Practice With Basic Chords

Start by practicing with basic chord progressions such as C, G, and D major. This helps to build a foundation for more complex chords and helps to train your ear. Chord finders can be used to identify the chord names and their respective positions on the fretboard, making it easier to memorize the finger positions.

Experiment With Chord Voicings

Chord finders can help identify different chord voicings and inversions to create unique sounds. Experimenting with different chord voicings can help create more dynamic arrangements. With chord finders, you can easily find the best combinations and the best ways to play them.

Use Chord Finders In Conjunction With Music Theory Studies

Music theory studies can be difficult for beginners, but chord finders can help simplify the process. Using a chord finder alongside music theory studies can help to solidify understanding by providing a visual representation of what is being learned. It’s important to note that chords are not just random finger combinations but can be explained scientifically. Learning music theory will help understand the reason behind the chords and their place in the key. In summary, chord finders can be an excellent tool for learning and mastering chords. By applying these tips, beginners can learn chords faster and more efficiently. By practicing with basic chords, experimenting with chord voicings, and using chord finders in conjunction with music theory studies, anyone can become proficient in playing chords.

Chord Finder And Chord Identifier

Credit: www.julieswihart.com

Frequently Asked Questions For Chord Finder And Chord Identifier

Is There An App That Can Identify A Chord?

Yes, there are many apps available on both Android and Apple app stores that can identify a chord by simply playing it or by analyzing an audio recording. These apps use advanced algorithms to identify the chord based on its frequency and sound waves.

Some popular apps include Chord Detector, Chordify, and Reverse Chord Finder.

How Can I Identify A Chord?

To identify a chord, you need to know the notes used in the chord. Look for the root note, count the number of half-steps between each note of the chord, and use a chord chart or app to determine the name of the chord.

Practice and familiarize yourself with the different chord shapes and patterns to identify chords quickly and accurately.

How Do You Identify Chords By Sight?

Identifying chords by sight requires practice and knowledge of chord shapes and patterns. Start by learning the basic chords, then practice recognizing them in different keys. Pay attention to the root note and the intervals between the notes in the chord.

Familiarity with music theory and notation can also aid in identifying chords quickly and accurately.

How Do I Find The Chord Of A Song?

To find the chords of a song, you can start by searching for the lyrics and chords online. You can also use chord recognition software or apps to identify the chords being played in a song. It’s important to practice and experiment with different chord progressions to find what sounds best for you.

Conclusion

Finding and identifying chords has never been easier with the help of chord finder and chord identifier tools. With just a few clicks, you can access a wealth of information and improve your music skills. Whether you’re a beginner or an experienced musician, these tools can help take your music to the next level.

So start exploring and discover the world of chords today!

Categories
Archive

Recording Vocals In Small Room

Recording vocals in a small room requires proper acoustic treatment and mic placement. In small rooms, sound tends to bounce around and cause unwanted reflections, leading to a subpar recording quality.

To ensure a high-quality recording, consider investing in acoustic panels or foam to absorb the sound and reduce reflections. Additionally, try positioning the microphone at the optimal distance and angle to capture the best sound. Experiment with different placements and techniques, and record in different parts of the room to find the best results.

With these tips, you can achieve a professional-sounding vocal recording even in a small space.

The Challenges Of Recording Vocals In Small Rooms

Recording vocals in small rooms can be challenging due to the lack of good acoustics. The sound waves tend to bounce off the walls and create unwanted echos. This can affect the clarity and quality of the vocals. Professional recording studios use soundproofing and acoustic treatment to create a controlled environment.

However, for those recording at home, there are some tips and tricks to improve the sound quality in a small room.

Recording vocals in a small room is one of the most challenging tasks for a recording engineer. The smaller the room, the more challenging it becomes to capture a clean and accurate sound. Small rooms are typically reflective, leading to unwanted frequency buildups and cancellations, which affect the overall sound quality. Therefore, a recording engineer needs to solve these problems before they start recording to ensure they get the best vocal recording possible.

Importance Of Good Acoustics

Good acoustics are essential for recording vocals in small rooms. The room must be acoustically treated to create a neutral and controlled recording environment. This treatment typically involves adding sound-absorbing panels and diffusers to the walls and ceiling of the room. Sound-absorbing panels help reduce unwanted reflections, while diffusers help scatter sound waves and provide a more natural-sounding recording environment.

Reflections And Resonances

Reflections and resonances are the main issues when recording vocals in small rooms. The sound waves reflecting off the walls, ceiling, and floor create resonances and standing waves, which can cause frequency buildups and cancellations. These reflections and resonances can be controlled by adding sound-absorbing materials and diffusers in strategic locations throughout the room. Also, using microphones that are directional can help eliminate unwanted reflections from the sides and back of the microphone.

Compromising On Control Room Space

One of the methods to overcome the challenges of recording vocals in small rooms is to compromise on control room space. The recording engineer may need to find alternative ways to monitor the recording without using a traditional control room setup. For example, using headphones can be an effective way to monitor the recording, or a portable recording setup, such as a laptop and audio interface, can be used. In conclusion, recording vocals in small rooms is a challenging task that requires proper planning and execution. Creating a neutral and controlled recording environment by acoustically treating the room, controlling reflections and resonances, and compromising on control room space can help achieve the best possible vocal recording.

Recording Vocals In Small Room

Credit: flypaper.soundfly.com

Preparing Your Small Room For Optimal Vocals Recordings

Optimizing a small room for recording vocals takes some planning. Furnishing it with soft surfaces such as curtains, carpet or foam tiles can help to reduce unwanted ambient noise. Additionally, experimenting with microphone placement and investing in noise-cancelling headphones can also improve the quality of your recordings.

Preparing Your Small Room for Optimal Vocals Recordings: Recording vocals in a small room can be a bit difficult as it can quickly become challenging to manage acoustics and the background noise. However, with the right techniques and preparation, it’s possible to get excellent recordings without breaking the bank. Here are a few tips to maximize your small room and get the best out of your recording. Treating Your Room Acoustics: The first and foremost thing to do is to consider room acoustics. Rooms with walls made of brick, wood, or concrete cause audio waves to bounce off them, leading to reverberation and an echo effect. One way to solve this problem is to place acoustic foam panels on your walls. The foam reduces sound reflections, leading to clearer sound recordings. Controlling Background Noise: Background noise is a common problem that can ruin your vocal recordings. Air conditioning, computer fans, traffic, and other unexpected noises can enter your microphone, leading to an undesirable recording. One way to reduce background noise in a small room is to soundproof it. Soundproofing the room involves using materials such as sound curtains or thick blankets to absorb sound. You can also place weather stripping on doors, which can help prevent sounds from leaking in or out. Locating the Ideal Mic Positioning: A Mic is one of the most important elements when it comes to vocal recordings. You should ensure that you have the appropriate microphone for the tone you are looking to capture. After you have installed acoustic foam and soundproofing materials, start experimenting with the positioning of your microphone. Finding the perfect position will depend on the size of the room, the acoustics, style of recording, and the microphone capabilities. As a general rule, the closer the mic is to the sound source, the less background noise you’ll pick up. Similarly, the further the mic is from the wall, the less sound reflections will be picked up. In conclusion, preparing your small room is crucial for optimal vocals recordings. Ensuring proper room acoustics, soundproofing, and ideal microphone positioning can make all the difference. With these tips in mind, you can produce excellent recordings without spending much, and your audience will enjoy listening to your well-recorded vocals.

Essential Equipment For Recording Great Vocals In A Small Room

Achieving great vocal recordings in a small room requires essential equipment. Invest in a high-quality microphone, pop filter, and a reflection filter to eliminate unwanted noises and echoes. These tools can make a big difference in your vocal recordings.

Recording vocals in a small room can be a tricky task, but having the essential equipment can make a big difference in the quality of the final recording. In this post, we will discuss the must-have equipment for recording great vocals in a small room.

Microphones For Small Room Recording

The quality of a vocal recording depends largely on the microphone used. For a small room recording, a condenser microphone is the best choice as it is highly sensitive and captures detailed nuances of the voice. Among condenser microphones, large diaphragm microphones are the go-to choice for capturing warm and crisp vocals.

Budget-friendly Alternatives To Stellar Mics

If you are on a tight budget, you don’t have to compromise on the quality of your vocal recording. There are budget-friendly alternatives available that can give stellar results. One such alternative is the dynamic microphone. Although it is not as sensitive as the condenser mic, it is great for capturing loud vocals and rejecting background noise. Another option is the USB microphone, which is easy to use, budget-friendly and can produce decent quality recordings.

Pop Filters And Reflection Filters

Pop filters and reflection filters are essential accessories for a small room recording setup. A pop filter prevents popping sounds caused by plosive consonants such as ‘p’ and ‘b’ and helps in producing a clear vocal tone. A reflection filter or a vocal booth is used to control the room reflections and echoes, which can negatively impact the recording quality. In conclusion, having the right equipment can make a huge difference when it comes to recording great vocals in a small room. Investing in a good quality microphone, pop filter and reflection filter can help you achieve professional-sounding vocal recordings, even in a small room setup.

Recording Vocals In Small Room

Credit: www.primacoustic.com

Tips And Tricks For Recording Vocals In A Small Room

Achieving high-quality vocal recordings in a small room can be a daunting task, but with the right approach, it’s possible. Tips and tricks such as selecting the right microphone, using acoustic treatment, and adjusting the positioning can significantly improve the overall sound of your recordings.

Recording vocals in a small room can be quite challenging for musicians and sound engineers alike. However, with the right tips and tricks, you can achieve a professional sound that matches that of big-budget studios. In this blog post, we’ll share some tips and tricks to optimize your recording quality and ensure your vocals sound great in a small room.

Choose The Right Vocal Performer

One of the most critical factors when recording vocals in a small room is choosing the right performer. A vocal performer who uses a gentle style of singing can help minimize issues like excessive room reflections that can occur in a small recording environment. Look for a versatile performer who can sing softly and forcefully and emphasize the right notes to create dynamics that complement the acoustics of the room. By choosing the right performer, you can help minimize drawbacks that stem from limited space in your recording room.

Use Headphones: Be The Performer

When recording vocals in a small room, it’s essential to counteract the adverse effects of acoustics by getting closer to the microphone. This means singing without worrying about how much your voice fills the room but instead focus on ensuring the vocals sound great in the microphone. One surefire way of achieving this is by using headphones to hear yourself better. By using headphones, you hear the sound you’re producing and keep adjusting until it matches the required quality. Moreover, headphones help reduce background noise from the room and enable you to focus on your performance.

Optimize Your Recording Techniques

In a small recording room, every little detail counts when it comes to recording techniques. Try to adjust your microphone settings and placement to minimize the room reflections and create a dry sound with a minimum amount of sounds from the room. Furthermore, try to use pop filters to prevent plosives, sibilance, and hissing sounds that may arise from consonants such as ‘s,’ ‘p,’ and ‘t.’ Additionally, placing a blanket or sound-dampening material on the floor and wall behind the singer can absorb the excess sound reflection and enhance the quality of the vocal recording. In conclusion, recording vocals in a small room requires attention to detail and optimal techniques that match the available space. By choosing the right performer, using headphones, and optimizing your recording techniques, you can achieve a professional sound that matches that of big-budget studios.

Post-production Tips For The Vocal Recordings

Learn how to make the most out of recording vocals in a small room with these post-production tips. With careful attention to noise reduction and EQ adjustments, you can achieve a professional-sounding vocal track that captures the emotion and character of the singer.

When it comes to recording vocals in a small room, post-production tips are essential to achieve a professional sound. The editing process can make a big difference in the quality of the final product. Below are some tips on how to effectively process and enhance the vocals for a polished and clean recording.

Eq And Compression

When recording vocals, it is important to have balance and clarity in the sound. EQ and compression are two essential tools to achieve this. EQ allows you to adjust the frequency levels of the vocals, while compression helps to even out the levels of the recording. When processing the vocals, start by using EQ to remove any unwanted frequencies that may be present in the recording. Then, apply compression to help even out the levels of the vocals. Be careful not to over-compress the vocals as this can result in an unnatural sound.

Adding Reverb To Enhance Space

Reverb is a great tool to create space in the vocals and add a sense of depth to the recording. When adding reverb, it is important to keep in mind the type of sound you want to achieve. A shorter reverb time works well for a more intimate sound, while a longer reverb time is better for a more spacious sound. Experiment with different reverb settings to find the perfect balance for your recording.

Additional Effects And Processing

In addition to EQ, compression, and reverb, there are other effects and processing techniques that can be used to enhance the vocals. These include adding delay, chorus, or distortion to the recording. However, it is important to use these effects sparingly as they can quickly become overpowering and detract from the overall quality of the recording. Experiment with different effects to find the perfect balance for your recording. In conclusion, post-production tips are essential when recording vocals in a small room. EQ, compression, and reverb are just a few of the tools that can be used to enhance the vocals and create balance and clarity in the sound. With practice and experimentation, you can achieve a polished and professional recording that is sure to impress.

Recording Vocals In Small Room

Credit: www.soundonsound.com

Frequently Asked Questions On Recording Vocals In Small Room

Should You Record Vocals In A Small Room?

Yes, you can record vocals in a small room. However, it’s vital to ensure the room is acoustically treated to avoid audio issues such as echoes and room noise. Additionally, using high-quality recording equipment and a pop filter can further improve the sound quality of the vocals.

Can You Record In A Small Room?

Yes, you can record in a small room, but acoustic treatment is important to minimize unwanted echo and reverberation. You can also use a portable vocal booth to create a more controlled recording environment.

How Do You Record Audio In A Small Room?

To record audio in a small room, you can follow these tips: 1. Choose a quiet room with minimal background noise. 2. Add sound-absorbing materials such as curtains or blankets to the room. 3. Use a directional microphone to capture clear audio.

4. Close all windows and doors to block out external noise. 5. Position the microphone close to the sound source for optimum recording.

What Size Room Is Best For Recording Vocals?

The best room size for recording vocals is around 10×10 feet with a ceiling that is at least 8 feet tall. A smaller room helps to prevent echoes and reverb while a higher ceiling allows for better ventilation and less sound reflections.

The room should also have good acoustics and be free of outside noise.

Conclusion

Creating a professional vocal recording in a small room requires careful consideration of the space, equipment, and techniques used. While it may seem challenging, with the right approach and a focus on improving recording quality over time, you can produce great vocal tracks.

By experimenting with positioning, acoustics, and investing in quality equipment, you can take your vocal recording to the next level. Remember to keep practicing and refining your techniques to achieve the best possible results.

Categories
Archive

What Makes Music Sound Louder

Sound waves with higher amplitude make music sound louder by creating more pressure on the eardrum. Louder music has a greater volume, which is the perceived loudness of the sound.

Several factors, including instrumental and vocal dynamics, equalization, and compression, can contribute to increasing the perceived loudness of music. The loudness of music is essential to creating a compelling audio experience, particularly for recordings played in a public space. As a result, sound engineers and music producers pay close attention to the technical elements that affect the auditory experience, carefully balancing the different components to create a polished and dynamic sound.

This article explores the factors that contribute to making music sound louder, offering insight into the techniques that audio professionals use to enhance the listening experience.

What Makes Music Sound Louder

Credit: www.wonderopolis.org

The Anatomy Of Sound

Sound is an intricate phenomenon that has captivated people since time immemorial. It’s a type of energy wave that travels through the air, and every single sound has its unique characteristics that make it distinguishable from the others. Understanding the anatomy of sound allows you to comprehend why a particular sound may sound louder than others. In this article, we’ll explore the factors that contribute to the perception of loudness, including sound waves, frequency and pitch, and the role of amplitude.

How Sound Waves Work

Sound is nothing more than a vibration that travels through the air. It moves in the form of a wave, with compressions and rarefactions being the high and low points in a wave, respectively. These waves travel through the air and are picked up by our eardrums, which converts them into signals sent to our brains that we perceive as sound. The louder a sound is, the larger the amplitude of the wave, and the more energetic the vibrations are when they reach our ears.

The Role Of Amplitude In Sound Perception

Amplitude is the measure of how high or low the waves are in terms of energy. Sound waves with high amplitude will produce more energy and are thus louder than sound waves with lower amplitude. When we experience loud sounds, it essentially means that the amplitude of the waves reaching our ear is large, with more energy and pressure applied to the eardrum. The more massive the vibrations are, the stronger the feeling of loudness we experience.

The Relationship Between Frequency And Pitch

Another essential consideration to understand when it comes to sound perception is pitch. Pitch is the characteristic of sound that enables us to identify sounds as high or low. Pitch is determined by frequency – the number of waves that formulate in a particular interval of time – with higher frequency producing higher pitches. Higher pitches are genuinely high-pitched sounds, while low pitches are resonating sounds. However, in cases like explosive noises, we may resonate with widely different sound frequencies that aren’t always congruent.

PitchFrequency Range (Hz)
Sub-sonicBelow 20Hz
Low frequency20Hz to 250Hz
Mid-frequency250Hz to 4000Hz
High-frequency4000Hz to 20000Hz
UltrasoundAbove 20000Hz

Knowing the anatomy of sound can help you like a sound engineer adjust the volume levels of different sound frequencies to create a well-balanced sound mixing. Understanding how pitch and amplitude work can help you appreciate music even more by identifying which frequencies are playing and how changing the amplitude of a particular frequency can affect the overall perception of sound.

What Makes Music Sound Louder

Credit: kids.frontiersin.org

Factors That Affect Loudness

Loudness in music is affected by multiple factors, including compression, equalization, volume levels, and mixing techniques. Compression and equalization can make a track more dynamic, while increasing the volume can make it sound louder. Mixing techniques like adding more layers or creating a fuller sound can also impact the perceived loudness of music.

Factors That Affect Loudness: Music is meant to be heard and enjoyed, and there is no denying that the volume plays a crucial role in this. The key question that arises here is: What makes music sound louder? The answer isn’t straightforward, as there are various factors that directly or indirectly impact the loudness of music. In this blog post, we will discuss the primary factors that affect loudness and help you understand how they impact the overall listening experience. The Power of The Sound Source: The power of the sound source is one of the most significant factors that determine how loud music sounds. The more powerful the sound source, the louder the music will be. It may seem obvious, but it’s not just about turning up the volume; the strength of the soundwaves that the source produces also play a crucial role. For instance, a powerful sound system can produce more robust sound waves than a cheap pair of earphones, resulting in louder music. The Distance From The Source: Another factor that affects loudness is the distance between the listener and the sound source. Sound waves tend to decrease in intensity as they travel further away from the source. Hence, the further away from the source you are, the lower the volume of the music will seem. It’s essential to note that this is not an issue when listening to headphones, as the sound source is located right next to the ear. The Acoustic Properties of The Environment: The environment where you listen to music also impacts the loudness of the sound. Sound waves tend to bounce off surfaces and produce echoes, which can lead to changes in volume. For instance, a room with hard surfaces like tiles and glass will produce more echoes than a carpeted room, resulting in louder music. This is something to keep in mind when choosing where to enjoy your favorite tunes. The Sensitivity of The Listener’s Ear: Everyone’s ears are unique, and the sensitivity of one’s ear is another crucial factor that affects loudness. Some people have more sensitive ears than others, meaning that they can hear sounds at lower volumes more clearly than others. Age is also a considerable factor, as our hearing tends to deteriorate as we grow older. It’s a good idea to keep this in mind when choosing how loud to play your music, as one person’s perfect volume could be painfully loud for another. In conclusion, these are some of the primary factors that impact the loudness of music. It’s essential to keep these factors in mind when enjoying your favorite tunes, whether it’s in a room with hard surfaces or while using a powerful sound system. Remember to take care of your ears, and always use a comfortable volume to ensure that you can keep enjoying music for years to come.

The Different Types Of Loudness

Different types of loudness in music can be achieved through various techniques such as compression, limiting, and equalization. These techniques amplify certain frequencies and compress others to create a more balanced and louder overall sound. With the right application, these techniques can enhance the quality of music and make it sound more impactful.

Perceived Loudness Vs. Actual Sound Level

Peak Vs. Rms Loudness

The Different Types of Loudness: When it comes to music, loudness is subjective and can be perceived differently by individuals. However, there are two different types of loudness – perceived loudness and actual sound level. Perceived loudness describes how loud a sound seems to the human ear, while actual sound level is the objective measure of the physical strength of sound waves. Another aspect of loudness that is important to consider is peak vs. RMS loudness. The peak loudness is the highest point of a sound wave, while the RMS (root-mean-square) loudness is a more accurate representation of the overall volume. RMS takes into account the duration and amplitude of the entire waveform, not just the peaks. Therefore, a song with high peak loudness but low RMS loudness may sound quieter than a song with low peak loudness but high RMS loudness. To further explain, the peak loudness is like the tallest person in a room, but it doesn’t necessarily mean they are the loudest. The RMS loudness is the average height of everyone in the room, representing the overall volume.

Perceived LoudnessActual Sound Level
– Influenced by factors such as frequency, duration, and amplitude– Measured in decibels (dB)
– Can differ between individuals and environments– Objective measure of the physical strength of sound waves
– Can be manipulated through mastering techniques– Used to comply with noise regulations

In conclusion, understanding the different types of loudness in music can help us achieve the desired sound and comply with regulations. While peak loudness may give a false impression of overall volume, RMS loudness is a more accurate representation of volume and can be improved through mastering techniques.

The Role Of Technology In Sound Enhancement

Technology plays a crucial role in sound enhancement, making music sound louder by controlling volume, equalization, and compression. With the advancement of sound engineering programs, producers can produce higher quality audio, resulting in a more enjoyable listening experience for music lovers.

When it comes to music, what makes it sound louder? It’s not just about turning up the volume; there’s a science behind it. Technology plays a vital role in enhancing the music listening experience. Various sound equipment and techniques are used to make the music sound more prominent and richer. Let’s take a closer look at the role of technology in sound enhancement with three subtopics: Amplifiers and EQsLimiters and CompressorsSoundproofing Techniques.

Amplifiers And Eqs

Amplifiers and EQs are the backbone of any sound system. Amplifiers increase the power of the incoming signal, while EQs (Equalizers) adjust the balance between bass, midrange, and treble frequencies. Amplifiers come in different shapes and sizes, and their power rating determines how much louder the music can get. EQs, on the other hand, can be hardware or software-based and provide the ability to fine-tune specific frequencies.

Limiters And Compressors

Limiters and compressors help prevent distortion and maintain a consistent volume level. They do this by limiting the peak volume and compressing the dynamic range of the music, making the loud parts softer and the soft parts louder. Limiters can be software or hardware-based and are often used in live performances. Compressors are commonly used in recording studios to help balance out the volume levels.

Soundproofing Techniques

Soundproofing techniques play a crucial role in controlling sound leakage, particularly in recording studios. A poorly designed or constructed room can ruin the sound quality. Soundproofing techniques include using specialized materials like acoustic foam, sound barriers, and bass traps, which absorb and deflect sound waves. Soundproofing ensures that the sound is contained within the room and doesn’t escape, resulting in a clearer, more defined sound. In conclusion, the role of technology in sound enhancement is essential. From amplifiers and EQs to limiters and compressors, and soundproofing techniques, the right combination of technology can make a vast improvement in the sound quality. These techniques are used by audio engineers, musicians, and music producers to create the perfect soundstage.

The Social And Emotional Impact Of Loud Music

The Social and Emotional Impact of Loud Music

Have you ever noticed how your mood changes when you listen to loud music? Loud music has a profound impact on our emotions and behavior, often making us feel more energized and excited. In this article, we will explore the psychology of loud music and its effects on our behavior and hearing.

The Psychology Of Loud Music

The human brain is wired to respond to loud sounds more intensely than soft ones. When we hear loud music, our brain releases endorphins, dopamine, and adrenaline, chemicals that are associated with pleasure, motivation, and arousal. This explains why loud music can make us feel more energetic and focused, especially when we are engaged in physical activities like exercising or dancing.

The Relationship Between Loud Music And Risky Behavior

Studies have also shown that loud music can increase our willingness to take risks. When we listen to loud music, we tend to feel more confident and impulsive, which can lead us to engage in behaviors that we might otherwise avoid. This effect is particularly evident in younger people, who are more likely to listen to loud music and engage in risky activities.

Risky Behaviors Associated with Loud MusicExamples
Reckless DrivingSpeeding, tailgating, racing
Substance AbuseDrinking, smoking
ViolenceFighting, arguing

The Effects Of Loud Music On Hearing

While loud music can be enjoyable and stimulating, it can also damage our hearing if we are exposed to it for long periods. Exposure to loud music can cause temporary or permanent hearing loss, tinnitus (ringing in the ears), and hyperacusis (sensitivity to loud sounds). The risk of hearing damage depends on the loudness level, duration of exposure, and individual susceptibility.

  1. Temporary hearing loss: when we are exposed to loud music for a short period, our hearing can become dull or muffled, but it usually recovers within a few hours.
  2. Tinnitus: when we are exposed to loud music for a prolonged period, we may experience a persistent ringing, buzzing, or humming in the ears, which can be distressing and affect our quality of life.
  3. Permanent hearing loss: when we are exposed to loud music for a long time, we may experience irreversible damage to our hearing, which can lead to communication difficulties, social isolation, and depression.

Therefore, it is important to protect our hearing by wearing earplugs or reducing the volume when listening to loud music.

What Makes Music Sound Louder

Credit: www.youtube.com

Frequently Asked Questions On What Makes Music Sound Louder

What Makes A Sound Louder?

Sound becomes louder when it has more energy and travels through a medium that allows it to spread more easily. The increase in energy causes the air particles to vibrate more intensely, resulting in louder sound waves.

How Does Music Get Louder?

Music gets louder when the volume or amplitude of sound waves increases. This can be achieved by amplifying the electrical signal that generates sound waves, by increasing the size or number of speakers, or by adjusting the equalizer to boost certain frequencies.

How Can I Increase The Loudness Of My Music?

To increase the loudness of your music, you can use compression and limiting techniques, adjust the EQ settings, maximize the volume levels, and consider mastering your track. However, be careful not to over-compress or distort the audio, as this can reduce quality and clarity.

How Can I Hear Music Louder?

To hear music louder, you can try increasing the volume on your device or use headphones or external speakers. Some devices may have a built-in equalizer to boost specific frequencies. Be careful not to raise the volume too high as it can damage your hearing.

Conclusion

To conclude, there are several factors that contribute to music sounding louder, including increasing volume and adjusting equalization settings. It is important to note, however, that excessive volume can lead to hearing damage and other health concerns. By understanding and utilizing the proper techniques, listeners can enjoy their music without compromising their well-being.

Ultimately, finding the right balance will lead to a more satisfying and enjoyable listening experience.

Categories
Archive

Tips For Mastering Pop Music

To master pop music, focus on song structure, melodies, lyrics, and production quality. Pop songs should have a strong hook and be easy to sing along to.

Pop music is the most popular genre of music globally. It’s known for its upbeat and catchy tunes played on various platforms like radios and live shows, among others. However, not everyone can produce excellent pop songs that wow listeners.

To dominate in the pop music industry, several aspects must be considered. First, understand the song structure, including the verse, chorus, bridge and pre chorus, and the composition of a pop song. Second, the melody should be memorable, easy to sing along to, and have a strong hook that sets it apart from other songs. The lyrics of the pop song should be relatable and have emotional depth. Lastly, a high-quality production is critical in producing a competitive pop song.

Tips For Mastering Pop Music

Credit: m.youtube.com

Establishing A Strong Foundation

Establishing a strong foundation is crucial when it comes to mastering Pop music. Whether you’re a beginner or an experienced musician, building a foundation of music theory, rhythm, and melody will set you up for success. In this blog post, we’ll discuss some tips on how to establish a foundation that will help you master Pop music.

Understanding Chord Progression

One of the essential components of Pop music is chord progression. The chord progression creates the harmonic structure of the song that accommodates the melody and rhythm. Understanding music theory and chord progressions is crucial when it comes to writing and playing Pop music. Practicing and mastering chord progressions will help you understand harmony and develop your musical ear.

Mastering Rhythms And Beats

Pop music is known for its catchy beats and rhythmic melodies. Developing a good sense of rhythm is crucial when it comes to mastering Pop music. Practice and experimentation are the keys to mastering rhythms and beats. Setting a metronome and playing along with different styles of music can help you develop a good sense of rhythm. Once you have the basics of rhythm down, you can experiment with different beats and patterns to create a unique pop sound.

Developing Your Melodic Sense

Creating a catchy melody is an essential part of writing Pop music. Developing your melodic sense will help you create memorable and engaging melodies. Practicing scales and learning to play melodies by ear can help you develop your melodic sense. Additionally, analyzing the melodies of other successful Pop songs can help you gain insight into what makes a great Pop melody. Remember, writing a melody is all about experimentation.

In conclusion, establishing a strong foundation is crucial when it comes to mastering Pop music. By understanding chord progressions, mastering rhythms and beats, and developing your melodic sense, you’ll be on your way to writing catchy and memorable Pop songs in no time. Keep practicing, experimenting, and most importantly, have fun!

Tips For Mastering Pop Music

Credit: www.masteringthemix.com

Crafting The Perfect Pop Song

Creating a pop hit that resonates with audiences and stays in their heads for days is every songwriter’s dream. Crafting the perfect pop song involves a lot of creative effort, but it is not unattainable. With a few specific tips, you can master the art of pop songwriting and produce timeless classics that fans will adore.

Hook Them In With A Memorable Chorus

The chorus is the crowning jewel of any pop song. It’s the part that listeners anticipate while singing along and is typically the most catchy and memorable part of the track. When writing your chorus, try to find the perfect balance between catchiness and repetition. The more memorable and appealing your chorus is, the easier it is for your audience to connect with and adore your pop hit.

Adding A Unique And Catchy Instrumental

It is difficult for a catchy tune to become an instant classic if it doesn’t have an excellent instrumental work. Crafting a unique and catchy instrumental is a crucial element in creating a hit pop song. You don’t have to stick to conventional sounds when making your instrumental. Instead, consider adding unique, unexpected elements to your tune to make it stand out from the crowd.

Write A Simple But Effective Structure

Simplicity wins when it comes to creating pop music. It is essential to keep your song structure simple and effective so that listeners can quickly catch on without any difficulties. Don’t worry about making your songwriting too complicated. Instead, focus on creating a structure that’s easy to follow and understand, making your hit pop song accessible to everyone.

TipDescription
Keep it relatableLyrics only connect with people when they can relate to them. Write about something universal or come up with a storyline that your audience can easily follow.
Short verses, catchy hooksKeep your verses short and sweet, allowing your chorus to take the center stage. Make your chorus a standout with unique elements that grab your listener’s attention.
Collaborate with othersCollaboration is the perfect way to expand your creativity while working with others who share your vision. Team up with other musicians to get inspired and take your songwriting to the next level.

By keeping these tips in mind, you can create the perfect pop hit that resonates with your audience and stands the test of time. Incorporate these tips into your songwriting process, and you’ll be well on your way to becoming a master of pop music!

Creating The Right Production

Maximizing the success of pop music production requires attention to key details that make the song stand out. This can include emphasizing catchy hooks, incorporating unique instrumentation, and achieving the right mix and mastering balance to make the track stand out across all listening devices and platforms.

Pop music is a genre that requires a specific approach to capture its essence successfully. Creating the right production that meets the standard of pop music requires combining the right tools, techniques, and skills. This post focuses on the crucial aspects of pop music production under the subheading of ‘Creating the Right Production.’

Selecting The Best Software And Equipment

Choosing the right software and equipment is the first step in creating the right production for pop music. The software you use should be able to handle the modern demands of producing pop music. For instance, Ableton Live and FL Studio are two popular software programs that can handle pop music production, whether you are a beginner or a seasoned producer. In addition, you should invest in quality hardware equipment such as MIDI controllers, headphones, monitors, and microphones. Your equipment should be capable of producing high-quality audio to create the perfect mix.

Get The Best Sound Out Of Your Instruments

Pop music tends to use a variety of instruments to create a dynamic sound. However, getting the best sound out of your instruments requires technical expertise. For example, understanding the right microphone placement for vocals and string instruments, drum tuning, and balancing audio levels are all essential techniques in creating the right sound for pop music. Using plugins such as compressors, equalizers, and reverb can also enhance the sound quality.

Make Use Of Modern Music Production Techniques

Modern music production techniques can help you achieve the perfect pop music production. These techniques include side-chaining, beat slicing, and parallel compression. Side-chaining is a technique where you use a compressor to control the volume of one track based on the volume of another track. Beat slicing is a technique used to manipulate drum loops to create different patterns. Parallel compression is a technique used to increase the perceived loudness of an audio signal without compromising the dynamic range. These techniques require an understanding of the software and hardware equipment. In summary, creating the right production for pop music requires selecting the best software and hardware equipment, getting the best sound out of your instruments, and making use of modern music production techniques. By following these tips, you can master pop music production and create top-quality pop music.

Tips For Mastering Pop Music

Credit: m.youtube.com

Polishing Your Sound

Learn the insider tips for mastering pop music and polishing your sound to perfection. From EQ and compression to finding the right mix balance, these techniques will help you achieve a professional sound for your pop records.

Using Effects And Automation To Add Depth

Adding effects and automation to your mix is crucial to add depth and texture to your sound. Whether it’s reverb, delay, or chorus, use these effects to enhance certain elements of your mix. For example, apply reverb to your vocals to create a sense of space or delay to your guitar to add a rhythmic element. You can also use automation to create movement and changes throughout your song, keeping the listener interested and engaged.

Master Your Tracks For The Best Possible Sound

Mastering your tracks is crucial to ensure that your final product is the best possible sound. This involves balancing the overall levels, EQ, and compression to achieve a cohesive, balanced mix that sounds good on different speakers and devices. Use reference tracks to compare your mix to professional tracks and make any necessary adjustments.

Getting Feedback And Continuously Improving

Getting feedback from others is crucial to improving your sound. Play your tracks for trusted friends, fellow musicians, or even take them to a professional audio engineer for a second opinion. Take their feedback on board and continuously work to improve your sound. Strive to make each new track better than the last. In conclusion, polishing your sound is essential to mastering pop music. By using effects and automation, mastering your tracks, and getting feedback, you can ensure that your music sounds its best and resonates with your audience. Keep working hard and making improvements and your music will continue to evolve and thrive.

Frequently Asked Questions For Tips For Mastering Pop Music

How Do You Master A Pop Song?

“Mastering a pop song involves a complex process of finalizing the mix by making technical adjustments to enhance the overall sound quality. This includes equalization, compression, volume adjustments, and noise reduction to achieve a consistent, clear and balanced sound. Utilizing specialized mastering tools and expertise is vital to produce a professional and high-quality finished product.

“

How Do You Make A Pop Song Successful?

To make a pop song successful, follow these steps: create a catchy chorus with a memorable melody, use relatable lyrics, create a strong hook, produce high-quality music and vocals, and promote the song through social media and other marketing channels.

What Is The Best Way To Master A Song?

To master a song, the best way is to use a professional mastering engineer or expert software. The mastering process involves applying EQ, compression, and other effects to achieve an optimal balance of frequency, volume, and dynamics. It’s important to listen on different sound systems and make adjustments accordingly.

Practice and experience are also key factors in mastering a song.

What Makes A Song Well Mastered?

A song is well mastered when it has balanced levels, full frequency range, proper stereo imaging, dynamic range, and appropriate loudness without exceeding the maximum level. A well-mastered song should sound clear, articulate and maintain tonal accuracy on various playback systems.

Conclusion

To conclude, mastering pop music can be a challenging but rewarding process. By following these tips, you can enhance your musical abilities and produce top-notch tracks that connect with your audience. Remember to stay true to your unique style, experiment with different sounds, and continuously strive for improvement.

With dedication, practice, and a willingness to learn, you can elevate your pop music game to new heights. Keep practicing, and never stop creating!