Categories
Archive

Programming Drums

Programming drums involves using software or hardware to create a drum pattern that complements the music being produced. To create a unique drum pattern, you need to understand the different drum elements, including kick, snare, hi-hat, and cymbals.

Drums are an essential part of any music production, providing the backbone that holds everything together. Whether it is a dance track or a rock song, the drums set the tone for the entire track. Programming drums is an important aspect of music production, and with the advancements in technology, it has become more accessible than ever.

Drum machines, electronic pads, and software make it possible for musicians to create complex and unique drum rhythms. We will explore the basics of programming drums and provide some tips to help you create your own drum pattern.

Drum Theory

Programming drums involves understanding drum theory, which includes elements such as rhythm, tempo, and timing. By implementing techniques such as MIDI programming and using various drum samples, programmers can create intricate and dynamic drum tracks for any music production.

Drums are the backbone of most genres of music, and programming drums can take your productions to the next level. Drum theory is the fundamental understanding of drums and their role in music. In this article, we’ll delve into the anatomy of a drum kit, the different types of drums and their sounds and understanding drum beats and rhythms.

The Anatomy Of A Drum Kit

A typical drum kit consists of various components, including:

Bass Drum– The largest drum in a drum kit and provides the low-end or bass sound.
Snare Drum– The most prominent drum and provides a snappy and sharp sound.
Tom-Toms– Toms come in varying sizes and provide a deep and resonating sound.
Hi-Hat Cymbals– A pair of cymbals that provides a rhythmic and consistent sound.
Ride Cymbal– A cymbal that provides a sustained and shimmering sound.
Crash Cymbal– A louder and explosive cymbal used for accents.

Different Types Of Drums And Their Sounds

Apart from the drums mentioned above, there are other types of drums that you can incorporate into your music. Here are some of the most common types of drums and the sounds they produce:

  • Bongos – these drums provide a sharp and high-pitched sound
  • Congas – used for Latin American rhythms and provide a deep and resonating sound
  • Djembe – produces a versatile African rhythm sound
  • Cajon – a type of box drum which produces a low-end bass sound when struck on the center

Understanding Drum Beats And Rhythms

Drum beats and rhythms are the backbone of most genres of music, especially in pop, rock, and electronic dance music. Understanding how to program drum beats and rhythms is essential to producing great music. Below are some common rhythms and beats you need to know:

  1. Four-on-the-Floor – found in most dance music. It involves playing the bass drum on every quarter note.
  2. Swing – a rhythm mostly found in jazz music. It involves playing an uneven pattern on the snare and cymbals.
  3. Funk – mainly found in funk and soul genres. It involves playing in a syncopated pattern.
  4. Latin – A rhythm found in Latin American music. It involves strong use of congas, bongos and other percussion instruments.

Drum programming is an essential aspect of music production. Understanding the basics of drum theory, including the anatomy of a drum kit, different types of drums and their sounds and understanding drum beats and rhythms, can take your productions to the next level.

Programming Drums

Credit: m.youtube.com

Choosing The Right Drum Samples

Programming drums can be a daunting task, regardless of the genre of music you are creating. It’s essential to pay attention to the drum samples to achieve a great sounding rhythm section. Choosing the correct drum samples can be a make or break decision that impacts the overall quality of the song. In this post, we discuss the different types of drum samples available and tips for finding the perfect drum samples for your song.

The Different Types Of Drum Samples Available

There are several types of drum samples available that serve different purposes. The most common drum samples include:

Type of Drum SampleDescription
Kick Drum SampleThe kick drum sample is the foundation of the rhythm section. It creates the low energy needed for the song.
Snare Drum SampleThe snare drum sample serves as the backbone of the rhythm section. It adds punch and drives the beat of the song.
Hi-Hat SampleThe hi-hat sample provides the rhythm and adds definition to the drums. It creates a “chick” sound when hit and muted.
Cymbal SampleThe cymbal sample creates a wash of sound and adds energy to the song. They come in various sizes and types and can be used to accentuate different parts of the song.

Tips For Finding The Perfect Drum Samples For Your Song

Choosing the right drum samples can be a challenging task, but here are some tips to make it easier:

  • Listen to other songs in the same genre: Listening to similar songs can help you identify the types of drum samples used and how they’re programmed in the song.
  • Consider the energy of the song: Each song has a different energy level, and the drum samples that work well for one song may not work well for another.
  • Experiment with different samples: Try to experiment with multiple drum samples, and don’t be afraid to mix and match to achieve the desired sound.
  • Don’t forget about dynamics: Pay attention to the dynamics of the drum samples, as they can significantly impact the overall sound of the song.

By using these tips, you can find the perfect drum samples for your song that complement the other instruments and create an impressive rhythm section.

Programming A Basic Drum Beat

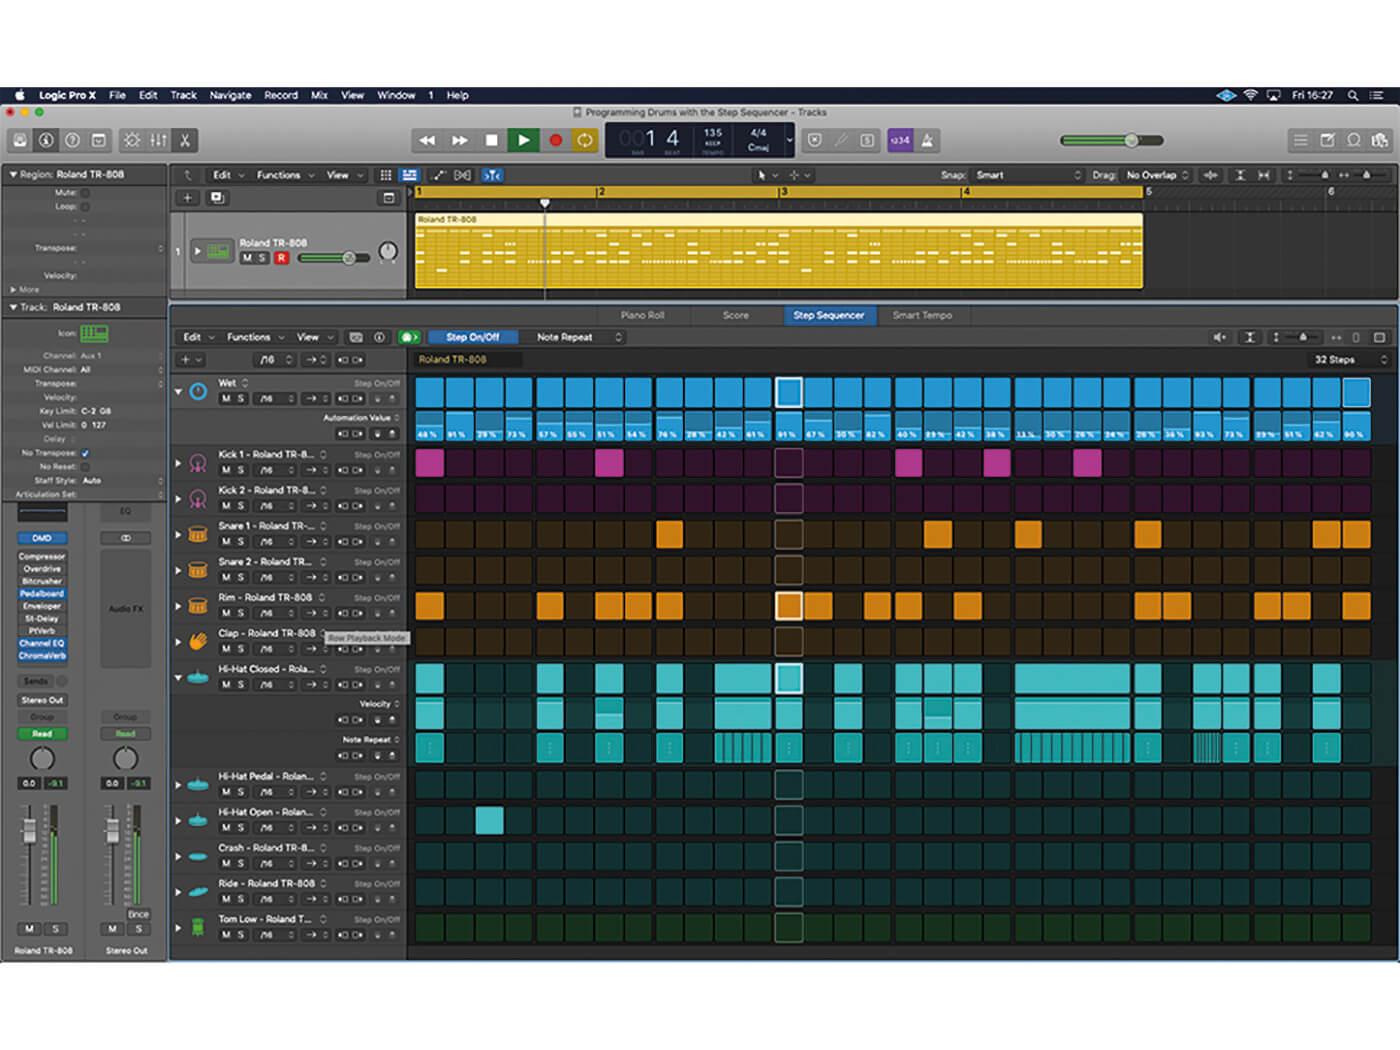
Drum programming is an essential skill for electronic music producers who want to create music that gets people moving. Having a solid foundation in drum programming can make all the difference in crafting a professional-sounding track. In this article, we’ll go through a step-by-step guide on programming a simple drum beat and share some tips for making your beat stand out from the rest.

Step-by-step Guide To Programming A Simple Drum Beat

Before we get started, it’s essential to choose a Digital Audio Workstation (DAW) that you’re comfortable with for drum programming. Once you’ve selected your preferred DAW, follow these steps:

  1. Create a new MIDI channel and select the drum kit of your choice.
  2. Decide on the tempo and time signature of your beat.
  3. Start programming the beat using the drum sounds of your choice.
  4. Ensure that your kick drum is on beats one and three in a four-beat bar. Add the snare drum on beats two and four. These two sounds make up the basic rhythm of your drum beat.
  5. Add more elements to your beat, such as hi-hats, cymbals, and percussion, to create a groove that complements the rest of your track.
  6. Add variation to your beat by adjusting the velocity of individual notes and incorporating fills and breaks to keep it interesting.
  7. Experiment with different rhythmic patterns until you find the one that fits your track the best.

Tips For Making Your Beat Sound Unique

To make your drum beat stand out, try implementing these tips:

  • Use uncommon drum sounds to add flavor and character to your beat.
  • Layer different drum sounds to create a more complex and dynamic rhythm.
  • Adjust the swing or shuffle settings to give your beat a groove that feels more human-like.
  • Use automation to add dynamic changes to your beat, such as filter sweeps and pitch shifts.
  • Incorporate live recordings or samples of drummers to add realism and authenticity to your beat.
  • Experiment with different time signatures to create unique and interesting rhythms.

By following these steps and tips, you’ll be able to program a solid and unique drum beat that complements your track. Remember to keep practicing and experimenting with different sounds and rhythms to find your signature sound.
Programming Drums

Credit: musictech.com

Advanced Drum Programming Techniques

Enhance the rhythm of your music with advanced drum programming techniques. Learn how to program a variety of beats, fills, and grooves with precision and complexity. Master the art of drum programming to bring out the best in your music.

Advanced Drum Programming Techniques Programming drums is an important aspect of music production when it comes to creating energetic and dynamic music. While basic drum programming is relatively easy, advanced drum programming techniques can truly make your drum patterns stand out. In this post, we’ll cover some of the advanced drum programming techniques you can use to take your drum programming skills to the next level. Adding Fills and Breaks to Your Drum Patterns One of the easiest ways to make your drum patterns sound more interesting is by adding fills and breaks. Fills add emphasis on the end of phrases or at transitional moments, while breaks are used to pause the drums and set up for a new section. By using fills and breaks strategically, you can build anticipation and keep the energy level high. These are the steps you can follow: – Identify where to add fills and breaks in your song structure – Choose the right samples or MIDI patterns to use as your fills and breaks – Use variations of your fills and breaks throughout the song to keep things interesting and dynamic Creating Dynamic Drum Builds and Drops Another technique to elevate your drum programming is to create dynamic builds and drops. Builds are used to increase tension and anticipation leading up to a climax, while drops release that tension and bring in a new section of the song. These are the steps to follow: – Build tension using a combination of drum patterns, rhythmic changes, and effects like filtering or automation – Bring in new elements and effects gradually to increase the intensity – Use a sudden break or pause to signal the drop, then release the tension with a big impact hitting on the first beat of the next section Incorporating Live Drum Recordings into Your Programming Using live drum recordings in your programming is another way to make your tracks sound more organic and natural. This technique can be especially useful if you’re not satisfied with the sound of your synthesized drum samples. Here’s how to incorporate live drums into your programming: – Record live drums in a suitable environment – Chop up the recordings into reusable segments, such as individual hits or loops – Use these segments in your drum patterns, either by triggering them through MIDI or directly sampling them into your project Using Effects to Enhance Your Drum Sounds Finally, using effects like EQ, compression, reverb, and delay can help enhance the impact and character of your drum sounds. Here are the steps you can follow: – Use EQ to shape the frequency balance of your drums, emphasizing important frequencies and cutting out unwanted ones – Use compression to tighten up the dynamics of your drums, making them sound more consistent and punchy – Use reverb and delay to add space and depth to your drums, creating a sense of ambience and atmosphere. By following these advanced drum programming techniques and incorporating them into your production workflow, you can create drum patterns that are more dynamic, interesting, and organic-sounding.

The Role Of Drums In Different Genres

Drums form the backbone of any music genre, adding a sense of rhythm and energy to the tracks. The role of drums varies based on the genre and influences how they are programmed. Let’s take a closer look at the role of drums in different music genres and programming drums for each of them.

Programming Drums For Hip-hop And Trap

In Hip-Hop and Trap, drums support the beats and provide a sense of movement and energy. The low-frequency kicks and snares are essential in creating a groove, while the high-hats add texture and rhythm. Programming drums for Hip-Hop and Trap involves creating a repetitive and consistent beat with variations to prevent monotony.

A common technique is to layer different drum samples to create a unique sound. Additionally, producers often use the Quantization technique, which aligns the drums to the nearest beat, resulting in a tight rhythmic pattern.

Programming Drums For Rock And Metal

Drums in rock and metal music play a more prominent and technical role than in other genres. The drummer’s proficiency in playing complex rhythms and fills is showcased in these genres. The drum programming should match the raw energy of the performance.

The style of drum programming varies based on the sub-genre of rock and metal. Classic rock has a simpler drum beat, while progressive rock uses intricate rhythm patterns. Similarly, Heavy Metal uses lots of double bass drumming, while Thrash Metal uses fast-paced beats.

Programming Drums For Electronic And Dance Music

Drums in electronic and dance music are often synthesized and programmed. The main goal is to create a beat that encourages people to dance. A common technique is to layer multiple drum sounds and apply effects such as compression, filters, and reverb.

The tempo of electronic and dance music is usually higher than other genres, and the drums provide the driving force behind the rhythm. Producers often use sidechain compression to create a pulsating effect, where the volume of the drums is lowered when other instruments are playing.

GenreDrum Programming Technique
Hip-Hop & TrapLayering & Quantization
Rock & MetalIntricate Patterns & Heavy Fills
Electronic & DanceSynthesizing and Effects

In conclusion, the role of drums in varying music genres affects how they are programmed. While drums are an essential part of rhythm, they communicate a unique message for each genre. Understanding the role of drums in different genres is paramount in producing a rhythm that complements the genre.

Collaborating With Drummers

Collaborating with drummers can be a challenging task, particularly when it comes to programming drums for a track. A musician must have a good understanding of the drummer’s style, the genre of music they are working on, and the desired outcome to create a track that sounds reasonable and natural.

Collaborating with drummers can be a great way to add a new dimension to your music. A drummer can bring a level of dynamic performance and musicality that is difficult to recreate with samples and programming alone. However, incorporating live drums into your recordings and productions can be a daunting task, especially if you’re not a drummer yourself. Here are some tips on how to work with drummers to program your beats and incorporate live drums into your music.

Incorporating Live Drums Into Your Recordings And Productions

Working with a drummer to record live drums for your project can be a rewarding experience, but it can also be complicated. Here are a few things to keep in mind:

  • Before you begin, make sure you and the drummer are on the same page about the musical direction of the song. This will help ensure that the drummer plays the right parts and the right feel.
  • When recording live drums, it’s important to use good microphones and a high-quality recording interface in order to capture the full frequency range and dynamics of the performance.
  • If you’re not comfortable recording drums yourself, consider hiring a professional studio or engineer who specializes in recording live drums.

Working With A Drummer To Program Your Beats

Working with a drummer to program your beats can be a great way to achieve a more organic, human feel in your music. Here are some things to keep in mind:

  • Start by discussing the feel and style of the drums you’re looking for. This will help the drummer understand what you’re trying to achieve and how to program the right parts.
  • It’s a good idea to have a basic beat or groove in mind before you start collaborating with the drummer. This will help guide the programming process and ensure that you end up with something that fits your vision for the song.
  • Be open to experimentation and collaboration. The drummer may have ideas for parts or sounds that you haven’t considered, and working together can lead to unexpected and exciting results.

In conclusion, collaborating with drummers can be a great way to add a new dimension to your music. By incorporating live drums into your recordings and productions or working with a drummer to program your beats, you can achieve a more dynamic and organic sound that is sure to stand out. Remember to keep an open mind and be willing to experiment, and you’re sure to create something that you’re proud of.

Programming Drums

Credit: www.soundonsound.com

Frequently Asked Questions For Programming Drums

How Do I Start Programming Drums?

To start programming drums, first choose a suitable digital audio workstation. Then, select a drum kit plugin and familiarize yourself with its features. Experiment with building drum patterns using the sequencer or MIDI controller. Finally, adjust the velocity, timing, and rhythm of each drum sound to create an authentic drum groove.

Is Drum Programming Hard?

Drum programming can be challenging for beginners, but it becomes easier as you gain more experience and practice. With the help of the right software and tutorials, anyone can learn to program drums.

How Do You Program A Good Sounding Drum?

To program a good sounding drum, choose the right drum samples and pay attention to the timing and velocity of each hit. Consider adding variations to create a more organic sound, and use effects like EQ and compression to enhance the final result.

Experiment and trust your ears to achieve a great sound.

How Can I Program My Drums Better?

To program your drums better, you should focus on timing, velocity, and groove. Experiment with different rhythms and patterns, and don’t be afraid to try unconventional combinations. Utilize the quantization feature to keep the timing tight, while also adding humanization to introduce subtle variations.

Finally, layer your drum sounds for added depth and complexity.

Conclusion

After reading this article, you should have a good understanding of how to program drums in your music productions. Keep in mind that it takes time and practice to get a realistic and natural sound. Experiment with different techniques and software tools, and always trust your ears when making adjustments.

As with any aspect of music production, there are no hard and fast rules, so feel free to get creative and have fun!

Categories
Archive

Api 2500 Compressor

The Api 2500 compressor is a high-quality, versatile tool for audio compression. With its unique features and adjustable settings, the Api 2500 offers precision control and high performance for any audio project.

Audio compression is a key element in professional sound engineering, and the Api 2500 compressor is a top-of-the-line option for those seeking outstanding quality and performance. Designed by audio experts, this device is renowned for its ability to provide detailed and accurate sound in any music style or application.

Whether you’re looking for punchy drum tracks or smooth vocal performances, the Api 2500 compressor is a reliable and efficient tool that will help you achieve your sonic goals. With multiple compression modes, threshold, makeup gain, and more, this device makes it easy to get the exact sound you’re looking for.

Api 2500 Compressor

Credit: www.uaudio.com

Features Of Api 2500 Compressor

The API 2500 Compressor is a versatile and high-quality audio compressor for mixing and mastering applications. It features a blend control for parallel compression, selectable high-pass and low-pass filters, and adjustable knee and threshold settings for precise control over signal dynamics.

If you’re looking for a compressor that can handle any task you throw at it, the API 2500 is a great option. This compressor has a wide range of features that make it perfect for both analog and digital applications. It’s a versatile piece of equipment that can handle anything from subtle compression to heavy limiting. Here are some of the key features of the API 2500 compressor.

Analog And Digital Compatibility

One of the things that make the API 2500 compressor so versatile is its compatibility with both analog and digital applications. The compressor can be used in both domains, making it a great choice for engineers who work in various settings. This compatibility also means that the compressor can smoothly integrate with other equipment, thus expanding the range of possibilities.

Feedforward And Feedback Compression Modes

The API 2500 compressor boasts both feedforward and feedback compression modes. The feedforward compression mode is used to control peaks in the audio signal, while the feedback compression mode is used to control the overall level of the signal. Using these modes, the API 2500 compressor can offer a wide range of compression possibilities, to suit various audio signals.

Vca And Opto Compression Modes

Another feature of the API 2500 compressor is the availability of both VCA and opto compression modes. VCA (Voltage-Controlled Amplifier) mode is best for precise and quick compression, while opto (Optical) mode is better suited to smoothing out audio and enhancing its character. The combination of these two modes provides a lot of flexibility and control for engineers.

Adjustable Threshold, Attack, Release, And Ratio

Finally, the API 2500 compressor has adjustable threshold, attack, release, and ratio settings. The threshold controls the level at which compression begins, the attack controls how quickly the compressor engages, the release controls when the compressor releases, and the Ratio modifies the amount of compression applied. These adjustable settings are easily accessible and versatile, allowing engineers to tailor their compression approach to the needs of the project. In conclusion, the API 2500 compressor is a great tool for audio engineers who need versatility, reliability, and control in their compression. With its compatible analog and digital applications, feedforward and feedback compression modes, VCA and opto compression modes, and adjustable threshold, attack, release, and ratio settings, the API 2500 compressor is a great investment for anyone looking to take their craft to the next level.

Applications Of Api 2500 Compressor In Music Production

The API 2500 Compressor is a popular choice for many music producers and engineers. Its versatile nature and high-quality sound make it an essential tool in the music production process. In this article, we will explore the various applications of the API 2500 Compressor in music production.

Mix Compression

Mix compression is one of the most popular applications of the API 2500 Compressor in music production. The compressor is used to control the dynamics of the mix, bringing all the elements of the track together. With its variable attack and release times, the API 2500 Compressor can be set up to gently squeeze the mix or deliver a heavier, more aggressive sound. It can add depth, warmth, and cohesion to the mix.

Drum Compression

The API 2500 Compressor is also an excellent choice for drum compression. Its ability to handle fast transients and deliver a punchy sound makes it ideal for compressing drums. The compressor can easily add weight to the kick drum and snare, tightening them up and giving them more presence in the mix.

Bass Compression

Bass compression is another application where the API 2500 Compressor shines. The compressor can tame the low-end energy of the bass, giving it more clarity and definition. It can also add sustain and create a more consistent bass sound. With the parallel compression option, it is easy to achieve a fat, powerful bass sound without compromising the clarity of the mix.

Vocal Compression

Finally, the API 2500 Compressor is an excellent tool for vocal compression. The compressor can be set up to gently compress the vocal, smoothing out any harshness or peaks. It can also add warmth and depth, giving the vocals a more natural, organic sound. With its variable attack and release times, the API 2500 Compressor can easily adapt to the dynamics of the vocal performance and make it sound more polished and professional.

The API 2500 Compressor is a powerful tool in the music producer’s arsenal. Its versatility and high-quality sound make it an essential part of the music production process. Whether you are compressing a mix, drum, bass, or vocals, the API 2500 Compressor delivers excellent results.

Api 2500 Vs Other Compressors

While there are many compressors on the market today, the API 2500 Compressor stands out as a top-tier option due to its unique features and versatility. Let’s compare the API 2500 with some other popular compressors: the SSL G Series Compressor, the Universal Audio LA-2A Compressor, and the Empirical Labs Distressor Compressor.

Ssl G Series Compressor

The SSL G Series Compressor is a classic and timeless compressor that has been used on countless hit records. Its sound is iconic and has become a staple in many studios around the world. While it’s a great compressor, it doesn’t offer the same level of versatility as the API 2500. The API 2500 has more control over the release time and can handle a wider range of music genres.

Universal Audio La-2a Compressor

The Universal Audio LA-2A Compressor is another classic and has a very distinct sound. It’s known for its warmth and smoothness, which works well on vocals and other sources that require gentle compression. However, it doesn’t offer the same level of control as the API 2500. The API 2500 has more parameters to shape the sound and can be used in more ways than just gentle compression.

Empirical Labs Distressor Compressor

The Empirical Labs Distressor Compressor is known for its versatility, just like the API 2500. It can be used in a wide variety of genres and has many different modes to shape the sound. However, the API 2500 has a more transparent sound than the Distressor, which can make it a better fit for certain applications like mastering.

In summary, while there are many great compressors on the market, the API 2500 stands out due to its unique combination of versatility and control. It can handle a wide range of genres and can be used in many different ways, making it a valuable addition to any studio’s arsenal.

Api 2500 Compressor

Credit: www.waves.com

Famous Artists And Producers Who Use Api 2500 Compressor

Several famous artists and producers use the API 2500 compressor to enhance their audio recordings, including Mark Ronson and John Mayer. The API 2500 compressor is known for its signature sound and versatile capabilities in producing professional-grade music.

The API 2500 Compressor is a legendary piece of equipment that has been used by renowned musicians and producers for many years. Its high-quality sound and versatility have made it a favorite among professionals in the music industry. Here are some famous artists and producers who have used the API 2500 Compressor in their work.

Andrew Scheps

Andrew Scheps is a well-known producer and mixer who has worked with numerous famous artists, including Adele, Metallica, and Red Hot Chili Peppers. He is known for his use of the API 2500 Compressor in his work, which he has described as his “go-to” piece of equipment.

Greg Wells

Greg Wells is a producer, songwriter, and musician who has worked with a wide range of musicians, such as Katy Perry, Dua Lipa, and Keith Urban. He has spoken of his love for the API 2500 Compressor, calling it an essential tool in his work and praising its ability to “glue” tracks together.

Michael Brauer

Michael Brauer is a Grammy award-winning mixing engineer who has worked with artists like Coldplay, John Mayer, and Bob Dylan. He has used the API 2500 Compressor extensively in his career, saying that it adds character and warmth to tracks and helps him achieve the sound he desires.

Tony Maserati

Tony Maserati is a mixing engineer who has worked with many famous artists such as Jay-Z, Beyonce and Lady Gaga. He is known for his use of the API 2500 Compressor in his mixing and has described it as a “workhorse” piece of equipment that adds depth and dimension to tracks. In conclusion, the API 2500 Compressor is a highly regarded piece of equipment that has been used by some of the most famous artists and producers in the world. Its quality sound and flexibility have made it a favorite among professionals in the music industry, and its use continues to be popular today.

Api 2500 Compressor Plugins

The API 2500 Compressor is among the best analog compressors which offers an excellent range of features for advanced users. The compressor has been used on many famous albums due to its warm, punchy and clear sound. In the digital world, API 2500 Compressor Plugins are widely used. These plugins mimic the analog sound and offer similar features to the hardware.

Waves Api 2500

One of the most popular API 2500 Compressor Plugins is the Waves API 2500. The plugin offers a faithful emulation of the hardware compressor. It includes all the controls, features, and circuitry of the original hardware and has been approved by API. The plugin includes a range of preset settings, making it easy for beginners to use, while also being adaptable to experienced users who wish to fine-tune their settings.

Uad Api 2500

The UAD API 2500 plugin is another popular option for those who require analog sound in their digital productions. The plugin offers an exact emulation of the original hardware components, which includes analog-style metering and control. The plugin is compatible with both Mac and Windows operating systems and offers an excellent variety of settings.

Slate Digital Fg-2500

The Slate Digital FG-2500 is the ultimate API 2500 emulation software. The company reproduced the hardware compressor by using advanced software modeling techniques. The result is a plugin which offers the original sound with all the convenience of digital technology. The FG-2500 offers both classic and modern plugins options, making it versatile for various audio mixing techniques, while still retaining the warm, punchy sound of the original hardware.

Api 2500 Compressor

Credit: vintageking.com

Frequently Asked Questions For Api 2500 Compressor

What Is The Api 2500 Compressor Used For?

API 2500 compressor is a popular audio processing tool used in music production to add punch, warmth, and clarity to tracks. It is commonly used to control dynamic range, increase loudness, and add character to individual tracks or the whole mix.

What Is Api 2500 Best For?

The API 2500 is best known for its versatile uses in audio mastering and mixing applications. It is widely used to control dynamics, provide added warmth and analog-style compression to tracks. Additionally, it can help bring out the clarity of vocals, drums, and other instruments in the mix.

Is The Api 2500 A Vca Compressor?

Yes, the API 2500 is a VCA compressor.

What Is Master Bus Compression?

Master bus compression is a mixing technique used in producing music. It involves applying a compressor to the master bus, which is the final stereo mix of all tracks in a session. The goal is to create a consistent and cohesive sound in the overall mix by controlling dynamic range and ensuring that no element of the song dominates over others.

Conclusion

After scrutinizing all the features and benefits, we can confidently state that the API 2500 Compressor is undoubtedly an exceptional compressor that will provide impeccable results. Its unique blend of classic and modern sounds, along with an extensive range of features, makes it a one-stop solution for all your compression needs.

Whether you are mixing, mastering, or tracking, the API 2500 Compressor has got you covered. The versatility and flexibility of this compressor make it a worthy addition to your studio setup. With its remarkable performance and sound quality, this compressor is undoubtedly a top pick for any professional sound engineer out there.

Categories
Archive

C7 Vs Cmaj7 Vs Cmin7

C7, Cmaj7, and Cmin7 are all types of chords used in music. C7 is a dominant seventh chord, Cmaj7 is a major seventh chord, and Cmin7 is a minor seventh chord.

In music theory, understanding the difference between different types of chords is a crucial part of learning how to play and compose music effectively. C7, Cmaj7, and Cmin7 are three common types of chords that have distinct sounds and uses in music.

C7 is a dominant seventh chord, which is often used in blues and jazz music to create tension and contrast. Cmaj7 is a major seventh chord, which has a bright and jazzy sound and is often used in pop and jazz music. Cmin7 is a minor seventh chord, which has a melancholic and soulful sound and is often used in blues and R&B music. By learning how to use these chords effectively, musicians can create a rich and dynamic musical experience for their listeners.

C7 Chord

C7, Cmaj7 and Cmin7 are all types of chords used in music. C7 is a dominant seventh chord, while Cmaj7 and Cmin7 are major seventh and minor seventh chords respectively. Each has its own unique sound and can be used to create different moods in a song.

The C7 chord is a must-learn for any aspiring guitar player. It’s a somewhat complex chord, but it’s not too difficult to play once you get the hang of it. In this blog post, we’ll explore the composition, characteristics, and how to play the C7 chord.

Composition And Structure:

The C7 chord consists of four notes – C, E, G, and Bb. It’s important to note that the Bb is what makes this chord different from the regular C major chord. The Bb is the 7th note in the C major scale and hence, the name C7. The composition of the C7 chord is as follows:

  • C – Root Note
  • E – Major 3rd
  • G – Perfect 5th
  • Bb – Flat 7th

Characteristics:

The C7 chord has a dominant sound to it. It’s often used in blues, rock, and jazz music for its distinct and powerful sound. The Bb note gives it a slightly dissonant quality, which can be desirable in certain musical contexts. It’s important to note that the C7 chord is not interchangeable with the Cmaj7 or Cmin7 chords, despite all having a C note and hence require a different finger placement.

How To Play:

To play the C7 chord, place your third finger on the 3rd fret of the A string, your index finger on the 1st fret of the B string, your middle finger on the 2nd fret of the D string, and your little finger on the 3rd fret of the G string. Be sure to press down each string firmly so that they all ring out clearly. This will allow you to achieve a full and resonant sound. In conclusion, the C7 chord is an essential chord to learn on the guitar. It has a dominant sound to it, which can be desirable in many different musical genres. By understanding its composition, characteristics, and how to play it, you’ll be able to incorporate the C7 chord into your music and take your playing to the next level.

Cmaj7 Chord

C7, Cmaj7, and Cmin7 are all chord variations based on the C major scale. The Cmaj7 includes the major 7th note, whereas C7 has a dominant 7th and Cmin7 has a minor 7th.

If you are a beginner learning how to play the guitar, you may have come across chords and wondered about their differences. One of the most popular chords is the Cmaj7 chord. It is a great addition to any song, and it’s essential to understand what this chord is, its composition, characteristics, and how to play it properly.

Composition And Structure

The Cmaj7 chord consists of four notes: C, E, G, and B. These notes create a warm and pleasing sound when played together. In music theory, Cmaj7 belongs to the diatonic chord family or the chords that belong to a particular key.

Characteristics

Cmaj7 chord delivers a happy and bright sound that can help create a joyful mood in a song. It also has a jazzy and elegant quality, making it a perfect fit for ballads and love songs. When strummed or plucked separately, each note creates a distinctive sound, but when played together, they blend harmoniously, creating an overall pleasing sound.

How To Play

Playing the Cmaj7 chord is relatively easy. Here’s how:

  1. Place your third finger on the 3rd fret of the A string, which is a C note.
  2. Place your second finger on the 2nd fret of the D string, which is an E note.
  3. Place your fourth finger on the 3rd fret of the B string, which is a G note.
  4. Strum all the strings except for the low E string.

That’s it! If you’re struggling with the fourth finger, you can also use your pinky finger to play the G note.

Conclusion

Learning the Cmaj7 chord is a great way to enhance your guitar playing skills and take your music to the next level. It may take some practice to get the sounds right, but once you do, you’ll have a new chord in your arsenal to add an exciting dimension to your music.

Cmin7 Chord

The Cmin7 chord is a four-note chord consisting of the root note, minor third, perfect fifth, and minor seventh. It differs from the C7 and Cmaj7 chords by using a minor third instead of a major third.

The Cmin7 chord is a four-note chord consisting of the root note ‘C’, a minor third (flat third), a perfect fifth, and a minor seventh. This chord is closely related to the C7 and Cmaj7 chords, which are also commonly used in music. However, the Cmin7 chord has its own unique characteristics that set it apart from the other two. In this article, we will discuss the composition, structure, characteristics, and how to play the Cmin7 chord.

Composition And Structure

The Cmin7 chord is made up of four notes: C, Eb, G, and Bb. It is constructed by combining the root note (C), a minor third (Eb), a perfect fifth (G), and a minor seventh (Bb). This gives us the formula 1-b3-5-b7. The ‘b’ symbol denotes the flat notes, indicating that the third and seventh notes of the chord are lowered by one half-step.

Characteristics

The Cmin7 chord has a dark and melancholic sound due to the minor third and minor seventh intervals. It is often used in jazz and blues music to create a sense of tension and release. The chord can also be used in rock, pop, and R&B music to add a touch of sophistication to a song.

How To Play

To play the Cmin7 chord, place your index finger on the first fret of the B string, your middle finger on the second fret of the D string, your ring finger on the third fret of the A string, and your pinky on the third fret of the high E string. Strum all the strings except for the low E string. This will produce the Cmin7 chord.

Summary Table

Chord NameCompositionStructureCharacteristicsHow to Play
C7C E G BbDominant 7thTense and bluesyPlace index finger on 1st fret of B string, middle finger on 2nd fret of D string, ring finger on 3rd fret of A string, and pinky on 3rd fret of high E string.
Cmaj7C E G BMajor 7thDreamy and jazzyPlace index finger on 1st fret of B string, middle finger on 2nd fret of D string, ring finger on 3rd fret of G string, and pinky on 4th fret of high E string.
Cmin7C Eb G BbMinor 7thDark and melancholicPlace index finger on 1st fret of B string, middle finger on 2nd fret of D string, ring finger on 3rd fret of A string, and pinky on 3rd fret of high E string.

In conclusion, the Cmin7 chord is a unique and versatile chord that can add depth and emotion to any song. By understanding its composition, structure, characteristics, and how to play it, you can incorporate this chord into your own music and create a unique and memorable sound.

C7 Vs Cmaj7 Vs Cmin7

Credit: www.brendanpauljacobs.com

Differences Between C7, Cmaj7 And Cmin7

C7, Cmaj7 and Cmin7 are chord types that differ based on their structures. Cmaj7 has a major seventh while Cmin7 has a minor seventh, and C7 has a dominant seventh. Their usage varies, with C7 commonly used in blues and jazz while Cmaj7 and Cmin7 more widely used in contemporary music.

If you are new to playing the piano or guitar, understanding chord variations can be daunting. Three chords that often confuse beginners are C7, Cmaj7, and Cmin7. While these chords share the same root note, they have different structures, compositions, characteristics, and sounds that distinguish them from one another. In this article, we’ll help you understand the differences between C7, Cmaj7, and Cmin7 by exploring their chord structures, characteristics and sound, and applications.

Chord Structure And Composition Differences

C7 is a dominant 7th chord that comprises four notes: C, E, G, and Bb. It has a major triad with a minor seventh note, giving it a dominant sound. In contrast, Cmaj7 is a major 7th chord that consists of four notes: C, E, G, and B. It has a major triad with a major seventh note, causing it to have a brighter and more dissonant sound than C7. Meanwhile, Cmin7 is a minor 7th chord composed of four notes: C, Eb, G, and Bb. It has a minor triad with a minor seventh note, giving it a dark and melancholic sound.

ChordRoot NoteThird NoteFifth NoteSeventh Note
C7dominant 7thCEGBb
Cmaj7major 7thCEGB
Cmin7minor 7thCEbGBb

Characteristics And Sound Differences

As mentioned, C7 has a dominant sound, providing tension that resolves to a major chord. Cmaj7 has a more complex and brighter sound that makes it ideal for jazz and neo-soul genres. On the other hand, Cmin7 has a melancholic and mellow sound and is often used in ballads and sad songs.

Application Differences

Knowing the differences in chord structure and sound can help you use these chords for different applications. C7 is often used in blues, soul, and rock music, especially as the V chord in a major key progression. Cmaj7 is commonly used in jazz, R&B, and pop ballads as it creates a dreamy atmosphere. Finally, Cmin7 is used in ballads, sad songs, and jazz to convey nostalgia, yearning, and despair. In summary, C7, Cmaj7, and Cmin7 chords have distinct chord structures, characteristics and sound, and applications. Understanding the differences between these chords can help you identify the right chord to use in your musical pieces.

Frequently Asked Questions On C7 Vs Cmaj7 Vs Cmin7

Is C7 The Same As C Major 7?

Yes, C7 and C major 7 are the same chord. The only difference is in how they are written. C7 is written with just the letter and number while C major 7 includes the word “major” to specify the type of seventh chord.

What Is A Cmin7 Chord?

A Cmin7 chord is a four-note chord consisting of the root note C, a minor third, a fifth, and a minor seventh note. In other words, it’s a C minor chord with an added flat 7th note. It’s commonly used in most genres of music, particularly in jazz and blues.

What Is The Difference Between A Major 7th And A Dominant 7th?

A major 7th chord contains the notes of a major triad with an added 7th interval, creating a bright and happy sound. A dominant 7th chord, on the other hand, includes a minor 7th interval and is often used in blues and rock music to create tension and resolve a song’s melody.

What Does C Major 7 Mean?

C major 7 refers to a four-note chord consisting of C, E, G, and B. The “7” indicates that the chord includes the seventh note in the C major scale, which is B. This chord has a distinctive sound and is commonly used in jazz and pop music.

Conclusion

Understanding the differences between C7, Cmaj7, and Cmin7 may seem confusing at first, but with regular practice, it becomes easier to identify and play the chords. Each chord has its unique sound and can be used to enhance music composition.

As a musician, having a strong understanding of these chords and how to use them elevates the quality of music produced. So, keep practicing, experimenting and have fun with these chords!

Categories
Archive

Best Daw For Mixing

The best DAW for mixing is subjective and depends on personal preference and budget. Some popular options include Pro Tools, Logic Pro, Ableton Live, and Cubase, all of which offer unique features and tools for mixing.

When considering the best DAW for mixing, it’s important to first identify your specific needs and goals. Do you need a DAW with advanced audio editing capabilities? Are you looking for a DAW with a wide range of plugins for mixing?

Do you prefer a specific interface and workflow? Once you’ve answered these questions, you can begin exploring the various options available. Pro Tools is commonly used in professional studios due to its extensive editing and mixing capabilities. Logic Pro is known for its user-friendly interface and diverse plugin options. Ableton Live is popular among electronic musicians for its unique session view and real-time effects processing. Cubase is favored for its powerful mixing tools and flexibility in project customization. Ultimately, the best DAW for mixing will depend on your specific needs and preferences. It’s important to do your research and test out different options before committing to a particular DAW.

Best Daw For Mixing

Credit: majormixing.com

How To Choose The Best Daw For Mixing

Choosing the right DAW for mixing is crucial for any audio engineer or producer. The right software can mean the difference between a professional-sounding mix and a lackluster one. With so many options on the market, it can be overwhelming to decide which one is right for you. In this article, we’ll explore some key factors to consider when selecting the best DAW for mixing.

Think About Your Workflow

The first thing to consider when choosing a DAW for mixing is your workflow. Do you prefer a more traditional mixing desk layout or a virtual one? Some DAWs, like Pro Tools or Logic Pro, offer a mixing desk view that mimics physical mixing consoles. Others, like Ableton Live or FL Studio, have a more unique and flexible interface that allows for looping, live performance, and DJing.

It’s important to think about how you work and what features you need. Do you need built-in virtual instruments, MIDI support, or advanced automation capabilities? Make a list of features that are most important to your workflow and look for a DAW that can accommodate those needs.

Consider Your Budget

Another important factor to consider when selecting the best DAW for mixing is your budget. Some DAWs, like Pro Tools or Cubase, are more expensive than others, like Reaper or Studio One. Additionally, some DAWs offer different pricing models, such as a subscription-based model or a one-time payment.

Consider how much you’re willing to spend and what pricing model works best for you. Keep in mind that some DAWs offer more features or additional plugins and virtual instruments that may be worth the extra cost.

Take Into Account The Plugins Supported

Plugins are a crucial component of any DAW used for mixing. They allow you to add additional effects, processors, and virtual instruments to your mixes. When selecting a DAW, it’s important to consider the plugins that are supported.

Some DAWs, like Pro Tools or Studio One, offer proprietary plugins that are specifically designed to work with their software. Others, like Ableton Live or FL Studio, have a wide range of third-party plugins that can be used. Think about the plugins you currently use or plan to use and ensure the DAW supports them.

Consider The Time You Have For Learning The Software

Learning a new piece of software can be time-consuming, and some DAWs are more complex than others. When selecting the best DAW for mixing, it’s important to consider the time you have available for learning the software.

If you’re short on time or prefer a more straightforward interface, something like GarageBand or Reaper may be a better choice than Pro Tools or Logic Pro. Additionally, some DAWs offer online tutorials, user forums, and other resources that can make the learning process easier.

Look For Compatibility With Your Equipment

The last thing to consider when selecting the best DAW for mixing is compatibility with your equipment. Do you have a particular audio interface, MIDI controller, or other hardware that you need to use with your DAW?

Make sure the software you choose is compatible with your existing hardware or has the ability to easily integrate with it. This can save you time and frustration in the long run and ensure your workflow is as seamless as possible.

Top Daws For Mixing

Mixing is a crucial aspect of music production that demands a reliable and efficient DAW (Digital Audio Workstation). A capable DAW simplifies the mixing process, enabling sound engineers and producers to focus on the creative aspect of music production. With numerous DAWs available in the market, choosing the best one for mixing can be overwhelming. Here, we have outlined some of the top DAWs for mixing to help you make an informed decision.

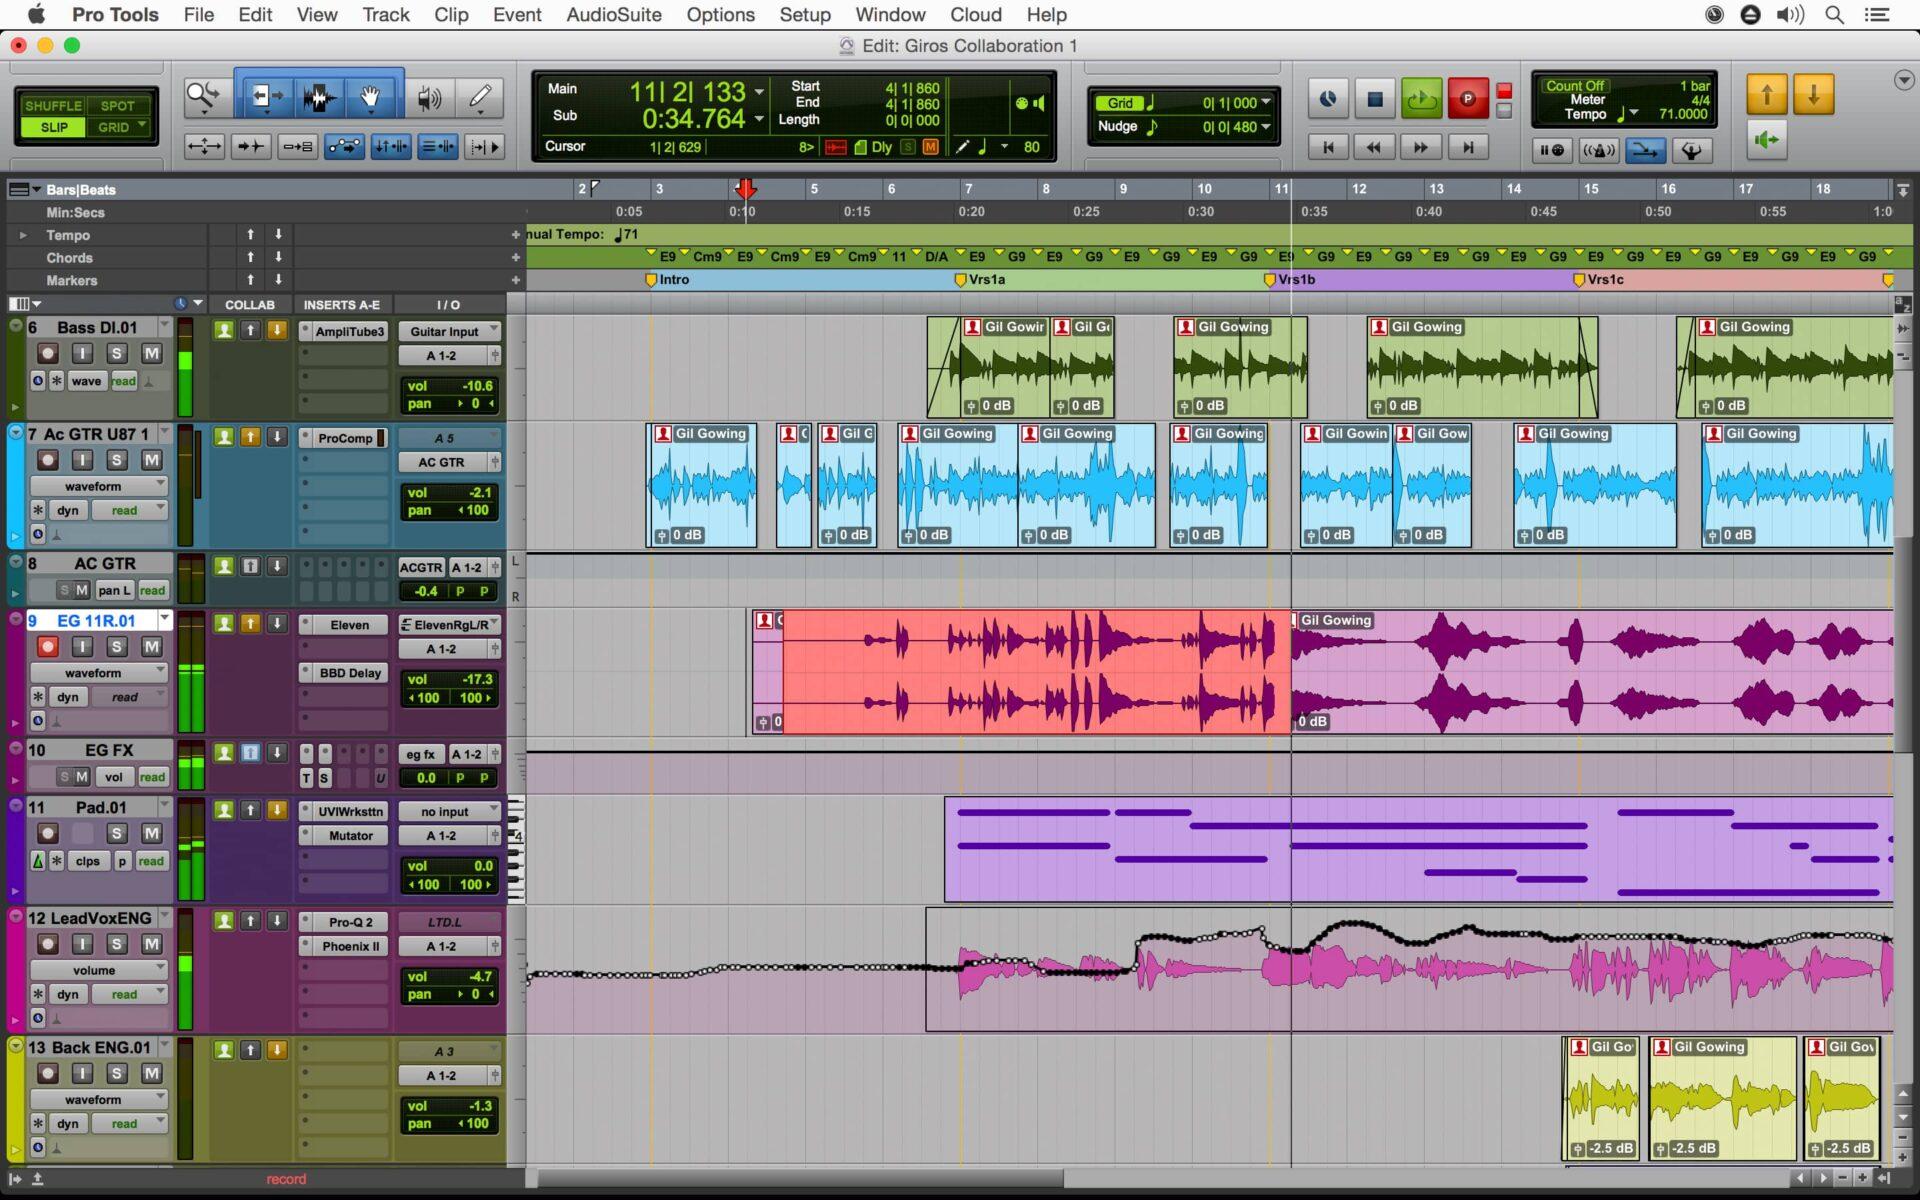
Pro Tools is a widely used DAW for audio mixing and editing in the music industry. It is popular among professionals due to its powerful features such as advanced automation, plugin support, and extensive mixing capabilities. The DAW’s mixing console provides multiple channels, allowing users to mix complex audio files with ease.

Logic Pro X is an intuitive DAW that simplifies the mixing process without compromising on functionality. It features a user-friendly interface and has more than 1500 instrument and effect plugins. The DAW’s mixing console offers a range of features such as flexible routing, EQ, and compression, enabling users to achieve a professional mix.

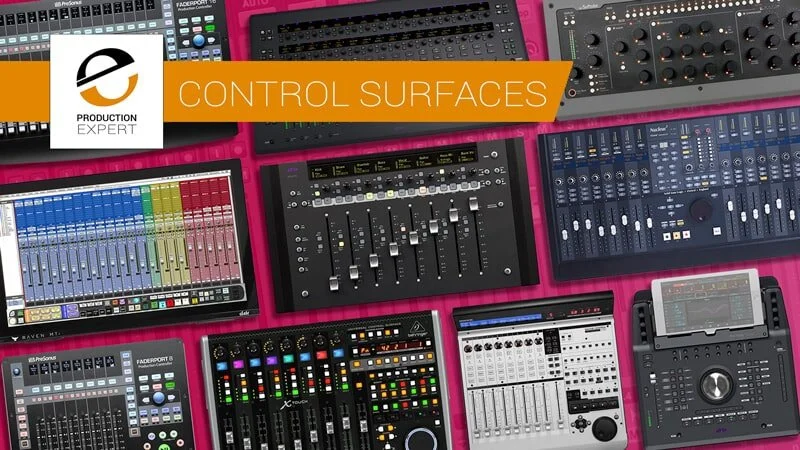
Cubase is a comprehensive DAW for mixing and editing digital audio. The software provides tools for creative mixing, including VST plugins, channel strip, and a range of mixing effects. Cubase integrates with several hardware controllers, making it easier to control the mixing process.

Ableton Live

Ableton Live is popular among electronic music producers due to its real-time mixing capabilities. The DAW provides features such as tempo-synced effects and MIDI mapping, making it simpler to mix electronic music. Ableton Live has an intuitive interface that enables users to focus on the creative aspect of mixing.

Studio One

Studio One is a user-friendly DAW that simplifies the mixing process. It features a drag-and-drop interface that enables users to add effects and instruments to their mixes. The DAW’s mix engine offers 64-bit processing and supports VST plugins, enabling users to achieve a professional mix.

Fl Studio

FL Studio is a popular DAW among hip-hop and EDM producers. It features a unique pattern-based sequencer, which simplifies the composition and mixing process. The DAW provides features such as flexible mixing, automation, and MIDI support, making it a go-to choice for electronic music producers.

Reaper

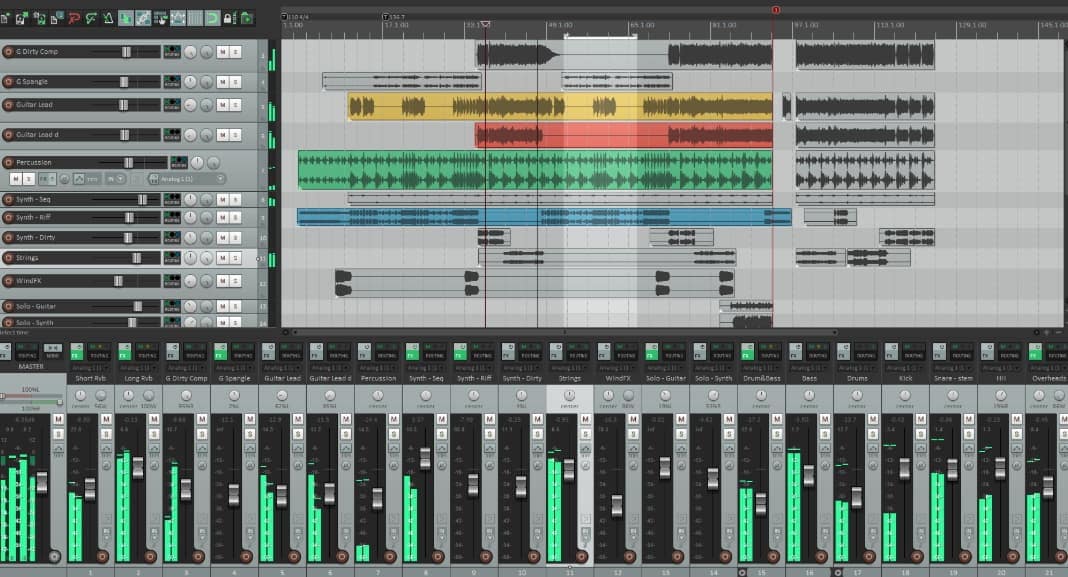
Reaper is a versatile DAW that offers a range of mixing features. Reaper provides support for VST plugins and multiple routing options, making it easier to mix digital audio files. The DAW has a user-friendly interface, enabling users to achieve a professional mix with ease.

Reason

Reason is a popular DAW that allows users to mix audio and MIDI. The DAW features a range of effects and instruments, including unique synthesizers and samplers. The DAW’s mixer provides extensive routing options and supports third-party plugins.

Pro Tools

Pro Tools is widely regarded as the best DAW for mixing due to its robust audio editing capabilities, highly customizable interface, and industry-standard features. With its top-notch plugins and advanced mixing tools, it is a preferred choice for artists, producers, and engineers alike.

What Makes Pro Tools A Great Daw For Mixing?

Pro Tools is undoubtedly one of the most powerful digital audio workstations in the market. It has been the industry standard for audio recording and mixing in music production, film, and television for many years. Mixing in Pro Tools is made easy with its flexible routing options, precision editing tools, and extensive plugin library. This DAW software offers incredible adaptability, allowing users to work on various projects of different sizes. Additionally, it provides seamless integration with hardware, making it a perfect choice for professionals.

Pros And Cons Of Pro Tools For Mixing

As with any software, Pro Tools has specific pros and cons when it comes to mixing. Pros:

  • Industry standard for audio mixing and editing
  • Flexible routing options
  • Precision editing tools, allowing for exact editing of audio files
  • Excellent plugin library, with many options for premium plugins and effects
  • Seamless hardware integration with Avid products

Cons:

  • Expensive for the full version
  • High CPU usage and hardware requirements
  • Steep learning curve for beginners
  • Not as intuitive as some other DAWs

Best Plugins For Pro Tools For Mixing

Pro Tools has a vast array of plugins available, ranging from EQs and compressors to reverb and delay effects. Choosing the right plugins for mixing can improve the overall sound quality of the mix. Here are a few best plugins for Pro Tools that we recommend:

PluginCategory
FabFilter Pro-Q 3EQ
Waves SSL E-ChannelChannel Strip
iZotope Neutron 3 AdvancedMixing Suite
Soundtoys DecapitatorSaturation
Valhalla RoomReverb
TAL-Reverb-2Reverb

These plugins will enhance the audio quality in your mixes and make Pro Tools a more efficient DAW for mixing.

Best Daw For Mixing

Credit: filmora.wondershare.com

Logic Pro X

Logic Pro X is widely considered one of the best Digital Audio Workstations (DAWs) for mixing. With an intuitive interface, powerful mixing tools and a vast library of plugins, Logic Pro X offers professional-level sound editing capabilities for both beginners and experts alike.

Logic Pro X is a digital audio workstation (DAW) software developed by Apple Inc. With its intuitive user interface, professional mixing capabilities, and extensive range of built-in plug-ins, it has quickly become a favorite among music producers and sound engineers alike. In this post, we will explore why Logic Pro X is considered one of the best DAWs for mixing, its pros and cons, and the best plug-ins to use.

What Makes Logic Pro X A Great Daw For Mixing?

Logic Pro X is one of the most popular DAWs for mixing due to its outstanding mixing capabilities and user-friendly interface. Here are some reasons why Logic Pro X is considered a great DAW for mixing:

  • Flexibility: Logic Pro X offers a wide range of customization options, making it easy to adapt to your mixing style.
  • Mixing Tools: With built-in EQ, compression, reverb, and delay tools, Logic Pro X allows for precise mixing adjustments to enhance the overall sound of your mix.
  • Intuitive User Interface: The user interface of Logic Pro X is intuitive and easy to navigate, allowing for efficient workflow and quick access to critical controls.
  • Comprehensive Library: Logic Pro X includes a massive library of built-in plug-ins, sounds, and loops that can be used to enhance your mix and speed up the production process.

Pros And Cons Of Logic Pro X For Mixing

Like any software, Logic Pro X has its pros and cons when it comes to mixing. Here are some of the most notable:

ProsCons
– Intuitive User Interface
– Extensive Plug-In Library
– High-Resolution Audio Processing
– Flexible Mixing Capabilities
– Limited Compatibility with Windows
– High Processing Power Required
– High Cost compared to some alternatives
– Steep Learning Curve for Beginners

Best Plug-ins For Logic Pro X For Mixing

In addition to the built-in plug-ins, Logic Pro X offers a range of third-party plug-ins that can enhance your mixing capabilities. Here are some of the best plug-ins for Logic Pro X:

  1. Waves SSL G-Master Buss Compressor: This plug-in is perfect for achieving the classic sound of the SSL G-Master Buss compressor, offering precise gain, threshold, and ratio controls.
  2. Valhalla Room Reverb: This plug-in is ideal for adding natural-sounding reverb to vocals, guitar tracks, and drums, with intuitive control over decay time, damping, and modulation.
  3. Soundtoys Decapitator: This plug-in emulates the sound of analog saturation and distortion, adding warmth and character to your mix.
  4. Native Instruments Kontakt 6: Kontakt 6 is a powerful sampler, offering an extensive library of high-quality sounds and instruments that can be used to enhance any mix.

Overall, Logic Pro X is an excellent choice for producers and sound engineers looking for a powerful, flexible, and user-friendly DAW for mixing. With its extensive range of built-in plug-ins, customization options, and third-party plug-ins, Logic Pro X has everything you need to create professional-sounding mixes.

Cubase

Cubase is one of the best DAWs for mixing, providing advanced VST connectivity and a comprehensive set of mixing tools that help users achieve a slick, polished sound. Its intuitive interface allows for precision editing and mastering, making it a top choice for music professionals.

Cubase is a highly popular digital audio workstation that has been around for more than three decades. It is known for its versatility and functionality, making it a great DAW for both recording and mixing. In this article, we’ll focus on the latter and discuss what makes Cubase a great DAW for mixing, its pros and cons, and the best plugins to use with Cubase for mixing.

What Makes Cubase A Great Daw For Mixing?

One of the primary reasons Cubase is a great DAW for mixing is its comprehensive mixer. The mixer provides a wide range of features such as inserts, equalizers, and compressors that make it easy to mix tracks effectively. You can easily tweak the settings for each plugin and channel to get the perfect sound. The mixer also allows for side-chain routing, which is a useful feature for creating complex mixdowns. With Cubase’s mixer, you can create complex routing setups, allowing you to apply plugins to multiple sources at the same time. Another factor that makes Cubase ideal for mixing is its advanced automation capabilities. You can easily automate the settings for individual channels, plugins, or the entire mix. This allows for precise control and creates a smooth workflow when mixing different tracks. Finally, Cubase’s audio engine is highly optimized, giving you low-latency performance, even with complex projects. This means you can mix down your tracks in real-time without experiencing any lag or issues.

Pros And Cons Of Cubase For Mixing

As with any software, Cubase has both pros and cons when it comes to mixing. Here is a breakdown of some of the advantages and disadvantages of using Cubase for mixing: Pros:

  • Comprehensive mixer with a wide range of features
  • Advanced automation capabilities for precise control
  • Low-latency performance, even with complex projects
  • Support for a wide range of plugins and instruments
  • Intuitive interface with customizable workflows

Cons:

  • Can be overwhelming for beginners due to the extensive feature set
  • Some users have reported stability issues with recent versions of Cubase
  • Expensive compared to other DAWs on the market

Best Plugins For Cubase For Mixing

When it comes to mixing, having the right plugins can make a huge difference. Here are some of the best plugins you can use with Cubase for mixing:

PluginFunction
Waves SSL G-Master Buss CompressorHighly regarded bus compressor for adding warmth and glue to your mix
FabFilter Pro-Q 2Award-winning equalizer plugin with a sleek user interface and advanced features
Sonnox Oxford InflatorDynamic loudness maximizer that helps your tracks stand out in a mix
UAD Neve 1073 EQEmulation of one of the most revered analogue EQs for adding character and color to your mix
Soundtoys DecapitatorSaturation plugin that adds warmth and grit to your tracks

In conclusion, Cubase is a highly versatile and functional DAW that is ideal for mixing. Its comprehensive mixer, advanced automation capabilities, and low-latency performance make it a top choice for professional producers and engineers. Additionally, with the right plugins and instruments, you can take your mixing skills to the next level.

Best Daw For Mixing

Credit: www.production-expert.com

Frequently Asked Questions Of Best Daw For Mixing

Which Daw Is The Best For Mixing?

There is no single DAW that is objectively the best for mixing, as it largely depends on personal preference and experience. However, some of the most popular choices among audio professionals include Pro Tools, Logic Pro, Cubase, Ableton Live, and Studio One.

It is recommended to try out a few different options and see which one feels most intuitive and comfortable to work with.

What Daw Do Most Professionals Use?

Professionals in the music industry mostly use digital audio workstation (DAW) software like Pro Tools, Logic Pro, and Ableton Live. These are popular because they offer a wide range of features and capabilities for music production.

Is Pro Tools The Best Daw For Mixing?

Yes, Pro Tools is considered to be one of the best DAWs for mixing due to its advanced audio editing capabilities, extensive plugin support, and compatibility with industry-standard hardware and software. However, individual preferences may vary based on the user’s experience and type of project.

What Daw Is Best For Mastering?

The best DAW for mastering is subjective and depends on personal preference. However, some commonly used DAWs for mastering are Steinberg WaveLab, iZotope Ozone, and Apple Logic Pro X. These DAWs have powerful mastering tools and plugins that can effectively enhance the final mix.

Conclusion

As a content writer and music enthusiast, I’ve thoroughly researched and tested various DAWs for mixing. From my experience, it’s clear that each software has its pros and cons, and the best one heavily depends on the user’s personal preference and music style.

However, after careful consideration, I’d recommend trying out Ableton Live or Logic Pro X for their versatility, intuitive interface, and extensive features. Ultimately, finding the perfect DAW for you takes time, experimentation, and a good ear.

Categories
Archive

Is Mixing Vocals Hard

Mixing vocals can be challenging, but with the right techniques and tools, it’s manageable. As vocals are one of the main elements in any song, mixing them properly is essential to achieve a well-balanced and professional sound.

Whether you’re a beginner or an experienced producer, the art of vocal mixing requires attention to detail and a good understanding of equalization, compression, reverb, delay, and other effects. By following some basic principles and experimenting with different settings, you can create a mix that emphasizes the vocals and makes them stand out in the mix.

We will discuss some tips and tricks on how to mix vocals effectively and achieve a professional sound.

Understanding The Vocal Mixing Process

Understanding the vocal mixing process can be challenging, especially if you’re new to the world of music production. However, with the right techniques and tools, even beginners can achieve a professional sound. It takes patience, practice and attention to detail, but the payoff is worth it.

Mixing vocals can be quite challenging for new audio engineers. It takes practice, skill, and the right knowledge to get the perfect mix. Understanding the vocal mixing process is essential for the creation of high-quality music productions. In this article, we will discuss the essential tools needed for mixing and the stages of the mixing process.

Essential Tools For Mixing

Before you start mixing vocals, you need to ensure that you have the necessary tools. These tools will help you achieve the desired sound. Here are the essential tools for vocal mixing:

ToolPurpose
EqualizerTo adjust the frequency response of the vocal track
CompressorTo control the dynamic range of the vocal track
ReverbTo add space and depth to the vocal track
DelayTo create an echo effect on the vocal track

Stages Of The Mixing Process

Mixing a vocal track involves several stages. Each stage plays a significant role in achieving the perfect mix. Here are the stages of the vocal mixing process:

  1. Volume Balancing: This is the first stage of mixing vocals. You have to ensure that the vocal track is balanced with the other instruments in the mix. Adjust the volume of the vocal track so that it’s audible but not overpowering.
  2. Panning: The panning stage is where you determine the stereo position of the vocal track. Adjust the pan knobs to create the desired stereo image.
  3. Equalization: The equalization stage involves adjusting the frequency response of the vocal track. Use the equalizer tool to remove unwanted frequencies and enhance the desired ones.
  4. Compression: The compression stage involves controlling the dynamic range of the vocal track. Use the compressor tool to make the loud parts of the vocal track softer and the soft parts louder.
  5. Reverb: The reverb stage involves adding space and depth to the vocal track. Use the reverb tool to create a natural-sounding acoustic environment.
  6. Delay: The delay stage involves creating an echo effect on the vocal track. Use the delay tool to add depth and interest to the vocal track.
  7. Automation: The automation stage involves making adjustments to the volume, pan, and effects of the vocal track throughout the mix. This is done to create variation and maintain the listener’s interest.

To sum up, mixing vocals can be challenging, but it’s an essential part of creating high-quality music productions. The key is to have the necessary tools and follow the stages of the mixing process in the right order. With practice and patience, you can achieve the perfect vocal mix.

Preparing Vocals For Mixing

Mixing vocals can be difficult, but it all starts with proper preparation. This includes tuning, timing, and editing the vocals to ensure they sound their best before they even reach the mixing stage. With attention to detail and the right techniques, anyone can achieve a great vocal mix.

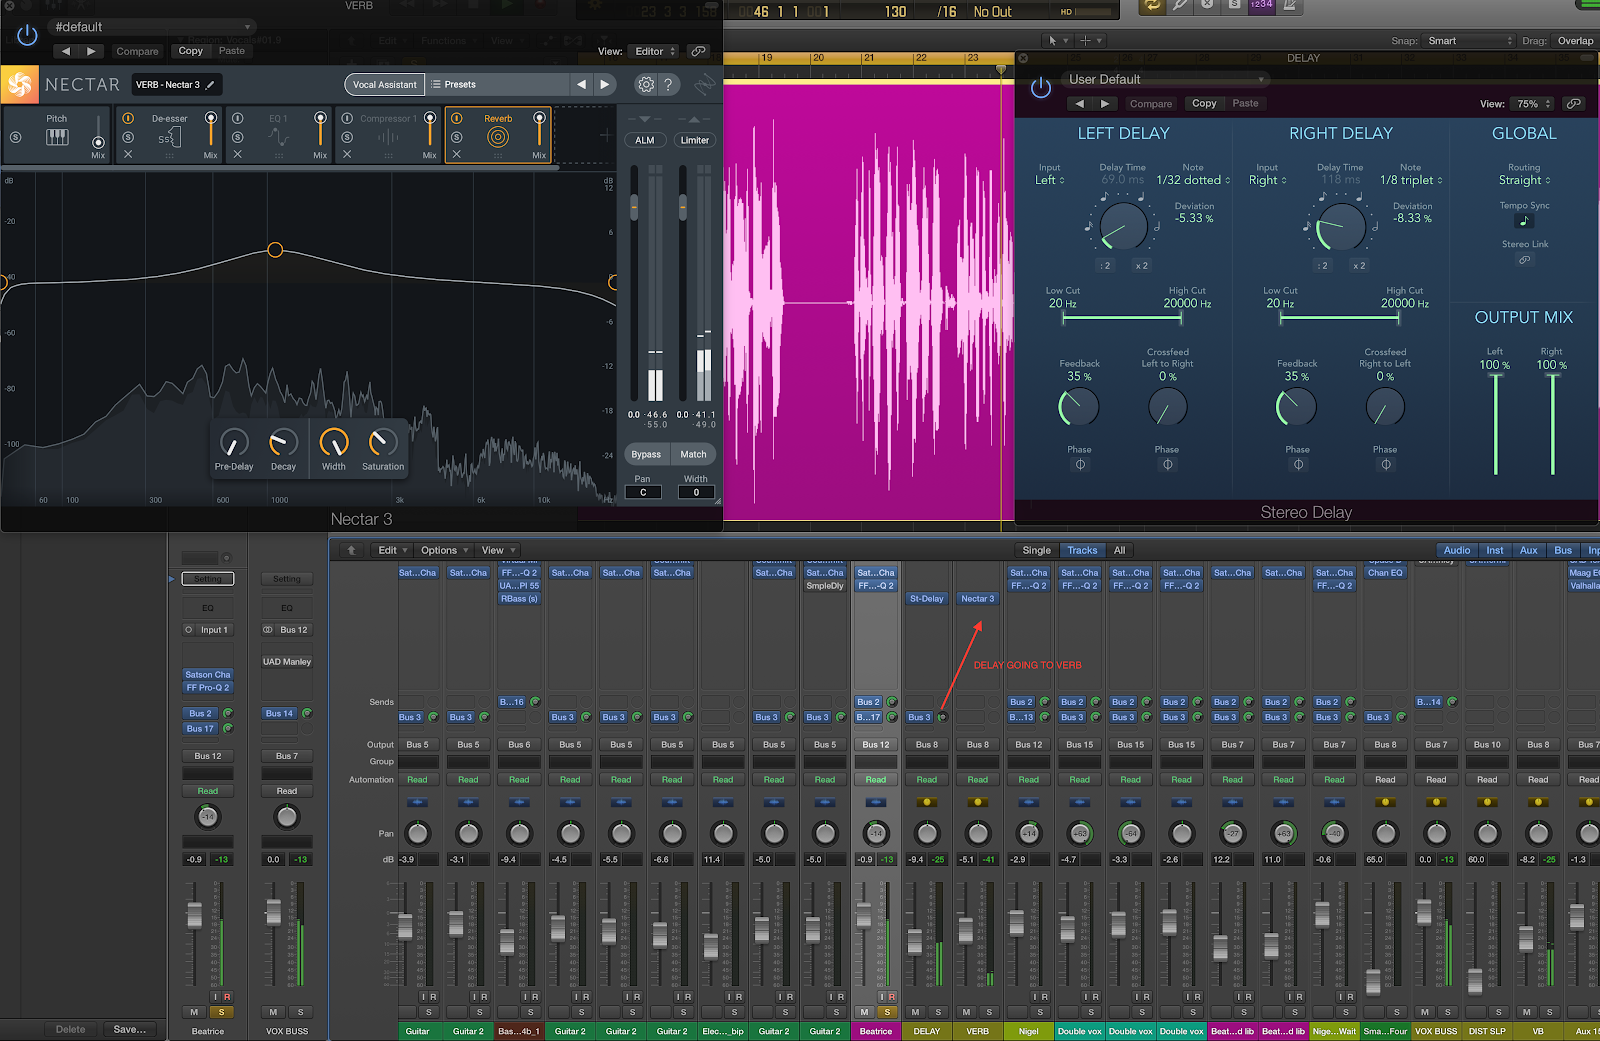
Preparing Vocals for Mixing Mixing vocals is an essential process in music production that requires keen attention to detail for the best results. Preparing the vocals for mixing involves various steps to achieve clear, crisp, and well-articulated sounds. For this reason, a lot of time, care, and attention need to be invested in this process to produce a polished final product. In this article, we explore the crucial aspects of preparing vocals for mixing, from recording techniques to editing and comping vocals. Recording Techniques Before you start mixing, it’s important to get the best possible sound during recording. The quality of the recording has a significant impact on the final mix. To achieve this, it’s essential to ensure that the recording equipment is in good working condition. Additionally, the recording environment should be free from external noise and echo. Proper microphone placement and selection are also essential. To get the best results, record in a soundproof booth with good acoustics. Consider using pop filters and shock mounts to reduce pops and unwanted noise. Editing and Comping Vocals After recording, the next step is editing and comping vocals. This process involves taking multiple vocal takes and combining them to form one cohesive performance. The aim is to align the different takes to create a perfect take. Edit out noise, pops, and clicks. Maintain good dynamics and natural breathing patterns while editing. The vocal comp should have the best lines from each take. The result should be a flawless performance showcasing the best of the vocalist’s strengths. Equalization (EQ) Equalization is the process of balancing the frequencies in the vocal track. It is achieved by boosting and cutting specific frequencies to enhance or remove specific sounds. Use a spectrum analyzer to determine the frequencies that need to be boosted or cut. Adjust the high and low frequency to reduce muddiness and muffle sounds. Ensure that the vocals sound natural, pleasant, and well-balanced. Compression Compression is the process of enhancing the dynamics of the vocal track. It ensures that the vocals are consistent throughout the performance. Compressors are used to reduce the peaks of loud sounds and increase the volume of quiet sounds. Set the attack and release times to achieve the desired effect. Too much compression will sound unnatural, while too little may result in a flat mix. Conclusion Preparing vocals for mixing is a critical process that should never be rushed. It involves paying attention to every detail to achieve the best sound quality. Follow the tips discussed in this article to prepare your vocals for mixing professionally. For more tips and tricks on audio production, win the hearts of your listeners, and keep them coming back for more!

Setting Up The Mix

Setting up the mix is an important part of the mixing process, particularly when it comes to mixing vocals. Making sure that each vocal track is carefully mixed and balanced can make all the difference in the final sound. As you begin to set up your vocal mix, there are a few key considerations to keep in mind.

Choosing The Right Level Balance

One of the most important aspects of mixing vocals is getting the right level balance between all of the different vocal tracks. When it comes to creating a balanced mix, there are a few things to keep in mind:

  • Make sure that each vocal track is levelled within your preferred DAW software.
  • Do not be afraid to use volume automation to adjust different parts of the track dynamically.

Eq And Compression Techniques

Once you have established the right balance of your vocal tracks, the next stage is to create some space in the mix using EQ and compression techniques. Here are some suggestions to get started:

  • Use a narrow Q, high boost on the high-frequency bands and a narrow Q reduction on the mid frequencies to add air to the vocals.
  • Apply mild compression to each vocal track to achieve more consistent dynamics across the recording.

Conclusion

Setting up the mix is a critical component of any mixing process, but it is particularly crucial when it comes to mixing vocals. By establishing the right level balance and utilizing EQ and compression techniques, you can achieve a great-sounding vocal mix that stands out from the crowd.

Is Mixing Vocals Hard

Credit: www.modernmetalsongwriter.com

Advanced Vocal Mixing Techniques

Advanced Vocal Mixing Techniques can be used to add that professional touch to your vocal recordings, making them more engaging and enjoyable. One of the most crucial aspects of vocal mixing is to balance the levels and tone of the vocals. But that’s not all, there are a lot of other things that you can do to make your vocal recorder sound like it was done by a pro.

Adding Effects And Automation

Adding effects and automation to your vocal recordings can elevate them to the next level. Effects like reverb, chorus, delay, and EQ can make your vocals sound wider and more interesting. By using automation, you can manipulate the vocal levels dynamically, making them blend perfectly with the other instruments in your mix. For instance, you can add automation to the volume levels of the harmonies to make them more subtle during the verse and more prominent during the chorus.

Dealing With Pitch Correction

Pitch correction is one of the most critical and challenging aspects of vocal mixing. One wrong note can completely ruin the entire recording. Fortunately, there are many pitch correction tools available today that make this task less daunting. Programs like Antares AutoTune, Melodyne, and Waves Tune can help you fix minor pitch issues without sounding robotic. However, it’s important to use pitch correction sparingly to maintain the natural sound of the vocals.

Overall, advanced vocal mixing techniques can significantly enhance the quality of your vocal recordings. By applying these techniques, you can achieve that professional-sounding vocal mix that will impress your listeners. Just remember to use moderation and let your creativity run wild!

Common Vocal Mixing Mistakes

Mixing vocals can be tricky, with common mistakes including improper EQ, incorrect levels, and forgetting to properly compress. But with a bit of practice and attention to detail, any aspiring producer can improve their vocal mixing skills.

Mixing vocals can be a challenging task, especially for beginners. It requires a lot of attention to detail and patience to get the perfect sound. However, several common mistakes can ruin your efforts, making the vocals sound flat or muddled. Therefore, mastering the art of vocal mixing requires identifying and avoiding these mistakes. Here are some common vocal mixing mistakes and how to avoid them effectively.

Over-processing Vocals

One of the common mistakes many producers make when mixing vocals is over-processing the sound. Applying too many effects, such as compression, reverb, and auto-tune, can ruin the natural character of the vocals. Instead, it’s essential to use these effects sparingly, keeping in mind the desired outcome of the project. To avoid over-processing vocals, focus on the key elements that bring out the best in the sound, including volume, pitch, and EQ.

Ignoring The Importance Of The Instrumental Mix

Another mistake when mixing vocals that many producers make is ignoring the importance of the instrumental mix. It’s crucial to ensure that the vocals sit well within the instrumental mix, or else they may sound disconnected and out of place. Therefore, when mixing vocals, make sure the levels of the background sounds, such as guitars, drums, and keys, complement the vocals. Ensure that the vocals and instrumental mix are cohesive, and the vocal mix doesn’t overpower the instrumental elements. In summary, vocal mixing requires practice and patience to achieve the desired sound. Avoiding these common vocal mixing mistakes can help you create a clear, dynamic, and distinct vocal mix. Remember to keep it simple, prioritize what’s essential to the song and tweak accordingly.

Is Mixing Vocals Hard

Credit: soundcloud.com

Tips For Better Vocal Mixing

Mixing vocals can be a challenging task for many music producers and engineers, but it doesn’t have to be. By paying attention to things like EQ, compression, and levels, you can create crisp and clear vocal mixes that sound professional and polished.

With a bit of patience and practice, anyone can become a master of vocal mixing.

Mixing vocals can be challenging, but with a handful of tips and practices, you can be on your way to producing high-quality vocal mixes. In this section, we’ll discuss tips for getting the vocals right from the start, the importance of practice, and other tricks to achieve the best vocal mix possible.

Get The Vocals Right From The Start

One of the most important tips for better vocal mixing is to start with quality vocals. This means ensuring that the vocal recording is free from background noise, clicks, pops, and other unwanted sounds. Use proper microphone placement, and ensure that the vocalist is close enough to the mic without causing distortion. Once you have a clean recording, adjust the levels to achieve a balance between the vocal and the rest of the mix. Set the gain on the preamp carefully, as this can greatly affect the vocal quality. Remember that the vocal should be the center of attention in most cases, so don’t be afraid to turn up the volume.

Practice, Practice, Practice

Mixing vocals takes practice. With time and experience, you will learn to identify common issues and find ways to fix them. Start by listening to a mix with fresh ears, and then identify problems such as sibilance, muffled sound, or a lack of presence. Use EQ to adjust the frequency balance, and add compression to provide consistency and balance. Remember that vocal mixing is not a one-size-fits-all process. Experiment with different settings, and try to find the balance between a dry and wet vocal sound. Use a reverb or delay effect to add space and warmth to the vocal, but be careful not to overdo it.

Other Tricks For Better Vocal Mixing

Apart from getting the vocals right from the start and practicing, there are other tricks you can use to achieve a better vocal mix. These include:

  • Using parallel compression to add sustain and body to the vocal without affecting the original signal.
  • Adding harmonies and ad-libs to enhance the vocal performance and fill up the mix.
  • Using automation to control the volume and effects throughout the song.
  • Using de-essers to reduce sibilance and harshness in the vocal.

By following these tips and practicing consistently, you can enhance your vocal mixing skills and achieve more professional-sounding mixes.

Is Mixing Vocals Hard

Credit: www.youtube.com

Frequently Asked Questions Of Is Mixing Vocals Hard

How Do You Mix Vocals Easily?

To mix vocals easily, start by setting the levels, EQ, and compression on each track. Then, use reverb and delay to create space around the vocals. It’s also essential to pan the vocal tracks to create a balanced stereo image.

Finally, apply any necessary automation to ensure the vocal tracks sit well in the mix.

What Level Do You Mix Vocals?

The level at which vocals are mixed depends on various factors like the genre of music, the type of vocals, and the overall sound of the track. However, generally, vocals are mixed to be loud enough to be heard clearly but not overpowering the rest of the music.

Additionally, mixing vocal levels also depends on the artist’s preference and the overall impact desired for the song.

Does Mixing Make Vocals Sound Better?

Mixing can enhance vocals and make them sound better by adjusting the levels of different elements in the track. The use of tools such as compression, EQ, and reverb can make the vocals more polished and professional. However, it ultimately depends on the skills of the mixer and the specific goals of the project.

Should You Mix A Beat Before Vocals?

Mixing a beat before vocals is a personal preference, but it is recommended to mix the beat first before adding vocals. This allows you to adjust the levels, EQ, and effects to create a balanced and cohesive sound that compliments the vocals.

Mixing the vocals first can result in a disjointed and inconsistent sound.

Conclusion

Mixing vocals can be a challenging task, but it’s a necessity for any song to sound its best. From EQing and compressing to adding effects and balancing levels, each step requires attention to detail and a good ear. However, with practice and patience, anyone can improve their vocal mixing skills.

It’s all about understanding the technical aspects and using your creativity to enhance the vocals and bring out the emotions in the song. So don’t be afraid to experiment and try different approaches until you find the perfect mix for your vocals.

Categories
Archive

Recording Tips Tricks

Recording Tips and Tricks: To ensure the best possible audio quality, utilize a dedicated recording space, minimize background noise, and experiment with microphone placement. As you prepare to record audio, it’s important to remember that the quality of the final product will be affected by the environment and equipment you use.

With a bit of preparation and attention to detail, however, you can create clear, professional-sounding recordings that capture the essence of your message. Also, we’ll share some essential recording tips and tricks that will help you achieve the best possible audio results.

Related reading: Tips On Recording Vocals and Tips For Repairing Bad Recordings. For background, see Sound recording and reproduction on Wikipedia.

Recording Tips: Creating A Recording Space

Moreover, to create a recording space, it is important to choose a room with good acoustics, sound-proofing, and minimal ambient noise. Use absorptive panels and bass traps for sound diffusion and proper sound insulation. A well-designed recording space will enhance the recording quality and produce professional-sounding audio tracks.

Creating a Recording Space Finding the Right Room When it comes to creating a recording space, the first step is finding the right room. In addition, your choice of room will have a significant impact on the quality of your recordings. Ideally, you want a room that is quiet, spacious, and has good acoustics. To find the right room, consider the following factors: 1. Size: Look for a room that is spacious enough to accommodate your recording equipment and any musicians or vocalists you may be working with. A larger room will also help reduce the chance of sound reflections and reverberations.

2. Location: Choose a room that is away from sources of noise such as busy streets, air conditioners, or other rooms where people are likely to make noise. 3. Furthermore, shape: Opt for a room with irregular shapes, as these tend to minimize the build-up of standing waves and acoustic problems. 4. Windows and Doors: Keep in mind that windows and doors can be sources of sound leakage. While it’s not always possible to completely eliminate external noise, consider using heavy curtains or soundproofing materials to minimize the impact.

Recording Tips: Tips

Additionally, once you’ve found the right room, it’s time to move on to the next step – soundproofing your space. Soundproofing Your Space Soundproofing your recording space is crucial to ensure that unwanted noise doesn’t interfere with your recordings. Here are some effective soundproofing tips and tricks: 1. Seal Gaps: Identify and seal any gaps or cracks in walls, windows, and doors using acoustic sealant or weatherstripping. This will help minimize sound leakage. 2. Use Acoustic Panels: Install acoustic panels on the walls to absorb and reduce sound reflections.

Also, these panels come in various sizes and can be easily mounted with adhesive or brackets. 3. Soundproof the Floor: Consider adding soundproof underlayments or carpets to the floor to minimize impact noise, such as footsteps or chair movements. 4. Build a Vocal Booth: If you’re recording vocals, building a vocal booth can provide an even more controlled environment. This can be done by constructing a small, isolated space within the room using specialized acoustic materials. Remember, the goal of soundproofing is to create a controlled recording environment with minimal external noise interference. Taking the time to properly soundproof your space will significantly improve the quality of your recordings.

Selecting The Right Equipment

Moreover, recording high-quality audio requires the right equipment. One can have the best recording skills, but without the proper equipment in place, the result may be subpar. Choosing the right equipment plays an essential role in recording success. In this article, we will provide you with tips and tricks for selecting the right equipment for recording.

Recording Tips: Microphone Types And Selection

In addition, microphones come in different types, and selecting the right type ensures that the recording captures the sound as desired. The two common types of microphones are dynamic and condenser microphones. Dynamic microphones are best for recording loud sound sources like drums and guitar amps, while condenser microphones are used for recording quieter sources like vocals and acoustic guitars.

When selecting a microphone, it’s vital to consider its directionality. Furthermore, directionality determines how the microphone picks up sound. Options range from omnidirectional microphones that pick up sound from all directions, bidirectional that picks up sound from the front and back, and unidirectional that picks up sound from one direction.

Another critical factor to consider is microphone placement. Additionally, proper placement ensures that the microphone captures the desired sound correctly. The distance between the microphone and the sound source is also crucial. In most cases, placing the microphone about 6-12 inches away from the sound source ensures optimal recording quality.

Audio Interface Selection

Also, an audio interface connects the microphone to the computer and determines the quality of the recording. When selecting an audio interface, it’s essential to consider the number of inputs, outputs, and included features.

Moreover, one of the critical features to look for in an audio interface is the preamp. A preamp is responsible for boosting the microphone signal, ensuring that the recording is audible. Some audio interfaces have built-in preamps, while others require external preamps.

The type of connection on the audio interface is also crucial. In addition, USB interfaces are common and easy to set up, making them the ideal choice for beginners. Thunderbolt and PCIe interfaces are more advanced options that provide better sample rates and lower latency rates.

By following these tips and tricks for selecting the right equipment, you are one step closer to recording high-quality audio. Ensure that you consider all factors before making a final decision on the equipment to use.

Recording Tips: Setting Up The Recording

Furthermore, to set up a recording, first make sure you have the right equipment and software for your needs. Test your setup beforehand, choose a quiet location, and use quality microphones and headphones. Check levels and positioning, and remember to save your recordings regularly.

When it comes to recording, setting up your equipment properly can make or break the success of your project. Before hitting the record button, take some time to consider a few key factors. Additionally, here are some tips and tricks for setting up your recording.

Mic Placement Techniques

Also, mic placement is a critical part of the recording process, and it can affect the quality of your recording. Here are some mic placement techniques to consider:

  • Moreover, close Miking: The mic is placed as close as possible to the sound source to capture a direct, clear sound.
  • Room Miking: The mic is placed further away from the sound source to capture the sound of the room or hall in which the recording takes place.
  • In addition, distance Miking: The mic is placed between the source and the room to balance the direct sound of the source with the sound of the room.

Recording Tips: Choosing The Right Recording Software

Recording software is an important aspect of the recording process, as it can influence the final result. Here are some considerations when choosing the right recording software:

ConsiderationExplanation
CostConsider your budget when choosing recording software, as some options may be more expensive than others.
CompatibilityMake sure the software is compatible with your operating system and hardware.
FeaturesConsider the features you need, such as multi-tracking, built-in effects, and automation capabilities.

By considering mic placement techniques and choosing the right recording software, you can set up a successful recording project. With these tips and tricks in mind, you’re well on your way to producing high-quality recordings.

Recording Tips Tricks

Credit: guitar.com

Optimizing The Recording Environment

To achieve high-quality recordings, optimizing the recording environment is critical. A well-optimized environment helps to capture the best sound quality and eliminate unwanted noise and interference that can ruin your recordings. In this section, we will be exploring the key factors that contribute to a well-optimized recording environment.

Recording Tips: Setting The Right Levels

Setting the right levels is essential to ensure that your recording sounds clear, balanced, and without distortion. The first step is to ensure your recording device is set at the appropriate level. Check your microphone sensitivity and adjust accordingly, too sensitive or low-sensitive microphone may affect the quality of the recording.

It’s also important to monitor your recording levels while recording. Keep an eye on the meters of your recording device and adjust accordingly. Avoid overloading the meters by recording with too high a volume, which can cause distortion and damage the recording quality.

Avoiding Common Recording Pitfalls

  • Room Acoustics: The acoustics of your recording room can have a significant impact on the quality of your recordings. A room that’s too live or too dead can make recordings sound unnatural and unappealing. You can address this by using sound barriers, curtains or installing acoustic foam panels in the room to remove echoes and excess noise.
  • Avoiding Background Noise: Background noise from things like air conditioners, fans, or traffic can be very disruptive and reduce the quality of your recordings. Try recording during low-traffic periods or try to eliminate the noise by soundproofing the room or using a noise reduction filter while editing.
  • Cable Positioning: Electrical devices like computers and lights can introduce interference or hum into your recordings if proper cable positioning is not done. So, always make sure no wire is in contact with any AC source.

In conclusion, optimizing your recording environment is essential to ensure the best quality recordings. By setting the right levels and avoiding common pitfalls like poor room acoustics and background noise, you can capture recordings that are clear, balanced, and free from interference.

Recording Tips: Editing Your Audio

To enhance the quality of your audio recording, editing is a crucial step. Be mindful of background noise and ensure consistent levels throughout the recording. Take time to edit out any unwanted parts and apply effects or EQ as needed to achieve a polished sound.

Editing your audio is a crucial process to refine and enhance the sound quality, which can make a huge difference in the final product. It involves post-production techniques that allow you to manipulate the audio to achieve a more polished and professional sound. In this post, we will discuss some essential tips and tricks to help you edit your audio like a pro.

Tweaking Eq And Other Effects

One of the most effective ways to shape your audio is to use the Equalizer (EQ). It is a tool that can cut or boost specific frequencies in your recording. By adjusting the EQ, you can make your audio brighter, warmer, or more spacious, depending on your needs. Other effects, such as compression, reverb, and delay, can also help enhance your audio. Compression can make the volume more consistent and smooth out any peaks and dips. Reverb and delay can add depth and ambiance to the sound, making it feel more natural and professional.

Recording Tips: Cleaning Up Background Noise

Background noise can be distracting and make your recording sound unprofessional. The good news is that you can reduce or eliminate it using noise reduction tools. These tools work by analyzing the frequency of the noise and subtracting it from the audio. However, be careful not to overuse noise reduction, as it can also remove some of the desirable frequency content from your recording. It’s best to use it sparingly and combine it with other techniques, such as EQ, to achieve a clean and natural-sounding recording.

In conclusion, editing your audio is a crucial step to enhance its quality and give it a professional touch. By using EQ and other effects, as well as noise reduction tools, you can shape your audio to achieve the desired sound. Remember to use these tools judiciously and experiment to find the perfect balance for your recording.

Recording Tips Tricks

Credit: www.groove3.com

Mixing And Mastering Your Tracks

Learn the best recording tips and tricks for mixing and mastering your tracks like the pros. Improve your sound quality and achieve professional results with proper techniques. Perfect your music production skills and create impressive tracks that stand out in the industry.

Recording Tips: Balancing Levels And Panning

Mixing and mastering are the keys to incredible sound quality. When it comes to mixing, balancing levels and panning play a pivotal role. Balancing levels refers to adjusting the volume of individual tracks in such a way that each instrument can be heard without overpowering others. On the other hand, panning refers to the horizontal placement of each track in the stereo field. To achieve a well-balanced mix, start by setting your levels low. Make sure that no track has a volume that is too high or too low. As you start to add tracks, increase the levels gradually. Once you have balanced all the levels, start panning. You can pan instruments like guitar, piano, and vocals, to the center while drums and percussion can be panned to the sides. Remember, panning allows you to create space in your mix.

Final Touches

Once your tracks are balanced, it’s time for the final touches. At this stage, you need to ensure that everything is at the right level, the EQ is well adjusted, and the dynamics are smooth. The three things that you should focus on at this stage are EQ, compression, and reverb. Start with the EQ and make sure all the frequencies are well balanced. Try cutting or boosting a few frequencies here and there to give a little sparkle or warmth to your mix. Follow that up with compression to smooth out the dynamics.

This will help to even out the levels and add more punch to your sound. Finally, add reverb to your tracks to give them depth and a sense of space. In conclusion, mixing and mastering can make or break your recordings. Balancing levels and panning are the first steps to achieving an excellent mix, while EQ, compression, and reverb are the final touches that make your tracks sound professional. Pay attention to these details, and you’ll be amazed at how much better your mixes sound.

Distributing Your Content

With the increasing popularity of video content, recording tips and tricks have become crucial for any content creator. To ensure your content reaches a wider audience, it’s important to distribute it through various channels, such as social media platforms, email newsletters, and video hosting sites like YouTube and Vimeo.

As a musician, you’ve probably spent hours upon hours recording your music. But the job isn’t quite finished yet. You need to get your music out into the world – so it can be heard, liked, shared, and even purchased. This is where distribution comes in.

Choosing A Platform For Your Content

When it comes to distributing your music online, there are many platforms to choose from. Each platform has its own pros and cons, so you need to decide which one is right for you. Some of the most popular platforms include:

PlatformProsCons
SoundCloudEasy to use, free to sign up, great for networkingLimited storage, limited analytics with free account
SpotifyThe largest music streaming platform, great for earning royaltiesDifficult to get noticed, limited control over your content
BandcampArtist-friendly, customizable, great for selling merchandiseLess well-known, not as many features as other platforms

Marketing Your Recordings

Once you’ve chosen a platform to distribute your music, you need to start marketing it. After all, just uploading your music won’t guarantee that anyone will listen to it. Here are some tips for marketing your recordings:

  1. Utilize social media to share your music and engage with your fans
  2. Build an email list to keep your fans updated on new releases and shows
  3. Collaborate with other musicians and cross-promote each other’s work
  4. Submit your music to blogs and online music publications
  5. Play live shows and gigs to gain exposure and connect with your fans

Overall, distributing your music and marketing your recordings effectively is essential for a successful music career. By choosing the right platform and utilizing marketing strategies, you can reach a larger audience and increase your chances of success.

Troubleshooting Your Recordings

Ensure a smooth recording process by troubleshooting your recordings with these helpful tips and tricks. Check your equipment, adjust microphone levels, and listen to test recordings to ensure the best quality sound.

As you’re recording your music, you’ll inevitably run into a few problems. Whether it’s difficulty with levels, distortion, or other issues, troubleshooting your recordings can often be frustrating. Fortunately, there are ways to identify and solve common issues you may run into.

Solving Common Issues

The first step to troubleshooting is identifying what is going wrong. Here are some of the most common issues and their solutions:

Problem #1: Distortion/hiss

If your recording is coming out with a lot of distortion or hiss, it might be because your levels are too high. Lowering the gain on your microphones or turning down the volume on your instrument can often help with this issue. It’s also a good idea to make sure that your recording software isn’t overloading your input.

Problem #2: Uneven levels

If your levels are uneven, it might be because you’re too far away from the microphone. Alternatively, you might be too close and risking distortion. Make sure to find the right distance between you and the microphones. If your equipment offers level meters, use those to adjust your distance. Experimenting and testing gradually will help you find the appropriate recording distance for your instrument or vocal style.

Preventing Technical Problems

Proper Room Acoustics

One of the most common technical problems people experience is poor room acoustics. This issue can manifest in a variety of ways, from harshness or muddiness to reflections or echoes. Proper room acoustics, such as soundproofing curtains or bass traps, can significantly improve the overall acoustics of your recording space.

Use Quality Equipment

You don’t need to splurge on expensive gear, but investing in quality microphones, audio interfaces, and software can greatly improve the quality of your recording.

Check Connections

Before you begin recording, make sure all your equipment’s cables and connections are secure. Loose connections and malfunctioning cables can cause issues like distortion, dropouts, or no audio output.

Maintain Proper Headroom

It can be tempting to max out the volume on all your input sources, but doing so can lead to clipping, distortion, and other audio anomalies. Maintaining proper headroom is essential for preventing technical difficulties in your recordings.

Hopefully, these tips can help you troubleshoot some of the most common issues you may encounter during your recording sessions. Keep experimenting – finding the right settings and techniques can be a rewarding way to improve the quality of your recordings.

Recording Tips Tricks

Credit: m.youtube.com

Frequently Asked Questions On Recording Tips Tricks

How Do You Record Audio Perfectly?

To record audio perfectly, you can follow these steps: 1. Choose a suitable recording location with little to no background noise 2. Use high-quality audio equipment, including microphones and headphones 3. Adjust the audio levels to avoid distortion or clipping 4.

Speak clearly and consistently into the microphone 5. Edit the audio afterward to remove any unwanted noise or errors.

How Can I Improve My Recording Performance?

To enhance your recording performance, consider improving your recording environment, investing in high-quality equipment, optimizing your microphone placement, mastering your technique, and experimenting with post-production techniques such as EQ and compression.

How Can I Record My Voice Better?

To record your voice better, consider investing in a quality microphone, find a quiet and well-lit environment, sit or stand up straight, and speak clearly and at a reasonable pace. Also, avoid background noise and practice speaking before recording.

How Do You Sound Professional When Recording?

To sound professional when recording, first, choose a quiet location free of background noise. Invest in a high-quality microphone and practice good microphone technique. Speak clearly and confidently, with good posture and enunciation. Finally, rehearse your content beforehand and aim for a conversational tone.

Conclusion

By implementing the recording tips and tricks mentioned you can significantly improve the quality of your recordings. With careful planning, preparatory work, and the right tools, you can achieve professional-sounding results without breaking the budget. Whether you’re a seasoned pro or just starting, these guidelines will help you make high-quality recordings that will capture the attention of your audience.

Practice and experimentation are key, so get started today and see what you can create!

Categories
Archive

Mixing Piano

Mixing piano involves blending individual tracks together to create a cohesive sound. Whether it’s acoustic or electronic, the piano can be EQ’d, compressed, and effect filtered to fit perfectly into a mix.

The piano is a versatile instrument that adds a touch of elegance to any musical composition. It could be jazz, pop, hip-hop, R&B, classical, or any other genre. However, mixing the piano can be challenging, especially when you want it to sound natural and clear in the mix.

Related reading: Piano Eq and Keys On The Piano. For background, see Piano on Wikipedia.

Whether you’re working with a live recorded piano or a virtual instrument, balancing the levels, applying EQ, compression, and reverb, and panning the stereo tracks can help bring your piano to life. We’ll share some tips and tricks for piano processing like a pro.

Before You Mix

Piano processing can be a daunting task, even for experienced music producers. Before you start mixing, there are a few things that you need to do to ensure that your mixing process goes smoothly.

Preparing Your Workspace

  • Clear your workspace of any unnecessary clutter.
  • Ensure that your keyboard, mouse, and any other equipment that you need are within easy reach.
  • Make sure that your computer is running smoothly and that you have the necessary software and plugins installed.

Setting Up Your Mix Environment

Your mix environment should be set up for optimal performance. Here are a few things that you should consider:

FactorThings to Consider
AcousticsConsider the acoustics of your room and invest in some acoustic treatment if necessary.
Speakers and HeadphonesInvest in a good pair of speakers and headphones to ensure that you can hear every detail of your mix.
Software and PluginsMake sure that you have the necessary software and plugins installed for your mixing process.

By preparing your workspace and setting up your mix environment properly, you can make the mixing process much easier and more enjoyable.

Getting Started With Mixing Piano

Piano processing can be a complex process, but with the right approach, you can create a clear and balanced sound that enhances your overall mix. Make sure to pay attention to EQ, compression, and balancing levels to achieve the desired results.

Piano processing is an art that can make or break your music. The piano is a fundamental instrument in most genres of music and is often the backbone of the melody and chords. Piano processing can be tricky, but with the right approach, you can create an incredible sound that complements the song. In this article, we will cover the basics of mixing piano and provide some tips to help you get started.

Importance Of Eqing Your Piano

The first step in piano processing is to EQ it properly. EQing will help to enhance the sound of the piano and bring out its best qualities. EQing involves adjusting the frequency bands of the piano to create a well-balanced sound. To EQ a piano, you need to identify the frequency ranges that need to be boosted or cut. For instance, if the piano sounds muddy, you need to reduce the low-frequency range. If it sounds too bright, you need to reduce the high-frequency range. A flat response curve is not necessarily the best option. Use your ears to determine the best EQ settings, and make sure it complements the rest of the mix.

Deciding On Reverbs And Delays

The next step in piano processing is to add reverb and delay to create a more spacious sound. The right reverb can give the piano some depth and warmth, while the delay can give it a sense of space and realism. When selecting reverbs and delays, consider the genre of your music. A long decay reverb might work well for a ballad, while a shorter reverb might be more suitable for a rock song. Always remember that less is more when it comes to reverb and delay.

Compression And Limiting

The final step in piano processing is to use compression and limiting. Compression helps to reduce the dynamic range of the piano, making it sound more even. Limiting is used to prevent clipping and ensure that the volume level doesn’t exceed a certain threshold. When applying compression and limiting, it’s important to use them subtly. Too much compression can result in a lifeless sound, while excessive limiting can cause distortion. Make sure to listen to the track carefully and adjust the settings until you get the desired sound. In conclusion, piano processing requires a delicate approach. It’s all about striking the right balance between EQing, adding reverb and delay, and using compression and limiting. With the right techniques and knowledge, you can create a beautiful piano sound that elevates your music.

Mixing Techniques For Piano

Mixing Techniques for Piano: Piano is one of the most ubiquitous instruments in contemporary music. It’s presence, be it as a featured instrument or in a supporting role, is undeniable. However, despite its versatility, piano can sometimes get lost in the mix. This is where mixing techniques come in handy. In this post, we’ll explore the various techniques you can use to make sure your piano tracks are heard loud and clear.

Adding Depth With Eqing:

EQing is a crucial component of mixing any instrument. To add depth to your piano, start by removing the unwanted frequencies such as the muddiness in the low end and the harshness in the high end. You can then boost the frequencies that give the piano its character, like the mid-range frequencies that highlight the attack of the keys. By doing so, you create separation between the piano and other instruments in the mix, making it stand out without sounding overpowering.

Creating Space With Reverb:

Reverb is an essential tool for creating a sense of space in your mix. Adding reverb to your piano track can help create the illusion of it being played in a natural environment, whether it’s a concert hall or a small room. However, it’s important to use reverb judiciously. Too much reverb can muddy the mix, whereas too little can make the piano sound dry and lifeless.

Using Delay For Stereo Widening:

Delay is another tool that can add depth and space to your piano track. By using a stereo delay, you can pan the left and right signals slightly apart, creating a wide stereo image. Be careful not to overdo it, though. The delay effect can quickly become distracting and take away from the piano’s natural tone.

Advanced Techniques

The process of piano processing involves advanced techniques such as EQ, compression, reverb and panning to create a well-balanced, polished sound. Experimenting with different settings and using your ears to adjust levels can help bring out the full potential of the instrument in a mix.

When it comes to piano processing, there are basic techniques involved like adjusting volume, panning, and EQ. However, if you want to take your piano mix to the next level, try incorporating some advanced techniques. In this article, we will focus on three: adjusting velocity, layering piano, and automation.

Adjusting Velocity For A Better Mix

One way to make your piano mix sound more realistic is by adjusting the velocity of each note. Not every pianist hits every key with the same force or velocity. Therefore, it is important to replicate this in your mix. Here are some tips for adjusting velocity:

  • Use a MIDI controller to adjust velocity levels manually
  • Use a velocity plug-in to adjust levels automatically
  • Aim for a mix that sounds natural and dynamic

By adjusting the velocity of each note, your mix will sound more like an actual performance.

Layering Piano: When And How To Do It

Sometimes, a single piano track is not enough to create the desired sound. That’s where layering comes in. However, it’s important not to overdo it, or your mix may sound cluttered. Here are some tips for layering piano:

  • Use a different piano sound with a different frequency range for layering
  • Layer sparingly to avoid clutter
  • Consider layering only specific parts instead of the whole performance

Layering can be a great way to add depth and dimension to your piano mix, but be sure to do it in a way that enhances the overall sound rather than detracting from it.

Automation For Maximum Value

Automation is a powerful tool for creating dynamic and interesting piano mixes. By automating parameters like volume, panning, and EQ, you can create an impression of the performer controlling the sound dynamics. Here are some tips for automation:

  • Make subtle changes to avoid jarring transitions
  • Experiment with different parameters to create interesting effects
  • Automate the parameters so they vary over time

Automation is a great way to keep your listener engaged and add interest to your piano mix. By mastering these advanced techniques, you can take your piano mixes to the next level. Adjusting velocity, layering piano, and automation can add depth, dimension and interest to your mix. By experimenting with these techniques, you can take the listener on a musical journey full of surprises and enjoyable experiences.

Things To Avoid While Mixing Piano

While mixing piano, it’s important to avoid overcooling the sound with too many effects. Strike a balance between the frequency range and add only subtle enhancements. Keep in mind that over-processing may ruin the natural tone and cause clashing with other instruments.

Piano processing is an essential task for producing high-quality music. Piano is a complex instrument and requires careful attention while mixing. However, there are certain things that you should avoid to ensure that your piano sounds its best. In this section, we will discuss three things that you should avoid when mixing piano: too much compression, overusing effects, and careless EQing.

Too Much Compression

Compression is an essential tool for controlling the dynamic range of your piano. However, too much compression can completely destroy the natural dynamics of the instrument. To avoid this, it is essential to use compression judiciously. Here are some things you should keep in mind:

  • Avoid using too much compression on the piano
  • Use different compressors with different settings to achieve a natural sound
  • Be careful while setting the attack and release time of your compressor

Overusing Effects

Effects can add character and depth to your piano, but overusing them can make your piano sound unnatural. Here are some things you should keep in mind:

  • Avoid using too many effects on the piano
  • Use effects that complement the style and mood of the song
  • Be careful while setting the wet/dry mix of your effects

Careless Eqing

EQing is an essential part of any mixing process, and it is especially important when mixing a piano. However, careless EQing can completely ruin the sound of your piano. Here are some things you should keep in mind:

  • Avoid EQing too much on the piano
  • Make small adjustments and listen carefully to the changes
  • Be careful while cutting or boosting certain frequencies

In conclusion, piano processing requires careful attention to detail. The above-mentioned things should be avoided while mixing piano to ensure that it sounds natural and complements the overall sound of the song. Remember, less is more in most cases, so use your tools judiciously, listen carefully, and make small adjustments for the best possible sound.

Mixing Piano

Credit: www.production-expert.com

Tips For Better Piano Mix

To achieve a balanced and harmonious piano mix, begin by EQing the low end to remove any unwanted rumble. Experiment with panning and reverb to create spatial depth and clarity in the mix. Consider the playing style and dynamics of the piano performance when adjusting levels and frequencies.

As a content writer, my tips for better piano mix will help you to achieve that perfect sound you’ve been seeking. Piano processing is unique because of its ability to blend with almost any type of music genre. However, creating an exceptional blend of piano and other instruments is not a walk in the park. Here are some helpful tips that will guide you in mixing the piano in your music:

Understand The Role Of Piano In Your Mix

The first step in achieving a better piano mix is to understand the role it plays in your music. You need to ask yourself if the piano is the leading instrument or just a supporting role. Once you determine the piano’s role, you can adjust the volume, panning, and effects to suit the role. For example, if the piano is playing a lead role, you would want to ensure that it stands out in the mix.

Getting The Best Sound Possible

A good piano mix starts with capturing high-quality sound. If you’re recording live piano, ensure that the room is properly treated to reduce unwanted noise, acoustics, and reflections. On the other hand, if you’re using a sampled piano sound, ensure that it has the right tone, sustain, and articulation.

Choosing The Right Piano Sound

Choosing the right piano sound is crucial to achieving a great mix. There are different types of pianos, such as grand piano, upright piano, and digital piano, each with its unique sound. If you want a bright sound, then you could go for a grand piano. If you want a more mellow sound, then an upright piano will be ideal. On the other hand, if you want more flexibility, then a digital piano is your best bet.

In conclusion, piano processing in your music can be a challenging task, but with these tips, you’re on your way to achieving a fantastic sound. Understanding the role of piano in your mix, getting the best sound possible, and choosing the right piano sound will put you in a better position to create a perfect piano mix that will bring out the best in your music.

Mixing Piano: The Final Touches

Achieve the perfect sound of your piano track with the final touch of mixing. It is crucial to blend the piano with the rest of the instruments and vocals while retaining its distinct sound.

Balancing And Panning Your Mix

Balancing and panning are crucial steps in the final touches of piano processing. When you balance your mix, you make sure that all elements have their own space and each part of the mix is audible. This way, no single instrument overpowers the others, and the mix sounds coherent. Meanwhile, panning helps you place each instrument in the stereo field. You can pan your piano to one side while complementing it with other instruments on the other side. This technique widens the sound field and creates a more pleasing listening experience.

Moreover, one way to balance your mix is by adjusting the faders. You can start with the piano fader at unity gain and then make room for other instruments. Sometimes, certain piano parts need to be louder or quieter to make other instruments stand out in the mix. Lastly, panning is a matter of preference, but start with the piano in the center and adjust the position of other instruments.

Final Listening For Perfection

The final listening stage is the most crucial part of piano processing. Here, you need to pay extra attention to details to ensure that the mix is perfect. Remember, always check your mix at low, mid, and high volumes. Listen for any frequency buildup and make adjustments to EQ. You should also check for any timing issues, such as delay or reverb. Finally, Walk around the room to ensure that the mix sounds great from different listening positions. Additionally, you can listen to your mix on different devices to double-check the mix.

Play your mix on a car stereo, a laptop, or headphones, for example. This way, you’ll get a sense of how your mix sounds in different listening environments. Overall, piano processing requires a balance of skills, knowledge, and creativity, so take your time with the final touches, and you’ll achieve a great-sounding mix.

Mixing Piano

Credit: www.musicguymixing.com

Mixing Piano

Credit: www.izotope.com

Frequently Asked Questions On Mixing Piano

How Do You Mix Piano Music?

Piano processing music requires careful attention to volume levels, panning, EQ, and effects. Start by balancing the levels of each track, ensuring no clipping occurs. Then, pan each track appropriately to create a stereo image. Use EQ to remove unwanted frequencies and add clarity to the sound.

Finally, add effects like reverb or delay to enhance the overall sound.

How Do You Mix And Eq On A Piano?

To mix and EQ a piano, first adjust the levels of each track to balance the sound. Next, remove unwanted frequencies with EQ, such as the rumble of the pedals or the noise of the hammers. Boost or cut frequencies to enhance specific sounds or fix problems.

Finally, use compression to even out the sound and make it consistent.

Should I Mix Piano In Mono Or Stereo?

The decision to mix piano in mono or stereo depends on your personal preference and the context of the song. Mixing in mono can create a centered and focused sound, while stereo can provide a wider and more expansive sound.

Experiment with both options and find what works best for the particular track.

How Loud Should Piano Be In A Mix?

The piano should be balanced with the other instruments in the mix. It should be audible enough to be heard, but not overpowering. It is important to listen to the overall mix and adjust the piano levels accordingly. There is no specific volume level as it depends on the song and the desired effect.

Conclusion

To sum up, piano processing requires precise attention to detail and a keen ear. As a sound engineer, you will need to learn how to balance the different sounds, frequencies, and effects to achieve the desired output. Experimentation is key; don’t be afraid to try new things and see how they sound.

Remember to always keep the listener in mind and make sure the piano blends seamlessly into the overall mix. With practice and patience, you can master the art of piano processing and take your productions to the next level.

Categories
Archive

Reverb Aux Send Vs Insert

The main difference between a reverb aux send and insert is that an aux send allows the original signal to remain untouched, while a reverb insert alters the original signal. Aux sends send a copy of the original signal to an auxiliary channel, which is then altered with reverb and mixed back with the original signal.

On the other hand, an insert sends the original signal through the reverb effect before returning it back to the mix. When mixing audio, it is important to understand the differences between using an aux send and an insert for adding reverb effects.

While an aux send allows for greater control over the reverb effect, an insert can produce a more natural sound by blending the original signal with the reverb effect. Both techniques can be useful depending on the desired sound and mixing preferences. By understanding the differences between the two, audio engineers can make more informed decisions when mixing their tracks.

Reverb Aux Send Vs Insert

Credit: www.izotope.com

Aux Send Vs Insert

Using a reverb effect can enhance your audio production, but should you use an Aux Send or an Insert? Aux Sends allow you to add reverb to multiple tracks, while Inserts add reverb to a single track. The choice depends on your preference and mixing needs.

As an audio engineer, understanding the difference between Aux Send and Insert can make a big difference in the quality of your productions. Aux Send and Insert are two common techniques used in the audio production process. Although both are used to manipulate sound, they function differently and have their own unique advantages. In this post, we will discuss the definitions of Aux Send and Insert, how they work, and the respective advantages of using each technique.

Definition Of Aux Send And Insert

Aux Send is a process that allows audio signals to be sent from a single source to multiple outputs. It creates a parallel signal path that can be used for a variety of effects, including reverb, delay, and compression. In contrast, Insert is a process that allows audio signals to be routed through an external signal processor. Insert works by interrupting the normal signal path of a channel strip to allow the inserted processor to modify the sound.

Working Of Aux Send And Insert

The working of Aux Send involves setting the levels of the signal to be sent and determining the destination of the signal. The signal level on the channel is then adjusted to mix in the auxiliary signal, which is then sent to the Aux Send output. On the other hand, Insert works by inserting an external processor into the signal chain. The signal is routed through the processor, which modifies the sound, before being routed back into the signal chain.

Advantages Of Using Aux Send Over Insert

One of the advantages of using Aux Send is that it allows for the use of multiple effects on a single signal path. It also makes it easier to control the level of the effect in the mix. Another benefit of using Aux Send is that it saves processing power, as only a single signal path is being processed through the effect rather than multiple paths. Additionally, it provides more flexibility in routing signals and allows for stereo imaging.

Advantages Of Using Insert Over Aux Send

Insert provides more precise control over the signal by allowing you to insert a processor into the signal path. It also provides greater transparency and clarity since the signal is being processed in a single path. This ensures that the effect is applied only to the intended signal and does not bleed into other signals. Moreover, since you are inserting the processor directly into the signal chain, it has lower latency than Aux Send. In conclusion, both Aux Send and Insert are crucial techniques in audio production. Understanding how each technique works and their respective advantages can help you make informed decisions in your productions. Whether you choose to use Aux Send or Insert will depend on your specific needs and creative goals.

Reverb Aux Send Vs Insert

Credit: www.mixinglessons.com

When To Use Aux Send

As an audio engineer, it’s essential to know the difference between using Reverb Aux Send and Insert. Knowing when to use aux send is crucial in creating a well-balanced mix. Below are some instances where using aux send can enhance the overall sound of the track.

Creating Ambience

When mixing a track, adding some reverb to certain elements can create depth and space. For instance, using a subtle amount of reverb on the background vocals, guitars, and drums can add a sense of ambiance to the mix. You can also use a longer decay time to simulate larger spaces like concert halls.

Building Depth

Reverb aux send can help create a sense of space in a mix and enhance the perceived depth of the different elements. For example, by using shorter decay times on sounds positioned in the foreground, with longer decay times on sounds behind them, you can give your mix a more 3D feel. Similarly, using reverb on vocals can make them sound like they occupy their space within the mix, rather than just hovering on top of everything.

Adding Space

Sometimes, a mix can feel a bit crowded, and the sounds seem to overlap with each other. Using Reverb Aux Send can help fix this issue by adding space between the different elements. Adding reverb to the lead vocals or other lead elements can help them stand out in the mix while creating a sense of separation from other instruments.

Creating Special Effects

Finally, Reverb Aux Send can be used to create unique, special effects. By tweaking the size, decay time, and other parameters, you can create anything from a subtle slapback delay on a vocal to an over-the-top shoegaze guitar effect. This technique is particularly popular in genres like ambient, experimental, and post-rock.

When To Use Insert

One key consideration in using reverb in mixing is whether to use a reverb aux send or insert. While both methods can achieve a similar effect, using an insert can provide more control over the reverb sound and its interaction with other elements in the mix.

Equalization

When you want to apply EQ to your signal, use an insert. An insert allows you to insert an EQ processor into the signal path in a way that creates no potential for feedback. By applying EQ in the insert, you have the ability to remove or cut frequencies from the signal path.

Compression

Compression is another common application in which inserts excel. When you want to apply compression to a signal, you can use an insert to insert a compressor into the signal path. By using the insert, you can adjust the compressor’s gain reduction and compression ratio to create the desired effect.

Distortion

An insert is also the best choice for applying distortion to a signal. Distortion can add a gritty edge to a sound and can be used for creative effect. Using inserts to add distortion to a signal allows you to create the desired effect without altering the dry signal.

Saturation

Inserts can also be used for saturation. Saturation is similar to distortion, but it tends to be more subtle and adds a warmer, vintage-like sound to a signal. Using inserts for saturation provides the opportunity to create the desired effect while maintaining control over the wet and dry mix.

How To Use Aux Send

To achieve a more natural-sounding blend of reverb in your mix, you may consider using the Reverb Aux Send instead of the Insert. The Reverb Aux Send enables you to send a small portion of the audio signal to a separate reverb bus, making it effortless to balance the ratio of dry to wet signals in your mix.

Setting Up Aux Send In Daw

To set up an Aux Send in your Digital Audio Workstation (DAW), create a new auxiliary channel and assign it to the output of your choice. In most DAWs, this can be done by selecting “create new aux track” or “create new bus”. Make sure the output of your audio tracks is set to the same output that you assigned to your new Aux Channel.

Routing Signals To Aux Send

To route a signal to your Aux Send, use the “send” or “aux send” knob on your audio track. This knob will determine the amount of signal that is sent to your Aux Channel.

Using Plugins With Aux Send

Using plugins with Aux Send is a great way to add effects to multiple tracks at once. To do this, insert your desired plugin on your Aux Channel and adjust the effects to your liking. You can then use the send or aux send knob on your audio tracks to add the desired amount of effect to each track.

Tips For Using Aux Send

– Use Aux Send to create depth and dimension in your mix by adding reverb or delay to certain tracks. – Use a separate Aux Channel for each effect to avoid overloading one channel. – Be mindful of the amount of signal you are sending to your Aux Channel to avoid distortion. – Experiment with different plugins and signal amounts to find the perfect effect for your mix. Overall, Aux Send is a powerful tool for adding effects and dimension to your mix. By following these simple steps and tips, you can effectively incorporate Aux Send into your mixing process.

How To Use Insert

Insert and reverb aux send are two different ways to add reverb to your track. The main difference is that the insert affects the original track while the reverb aux send creates a separate track for the reverb. Use the insert for a more direct and intense reverb effect, and the reverb aux send for a more subtle and controlled effect.

Inserts are a useful tool in mixing that allow you to apply an effect to a specific track without affecting other tracks. This is useful when you want to apply an effect such as compression or EQ to a specific track. In this section, we will discuss how to use insert in your DAW to enhance your mixing skills.

Setting Up Insert In Daw

Setting up insert in your DAW is relatively easy. Simply follow these steps:

  1. Select the track you want to apply the effect to.
  2. Locate the insert section on your DAW’s mixer channel.
  3. Click on the insert slot you want to use.
  4. Select the plugin you want to use.

Choosing The Right Insert Plugin

Choosing the right insert plugin can make a significant difference in your mix. Here are some tips on selecting the right insert plugin:

  • Choose a plugin that complements the track.
  • Consider the effect you want to apply to the track.
  • Read reviews and user feedback on the plugin.
  • Test the plugin before purchasing it to ensure that it works with your DAW.

Adjusting Insert Settings

After selecting your insert plugin, it’s time to adjust the settings to get the right sound. Here are some tips on adjusting insert settings:

  • Start with the default settings and make adjustments gradually.
  • Listen to how the effect affects the track and make adjustments based on what you hear.
  • Use the bypass button to compare the sound with and without the effect.
  • Use automation to help you achieve the desired effect.

Tips For Using Insert

Here are some additional tips for using insert:

  • Avoid using too many inserts as it can clutter the mix.
  • Place the insert effect before the fader to ensure that the effect is not affected by the fader position.
  • Use presets as a starting point to save time and get a better sound.
  • Experiment with different plugins to find the right sound for your mix.

With these tips, you can effectively use insert to enhance your mix and take your music to the next level.

Reverb Aux Send Vs Insert

Credit: support.emerson.edu

Frequently Asked Questions Of Reverb Aux Send Vs Insert

Should You Put Reverb On A Send?

Yes, it’s recommended to use reverb on a send. This way, you can apply the same reverb to multiple tracks and have more control over the overall mix. It also saves processing power since the reverb is only being applied once instead of on every individual track.

What Is The Purpose Of Aux Send?

An aux send is a feature found on audio mixing consoles that allows you to create a separate mix of audio signals. It allows you to send a portion of an audio signal to another place in the mix, such as for sending a signal to a reverb processor.

The purpose of an aux send is to create more control over the sound and keep the original mix intact.

What Is The Difference Between Send And Insert Fx?

Send FX sends the entire signal to an external processor or plugin, creating a parallel signal. Insert FX inserts an effect into the signal chain, affecting the original signal.

What Does Aux Return Do?

Aux return is an input on a mixer that connects to an external processor and allows you to add effects to the audio signals. It sends a copy of the audio to the processor, which adds effects before returning the signal to the mixer.

This enables you to apply effects, such as reverb or delay, to specific channels independently.

Conclusion

Both reverb aux send and insert are crucial tools for adding reverb effects to your music productions. The decision to use one over the other largely depends on your mixing style and the specific features of your audio software. Regardless of which method you choose, it’s important to experiment and find the right balance between reverb and other elements in your mix.

With practice and a bit of experimentation, you’ll be on your way to creating mesmerizing music productions that stand out in a crowded industry.

Categories
Archive

Home Studio Essentials

Home studio essentials include a computer, audio interface, microphone, and headphones. Setting up a home recording studio can be a daunting task, but with the right equipment, it can be an affordable and rewarding experience.

Creating a home studio is a meaningful investment for musicians and producers of all levels. It not only allows for more creative control and flexibility, but it also provides a space to experiment and hone one’s skills. With technological advancements, it is now easier and more affordable than ever to build and operate a home recording studio.

In addition to the essentials mentioned above, other key elements may include a DAW (digital audio workstation), studio monitors, acoustic treatment, and various types of software and plugins. This article will explore each of these items in detail and provide guidance on selecting and setting up equipment for a successful home studio.

Home Studio Essentials

Credit: blog.native-instruments.com

Choosing The Right Room

A home studio can be a musician’s or content creator’s dream come true. However, having the right equipment, software or programs alone cannot guarantee success. The environment in which you produce your content plays an essential role in determining the quality of your output. This is why choosing the right room for your home studio is crucial. In this article, we will explore some factors to consider when selecting a room for your studio.

Size And Space

The first thing to consider when choosing a room for your home studio is the available space. A small room can be challenging to work with. You need adequate space to move around and arrange equipment, especially if you plan to record live instruments. On the other hand, a large room can have acoustic challenges if not appropriately treated. Ideally, you want a room that provides enough space for your studio equipment without leaving you feeling cramped.

A larger room also provides you with more options for sound treatment solutions. Acoustic foam panels, bass traps and diffusers can help to improve sound quality in your home studio. The right balance of absorptive and reflective surfaces can create a natural-sounding space for recording and mixing.

Acoustics

Acoustics is a critical factor to consider when choosing a room for your home studio. The right acoustic treatment can improve the quality of your audio recordings and enhance your mixing and mastering process.

If you are lucky, you may find a room that already has excellent acoustics. However, most rooms require some degree of acoustic treatment to achieve an ideal sound. The first step is to conduct an acoustical analysis of the potential room using a frequency response analyzer. This tool measures the response of the room to sound waves and identifies problem areas that need treatment.

  • Acoustic panels absorb sound reflections and improve clarity
  • Bass traps reduce low frequency build-up and control the room’s resonances
  • Diffusers scatter sound waves and create a more natural-sounding space.

Striking a balance between these acoustic treatments can be difficult. You may want to consult with an acoustic treatment professional to achieve the perfect sound for your home studio.

Choosing the right room for your home studio can be the difference between a mediocre output and a sensational one. The size and space of the room, as well as its acoustics, are essential factors to consider when selecting a room for your studio. Take the time to choose the right room, find the right balance of acoustics treatments, and you’ll be on your way to producing quality content in no time.

Home Studio Essentials

Credit: www.sweetwater.com

Basic Equipment Needed

Setting up a home studio can be a challenging task, but it’s worth the effort if you’re passionate about music production. One of the most crucial aspects of creating a home studio is acquiring the right equipment to ensure you produce high-quality music. Here is a breakdown of the basic equipment you need:

Computer

To create music, you need a computer that has a decent processing speed, RAM, and storage space. A good quality computer is the backbone of your studio as it plays an integral role in running software and processing the audio.

Daw Software

DAW (Digital Audio Workstation) software is used to record, edit, and mix music. It’s the heart of any home studio, and there are numerous software applications available in the market. Some popular DAW software includes GarageBand, Pro Tools, Ableton Live, Logic Pro, and FL Studio.

Microphones

A microphone is an essential tool for recording vocals and instruments. Dynamic microphones are generally cheaper and more durable, making them an ideal option for home studios. On the other hand, condenser microphones are more expensive and sensitive, making them better suited for recording high-quality vocals and acoustic instruments.

Audio Interface

An audio interface is an external device that connects to your computer and enables you to connect microphones, instruments, and studio monitors to your system. It’s crucial to invest in a good quality audio interface that has preamps to ensure that the sound captured by your microphones is of the highest quality.

Studio Monitors

Studio monitors are an essential component of a home studio as they enable you to hear the intricate details of your music. They differ from regular speakers as they produce a flatter frequency response, which means you’ll hear a more accurate representation of your sound. This allows you to make better mixing decisions as you’ll be able to distinguish between different levels and frequencies.

In conclusion, acquiring the right equipment is essential for creating a professional-sounding home studio. By investing in a good quality computer, DAW software, microphones, audio interface, and studio monitors, you can be well on your way to producing high-quality music.

Setting Up Acoustics

Setting up acoustics in your home studio is essential if you want to produce quality sound. Not everyone is aware of the fact that the room they record in can affect the final output of the recording. That’s why it’s crucial to understand different ways to set up acoustics in your home studio. The three essential components to consider while setting up acoustics are diffusion, absorption, and bass traps.

Diffusion

Diffusion is a technique that makes the sound waves spread out more evenly in the room. It breaks up any direct reflections that can cause a slap-back echo. Using diffusers is a great way to disperse the sound waves and create a better listening environment. Diffusers scatter sound waves in different directions, which helps prevent unwanted sound reflections. There are many diffusers available in the market, including quadratic and skyline diffusers.

Absorption

Absorption is an essential component for any home studio setup. An ideal recording space is one with minimal reverberation. Using acoustic panels is the easiest way to achieve this goal. Acoustic panels are designed to absorb sound waves and prevent them from bouncing off walls. These panels come in many shapes and sizes, and they can handle different frequencies. They’re an excellent investment for home studios, and they help set up a professional atmosphere for recording.

Bass Traps

If you’re looking for a way to control low frequencies in your home studio, bass traps are the way to go. The low-frequency sounds that accumulate in corners of the room are known as “room modes.” These room modes can cause a build-up of bass in the recording, which can be difficult to control during mixing. Bass traps can help absorb some of that trapped sound energy, resulting in a more balanced sound. Bass traps come in different shapes, including triangular and cylindrical shapes. They’re a great investment for any home studio set up.

Setting up acoustics might be confusing initially, but by using these essential components, you can achieve a professional sound recording in your home studio. Diffusion, absorption, and bass traps are essential components that should not be overlooked. By using these techniques, you can produce a high-quality sound in your home studio without breaking the bank.

Recording Techniques

Learn essential home studio recording techniques, including microphone placement, soundproofing, post-processing effects and mixing. Successfully implement these techniques to produce high-quality music right from your home setup.

Recording Techniques Recording music at home has never been easier, thanks to the wealth of affordable home studio equipment that is now available. With some basic gear and a few essential recording techniques, you can capture high-quality audio that rivals professional studio recordings. In this post, we’ll focus on recording techniques that will help you achieve fantastic results with your recordings. Mic Placement The placement of your microphone can have a significant impact on the sound that you capture. A few inches can mean the difference between a clear, articulate recording and a muddy, unintelligible mess. Here are a few tips for mic placement: – Place your microphone close to the sound source for a more intimate sound. – For a roomier, more spacious sound, place the microphone farther away. – When recording vocals, place the microphone at the singer’s mouth and slightly above it for a brighter sound. Choosing the Right Mic Choosing the right microphone is crucial for getting the sound you want. Here are some tips for finding the right mic: – Condenser microphones are great for recording vocals and acoustic instruments. – Dynamic microphones are better for recording electric guitars and drums. – Ribbon microphones are great for capturing natural, warm sounds. Recording Vocals When recording vocals, it’s essential to focus on capturing a clean, clear sound. Here are some tips for recording vocals: – Reduce background noise by using a pop filter or a noise gate. – Use a compressor to even out the volume of your vocal track. – Experiment with different microphone placements to find the perfect sound. Recording Instruments Recording instruments can be a bit trickier than recording vocals, but with some patience and practice, you can achieve great results. Here are some tips for recording instruments: – Use a close mic technique to capture the sound of the instrument up close. – Use a room mic to capture the natural sound of the instrument in the space. – Experiment with different microphone placements to find the perfect sound. With these recording techniques, you’ll be well on your way to creating fantastic recordings in your home studio. Remember to experiment, have fun, and never stop learning. Happy recording!

Mixing Essentials

Mixing is the process of combining different audio elements to create a cohesive sound. It involves balancing and blending different tracks while enhancing their individual qualities. In this section, we will discuss some of the essential tools and techniques that you need to know to achieve a professional sound in your home studio.

Eq

EQ or equalization is a crucial tool in mixing that allows you to adjust the balance and frequency content of individual tracks. With EQ, you can boost or cut specific frequencies to shape the sound of the individual tracks and make them fit together better in the overall mix. It’s essential to use EQ tastefully, so you don’t overdo it, and the tracks are still sounding natural.

Compression

Compression is another vital tool in mixing that helps you manage the dynamic range of audio tracks. It reduces the difference between the loudest and softest parts of a track, so all parts of the song are audible and sound well-balanced. By using compression, you can make the lead vocal sit nicely on top of the mix and the drums glue together, creating a cohesive sound.

Reverb

Reverb is all about creating a sense of space or depth in your tracks. It emulates the sound of a room or a hall and adds a sense of dimension to your tracks. Reverb can also be used creatively to create special effects or add emotional impact to specific parts of a song. As with EQ, it’s essential to use reverb tastefully and vary according to the genre of music you’re creating.

Delay

Delay is another popular effect used in mixing that creates an echo or a slapback effect in the track. It can add a sense of depth or playfulness to the sound while simulating the sound of a space or environment. When used correctly, delay can make vocals sound larger than life, or create a dreamy soundscape for an instrumental track.

Summary of Mixing Essentials
Tool/TechniqueFunctionUsage
EQBalance & frequency adjustment of tracksTastefully to ensure natural sound
CompressionManagement of track dynamic rangeTo create cohesive & well-balanced sound
ReverbCreation of a sense of space or depthTo add dimension & emotional impact
DelayCreation of echo, slapback effectsTo add depth, playfulness & dreamy soundscape

By mastering the four mixing essentials, you can achieve a professional and polished sound that can complete with major label releases. These are just the basics, and as you continue to hone your mixing skills, you can explore more complex techniques and tools and create your unique signature sound.

Home Studio Essentials

Credit: output.com

Mastering Your Tracks

Your home music studio is nearly complete, and you’ve recorded, mixed, and edited your music tracks. What’s next? It’s time to bring out the best in your music by mastering your tracks. Mastering is a crucial step in the music production process as it ensures that your music tracks have a consistent sound and volume across different platforms. In this post, we’ll discuss what mastering is and the essential tools you’ll need to get started.

What Is Mastering?

Mastering is the final process step to balance and optimize the sonic elements of your tracks. It involves adjusting the levels of various audio elements, equalization (EQ), compression, stereo imaging, and loudness to create a consistent, polished, and ready-for-distribution final product. You will need a good understanding of music production, mixing, and mastering, as well as quality headphones, studio monitors, or both.

Spectral Processing

Spectral processing allows you to visualize and edit audio frequencies. Spectral analyzers and equalizers let you identify and target the specific frequencies that need boosting, cutting or retaining for each instrument or track. EQ software helps in shaping the tone of your tracks. Select a high-quality EQ plugin to do the job right.

Stereo Imaging

Stereo imaging gives your music tracks their sense of space and depth. Panning audio elements in the stereo field influences how they sound. Reverbs, delays, and other effects affect how audio elements are perceived spatially. You can use a stereo imager tool to widen or narrow the stereo image of your music tracks.

Loudness Maximization

Loudness maximization is the process of maximizing the perceived volume of your music tracks while minimizing distortion. It’s essential to make sure that your music tracks sound consistent from the quietest part to the loudest part. A limiter is a tool used in loudness maximization to control the peaks in the music tracks and increase the perceived volume level.

You’ve now got a basic understanding of mastering your tracks essential tools: spectral processing, stereo imaging, and loudness maximization. Incorporating these tools and techniques into your home music studio setup will help you achieve that polished, professional sound that will sound great across all platforms.

Maintaining Your Home Studio

Maintaining your home studio is crucial to ensure a successful recording session. Keep your space clean and organized, invest in quality equipment, and optimize your acoustics with proper sound treatment. Regular maintenance and upkeep will guarantee a professional and productive work environment.

Creating a home studio is an exciting process that requires a lot of planning, effort, and investment in equipment. However, setting up a home studio is not enough; you also need to maintain it regularly to keep it in top condition. In this section, we’ll explore some essential home studio maintenance tips that every music producer should know.

Ear Protection

If you’re producing music, then you’re likely to be spending long hours in your home studio wearing headphones or monitoring speakers. Hearing protection is critical to ensuring that you don’t develop hearing damage from extended exposure to loud sounds. Investing in a high-quality pair of over-ear headphones or earplugs is a smart move. Look for headphones that provide adequate sound isolation, comfortable padding, and a relatively flat frequency response.

Regular Cleaning

Dust and dirt are the enemies of any home studio setup. Regular cleaning of your equipment and the studio environment is essential to ensure that your gear functions correctly, and the sound quality is not compromised. You can use a microfiber cloth or a soft-bristled brush to clean your monitoring speakers, computer screen, and other studio equipment. Avoid using harsh chemicals that will damage your gear and always read the manufacturer’s instructions.

Equipment Upgrades

Upgrading your home studio equipment is an ongoing process, but you need to ensure that you’re making informed decisions that will benefit your music production. Don’t just upgrade for the sake of it. Do your research to find out about the latest equipment trends in the market, as well as read reviews and watch demo videos to help guide your decision-making process. When choosing new gear, always consider your current setup and how the new addition will complement your workflow. In conclusion, maintaining your home studio is essential to ensure productivity, high-quality sound, and your own personal health. By investing in ear protection, regular cleaning, and equipment upgrades, you will maintain a functional and productive home studio for years to come.

Frequently Asked Questions On Home Studio Essentials

What Do You Need In A Home Studio?

A home studio needs a computer, digital audio workstation software, audio interface, microphone, headphones or studio monitors, and cables. The quality of each component should be considered, but you can start with budget-friendly options and upgrade as needed.

What Are The 10 Most Basic Things You Will Need When Starting Your Studio?

To start a studio, you will need 10 basic things. These are: a suitable location, professional equipment, finances, a business plan, legal permits, insurance, reliable software, a website, social media presence, and clients.

What Do You Need To Own A Studio?

To own a studio, you’ll need proper equipment like cameras, lighting, and backdrops. You will also need an ideal location, enough space, and a well-decorated setting to provide a conducive environment for photography or recording. Along with the necessary legal documentation for running a business, such as a license and insurance, you’re ready to successfully run your studio.

How Much Is A Basic Home Studio Setup?

A basic home studio setup can cost between $500 and $2000. It will typically include a computer, an audio interface, a microphone, headphones, and software for recording and editing. The cost may vary based on the quality of equipment and features needed.

Conclusion

To sum up, setting up a home studio could be challenging, but having the essential equipment makes things easier. The key to a successful home recording is to invest in high-quality gear and create an environment that is conducive to recording.

By following the tips mentioned above, you can now start producing professional-quality tracks from the comfort of your home. Keep exploring new techniques, experiment, and most importantly, have fun with your music-making!

Categories
Archive

Stem Mastering A Pop Song

Stem mastering a pop song involves separating different elements of a mixed track and processing them individually in order to achieve a more balanced and polished final product. Music production has developed significantly in recent years, with innovative techniques now available for producers and engineers to take advantage of.

One such technique is stem mastering, particularly useful for pop songs. Stem mastering involves the process of isolating different parts of a mix, such as drums, guitars, or vocals, and processing them separately. This allows a mastering engineer to make more targeted changes and adjustments, resulting in a more polished and well-balanced final product.

Whether you’re an artist, producer, or engineer, understanding stem mastering and its benefits can improve the quality and impact of your final mix.

Preparing For Stem Mastering

Preparing for stem mastering a pop song involves separating the different elements of the mix, such as vocals, drums, and synths, into individual tracks or stems. This allows for greater control during the mastering process, ensuring each element is balanced and cohesive within the mix.

Preparing for Stem Mastering Stem mastering has become increasingly popular as it provides greater control over the final mix. Preparing the stems correctly is crucial to achieving the desired result. In this article, we will focus on how to prepare a pop song for stem mastering. The following subheadings will cover important aspects of the preparations: The importance of pre-production decisions, Arranging tracks for stem mastering, and Cleaning up tracks for stem mastering. The Importance of Pre-Production Decisions Making the right decisions in pre-production can make the stem mastering process much smoother. It is essential to identify the core elements of the song, such as the lead vocal, the lead instrument, and drums. These elements should be recorded with the highest sound quality possible. Choosing the right tonality, tempo, and arrangement can also help in the post-production stages. Arranging Tracks for Stem Mastering To maximize the benefits of stem mastering, it is necessary to organize the tracks in groups that have similar frequencies and dynamics. For instance, all drums are grouped into one stem, all guitars in another, and so on. Before grouping, ensure that each section has a balanced frequency range and is not crowded by too many sounds. It’s also important to name each stem to properly identify its content. Cleaning up Tracks for Stem Mastering Preparing tracks for stem mastering requires removing any unwanted or unnecessary sounds. This step includes eliminating hums, pops, clicks, and background noises. Panning and balancing are also important to ensure the desired clarity and depth of the mixes. It’s vital to keep the volume consistent throughout the song and avoid tracks peaking or clipping. Overall, by following the appropriate pre-production decisions, grouping your tracks correctly, and cleaning up your tracks, you can set the foundation for a successful stem mastering process. Don’t skip these important steps in preparation, as they are critical in achieving the desired final product.

Stem Mastering Pop Songs

Stem mastering a pop song involves breaking down the audio elements into separate layers, allowing for greater control during the mixing process. With stem mastering, each layer can be adjusted to ensure a cohesive and balanced final product that sounds great across all types of playback systems.

Stem mastering pop songs involves taking a completed mix and breaking it down into individual elements, or “stems”, which are then processed independently before being recombined into a final master. This approach allows greater control over individual elements of the mix and can lead to a more polished final product. In this post, we will explore the key techniques involved in stem mastering a pop song and how they can be used to achieve a cohesive, impactful result.

The Role Of Eq In Stem Mastering

EQ is an essential tool in stem mastering and can be used to shape individual elements of the mix to give them more clarity and impact. When it comes to mastering pop songs, it’s important to pay close attention to the low end, which can quickly become muddy and indistinct without careful balancing. EQ can be used to carve out space for the kick drum and bass, while also adding sparkle and definition to the high end.

Balancing Levels And Tightening The Mix

One of the main advantages of stem mastering is the ability to balance levels between different elements of the mix. This can be crucial when it comes to pop songs, which often have a lot of competing elements fighting for attention. By carefully adjusting levels and panning, a stem mastering engineer can ensure that each element of the mix has its own space and is heard clearly. Tightening the mix can also involve editing out unnecessary elements or using automation to bring certain sounds in and out of the mix at key moments.

Adding Excitement And Impact With Compression

Compression is another key tool in stem mastering, used to add excitement and impact to individual elements of the mix. By carefully setting attack and release times, a compressor can help to bring out the transient detail in percussion and other rhythmic elements. Compression can also be used on vocals to smooth out any inconsistencies in level, making them sound more polished and professional.

Using Saturation And Harmonics To Add Warmth And Dimension

Saturation and harmonic distortion can be used to add warmth and dimension to individual elements of the mix, giving them more character and depth. When used judiciously, saturation can make percussion sound more lively and full, while adding harmonics to bass and other elements can give them more presence in the mix.

Creating A Cohesive Master With The Final Limiter

The final limiter is the last stage of the stem mastering process and is used to ensure that the final mix is cohesive and consistent in volume. A good limiter can bring up the overall level of the mix without adding unwanted distortion or harshness, while also ensuring that the low end remains solid and punchy. The limiter should be used sparingly and with care, as pushing it too hard can lead to a loss of detail or a “squashed” sound. In conclusion, stem mastering pop songs requires careful attention to detail and a deep understanding of how to shape individual elements to create a cohesive, impactful final mix. By using tools like EQ, compression, saturation, and the final limiter, a skilled stem mastering engineer can bring out the best in a pop song and make it shine.

Selecting The Right Engineer For The Job

Finding the right engineer for stem mastering a pop song is crucial. Look for someone with experience in pop music, who can bring out the song’s energy and make it sound cohesive. Ask for samples and references to make an informed decision and ensure the best possible results.

When it comes to stem mastering a pop song, selecting the right engineer for the job is one of the most crucial aspects to get the desired outcome. The process of mastering requires a blend of technical expertise and artistic flair. Hence, it is crucial to ensure that the engineer you choose has ample experience in handling similar projects. Here are the crucial factors that you must consider while selecting an engineer.

Finding An Experienced Mastering Engineer

One of the most important things to consider while selecting a mastering engineer is experience. Mastering is a culmination of various technical and artistic skills, and it takes years of experience to perfect the art. Hence, when you are seeking a mastering engineer, make sure to look for someone who has extensive experience in handling a diverse range of projects. It is advisable to look for an engineer who has been in the industry for several years and has worked with some known names.

The Importance Of Communication

Communication is the key to success in any project, and it is especially crucial in the mastering process. You must ensure that the engineer you select is easy to communicate with and understands your requirements. The engineer must be able to understand your vision for the song and make the necessary adjustments accordingly. You must also be receptive to feedback and suggestions and work with the engineer collaboratively to achieve the best possible outcome.

Providing Reference Tracks

When you are selecting a mastering engineer, it is essential to provide them with reference tracks. Reference tracks are used to provide the engineer with a clear understanding of the type of sound you are looking for. It enables the engineer to identify the nuances that make the specific genre of music successful and gives them clarity on how to achieve the sound that you are looking for. Make sure to provide engineers with multiple reference tracks, so they have a more comprehensive idea of what you are looking for. In conclusion, selecting the right engineer for stem mastering is a crucial aspect of ensuring that your pop song sounds the best that it can. Experience, communication, and providing reference tracks are some of the crucial factors that you must consider while selecting a mastering engineer. Remember, when you find an engineer that you trust and communicate well with, it can make a world of difference to the final outcome of your project.

Stem Mastering A Pop Song

Credit: www.fiverr.com

Frequently Asked Questions On Stem Mastering A Pop Song

How Do You Stem Master A Song?

To stem master a song, you need to extract the instrumental part from the original track. This can be done by using audio editing software and isolating the elements such as vocals, drums, bass, etc. Once the stem tracks are obtained, they can be mixed and mastered separately, leading to a cleaner and more professional final production.

Is Stem Mastering Worth It?

Yes, stem mastering can be worth it for certain situations. It can provide more control over individual elements of a mix and produce a better final product. However, it ultimately depends on the specific needs and goals of the project.

Is Mastering With Stems The Same As Stereo?

No, mastering with stems is not the same as stereo. Stereo mastering involves processing a single audio file, whereas mastering with stems involves processing multiple individual audio tracks that make up a song. Stem mastering allows for greater control over the individual elements of a mix.

Does Mastering A Song Make It Sound Better?

Mastering can make a song sound better by improving its overall clarity, volume, and tonal balance. It involves the final stage of audio production and is essential to ensure that your music sounds good on different playback systems. Proper mastering can enhance the listener’s experience and make your music stand out.

Conclusion

Stem mastering a pop song is a crucial step in the production process, as it enables us to enhance the overall sound quality and create a more polished final product. By carefully balancing and harmonizing the various audio elements, we can achieve a more cohesive and dynamic track that resonates with listeners.

With the right tools and techniques, you can elevate your music to the next level and stand out in an increasingly competitive market.