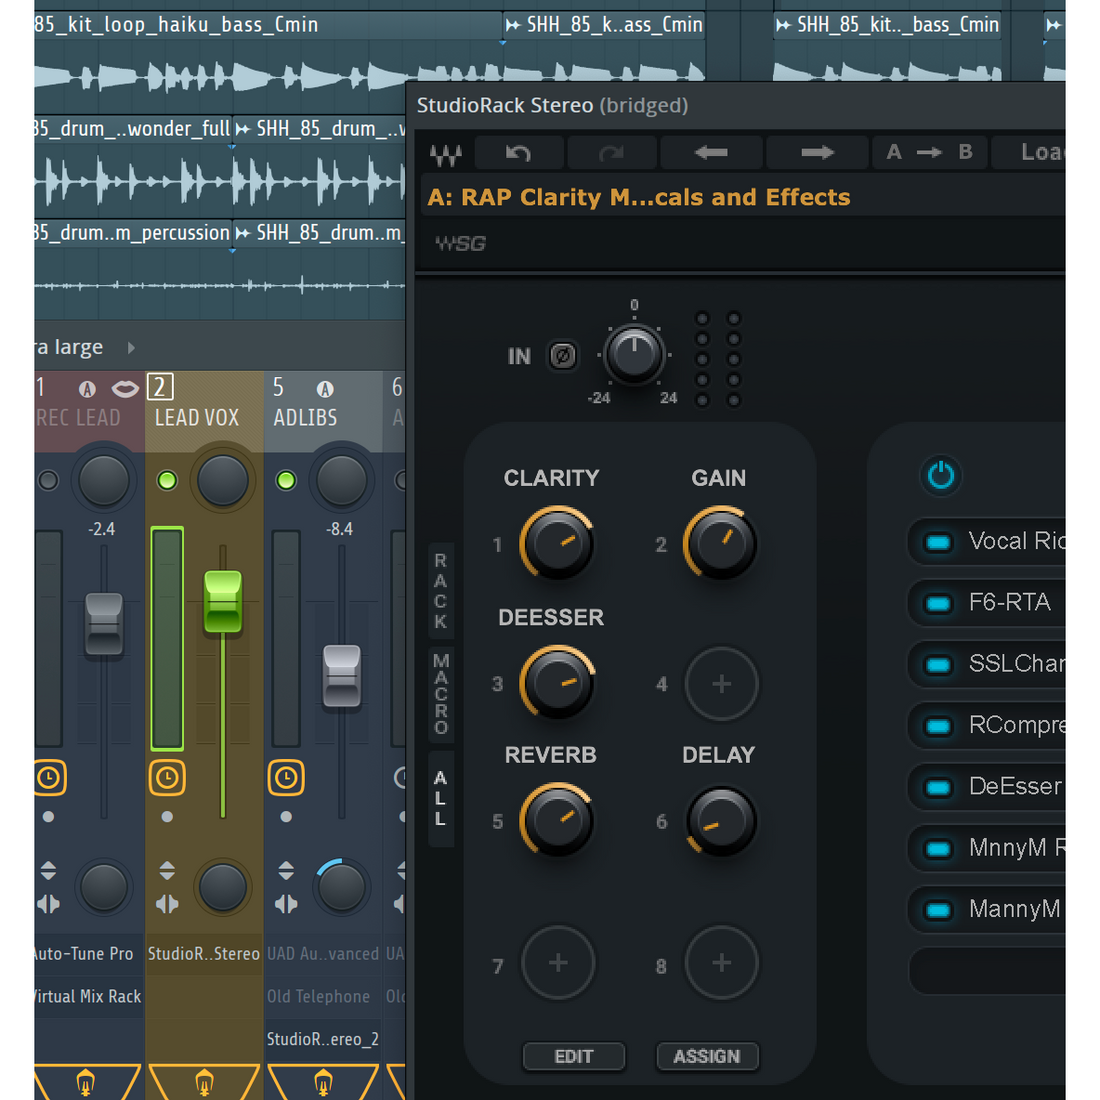
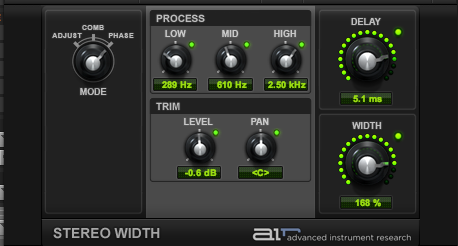
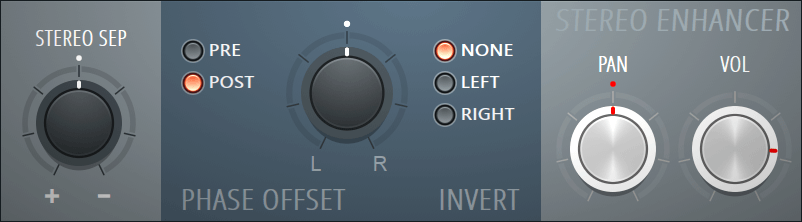
Setting up reverbs is a crucial part of sound engineering. To do so, adjust the reverb time, diffusion, and predelay settings on your audio mixing console or software.
Reverb is an essential tool that can add depth, dimension, and character to any audio recording. However, it can also muddy the mix if not used correctly. Therefore, it’s essential to understand how to set up and manipulate reverb effectively while mixing audio.
There are various types of reverbs to choose from, including convolution and algorithmic reverbs, each with its unique sound quality and processing power. Overall, mastering the art of setting up reverbs can help you achieve professional-sounding audio mixes that stand out from the crowd.
Types Of Reverbs
The term “reverb” refers to the reflection of sound waves from the walls, ceiling, and floor of a space. When music or vocals are recorded, a dry signal is captured, but it might sound unnatural and not pleasing to the ears. This is where reverb comes in. Engineers use reverb to add dimension and depth to the sound, making it sound more natural and pleasing to the ears.
Plate Reverb
Plate reverb was first used in the 1950s and 60s. It works by using a metal plate, typically made of steel or aluminum, which vibrates as the sound passes through it. The sound waves bounce back off the plate producing an echo that is picked up by a transducer. A plate reverb produces a warmer and smoother sound than other types of reverb and is commonly used on vocals, drums, and guitars.
Spring Reverb
Spring reverbs use a metal spring that vibrates as the sound passes through it, creating a reverberant sound. The sound waves are picked up by a transducer and then amplified. Spring reverbs are commonly used in guitar amplifiers and sound effect units, producing a brighter, metallic sound than a plate reverb.
Digital Reverb
Digital reverbs are electronic effects that simulate the sound of a physical space. Usually, digital reverb comes preinstalled in recording software or hardware. Producers can select the shape and size of the room to produce a custom sound by selecting a variety of parameters like decay time, predelay, and high-pass/low-pass filters. Digital reverbs come in various types, including hall, room, and plate.
Convolution Reverb
Convolution reverb is a reverb effect that uses recorded samples of physical spaces (e.g., churches, concert halls). The sound engineer first records an impulse response — the sound generated by a short, sharp noise in a particular environment. They then use this response to create a reverb effect, which can be applied to the sound. Convolution reverbs are becoming more and more popular because they produce very natural-sounding reverbs.
One of the most important things to remember when setting up reverbs is to use your ears to determine what sounds good. Experiment with different types of reverb to achieve the desired effect. For instance, a plate reverb might sound best on a guitar, while a convolution reverb might be better suited to vocals. With careful experimentation, you can tailor your reverbs to suit your project perfectly.
Credit: m.youtube.com
Setting Up Your Reverb
Getting the right reverb sound can be the difference between a flat, lifeless recording and one that sounds professional and full of depth. When it comes to setting up your reverb, there are a few key controls you’ll need to focus on in order to get the best sound possible.
Setting Reverb Size
The first control to pay attention to is the reverb size. This controls the length of the reverb tail, or how long the reverb echoes in the room. Small room settings are great for adding subtle depth to your sound, while larger room sounds are perfect for creating an expansive, ambient sound.
Room Size
Sound
Small
Subtle depth
Large
Expansive, ambient sound
Setting Reverb Time
The reverb time controls the length of time it takes for the reverb to die away. Short reverb times are great for percussive instruments, while longer times work well with sustained sounds like vocals or strings.
Setting Reverb Pre-delay
The pre-delay setting determines the amount of time between the original sound and the start of the reverb. This can be used to create a sense of space between the instrument and the reverb.
Adjusting Eq On Reverb Send
Adjusting the EQ on your reverb send can help to fine-tune the sound of the reverb and make it work better with the other elements in your mix. It’s important to avoid clashing frequencies when setting the EQ on the reverb send.
Low-cut filters can help to remove unwanted low frequencies from the reverb sound.
High-cut filters can help to soften the high-end of the reverb sound.
Setting Reverb Wet/dry Mix
The wet/dry mix controls how much of the original sound is mixed with the reverb. A 100% wet mix will give you a completely reverberant sound, while a 50/50 mix will blend the dry signal with the reverb for a more natural sound.
By paying attention to these key controls, you can achieve the perfect reverb sound for your recordings and take your music to the next level.
Best Practices For Using Reverbs
Properly setting up reverbs can enhance the audio quality of any recording. To ensure the best results, consider the type of reverb and adjust the settings based on the desired effect and the specific sound being recorded.
As a beginner, setting up reverbs can be quite tricky. However, with these best practices, you’ll be able to use them effectively and efficiently.
Using Reverb In Your Mix
When using reverbs in your mix, it’s essential to keep in mind that the amount of reverb can affect the overall sound of your mix. Too much reverb can make your mix sound muddy, while too little can make it sound dry. To achieve a natural-sounding mix, it’s best to start with a small amount of reverb and gradually increase it.
Using Multiple Reverbs
Using multiple reverbs can add depth and texture to your mix. However, it’s crucial to use them wisely. You should use different types of reverbs for various instruments and vocals to avoid muddiness. For example, for vocals, you can use a plate reverb to add warmth, while for drums, you can use a hall reverb to add space.
Using Reverb As An Effect
Reverb can also be used as an effect to create an entirely new sound. To use reverb as an effect, you can experiment with different parameters like pre-delay, decay time, and diffusion. You can also modulate your reverb to create a dynamic sound. In conclusion, implementing these best practices will help you achieve an effective and natural-sounding mix. Remember to start with small amounts of reverb, use multiple reverbs wisely, and experiment with different parameters.
Credit: www.reddit.com
Frequently Asked Questions On Setting Up Reverbs
What Is A Good Reverb Setting?
A good reverb setting depends on the desired effect. A short decay time is good for a subtle effect while a longer decay time creates a more dramatic effect. The wet/dry mix will also affect the overall sound. Experiment with different settings to find the best one for your particular project.
How Do You Use Reverb Effectively?
Use reverb effectively by adjusting the right amount, decay time, and early reflections. Consider the type of reverb to use, whether it’s plate, hall, or room, among others. Experiment with positioning, pre-delay, and EQ settings to get the desired effect.
Lastly, avoid overusing and always trust your ears when making adjustments.
How Many Reverbs Should I Use In A Mix?
Limit the number of reverbs to 2-3 in a mix. Using too many can create a muddy and cluttered mix. Choose different types of reverbs to add depth and dimension. Use a short decay time for tight sounds and a longer time for vocals and instruments.
How Do I Set Up Reverb For Vocals?
To set up reverb for vocals, first choose the software or hardware reverb unit. Begin with a small amount of reverb, then adjust the room size and decay time for the desired effect. Finally, fine-tune the mix to ensure the vocals are not overpowered by the reverb.
Conclusion
Setting up reverbs can greatly enhance the overall sound and quality of your audio productions. By understanding the types of reverb, adjusting the parameters, and experimenting with different settings, you can create unique and professional-sounding effects. It’s important to remember that while reverb can be a powerful tool, too much or improper use can lead to a muddy or unnatural sound.
With these tips in mind, take some time to explore and experiment with reverb and start creating high-quality audio today.
The best way to mix lead vocals is to start by adjusting the levels and EQ settings. It is important to find the right balance between the vocals and the instrumental tracks while highlighting the unique qualities of the singer’s voice.
This includes paying attention to the vocal range and removing any unwanted frequencies. It is also essential to use compression and effects such as reverb and delay to enhance the vocals and make them stand out in the mix. By following these techniques, you can achieve a polished and professional-sounding lead vocal mix that complements the overall track.
Mixing lead vocals is a vital component of music production, and it requires a certain level of expertise to achieve the desired results. Lead vocals need to be balanced with other tracks in the mix and given the right amount of space to shine. We will explore the best techniques for mixing lead vocals and achieving a professional-sounding result. From adjusting levels and EQ settings to using compression, reverb, and delay, we will break down the essential steps required to make lead vocals stand out in a mix. So, let’s dive in and learn how to mix lead vocals like a pro!
Start With Quality Recordings
When it comes to mixing lead vocals, starting with a quality recording is crucial for achieving a polished and professional sound. No matter how skilled you are at mixing, you can’t magically fix a poorly recorded vocal.
Get The Best Possible Recording
Before you even begin to think about mixing, it’s important to ensure that you have the best possible recording of your lead vocal. This means investing in a high-quality microphone, using proper microphone placement techniques, and recording in a quiet environment.
If possible, record in a professional studio with acoustic treatment and soundproofing to minimize unwanted room noise and reverberation. Audio engineers can also use tools like pop filters, reflection filters, and mic shields to further improve the quality of the recording.
Pay Attention To The Room Acoustics
Even with the best recording equipment, room acoustics can have a significant impact on the quality of your lead vocal recording. To minimize unwanted room noise and reflections, try to record in a small, acoustically treated space with low ceilings and minimal hard surfaces.
If you’re recording in a less-than-ideal space, you can use acoustic treatment options like bass traps, acoustic panels, and diffusers to help improve the acoustics of the room.
By starting with a quality vocal recording and paying attention to the room acoustics, you’re setting yourself up for success when it comes to mixing your lead vocal. Remember, a great mix starts with a great recording!
Credit: www.toontrack.com
Cleaning Up The Recording
Achieving the perfect mix for a lead vocal can be tricky, but cleaning up the recording is an important first step. Using EQ, compression and other audio tools to remove unwanted background noise and enhance the vocal’s natural characteristics can produce a polished and professional sound.
De-noising And De-clicking
Before you start mixing a lead vocal, it is essential to clean up the recording. One of the most crucial steps in cleaning up a recording is de-noising and de-clicking. These two processes help reduce unwanted noise and clicks that may be present in the recording, resulting in a cleaner and more polished vocal sound. De-noising involves reducing background noise in the recording. This process is particularly important if the recording took place in a noisy environment or if the microphone was not able to reject unwanted sounds. There are various software tools available that allow you to reduce noise without affecting the overall quality of the vocal. De-clicking, on the other hand, involves removing clicks and pops that may be present in the recording. This may be caused by issues with the recording equipment or the performer’s mouth noises like lip smacks. It can be achieved through software plugins that analyze the audio waveform and remove the clicks while preserving the vocal’s natural sound.
Comping And Editing
Once the vocal recording is clean, the next step is to comp and edit it to create a perfect take. Comping involves selecting the best parts of different takes and combining them into one cohesive performance. This can include choosing the best phrasing, and even stitching together individual words or phrases to create the ideal performance. Editing is the process of correcting timing and tuning issues that may be present in the recording. With editing tools, any time or pitch discrepancies can be quickly corrected while maintaining the natural feel of the vocal performance. In conclusion, cleaning up a vocal recording is a vital step in achieving a polished and professional-sounding mix. By de-noising and de-clicking the recording and then comping and editing it, you can create an ideal performance that will shine through in your mix.
Levels And Panning
For the best way to mix lead vocal, focus on levels and panning. Ensure the lead vocal is sitting just above the mix and it doesn’t overpower the other tracks. Using panning can create a natural sound and provide some space for other elements in the mix.
Levels and Panning are crucial to a well-balanced lead vocal mix. Setting levels ensures that the vocals are audible and balanced with the other instruments in the mix. Panning is where you place the vocal sounds across the stereo spectrum to create a sense of space and stereo width. Here are some tips to help you achieve a well-mixed lead vocal.
Set The Levels For The Mix
The first step in mixing lead vocals is setting the levels. It’s essential to adjust the volume levels carefully to ensure that the vocal track is audible and balanced with other instruments in the mix. The vocal track should not be too loud or too soft compared to other tracks. It is recommended to turn down all other tracks and set the vocal volume at a comfortable level. Then bring the other tracks up gradually until you achieve a perfect balance.
Panning
After setting the volume levels, the next step is to apply panning to the vocal sounds. Panning ensures the lead vocals are well-spread across the stereo spectrum. It’s best to avoid hard panning becuase it can shift all the focus to one side only. For example, If you have multiple lead vocals, then you can pan them slightly apart from each other, which adds width and dimension to the overall sound of the mix. You can keep the bass and drums in the center, while the guitars can be panned to the left and right sides for a firm foundation.
Bonus Tips:
While mixing the lead vocal, it’s essential to keep the lyrics clear and easy to understand. It’s best to showcase the lyrics volume louder so that, the listener can hear and enjoy it easily.
It’s best to use a high-pass EQ filter to eliminate unwanted low-end frequency buildup in the vocal mix.
Compression can help you balance out the vocal dynamics – however, don’t overuse compression, which can cause the sound of the vocals to fall flat.
Create a reverse stereo delay effect on your vocal sound samples. This will add extra depth and width to the vocal sound.
Credit: m.youtube.com
Equalization And Compression
Achieving the best mix for a lead vocal requires a combination of equalization and compression techniques. Equalization can create space for the vocal in the mix, while compression helps to even out the levels. Careful application of these tools can result in a clear and balanced lead vocal.
Equalization and Compression are undoubtedly two of the most vital processes in mixing lead vocal. Both of them play significant roles in enhancing and bringing out the best possible quality of the vocal recording. In this post, we’ll be discussing these two processes in detail and how to use them effectively to mix lead vocal to its full potential.
Equalization (eq)
Equalization is the process of balancing the frequency spectrum of the vocal recording, which helps to attain a rich and professional sound. It’s easy to go overboard with equalization, so it’s crucial to be careful while equalizing the vocal recording. When it comes to EQing lead vocals, it’s essential to use a high-pass filter to cut out any unwanted low end that can cause muddiness in the vocal recording. Additionally, focus on cutting down any frequency bands that are masked and emphasize the frequencies that will make the vocal recording sound more natural and full. A great tip while equalizing the vocals is to use a subtractive approach, which means removing unwanted frequencies rather than boosting the good ones. It can be helpful to do the equalization in solo mode so that you can hear each frequency band clearly.
Compression
Compression is the process of controlling the dynamic range of the vocal recording, which helps to make the vocals sound more consistent and professional. It’s important to note that over-compression can make the vocals sound unnatural, so it’s important to apply the compression subtly. Start with a low ratio, around 2:1 or 3:1, and set a threshold that will activate the compression only on the louder parts of the vocal. Typically, a threshold value of -10 dB works well for lead vocals. When it comes to attack and release times, it’s best to use the fastest setting possible that doesn’t cause any distortion. A good starting point would be an attack time of 10-30ms and a release time of 50-100ms. Overall, equalization and compression are the two most important techniques for mixing lead vocals. They help to ensure a consistent and professional sound and can make all the difference. Remember, the goal is to enhance the vocals, not to fix them. So keep that in mind while applying EQ and compression techniques to your vocal mixing.
Effects Processing
When mixing lead vocals, it’s important to use effects processing to enhance the sound and make it stand out. The best way to achieve this is by experimenting with different EQ, compression, and reverb settings to find the perfect balance and make the vocals pop in the mix.
Effects Processing: Vocal processing involves the use of various effects plugins to enhance sound quality and improve the overall tone of the lead singer’s performance. Effects processing plays a vital role in giving life to a vocal track, and it is essential to get it right, as it can make or break the mix. There are several different types of effects processing that can be used, including reverb, delay, chorus, and others. Each effect has its unique qualities that, when used correctly, can enhance the vocal track to achieve a professional sound. Reverb: Reverb is one of the most commonly used effects in music production and mixing. It simulates the sound reflections in a physical space, making the vocals sound like they were recorded in a larger room, such as a concert hall. Using reverb can add a sense of depth and ambiance to the vocal track, making it sound more natural and full. It is essential to use reverb sparingly to avoid overwhelming the mix with too much audio information. Delay: Delay is another popular effect used in vocal processing to give a sense of space and dimension to the lead vocals. It provides a subtle echo to the lead singer’s performance, creating a three-dimensional sound. The amount of delay used depends on the music genre and the singer’s style. It can be used subtly to add a sense of space or more heavily to create a distinct effect. Chorus: Chorus is an effect plugin that adds a slight pitch variation to the vocals, creating a sense of multiple singers singing simultaneously. It can add richness and depth to the vocal track, making it sound fuller and more engaging. The amount of chorus used varies depending on the singer’s style and the musical genre. To sum up, effects processing can take a simple lead vocal track to a whole new level and make it sound professional. When using reverb, delay, or chorus, it is essential to use them sparingly and adjust them based on the singer’s style, musical genre, and the overall mix’s needs. By doing so, the result will be a well-mixed final product that enhances the vocal performance and makes it stand out.
Automation
Achieving the best way to mix lead vocals can be a challenging task. Fortunately, automation tools such as EQs, compressors, and de-essers can help you attain a polished and balanced sound for your vocals. Employing these tools alongside manual adjustments enables better control and an optimal final performance.
Automating The Volume And Pan:
Once you have recorded the lead vocal, you can manually adjust the volume level of each line to create a polished mix. This process can be time-consuming, but with the aid of automation, you can focus on other elements of the mix, such as effects. Automating the volume and pan involves setting the specific level and position of the vocal in the mix, and Logic and Ableton are powerful DAWs for such tasks.
Automating The Effects:
Once the volume and pan of the vocals are appropriately configured, automation can also be useful for adding effects that enhance the lead vocal. The technique involves setting parameter variations during different parts of the song, such as increasing or decreasing the reverb on the choruses and bridges. Automation allows the effects to be utilized in the song in a way that mimics a live performance. By doing so, the lead vocal becomes a character in the music that interacts with the mood and energies of different sections of the song. When done right, automation adds depth, dynamics, and expression to the lead vocals while enhancing the overall quality of the song. By using DAWs like Logic and Ableton, the process can be simple and easy, and with a little practice, you can master the art of automation; making it an integral part of your mixing process.
Reference Tracks And A/b Testing
To find the best way to mix lead vocals, reference tracks and A/B testing can be crucial. Listen to other songs with similar vocal styles and use them as reference tracks to guide your mixing decisions. Use A/B testing to compare your mix with other professional mixes and make adjustments accordingly.
When it comes to mixing lead vocals, Reference Tracks and A/B testing are crucial for achieving a polished and professional sound. By comparing your mix to the reference tracks you admire and performing A/B testing, you can ensure that your vocals are clear, pronounced, and balanced in the mix.
Comparing Your Mix With Professional Reference Tracks
To start, choose three to five reference tracks that have a similar style and genre to your mixing project. These reference tracks will serve as a benchmark for your mix; you will compare your vocal mix with the reference tracks while keeping an eye on the levels, tones, and dynamics. Compare and analyze these reference tracks, trying to identify the key elements that make them sound polished, balanced, and professional. Once you have a good understanding of your reference tracks, try comparing your mix to them, making small changes in your mix to match their tone and dynamics. Keep in mind that the vocals should remain the centerpiece of the mix, and you must be careful not to drown them out or make them sound flat.
A/b Testing
A/B Testing is comparing two different versions of audio to evaluate which one sounds better. In the case of mixing lead vocals, you should compare the version of the mix with the reference track, side-by-side. With A/B testing, you can instantly hear the difference between two variations of your mix, whether they are better or worse than the other. To perform A/B testing, first, establish a clear A/B testing framework. You need to be sure of the differences you are looking for in your mix; it could be a change in EQ, compression, or panning. Set clear and straightforward testing criteria to ensure that you can accurately identify the changes in your mix. Then, switch between the A and B versions and listen to the differences and identify which sounds better. In conclusion, using Reference Tracks and A/B testing is an effective way to mix lead vocals. Comparing your mix with professional reference tracks and performing A/B testing will help you achieve a clear and balanced sound that matches the industry standards. It can be challenging to mix vocals, but these techniques make it much easier and achievable.
Credit: flypaper.soundfly.com
Mastering
Mastering is the final step in the music production process that ensures the audio tracks sound polished, balanced, and ready for release. It is a technical process that requires an experienced engineer to work on the final stereo mix and optimize it for distribution on different media, such as CD, vinyl, streaming platforms, radio, and film. Mastering focuses on the overall sound quality of the tracks, including the tonal balance, loudness, stereo width, clarity, depth, dynamics, and consistency. In this article, we will discuss the best way to mix lead vocals and how mastering can enhance the final product.
Preparing The Mix For Mastering
Before sending your mix to a mastering engineer, it is essential to ensure that it has been mixed correctly. The mix must be free from any peaking, distortion, or noise issues. You can use a limiter to reduce the risk of clipping and ensure the mix’s loudness is consistent throughout. Also, make sure you have left enough headroom for the mastering engineer to work with. Typically, it is recommended to have around -6 dB to -3 dB of headroom. Additionally, it is crucial to export the mix at the highest possible sample rate and bit depth to retain the audio quality.
Selecting The Right Mastering Engineer
Choosing the right mastering engineer is crucial to get the best results for your mix. Consider factors such as their experience, portfolio, mastering studio, gear, and client feedback. Try to listen to some of their previous work to ensure their style matches your vision. Communication is also essential. Clearly communicate your goals, preferences, and expectations with the mastering engineer. It is crucial to build a good relationship, and it will result in the best possible outcome for your audio tracks.
Frequently Asked Questions Of Best Way To Mix Lead Vocal
How Do You Mix Lead Vocals?
To mix lead vocals, start by balancing the track to ensure all components are audible. Use EQ to eliminate unnecessary frequencies and compression to level out volume. Adjust reverb and delay to add depth and space, then use automation to fine-tune the mix.
Should Lead Vocals Be Mixed In Mono Or Stereo?
Lead vocals can be mixed in both mono and stereo, depending on the type of music and desired sound. In mono, the vocals are centered and can sound stronger and more present. In stereo, the vocals can create a wider, more spacious sound.
It ultimately comes down to personal preference and the overall mix of the song.
What Are The 6 C’s Of Vocal Mixing?
The 6 C’s of vocal mixing include: clarity, consistency, coherence, compression, contrast, and creativity. These elements are essential for achieving a well-balanced and professional-sounding vocal mix.
How Should Lead Vocals Be Panned?
Lead vocals should be panned at the center, with minor pan adjustments to create a spacious feel. Avoid panning too hard left or right, as it can cause the vocal to sound unbalanced and distract the listener from the main focus of the track.
Conclusion
Crafting the perfect mix for a lead vocal can be a challenging task for any music producer or sound engineer. Utilizing proper techniques and understanding the role the vocals play in a song can lead to a successful outcome. From EQ to compression, reverb and delay, the options can be overwhelming.
However, experimenting with different settings and collaborating with the artist can lead to a satisfying mix that showcases their unique talent. Keep in mind that every song is different and requires a personalized approach. Trust your ears and have fun creating!
Novation Audiohub 2X4 is a compact audio interface that offers high-quality sound and connectivity options. The Novation Audiohub 2X4 is a must-have for musicians and producers who need a compact, versatile audio interface that delivers top-notch sound quality and flexible connectivity options.
With its two-in, four-out design, this interface allows you to connect all your essential gear, including MIDI controllers and USB devices, while its high-quality preamps and converters ensure pristine sound quality. Whether you’re recording at home or on the go, the Audiohub 2X4 is the perfect tool for capturing your creativity and bringing your music to life.
So if you’re looking for a versatile, portable audio interface that delivers excellent performance and intuitive controls, the Novation Audiohub 2X4 is an excellent choice.
Credit: www.soundonsound.com
Features
Novation Audiohub 2X4 is an incredibly useful device that offers a 2-in-4 out audio interface with integrated 3-port USB 2. 0 hub. This innovative feature is custom-designed for electronic music makers with the ability to plug in MIDI controllers, keyboards, and format specific player units.
Novation Audiohub 2X4 is the ultimate audio interface for modern electronic music producers. It is designed to solve multiple connectivity issues in one device. The features of Novation Audiohub 2X4 make it an impressive device for professionals who are looking for a highly customizable and flexible audio interface. Let’s explore the essential features of Novation Audiohub 2X4.
Inputs:
Novation Audiohub 2X4 is a powerful audio interface that offers a plethora of inputs. It features two XLR/TRS combo jacks that can be used with microphones, guitars, and line level instruments. Additionally, two pairs of RCA inputs can be used to connect DJ mixers, CD players, and other line-level devices. One of the unique features of Novation Audiohub 2X4 is the built-in three-port USB 2.0 hub, enabling you to connect up to three USB controllers or other USB devices simultaneously.
Outputs:
The Novation Audiohub 2X4 has a comprehensive list of output options. It includes two TRS line-level outputs for connecting studio monitors, one headphone output and one RCA output, which can be used for recording or connecting external audio devices. The Audiohub 2X4 is designed to deliver high-quality audio output, ensuring that your music sounds great on every device.
Mixer Section:
Novation Audiohub 2X4 comes equipped with an intuitive mixer section that allows you to control the sound in real time. The device features a crossfader that enables you to mix audio from different sources. The headphone output has its own volume control, allowing you to monitor your mix independently. The Audiohub 2X4 mixer section also features a monitor select switch that lets you choose which audio source should be played through your studio monitors. In conclusion, Novation Audiohub 2X4 is an excellent audio interface that offers exceptional features. It is designed to cater to all your needs allowing you to connect multiple devices and control sound in real time. The device is a perfect fit for modern electronic music producers, allowing them to achieve the highest level of sound quality without any hassle.
Credit: us.novationmusic.com
Design
Novation Audiohub 2X4 is a versatile audio interface equipped with USB and multiple outputs for synths, drum machines and controllers. It features a compact design with extensive connectivity, providing ample routing options from a central hub for a streamlined production workflow.
Novation has always been known for its excellent quality and innovative designs. The Audiohub 2X4 is no exception. Its unique design and superior quality make it the perfect fit for any home studio. Let’s take a closer look at the design of this incredible product.
Size And Weight
Novation Audiohub 2X4 is a compact device that has been designed to fit easily on a small desk or table. With dimensions of 192mm x 120mm x 46mm, this device is small enough to be taken with you on the go. It weighs only 870g, making it one of the lightest devices in its class. The portable design also makes it easy to store away when it’s not needed.
Material And Color
Novation Audiohub 2X4 has a sleek black design that makes it look modern and stylish. The body of the device is made of high-quality plastic that is durable and long-lasting. The matte finish gives it a premium look and feel. The buttons on the unit are rubberized and have a non-slip texture, making them easy to use even in dim lighting conditions.
Connectivity
Novation Audiohub 2X4 has four USB ports and two 6.35mm jack outputs. The USB ports can be used to connect to your computer, MIDI controller, or other devices. The two 6.35mm jack outputs allow you to connect your headphones, monitors, or other audio devices. The back of the device also has a power input, so you can use it without draining your laptop’s battery. In conclusion, Novation Audiohub 2X4 is an excellent device with a unique and modern design. Its lightweight and compact size make it perfect for home studios and on-the-go music producers. With superior sound quality, easy connectivity, and a sleek matte finish, this device is a must-have for anyone serious about their music production.
Compatibility
Novation Audiohub 2X4 is compatible with various devices, such as laptops, iPads, and other MIDI controllers. It allows multiple USB connections and features a high-quality audio interface, making it a versatile and convenient tool for music production.
Novation Audiohub 2X4 offers excellent compatibility with various Operating systems and digital audio workstation (DAW) software. With its ability to connect to multiple devices, this audio interface simplifies the process of music production and live performance.
Operating System
Novation Audiohub 2X4 is compatible with most operating systems like Windows, MAC OS, and iOS. It’s very easy to set up and requires no additional driver for most operating systems. All you need to do is plug it in, and you’re good to go. This compatibility ensures that you can use the Audiohub with most devices without any difficulty.
Daw Software
This audio interface is compatible with most DAW software like Ableton Live, Cubase, Logic Pro, FL Studio, and more. This means that it can be integrated seamlessly into your existing music production set up. Additionally, Audiohub 2X4 has been designed with music production in mind and has specific features that allow for easy integration with these popular DAWs. It’s essential to ensure that your DAW software is compatible with the Audiohub to make the most out of it. Novation Audiohub 2X4 compatibility with various Operating systems and DAW software ensures that you can use it with most devices and integrate it seamlessly into your production studio. It’s a versatile audio interface that makes music production and live performance a straightforward process.
Credit: novationmusic.com
Setup
Novation Audiohub 2X4 setup is a simple and straightforward process. The device connects to your computer via USB and to your speakers or headphones through its audio outputs. It also features four inputs for external devices such as instruments or microphones.
Setting up the Novation Audiohub 2X4 is a breeze, and it only takes a few minutes to get it up and running. Whether you’re a seasoned musician or a beginner, the Audiohub 2X4 is easy to use, and it comes with all the necessary connections to help you start recording music in no time. In this section, we’ll discuss the different steps involved in setting up the Audiohub 2X4, including connection and driver installation.
Connection
The Novation Audiohub 2X4 features a variety of different inputs and outputs, including two headphone outputs, a line output, and four USB ports. To connect your Audiohub 2X4 to your computer, simply use the supplied USB cable. You can then connect your speakers or headphones to the Audiohub 2X4’s output jacks. If you want to use your Audiohub 2X4 with other devices, you can connect them using the audio jacks on the back of the unit. For example, if you want to connect your synthesizer, you can use the Audiohub 2X4’s line input. You can even connect your iPad or other mobile devices using the USB ports.
Driver Installation
Installing the drivers for your Novation Audiohub 2X4 is straightforward. First, make sure that your Audiohub 2X4 is plugged into your computer using the USB cable. Your computer should automatically recognise the Audiohub 2X4 as a new device and install the necessary drivers. Once the drivers are installed, you can start using your Audiohub 2X4 to record and play back music. Whether you’re using a DAW or other software, the Audiohub 2X4 works seamlessly with a variety of different programs, making it the perfect choice for musicians and producers of all skill levels. Overall, the Novation Audiohub 2X4 is a versatile and powerful audio interface that’s perfect for recording music, playing back sound effects, and more. With its easy-to-use setup and driver installation process, it’s the perfect choice for anyone looking to take their music production to the next level.
Performance
Novation Audiohub 2X4 is a highly versatile audio interface that delivers an outstanding audio performance with its latest features and technological advancements. In this blog post, we will mainly discuss the performance of Novation Audiohub 2X4 with a focus on its Latency and Sound Quality.
Latency
Latency is an issue that affects producers, especially when they are recording live instruments or sending MIDI signals. With Novation Audiohub 2X4, you don’t have to worry about latency as it comes with an ultra-low latency of just 1.1ms. This means that you can record without any audible delay and enjoy the responsiveness and accuracy of your software synths and drum machines.
Sound Quality
Novation Audiohub 2X4 provides a high-quality sound output that is impressive for producers, musicians, and DJs. It has 24-bit/96kHz resolution that provides clear and crisp sound. The audio interface also includes two Focusrite preamps that come with a high 118dB dynamic range and low noise so that your recordings sound professional and of studio quality. Plus, the Audiohub can easily handle high output levels from both Mac and Windows computers — perfect for the loud environments of festival stages and other performance scenarios.
Overall, the performance of Novation Audiohub 2X4 is exceptional, and its features make it an excellent choice for both recording and live performances. Its low latency and high sound quality provide a flawless and reliable experience for producers and musicians alike.
Price And Availability
If you’re looking for an audio interface that’s both reliable and affordable, the Novation Audiohub 2X4 is an excellent option. With an array of features that make it suitable for home recording and live performances, it offers great value for money. Here’s what you need to know about its price and availability.
Price Range
The Novation Audiohub 2X4 is currently available in the market for a very reasonable price range, which is around $149 to $179, depending on where you purchase it from. This is a great price considering all the features and benefits it offers. The product is available for purchase from various online and offline stores, making it readily accessible to anyone interested in purchasing it.
Where To Buy
If you’re interested in purchasing the Novation Audiohub 2X4, there are various online and offline stores where you can find it. Some of the most popular online stores where the device is available include Amazon, Guitar Center, Sweetwater, and B&H. You can also purchase it from the official Novation website. Furthermore, you can locate a dealer near you using the dealer locator tool on the Novation website.
Store
Price
Availability
Amazon
$149 – $179
Online
Guitar Center
$149 – $179
Online and In-store
Sweetwater
$149 – $179
Online
BH
$149 – $179
Online and In-store
Novation
$149 – $179
Online
Overall, the Novation Audiohub 2X4 is a great option for anyone looking for a reliable and affordable audio interface. With its reasonable price range and availability in various stores, it’s easily accessible for anyone interested in purchasing it.
Frequently Asked Questions Of Novation Audiohub 2×4
What Is Novation Audiohub 2×4?
Novation Audiohub 2X4 is a versatile audio interface that provides a perfect blend of audio inputs, MIDI connectors, and USB hub.
What Are The Key Features Of Novation Audiohub 2×4?
Novation Audiohub 2X4 has two balanced speaker outputs, four line inputs, two low noise microphone preamps, and a USB hub that supports USB bus power for convenient use.
How Can I Use Novation Audiohub 2×4 In My Music Production?
With its multiple inputs and outputs, Novation Audiohub 2X4 can be used to connect various instruments and devices, record and playback sounds, edit and mix tracks, and perform live shows.
What Software Is Compatible With Novation Audiohub 2×4?
Novation Audiohub 2X4 works seamlessly with any DAW software, including Ableton Live, Logic Pro, and Pro Tools, thanks to its class-compliant USB design.
Conclusion
The Novation Audiohub 2X4 is a top-notch audio interface that provides a perfect solution for both amateurs and professionals in need of a compact, portable, and reliable device. Its solid construction, excellent audio quality, and versatile connectivity options make it one of the best choices in the market.
With the ability to power USB devices and mix multiple audio sources, the Audiohub 2X4 is a must-have for any musician or producer on the go. Get your hands on one now and elevate your sound to the next level!
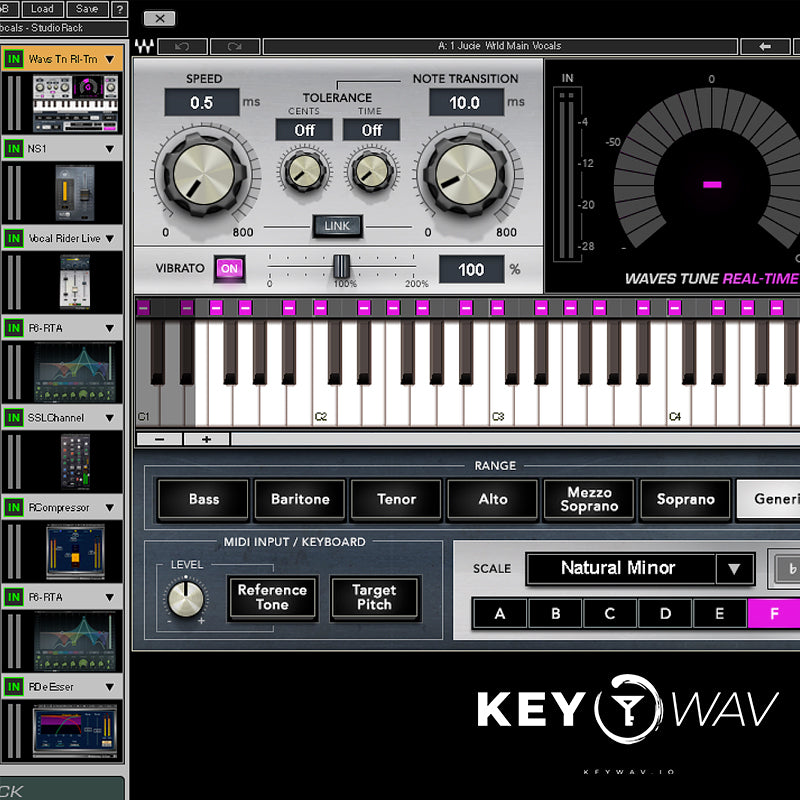
Autotune Pro Tutorial is an informative guide on how to use Autotune Pro for pitch correction and vocal effects. Autotune Pro is a powerful tool that can be used to achieve pitch-perfect vocals, create creative effects, and tune instruments.
In this tutorial, you will learn how to use Autotune Pro to create polished vocals with a natural sound and add creative effects to your tracks. Whether you are a professional producer or a beginner looking to improve your vocal recordings, this comprehensive tutorial will provide you with the knowledge you need to get the most out of Autotune Pro.
Setting Up Autotune Pro
Learn how to set up Autotune Pro in this tutorial. Follow step-by-step instructions to get started with the popular pitch correction software and achieve professional-sounding results for your recordings.
Autotune Pro, an advanced pitch correction software, helps you polish your vocal tracks to make them sound professional. In this tutorial, we’ll walk you through the process of setting up Autotune Pro to take your vocal production to the next level. We’ll discuss everything from installation and authorization, to setting input and output sources.
Installation And Authorization
Before we can begin, you must download and install the latest version of Autotune Pro. Once the software is installed, it must be authorized. You can either authorize it online by following the step-by-step guide or you can use the ilok smartkey USB dongle.
Setting Input And Output Sources
After successfully downloading and authorizing Autotune Pro, it’s time to set up your audio input and output source. Autotune Pro supports a variety of input and output types, such as microphones, headphones, and speakers. Ensure that you have selected the correct input and output source settings by following these simple steps:
Open the Autotune Pro plugin in your DAW
Select the settings tab
Select the audio tab
Select your preferred input and output source from the available options
It’s important to ensure that your input and output sources are working properly before moving forward with using Autotune Pro. Following these steps will ensure that your settings are properly configured, and you’re ready to begin using Autotune Pro effectively.
Conclusion
Setting up Autotune Pro can seem daunting at first, but with the proper guidance, it can become straightforward. By following the step-by-step guide we have provided, you can set up your Autotune Pro software effectively. So, what are you waiting for? Get started today and produce some amazing vocal tracks with Autotune Pro!
The Interface
If you’re familiar with music production or are an artist yourself, you’ve likely heard of Autotune Pro. This music production software is an industry favorite that has brought about a new way of recording and producing music. However, whether you’re new to the software or have some experience with it, navigating its interface can be challenging. In this Autotune Pro tutorial, we’ll look at an overview of the Autotune Pro interface, how to navigate the interface, and customizing the interface.
Overview Of Autotune Pro Interface
The Autotune Pro interface is carefully crafted to provide the best user experience for music production. It features an ergonomic, resizable, and easy-to-use interface that offers maximum usability and functionality. Additionally, the interface incorporates an efficient display of the settings and features of Autotune Pro without compromising on the screen’s real estate, ensuring that all the critical features are visible and easily accessible.
Navigating The Interface
The interface of Autotune Pro is well-organized with different sections and controls grouped according to their functions. The software features an easy-to-navigate menu and toolbar system, and everything is accessible via tabs. Once you become familiar with the interface’s layout, you can save time navigating through it, thereby allowing you to focus on your music. Moreover, Autotune Pro features a search bar function, easing the search for specific features and settings within the software.
Customizing The Interface
Customizing the Autotune Pro interface can significantly improve your music production workflow, allowing you to work more efficiently and effectively. The software’s interface is flexible, meaning you can customize it according to your preferences and needs. Autotune Pro lets users choose between Light and Dark modes or customize the software’s colors to their liking. Additionally, you can resize the interface according to your screen’s resolution, making everything clearer, crisper, and easier to spot.
In conclusion, the interface of Autotune Pro is incredibly versatile, well-organized, and intuitive, and once you familiarize yourself with it, its tools and features become more accessible. The software’s clear and intuitive interface design, combined with its range of powerful features, makes it an excellent choice for anyone who wants to take their music production to the next level.
Working With Tracks
In this Autotune Pro tutorial, we explore the benefits of using tracks within the software. Learn how to effectively organize your vocals and instruments, and streamline your recording process for optimal results.
Autotune Pro is a powerful tool for vocal processing and pitch correction. If you want to make the most out of it, it’s essential to understand how to work with tracks. In this tutorial, we’ll cover three crucial elements of working with tracks in Autotune Pro.
Importing Audio Tracks
Before you start tuning your vocals, you need to import the audio tracks you want to process. Here’s how to do it:
Click on the “File” menu, then “New Session” to start a new project.
Click on the “File” menu, then “Import Audio.”
Select the audio file you want to import and click “Open.”
Your audio file will now appear as a track in the main window.
Working With Midi Tracks
In addition to importing audio tracks, Autotune Pro also allows you to work with MIDI tracks. Here’s how to do it:
Click on the “Track” menu, then “New Track.”
Select “MIDI Track” from the dropdown menu.
Choose the instrument you want to use and click “Create.”
You can now start recording your MIDI track or add notes manually.
Creating New Tracks
If you want to add more tracks to your project, here’s how to do it:
Click on the “Track” menu, then “New Track.”
Select “Audio Track” or “Instrument Track” from the dropdown menu, depending on what you want to add.
Choose the settings you want to use and click “Create.”
The new track will now appear in your project, and you can start recording or importing audio.
With these tips, you should have a good foundation for working with tracks in Autotune Pro. Experiment with different settings and techniques to discover what works best for your project.
Credit: www.groove3.com
Basic Autotune Tools
Learn how to use basic autotune tools in this Autotune Pro tutorial. With step-by-step guidance, you can easily master the fundamentals of autotuning and enhance your vocal recordings.
Autotune Pro is a powerful tool in music production that helps to correct pitch and improve the overall quality of a vocal recording. For beginners, the software may seem complicated, but understanding the basic tools of pitch correction, formant correction, and vibrato control can make the process easier. In this Autotune Pro tutorial, we will look at each of these tools in detail.
Pitch Correction
Pitch correction is the most commonly used tool in Autotune Pro. It enables you to correct pitch errors and adjust the pitch of the vocal recording to match the desired key of the song. With Autotune Pro, you can correct pitch errors manually by drawing a pitch curve or let the software do it automatically. Autotune Pro can also correct pitch errors in real-time during live performances.
Formant Correction
The formant correction tool in Autotune Pro enables you to adjust the vocal timbre and change the sound of a vocal recording. It allows you to alter the characteristic of the voice while keeping the pitch intact. With formant correction, you can make the voice sound deeper, brighter, or more natural. Formant correction is especially useful when working with instruments that are difficult to play in tune, such as the human voice.
Vibrato Control
Vibrato control is a tool that enables you to adjust the vibrato effect in a vocal recording. Vibrato is the rapid variation in pitch that gives a voice its natural sound. Autotune Pro’s vibrato control tool allows you to adjust the depth, speed, and amount of vibrato in a recording. With this tool, you can create a more natural sound or even remove vibrato altogether. To conclude, understanding the basic Autotune Pro tools can make all the difference when it comes to producing high-quality vocal recordings. With pitch correction, formant correction, and vibrato control in your toolkit, you can take your music production to the next level.
Advanced Tools And Techniques
Discover new ways to enhance your vocal recordings with the Autotune Pro tutorial. From pitch correction to time manipulation, the advanced tools and techniques provided will help take your music production to the next level.
Autotune Pro is a popular music production tool that allows users to correct and enhance vocal performances. While the software is relatively straightforward to use, there are plenty of advanced tools and techniques you can utilize to take your recordings to the next level. In this Autotune Pro tutorial, we’ll cover some of the advanced features of the software, including scale editing, note editing, and the various advanced settings available.
Scale Editing
Scale editing in Autotune Pro allows users to adjust the key and scale of a recording. This can be incredibly useful when working with a vocal that is not recorded in the correct key. Here’s how to use scale editing in Autotune Pro:
Open the pitch and time correction settings in Autotune Pro.
Select the scale of the original recording.
Adjust the key and scale as needed.
Apply the changes to the recording.
Note Editing
Note editing in Autotune Pro is a powerful tool that allows users to correct individual notes within a recording. This can be useful when a vocal performance is slightly off pitch in certain areas. Here’s how to use note editing in Autotune Pro:
Open the pitch and time correction settings in Autotune Pro.
Select the note you want to edit.
Adjust the pitch and duration of the note as needed.
Apply the changes to the recording.
Advanced Settings
Autotune Pro also includes a range of advanced settings that allow users to fine-tune their vocal recordings. Here are some of the advanced settings available in Autotune Pro:
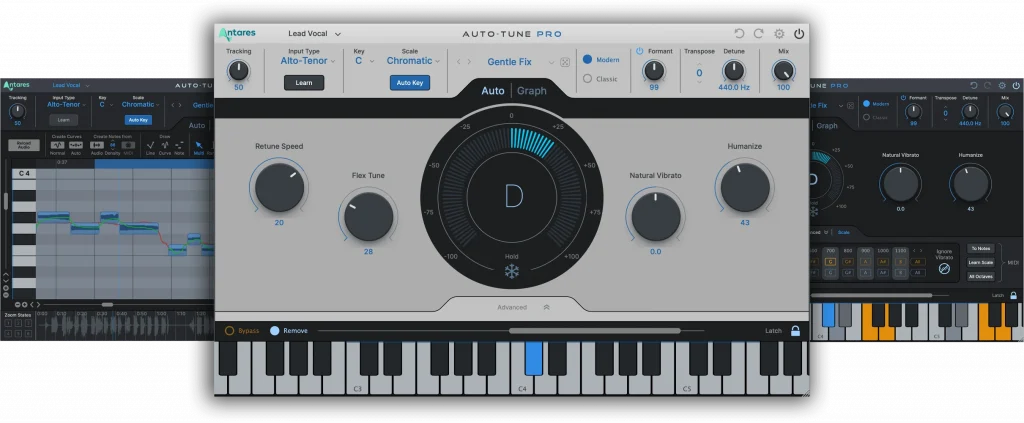
Retune Speed: This setting controls how quickly the software corrects pitch errors.
Humanize: This setting adds subtle variations to the pitch correction to create a more natural sound.
Formant: This setting adjusts the vocal’s formants to create a more natural sound.
Flex Tune: This setting controls the level of pitch correction applied to sustained notes.
By utilizing these advanced tools and techniques, you can take your Autotune Pro recordings to the next level. Whether you’re a professional producer or a beginner just starting out, these features are sure to come in handy.
Credit: www.antarestech.com
Mixing And Mastering With Autotune Pro
Learn how to perfect your songs with Autotune Pro through this step-by-step tutorial on mixing and mastering. Adjust pitch, speed, and formant to achieve a polished and professional sound.
Autotune Pro is a go-to plugin for many music producers and artists who want to achieve professional-sounding vocals. While it’s commonly known for pitch correction, it’s much more than that. Autotune Pro offers powerful features for both mixing and mastering, which can be used to enhance the overall sound quality of your music. In this Autotune Pro tutorial, we’ll be exploring the different ways you can use it in your mix and mastering process.
Autotune In The Mix
One of the most common uses of Autotune Pro in mixing is to correct pitch issues in a vocal track. However, this plugin can also be used creatively to achieve unique vocal effects. For example, you can use the Humanize function to add a natural feel to robotic vocal performances. Additionally, you can experiment with the Flex-Tune feature to create subtle pitch shifts that can make the vocals sound more expressive. Here are some tips to consider when using Autotune Pro in your mix:
Use Autotune Pro as the last plugin in your chain to ensure it doesn’t affect the processing of other plugins.
Find the right key and scale settings that match the vocals and adjust the retune speed to suit the song’s genre and style.
Use the sidechain input to trigger the plugin only when the vocal is singing.
Use subtle adjustments if pitch correction is required, as over-processing can make the vocals sound unnatural.
Autotune In Mastering
When it comes to mastering, the aim is to achieve a balanced and cohesive sound across all tracks. Autotune Pro can be used in mastering to correct pitch issues in the vocals and any background harmonies that were missed during mixing. This plugin can also be used creatively to add subtle pitch modulations that can make the vocals more interesting to listen to. Here are some tips to consider when using Autotune Pro in mastering:
Use Autotune Pro only when essential for the song and genre. Not all songs require pitch correction in the mastering stage.
Use the retune speed feature wisely to avoid over-processing the vocals.
Use the key, scale, and reference frequency settings to make sure the vocals are in tune with the song’s key and scale.
Use the output gain feature to control the loudness of the vocals without affecting the overall loudness of the mix.
Autotune Pro is a versatile plugin that can be used creatively in both mixing and mastering. Use it wisely to achieve a professional sound, but don’t overdo it. The goal is to enhance the vocals, not to make them sound unnatural. Experiment with the different features and settings to find what works best for your music and style.
Tips And Tricks
Tips and Tricks to Get the Most Out of Autotune Pro Tutorial
If you are a music producer, singer, or songwriter, you may be looking to enhance your music productions with Autotune Pro. Regardless of your music style, Autotune technology can help you improve your vocals and overall sound quality.
Using Autotune For Creative Effects
Autotune is not just about pitch correction; it can also help you to create creative effects. One way to use Autotune creatively is to experiment with different settings to achieve a more auto-tuned or robotic effect. For instance, you can use the Retune Speed knob to adjust how fast or slow the pitch correction moves from one pitch to another.
You can also play around with the Humanize function, which can add some natural imperfections to your vocals in real-time. This feature can make your vocals sound more natural and less robotic.
Improving Workflow With Shortcuts
Learning keyboard shortcuts is a great way to improve your workflow and increase your productivity when using Autotune Pro. Here are some of the most useful keyboard shortcuts:
Keyboard Shortcut
Description
Cmd + Z (Mac) or Ctrl + Z (PC)
Undo last action
Cmd + Shift + Z (Mac) or Ctrl + Shift + Z (PC)
Redo last undone action
Cmd + C (Mac) or Ctrl + C (PC)
Copy selected audio or settings
Cmd + V (Mac) or Ctrl + V (PC)
Paste selected audio or settings
Cmd + D (Mac) or Ctrl + D (PC)
Duplicate the selected audio region
Using these shortcuts can save you a significant amount of time and boost your productivity.
By utilizing the creative capabilities of Autotune and mastering the most useful keyboard shortcuts, you can take your music production to the next level.
Credit: www.youtube.com
Frequently Asked Questions For Autotune Pro Tutorial
What Does Auto-tune Pro Do?
Auto-Tune Pro is a pitch correction software that corrects off-key notes in vocal tracks. It has advanced features like automatic scale detection, formant shifting, and time correction. Auto-Tune Pro is used by music producers, engineers, and artists to enhance the quality of their recordings and achieve a polished sound.
How Do I Use Auto-tune Pro In Pro Tools?
To use Auto-Tune Pro in Pro Tools, first, open the session and insert the plugin on the desired track. Then, choose the appropriate settings for your vocal, instrument, or MIDI track. You can also adjust the retune speed, formant, and vibrato parameters based on your preference.
Finally, playback the track and adjust as necessary until you achieve the desired effect.
How Do I Activate Auto-tune Pro?
To activate Auto-Tune Pro, you need to follow these steps: 1. Download Auto-Tune Pro and install it on your computer. 2. Launch the application and click on the Activate button. 3. Enter your iLok User ID and the Activation Code provided, then click Activate.
4. Restart the Auto-Tune Pro application and start using it with all its features.
Is Antares Autotune Pro Worth It?
Yes, Antares autotune Pro is worth it for musicians and producers who want to achieve high-quality vocal pitch correction and sound design. It offers advanced features like Auto-Key detection, Flex-Tune technology, and real-time MIDI control. Additionally, it has a user-friendly interface and a wide range of presets available.
Conclusion
By now, you have learned a lot about Autotune Pro and how it can enhance your music production process. With the help of this tutorial, you now have the tools to adjust the pitch of your vocals and ensure that your music is up to par.
Keep in mind that Autotune Pro is just one tool in your arsenal and can be combined with other techniques to achieve the desired sound. As you continue to experiment and refine your approach, don’t forget to practice and always be open to discovering new ways to improve your music.
Tap Tempo in Pro Tools First allows users to set the tempo of their project by tapping on a button. Pro Tools First is a popular digital audio workstation that is used as a music production tool.
It is a free version of the industry-standard Pro Tools software and is aimed at beginners and those who are just starting with music production. One of the features available in Pro Tools First is the tap tempo function. This feature allows users to set the tempo of their project by simply tapping on a button.
It is a useful function for musicians who want to add a particular rhythm or tempo to their music. We will explore the Tap Tempo function in Pro Tools First and how it can be used in music production.
Credit: www.mixinglessons.com
What Is Tap Tempo?
Tap Tempo is a feature that allows users to set the tempo for a project by tapping a button in time with the music. In Pro Tools First, the tap tempo button is located in the transport window and can be used to adjust the tempo of the current session.
Definition And Explanation
Tap Tempo is a feature that lets you set the tempo or rhythm of your music by tapping a button in time with the music. Tap Tempo Pro Tools First is a software tool that brings Tap Tempo functionality to Pro Tools First, the free version of Avid’s popular Pro Tools digital audio workstation software. With Tap Tempo Pro Tools First, musicians and producers can easily set the tempo of their music without having to manually enter a number on a metronome or clock. A few taps on a button is all it takes to get the perfect tempo for your song.
How Tap Tempo Works
Tap Tempo works by analyzing the time elapsed between each tap and then calculates the average time between taps. This average time is then used to set the tempo of the music. For example, if you tap the button four times over the course of four seconds, Tap Tempo will calculate that each tap occurred one second apart, and set the tempo accordingly. Tap Tempo can be used to set the tempo for a single section of a song or for an entire song.
Benefits Of Tap Tempo Pro Tools First
Tap Tempo Pro Tools First brings several benefits to musicians, producers, and audio engineers. It allows you to work more efficiently by eliminating the need to manually input tempo values. It also helps keep your music consistent by setting a precise tempo that remains constant throughout the entire song. Additionally, Tap Tempo Pro Tools First gives you the ability to easily adjust the tempo of your music during playback, making it easy to try out different tempos and find the one that works best for your song. In summary, Tap Tempo Pro Tools First is a powerful tool that helps you set the tempo of your music quickly and accurately. With its ability to calculate tempo based on your taps, it eliminates the need for manual data entry and allows you to focus on making great music. Whether you are a beginner or a seasoned pro, Tap Tempo Pro Tools First can help take your music to the next level.
Credit: www.mixinglessons.com
How Does Tap Tempo Work In Pro Tools First?
Tap Tempo in Pro Tools First allows users to set the tempo of a project manually by tapping a button on their keyboard or a MIDI controller. This feature is useful for musicians who want to improvise or play along with a previously recorded track.
Introduction To Pro Tools First
Pro Tools First is a digital audio workstation designed for beginners who are looking for an easy-to-use but powerful audio editing software. Whether you are recording a music track or editing a podcast, Pro Tools First offers intuitive features to help you create professional-sounding audio projects. One of the most useful features in Pro Tools First is the Tap Tempo function, which allows you to set the tempo of your audio project quickly and accurately.
Accessing Tap Tempo Feature
You can access the Tap Tempo feature in Pro Tools First by simply clicking on the Tap button in the Transport window. The button is located near the center of the window, between the Time Signature and Click buttons. Once the Tap button is selected, you can tap along with the beat of your audio track, and Pro Tools First will automatically calculate the tempo based on your tap rhythm.
Using Tap Tempo Feature
Using the Tap Tempo feature in Pro Tools First is easy and straightforward. Here are the steps you need to follow:
Open your Pro Tools First project and click on the Tap button in the Transport window.
Tap along with the beat of your audio track using the mouse or a MIDI controller.
Pro Tools First will calculate the tempo based on your tap rhythm and set the tempo for your project accordingly.
If the tempo is not accurate, you can repeat the tapping process to reset the tempo again.
By using the Tap Tempo function in Pro Tools First, you can ensure that your audio project is in the correct tempo and alignment with the rhythm of your music track or podcast. This will help you achieve a more polished and professional sound in your audio projects.
Benefits Of Using Tap Tempo In Pro Tools First
Tap Tempo in Pro Tools First allows for easy synchronization of music with its adjustable tempo settings. It saves time and gives precision to your music-making process.
If you are a musician or audio producer, perfect timing is key to creating high-quality audio. Whether you are recording live instruments or programming MIDI tracks, maintaining a consistent tempo is essential for creating a polished and professional end product. Tap Tempo is a valuable tool in Pro Tools First that allows you to set your project’s tempo by simply tapping along to the beat. Here are some of the key benefits of using Tap Tempo in Pro Tools First:
Ensuring Perfect Timing
With Tap Tempo, you no longer have to worry about trying to calculate the tempo of your song by ear or using a metronome. Simply tap along to the beat with your mouse or keyboard, and Pro Tools First will automatically detect and set the tempo for you. This ensures that your project maintains a consistent tempo throughout, making it easier for you to add and edit audio tracks later on.
Ease And Speed Of Use
Using Tap Tempo is intuitive and easy to learn, making it accessible to users of all experience levels. Tapping along to the beat is a natural movement that most musicians and producers are already familiar with, making it a quick and efficient way to set your project’s tempo.
Flexibility In Tempo Changes
One of the best things about Tap Tempo is the flexibility it offers in making tempo changes. If you want to increase or decrease the tempo of your project at any point, simply tap along to the new beat and let Pro Tools First do the rest. This ensures that your tempo changes are accurate and seamless, without any disruption to your workflow. In conclusion, Tap Tempo is an essential tool for any musician or audio producer working with Pro Tools First. It offers a range of benefits, including perfect timing, ease and speed of use, and flexibility in tempo changes. By using Tap Tempo, you can be sure that your project maintains a consistent tempo throughout, making it easier to create high-quality audio.
Credit: www.youtube.com
Advanced Techniques For Using Tap Tempo In Pro Tools First
Learn how to use advanced techniques for Tap Tempo in Pro Tools First to create more dynamic and precise music. Fine-tune your rhythms like a pro with this powerful feature.
Tap tempo is a powerful tool available in Pro Tools First that allows you to set the tempo of a project by tapping on a button. While this feature is useful for quickly setting a tempo, it also has many advanced techniques that can help you refine your project’s tempo and meter. Here are some of the advanced techniques for using Tap Tempo in Pro Tools First.
Changing Meter And Tempo Mid-song
One of the most significant advantages of Tap Tempo in Pro Tools First is the ability to change the tempo and meter mid-song. To change the meter mid-song, select the desired meter in the transport window, and Pro Tools will automatically adjust the tempo to match. You can also change the tempo mid-song by tapping the tempo button on the transport window at the desired tempo.
Syncing To External Audio Sources
Another powerful feature of Tap Tempo in Pro Tools First is the ability to sync to external audio sources. This feature is particularly useful if you’re recording a live performance that has slight tempo fluctuations. Pro Tools First can detect the tempo of an external audio source and automatically adjust the tempo of your project. To use this feature, go to Conductor, create a new conductor track, select “Sync to External Audio,” and choose your audio source.
Creating Tempo Maps
Tap Tempo in Pro Tools First can help you create tempo maps for complex compositions. To create a tempo map, you need to tap the tempo button at specific intervals to create markers on the timeline. You can then use these markers to refine the tempo and meter of your project. This feature is particularly useful if you’re working on a classical, jazz, or experimental music project that has signature tempo and meter changes. In conclusion, Tap Tempo is a powerful tool that can help you refine the tempo and meter of your project. By using the advanced techniques in Pro Tools First, you can take full advantage of this feature and create a more sophisticated and nuanced musical composition.
Tips For Getting The Most Out Of Tap Tempo In Pro Tools First
Maximizing your productivity in Pro Tools First requires utilizing Tap Tempo to its fullest potential. With a few simple tips, you can streamline your workflow and create more accurate and consistent tempos.
Tips for getting the most out of Tap Tempo in Pro Tools First Tap Tempo is a handy tool that allows you to set the tempo of a session by tapping on a button. It is available in Pro Tools First and can be used to stay in sync with other musicians or to keep a consistent tempo throughout your recording. Here are a few tips to help you get the most out of Tap Tempo in Pro Tools First. Practice with a metronome before tapping Before you start tapping away, it’s important to practice with a metronome first. This will help you to get a feel for the tempo and ensure that you are tapping at a consistent pace. Using a metronome will also help you improve your timing and rhythm, which can be beneficial when recording with other musicians. Using Tap Tempo with different genres of music Tap Tempo can be used with any style of music, and it’s important to adjust the tempo to suit the style you’re working with. For example, if you’re recording a ballad, you may want to set the tempo at a slower pace. Alternatively, if you’re working on a dance track, you may want to set the tempo at a faster pace. Experimenting with non-traditional time signatures Tap Tempo can be used to experiment with non-traditional time signatures, such as 5/4 or 7/8. When working with non-traditional time signatures, it’s important to ensure that each beat is consistent to maintain the rhythm of the song. You can even use Tap Tempo to create interesting rhythmic patterns by tapping at irregular intervals. In conclusion, Tap Tempo is a powerful tool that can improve your timing, rhythm, and overall recording quality. By practicing with a metronome, adjusting the tempo to suit different genres, and experimenting with non-traditional time signatures, you can get the most out of Tap Tempo in Pro Tools First.
Frequently Asked Questions For Tap Tempo Pro Tools First
How Do You Tap A Tempo In Pro Tools?
To tap a tempo in Pro Tools, use the “Tempo Ruler” at the top of the screen and click on the “Tap” button. Then, tap along with the beat using your keyboard or mouse, and Pro Tools will calculate the tempo.
How Do You Change The Tempo In Pro Tools First?
To change the tempo in Pro Tools First, simply navigate to the top menu and select “Setup” followed by “Session”. From there, you can adjust the tempo in the “Tempo” field and apply it to your project.
How Do I Make A Click Track In Pro Tools First?
To make a click track in Pro Tools First, start by creating a new session. Then click on the “+” button on the Tracks menu, and select “Click” from the list of track types. After that, you can customize the click track by adjusting the tempo, meter, and sound.
Finally, press record and your click track will start playing.
What Comes With Pro Tools First?
Pro Tools First comes with a variety of features including 16 audio tracks, 16 MIDI tracks, and over 20 plug-ins for music production. It also comes with a variety of virtual instruments, loops, and samples to enhance music creation. However, it lacks some features like offline bounce and surround mixing.
Conclusion
Tap Tempo Pro Tools First is a powerful tool for musicians seeking to streamline their music making process. Its user-friendly interface and range of features make it an indispensable tool for any musician, regardless of their experience level. By enabling musicians to effortlessly create and manage tempo maps, Tap Tempo Pro Tools First is sure to become a go-to resource for music production.
Its versatility, functionality, and ease of use make it a must-have for anyone looking to take their music to the next level.
The best PC for audio is the Apple iMac Pro or the HP Envy Curved All-In-One. These systems have strong processing power and excellent sound quality.
As an Amazon Associate I earn from qualifying purchases.
With the rise of digital audio production, it’s important to have a computer that has both excellent processing power and sound quality. If you’re looking to invest in a PC for audio, the Apple iMac Pro and the HP Envy Curved All-In-One are two great choices.
The iMac Pro has a 27-inch Retina 5K display, an 8-core Intel Xeon processor, and a Radeon Pro Vega 56 graphics processor. The HP Envy Curved All-In-One has a unique design for immersive sound and comes equipped with Bang & Olufsen audio technology. These systems offer a seamless audio production experience with their powerful specs and quality sound output.
Factors To Consider
When searching for the best PC for audio, there are several factors to consider, including the processor speed, RAM, and sound card. A powerful CPU is necessary for running intensive audio software, while ample RAM ensures smooth multitasking. The sound card is also vital for high-quality audio output.
Factors to Consider: Best PC for Audio When it comes to creating and editing audio, a powerful PC is essential. A PC that meets the needs for audio work can make all the difference in producing high-quality content. However, selecting the right PC can be overwhelming with the range of choices available. Here are some factors to consider to help you find the best PC for audio work:
Budget
Your budget will be the most significant factor when selecting a PC for audio work. The amount of money you have to spend will restrict your options. You can still find a PC that suits your audio needs even on a tight budget. However, having a higher budget will open up better options for you.
Processor
When selecting a processor, you need to consider the speed, number of cores and threads, and cache size. A processor with a high clock speed and multicore processing can handle resource-intensive operations better. A six or eight-core processor such as Intel Core i7 or i9, or AMD Ryzen 7 or 9, can suit audio production.
Ram
Random-access memory (RAM) is an essential component you need for audio production. A higher RAM capacity will enable your software to run better, which can enhance workflow speed and audio processing. A minimum of 8GB RAM is suitable, but for better performance, opt for 16GB RAM.
Storage
Your storage requirement will depend on the size of the audio files you work with. High-quality audio files can take up significant space. Therefore, you need to consider having a fast and spacious storage system. A Solid-state drive (SSD) with at least 256GB or 512GB should be sufficient, and you can supplement it with external hard drives if you need more storage. In conclusion, these factors are crucial when selecting a PC for audio production. While a higher budget will open up better options, you can still find a PC that suits your needs even on a tighter budget. Therefore, consider each factor and find the best PC that will suit your audio production needs.
Top Pcs For Audio Work
For audio work, the top PC options include the Dell XPS 8930, HP Envy Desktop, and Asus ROG Strix Gaming Desktop. These PCs boast powerful processors and graphics cards, as well as ample storage and memory to handle audio production software.
When it comes to audio work, having a powerful and reliable PC is crucial. From music production to sound editing, a good PC can make a huge difference in the quality of your work. In this article, we will discuss the top PCs for audio work that you can choose from.
Dell Xps 8930
The Dell XPS 8930 is a great option for audio work due to its powerful specs. It comes with an 8th Generation Intel Core i7-8700 processor, NVIDIA GeForce GTX 1050Ti graphics card, and 16GB DDR4 RAM. It also has a 512GB SSD and 2TB hard drive, providing ample storage for your audio files. Additionally, the PC has a sleek and stylish design, making it a great addition to your workspace.
Hp Envy 32
Another great PC for audio work is the HP Envy 32. It is equipped with an Intel Core i7-10700 processor, NVIDIA GeForce RTX 2060 graphics card, and 16GB DDR4 RAM. The PC also has a 256GB SSD and 1TB hard drive, giving you plenty of space to store your audio files. What sets the HP Envy 32 apart is its built-in Bang & Olufsen audio system, providing high-quality sound output.
Apple Imac
For those who prefer using macOS, the Apple iMac is a top choice for audio work. It comes with a 10th Generation Intel Core i5 processor, Radeon Pro 5300 graphics card, and 8GB DDR4 RAM (expandable up to 128GB). The iMac also has a 512GB SSD, providing fast and reliable storage for your audio files. Additionally, the PC has a stunning Retina display, allowing you to view your work in high definition. In conclusion, when it comes to audio work, choosing the right PC can greatly impact the quality of your work. Whether you opt for the Dell XPS 8930, HP Envy 32, or Apple iMac, make sure to consider your specific needs and preferences. With the right PC, you can take your audio work to the next level.
Audio Editing Software
When it comes to creating high quality audio content, investing in the right tools is crucial. The right PC for audio editing software can make all the difference in terms of efficiency and overall quality. There are numerous options on the market, but in this article, we will focus on the top three audio editing software:
Pro Tools
Pro Tools is a popular digital audio workstation used by professionals within the music and film industry. The software offers advanced editing tools, easy-to-use interface, and compatibility with most audio formats. Pro Tools is available in different versions, including the standard version, Pro-Tools Ultimate, and Pro Tools First, designed for beginners.
Logic Pro X
Another top choice for audio editing software is Logic Pro X, a digital audio workstation designed for Mac users. Logic Pro X is known for its powerful features, including its extensive library of plugins and instruments. The software is ideal for recording, editing, and mixing music.
Ableton Live
Ableton Live is a unique digital audio workstation. Its real-time composition and performance-oriented design has made it a popular choice for professional musicians and DJs. The software offers a variety of editing tools, effects, and plugins designed to help you create unique sounds and arrangements.
Software
Pros
Cons
Pro Tools
– Advanced editing tools – Compatibility with most audio formats – Different versions available for different skill levels
– Can be expensive – Steep learning curve for beginners
Logic Pro X
– Extensive library of plugins and instruments – Designed for Mac users – Ideal for recording, editing, and mixing music
– Only available for Mac – Can be expensive for beginners
Ableton Live
– Real-time composition and performance-oriented design – Variety of editing tools, effects, and plugins – Popular choice for professional musicians and DJs
– Not ideal for audio post-production – Learning curve for beginners
Credit: www.youtube.com
Additional Gear Required
To achieve the best PC for audio usage, additional gear is required. You may need to invest in a high-quality sound card, headphones, or speakers to ensure optimal sound performance. Make sure to research and choose components carefully to get the best audio experience possible.
When looking for the best PC for audio, it’s important to consider the additional gear required to complete your setup. This includes items such as studio monitors, an audio interface, and a microphone.
Studio Monitors
Studio monitors are speakers specifically designed for audio production, providing accurate and clear sound reproduction. When selecting studio monitors, consider factors such as frequency response, size, and power output. Some recommended options include the KRK Rokit 5 Studio Monitors and the JBL Professional 305P MkII Studio Monitors.
Audio Interface
An audio interface is a device that connects your computer to other audio equipment, such as mixers, microphones, and studio monitors. It typically features inputs and outputs for multiple devices, and can also provide improved sound quality. Some popular audio interfaces include the Focusrite Scarlett 2i2 and the PreSonus AudioBox USB 96.
Microphone
A microphone is essential for capturing high-quality audio, whether you’re recording vocals or instruments. There are several types of microphones available, including dynamic, condenser, and ribbon. Consider factors such as frequency response, polar pattern, and sensitivity when selecting a microphone. Some recommended options include the Shure SM7B and the Audio-Technica AT4053b. In summary, when purchasing a PC for audio, additional gear is required to achieve optimal sound quality. Studio monitors, an audio interface, and a microphone are all essential pieces of equipment to consider when setting up your audio production studio.
Setup And Configuration
For the best PC for audio setup and configuration, it’s important to consider the processing power, RAM, and storage space of the computer. Look for models with high-quality sound cards, as well as options for upgrading or adding external audio interfaces.
When it comes to audio production, having the right setup and configuration is essential. It is essential to have a computer that can handle all the heavy software and equipment required for professional audio work. In this article, we will discuss how to set up and configure your PC for audio production and what hardware and software you should consider.
Connecting Studio Monitors
The first step to a good audio production setup is connecting the studio monitors correctly. You need to ensure that you have the right cables and connectors to connect your speakers to your PC. It’s good to invest in high-quality speakers and cables as this will affect the sound quality. Moreover, some studio monitors also come with built-in amplifiers and sound processors, which allows better control of sound output. Once you have the equipment, you can follow these steps:
Connect your studio monitors to the audio interface.
Connect the audio interface to your PC using USB or Thunderbolt cable.
Ensure that the drivers for your audio interface are installed correctly on your PC.
Turn on the audio interface and test the speakers to ensure they are working correctly.
Optimizing Audio Settings
It’s important to optimize audio settings to get the best sound quality from your PC. Some of the essential audio settings to configure include:
Sample rate: This is the number of samples taken per second, and it affects the sound quality. Choose a higher sample rate for better audio quality, but it will also take up more space on your hard drive.
Buffer size: This determines the latency between the time when the sound source produces an audio signal and the time when you hear it. Lower buffer size results in lower latency but can cause audio distortion.
Audio format: You need to choose the right audio format for your project, such as WAV or MP3. WAV is lossless and offers high audio quality, while MP3 is compressed and takes up less space but with lower audio quality.
DSP Settings: Digital Signal Processing (DSP) allows you to modify an audio signal. Configure DSP settings to suppress unwanted noise, improve the clarity of the audio signal, and to optimize the dynamic range.
Wrapping Up
Setting up and configuring your PC correctly for audio production is crucial when undertaking any audio work. Ensure that you have the correct hardware and software, connect your studio monitors correctly, and optimize your audio settings. A well-configured PC will go a long way in providing an incredible audio production experience.
Troubleshooting Common Issues
If you’re in the market for the best PC for audio, common issues you may encounter include compatibility problems with audio interfaces and driver issues. Troubleshooting these issues can be a painstaking process but is essential in ensuring the highest quality audio production possible.
In the world of music production, having the right PC is essential to avoid common issues that can affect the quality of your audio work. Troubleshooting these issues can be time-consuming and frustrating, but with the right knowledge and tools, you can minimize or avoid them altogether. In this section, we’ll discuss some of the most common issues that audio producers face and how to troubleshoot them effectively using your PC.
Latency
Latency is the time delay between an audio signal being generated and when it is heard by the listener. This occurs when your computer processes audio data, which takes time, and other hardware components, such as your sound card, also contribute to latency. You may experience latency issues when recording audio, which can result in a delay between the time you play or sing and when you hear the playback through your headphones. This can make it difficult to keep up with the beat and may affect the quality of your recording. To minimize latency, you can adjust the buffer size in your audio software settings. By decreasing the buffer size, you can reduce the time it takes for your computer to process the audio data and improve your recording experience.
Buffer Size
The buffer size refers to the amount of audio data that your computer processes before sending it to your sound card for playback. A larger buffer size can reduce the likelihood of audio dropouts or glitches but also increases latency. A smaller buffer size can decrease latency but may result in audio artifacts or glitches. Finding the right buffer size depends on your computer’s processing power and the audio software you use. Start with a mid-range buffer size and adjust it according to your requirements.
Compatibility Problems
Compatibility issues may arise between your computer’s hardware, software, and audio interface. This can cause problems such as audio distortion, latency, or dropouts. Before purchasing any audio hardware, check for compatibility with your PC’s operating system and other hardware components, such as the processor and sound card. Some audio software may also require specific hardware or software configuration to function optimally. Always read the software’s system requirements before installing it on your PC. In summary, mastering the art of troubleshooting common issues that arise when working with audio on your PC can help you avoid common audio problems. You should always consider the latency, buffer size, and compatibility of any audio hardware and software to your PC before making a purchase. By following these tips, you can create top-quality audio projects with minimum disturbances to your workflow.
Maintenance
For high-quality audio performance, the best PC for audio will have sufficient RAM, a fast processor, and a dedicated soundcard or external audio interface. Regular maintenance checks for any hardware or software issues are crucial to ensuring seamless audio playback and recording.
Regular Cleaning
Keeping your PC for audio clean is crucial to ensure it runs at its optimum level. Without proper maintenance, the dust and debris build-up can have a detrimental effect on the PC’s internal components, including the audio hardware. Regularly dusting off and wiping down the PC and its components can prevent overheating and prolong the PC’s lifespan.
Updating Drivers
To ensure that your PC for audio runs seamlessly, keeping all drivers up-to-date is vital. Audio drivers are software programs that enable the PC’s audio hardware to communicate with the operating system and other software applications installed on the PC. Regularly checking for updates and installing them can ensure that your PC runs smoothly without any hiccups.
Backing Up Files
Backing up files is an essential aspect of maintaining your PC for audio. All the audio files and software programs are vulnerable to data loss or corruption. A power surge or a system crash can delete or damage critical files, causing data loss. Creating regular backup files can help in restoring the lost data. Storing the backup files on external storage devices or cloud storage platforms can provide an additional layer of security and ensure quick recovery in case of an emergency.
Credit: www.pcworld.com
Credit: hardwarecanucks.com
Frequently Asked Questions Of Best Pc For Audio
What Pc Has Best Audio?
The Dell XPS 13 is the PC with the best audio quality. The laptop’s Waves MaxxAudio Pro software enhances the sound quality, and the speakers offer clear, crisp sound. The XPS 13 is a great choice for audiophiles who want a quality listening experience from their PC.
Which Computer Is Best For Audio Production?
For audio production, a high-performance computer with a powerful processor, ample RAM (at least 8GB), and a good sound card or audio interface is the best choice. A desktop computer or a laptop with a large screen and good battery life is also preferable.
What Computer Is Better For Music?
A computer with a powerful processor, fast RAM, and ample storage is ideal for music production. A desktop PC with a dedicated sound card and large screen is best, but high-end laptops can also work. Look for models with quad-core processors, at least 8GB of RAM, and 512GB of solid-state drive (SSD) storage.
What Kind Of Computer Do I Need To Record Music?
To record music, you’ll need a computer with a strong processor, at least 8GB of RAM, and a high-quality sound card. A reliable hard drive or SSD, with ample storage space for your music files, is also important. You may also need additional software or hardware depending on your recording needs.
Conclusion
A PC that is optimized for audio production is crucial for achieving high-quality sound. The best PC for audio will have a powerful processor, ample RAM, and storage space to handle music production software and large audio files. It should also have a reliable sound card, graphics card, and preferably, a solid-state drive.
Investing in the right PC will improve your audio production experience and help you create music that sounds professional and polished.
Waves Vocal Presets provide ready-to-use sound settings for vocals in music production. These presets aim to enhance and optimize the vocal sound for different genres and styles, while saving time in the mixing process.
Also, these presets are a boon to music producers and audio engineers who are often looking for ways to optimize their workflow to save time and yet produce high-quality music. These ready-to-use vocal presets are a great way to easily enhance the vocal sound without spending too much time on tweaking every parameter.
Waves offers a range of vocal presets for various styles of music, such as pop, hip-hop, rock, and R&B, as well as utility presets for de-essing, compression, and more. Also, we will explore the different types of Waves Vocal Presets available and how they can enhance the vocal sound in your music production.
Credit: m.youtube.com
Why Use Waves Vocal Presets?
Moreover, are you looking to take your vocals to the next level? Look no further than these presets. In addition, these customizable presets aim to give your vocals that professional sound you’ve been striving for. With these presets, you can achieve a high-quality sound, save time, and customize your sound all at the same time. In this post, we’ll dive into why you should use these presets and how they can benefit your music.
Waves Vocal Presets: Achieve Professional Sound
In addition, with these presets, achieving a professional sound has never been easier. These presets specifically aim to give your vocals the clarity, depth, and presence of a professionally mixed track. Industry professionals who have worked with some of the biggest names in music created the presets, so you can trust that you’re getting a top-of-the-line sound.
Save Time
Furthermore, one of the biggest advantages of using these presets is the time it saves you. Rather than spending hours tweaking your vocals, you can simply choose a preset that works for your voice and style. For example, this allows you to focus on the creative aspects of your music and get your tracks out faster.
Customization Options
While Waves Vocal Presets aim to give you a professional sound right out of the gate, they also offer a range of customization options. As a result, you can adjust the EQ, compression, reverb, and other settings to fine-tune your sound and make it unique to your style. Additionally, this ensures that every track you create has a distinct sound that’s all your own.
In conclusion, these presets offer an incredible value to all musicians. However, with these presets, you can achieve a professional sound, save time, and customize your track all at once. Also, don’t miss out – give Waves Vocal Presets a try and take your vocals to the next level today.
Types Of Waves Vocal Presets
Moreover, discover the wide range of these presets available, each designed to enhance the sound and quality of vocals in different ways. Then, from EQ adjustments to compression settings, there is a preset for every style and genre of music.
When it comes to mixing vocals, these presets are some of the most sought-after tools in the industry. In short, these presets can quickly achieve a polished, professional sound for your vocals without the need for extensive EQ and compression adjustments. Waves offers a range of vocal presets designed specifically for lead vocals, background vocals, and ad-libs. In addition, each type of preset uniquely enhances the best qualities of each type of vocal performance.
Lead Vocal Presets
Lead vocals are the backbone of any song, and as such require a high level of attention during mixing. Furthermore, Waves Lead Vocal Presets offer a range of options to enhance the natural tone and character of the lead vocal. Some of the most popular Waves Lead Vocal Presets include:
Clear Lead Vocal: designed to enhance clarity and presence while taming harsh frequencies
Additionally, vintage Lead Vocal: adds warm, analog-style character to the vocals
Also, telephone Vocal: simulates the sound of a telephone or radio transmission
Background Vocal Presets
Background vocals add depth, texture, and harmony to a song. Waves Background Vocal Presets help these vocals sit perfectly within the mix without taking away from the lead vocal. Some of the most popular Waves Background Vocal Presets include:
Chorus Vocal: adds lush, stereo chorusing to the background vocals
Harmony Vocal: enhances the harmonies in the background vocals
Double Vocal: creates a thick, layered effect by doubling the background vocals
Ad-lib Vocal Presets
Ad-libs are spontaneous, improvisational vocalizations that often add an extra layer of emotion and energy to a song. Waves Ad-Lib Vocal Presets offer a range of options to enhance these unique vocal performances. Some of the most popular Waves Ad-Lib Vocal Presets include:
Delay Vocal: adds rhythmic delays to the ad-libs for a dynamic effect
Reverse Vocal: creates an ethereal, otherworldly effect by reversing the ad-lib
Filter Vocal: uses high-pass or low-pass filters to creatively shape the ad-libs
No matter the type of vocal performance, these presets offer an array of options to quickly and easily achieve a professional sound. With the right combination of presets, you can create a cohesive and polished vocal mix that perfectly complements your music.
Choosing The Right Waves Vocal Preset
Selecting the appropriate Waves vocal preset can enhance the overall quality of your mix. Consider the type of music, vocal style, and intended mood before making your selection. With a variety of options available, a well-chosen Waves vocal preset can make your vocals stand out.
Waves Vocal preset is the ultimate time-saving tool for music producers and enthusiasts alike. With hundreds of presets available, users can count on easy and effortless mixing of tracks. However, with so many options to choose from, selecting the right preset can be a daunting task. Here, we will look at some crucial factors to consider when choosing the right Waves Vocal preset for your project.
Waves Vocal Presets: Genre
The first factor to consider when choosing a Waves Vocal preset is the genre of your music. Different Waves Vocal presets suit different genres. Therefore, it is crucial to select a preset that compliments your genre and enhances the overall sound quality of your track. For instance, if you are working on a rap song, you should choose a preset that highlights the rap vocals’ punchy and aggressive nature, such as the “Vocals Hip Hop Punch” preset.
Vocal Style
The Vocal Style is another critical factor to consider. The Vocal Style should match the type of vocals in your project. Different presets are available for different vocal styles, such as male/female lead and background vocals. Ensure you select a Waves Vocal preset that enhances and blends with your vocalist’s style and delivery. For instance, if you have a female vocalist on a pop track, you can select the “Vocals Female Waves Vocal Presets: Pop” preset.
Recording Environment
The recording environment is an essential factor to consider when selecting Waves Vocal presets. The acoustics and ambiance of your recording environment can drastically affect the vocals’ sound quality. If the recording space was not optimal, selecting the right preset becomes even more critical. These presets such as “Vocals Bright Room” and “Vocals Warm Room” are optimized to enhance the vocals’ sound quality in a live recording environment. In summary, selecting the right Waves Vocal preset can have a massive impact on your project’s overall sound quality. Understanding the genre of your music, Vocal Style, and recording environment will help you narrow down the options and choose the right preset. Take your time, experiment with different Waves Vocal presets, and don’t be afraid to mix and match until you find the perfect fit for your project.
Credit: keywav.io
How To Use Waves Vocal Presets
These presets are a great tool for enhancing your vocal recordings. These presets are engineered to automatically adjust various parameters to create a polished sound without much effort. In this section, we will discuss how to install the presets and apply them within a mix, and also how to fine-tune them to your liking.
Installation
Installing Waves Vocal Presets is a simple process and can be done in just a few clicks. Here are the steps to install:
Launch the Waves Central application on your computer.
In the Install Products tab, select the Vocal category.
Expand the list of vocal plugins and select the preferred preset you want to install.
Click the Install button and wait for the installation to complete.
Application Within A Mix
Once you have installed these presets, it’s time to start using them within a mix. Here are some steps to get you started:
Launch your DAW (Digital Audio Workstation) of choice and import your vocal tracks.
Create a new insert on your vocal track and select the plugin manager.
Choose ‘Waves’ from the list of manufacturers and select the preferred preset from the list.
Activate the preset and adjust the settings to your liking.
Repeat the process on other vocal tracks if required and adjust the levels so that they blend well with other instruments in the mix.
Fine-tuning
While Waves Vocal Presets are designed to automatically set many parameters, you can still fine-tune the settings for a unique sound. Here are some tips:
Adjust the EQ settings to enhance certain frequencies such as boosting high-end for a brighter sound.
Use Compression to even out the dynamics of the vocals and create a consistent level.
Experiment with other settings like Reverb, Delay, and Chorus, to add a specific texture to your vocals.
Save your own personalized presets so that you can quickly recall them for future projects.
With these tips, you can use these presets to create professional-sounding vocals in your productions. Don’t be afraid to experiment with different presets and settings to find the perfect match for your mix.
Top 5 Waves Vocal Presets For Different Genres
Check out our top 5 Waves vocal presets for different genres, including pop, rock, hip-hop, R&B, and EDM. These presets are designed to give your vocals a professional sound with just one click. Elevate your music production with the power of Waves plugins.
Waves has been a leader in the production of professional audio plugins, with a wide range of products for mixing, mastering, and vocals. One of the company’s flagship products is the vocal presets, which cater to different genres. Having the right vocal preset can make all the difference in music production. In this article, we will explore the Top 5 Waves Vocal Presets for different genres, including pop, hip hop, rock, R&B, and EDM.
Pop
The pop genre often requires a clean and polished vocal sound. The Waves Maserati VX1 preset is a great option for pop vocals. Its vintage processor emulates the analog sound of recording equipment used in classic pop music. The preset gives the vocal track warmth, without being too harsh, and adds a subtle touch of saturation.
Hip Hop
Hip hop is a genre that demands a strong, upfront vocal presence. The Waves JJP Vocals preset is perfect for achieving that. It was created by Grammy-winning engineer Jack Joseph Puig and gives vocals a modern, powerful edge. The preset also has a built-in de-esser that helps tame harsh high frequencies, making the vocal sound smooth and clear.
Rock
Rock music requires a vocal preset that can deliver a gritty and aggressive tone. The Waves SSL E-Channel preset is designed for just that purpose. It emulates the classic sound of the SSL 4000 console and gives vocals a raw, in-your-face quality. The preset adds depth and character to the vocal, making it stand out in the mix.
Rb
The R&B genre demands a vocal sound that is both smooth and emotive. The Waves CLA Vocals preset is perfect for achieving that. It was created by Grammy-winning engineer Chris Lord-Alge and gives vocals a polished, professional sound. The preset includes compression and EQ settings that help bring out the natural character of the vocal.
Edm
Electronic dance music (EDM) often features heavily processed vocals that are heavily edited. The Waves Vocal Rider preset is an excellent tool for achieving the desired effect in EDM. It uses an automatic gain control algorithm to help keep the vocal consistent throughout the song. This preset saves producers much time as they don’t have to automate their vocals manually. In conclusion, using the right vocal preset can take your music to the next level. The above Waves vocal presets for different genres provide a solid foundation for establishing the desired vocal sound for each genre.
Credit: keywav.io
Frequently Asked Questions On Waves Vocal Presets
What Are The Best Wave Plugins For Vocals?
Some of the best wave plugins for vocals include: Waves Tune, Waves SSL E-Channel, Waves CLA Vocals, Waves Renaissance Vox, Waves H-Delay and Waves Doubler.
Do Vocal Presets Work?
Yes, vocal presets work by providing a pre-made set of settings for your vocal track to give it a specific sound or style. Vocal presets save you time and effort in the recording and mixing process. However, it is important to note that it may not work for every voice and may require adjustments and tweaks to suit individual needs.
Where Are Waves Presets?
Waves presets can usually be found in the Waves plug-in menu or folder where they were installed. Some plug-ins also have a “preset browser” feature that allows you to easily access and manage your presets. Check the Waves user manual or website for more specific instructions on locating and using presets.
Is Wave Audio Good?
Wave Audio is a good option for those who need to work with audio files. Its features and functionalities make it an ideal option for recording and editing audios effectively. Overall, it is a recommended option for individuals who need a versatile audio editing tool.
Conclusion
To sum it up, these presets can be a game-changer for producers and engineers in the music industry. With their user-friendly interface and top-of-the-line sound quality, they allow creative minds to focus on their music instead of spending hours on tedious vocal processing tasks.
Whether you’re working on a commercial hit or an indie masterpiece, these presets can help you achieve a professional-sounding mix in minutes. So why wait? Give them a try and discover the power of Waves today.
Manual vocal editing involves the process of manipulating recorded audio to enhance and fix vocal performances. Vocal editing is a critical element in ensuring that a song meets industry standards and sounds pleasing to the ears.
From adjusting pitch and timing to adding effects and removing noises, manual vocal editing requires a skilled and experienced audio engineer to perform the task accurately. With proper vocal editing, the quality and clarity of the vocals are improved, resulting in a polished and professional-sounding track.
We will discuss the different techniques used in manual vocal editing and how they contribute to creating a flawless vocal performance.
Credit: www.waves.com
The Art Of Manual Vocal Editing
The Art of Manual Vocal Editing:
The process of mixing a vocal track can make or break a song. An artist’s voice is the centerpiece around which all other instruments revolve, so it’s essential to make it sound as polished and professional as possible. This is where the art of manual vocal editing comes into play.
Introduction to Vocal Editing:
Vocal editing is the process of manipulating recorded vocal tracks in order to perfect their quality and prominence in a song. While many tools and plugins exist to help with this process, manual vocal editing is a crucial component of the final mix.
Why Manual Vocal Editing is Important:
There are times when even the most advanced plugins and software can’t achieve the right sound without manual intervention. Manual vocal editing allows you to fine-tune every aspect of a vocal track, from timing and pitch to breaths and background noises. This level of attention to detail ensures that the vocals stand out in the mix and bring the song to a new level.
Tools Required for Manual Vocal Editing:
Here are some of the essential tools required for manual vocal editing:
Tool
Description
Zoom Slider
An essential tool for manual editing, this allows you to zoom in on specific portions of the vocal track, so you can spot and edit any errors or inconsistencies.
Cut and Paste Tools
These tools enable you to cut and paste specific portions of the vocal track as needed. This comes in handy when you need to shift the timing of certain sections or remove extraneous noise.
Volume Automation
Manual vocal editing requires adjusting volume levels at the individual word or syllable level. This tool enables you to create cleaner fades at the beginning and end of phrases, eliminate pops and clicks, and improve the overall quality of the vocal track.
By incorporating manual vocal editing into your mixing process, you’ll be able to achieve a final product that’s nothing short of stunning.
Credit: www.waves.com
Preparing For Manual Vocal Editing
Preparing for manual vocal editing requires a few essential steps to achieve the best results. Start by selecting a high-quality recording and ensuring that the vocalist’s performance follows the intended melody and pitch before beginning the manual editing process.
Preparing for Manual Vocal Editing Manual vocal editing is an essential part of the post-production process for any vocal-based project. From removing unwanted sounds to adjusting vocal levels, manual vocal editing helps to produce professional-sounding audio. However, before you start editing your vocals manually, you need to prepare your workspace, clean up your audio files, and identify any issues that may need to be addressed during the editing process. Below, we will discuss these important preparatory steps in more detail. Setting Up Your Workspace When it comes to manual vocal editing, setting up your workspace correctly is crucial. You need to make sure that you have an organized and quiet environment to work in. Here are some tips for setting up your workspace: – Use headphones to listen to the audio file to prevent any external noise from interfering in the editing process. – Make sure that you have ample space to work and place all necessary equipment, such as a computer, audio editing software, a microphone and preamp, and pop filter. – Ensure that your workspace is comfortable and well-ventilated to reduce distractions and increase your focus. Cleaning up Audio Files Before editing your vocals manually, it’s essential to clean up your audio files. Cleaning up involves removing any unwanted sounds, such as background noise, clicks, and pops. Here are some tips to help you clean up your audio files: – Use noise reduction tools to remove unwanted sounds. – Use EQ to clean up any muddy or cluttered areas of the vocal track. – Use de-essing tools to remove any harshness in the vocal recording. Identifying Audio Issues before Editing Identifying audio issues before editing helps to ensure that you address any issues at the source and produce high-quality audio. Here are some issues you should look out for: – Plosives: These are abrupt pops or bursts of air that can be heard when pronouncing certain letters or sounds like “P” or “B”. – Sibilance: This is a hissing sound that occurs when pronouncing “S” or “SH” sounds. – Room noise or ambient noise: This is background noise that can be heard in your audio recording. In Conclusion Preparing for manual vocal editing is just as important as the editing process itself. From setting up your workspace to identifying and addressing audio issues, taking these preparatory steps will help to ensure that your final audio product is clear, professional-sounding, and high-quality.
Manual Vocal Editing Techniques
Manual vocal editing techniques involve using various audio editing tools to manually adjust the pitch, timing, and tone of a recorded vocal performance. This process can help to enhance the overall quality and clarity of the vocals, ensuring that they fit seamlessly into the final mix of a song or recording.
Manual vocal editing techniques can be a game-changer when you want to produce high-quality vocals. Whether you’re working on a podcast or a music project, the manual vocal editing process can help you remove unwanted sounds, adjust vocal volume, and perfect pitch correction. In this blog post, we’ll discuss some of the most important manual vocal editing techniques, including removing background noise, eliminating pops and clicks, adjusting vocal volume, pitch correction, time alignment, and adding effects for enhancement.
Removing Background Noise
Background noise is a common issue that can affect the quality of your vocals. You can remove background noise manually by using noise reduction software. You can also use the following techniques:
Use a noise gate to cut off any sound below a certain level
Apply a low-pass filter to reduce high-frequency noise
Record in a quiet environment to reduce background noise during recording
Eliminating Pops And Clicks
Pops and clicks often occur when you record vocals, and they can be quite distracting to listeners. To eliminate pops and clicks, you can use the following techniques:
Use a pop filter when recording
Adjust the microphone distance and angle
Remove the pops and clicks manually from the waveform using an audio editor
Adjusting Vocal Volume
Adjusting vocal volume is crucial to create balanced sound in your recordings. You can adjust the vocal volume manually by using the following techniques:
Use automation to control the volume of individual sections of your recording
Use compression to even out the volume of your vocals
Use normalization to set all the vocal tracks to the same level
Pitch Correction And Time Alignment
When it comes to perfecting vocals, pitch correction and time alignment are vital. The following techniques can help you achieve pitch correction and time alignment:
Use pitch correction tools to correct off-key notes
Use manual editing to adjust pitch by changing the pitch of notes individually
Time-align the vocals by aligning the start of each phrase
Adding Effects For Enhancement
Adding effects can be an effective way to enhance your vocal tracks. There are various types of effects you can use, such as reverb, delay, chorus, and EQ. The following techniques can be used to add effects for enhancement:
Use reverb to create a sense of space and depth
Use delay to create a sense of depth and repetition
Use chorus to create a sense of doubling
Use EQ to enhance certain frequencies and reduce others
In conclusion, manual vocal editing techniques are essential if you want to produce high-quality vocals. By following the techniques mentioned above, you can achieve a polished and professional sound in your recordings.
Advanced Manual Vocal Editing Techniques
Manual vocal editing is important for those want to achieve a professional sounding mix. It takes the raw vocals and polishes them until they are ready for the final mix. Advanced manual vocal editing techniques go beyond basic editing and require a deeper understanding of the tools and techniques available. This section will cover some of these advanced techniques, including eliminating mouth noises, removing breath sounds, de-essing and removing sibilance, and making creative vocal adjustments.
Eliminating Mouth Noises
Mouth noises can be distracting and take away from the overall quality of the vocal recording. These noises can include clicks, pops, lip smacks, and other unwanted sounds. To eliminate these noises, it’s important to zoom in on the waveform and identify the exact location of the noise. One way to eliminate it is to use the ‘Silence’ function in your DAW. Another way is to use a spectral editor to remove the noise frequency and only leaving the clean vocal.
Removing Breath Sounds
Breath sounds are an essential part of a vocal performance, but they can also be distracting if they are too loud or if there are too many of them. The best way to remove breath sounds is to use volume automation and reduce the volume of the breaths during the vocal phrases. An alternative is to delete the breath sounds between the phrases, but this requires skill to do so without affecting the musicality of the performance.
De-essing And Removing Sibilance
Sibilance or harsh “S” sounds can be problematic when mixing vocals. To remove sibilance, a de-esser plugin is used. A de-esser works by compressing only the frequency range where the sibilance occurs, allowing the rest of the vocal to remain untouched. Manual de-essing is also possible by automating the volume of the sibilant parts of the vocal, providing even more control over the final result.
Making Creative Vocal Adjustments
Vocal producers might also want to make creative adjustments to the vocal in addition to the necessary technical adjustments. This can include adding reverb, delay, or other effects on certain words or phrases to add emphasis and impact, or pitch correction to tighten up the vocal performance. These creative adjustments can help the vocals shine in the mix and make them stand out.
Best Practices For Manual Vocal Editing
Effective manual vocal editing involves careful attention to detail, patience, and a keen ear. It is essential to use appropriate tools to treat the vocal track, and a professional editor must use various techniques to ensure the vocals are polished and blend in well with the rest of the audio track.
If you’re in the business of producing music or podcasts, then you know that vocal editing can be a time-consuming process. However, it’s vital for creating the best sound quality possible. Manual vocal editing involves adjusting and refining the raw vocal recording to create a polished sound that is ready for final production. In this section, we will be focusing on the best practices for manual vocal editing, which include maintaining a natural sound, avoiding over-editing, checking edits in context, and taking listening breaks to avoid ear fatigue.
Maintaining A Natural Sound
While editing, it’s essential to maintain the singer or speaker’s natural sound. Overprocessing can make the recording sound artificial or robotic, which is not ideal. To maintain a natural sound, refrain from using too many plugins, filters, or effects. Instead, use compression, EQ, and de-essing in moderation. Edit carefully, focusing on correcting any glaring mistakes or issues while keeping the essence of the vocal performance intact.
Avoiding Over-editing
Over-editing can end up ruining the original recording. It’s crucial to avoid making too many cuts or edits as this can end up sounding disjointed. Try to cut only the parts that are necessary and leave small breaths and imperfections so that the sound remains natural. Additionally, avoid excessive noise reduction, which can make the recording sound unnatural and much worse than the original.
Checking Edits In Context
It’s crucial to check your edited piece in context to ensure that it fits well with other elements in the production. For instance, edited vocals will sound different when music is added to the mix. Play the edited recording in conjunction with other elements to assess the blend and adjust accordingly. Playing the recording in context will also allow you to identify any errors that might have gone unnoticed during previous edits.
Listening Breaks To Avoid Ear Fatigue
Finally, during the editing process, taking frequent listening breaks is essential to avoid ear fatigue. This encourages a fresh perspective, making it easy to identify any mistakes made during the editing phase. Short breaks can also lower the odds of developing listening fatigue, which can lead to more errors, unnecessary cutting, or over-processing. In conclusion, manual vocal editing requires extreme care and attention to detail. Adopting the best practices we’ve outlined, including maintaining a natural sound, avoiding over-editing, checking edits in context, and taking listening breaks, will lead to a well-edited vocal recording that is ready for final production.
Tips And Tricks For Faster Manual Vocal Editing
Discover top tips and tricks for faster manual vocal editing, perfect for music producers and audio engineers. Increase efficiency and accuracy by utilizing techniques such as track organization, pitch and timing correction, and detailed note editing to enhance your vocal recordings.
Manual vocal editing can be a tedious task, but it is an essential step in producing high-quality audio. Whether you are editing a podcast, voiceover, or music track, there are several tips and tricks you can use to speed up your workflow and improve your final product. In this article, we will explore using macros, keyboard shortcuts, and vocal templates to save time and create more consistent edits.
Using Macros To Speed Up Workflow
Macros are sequences of commands that you can record and play back with a single keystroke. They are a powerful tool that can help you automate repetitive tasks and speed up your editing process. To create a macro, simply record a sequence of editing commands, such as cutting, pasting, and adjusting volume levels. You can then assign the macro to a specific key or button for quick access.
Keyboard Shortcuts For Popular Editing Techniques
Keyboard shortcuts are another essential tool for faster vocal editing. They allow you to perform common editing tasks without switching between your mouse and keyboard. Some popular shortcuts include:
Cut: Ctrl + X
Copy: Ctrl + C
Paste: Ctrl + V
Undo: Ctrl + Z
Redo: Ctrl + Y
Adjust Volume: Ctrl + Up/Down arrow keys
By memorizing and using these shortcuts, you can save a significant amount of time and work more efficiently.
Creating Vocal Templates For Consistency
Creating vocal templates is an excellent way to ensure consistency in your editing. Templates can include presets for EQ, compression, and other effects, as well as markers for common editing points, such as intros, outros, and ad breaks. By using a template, you can quickly apply these settings to new vocal tracks, saving time and ensuring consistency across your entire project. In conclusion, using macros, keyboard shortcuts, and vocal templates are just a few of the many tips and tricks you can use for faster manual vocal editing. By incorporating these techniques into your workflow, you can streamline your editing process, produce higher-quality audio, and save time in the long run.
Manual Vocal Editing Vs. Auto-tune And Vocal Processing Software
Manual vocal editing offers a personalized approach to vocal processing that differs from the automated processes of Auto-Tune and vocal processing software. With manual vocal editing, an expert sound engineer can address subtleties and nuances that automated programs may miss, resulting in a more authentic sound.
Introduction: Music production has developed rapidly over the years, especially when it comes to vocal editing. Since the rise of Auto-Tune and vocal processing software, musicians have been able to fine-tune their vocal performances with ease. However, when it comes to achieving a more natural and dynamic sound, manual vocal editing is still the way to go. In this article, we will delve into the advantages and disadvantages of manual editing, when to use auto-tune, and how to find a balance between the two methods to achieve the desired outcome.
Advantages And Disadvantages Of Manual Editing
Manual vocal editing involves listening back to the vocal performance and making small adjustments where necessary. This method relies on the editor’s personal taste and is a more time-consuming process than using Auto-Tune or vocal processing software. However, manual editing has numerous advantages such as:
Preserving a natural vocal sound without the robotic effect of Auto-Tune
Allowing more creativity and control over the vocal performance
Fine-tuning specific parts of the vocal performance that software may not catch
On the other hand, manual editing has some disadvantages such as:
A more time-consuming process and requires skilled professionals
May not be suitable for certain genres such as EDM or pop
Cannot correct major pitch issues as efficiently as Auto-tune or vocal processing software
When To Use Auto-tune And Vocal Processing Software
Auto-Tune and vocal processing software have become a staple in the music industry, particularly in genres that require a more polished and synthetic sound. Here are some instances when auto-tune or vocal processing software may be useful:
To correct major pitch issues
To achieve a pitch-perfect sound required in some genres
To create a synthetic or artificial sound
It is important to note that while these tools are useful, overuse can lead to a loss of authenticity and can result in a less-than-natural sound.
Finding A Balance Between Manual Editing And Vocal Processing
While both manual vocal editing and auto-tune/vocal processing software have their advantages, finding a balance between the two methods can result in an outstanding vocal performance. In some cases, a combination of the two methods may be necessary to achieve a desired sound. Here are some tips:
Use auto-tune and vocal processing software as a tool for problem areas in the vocal performance
Use manual editing to fine-tune the overall sound and maintain its natural quality
Consider the genre and style of music when deciding which method to use
By striking a balance between manual editing and vocal processing, musicians can achieve a natural-sounding vocal performance without compromising on quality and authenticity.
Credit: vimeo.com
Frequently Asked Questions For Manual Vocal Editing
How Do I Edit Raw Vocals?
To edit raw vocals, you need a digital audio workstation (DAW) software. The first step is to import the raw vocals into the software. Then, you can adjust the volume levels, remove unwanted background noise, apply EQ and compression, and add effects like reverb or delay.
You can also cut and splice the vocals to rearrange them or eliminate any mistakes. Finally, export the edited vocals as a separate audio file.
What Do Artists Use To Edit Their Voice?
Artists use digital audio workstations (DAWs) to edit their vocals. Common DAWs include Pro Tools, Logic Pro, Ableton Live, and FL Studio. These software programs allow artists to record, mix, and edit their vocals with a range of tools such as EQ, compression, reverb, and pitch correction.
What Is Editing Vocals Called?
The process of editing vocals is called vocal mixing or vocal editing. It involves manipulating the individual tracks of a vocal recording to improve the sound quality and overall performance. This can include correcting pitch, adjusting timing, removing unwanted noises, and adding effects.
Vocal mixing is an important step in creating professional-sounding audio recordings.
Is Auto-tune Just Pitch Correction?
No, Auto-Tune is not just pitch correction. While it is mainly used for pitch correction in music production, it also has other features like time correction and vocal effects. It has become a staple tool in the music industry for its ability to enhance vocal performances and create a unique sound.
Conclusion
Manual vocal editing can be a time-consuming process, but it is essential for achieving high-quality audio in any recording. By following the tips discussed in this post, including careful noise reduction, adjusting timing and pitch, and applying creative effects, you can transform even the roughest vocal recordings into polished, professional-sounding tracks.
With these best practices in mind, you’ll be well on your way to producing your most dynamic and engaging vocal performances yet.
Stereo enhancement refers to the process of manipulating the audio signal to create a wider and more immersive stereo image. This technique is commonly used in music production, film and television sound, and other audio applications to enhance the overall listening experience.
Stereo enhancement is a technique used in audio production to create a wider and more immersive stereo image. By manipulating the audio signal, it is possible to give the impression of a more spacious sound, creating a more dynamic and engaging listening experience.
This technique is widely used in music production, film and television sound, and other audio applications to enhance the overall sound quality. Stereo enhancement can be achieved using a variety of techniques, including panning, stereo widening and reverberation. We will explore some of the different methods of stereo enhancement and their effectiveness in different contexts.
Credit: drewbrashler.com
How Does Stereo Enhancement Work?
Stereo enhancement is a technique used to widen the stereo image of an audio track. This is achieved by using various methods such as panning, delay, and reverb to create the illusion of a wider soundstage. With stereo enhancement, listeners can experience a more immersive and dynamic audio experience.
Stereo enhancement is used to enhance the stereo image of audio recordings. It is a process that alters the spacing and timing of audio signals to create a wider, more spacious sound. Stereo enhancement works by manipulating the phase relationship and amplitude between the left and right channels of an audio signal. This process is done by stereo enhancement plugins or hardware that alters the stereo image of an audio recording.
Introduction To Stereo Imaging
Stereo imaging is the process of creating a sense of space and dimensionality in an audio recording. When we hear sound naturally, our brains use the information received by our left and right ears to create a spatial map of the environment around us. In music production, stereo imaging is used to create a sense of depth and dimensionality in the audio, making it sound more natural and immersive.
Types Of Stereo Enhancement
There are two major types of stereo enhancement: Mid-Side (M/S) processing and Stereo Widening. Mid-Side processing involves manipulating the center and side channels of a stereo signal. The center channel carries the mono information, while the side channel carries the stereo information. Stereo widening, on the other hand, involves manipulating the stereo width of a signal to create a more spacious sound.
Technical Aspects Of Stereo Enhancement
Stereo enhancement alters the stereo image by manipulating the phase and amplitude relationships between the left and right channels of an audio signal. It involves techniques such as Mid-Side processing, stereo widening, panning, and EQ. The process can be done using stereo enhancement plugins or hardware, and it requires a good understanding of stereo imaging and the technical aspects of audio production. In conclusion, Stereo Enhancement is a powerful tool that can make your audio recordings sound wider and more immersive. By manipulating the phase and amplitude relationships between the left and right channels of an audio signal, you can create a more spacious sound that enhances the listening experience. With the right techniques and tools, you can take your music production to the next level and create stunning audio recordings.
Credit: garynobleshow.blogspot.com
The Benefits Of Stereo Enhancement In Music Production
Stereo enhancement in music production offers several advantages that can improve the quality of any song. It provides a better soundstage and clearer separation of individual musical elements, resulting in a more immersive listening experience. Additionally, it can make a track more dynamic and exciting by widening the stereo image.
Stereo enhancement is the process of widening the sound stage and highlighting specific elements in a mix, resulting in improved overall clarity and definition. With the use of advanced techniques and tools, it is now possible to take a song or track and transform it into something truly remarkable. In this post, we will explore the various benefits of stereo enhancement and how it can help to take your music production to the next level.
Creating A Wider Sound Stage
One of the primary benefits of stereo enhancement is the ability to create a wider sound stage. By widening the stereo field, you can make a track sound much bigger and more impressive. This effect is achieved by manipulating the phase relationship between the left and right channels, creating a sense of space and depth. It is particularly effective in electronic music genres, where a wide stereo field is often desired for a more immersive listening experience.
Highlighting Specific Elements In A Mix
Another advantage of stereo enhancement is the ability to highlight specific elements in a mix. By using panning or spatial effects, you can make certain sounds stand out and draw attention to them. For example, you could pan a guitar solo to one side of the mix, making it more prominent and creating a sense of movement. This technique can be particularly effective in dense mixes, where it can be difficult to separate individual elements.
Improving Overall Clarity And Definition
In addition to creating a wider sound stage and highlighting specific elements, stereo enhancement can also improve overall clarity and definition. This is achieved by reducing masking and improving the separation between different sounds in a mix. By separating sounds and assigning them to different locations in the stereo field, you can create a much clearer and more defined overall sound. In conclusion, stereo enhancement is a powerful tool for music producers looking to take their tracks to the next level. By creating a wider sound stage, highlighting specific elements in a mix, and improving overall clarity and definition, you can create truly impressive sounding tracks. Whether you are working with electronic music or any other genre, stereo enhancement can help you to achieve your creative vision.
Common Techniques For Stereo Enhancement In Music Production
Stereo enhancement is a common technique in music production that improves the overall sound quality and creates an immersive experience for listeners. Some common techniques for stereo enhancement include panning, doubling, stereo wideners, and EQ adjustments.
Music production involves mixing and mastering. Stereo enhancement is a vital aspect of music production. It focuses on increasing the sound image of a song, as well as creating a wider and more natural soundstage. Stereo enhancement techniques can help to give music a more immersive and captivating listening experience.
Panning
Panning refers to the distribution of sound across the stereo field. By altering the positioning of audio elements between the left and right channels, panning can help to create a more dynamic and interesting mix. Panning can also be used to place instruments or vocals in specific locations within the stereo field, helping to create a sense of depth and space in a mix.
Delay And Reverb
Delay and reverb are two effects widely used in stereo enhancement. Delay is an effect that creates an echo-like effect by playing back a sound signal after a short delay. Reverb, on the other hand, simulates the sound of a room or space and can add a sense of atmosphere and depth to a mix.
Mid-side Processing
Mid-side processing is a technique that deals with the separate processing of stereo information in a mix. Rather than processing both left and right channels together, mid-side processing splits the audio into its mid (mono) and side (stereo) components. This technique can help to enhance the width and focus of a mix, as well as modify the stereo image of specific elements within a track.
Stereo Widening Plugins
Stereo widening plugins are third-party tools used to enhance stereo content. They can be used to give a mix a wider stereo field, make instruments appear larger and more spacious, and create the illusion of distance between different elements of a mix. These plugins can be used to add presence and clarity to a mix, and they are particularly helpful for creating a polished and professional-sounding final mix. In conclusion, stereo enhancement techniques play a vital role in music production. The use of panning, delay and reverb, mid-side processing, and stereo widening plugins can help to create an immersive and captivating listening experience for listeners. These techniques can help to give music a sense of depth, space, and clarity that is essential to a professional-sounding mix.
Stereo Enhancement In Audio Post-production
Stereo Enhancement is the process of modifying audio signals to provide a wider stereo soundstage. It involves using different techniques and tools such as panning, reverb, delay, and EQ to create a sense of space and depth in the stereo field. In audio post-production, stereo enhancement can be applied to any type of audio content, be it music, dialogue, or sound effects. It can help to improve the overall quality of the audio and provide a more immersive listening experience.
Creating Immersive Soundscapes For Film And Tv
In film and TV, stereo enhancement is crucial for creating immersive soundscapes that transport the viewers into the world of the story. By using different stereo widening techniques, sound designers can enhance the sound effects and background music to provide a more realistic and convincing auditory experience. For instance, in an action scene, the sound of bullets whizzing past or explosions can be panned across the stereo field to create a feeling of movement and action. Stereo enhancement also enables sound designers to create a sense of space and environment, for instance, by simulating the acoustics of a room or outdoor location.
Applying Stereo Enhancement To Dialogue And Sound Effects
Dialogue is a critical element in film and TV, and it is essential to ensure that it is clear, intelligible, and well-balanced with other audio elements such as music and sound effects. Stereo enhancement can help to make the dialogue more prominent in the mix by using techniques such as center panning, EQ, and compression. By separating the dialogue from other elements and placing it in the center of the stereo field, it becomes easier for viewers to understand and follow the story. Similarly, sound designers can use stereo enhancement techniques to make sound effects more prominent in the mix, such as by using panning and reverb to simulate the location and environment of the sound.
Examples Of Stereo Enhancement In Popular Films
Film title
Stereo enhancement technique
The Dark Knight
Use of panning and EQ to create a wide and immersive soundstage for action and dialogue scenes
The Social Network
Use of stereo widening and reverb to create a sense of space and environment in dialogue and music scenes
Avengers: Infinity War
Use of center panning and EQ to ensure clear and intelligible dialogue in an action-heavy film
These examples illustrate how stereo enhancement can be used in different ways to achieve different creative goals in film sound design. By using these techniques effectively, sound designers can enhance the audio quality and provide a more engaging and immersive experience for the audience.
Potential Downsides Of Stereo Enhancement
Stereo enhancement can improve the spatial quality of audio, but it can also lead to potential downsides. Overuse of stereo enhancement effects can cause phasing issues and make the mix sound unnatural on mono playback devices.
Stereo enhancement is a popular technique used by audio engineers to widen the stereo image of a recording. While this technique can result in a more immersive and engaging listening experience, it is not without its potential downsides. Two common issues that can arise with stereo enhancement are phase issues and comb filtering, which can negatively impact the overall sound quality.
Phase Issues
Phase issues can occur when the left and right channels of a stereo recording are out of sync. This can happen when stereo enhancement techniques are used excessively, resulting in an unpleasant, muffled sound. Phase issues can also cause problems when a recording is played back on mono equipment, resulting in a loss of signal. One way to avoid phase issues is to use stereo enhancement techniques in moderation and to listen to the mix in mono to ensure that there are no phase cancellations.
Comb Filtering
Comb filtering is another potential issue that can arise with stereo enhancement. This occurs when a recording is processed in such a way that certain frequencies cancel each other out, leading to a loss of clarity and definition. Comb filtering can be especially pronounced in recordings with a lot of high-frequency content, such as cymbals or vocal sibilance. To avoid comb filtering, it is important to use stereo enhancement techniques sparingly and to be mindful of the frequency content of the recording.
Excessive Use Leading To Listener Fatigue
In addition to phase issues and comb filtering, another problem that can arise with stereo enhancement is listener fatigue. Excessive use of stereo enhancement techniques can result in a fatiguing, unnatural sound that can be unpleasant to listen to for extended periods of time. To avoid listener fatigue, it is important to use stereo enhancement techniques in moderation and to prioritize the overall balance and clarity of the mix. In conclusion, while stereo enhancement can result in a more immersive and engaging listening experience, it is important to be mindful of the potential downsides. By using stereo enhancement techniques in moderation and paying attention to the overall sound balance and clarity, it is possible to achieve a satisfying and natural-sounding mix.
Credit: www.image-line.com
Frequently Asked Questions Of Stereo Enhancement
What Is Stereo Enhancement?
Stereo enhancement is a process of widening the stereo image of audio tracks to create a more immersive listening experience. It is achieved using various techniques, such as delay and reverb, to create a sense of space and dimensionality. Stereo enhancement can enhance the overall quality of audio by bringing out the details and making it sound more vibrant and impactful.
How Can I Make My Stereo Image Better?
To improve your stereo image, try these tips: 1. Ensure that both speakers are placed equidistantly from your listening position. 2. Consider using an imaging plug-in to widen the stereo field. 3. Use a stereo microphone for recording. 4. Avoid hard-panning tracks to one side to prevent loss of information 5.
Play around with the stereo wideness knob on your mixer or within your DAW to find the ideal sound.
What Does Stereo Expander Do?
A stereo expander widens the sound image of a stereo recording by manipulating the audio signal, making it seem like the sound is coming from a wider space.
What Does Stereo Enhancer Do In Fl Studio?
A stereo enhancer in FL Studio is used to create a wider stereo sound by adjusting the stereo field of a track. It works by increasing the separation between the left and right channels and adjusting the panning of each frequency band.
This can make a track sound bigger and more immersive.
Conclusion
To enhance your stereo experience, implementing stereo enhancement tools and techniques can make a significant difference. With the various options available in the market, it is essential to choose the right technique that suits your preferences and requirements. By understanding the process and using the right equipment, you can enjoy high-quality sound and an overall improved listening experience.
Don’t settle for mediocre stereo sound when enhancement is within reach. Upgrade your system with the latest techniques available and enjoy a whole new level of musical experience.
To mix lead rap vocals, use EQ to boost clarity and cut unwanted frequencies. Then, apply compression to even out the performance.
Mixing lead rap vocals is often a critical component in producing a successful track. By emphasizing clarity and controlling dynamics, you can ensure that the vocals are prominent and punchy. Start by applying EQ to the lead vocal track, boosting the frequencies that are most necessary for the vocal performance to shine through while cutting any unwanted frequencies that may be muddying the sound.
Then, apply compression to the vocal track to regulate the volume and to bring out any quiet or underemphasized parts of the performance. These two simple techniques will provide a solid foundation for building a great mix that accentuates the lead rap vocals.
Credit: www.udemy.com
Preparation
Before you start mixing lead rap vocals, it’s crucial to prepare yourself and your studio. This process involves gathering the required equipment and setting up the studio to ensure the best possible results. Here’s what you need to do:
Gathering The Required Equipment
First and foremost, you need to gather all the necessary equipment to mix lead rap vocals. Here’s a list of what you need:
Computer with a DAW software
Quality microphone
Pop filter
Microphone cable
Audio interface
Studio headphones
Studio monitors
Acoustic treatment for your studio
Setting Up The Studio
Before mixing, you need to make sure your studio is properly set up. Here are a few things to consider:
Set up your studio in a quiet and isolated room to avoid any unwanted noise interference.
Place your studio monitors at ear level to ensure the most accurate sound.
Position the microphone and pop filter in the right place to get the best possible sound from the vocalist.
Make sure to apply acoustic treatment to your studio to reduce reflections and echoes that can affect the sound quality.
Finally, adjust the settings of your DAW software to enable proper signal flow and set the right levels for the vocals and instrumental tracks.
Recording Techniques
Achieving a clear and balanced sound for lead rap vocals during mixing requires attention to detail in recording techniques. Mic placement, EQ, compression, and effects like reverb and delay can all play a key role in shaping the final product.
Recording rap vocals can be challenging, but mixing them can be even more difficult. A good mix begins with good recordings, and that’s where recording techniques come into play. In this article, we will discuss mic placement, compression, and equalization techniques that will help you achieve a professional sound in your rap vocal mix.
Mic Placement
Mic placement is important in any recording, but especially in rap vocals where the delivery is fast and rhythmic. Here are some tips for mic placement for the best sound:
Position the mic about 6-8 inches away from the rapper’s mouth
Avoid placing the mic directly in front of the mouth to minimise plosives
Try different angles to find the best sound, experiment with higher and lower positions
If the artist moves around, use a pop filter to avoid unwanted sounds
Compression
Compression is a crucial tool for mixing rap vocals. It helps to even out the levels of the vocal performance, making it easier to mix and giving it a more polished sound. Here are some tips for using compression on rap vocals:
Start with a ratio of 2:1 or 3:1, with a fast attack and medium to fast release time
Set the threshold so that the compressor only kicks in during the louder parts of the vocal
If the vocals are still too dynamic, adjust the ratio and threshold to taste
Use makeup gain to bring up the overall level of the vocal after compression
Equalization
Equalization is used to shape the tonal balance of the vocal. It can help to cut out unwanted frequencies and enhance the desired characteristics of the rapper’s voice. Here are some tips for using EQ on rap vocals:
Use high-pass filter to remove low-end rumble
Boost the presence around 2-5kHz to add clarity and intelligibility
If the vocal sounds harsh or sibilant, use a de-esser to tame the high-frequency content
Use a gentle low-mid boost around 200-400Hz to add warmth and body to the vocal
Now that you have an understanding of recording techniques such as mic placement, compression, and equalization, you can apply these tips to your rap vocal mix and achieve a professional sound. Remember to experiment and trust your ears to find the perfect balance for your mix.
Organizing The Vocals
To mix lead rap vocals, the first step is to organize them properly. Start by checking the timing, pitch, and volume of each recorded vocal track. Next, use compression, EQ, and reverb to enhance the vocals and make them stand out in the mix.
Finally, add appropriate effects like delay and saturation to add depth and character.
Lead rap vocals play a vital role in the success of any track. However, mixing them can be a challenging task. For a professional-sounding mix, it is essential to organize the vocals properly. This involves fixing timing issues, cleaning up the audio, and creating backups. Below, we will explore each of the steps in detail.
Fixing Timing Issues
Timing issues in lead rap vocals can negatively impact the overall quality of the mix. Fixing them is necessary to achieve a polished sound. One way to address timing issues is to use the quantization tool. This tool corrects the timing of individual vocal parts, helping create a cohesive sound. Additionally, aligning the vocal tracks with the mix’s tempo can help in reducing timing issues.
Cleaning Up The Audio
Unwanted noise, background hiss, and clicks can detract from the clarity of the lead rap vocals. Cleaning up the audio is a critical step in the mixing process. One effective way to eliminate unwanted noise is by using noise reduction tools. Additionally, using EQ to remove any frequencies that are not essential to the mix can help in creating a cleaner sound.
Creating Backups
Creating backups is an essential part of organizing vocals. This ensures that in case of any data loss, you can always retrieve your work. One way to create backups is by saving the project as different versions. This way, if any data gets lost, you can quickly revert to an earlier version. Additionally, saving the project files to an external hard drive or cloud storage provides an extra layer of security. In conclusion, organizing lead rap vocals is a crucial step in the mixing process. It helps make the vocals sound more polished, coherent, and professional. By fixing timing issues, cleaning up the audio, and creating backups, you can achieve a better mix.
Initial Mixing
To mix lead rap vocals, it is important to start with the initial mixing stage. This involves adjusting the levels and panning of the vocals, as well as applying some basic effects such as EQ and compression. By getting the initial mix right, you can lay the foundation for a clear, powerful rap vocal sound.
After recording your lead rap vocals, it’s time to start mixing your tracks. The initial mixing process involves balancing the levels and panning the vocals. Mixing helps to enhance the sound quality of each track and ensures all instruments and vocals can be heard clearly. In this section, we will break down the process of initial mixing into two sub-headings – balancing the levels and panning the vocals.
Balancing The Levels
Balancing the levels involves ensuring that each track can be heard at the same loudness level. When starting, bring up the fader on each track and adjust the level by listening to the sound. The goal is to achieve a balanced sound where no part of the track is too loud or too soft. This ensures that each element of the mix is audible and adds value to the final audio track. Using EQ and compression plugins can be helpful to control the dynamics of each element and remove any unwanted noise.
Panning The Vocals
Panning vocals involves distributing the lead vocal track between the left and right channels to form stereo placement. Before panning, it’s essential to determine the position of each element in the track to ensure a balanced sound. In Hip-hop, a common approach is to center the lead vocal and pan the backing vocals left and right. This will add depth and dimension to the sound. You can use pan automation to create movement across the audio, which can enhance the overall listening experience. After completing the initial mixing process, move on to the next step to add effects and EQ. Keep in mind that the mixing process often requires multiple iterations to ensure the best sounding mix.
Advanced Techniques
Learn advanced techniques to mix lead rap vocals with this comprehensive guide. From EQ and compression to reverb and delay, discover how to enhance the vocal’s presence, clarity, and impact in the mix.
As an experienced sound engineer, you know that mixing lead rap vocals is not an easy task. It requires a keen ear, a lot of patience, and many years of experience. You also know that you can’t rely on basic techniques to achieve the best results. That’s why in this article, we will be looking at some advanced techniques that you can use to mix lead rap vocals.
Adding Effects
When it comes to mixing lead rap vocals, adding effects can make a big difference in the final output. Here are some effects that you can use to enhance the vocals:
Reverb: Use reverb to add depth to the vocal track. Be mindful of the decay time to avoid overdoing it.
Delay: Delay is another effect that you can use to add space to the vocal track. Be careful not to use too much as it can clutter the mix.
EQ: Use EQ to cut any unwanted frequencies that may interfere with the vocals. Boosting the highs can add clarity to the vocals.
Compression: Use compression to even out the levels of the vocal track. It can also add punch and presence to the vocals.
Automating The Mix
Another advanced technique that you can use to mix lead rap vocals is automating the mix. This means adjusting the levels, panning, and effects at specific points in the song. Here are some examples:
Volume Automation: Lower the volume during the verses and increase it during the chorus to create a dynamic mix.
Panning Automation: Automate the panning of the vocal track to create movement and interest in the mix.
Effects Automation: Automate the effects of the vocal track to create an interesting and unique sound that suits the song.
Adjusting The Stereo Field
Adjusting the stereo field can also make a big difference in the way the vocals sit in the mix. Here are some tips:
Use stereo widening to create a wider stereo image of the vocal track.
Pan the doubled vocals to opposite sides of the stereo field to create a stereo effect.
Use mid-side processing to adjust the center and side of the vocal mix.
In Conclusion
Mixing lead rap vocals is a complex process that requires a lot of knowledge, skill, and experience. By using these advanced techniques, you can take your mix to the next level and create a professional sound that stands out from the rest. Remember, it’s all about experimentation and finding what works best for the song. Happy mixing!
Credit: m.youtube.com
Getting The Right Sound
Mixing lead rap vocals can be a tricky task, as the vocals need to stand out while blending seamlessly with the beat. To achieve the right sound, it’s important to EQ and compress the vocals, use effects like reverb and delay, and ensure the levels are balanced throughout the mix.
Are you struggling to get the perfect mix of lead rap vocals? Getting the right sound can be challenging, but with the right techniques, it’s certainly achievable. One of the essential aspects of mixing lead rap vocals is to find the balance between various elements such as clarity, presence, and warmth. In this article, we’ll focus on some techniques to help you get the right sound for your lead rap vocals.
Comparing To Commercial Tracks
One common mistake that many music producers make is to ignore commercial tracks while mixing their lead rap vocals. By comparing your mix to those of commercial tracks, you can identify the potential issues in your mix. You can easily notice if the vocals lack clarity, presence, or warmth. Remember, the ultimate goal of mixing is to create a sound that is commercially viable.
Finding The Sweet Spot
When mixing lead rap vocals, you need to find the sweet spot where all the elements of your mix come together. One crucial aspect of finding this sweet spot is to use appropriate levels of compression and EQ. Too much compression can result in a dull sound, while too little can cause the vocals to sound weak. Similarly, overuse of EQ can color the sound of the vocals, which is not always desirable.
Making Sure The Vocals Stand Out
Lead rap vocals are the centerpiece of any rap track, and it’s essential to ensure that they stand out in the mix. One technique to make the vocals stand out is to use a subtle amount of reverb, which creates a sense of space around the vocal. Another technique is to use delay, which not only adds character to the vocal but also helps to create a sense of depth in the mix. In conclusion, getting the right sound for lead rap vocals requires patience and practice. By using appropriate levels of compression and EQ, comparing your mix to commercial tracks, and making sure the vocals stand out, you can achieve the perfect mix for your lead rap vocals.
Final Touches
Achieving the perfect mix for lead rap vocals requires attention to detail and careful execution. From adjusting equalization to fine-tuning levels, the final touches can make all the difference in creating a clean and powerful sound.
After spending time perfecting the mix for your lead rap vocals, it’s important to put on the finishing touches to make sure the audio is ready for release. This involves mastering the track, creating a radio edit, and exporting the final mix.
Mastering The Track
The mastering process allows you to refine the audio by adjusting the overall EQ and volume levels to make sure it sounds consistent across different playback systems. To master your track, follow these steps:
Export the mix to a new audio file.
Open a mastering plugin or software and import the audio file.
Adjust the EQ to enhance the bass, treble, or midrange as necessary.
Use a limiter to tame any peak levels and increase overall volume.
Preview the mastered track and make any necessary adjustments.
Creating A Radio Edit
When you create a radio edit of your track, you’ll need to shorten it to fit within a specific time limit. This version should have a clear intro, verse, chorus, and outro and all non-essential elements should be removed to create a tighter, more focused mix. To create a radio edit, follow these steps:
Listen to your track and identify the sections that can be shortened or removed.
Decide on a time limit for the radio edit, typically between two and three minutes.
Edit the track to fit within the time limit, making sure to retain the essential parts of the song.
Preview the radio edit to ensure it flows well and represents the song effectively.
Exporting The Final Mix
Once you’ve mastered the track and created a radio edit, it’s time to export the final mix. This process involves bouncing the track to an audio file that’s ready for release. To export the final mix, follow these steps:
Check that all plugins and effects are turned off so that the mix exports without any processing.
Choose a file format that’s suitable for your intended use, such as WAV or MP3.
Set the appropriate bit rate and sample rate for the file.
Export the file and name it appropriately, including the track name and version.
Listen to the final mix to ensure it’s ready for release.
By following these steps for final touches, you can ensure that your lead rap vocals sound polished and professional, ready to be shared with the world.
Credit: mrmixandmaster.com
Frequently Asked Questions On How To Mix Lead Rap Vocals
How Do You Mix Lead Vocals?
To mix lead vocals in audio production, follow these tips: 1. Start by choosing the right microphone, preamp and compressor. 2. Focus on the singer’s voice, and use EQ and compression to make it stand out. 3. Add effects such as reverb and delay to enhance the vocal.
4. Use automation to create dynamic changes throughout the song. 5. Finally, listen to the mix in different environments to make adjustments and achieve a balanced sound.
How Do You Mix Aggressive Rap Vocals?
Mixing aggressive rap vocals involves EQing the vocals to remove any muddiness or harshness, using compression to control dynamics, adding effects such as reverb or delay, and adjusting the volume levels. It’s important to pay attention to the timing and flow of the vocals to ensure they fit with the instrumental.
Finally, mastering the track will bring everything together for a polished sound.
What Are The Eq Settings For Rap Vocal?
EQ settings for rap vocals typically involve boosting the presence and upper mid-range frequencies to bring out the clarity and punchiness of the vocals. A slight boost in the low-end frequencies can also be applied to add depth and warmth.
However, it’s important to tailor the EQ settings to the specific vocal recording and individual vocal characteristics.
How Do You Mix Crispy Rap Vocals?
To mix crispy rap vocals, use EQ to cut out any unwanted frequencies, compress the vocals to reduce dynamic range, apply reverb and delay for depth, adjust levels, and add saturation for warmth and character. Experiment with different effects and settings until you achieve the desired sound.
Conclusion
To sum up, mixing lead rap vocals is essential to create a polished and professional sound for your music. By following the tips outlined in this blog post, you can enhance the quality of your tracks and make them stand out from the crowd.
Remember to pay close attention to EQ and compression, experiment with different effects, and always trust your ears. With practice and patience, you can become a master at mixing lead rap vocals and take your music to the next level.