Categories
Archive

Abbey Road Studios

Abbey Road Studios is a legendary recording studio located in London, England that has played host to some of the greatest musicians in history. The studio first opened its doors in 1931, and has since become a landmark destination for music lovers from around the world.

Abbey Road Studios has been the site of some of the most iconic recordings in music history. From The Beatles’ famous Abbey Road album to Pink Floyd’s The Dark Side of the Moon, the studio has played a pivotal role in shaping the sound of modern music.

Today, Abbey Road Studios remains one of the most sought-after recording destinations in the world, and continues to attract top talent from across the globe.

Abbey Road Studios

Credit: www.psaudio.com

History

Abbey Road Studios is a name synonymous with music. It is a recording studio in London, England, that has played a significant role in the music industry. From its founding in the 1930s to now, Abbey Road Studios has been pivotal in the creation of countless iconic albums of popular music, from The Beatles, to Pink Floyd, to Adele.

Founding Of Abbey Road Studios

The history of Abbey Road Studios began in 1931 when the Gramophone Company (now EMI Records) acquired a house on Abbey Road in London and converted it into the world’s first custom-built recording studio. The studio was designed by architect Sir Edward Elgar, who wanted to create a space that would provide the best acoustics and technology available to record music. The first recording at Abbey Road Studios was of classical music, but soon, it became a hub for pop and rock music.

Significance Of The Location

The location of Abbey Road Studios has played a significant role in its success. The studio’s proximity to London’s music scene has made it a go-to destination for musicians from all over the world. The studio has also been the location for many iconic album covers, including The Beatles’ 11th studio album, “Abbey Road,” released in 1969. The album cover featured the fab four crossing the street in front of the studio, and this has become one of the most iconic images in music history.

In conclusion, Abbey Road Studios has a rich history that dates back to the 1930s and has played a significant role in the music industry. The studio’s unique position and close proximity to London’s music scene has been instrumental in its success, and it continues to attract some of the world’s biggest artists today.

Iconic Albums Recorded

Abbey Road Studios, located in London, has been the birthplace of hundreds of iconic albums. Some of the biggest names in music have recorded their most influential albums in this studio, making it one of the most legendary recording studios in the world. Here are a few of the most famous and influential albums that were recorded at Abbey Road Studios:

The Beatles – Abbey Road

Abbey Road Studios is synonymous with The Beatles, who recorded the majority of their music at this studio. They recorded their last album, Abbey Road, in 1969. This album contains some of their biggest hits, including “Come Together” and “Here Comes the Sun”. The iconic image of the band walking across the zebra crossing outside Abbey Road Studios has become one of the most recognizable album covers in history. The legacy of The Beatles and their music has continued to inspire generations of musicians and fans.

Pink Floyd – The Wall

The progressive rock band Pink Floyd recorded their hugely popular concept album, The Wall, at Abbey Road Studios in 1979. This album explores the themes of isolation and self-discovery and has become one of the best-selling albums of all time. The album features hits such as “Another Brick in the Wall” and “Comfortably Numb”. Pink Floyd’s unique sound and the themes explored in their music have made them one of the most influential bands in history.

Radiohead – The Bends

In 1995, Radiohead recorded their second album, The Bends, at Abbey Road Studios. This album marked a turning point in the band’s sound and resulted in several hit singles, including “High and Dry” and “Fake Plastic Trees”. The album’s success helped establish Radiohead as one of the most important bands of the 1990s and the following decades. The Bends’ unique sound and its examination of the themes of alienation and disaffection have made it an important album in rock history.

Abbey Road Studios has been the site of some of the most important and influential albums in music history. The legacy of the iconic musicians who recorded at this studio continues to inspire generations of music lovers and influences modern recording techniques.

Technology

Abbey Road Studios, a British music recording studio located in London, has served as a renowned hub for popular music for over 90 years. With a long, storied history of hosting artists such as The Beatles, Pink Floyd, and Adele, Abbey Road Studios continues to be a mecca for music enthusiasts and producers alike.

Abbey Road Studios has been at the forefront of sound engineering and music production for over 80 years. Since its inception, the studio has continually pushed the boundaries of technology, bringing innovation and creativity into the world of music. With a deep history of music production, Abbey Road Studios has evolved with the changes in technology, providing cutting-edge solutions for artists worldwide.

Innovations In Sound Engineering

Abbey Road Studios is renowned for its unique sound, and it is no coincidence that it has been the birthplace of some of the most significant innovations in sound engineering. The studio was the first to introduce artificial double-tracking, which involved recording the same performance twice to create an enhanced version of the original recording. Another innovation that Abbey Road Studios is credited for is the ‘Direct Injection Box,’ which enabled the studio to record instruments directly into the mixing console, leading to a cleaner sound and less background noise. This invention revolutionized the recording process and gave Abbey Road an edge over its competitors.

Introduction Of Stereo Sound

Abbey Road Studios is also responsible for the popularization of stereo sound. In 1963, the studio recorded the Beatles’ first stereo single, “Please Please Me,” which went on to become a chart-topping hit. The studio’s focus on stereo sound proved to be a massive success, and soon multiple studios worldwide began following Abbey Road’s lead. Abbey Road’s technological innovations are still relevant and influential today. The studio has continued to push the boundaries of sound engineering, introducing new techniques and technologies, such as the state-of-the-art Dolby Atmos mixing system. Abbey Road Studios has become a landmark for music technology, and its reputation for excellence in sound engineering remains untouched.

Abbey Road Studios

Credit: www.alamy.com

Studio Facilities

Abbey Road Studios in London has been the go-to destination for some of the world’s most legendary sound recordings. From The Beatles to Pink Floyd, countless famous musicians have walked the halls of this iconic studio. One of the key reasons for its success has been its state-of-the-art studio facilities. Let’s explore each of them.

Recording Studios

Abbey Road Studios has three world-class recording studios: Studio One, Two, and Three. Each studio boasts an impressive range of equipment and software to cater to the diverse needs of producing sounds of various genres. All three studios are built with sound-proof walls to avoid any outside disturbance and create the desired acoustic ambiance.

Mastering Suites

Abbey Road Studios offers two mastering suites that help polish and perfect the sound quality of your music. These suites are equipped with the latest technology and software to correct any errors that might happen during the recording or mixing process. These sound engineers work to provide you with the best possible listening experience across all supported platforms.

Mixing Rooms

In addition to the recording and mastering facilities, Abbey Road Studios has three mixing rooms—each with its unique sonic qualities. The mixing rooms feature a state-of-the-art sound-proofing system and are famous for their impeccable acoustics. These rooms are equipped with the latest sound mixing software and hardware technology, making the mixing process seamless and efficient.

Summary

In summary, Abbey Road Studios provides musicians with world-class studio facilities to create and perfect their musical creations. With its three recording studios, two mastering suites, and mixing rooms, Abbey Road Studios offers a range of options that cater to the needs of every musician. The best part is that all of these facilities are available at competitive rates, making Abbey Road Studios a popular choice for musicians from all over the world.

Musical Innovations

Abbey Road Studios has been a hotspot for musical innovations since its establishment in 1931. Being the birthplace of iconic albums, such as The Beatles’ ‘Abbey Road’ and Pink Floyd’s ‘Wish You Were Here,’ the studio continues to inspire musicians all around the world.

Abbey Road Studios, located in London, is one of the most famous recording studios in the world, known for its exceptional sound quality and a history of iconic recordings that have shaped the modern music industry. The studio has been at the forefront of musical innovation since its establishment in 1931, and has been a hub for some of the most significant cultural developments in music history. In this blog post, we will take a closer look at the musical innovations that have come out of Abbey Road Studios, including the creation of new sounds and collaborations with musicians.

Creation Of New Sounds

Abbey Road Studios is famous for its pioneering efforts in developing new recording techniques and equipment. The studio’s engineers and producers have always pushed the boundaries of what’s possible from a recording session, and they are credited with discovering new sounds that have shaped many music genres. For example, Abbey Road Studios was one of the first recording studios in the world to use the technique of artificial double tracking, which allows a single performer to sound like a full band. Other innovations that came out of the studio include backward tape loops and phasing effects, which have been used in countless recordings over the years.

Collaborations With Musicians

Another significant innovation that came out of Abbey Road Studios is the unique collaboration that the studio has with musicians. The studio’s engineers and producers work closely with artists to create a sound that reflects the artist’s musical vision. This partnership between producer and artist has resulted in some of the most iconic albums in history, such as The Beatles’ Sgt. Pepper’s Lonely Hearts Club Band and Pink Floyd’s Dark Side of the Moon. The studio’s engineers have also worked with some of the most innovative and daring musicians, including Radiohead, U2, and Oasis. In conclusion, Abbey Road Studios has consistently been a hub of musical innovation, and its contributions range from new recording techniques to partnering with daring and risky musicians. Without Abbey Road Studios, the world of music would be a little less colorful, and it’s no wonder that the studio enjoys an unrivaled reputation as one of the most iconic recording studios in the world.

Film And Tv Scores

Abbey Road Studios has been responsible for producing some of the most iconic film and TV scores of all time. From Star Wars to Harry Potter, their expert sound engineers have helped bring to life some of the most memorable moments in cinema history.

James Bond Theme

Abbey Road Studios has been the creative space for many iconic film and TV scores, including the James Bond Theme. Composed by Monty Norman, arranged by John Barry, and played by the John Barry Orchestra, the James Bond Theme has become an instantly recognizable tune that has accompanied the famous spy on his adventures for decades. The recording of the theme at Abbey Road Studios in 1962 was a defining moment for the studios, cementing their reputation as the go-to destination for recording film scores.

Harry Potter Soundtrack

The Harry Potter Soundtrack also owes its roots to Abbey Road Studios. Composed by John Williams and later by Alexandre Desplat, the music for the wizarding world has become almost as beloved as the franchise itself. “Hedwig’s Theme” has become an instantly recognizable tune that brings back memories of the magical world every time it is heard, while the soaring scores of the later films helped to elevate the series to epic proportions. The Abbey Road Studios provided the perfect space for recording this music, with its state-of-the-art equipment and experienced engineers, ensuring that each note sounded just as magical as it needed to. Abbey Road Studios’ long-standing tradition of recording film and TV scores has cemented its place in musical history, with the James Bond Theme and Harry Potter Soundtrack serving as just two examples. The studio’s continued commitment to providing the best equipment and expertise for all of its recordings ensures that future generations of musicians will be able to create music that truly stands out in the crowded entertainment industry.

Famous Visitors

Famous visitors have graced the Abbey Road Studios, where legendary albums were recorded. The Beatles, Pink Floyd, and Adele are just a few of the notable names that have made their mark in this iconic recording studio.

Abbey Road Studios is one of the most legendary and iconic music recording studios in the world. The list of famous musicians that have recorded at Abbey Road reads like a who’s who of popular music. From The Beatles to Adele, the studio has been home to some of the most influential recordings of modern times. But it’s not just musicians who have made their way through the doors of Abbey Road. The studio has also played host to plenty of celebrity visitors and sightings over the years.

Lists Of Famous Musicians Who Have Recorded At Abbey Road

Abbey Road Studios has been graced by an impressive list of musical legends over the years, from rock and roll royalty to pop superstars. Some of the most famous musicians who have recorded at Abbey Road include:

  • The Beatles
  • Elton John
  • The Rolling Stones
  • Pink Floyd
  • Adele
  • Kate Bush

But that’s only scratching the surface. Many other influential artists have taken advantage of the unique and inspiring atmosphere at Abbey Road to create some of their most memorable work.

Celebrity Sightings

As one of the most well-known recording studios in the world, Abbey Road has also attracted a fair share of celebrity visitors over the years. Some of the most notable celebrity sightings at Abbey Road include:

  • Tom Cruise
  • Jimmy Page
  • Paul McCartney
  • Ringo Starr
  • Kate Middleton

Abbey Road Studios has played a central role in the world of music and popular culture for decades. From hosting some of the most influential musicians in history to attracting celebrities from all walks of life, the famous studio has left an indelible mark on the world.
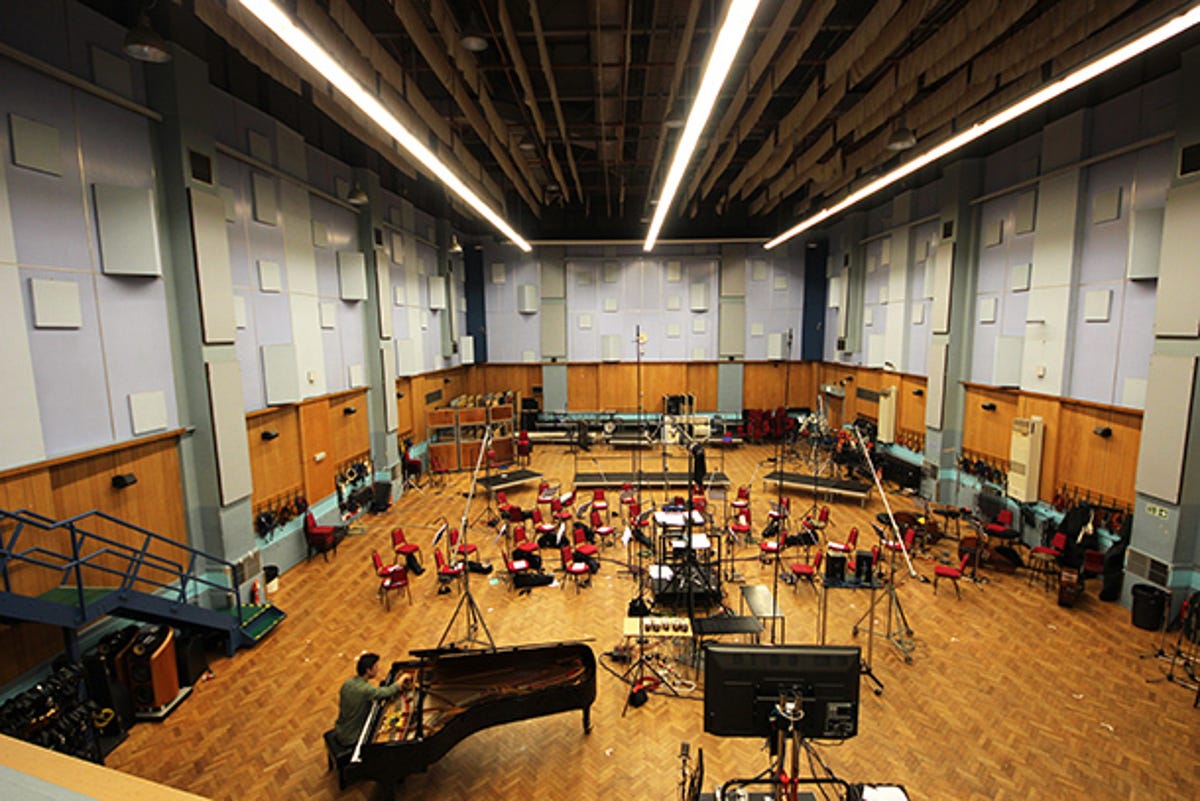
Abbey Road Studios

Credit: www.cnet.com

Legacy

Abbey Road Studios’ legacy is unparalleled. From The Beatles to Pink Floyd, countless legendary musicians have graced its halls and left their mark on music history. Today, the studio continues to attract artists from all over the world who are eager to create music in its legendary rooms.

Abbey Road Studios has a rich legacy in the music industry that spans over 80 years. The studio has played a pivotal role in shaping the sound of popular music, hosting some of the biggest artists and bands of all time, including The Beatles, Pink Floyd, and Adele. Today, Abbey Road Studios is one of the most iconic recording studios in the world, with a reputation for producing exceptional quality sound.

Influence On Pop Culture

Abbey Road Studios has had a significant influence on pop culture, shaping the sound of music for generations to come. The studio’s unique approach to recording, which includes the use of innovative technology and techniques, has helped to create some of the most memorable and iconic songs of all time. From The Beatles’ “Abbey Road” album, which remains one of the best-selling albums of all time, to Pink Floyd’s “Dark Side of the Moon,” Abbey Road Studios has been the birthplace of some of the most influential albums in the history of music.

Future Of Abbey Road Studios

As the music industry continues to evolve, Abbey Road Studios remains committed to staying at the cutting edge of technology and innovation. The studio has recently undergone a major renovation to ensure that it is equipped with the latest equipment and technology. Additionally, the studio has expanded its services to include music mastering, making it a one-stop-shop for all music production needs. With its rich history and commitment to innovation, Abbey Road Studios is poised to remain at the forefront of the music industry for many years to come. In summary, Abbey Road Studios’ legacy in the music industry is undeniable. Its influence on pop culture has helped shape the sound of music for generations, and its commitment to innovation ensures that it will continue to be a leader in the industry for many years to come.

Frequently Asked Questions For Abbey Road Studios

Why Is Abbey Road Studios So Famous?

Abbey Road Studios is famous because it’s known as the birthplace of the Beatles’ iconic albums. It’s also where many other famous musicians recorded hits, and its innovative equipment and studios helped revolutionize the music industry. Today, it remains a popular destination for music lovers.

What Bands Recorded At Abbey Road Studios?

Abbey Road Studios has been a recording hub for top-notch bands like The Beatles, Pink Floyd, Oasis, Radiohead, and Adele, among others.

Is It Worth Visiting Abbey Road Studios?

Abbey Road Studios is worth visiting for music enthusiasts and fans of the Beatles. You can take a tour and see where some of the most iconic songs were recorded. It offers a unique experience to learn about music history and see the facilities where legendary artists have created music.

Can You Still Record At Abbey Road Studios?

Yes, Abbey Road Studios still offers recording services. However, availability and pricing may vary depending on the specific requirements of each project. It is recommended to directly contact the studios for more information.

Conclusion

Abbey Road Studios has left a profound impact on the music industry. From The Beatles to Pink Floyd, the iconic studio has seen the creation of some of the most influential albums of all time. Its rich history and exceptional recording equipment have made it a landmark in the music world and a must-visit destination for music lovers.

The studio continues to inspire new generations of artists, and its legacy will undoubtedly endure for years to come.
Categories
Archive

What Can Mastering Do

This guide covers mastering process in plain terms. Mastering enhances the sound quality and ensures consistency throughout an album or playlist. With mastering, engineers balance, refine, and optimize recordings for different playback devices and environments.

Also, if you want your music to stand out in a crowded market and sound professional, mastering is essential. It is the final step in the music production process and involves preparing the recordings for distribution by improving their overall sonic quality.

Related reading: AI Audio Mastering and Dolby Atmos Mastering.

During mastering, engineers apply EQ, compression, and limiting to refine the sound, enhance clarity, and add volume. Additionally, mastering ensures that every track in an album or playlist has a consistent volume level and tonal balance. Moreover, this is crucial for ensuring that the music sounds great on different playback systems, from earbuds to high-end speakers. We’ll go over the benefits of mastering, the mastering process, and how to choose a mastering engineer that’s right for your music.

Mastering Process: What Is Mastering

In addition, mastering is the final step of audio post-production. It aims to balance out the individual tracks of a recording, enhance the overall clarity, and ensure consistency across multiple mediums. Through mastering, a track can reach its full potential and sound as intended on any playback device.

Furthermore, mastering is one of the final steps in the production of a music track. It is a process that prepares the final mix for distribution by optimizing and enhancing its sound quality. Every mastering engineer aims to ensure that the music track sounds impressive across various speakers and audio systems.

The Definition Of Mastering

Additionally, to put it simply, mastering is the final step in music production, where the engineer prepares the final mix to ensure the best possible sound quality. The engineer optimizes the overall size, volume, and depth of the track by adjusting equalization, compression, stereo enhancement, and other processing techniques. Mastering also involves adding metadata to the track, such as song titles, artist names, and other details that make it easier for distribution platforms like Spotify, Apple Music, and YouTube to catalog the track.

Mastering Process: Audio Mastering Vs Mixing

Mixing and mastering are two crucial steps in the production of a music track, but they are entirely different processes. Also, mixing involves blending all the individual tracks and instruments of a song into a single, stereo track. It is the step where the sound engineer balances the levels of different components in the mix, enhances the frequency, makes adjustments to the dynamics, and adds effects like reverb or delay. On the other hand, mastering involves optimizing the overall sound of the final mix. It ensures that the track quality is consistent throughout and sounds great across different speakers and playback systems. The mastering engineer uses specific tools and techniques to address any issues and further improve the mix’s quality.

Why Mastering Is Important?

Moreover, mastering can make a vast difference in how a music track sounds and can greatly enhance the listening experience. It helps eliminate any errors or inconsistencies within the mix and optimizes the overall sound quality. A well-mastered track ensures that the final mix sounds great across various platforms, from radio stations and clubs to headphones and home audio systems. It can make the track more attractive to listeners and increase its chances of earning plays and shares across various platforms. In conclusion, mastering is an essential step in ensuring that the final music track sounds the best that it possibly can. It is a process that takes a specialized set of skills and knowledge, and trusting a trained mastering professional is a great way to guarantee that your music sounds great to audiences everywhere.

The Importance Of Mastering

Mastering is a crucial step in the audio production process that can make a world of difference in the final product. It enhances the overall sound quality, improves clarity, and ensures that the track is ready for distribution across various platforms.

With proper mastering, artists can take their music to the next level and stand out in a highly competitive industry.

Mastering is a critical stage in music production that involves fine-tuning and enhancing the final mix before its release. It is an essential step that distinguishes a great song from an average song. Here are some reasons why mastering is vital.

Mastering Process: Improving Audio Quality

Mastering can significantly improve the overall audio quality of your mix. Through mastering, the engineer can bring clarity and punch to the mix, which is especially crucial when playing the song on different platforms. It helps in optimizing the track for specific mediums like radio, streaming platforms, or CDs, ensuring your music sounds the best it can be.

Cohesive Album Production

Mastering can help in creating a cohesive sound across all the tracks on an album. It can even out and enhance the differences between different songs concerning loudness, tone, or feel, making the album sound complete and unified.

Making Tracks Standout In A Competitive Market

In a competitive market, where millions of songs are uploaded daily, mastering can make your tracks stand out and attract more listeners. A well-mastered song has a higher chance of being placed on streaming playlists, receiving radio airplay, or even going viral on social media platforms. Therefore, it is crucial to get your music mastered by an experienced engineer to give it the professional touch it deserves and make it noticeable and competitive. Mastering is indeed a vital stage in the music production process that can make or break the success of a song. It’s essential that the engineer has the right skills, tools, and knowledge to ensure a good result.

The Mastering Process

The mastering process is an essential step in the music production process that can make a significant difference in the final sound quality of a track. It is the final stage where all the individual tracks come together and are balanced, equalized, and enhanced to achieve the final desired sound.

Mastering Process: Pre-mastering Steps

Before the mastering process begins, it is essential to ensure that each track is at its best possible quality. This means removing any unnecessary sounds and ensuring that all tracks have the correct levels and balance. Additionally, it is crucial to ensure that there are no noticeable errors in the individual tracks, including pops, clicks or background noises. Another important step is to ensure that the music is mixed in the right format to achieve the best possible sound quality during the mastering process.

Mastering Techniques

During the mastering process, a mastering engineer works on balancing the volume levels, equalizing the frequency spectrum, and adding compression, harmonics and other effects to enhance the overall sound quality of the track. Several techniques can achieve the desired sound, including equalization, compression, limiting, stereo enhancement, and harmonic distortion. The goal of mastering is to create a final mix that is cohesive and balanced across all listening systems and enhances the musicality of the track.

Mastering Process: Post-mastering Quality Control

After the mastering process is complete, the final mix goes through a series of quality-control checks to ensure that it is of the highest possible quality. Among the tests performed include ensuring that the final mix sounds the same across different listening systems, ensuring that there are no errors, dips or inconsistencies in the audio and mastering levels, and that all levels are consistent across all tracks. Additionally, every final track should be tested in different listening environments, including headphones, speaker systems e.g. on a cell phone, car radio, and club or studio monitors. This ensures that the final track sounds excellent in a variety of settings and is ready for release.

Overall, the mastering process is a crucial step in achieving the best possible sound quality for a song or album. With the right pre-mastering steps and mastering techniques, combined with rigorous post-mastering quality control, a track can be released whose sound is not only balanced and optimized but is also cohesive and consistent across all listening devices and environments.

Do-it-yourself Mastering

Mastering is the final stage of music production, where the audio tracks go through a finely-tuned and professional process to enhance the sound quality. Traditionally, this process was only accessible to studios or professionals with the necessary equipment and expertise. However, with the advancements in technology, mastering can now be done at home with the help of various tools and software.

Mastering Process: Mastering Without Gear And Software

Most of the DIY mastering techniques do require some basic gear such as an audio interface, digital audio workstation (DAW), and studio monitors, but there are also methods for those who don’t have access to these tools. For example, using reference tracks is a simple but effective way of improving the sound quality of your mixes. By comparing your track with a commercial release that has a similar sound, you can get an idea of how your mix should sound and make the necessary adjustments.

Popular Diy Mastering Tools

Although mastering is a complex process that involves various techniques, you don’t necessarily need to have a degree in audio engineering to master your own tracks. There are a number of software and plugins that can help you achieve professional-sounding results. Some of the popular DIY mastering tools include:

  • iZotope Ozone
  • Waves L3-LL Multimaximizer
  • T-RackS 5 Mastering Suite

Each tool has its own unique features and functionalities, but they all aim to make the mastering process more accessible and user-friendly. With these tools, you can adjust the EQ, compress the tracks, and add other effects to improve the overall sound of your mixes.

Mastering Process: Hiring A Professional Mastering Engineer

Mastering enhances the clarity, balance and overall sound quality of your music. A professional mastering engineer brings their skills, experience and specialized equipment to achieve a polished final mix. Hiring a mastering engineer can take your music to the next level.

As a musician or music producer, you put a lot of heart and soul into creating your tracks, and understandably, you want your music to sound the best it possibly can. Enter mastering, the final step in the music production process that can make all the difference in the perceived quality of your music. Mastering can correct any issues with EQ or dynamics, create cleaner sound, and add that extra polish that separates amateur tracks from professional ones. But what exactly is mastering and why is it so important? And when it comes to hiring a professional mastering engineer, what are the factors to consider? We’ll cover all these questions and more below.

Pros Of Hiring An Engineer

Hiring a professional mastering engineer has several advantages over attempting to master your tracks yourself. For one, a professional has trained ears and sophisticated studio equipment that will allow for a more precise, detailed approach to mastering. Secondly, a mastering engineer knows how to balance volume levels and dynamic range, which can make a huge difference in how your music sounds on different playback systems. Lastly, a mastering engineer can provide an objective perspective on your music and determine if anything needs fixing before it goes to distribution.

Factors To Consider When Choosing An Engineer

If you’ve decided to hire a professional mastering engineer, there are a few factors to keep in mind when making your selection. One crucial factor is an engineer’s experience. A more experienced mastering engineer will have a better understanding of how to enhance the sonic qualities of your particular genre of music. Additionally, consider an engineer’s previous work and client satisfaction. Looking at their portfolio or even contacting references can give you an idea of what to expect in terms of quality and communication.

Another important factor is pricing – some mastering engineers offer more affordable options than others, but keep in mind that quality work generally comes at a higher price. Lastly, communication is key. A good mastering engineer will be responsive to your needs and ideas and be able to effectively communicate their approach to mastering your music. Overall, hiring a professional mastering engineer can take your music to the next level and ensure that it competes with the industry’s highest quality tracks.

By considering the pros and cons and selecting an experienced and communicative engineer, you’ll be on the right track to releasing your best-sounding music to date.

Mastering process – What Can Mastering Do for Your Music?

Credit: arstechnica.com

Mastering Process: Famous Mastering Studios

Famous Mastering Studios are dedicated to making your music sound its best. Mastering can add depth, clarity and volume to your mix, creating a polished sound that stands out from the rest. Work with experienced professionals to achieve the sound you want.

Mastering is one of the most critical steps in the music production process. It elevates the sound quality of the final mix by fine-tuning the balance, clarity, and overall sound of the recording. A good mastering engineer can make a world of difference to the final product. This post delves into the top mastering studios globally, showcasing the unique features of each studio, and highlighting some of the most famous studios.

Abbey Road Studios

Abbey Road Studios is among the most renowned studios globally and is synonymous with music greatness. It is located in London and is prominently known for hosting The Beatles’ music production. The studio’s mastering room houses the latest equipment, including PMC Speakers, Sontec, and Crane Song EQs, providing the mastering engineer with unparalleled precision and accuracy. The studio offers diverse sound treatment options, which create uniquely different sound textures, making it a favorite for most artists.

Mastering Process: Sterling Sound

Sterling Sound is a mastering studio centered in New York City with branches in Nashville and New Jersey. It has worked with some of the biggest names in the music industry, including Madonna and Jay Z. The studio is renowned for its top-of-the-line analog gear such as the custom-built Sterling consoles, Manley Massives, and Pultec EQs. Sterling Sound has a team of award-winning engineers who imbue vast experience and expertise into the mastering process.

Metropolis Mastering

Metropolis Mastering is a UK-based mastering studio that has grown in popularity in recent years. The studio boasts of some impressive gear like SADiE DSD Mastering Systems, Maselec MDS-2, and the Prism Sound MEA-2 precision equalizer. It has a colossal clientele list, including legends like The Rolling Stones and Queen, to mention a few. The studio enjoys a rise in popularity, mainly due to its spatial audio mastering technique, which provides a 360-degree, immersive music experience. In conclusion, mastering studios provide different services and experiences, which are unique to each studio. Deciding on the right studio to work with ultimately depends on the budget, desired result, and preference. We hope this article assists musicians in making informed decisions when sourcing for mastering services.

Mastering Myths Debunked

Mastering is often considered as a magical solution that can fix any issues in audio recordings. On the other hand, some people believe that mastering is not necessary at all. However, neither of these two opinions is entirely accurate. In reality, mastering plays a crucial role in shaping the final sound of an audio recording, but it is not an all-powerful tool that can fix everything.

Mastering Can Fix Anything

Even though mastering can do wonders to enhance the overall quality of an audio recording, it cannot fix everything. There are some issues that are best corrected in the recording and mixing stages. For example, if there is clipping or distortion in the original recording, mastering cannot entirely remove these artifacts.

IssueCan be FixedBest Stage to Fix
Timing IssuesPartiallyRecording/Mixing
Volume ImbalancesYesRecording/Mixing
Noise/HumPartiallyRecording
OvercompressionNoMixing
Distortion/ClippingNoRecording/Mixing

The Louder, The Better

Some people believe that the loudness level is the most critical factor in the overall quality of an audio recording. They think that the louder, the better. However, this is not always true. Loudness is just one aspect of mastering, and there are many cases where softer mastering can result in a better sound quality. If the loudness level is pushed too hard, it can introduce distortion, loss of dynamic range, and fatigue to the listener.

To wrap up, mastering is a critical process in producing professional-quality audio recordings. However, it is essential to understand its limitations and debunk the common myths associated with it. With the right approach, mastering can take a good recording to the next level and make it sound exceptional, but it cannot perform miracles.

Frequently Asked Questions On What Can Mastering Do

What Is The Use Of Mastering?

Mastering is the process of fine-tuning a recorded track to achieve optimal sound quality and consistency across different audio systems. It involves adjustments to dynamics, EQ, and stereo imaging, among other things, to make the final product sound polished and professional.

What Are The Effects Of Mastering?

Mastering is the process of preparing and optimizing recorded audio for distribution. It aims to enhance the sonic quality, clarity, and loudness of a track. The effects of mastering include improving the overall sound quality, ensuring consistency across tracks, making the music more appealing to listeners, and enhancing its commercial viability.

Does Mastering Improve Sound Quality?

Yes, mastering improves sound quality. It involves finalizing the mix and adjusting the overall EQ, dynamics, and volume. Mastering also ensures consistency in audio across different devices and platforms. A properly mastered track sounds professional and polished, making it more appealing to listeners.

Does Mastering Make A Difference?

Mastering can make a significant difference in the quality of audio. It can enhance the overall volume, frequency, and dynamics of the tracks. This process can make the audio sound polished and professional.

Conclusion

Mastering is the art of creating a polished and professional final product. Whether it’s music, video, or any other medium, mastering is essential. Mastered content stands out from the rest and attracts a larger audience. It creates a distinct brand identity by enhancing the sound and visuals that represent it.

Hence, mastering should be a crucial part of the creative process. Its ability to enhance and refine content is unparalleled. Invest in mastering, and make your content stand out!

For more background, see Audio mastering on Wikipedia. You may also like our guide: Can Mastering Make Your Song Sound Better.

Categories
Archive

Mixing With Headphones

Mixing with headphones requires a specific approach and proper techniques. In order to achieve accurate and balanced sound, it is important to understand the limitations and advantages of headphones.

Headphones are a popular alternative to traditional studio monitors for recording and mixing music. They offer a more intimate listening experience and can help isolate individual elements in a mix. However, they also have some limitations, such as potential ear fatigue and a lack of physical space and dimension.

To overcome these limitations, experienced engineers often rely on a combination of techniques, including reference tracks, cross-referencing with other listening systems, and using specialized EQ and monitoring plugins. It is also important to choose high-quality headphones that accurately represent the sound and dynamics of the mix. We will discuss the dos and don’ts of mixing with headphones, as well as some essential tips and tricks to help you achieve professional-level results.

Why Mixing With Headphones Is Challenging

Mixing with headphones presents unique challenges due to their closed-back nature that limits the perception of the stereo image and frequency response. Additionally, headphones can cause listener fatigue and lack the physicality of monitors, making it difficult to achieve a balanced mix.

Mixing with headphones has become increasingly common for many producers and engineers, especially those working in home studios or remote locations. Headphones provide a convenient and affordable way to monitor and mix audio, but they also have a unique set of challenges. In this article, we’ll explore some of the reasons why mixing with headphones can be challenging and offer some tips to overcome these challenges.

Lack Of Physical Interaction With Sound

One of the biggest challenges of mixing with headphones is the lack of physical interaction with sound. Unlike speakers, which interact with the room and create a three-dimensional soundstage, headphones deliver sound directly to the ears. This can create a sense of “in your head” sound that can lead to inaccurate monitoring and mixing decisions. It’s important to compensate for this by checking your mix on multiple systems, like car speakers or studio monitors.

Impedance And Frequency Response

Another challenge of mixing with headphones is the impedance and frequency response of different models. Impedance can affect the level of detail and accuracy in your monitoring, while frequency response can alter the perceived balance of different elements in your mix. Choose a pair of headphones that are well-suited for your specific needs, and take the time to understand their technical specifications in order to make informed mixing decisions.

Soundstage Limitations

Finally, another challenge of mixing with headphones is their soundstage limitations. While some headphones have a relatively wide soundstage, others can feel quite narrow and confined. This can make it difficult to hear the true spatial relationships between different elements in your mix. To compensate for this, try using a stereo imaging plugin to enhance the perceived width and depth of your mix. In conclusion, mixing with headphones can be a valuable tool for many producers and engineers, but it requires careful consideration and attention to detail. By recognizing and compensating for the unique challenges of headphone monitoring, you can achieve accurate and effective mixes that will translate to a variety of listening environments.

Mixing With Headphones

Credit: www.soundonsound.com

Advantages Of Mixing With Headphones

Mixing with headphones can offer some significant advantages such as greater accuracy, portability, and a more detailed sonic representation. With the right pair of headphones and a disciplined approach, you can produce high-quality mixes with ease and confidence.

When it comes to mixing audio, headphones have become an increasingly popular alternative to traditional studio monitors. As technology advances, headphones are now able to provide high-quality sound reproduction that is comparable to that of studio monitors. Here are some advantages of mixing with headphones:

Noise Isolation

Headphones are fantastic for mixing because they provide excellent noise isolation. With headphones on, you can completely block out external noise, which is impossible to achieve with studio monitors. This means you can hear every detail in your mix, which is crucial when making decisions about the dynamics and EQ of your audio. Additionally, noise isolation can help keep your mixing environment consistent, regardless of where you are or what time of day it is.

Consistency

Whether you’re in a professional studio or working from home, using headphones ensures consistency in your mixes. Unlike studio monitors, which can sound different depending on the location and position in the room, headphones provide the same sound no matter where you are. This consistency makes it easier to make accurate mixing decisions, as the sound of the mix remains the same.

Convenience

Mixing with headphones is incredibly convenient. You can work from practically anywhere without worrying about the room’s acoustics, and you don’t need to invest in expensive studio equipment. Headphones also make it easy to hear low-frequency sounds clearly, which can be difficult to achieve with monitors in small rooms or untreated environments. Besides, they are portable and can be taken wherever you want. In summary, mixing with headphones offers advantages such as excellent noise isolation, consistency, and unmatched convenience. With the right pair of headphones, you can produce high-quality audio that rivals professional studio monitors.

Tips For Successful Headphone Mixing

Achieving an accurate mix with headphones can be challenging, but it’s essential to ensure your music sounds great across various playback systems. To succeed in headphone mixing, use high-quality headphones, consider adding crossfeed, adjust levels carefully, take breaks to avoid ear fatigue, use reference tracks, and check your mix across other systems.

As a music producer or audio engineer, headphone mixing has become an integral part of the job. With the advancements in technology, headphones have become much more accessible and affordable. However, not all headphones are created equal, and mixing on low-quality headphones can lead to poor translation in different playback systems. Here are some tips for successful headphone mixing.

Use High-quality Headphones

The first tip for successful headphone mixing is to use high-quality headphones. Investing in a good pair of headphones is crucial for accurate monitoring and sound quality. Closed-back headphones are recommended for tracking and overdubbing, whereas open-back headphones are ideal for mixing and mastering.

Calibrate For Flat Frequency Response

The frequency response of headphones plays a significant role in headphone mixing. Each pair of headphones has its own frequency response curve, which affects how the audio sounds. It’s essential to calibrate headphones accurately to achieve a flat frequency response. Many software applications and plugins can help calibrate headphones, including Sonarworks, Waves, and IK Multimedia.

Take Breaks

Finally, taking breaks is crucial while headphone mixing. Listening to music on headphones for extended periods can cause ear fatigue, leading to inaccurate monitoring and mix decisions. Taking regular breaks is a way to give your ears a rest and come back to mixing with fresh ears. It’s advisable to take a 10 to 15-minute break for every hour of headphone mixing. In conclusion, headphone mixing is a useful tool, but it’s essential to use high-quality headphones, calibrate for flat frequency response, and take breaks to avoid ear fatigue. By following these tips, you can achieve a better mix and sound quality, helping your music translate well in different playback systems.

Mixing With Headphones

Credit: vintageking.com

The Future Of Headphone Mixing

The future of music production is here, and it’s all about headphones. Headphone mixing has been around for decades, but recent advancements in technology have made it a viable option for producers and engineers around the world. In this article, we’ll explore the future of headphone mixing and the latest advancements in headphone technology that are making it possible.

Advancements In Headphone Technology

Headphones have come a long way since the first earbuds were invented in the early 1980s. Today, there are headphones for every type of listener, from casual listeners to audiophiles and professional sound engineers. The latest advancements in headphone technology have made it possible to mix and master audio tracks using headphones with near-studio quality results.

New features like noise-cancelling technology, Bluetooth connectivity, and voice assistants like Siri and Amazon’s Alexa have made headphones more versatile than ever before. Take active noise-cancelling, for example – this technology blocks out external noise so you can focus on your music production. Wireless headphones have become popular over the years, which has enabled producers to work remotely while still maintaining high-quality music production.

Virtual Reality Audio

The future of headphone mixing is not only about sound quality and newer features, it’s all about giving a mesmerizing experience to the listeners using virtual reality audio technology. While the music industry is already producing 3D sounds for a few years, it’s the era of binaural beats and 3D sounds that enrich a listener’s experience.

Virtual Reality audio uses 3D audio technology to create a three-dimensional sound field that mimics real-life soundscapes. When using headphones, this technology creates an immersive audio experience that makes you feel like you’re in the middle of a sound field. Many music producers are already using virtual reality audio technology in their productions, and it’s expected to become even more popular as technology continues to advance.

Conclusion

The future of music production lies in headphone mixing, and with the latest advancements in headphone technology and Virtual Reality audio, producers and engineers can create high-quality audio tracks that rival studio recordings. Whether you’re a professional sound engineer or an aspiring music producer, headphone mixing is a tool that you can use to take your creativity to the next level.

Mixing With Headphones

Credit: www.acousticfields.com

Frequently Asked Questions For Mixing With Headphones

Is It Okay To Mix With Headphones?

Yes, it is okay to mix with headphones. However, it is crucial to keep in mind that the mix may sound different when played through different speaker systems. It is recommended to test the mix on several different speakers and headphones to ensure it sounds good on all devices.

Is It Better To Mix On Monitors Or Headphones?

It depends on personal preference and the type of music being mixed. Headphones are great for hearing individual elements in a mix, while monitors provide a more accurate representation of how the music will sound on various playback systems. It’s recommended to use a combination of both to achieve the best results.

Why Does Mix Sound Better In Headphones?

Mixes generally sound better in headphones because the sound is directed right into your ears and can be heard with a higher level of detail, accuracy and clarity. Headphones block outside noise which makes it easier to discern subtle nuances, panning and EQ.

It provides a close-up and concentrated listening experience.

Are Flat Headphones Better For Mixing?

Yes, flat headphones are better for mixing as they produce a neutral and accurate sound that helps in identifying and correcting flaws in the mix. Flat headphones do not artificially enhance any frequency range and provide an uncolored soundstage, making them ideal for mixing and mastering audio.

Conclusion

Using headphones to mix audio tracks comes with a host of advantages. With careful consideration of the limitations of headphones, digital audio workstations with plugin simulation, and attentive listening, you can achieve high-quality and polished audio mixes. Don’t forget to take breaks and ensure your headphones are calibrated correctly.

Happy mixing!

Related: Best Headphones For Mixing

Categories
Archive

Top Five Waves Plugins

The top five Waves plugins are SSL G-Master Buss Compressor, API 2500, CLA-76 Compressor / Limiter, Vocal Rider and Waves Tune Real-Time. These plugins provide high-quality sound and efficient performance for various applications.

Waves Audio is a reputable company that provides audio processing solutions for professional music production and sound engineering. These plugins are designed to enhance the quality of audio signals and provide dynamic control over sound output. Each of these top five Waves plugins has unique features and capabilities that cater to specific audio processing requirements.

SSL G-Master Buss Compressor is modeled after the legendary SSL G-Series console and provides a classic analog sound. API 2500 is a stereo compressor that offers a transparent sound with precise control. CLA-76 Compressor / Limiter is based on the classic UREI 1176 compressor and provides a fast and aggressive sound. Vocal Rider is a vocal compressor that automates the level of vocals in real-time. Waves Tune Real-Time is a pitch correction plugin that corrects vocal pitch on the fly. We will explore the top five Waves plugins and their capabilities, to help you choose the ideal plugin for your audio processing needs.

Overview Of Waves Plugins

Discover the top five must-have Waves plugins for your next music production project. Wave plugins such as SSL G Master Buss Compressor, CLA-76 Compressor/Limiter, and H-Delay Hybrid Delay are essential for professional audio mixing and mastering.

Waves Plugins is an innovative software system used to enhance audio production. The plugins are widely used by engineers, musicians, and producers to create a professional sound and maximize the quality of audio. Waves plugins are developed by Waves audio, which has been a leader in audio production. When it comes to plugins, Waves is the go-to platform for anyone looking to improve their audio production.

The Innovation Of Waves Plugins

Waves Plugins is an innovative solution for audio production. The plugins are designed with advanced algorithms that maximize audio quality. Waves plugins have been engineered with advanced features that allow for seamless integration into any digital audio workstation. The platform has over 200 audio plugins that fit different music genres. This makes the platform flexible and versatile for audio production. Whether you are creating music, podcasts, or movies, Waves plugins will provide you with the tools you need to achieve professional-grade sound quality.

The Benefits Of Using Waves Plugins

Using Waves plugins for audio production has several benefits. Firstly, the plugins are user-friendly, and anyone can use them to enhance their audio production, even beginners. They are also compatible with popular digital audio workstations like Ableton Live, ProTools, and Logic Pro, making it easy to use them regardless of the workstation. Waves plugins are designed to optimize workflow, and this saves time while improving the quality of sound. Another benefit is that there are so many plugins available that you can use to experiment with sound. From equalizers, compressors, reverbs to delays, Waves has it all. Lastly, Waves plugins are cost-effective, considering all the advanced features they come with.

Benefits of Waves PluginsSummary
User-friendlyEasy to use, even for beginners
CompatibleWorks with popular digital audio workstations
Optimize workflowSaves time while improving sound quality
Flexible and versatileHas over 200 audio plugins that fit different music genres
Cost-effectiveConsidering all the advanced features they come with

In conclusion, Waves Plugins is a great choice for anyone who wants to take their audio production to the next level. With its advanced features, user-friendly interface, compatibility, and cost-effectiveness, Waves Plugins is the go-to platform for audio production.

Top Five Waves Plugins

Credit: blog.beatworx.in

Introduction To The Top Five Waves Plugins

Discover the top five Waves plugins for enhancing your audio production. These plugins offer high-quality audio processing and versatile tools for shaping sound. Explore the best options for compression, reverb, EQ, distortion, and more.

Waves Audio is known for providing industry-standard plugins for both mixing and mastering. Choosing the right plugins can influence the outcome of your final mix. With so many plugins available, selecting the most efficient ones can be difficult. In this post, we will dive into the top five Waves plugins available in the market based on ranking factors and criteria for choosing the best plugins.

Factors Considered In Ranking

To provide an unbiased list of the top five Waves plugins, we considered the following factors:

  • Overall plugin quality
  • User feedback and reviews
  • Pricing and affordability
  • Compatibility and ease of use
  • Effectiveness and efficiency in the mixing process

Criteria For Choosing The Best Plugins

After analyzing different Waves plugins and feedback from users, we came up with the following criterias.

  1. Usability: We considered plugins that were easy to use and had user-friendly interfaces
  2. Functionality: The functionality and efficiency of the plugin in the mixing process
  3. Price: The affordability of the plugin considering the user’s budget
  4. Compatibility: We considered plugins that were compatible with various DAWs and operating systems
  5. Reliability: Plugins that are known to give consistent and high-quality results

Based on these criterias, we came up with the following top five Waves plugins that should be considered by music producers, engineers, and mixers.

1. Ssl G-master Buss Compressor

When it comes to audio mixing, the SSL G-Master Buss Compressor is considered as one of the go-to plugins for professionals. This plugin, designed to replicate the classic SSL master bus compressor, has been used in countless hit records and by top engineers around the world. Let’s take a closer look at its features and benefits.

Features Of The Plugin

FeatureDescription
RatioOffers variable attack times and ratios, from 1.5:1 to 6:1.
ThresholdAdjustable threshold control to manage the level signal.
Make-up gainProvides makeup gain up to 20 dB.
SidechainBuilds sidechain filters for stereo imaging and frequency-dependent compression.
Auto ReleaseAuto-release function for easier and quicker adjustments.

Benefits Of The Plugin For Audio Mixing

  • Transparent Compression: SSL G-Master Buss Compressor offers transparent compression and provides the user with a perfect tool to manage the final mix.
  • Harmonics: The plugin increases the harmonics of the mixed audio material, improving the overall sound quality.
  • Dynamic Control: The compressor ensures dynamic control for any style and genre of music.
  • Fidelity: With its accurate analog emulation runtime code, this plugin provides exceptional fidelity, reducing any distortion or noise created by the compression process.
  • Mastering: The SSL G-Master Buss Compressor is widely used for mastering purposes, improving the overall sound quality of the final output.

Using the SSL G-Master Buss Compressor plugin allows every producer and engineer to take their final mix to another level. Whether it be electronic dance music, orchestral or rock music, the SSL G-Master Buss Compressor provides complete control over any mix.

2. Cla-2a Compressor/limiter

The CLA-2A compressor/limiter is one of the most popular plugins created by Waves Audio. It was designed in collaboration with Grammy-winning mixing engineer Chris Lord-Alge, and it has become an essential tool for audio compression in the music industry. The CLA-2A plugin is modeled after the classic Teletronix LA-2A hardware compressor, which was first introduced in the 1960s. With its fully analog design and unique optical gain-reduction element, the LA-2A has become known for its warm, smooth, and transparent compression.

Features Of The Plugin

FeatureFunction
Gain Reduction MeterShows the amount of compression being applied to the signal.
Time Constant SwitchAllows users to switch between slow and fast time constants for different types of signals.
Input/Output GainAllows users to adjust the input and/or output gain of the plugin.
Peak ReductionControls the amount of maximum peak reduction applied by the plugin.

Benefits Of The Plugin For Audio Compression

  • The CLA-2A plugin provides the warmth and transparency of the classic LA-2A hardware compressor with the convenience and flexibility of a software plugin.
  • The plugin is ideal for vocal, guitar, bass, and drum tracks, as well as any other signals that could benefit from smooth compression with minimal artifacts.
  • The Time Constant switch offers two different settings for different types of signals, giving users more control over the compression process.
  • The Gain Reduction Meter allows users to visually monitor the amount of compression being applied to the signal, helping them to make adjustments as needed.
  • The Input/Output Gain controls give users more control over the volume of their tracks, allowing them to balance the compressed and uncompressed signals as needed.

The CLA-2A compressor/limiter plugin is a must-have for any audio engineer or producer looking to add warmth, transparency, and smoothness to their tracks. Whether you’re working on vocals, guitars, bass, drums, or any other type of signal, the CLA-2A plugin has the tools you need to get the job done.

3. H-delay Hybrid Delay

One of the standout plugins in the Waves library is the H-Delay Hybrid Delay. This plugin is known for its versatility and flexibility, making it a popular choice for audio engineers and producers alike.

Features Of The Plugin

  • Hybrid delay plugin combining classic analog and modern digital delay types
  • Variable delay times, feedback, and mix controls
  • Seamless automation and recall
  • Stereo Width control for enhancing the stereo image of delays
  • Tap tempo and BPM sync capabilities for syncing the delay time with your track

The H-Delay Hybrid Delay has a range of features that make it a valuable tool in any producer or engineer’s toolkit. With classic analog and modern digital delay types, variable time controls, and automation and recall options, the plugin provides the flexibility and control needed to fine-tune your sound.

Benefits Of The Plugin For Audio Delay

  • Enhances the rhythmic quality of a track
  • Adds depth and dimension to vocals and instruments
  • Allows for creative sound design and experimentation
  • Can be used to create unique delay effects and textures
  • Allows for precise synchronization with the tempo of a track

As an audio delay tool, the H-Delay Hybrid Delay delivers several benefits. It can add a rhythmic quality to a track, bringing vocals and instruments to life by adding depth and dimension to the sound. It also offers the opportunity for experimentation and creativity, allowing producers to create unique textures and effects.

Top Five Waves Plugins

Credit: www.ifitsoundsgood.com

4. J37 Tape Saturation

The J37 Tape Saturation is one of the top five Waves plugins known for its ability to add warmth and depth to digital recordings. This plugin emulates the unique sound of the original reel-to-reel tape machine, perfect for creating vintage sounds in modern productions.

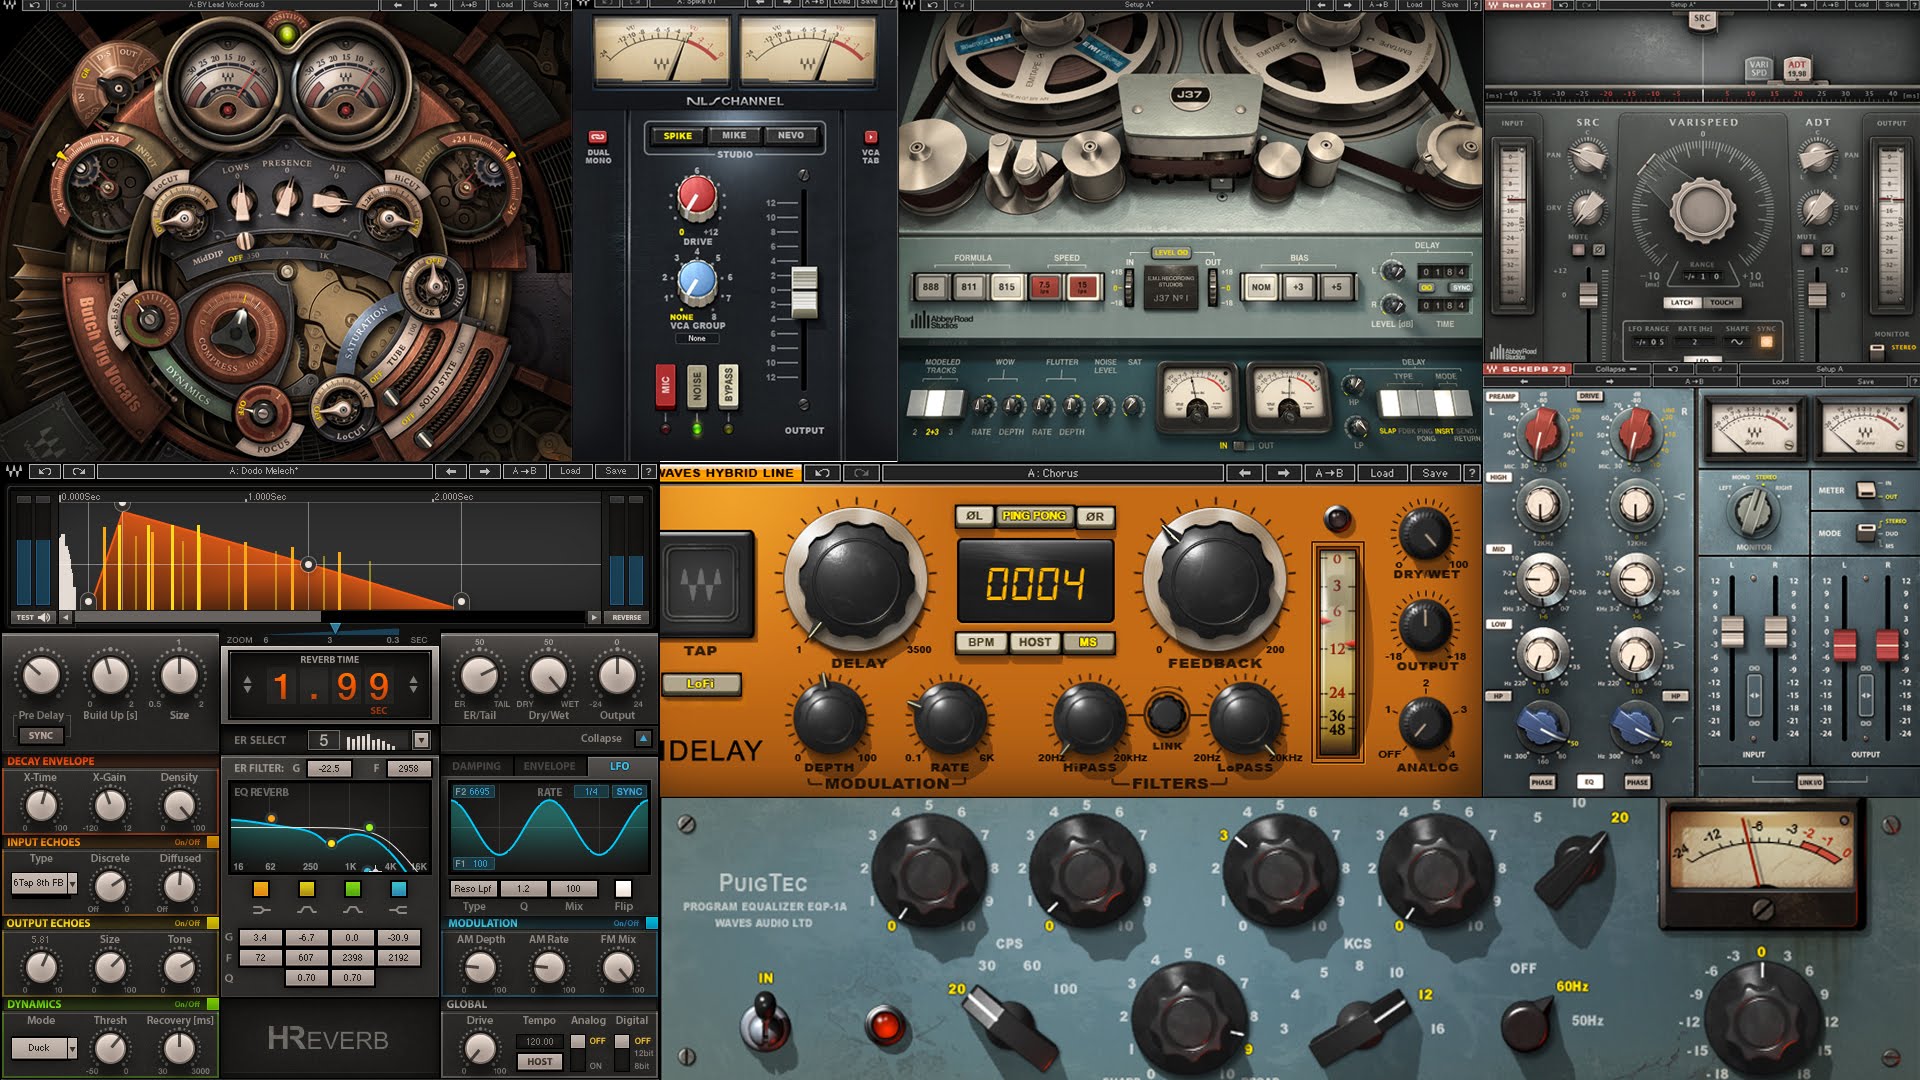
The J37 Tape Saturation plugin is perfect for adding warmth to your mixes and replicating the sound of vintage analog tape. Developed in collaboration with Abbey Road Studios, this plugin emulates the iconic sound of the J37 4-track recorder used by The Beatles and offers tape saturation, distortion, and tape delay effects. In this section, we’ll discuss the features and benefits of this powerful plugin.

Features Of The Plugin

The J37 Tape Saturation plugin has a range of features that make it an excellent addition to any mixing setup. Some of its key highlights include:

FeaturesDescription
Tape saturation and distortionThe plugin offers a range of tape saturation and distortion effects that can be used to add warmth and character to your tracks.
Tape delayThe J37 also includes a range of tape delay effects that can be used to create unique delays and echoes in your mix.
EQ controlsThe plugin features a set of EQ controls that can be used to shape the tone of your tracks.
Variable speed controlYou can adjust the speed of the tape playback to create unique pitch effects.

Benefits Of The Plugin For Audio Saturation

The J37 Tape Saturation plugin is an excellent choice for those looking to add warmth and saturation to their tracks. Some of its key benefits include:

  • Vintage sound: The plugin is designed to replicate the sound of vintage analog tape machines, offering an authentic, warm sound.
  • Wide range of effects: With tape saturation, distortion, tape delay, and EQ controls, the plugin offers a range of effects that can be used to shape and enhance the tone of your tracks.
  • User-friendly: The J37 is user-friendly and intuitive, making it easy to achieve the sound you’re looking for without getting bogged down in complex settings.

Overall, the J37 Tape Saturation plugin is a fantastic tool for adding warmth and character to your tracks, and is a must-have for anyone looking to achieve a vintage sound in their mixes.

5. Abbey Road Reverb Plates

Abbey Road Reverb Plates is one of the top five Waves Plugins. It brings the sound of the iconic British rock era to your music production with its reverb effect. The plugin is a must-have for those who want to add vintage textures to their music.

Abbey Road Reverb Plates is a Waves plugin that enhances your audio with rich and unique reverb sounds. It was modeled after the four original plates reverb chambers at the world-renowned Abbey Road Studios in London. This plugin provides a classic and authentic reverb sound that can elevate your audio to another level.

Features Of The Plugin

Abbey Road Reverb Plates is a powerful and versatile plugin with several features that make it stand out. Below are some of the features of this plugin:

  • Modeled after the original Abbey Road Studios’ four plate reverb chambers
  • Four preset modes for different plate sizes and tonal characters
  • Integrated modulation section for creating unique reverb effects
  • Simple and intuitive interface for easy tweaking of parameters
  • Mono-to-stereo and stereo components for enhanced stereo imaging

Benefits Of The Plugin For Audio Reverb

Abbey Road Reverb Plates has great benefits when it comes to audio reverb. Below are some of the benefits of using this plugin for your audio:

  1. Provides a classic and authentic reverb sound that can elevate the quality of your audio.
  2. Allows you to create unique and customizable reverb effects for your audio
  3. Easy to use interface that enables you to tweak parameters and get the desired sound quickly
  4. Provides different preset modes for different plate sizes and tonal characters
  5. Gives you a great deal of control over your reverb sound

In conclusion, Abbey Road Reverb Plates is a fantastic Waves plugin that should be in every audio reverb enthusiast’s toolkit. It provides authentic and classic reverb sounds that can give your audio projects an excellent finishing touch. Try it out today and elevate your audio to new levels!

Top Five Waves Plugins

Credit: www.youtube.com

Frequently Asked Questions For Top Five Waves Plugins

What Is The Most Popular Waves Plugin?

The most popular Waves plugin is the CLA-2A compressor/limiter. It’s widely used in the music production industry and favored for its vintage sound and transparent compression.

Do Professionals Use Waves Plugins?

Yes, many professionals in the music industry use Waves plugins as they are renowned for their high-quality sound and versatility. From producers to engineers to musicians, Waves plugins are utilized in a variety of settings and genres.

Do Waves Make Good Plugins?

Yes, Waves is a well-respected brand in the audio industry and their plugins are widely used by professionals in the music, film, and TV industries. Their plugins are known for their high-quality sound and versatility, making them a popular choice among producers, engineers, and musicians.

What Are V14 Waves Plugins?

V14 Waves plugins refer to the latest version of Waves audio plugins, which include improvements in sound quality, processing power, and creative capabilities. They are designed for use in professional audio production and are compatible with a wide range of digital audio workstations.

Conclusion

After looking at the top five Waves plugins, it is clear to see why they are a leader in the audio industry. Each of the plugins mentioned provides unique features and can enhance any audio project. From the renowned equalizers to the powerful limiters, Waves plugins offer a range of tools for music producers and sound engineers.

Whether you are an amateur or a professional, these plugins will take your audio to the next level. So, if you want to produce high-quality audio, make sure to add the Waves plugins to your toolkit.

Categories
Archive

Pro Tools First Spot Mode

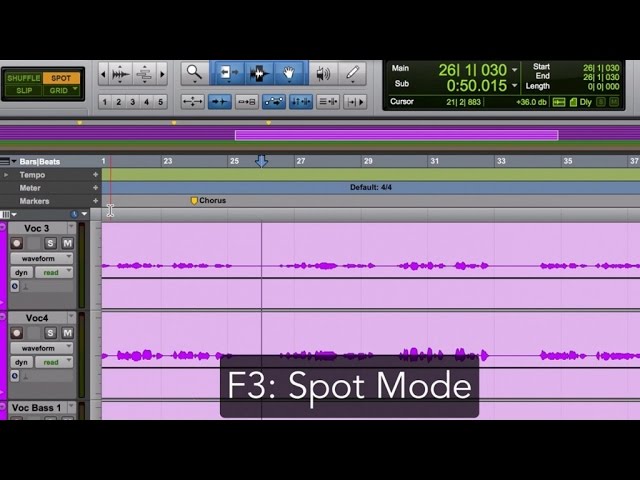
Pro Tools’ Spot Mode allows users to accurately position audio clips within a session. With Spot Mode, users can place clips in precise locations based on timecode, bar/beat, or samples.

Pro Tools is industry-standard software for audio production, and its Spot Mode feature is an essential tool. Whether editing music or sound for film, Spot Mode makes it easier to ensure clips are synchronized with the project’s overall timeline. This feature enables users to place audio clips with exceptional precision, thanks to the extensive options for setting clip location.

Spot Mode is an invaluable tool for professionals aiming to perfect their work and deliver high-quality results.

Pro Tools First Spot Mode

Credit: www.mixinglessons.com

Getting Started

Spot mode is an excellent feature of Pro Tools First, ideal for getting started with music production. It enables users to create seamless edits and automatically correct any musical misalignments, resulting in better recordings.

If you’re new to Pro Tools First or just starting out with Spot Mode, we’ve got you covered. This guide will provide clear, step-by-step instructions on how to download and install the software, create a new session and get started with Spot Mode.

Downloading And Installing Pro Tools First

The first thing you need to do is download and install Pro Tools First on your computer. Here’s how to do it:

  1. Go to the Avid website and create an account.
  2. Once you’ve created an account, log in and download the Pro Tools First installer.
  3. Run the installer and follow the on-screen instructions to complete the installation process.
  4. When the installation is complete, launch Pro Tools First.

Creating A New Session

Now that you’ve installed Pro Tools First, it’s time to create a new session. Here’s how to do it:

  1. Click on “File” in the top menu and select “New”, or use the keyboard shortcut “Command” + “Shift” + “N” on a Mac or “Control” + “Shift” + “N” on a PC.
  2. Choose your session settings such as sample rate, bit depth and session length, and then click “Create”.

Using Spot Mode

Spot Mode is a feature in Pro Tools First that makes it easy to spot and edit audio files. Here’s how to use it:

  1. Click on the “Edit” menu and select “Spot Mode” or use the keyboard shortcut “F7”.
  2. Choose the audio file you want to edit and drag it to the Spot Marker located at the top of the screen.
  3. Use the “Spot Conform” tool to align the audio file with the session’s timeline.
  4. Once the file is aligned, you can make edits using the standard editing tools in Pro Tools First.

In conclusion, Pro Tools First Spot Mode makes it easy to edit audio files, and by following these simple steps, you can get started with it in no time.

Using Pro Tools First Spot Mode

Pro Tools First Spot Mode is a powerful tool for precise editing in audio mixing. This feature helps you make minute adjustments to your recordings, allowing you to easily move and place sound accurately.

Pro Tools First Spot Mode is a powerful tool that helps to edit audio files with precision and accuracy. It is extremely useful for aligning multiple tracks or editing audio recordings for music or video projects. In this article, we will be discussing the steps involved in using Pro Tools First Spot Mode with the following H3 headings: Importing Audio Files, Navigating the Spot Mode Window, Setting Spot Points, Editing Spot Points.

Importing Audio Files

To start using Spot Mode in Pro Tools First, you need to import audio files into the session. Click on the File menu and choose Import to select the files that you want to work on. Once the files are imported, you can drag and drop them onto the track where you want to edit them.

Navigating The Spot Mode Window

The Spot Mode Window is where you will perform all the editing tasks for your audio files. To access it, click on the Spot Mode button which is located in the top right corner of the Pro Tools First interface. The Spot Mode Window will then open up, showing a graph display of your audio recordings.

Setting Spot Points

After opening the Spot Mode Window, you can begin setting spot points. Spot points are markers on your audio files that help you align or edit specific sections. To set a spot point, zoom in on the section of the audio recording that you want to edit and hit the “Add Spot” button. This will create a spot point at the position of the playhead.

Editing Spot Points

Once you have set up spot points, you can begin editing them. Simply click on the spot point to select it and then click and drag the marker to move it. You can also use the “nudge” function to move the selected spot point to the left or right using the arrow keys on your keyboard. Additionally, you can extend or shorten the length of the spot point by clicking and dragging the edges of the marker. Spot Mode in Pro Tools First is an excellent tool for editing audio files with precision and accuracy. With the ability to set and edit spot points, you can ensure that your audio recordings are perfectly aligned and edited to your liking. Follow the steps outlined in this article to start using Spot Mode in your Pro Tools First sessions.

Advanced Techniques

Learn advanced techniques in Pro Tools First Spot Mode to produce high-quality audio tracks and recordings with ease. The new feature allows you to align sound clips with precision, making editing a breeze.

Advanced Techniques: Using Spot Mode in Pro Tools First Pro Tools First is a digital audio workstation that allows users to edit and manipulate audio and video tracks. One of its advanced features is Spot Mode, which allows users to place a specific audio segment at a precise timecode position. When it comes to advanced techniques using Spot Mode, users can greatly improve their workflow and achieve a more polished finished product. In this article, we will explore how to use Spot Mode with video, create reminders and notes, and export a spotting list. Using Spot Mode with Video Pro Tools First has a unique feature that allows users to sync their audio with video. Using Spot Mode with video enables users to place an audio segment at a specific timecode position in the video timeline. This can be extremely useful for sound designers who are working on a film or video project. By using Spot Mode, sound designers can create a seamless audio experience that matches the on-screen action. To use Spot Mode with video in Pro Tools First, follow these steps: 1. Import your video file into Pro Tools First. 2. Right-click on the video file and select “Import Audio”. 3. Choose “Create New Audio Track” in the “Import Audio” dialog box. 4. When the Audio Import Options box appears, select “Spot Mode” to sync your audio with the video. 5. Use the Spot tool to place your audio segment at the exact timecode position in the video timeline. Creating Reminders and Notes Pro Tools First Spot Mode also allows users to create reminders and notes for specific timecode positions. This feature can be extremely helpful for editors who need to mark specific audio segments for later use. By using the Spot Mode Note function, users can add information about a particular audio segment, such as the name of the speaker or the content of the dialogue. To create reminders and notes in Spot Mode, follow these steps: 1. Use the Spot tool to place your audio segment at the desired timecode position. 2. Right-click on the audio segment and select “Add Spot Note”. 3. Enter your reminder or note in the “Spot Note” dialog box. Exporting a Spotting List Finally, Pro Tools First Spot Mode also allows users to export a spotting list of all the audio segments placed in the project. This function can be extremely useful for editors who need to reference the audio segments later or share their work with others. To export a spotting list in Pro Tools First, follow these steps: 1. Go to the “File” menu and select “Export”. 2. Select “Spotting List” in the “Export” dialog box. 3. Choose the desired format and save the file. Conclusion: Pro Tools First Spot Mode has a variety of advanced techniques that can greatly improve your workflow. By using Spot Mode with video, creating reminders and notes, and exporting a spotting list, users can achieve a more polished finished product. Whether you’re an audio editor, sound designer, or film and video editor, Pro Tools First Spot Mode is a valuable tool that can take your work to the next level.

Pro Tools First Spot Mode

Credit: www.youtube.com

Troubleshooting Common Issues

To troubleshoot common issues with Pro Tools First Spot Mode, start by checking your audio input settings and ensuring your tracks are armed for recording. If you experience latency or playback issues, adjust your buffer size or disable plug-ins not in use.

Be sure to also stay up to date with software updates to avoid compatibility issues.

Introduction: Pro Tools First is a popular digital audio workstation for music production, recording, and editing. However, even the most experienced and proficient users can encounter issues and problems while using it. The Spot Mode in Pro Tools First is an essential feature that enables users to align audio files in the correct position. However, some users might encounter issues with the Spot Mode while using it. We will explore the most common issues and the best troubleshooting solutions for them. Issues with Audio Files: One of the most common issues users might face while using the Spot Mode in Pro Tools First is with audio files. If an audio file is not imported correctly or in the right format, it might not play as expected or fail to spot correctly. In such cases, users must ensure that the audio file is in the right format, preferably WAV or AIFF. Additionally, users must make sure that the audio file is imported into the project at the correct sample rate and bit depth. Non-native audio files might cause compatibility issues and not play as expected. Spot Points Not Aligning: Another common issue that users might face is Spot Points not aligning in Pro Tools First. The Spot Mode might fail to recognize the correct starting points in the audio file, leading to unsynchronized audio. In such cases, users can try adjusting the Spot Mode settings, such as the Spot Mode Offset or the Spot Mode Sensitivity. These settings can help in adjusting the Spot Points accurately in the audio file. Pro Tools First Crashing: Another frustrating issue that users might face is Pro Tools First crashing unexpectedly. This issue can occur due to various reasons, such as insufficient computer resources, corrupted audio files, or driver conflicts. In such cases, users can try optimizing their computer settings, such as increasing the buffer size or closing unnecessary programs. Additionally, users must ensure that their Pro Tools First version is updated to the latest version, and all plugins and drivers are up-to-date. Conclusion: The Spot Mode in Pro Tools First is a powerful tool that can simplify and streamline audio editing. However, it is essential to understand that issues might arise while using it. Users must try the troubleshooting solutions mentioned above to fix most common issues. Additionally, users must regularly backup their projects and maintain their computer systems to ensure smooth and uninterrupted audio editing experience.

Pro Tools First Spot Mode

Credit: www.independent.co.uk

Frequently Asked Questions For Pro Tools First Spot Mode

What Is Spot Mode?

Spot mode is a camera mode that allows you to focus on a specific area in your image or video. With spot mode, your camera will only detect and adjust the exposure and focus on that specific area, resulting in a clearer, more detailed shot.

What Is Spot Dialog In Pro Tools?

Spot dialog is a feature in Pro Tools that enables users to quickly find and edit specific sections of a recording. This is useful for fixing mistakes, adding effects, or making any necessary changes to the audio. It functions like a marker, allowing users to easily navigate through a session and make edits efficiently.

How Do I Turn On Slip Mode In Pro Tools?

To turn on slip mode in Pro Tools, simply press the “F2” key or click on the slip mode button located on the toolbar. This will activate slip mode, allowing you to move audio clips within a track without affecting the other clips’ positions.

How Do I Change The Start Point In Pro Tools?

To change the start point in Pro Tools, click and drag the timeline ruler to where you want the new start point to be. Alternatively, use the “Location” field in the transport window and type in the new start point timecode or bar/beat value.

Conclusion

To sum up, Pro Tools First Spot Mode is an exceptional feature that gives audio engineers, music producers, and musicians the flexibility to edit audio precisely and effortlessly. This unique feature allows you to Spot audio clips to a specific point on the timeline and adjust the pitch, tempo, and volume for a perfect match.

Not only does this feature save a tremendous amount of time, but it also guarantees an expert outcome. Hence, Pro Tools First Spot Mode deserves commendation for its efficiency and quality.

Categories
Archive

Music Production Services

Music production services involve creating, recording, mixing, and mastering music tracks and albums. These services are designed to help artists and musicians bring their musical ideas to life and turn them into high-quality recordings that can be shared with the world.

Music production services are essential for musicians and artists looking to create professional-sounding recordings. These services involve a range of tasks, including recording, editing, mixing, and mastering tracks, as well as producing and arranging entire albums. Music production companies typically offer a suite of services designed to meet the specific needs of their clients, whether they are looking to record a single track or an entire album.

With the right music production services, artists and musicians can take their music to the next level and create recordings that sound polished, professional, and ready for distribution.

Why You Should Consider Music Production Services

Music Production Services can help you achieve a professional sound for your music. Professional producers and engineers have the knowledge and equipment to enhance your music and make it stand out in today’s competitive music industry. With the right guidance, music production services can make your music dreams a reality.

If you’re a musician or artist looking to create high-quality recordings, it’s essential to consider working with professional music production services. With their expertise, access to state-of-the-art production equipment and software, and a streamlined production process, you can save time, money, and ensure that you emerge with expertly crafted audio tracks.

Access To High-quality Production Equipment And Software

One of the primary benefits of using professional music production services is having access to top-quality production equipment and software. Using high-end microphones, audio interfaces, and outboard gear, the music production team can capture the best-quality audio possible and bring your music to life. Additionally, music production software such as Ableton Live, Logic Pro X, or Pro Tools is expensive and complex to use. Professional music production services have experienced professionals who understand how to use this software to its full potential.

Expertise Of Experienced Professionals

Another advantage of using music production services is the access to experienced professionals. The production team consists of audio engineers, mixers, producers, and mastering engineers who can bring their unique set of skills to your music. They can offer suggestions on how to improve your recordings and provide valuable feedback that you might not have discovered on your own. Also, experienced audio professionals can help guide you through the recording process, ensuring your tracks sound their best from the start. This way, you save time and money because you won’t have to spend time re-recording parts and re-doing tracks that aren’t perfect.

Streamlined Production Process

Finally, working with music production services can ensure a smooth, streamlined production process. When creating music, numerous steps are involved, including recording, editing, mixing, and mastering. Professional music production services have a team of experts who can manage each step of the process, saving you time and money. With a streamlined plan, the team can help take your track from the start to the final master, ensuring it’s the best it can be. In conclusion, when working with professional music production services, you gain access to high-quality production equipment and software, have access to experienced professionals, and get a streamlined production process. With these advantages, you can ensure your music sounds its best while saving time and money.

Music Production Services

Credit: desygner.com

The Music Production Process

Music production services involve a multi-step process in which skilled producers collaborate with artists to create professional tracks. From songwriting to final mastering, the production team oversees every aspect of the music’s creation to ensure a high-quality end product that reflects the artist’s unique style and vision.

Music production services encompass a blend of creative and technical processes employed to make a song or album ready for distribution. Each stage of the process plays a critical role in producing high-quality music, and each demands specialized skills, equipment, and software. Missteps in any of the stages could affect the final outcome of the project.

Pre-production

The pre-production stage is where the magic begins. It involves brainstorming ideas, conceptualizing, and creating a roadmap for the project. It allows producers and artists to lay a strong foundation that will guide them through the entire process. At this stage, there’s a need to create lyrics, write melodies, and plan the arrangement of instrumentation. It is also essential to establish the budget and schedule, book studio time, and decide on the recording venue.

Recording

Recording is where creativity meets technology. Once the team has planned and rehearsed the tracks, they are then ready to record. This stage involves setting up the sound, microphones, and other equipment in the recording studio. Artists get to perform, and producers record the sessions. This step could take several sessions to complete, depending on the project’s complexity, and may include recording overdubs, alternate takes, and even effects.

Editing

In music production, editing involves selecting the best recordings from the recording stage and working on them to make the final cut. This stage is all about perfecting the audio recordings to ensure that every aspect of the sound is just right. The producer may remove undesirable sounds, tune the vocal tracks, work on timing, and make other adjustments to enhance the music.

Mixing

The mixing stage takes the previously recorded and edited tracks and blends them together. It involves setting the levels, balancing the instruments, panning tracks, adding effects, enhancing sounds, and editing audio transitions. Essentially, it is the process of making sounds sit well together. Mixing is critical because it is the final stage before mastering, the final touch before the music leaves the mixing room and temporarily loses the protection of the mix engineer’s ears.

Mastering

Mastering is the last step in the music production process. It involves taking the finished mix and working on it to ensure that it is ready for release. At this point, the music will undergo a final EQ adjustment, compression, and limiting. The mastering engineer is tasked with making sure that the song is uniform in volume, has the right amount of brightness and warmth, and is free from errors before distribution. In conclusion, each stage of the music production process plays a critical role in producing high-quality and professional-grade music. Missteps in any of these stages can be costly and could affect the final outcome of the project. Therefore, employing the services of an experienced music producer is essential in ensuring that you get a high-quality final product.

Types Of Music Production Services

Music production services have various types, such as recording, mixing, mastering, and songwriting. Each service plays a vital role in creating a perfect sound for a music project. Whether it’s in a professional studio or online, these services are essential to achieving the desired sound quality.

If you are a musician or a content creator, you might be aware of the importance of high-quality music production services. In today’s highly competitive market, producing quality music is crucial for your success. There are multiple types of music production services available that cater to different requirements. Let’s discuss the most popular types of music production services available in the market.

Full Music Production Services

Full music production services entail the complete process of creating music – from scratch to delivery. It includes recording, mixing, mastering, composition, sound design, and instrumentation. You can avail full music production services to achieve a complete and polished sound for your music.

Professional Music Mixing Services

Professional music mixing services refer to the process of combining and balancing different sound elements in your music. Professional mixing services use advanced software, hardware, and acoustic treatment to create a high-quality sound. You can avail of professional mixing services to enhance your music’s clarity, depth, and overall impact.

Music Composition And Arrangement

Music composition and arrangement services refer to creating unique and original music. A music composer takes your musical ideas and translates them into complete compositions. They also arrange different musical elements to create a complete and cohesive music piece.

Vocal Tuning And Editing

Vocal tuning and editing refer to the process of correcting off-key or off-pitch notes and ensuring a clean vocal performance. Vocal tuning and editing services can enhance your vocals and improve the overall quality of your music.

Sound Design And Audio Post-production

Sound design services include creating unique sounds and effects to complement your music. Sound design services can add depth and dimension to your music, making it sound more professional and engaging. Audio post-production services include editing, mixing, and mastering of audio files to enhance their sound quality and clarity. In conclusion, choosing the right music production service can make a significant difference in the quality of your music. Now that you know about the different types of music production services, you can make an informed decision and choose the service that fits your requirements the best.

How To Choose The Best Music Production Service Provider

Choosing the best music production service provider can be a difficult task. Look for companies that have a diverse portfolio, affordable pricing, positive reviews, and experienced professionals who can help you achieve your goals. Take your time and do your research to ensure that you make the right decision.

Music production is a crucial aspect of any musical project, whether you are an independent artist or a major record label. Finding the perfect music production service provider can be challenging, as there are various factors to consider. This guide will provide you with essential tips on how to choose the best music production service provider.

Consider The Provider’s Experience And Portfolio

Before hiring a music production service provider, it is essential to consider their experience and portfolio. The provider’s experiences should align with your project and genre. Additionally, review their portfolio to view their previous projects. If their portfolio showcases similar projects to yours and their work aligns with your vision, then they are a suitable provider for your project.

Check For Testimonials And Reviews

One of the best ways to determine a music production service provider’s reputation is by checking their testimonials and reviews. It provides an insight as to how previous clients felt about their service quality, timeliness, and communication. You can find reviews and testimonials on their website, social media platforms, or Google My Business listings.

Discuss The Scope Of Your Project In Detail

When communicating with the music production service provider, it is essential to discuss the scope of your project in detail. Ensure that you provide them with every necessary detail concerning your project, including project timeline, budget, and any production specifications you have in mind. Communicating your vision in detail from the outset is the ideal way to guarantee that the provider can fulfill your expectations.

Review The Pricing And Payment Structure

When choosing a music production service provider, ensure that you review their pricing and payment structures. It is essential to determine if their pricing works within your budget. Additionally, you should know the payment structure, whether they charge a flat rate or based on a milestone or hourly rate. Ensure that payment terms and conditions work in your favor and are crystal clear before moving forward. In conclusion, choosing the best music production service provider can predict the success of your project. It is crucial to consider every necessary factor before selecting one. Consider their experience and portfolio, check for testimonials and reviews, discuss the scope of your project in detail, and review the pricing and payment structure. By doing this, you’ll choose the best music production service provider and ensure the success of your project.

Benefits Of Hiring A Professional Music Production Service Provider

Hiring a professional music production service provider has several benefits. They have the expertise, equipment, and resources to create high-quality music that meets industry standards. Professional music production services can also provide valuable feedback and guidance to help artists achieve their goals.

Creating music is a craft that requires a lot of skill, time, and effort. As an artist or a producer, it is important to have your music sounding as professional and high-quality as possible to catch the attention of potential listeners and fans. Hiring a professional music production service provider can help you achieve that. Here are some of the many benefits you can get from hiring a professional music production service provider:

High-quality Production And Sound

A professional music production service provider has the expertise, experience, and the latest technology to produce music of the highest quality. They know how to maximize the use of various recording and mixing techniques to enhance the sound of your music. They also have access to high-quality equipment and software that allow for the creation of professional-level music.

Time And Cost Efficiency

Working with a professional music production service provider can save you time and money. Instead of spending hours recording, mixing and mastering your tracks, a professional can handle all of those aspects of music production quickly and efficiently. This leaves you with more time to focus on other aspects of your music career, such as promoting your music, performing live, and creating new material.

Boost In Creativity And Overall Project Quality

Working with a professional music production service provider can also give you a boost in your creativity. They can offer fresh ideas and honest feedback to enhance your music. Moreover, a professional has the experience and expertise to help you create and refine your music to a high standard which results in an improvement in the overall quality of your project.

Access To Industry Connections And Resources

Another benefit of working with a professional music production service provider is having access to their industry connections and resources. A professional can provide information and assistance in various aspects of the music industry that can be hard to navigate alone, including publishing, distribution, and marketing. They can offer valuable insights, share their contacts, and provide valuable resources to help you take your music to the next level. Overall, hiring a professional music production service provider can help take your music career to the next level. From high-quality production and sound to efficient time and cost management, to valuable resources and industry connections, a professional can help you achieve your music goals and produce high-quality tracks that can get noticed by potential listeners and fans in the industry.

Common Misconceptions About Music Production Services

Music production services are often misunderstood, with many believing that it’s a straightforward process of just recording and mixing. However, there are many other aspects to consider, such as pre-production planning and post-production editing. A professional music producer brings creativity, knowledge, and technical skills, ensuring the best possible sound for your music.

Music production services are essential for artists and musicians who want to produce high-quality music that resonates with their target audience. Unfortunately, there are several misconceptions about music production services that prevent some musicians from seeking professional help. In this article, we debunk some of the most common misconceptions about music production services.

It’s Only For Established Artists Or Musicians

One of the most prevalent misconceptions about music production services is that they are only meant for established musicians. Many upcoming artists believe that they don’t need professional assistance until they are famous. However, this is far from the truth. Irrespective of your music career level, music production services can help you refine your craft and create quality music that appeals to your target audience. Seasoned music producers can work with you to identify your unique sound, brand, and style and help you showcase them in your music.

It’s Too Costly

Another common misconception about music production services is that they are costly. While it’s true that some music production services can be expensive, it’s possible to find affordable options that fit your budget. Many music production companies offer a range of packages with different prices to cater to various budgets. You can also consider working with independent music producers who provide affordable services that suit your budget.

The Production Process Takes Too Long

Many upcoming musicians also believe that music production services take too long, and they can’t afford to wait for several months to release new music. While the production process may take some time, it’s possible to expedite the process without compromising the quality of your music. Competent music producers follow a well-structured production process that ensures they deliver quality music within a reasonable time frame. It’s essential to communicate your timelines and deadlines with your music production team to ensure they prioritize your needs accordingly.

It Compromises Artistic Integrity

One of the biggest concerns for many musicians is the fear that music production services may compromise their artistic integrity. However, a competent music producer understands that every artist has a unique sound, style, and brand. Their job is to help you refine your music without compromising your artistic identity. By working collaboratively with you, your music producer can help you create music that not only meets your artistic standards but also appeals to your target audience. In conclusion, music production services are essential for any artist or musician who wants to create high-quality music that resonates with their audience. By debunking these common misconceptions, we hope that more upcoming musicians will seek professional help and create exceptional music that will propel their music careers to new heights.

Frequently Asked Questions For Music Production Services

How Much Does It Cost To Hire A Music Producer?

The cost of hiring a music producer varies depending on their experience and level of expertise. A beginner producer may charge around $500 per song, while an experienced one can charge up to $10,000 per song. It’s best to discuss your budget with the producer to come to a mutual agreement.

What Services Do Music Production Companies Offer?

Music production companies offer a range of services including music composing, arrangement, recording, mixing, mastering, sound design, and distribution. They may also provide vocal tracking, session musician services, music licensing, and audio post-production services.

How Do I Find Someone To Produce My Music?

To find someone to produce your music, start by researching producers online and on social media. Attend local music events and connect with other musicians to ask for referrals. Consider hiring a professional agent or manager who can help you find the right producer for your music.

Collaborate with other musicians and producers to expand your network and increase your chances of finding the perfect match for your creative vision.

How Much Does It Cost To Have A Music Production Company?

The cost of a music production company varies widely depending on the specific services required. Some companies offer package deals starting from $500, while larger projects can cost up to tens of thousands of dollars. It’s best to consult with individual companies for a personalized quote.

Conclusion

Music production services are an essential aspect of the music industry and are crucial for artists to showcase their talents. By hiring a professional production service, artists can elevate their sound quality and receive support from experienced professionals. Quality production services can help artists stay relevant and succeed in the competitive music industry.

With a full range of services available, a music production service can assist artists in creating a unique sound that stands out in the industry. Trusting in the expertise and experience of a production team can set an artist on the path to success.

Categories
Archive

How To Setup Ableton Obs

To setup Ableton OBS, download and install OBS, then launch Ableton and set up audio input and output. In this guide, you’ll learn how to adjust your audio and visual settings in Ableton OBS for the best recording experience.

OBS is a free and open-source streaming and recording software that allows you to capture high-quality video and audio from your computer. Ableton is a popular digital audio workstation used by many musicians and producers for creating music and live performances.

By combining these two powerful tools, you can create engaging and professional-looking videos of your music performances or tutorials. We’ll cover everything you need to know to get started with Ableton OBS.

Choose Hardware

Setting up Ableton OBS requires selecting appropriate hardware for optimum performance. From the computer to the audio interface, microphone, and camera, choosing the right equipment can make a significant impact on the quality of your live streaming sessions.

Choose Hardware If you’re new to Ableton Live or looking to upgrade your setup, selecting the right hardware is a crucial step in creating the perfect work environment. In this subheading, we’ll take a closer look at what to consider when selecting the hardware.

Selecting Your Computer

Your computer is the backbone of your Ableton setup so it’s important to choose one that can handle the software’s processing power. Here are some key features to look for in a computer:

  • Processor- Look for a computer with a fast multi-core processor for speedy loading times and smooth operation.
  • RAM – More memory allows the computer to handle larger sets and audio files without crashing. Aim for 8GB RAM at a minimum.
  • Storage – The amount of storage you need is dependent on your workflow. If you’re working with a lot of large audio files, consider an external storage device like an SSD.

Audio Interface Selection

An audio interface is essential for recording audio into Ableton. Here are some key features to look for when selecting an audio interface:

  • Input/Output Count – The number of inputs/outputs you need is dependent on your setup. Consider the instruments you will be recording and any potential need for expanding in the future.
  • Connectivity – USB is a common choice, but Thunderbolt and FireWire are also available. Keep compatibility in mind when selecting an audio interface.
  • Sample Rate/Bit Depth – Determine the sample rate and bit depth of your projects to ensure your audio interface can handle it.

Midi Controller Setup

A MIDI controller is a physical device that allows you to control Ableton’s software with hands-on interaction. Here’s what to look for when selecting a MIDI controller:

  • Number of Keys/Buttons – Determine the number of keys/buttons you need based on your workflow. A larger controller provides more options, but also requires more desk space.
  • Connectivity – USB is the most common connection, but consider other options based on your computer setup.
  • Compatibility – Ensure that the MIDI controller is compatible with your version of Ableton.

By paying close attention to these hardware options, you’ll be able to select the right equipment to suit your workflow, and create an Ableton setup that works best for you.

How To Setup Ableton Obs

Credit: community.justinguitar.com

Setting Up Ableton

Ableton Live is a powerful software designed for music production and live performance. Setting it up properly is crucial to ensure a smooth and efficient workflow. In this article, we will go through the steps to install and set up Ableton, configure audio and MIDI preferences, and connect external instruments.

Installation And Setup

The first step is to download and install Ableton Live from the official website. Once the download is complete, run the installer and follow the on-screen instructions. After installation, launch Ableton Live from your Applications folder (Mac) or Start menu (Windows).

Once you’ve opened Ableton, you’ll be prompted to enter your license information. If you haven’t purchased Ableton yet, you can use the 90-day free trial.

Audio And Midi Preferences

Before you start making music, it’s important to configure the audio and MIDI preferences to suit your needs. To do this, navigate to the “Options” menu and select “Preferences”.

Under the “Audio” tab, you can choose your audio interface, sample rate, and buffer size. It’s recommended to choose the highest buffer size possible without affecting the performance of your computer to avoid audio dropouts.

Under the “MIDI” tab, you can select your MIDI input and output devices. You can also configure MIDI mapping and sync settings.

Setting Up External Instruments

If you have external instruments like synthesizers or drum machines, you can connect them to Ableton and use them in your productions. To do this, you’ll need a MIDI interface or a compatible audio interface with MIDI capabilities.

Connect the MIDI or audio cables from your external instrument to your interface, then connect the interface to your computer. In Ableton’s preferences, under the “MIDI” tab, select your external instrument as the MIDI input device. You can now use your external instrument in your Ableton projects!

Creating A Project

Setting up Ableton OBS is a straightforward process requiring a few basic steps. First, download OBS and Ableton Live software, then configure the audio settings in OBS, followed by adding sources and scenes. With some practice, you’ll be able to create high-quality music videos and live stream performances.

Creating a Project Setting up Ableton Live for the first time can be an exciting yet daunting task. But don’t worry, we’ll guide you through the process step by step. One of the first things you need to do when starting a new project is to create a project file. Here are the steps you need to follow to create a project in Ableton Live. Selecting a Template When you first open Ableton Live, you will be presented with a window asking if you want to create a brand new project or use a provided template. Choosing a template is recommended, especially for new users because it helps you get started more quickly. Ableton Live provides several templates covering different genres of music production, so choose the one that is closest to the type of production you want to achieve. Importing Audio/MIDI Files The next step after choosing a template is importing audio or MIDI files. If you have recorded an audio track or composed one using a digital audio workstation (DAW), you can quickly import it into your Ableton Live project. To do this, select the File menu in Ableton Live and choose Import Audio/MIDI File. Locate the file you want to import and drag it into the Arrangement or Session View of the project. Working with Plugins and Effects One of the great things about using Ableton Live is the vast array of included plugins and effects. Ableton Live comes with built-in plugins and effects for EQ, compression, delay, reverb, and many more. To use these plugins, simply drag and drop them onto the audio or MIDI track you want to apply them to. You can customize the settings and parameters of each plugin to your liking. In conclusion, creating a project in Ableton Live is easy and straightforward. By following the simple steps outlined above, you can create a new project file, choose a template, import audio or MIDI files, and apply plugins and effects to your tracks. Now that you are familiar with the fundamentals of setting up a project in Ableton Live, it’s time to dive into the fun stuff – creating music!

Working With Clips And Tracks

Learn how to set up Ableton OBS by working with clips and tracks. This involves importing audio and video files, creating new tracks, and adding clips to them. With this knowledge, you can create professional-looking live streams and recordings.

Ableton Obs is a popular digital audio workstation used by musicians, producers, and sound designers. One of the essential features in Ableton Obs is the ability to work with Clips and Tracks. Clips are audio or MIDI recordings, while tracks are collections of clips that you can organize and edit. In this article, we will explore the basics of working with Clips and Tracks in Ableton Obs.

Creating Audio/midi Clips

To create an audio clip, click on the “Create” button in the “Session” or “Arrangement” view, then select “Audio” from the options. You can also use the shortcut key “Ctrl + T” to create a new audio track. Next, locate the clip view in the lower section of the interface, and click on the “New” button to create a new clip. You can then record or drag and drop an audio sample into the clip. To create a MIDI clip, follow the same procedure, but this time select “MIDI” from the options. Once you have a blank MIDI clip open, you can start adding notes with your MIDI controller. You can also draw in notes using the MIDI editor or use the step sequencer.

Editing Clips

Ableton Obs provides several editing tools to manipulate audio and MIDI clips. To edit an audio clip, simply double click on the clip to open it in the clip view. From here, you can adjust the volume, pan, and other parameters. You can also add effects such as EQ, reverb, and delay to the clip. Editing MIDI clips is similar to editing audio clips. Double click on the clip to open it in the clip view, and use the editing tools to adjust the notes, velocity, and other parameters. You can also use the MIDI editor to fine-tune the notes.

Organizing Tracks

Organizing tracks in Ableton Obs is easy. To create a new track, click on the “Create” button in the “Session” or “Arrangement” view, then select “Audio” or “MIDI” from the options. You can then drag and drop clips into the track, or record new clips into the track. You can also group tracks together by selecting them and using the “Group” option in the right-click menu. This allows you to control the volume, pan, and other parameters of multiple tracks at once. You can also use the “Send” option to route audio from one track to another. In conclusion, working with Clips and Tracks in Ableton Obs is essential for creating and organizing your music. With the right knowledge and practice, you can create professional-grade tracks that stand out.

Arranging Your Project

Once you have recorded all your clips, it’s time to arrange your project. This is where you decide the flow of the song and create a structure for it. With Ableton OBS, you have full control over how you want to arrange your clips, giving you the freedom to experiment with different ideas until you find the perfect arrangement for your project.

Working With Scenes

Scenes are the building blocks of your project, and setting up scenes correctly is crucial to create an effective arrangement. Scenes can be thought of as a combination of clips that are played together. You can use scenes to create variations in your song or to transition between different parts of your track. To create a new scene, simply right-click the empty area in the Scenes pane and select “Insert Scene.”

Arranging Clips On The Timeline

Once you have created your scenes, the next step is to arrange your clips in the timeline. The timeline is where you can see all your clips laid out from start to finish. To add a clip to the timeline, simply drag and drop it from the browser or session view onto the timeline. You can move clips around the timeline by dragging them to the desired position. You can also trim clips by dragging their edges.

Building The Song Structure

The final step is to build the song structure. This is where you decide the order of your scenes and clips to create a full song. It’s important to keep the listener engaged by varying the arrangement and introducing new elements throughout the track. To do this, you can use different scenes, add effects, and apply automation to make the song more interesting. Once you have built the song structure, you can export it as a finished track.

How To Setup Ableton Obs

Credit: blog.b2fab.com

Mixing And Mastering

Set up Ableton OBS for Mixing and Mastering with ease by following these simple steps: create a new project, import your audio, add effects to your tracks, set levels and pan, export and save your final mix. With Ableton OBS, you’ll have all the tools you need to create high-quality, polished audio projects.

Mixing and Mastering your track is an essential part of the music production process. It involves balancing the different elements of your track, enhancing their sound quality, and ensuring that your final mix sounds cohesive. Ableton OBS has many powerful tools that can help you with the Mixing and Mastering process, including faders, EQ, compression, reverb, and delay. —

Working With Faders And Panning

When it comes to balancing your track, you can use Ableton OBS’s faders to adjust the volume of each element. Start by setting the volume of your kick drum, bass, and vocals to ensure they’re audible. Then, use the faders to balance the other elements of your track, such as your pads, synths, and percussion. You can also use panning to create a sense of space and depth in your mix. For instance, you can pan your hi-hats to the right and your shakers to the left. To pan a track in Ableton OBS, click on the circle icon in the mixer view and move it left or right. —

Using Eq And Compression

EQ and compression are essential tools for improving the sound quality of your tracks. EQ allows you to adjust the frequency balance of your sounds, while compression can help you control the dynamic range of your tracks. To use EQ, start by identifying the frequency range that needs tweaking. For instance, if your bass sound is too boomy, use the EQ to attenuate the low-frequency range. You can do this by dragging the EQ curve downwards on the relevant frequency. To use compression, start by setting the threshold to an appropriate level to give your track some dynamic range without being too squashed. You can then adjust the attack and release times to control how quickly the compressor kicks in and out. —

Adding Reverb And Delay

Reverb and delay are two of the most commonly used effects in music production. They can add depth and atmosphere to your tracks, making them sound more polished and professional. To add reverb to a track in Ableton OBS, start by inserting a reverb plugin onto the track. Then, adjust the wet/dry balance to control the amount of reverb you want to apply. You can additionally adjust the decay time to determine how long the reverb lasts. To add delay, insert a delay plugin onto the track, and adjust the feedback and delay time to control the effect. You can experiment with different settings until you find the right balance for your track. —

Mastering Your Track

Mastering your track is the final step in the Mixing and Mastering process. It involves applying a series of effects to your entire track to ensure that it sounds cohesive and professional. To master your track in Ableton OBS, start by applying a limiter to the master bus. This will help you increase the overall loudness of your track without causing distortion. You can then apply equalization to further balance your track and enhance its sound quality. Overall, the Mixing and Mastering process requires patience, experimentation, and good ears. But with Ableton OBS’s powerful tools, you can take your tracks to the next level and achieve professional-level sound quality.

Exporting Your Project

Exporting your project from Ableton Obs is a crucial step towards sharing your music creations with the world. It helps you prepare your project for distribution and ensures that it is compatible with different playback platforms. In this guide, we will walk you through the various steps involved in exporting your project.

Preparing Your Project For Export

Before exporting your project, there are a few things you need to keep in mind to avoid any last-minute surprises. Here’s a checklist of things you need to ensure:

  • Check that you have added all the necessary plugins and effects
  • Ensure that all the tracks in your project are named and labeled appropriately
  • Make sure your audio levels are optimized and not peaking
  • If you have any automation or MIDI clips in your project, double-check that they are working correctly and are synchronized

Exporting Audio

Once you have prepared your project, you can start exporting your audio. Here are the steps:

  1. Go to the File menu and select ‘Export Audio/Video’
  2. Select the format and quality of your output audio file
  3. Specify the location where you want to save the exported audio file
  4. Name your exported file
  5. Finally, click on the ‘Export’ button to start the process

Uploading To Soundcloud Or Other Platforms

After exporting your audio, you can upload it to a music platform such as SoundCloud. Here’s how:

  1. Sign up for a SoundCloud account if you haven’t already
  2. Click on the ‘Upload’ button in the top right corner of your SoundCloud dashboard
  3. Select the audio file you want to upload
  4. Add a title, description, and artwork for your track
  5. Choose the genre that best suits your track
  6. Finally, click on the ‘Save’ button to publish your track on SoundCloud

By following these simple steps, you can now export your Ableton Obs project and share your musical creations with the world. Happy exporting!

Troubleshooting

Having trouble setting up Ableton OBS? Troubleshooting the software can be frustrating, but it’s essential for ensuring smooth broadcasting. Follow step-by-step guides and watch tutorials to diagnose and fix any issues in a timely manner.

Troubleshooting is an important aspect of using any software, including Ableton OBS. Setting up Ableton OBS can be a bit overwhelming for beginners. You may encounter problems that prevent you from maximizing the software’s potential. However, with a little bit of troubleshooting, you can get back on track. In this section, we will cover the most common issues users face and the solutions to each of them.

Common Issues And Solutions

When setting up Ableton OBS, you may experience issues such as audio crackling, device detection problems, or scenes/sources not appearing. Here are some common troubleshooting tips: – Audio Glitches or Crackles: One of the most frequent issues that users face is audio glitches or crackles. This issue often arises when the buffer size is too low. To fix it, try increasing the buffer size in your audio settings or reducing the number of devices connected. – No Audio Input or Output: Unable to detect the audio input or output device? Check your device compatibility with Ableton OBS. If your device is compatible and still not detecting, try updating or reinstalling the audio drivers. – Scenes/Sources not appearing: Trouble adding a scene or source? Make sure you have added it to the correct canvas. You can click on the “+” button at the bottom of the OBS window to add a new one. – Display Capture Issues: Unable to capture your display? Try updating your graphics card driver, ensuring the relevant source is selected, and running OBS as an administrator.

Code Compilation Issues

Code compilation issues can prevent you from getting started with Ableton OBS. If you’re experiencing these issues, here are some possibilities: – Incorrect Code: Ensure that you have typed the code correctly, including all the commas, brackets, and quotation marks. – Compatibility issues: Check the version of the software you’re using. Some codes won’t work with earlier versions. – Missing Dependencies: Before running any code, ensure you have installed the required dependencies, libraries, and plugins. You can consult the user documentation provided or seek support from the community forums. In conclusion, troubleshooting Ableton OBS may seem daunting. However, knowing how to handle common issues can go a long way in maximizing your experience. Remember to always check for compatibility, update your software and drivers, and follow the guidelines provided. With these tips, you should be on your way to a seamless usage of Ableton OBS.

How To Setup Ableton Obs

Credit: m.youtube.com

Frequently Asked Questions For How To Setup Ableton Obs

How Do I Get Audio From Ableton To Obs Mac?

To get audio from Ableton to OBS on a Mac, you first need to set up a virtual audio device using software such as Soundflower or BlackHole. Once set up, select the virtual audio device as the audio input in both Ableton and OBS.

Your audio from Ableton should now be transmitted to OBS.

How Do I Set Output Device In Ableton?

To set the output device in Ableton, click on “Options” in the menu bar and select “Preferences. ” Then, go to the “Audio” tab and choose the desired output device from the drop-down menu under “Audio Output Device. ” Finally, click “OK” to save the changes.

How Do I Set Up Audio On Obs?

To set up audio on OBS, go to “Settings” and select “Audio”. Choose your desired input and output devices. To add audio sources, click the “+” icon in the “Sources” box and choose audio input capture or audio output capture.

Adjust audio levels using the sliders under “Mixer”.

How Do I Set Up Recording In Ableton?

To set up recording in Ableton, first create a new audio track. Then select the audio source, arm the track for recording, and press the record button. You can also use MIDI or external devices to record. Make sure to adjust the input levels and monitor the recording.

That’s it!

Conclusion

Setting up Ableton OBS can be a tricky process, but with this step-by-step guide, you can easily master it in no time. Remember to check all the vital settings, such as audio and video inputs, to ensure a smooth streaming experience.

Make use of the plugins and customizable features to elevate your live performances and recording sessions. With Ableton OBS, the possibilities are endless. So get creative and start streaming like a pro!

Categories
Archive

How To Arrange A Song

To arrange a song, start with the melody and build the rest of the song around it. A well-arranged song should have a structure, dynamics, texture and harmony that enhance the overall listening experience.

Arranging a song can make it stand out from other songs, creating a unique and memorable listening experience. Good song arrangement involves deciding on the chord progression, the instrumental parts, and the overall structure of the song. It also involves understanding the dynamics of the song, such as where to add a bridge, chorus, or interlude, as well as carefully selecting the tone and tempo of each section.

With these elements in mind, a song can be carefully crafted and arranged to create an irresistible listening experience for the audience.

How To Arrange A Song

Credit: www.soundonsound.com

Choosing The Key

When arranging a song, choosing the right key is crucial in ensuring that the melody, chords, and lyrics all work together harmoniously. Experiment with different keys to find the one that best suits the desired mood and tone of the song, while also considering the singer’s range.

Major Or Minor

One of the first decisions to make when arranging a song is choosing whether to use a major or minor key. A major key often creates a bright and happy sound, while a minor key can add a dark or sad tone to the music. When choosing between the two, consider the mood of the song and the emotions you want to evoke in the listener. It’s also important to ensure that the key fits well with the melody and lyrics, creating a cohesive and meaningful arrangement.

Matching The Singer’s Range

Another crucial factor to consider when choosing the key is the singer’s vocal range. If the key is too high or too low for the singer, they may struggle to hit the notes comfortably and the performance could suffer as a result. It’s important to understand the singer’s range and choose a key that allows them to showcase their strengths while still staying true to the original melody and feel of the song. This could involve transposing the key to a different pitch or experimenting with different musical arrangements.

Alternate Tunings

Sometimes, standard tuning may not be the best option and alternate tunings can be used to create unique and interesting sounds. For example, drop D tuning can create a heavier and more intense sound, while DADGAD tuning can create a more folk or Celtic vibe. However, it’s important to consider the impact of alternate tunings on the song and ensure that they do not detract from the overall feel and message of the music. Ultimately, choosing the key is an essential part of arranging a song and requires careful consideration of various factors, such as the mood, lyrics, singer’s range, and even alternate tunings. By understanding these factors and experimenting with different options, you can create an arrangement that truly captures the essence of the music and resonates with the audience.

Picking The Chord Progression

To arrange a song, picking the right chord progression is crucial. It sets the tone and emotion of the music and can make or break the song’s flow. Experimenting with different chord combinations and using music theory can help create a solid foundation for your song.

Choosing the right chord progression is essential in arranging a song. The chord progression creates the mood and emotion of the song, while also helping to structure it. Here are some tips to ensure you pick the right progression for your song.

Identifying The Verse, Chorus, And Bridge

The verse, chorus, and bridge are the three main sections of a song. Identifying these sections will help you pick the right chord progression for each part. The verse usually has a lower intensity than the other sections and should have a different chord progression to help distinguish it. The chorus should have a more upbeat and memorable chord progression to make it stand out. Lastly, the bridge is often used as a transition and should have a surprising and unique chord progression.

Sticking To Basic Chords

When picking the chord progression for your song, stick to basic chords. Basic chords are easy to play and are widely used in popular music. They include major, minor, and seventh chords, which can be arranged in various ways to create different sounds and emotions. Using complex chords can make the song sound unnatural and difficult to follow.

Putting It All Together

Once you have identified the verse, chorus, and bridge, and have picked your basic chords, it’s time to put it all together. Start by playing the chords in sequence to see how they sound. Then, experiment with different progressions until you find one that works. Remember to keep the mood and structure of the song in mind and adjust as needed. In conclusion, picking the chord progression is a crucial step in arranging a song. Following these tips should help you choose the right chords for each section, and ensure that your song sounds natural and flows well. Keep practicing and experimenting, and soon you’ll be creating great-sounding chord progressions in no time!

Creating The Melody

Creating a melody is one of the most important aspects of arranging a song. It’s what makes the song memorable and catchy. There are various ways to create a melody, but we’ll explore two of the most effective methods:

Starting With Acapella

One way to create a melody is to start with an acapella version of the song. This means singing the song without accompaniment. Sing the song slowly and experiment with different notes until you find a melody that sounds good to you. You can also hum a melody if you’re not confident in your singing ability.

Using The Chords As Your Guide

Another way to create a melody is to use the chords as your guide. Look at the chords of the song and try to come up with a melody that fits the chord progression. Start with the first chord and try to create a melody that fits it. Move on to the next chord and repeat the process. Remember to keep the melody simple and easy to sing along to.

  • Start with a simple melody and build on it
  • Avoid using too many notes in the melody
  • Use repetition to make the melody catchy

Creating a melody takes practice and patience. Don’t be afraid to experiment with different ideas until you find one that works. Remember to keep it simple, catchy, and easy to sing along to.

Adding Harmonies

Adding harmonies to a song is a great way to create depth and texture, and make it more interesting to listen to. But, it’s not always easy to decide on the right type of harmony to use, or how to layer them effectively. In this post, we’ll cover the basics of adding harmonies to your song, including how to decide on the right type of harmony and how to layer them effectively.

Deciding The Type Of Harmony

Choosing the right type of harmony to add to your song depends on several factors, including the genre of music you’re creating and the overall mood you want to convey. Here are some common types of harmonies you can consider:

Type of HarmonyDescription
Parallel HarmonyUses chords that are in the same key as the melody, creating a fuller sound
Contrary HarmonyMoves in an opposite direction to the melody, creating tension and interest
CountermelodyA secondary melody that is musically complementary to the main melody, creating a more complex song structure

Consider experimenting with each type of harmony to see which works best for your song.

Experimenting With Layers

Layering harmonies is a great way to create a rich and complex sound. The trick is to ensure that each layer complements the melody without overpowering it. Here are some tips to help you layer your harmonies effectively:

  • Start with simple harmonies. Begin by adding a simple harmony to your melody. Once you are happy with how it sounds, you can add more complex harmonies.
  • Experiment with different intervals. Try layering harmonies at different intervals, such as thirds or fifths, to create a richer sound.
  • Avoid clashing notes. Be sure to choose harmonies that don’t clash with the melody or other harmonies already in the song.
  • Think about balance. Make sure the volume of each harmony layer is balanced, so that one layer doesn’t dominate the others.

Layering harmonies can be a time-consuming process, but the result is often worth the effort. With the right approach, you can elevate your song from good to great.

Writing The Lyrics

To arrange a song, the lyrics must be written first. Start by brainstorming different themes and emotions for the song, then create a structure for the verses and choruses. Consider the melody and rhythm when arranging the lyrics to ensure that they flow seamlessly with the music.

Constant revisions and feedback can help refine the final product.

As an aspiring songwriter, creating lyrics that your listeners can relate to is essential. Writing a song requires a lot of effort and creativity, from coming up with the theme and message to finding perfect rhymes and metaphors. In this blog post, we will teach you how to write a great song by focusing on the lyrics. Let us begin by discussing the first step in writing lyrics: determining the theme and message.

Determining The Theme And Message

The theme and message of a song refer to the underlying idea and emotion that the songwriter intends to convey in the song. It could be about love, heartbreak, nostalgia, life lessons, or social issues, among other topics. To determine your theme and message, consider what inspired the song’s creation and what you want your listeners to take away from the experience. For instance, if you are writing a song about lost love, you can choose to focus on the pain and heartbreak rather than the reasons behind the breakup. Alternatively, you can choose to focus on the lesson learned from the relationship. The message here could be that one needs to learn from their past relationships to be better in future ones.

Finding Rhymes And Metaphors

After identifying the song’s theme and message, you can now start to embellish the lyrics with great rhymes and metaphors. Finding the right words, phrases, and rhymes can be challenging, and it requires a lot of trial and error. The trick here is to keep it simple and understandable. Avoid using complex words or phrases that can make it difficult for your listeners to comprehend the message. Perfect rhymes, metaphors, and similes not only make your lyrics more interesting, but they also help your listeners understand the message you are trying to convey. Conclusion In songwriting, the lyrics are just as vital as the melody, rhythm, and harmony. The lyrics give the song meaning, making it more relatable to the listeners. Determining the theme and message and finding perfect rhymes and metaphors can help you write better songs. Remember that great songwriting takes practice, effort, and creativity. With these tips, you will be able to arrange a great song that resonates with your listeners.

How To Arrange A Song

Credit: www.youtube.com

Refining The Arrangement

After creating a rough outline of your song, it’s essential to refine the arrangement to ensure that it flows smoothly and captures the listener’s interest. The arrangement of a song involves the organization of different musical parts, such as verses, choruses, and bridges, to create a coherent whole. Here are some tips to help you fine-tune your arrangement:

Listening To The Recording

The first step to refining your song’s arrangement is by listening to your recording. Ensure that you have recorded all the sections of the song, including the vocals and the instrumental parts. By listening to it, you can identify the strengths and weaknesses of the track and make decisions on how to improve it. You can use headphones or speakers to listen to the recording, but it’s essential to find a quiet place to avoid any distractions that may interfere with your concentration.

Adjusting Tempo And Dynamics

The tempo and dynamics of a song play a crucial role in its arrangement. By adjusting the tempo and dynamics, you can create unique and engaging parts that capture the listener’s attention. For example, you can increase the tempo of the chorus to create tension and excitement in the song. Alternatively, you can decrease the tempo of the verse to create a more relaxed mood. Similarly, adjusting the dynamics of the song can create varied musical parts that make it more interesting to listeners.

Using Fills And Transitions

Another way to refine your song’s arrangement is by using fills and transitions. Fills are short musical phrases used to fill in the gaps between different parts of a track. On the other hand, transitions are sections of music used to move from one part of the song to another, such as moving from the chorus to the verse. By using fills and transitions, you can create smooth transitions between different musical parts, making the song more cohesive and enjoyable to listen to.

Adding Or Removing Parts

Finally, adding or removing parts of a song can help refine its arrangement. For example, you can remove a section that sounds repetitive or unnecessary. Likewise, you can add an instrumental part or vocal harmony to make the song more interesting. When you add or remove parts, ensure that they fit seamlessly into the arrangement and do not disrupt the song’s flow.

Conclusion

Refining the arrangement of a song is a critical process that can make it stand out from the rest. By listening to the recording, adjusting the tempo and dynamics, using fills and transitions, and adding or removing parts, you can create a coherent and engaging track that captures the listener’s interest.

How To Arrange A Song

Credit: www.supremetracks.com

Frequently Asked Questions Of How To Arrange A Song

How Should Songs Be Arranged?

Songs should be arranged in a way that keeps the listener engaged and interested. The typical arrangement includes an introduction, verse, chorus, verse, chorus, bridge, and chorus. It’s important to consider the pacing and flow of the song, as well as the placement of instrumental solos or dynamic shifts.

The goal is to create a cohesive listening experience that tells a story or conveys a mood.

How Do You Legally Arrange A Song?

To legally arrange a song, you must obtain permission from the song’s copyright holder. This can be done by contacting the publisher or performing rights organization. You may also need to negotiate compensation and credit for your arrangement. It is important to ensure that all necessary legal requirements are met before recording or performing the arrangement.

How Do I Rearrange An Existing Song?

To rearrange an existing song, start by identifying the elements you want to change, such as the order of verses or choruses. Then, experiment with different arrangements until you find one you like. Consider adding or removing instrumentation or changing the tempo to further modify the song’s structure.

Practice playing the new arrangement to ensure it works well.

What Is The Basic Arrangement Of A Song?

The basic arrangement of a song typically consists of an intro, verses, a chorus, a bridge, and an outro. The verses and chorus typically repeat throughout the song and the bridge provides a contrast to the other sections. The intro and outro are typically shorter and serve to introduce and conclude the song.

Conclusion

Arranging a song is a complex and rewarding process that involves creativity, skill, and attention to detail. Understanding the core elements of melody, harmony, rhythm, and structure is crucial for arranging a song that captivates the listener. By following the guidelines outlined in this blog post, you can improve your song arranging skills and take your music to the next level.

With practice and a willingness to experiment, you can create music that resonates with your audience and stands the test of time. Happy arranging!

Categories
Archive

Enhancing The Snare

To enhance the snare, adjust the head tension and experiment with different types of drumheads. Additionally, consider incorporating dampening techniques to achieve the desired sound.

The snare drum is an essential component of a drum set, commonly used in most genres of music. It provides the backbone of the rhythm and helps to create a unique sound. To make the most out of the snare drum, drummers need to know how to enhance its sound.

We will discuss some tips on how to enhance the snare drum’s sound. We will explore different techniques of adjusting head tension, types of drum heads, and dampening techniques drummers can use to achieve their desired sound. By implementing these techniques, drummers can make their snare drum sound better and stand out in their performances.

The Anatomy Of The Snare

Enhancing the snare drum involves understanding the intricate anatomy of the instrument. From the type of snare wires used to the material of the drumhead, every component affects the sound produced. Paying attention to these details can elevate the overall quality of the snare’s sound.

The snare drum is an essential percussion instrument in any drum set. It plays a crucial role in creating the rhythm and tempo of a musical piece. To enhance the sound of a snare drum, it is essential to understand its structure and components. The anatomy of the snare drum consists of various elements that work together to produce a distinctive sound. In this blog post, we will be discussing the materials used in snare drum construction and the components of the snare drum that contribute to its unique sound.

Materials Used In Snare Drum Construction

The materials used in snare drum construction plays a significant role in determining its tone and durability. Drum manufacturers use a wide range of materials to build snare drums, including:

MaterialProsCons
WoodDurable, Warm soundExpensive, susceptible to humidity and temperature changes
SteelLoud, bright sound, Affordable, High-PitchedNot durable, prone to rust and scratches
BrassWarm, rich sound, budget-friendly, durableCareful maintenance needed, heavy and difficult to handle

Components Of The Snare Drum

A snare drum generally consists of the following components:

  • Drumhead – The drumhead is the top part of the snare drum, responsible for producing the sound. Drumheads can be made from various materials, including polyester, Mylar, or animal skin.
  • Shell – The shell is the body of the snare drum, and it’s responsible for reflecting and amplifying sound. Manufacturers can use wood, steel, brass to make snare drum shells.
  • Snare Wires – Snare wires sit on the bottom head of the drum and create the signature “crackling” sound that defines the snare drum.
  • Lugs – Lugs are the small metal pieces that connect the tension rods to the shell.
  • Tension Rods – Tension rods are the screws that secure the drumhead to the shell and are used to adjust the drum’s tuning.
  • Strainer – The strainer is a mechanism that controls the tension and release of the snare wires.
  • Butt Plate – The butt plate is the metal piece that secures the other end of the snare wires.

In conclusion, understanding the anatomy of the snare drum is essential to enhance its sound. The materials used in snare drum construction and its various components significantly impact the snare drum’s tone and durability. By taking care of these components, drummers can ensure that they get the best possible sound out of their snare drums.

Enhancing The Snare

Credit: drumcenternh.com

Common Challenges With Snare Drum Sound

Enhancing the sound of the snare drum can be challenging due to common issues such as tuning, dampening, and resonance. Achieving the desired tone and projection requires careful adjustment and experimentation with different techniques and tools.

Snare drum is a crucial part of a drum set, and any issue with its sound can adversely affect the entire music composition. There are several common challenges associated with the snare drum sound, which can be frustrating. As a drummer, you may face problems like unwanted overtones and ringing, inconsistent or weak snare response, and difficulty in achieving the desired sound.

Unwanted Overtones And Ringing

One of the most common challenges in enhancing the snare drum is dealing with unwanted overtones and ringing. The ringing sound can occur if the snare wires are loose, the tension rods are not tightened correctly, or if the snare head is not seated correctly on the drum. Overtones can also be a problem if the snare drumhead is too old and worn out or if the snare wires are damaged. To overcome these issues, you can try the following:

  • Replace the drumhead
  • Check the snare wires and tighten them
  • Ensure that all bolts and nuts are secured tightly
  • Use dampening techniques for controlling overtones

Inconsistent Or Weak Snare Response

Another issue faced by drummers is the inconsistent or weak snare response that can hinder the overall drum sound. The snare might produce an uneven response or sound weak, which typically happens if the snare wires are too loose, the drumhead is too thick, or the snare is not correctly positioned on the stand. Here’s how to deal with this problem:

  1. Adjust the tension of the snare wires to ensure they are not too tight or too loose.
  2. Check the snare’s position and adjust it to get the desired sound.
  3. Try different snare drumheads for varying response levels.
  4. Use a different snare drum when necessary.

Difficulty Achieving Desired Sound

Many drummers face the challenge of achieving the desired sound they have been looking for from their snare drum. It can be a daunting task to find the exact sound you are looking for, and numerous factors can influence the output. Some common reasons behind difficulty in achieving the desired sound are improper tuning, wrong drumhead selection, and lack of understanding of drum-shell construction. Here is what you can do:

  • Research drum shell materials and choose the one that suits you.
  • Experiment with different drumhead types and brands to achieve the desired sound.
  • Use digital drum tuners to ensure proper tuning.

In conclusion, you must have a clear understanding of the common challenges faced while enhancing snare drum sound and how to overcome them. By applying the right technique and approaches mentioned above, you can achieve the desired sound and take your music composition to the next level.

Muffling Techniques For Better Snare Sound

A snare drum’s sound is the heartbeat of any drum kit. It serves the purpose of providing the crucial rhythm that underlies practically all music. However, an unbalanced or poorly executed snare drum sound can ruin a song. Therefore, it’s important to learn how to enhance the snare through muffling and dampening techniques.

Adding Dampening Gel Or Tape To The Drum Head

The simplest method of muffling a snare drum is by applying a dampening gel or tape to the drumhead. The gel or tape reduces the ringing overtones and undesirable resonances in the drum.

  • Apply gel: Gently apply the gel to the drumhead using your finger. Adjust the amount until you achieve your desired sound.
  • Apply tape: Cut a small piece of gaffer’s tape or duct tape and attach it to the drumhead one inch from the edge. Adjust the amount and placement of the tape for optimal results.

Using A Snare Drum Mute

A snare drum mute is a dampening device that sits on top of the drumhead to mute the sound. It is a quick and easy way to lower the volume of your snare drum.

  • Place the snare drum mute: Place the snare drum mute on top of the drumhead. Adjust the mute for the desired sound and volume.
  • Remove the snare wires: Removing the snare wires from the drum can also contribute to the effect of a snare drum mute.

Utilizing External Dampening Devices

External dampening devices are used to decrease the volume of drums and adjust the tone to suit your playing style. They come in various forms and materials, such as drum rings, drum dots, and O-rings.

External Dampening DevicesUse
Drum RingsMuffles drumhead while maintaining a natural drum sound
Drum DotsReduces unwanted overtones and side stick sounds
O-ringsAdjusts the tone of the drum and reduces decay time

With these muffling techniques, you can now achieve a better snare sound. Experiment with different techniques and combinations to find the best sound suitable for your playing style and genre of music.

Adjusting Snare Wires For Optimal Sound

Achieving the optimal sound of the snare drum is crucial for any drummer. One of the ways to enhance the snare’s sound is by adjusting the snare wires. Fine-tuning the tension and position of the snare wires can help produce a fuller, crisper, and more resonant sound.

Adjusting the snare wires is a crucial element to achieving the desired sound from your snare drum. Proper adjustments can enhance the drum’s sensitivity, projection, and overall tonal quality. In this article, we’ll discuss the various techniques for tuning, experimenting with tension, and lubricating the snare wires to achieve optimal sound quality.

Tuning The Snare Wires For Optimal Response

Tuning the snare wires involves adjusting the tension of the wires to achieve the desired snare buzz. The snare wires should be tight enough to produce a crisp snare sound but not too tight that it chokes the drum. To tune the snare wires, start by loosening the tension rods that secure the snare wires to the snare drum. Then, tighten or loosen the snare wires until you achieve the desired snare buzz. Once you have found the right tone, tighten the tension rods back to secure the snare wires.

Experimenting With Snare Wire Tension

Experimenting with the snare wire tension can help you find the perfect balance between sensitivity and projection. Experimenting with high and low wire tension can help you find the sweet spot that delivers optimal sound quality. You can increase the tension of the snare wires by tightening them or decrease them by loosening them. It’s important to note that the snare wire tension also affects the tone of the snare drum, so don’t be afraid to experiment until you find the perfect balance.

Lubricating The Snare Wires

Lubricating the snare wires can significantly improve their response, making them more sensitive and reducing any unwanted rattling. To lubricate the snare wires, you can apply a thin layer of drumstick wax or oil to the wires’ surface. This will reduce any friction between the wires and the snare bed, allowing them to vibrate more freely and creating a smoother snare sound. In conclusion, adjusting the snare wires is a fundamental aspect of achieving optimal sound quality from your snare drum. Tuning the snare wires, experimenting with the tension, and lubrication are effective techniques that can help you achieve the perfect snare sound. So, don’t be afraid to experiment until you find the right combination that delivers the sound you desire.

Upgrading Snare Drum Components

Upgrading the components of your snare drum can greatly enhance its sound, making it crisper and more powerful. From changing the snare wires to upgrading the drumhead, there are several options available to enhance the snare’s performance.

When it comes to creating a solid drum sound, there is perhaps no more important drum than the snare. This drum creates the backbone of most beats and gives them their drive and punch. However, not all snare drums are created equal. Fortunately, there are ways to upgrade and enhance the sound of your snare drum, most of which involve upgrading its components. In this post, we’ll explore four ways to enhance your snare drum, starting with replacing the snare drum heads.

Replacing Snare Drum Heads

A common starting point when upgrading snare drum components is replacing the snare drum heads. The drum head is the part of your snare drum that resonates and creates the actual drum sound, so it’s important to make sure that you have high-quality drum heads. When choosing a snare drum head, you’ll want to consider the sound you’re after. Do you want a bright and highly responsive sound, or a rich and deep tone? Once you have a clear goal in mind, consider exploring options such as coated, clear, or hybrid drum heads, which offer a range of tones and sounds.

Upgrading Snare Wires

Another important part of your snare drum is the snare wires themselves. These thin metal wires rest against the bottom head of the snare drum and vibrate when the drum is struck, creating the characteristic snare sound. Upgrading your snare wires can dramatically alter the sound of your snare drum, and offer new and exciting tonal possibilities. Snare wires come in a variety of materials, thicknesses, and numbers of strands.

Swapping Out Snare Strainers And Butt Plates

The snare strainer, or throw-off, is the mechanism that allows you to disengage or engage the snare wires. It’s an often-overlooked component of the snare drum, but it’s an important one. By swapping out your snare strainer and butt plate, you can change the tension of your snare wires and the way they interact with the drum heads. This can create a different snare sound, and give you added control over the dynamics and response of your drum.

Installing Aftermarket Snare Accessories

Finally, you can consider installing aftermarket snare accessories to enhance your snare sound. These can include things like tambourines, jingles, and other noise-makers that can add unique sounds and tones to your snare. Additionally, there are a wide variety of snare drum dampeners, tone controls, and even wireless triggers that can affect the sound of your snare.

Enhancing the Snare – SubheadingsHTML Syntax
Upgrading Snare Drum Components
Replacing Snare Drum Heads
Upgrading Snare Wires
Swapping Out Snare Strainers and Butt Plates
Installing Aftermarket Snare Accessories
Enhancing The Snare

Credit: www.amazon.com

The Impact Of Snare Drumsticks And Playing Techniques

Playing the snare drum involves not only the type of drumstick used but also the playing technique. A drummer can enhance the snare’s sound by adjusting the stick angle, stroke, and rebound. By experimenting with different sticks and techniques, a drummer can create a unique and distinctive sound.

Playing the snare drum requires more than just technical proficiency. Snare drumsticks and playing techniques have a significant impact on the sound and feel of the drum. A good drummer knows the importance of selecting the right snare drumsticks and incorporating different drumming techniques to achieve the desired sound. In this post, we delve into these crucial aspects of snare drumming, providing you with essential tips to enhance your sound experience.

Selecting The Right Snare Drumsticks

Choosing the right snare drumsticks can make a notable difference in the sound experience for the drummer and the audience. The thickness, weight, and shape of drumsticks determine the volume, tone, and resonance of the snare drum. Here are some factors to keep in mind when selecting the right snare drumsticks:

  • Consider the genre of music you play, and choose a stick that is appropriate for the style
  • Check for the thickness and weight of the drumstick to know how it affects the sound
  • Choose a stick that is comfortable in your hand but doesn’t compromise the drum’s sound
  • Test out different drumsticks and find the ones that match your playing style and drum sound

Incorporating Different Drumming Techniques To Achieve Desired Sound

Apart from selecting the right snare drumsticks, drumming techniques play a massive role in the sound production of the drum. The drummer’s technique can create a broad range of sounds and tones from the snare drum. Here are some techniques to incorporate to achieve the desired sound:

TechniqueDescription
Ghost NotesSoftly played notes that add texture and complexity to the groove
RimshotsStriking the rim and drumhead at the same time for a powerful, cutting sound
Buzz RollsRapidly striking the snare drum to create a vibrating sound
FlamSimultaneously hitting the drum and stick against each other for a distinct sound

In summary, selecting the right snare drumsticks and incorporating different drumming techniques can impact the snare drum’s sound quality and playing experience. As a drummer, experimenting with different sticks and techniques will help you find the perfect combination that matches your playing style and the genre of music you play.

Tips For Recording And Amplifying Your Snare Drum

Recording and amplifying your snare drum can enhance its sound quality. Use dynamic microphones and experiment with mic positioning to find the sweet spot. Eq the recorded sound by boosting frequencies, and increase the snare drum’s attack with compression.

If you’re a drummer, then you know how crucial the snare drum is to the overall sound of a song. It’s the foundation of the beat and adds character to every performance. Therefore, it’s essential to have a well-recorded and amplified snare sound. Here are some tips on how to record and amplify your snare drum to enhance its sound.

Selecting The Right Microphones And Placement For Snare Recording

When it comes to recording a snare, it’s important to select the right microphone and place it correctly. There are three commonly used microphone types – dynamic, condenser, and ribbon. Dynamic microphones are excellent for capturing the attack of the snare, while condenser mics capture the details and nuances of the snare sound. Ribbon mics are great for adding warmth to the recording. It’s also important to consider the placement of the microphone. Placing the microphone close to the head of the snare will capture more attack and punch, while placing it further away will capture more of the room sound. To capture a more natural sound, try using two microphones – one close to the head of the snare and another one overhead.

Using Eq And Compression To Enhance Snare Sound

EQ and compression are crucial tools in enhancing the sound of the snare. EQ can remove unwanted frequencies and boost the desired ones, resulting in a cleaner and more defined sound. Boosting frequencies around 200 Hz will add warmth while boosting around 6 kHz will bring out the snare’s snap. Compression, on the other hand, controls the dynamic range of the snare, resulting in a more balanced sound. Apply a moderate amount of compression with a fast attack and release time to capture the initial attack of the snare without squashing the sustain.

Exploring Different Amplification Techniques For Live Performance

Amplification of the snare drum is crucial in a live performance situation. There are various techniques to achieve the desired sound. One technique is to use a microphone to amplify the sound of the snare. Another technique is to use a trigger that can be placed on the snare to trigger an electronic sound module. This technique is commonly used in genres like metal and electronic music. It’s also essential to balance the sound of the snare with the rest of the drum kit. Use a mixer to EQ, compress, and balance the different elements of the kit. In Conclusion, recording and amplifying the snare drum requires a combination of technical knowledge and artistic sensibility. Proper microphone selection and placement, along with EQ and compression, can help create a distinctive and professional snare sound. Experiment with different recording and amplification techniques to find what works best for your snare sound.

Enhancing The Snare

Credit: m.youtube.com

Frequently Asked Questions On Enhancing The Snare

How Can I Improve My Snare?

To improve your snare, you can start by experimenting with your drumhead tension and snare wire tension. You can also experiment with different drumsticks and drumheads. Try dampening your snare drum with gels or cloth to reduce overtones. Finally, learning proper snare drumming techniques can also improve your snare sound.

How Do You Boost A Snare?

To boost a snare, try the following techniques: 1. Experiment with different types of drumheads 2. Adjust the tension of the snare wires 3. Experiment with different snare wire types 4. Use a snare drum EQ plug-in or a dedicated channel strip 5. Experiment with different snare drum mics and placements.

What’s The Meaning Of Snare?

A snare is a type of drum that has a set of wires or strings stretched across the bottom head that create a distinctive rattling sound. It is commonly used in various genres of music, including rock, pop, and jazz.

How Do I Make My Snare More Punchy?

To make your snare more punchy, you can try adjusting the EQ to boost the mid-range frequencies, compressing the snare to control its dynamic range, and adding some distortion to give it more edge. Experimenting with different mic placements and drum heads can also help achieve the desired sound.

Conclusion

After reading through these tips, it may feel overwhelming to enhance your snare drum sound. However, with some practice and experimentation, you can achieve the perfect tone for your style of music. Remember to focus on tuning, dampening, and finding the right snare wires.

Don’t be afraid to try new techniques and adjustments to make your snare drum truly stand out. With these tips, you’ll be well on your way to a snare sound that will captivate your audience and leave a lasting impact on your music.

Categories
Archive

Reverb Plugin Paramaters

Reverb plugin parameters control the characteristics of the reverb effect that a plugin produces. These parameters can include decay time, pre-delay, and damping, among others.

Reverb plugins are crucial tools in music production, allowing for the enhancement of spatial characteristics within audio recordings. By adding reverb effects, producers can create a sense of depth and space within tracks, from small room spaces to large concert hall reverbs.

While the specific parameters for each reverb plugin may vary, their control over decay time, pre-delay, and damping, and the ratio between early reflections and late reflections, remains constant. Additionally, some plugins may provide extra settings for frequency shaping, modulation, and stereo-image manipulation. With such advanced tools, producers can craft unique sonic environments and add a cinematic quality to music production.

Reverb Plugin Paramaters

Credit: www.joecrowtheaudiopro.com

Types Of Reverb Plugin Parameters

Reverb plugin parameters can be categorized into different types such as early reflections, decay time, diffusion, damping, pre-delay and more. Understanding each of these parameters can help improve the overall sound quality in music production or sound design.

Reverb plugins provide a range of parameters that allow you to customize the sound of your recordings. Understanding these different types of parameters can help you create the desired ambience for your mix. In this post, we will discuss the four main categories of reverb plugin parameters: Reflection, Decay, Room, and Tail. The reflection parameters of a reverb plugin control the early reflections of a sound. These parameters allow you to define how the sound bounces off the walls and objects in a virtual room. Reflection parameters include:

  • Pre-Delay: This parameter sets the time delay between the direct sound and the early reflections.
  • Early Reflections: This parameter determines the intensity and frequency content of the early reflections.
  • Diffusion: This parameter adjusts the spread of the reflections, simulating the absorption and diffusion properties of various materials in a room.

The decay parameters of a reverb plugin control the length and character of the reverb tail. These parameters determine how long the sound lasts in a virtual room and how it evolves over time. Decay parameters include:

  • Decay Time: This parameter sets the duration of the reverb tail.
  • High-Frequency Damping: This parameter attenuates high frequencies as the reverb decays, simulating the natural absorption of high-frequency sound waves by air and materials in a room.
  • Low-Frequency Cut: This parameter removes low frequencies from the reverb tail, preventing excessive rumble and muddiness in the mix.

The room parameters of a reverb plugin control the size, shape, and characteristics of the virtual room. These parameters define the tonal and spatial qualities of the reverb. Room parameters include:

  • Room Size: This parameter sets the physical dimensions of the virtual room.
  • Room Shape: This parameter determines the geometry and symmetry of the virtual room.
  • Reflectivity: This parameter sets how reflective the surfaces in the virtual room are, affecting the amount and coloration of the reverb.

The tail parameters of a reverb plugin control the late reflections and the overall decay of the reverb. These parameters allow you to adjust the subtler qualities of the reverb for a more natural and musical sound. Tail parameters include:

  • Bass Multiplier: This parameter boosts or cuts the low-frequency content of the reverb tail, enhancing or reducing its presence and impact.
  • Early/Late Mix: This parameter adjusts the balance between the early and late reflections of the reverb, affecting the perceived distance and size of the virtual room.

Overall, reverb plugin parameters are powerful tools that can help you enhance the space and depth of your audio recordings. By experimenting with different settings and combinations, you can create unique and compelling soundscapes that capture the mood and emotion of your music.

Reverb Plugin Paramaters

Credit: www.mixinglessons.com

Reflection Parameters

Reflection parameters in reverb plugins control the characteristics of the sound being reflected off various surfaces. They include parameters such as decay time and pre-delay time, which determine the length of time it takes for the reflected sound to fade out and how quickly the reflections start after the initial sound.

The Reflection Parameters are an essential component of any reverb plugin. These parameters determine the sound of a virtual space, simulating the different characteristics of a room in a track. The Reflection Parameters include Early Reflections, Diffusion, Damping, and Spread. Today, we will deep dive into these parameters, dissecting each one to explore how they affect the overall sound.

Early Reflections

The Early Reflections parameter determines how quickly the sound waves reflect off the walls and surfaces of a virtual space. Adjusting this parameter can help create different feelings of space, such as a small room or a concert hall. By increasing these reflections, you can create a more apparent sense of space, whereas lowering this parameter can simulate a dry environment.

Diffusion

The Diffusion parameter affects how reflective surfaces of a virtual space are. By adding more diffusion, high frequencies of the sound wave will be scattered more, reducing the ‘brightness’ and giving the impression of a more “diffuse” space. However, too much diffusion can lead to a loss of clarity.

Damping

Damping is an essential parameter to adjust to produce a natural sound. This parameter modifies the decay time of all frequencies. By reducing the damping, you can achieve a spacier, more open sound, while increasing damping can make the sound tighter. It’s also crucial for removing any room resonances that could lead to unpleasant ringing and overtones.

Spread

Finally, the Spread parameter affects the stereo width of the reverb. Increasing the spread parameter widens the stereo imaging, leading to a more immersive and expansive soundscape. However, this could result in unwanted phasing and comb-filtering, making it important to be used in moderation. In conclusion, reflection parameters play a vital part in producing a natural-sounding virtual space. Careful and creative adjustment of these parameters can help create a perfect acoustic environment for your mix, whether it be a small, intimate room or a vast, majestic cathedral.

Decay Parameters

The Decay Parameters of reverb plugins are essential for shaping the sound and creating an immersive feel to the music. The Decay Parameters control how the sound fades away after the initial reflection, making it sound more realistic and natural. In this article, we will explore the different aspects of the Decay Parameters, such as Reverb Time, High-Frequency Decay, and Low-Frequency Decay.

Reverb Time

Reverb Time controls how long it takes for the sound to decay to a certain volume level after the initial reflection. A lower setting would make the sound decay faster, while a higher setting would make the sound decay slower, hence giving more space and depth to the music. This parameter is vital when you want to achieve a particular ambiance for your mix. For instance, a longer Reverb Time would work well when mixing orchestral music or ballads.

High-frequency Decay

High-Frequency Decay influences how the high-frequency sounds decay after the initial reflection. A higher setting would make the high-frequency sound decay slower than the low-frequency sound, creating a natural balance in the mix, or even emphasizing the highs. If the High-Frequency Decay is too low, it may create a dull or muddy sound. On the other hand, too much emphasis on the highs can make the reverb sound sharp and unnatural.

Low-frequency Decay

Low-Frequency Decay controls how the low-frequency sounds decay after the initial reflection. This parameter can add warmth or muddiness to the sound, depending on the setting. A higher value would make the low-frequency sound last longer, creating a warmer and more natural sound. A lower value will result in a shorter decay time, giving the mix more clarity. The Low-Frequency Decay is crucial when mixing low-frequency instruments like bass or kick drums.

In conclusion, the Decay Parameters are crucial and versatile tools, which allow you to shape the sound of your mix. Finding the right balance can transform a dull mix into an immersive and realistic soundscape. Moreover, understanding the Decay Parameters allows you to make informed decisions while mixing and creating your own unique sound.

Reverb Plugin Paramaters

Credit: www.mixinglessons.com

Room Parameters

Room parameters play a crucial role when it comes to reverb plugins. These parameters include room size, diffusion, and damping, which are used to create the desired reverb effect in a virtual space.

When it comes to producing high-quality audio, it’s essential to get the room parameters right. Reverb plugins come with various room parameters that allow for customization of the room’s acoustics. Among these parameters, the Room Size, Absorption, Predelay, and Early Reflection Level, are crucial for achieving a perfect acoustic environment.

Room Size

The size of a particular virtual room can be set using the Room Size parameter. Smaller rooms will generally produce a more closed, intimate feel, while larger rooms will increase the sense of space. With a reverb plugin, you can set the desired room size to match your desired effect.

Absorption

Absorption settings affect the amount of reverb that reflects off surfaces. The higher the absorption setting, the fewer reflections occur, and the dry the sound will be. Lowering the absorption setting results in more reflections and can create a natural, lively sound.

Predelay

Predelay is an essential parameter that determines the length of time between the audio’s source and the first reflection. A longer predelay setting gives time for the direct sound to be heard before the reflections, and this can create a sense of distance – such as in a big hall. A shorter predelay will give a sound that feels closer as the reflections come sooner.

Early Reflection Level

The Early Reflection Level parameter controls the level of the initial reflections. The initial reflections occur when the sound reflects off the surfaces before it starts echoing inside the room, and these can significantly impact the sound’s timbre and spatial perception. Adjusting the early reflection level can result in more or less spacious audio, depending on the desired effect. In conclusion, room parameters are an essential part of any reverb plugin. Customizing the size of the virtual room, setting the absorption levels, adjusting the predelay and early reflection level can all create a unique acoustic environment and help achieve the desired sound. By optimizing these parameters, audio engineers and producers can create dynamic and professional recordings that stand out among the rest.

Tail Parameters

Tail parameters are a vital part of reverb plugin parameters that determine the length of the reverb tail. They control how long it takes for the sound to decay, and how much of it you can hear in a given amount of time.

By adjusting the tail parameters, you can sculpt the desired amount of reverb in your mix.

If you’re a music producer or audio engineer, then you already know how important it is to add some reverb to get that natural sound. And when it comes to reverb plugins, tail parameters are among the most important ones to consider.

Tail Level

Tail level refers to the amount of reverb that’s added to the end of your sound. This parameter is usually measured in decibels and can be adjusted according to your preferences. Be careful not to overdo this parameter, though, since too much can make your sound muddy and unclear.

Tail Eq

Tail EQ is another important parameter to consider when adjusting your reverb plugin. This parameter affects the frequency response of your reverb tail, allowing you to boost or cut certain frequencies to get the desired sound. By tweaking the tail EQ settings, you can add warmth, depth, and clarity to your reverbs.

Tail Delay

The tail delay parameter is measured in milliseconds and is used to determine how long the reverb lingers after the original sound has stopped. It is an essential parameter to consider when adjusting your reverb tail settings. You can use this parameter to create anything from short, subtle reverbs to long, ambient reverbs that make your sound more ethereal. In conclusion, the tail parameters of a reverb plugin are crucial in creating a natural-sounding reverb. Tail level, tail EQ, and tail delay are the three main parameters that you should pay attention to when trying to get that perfect sound. By adjusting these parameters, you can add warmth, depth, and clarity to your sound and create a unique and natural-sounding reverb.

Frequently Asked Questions Of Reverb Plugin Paramaters

What Are The Basic Parameters Of A Reverb?

The basic parameters of a reverb are the amount of time it takes for the sound to decay, how much high-frequency damping it has, the amount of pre-delay before the reverb starts, and the size of the simulated space. Additionally, some reverbs also have EQ controls to shape the reverb’s frequency response.

What Are Good Reverb Settings?

Good reverb settings depend on the type of audio you’re working with and the desired effect. Generally, using a short decay time with low wet/dry mix is suitable for vocals and lead instruments. For drums, a longer decay time with higher wet/dry mix works well.

Experiment with reverb pre-delay, EQ, and other effects to find the perfect settings for your mix.

What Is The Best Frequency For Reverb?

The best frequency for reverb depends on the audio source and the desired effect. Generally, lower frequencies work well for larger spaces like concert halls, while higher frequencies work better for smaller rooms. Experimentation is key to finding the perfect frequency for your specific situation.

What Is The Purpose Of The Dampening Parameter In This Reverb Plugin?

The dampening parameter in this reverb plugin is used to control the high-frequency content present in the reverb tail. It can help to create a warmer or brighter sound, depending on how it’s adjusted.

Conclusion

To wrap it up, the reverb plugin is a game-changer in the music industry. With its versatile and easy-to-use parameters, it gives sound engineers and music producers the freedom to experiment with various sound effects. From halls to chambers and beyond, the plugin’s ability to customize and manipulate sounds gives birth to various genres and tracks.

It’s safe to say that the reverb plugin is an essential tool in music production, and its importance cannot be understated. So why wait? Dive right in and explore the endless possibilities that the reverb plugin has to offer!