Categories
Archive

What Is Mastering A Song: The Ultimate Guide to Perfect Sound

Mastering a song is the final stage in audio production, where the audio is fine-tuned for distribution, ensuring consistency and clarity. When musicians and producers finish recording and mixing a song, the next step is mastering.


During mastering, an experienced engineer uses specialized tools to enhance the overall sound quality, optimize levels, improve clarity, and ensure the song sounds great on all devices. Mastering involves adjusting the tonal balance, maximizing loudness, and ensuring a cohesive sound across all tracks on an album.


It is a crucial process that can elevate a song to a professional level and make it ready for release to the public. Mastering can make a significant impact on how a song is perceived by listeners, making it an essential step in the music production process.

What Is Mastering A Song: The Ultimate Guide to Perfect Sound


Credit: www.amazon.com


The Art Of Mastering

Before delving into the technical nuances, mastering a song is truly an art form. It involves the delicate balance of enhancing the sound quality while preserving the artist’s vision. Mastering is that final polishing touch that can make a song come to life and shine.

The Importance Of Mastering

Mastering holds immense importance in the music production process. It ensures consistency in sound across an entire album, making sure each song blends seamlessly. A well-mastered song can stand out among the competition and sound professional.

What Is Audio Mastering?

Audio mastering is the final step in the music production journey. It involves adjusting and optimizing the audio elements of a song to achieve a balanced and cohesive sound. It enhances clarity, depth, and overall quality, making the song sound its best across different listening devices.

The Mastering Engineer’s Role


The role of a mastering engineer is crucial in enhancing the final sound quality of a song. Mastering a song involves refining the overall sound, adjusting levels, adding final touches, and ensuring consistency across the entire album. This process is essential for ensuring that the song sounds the best it possibly can across all devices and platforms.

Understanding Signal Processing

The mastering engineer’s role involves understanding crucial signal processing techniques.

  • Enhancing dynamics and clarity
  • Applying EQ adjustments
  • Utilizing compression effectively

Balancing The Mix

The mastering engineer focuses on balancing the mix to ensure all elements are cohesive.

  1. Adjusting volume levels
  2. Ensuring consistent tonal balance
  3. Creating a uniform sound across tracks

Tools And Techniques

`Mastering a song involves several essential tools and techniques to achieve the best possible audio quality before releasing it to the world. Understanding the intricacies of mastering not only requires a keen ear but also an adept understanding of the tools and techniques used in the process.

`equalization And Compression`

`Equalization and compression are indispensable tools in the mastering process. ``Equalization`` involves adjusting the balance of frequencies within a song to ensure a more pleasing and coherent sound. This can be achieved by boosting or cutting specific frequencies, bringing out the best in each element of the track.`

`On the other hand, ``compression`` helps in controlling the dynamic range of the audio, effectively balancing the loud and soft parts. This ensures that the audio maintains consistency and clarity, enhancing the overall listening experience.

`stereo Widening And Limiting`

`Stereo widening and limiting are crucial techniques often employed in the mastering process. ``Stereo widening`` adds depth and dimension to the audio, creating a broader and more immersive soundstage. This technique can make the song more captivating and engaging for the listener.`

`Additionally, ``limiting`` is used to control the peaks of the audio signal, preventing it from surpassing a certain level. This ensures that the audio maintains a consistent volume without clipping, allowing it to sound powerful and polished across different playback systems.

What Is Mastering A Song: The Ultimate Guide to Perfect Sound


Credit: www.avid.com


The Creative Aspect

Mastering a song is not just about technical adjustments; it also involves a creative aspect that takes the music to the next level. With this essential step in the music production process, audio engineers have the opportunity to add depth and dimension to the mix, enhancing clarity and loudness. Let’s explore how mastering brings out the artistic essence of a song.

Adding Depth And Dimension

When it comes to adding depth and dimension during the mastering process, audio engineers utilize various techniques to bring out the full potential of a song. Through careful shaping of the frequency spectrum, subtle nuances and hidden elements are revealed, allowing the song to breathe and come alive.

By enhancing the stereo field, the song gains width and space, immersing the listener in a rich sonic experience. This is achieved by applying stereo widening techniques, panning elements strategically, and using stereo reverb to create a sense of depth.

In addition, vocal harmonies and instrumental layers are given a chance to shine through meticulous equalization, compression, and saturation, ensuring that each element is balanced and contributes to the overall sonic tapestry. This careful attention to detail brings out the full emotional impact of the song.

Enhancing Clarity And Loudness

A crucial aspect of mastering is enhancing the clarity and loudness of a song. By skillfully applying dynamics processing techniques, audio engineers ensure that every instrument and vocal stands out and can be heard with maximum clarity. This is achieved through precise equalization and compression that shapes the frequencies and controls the dynamics.

Moreover, limiting and peak control are employed to raise the overall volume of the track without sacrificing the dynamics and clarity. This brings the song to a competitive level, matching the industry standards and ensuring it can be enjoyed on various platforms and playback systems.

Through the creative use of automation, audio engineers can also accentuate certain song sections, such as the chorus or instrumental solos, adding energy and impact to the overall composition. This dynamic control adds excitement and engages the listener throughout the song.


Mastering In The Digital Age


Mastering a song in the digital age involves enhancing its audio quality for a polished and professional sound. This process refines the overall balance, clarity, and dynamics of a track to ensure it meets industry standards and sounds its best across various platforms.

The Impact Of Streaming Platforms

In the digital age, the rise of music streaming platforms has revolutionized the way we consume music. With millions of songs available at our fingertips, it’s crucial for artists and producers to understand how mastering plays a role in the success of their music on these platforms. Streaming platforms like Spotify, Apple Music, and YouTube Music have specific loudness normalization algorithms in place to create a consistent playback experience for listeners. This means that if your song is too quiet or too loud compared to other songs in a playlist or album, it may be automatically adjusted to match the desired loudness level.

Mastering For Different Formats

When it comes to mastering a song for streaming platforms, it’s important to consider the various formats in which your music will be delivered. Each format, whether it’s a high-quality FLAC file or a compressed MP3, comes with its own set of characteristics and limitations. For example, a song that sounds great on a high-end pair of studio monitors might lose its impact when played through earbuds or car speakers. Mastering engineers take this into account and optimize the audio accordingly, making sure that the song translates well across different playback systems. Additionally, mastering for different formats involves tailoring the dynamics and frequency balance to suit the characteristics of each format. For instance, a CD might have more headroom and dynamic range compared to a digital streaming format, where loudness is often prioritized.

Examples Of Mastering Techniques

Mastering engineers use a range of techniques to enhance the overall sound of a song, ensuring it is optimized for streaming platforms and various formats. Some of these techniques include:

  • Equalization (EQ): Adjusting the frequency spectrum to enhance clarity and balance
  • Compression: Controlling the dynamic range of a song to ensure consistent volume levels
  • Stereo Widening: Expanding the stereo image to create a wider soundstage
  • Loudness Maximization: Enhancing the perceived loudness of the song without sacrificing dynamic range
  • Mastering Limiting: Preventing the audio from clipping or distorting during playback

By utilizing these mastering techniques, engineers can transform your mix into a polished, professional sounding track that will captivate listeners on streaming platforms.

Conclusion

In conclusion, mastering in the digital age is crucial for artists and producers to ensure their music stands out on streaming platforms. Understanding the impact of these platforms, mastering for different formats, and utilizing various techniques can greatly enhance the sonic quality of your music and help it reach a wider audience. So, whether you’re an emerging artist or an established musician, investing in professional mastering services is an essential step in delivering your music at its best.
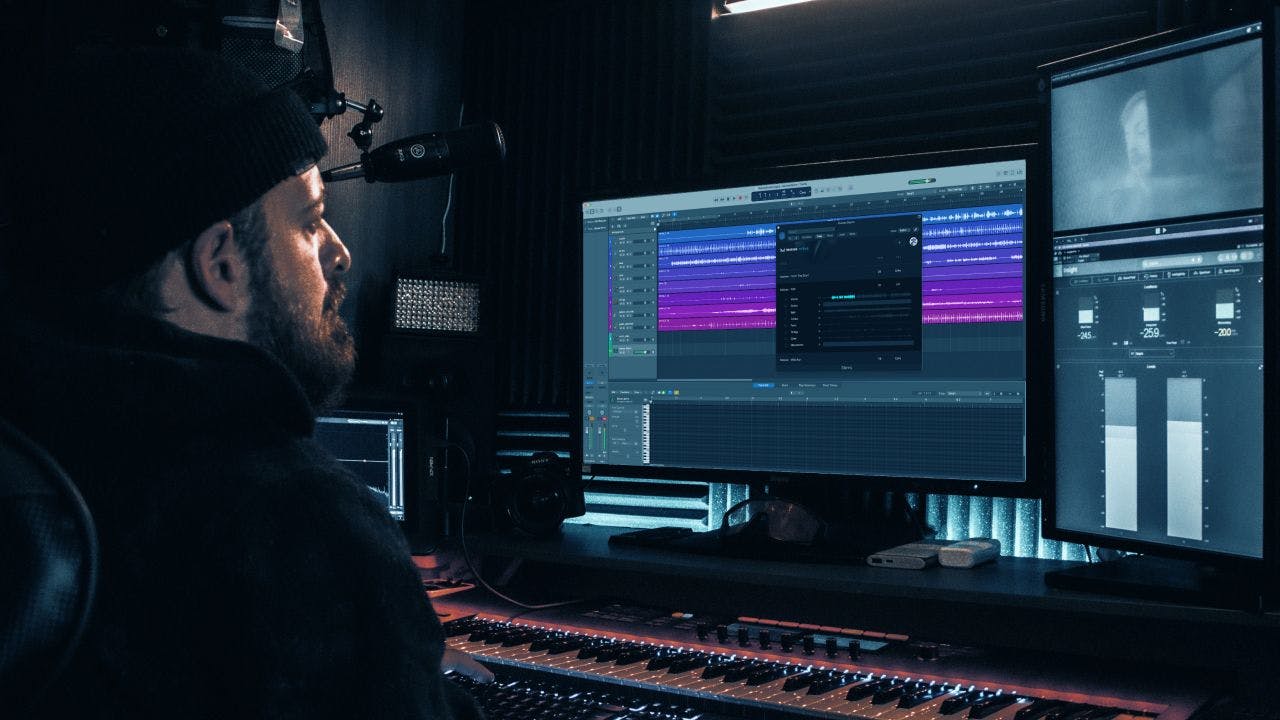
What Is Mastering A Song: The Ultimate Guide to Perfect Sound


Credit: moises.ai


Frequently Asked Questions Of What Is Mastering A Song


What Is Mastering A Song And Why Is It Important?


Mastering a song is the final step in the music production process. It ensures that the overall sound is polished, balanced, and consistent across all playback systems. Mastering enhances the sonic qualities of the track, making it sound professional and ready for distribution.


What Does A Mastering Engineer Do?


A mastering engineer is responsible for enhancing the audio quality of a song. They use various techniques like EQ, compression, and stereo imaging to improve the overall sound. The engineer also ensures that the song meets the technical requirements for different platforms and formats.


How Long Does It Take To Master A Song?


The time required to master a song depends on various factors like the length and complexity of the track, the engineer’s workload, and the level of perfection desired. On average, it can take a few hours to a few days to complete the mastering process for a single song.


Can I Master My Own Songs?


While it is possible to master your own songs, it is generally advisable to work with a professional mastering engineer. They bring expertise, experience, and an objective perspective to ensure the best possible results. A fresh set of ears can often catch issues that an artist might miss.


Conclusion


Mastering a song is a crucial step in the music production process. It adds the final polish and ensures the track sounds its best across different audio systems. With the right mastering techniques, a song can reach its full potential and stand out in today’s competitive music industry.


Mastering truly brings out the best in a song.

Categories
Archive

Song Copyright: Protect Your Song with These Power Tips

To protect your song’s copyright, register it with the Copyright Office and keep meticulous records. Music creators must take proactive steps to safeguard their original compositions and lyrics from unauthorized use or infringement.


By understanding the essential elements of song copyright and utilizing legal protections, you can secure your intellectual property and prevent potential disputes. This guide explores effective strategies for safeguarding your music rights, including copyright registration processes, licensing agreements, and enforcement options.


Whether you’re a budding songwriter or an established musician, ensuring the protection of your songs is crucial for maintaining ownership and control over your creative works. Learn how to navigate the complex world of music copyright and safeguard your artistic creations for long-term success.


The Basics Of Song Copyright

What Is Song Copyright?

Song Copyright is the legal protection of original musical works, including lyrics, melodies, and arrangements.

Importance Of Song Copyright

Song Copyright is crucial for creators as it protects their intellectual property from unauthorized use or distribution.


Credit: www.facebook.com


Understanding Copyright Laws

Understanding Copyright Laws is crucial for songwriters to safeguard their creative work.

Key Concepts Of Copyright Law

  • Copyright protects original works of authorship.
  • It gives the owner exclusive rights to reproduce, distribute, and perform the work.
  • Registration isn’t required for copyright protection, but it offers legal benefits.

How Copyright Laws Apply To Songs

  • Songs are considered creative works that qualify for copyright protection.
  • Lyrics, melodies, and arrangements are all protectable elements in a song.
  • Ownership of a song automatically belongs to the creator upon creation.

Steps To Copyrighting Your Song

In the music industry, protecting your song through copyright is crucial in safeguarding your intellectual property. By following the steps to copyright your song, you can ensure that your work is legally protected from unauthorized use or reproduction. The process involves song creation and fixation, and registering your copyright. By understanding and implementing these steps, you can have peace of mind knowing that your song is fully protected.

Song Creation And Fixation

Song creation and fixation are essential steps in the copyrighting process. It involves expressing your song in a tangible form, such as writing down the lyrics, composing the music, or recording a demo. This fixation establishes a clear and identifiable date of creation, which is crucial when registering your copyright. Make sure to preserve all versions of your song, as these materials can serve as evidence of the original creation.

Registering Your Copyright

  1. Visit the official website of the copyright office.
  2. Complete the copyright registration application.
  3. Submit the required deposit materials, such as the lyrics and music score.
  4. Pay the applicable fee for the registration process.
  5. Wait for the copyright office to process and approve your registration.

Once your song is registered, it is officially recognized as a copyrighted work, providing you with legal protection and the ability to enforce your rights if infringement occurs.


Credit: m.facebook.com


Defending Your Song Copyright

Protecting your song copyright is crucial in the music industry. With the rise of digital media and the ease of sharing content online, it has become increasingly important to take steps to defend your intellectual property. In this blog post, we will explore how you can identify copyright infringement and what legal actions you can take to protect your song.

Identifying Copyright Infringement

Identifying copyright infringement is an essential step in defending your song. There are several ways to spot potential misuse of your work:

  • Perform regular online searches using your song title or lyrics to check for unauthorized use.
  • Monitor music streaming platforms and video-sharing sites for any unauthorized uploads of your song.
  • Keep an eye on social media platforms, blogs, and websites where your song might be shared without your permission.
  • Consider using digital content identification services that can detect unauthorized use of your song across various platforms.

Taking Legal Action

If you find evidence of copyright infringement, it is important to take prompt legal action to protect your rights. Here are some steps you can take:

  1. Gather evidence: Document all instances of infringement, including dates, locations, and supporting material.
  2. Consult a lawyer: Seek legal advice from a qualified intellectual property attorney to understand your options.
  3. Send a cease and desist letter: Notify the infringing party in writing to stop using your song without authorization.
  4. File a DMCA takedown notice: If the infringement occurs online, you can request the removal of the unauthorized content under the Digital Millennium Copyright Act.
  5. Consider filing a lawsuit: If the infringement persists and significant damages have been incurred, pursuing legal action may be necessary to protect your song.

Defending your song copyright requires vigilance and proactive measures. By identifying potential infringement and taking appropriate legal action, you can safeguard your intellectual property and ensure that you receive the recognition and compensation your song deserves.


Maximizing Song Copyright Protection

Songwriters invest their time, talent, and emotions into creating original music. It is crucial for them to understand the importance of protecting their song copyright. Maximizing song copyright protection ensures that songwriters have control over the use and distribution of their music, while also providing them with the opportunity to earn royalties. In this article, we will discuss two essential steps that songwriters can take to maximize their song copyright protection: Licensing Your Song and Monitoring and Enforcing Your Rights.

Licensing Your Song

The first step in maximizing song copyright protection is licensing your song. Licensing allows you to authorize others to use your music in exchange for a fee or royalty. By licensing your song, you retain control over how and where your music is used, ensuring that you are appropriately compensated for your work.

There are various types of licenses you can consider:

  • Sync License: This type of license allows your music to be paired with visual media, such as films, TV shows, or advertisements.
  • Mechanical License: This license allows others to reproduce and distribute your music in the form of CDs, digital downloads, or streaming.
  • Performance License: This license is necessary if your music will be performed live or broadcast on radio, television, or online platforms.

By understanding the different licensing options available, songwriters can ensure that their music is used legally and that they receive the appropriate compensation for their creative work.

Monitoring And Enforcing Your Rights

Another crucial step in maximizing song copyright protection is actively monitoring and enforcing your rights as a songwriter. It is vital to keep an eye on how your music is being used to prevent unauthorized use or infringement.

To effectively monitor and enforce your rights, consider the following actions:

  1. Register your copyright: Registering your song with the appropriate copyright office provides legal evidence of your ownership and makes it easier to take legal action in case of infringement.
  2. Regularly search for unauthorized use: Utilize online platforms and music streaming services to search for instances where your music may be used without permission.
  3. Issue cease and desist letters: If you discover unauthorized use, promptly send a cease and desist letter to the infringer, requesting them to stop using your music immediately.
  4. Consult a lawyer: In case of persistent infringement or complex legal issues, seek advice from an experienced copyright lawyer who can guide you through the legal process.

By actively monitoring and enforcing your rights, you can protect your music and ensure that you are properly credited and compensated for your creative work.

In conclusion, maximizing song copyright protection requires proactive steps such as licensing your song and monitoring and enforcing your rights as a songwriter. By understanding the importance of these steps and taking appropriate actions, songwriters can safeguard their creative work, maintain control over its use, and earn the recognition and compensation they deserve.

Song Copyright: Protect Your Song with These Power Tips


Credit: www.legalzoom.com


Frequently Asked Questions Of Song Copyright How To Protect Your Song


How Can I Protect My Song From Copyright Infringement?


To protect your song, you can register it with the U. S. Copyright Office. This will provide legal evidence of ownership and give you the ability to take legal action if someone infringes upon your copyright.


What Is The Process Of Song Copyright Registration?


To register a song for copyright, you need to complete an application form, provide a copy of the song, and pay the registration fee. Once the Copyright Office reviews and approves your application, you will receive a certificate of registration.


What Rights Does A Copyright Give Me As A Songwriter?


As a songwriter, copyright gives you exclusive rights to reproduce, distribute, perform, display, and create derivative works based on your song. You have the power to control how your music is used and license it to others for a fee.


Can I Copyright Just The Lyrics Or The Melody Of My Song?


Yes, you can copyright both the lyrics and the melody of your song. Copyright protects original creative works, including the specific arrangement of words and notes in a song.


Conclusion


Protecting your song’s copyright is crucial for safeguarding your intellectual property and ensuring fair compensation. By understanding the legal aspects and taking necessary steps, you can secure your rights and enjoy the benefits of your creative work. Don’t overlook the importance of registering your song and consulting legal experts for added protection.

Categories
Archive

Musicians Exposed: The Truth About Releasing A Single

Releasing a single is a complex process that involves strategic planning, promotion, and timing. Musicians must consider various factors for a successful release.


Introducing a new single to the world is a crucial moment for musicians. With the music industry becoming increasingly competitive, artists need to navigate the complexities of releasing a single effectively. From crafting the perfect sound to engaging with their audience, every step plays a vital role in the success of a single.


We will delve into the truth behind releasing a single and explore key strategies for musicians to maximize their impact in the digital landscape.


Credit: www.alamy.com


Challenges Of Releasing A Single

Releasing a single can pose various challenges for musicians, impacting their journey in the music industry. Navigating the Music Industry requires strategic planning and understanding of market trends.

Creating An Impactful Single

Striking the right chord with the audience is essential when working on Creating an Impactful Single. From lyrics to melody, every aspect needs careful consideration.

Marketing Strategies

Musicians need solid marketing strategies to maximize the impact of releasing a single. Two essential tactics are Building Hype Before Release and Utilizing Social Media.

Building Hype Before Release

Create anticipation with snippets. Hold giveaways to energize fans before the single launch. Engage influencers to expand reach. Host exclusive listening parties to build buzz.

Utilizing Social Media

Post teaser clips. Run interactive contests. Engage with followers. Collaborate with other artists for cross-promotion.


Financial Considerations

When planning to release a single, there are several financial considerations that musicians need to take into account. Budgeting for promotion, understanding royalties and revenue streams, and managing the overall financial investment are crucial aspects to navigate.

Budgeting For Promotion

Setting a budget for promoting your single is essential to ensure it reaches the widest audience possible. Consider allocating funds for digital marketing, social media promotions, PR services, and potentially hiring a publicist or a marketing team to drive visibility and engagement.

Royalties And Revenue Streams

Understanding the various revenue streams and royalties associated with releasing a single is key. This includes income from digital sales, streaming platforms, performance royalties, and potential sync licensing opportunities. Familiarize yourself with the different sources of income to maximize your revenue potential.

Collaborations And Partnerships

Collaborating with other musicians and partnering with professionals in the industry is a powerful strategy to maximize the potential of your single release. Working with producers and engineers, as well as finding the right distribution channels, can greatly enhance your project’s success. Let’s delve into these two essential aspects of collaborations and partnerships for musicians.

Working With Producers And Engineers

Collaborating with skilled producers and engineers is key to bringing your musical vision to life. These experts have a deep understanding of sound engineering and can offer invaluable guidance in terms of arrangement, production techniques, and overall sonic quality.

With their technical expertise, producers and engineers can help you elevate your single to the next level. They know how to create a polished and professional sound that captivates listeners. Whether it’s refining the mix, enhancing the vocal performance, or experimenting with different instrumentations, their input can be transformative.

Moreover, working with producers and engineers opens up opportunities for creative exploration. They can bring fresh ideas and perspectives that you may not have considered, ultimately enhancing the uniqueness and marketability of your music.

Finding The Right Distribution Channels

Once your single is ready, it’s crucial to find the right distribution channels to ensure maximum exposure and reach among your target audience. The digital age has revolutionized the music industry, providing numerous platforms and services that can help you distribute and promote your music effectively.

Consider utilizing popular music streaming platforms like Spotify, Apple Music, and Pandora to make your single available to millions of potential listeners. These platforms offer excellent discoverability features and allow you to connect with fans worldwide.

Additionally, explore partnerships with independent record labels or music distribution companies that align with your genre and target audience. These partnerships can provide you with the necessary resources, marketing support, and industry connections to amplify your single’s impact.

Remember to leverage social media platforms like Instagram, YouTube, and TikTok to build your fan base and engage with your audience directly. Creating visually appealing content, collaborating with influencers, and sharing behind-the-scenes glimpses can generate buzz and increase your single’s visibility.

Ultimately, collaborations and partnerships with producers, engineers, and distribution channels are instrumental in unlocking the full potential of your single release. By harnessing the expertise and reach of these collaborators, you can effectively elevate your music and propel your career forward.

Long-term Success


Achieving long-term success as a musician requires understanding the truth about releasing a single. It’s crucial to develop a strategic plan that encompasses promotion, marketing, and engaging with fans to ensure sustained growth and recognition in the music industry.

Sustaining Momentum Post-release

Once you release a single, the work doesn’t stop there. In fact, it’s just the beginning of a journey towards long-term success as a musician. One of the key aspects of achieving this success is sustaining momentum post-release. That means keeping the buzz around your single alive and ensuring that you continue to gain exposure and reach new listeners.

So, how can you sustain momentum post-release? Here are a few strategies to consider:

  1. Create Engaging Content: Keep your audience invested in your music by regularly creating and sharing engaging content. This could be behind-the-scenes footage, lyric videos, live performances, or even personal stories that give your fans a glimpse into your life as a musician. By providing value and connecting with your audience, you’ll keep them eager for more.
  2. Build a Social Media Presence: Social media is an incredibly powerful tool for musicians. Utilize platforms such as Instagram, Facebook, and Twitter to connect with your fans, engage in conversations, and promote your music. Regularly update your followers with news, upcoming gigs, and any exciting developments in your musical journey.
  3. Collaborate with Other Artists: Collaboration can be a great way to expand your reach and captivate new audiences. Consider partnering with artists in complementary genres or musicians who share a similar fanbase. By combining your talents, you can create something new and exciting that will generate buzz and give your music a fresh perspective.
  4. Promote Your Music: Getting your music in front of new listeners is crucial for long-term success. Explore different avenues for promotion, such as reaching out to music bloggers, submitting your music to online playlists, or even working with a PR agency or a music marketing expert. The more exposure you can gain, the greater the chances of building a larger and more dedicated fanbase.
  5. Stay Consistent: Consistency is key when it comes to sustaining momentum post-release. Keep releasing new music on a regular basis to keep your fans engaged and interested. This doesn’t mean rushing the creative process, but rather ensuring that you have a steady stream of music that keeps your audience hooked and excited for what’s to come.

Building A Fanbase

Building a dedicated fanbase is an essential aspect of achieving long-term success as a musician. These are the people who will support your music, attend your shows, and help spread the word about your talent to others. To build a strong and loyal fanbase, consider the following strategies:

  • Connect with Your Audience: Building a fanbase starts with connecting with your audience on a personal level. Interact with your fans, both online and offline, by responding to their comments, private messages, and attending meet-and-greets after shows. Show genuine appreciation for their support, and they’ll be more likely to follow your musical journey.
  • Perform Live: Live performances are a fantastic way to connect with your audience and build a fanbase. Whether you’re playing at small local venues or larger festivals, focus on delivering a memorable and energetic show that leaves a lasting impression on your audience. Don’t underestimate the power of word-of-mouth recommendations that can result from an amazing live performance.
  • Offer Incentives: To encourage fan loyalty, consider offering incentives such as exclusive merchandise, early access to new releases, or special VIP experiences. These incentives not only make your fans feel valued but also create a sense of exclusivity that can help build a stronger connection with your audience.
  • Utilize Mailing Lists: Collecting email addresses through a mailing list provides a direct and personal way to communicate with your fans. Use this platform to share updates, tour dates, and exclusive content directly with your dedicated fanbase. Regularly engage with your email subscribers to foster a sense of community and make them feel like part of your musical journey.
  • Support Other Artists: Building a fanbase isn’t just about promoting your own music. Show support for other artists who inspire you or share a similar fanbase. By attending their shows, sharing their music, or even collaborating with them, you’re likely to gain exposure to a new audience that may become your fans as well.
Musicians Exposed: The Truth About Releasing A Single


Credit: www.grammy.com


Musicians Exposed: The Truth About Releasing A Single


Credit: www.facebook.com


Frequently Asked Questions For Musicians The Truth About Releasing A Single


Q1: How Do Musicians Release A Single?


A1: Musicians can release a single by distributing it on digital music platforms like Spotify, iTunes, and YouTube. They can also promote it through social media, blogs, and email newsletters to reach a wide audience and build momentum for the release.


Having a well-planned marketing strategy is crucial to maximize the impact of the single.


Conclusion


Releasing a single can be crucial for musicians. It requires strategizing, promotion, and patience. Understanding the music industry landscape is essential. However, with effective planning and a well-thought-out approach, releasing a single can bring success. By staying informed and adaptable, artists can navigate the process confidently.

Categories
Archive

Mixing Or Mastering: Unleash the Power of Sound

Mixing involves blending individual tracks, while mastering focuses on enhancing the overall sound of a completed mix. Both processes are crucial for achieving professional-quality audio.


When it comes to music production, understanding the difference between mixing and mastering is essential for creating polished and professional-sounding tracks. While mixing deals with the balance and placement of individual elements within a song, mastering is the final step that ensures the overall mix is cohesive and sonically pleasing.


By mastering the art of mixing and mastering, audio engineers and producers can elevate their music to the next level and stand out in a competitive industry. Let’s dive deeper into the world of mixing and mastering and explore their significance in the world of music production.


The Difference Between Mixing And Mastering

Roles And Responsibilities

Mixing involves blending individual audio tracks together to create a cohesive and balanced sound. Mastering, on the other hand, focuses on enhancing the overall quality of the mixed track.

Tools And Techniques

In mixing, tools like equalizers and compressors are used to adjust levels and frequencies of each track. Mastering utilizes tools such as limiters and multiband compressors to finalize the overall sound of the track.


Credit: www.facebook.com


The Art Of Mixing

Mixing and mastering are essential stages in the music production process. Here, we delve into the art of mixing, where the magic truly happens.

Balancing And Equalization

  • Use panning to place instruments within the stereo field.
  • Adjust volumes to ensure every element is heard.

Adding Effects And Automation

  1. Experiment with reverb or delay to create depth.
  2. Utilize compression for a more polished sound.

The Science Of Mastering

Mastering is the final step in the audio production process, where the overall sound of a track is polished and enhanced to achieve sonic balance and clarity. The science of mastering involves using a combination of technical skills and artistic sensibility to optimize the audio for various playback systems.

Audio Enhancement And Optimization

Mastering engineers leverage a series of tools and techniques to enhance the audio quality of a track. This involves making adjustments to the dynamic range, equalization, and stereo imaging to ensure that the music sounds cohesive and captivating on different playback devices.

Finalizing The Sound

Once the individual tracks have been mixed, the mastering engineer applies final touches to the overall sound. This may involve further adjusting the levels and tones, as well as incorporating multiband compression and limiting to ensure that the music is both balanced and consistent in volume and dynamics.

Professional Tips And Tricks

As a professional content writer, I understand the importance of creating engaging and SEO-friendly content. In this blog post, we will explore some valuable tips and tricks for mixing and mastering audio. These techniques will help you enhance the quality of your recordings and ensure they sound great across different devices. Let’s dive in and discover the secrets to creating depth and space in your audio, as well as ensuring compatibility across devices!

Creating Depth And Space

When it comes to mixing or mastering audio, creating depth and space is crucial. This technique allows you to separate each instrument and create a three-dimensional sound. Here are some professional tips to achieve this:

  1. Use panning to position instruments in the stereo field. This technique helps to create a sense of width and depth in your mix.
  2. Add reverberation and delay effects to simulate the sound of different spaces. Experiment with different reverb types and settings to find the perfect balance.
  3. Consider using EQ and compression to shape the frequency response and dynamics of individual instruments, helping them to sit better in the mix and create a sense of space.
  4. Use automation to add movement and variation to your mix. This can include automating the volume, panning, or effects parameters over time.

By implementing these techniques, you can take your audio recordings to the next level by giving them depth and space that captivate listeners.

Ensuring Compatibility Across Devices

When it comes to audio production, ensuring compatibility across different devices is essential. Here are some tips to help you achieve this:

  • Master your audio at an appropriate loudness level to avoid distortion or clipping on various playback systems.
  • Check your mix on different devices and speakers to ensure it translates well across various listening environments.
  • Consider using reference tracks to compare the sound of your mix with professionally mixed and mastered songs in a similar genre.
  • Pay attention to the stereo width of your mix, as some devices may have different speaker configurations or limitations.

By following these professional tips, you can ensure that your audio sounds consistent and pleasing, regardless of the device it is played on. Achieving compatibility across devices is crucial for providing a high-quality listening experience to your audience.


The Impact Of Mixing And Mastering On The Final Product

The Impact of Mixing and Mastering on the Final Product

Mixing and mastering are essential stages in the audio production process that significantly impact the final quality and perception of a song or piece of audio content. These two stages, though often used interchangeably, play distinct roles in enhancing the sound and optimizing it for consumption across various platforms and mediums. Understanding the effects of mixing and mastering on sound quality and listener experience is crucial for creating a professional and engaging final product.

Effect On Sound Quality

Mixing:

Mixing involves combining multiple individual audio tracks, adjusting their levels, panning, and applying various audio effects to create a balanced and cohesive sound. Through mixing, elements such as vocals, instruments, and effects are blended together to create a unified sonic landscape. Proper mixing ensures each element occupies the right frequency range while avoiding clashes and muddiness, resulting in a clean and well-defined audio mix.

Mastering:

On the other hand, mastering is the final step in the audio production process, where the mixed track is refined and optimized for distribution. The mastering engineer focuses on adjusting the overall tonal balance, dynamics, stereo image, and loudness of the track. By using specialized audio processors and mastering techniques, the engineer enhances the clarity, depth, and punch of the mix, ensuring it translates well on different playback systems and platforms.

Influence On Listener Experience

Mixing:

The quality of mixing greatly influences the listener’s experience. A well-mixed track allows each element to be heard distinctly, contributing to a more immersive and enjoyable listening experience. A balanced mix enables the listener to appreciate the nuances of the performance, enhancing emotional engagement and connection with the music or audio content.

Mastering:

Effective mastering further enhances the listener’s experience by ensuring the track maintains consistent sonic quality across different playback devices and environments. It optimizes the overall volume to compete with commercial releases, ensuring the song stands out and grabs the listener’s attention. Through mastering, the dynamics are controlled, helping the track sound more polished, vibrant, and professional.

Remember, both mixing and mastering impact the sound quality and listener experience in different ways. While mixing ensures a cohesive and balanced sound, mastering adds the final touches to make the track sound commercially competitive and pleasing to the listener’s ears.

Mixing Or Mastering: Unleash the Power of Sound


Credit: community.native-instruments.com


Mixing Or Mastering: Unleash the Power of Sound


Credit: www.facebook.com


Frequently Asked Questions On Mixing Or Mastering


What Is The Difference Between Mixing And Mastering?


Mixing is the process of combining individual audio tracks into a final stereo mix, adjusting levels, panning, and adding effects. Mastering is the final stage where the mixed track is polished for distribution, enhancing overall sound quality and making it ready for different playback systems.


Why Is Mixing Important In Music Production?


Mixing is crucial in music production as it balances and shapes different elements of a song. It brings out the best in each instrument and vocal, creating a cohesive and professional sound. A well-mixed track ensures clarity, depth, and impact, making it enjoyable to listen to across various platforms.


What Does A Mastering Engineer Do?


A mastering engineer is responsible for the final touches of a song. They ensure that the track sounds consistent, balanced, and optimized for different listening environments. They correct any sonic imperfections, enhance the overall sound quality, and prepare the track for distribution, ensuring it meets industry standards.


Conclusion


The process of mixing and mastering is crucial for achieving high-quality audio productions. These stages ensure that the final product is polished and professional, ready for release. By understanding the differences and roles of mixing and mastering, you can effectively enhance the clarity, balance, and overall impact of your music.

Categories
Archive

Mastering Audio Formats: The Ultimate Guide for Audiophiles

Audio formats determine how sound is stored and transmitted, impacting quality and compatibility across devices. Understanding the nuances of various audio formats is essential for optimizing listening experiences.


Different formats such as MP3, WAV, and FLAC offer distinct advantages and limitations in terms of compression, file size, and audio fidelity. By delving into the specifics of each format, individuals can make informed decisions when it comes to selecting the most suitable format for their needs.


Whether it’s for music, podcasts, or other audio content, being well-versed in audio formats can enhance enjoyment and ensure seamless playback on different platforms and devices. Discovering the right format can elevate the audio experience to new heights, providing clarity, richness, and fidelity to sound reproduction.


The Basics Of Audio Formats


Audio formats refer to the way sound is stored and encoded in digital files. Common formats like MP3, WAV, and FLAC vary based on compression and quality. Understanding these formats helps in choosing the best one for specific needs, such as streaming, editing, or high-fidelity listening.

Audio formats refer to the way sound is encoded and stored in a digital file. Understanding the differences between lossy and lossless formats is crucial for quality sound reproduction. Let’s delve into the essentials:

Lossy Vs. Lossless

Lossy formats compress audio data, sacrificing some quality for smaller file sizes. On the other hand, lossless formats retain all original audio information without compressing.

Common Audio File Types

1. MP3: Widely used and compressed (lossy) format. 2. WAV: Uncompressed (lossless) format with high quality. 3. FLAC: Lossless format known for high fidelity. 4. AAC: Prominent lossy format emphasizing quality compression. In conclusion, grasping the nuances of audio formats is key to optimizing sound quality in digital media.

Understanding Compression

Understanding Compression:

the Impact On Sound Quality

Compression affects how audio files are stored and transmitted, influencing their overall quality.

popular Compression Algorithms

Various algorithms are used for compressing audio data, each with its unique way of reducing file size while maintaining quality.

Exploring High-resolution Audio

Defining Hi-res Audio

High-resolution audio, often referred to as hi-res audio, is a digital audio format that exceeds the quality of standard formats like MP3 or CD. It offers a higher fidelity and resolution, capturing more detail and nuance in the sound.

Benefits And Limitations

One of the key benefits of high-resolution audio is its ability to deliver a more immersive and dynamic listening experience, allowing users to hear subtle nuances and details that may be lost in compressed audio formats. However, hi-res audio files are typically larger in size, requiring more storage and data bandwidth, and not all devices and headphones are compatible with hi-res audio.

Mastering Audio Formats: The Ultimate Guide for Audiophiles


Credit: www.amazon.com


Unraveling Metadata

When it comes to understanding audio formats, it is important to dive into the intricate world of metadata. Metadata, simply put, is data about data. It provides valuable information about the audio file, allowing users to identify, organize, and search for specific audio content seamlessly.

Importance Of Metadata

Metadata plays a crucial role in audio formats as it enhances the user experience by providing essential details about the audio file. It not only includes basic information like the title, artist, and track duration but also offers a wealth of additional data that helps users explore and interact with the audio content.

For instance, metadata can include details such as the album cover, release date, genre, and even the lyrics of the song. This wealth of information can be immensely valuable for music lovers, podcast enthusiasts, and anyone looking to organize their audio library effectively.

Metadata Formats

Various metadata formats exist, with the most common being ID3 tags and Vorbis comments. ID3 tags, primarily used in MP3 files, allow for the embedding of metadata directly within the audio file. This format ensures that the metadata remains intact even if the audio file is transferred to different devices or platforms.

On the other hand, Vorbis comments are commonly found in Ogg Vorbis files and offer a flexible and extensible way to store metadata. This format allows users to easily add, modify, or remove specific tags, providing greater control over the metadata associated with the audio file.

It’s important to note that the choice of metadata format depends on the specific audio file format being used. Different audio formats may support different metadata formats, and it’s crucial to ensure compatibility to avoid any loss or corruption of metadata during file conversions or transfers.

Furthermore, metadata formats are constantly evolving to adapt to changing technological advancements and user requirements. This ensures that users have access to the most relevant and up-to-date metadata options for their audio files.


Optimizing Audio Formats

When it comes to optimizing audio formats, there are several considerations to keep in mind. Choosing the right format and following best practices for audio conversion can make a significant difference in the quality and efficiency of your audio files. In this section, we will explore these topics in more detail to help you make informed decisions and improve your audio performance.

Choosing The Right Format

Choosing the right audio format can have a significant impact on the overall quality and compatibility of your audio files. Different formats are suitable for different purposes, so it’s crucial to understand the characteristics of each format before making a decision. Here are some commonly used audio formats:

Format Description
MP3 A widely supported format that provides good quality with reasonable file size.
WAV An uncompressed format that offers the highest audio quality but comes with larger file sizes.
FLAC A compression format that preserves audio quality while reducing file size.
AAC A popular format that provides good quality and smaller file sizes compared to MP3.
  • Consider the purpose: If you need high-quality audio without compromising file size, WAV format may be suitable. However, if you prioritize smaller file sizes without considerable quality loss, formats like MP3 or AAC can be a better choice.
  • Compatibility: Ensure that the chosen format is widely supported across different devices and platforms to reach a broader audience.
  • Bitrate and sample rate: Adjust the bitrate and sample rate according to the requirements of your audio content. Higher bitrate and sample rate generally result in better quality but increase file size as well.

Best Practices For Audio Conversion

Converting audio files from one format to another requires careful attention to preserve the quality and integrity of the original content. To achieve optimal results, consider the following best practices:

  1. Use reliable software: Choose reputable audio conversion software to ensure accurate and reliable conversions. This helps maintain audio fidelity and minimize any potential loss in quality.
  2. Backup your original files: Before performing any audio conversion, make sure to create a backup of your original files. This allows you to revert to the original format if needed, without any loss of data.
  3. Test and compare: After converting audio files, perform thorough testing and compare the converted version with the original. This helps identify any quality degradation or inconsistencies.
  4. Consider batch conversion: If you have a large number of audio files, batch conversion can save time and effort. However, ensure that the conversion settings are consistent and appropriate for all files.
  5. Monitor file sizes: Pay attention to the file sizes of converted audio files. While compression may be necessary for efficient storage and streaming, excessive compression can result in noticeable quality loss.

By following these best practices, you can optimize audio formats and ensure that your audio files maintain their quality, compatibility, and efficiency throughout the conversion process.

Mastering Audio Formats: The Ultimate Guide for Audiophiles


Credit: mixingmonster.com


Mastering Audio Formats: The Ultimate Guide for Audiophiles


Credit: dsd-guide.com


Frequently Asked Questions On Understanding Audio Formats


Can I Convert An Mp3 File Into A Wav File?


Yes, you can easily convert an MP3 file into a WAV file using various audio conversion software or online converters. Converting from MP3 to WAV format allows you to have high-quality, uncompressed audio files that are compatible with a wider range of audio editing and playback devices.


What Audio Format Should I Use For Audio Editing?


For audio editing purposes, it is best to use a lossless audio format such as WAV or FLAC. These formats retain the original audio quality and provide maximum flexibility for editing, processing, and applying effects. Lossy formats like MP3 may result in quality degradation due to compression.


What Is The Difference Between Mp3 And Aac Audio Formats?


Both MP3 and AAC are popular audio formats, but AAC provides better audio quality at lower bit rates compared to MP3. AAC is the default format used by Apple iTunes and iPods, while MP3 is more widely compatible across different devices and platforms.


Consider your playback devices and desired audio quality when choosing between the two.


How Do I Convert Audio Files To A Smaller Size?


To reduce the size of audio files, you can compress them using audio codecs like AAC or Opus. Lowering the bit rate or using variable bit rate (VBR) encoding can significantly reduce file size without sacrificing too much audio quality.


Alternatively, you can convert to a lossy format like MP3, but this may result in some audio quality loss.


Conclusion


In a world filled with varied audio formats, the decision about which one to use can be daunting. However, by gaining a better understanding of the different audio formats available, you can make an informed choice that best suits your needs.


Choosing the right audio format can enhance your listening experience and ensure the highest quality sound for your music or audio files.

Categories
Archive

How Did Music Production Work before Computers

Before computers, music production involved analog equipment like mixers, tape machines, and outboard effects. Producers physically manipulated sounds to create music.


The process was labor-intensive but allowed for unique creative decisions and hands-on control. In modern times, with the advent of computers, music production has undergone a significant transformation. Digital audio workstations (DAWs) have streamlined the process, allowing for easier editing, mixing, and mastering.


Today, producers can create music entirely within the digital realm, using software plugins to emulate analog gear. While the methods have evolved, the fundamentals of music production remain rooted in creativity and skill, whether using analog or digital tools.


The Evolution Of Music Production

Before the digital age, music production relied on analog techniques and hardware. Let’s explore the fascinating journey of music production and the pivotal role analog recording methods and hardware played in shaping the music industry.

Analog Recording Methods:

  • Analog recording involved capturing sound waves directly onto physical mediums like magnetic tapes.
  • This method required devices such as reel-to-reel tape recorders and analog mixing consoles.
  • Music producers meticulously manipulated sound by adjusting physical knobs and sliders.

Role Of Hardware In Producing Music:

Hardware, like microphones and amplifiers, transformed raw sounds into recorded music.

Synthesizers and drum machines brought versatility to music creation.

How Did Music Production Work before Computers: Unveiling the Pre-Digital Era


Credit: www.pcmag.com


The Process Of Pre-computer Music Production

Before computers revolutionized music production, the process was meticulous and hands-on. Let’s delve into the fascinating world of pre-computer music production.

Composition And Arrangement

In the pre-computer era, composers sketched their musical ideas with pen and paper. They meticulously arranged notes and harmonies creating intricate musical scores.

Recording And Mixing Techniques

Recording involved using analog equipment like reel-to-reel tapes. Sound engineers carefully adjusted levels and effects to achieve the desired sound.


Challenges Faced By Pre-digital Music Producers

Limitations Of Analog Equipment

In the pre-digital era, music producers had to rely on analog equipment, such as tape machines and mixing consoles, which had significant limitations. The audio recordings were susceptible to degradation, noise, and distortion, and the flexibility for manipulation and editing was severely restricted.

Quality Control And Editing

The lack of digital technology made quality control and editing a daunting task for music producers. Any changes to the recorded audio had to be carefully managed, as multiple generations of analog copies could lead to a loss of fidelity. This made the editing process time-consuming and significantly constrained the creative possibilities for music production.

How Did Music Production Work before Computers: Unveiling the Pre-Digital Era


Credit: nypost.com


Influence On Music Creation And Sound Diversity


Before computers, music production relied on manual instruments, recording, and mixing techniques. This process involved extensive collaboration and hands-on creativity, contributing to diverse and unique soundscapes in music creation. The influence of traditional production methods is still evident in today’s music, showcasing the rich history of sound diversity.

Before the advent of computers in music production, the process of creating music was vastly different. This era, characterized by analog sound and manual techniques, had a profound impact on the development of genres and the unique characteristics of the sound produced.

I. Impact On Genre Development

Analog music production played a pivotal role in shaping the development of various musical genres. It allowed artists to experiment with different sounds and styles, pushing the boundaries of traditional music conventions. As a result, new genres emerged, bringing fresh perspectives and innovative approaches to music creation. During this time, artists heavily relied on physical instruments and equipment to produce music. The availability of different instruments and their unique tonal qualities influenced the direction of genre evolution. This analog approach contributed to the creation of distinct sounds that have become synonymous with particular genres, such as the rich and warm tones of jazz or the raw, distorted guitars of rock music.

Ii. Unique Characteristics Of Analog Sound

Analog sound had an unmistakable charm and character that set it apart from the digitally produced sound of today. The limitations and imperfections inherent in analog production gave rise to unique textural qualities that added depth and richness to recordings. One of the defining characteristics of analog sound was its warmth. The use of analog recording equipment, such as tape machines and vinyl records, introduced subtle harmonics and natural compression that digital recordings often struggle to replicate. This warmth and authenticity provided recordings with a sense of organic and live feeling, captivating listeners with its inherent soulfulness. In addition, analog production techniques contributed to the creation of certain sonic artifacts that are cherished in the music world. The unpredictability of analog equipment, including analog synthesizers and tape delays, resulted in analog anomalies like tape saturation, wow and flutter, or even happy accidents during live performances. These imperfections gave recordings a human touch, injecting them with a sense of uniqueness and character. To sum up, the era before computers revolutionized music production had a significant influence on both the development of musical genres and the exceptional characteristics of analog sound. The manual techniques and analog equipment used during this time shaped the course of music history, contributing to the diversity of sound and the creation of timeless recordings.

Legacy Of Pre-computer Music Production

Before the advent of computers, music production followed a vastly different process. The legacy of pre-computer music production includes various aspects that have shaped the way modern-day music is created and preserved. From the charm of analog techniques to their modern-day applications, the influence of the past continues to resonate and inspire in the world of music production.

Modern-day Applications

Despite the dominance of digital music production today, the legacy of pre-computer techniques remains relevant. Many producers and musicians recognize the unique qualities and character of analog equipment and strive to incorporate them into their modern-day productions. By combining the best of both worlds, they are able to create music that carries the soul of the past while enjoying the convenience and flexibility offered by technology.

Preservation Of Analog Techniques

The importance of analog techniques in music production cannot be understated. While digital technology has undoubtedly revolutionized the industry, there is still an inherent appreciation for the warmth, depth, and natural imperfections present in analog recordings. This has led to a movement to preserve and revive analog techniques, ensuring that future generations have the opportunity to experience the rich soundscapes of the past.

Analog Techniques Advantages
Vinyl Records
  • Authentic sound reproduction
  • Unique experience for listeners
  • Artistic value of physical format
Analog Synthesizers
  • Organic and warm sound
  • Real-time manipulation and performance
  • Subtle variations with each use

The preservation of analog techniques not only pays homage to the origins of music production but also serves as a constant reminder of the artistry and craftsmanship involved in the creation of music. By embracing both digital and analog methods, the modern-day music industry continues to evolve, incorporating the best of both past and present to shape the future of music production.

How Did Music Production Work before Computers: Unveiling the Pre-Digital Era


Credit: www.linearity.io


Frequently Asked Questions For How Did Music Production Work Before Computers


How Was Music Produced Before Computers?


Music production before computers involved manual recording, editing, and mixing techniques. Artists used analog equipment like tape recorders and mixing consoles to capture and manipulate sound. It required extensive physical labor and technical expertise to achieve desired results.


What Were The Challenges Of Music Production Without Computers?


Music production without computers faced challenges like limited editing capabilities, longer recording and mixing processes, and the need for large physical spaces to house equipment. The lack of automation made precise adjustments time-consuming, and mistakes often required re-recording from scratch.


How Were Musical Instruments Recorded Without Computers?


Musical instruments were recorded before computers using techniques like direct recordings into microphones or amplifiers, or by capturing the sound using analog tape recorders. This required technical skills, a well-equipped recording studio, and careful positioning of microphones to capture the desired sound quality.


How Did Artists Edit Their Recordings Without Computers?


Artists edited their recordings manually by physically cutting and splicing tapes using razor blades and tape. They would trim, reposition, or remove sections of the recorded material to achieve the desired structure and sound quality. This required precision and expertise to ensure seamless transitions and accurate timing.


Conclusion


In the past, music production relied on manual recording and analog equipment. Skills, creativity, and technical know-how were crucial. Musicians and producers put in countless hours to achieve the desired sound. Despite the limitations, they paved the way for modern music production.


Understanding the evolution is key to appreciating the art form.

Categories
Archive

Inspiration For Songwriting : Unleash Your Creative Potential

To find inspiration for songwriting, explore personal experiences, emotions, and observations. Engage in creative activities for fresh ideas.


When creating music, drawing from deep emotions and unique perspectives can result in powerful and resonant songs. By tapping into your own thoughts, memories, and feelings, you can create authentic and compelling lyrics that connect with listeners on a profound level.


Additionally, experimenting with different styles, genres, and techniques can help spark creativity and provide a fresh approach to your songwriting process. Collaborating with other musicians or artists can also offer new insights and inspiration, leading to innovative and dynamic music compositions. By continuously seeking inspiration and pushing boundaries, you can cultivate a rich and diverse repertoire of songs that resonate with audiences and showcase your creativity and talent as a songwriter.

Inspiration For Songwriting : Unleash Your Creative Potential


Credit: aihunt.app


The Power Of Inspiration

Finding Meaningful Experiences

Embrace nature; the trees, the sky, a simple gesture can spark creativity.

Exploring Emotions And Feelings

Delve into your heart; unveil stories untold within to craft emotive ballads.

External Sources Of Inspiration

External Sources of Inspiration come in various forms, providing songwriters with a wealth of creative stimuli.

Nature’s Influence

Nature’s beauty and tranquility can ignite creativity in songwriting.

Art And Literature

Art and literature offer rich narratives and emotions that can inspire song lyrics.

Internal Sources Of Inspiration

In songwriting, there are external and internal sources of inspiration. While external stimuli like nature, people, and events can prompt creative ideas, internal sources of inspiration, such as self-reflection and mindfulness, play a crucial role in the songwriting process. Understanding and acknowledging these internal sources can lead to deeply personal and relatable songs.

Social Reflection And Personal Growth

Songwriting often stems from self-exploration and emotional experiences. Self-reflection allows songwriters to delve into their feelings and thoughts, translating them into meaningful lyrics and melodies. Personal growth also serves as a well of inspiration, as individuals evolve and undergo transformative experiences, providing rich material for songwriting.

Mindfulness And Meditation

Mindfulness and meditation are powerful tools for unlocking creativity. By cultivating a present-moment awareness, songwriters can tap into their emotions and inner thoughts, fostering an environment conducive to lyrical and musical inspiration. These practices allow for a heightened sensitivity to one’s internal landscape, resulting in authentic and profound songwriting.

Inspiration For Songwriting : Unleash Your Creative Potential


Credit: www.facebook.com


Techniques For Unleashing Creativity

When it comes to songwriting, creativity is key. Sometimes, however, it can feel like the well of inspiration has run dry. That’s why it’s important to have a toolkit of techniques to unleash your creativity and get those songwriting juices flowing. In this post, we’ll explore two techniques that can help you tap into your creative energy and discover new songwriting ideas: Free Writing and Journaling, and Collaboration and Brainstorming.

Free Writing And Journaling

Sometimes, the hardest part of songwriting is simply getting started. That’s where free writing and journaling can be incredibly valuable. Free writing involves setting a timer for a predetermined amount of time, usually about 10 minutes, and writing nonstop. The goal is to let your mind wander and explore different ideas, without worrying about grammar or structure.

Journaling, on the other hand, is a more structured approach. It involves keeping a dedicated journal for your songwriting ideas, with daily entries and prompts to get your creativity flowing. By regularly writing down your thoughts, observations, and feelings, you create a valuable resource that you can refer back to when you’re ready to write a new song.

Collaboration And Brainstorming

Songwriting doesn’t have to be a solitary pursuit. Collaborating with other musicians and songwriters can bring new ideas and perspectives to your work. By bouncing ideas off each other and pooling your creativity, you can create songs that are greater than the sum of their parts.

Brainstorming is a powerful tool for collaboration. Start by gathering a group of fellow songwriters and musicians. Set a timer for a specified amount of time, and let everyone share their ideas freely. Write down every idea that comes up – no matter how crazy or unconventional it may seem. Once the brainstorming session is over, you can sift through the ideas and find the ones that resonate with you. From there, you can start shaping them into songs.


Overcoming Creative Blocks

As a songwriter, there may come a time when you feel stuck, unable to come up with new ideas or lyrics. These creative blocks can be frustrating, but they are a common challenge that all songwriters face. The good news is, there are strategies you can use to overcome these blocks and find inspiration for your songwriting.

Cultivating A Creative Mindset

To overcome creative blocks, it’s crucial to cultivate a creative mindset. This means embracing a few key principles:

  • Embrace Curiosity: Stay open-minded and curious about the world around you. Seek out new experiences, listen to different genres of music, and explore various art forms. This helps expand your creative palette and can spark unique and innovative ideas.
  • Practice Mindfulness: Take the time to slow down, relax, and be present. Mindfulness allows you to clear your mind of distractions and create space for new ideas to emerge. It can be as simple as sitting in nature, meditating, or engaging in activities that bring you joy.
  • Stay Positive: Cultivate a positive mindset and attitude towards your creativity. Instead of getting discouraged by setbacks or perceived failures, see them as opportunities for growth and learning. Surround yourself with supportive individuals who inspire and encourage you.
  • Set Realistic Goals: Break down your songwriting process into smaller, achievable goals. This helps prevent overwhelm and allows you to focus on one aspect at a time. Celebrate your progress along the way to maintain motivation.

Embracing Imperfection

Another way to overcome creative blocks is by embracing imperfection. Many songwriters get caught up in striving for perfection, which can stifle creativity. Instead, embrace the beauty of imperfection:

  • Write Freely: Don’t worry about writing the perfect lyrics or melody right away. Give yourself permission to write freely, without judgment. You can always revise and polish later.
  • Embrace Mistakes: Mistakes are a natural part of the creative process. Instead of fearing them, see them as opportunities for exploration and growth. Allow yourself to experiment and take risks.
  • Find Your Unique Voice: Don’t compare yourself to others or try to imitate their style. Embrace your unique voice and let it shine through in your songwriting. Authenticity is key to creating impactful and memorable songs.
  • Let Go of Expectations: Release any expectations or attachments to the outcome of your songwriting. Focus on the joy of the creative process itself rather than solely on the end result. This frees you to be more spontaneous and creative.

By cultivating a creative mindset and embracing imperfection, you can break through creative blocks and find renewed inspiration for your songwriting. Remember, creativity is a journey, and each block you overcome leads to growth and greater artistic expression.

Inspiration For Songwriting : Unleash Your Creative Potential


Credit: speedsongwriting.com


Frequently Asked Questions For Inspiration For Songwriting


What Are Some Tips For Finding Inspiration For Songwriting?


To find inspiration for songwriting, try listening to different genres, observing your surroundings, reflecting on personal experiences, experimenting with melodies, and collaborating with other musicians. Additionally, keeping a notebook, attending concerts, and exploring emotions can also ignite creativity in songwriting.


How Can I Overcome Songwriter’s Block?


To overcome songwriter’s block, try taking a break and engaging in activities such as reading, painting, or exercising. Exploring new music, experimenting with different instruments, and seeking inspiration from nature or artwork can also help. Additionally, collaborating with other songwriters or seeking feedback from peers can offer fresh perspectives and ideas.


What Are Some Effective Ways To Improve Songwriting Skills?


To enhance your songwriting skills, practice regularly, analyze and learn from songs you admire, and participate in workshops or songwriting courses. Experiment with different chord progressions, song structures, and lyrical techniques. Seeking feedback from peers or mentors, as well as exploring different collaborations, can also contribute to continuous growth as a songwriter.


Conclusion


Songwriting is an art that draws from personal experiences and emotions. By exploring different sources of inspiration, such as nature, relationships, and social issues, songwriters can enhance their creativity and connect with their audience on a deeper level. Whether drawing from personal experiences or finding inspiration in the world around us, the possibilities for songwriting are endless.

Categories
Archive

How To Finish Old Songs: Unleash Your Creative Potential

To finish old songs, revisit the lyrics, melody, and arrangement before recording or performing them. Revise, refine, and practice for a fresh rendition of the song.


Revisiting and completing old songs can be a fulfilling creative endeavor for musicians. Whether it’s revamping an unfinished composition or breathing new life into a forgotten tune, the process of finishing old songs involves reimagining the lyrics, melody, and overall arrangement.


By revisiting your past works with a fresh perspective and making necessary adjustments, you can elevate the original piece to new heights. This journey of rediscovery and refinement not only allows you to showcase your growth as an artist but also provides a sense of satisfaction as you bring completeness to your musical creations.


Credit: www.goodreads.com


Unlocking Creativity Through Finishing Old Songs


Unlock your creative potential by completing unfinished songs. Revitalize your creative process by revisiting old material and giving it a fresh perspective, ultimately unlocking new and innovative ideas. Finishing old songs can act as a catalyst for creativity, bringing new life and inspiration to your music.

Rediscovering Inspiration

One way to unlock creativity is by returning to unfinished songs, sparking new ideas.

Overcoming Creative Blocks

If you’re stuck, revisiting old songs can provide fresh perspectives and break through barriers.

How To Finish Old Songs: Unleash Your Creative Potential


Credit: www.facebook.com


Revisiting Unfinished Material

Revisiting Unfinished Material:

Identifying Promising Unfinished Songs

Evaluate old songs for potential, focus on strong lyrics and catchy melodies.

  • Review unfinished songs based on personal connection.
  • Look for verses or choruses that resonate emotionally.

Reimagining Old Lyrics And Melodies

Update outdated lyrics, consider fresh perspectives and themes.

  1. Modernize language to make the song more relevant.
  2. Experiment with new melodic patterns and structures.

By revisiting old material and giving it a new spin, you can breathe new life into unfinished songs and create impressive music!


Tools And Techniques For Song Completion

When it comes to finishing old songs, utilizing the right tools and techniques can be crucial. With the right resources, you can enhance your creativity, gain fresh perspectives, and ultimately bring your incomplete songs to completion. In this section, we’ll explore the different tools and techniques that can help you in completing old songs.

Utilizing Technology For Enhancement

Technology can play a significant role in refining and completing old songs. Here are some ways in which you can utilize technology for song completion:

  • Use digital audio workstations (DAWs) to refine and arrange your musical ideas efficiently.
  • Experiment with virtual instruments and plugins to add new layers and textures to your unfinished songs.
  • Employ audio editing software to fine-tune existing recordings and correct imperfections.

Collaborating With Others For Fresh Perspectives

Collaborating with other musicians and songwriters can provide fresh perspectives and ideas that may help in finishing old songs. Here’s how you can benefit from collaborating with others:

  1. Engage in co-writing sessions to generate new lyrics and melody ideas for incomplete songs.
  2. Seek feedback and input from fellow musicians to identify areas for improvement and new directions.
  3. Consider partnering with a producer or arranger to bring a new sonic approach to your unfinished compositions.

Finding Motivation And Accountability


To propel yourself to complete old songs, seek motivation and accountability from peers or music mentors. Surround yourself with supportive individuals to stay inspired and focused on finishing your musical projects. Reach out for guidance, feedback, and encouragement to overcome any creative roadblocks.

Setting Realistic Goals

Setting&nbspbold and realistic goals is a crucial step in finishing old songs. By breaking down your project into smaller tasks, you can tackle them one at a time, which helps prevent overwhelm.

  • Start by evaluating your current progress on the song and identify the areas that need attention.
  • Set specific and measurable goals that are achievable within a reasonable timeframe.
  • Be mindful of your available time and resources, and make sure your goals reflect them.

By setting realistic goals, you are more likely to stay motivated and see progress in your songwriting journey.&nbspbold

Sharing Progress With A Community

Sharing your progress with a community can provide valuable motivation and accountability. When you share your work, you open yourself up to constructive feedback and support from like-minded individuals.

  1. Join online forums, social media groups, or songwriting communities where you can connect with other musicians.
  2. Regularly update your audience on your progress by sharing snippets, snippets, lyrics, or recordings of your work.
  3. Engage in discussions and actively participate in giving and receiving feedback to enhance your songwriting skills.

Being part of a community keeps you motivated, encourages you to keep going, and builds a network of peers who can provide valuable insights along the way.

Embracing The Evolution Of Your Craft

As creators, we often find ourselves revisiting old songs, whether for inspiration, nostalgia, or simply because they hold a special place in our hearts. However, it’s important to remember that our craft is ever-evolving, and what we once considered finished may no longer align with our current skill set and creative vision. In this blog post, we’ll explore the process of finishing old songs and how to embrace the evolution of your craft.

Learning From Completed Songs

When looking back at completed songs from our past, it’s crucial to approach them with a critical eye and a growth mindset. Each finished song has the potential to teach us valuable lessons about our strengths, weaknesses, and areas of improvement. By analyzing our previous work, we can unearth insights that will help us grow as artists.

Consider creating a table to compare and contrast your completed songs. List the elements such as lyrics, melody, chord progressions, and production techniques. Identify patterns or recurring themes that emerge across your body of work. This analysis will give you a clear picture of your strengths and areas that may need refinement.

Applying Insights To Future Projects

Having identified the patterns and themes from your completed songs, it’s time to apply these insights to your future projects. Whether you’re starting a new song or revamping an old one, these lessons can guide your artistic decisions and help propel your craft forward.

  • Experiment with different approaches and techniques based on the strengths you’ve identified from your past work.
  • Challenge yourself to address the weaknesses you’ve discovered by seeking out resources, collaborating with other artists, or practicing specific skills.
  • Use your newfound knowledge to create fresh, captivating melodies and lyrics, while exploring innovative production techniques.

Remember, the evolution of your craft is a continuous process. Embrace the growth mindset and never be afraid to experiment, learn, and adapt. By finishing old songs and applying the lessons learned, you’ll be able to create music that reflects your current skill set and artistic vision.

How To Finish Old Songs: Unleash Your Creative Potential


Credit: www.bookmarketingmentors.com


Frequently Asked Questions Of How To Finish Old Songs


How Can I Find Inspiration To Finish Old Songs?


Finding inspiration to finish old songs can be challenging. Try listening to new music, reading books, going for walks, or collaborating with other musicians. Experiment with different chord progressions, melodies, or lyrics to breathe new life into your unfinished songs.


Don’t be afraid to take breaks and come back to your songs with fresh ears and perspective.


What Are Some Techniques For Completing Unfinished Songs?


There are several techniques you can try to complete unfinished songs. Consider revisiting your original idea with a fresh perspective, experimenting with different song structures, or changing the tempo or key to create a new vibe. Collaborating with other songwriters can also help bring new ideas and perspectives to the table.


Don’t be afraid to edit, rewrite, or rearrange parts of your song until you are satisfied with the final result.


How Can I Overcome Writer’s Block While Finishing Old Songs?


Writer’s block is a common challenge faced by musicians. To overcome it, try different techniques such as freewriting, where you write without judgment or self-editing. Taking breaks, setting deadlines, or trying new songwriting exercises like writing with specific prompts or constraints can also help spark creativity.


Remember to be patient with yourself and trust the process – sometimes the best ideas come when you least expect them.


Conclusion


Finishing old songs can be a rewarding and fulfilling process for any songwriter. By following the tips and techniques mentioned in this blog post, you can breathe new life into your old musical creations and showcase your creativity. Remember to stay patient and persistent as you work towards completing your songs.


With dedication and determination, you can turn your old songs into timeless masterpieces.

Categories
Archive

Record And Mix Vocals : Master the Art of Vocal Recording and Mixing

As an Amazon Associate I earn from qualifying purchases.

To record and mix vocals, use a quality microphone and software for optimal sound quality. Adjust levels and add effects for a professional finish.


When producing music, vocals are a critical element that can make or break a song. It is important to capture clear and crisp vocals during the recording process to ensure they stand out in the mix. Mixing vocals involves adjusting levels, adding effects like reverb or compression, and fine-tuning the overall sound to blend seamlessly with the music.


By following some simple tips and techniques, you can elevate your vocal recordings to the next level and create a polished and professional sound. We will discuss the best practices for recording and mixing vocals to help you achieve the desired results in your music production.


Credit: www.facebook.com


Choosing The Right Equipment

`When setting up your home recording studio for vocals, the key is Choosing the Right Equipment. This includes selecting the appropriate microphone and understanding vocal preamps.

Selecting The Right Microphone

`Different microphones have varying characteristics that can impact the quality of your vocal recordings. Consider factors like sensitivity and frequency response when choosing a microphone.

Understanding Vocal Preamps

`Vocal preamps are essential for capturing clear and crisp vocals. Look for preamps that provide sufficient gain while maintaining low noise levels.

Setting Up Your Recording Space

Optimizing Room Acoustics

Optimizing room acoustics is crucial for quality vocal recordings. Use soundproofing materials like foam panels to reduce echoes.

  • Eliminate background noise for cleaner recordings.
  • Strategically place acoustic panels for balanced sound.

Positioning Microphones For Vocal Recording

Proper mic placement impacts audio quality significantly. Experiment with different positions to find the best sound.

  1. Position the microphone at the singer’s mouth level.
  2. Maintain an appropriate distance to avoid sudden noise peaks.

Recording Techniques

When it comes to recording vocals, using the right techniques is crucial in producing high-quality tracks. Effective recording techniques can make a significant difference in the sound and clarity of the final vocal mix. Mic placement, pop filters, and windscreens are all essential aspects of the recording process that can greatly impact the overall outcome.

Mic Placement For Different Vocal Styles

Mic placement plays a critical role in capturing the best vocal performance. The distance and angle of the microphone can significantly affect the tone and clarity of the recording. For upbeat, energetic vocals, positioning the mic slightly off-axis can help in reducing plosives and achieving a more balanced sound.

For softer, more intimate vocal styles, placing the mic at a closer distance and directly in front of the vocalist can enhance the warmth and intimacy of the recording. Experimenting with different positions and distances can help find the optimal placement for each specific vocal style.

Using Pop Filters And Windscreens

Pop filters are essential for reducing plosive sounds and excessive air from interfering with the recording. These filters are particularly helpful when capturing vocal performances with strong plosive sounds. Placing a pop filter a few inches in front of the microphone can effectively mitigate these unwanted noises, resulting in a cleaner recording.

Windscreens are beneficial for outdoor or location recordings where wind noise may impact the quality of the vocal track. Using a windscreen can help minimize the effects of external elements and ensure a more consistent and clear vocal recording, especially in outdoor environments.

Mixing Vocals


Optimizing the vocal recording and mixing process is crucial for creating a professional sound. Skillfully blending vocals with the right effects and adjusting levels can greatly enhance the overall quality of a song or audio project. It’s essential to fine-tune the vocals to ensure clarity and balance within the mix.

Understanding Eq And Compression For Vocals

Mixing vocals is a critical step in achieving a polished and professional sound for your recordings. To make the vocals stand out in the mix, it’s essential to have a solid understanding of EQ and compression techniques.

EQ, or equalization, allows you to shape the frequency response of the vocals. By boosting or cutting specific frequencies, you can improve clarity, remove unwanted resonances, and create a balanced sound. It’s important to remember that EQ should be used sparingly and with precision.

When using EQ for vocals, focus on enhancing the presence and intelligibility. Start by cutting any low-end rumble or harsh high frequencies that can muddy the vocals. You can then experiment with subtle boosts in the upper midrange to bring out the vocal clarity and add warmth.

Compression, on the other hand, helps control the dynamics of the vocals. It smooths out volume inconsistencies, allowing the vocals to sit more evenly in the mix. By reducing the dynamic range, compression helps enhance the overall consistency and impact of the vocals.

To use compression effectively, set an appropriate threshold that engages the compressor only when the vocals exceed a certain level. Apply a moderate ratio (around 2:1 or 3:1) to avoid over-compressing and losing natural dynamics. Adjust the attack and release times to shape the vocal’s envelope, ensuring a natural and transparent sound.

Adding Reverb And Delay Effectively

Reverb and delay are two common effects used in vocal mixing to add depth and space. They can create a sense of ambiance, making the vocals sound more polished and professional. However, it’s crucial to use these effects tastefully and in moderation.

Reverb simulates the sound reflections in a room, adding a sense of space and depth to the vocals. To use reverb effectively, consider the size and character of the virtual space you want to create. A large hall reverb can give the vocals an expansive and epic feel, while a smaller room reverb can provide a more intimate and natural sound.

Delay is another effect that can enhance the vocals by creating echoes and repetitions. It can add a sense of movement and interest to the vocals. When using delay, be mindful of the timing and feedback settings. Experiment with different delay times and feedback amounts to create unique and creative vocal effects.

Key Points for EQ and Compression Key Points for Reverb and Delay
  • Boost or cut frequencies to shape the vocal’s sound.
  • Focus on clarity, presence, and balance.
  • Use compression to control dynamics and enhance consistency.
  • Set an appropriate threshold and ratio for natural results.
  • Adjust attack and release to shape the vocal’s envelope.
  • Reverb adds depth and space to the vocals.
  • Consider the size and character of the virtual space.
  • Delay creates echoes and repetitions for movement.
  • Experiment with timing and feedback settings for unique effects.
  • Use these effects tastefully and in moderation.

By understanding EQ and compression techniques, you can enhance the clarity and impact of vocals in your mix. Furthermore, using reverb and delay effectively can add depth and interest to your vocals, creating a more professional and immersive sound. Experiment, trust your ears, and remember to strike a balance between the technical aspects and artistic expression when mixing vocals.

Troubleshooting Common Issues

Recording and mixing vocals can be a challenging task, especially when dealing with common issues that can affect the quality of your recordings. This section will explore two major problems that you may encounter when recording vocals and provide practical solutions to overcome them.

Dealing With Sibilance And Plosives

Sibilance and plosives are two common problems that can plague vocals recordings. Sibilance occurs when the ‘ss’, ‘ch’, and ‘sh’ sounds are excessively harsh and pronounced. Plosives, on the other hand, are the sharp bursts of air that occur when words with ‘p’ and ‘b’ sounds are pronounced.

To tackle sibilance, consider using a de-esser plugin during the mixing process. This handy tool helps to tame and reduce the excessive harshness of the ‘s’ sounds, providing a smoother and more pleasant listening experience. Alternatively, you can adjust the microphone angle or distance to minimize the direct impact of sibilance.

When it comes to dealing with plosives, using a pop filter is a must. This simple device is placed in front of the microphone to mitigate the impact of plosives by diffusing the bursts of air before they reach the microphone diaphragm. Additionally, positioning the microphone slightly off-axis or at an angle can also help minimize plosives.

Fixing Vocal Recording Noise

Vocal recording noise can greatly affect the overall quality and clarity of your vocal recordings. To tackle this issue, there are several steps you can take during both the recording and mixing process.

Firstly, ensure that you are recording in a quiet environment with minimal background noise. Acoustic treatment in your recording space can also help to reduce unwanted reflections and noise interference. Moreover, using a high-quality microphone with good noise rejection capabilities can significantly reduce recording noise.

If you still encounter noise issues during the recording, consider using a noise gate plugin during the mixing process. This plugin helps to eliminate any unwanted background noise during silent or low-volume parts of the vocal recordings.

In addition to the noise gate, applying equalization (EQ) can also help reduce specific frequencies that contribute to the noise. The precise frequency range can vary depending on the type of noise, so experiment with EQ settings to find the optimal to minimize noise while preserving the natural character of the vocals.

Record And Mix Vocals  : Master the Art of Vocal Recording and Mixing


Credit: emastered.com


Record And Mix Vocals  : Master the Art of Vocal Recording and Mixing


Credit: www.practical-music-production.com


Frequently Asked Questions For Record And Mix Vocals


How Do You Record Vocals At Home?


To record vocals at home, set up a quiet space, use a microphone and audio interface, position the microphone properly, adjust the gain, and hit record. Make sure to use headphones for monitoring and consider using pop filters or reflection filters for improved sound quality.


What Is The Best Microphone For Recording Vocals?


The best microphone for recording vocals depends on your budget and needs. Some popular options include the Shure SM58 for live performances, the Audio-Technica AT2020 for home studios, and the Neumann U87 for professional recordings. Consider factors like sensitivity, frequency response, and polar pattern when choosing a microphone.


How Do You Mix Vocals In A Song?


To mix vocals in a song, start by cleaning up the audio with noise reduction and EQ. Use compression to control the dynamics and add EQ, reverb, and delay for desired tonal and spatial characteristics. Use automation to balance the vocal levels and ensure they sit well in the mix.


Experiment and trust your ears while mixing.


Conclusion


Mastering the art of recording and mixing vocals is essential for achieving professional-quality music. By following the tips and techniques discussed you can enhance the clarity, presence, and impact of your vocal tracks. Keep experimenting, practicing, and refining your skills to achieve the perfect vocal sound for your music.


Categories
Archive

Safely Disconnect Audio Interfaces: 5 Foolproof Methods

To safely disconnect audio interfaces, always use the “eject” or “safely remove hardware” option on your computer before unplugging the device. This helps prevent data corruption and hardware damage.


Audio interfaces play a critical role in capturing high-quality sound for your recordings. However, it’s essential to handle them properly, ensuring their longevity and optimal performance. In this guide, we’ll explore the importance of safely disconnecting audio interfaces as well as the steps you should follow to do so correctly.


By following these guidelines, you can maintain the integrity of your audio equipment and avoid potential issues that may arise from improper disconnection practices.

Safely Disconnect Audio Interfaces: 5 Foolproof Methods


Credit: qnextech.com


Why Safe Disconnection Is Important

Safe disconnection of audio interfaces prevents data loss.

This practice helps in avoiding hardware damage.

When you disconnect your audio interface safely, you reduce the risk of data loss and hardware damage.

Method 1: Using The Eject Function

Step-by-step Guide

  1. Locate the audio interface icon on your computer’s taskbar.
  2. Right-click on the icon to reveal a drop-down menu.
  3. Select the ‘Eject’ option to safely disconnect the audio interface.
  4. Wait for the system to complete the ejection process before physically disconnecting the device.

Method 2: Unplugging Usb Audio Interfaces

When it comes to safely disconnecting USB audio interfaces, it’s crucial to follow the proper shutdown procedures and guidelines to avoid any potential damage. Unplugging USB audio interfaces without following the correct protocol can lead to issues such as data corruption and hardware malfunctions. In this section, we will discuss Method 2 for disconnecting USB audio interfaces and provide essential guidelines for a smooth and secure disconnection process.

Proper Shutdown Procedure

Before unplugging your USB audio interface, it’s essential to ensure that all active connections and processes are safely terminated. Close all audio software applications and pause or stop any ongoing recordings or playback. Make sure that the device is not actively transmitting data, as sudden unplugging during data transfer can lead to potential data loss or corruption. By following a proper shutdown procedure, you can mitigate the risk of damage to your USB audio interface and associated hardware.

Guidelines For Unplugging

When it comes to actually unplugging the USB audio interface, there are a few critical guidelines to keep in mind. Always remove the device using the designated removal option in your operating system. Avoid simply yanking the USB cable as this can lead to electrical shorts or damage to the interface. Wait for a few seconds after initiating the removal process to ensure that all residual power is safely drained from the device before physically disconnecting it. By adhering to these guidelines, you can minimize the risk of hardware malfunction and ensure a safe and smooth disconnection process.

Method 3: Software-based Disconnection

When it comes to safely disconnecting audio interfaces, another method you can rely on is software-based disconnection. This method involves using operating system utilities to disconnect your audio interface from your computer. This can be a convenient and efficient way to ensure a smooth disconnection without any data loss or damage to your equipment.

Using Operating System Utilities

Most operating systems provide built-in utilities that allow you to safely disconnect external devices like audio interfaces. These utilities are specifically designed to handle the disconnection process smoothly and efficiently, minimizing any potential risks or issues. Using these utilities ensures that all data being transferred between your computer and the audio interface is properly halted before disconnecting.

Best Practices For Software Disconnection

When utilizing software-based disconnection for your audio interface, it’s important to follow some best practices to ensure a secure disconnection:

  1. Close any audio software: Before disconnecting your audio interface, make sure to close any audio software or applications that may be using it. This includes digital audio workstations, media players, or any other program that accesses the audio interface. Closing these programs ensures that no active data transfer is taking place when you disconnect.
  2. Use the system tray or menu: Many operating systems offer a system tray or menu where you can safely eject or disconnect external devices. Look for the icon representing your audio interface in these areas and right-click or select the appropriate option to disconnect.
  3. Wait for the confirmation: After selecting the option to disconnect your audio interface, wait for the operating system to confirm that it is safe to physically disconnect the device. This confirmation message ensures that all necessary processes have been completed and it is the right time to disconnect the audio interface.
  4. Physically disconnect the device: Once you receive the confirmation, you can safely unplug or disconnect your audio interface from your computer. Be gentle while removing any cables or connectors to avoid any damage to the equipment.

By adhering to these best practices, you can ensure a smooth and secure disconnection of your audio interface using software-based methods. Following these steps reduces the risk of data loss, equipment damage, or any other potential issues that may arise during the disconnection process.

Method 4: Powering Down External Audio Interfaces

Properly disconnecting an audio interface is essential to prevent damage and prolong its lifespan. In this method, we will discuss the sequential power-off process and the safety measures you need to consider.

Sequential Power-off Process

To safely power down your external audio interface, follow these steps:

  1. Turn off any connected monitors or speakers first. This prevents any sudden pops or audio spikes that could potentially harm your equipment or ears.
  2. Next, turn down the volume on both your computer and audio interface. Gradually reducing the volume minimizes the risk of any sudden loud sounds during the disconnection process.
  3. Once the volume is lowered, locate the power switch on your audio interface. It is usually located on the front or back panel of the device.
  4. Switch off the power button of your audio interface. Give it a few seconds to completely power down.
  5. Finally, you can disconnect any cables connecting your audio interface to your computer or other devices. Make sure to gently remove them while holding the connectors instead of pulling on the wires.

Safety Measures For Powering Down

When powering down your external audio interface, remember to take these safety measures:

  • Always refer to the manufacturer’s instructions for specific power-off procedures. Each audio interface may have slight variations in the process.
  • Ensure that your audio interface is not in use and that all audio applications and software are closed before starting the power-off process.
  • Do not abruptly unplug or turn off the audio interface without following the proper power-off sequence, as this can cause damage to the device and may lead to data loss.
  • Keep your audio interface away from liquids and extreme temperatures. Powering down is an ideal time to safeguard your equipment by storing it properly in a safe and dry environment.
  • Regularly inspect your audio interface’s power cables and connectors for any signs of wear or damage. Replace any faulty cables immediately to avoid potential hazards.

By following this sequential power-off process and implementing the safety measures, you can safely disconnect your external audio interface and ensure its longevity and optimal performance.

Safely Disconnect Audio Interfaces: 5 Foolproof Methods


Credit: www.amazon.com


Method 5: Using Dedicated Disconnect Tools

When disconnecting audio interfaces, it’s crucial to ensure the process is executed safely to prevent damage to the equipment. One effective method for safely disconnecting audio interfaces is by using dedicated disconnect tools. These tools are specifically designed to streamline the disconnection process and minimize the risk of any potential damage. Let’s explore the benefits and considerations of using dedicated disconnect tools for audio interfaces.

Overview Of Disconnect Tools

Dedicated disconnect tools are specially crafted devices that facilitate the safe disconnection of audio interfaces. These tools are engineered with precision and consideration for the delicate components of audio interfaces, ensuring a smooth and damage-free disconnection process. They often feature ergonomic designs and are equipped with mechanisms that minimize the risk of electrical surges or signal interference during the disconnection.

Benefits And Considerations

  • Efficient Disconnect: Dedicated disconnect tools streamline the disconnection process, saving time and effort.
  • Reduced Risk: These tools mitigate the risk of potential damage to audio interfaces and associated equipment.
  • Safety: By employing dedicated disconnect tools, the safety of both the user and the audio interface is prioritized.
  • Longevity: Consistently utilizing dedicated disconnect tools can contribute to the prolonged lifespan of audio interfaces.


Safely Disconnect Audio Interfaces: 5 Foolproof Methods


Credit: answers.microsoft.com


Frequently Asked Questions Of Safely Disconnect Audio Interfaces


How Do I Safely Disconnect My Audio Interface?


To safely disconnect your audio interface, make sure to turn off any audio software or programs using it. Then, unplug the USB or FireWire cable connected to your computer. Finally, power down the audio interface by pressing the power button or unplugging it from the power source.


Conclusion


Safely disconnecting audio interfaces is crucial for maintaining the integrity of your equipment. By following the proper steps, you can ensure longevity and optimal performance of your devices. Remember to power off, unplug, and wait for all lights to turn off before unplugging any cables.


By prioritizing safe practices, you can avoid potential damage and enjoy seamless audio experiences.