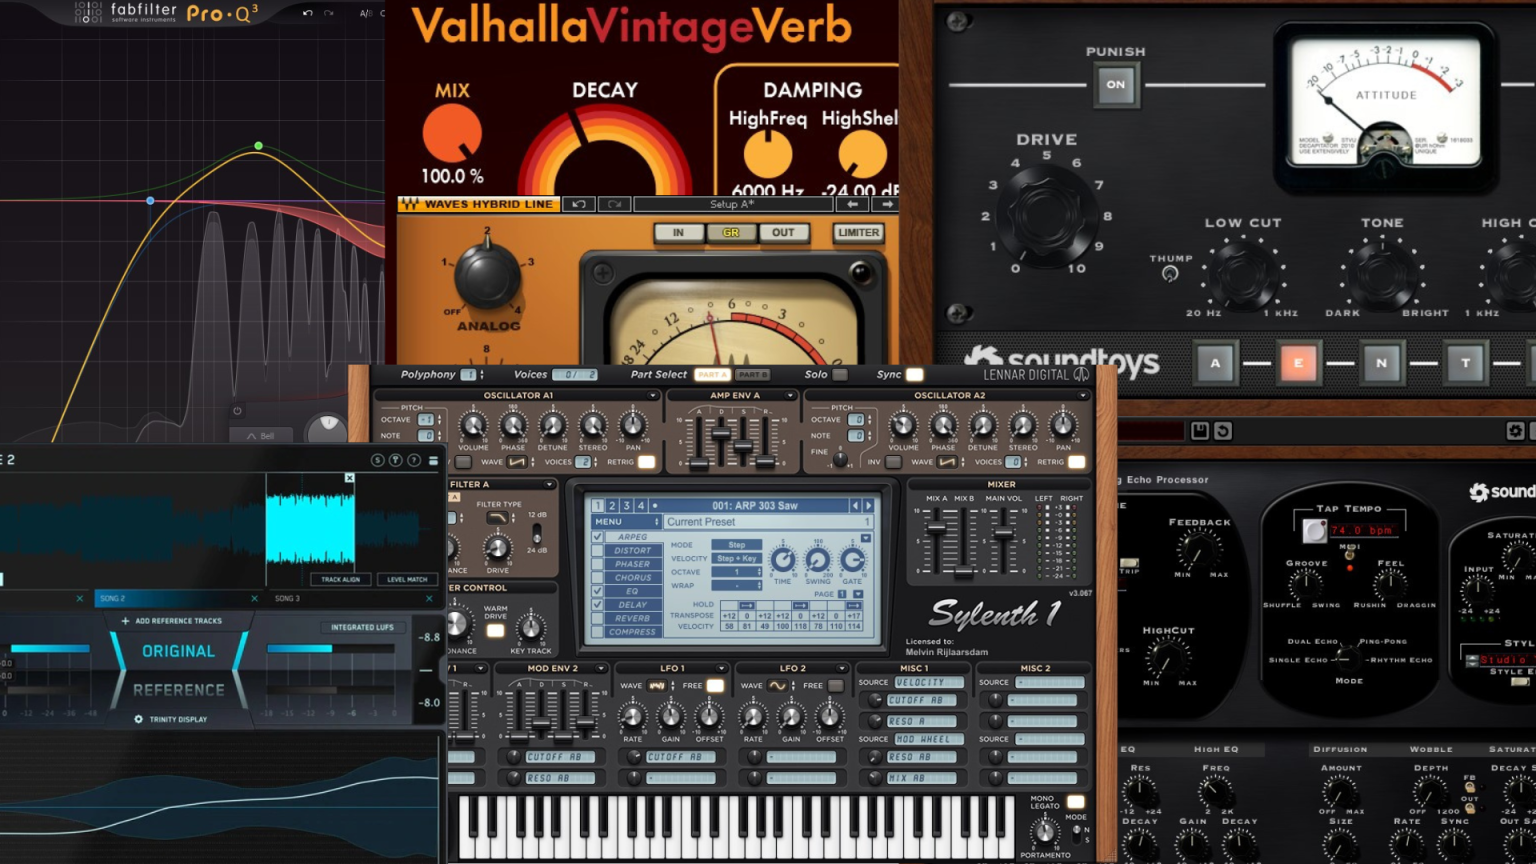
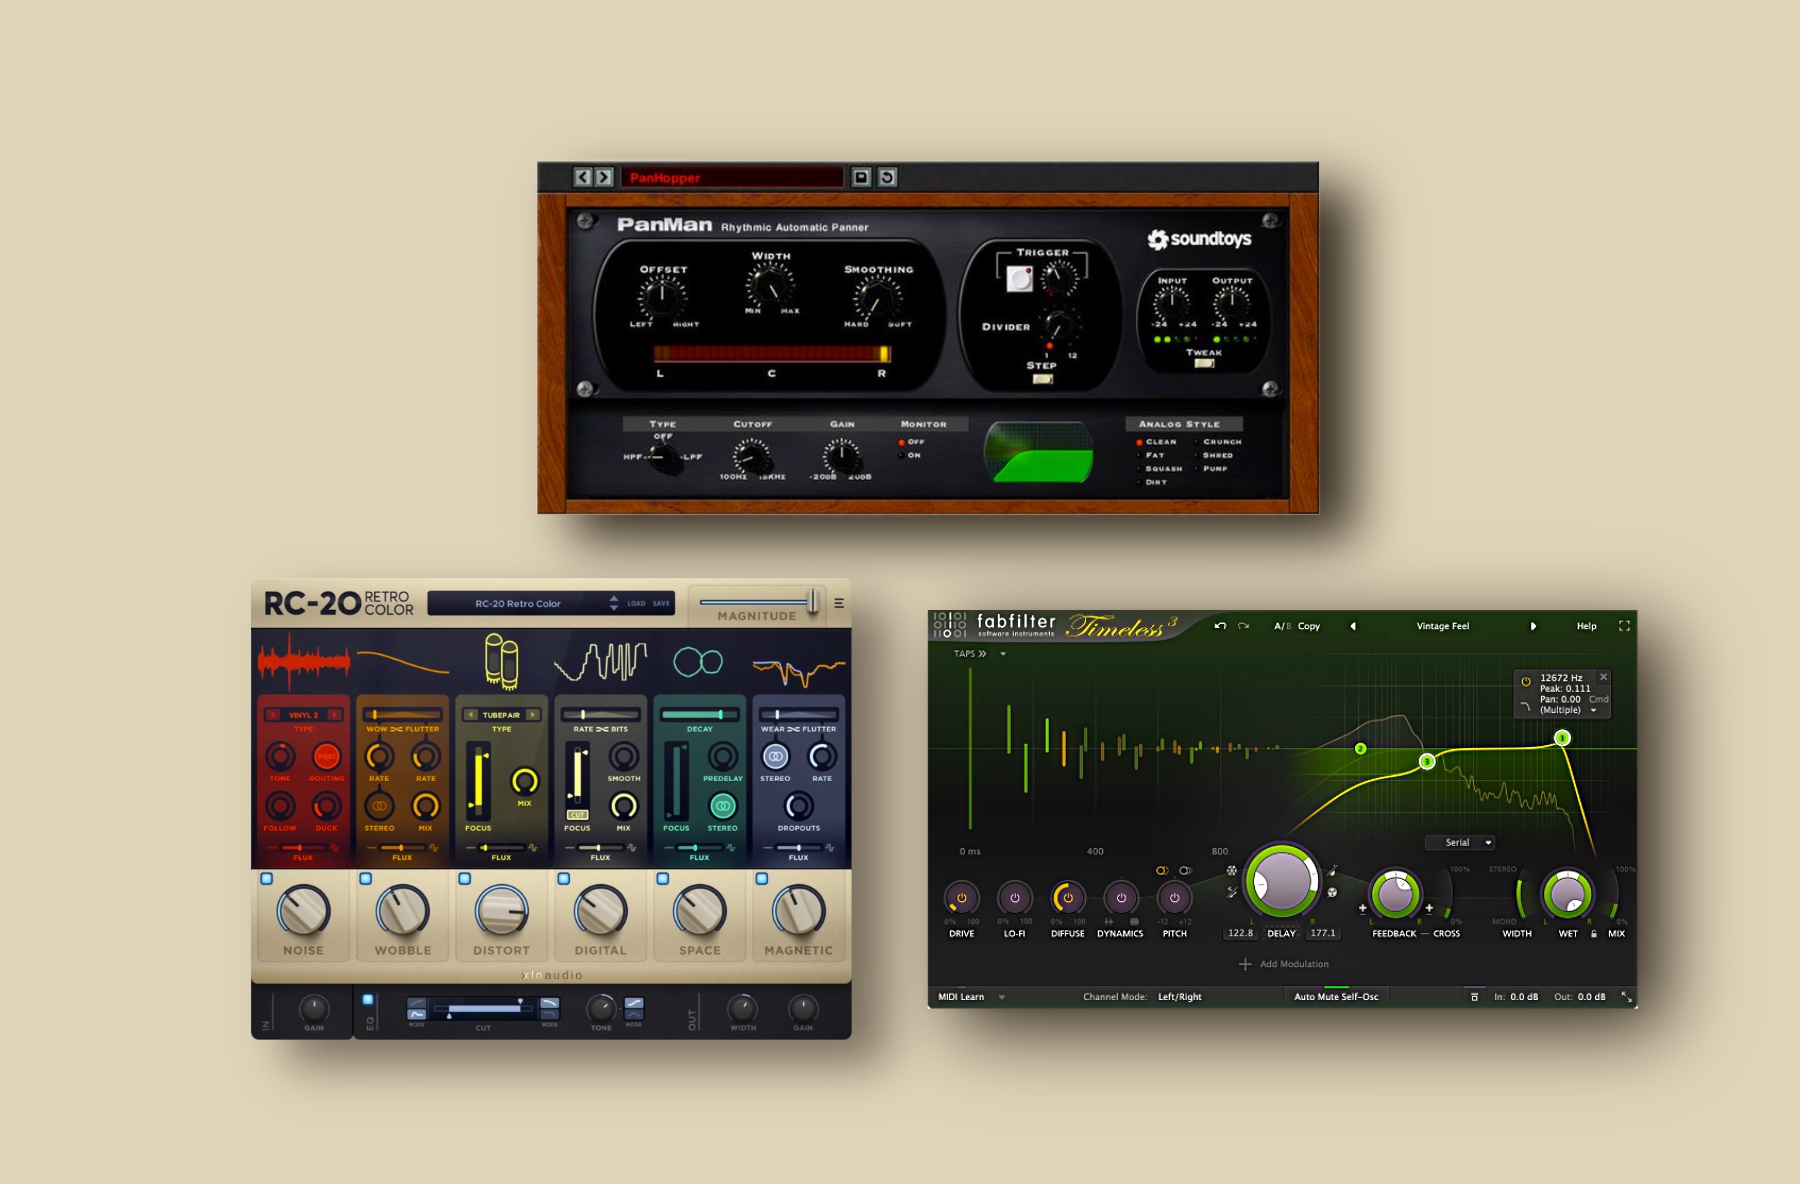
Plugins for music producers can enhance the quality and creativity of their work. These plugins provide a range of tools and effects to manipulate audio, improve mixing and mastering, and add unique textures and sounds to productions.
As a music producer, the right plugins can make all the difference in taking your tracks to the next level. From EQs and compressors to reverbs and delays, there are countless options available to suit your specific needs and preferences.
Some popular plugins for music production include Serum, Kontakt, Omnisphere, and Waves. The key is to find a balance between selecting plugins that fit your workflow and style, while also experimenting with new ones to push your creativity. With the right plugins, music producers can achieve the professional sound and unique flair that sets their work apart.
Types Of Plugins
Music producers can benefit from various types of plugins, such as virtual instruments, effects, and mixing tools. These plugins can enhance the sound quality, creativity, and efficiency in music production.
Types of Plugins: Plugins are essential tools that multiplies the power of digital audio workstations (DAWs) and allows producers to create outstanding soundtracks. Typically, plugins are categorized into three main types: Virtual Instruments, Effects Plugins, and Utility Plugins. Virtual Instruments: Virtual Instruments are standalone software instruments that mimic real instruments. These plugins give producers access to an array of electronic and acoustic instrumental simulations. It’s possible to play a virtual instrument through a MIDI controller or keyboard attached to a computer. The following are examples of Virtual Instruments plugins: – Grand Piano: provides a range of piano sounds such as a grand, upright, or electric piano. – Omnisphere: a popular and versatile plugin that delivers exceptional sound design and synthesis capabilities. – Kontakt: a sampler designed with the flexibility of composing grand orchestras works, choir pieces, or EDM bangers in mind. Effects Plugins: Effects Plugins purpose is to shape and modify existing audio signals. Producers use these plugins to add spread, echo, or distortion, depending on the required effect. Effects plugins provide the producer with the possibility to hyper-customize their sounds. The following are examples of Effects Plugins: – Reverb: adds reverberation to the sound, defining the space and distance that the listener perceives it. – Delay: adds a delayed echo to the sound that provides a sense of space to the listener. – Distortion: adds harmonic excitement to the sound and can make it more aggressive or distorted if required. Utility Plugins: Utility Plugins are designed to help producers carry out different tasks and streamline workflows. They usually center around metering, tuning, and alignment for final outputs. Here are some examples of Utility Plugins: – EQ (Equalization): balances the frequencies on an individual track or a mix to ensure that they complement each other. – Compressor: reduces the dynamic range of a track and provides greater control over the loudness of a mix. – Mastering Plugins: these are plugins that are used to finalize the mix and add the final polish. Conclusion: The different types of plugins available to music producers provide a wide range of tools and possibilities for creating music. Whether it’s Virtual Instruments, Effects or Utility Plugins, these tools assist and guide producers to create unique and distinctive sounds. As a music lover, understanding the different categories of plugins available will go a long way in helping you to create better soundscapes.
Credit: www.optoproductions.com
Top Plugins For Music Producers
Discover the top plugins for music producers to take your productions to another level. These exceptional plugins include VSTs, synths, virtual instruments, and more. Enhance your music production and unleash your creativity with these versatile plugins.
Plugins are an essential part of music production and can make a huge difference in the quality of sound. In today’s world, there are many plugins for music producers to choose from, making it overwhelming to pick the right one. We have compiled a list of the best plugins for music producers, from Native Instruments Komplete, Waves Audio Plugins, Izotope Plugins, Spectrasonics Omnisphere to FabFilter Plugins.
Native Instruments Komplete
Native Instruments Komplete is one of the most popular plugins among music producers. With over 65,000 sounds and more than 600GB of samples, it is a comprehensive package of high-quality sounds, synths, and instruments. It also includes popular software like Kontakt, Reaktor, and Guitar Rig, which can be used to create music across different genres. You can use sounds from Komplete in any digital audio workstation (DAW) like Ableton, Logic, or FL Studio.
Waves Audio Plugins
Waves Audio Plugins is another well-known plugin for music producers. The Waves Gold Bundle includes 42 plugins, and you can choose to buy individual plugins to suit your needs. Waves is acclaimed for its mastering plugins like the L3-LL Multimaximizer and the SSL G-Master Buss Compressor. Waves Audio Plugins is a bit on the expensive side, but the quality of sound makes it worth the investment.
Izotope Plugins
Izotope Plugins is one of the most popular plugins for mixing and mastering. Their Neutron 3 Advanced plugin is a go-to tool for music producers, providing a one-stop-shop for all your mixing needs. It analyzes your audio and offers suggestions for EQ, compression, and other settings. Izotope Plugins include popular software like RX 8, which is a must-have for audio restoration projects.
Spectrasonics Omnisphere
Spectrasonics Omnisphere is a virtual instrument plugin that’s widely used in music production. With over 14,000 sounds, it is a powerful tool for creating music across different genres. It includes sounds ranging from traditional instruments like pianos to electronic sounds like synths and pads. Omnisphere is known for its unique sounds and the ability to manipulate them.
Fabfilter Plugins
FabFilter Plugins is a collection of plugins for mixing and mastering. Their Pro-Q 3 equalizer plugin is one of the best in the market, providing a clear and precise sound. Their Pro-MB multiband compressor and the Pro-L 2 limiter are also popular among music producers. FabFilter Plugins are easy to use and provide a professional level of sound quality. In conclusion, Native Instruments Komplete, Waves Audio Plugins, Izotope Plugins, Spectrasonics Omnisphere, and FabFilter Plugins are top plugins for music producers. With these plugins in hand, music production becomes easier, faster, and more fun. They are essential tools in a music producer’s arsenal, regardless of the music genre.
How To Choose Plugins
When choosing plugins for music production, it’s important to consider their compatibility with your DAW, their quality, and their functionality. Take the time to research and read reviews from trusted sources before making a purchase, and consider whether each plugin is necessary for your specific needs and workflow.
When it comes to producing music, plugins are essential tools that can enhance workflow, creativity, and the overall quality of your music. With the plethora of plugins available in the market, selecting the best plugins that cater to your workflow can be daunting. It is imperative to understand what to look for in a plugin before making a purchase. This section will illustrate the critical factors to consider when choosing plugins.
Compatibility
The primary factor to consider when choosing plugins is compatibility. Compatibility issues can occur if your Digital Audio Workstation (DAW) and operating system (OS) are not compatible with a plugin. It is crucial to verify if a plugin is compatible with your DAW and OS before making a purchase. Most plugin developers provide compatibility information on their websites, making it easy for you to make an informed decision. You can also seek recommendations from your peers or consult with experts to ensure that you buy a plugin that works seamlessly with your DAW and OS.
Functionality
The functionality of a plugin is another critical factor to consider. It is essential to understand what a plugin does and how it does it. A plugin can either be a virtual instrument or effect. Virtual instruments generate sounds that create melodies, beats, or chords, while effects modify the sound of a recording. Understanding the type of plugins that best suit your workflow can help you narrow down your options. You can also consider the number of features a plugin offers and how they can aid your music production process.
Pricing
Pricing is a crucial factor to consider when choosing plugins. The cost of a plugin can vary, depending on several factors such as the features, reputation of the developer, and the market demand. It is essential to set a budget and identify plugins that fall within your budget. However, it is crucial to note that cheap plugins may compromise quality or functionality. Conversely, an expensive plugin does not always guarantee quality or functionality. You can also research alternative plugins that offer similar features at a fraction of the cost. In conclusion, choosing plugins is a crucial step in music production. Understanding compatibility, functionality, and pricing can help you make informed decisions that cater to your workflow and budget. By applying the factors discussed in this section, you can save time, money, and enhance the overall quality of your music production.
Credit: plus.pointblankmusicschool.com
Credit: thebasementxxx.com
Frequently Asked Questions Of Plugins For Music Producers
What Are The Best Plugins For Music Production?
The best plugins for music production are subjective and depend on personal preference. However, some popular choices include Native Instruments Komplete 13, Waves SSL E-Channel, Valhalla VintageVerb, and FabFilter Pro-Q 3.
What Are Plugins Used For In Music Production?
Plugins are software programs that are used in music production to enhance the creative process and functionality of digital audio workstations. These can be used for tasks such as adding effects, virtual instruments, equalization and compression to audio tracks.
Do Producers Use Plugins?
Yes, producers use plugins extensively in their production work. Plugins enhance the sound quality, provide creative effects and add depth to the tracks. These plugins help in achieving desired sound quality and make the track stand out. From EQs to reverb, compression to distortion, producers use plugins for a variety of purposes.
What Plugins Do Artists Use?
Artists commonly use plugins for graphic design, photo editing, and digital painting. Popular options include Adobe Photoshop, Illustrator, Lightroom, and Procreate. Additionally, some artists use plugins for 3D modeling, animation, and video editing, such as Blender and Final Cut Pro.
Conclusion
Plugins are a must-have for music producers who wish to take their craft to the next level. Using a combination of the right plugins can enhance the quality, efficiency, and creativity of your music production process. With thousands of plugins available on the market, selecting the right ones can be a daunting task.
However, armed with the knowledge provided by this blog post, you can now make informed decisions that will help you create better music. Try out new plugins and experiment with different combinations to unlock your full potential as a music producer.
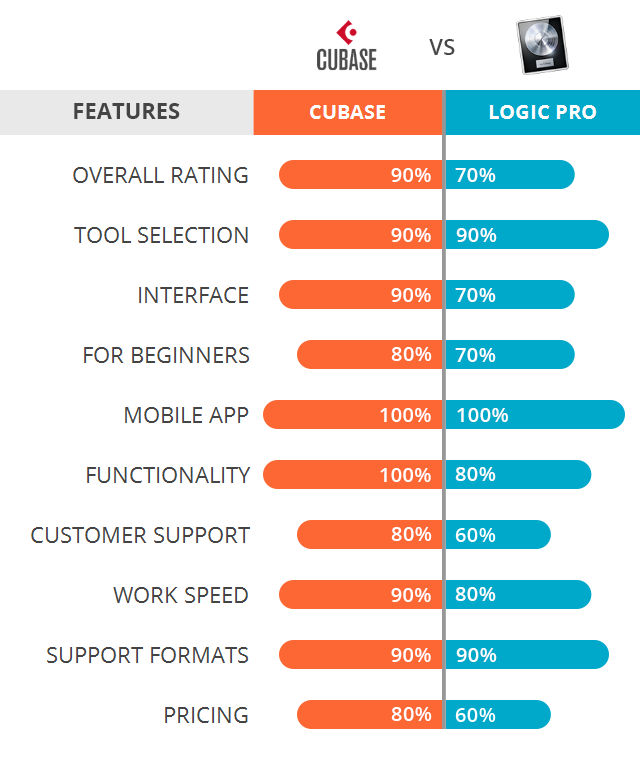
Logic Pro X is more user-friendly and has a better-integrated interface compared to Cubase. Both are popular music production software with unique features catering to different users’ needs.
Music production software has flooded the market, making it difficult to choose between them. Both DAWs are two music production software that stands out from the crowd. We will compare Logic Pro X vs. Cubase and determine which one is best suited for your needs.
Both software boasts of unique features that cater to specific user needs. Logic Pro X has more than 2800 instruments and effects, whereas Cubase shines in MIDI editing, audio recording, and mixing. Read on to find out more about their differences and which one is more suited to your style of music production.
Credit: fixthephoto.com
Logic Pro X And Cubase: Features And Interface
Logic Pro X and Cubase are both professional music production software with impressive features and interface. While Logic Pro X is popular among Mac users, Cubase offers more flexibility for both Mac and PC users with advanced MIDI and audio editing capabilities.
When it comes to music production software, Logic Pro X and Cubase are two of the most popular options available. Both offer a range of features and user-friendly interfaces that make music production accessible to both professionals and amateurs. However, there are some key differences between these two software options that users should be aware of before making a decision.
Differences In Features
While both Logic Pro X and Cubase offer comprehensive sets of features, they differ in some significant ways. One of the biggest differences is that Logic Pro X is only available on Mac, while Cubase is compatible with both Mac and Windows. Additionally, Logic Pro X has some unique features such as Flex Pitch, which allows users to manipulate the pitch of individual notes within an audio recording. On the other hand, Cubase offers some advanced features such as VST Connect, which allows users to collaborate with other musicians remotely in real-time. Cubase also has a more advanced audio warping feature than Logic Pro X, allowing for more precise timing adjustments.
Logic Pro X And Cubase: Ui Of Logic Pro X
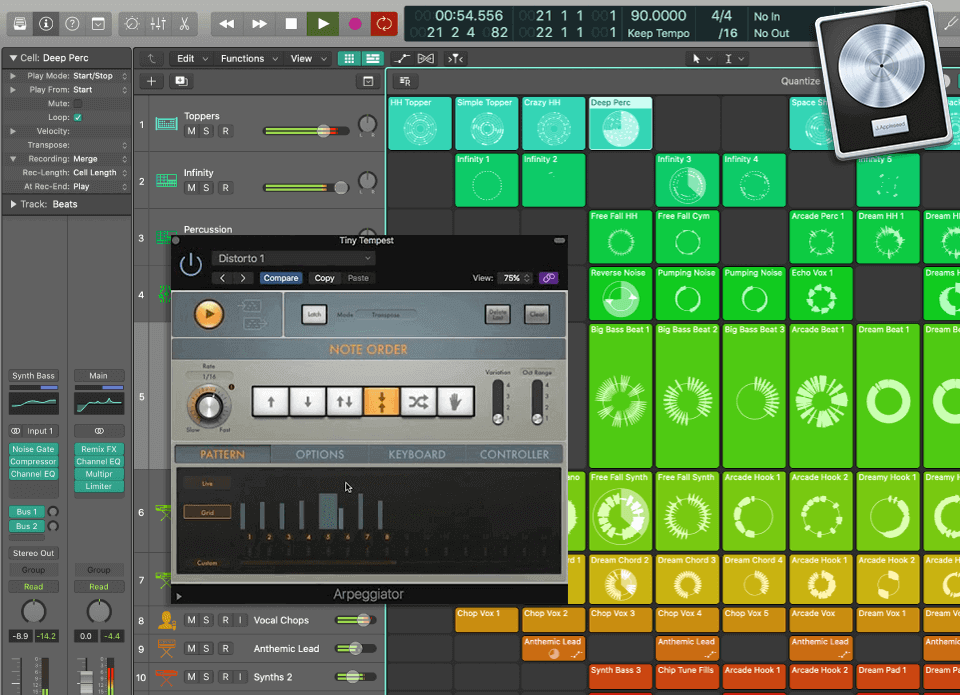
The Logic Pro X interface is designed with user-friendliness in mind. The main window is divided into different areas, each with its own set of tools and options. The interface is customizable so that users can choose which tools they want to use and where they want them to appear on the screen. The interface is also highly responsive and supports Retina displays. In addition to the main interface, Logic Pro X also offers a variety of specialized windows for different types of tasks. For example, there is a dedicated mixer window for adjusting levels and effects, a score editor for writing sheet music, and a drum machine designer for creating custom drum kits.
Ui Of Cubase
The Cubase interface is similarly customizable, allowing users to choose which elements they want to have on screen and where they want them to appear. The interface can also be scaled up or down to suit different screen sizes or user preferences. This makes it easy to switch between Mac and Windows operating systems as well as different types of computer monitors. One unique feature of the Cubase interface is the Channel Strip, which provides access to a wide range of mixing tools in a single window.
This makes it easy to adjust levels, apply effects, and make other changes to audio tracks on the fly. Both Logic Pro X and Cubase have user-friendly interfaces that make it easy for musicians to focus on their creativity rather than the technical details of music production. However, each software has its own set of unique features and tools that make it ideal for different types of users. By comparing the features and interfaces of both software options, users can make an informed decision and select the option that best suits their needs.
Logic Pro X And Cubase: Audio Editing
Logic Pro X and Cubase are both popular Digital Audio Workstations (DAW) used for audio editing by professionals. While Logic Pro X is mostly used by Mac users, Cubase is widely popular among Windows users. Both these DAWs offer a range of advanced editing features, making it challenging to choose one over the other.
Audio editing is a crucial part of the music production process. It’s where you can fine-tune each instrument, adjust timing, and create the perfect mix. Two of the most popular DAWs for audio editing are Logic Pro X and Cubase. In this article, we’ll explore the various tools for audio editing in both software and compare their workflow.
Tools For Audio Editing In Logic Pro X
Logic Pro X offers an extensive range of tools for audio editing. Here are some of its most notable features:
Flex Time – This tool allows you to adjust the timing of individual audio segments to fix timing issues or tighten up a groove.
Flex Pitch – With Flex Pitch, you can fine-tune the pitch of individual notes in audio recordings.
Quantize – Quantize allows you to snap MIDI and audio regions to a grid for a more accurate, robotic feel.
Smart Tempo – This feature automatically detects the tempo of your recording and adjusts it to match the project tempo, a handy tool for live recordings.
Audio to MIDI Conversion – Logic Pro X detects the pitch and timing of audio recordings and can convert it to MIDI data.
Tools For Audio Editing In Cubase
Cubase has a unique user interface and workflow that differentiates it from Logic Pro X. Here are some of the most popular tools for audio editing in Cubase:
Variaudio – This tool allows for pitch correction and advanced pitch shifting of individual notes.
Hitpoint Detection – Cubase can detect the hitpoints in an audio recording and quantize it based on those points.
Time Warp – Time Warp allows you to change the timing of individual audio segments to fix timing issues.
Audio Warp – Audio Warp can quantize and stretch audio recordings to match a project tempo, a handy feature for live recordings.
VariAudio 3 – This upgraded feature offers more natural-sounding pitch correction options and advanced tuning capabilities.
Logic Pro X And Cubase: Workflow Comparison
The workflow in both Logic Pro X and Cubase is relatively similar and based on your personal preference. However, the overall look and feel of the two DAWs are different, and the tools for audio editing have different names. Here’s a quick comparison of the workflow between the two: In Logic Pro X, you will typically use the following order of operations:
Flex Time for timing errors
Flex Pitch for pitch adjustments
Quantize MIDI and Regions
Meanwhile, in Cubase, the preferred order of operations is:
Hitpoint Detection for quantizing
Time Warp for timing adjustments
Variaudio for pitch correction
Ultimately, both Logic Pro X and Cubase offer a fantastic range of tools for audio editing. It comes down to personal preference, workflow, and the type of music you want to create.
Midi Editing
Logic Pro X and Cubase are both excellent DAWs for MIDI editing. While Logic is known for its ease of use and intuitive interface, Cubase offers a more advanced set of editing tools and functions to enhance productivity and creativity.
If you have experience with composing digital music, the common software tools you may have heard before are Logic Pro X and Cubase. Both these music production software has their strengths and weakness. One important aspect of digital music production is MIDI editing. Let’s compare the two software in terms of their MIDI editing features.
Logic Pro X And Cubase: Midi Features In Logic Pro X
Logic Pro X provides a user-friendly interface that comes packed with MIDI tools. The software has a vast range of advanced MIDI features to help create music. Users can comprehensively adjust and manipulate MIDI notes with the help of features like Smart Quantize and the Piano Roll Editor. The Flex Pitch feature enables users to change the pitch of individual audio notes with ease. Logic Pro X also offers a step sequencer that allows users to program beats and rhythms quickly.
Midi Features In Cubase
Cubase has gained popularity among music creators worldwide owing to its extensive MIDI editing capabilities. It enables fine-tuning of innumerable MIDI parameters using features such as Drum Editor, Score Editor, and the Logical Editor. In Cubase, users can manipulate several MIDI clips simultaneously. The software also has a powerful MIDI recording and editing suite that enables the tweaking of individual notes, volumes, and velocity.
Logic Pro X And Cubase: Ease Of Use
When it comes to ease of use, both Logic Pro X and Cubase are relatively easy to use in their own way. Logic Pro X scores over Cubase in terms of workflow as it comes with a built-in comprehensive library of MIDI effects. However, Cubase covers a broader range of workflow as it is integrated better with other Steinberg products. Additionally, Cubase has a much more customizable workspace, allowing creators to adjust their user interface to their preferences.
In conclusion, choosing between Logic Pro X and Cubase is merely a matter of preference, as both these software tools deliver powerful MIDI editing features. If you’re a music producer with a penchant for electronic music production, you’ll appreciate Logic Pro X’s built-in tools. On the other hand, if you’re a scoring editor or want to produce music in a professional studio setting and need a tool that offers excellent music composition and sound engineering capabilities, then Cubase is the way to go.
Virtual Instruments And Effects
Logic Pro X and Cubase are both popular software options for producing music with virtual instruments and effects. While Logic Pro X is renowned for its ease of use and compatibility with Apple products, Cubase boasts complex features and offers a wider range of instruments and effects.
Ultimately, the choice between these two programs depends on personal preference and the specific needs of the user.
Virtual Instruments And Effects Comparison: Logic Pro X Vs Cubase
When it comes to digital audio workstations (DAWs), Logic Pro X and Cubase are two of the most popular options on the market. Both are highly capable programs that offer a wide range of features and tools for music production. One crucial aspect of any DAW is the quality and variety of its virtual instruments and effects plugins. In this article, we’ll take a closer look at the virtual instruments and effects offered by Logic Pro X and Cubase, comparing the included options and highlighting additional plugins available for each program.
Logic Pro X And Cubase: Comparison Of Included Virtual Instruments
When it comes to virtual instruments, both Logic Pro X and Cubase offer a wide variety of options, ranging from synths to orchestral instruments to drum machines. However, there are some key differences in the types of instruments included with each program. In Logic Pro X, users have access to over 70 virtual instruments, including several that are exclusive to the program, such as the popular Alchemy synth. Logic also includes a number of software instrument libraries, such as the Studio Strings and Retro Synth collections, which provide high-quality recordings of various instruments and sounds.
Cubase, on the other hand, includes a more modest collection of virtual instruments. Its Halion Sonic SE software synthesizer offers a range of sounds and presets, but users may find themselves wanting more variety. However, Cubase’s included instrument library is expandable through the purchase of additional plugins, allowing users to tailor their setup to their specific needs.
Comparison Of Included Effects Plugins
In addition to virtual instruments, effects plugins are a crucial part of any music production setup. Both Logic Pro X and Cubase offer a variety of effects plugins, from EQs to compressors to reverbs. Logic Pro X’s effects plugin suite is both extensive and high-quality, with over 80 different plugins included. This library includes both classic analog emulations and modern digital effects, giving users a wide range of sonic possibilities. Cubase also includes a solid collection of effects plugins, including a range of EQs and dynamics processors. However, some users may find the selection a bit limited compared to Logic Pro X. As with virtual instruments, Cubase’s effects library can be expanded through the purchase of additional plugins.
Logic Pro X And Cubase: Additional Virtual Instruments Available
While both Logic Pro X and Cubase offer a strong selection of built-in virtual instruments, there are many additional plugins available for each program that can greatly expand the sonic palette. For Logic Pro X, some popular third-party virtual instruments include Omnisphere, Kontakt, and Serum. These plugins offer a wealth of additional sounds and features that can take a user’s production to the next level. Cubase users have access to a range of additional instrument plugins as well, including the HALion and Groove Agent series.
These plugins offer a level of customization and control that is not available with the built-in virtual instruments. Overall, when it comes to virtual instruments and effects, both Logic Pro X and Cubase offer plenty of options for users. While Logic Pro X’s included libraries are larger and more varied, Cubase provides the flexibility to tailor a setup to specific needs through the purchase of additional plugins. Ultimately, the choice between the two programs depends on the individual user’s needs and preferences.
Mixing And Mastering
Mixing and mastering are essential stages in music production, determining the quality of the final product. Logic Pro X and Cubase are two of the most renowned Digital Audio Workstations (DAW) that offer comprehensive features designed for audio mixing and mastering. In this section, we will compare the mixing and mastering tools available in Logic Pro X and Cubase to help you decide which one suits your music production needs.
Logic Pro X And Cubase: Mixing Tools In Logic Pro X
Logic Pro X offers a range of powerful mixing tools that enable you to create high-quality mixes with ease. The DAW provides a customizable mixer interface, including channel strips, EQ, and dynamics processing. With Logic Pro X, you can easily adjust the gain, pan, and stereo width of each track to achieve the desired balance.
The mixer also offers a range of automation functionalities that enable you to control various mix parameters, including volume, pan, mute, and solo, among others. Logic Pro X allows you to use third-party plug-ins within the mixer interface, expanding the range of effects and processing options available.
Mixing Tools In Cubase
Cubase provides a comprehensive mixing environment that includes a customizable mixer interface with integrated channel strips, EQ, and dynamics processing. With Cubase, you can easily adjust the gain, pan, and stereo width of each track to achieve the desired balance.
The DAW also offers a range of automation functionalities that enable you to control various mix parameters such as volume, pan, mute, and solo, among others. Cubase allows you to use third-party plug-ins within the mixer interface, expanding the range of effects and processing options available.
Logic Pro X And Cubase: Mastering Features Comparison
In addition to mixing tools, both Logic Pro X and Cubase offer advanced mastering functionality designed to enhance the overall quality of the final mix.
Logic Pro X
Cubase
Comes with a comprehensive range of mastering plug-ins including EQ, compressors, and limiters.
Offers advanced loudness metering tools, making it easy to monitor and adjust the overall loudness of the final mix.
Allows you to use third-party plug-ins within the mastering environment, expanding the range of effects and processing options available.
Provides a range of audio editing tools designed to help you make fine adjustments to the final mix, including EQ, dynamics processing, and stereo enhancement.
Ultimately, when it comes to choosing between Logic Pro X and Cubase for mixing and mastering, both DAWs provide robust tools and functionalities that can help you achieve great-sounding mixes. Your decision should depend on your personal preference, user experience, and the specific demands of your music production needs.
Credit: m.youtube.com
Third Party Plugin Support
Logic Pro X and Cubase are two of the biggest DAW platforms in the market. Both software have excellent third-party plugin support, but they perform differently in terms of workflow and customization.
Supported Plugin Formats In Logic Pro X
Logic Pro X is a digital audio workstation software that natively supports Audio Units (AU) format plugins. It is a plugin format developed by Apple Inc. and is exclusively available for Mac OS. In addition to the native support for AU plugins, Logic Pro X also supports third-party plugins in VST and AAX formats. These plugins can be used for a variety of purposes, including instrument emulation, audio effects, and MIDI control. The software also supports MIDI-controlled plugins, MIDI effects, and MIDI processors.
Supported Plugin Formats In Cubase
Cubase is a digital audio workstation software developed by Steinberg. It supports VST plugin format, which is the most widely used format in the music industry and is supported by most digital audio workstation software. Cubase also supports VST3 and AU plugin formats, which ensures third-party plugins can be used easily. In addition to the plugin formats, Cubase also supports MIDI-controlled plugins, MIDI effects, and MIDI processors.
Ease Of Use
Logic Pro X offers effortless usability when it comes to loading and using third-party plugins. The process of scanning for new plugins and updates is automated, and the installation process is straightforward. The software eliminates the need for manual setup, which makes it easy for beginners to add plugins to their workflow. Cubase also makes installing and using third-party plugins a seamless process with its MediaBay feature. This feature provides an efficient browser for all types of media that includes filters to narrow down the search results. Cubase’s media bay feature ensures quick access to third-party plugins within the software.
In conclusion, both Logic Pro X and Cubase have an excellent selection of third-party plugins, supporting various formats. Both software are popular choices for music producers, composers, and sound designers alike. However, the ease of use depends on the user’s preference and familiarity with the software, making it a personal choice.
Pricing And Availability
Logic Pro X and Cubase have different pricing and availability options. While Logic Pro X is exclusive to Mac users with a one-time fee, Cubase offers subscription-based plans that support both Windows and Mac. It’s essential to consider your operating system, budget, and feature requirements before choosing a DAW.
When it comes to choosing between Logic Pro X and Cubase, one of the essential factors that you need to consider is the pricing and availability of these two digital audio workstations. Both Logic Pro X and Cubase have their unique features and user interface, but the price difference and availability can make a difference in your choice.
Price Comparison
When it comes to price, Logic Pro X wins the race. It costs only $199, which is a one-time purchase fee. Logic Pro X also includes a range of virtual instruments, mix plugins, and sound effects, which makes it an excellent value for money. On the other hand, Cubase has different pricing plans that start at $99 and go as high as $579. The price variation depends on the features and plugins you want to use. However, if you want to get the most out of Cubase, you’ll have to purchase the higher-priced versions, which will cost you a pretty penny.
Availability Of Free Trial Versions
Trying out a piece of software before purchasing it is a must, especially if you’re on a budget. Both Logic Pro X and Cubase offer free trial versions. Logic Pro X comes with a 90-day free trial, which is more than enough time to explore all the features and capabilities fully. Cubase, on the other hand, offers a 30-day free trial, which is shorter but still provides ample time to test out the software.
Upgrade Options
If you’re planning to upgrade to a newer version of the software, it’s crucial to understand the upgrade options available. In the case of Logic Pro X, all future updates are free of cost. So, if you buy Logic Pro X once, you’ll receive free updates for life. On the other hand, Cubase requires paid updates, and the cost of these updates depends on the version you have. If you own the latest version of Cubase, the upgrade pricing is usually reasonable. However, if you’re using an older version, the upgrade cost can add up and become costly.
In Conclusion, Logic Pro X has a reasonable price point, a more comprehensive range of plugins, and free future updates. In Contrast, Cubase has multiple pricing plans, a shorter free trial period, and upgrade pricing that can get expensive. Ultimately, it’s up to you to decide which DAW best suits your needs and budget.
Credit: fixthephoto.com
Final Verdict
Logic Pro X and Cubase are both powerful and popular digital audio workstations used by music producers worldwide. While Logic Pro X is preferred for its intuitive design and easy-to-use interface, Cubase is known for its advanced features and flexibility.
The final verdict ultimately depends on the individual’s needs and preferences.
Which One To Choose?
If you are someone who wants a simple, beginner-friendly DAW to record music, Logic Pro X is the way to go. On the other hand, if you want a full-fledged DAW with advanced features for professional use, Cubase is the best bet. However, if you are already familiar with the interface of either one of the software, it could be a good idea to stick with it rather than starting anew.
Conclusion
Both Logic Pro X and Cubase offer superior, high-quality audio and are loved by professionals and amateur enthusiasts alike. While Logic Pro X stands out for its simplicity, Cubase has an edge in terms of its feature-packed modules. The choice depends entirely on the user’s requirement and level of expertise. Whether you choose Logic Pro X or Cubase, what truly matters is the music you make with it.
Frequently Asked Questions Of Logic Pro X Vs Cubase
Is Logic As Good As Cubase?
Both Logic and Cubase are highly capable music production software, highly appreciated by music producers. The choice of the software mostly relies on personal preferences based on Music production needs. However, keeping in mind their features, workflow, and interface, it is challenging to pinpoint which one is better.
Is Cubase Used By Professionals?
Yes, Cubase is used by countless professionals in the music industry. It is a popular Digital Audio Workstation (DAW) software that is known for its versatility, user-friendly interface, and advanced features. Many famous musicians, producers, and sound engineers rely on Cubase to create and record high-quality music.
What Is Better Than Cubase?
There is no single software that is universally better than Cubase. It ultimately depends on your specific needs and preferences. Some popular alternatives include Ableton Live, Logic Pro, Pro Tools, and Studio One.
Why Logic Pro Is The Best Daw?
Logic Pro is the best DAW because of its user-friendly interface, high-quality sound libraries, efficient workflow, and affordability compared to its competitors. With its powerful editing and mixing capabilities, Logic Pro is the go-to software for music producers, artists, and composers.
This DAW continues to evolve and provide top-notch features for both beginners and professionals.
Conclusion
After comparing Logic Pro X and Cubase, both DAWs are great options for music production. However, Logic Pro X is the better option for beginners due to its user-friendly interface and easy-to-learn features. On the other hand, Cubase offers more advanced features that appeal to professional producers.
Ultimately, it comes down to personal preference and the specific needs of the user. Regardless of which DAW is chosen, both Logic Pro X and Cubase can bring a musician’s composition to life.
Producers use reverb to give recordings a sense of space. Reverb is used to enhance the sound quality of music recordings and live performances. It improves the overall tone of the music and provides a natural ambiance that makes the listener feel as though they are in the same physical space as the performers.
Also, as a musician or producer, you want your music to stand out and sound its best. That’s where reverb comes in. Reverb is an audio effect that simulates the natural sound of an acoustic space, adding depth, dimension, and texture to your tracks.
Whether you’re recording in a studio or performing on stage, reverberation can take your sound to the next level. We’ll take a closer look at what ambience is, how it works, and why it’s an essential tool for any musician or producer. So, let’s dive in!
Credit: www.masteringthemix.com
Emulating Acoustic Spaces
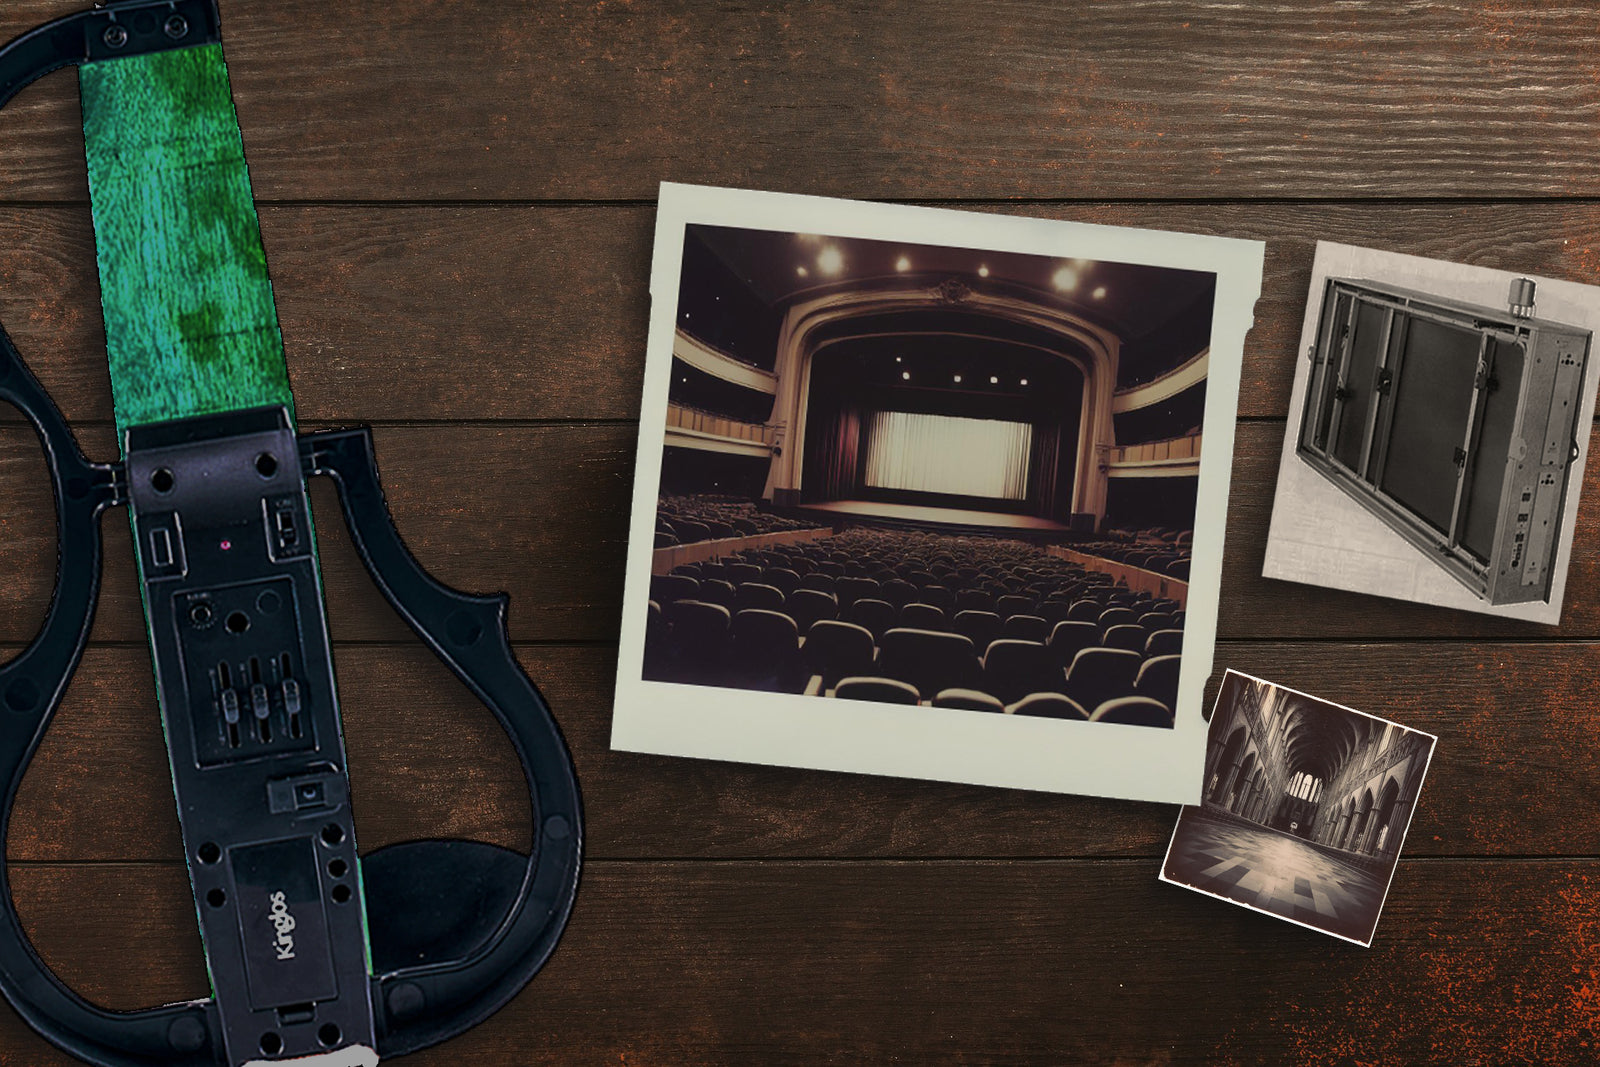
If you’re new to audio production, you might be wondering why musicians and sound engineers rely so heavily on the use of reverberation. One of the key reasons for this is because ambience can emulate a variety of acoustic spaces, such as concert halls, recording studios, and even caves!
How Reverberation Works
Before we dive into how reverberation can emulate different acoustic spaces, it’s important to understand the anatomy of ambience. Essentially, ambience is an effect that makes sound waves bounce around in an enclosed space before reaching the listener’s ears. This creates a sense of spatial depth and can make sounds feel more natural and lifelike.
You can create reverberation using a variety of different techniques, including digital signal processing, physical modeling, and convolution.
Convolution Reverb
Convolution reverb is a type of digital reverb that is particularly effective at emulating real-world acoustic spaces. This technique involves capturing the impulse response of a real-world acoustic space (such as a concert hall) and then using that impulse response to create a digital reverb effect.
This allows sound engineers to recreate the ambience of any space they can capture an impulse response from, which is incredibly powerful for both mixing and post-production work. For example, if you’re mixing a live recording of a band playing in a small club, you could use convolution reverb to make it sound like they’re playing in a massive concert hall.
Overall, emulating acoustic spaces with reverberation is a powerful tool for musicians and sound engineers alike. Whether you’re trying to create a sense of space and depth in your recordings or recreate the effect of a specific acoustic space, ambience is an essential tool that should be in every producer’s arsenal.
Credit: neoclassical.kinglos.com
Using Reverb As A Mixing Tool
Reverberation can enhance the sonic space in a mix. It can add depth, dimension and a sense of realism to any recording. By using varying amounts and types of ambience, a song can achieve a cohesive, professional sound.
As a mixing tool, reverberation can create depth, set the stage, and prioritize instruments in the mix. Ambience adds a sense of space and distance to your mix, making it sound more alive and organic. In this section, we will discuss how to use reverberation in your mix effectively.
Creating Depth
Ambience can create the illusion of space in your mix. By adding reverberation to some elements in your mix, you can create a sense of distance between them and the listener. This technique is useful when you want your mix to have a more natural and organic feel.
Setting The Stage
One of the most effective ways to use ambience is to set the stage for your mix. By adding reverberation to the main elements in your mix, such as the vocals or guitar, you can create a sense of size and space. This technique is great for creating an intimate or grandiose atmosphere in your mix, depending on your intentions.
Prioritizing Instruments in the Space
Ambience can also be used to prioritize instruments in the mix. By adding more reverberation to specific instruments, you can create a sense of space and distance, allowing them to stand out from the mix. This technique is useful when you want to emphasize a specific instrument, such as a lead guitar or a vocal track. To sum it up, ambience is a powerful tool for adding depth, setting the stage, and prioritizing instruments in your mix. Remember, the key is to use it in moderation and with intention. By understanding how reverberation works, you can take your mixes to the next level and create the perfect ambiance for your music.
Special Techniques
Ambience is an essential tool for adding depth and atmosphere to audio recordings. Special reverberation techniques can be used to create unique sonic textures and enhance the overall sound quality of a mix. By using ambience effectively, you can add a sense of space and dimensionality to your recordings.
Reverberation is an essential effect in any audio production, whether it’s music or podcasts. It adds depth, creates the illusion of space, and enhances the overall audio quality. But did you know that there are special ambience techniques that can take your audio to the next level? In this blog post, we’ll be discussing some of the most popular special reverberation techniques you can use to make your audio sound unique and professional.
Reverb Swells
Ambience swells are an incredible way to add a sense of drama to your audio. It involves gradually increasing the effect on a track, building up to a crescendo. This technique works best on instruments like guitars or pianos, but you can also use it on vocals. The key is to start with a dry sound and gradually introduce the ambience, creating a slow rise in the audio. Reverberation swells can be used for intros, outros, or as a transition between different parts of your audio production.
Reverse Reverb
Reverse reverb is a cool effect that creates a backwards-like sound. It involves recording a short section of audio and reversing it, adding ambience to the reversed sound, and then reversing it back to its original direction. This technique works well on vocals and creates an otherworldly effect in your audio. You can use it to add emphasis to specific words or phrases, or as a creative effect in your audio production.
Gated Reverb
Gated reverb is a technique that involves adding reverberation to a track but cutting off the tail of the ambience using a noise gate. This technique works well on drums and creates a punchy, explosive sound. You’ll need to experiment with different settings to get the right balance of ambience and gate, but once you find the sweet spot, you’ll have a powerful and professional sound for your drums. Overall, special reverberation techniques can add that extra touch of professionalism to your audio productions. Whether it’s reverberation swells, reverse reverb, or gated reverb, each technique has its unique sound and purpose. By experimenting with these techniques, you can take your audio to the next level and create a unique and professional sound that your audience will love.
Choosing The Right Reverb
Choosing the right reverberation can enhance the quality and richness of your audio, making it sound more natural and professional. Proper use of reverb can add depth and dimension to your recordings, making them more pleasing to the ear.
Choosing the right ambience is critical to making your mix sound professional and polished. With numerous options available on the market, selecting the right type of ambience can be challenging. In this article, we will examine some essential factors to consider when choosing the right reverb.
Room Size And Decay Time
When selecting an effect, room size and decay time are critical factors to consider. An effect with a long decay time is ideal for creating a large, spacious room sound, while a shorter decay time is suitable for simulating a smaller space. If you are working with a small room size, you may want to select a reverb with a shorter decay time to avoid overwhelming your mix. Conversely, if you are working with a larger space, a long decay time ambience can help fill the space.
Algorithmic Versus Convolution
Another critical factor to consider when choosing an ambience is whether it is algorithmic or convolution reverb. Algorithmic reverb generates a simulated echo and is often used for creating a virtual space. Convolution reverb, on the other hand, uses a real room impulse response to create a more real, natural-sounding reverb. Understanding the difference between the two types of reverberation can help you select the appropriate type for the sound you are trying to produce.
Matching With The Genre And Style
Matching the genre and style of music is also essential when selecting the right reverberation. For example, a long decay reverb is ideal for ambient music or ballads, while a shorter decay reverb works better for punk or rock music. The type of ambience you choose can also impact the overall feel of the track, so selecting the right reverberation is crucial for enhancing the overall mood and tone. In conclusion, choosing the right ambience is a critical step in making your mix sound professional and polished. By considering factors such as room size, decay time, algorithmic versus convolution reverb, and genre and style, you can select the appropriate reverb for your track. The result will be a well-crafted mix with the right amount of ambience to make it sound professional and engaging.
Credit: www.mixinglessons.com
Frequently Asked Questions On Why Use Reverb
Why Would You Use Reverb?
Reverberation is used to create the illusion of a space in audio recordings. It adds depth and dimension to the sound, making it sound more natural and pleasing to the ear. It is often used in music production, film sound design and broadcasting to create a sense of immersion.
Does Reverb Make You Sound Better?
Reverb doesn’t necessarily make you sound better, but it can enhance the clarity of certain sounds, create ambiance, and add depth to your recording or performance. However, excessive reverberation can be distracting and muddy the overall sound. Ultimately, it depends on the desired effect and the specific use case.
When Should You Not Use Reverb?
Reverb should not be used excessively or inappropriately such as in a small room with hard surfaces or when a dry, intimate sound is desired. It should also be avoided if it clashes with the genre or style of the music.
In addition, certain instruments or vocals may not benefit from ambience. Ultimately, the decision to use reverb should be made based on artistic choices and the desired effect.
Do I Need Reverb On Every Sound?
No, you don’t need ambience on every sound. Reverberation can enhance and give dimension to sounds but it may not be suitable for all types of audio recordings. It’s important to use reverb judiciously and only when it adds value to the overall mix.
Conclusion
After examining the benefits and features of reverberation, it’s clear why musicians and producers turn to this platform for their audio needs. From its intuitive interface to its wide range of effects, Reverb provides a streamlined and efficient way to elevate your sound.
Whether you’re a professional recording artist or a beginner musician, ambience offers a valuable and user-friendly tool for music production. Start exploring today and experience the difference that Reverb can make.
Vocal and mastering presets refer to pre-configured settings in music production software that apply specific effects and settings to enhance vocals and improve the overall sound of a mix. With these presets, producers can quickly apply a variety of effects to their audio without having to manually adjust individual settings.
These presets can range from basic EQ and compression settings to more complex signal chains and dynamic processing. Ultimately, the use of vocal and mastering presets can significantly streamline and improve the music production process. We will delve deeper into the benefits of using vocal and mastering presets and how they can help you create better mixes.
Credit: www.youtube.com
Benefits Of Using Vocal And Mastering Presets
Using vocal and mastering presets can greatly enhance the quality of your recordings and save time spent on manual adjustments. These presets are designed by experts to provide a professional touch to your music.
As a music producer, we all strive for the perfect sound in our recordings. In the pursuit of that goal, we can spend hours tweaking and fine-tuning each individual track to achieve the desired output. However, with the advancements in technology, the use of vocal and mastering presets has become a buzzworthy trend in the music industry. Let’s explore some benefits of using vocal and mastering presets.
Consistency In Sound
One of the most significant benefits of using vocal and mastering presets is the consistency they offer. These presets are pre-configured plugins that maintain a consistent sound throughout your recording. The presets allow you to achieve the same sound quality across multiple recordings, saving you the hassle of starting each song from scratch. This consistency helps you establish a signature sound that your fans will come to recognize, making you stand out from others.
Saves Time
Another significant benefit of using vocal and mastering presets is the amount of time they save. By using presets, you can bypass the lengthy process of adjusting each parameter in your plugins. The presets help you jump-start the mixing process, letting you focus on other aspects of your music production journey. With saved time, you can produce more music or delve into more creative experimentation.
Ease Of Use
Using vocal and mastering presets is generally effortless and easy to use. Even if you are a beginner, you can effortlessly achieve a professional-sounding mix right off the bat. The presets come pre-loaded with a plethora of customizable options that allow you to tweak and adjust the pre-configured sound settings to fit your unique needs. The flexibility of these presets helps you save time and still achieve a great sound quality. In conclusion, the use of vocal and mastering presets can be an excellent addition to your music production process. They guarantee consistency, save time, and offer ease of use, ultimately providing you with a means to effectively express yourself creatively. By saving time and producing more music with consistent quality, you can increase your productivity and improve the overall quality of your music output.
How To Use Vocal And Mastering Presets
Vocal and mastering presets are a great way to give your music a polished and professional sound without spending hours tweaking settings. These presets contain settings for various aspects of the vocal and mastering processes, including EQ, compression, and reverb. In this article, we’ll discuss how to use these presets effectively, including how to choose the right preset for your music and how to modify presets to suit your specific needs.
Choosing The Right Preset
When selecting a vocal or mastering preset, it’s important to consider the genre and style of your music. For example, if you’re creating a pop song, you may want a preset that emphasizes the high end to help the vocals cut through the mix. On the other hand, if you’re creating a folk song, you may want a more laidback and natural-sounding preset.
You should also consider the individual qualities of the singer’s voice. If they have a deep and rich voice, you may want to choose a preset that emphasizes the low end. If they have a high-pitched and airy voice, you may want a preset that boosts the mid-range frequencies.
Modifying The Preset
While presets can be a great starting point, they may not be perfect for every situation. Fortunately, most presets can be easily modified to suit your needs. For example, if you find that a preset is adding too much reverb, you can reduce the reverb level to make it sound more natural.
You may also want to adjust the EQ settings to better match the singer’s voice. For example, if the vocals are sounding muddy, you may want to cut the low end frequencies. Alternatively, if the vocals are sounding thin, you may want to boost the mid-range frequencies.
It’s important to remember that presets are meant to be a starting point. They are not a one-size-fits-all solution, and you may need to experiment with different presets and settings to find the right sound for your music.
In Conclusion
Vocal and mastering presets are a valuable tool for any music producer or engineer. By choosing the right preset and modifying it to suit your needs, you can give your music a professional and polished sound. Remember to experiment with different presets and settings to find the right sound for your music.
Top Vocal Presets For Different Genres
Discover the top vocal and mastering presets for different genres of music. With these carefully crafted presets, you can achieve professional-sounding vocals for your next track. Whether you’re producing hip-hop, pop, or EDM, these presets are a valuable tool for any producer.
As an artist, it is crucial to have the perfect sound for your music. One way to achieve this is by using vocal and mastering presets. They help to streamline the mixing process, ensure consistency, and boost the quality of your vocals. There are different kinds of presets available in the market, each suitable for a particular genre. In this post, we will explore the top vocal presets for different music styles like Pop, Hip Hop, R&B, EDM, and Rock.
Pop
Pop music is known for its catchy melodies, upbeat rhythms, and emotional lyrics. If you’re a pop artist, you need a vocal preset that captures those elements. The best pop vocal presets are those that enhance the brightness and clarity of your vocals. Some great vocal presets for pop music include:
Pop Sound Vocal Preset
Pop Vocal Assistant
Pop Vocals
Hip Hop
When it comes to Hip Hop, the vocals are just as important as the beats. Your vocals need to be crisp, clear, and perfectly blended with the instrumental. Hip Hop vocal presets should emphasize the depth and warmth of your voice. Here are the top vocal presets for Hip Hop:
Hip Hop Vocal Preset
Trap Vocal Effects
Urban Vocals
Rb
Smooth vocals, slow rhythms, and passionate lyrics – R&B is all about creating an emotional connection with your audience. To achieve this, you need vocal presets that enhance the richness and depth of your voice. Here are some of the best vocal presets for R&B:
R&B Vocal Preset
Soulful Vocals
Rhythm and Blues
Edm
EDM music is all about energy, rhythm, and soul. To match these elements, your vocals need to be powerful, punchy, and hypnotic. EDM vocal presets should emphasize the bass and treble of your voice. Here are some of the best vocal presets for EDM:
EDM Vocal Preset
Techno Vocals
Trance Voice Effect
Rock
Rock music is known for its raw energy, angst, and emotion. To capture this essence, your vocals need to be powerful, raw, and full of grit. Rock vocal presets should emphasize the distortion and depth of your voice. Here are some of the best vocal presets for rock music:
Rock Vocal Preset
Heavy Metal Vocals
Punk Rock Voice Effect
By choosing the right vocal presets, you can take your music to the next level. It’s important to experiment with different presets until you find the perfect one for your sound. With the above recommendations, you’re one step closer to achieving a professional vocal sound that suits your music genre.
Credit: mixandmastermysong.com
Top Mastering Presets For Different Genres
As a musician or producer, it’s crucial to get the most out of your tracks and ensure they sound professional. One of the best ways to achieve this is by mastering your tracks. Mastering is the final stage in the music production process where you polish your tracks and make them sound their best. Applying mastering presets can make this process much easier and help you achieve the sound you’re looking for. Here are some of the best mastering presets for different music genres:
Pop
Pop music typically has a bright and polished sound, with crisp and punchy drums, bright vocals, and catchy melodies. A great mastering preset for pop music is Waves’ L3-LL Multimaximizer. This preset can help bring clarity to your vocals and make your drums pop. You can also use the Ozone 8 Mastering Suite from iZotope, which has several pop-specific mastering presets to choose from.
Hip Hop
Hip hop is characterized by its deep basslines, punchy drums, and clear and strong vocals. For mastering hip hop tracks, you can use the Waves SSL G-Master Buss Compressor, which is modeled after the classic SSL console. This preset can help bring out the low end in your tracks while adding some warmth and character. Another great option is the FabFilter Pro-L 2, which has a range of hip hop-specific presets to choose from.
Rb
R&B music is all about smooth vocals, warm and rich textures, and soulful melodies. To master R&B tracks, you can use the Waves API 2500 compressor, which can bring out the warmth and character of your tracks. You can also try the Ozone 8 Mastering Suite from iZotope, which has several R&B-specific presets to choose from.
Edm
EDM music is characterized by its high-energy beats, explosive drop sections, and bright and colorful soundscapes. A great mastering preset for EDM tracks is the Waves L3 Ultramaximizer, which can bring out the high-end frequencies and add clarity to your tracks. You can also try the FabFilter Pro-MB, which has several EDM-specific presets to choose from.
Rock
Rock music is all about power, energy, and attitude. To master rock tracks, you can use the Waves PuigChild 660 and 670 compressors, which can bring out the punchiness and character of your tracks. You can also try the Slate Digital FG-X Mastering Suite, which has several rock-specific presets to choose from.
How To Create Your Own Custom Presets
If you’ve been using vocal and mastering presets and feel like they’re not quite fitting your sound, it might be time to create your own custom presets. Creating your own presets can help you achieve more personalized and unique sounds that can make your music stand out in a competitive market. Here are some steps to help you get started:
Understanding The Basics Of Eq And Compression
Before you can create your custom presets, it’s essential to understand the basics of EQ and compression. EQ helps you balance the frequencies in your audio, while compression controls the dynamics of your sound. These two tools can help you craft the perfect sound for your genre.
When using EQ, make sure to listen to your audio carefully and adjust the frequencies to achieve the desired sound. Use compression to bring out the quieter elements of your sound and level out your audio for a smoother sound. Familiarize yourself with these tools to create custom presets that work for your music.
Experimenting With Different Settings
The key to creating custom presets is experimentation. Don’t be afraid to try different EQ and compression settings until you find what works best for your sound. Move the sliders back and forth and listen to how your sound changes with each adjustment. Take notes on what settings work best for specific instruments or genres. Exploring and being creative with your settings will help you achieve your desired sound.
Saving Your Custom Presets
Once you’ve found your perfect settings, it’s time to save your custom presets. Most plugins have a save button that allows you to save your settings for future use. Name your preset something easy to remember so that you can easily find it when you need it. Having your custom presets saved will help streamline your workflow, saving you time in the long run.
Remember, creating custom presets can take some time, but it’s worth it to achieve a more personalized and unique sound. Use these tips to help guide you through the process, and don’t be afraid to experiment and have fun!
Credit: www.instagram.com
Common Misconceptions About Using Presets
As a music producer, you might have heard about vocal and mastering presets. These presets are pre-made settings that you can apply to your audio tracks to achieve a certain sound or effect. Although using presets can be beneficial and time-saving, some common misconceptions around them have led some producers to avoid using them entirely. In this blog, we will explore these misconceptions, debunk them, and show you why presets can be a useful tool for any music producer.
Presets Are Not One Size Fits All
One of the most common misconceptions is that presets are a one-size-fits-all solution for mixing and mastering. This is not entirely accurate. While presets can provide a starting point for your mixing and mastering process, every track is unique and requires a bespoke approach. Your music may have specific requirements that need to be addressed, including the sound, arrangement, dynamics, and instrumentation. Using a pre-made preset may not be enough to achieve the sound you want. Therefore, presets should be regarded as a tool, and not as a bring-all end-all solution.
Presets Do Not Eliminate The Need For Proper Mixing And Mastering
Another common misconception with presets is that they eliminate the need for proper mixing and mastering, but this is not true. While presets can provide a great starting point for the mixing and mastering process, it is important to keep in mind that they cannot replace proper mixing and mastering techniques. Good mixing and mastering require technical skills, a trained ear, and artistic judgment. Using presets can be a starting point, but you will need to tweak, adjust and customize the settings to achieve the desired sound. So, if you’re a beginner, presets can be a great way to get started, but it is always beneficial to learn proper mixing and mastering techniques.
In Conclusion
Vocal and mastering presets are a great tool for any music producer. They can provide efficiency and a great starting point for your mixing and mastering process. However, it is important to keep in mind that they are not a one-size-fits-all solution and cannot replace proper mixing and mastering techniques. Using presets can be a helpful tool to achieve unique sounds, but always remember to use your technical skills, artistic judgments, and trained ear to achieve the desired outcomes.
Frequently Asked Questions Of Vocal And Mastering Presets
Do Artists Use Vocal Presets?
Yes, some artists use vocal presets to enhance their recordings and achieve a specific sound or tone. These presets can be customized to fit the individual style of the artist and are commonly used across various genres. However, not all artists use presets as some prefer a more natural and authentic sound.
What Vocal Plugins Do Professionals Use?
Professionals use a variety of vocal plugins depending on their preference and needs. Some popular options among professionals include Antares Auto-Tune Pro, Waves Tune Real-Time, iZotope Nectar, and Melodyne. However, the choice ultimately depends on the type of project and desired outcome.
Does Garageband Have Vocal Presets?
Yes, GarageBand has a range of vocal presets to help enhance the quality of your recordings, including male and female voices, pop, rock and R&B settings, as well as auto-tune and distortion effects. These presets can be accessed within the software’s library of instrument and audio samples.
What Is A Vocal Chain Preset?
A vocal chain preset is a pre-designed combination of effects and plugins used to enhance a vocal recording. It can include compression, EQ, reverb, delay, and other effects that help shape the sound. These presets are readily available to apply to your vocal recordings and save you time in the mixing process.
Conclusion
To wrap things up, utilizing vocal and mastering presets can be a game-changer for music producers. These tools save valuable time and can help beginners and experts alike produce high-quality music tracks with ease. With the vast array of presets available nowadays, you can achieve the exact sound you’re looking for, no matter the genre.
Incorporate these presets into your music-making process, keep improving your skills, and watch your work stand out from the rest. Happy producing!
Using a click track is a personal preference when recording music. Some musicians and producers swear by it, while others find it restrictive.
Ultimately, it depends on your workflow and style of recording. A click track is a tool used to keep time during a recording session. It’s an audible metronome that plays in the musician’s ear while they play or sing. The click sound is a consistent beat that helps musicians keep time and maintain a consistent tempo throughout the song.
However, some musicians find it distracting and prefer to record without one. We’ll discuss the pros and cons of using a click track and help you decide if it’s right for your recording process.
Credit: worshiponline.com
Pros Of Using A Click Track
Click tracks can greatly benefit musicians and performers by providing a steady rhythm and improving timing accuracy during live performances and recording sessions. It can also help with songwriting and arranging by allowing for precise tempo changes and easily mapping out song structures.
Playing in a band is all about timing and rhythm. If you want to stay in sync with your bandmates and ensure a consistent performance, using a click track is highly recommended. In this blog post, we will be discussing the benefits of using a click track, focusing on two key areas: improved timing and rhythm, and how it makes it easy to stay in time with the band.
Improved Timing And Rhythm
Using a click track improves your timing and rhythm. Essentially, it’s a metronome that you can hear while playing. Rather than relying on someone else to keep time or your internal sense of timing, a click track provides a constant beat that ensures you’re playing in time with the music. This is especially important when it comes to studio recordings, where precision is paramount. Whether it’s the drummer keeping the beat or a guitarist providing a rhythmic drone, everyone in the band should play to a click track.
Easy To Stay In Time With The Band
Using a click track makes it easy to stay in time with the band. It’s especially useful during rehearsals, where everyone in the band can practice together, playing to the same beat. The click track is audible to everyone in the band, so they can follow the rhythm and play in sync with each other. This is especially helpful if you’re playing with new band members or musicians who are not quite familiar with your style.
More Consistent Performances
By using a click track, your band can ensure more consistent performances. This is simply because everyone in the band is playing in sync with each other and to the same beat. There’s no deviation from the original tempo or rhythm of the song, so every performance will sound the same, with no unwanted changes in tempo or timing. In a live setting, a consistent performance can make all the difference in creating a great musical experience for the audience. In conclusion, using a click track has many benefits that should not be ignored. By providing a consistent beat and rhythm, click tracks help improve a band’s overall performance and ensure the music is played with precision. It’s certainly worth considering if you want to take your music to the next level.
Cons Of Using A Click Track
Using a click track can sometimes hinder the natural flow and creativity of a musician, leading to a robotic or mechanical sound. In addition, relying solely on a click track can prevent flexibility in live performances, making it difficult to adapt to changes.
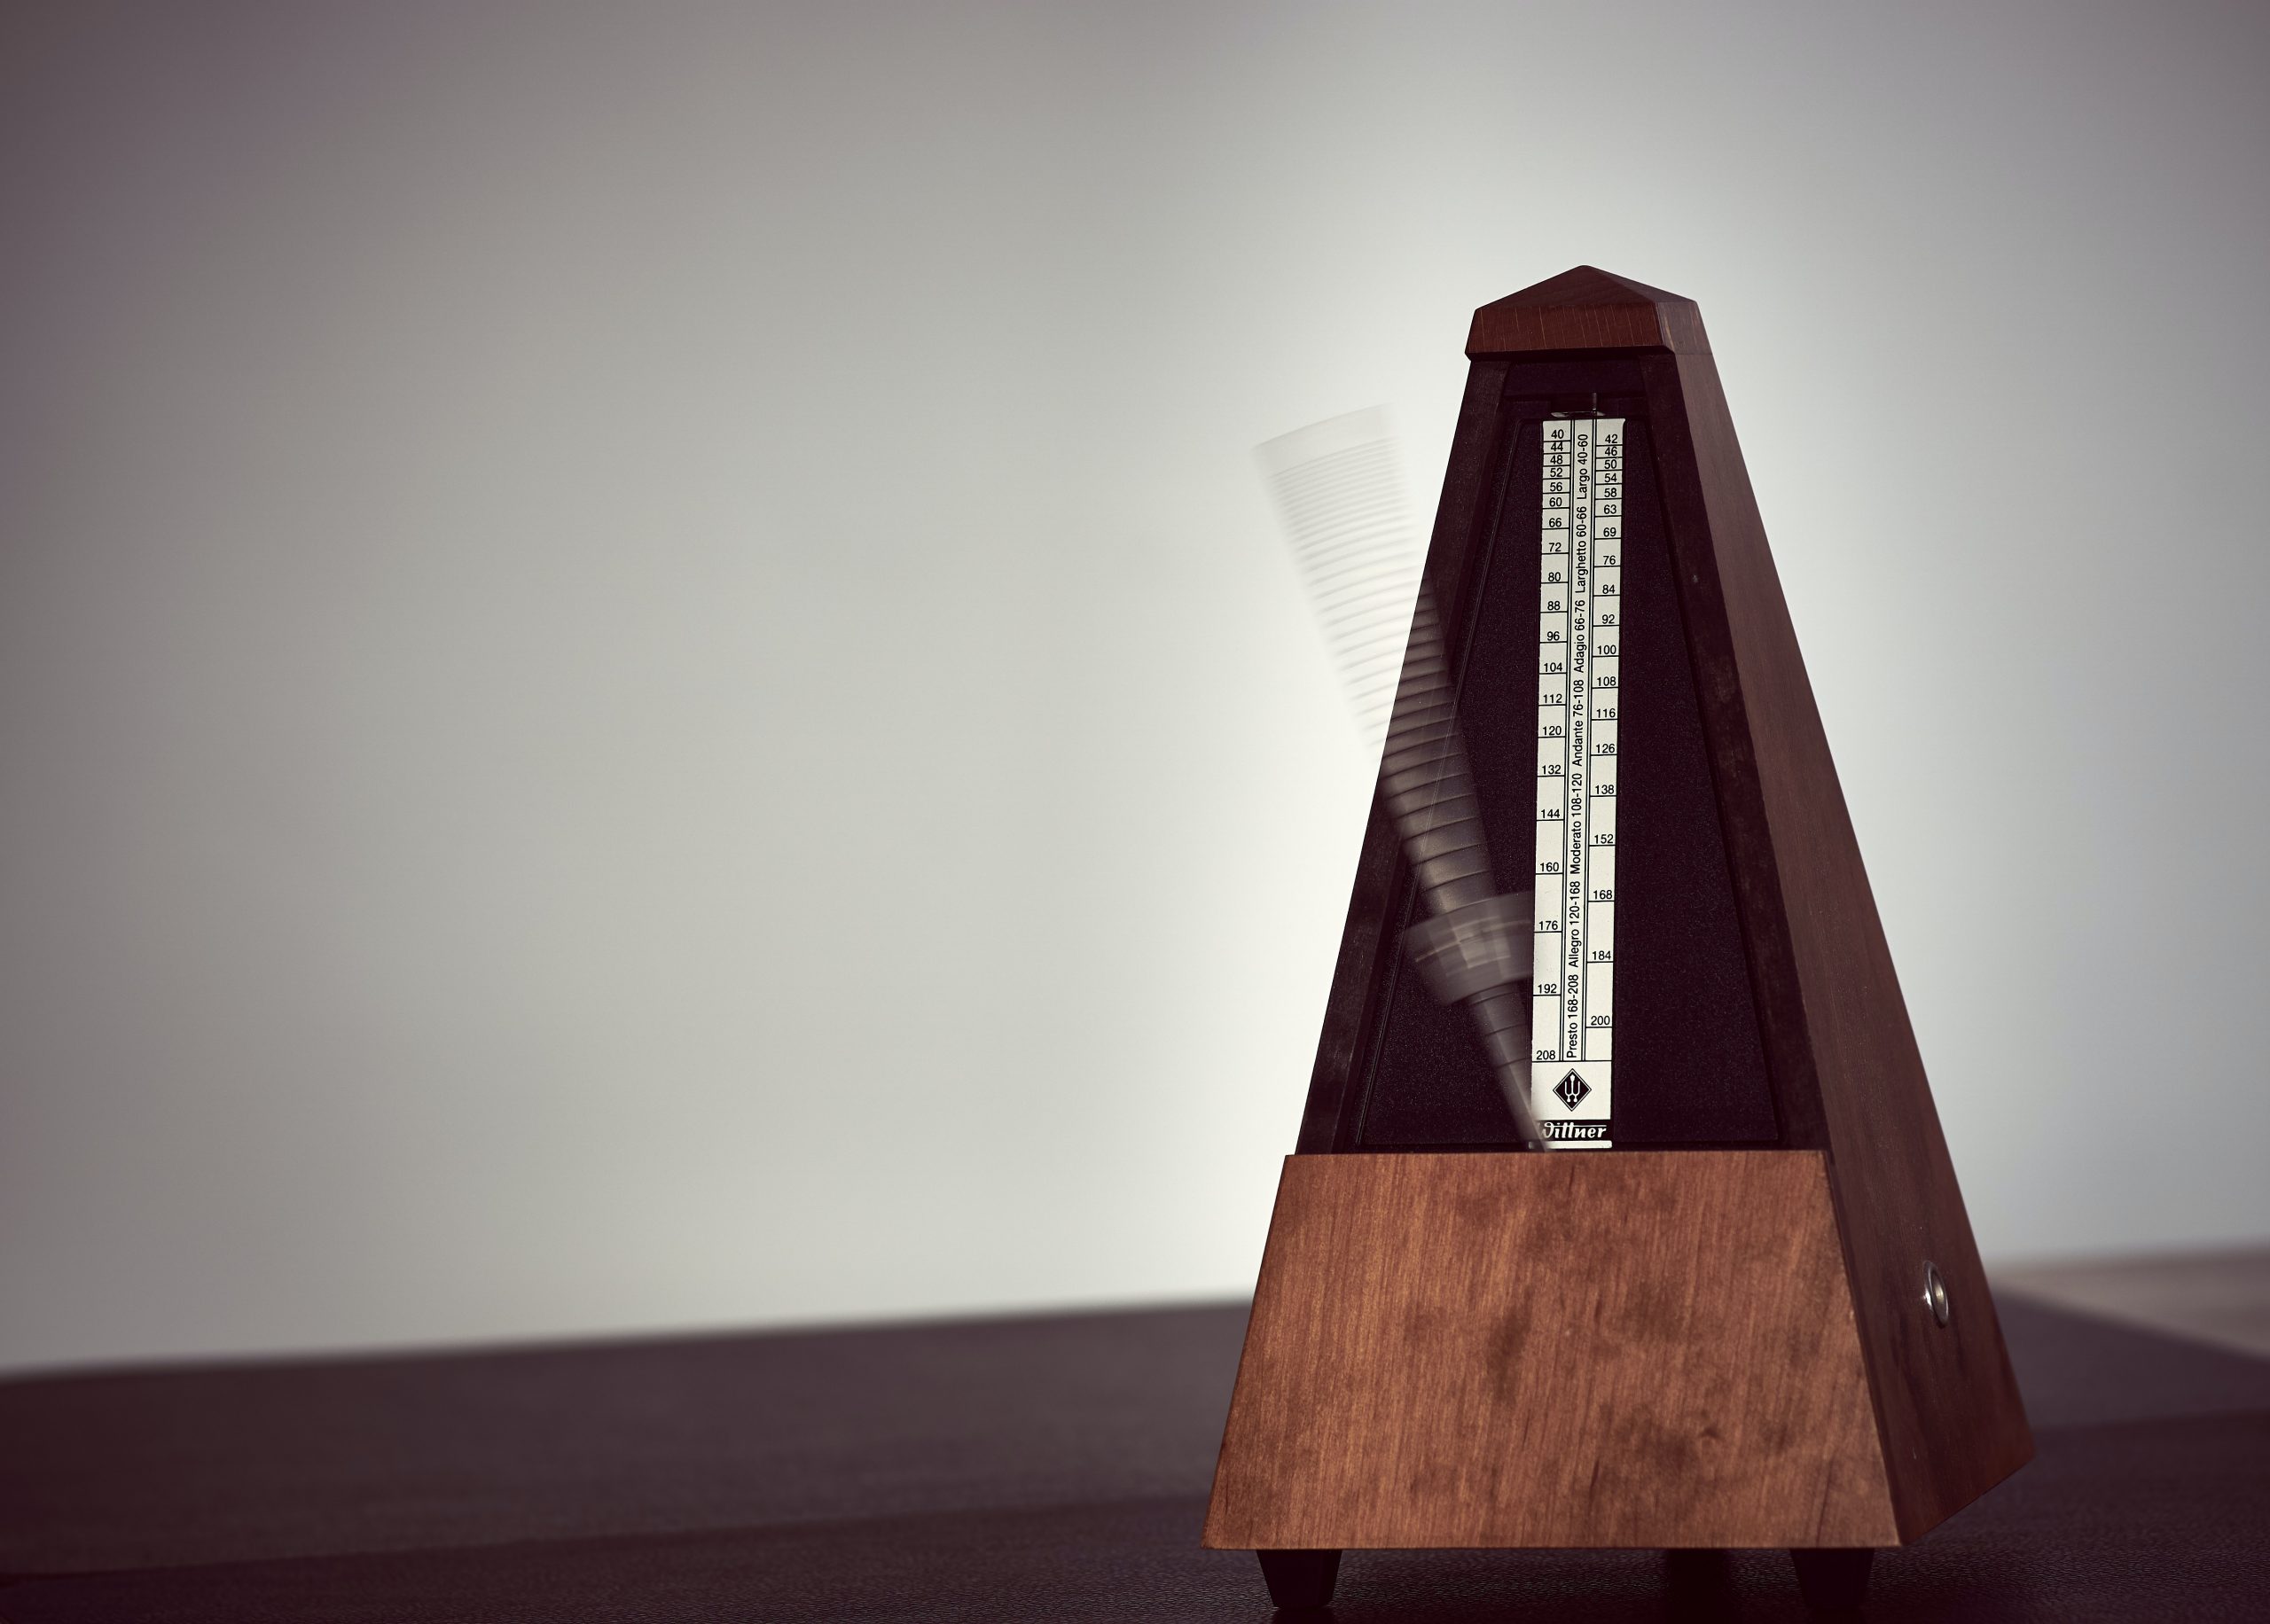
A click track, also known as a metronome, is commonly used in music production to keep musicians in time with one another. While it has its benefits, there are also some downsides to using a click track that should be considered before deciding to use one.
Less Room For Musical Expression
One of the main drawbacks of using a click track is that it can limit the amount of musical expression in a performance. When playing with a click track, musicians must stick to a set tempo, which can make it difficult to add dynamics or change the tempo to fit the mood of a song. This can result in a performance that feels rigid and lacks the emotional impact that comes from a live, organic performance.
Can Be Distracting
In addition to inhibiting musical expression, a click track can also be distracting to some musicians. Musicians may become overly focused on keeping time with the click and lose sight of the overall performance. This can lead to a lack of spontaneity and creativity in the music.
Requires Practice And Preparation
Using a click track requires a significant amount of practice and preparation. Musicians must be able to play consistently in time with the click and be comfortable with the technology used to produce the click track. This can be time-consuming and may take away from time that could be spent focusing on other aspects of the performance.
Conclusion
While using a click track can have its benefits, it is important to consider the potential drawbacks before deciding to use one. It is ultimately up to each individual musician to decide what works best for them and their music.
When To Use A Click Track
Click tracks are a crucial component of recording music in a studio setting. These tools are used to create a consistent musical tempo, helping to keep tracks on beat and in sync. However, click tracks are not always necessary, and there are many situations where they may not be useful or even desirable. Here are some instances when you should consider using a click track:
In The Studio
When recording in a studio, a click track is a must-have for most musicians and producers. By keeping all of the instruments and vocals in sync, a click track can help create a polished and professional recording. It’s important to choose the right click track speed and sound to match the style of music being recorded, but once it’s set up, the click track can be a valuable tool throughout the recording process.
For Live Performances
While click tracks are traditionally used in the studio, many musicians also rely on them during live performances. By syncing up electronic elements, backing tracks, and visuals, click tracks can help create a more immersive and engaging live experience. However, it’s important to use click tracks sparingly during live performances, as they can also make the performance feel robotic and unengaging if used too heavily.
For Certain Musical Styles
Finally, click tracks are often used for certain musical styles that rely heavily on precise timing and rhythm. For example, electronic dance music (EDM) often relies on click tracks to create a consistent beat and tempo. Similarly, some metal, punk, and hardcore bands use click tracks to ensure that their fast, technical playing stays in sync throughout a song.
Pros of using a click track:
Cons of using a click track:
Helps ensure consistent tempo and timing.Can make recording and performance more polished and professional.Useful for certain musical styles and genres.
Can make performances feel robotic and unengaging.Requires careful setup and adjustment to match the musical style and tempo.May not be necessary or desirable for all recording or performance situations.
If you’re unsure whether or not to use a click track, it’s important to consider the style of music you’re creating and the context in which it will be performed. While click tracks can be a valuable tool in many situations, they should never be used as a crutch to compensate for poor timing or musicianship. Ultimately, the decision to use a click track should be based on the needs of the song and the preferences of the musicians and producers involved.
Credit: upayasound.com
Alternatives To Using A Click Track
If you’re looking to add variety to your music productions, ditching the click track can be a great way to experiment with timing and dynamics. Alternatives like using a human drummer or playing to a loop can help create a more natural and expressive feel in your recordings.
If you are not a big fan of using a click track, you are not alone. In fact, some musicians find it too restrictive and robotic, leading to robotic-sounding music. Fortunately, there are alternative ways to keep time while playing.
Internal Timekeeping
One way to keep time without relying on a click track is with your internal timekeeping. This alternative requires you to have good rhythm, so it may not work for everyone. You can practice this skill by tapping your foot or counting the beats in your head. To ensure that you keep track of the tempo, listen to recordings of music that has a consistent beat and try to memorize it.
Band Communication
Communication is key in any band. In the absence of a click track, ensure that everyone in the band is on the same page regarding the tempo and rhythm. You can achieve this by discussing the song’s tempo before rehearsal or playing, either by counting the beats in unison or by playing together as a group.
Using A Drummer Or Metronome
If you’re in a band, having a drummer who can keep time is a good alternative to using a click track. A good drummer can intuitively adapt to the tempo changes and fluctuations within the music. If you don’t have a drummer, you can use a metronome. Although it might sound more robotic, a metronome is still an excellent tool to keep the tempo steady. Using any of these alternatives to using a click track can help you to create more organic-sounding music while still keeping you on the beat. Of course, there are situations where a click track might be more appropriate, such as recording music for film or TV. However, these alternatives are worth exploring.
Credit: www.mixinglessons.com
Frequently Asked Questions On Should I Use A Click Track
Are Click Tracks Necessary?
Yes, click tracks are necessary for recording music. They help musicians stay in time and keep the tempo consistent throughout the entire recording. Without click tracks, it would be more difficult to synchronize different parts of a song and ensure that it sounds cohesive.
What Is The Point Of A Click Track?
A click track is a metronome-like tool used in music production to keep a consistent tempo during recording. It helps to ensure that all musicians and tracks are in sync and can be edited easily. Click tracks also allow for precise editing and overdubbing of music tracks.
Is The Click Track Method Still Used?
Yes, the click track method is still used in music production. It’s a popular tool for staying on rhythm and timing, particularly in recording sessions and live performances. Click tracks can be customised to the specific needs of the song, and there are various software and equipment options available.
Does Metallica Use A Click Track?
Yes, Metallica uses a click track during live performances to keep the tempo consistent. They also use it during recording sessions to maintain timing accuracy and synchronize multiple tracks.
Conclusion
Ultimately, the decision to use a click track is up to the individual artist and their musical intentions. While it can provide a sense of rhythmic consistency and stability, it may also limit creative expression and spontaneity. It is important to weigh the pros and cons and experiment with different recording techniques to determine what works best for each unique situation.
At the end of the day, the most important thing is to create music that feels authentic and true to oneself.
Basic vocal reverb effects add depth and dimension to a singer’s voice, creating a natural, spacious sound in a recording or live performance. Reverb simulates the effect of a singer’s voice being heard in a large, reflective space, adding character to the sound.
Vocal reverb effects are essential for any singer looking to add depth and dimension to their sound. Reverb is a critical tool in creating a natural, spacious recording or live performance, simulating the sensation of singing in a large, reflective room.
By using various reverb settings, singers can add character and distinctive qualities to their voice, whether they want to create a warm, natural sound or a bright, angelic tone. In this blog post, we’ll explore the different types of reverb effects and how singers can best incorporate them into their music.
Credit: www.izotope.com
Types Of Reverb
Reverb is a crucial effect that helps add depth, dimension, and space to vocal recordings. There are different types of reverb that you can use to create different moods and textures. It’s important to understand these types of reverb to use them effectively in your vocal recordings.
Spring Reverb
Spring reverb was first used in guitar amps and is used in many classic recordings. It’s an analog effect that uses a spring to create a reverberant sound. This type of reverb has a distinct sound and is characterized by a boingy, metallic sound.
Plate Reverb
A plate reverb is a type of mechanical reverb that uses a thin metal plate to create the effect. Plate reverb has a smoother and more natural sound than spring reverb and is well-suited for vocals. It can be adjusted to create a wide range of effects, from subtle warmth to a more pronounced, echoey sound.
Hall Reverb
Hall reverb is a simulation of the reverb that occurs in a large room or concert hall. This type of reverb is often used in classical music productions and adds depth and space to vocal recordings. It has a distinctive sound characterized by a long decay with a rich and natural tone.
Room Reverb
Room reverb is a simulation of the reverb that occurs in a smaller, more confined space. It has a shorter decay time than hall reverb and can be used to create a more intimate sound. Room reverb is great for adding a natural-sounding ambience to vocal recordings and creating a sense of space.
Using Reverb With Vocals
Adding reverb effects to vocals can enhance the overall sound of a mix and create a more spacious and professional feel. Basic vocal reverb effects can be achieved through adjusting parameters such as decay time, pre-delay, and wet/dry mix.
When it comes to achieving a professional-sounding vocal track, using reverb is a crucial step. Reverb adds space and depth to your vocals, making them sound like they were recorded in a more natural environment. In this section, we will discuss the basics of using reverb with vocals.
Setting Up The Reverb
The first step in using reverb with vocals is setting up your reverb effect. Most digital audio workstations (DAWs) come with built-in reverb plugins, or you can use third-party plugins. Create a new reverb track and add your chosen reverb plugin. You can also use a reverb bus and send your vocal track to it.
Adjusting The Reverb Time
The reverb time is the length of the reverb tail. A longer reverb time will make your vocals sound like they were recorded in a bigger room or space, while a shorter reverb time will give a tighter and more focused sound. Adjusting the reverb time will depend on the type of song and the style you want to achieve.
Using Eq To Enhance The Reverb
Equalization (EQ) can also be applied to the reverb to enhance the desired sound. Use a high-pass filter on the reverb to cut out any unwanted low-end frequencies that may muddy up the mix. You can also use a low-pass filter to reduce any harsh or bright frequencies. Adjusting the EQ of the reverb can give it a more natural and polished sound.
Adding Depth With Delay
Delay can be used to add depth and movement to your vocals. Create a new delay track and set the delay time to match the tempo of your song. Adjust the feedback, mix and volume levels to create a desired effect. Using a delay effect can also add a sense of space and dimension to your vocals. In conclusion, using reverb with vocals is a crucial step to achieving a professional-sounding vocal track. By setting up the reverb, adjusting the reverb time, using EQ to enhance the reverb, and adding depth with delay, you can create space and depth to make your vocals stand out.
Common Reverb Mistakes To Avoid
Vocal reverb is an effect that can add depth and dimension to your vocals, making them sound fuller and more professional. However, using reverb improperly can quickly turn your otherwise great-sounding vocals into a mess. Here are some common reverb mistakes to avoid when applying reverb effects to your vocals.
Using Too Much Reverb
Too much of anything can be harmful, and the same applies to reverb. Using too much reverb can make your vocals sound washed out and distant, which can make it difficult for your listeners to understand the lyrics. Instead, use reverb sparingly and find the right balance between wet (reverb) and dry (no reverb) signals.
Not Adjusting The Reverb Time
Reverb time refers to the length of time it takes for the reverb to decay. Not adjusting the reverb time can lead to muddy and distorted vocals. Longer reverb times are ideal for ballads or slow songs, while shorter reverb times work well for fast-paced tracks or songs with heavy instrumentals.
Forgetting To Eq The Reverb
Applying EQ to the reverb helps to ensure that it doesn’t clash with the vocal frequency range, making it sound more natural and not overpowering. Neglecting to EQ the reverb can make the vocals sound muffled and unbalanced. It’s important to listen to the vocals and adjust the reverb EQ until you find the right balance.
Using The Wrong Type Of Reverb
Not all types of reverb are created equal, and using the wrong one can have disastrous effects on your vocals. For instance, a plate reverb might sound great on guitars but may not be suitable for vocals. Conversely, a hall reverb might be too spacious for guitar and can leave it sounding thin. Choose the right type of reverb for the vocals, considering the mood and tone of the song.
By avoiding these common reverb mistakes, you’ll be able to add the right amount of reverb effect to your vocals, making them sound fuller and professional, and enhances the overall track.
Credit: www.izotope.com
Famous Tracks With Great Vocal Reverb
Vocal reverb is an essential part of any song that features vocals. It can give depth, dimension, and continuity to the vocals, making them sound fuller and richer. However, it’s important to use it in moderation as too much reverb can make the vocals sound distant and muddy. Some of the most famous tracks of all time have used vocal reverb to great effect and here are some examples:
Example Track 1
The first track that comes to mind when discussing great vocal reverb is “Yesterday” by The Beatles. It features a lush reverb effect that gives Paul McCartney’s vocals a dreamy, ethereal quality. The reverb also adds a sense of nostalgia, fitting perfectly with the song’s introspective lyrics.
Example Track 2
Another great track that showcases the power of vocal reverb is “Unchained Melody” by The Righteous Brothers. The song is legendary for its soaring vocals and the reverb adds to the grandeur of the performance, making it even more emotional and impactful. The reverb also mimics the sound of a large concert hall, adding to the sense of drama and spectacle.
Example Track 3
The final track that we’ll discuss is “God Only Knows” by The Beach Boys. This song is famous for its beautiful harmonies and intricate vocal arrangements, and the reverb plays a crucial role in giving them a sense of space and dimension. The vocals sound as though they were recorded in a vast cathedral, adding to the song’s sense of grandeur and majesty.
These tracks are just a few examples of the incredible power of vocal reverb. When used correctly, it can add depth, emotion, and richness to any vocal performance, elevating it to new heights of musical beauty.
Credit: www.amazon.com
Frequently Asked Questions On Basic Vocal Reverb Effects
What Is The Best Reverb Effect For Vocals?
The best reverb effect for vocals is subjective and depends on personal preference. Some popular options include: Lexicon PCM Native Reverb Plug-in, Valhalla VintageVerb, Waves IR1 Convolution Reverb, and Soundtoys Little Plate.
What Are The Effects Of Reverb Vocals?
Reverb vocals add depth and space to a track, making it sound livelier. It can create a sense of intimacy or detachment, depending on the amount and type of reverb used. Reverb also helps to blend vocals with backing tracks, resulting in a more cohesive and polished sound.
What Are The Basic Vocal Effects?
There are several basic vocal effects that singers can use to add variation to their performances. These include vibrato, falsetto, growling, screaming, and breathiness.
What Are The Basics Of Reverb?
Reverb is the name given to the effect of sound waves reflecting off surfaces in an enclosed space. It has two main components: the early reflections which come from surfaces close to the sound source, and the later reflections which are more diffused and come from further away.
Reverb can be added artificially using reverb plugins and hardware units during the mixing process. Understanding the basics of reverb is important for creating a natural, balanced sound.
Conclusion
Vocal reverb effects play a significant role in adding color, depth, and dimension to your recordings. By understanding the different types of reverb effects and their respective settings, you can easily achieve a professional-sounding result. Remember that reverb is a powerful tool that can make or break your vocal tracks, so always experiment and find the perfect balance that suits your tastes.
With these tips in mind, you’ll be able to add some reverb to your vocals like a pro.
Here is an example of an accurate, to-the-point answer in two sentences: “Top free Kontakt libraries include LABS by Spitfire Audio, Iowa Piano by bigcat instruments and Project Pegasus by Soundiron. Each of these libraries offers a unique collection of sounds for composers and producers to use in their projects.”
Now for the Kontakt is one of the most popular and versatile software samplers used by musicians and producers. With its expansive library of sounds and intuitive interface, it has become a go-to tool for creating music across a wide range of genres.
While there are many high-quality paid libraries available, there are also some great free options that can rival their paid counterparts. We’ll take a closer look at some of the top free Kontakt libraries available to composers and producers.
Credit: m.youtube.com
Top 5 Free Kontakt Libraries
If you’re a music composer or producer looking for options to enhance your sound and take it to the next level, top-quality virtual instruments are an essential part of your toolkit. While premium Kontakt libraries can be quite expensive, there are plenty of free ones out there that can help you achieve incredible results without breaking the bank. Here are the top 5 free Kontakt libraries that you should check out:
Spitfire Audio Labs
Spitfire Audio LABS is a collection of unique and inspiring virtual instruments that you can use in your compositions for free. This library includes everything from strings and choirs to pianos and synths, and the sounds are of the highest quality. The LABS interface is straightforward to use, and Spitfire Audio releases new sounds regularly, making it an excellent option for those who like to keep their compositions fresh and varied.
Versilian Studios Chamber Orchestra 2
If you’re looking for an orchestral sound with a free price tag, Versilian Studios Chamber Orchestra 2 should be on your list. This library includes over 1500 samples of various orchestral instruments, including strings, woodwinds, and brass, and it has an authentic sound that will make your compositions truly epic. The interface is easy to use, making it an excellent option for both beginner and advanced composers.
Projectsam Free Orchestra
The ProjectSAM Free Orchestra Kontakt library is a collection of tools that can help you bring your musical compositions to life. It includes a wide variety of orchestral sounds, such as woodwinds, brass, and percussion, as well as synthesized sounds that you can use to add depth and dimension to your tracks. The sounds have been recorded by professional musicians, ensuring that the quality is excellent.
Soniccouture Free
Soniccouture Free is a high-quality library of physical and tuned percussion instruments that you can download for free. This library includes a wide variety of drum machines, gongs, bells, cymbals, and more, all with a realistic sound that will give your tracks a unique character. The interface is simple to use, and the sounds are of exceptional quality, making it an excellent option for those looking to add some percussion to their compositions.
Performance Samples
The Performance Samples Kontakt library includes high-quality sounds of various orchestral instruments. This library is perfect for those looking for a premium sound at no cost. The library includes a wide range of articulations, from harmonics to spiccato, and it has an intuitive interface that will allow you to achieve great results quickly. The sounds in this library have been recorded in an excellent way and will add depth and expression to your compositions.
Credit: bedroomproducersblog.com
Credit: m.youtube.com
Frequently Asked Questions On Top Free Kontakt Libraries
Which Kontakt Library Is Best?
The best Kontakt library depends on individual preferences and needs. There are various high-quality Kontakt libraries available, each with unique features, sounds, and functions. It’s recommended to research and compare different options to find the one that suits your requirements best.
How To Get Kontakt Libraries For Free?
Unfortunately, it’s not recommended to get kontakt libraries for free due to piracy issues. You should always purchase them from reputable sources such as Native Instruments or verified third-party sellers to ensure the library’s authenticity and legality.
What Is The Best Free Guitar Library For Kontakt?
The best free guitar library for Kontakt is the Ample Guitar M Lite II. It includes 530 MB of samples with a variety of articulations and playing styles. The intuitive interface makes it easy to use and customize. Plus, it’s compatible with both Mac and Windows operating systems.
Which Kontakt Player Is Free?
The Kontakt 6 Player is the free version of the Kontakt Player software. It allows users to play and manipulate samples without the need for the full Kontakt library.
Conclusion
To wrap up, we’ve covered the top free Kontakt libraries available for download. Each library offers a unique selection of sounds, instruments, and effects for producers and composers alike. By using these libraries, you can enhance your music production workflow and bring new creative possibilities to your music.
With so many great options to choose from, there’s no reason not to try them out and experiment with new sounds in your tracks. Keep creating and exploring, and above all, have fun!
Pro Tools First Grid Mode is a feature that allows you to sync audio and MIDI clips to a specified tempo. With Grid Mode enabled, users can easily manipulate audio and MIDI clips to match the rhythm of their project.
Pro Tools First is a popular digital audio workstation that offers a variety of features and tools to help users create professional-quality music. One of its most useful features is the Grid Mode, which allows you to sync audio and MIDI clips to a specific tempo.
This feature is especially helpful for users who want to create music that is consistent in pace and rhythm. We will delve deeper into Pro Tools First Grid Mode, how it works, and how you can use it to create your own music. So, if you’re a music producer or audio engineer looking to improve your workflow, keep reading!
Activating Grid Mode In Pro Tools First
Pro Tools First Grid mode allows you to edit audio files according to the rhythm of the song or recording. It allows you to snap audio clips to a specific grid, making it easier to make precise edits. Activating Grid Mode in Pro Tools First is easy, and you can use it for rhythm-based editing.
Step-by-step Guide:
Open your Pro Tools First project file.
Select the Track containing your audio file that you want to edit.
Click on the Edit Window to activate it.
Look for the Grid Mode option, which is located at the top of the Edit Window.
Click on the Grid Mode option to activate it.
Select a grid value from the Grid Value menu. This value determines how much the audio clips will snap to the grid. You can choose between whole notes, half-notes, quarter-notes, eighth-notes, sixteenth-notes, and thirty-second notes.
You can also adjust the tempo of the grid and make it match the tempo of the song or recording.
You are now ready to edit your audio files using Grid mode.
Using Grid Mode For Rhythm-based Editing:
Grid mode is ideal for rhythm-based editing as it allows you to snap audio clips to the beat of the song or recording. You can easily move, trim, cut, and paste audio clips while maintaining the rhythm of the song.
For instance, if you want to clean up a drum track, you can use Grid mode to line up the snare hits with the grid. This will allow you to make precise edits and tighten up the track. Similarly, you can use Grid mode to align vocal tracks, guitars, or any other instrument that needs to be in rhythm with the song.
In conclusion, activating Grid mode in Pro Tools First is a simple process that allows you to edit audio files according to the rhythm of the song. Using Grid mode for rhythm-based editing ensures that your audio clips stay in sync with the song or recording, making your edits more accurate and precise.
Credit: www.mixinglessons.com
Benefits Of Grid Mode In Pro Tools First
As a beginner in music production, it’s essential to have an easy-to-use editing tool that can help you create precise rhythmic patterns. This is where Pro Tools First Grid Mode comes into play, allowing you to edit audio with precision, set rhythmic patterns, and simplify the editing process.
Precision Editing:
With Pro Tools First Grid Mode, you can edit your music with extreme precision, ensuring that every beat is aligned with precision. Grid mode helps you create accurate and consistent edits that can help improve the overall sound quality of your music. The grid lines in grid mode provide reference points for audio editing, making sure every clip is in time with the rhythm.
Ability To Set Rhythmic Patterns:
Grid mode in Pro Tools First gives you the ability to set rhythmic patterns that match the tempo of your music. The rhythm you set determines the timing of your clips, ensuring that they match the beat. By using the grid lines, you can match the rhythm of your audio clips with the beat, making your music sound more consistent and professional.
Ease Of Use For Beginners:
Pro Tools First Grid Mode is incredibly easy to use, even for beginners. It simplifies the editing process by providing clear reference points, easing your work in creating complex rhythmic sections. With a simple click and drag, you can seamlessly align your audio clips with the beat and create an impressive sound. It helps make sound production more accessible for beginners, allowing them to create professional-quality music in minutes.
Overall, the Pro Tools First Grid Mode is an essential tool for music production industry professionals and beginners alike. It can help you edit your music with precision, set rhythmic patterns, and make editing easier. It’s an incredibly user-friendly tool that can help you improve your sound quality, making your music sound more professional than ever before.
Tips For Using Grid Mode In Pro Tools First
Learn how to maximize your efficiency in Pro Tools First by utilizing the Grid Mode. This powerful feature allows you to quickly and precisely arrange your audio components according to your desired timing and rhythm, resulting in a smoother workflow and a more polished finished product.
Tips for using Grid Mode in Pro Tools First Pro Tools First is widely considered a powerhouse in music production software. One of the features that make it popular among musicians and producers is Grid Mode, which allows for accurate timing adjustments to align musical elements flawlessly. Below are some useful tips for using Grid Mode in Pro Tools First to elevate your productions. Zooming in for precise edits To make precise edits, zooming in is crucial. Simply press the “Z” key on your keyboard to activate the zoom tool and click and drag across the section you want to edit. The waveform will be magnified, allowing you to visualize and edit on a sample-by-sample level. It’s a valuable tool when you need to hand-align beats for a tight rhythmic feel. Utilising snap settings Snap settings can help you move each beat into place without the need for manual adjustment on each individual track. To ensure accurate snaps, open the Snap to Grid button (magnet icon) on the top toolbar and select the note-value that fits your track’s timing. When you move your cursor, it will automatically snap elements to the grid lines for the set note-value. Avoid over-reliance by disengaging snap mode to make adjustments to the rhythmic feel when necessary. Respecting the original groove, ensuring each When using Grid Mode, it’s important to ensure your timing adjustments don’t alter the rhythmic feel of the original recording. By maintaining a natural feel, you’ll have a more human performance that grooves with its intended energy. To achieve this, consider slowing down the playback to identify the natural rhythm of the track’s groove. When you come around to lining up audio elements, adjusting snaps and editing to grid lines, you could produce a tight and refined version of the initial recording while maintaining the feel of the original groove. Utilise Grid Mode to perfect the timing of vocal samples, guitar plucks, drum hits, and other audio elements. While it may take some practice to get the hang of it, with this feature, you’ll be able to produce a perfect rhythmic and refined tune that’s all of your own.
Credit: www.vennaudio.com
Advanced Techniques With Grid Mode
Pro Tools First users can elevate their editing game with the help of Grid Mode. This advanced technique allows for seamless audio alignment and manipulation for a more polished final product.
Pro Tools First Grid Mode is a powerful tool for musicians and producers who want to create complex and intricate patterns. With advanced techniques, you can produce music with incredible precision and accuracy to take your music production to the next level. In this post, we’ll focus on some advanced techniques with Grid Mode, namely changing time signature mid-session, combining Grid Mode with MIDI editing, and creating complex patterns.
Changing Time Signature Mid-session
Changing the time signature is never an easy task, and it becomes even harder when you want to do it in the middle of a session. With Grid Mode, you can change the time signature of your session with ease. Simply locate the time signature ruler at the top of the screen and click it. Then, select the new time signature that you want. Pro Tools First Grid Mode will perform the change automatically, without affecting your existing MIDI or audio recordings. It is a simple but powerful feature that can save you time and effort.
Combining Grid Mode With Midi Editing
When it comes to MIDI editing, Grid Mode is a fantastic tool that helps you align and snap your MIDI notes with incredible precision. You can also take advantage of the other MIDI editing features in Pro Tools First, such as the ability to move, cut, and copy MIDI notes within your session. When you combine Grid Mode with MIDI editing, you get a comprehensive set of editing tools that can help you achieve the results you want.
Creating Complex Patterns, Ensuring Each
With Grid Mode, you can create complex patterns with ease. Start by defining the tempo and time signature of your session. Then, use the Grid Mode to snap your MIDI notes align to the beat or grid. You can also use Grid Mode to create complex polyrhythms by setting different grid values for different instruments. Creating complex rhythms becomes easy when you use Pro Tools First Grid Mode. In conclusion, Pro Tools First Grid Mode is a powerful tool for music producers and musicians. By taking advantage of its advanced features like changing time signature mid-session, combining Grid Mode with MIDI editing, and creating complex patterns, you can produce music with incredible precision and accuracy. With Grid Mode, you can focus on your creativity and let the tool do the work.
Troubleshooting Grid Mode In Pro Tools First
To troubleshoot the Grid mode in Pro Tools First, first ensure you have the right edition for your needs and that it has been upgraded with the necessary updates. Then, adjust the Beat Grid’s position to match tempo changes and audio fluctuations to keep your tracks in sync with the desired tempo.
Finally, use the Grid mode to quantize your beats and align them with the bars and beats of your track.
If you are new to Pro Tools First and its Grid Mode, you might encounter some challenges while trying to use it. But worry not; in this post, we will explore troubleshooting tips to help you overcome any hurdles that come your way.
Common Issues And Solutions
Here are some typical problems you may encounter while using Grid Mode in Pro Tools First and solutions to resolve them.
Problem
Solution
No audio is playing
Ensure that the audio track is not muted. You can also check if your computer’s sound settings are okay
Grid is not working as expected
Check the snap and grid settings on the Edit window of Pro Tools First and adjust them accordingly.
Grid lines are not visible
Ensure that the view grid option is selected on the Edit window toolbar.
Resetting Grid Mode Preferences
If you are still having issues with Grid Mode in Pro Tools First despite trying the solutions above, you may want to reset Grid Mode preferences. Here is how to do it:
Press and hold the left Shift + Left Option + Left Control keys while opening Pro Tools First
Continue holding the keys until the Prompt window appears
Click “OK” and release the keys
Pro Tools will open with default preferences.
Conclusion
Grid Mode in Pro Tools First is a fantastic tool that enables you to be more precise when editing audio files. However, you may experience some challenges using it. The common issues and solutions highlighted above will help you overcome these obstacles, and if all fails, resetting Grid Mode preferences might help.
Credit: www.amazon.com
Frequently Asked Questions On Pro Tools First Grid Mode
How Do I Turn On Grid Mode In Pro Tools?
To turn on grid mode in Pro Tools, simply go to the View menu and select “Edit Window Grid” or “Mix Window Grid,” depending on the window you’re working in. You can also use the keyboard shortcut Command+2 on a Mac or Control+2 on a PC.
This will enable the grid mode in Pro Tools.
Why Can’t I See The Grid In Pro Tools?
To view the grid in Pro Tools, press the “Option+Command+G” keys on a Mac, or “Alt+Control+G” on a PC. If the grid is still not visible, go to the “View” menu and select “Edit Window Views,” then check the box next to “Grid” to enable it.
What Is The Shortcut For Grid Mode In Pro Tools?
The shortcut key for Grid mode in Pro Tools is the “Command” key for Mac or “Ctrl” key for Windows along with the “G” key.
How Do I Turn Off Snap To Grid In Pro Tools?
To turn off snap to grid in Pro Tools, go to the “Options” menu and select “Preferences. ” Under the “Editing” tab, uncheck the “Grid” option under “Operations. ” You can also toggle snap to grid on and off using the “S” key on your keyboard.
Conclusion
Pro Tools First Grid Mode is a powerful tool that offers great flexibility in audio editing. With its intuitive interface and easy-to-grasp layout, this software helps users achieve their goals with greater precision and efficiency. For beginners and hobbyists, this is a great way to get started without breaking the bank.
And for professionals, it’s a valuable addition to your existing toolkit. Whether you’re recording, mixing or mastering, Grid Mode is definitely a feature worth exploring. So go ahead and give it a spin – you won’t be disappointed!
Practice mixing is essential for improving your mixing skills. It involves experimenting with various audio levels to achieve a balanced and enjoyable sound.
Mixing requires patience and attention to detail, as well as knowledge of different techniques and tools. As a musician or audio engineer, you will benefit greatly from honing your mixing abilities through regular practice. With dedication and persistence, you can create professional-quality mixes that enhance the impact of your music and captivate your audience.
We will explore some helpful tips and strategies to help you get started and make the most of your mixing practice sessions.
Credit: www.youtube.com
Importance Of Mixing
Mixing is a critical element of music production that involves blending multiple audio tracks into one cohesive track. It is a process that significantly impacts the overall sound quality of a song. Mixing is essential for both amateur and professional musicians. Here are some reasons why mixing is crucial:
Enhances Sound Quality
One of the main reasons mixing is essential is that it can enhance the sound quality of a track. Audio tracks recorded in different environments and with different equipment usually have varying sound quality. Mixing allows you to eliminate unwanted noise and emphasize specific highlights in each track. With proper mixing, the overall sound quality of a track can be significantly improved, which can make it more pleasurable for the listener.
Lends Professional Touch
Incorporating proper mixing techniques helps create a professional and polished sound that can help make a track stand out. A well-mixed track sounds like it was produced by professionals and lends credibility to the musician or producer. Having professional-sounding music can attract more established music industry figures, such as record labels, producers, and agents, and enable a musician to gain a larger audience.
Overall, mixing is an essential component of music production that can improve the quality and sound of a track. Whether you’re an amateur or professional musician, incorporating mixing techniques can help take your music to the next level and make it stand out in a crowded and competitive market.
Basic Guidelines
When practicing mixing, it’s important to pay attention to the levels of each instrument or element in the mix. Make sure that no single instrument or element is overpowering the others. It’s also important to consider the stereo field and panning to create a balanced and cohesive overall sound.
Mixing is the process of balancing and adjusting individual audio tracks to create a final stereo mix that sounds good on various playback systems. It’s a complex process that involves technical skills and creative artistry. By following some basic guidelines, you can create mixes that sound professional and polished. In this post, we’ll explore a few essential tips that will help you get started with mixing.
Understanding Track Structure
Before you start mixing, it’s essential to understand the structure of the individual tracks. You need to identify the different elements of a song, such as the vocals, drums, bass, guitar, and keyboards, and understand their roles in the mix. This will help you to balance the levels, EQ, and dynamics of each track to create a cohesive sound.
Balancing Eq And Dynamics
EQ and dynamics are two critical parameters that affect the overall sound of a mix. EQ helps you to adjust the tonal balance of each track by boosting or cutting certain frequencies. Dynamics refer to the changes in volume level over time. When you balance the EQ and dynamics of each track, you can create a mix that has clarity, punch, and dynamics.
Panning
Panning is the process of placing each track in the stereo field. By panning, you can create a sense of space and separation between the different tracks. It’s essential to pan instruments in a way that complements the overall sound of the mix. For example, panning drums closer to the center and guitars wider can create a balanced and comfortable stereo image.
Adding Reverb And Delay
Reverb and delay are two essential effects that add depth and character to a mix. Reverb simulates the reflections of sound in a room, creating a sense of space and ambiance. Delay creates echoes that can be used for rhythmic effects or to add a sense of depth to vocals and guitars. When used appropriately, these effects can add a lot of character to a mix. In conclusion, by following these basic guidelines, you can create mixes that sound professional and polished. It’s essential to understand the structure of the tracks, balance the EQ and dynamics, pan the tracks correctly, and add appropriate effects. With practice and patience, you’ll be able to create mixes that sound great on any playback system.
Tips For Effective Mixing
To become an effective mixer, it’s essential to practice often. Experiment with different techniques, learn from mistakes, and refine your skills. Consistent practice builds confidence and allows you to create high-quality mixes that stand out from the rest.
If you are a music producer or audio engineer, you know that mixing is a crucial process that can make or break your final product. Although mixing can be a challenging task, there are several tips that can help you to mix effectively. In this post, we will discuss the essential tips for effective mixing, which include starting with a clean mix, taking breaks frequently, getting feedback from others, and using reference tracks.
Start With Clean Mix
Before you start mixing, it is essential to ensure that you have a clean mix. A clean mix means that all the tracks in the project are well recorded, labeled, and organized. Having a clean mix will eliminate any unwanted noise and make it easier to identify and fix any issues in the project. You must also ensure that each track has its equalization settings, such as volume, panning, and effects. Starting with a clean mix will save you a lot of time during the mixing process.
Take Breaks Frequently
Mixing requires a lot of concentration, which can be exhausting. Don’t try to mix everything at once. You need breaks to rest your ears and mind. Taking frequent breaks will help you to maintain a fresh perspective and make better decisions while mixing. It would be best to take a break for every hour you spend mixing.
Get Feedback From Others
As much as you are proud of your work, it is essential to get feedback from other people. Feedback allows you to identify the strengths and weaknesses of your mix and improve it. You can seek feedback from other music producers, audio engineers, or anyone in the music industry who can give you honest feedback. Encourage them to be specific and objective about what they liked and didn’t like about the mix.
Reference Tracks
Reference tracks can be an invaluable tool during the mixing process. They help you to compare your mix to commercially released songs in a similar genre. It will help you to understand how professional mixes sound and compare them to your mix. You can identify elements of professional mixes that you can apply to your mix, such as compression, EQ, reverb, and panning. In conclusion, mixing requires practice, and by following these tips, you can improve your mixing skills. Remember to start with a clean mix, take breaks frequently, get feedback from others and use reference tracks. These tips are not exhaustive, and there are more tips you can add to your workflow to improve your mixing skills further.
Common Mistakes To Avoid
When practicing mixing, some common mistakes to avoid include ignoring the importance of leveling, EQing, and compression. It’s also essential to use high-quality sounds and avoid overcrowding tracks with too many elements. Taking breaks and listening on various devices can also lead to better results.
Mixing is both an art and a science. It’s not just about adjusting the levels of tracks and adding effects. However, as with any art, there are certain mistakes that beginners make. Here we discuss the most common mixing mistakes and how to avoid them.
Overprocessing
One of the most common mistakes that beginners make is overprocessing. It can be tempting to add multiple effects to every track, but this can lead to an unnatural sound and even cause phase issues. Instead of applying every effect in the book, use your ears and decide which ones work best for each track.
Ignoring The Importance Of Gain Staging
Gain staging refers to the process of setting the levels of each track in your mix. If your levels are too low, you risk losing fidelity. If they’re too high, you risk clipping and distortion. Gain staging may be a tedious process, but it’s crucial for a clean and balanced mix.
Lack Of Attention To Stereo Field
The stereo field is the imaginary space where each instrument sits in a mix. A lack of attention to the stereo field can lead to a cluttered and muddy mix. Panning can help create a sense of space and separation between tracks. So, take a moment to pan each track and ensure that each instrument has its own space in your mix. In conclusion, these are just a few of the common mixing mistakes that beginners make. By avoiding these mistakes and taking the time to thoughtfully mix your tracks, you can achieve a professional-sounding mix that stands out. Remember, that mixing is a skill that takes time and practice to perfect.
Mixing Techniques
In music production, mixing refers to the process of blending different elements of an audio recording to create a final mix that sounds balanced and cohesive. As a mixing engineer, it is essential to have a variety of techniques to achieve this desired mix. In this post, we will explore some popular methods, including frequency masking, parallel compression, sidechain compression, and automation.
Frequency Masking
Frequencies can sometimes compete in a mix, resulting in masking, which occurs when one frequency covers or hides another. To prevent this, you need to identify and adjust the frequency range of each element to find its sweet spot. EQ can be helpful in tackling this, but it requires a careful ear and experience to master. For instance, if the kick drum is clashing with the bass guitar, you can use EQ to cut the frequency of the kick drum slightly, so it doesn’t overlap with the bass. By doing this, both instruments can be heard distinctly without fighting for space in the mix.
Parallel Compression
Parallel compression is a mixing technique where you blend a compressed and uncompressed signal to achieve more control over the dynamic range of a track. You achieve this by duplicating the track you want to compress and compressing the duplicate track heavily. This compressed duplicate track can be mixed back in with the original track to create a fuller and more impactful sound.
Sidechain Compression
Sidechain compression is a technique where you use a compressor on one track to manipulate the dynamics of another track. For instance, you can use a sidechain compressor on the bass guitar track to reduce its volume briefly every time the kick drum hits, allowing the kick drum to punch through the mix without clashing with the bass.
Automation
Automation is the method of controlling parameters like volume, panning, effects, and EQ over time to achieve dynamic changes in a mix. It can be used to add variety and interest to your mix, making it more engaging for the listener. For example, you could automate the volume of a guitar solo to make it quieter during the verse and louder during the chorus, creating a more dramatic effect.
In conclusion, these four mixing techniques are just some of the many methods you can use to achieve a balanced and cohesive mix. Every mix is unique, and depending on the track, you may need to use one or several of these techniques, in addition to your creativity and experience as a mixing engineer. Practicing these techniques will help you develop your skills, and you will soon be able to achieve the desired mix in no time.
Credit: marymcandrew.com
Tools And Technologies
Practice mixing requires a range of tools and technologies to help create a polished end result. From mixing consoles and speakers to digital audio workstations and plugins, there are numerous resources available to assist in the mixing process. It’s important to experiment with different tools and develop a personalized workflow that works best for you.
When it comes to mixing music, music producers and sound engineers rely heavily on different tools and technologies to help them achieve the best results possible. Some of the most important tools in mixing include Digital Audio Workstations, Plugins and Effects, and Mixing Consoles.
Digital Audio Workstations
Digital Audio Workstations (DAWs) are software programs used to record, edit, and mix audio files. They come with a range of tools and features, including virtual instruments, MIDI editors, and audio effects. Popular DAWs include Ableton Live, Logic Pro X, and Pro Tools.
Plugins And Effects
Plugins and effects are essential tools in mixing. They are used to enhance the sound quality, add depth and texture, or fix any issues in an audio track. Some popular plugins and effects include EQ (equalizer), reverb, delay, compression, and noise reduction. Many DAWs come with their own plugins and effects, and third-party plugins are also available.
Mixing Consoles
Mixing consoles, also known as mixing desks or boards, are used to control and adjust the levels, panning, and effects of multiple audio sources. They are commonly used in live sound and studio recording sessions. Modern digital consoles can also be used as standalone units or controlled from a computer or tablet. Overall, with the help of these essential tools and technologies, sound engineers and music producers can achieve the perfect mix of their music.
Credit: m.youtube.com
Frequently Asked Questions For Practice Mixing
Where Can I Find Multitracks To Practice Mixing?
Multitracks for practicing mixing can be found on several websites, including The Pro Audio Files, Mixing Secrets, and Cambridge Music Technology. These websites offer multitracks of popular songs in various genres for users to practice mixing and mastering skills.
How Can I Practice Audio Mixing At Home?
To practice audio mixing at home, you can start by investing in a digital audio workstation and a good set of headphones. Consult online resources and tutorials to learn the basics of mixing techniques. Experiment with different software and equipment to develop your skills.
Finally, practice regularly and seek feedback from other musicians or professionals.
How Do You Teach Yourself To Mix?
To teach yourself to mix, start by practicing with a basic software or equipment. Study the basics of volume levels, frequency ranges, and EQ. Enhance your skills by researching techniques from different sources, experimenting with different tracks and sounds, and seeking feedback from other professionals.
With patience, practice, and a willingness to learn, anyone can become an expert mixer.
How Much Is Professional Mixing?
The cost of professional mixing can vary depending on factors such as the provider’s experience, the complexity of the project, and the length of the track. On average, expect to spend anywhere from $100 to $1000 per song.
Conclusion
Incorporating mixing into your musical practice routine is a must-do for any aspiring producer, DJ, or musician. With today’s technology, the tools are readily available to explore and improve your mixing skills. By carefully following these guidelines and consistently practicing, you can take your mixes to the next level and stand out in a crowded industry.
Remember, mixing is an important aspect of the music creation process, and the ability to do it well is a valuable asset. So, get started today and watch your skills grow!
The keys on a piano consist of both white and black keys arranged in a specific pattern. Playing the piano involves striking these keys in various combinations to produce a desired melody or harmony.
Piano keys are labeled with letters and numbers to indicate their specific pitches, and they are grouped into octaves. Beginners typically start by learning notes and finger positioning on the basic white keys before moving on to mastering more complex pieces that incorporate black keys.
From classical music to pop tunes, the piano is a versatile instrument that can evoke a range of emotions and connect with a variety of audiences. We will explore the different parts of the piano keyboard and discuss the basics of learning to play this beautiful instrument.
Credit: www.julieswihart.com
Parts Of A Piano Keyboard
Whether you are a seasoned pianist or just starting on your musical journey, it is essential to understand the different parts of the piano keyboard. The keyboard is the most prominent feature on a piano and consists of black and white keys arranged in a specific pattern.
White Keys
The white keys, also known as naturals, are the most recognizable parts of the piano keyboard. There are 52 white keys on a full-sized piano keyboard and 36 on smaller keyboards. These keys are arranged in groups of two and three that repeat across the keyboard. The white keys are named after the first seven letters of the alphabet, starting with A and ending with G.
Black Keys
The black keys, known as sharps and flats, are the smaller keys positioned between the white keys. There are 36 black keys on a full-sized piano keyboard and 25 on smaller keyboards. The black keys are named after the white keys they are positioned adjacent to and are used to play semitones, or half-steps.
The black keys are arranged in groups of two and three to correspond with the groupings of the white keys. These groups of black keys form patterns of two and three that repeat across the keyboard. Understanding the arrangement of the black keys is essential to playing scales and arpeggios.
Learning the different parts of the piano keyboard is the foundation for playing the piano. With an understanding of the arrangement of the white and black keys, you can start to play simple melodies and begin your journey to becoming a proficient pianist.
Musical Notation
Musical notation is the written language of music enabling musicians to play together. The keys on the piano correspond to specific notes and are represented by letters and symbols on sheet music, allowing for easy playability.
Musical notation is the system musicians use to write and read music. It is made up of symbols and markings that represent musical sounds and rhythms. When it comes to playing the piano, understanding how to read musical notation is crucial. In order to do this, you must first identify the notes on the keys.
Identifying The Notes On The Keys
At first glance, the keys on a piano can seem overwhelming. However, with a basic understanding of musical notation, identifying the notes becomes much easier. Each key on a piano corresponds to a specific musical note. The standard piano has 88 keys, which include white and black keys. The white keys represent the notes A, B, C, D, E, F, and G. The black keys represent the sharp or flat versions of these notes.
Note Value
Once you’ve identified the notes on the keys, the next step is understanding note value. Note value refers to the length of time a note is played. In musical notation, each note has a specific shape that indicates its value. A whole note represents four beats, a half note represents two beats, a quarter note represents one beat, an eighth note represents half a beat, and a sixteenth note represents a quarter of a beat.
Putting It All Together
Now that you understand how to identify the notes on the keys and the different values they can hold, you’re ready to read and play sheet music. Sheet music is a written representation of music that uses musical notation. In sheet music, notes and rhythm are written on a series of five horizontal lines called a staff. The notes are placed on the staff according to their pitch and duration, and the duration is indicated by the shape of the note. By understanding the basics of musical notation and practicing reading sheet music, you can play any song on the piano. It takes time and patience to master the piano, but with a solid foundation in musical notation, you’ll be well on your way to becoming a skilled pianist.
Playing Techniques
Mastering the keys on the piano requires understanding playing techniques, such as proper finger placement and hand positioning. By practicing these skills regularly, you can improve your playing abilities and create beautiful music.
When it comes to playing the piano, mastering the playing techniques is crucial. Proper hand positioning and finger placement can make a significant difference in how well one can play the instrument. In this section, we will discuss the importance of hand positioning and finger placement, providing tips for beginners to improve their playing skills.
Hand Positioning
When sitting on the piano bench, your arms should be level with the keyboard, and your hands should be relaxed. Keep your elbows close to your body, and your wrists slightly raised but not locked. Keep your fingers curved, with your fingertips touching the keys. Maintain this position while playing to avoid injury and increase control over the keys.
Finger Placement
Finger placement is crucial to playing the piano as it enables you to play the right notes and chords. Starting with the thumb, each finger has a designated number from 1 to 5. The thumb is finger 1, followed by the index finger (2), middle finger (3), ring finger (4), and the little finger (5). Practice playing simple scales and exercises to strengthen your fingers and familiarize yourself with the correct finger placement. Remember to keep your fingers curved and avoid pressing too hard on the keys.
Practice Tips
– Practice hand and finger warm-up exercises before playing to reduce the risk of injury. – Focus on finger independence by practicing individual finger exercises. – Start with simple pieces and gradually work your way up to more complex songs. – Practice playing with both hands simultaneously to strengthen your coordination. – Take breaks to avoid fatigue and prevent injuring your hands and wrists. By mastering proper hand positioning and finger placement, you can significantly improve your piano playing skills. Remember, practice makes perfect, so don’t be discouraged if progress seems slow at first. Keep practicing and eventually, you will be able to play the piano with ease.
Basic Piano Chords
Learning basic piano chords is crucial for any beginner. It’s important to understand the keys on the piano so you can easily identify notes and create beautiful music.
If you’re just starting out on the piano, understanding the basics of piano chords is crucial. Basic piano chords are the foundation of every song, and mastering them will help you learn more complex chords as you progress in your playing. In this post, we’ll be focusing on two types of basic piano chords: major chords and minor chords.
Major Chords
Major chords are some of the most commonly used chords in music. They’re used in pop, rock, classical, and all other genres. Major chords are built on the first, third, and fifth notes of a major scale. For example, C major chord is made up of the notes C, E, and G. Here’s a table showing some common major chords:
Chord
Notes
C Major
C, E, G
D Major
D, F#, A
E Major
E, G#, B
Minor Chords
Minor chords are another essential type of chord. They’re often used to give songs a melancholy or sad sound. To create a minor chord, start with a major chord and flatten the third note. For example, C minor chord is made up of the notes C, Eb, and G. Here’s a table showing some common minor chords:
Chord
Notes
C Minor
C, Eb, G
D Minor
D, F, A
E Minor
E, G, B
Learning these basic piano chords is a great start to playing piano. As you continue to practice, you’ll begin to understand how chords work together to create melodies and harmonies. With enough practice, you’ll be able to create your own music using these basic chords or even more complex ones.
Playing Piano Sheet Music
Playing the piano requires fundamental skills, and one of them is reading and interpreting sheet music. If you want to play the piano proficiently, you must learn how to read music sheets with ease and precision. In this post, we will explore the basics of reading music and how to translate sheet music into piano keys.
Reading Sheet Music
During the first few lessons of piano, the teacher will teach you how to read sheet music. Each sheet has horizontal lines and vertical spaces that represent the different notes in a song. To represent different keys on the piano, sheet music uses different signs and symbols. When you read sheet music, you will see different signs that represent the notes of the melody, the duration of the note played, the speed and volume of the music, and the type of key changes.
Translating Sheet Music To Piano
After you learn how to read sheet music, it’s time to translate what you have read into keys on the piano. The skill to interpret sheet music to piano is essential for playing different melodies fluently. While sheet music may appear confusing initially, it is actually quite simple once you know how to decipher it. One way of translating sheet music onto the piano is by understanding the correlation between the sheet music notation and piano keys. You can easily identify the piano keys that correspond with each note in the sheet music by using a chart that shows the correlation between the notes of the music sheet and the piano keys.
Another critical element of interpreting sheet music to piano keys is the ability to recognize the melody and harmonies of a song. When you can hear the melody in your head, you can analyze the sheet music and translate it to the piano keys that correspond to each note. This ability takes a lot of practice and effort, but with time, it becomes second nature to piano players.
Overall, playing piano sheet music is a fundamental skill that every beginner piano player must learn. With a thorough understanding of reading sheet music and how to translate it to the piano keys, you can play different tunes fluently and enhance your musical abilities. Practice consistently, and before you know it, you will conquer the keys of the piano.
Credit: m.youtube.com
Common Beginner Mistakes
Beginner piano players often make mistakes when it comes to the keys on the piano. Specifically, they tend to struggle with identifying and remembering the different notes on the instrument, which can hinder their progress when it comes to learning to play melodies and chords.
With practice and guidance, beginners can overcome these challenges and become confident piano players.
As a beginner learning to play the piano, it’s common to make mistakes that can hinder your progress. In this blog post, we will be discussing some of the common beginner mistakes that many people make when learning to play the piano. By understanding these mistakes, you can avoid them and progress faster in your learning journey.
Neglecting Scales And Arpeggios
One of the most common mistakes that beginners make when learning the piano is neglecting to practice scales and arpeggios. Often, beginners want to jump right into playing their favorite songs and may not see the importance of practicing scales and arpeggios. However, practicing these exercises regularly can help you develop better finger dexterity and hand coordination. Make sure to practice scales and arpeggios in every key, and at different tempos, making it easier for you to play songs when advanced to intermediate level.
Excessive Reliance On Sheet Music
Another mistake that beginners make is relying too much on sheet music. While sheet music is an important tool for learning how to play the piano, relying on it exclusively can hinder your progress. It can also lead to weak sight-reading skills, which will make it harder for you to play music on the fly. To avoid this mistake, make sure to practice playing by ear. This can be done by listening to a song and trying to recreate it on the piano without looking at the sheet music. This exercise can help you develop better aural skills and make it easier for you to improvise your own music.
Conclusion
By avoiding these common beginner mistakes, you can progress faster in your learning journey and become a better piano player. Remember, practice and patience are key to improving your piano playing skills, so keep at it, and you’ll be playing like a pro in no time!
Practice Techniques And Tips
Learn to master the keys on the piano with these practice techniques and tips. Start with proper hand positioning and gradually progress to playing scales and chords. Consistent practice and dedication will lead to improving your skills and mastering the art of piano playing.
Playing the piano can be both rewarding and challenging. While it requires a lot of practice, there are certain techniques and tips that can help you learn more effectively and efficiently. Here are some key ways to improve your piano skills.
Consistency And Regularity
The key to becoming proficient at playing the piano is consistent and regular practice. However, it’s not just about the time spent practicing, but also the quality of the practice sessions. Shorter, concentrated practice sessions are often more effective than longer, less focused ones. Consider setting a regular practice schedule and staying committed to it.
Enlisting The Help Of A Piano Teacher
Working with a piano teacher can provide you with valuable feedback and guidance. A professional piano teacher can identify your strengths and weaknesses, and adjust your practice techniques accordingly. They can also provide you with tailored exercises and support you as you progress. Working with a piano teacher doesn’t have to be expensive or time-consuming. You can seek online resources, video tutorials, and affordable in-person lessons. By investing in a reliable source of quality guidance and support, you can more effectively achieve your goals.
Supplementing Practice Techniques With Key Tools
There are also numerous tools and resources available that can help you improve your piano skills. These include metronomes for tracking time and rhythm, ear-training apps, and recording software to help you visualize your progress. Consider which tools could be useful to you and incorporate them into your practice routine.
Conclusion
Improving your piano skills takes time, dedication, and consistent effort. By incorporating these practice techniques and tips into your routine and seeking the support of a teacher or valuable tools, you can work towards becoming a more accomplished pianist.
Credit: www.pinterest.com
Frequently Asked Questions For Keys On The Piano
What Are The 12 Keys In Piano?
The 12 keys in a piano are the 7 white keys (A, B, C, D, E, F, G) and the 5 black keys (A#, C#, D#, F#, G#). These keys repeat in pattern across the piano’s keyboard. The different keys allow for playing different notes and creating varied melodies.
What Are Keys In Piano?
Keys in piano refer to the set of white and black rectangular pieces that are pressed to produce sound. These keys make up the 88-note keyboard on a standard piano, with seven octaves plus a few additional notes. Tones vary between each key, allowing musicians to play melodies and chords with different sounds.
What Are The 88 Keys On A Piano?
A piano typically has 88 keys, consisting of 52 white keys and 36 black keys. The keys represent various musical notes and are arranged in repeating patterns of 12 keys.
What Are The 52 Keys On A Piano?
A piano has 52 white and black keys, including the seven octaves and extra notes. The keys are arranged in groups of two and three to create musical scales and chords.
Conclusion
After reading this blog post, you should now have a better understanding of the keys on the piano. The piano is an important instrument to learn, and it all starts with understanding the basics. From C to B, each key serves a unique purpose and helps to create beautiful melodies.
By practicing regularly and improving your skills, you can reach new heights in your piano playing abilities. Remember to keep these key principles in mind, and keep playing!