Categories
Archive

Mastering Midi: Record Like a Pro in Fl Studio

To record MIDI in FL Studio, simply connect your MIDI device, select it as input, and hit record. FL Studio makes recording MIDI quick and easy.


In the world of music production, capturing MIDI data is a crucial step in creating electronic music compositions. FL Studio, a popular digital audio workstation, offers a straightforward method to record MIDI notes and performances from external controllers or virtual instruments.


This process allows producers and musicians to input musical ideas directly into their projects, enabling them to manipulate and arrange these recordings to craft intricate and captivating tracks. Whether you’re a seasoned pro or a beginner in music production, knowing how to record MIDI in FL Studio is a valuable skill that can enhance your workflow and creativity. Let’s dive deeper into the steps and techniques for recording MIDI in FL Studio.


Getting Started With Midi


If you’re new to recording Midi in FL Studio, it’s essential to start with the basics. Follow these steps to kickstart your Midi recording journey.

Choosing The Right Midi Controller

Select a Midi Controller that suits your music production needs and budget. Ensure compatibility with FL Studio to streamline your workflow.

Setting Up Midi Controller In Fl Studio

Connect your Midi Controller to your computer using a USB cable. Open FL Studio and navigate to Settings > Midi Settings to configure your Controller.
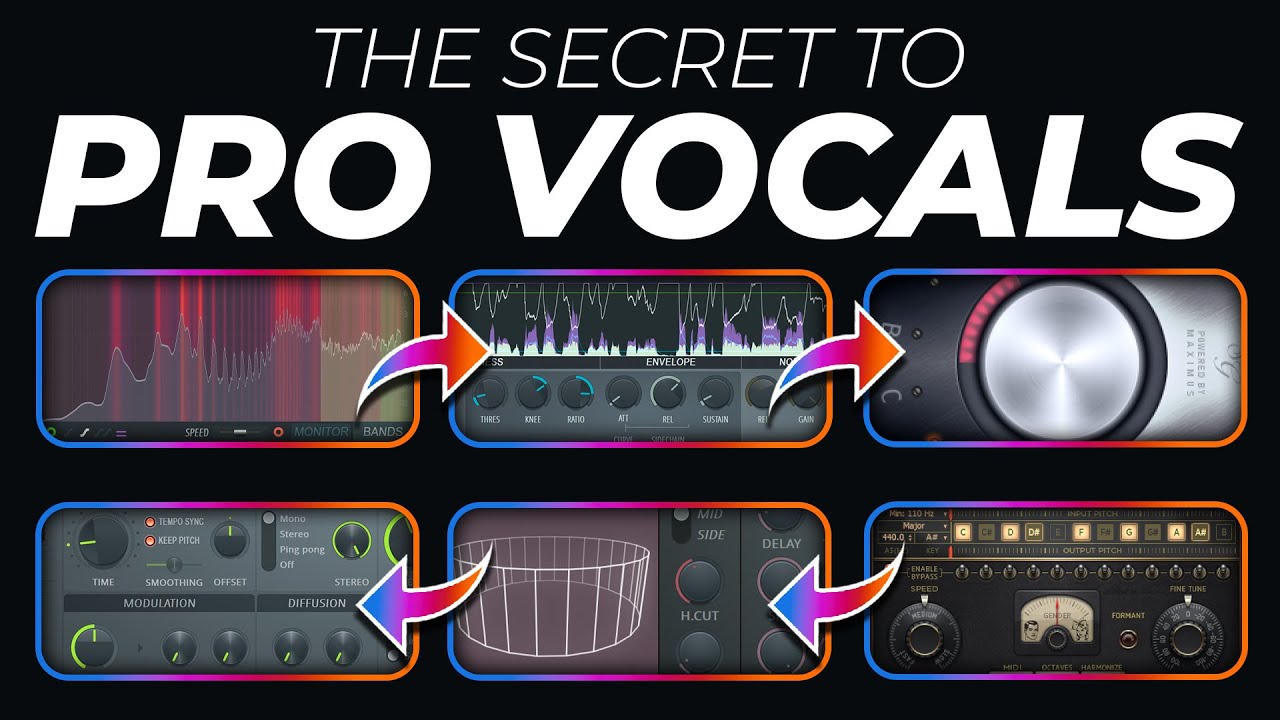
 

Mastering Midi: Record Like a Pro in Fl Studio


Credit: www.youtube.com


Understanding Midi Recording

Understanding Midi Recording:
Recording Midi in FL Studio involves understanding how Midi channels work and using the Piano Roll for precise recording. Let’s explore these key concepts.

Exploring Midi Channels

Midi channels allow you to separate different instruments or sounds within FL Studio. Each channel can have its unique settings and parameters.

Utilizing Piano Roll For Midi Recording

The Piano Roll is a powerful tool in FL Studio for recording, editing, and arranging Midi notes. You can input notes, adjust their length, and create melodies easily.

Advanced Midi Editing Techniques

Mastering advanced MIDI editing techniques can take your music production skills to the next level. These techniques allow you to fine-tune your MIDI recordings, ensuring that every note and expression is precisely as you intended. Below are some powerful methods that can help you elevate your MIDI editing prowess.

Applying Quantization For Perfect Timing

Quantization is a crucial tool for achieving impeccable timing in your MIDI recordings. By applying quantization, you can automatically align notes to the nearest specified value, ensuring that your music maintains a consistent and precise rhythm.

Creating Expressive Midi With Velocity And Modulation

Velocity and modulation introduce dynamic and expressive elements to your MIDI recordings. Manipulating velocity allows you to control the strength of each note, while modulation enables you to add subtle variations in pitch, expression, and timbre, resulting in a more emotive and nuanced sound.

Mastering Midi: Record Like a Pro in Fl Studio


Credit: m.facebook.com


Using Midi Effects And Tools

When it comes to creating music in FL Studio, utilizing MIDI effects and tools can take your compositions to the next level. These tools provide you with creative options and allow you to add depth and complexity to your MIDI recordings. In this blog post, we will explore the various MIDI effects and tools available in FL Studio, focusing on two essential aspects: utilizing arpeggiator and chord tools, and implementing MIDI CC for parameter control.

Utilizing Arpeggiator And Chord Tools

The arpeggiator and chord tools in FL Studio empower you to create intricate melodies and chords effortlessly. The arpeggiator tool takes a chord and automatically sequences its individual notes, creating captivating rhythmic patterns. Here’s how you can utilize these tools:

1. Arpeggiator:

The arpeggiator tool can be found in the Channel Rack. To use it, follow these steps:

  1. Select the channel containing the MIDI notes you want to arpeggiate.
  2. Open the Channel Settings window by clicking the gear icon on the channel.
  3. Under the “Arpeggiator” section, enable the arpeggiator by clicking the button.
  4. Choose a preset pattern or customize the pattern to your liking.
  5. Adjust the arpeggiator rate and other parameters to achieve the desired effect.

2. Chord Tools:

FL Studio offers various chord tools that assist in creating harmonies and complex chord progressions. Here are the steps to use them:

  1. Select the channel you want to add chords to.
  2. Open the Piano Roll for the selected channel.
  3. Click on the “Helpers” menu and choose the chord tool you want to use.
  4. Click on the desired note on the Piano Roll grid to insert the chord.
  5. Adjust the chord’s length and position to fit your composition.

Implementing Midi Cc For Parameter Control

Implementing MIDI CC (Continuous Controller) allows you to control various parameters in FL Studio using external MIDI devices such as keyboards, controllers, or even your computer keyboard. Here’s how you can make use of MIDI CC:

  1. Connect your MIDI device to your computer and ensure it’s recognized by FL Studio.
  2. Open the Plugin Wrapper for the instrument or effect you want to control.
  3. In the “Controls” tab of the Plugin Wrapper, right-click on the parameter you want to assign to MIDI CC.
  4. Select “Link to Controller” and move the desired control on your MIDI device.
  5. FL Studio will automatically assign the MIDI CC to the parameter, allowing you to control it in real-time.


Mixing And Mastering Midi Tracks

Mixing and mastering MIDI tracks in FL Studio is an essential step in achieving a professional and polished sound. Balancing the MIDI tracks in your mix ensures that no instrument overpowers the others and that they all work together harmoniously. Applying effects and automation adds depth, dynamics, and movement to your MIDI tracks, making them more compelling and engaging. In this blog post, we will explore these techniques in detail

Balancing Midi Tracks In The Mix

When mixing MIDI tracks in FL Studio, it’s crucial to achieve a well-balanced sound where each instrument can be heard clearly without overpowering the others. To successfully balance your MIDI tracks, follow these steps:

  1. Start by soloing one MIDI track at a time and adjusting its volume level until it sits nicely in the mix.
  2. Make use of panning to position each MIDI track in the stereo field. This technique helps create a sense of space and separation.
  3. Consider using EQ to remove any unwanted frequencies and make room for other elements of your mix.
  4. Use compression to control the dynamic range of your MIDI tracks, ensuring that the softer parts are audible and the louder parts don’t overpower the mix.

By carefully balancing your MIDI tracks, you can create a cohesive and well-blended mix where each instrument has its place.

Applying Effects And Automation For Dynamic Midi

Adding effects and automation to your MIDI tracks can take your music to the next level, providing depth, movement, and interest. Here are some techniques to consider:

  • Experiment with reverb and delay effects to create a sense of depth and space in your MIDI tracks. Modulation effects such as chorus and flanger can add movement and character.
  • Utilize automation to vary parameters, such as volume, panning, and effect settings, over time. This adds dynamics and keeps your listeners engaged.
  • Consider using sidechain compression to create a rhythmic pumping effect between MIDI tracks, adding excitement and energy to your music.

Applying effects and automation allows you to shape and mold your MIDI tracks, making them more dynamic and captivating for your audience.
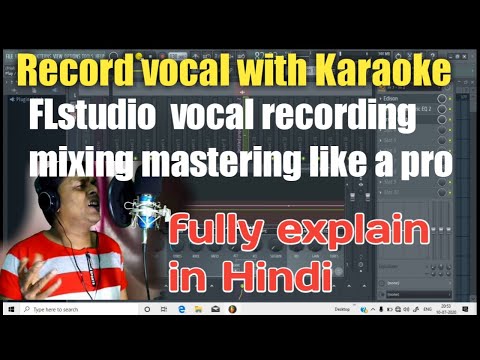
Mastering Midi: Record Like a Pro in Fl Studio


Credit: www.youtube.com


Frequently Asked Questions On How To Record Midi In Fl Studio


How Do I Record Midi In Fl Studio?


To record MIDI in FL Studio, simply create a new MIDI track, select the MIDI input, and hit record. You can also use a MIDI controller to play and record your music.


How Do I Record Midi Files?


To record MIDI files, connect MIDI controller to computer, select recording software, create new MIDI track, record, and save.


How Do I Set Up Midi In Fl Studio?


To set up MIDI in FL Studio, connect your MIDI device, go to Options > MIDI settings, select your device as an input/output, and enable it.


Does Fl Studio Have Built In Midi?


Yes, FL Studio has built-in MIDI capabilities for creating and editing musical sequences and patterns.


Conclusion


MIDI recording in FL Studio is a powerful tool for music production. With its user-friendly interface and versatile features, capturing and editing MIDI data has never been more straightforward. By following the tips and techniques discussed, you can elevate your music production and create professional-sounding tracks.


Dive into the world of MIDI recording and watch your creativity flourish.
Categories
Archive

Fl Studio Download : Unleash your creativity with this powerful music production software

To download FL Studio, visit the official website and follow the instructions for your operating system. FL Studio is a popular digital audio workstation utilized by music producers, DJs, and artists worldwide.


With its user-friendly interface and powerful features, FL Studio allows for creative freedom in music production. Whether you’re a beginner or experienced producer, FL Studio offers a range of tools and plugins to enhance your workflow. We’ll explore the benefits of using FL Studio, how to download it, and some tips for getting started on your music production journey.


Let’s dive in and unleash your musical creativity with FL Studio.


What Is Fl Studio?

What is FL Studio?

FL Studio is a renowned digital audio workstation that offers a user-friendly interface for music production. It allows users to create, edit, and mix music seamlessly.

Features

  • Intuitive interface for easy music production
  • Wide range of virtual instruments and effects
  • Advanced audio editing capabilities
  • Real-time audio stretching and pitch shifting
  • Support for third-party plugins
  • Automation of most parameters

Versions Available

Version Description
FL Studio Demo Free version with limited features
FL Studio Fruity Edition Basic version with essential features
FL Studio Producer Edition Mid-level version with more advanced tools
FL Studio Signature Bundle Comprehensive version with all features included
Fl Studio Download  : Unleash your creativity with this powerful music production software


Credit: www.linkedin.com


Getting Started With Fl Studio

Downloading And Installation

Download FL Studio from the official website. Follow on-screen instructions for installation.

User Interface Overview

FL Studio’s interface consists of a toolbar, navigation options, and multiple menus.

Exploring Fl Studio’s Tools And Functions

In this section, we will delve into the myriad tools and functions FL Studio has to offer, empowering music producers and enthusiasts to create, edit, and mix music with ease. Let’s explore FL Studio’s powerhouse tools and functions that elevate music production to new heights.

Music Production Tools

FL Studio provides a comprehensive suite of music production tools for crafting captivating beats and melodies. From its intuitive piano roll to the robust collection of virtual instruments and synthesizers, FL Studio equips artists with the essential resources to unleash their creativity.

Editing And Mixing Features

With its advanced editing capabilities and professional-grade mixing features, FL Studio empowers users to refine their compositions to perfection. The software’s seamless integration of audio editing tools and customizable mixer tracks facilitates the manipulation and enhancement of sound elements, enabling users to achieve polished and professional-quality productions.

Fl Studio Download  : Unleash your creativity with this powerful music production software


Credit: ise.edu.al


Advanced Techniques And Tips

When it comes to using FL Studio to its fullest potential, mastering advanced techniques and tips can take your productions to the next level. In this section, we will explore a couple of crucial areas that can greatly enhance your workflow and improve the overall quality of your tracks. Let’s dive in!

Incorporating Virtual Instruments

One of the standout features of FL Studio is its vast collection of high-quality virtual instruments. These instruments can emulate the sound of real-world musical instruments, sound effects, or even create unique synthesized sounds. By incorporating virtual instruments into your tracks, you can add depth, texture, and variety to your music.

Here are a few tips to make the most out of virtual instruments in FL Studio:

  • Experiment with different instrument presets to find the perfect sound for your track.
  • Layer multiple virtual instruments to create complex and unique sounds.
  • Utilize automation to add movement and dynamics to your virtual instruments.
  • Take advantage of the mixer’s effects and EQ to shape and enhance the sound of your virtual instruments.

Incorporating virtual instruments gives you endless possibilities to explore and create music that stands out from the crowd.

Mastering And Finalizing Tracks

Once you’ve completed your composition and are satisfied with the arrangement, it’s time to master and finalize your track. Mastering is the process of optimizing the sound of your mix, making it sound professional and polished across various audio systems.

Consider the following techniques and tips to achieve a well-mastered track:

  1. Ensure proper volume levels and balance between different elements of your mix.
  2. Apply EQ to refine the frequencies and create a better tonal balance in your track.
  3. Add compression to control dynamics and give your track a more consistent sound.
  4. Enhance the stereo image by using techniques such as panning and stereo widening.
  5. Use a limiter to prevent clipping and ensure your track reaches an appropriate loudness level.
  6. Consider referencing your track against professional reference tracks to make necessary adjustments.

By following these mastering techniques, you can achieve a final mix that sounds professional and ready for distribution.


Taking Your Creativity To The Next Level

Fl Studio is a powerful digital audio workstation that allows you to create and produce music like a professional. It provides numerous features and tools that can take your creativity to the next level. In this section, we will explore how Fl Studio enables you to elevate your music production through utilizing automation and effects, as well as collaborating and sharing your work with others.

One of the key ways Fl Studio empowers your creativity is through the use of automation and effects. Automation allows you to control various parameters of your tracks over time, resulting in dynamic and evolving soundscapes. With Fl Studio, you can automate volume, panning, effects settings, and much more. This gives you the flexibility to add movement and complexity to your music, capturing the listener’s attention and creating a memorable experience.

Fl Studio also offers a vast array of built-in effects that can transform your sounds. From reverbs and delays to compressors and distortion, these effects allow you to shape and mold your audio to perfection. Whether you want to add depth and space to your tracks or give them a gritty edge, Fl Studio provides the tools you need to achieve the desired result. Experimentation is key here, as you explore different combinations of effects to find the perfect sound for your music.

Fl Studio not only caters to your individual creativity but also enables you to collaborate and share your work with others seamlessly. With its intuitive interface and streamlined workflow, collaborating with other musicians becomes a breeze. You can easily exchange project files, share stems for remixing, and even work together in real-time. This opens up a world of possibilities for collaboration, allowing you to draw inspiration from others and create music that surpasses what you can achieve alone.

When it comes to sharing your work, Fl Studio offers various options to showcase your talent. You can render your tracks to high-quality audio formats, export stems for mixing and mastering, or even create music videos. Additionally, Fl Studio supports integration with popular social media platforms, making it easy to reach a wider audience and gain recognition for your musical creations.

Fl Studio Download  : Unleash your creativity with this powerful music production software


Credit: m.facebook.com


Frequently Asked Questions On Fl Studio Download


Is Fl Studio 100% Free?


No, FL Studio is not 100% free. It offers a free trial, but the full version requires purchase.


How Much Does Fl Studios Cost?


FL Studio pricing varies with different editions, starting from $99 for the basic edition.


Is Fl Studio 20.9 Free?


FL Studio 20. 9 is not free. It requires a purchase to access the full version.


Is It Safe To Download Fl Studio?


Yes, it is safe to download FL Studio. Ensure you use official sources to prevent malware.


Conclusion


In the world of music production, FL Studio stands out as a versatile and powerful tool for creating and editing music. With its user-friendly interface and array of features, it has become a go-to choice for many musicians and producers.


The availability of the FL Studio download opens up endless possibilities for aspiring artists to explore their creativity in the realm of music production. Whether you are a beginner or a seasoned professional, FL Studio offers a platform that caters to all levels of expertise.


So, go ahead and take advantage of this fantastic software to bring your musical ideas to life.

Categories
Archive

How to Sidechain in Fl Studio: Master the Art of Dynamic Mixes

To sidechain in FL Studio, route the desired track into a compressor on the target track. Sidechaining in FL Studio involves using the routing capabilities to link one track’s audio to affect another track’s volume.


By setting up a compressor on the target track and routing the input to the desired sidechain source, you can achieve the popular pumping effect often heard in electronic music. Understanding how to sidechain effectively can help create dynamic mixes with well-controlled elements that blend seamlessly together.


In this guide, we will explore the step-by-step process of setting up sidechain compression in FL Studio to enhance your music production skills and add depth to your tracks. Let’s delve into the intricacies of sidechaining and how you can implement it in your projects.

How to Sidechain in Fl Studio: Master the Art of Dynamic Mixes


Credit: unison.audio


Setting Up Sidechain In Fl Studio


Discover how to set up sidechain in FL Studio with this step-by-step guide. Learn the process of creating that pumping and rhythmic effect in your music production. Master this technique to make your tracks stand out and sound professional.

Choosing The Right Plugin

When sidechaining in Fl Studio, choose a suitable compressor plugin.

  • Some popular options include Fruity Limiter and Gross Beat.
  • Ensure the selected plugin supports sidechain functionality.

Creating The Sidechain

Initiate the sidechain process by following these steps:

  1. Open your Fl Studio project and select the track to be sidechained.
  2. Add the chosen compressor plugin to the track.
  3. Locate the sidechain input option within the plugin settings.
  4. Route the audio source you want to trigger the sidechain to this input.
  5. Adjust the compressor parameters to achieve the desired sidechain effect.

Mastering Sidechain Compression

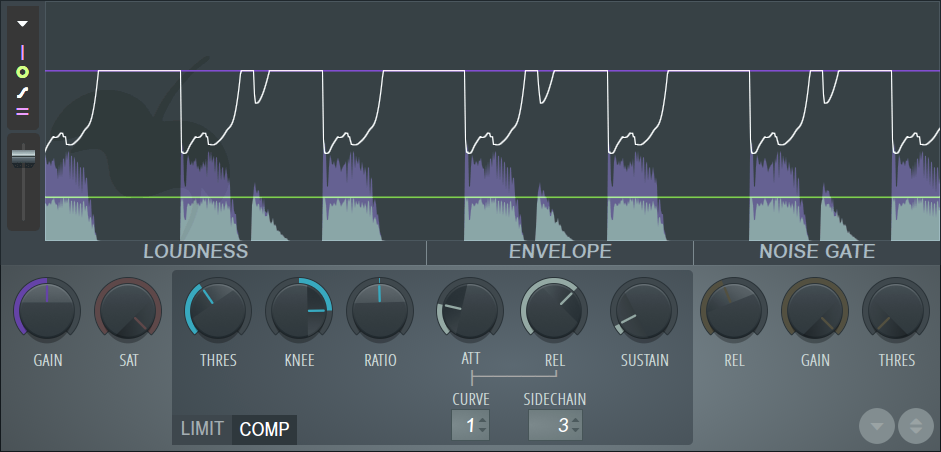
Understanding the nuances of sidechain compression is essential for achieving professional sound quality in your music production. Mastering sidechain compression in FL Studio involves fine-tuning parameters like threshold, ratio, attack, and release to create dynamic and balanced mix elements.

Understanding Threshold And Ratio

Threshold determines the level at which compression will kick in, while ratio controls the extent of compression applied to the signal. Adjusting these settings is crucial for achieving the desired balance between the main track and the sidechain-triggered element.

Fine-tuning The Release And Attack

Release dictates how quickly the compressor recovers after the input signal falls below the threshold, while attack controls how quickly the compression is applied when the signal exceeds the threshold. Balancing these settings is vital for a smooth and natural-sounding sidechain effect.

Creative Applications Of Sidechaining

When it comes to mixing and producing music, one of the most powerful and versatile techniques that producers can employ is sidechaining. This process involves using a compressor to dynamically manipulate the level of one sound source based on the level of another. While sidechaining is commonly used to create a pumping effect in electronic music, its creative applications extend far beyond that. In this article, we’ll explore some innovative ways you can use sidechaining in FL Studio to add depth, movement, and excitement to your tracks.

Using Sidechain For Pumping Effect

One of the most popular and well-known applications of sidechaining is to create the classic pumping effect in electronic dance music. By sidechaining a kick drum to a bassline or synth, you can make the other instrument “duck” or decrease in volume every time the kick hits, creating a pulsating and energetic rhythm. This technique adds groove and impact to the mix, making it ideal for genres like house, trance, and EDM.

Creating Unique Rhythmic Textures

Beyond the traditional pumping effect, sidechaining can be used to create unique and dynamic rhythmic textures in your music. By sidechaining different elements in your mix to each other, you can achieve intricate and evolving interplay between sounds. For example, sidechaining a pad to a percussion loop can result in subtle and mesmerizing movements, adding depth and interest to your arrangement.

How to Sidechain in Fl Studio: Master the Art of Dynamic Mixes


Credit: www.image-line.com


Advanced Tips And Techniques

When it comes to sidechaining in FL Studio, there are plenty of advanced tips and techniques that can take your mixes to the next level. In this section, we will explore two key areas: sidechaining multiple elements and automation for dynamic mixes. These techniques will help you create more professional-sounding tracks and give you greater control over your mix.

Sidechaining Multiple Elements

One of the powerful features of FL Studio is the ability to sidechain multiple elements in your mix. This technique allows you to create complex rhythmic patterns and give your tracks a unique sound. To sidechain multiple elements, follow these steps:

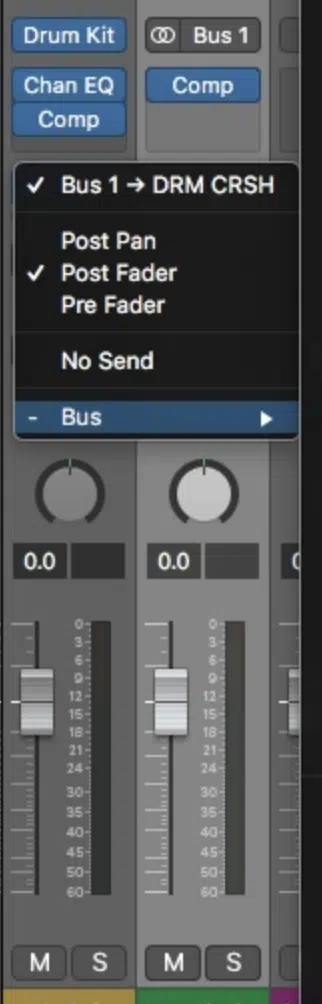
  1. Create a bus or group channel for the elements you want to sidechain. This will allow you to apply the sidechain effect to multiple elements simultaneously.
  2. Route the audio outputs of the elements you want to sidechain to the bus or group channel you created.
  3. Select the bus or group channel and add a compressor to the channel insert.
  4. Adjust the compressor settings to your desired effect. For example, you can set a fast attack time to create a pumping effect, or adjust the threshold to control the amount of sidechain compression applied.
  5. Route the sidechain source, usually a kick drum or bassline, to the sidechain input of the compressor on the bus or group channel.
  6. Adjust the sidechain input level to fine-tune the sidechain effect and achieve the desired level of pumping.

By sidechaining multiple elements, you can create intricate rhythmic patterns and achieve greater separation and clarity in your mix. Experiment with different combinations of elements and sidechain settings to discover unique and creative effects.

Automation For Dynamic Mixes

Automation is a key tool for creating dynamic mixes in FL Studio. It allows you to control various parameters over time, such as volume, panning, and effects. Through automation, you can add movement and interest to your tracks, highlighting important elements and creating transitions. Here’s how you can use automation for dynamic mixes:

  • Select the parameter you want to automate, such as volume, panning, or an effect parameter.
  • Enable automation recording by clicking on the automation icon in the track header or using the shortcut key.
  • Play your track and adjust the parameter in real-time while the recording is active.
  • Once you have recorded your automation, you can fine-tune it by editing the automation points on the automation lane.
  • Experiment with different automation shapes and curves to add dynamics and expressiveness to your mix.

Automation is a powerful tool that allows you to sculpt your mix and create unique sonic landscapes. It gives you complete control over how your elements evolve and interact over time.

How to Sidechain in Fl Studio: Master the Art of Dynamic Mixes


Credit: www.adsrsounds.com


Frequently Asked Questions On How To Sidechain In Fl Studio


How Do You Sidechain Tracks In Fl Studio?


To sidechain tracks in FL Studio, route the desired input to a mixer track. Then, add a compressor to the destination track. Next, click on the sidechain button and select the input track. Adjust threshold and ratio settings to achieve the desired sidechain effect.


How Do You Properly Sidechain?


To properly sidechain, route the audio signal of one track through another track’s compressor. Adjust the sidechain input on the compressor to control the level of compression applied. Experiment with different settings for desired effects.


How Do I Sidechain My Fl Studio Fruity Peak Controller?


To sidechain your FL Studio Fruity Peak controller, route the desired audio track to a compressor inserted on the target track, then adjust the sidechain input to receive signal from the routed track. Adjust settings for desired effect.


How Do You Side Chain Kick And 808?


Side chain the kick to the 808 by using a compressor. Route the kick’s audio to the compressor’s side chain input. Adjust the settings to trigger the compression on the 808 whenever the kick hits. This creates space for the kick in the mix without sacrificing the 808’s power.


Conclusion


To sum up, sidechaining in FL Studio is a crucial tool for achieving a dynamic mix. Understanding the various techniques and options available for sidechaining can greatly enhance your music production. By implementing the tips and tricks covered in this guide, you can take your productions to the next level.


Experiment, practice, and have fun exploring the creative possibilities of sidechaining in FL Studio.


Categories
Archive

Fl Studio Free Trial: Unlock Your Musical Potential Today!

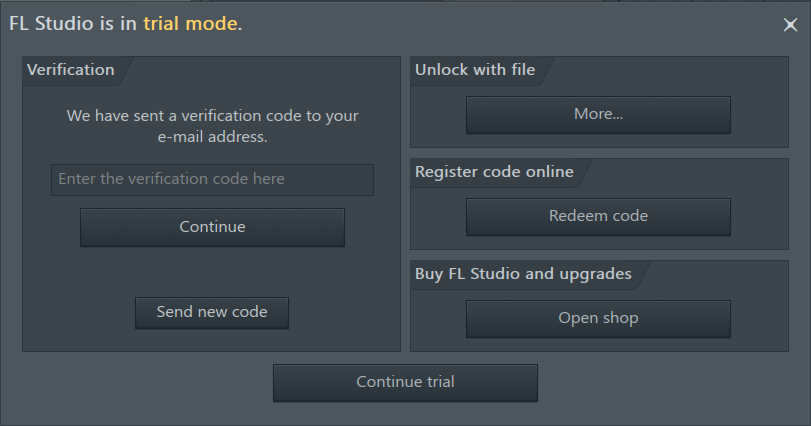
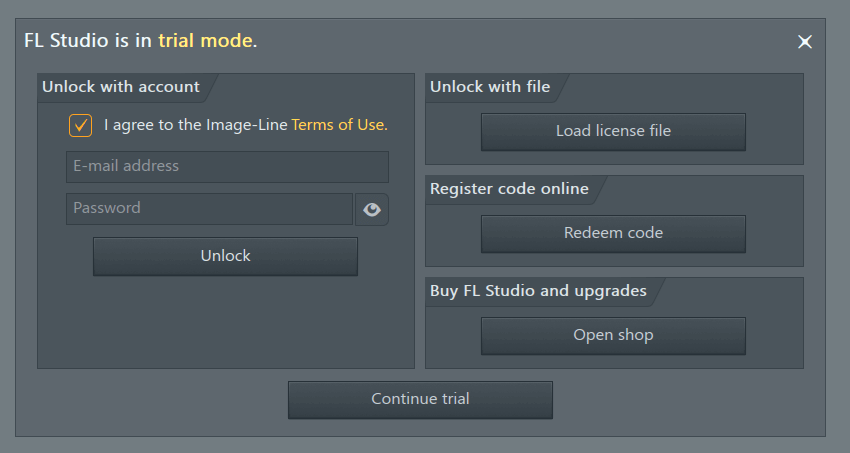
FL Studio offers a free trial version, allowing users to test its features before purchasing. The trial includes limited functionality.


FL Studio’s free trial is a great opportunity to explore its capabilities firsthand. With access to essential features, users can experience the software’s interface and workflow. Whether you’re a beginner or a seasoned producer, the trial version lets you create, mix, and edit music to see if FL Studio meets your needs.


Take advantage of this trial to determine if it aligns with your music production goals before committing to a purchase. Download the free trial today and unleash your creativity with FL Studio.

Fl Studio Free Trial: Unlock Your Musical Potential Today!


Credit: www.izotope.com


Exploring Fl Studio Free Trial

FL Studio free trial offers a taste of its powerful music production capabilities. From creating beats to mixing tracks, this trial version allows you to delve into FL Studio’s world.

Features Benefits
Intuitive interface Easy to navigate for beginners
Diverse sound library Inspires creativity with endless options
Advanced editing tools Enhances precision in music production
  1. Visit the FL Studio website
  2. Locate the free trial download option
  3. Complete the download and installation process
  4. Start exploring FL Studio’s features

Mastering Fl Studio’s Interface


Learn how to navigate FL Studio’s user-friendly interface with a free trial. Discover its intuitive features and start producing your own music seamlessly. Elevate your music production skills with the versatility FL Studio offers.

Navigating The Dashboard

The dashboard in FL Studio serves as the control center for your music production.

Effortlessly navigate through different sections like the playlist, mixer, and piano roll.

Customizing Your Workflow

Make FL Studio your own by customizing its interface to suit your preferences.

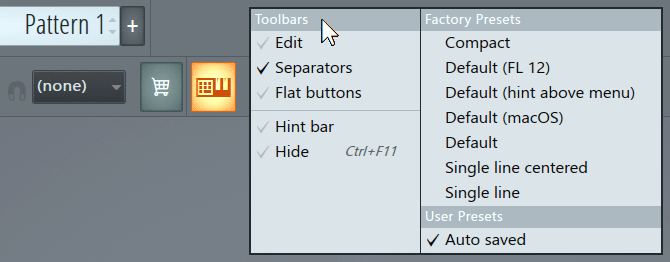
Adjust the layout, color scheme, and toolbars for an optimized workflow.


Creating Music With Fl Studio

Are you passionate about music production? FL Studio is a powerful digital audio workstation that allows you to unleash your creativity and compose your own music. With its intuitive interface and extensive range of features, FL Studio is the perfect tool for both beginners and experienced producers to bring their musical ideas to life. Let’s explore the exciting world of music creation with FL Studio and see how you can make the most of its instruments, effects, and the step sequencer.

Utilizing Instruments And Effects

FL Studio provides a vast array of virtual instruments and effects that enable you to craft unique sounds and textures for your music. From synthesizers and drum machines to samplers and audio effects, FL Studio offers a comprehensive collection of tools to shape your sonic landscape. Whether you’re looking to create rich melodies with realistic instrument emulations or experiment with electronic textures and futuristic sounds, FL Studio’s wide range of instruments and effects opens up endless possibilities for your music production journey.

Understanding The Step Sequencer

The step sequencer is at the core of FL Studio’s workflow, allowing you to arrange patterns and sequences for your musical ideas. With its intuitive grid-based interface, you can easily program drum patterns, melodic sequences, and basslines to build the foundation of your tracks. Understanding the step sequencer in FL Studio empowers you to create intricate rhythms, experiment with different time signatures, and layer musical elements with precision. Learning to navigate the step sequencer is a crucial skill that will streamline your music production process and unleash your creativity.

Mixing And Mastering In Fl Studio


Experience professional mixing and mastering in FL Studio with a free trial. Elevate your music production with FL Studio’s intuitive interface and advanced features. Try it now to unleash your creativity and achieve top-notch sound quality.

Balancing Your Tracks

One of the key aspects of mixing in FL Studio is finding the right balance between different elements in your tracks. Balancing refers to the process of adjusting the volume levels of individual instruments and sounds to create a cohesive and well-rounded mix. You want each element to be audible and contribute to the overall sound without overpowering or being drowned out by others. To achieve this, FL Studio provides several tools, including faders, panning controls, and plugins such as the Mixer. These tools enable you to adjust the volume and placement of each sound element accurately. By carefully balancing your tracks, you can ensure that each instrument or sound fits together harmoniously, resulting in a professional and polished mix.

Applying Post-production Techniques

Once you have achieved a balanced mix, the next step is mastering. Mastering is the final stage of the music production process, where you apply various post-production techniques to enhance and optimize the overall sound quality of your tracks. FL Studio offers a range of powerful mastering tools and plugins that allow you to shape the frequency response, dynamics, stereo image, and overall loudness of your songs. For example, you can use the Maximus plugin to compress and limit the dynamic range, the Parametric EQ 2 to fine-tune the tonal balance, and the Stereo Shaper to control the stereo width of your mix. With these tools at your disposal, you can give your tracks that radio-ready, professional sheen that stands out from the rest.

Taking Your Music To The Next Level


Elevate your music with the FL Studio Free Trial and unlock endless creative possibilities. Experience professional-grade tools and unleash your musical genius today. Take the next step in your music journey with FL Studio’s powerful software.

Collaborating With Other Artists

One of the most exciting aspects of the FL Studio Free Trial is the opportunity it provides to collaborate with other artists. The world of music is all about collaboration, and with FL Studio, you can easily connect with fellow musicians and create something truly unique.

  • Reach out to other artists: with the free trial, you have the chance to explore different styles and genres by collaborating with like-minded individuals. Whether you’re searching for a vocalist, a guitarist, or a producer, FL Studio’s vast community offers endless possibilities.
  • Exchange ideas and techniques: working with other artists allows you to learn from their experiences and gain new perspectives. Sharing techniques and ideas can unlock your creativity and take your music to new heights.
  • Combine strengths: collaborating with others means combining your strengths and talents. You can enhance your sound by blending different musical styles and influences, resulting in a unique and captivating sound.

Showcasing Your Work

FL Studio Free Trial provides an excellent platform for showcasing your musical talents, allowing you to present your work to a wider audience. Here’s how you can make the most out of this opportunity:

  1. Create a portfolio: use FL Studio to compile your best tracks and create a portfolio that showcases your musical journey. By highlighting your skills and creativity, you’ll attract the attention of listeners, producers, and industry professionals.
  2. Promote your music: FL Studio offers various tools to help you promote your work. From social media integration to online streaming platforms, you can easily share your tracks with the world and gain a following of dedicated fans.
  3. Participate in competitions: FL Studio often hosts competitions where you can submit your creations for a chance to win prizes and gain recognition. Engaging in these contests not only gives you a goal to work towards but also gives you the opportunity to gain exposure.

Fl Studio Free Trial: Unlock Your Musical Potential Today!


Credit: www.image-line.com


Fl Studio Free Trial: Unlock Your Musical Potential Today!


Credit: www.image-line.com


Frequently Asked Questions On Fl Studio Free Trial


How Long Is Fl Studio’s Free Trial?


FL Studio’s free trial lasts for unlimited time with some features disabled.


What Are The Limits Of Fl Studio Free Trial?


The free trial of FL Studio has some limitations. You can’t reopen saved projects, access some premium features, or use certain plug-ins. However, you can still explore and experiment with the software’s core functionalities to create music.


Can I Get Fl Studio For Free?


No, FL Studio is not available for free. It is a premium software that requires a paid license to use.


How To Unlock Full Fl Studio For Free?


Unfortunately, there is no legal way to unlock the full version of FL Studio for free. It’s best to purchase a legitimate license to support the developers and gain access to all features.


Conclusion


The FL Studio free trial offers a fantastic opportunity for music enthusiasts to explore its features without any financial commitment. With its user-friendly interface and extensive library of plugins and instruments, it is perfect for both beginners and professionals. Download the trial version today and unlock your music production potential.

Categories
Archive

Fl Studio Themes: Unleash Your Musical Creativity with Our Power Packed Themes

Fl Studio offers various customizable themes for users to personalize their interface according to preferences. These themes provide visually appealing options that cater to different workflows and aesthetics.


With a wide range of color schemes and layouts, users can enhance their user experience and work environment. From dark themes for a sleek look to vibrant themes for creative inspiration, Fl Studio themes offer versatility for every user. Furthermore, the ability to customize themes allows users to tailor the software to their specific needs and style, making the music production process more enjoyable and efficient.


By exploring the different themes available, users can find the perfect fit for their individual preferences and workflow.


Credit: m.facebook.com


Explore Fl Studio Themes

Are you ready to dive into the creative world of Fl Studio Themes? Let’s discover the Theme Library and the benefits of using them.

Discovering The Theme Library

When you explore Fl Studio Themes, you open a treasure trove of visually appealing designs. The Theme Library is a collection of unique and customizable themes that enhance your Fl Studio experience.

Benefits Of Using Fl Studio Themes

  • Enhanced visual aesthetics
  • Improved user experience
  • Increased productivity
  • Boosted creativity
  • Personalized workspace

Customizing Your Experience

In the world of music production, customizing your experience is key to enhancing your workflow and creativity in FL Studio. By personalizing the user interface and adapting themes to your workflow, you can create a setup that is tailored to your preferences.

Personalizing The User Interface

Customize the look and feel of FL Studio with different themes to match your style and preferences.

Adapting Themes To Your Workflow

Make the most of themes by choosing ones that optimize your workflow and make navigation smoother.


Maximizing Productivity

When it comes to music production, time is of the essence. The more efficient your workflow, the more time you can dedicate to creating and refining your music. In the world of FL Studio, maximizing productivity is key to unleashing your creative potential. By customizing your workspace with the perfect theme, you can optimize your visual clarity, streamline your workflow, and ultimately boost your productivity.

Streamlining Your Workflow

One of the key benefits of a well-crafted FL Studio theme is its ability to streamline your workflow. With intuitive color schemes and layout designs, you can organize your workspace to match your unique production style. By eliminating distractions and focusing on the essentials, you can navigate your projects with ease, leading to a more fluent creative process.

Optimizing Visual Clarity

Visual clarity is essential when working on intricate music projects. A well-designed theme can optimize the visual elements of FL Studio, ensuring that all menus, patterns, and tracks are displayed in a clear and organized manner. With a carefully chosen theme, you can prevent visual fatigue and seamlessly navigate through complex projects, enhancing your overall productivity.

Fl Studio Themes: Unleash Your Musical Creativity with Our Power Packed Themes


Credit: www.image-line.com


Finding The Perfect Inspiration


Explore an array of captivating themes in FL Studio to fuel your creativity and find the perfect inspiration for your music production. With themes ranging from minimalist to vibrant, discover the one that resonates with your artistic vision and enhances your workflow.


Let your workspace reflect your unique style and personality.

Enhancing Creative Atmosphere

Creating music is an art that requires a harmonious and inspiring environment. In your quest to find the perfect inspiration for your music production, consider the impact of your FL Studio theme on your creative atmosphere. The visual aspect of your workstation can greatly influence your mood, motivation, and overall creativity. With the right FL Studio theme, you can transform your workspace into a captivating realm that stimulates your imagination and creativity.

Boosting Motivation And Focus

The right FL Studio theme can do much more than just enhance the visual appeal of your workspace. It can also play a vital role in boosting your motivation and focus. When immersed in a theme that aligns with your personal preferences and musical style, you will find yourself naturally drawn to your workstation, eager to explore and create. The right combination of colors, fonts, and overall aesthetics can provide a sense of harmony and alignment with your artistic vision, enabling you to immerse yourself fully in the music-making process. Furthermore, a well-designed FL Studio theme can help eliminate distractions by keeping your interface clean and organized. By simplifying the visual clutter and presenting your tools and options in an intuitive and user-friendly manner, the theme allows you to stay laser-focused on your music production without unnecessary distractions. This enhanced focus can greatly improve your productivity and enable you to bring your musical ideas to life more efficiently. In addition to boosting focus, the right FL Studio theme can also enhance your overall workflow. By customizing the appearance of your workstation to match your preferences, you can create an environment that feels intuitive and familiar. You can arrange and highlight specific elements that are essential to your music production process, making it easier to access and utilize them. This streamlining of your workflow directly translates into increased efficiency and more seamless music-making experiences. In conclusion, finding the perfect inspiration for your music production journey starts with carefully selecting the ideal FL Studio theme. By enhancing your creative atmosphere, boosting your motivation and focus, and improving your overall workflow, the right theme can have a profound impact on your music-making experience. Delve into the vast array of FL Studio themes and discover the one that resonates with your artistic vision, unleashing your true potential as a music producer.

Creating A Unique Ambiance

Creating a Unique Ambiance is an essential aspect of producing music in Fl Studio. The right ambiance can enhance your creativity, set the mood, and inspire your artistic vision. In this blog post, we will explore the various ways you can elevate your studio aesthetics with Fl Studio Themes and how they can reflect your unique artistic style.

Elevating Studio Aesthetics

Fl Studio Themes offer a wide range of visual customization options that allow you to transform your workspace into a visually appealing and inspiring environment. By selecting the perfect theme, you can create a studio aesthetic that matches your personal style and enhances your creative workflow.

One way to elevate your studio aesthetics is to choose a theme that complements the genre of music you primarily produce. A sleek and minimalist theme can provide a clean and streamlined look for electronic music producers, while a vintage-inspired theme can bring a sense of nostalgia and warmth for those creating retro-inspired tracks.

Benefits of Elevating Studio Aesthetics:
Enhances creativity and inspiration
Creates a visually appealing and inspiring environment
Matches personal style and complements music genre
Improves overall workflow and efficiency

Reflecting Your Artistic Style

Your artistic style is unique, and it deserves to be reflected in every aspect of your music production process. Fl Studio Themes allow you to personalize your workspace and create a visual representation of your artistic vision. By selecting a theme that resonates with your style, you can create an environment that feels like an extension of your creativity.

You can reflect your artistic style by customizing various elements of the theme, such as the color palette, layout, and visual effects. Whether you prefer vibrant and bold colors or a more muted and calming aesthetic, you can easily tailor the theme to suit your preferences.

  1. Choose a theme that resonates with your artistic style
  2. Customize color palette, layout, and visual effects
  3. Create an environment that feels like an extension of your creativity

Making Fl Studio your own and incorporating your personal style can significantly impact your creative process. When your workspace reflects your artistic vision, it becomes a place of inspiration and allows you to fully immerse yourself in the music-making experience.

Fl Studio Themes: Unleash Your Musical Creativity with Our Power Packed Themes


Credit: m.facebook.com


Frequently Asked Questions For Fl Studio Themes


Does Fl Studio Have Themes?


Yes, FL Studio offers themes to customize the appearance of the interface according to your preferences.


How Do I Install Custom Fl Studio Themes?


To install custom FL Studio themes, download the theme file and place it in the “Enable” folder within FL Studio. Open FL Studio, go to the Options menu, select “General,” then click on “Skin” and choose the installed custom theme.


How Do I Make Fl Studio Look Better?


To make FL Studio look better, customize the interface using different color schemes and skins. Adjust the font size and layout to improve visual appeal. Use high-quality monitors for better display resolution. Remove any unused windows or plugins to declutter the workspace and enhance user experience.


Will Fl Studio 21 Have Skins?


Yes, FL Studio 21 will have skins. Users can customize the appearance of the software with different graphical interfaces according to their preferences.


Conclusion


FL Studio themes offer a customizable and visually appealing experience for music producers. With a wide range of options and the ability to create your own themes, FL Studio provides a unique and personalized environment for users. The visual enhancement and personalization options make FL Studio themes a valuable addition to the music production process.

Categories
Archive

How to Enhance Your Beats: Adding Drum Kits to FL Studio

To add drum kits to FL Studio, import or drag and drop the desired kits into the software. You can also use the browser to locate and load drum kit samples.


Are you a music producer looking to enhance your beats in FL Studio? Adding drum kits to FL Studio is a straightforward process that can take your productions to the next level. By importing or dragging and dropping drum kits into the software, you can easily access a wide range of high-quality drum sounds.


This allows you to create unique and dynamic rhythms that will make your tracks stand out. Whether you’re a beginner or a seasoned producer, experimenting with different drum kits in FL Studio can inspire new ideas and help you craft professional-sounding beats.


Selecting The Right Drum Kits

When choosing drum kits for FL Studio, the process of selecting the right ones can greatly impact the quality and style of your music. Consider the following factors to ensure you pick the perfect drum kits for your next music project.

Considering Genre And Style

For coherence and authenticity in your music, match the drum kits with your genre and style. Ensure the sound of the drum kits complements the overall tone of your track.

Evaluating Sound Quality

Focus on sound quality when selecting drum kits. Pay attention to clarity, depth, and richness to enhance the overall production value of your music.

Adding Drum Kits To Fl Studio

To enhance your music production in FL Studio, adding drum kits is essential. This guide will walk you through Downloading Drum Kits and Installing Drum Kits in FL Studio.

Downloading Drum Kits

1. Search for websites offering free downloadable drum kits.

  • Look for high-quality drum samples.
  • Ensure the drum kits are compatible with FL Studio.

Installing Drum Kits

1. Download the drum kit files to your computer.

  1. Locate the FL Studio installation folder.
  2. Copy the downloaded drum kit files into the “Packs” folder.

Optimizing Drum Kit Usage

When creating music in FL Studio, one of the most essential elements is the drum kit. Effectively optimizing the use of drum kits can significantly elevate the quality and impact of your beats. Understanding how to utilize mixer channels, apply effects, and process your drum kit samples is crucial for achieving professional-quality sound. Here are some essential tips and techniques for optimizing drum kit usage in FL Studio.

Utilizing Mixer Channels

When adding drum kits to FL Studio, utilizing mixer channels is crucial for achieving a balanced and polished sound. Assign each drum element to its own mixer channel to have complete control over the levels, panning, and effects. Organizing your drum sounds within the mixer makes it easier to manage and process individual elements, allowing you to create a cohesive and dynamic mix.

Applying Effects And Processing

Applying effects and processing to your drum kit samples can immensely impact the overall sound of your beats. Experiment with a variety of effects such as compression, EQ, reverb, and saturation to enhance the individual elements and the overall kit. Additionally, consider using techniques like parallel processing and bus routing to apply effects to multiple drum sounds collectively, further enhancing their cohesion and impact.

How to Enhance Your Beats: Adding Drum Kits to FL Studio


Credit: swmrs.com


Creating Unique Patterns


Enhance your music production by incorporating new drum kits into Fl Studio. Create unique patterns by experimenting with different sounds and rhythms, allowing your tracks to stand out from the rest. With a few simple steps, you can easily add diversity to your music and take it to the next level.

Utilizing Step Sequencer

One of the key tools for creating unique drum patterns in FL Studio is the Step Sequencer. The Step Sequencer allows you to program individual drum sounds to play at specific moments in your music. This gives you complete control over the rhythm and timing of your drum beats.

  • Open the Step Sequencer by clicking on the Step Sequencer tab at the top of the FL Studio interface.
  • In the Step Sequencer, you will see a grid layout with rows representing different drum sounds and columns representing beats or steps.
  • To add a drum sound, simply click on an empty cell in the grid and select the desired drum sound from the drop-down menu.
  • After adding a drum sound, you can then click on the cells in the grid to activate or deactivate them. This allows you to create unique drum patterns by activating different combinations of cells for each drum sound.

Adding Variation And Dynamics

Once you have programmed your basic drum pattern using the Step Sequencer, it’s time to add variation and dynamics to make your drum beats more interesting and engaging.

  • One way to add variation is to change the velocity or volume of specific drum hits. This can be done by adjusting the velocity settings for each drum sound in the Step Sequencer. By varying the velocity, you can create a more dynamic and expressive drum pattern.
  • Another way to add variation is to introduce fill patterns or drum fills. Drum fills are short, rhythmic passages that are typically played between sections of a song to add excitement and transition smoothly. You can create drum fills by programming specific drum hits in a different pattern or by using the piano roll to manually input drum hits.
  • Experiment with different drum sound combinations, patterns, and timings to create unique and interesting drum beats. Don’t be afraid to think outside the box and try unconventional rhythms or arrangements.


Advanced Drum Kit Techniques

When it comes to creating dynamic and professional drum tracks in Fl Studio, understanding advanced drum kit techniques can take your beats to the next level. In this section, we will explore two essential techniques: Layering Drum Sounds and Customizing Drum Samples. These techniques allow you to add depth, texture, and personality to your drum tracks, elevating your music production to new heights.

Layering Drum Sounds

Layering drum sounds involves combining multiple drum samples to create a unified and impactful sound. This technique allows you to blend different elements, such as the attack from one sample and the sustain from another, resulting in a more unique and interesting drum sound.

To layer drum sounds in FL Studio, follow these steps:

  1. Choose the primary drum sound that will serve as the foundation for your beat.
  2. Find complementary drum samples that enhance the desired characteristics of your primary sound.
  3. Layer the additional drum samples on top of your primary sound, adjusting their volume and panning to create a balanced blend.
  4. Experiment with EQ, compression, and other audio effects to further shape and refine the layered drum sound.

Customizing Drum Samples

Customizing drum samples allows you to tailor each individual drum sound to fit perfectly within your mix. This technique enables you to adjust the tone, dynamics, and character of each drum sample, giving your beats a distinct and polished sound.

To customize drum samples in FL Studio, consider the following:

  • Use a sampler or drum plugin that offers comprehensive editing capabilities, allowing you to modify the sound properties of each drum sample.
  • Experiment with parameters such as pitch, decay, attack, and release to alter the tonal characteristics of the drum.
  • Apply effects like reverb, delay, and distortion to add depth and texture to the drum sound.
  • Consider layering customized drum samples on top of each other to create even more nuanced and unique sounds.

By incorporating advanced drum kit techniques such as layering drum sounds and customizing drum samples, you have the power to transform your drum tracks from ordinary to extraordinary. These techniques allow you to unleash your creativity and craft drum beats that truly stand out in the crowded music production landscape. Experiment, explore, and let your imagination guide you as you master the art of advanced drum kit techniques in Fl Studio.

How to Enhance Your Beats: Adding Drum Kits to FL Studio


Credit: www.ac3filter.net


How to Enhance Your Beats: Adding Drum Kits to FL Studio


Credit: www.pluginboutique.com


Frequently Asked Questions Of How To Add Drum Kits To Fl Studio


How Do I Import Drum Kits Into Fl Studio?


To import drum kits into FL Studio, go to the Browser panel, select the “Packs” folder, and drag the drum kit folder into the “User” folder. Then open the Plugin database, refresh, and your imported drum kit will appear in the “User” section for use.


How Do I Add Packs To Fl Studio?


To add packs to FL Studio, go to the ‘Options’ menu, select ‘Manage Plugins’ and click on ‘Start scan’. Locate the pack on your computer and select it to add.


How Do I Add A Drum Kit To Studio One?


To add a drum kit to Studio One, open a new song, go to the Instruments tab, select Impact, and drag the desired drum kit onto the instrument track. Customize the kit using the Impact interface and start creating beats.


How Do I Add Percussion To Fl Studio?


To add percussion to FL Studio, follow these steps: 1. Open FL Studio and create a new pattern. 2. In the step sequencer, select a drum sound you want to use. 3. Click on the piano roll to add drum hits at desired time intervals.


4. Repeat this process to add more percussion sounds. 5. Play the pattern to hear the percussion in your FL Studio project.


Conclusion


Incorporating drum kits into FL Studio is a game-changer for music producers. Understanding the process and mastering the techniques can take your music to the next level. Experimenting with different sounds and rhythms can spark creativity and inspire unique beats.


By following these steps, you can elevate your music production skills and create professional-quality tracks. Flaunt your creativity and make some banging beats!

Categories
Archive

Fl Studio Template Folder: Maximize Your Workflow with Custom Templates

The FL Studio template folder stores project files, allowing customization of default templates and saving custom ones. Within this folder, users can set personalized templates and make them default using easy steps.


Located in the FL Studio User Data folder, storing and managing templates becomes effortless, enhancing the workflow and efficiency of music production. By following simple instructions, you can navigate the template folder, save your customized templates, and set them as default for seamless project creation in FL Studio.


This organized approach ensures quick access to your preferred templates, optimizing your music production experience.


Credit: www.process.st


Understanding Fl Studio Template Folder

In FL Studio, the Template Folder is located in the User data folder under the path: User data folder\FL Studio\Projects\Templates.

Default templates in FL Studio are the pre-defined templates that come with the software, while custom templates are projects that you create based on your preferences.

Default templates serve as a starting point for new projects and are accessible from the templates menu. On the other hand, custom templates are personalized projects that you can save and reuse for future productions.

When setting up a default template, you can simply open the desired project, customize it according to your needs, and save it as the default template. This way, every time you launch FL Studio, you will start with your customized template.


Credit: riverside.fm


Creating Custom Templates

Creating custom templates in FL Studio can streamline your workflow and help you stay organized. By setting up default templates and customizing them to suit your needs, you can save time and focus on your creative process.

Setting Up Default Template

To set up a default template in FL Studio, follow these steps:

  1. Extract the project folder and open it in FL Studio.
  2. Customize the template to your preferences.
  3. Locate FL Studio’s “Template” folder.
  4. Choose a name for the template and save it.
  5. Open the template from the menu.
  6. Restart FL Studio.
  7. Your template should now be set as the default.

Customizing Templates For Workflow

Customizing templates in FL Studio allows you to tailor them to your specific workflow. Here are some tips:

  • Organize tracks and plugins according to your usual setup.
  • Create custom mixer presets for quick access.
  • Add markers for different sections of your projects.
  • Save different versions of templates for various types of projects.

By creating custom templates and setting up default options in FL Studio, you can optimize your workflow and focus on making music.

Optimizing Workflow With Templates

In the music production world, time equals money. Maximizing efficiency can significantly impact the outcome of your creative endeavors. With the vast array of features and complexities within FL Studio, creating and organizing templates is an essential tool for streamlining your workflow and boosting productivity. By utilizing templates effectively, you can eliminate repetitive tasks and focus on your artistic expression.

Filter Groups And Fx Busses

Organizing your tracks in FL Studio by creating filter groups and FX busses can streamline your mixing process. By categorizing similar instruments or sounds into specific groups, you can easily adjust and process them collectively. This method enhances efficiency and maintains a structured workflow, allowing you to focus on the creative aspects of your project.

Adding Favorite Plugins And Setting Up Master Chain

Integrating your favorite plugins and setting up a master chain in your template can save valuable time during the production process. By preloading frequently used plugins and configuring a master chain setup, you can ensure consistency and efficiency across your projects. This optimization not only facilitates smoother workflow but also provides a familiar starting point for your creative process.


Credit: musiciansinstitute.nonlineareducating.com


Advanced Tips And Insights

In this section, we will explore advanced tips and insights for the Fl Studio Template Folder. These tips will help you save and organize your templates efficiently, as well as utilize them for streamlined music production. Let’s dive in!

Saving And Organizing Templates

When it comes to saving and organizing your Fl Studio templates, it is important to follow a systematic approach. By doing so, you can easily access and use your templates whenever you need them. Here are some tips to help you:

  1. Create a folder specifically for your templates. This will ensure that all your templates are stored in one place for easy access. You can name this folder anything you prefer.
  2. Give each template a descriptive name. This will help you quickly identify the purpose or style of each template. For example, if you have a template for trap beats, you can name it “Trap Beat Template”.
  3. Consider adding sub-folders within your template folder. This can further categorize your templates and make them easier to navigate. For instance, you can have sub-folders for different genres like hip-hop, electronic, or rock.
  4. Regularly update and refine your templates. As you gain more experience and develop your music production skills, you may come across new techniques or sound design elements that you want to incorporate into your templates. Make sure to update your templates accordingly to stay up to date.

Utilizing Templates For Efficient Music Production

Now that you have your templates saved and organized, it is time to utilize them to maximize your music production efficiency. Here are some insights to help you make the most out of your templates:

  • When starting a new project, use a template as your foundation. This will save you time and effort in setting up all the basic tracks, instruments, and effects. You can simply open the template, customize it to your specific needs, and start working on your new track.
  • Experiment with different template variations. You can create multiple versions of a template by saving different configurations or arrangements. This allows you to easily explore different ideas without starting from scratch every time.
  • Take advantage of template automation. If you frequently use specific automation techniques or effects, you can set them up in your template. This way, you won’t have to manually add them to each project, saving you valuable time and effort.
  • Share your templates with other producers. If you have created templates that you find particularly useful, consider sharing them with the music production community. This can be a great way to connect with other producers and exchange ideas.

By implementing these advanced tips and insights, you can harness the full potential of the Fl Studio Template Folder. Saving and organizing your templates in a structured manner, as well as utilizing them efficiently, will enhance your music production workflow and help you create music more seamlessly than ever before.

Frequently Asked Questions Of Fl Studio Template Folder


Where Are Fl Studio Templates Stored?


FL Studio templates are stored in the User data folder of the FL Studio software. You can also manually save custom templates in the Projects/Templates folder.


How Do I Add A Template To Fl Studio?


To add a template to FL Studio, open the project and customize it. Save it in the “Template” folder, and choose a name. Then open it from the menu, restart FL Studio, and it will be set as your default template.


How Do I Save A Template In Fl 21?


To save a template in FL 21, extract project folder, customize in FL Studio, save in “Templates” folder, and set as default.


How Do I Save My Fl Studio Layout?


To save your FL Studio layout, customize a template, locate “Template” folder, name it, and save. Set it as default and restart FL Studio.


Conclusion


In creating and using FL Studio Template Folder, you have the flexibility to customize and save your project settings, effectively streamlining your music production workflow. This not only saves time but also allows you to maintain consistency in your projects.


By understanding how to utilize and manage these templates, you can elevate your music production experience to new levels of efficiency and creativity.


https://www.youtube.com/watch?v=t_P3KlUgylE


Categories
Archive

Unlock the Beat: How to Change Tempo in FL Studio

To change tempo in FL Studio, adjust the BPM setting in the top left corner. Additionally, you can use automation clips.


Want to add some flair to your music production in FL Studio? Changing the tempo can give your tracks a different feel. Whether you want a slow, moody vibe or a fast-paced energy, altering the tempo can make a significant impact on your sound.


In FL Studio, this process is a breeze – simply tweak the BPM setting in the program’s interface. You can also create automation clips to smoothly transition between different tempos in your music. Stay tuned to learn how to master the tempo-changing feature in FL Studio and take your music production to the next level.


Understanding Tempo

Understanding Tempo is crucial in music production. Tempo refers to the speed at which a piece of music is played, and it impacts the overall feel and groove of a track.

The Role Of Tempo In Music

Tempo sets the pace and energy of a song. It determines how fast or slow the beat and rhythm move, influencing the emotions and vibe of the music.

Impact On Music Production

Changing the tempo can completely transform a song’s mood and style. It allows producers to experiment with different feels and create unique sonic experiences.

Unlock the Beat: How to Change Tempo in FL Studio


Credit: www.image-line.com


Methods For Changing Tempo

Using Tempo Automation

Apply tempo changes gradually throughout the track for seamless transitions.

Adjusting Time-stretching

Modify the tempo by adjusting the time-stretching feature for precise control.


Best Practices

When altering tempo in FL Studio, it’s essential to adhere to best practices to ensure that the audio quality is maintained and that the tempo change seamlessly syncs with other elements in your project. Here are some best practices to consider when changing tempo in FL Studio:

Maintaining Audio Quality

Preserving the audio quality during tempo changes is crucial for a professional and polished sound. To achieve this, consider the following:

  • Ensure that time-stretching algorithms are applied appropriately to avoid audio artifacts.
  • Adjust the pitch-shift settings if necessary to retain the original tonality of the audio.

Syncing With Other Elements

When adjusting the tempo in FL Studio, it’s important to ensure that the tempo change synchronizes seamlessly with other elements in the project. Here are some tips for syncing different elements:

  1. Use automation clips to smoothly transition the tempo changes in conjunction with other elements such as effects, volume levels, and panning.
  2. Consider adjusting the timing of MIDI patterns and audio clips to align with the new tempo, maintaining musical coherence throughout the project.
Unlock the Beat: How to Change Tempo in FL Studio


Credit: www.quora.com


Creative Applications

When it comes to using FL Studio, the possibilities for creative applications are endless. One of the most exciting aspects is the ability to change the tempo of your tracks. This simple adjustment can completely transform the energy and mood of a composition, allowing you to explore new musical territories and experiment with different genres. In this section, we will dive into two specific creative applications of changing tempo: creating build-ups and breakdowns, and exploring genre-specific tempo techniques.

Creating Build-ups And Breakdowns

Build-ups and breakdowns are essential elements in electronic music production, as they help to add tension and release to a track. By changing the tempo strategically, you can enhance the impact of these musical sections and elevate the overall listening experience.

Here are some techniques to consider when creating build-ups and breakdowns:

  1. Gradual Tempo Changes: Gradually increasing or decreasing the tempo over a specific period can build anticipation or create a dramatic effect. Try increasing the tempo during a build-up to generate excitement, and then slow it down during a breakdown to provide a moment of calmness and reflection.
  2. Syncopated Rhythms: Experiment with syncopated rhythms during build-ups and breakdowns to create a sense of tension and energy. By altering the tempo, you can amplify the impact of these rhythmic patterns, resulting in a more dynamic and engaging musical experience.
  3. Adding Fills and Effects: Changing the tempo allows you to incorporate additional fills, drum rolls, and effects during build-ups and breakdowns. This can help to create more impactful transitions and add interest to your compositions.

Exploring Genre-specific Tempo Techniques

Each genre of music has its unique characteristics, and tempo plays a vital role in defining the overall vibe and energy. By exploring genre-specific tempo techniques, you can further enhance the authenticity and impact of your compositions.

Here are some examples of genre-specific tempo techniques:

Genre Tempo Technique
Hip Hop Using slower tempos, such as 80-90 BPM, to create a relaxed and laid-back feeling.
Techno Employing faster tempos, ranging from 120-150 BPM, to generate a high-energy and driving groove.
House Utilizing moderate tempos, typically around 120-130 BPM, to create a danceable and infectious rhythm.

Remember, these are just a few examples, and there are countless other tempo techniques you can explore across various genres. Don’t be afraid to experiment and push the boundaries.

In conclusion, changing the tempo in FL Studio opens up a world of creative possibilities. By understanding how to utilize this feature, you can take your music to new heights, whether it’s by creating impactful build-ups and breakdowns or by exploring genre-specific tempo techniques. So go ahead, experiment, and let your imagination run wild!

Unlock the Beat: How to Change Tempo in FL Studio


Credit: www.image-line.com


Frequently Asked Questions On How To Change Tempo In Fl Studio


How Do I Speed Up The Tempo Of A Sample In Fl Studio?


To speed up the tempo of a sample in FL Studio, simply adjust the BPM setting in the software. Increase the value for a faster tempo, or reduce it for a slower tempo.


How Do I Change The Tempo Of Audio?


To change the tempo of audio, use editing software like Audacity or Adobe Audition. Open the audio file, find the tempo control or time-stretch tool, and adjust as needed. Save the changes and export the modified audio.


How Do I Change The Tempo In Fl Studio Without Changing Pitch?


To change tempo in FL Studio without altering pitch, adjust the BPM setting in the software.


How Do I Lower My Bpm In Fl Studio?


To lower BPM in FL Studio, adjust tempo knob or manually input lower BPM value.


Conclusion


Changing tempo in FL Studio is a crucial aspect of music production. With the flexibility and control it offers, you can bring your creative vision to life. By following the steps outlined in this guide, you can easily manipulate the tempo of your tracks to enhance the overall quality and impact of your music.

Categories
Archive

Deelay Vst Free Download: Get the Ultimate Delay Plugin for Modern Producers

Deelay VST is a free delay plugin by Integraudio & Sixth Sample, designed for modern producers, featuring various controls and modulation options. Released in collaboration with Sixth Sample, this versatile plugin offers diffusion quality, modulation controls, and different delay modes suitable for creative sound manipulation.


With a user-friendly interface and high-quality features, Deelay VST is a valuable addition to any producer’s toolkit. Whether you’re looking to enhance your tracks with unique echoes or experiment with distortion modes, this plugin provides an array of tools to elevate your sound production effortlessly.


Download Deelay VST for free and explore its capabilities in adding depth and character to your music compositions.


Deelay Plugin Highlights


Developed in collaboration with Sixth Sample, Deelay is a versatile and free delay plugin that offers a wide range of features tailored for modern producers. Its simple and minimalistic interface makes it easy to navigate and use. Download Deelay now for free!

Collaboration With Sixth Sample

Developed in collaboration with Sixth Sample, Integraudio’s Deelay is a free delay plugin with a plethora of features geared for modern producers.

Plethora Of Features

Deelay is not just your average plugin; it offers a plethora of features that cater to the diverse needs of music producers.

Minimalistic Interface

One of the standout features of Deelay is its minimalistic interface that ensures a clutter-free user experience without compromising functionality.

Deelay Vst Free Download: Get the Ultimate Delay Plugin for Modern Producers


Credit: bedroomproducersblog.com


User Experience

When using Deelay VST, users can expect an exceptional user experience that combines simplicity with advanced features to enhance their music production.

Simple Controls

  • Deelay VST offers an intuitive interface with self-documented controls that are easy to navigate.
  • Users can adjust settings effortlessly, making it suitable for beginners and seasoned producers alike.

Quality Of Sound

  • The diffusion quality of Deelay VST ensures that the delay effects produced are of high quality and professional-grade.
  • With modulation controls and various modes, users can fine-tune their sound to achieve the desired results.

Compatibility And Installation

  • Deelay VST is compatible with both macOS and Windows operating systems, making it accessible to a wide range of users.
  • The installation process is straightforward and seamless, allowing users to start using the plugin quickly.

Community Reception

Sure, here’s an HTML-formatted section of a blog post about Deelay Vst Free Download, focusing on the subheading: Community Reception. “`html

When it comes to the community reception of Deelay VST, it has garnered significant attention from producers in the music industry. The tool’s innovative features and user-friendly interface have led to widespread discussion and feedback within the music production community.

Ratings And Reviews

Producers and music enthusiasts have given Deelay VST a stellar rating of 5 out of 5. The plugin has been praised for its versatility and advanced functionalities, making it a highly sought-after tool for modern music production.

Producers’ Feedback

Feedback from producers who have utilized Deelay VST has been overwhelmingly positive. Many have applauded its intuitive controls, which allow for seamless creativity and experimentation in crafting unique sounds. Additionally, users appreciate the minimalistic interface, which enhances workflow efficiency and user experience.

“` Overall, Deelay VST has received commendable ratings and positive feedback from the music production community, solidifying its reputation as a valuable tool for producers.

Deelay Vst Free Download: Get the Ultimate Delay Plugin for Modern Producers


Credit: integraudio.com


Deelay Vst Free Download: Get the Ultimate Delay Plugin for Modern Producers


Credit: bedroomproducersblog.com


Frequently Asked Questions On Deelay Vst Free Download


How Can I Download Deelay Vst For Free?


You can download Deelay Vst for free by visiting the official website of Sixth Sample or Integraudio. Look for the download link for Deelay Vst and click on it to start the download process. Make sure to follow the installation instructions provided to properly install the plugin on your device.


What Are The Main Features Of Deelay Vst?


Deelay Vst offers a range of features suited for modern producers. Some of the main features include self-documented controls, diffusion quality for reverb creation, modulation controls, mono toggle, various delay modes, and a planetarium preset. These features provide flexibility and creative possibilities for your delay effects.


How Is Deelay Vst Different From Other Delay Plugins?


Deelay Vst stands out from other delay plugins due to its collaborative development by Sixth Sample and Integraudio. It offers a plethora of features packed into a simple and minimalistic interface. The plugin is designed to cater to the needs of modern producers, providing them with a versatile and high-quality delay tool.


Conclusion


With a plethora of features geared for modern producers, the free Deelay VST is a must-have plugin. Offering a versatile delay with modulation controls and diffusion quality, it provides an essential sound engineering tool. Its minimalistic interface makes it user-friendly and accessible to all music creators.


Download now to enhance your music production.


https://www.youtube.com/watch?v=BzQvWmgfvJE


Categories
Archive

Compressor Ac1 Vst Plugin: Master Your Music with the Ultimate Tool

The Compressor AC1 VST Plugin is an essential tool for audio compression. It enhances dynamics and boosts volume, delivering professional-level results.


Incorporating this plugin into your workflow can significantly improve the quality of your audio projects. Audio compression is a crucial process in the music and production industry. The Compressor AC1 VST Plugin stands out as an effective solution to refine sound quality and achieve a balanced audio output.


With its user-friendly interface and advanced features, this plugin offers a versatile and efficient tool for audio professionals. By utilizing the capabilities of the Compressor AC1 VST Plugin, you can elevate your audio productions to new heights and produce high-quality audio content.

Compressor Ac1 Vst Plugin: Master Your Music with the Ultimate Tool


Credit: www.blackgateco.com


Top Compressor Vst Plugins

Adhd Leveling Tool

ADHD Leveling Tool offers precise control over dynamics, enhancing the overall sound quality.

Klevgrand Korvpressor

Klevgrand Korvpressor provides a unique blend of compression and character to elevate your audio projects.

Tdr Kotelnikov

TDR Kotelnikov stands out for its advanced features and exceptional sound shaping capabilities.

Compressor Ac1 Vst Plugin: Master Your Music with the Ultimate Tool


Credit: www.youtube.com


Functionality Of Compressor Vst Plugins

The functionality of compressor VST plugins plays a crucial role in shaping the audio quality and dynamics of sound recordings. These plugins are designed to emulate professional compressors, enhancing audio while providing dynamic control.

Emulation Of Professional Compressors

VST compressor plugins mimic the behavior and characteristics of high-end hardware compressors used in professional audio production. They replicate the sound and response of renowned compressors, offering users a cost-effective solution to achieve similar audio results.

Audio Enhancement And Dynamic Control

Compressor VST plugins effectively enhance audio quality by reducing peaks and balancing sound levels, resulting in a more polished and cohesive sound output. They provide precise dynamic control, allowing users to shape the dynamics of their audio recordings with accuracy and flexibility.

https://www.youtube.com/watch?v=8NEzziEfCoQ


User Experience And Reviews

When it comes to selecting a compressor AC1 VST plugin, the user experience and reviews play a crucial role in making an informed decision. It’s essential to gauge the plugin’s efficiency and usability before integrating it into your workflow. Let’s delve into the key aspects that shape the user experience and reviews for the Compressor AC1 VST plugin.

Intuitive Graphical Interface

The Compressor AC1 VST plugin offers an intuitive graphical interface that simplifies the compression process, making it accessible for both beginners and seasoned professionals. Its user-friendly design enables users to navigate through various controls and parameters with ease, fostering a seamless workflow. The visual representation of compression settings allows for quick adjustments, enhancing the overall user experience.

Custom Distortion Algorithm

The custom distortion algorithm integrated into the Compressor AC1 VST plugin is a standout feature that resonates positively with users. It emulates the sought-after sound of analog tape, delivering rich and characterful distortion effects. This unique algorithm adds a layer of depth and warmth to audio signals, contributing to the plugin’s appeal among music producers and sound engineers.

Availability And Pricing


The Compressor AC1 VST plugin is available for download with free delivery. With an intuitive graphical interface and custom distortion algorithm, it emulates the sound of analog tape, providing users with awesome drops, transitions, soundscapes, and LFO FX sounds. Get this plugin at a price of $25.


00.

When it comes to finding the perfect compressor plugin for your audio needs, the Compressor Ac1 Vst Plugin is definitely one to consider. This plugin emulates the sound and response of professional-level compressors, providing you with a tool to tighten up your audio and increase the overall volume. But where can you find this plugin and how much does it cost? Let’s delve into the availability and pricing options.

Free And Paid Options

If you’re on a budget or simply want to test out the Compressor Ac1 Vst Plugin before committing to a purchase, you’ll be happy to know that there are free options available. Websites like KVR Audio and VST Warehouse offer the plugin as a free download, allowing you to explore its features and see if it fits your needs.

However, if you’re looking for additional functionalities and premium support, the paid versions might be more suitable for you. The official website of the Compressor Ac1 Vst Plugin, Audio Hertz, provides a paid option for $25. This option comes with an intuitive graphical interface that you already know and love, as well as two separate saturation circuits and a custom distortion algorithm to emulate the sound of analog tape.

Pricing And Stock Information

If you decide to go for the paid option, it’s important to check the availability and stock information before making a purchase. To ensure you’re getting the most accurate and up-to-date information, you can visit websites like Looperman, Vst4you, and DontCrack. These websites provide details about the Compressor Ac1 Vst Plugin, including pricing, stock availability, and download options.

So, whether you choose the free or paid option, the Compressor Ac1 Vst Plugin offers a range of features to enhance your audio production. Make sure to check the availability and pricing information from trusted sources to make an informed decision and take your audio to the next level.

Compressor Ac1 Vst Plugin: Master Your Music with the Ultimate Tool


Credit: www.kvraudio.com


Frequently Asked Questions Of Compressor Ac1 Vst Plugin


What’s The Best Compressor Plugin?


When it comes to the best compressor plugin, top options include ADHD Levelling Tool, Klevgrand Korvpressor, and TDR Kotelnikov. These plugins emulate professional compressors, tightening audio and increasing overall volume for a smoother sound. This can be found in Logic Pro for Mac.


What Is Compressor Plugin?


A compressor plugin replicates professional compressors, tightening sound by reducing excessive levels and boosting volume.


What Is A Compressor Plugin?


A compressor plugin emulates the sound and response of professional compressors to tighten up audio by reducing sounds that exceed a certain threshold level, smoothing out dynamics, and increasing overall volume.


How Does A Compressor Plugin Work?


A compressor plugin works by analyzing the audio signal and automatically reducing the volume of sounds that exceed a certain threshold. It applies dynamic processing to even out the audio’s volume and make it sound more balanced and controlled.


Conclusion


A high-quality compressor AC1 VST plugin can significantly enhance the sound of your audio by reducing excessive noise and smoothing out the dynamics, ultimately boosting the overall volume and perceived loudness. With numerous options available in the market, finding the best compressor plugin should be based on your specific audio needs and preferences.