Categories
Archive

T-De-Esser Plus : The Ultimate Solution for Smooth Vocals

T-De-Esser Plus by Techivation is a powerful, professional, and versatile de-esser plugin that smooths out high frequencies while maintaining a natural and musical sound. Ideal for vocal recordings with loud sibilance to create a smoother listening experience.


Many professionals incorporate de-essers in their vocal chains for enhanced sound quality. Whether you are producing music or working on audio projects, T-De-Esser Plus can save you time and effort while delivering effective results on individual tracks. Streamline your workflow and achieve professional audio quality with this user-friendly plugin.
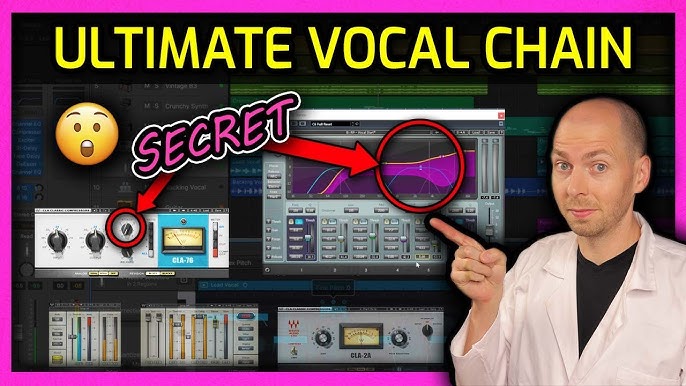
T-De-Esser Plus : The Ultimate Solution for Smooth Vocals


Credit: m.youtube.com


Features

The T-De-Esser Plus by Techivation offers a range of features that enhance your audio editing experience.

Interface Overview

The interface of T-De-Esser Plus is user-friendly, providing easy navigation for efficient editing.

Intensity And Sharpness Adjustment

You can adjust the intensity and sharpness of the de-esser to perfectly tailor it to your specific audio needs.

Saving And Loading Presets

Easily save and load presets in T-De-Esser Plus to quickly access your preferred settings for different projects.

User Reviews


T-De-Esser Plus by Techivation is a new free de-esser plugin that effectively smooths high frequencies while maintaining a natural and musical sound. Streamline your audio project workflow with this powerful and versatile tool.

Review From Topmop Productions

Topmop Productions praises T-De-Esser Plus for its exceptional performance in controlling sibilance. The detailed review showcases the plugin’s effectiveness in enhancing vocals.

Review From White Noise Studio

White Noise Studio’s review delves into the controls and usability of T-De-Esser Plus. The studio appreciates its ability to refine transients, highlighting its value for enhancing drum recordings.

Industry experts recommend T-De-Esser Plus for its versatility and efficiency in audio processing. The plugin’s user-friendly interface and natural sound make it a preferred choice for vocal treatments.

Usage And Applications

T-De-Esser Plus by Techivation is a powerful tool designed to effectively manage sibilance and harshness in vocal recordings. This innovative plugin is essential for audio professionals seeking to achieve a smooth and polished vocal performance. Its applications extend beyond vocals, making it a versatile addition to any audio project.

What Is A De-esser And Its Use In Vocals

A de-esser is a crucial tool in audio production, specifically tailored to address sibilance issues in vocal recordings. It effectively reduces the harsh ‘ess’ and ‘shh’ sounds, ensuring a more pleasant listening experience.

Best De-esser Plugins In The Market

  • Fabfilter Pro-DS: Known for its advanced features and precise control over sibilance.
  • Waves Sibilance: Offers intuitive controls and high-quality processing for sibilance reduction.
  • Digitalfishphones SPITFISH: A popular free de-esser plugin with effective sibilance attenuation.
  • HOFA IQ-Series DeEsser: Provides transparent sibilance reduction with minimal artifacts.
  • Accusonus Era De-Esser Pro: Known for its intelligent signal analysis and high-quality processing.

How To Use T-de-esser Plus In Audio Projects

Utilizing T-De-Esser Plus in audio projects is straightforward and highly effective. Whether it’s individual tracks or the entire mix, this plugin offers seamless integration and exceptional sibilance control.

By adjusting the intensity and sharpness parameters, users can precisely tailor the sibilance reduction to their specific requirements. T-De-Esser Plus also allows for easy preset saving and loading, streamlining workflow efficiency.

Additionally, this plugin extends its functionality beyond vocals, making it a valuable asset for managing transient elements in various sound sources, such as drums and guitars.
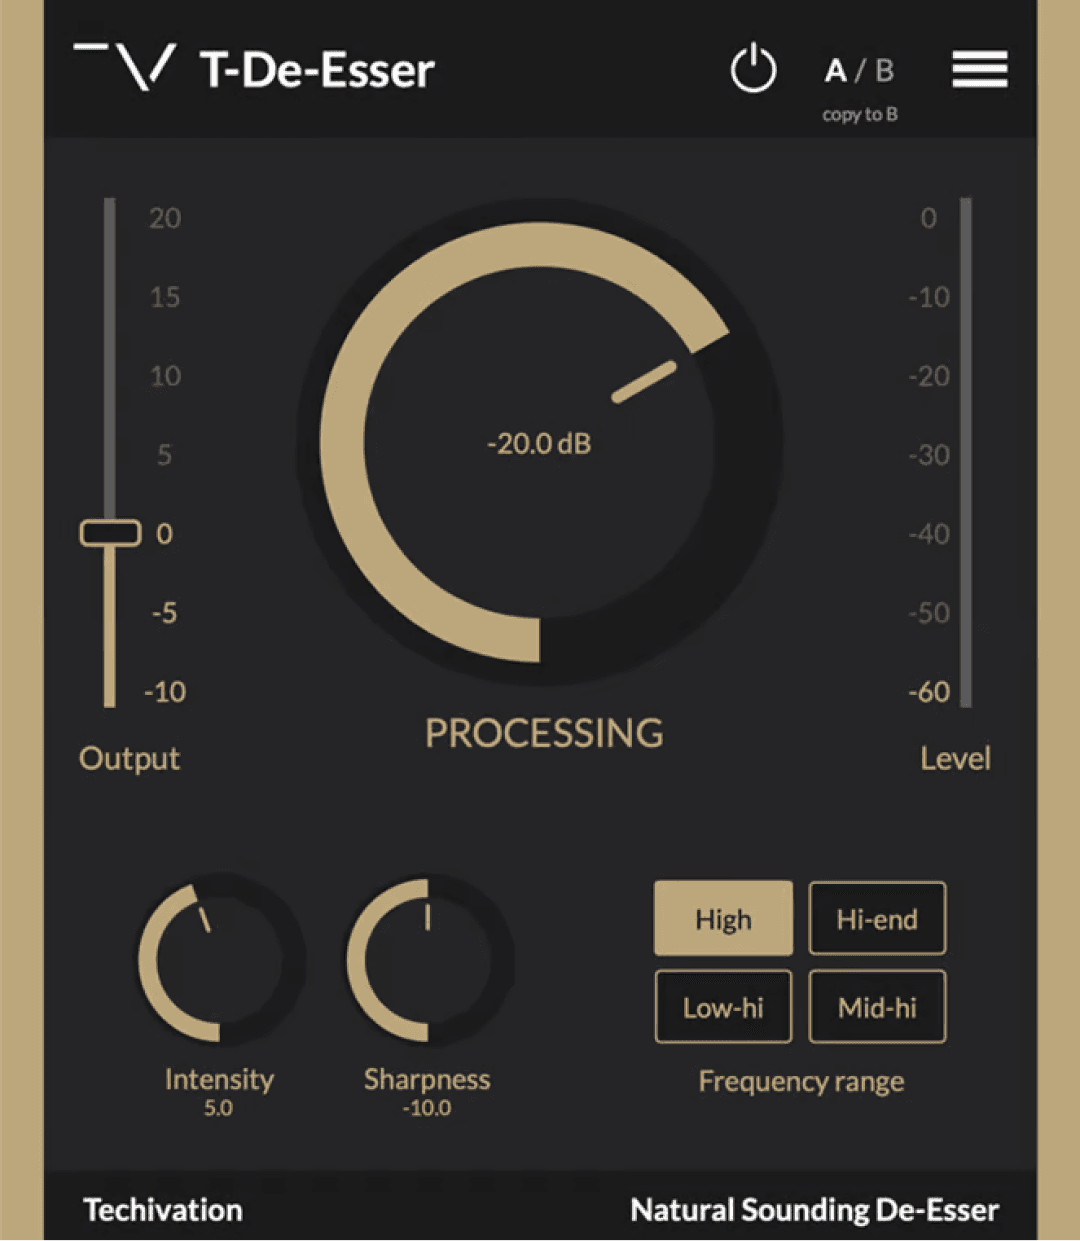
T-De-Esser Plus : The Ultimate Solution for Smooth Vocals


Credit: techivation.com


Techivation Products

At Techivation, we are dedicated to developing innovative audio plugins that enhance your music production experience. Our line of products is designed to provide you with professional-quality tools that are easy to use and deliver outstanding results. Whether you’re a beginner or a seasoned audio engineer, our products can help you achieve the perfect sound.

T-de-esser Pro: Features And Availability

If you’re looking for a comprehensive de-esser plugin, look no further than T-De-Esser Pro. With its advanced features and intuitive interface, this plugin gives you complete control over your vocal recordings. T-De-Esser Pro effectively reduces harsh sibilance without affecting the overall quality of your vocals. It works seamlessly on individual tracks and can be an essential tool for any professional recording session.

T-De-Esser Pro is available for purchase on our website, allowing you to take advantage of its powerful features and enhance your audio projects. Whether you’re a musician, producer, or sound engineer, T-De-Esser Pro is a must-have plugin that can elevate your recordings to new heights.

T-de-esser: Free Musical Sounding De-esser

If you’re on a tight budget or simply want to try out our de-esser plugin before making a purchase, we offer T-De-Esser for free. Despite being free, T-De-Esser delivers exceptional results and maintains the natural musicality of your vocals. It effectively reduces sibilance without introducing any artifacts or compromising the overall sound quality.

With T-De-Esser, you can give your vocals that professional touch without spending a dime. Download it from our website and experience the power of this free musical sounding de-esser today.

Comparison With T-exciter

While T-De-Esser focuses on reducing sibilance in vocals, our T-Exciter plugin adds excitement and brightness to your audio. T-Exciter is designed to enhance the high frequencies of your tracks, giving them a polished and vibrant sound. It works seamlessly with T-De-Esser, allowing you to fine-tune your vocals and add that extra sparkle.

By combining T-De-Esser and T-Exciter, you have a powerful duo that can take your audio productions to the next level. Experiment with different settings and unleash your creativity with these versatile plugins.
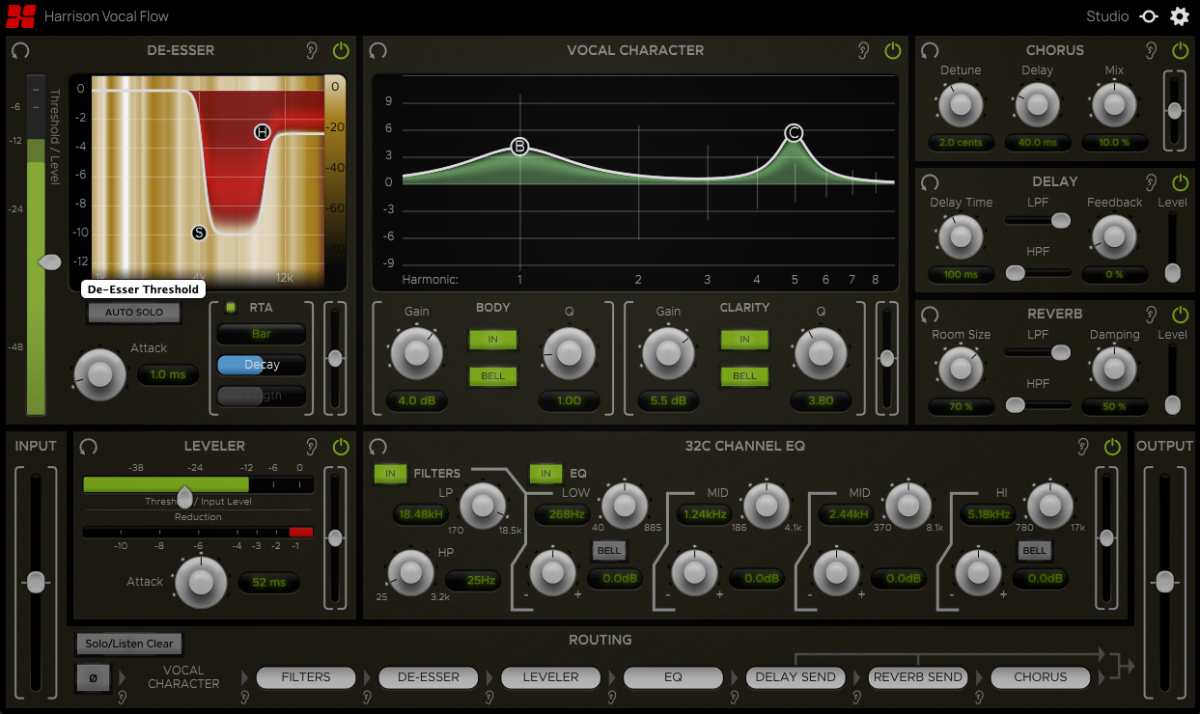
https://www.youtube.com/watch?v=jgFJRAo2WI8


T-De-Esser Plus : The Ultimate Solution for Smooth Vocals


Credit: store.harrisonaudio.com


Frequently Asked Questions For T-de-esser Plus


What Is De-esser Used For?


A de-esser is used to reduce sibilance in vocal recordings, making them less harsh on the listener’s ears. It is commonly used in the vocal chain of professional recordings. While helpful, it may not always be necessary.


What Are The Best De-esser Plugins?


The top de-esser plugins are Fabfilter Pro-DS, Waves Sibilance, Digitalfishphones SPITFISH, HOFA IQ-Series DeEsser, and Brainworx SPL De-esser.


How Do You Use Td Esser?


To use TD Esser, download the plugin, insert it on the vocal track, adjust intensity and sharpness settings, then save presets.


How Do I Get Rid Of Sibilance In Reaper?


To get rid of sibilance in Reaper, use a de-esser plugin like T-De-Esser Plus to reduce sharp “s” sounds in vocal recordings. Adjust the intensity and sharpness settings as needed for a smoother sound. Download the plugin from Techivation to streamline your audio project workflow.


Conclusion


T-De-Esser Plus by Techivation offers a powerful, professional, and versatile solution for smoothing out high frequencies while maintaining a natural and musical sound. With its user-friendly interface and effective de-essing capabilities, this plugin is a valuable addition to any audio project workflow.


Whether working on individual tracks or vocal recordings, T-De-Esser Plus can save both time and effort, making it a valuable tool for audio professionals.


Categories
Archive

Signalizer Vst: Unleash the Power of Audio Visualization

Signalizer VST is a real-time audio visualization plugin by Janus Lynggaard Thorborg based in Austin, Texas. It offers engineering-grade oscilloscope, vectorscope, and spectrum analysis features for music production.


Signalizer provides detailed wave cycle displays, waveform interpretations, and customizable waveform coloring. Whether you’re a beginner or advanced producer, Signalizer enhances sound visualization and analysis with a user-friendly interface. Its hands-on approach to audio visualization makes it an essential tool for musicians looking to optimize their sound editing process.


Janus Thorborg has made Signalizer available for free, allowing users to access professional-grade visual tools for their music projects.


Key Features


Introducing Signalizer Vst, a powerful audio visualization plugin featuring the BEST oscilloscope, vectorscope, and spectrum analysis capabilities. Experience real-time engineering-grade audio visualization with fast response and frame rates for a seamless workflow. Get your hands on Signalizer Vst for a top-notch audio visual experience.

Real-time Audio Visualization

Signalizer VST offers real-time audio visualization capabilities that allow users to visualize audio signals instantly.

Oscilloscope, Vectorscope, And Spectrum Analysis

The plugin includes oscilloscope, vectorscope, and spectrum analysis tools for in-depth audio waveform and frequency analysis.

Signalizer Vst: Unleash the Power of Audio Visualization


Credit: www.jthorborg.com


User Experience


Signalizer VST is designed to enhance user experience by providing real-time audio visualization. Janus Lynggaard Thorborg’s free oscilloscope and spectrum analyzer offers extensive features, including wave cycle display, waveform interpretation, and time mode. This powerful plugin aims to elevate audio engineering-grade visualization for seamless integration within music production.

Ease Of Installation

Signalizer VST boasts hassle-free installation, ensuring users can set it up swiftly without any technical hurdles.

Customization Options

Users can personalize Signalizer VST to suit their preferences, offering a wide range of customization choices for a tailored experience. User Experience: Signalizer VST caters to users seeking an effortless installation process and extensive customization options. With seamless setup and versatile personalization features, users can delve into the plugin without delay or limitations.


Community Feedback

One of the critical aspects of assessing any software or plugin is the community feedback it receives. User reviews and the integration of the plugin with Digital Audio Workstations (DAWs) play a significant role in determining its practicality and effectiveness.

User Reviews

Signalizer VST has garnered positive reviews from users across various online platforms. Its ability to provide real-time audio visualization capabilities has impressed many, with users praising its user-friendly interface and diverse range of visualization tools.

Integration With Daws

Signalizer VST seamlessly integrates with popular DAWs such as Logic Pro X, Ableton Live, and others, ensuring a smooth and efficient workflow for music producers and audio engineers. Its compatibility with a wide range of DAWs has been a key factor in its widespread adoption within the music production community.

Signalizer Vst: Unleash the Power of Audio Visualization


Credit: www.jthorborg.com


Future Developments


Discover the cutting-edge Future Developments in audio visualization with Signalizer VST, a revolutionary real-time oscilloscope and spectrum analyzer. Elevate your music production with Signalizer’s advanced waveform interpretation and customizable features.

Upcoming Updates

Signalizer Vst, the popular audio visualization plugin created by Janus Lynggaard Thorborg, is constantly evolving to meet the needs of its users. With each update, the plugin becomes even more powerful and user-friendly. Let’s delve into some of the exciting upcoming updates that will further enhance the Signalizer experience.

Enhancements In Visualizations

One of the key areas in which Signalizer Vst is continuously improving is its visualizations. The upcoming updates will bring a plethora of enhancements to the visual representation of audio signals. These improvements will allow users to have a more immersive and interactive experience while working with the plugin. Some of the notable enhancements include:

  • Introducing new visualization modes, such as waveform coloring and time mode, to provide users with more options for analyzing and interpreting audio signals.
  • Improved wave cycle display, enabling users to gain deeper insights into the characteristics of the audio waveforms.
  • Enhanced spectrum analyzer and vectorscope functionalities, making it easier for users to analyze frequency content and stereo imaging.
  • Addition of a waterfall graph, allowing for a comprehensive visualization of the audio signal over time.

With these enhancements, Signalizer Vst will not only provide accurate visual feedback but also empower users to make more informed decisions when it comes to audio processing and mixing. The future developments of Signalizer Vst are focused on delivering a seamless user experience with enhanced visualizations. Stay tuned for these upcoming updates to take your audio visualization capabilities to the next level.

Signalizer Vst: Unleash the Power of Audio Visualization


Credit: www.jthorborg.com


Frequently Asked Questions On Signalizer Vst


What Is Signalizer Vst And How Does It Work?


Signalizer Vst is a real-time audio visualization plugin that provides engineering-grade and customizable visualizations of audio. It offers features like oscilloscope, vectorscope, and spectrum analyzer, allowing you to analyze and interpret waveforms and frequencies in your audio. Its fast response and frame rates make it an efficient tool for music production and sound engineering.


How Can Signalizer Vst Enhance My Audio Production?


Signalizer Vst can enhance your audio production by providing accurate and detailed visual representations of your audio signals. It helps you identify waveform characteristics, visualize stereo imaging, and analyze frequency content. With its precise measurements and customizable settings, Signalizer Vst gives you greater control and insight into your audio, resulting in improved mixing, mastering, and overall audio quality.


Is Signalizer Vst Compatible With All Major Daws?


Yes, Signalizer Vst is compatible with all major Digital Audio Workstations (DAWs). It can be used as a plugin within your favorite recording software, allowing seamless integration and direct access to its powerful visualization tools. Whether you’re working in Logic Pro X, Ableton Live, or any other popular DAW, Signalizer Vst can be a valuable addition to your audio production workflow.


Conclusion


Signalizer VST is a versatile and powerful audio visualization plugin that offers real-time engineering-grade visualizations and customization options. With fast response and frame rates, it provides a range of features such as oscilloscope and vectorscope, making it an essential tool for music production and digital signal processing.


Its availability for free and unique functionalities make it a valuable asset for audio professionals and enthusiasts alike.

Categories
Archive

Save Mixer Preset: Unlock the Hidden Power of FL Studio!

To save a mixer preset in FL Studio, right-click on the mixer channel and select File > Save mixer track state as, then name and save the file with a .fst extension location. When it comes to managing your mixer presets in FL Studio, it’s essential to know how to save and recall them efficiently.


By following simple steps like right-clicking on the mixer channel and selecting the save option, you can easily create and organize your presets for future use. In this guide, we will explore the process of saving mixer presets in FL Studio, allowing you to streamline your workflow and enhance productivity in your music production journey.


Let’s dive in and learn the ins and outs of preserving your mixer settings in FL Studio.


Understanding Fl Studio Mixer Presets

In FL Studio, Mixer Presets play a vital role in shaping the sound of your tracks. These presets store a snapshot of all your mixer settings, effects, and channel configurations. By understanding Mixer Presets, you can streamline your workflow and maintain consistency in your productions.

Importance Of Saving Mixer Presets

Saving Mixer Presets in FL Studio is crucial for efficiency and organization. It allows you to quickly recall specific settings for your mixer channels, effects, and routing. By saving presets, you can create a library of customized settings tailored to your unique sound.

Save Mixer Preset: Unlock the Hidden Power of FL Studio!


Credit: www.image-line.com


How To Save Mixer Presets In Fl Studio

Learn how to effectively save your mixer presets in FL Studio to streamline your workflow.

Benefits Of Saving Mixer Presets

Discover the advantages of saving mixer presets in FL Studio for improved efficiency and organization.

When it comes to saving mixer presets in FL Studio, it’s crucial to follow a systematic approach. By saving your mixer presets, you can easily recall your preferred settings for future projects.

  • Right-click on the mixer channel you wish to save
  • Select ‘File’ and then choose ‘Save mixer track state as’
  • Assign a name and location for the preset file
  • The preset file will have a .fst extension

Benefits Of Saving Mixer Presets

  1. Efficiently recall your preferred settings
  2. Streamline your workflow for future projects
  3. Organize and categorize your mixer presets for easy access

By saving mixer presets in FL Studio, you can maintain consistency in your mixing process and enhance productivity. Take advantage of this feature to optimize your music production workflow.

https://www.youtube.com/watch?v=eLd3t3-_ats


Advanced Techniques For Mixer Presets


To save advanced mixer presets in FL Studio, right-click on the mixer channel and select “File > Save mixer track state as. ” Choose a name and location for the preset file which will have a. fst extension. Additionally, you can also save the entire mixer state using “File > Export > Project bones” for a comprehensive preset approach.

Advanced Techniques for Mixer Presets When it comes to using mixer presets in FL Studio, understanding advanced techniques can take your workflow to the next level. In this section, we will explore organizing and naming presets, sharing and exporting presets, to help you effectively manage your mixer settings.

Organizing And Naming Presets

Organizing and naming your mixer presets is crucial for efficiency and easy access. Here are some tips for effectively managing your presets:

  • Group similar presets under specific categories or genres for easy navigation.
  • Utilize a consistent naming convention to quickly identify the purpose or effect of each preset.
  • Consider adding tags or keywords to your preset names to enhance searchability.
  • Regularly review and tidy up your preset library to remove any redundant or unused presets.

Sharing And Exporting Presets

Whether you want to share your presets with others or simply back them up for future use, knowing how to share and export presets is essential. Here’s how you can do it:

  1. Export individual presets by right-clicking on the mixer channel and selecting “File > Save mixer track state as”.
  2. To share multiple presets, consider using the “File > Export > Project bones” function to export a neat folder structure of all used effects and mixer channels.
  3. For collaboration purposes, consider creating a document that lists the details of each preset and its intended use.
  4. When sharing presets online, consider using descriptive and keyword-rich filenames to improve search engine visibility.

Save Mixer Preset: Unlock the Hidden Power of FL Studio!


Credit: www.amazon.com


Optimizing Workflow With Mixer Presets

Save Mixer Preset Fl Studio offers a valuable feature that allows users to optimize their workflow through the use of mixer presets. These presets save both time and effort, providing a convenient way to access custom settings and configurations for the mixer in FL Studio. In this blog post, we will explore two key aspects of optimizing workflow with mixer presets: saving time and effort, and customizing default presets.

Saving Time And Effort

One of the primary benefits of using mixer presets is the time and effort they save. Instead of manually adjusting each parameter and setting on the mixer for every project, you can simply load a saved preset that contains all your preferred settings. This eliminates the need for repetitive and time-consuming tasks, allowing you to dive straight into the creative process.

By having access to your preferred mixer settings at the click of a button, you can focus on what matters most – producing music. Whether you have specific EQ settings, channel routing configurations, or preferred effects chains, saving them as presets ensures consistency across your projects. This saves you from starting from scratch with every new track and helps you maintain a cohesive sound throughout your music.

Customizing Default Presets

Another advantage of using mixer presets is the ability to customize default settings. FL Studio provides a range of default presets, but they may not always align with your personal preferences or workflow. However, by creating and saving your own custom presets, you can tailor the mixer to suit your specific needs.

To customize default presets, simply load the preset you want to modify, make the desired adjustments to the mixer parameters, and save it as a new preset. This way, every time you start a new project or open FL Studio, your customized presets will be readily available, offering a more personalized and efficient way to work.

Customizing default presets also allows you to create a consistent starting point for your projects. By saving your customized mixer presets as default, you ensure that every time you open FL Studio, you have a familiar setup that aligns with your preferred workflow. This streamlines your creative process and reduces the time spent on repetitive setup tasks.

In conclusion, optimizing your workflow with mixer presets provides numerous benefits, including saving time and effort, as well as customizing default presets. By utilizing these features in FL Studio, you can enhance your productivity, maintain consistency in your music production, and create a tailored environment that matches your unique creative needs. With the Save Mixer Preset Fl Studio, you can take full control of your mixer settings and streamline your music production process like never before.

Mastering Fl Studio Mixer Presets


Save time mastering FL Studio Mixer Presets by simply right-clicking on a mixer channel and selecting “Save mixer track state as. ” Choose a name and location for the preset with a. fst extension for easy recall and efficiency in your workflow.

Creating Customized Presets

Creating customized presets for the FL Studio mixer is a powerful way to streamline your workflow and achieve consistent results. With FL Studio’s extensive mixer features, you can save your preferred settings for individual channels or groups of channels and easily recall them for future projects.

To create a customized preset, simply right-click on the desired mixer channel and select “File” > “Save mixer track state as.” Choose an appropriate name and location for your preset file, which will have a .fst extension. By saving your mixer settings in this way, you can quickly load them whenever you need to, saving valuable time and effort.

Utilizing Third-party Presets

In addition to creating your own customized presets, you can also take advantage of third-party presets to enhance your mixing experience in FL Studio. These presets, created by experienced audio engineers and producers, can provide you with a wide range of professionally crafted settings that can be applied to your mixer channels with just a few clicks.

To utilize third-party presets, you can simply import them into your FL Studio project and apply them to the desired mixer channels. This allows you to experiment with different mixing styles and techniques without having to start from scratch. Whether you’re looking for a specific sound or trying to achieve a certain vibe in your mix, third-party presets can be a valuable resource to have in your toolbox.

When importing third-party presets, it’s important to ensure that they are compatible with the version of FL Studio you are using. Also, make sure to follow the instructions provided by the preset creator to achieve the intended results.

Save Mixer Preset: Unlock the Hidden Power of FL Studio!


Credit: www.youtube.com


Frequently Asked Questions For Save Mixer Preset Fl Studio


How Do I Save A Mixer Template In Fl Studio?


To save a mixer template in FL Studio, right-click on the mixer channel, choose File > Save mixer track state as. Name and save the preset file with a. fst extension.


How Do I Save A Mixer Channel Preset?


To save a mixer channel preset in FL Studio, right-click the channel and select “File > Save mixer track state as. ” Choose a name and location for the preset file with the. fst extension. For a mixer snapshot, click the snapshot icon in the toolbar and select “Save.


“


How Do I Save My Presets In Fl Studio?


To save presets in FL Studio, right-click on the mixer channel and select “File” > “Save Mixer Track State As. ” Name the preset and choose a location with a. fst extension. You can also save a mixer snapshot by clicking on the snapshot icon in the mixer toolbar and selecting “Save.


“


How Do I Export Mixer Settings In Fl Studio?


To export mixer settings in FL Studio, right-click on the mixer channel and select “File > Save mixer track state as. ” Give the preset a name and choose a location to save the file with a. fst extension. Alternatively, you can click on the snapshot icon in the mixer toolbar and select “Save” to save a mixer snapshot.


Conclusion


Understanding how to save mixer presets in FL Studio can significantly enhance workflow efficiency. By following the simple steps outlined, users can streamline their production process and save valuable time during music creation. Embracing these techniques can lead to a more organized and effective approach to managing mixer settings in FL Studio.

Categories
Archive

Tdr Vos Slickeq Vst Plugin: Master Your Music with Impeccable Sound

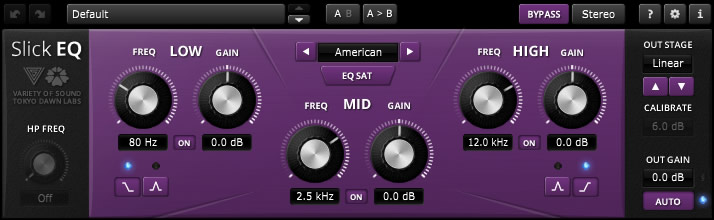
TDR VOS SlickEQ VST Plugin is a versatile mixing/mastering equalizer known for ease of use and impeccable sound quality. With its user-friendly interface and flexible options, it is a popular choice among audio professionals.
 

Tokyo Dawn Records developed this plugin, offering a range of features such as filter-bands and unique EQ models to enhance audio production. Whether you are a beginner or an experienced producer, TDR VOS SlickEQ provides the tools needed to achieve high-quality results in your music projects.


Its innovative design and performance make it a valuable asset for anyone looking to fine-tune their audio output.

Tdr Vos Slickeq Vst Plugin: Master Your Music with Impeccable Sound


Credit: www.facebook.com


Benefits Of Tdr Vos Slickeq Plugin


Experience the benefits of the TDR VOS SlickEQ VST plugin, designed for easy mixing and mastering. With its musical flexibility and impeccable sound, this plugin offers a user-friendly equalizer for all your audio needs.

Impeccable Sound Quality

VOS SlickEQ boasts top-notch sound quality, ensuring your audio projects are crisp and clear.

Musical Flexibility

Enjoy the versatility of TDR VOS SlickEQ, allowing you to fine-tune your sound with precision.

Ease Of Use

SlickEQ Plugin is user-friendly, making it easy for both beginners and professionals to navigate effortlessly.

Tdr Vos Slickeq Vst Plugin: Master Your Music with Impeccable Sound


Credit: www.tokyodawn.net


Comparing Slickeq Free & Gentleman’s Edition


TDR VOS SlickEQ offers both a Free and Gentleman’s Edition. The Free version includes essential EQ features, while the Gentleman’s Edition provides additional EQ styles and output saturation controls, offering more flexibility for mixing and mastering tasks. Both versions aim for ease of use and exceptional sound quality.

Feature Differences

TDR VOS SlickEQ Free and Gentleman’s Edition offer distinct features catering to varying user needs.

User Applications

SlickEQ Free appeals to entry-level users seeking a solid equalizer for basic mixing tasks. In contrast, the Gentleman’s Edition targets professionals demanding advanced EQ capabilities. The difference between SlickEQ Free and the Gentleman’s Edition lies in the feature set. While SlickEQ Free provides standard EQ functionality, the Gentleman’s Edition enhances the experience with additional features tailored for power users. This includes sophisticated saturation controls and enhanced EQ modes for refined audio manipulation. For novice users or those with basic requirements, SlickEQ Free delivers a no-frills experience in a user-friendly package. Meanwhile, the Gentleman’s Edition caters to audio engineers and professionals seeking customization and precision in their equalization process. Flexible and musically inclined, TDR VOS SlickEQ plugins satisfy a wide range of audio production needs. Whether opting for the Free version for essential tasks or diving into the Gentleman’s Edition for advanced control, both plugins promise sonic excellence in your mixing endeavors.

Use Cases And Practical Applications

The TDR VOS SlickEQ VST plugin is a versatile tool that offers a wide range of applications in audio production. Whether you are working on mixing and mastering or enhancing individual audio tracks, this plugin provides powerful features to elevate the quality of your audio projects.

Mixing And Mastering

When it comes to mixing and mastering, the TDR VOS SlickEQ plugin can be a game-changer. It offers precise control over the audio frequency spectrum, allowing you to sculpt the sound to perfection. With its intuitive interface and musical flexibility, it is a valuable asset for achieving balanced and professional mixes.

Enhancing Audio Tracks

For enhancing audio tracks, the TDR VOS SlickEQ VST plugin excels in delivering impeccable sound quality. Whether you need to boost the presence of vocals, add warmth to instruments, or tame harsh frequencies, this plugin offers a variety of tools to enhance the character and clarity of your audio recordings.

Tdr Vos Slickeq Vst Plugin: Master Your Music with Impeccable Sound


Credit: www.tokyodawn.net


User Testimonials And Reviews


Explore authentic user testimonials and reviews for the TDR VOS SlickEQ VST Plugin. Discover a mixing/mastering equalizer that harmoniously blends musical flexibility with outstanding sound quality. Gain insights from real users to elevate your audio production experience.

Professional Opinions

When it comes to the TDR VOS SlickEQ VST Plugin, industry professionals have been raving about its performance and versatility. Here are some of the professional opinions and reviews:

Review Source Review Excerpt
Joe’s Cave – Video & Audio Tutorials and Reviews “The TDR VOS SlickEQ Free & Gentleman’s Edition is a game-changer in terms of EQ plugins. The different EQ styles and models offer endless possibilities for shaping your sound. The EQ matching feature is also a standout, making it easy to match audio levels. Overall, this plugin is a must-have for any audio engineer.”
Modern Mixing “TDR VOS SlickEQ is a top-notch mixing and mastering equalizer. The mid frequency control allows for precise adjustments, while the EQ saturation adds warmth and character to the sound. The Auto Gain mode is a handy tool for maintaining balanced levels. This plugin definitely stands out from the competition.”
apbeat “The TDR VOS SlickEQ plugin is an exceptional equalizer with a user-friendly interface. The mellow and EQ saturation controls provide a unique sound signature, while the tutorial videos help in understanding the plugin’s features. It’s a free plugin that delivers professional results.”

User Experiences

Users of the TDR VOS SlickEQ VST Plugin have also shared their positive experiences. Here are some user testimonials and reviews:

  • “I’ve been using the TDR VOS SlickEQ plugin for a while now, and it has become an essential tool in my mixing process. The flexibility of the EQ styles and the ability to match audio levels has made my workflow more efficient.” – John, Audio Engineer
  • “As a home studio producer, I can confidently say that the TDR VOS SlickEQ is one of the best free plugins out there. The EQ models and saturation controls help me achieve a polished sound without breaking the bank.” – Sarah, Music Producer
  • “I’ve tried many EQ plugins, but the TDR VOS SlickEQ stands out in terms of usability and sound quality. The non-linearity options and different output stages offer interesting textures, giving my mixes a unique character.” – Michael, Sound Designer

These user testimonials and professional opinions highlight the effectiveness and versatility of the TDR VOS SlickEQ VST Plugin. Whether you’re a seasoned audio engineer or a home studio producer, this plugin is worth considering for its ease of use, musical flexibility, and impeccable sound.


Frequently Asked Questions On Tdr Vos Slickeq Vst Plugin


What Is Slick Eq?


TDR VOS SlickEQ is a user-friendly mixing/mastering equalizer known for its musical flexibility and excellent sound quality.


What Is Tdr Nova Plugin?


TDR Nova is a dynamic equalizer plugin with flexible filtering and sound precision.


What Is Tdr Vos Slickeq Plugin?


TDR VOS SlickEQ is a mixing/mastering equalizer designed for ease of use, musical flexibility, and impeccable sound quality.


How Does Tdr Vos Slickeq Work?


TDR VOS SlickEQ offers a range of EQ style modes, EQ models, and a lowpass filter to shape your audio. It also features matching audio levels and a linear EQ setting for precise control.


Conclusion


TDR VOS SlickEQ VST plugin stands out for its ease of use, musical flexibility, and impeccable sound quality. With a variety of filter bands and output stages, this plugin provides subtle yet effective textures for your mixing and mastering needs.


Whether you’re an audio professional or enthusiast, this plugin offers excellent value and performance.

Categories
Archive

Fl Studio Price: Unlocking Affordable Beats and Limitless Creativity

FL Studio prices range from $99 to $899 based on the edition and features included. FL Studio is a popular digital audio workstation (DAW) used by music producers worldwide.


With a user-friendly interface and versatile tools, FL Studio offers a range of pricing options to cater to different user needs and budgets. Whether you are a beginner looking to start producing music or a professional seeking advanced features, FL Studio provides a range of pricing tiers to suit your requirements.


Let’s explore the various price points and editions of FL Studio to help you make an informed decision on selecting the best option for your music production needs.


Credit: uk.linkedin.com


The Basics Of Fl Studio

FL Studio is a popular digital audio workstation that offers a wide array of tools and features for music production. Let’s dive into the key aspects of FL Studio.

User Interface

The FL Studio user interface is user-friendly and intuitive, making it easy for both beginners and experienced producers to navigate.

Key Features

  • Supports a wide range of audio formats.
  • Comes with a variety of virtual instruments and plugins.
  • Allows for seamless audio recording and editing.
  • Offers a powerful mixer with customizable effects.

FL Studio Price is competitive, with different versions catering to the needs of all types of users. Whether you’re a hobbyist or a professional producer, FL Studio has something to offer.

Understanding Fl Studio Pricing Tiers

Fl Studio Fruity Edition

FL Studio Fruity Edition is ideal for beginners

Fl Studio Producer Edition

Fl Studio Signature Bundle

The ultimate package with extensive plugins and tools

Comparing Features And Pricing

When looking to purchase music production software, one of the most important considerations is the comparison of features and pricing. Making an informed decision between different options available is crucial for getting the best value for money.

Feature Variations

FL Studio offers multiple versions, each with varying features to cater to different user needs. The Fruity Edition, Producer Edition, and Signature Bundle are tailored to different levels of music production expertise. While the Fruity Edition is ideal for beginners, the Producer Edition and Signature Bundle offer advanced tools and instruments, making them suitable for professional musicians and producers.

Each version comes with a set of unique features, including different plugins, audio editing capabilities, and mixing tools. It’s important to carefully compare these features to determine which version offers the tools necessary for your specific music production requirements.

Value For Money

When considering the pricing of FL Studio, it’s essential to evaluate the value for money offered by each version. The Fruity Edition provides an economical entry point for beginners, but it may lack some advanced features found in the higher-tier versions. On the other hand, the Producer Edition and Signature Bundle offer a comprehensive set of features and plugins which justify their higher price points for more experienced users.

It’s crucial to analyze the pricing in relation to the features included, ensuring that the chosen version provides the necessary tools for your music production endeavors while offering good value for the investment.

Fl Studio Price: Unlocking Affordable Beats and Limitless Creativity


Credit: www.image-line.com


Unlocking Creativity With Fl Studio

Sample Library

FL Studio offers a vast and diverse sample library that serves as a treasure trove for musicians and producers alike. The extensive collection of samples includes everything from drums to strings, synths to vocals, and everything in between. With just a few clicks, users can effortlessly browse through thousands of high-quality samples, allowing them to experiment with different sounds and genres.

But it doesn’t stop there; FL Studio also allows you to import your own samples, giving you endless possibilities to create unique and personalized tracks. Whether you want to add some acoustic guitar strums or incorporate exotic percussions, the sample library in FL Studio has got you covered.

Midi Controller Integration

To enhance your creativity further, FL Studio seamlessly integrates with MIDI controllers. Whether you prefer the tactile experience of playing keys or the precision of using drum pads, FL Studio allows you to connect and control your virtual instruments and effects with ease.

With MIDI controller integration, you can take your music production to the next level. Easily record melodies, harmonies, and chords, or lay down intricate drum patterns – all in real-time. The intuitive mapping of MIDI controllers in FL Studio ensures a seamless workflow, giving you the freedom to express your musical ideas effortlessly.

Moreover, the MIDI learn feature allows you to assign any parameter from FL Studio to any knob, button, or fader on your MIDI controller. This customization enables you to have complete control over your music and unlocks a whole new level of creative expression.

Sample Library MIDI Controller Integration
Extensive collection of high-quality samples Seamless integration with MIDI controllers
Import your own samples for unlimited possibilities Easily record melodies, chords, and drum patterns in real-time
Experiment with different sounds and genres MIDI learn feature for complete customization

Unlocking your creativity with FL Studio is an exhilarating experience. The powerful combination of the sample library and MIDI controller integration provides you with the tools you need to bring your musical ideas to life. Whether you’re a beginner looking to dive into music production or a seasoned artist ready to explore new horizons, FL Studio is the perfect companion to unleash your creativity and turn your imagination into reality.


Making The Right Investment

Are you considering purchasing FL Studio but unsure about which option is best for you? Making the right investment is crucial for any aspiring musician or producer. In this article, we will explore two important factors to consider when buying FL Studio: Rookie vs. Pro and Upgrading vs. Full Purchase. By understanding these aspects, you can make an informed decision that aligns with your needs and goals.

Rookie Vs. Pro

When it comes to FL Studio, there are options available for both rookies and professionals. If you’re just starting, it’s essential to consider the features you’ll need to develop your skills. FL Studio’s Fruity Edition offers a great starting point, giving beginners access to the powerful features necessary for creating their own music. With a user-friendly interface, this edition is perfect for those who are new to music production.

If you’re a more advanced user or a professional producer, the Producer Edition or Signature Bundle might be more suitable for you. These editions provide additional features such as advanced audio recording and editing tools, time-stretching and pitch-shifting capabilities, and access to a vast library of plugins and instruments. They are designed to meet the needs of experienced users, allowing them to take their productions to the next level.

Upgrading Vs. Full Purchase

If you’re already using FL Studio but looking for more advanced features, you may wonder whether upgrading or making a full purchase is the right choice. FL Studio offers seamless upgrade options that allow you to unlock additional features and plugins within your existing version. This way, you can save money while still enjoying the benefits of new functionalities.

On the other hand, if you are using an older version of FL Studio or looking to access all the features and plugins, a full purchase is the way to go. Upgrading to the latest edition ensures you have all the tools necessary to create professional-grade music. Additionally, purchasing the latest edition also grants you access to free updates, ensuring you stay up-to-date with the latest innovations in music production.

When considering whether to upgrade or make a full purchase, it’s important to evaluate your current needs and future aspirations. Assessing your goals and objectives will enable you to make an investment that aligns with your long-term growth as a musician or producer.

Conclusion

In conclusion, when it comes to choosing the right version of FL Studio, understanding the differences between Rookie vs. Pro and Upgrading vs. Full Purchase is crucial. The right investment will enable you to maximize your creativity and unlock all the tools and features necessary to produce high-quality music. So, assess your needs, evaluate your options, and make a decision that propels you toward your musical goals.

Fl Studio Price: Unlocking Affordable Beats and Limitless Creativity


Credit: www.sweetwater.com


Frequently Asked Questions For Fl Studio Price


How Much Does Fl Studios Cost?


FL Studio costs $99 to $899, depending on the edition and additional plugins.


Is Fl Studio 100% Free?


No, FL Studio is not 100% free. It offers a free trial version with limitations.


Is Fl Studio A One Time Payment?


FL Studio is not a one-time payment; it offers both one-time purchase and subscription options.


Should I Buy Fl Studio As A Beginner?


Yes, FL Studio is beginner-friendly, with a user-friendly interface and ample tutorials available.


Conclusion


Choosing the right FL Studio package is essential for your music production needs. As you navigate the various price points, consider the features and tools that will best support your creative process. Finding a balance between cost and functionality ensures that you make a sound investment in your music production journey.

Categories
Archive

Fl Studio 20 : The Ultimate Music Production Powerhouse

FL Studio 20 is a popular digital audio workstation for music production, known for its versatile features and user-friendly interface. With powerful tools for recording, editing, and mixing audio, it’s favored by both beginners and professionals alike.


FL Studio 20 offers a wide range of virtual instruments, effects, and plugins, allowing users to create high-quality music in various genres. Its intuitive workflow makes it easy to compose, arrange, and produce music efficiently, making it a top choice in the music production community.


Whether you’re a novice musician or a seasoned producer, FL Studio 20 provides all the necessary tools to bring your musical ideas to life.

Fl Studio 20  : The Ultimate Music Production Powerhouse


Credit: ntrack.com


Key Features


FL Studio 20 offers a wide range of features, including a flexible interface, powerful MIDI capabilities, advanced audio editing tools, and a variety of virtual instruments and effects. Its innovative workflow and user-friendly design make it a popular choice for music producers and artists.

FL Studio 20 offers a range of key features that make it a popular choice among music producers. Let’s take a closer look at some of the highlight functionalities:

User Interface

The user interface of FL Studio 20 is intuitive and user-friendly, making it easy for beginners to start creating music quickly.

Audio Recording

With its seamless audio recording capabilities, FL Studio 20 allows users to capture high-quality sound directly into the software.

Midi Sequencing

The MIDI sequencing feature in FL Studio 20 enables users to easily create and edit intricate musical compositions with precision.

Advanced Tools

Within FL Studio 20, users have access to a plethora of advanced tools that elevate their music production capabilities.

Mixing And Effects

FL Studio 20’s mixing capabilities allow users to blend and fine-tune audio tracks effortlessly.

  • Create dynamic mixtures with precise control.
  • Apply various effects to enhance audio quality.
  • Experiment with different mixing techniques.

Automation And Editing

With FL Studio 20’s automation features, users can streamline their workflow and add creative flair to their compositions.

  1. Automate volume, panning, and other parameters.
  2. Edit audio clips with precision and ease.
  3. Enjoy efficient editing tools for seamless production.

Innovative Functionality

When it comes to music production software, FL Studio 20 is known for its innovative functionality that sets it apart from its competitors. From advanced time-stretching and pitch-shifting capabilities to pattern-based sequencing, FL Studio 20 offers a wide range of cutting-edge features for music producers and creators.

Time-stretching And Pitch-shifting

One of the standout features of FL Studio 20 is its advanced time-stretching and pitch-shifting functionalities. With the ability to manipulate the tempo and pitch of audio clips without affecting their quality, producers have unparalleled flexibility in creating unique soundscapes and compositions. FL Studio 20’s time-stretching and pitch-shifting tools empower users to experiment with different musical ideas and elevate their productions to new heights.

Pattern-based Sequencing

FL Studio 20’s pattern-based sequencing is a game-changer for music producers looking to streamline their workflow. By organizing musical patterns and arrangements into a visually intuitive interface, users can easily create complex compositions with a simple drag-and-drop approach. This innovative feature enables effortless experimentation and iteration, allowing producers to focus on the creative process without being hindered by technical complexities.

Fl Studio 20  : The Ultimate Music Production Powerhouse


Credit: unison.audio


Workflow Optimization

When it comes to music production software, FL Studio 20 is a popular choice among professionals and amateurs alike. One key aspect that sets FL Studio 20 apart is its focus on workflow optimization. By streamlining the creative process, FL Studio 20 allows users to be more productive, efficient, and creative. In this blog post, we will explore two essential aspects of workflow optimization in FL Studio 20: Templates and Presets, as well as Browser and Organization Tools.

Templates And Presets

No matter if you’re a beginner or an experienced producer, starting a project from scratch can be time-consuming and overwhelming. FL Studio 20 offers a wide range of templates and presets to help you kickstart your projects with ease. These pre-configured settings save you valuable time and allow you to focus on the creative aspects of music-making.

With FL Studio’s selection of templates, you can choose from various genres, such as hip-hop, EDM, or pop, and get started right away. Each template is meticulously crafted to include essential instruments, effects, and mixing settings specific to the chosen genre. Whether you’re a beatmaker or a sound designer, these templates provide a solid foundation for your creative endeavors.

Furthermore, FL Studio 20 provides an extensive library of presets for its built-in plugins, such as synthesizers, equalizers, and effects. These presets offer a starting point for creating unique sounds without having to dive deep into intricate sound design. By selecting a preset that resonates with your musical vision, you can quickly tweak and customize it to suit your needs.

Browser And Organization Tools

Organizing your files, sounds, and plugins is vital for an efficient music-making process. FL Studio 20’s browser and organization tools make this task seamless and hassle-free. The browser allows you to navigate through your files, samples, and plugins effortlessly, making it easy to find what you need when you need it.

With FL Studio’s tagging system, you can add custom tags to your files, samples, and plugins for easy categorization. This feature enables you to create personalized organizational structures to suit your workflow. Additionally, the search function within the browser allows for quick and precise searching, ensuring you spend less time digging through files and more time crafting your music.

Moreover, FL Studio 20’s project organization features enable you to arrange patterns, tracks, and mixer channels in a logical and visually pleasing manner. With the ability to color-code, group, and arrange elements, you can create a clear and structured workflow tailored to your preferences. These tools not only enhance your productivity but also provide a visually intuitive interface that helps you stay focused on what matters most – making music.


Collaboration And Sharing

Collaboration and sharing are key aspects of any music production software, and FL Studio 20 excels in this area. With its intuitive interface and comprehensive set of features, it allows artists and producers to seamlessly collaborate with other musicians and easily share their work with the world.

Plug-in Support

One of the standout features of FL Studio 20 is its extensive plug-in support. Whether you’re looking for virtual instruments, effects processors, or other audio tools, FL Studio has got you covered. With its support for VST and AU plugins, you can easily integrate third-party software into your projects, expanding your creative possibilities.

FL Studio’s plug-in support also allows for seamless collaboration with other artists. You can easily share your project files with fellow musicians who may be using different DAWs, ensuring that everyone can contribute their unique expertise and create stunning music together. The flexibility of plug-in support makes FL Studio a favorite among producers and artists alike.

Export And Integration

When it comes to sharing your music with the world, FL Studio 20 offers a wide range of export and integration options. You can export your tracks in different formats including MP3, WAV, and MIDI, allowing you to share your music on various platforms and devices with ease.

Beyond traditional export options, FL Studio also offers seamless integration with popular streaming platforms and social media. With just a few clicks, you can directly upload your music to platforms like SoundCloud and YouTube, reaching a wider audience and gaining exposure for your work. FL Studio’s integration capabilities make it a go-to choice for artists who want to share their music quickly and efficiently.

Fl Studio 20  : The Ultimate Music Production Powerhouse


Credit: www.sonicacademy.com


Frequently Asked Questions For Fl Studio 20


Can You Get Fl Studio 20 For Free?


No, FL Studio 20 is not available for free. It is a paid software for music production.


How Expensive Is Fl Studio 20?


FL Studio 20 pricing varies based on the edition starting from $99 for the Fruity Edition.


Will Fl Studio 21 Be Free?


FL Studio 21 is not free. It is a paid software.


Is Fl Studio 100% Free?


FL Studio is not 100% free, but it does offer a free trial version. The trial version has limitations, and to access all features, you need to purchase the full version.


Conclusion


In a nutshell, FL Studio 20 is a versatile and powerful music production software that offers a wide range of tools and features for music creators. With its user-friendly interface and comprehensive functionality, it is a valuable asset for beginners and professionals alike.


Whether you’re making beats or recording vocals, FL Studio 20 has got you covered.

Categories
Archive

How to Undo in Fl Studio: Essential Techniques for Maximum Efficiency

To undo in FL Studio, simply press Ctrl+Z on your keyboard. This action will revert your last change.


FL Studio is a popular digital audio workstation utilized by music producers around the world. With its diverse range of features and intuitive interface, users can create professional-level music easily. However, mistakes are inevitable during the creative process. Knowing how to undo is crucial for maintaining productivity and workflow efficiency.


Whether adjusting a parameter, deleting a track, or editing MIDI notes, the Ctrl+Z shortcut in FL Studio allows users to quickly backtrack and correct errors. By mastering this simple yet powerful function, producers can focus on their creativity without worrying about making mistakes.


Fl Studio Interface Basics


Learn the basics of the FL Studio interface to effectively utilize its “Undo” function. Navigate the interface to undo actions by using the keyboard shortcut or selecting “Edit” and then “Undo” from the menu. Mastering this feature allows for seamless corrective actions during music production.

Navigation

In FL Studio, navigation across different sections is vital for seamless workflow.

  • Browser Panel: Holds samples, plugins, and presets.
  • Channel Rack: Where instruments and audio clips reside.
  • Playlist: Arranges various patterns into a song format.
  • Mixer: Adjusts volume, effects, and panning of tracks.

Tool Selection

Choosing the right tool in FL Studio can enhance your editing capabilities.

  1. Selection Tool: Highlight and manipulate specific parts of your project.
  2. Draw Tool: Create MIDI notes or automation with precision.
  3. Pencil Tool: Insert notes or draw automation freely.
  4. Paint Tool: Easily paint patterns in the Piano Roll.

“` This SEO-optimized content provides an engaging overview of Fl Studio Interface Basics, focusing on Navigation and Tool Selection using HTML syntax for WordPress.

How to Undo in Fl Studio: Essential Techniques for Maximum Efficiency


Credit: www.image-line.com


Understanding Undo Functionality

Understanding Undo Functionality in FL Studio is crucial for maximizing your workflow efficiency. Familiarizing yourself with how undo works can save you time and effort during your music production process.

Applying Undo

To activate Undo in FL Studio, simply press Ctrl + Z on your keyboard. This command allows you to revert the last action you performed within the software.

Limitations

While Undo is a valuable tool, it’s essential to note its limitations. In FL Studio, the number of steps you can undo may be restricted based on your project settings and system capabilities.

Utilizing History Panel

In FL Studio, the History Panel is a powerful feature that allows you to undo and redo changes made to your project. By utilizing this feature, you can easily navigate through the history of your project and revert to previous states. Understanding how to effectively use the History Panel can greatly improve your workflow and make it easier to experiment with different ideas without the fear of irreversible changes.

Accessing History Panel

To access the History Panel in FL Studio, you can simply locate and click on the ‘History’ button located in the top toolbar. Alternatively, you can press Ctrl+Alt+Z on your keyboard to quickly open the History Panel. Once accessed, you will be able to view a list of the recent actions performed in your project, allowing you to easily track and undo changes as needed.

Navigating History

Once the History Panel is open, you can navigate through the list of actions by using the scrollbar on the right-hand side. This allows you to quickly locate and select a specific point in your project’s history that you’d like to revert to. By clicking on a specific action in the History Panel, you can instantly undo or redo the changes, making it easy to experiment and fine-tune your project without the fear of irreversible edits.

Customizing Undo Settings

Customizing Undo Settings is an important aspect of using FL Studio efficiently. By adjusting the number of undos and configuring memory usage, you can tailor the undo feature to fit your specific workflow. In this section, we will explore how to make these customizations to enhance your FL Studio experience.

Adjusting Number Of Undos

By default, FL Studio allows you to undo up to 32 actions. However, you can adjust this number to better suit your needs. To do this:

  1. Click on ‘Options’ in the toolbar at the top of the screen
  2. From the drop-down menu, select ‘General Settings’
  3. In the General Settings window, locate the ‘Undo Steps’ option
  4. Adjust the number using the provided slider. Increase it if you require more undos, or decrease it if you prefer fewer.
  5. Click ‘Accept’ to save your changes and exit the General Settings window

By customizing the number of undos, you can ensure that you have enough steps to backtrack when needed, or reduce unnecessary clutter in your undo history.

Configuring Memory Usage

FL Studio also allows you to configure the memory usage specifically for the undo feature. This ensures that the undo history does not excessively consume system resources. To configure memory usage:

  1. Again, click on ‘Options’ in the toolbar at the top of the screen
  2. Select ‘General Settings’ from the drop-down menu
  3. In the General Settings window, find the ‘Undo/Memory’ section
  4. Under this section, you will see an option to specify the ‘Maximum undo steps’ and ‘Maximum memory per undo step’
  5. Adjust these values based on your system’s capabilities and your desired performance
  6. Remember to find a balance between the number of undos and the memory usage to optimize FL Studio’s performance
  7. Click ‘Accept’ to save your changes

By configuring memory usage, you can optimize the undo feature to work seamlessly with your computer’s resources, ensuring efficient workflow and preventing any unnecessary slowdowns.

Best Practices For Undo In Fl Studio

When working in FL Studio, it’s crucial to have a strong understanding of the undo feature. This allows you to revert any changes you’ve made, giving you the freedom to experiment and refine your creative process. In this section, we’ll explore the best practices for using the undo feature effectively in FL Studio.

Workflow Optimization

To optimize your workflow in FL Studio, it’s essential to make the most of the undo feature. Here are some tips to help you work efficiently:

  1. Save regularly: Before making any major changes, it’s important to save your project. This way, if you make a mistake or want to backtrack, you can always revert to a previous version.
  2. Use keyboard shortcuts: FL Studio offers a range of keyboard shortcuts for undoing and redoing actions. These shortcuts can save you valuable time and help streamline your workflow. Familiarize yourself with these shortcuts to increase your productivity.
  3. Utilize the Step Sequencer: The Step Sequencer in FL Studio allows you to easily create and edit patterns. If you make a mistake or want to try a different variation, you can simply undo or redo your actions. This versatility enables you to experiment without the fear of permanently altering your composition.

Avoiding Overcomplication

One common mistake when using the undo feature in FL Studio is overcomplicating your workflow. Here are a few strategies to avoid unnecessary complications:

  • Think before you undo: Before undoing any action, consider the potential consequences. Undoing certain actions may have a domino effect, affecting other elements of your project. Be mindful of the overall impact before proceeding.
  • Limit the number of undos: While the undo feature in FL Studio is incredibly useful, relying too heavily on it can lead to confusion and a cluttered project. Only undo changes that are absolutely necessary, and try to find alternative solutions whenever possible.
  • Backup your files: In addition to using the undo feature, it’s crucial to regularly back up your FL Studio project files. This way, if you reach a point where undoing is no longer a viable option, you can always revert to a previous version of your project.
How to Undo in Fl Studio: Essential Techniques for Maximum Efficiency


Credit: zapier.com


How to Undo in Fl Studio: Essential Techniques for Maximum Efficiency


Credit: www.amazon.com


Frequently Asked Questions On How To Undo In Fl Studio


How Do You Undo And Undo In Fl Studio?


To undo in FL Studio, press “Ctrl+Z” on your keyboard. To redo, press “Ctrl+Y. ” It’s a simple shortcut that helps with editing.


How Do I Undo A Delete In Fl Studio Mac?


To undo a delete in FL Studio Mac, simply press Command + Z on your keyboard.


How Do I Undo A Cut In Fl Studio?


To undo a cut in FL Studio, simply press “Ctrl” + “Z” on your keyboard. This action will reverse the cut operation and restore the audio or data that was removed.


How Do I Go Back More Than Once In Fl Studio?


To go back multiple times in FL Studio, simply use the Undo feature (Ctrl + Z) repeatedly until you reach the desired step.


Conclusion


Mastering the undo feature in FL Studio is crucial for seamless music production. By following the step-by-step guide provided, you can effectively utilize this function to undo and redo actions, preventing any mishaps and enhancing your workflow. Remember, practice makes perfect, so keep experimenting and honing your skills.


Categories
Archive

Fl Studio Mobile : Unlock Your Music’s Potential

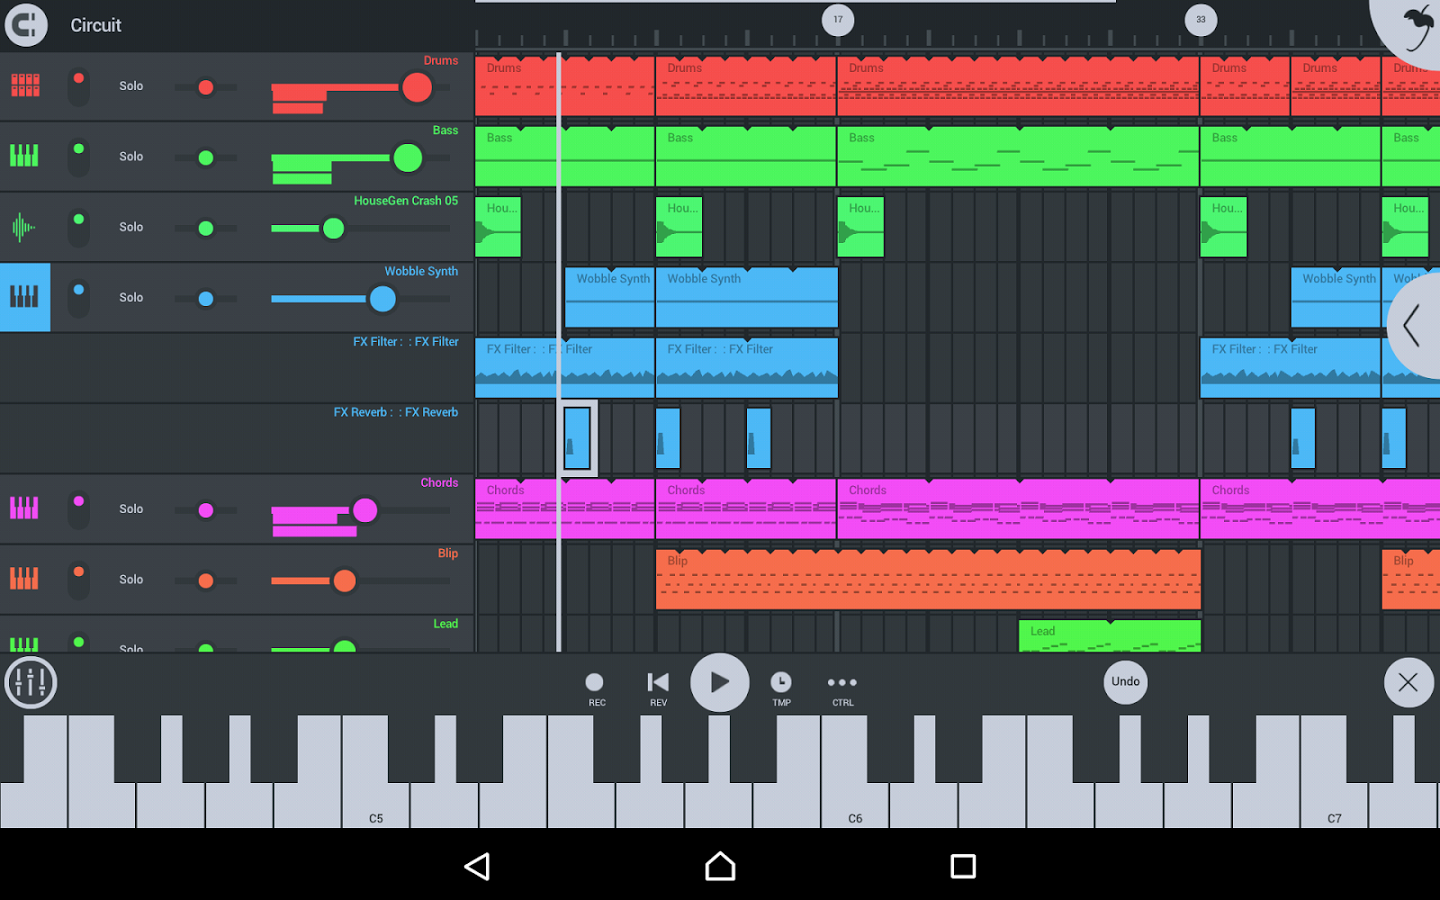
Fl Studio Mobile is a powerful music production app for creating and editing music on-the-go. It offers a wide range of features including virtual instruments, audio recording, and high-quality effects.


Whether you are a beginner or a seasoned musician, Fl Studio Mobile provides a user-friendly interface and professional tools to help you unleash your creativity. With its intuitive controls and seamless workflow, you can easily compose, record, arrange, and mix your tracks with precision and ease.


Compatible with both iOS and Android devices, Fl Studio Mobile allows you to produce music anytime, anywhere. Whether you are a songwriter, beatmaker, or producer, this mobile app is a valuable tool to bring your musical ideas to life.

Fl Studio Mobile  : Unlock Your Music's Potential


Credit: www.image-line.com


Unlock Your Music’s Potential

With FL Studio Mobile, you have the power to bring out the full potential of your music creations. Whether you are a budding musician or a seasoned producer, this versatile mobile app opens up a world of possibilities for crafting high-quality tracks on the go.

Introduction

FL Studio Mobile is a feature-packed music production app that allows you to harness the power of a fully-fledged digital audio workstation right from your mobile device. This innovative software empowers you to create, edit, and mix music with precision and ease.

  • Intuitive Interface: Easily navigate through the user-friendly interface for seamless music production.
  • Flexible Editing Tools: Fine-tune your tracks with a range of editing tools for precision control over your music.
  • High-Quality Sound Library: Access a vast library of high-quality sounds and samples to enhance your compositions.
Feature Description
Diverse Instruments Explore a wide array of virtual instruments to add depth and creativity to your music.
Sequencer and Mixer: Effortlessly arrange and mix your tracks with the built-in sequencer and mixer tools.
Export Options: Export your completed tracks in various formats to share them with the world.
  • Real-Time Effects: Apply real-time effects and filters to enhance your tracks on the fly.
  • Project Sharing: Collaborate with others by easily sharing your projects for seamless teamwork.
Fl Studio Mobile  : Unlock Your Music's Potential


Credit: www.image-line.com


Features Of Fl Studio Mobile

FL Studio Mobile is a powerful music production app designed for on-the-go creators. Let’s delve into its impressive features:

User Interface

The user-friendly interface of FL Studio Mobile makes music production effortless for beginners and professionals alike.

Music Production Tools

  • Diverse selection of virtual instruments and FX for creating high-quality tracks.
  • Sequencer with step mode for precise beat-making.
  • Mixer with per-track mute, solo, effect bus, pan, and volume adjustment.

Integration With Fl Studio

  1. Seamless compatibility with FL Studio on desktop for transferring projects back and forth.
  2. Synchronization of projects across devices using Wi-Fi.


Fl Studio Mobile  : Unlock Your Music's Potential


Credit: routenote.com


Frequently Asked Questions Of Fl Studio Mobile


Is Fl Studio Mobile Worth It?


Yes, FL Studio Mobile is worth it for music production on the go. Its robust features and user-friendly interface make it a valuable investment for musicians. It allows for seamless creativity and production.


Is Fl Studio Mobile The Same As Fl Studio?


FL Studio Mobile is a mobile version of FL Studio but with some limitations. It allows you to create music on your smartphone or tablet, albeit with fewer features compared to the full desktop version.


Can You Use Fl Studio On Ipad?


Yes, you can use FL Studio on an iPad. FL Studio is available as a mobile app for iPad devices, allowing you to create music on the go.


Is Fl Studio Really Free?


No, FL Studio is not completely free; there is a free trial version available.


Conclusion


FL Studio Mobile is a powerful music creation app with a user-friendly interface for both beginners and professionals. Its extensive range of features and compatibility with various devices make it a versatile tool for music production. With its intuitive design and numerous editing options, FL Studio Mobile is a must-have for any aspiring musician or producer.

Categories
Archive

How to Loop in FL Studio: Master the Art of Seamless Beats

To loop in FL Studio, set your desired loop markers and press Ctrl + L. FL Studio will automatically loop the selected area. FL Studio is a popular digital audio workstation that offers a variety of features for music production.


Looping is a fundamental technique used by producers to repeat a section of a song seamlessly. By mastering the art of looping in FL Studio, you can enhance your music production workflow and create dynamic tracks with ease. We will explore how to loop in FL Studio and discuss some tips and tricks to take your music production skills to the next level.


Let’s dive in and unravel the secrets of looping in FL Studio for a seamless music creation experience.

How to Loop in FL Studio: Master the Art of Seamless Beats


Credit: www.producerloops.com


Getting Started With Fl Studio


Discover how to easily create loops in FL Studio with this beginner-friendly guide. Learn the step-by-step process for looping and start producing your own music in no time. Master the art of looping and take your music production skills to the next level in FL Studio.

Choosing The Right Version

When starting with FL Studio, choose the version that suits your needs.

Understanding The User Interface

Get familiar with the FL Studio user interface to navigate smoothly.

FL Studio, a popular digital audio workstation, is your gateway to creating music. To get going, follow these essential steps in Choosing the Right Version and Understanding the User Interface.

Choosing The Right Version

  • Assess your music production needs
  • Choose between FL Studio Fruity Edition, Producer Edition, or Signature Bundle
  • Select the version with features that align with your goals

Understanding The User Interface

  1. Explore the main menu for essential functions
  2. Learn the layout of the Channel Rack, Playlist, and Mixer
  3. Understand tools like Piano Roll and Browser for a seamless workflow
How to Loop in FL Studio: Master the Art of Seamless Beats


Credit: www.adsrsounds.com


Understanding Looping In Music Production

In music production, looping is a fundamental technique that allows producers to repeat a section of sound seamlessly.

What Are Loops?

Loops are short sections of music that can be repeated to create a continuous sound pattern.

The Importance Of Looping In Fl Studio

Looping in FL Studio streamlines the music creation process, enabling quick arrangement and experimentation.

Creating Seamless Beats In Fl Studio

FL Studio’s flexibility and robust features make it a go-to software for creating seamless beats. One of the essential techniques in achieving this is mastering the art of looping. With the ability to select, import, arrange, and layer loop samples, FL Studio gives you the tools to craft dynamic, cohesive beats that flow effortlessly.

Selecting And Importing Loop Samples

When crafting a seamless beat in FL Studio, the first step is selecting and importing loop samples. Navigate to your library of loops and carefully choose samples that complement each other. Look for those that seamlessly align with your desired beat’s genre and tempo. Import these samples into FL Studio by simply dragging them into the software’s interface. Ensure that the loop samples are of high quality and well-suited for your project, as this contributes significantly to the final output of your beat.

Arranging And Layering Loops

Once you have imported the loop samples, the next step is arranging and layering them to create a cohesive beat. Begin by organizing the samples in the playlist section, considering the desired structure and flow of the beat. Layer the loops creatively, ensuring they complement each other and add depth to the overall sound. Experiment with cutting, slicing, and overlapping the loops to create a unique blend of sounds. This process allows you to tailor the loops to fit seamlessly into your beat, ultimately producing a polished and professional sound.

Advanced Looping Techniques


Unlock the full potential of FL Studio with advanced looping techniques for seamless music production. Learn how to create intricate loops effortlessly and elevate your music to the next level. Master the art of looping in FL Studio and unleash your creativity like never before.

Manipulating Loop Tempo And Pitch

Manipulating loop tempo and pitch can greatly enhance your music production in FL Studio. With these advanced looping techniques, you can take your loops to a whole new level. To manipulate loop tempo in FL Studio, follow these steps:

  1. First, select the loop you want to manipulate by clicking and dragging the loop onto the playlist.
  2. Then, right-click on the loop item and select ‘Edit’ from the menu.
  3. In the Channel Settings window, you will see a ‘Time stretching’ section. Here, you can change the tempo of the loop by adjusting the ‘Time’ knob.
  4. By increasing or decreasing the tempo, you can speed up or slow down the loop to fit the desired tempo of your project.

Similarly, you can also manipulate loop pitch using the following steps:

  1. Start by selecting the loop you want to manipulate and open the Channel Settings window by right-clicking on the loop item and selecting ‘Edit’.
  2. In the Channel Settings window, you will find a ‘Pitch’ section. Here, you can adjust the pitch of the loop by dragging the ‘Pitch’ knob up or down.
  3. Experiment with different pitch settings to create unique variations of your loop and make it fit harmonically with the rest of your track.

Adding Effects And Automation

Adding effects and automation to your loops can bring them to life and add depth and interest to your music. FL Studio offers a wide range of effects and automation options to help you achieve the desired sound. To add effects to your loops in FL Studio:

  1. Select the loop you want to add effects to and open the Mixer window by clicking on the mixer icon on the toolbar.
  2. In the Mixer window, you will see a series of slots labeled ‘FX’. Click on an empty slot to add an effect to the loop.
  3. A list of available effects will appear. Choose the one that best suits your sound and adjust the settings to your liking.
  4. You can add multiple effects to a loop by repeating these steps.

Automation allows you to control and manipulate parameters of your loops over time. To automate an effect parameter in FL Studio:

  1. In the Mixer window, right-click on the knob or slider you want to automate.
  2. Select ‘Create Automation Clip’ from the menu.
  3. A new automation clip will be created in the Playlist window. You can now draw or record automation data to control the effect parameter.
  4. Experiment with different automation patterns to create dynamic and evolving sounds.

By mastering these advanced looping techniques in FL Studio, you can transform your loops into captivating musical elements. Whether it’s manipulating tempo and pitch or adding effects and automation, the possibilities for creativity are endless.


Tips For Mastering Looping In Fl Studio

Looping is an essential technique in music production, allowing you to create catchy rhythms and repetitive patterns that form the foundation of many electronic tracks. FL Studio, with its powerful loop-based workflow, offers a myriad of possibilities for producers of all genres. Whether you’re a beginner or a seasoned artist, here are some valuable tips to help you master looping in FL Studio.

Organizing Your Loop Library

One of the key aspects of efficient looping is having a well-organized loop library. It’s important to categorize your loops based on their genre, style, or instrument to easily find the perfect loop for your projects. Here’s how you can organize your loop library:

  1. Create folders for different genres or styles, like “Hip Hop,” “EDM,” or “Ambient.”
  2. Separate loops based on their characteristics, such as drums, melodies, basslines, or vocals.
  3. Use descriptive names for your loop files, including relevant keywords that can be easily searched.
  4. Add relevant tags or labels to your loop files for quick reference.

A well-organized loop library not only saves time but also inspires creativity by making it effortless to experiment with various loops.

Experimenting With Different Genres

As a musician, it’s crucial to explore different genres and styles to broaden your horizons and keep your creativity flowing. FL Studio offers a vast range of high-quality loops spanning multiple genres, allowing you to experiment and blend different styles seamlessly. Here’s how you can make the most out of this:

  1. Start by selecting loops from genres you’re familiar with to build a solid foundation.
  2. Gradually incorporate loops from other genres to infuse unique flavors into your music.
  3. Experiment with tempo and pitch adjustments to fit loops from different genres together harmoniously.
  4. Combine loops from contrasting genres to create captivating fusion tracks that push boundaries.

Remember, experimenting with different genres not only expands your skill set but also enables you to create distinctive and memorable music.

By organizing your loop library effectively and venturing into various genres, you can elevate your looping game in FL Studio. Embrace these tips, let your creativity flow, and watch your looping skills reach new heights!

How to Loop in FL Studio: Master the Art of Seamless Beats


Credit: www.djanddiscostuff.com


Frequently Asked Questions Of How To Loop In Fl Studio


How To Make A Loop In Fl Studio?


To make a loop in FL Studio, simply select the region you want to loop, then press Ctrl+L. This creates a loop region that plays repeatedly.


How Do I Turn On Loop Mode In Fl Studio?


To turn on loop mode in FL Studio, simply click on the playlist menu, select “Looping,” and then choose “Enable loop. “


How Do You Loop A Sample?


Looping a sample involves repeating a specific section of audio continuously. To loop a sample, select the desired section, set the loop points, and enable loop mode in your audio software or sampler. This allows the sample to play seamlessly as a repeating loop.


How Do You Set Loop Points In Fl Studio?


To set loop points in FL Studio, open the playlist and enable looping mode by clicking the loop icon. Drag the left and right markers to define your loop range. Press the play button to start and stop the looped playback.


Conclusion


Mastering the art of looping in FL Studio can take your music production to new heights. With the tips and techniques shared in this post, you are well on your way to creating captivating loops for your tracks. Practice and experimentation will further refine your skills, allowing you to craft stunning compositions.


Keep pushing your creative boundaries and enjoy the process of looping in FL Studio.

Categories
Archive

Fresh Air Vst Plugin: Unleash the Power of Brilliance!

Fresh Air VST Plugin by Slate Digital is a free high-frequency exciter with brilliance and smoothness. Create sparkling mixes with Fresh Air in seconds by signing up for a free account on Slate Digital.


This dynamic plugin breathes new life into your mix with just two knobs, adding brilliance and excitement to your top end without harshness. Inspired by classic Dolby Type A exciters, Fresh Air solves high-frequency content control issues in music production, providing a seamless and impressive sound enhancement tool.


With its free availability and user-friendly interface, Fresh Air is a must-have plugin for any music producer looking to elevate their mixes effortlessly.


Introducing Fresh Air Vst Plugin

Fresh Air VST Plugin is a powerful tool that enhances audio quality with ease.

From enhancing vocals to adding brightness to your mix, Fresh Air is a game-changer in the world of audio production.

Overview Of Fresh Air Vst Plugin

Fresh Air VST Plugin is a dynamic high-frequency processor that breathes new life into your mix with just two knobs.

Benefits Of Fresh Air Vst Plugin

  • Enhances Audio Quality: Adds brilliance & excitement to the top end of your tracks without harshness.
  • Easy to Use: With simple controls, Fresh Air allows you to achieve professional-grade results effortlessly.
  • Improves Mixes: Smoothens tracks and brings out high-frequency content for a polished sound.


Credit: fastercapital.com


How To Use Fresh Air Vst Plugin

Fresh Air Vst Plugin is a powerful tool that can enhance your audio productions by adding brilliance and excitement to your tracks without any harshness. Learning how to effectively incorporate Fresh Air into your mix can take your music to the next level.

Incorporating Fresh Air On Different Instruments

When using Fresh Air Vst Plugin on various instruments, consider experimenting with different settings to achieve the desired effect. Here are some tips for incorporating Fresh Air on different instruments:

  • On vocals: Use Fresh Air to add clarity and sparkle to vocal tracks.
  • On drums: Enhance the high-frequency content of drum sounds for a crisp and dynamic mix.
  • On bass guitar: Add brightness and presence to bass lines without sacrificing warmth.
  • On mix bus: Apply Fresh Air subtly across the entire mix to lift the overall sound.

Optimizing Fresh Air For Vocal Clarity

When focusing on vocal clarity, Fresh Air can be a game-changer. Follow these steps to optimize Fresh Air for vocal clarity:

  1. Start with a subtle amount of Fresh Air to avoid over-processing the vocals.
  2. Adjust the knob settings until you achieve the right balance between brightness and warmth.
  3. Use Fresh Air sparingly in the mix to prevent the vocals from sounding too harsh.

Slate Digital Fresh Air: The Free Exciter

When it comes to adding a touch of brilliance and excitement to the high-frequency content of your audio tracks, the Fresh Air Vst Plugin by Slate Digital is a game-changer. Known for its ability to seamlessly enhance the top end without any harshness, it has become a must-have tool for music producers and mix engineers.

Features Of The Free Version

The free version of Fresh Air Vst Plugin offers a dynamic high-frequency processor with just two knobs, making it incredibly easy to use. It breathes new life into your mix, adding sparkle and shine to your tracks. Based on classic Dolby-A noise reduction modded exciters, Fresh Air is designed to provide control over high-frequency content without compromising the smoothness of your tracks.

Downloading And Accessing Fresh Air Plugin

Downloading the Fresh Air plugin is a simple process. By creating a free account on Slate Digital, you can gain instant access to this powerful tool. Once downloaded, it can be seamlessly integrated into your DAW, allowing you to elevate the high-frequency elements of your audio with just a few simple adjustments.

User Reviews And Alternatives

When it comes to audio plugins, user reviews play a crucial role in helping us make informed decisions. Fresh Air VST Plugin has been gaining popularity among music producers and engineers for its exceptional high-frequency exciter capabilities. Let’s take a look at some feedback from users who have experienced the magic of Fresh Air:

Feedback From Users

The Fresh Air VST Plugin has been receiving rave reviews from professionals in the music industry. Users have praised its ability to add brilliance and excitement to the top end of their mixes without any brittleness. Here are some testimonials from satisfied users:

  • “Fresh Air has become an indispensable tool in my mixing arsenal. It brings a new level of clarity and sparkle to my tracks, making them stand out in the mix.” – John, music producer
  • “I’ve tried several high-frequency exciters, but Fresh Air takes the cake. It effortlessly smooths out harshness in my tracks, giving them a professional sheen.” – Sarah, audio engineer
  • “I can’t believe Fresh Air is free! It competes with paid plugins in terms of quality and performance. Highly recommended for anyone looking to add that extra shine to their mixes.” – Mike, home studio owner

Alternative Plugins Similar To Fresh Air

If you’re looking for alternative plugins that offer similar functionality to Fresh Air, here are a few options to consider:

Plugin Name Description Price
BrightSpark A versatile high-frequency exciter with customizable controls for adding sparkle and presence to your mix. $49
ShimmerEQ An EQ plugin specifically designed to enhance and brighten the top end of your audio with intuitive controls. $89
Airwave A unique exciter plugin that adds airy and spacious qualities to your high frequencies, perfect for creating a sense of depth in your mix. $69

These alternatives provide different approaches to achieving that extra sparkle in your mixes. As with any plugin, it’s recommended to try out demos or free versions to see which one best suits your needs and workflow.


Final Thoughts On Fresh Air Vst Plugin

After exploring the capabilities and features of the Fresh Air Vst Plugin, it is clear that this innovative tool has a significant impact on music production. With just two knobs, Fresh Air breathes new life into mixes by adding brilliance and excitement to the top end.

Impact Of Fresh Air On Music Production

The Fresh Air Vst Plugin addresses one of the most pressing problems in music production – controlling high-frequency content without adding harshness. Based on classic, Dolby-A noise reduction modded exciters, this plugin allows users to smooth tracks and enhance the overall sound of their mix. The added brilliance and excitement make a noticeable difference, bringing a new level of professionalism to any project.

With Fresh Air, musicians and producers can easily achieve a polished sound with just the twist of a knob. Whether it’s vocals, drums, bass, or the entire mix bus, the plugin can be applied to any element, elevating the clarity and presence of the audio.

Innovative Uses And Further Explorations

While Fresh Air excels in enhancing the high-frequency range, its application extends beyond traditional usage. Musicians and producers have discovered innovative ways to utilize this plugin to push creative boundaries.

  • Experiment with extreme settings on unconventional instruments or sound effects to create unique textures and sonic landscapes.
  • Use Fresh Air in parallel processing to blend the processed signal with the original, adding subtle sparkle and shine while preserving the natural character.
  • Try automating the Fresh Air plugin’s parameters to introduce dynamic movement and enhance specific sections of a song.
  • Consider using Fresh Air during mastering to add a final touch of brilliance and excitement to the entire mix, ensuring it stands out on any playback system.

The possibilities are endless when it comes to exploring the creative potential of the Fresh Air Vst Plugin. With its intuitive interface and powerful capabilities, musicians and producers can take their tracks to new heights.

If you’re looking for a free plugin that can greatly enhance your music production, Fresh Air is a must-have. Its impact on the final sound is undeniable, and its innovative uses provide endless opportunities for exploration and experimentation.


Credit: www.facebook.com


Credit: m.facebook.com


Frequently Asked Questions For Fresh Air Vst Plugin


Is Fresh Air Plugin For Free?


Yes, the Fresh Air plugin is free. You can create a free account on Slate Digital and access it instantly.


Is Fresh Air No Longer Free?


Fresh Air by Slate Digital is still free to listeners. Regular episodes are available at no cost.


What Is Fresh Air Plugin For?


Fresh Air plugin is a high-frequency exciter that enhances brilliance in your mixes. It adds excitement without brittleness, smoothing tracks.


What Type Of Plug-in Is Fresh Air?


Fresh Air is a dynamic high-frequency processor inspired by classic Dolby Type A noise reduction modded exciters. It adds brilliance and excitement to your top end without brittleness. It’s a free plugin offered by Slate Digital and is designed to enhance the high-frequency content in music production.


Conclusion


In just a few clicks, Fresh Air VST Plugin can transform your mix, adding brilliance and excitement without any harshness. With its dynamic high-frequency processing, it’s a must-have tool for any music producer or audio engineer. So, what are you waiting for?


Bring new life to your sound with Fresh Air today.