Categories
Archive

Using the Stereo Shaper in Fl Studio: Master Your Music Mix

In the world of music production, achieving a professional and polished sound is crucial. One of the key elements in achieving this is through effective stereo imaging. FL Studio, a popular digital audio workstation (DAW) software, provides a powerful tool for enhancing stereo width and imaging – the Stereo Shaper.

The Stereo Shaper in FL Studio is a versatile plugin that allows producers and engineers to manipulate the stereo image of their audio signals, ultimately creating a more immersive and dynamic listening experience. Whether you’re working on a dance track, a pop song, or a cinematic score, the Stereo Shaper can be an invaluable asset in your production arsenal.
Using the Stereo Shaper in Fl Studio: Master Your Music Mix

Credit: www.image-line.com

Using the Stereo Shaper in Fl Studio: Master Your Music Mix

Credit: m.youtube.com

Understanding the Basics of Stereo Shaper

Before delving into the practical applications of the Stereo Shaper, it’s essential to understand its core functionalities. At its core, the Stereo Shaper enables users to control the stereo width, balance, and panning of audio signals. This means you can adjust the placement and spread of sound within the stereo field, giving you the ability to create a sense of space and dimension in your mixes.

Key Features Of The Stereo Shaper

Let’s explore some of the key features of the Stereo Shaper and how they can be utilized to enhance your music production:

Feature Description
Width Control It allows you to adjust the stereo width of the audio signal, making it narrower or wider as needed.
Phase Offset By manipulating the phase relationship between the left and right channels, you can create unique stereo effects and alter the perceived location of sound sources.
Panning The Stereo Shaper provides precise panning controls, enabling you to place sounds anywhere in the stereo field.
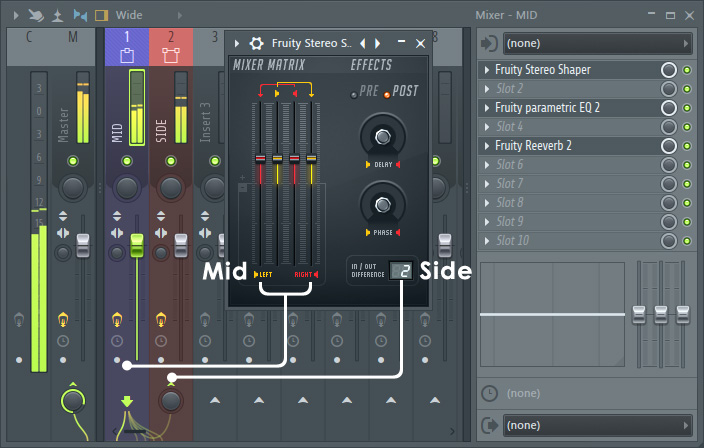
Mid/Side Processing This feature allows you to independently process the middle (mono) and side (stereo) components of the audio signal, offering greater flexibility in shaping the stereo image.

Practical Applications of the Stereo Shaper

Now that we understand the capabilities of the Stereo Shaper, let’s explore some practical applications:

  • Enhancing Synth Pads: When working with lush synth pads, you can use the Stereo Shaper to widen the stereo image, creating an expansive and ethereal sound.
  • Creating Stereo Movement: By modulating the width control over time, you can introduce dynamic movement in the stereo field, adding interest and depth to your mixes.
  • Stereoizing Mono Recordings: Transform mono recordings into stereo by using the Stereo Shaper’s width control and phase offset, breathing new life into old tracks.
  • Adding Spatial Effects: Experiment with the phase offset and panning controls to introduce captivating spatial effects, such as swirling motion and wide stereo sweeps.
Tips for Using the Stereo Shaper Effectively

To make the most of the Stereo Shaper, consider the following tips:

  1. Subtle Adjustments: Small changes in stereo width and positioning can yield significant improvements, so approach the controls with precision.
  2. Referencing in Mono: Check your mix in mono to ensure that important elements remain coherent and impactful, even with stereo processing applied.
  3. Automation: Experiment with automating the parameters of the Stereo Shaper to create evolving stereo landscapes throughout your music.
  4. Layering Effects: Combine the Stereo Shaper with other spatial processing effects for a more complex and nuanced stereo image.
Final Thoughts

The Stereo Shaper is a valuable tool for shaping the spatial characteristics of your audio, offering a myriad of creative possibilities. By mastering the art of stereo manipulation, you can elevate your music to new dimensions, captivating your listeners with immersive and engaging sonic experiences.

With its intuitive interface and powerful features, the Stereo Shaper in FL Studio empowers producers and engineers to sculpt their mixes with precision and artistry. Embrace the potential of stereo imaging and let the Stereo Shaper guide you towards a more compelling and impactful sound.

Take your music production to the next level with the Stereo Shaper – explore its capabilities, experiment with different settings, and discover the endless ways it can enrich your sonic creations.

Frequently Asked Questions On Using The Stereo Shaper In Fl Studio: Master Your Music Mix


How Does The Stereo Shaper Work?


The stereo shaper is a plugin in FL Studio that manipulates the stereo field of a sound, allowing you to widen or narrow the stereo image.


What Are The Benefits Of Using The Stereo Shaper?


Using the stereo shaper can enhance the depth and width of your audio mix, making it more immersive and engaging for listeners.


Can The Stereo Shaper Be Used On Individual Tracks?


Yes, the stereo shaper can be applied to individual tracks, giving you precise control over the stereo image of each element in your mix.


How Can I Widen The Stereo Image With The Stereo Shaper?


By increasing the stereo separation or adjusting the stereo width controls in the stereo shaper, you can achieve a wider stereo image.
Categories
Archive

Using the Edison Audio Editor in Fl Studio: Mastering Sound Production

When it comes to producing high-quality music, having the right tools at your disposal is essential. FL Studio is a powerful digital audio workstation that offers a wide range of features to help you create professional-sounding tracks. One of the most powerful tools in FL Studio is the Edison audio editor. In this guide, we will explore how to use the Edison audio editor to edit and manipulate audio in FL Studio.

Getting Started with Edison

Before we dive into the details of using the Edison audio editor, let’s first understand how to access and open the editor in FL Studio. To open Edison, simply add it as an effect to the mixer track of the audio clip you want to edit. Once added, you can double-click on the Edison icon in the mixer to open the editor window.

Using the Edison Audio Editor in Fl Studio: Mastering Sound Production

Credit: www.youtube.com

Using the Edison Audio Editor in Fl Studio: Mastering Sound Production

Credit: us.pluginsmasters.com

Basic Editing Functions

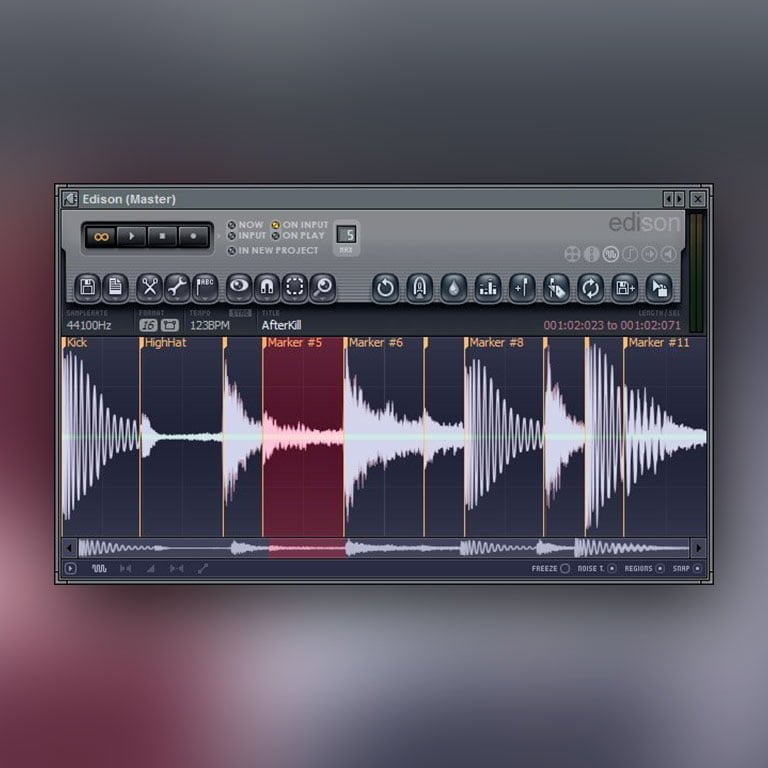
Once you have opened the Edison audio editor, you will have access to a range of basic editing functions to help you manipulate your audio. These include functions such as cut, copy, paste, and delete. You can use these functions to trim audio clips, remove unwanted sections, and rearrange audio to fit your desired composition.

Warping And Time-stretching

One of the most powerful features of the Edison audio editor is its ability to warp and time-stretch audio. This allows you to manipulate the timing and tempo of audio clips to fit your project. Simply select the audio clip you want to manipulate and use the time-stretching tools in Edison to adjust the timing and tempo as needed.

Noise Reduction And Restoration

Another useful feature of the Edison audio editor is its noise reduction and restoration tools. These tools allow you to clean up audio recordings by reducing background noise and restoring clarity to your audio. You can use these tools to improve the overall quality of your audio recordings and ensure that your tracks sound professional and polished.

Advanced Editing and Analysis

In addition to basic editing functions, the Edison audio editor also offers advanced editing and analysis tools to help you fine-tune your audio. These tools include spectral analysis, frequency analysis, and audio processing functions. You can use these tools to dive deep into the details of your audio and make precise adjustments to achieve the perfect sound.

Exporting And Saving

Once you have finished editing your audio in the Edison audio editor, you can easily export and save your work. Simply click on the export button within the editor and choose your desired file format and settings. This makes it easy to seamlessly integrate your edited audio back into your FL Studio project.

Frequently Asked Questions For Using The Edison Audio Editor In Fl Studio: Mastering Sound Production


How Do I Open The Edison Audio Editor In Fl Studio?


To access the Edison Audio Editor in FL Studio, simply click on the “Channel Rack” button and then select “Edison” from the drop-down menu.


What Are The Key Features Of The Edison Audio Editor?


The Edison Audio Editor in FL Studio offers a range of powerful features such as waveform editing, spectral analysis, audio recording, time stretching, and pitch shifting.


How Can I Use The Waveform Editing Feature In The Edison Audio Editor?


To edit the waveform in the Edison Audio Editor, simply select the portion of audio you want to modify, and then apply various editing tools such as cut, copy, paste, normalize, reverse, and more.


Can I Record Audio Directly Into The Edison Audio Editor?


Yes, you can easily record audio directly into the Edison Audio Editor by clicking on the “Record” button and selecting the input source.

Conclusion

In conclusion, the Edison audio editor in FL Studio is a versatile and powerful tool that offers a wide range of features to help you edit and manipulate audio with ease. Whether you are a beginner or an experienced producer, the Edison audio editor has everything you need to take your audio production to the next level. By mastering the use of the Edison audio editor, you can unlock endless creative possibilities and produce professional-sounding tracks that stand out from the crowd.

Categories
Archive

Using the Fruity Slicer in Fl Studio : Mastering Slice Techniques

FL Studio is a widely used digital audio workstation known for its powerful features and intuitive interface. One of its standout tools is the Fruity Slicer, a versatile plugin that offers users the ability to slice and manipulate audio samples with precision and creativity. Whether you’re a seasoned producer or just starting out, the Fruity Slicer can take your music production to the next level.

What is the Fruity Slicer?

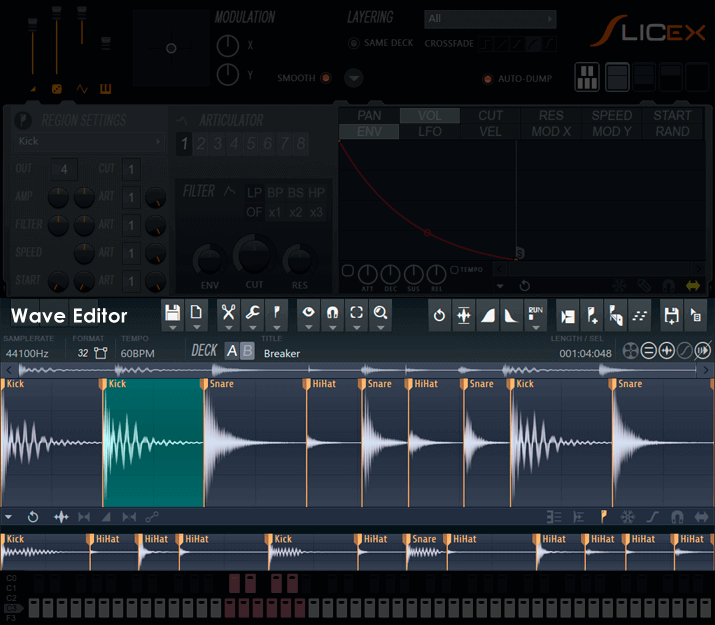
The Fruity Slicer is a plugin within FL Studio that can be used to chop up audio samples into smaller parts, also known as slices. These slices can then be rearranged, sequenced, and processed in various ways to create unique musical elements. The Fruity Slicer is perfect for working with drum loops, vocal samples, melodies, and any other audio material that you want to manipulate.

How to Use the Fruity Slicer

Using the Fruity Slicer in FL Studio is a straightforward process. Here’s a step-by-step guide to get you started:

  1. First, load a sample into FL Studio by dragging and dropping it onto the Playlist or Channel Rack.
  2. Next, add the Fruity Slicer plugin to the channel where your sample is loaded.
  3. Once the plugin is added, you can adjust the start and end points of the slice markers to define the boundaries of each slice.
  4. To create custom slice markers, simply click and drag on the waveform display in the Fruity Slicer interface.
  5. You can also use the Auto-Slice feature to automatically detect and assign slice markers based on transients in the audio.
  6. Once you have your slices defined, you can start rearranging them by dragging and dropping them onto the step sequencer or piano roll.
  7. The Fruity Slicer offers a range of additional features, such as pitch and time manipulation, volume and pan envelopes, and various effects.
Using the Fruity Slicer in Fl Studio  : Mastering Slice Techniques

Credit: www.image-line.com

Using the Fruity Slicer in Fl Studio  : Mastering Slice Techniques

Credit: m.youtube.com

Tips for Using the Fruity Slicer Effectively

Here are some tips to help you make the most of the Fruity Slicer:

  • Experiment with different slice markers to find interesting and unique combinations.
  • Apply effects such as reverb, delay, and distortion to individual slices for added variety and texture.
  • Automate the slice markers’ positions to create evolving patterns and sequences.
  • Try using the Fruity Slicer on non-traditional samples, such as field recordings or sound effects, to create unconventional sounds.
  • Combine the Fruity Slicer with other FL Studio plugins and features, such as the piano roll and mixer, to further enhance your creative options.

Final Thoughts

The Fruity Slicer is an incredibly powerful tool for slicing and manipulating audio in FL Studio. Whether you’re using it for beat production, remixing, or experimental sound design, the possibilities for creativity are endless. By taking advantage of the Fruity Slicer’s features and experimenting with different techniques, you can add depth, uniqueness, and professional polish to your music productions. So go ahead, dive into the world of the Fruity Slicer, and let your imagination run wild!

Frequently Asked Questions For Using The Fruity Slicer In Fl Studio : Mastering Slice Techniques


What Is The Fruity Slicer In Fl Studio?


The Fruity Slicer is a powerful tool in FL Studio used for slicing and rearranging audio samples.


How Can I Use The Fruity Slicer For Beat-making?


You can use Fruity Slicer to chop and rearrange samples, create unique beats, and add flair to your music.


What Are The Key Features Of The Fruity Slicer?


Fruity Slicer offers precision slicing, pitch-shifting, time-stretching, and intuitive sample manipulation tools for music production.


Can I Import My Own Samples Into The Fruity Slicer?


Yes, you can easily import your own samples into the Fruity Slicer for creative experimentation and music production.

Categories
Archive

Understanding the Different Types of Tracks in Ableton Live : Ultimate Guide

Ableton Live is a powerful digital audio workstation that offers musicians and producers a wide range of creative tools. One of the key features of Ableton Live is its versatile track options. In this article, we will explore the different types of tracks available in Ableton Live and how they can enhance your music production workflow.

Midi Tracks

Midi tracks in Ableton Live allow you to sequence and manipulate virtual instruments and hardware synthesizers. With a midi track, you can create melodies, chords, and rhythms using a piano roll editor, step sequencer, or by playing a midi controller. Midi tracks are perfect for electronic music producers or anyone who wants to incorporate virtual instruments into their compositions.

Audio Tracks

Audio tracks in Ableton Live are used for recording and processing audio signals. Whether you want to record vocals, guitars, drums, or any other live audio source, audio tracks provide the means to do so. You can apply various audio effects and plugins to shape the sound and create unique textures. Audio tracks are essential for capturing and manipulating real-world sounds in your productions.

Credit: www.productionmusiclive.com

Return Tracks

Return tracks in Ableton Live are special tracks designed to receive audio from other tracks in the session. They are commonly used for adding reverb, delay, or other time-based effects to multiple tracks simultaneously. By sending audio to a return track, you can create cohesive and immersive soundscapes in your mix. Return tracks are also useful for applying master bus processing effects.

Group Tracks

Group tracks in Ableton Live act as containers for other tracks, allowing you to group related tracks together. By grouping tracks, you can process them as a whole, apply effects to multiple tracks simultaneously, and easily manage your mix. Group tracks are useful for organizing your session and applying collective processing to multiple tracks, such as adding compression or EQ to a group of drums.

Drum Racks

Drum racks in Ableton Live are specialized midi tracks designed for creating and performing drum sounds. With a drum rack, you can load and trigger multiple samples or virtual drum machines, allowing you to create dynamic drum patterns and perform live. Drum racks are perfect for beat-making and electronic music production.

Instrument Racks

Instrument racks in Ableton Live are versatile tools that allow you to combine and layer multiple instruments or effects. With an instrument rack, you can create complex sounds by stacking and manipulating different sound sources and effects. This feature is especially useful for sound design and creating unique textures in your music.

Understanding the Different Types of Tracks in Ableton Live : Ultimate Guide

Credit: glitchmagic.com

Audio Effect Tracks

Audio effect tracks in Ableton Live are dedicated tracks for hosting audio effects. They allow you to apply audio effects globally across multiple tracks in your session. By grouping tracks and sending them to an audio effect track, you can achieve parallel processing and effortlessly add consistent effects to your mix. Audio effect tracks are ideal for adding polish and character to your sound.

Frequently Asked Questions Of Understanding The Different Types Of Tracks In Ableton Live : Ultimate Guide


What Are Midi Tracks In Ableton Live?


MIDI tracks in Ableton Live are used for sequencing and controlling virtual instruments and external hardware.


How Do Audio Tracks Work In Ableton Live?


Audio tracks in Ableton Live are for recording and playing back audio clips and samples.


Can You Explain The Purpose Of Return Tracks In Ableton Live?


Return tracks in Ableton Live are used for applying effects to multiple tracks and creating parallel processing chains.


What Are Group Tracks Used For In Ableton Live?


Group tracks in Ableton Live are used to process and control multiple tracks as a single unit.

Conclusion

Ableton Live offers a diverse set of track types that cater to every aspect of music production. By understanding the different track options available, you can elevate your creative process and unlock new possibilities. Midi tracks, audio tracks, return tracks, group tracks, drum racks, instrument racks, and audio effect tracks all play a vital role in shaping your music and ensuring a seamless production workflow. Experiment with these track types, and you’ll discover new ways to express yourself and create impressive music using Ableton Live.

Categories
Archive

Using Eq in Ableton Live : Mastering Audio Mixing Techniques

Ableton Live is a powerful and versatile digital audio workstation (DAW) used by music producers, DJs, and musicians around the world. One of the key tools in Ableton Live’s arsenal is the EQ (Equalizer), which allows you to shape the tonal balance of your audio tracks.

Using Eq in Ableton Live  : Mastering Audio Mixing Techniques

Credit: m.youtube.com

What is EQ?

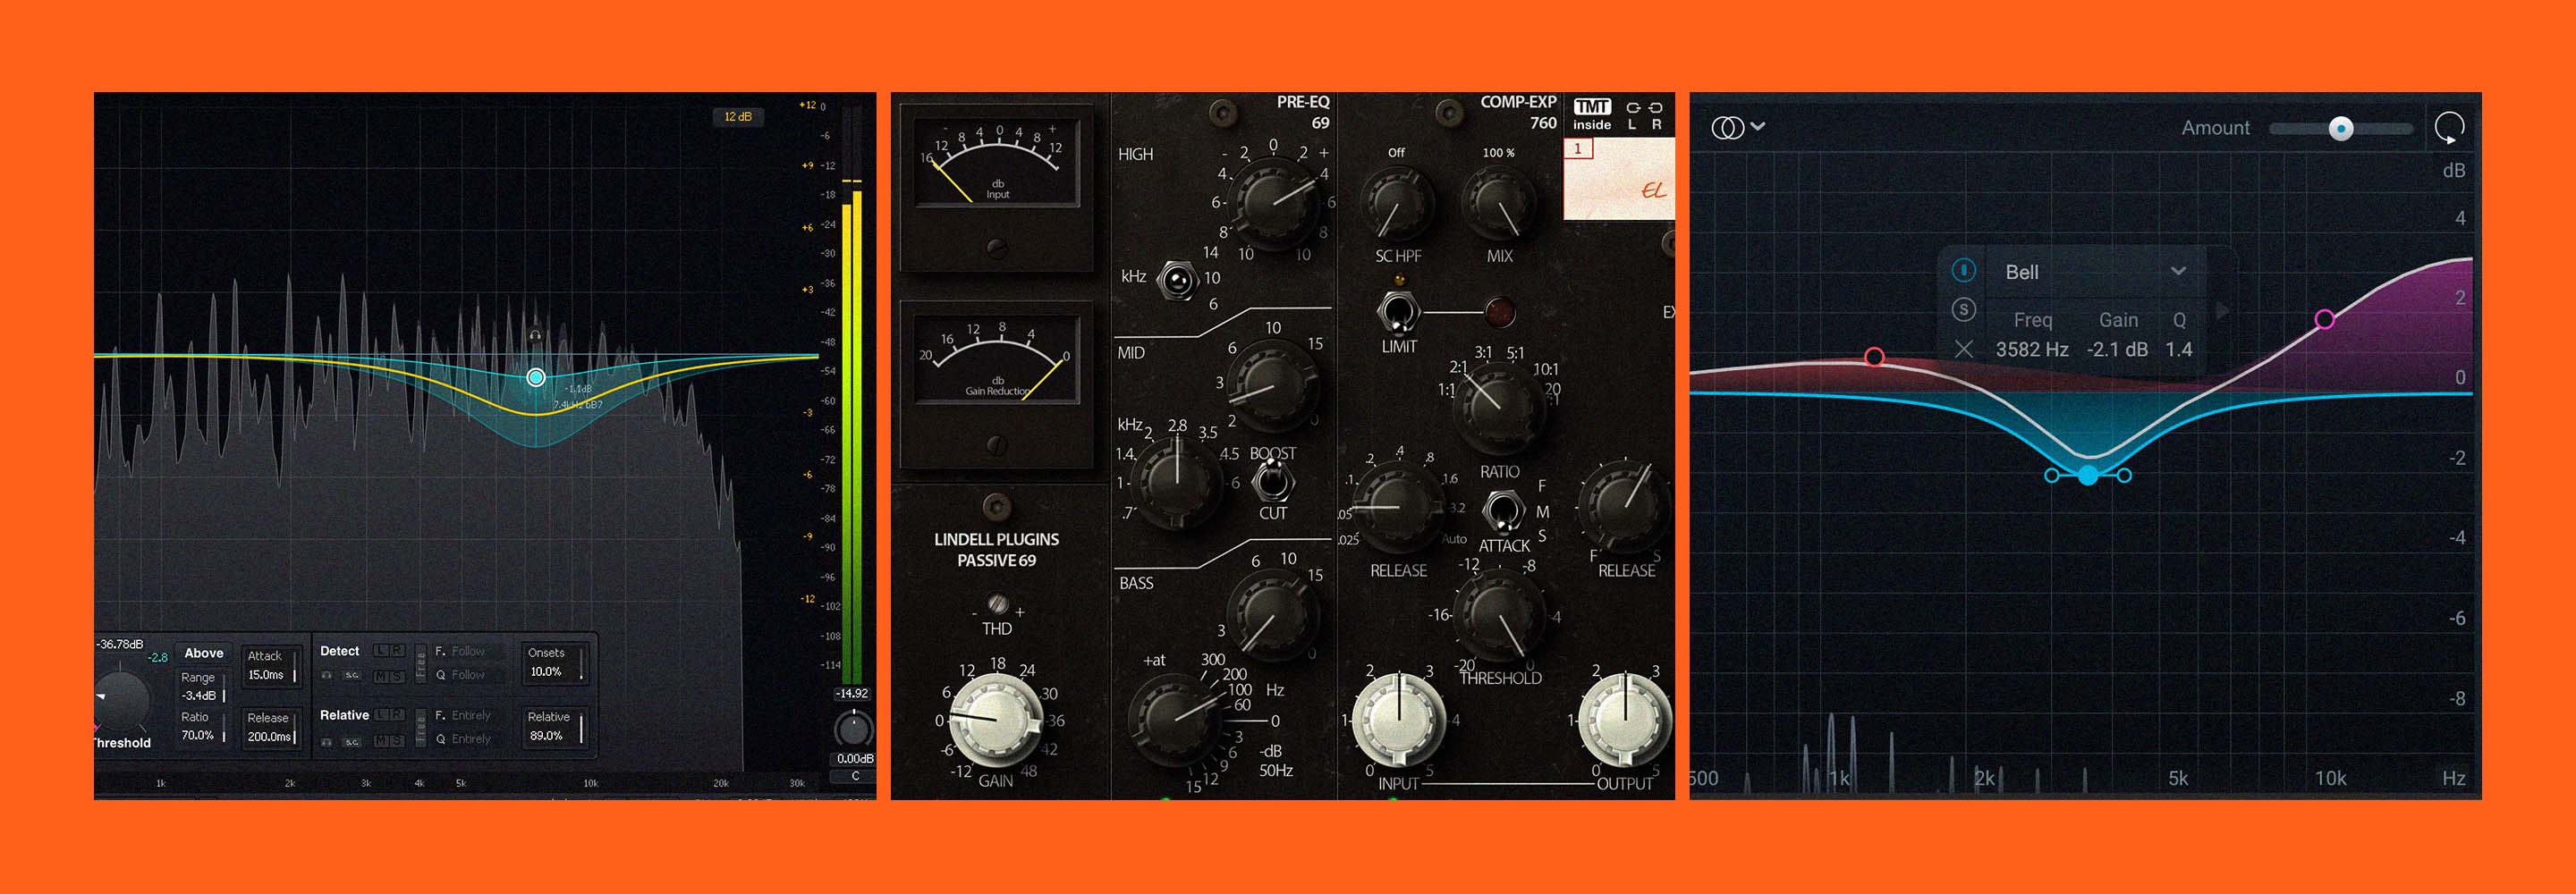
EQ is a tool used in audio production to adjust the balance between different frequencies in a sound. It consists of a series of filters that can boost or attenuate specific frequency ranges, allowing you to control the overall tonal balance of a track.

Using Eq in Ableton Live  : Mastering Audio Mixing Techniques

Credit: www.izotope.com

Using EQ in Ableton Live

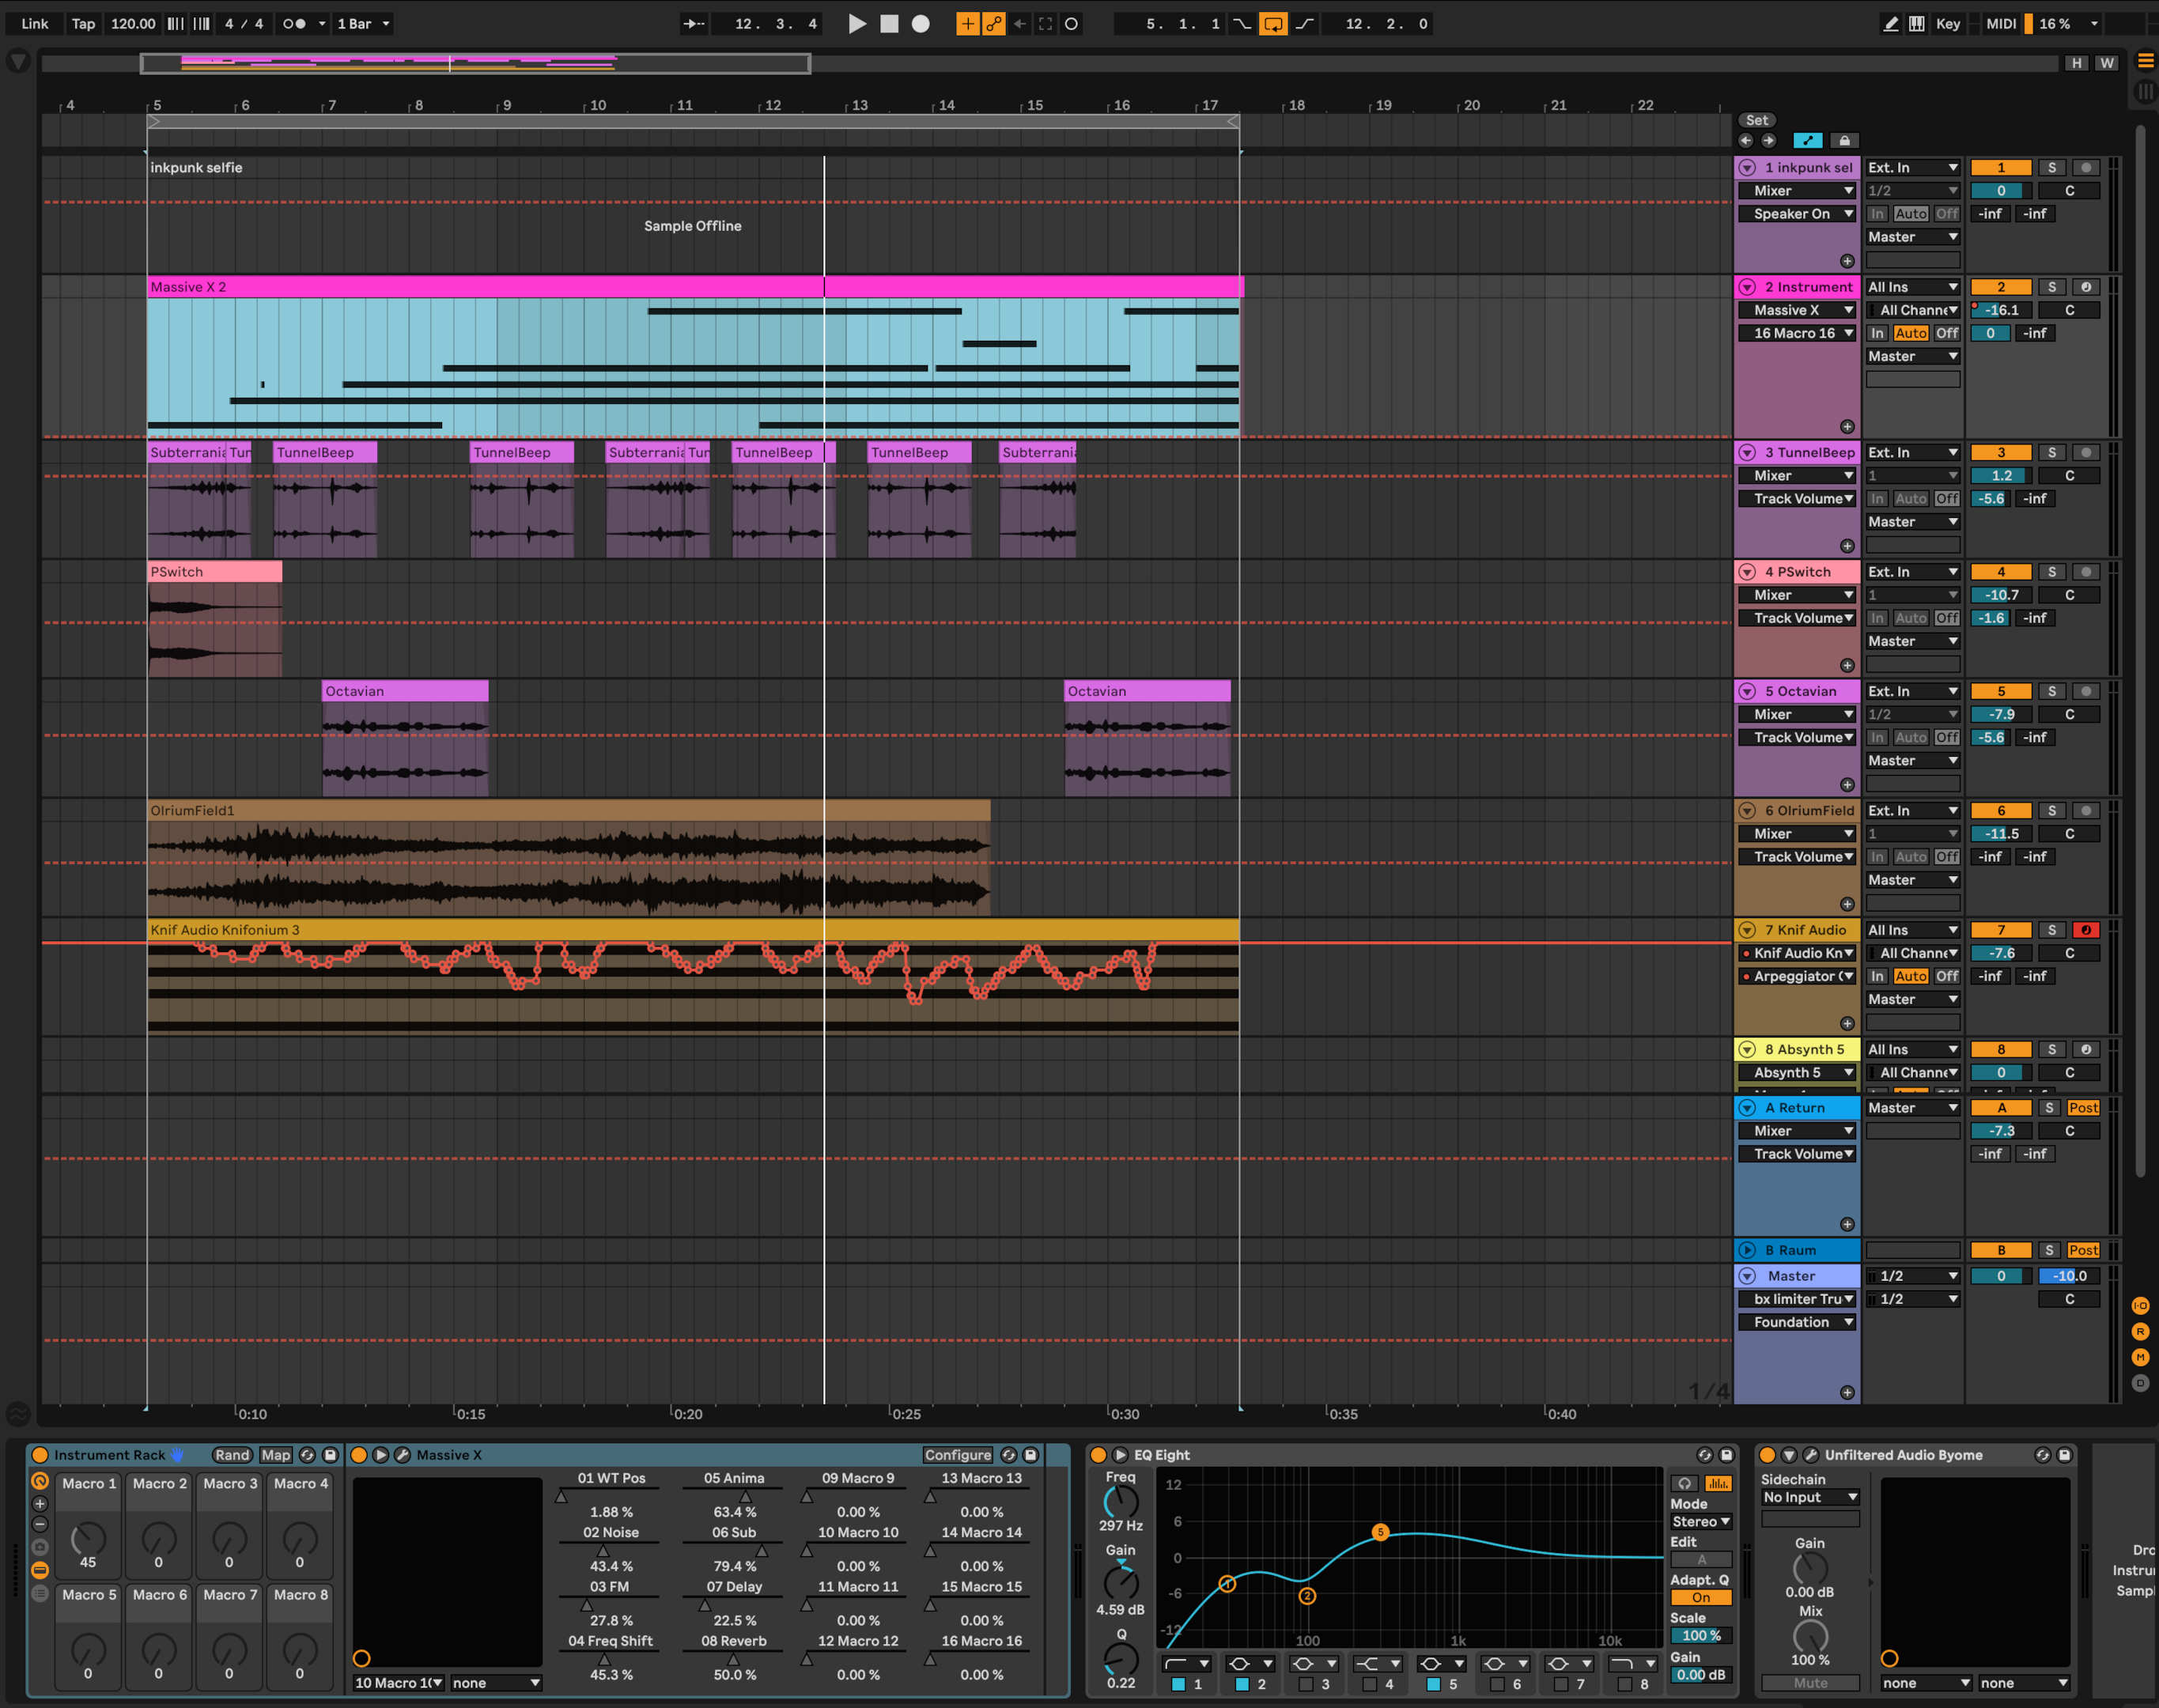
Ableton Live offers a flexible EQ plugin called EQ Eight, which provides eight bands of EQ to work with. Here are some tips and techniques for using EQ in Ableton Live:

  1. Identify problem frequencies: Start by identifying any problem frequencies in your audio track. These can be frequencies that sound harsh, muddy, or unbalanced. It’s important to have a clear goal in mind before applying EQ to your track.
  2. High-pass and low-pass filters: Use high-pass and low-pass filters to remove unwanted frequencies from your audio. High-pass filters cut off frequencies below a certain point, while low-pass filters cut off frequencies above a certain point. This can help clean up your mix and remove any unnecessary rumble or hiss.
  3. Boost or cut frequencies: Use EQ to boost or cut specific frequency ranges to shape the sound of your track. For example, if you want to add more presence to a vocal track, you could boost the high-frequency range. If you want to reduce the boomy sound of a bassline, you could cut the low-frequency range.
  4. Q factor: The Q factor controls the width of the EQ band. A higher Q factor narrows the band, affecting a smaller range of frequencies, while a lower Q factor widens the band, affecting a broader range of frequencies. Experiment with different Q values to achieve the desired effect.
  5. Use EQ in conjunction with other effects: EQ works well when combined with other effects in Ableton Live. For example, you can use EQ before a compressor to shape the dynamics of a track, or after a reverb to control the frequency balance of the reverb tail.

Best Practices for EQ in Ableton Live

To ensure optimal results when using EQ in Ableton Live, consider the following best practices:

Tip Description
1 Start with subtle adjustments and make small incremental changes. It’s easy to go overboard with EQ, so take your time to find the right balance.
2 Listen critically and A/B test. Compare your audio before and after applying EQ to ensure you’re achieving the desired result.
3 Consider the context of the mix. EQ decisions should be made in relation to other elements in the mix to maintain a balanced sound.
4 Experiment with different EQ shapes and techniques to develop your own unique sound. There are no strict rules; trust your ears!

By understanding the fundamentals of EQ and utilizing the EQ Eight plugin in Ableton Live, you can take your audio productions to the next level. Remember to experiment, listen critically, and trust your ears to achieve the desired tonal balance in your tracks.

Frequently Asked Questions On Using Eq In Ableton Live : Mastering Audio Mixing Techniques


What Is Eq In Ableton Live Used For?


Eq in Ableton Live is used to adjust frequencies in audio signals for better clarity and balance.


How To Add Eq To A Track In Ableton Live?


To add Eq to a track in Ableton Live, simply drag and drop an Eq plugin onto the track.


What Are The Primary Functions Of Eq In Ableton Live?


The primary functions of Eq in Ableton Live include boosting or cutting specific frequency ranges, shaping the tonal quality, and removing unwanted noise from audio tracks.


Can Eq Be Automated In Ableton Live?


Yes, Eq parameters can be automated in Ableton Live to create dynamic changes in the audio frequency balance over time.

Categories
Archive

Understanding Sound Design in Ableton Live : Mastering Music Production

Ableton Live is a powerful digital audio workstation that allows musicians, producers, and sound designers to create and manipulate sounds in a variety of ways. Sound design is the art of creating and manipulating sounds to evoke specific emotions, enhance visual experiences, or simply create unique and interesting sonic textures. In this article, we will explore the fundamentals of sound design in Ableton Live and how you can use the software to craft your own sounds.

Credit: www.productionmusiclive.com

Credit: www.amazon.com

The Basics of Sound Design

Sound is a vibration that travels through the air and can be captured and manipulated using various tools and techniques. In sound design, you have control over several parameters such as pitch, volume, duration, and timbre. Ableton Live provides a range of tools and features to help you shape and sculpt sounds to your liking.

1. Using Synthesis

Synthesis is the process of creating sound from scratch using oscillators, filters, and envelopes. Ableton Live offers a variety of synthesizers like Operator and Analog, which allow you to generate a wide range of sounds. Experiment with different waveforms, filter settings, and modulation to create your desired sound.

2. Manipulating Samples

Ableton Live also allows you to import and manipulate audio samples. You can chop, stretch, and pitch-shift samples to create unique sounds. The Simpler and Sampler instruments are great tools for working with samples. Use automation to add movement and variation to your samples.

3. Applying Effects

Effects play a crucial role in sound design. Ableton Live offers an extensive collection of effects such as reverb, delay, distortion, and modulation. Experiment with different effect chains and parameters to further shape and transform your sounds. Automate effect parameters to create dynamic and evolving textures.

Tips for Effective Sound Design

Here are some tips to help you create effective and impactful sounds in Ableton Live:

1. Experiment And Explore

Don’t be afraid to experiment with different synthesis techniques, sample manipulation, and effects. Try out different combinations and settings to discover new and interesting sounds.

2. Use Layering

Layering multiple sounds together can create rich and complex textures. Combine different synths, samples, and effects to add depth and dimension to your sound design.

3. Understand Frequency Ranges

Having a good understanding of the frequency ranges helps you create a balanced mix. Low-frequency sounds are felt more than heard, while high-frequency sounds add brightness and definition. Use EQ and filters to shape the frequency spectrum of your sounds.

4. Work With Envelopes

Envelopes control the evolution of a sound over time. The most common envelopes are the ADSR envelopes (Attack, Decay, Sustain, Release). Experiment with different envelope settings to create evolving and dynamic sounds.

5. Play With Modulation

Modulation adds movement and modulation to your sounds. Ableton Live offers several modulation sources such as LFOs, envelopes, and MIDI mapping. Use modulation to create rhythm, texture, and variation in your sound design.

Frequently Asked Questions On Understanding Sound Design In Ableton Live : Mastering Music Production


What Is Sound Design In Music Production?


Sound design is the process of creating or manipulating sounds to fit a specific purpose within a musical composition.


Why Is Sound Design Important In Ableton Live?


Sound design is crucial in Ableton Live to create unique, professional-quality sounds and enhance the overall music production.


How Can Sound Design Affect The Mood Of A Song In Ableton Live?


Sound design can influence the emotional impact of a song by shaping the tone, texture, and atmosphere of the music.


What Are Some Techniques For Sound Design In Ableton Live?


Using synthesizers, audio effects, sampling, and modulation are essential techniques for sound design in Ableton Live.

Conclusion

Ableton Live is an excellent platform for exploring the world of sound design. Whether you are a musician, producer, or sound designer, being able to create your own sounds can greatly enhance your creative output. Remember to experiment, explore, and have fun with the tools and features available in Ableton Live to craft unique and compelling sounds.

Categories
Archive

Creating Bass Sounds in Fl Studio: Mastering the Art

In the world of music production, bass is a crucial element that adds depth, power, and energy to any track. Whether you are a beginner or an experienced producer, knowing how to create impactful bass sounds is essential. In this comprehensive guide, we will explore different techniques and tools you can use to create amazing bass sounds in FL Studio.

1. Choosing the Right Waveform

The waveform you select for your bass sound sets the foundation of its character and tone. In FL Studio, you have various options such as sine, sawtooth, square, and more. Experiment with different waveforms to achieve the desired bass texture and timbre.

2. Utilizing Oscillators

Oscillators are responsible for generating sound in synthesizers. In FL Studio, you can use multiple oscillators to create complex bass sounds. By detuning oscillators slightly, you can achieve a thicker and more powerful bass tone. Experiment with different combinations of detuning and waveshaping to find unique and interesting sounds.

3. Applying Filters and Envelopes

Filters allow you to shape the frequency spectrum of your bass sound. In FL Studio, you can use low-pass, high-pass, band-pass, or notch filters to remove unwanted frequencies and emphasize the desired ones. Additionally, envelopes are useful for controlling the dynamic behavior of your bass sound. For example, by applying a quick attack and a long decay, you can create a punchy bass sound with a sustained tail.

4. Adding Distortion and Saturation

Distortion and saturation are powerful tools for adding warmth and grit to your bass sounds. In FL Studio, you can use plugins such as Fruity Waveshaper, Fruity Blood Overdrive, or Fruity Fast Dist to introduce harmonics and drive into your bass. Be mindful of the intensity to maintain clarity and avoid muddiness.

Credit: www.practical-music-production.com

5. Layering Bass Sounds

Layering multiple bass sounds can take your productions to the next level. FL Studio allows you to stack different bass patches and blend their qualities. Combine a sub-bass for low-end depth, a mid-range bass for warmth, and a high-end bass for presence. This creates a complex and rich bass sound that fills the frequency spectrum.

Creating Bass Sounds in Fl Studio: Mastering the Art

Credit: www.image-line.com

6. Modulation and Automation

Modulating and automating various parameters can bring movement and interest to your bass sounds. FL Studio provides numerous modulation options, such as LFOs, envelopes, and modulation matrix. Experiment with modulating parameters like cutoff frequency, resonance, or volume to create evolving and dynamic bass sounds.

7. Experimenting with Effects

Effects are the icing on the cake when it comes to bass sound design. In FL Studio, you can use effects like reverb, delay, chorus, and flanger to add depth, space, and dimension to your bass sounds. Don’t be afraid to experiment with different combinations and settings to create unique and memorable bass textures.

8. Reference and Fine-Tuning

Always refer to professional tracks or songs that inspire you. Analyze their bass sounds and try to achieve a similar impact and character. Pay attention to how the bass interacts with other elements in the mix. Additionally, use EQ and compression to fine-tune your bass sound and ensure it sits well in the overall mix.

2026 Update: FL Studio’s Bassline Generator

FL Studio 2025 added a Bassline Generator to the Chord Progression Tool. Image-Line describes it as giving you instant basslines to pair with any progression. Treat the result as a starting point: generate a line, then shape it with the sound design and layering techniques below.

Frequently Asked Questions Of Creating Bass Sounds In Fl Studio: Mastering The Art

How Can I Create A Powerful Bass Sound In Fl Studio?

To create a powerful bass sound in FL Studio, start with a sine wave oscillator and layer it with a distorted wave for depth and richness.

What Effects Can Enhance The Bass Sound?

To enhance the bass sound, use effects such as distortion, compression, EQ, and stereo imaging to add depth, warmth, and presence.

Why Is Layering Important In Creating Bass Sounds?

Layering is important in creating bass sounds as it adds complexity and richness, allowing for a more dynamic and impactful sound.

What Are Some Techniques For Modulating Bass Sounds?

Techniques for modulating bass sounds include using LFOs for wobble effects, pitch modulation, and filter cutoff modulation for dynamic variation.

Can FL Studio generate a bassline automatically?

Yes. FL Studio 2025 added a bassline mode to the Chord Progression Tool that creates a bassline following your chords. Edit it in the Piano roll to make it your own.

Conclusion

In conclusion, creating bass sounds in FL Studio is a creative and dynamic process. By utilizing waveforms, oscillators, filters, effects, and modulation, you can design unique and powerful bass sounds that elevate your music productions. Remember to experiment, trust your ears, and don’t be afraid to push the boundaries of sound design. With practice and persistence, you’ll be able to create bass sounds that make your tracks stand out.

Categories
Archive

Creating Pad Sounds in Fl Studio : Ultimate Guide for Beginners

Are you an aspiring music producer looking to enhance your productions with lush and atmospheric pad sounds? Look no further! In this article, we will explore the process of creating stunning pad sounds using FL Studio, a popular digital audio workstation. With a few techniques and tips, you will be well on your way to crafting captivating soundscapes that will add depth and emotion to your music.

Selecting the Right Synth

The first step in creating pad sounds is selecting the right synthesizer. FL Studio offers a wide range of built-in synthesizers such as Sytrus, Harmor, and Serum. Each synth has its own unique features and capabilities. Experiment with different synths to find the one that suits your style and desired sound.

Layering Multiple Oscillators

To achieve a rich and full-bodied pad sound, it is essential to layer multiple oscillators. Oscillators generate the basic waveforms that form the foundation of your sound. Experiment with different waveforms such as sine, sawtooth, and square to create interesting harmonics. Adjust the volume and detune parameters of each oscillator to add depth and width to your sound.

Applying Filters and Effects

Filters and effects play a crucial role in shaping and molding your pad sound. FL Studio provides a wide range of filters, including low pass, high pass, and bandpass filters. Experiment with different filter types and settings to achieve the desired tonal characteristics. Additionally, applying effects such as reverb, delay, and chorus can further enhance the spatial and ambient qualities of your pad sound.

Creating Pad Sounds in Fl Studio  : Ultimate Guide for Beginners

Credit: itsgratuitous.com

Modulation and Automation

Modulation and automation are powerful tools for adding movement and expression to your pad sounds. FL Studio offers various modulation options such as LFOs (low-frequency oscillators) and envelopes. By assigning these modulators to parameters like filter cutoff or oscillator pitch, you can create evolving and dynamic pad sounds. Experiment with different modulation sources and destinations to find the perfect balance.

Utilizing Pads In Midi Chords

When playing pad sounds in chord progressions, it is essential to pay attention to the MIDI arrangement. Instead of playing all the notes simultaneously, create MIDI chords that spread the notes across a few octaves. This technique will ensure that each note blends seamlessly with the pad sound, giving a lush and harmonious result. Experiment with different inversions and voicings to add interest to your chord progressions.

Creating Movement with Arpeggios

Incorporating arpeggios into your pad sounds can add a sense of movement and rhythm. FL Studio’s piano roll allows you to easily create arpeggiated patterns by sequencing the individual notes of a chord. Experiment with different arpeggio patterns, note lengths, and velocities to create captivating rhythmic elements that complement your pad sound.

Creating Pad Sounds in Fl Studio  : Ultimate Guide for Beginners

Credit: m.youtube.com

Final Touches and Mastering

Once you have crafted your pad sound, it’s time to add the final touches and ensure a polished mix. Use EQ to balance the frequencies and remove any unwanted resonances. Apply gentle compression to control the dynamic range and add warmth to the sound. Utilize stereo imaging techniques to widen the stereo field and create a sense of space. Finally, apply a limiter to ensure the sound remains within a desirable volume range.

Conclusion

Creating pad sounds in FL Studio is a rewarding process that allows you to add depth and atmosphere to your music. By selecting the right synth, layering oscillators, applying filters and effects, as well as utilizing modulation and automation, you can create captivating pad sounds that will take your productions to the next level. Don’t be afraid to experiment and explore different techniques to find your unique sound. Happy music-making!

Frequently Asked Questions On Creating Pad Sounds In Fl Studio : Ultimate Guide For Beginners


How To Create Pad Sounds In Fl Studio?


To create pad sounds in Fl Studio, use soft synths like Serum and tweak filter envelopes.


What Are Some Techniques For Designing Pad Sounds?


Experiment with layering, use slow attack and release, adjust filter cutoff, and add reverb and delay.


Can I Use Stock Plugins To Make Pad Sounds?


Yes, Fl Studio’s stock plugins like Harmor, Sytrus, and 3xOsc are capable of creating diverse pad sounds.


What Is The Importance Of Modulation In Pad Sounds?


Modulation adds movement and interest to pad sounds, creating a dynamic and evolving texture.

Categories
Archive

Using the Arpeggiator in Fl Studio

For electronic music producers and enthusiasts, FL Studio has been a powerhouse for crafting sonic masterpieces. Among its many features, the arpeggiator stands out as a powerful tool for adding depth and complexity to your compositions.

Understanding the Arpeggiator

The arpeggiator is a fundamental component in electronic music production. This versatile tool takes chords and plays their individual notes in rapid succession, creating captivating melodic patterns. In FL Studio, the arpeggiator offers a wide range of customization options, allowing you to tailor the output to suit your creative vision.

Unlocking The Potential

By mastering the arpeggiator in FL Studio, you can elevate your music to new heights. Whether you’re aiming for pulsating dance anthems or ethereal soundscapes, the arpeggiator can breathe life into your compositions. Let’s delve into the essential techniques for harnessing the true potential of the arpeggiator.

Customization and Control

FL Studio empowers you with a plethora of options to fine-tune the arpeggiator. From adjusting the rhythm and note order to applying velocity and octave settings, you have the tools to shape the arpeggiated patterns to perfection.

Experimenting With Rhythmic Patterns

The arpeggiator’s rhythmic capabilities are a game-changer for infusing energy and movement into your tracks. By tweaking the timing and syncopation, you can create infectious grooves that propel your music forward. Experiment with different rhythmic patterns to discover the perfect fit for your composition.

Crafting Dynamic Melodic Sequences

With FL Studio’s arpeggiator, you can unleash a world of melodic possibilities. Adjusting the note order, range, and octave settings enables you to sculpt intricate and dynamic sequences. Whether you’re aiming for a cascading waterfall of notes or a pulsating synth lead, the arpeggiator puts the power of melodies in your hands.

Credit: www.musicradar.com

Credit: www.sweetwater.com

Layering and Texturing

One of the arpeggiator’s greatest strengths lies in its ability to enrich your soundscapes through layering and texturing. By combining multiple instances of the arpeggiator with different instruments or sound sources, you can create lush and multi-dimensional textures that captivate the listener.

Exploring Sound Design Possibilities

FL Studio’s arpeggiator opens doors to endless sound design explorations. By pairing it with diverse synthesizers, samplers, and virtual instruments, you can fashion an array of sonic textures and timbres. Experiment with blending arpeggiated patterns across various sounds to craft a rich and immersive sonic tapestry.

Integration with Automation

Automation adds a layer of dynamism and expressiveness to your music. In FL Studio, you can harness the power of automation to modulate the arpeggiator’s parameters in real-time, infusing your tracks with evolving and captivating sonic movement.

Dynamic Parameter Control

Through automation, you can dynamically alter the arpeggiator’s settings such as rhythm, velocity, and octave, creating evolving textures and captivating transitions. Integrate automation into your compositions to breathe life into your arpeggiator-driven sequences.

Performance and Live Applications

Beyond the studio environment, the arpeggiator in FL Studio shines as a potent tool for live performances. Whether you’re crafting pulsating arpeggio sequences for a stage performance or adding spontaneous flair to your DJ sets, FL Studio’s arpeggiator empowers you to engage and captivate your audience.

Seamless Integration With Performance Controllers

FL Studio’s compatibility with MIDI controllers allows for seamless integration of the arpeggiator into your live performances. By mapping the arpeggiator’s parameters to your controller’s knobs, sliders, or pads, you can unleash dynamic and expressive arpeggio manipulations on stage.

Real-time Arpeggio Manipulation

During live performances, the arpeggiator serves as a creative tool for real-time manipulation. Through intuitive control of the arpeggiator’s settings, you can craft mesmerizing arpeggio variations, transforming your live renditions into immersive sonic journeys.

Frequently Asked Questions On Using The Arpeggiator In Fl Studio: Mastering Musical Harmony


How Does The Arpeggiator Work In Fl Studio?


The Arpeggiator in FL Studio is a powerful tool that transforms chords into intricate melodies by automatically playing individual notes at lightning speed.


Can I Customize The Arpeggiator Patterns In Fl Studio?


Indeed! FL Studio allows you to fully customize the Arpeggiator patterns by adjusting the note order, octave range, and timing, enabling you to create unique and captivating musical sequences.


What Are The Different Arpeggiator Modes Available In Fl Studio?


FL Studio offers various Arpeggiator modes like Up, Down, Up/Down, Random, and Chord, each with its own distinct way of playing the notes. Experimenting with these modes can unleash a world of creative possibilities.


How Can The Arpeggiator Settings Be Synchronized With My Project Tempo In Fl Studio?


Syncing the Arpeggiator settings to your project tempo in FL Studio is effortless. By enabling the “Sync” button, the Arpeggiator will automatically adjust its speed and timing to match the tempo of your project.

Conclusion

With its boundless potential for creativity and expression, the arpeggiator in FL Studio stands as a cornerstone of modern electronic music production. By mastering its intricacies and exploring its diverse applications, you can unlock a world of captivating sonic possibilities.

So dive into the realms of FL Studio’s arpeggiator, and let your compositions flourish with the mesmerizing allure of arpeggiated sequences.

Categories
Archive

Using the 3Xosc Synthesizer in Fl Studio: Master Sound Design

When it comes to producing music in FL Studio, understanding and utilizing different synthesizers is crucial. One of the most popular and versatile synthesizers in the software is the 3Xosc. In this article, we will explore the features and functionality of the 3Xosc synthesizer, and how you can use it to create unique sounds for your music production.

Using the 3Xosc Synthesizer in Fl Studio: Master Sound Design

Credit: www.groove3.com

Using the 3Xosc Synthesizer in Fl Studio: Master Sound Design

Credit: www.youtube.com

What is the 3Xosc Synthesizer?

The 3Xosc synthesizer is a powerful yet user-friendly virtual analog synthesizer that comes bundled with FL Studio. It is capable of producing a wide range of sounds, from classic analog tones to futuristic electronic sounds. With its intuitive interface and flexible modulation options, it is suitable for both beginners and advanced producers.

Features And Functionality

The 3Xosc synthesizer consists of three oscillators, each of which can generate different waveforms such as sine, triangle, square, and sawtooth. These oscillators allow you to create rich and complex sounds by blending them together and adjusting their individual parameters.

In addition to the oscillators, the synthesizer also includes a versatile filter section. The filter allows you to shape the tone of your sound by adjusting parameters such as cutoff frequency, resonance, and filter type (low-pass, high-pass, band-pass, etc.). This feature is especially useful for creating unique and dynamic sound textures.

Furthermore, the 3Xosc synthesizer offers various modulation options to add movement and expression to your sounds. It includes three envelope generators for controlling the volume, pitch, and filter modulation. Additionally, there are two LFOs (Low-Frequency Oscillators) that can modulate different parameters such as pitch, filter, and oscillator phase.

Using the 3Xosc in FL Studio

Now that you understand the basic features and functionality of the 3Xosc synthesizer, let’s explore how you can use it to create your own sounds in FL Studio.

  1. Open FL Studio and create a new project.
  2. Drag and drop the 3Xosc synthesizer onto a channel in the Step Sequencer.
  3. Click on the 3Xosc to open its interface.
  4. Experiment with the different waveforms and oscillator settings to create desired tones.
  5. Adjust the filter parameters to shape the sound further.
  6. Use the envelope generators and LFOs to add movement and modulation.
  7. Experiment with different modulation routings to achieve unique effects.
  8. Save your preset for future use or create variations by tweaking the settings.
Tips for Using the 3Xosc

Here are some handy tips to enhance your experience when using the 3Xosc synthesizer in FL Studio:

  • Experiment with layering multiple instances of the 3Xosc to create complex and layered sounds.
  • Try automating different parameters to add variation and interest to your sounds over time.
  • Combine the 3Xosc with other synthesizers and effects in FL Studio to create even more unique and textured sounds.
  • Take advantage of the built-in presets in the 3Xosc for inspiration and to quickly access various sound options.

In conclusion, the 3Xosc synthesizer is a powerful tool in FL Studio that allows you to create a wide variety of sounds for your music production. Its user-friendly interface, versatile features, and modulation options make it suitable for both beginners and advanced producers. With a little experimentation and creativity, you can unlock the full potential of the 3Xosc and unleash your musical ideas.

Frequently Asked Questions For Using The 3xosc Synthesizer In Fl Studio: Master Sound Design


What Are The Key Features Of 3xosc Synthesizer In Fl Studio?


The 3Xosc Synthesizer in FL Studio offers three oscillators, multiple waveforms, and versatile sound modulation options.


How To Create A Simple Melody Using 3xosc Synthesizer?


To create a simple melody with 3Xosc Synthesizer, start by selecting a waveform, adjusting the pitch, and adding basic effects.


What Are The Best Tips For Optimizing 3xosc Synthesizer Settings?


Optimize 3Xosc Synthesizer by experimenting with different waveforms, adjusting envelope settings, and utilizing modulation for unique sounds.


Can 3xosc Synthesizer Be Used For Creating Basslines?


Yes, 3Xosc Synthesizer is ideal for creating basslines due to its powerful waveform and modulation capabilities.