Categories
Archive

Creating Sound Effects in Fl Studio: Expert Techniques for Dynamic Results

When it comes to music production, sound effects play a crucial role in enhancing the overall listening experience. Whether you are a seasoned producer or a beginner, learning how to create high-quality sound effects in FL Studio can take your music to the next level.

Credit: www.sweetwater.com
Creating Sound Effects in Fl Studio: Expert Techniques for Dynamic Results

Credit: blog.native-instruments.com

Understanding Sound Effects

Before diving into the world of sound effects creation, it’s important to understand the role they play. Sound effects are used to emphasize actions, enhance mood, and create a more immersive auditory experience. They can range from simple everyday sounds to complex, otherworldly textures.

Getting Started with FL Studio

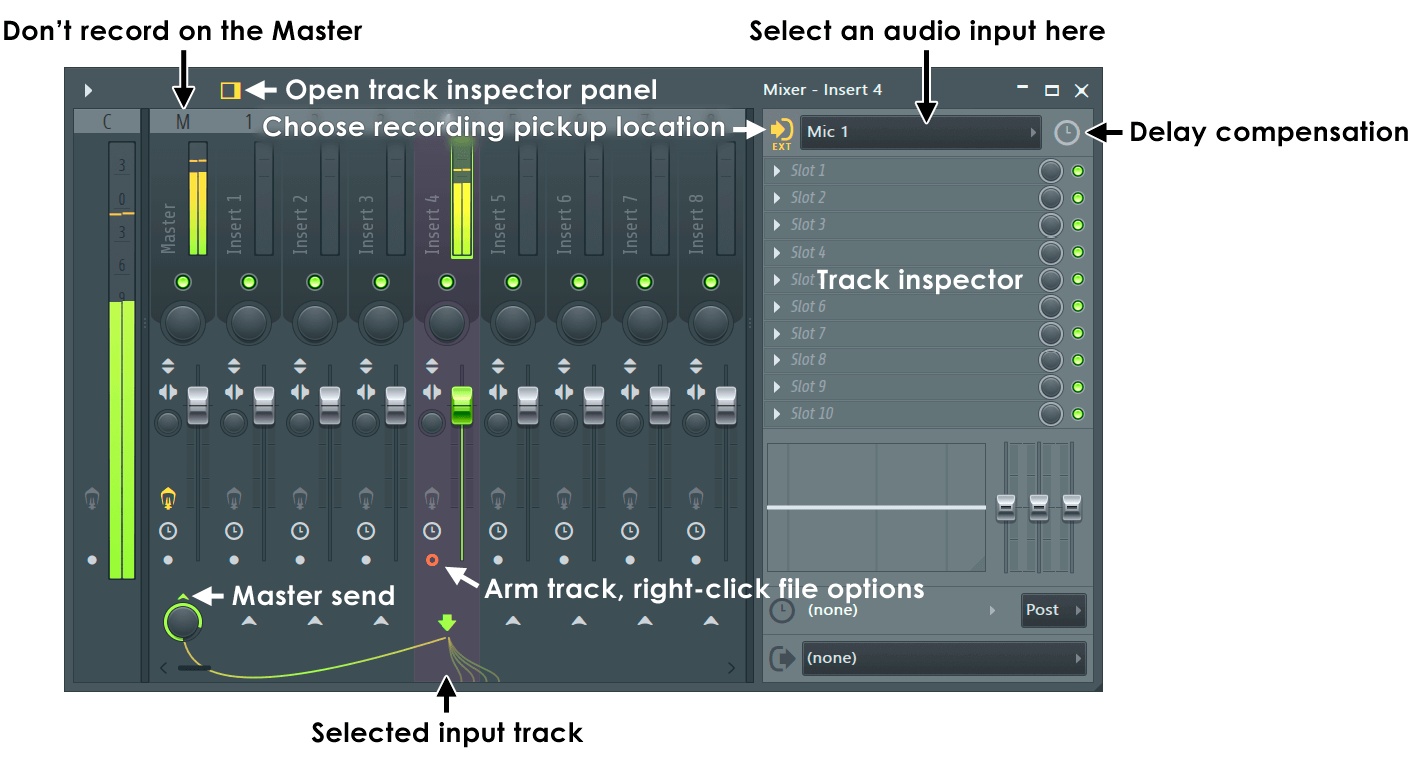
FL Studio is a powerful digital audio workstation that offers a wide range of tools and features for sound design and music production. If you’re new to FL Studio, familiarize yourself with its interface, including the mixer, channel rack, and piano roll.

Creating Custom Sound Effects

Now, let’s delve into the exciting process of creating your own sound effects in FL Studio. Here are some effective techniques to get you started:

1. Layering Sounds

Combine multiple audio samples or synthesized sounds to create a more complex and unique sound effect. Experiment with different combinations and volumes to achieve the desired result.

2. Automation And Modulation

Use FL Studio’s automation and modulation features to add movement and dynamics to your sound effects. This can involve adjusting parameters such as pitch, volume, and filter cutoff over time.

3. Foley Recording

Explore the world of foley recording by capturing everyday sounds and manipulating them to fit your creative vision. This could involve recording sounds using everyday objects and processing them with FL Studio’s effects and processing tools.

4. Synthesis And Sampling

Experiment with FL Studio’s synthesis and sampling capabilities to create original sound effects. Whether you’re crafting futuristic sci-fi sounds or realistic environmental textures, the possibilities are endless with FL Studio’s versatile instruments and samplers.

Using Effects and Processing

Once you’ve crafted your sound effects, it’s time to enhance and polish them using FL Studio’s built-in effects and processing tools. Here are some essential techniques to consider:

1. Eq And Filtering

Use equalization and filtering to shape the frequency content of your sound effects. This can help emphasize certain sonic characteristics and remove unwanted noise or frequencies.

2. Reverb And Delay

Experiment with reverb and delay effects to add depth and spatial realism to your sound effects. Adjust the parameters to create a sense of space and ambiance that complements your audio creations.

3. Compression And Dynamics

Apply compression and dynamic processing to control the volume and intensity of your sound effects. This can help ensure a consistent and impactful sonic presence in your music productions.

4. Creative Sound Design

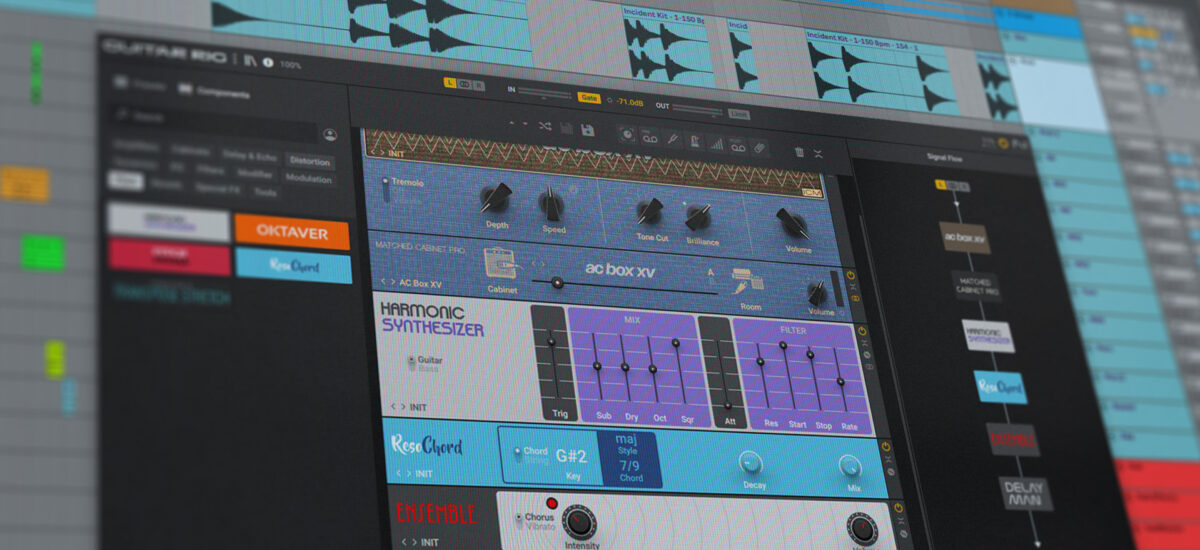
Embrace creative sound design by leveraging FL Studio’s synthesis and processing tools to transform ordinary sounds into extraordinary sonic elements. Explore granular synthesis, harmonic manipulation, and spectral processing to push the boundaries of your sound effects.

Exporting and Integration

Once your sound effects are perfected, it’s time to export them for use in your music projects. FL Studio provides seamless integration for exporting audio files in various formats, allowing you to easily incorporate your custom sound effects into your compositions.

Frequently Asked Questions Of Creating Sound Effects In Fl Studio: Expert Techniques For Dynamic Results


How Can I Create Sound Effects In Fl Studio?


To create sound effects in Fl Studio, you can utilize various features such as plugins, automation, and audio manipulation tools. Experiment with different settings and effects to achieve the desired sound.


What Are Some Essential Plugins For Creating Sound Effects In Fl Studio?


For sound effects creation in Fl Studio, consider using plugins like Harmor, Sytrus, and Gross Beat. These plugins offer a wide range of options for sound manipulation and can help you achieve unique and professional results.


How Can I Use Automation To Enhance My Sound Effects In Fl Studio?


Automation is a powerful tool in Fl Studio that allows you to control various parameters over time. By automating the effects, you can create dynamic and evolving sound effects that add depth and interest to your compositions.


Can I Import My Own Audio Files To Use As Sound Effects In Fl Studio?


Absolutely! Fl Studio provides the option to import audio files, allowing you to use your own recordings or sound libraries for creating sound effects. Simply drag and drop the audio files into the Fl Studio workspace and start manipulating them using the available tools.

Conclusion

With the powerful tools and creative capabilities of FL Studio, you have the potential to craft stunning and immersive sound effects that elevate your music to new heights. Whether you’re crafting subtle background textures or jaw-dropping cinematic impacts, FL Studio empowers you to unleash your sonic imagination and create sound effects that captivate and inspire.

So, dive in and explore the endless possibilities of sound design in FL Studio, and let your creativity soar!
Categories
Archive

Using the Piano Roll in Fl Studio: Mastering Music Production

Interested in composing music using FL Studio? The Piano Roll is an essential tool that can help you unleash your creativity and compose beautiful melodies. In this article, we will explore the various functions of the Piano Roll and how to make the most out of it.

Understanding the Piano Roll

The Piano Roll is a grid-like interface that visually represents the notes and rhythm of your music. It displays a virtual piano keyboard on one side, along with a timeline and grid on the other. This allows you to easily arrange and edit notes in a step-by-step manner.

Composing melodies

The Piano Roll makes it easy to compose melodies even if you don’t have any prior music theory knowledge. Simply select your desired instrument, click on the grid to add notes, and adjust their length and pitch as needed. You can experiment with different rhythms and tempos to create unique melodies that suit your style.

Editing notes

Need to make changes to your composition? The Piano Roll allows you to edit notes with precision. You can easily adjust the position, length, and velocity of each note by clicking and dragging them on the grid. This level of control enables you to fine-tune your melodies and make them sound exactly as you envision.

Advanced editing techniques

The Piano Roll offers various advanced editing techniques to take your music to the next level. You can use functions like quantization to automatically align your notes to the grid, making them sound more synchronized and professional. Additionally, you can apply swing settings to add a subtle groove to your composition.

Credit: eightify.app

Using scale highlighting

If you struggle to find the right notes within a scale, the Piano Roll has a useful feature called scale highlighting. By selecting a specific scale, the Piano Roll will highlight the keys that belong to that scale. This eliminates the guesswork and ensures that your composition remains in key.

Creating harmonies and chords

Want to add depth and richness to your melodies? The Piano Roll makes it simple to create harmonies and chords. By stacking multiple notes together, you can create chord progressions that evoke different emotions. The Piano Roll allows you to easily duplicate, transpose, and manipulate chords to create complex musical arrangements.

Working with MIDI

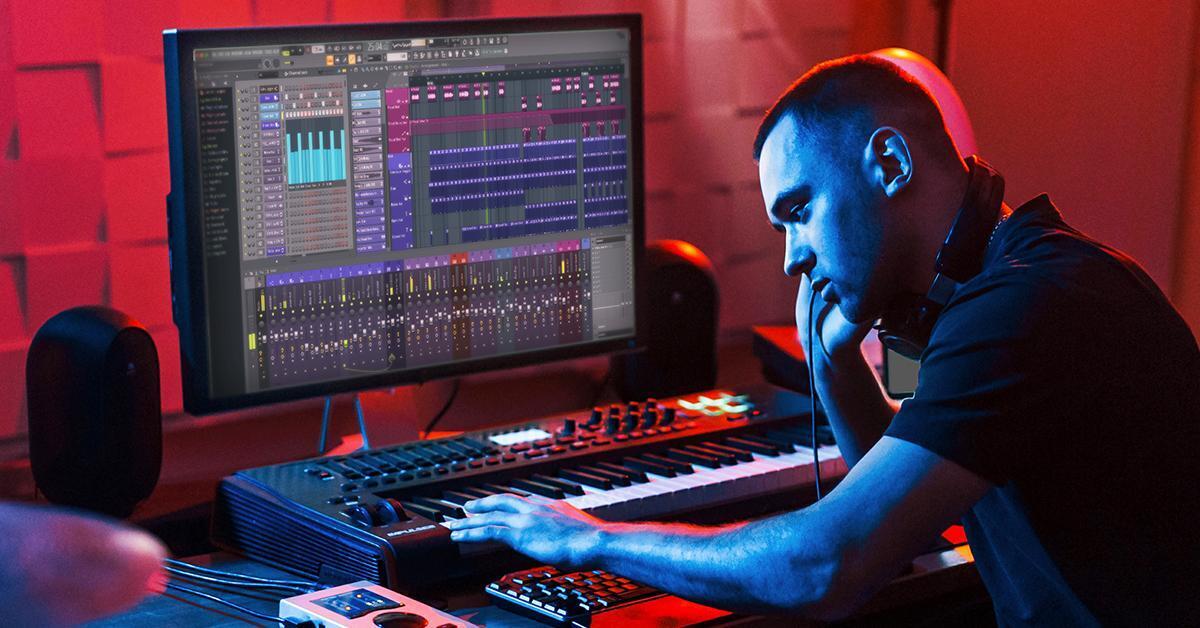
FL Studio is compatible with MIDI controllers, which can greatly enhance your experience with the Piano Roll. By connecting a MIDI keyboard, you can play and record your melodies in real-time, adding a human touch to your compositions. This allows for a more intuitive and expressive music-making process.

Using the Piano Roll in Fl Studio: Mastering Music Production

Credit: www.sweetwater.com

Exporting your composition

Once you have completed your masterpiece in the Piano Roll, you can export it to various file formats, such as WAV or MP3. This enables you to share your music online or collaborate with other musicians. FL Studio provides a seamless export process, ensuring that your composition sounds great in any playback device.

Frequently Asked Questions For Using The Piano Roll In Fl Studio: Mastering Music Production


What Is The Piano Roll In Fl Studio?


The Piano Roll is a graphical interface where you can create and edit MIDI notes for instruments.


How To Access The Piano Roll In Fl Studio?


To access the Piano Roll, just click on the piano icon of your desired instrument channel.


What Can You Do In The Piano Roll?


In the Piano Roll, you can draw, edit, and arrange MIDI notes, adjust velocity, and add articulations.


How Can You Quantize Notes In The Piano Roll?


To quantize notes, select the notes in the Piano Roll, then right-click and choose “Tools” > “Quantize. “

Conclusion

The Piano Roll in FL Studio is a powerful tool that empowers musicians to create incredible melodies and compositions. Whether you are a beginner or an experienced producer, the Piano Roll offers a user-friendly interface with advanced features to bring your musical ideas to life. So go ahead, start experimenting with the Piano Roll, and unlock your creative potential!

Categories
Archive

Understanding Mixing And Mastering in Fl Studio: Pro Tips for Success

Mixing and mastering are crucial steps in the production of professional music recordings. In this article, we will delve into the world of mixing and mastering in FL Studio, a popular digital audio workstation (DAW) used by many music producers and enthusiasts.

What is Mixing?

Mixing is the process of combining individual audio tracks, adjusting their levels, panning, EQ, and effects to create a cohesive and balanced final mix. It involves making sure that each element, such as vocals, drums, guitars, and synths, sits well together and occupies the appropriate space in the stereo field.

In FL Studio, the Mixer window is where all the tracks and their associated plugins are organized and controlled. The Mixer provides a comprehensive set of tools and features to manipulate and enhance your audio recordings.

Basic Mixing Techniques

To achieve a well-mixed track, here are some essential techniques to consider:

  • 1. Balancing Levels: Adjust the volume levels of each track to ensure that no element overpowers the others.
  • 2. Panning: Place each sound element appropriately in the stereo field to create a sense of space and separation.
  • 3. EQ (Equalization): Shape the frequency content of each track to remove unwanted frequencies and enhance desired ones.
  • 4. Compression: Use compression to control dynamics, even out the volume, and add sustain to individual tracks or the overall mix.
  • 5. Effects: Utilize different types of effects, such as reverb, delay, and modulation, to add depth, ambiance, and character to your sounds.

Credit: fltips.com

What is Mastering?

Mastering is the final step in music production, where the mixed track is prepared for distribution. It involves fine-tuning the overall sound, improving clarity, maximizing loudness, and maintaining consistency across an album or a collection of songs.

In FL Studio, the mastering process can be carried out using the Master Mixer track or by routing the mixed track to a separate mix bus. This allows for applying various mastering plugins and effects to the entire mix.

Key Mastering Techniques

Consider the following techniques when mastering your tracks:

  • 1. Equalization: Use EQ to enhance the tonal balance and correct any frequency imbalances.
  • 2. Compression and Limiting: Apply compression and limiting to control dynamics, enhance punch, and ensure the track reaches optimal loudness without clipping.
  • 3. Stereo Widening: Use stereo enhancement techniques to create a wider and more immersive stereo image.
  • 4. Stereo Imaging: Adjust the stereo placement of different elements to create separation and avoid any phase issues.
  • 5. Final Loudness Adjustments: Use a limiter or loudness maximizer to ensure that the track meets industry-defined loudness standards.

Credit: www.amazon.com

Collaboration and Iteration

Throughout the mixing and mastering process, it’s essential to maintain open communication with the artist or musician. Collaboration and iteration are key to achieving the desired sound and meeting the artist’s vision.

FL Studio provides numerous collaboration features, such as the ability to export stems for external mixing or sending project files to other producers for additional input.

Frequently Asked Questions Of Understanding Mixing And Mastering In Fl Studio: Pro Tips For Success


What Is The Importance Of Mixing In Fl Studio?


Mixing in FL Studio is crucial for blending and balancing the individual tracks to create a coherent and impactful sound.


How Does Mastering Improve Audio Quality In Fl Studio?


Mastering in FL Studio enhances the overall sound quality, ensuring consistency, tonal balance, and optimal playback across various audio systems.


What Are Some Common Mixing Mistakes To Avoid In Fl Studio?


Common mixing mistakes to avoid in FL Studio include over-compression, improper use of effects, neglecting the importance of levels, and overlooking frequency clashes.


Why Is It Essential To Understand The Concept Of Eq In Fl Studio?


Understanding EQ in FL Studio allows precise tonal shaping, frequency balancing, and addressing any potential masking issues, resulting in a clearer and well-defined mix.

Conclusion

Understanding the concepts and techniques of mixing and mastering in FL Studio is crucial for anyone looking to produce professional-quality music. By carefully balancing levels, applying EQ and effects, and refining the overall sound, you can create tracks that stand out and captivate your listeners.

With FL Studio’s extensive mixing and mastering capabilities, as well as its collaboration tools, you’ll have all the necessary resources to elevate your music production to new heights.

Categories
Archive

Using the Limiter in Fl Studio: Mastering Your Sound Production

FL Studio is a powerful and versatile digital audio workstation that offers a wide range of tools to help you perfect your music production. One of the most important tools in your arsenal is the limiter, which plays a crucial role in achieving a polished and professional sound.

Using the Limiter in Fl Studio: Mastering Your Sound Production

Credit: howtomakeelectronicmusic.com

What is a Limiter?

A limiter is an audio processing tool that is used to control the dynamic range of a sound. It works by setting a threshold level, beyond which the audio signal is not allowed to peak. This prevents clipping and distortion, ensuring that your tracks maintain a consistent and balanced volume.

How to Access the Limiter in FL Studio

When working in FL Studio, accessing the limiter is a straightforward process. Simply navigate to the mixer window and select the track you wish to apply the limiter to. Then, add the limiter plugin to the effects chain for that track.

Understanding the Controls

Once the limiter is added to your track, you will be presented with a range of controls that allow you to fine-tune its performance. The main controls typically include:

Control Description
Threshold Sets the level at which the limiter starts acting on the audio signal.
Ratio Determines the amount of gain reduction applied once the signal exceeds the threshold.
Attack Controls how quickly the limiter responds to peaks in the audio signal.
Release Determines how long it takes for the gain reduction to stop after the signal falls below the threshold.

Best Practices for Using the Limiter

When using the limiter in FL Studio, there are several best practices to keep in mind to achieve optimal results:

  • Set the Threshold Conservatively: It’s important to set the threshold at a level that allows for some dynamic range in your audio signal, without allowing it to peak and distort.
  • Use a Reasonable Ratio: The ratio setting should be chosen based on the specific needs of your track. A lower ratio will result in a more subtle compression, while a higher ratio is more aggressive.
  • Adjust Attack and Release Settings: Fine-tuning the attack and release controls can help you achieve the desired balance between controlling peaks and maintaining the natural dynamics of your audio.
  • Monitor Gain Reduction: Keep an eye on the gain reduction meter to ensure that the limiter is acting appropriately without overly compressing your signal.

Applying the Limiter in Different Scenarios

Depending on the specific needs of your production, there are different ways to apply the limiter effectively:

  • Master Bus Limiter: Applying a limiter to the master bus can help control the overall dynamics of your mix, ensuring a consistent and balanced sound across all tracks.
  • Individual Track Limiting: Using limiters on individual tracks can help tame any unruly peaks and ensure that each element of your mix sits well within the overall sonic landscape.
  • Creative Sound Shaping: Beyond its traditional mastering and mixing applications, the limiter can also be used creatively to shape the envelope of sounds, giving them a unique character.

Credit: github.com

Frequently Asked Questions On Using The Limiter In Fl Studio: Mastering Your Sound Production


How Does The Limiter Work In Fl Studio?


The Limiter in FL Studio is a plugin used for dynamic range compression. It helps prevent audio signals from exceeding a set threshold, resulting in a more balanced and controlled sound.


What Is The Purpose Of Using The Limiter In Fl Studio?


The Limiter plugin in FL Studio is primarily used to prevent audio clipping and ensure that the mix does not exceed a certain level, allowing for a more polished and professional sound.


How To Apply The Limiter In Fl Studio?


To apply the Limiter in FL Studio, simply insert the plugin on the desired track or master channel. Adjust the threshold, ratio, and other parameters as needed to achieve the desired level of dynamic control.


Can The Limiter Be Used For Mastering In Fl Studio?


Yes, the Limiter in FL Studio is commonly used for mastering purposes. By carefully adjusting the parameters, the Limiter helps maximize the loudness of the final mix while maintaining a balanced and controlled sound.

Conclusion

Mastering the use of the limiter is an essential skill for any music producer, and FL Studio provides a robust toolset to help you achieve professional results. By understanding the principles of audio dynamics and employing the limiter effectively, you can take your music to the next level, with a polished and powerful sound that stands out in the crowded world of modern music production.

Categories
Archive

Using the Drumaxx Drum Machine in Fl Studio: Mastering Beat Production

FL Studio is known for its wide array of powerful instruments and effects, and the Drumaxx drum machine is no exception. Whether you are a novice or a seasoned producer, this plugin can add unique and professional drum sounds to your tracks.

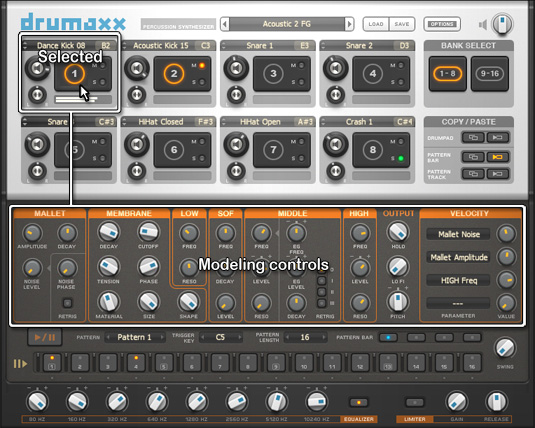
With its intuitive interface and impressive sound design capabilities, Drumaxx gives you complete control over your drum patterns. Let’s dive into how to effectively use this drum machine in FL Studio to create professional-grade beats.

Credit: us.pluginsmasters.com

Getting Started: Installing Drumaxx

Before you can start using Drumaxx in FL Studio, you need to ensure that the plugin is properly installed:

  1. Open FL Studio and go to the “Options” menu.
  2. Select “Manage Plugins” from the dropdown menu.
  3. In the Plugin Manager, click on “Add Path” and locate the folder where you have installed Drumaxx.
  4. Once you’ve added the path, click on “Find Plugins” and FL Studio will scan for available plugins, including Drumaxx.
  5. Once Drumaxx appears in the list, make sure the box next to it is checked.
  6. Click “Close” to exit the Plugin Manager.

Creating Drum Patterns in Drumaxx

Now that Drumaxx is installed, it’s time to start creating drum patterns. Here’s a step-by-step guide on how to get started:

  1. Create a new pattern or open an existing one in FL Studio.
  2. Go to the Channel Rack and click on the “+” button to add a new instrument.
  3. Scroll down and select “Drumaxx” from the list of plugins.
  4. Once Drumaxx is added to the Channel Rack, click on the channel to access its settings.
  5. The Drumaxx interface will appear, showing a range of drum modules.
  6. Click on a drum module to activate it and adjust the parameters such as pitch, volume, and waveform.
  7. Continue adding and customizing drum modules until you have the desired drum sound.
Using the Drumaxx Drum Machine in Fl Studio: Mastering Beat Production

Credit: www.image-line.com

Sequencing Drum Patterns

Now that you have created your drum sound, it’s time to sequence a drum pattern. Follow these steps:

  1. Open the Piano Roll for your Drumaxx channel by double-clicking on it in the Channel Rack.
  2. The Piano Roll allows you to program and edit drum sequences.
  3. Use the pencil or paintbrush tool in the Piano Roll to draw in your drum pattern.
  4. Adjust the length and position of each note to create variations in the drum pattern.
  5. Experiment with different velocities to add dynamics to your drum pattern.
  6. Once you are satisfied with your drum pattern, exit the Piano Roll and play your sequence in FL Studio.

Exploring Drumaxx Features

Drumaxx offers several features that can enhance your drum programming experience:

Integrated Effects

Drumaxx includes a range of integrated effects such as EQ, distortion, and reverb. Experiment with these effects to shape your drum sound and add depth to your mix.

Modulation And Automation

Drumaxx allows you to modulate and automate various parameters. Use this feature to create evolving drum sequences by gradually changing parameters over time.

Layering Drum Modules

By layering multiple drum modules, you can achieve complex and unique drum sounds. Experiment with different combinations to create your signature drum kit.

Using The Step Sequencer

If you prefer a more traditional step sequencing approach, Drumaxx also includes a built-in step sequencer. This feature allows you to create drum patterns by programming individual steps, providing a hands-on and precise method of sequencing.

Frequently Asked Questions For Using The Drumaxx Drum Machine In Fl Studio: Mastering Beat Production


What Are The Key Features Of The Drumaxx Drum Machine?


The Drumaxx Drum Machine in Fl Studio offers a versatile range of sound-shaping and sequencing capabilities. It includes a comprehensive range of sound sculpting tools, flexible pattern creation, and extensive modulation options.


How Can I Utilize The Drumaxx Drum Machine In Fl Studio?


You can harness the power of Drumaxx by exploring its extensive sound design and sequencing tools. Experiment with its numerous modulation options, customize your drum sounds, and create dynamic and expressive drum patterns.


What Makes Drumaxx Stand Out From Other Drum Machines?


Drumaxx sets itself apart by providing a unique combination of synthesis and flexible modulation options. Its intuitive interface and extensive sound-shaping capabilities make it a standout choice for electronic music producers.


Can I Integrate Drumaxx With Other Plugins In Fl Studio?


Yes, Drumaxx seamlessly integrates with other plugins in Fl Studio, allowing you to expand and enhance your music production workflow. You can combine it with various effects and instruments to create rich and complex soundscapes.

Conclusion

The Drumaxx drum machine is a powerful tool for producing professional-quality drum sounds in FL Studio. By following these steps and exploring its features, you can create dynamic and unique drum patterns for your music productions. Experiment, practice, and have fun with Drumaxx to take your beats to the next level!

Categories
Archive

Creating a New Project in Fl Studio : Essential Steps for Success

FL Studio is a powerful digital audio workstation that is popular among music producers and enthusiasts. If you’re new to FL Studio and want to start a new project, you’re in the right place. In this guide, we’ll walk you through the step-by-step process of creating a new project in FL Studio.

Credit: www.projectmanager.com

Step 1: Launching FL Studio

The first step is to launch the FL Studio application on your computer. Once the application is open, you will be greeted with the FL Studio interface which consists of various panels and windows.

Step 2: Setting Up the Project

Before you start working on your project, it’s essential to set up the project settings. Click on the “Options” menu and select “Project General Settings.” Here, you can configure the project’s tempo, time signature, and other settings according to your preferences.

Step 3: Adding Instruments and Samples

Once the project settings are in place, you can start adding instruments and samples to your project. FL Studio comes with a wide range of virtual instruments and samples that you can use to create your music. To add an instrument or sample, simply drag and drop it into the channel rack or the playlist.

Step 4: Sequencing and Arranging

With the instruments and samples added, it’s time to start sequencing and arranging your music. The channel rack is where you can sequence your patterns, while the playlist is where you can arrange your patterns into a complete song structure. Use the piano roll to create melodies and patterns for your instruments.

Step 5: Mixing and Effects

FL Studio provides a comprehensive set of mixing and effects tools to fine-tune your music. You can adjust the volume, panning, and apply various effects such as reverb, delay, and equalization to each instrument or sample. The mixer window allows you to control and adjust the various elements of your music.

Step 6: Automation and Editing

Automation adds movement and dynamics to your music. You can automate parameters such as volume, panning, and effects to create dynamic changes over time. In the playlist, you can edit and arrange different sections of your music to bring it all together into a cohesive composition.

Credit: www.shopify.com

Step 7: Exporting the Project

Once you’ve completed your project, it’s time to export it. Click on the “File” menu and select “Export” to choose the desired audio format and settings for your final mix. You can export your project as a WAV, MP3, or any other compatible audio format.

Frequently Asked Questions For Creating A New Project In Fl Studio : Essential Steps For Success


How Do I Create A New Project In Fl Studio?


To create a new project in FL Studio, simply launch the software and click on “File” in the top menu bar. From the dropdown menu, select “New” and then “Empty. ” This will create a new project with no pre-loaded content, allowing you to start from scratch.


What Are The Steps To Start A New Project In Fl Studio?


To start a new project in FL Studio, follow these simple steps:
1. Open FL Studio software. 2. Click on “File” in the top menu bar. 3. Select “New” and then “Empty” from the dropdown menu. 4. Your new project will now be ready to use, with no pre-existing content.


Can I Import Audio Files Into A New Fl Studio Project?


Yes, you can easily import audio files into a new FL Studio project. Simply click on the “File” menu, select “Import,” and choose the audio file you wish to import. FL Studio supports various audio formats, allowing you to seamlessly integrate audio files into your project.


What Is The Recommended File Format For Audio Import In Fl Studio?


FL Studio supports a variety of audio formats, but the recommended file format for audio import is WAV (Waveform Audio File Format). WAV files offer high audio quality and are widely compatible, making them the ideal choice for seamless audio integration in FL Studio projects.

Conclusion

Creating a new project in FL Studio is an exciting process that allows you to unleash your creativity and bring your musical ideas to life. By following the steps outlined in this guide, you can kickstart your music production journey in FL Studio and create your own unique soundscapes.

Categories
Archive

Introduction to Fl Studio : Mastering the Basics for Beginners

FL Studio, also known as Fruity Loops, is a powerful digital audio workstation (DAW) that is widely used by music producers and enthusiasts around the world. With its intuitive interface and advanced features, FL Studio provides a seamless platform for creating, recording, editing, and mixing music.

Key Features of FL Studio

FL Studio offers a wide range of features and tools that make it a popular choice among music creators. Some of the key features are:

  • Step Sequencer: FL Studio’s step sequencer allows users to create patterns and sequences of musical notes easily.
  • Mixer: The mixer in FL Studio enables users to adjust the volume, panning, and effects of each track.
  • Virtual Instruments: FL Studio comes with a wide variety of virtual instruments, including synths, samplers, and drum machines, allowing users to compose music using different sounds and tones.
  • Audio Recording: Users can record live vocals or instruments directly into FL Studio and apply effects and adjustments to their recordings.
  • Automation: FL Studio allows users to automate various parameters such as volume, panning, and effects to create dynamic and evolving sounds.
  • Audio Editing: With FL Studio’s robust audio editing capabilities, users can manipulate and tweak their recordings to perfection.

Getting Started with FL Studio

Here are a few steps to get you started with FL Studio:

  1. Download and Install: Visit the official FL Studio website and download the latest version of the software. Follow the installation instructions provided.
  2. Interface Familiarization: Once you have FL Studio installed, take some time to familiarize yourself with the interface. The main workspace consists of the step sequencer, mixer, piano roll, and playlist, where you’ll be creating and arranging your music.
  3. Create a New Project: Click on “File” and select “New” to start a new project. Give it a name and set your desired tempo.
  4. Adding Sounds: FL Studio comes with a vast library of sounds, or you can import your own. Drag and drop instruments or samples onto the step sequencer to start creating musical patterns.
  5. Arranging Patterns: Use the playlist view to arrange your patterns into a song structure. Simply drag the patterns onto the playlist and arrange them as desired.
  6. Recording: If you want to record live vocals or instruments, connect your audio interface and microphone/instrument to your computer. Click on the record button, and FL Studio will capture your performance.
  7. Mixing and Mastering: Once you have your song arranged, you can start mixing and applying effects to each track in the mixer view. Adjust the levels, add EQ, compression, reverb, and other effects to achieve the desired sound. Once satisfied, export your final mix.
Introduction to Fl Studio  : Mastering the Basics for Beginners

Credit: www.image-line.com

Credit: www.amazon.com

Tips for Using FL Studio

Here are some useful tips to enhance your FL Studio experience:

  • Use Keyboard Shortcuts: Learning keyboard shortcuts will significantly speed up your workflow in FL Studio. Take some time to familiarize yourself with the most commonly used shortcuts.
  • Experiment with Plugins: FL Studio supports a wide range of plugins, including virtual instruments and audio effects. Explore different plugins to expand your sonic palette.
  • Watch Tutorials: There are numerous tutorials available online that can help you learn various techniques and tricks in FL Studio. From the basics to advanced production tips, tutorials can be a valuable resource.
  • Collaborate with Others: FL Studio allows you to collaborate with other musicians and producers seamlessly. Share your project files and collaborate on music projects together.
  • Backup Your Projects: Regularly backup your FL Studio projects to avoid losing your hard work. Use external drives or cloud storage to keep your projects safe.

Remember, practice is key when it comes to producing music in FL Studio. Don’t be afraid to experiment and try new things. With dedication and creativity, you can unlock the full potential of FL Studio and create incredible music.

Frequently Asked Questions For Introduction To Fl Studio : Mastering The Basics For Beginners


What Are The Key Features Of Fl Studio?


FL Studio offers a comprehensive range of tools for music production, including a step sequencer, piano roll, mixer, and a vast library of high-quality sounds and instruments.


How Can Fl Studio Benefit Music Producers?


FL Studio enables music producers to create professional-quality tracks with a user-friendly interface, a wide range of plugins, and support for various music genres.


Is Fl Studio Suitable For Beginners?


FL Studio is beginner-friendly, with intuitive features and tutorials to help new users learn music production techniques and navigate the software effectively.


What Operating Systems Does Fl Studio Support?


FL Studio is compatible with Windows and macOS, providing a versatile platform for music production across different operating systems.

Categories
Archive

Using the Chord Tool in Fl Studio: Master Harmonic Creation.

When it comes to music production, creating captivating melodies and harmonies is essential to crafting memorable tracks. In the digital audio workstation (DAW) environment, Fl Studio stands out as a versatile and powerful platform for music creation.

One of the key features that sets Fl Studio apart is its Chord tool, which empowers producers to easily and efficiently generate complex chord progressions and melodies. Whether you’re a beginner or an experienced producer, understanding how to effectively use the Chord tool in Fl Studio can significantly enhance your music production workflow.

Credit: www.productionmusiclive.com

The Power of Chord Progressions

Chord progressions form the harmonic foundation of music compositions. They establish the emotional and tonal landscape of a piece, guiding the listener through a musical journey. With the Chord tool in Fl Studio, the process of creating and experimenting with chord progressions becomes highly intuitive and accessible.

How To Access The Chord Tool

Upon opening Fl Studio, located at the left-hand side of the piano roll is the Chord tool icon. By clicking on this icon, a menu of preset chord types becomes available, offering options such as major, minor, diminished, and augmented chords, among others.

Using The Chord Tool

Once a specific chord type is selected, simply clicking on the piano roll will create the corresponding chord. This streamlined process enables users to efficiently build chord progressions without needing to manually input each note, saving valuable time and enhancing creativity.

Advanced Chord Customization

Beyond the preset chord types, Fl Studio provides advanced customization options for fine-tuning chord voicings and inversions. By right-clicking on a chord within the piano roll, producers can access a menu of chord editing functionalities, allowing for precise adjustments to the chord structure.

Experimenting With Inversions

Inversions of chords can add depth and movement to a composition. Fl Studio’s Chord tool facilitates easy experimentation with inversions, empowering producers to discover unique harmonic arrangements that elevate their music productions.

Creating Custom Chord Templates

Producers can also save their custom chord progressions as templates within Fl Studio, streamlining the production process for future projects. This feature fosters creativity and allows for the development of a personalized harmonic palette.

Integration with Melody Creation

As the Chord tool streamlines the creation of chord progressions, it seamlessly integrates with Fl Studio’s robust melody and lead creation functionalities. This allows producers to effortlessly build melodic elements that harmonically align with their chord progressions.

Building Melodies On Chord Foundations

With the Chord tool serving as a harmonic guide, producers can construct melodies that complement and enrich the underlying chord progressions. This cohesive integration ensures that the musical elements of a composition work harmoniously together.

Utilizing Scale Highlighting

Fl Studio’s piano roll includes a scale highlighting feature, which visually displays the notes within a selected musical scale. When coupled with the Chord tool, producers gain valuable insight into which notes harmonically align with their chosen chords, facilitating informed and melodic composition.

Credit: blog.presonus.com

Enhancing Workflow and Creativity

Ultimately, the Chord tool in Fl Studio empowers music producers by offering a straightforward and efficient method for generating rich chord progressions and melodies. By reducing the technical barriers associated with chord construction, producers can focus on unleashing their creative visions and exploring new musical possibilities.

Whether you’re looking to craft compelling pop hooks, emotive ballads, or intricate electronic compositions, mastering the Chord tool in Fl Studio equips you with a powerful resource to elevate your music production endeavors.

Frequently Asked Questions Of Using The Chord Tool In Fl Studio: Master Harmonic Creation.


How Do I Use The Chord Tool In Fl Studio?


The Chord Tool in FL Studio allows you to easily create complex chords by simply pressing a single key on your MIDI keyboard. Simply open the Chord Tool, select the desired chord type and inversion, and start playing your MIDI keyboard to hear the chords instantly.


What Are The Benefits Of Using The Chord Tool In Fl Studio?


The Chord Tool in FL Studio offers numerous benefits, such as saving time and effort in composing chords manually. It allows you to experiment with different chord progressions, create harmonies, and effortlessly add depth to your music production. It is a powerful tool for both beginners and experienced producers.


Can I Customize The Chord Types In The Chord Tool?


Yes, you have the freedom to customize the chord types in the Chord Tool. FL Studio provides a wide range of pre-defined chord types, but you can also create your own customized chords by selecting the desired notes from the piano roll.


How Can I Use The Chord Tool To Explore Different Chord Progressions?


The Chord Tool in FL Studio is a great tool for exploring and experimenting with different chord progressions. You can easily switch between different chord types, inversions, and voicings to create unique and interesting progressions that complement your music. It’s a great way to enhance your creative process.

Conclusion

Incorporating the Chord tool into your music production workflow represents a significant advantage in the endeavor to create captivating and dynamic compositions. As you familiarize yourself with the capabilities of the Chord tool, you’ll discover newfound freedom to experiment with harmonic structures, integrate melodies, and express your musical ideas with clarity and impact.

Embrace the potential of the Chord tool in Fl Studio, and unlock a world of harmonic exploration and creative innovation in your music production journey.

Categories
Archive

How Can I Achieve Punchy Drums in a Mix?

Punchy drums are crucial for creating a powerful and impactful mix. Whether you are working on a song, a podcast, or any other audio project, the drums play a vital role in driving the rhythm and energizing the track. In this article, we will explore some effective techniques to help you achieve punchy drums that will make your mix stand out.


1. Start with a Solid Drum Recording

To achieve punchy drums, it is essential to start with a well-recorded drum track. Ensure that the drums are properly tuned, mic’d up correctly, and recorded in a suitable environment. A clean and high-quality recording will provide a solid foundation for the mixing process.

2. Focus on the Kick and Snare

The kick and snare are the backbone of any drum mix, and getting them right is crucial. Use EQ to enhance the attack and body of the kick drum, and add some low-end punch to make it stand out. For the snare, focus on bringing out its crack and presence, while also controlling any unwanted resonances.

3. Layer and Blend Drum Samples

Adding additional drum samples can help you achieve a thicker and more punchy sound. Layering samples alongside the original drum tracks can add depth and impact. Experiment with different samples, blending them with the existing drums, and adjusting the levels and EQ to achieve the desired result.

4. Use Compression Wisely

Compression is a powerful tool for achieving punchy drums. Apply moderate compression to the kick and snare to control the dynamics and add sustain. Use a fast attack time to emphasize the transients and a medium release time to maintain the natural feel.

5. Employ Parallel Compression

Parallel compression, also known as New York compression, can take your drums to the next level. Create a parallel bus where you heavily compress the drum tracks, blending the compressed signal with the original tracks. This technique adds density and impact while retaining the natural dynamics.

6. Utilize Drum Bus Processing

Applying processing to the drum bus can help create a cohesive and punchy drum sound. Experiment with techniques like EQ, saturation, and transient shaping to enhance the overall drum mix. Carefully sculpt the frequencies to bring out the desired characteristics of the drums.

7. Pay Attention to the Room Sound

Capturing the room sound or adding artificial reverb can add depth and realism to the drums. Experiment with different room mic placements and reverb settings to create a sense of ambience that complements the other elements of the mix. Tailor the room sound to suit the genre and style of the music.

Credit: www.linkedin.com

8. Balance the Drum Levels

A well-balanced drum mix is essential for achieving punchy drums. Make sure that each drum element is appropriately leveled in the mix. Use panning to create separation and stereo width, and ensure that the drums are not overpowering other instruments or vocals.

9. Don’t Overlook Drum Editing

Clean up any unwanted noise, clicks, or inconsistencies in the drum tracks through careful editing. Use tools like crossfades and transient editing to smooth out drum hits and create a more polished sound. A well-edited drum track sets the stage for a punchy mix.

How Can I Achieve Punchy Drums in a Mix?

Credit: m.youtube.com

10. Trust Your Ears and Experiment

Remember that achieving punchy drums is subjective and can vary depending on the musical context. Trust your ears and the vision you have for the mix. Experiment with different techniques and plugins to find the perfect combination that suits your style and enhances the impact of the drums in the mix.

By following these tips and techniques, you will be well on your way to achieving punchy drums in your mixes. Remember that practice and experience play a significant role, so don’t be afraid to keep honing your skills and refining your craft.

Frequently Asked Questions For How Can I Achieve Punchy Drums In A Mix?


How Can I Make My Drums Punchy?


To achieve punchy drums, focus on the right combination of compression, EQ, and transient shaping.


What Role Does Compression Play In Drum Mixing?


Compression helps control the dynamic range of drums, adding punch and impact to the overall sound.


Why Is Eq Important For Drum Mix?


EQ allows you to boost or cut specific frequencies, helping to enhance the clarity and impact of drums in the mix.


Is Transient Shaping Beneficial For Drum Processing?


Yes, transient shaping allows you to emphasize or soften the drum transients, enhancing punch and clarity in the mix.

Categories
Archive

Understanding the Mixer in Fl Studio: Mastering Sound Levels

FL Studio is a popular digital audio workstation (DAW) that is used by music producers and musicians to create, edit, and mix music. One of the key components of FL Studio is the mixer, which plays a crucial role in the production and finalization of a track. In this article, we will explore the various functions and features of the mixer in FL Studio, and how you can use it to enhance your music production.

Understanding the Mixer in Fl Studio: Mastering Sound Levels

Credit: jrmastering.com

What is the Mixer in FL Studio?

The mixer in FL Studio is a powerful tool that allows you to control and manipulate the audio signals from different tracks in your project. It provides a visual representation of each track, allowing you to adjust the volume, panning, and effects of individual sounds, as well as the overall mix of your project. Understanding the different elements of the mixer is essential for creating a professional and polished sound.

Channels and Inserts

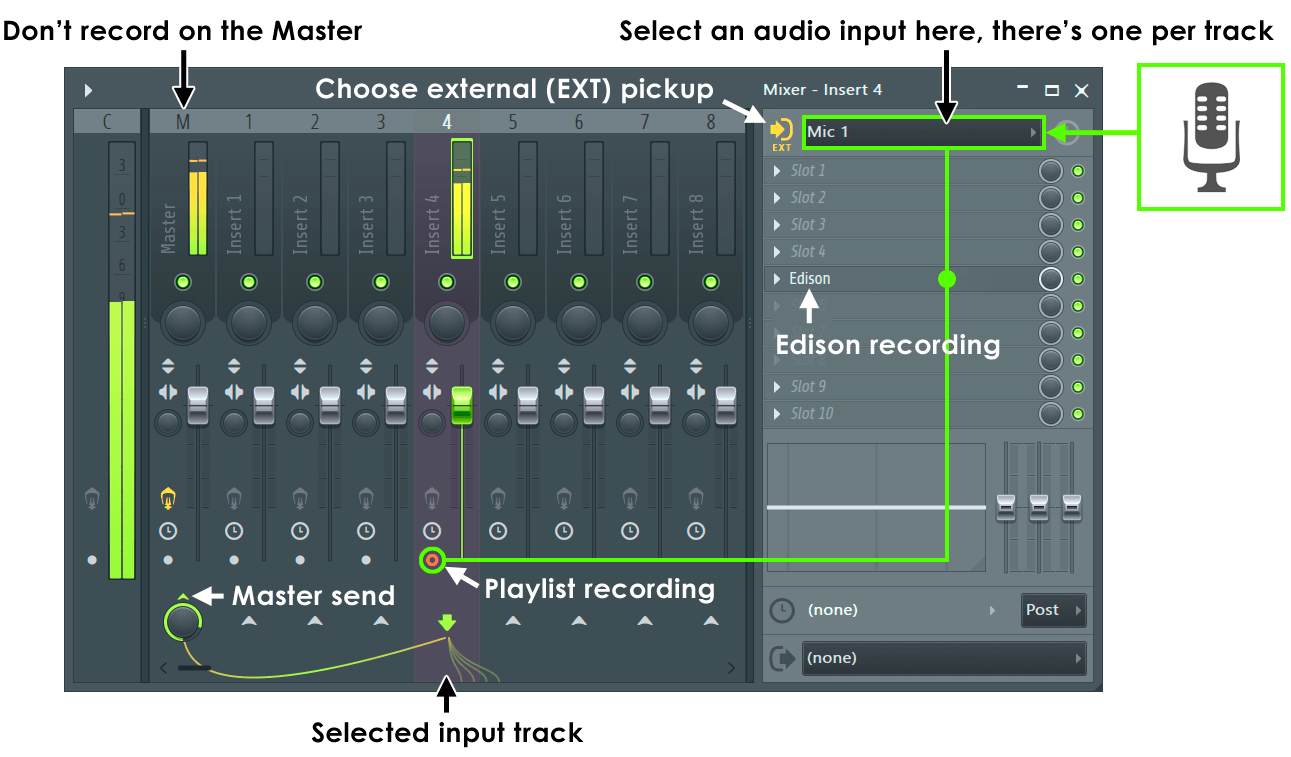
When you open the mixer in FL Studio, you will see a series of channels that correspond to the tracks in your project. Each channel represents a specific track and contains controls for volume, panning, and effects. You can also add additional effects to a channel using inserts, allowing you to further shape and enhance the sound of each track.

Understanding the Mixer in Fl Studio: Mastering Sound Levels

Credit: www.image-line.com

Routing and Mixing

The mixer in FL Studio allows you to route audio from different tracks to individual channels, giving you the ability to create complex and dynamic mixes. You can use routing to send the output of one track to another track for further processing, or to create submixes that combine multiple tracks into a single channel. This flexibility is essential for creating a professional and cohesive mix.

Effects and Processing

FL Studio comes with a wide range of built-in effects and processors that you can use to shape and manipulate the sound of your tracks. These include EQ, compression, reverb, delay, and more, allowing you to add depth and character to your music. The mixer provides easy access to these effects, making it simple to apply them to individual tracks or the overall mix.

Automation and Control

One of the most powerful features of the mixer in FL Studio is its automation capabilities. Automation allows you to control and manipulate various parameters of the mixer and individual plugins over time, such as volume, panning, and effect parameters. This is essential for creating dynamic and expressive mixes, and can be used to add movement and interest to your music.

Final Thoughts

The mixer is a central component of FL Studio, and mastering its functions is essential for achieving professional-sounding mixes. By understanding the different elements of the mixer, such as channels, routing, effects, and automation, you can take your music production to the next level and create polished and compelling tracks. Experiment with the features of the mixer and don’t be afraid to push the boundaries of your creativity to achieve the best results.

Frequently Asked Questions For Understanding The Mixer In Fl Studio: Mastering Sound Levels


How Does The Mixer Work In Fl Studio?


The mixer in FL Studio allows you to adjust the volume, panning, and effects of individual tracks to create a balanced and polished sound for your music.


What Are The Main Components Of The Fl Studio Mixer?


The FL Studio mixer consists of channels, inserts, sends, and master track, each serving a unique purpose in the production process.


How Can I Add Effects To A Channel In The Fl Studio Mixer?


To add effects to a channel, simply click on the desired insert slot, choose an effect plugin, and adjust the settings to achieve the desired sound enhancement.


Can I Route Multiple Channels To A Single Mixer Track In Fl Studio?


Yes, you can route multiple channels to a single mixer track by using the channel rack and linking the channels to the desired mixer track.