Categories
Archive

Introduction to Ableton Live : Master Music Production

Ableton Live is a powerful digital audio workstation (DAW) that has become a go-to tool for musicians, producers, and DJs around the world. Whether you’re a beginner or a seasoned professional, Ableton Live offers a wealth of features and tools that can take your music production to the next level. In this article, we will provide an overview of Ableton Live and discuss its key features.

The Interface

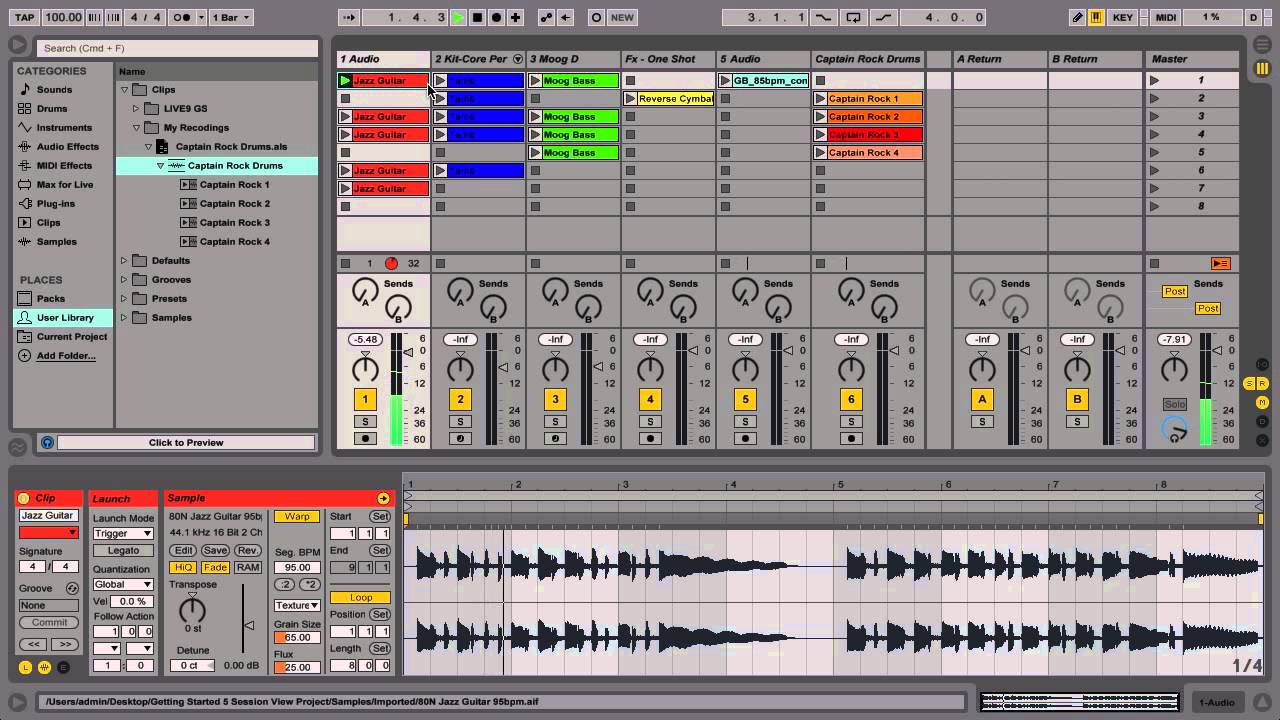
Ableton Live has a user-friendly and intuitive interface that allows users to easily navigate and access its various features. The main screen is divided into two views: Session View and Arrangement View.

The Session View is designed for live performances and improvisation. It uses a grid-based layout where you can trigger and arrange different clips of audio, MIDI, and effects. This allows for real-time manipulation and experimentation with your music.

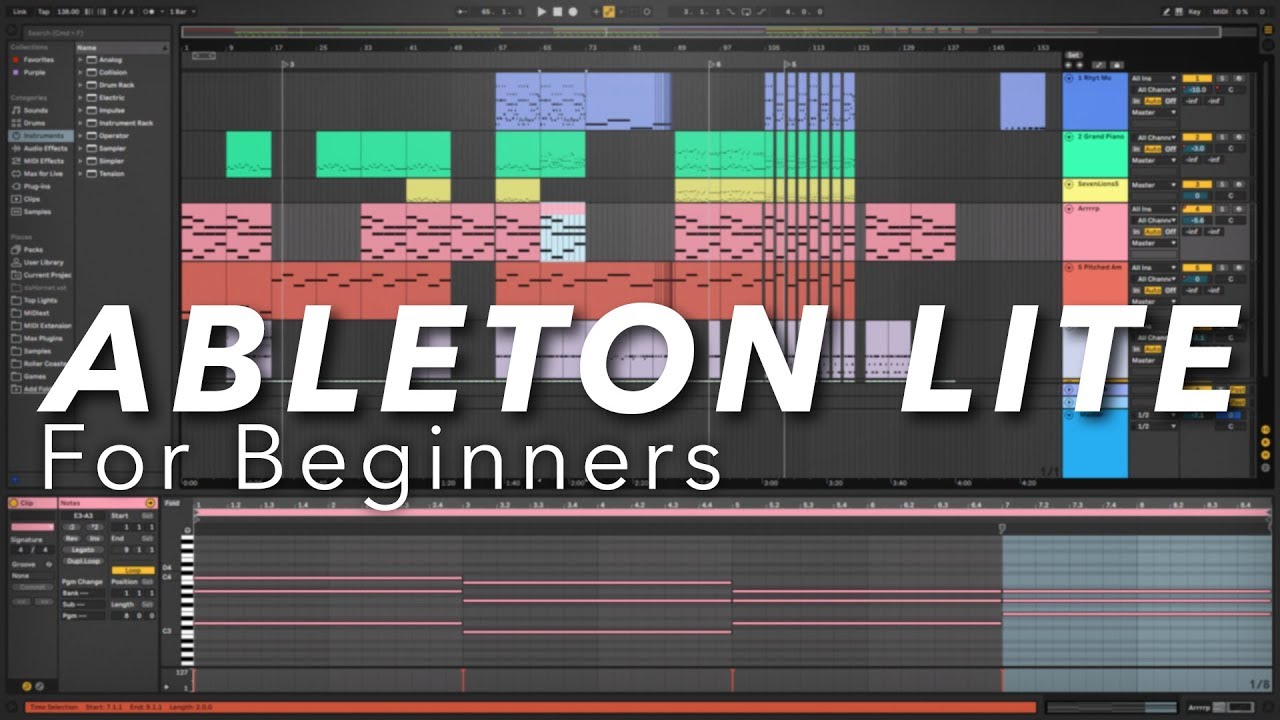
The Arrangement View is more traditional and resembles a timeline. It is used for arranging and composing your tracks. Here, you can edit and sequence your clips, add automation, and fine-tune your music.

Clip-based Workflow

Ableton Live’s clip-based workflow is one of its standout features. Instead of working with traditional timelines and tracks, Live encourages users to work with clips. Clips are small pieces of audio or MIDI that can be triggered, looped, and manipulated.

Working with clips allows for a more flexible and creative approach to music production. You can easily experiment with different variations of a musical idea, trigger effects in real-time, and seamlessly arrange and rearrange your clips on the fly.

Furthermore, Live’s unique warping feature enables you to easily match the timing and tempo of different clips, making it a valuable tool for remixing and live performances.

Instruments and Effects

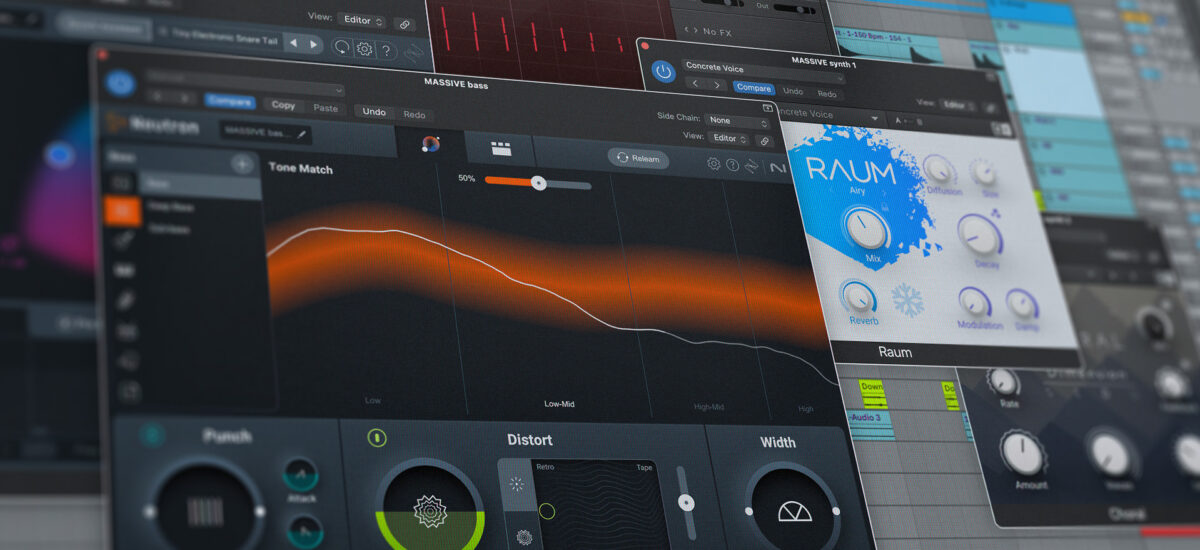
Ableton Live comes bundled with a wide range of virtual instruments and effects that cover a variety of musical styles and genres. From synthesizers and samplers to drum machines and guitar emulators, Live offers a vast collection of high-quality sounds and tools to enhance your music production.

Additionally, Live supports third-party VST and AU plugins, allowing you to expand your sonic possibilities even further. This means you can integrate your favorite plugins seamlessly into your Ableton Live workflow.

Max for Live Integration

Ableton Live also integrates with Max for Live, which is a visual programming environment that expands the functionality of Live. Max for Live allows users to create custom devices, effects, and instruments using a graphical interface.

Max for Live offers endless possibilities for sound design and experimentation. You can build your own unique instruments, create complex effects chains, and develop innovative performance setups.
Introduction to Ableton Live : Master Music Production

Credit: www.ableton.com

Workflow and Performance Enhancements

Ableton Live continually strives to improve its workflow, optimizing the user experience and enhancing performance. The latest versions of Live have introduced several features to streamline music production:

  • Group Tracks: Easily manage and organize multiple tracks by grouping them together.
  • Browser Collections: Create custom collections of your favorite sounds and devices for quick access.
  • Multiple MIDI Clip Editing: Edit multiple MIDI clips simultaneously, making it easier to work on complex compositions.
  • Automation Envelopes: Add and edit automation more easily with improved visualization and control.
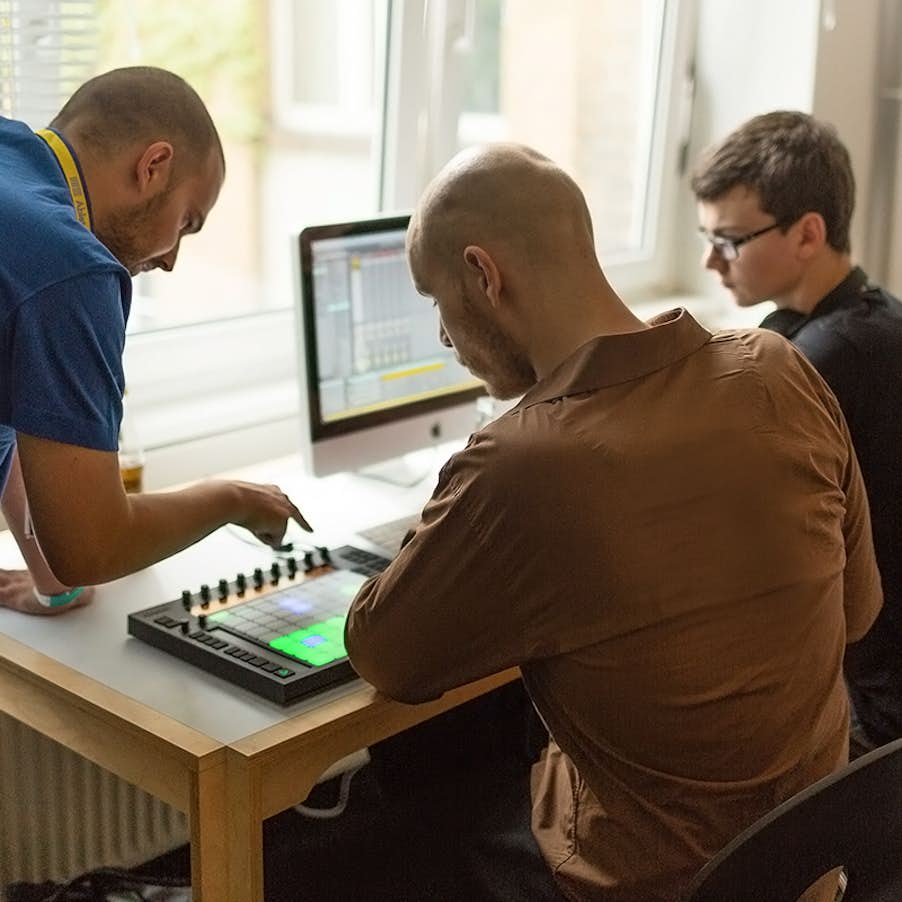
  • Push Integration: Ableton Push is a hardware controller specifically designed for Live, providing hands-on control of your music production.
Introduction to Ableton Live : Master Music Production

Credit: www.youtube.com

Frequently Asked Questions For Introduction To Ableton Live : Master Music Production


What Is Ableton Live Used For?


Ableton Live is a popular digital audio workstation used for music production, live performance, and DJing.


How To Use Midi In Ableton Live?


To use MIDI in Ableton Live, simply connect your MIDI controller, select the track, and start playing or recording your MIDI data.


What Are The Different Versions Of Ableton Live?


Ableton Live comes in three main versions: Intro, Standard, and Suite, each offering different features and capabilities.


Where To Find Ableton Live Tutorials?


You can find Ableton Live tutorials on various online platforms such as YouTube, music production websites, and official Ableton Live website.

Conclusion

Ableton Live is a versatile and powerful DAW that offers a unique and intuitive approach to music production. Its clip-based workflow, seamless integration of instruments and effects, and continuous updates and enhancements make it a popular choice for both beginners and professionals.

Whether you’re creating electronic music, recording live instruments, or performing live on stage, Ableton Live provides the tools and flexibility you need to bring your musical ideas to life.
Categories
Archive

Understanding Sampling in Ableton Live : Master the Essential Techniques

If you are a music producer or an aspiring musician, you have likely come across the term ‘sampling’ at some point. Sampling is a technique widely used in popular music production, and one of the most powerful tools to create unique and innovative sounds. In this article, we will break down the concept of sampling and explore how it is utilized in the popular software, Ableton Live.

What is Sampling?

At its core, sampling is the process of taking a small portion, or a ‘sample,’ of a pre-recorded audio track or sound and using it as an instrument or sound source in your own composition. This can involve anything from sampling a drum break from a classic recording to extracting a particular synth sound from a song in order to incorporate it into your own production.

Sampling has been prevalent in music production since the 1980s, when samplers became popular in hip-hop, electronic, and pop music. Since then, technology has advanced, and sampling has become much more accessible, with software like Ableton Live making it easier than ever to integrate samples into your own compositions.

Sampling in Ableton Live

Ableton Live is a powerful digital audio workstation (DAW) that provides a range of tools and features designed specifically for sampling. It offers a user-friendly interface and a comprehensive set of tools to manipulate samples, enabling producers to explore endless creative possibilities.

One of the key features of Ableton Live is its ability to slice and dice samples. This allows you to break down a larger audio file into smaller parts, which can then be rearranged, looped, or manipulated in various ways. This feature is particularly useful when working with drum loops or vocal phrases, as it allows for precise control over individual elements within a sample.

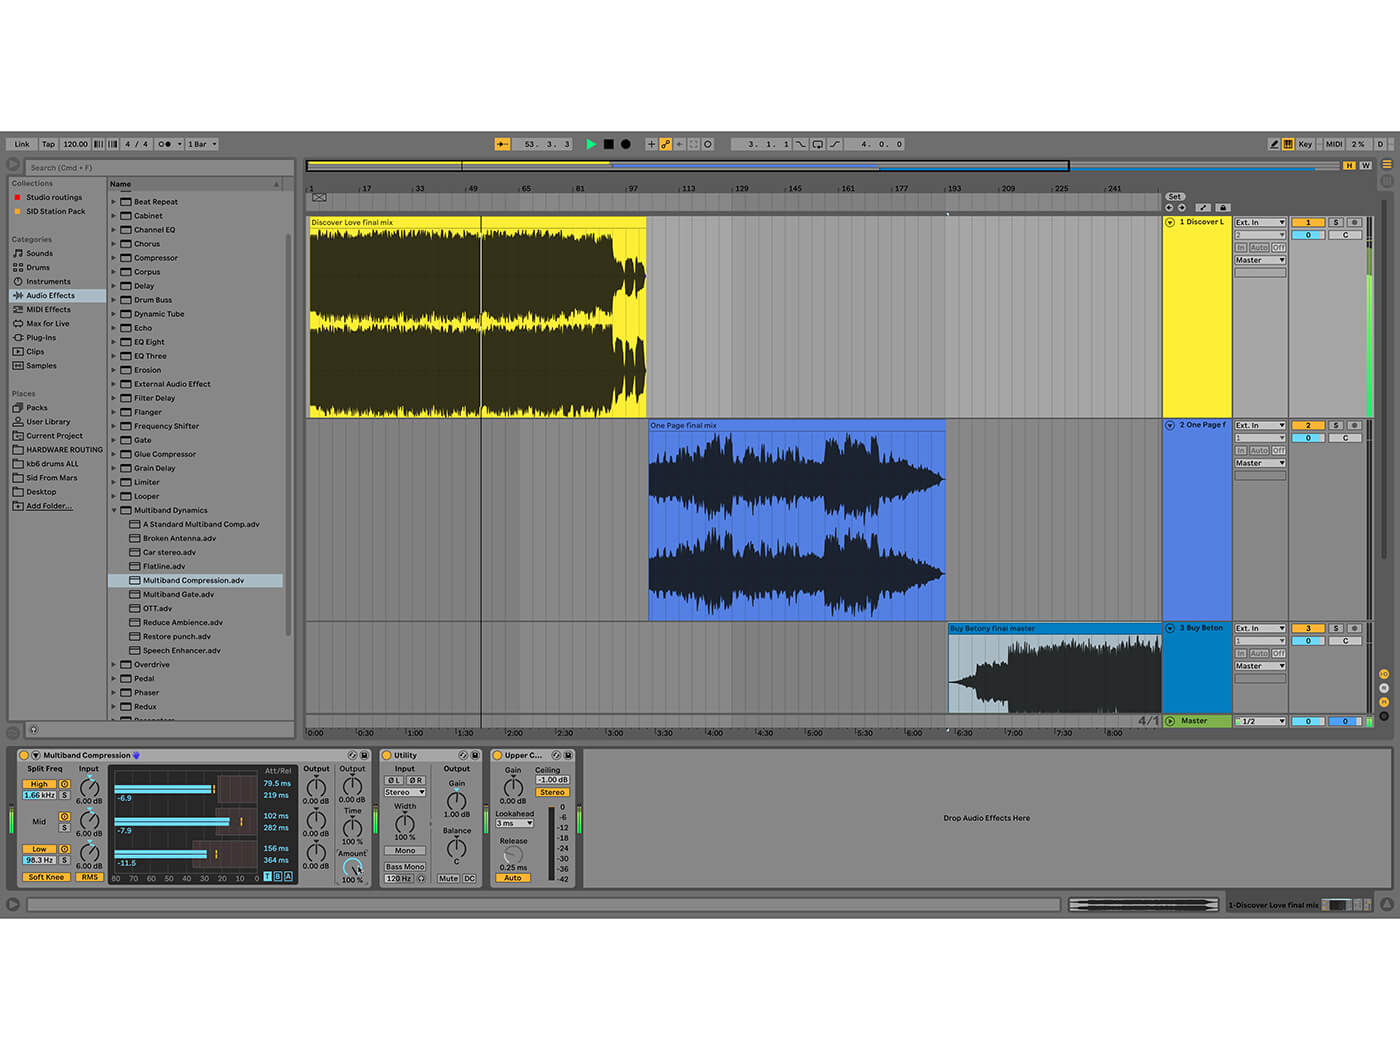
Ableton Live also offers a wide array of built-in effects and processors that can be applied to your samples. From EQ and compression to reverb and delay, these effects add depth and character to your samples, allowing you to shape and mold them into something entirely new.

Credit: blackoctopus-sound.com

Understanding Sampling in Ableton Live  : Master the Essential Techniques

Credit: blog.native-instruments.com

Using Samples in Ableton Live

Now that we have a basic understanding of sampling and its relation to Ableton Live, let’s explore some practical ways to use samples in your own productions.

1. Drum Sampling

Drum sampling is a popular technique used in various genres of music. By taking drum hits or loops from existing recordings or sample packs, you can construct unique drum patterns for your own tracks. Ableton Live’s slicing feature makes it easy to rearrange and manipulate drum samples, allowing you to create intricate rhythms and exciting variations.

2. Creating Melodies

Samples can also be used to create melodies. By taking short musical phrases or individual notes from existing recordings, you can create unique melodies that add depth and texture to your own compositions. Ableton Live’s warping feature allows you to adjust the pitch and timing of your samples, giving you even more creative control over your melodies.

3. Sound Design

Sampling is a powerful tool for sound design. By extracting unique sounds from existing recordings or field recordings, you can create your own library of custom sounds to use in your productions. Ableton Live’s built-in effects and processors offer endless possibilities for shaping and manipulating these samples, allowing you to create original and distinctive sounds.

Frequently Asked Questions On Understanding Sampling In Ableton Live : Master The Essential Techniques


What Is Sampling In Music Production?


Sampling is the process of taking a portion of a sound recording and reusing it in a different song or piece of music.


How Can I Use Sampling In Ableton Live?


In Ableton Live, you can use sampling to manipulate, chop, and rearrange audio clips to create unique sounds and compositions.


Why Is Sampling Important In Music Production?


Sampling is important as it allows producers to create new and innovative music by incorporating existing sounds in a creative way.


What Are The Benefits Of Sampling In Ableton Live?


Using sampling in Ableton Live enables you to experiment with different sounds, textures, and tones, expanding your creative possibilities.

Conclusion

Sampling is a fundamental technique in music production, and Ableton Live provides a comprehensive set of tools and features to help you explore the creative possibilities of sampling. Whether you are using samples for drum patterns, melodies, or sound design, Ableton Live’s intuitive interface and powerful features make it an ideal choice for incorporating samples into your own compositions.

With practice and experimentation, you can harness the power of sampling to produce unique and innovative music that stands out from the crowd. So, dive into the world of sampling in Ableton Live and let your creativity soar!

Categories
Archive

Using the Limiter in Ableton Live : Mastering Your Sound.

Ableton Live is a powerful digital audio workstation (DAW) that offers a wide range of tools and effects for music production. One essential tool in every producer’s toolkit is the Limiter. The Limiter is an audio effect used to control the dynamic range of a track by preventing the audio signal from exceeding a certain level, known as the “ceiling”. In this article, we will explore how to use the Limiter in Ableton Live to optimize the quality and loudness of your tracks.

Using the Limiter in Ableton Live : Mastering Your Sound.

Credit: musictech.com

Step 1: Adding the Limiter to a Track

To begin, open Ableton Live and create a new project. Select a track that you want to apply the Limiter to and navigate to the “Audio Effects” section of the sidebar. Locate the “Limiter” effect and drag it onto the track.

Using the Limiter in Ableton Live : Mastering Your Sound.

Credit: www.masteringthemix.com

Step 2: Adjusting the Parameters

Once the Limiter is added to the track, you can start adjusting the parameters to achieve the desired effect. The main parameters you need to focus on are:

Parameter Description
Threshold This determines the volume level at which the Limiter kicks in. Adjust the threshold according to the dynamics of your track. Lower values result in more limiting.
Gain This controls the amount of gain applied to the limited signal. Increase the gain to add more loudness to your track, but be careful not to introduce distortion.
Release The release time determines how quickly the Limiter stops applying gain reduction after the input level drops below the threshold. Longer release times can result in a more natural sound.

Step 3: Monitoring the Gain Reduction

It’s important to monitor the gain reduction meter while adjusting the parameters. The gain reduction meter displays the amount of gain being reduced by the Limiter. Aim for a moderate amount of gain reduction to achieve a balanced sound without sacrificing too much dynamics.

Step 4: Comparing Before and After

When working with the Limiter, it’s always a good idea to compare the sound before and after applying the effect. Toggle the Limiter on and off to hear the difference it makes to the overall loudness and dynamics of the track. Fine-tune the parameters until you achieve the desired result.

Step 5: Using the Limiter as a Mastering Tool

The Limiter is also commonly used as a mastering tool to ensure the final mix reaches an optimal loudness level. In this case, instead of adding the Limiter to individual tracks, you apply it to the master track. Adjust the parameters to achieve a balanced and loud final mix.

Remember, moderation is key when using the Limiter. It’s easy to over-compress your tracks and end up with a result that lacks dynamics and sounds unnatural. Use your ears and make small adjustments to preserve the integrity of your mix while achieving a professional sound.

By following these steps, you can effectively use the Limiter in Ableton Live to enhance the quality and loudness of your tracks. Experiment with different settings and find the sweet spot that works best for your music. With practice and a keen ear, you’ll be able to achieve polished and professional-sounding tracks.

Frequently Asked Questions Of Using The Limiter In Ableton Live : Mastering Your Sound.


What Is The Limiter In Ableton Live?


The Limiter in Ableton Live is a powerful audio effect used to prevent audio signals from exceeding a specified level.


How Does The Limiter Work In Ableton Live?


The Limiter works by setting a threshold level, preventing the audio signal from exceeding that point, and applying gain to boost the overall volume.


Is The Limiter Essential For Audio Production?


Yes, the Limiter is essential for controlling and maximizing the loudness of audio tracks in Ableton Live, ensuring a balanced and professional sound.


Can The Limiter Be Used For Mastering In Ableton Live?


Absolutely, the Limiter is commonly used in mastering to increase the loudness of a mix while preventing clipping and distortion.

Categories
Archive

Using the Midi Effects in Ableton Live: Master Midi Manipulation

When it comes to music production, Ableton Live is a powerful software that offers a wide range of features and tools. One of its standout features is the Midi Effects, which allow you to enhance and manipulate your MIDI tracks in creative ways. In this article, we will explore how to use the Midi Effects in Ableton Live to take your music production to the next level.

Midi Effects Overview

Before we delve into the specific Midi Effects in Ableton Live, let’s understand what Midi Effects are. Midi Effects are virtual devices within Ableton Live that can be inserted into your MIDI tracks to modify and shape the MIDI data in real-time.

These effects can be used to create complex melodies, harmonies, rhythmic patterns, and much more. They provide endless possibilities for experimentation and creativity, allowing you to add depth and complexity to your music.

Using the Midi Effects in Ableton Live: Master Midi Manipulation

Credit: www.ableton.com

Credit: www.amazon.com

Types of Midi Effects

Ableton Live offers a variety of Midi Effects that serve different purposes. Let’s take a look at some of the most commonly used Midi Effects:

Midi Effect Description
Arpeggiator Generates arpeggios based on the incoming MIDI notes.
Chord Transposes incoming MIDI notes to create chords.
Note Length Controls the duration of MIDI notes.
Random Introduces randomness to the MIDI data.
Scale Restricts incoming MIDI notes to a specific scale.

How to Use Midi Effects in Ableton Live

Now that we have an understanding of the Midi Effects available in Ableton Live, let’s explore how to use them effectively:

  1. Open Ableton Live and create a new MIDI track.
  2. Click on the “Midi Effects” category in the browser, and drag the desired Midi Effect onto the MIDI track.
  3. Adjust the parameters of the Midi Effect to achieve the desired effect. For example, in the Arpeggiator, you can choose the arpeggio pattern and adjust the rate, while in the Chord effect, you can choose the chord type and invert the chords.
  4. Experiment with different Midi Effects and their parameters to create unique sounds and melodies.
  5. Combine multiple Midi Effects to create complex and evolving compositions.

Tips for Using Midi Effects

Here are some tips to help you make the most out of the Midi Effects in Ableton Live:

  • Automate the parameters of the Midi Effects to introduce variations and add movement to your music.
  • Map the Midi Effect parameters to a MIDI controller for real-time control and performance.
  • Layer different Midi Effects to create intricate and layered textures.
  • Experiment with different combinations of Midi Effects to discover unexpected and unique results.
  • Save your favorite Midi Effect chains as presets for future use.

Frequently Asked Questions On Using The Midi Effects In Ableton Live: Master Midi Manipulation


What Are Midi Effects In Ableton Live?


MIDI effects are tools used to modify, process, or generate MIDI data within Ableton Live. They include devices like arpeggiators, chord plugins, and more.


How Can Midi Effects Enhance My Music Production?


MIDI effects can add creativity and complexity to your music by transforming the MIDI data of your tracks, enabling you to explore new musical ideas and create unique sounds.


What Are Some Popular Midi Effects Used In Ableton Live?


Common MIDI effects in Ableton Live include Arpeggiator, Chord, Scale, Note Length, Pitch, Random, and Velocity. Each effect offers unique ways to manipulate MIDI data.


Can Midi Effects Help In Creating Dynamic Melodies?


Yes, MIDI effects such as arpeggiators and scales can assist in creating dynamic and intricate melodies by automatically generating rhythmic patterns and harmonies.

Conclusion

The Midi Effects in Ableton Live offer a world of possibilities for enhancing and manipulating your MIDI tracks. Whether you want to create complex melodies, unique harmonies, or experiment with rhythmic patterns, the Midi Effects can help you achieve your musical vision. So, take some time to explore these effects, experiment with different combinations, and let your creativity soar!

Categories
Archive

Using the Arrangement View in Ableton Live : Mastering Music Production.

Ableton Live is a powerful music production software that offers two main views for creating and arranging music: Session View and Arrangement View. In this blog post, we will focus on the latter, the Arrangement View, and explore its features, benefits, and how to use it effectively.

Overview of Arrangement View

The Arrangement View in Ableton Live is designed for linear music creation and arrangement. It resembles a traditional timeline-based recording software, where you can arrange and rearrange your clips, tracks, and MIDI notes to create your final composition.

Using the Arrangement View in Ableton Live  : Mastering Music Production.

Credit: audioservices.studio

Credit: www.facebook.com

Benefits of Arrangement View

The Arrangement View offers several benefits to musicians and producers:

  • Flexible composition: With the Arrangement View, you can easily experiment with different song structures, create dynamic arrangements, and make changes to your composition on the fly.
  • Precise control: Unlike the Session View, the Arrangement View allows for precise control over your music by enabling you to edit and arrange individual clips, automate parameters, and apply effects with ease.
  • Advanced editing features: The Arrangement View offers powerful editing capabilities such as MIDI note manipulation, audio warping, time-stretching, and more. These features allow you to refine your music and achieve the desired sound.

Using the Arrangement View

1. Setting Up Your Tracks

Start by setting up your tracks in the Arrangement View. Each track represents a layer of sound or a specific instrument in your composition. You can create new audio or MIDI tracks by right-clicking anywhere in the track area and selecting the desired option from the menu.

2. Adding Clips

Clips are small chunks of pre-recorded MIDI or audio data that you can arrange in the Arrangement View. To add a clip, simply drag and drop it from the Browser panel onto the desired track. You can then resize, duplicate, or move the clips within the timeline to create your arrangement.

3. Arranging Your Composition

Once you have added clips to your tracks, you can start arranging your composition by dragging and dropping the clips within the timeline. This allows you to create different sections of your song, such as verses, choruses, and bridges. You can also copy and paste clips to repeat patterns or create variations.

4. Editing And Shaping Your Music

The Arrangement View offers a wide range of editing tools to shape and refine your music. You can adjust MIDI notes, apply quantization to tighten up timing, use audio warping to match different tempo and pitch, and automate parameters to create dynamic changes throughout your composition.

5. Applying Effects And Mixing

Once your composition is arranged, you can apply effects to individual tracks or the entire arrangement. Ableton Live provides a variety of built-in audio effects that allow you to shape the sound to your liking. You can also use the mixer section in the Arrangement View to balance levels, pan sounds, and add final touches to your mix.

Frequently Asked Questions Of Using The Arrangement View In Ableton Live : Mastering Music Production.


What Is Arrangement View In Ableton Live?


Arrangement View is a linear layout for composing and arranging music in Ableton Live. It allows you to arrange and organize your music in a traditional, timeline-based format.


How Do I Navigate Arrangement View In Ableton Live?


You can navigate Arrangement View by using the zoom controls, scrollbar, and timeline markers to move around the timeline and section of your music.


Can I Edit Midi And Audio Clips In Arrangement View?


Yes, you can edit MIDI and audio clips directly in Arrangement View by moving, copying, and looping them within the timeline.


What Are The Benefits Of Using Arrangement View?


Arrangement View provides a clear and intuitive way to structure your music, allowing for detailed editing and fine-tuning of your composition.

Conclusion

The Arrangement View in Ableton Live is a versatile and powerful tool for music production. Its timeline-based layout and advanced editing features give you precise control over your composition. By following these steps, you can effectively use the Arrangement View to arrange, edit, and shape your music, ultimately bringing your musical ideas to life.

Categories
Archive

Understanding Parallel Processing in FL Studio: Master Your Mix

Parallel processing is a powerful technique used in FL Studio to enhance the quality of audio tracks and achieve a more professional sound. This article explores the concept of parallel processing, its benefits, and how you can effectively use it in FL Studio to elevate your music production.

What is Parallel Processing?

Parallel processing, also known as parallel compression or New York compression, involves blending a heavily compressed version of an audio signal with the dry (uncompressed) signal. This technique allows you to retain the clarity and dynamic range of the original signal while adding power and presence to it.

The Benefits of Parallel Processing

Parallel processing offers several advantages, including:

  • Enhanced Dynamics: It helps to maintain the dynamics of the original signal, preventing it from sounding overly squashed or lifeless.
  • Increased Power and Presence: It adds weight and energy to the audio signal, making it stand out in the mix.
  • Improved Control: It provides greater control over the balance between the dry and processed signals, allowing you to fine-tune the overall sound.

Parallel Processing in FL Studio

FL Studio offers a range of tools and features for implementing parallel processing, including the use of mixer tracks, audio effects, and plugins. Here’s how you can make use of parallel processing in FL Studio:

Setting Up Parallel Processing

To set up parallel processing in FL Studio, follow these steps:

  1. Create Sends: Route the audio signal to a separate mixer track using sends or aux channels.
  2. Apply Compression: Apply heavy compression to the parallel track to achieve the desired effect.
  3. Blend the Signals: Adjust the level of the compressed signal to mix it with the original signal to achieve the desired balance.

Using Parallel Processing Plugins

FL Studio offers various third-party plugins that are well-suited for parallel processing, including compressor, EQ, and saturation plugins. These plugins can help to enhance the dynamic range, tonal balance, and warmth of your audio tracks when used in parallel processing chains.

Understanding Parallel Processing in FL Studio: Master Your Mix

Credit: howtomakeelectronicmusic.com

Tips for Effective Parallel Processing

When implementing parallel processing in FL Studio, keep the following tips in mind:

  • Use Your Ears: Pay attention to how the processed signal blends with the dry signal and make adjustments based on what sounds best to you.
  • Start with Moderate Settings: Begin with moderate compression and processing settings before making further adjustments to avoid over-processing the signal.
  • Experiment with Different Effects: Try using different combinations of effects and plugins in parallel processing chains to explore new sounds and textures.

Credit: www.morningdewmedia.com

Frequently Asked Questions Of Understanding Parallel Processing In Fl Studio: Master Your Mix


How Does Parallel Processing Work In Fl Studio?


Parallel processing in FL Studio refers to the technique of splitting audio signals into multiple tracks and processing them separately. This helps to optimize CPU usage and allows for individual control over different aspects of the sound.


What Are The Benefits Of Using Parallel Processing In Fl Studio?


Using parallel processing in FL Studio provides several benefits. It allows for greater control over individual audio elements, helps to achieve a more balanced mix, enhances the sound by adding depth and richness, and improves overall audio quality.


How Can Parallel Processing Improve The Clarity Of My Mix In Fl Studio?


Parallel processing can improve mix clarity in FL Studio by allowing you to apply different effects and processing techniques to specific elements of the mix. This helps to bring out the desired characteristics of each element, reducing muddiness and enhancing overall clarity.


Can Parallel Processing Help In Achieving A Wider Stereo Image In Fl Studio?


Yes, parallel processing can be an efficient way to achieve a wider stereo image in FL Studio. By applying stereo widening techniques on parallel processed tracks, you can create a more spacious and immersive soundstage, enhancing the stereo image of your mix.

Conclusion

Parallel processing is a valuable technique that can significantly enhance the quality and impact of your audio productions in FL Studio. By understanding the concept of parallel processing and learning how to implement it effectively, you can take your music production to the next level and achieve professional-sounding results.

Categories
Archive

Using the Slice to Midi Function in Ableton Live: Mastering Music Production

Are you ready to take your music production to the next level? Ableton Live offers a range of powerful tools that can help you create amazing tracks. One such tool is the Slice to MIDI function, which allows you to slice audio files into smaller sections and convert them into MIDI notes. In this article, we will explore how to use this feature effectively to enhance your music production workflow.

What is the Slice to MIDI Function?

The Slice to MIDI function in Ableton Live is a feature that enables you to convert audio clips into a MIDI sequence. It essentially slices the audio file at transient markers and assigns each slice to a separate MIDI note. This allows you to manipulate and rearrange the audio in various ways, giving you greater flexibility and creative control over your tracks.

How to Use the Slice to MIDI Function

Using the Slice to MIDI function is a straightforward process. Follow these steps to get started:

  1. Drag and drop an audio clip into an audio track in Ableton Live.
  2. Select the audio clip by clicking on it.
  3. In the Clip Detail View, navigate to the Transients section.
  4. Click on the “Slice” button. Ableton Live will analyze the audio clip and place markers at each transient.
  5. Adjust the sensitivity of the slicing by using the Sensitivity knob.
  6. Once you are satisfied with the slicing, click on the “Slice to MIDI” button.
  7. A dialog box will appear, allowing you to choose the desired settings for the sliced MIDI notes.
  8. Click “OK” to confirm and create a new MIDI track with the sliced MIDI notes.

Exploring the Sliced MIDI Notes

Once the audio clip has been converted into sliced MIDI notes, you can now work with them in various ways:

  • Editing: You can edit the individual MIDI notes to fine-tune the timing, pitch, and other parameters.
  • Arrangement: Arrange the sliced MIDI notes in different patterns to create unique musical phrases.
  • Sampling: Use the sliced MIDI notes as a basis for creating new drum kits or melodic samples.
  • Sound Design: Manipulate the sliced MIDI notes using Ableton Live’s powerful MIDI effects and instruments to create interesting sound textures.

Credit: flypaper.soundfly.com

Using the Slice to Midi Function in Ableton Live: Mastering Music Production

Credit: www.ableton.com

Tips for Using the Slice to MIDI Function

Here are some tips to help you make the most out of the Slice to MIDI function:

  • Experiment with different sensitivity levels to achieve the desired slicing accuracy.
  • Use the Warp Markers in Ableton Live to refine the timing of the sliced MIDI notes if necessary.
  • Experiment with different MIDI instruments and effects to add creativity and depth to your sliced MIDI patterns.
  • Combine multiple sliced MIDI clips to create complex rhythm and melodic compositions.
  • Save your sliced presets for future use to speed up your workflow.

In Conclusion

The Slice to MIDI function in Ableton Live is a powerful tool that allows you to extract MIDI information from audio files. It offers endless creative possibilities for manipulating and arranging your tracks. By using this function effectively, you can elevate your music production to new heights. So go ahead, unleash your creativity, and start exploring the incredible capabilities of the Slice to MIDI function in Ableton Live!

Frequently Asked Questions For Using The Slice To Midi Function In Ableton Live: Mastering Music Production


What Is The Slice To Midi Function In Ableton Live?


The Slice to Midi function in Ableton Live is a feature that allows you to slice audio and convert it into a MIDI track, enabling manipulation of the audio in a variety of ways.


How Can I Use The Slice To Midi Function Effectively?


To use the Slice to Midi function effectively, first select the audio clip, then right-click to access the context menu, and choose “Slice to Midi. ” Adjust the slicing parameters to tailor the conversion to your specific needs.


What Are The Benefits Of Using The Slice To Midi Function?


By utilizing the Slice to Midi function, you can easily manipulate audio recordings and loops, creating unique musical patterns and arrangements. It provides creative flexibility and experimentation in music production.


Can The Slice To Midi Function Help With Remixing Music?


Yes, the Slice to Midi function can greatly aid in remixing music as it allows you to extract specific elements from an audio sample and rearrange them in a MIDI track to create a new musical composition.

Categories
Archive

Using the Utility Tool in Ableton Live : Enhance Your Sound Production

When it comes to music production, having the right tools at your disposal can greatly enhance your creative process and enable you to achieve the desired results. One such tool that is often overlooked but highly effective is the Utility tool in Ableton Live. In this article, we will explore the various ways in which this tool can be used to take your music to the next level.

What is the Utility Tool?

The Utility tool is a versatile audio effect device in Ableton Live that provides a range of functions for manipulating sound. It can be accessed from the audio effects section of the software. The tool offers multiple parameters and controls which allow you to modify audio signals in different ways.

Credit: www.ableton.com

Using the Utility Tool for Gain Adjustments

One of the primary functions of the Utility tool is to adjust the gain or volume of audio signals. Whether you want to boost the volume of a track or decrease it to create a dynamic mix, the Utility tool makes it simple. Simply drag and adjust the Gain knob to increase or decrease the volume. The tool also offers a handy volume slider, which allows for precise adjustments.

Frequency Gain
Bass +3dB
Mids +1dB
Treble +2dB

Working with Stereo Width

The Utility tool also offers a powerful feature to control the stereo width of your audio. This allows you to manipulate the placement of sounds in the stereo field, giving you greater control over your mix. You can use the Width knob to adjust the stereo image, either making it wider or narrower as per your requirements.

Mono Compatibility

Ensuring that your mix sounds good in mono is vital, especially for targeting audiences who might be listening on mono playback systems. The Utility tool comes in handy here as well. Simply switch to the Mono mode using the Stereo/Mono button. This will collapse the stereo image into mono, providing a clear representation of how your mix will sound in mono.

Phase Inversion

Another useful feature of the Utility tool is phase inversion. This can help deal with phase cancellation issues that may occur when combining multiple audio sources. By inverting the phase of one source, you can effectively eliminate or minimize any phase cancellation, resulting in a cleaner and more defined sound.

Automation and MIDI Mapping

The Utility tool in Ableton Live can also be automated and MIDI mapped, allowing you to create dynamic changes in real-time. You can automate parameters such as gain and stereo width, providing movement and variation to your mix. MIDI mapping is particularly useful if you want to control the tool’s parameters using external MIDI controllers.

Using the Utility Tool in Ableton Live  : Enhance Your Sound Production

Credit: www.production-expert.com

Frequently Asked Questions For Using The Utility Tool In Ableton Live : Enhance Your Sound Production


What Is The Utility Tool In Ableton Live?


The Utility Tool is a versatile audio effect that provides essential features for adjusting audio signals within Ableton Live.


How Can I Use The Utility Tool In Ableton Live?


You can use the Utility Tool to adjust gain, stereo width, and phase, as well as for mid-side processing and mono bass enhancement.


What Is Gain In The Utility Tool?


Gain in the Utility Tool allows you to increase or decrease the volume of the audio signal, providing precise control over the audio levels.


How Does The Utility Tool Affect Stereo Width?


The Utility Tool can widen or narrow the stereo image of the audio, altering the perception of space and placement within the mix.

Conclusion

The Utility tool in Ableton Live is a versatile tool that offers a range of functions to enhance your music production workflow. From gain adjustments to stereo width control and mono compatibility, using this tool allows you to achieve greater precision and control over your mix. Take advantage of its features and elevate your music to new heights.

Categories
Archive

Using Reverb in Fl Studio : Ultimate Tips for Enhanced Sound

Reverb is an essential tool in music production, adding depth, presence, and dimension to sounds. In FL Studio, utilizing reverb can take your tracks to the next level, creating a rich and immersive listening experience for your audience. Let’s delve into the world of reverb and how it can be effectively used in FL Studio to enhance your music.

Understanding Reverb

Reverb is the persistence of sound after the original sound is produced. It simulates the natural acoustic properties of different spaces, from small rooms to expansive concert halls. By applying reverb, you can make your sounds feel like they exist in a physical space, adding a sense of realism and atmosphere to your mix.

Credit: www.amazon.com

Using Reverb in FL Studio

FL Studio offers a range of reverb plugins that cater to various sonic needs. From the classic Fruity Reverb 2 to more advanced third-party plugins, FL Studio provides a versatile toolkit for applying reverb to your tracks.

Best Practices For Applying Reverb

When using reverb in FL Studio, it’s important to consider the following best practices:

  • Experiment with Pre-Delay: Adjusting the pre-delay parameter can influence the perceived distance of the sound source, allowing you to create a sense of spaciousness or intimacy.
  • Set the Decay Time: Tailoring the decay time of the reverb helps in shaping the length of the reverberation, determining how long the reflections persist in the virtual space.
  • Consider EQ-ing the Reverb: Applying EQ to the reverb can help in sculpting the tonal characteristics of the reverberated signal, ensuring it complements the original sound.
  • Experiment with Room Size and Shape: FL Studio’s reverb plugins allow for adjusting the room size and shape, enabling you to mimic a diverse range of acoustic environments.

Credit: www.sweetwater.com

Creating Depth and Space

One of the key benefits of reverb is its ability to create a sense of depth and space in your mix. By applying reverb to various elements, such as vocals, instruments, and drums, you can establish a cohesive and expansive sonic landscape.

Vocal Reverb

When working with vocals in FL Studio, applying reverb can elevate the vocal performance, adding a luscious ambience and sense of airiness. By judiciously blending the dry and wet signals, you can craft a vocal sound that sits beautifully within the mix.

Instrument Reverb

For instruments, such as guitars, pianos, and synths, reverb can be used to imbue them with a sense of space and emotive resonance. By adjusting the reverb parameters, you can tailor the spatial characteristics to suit the specific instrument and musical context.

Drum Reverb

Applying reverb to drums in FL Studio can transform the percussive elements, adding depth and dimension to the rhythm section. Whether it’s a subtle room ambience or a thunderous hall reverb, experimenting with different reverb settings can enhance the impact and texture of your drum tracks.

Enhancing Presence and Atmosphere

In addition to creating depth, reverb can enrich the presence and atmosphere of your music. Whether you’re aiming for a subtle and intimate vibe or a grandiose and ethereal sonic landscape, reverb in FL Studio can help you achieve the desired mood and atmosphere in your productions.

Ambient Soundscapes

Reverb is a powerful tool for crafting lush and expansive ambient soundscapes in FL Studio. By carefully designing the reverb settings, you can transport your listeners to captivating sonic realms, where every sound feels enveloped in a captivating sense of space and atmosphere.

Cinematic Effects

For producers working on film scoring and cinematic music, reverb can be employed to create evocative and cinematic effects. Whether it’s simulating the vast expanse of a desolate landscape or capturing the intimacy of a poignant moment, reverb allows you to infuse your compositions with cinematic grandeur and emotion.

Experimentation and Creativity

Ultimately, the art of using reverb in FL Studio is a journey of experimentation and creativity. Don’t be afraid to push the boundaries and explore unconventional applications of reverb to achieve unique and compelling sonic results. Trust your ears, and let reverb be a tool for sculpting the sonic tapestry of your music.

Frequently Asked Questions Of Using Reverb In Fl Studio : Ultimate Tips For Enhanced Sound


Q: What Is Reverb In Fl Studio?


A: Reverb in Fl Studio is a sound effect that adds depth and spaciousness to audio by simulating the sound reflections in a physical space.


Q: How Do I Add Reverb In Fl Studio?


A: To add reverb in Fl Studio, select the desired track, open the mixer, and insert a reverb plugin. Adjust the parameters to achieve the desired effect.


Q: What Are The Different Types Of Reverb In Fl Studio?


A: Fl Studio offers various types of reverb, including plate, room, hall, and cathedral. Each type offers a different sonic character and ambiance.


Q: Can I Adjust The Reverb Settings In Fl Studio?


A: Yes, in Fl Studio, you can customize the reverb settings such as decay time, pre-delay, diffusion, and damping to tailor the effect to your liking.

Conclusion

Using reverb effectively in FL Studio can transform your music, elevating it to new levels of depth, presence, and atmosphere. Whether you’re crafting intimate vocal ballads, expansive ambient soundscapes, or thunderous cinematic compositions, reverb is your ally in shaping the sonic identity of your creations. Embrace the art of reverb, and let your music resonate with captivating depth and presence.

Categories
Archive

Using the Simpler in Ableton Live : Mastering Music Production

The Simpler is a powerful tool in Ableton Live that allows producers and musicians to manipulate and create unique sounds. Whether you are a beginner or an advanced user, the Simpler can enhance your music production process. In this article, we will explore the various features and functions of the Simpler and how to use it effectively.

What is the Simpler?

The Simpler is a sampling instrument in Ableton Live that allows you to play and manipulate audio samples. It is a versatile tool that can be used for basic sound manipulation, slicing, chopping, and even creating complex soundscapes. With its user-friendly interface, the Simpler makes it easy for anyone to dive into the world of sampling and sound design.

Features and Functions

Let’s take a closer look at some of the features and functions of the Simpler:

  1. Sample Import: The Simpler allows you to import audio samples of various formats, making it easy to integrate your own sounds into your tracks.
  2. Playback Modes: You can choose from different playback modes such as Classic, One-Shot, Slicing, and more. Each mode offers a unique way of triggering and manipulating your samples.
  3. Looping: The Simpler allows you to loop sections of your samples, enabling you to create repetitive patterns or sustain sounds for longer durations.
  4. Envelope and Filter Controls: You can shape the sound of your samples using the Simpler’s envelope and filter controls. Adjusting parameters such as attack, decay, sustain, release, and resonance can drastically transform your samples.
  5. Pitch and Time Controls: With the Simpler, you have the ability to adjust the pitch and time of your samples, allowing you to create interesting effects and textures.
  6. Modulation: The Simpler offers a range of modulation options to add movement and depth to your samples. You can use LFOs, envelopes, and other modulation sources to modulate parameters such as pitch, filter, and volume.

Credit: www.youtube.com

How to Use the Simpler

Using the Simpler in Ableton Live is a straightforward process. Let’s go through the basic steps:

  1. Drag and drop a sample onto an audio track in Ableton Live.
  2. Select the sample and click on the Simpler instrument in the instrument rack.
  3. Once the Simpler is loaded, you can choose a playback mode that suits your needs.
  4. Adjust the start and end points of the sample using the start and end markers in the waveform display.
  5. Experiment with the various controls such as pitch, filter, envelope, and modulation to shape the sound of your sample.
  6. If you want to slice your sample, activate the Slice mode and adjust the sensitivity and other settings as desired.
  7. After refining the sound, you can further enhance it by adding effects and other audio processing plugins in Ableton Live.

Remember, the Simpler is a versatile tool, and there is no right or wrong way to use it. Be creative and experiment with different settings to discover new sounds and techniques.

Credit: soundbetter.com

Frequently Asked Questions Of Using The Simpler In Ableton Live : Mastering Music Production


What Is The Simpler In Ableton Live?


The Simpler is a versatile sampling instrument in Ableton Live, designed for easy manipulation of audio samples.


How Can I Use The Simpler For Audio Editing?


You can use the Simpler to slice, warp, and loop audio samples, as well as apply various effects for creative audio editing.


What Are The Key Features Of Simpler?


Simpler provides features such as slicing, warping, pitch modulation, and easy integration with Ableton Live’s workflow.


How Does The Simpler Facilitate Music Production?


Simpler streamlines the process of importing and manipulating audio samples, making it an essential tool for music production in Ableton Live.

Conclusion

The Simpler in Ableton Live is a game-changer when it comes to sampling and sound design. Its intuitive interface and powerful features make it an essential tool for any music producer or musician. Whether you are looking to manipulate existing samples or create unique soundscapes, the Simpler has got you covered. Take the time to explore its capabilities and unlock a world of sonic possibilities.