Categories
Archive

Understanding Audio Recording in Ableton Live : Master Your Mixes

Do you want to take your music production skills to the next level? Look no further than Ableton Live, one of the most popular digital audio workstations (DAWs) among musicians, producers, and DJs. In this article, we will delve into the world of audio recording in Ableton Live and explore the essential concepts you need to understand to master this powerful software.

1. Setting Up Your Audio Interface

Before you can start recording audio in Ableton Live, it’s crucial to set up your audio interface properly. Connect your audio interface to your computer and launch Ableton Live. Navigate to the preferences menu and select your audio interface as the input and output device. Remember to adjust the sample rate and buffer size for optimal performance.

2. Understanding Tracks

In Ableton Live, tracks are the building blocks of your projects. They can be either audio tracks or MIDI tracks. Audio tracks are used for recording audio, while MIDI tracks are used for programming virtual instruments. To create an audio track, simply right-click on the empty space in the track area and select “Insert Audio Track.”

3. Choosing the Right Inputs and Outputs

Once you have created an audio track, it’s time to select the appropriate input and output sources. Click on the “In” and “Out” menus on the track header to choose the desired audio inputs and outputs. It’s essential to choose the correct input source to ensure that Ableton Live receives the audio signal correctly.

Credit: www.facebook.com

4. Enabling Monitoring

Monitoring allows you to hear the audio input in real-time as you record. By default, monitoring is disabled in Ableton Live. To enable it, click on the “Monitor” button on the track header. You can choose between “Auto,” “In,” or “Off.” The “Auto” option enables monitoring when the track is armed for recording.

5. Arm the Track for Recording

Before you can start recording, you need to arm the audio track. Click on the “Arm” button on the track header to enable recording. The button will turn red when the track is armed. You can also arm multiple tracks at once by holding down the “Shift” key and clicking on the “Arm” buttons of the desired tracks.

6. Setting the Correct Input Levels

Properly setting the input levels is crucial to achieve high-quality recordings. To avoid clipping and distortion, make sure the input signal is strong enough but not too loud. Use the “Input Gain” knob on your audio interface or the “Input Gain” controls in Ableton Live to adjust the input levels. Aim for a healthy signal level that never reaches the “Red” zone.
Understanding Audio Recording in Ableton Live  : Master Your Mixes

Credit: musictech.com

7. Recording in Session View

Ableton Live offers two primary recording modes: Session View and Arrangement View. In Session View, you can record and experiment with ideas spontaneously. To record audio in Session View, make sure the track is armed for recording and press the record button located above the track. Hit the play button to start recording, and press stop when you are done.

8. Recording in Arrangement View

In Arrangement View, you can arrange your recorded clips into a song structure. To record in Arrangement View, click on the “Arrangement Record” button located at the top of the screen. This mode allows for more precise editing and fine-tuning of your recordings. You can overdub multiple takes and rearrange them easily.

9. Editing and Post-Processing

After recording your audio, it’s time to edit and refine your recordings. Ableton Live offers a wide range of editing tools and techniques to help you polish your recordings. You can trim, crop, duplicate, and reverse audio clips. You can also apply various audio effects, adjust the volume and panning, and even time-stretch your recordings.

10. Exporting Your Final Recording

Once you are satisfied with your recordings and editing, it’s time to export your final masterpiece. Ableton Live provides various export options, allowing you to choose the file format, sample rate, and bit depth. Click on the “Export” button and follow the on-screen prompts to export your audio file.

Frequently Asked Questions On Understanding Audio Recording In Ableton Live : Master Your Mixes


How Can I Improve Audio Recording Quality In Ableton Live?


To improve audio recording quality in Ableton Live, consider using a high-quality microphone and ensuring optimal soundproofing in your recording space.


What Are Some Essential Tips For Recording Vocals In Ableton Live?


For recording vocals in Ableton Live, make sure to use a pop filter and adjust microphone placement to achieve the best sound quality. Additionally, experiment with different room acoustics.


Why Is Monitoring Important During Audio Recording In Ableton Live?


Monitoring is crucial during audio recording in Ableton Live as it allows you to hear the real-time sound, ensuring optimal levels and avoiding unwanted distortions in the recording.


How Can I Reduce Background Noise In My Audio Recordings In Ableton Live?


To minimize background noise in audio recordings in Ableton Live, try using noise reduction plugins or positioning the microphone closer to the sound source while maintaining proper gain levels.

Conclusion

Understanding audio recording in Ableton Live is crucial for unleashing your creative potential in music production. With the knowledge gained from this article, you are now equipped to navigate the world of audio recording in Ableton Live confidently. Remember to experiment, have fun, and keep refining your recordings to create professional-quality music.
Categories
Archive

Creating Lead Sounds in Ableton Live

When it comes to music production, having captivating lead sounds is essential in capturing the attention of your listeners. In this article, we will explore how to create incredible lead sounds using Ableton Live, a popular digital audio workstation (DAW).

The Importance of Lead Sounds

Lead sounds play a crucial role in a music composition. They often carry the melody and instantly grab the audience’s attention. Whether you’re producing electronic dance music, pop, or even orchestral pieces, having a memorable lead sound can make all the difference in creating a hit.

Getting Started

Ableton Live offers various tools and features that allow producers to craft unique and impressive lead sounds. Let’s dive into a step-by-step process of creating lead sounds in Ableton Live:

  1. Choose the Right Synthesizer

Using a synthesizer is the foundation for creating lead sounds. Ableton Live comes with several built-in synthesizers such as Analog, Operator, and Wavetable. Each synthesizer offers different sound characteristics, so explore them to find the one that fits your desired lead sound.

  1. Experiment with Oscillators

Oscillators generate the basic waveform of your sound. Ableton Live offers multiple oscillator types, including sine, square, triangle, and sawtooth. Experiment with different combinations to create interesting timbres and harmonics for your lead sound.

  1. Modify Envelope Parameters

Envelopes control how the sound evolves over time. Typically, a lead sound benefits from a fast attack and decay, allowing it to cut through the mix. Adjust the envelope parameters such as attack, decay, sustain, and release to shape the sound to your liking.

  1. Add Effects

Effects are essential in adding depth and character to your lead sound. Ableton Live provides a wide range of effects such as reverb, delay, distortion, and chorus. Apply effects strategically to enhance the sound and create a unique sonic texture.

  1. Experiment with Modulation

Modulation adds movement and expression to your lead sound. Utilize Ableton Live’s modulation tools like LFOs (Low-Frequency Oscillators) to create vibrato, tremolo, or other dynamic effects. Play around with modulation to give your lead sound a lively and organic feel.

Credit: www.amazon.com

Designing Custom Lead Sounds

While exploring the presets and built-in sounds is a great starting point, designing your own custom lead sounds can give your music a distinctive touch. Here are a few approaches to consider:

Layering Sounds

Layering involves combining multiple sounds to create a more complex and rich lead sound. Select different synthesizers or sound sources and layer them together. This technique allows you to blend various timbres and create a unique sonic palette for your lead sounds.

Actionnable Tweaking

Incorporating automation in your lead sounds can make them more dynamic and expressive. Use Ableton Live’s automation features to modulate parameters such as filter cutoff, resonance, or effects parameters in real-time. This technique can add excitement and variation to your lead sounds.

Sampling And Manipulation

Sampling existing sounds, whether from your own recordings or libraries, can offer a vast array of possibilities for creating lead sounds. In Ableton Live, you can manipulate and process samples using audio effects, warp modes, and slicing techniques. This approach can lead to some truly unique and captivating lead sounds.

The Final Touches

Once you’ve created your lead sound, it’s essential to fine-tune it to suit your composition. Consider the following tips:

  • Adjust EQ: Use EQ to shape the overall frequency response of your lead sound. Cutting or boosting specific frequencies can help it sit better in the mix.
  • Apply Compression: Compression can add sustain and control the dynamics of your lead sound. Experiment with different settings to achieve the desired result.
  • Create Variations: Duplicate your lead sound and make subtle changes to each instance. This technique can add interest and variation to your lead melody over time.
  • Save Your Presets: Once you’ve created a lead sound you are happy with, save it as a preset. This way, you can easily access and reuse it in future projects.

Credit: m.facebook.com

Frequently Asked Questions On Creating Lead Sounds In Ableton Live: Mastering Sound Design


What Are Lead Sounds In Music Production?


Lead sounds are melodic elements that carry the main melody and capture the listener’s attention.


How To Create Lead Sounds In Ableton Live?


In Ableton Live, utilize synthesizers, such as Analog or Wavetable, and experiment with oscillators, filters, and modulation to craft unique lead sounds.


Why Is Sound Design Important In Music Production?


Sound design allows producers to create unique and captivating sounds, enhancing the overall quality and appeal of their music.


What Role Do Lead Sounds Play In A Track?


Lead sounds serve as the focal point of a track, guiding the listener through the melody and adding depth to the overall musical composition.

Conclusion

Creating lead sounds in Ableton Live opens up a world of possibilities for music producers. By exploring the powerful synthesizers, experimenting with modulation and effects, and designing your own custom lead sounds, you can elevate your music to new heights. Remember to fine-tune your lead sound to fit your composition and save your presets for easy access in the future. Now, armed with these techniques, go ahead and create captivating lead sounds that will leave a lasting impact on your audience!

Categories
Archive

Understanding Sidechain Compression in Ableton Live : Mastering Audio Dynamics

Sidechain compression is a powerful technique used in music production to create dynamic and impactful mixes. It is commonly used to duck or control the volume of one track based on the level of another track. In this article, we will dive deep into understanding sidechain compression in Ableton Live, a popular digital audio workstation (DAW) among producers and musicians.

What is Sidechain Compression?

Sidechain compression is a specific type of compression where the audio signal on one track triggers the compression on another track. This technique is often used to make room for the kick drum in a mix by reducing the volume of other elements, such as bass or pads, whenever the kick drum hits.

Sidechain compression can also be used creatively to add a pumping or rhythmic effect to a track. It can be heard in genres like EDM, where the bassline or other elements are rhythmically “sucked in” or pulsate in sync with the kick drum.

Setting Up Sidechain Compression in Ableton Live

Ableton Live provides a user-friendly way to set up sidechain compression using its built-in Compressor device. Here are the steps to configure sidechain compression in Ableton Live:

  1. Insert the Compressor device on the track you want to apply sidechain compression to.
  2. Click on the “Sidechain” button on the Compressor device.
  3. Choose the source track that will trigger the compression from the drop-down menu.
  4. Adjust the threshold, ratio, attack, and release settings according to your desired effect.

By adjusting the threshold, you determine the level at which the sidechain compression is activated. The ratio control sets the amount of compression applied, while the attack and release parameters determine how quickly the compression reacts and recovers.

Applications of Sidechain Compression in Ableton Live

Sidechain compression can be used in various ways to improve your mix and create interesting sound effects. Here are a few applications:

1. Mixing The Kick And Bass

In many genres, the kick drum and bassline are the foundation of the track. By applying sidechain compression, you can ensure that the bassline ducks whenever the kick drum hits, preventing conflicting frequencies and creating a tight, defined mix.

2. Creating Pumping Effects

Sidechain compression can be used creatively to create pumping effects that add energy and movement to your tracks. By sidechaining elements like pads, synths, or vocals to the kick drum, you can achieve a rhythmic pulsating effect that elevates the overall groove of the song.

3. Clearing Space For Vocals

Sidechain compression can also be used to make room for vocals in a mix. By sidechaining other elements, such as guitars or pads, to the vocal track, you can automatically reduce their volume whenever the vocals are present, allowing the vocals to cut through the mix more effectively.

4. Dynamic Effects And Sound Design

Aside from traditional mixing applications, sidechain compression can be used for creative sound design. By sidechaining various effects, such as reverb or delay, to the source material, you can create interesting rhythmic patterns and dynamic textures.

Understanding Sidechain Compression in Ableton Live  : Mastering Audio Dynamics

Credit: www.waves.com

Tips for Using Sidechain Compression Effectively

While sidechain compression can be a powerful tool, it’s important to use it tastefully and in moderation. Here are some tips for using sidechain compression effectively in your Ableton Live projects:

  • Experiment with different attack and release settings to find the right balance between the pumping effect and maintaining a natural sound.
  • Use sidechain compression subtly to avoid creating a distracting or exaggerated effect.
  • Automate the sidechain compression settings to add movement and variation throughout the song.
  • Consider using different sidechain sources for different sections of the song to create dynamic transitions.
  • Try using sidechain compression on effects like delays or reverbs to create interesting rhythmic textures.

Remember that sidechain compression is just one tool in your mixing and production arsenal. It’s essential to pair it with other techniques and tools to achieve a professional and polished mix.

Credit: www.kvraudio.com

Frequently Asked Questions Of Understanding Sidechain Compression In Ableton Live : Mastering Audio Dynamics


What Is Sidechain Compression In Music Production?


Sidechain compression is a technique where the input of a compressor is triggered by an external source, such as a kick drum, to create a pumping effect in the music.


How Does Sidechain Compression Work In Ableton Live?


In Ableton Live, sidechain compression works by using the sidechain input of a compressor to detect the audio signal from another track and then apply compression to the track it is placed on.


What Is The Benefit Of Using Sidechain Compression?


Using sidechain compression can help in creating a rhythmic effect, reducing clashing frequencies, and making sounds more pronounced in a mix.


Can Sidechain Compression Be Used For More Than Just Ducking?


Yes, sidechain compression can also be used creatively for creating breathing effects, rhythmic gating, and shaping the sound of instruments in a mix.

Conclusion

Understanding sidechain compression in Ableton Live opens up a world of creative possibilities in your music productions. Whether you’re aiming for a tight mix, a pumping effect, or creating dynamic transitions, sidechain compression can help you achieve your desired results. By following the steps outlined in this article and experimenting with different settings, you’ll be well on your way to mastering the art of sidechain compression in Ableton Live.

Categories
Archive

Using Reverb in Ableton Live: Mastering Advanced Techniques

Reverb is an essential effect that can transform your sound and give it depth and space. As a producer or musician, understanding how to use reverb in Ableton Live can take your tracks to the next level. In this article, we will explore the ins and outs of using reverb in Ableton Live and provide some tips and tricks to help you optimize your sound.

What is Reverb?

Reverb is a natural acoustic phenomenon that occurs when sound waves reflect off surfaces in a space. It is the sonic footprint of a room and can vary depending on the size, shape, and materials of the room. In the digital world, reverb is created using algorithms to simulate these characteristics.

In Ableton Live, the reverb effect is an audio effect that can be applied to individual tracks or the master track. It adds a sense of space and realism to your sounds, making them feel like they are being played in a specific environment.

Adding Reverb to Individual Tracks

To add reverb to an individual track in Ableton Live, simply create a new audio track, select the track you want to process, and navigate to the audio effects rack in the browser. Drag and drop the reverb effect onto the track.

Once you have added the reverb effect, you can adjust its parameters to achieve the desired sound. The most common parameters include:

Parameter Description
Room Size Controls the perceived size of the virtual space
Decay Time Determines how long the reverb tail lasts
Damping Controls the high-frequency decay of the reverb
Pre-Delay Sets the time before the reverb effect kicks in
Mix Adjusts the balance between the dry and wet signal

Experiment with these parameters to find the right balance for your track. A smaller room size and shorter decay time can make your sound feel closer and more intimate, while a larger room size and longer decay time can create a sense of spaciousness.

Using Reverb in Ableton Live: Mastering Advanced Techniques

Credit: www.fullcompass.com

Using Reverb on the Master Track

Applying reverb to the master track in Ableton Live can help unify the overall sound of your mix and give it a cohesive feel. To add reverb to the master track, simply create a return track, select the master track, and route it to the return track.

Once you have routed the master track to the return track, you can add the reverb effect to the return track. Adjust the parameters to achieve the desired sound, keeping in mind that a subtle amount of reverb can go a long way when applied to the entire mix.

Tips and Tricks

  • Use EQ before and after the reverb effect to shape the reverb tail and avoid muddiness.
  • Automate the reverb parameters to create dynamic and evolving sounds.
  • Try layering multiple instances of reverb with different settings for more complex and unique effects.
  • Experiment with different types of reverb, such as plate, hall, or spring, to achieve different sonic characteristics.
  • Consider using sidechain compression on the reverb to create rhythmic pumping effects.

Remember, less is often more when it comes to reverb. It is easy to overdo it and end up with a muddy or washed-out mix. Use your ears and trust your instincts to find the right balance for your tracks.

Using Reverb in Ableton Live: Mastering Advanced Techniques

Credit: www.udemy.com

Frequently Asked Questions For Using Reverb In Ableton Live: Mastering Advanced Techniques


What Is Reverb And How Does It Work?


Reverb is a sound effect that simulates acoustic spaces, adding depth and dimension to audio.


Why Is Reverb Important In Music Production?


Reverb enhances the sound by giving it a sense of space and making it more immersive.


Can Reverb Be Used On Different Instruments And Vocals?


Yes, reverb can be used on various instruments and vocals to create a cohesive and balanced mix.


What Are Some Common Reverb Techniques In Ableton Live?


Common reverb techniques in Ableton Live include using predelay, adjusting decay time, and experimenting with different reverb types.

Conclusion

Reverb is a powerful tool that can transform your tracks and add depth and realism to your sound. By understanding how to use reverb in Ableton Live and experimenting with different settings, you can create professional-sounding mixes that stand out. So go ahead, dive into the world of reverb, and take your music to new heights!

Categories
Archive

Using the Eq Eight in Ableton Live: Mastering Audio Essentials

If you are a music producer or sound engineer, you probably know how important it is to have a good equalizer to shape the frequencies in your tracks. In Ableton Live, one of the most powerful and versatile equalizers is the Eq Eight. In this article, we will explore how to effectively use this tool to enhance your music.

Understanding the Eq Eight

The Eq Eight is a native Ableton Live device that enables you to control and adjust the frequency content of your audio. It consists of eight bands, each representing a different frequency range, and offers a variety of features to shape the sound to your liking.

Here are some key features of the Eq Eight:

  • Frequency Bands: The Eq Eight has eight frequency bands, starting from the low end (20 Hz) to the high end (20 kHz). Each band can be independently adjusted to boost or attenuate specific frequencies.
  • Gain Control: You have control over the gain (volume) of each frequency band. This allows you to increase or decrease the level of specific frequencies in your audio.
  • Q Control: The Q control determines the width of the frequency band affected by the gain adjustment. A narrower Q value focuses on a smaller range of frequencies, while a wider Q value affects a broader range.
  • Filter Types: The Eq Eight offers different filter types, including low-pass, high-pass, band-pass, and notch filters. These filters allow you to sculpt your audio by selectively filtering out unwanted frequencies.
Using the Eq Eight in Ableton Live: Mastering Audio Essentials

Credit: www.production-expert.com

Using the Eq Eight Effectively

Now, let’s dive into some practical tips on how to effectively use the Eq Eight in your productions:

1. Frequency Analysis

Before making any adjustments, it’s helpful to analyze the frequency content of the audio you are working with. You can use Ableton Live’s built-in Spectrum analyzer or third-party tools to identify any problematic frequencies or areas that need enhancement.

2. Corrective Equalization

If you notice any frequency imbalances or unwanted resonances in your audio, you can use the Eq Eight to correct them. For example, if a specific frequency is too dominant, you can attenuate it by reducing the gain in the corresponding frequency band.

3. Enhance The Mix

The Eq Eight can also be used to enhance the overall mix of your track. By gently boosting certain frequency ranges, you can add warmth, clarity, or presence to your audio. However, be cautious not to overdo the boosts, as it can result in an unbalanced mix.

4. Creative Sound Design

Experimenting with the Eq Eight’s filters and frequency adjustments can lead to creative sound design possibilities. By applying drastic EQ changes, such as using a notch filter to create a unique vocal effect or applying a high-pass filter to remove low-end rumble, you can add character and uniqueness to your audio.

5. Automation

The Eq Eight’s parameters, including frequency bands, gain controls, and filter types, can be automated over time. This allows for dynamic changes throughout your track, adding movement and interest to specific sections or individual elements.

Using the Eq Eight in Ableton Live: Mastering Audio Essentials

Credit: blog.native-instruments.com

Frequently Asked Questions Of Using The Eq Eight In Ableton Live: Mastering Audio Essentials


What Is The Eq Eight Used For?


The Eq Eight is used for precise and versatile equalization in music production.


How To Access The Eq Eight In Ableton Live?


To access the Eq Eight in Ableton Live, simply add it as an audio effect to a track.


What Are The Main Features Of Eq Eight?


The Eq Eight features eight parametric filters, various filter types, spectrum analyzer, and EQ curves.


How Does Eq Eight Improve Sound Quality?


Eq Eight helps in shaping the audio by adjusting the frequency content to achieve better balance and clarity.

Conclusion

The Eq Eight is an essential tool for any music producer or sound engineer working in Ableton Live. By understanding its various features and applying them effectively, you can shape the frequencies in your tracks to achieve a professional and polished sound. Remember to analyze, correct, enhance, experiment, and automate to maximize the potential of the Eq Eight in your productions.

Categories
Archive

Understanding MIDI in Ableton Live : Mastering Tips

When it comes to music production and performance, MIDI (Musical Instrument Digital Interface) is a crucial component that has revolutionized the way musicians create and manipulate sound. In this comprehensive guide, we will explore MIDI and its application in Ableton Live.

What is MIDI?

MIDI is a protocol that allows electronic musical instruments, computers, and other devices to communicate and control each other. It works by transmitting and receiving musical information as digital data.

MIDI data consists of messages that represent different aspects of music, such as notes, dynamics, timing, and control parameters. These messages can be generated by MIDI controllers, synthesizers, drum machines, and various other MIDI-compatible devices.

Understanding MIDI in Ableton Live  : Mastering Tips

Credit: splice.com

Credit: www.facebook.com

MIDI in Ableton Live

Ableton Live is a popular digital audio workstation (DAW) that offers extensive MIDI functionality. It allows users to record, edit, and manipulate MIDI data to create complex musical compositions.

Midi Instruments And Devices

Ableton Live supports virtual and external MIDI instruments. Virtual instruments are software-based synthesizers, samplers, and drum machines that can be controlled and played using MIDI. External MIDI instruments are hardware devices that generate sound based on MIDI input.

Midi Clips

In Ableton Live, MIDI data is organized into clips. A MIDI clip contains a sequence of MIDI notes, along with other musical information, such as velocity, pitch, and duration. These clips can be arranged and triggered within Ableton Live’s timeline, allowing for the creation of intricate musical arrangements.

Midi Effects

Ableton Live provides a wide range of MIDI effects that can be applied to MIDI clips. These effects include arpeggiators, chord generators, scale adjusters, and more. MIDI effects can add depth, complexity, and variation to MIDI sequences, enhancing the overall musical experience.

Working with MIDI in Ableton Live

Now that we have an understanding of MIDI and its role in Ableton Live, let’s explore some practical uses and techniques for working with MIDI:

Recording Midi

Ableton Live allows users to record MIDI data in real-time using MIDI controllers. Simply connect your MIDI controller to your computer, select the appropriate MIDI input in Ableton Live’s preferences, and hit the record button. You can then play your MIDI instrument and the recorded MIDI data will be captured and displayed as a MIDI clip.

Editing Midi

Ableton Live provides powerful MIDI editing capabilities. You can adjust note lengths, velocities, and positions, quantize MIDI notes to improve timing, and even transpose entire MIDI sequences. This flexibility allows for precise control over MIDI data and enables you to fine-tune your musical compositions.

Midi Mapping

Ableton Live allows users to map MIDI controls to various parameters within the software. This means you can use your MIDI controller to manipulate various aspects of your Live set, such as adjusting volume levels, tweaking effects parameters, and triggering MIDI clips. MIDI mapping provides a hands-on approach to controlling Ableton Live, enhancing your workflow and performance capabilities.

Tips for Using MIDI in Ableton Live

To make the most of MIDI in Ableton Live, consider the following tips:

  • Experiment with different MIDI instruments and devices to discover unique sounds and textures.
  • Explore the extensive range of MIDI effects available in Ableton Live to add depth and creativity to your compositions.
  • Take advantage of MIDI mapping to customize your MIDI controller and create a personalized performance setup.
  • Utilize MIDI clips to create dynamic and evolving musical arrangements.
  • Learn keyboard shortcuts and workflows within Ableton Live to speed up your MIDI production process.
  • Experiment with MIDI editing techniques to add flair and expression to your MIDI sequences.

By understanding MIDI and harnessing its power within Ableton Live, you can unlock endless possibilities for musical expression and creativity. With practice and experimentation, MIDI can become a powerful tool in your music production toolkit.

Frequently Asked Questions On Understanding Midi In Ableton Live : Mastering Tips


What Is Midi And How Does It Work?


MIDI (Musical Instrument Digital Interface) is a protocol that allows electronic musical instruments, computers, and other devices to communicate with each other. It transmits performance data such as note information, control signals, and clock signals.


How Can I Use Midi In Ableton Live?


In Ableton Live, you can use MIDI to control virtual instruments, sequence musical performances, and manipulate sound parameters. MIDI allows for creative expression and control within the software.


What Are The Advantages Of Using Midi In Music Production?


Using MIDI in music production enables flexible editing of musical performances, integration of diverse hardware and software, and precise control over musical elements. It also simplifies the process of recording and arranging music.


Can I Connect External Midi Devices To Ableton Live?


Yes, Ableton Live allows you to connect external MIDI devices such as keyboards, drum machines, and controllers to integrate hardware instruments and expand your creative capabilities within the software.

Categories
Archive

Using Stereo Imaging in Ableton Live : Enhance Your Mix

Stereo imaging is an essential tool in music production, enabling producers and engineers to create a wide and immersive soundstage. In Ableton Live, you can easily manipulate the stereo image of your tracks to enhance the spatial depth and width of your mix. In this article, we will explore various ways to utilize stereo imaging techniques in Ableton Live.

1. Panning

Panning is the most basic and widely used technique for stereo imaging. It involves placing audio elements at different positions within the stereo field. Ableton Live offers precise panning controls on each track, allowing you to position sounds anywhere from left to right. By careful panning, you can create an enhanced sense of space and separation in your mix.

Using Stereo Imaging in Ableton Live  : Enhance Your Mix

Credit: www.teammbl.com

2. Stereo Widening

Stereo wideners are plugins that can expand the stereo image of a sound beyond its original width. Ableton Live provides various stereo widening plugins, allowing you to increase the perceived width of your audio. These plugins work by manipulating the phase relationship between the left and right channels, resulting in a wider soundstage.

When using stereo wideners, be mindful not to overdo it as it can lead to phase cancellation and cause your mix to sound unnatural or lose its mono compatibility. Use them subtly to enhance your mix rather than radically transforming it.

3. Mid-Side Processing

Mid-Side (M/S) processing is a powerful technique that enables you to separately process the mono (mid) and stereo (side) components of an audio signal. In Ableton Live, you can utilize M/S processing techniques using the utility plugin and EQ Eight.

To apply M/S processing, start by duplicating your audio track. On one track, apply a utility plugin and set the width to 0%, effectively collapsing the audio to mono. On the other track, adjust the width to 200%, emphasizing the stereo aspects. Now you can process each track differently, focusing on the mono elements for clarity and the stereo elements for width and depth.

4. Haas Effect

The Haas effect, also known as the precedence effect, is a psychoacoustic phenomenon that allows you to create the perception of stereo width by introducing a small delay between the left and right channels. In Ableton Live, you can easily achieve this effect by using a delay plugin.

To apply the Haas effect, insert a delay plugin on the desired track and set the delay time between 10-30 milliseconds on one channel. Ensure that the delayed channel is panned to the opposite side of the original sound. This delay time is short enough to avoid being perceived as a separate echo, but sufficient to generate a spacious stereo image.

Using Stereo Imaging in Ableton Live  : Enhance Your Mix

Credit: www.waves.com

5. Frequency-Based Stereo Enhancement

Another effective technique for stereo imaging is frequency-based stereo enhancement. By selectively widening specific frequency bands, you can add depth and spatial separation to different elements of your mix. Ableton Live offers EQ Eight, which can be used for this purpose.

To apply frequency-based stereo enhancement, open an instance of EQ Eight on the desired track. Enable EQ Eight’s M/S mode by clicking on the “M/S” button, allowing you to adjust the stereo width independently for different frequency bands. By widening the higher frequency bands, such as vocals or cymbals, you can create a sense of spaciousness while keeping the lower frequencies centered for a solid foundation.

Frequently Asked Questions Of Using Stereo Imaging In Ableton Live : Enhance Your Mix


What Is Stereo Imaging In Ableton Live?


Stereo imaging in Ableton Live involves manipulating the stereo field to create a sense of width in the mix.


Why Is Stereo Imaging Important In Music Production?


Stereo imaging enhances the spatial perception of sound, making the mix more immersive and enjoyable for the listeners.


How Can I Improve Stereo Imaging In Ableton Live?


You can improve stereo imaging in Ableton Live by using stereo widening plugins, panning instruments effectively, and using spatial effects like reverb and delay.


What Are Some Common Mistakes To Avoid In Stereo Imaging?


Common mistakes to avoid in stereo imaging include excessive stereo widening, neglecting mono compatibility, and overusing panning.

Conclusion

Stereo imaging is a valuable tool in music production, allowing you to create a captivating and immersive listening experience. In Ableton Live, the panning controls, stereo wideners, mid-side processing, the Haas effect, and frequency-based stereo enhancement techniques provide you with a wide range of options to experiment with.

Remember to use stereo imaging techniques judiciously, always considering the context and intention of your mix. Experiment with different combinations of techniques and find what works best for your tracks. By mastering stereo imaging in Ableton Live, you can take your mixes to a whole new level of sonic excellence.

Categories
Archive

Using Effects in Ableton Live : Mastering the Essential Audio Tools

Ableton Live is a powerful digital audio workstation that offers a wide range of effects to enhance your sounds and take your music production to the next level. Whether you’re a beginner or an experienced producer, understanding and utilizing effects can greatly influence the quality and creativity of your music.

1. Understanding Effects

Effects are audio processing tools that shape and modify sound. In Ableton Live, effects can be applied to individual tracks or the entire mix. They can be used to add depth, create ambiance, enhance dynamics, or completely transform sounds.

Types Of Effects:

  • Dynamic Effects: Compressors, limiters, and gates that control volume and dynamics.
  • Time-based Effects: Reverbs, delays, and echoes that add space and ambiance.
  • Modulation Effects: Chorus, flanger, and phaser that create movement and texture.
  • Filtering Effects: EQs, filters, and wah-wah pedals that sculpt the frequency spectrum.
  • Distortion and Saturation Effects: Overdrives, saturators, and amp simulators that add grit and character.

2. Applying Effects in Ableton Live

Ableton Live provides a user-friendly interface for applying and manipulating effects. Here are the steps to follow:

  1. Open Ableton Live and select the track where you want to apply the effect.
  2. Click on the “Audio Effects” tab in the browser window to access the effects library.
  3. Drag and drop the desired effect onto the track.
  4. Adjust the effect parameters to achieve the desired sound.
  5. Experiment with different effects and their settings to explore creative possibilities.

3. Using Effects Creatively

While effects can be used to fix certain audio problems, they are also great tools for unleashing your creativity. Here are a few tips:

  • Automation: Utilize automation to create dynamic changes in effect parameters over time.
  • Layering Effects: Stack multiple effects to create complex and unique sounds.
  • Parallel Processing: Blend the original sound with an effect-processed copy to add depth and dimension.
  • External Hardware: Explore connecting external effects processors for a more hands-on approach.
  • Presets and Templates: Save your favorite effect settings as presets or create templates for quick and consistent results.

4. Performance Effects

Ableton Live offers real-time performance effects that can be controlled using MIDI controllers or automation. These effects can add excitement and interactivity to your live performances or recordings. Some popular performance effects in Ableton Live include beat repeat, arpeggiator, and grain delay.

Using Effects in Ableton Live  : Mastering the Essential Audio Tools

Credit: www.avid.com

Credit: www.amazon.com

5. Mixing and Mastering Effects

When it comes to mixing and mastering, Ableton Live provides a variety of effects specifically designed for these stages. EQ, compression, stereo imaging, and mastering tools are essential for achieving a polished and professional sound.

Final Words

Understanding the fundamentals of effects and their application in Ableton Live will enable you to take full advantage of this powerful software. Experiment, explore, and let your creativity soar as you utilize effects to shape and transform your music.

Frequently Asked Questions On Using Effects In Ableton Live : Mastering The Essential Audio Tools


What Are The Different Types Of Effects In Ableton Live?


Ableton Live offers a wide range of effects including delay, reverb, EQ, compression, and more to enhance your audio.


How Can I Add Effects To A Track In Ableton Live?


To add effects to a track in Ableton Live, simply drag and drop the desired effect from the browser onto the track.


Is It Possible To Automate Effects In Ableton Live?


Yes, you can easily automate effects in Ableton Live by using automation lanes in the arrangement view.


Can I Use Third-party Effects Plugins In Ableton Live?


Absolutely! Ableton Live supports third-party effects plugins, giving you access to a vast array of additional creative tools.

Categories
Archive

Using the Sampler in Ableton Live : Master Sampling Techniques

Ableton Live is a powerful digital audio workstation that offers a wide range of tools and features for music production. One of the most essential tools in Live is the Sampler. The Sampler is a versatile instrument that allows you to manipulate and play back audio samples.

Credit: www.amazon.com

Getting Started with the Sampler

To access the Sampler in Ableton Live, simply drag and drop a sample onto a MIDI track. Once the sample is loaded into the Sampler, you can start exploring its various parameters and functions.

Adjusting Playback Parameters

The Sampler provides you with the ability to adjust playback parameters such as start and end points, looping, and the pitch of the sample. This allows you to manipulate and shape the sound to fit your project’s needs.

You can also apply various modulation and effects to the sample, such as filters, LFOs, and envelopes. This adds depth and character to your sample and helps you create unique and interesting sounds.

Mapping Samples to MIDI

One of the most exciting features of the Sampler is its ability to map samples to different MIDI notes. This allows you to create melodic patterns and play the sample like a traditional instrument.

To map a sample to a MIDI note, simply click on the “Zone” tab in the Sampler’s interface and select the desired range of notes. You can also adjust the root note and fine-tune the pitch to match your desired key.

Using Sampler In Live Performance

The Sampler is not only useful in the studio, but it can also enhance your live performances. With the Sampler, you can trigger samples and create on-the-fly remixes, adding an extra layer of creativity and improvisation to your live sets.

To integrate the Sampler into your live performance, you can assign specific samples to a MIDI controller, allowing you to trigger them with the press of a button or the strike of a pad. This gives you immediate control over your samples and allows you to manipulate them in real-time.

Credit: m.youtube.com

Tips and Tricks

Here are some additional tips and tricks to optimize your experience with the Sampler:

  • Experiment with different sample manipulation techniques, such as reversing, time-stretching, and slicing.
  • Use the Sampler’s built-in automation features to create dynamic and evolving sounds.
  • Explore the vast library of pre-made sampler instruments and loops available online.
  • Combine multiple instances of the Sampler to create complex and layered textures.

Final Thoughts

The Sampler in Ableton Live is an incredibly powerful tool that opens up endless possibilities for audio manipulation and creative expression. Whether you’re a producer, performer, or sound designer, the Sampler is an essential part of your musical toolkit. With its intuitive interface and extensive feature set, the Sampler allows you to take your music to new heights.

Frequently Asked Questions On Using The Sampler In Ableton Live : Master Sampling Techniques


How Can I Use The Sampler In Ableton Live?


To use the Sampler in Ableton Live, drag and drop a sample onto the Sampler instrument and start creating music.


What Are The Key Features Of The Sampler In Ableton Live?


The Sampler in Ableton Live offers advanced sound manipulation, sample slicing, multisample support, and powerful modulation capabilities.


What Are Some Creative Ways To Use The Sampler In Ableton Live?


You can use the Sampler to create unique textures, manipulate vocals, experiment with time-stretching, and design complex soundscapes.


Can I Import My Own Samples Into The Sampler In Ableton Live?


Yes, you can import your own samples and use the Sampler’s powerful tools to tailor and sculpt them into your desired sonic creations.

Categories
Archive

Understanding the Different Types of Synthesizers in Ableton Live: Master Your Music Creation

When it comes to music production, one of the most versatile tools you can have in your arsenal is a synthesizer. Synthesizers allow you to create a wide range of sounds and textures, making them extremely popular among producers and musicians alike.

If you’re an Ableton Live user, you have access to a variety of synthesizers that come bundled with the software. Each synthesizer has its own unique characteristics and features, which can make choosing the right one a bit overwhelming, especially for beginners.

Understanding the Different Types of Synthesizers in Ableton Live: Master Your Music Creation

Credit: samplefocus.com

1. Analog Synthesizers

Analog synthesizers are designed to replicate the sound generation methods of early electronic musical instruments. They use analog circuits and components to create and shape sounds. Ableton Live offers several analog synthesizers, such as Analog and Operator.

Analog: Analog is a powerful subtractive synthesizer that emulates the characteristics of vintage analog hardware. It features two oscillators, a multimode filter, and various modulation options.

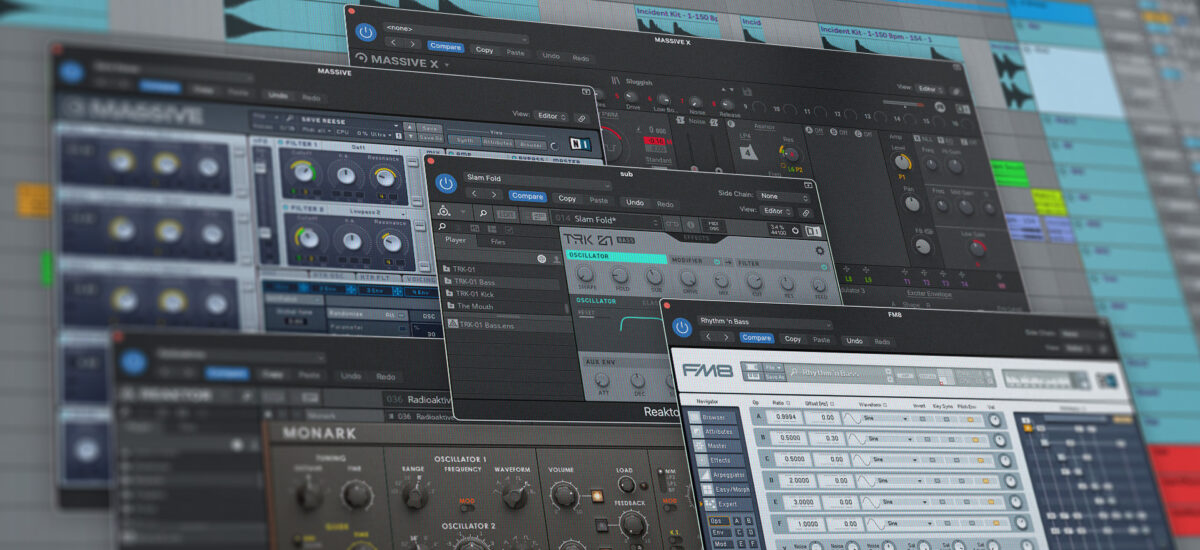
Operator: Operator is a frequency modulation (FM) synthesizer that allows you to create complex and evolving sounds. It offers four oscillators and a vast array of modulation possibilities.

2. Wavetable Synthesizers

Wavetable synthesizers are a modern type of synthesizer that use wavetables as their sound source. Wavetables contain a collection of pre-recorded waveforms that can be manipulated in real-time. In Ableton Live, you have two popular wavetable synthesizers: Wavetable and Serum.

Wavetable: Wavetable is a versatile synthesizer that lets you create evolving and complex sounds using its extensive wavetable library. It offers powerful modulation capabilities and an intuitive interface.

Serum: Serum is a third-party wavetable synthesizer that has gained immense popularity among producers. It features a wide range of wavetables and a comprehensive set of modulation options, making it a favorite for sound designers.

3. FM Synthesizers

FM synthesizers use frequency modulation to generate sounds. They are known for their ability to create bright and metallic tones and are widely used in genres like electronic and pop music. Ableton Live includes a notable FM synthesizer called FM8.

FM8: FM8 is a software synthesizer developed by Native Instruments. It offers powerful FM synthesis capabilities, a flexible modulation system, and an extensive library of presets. It is highly regarded for its ability to create rich and complex sounds.

Understanding the Different Types of Synthesizers in Ableton Live: Master Your Music Creation

Credit: blog.native-instruments.com

4. Physical Modeling Synthesizers

Physical modeling synthesizers simulate the behavior of acoustic instruments and allow you to create realistic emulations of pianos, strings, and other acoustic sounds. Ableton Live provides a unique physical modeling synthesizer known as Collision.

Collision: Collision uses algorithms to recreate the resonant properties of objects colliding, giving you the ability to generate an array of percussive and tonal sounds. It is perfect for producing realistic percussion and plucked instrument sounds.

5. Sampler and Simpler

Although Sampler and Simpler are not traditional synthesizers, they are powerful tools for sample-based sound design in Ableton Live.

Sampler: Sampler is a professional-grade sampling instrument that lets you manipulate and manipulate samples in numerous ways. It offers advanced mapping and modulation options, making it a favorite among sample-based music producers.

Simpler: Simpler is a streamlined version of Sampler, offering a more straightforward interface for quickly loading and manipulating samples. It is perfect for anyone looking to dive into sample-based production with ease.

By understanding the different types of synthesizers in Ableton Live, you can unlock an infinite world of sound possibilities. Whether you’re a beginner or an experienced producer, each synthesizer offers unique features that can help you craft your sonic landscapes. Experiment with different synthesizers and let your creativity soar!

Frequently Asked Questions For Understanding The Different Types Of Synthesizers In Ableton Live: Master Your Music Creation


What Are The Main Types Of Synthesizers Used In Ableton Live?


The main types of synthesizers used in Ableton Live are analog, digital, and software synthesizers. Each type has its own unique characteristics and sound capabilities.


How Does An Analog Synthesizer Differ From A Digital Synthesizer?


Analog synthesizers generate sound using electronic circuitry and are known for their warm and organic sound. On the other hand, digital synthesizers use digital signal processing to create and manipulate sounds, offering a wide range of sonic possibilities.


What Are The Advantages Of Using Software Synthesizers In Ableton Live?


Software synthesizers in Ableton Live offer a convenient, portable, and versatile solution for music production. They also provide a wide variety of sound options, easy integration with other software, and the ability to save and recall presets.


Can I Use Both Hardware And Software Synthesizers In Ableton Live?


Yes, Ableton Live allows seamless integration of both hardware and software synthesizers, providing users with the flexibility to combine different sonic textures and timbres in their music production.