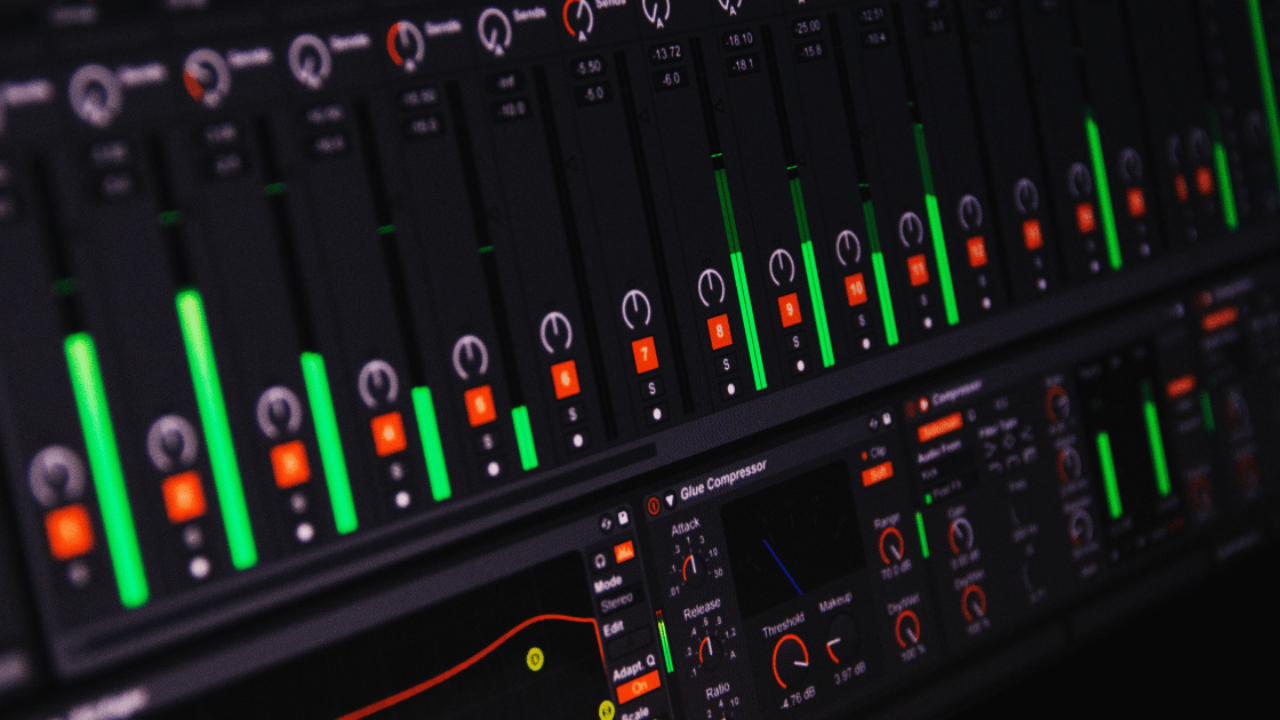
Welcome to this comprehensive guide on the Mixer in Ableton Live! In this article, we will explore the fundamental aspects of the Mixer within the renowned music production software, Ableton Live. Regardless of whether you are a novice or an experienced user, understanding the Mixer is crucial for enhancing your production skills and achieving high-quality sound mixes in your music projects.
What is the Mixer in Ableton Live?
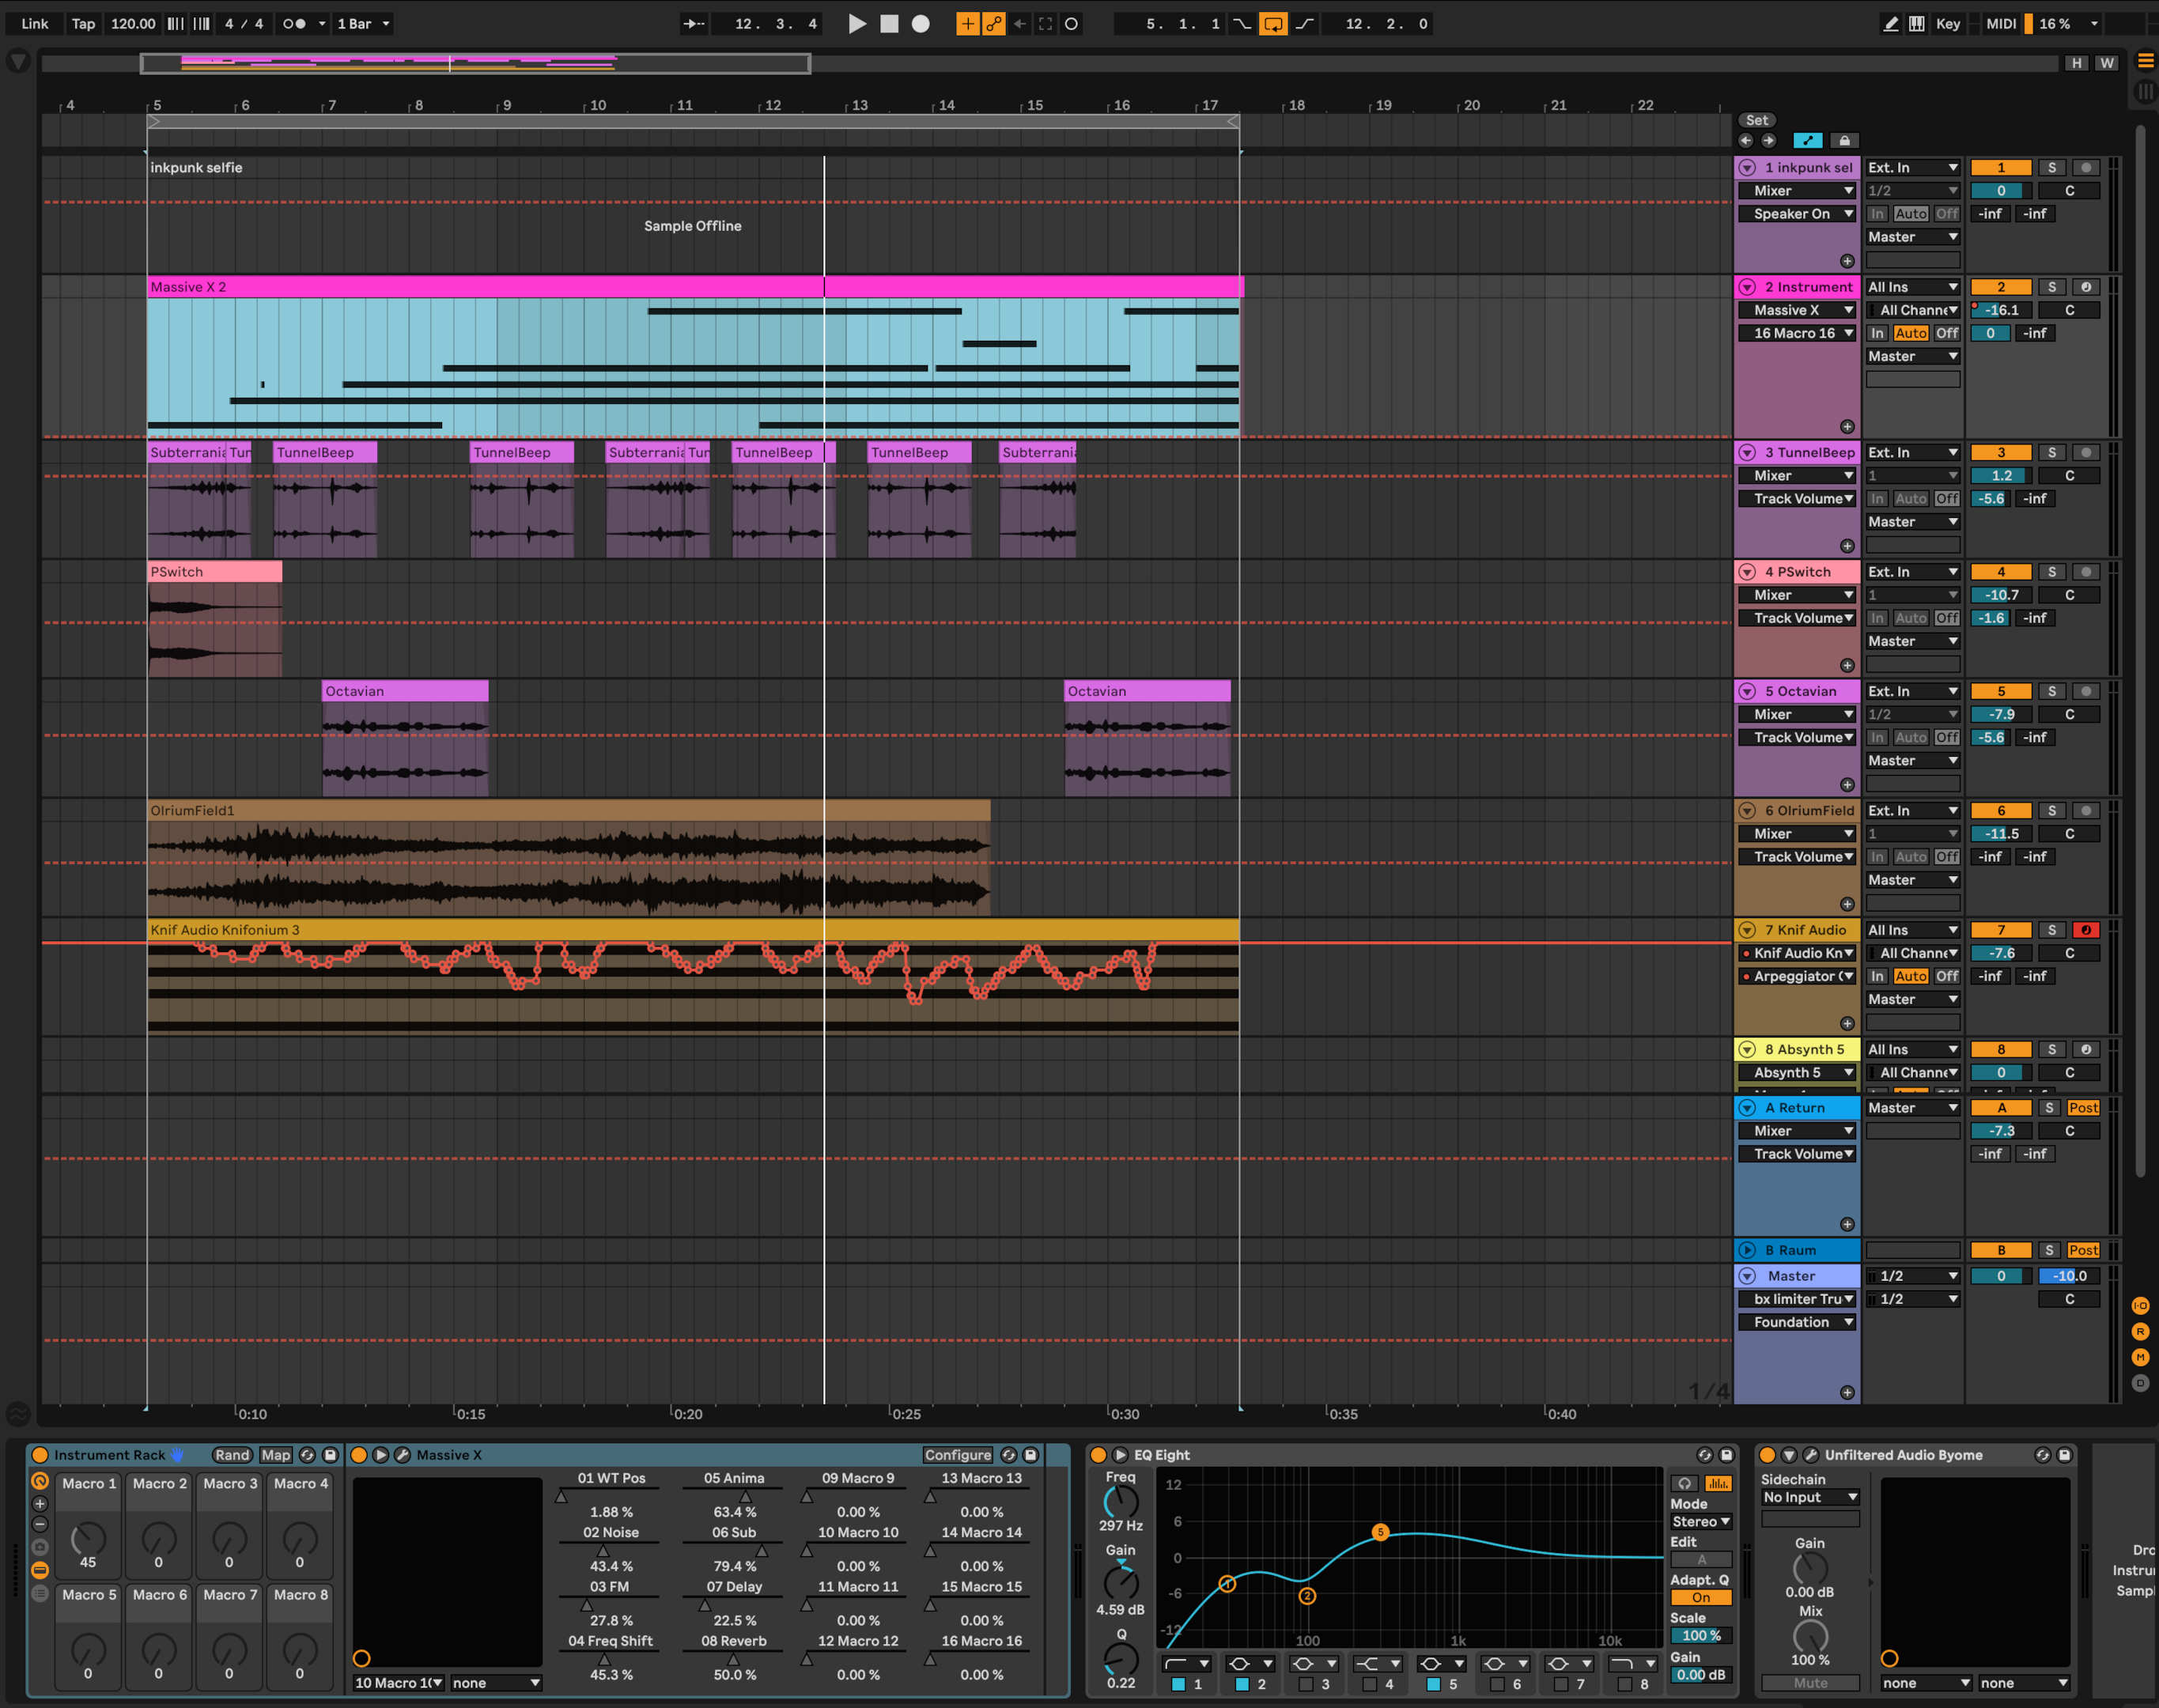
The Mixer in Ableton Live is the central control hub where you can adjust the volume, panning, and effects of individual tracks within your project. It enables you to blend and balance different audio elements to create a cohesive and professional-sounding mix. The Mixer plays a pivotal role in shaping the overall sound of your music compositions.
Essential Features of the Mixer
Let’s delve into some of the key features that make the Mixer in Ableton Live a powerful tool for music production:
Volume Faders: These sliders allow you to adjust the volume level of each track in your project. Proper volume balancing is essential for achieving a well-mixed and dynamic sound.
Pan Controls: Pan controls determine the placement of the audio signal within the stereo field, allowing you to create a sense of spatial width and depth in your mix.
Send/Return Tracks: These tracks enable you to route audio from multiple tracks to a shared effects track for applying reverb, delay, or other effects uniformly across your mix.
Audio Effects: Ableton Live offers a wide range of built-in audio effects that can be applied to individual tracks within the Mixer to enhance the sonic characteristics of your sounds.
Optimizing Your Workflow with the Mixer
Efficiently utilizing the Mixer in Ableton Live can significantly streamline your workflow and boost your productivity during the music production process. Here are some tips to optimize your experience:
Organize Your Tracks: Group similar tracks together in the Mixer to maintain a structured layout and facilitate easier navigation.
Use Bus Routing: Route multiple tracks to a bus track for collective processing, allowing you to apply effects to multiple tracks simultaneously.
Save and Recall Mixer Settings: Save custom mixer configurations as presets for quick access, enabling you to recall your preferred settings for future projects.
Advanced Techniques in the Mixer
For more experienced users looking to elevate their mixing skills in Ableton Live, here are some advanced techniques to explore:
Technique
Description
Sidechain Compression
Use sidechain compression to create rhythmic pumping effects by triggering the compressor on one track with the audio signal from another track.
Parallel Processing
Implement parallel processing by duplicating a track, applying heavy processing to the duplicate, and blending it back with the original track for added depth and texture.
Midi Mapping
Assign MIDI controls to Mixer parameters for real-time manipulation and automation, providing dynamic control over your mix elements.
Credit: www.amazon.com
Credit: www.facebook.com
Frequently Asked Questions Of Mastering The Mixer: Unleash The Full Potential Of Ableton Live
What Is The Role Of The Mixer In Ableton Live?
The mixer in Ableton Live functions as the control center for adjusting volume, panning, and effects for all tracks.
How Can I Use The Mixer For Audio Routing?
You can use the mixer in Ableton Live to route audio by sending a track’s output to a specific mixer channel or bus.
Can I Apply Effects Through The Mixer In Ableton Live?
Yes, you can apply a variety of effects such as EQ, compression, and reverb through the mixer in Ableton Live for each track.
What Is The Purpose Of Track Grouping In The Mixer?
The track grouping feature in the mixer allows for simultaneous control of multiple tracks, making it easier to adjust settings collectively.
Conclusion
In conclusion, mastering the Mixer in Ableton Live is essential for achieving professional-quality mixes that stand out in the music industry. By understanding the core features, optimizing your workflow, and exploring advanced techniques, you can elevate your music production skills and unleash your creative potential within the digital audio workspace of Ableton Live. Start experimenting with the Mixer today and witness the transformative impact it can have on your music projects!
Mixing a song typically takes 4-12 hours, depending on complexity. Experienced professionals might do it faster.
The process of mixing a song is a critical stage in music production, balancing various audio elements to ensure clarity and harmony. This period can vary widely due to factors such as the number of tracks, the genre of music, the complexity of the audio, and the level of perfection sought by both the mixer and the artist.
Skilled mixing engineers carefully tweak levels, pan positions, equalization, and effects like reverb and delay. They sculpt the sound to create a polished final product that resonates with listeners. The exact time can also depend on whether the mix is for a demo, a commercial release, or personal use, with professional standards often requiring additional hours of meticulous work.
The Art And Science Of Mixing A Song
Mixing a song is a delicate balance between creativity and technical precision. It’s like painting with sound. Each layer of music works together to create a sonic masterpiece. Artists and producers spend hours in the studio perfecting this craft. So, let’s dive into the intricate world of blending sounds.
Blending Creativity With Technical Skills
A song mixer is both an artist and a scientist. Creativity meets technology in their hands. Mixers adjust levels, tweak equalization, and add effects. This shapes the emotional impact of a song. It’s crucial to have a deep understanding of musical elements. But you also need to master advanced audio software. A great mixer uses both to bring a song to life.
Understanding The Mixer’s Role
The role of a mixer is to find harmony between sound elements. This might include vocals, guitars, drums, and more. A mixer must consider several aspects. These are volume, panning, dynamics, and frequency balance. They also need to preserve the song’s vision. The goal is to enhance the listener’s experience. A well-mixed song feels complete and polished. It should take the audience on an auditory journey.
Assessing the Raw Materials: Review the individual tracks for quality.
Setting Levels and Pan: Balance each track in the stereo field.
Applying EQ and Dynamics: Shape the sound to fit together like pieces of a puzzle.
Adding Effects and Processing: Use reverb, delay, and other tools to create depth.
Final Touches: Ensure that all elements work in unity for a polished result.
Pre-mix Preparation
Before diving into the audio waves, solid prep sets the stage for a standout mix. This phase lays down the canvas where the song’s colors will shine. Thoughtful organization and high-quality recordings define this crucial step. Get these right, and mixing your song flows smoother and faster.
Organizing Tracks And Sessions
Good organization makes mixing easier. Start by naming tracks clearly.
Kick, Snare, Guitar, Vocals — Keep it simple and direct.
Colors and Numbers — Use them to group similar tracks.
Template Use — Saves time with preset routings and effects.
Consolidate audio files for a clean session view. Be sure each track starts at the same point. This prevents timing issues and maintains sync.
Ensuring Quality Recordings
High-class mixes rely on top-notch takes. Check each track for clarity.
No Clipping — Distortion ruins good takes. Keep levels in check.
Clean Editing — No abrupt cuts. Fade in and out gently.
Tune and Time — Pitch-perfect and in rhythm often wins the day.
Invest time in removing background noise. Listen for hisses, hums, or pops. Fix these now, not later.
Factors Affecting Mixing Time
Finding out how long it takes to mix a song is like asking how long it takes to paint a picture. Many elements can influence the time it takes for a song to go from raw tracks to a polished mix. Understanding these factors is key for artists, producers, and mix engineers alike. Let’s dive into what impacts mixing time.
Complexity Of The Song
The number of layers in a song directly affects the mixing time. More elements mean more work. Here are a few aspects to consider:
Track count: More tracks demand more attention.
Instrument variety: Different instruments can challenge a mixer’s skills.
Vocal arrangements: Harmonies and ad-libs require fine-tuning.
Audio quality: Poor recordings may need extra work to sound good.
A complex song with many tracks will take longer to mix than a simple acoustic piece.
Experience Level Of The Mixer
A mixer’s expertise plays a critical role in the mixing process. The experience will influence not just the time it takes, but the quality of the final mix. Let’s compare:
Mixer Experience Level
Impact on Mixing Time
Novice
Longer, due to a learning curve.
Intermediate
Medium, with fewer revisions needed.
Professional
Faster, with more efficient workflows.
A seasoned mixer might mix a song in a few hours, while a beginner might need several days to achieve a similar outcome.
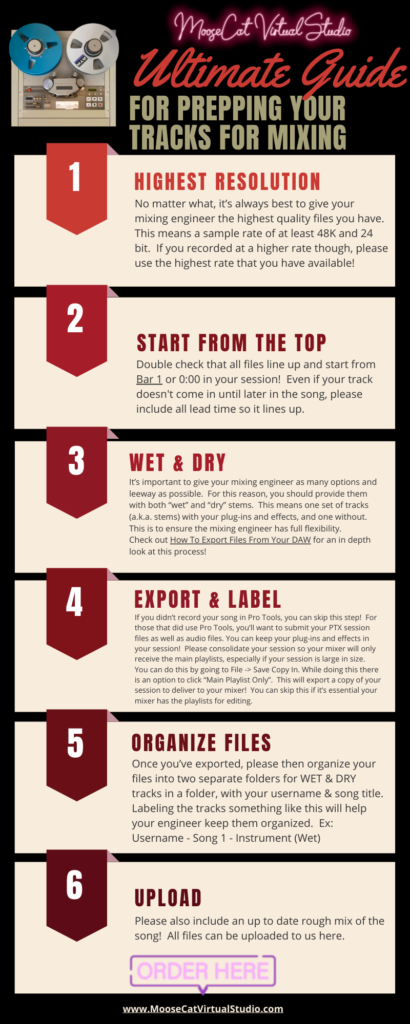
Credit: moosecatrecording.com
Average Timeframes For Mixing
The journey of a song from recording to release is thrilling. One key step is mixing. This process blends recorded tracks together. It balances sounds. It polishes the final piece. Mixes vary in complexity. So, the time to mix a song can differ. Let’s explore average timeframes for different settings.
Indie And Home Studios
Mixing in indie or home studios is unique. These settings often mean more flexibility. There’s no rush. Artists work at their own pace. Still, average mixing time frames exist.
Simple projects: 1-2 days
Medium complexity: up to 1 week
Complex tasks: 2 weeks or more
Artists mix as they create. This could lead to faster completion. Or, it might extend mixing time. It depends on the project’s needs and the artist’s vision.
Professional Studio Expectations
In professional studios, the process is different. Timelines are tighter. The focus is efficiency. Sessions are booked by the hour or day. Here’s a general idea of what to expect:
Project Type
Expected Time
Single song
8-16 hours
EP (3-5 songs)
3-5 days
Full album (10-12 songs)
2-4 weeks
Experience dictates speed. Professional engineers work swiftly. They deliver quality fast. They keep to schedules. Some projects might need extra time. Quality takes precedence.
Phase-by-phase Breakdown
Entering the world of music production unveils a fascinating process, song mixing. The duration of mixing a song can vary widely. It depends on the complexity and number of tracks. Dive into a detailed phase-by-phase breakdown of the mixing process and discover the journey your music undertakes before it shines to perfection.
Initial Listen And Assessment
Knowing your material is the first step in mixing. The engineer plays the song, identifying the standout elements. This phase is crucial for setting goals. A typical initial listen may involve:
Note-taking on specific areas of improvement
Understanding the creative vision of the artist
Recognizing the emotional heart of the song
This phase sets the stage for the mix and usually takes about an hour.
Tweaking Individual Tracks
Attention shifts to each track independently. The aim is to ensure clarity and balance. This involves:
Cleaning up unwanted noise
Adjusting timing and pitch where necessary
Setting basic volume levels and pans
Depending on the track count, this could range from several hours to multiple sessions.
Applying Effects And Dynamics
The next phase is about enhancing the mix with effects and dynamics processing. Key tasks include:
Effects/Dynamics
Goals
Compression
To achieve a balanced, smooth performance
Reverb
To add depth and space
EQ
To shape the tone
This creative step varies greatly, taking from a few hours to a whole day or more.
The Role Of Automation And Presets
The Role of Automation and Presets has become increasingly crucial in the music production industry. Automation tools and preset libraries can propel the mixing phase forward at an impressive pace. A discussion on their advantages and possible pitfalls is essential for modern producers.
Speeding Up The Process
Mixing a song can be time-consuming. Automation and presets transform this task. They deliver consistent results quickly. Presets serve as starting points for effects and settings, cutting down the time needed to mix tracks. Automated processes guide repetitive tasks, allowing for creative focus elsewhere.
Equalizer presets match common instruments
Compression settings ready for various genres
Reusable templates for consistent project structures
Automation enables real-time adjustments to multiple tracks. Volume levels, panning, and effects parameters sync to song elements, without manual input each time.
Risks Of Over-reliance
Despite the benefits, heavy reliance on presets and automation poses risks. Every song is unique, so a one-size-fits-all approach can lead to a mix that lacks character. Identical presets across different songs diminish sonic diversity. It can make tracks sound too similar or generic.
Overuse may stifle creativity
Lack of attention to detail in critical mix elements
Potential for disregarding an artist’s unique style
Strong knowledge of basic mixing principles ensures presets serve as aids rather than crutches. Aim for a balance between automated conveniences and personalized tweaks. This strategy maintains a song’s individuality while still benefiting from technology’s pace.
Strategies To Efficiently Mix A Song
Welcome to the heart of music production: the mixdown. Crafting a clear, balanced and dynamic mix requires both skill and patience. Goal-oriented strategies ensure a fluid process and stellar end product. We dive into time-tested methods to streamline your mixing process, making it as efficient as possible.
Time Management Practices
Efficient session management is the cornerstone of a good mix. Diligent scheduling and breaks fall under this framework.
Set achievable goals: Break your mix into smaller tasks.
Allocate time: Assign specific periods to each task.
Take regular breaks: Short pauses help maintain a fresh ear.
Monitor progress: Use checklists to track completion.
Using Reference Tracks
A reference track is a secret weapon for efficient mixing. It provides a roadmap for sound quality and balance.
Choose wisely: Select tracks that mirror your desired output.
Analyze the mix: Note its balance, dynamics, and frequency distribution.
Match levels: Ensure your track plays at a similar perceived loudness.
Compare and adjust: Regularly switch between the reference and your mix.
Common Pitfalls And How To Avoid Them
When diving into the complex world of mixing a song, it’s easy to get caught off track. Recognizing common pitfalls can save valuable time and energy. Understanding what to watch out for enables you to streamline the mixing process and achieve results that truly resonate with listeners. Let’s walk through some of these traps and learn the best practices to avoid them.
Over-mixing And Ear Fatigue
Over-mixing is a frequent misstep that can lead to a flat and lifeless track. The key is finding balance and knowing when to step back. Here are a few tips:
Set time limits for mixing sessions to prevent overwork.
Take regular breaks to rest your ears and maintain perspective.
Use reference tracks to ensure your mix stays dynamic.
Ear fatigue diminishes your mixing abilities. Your ears become less sensitive to changes in the mix. To combat this:
Mix at lower volumes when possible.
Step away from the studio every couple of hours.
Consider alternate listening environments for fresh perspectives.
Losing Perspective Of The End Goal
It’s easy to lose sight of the song’s ultimate objective amid the minutiae of mixing. Always keep the end goal in mind:
Start with a clear vision of the song’s final sound.
Regularly revisit the original demo for direction.
Get feedback from trusted ears to avoid tunnel vision.
Remember, the goal of mixing is to enhance the song, not overshadow its core essence. Ensuring each element complements the other is paramount.
Finalizing The Mix
Finalizing the Mix stands as a critical stage in music production, where the intricate process of blending tracks reaches its culmination. Precision and an attentive ear steer this journey towards a polished, coherent single track that radiates the artist’s vision. Let’s delve into the essential steps at this juncture.
Knowing When It’s Done
A common dilemma faced by producers is deciding when a mix is truly finished. Signs of a complete mix often include clarity in each instrument, balanced levels, and a sense of sonic harmony that aligns with the intended artistic message. Trusting your instincts plays a key role in drawing the line. Here are clear indicators to watch for:
Consistency across various listening devices
Dynamics and emotion in line with the song’s mood
Feedback from unbiased ears representing the target audience
Preparing For Mastering
With the mixdown set, preparation for mastering is the next vital step. It ensures your track is ready to compete in the loudness and quality arena of commercial releases. Follow these important pre-mastering tasks:
Check for adequate headroom, ideally peaking at -6dB
Perform a final quality control pass, removing any clicks or noise
Render the mix in the highest possible resolution, like 24-bit
By sticking to these guidelines, your song stands tall, primed for the mastering process that will elevate it to its fullest potential.
Credit: info.xposuremusic.com
Frequently Asked Questions For How Long Does It Take To Mix A Song
What Factors Affect Song Mixing Time?
Song mixing time can be influenced by several factors including the complexity of the track, the number of instruments, the quality of the recording, the experience of the mixing engineer, and the desired quality of the final mix. Generally, more elements require more time.
How Long Should Mixing A Single Song Take?
Mixing a single song can take anywhere from a few hours to several days. Professional engineers often spend 4-8 hours for a basic mix. However, complex songs with numerous tracks may require 10-20 hours or more to achieve the desired sound quality and detail.
Can Mixing Be Done In One Day?
Yes, mixing can be done in one day, especially for simpler projects or with tight deadlines. That said, extra time allows for finer adjustments and a more polished end product. Adequate breaks are crucial for critical listening throughout the process.
What’s The Average Time To Mix An Ep?
The average time to mix an Extended Play (EP) can range from a couple of days to a week or more. An EP typically includes 3-5 songs, and each song may require one or two days of mixing, depending on the complexity and production goals.
Conclusion
Wrapping up, mixing a song varies in time due to multiple factors. Expertise, song complexity, and equipment all play a role. Aim for patience and precision rather than speed. A well-mixed track can elevate your music, making the time invested utterly worthwhile.
Keep practicing and refining your skills for the best results.
Ableton Live is a powerful digital audio workstation (DAW) that offers a wide range of tools and features for music production. When it comes to creating bass sounds, Ableton Live provides various plugins and techniques to help you achieve the desired results. In this article, we will explore some useful tips and tricks to create compelling bass sounds in Ableton Live.
Selecting the Right Oscillator
The oscillator is the fundamental building block of any bass sound. Ableton Live offers a variety of oscillator types, such as sine, square, sawtooth, and triangle waves. Each waveform has its unique characteristics, and you can experiment with different combinations to find the perfect match for your bass sound.
Applying Filters and Envelopes
To shape your bass sound further, you can apply filters and envelopes. Filters allow you to remove unwanted frequencies and emphasize certain aspects of the sound. Ableton Live features various filter types, including low-pass, high-pass, band-pass, and notch filters. Experimenting with different filter settings can help you achieve the desired tonal qualities.
Envelopes, on the other hand, control how the sound evolves over time. The most commonly used envelope parameters include Attack, Decay, Sustain, and Release (ADSR). Adjusting these parameters can significantly impact the character and dynamics of your bass sound.
Layering Multiple Sounds
Layering multiple bass sounds can add depth and complexity to your compositions. Ableton Live allows you to stack multiple sound sources together, combining different oscillator waveforms, filters, and effects. Experiment with different layering techniques to create a unique and powerful bass sound.
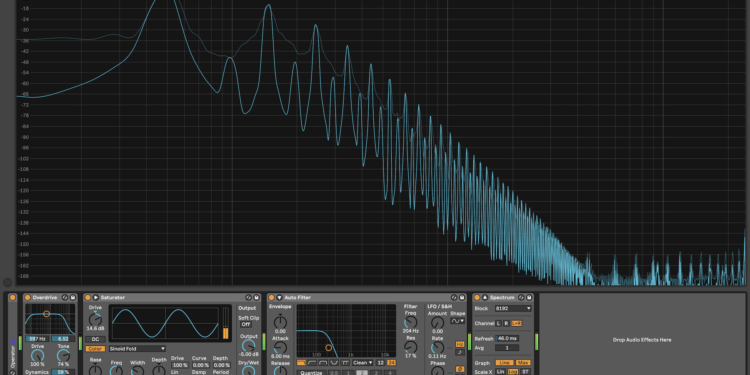
Credit: blog.faderpro.com
Utilizing Effects and Modulation
Ableton Live provides a wide range of effects and modulation tools that can enhance your bass sound. Some popular effects for bass include distortion, overdrive, chorus, and reverb. Additionally, utilizing modulation effects like LFOs (Low-Frequency Oscillators) can bring movement and texture to your bass sound.
Working with MIDI Controllers
Ableton Live can be integrated with various MIDI controllers, allowing you to have hands-on control over your bass sounds. MIDI controllers offer tactile and expressive ways to manipulate parameters in real-time, enabling you to create dynamic and organic bass performances. Consider investing in a MIDI controller to take your bass sound creation to the next level.
Credit: www.mind-flux.com
Sound Design Resources
There are plenty of resources available online for learning more about sound design in Ableton Live. Websites, forums, tutorials, and YouTube channels dedicated to music production can provide valuable insights and ideas for creating unique bass sounds. Exploring these resources can help you stay updated with the latest techniques and trends in bass sound design.
Frequently Asked Questions For Creating Bass Sounds In Ableton Live: Mastering The Art
How To Create A Classic Bass Sound In Ableton Live?
To create a classic bass sound in Ableton Live, start with a simple waveform like a sine or sawtooth, add a low-pass filter, and adjust the envelope to give it punch and sustain.
What Are Some Essential Effects For Processing Bass Sounds?
Essential effects for bass processing in Ableton Live include EQ to boost or cut specific frequencies, compression to even out the volume, and saturation to add warmth and harmonics.
Why Is Proper Eq Important For Bass Sounds In Ableton Live?
Proper EQ is important for bass sounds in Ableton Live to ensure clarity and definition, remove muddiness, and tailor the sound to fit with other elements in the mix.
How Can Layering Enhance The Depth Of A Bass Sound?
Layering bass sounds in Ableton Live can enhance depth by combining different waveforms or samples, blending frequencies, and stacking different timbres to create a rich, full-bodied sound.
Conclusion
Creating captivating bass sounds in Ableton Live involves careful selection and manipulation of oscillators, filters, envelopes, effects, and modulation. By experimenting with different settings, layering techniques, and utilizing MIDI controllers, you can develop unique and impactful bass sounds that add depth and richness to your music productions. Remember to stay curious and continue learning to refine your skills in bass sound design.
Spotify artists cannot see exactly who listens to their songs. They only have access to anonymized, aggregated data about their listeners.
Spotify is an audio streaming platform that has revolutionized music consumption, offering musicians insights that were once inconceivable. Now, artists can view a treasure trove of anonymous data, such as listener demographics, location, and listening habits, through Spotify for Artists.
This information helps artists understand their audience, plan tours, and tailor marketing strategies. With over 345 million active users, Spotify provides artists with the tools to analyze their reach and impact within the vast landscape of digital music consumers. Despite this, the exact identities of listeners remain private, ensuring user confidentiality and keeping personal listening experiences discreet.
The Spotify Landscape
Spotify has transformed the way we consume music, creating a vast landscape where artists and fans connect like never before. In this terrain, questions about privacy and data naturally surface, especially for artists curious about their listeners.
The Rise Of Streaming
Streaming services have skyrocketed in popularity, with Spotify leading the charge. Millions now prefer instant access to their favorite tunes over owning physical copies.
Convenient and flexible music consumption.
Access to a vast library of songs anytime.
Personalized playlists and music discovery features.
Privacy And User Data
Privacy remains pivotal for Spotify, ensuring user data stays protected. Artists receive insightful analytics without compromising listener identity.
Artists Can See:
User Data Not Shared:
General listener demographics
Individual names or accounts
Total number of streams
Personal listener information
Playlist adds and location data
Specific user listening habits
Such measures ensure a balance between valuable feedback for artists and essential privacy for listeners.
Artist Analytics On Spotify
Imagine you are a music artist on Spotify. You want to know who enjoys your music. Spotify has tools for that! They help artists see who is listening and where their songs are popular. This is useful for planning tours and knowing your fans better.
Spotify For Artists: Features
Spotify for Artists is a dashboard full of goodies. It shows you who is streaming your tracks. It even tells you about your listeners. You can see where they are from and what they like to listen to. This helps you connect with your fans.
Real-Time Stats: See when fans play your songs.
Profile Customization: Make your Spotify profile look great.
Playlist Submission: Submit new music to Spotify’s editorial team.
Metrics And Data Available
Spotify does not show specific names of listeners. But, it provides lots of info to help you understand your audience. Here’s what you can see:
Metrics
What It Shows
Monthly Listeners
How many people play your music every month.
Listener Demographics
Ages and locations of your listeners.
Playlist Adds
Which playlists feature your tracks and how many times they have been played.
Song Saves
How many times listeners have saved your songs.
These details help artists grow their music careers. Use them to make your fans happy with more of what they love!
Streamer Data: Limits And Accessibility
In the world of music streaming, artists crave insights into their audiences. Yet, there’s a balance to maintain. Spotify provides artists with data on their listeners, but strict limits ensure privacy remains unbreached. Understanding what information is accessible to artists and what stays private helps to demystify the Spotify experience for both creators and streamers. Let’s dive into the details of streamer data on Spotify.
Data Privacy Policies
Spotify takes user privacy seriously. Adherence to global data protection regulations shapes the kind of information artists can see about their listeners. Here’s a breakdown of the privacy boundaries:
No individual identification: Spotify doesn’t allow artists to identify who is streaming their music.
General analytics only: Creators get aggregate data, such as total plays, skips, and saves.
Geographical insights: Artists know the countries and cities their listeners are from but not exact locations.
Anonymous demographic details: Ages and genders of listeners are provided without personal identifiers.
Information Artists Can Access
Artists have access to a wealth of anonymous streaming statistics that help them understand their audience. Below is what artists can explore:
Type of Data
Description
Listener Numbers
Total and unique listener counts over different time frames.
Playlist Adds
Information on which playlists feature their songs and listener counts from those playlists.
Song Popularity
Metrics on how their songs perform on the platform overall.
Social Sharing
Insights into how often listeners share their songs on social platforms.
Customized dashboards in Spotify for Artists allow creators to analyze trends, track growth, and make informed decisions about promotions and fan engagement.
The Power Of Listener Insights
The world of music streaming has evolved, and with it, so has the interaction between artists and their listeners. The Power of Listener Insights is revolutionizing the way artists understand their audience. Spotify has provided musicians with valuable data to refine their music and marketing strategies. Explore how artists are leveraging these insights to their advantage.
Understanding Demographics
Knowing who listens to their music is crucial for artists. This helps them tailor their content and promotional efforts.
Age and Gender: Artists see listener age ranges and gender distribution.
Geographic Location: Spotify shows listener locations down to the city level.
Music Tastes: Insight into other music their audience enjoys informs collaboration decisions.
Demographic data benefits artists in crafting targeted campaigns and developing a deeper connection with their fans.
Tracking Listener Engagement
Engagement metrics shine a spotlight on how listeners interact with an artist’s songs. This is crucial for understanding which tracks resonate more with audiences.
Engagement Data
Benefit to Artist
Play Counts
Assess popularity and reach
Playlist Adds
Measure listener retention and potential for virality
Skip Rates
Judge song appeal and listener engagement
Save Rates
Understand which songs fans love the most
With engagement data, artists fine-tune their musical craft, fostering higher listener satisfaction and growth.
Case Studies
Artists on Spotify have a world of data at their fingertips. But what insights can they really glean from streaming statistics? By diving into case studies, we can see how analyzing listeners shapes the music industry. Let’s explore the impacts of analytics and privacy.
Success Through Analytics
Analytics help artists grow. Take the story of indie musician, Lucy Dream. She used Spotify’s analytics to understand her fanbase. Her data showed that a specific city had a high number of streams. Lucy organized a tour in that city and sold out her shows.
Identified high-listener areas
Planned targeted tours
Increased engagement with fans
Privacy Challenges And Spotify
However, with great data comes great responsibility. Artist Ben Rock faced a backlash when he mentioned specific fans during a show. Ben received insights about his top listeners from Spotify. But he didn’t know that sharing such data could invade privacy. It sparked a debate on user privacy.
Artist mentioned fans by name
Fans felt their privacy was violated
Renewed discussion on ethical use of data
These cases show how Spotify’s analytics can boost success yet challenge privacy. Artists balance between understanding their audience and respecting listener anonymity.
Balancing Privacy And Marketing
Artists and marketers often walk a tightrope between accessing valuable listener data and respecting fan privacy. On streaming platforms like Spotify, this balance is crucial. Adequate data helps artists understand their audience better, tailor their music and promotional efforts, and ultimately succeed in a competitive industry. Yet, privacy remains a top concern for listeners who cherish their anonymity. This section explores how artists can navigate these waters effectively.
Fan Privacy Concerns
Fans cherish their ability to stream music anonymously. They worry about personal data misuse. Spotify artists do not see specific listener details, ensuring user privacy. The platform offers generalized data, not individualized tracking. Listener’s trust is paramount. Confidentiality promotes a safe listening environment.
Strategies For Responsible Use Of Data
Strategic and ethical use of listener data benefits both artists and fans. Artists get anonymized insights, not personal identities. They should focus on trends and patterns, not individuals. Respect for privacy builds loyal fan bases. Using data to improve musical offerings can enhance the listener experience without compromising privacy. Ethical data practices are a win-win.
Analyze genre popularity amongst listeners to inform future creations.
Monitor song performance to tailor marketing strategies.
Engage with audiences through personalized content, mindful of privacy boundaries.
By adopting these strategies, artists can embrace the power of data while upholding their fans’ right to privacy.
Tools And Integrations
Spotify offers artists fantastic insights about their music. But with third-party tools and advanced analytics integrations, the experience only gets better. These add-ons help artists understand their audience on a deeper level. Knowing who listens, from where, and which songs they love the most is crucial. Let’s discover the tools that bridge the gap between artists and fans.
Connecting With Third-party Tools
To broaden the scope of analytics, Spotify has made connecting with third-party tools simple. Here’s what artists can do:
Link up their Spotify profile with social media analytics.
Track song performances across different platforms.
Analyze listener demographics in detail.
Enhancing Spotify Analytics
By enhancing Spotify’s existing analytics, artists can unlock new potential:
Identify listener trends over time.
Get notified when songs are added to popular playlists.
Understand fan engagement through detailed reports.
Credit: www.hypebot.com
The Future Of Music Streaming
The world of music streaming is rapidly evolving, pushing the boundaries of how artists connect with fans. At the heart of this innovation lies a question that piques the curiosity of many musicians: Can Spotify artists see who listens to their songs? As we look ahead, the future of music streaming promises to deepen the bond between artist and listener through data and technology. Let’s explore what these changes might look like.
Predicting Trends
Understanding listener preferences is crucial for artists to stay ahead. With advanced analytics, artists can now:
Identify emerging genres – Spot new music trends as they start.
Track song performance – Monitor which tracks gain traction.
Analyze listener demographics – Tailor promotions to specific groups.
Such insights help artists predict and influence future music trends.
Evolving Artist-listener Relationships
Music streaming platforms are transforming artist-fan interactions:
Real-time feedback loop – Instant reactions to new releases.
Personalized experiences – Custom content for individual fans.
Exclusive access – Behind-the-scenes glimpses for engaged listeners.
By leveraging listener data, artists can create more personal, long-lasting relationships with their audience.
Frequently Asked Questions Of Can Spotify Artist See Who Listens To Their Songs
Can Artists View Listener Demographics On Spotify?
Artists can access demographic information about their listeners via Spotify for Artists. This includes age, gender, location, and what playlists are generating the most streams. However, individual user profiles are not shared with artists for privacy reasons.
Do Spotify Artists See Individual User Data?
No, Spotify does not provide artists with data on individual listeners for privacy reasons. They get aggregated data to understand their listener base but cannot see individual profiles or listen habits.
How Do Artists Know Their Popular Songs On Spotify?
Spotify for Artists gives detailed insights on song performances. Artists can see the number of plays, listener retention, and playlist additions. This helps them identify which songs are most popular among their audience.
Can Spotify Artists Interact With Their Fans?
Spotify doesn’t offer direct communication tools between artists and listeners. Artists often share their social media handles in their Spotify profiles to interact with fans elsewhere.
Conclusion
Wrapping up, Spotify provides artists valuable insights, but not individual listener details. This balance maintains privacy while helping artists grow. Stay updated with Spotify’s evolving features for the best experience. Whether you’re streaming or creating, this platform is shaping the future of music consumption and creation.
In order to achieve high-quality audio recordings in Ableton Live, it is crucial to properly set up your audio interface. An audio interface serves as the bridge between your computer and external audio sources, such as microphones and instruments. In this article, we will guide you through the steps of setting up your audio interface in Ableton Live, ensuring optimal recording and playback results.
Step 1: Connect Your Audio Interface
Firstly, connect your audio interface to your computer using an appropriate cable. Most audio interfaces use USB, Thunderbolt, or FireWire connections. Make sure to consult the manual of your specific audio interface for the correct cable and connection.
Step 2: Install the Software Driver
Next, you need to install the software driver for your audio interface. The software driver allows your computer to recognize and communicate with the audio interface effectively. Visit the manufacturer’s website and download the latest driver for your particular operating system.
Credit: rolandcorp.com.au
Step 3: Configure Audio Settings in Ableton Live
Launch Ableton Live and navigate to the Preferences menu by clicking on “Options” and selecting “Preferences.” In the Preferences window, select the “Audio” tab.
Under the “Audio Device” dropdown menu, choose your audio interface from the available options. If your interface supports it, select the highest available sample rate for optimal audio quality. Common sample rates include 44.1 kHz and 48 kHz.
Next, select the desired buffer size. Smaller buffer sizes provide lower latency but may require more CPU power. Larger buffer sizes offer higher latency but provide more stable performance. Experiment with different buffer sizes to find the best balance for your specific setup.
Step 4: Set Up Input and Output Routing
In the Audio Preferences window, click on the “Input Config” tab. Here, you’ll be able to specify which inputs of your audio interface you want Ableton Live to recognize. Enable the inputs you wish to use for recording by clicking on the respective checkboxes.
Similarly, click on the “Output Config” tab to configure your desired output routing. This setting determines where Ableton Live will send the audio for playback. Enable the outputs that correspond to your speakers or headphones.
Step 5: Test and Adjust Levels
Once you have set up your inputs and outputs, it’s important to test and adjust the audio levels in Ableton Live. Create a new audio track by clicking on the “+” icon in the track view. Ensure that the audio track is armed for recording by clicking on the small red “Arm” button.
Speak or play your instrument into the microphone or audio source connected to your audio interface. Observe the signal level meters on the audio track. Make sure the input signal is neither too quiet nor clipping (indicating it’s too loud). Adjust the input gain on your audio interface accordingly until you achieve a balanced signal.
Step 6: Apply Monitoring and Recording Settings
To monitor your audio inputs while recording, click on the small headphone icon located on the audio track. This enables the “Input Monitoring” feature, allowing you to hear the input signal in real-time. Adjust the monitoring level to a comfortable level.
Configure the recording settings in Ableton Live by choosing the desired audio format and bit depth. In most cases, 24-bit is recommended as it offers a wider dynamic range and higher audio quality compared to 16-bit. Select either mono or stereo recording mode based on your requirements.
Credit: glitchmagic.com
Step 7: Ready to Record and Produce
With your audio interface properly set up in Ableton Live, you are ready to record and produce music with confidence. Ensure that you save your preferences in Ableton Live for future sessions.
Remember to refer back to the manual of your audio interface for additional guidance and troubleshooting specific to your model. Take your time to explore the features and capabilities of your audio interface in conjunction with Ableton Live, and enjoy the enhanced audio recording and production experience.
Frequently Asked Questions For Setting Up Your Audio Interface In Ableton Live : Ultimate Guide For Beginners
What Is An Audio Interface?
An audio interface is a hardware device that allows you to connect microphones, instruments, and other audio gear to your computer for recording and playback.
Why Do I Need An Audio Interface For Ableton Live?
An audio interface is essential for achieving high-quality sound input and output, reducing latency, and connecting professional studio gear to your Ableton Live setup.
How Do I Connect My Audio Interface To Ableton Live?
Connect your audio interface to your computer using a USB or Thunderbolt cable, and then select it as your input and output device in Ableton Live’s preferences.
Can I Use Multiple Audio Interfaces With Ableton Live?
Yes, you can use multiple audio interfaces with Ableton Live by setting up an aggregate device on your computer to combine the inputs and outputs of the individual interfaces.
Transients in music are short, high-energy bursts that occur at the onset of a sound. They are crucial for defining the character of an instrument or sound within a mix.
Transients grab the listener’s attention, shaping the clarity and punch of audio tracks. In the realm of music production, understanding and manipulating transients is essential for sound engineers and producers. This knowledge enables them to craft a mix where each element stands out or blends smoothly as desired.
Properly managing transients can also help in maintaining the dynamic feel of a live performance when recorded. By using compression and transient-shaping tools, producers ensure that the music’s energy and drive are translated effectively through speakers or headphones to the audience. Recognizing the importance of transients is fundamental for achieving a professional and impactful sound in any musical work.
Introduction To Transients In Music
When we talk about music, we often focus on melody and rhythm. But there’s another element that’s just as crucial—transients. Transients are the very first sounds we hear when an instrument is played. They act like a musical handshake; they catch our attention and set the tone for what’s to come.
Defining The Pulse Of Sound
Imagine throwing a stone into a calm pond. The initial splash is what we can compare to a transient in music. It’s bold and demands attention. In audio, transients are the short bursts of energy that occur at the beginning of a sound. They can be the strum of a guitar or the hit of a drumstick—these are the moments that give a sound its initial impact.
The Role Of Transients In Acoustic Signatures
Transients are more than just the start of a sound; they are a sound’s unique signature. Just as no two people have the same voice, no two musical instruments have identical transients. They help us instantly recognize the type of instrument and the way it’s being played. This is crucial for listeners to identify and connect with the music on a deeper level.
Why Do Transients Matter?
They grab our attention.
They define the character of a sound.
They help in sound recognition.
They enhance musical dynamics and expression.
The Science Of Transients
Transients in music are sudden bursts of energy. They mark the start of musical sounds. Your ears pick up these quick changes. Transients help in feeling the rhythm and understanding the texture of instruments. Let’s delve into the science behind transients.
Physical Properties Of Transients
Transients have unique properties. These include sharp attack time and high amplitude. They occur at the beginning of a sound. This is known as the ‘attack phase’. The attack phase is quick. It can be as short as a few milliseconds.
Short Duration: They’re brief but powerful.
High Energy: They add punch to music.
Diverse Spectrum: They give each instrument a unique sound.
These properties help in distinguishing sounds. They make a piano sound different from a drum, for example.
How Sound Engineering Captures Transients
Sound engineers use special tools to capture transients. They aim for clarity and detail. The goal is to make every transient heard. This is what makes music feel alive.
Tool
Function
Microphones
Capture the raw sound waves.
Compressors
Control the dynamic range.
Limiters
Prevent distortion.
Equalizers
Enhance certain frequencies.
In the studio, precise settings ensure every transient gets recorded just right. High-quality equipment is crucial. Great recordings can preserve the transients without losing any detail.
Perception Of Transients
The world of music is rich with nuances that shape our listening experience. Among these nuances are transients, the initial attack phase in a sound wave. These spikes in audio signal are critical for the clarity and definition of a sound. They guide us in identifying the type of instrument or the nature of a sound source. Understanding transients enriches our perception of music and affects how we interact with sound.
Human Hearing And Transient Sensitivity
Human ears are like super detectors for sudden changes in sound. We have a natural ability to notice the start, or ‘attack,’ of any note or sound effect. This skill helps us recognize different sounds and where they come from. Our ears pay close attention to these quick bursts of audio energy, known as transients.
Frequency Range: Humans can hear frequencies from 20 Hz to 20,000 Hz, and transients often occupy a broad spectrum within this range.
Dynamic Range: Our hearing can pick up the softest whispers to the loudest roars, making it capable of detecting the faintest to the most powerful transients.
Spatial Awareness: Transients contribute to our ability to locate sounds, enhancing 3D auditory perception.
The Psychological Impact Of Transients On Listeners
Transients hold power over our emotions. They can make a song feel punchy, aggressive, soft, or delicate. Listeners subconsciously associate different transient characteristics with specific emotional responses.
Transient Characteristic
Emotional Response
Sharp, Quick Attack
Excitement, Energy
Slow, Gentle Attack
Calmness, Serenity
The impact transients have on listeners is vast. They are like the punctuation in the language of music. Proper handling of transients can turn ordinary sound into an extraordinary listening experience, leaving a lasting impression on the listener.
Transients In Musical Genres
In the realm of music, transients play a pivotal role. These sharp bursts of sound at the beginning of notes guide our ears. Transients help define a genre’s identity, from the punchy strikes in drum ‘n’ bass to the gentle plucks of a classical guitar. Now, let’s explore how transients leave their mark across different musical landscapes.
Characterizing Different Genres With Transients
Diverse genres lean on transients to shape their core sound. Let’s break this down:
Rock ‘n’ Roll: It thrives on the raw energy of drum hits and guitar riffs.
Jazz: Here, the subtle onset of a saxophone or double bass speaks volumes.
Electronic: This genre boasts synthesized transients that can be sharp or atmospheric.
Ambient: Soft and slow transients blend to create a seamless audio experience.
Each genre’s transients tell a unique story, inviting us into different auditory worlds.
Iconic Transient Moments In Music History
Certain transient-rich moments have left an indelible mark on music. Below are some memorable instances:
Year
Artist
Song
Transient Highlight
1968
The Beatles
Revolution
Fuzzy guitar intro
1980
The Police
Don’t Stand So Close to Me
Striking snare snap
1991
Nirvana
Smells Like Teen Spirit
Explosive drum entrance
These snapshots shape moments that resonate with listeners even decades later. Iconic transients become part of our collective memory, defining the beats of generations.
Transient Shaping And Production Techniques
When a beat drops or a finger plucks a guitar string, there’s a spike in sound. That’s a transient—the first hit of sound that commands attention. Properly managing these transients in a mix can mean the difference between a flat track and one that pops. In the world of music production, transient shaping tools and techniques are crucial for delivering precision and vibrancy to a track.
Tools For Shaping Transients In The Studio
Great mixes often rely on well-crafted transients. The right tools ensure artists achieve the desired punch or smoothness in their music.
Dynamic Range Compressors: Reduce the volume of loud sounds or amplify quiet sounds by changing the dynamic range of the audio signal.
Limiters: Ensure audio does not exceed a certain level, acting as a ceiling for transients.
Envelope Shapers: Adjust the attack, hold, decay, and sustain characteristics of audio signals.
Transient Designer Plugins: Allow for shaping of the attack and release of sound without altering other dynamics.
Equalizers (EQ): While not transient shapers per se, EQs can be used to accentuate or diminish certain frequencies that are transient-rich.
Creative Use Of Transient Shapers In Mixing
Transient shapers are not just repair tools. They’re key to creative mixing approaches. Transient shapers can:
Add crispness to percussion or soften them for a blend into the background.
Give a plucked string a sharper attack, making it more pronounced.
Adjust the body of a note for longer resonance or a quick fall-off in sound.
Create an illusion of space, making the listener feel closer or further away from the sound source.
With these techniques, engineers shape the dynamics of music, ensuring each beat, pluck or vocal nuance is felt with the intended impact. Subtle tweaks make a track feel alive, creating an engaging listening experience.
Credit: www.binghamton.edu
Impact Of Transients On Musical Feel
The impact of transients on musical feel shapes how we experience rhythm, energy, and emotion in a song. Transients are the initial attack of a sound wave and create the dynamic peaks that make music feel alive.
Transients And The Groove Of A Track
Transients are essential in defining a track’s groove. They are the precise moments where instruments meet the beat, giving a song its bounce and swing. The sharpness or softness of these transients guide the listeners’ feet to the rhythm. Drum kicks and snare hits are prime examples as they punctuate the groove with their transients.
Snappy kick drums drive the dance floor’s energy.
Snares with strong transients add snap to the groove.
Hi-hats with subtle transients contribute to the track’s overall shuffle.
Dynamics And Expression Through Transients
Transients can convey feelings without words. In softer music, like a string quartet, the bow’s transients against the strings communicate tension or release. In electric guitar riffs, transients express aggression or gentleness. The manipulation of these peaks can impact the emotional response that the music evokes.
Instrument
Transient Character
Emotional Impact
Piano
Soft transients
Intimacy, nostalgia
Electric Guitar
Sharp transients
Energy, excitement
Dynamic changes in transients also enhance a song’s expression. Crescendos and diminuendos rely on the rise and fall of transient intensity to communicate emotion and anticipation.
The Future Of Transients In Sound Design
Transients in music shape the dynamics and energy of sounds. These momentary bursts are crucial in giving vibrancy to audio. They often define the attack of percussive instruments, making them pop in a mix. As we venture into the future, transients hold a new significance in sound design. Tech advancements allow unprecedented control over these fleeting sounds.
Innovations In Transient Manipulation
Sound engineers constantly seek new ways to mold transients. With recent software developments, producers now have tools at their fingertips to enhance or suppress transients. This provides precise control over the sonic character of a track.
Envelope Shapers: Modify attack and sustain of sounds, offering more punch or smoothness.
Dynamic EQs: Change frequency content with precision, affecting transient presence.
Transfuser Plugins: Merge sounds, creating hybrid transients for unique textures.
Producers can now sculpt the transient response of any instrument to fit seamlessly into a mix, creating clearer, more defined tracks.
Exploring The Frontiers Of Transient-based Effects
Transient-based effects push the envelope of what’s possible in sound design. These effects tap into transients to generate novel sonic landscapes.
Transients as Modulators: They can modulate other effects, inducing rhythmic variations.
Transient Distortion: When selectively applied, adds grit and character to the initial hit of sounds.
Transient Filtering Effects: Can highlight or diminish specific aspects of the sound’s attack.
These techniques are revolutionizing how we perceive rhythm, timbre, and space in music production. With continued innovation, the manipulation and utilization of transients in sound design will surely advance, leading to fresh approaches and sonic discoveries.
Analyzing And Learning From The Masters
Transients in music are the initial attack sounds that begin musical notes. These powerful spikes operate as sonic signatures. Great producers expertly manipulate transients to define a track’s character. Understanding how this works helps create dynamic and captivating music. We can learn much by analyzing successful tracks and producers.
Studying Producers’ Handling Of Transients
Every experienced producer has a unique touch with transients. Examining their techniques offers valuable insight for us to grow. Let’s break down how these wizards wield sonic elements.
Clipping and limiting – Some shape transients through clipping or limiting, enhancing a track’s punchiness.
Transient shaping – Others use transient shapers, narrowing or widening the transient impact.
Envelope manipulation – Tweaking envelopes in synthesizers allows for precise transient editing.
Layering – Smart layering of sounds can intensify or soften the bite of a note’s onset.
Learning Techniques From Famous Tracks
Legendary tracks often contain mastered treatment of transients. Let’s dissect and learn. Here’s a simple way to study.
Pick a track: Choose a famous track known for its production quality.
Listen carefully: Focus on how the attack of notes varies throughout.
Identify the tools: Guess which tools might have shaped the transients.
Experiment: Try to replicate the transient effects in your productions.
Digging into the nitty-gritty of these hits could unlock the secrets to their punch and clarity. It’s all about practice and observation.
Conclusion: The Unseen Heroes Of Sound
Transients in music are crucial, yet often overlooked. These brief bursts of sound are the backbone of rhythm and clarity in our favorite tunes. As we wrap up our exploration, let’s remember: these sonic pulses steer the emotion and dynamics within a melody. Without them, music loses its punch and personality.
Summarizing The Essence Of Transients
Transients are instantaneous peaks in audio signals. They mark the start of a sound and are followed by a decline to silence. Think of them like the spark that ignites a musical note. These elements play a pivotal role as they:
Define articulation and timbre
Guide our ears to rhythm and texture
Provide signals for audio processing tasks
With precise transients, every pluck, beat, and percussion hit stays crisp and emotionally impactful.
Incorporating Transient Awareness In Music Creation
For music creators, understanding transients is a vital skill. It opens up ways to sculpt sound with finesse. Here’s how artists and producers use this knowledge:
By adjusting attack and decay in sounds
Applying compression for desired punchiness or softness
Shaping sonic textures to enhance listening experiences
Balance in sound design makes music better. Creators must respect transients for their art to resonate with listeners. Reflecting on the role of transients can lead to masterful soundscapes that listeners love.
Frequently Asked Questions On What Are Transients In Music Why Are They Important Explained
What Defines A Transient In Music?
Transients in music are short bursts of energy that occur at the beginning of a sound. They help define the attack and contribute to the overall clarity and punch of auditory events. These initial spikes are crucial for perceiving rhythm and timbre.
Why Are Transients Crucial For Clarity?
Transients are crucial for clarity as they mark the precise beginning of sounds. They help distinguish separate instruments and notes in a mix. Their sharpness and definition can significantly affect the intelligibility of complex musical passages.
How Do Transients Affect Music Dynamics?
Transients impact music dynamics by influencing the perceived loudness and impact of notes. They provide the initial spike in energy that can make a sound stand out or blend within a piece, affecting the overall dynamic expression and feel.
Can Transients Shape Music Genre Characteristics?
Yes, transients can shape music genre characteristics. For example, in EDM, pronounced transients contribute to the punchy beats, while in classical music, smoother transients can create a more organic flow, reflecting each genre’s distinct sound.
Conclusion
Understanding transients in music elevates production and listening experiences. These elements inject life, aiding in dynamic expression and sonic clarity. Recognizing their impact helps artists create compelling tracks and enables listeners to appreciate the nuances of sound. Embracing transients can truly transform your musical journey.
In today’s music production landscape, achieving a professional-sounding mix is crucial, and having a good understanding of compression techniques is essential. One of the most powerful tools available in the world of audio production is multiband compression. In this guide, we will explore how to use multiband compression effectively in Ableton Live.
Credit: www.waves.com
What is Multiband Compression?
Multiband compression is a technique used to control the dynamic range of specific frequency bands. Unlike regular compression, which applies the same compression settings to the entire audio signal, multiband compression allows for independent control over different frequency ranges. This gives you the ability to target and compress specific areas of the audio spectrum.
Credit: m.youtube.com
Why Use Multiband Compression?
Using multiband compression can help to achieve a more balanced and controlled mix. It allows you to address specific frequency issues without affecting the rest of the audio spectrum. Here are a few scenarios where multiband compression can be particularly useful:
Taming Harsh Frequencies: If a particular frequency range in a mix sounds harsh or piercing, you can use multiband compression to gently reduce the volume of that specific frequency range.
Balancing a Mix: Multiband compression can be used to even out the dynamics of individual instruments or elements in a mix, ensuring they sit well together.
Enhancing Low-End: By compressing the low-frequency range, you can add weight and clarity to bass-heavy elements in your mix.
Managing Sibilance: Multiband compression can help control excessive sibilance in vocals, resulting in a smoother and more pleasant sound.
Using Multiband Compression in Ableton Live
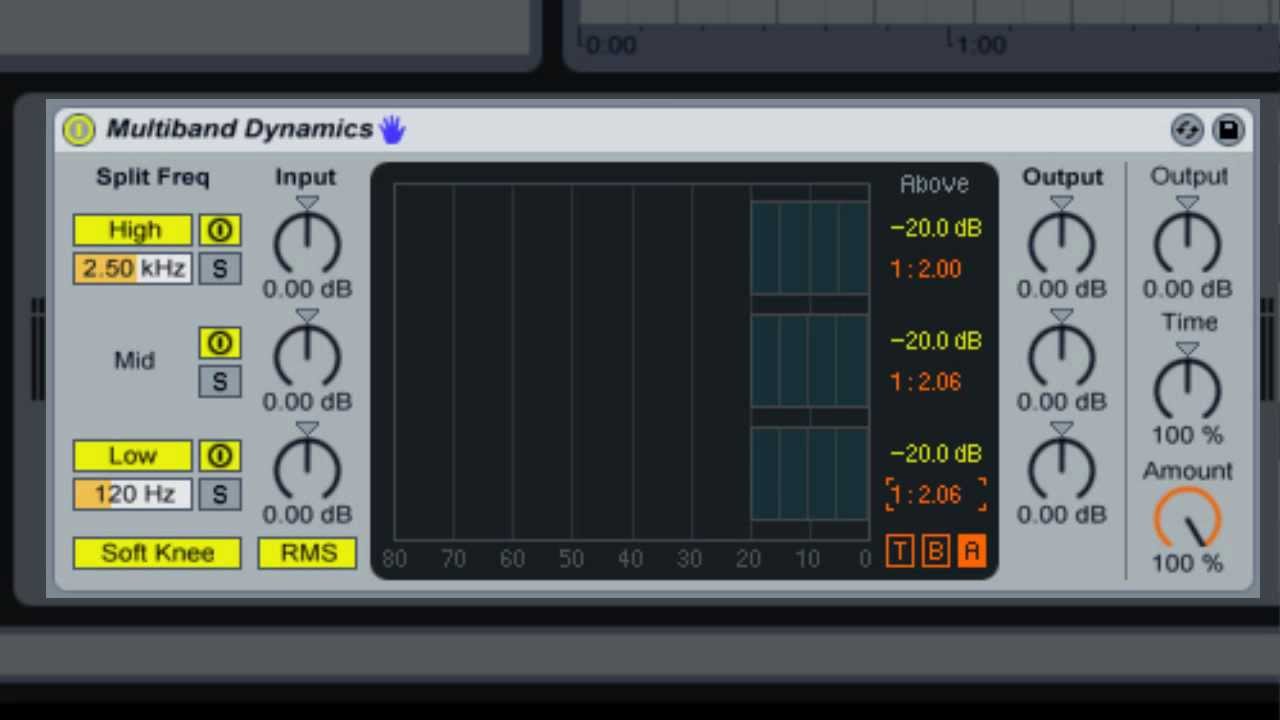
Ableton Live offers a built-in multiband audio effect called “Multiband Dynamics” that allows you to apply multiband compression to your tracks. Here’s how you can use it:
Drag and drop the “Multiband Dynamics” effect onto the track you want to process.
Start by adjusting the crossover frequencies for each band. The crossover points determine where the frequency bands begin and end. You can typically find three or four bands in a multiband compressor, each with its own set of controls.
Set the compression parameters for each band. This includes adjusting the threshold, ratio, attack, and release settings to shape the compression for each frequency range.
Listen to the effect in the context of your mix and make adjustments as needed.
Remember, it’s important to use multiband compression subtly and listen carefully to the impact on your mix. Be mindful not to over-compress and lose dynamics or create an unnatural sound.
Tips for Effective Multiband Compression
Here are a few tips to help you make the most out of multiband compression:
Set appropriate crossover frequencies: Experiment with different crossover points to ensure that each band is targeting the desired frequency range. A well-chosen crossover point is crucial for avoiding phase cancellation and achieving a transparent sound.
Use visual feedback: Monitor the gain reduction meter for each band to guide your adjustments. This will help you see how much compression is being applied to each frequency range.
Compare different settings: A/B testing allows you to compare the original sound with the compressed sound. This can help you decide if the compression is enhancing the mix or causing any negative effects.
Pros of Multiband Compression
Cons of Multiband Compression
Targeted control over frequency bands
Enhanced mix balance
Improved control over dynamic range
Flexibility in sound shaping
Potential for phase cancellation if crossover points are not appropriately set
Can introduce artifacts if used excessively
Requires careful listening and adjustment
With practice, multiband compression can become a powerful tool in your audio production arsenal. It allows you to sculpt your sound and bring out the best in your mix. Remember to experiment, trust your ears, and always strive for a balanced and professional result. Happy mixing!
Frequently Asked Questions Of Using Multiband Compression In Ableton Live: Master Dynamic Mixes
What Is Multiband Compression?
Multiband compression divides the audio signal into multiple frequency bands for more precise control over dynamics.
How Does Multiband Compression Differ From Regular Compression?
Multiband compression allows separate compression settings for different frequency bands, providing more focused and detailed dynamic processing.
When Should I Use Multiband Compression In My Ableton Live Projects?
Multiband compression is ideal for taming unruly frequencies, controlling dynamic range, and adding clarity and punch to your mixes.
What Are The Benefits Of Using Multiband Compression In Ableton Live?
Multiband compression can help to balance out the tonal and dynamic content of your audio, resulting in a more polished and professional sound.
Cubase templates are usually stored in the user’s application data folder. Specifically, this path is often within the ‘Steinberg/Cubase’ directory under ‘Templates’.
Cubase, the highly regarded music production software developed by Steinberg, streamlines the creative process for artists and producers. With customizable templates, users can jump-start their projects, maintaining consistency and speeding up workflow. These templates save not only the instrument and effects settings but also the chosen routing and mixer configurations.
By leveraging templates, professionals and hobbyists alike can focus more on creativity rather than setup intricacies. With a wide range of genres and recording situations covered, Cubase templates are a valuable asset for anyone looking to minimize setup time and get straight to work. Whether scoring for film, producing a podcast, or crafting the next hit song, these templates are readily available to kickstart your Cubase session.
The Quest For Cubase Templates
Many music producers and sound engineers seek the perfect starting point for their projects—a familiar battleground known as Cubase templates.
What Are Cubase Templates?
Cubase templates are project files that set the stage for audio production. They might include predefined tracks, effects, and even virtual instruments. They allow users to jump into the creative process without losing time setting up.
Pre-set configurations for quick start
Includes audio, MIDI tracks, and more
Saves time, boosts workflow efficiency
The Importance Of Template Management
Understanding where Cubase stores these templates is crucial for any serious producer.
Reason
Explanation
Backup Essentials
Keep copies of your templates safe.
Easy Sharing
Share your workflow with others quickly.
Clear Organization
Maintain a well-organized template library.
By mastering template management, users ensure their work remains intact, portable, and accessible whenever inspiration strikes.
Default Locations On Different Systems
Cubase Templates simplify music creation. They save settings per project. Knowing where Cubase stores these templates saves time and streamlines workflow. This blog post reveals the default file locations for Cubase templates on different operating systems. Let’s dive in.
Windows File Path
On Windows, Cubase templates live in a folder deep within the system. Here’s the path:
As with Windows, replace [Username] with your Mac username. The Library folder can be hidden. Hold the Option key while using the Go menu in Finder to access it.
Customizing Template Storage
Customizing Template Storage in Cubase boosts workflow efficiency. It allows quick access to preferred project settings. Users benefit from tailoring storage locations to their needs. Let’s dive into optimizing template storage paths.
Changing The Default Path
To change the default storage path for Cubase templates, follow these steps:
Open Cubase and navigate to the File menu.
Select “Preferences”.
In the Preferences window, click “VST”.
Look for “Default Locations” and click on “Project Templates”.
Click the “Browse” button to set a new location.
Choose your custom folder and click “Select Folder”.
Hit “OK” to save your changes.
Note: The next time you save a template, Cubase will use this new path.
Organizing Custom Templates
Keeping templates organized speeds up the creative process. Here’s a simple method:
Create folders by project type, like “Rock” or “Orchestral”.
Name each template clearly, for instance, “Rock-Basic Setup.cpr”.
Launch Cubase, click on “New Project”, and select “More”.
Your custom folders now appear, offering quick access to organized templates.
Credit: access.redhat.com
Finding Lost Cubase Templates
Working with Cubase often involves using a variety of templates to streamline music production. At times, these valuable templates can go missing. To help you get back to making music swiftly, here’s a guide on finding lost Cubase templates.
Common Misplacement Issues
Users often encounter template misplacement. This occurs for several reasons:
Default saving locations could have been overlooked.
Folder paths may change after updates or migrations.
Inadvertent movements of files outside of Cubase can cause disconnections.
Ensure hidden folders are visible on your system to locate these paths.
Recovering Deleted Templates
If a template has been deleted, steps to recover are straightforward:
Check the Recycle Bin or Trash folder.
If available, restore the file to its original location.
Backup drives can be a restoration source.
Use file recovery software as a last resort.
Remember, prompt action increases recovery chances. Templates often contain customized settings crucial for projects. Maintaining regular backups can prevent potential losses.
Saving And Sharing Templates
When working with Cubase, templates are time-savers. They store your settings. They allow you to jump-start new projects. But, knowing where they are and how to handle them is key. This essential guide explains how to save and share Cubase templates. So, let’s dive into the best practices for keeping your workflow smooth and collaborative.
Best Practices For Saving
User templates in Cubase are not just files. They are the blueprints for your projects. To ensure their safety and usability:
Choose a memorable name for easy identification.
Store them locally in the default location or a custom folder.
Back them up regularly on an external drive or cloud service.
Update your templates as you refine your workflow.
Methods For Sharing With Others
Sharing your Cubase templates can help others. It can improve collaboration too. Here are top ways to share:
Use the ‘Export’ function within Cubase to create a .cpr file.
Compress the template file to reduce size and make transfer easier.
Email the file or use a file-sharing service for larger templates.
Following these steps, you ensure your Cubase templates are safe. You make sure they’re accessible to those who need them.
Credit: support.spectrasonics.net
Troubleshooting Common Issues
Troubleshooting common issues with Cubase template storage can save time and prevent frustration. Whether you’re dealing with corrupted templates or version incompatibility, knowing how to fix these problems is essential for a smooth music production workflow. Discover solutions to the most common hiccups that might occur with your Cubase templates.
Corrupted Template Files
Corrupted template files are a nuisance. They can halt your creative process. If you find that some templates won’t load or function improperly, consider these steps:
Locate the original template file.
Delete the corrupted version.
Recover from a backup, if available.
Recreate the template, if necessary.
Keep backups of your templates to avoid losing important setups. Always save new versions after making significant changes.
Incompatibility Between Versions
Issue
Solution
Template not opening in a new Cubase version
Update the old template within the latest Cubase to ensure compatibility
Missing features or plug-ins
Check plug-in versions; update or replace as necessary
Error messages on load
Refer to documentation for error codes; address specific issues
Running into version incompatibility can be challenging. Always ensure both your project and Cubase software are updated. When updating Cubase, check the documentation for changes that might affect your templates. Pay special attention to plugin compatibility within your projects.
Leveraging Templates For Efficient Workflows
Efficient workflows save time and reduce stress for music producers using Cubase. Templates are the secret weapon for quickly jumping into the creative process. They store your preferred starting points, including track setups, effects, and signal routing. Knowing where these templates are stored boosts your productivity. Let’s explore how to leverage them.
Streamlining The Setup Process
A template in Cubase can streamline your setup process immensely. With templates, you save hours on initial setup, meaning more time for creativity. Once you create a template, it’s just a click away for your next project.
Track Presets: Save instrument and effect chains.
Mixer Settings: Keep your fader levels and pan adjustments.
Input/Output Assignments: Set up your audio routing.
Find your templates at: C:\Users\Username\AppData\Roaming\Steinberg\Cubase\Project Templates
Creating Consistency Across Projects
Consistent quality is key in music production. Cubase templates ensure this across all your projects.
They let you maintain:
Element
Benefit
Sound Settings
Unified audio quality
Effects Chains
Signature sound in all projects
Mixing Presets
Fast final product finishing
Credit: unison.audio
Advanced Tips And Best Practices
Welcome to the deep dive into Cubase templates. This section covers advanced tips and best practices that can take your music production workflow to the next level. Discover how to make the most out of Cubase’s powerful features.
Optimizing Template Performance
Template optimization ensures smooth operation and quick loading times. Follow these tips for peak performance:
Disable unused tracks: Right-click and select ‘Disable Track’ to free resources.
Strip silence: Use the ‘Strip Silence’ feature to remove dead space, reducing file size.
Update plug-ins: Keep third-party VSTs up-to-date for compatibility and efficiency.
Archive unused takes: Right-click on the track, then select ‘Archive’ to prevent overloading.
Set up folders: Group similar tracks into folders to make templates clearer and easier to navigate.
Presets: Save effect and instrument settings as presets to recall with one click.
Creative Uses Of Templates
Templates can be more than starting points for new projects. Here’s how to get creative:
Mood boards: Create templates with specific sound palettes for various moods.
Genre-specific setups: Have a go-to template for each genre you work on, with tailored instruments and effects.
Pre-mixed templates: Design templates with pre-mixed tracks for quicker results.
Education: Use templates to teach specific production techniques.
Live performance: Set up templates for live sets, with macro controls mapped out.
Collaborative projects: Share your templates with other producers to streamline collaboration.
Template Quick Tips
Tip
Benefit
Version Control
Track changes across template iterations
Minimal VSTs
Load templates faster with fewer VSTs
By integrating these advanced techniques and best practices, Cubase users can enhance their music production workflows efficiently. Explore these tips to uncover your own unique template strategy.
Frequently Asked Questions Of Where Are Cubase Templates Stored
Where Can I Find Cubase Project Templates?
Cubase project templates are typically stored within the application’s folder under ‘Templates’. On Windows, this path usually resembles ‘C:\Users\[Your User Name]\AppData\Roaming\Steinberg\Cubase [Version]\Project Templates’. Replace ‘[Your User Name]’ and ‘[Version]’ with your actual Windows username and Cubase version.
How To Access Cubase Track Presets Quickly?
To access Cubase track presets quickly, open the MediaBay by pressing [F5] or navigating through the ‘Media’ menu. Inside MediaBay, go to ‘VST Sound’ then ‘Track Presets’ and choose from various categories. This enables instant access to pre-configured settings.
Can I Change The Location Of Cubase Templates?
By default, you cannot change the Cubase template location within the program. However, you can manually copy and move templates to another directory, but you’ll need to navigate to the new location when loading them. It’s recommended to keep the original path for seamless operation.
Are Cubase Templates Shared Between Versions?
Templates created or saved in one version of Cubase generally remain within that version’s specific directory. They are not automatically shared between versions, but you can manually transfer them to the appropriate folder for different versions you have installed.
Conclusion
As we wrap up, remember that Cubase templates save time and streamline your workflow. Stored locally in the “Templates” folder, they’re a click away. Regular backups will protect your custom setups. Happy music-making with your personalized Cubase environment at hand! Keep creating, experimenting, and enjoying the ease of pre-set templates.
When it comes to music production, Ableton Live is a popular choice among producers and DJs. One of the key features that sets Ableton Live apart from other DAWs (Digital Audio Workstations) is its powerful parallel processing capabilities. In this article, we will dive into the world of parallel processing and explore how it can enhance your music production workflow in Ableton Live.
Credit: www.attackmagazine.com
What is Parallel Processing?
Parallel processing, also known as parallel compression or New York compression, is a technique used to enhance the dynamic range and overall impact of audio signals. It involves blending a heavily compressed version of the original signal with the dry (uncompressed) signal.
The compressed signal adds punch, sustain, and consistency to the mix, while the dry signal preserves the original transients and dynamics. The result is a harmonious blend of the best qualities from both signals.
How to Use Parallel Processing in Ableton Live
Ableton Live provides several ways to utilize parallel processing, allowing you to experiment and find the right approach for each specific audio element in your mix. Here are a few techniques:
1. Parallel Compression On Individual Tracks
You can apply parallel compression to individual tracks to add depth and impact. Start by duplicating the track you want to process, and then apply heavy compression to the duplicated track. Blend the compressed track with the original using the fader or the track’s volume control. This technique works exceptionally well on drums, vocals, and basslines.
Benefits
Considerations
Enhances sustain and attack
May increase background noise
Increases perceived loudness
Can introduce artifacts if overdone
2. Parallel Processing With Audio Effect Racks
Ableton Live’s Audio Effect Racks provide a flexible way to implement parallel processing. Create an Audio Effect Rack, and within the rack, add a chain for the original (dry) signal and another chain for the heavily processed (wet) signal. Adjust the volume and processing settings for each chain, and blend them together using the rack’s macro controls. This technique is ideal for adding parallel effects such as reverb or distortion.
3. Parallel Processing With Return Tracks
Return Tracks in Ableton Live allow you to create parallel processing chains that can be shared across multiple tracks. Set up a return track, and insert the desired audio effects or processors. Now, send a portion of the original signal from each track to the return track using the track’s send controls. Adjust the return track’s volume and effect settings to achieve the desired parallel processing effect across multiple tracks.
Credit: shop.343labs.com
Advantages of Parallel Processing in Ableton Live
Parallel processing offers several advantages that can elevate your music production to the next level:
Enhanced control over dynamics: Parallel compression allows you to shape the dynamics of individual tracks or the entire mix, providing greater control over the overall sound.
Increased loudness without sacrificing transients: By blending the compressed and uncompressed signals, you can achieve a louder mix while preserving the original transients and dynamics.
Improved depth and impact: Parallel processing can make your tracks sound bigger, fuller, and more impactful by adding sustain, punch, and consistency.
Greater creativity and experimentation: Ableton Live’s versatile parallel processing capabilities empower you to experiment with various techniques and effects, encouraging creativity in your music production.
Whether you’re a seasoned producer or just starting, understanding and incorporating parallel processing techniques in Ableton Live can take your music to new heights. Experiment, refine, and find your own unique sonic signature with the power of parallel processing!
Frequently Asked Questions For Understanding Parallel Processing In Ableton Live : Master Audio Production
What Is Parallel Processing In Music Production?
Parallel processing allows blending original and processed signals for enhanced audio effects.
How Does Parallel Processing Benefit Music Production?
It adds depth, clarity, and uniqueness to audio with a controlled application of effects.
Can I Use Parallel Processing In Ableton Live?
Yes, Ableton Live offers advanced parallel processing techniques for versatile audio manipulation.
What Are The Common Parallel Processing Techniques In Ableton Live?
Utilize sends/returns, audio effect racks, and group tracks for effective parallel processing.
Ableton Live is a popular digital audio workstation (DAW) used by musicians, producers, and DJs to create and perform music. One of its key features is the Clip View, which allows users to manipulate and edit audio clips within a session. In this article, we will explore the various functions and techniques of the Clip View in Ableton Live.
Credit: www.levelsmusicproduction.com
Getting Started with Clip View
Clip View can be accessed by double-clicking on a clip within Ableton Live’s session view. Upon opening Clip View, you are presented with an array of controls and parameters to shape and mold your audio clip.
The Clip View interface is divided into different sections. The top section contains the name of the clip, its color, and a dropdown menu where you can select different clip settings. The middle section displays the waveform of the audio clip, allowing you to visualize the audio content. The bottom section consists of various controls and parameters for editing and manipulating the clip.
Basic Clip Editing
Clip View offers a range of basic editing tools to help you refine and polish your audio clips. You can easily shorten or lengthen a clip by dragging its edges, quantize the timing of the clip to the grid, or adjust the volume and pan settings to achieve the desired stereo image. Additionally, you can reverse the clip, apply fades, and even transpose the pitch of the audio.
Looping And Warping
One of the most powerful features of Clip View is its ability to loop and warp audio clips. By enabling the loop switch, you can set the in and out points of the loop, allowing the clip to repeat indefinitely. This is particularly useful when working with drum loops or repetitive musical patterns.
Warping is another essential function in Clip View. It allows you to adjust the timing and tempo of a clip without affecting its pitch. By warping a clip, you can sync it to the project’s tempo or create interesting rhythmic variations. Ableton Live’s warping engine is highly regarded for its accuracy and flexibility, making it a sought-after tool for DJs and live performers.
Automation And Modulation
Clip View provides a seamless integration between audio and MIDI clips. You can easily automate various parameters of a clip, such as volume, pan, or any other device parameter in Ableton Live. This allows for smooth and dynamic changes throughout the duration of the clip. By modulating the clip’s parameters, you can create evolving soundscapes, expressive melodies, or intricate rhythmic patterns.
Credit: www.facebook.com
Advanced Techniques in Clip View
Now that we have covered the basics of Clip View, let’s explore some advanced techniques to take your audio manipulation to the next level.
Audio Effects And Processing
Ableton Live offers a vast array of audio effects that can be applied directly within Clip View. From EQ and compression to reverb and delay, these effects can help shape the sonic character of your audio clips. With Live’s extensive collection of audio effects, you can achieve professional-sounding results without the need for external plugins.
Max For Live Integration
Max for Live is a powerful extension of Ableton Live that allows users to create their own custom devices and tools. With Clip View, you can utilize Max for Live devices to add unique functionalities to your audio clips. This integration opens up endless creative possibilities, enabling you to create customized effects, sequencers, and even instruments.
Live Performance And Djing
Clip View plays a significant role in live performances and DJ sets. Ableton Live offers session view, which is designed for live improvisation and performance. By triggering and launching different clips within Clip View, you can create intricate arrangements, build-ups, and breakdowns in real-time. The ability to manipulate audio clips on the fly provides DJs and live performers with unparalleled creative potential on stage.
Frequently Asked Questions For Using The Clip View In Ableton Live : Mastering Music Production
What Is The Clip View In Ableton Live?
The Clip View in Ableton Live is the interface where you can manipulate and control individual clips within tracks.
How To Access The Clip View?
To access the Clip View in Ableton Live, simply double-click on the clip you want to edit or use the shortcut Shift+Tab.
What Can I Do In The Clip View?
In the Clip View, you can adjust parameters like volume, panning, and add effects to the individual clip.
Can I Automate Parameters In The Clip View?
Yes, you can automate various parameters within the Clip View to create dynamic and evolving sounds.
Conclusion
The Clip View in Ableton Live is a powerful tool for manipulating and editing audio clips. It offers a range of features and functions that can elevate your music production and live performances. By mastering Clip View, you gain precise control over your audio clips, allowing you to create unique and captivating musical experiences.