Categories
Archive

How To Boost The Effectiveness Of Your Software Based Studio

To boost effectiveness of your software based studio, focus on streamlining workflow and optimizing project management. Implement automation tools and regularly update hardware and software.


In today’s digital age, software based studios have revolutionized the music production industry. However, with this increased convenience comes the need for constant innovation to keep pace with ever-changing technology. To ensure your studio remains competitive, it’s important to focus on boosting its effectiveness.


This can be achieved by streamlining the workflow, optimizing project management, and implementing automation tools to save time and increase productivity. Additionally, it’s crucial to regularly update the hardware and software to stay ahead of the curve. We will explore ways to maximize the effectiveness of your software based studio and stay ahead of the competition.


Optimizing Hardware Configuration

Optimizing hardware configuration is an essential aspect of enhancing the effectiveness of your software-based studio. Having the right computer hardware and investing in additional hardware components can go a long way in boosting performance, improving productivity, and enhancing the quality of your output. In this article, we will explore the various ways to optimize your hardware configuration, starting with choosing the right computer hardware.

Choosing The Right Computer Hardware

When it comes to selecting the right computer hardware for your software-based studio, there are several factors to consider, such as processing power, RAM, storage capacity, and graphics card. These components are crucial in enabling your software programs to run smoothly, without glitches or lags.

Investing in a high-performance CPU, such as Intel Core i7 or i9, can significantly enhance your software’s rendering, encoding, and processing capabilities, thus increasing overall productivity. Additionally, having ample RAM, preferably 16GB or more, enables you to multitask without experiencing a slowdown in performance.

A robust graphics card is also essential, particularly if you work with graphic-intensive software such as Adobe Photoshop or Illustrator. A graphics card with a dedicated graphics memory will enhance image processing, rendering, and overall performance, enabling your software to perform optimally.

Investing In Additional Hardware Components

Aside from the computer hardware components, investing in additional hardware components can also enhance your software-based studio’s effectiveness. For instance, having a high-quality monitor with a wide color gamut and high resolution can significantly improve your ability to edit images or videos, leading to a more refined output.

You can also invest in an external hard drive or an SSD to boost your storage capacity and enable faster data transfer between devices. An additional graphics tablet can also help you interact more easily with graphic design software and create more precise designs than using a mouse or trackpad.

Overall, optimizing your hardware configuration is critical to the effectiveness of your software-based studio. By selecting the right computer hardware and investing in additional hardware components, you can significantly improve your output, productivity and stay ahead of the competition.

Software Framework Optimization

If you are a content creator, you may have already realized the importance of having a software-based studio. With technology advancements, software frameworks have become a necessity in the creation process, and understanding the importance of optimizing this framework will make your content creation process more seamless, efficient, and profitable. In this blog post, we will focus on Software Framework Optimization and explore how you can enhance the effectiveness of your software-based studio.

Optimizing The Studio Workflow

If you have a cluttered desktop, endless windows, and dozens of tabs open, you know how frustrating it can be to find that one app or file you need. The same can be said for your software-based studio. Fortunately, optimizing your workflow can help streamline your creative process. Here are a few tips to help you optimize your studio workflow:

  • Define the scope of your project: This will help you to prioritize tasks.
  • Organize your files: Creating a clear file hierarchy and naming conventions will help identify files quickly.
  • Use automation tools: Automated workflows can help save time and eliminate repetitive tasks.
  • Collaborate and communicate effectively with team members: Consistent communication within your team can help prevent workflow bottlenecks.

Simplifying The User Interface

The complexity of your software-based studio’s user interface can affect productivity and hinder creativity. Simplifying the user interface can help you focus on your creativity without distractions. Here are a few ways to simplify the user interface:

  • Use keyboard shortcuts: This helps you switch between tools and navigate the interface faster.
  • Customize your workspace: Only display necessary tools for a specific project.
  • Use a consistent color theme: Choose a color theme that makes it easier to navigate through different color schemes.
  • Use tooltips: Tooltips can help explain what each function does to avoid confusion.

Automating Processes

Automation tools can save you a lot of time in the software-based studio by eliminating mundane tasks and repetitive actions. Here are a few tasks you can automate:

  • Batch processing: Apply instructions to an entire batch of files.
  • Text retrieval: Automatically retrieve pieces of text from sources.
  • Backup: You can set up automatic backups.
  • Auto save: You can set up automatic saves to prevent loss of work due to unexpected power outages or other issues.

Overall, optimizing your software-based studio is a dynamic process that can substantially improve your creativity and productivity. By following these tips, you can streamline your workflow, simplify your user interface, and automate repetitive tasks so you can focus on what you do best- your creativity.


Streamlining Collaboration In Your Studio

Collaboration is key in a software-based studio. Streamlining collaboration can help increase productivity and efficiency. In this section, we will explore different collaboration tools and platforms, project management techniques and ways to create a collaborative studio environment.

Collaboration Tools And Platforms

With advancements in technology, there are various collaboration tools and platforms available to make communication and collaboration within your studio much easier. Some of these tools include:

Tool Description
Slack A communication platform that allows for group chats, direct messages, and file sharing.
Google Drive A cloud platform that enables file sharing and collaboration on documents, spreadsheets, and presentations.
Trello A project management tool that helps organize and track projects.

Project Management Techniques

Project management techniques aid in organizing and tracking projects. Here are some techniques to enhance collaboration in your studio:

  • Agile Methodology: This approach breaks projects down into small tasks and allows the team to work together to complete them.
  • Scrum: This is a project management technique where teams work together in sprints to complete tasks.
  • Kanban: This technique focuses on visualizing workflows to track progress and identify areas for improvement.

Creating A Collaborative Studio Environment

Finally, creating a collaborative studio environment can encourage teamwork and enhance productivity. Here are some ways to achieve this:

  1. Encourage Communication: Encourage open communication between team members to prevent miscommunication and misunderstandings.
  2. Create a Positive Culture: Foster a positive and supportive work culture by encouraging creativity and embracing diversity.
  3. Promote Teamwork: Establish team building activities, encourage collaboration, and recognize team achievements.

Implementing these tools, techniques, and strategies for your software-based studio can help streamline collaboration, increase productivity, and ultimately lead to more success.

Maximizing The Creative Process

If you own a software-based studio, you are well aware of the importance of creative vision, experimentation, and professional networking. However, it can be challenging for creative professionals to streamline the creative process while simultaneously catering to the demands of their clients. In this post, we will explore three essential strategies that can help you maximize your creative process, develop a unique vision, and build a strong network to boost the effectiveness of your software-based studio.

Developing A Creative Vision

A clear and compelling creative vision is the cornerstone of any successful software-based studio. Your creative vision should reflect your personal philosophy, beliefs, and artistic style. Therefore, it is essential to stay connected to your inner voice and find inspiration to develop a unique and authentic vision that stands out from the crowd. Here are some tips to help you develop a strong creative vision:

  • Identify your core values and beliefs
  • Find inspiration by exploring new techniques and trends
  • Do not be afraid to take risks and experiment with new ideas
  • Stay true to your artistic style and do not compromise on your creative vision

Experimenting With New Techniques

As a creative professional, you are always on the lookout for new techniques and tools to streamline your creative process and produce high-quality work for your clients. Experimentation is an integral part of the creative process, and it is essential to explore new techniques and push your limits to discover innovative solutions that can set you apart from others in your industry. Here are some tips to help you experiment with new techniques:

  1. Create a conducive environment that inspires creativity and experimentation
  2. Research new trends and techniques in your industry
  3. Collaborate with other creative professionals and exchange ideas
  4. Experiment with different software and tools to find the ones that work best for you

Building A Strong Professional Network

Building a strong professional network is essential for any creative professional, especially those who own software-based studios. A strong network can help you stay updated on the latest trends and developments in your industry, connect with potential clients, and collaborate with other creative professionals on exciting projects. Here are some tips to help you build a robust professional network:

  • Attend networking events and conferences in your industry
  • Join professional organizations and online communities
  • Collaborate with other creative professionals on exciting projects
  • Stay connected with your clients and seek their feedback to improve your services

In conclusion, maximizing the creative process in your software-based studio requires a combination of creativity, experimentation, and strong networking skills. By developing a compelling creative vision, experimenting with new techniques, and building a robust professional network, you can take your studio to the next level and create high-quality work that stands out from the crowd.

Promoting Your Studio

Promoting Your Studio is an essential part of running a software-based studio. Even if you have impressively designed software, without the right promotional efforts, your brand might not reach the intended audience. It is essential to identify your target market and develop promotional strategies to boost your product’s effectiveness. This post will share some tips on promoting your software-based studio.

Creating A Strong Brand Identity

Your brand identification is the first touchpoint for potential customers. It would help if you started by developing a brand strategy that reflects the values, vision, and mission of your software studio. A strong brand identity will help differentiate your software studio from competitors and make it easy for customers to recognize your product.

Here are some tips to help you create a strong brand identity:

  • Develop a brand story that connects with your target market.
  • Ensure consistent use of brand colors and fonts across all marketing channels and products.
  • Create a memorable logo that communicates your software studio’s vision.
  • Use customer reviews and testimonials to reinforce your brand’s credibility.

Developing A Marketing Strategy

Your marketing strategy will determine how your software-based studio reaches its target audience. With a well-defined marketing strategy, you can engage with your customers, build trust, and increase sales. Here are some tips to help you develop a marketing strategy:

  • Identify your target market and understand their needs and preferences.
  • Create buyer personas to guide your marketing efforts.
  • Set measurable marketing objectives that align with your business goals.
  • Develop a content strategy that resonates with your target audience.
  • Use analytics to track the effectiveness of your marketing efforts.

Leveraging Social Media Platforms

Social media platforms provide an excellent opportunity to promote your software-based studio. By leveraging social media platforms, you can reach a larger audience and engage with potential customers. Here are some tips to help you leverage social media platforms:

  • Identify social media platforms that your target audience is most likely to use.
  • Create social media profiles that reflect your brand’s personality.
  • Share relevant content that resonates with your target audience.
  • Engage with your followers by responding to comments and messages.
  • Run social media campaigns to promote your software-based studio.

By following the tips outlined in this post, you can boost the effectiveness of your software-based studio and reach your target audience. Remember, creating a strong brand identity, developing a marketing strategy, and leveraging social media platforms are just some of the ways you can promote your software-based studio.


Managing Your Finances


Optimizing your financial management software can boost its effectiveness in various ways. Ensure that your software is regularly updated, use automated tools to streamline processes and improve accuracy, and leverage data analytics to make informed decisions. With these tips, you can enhance the productivity of your studio and make the most of your financial resources.

Managing Your Finances is crucial when it comes to boosting the effectiveness of your software-based studio. Without proper financial management, your efforts to grow your business can be undone by poor financial planning. Setting a budget, establishing financial goals, and tracking your income and expenses are all essential components of effective financial management. Let’s dive in!

Setting A Budget

Setting a budget for your software-based studio is essential for ensuring your business is financially successful. A budget helps you plan and prioritize your spending, and it allows you to track your revenues and expenses. To set a budget, start by determining your monthly income and expenses. This will help you see how much money you have to work with each month, and it will help you identify areas where you can cut costs to free up money for other things. You can use budgeting apps, software, or templates to help you create and manage your budget.

Establishing Financial Goals

Establishing financial goals for your software-based studio is essential for long-term success. Financial goals help you focus your energy, track your progress, and measure your success. To establish financial goals, start by determining what you want to achieve and by when. For example, you may want to increase your revenues by a certain percentage over the next year or reduce your expenses by a certain amount. Once you establish your goals, create a plan for achieving them that includes specific action steps and deadlines.

Tracking Your Income And Expenses

Tracking your income and expenses is essential for effective financial management. It helps you see where your money is going, identify areas where you can cut costs, and ensure you’re on track to meet your financial goals. There are several ways to track your income and expenses, including using spreadsheets, software, or apps. Whatever method you choose, make sure you record all your income and expenses regularly and review your financial reports regularly to ensure you’re on track. In conclusion, managing your finances is critical to the success of your software-based studio. Setting a budget, establishing financial goals, and tracking your income and expenses are essential components of effective financial management. By following these simple steps, you’ll be well on your way to achieving financial success and growing your business.

Investing In Professional Development


Investing in professional development is essential to enhance the efficiency of your software-based studio. It can help you stay updated on the latest technologies and refine your skills, which ultimately leads to better project outcomes. Continuous learning and development can take your studio to greater heights in the highly competitive software industry.

Investing in Professional Development is crucial for individuals hoping to boost the effectiveness of their software-based studio. Keeping up with industry developments and trends is essential in staying ahead of the competition. By investing time and resources into continued professional development, individuals can expect a range of benefits, including networking with industry professionals, taking skills-based courses, and attending industry conferences and workshops.

Networking With Industry Professionals

Networking is an important part of any industry and software is no exception. Networking with industry professionals can be done both online and offline. Online networking may include connecting on LinkedIn or participating in relevant forums, while offline networking can be done by attending software-related events, trade shows or conferences.

Taking Skills-based Courses

Taking skills-based courses is another way of building on professional development. Online course platforms such as Udemy, Skillshare, and Coursera offer a wide range of courses, including programming languages courses and software development courses. Some software development companies may offer on-site training, master classes, or mentorship programs to their employees.

Attending Industry Conferences And Workshops

Industry conferences and workshops are excellent sources of information where we can learn about the best practices, emerging trends, and new ideas from speakers and attendees from around the world. Taking part in these events broadens the individual’s perspective and provides the opportunity to learn from others’ successes and challenges. In conclusion, investing in professional development is an excellent strategy for boosting the effectiveness of your software-based studio. Networking with industry professionals, taking Skills-based courses, and attending industry conferences and workshops will help keep you ahead of competitors and ensure that you stay up to date with industry standards and trends. Keep learning, stay connected and leverage the advantages that continued professional development can offer your software-based studio.


Building A Strong Team

Having the right people on your team can make or break the success of any software-based studio. That’s why building a strong team of skilled and motivated individuals is crucial. It’s the foundation on which your software-based studio will stand. In this post, we’ll focus on hiring the right team members, building cohesive teams, and creating a positive work culture.

Hiring The Right Team Members

Hiring the right team members is essential for a successful software-based studio. The initial step in the process is creating well-defined job descriptions that clearly specify the qualifications, skill sets, and knowledge required for the role. Once you have a pool of candidates, the interview process is critical. Ideally, you want individuals who have the right experience and personality to fit your studio’s culture. Culture fit is often more important in the long run because it allows you to work together seamlessly.

Building Cohesive Teams

Building a cohesive team may seem daunting, but don’t worry; there are many action items you can implement. Encouraging communication, providing opportunities for team members to get to know each other, and promoting teamwork are some of the easiest ways to create a cohesive team. You can also plan team-building activities, celebrate team successes, and reward teamwork output to boost team morale.

Creating A Positive Work Culture

Creating a positive work culture is vital to the success of your software-based studio. A positive work culture fosters creativity, productivity, and overall job satisfaction. But, what does a positive work culture look like? It’s a culture that encourages feedback, recognizes accomplishments, values transparency, and provides opportunities for growth. From employee benefits and compensation to annual retreats and training sessions, a positive company’s culture is not optional.

Invest time into recruiting and hiring individuals who share your values and emphasize the importance of building strong teams, culture, and communication. Once you have the right people in place, building and nurturing a cohesive team requires intention, attention, and effort. Don’t underestimate the importance of team-building activities or encouraging your team to celebrate successes altogether. The bottom line is, when a team is working in harmony, they are better equipped to overcome obstacles and create extraordinary things.

How To Boost The Effectiveness Of Your Software Based Studio


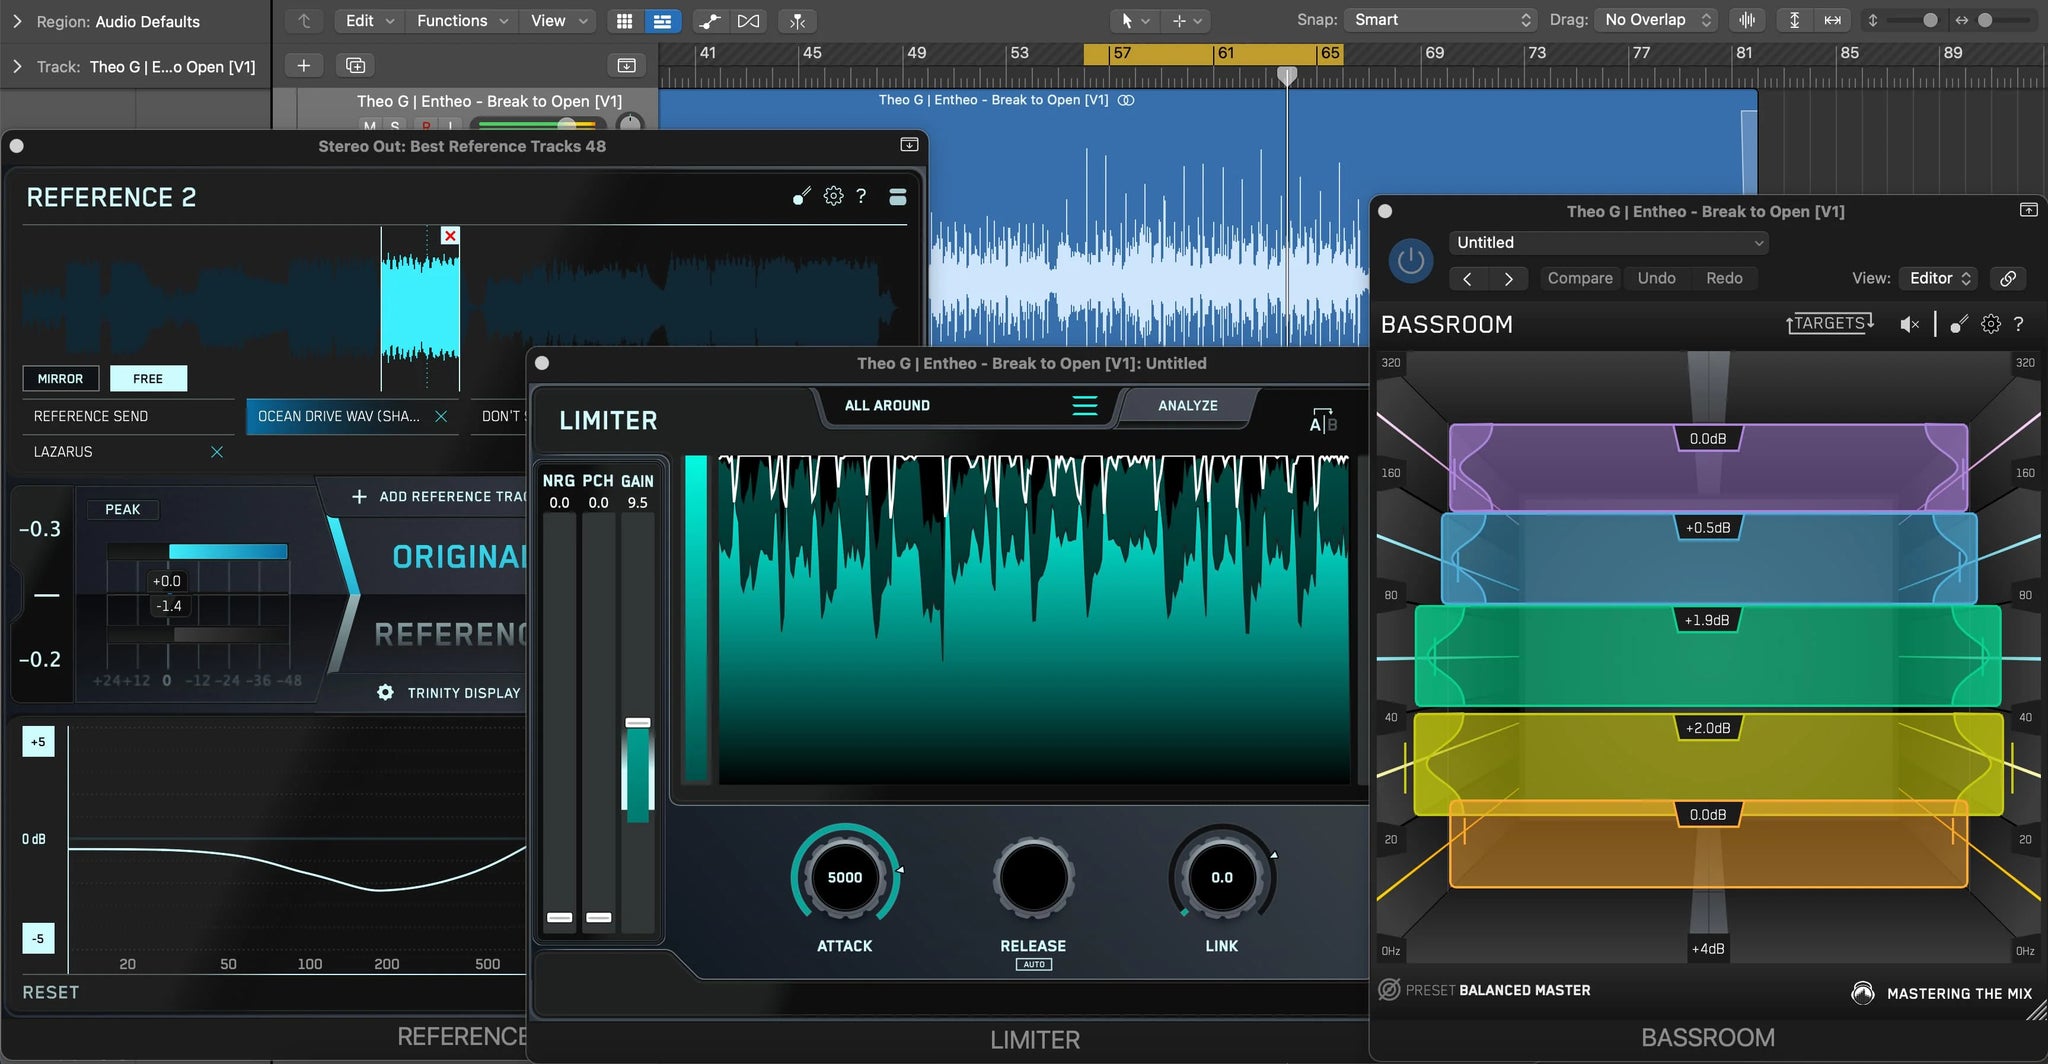
Credit: www.masteringthemix.com


Frequently Asked Questions Of How To Boost The Effectiveness Of Your Software Based Studio


How Can I Improve The Performance Of My Software-based Studio?


Upgrading your hardware, optimizing your software settings, and minimizing background processes can improve your studio’s performance.


How Do I Organize My Files And Project Data Efficiently?


Organize your files into logical categories and subcategories, use version control, and backup regularly to store your data efficiently.


What Are The Best Tools For Project Management In A Software Studio?


Jira, Trello, and Asana are popular project management tools that help software studios manage tasks, prioritize projects, and track progress.


Should I Invest In New Equipment And Software Regularly?


Investing in new equipment and software regularly can help you stay current, improve efficiency, and enhance the quality of your work.


Conclusion


To sum up, taking the right measures to optimize the effectiveness of your software-based studio can do wonders for your overall productivity and efficiency. Make sure to prioritize your hardware and software needs, create a comfortable working environment, optimize your workflow with smart shortcuts and macros, and get organized with project management tools.


By constantly improving and updating your studio setup, you can stay ahead of the curve and produce quality work that meets the demands of today’s competitive market.
Categories
Archive

Mistakes We All Make When Mixing Music And How To Fix Them

Mistakes made while mixing music are common and here are some ways to fix them. Mixing music requires careful attention to detail to ensure that the sound is well-balanced, with maximum impact.


To achieve this, the following three mistakes must be avoided. Overcompression, lack of EQ understanding and too much reverb are primary culprits that can plague a mix. Mixing music is an essential element in producing great songs, but making mistakes during the process can negatively impact the final product.


Avoiding errors before, during, and after the mix is critical to achieving high-quality sound. Poorly mixed songs can lack the right balance, have problems with dynamics, sound dull or noisy, or lack clarity in instrumentation and vocals. All these can lead to music that’s not well received, resulting in low play counts or downloads. But, with the right approach, these errors can quickly be rectified. This article will highlight some of the most common mistakes made when mixing music and show you how to fix them.


Over-equalizing Tracks


One common mistake when mixing music is over-equalizing tracks. This occurs when an excessive amount of EQ is added to a track, causing it to lose its natural sound and clarity. However, this can be fixed by re-evaluating each track and adjusting the EQ accordingly to achieve a more balanced mix.

Why Over-equalizing Is A Problem

Over-equalizing is one of the most common mistakes made when mixing music. It involves adding too much equalization to a track, which can result in distorted and unbalanced sound. The problem with over-equalizing is that it becomes impossible to restore the original sound, making it difficult to fix the track. When you overdo it, the mix will sound muddy and the track will lose its definition. It is important to understand the proper balance between frequencies to avoid this problem.

Tips For Fixing Over-eq’d Tracks

If your track is suffering from over-equalization, there are some tips you can use to fix the issue:

  1. Start Fresh: The first step to fixing over-eq’d tracks is to delete all EQ settings applied to the track so far, bringing the track to its original form.
  2. Refer to The Reference: Try to listen to professional audio tracks with similar sonic aspects to help you get an idea of what you’re aiming for.
  3. Carve The Mix: First, cut out any extreme frequency problems, such as irritating sibilance, booming bass, or muddy mids, to help you determine what the critical energy of the mix is. Once you have this worked out, you can make small adjustments to the instrument clusters using EQ to distinguish each piece of the mix and enhance the balance of your mix.
  4. Make narrow cuts as opposed to broad: This technique will help you to pinpoint the correct frequency to reduce and increase it again to observe the effect, rather than attempting to fix the overall sound.
  5. Tailor to the instrument: When you narrow the frequency band, it is important to keep the instrument’s specific frequency spectrum in shop.
  6. Work with Levels: Check the levels to see if they are balanced. Don’t get stuck equalizing the tracks but try to balance them according to the volume. If the volumes are not set properly then all your EQ efforts will be in vain.

These tips should be helpful in fixing any over-equalized tracks, and by avoiding over-equalization in the first place, you can ensure that your tracks sound clean, balanced and professional.


Ignoring The Importance Of Panning


One common mistake when mixing music is ignoring the importance of planning. This can lead to a cluttered mix and make it difficult to achieve a balanced sound. To fix this, take the time to plan out your mixing process and identify the key elements you want to highlight in the mix.

Ignoring the Importance of Panning One of the most common mistakes made in music mixing is ignoring the importance of panning. Panning involves distributing the audio signals of different instruments and vocals across different stereo channels. It is essential because it creates a sense of depth and width, and it allows the listener to distinguish between different elements of the mix. In this section, we’ll discuss what panning is, why it’s essential, and provide tips for effective panning. What is Panning and Why it’s Essential? Panning is the process of distributing audio signals of different instruments and sounds across multiple channels, resulting in a stereo mix. Panning is a fundamental element in music mixing, and it helps to create space and depth in the mix. By separating the sounds into different channels, it allows each instrument to sit in its space in the stereo field, making it easier for the listener to hear all the different sounds in the mix. Effective panning is essential to achieve a balanced mix. Without proper panning, some elements of the mix might be dominant, and others might be too low or completely absent. As a result, the mix can sound muddy, cluttered, or unappealing to the listener. Tips for Effective Panning Here are some tips that can help you achieve effective panning: 1. Start with the kick and bass: Begin with panning the kick and bass to the center, as they are the foundation of the mix 2. Go wide with drums and guitars: Panning the drums and guitars towards the edges can create a more spacious mix, making the sound feel wider and more immersive. 3. Create variation: To create interest and movement in the mix, try not to keep all the sounds in the same place. By panning things in different directions, it can help the listener distinguish between the different elements. 4. Use mono elements: In some instances, it might be better to keep some elements of the mix in mono. For example, if a vocal has a lot of low-end content, it’s better to keep it in the center and mono. 5. Use the right tools: When panning sounds, it’s important to use the right tools. Most mixing software has panning features, but dedicated plugins can provide even more control of the stereo field. Effective panning is crucial for ensuring a balanced, spacious, and immersive mix. By following the tips in this section, you can achieve effective panning and create music that sounds great no matter where it’s played.


Improper Use Of Reverb


One common mistake in music mixing is the improper use of reverb. It’s easy to overdo or underutilize this effect, resulting in a poor sound quality. To fix this, experiment with different reverb types and adjust the levels until you achieve a natural and balanced sound.

Why Improper Reverb Usage Can Ruin A Mix

Reverb is a vital tool in music mixing that helps add life and space to a track. However, it’s widespread among beginners to overdo it, which can ruin an otherwise great mix. Applying reverb can be tricky, especially when trying to achieve clarity, depth, and separation. Improper use of reverb can lead to a muddy mix, which blurs all the individual sounds into one big mess. It’s essential to learn how to use reverb like a pro.

Tips For Using Reverb Like A Pro

If you’re having trouble using reverb effectively, here are some tips to help you use it like a pro:

1. Choose The Right Type Of Reverb

Different types of reverb are suitable for distinct situations. For instance, a hall reverb may be perfect for making a guitar solo sound grand and spacious, while a plate reverb may work well for vocals. It’s crucial to choose the right type, based on what you want to achieve best.

2. Adjust The Decay Time

The decay time of a reverb refers to the amount of time it takes for the reverberation to fade away. A short decay time adds a sense of intimacy and clarity, while a longer decay can add depth and ambiance. It’s essential to adjust the decay time of your reverb to get the right feel for your mix.

3. Use EQ To Sculpt The Reverb

Just like all other elements in a mix, reverb must be EQ-ed to fit well. Use EQ to push back certain frequencies of the reverb to create space and clarity for the rest of the mix. Filtering out some low-end frequencies and boosting some high-end frequencies can accentuate the sense of space without cluttering the mix.

4. Try Sidechain Compression

In some cases, using sidechain compression can help improve the use of reverb in a mix. For example, you can set up the compressor to duck the reverb every time the kick or snare drums hit, allowing these essential elements to stand out.

5. Pay Attention To The Mix’s Overall Clarity

When using reverb, it’s easy to get caught up in the sound and forget the overall mix’s clarity. Always be careful not to overdo the reverb, which can clutter the mix. Remember, the goal is to add depth and a sense of space to the mix, not smother it. Mastering the use of reverb can help add depth, space, and emotion to your music. However, improper use of reverb can lead to a muddy mix that’s difficult to listen to. Follow these tips to use reverb like a pro and take your mixing skills to the next level!

Mistakes We All Make When Mixing Music And How To Fix Them


Credit: www.youtube.com


Not Paying Attention To Levels


Not paying attention to levels is a common mistake made when mixing music. To fix this, ensure that each element of the track is at the correct volume level, and use compression and EQ to balance the sound. Pay attention to each instrument and vocal, and make sure they are all heard clearly in the mix.

How Improper Levels Can Hurt Your Mix

Levels are a crucial part of the mixing process, and they play a significant role in determining the quality of the final output. Unfortunately, many music producers and sound engineers often overlook the importance of proper levels, leading to a poorly mixed track. Improper levels can cause a lot of problems, such as distortion, harshness, and muddiness in the mix, making it hard to hear individual instruments and vocals. The most common mistake people make with levels is pushing them too high, thinking that it will make the track louder and more powerful. However, this approach often results in clipping, which leads to unwanted distortion and can damage speakers and amplifiers in extreme cases.

Tips For Getting The Right Levels

Getting the right levels can be challenging, but it is crucial for achieving a balanced and professional-sounding mix. Here are some tips to ensure that you are getting the right levels:

  • Start by setting the overall volume of your track to a comfortable listening level.
  • Use a VU meter or a plugin to monitor your levels and ensure that they are not peaking or clipping.
  • Set the levels of each track individually, starting with the drums, followed by the bass, rhythm, and melody instruments.
  • Pay attention to the relative levels of each track and adjust them to create a balanced mix.
  • Avoid boosting levels too much, as it can cause harshness and distortion. Instead, try to reduce levels in problem areas, such as resonant frequencies and plosives.
  • Don’t be afraid to use automation to adjust levels in different parts of the song, such as verses, choruses, and bridges.

By paying attention to levels and following these tips, you can avoid common mistakes and achieve a well-balanced mix that sounds great on any listening device.

Using Too Many Effects

When you’re mixing music, effects are an essential tool. They help you to add depth, shimmer, and texture to your tracks. However, it’s easy to get carried away and use too many effects.

Why Overusing Effects Can Be A Problem

Using too many effects can lead to a cluttered and muddy mix, where each element struggles to stand out. This can result in an overall loss of clarity and impact, making your mix sound amateurish.

Moreover, overusing effects in the mixing stage can create issues in the later stages of mastering and post-production.

Tips For Using Effects Tastefully

The key to using effects tastefully is to understand that they are meant to enhance the mix, not to overwhelm it. Here are a few tips for using effects tastefully:

  • Use effects sparingly. Keep in mind that less is usually more when it comes to mixing.
  • Avoid using too many effects on a single track. Instead, use one or two effects per track, and try to pick the ones that complement each other.
  • Use EQ to shape the sound before adding effects. This will help you to create a cleaner and more dynamic mix that can withstand the addition of effects.
  • Experiment with different effects, but make sure you’re using them for a specific reason. Don’t add effects just because you can.
  • Use automation to add interest and variation. For example, you can automate the dry/wet mix of a reverb effect on a vocal track to create a sense of space and depth.

Wrapping Up

Using too many effects can be a common mistake when mixing music. However, by following these tips, you can use effects to enhance your mix tastefully, creating a more dynamic and impactful final product.

Mixing In An Untreated Room


Mixing music in an untreated room can lead to mistakes when it comes to achieving a balanced and clear sound. To fix this issue, consider investing in acoustic treatment or using headphones to better hear the nuances of your mix.

Mixing in an untreated room is a common mistake that many amateur music producers make. A poorly treated environment can lead to inaccurate monitoring, which can ultimately affect the quality of your final mix. In this section, we’ll discuss why a treated room is essential for a good mix and provide some tips on how you can treat your room on a budget.

Why A Treated Room Is Essential For A Good Mix

Mixing music requires accuracy in sound reproduction, which is only possible in a room with ideal acoustics. An untreated room can have acoustic problems such as flutter echoes, standing waves, and excessive bass buildup. This can make it difficult to identify flaws in a mix and achieve a balanced sound. By treating your room, you can minimize these acoustic issues and achieve a clearer and more accurate representation of the music that you are mixing.

Tips For Treating Your Room On A Budget

Treating your room can be an expensive process, but it doesn’t have to be. There are plenty of budget-friendly ways to treat a room that can significantly improve its acoustics. Here are a few tips:

  • Hang up curtains or blankets over your walls. This will help to absorb sound reflections and improve the clarity of your mix.
  • Invest in acoustic panels. If you have the budget, buying acoustic panels designed for treating rooms is one of the most effective solutions.
  • Use bass traps to reduce excessive bass buildup. This can be achieved by using corner bass traps or DIY bass traps that you can easily make at home.
  • Position your monitors correctly. This may seem obvious but it’s worth mentioning. A correct position will help in decreasing unwanted reflections and hence improving the clarity.

In conclusion, mixing in an untreated room can lead to inaccurate monitoring and affect the quality of your final mix. A treated room is essential for achieving a good mix, and there are plenty of budget-friendly ways to treat a room. By following these tips, you can improve the acoustics of your mixing room and ultimately achieve better sounding mixes.

Neglecting The Importance Of Dynamics


Neglecting the importance of dynamics is a common mistake when mixing music. It is important to pay attention to the volume, panning, and levels of each instrument to ensure a balanced and dynamic final product. Adjusting the dynamics can bring life to your mix and enhance the overall listening experience.

As a music producer or mixer, it’s easy to get caught up in perfecting each element of your mix – the kick drum, snare, vocals, synths, and so on. However, one crucial aspect of mixing that often gets overlooked is dynamics. Neglecting dynamics can result in a flat, lifeless mix that lacks the emotional impact and interest that comes with a well-balanced dynamic range. In this section, we’ll explain what dynamics are, why they matter, and give you some tips on how to balance them in your mix.

What Are Dynamics And Why They Matter

Dynamics refer to the range of amplitude in a piece of music, from the quietest parts to the loudest parts. A dynamic mix takes advantage of this range to create a sense of tension and release, keeping the listener engaged and emotionally invested in the music. Dynamics are crucial to creating a compelling and immersive listening experience. Neglecting dynamics can lead to a mix that sounds dull and unengaging. Without those peaks and valleys in volume, every element of the mix ends up sounding the same, and the listener can lose interest quickly. It’s essential to pay attention to dynamics throughout the mixing process.

Tips For Balancing Dynamics In A Mix

There are several ways to balance dynamics in a mix, and a lot of it comes down to using your ears and making subtle adjustments. Here are some tips:

  • Start with the arrangement – Before you even start mixing, consider how the different elements of the song fit together dynamically. Make sure the arrangement includes quiet sections, build-ups, and impactful drops to keep the listener engaged.
  • Use compression – Compression is a powerful tool for controlling dynamics. Use it to reign in peaks and boost quieter sections. Be careful not to overdo it, though – too much compression can result in a squashed, lifeless mix.
  • Pan elements – Panning different elements will help create space in the stereo image and give each element its own dynamic range. Panning can also help prevent certain elements from overpowering others.
  • Automate levels – Consider using automation to adjust levels throughout the mix. For example, you could automate the volume of a synth to gradually build up to a drop, or use automation to bring in vocals at just the right moment.
  • Consider the mastering process – Keep in mind how dynamics will affect the mastering process. It’s much easier to reduce dynamic range during mastering than to try to add it back in after the fact.

Remember, don’t neglect the importance of dynamics in your mix! Take the time to balance the dynamic range and create an immersive, engaging listening experience.

Not Reference Mixing

Mixing music is an intricate process that involves balancing different sound elements to achieve a cohesive and polished final product. However, mistakes can easily occur, especially when not utilizing a crucial technique- reference mixing. Reference mixing is essential to help in determining if the mix is worth pursuing. In this article, we’ll delve into what reference mixing is and why it’s crucial to effective mixing. Furthermore, we’ll give invaluable tips for effective reference mixing.

What Is Reference Mixing And Why You Should Do It

Reference mixing is the process of comparing and contrasting your mix with a professionally mixed track that’s similar in genre, energy, and other characteristics. This technique allows you to identify any weaknesses in your mix and make the necessary adjustments to improve it. Reference mixing acts as a benchmark to verify if the mix is on the right path to achieving the desired sound quality.

The main reason why reference mixing is essential is that our ears are easily biased to what we’ve heard and worked on for long periods. Therefore, by comparing your mix with a professional track, it helps you to have a fresh perspective to make critical decisions based on the perceived sound quality.

Tips For Effective Reference Mixing

Reference mixing is a handy technique when done correctly. Here are some tips for effective and efficient reference mixing:

Tip Explanation
Choose the Right Reference Track Selecting the right reference track is crucial, and it should be similar to what you want to achieve in terms of sound quality, energy, genre, and vocal delivery.
Use More Than One Reference Track It’s advisable to use two or three reference tracks to develop a broader reference point.
Listen Holistically Instead of focusing on one sound element, it’s essential to listen to the tracks as a whole, determining how the individual components interact to achieve the desired sound quality.
Use High-Quality Headphones or Speakers High-quality equipment is essential in accurately and effectively hearing the nuances in both your mix and the reference tracks.
Take Breaks Between Mixing It’s essential to take breaks between successive mixes to prevent ear fatigue, which can affect your ability to make objective decisions.

Reference mixing is an essential technique in mixing music. It allows you to understand and achieve the desired sound quality accurately. Utilizing it helps you avoid common mixing mistakes and create a polished end product.

Mistakes We All Make When Mixing Music And How To Fix Them


Credit: beatbloom.com


Frequently Asked Questions For Mistakes We All Make When Mixing Music And How To Fix Them


How Can I Improve My Mixing Music?


To improve your mixing music, follow these steps: 1. Focus on the balance between different instruments and sounds. 2. Be mindful of the levels and use EQ to make sure each element has its space in the mix. 3. Make use of panning to create separation between sounds.


4. Use effects like reverb and delay to add depth and dimension. 5. Take breaks to give your ears a rest and come back to the mix with fresh perspective.


How Do I Fix Audio Mixing?


To fix audio mixing, you can start by adjusting levels, panning, and EQ. You can also try adding effects, such as reverb or compression. It’s important to use reference tracks and take breaks to ensure the mix sounds good on different sound systems.


How Do You Mix Music Perfectly?


To mix music perfectly, follow these 5 guidelines: 1. Ensure your tracks are in sync. 2. Use EQ to find the sweet spot for each track. 3. Adjust volume levels and use a limiter to avoid clipping. 4. Give each track its own sonic space 5.


Listen critically and make any necessary adjustments.


Can Mastering Fix A Bad Mix?


Mastering can improve the overall sound quality of a mix, but it cannot fix fundamental problems such as poor arrangement, bad recordings, and improper mixing techniques. Mastering aims to enhance the already existing sound components, so a bad mix may benefit from mastering to some extent, but it cannot completely fix it.


Conclusion


Ultimately, mixing music can be a complex and nuanced process. However, by avoiding common mistakes such as not properly balancing levels, not paying attention to EQ and having a lack of attention to detail, you can drastically improve your sound.


Remember, mixing is an art form and takes practice. By incorporating the tips mentioned you’ll be able to improve your craft and create a sound that truly represents you and your unique style. Happy mixing!

Categories
Archive

What Lufs Should I Master For Streaming Spotify Apple Music

To optimize your music for streaming on services like Spotify and Apple Music, aim for a loudness of -14 LUFS integrated. This will ensure it sounds consistent across different platforms and won’t be subject to loudness normalization.


Mastering for streaming services is a crucial part of the music production process. With so many people listening to music through streaming platforms like Spotify and Apple Music, mastering for these specific services has important implications for how audiences will experience your music.


We’ll explore what LUFS are, the role they play in mastering for streaming services, and why a loudness of -14 LUFS integrated is a good target to aim for. We’ll also provide some tips for achieving the best possible sound quality on these platforms.

What Lufs Should I Master For Streaming Spotify Apple Music


Credit: www.masteringthemix.com


Lufs Explained

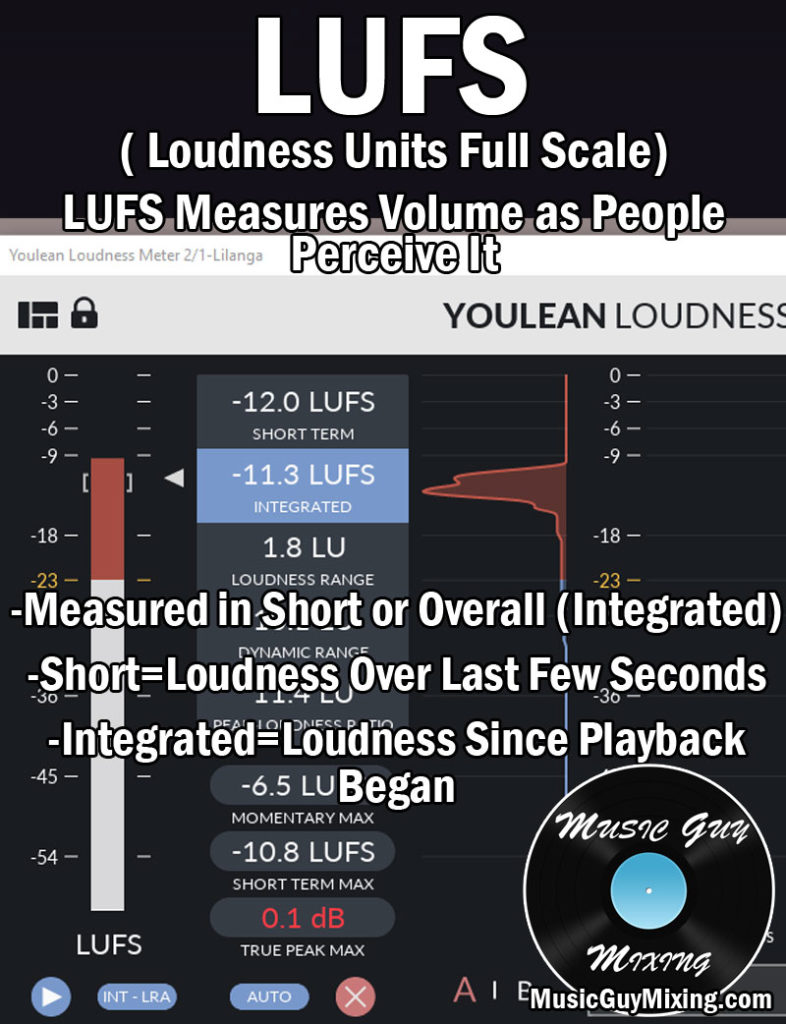
If you’re new to audio mastering, you might have heard the term LUFS mentioned. LUFS, or Loudness Units relative to Full Scale, is a measure used to standardize the loudness of audio tracks. LUFS is particularly important for streaming platforms such as Spotify and Apple Music, where inconsistent loudness levels can be frustrating for listeners.

What Are Lufs?

LUFS is a specific measurement of loudness. It accounts for how loud a track sounds to the human ear, and makes it easier to compare audio across different platforms. LUFS seeks to standardize loudness levels so that listeners don’t experience sudden jumps in volume while listening to different tracks.

Why Are They Important For Streaming Platforms?

Streaming platforms are becoming the go-to way to listen to music. However, inconsistent loudness levels across tracks can be frustrating for listeners. This is where LUFS comes in. By standardizing the loudness of tracks, listeners can have a consistent experience, no matter what song or artist they’re listening to.

LUFS is particularly important for streaming platforms since tracks streamed on different devices have different loudness levels. For example, a song played through a laptop might sound louder or quieter than the same song played through a smartphone. Standardizing loudness with LUFS ensures a consistent experience regardless of the device.

Overall, LUFS is a crucial aspect of audio mastering for anyone who wants their music to sound good on streaming platforms.

Recommended Lufs Levels For Streaming Platforms

The Recommended LUFS Levels for Streaming Platforms are important to understand if you want to make sure your music sounds consistent across different platforms. LUFS (Loudness Units Full Scale) is a measurement of the perceived loudness of audio. Different platforms have different normalization levels which affect the overall loudness of your music. In this blog post, we will discuss the Recommended LUFS Levels for some of the popular streaming platforms like Spotify, Apple Music, YouTube, and Tidal.

Spotify Normalization Levels

Spotify uses a normalization algorithm to ensure all tracks in their library play at the same volume. The normalization level used by Spotify is -14 LUFS integrated. This means that if your track is louder than -14 LUFS, Spotify will automatically turn it down. It’s important to note that Spotify measures loudness using the integrated LUFS measurement which takes into account the overall loudness of the entire track.

Apple Music Normalization Levels

Similar to Spotify, Apple Music also uses normalization to ensure all tracks play at the same volume. Apple Music uses a normalization level of -16 LUFS integrated. This means if your track is louder than -16 LUFS, it will automatically be turned down.

Youtube Normalization Levels

YouTube has a different approach to normalization compared to the other platforms. They use a loudness range target of -13 LUFS for their normalization. This means that they preserve the dynamic range of the audio while still ensuring that it’s not too loud.

Tidal Normalization Levels

Tidal has two options when it comes to normalization. The default normalization level used by Tidal is -14 LUFS integrated. However, Tidal also offers a ‘Master’ quality option which allows you to upload your music with the original dynamics without any normalization.


Lufs Measurement Tools


To ensure that your music is properly prepared for streaming on platforms like Spotify and Apple Music, it’s important to use LUFS measurement tools. These tools help you determine the optimal loudness level for your tracks, ensuring that they sound great and won’t be penalized for being too loud or quiet.

Measuring loudness is essential for mastering tracks for streaming on Spotify, Apple Music, or any other platform. LUFS (Loudness Units Full Scale) is the measurement unit that defines loudness levels. To achieve the desired LUFS levels for streaming on these platforms, mastering engineers must utilize specialized LUFS measurement tools. In this section, we will discuss how to measure LUFS and the tools you can use for measuring and adjusting loudness.

How To Measure Lufs?

Measuring LUFS involves using a meter that indicates the average loudness level and peaks of an audio track over time. LUFS meters display the overall loudness levels of the entire track, which helps mastering engineers to control the levels and ensure optimal sonic performance. There are several LUFS meters available in the market, such as:

  • iZotope Ozone’s Loudness Meter (Free & Paid)
  • Waves WLM Loudness Meter (Paid)
  • MeterPlugs’ K-Meter (Free & Paid)
  • HOFA-Plugins’ 4U+ Loudness Meter (Free & Paid)

Once you have selected the LUFS meter of your choice, follow these steps to measure LUFS:

  1. Insert the meter into your DAW’s master channel.
  2. Play the track from the beginning to the end.
  3. Check the LUFS reading when the track finishes playing
  4. If the reading is too high, use EQ, compression or limiting to adjust the loudness level of your track.

Tools For Measuring And Adjusting Loudness

Now that you know how to measure LUFS, let’s discuss the software tools that you can use to adjust and optimize the loudness of your tracks for streaming.

  • iZotope Ozone Suite: A comprehensive suite of tools designed for mastering engineers, including a loudness meter and a collection of modules for EQ, compression, and limiting.
  • Waves L3 Multimaximizer: A mastering limiter that can help you boost the volume of your tracks and achieve the desired loudness levels.
  • T-Racks 5: A powerful mastering suite that includes a range of modules, including EQ, compression, and limiting.
  • Slate Digital FG-X: A mastering limiter that utilizes intelligent algorithms to maximize loudness levels without introducing distortion or artifacts.

Using the software tools mentioned above, you can ensure that your tracks comply with the optimal LUFS levels required to stream correctly on Spotify, Apple Music, and other platforms. In conclusion, measuring and optimizing the loudness of your tracks for streaming is crucial for ensuring that your music sounds its best. Utilizing LUFS measurement tools and software plugins, mastering engineers can control and adjust the tracks’ loudness levels perfectly.

What Lufs Should I Master For Streaming Spotify Apple Music


Credit: www.raytownproductions.com


Factors Affecting Lufs


LUFS, or Loudness Units Full Scale, is a measure of loudness used in audio mastering. The optimal LUFS for streaming platforms like Spotify and Apple Music can vary, with factors such as genre and listener preferences affecting the ideal level.


It’s important for content creators to take these factors into consideration when mastering for streaming services.

Factors Affecting LUFS: Mastering Techniques Every mastering technique has a different effect on the overall loudness. Use of compression, limiting, and normalization can heavily impact the LUFS reading. An intricate mastering technique applied to a particular area in a track can negate loudness in that particular region, hence the importance of mastering the track with a holistic approach. Genres and Styles Different genres and styles require varying levels of loudness. For example, electronic dance music tracks need to be louder than acoustic songs. Therefore LUFS levels differ depending on the type of music the artist is producing. Platform Distribution Various streaming platforms apply different normalization algorithms resulting in differences in the LUFS levels. For example, Spotify uses slightly lower LUFS levels when compared to Apple Music. Therefore, to maintain consistency a mastering engineer must consider the platform which the track will be released on. Listener Preferences Listeners also impact the LUFS levels. The dynamics of a track are important as they affect the overall feel of the track. For example, a listener may not enjoy a track which has been made louder by using limiting. Therefore, to maximize the listener’s experience, the mastering engineer must find a balance between loudness and dynamics. Mastering Techniques The key to mastering lies in balance between the dynamic and loudness range of the track. Some mastering techniques like using a limiter may reduce the overall dynamics; whereas applying subtle compression, can maintain the balance between dynamic range and LUFS levels. Genres and Styles The type of music and its tempo play a crucial role in the setting of appropriate LUFS levels. For example, electronic dance music requires a higher LUFS level compared to ballads which tend to be generally quieter. Platform Distribution Different streaming services like Spotify, Apple Music, Pandora, and YouTube have their own LUFS levels. The mastering engineer must understand the specific streaming platform and deliver the master with appropriate LUFS levels for that platform. Listener Preferences The most important aspect of creating music is ensuring that the listeners enjoy and appreciate the music. The listener’s tolerance varies with dynamics, and other factors which ultimately adjust the LUFS level. An experienced mastering engineer design a master with the appropriate levels that meet the needs of the listeners. In conclusion, by understanding the factors that affect LUFS, mastering engineers can effectively color the final output to meet the desired impact. By taking into consideration the mastering techniques, genres and styles, platform distribution and listener preferences, it can provide the solution to setting the perfect LUFS levels for music.

Optimizing Audio For Streaming Platforms

Streaming platforms like Spotify and Apple Music have specific audio requirements, and optimizing your audio is crucial to ensure it meets those standards. One of the most important factors is mastering your audio with the appropriate LUFS levels, or Loudness Units Full Scale. In this article, we’ll delve into some techniques for mastering your audio for streaming, adjusting your LUFS levels for different platforms, and why quality is just as important as loudness.

Mastering Techniques For Streaming

Mastering your audio for streaming requires specific techniques to ensure the best possible sound quality. Here are some of the most effective techniques to consider:

  • Use EQ to balance out your mix and eliminate any harsh or muddy frequencies.
  • Add some compression to your mix to even out the levels and give your audio a more polished sound.
  • Limit your audio to prevent clipping and ensure the levels are consistent.
  • Add some stereo imaging to create a wider soundstage and make your audio sound bigger and more dynamic.

Adjusting Lufs Levels For Different Platforms

LUFS levels can vary across different streaming platforms, so it’s important to adjust your levels accordingly. Here are some of the most common LUFS levels for popular streaming platforms:

Streaming Platform LUFS Level
Spotify -14 LUFS
Apple Music -16 LUFS
Tidal -14 LUFS

Keep in mind that these levels can change, so be sure to research the latest requirements for each platform. Adjusting your levels to meet these requirements can ensure your audio sounds great on any platform.

Quality Vs. Loudness

While it’s crucial to ensure your audio meets the correct loudness levels, it’s equally important to prioritize quality over loudness. This means avoiding over-compression and maximizing dynamic range. A more dynamic mix will stand out on the platform and sound more engaging to listeners.

With these techniques and ideas in mind, you can master your audio for streaming platforms like Spotify and Apple Music. By optimizing your audio, you can make sure it sounds its best and stands out in an increasingly crowded field of great-sounding music.

What Lufs Should I Master For Streaming Spotify Apple Music


Credit: www.musicguymixing.com


Frequently Asked Questions For What Lufs Should I Master For Streaming Spotify Apple Music


Is 12 Lufs Too Loud For Streaming?


No, 12 LUFS is not too loud for streaming. It is actually the recommended loudness level for an audio file to be streamed on platforms like Spotify and Apple Music. This ensures that the audio is consistent across different devices and platforms.


What Is The Best Lufs Level For Spotify?


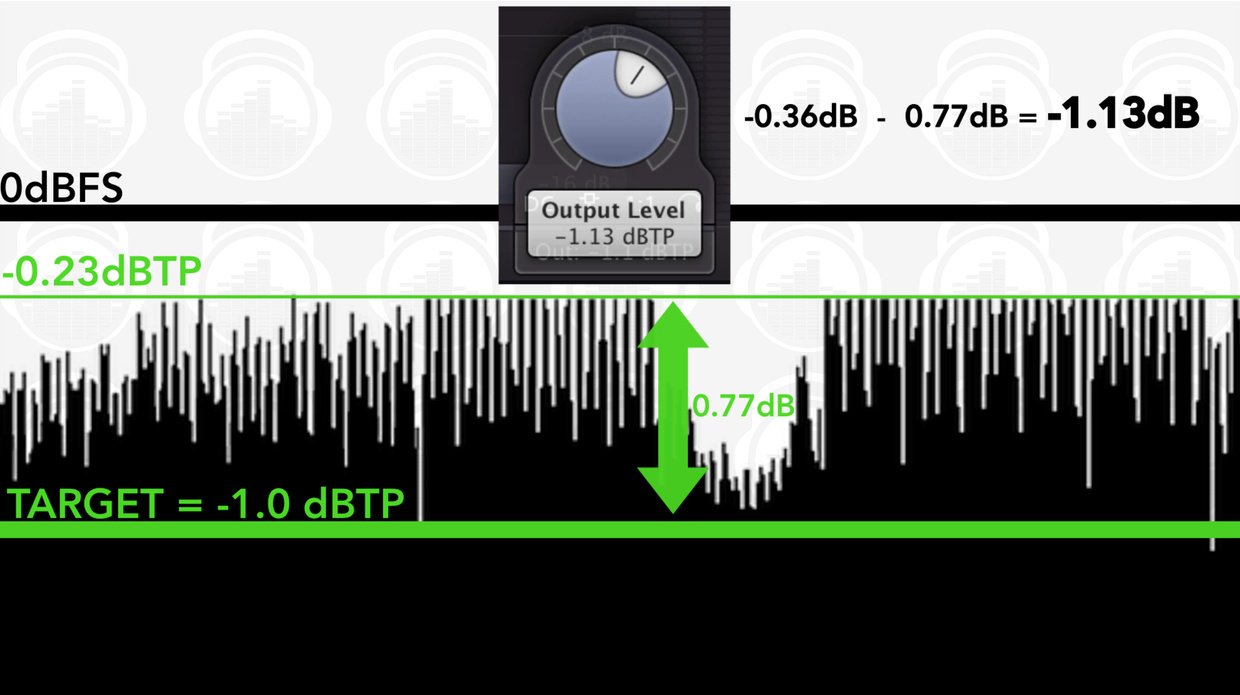
The recommended LUFS level for Spotify is -14 LUFS for the integrated loudness and -1 dBTP for the true peak level. Spotify normalizes all tracks to this level, which ensures consistent playback volume across all content on their platform.


What Are The Loudness Standards For Apple Music?


The loudness standards for Apple music are -13 LUFS Integrated (loudness units relative to full scale) with a True Peak of -1 dBTP (decibels true peak). These guidelines ensure that all content on Apple Music is balanced and consistent in terms of loudness.


Is 10 Lufs Too Loud?


Yes, 10 LUFS can be too loud for some content. It depends on various factors such as the type of content, platform, and audience. It is recommended to check the loudness requirements of the specific platform and adjust accordingly for optimal listening experience.


Conclusion


To master the appropriate LUFS for streaming on Spotify or Apple Music, it is essential to understand the technical requirements. Too much compression can result in a lower-quality audio stream, while a lack of compression can result in a fluctuation in volume.


Understanding the right LUFS for streaming services can help your music reach a broader audience without sacrificing quality. So, make sure to test and find the ideal LUFS level for your music based on the streaming platform’s guidelines. Keep mastering!

Categories
Archive

How To Create Your Own Samples Tips To Create Your Sample Pack

To create your own sample pack, gather your favorite sounds, organize them, and export them as one file. Here are some tips to make the process easier.


Creating your own sample pack is a great way to have unique sounds that fit your style. Whether you’re a producer, musician, or DJ, having a custom selection of samples can take your creativity to the next level. However, creating a sample pack can be a daunting task, especially if you don’t know where to start.


We will explore some tips and tricks on how to create your own sample pack. From organizing your sounds to properly exporting them, we’ll cover all the necessary steps to make your custom sample pack. So, let’s dive in and get started!

How To Create Your Own Samples Tips To Create Your Sample Pack


Credit: unison.audio


Understanding The Different Types Of Samples


To create your own sample pack, it’s essential to understand the different types of samples available. There are one-shot samples that are used for individual sounds and loops for creating repetitive sequences. Make sure your samples are high-quality and well-organized to make them useful.

Creating your own sample pack is a great way to bring your music production to the next level. Sampling is the art of taking sounds from various sources and turning them into something new. However, when it comes to creating your own samples, there are a few things you need to understand first, starting with the different types of samples.

Choosing The Right Source For Your Samples

The first step to creating your own sample pack is to choose the right source for your samples. Samples can come from a wide variety of sources, including recordings of live instruments, field recordings, or pre-existing sound libraries. When choosing your source, you need to consider the style of music you produce and the overall vibe you want your samples to convey. For example, if you produce electronic music, you might want to look for samples that are more synthetic and processed. On the other hand, if you’re producing acoustic music, you might want to look for samples that are more natural and organic.

Acoustic Vs. Electronic Samples

When it comes to samples, there are two main categories: acoustic and electronic. Acoustic samples are sounds that have been recorded from live instruments or physical objects, such as drums, piano, or percussion. These samples tend to be more natural and organic and are great for adding a human-like touch to your music. Electronic samples, on the other hand, are created using digital synthesis techniques, such as wavetable, granular or FM synthesis. They have a more processed or synthetic character and are perfect for electronic dance music or sound design.

Single-shot Vs. Looped Samples

Another consideration when creating your own sample pack is whether you want to use single-shot or looped samples. Single-shot samples are individual sounds that play once and then stop, while looped samples are sounds that repeat over and over again until you stop them. Single-shot samples are great for creating realistic drum patterns or playing melodic phrases. Looping samples are perfect for creating ambient environments or for layering multiple sounds together to create a complex texture. In conclusion, understanding the different types of samples is crucial when it comes to creating your own sample pack. Consider the source of your samples, whether they are acoustic or electronic, and whether you want to use single-shot or looped samples. By taking these factors into account, you’ll be well on your way to creating a sample pack that is uniquely yours and perfect for your music production needs.

How To Create Your Own Samples Tips To Create Your Sample Pack


Credit: www.productionmusiclive.com


How To Record Your Own Samples


Learn the tips and tricks on how to create your own sample pack by recording your own samples. With just a few basic tools and techniques, you can create unique and personalized samples that represent your style and sound. This can be a valuable asset for producers and musicians who want to stand out and create their own signature sound.

Are you a music producer who wants to create a unique sound library? Creating your own sample pack is an excellent idea, and it all starts with recording your own samples. In this section, we’ll cover the essential aspects of recording your samples to ensure you create high-quality samples that are fit for commercial use.

Choosing The Right Recording Equipment

Choosing the right equipment is crucial in creating high-quality audio samples. To begin with, you need a reliable microphone that can adequately capture sounds. The choice of a microphone depends on the type of sound you want to record. Here are some popular microphones and their best uses.

Microphone Best used for
Dynamic microphone Drums, guitar amplifiers, bass amplifiers
Condenser microphone Vocals, acoustic guitars, pianos, synth pads
Ribbon microphone Brass, woodwinds, guitar amplifiers, vocals

Other things to consider when choosing recording equipment include audio interfaces, preamplifiers, and pop filters. Once you have the right equipment, it’s time to record your samples.

Tips For Recording Clear And Versatile Samples

When recording your samples, it’s essential to keep the following tips in mind to achieve clarity and versatility in your recordings.

  • Reduce background noise: Before you begin recording, ensure you identify all the sources of noise in your recording space. Consider soundproofing your room or using a microphone shield to reduce ambient noise.
  • Capture multiple variations: To achieve versatility in your sound library, capture multiple variations of your sound. For instance, if you’re recording a snare drum, record multiple hits from different angles and with different intensities.
  • Experiment with microphone placement: Placing the microphone in different positions will affect the sound you record, so it’s essential to experiment to find the best position that suits your needs.
  • Check audio levels: Before you start recording a particular sound, ensure you check the audio levels to avoid clipping.
  • Record in Wav or Aiff format: Always record your samples in lossless formats such as WAV or AIFF for the best quality.
  • Take breaks: Recording samples can be tedious, so it’s essential to take breaks to avoid ear fatigue.

Organizing And Editing Your Recorded Samples

Once you have recorded your samples, it’s time to organize and edit them.

  • Organize samples in folders: Create folders for different categories of sounds such as percussion, bass, guitars, and so on.
  • Normalize audio levels: Normalize the audio levels to ensure they are consistent across all samples.
  • Edit audio: Use audio editing software such as Ableton, Logic Pro, or Audacity to edit your audio samples. You can trim samples, add reverb, EQ, and other effects to make them sound better.
  • Add metadata: Lastly, add metadata to your samples to make it easier to search for them in your sound library. Include details such as keywords, tempo, key, and instrument.

In conclusion, recording your samples is a simple process, but it requires some effort and attention to detail. By following these tips and best practices, you’ll be able to create a unique and high-quality sound library that sets you apart as a music producer.

Creative Ways To Use Your Samples


Create unique and compelling sample pack to infuse creativity in your music with these tips. Experiment with different sounds, styles and techniques to create your own samples that stand out. Use them creatively in your tracks and share with others to take your music to new heights.

If you’re an aspiring music producer, creating your own samples can be a game-changer. Samples can come in handy for adding unique sounds, textures, and beats to your tracks. In this article, we’ll talk about some creative ways to use your samples.

Layering And Processing Your Samples

One of the most creative ways to use your samples is by layering and processing them. This will give you the chance to create new and exciting sounds. For example, you can layer a drum sample with a vocal sample and then add some reverb or delay to create a new percussion sound.

Creating Unique Atmospheres And Textures

Samples can be used to fill up the sonic space in your track by adding atmospheres and textures. This will help create a sense of depth and space in your music. You can use samples such as natural sounds, like rain or birds chirping, or electronic sounds, like white noise or pads, to create unique atmospheres and textures.

Making Beats And Grooves With Your Samples

Samples can be used to create beats and grooves that can form the foundation of a track. You can use drum, bass, and melody samples to create your beats and grooves. By chopping and manipulating your samples, you can create unique rhythms and melodies. In conclusion, there are many creative ways to use your samples. By layering and processing your samples, creating unique atmospheres and textures, and making beats and grooves with your samples, you can add depth, space, and excitement to your music. Take your music to the next level by using these tips and techniques to create your own sample pack!

How To Create Your Own Samples Tips To Create Your Sample Pack


Credit: help.algoriddim.com


Creating Your Sample Pack

Sample packs are the perfect way to showcase your music production skills. Creating your own sample pack can be a challenging and time-consuming process, but the results are well worth it. With a well-crafted sample pack, you can create a unique sound library that can help you stand out from the crowd. In this article, we will cover some tips to help you create your own sample pack.

Selecting Your Best Samples

The first step in creating your sample pack is selecting your best samples. Your sample pack should showcase your unique style, so select samples that best represent your sound. Choose samples that are high quality, unique, and diverse. Pick your most popular samples and ensure that they are well mixed and edited. Make sure that you have enough samples to create a full pack.

Naming And Tagging Your Samples

Once you have your samples selected, you need to name and tag them. Naming your samples in a clear and logical way can make them easier to find later. Tagging your samples with relevant keywords can also make them easier to search for. You should name and tag your samples based on their category, genre, and instrumentation. This will make it easier for other producers to find your samples.

Choosing The File Format And Compression

Choosing the right file format and compression is crucial when creating your sample pack. You want to choose a format that is compatible with most music production software. WAV and AIFF are the most common formats used for samples. Compression is also important as it affects the quality of your samples. You should compress your samples to a suitable size without sacrificing the quality. MP3 is not recommended as it compresses the sound too much.

To sum up, creating your sample pack requires you to select your best samples, name and tag them correctly, and choose the right file format and compression. Follow these tips, and you will be able to create a unique and high-quality sample pack that showcases your music production skills.


Sharing And Selling Your Samples


Creating your own sample pack is a great opportunity to showcase your sound to others and potentially make some profit. Some tips to create your sample pack include selecting high-quality sounds, organizing them by category, and offering variety to appeal to a wider audience.

Choosing The Right Platform For Your Sample Pack

When it comes to sharing and selling your sample pack, choosing the right platform is crucial. There are several options available, such as online marketplaces like Gumroad, Sellfy, and Shopify, or you can create your own website and sell directly to your customers. Here are some factors to consider when choosing a platform:

  • Cost: Different platforms charge different fees for using their service. Make sure to consider the cost of each platform and choose one that fits your budget.
  • Features: Look for a platform that offers features that are important to you, such as a customizable storefront, marketing tools, and analytics.
  • Audience: Consider where your audience is located and which platform they are most likely to use. For example, if your target audience is young musicians who primarily use Instagram, consider selling your samples on a platform that integrates with Instagram.

Tips For Marketing And Promoting Your Sample Pack

Once you have your sample pack ready to go, it’s time to start promoting it. Here are some tips for successfully marketing and promoting your sample pack:

  • Use social media: Social media platforms like Instagram, Twitter, and Facebook are great places to promote your sample pack and reach a wider audience.
  • Collaborate with influencers: Partnering with influencers in your niche can help you reach a larger audience and establish credibility.
  • Offer deals and discounts: Offering limited-time deals and discounts can help generate buzz and encourage people to buy.
  • Create a demo: Creating a demo of your sample pack can help potential customers get a sense of what they’re getting before they buy.

Preparing Your Samples For Distribution

Once you start selling your sample pack, it’s important to make sure your samples are properly prepared for distribution. Here are some things to keep in mind:

  • Format: Make sure your samples are in a format that is widely compatible, such as WAV or MP3.
  • Organization: Organize your samples in a logical way, such as by instrument or genre.
  • Metadata: Make sure your samples are properly labeled with metadata like tempo, key, and instrument.
  • Documentation: Include documentation that explains how to use your samples and any licensing restrictions or requirements.

In conclusion, creating a successful sample pack requires careful planning, preparation, and promotion. By choosing the right platform, marketing effectively, and preparing your samples for distribution, you can increase your chances of success and reach a wider audience.

Avoiding Common Mistakes When Creating Your Sample Pack


When creating your own sample pack, it is important to avoid common mistakes that could affect its overall quality. Tips on creating a sample pack include selecting diverse samples, choosing appropriate packaging, and taking high-quality photographs that accurately represent the samples.


Attention to detail and patience in the process will ensure a successful sample pack.

When creating your own sample pack, it’s important to avoid certain mistakes that could hinder its effectiveness. One of the most significant benefits of a sample pack is its ability to showcase your unique sound to potential clients and collaborators. However, if the pack is not well-executed, it could result in missed opportunities. In this section, we will explore some common mistakes people make when creating their sample pack and how to avoid them.

Overusing Popular Samples

It can be tempting to include popular samples in your pack as they are familiar sounds that people recognize. However, overusing them can result in your sound being lost in the mix. Your sample pack should represent your sound and style, so it’s important to choose samples that compliment that. Using popular samples sparingly is okay, but don’t rely on them as the backbone of your pack. Be sure to include unique and original sounds to showcase your creativity.

Not Paying Attention To Quality

The quality of your samples should be a top priority when creating your pack. If the samples sound cheap, low-quality or generic, potential clients may assume that your music is the same. Ensure that all your samples are professionally recorded and edited. You can also consider hiring a sound engineer to help you with this if you’re not experienced with music production. The better the quality of your samples, the more likely people will be willing to invest in your music.

Overcomplicating Your Sample Pack

When creating your sample pack, it’s important to remember that simplicity is key. Many people make the mistake of trying to include too much in their pack, resulting in a confusing and overwhelming collection of sounds. Stick to your strengths and keep your samples concentrated on your niche. Too much variety can dilute your sound and cause confusion for potential clients. Keep your pack focused and allow the listener to experience your sound in its purest form. In conclusion, creating a sample pack can be an essential tool for showcasing your unique sound as a music producer. Remember, when developing your pack, don’t overuse popular samples, pay attention to quality, and avoid overcomplicating your pack. By following these guidelines, you’ll be well on your way to creating an effective sample pack that showcases your strengths and attracts potential clients.

Frequently Asked Questions On How To Create Your Own Samples Tips To Create Your Sample Pack


What Makes A Good Sample Pack?


A good sample pack should have a variety of high-quality sounds, be categorized well, have clearly labeled files, and be compatible with popular software. It should also offer a sufficient number of samples in each category, have a reasonable price, and provide customer support.


How Many Samples Should Be In A Sample Pack?


There is no set number of samples that should be included in a sample pack. The number of samples will vary depending on the product and brand. However, generally, sample packs will contain enough product for a customer to try and potentially purchase the full-sized version.


How To Sell Your Own Sample Pack?


To sell your own sample pack, start by determining your target market and creating a unique selling proposition. Develop a high-quality sample pack with eye-catching packaging, and consider offering a discount to early customers. Promote your sample pack through social media, email marketing, and targeted advertising to attract potential customers.


Additionally, consider partnering with influencers or industry experts to showcase your product to a wider audience.


Are Sample Packs Legal?


Yes, sample packs are legal as long as they are obtained through legal means and do not violate any copyright or trademark laws. It is important to ensure that the samples are properly licensed and credited to the original creators.


Conclusion


Creating your own sample pack can be an exciting and rewarding experience. Remember to choose a theme and tailor your packs to your target audience. Pay attention to packaging and presentation as this can make a difference in how your samples are received.


Keep experimenting with different combinations and improve on your sample packs to make them stand out. With these tips, you are well on your way to creating a successful sample pack business.

Categories
Archive

How To Master Music To Get An Exact True Peak And Lufs Reading

To master music for an exact true peak and LUFS reading, use a limiter and a loudness meter. Firstly, the limiter should be applied to prevent peak levels from exceeding 0dB.


Secondly, use a loudness meter to ensure that the average loudness of your track hits the target LUFS level. Mastering music is a crucial step towards achieving a professional-sounding mix. It involves fine-tuning the final mix to optimize it for distribution on various platforms.


Mastering also ensures that the track is at a consistent volume level and has an optimal dynamic range. One of the main aspects of mastering is achieving the desired loudness level, which is typically indicated by the loudness units full scale (LUFS) reading. A true peak is also essential to avoid digital distortions, so it’s important to use a limiter to maintain the levels below 0dB. We will discuss how to master music to achieve an exact true peak and LUFS reading using readily available tools.


What Is Mastering Music?


Mastering music involves the process of fine-tuning a sound recording before its release. To achieve an exact true peak and LUFS reading, mastering engineers use audio editing tools and techniques to optimize the dynamics and frequency response of the recording.

Definition Of Music Mastering

Music mastering is the final stage of the music production process, which involves fine-tuning the audio to create a final mix that sounds polished and professional. This process addresses several aspects such as volume, equalization, compression, stereo enhancement, and dynamic range control. In simple terms, it is the process of taking a mix and making it sound as good as possible across all devices and listening environments.

Importance Of Mastering Music

Mastering music is crucial for a variety of reasons. One reason is to ensure consistency across different devices and listening environments. When a listener plays your music on different devices, they should experience the same level of clarity, volume, and tonality. Another reason is to achieve an optimal loudness level that is not too quiet or too loud, which can cause distortion or clipping. In addition, mastering addresses issues related to the stereo image, such as the panning and positioning of instruments within the mix. This can create a sense of depth and immersion for listeners. Lastly, mastering music can impact how it is perceived by industry professionals such as radio programmers, music supervisors, and mastering engineers, who all play a crucial role in getting a song heard and recognized.

Getting An Exact True Peak And Lufs Reading

To achieve an exact true peak and LUFS Reading for your mastered music, it is essential to use appropriate mastering software that can measure and read these values accurately. This helps to ensure that your music is properly leveled without any clipping, distortion, or harshness. A great mastering engineer will use their ears, knowledge, and technical tools to produce a final mix that can hit all target platforms. The limiters incorporated in mastering software can help to maintain an optimal true peak level. The LUFS reading, on the other hand, helps to measure the loudness level of the mastered audio. This is important because you want a consistent level of perceived loudness for your listeners across different platforms. With precise readings in both areas, your mastered mix can sound engineered to perfection and can be trusted to play across multiple platforms.

Understanding True Peak And Lufs Reading


Mastering music involves understanding true peak and LUFS readings, which are measures of audio loudness. By getting an exact measurement, you can ensure your music is high-quality and optimized for various platforms.

What Is True Peak?

True Peak refers to the maximum amplitude of a sound waveform. It represents the highest point of the waveform, which directly affects the overall volume of the audio. In simpler terms, true peak is the highest level of an audio file and measures the highest amplitude of a waveform. It is important to measure true peak because it prevents audio distortion and ensures that the audio is not too loud or too quiet.

What Is Lufs Reading?

LUFS (Loudness Units relative to Full Scale) reading is a measure of the perceived loudness of an audio file. It measures the perceived volume of audio by taking into account human perception. This means that two audio files with the same LUFS reading sound equally loud to human ears, even if their true peak levels are different. Measuring LUFS is an important part of mastering music because it ensures that all audio files are at the same perceived volume level.

Difference Between True Peak And Lufs

The main difference between true peak and LUFS reading is that true peak measures the highest amplitude of an audio file, while LUFS measures the perceived loudness of an audio file. While both measurements are important, true peak is essential to avoid audio distortion, while LUFS ensures that all audio files are perceived equally loud to human ears. Therefore, both true peak and LUFS should be measured and adjusted during the mastering process to achieve the best possible sound.

Tools And Techniques For Mastering Music


Mastering music requires the use of specific tools and techniques to achieve an exact true peak and LUFS reading. By utilizing software such as FabFilter Pro-L 2 and employing EQ, compression, and limiting, music producers can ensure that their final tracks will sound polished and professional.

If you’re an artist or a producer, you understand how crucial it is to get the perfect sound when you release a new track. To achieve this, it is essential to master your music accurately. The process of music mastering ensures the audio is clear, balanced, and well-polished. A well-mastered track will guarantee the best possible experience for your listeners. In this article, we will take a look at the tools and techniques you need to master music, including preparing the mix for mastering, the essential tools needed for the process, and techniques to ensure your music gets an exact True Peak and LUFS reading.

Preparing The Mix For Mastering

Before you begin mastering your track, it is vital to prepare your mix to make it ready for the process. A good mix should have enough headroom to avoid any digital distortion, which can impact the final sound quality. Additionally, a good mix should have no clipping, and the frequency balance should be consistent throughout the track. This preparation will ensure that you can proceed to the mastering phase with the best possible mix.

Essential Tools For Mastering Music

To master your music, certain tools are essential. One such tool is a Digital Audio Workstation (DAW), where you can make the necessary changes and adjustments to your mix to achieve the perfect sound. A limiter is another essential tool in mastering music. It helps to minimize the dynamic range and ensure it is at a consistent level throughout the track. Other tools that can come in handy include an equalizer (EQ) for balancing the frequency, compression for controlling the dynamics, and a stereo widener for expanding the stereo field.

Techniques In Mastering Music

When mastering your music, it is essential to consider techniques that can ensure your sound meets industry standards. One such technique is to ensure the track has an exact True Peak and LUFS reading. A True Peak meter identifies the highest peak in your audio’s digital waveform, while LUFS measures the loudness of your track. The loudness meter ensures the track meets the standard loudness range set by streaming platforms and broadcasters. Another technique to consider is EQ matching. Here, you compare your track to commercial tracks you admire and then use EQ and compression to help get the sound you’re trying to achieve. Finally, the use of reference tracks can help you compare your sound to similar mastered tracks to make the necessary adjustments to get the perfect sound. In conclusion, mastering music requires the appropriate tools and techniques. Ensuring that your mix is ready for mastering will guarantee the best possible outcome, while the use of essential tools such as a limiter or equalizer is crucial. Applying techniques like LUFS measuring and EQ matching will make sure that you achieve the perfect sound you’re aiming for.

How To Master Music To Get An Exact True Peak And Lufs Reading


Credit: www.masteringthemix.com


Preparing For Mastering Music


To achieve an accurate true peak and LUFS reading when mastering music, there are several steps to follow. This involves properly setting up your equipment, understanding the technical aspects of mastering, and knowing how to use the right tools and techniques to achieve the desired result.


With careful preparation and attention to detail, you can produce professional-quality music that sounds polished and balanced.

Preparing for Mastering Music can be a daunting task, and it requires careful planning and execution to get the desired outcome. Before beginning the mastering process, there are essential steps you must take to prepare your work environment, equipment, and tools to ensure your music is mastered accurately. This post will discuss the importance of room acoustics, calibrating the monitors, and creating headroom, critical to getting an exact True Peak and LUFS reading.

Importance Of Room Acoustics

Room acoustics are the foundation of quality audio mixing and mastering. Your room’s shape, size, and furnishings can impact the treatment of sound in your space. For example, a room with hard and reflective surfaces can create echoes and a reverberant effect, which can negatively affect your audio mixing and mastering results. One way to address this issue is to add acoustic treatment materials to your room to absorb unwanted echoes and reflections. By doing so, you can achieve a more accurate and balanced sound.

Calibrating The Monitors

Monitor calibration is crucial for getting an accurate sound when mastering music. You cannot trust your ears purely to make the necessary adjustments to your mix. By calibrating your monitors, you can achieve a consistent bass response and accurate frequency reproduction. It’s also essential to check your monitor volume levels to ensure that you are not overloading your speakers, which can result in an inaccurate representation of your mix. A sound meter can help to achieve the right decibel levels and avoid hearing damage.

Creating Headroom

Headroom is the space between your mix’s peak level and the maximum level at which you can master it without distortion. To achieve an exact True Peak and LUFS reading, you must create headroom by reducing the volume of your mix by a few decibels. A good rule of thumb is to leave around 3 to 6 dB of headroom on your tracks for mastering. Doing so allows you to add equalization (EQ), compression, and other mastering processes without clipping your mix, resulting in a more polished and balanced sound. In conclusion, preparing for mastering music requires careful planning and execution to ensure the best possible outcome. By taking essential steps such as improving room acoustics, calibrating your monitors, and creating headroom, you can achieve an exact True Peak and LUFS reading to produce the best masters of your music.


Mastering Music Step-by-step

Mastering music is a crucial process in achieving the desired sound quality and balance for your music tracks, matching the required industry standards that ultimately affect how listeners will perceive your music. It’s a multistep process that starts with gain-staging your mix down to the final limiting and checking True Peak and LUFS Reading for your final master. In this article, we will discuss how to master music step-by-step, focusing on the subtopics of gain staging, compression and EQ, adding ambience, stereo widening, limiting, and checking True Peak and LUFS Reading.

Step 1: Gain Staging

The first step of mastering music is to gain stage the tracks to ensure the mix is at an appropriate level for mastering. This is done to prevent any distortion in the final mix. Start by adjusting the levels of all the tracks, keep an eye on the meters, and aim for a peak level of -6dB.

Step 2: Compression And Eq

Compression and EQ are fundamental tools for ensuring balance, clarity, and an even frequency response across the entire track. Begin by applying compression to balance out the dynamics, then move on to EQ. Use EQ to correct any frequency imbalances and enhance the sound of each track.

Step 3: Adding Ambience

Adding ambience is a crucial step in creating a sense of space and dimensionality in your music tracks. This helps bring your music alive and gives it depth. Adding ambience can be done by using time-based effects such as reverb and delay.

Step 4: Stereo Widening

Creating stereo width helps the track sound bigger and wider. The process involves manipulating the stereo image of the track, such as panning and using stereo effects, and can create a more engaging and immersive listening experience.

Step 5: Limiting

Limiting is a technique used to increase the volume and overall loudness of a track while also preventing the audio from going into distortion. However, it’s easy to overdo it, so be cautious when applying limiting to your track.

Step 6: Checking True Peak And Lufs Reading

The final step of mastering music is to check the True Peak and LUFS Reading, ensuring they match the required industry standards. This is important because it affects how your music sounds across different platforms and devices. Aim for a True Peak of -1dB and an integrated LUFS Reading of -14 dB to -9dB for streaming platforms such as Spotify, YouTube, and iTunes.

By following these step-by-step processes, you can master your music to achieve the desired true peak, LUFS Reading, and industry standards, ultimately leading to a better-sounding final product.

How To Master Music To Get An Exact True Peak And Lufs Reading


Credit: www.youtube.com


Common Mistakes In Mastering Music

Mastering music is a crucial step in the music production process. It involves preparing and transferring the final mix of a song to a storage device, allowing it to be replicated or distributed. The goal of mastering is to ensure that the final music product is sonically coherent and consistent. In mastering, the producer applies several techniques such as equalization, compression, limiting, and normalization to achieve a balanced and polished sound. However, there are several common mistakes that one should avoid while mastering music.

Over-compressing The Mix

Compression is a technique used to reduce the dynamic range of a track, this technique can be applied to a mix when it needs to be tamed. However, over-compressing a mix can cause the music to lose its natural dynamics and sound lifeless or flat. It is essential to understand the appropriate threshold, attack, and release settings when applying compression in mastering. The threshold controls how much volume above a certain point is compressed, while attack and release determine how fast a compressor kicks in and how smoothly it lets go of the sound. Strike a balance between compressed and uncompressed signals to achieve the perfect mix.

Over-limiting The Mix

Loudness is an essential element in modern music production; however, many producers push their music too far, resulting in distorted and compressed audio that’s fatiguing to the ears. Limiting is a popular technique used to increase the average volume of a track without pushing the peaks beyond 0 dBFS. However, pushing the limiter too hard can cause harsh clipping, resulting in a distorted sound. The key is to find a balance between volume and sound quality, and this can be achieved by applying light compression, limiting, and gain staging, which ensures that each element in the mix sits well together.

Over-eqing The Mix

Equalization is a technique used to adjust the balance of frequencies in a track. EQing is a powerful tool, but it can be overused if not employed correctly. Over-EQing can cause a mix to sound unnatural, harsh, or muddy. When EQing, take a subtle approach, and cut frequencies that aren’t necessary. If boosting frequencies, do it sparingly and always with caution. Use your ears and trust your instincts, and always reference your mix to other well-mastered tracks to avoid overdoing it.

In conclusion, avoiding these three common mistakes is crucial in mastering music to achieve an exact true peak and LUFS reading. Strike a balance between the use of compression, limiting, and EQing, and your music will come out sonically polished, balanced, and ready for the world to hear.

How To Master Music To Get An Exact True Peak And Lufs Reading


Credit: www.masteringthemix.com


Frequently Asked Questions For How To Master Music To Get An Exact True Peak And Lufs Reading


What Is The Recommended Lufs And True Peak?


The recommended LUFS (Loudness Units Full Scale) and true peak levels for audio depend on your intended platform or delivery method. Generally, streaming services recommend -16 LUFS integrated loudness with a true peak of -1 dBFS. Broadcasters may prefer -23 LUFS integrated loudness with a true peak of -2 dBTP.


It’s best to check with the platform or delivery specifications for exact guidelines.


What Should My True Peak Be Before Mastering?


The true peak level before mastering should be no higher than -1dBTP, as recommended by streaming services like Spotify and Apple Music. This ensures that your final product does not distort or clip. It is important to use peak-normalizing before mastering to achieve this level.


How Do You Measure True Peak?


To measure true peak, use a true peak meter that provides accurate measurement of inter-sample peaks. This ensures proper representation of audio levels without clipping or distortion. True peak levels are measured in decibels (dB), and the recommended target is -1dBTP to avoid any potential issues with audio distortion.


How Do You Bring Down True Peak?


To bring down true peak, you can use peak limiters, add compression, or use a clipper. You can also re-record the audio to avoid clipping or use gain staging to lower the volume of louder instruments. Additionally, you can use a true peak limiter to analyze and reduce any inter-sample peaks, ensuring optimal output levels.


Conclusion


In mastering music, getting an exact true peak and LUFS reading is crucial to ensuring that your audio sounds consistent across different platforms and systems. Using the right tools and techniques can make all the difference in achieving this goal.


By paying attention to the details and making adjustments as necessary, you can create top-quality music that will be appreciated by listeners everywhere. Keep these tips in mind and you’ll be well on your way to mastering your music like a pro.

Categories
Archive

The Fundamentals Of Mastering What Every Producer Should Know

Mastering the fundamentals of music production is essential for producers. To elevate their craft, they need to have the necessary knowledge and skills to make quality music.


With the rapidly changing music industry, producers need to stay on top of the latest technology, software, and trends to create fresh and innovative sounds. They should also understand the importance of organizing their workflow, establishing good habits, and networking with other industry professionals.


A successful music producer must possess a combination of creativity, technical knowledge, and business acumen to succeed. We will discuss the fundamentals of mastering music production, which will help any producer create better tracks, get more work, and build a successful career.

The Fundamentals Of Mastering What Every Producer Should Know


Credit: www.masteringthemix.com


Importance Of Mastering

Music production can be a challenging task, and more often than not, it requires the combined effort of several professionals. One such professional is a mastering engineer, whose job is to fine-tune and polish your raw mix to a finalized, professional quality. The importance of mastering cannot be overstated, and in this article, we will take a closer look at why.

Achieving A Polished Final Product

Mastering is the final step in the music production process. It is where a skilled engineer applies a series of processing techniques and tweaks to your mix to enhance the overall sound quality and create a refined final product. It represents the last chance to catch any issues that may have been missed during the mixing process and ensure that your music is sonically balanced across all frequencies and sounds great on any playback system.

Setting Your Music Apart From The Competition

In today’s music landscape, technology has made it easier than ever for anyone with a computer and an internet connection to create and distribute music. As a result, there is more competition than ever, and standing out from the crowd requires attention to detail. Mastering helps to give your music a sonic edge and ensures that it sounds as professional as possible. By investing in a great mix and master, producers can lift their music above the sea of other releases vying for listeners’ attention.

Music production is a nuanced craft, and mastering is an integral part of the process. By investing in a professional mastering engineer, producers can achieve a polished, finished product that stands out in a crowded marketplace. Whether you are putting together a demo, releasing music independently, or working on a commercial project, the importance of mastering cannot be overstated.

Preparing Your Mix


To achieve the best mix, every producer needs to understand the fundamentals of mastering. Properly preparing your mix is essential to creating a great final product. This includes ensuring balanced levels, using EQ and compression appropriately, and considering the overall sonic quality of the mix.

Preparing Your Mix Preparing your mix is important to ensure your music sounds good on all types of devices. The key to a clean and professional mix is to start with high-quality sounds and properly prepare your mix with the basic fundamentals. In this section, we will discuss the essential fundamentals that each producer should know when preparing their mix. Ensuring proper gain staging Gain staging is the process of properly adjusting the levels of your audio signals to prevent distortion and clipping. Every plugin affects the levels of your mix, so it’s important to set the input and output levels of each plugin to prevent any unintended distortion and clipping. Aim for a peak level of around -6db to -3db for each track to prevent any distortion. Cleaning up your mix with EQ Equalization (EQ) is a vital tool that allows you to balance the frequency spectrum of your mix. Use an EQ to adjust the levels of each track’s frequency range. Cut out any unwanted frequencies using a high pass or low pass filter. Boost or cut frequencies that clash with other elements in your mix. Always keep your EQ adjustments subtle to avoid creating any drastic changes in the sound. Adding compression for energy and cohesion Compression is a useful tool that adds energy and cohesion to your mix. Use compression to limit the dynamic range of your track and even out the levels. Add compression to drums, bass, vocals, and any other track that needs to be tamed. Use a light-touch approach to avoid over-compressing, which can result in a flat, lifeless mix. Using reverb and delay for depth and dimension Reverb and delay are effects that can add depth and dimension to your mix. Use reverb to create a sense of space and to place each element in your mix into a sonic space. Delays can help add rhythm and energy to your track. Use them to create a sense of movement and to add excitement to your mix. Don’t overuse reverb and delay effects to avoid muddying the mix. Achieving a balanced stereo image A balanced stereo image is essential for creating a professional-sounding mix. Aim for a wide, but balanced stereo image by panning each element appropriately. Use stereo widening effects sparingly and check your mix in mono to ensure that it sounds good on all devices. Balancing each element of your mix in the stereo field is crucial in creating a clean and professional mix. In conclusion, preparing your mix is essential in creating a professional-sounding track. Ensuring proper gain staging, cleaning up your mix with EQ, adding compression and reverb, and achieving a balanced stereo image are the fundamental techniques that producers should master to create a masterful mix.


Mastering Tools And Techniques


Mastering the tools and techniques of production is fundamental knowledge that every producer should have. It involves skills like gain staging, equalization, compression, and limiting, which are vital for creating high-quality audio. By mastering these skills, you can produce music that sounds clear, balanced and cohesive.

Maximizing Loudness Without Sacrificing Dynamics

To get your track as loud as possible while still maintaining its dynamics, use a combination of compression and limiting. Compression helps even out the dynamics of a track, and limiting ensures that the loudest parts don’t clip. But be careful not to overdo it: too much compression and limiting can lead to a squashed, lifeless sound.

Mastering For Different Listening Environments

Different playback systems and environments affect how music is perceived, so it’s important to master your tracks with different listening environments in mind. A balanced and well-controlled low end is crucial for subwoofers and club systems, while a sparkling high end is important for headphones and small speakers. Referencing your mix on different systems and in different rooms is key to ensuring it translates well across different environments.

Using Limiting And Clipping To Control Peaks

Limiting to control peaks and clipping to add a touch of distortion can be useful tools in mastering. But again, don’t go overboard: too much limiting or clipping can cause distortion and make your track sound harsh or lifeless.

Applying Dither To Reduce Bit Depth For Distribution

When exporting your mix from a higher bit depth to a lower one, such as from 24-bit to 16-bit for distribution, dither is required to ensure a smooth transition and prevent quantization distortion. Dither adds low-level noise that masks the distortion, resulting in a cleaner, more accurate sound.

Dealing With Common Mastering Mistakes

Common mistakes in mastering include over-compression, over-limiting, not referencing on different systems, and not leaving enough headroom. To avoid these mistakes, take breaks frequently to ensure you are not fatigued, keep A/B-ing your mix with other commercial releases, and always aim for a balanced rather than just loud track. Taking time and implementing these techniques will make your music sound better on any playback system.

Working With A Mastering Engineer


Working with a mastering engineer is a crucial step in the production process. It’s important for every producer to understand the fundamentals of mastering, which involves balancing the mix, enhancing the overall sound quality, and preparing the final product for distribution.


A skilled mastering engineer can help bring out the best in your music and ensure it sounds its best on any platform or device.

When it comes to releasing high-quality music, mastering is an essential step in the production process. Working with a professional mastering engineer can help bring out the best in your mixes and take them to the next level. In this article, we’ll go over the fundamentals of mastering, including how to choose the right mastering engineer for your project, how to effectively communicate your artistic vision, and how to provide the engineer with high-quality mixes.

Choosing The Right Engineer For Your Project

Choosing the right mastering engineer for your project can make all the difference in the quality of the final product. Look for an engineer who specializes in your genre of music and has experience working with artists at your level. Ask for references and listen to examples of their previous work to ensure they have a track record of producing high-quality masters.

Communicating Your Artistic Vision To The Engineer

It’s important to effectively communicate your artistic vision to the mastering engineer so that they fully understand your goals for the final product. Provide them with detailed notes on the sound and feel you’re going for, as well as specific examples of other songs or artists that inspire you. The engineer can use this information to make the necessary adjustments during mastering.

Providing High-quality Mixes For Mastering

The quality of the mixes you provide to the mastering engineer will directly impact the quality of the final product. Deliver uncompressed, high-resolution audio files to the engineer to ensure the best sound quality. Be sure to check for any clipping, distortion, or other issues before submitting the files for mastering.

Making Revisions And Feedback Loops

After receiving the mastered tracks from the engineer, it’s important to carefully review them and make notes for any necessary revisions. Provide this feedback to the engineer and work together in a feedback loop to ensure that the final product meets your expectations.

Understanding The Role Of The Mastering Engineer In The Industry

The role of the mastering engineer in the music industry is to ensure that the final product sounds polished and professional. They use their expertise to adjust the levels, stereo imaging, and other factors to create a cohesive and well-balanced final product. By understanding the mastering engineer’s role, you can work collaboratively to achieve the desired sound for your project.

Preparing Your Tracks For Release


As a producer, it’s crucial to understand the fundamentals of mastering in order to adequately prepare tracks for release. Everything from EQ and compression to stereo imaging and limiting must be carefully considered and executed in order to produce a final product that is polished and ready for distribution.

Choosing The Right Release Formats And Platforms

Choosing the right release format and platform is essential in making your music accessible to your audience. Different release formats such as MP3, WAV, and FLAC can affect the sound quality of your tracks. You must choose a format that suits the genre and quality of your music. Also, consider the target audience and the platform they prefer. For example, if your fanbase is on SoundCloud, you may want to release your tracks there.

Encoding Your Files With Proper Metadata

Metadata is crucial in organizing your music library and making your tracks searchable online. It includes information such as track title, artist name, album name, release date, and genre. Encoding your files with proper metadata ensures that your tracks are easily discoverable by search engines and online music stores. Moreover, it helps to prevent any copyright issues.

Creating Compelling Artwork And Packaging

Visuals play a significant role in attracting potential listeners and expressing your music’s personality. Creating compelling artwork and packaging can make your release stand out from others. Ensure that your artwork aligns with your music and captures the attention of your audience. A well-designed cover art can elevate your release and attract more listeners.

Creating A Release Strategy For Maximum Impact

Planning a release strategy is crucial in making the most out of your music. A release strategy involves setting a release date, timing your promotion, and creating anticipation. You should also consider different channels for promotion, such as social media, blogs, and playlists. A well-planned release strategy can increase your exposure and maximize the impact of your music. In conclusion, preparing your tracks for release involves choosing the right format and platform, encoding your files with proper metadata, creating compelling artwork and packaging, and planning a release strategy for maximum impact. By following these fundamentals, you can increase the reach and impact of your music.

The Fundamentals Of Mastering What Every Producer Should Know


Credit: www.masteringthemix.com


The Fundamentals Of Mastering What Every Producer Should Know


Credit: www.masteringthemix.com


Frequently Asked Questions On The Fundamentals Of Mastering What Every Producer Should Know


What Are The Basics Of Mastering?


Mastering is an essential process done to ensure that a recording is ready for duplication and distribution. It involves enhancing and polishing a recording’s final mix by adjusting its levels, equalization, compression and more. Mastering also involves checking the sound quality, adding song metadata, and creating the final output format for distribution.


What Are The Basic Steps Of Mastering?


The basic steps of mastering include identifying the goals and objectives, creating a plan, practicing consistently, seeking feedback and adjusting accordingly, and finally, mastering the skills through repetition and refinement.


What Is The Industry Standard For Mastering?


The industry standard for mastering refers to the process of preparing and transferring recorded audio from the source to a master recording. This process involves enhancing the audio quality, adjusting levels, adding equalization and compression, and ensuring a consistent sound throughout the final product.


Mastering is an essential step in producing high-quality recordings for commercial release.


What Is The Perfect Mastering Level?


The perfect mastering level is subjective and depends on the music itself and the desired outcome. However, a common target for mastering is to achieve a loudness level similar to other commercially released tracks while maintaining a good balance of dynamics and EQ.


The level should not be so loud that it causes distortion or loss of quality.


Conclusion


Producing music is a complex art form that requires a deep understanding of the craft, strong technical skills, and the ability to work well under pressure. Whether you’re a seasoned producer or just starting out, mastering the fundamentals is key to producing top-quality tracks.


From understanding different sound engineering techniques to honing your composition skills, taking the time to perfect your craft will help you stand out in the industry. Keep in mind that it takes time and dedication to master this art form, but with practice and perseverance, you can achieve great things as a music producer.


So go ahead, hone your skills, and let the music speak for itself!

Categories
Archive

Transform Your Bedroom Into A Professional Recording Studio

Transforming a bedroom into a professional recording studio requires careful planning and investment in quality equipment. With the right tools and techniques, it is possible to achieve professional-grade sound in a home setting.


Creating a professional-grade recording studio in a bedroom space comes with many challenges. However, it is achievable by utilizing the right equipment and techniques. With proper planning, one can create a comfortable and acoustically treated space that enhances the recording quality.


As much as the required equipment like microphones, headphones, and audio interfaces can be relatively expensive, they are necessary to capture high-quality audio. This article provides some tips and steps to help you transform your bedroom into a professional recording studio.


Choosing The Right Room

Your bedroom can be your sanctuary, but it can also be transformed into a professional recording studio. Before you start recording, make sure to choose the right room. This is crucial to the quality of your recordings, as sound quality is heavily influenced by the environment in which it is recorded. Here’s how identifying the ideal room and accommodating studio equipment can make all the difference in producing high-quality audio.

Identifying The Ideal Room

The ideal room for a recording studio should have a rectangular shape, be free of clutter, and have non-parallel walls. The reason behind this is that sound waves bounce off surfaces, and non-parallel walls prevent sound from bouncing back and creating echoes or a “boxy” sound.

You should also consider the size of your room. Larger rooms generally produce better acoustics and offer more space for your studio equipment. Additionally, the ideal room is away from sources of ambient noise, such as railways or busy streets, that can interfere with sound quality.

Accommodating Studio Equipment

When choosing a room, consider how you will accommodate your studio equipment. If you have a lot of gear, a larger room is better. Additionally, you should consider how soundproof your room is. You do not want sound escaping from your recording studio and interfering with other household members or neighbors.

One solution to this issue is to use acoustic panels. These panels are designed to absorb sound and create a more controlled audio environment. You can also use a mobile vocal booth, which is a portable sound-absorbing enclosure that offers you the flexibility to quickly move and set up your recording studio anywhere in your home.

Choosing the right room is the foundation for producing high-quality audio in your recording studio. An ideal room will reduce the need for post-production manipulation, increase the clarity of your recordings and help you achieve the sound you’re aiming for.

Accommodating for your studio equipment ensures that you achieve the best sound quality possible and that your recordings will be free of any unwanted noise that can detract from the overall quality of your recordings. With the right room, you can start recording with ease and create professional-grade audio from the comfort of your own home.

Soundproofing Your Room


Transform your bedroom into a professional recording studio by soundproofing it using thick curtains, acoustic panels, and carpets. This will help to minimize outside noise interference and give you a quieter environment for recording crisp and clean audio.

Soundproofing your room is an essential step towards creating a professional recording studio in your bedroom. It is an effective way to reduce the noise level and create a space that is insulated from external noise. Soundproofing also helps to trap sound waves within the room, prevents echoes, and produces a crisp and clear sound. Let’s explore some key aspects of soundproofing your bedroom for recording purposes:

Understanding Soundproofing

Understanding the concepts of soundproofing is necessary for a successful recording studio. Soundproofing isn’t just about sticking acoustic foam on the walls. It’s a complex process that requires the use of different techniques and materials to absorb sound and prevent it from escaping. Proper soundproofing involves analyzing sources of noise, identifying its effects, and addressing it accordingly.

Dealing with Sound Leaks

Dealing with sound leaks is crucial to creating a soundproof recording studio. Sound can leak through any gap, no matter how small, so it’s essential to locate and seal them all. Start by checking doors, windows, crevices, and gaps around pipes, cables, and vents. Seal these leaks with soundproofing materials such as acoustic sealants or weather stripping to prevent sound from leaking out or coming in.

Affordable Soundproofing Solutions

Soundproofing your bedroom doesn’t have to be expensive. There are several affordable solutions that can help dampen noise and improve sound quality. Some of the most cost-effective soundproofing materials include acoustic blankets, curtains, and foam panels. These materials absorb sound and prevent echoes from forming. Additionally, rearranging furniture and adding bookshelves or heavy curtains can significantly reduce noise levels. In conclusion, soundproofing is essential for creating a professional recording studio in your bedroom. Understanding soundproofing concepts, addressing sound leaks, and using affordable soundproofing materials are all key elements of successfully soundproofing your room. Use these tips to transform your bedroom into a high-quality recording studio.


Essential Studio Equipment


Equip your bedroom with essential studio equipment to transform it into a professional recording studio. Invest in a good quality microphone, headphones, audio interface, and acoustic treatment to achieve excellent sound quality.

So, you’ve decided to take your music career to the next level by turning your bedroom into a professional recording studio! Before you start recording, you need to ensure that you have all the essential studio equipment to produce high-quality recordings. From microphones to digital audio workstations, the following sections highlight the must-have equipment for your home studio.

Microphones And Pop Filters

The microphone is the most important piece of equipment in your home studio, as it captures the sound you want to record. A good quality microphone helps to ensure clear and accurate audio recordings. However, without a pop filter, even the most expensive microphone can produce low-quality recordings. A pop filter helps to reduce popping sounds caused by words that start with “p,” “b,” and “t.” Invest in high-quality microphones and pop filters to ensure the best possible recording quality.

Headphones And Studio Monitors

Headphones and Studio Monitors are essential studio equipment for home recording. Headphones help to isolate the sound in your ears, allowing you to hear every detail of the recording. Studio monitors are designed to produce high-quality sound, allowing you to hear every detail in the recorded track. Investing in a good quality pair of headphones and studio monitors will ensure high-quality recordings.

Audio Interfaces And Cables

Audio Interfaces allow you to connect your microphone, headphones, and studio monitors to your computer. They convert analog signals from your microphone into digital signals that can be recorded on your computer. Good quality audio interfaces reduce latency, ensuring that the recording is in sync with the music. Quality cables are also essential as they transmit audio signals from the microphone to the interface.

Computers And Digital Audio Workstations

The computer is the heart of your home recording studio, and it’s essential to have one that is fast and reliable. It should have a fast processor, enough RAM, and sufficient storage to store your recordings and projects. Digital audio workstations (DAWs) are software applications used for recording, editing, and mixing music on a computer. Invest in a high-quality computer and DAW to ensure that you can produce high-quality recordings with ease. Transforming your bedroom into a professional recording studio requires some essential equipment, and now that you know what to look for, you can now start to create high-quality recordings.

Transform Your Bedroom Into A Professional Recording Studio


Credit: www.extraspace.com


Setting Up Recording And Mixing Spaces


Transform your bedroom into a professional recording studio by setting up a recording and mixing space. Choose a quiet corner and invest in acoustic treatment, quality headphones, and speakers. Positioning your gear correctly and optimizing your room’s layout can make a big difference in the quality of your recordings.

Transforming your bedroom into a professional recording studio requires proper planning and organization. One of the essential aspects to consider is setting up recording and mixing spaces. Creating separate spaces for recording and mixing is crucial for achieving high-quality audio results. In this section, we will explore how to design the recording space, and how to position the mixing desk and speakers for optimal audio output.

Designing The Recording Space

The recording space must be designed with audio quality in mind. It should be acoustically treated to minimize reflections and external noise interference. To achieve this, you must consider the following factors when designing the recording space:

  • Create a space that is relatively small and enclosed.
  • Ensure that the walls and ceiling are covered with acoustic materials such as foam panels or fibreglass.
  • Add bass traps to reduce low-frequency sound waves.
  • Carpet the floors to absorb sound and reduce reflection.
  • Avoid windows in the recording space as they tend to let in external noise.

Positioning The Mixing Desk And Speakers

The placement of the mixing desk and speakers is critical for achieving optimal audio output. The mixing desk should be positioned centrally in the mixing space, and the speakers should be strategically placed for a balanced frequency response. Here are some tips on how to position the mixing desk and speakers:

  • Position the mixing desk and speakers away from walls to minimize reflections.
  • Place the speakers at ear level and angled towards the mixing position.
  • Ensure that the speakers and mixing desk are equidistant from the back and side walls.
  • Use speaker isolation pads to reduce vibrations and improve audio clarity.
  • Take time to fine-tune the speaker placement to ensure the best audio balance.

In conclusion, setting up recording and mixing spaces is an essential aspect of creating a professional recording studio. Designing the recording space to be acoustically treated and positioning the mixing desk and speakers for optimal performance will ensure high-quality audio output. With proper planning and execution, you can transform your bedroom into a fully functional recording studio.

Sound Treatment And Acoustics

Are you a musician or podcaster who wants to record high-quality audio but don’t have access to a professional recording studio? Worry not! With the right tools and techniques, you can transform your bedroom into a professional recording studio. One of the most important factors to consider is sound treatment and acoustics. In this post, we’ll explore the importance of acoustics and how to treat your room’s acoustics with absorption and diffusion techniques.

The Importance Of Acoustics

Before you start transforming your bedroom into a recording studio, it’s essential to understand the importance of acoustics. Acoustics refer to the way sound waves behave in a room. A well-acousticated room can make your recordings sound professional while a poorly acousticated room can make them sound muffled and echoey.

Treating Your Room’s Acoustics With Absorption And Diffusion

One of the most effective ways to treat your room’s acoustics is by adding absorption and diffusion materials. Absorption materials soak up sound waves and prevent them from bouncing around the room. Diffusion materials scatter sound waves and prevent them from reflecting off surfaces. Together, these materials can create a balanced and clear sound in your recordings.

When it comes to absorption materials, consider adding curtains, carpets, and soundproof foam panels to your room. These materials can absorb unwanted echoes and reverberations and provide a more controlled sound environment.

For diffusion materials, consider adding bookshelves, diffuser panels, and plants to your room. These materials can scatter sound waves and create a more natural and spacious sound environment.

In Conclusion

Transforming your bedroom into a professional recording studio is not an impossible task. With the right tools and techniques, you can achieve high-quality recordings in the comfort of your own home. When it comes to sound treatment and acoustics, remember to prioritize absorption and diffusion materials to create a balanced and clear sound in your recordings.

DO DON’T
Use absorption and diffusion materials to create a balanced sound environment. Use low-quality equipment that can reduce the quality of your recordings.
Understand the importance of acoustics and how they impact your recordings. Ignore the acoustics of your room and hope for good recordings.
Invest in quality headphones to monitor your recordings. Assume that your recordings will sound good without monitoring them.
Transform Your Bedroom Into A Professional Recording Studio


Credit: sound-zero.com


Music Production Tips For Beginners

Transforming your bedroom into a professional recording studio for music production can be an overwhelming task, especially for beginners. However, with the right mindset, equipment, and techniques, you can achieve great results and unleash your creativity. In this article, we’ll provide you with music production tips for beginners that will help you produce quality music from your bedroom studio.

Working With Plugins And Effects

Plugins and effects are essential tools for music production. They help produce different sounds and effects necessary for a quality production. Plugins are software programs that operate within a DAW (Digital Audio Workstation) and enable producers to create, mix and manipulate sound. Some important plugins that every music producer should have in their arsenal include:

  • EQ (Equalizer) plugin
  • Compression plugin
  • Reverb plugin
  • Delay plugin
  • Chorus plugin

These plugins can be used to achieve different sound effects and tones. However, it’s important to note that overusing plugins can lead to a noisy and cluttered mix that may negatively affect the final output. Therefore, use plugins and effects as needed and ensure they are of high quality for optimal sound output.

Building A Mixing Template

Building a mixing template is a crucial step towards effective music production. A mixing template is a pre-configured setup that enables a producer to quickly start mixing without wasting much time doing every configuration from scratch. To build a mixing template:

  1. Start by selecting your preferred DAW
  2. Create a new project
  3. Add commonly used mixing effects to your template
  4. Save your mixing template for future use

Building a mixing template can significantly improve your workflow and save time, especially when working on multiple projects.

Mixing And Mastering Basics

Mixing and mastering are essential processes in music production that help improve the clarity, balance and impact of your mix. Mixing involves combining different tracks to create a cohesive sound, while mastering involves preparing the final mix for distribution. Some basic mixing and mastering tips for beginners include:

  • Start by correctly leveling your tracks
  • Use EQ and compression plugins to achieve balance and clarity
  • Ensure your mix isn’t too loud and has enough headroom
  • Apply reverb and other special effects sparingly
  • Use reference tracks to compare your mix with professional-sounding mixes

Finally, it’s important to note that the quality of your mix is only as good as the quality of your recording equipment. Therefore, invest in quality recording equipment for optimal results.

Creative Ideas For Bedroom Studio Enhancements


Transform your bedroom into a professional recording studio with these creative ideas. Upgrade your acoustic treatments by adding soundproof curtains or DIY acoustic panels. Use adjustable LED lights to set the right mood, and invest in quality audio equipment for your music production.

Creative Ideas for Bedroom Studio Enhancements There’s nothing quite like the convenience of having a recording studio right inside your bedroom. But setting up a professional-grade studio requires careful planning, acquiring the right equipment, and creating the right environment. Besides considering factors such as good acoustics, proper lighting, and excellent ventilation, there are additional studio enhancements you can consider that will help transform your bedroom into a recording studio. Decorative Soundproofing Soundproofing is a crucial aspect of creating a professional recording studio. It helps in preventing outside noise from interfering and ensures that your music doesn’t disturb your neighbors. But who said soundproofing can’t look great? Decorative soundproofing is an innovative solution that enhances the aesthetic appeal of your space while still providing adequate sound insulation. You can add curtains or drapes, acoustic panels, or even use DIY soundproofing items like bookshelves, carpets, and rugs to add a stylish touch to your studio. Additional Studio Furniture and Accessories To get the most out of your bedroom studio, you’ll need the right furniture and accessories. Investing in a comfortable chair or a couch to lounge on during breaks can make all the difference when recording for extended periods. A desk or table large enough to hold all your equipment, a computer, and other essentials will help you stay organized and make workflow more manageable. You can also consider adding decorative elements like paintings or posters to create a unique and inspiring space. Incorporating Plants and Greenery Did you know that adding a little greenery can improve the air quality in your recording studio? Incorporating plants and flowers is a simple and affordable way to reduce background noise and bring life to your room. Consider placing potted plants on shelves, window sills, or adding hanging plants from the ceiling. Not only will they look great and make your space feel more alive, but they’ll also improve your mood and reduce stress levels. In summary, when you’re designing a recording studio in your bedroom, don’t just focus on the technical aspects of soundproofing and equipment. Creative ideas like decorative soundproofing, additional furniture and accessories, and incorporating plants and greenery can take your space to the next level. Consider incorporating these innovative enhancements into your bedroom studio setup to create an inspiring, comfortable, and professional space.

Taking The Next Steps: Networking And Promotion


Transform your bedroom into a professional recording studio with these networking and promotion tips. Connect with local musicians and industry professionals, promote your work on social media and online platforms, and invest in quality equipment to elevate your sound.

Now that you have transformed your bedroom into a professional recording studio, it’s time to take it to the next level. If you want to make a career in the music industry, networking and promotion are crucial steps that can take you closer to your goals. In this section, we will discuss two strategies that you can use to promote your recording studio and gain exposure in the local music scene.

Connecting With Local Musicians And Producers

One of the best ways to get your name out there is by connecting with local musicians and producers. Attend local gigs, open mic nights or music festivals, and introduce yourself to the artists and producers. You can also use online platforms such as Craigslist, Meetup, and Facebook groups to connect with other musicians and producers in your area. Collaborating with local artists can help you expand your network, build your portfolio, and potentially lead to paid gigs in the future.

Leveraging Social Media For Promotion

Social media is a powerful tool for promoting your recording studio. Create business profiles on various social media platforms such as Facebook, Instagram, and Twitter. Share photos of your studio, equipment, and clients’ work. Offer discounts and promotions for new clients and post testimonials from satisfied customers. Engage with your followers by responding to comments and direct messages promptly. You can also collaborate with influencers or bloggers in the music industry to feature your studio on their platforms, which can help increase your visibility and credibility. In conclusion, taking the next steps to promote your recording studio requires effort, consistency, and patience. By connecting with local musicians and producers and leveraging social media, you can increase your exposure and potentially land more paid gigs. Remember, promoting your recording studio is an ongoing process, so be sure to keep networking and promoting your brand to reach your full potential in the music industry.


Frequently Asked Questions Of Transform Your Bedroom Into A Professional Recording Studio


How To Turn A Bedroom Into A Recording Studio?


To turn a bedroom into a recording studio, follow these steps: 1. Choose the right room with good acoustics and soundproofing. 2. Remove any unnecessary items and arrange furniture for optimal sound. 3. Add acoustic treatment like sound-absorbing panels and bass traps.


4. Invest in quality recording equipment like microphones and a mixing board. 5. Set up a computer with recording software for editing and post-production.


How Do I Make My Room Good For Audio Recording?


To make your room ideal for audio recording, you should consider soundproofing, using acoustic treatment, minimizing background noise, positioning yourself and the microphone correctly, and using appropriate equipment. Proper placement of furniture, rugs, and curtains can also help to improve sound quality.


Can You Record Music In Your Bedroom?


Yes, you can record music in your bedroom. Many popular artists have started their careers this way, and with today’s technology, it’s easier than ever. Of course, the quality of your recordings may vary depending on your equipment and environment, but it’s definitely possible to create professional-sounding music from your bedroom.


How Do I Set Up A Studio In My Bedroom?


To set up a studio in your bedroom, follow these steps: 1. Choose a room with enough space for your equipment. 2. Consider soundproofing measures to improve the quality of your recordings. 3. Select lighting that best suits your needs; artificial or natural light depending on your preference.


4. Purchase the necessary equipment depending on the type of studio you want to set up. 5. Finalize the space and arrange everything appropriately.


Conclusion


With just a few adjustments and the right tools, it’s possible to turn your bedroom into a professional recording studio. From soundproofing to equipment selection, these simple steps can make a significant difference in your recordings. Whether you’re a musician, podcaster, or voice-over artist, the benefits of having a quality recording space are undeniable.


With the tips provided in this post, you can create a comfortable and professional environment that will help you take your craft to the next level.

Categories
Archive

Too Good To Be True The Truth About Free Mixing And Mastering

Free mixing and mastering offers are usually too good to be true. Most of them are scams that can harm your music career.


These services are often carried out by inexperienced engineers who may cause more harm than good. As an upcoming music artist, you may not have the budget to hire a professional audio engineer to mix and master your music. It’s in such situations that “free” mixing and mastering services may seem like a great deal.


However, like most things in life, if something seems too good to be true, it probably is. In most cases, these offers are fraudulent, with inexperienced individuals offering their mixing and mastering services at no cost. We’ll take a look at the truth behind free mixing and mastering services and explore why they could harm your music career rather than further it.


Myth Of Free Mixing And Mastering

Many musicians looking to save money and stay within budget often opt for free mixing and mastering services. While this may seem like a great deal, the reality is much different. In this article, we’ll explore the truth behind free mixing and why it’s often too good to be true.

Understanding The Concept

To understand why free mixing and mastering is a myth, it’s important to first understand the concept of mixing and mastering. Mixing is the process of blending individual tracks together to create a cohesive sound. Mastering is the final step in the production process, where the finished mix is polished and prepared for distribution.

While it may seem like an easy process, mixing and mastering requires knowledge, experience, and a set of specialized tools. It’s not just about adjusting levels and adding effects, but also about understanding the nuances of each track and how they fit together to create the final product.

Why It’s Too Good To Be True

Free mixing and mastering services may seem like a great way to save money, but the reality is that these services often come with a catch. Many free mixing and mastering services are offered by inexperienced engineers who are looking to build their portfolios. They may lack the knowledge and expertise needed to produce a high-quality mix, which can ultimately harm your music.

Additionally, free mixing and mastering services may use low-quality equipment and plugins, resulting in a mix that sounds muddy, distorted, or unbalanced. These issues can be difficult, if not impossible, to fix, costing you time and money in the long run.

How To Ensure Quality

If you want to ensure that your music is produced to the highest quality standards, it’s important to invest in a professional mixing and mastering service. While it may cost more upfront, a professional engineer will have the experience, knowledge, and equipment needed to produce a mix that sounds great on any platform.

When researching mixing and mastering services, be sure to ask for examples of their previous work and read reviews from other musicians. This will give you a better idea of their experience and ability to produce a high-quality mix.

Ultimately, while free mixing and mastering services may seem like a great deal, the reality is that they often come with hidden costs that can harm the quality of your music. By investing in a professional service, you can ensure that your music is produced to the highest standards and sounds great to your audience.

Exploring The Pitfalls

Free mixing and mastering services can be appealing to anyone looking to save money on their music projects. However, there are several pitfalls to be aware of when taking advantage of these offers. In this article, we will explore these pitfalls, including why exactly free services come at a cost, the questionable quality and expertise offered by some providers, and the hidden terms and conditions that could end up costing you more than you anticipated.

Why Free Comes At A Cost

It’s tempting to take advantage of free mixing and mastering services, especially when you’re on a tight budget. However, it’s important to understand that nothing in life is truly free. Providers offering free services operate with a business model that ultimately aims to make a profit. Typically, they will offer free services as a way to attract customers, who they will then try to upsell paid services to then saying it was not included in the free plan. What’s more, you could experience long waits for your project to be completed, low-quality outputs, and subpar customer service. In the end, the true cost of free services can be time-consuming and detrimental to your overall music project.

Questionable Quality And Expertise

When it comes to mixing and mastering music, experience and expertise are crucial. Unfortunately, some providers offering free mixing and mastering services may lack the necessary knowledge, skills, and tools required to provide quality outputs. It’s important to consider that professional mixing and mastering requires the use of high-quality equipment and software, which can be expensive to maintain. Free service providers may not have access to these resources, and therefore, their outputs could suffer from poor quality.

Hidden Terms And Conditions

Finally, it’s essential to read the fine print when it comes to free mixing and mastering services. Some providers may have hidden terms and conditions that could end up costing you more than you anticipated. For example, a provider may offer free services, but only for a limited time or on a limited number of tracks. They may also add additional fees for certain services that were not disclosed upfront, such as revisions or file-format conversions. By taking the time to read all terms and conditions before signing up, you can avoid any nasty surprises and ensure you’re getting the best deal possible for your music project.

The Real Cost Of Mixing And Mastering


Free mixing and mastering may sound tempting, but the reality is that it could cost you more in the long run. From poor quality sound to damage control, there are multiple reasons why investing in professional mixing and mastering services is worth the price.

When it comes to music production, mixing and mastering are two essential processes that give the final product its polished and professional sound. One common misconception among budding artists is that free mixing and mastering services are all they need to take their music career to new heights. However, the truth is that these free services can cost you more money in the long run.

Investing In Your Craft

Investing in your craft should be a top priority for any serious musician. Just as you wouldn’t expect a mechanic to fix your car for free, you shouldn’t expect a sound engineer to mix and master your music for free. Any professional service should be compensated accordingly.

Understanding Rates And Charges

Mixing and mastering rates vary depending on the professional’s level of experience and the complexity of the tracks. Be sure to research several service providers and compare their rates and experience levels. Understand what services are included and what constitutes additional fees before agreeing to any work.

Reaping The Benefits Of Quality Work

By investing in professional mixing and mastering, you are ensuring that your music is brought to its fullest potential. A professionally mixed and mastered track will stand out and garner more attention than a poorly mixed track– drawing in more fans and ultimately resulting in more money and opportunities. In conclusion, free mixing and mastering services may seem like a good way to save a few bucks, but they can end up costing you more in the long run. By investing in your craft and understanding the real costs of mixing and mastering, you can ensure that your music gets the attention it deserves.


How To Choose The Right Mixing And Mastering Services

The quality of a song largely depends on the mixing and mastering services. While some artists prefer to do it themselves, others opt to get professionals. However, with so many options available, it can be overwhelming to select the best mixing and mastering services. Many services offer free mixing and mastering, which seems too good to be true. This blog will discuss how to choose the right mixing and mastering services.

Identifying Expertise And Experience

When selecting the right mixing and mastering service, expertise and experience are the key factors to consider. You want to be sure that the individual or company you choose has a vast knowledge and experience in the field. Ensure that they have a proven track record of success with different genres of songs. The mixing and mastering service should have a team of professionals that will deliver high-quality work.

Requesting Samples And References

It is essential to request samples of previous work done by the mixing and mastering service. By scrutinizing their previous work, you will have an idea of the quality of work they can deliver. You can also request references from previous clients to get honest and valuable feedback about the services provided by the company. Honest feedback from previous clients is crucial in making an informed decision.

Understanding The Process

Understanding the mixing and mastering process is necessary for an artist. Familiarizing yourself with the process will enable you to make informed decisions during the mixing and mastering stage. Ensure that the mixing and mastering service you choose takes you through the process to understand each step. Confirm that the service provider outlines the entire process, including the revisions, timelines, and costs.

Choosing the right mixing and mastering service can be a daunting task, but with the right information, it is manageable. Ensure that the individual or company meets your expectations and needs. Follow the steps outlined above to make an informed decision.

Making The Most Of Your Mixing And Mastering Experience


Maximize your mixing and mastering experience by avoiding the allure of free services. While it may seem too good to be true, the truth is that low-quality results can harm your music career in the long run. Invest in professional assistance to achieve the desired outcome.

If you’ve decided to utilize free mixing and mastering services, it’s important to understand how to make the most of the experience. Collaborating with your mixer is crucial, as is providing feedback and direction throughout the process. Ultimately, your goal is to maximize the final product to ensure you’re receiving a polished and professional end result. In this post, we’ll explore the best ways to collaborate with your mixer, how to provide effective feedback, and tips for maximizing the final product.

Collaborating With Your Mixer

Collaborating with your mixer is a vital part of the mixing and mastering process. It’s important to establish clear communication from the beginning of the project and to provide your mixer with as much information as possible. This can include details about the mood and style of your music, any specific sounds or instruments you want included, and any particular effects or edits you need. Another way to collaborate effectively is to ask for updates and check-ins throughout the process. This can help keep you informed about how your song is progressing and ensure that you’re satisfied with the direction the mixer is taking. Remember, the mixer is there to help you achieve your vision, so don’t be afraid to voice your opinions and provide feedback.

Providing Feedback And Direction

Providing effective feedback is crucial to ensuring that your final product meets your expectations. One of the best ways to do this is to be specific about what you like and what you don’t like. This can include details about the volume levels, changes you want made to particular instruments or sounds, or adjustments to the overall tone or mood of the music. It’s also important to be clear and concise in your feedback. This can help ensure that the mixer understands your point of view and can make the necessary changes to achieve your desired sound. Finally, be open to suggestions from your mixer. They have experience and expertise in their field and may have suggestions for improvements that you hadn’t considered.

Maximizing The Final Product

Maximizing the final product is all about ensuring that your song is polished and professional sounding. Once your mixer has delivered the final version of the song, take the time to listen to it on a range of different devices. This can include headphones, speakers, and car audio systems. This will help you identify any areas that still need tweaking. In addition, consider having an experienced friend or fellow musician listen to the song and provide feedback. This can help you identify any areas for improvement that you may have missed. Ultimately, making the most of your mixing and mastering experience comes down to effective collaboration, clear communication, and a commitment to achieving the best possible final product.

Too Good To Be True The Truth About Free Mixing And Mastering


Credit: www.amazon.com


The Future Of Mixing And Mastering

Mixing and mastering are crucial components of music production. They give music that professional touch that makes it a delight to listen to. Over the years, technology has evolved, and so has the music industry. In this post, we’ll examine the future of mixing and mastering, advancements in technology, changing industry standards, and the importance of investing in your music.

Advancements In Technology

In the past, mixing and mastering used to be done in a studio using analog gear. Today, there are many digital tools that make the process easier and more efficient. Some of these digital tools include digital audio workstations, plugins, and mastering software. In addition, cloud-based music production collaboration tools allow producers and engineers from all over the world to work on a project simultaneously.

Changing Industry Standards

The music industry is constantly evolving, and this means industry standards are also changing. For instance, music streaming platforms have emerged, and they have different requirements for masters. Producers and engineers must stay up-to-date with these changes to ensure that the music they produce meets the industry standards for each new platform.

The Importance Of Investing In Your Music

Investing in your music means investing in yourself. It means taking your music career seriously and ensuring that your music stands out from the competition. By investing in the latest mixing and mastering technologies, you can create music that is world-class and ready for the music industry.

In Summary

The future of mixing and mastering looks bright, with advancements in technology and changing industry standards. However, to achieve professional sounding music, producers and engineers must invest in the latest tools and stay up-to-date with changes in the industry.

Too Good To Be True The Truth About Free Mixing And Mastering


Credit: www.masteringthemix.com


Frequently Asked Questions Of Too Good To Be True The Truth About Free Mixing And Mastering


What Is The Truth About Mixing And Mastering?


Mixing is the process of combining different audio tracks to create a final song, while mastering is the final stage of the music production process before distribution. Mixing focuses on adjusting the different levels, panning, and equalization of each track, while mastering aims to harmonize the overall sound of the track, add volume, and improve the overall quality of the sound.


Both are important steps in creating high-quality music.


Should I Pay For Mixing And Mastering?


Yes, you should pay for mixing and mastering. It ensures the quality of your music and makes it sound polished and professional. Mixing and mastering experts have the right skills and tools to enhance the sound quality and ensure a clean mix while also removing any unwanted noise or errors.


Do You Really Need Mastering?


Mastering is an important step in the production process of any music or audio project. It ensures that the final product is consistent in volume and tonality across different playback devices. It also enhances the overall sound quality and eliminates any technical issues that might detract from the listening experience.


Thus, mastering is crucial for achieving a professional, polished, and marketable audio product.


Can Ai Mix And Master A Song?


Yes, AI can mix and master a song using advanced algorithms and machine learning technology. However, it still requires human supervision and input to achieve the desired sound and quality.


Conclusion


When it comes to free mixing and mastering services, remember the old saying: if it seems too good to be true, it probably is. While there are some legitimate offers out there, many are simply attempts to scam musicians out of their money or steal their intellectual property.


Opting for a trusted and reputable provider may require some investment, but it will be worth it in the long run. Protect your art and your investment by doing your research and choosing wisely.


Categories
Archive

How To Record And Edit A Voice Over Or Podcast To Sound Great

To record and edit a great sounding voiceover or podcast, invest in quality recording equipment and software. Use a quiet space, speak clearly and consistently, and edit out any mistakes or unwanted noise.


With a little practice and attention to detail, you can produce an exceptional sounding program that sounds professional and polished. Whether you are a seasoned podcaster or just getting started, the quality of your audio can make or break your success.


A great-sounding voiceover or podcast can draw listeners in and keep them coming back for more. Fortunately, you don’t need a ton of fancy equipment or advanced technical skills to get started. With a few essential tools and some basic techniques, you can create compelling content that sounds polished and professional. We’ll walk you through the essential steps for recording and editing a great-sounding voiceover or podcast. Let’s get started!


Choose The Right Equipment


Selecting the appropriate recording and editing equipment can make a huge difference in the quality of your voice-over or podcast. To achieve a professional sound, invest in high-quality microphones, audio interfaces, and editing software.

When it comes to recording a high-quality voice over or podcast, it is essential to choose the right equipment. In this section, we’ll discuss the key pieces of equipment that you need to ensure a great-sounding recording.

Microphones

Choosing the right microphone is crucial for recording a clear and crisp voice over or podcast. There are two main types of microphones: dynamic and condenser microphones. Dynamic microphones are excellent for recording in noisy environments as they are less sensitive than condenser microphones. On the other hand, condenser microphones are more sensitive and offer greater clarity and detail. Here are some popular microphones that you can consider for your recording needs:

Microphone Type Price Range
Blue Yeti Condenser $130-$200
Rode NT1A Condenser $230-$380
Shure SM7B Dynamic $400-$500

Pop Filters

Pop filters are essential to have when recording a voice over or podcast. They help reduce popping sounds caused by pronouncing words that start with letters such as “B,” “P,” and “T.” These sounds can be distracting and take away from the overall quality of your recording. Here are some popular pop filters that you can consider for your recording needs:

  • Stedman Proscreen XL
  • Nady MPF-6
  • Dragonpad USA Pop Filter

Headphones

Having a good pair of headphones is essential for monitoring your voice while recording a podcast or voice over. They help you hear any issues with your recording, such as background noise, and allow you to make adjustments accordingly. Here are some popular headphones that you can consider for your recording needs:

  1. Sennheiser HD280 Pro
  2. Beyerdynamic DT 770 Pro
  3. Sony MDR-7506

In conclusion, choosing the right equipment is critical to ensure a great-sounding podcast or voice over. By investing in quality microphones, pop filters, and headphones, you can achieve a professional-sounding recording that your audience will enjoy.

Prepare Your Recording Environment

Creating a great podcast or voice-over requires careful planning and preparation. A good recording environment is essential for producing high-quality audio that engages your audience and enhances your message. Here are some tips for preparing your recording environment to achieve the best possible sound quality.

Eliminate Background Noise

Background noise can make your audio sound unprofessional and distracting. To eliminate background noise, try to record in a quiet room with no or little acoustic echo or sound reflection. Avoid recording in noisy or busy rooms like next to the kitchen or the road with high traffic.

You can also use noise-canceling software during the editing process to remove any unwanted noise. However, it’s best to try and avoid background noise in the first place as much as possible.

Position Your Microphone Correctly

The position of your microphone can significantly impact the quality of your recording. Ideally, the microphone should be placed 4-8 inches away from your mouth to capture the natural sound of your voice without picking up background noise or breathing sounds. Place the microphone in front of you, instead of to the side, to get a clearer audio signal.

If you’re using a directional microphone, ensure that it is pointed towards your mouth and away from any reflective surfaces. This will help reduce any interference or echo from the surrounding environment.

Use Sound-absorbing Materials

Sound-absorbing materials like acoustic foam can help reduce any echo or noise reflection in your recording environment. You can place acoustic foam on walls, ceilings, or floors to improve the acoustics of your recording space.

You can also use other materials like carpets, rugs, and curtains to absorb sound reflection and improve your audio quality. Using sound-absorbing materials in your recording environment can also help prevent any outside noise from entering your recording space.

By preparing your recording environment, you can ensure that your podcast or voice-over sounds clear and professional. Implementing these tips can help you create high-quality audio and engage your audience with your message.

Adjust Recording Settings


Adjust recording settings is crucial when recording a voice-over or podcast to achieve great sound quality. By adjusting the input level, microphone placement, and room acoustics, you can minimize background noise and ensure that your voice sounds clear and professional.

Adjust Recording Settings: To ensure that your voice over or podcast sounds great, it’s important to adjust the recording settings properly. This includes setting the input level, choosing the right file format, and recording in a high-quality format. Let’s take a closer look at each of these settings. Set the Proper Input Level: The input level determines how loud your recording will be. If the input level is too low, your recording will be too soft and may not be audible. If the input level is too high, your recording will be distorted and may even sound like it’s clipping. The proper input level should be set so that your voice sounds clear and natural. Choose the Right File Format: The file format you choose for your recording can have a big impact on the final sound quality. MP3 is a common file format used for podcasts, but it does compress the audio and can lower the quality. If you want to retain the best possible sound quality, consider using a WAV or AIFF file format. Record in a High-Quality Format: Recording in a high-quality format is essential for producing a great sounding voice over or podcast. Aim to record your audio in at least 24-bit/48kHz or higher. This will ensure that all the nuances of your voice are captured, resulting in a clearer and more natural sounding recording. In conclusion, adjusting the recording settings is a crucial step in creating a high-quality voice over or podcast. It’s important to set the proper input level, choose the right file format, and record in a high-quality format. By following these tips, you’ll be on your way to producing a great sounding recording that your listeners will love.

How To Record And Edit A Voice Over Or Podcast To Sound Great


Credit: www.descript.com


Perform A Flawless Recording


Recording a flawless voice over or podcast involves proper preparation, quality equipment, and meticulous editing. To ensure high audio quality, reduce background noise, eliminate mouth noises, and adjust audio levels for consistent volume. With professional software, focus on editing out dead spaces, adding background music, and utilizing appropriate effects.

Perform A Flawless Recording: When it comes to recording a voice over or podcast, it’s easy to underestimate the importance of a flawless recording. However, it is one of the most essential factors that can make or break the quality of your final product. Here, we’ll look into some crucial tips that you should keep in mind when recording your voice-over or podcast to sound great.

Warm Up Your Voice

Before you start recording, ensure that you warm up your voice for at least five minutes. Vocal warm-ups will help you avoid potential voice fluctuations and other vocal issues when you start recording. To warm up your voice, you can do exercises like humming, singing, or stretches that help loosen your throat muscles.

Speak Clearly And Consistently

Speaking clearly and consistently is crucial when recording a voice-over or podcast. Maintain a consistent distance from the microphone to avoid volume fluctuations, and be mindful of your pace and tone. If necessary, you can use a script or bullet points to help you stay on track.

Avoid Common Recording Mistakes

There are several common recording mistakes that you must avoid to get a flawless recording. Some of these mistakes include:

  • Recording in a noisy environment
  • Improper use of microphone technique
  • Inconsistent recording volume
  • Improper room acoustics
  • Background hums or buzzing sound

You can avoid these mistakes by using a good quality microphone, wearing headphones, choosing a quiet place for recording, and reducing the noise in your surroundings. Additionally, you can use noise-reducing software or acoustic panels to improve the quality of your recording. In conclusion, you can perform a flawless recording if you keep these tips in mind. By warming up your voice, speaking clearly and consistently, and avoiding common recording mistakes, you can produce a high-quality voice-over or podcast that sounds great.


Edit Your Recording


Learn how to record and edit your voice over or podcast to sound great with these simple tips. Use noise reduction tools, adjust the levels, and add effects to enhance the quality of your recording. Make sure to listen to the final version before publishing to ensure a professional and polished product.

Once you have recorded your voice over or podcast, your next step is to edit it in order to produce a high-quality audio. Editing involves a series of actions such as trimming excess audio, enhancing vocals with EQ, and including music and sound effects. Editing your recording is a crucial step to ensuring a smooth-flowing podcast or voice over that your audience will enjoy.

Trim Excess Audio

When editing your recording, your first step should be to trim any excess audio. This could include sounds such as breathing, rustling of clothing, or clicks coming from the mouse or keyboard. The objective of trimming is to make your audio as concise as possible and to eliminate any distractions. It’s important to note that you don’t want to cut out too much audio, as this could give your recording a choppy feel. Instead, you should aim to maintain the natural flow of your speech while eliminating anything that doesn’t add value.

Use Eq To Enhance Vocals

Equalization (EQ) is a process of balancing the different frequencies in your recording. In order to enhance the vocals, you should tweak the EQ settings of your audio software. The EQ settings can help you improve the clarity and quality of your recording. For instance, you can boost the higher frequencies to make the vocals sound more vibrant. If your audio sounds bass-heavy, you can reduce the low frequencies to make it more balanced. Experiment with different EQ settings until you achieve the perfect sound.

Include Music And Sound Effects

Music and sound effects can add an extra layer of interest to your recordings. Including background music can help to set the mood and tone of your podcast or voice over. Similarly, sound effects can provide context and make your recording more engaging. For example, if you’re discussing a certain topic, you can include sound effects related to that topic. When choosing music and sound effects, ensure that they don’t overpower your vocals. Instead, they should complement and enhance your recording. In conclusion, editing your recording is a vital step to ensuring you produce high-quality audio. By trimming excess audio, using EQ to enhance vocals, and including music and sound effects, you can elevate your recording to the next level. Take your time when editing and strive to produce a polished and professional final product that will keep your audience enthralled.

How To Record And Edit A Voice Over Or Podcast To Sound Great


Credit: www.nytimes.com


Mix And Master Your Podcast/voice Over


Learn how to record and edit your podcast or voice over to achieve professional-sounding audio. Mixing and mastering is a vital aspect to bringing your content to life, from fine-tuning levels to adjusting EQ and compression.

Mix and Master Your Podcast/Voice Over: Balancing Audio Levels, Compression/Limiting, and Adding Finishing Touches When it comes to creating a podcast or voice over that sounds great, there are several steps involved. One of the most critical is the mixing and mastering process. This involves balancing audio levels, applying compression/limiting, and adding any finishing touches to the project to ensure that it sounds professional and polished. Balance Audio Levels Balancing audio levels is critical to ensuring that your podcast or voiceover sounds consistent throughout. If certain parts are too loud or too soft, it can be distracting to listeners. As a rule of thumb, aim to keep your average volume levels around -16 dBFS, with peaks no higher than -6. To balance your levels, it’s important to use headphones or a dedicated studio monitor system. This will allow you to hear the nuances of your audio and make adjustments as needed. In addition, you can use tools like EQ to enhance specific frequency ranges. Apply Compression/Limiting Compression and limiting help to even out the volume of your audio even further. Compression is used to reduce the dynamic range of your audio, making softer passages louder and louder passages softer. This can help even out the overall volume of your podcast or voice over. Limiting, meanwhile, is a type of compression that ensures that no part of your audio exceeds a certain volume threshold. This can help prevent clipping and other types of distortion in your final mix. To use compression and limiting effectively, it’s important to experiment with different settings and adjust them until you achieve the desired effect. Additionally, you may want to use multiple compression and limiting plugins or tools to achieve a more nuanced sound. Add Finishing Touches Finally, adding some finishing touches can help take your podcast or voice over to the next level. This might include things like adding a subtle reverb effect to give your audio a more spacious feel, or using a noise reduction tool to remove any background noise or hiss. When adding finishing touches, it’s important to be subtle and not overdo it. Too much reverb, for example, can make your audio sound washed out and unnatural. Experiment with different effects to see what works best for your specific project. Overall, the mixing and mastering process is a critical component of creating a professional-sounding podcast or voice over. By balancing audio levels, applying compression and limiting, and adding finishing touches, you can create an audio product that sounds great and engages your listeners from start to finish.

Export And Share Your Content


Learn how to record and edit a high quality voice over or podcast with these expert tips. Enhance your content and export and share with ease for a professional result.

Now that you’ve recorded and edited your podcast or voice over, it’s time to get your content out there. The final step in the process is exporting your audio and sharing it with your audience. Here’s what you need to know:

Choose The Right Export Settings

Before you export your audio, you’ll need to choose the right settings for your file. This will depend on where you plan to upload your content. If you’re uploading to a podcast hosting platform, they may have specific requirements for file format, bit rate, and sample rate. If you’re unsure, reach out to the platform’s support team for guidance. For most platforms, however, the following settings should work:

  • File format: MP3
  • Bit rate: 128 kbps
  • Sample rate: 44.1 kHz

These settings will give you a good balance of audio quality and file size. Once you’ve chosen your settings, export your audio file.

Upload And Distribute Your Content

Now that you have your exported audio file, it’s time to upload it to your podcast hosting platform or other distribution channels. Each platform will have its own process for uploading content, so be sure to follow their instructions carefully. In addition to uploading your content to hosting platforms, consider distributing it to other channels as well. You can upload your podcast to YouTube, SoundCloud, or other streaming platforms. You can also share your content on social media channels like Twitter, Facebook, and Instagram.

Promote Your Podcast Or Voice Over

Once your content is uploaded and distributed, it’s time to start promoting it. Here are a few ways to get the word out:

  1. Share your content on social media channels: Post links to your content on your social media accounts, and encourage your followers to share it with their followers as well.
  2. Reach out to other content creators: Connect with other podcasters or voice over artists in your niche, and collaborate on content or cross-promote each other’s work.
  3. Optimize your SEO: Use relevant keywords in your podcast title, description, and show notes to help your content rank higher in search results.
  4. Engage with your audience: Respond to comments and feedback from your listeners, and ask for their input and suggestions for future content.

By following these steps, you’ll be able to export, upload, and promote your podcast or voice over for maximum impact. Happy recording!

How To Record And Edit A Voice Over Or Podcast To Sound Great


Credit: m.youtube.com


Frequently Asked Questions Of How To Record And Edit A Voice Over Or Podcast To Sound Great


How Do You Record Your Voice And Make It Sound Good?


To record your voice and make it sound good, you will need a good quality microphone and recording software. You should also choose a quiet location with good acoustics, and speak clearly and confidently into the microphone. Adjust the EQ settings to enhance your voice quality, and add effects like reverb or compression to improve the sound.


How Can I Make My Voice Sound Better When Recording A Podcast?


To improve your voice when recording a podcast, try the following tips: – Speak from your diaphragm – Practice breathing exercises – Stay hydrated – Use a good quality microphone – Experiment with microphone placement By following these guidelines, you’ll be able to improve the clarity and tone of your voice for your listeners.


How Can I Make My Voice Over Sound Better?


To make your voice over sound better, you can follow these tips: 1. Invest in good quality recording equipment 2. Practice your vocal technique 3. Focus on your breathing 4. Use proper microphone technique 5. Edit and enhance your recording with filters or equalizers.


How Do You Record A Perfect Voice Over?


To record a perfect voice over, follow these steps: 1. Choose a quiet and echo-free recording environment. 2. Use high-quality recording equipment. 3. Speak clearly and at a consistent volume and pace. 4. Take breaks as needed to avoid fatigue.


5. Edit and mix your recording for a polished final product.


Conclusion


With the rise of podcasts and voiceovers, it’s crucial to know how to record and edit your content to sound great. From choosing the right equipment to mastering post-production techniques, there are many factors to consider. By following the tips and tricks outlined in this post, you’ll be well on your way to producing high-quality audio content that engages and resonates with your audience.


Remember, practice makes perfect, so keep refining your skills and experimenting with new techniques to take your content to the next level. Happy recording!

Categories
Archive

How To Make Lush Evolving Pads In Wavetable Ableton Tutorial

To make lush evolving pads in Wavetable Ableton tutorial, you will need to use automation to manipulate several parameters such as filter cutoff, envelope, and LFO. Adding effects like reverb and delay can enhance the evolving pads to sound more spacious.


Making unique soundscapes is a crucial aspect of music production, especially in genres like ambient and chillout. One of the essential techniques for creating atmospheric pads is manipulating parameters in real-time. In this tutorial, we will cover the step-by-step process of creating lush evolving pads in Wavetable Ableton.


The tutorial will be beginner-friendly, and we will explain each step in detail, including how to use automation envelopes, the ideal configuration for Wavetable, and how to add effects like reverb and delay for a more immersive sound. With these techniques, you will be able to create unique pads that will make your tracks stand out.

How To Make Lush Evolving Pads In Wavetable Ableton Tutorial


Credit: www.youtube.com


Getting Started With Wavetable


Learn how to create lush evolving pads in Wavetable with this Ableton tutorial. Get started with the basics and advance your sound design skills to create unique and mesmerizing sounds.

If you are looking to create lush evolving pads in Ableton, Wavetable might just be the tool that you need. Wavetable is a powerful Ableton Live device that allows you to create, edit and morph wavetable sounds. In this tutorial, we will take a deep dive into how you can get started with Wavetable and create stunning evolving pads that will elevate your productions.

Setting Up Your Audio Device

Before you begin using Wavetable, it is important to ensure that your audio device is set up correctly. To set up your audio device, follow these simple steps:

  1. Open Ableton and go to the ‘Preferences’ menu.
  2. Click on the ‘Audio’ tab.
  3. Select your audio device from the drop-down list.
  4. Configure your audio device settings by adjusting the buffer size, sample rate, and other settings as per your preference.
  5. Click ‘OK’ to confirm your audio device settings.

Loading Up Wavetable

Once your audio device is set up, the next step is to load up Wavetable in Ableton. To load up Wavetable, follow these simple steps:

  1. Create a new MIDI track in Ableton.
  2. Select ‘Wavetable’ from the ‘Instruments’ list in the Ableton browser.
  3. Double click on ‘Wavetable’ to load it up in the instrument rack.

Understanding The Interface

Now that you have Wavetable loaded up in your Ableton session, it is time to understand the interface. The Wavetable interface is divided into several sections, including the oscillator section, the filter section, and the LFO section. Here is a brief overview of each section:

  • The oscillator section allows you to shape and morph the wavetable sounds.
  • The filter section allows you to filter the sound and control its frequency and resonance.
  • The LFO section allows you to add modulation to the sound, creating movement and interest.

In conclusion, Wavetable is a powerful tool that can help you create lush evolving pads in Ableton. By following these simple steps, you can get started with Wavetable and begin creating stunning sounds that will take your productions to the next level.


Creating A Basic Pad Sound


Learn how to make lush evolving pads in Wavetable Ableton with this easy-to-follow tutorial. You’ll discover how to create a basic pad sound that’s perfect for adding depth and warmth to your music tracks. With step-by-step guidance and practical tips, you’ll be making professional-sounding pads in no time!

Creating a Basic Pad Sound Creating lush evolving pads in Wavetable Ableton can seem daunting, but with the right techniques, any producer can master it. The first step is creating a basic pad sound. Here are the steps to accomplish this: Selecting the Right Wavetable Selecting the right wavetable is crucial in creating a basic pad sound. Look for wavetables with complex harmonics to achieve a rich and full sound. Wavetables like ‘Analog Classics’, ‘Resonators’ or ‘Spectral’ are great options to start with. Adjusting the Wavetable Position and Volume Envelope Once you have selected the right wavetable, adjust the position to find the desired sound. Play around with different wavetable positions to create variation. Next, adjust the volume envelope to set the pad’s attack, decay, sustain, and release. A slow attack and long release are vital for achieving a pad sound. Adding Effects to the Sound Adding effects to the sound is the final step in creating a basic pad sound. Consider adding filters, reverb, and distortion to add warmth and depth. A low pass filter can be used to cut out unwanted frequencies, while a high pass filter can help bring out the pad’s high-end characteristics. After applying the necessary effects, record a MIDI clip and experiment with chords and melodies to see how the pad sound shapes. By following these simple steps and experimenting with different wavetables and effects, you can create a unique and lush pad sound in Wavetable Ableton that sets your music apart from the crowd.

Adding Modulation To Your Pad


Elevate the character of your pads by adding modulation to create lush evolving sounds. This Wavetable Ableton tutorial teaches you how to craft intricate pads that are both mesmerizing and unique.

To make your pads sound more interesting and vibrant, adding modulation is essential. Exploring the modulation matrix allows you to choose which parameters you want to modulate, and how you want to modulate them. In this tutorial, we’ll show you how to assign modulators to parameters and adjust modulation depth in Ableton Wavetable, providing you with lush sound.

Exploring The Modulation Matrix

Ableton Wavetable provides a plethora of modulation options that can help enhance your pad sounds. The modulation matrix allows you to assign modulators to various parameters, and you can choose from LFOs, Envelopes, Velocity, and other sources. When adding modulation to your pad, it’s crucial to start with the right source. LFOs are ideal for creating automated and evolving sounds, while envelopes offer snappier and more controlled modulation. Velocity can affect modulations according to how hard you strike your MIDI notes.

Assigning Modulators To Parameters

Once you’ve selected your preferred source, it’s time to assign it to your desired parameter. Ableton provides a straightforward drag-and-drop system, where you can drag your modulation source to the parameter you want to modulate. For example, by dragging an LFO onto the filter cutoff, you can create a moving filter effect that adds interest to your pad sound. Likewise, if you drag an envelope to the waveform position, your oscillator waveform can change over time, resulting in more dynamic sounds.

Adjusting Modulation Depth For A Lush Sound

Modulation depth determines how much modulation you want to apply to a parameter. It can be adjusted in real-time through the modulation matrix, or it can be controlled by mapping it to a MIDI controller. When modulating parameters, it’s important to strike the right balance. Too much modulation can make your pad sound chaotic and out of control, while too little can be dull and lifeless. By following the correct modulation depth, you can create rich and evolving pads that provide the necessary balance between automation and control. For example, by increasing the modulation depth on the filter cutoff with an LFO, you’ll get a moving filter effect that’s not too overpowering or too weak. In conclusion, adding modulation to your pads is an excellent way to enhance their sonic character and create unique sounds. By exploring the modulation matrix, experimenting with different sources, and adjusting modulation depth, you can create lush evolving pads that will enhance your music production.


Working With Filters

Working with Filters:

If you are looking to create lush evolving pads in Wavetable with Ableton, you’ll need to understand how to work with filters. Filters can help you shape the sound of your pad, and add movement to your composition. In this tutorial, we’ll explore how to work with filters in Wavetable to create unique sounds for your pads.

Overview Of Filter Types In Wavetable:

Wavetable offers four different filter types: lowpass, highpass, bandpass, and notch. Each filter has its unique characteristics and parameters, making it easier to shape the sound in a particular way. For instance, lowpass filters allow the lower frequencies to pass through, while blocking higher frequencies.

Adjusting Filter Cutoff And Resonance:

Adjusting the filter cutoff and resonance can help you shape the sound of your pad in a significant way. The filter cutoff controls the frequencies that are allowed to pass through. By changing the cutoff frequency, you can introduce new harmonics to your sound, making it more interesting. On the other hand, the resonance controls the peak of the filter’s response curve. By increasing the resonance, you can emphasize the cutoff frequency, creating a more pronounced effect.

Using Filter Modulation To Add Movement:

If you want to add movement to your pad, you can use filter modulation. By modulating the filter cutoff or resonance using an LFO (low-frequency oscillator), you can introduce new movement to your pad, making it more interesting and dynamic. The modulation can be set to different rates and depths, giving you greater control over your sound.


Incorporating Lfos


Utilize LFOs to create lush evolving pads with the Wavetable plugin in Ableton. By incorporating LFOs for automating parameters such as filter cutoff and wavetable position, you can add movement and depth to your sound. Follow along this tutorial for step-by-step instructions.

Understanding Lfos In Wavetable

LFOs, or Low-Frequency Oscillators, are a powerful tool for making evolving pads in Wavetable in Ableton. LFOs can add movement, modulation, and depth to your pads in an intuitive and creative way. In Wavetable, there are two types of LFOs: Global LFOs that impact all the oscillators in the instrument, and Local LFOs that affect only the selected oscillator.

Assigning Lfos To Parameters For Evolving Movement

To assign an LFO to a parameter, click on the parameter’s value and drag it onto the LFO’s target square. You can then choose the waveform, rate, and other settings for the LFO. For example, you might assign an LFO to the Wavetable position parameter to create a moving and evolving pad.

Syncing Lfos To Your Track Tempo

Syncing your LFOs to your track tempo is essential to ensure that their movements fit with your music. To do this, select “Sync” mode in the LFO’s settings and choose the note value that matches your track’s tempo. You can also adjust the LFO’s phase, offset, and other settings to further shape the LFO movement. Using LFOs in Wavetable is an excellent way to bring life and interest to your evolving pads. With a bit of experimentation and creativity, you can create dynamic and evolving pads that add depth and movement to your tracks.

Advanced Techniques


Discover advanced techniques to create lush evolving pads in Wavetable Ableton with this tutorial. Learn how to use modulation sources to add depth and movement to your sound design, creating rich and dynamic sonic landscapes.

Creating lush evolving pads is a hallmark of professional sound design, and it requires knowledge of some advanced techniques. In this tutorial, we’ll focus on two key functions – Unison and Spread – while also exploring the use of FM modulation for complex harmonic content. Finally, we’ll dive into the Ableton effects rack to make your pads truly stand out.

Using The Unison And Spread Functions

To create a richer, more complex sound, try using the Unison and Spread functions in Ableton’s Wavetable. Unison allows you to play multiple voices of a sound simultaneously, while Spread detunes the voices slightly, creating a wider stereo field. By adjusting these two parameters, you can create thick, swirling pads that are full of movement and character.

Adding Fm Modulation For Complex Harmonic Content

Frequency modulation (FM) is a powerful tool for creating complex harmonic content. By modulating the frequency of one oscillator with another, you can create lush, evolving pads with a wide range of tones and textures. Experiment with different waveforms and ratios to find the perfect sound for your track.

Exploring The Effects Rack

Finally, don’t forget to explore Ableton’s effects rack to take your pads to the next level. Try adding delay, reverb, and other effects to create a sense of space and depth. You can also experiment with distortion, filtering, and other processing to add character and warmth to your sound. With a little bit of creativity, you can turn a simple pad into a highly dynamic and expressive element of your track.

Frequently Asked Questions Of How To Make Lush Evolving Pads In Wavetable Ableton Tutorial


Is Ableton Wavetable As Good As Serum?


Ableton Wavetable is a powerful synthesizer that comes built-in with Ableton Live. While Serum is a popular third-party synth plugin, Wavetable offers many of the same features such as wavetable synthesis, modulation options, and effects. It ultimately comes down to personal preference and the specific sound that you’re looking to create.


How Do You Make A Good Pad Synth?


To create a good pad synth, start with a basic wave shape like a sine or triangle and add layers of harmonics with low-pass filtering. Use a slow attack and release envelope for a sustaining sound. Experiment with different effects like reverb, delay, and chorus to add depth and movement.


Finally, adjust the parameters to suit the overall mix and style of music.


How Do I Add A Pad In Ableton?


To add a pad in Ableton, first select the desired instrument or MIDI track. Then, click on the “Instruments” tab in the browser window and drag the chosen pad instrument onto your track. Finally, you can adjust the volume, effects, and settings of your pad using the built-in parameters and controls.


How Do You Use Lfo In Wavetable?


To use LFO in Wavetable, first click on the LFO tab and select the desired wave shape. Then, choose the rate and depth, and adjust any additional parameters to create the desired modulation effect on the sound.


Conclusion


To sum up, creating lush evolving pads in Wavetable Ableton is a complex process, but it’s worth the effort. With enough patience and practice, you can achieve unique, remarkable, and professional-sounding pads to use in your productions. It’s important to take advantage of automation, experimentation, and modulation to add movement, depth, and character to your sound.


Don’t be afraid to push yourself out of your comfort zone and explore new possibilities. With these tips and tricks, you’ll be on your way to crafting captivating pads that will elevate your tracks to the next level.