Categories
Archive

How To Arrange A Track Arrangement Tips For Electronic Music

This guide covers arrangement tips in plain terms. To arrange a track for electronic music, start by mapping out your song structure and creating a clear and consistent groove. Then, layer your synth and percussion tracks to build tension and energy, and add variation through automation and effects.


Electronic music has come a long way since its early experimental days. Also, it now spans a wide range of genres from techno and house to dubstep and trap. With the right approach to arranging your tracks, you can create music that captures the energy, atmosphere, and emotion of electronic music, and keeps listeners engaged from start to finish.

Related reading: Arrangement Structure in a Song and How The Right Arrangement Can Improve Your Mix. For background, see the Wikipedia article on Electronic music.


Moreover, we’ll explore some tips and techniques for arranging electronic tracks. This includes how to create a compelling song structure, use groove to drive your track, layer synths and percussion, add variation through automation, and experiment with effects. Whether you’re a seasoned producer or just starting out, these tips can help you take your electronic music to the next level.

How To Arrange A Track Arrangement Tips For Electronic Music


Credit: www.youtube.com


Understanding Music Arrangement


In addition, gain insight into the essential aspects behind music arrangement and learn vital tips for arranging electronic tracks. Discover how to master the art of arranging music and take your compositions to the next level with expert guidance.

Arrangement Definition

Understanding music arrangement is vital for any electronic music producer who wants to create unique, professional-sounding music. Arrangement is the process of organizing, editing, and manipulating different sections of a track, such as verses, choruses, and bridges, to create a cohesive and dynamic musical composition. In this blog post, we will discuss the importance of arrangement, core elements of music arrangement, and arrangement tips to help you produce captivating electronic music.

Why Arrangement Is Important

Effective arrangement is critical to create a compelling listening experience. A well-arranged track can captivate an audience’s attention and keep them engaged throughout the entire song. Arrangement also plays a crucial role in creating a musical journey. This allows the listener to experience many emotions by building tension, adding layers, and introducing new elements throughout the track. In addition, successful arrangement can improve the overall mix and mastering process by helping you identify and eliminate any unnecessary sounds or sections. So, if you want to create standout electronic music that resonates with your audience, mastering the art of music arrangement is essential.

Core Elements Of Music Arrangement

Music arrangement can be broken down into several key elements that work together to create a cohesive and dynamic track. These elements include:

  • Intro: The beginning section of a track that sets the tone and introduces the main musical elements.
  • Verse: The main section of a track that typically contains the song’s lyrics and melody.
  • Chorus: The catchy and memorable part of the song that is repeated several times throughout the composition.
  • Bridge: The transitional section that adds variation and builds tension before returning to the verse or chorus.
  • Outro: The final section of the track that provides closure and signals the end of the composition.

By understanding these core elements of music arrangement, you can begin to create a framework for your tracks and experiment with different combinations to create unique and memorable electronic music.

Arrangement Tips For Electronic Music

To create a successful music arrangement, consider the following tips:

  1. Start with a basic arrangement: Begin by creating a basic arrangement with all the necessary sections of the track. Then, refine and adjust the arrangement to create a compelling composition.
  2. Keep it simple: Avoid overcrowding your tracks with too many sounds or elements. Instead, focus on creating a clear and concise arrangement that highlights the most important parts of the composition.
  3. Experiment with different arrangements: Don’t be afraid to experiment with different arrangements and structures to create a unique sound that stands out from the crowd.
  4. Build tension and release: Use variations in volume, intensity, and complexity to build tension and create a dynamic and engaging listening experience. Then, release that tension with a satisfying conclusion or resolution.
  5. Listen and revise: Finally, always listen to your tracks with a critical ear and revise the arrangement as necessary to improve the overall quality of the composition.

By following these tips and mastering the core elements of music arrangement, you can create impactful and memorable electronic music that resonates with your audience.

Creating A Foundation for Arrangement Tips

When it comes to creating electronic music, arranging a track can be a daunting task, especially for those new to the production process. One of the most important elements to consider is creating a solid foundation for the track. This involves setting the key and tempo, establishing a basic rhythm, and developing a bassline. In this blog post, we will go through each of these elements and provide tips on how to create a strong foundation for your electronic music track.

Choosing Key And Tempo for Arrangement Tips

In electronic music production, choosing the right key and tempo is crucial. The key sets the overall tonality of the track and can greatly affect the mood. Meanwhile, the tempo determines the pace and energy of the track. When selecting a key, it is important to consider the genre of music you are creating, as certain keys are more commonly used in particular genres.

Similarly, the tempo should also align with the genre and style of music you are creating. A slower tempo may be suitable for a chill ambient track. Meanwhile, a faster tempo will work better for a high-energy dance track. Experiment with different keys and tempos until you find the right combination that suits your track.

Creating A Basic Rhythm for Arrangement Tips

The rhythm is what drives the track and provides the foundation for other elements to build upon. Starting with a basic rhythm can help you create a strong foundation for your track. You can use a drum machine or software to create your rhythm.

When creating a rhythm, consider the genre of music you are producing and the instrumentation you plan to use. Aim to keep the rhythm simple yet effective, and leave space for other elements to shine.

Developing A Bassline for Arrangement Tips

The bassline plays a crucial role in electronic music and helps to anchor the track. When developing a bassline, consider the key and tempo of your track and aim to match the energy.

Start with a simple bassline and build upon it as you add more elements to the track. Experiment with different sounds and rhythms until you find the perfect bassline for your track.

By following these tips for creating a foundation for your electronic music track, you will be well on your way to arranging a successful track. Remember to keep it simple and don’t be afraid to experiment with different sounds and rhythms until you find the perfect combination for your track.

Creating Musical Variation for Arrangement Tips


Learn how to create musical variation and arrange tracks like a pro with these helpful tips for electronic music. Experiment with different sounds, rhythms, and melodies to keep your audience engaged and make your music stand out.

Creating Musical Variation: One of the essential elements of a successful track arrangement is creating musical variation. The purpose of this is to keep the listener engaged and interested throughout the song. In electronic music, this can be done through a variety of techniques. This includes adding chords and melodies, incorporating sound effects, and developing musical progressions. In this section, we will explore each technique in detail to help you elevate your track arrangement skills. Adding Chords and Melodies: One of the most effective ways of creating musical variation is by adding chords and melodies. This involves introducing new musical elements or modifying existing ones to keep the listener engaged. Here are a few tips for incorporating chords and melodies into your track arrangement:

Tips For Adding Chords And Melodies

  • Use chord progressions to create tension and release in your music
  • Experiment with different scales and modes
  • Introduce new melodies or modify existing ones to keep things interesting
  • Make sure your chords and melodies complement each other and fit within the overall mood of the track

Incorporating Sound Effects: Another effective way of adding variation to your track arrangement is by incorporating sound effects. Sound effects can add depth, texture, and atmosphere to your music. Here are some tips for using sound effects in your track arrangement:

Tips For Incorporating Sound Effects

  • Use sound effects to create transitions between different sections of your track
  • Experiment with different types of sound effects, such as risers, impacts, and sweeps
  • Use sound effects to create atmosphere and mood
  • Make sure your sound effects fit within the overall theme of the track

Developing Musical Progressions: Lastly, musical progressions can also help create variation in your track arrangement. By gradually building and developing the musical elements of your track, you can keep your listener engaged and interested until the very end. Here are some tips for developing musical progressions in your track arrangement:

Tips For Developing Musical Progressions

  • Use repetition to create familiarity and recognition in your track
  • Gradually build up the musical elements of your track to create tension and excitement
  • Add new musical elements and modify existing ones to keep things interesting
  • Make sure your musical progressions fit within the overall structure and theme of the track

In conclusion, creating musical variation is an essential part of a successful track arrangement in electronic music. By incorporating chords and melodies, sound effects, and developing musical progressions, you can keep your listener engaged and interested throughout the entire track. Experimenting with these techniques and finding what works best for your style and genre can help take your track arrangement skills to the next level.

Designing Transitions for Arrangement Tips

Transitioning from one section of a track to another is an important element of electronic music production. It can take a track from good to great, keeping the listener engaged and interested. However, designing transitions can be challenging and requires careful planning and execution. In this post, we’ll discuss tips and techniques for designing effective transitions in your electronic music tracks. We’ll cover three main areas: Introduction to song transitions, creating fluid buildups, and designing impactful drops.

Introduction To Song Transitions

Before we dive into the specifics of creating transitions, it’s important to understand the role they play in your track. A transition is a point in a song where two different sections meet and merge into one another. It can be a subtle shift or a dramatic change. But its purpose is to smoothly guide the listener through the structure of the track.

When designing transitions, it’s important to consider the context of the two sections you’re moving between. If one section is calm and melodic and the other is chaotic and intense, you’ll need to find a way to blend the two styles together to create a cohesive transition.

Creating Fluid Buildups for Arrangement Tips

A buildup is a section of a track where tension and energy are gradually increased, usually leading up to a drop or some other significant change in the music. When creating a buildup, it’s essential to keep the listener engaged and interested throughout. Here are some tips:

  • Use automation to gradually increase the volume, tempo, or effects
  • Introduce new elements or textures to keep the buildup evolving
  • Use white noise or risers to create tension and anticipation

Designing Impactful Drops for Arrangement Tips

The drop is often the most significant and memorable part of the track, so it’s vital to get it right. Here are some tips to make your drops impactful:

  • Build up to the drop to create anticipation
  • Make the drop more significant than the buildup
  • Use sound effects, instrument changes, and/or vocal samples to add interest and variation
  • Change the drum pattern to create a different rhythm and increase energy

By following these tips and techniques, you can create smooth and effective transitions in your electronic music tracks. Remember, transitions can take your track from good to great, so it’s worth investing time and effort to get them right.


Adding Depth To Your Arrangement

Creating a strong track arrangement is the key to keeping your listeners engaged and interested in your music. To take your electronic music production to the next level, adding depth to your arrangement is crucial. With the right techniques and tools, you can make your music sound richer and more complex. Here are some tips on how to add depth to your arrangement:

Creating Countermelodies for Arrangement Tips

Countermelodies are a great way to add depth to your arrangement and make it more interesting. These are secondary melodies that run alongside the main melody to create a richer and more complex sound. When creating countermelodies, try to use different intervals, rhythms, and dynamics to create contrast with the main melody.

You can also try using call and response techniques, where the countermelody responds to the main melody. This creates a conversation between the melodies and adds more interest to your track.

Using Panning Techniques in Arrangement Tips

Panning is a powerful tool for creating depth in your arrangement. By placing different elements of your track in different parts of the stereo field, you can create a sense of space and make your music sound more immersive.

For example, you can try panning your percussion elements to one side and your melody to the other. This creates separation between the different elements of your track and makes it easier for your listeners to distinguish between them.

Exploring Automation for Arrangement Tips

Automation is a great way to add depth and interest to your arrangement. By automating different parameters in your track, such as volume, panning, and effects, you can create dynamic and evolving music.

For example, you can try automating the filter cutoff on a synth to create a sweeping effect, or automate the panning on a percussion element to create movement in your mix.

Overall, adding depth to your arrangement requires experimentation and creativity. By incorporating countermelodies, panning techniques, and automation into your production process, you can create music that is rich, complex, and engaging for your listeners.


Structuring Your Track


Structuring your track is crucial for creating a cohesive and engaging listening experience in electronic music. Tips for arrangement include starting with a strong intro, developing a compelling groove, adding variation, and creating a memorable outro. Experimentation is key to finding the perfect arrangement that suits the vibe and emotions of the track.

Overview Of Track Structures

When it comes to arranging electronic music, there are several common approaches to structuring your track. The most popular are the standard arrangement and the build-up/teardown arrangement. The standard approach involves breaking your track down into several sections, including intro, verse, pre-chorus, chorus, breakdown, build-up, and outro. The build-up/teardown approach involves gradually building the track up to a climax before breaking it back down for the outro.

Deciding On Arrangement Length

Before you start arranging your track, you need to decide on the overall arrangement length. This will depend on the genre of music you’re producing and the intended use of the track. For example, if you’re producing a club hit, you may want to aim for a track length of around 6-7 minutes. However, if you’re producing music for sync licensing, you’ll need to keep the length under 3 minutes to meet industry standards.

Creating A Cohesive Track Flow

Once you’ve decided on the track structure and length, it’s time to start arranging your track. The key to creating a cohesive flow in your track is to ensure that each section transitions smoothly into the next. You can do this by using effects such as reverb, delay, and risers to build tension and anticipation. You can also change up the melody, instrumentation, or rhythm to create contrast between different sections. To help you visualize the flow of your track, you may want to create a map or diagram of the arrangement.

This can help you see how each section fits together and identify any areas that may need tweaking. Keep in mind that arrangement is a subjective process, and what works for one track may not work for another. Trust your instincts and experiment until you find an arrangement that works for your track.

How To Arrange A Track Arrangement Tips For Electronic Music


Credit: m.youtube.com


Frequently Asked Questions On How To Arrange A Track Arrangement Tips For Electronic Music


How Do You Arrange An Edm Track?


To arrange an EDM track effectively, you need to start with a basic structure, build around the main melody and focus on creating dynamic sections. You can use automation, effects, and fills to create transitions and keep the listener engaged.


The arrangement should build towards an exciting climax and then end with a clean outro to provide a satisfactory listening experience.


How Do You Arrange Music Tracks?


To arrange music tracks, you need to consider the song order, tempo, key, and overall flow of the playlist. Start with an opening track that sets the tone, and follow it with tracks that build momentum. Place slower tracks in strategic spots to provide dynamic contrast.


End with a closing track that wraps up the playlist neatly. It’s important to ensure a seamless transition from one track to another to keep the listener engaged.


How Do You Arrange A Song Structure?


Arranging a song structure involves organizing the different sections of a song such as verses, choruses, bridges, and instrumental breaks in a way that creates a cohesive and logical flow. Typically, a common structure is verse-chorus-verse-chorus-bridge-chorus, although variations are possible.


It’s important to consider the overall energy and emotional arc of the song when deciding on the order and length of each section.


How Do You Legally Arrange Music?


Legally arranging music involves obtaining permission from the copyright holder to use or adapt their work. This typically involves obtaining a license, which can be done through organizations such as ASCAP or BMI. It’s important to make sure all necessary permissions are obtained to avoid legal issues.


Conclusion


To conclude, arranging a track for electronic music can be a daunting task. But it can be made much easier by following these tips. Remember, every production is unique, and it’s okay to make mistakes along the way. Experimenting and trying new things is all part of the creative process.


By carefully considering each element in your track arrangement, you can create a cohesive and captivating listening experience for your audience. With practice, dedication, and an open mind, you can achieve your goals as an electronic music producer.

Categories
Archive

Mastering Like A Pro With Free Plugins Only In Ableton Live

Mastering like a pro in Ableton Live is achievable using only free plugins. Learn how in this concise guide.


Ableton Live is a popular DAW for electronic musicians and producers, known for its intuitive workflow and live performance capabilities. While many producers may use third-party plugins for mastering, Ableton actually includes several helpful tools right out of the box.


In this guide, we’ll explore how to master your tracks like a pro using only free plugins in Ableton Live. We’ll cover everything from basic levels and EQ adjustments to multiband compression and stereo widening. By the end of this article, you’ll have a solid understanding of how to use these powerful free plugins to give your tracks a professional-sounding finish.


Setting Up Your Workspace

If you’re an aspiring music producer, you’ve probably heard about Ableton Live. This digital audio workstation is the go-to tool for many music producers around the world, thanks to its outstanding features and free plugins that allow you to create exceptional music without breaking the bank. If you wish to master like a pro with Ableton Live, you need to learn how to set up your workspace properly.

Organizing Your Layout

The first step to mastering like a pro with Ableton Live is organizing your layout. How you arrange your workspace can significantly impact your workflow, making it either easier or more challenging to produce music. Arrange your interface to suit your working style and preferences. You can resize your panels, move your windows around, and organize your tracks in a manner that makes sense to you.

Customizing Your Preferences

Ableton Live comes with a plethora of customization options to help you personalize your workspace. In the preferences menu, you can change various settings such as audio, MIDI, look and feel, and file path. Understanding your preferences can help you work more efficiently, and ultimately produce better music.

Another essential customization feature is the hotkey mapping. Ableton Live allows you to map different shortcut keys to the various tools and functions in the software, enabling you to work faster and more efficiently.

Conclusion

In conclusion, setting up your workspace is an essential step towards mastering like a pro with Ableton Live. Organizing your layout and customizing your preferences can significantly improve your workflow and enhance your overall music production experience. By taking advantage of Ableton Live’s free plugins, you can create high-quality music that will wow your audience.

Essential Navigation Tips

Navigating The Session And Arrangement Views

One of the first things to do when working in Ableton Live is familiarizing yourself with the different views. There are two main views: the Session View and the Arrangement View.

The Session View is where you can launch clips, create loops, and experiment with different combinations of sounds. This view is perfect for live performance and improvisation. The Arrangement View, on the other hand, is where you arrange and edit your clips, creating a linear composition.

Switching between the two views is simple. You can either use the dedicated buttons on the top right of the screen or use the Tab key on your keyboard.

Using Keyboard Shortcuts

Keyboard shortcuts are an essential part of any Ableton Live user’s workflow. They can save you time and make the navigation process much more efficient.

Here are some essential keyboard shortcuts you should know:

Shortcut Action
Tab Switch between Session and Arrangement Views
Spacebar Start and stop playback
Ctrl + D Duplicate selected clips/tracks
Ctrl + J Join selected clips into one
Ctrl + L Loop selected clips

These are just a few of the many keyboard shortcuts available in Ableton Live. Take some time to explore them and find the ones that work best for you.

Maximizing Workflow With Free Midi Effects


Maximize your workflow with free MIDI effects and master your tracks like a pro using only Ableton Live’s free plugins. With a variety of effects at your disposal, you can add new dimensions to your sound and take your tracks to the next level.

As a music producer, workflow is crucial to successfully complete tracks and keep your creativity flowing. With Ableton Live, maximizing workflow can be achieved with the use of free MIDI effects plugins. These plugins not only save time but also enhance the creative process. Here are some ways to use Ableton Live’s free MIDI effects to master like a pro.

Using Arpeggiator For Creative Melodies

The Arpeggiator is a free MIDI effect in Ableton Live that can help you create unique and creative melodies. It allows you to play a chord and automatically arpeggiate it into a sequence of notes. This saves time compared to manually playing each note in a sequence. Additionally, the Arpeggiator has many settings, allowing you to customize the rhythm and style of the arpeggiated sequence created. It’s a great way to add variety and excitement to your melodies.

Creating Custom Rhythms With Beat Repeat

Beat Repeat is another free MIDI effect that can help you save time and create unique sounds. It allows you to repeat a section of a MIDI clip at a specified time interval. You can also add various effects and customize the rhythm by changing the rate and probability of each repetition. This can be used to create custom rhythms and add variation to your beats. Beat Repeat can also be used creatively on other non-percussive sounds to create unique textures.

Building Chord Progressions With Chord

Creating chord progressions can be challenging for some producers. Chord is a free MIDI effect in Ableton Live that can help with that. It allows you to play one note and automatically generates chords based on the specific key and chord type you select. This saves time in creating chord progressions and allows you to experiment with different chord types. Chord also has many settings, including strum and velocity controls, which can help you create more nuanced and expressive chord progressions. In conclusion, Ableton Live’s free MIDI effects plugins are powerful tools that can help you maximize workflow and enhance creativity. By using Arpeggiator, Beat Repeat, and Chord, you can create unique melodies, rhythms, and chord progressions quickly and efficiently. The best part is that these plugins are free and come with Ableton Live, making it more accessible to all producers.

Mastering Like A Pro With Free Plugins Only In Ableton Live


Credit: www.productionmusiclive.com


Free Mixing And Mastering Plugins


Achieving professional-quality sound in your music productions doesn’t have to break the bank. With free mixing and mastering plugins available in Ableton Live, you can produce top-quality tracks from the comfort of your home.

Free mixing and mastering plugins have revolutionized the way music is produced today. With the availability of free plugins, it is now easier for aspiring musicians and producers to achieve a polished and professional level of sound. In this blog post, we will focus on how to master like a pro using only free plugins in Ableton Live.

Utilizing Eq Eight For Precision Eqing

EQing is a crucial aspect of mixing and mastering. It’s the process of adjusting the balance between different frequency ranges in a track. EQ Eight is a powerful tool in Ableton Live that allows you to precisely EQ your music. You can cut or boost specific frequencies, adjust the Q factor, and even solo each band to hear the changes better. With EQ Eight, you can achieve a brighter, clearer, and more defined sound.

Using Compressor For Dynamic Control

Dynamic range is the difference between the loudest and softest parts of a track. Compressors help reduce this range, making the overall volume more consistent. Using a compressor can also add warmth and thickness to your mix. Ableton Live’s Compressor is a versatile tool that allows for side-chain compression, adding a pumping effect to your track. Adjusting threshold, ratio, attack, and release settings can change the compressor’s effect on the sound. With some tweaking, you can achieve a well-controlled, punchy, and balanced sound.

Maximizing Loudness With Limiter

Maximizing the loudness of your track without causing distortion is an integral part of mastering. A limiter ensures that no signal goes beyond a particular level of loudness. By setting the threshold and ceiling values correctly, you can achieve a loud and professional sound without sacrificing quality. Ableton Live’s Limiter is a powerful plugin that allows for precise adjustments. You can choose between different modes and even use the ISP (inter-sample peak) detection to catch any peak levels that the limiter may miss. With Limiter, you can get your tracks sounding as loud and full as any commercial release. In conclusion, using free mixing and mastering plugins is an excellent way for aspiring musicians and producers to hone their craft. EQ Eight, Compressor, and Limiter are powerful tools that help achieve a polished, professional level of sound. Utilizing these plugins and using them wisely can help elevate your tracks to the next level.


Bonus Tips And Tricks


Learn how to master your tracks like a professional using only free plugins in Ableton Live with these bonus tips and tricks. Maximize your sound quality and gain the edge you need to stand out in today’s competitive music industry.

Bonus Tips and Tricks Now that you have learned the basics of mastering like a pro using free plugins only in Ableton Live, it’s time to dive into some bonus tips and tricks. These tips will help you take your mastering skills to the next level and add some artistic expressions to your tracks. Automating Effects for Artistic Expressions One of the best ways to add some artistic expression and creativity to your mastered tracks is by automating effects. With Ableton Live, you can easily automate effects such as reverb, delay, and EQ. This allows you to create dynamic changes in your track and add some depth to your sound. To automate an effect in Ableton Live, simply right-click on the effect and select “show automation.” This will bring up a new track where you can draw in your automation. You can also use the automation curves to create more dynamic changes in your track. Navigating Multi-Sampled Instruments using Sampler If you’re working with multi-sampled instruments in Ableton Live, then the Sampler plugin is your best friend. This powerful plugin allows you to load up multiple samples and map them to different keys on your keyboard. This makes it easy to create complex melodies and layer sounds for a richer sound. To use Sampler in Ableton Live, simply drag and drop your samples into the plugin and map them to your keyboard. You can then adjust the pitch, filter, and envelope settings to create your own unique sound. With Sampler, the possibilities are endless. In conclusion, mastering like a pro with free plugins only in Ableton Live is not only possible but also quite easy. With these bonus tips and tricks, you can take your mastering skills to the next level and create dynamic and artistic expressions in your tracks. Remember to experiment and have fun with your mastering process, and you’ll be sure to create some amazing tracks.

Mastering Like A Pro With Free Plugins Only In Ableton Live


Credit: m.youtube.com


Mastering Like A Pro With Free Plugins Only In Ableton Live


Credit: www.reddit.com


Frequently Asked Questions For Mastering Like A Pro With Free Plugins Only In Ableton Live


Can You Use Just Ableton For Mastering?


Yes, Ableton can be used for mastering, however, it is recommended to use third-party plugins in addition to Ableton’s built-in mastering tools for achieving a professional-grade final mix. It is important to have a good understanding of mastering principles and techniques to achieve the best results.


What Plugins Needed For Mastering?


No specific plugin is needed for mastering. However, certain tools are required, such as EQ, compressor, limiter, and metering plugins. These plugins assist in achieving a polished and professional sound during the mastering process. It is crucial to have a good understanding of each plugin and its functions.


Is Ableton Live Good For Mixing And Mastering?


Yes, Ableton Live is good for mixing and mastering. It has a variety of built-in audio effects and tools that allow for precise control and manipulation of sound. Its intuitive interface makes it easy for both beginner and advanced users to achieve professional quality mixes and masters.


Does Ableton Have Free Plugins?


Yes, Ableton offers a range of free plugins that users can download from their website. These plugins include instruments, effects, and samples. Some of the popular free plugins offered by Ableton are Grain Scanner, Distorted Reality, and Bass. Users can also find many third-party plugins that are compatible with Ableton.


Conclusion


Mastering audio is an essential technique for any music producer. With the use of free plugins, you can achieve that professional sound quality that your tracks need. Ableton Live offers several plugins that can help you to master like a pro, such as the Multiband Dynamics and the Utility plugin.


In this blog post, we have explored some of these free options and provided you with tips and tricks to get the most out of them. Keep experimenting with these plugins and your master tracks will soar to new heights.


Happy mastering!

Categories
Archive

How To Mix Bass For Pop Rock Hip Hop Rnb And Electronic Music

To mix bass for pop rock, hip hop, R&B and electronic music, start by setting the right levels and EQ on the bass track. Use compression to control dynamics and add effects for tone shaping.


Mixing the bass for different genres of music requires different techniques and approaches to achieve a satisfying and cohesive mix. In pop rock, the bass should sit well with the guitar and complement the vocal melody. In hip hop and R&B, the bass is typically the foundation of the track and should be punchy and impactful.


In electronic music, the bass can range from deep and subby to bright and aggressive. In all cases, a well-mixed bass adds depth and power to the overall track. We’ll take a closer look at how to mix bass for pop rock, hip hop, R&B and electronic music.


Understanding The Importance Of Bass Mixing


Understanding the importance of bass mixing is crucial for producing top-quality pop rock, hip hop, RnB and electronic music. A well-mixed bass can make the difference between an average track and a hit, highlighting the fundamental groove of the song and, thus, giving it more character.


With the right techniques and tools, you can easily achieve a professional sound that will impress any listener.

As a music enthusiast or producer, understanding the importance of bass mixing is crucial. The bassline sets the tone for any song, and its processing determines the sound and emotional impact of the music. Mixing the bass correctly enhances the overall quality of the music track.

Key Role Of Bass In Different Music Genres

The bass plays a fundamental role in any music genre, but its use varies in different types of music. Below are some examples of the key role of bass in different music genres:

Music Genre Description of Bass Role
Pop Bass serves as the foundation of the rhythmic framework, anchoring the music.
Rock Bass guitar is a key component of rock music, and its tone and texture can significantly affect the listener’s experience.
Hip Hop The bass is the backbone of Hip Hop music. The bassline syncs with the percussion to establish the tempo.
RnB Bass creates a warm, rich sound that enhances the music’s soulful and smooth sound.
Electronic Dance Music Bass creates the energy for electronic dance music, getting the audience moving and keeping the rhythm going.

Common Challenges In Mixing Bass

Mixing bass can be challenging, and it’s common to encounter issues such as:

  • Inaudible bass: Bass frequencies are often difficult to hear on certain playback systems, resulting in a weak bass sound.
  • Overpowering bass: When the bass is too loud, it can drown out other elements of the music.
  • Clashing frequencies: If the bass instruments are not adequately separated in frequency, they may interfere with each other and cause muddiness or distortion.
  • Inconsistent bass: Sometimes, the bass may sound inconsistent throughout the song if not appropriately equalized, compressed, and layered.

In conclusion, understanding the role of bass in different music genres and common issues in bass mixing can help you create better music. With the right techniques and tools, you can mix the bass to bring out the best in your music.

Preparing Your Mix For Bass Mixing


To get the perfect mix for pop rock, hip hop, RnB and electronic music, it’s important to approach bass mixing with care. Start by balancing out the levels and frequencies, using high-quality headphones or speakers and experimenting with different techniques to achieve the desired sound.

Before you dive into mixing the bass for your pop rock hip hop Rnb or electronic music, you need to prepare your mix for it. You need to create a proper balance in your mix and set up your audio workspace to ensure that you can focus all your attention on mixing the bass.

Creating A Proper Balance In Your Mix

When preparing your mix for bass mixing, you need to ensure that the levels of all instruments are balanced. This means that no individual instrument should overpower another and that they should all complement each other. To achieve this, you can use EQ and compression to fine-tune each instrument’s sound. Here are some tips to help you create a proper balance in your mix:

  • Start by setting the levels of the drums and bass to ensure that they work together.
  • Then bring in the other instruments one by one, adjusting their levels as you go along.
  • Make sure to listen to the mix as a whole, rather than just focusing on individual instruments.
  • Use EQ to cut frequencies that clash between instruments, ensuring that each instrument has its own space in the mix.
  • Use compression to even out the levels of individual instruments.

Setting Up Your Audio Workspace

To fully focus on mixing the bass, you need to eliminate any distractions from your audio workspace. Here’s how you can set up your audio workspace:

  1. Ensure that your studio monitors or headphones are in good working condition and calibrated to provide an accurate representation of the mix.
  2. Eliminate any background noise or distractions.
  3. Position yourself in the “sweet spot” to listen to the mix.
  4. Close any unnecessary software or applications on your computer to avoid any interruptions.
  5. Organize your session to make it easier to navigate and access different elements of the mix.

By following these tips and setting up your audio workspace correctly, you can ensure that you have a proper foundation for mixing the bass in your pop rock hip hop Rnb or electronic music.

Eq Techniques For Bass Mixing


Create a punchy and inviting description of EQ Techniques for Bass Mixing in pop, rock, hip hop, R&B, and electronic music. Learn how to produce clean, balanced, and powerful bass with expert audio engineering techniques for your tracks. Perfect for music producers and mixing engineers.

Mixing bass for different genres requires different EQ techniques. EQ techniques eliminate unwanted frequencies from the bass and enhance the ideal frequency range. Successful bass mixing techniques will not only ensure clarity but also provide a pleasing listening experience. In this article, we will take a closer look at two essential bass EQ techniques – removing unwanted frequencies and enhancing the ideal frequency range.

Removing Unwanted Frequencies From The Bass

Removing unwanted frequencies in the bass has a drastic impact on the overall sound. Unwanted frequencies such as rumble and noise can turn a good mix into an amateur one. Here’s how to remove unwanted frequencies in the bass:

Technique Description
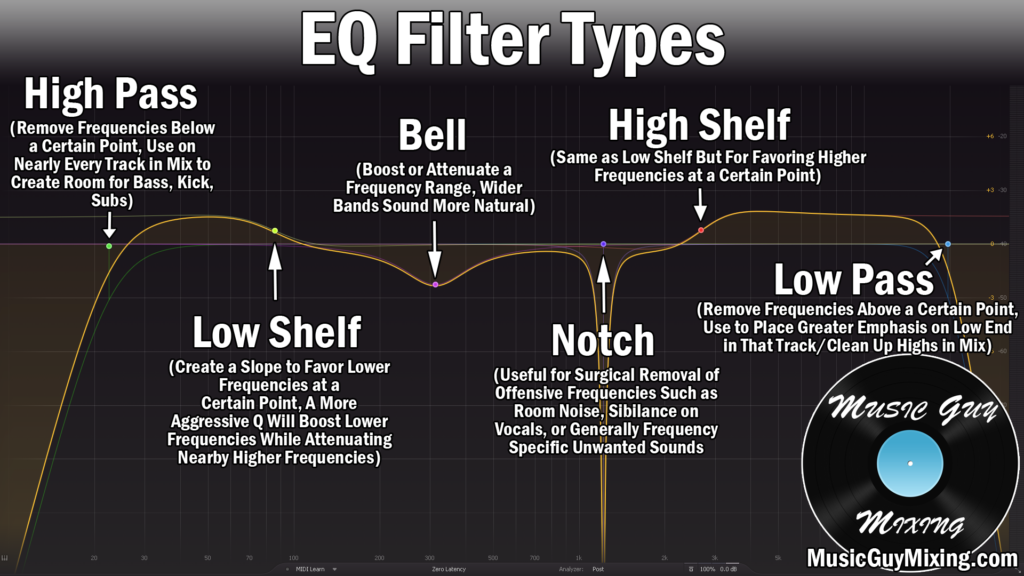
High Pass Filter Eliminates low-end rumble, allowing the bass to sit better in the mix.
Notch Filter Eliminates specific frequencies, helping to remove standing waves in a room, and reduce feedback.
Low Shelf Filter Reduces low-end boominess, which can muddy up the mix.

Enhancing The Ideal Frequency Range For Bass In Various Genres

Different genres have distinct characteristics that require special EQ attention for bass. The ideal frequency range for bass varies from genre to genre. Here’s how to enhance the ideal frequency range:

  • Pop: Enhance the upper bass frequencies to give it more presence and allow it to cut through the mix.
  • Rock: Enhance the lower and mid frequencies to give it a full and punchy sound.
  • Hip hop: Enhance the sub-bass frequencies for a deep, booming sound. Cut the mid frequencies to make space for vocals.
  • R&B: Enhance the mid frequencies to give it warmth and a full sound.
  • Electronic: Enhance the upper bass and mid frequencies for a bright and punchy sound.

By removing unwanted frequencies and enhancing the ideal frequency range, you can achieve a mix with clean and clear bass that stands out in the mix. Take the time to experiment with different EQ techniques until you find the perfect balance for your mix.

How To Mix Bass For Pop Rock Hip Hop Rnb And Electronic Music


Credit: www.masteringthemix.com


Compressor Techniques For Bass Mixing


Achieving the perfect bass balance can be challenging, but utilizing compressor techniques can help. Whether you’re mixing pop, rock, hip hop, R&B, or electronic music, understanding the role of compression and its settings can make a significant difference in the final mix.

Bass is a crucial element of every music genre, whether it’s Pop, Rock, Hip Hop, RnB or Electronic. It sets the groove and mood of a song and gives it the depth it needs. However, mixing bass can be a challenging task for beginners and even for experienced engineers. One of the most powerful tools for bass mixing is compression. In this article, we will discuss the dynamic control of bass sounds and managing bass levels for different sections of the song using compressor techniques.

Dynamic Control Of Bass Sounds

Bass sounds are dynamic in nature, meaning they can vary in volume depending on the notes and the playing style of the bassist. When mixing, it’s essential to ensure that the bass sound is consistent throughout the song. This is where compression comes into play. By using a compressor, you can control the dynamic range of the bass sound, making the quiet parts louder and the loud parts quieter. Here are a few compressor settings that you can use for dynamic control of bass sounds:

  • Threshold: Set the threshold to a level where the compressor kicks in when the bass sound exceeds that level.
  • Ratio: Set the ratio to a level that reduces the dynamic range of the bass sound but does not make it sound unnatural.
  • Attack: Set the attack to a fast setting to catch the initial transient of the bass sound.
  • Release: Set the release to a level that allows the bass sound to breathe between notes.

Managing Bass Levels For Different Sections Of The Song

Managing bass levels for different sections of the song is just as important as controlling the dynamic range of the bass sound. Each section of the song, such as the verse, chorus, and bridge, has different energy levels and requires different bass levels to maintain the groove of the song. Here are a few compressor settings that you can use for managing bass levels:

  • Sidechain: Use sidechain compression to duck the bass sound when the kick drum hits, allowing the kick drum to cut through the mix.
  • Parallel Compression: Use parallel compression to add sustain and weight to the bass sound without losing the initial punch.
  • Multiband Compression: Use multiband compression to control specific frequency ranges of the bass sound without affecting the other frequencies.

In conclusion, compression is a powerful tool for bass mixing, providing dynamic control and managing bass levels for different sections of the song. By experimenting with various compressor settings, you can achieve a cohesive and groovy bass sound that complements the rest of the music.

Achieving A Tight Bottom End


Get a tighter bottom end in your pop rock, hip hop, RnB, or electronic mix by properly mixing your bass. By using EQ to carve out unnecessary frequencies, compressing and limiting to control dynamics, and adding distortion or saturation for warmth and character, you can achieve a solid and well-defined bass that sits perfectly in your mix.

When mixing pop rock, hip hop, RnB or electronic music, one of the most important aspects to get right is the bass. The bass is what provides the foundation for the track and the backbone of the rhythm section. Achieving a tight bottom end is crucial to ensure that the bass is heard and felt without overpowering the rest of the mix. In this post, we will discuss two techniques for achieving a tight bottom end: using sidechain compression for kick and bass and properly gating your bass track.

Using Sidechain Compression For Kick And Bass

Using sidechain compression is a popular technique for achieving a tight bottom end in mix. Basically, you use a compressor to attenuate the bass whenever the kick drum hits. This creates space in the mix for both the kick and bass to be heard without competing with each other. Here’s how to do it:

  1. Insert a compressor plugin on the bass track and set it to a ratio of around 3:1.
  2. Find the sidechain input on the compressor and route it to the kick drum track.
  3. Set the attack of the compressor to around 10ms and the release to around 100ms.
  4. Adjust the threshold and gain reduction settings until you hear the bass being attenuated whenever the kick drum hits.

Using sidechain compression can help create a tight bottom end in your mix by creating more space for both the bass and kick drum.

Properly Gating Your Bass Track

Another technique for achieving a tight bottom end is to properly gate your bass track. Gating is a process of controlling the volume of a signal based on a threshold level. With gating, you set a threshold level below which the signal is muted, effectively cutting out any unwanted noise or bleed. Here’s how to properly gate your bass track:

  1. Insert a noise gate plugin on the bass track.
  2. Set the threshold to a level where it mutes any unwanted noises or bleed.
  3. Adjust the attack and release times so that the gate opens and closes quickly and smoothly.
  4. Add some hysteresis to prevent the gate from opening and closing too quickly, which can cause a pumping effect.

Properly gating your bass track can help reduce unwanted noise and bleed, which can make your bottom end sound tighter and more focused. In conclusion, achieving a tight bottom end is essential in any pop rock, hip hop, RnB or electronic music mix. By using sidechain compression for kick and bass and properly gating your bass track, you can create space for both the kick and bass to be heard without competing with each other and make your bottom end sound tighter and more focused.

How To Mix Bass For Pop Rock Hip Hop Rnb And Electronic Music


Credit: www.masteringthemix.com


Creating Movement In Your Bass

One of the most important aspects of mixing bass for pop rock, hip hop, RnB, and electronic music is creating movement in your bass. A static bassline can quickly become monotonous and uninteresting, while a bassline that moves and evolves will keep the listener engaged and interested. There are several techniques you can use to create movement in your bass, including modulation, distortion, and automation of effects.

Using Modulation And Distortion For Interesting Bass Sounds

One way to create movement in your bass is by using modulation and distortion to add interesting harmonics and overtones to your bassline. Modulation can add a bit of movement to your bassline by creating subtle pitch shifts or vibrato effects. You can achieve this effect with a plugin like Waves’ MetaFlanger or Soundtoys’ Tremolator. Distortion can add grit and texture to your bassline, making it stand out in the mix. It can also add harmonics and overtones that create movement and interest. Try using a distortion plugin like Decapitator or FabFilter Saturn to get started.

Automating Effects For Different Sections Of The Song

To keep your bassline interesting throughout your song, consider automating effects for different sections. This means adjusting parameters like modulation, distortion, and even EQ settings to fit the mood and energy of each section. For example, you may want a more subtle, clean bassline during the verses, then add some distortion and modulation for the chorus. This helps to create contrast and keep things interesting for the listener. Use automation in your DAW to achieve this effect, and experiment with different settings to find what works best for your song.

In conclusion, creating movement in your bassline is key to keeping your listeners engaged and interested. By using modulation, distortion, and automation of effects, you can add interest and energy to your bassline throughout your song. So don’t be afraid to experiment and try new things!

Ensuring Compatibility With Different Devices

Mixing bass for different genres can be a challenging task, but ensuring compatibility on various devices requires even more attention to detail. Devices such as home theater systems, car stereos, laptops, and smartphones have different speakers and frequency responses. Therefore, it becomes crucial to test your mix on different devices to ensure that the bass level is consistent and balanced across all systems.

Considering Playback On Various Systems

Before uploading your mix online, you need to ensure that it sounds the same on all devices, regardless of speaker size, frequency response, or EQ settings, as it can affect the listening experience. Factors like the listener’s environment, speaker placement, and hardware settings also play a significant role in the way the audio is perceived, which emphasizes the importance of compatibility testing.

Testing Your Mix On Different Output Sources

The best way to test the compatibility of your mix is to listen to it on various output sources such as laptops, smartphones, home theater systems, headphones, car stereos, and studio monitors. It is also crucial to keep in mind that low frequencies are directional, and they tend to get absorbed by walls and furniture. Therefore, testing your mix in different audio environments is important to ensure that your mix sounds consistent in all listening environments.

Final Thoughts

When it comes to mixing bass for different genres, ensuring compatibility with various devices is the key to achieving a balanced and consistent mix. Keep in mind that compatibility testing should be an essential part of your mixing process, and by doing so, you can ensure that your mix sounds great on all systems and listening environments.


Finalizing Your Mix With Proper Bass Levels


Achieving the perfect bass mix can be a challenge for any genre of music. Pop rock, hip hop, RnB, and electronic music require specific techniques to balance bass levels. From choosing the right sounds to adjusting EQ, there are several steps to ensure the bass stands out without overpowering the rest of the mix.

Comparing Your Mix To Other Reference Tracks

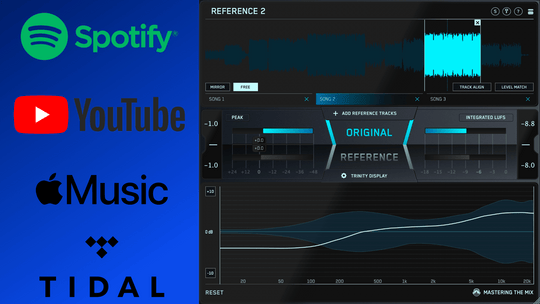
Before you finalize your mix, it’s important to compare it to other reference tracks in a similar pop rock hip hop RnB or electronic genre. Listen to the reference tracks and take note of the bass levels, ensuring your mix is not too overpowering or too low. You can use a spectrum analyzer or visual EQ to see where your bass sits with your reference tracks, making adjustments where necessary. Keep in mind that your bass should be felt, not just heard.

Fine-tuning Bass Levels For A Polished Final Mix

Once you’ve compared your mix to your reference tracks, it’s time to fine-tune your bass levels for a polished final mix. Start by checking your kick and bass relationship, making sure they are not fighting for the same frequency space. Use EQ to cut any frequencies that clash, while also boosting the frequencies that give your bass its character. Next, check your bass instrument or sample. Make sure it’s properly tuned and the notes are sitting well in the mix. Adjust the levels accordingly and use compression and saturation to add warmth and character to your bass. Finally, check your overall bass levels. Make sure they are balanced and consistent throughout the song. You don’t want the bass levels to dip or peak at any point in the song, as it can distract the listener from the message of the song.

Final Thoughts

In conclusion, finalizing your mix with proper bass levels is essential to achieving a polished, professional sounding mix. By comparing your mix to other reference tracks and fine-tuning your bass levels, you can ensure that your bass is felt, not just heard. Take your time and make the necessary adjustments to achieve the desired result.


Frequently Asked Questions For How To Mix Bass For Pop Rock Hip Hop Rnb And Electronic Music


How Do You Mix Electronic Bass?


To mix electronic bass, follow these steps: 1. Start with a clean mix. 2. EQ the bass to remove unwanted frequencies and boost the desired ones. 3. Use compression to control the dynamics of the bass. 4. Add effects like distortion or chorus to enhance the sound.


5. Make sure the bass sits well with the rest of the instruments in the mix. Remember to always listen critically and adjust as needed.


How Do You Mix Bass Into A Song?


To mix bass into a song, start by EQing the track to remove unwanted frequencies. Use compression to even out the volume and add sustain. Set the bass level to complement the kick and snare. Use sidechain compression to prevent the bass and kick from clashing.


Finally, adjust the overall mix to balance the bass with other elements.


Does Rnb Have Bass?


Yes, RNB does have bass.


Where Should Bass Be In Mix?


Bass should be in the center of the mix, but not too loud that it overpowers other elements. It should also have its own space and not clash with kick drums or other low-end instruments. Proper EQ and compression can help achieve a balanced sound.


Conclusion


To sum up, mixing bass for different genres can be a challenging task. However, with the right techniques and tools, it is possible to achieve a balanced and impactful bass mix. Experiment with EQ, compression, and saturation to achieve the desired tone and level.


Remember to trust your ears and not rely solely on meters and plugins. Follow these tips and tricks to create a powerful and dynamic bass sound for your next pop, rock, hip hop, RnB, or electronic music project.

Categories
Archive

What is the Difference between Audio Engineer And Sound Engineer

Audio engineers and sound engineers are often used interchangeably, but there is a subtle difference. Audio engineers focus on recording and mixing music, while sound engineers work on designing and implementing sound systems for live events or film production.


The field of audio engineering and sound production has vastly evolved, and the distinction between the two has become increasingly blurred. However, it is essential to distinguish between their job roles to understand the specific skills and expertise necessary for each job.


Both audio engineers and sound engineers need to have a solid technical background, a good ear for sound, and excellent communication skills to deal with artists and clients. Additionally, they need to keep up with the latest technology and equipment trends to succeed in the industry. We’ll explore the job responsibilities, qualifications and the future of audio engineering and sound engineering.

What is the Difference between Audio Engineer And Sound Engineer


Credit: www.ipr.edu


Defining Audio Engineering


Audio engineering and sound engineering can be used interchangeably, but they are not exactly the same. While sound engineering is more focused on live events, audio engineering is more geared towards recording, mixing, and producing music and sound effects. The audio engineer is responsible for capturing and manipulating sound in the recording studio or post-production stages.

Audio Engineering is an important aspect of music production that involves mixing, recording, and mastering of audio. It’s a technical field that requires specific skills, knowledge, and experience. In the music industry, audio engineering is a crucial part of the production process since it determines the quality of the final product.

Roles And Responsibilities Of An Audio Engineer

The role of an audio engineer is to manage and oversee the entire sound recording process. This includes setting up equipment, working with recording software, and ensuring that the final product meets the client’s expectations. An audio engineer is responsible for adjusting levels and making sure that all individual elements of the music mix well together. Here are some common responsibilities of an audio engineer:

  • Setting up and testing recording equipment
  • Recording and mixing audio tracks
  • Editing and post-production work
  • Collaborating with artists and producers to achieve their desired sound
  • Managing the recording budget and timeline

Skills Required For Audio Engineering

To be an effective audio engineer, one must possess a wide range of skills and knowledge, including technical and creative abilities. Here are some technical skills required for audio engineering:

Technical Skills Creative Skills
Knowledge of recording equipment and software Ability to work creatively with sound
Understanding of mixing and mastering techniques An ear for music and sound design
Knowledge of acoustics and sound theory Ability to improvise and think creatively

Overall, a skilled audio engineer requires both technical and creative skills to bring a project to life.

Defining Sound Engineering

Sound engineering is the process of recording, mixing, and reproducing sound using various equipment and software. It involves everything from setting up microphones to creating the final sound mix. A sound engineer is responsible for ensuring that audio quality is clear and consistent while considering various factors, such as acoustics, volume, and tone.

Roles And Responsibilities Of A Sound Engineer

A sound engineer performs a variety of tasks to ensure that they are adequately capturing sound and delivering quality audio. Some of the key roles and responsibilities of a sound engineer include:

  • Setting up audio systems for events, concerts, and performances
  • Managing and maintaining audio equipment and software
  • Designing sound effects for movies, television shows, and video games
  • Collaborating with producers, artists, and other sound engineers to create great audio mixes
  • Tuning acoustics and creating soundproof environments for recordings
  • Ensuring that the final product meets high-quality standards and is free from technical issues

Skills Required For Sound Engineering

While sound engineering is a technical field that requires a great deal of knowledge about audio recording and technology, it also requires a certain set of skills to be a successful sound engineer. Some of the essential skills sound engineers possess include:

Skills Description
Attention to detail Sound engineers must have an eye for detail and be able to notice even the slightest difference in sound quality or audio performance.
Problem-solving Sound engineers should be problem solvers and must have the ability to troubleshoot and fix technical issues.
Communication Sound engineering involves collaborating with several people, which makes communication skills a critical requirement for this field.
Technical Knowledge Sound engineers must be knowledgeable about audio technologies, including sound mixing, recording software, and digital audio workstations.

Overall, sound engineering is an essential process that plays a critical role in the creation of music, television, and film productions. A sound engineer’s role is to ensure that the sound quality of any project is pristine and meets the highest quality standards possible. Therefore, it requires a mix of technical knowledge and hands-on experience combined with several soft skills such as communication and problem-solving.


Key Differences Between Audio Engineering And Sound Engineering


Audio engineering and sound engineering are two distinct fields that involve working with sound and music. Audio engineers focus more on the technical aspects of recording and mixing of music and audio tracks, while sound engineers focus more on the creative aspects of designing and mixing sound effects for film, television, and video games.


Both professions require a deep understanding of sound and acoustics, but have different roles in the production process.

Key Differences between Audio Engineering and Sound Engineering Content creators and professionals in the sound industry often use the terms audio engineering and sound engineering interchangeably. However, these two professions are not the same. While they share some similarities, they differ in their primary focus, work environment, equipment and tools used, and qualifications required.

Primary Focus

At its core, audio engineering deals with the manipulation of audio signals to achieve the desired sound quality. Audio engineers use various techniques to record, edit, mix, and master audio tracks to create polished, high-quality sound output for music, film, TV shows, and other forms of media. On the other hand, sound engineering encompasses all aspects of audio engineering but also includes sound design, live event sound, and sound system setup and maintenance. Sound engineers work with live sound at events, design soundscapes for films and TV shows, and set up sound systems in venues like concert halls, arenas, and theaters.

Work Environment

Audio engineers typically work in recording studios and other post-production facilities. They may work with musicians, producers, and other audio professionals to create and edit audio tracks for albums, films, and TV shows. Sound engineers, on the other hand, work in a range of environments, from concert venues and theaters to film sets and post-production facilities. They may travel frequently and work long hours, especially during live events.

Equipment And Tools Used

Audio engineers use a range of equipment and tools, including microphones, audio editing software, mixing consoles, and studio monitors. They may also use hardware such as compressors, preamplifiers, and equalizers to manipulate audio signals. Sound engineers use similar equipment as audio engineers, but they also work with sound systems, including speakers, amplifiers, and digital signal processors (DSP). They may also use specialized software for sound design and live sound mixing.

Qualifications Required

To become an audio engineer, one typically needs a degree in audio engineering, music production, or a related field. They should also have technical skills and experience with audio equipment and software. To become a sound engineer, one may need a degree in audio engineering, music production, or theater production. They should also have experience with sound systems and live sound mixing. Sound engineers may also need to be certified in specific equipment or software. In conclusion, while audio engineering and sound engineering share some similarities, they differ in their primary focus, work environment, equipment and tools used, and qualifications required. Understanding the differences between these two professions is essential for anyone looking to pursue a career in the sound industry.

What is the Difference between Audio Engineer And Sound Engineer


Credit: m.youtube.com


Career Opportunities For Audio And Sound Engineers


Audio engineers are responsible for recording and manipulating sound for various applications, while sound engineers work with live sound systems in a variety of settings. Both paths offer promising career opportunities in the music, film, and broadcasting industries.

When it comes to the entertainment industry, audio and sound engineers are two of the most vital professions. Though the terms audio engineer and sound engineer are often used interchangeably, they have different roles and responsibilities. While audio engineers focus on recording and producing sound in music studios, sound engineers deal with sound systems and acoustics in live events.

Audio Engineer Career Paths

Being an audio engineer can be a challenging and rewarding career choice. With the surge of online media platforms and the increased demand for high-quality audio, there are numerous career opportunities for audio engineers. Some of the career paths an audio engineer can pursue include:

  • Music production: Working in a music studio recording, editing and mixing sound for music albums and movies
  • Radio broadcasting: Recording voiceovers, interviews, and various shows for radio stations
  • Game audio production: Creating a unique audio experience for games, from sound effects to background music
  • Sound design: Creating and recording sound effects for television shows, movies, and video games
  • Post-production: Mixing and editing sound for television shows, documentaries and movies

Sound Engineer Career Paths

Sound engineers are responsible for setting up and operating sound systems for live events, such as concerts, corporate events, conferences and more. They need to have a good understanding of acoustics, different sound systems and types of microphones. A sound engineer’s career paths include:

  • Live events: Operating sound systems during live shows and creating the perfect sound experience for the audience
  • Corporate events: Providing sound support during conferences, meetings and other corporate events
  • Television and film production: Providing sound support during television shows and film production
  • Theatre production: Creating soundscapes and designing sound effects for theatrical shows and productions

Whether you choose to pursue a career as an audio or sound engineer, both professions require creativity, technical skills, attention to detail, and a passion for sound. The entertainment industry is constantly evolving, and there are a plethora of opportunities available for those who are passionate about audio and sound engineering.

Trends And Developments In Audio And Sound Engineering


Audio engineers are typically responsible for the technical aspects of recording, mixing, and editing music and sound. Sound engineers, on the other hand, might focus more on live events and installations, working with speakers, microphones, and sound systems. Although the roles can overlap, the main difference lies in the setting and scope of their work.

Audio and sound engineering is a fast-growing field, driven by the advancements in technology and the rising demand for high-quality sound in various industries. Audio engineers and sound engineers share many similarities, but there are some key differences in their roles and responsibilities. One of the most exciting aspects of this field is the continuous emergence of new technologies and innovations that are shaping the industry. Let’s take a closer look at some of the trends and developments in audio and sound engineering.

New Technologies And Innovations

One of the most notable technological advancements in audio and sound engineering is the rise of artificial intelligence and machine learning. These technologies are being used to create better sound quality, improve noise-cancellation, and enhance audio processing. For instance, sound engineers are now using machine learning algorithms to predict and remove unwanted sounds in live performances or interviews. Another emerging technology is immersive audio, which allows the creation of a three-dimensional sound experience that surrounds the listener. This technology is already being used in some movie theaters, video games, and virtual reality applications. Spatial audio is another innovation that enables creators to position sound sources in a virtual space using specific tools and software.

Future Career Prospects

The future looks bright for audio and sound engineers as there is a growing need for high-quality sound in various sectors. More and more businesses are realizing the importance of sound quality in their online presence, which has led to an increase in demand for sound engineering professionals. Additionally, with the impressive advancements in technology, the need for professionals with up-to-date technical skills and knowledge is higher than ever. Some of the careers that are popular in this field are audio engineer, sound technician, recording engineer, and mix engineer. These professions require a lot of creativity, skill, and patience, as well as a solid background in physics, electronics, and computer science. However, there are many training programs and courses available for those interested in pursuing a career in this field. In conclusion, audio and sound engineering is a dynamic and exciting field that is constantly evolving. With emerging technologies and growing demand, this field offers numerous career opportunities for those with the right skills and training. Whether you aspire to be an audio engineer, sound technician, or recording engineer, you can expect a promising future in this fast-paced industry.

What is the Difference between Audio Engineer And Sound Engineer


Credit: www.indeed.com


Pros And Cons Of Pursuing Audio Engineering Vs. Sound Engineering


Audio engineering and sound engineering may sound similar, but they have distinct differences. Audio engineers focus on the technical side of recording and editing a sound, while sound engineers handle the live sound at events. The pros and cons of pursuing each field should be carefully considered before making a decision.

Pros and Cons of Pursuing Audio Engineering vs. Sound Engineering Audio engineering and sound engineering are often used interchangeably, but they are not the same thing. While both deal with the manipulation of sound, their applications and job roles differ. Understanding the differences between these two fields is important for anyone considering pursuing a career in either one. Here are the advantages and disadvantages of pursuing audio engineering vs. sound engineering:

Advantages Of Audio Engineering

Audio engineering is a technically challenging field that involves recording, mixing, and manipulating sound for various media platforms such as movies, music, and broadcasting. Some advantages of pursuing a career in audio engineering are:

  • Opportunities to work with high-profile performers and artists.
  • The chance to use cutting-edge technology and equipment.
  • Ability to work in a variety of industries, including music, television, film, and gaming.
  • Potential for high earning potential with experience and expertise.

Disadvantages Of Audio Engineering

As with any field, there are also some disadvantages of pursuing a career in audio engineering, such as:

  • Highly competitive job market with limited opportunities
  • Long hours in recording studios with unpredictable schedules.
  • Success in the field is largely dependent on having a strong network of contacts and experience.
  • Newcomers may struggle to find work without first gaining experience and building up a portfolio of work.

Advantages Of Sound Engineering

Sound engineering is a diverse field that encompasses various roles related to the production, manipulation, and dissemination of sound. Here are some advantages of pursuing a career in sound engineering:

  • Ability to work in diverse industries, including music, film, television, sporting events and live concerts.
  • Opportunities to work on large-scale projects such as festivals or stadium events.
  • Potential for high earnings for experienced sound engineers with a strong portfolio of work.
  • Chance to work in exciting environments with lots of creative freedom.

Disadvantages Of Sound Engineering

While there are many advantages to sound engineering, there are also some disadvantages, including:

  • Highly competitive job market with limited opportunities, particularly at the entry-level.
  • Long hours and frequent travel depending on the project and the industry.
  • Success in the field largely depends on maintaining a strong network of contacts and continuously honing skills.
  • Heavy workload with tight deadlines can lead to burnout without proper time management.

In conclusion, both audio engineering and sound engineering fields are exciting and challenging. Both fields require hard work, dedication, and a passion for sound. Understanding the differences between the two fields in terms of opportunities, benefits, and challenges should enable you to make informed choices about which field to pursue and what to expect when starting your career.

Frequently Asked Questions Of What Is The Difference Between Audio Engineer And Sound Engineer


Is A Sound Engineer The Same As An Audio Engineer?


Yes, a sound engineer is the same as an audio engineer. Both terms are used interchangeably to refer to professionals who work with sound equipment and technology to record, mix, and produce audio for a variety of applications, including music, film, television, and live events.


What Does A Audio Engineer Do?


An audio engineer is a professional responsible for recording, mixing, and mastering sound for musical compositions, TV shows, movies, and other forms of multimedia. They ensure that the final product sounds clear, balanced, and professional. Most work in recording studios or for broadcasting companies.


What Is The Difference Between Sound Design And Audio Engineering?


Sound design involves creating or manipulating audio elements to create a specific mood, tone or atmosphere for a particular media project. Audio engineering is the technical work to mix, record, edit, and master the sound elements of a specific medium to ensure the best quality output.


In simpler words, sound design is artistic, while audio engineering is technical.


Do Audio Engineers Make Money?


Yes, audio engineers can make good money depending on their skills, experience, and the type of work they do. Salaries typically range from $30,000 to $100,000+ per year, with higher salaries for those who work in entertainment, music, or broadcasting industries.


Conclusion


Both audio engineers and sound engineers have distinct roles in the music and entertainment industries. While they share some similarities, they differ in their areas of expertise and responsibilities. Audio engineers primarily focus on recording and mixing music, while sound engineers work with live sound and installation projects.


Regardless of their differences, both these professionals play crucial roles in delivering high-quality sound experiences to the audience. It is important to understand their distinctions to make informed decisions when seeking their services.

Categories
Archive

How To Layer Guitars In A Mix Finding Harmony Amidst The Chaos

To layer guitars in a mix, start with two complementary guitar parts that don’t clash. Then, use EQ and panning to create a sense of space and avoid muddiness.


Layering guitars in a mix can be challenging but rewarding. It’s all about creating harmony amidst the chaos of multiple instruments, so each has its own space in the mix. One approach is to choose two guitar parts that complement each other and avoid clashing frequencies.


You can then use EQ to carve out space for each guitar and panning to spread them across the stereo field. Adding distortion, reverb, and delay can also help create a sense of depth and dimension. With careful attention to detail, layering guitars can add texture and richness to any mix.

How To Layer Guitars In A Mix Finding Harmony Amidst The Chaos


Credit: www.masteringthemix.com


Why Layering Guitars Matters


Layering guitars is crucial to create a well-balanced mix. It allows for multiple guitar parts to coexist harmonically, making the track sound fuller and more dynamic. By utilizing different tonal ranges and techniques, guitar layering can add depth and dimension to any production.

Layering guitars is a commonly used technique to create a richer sound and add depth and texture to a track. It involves recording multiple guitar tracks and layering them on top of each other to create a more complex and multi-dimensional sound. By recording each guitar part separately, you can tweak the settings for each track to create a cohesive yet dynamic sound. Here are some reasons why layering guitars matters:

Creating A Richer Sound

Layering guitars allows you to create a fuller sound that one guitar alone cannot achieve. By recording different guitar parts with different tonal qualities and playing styles, you can create a unique and full-bodied sound that fills up the frequency spectrum. For example, you can layer clean guitar chords with distorted power chords to create a more complex, interesting sound. This also makes the track sound more polished and professional.

Adding Depth And Texture

Layering guitars can also add depth and texture to a track. By recording multiple guitar tracks and panning them to different positions, you can create a sense of space and dimensionality. You can also experiment with different effects such as reverb and delay to create a layered, atmospheric sound. This adds interest and complexity to the track and makes it more engaging for the listener. In conclusion, layering guitars is an essential technique to add richness, depth and texture to a track. By experimenting with different guitar parts, settings and effects, you can create a unique and professional sound that stands out from the rest.

Getting Started: Pre-production

Layering guitars is an art that can make or break a song. It takes time and effort to find the right balance so that each guitar part complements the others. Pre-production is a crucial aspect of layering guitars, as it lays the foundation for a good mix. In this guide, we’ll take you through the steps of pre-production to help you get started.

Choose Your Guitars

The first step in layering guitars is choosing which guitars to use. Each guitar has its unique tonal quality. It’s essential to choose guitars that complement each other to avoid clashing tones. For example, using a Les Paul and a Stratocaster in the same mix can work, but it can also create tonal clashes. It’s essential to experiment with different guitar combinations to find the best fit.

Consider Tuning

Tuning is another crucial aspect of pre-production. It’s essential to ensure that all guitars used in the mix are in tune with each other. Tuning mismatch can cause dissonance and make it difficult to achieve a cohesive mix. Additionally, it’s vital to consider alternate tunings if you want to achieve a unique sound. Standard tuning works for most songs, but if you want to try something different, explore alternate tunings like dropped D or open G.

Explore Effects

Effects like reverb, delay, and modulation can add layers to your guitar tracks. It’s essential to experiment with different effects to find the right balance of tonal quality. Reverb can add space and depth to guitar tracks while delay can create a sense of movement. It’s important not to go overboard with effects as it can drown out the main guitar track or create unnecessary confusion.

Pre-production is an essential step in creating a cohesive mix that sounds great. Choosing the right guitars, tuning them correctly, and experimenting with effects will help you achieve a balance in your mix. Once you’ve completed pre-production, you can move on to the recording stage and mix your guitars to create a fantastic track.


Practical Tips For Layering Guitars


Layering guitars in a mix can create a rich and complex sound, but it can also lead to chaos if not done correctly. To find harmony in your mix, use practical tips such as panning, EQing, and selecting the right tone for each layer.


With these techniques, you can create a balanced and dynamic guitar sound.

Layering guitars in a mix is an art that can be challenging, but when done correctly, it can make your music sound fuller and richer. Finding harmony amidst the chaos is essential, and practical tips can help you achieve that.

Try Different Voicings

Experimenting with different guitar voicings can make a huge difference in layering guitars. Instead of playing the same chords, try different inversions, arpeggios, and melodies. It will create a blend of different tones that’ll add depth to your music. Using a capo on the guitar can also help create higher or lower voicings of a particular chord. It’s important to avoid over-layering, as it can cause the guitars to clash with each other.

Focus On Tone And Texture

Each guitar in your mix should have its unique tone and texture. Focus on the equalization, with each track having its frequency range. Subtle changes in reverb, delay, and compression settings can also add texture and depth to the mix. It’s essential to keep the guitar parts complementary rather than competitive. One trick is to assign different frequency ranges to each track, so they work together harmoniously.

Panning For Space

Panning is an effective technique to create space and separation between each guitar track. Panning guitars to the left, center, and right can create a sense of depth, as if they’re coming from different sides of the stage. This can make the mix sound more immersive and engaging. One important thing to keep in mind is to use panning judiciously. Over-panning can make the mix sound unnatural and unbalanced.

Know When To Hold Back

Sometimes, less is more in layering guitars. It’s essential to know when to hold back and let a particular guitar part stand on its own. Trying to add more layers can make the mix sound cluttered. It’s essential to give each guitar part its space in the mix, allowing it to breathe and shine. It’s also important to listen to the mix and identify any masking of frequencies that could make the mix sound muddy or too dense. Using these practical tips can help you create a layered guitar mix that sounds rich, natural, and engaging. By exploring different combinations of tones, textures, and panning, you can add depth and nuance to your music.

Finding The Right Arrangement

Layering guitars in a mix can create a rich, full sound, but it can also create chaos if not done properly. The key to finding the right arrangement is to use different guitars to play different parts and give each guitar its own space in the mix.

Start With Rhythm Guitars

The foundation of any guitar mix is the rhythm guitar. This guitar provides the framework for the song, and it is where you start to build the sound. It is important to choose the right guitar and the right amp to get the desired sound. Once you have the right sound, you can start layering other guitars on top.

  • Choose the right guitar and amp
  • Start building the sound from the rhythm guitar

Building Up The Sound

Once you have the rhythm guitar in place, you can start layering other guitars to add depth and texture. You can add a second rhythm guitar to fill out the sound, or you can add a clean guitar or a guitar playing arpeggios to add a melodic element. You can also pan the guitars to different positions in the mix to create a wider sound.

  • Add a second rhythm guitar or a guitar playing arpeggios
  • Pan the guitars to different positions in the mix

Lead Guitar And The Melodic Element

The lead guitar is where you can really make a guitar mix shine. This guitar plays the melody of the song and adds a sense of urgency or emotion to the mix. It is important to choose the right guitar and the right amp for the lead guitar to get the desired tone. You can also use effects, such as distortion or delay, to enhance the sound of the lead guitar.

  • Choose the right guitar and amp for the lead guitar
  • Use effects, such as distortion or delay, to enhance the sound of the lead guitar

Finishing Touches

Once you have all the guitars in place, it’s time to add the finishing touches. You can use EQ and compression to balance the guitars and make sure each guitar has its own space in the mix. You can also adjust the levels of each guitar to make sure they are sitting in the right place in the mix.

  • Use EQ and compression to balance the guitars
  • Adjust the levels of each guitar to make sure they are sitting in the right place in the mix

Working With The Mix

Working with the mix can be a daunting task, especially when it comes to layering guitars. With so many tracks to manage, it’s easy to lose track of each individual part and end up with a disorganized mess. However, with a few key techniques, you can create a well-balanced mix with multiple guitar layers that complement each other and don’t clash. In this article, we’ll explore how to layer guitars in a mix and find harmony amidst the chaos.

Eq And Compression

One of the most crucial aspects of layering guitars is EQ and compression. Each guitar layer should have its own place in the frequency spectrum, and EQ can help achieve this. A common technique is to carve out space for each layer by using a high-pass filter to remove unnecessary low frequencies. This creates room for the bass and kick drum to sit comfortably in the mix.

Compression helps control the dynamic range of each layer and can help make them sound more cohesive. Try using light compression on each guitar track to even out any inconsistencies in volume and add sustain to the notes.

Creating Space With Reverb And Delay

Reverb and delay are essential tools for creating space in a mix. They can help blend multiple guitar layers and make them sound like they are playing in the same room. However, it’s important to use them sparingly to avoid a washed-out sound.

For example, you can use a short reverb on a lead guitar to make it sound like it’s in front of the mix, while a longer reverb on a rhythm guitar can create a sense of depth and ambience. Delay can be used to create an echo effect or add rhythmic interest to a part.

Balancing The Levels

Once you’ve EQ’d, compressed, and added space to your guitar layers, it’s time to balance their levels. This step is critical to ensure each layer contributes to the overall sound without overpowering the rest of the mix.

Start by setting the levels of the prominent parts, such as the lead guitar, and then adjust the other layers to support it. Pay attention to any frequency clashes between guitar layers and adjust the EQ as necessary.

Tip: Try using visualization plugins to help identify frequency clashes and balance the levels.

With these techniques, you can successfully layer multiple guitar tracks in a mix and create an interesting and dynamic sound. Remember to experiment with different EQ and compression settings, as well as reverb and delay settings to find the right balance for your specific mix.

How To Layer Guitars In A Mix Finding Harmony Amidst The Chaos


Credit: www.masteringthemix.com


Tips For Layering Acoustic Guitars


Layering acoustic guitars in a mix can be challenging, but with practice and patience it can produce a rich and harmonious sound. Start by assigning different parts to each guitar, focusing on tone and timing. Experiment with panning and effects to create a sense of depth and space.

When it comes to mixing acoustic guitars, layering can add depth and richness to your music. However, it can also quickly become chaotic if you don’t have a plan. Here are some tips on how to layer acoustic guitars in a mix and find harmony amidst the chaos.

Leave Some Space

When layering acoustic guitars, it’s important to give each layer enough room to breathe. This means leaving gaps in the frequency spectrum for each guitar to occupy. To achieve this, try panning one guitar to the left and the other to the right. Also, you can EQ each guitar differently to fill different frequency ranges. For instance, a brighter guitar works well on the right while a warmer-sounding one can be good for the left. This technique provides listeners with clearer audio that is catchy and easy on the ear.

Experimenting With Capos And Tunings

Playing with different tunings and capos is another way to layer acoustic guitars. Capos let you change the key of your guitar without retuning it, providing a full chord sound without the wall of sound effect that many layers can bring. This technique creates a unique sound that is different from the original acoustic guitar sound. You can also experiment with open tunings to give your guitars more depth or texture.

Playing With Double-tracking

Double-tracking involves recording the same guitar part twice and panning them slightly left and right. This technique adds width to the track and provides a great sense of space. If you’re using more than two guitars, double-tracking each one will add complexity to the sound. Ensure that each guitar is double-tracked correctly with a distinct tone and character that complements the rest of the mix. In conclusion, the art of layering acoustic guitars requires patience and is detail-oriented. Utilizing tools like panning, different capos and tunings, and double-tracking rightly can help you create rich, deep soundscapes that draw listeners in.

How To Layer Guitars In A Mix Finding Harmony Amidst The Chaos


Credit: www.masteringthemix.com


Frequently Asked Questions Of How To Layer Guitars In A Mix Finding Harmony Amidst The Chaos


How To Layer Guitars In A Mix?


To layer guitars in a mix, start by recording each guitar part separately and making sure they are in tune. Then, pan each guitar to opposite sides of the stereo field and adjust the levels so they blend well together.


Use EQ to carve out space for each guitar and consider adding effects, such as reverb or delay, to create depth and complexity. Experiment with different arrangements and listen to the mix on multiple devices to ensure it sounds good everywhere.


How Do You Mix Guitars?


To mix guitars, first make sure each guitar track is recorded well and EQ’d appropriately. Pan each track to separate them in the stereo field and adjust volume levels so they blend well together. Use panning, EQ, compression, and reverb to create a coherent, balanced guitar mix.


How Do You Layer Guitars In A Mix?


To layer guitars in a mix, you start by recording multiple guitar parts with different tones and textures. Then, you pan them to create a wider soundstage and add effects to enhance their individual qualities. Finally, you adjust the levels and frequencies of each track to find the perfect balance.


Should I Use The Same Type Of Guitar For Each Layer?


No, it’s better to use different types of guitars for each layer to create a more interesting and diverse sound. Acoustic, electric, and bass guitars can all be used in a mix. You can also experiment with different playing styles and string gauges to add variety.


Conclusion


In wrapping up, mastering the art of guitar layering is integral to achieving a harmonious sound amidst the chaos in a mix. By blending different guitar tones, frequencies, and textures, you can create an immersive audio experience that engages your listeners on a deeper level.


Remember to experiment with different layering techniques, use the right tools, and always trust your ears. With these tips in mind, you’ll be well on your way to becoming a guitar layering pro, ready to elevate your music to the next level.

Categories
Archive

Whats New In Ableton Live 11 All New Features Of Live 11 Explained

Ableton Live 11 is the latest version of Ableton’s popular digital audio workstation (DAW) software. It includes several new features such as comping, MPE support, and improved Max for Live integration.


Live 11 also introduces new devices like Hybrid Reverb, Spectral Resonator, and updates to existing ones like EQ Eight and Redux. Also, the software is designed to help musicians and producers become more creative and perform better by providing them with tools and features that enhance their workflow and inspire new ideas.

Related reading: FL Studio vs. Ableton Live A Comprehensive Comparison of Pros and Cons and Mastering In Ableton Live 10. For background, see the Wikipedia article on Ableton Live.


Moreover, with its intuitive and streamlined user interface, Live 11 is a must-have for anyone who wants to make music and push their creative boundaries.

Whats New In Ableton Live 11 All New Features Of Live 11 Explained


Credit: m.youtube.com


New Features In Ableton Live 11


In addition, the update has released new features, including comping, MPE compatibility, and improved sound design and processing. These updates provide a smoother workflow, enhanced creativity, and more control for music producers.

Furthermore, Ableton Live is a popular digital audio workstation among musicians, producers and DJs around the world. The latest version of the new version is now released with exciting new features that are sure to enhance your music-making capabilities.

Comping Improvements for Ableton Live 11

Additionally, Live 11 introduces several improvements to its comping capabilities. Comping is the process of selecting and combining the best parts of multiple takes to create a final, polished performance. The comping improvements in the update makes this process easier and more efficient than ever before. With the new take recording feature, you can now record multiple takes of a performance and view them all in the same clip. Take lanes let you pick and comp the best parts of each take. The final performance blends all your best moments.

Mpe Compatibility for Ableton Live 11

MPE compatibility is another new feature in the new version. Also, MPE stands for MIDI Polyphonic Expression, a new standard for expressing more musical expression in MIDI messages. MPE is great for working with MIDI controllers that have pressure-sensitive pads and keys. With MPE compatibility, you can now record and edit MPE-compatible MIDI data directly in Ableton Live. This means you can now fully take advantage of the expressive capabilities of MPE MIDI controllers, and create more nuanced and dynamic performances than ever before.

New And Upgraded Devices for Ableton Live 11

In addition to the above new features, Ableton Live 11 also introduces several new and upgraded devices. Moreover, one new device is the Hybrid Reverb. It combines a digital reverb algorithm with an algorithmic reverb, allowing you to create unique and complex reverb sounds. Another new device is the Spectral Resonator. This device allows you to extract harmonic structures from sound samples and then process them with spectral filters and resonators. This results in new and interesting sounds that can add depth and complexity to your music.

Furthermore, some of the existing devices in Ableton Live have been upgraded for better performance and functionality. For example, the EQ Eight device now has updated graphics and a new “Peak & RMS” mode that allows you to measure both peak and RMS levels of a signal. In conclusion, Ableton Live 11 is a powerful and feature-packed update that adds several new and exciting features for musicians, producers, and DJs. Whether you’re interested in comping improvements, MPE compatibility, or the new and upgraded devices, Ableton Live 11 has something for everyone.

Whats New In Ableton Live 11 All New Features Of Live 11 Explained


Credit: m.youtube.com


Creative Possibilities With Live 11

Furthermore, Ableton Live 11 is the latest version of the popular music production software that comes packed with an array of new features. Live 11 expands your creative potential with a wide range of new tools and effects that enable you to produce music in new and exciting ways.

Hybrid Reverb for Ableton Live 11

Additionally, the Hybrid Reverb is a powerful new algorithmic reverb that combines a convolution reverb with a digital algorithmic reverb to give you unprecedented control over your sound. Hybrid Reverb blends convolution and algorithmic reverbs into rich tails. You can balance the two to create new kinds of reverb.

Tempo Following for Ableton Live 11

Live 11 introduces a new feature called Tempo Following, which automatically adjusts the tempo of your project in real-time based on external audio input. Also, this means you can easily sync your Live sets with other instruments or performers. This allows you to create more dynamic, expressive performances that are perfectly in sync.

Note Chance for Ableton Live 11

Moreover, Note Chance is an innovative feature that introduces probability and randomness to your MIDI patterns. With Note Chance, each note in your pattern can be assigned a probability value, which determines the likelihood of the note being triggered. This gives you greater control over your patterns and allows you to create truly unique and unpredictable rhythms.

Whether you’re a seasoned producer or just starting out, Live 11 is an essential tool for anyone looking to explore new creative possibilities in music production.


Workflow Enhancements For Music Production

Workflow enhancements play a crucial role in making music creation an enjoyable experience. With Ableton’s new update, Live 11, creators can delight in the innovative features that will enhance the creative process, optimize workflow, and improve the quality of their work. The update comes with several improvements, including user interface changes, new effects, and instrument collections, and much more. Among the notable improvements are the enhancements focused on the Workflow Enhancements for Music Production.

Velocity And Midi Probability

Velocity controls how loud a note plays. In Ableton Live 11, you can also randomize velocity per note with velocity chance. This feature provides better control of dynamics on live performances. It is an incredibly useful technique when working on sampled instruments. The MIDI Probability function is a new addition to Ableton Live 11. It allows producers to create more organic rhythms by varying the probability of specific MIDI notes. This feature helps produce more human-like rhythms that are less robotic and more natural.

Linked Track Editing

Ableton Live 11 now allows for track editing from a single track. This feature is a spectacular development for projects with a multitude of tracks. Meanwhile, it provides effortless navigation and project management. The Linked Track Editing feature saves time and effort by enabling users to edit automation, clips, and other parameters on multiple tracks at once.

Performance Improvements

Ableton Live 11 comes with amazing performance improvements aimed at speeding up workflow and enhancing overall performance. The program loads faster, making it quicker to create and switch between multiple projects. The program now supports multi-core processors, improving the CPU usage when working on large projects. These performance upgrades significantly improve the user experience and offer smooth operation when working on larger projects.

Whats New In Ableton Live 11 All New Features Of Live 11 Explained


Credit: www.groove3.com


How Live 11 Supports Live Performance


Live 11 offers a range of new features that are perfect for live performances. These features include tempo following, playback at half-speed, and more flexible rhythmic work. With these new tools, musicians can create an immersive experience for their audience and take their sets to the next level.

Live 11 brings along several new features in its arsenal. It’s an absolute delight for music producers and performers who want to groove to the beat like never before. Let us dive into one of the crucial subheadings – ‘How Live 11 Supports Live Performance.’ Here we will discuss in detail, three essential performance-oriented features – Macro Snapshots, Expression Control, and Visual Feedback.

Macro Snapshots

With Macro Snapshots, you can now save a snapshot of the device’s parameters and recall it later. This feature helps the performers switch between soundscapes within the same device quickly. Imagine tweaking the filter cutoff, resonance, and LFO rate for a synth in your performance set. By the end of the session, you have a sound that you adore. Macro Snapshots allow you to save this exact sound and recall it whenever you want. You can then switch back to the original settings without having to adjust the parameters manually.

Expression Control

Live 11’s Expression Control empowers you to perform a delicate balance of sound manipulation. In the studio, you can set up automated parameters to change over time, through automation curves. In a session, Expression Control allows you to override the automation and adjust the parameters manually. Thus, you can add a human touch to your performance, all the while ensuring that the sound is still in sync. It’s just like having an additional layer of control in a live setup, elevating your performance to the next level.

Visual Feedback

Visual Feedback provides you with feedback on critical aspects of your performance. For instance, with the new Ruler in Arrangement mode, you can see a live display of the distance between two points. This feature allows you to keep an immaculate sense of timing throughout your performance. Another example is the new display meters on track volume and device parameters. These meters light up in bright colors and flicker with the beat. This makes it easy to keep an eye on the music’s pulse. With Visual Feedback, you can stay on top of your sound plus experience the vibe as well.

In conclusion, Live 11 caters to all the needs of a performer. It ensures that music creation is as enjoyable as it is robust. With Macro Snapshots, Expression Control, and Visual Feedback, Live 11 helps artists create stunning performances that perfectly sync with their vibes.

Frequently Asked Questions On Whats New In Ableton Live 11 All New Features Of Live 11 Explained


What’s New In Ableton Live 11?


Ableton Live 11 features new and improved features that enhance the user’s music production performance. These include comping capabilities, 16 new MIDI effects, flexible routing options, and improved sound libraries. The update also includes new devices such as Hybrid Reverb and Spectral Resonator.


What Changes In Ableton Live 11?


Ableton Live 11 introduces comping, MPE support, new instruments, and effects. It offers new devices like Hybrid Reverb, Saturator, Spectral Resonator, and more. Its clip view adds cursor recording and editing, MIDI polyphonic expression, and improved automation editing. The performance features have been enhanced with tempo-following, follow actions, and MPE compatibility.


What Is New In Ableton 11.3 11?


Ableton 11. 3 11 comes with improved performance and new features. It includes MPE compatibility to allow for more expressive playing, audio and MIDI recording enhancements, and updates to various instruments and effects. The update also includes improved visualizations and workflow enhancements.


What Are The Benefits Of Ableton 11?


Ableton 11 brings several new features, including comping, MPE support, linked track editing, tempo following, and new devices. Comping allows you to piece together the best takes, while MPE support is perfect for MIDI controllers. Linked track editing simplifies the editing process, and tempo following lets Ableton adapt to live drummers.


New devices like Hybrid Reverb and Spectral Time add to its creative possibilities.


Conclusion


Ableton Live 11 is an impressive and noteworthy update that includes various new features, effects, and tools to enhance your music creation process. From Tempo Following to MPE support, Ableton has stepped up their game with this update. There’s no doubt that this latest version of Ableton Live will take your music-making experience to an entirely new level.


We can’t wait to see what the future holds for this incredible software. Get your hands on Ableton Live 11 today and start your musical journey with confidence and creativity!

Categories
Archive

What Is The Purpose Of A Mix And Master Why Choose Us For Your Next Record

A mix and master aim to enhance the quality and clarity of a recording. Choose us for your next record because we deliver professional results that meet your expectations and preferences.


Your music should sound the way you intend it to. To achieve this, you need to consider mixing and mastering your tracks. This process involves making technical adjustments that enhance the sonic qualities of a recorded piece. It balances the different elements of a track to ensure that they blend smoothly, and that the sound is consistent across all playback devices.


This is important because good mixing and mastering can make the difference between an amateurish and a professional recording. At our company, we have a team of experienced engineers who have the skills and tools to refine your music to the highest standards. We deliver crystal-clear sound, powerful bass, vibrant vocals, and well-defined instrumentals that capture the spirit and soul of your music. Our work is tailored to your style and preferences, and we strive to bring out the best in your sound. Whether you are a solo artist, a band, or a record label, we can help you achieve your goals and take your music career to the next level.

What Is The Purpose Of A Mix And Master Why Choose Us For Your Next Record


Credit: bbchifisound.com


The Importance Of Mixing And Mastering

The Importance Of Mixing And Mastering cannot be overstated in the music production process. Mixing and mastering play a critical role in enhancing the sound quality of your track, ensuring that it sounds professional, balanced, and polished. At [Company Name], we are passionate about producing top-notch music that will resonate with your audience, and we make use of the latest software and equipment to deliver excellent mixing and mastering services. Whether you are a beginner or a seasoned musician, our team of experts will help you to create music that stands out from the crowd.

What Is Mixing?

Mixing is the process of combining different tracks, sounds, and instruments to create a balanced and harmonious sound. In the mixing process, your music is given a cohesive sound, and all the different elements of the track are brought together in a way that is pleasing to the listener. Mixing involves adjusting the gain, EQ, compression, panning, and reverb of each track to ensure that they blend well together. Our mixing engineers at [Company Name] have years of experience fine-tuning every detail of your music to provide you with a polished, professional-sounding mix that complements your unique style.

What Is Mastering?

Mastering is the final step of the music production process. It involves enhancing the overall sound quality and loudness of your track, thus making it suitable for distribution. During mastering, any issues that may have been missed during the mixing process are addressed. Loudness levels are balanced, frequency levels are adjusted, and compression is added to improve the dynamic range of your music. Our mastering engineers at [Company Name] use the latest technology and equipment to deliver the best possible results for your music, thus ensuring that your tracks stand out in the competitive music industry.

How They Impact Your Record

Mixing and mastering are crucial in ensuring that your music stands out from the crowd. Mixing brings together all the different elements of the track into a cohesive sound that is pleasing to the listener, while mastering ensures that the overall sound quality and loudness are improved. Poor mixing and mastering can result in a track that sounds flat, lacks balance, and fails to capture the attention of your audience. At [Company Name], we understand how important the mixing and mastering process is to your music, and we provide exceptional services to ensure that your tracks are of the highest quality.


About [Company Name]
Our Services Description
Mixing We blend all the different elements of your track into a cohesive sound that is pleasing to the listener. Our mixing engineers use years of expertise to perfect the sound of your track.
Mastering We enhance the overall sound quality and loudness of your track, thus making it suitable for distribution. Our mastering engineers use the latest technology and equipment to deliver the best possible results for your music.
Production We offer end-to-end music production services, from songwriting to mixing and mastering. Our team of experts ensures that your music is of the highest quality and that it is tailored to suit your unique style.
Artist Development We provide personalized artist development services to help you grow as a musician. We offer mentorship, coaching, and training to help you refine your skills and expand your reach.

At [Company Name], we are passionate about producing music that resonates with your audience. We understand how important the mixing and mastering process is to your music, and we provide exceptional services to ensure that your tracks are of the highest quality. Whether you are a beginner or a seasoned musician, we have the expertise and equipment needed to take your music to the next level. Contact us today to learn more about our services.


The Benefits Of Professional Mixing And Mastering


Professional mixing and mastering enhances the quality of your music and helps it stand out in a competitive industry. With our expertise, we can ensure that your next record has exceptional sound quality and meets industry standards. Choose us for your mix and master needs to achieve a polished and professional sound.

When it comes to creating a successful record, there are many important steps to consider. One of the most crucial steps is mixing and mastering. If done properly, the result is a polished and professional sound that stands out from the rest. Here are a few of the benefits you can expect when you choose professional mixing and mastering with us:

Why Choose A Professional?

Choosing a professional for your mixing and mastering needs ensures that you get the best possible outcome. A professional has the experience and expertise needed to create a polished and professional sound for your record. They know how to use the latest techniques and equipment to ensure that your music is ready for distribution.

Consistency Across Formats

A professional mixing and mastering service also ensures that your music sounds great across all formats. Whether it’s streaming, CD or vinyl, a professional can ensure that your music is polished and sounds great on any platform. This is important, as fans expect to be able to listen to your music on any platform they choose.

Industry-standard Quality

A professional mixing and mastering engineer uses the latest equipment and techniques to ensure that your record meets industry standards. They have access to top-quality equipment and software that allows them to fine-tune every aspect of your record. This means that your music will sound just as great as the top-selling hits in the industry.

Experience And Expertise

Finally, when you choose our professional mixing and mastering service, you get access to our team’s extensive experience and expertise. Our engineers have worked on hundreds of records from a wide range of genres. This means that they know how to get the best out of your music, no matter what style it is. They can work with you to create a sound that you love, and that helps your music stand out. In conclusion, choosing a professional mixing and mastering service is a crucial step in ensuring that your music is ready for distribution. It ensures that your music sounds polished and professional across all platforms and meets industry standards. With our team’s expertise and experience, we can help you create a record that stands out from the rest.

Our Approach To Mixing And Mastering


At our studio, we understand the importance of a well-crafted mix and master to make your music sound its best. Our approach combines technical expertise and a keen ear for detail to ensure that your song has the right balance, clarity, and impact.


Choose us for your next record and let us bring out the full potential of your music.

Collaborating with artists, applying advanced techniques and tools, and tailoring our services to your vision are the core principles that guide our approach to mixing and mastering. We believe that each artist has a unique sound and vision, and it’s our job to ensure that their music is polished and ready for the world to hear.

Collaboration With Artists

We understand that music is a personal expression, and that’s why collaboration with our clients is at the heart of our approach. Our team of professionals works closely with every artist to understand their creative goals and vision. We provide regular updates throughout the mixing and mastering process, and we welcome feedback, ensuring that you’re happy with the final product.

Advanced Techniques And Tools

At our studio, we use the latest technology and advanced techniques to ensure that your music stands out from the crowd. Whether it’s removing background noise, enhancing vocals, or perfecting the sound of each instrument, our team has the expertise to deliver exceptional quality. We passionately explore new and innovative techniques to ensure that we stay ahead of the curve.

Tailored To Your Vision

We know that every artist has a unique vision for their music, and that’s why we tailor our services to fit your needs. Our experienced artists take the time to understand your style and preferences to ensure that your music reflects your personality and goals. We offer bespoke services that match your vision, while providing expert advice to make your music the best it can be. In conclusion, our approach to mixing and mastering ensures that every artist who chooses us for their next record is presented with an exceptional product. We strive to capture the uniqueness of your music, polish it to perfection, and bring it to the next level, making sure your music is everything you envisioned and more.

The Results Of High-quality Mixing And Mastering


High-quality mixing and mastering can make all the difference when it comes to the final sound of your record. With our expertise and state-of-the-art equipment, we can enhance your audio to its full potential. Choose us for your next project to ensure a professional and polished result.

Maximizing The Potential Of Your Record

High-quality mixing and mastering has a tremendous impact on the potential of your record. It is a process where individual tracks are blended together to create a balanced and cohesive sound. Our team of professionals understands the importance of highlighting the strengths of your music and improving the weaker sections. We focus on enhancing the quality of your sound, fixing any technical issues, and creating an overall cohesive and polished final product.

Clarity And Balance

Clarity and balance are two essential elements of a great mix and master. We use advanced techniques to ensure clarity in the vocals, instruments, and percussion. Each element is given enough space to shine and occupy its rightful place in the production. We maintain a delicate balance between each track while ensuring that every sound complements the others. The result is a clear and crisp sound that is pleasing to the ears and loved by your listeners.

Increased Listenership And Engagement

High-quality mixing and mastering services can significantly increase your listenership and engagement. With a well-balanced and polished sound, you can improve the overall quality of your music, making it more enjoyable and engaging for your listeners. A professional mix and master can make your music stand out from the rest, making it more appealing to listeners and ultimately leading to increased plays and shares. Our team specializes in delivering mixes that resonate with your target audience while remaining true to your unique sound.

The Benefits Of Professional Mixing And Mastering
High-quality sound that is clear, balanced, and polished
Maximizes the potential of your music and highlights its strengths
Increases listenership and engagement
Makes your music stand out from the rest
Improves the overall quality of your music

Choose us for your next record and experience professional mixing and mastering services that will enhance the quality of your music, increase your listenership, and take your music career to the next level. Our team of experts will work with you to deliver a high-quality final product that resonates with your audience while remaining true to your unique sound.

The Importance Of Choosing The Right Mix And Mastering Service

When it comes to music production, having the right mix and mastering is crucial for a successful recording. A mix and mastering service will take your raw tracks and transform them into a polished and professional sound. However, not all mix and mastering services are created equal. Choosing the right one can be the difference between a hit and a miss. In this article, we will discuss the importance of choosing the right mix and mastering service and why you should choose us for your next record.

Expensive Does Not Always Mean Better

Many musicians assume that the most expensive mix and mastering service is the best one. However, that is not always the case. While higher prices may indicate more experience or better equipment, it does not always guarantee a better result. In fact, some of the best mix and mastering can be done by smaller, more affordable services. Choose a service that fits your budget and has a track record of delivering high-quality work.

Experience And Reputation

Experience and reputation are two of the most important factors to consider when choosing a mix and mastering service. The more experience a service has, the more likely they are to deliver quality work. Additionally, take a look at their reputation in the industry. Are they well-respected? Do they have good reviews from past clients? This can be a good indicator of their reliability and quality of work.

Collaboration And Communication

Another important aspect to consider is the level of collaboration and communication the service offers. A good mix and mastering service should be able to work closely with you to understand your vision for the track and make sure it comes to life in the final product. Communication is key, especially when it comes to revisions and edits. Look for a service that values collaboration and has clear communication channels.

Portfolio And Reviews

Finally, it is important to take a look at the service’s portfolio and reviews. A strong portfolio will give you a good idea of their previous work and whether or not they have experience in your genre. Reviews from past clients can also be a helpful indicator of their reliability and quality of work. Look for a service that has a robust portfolio and positive reviews from past clients.

At [Service Name], we understand the importance of a well-crafted mix and mastering. Our team of experienced professionals has a track record of delivering high-quality work across all genres. We pride ourselves on our collaborative approach and clear communication channels throughout the entire process. Plus, our portfolio and reviews speak for themselves. Don’t leave your music production to chance. Choose [Service Name] for your next record.


Frequently Asked Questions On What Is The Purpose Of A Mix And Master Why Choose Us For Your Next Record


Why Mixing And Mastering Is Important?


Mixing and mastering are essential steps in music production. Mixing balances the levels of individual tracks and adds effects to achieve a cohesive sound. Mastering ensures that the final mix meets industry standards, making it sound polished and professional. Without proper mixing and mastering, the music may sound amateurish and lack the desired impact.


What Is The Purpose Of Mixing Music?


The purpose of mixing music is to balance the individual elements of a song, such as vocals, drums, and instruments, into a cohesive and pleasing sound. This involves adjusting levels, panning, EQ, and effects to enhance the overall quality and impact of the music.


What Is The Purpose Of Mastering A Song?


Mastering a song is the final stage in music production that involves fine-tuning the sound, ensuring consistency, and optimizing the overall playback quality. The main goal of mastering is to make the final mix sound polished, balanced, and ready for distribution across various platforms.


What Does Mixing And Mastering Does For A Track?


Mixing and mastering improve the overall sound quality and clarity of a track. Mixing blends all individual elements, adjusting their levels, panning, and EQ to create a cohesive sound. Mastering takes the mixed track and applies final touches, including balancing frequencies, adjusting dynamics, and preparing for distribution.


Conclusion


A well-executed mix and master can be the difference between a mediocre and incredible sounding track. At our company, we prioritize attention to detail and a commitment to elevating your music to its fullest potential. With our experienced engineers and state-of-the-art equipment, we offer a seamless and efficient process to take your music to the next level.


Trust us to deliver the professional sound you deserve.


Categories
Archive

How To Use Music From Youtube Spotify And Apple Music As A Reference Track

To use music from Youtube, Spotify, and Apple Music as a reference track, simply import the song into your audio software. Then, match the settings of your project to the imported track including tempo and key, to use it as a reference.


As a music producer or audio engineer, it’s essential to use reference tracks to gauge the sound quality of your mixes. There are numerous reference tracks available online, and you may wonder how to use music from Youtube, Spotify, and Apple Music as a reference track.


Using reference tracks from popular streaming platforms is relatively easy and effective. However, you need to import the music into your software and match the settings with your project. Doing this will help you achieve a professional sound quality and benchmark the sound of your mixes with other popular music.


Why Use Reference Tracks?


Using reference tracks from music platforms like YouTube, Spotify, and Apple Music can be a valuable tool for musicians and producers to improve their own tracks. By analyzing the structure, sound design, and mixing of professionally produced tracks, artists can gain insight into what makes a successful song and apply those techniques to their own music.

If you are an aspiring musician or a music producer, you must have faced the dilemma of creating the perfect sound. You might have a clear idea of how you want your track to sound, but somehow, you can’t achieve it. You might have tried tweaking and turning every knob on your music software, but it’s not working. Here’s where reference tracks come to your rescue.

Benefits Of Using Reference Tracks

Using reference tracks can give you that much-needed reference point that helps you create a perfect sound. By using a reference track, you can observe how the music is balanced, and what frequency range is used. Depending on the outcome, you can adjust it to your music to get that similar sound.

How Reference Tracks Help In Music Production

When creating a track, it’s essential to keep in mind the end result. A reference track helps you keep that in mind. It guides you through the process of balancing all the elements in your music and achieving the desired sound. Reference tracks can also help you identify potential issues and areas that need improvement.

Conclusion

In conclusion, using reference tracks can significantly improve your music production skills. It can guide you in creating the perfect balance of frequency, volume, and overall sound. If you are new to music production, then using a reference track can help you a lot. So, the next time you face a creative block, try using a reference track, and you’ll be amazed at how much it can help you.

How To Use Music From Youtube Spotify And Apple Music As A Reference Track


Credit: www.masteringthemix.com


Music From Youtube As A Reference Track


Using music from popular streaming platforms like Youtube, Spotify, and Apple Music as a reference track in your own music productions can be a valuable tool. By analyzing and comparing the production quality, structure, and arrangement of your reference track, you can improve your own songs and achieve a more professional sound.

How To Choose A Good Reference Track On Youtube

Choosing the right reference track on Youtube is crucial for a successful music production. To find a suitable reference track, start by defining your genre and subgenre, then search for tracks and playlists that align with your track’s style and tempo. It is advisable to stick with tracks that have a good mix and mastering, and a similar vibe to your track.

Downloading Audio From Youtube For Reference

Once you have found the ideal reference track, it is time to download its audio for reference. Several tools allow you to download audio from Youtube, such as FLVTO, Freemake Video Downloader, and 4K Video Downloader. To download audio, copy the Youtube video link to your clipboard, paste it into the video downloader application, select the audio-only option, and hit download. Once downloaded, you can use the audio file as a reference track in your DAW.

Using Youtube Playlists As A Reference Track

Youtube playlists make it easy to find multiple reference tracks in one place. Search for playlists in your genre and subgenre, and select a high-rated playlist with tracks that align with your style. You can also curate your playlist based on the intended vibe and energy of your track. Once you have selected your playlist, download the audio for each track using the above instructions.

The Importance Of Volume Matching Your Reference Track

When using a reference track from Youtube as a comparison, ensure that the track and your mix’s volume levels are matched. An imbalance in volume can affect your perception of the mix, and can lead to poor mixing decisions. You can use volume matching tools such as iZotope’s Ozone Match EQ or Waves Playlist Rider to match the volume of your reference track to your mix. This ensures that you have an objective comparison point that is not affected by volume differences.

Conclusion

By following the steps above, you can effectively use music from Youtube as a reference track in your music production. A good reference track is crucial in informing your mixing and mastering decisions, and can greatly improve your final mix’s overall quality. Remember to choose a track that aligns with your genre and style, download the audio for reference, and match the volume level of your reference track to your mix.

Music From Spotify As A Reference Track


Using music from platforms like Spotify, YouTube, and Apple Music as a reference track can be a great tool for musicians and producers. By listening closely to the production techniques and sound design of existing songs, artists can gain a better understanding of how to make their own music stand out in a crowded field of competitors.

Music streaming platforms have become a great resource for music producers and sound engineers. By using music from Spotify or other platforms as reference tracks, producers can improve the quality of their own productions. Spotify is one of the most popular music streaming platforms and offers a vast collection of songs across different genres. This blog post will guide you on how to use music from Spotify as a reference track in your music production process.

How To Find The Right Track On Spotify For Reference

When using music from Spotify as a reference track, it is essential to choose the right track that fits your music production needs. Here are some tips to help you find the right track on Spotify for your reference:

  • Choose a track that is in the same genre as your production
  • Look for a track that has a sound or style that you wish to emulate
  • Choose a track with a good mix and master
  • Find a track that is popular or has a high play count

Streaming Vs. Downloading Audio On Spotify

Spotify allows users to either stream or download audio files. When using music from Spotify as a reference track, it is crucial to consider the type of audio file you will use in your production process. Here are a few things to consider when choosing between streaming or downloading audio on Spotify:

Streaming Audio Downloading Audio
Allows easy access to a vast selection of tracks Provides higher-quality audio files
Takes up less storage space on your device Allows for offline playback
May have slightly lower quality audio files Requires more storage space on your device

In conclusion, using music from Spotify as a reference track is an excellent way to improve your production process. By carefully selecting the right track and deciding between streaming or downloading audio, you can ensure that you have the best reference track for your production needs.

How To Use Music From Youtube Spotify And Apple Music As A Reference Track


Credit: www.google.com


Music From Apple Music As A Reference Track

If you are a musician, you probably know the importance of reference tracks in creating new music. However, finding the right reference track can be a challenge. Luckily, services like Youtube, Spotify, and Apple Music make it easy to access a wide range of music that can be used as reference tracks in your creative process. In this article, we will focus on using music from Apple Music as a reference track.

Using Apple Music’s ‘add To Library’ Feature For Reference

The first step in using Apple Music as a reference track is to add the track to your music library. This can be done by using the ‘Add to Library’ feature. Simply search for the track you want to use as a reference, then click the plus sign next to it. The track will be added to your library, where you can easily access it whenever you need to use it as a reference.

Accessing Offline Audio From Apple Music

If you want to access the audio from a reference track even when you are offline, you can use offline mode in Apple Music. In offline mode, you can listen to any track that you have added to your library, even if you do not have an internet connection. To enable offline mode, go to your music library and select the track you want to use as a reference. Then, click the three dots next to the track and select ‘Make Available Offline’. The track will be downloaded to your device and will be available for offline listening.

Conclusion

Using music from Apple Music as a reference track is a great way to improve your creative process. By using the ‘Add to Library’ feature and enabling offline mode, you can easily access the track whenever you need it, even if you do not have an internet connection. Give it a try and see how it can help you create better music.

Tips For Using Reference Tracks Effectively

Using reference tracks while mixing or mastering audio is a common practice for ensuring that your mix is on par with professional industry standards. It gives you an opportunity to compare your mix to a track that is already mixed correctly and helps identify areas for improvement. Here are some tips that can help you make the most out of using reference tracks:

Comparing Your Mix To The Reference Track

The primary purpose of using a reference track is to compare it to your mix and identify areas that need improvement. When comparing your mix to the reference track, pay attention to the overall balance of the frequency spectrum, the loudness level, and the stereo width. However, keep in mind that your mix should not be a carbon copy of the reference track, but rather a unique piece of audio. Use the reference track only as a guide to identify areas that need improvement.

Adjusting Levels And Eq To Match The Reference

The most significant advantage of using a reference track is that it can guide you to adjust levels and EQ to match the quality of the reference track. One way to do this is by volume matching your mix with the reference track, so they are at the same perceived loudness level. After volume matching, use EQ automation to balance any frequency imbalances you notice.

Using Multiple Reference Tracks

It is always a good idea to use multiple reference tracks to cross-check your mix from different genres and mixes. This can help you identify any issues with your mix that may not be apparent when comparing it to just one reference track. The use of multiple reference tracks also ensures that your mix is not biased towards a particular style or genre.

With these tips, you can use reference tracks effectively to help improve the quality of your audio mixes. By comparing your mix to other quality mixes and adjusting the levels and EQ, you can identify and correct any issues and deliver a polished final product.


Frequently Asked Questions On How To Use Music From Youtube Spotify And Apple Music As A Reference Track


How Do You Use A Mix Reference?


To use a mix reference, listen to a well-mixed and balanced track that is similar to what you want to achieve. Take note of the instruments’ volume, panning, and effects. A/B compare your mix with the reference track, making adjustments until your mix approaches the reference track’s sound.


How Do You Reference A Track?


To reference a track, include the song title, artist, album name, date of release, and the record label. Use the following format: Artist. (Year). Song title. On Album Name. Record Label.


How Do I Import Music From Youtube To Spotify?


Unfortunately, you cannot import music directly from YouTube to Spotify. However, there are third-party apps like SongShift and TuneMyMusic that can help you transfer your playlists from YouTube to Spotify. Just select the playlists you want to transfer, follow the prompts, and voila! Your music will be in Spotify.


How Do You Level Match A Reference Track?


To level match a reference track, adjust the volume of the tracks until they have the same loudness level using a metering plugin like LUFS or RMS. A/B testing and critical listening can also help achieve a balanced mix. Remember to apply EQ and compression to match the tonal balance and dynamic range in the reference track.


Conclusion


Ultimately, as a music producer or a songwriter, using music as a reference track is a necessity in creating the ideal track. Each music streaming platform offers a unique experience in terms of deciding which reference track to choose from.


However, with YouTube, Spotify and Apple Music, producers and songwriters will have access to an endless number of tracks, which can be used as reference tracks. So take advantage of this unique opportunity for a successful music career.


Categories
Archive

How To Remove Noise From Vocals And Make Them Sound Much Cleaner

To remove noise from vocals and make them sound cleaner, you can use noise reduction plugins or software. These tools work by analyzing the audio and filtering out unwanted background noise, leaving behind only the clear sound of the vocals.


By using a combination of noise reduction and equalization, you can achieve a polished, professional-sounding vocal track that is free of distracting artifacts. If you’re looking to create high-quality vocal tracks for your music production or podcast, removing background noise is an essential part of the process.


Whether it’s the sound of a noisy room, electrical interference, or other unwanted sounds, removing noise from your vocal recordings can make all the difference in the final product. With the right tools and techniques, you can easily get rid of unwanted noise and create a polished, clean-sounding recording that sounds great on any platform. We’ll cover some of the best methods for removing noise from vocals and making them sound much cleaner.

How To Remove Noise From Vocals And Make Them Sound Much Cleaner


Credit: www.musicguymixing.com


Identifying Unwanted Noise

If you’re recording the vocals for a music track or podcast, then removing unwanted noise from the recording is critical. Identifying the unwanted noise is the first step in achieving a clean and polished sounding track.

Different Types Of Noise

Before you start removing noise from vocals, you should understand the different types of noise that can appear in a recording. Some of the most common types of noise include:

Noise Type Description
Background Noise Noise from the environment, like traffic, people talking, or air conditioning units.
Electronic Noise Noise from electronic devices, such as humming or buzzing sounds.
Mouth Noise Noise created by the mouth, such as breathing sounds or lip smacks.

Tools Available For Identifying Noise

There are several tools available that can help you identify unwanted noise in a vocal recording. Some of the most popular tools include:

  • Equalizers: Used to adjust frequency levels and remove unwanted sounds.
  • Spectral Analyzers: Used to visualize the frequency spectrum, making it easier to identify unwanted noise.
  • Noise Gates: Used to remove sounds below a certain threshold, helping to eliminate background noise.
  • De-Essers: Used to remove harsh ‘s’ and ‘sh’ sounds from recordings.

Tips For Identifying Noise Accurately

When identifying unwanted noise in a vocal recording, it’s important to approach the task with methodical attention to detail. Here are some tips to consider:

  1. Listen Closely: Headphones are recommended to identify noise accurately since speakers can obscure the recording’s noise.
  2. Adjust Volume Levels: Use loudness-normalized settings to compare recordings and hear previously inaudible noise.
  3. Automate the Evaluation: Programs such as EQ Match can help to automate the process of identifying problematic frequencies so you can remove them accurately.

Identifying unwanted noise is vital to improve the quality of your recording and create a polished and professional track. Knowing the different types of noise, the available tools, and tips for identifying noise accurately can help make the process easier and achieve the desired result.

How To Remove Noise From Vocals And Make Them Sound Much Cleaner


Credit: www.uaudio.com


Manual Removal Techniques

Manual removal techniques are an essential part of the noise reduction process. While it may be easier to use plugins or software, sometimes manual techniques are necessary to remove noise entirely. This article will cover three manual removal techniques: Equalization (EQ), Sampling, and Volume Automation.

Equalization (eq)

Equalization, commonly referred to as EQ, is an effective way to remove noise from vocals. EQ allows you to adjust the levels and frequencies of each part of an audio track. With EQ, you can cut out any frequency that causes unwanted noise in the vocal track. To remove noise using EQ, follow these steps:

  1. Open the vocal track in your digital audio workstation (DAW) and add an EQ plugin.
  2. Play the vocal track and listen for any unwanted noise.
  3. Identify the frequency range of the unwanted noise.
  4. Adjust the EQ to reduce the volume of the noise frequency range.
  5. Continuously play the vocal track and make further adjustments until the noise is removed.

It is important to note that removing too much of a frequency range can also negatively impact the vocal quality, so use EQ conservatively.

Sampling

Sampling involves cutting out small sections of the vocal track that contain noise. Sampling is best used for consistent noise, such as background hum or hiss. To remove noise using sampling, follow these steps:

  1. Identify the section of the vocal track that contains the unwanted noise.
  2. Highlight the section of the track containing the unwanted noise.
  3. Cut out the highlighted section of the track using the “cut” function on your DAW.
  4. Smooth out the vocal track by fading in and out at the beginning and end of the cut section.

Repeat this process for any additional sections of the vocal track that contain unwanted noise.

Volume Automation

Volume automation allows you to adjust the volume level of specific parts of the vocal track over time. Volume automation is particularly useful for removing noise that occurs sporadically throughout the vocal track. To remove noise using volume automation, follow these steps:

  1. Listen to the vocal track and identify the sections of the track that have unwanted noise.
  2. Add a volume automation plugin to the DAW.
  3. Select the section of the vocal track that contains the unwanted noise.
  4. Reduce the volume level of the affected section using volume automation.
  5. Smooth out the vocal track by gradually increasing the volume level after the affected section.

Repeat this process for any additional sections of the vocal track that contain unwanted noise.


Automatic Noise Reduction Software


Achieve crystal clear vocals with automatic noise reduction software. Say goodbye to any unwanted sounds that may affect the quality of your recordings and enjoy a cleaner, professional sound.

Vocals play an essential role in creating a good music piece. However, recording vocals in a noisy environment can lead to poor sound quality. Using Automatic Noise Reduction (ANR) software can help remove any unwanted sounds, such as clicks or hums, from the vocal recording.

What Is Automatic Noise Reduction?

ANR is a software tool that eliminates unwanted background noise from audio recordings. ANR software uses an algorithm that analyses and identifies the distinct sound patterns of noise, such as fans, hums, or clicks. The software then removes these unwanted sounds, keeping the natural sound of the vocals intact.

Advantages Of Using Automatic Noise Reduction Software

Using ANR software provides various benefits, including the following:

Advantages
Eliminates unwanted background noise.
Retains the natural sound of the vocals.
Improves the overall sound quality of the recording.
Minimizes the need for expensive sound equipment.

Disadvantages Of Using Automatic Noise Reduction Software

While ANR software has several advantages, it also has a few disadvantages that include:

  • May remove some of the natural elements from the recording.
  • The software may remove some essential sounds along with the background noise.
  • May produce an unnatural-sounding vocal recording.

In conclusion, Automatic Noise Reduction (ANR) software is an excellent tool that can help remove unwanted background noise from audio recordings. However, before using it, it is essential to understand its pros and cons. ANR is not a replacement for a recording in a quiet environment or professional sound equipment, but it can significantly improve the overall quality of a vocal recording.

Third-party Noise Reduction Plugins


Eliminate background noise from vocals with third-party noise reduction plugins. These tools can clean up your audio tracks and produce a much smoother sound. Enhance the clarity and quality of your recordings with this simple solution.

What Are Third-party Noise Reduction Plugins?

Third-party plugins are additional tools or software that can be used to enhance the functionality of a digital audio workstation (DAW). In the case of noise reduction plugins, these tools help reduce unwanted noise from vocal recordings. Third-party plugins are developed outside the DAW by different companies, and they come in different forms and features.

Benefits Of Using Third-party Plugins

One significant advantage of using third-party plugins is that they offer more advanced and effective noise reduction capabilities than built-in noise reduction tools in most DAWS. These plugins have specifically developed algorithms for noise reduction that are ideal for different types of audio recordings. Additionally, third-party plugins are great at reducing noise without negatively affecting the vocal’s quality, clarity, and naturalness.

Popular Third-party Plugins

There are various noise reduction plugins available for different DAWs in the market, but some are more popular than others. Some of the widely used noise reduction plugins include:

Plugin Name Developer DAWs supported
iZotope RX 8 Standard iZotope Pro Tools, Logic Pro X, Cubase, Ableton Live, FL Studio, and more
Waves NS1 Noise Suppressor Waves Pro Tools, Logic Pro X, Ableton Live, Cubase, and more
Accusonus ERA Bundle Accusonus Pro Tools, Logic Pro X, Ableton Live, Cubase, and more
Sonnox Oxford DeNoiser Sonnox Pro Tools, Logic Pro X, Cubase, and more

Using third-party plugins for noise reduction is a great way to achieve clean and professional-sounding vocals. These plugins are highly effective and offer advanced features that native noise reduction tools might not provide. Try out some of the popular plugins mentioned above to make a significant improvement in your vocal recordings.

Best Practices For Removing Noise


Improve the quality of your vocals by removing background noise and unwanted sounds. Implementing the correct techniques such as EQ, gating, and compression can make your vocals sound clear and polished. Experiment with different settings and find what works best for you.

When it comes to recording vocals, the presence of noise can significantly impede the quality of your audio recording. It can be frustrating to hear hiss, buzz, or other unwanted sounds in your recordings. Vocal tracks with noise are unpleasant to listen and create distractions that take away from the vocal quality. Therefore, it is essential to use proper techniques and tools to remove noise from your vocals and deliver a clean and professional-quality sound. In this post, we will discuss best practices for removing noise from your vocal tracks and make them sound much cleaner than you ever thought possible.

Choosing The Right Tools For Removing Noise

To remove noise from your vocals, you need to have the right tools in your arsenal. Some of the most popular tools for removing noise include:

  1. Noise Gates: These tools work by suppressing sounds below a particular threshold. They are perfect for removing low-level noise such as electrical hums and background noise.
  2. EQ Plugins: EQ plugins such as Deesser are perfect for removing high-frequency noise such as sibilance and hissing noises from vocals. You can use an EQ plugin to cut the excess frequencies that are causing the noise.
  3. De-Noise Plugins: De-noise plugins work by analyzing the noise and removing it from the audio file. You can use these plugins to remove noises that you can’t address with EQ or noise gates, such as plugin noise or room background noise.

Removing Noise Without Affecting The Vocal Quality

When removing noise from your vocals, one of the most crucial factors to keep in mind is preserving the vocal quality. Excessive noise reduction can lead to unintended changes in the vocal tone, which might create an unnatural sound. Therefore, you should be cautious when applying these tools to avoid affecting your vocal’s quality. Here are some techniques to remove noise without affecting the vocal’s quality:

  • Identify the noise: Understanding the type and frequency of the noise in the recording can help you apply the right noise reduction technique.
  • Use noise gate sparingly: Noise gates are effective for removing unwanted background noise but could also remove desirable and subtle sounds that add character to the vocal quality. Therefore, use noise gates sparingly to preserve the vocal’s dynamics.
  • Be Careful with EQ: EQ is an effective tool for removing unwanted frequencies, but excessive EQ could lead to artifact sound. Always check the EQ’s settings and frequency cut-offs to avoid affecting the vocal’s natural sound.
  • Go easy on De-noise plugins: De-noise plugins can effectively remove unwanted background noise, but excessive de-noising could result in artifact sound and affect the natural vocal quality. Therefore, apply de-noising gradually and carefully to preserve the vocal’s natural sound.

Knowing When To Stop Removing Noise

While removing noise is essential in improving the quality of your vocal recordings, it is essential to know when to stop. Overprocessing your vocal tracks could end up removing essential elements that contribute to the vocal quality. Therefore, it is crucial to apply noise reduction techniques gradually and carefully, always checking for changes in the quality of the vocal sound. If the noise is minimal or negligible, you might not need to remove it at all. Therefore, know when to stop removing noise and trust your ears to deliver the best vocal quality sound. In conclusion, removing noise from your vocal tracks requires technique and precision to maintain the vocal quality. Applying the best practices for removing noise detailed in this article will help you create clean and professional-quality sound vocals, free from unwanted distractions.


Frequently Asked Questions For How To Remove Noise From Vocals And Make Them Sound Much Cleaner


How Do You Make Your Vocals Sound Clearer?


To make your vocals sound clearer, ensure you start with a good quality recording and use a pop filter. Use EQ to cut the low-end rumble and boost high frequencies. Apply compression to even out the vocal volume, and use a de-esser to reduce harsh sibilance.


Lastly, use a reverb or delay effect to add depth and dimension to the vocals.


How Do I Make My Audio Sound Cleaner?


To make your audio sound cleaner, try using a noise gate or noise reduction software to remove unwanted background noise. You can also adjust the EQ settings to balance out the audio frequencies. Using a pop filter and positioning the microphone correctly can also help reduce unwanted sounds.


Lastly, edit and mix your audio carefully to ensure it sounds as clean as possible.


How Do You Clean Up Vocal Audio?


To clean up vocal audio, first, use a noise reduction tool to remove any background noise. Then, use an equalizer to correct any unwanted frequency imbalances. Finally, use a de-esser to remove any harsh or sibilant sounds. Additionally, you can use a compressor to level out any volume discrepancies.


How Do I Remove Extreme Noise From Audio?


To remove extreme noise from audio, you need to use noise reduction software or tools. Some popular options include Adobe Audition, Audacity, and RX 7 by iZotope. These tools allow you to filter out background noise and enhance the clarity of the audio recording.


Be sure to use a high-quality recording device and a quiet environment to minimize noise in the first place.


Conclusion


There you have it, removing noise from vocals and making them sound much cleaner isn’t an impossible task. All it takes is a little bit of patience and practice. With the right tools and techniques, you’ll be able to create high-quality audio content that stands out from the crowd.


So go ahead, give it a try and let your vocals shine through with clarity. Keep these tips in mind and you’ll be sure to succeed in your endeavors.

Categories
Archive

How To Compress Drums With Ableton Glue Compressor The Magic Setting

To compress drums with Ableton Glue Compressor and achieve the magic setting, select the “All-Round” preset and adjust the “Ratio” and “Threshold” settings according to the track. Ableton Live is a popular choice for producers and musicians who want to create high-quality music pieces and enhance their sound mixing skills.


Also, the Glue is a vital tool that every musician should master. It is an excellent compressor plugin that comes bundled with the Ableton Live Suite and has proven to be very helpful in drum mixing. Using this compressor correctly can make all the difference in your music piece, especially when it comes to compressing drums.

Related reading: How To Glue Kick And Bass With Saturation and Api 2500 Compressor. For background, see the Wikipedia article on Dynamic range compression.


In this post, we’ll be discussing how to use it to compress drums and achieve the magic setting that many professionals use to make their songs sound amazing.

How To Compress Drums With Ableton Glue Compressor The Magic Setting


Credit: soundoracle.net


Using Ableton Glue Compressor

Using Ableton Glue Compressor is essential for any music producer who wants to create a perfect track with the best sound quality. The plugin is fundamental for mixing your drums and achieving a polished sound that can be compared to the best hits out there. By using the plugin with the magic settings, you can elevate your track to a new level that captures your audience’s attention.

Plugin Overview

Ableton Glue Compressor is a powerful audio effect tool that enables music producers to achieve a clean and polished sound by compressing and mixing their audio. It comes with a range of presets, minimal controls, and its magic settings. The plugin is easily accessible in the Audio Effects section of Ableton Live’s browser toolbar. It’s designed to work well with any type of music genre, but the plugin is most common for processing drum tracks.

The Magic Settings

The Glue Compressor’s magic comes from its unique settings that allow you to create a compressed sound that doesn’t distort or affects the audio quality. The “Soft,” “Medium,” and “Hard” settings enable you to set the compression level to your desired range based on your preference and sound quality. The “THR” knob controls the amount of compression to apply. Meanwhile, the “Makeup” control adjusts the level of gain applied to the compressed signal.

When using Ableton GLUE Compressor to compress drums, set the Attack to 10ms and Release to 100ms. This will ensure that the compressor releases the drum just in time for the next hit, making the sound punchier.

Another magic setting trick is to enable the Sidechain filter. This filter allows the compressor to only react to specific frequency ranges, ensuring that the audio quality is not affected. You can use the filter to remove unnecessary frequencies or to emphasize the frequency range that you need.

By using Ableton Glue Compressor, and applying some of its magic settings, you can get that polished drum sound that’s perfect for any music genre that you might be working with.

Compressing Drums With Glue Compressor

If you’re producing music, you already know how drums are one of the essential parts of any track. However, getting the perfect drum sound can be challenging. Luckily, Ableton Live offers a fantastic plugin that can help you achieve it – the Glue Compressor. In this article, we’re going to explore how to compress drums with Ableton Glue Compressor, with a focus on the magic settings that can enhance your drum sound.

Setting Up for Ableton Glue Compressor

Before diving into the magic settings, you need to set up Ableton Glue Compressor correctly. First, you want to insert it into the drum rack’s master channel. The Glue Compressor works best when applied to each element in the drum rack and then brought together at the end in the master channel. So, it’s best to group your drums into a single drum rack.

Setting The Threshold for Ableton Glue Compressor

Now it’s time to set the threshold. The threshold determines how much of the signal will be compressed. If your threshold is set too low, the compressor will be triggered from every little sound. Your drum sound will be flat. On the other hand, if your threshold is too high, the compressor won’t do much. Your sound won’t be balanced. So, aim for a balance where the compressor triggers only on the loudest parts of the drums sound.

Adjusting Ratio And Attack/release for Ableton Glue Compressor

After setting the threshold, you want to adjust the ratio and attack/release parameters. The ratio determines how much compression is applied to the signal when it goes above the threshold. Typically, a ratio of 4:1 or 8:1 works well for drums. The attack and release parameters are essential to shape the sound of the drums. If your drums need more punch, you can decrease the attack time. If your drums need more sustain, you can increase the release time. Remember to use your ears to find the right balance!

Using Makeup Gain for Ableton Glue Compressor

Finally, you want to use the makeup gain to boost the compressed sound back to its original volume level. The makeup gain is the amount of gain applied to the compressed signal after the compression. It’s best to adjust it subtly, so you don’t introduce any unwanted distortion or clipping.

By following these simple steps, you can enhance the sound of your drum tracks with Ableton Glue Compressor. Remember, the key is to use your ears and find the right balance that works for your specific track.

Fine Tuning Your Drum Compression


Learn the magic settings to fine tune your drum compression with Ableton Glue Compressor. With a few adjustments like adding sidechain, adjusting attack, release, and ratio, you can achieve professional-quality drum sounds for your productions.

When it comes to music production, drum compression is a crucial step to achieving a polished sound. Once you’ve dialed in the basic settings for your Ableton Glue Compressor, it’s time to fine-tune your drum compression to perfection. In this section, we’ll take a look at some effective tips for fine-tuning your drum compression.

Finding The Sweet Spot for Ableton Glue Compressor

The first step in fine-tuning your drum compression is finding the sweet spot. This refers to the optimal level of compression that provides the right balance of volume and dynamics. One way to do this is by adjusting the threshold and ratio parameters for your drums until you find the ideal balance. Keep in mind that the sweet spot will vary depending on the track. So don’t be afraid to experiment to find the perfect balance.

Using Sidechain Compression for Ableton Glue Compressor

Another effective technique for fine-tuning your drum compression is using sidechain compression. This involves using a secondary signal to trigger the compressor. This allows you to sculpt the compression around the kick and snare hits. To set this up, you’ll need to create a separate audio track for your kick and snare and route it to a sidechain bus. From there, you can adjust the attack and release parameters to create a more dynamic sound.

Adding Parallel Compression for Ableton Glue Compressor

Parallel compression is also a useful technique for fine-tuning your drum compression. This involves sending a duplicate signal of your drum track to a separate bus. So applying heavy compression to the duplicate signal. By blending the compressed signal with the original signal, you can achieve a fuller, more dynamic sound without sacrificing the natural dynamics of your drums.

Avoiding Common Mistakes in Ableton Glue Compressor

As with any audio technique, there are some common mistakes to avoid when fine-tuning your drum compression. One common mistake is over-compressing your drums, which can lead to a loss of dynamics and a flat, lifeless sound. Another mistake is neglecting to adjust the attack and release parameters, which are crucial for achieving the desired level of punch and sustain. Remember, the key to fine-tuning your drum compression is to experiment and find the right balance for your track. By using the techniques outlined above and avoiding common mistakes, you can achieve a polished, professional sound that highlights the natural dynamics of your drums.


Applying Compression Techniques To Other Instruments for Ableton Glue Compressor


Ableton Glue Compressor can work wonders when it comes to compressing drums. With the right settings, it can make your drums sound punchy and powerful. By applying these compression techniques to other instruments, you can give them the same treatment.

If you’ve been following along, then you know that the Ableton Glue Compressor is a powerful tool that can take your drum mixes to the next level. But what about other instruments? Can you apply compression techniques to bass, pianos, synths, and vocals? Of course, you can! In fact, understanding how to apply compression to other instruments is just as important as understanding how to compress drums. In this post, we’ll cover some simple yet effective compression techniques for other instruments, starting with bass.

Applying Techniques To Bass for Ableton Glue Compressor

When it comes to bass compression, the goal is to even out the volume and add sustain while maintaining the low-end punch. Start with a ratio of around 4:1 and adjust the threshold until you see a reduction of around 3dB on the most prominent peaks. It’s also important to adjust the attack and release times until you get enough sustain but also maintain the low-end punch. For bass, it’s recommended to use slower attack times and fast release times.

Using Compression On Synths And Keys

Synths and keys are often used for their atmospheric and ambient qualities, so it’s important to use compression subtly to avoid losing the dynamics and expression. A good place to start is with a ratio of around 2:1 and a gentle reduction of around 1-2dB. Then, adjust the attack and release times to taste. For a more natural and dynamic-sounding instrument, try using parallel compression techniques to blend the dry and wet signals.

Vocal Compression Techniques

Vocals are perhaps the most important instrument in any mix, and compressing them can be a tricky process. A good starting point is to use a ratio of around 3:1 with a threshold that reduces the gain reduction by around 3dB on the most prominent peaks. Be careful not to over-compress or squash the dynamics, as this can make the vocals sound unnatural and lifeless. If you’re having trouble getting the vocals to sit in the mix, try using multiband compression to focus on specific frequency ranges.

In conclusion, applying compression techniques to other instruments requires careful attention to the unique qualities of each instrument. As with drums, there’s no one-size-fits-all approach to compression, and experimentation is key. But by following these simple guidelines for bass, synths and keys, and vocals, you’ll be on your way to creating well-balanced and dynamic mixes that sound great on any system.

Using Drum Compression In A Mix


Achieving a balanced drum mix is essential to the success of any track. Utilizing drum compression can significantly enhance the audio quality. Ableton Glue Compressor’s magic setting can make compression easy, producing an improved and cohesive sound.

When it comes to mixing drums, compression plays a vital role. Using Ableton Glue Compressor is one of the best ways to get that perfect compressed sound. Here’s how you can use it to compress your drums.

Balancing Your Drums With Other Instruments

Before applying compression to your drums, it’s essential to ensure that they’re balanced well with other instruments in the mix. If the drums are too loud and overpowering, even the best compression won’t fix the issue. Try to create some space in the mix for the drums by lowering the volumes of other instruments.

Using Buss Compression

Buss compression is another technique that can help compress drums effectively. By using one instance of Ableton Glue Compressor on multiple drum tracks, you can compress them as a group. This makes them fit better into the mix. Buss compression can also help the drums sound more cohesive and sit better in the mix.

Compressing Your Master Bus

Moreover, compressing the master bus can also be beneficial, but it’s essential to be careful. Compressing too much can cause the mix to lose its natural dynamics. Start with a low ratio, and gradually increase it until it sounds good. Remember that mastering is a different process, and the mix should be balanced before the mastering process. In conclusion, using Ableton Glue Compressor can help you compress your drums effectively. By balancing your drums with other instruments, using buss compression, and compressing the master bus, you can get that perfect compressed sound that fits well in your mix.

How To Compress Drums With Ableton Glue Compressor The Magic Setting


Credit: m.youtube.com


Frequently Asked Questions Of How To Compress Drums With Ableton Glue Compressor The Magic Setting


How Do You Glue Compress Drums?


To glue compress drums, first clean the surfaces with alcohol or acetone. Apply a thin layer of industrial-grade adhesive, making sure to cover the entire surface area. Press the two surfaces together and use clamps to hold them in place until the adhesive dries.


Finally, allow the glue to cure for at least 24 hours before using the drums.


What Setting Do You Use For Drum Compression?


It depends on the type of drum sound you want to achieve. A good starting point is to set the ratio to 4:1, attack between 10-30 ms, release around 100-150 ms, and adjust the threshold until you get a reduction of 2-3 dB.


Experimentation is key, so adjust to your liking.


What Ratio Do You Compress Drums?


It depends on the genre of music and the desired sound. But typically a ratio of 4:1 or 6:1 is used for drum compression. However, it’s important to adjust the ratio based on the specific needs of the track and use your ears to determine what sounds best.


How Do I Compress In Ableton?


To compress audio in Ableton, simply select the desired audio clip and navigate to the ‘Audio Effects’ menu. Click on ‘Compressor’ and adjust the settings to your preference, such as threshold, ratio, attack, release, and makeup gain. You can also adjust the visual representation of the compressor with the ‘Visual Display’ option.


Conclusion


Ableton Glue Compressor provides a powerful tool for drum compression. The secret lies in the setting that allows the user to achieve stunning results with maximum effectiveness. As a result, you can easily create a solid drum mix that is both punchy and cohesive.


With the techniques outlined above, you can take your drum compression to the next level. So, try it out and take advantage of Ableton Glue Compressor’s magic setting for drums.