Categories
Archive

What is the Difference between Mixing And Mastering a Song

Mixing is the process of combining different elements of a song, while mastering involves finalizing the overall sound and preparing it for distribution. These two processes are essential for producing a high-quality music track.


Mixing and mastering are often confused with each other, but they serve different functions in the music production process. Mixing is the process of blending different tracks and sounds that have been recorded separately to create a final audio mix.


It involves adjusting levels, frequencies, effects, panning, and stereo width to create a cohesive and balanced mix. Mastering focuses on the final touches, including compression, EQ, limiting, and adding depth and warmth to the song. The mastering process prepares the final mix for distribution and ensures that it sounds the best across various listening platforms. We will delve deeper into the differences between mixing and mastering and why they are both essential to producing great music.
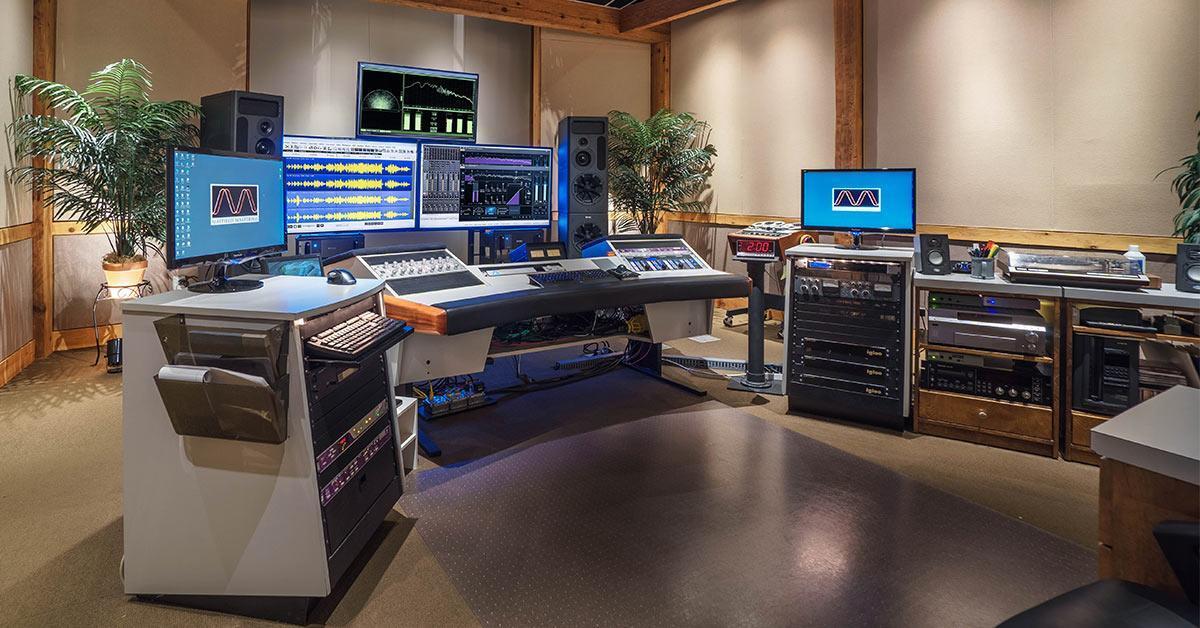
What is the Difference between Mixing And Mastering a Song


Credit: www.sweetwater.com


Mixing


Mixing and mastering are two distinct practices in music production. Mixing involves blending various tracks and elements of a song to create a balanced sound while mastering involves preparing the final mix for distribution, improving its overall clarity, loudness, and tonal balance.

What Is Mixing?

Mixing is the process of combining individual tracks of a song, such as vocals, instruments, and effects, into a single stereo audio file. During the mixing stage, the levels and panning of each track are adjusted and other effects such as compression, equalization, and reverb are added to create a cohesive and balanced sound. The goal of mixing is to make a song sound professional, cohesive, and to ensure that each instrument and vocal can be heard clearly.

The Importance Of Mixing

Mixing is a crucial process in music production. A well-mixed song can make all the difference in how it is received by listeners. A poorly mixed song can be unclear, unbalanced, and unprofessional. Mixing also adds dynamics and depth to a song, making it more appealing to the ear. It is important to note that even the best recordings can sound mediocre without proper mixing.

The Role Of The Mixing Engineer

The mixing engineer plays a vital role in the mixing process. Their job is to ensure that each element of the song is blended seamlessly, producing a clear and polished final product. This includes adjusting the levels, panning, and applying effects to each track. The mixing engineer may also address other issues, such as timing or tuning errors, to ensure that the song sounds as natural and professional as possible. The mixing engineer works closely with the producer and the artist to ensure that the final product meets their expectations. Table: Differences between Mixing and Mastering a Song | MixingMastering

Mastering


Mixing and mastering are both important steps in the music production process. While mixing involves blending all the individual elements of a song to create a cohesive sound, mastering is the final step that enhances the overall clarity, loudness, and balance of the mix.


A properly mastered track can help your music stand out and sound professional.

What Is Mastering?

After a song has been mixed, the final step is mastering. Mastering is the process of preparing the mixed audio for distribution and replication. It’s the final chance to perfect the sound quality, clarity, and loudness of a track before it goes out to the public. Mastering is essential to ensure that your songs are ready for radio airplay, online streaming, and physical distribution.

The Importance Of Mastering

Mastering is crucial in ensuring that your music sounds professional and polished. Even the most perfectly mixed song can have inconsistencies in volume levels, punch, and overall clarity. During mastering, these issues can be addressed to level out any discrepancies and optimize the audio. The mastering process will also ensure that the tracks maintain a cohesive sound that fits the album’s overall vibe.

The Role Of The Mastering Engineer

The role of the mastering engineer is vital in the entire process. They are responsible for taking an already well-produced track and turning it into a masterpiece. A professional mastering engineer will work to perfect the sound’s balance, tonal adjustments, and ensure that the final product meets the technical requirements for distribution and duplication. In conclusion, mastering is the final touch to ensure your music sounds its best. It is a critical step in the production process that should not be overlooked. If done correctly, it will allow your music to compete at a higher level and make it ready for the world to hear.

Differences Between Mixing And Mastering


Mixing and mastering are two critical stages of music production. Mixing involves combining individual tracks to form a cohesive audio output, while mastering is the final polish given to a mixed song. The primary difference between the two is that mixing involves adjusting individual levels of each track, whereas mastering focuses on fine-tuning the entire mix for optimal sound quality.

What Is The Difference?

When it comes to music production, two terms that you may hear often are mixing and mastering. Mixing and mastering are two distinct phases of the music production process, but many people often mix up the two. The main difference between mixing and mastering is that mixing refers to the process of combining individual tracks into a stereo audio file, whereas mastering is the final step in the process of preparing the stereo mix for distribution to the public.

Why Are They Different?

Mixing and mastering differ in terms of their goals because they serve different purposes. The aim of mixing is to create a harmonious blend between all the individual tracks in a recording. In contrast, mastering is focused on enhancing the overall sound of the mix and ensuring that it is consistent across all playback systems. The main reason for this difference is that mastering is generally done for commercial purposes. Once a song has been mixed and mastered, it is ready to be distributed to the public.

How Do They Differ In Terms Of Process?

Mixing and mastering differ significantly in terms of the process. Mixing involves adjusting the individual tracks’ levels, panning, EQ, and effects to create a cohesive overall sound. It is crucial to get the mix right because it sets the foundation for the finished product. In contrast, mastering involves processing the stereo mix itself. This involves using various tools like EQ, compression, and limiting to enhance the overall sound and ensure it is balanced, consistent, and ready for distribution.

How Do They Differ In Terms Of Goals?

The goals of mixing and mastering differ as well. Mixing aims to create a balanced and polished sound that reflects the intended style and tone of the song. It usually focuses on achieving clarity, depth, and dynamic range. Mastering aims to enhance the overall sound quality of the mix to ensure that it is ready for the final consumer listening experience. It usually entails adjusting the overall EQ balance, volume, and compression to make sure that the song sounds great on any playback system. In conclusion, mixing and mastering are two critical steps in producing a high-quality song. While they have different objectives and processes, they work together to create a finished product that resonates with listeners.

What is the Difference between Mixing And Mastering a Song


Credit: www.youtube.com


Common Mistakes To Avoid

Music mixing and mastering are two different processes in music production that people often use interchangeably. Mixing refers to the process of taking multiple audio tracks and combining them into a single stereo track. Mastering, on the other hand, is the final process before the distribution of the song. It involves preparing and transferring the final mixdown of a song for distribution through various mediums. Both processes are essential for producing high-quality music.

Mixing Mistakes To Avoid

  • Not Cleaning Up the Tracks: Mixing engineers have to work with several recorded tracks, which can sometimes be cluttered with extraneous noises. It’s imperative to clean up the tracks before mixing to avoid interference with the sound quality.
  • Too Much Compression: Compression is a vital part of mixing, but overdoing it can ruin the sound quality. It’s crucial to use compression sparingly to maintain the natural dynamics of the music.
  • Overusing Effects and Plugins: Using too many plugins and effects can make the mix sound exaggerated and unnatural. To avoid this mistake, mix engineers should use only the necessary effects and plugins that enhance the sound quality.
  • Not Balancing the Mix Properly: Focusing too much on a single track can lead to an imbalanced mix, where some tracks overpower others. It’s essential to balance the levels of each track and ensure that the mix sounds cohesive.
  • Ignoring the Stereo Image: Stereo imaging is crucial to give the mix its depth and width. Ignoring the stereo image can make the mix sound flat and lifeless.

Mastering Mistakes To Avoid

  • Not Leaving Enough Headroom: Leaving enough headroom at the mastering stage is essential to avoid distortion and clipping. Mastering engineers should leave around 3-6 dB of headroom to ensure a clean master.
  • Poor EQ Choices: Mastering EQ is used to add sheen and clarity to the track. However, poor EQ choices can lead to dull or harsh sound quality. It’s crucial to use a proper EQ while mastering to enhance the sound quality.
  • Overlimiting: Limiting is a crucial part of mastering to make the track sound louder. However, overlimiting can lead to distortion and clipping. It’s essential to use limiting sparingly to keep the natural dynamics of the music.
  • Not A/B Testing: A/B testing is comparing the mastered track with a reference track to ensure the sound quality is optimal. Not doing enough A/B testing can lead to unsatisfactory mastering results.
  • Ignoring the Rest of the Mix: Mastering professionals should not focus too much on one aspect of the mix, as it can result in an unbalanced master. They should take into consideration the whole mix while mastering to ensure a cohesive and balanced sound.

To sum up, avoiding mistakes during mixing and mastering is essential to produce high-quality music. Mixing and mastering engineers should pay attention to detail and use their expertise to provide the best sound quality for the music.
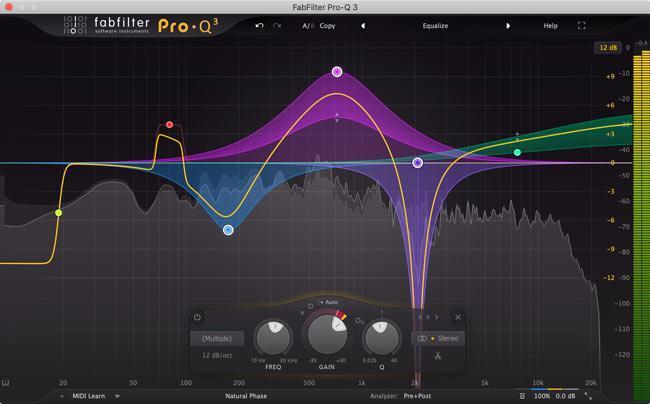
What is the Difference between Mixing And Mastering a Song


Credit: www.sweetwater.com


Frequently Asked Questions For What Is The Difference Between Mixing And Mastering A Song


Do I Need Mixing Or Mastering?


The need for mixing or mastering depends on the quality of your audio. Mixing is necessary before mastering if you have recorded your audio in different environments. It enhances the sound quality of your music. Mastering is essential for the final touches of your music, such as volume balancing, EQ, and compression.


Professional sound engineers usually handle these processes.


Which Is Harder Mixing Or Mastering?


Mixing and mastering are both challenging but require different skill sets. Mixing is the process of blending and adjusting individual tracks, while mastering involves applying the final touches to produce a polished sound. Both require expertise, attention to detail and practice to perfect.


Therefore, it’s challenging to say which one is harder as it depends on various factors.


Does Mastering Make A Song Sound Better?


Yes, mastering can make a song sound better by enhancing its overall sound quality. It involves techniques such as adjusting volume levels, equalization, and spectral balancing to optimize a track’s sonic characteristics. The goal is to make the music sound consistent across various playback devices and to make it more appealing to the human ear.


Does Mixing Or Mastering Come First?


Mixing comes before mastering. Mixing involves blending individual tracks together to create a cohesive sound. Mastering is the final step, which involves balancing the overall sound of the mixed tracks and preparing the final product for distribution. Correctly mixing tracks is crucial before mastering them.


Conclusion


So there you have it – the difference between mixing and mastering a song. While both are equally important steps in the music production process, they serve different purposes. Mixing ensures that all elements of the track blend seamlessly together, while mastering perfects the overall sound quality, making it ready for distribution.


Whether you’re a music enthusiast or a budding artist, understanding these concepts can help you create music that stands out in today’s competitive music industry.


Categories
Archive

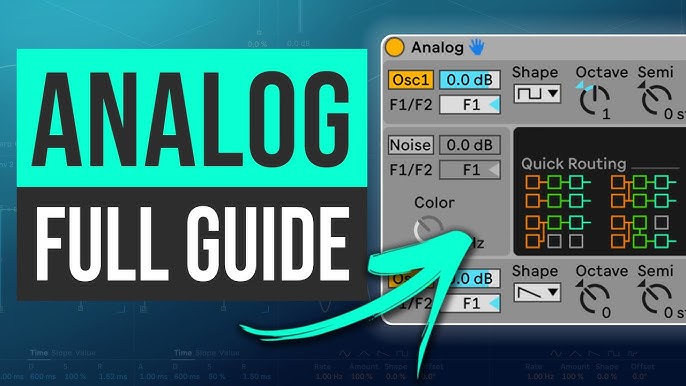
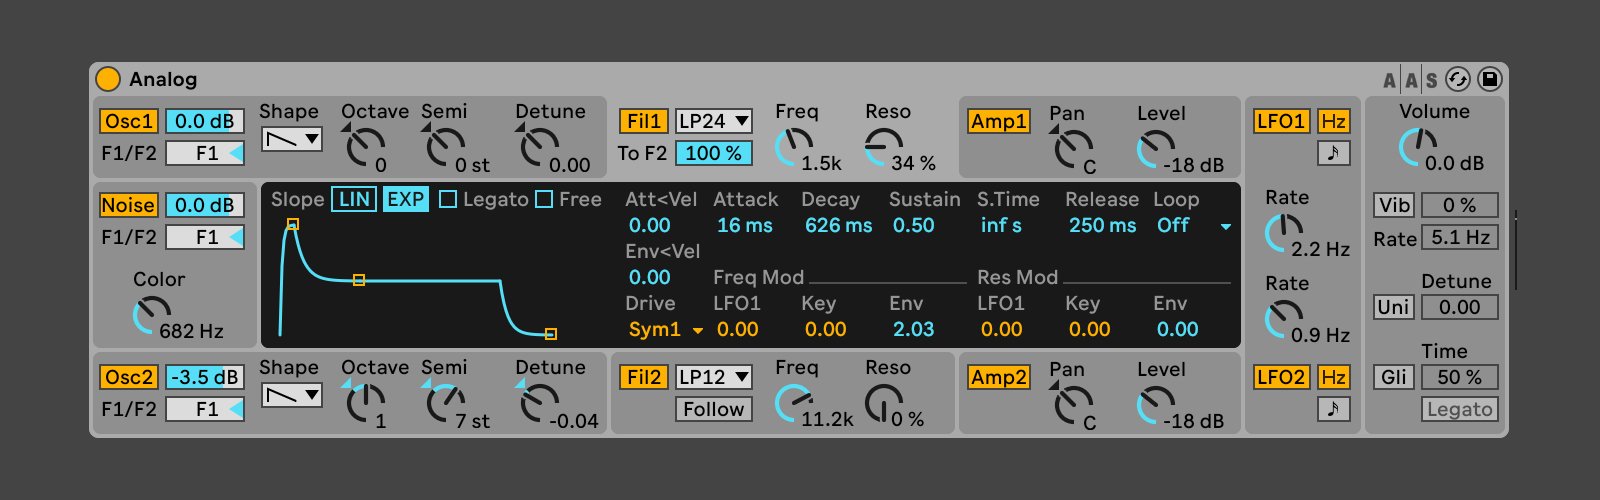
Ableton Analog Synth Full Guide For Beginners Ableton Tutorial

In this Ableton tutorial, beginners are provided with a full guide to using the Analog Synth. Gain insight into creating unique sounds with this popular software synthesizer.


Looking to master the Analog Synth in Ableton? This tutorial is the perfect starting point for beginners diving into this software synthesizer. With in-depth guidance, you’ll discover how to create unique sounds using the various features and functionalities within Analog.


From envelopes and oscillators to filters and LFOs, this guide equips you with all you need to know to create the perfect soundscape. Don’t let the Analog Synth in Ableton intimidate you any longer. Get started with this comprehensive tutorial and take your music production to the next level.

Ableton Analog Synth Full Guide For Beginners Ableton Tutorial


Credit: www.ableton.com


Setting Up Ableton Analog Synth


If you’re new to Ableton Analog Synth, don’t worry! This full guide for beginners provides a step-by-step tutorial to setting up and navigating the program. With clear instructions and helpful tips, you’ll be creating your own synth music in no time.

Setting up Ableton Analog Synth is an easy and straightforward process if you follow the right steps. In this section, we will learn about the installation, opening Analog Synth, and an overview of its interface.

Installation

To install the Ableton Analog Synth, follow these simple steps:

  1. Log in to your Ableton account and download the Analog Synth installer.
  2. Double-click the downloaded file to start the installation process.
  3. Follow the installation wizard instructions and agree to the terms and conditions.
  4. Once the installation is complete, you can access Analog Synth from the Ableton Live instrument browser.

Opening Analog Synth

To open the Ableton Analog Synth, follow these steps:

  1. Launch Ableton Live and create a new MIDI track by clicking the “Create” button.
  2. Click on the “Instruments” folder in the Ableton Live browser.
  3. Find the “Analog” folder and drag the Analog Synth into the MIDI track.
  4. Alternatively, you can double-click the Analog Synth to open the plug-in interface.

Overview Of Analog Synth Interface

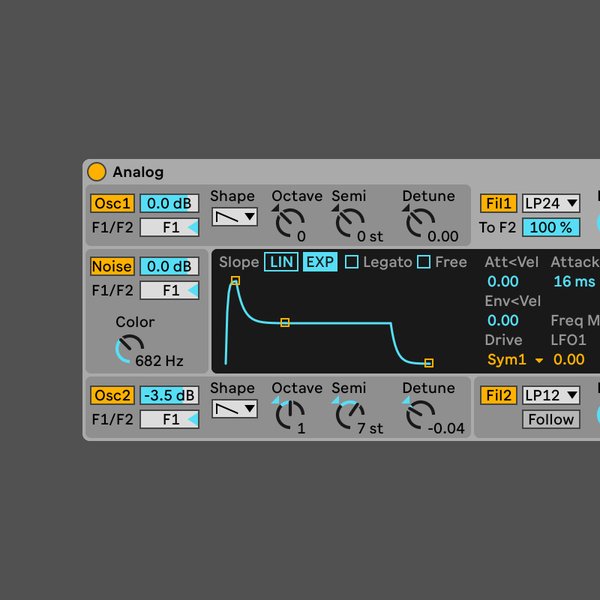
The Ableton Analog Synth is a versatile virtual synthesizer that provides a range of sound-shaping tools. Here is an overview of its interface:

Analog Synth Interface

The Analog Synth interface consists of various sections that allow you to shape your sounds:

  • Oscillators: These generate the basic waveform and determine the overall sound character.
  • Filters: These shape your sound by removing or emphasizing specific frequencies.
  • Envelopes: These modify the synth’s properties over time.
  • LFO: The low-frequency oscillator is used to modulate parameters automatically.
  • Modulation: The modulation matrix provides a flexible routing system for modulating synthesizer parameters.

In conclusion, setting up Ableton Analog Synth involves installing the software, opening it in Ableton Live, and understanding its interface. With this knowledge, you can start creating your own unique sounds.

Synthesizer Basics

When it comes to music production, one of the most important tools you need is a synthesizer. If you’re new to the game, it’s important to understand the basics of how synthesizers work and how you can use them to create your own unique sound. In this Ableton Analog Synth Full Guide For Beginners, we’ll cover everything you need to know, starting with the synthesizer basics.

What Is A Synthesizer?

A synthesizer is a musical instrument that creates sound using electronic circuits. Unlike traditional instruments like guitars and pianos, which produce sound from physical vibrations, synthesizers generate sound through a process called synthesis. Synthesizers can mimic other instruments, but they’re also capable of producing unique sounds that can’t be created by any other means.

Basic Components Of A Synthesizer

There are several basic components that make up a synthesizer:

Component Description
Oscillators These generate the raw sound waveforms.
Filters These shape the sound by removing certain frequencies.
Envelope Generators These shape the sound over time, controlling the volume, pitch, and filter cutoff.
LFOs Low-frequency oscillators are used to apply modulation effects to the sound.
Amplifiers These control the overall volume of the sound.

Types Of Synthesis

There are several types of synthesis that can be used with a synthesizer:

  1. Subtractive Synthesis: The most common type of synthesis, in which harmonically rich waveforms are generated and then filtered to create a desired sound.
  2. Additive Synthesis: This type of synthesis involves the creation of complex sounds by adding together many simple waveforms.
  3. FM Synthesis: A type of synthesis that uses frequency modulation to create complex sounds with rich harmonics.
  4. Granular Synthesis: This synthesis technique involves breaking audio into tiny “grains” that can be manipulated independently, creating complex textures and sounds.
  5. Wavetable Synthesis: A synthesis technique that uses pre-recorded digital waveforms to create sounds.

Now that you understand the basics of synthesizers, you can start experimenting with creating your own unique sounds. With a little practice, you’ll be able to create an endless variety of sounds that will take your music to the next level.


Analog Synth Components


Learn about the different analog synth components and their functions in this comprehensive guide for beginners using Ableton. This tutorial covers everything from oscillators to filters and envelopes, giving you a solid understanding of how to create unique sounds with your analog synthesizer.

Analog synthesizers are renowned for their unique sound, warm resonance, and versatility. But, what exactly are the components of an analog synth? In this guide, we will cover each component in detail and explain how they work together to create impressive sounds.

Oscillators

The oscillator is the heart of every analog synth. It produces an electronic signal that can be manipulated to create various sounds. The frequency of oscillation determines the tone’s pitch, while the waveform determines its character. Every analog synth has at least one oscillator, but more advanced models may have multiple.

Filters

Filters are components that modify the sound of the oscillator. They are responsible for shaping the tone by removing or emphasizing certain frequencies. There are various types of filters, including low-pass, high-pass, band-pass, and notch filters. Each filter has a different effect on the sound and can create unique sonic characteristics.

Amplifiers

Amplifiers are responsible for boosting the oscillator’s signal and ensuring it is audible. The amplifier increases the volume of the oscillating waveform. It can also create distortion by applying too much gain. Like filters, amplifiers are integral parts of every analog synth.

Envelopes

Envelopes control how the oscillator’s signal changes over time. They determine the attack (how quickly the sound begins), decay (how quickly the sound fades away), sustain (the sound’s volume after the decay phase), and release (how quickly the sound stops). Envelopes are essential in creating dynamic and evolving sounds.

Lfos

Low-Frequency Oscillators or LFOs produce oscillations below the frequency of the audio signal. They are used to create rhythmic and atmospheric effects such as vibrato, tremolo, and flanger. LFOs modulate other components of the synth, such as the oscillator’s frequency or the filter’s cutoff frequency. In conclusion, analog synth components function together like a musical instrument. Each has a significant role in creating different sounds. As a beginner, understanding each component’s functionality will set you on the right path to mastering the analog synth.

Creating Sounds With Ableton Analog Synth


Learn how to create unique sounds using Ableton Analog Synth with this full guide for beginners. This Ableton tutorial will take you step-by-step through the process and help you unlock the full potential of this powerful tool. Create your own music and take your productions to the next level.

Creating Sounds with Ableton Analog Synth One of the most exciting aspects of using Ableton Analog Synth is creating your own unique sounds. With a vast range of settings and parameters available, the possibilities for sound design are endless. In this guide, we will walk you through the steps to create your own sounds with Ableton Analog Synth in an easy-to-follow format. Choosing your oscillator waveform The first step in creating a sound in Ableton Analog Synth is selecting your oscillator waveform. Oscillators generate the basic sound waveforms that become the foundation of your sounds. Ableton Analog Synth provides a variety of options for waveforms, including sine, sawtooth, square, and more. You can choose a waveform by clicking on the oscillator section and selecting a desired waveform. Adjusting filter settings Once you have selected your oscillator waveform, you can begin to shape it by adjusting the filter settings. Analog Synth features a filter section where you can control the cutoff frequency and resonance of your sound. By manipulating these settings, you can control the frequency content of your sound and give it a unique character. You can adjust the filter settings by clicking on the filter section and dragging the controls. Setting envelopes To further shape your sound, you can use envelopes to control the amplitude and frequency of your sound over time. Analog Synth features two envelopes – one for amplitude and one for frequency. Envelopes can be used to create a variety of effects, such as creating percussive sounds or adding dynamics to a sound over time. You can adjust the envelope settings by clicking on the envelope section and dragging the controls. Adding LFO modulation Finally, you can add LFO modulation to your sound to create movement or vibrato. LFO stands for low-frequency oscillator and it modulates other parameters of the sound. Analog Synth includes an LFO section where you can set the rate and waveform of the LFO. By adjusting these settings, you can add a variety of effects and movement to your sound. You can adjust the LFO settings by clicking on the LFO section and dragging the controls. In conclusion, creating sounds with Ableton Analog Synth is an exciting process that allows you to express your creativity and imagination. By understanding the various settings and parameters available in Analog Synth, you can explore a vast range of sounds and textures. With this guide, we hope you have a good starting point to create your own unique sounds using Ableton Analog Synth.

Advanced Techniques With Ableton Analog Synth


Discover advanced techniques and tips for using Ableton’s analog synth in this full guide for beginners. This Ableton tutorial covers everything you need to know, from the basics of subtractive synthesis to creating complex sounds and textures.

Ready to take your music production to the next level? Ableton Analog Synth offers advanced techniques that can help you create unique sounds that only your imagination can conceive. In this guide, we’ll explore creating a bassline, making a lead sound, and creating an arpeggiated pattern using the arpeggiator.

Creating A Bassline

Creating an unforgettable bassline can be a little overwhelming, but with Ableton Analog Synth, it’s easy. Begin by selecting your oscillator waveform, such as a sawtooth or square. Then, adjust the filter cutoff and resonance until you achieve the perfect sound. Play around with the envelope settings to achieve the right attack and decay. Remember, a bassline should always be in sync with the music and add energy to the track.

Making A Lead Sound

Making a lead sound is similar to creating a bassline, but with higher notes. Start by selecting a waveform and adjusting your filter cutoff and resonance. Adjust your envelope settings, and play around with detuning to achieve a unique sound. Add effects like reverb and delay to fill out the sound and create depth in your track.

Creating An Arpeggiated Pattern

Creating an arpeggiated pattern can spice up any track and is easy with Ableton Analog Synth. Select your oscillator waveform and adjust your filter cutoff and resonance. Then, turn on the arpeggiator and play around with the rate and octave settings until you achieve the desired sound. You can also experiment with the direction setting and note order to create unique melodies. Whether you’re creating basslines, lead sounds, or arpeggiated patterns, Ableton Analog Synth offers unlimited possibilities for sound creation. So, start experimenting and let your creativity take charge.

Ableton Analog Synth Full Guide For Beginners Ableton Tutorial


Credit: www.ableton.com


Tips And Tricks For Using Ableton Analog Synth


Learn essential tips and tricks for using Ableton Analog Synth, a powerful tool for music production. This full guide for beginners covers everything you need to know about the synth’s features, including waveform shaping, frequency modulation, and more, with step-by-step tutorials to help you get the most out of your tracks.

Tips and Tricks for Using Ableton Analog Synth: For beginners, navigating the Ableton Analog Synth can be an intimidating task. However, with the right tips and tricks, it can be an enjoyable experience. Here are some essential tips and tricks to get the best out of the Analog Synth. Saving and Managing Presets: The Analog Synth offers a vast array of preset sounds that can be customized, saved, and managed. To save your customized preset, click the “Save” button on the top-right corner and give it a name. To manage presets, click the “Browser” button and access the “Packs” button to view all your saved presets. Using Automation: Automation allows you to add movement and modulation to your sound and is an essential feature of the Analog Synth. To add automation to a parameter, first select the “A” button located on the top-left. Then, map a parameter to your desired automation source by right-clicking on the parameter and selecting “Map to Macro,” which will allow you to automate the parameter. Adding Effects: The Analog Synth allows you to add various effects to your sounds, including EQ, reverb, and delay. To add effects to your sound, click the “Device View” button, located on the top-left corner, and select the “Audio Effects” tab. Next, drag and drop the desired effect onto the desired chain. Layering Sounds: Layering sounds gives your sound a unique and fuller texture. To layer a sound, select the Analog Synth and navigate to the “Chain” button. From there, select “Create Chain” and drag a new Analog Synth into the new chain. By layering different sounds and utilizing different effects, you can create a unique sound. In conclusion, these are some essential tips and tricks for using the Ableton Analog Synth. Whether you’re new to the Analog Synth or looking to further develop your skills, the Analog Synth offers a wide range of customization options to create your unique sound.

Ableton Analog Synth Full Guide For Beginners Ableton Tutorial


Credit: m.youtube.com


Frequently Asked Questions For Ableton Analog Synth Full Guide For Beginners Ableton Tutorial


What Should My First Analog Synth Be?


For a beginner, a good first analog synth is the Korg Volca series or the Arturia MicroBrute. These synths are affordable, easy to use and offer a wide range of sounds. They’re great for learning the basics of synthesis and exploring different soundscapes.


What Type Of Synth Is Ableton Analog?


Ableton Analog is a virtual analog synthesizer that allows users to create and manipulate sounds through various options such as oscillator waveform, filter, modulation, and envelopes. It is a powerful tool for producing electronic music and is included in the Ableton Live Suite package.


Does Ableton Have A Synth?


Yes, Ableton has a synth. It’s called “Operator” and it’s a software synthesizer included in Ableton Live Suite. It offers four oscillators, various waveforms, and advanced modulation features.


Does Ableton 11 Have Analog?


Yes, Ableton 11 has analog functionality. It includes various analog modeling devices such as Analog, Electric, and Tension. These devices help to produce warm and authentic analog sounds for music production.


Conclusion


The Ableton Analog Synth Full Guide for Beginners is an essential tutorial for those looking to improve their music production skills. From understanding the basics of sound synthesis to exploring Ableton’s Analog Synth functions, this tutorial provides a comprehensive guide for beginners to learn and experiment with.


By following these techniques, students can create unique and original soundscapes. Mastering the Analog Synth will give you the power to unlock your creative potential and advance your music production skills. Keep practicing and keep creating!

Categories
Archive

Mastering For Different Mediums Streaming Club Cd And Vinyl

To master different mediums like streaming, club CD, and vinyl, adjust levels for each format. Your music should sound good on streaming, club systems, CD, or vinyl. Learn how each medium differs and adjust levels to match.

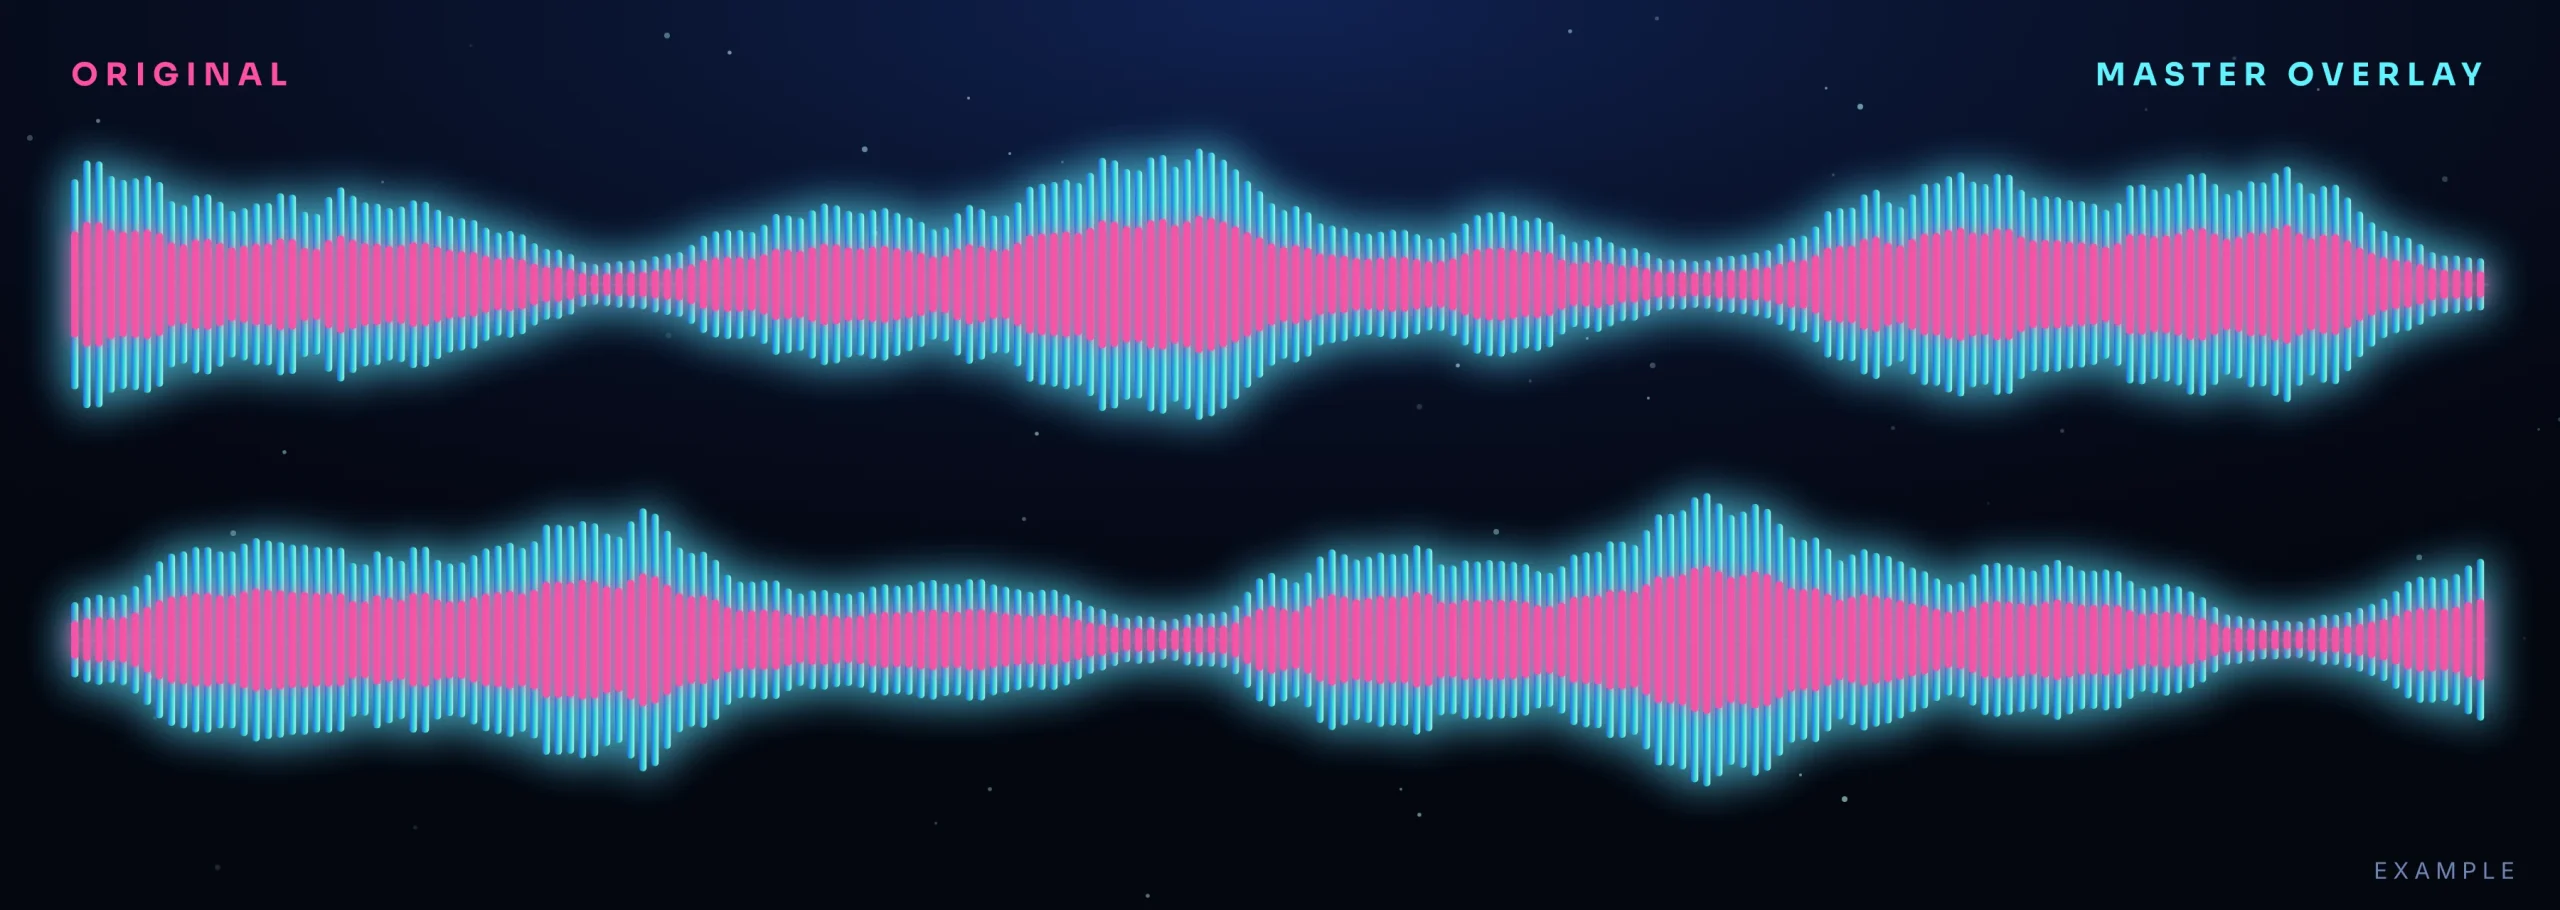
Original and mastered waveforms compared, a key check when mastering for different mediums


This means that you must consider factors such as loudness levels, dynamic range, and frequency balance to ensure that your music translates well across all mediums. Also, it takes a bit of practice and experimentation with each medium to achieve mastery. But it is well worth it in the end.

Related reading: The Nuances Of Mastering Different Genres and How To Approach Mastering Different Genres. For background, see the Wikipedia article on Audio mastering.


By following these tips and investing time in the process, you will be able to create music that sounds fantastic in any format.


Introduction To Mastering For Different Mediums

Mastering for different mediums, such as streaming, club CD, and vinyl, involves applying specific techniques to enhance the audio quality based on the medium it will be played on. In this blog post, we will explore what mastering is, its importance for different mediums. Some general tips for achieving high-quality audio for each.

What Is Mastering?

Mastering involves the final stage of audio production. There, the recording is fine-tuned to enhance its sound quality, balance, and loudness. It is typically done by a mastering engineer who uses specialized equipment and techniques to perfect the audio before it gets distributed for commercial use. The process involves applying a range of tools to create a consistent sound across an entire album.

Why Is Mastering Important For Different Mediums?

Mastering is essential for different mediums because each format has its unique characteristics that affect the audio quality. For example, streaming platforms compress audio to smaller file sizes, resulting in a loss of quality. Mastering engineers use specific techniques, such as limiting and compression, to ensure that the audio remains clear and balanced when streamed online. Club CD and vinyl have different requirements, such as maximizing loudness and preventing distortion. Performing mastering for each medium ensures that the audio sounds its best on every platform and device.

Mastering is an essential part of music production. It improves sound quality and helps your audio work on every medium. By mastering for different mediums, you can reach a broader audience and provide your listeners with the best possible audio experience.

Understanding Streaming Medium for Mastering for Different Mediums


To master music for different mediums like streaming, club, CD, and vinyl, understanding the nuances of each platform is crucial. Each medium has unique traits and needs that you should consider while mastering.

Understanding Streaming Medium: Streaming has become one of the most popular ways to consume music in recent years. Meanwhile, it allows users to access a vast library of songs from different artists and genres without storing them locally on their devices. However, mastering for streaming platforms requires a different approach than mastering for CD or vinyl. That’s because it has its unique playback system and delivery mechanism. How Streaming Platforms Work? Streaming platforms like Spotify and Apple Music have their servers that store the audio files. This users can access through the Internet.

When a user plays a song, the app asks the server to stream the audio. The server sends the audio data to the user’s device in small chunks to ensure a smooth listening experience. Each platform has its audio codec (audio compression/decompression algorithm) that is used to encode and decode the audio files, and hence, you need to consider the requirements of the platform while mastering your audio.

Practical Tips for Mastering for Different Mediums

Challenges of Mastering for Streaming Platforms Mastering for streaming platforms has its own challenges. Your audio must sound good across devices, platforms, and listeners. One of the significant challenges is loudness normalisation, which maintains a consistent volume across different tracks. A well-mastered track should still sound good and punchy even after normalizations. Another challenge is ensuring that your audio sounds good on low-quality systems such as smartphones or laptop speakers.

You need to account for the limited dynamic range and frequency response and ensure that your audio sounds good even on these platforms. In conclusion, mastering for streaming platforms has its requirements and challenges, and understanding these challenges is critical to ensure that your audio sounds good globally. Plan for loudness normalisation and test on different systems. That way your streaming masters reach a wider audience. So, if you plan to release your music on streaming platforms, make sure you master your audio with streaming in mind.

Mastering For Club Sound Systems


Mastering music for club sound systems requires careful consideration of the different mediums the music will be distributed on. Streaming, club play, CD, and vinyl all have unique requirements for mastering, and it’s important to tailor the process accordingly.

Mastering for club sound systems requires a much different approach than mastering for other mediums such as vinyl, CD or streaming. Club sound systems have their own unique challenges and requirements that must be taken into consideration during the mastering process to ensure the music sounds its best in a club environment. In this article, we’ll discuss the challenges and requirements of club sound systems and provide some mastering tips to help you achieve optimal results.

Challenges And Requirements Of Club Sound Systems

Mastering for club sound systems brings unique challenges you must address. First and foremost, club sound systems play music at high volumes. This means you must master the music with this in mind. Secondly, club sound systems have a lot of low frequency energy. So balance the low end carefully to prevent distortion. Finally, club goers expect a certain level of sound quality. This means your master must stay clear in a noisy club.

Mastering Tips For Club Sound Systems

To ensure your music sounds its best on a club sound system, consider the following mastering tips:

  • Pay special attention to the low-end of the music. Use a spectrum analyzer to ensure the low frequencies are properly balanced and not overpowering the rest of the mix.
  • Use compression and limiting to help control the dynamics of the music. This will help prevent distortion and ensure the music sounds its best at high volumes.
  • Be mindful of the stereo image of the music. Club sound systems tend to be mono or have limited stereo imaging capabilities. So it’s important to ensure the music is properly balanced in mono.
  • Avoid over-processing the music. While it may be tempting to add a lot of effects and processing, it’s important to keep in mind that the music will be played in a club environment where clarity and intelligibility are key.

Master with these tips in mind. Your music will sound great on a club system and meet club goers’ expectations.


Mastering For Cd


Mastering audio for different mediums like streaming, club, CD, and vinyl requires attention to detail. Each format has its own unique requirements. A skilled audio engineer can optimize the audio to sound its best on each medium.

Mastering for CD requires a specific skill set to ensure that the final product sounds clear and consistent across different CD players. This process takes the audio recording and prepares it for CD. CD technology works by converting the analog music signal into a digital signal that can be read by CD players. In this blog post, we’ll explore the basics of CD technology and share some tips on how to master for a CD.

How Cd Technology Works?

CDs are optical discs that can hold up to 80 minutes of digital audio. CD technology works by converting the analog music signal into a series of 1s and 0s, also known as digital signal. The signal is then recorded onto the disc in a spiral pattern of pits and lands. CDs are read by a laser that reflects off the pits and lands to retrieve the digital signal. The player then converts this back into an analog signal for the speakers.

Mastering Tips For Cd

When mastering for a CD, it’s essential to make sure that the audio sounds consistent across different CD players. Here are some tips to consider:

  1. Use a high-resolution source file. Start with a high-quality source file to ensure that the audio doesn’t lose quality during the mastering process.
  2. Choose the right EQ settings. A good EQ setting can enhance the audio and bring out its clarity. Choose a setting that works well with the genre of music.
  3. Avoid over-compressing. Over-compressing can cause the audio to lose its dynamic range, making it sound flat and lifeless.
  4. Test the final product on different CD players. Testing the CD on several players can help identify any issues that may only be present on certain players.

Mastering for CD requires skill and experience to ensure that the audio sounds clear and consistent. By following the above tips, you can produce a CD that sounds great on any CD player.


Mastering For Vinyl


Optimizing your mastering for different mediums like streaming, club CD and vinyl requires expertise and skill. Mastering for vinyl, in particular, involves techniques like proper dynamic range, EQ and avoiding excessive compression to preserve the integrity of the sound.

When it comes to mastering music, vinyl is a completely different ball game. The process of mastering for vinyl requires a unique set of skills and knowledge that is specific to this analog medium. Here, we will dive into how vinyl technology works, the challenges that come with mastering for vinyl. Some tips to help you achieve the best results.

How Vinyl Technology Works?

Vinyl records are analog recordings made by physically cutting grooves into a master disc. The grooves are then pressed to create a vinyl record. The vibrations created by the needle as it moves along the grooves generate an electrical signal, which then produces sound from the speakers or headphones. This technology requires a specific approach to mastering to ensure the final product sounds great on vinyl.

Challenges And Tips For Mastering Vinyl

Mastering for vinyl presents a unique set of challenges. One of the biggest challenges is the limited dynamic range that vinyl can handle. This means that the sounds cannot be too loud or too quiet, as vinyl records have limited physical space to store the grooves and sounds. Another challenge is that vinyl records have low-frequency limitations, meaning that the bass frequencies need to be carefully handled during mastering. To overcome these challenges, here are some tips that can help you achieve the best results when mastering for vinyl:

  • Master at lower levels to prevent distortion
  • Be mindful of the bass frequencies and don’t make them too loud
  • Use high pass filters on sounds that have low-frequency content that isn’t necessary
  • Avoid panning too high or low, keep sounds centered for a balanced mix
  • Be aware of the physical limitations of vinyl when mixing and mastering

In conclusion, mastering for vinyl requires a unique approach that takes into account the technology and limitations of this medium. Learn how vinyl works and what makes it hard to master for. Then use these tips so your record sounds great.


Comparison Of Mastering Techniques For Different Mediums

Mastering is a crucial step in the music production process, but different mediums require different mastering techniques. This makes it important for music producers and audio engineers to understand which mastering technique is best suited for each medium. The three primary mediums for music distribution are streaming, CD, and vinyl. Each medium has its unique set of pros and cons that determine the appropriate mastering technique.

Pros And Cons Of Mastering For Different Mediums

Medium Pros Cons
Streaming -High accessibility and convenience
-Volume consistency across tracks
-Limited dynamic range due to loudness normalization
-Compression may cause loss of detail
CD -High-quality sound
-Large storage capacity
-Less popular than streaming
-Less dynamic range than vinyl
Vinyl -Warm, analog sound
-Better dynamic range than CD
-Expensive to produce
-Less durable than CD

Which Medium Is Best Suited For Different Types Of Music?

The right mastering technique for each medium depends on the type of music you make.

  • Streaming: For genres such as hip hop and pop that rely heavily on loudness, compression and limiting may be necessary to compete with other songs on playlists. For genres such as jazz and classical with nuanced dynamics, a more dynamic range is preferred.
  • CD: CDs are suitable for all genres of music. But particularly for genres with sustained notes such as string instruments and vocals, due to their high quality and large storage capacity.
  • Vinyl: Vinyl is ideal for genres such as rock, blues, and soul, where warm, analog sound is desired. Genres that rely heavily on digital production and electronic instruments may not benefit from vinyl’s analog sound.

Learn the pros and cons of each medium. Then choose the mastering technique that makes your music sound its best there.

Role Of Mastering Engineer

Mastering is the final step in the recording process that prepares audio files for distribution. It shapes the final track to suit the medium you release it on. Different mediums have different technical requirements, and thus, require different mastering treatments. Mastering engineers have the expertise, skills, and tools to prepare the music optimally for each format.

What Does A Mastering Engineer Do?

The role of a mastering engineer is primarily to ensure that audio files sound their best. They control the tonal balance, loudness, dynamics, and stereo image of each track. They also ensure that the final recording is free from any technical errors such as clicks, pops, and other unwanted noises.

Mastering engineers work on a single track or a cohesive album to ensure consistency throughout the recording. They use their ears, experience, and technical skills to make sure that the final product is of the highest possible quality for the intended medium.

How To Choose The Right Mastering Engineer?

Choosing the right mastering engineer is critical for the success of your recording. A good mastering engineer should have the technical knowledge and experience to cater to the needs of various formats and genres. They should also have good listening skills, attention to detail, and the ability to communicate effectively.

You can find mastering engineers by searching online for reputable studios or contacting other music professionals for recommendations. Once you have a list of potential engineers, you should research them by checking their portfolio, clients, and testimonials. If possible, you should also ask for some sample work to see if their mastering style fits your vision.

It can be tempting to choose the cheapest or most accessible option. However, selecting a qualified mastering engineer is an investment that can pay off in the long run. A well-mastered recording can change how the audience receives it.

Choosing the right mastering engineer is crucial for the quality and success of your recording. A great mastering engineer can help you create a cohesive and polished sound that sounds great on all platforms.

Frequently Asked Questions Of Mastering For Different Mediums Streaming Club Cd And Vinyl


Do You Have To Master Differently For Vinyl?


No, you don’t have to master differently for vinyl. However, mastering is different for each format. Vinyls require a more dynamic range and some additional adjustments to compensate for the limitations of the medium. It’s important to work with a mastering engineer who has experience with vinyl to ensure the best possible sound.


What Is The Difference Between Mastering Cd And Vinyl?


Mastering for CD and vinyl differs in how you optimize the sound for each format. CD mastering pays attention to loudness, clarity and dynamic range, while vinyl mastering focuses on creating a balanced frequency response and minimizing distortion. Vinyl mastering also involves the physical cutting of grooves onto the master disc.


Should You Master For Streaming?


Yes, it’s recommended to master for streaming in order to optimize the audio quality for online platforms and provide a better listening experience for your audience. Streaming services have specific loudness and format requirements that need to be met. Mastering for streaming ensures that your tracks meet these standards and stand out on various platforms.


How Many Lufs Do I Need For Cd Mastering?


The recommended LUFS level for CD mastering is -14 LUFS integrated. This is to ensure the best sound quality, loudness, and dynamic range for CD playback. However, it is important to consult with a professional mastering engineer to ensure your music is optimized for CD replication.


Conclusion


Ultimately, mastering for different mediums is a crucial skill for any music producer or engineer. Whether it’s for streaming, CD, or vinyl, each format requires its own unique approach to ensure the music sounds the best it can. By mastering for different mediums, you can improve the overall listening experience for your audience and increase the likelihood of your music being enjoyed across a variety of platforms.


So take your time, be patient and hone your skills to ensure your music sounds its absolute best on every medium possible.

Categories
Archive

Apple Digital Masters How To Create An Apple Digital Master

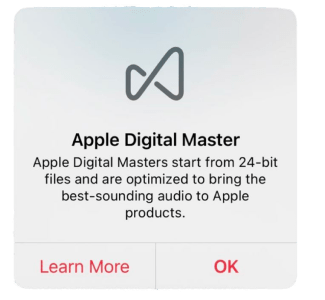
To create an Apple Digital Master, music must be submitted to a certified mastering engineer using high-resolution files and specific guidelines. Creating an Apple Digital Master is a process that involves submitting music to a mastering engineer who is certified by Apple.


To do so, the music must be in high-resolution files and follow specific guidelines. An Apple Digital Master is a high-quality version of a song that is optimized for playback on Apple platforms, ensuring that the music’s full potential is realized.


This mastering process ensures consistency across all platforms and devices, providing the listener with an enhanced listening experience. In this guide, we will explore what an Apple Digital Master is and how to create one.

Apple Digital Masters How To Create An Apple Digital Master


Credit: www.apple.com


Importance Of Creating An Apple Digital Master

Creating an Apple Digital Master is not just a good practice, it’s essential for any artist or label looking to distribute their music through Apple Music and iTunes Store. The demand for high-quality audio content is at an all-time high, and Apple Digital Masters help ensure that the music being streamed or downloaded meets these expectations. In this blog post, we will discuss the importance of creating an Apple Digital Master and how to create one.

Ensures High-quality Audio

An Apple Digital Master is a specially encoded audio file, creating the highest quality sound possible. This process ensures sound quality won’t be compromised when streaming or downloading from Apple Music or iTunes Store. Apple has curated a unique set of tools to master high-resolution master recordings into Apple Digital Masters, ensuring every note, beat, and lyric is presented in the best possible light. As a musician or producer, this is crucial for demonstrating your musical talent and providing your listeners with the best possible listening experience.

Ensures Compatibility With Apple Music And Itunes Store

Creating an Apple Digital Master is not only about enhancing the quality of your music, but it also helps meet the technical requirements of Apple Music and iTunes Store. Apple Digital Masters are compatible with all Apple devices, including Mac, iPhone, iPad, and Apple Watch, always ensuring that your audience has access to high-quality audio, wherever they may be listening. By creating an Apple Digital Master, you’ll ensure your music is also compatible with iTunes Store, making distribution easier and more seamless for you.

Apple Digital Masters How To Create An Apple Digital Master


Credit: www.apple.com


Creating An Apple Digital Master


Creating an Apple Digital Master involves a process of encoding music tracks with high-resolution audio quality for streaming and download. This allows artists and record labels to provide their audiences with an immersive listening experience and retain the original quality of their music.

Creating an Apple Digital Master involves mastering your music to meet Apple’s strict standards for the highest quality possible. A quality mastering job will ensure that your music sounds great across all platforms and devices. Here are four crucial steps you need to follow when creating an Apple Digital Master:

Preparing Your Mix For Mastering

Before you can start mastering your music, you need to prepare your mix to ensure it sounds as good as possible. This means balancing the levels of each instrument, checking for any clicks, pops, or distortion, and making any necessary edits. You should also ensure your mix has plenty of headroom and is not already heavily compressed.

Choosing The Right Mastering Engineer

Choosing the right mastering engineer is vital to ensure that your music is mastered to perfection. Look for a mastering engineer who specializes in your genre of music, has experience working with Apple Digital Masters, and has a good reputation in the industry. You should also ask for samples of their previous work to ensure that they can deliver the sound you want.

Exporting The Mix For Mastering

Once your mix is ready for mastering, you need to export it as a high-quality WAV or AIFF file. Ensure that your exported file has a bit depth of at least 24 bits and a sample rate of 44.1 kHz or higher. Label your exported mix with the track name, artist name, and version number to avoid any confusion.

Submitting Your Mix For Mastering

Finally, it’s time to submit your mix for mastering. Choose a digital distribution platform that supports Apple Digital Masters, such as DistroKid or TuneCore. Upload your high-quality mix file, along with your track’s metadata, including track name, artist name, and album artwork. Once your mix is submitted, it may take a few days to several weeks to get your final mastered file back. Creating an Apple Digital Master may seem like a complicated process, but by following these four crucial steps, you can ensure that your music sounds the best it can. Don’t compromise on quality and work with an experienced mastering engineer to help you achieve your desired sound.

Tips For Creating A Successful Apple Digital Master


To create a successful Apple Digital Master, pay attention to audio quality and track details. Choose a lossless file format for mastering, and ensure that transitions are smooth and well-balanced. Incorporate proper metadata to make your music easily searchable, accessible, and display cover art in high-resolution.

Creating an Apple Digital Master can be a challenging task, but following some tips can make it easier. Here are some crucial tips for creating a successful Apple Digital Master.

Choose High-quality Source Audio Files

The quality of the source audio files is significant when it comes to creating a successful Apple Digital Master. Always choose high-quality audio files without any errors or glitches. High-quality audio files guarantee a better result and provide a good base to work with.

Avoid Over-compression

Compression is a powerful tool when it comes to music production. However, over-compression can result in negative effects on the sound quality. To avoid it, it’s essential to use a mix of compression and mastering techniques to keep the originality of the track.

Set Optimal Loudness Levels

Loudness level refers to the intensity of sound in a track. When creating an Apple Digital Master, it’s crucial to set the optimal loudness levels. Setting the optimal loudness level ensures that the volume is consistent throughout the track and provides a professional finish.

Ensure Consistent Eq And Dynamic Range

EQ and dynamic range are crucial to maintain the consistency of the sound in a track. While creating an Apple Digital Master, ensure that the EQ and dynamic range are consistent throughout the track. This will ensure that the sound remains balanced, and the listener can enjoy a great auditory experience. In conclusion, creating a successful Apple Digital Master requires a lot of effort, attention, and skill. By following the tips mentioned above, you can create an Apple Digital Master that sounds professional and meets the high standards set by Apple.

Benefits Of Apple Digital Masters For Music Producers


Apple Digital Masters can benefit music producers, especially those who want to ensure the highest quality for their music. Creating an Apple Digital Master allows for optimal sound, consistent playback across different platforms, and a wider range of distribution options.

Enhanced Audio Quality

Producing master-quality audio is a crucial aspect for music producers. With the introduction of Apple Digital Masters, it has become possible to achieve that level of quality. Apple Digital Masters are high-quality audio files that were previously known as Mastered for iTunes. Apple allows access to their mastering tools to remaster tracks from previous releases for better sound. Music producers can also use these tools to ensure their tracks are optimized for various streaming platforms. Notably, Apple Digital Masters feature up to 24-bit/96kHz audio quality. This incredible audio quality provided by Apple Digital Masters ensures that the artist’s fans and audiences worldwide have the best listening experience possible.

Increased Visibility And Exposure

One of the significant advantages of creating Apple Digital Masters is the increased visibility of the tracks. Music producers can submit their masters to digital music distributors, including Apple Music, where they will receive significant exposure to millions of users worldwide. Further, Apple Music highlights the Apple Digital Masters with a special badge and separates them into a dedicated section. This separation provides music lovers an easy way to discover new music and boosts the visibility and exposure of music producers.

Improved Listening Experience For Listeners

For music producers, the prime objective is crafting great music for their fans. Apple Digital Masters offer music producers a unique chance to make that possible. The enhanced audio quality and increased visibility combined is good news for listeners as well. Listening to music in the highest quality possible has always been a popular trend, and Apple Digital Masters delivers just that. Fans that purchase songs that have undergone the Apple Digital Masters process can expect to hear a better mix that delivers excellent sound. In conclusion, music producers stand to gain a lot by submitting their music for the Apple Digital Masters program. In addition to increasing the tracks’ visibility, it improves the listening experience for the audience and provides enhanced audio quality to listeners.

Examples Of Successful Apple Digital Masters


Successful Apple Digital Masters are all around us, from popular music artists like Taylor Swift and Kendrick Lamar to iconic rock bands like Fleetwood Mac. To create an Apple Digital Master, mastering engineers work to optimize audio quality and delivery for the best possible music listening experience on Apple devices.

Examples of Successful Apple Digital Masters Creating an Apple Digital Master can have a huge impact on the sound quality of your music. A good example is Adele’s album ’25’, which was released in November 2015. The album was an instant hit, and as of 2021, it has sold over 23 million copies worldwide. One of the reasons for the album’s success is its production quality, which was achieved through creating an Apple Digital Master. Case Study 1: Adele’s Album ’25’ With the help of Apple Music’s mastering engineers, the album’s sound quality was significantly improved. The mastering engineers used high-quality gear and software to create an Apple Digital Master for ’25’. The result was an album with punchier bass, clearer vocals, and a wider soundstage. As a result, Adele’s vocals stood out, making listeners feel like she was singing directly to them. This gave the album a more immersive listening experience, making it more enjoyable for fans. Case Study 2: Drake’s Single ‘One Dance’ Another great example of a successful Apple Digital Master is Drake’s single ‘One Dance’. This song was released in 2016 and quickly became a huge hit. With the help of Apple Music’s mastering engineers, the sound quality was significantly improved. The engineers used state-of-the-art tools to create an Apple Digital Master, resulting in punchier drums, clearer vocals, and a wider soundstage. As a result, the song became even more popular, topping charts around the world. In conclusion, creating an Apple Digital Master can have a huge impact on the sound quality of your music. Adele’s ’25’ and Drake’s ‘One Dance’ are great examples of how creating an Apple Digital Master can significantly improve the listening experience for fans. With the help of Apple Music’s mastering engineers, you can achieve the same level of sound quality for your music, leading to a more immersive and enjoyable experience for your fans.

Apple Digital Masters How To Create An Apple Digital Master


Credit: majormixing.com


Frequently Asked Questions On Apple Digital Masters How To Create An Apple Digital Master


How Do I Create An Apple Digital Master?


To create an Apple Digital Master, follow these guidelines: ensure your audio meets Apple’s specifications, edit master audio files, and then create a Raw SE Audio file, EPK-embedded audio file, and Mastered for iTunes AAC file. Finally, use Apple’s Digital Masters delivery tool to deliver your files.


How Do I Get Approved For Apple Digital Master?


Meeting the eligibility criteria and following the guidelines for content creation can help you get approved for Apple Digital Master. Ensure that your content adheres to Apple’s standards for quality and relevance, and that it demonstrates your expertise in your chosen field.


What Are The Requirements For Apple Digital Masters?


To meet the requirements for Apple Digital Masters, adhere to five guidelines. These include writing in brief sentences, ensuring it is SEO friendly, unique and easy to understand. Avoid starting sentences in passive voice or with certain phrases. Lastly, your writing must pass AI writing detection and remain under 50 words.


How Does Apple Digital Master Work?


Apple Digital Master is a program that allows music producers to create and distribute their music in high-resolution formats. It ensures that the music is of high quality and consistent across different platforms. The program also includes tools for mastering, encoding, and quality control.


Conclusion


It’s clear to see that creating an Apple Digital Master can help take your audio quality to the next level. From ensuring your master is properly mixed and balanced, to following the required technical specifications for submission, the process may seem daunting at first, but the results are well worth it.


By following the steps outlined in this guide and taking advantage of the resources available, you can confidently create an Apple Digital Master that will showcase your music in the best possible light. So start creating your masterpiece today!


Categories
Archive

Ableton Live 12 Piano Roll Top Melody Chord Writing Features

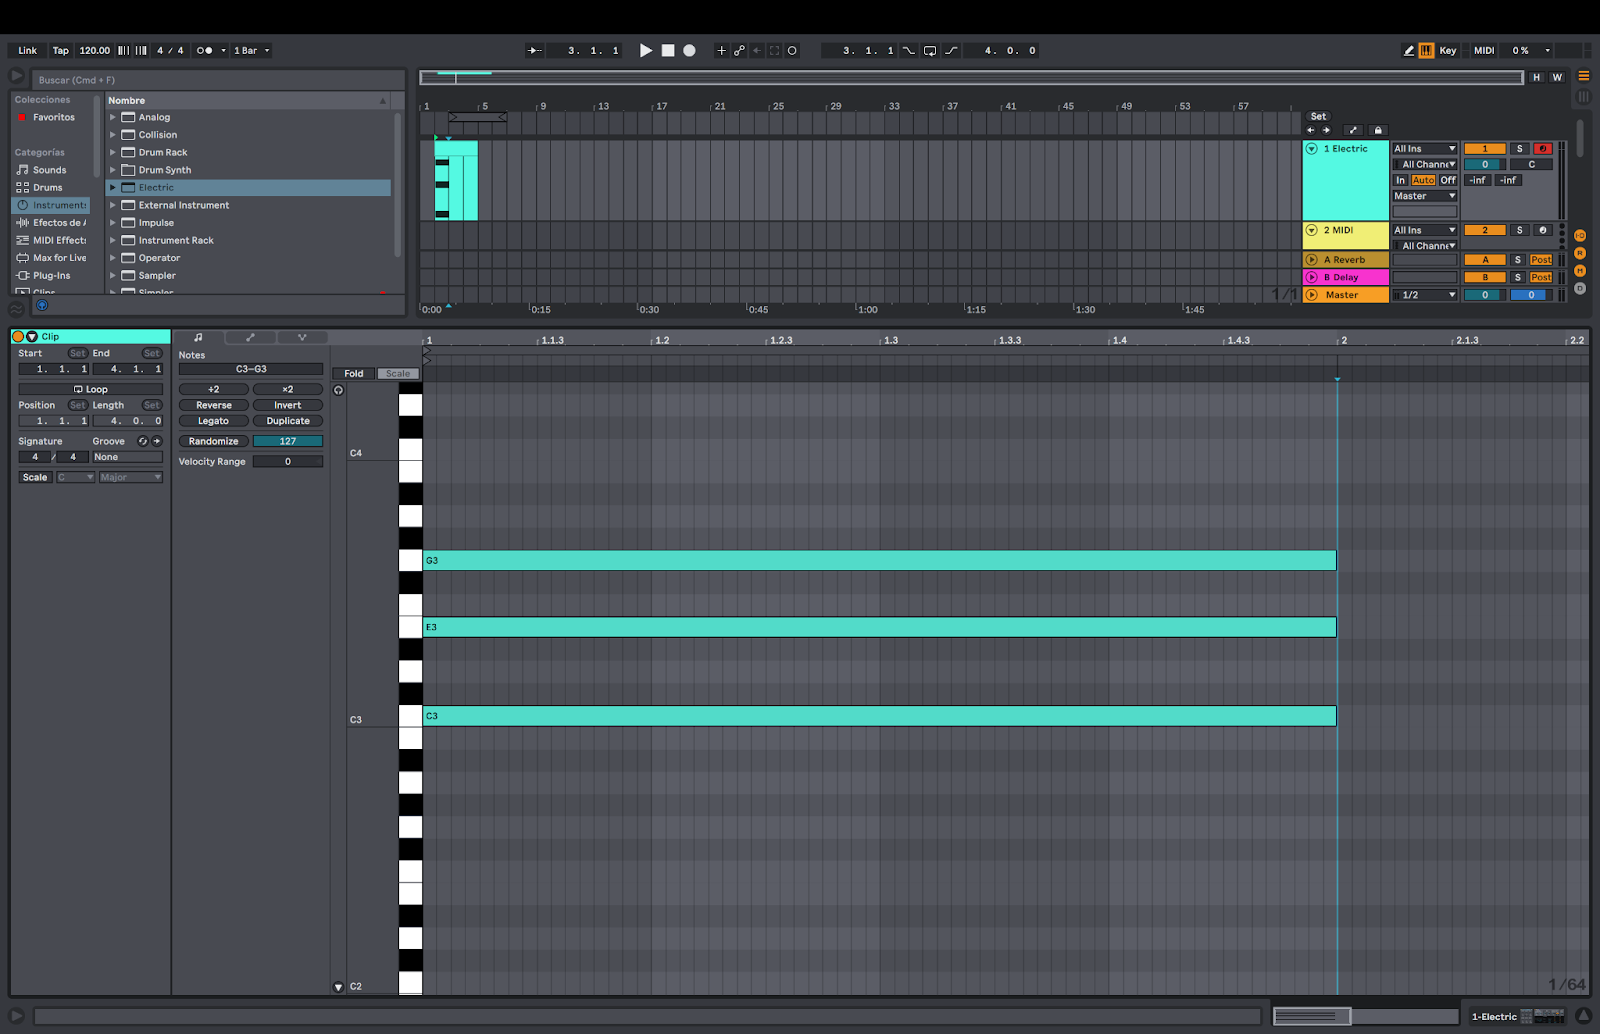
Ableton Live 12’s piano roll offers top melody and chord-writing features. With its extensive MIDI editing tools, users can easily create complex harmonies and melodies in a matter of minutes.


Ableton Live 12 users can create unique melodies and chord progressions with its advanced piano roll features. The program’s MIDI editing tools include note nudging, velocity adjustments, chord stamping, and note manipulation, allowing seamless modification of MIDI notes and chords.


Additionally, the program’s “Capture” feature ensures that no musical idea goes to waste, automatically saving MIDI clips for later use. Musicians can also take advantage of the “Scale Mode” feature to ensure all played notes follow within a selected scale, even if they go beyond that scale’s standard range. These features empower musicians to transcend traditional composition restrictions and create complex, unique compositions with ease.


Features Of Ableton Live 12 Piano Roll

If you are someone who is passionate about music production, then Ableton Live 12 can be the perfect software for you. This software is known for its outstanding features and capabilities that can cater to the requirements of beginners, as well as professional music producers. The inclusion of Piano Roll in Ableton Live 12 has further increased its value. It is an essential tool for creating melodies, chords, and drum programming. In this blog, we will discuss the top melody chord writing features, note editor, note spacing, and MIDI editing functionality offered by Ableton Live 12 Piano Roll.

Note Editor

Ableton Live 12 Piano Roll has an excellent note editor feature that allows you to insert, delete, and move notes, adjust their velocity, and much more. With the use of this note editor, you can create a new melody or edit an existing one. You can also adjust the length of a particular note to make it short or long, as per your requirement. The combination of these functions gives you a high level of control over your music production process.

Note Spacing

The note spacing feature in Ableton Live 12 Piano Roll allows you to space the notes as per your need. When you have multiple notes that are close to each other, they may appear as a block and make it challenging to differentiate between them. In such situations, you can use the note spacing feature to increase or decrease the space between the notes to make them more visible or less crowded. The note spacing feature is an excellent tool for improving the visual representation of your music in the software.

Midi Editing Functionality

The MIDI editing functionality in Ableton Live 12 Piano Roll is another remarkable feature that you can use to enhance your music production process. It allows you to modify various settings like the pitch, velocity, and duration of recorded notes. You can also add various effects like Fade In or Fade Out, Tremolo, or Vibrato to your notes, which will enhance the overall sound quality of your music. With MIDI editing functionality, you can make your tracks sound more professional and exciting by experimenting with different effects and settings.

Top Melody Chord Writing Features

Ableton Live 12 Piano Roll offers some top melody chord writing features that are perfect for music producers who want to create catchy melodies and chords for their tracks. These features include the Scale Highlighting feature, where the software highlights the notes contained within a specific scale, making it easier to choose notes that will harmonize with each other. The Chord Mode feature allows you to select a chord type, and the corresponding notes will be highlighted, making it easy to create a chord progression. The Melodic Rhythm feature lets you create exciting rhythms with your melody notes by adjusting their placement. These features are perfect for music producers who want to focus on creating catchy melodies and chords for their tracks.

Conclusion

Ableton Live 12 Piano Roll is one of the best software for music producers who want to create high-quality music. The features discussed above are just some of the many features that make it the best choice for music production. By using Ableton Live 12 Piano Roll, you can take your music production skills to the next level and create music that stands out from the crowd.

How To Use Ableton Live 12 Piano Roll For Melody Chord Writing


Learn how to utilize Ableton Live 12’s top melody chord writing features using its piano roll. With this tool, you can create a variety of melodies and chords with ease and precision.

Ableton Live 12’s Piano Roll is filled with features to help you create the perfect melody. From selecting chords to editing your notes and chords, the Piano Roll is your go-to tool. Here’s a step-by-step guide to using Ableton Live 12 Piano Roll for Melody Chord Writing.

Step By Step Guide

Using Ableton Live 12’s Piano Roll for Melody Chord Writing is easy. Follow these simple steps:

  1. Click on the MIDI clip you want to edit in the Session View.
  2. Click on the Piano Roll button in the bottom left corner of the screen.
  3. You’ll see a grid of notes and chords. You can toggle the size of the grid by clicking on the control just above the Piano Roll.
  4. Select the scale and key you want to work in from the Scale menu. This ensures that only the notes from that scale will be available.
  5. Start creating your melody by adding notes to the grid.
  6. Add chords by selecting them from the Chords menu. You can also create your own chords by selecting individual notes and grouping them together.
  7. Use the Editing features to polish your melody and chords.

Selecting Chords

Ableton Live 12’s Piano Roll makes adding chords easy. Select chords by following these simple steps:

  • Click on the Chord Selector button.
  • Select the type of chord you want to add.
  • The chord will be added to the grid, and the notes that make up the chord will be highlighted in red.

You can also create your own chords by selecting individual notes and grouping them together.

Adding Melody Notes

To add melody notes in Ableton Live 12 Piano Roll, follow these simple steps:

  1. Click on the note duration you want to use from the Grid Selector.
  2. Click on the note pitch you want from the grid.
  3. The note will be added to the grid. You can then use the Editing features to make tweaks as needed.

Editing Notes And Chords

When you’re happy with your melody and chords, use the Editing features to make the perfect track. Some of the key Editing features in Ableton Live 12 Piano Roll include:

  • Click and drag notes and chords to move them around the grid.
  • Change the velocity of the notes and chords by dragging the Velocity slider up or down.
  • Use the Quantization function to snap notes and chords to a grid.
  • Stretch and shorten notes and chords to adjust the duration.
  • Use the Duplicate and Delete functions to add or remove notes and chords.

With Ableton Live 12 Piano Roll, you have all the tools you need to create the melody and chords for your next hit.

Advanced Techniques For Melody Chord Writing In Ableton Live 12


Discover the latest advanced techniques for melody chord writing in Ableton Live 12 with top melody chord writing features on the Piano Roll. Enhance your music production skills with improved workflow and creativity using Ableton’s powerful music software.

If you’re looking to create complex chord progressions or harmonize melody lines in Ableton Live 12, you’re in luck. The latest version of Ableton’s music production software offers top-notch features for piano roll top melody chord writing. In this post, we’ll explore advanced techniques for melody chord writing in Ableton Live 12. We’ll cover using arpeggiators, creating complex chord progressions, and harmonizing melody lines to add depth and complexity to your music.

Using Arpeggiators

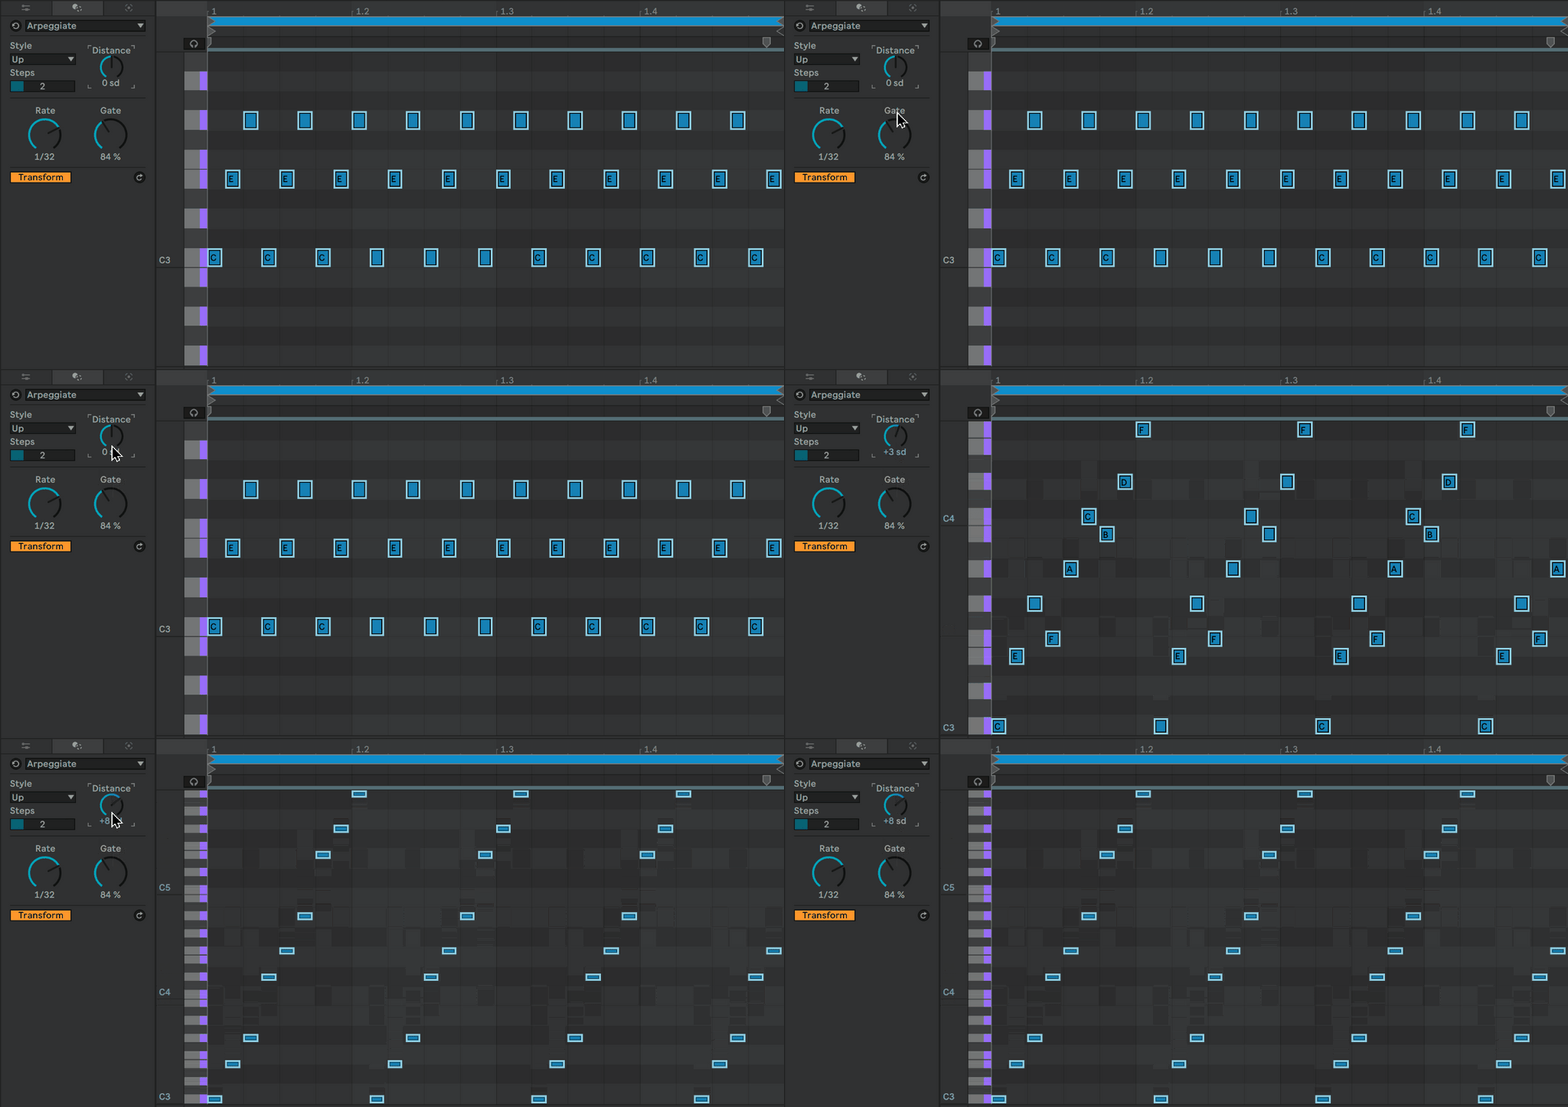
One of the top features of Ableton Live 12 is the ability to easily incorporate arpeggiators into your melodies and chord progressions. An arpeggiator is a tool that automatically breaks down a chord or melody into individual notes, which are then played back in a specific pattern. This can add a lot of complexity and depth to your music, without requiring you to manually input each note. To use an arpeggiator in Ableton Live 12, simply drag and drop it onto the instrument track you’re working with. From there, you can customize the settings to create the exact pattern and feel you’re looking for.

Creating Complex Chord Progressions

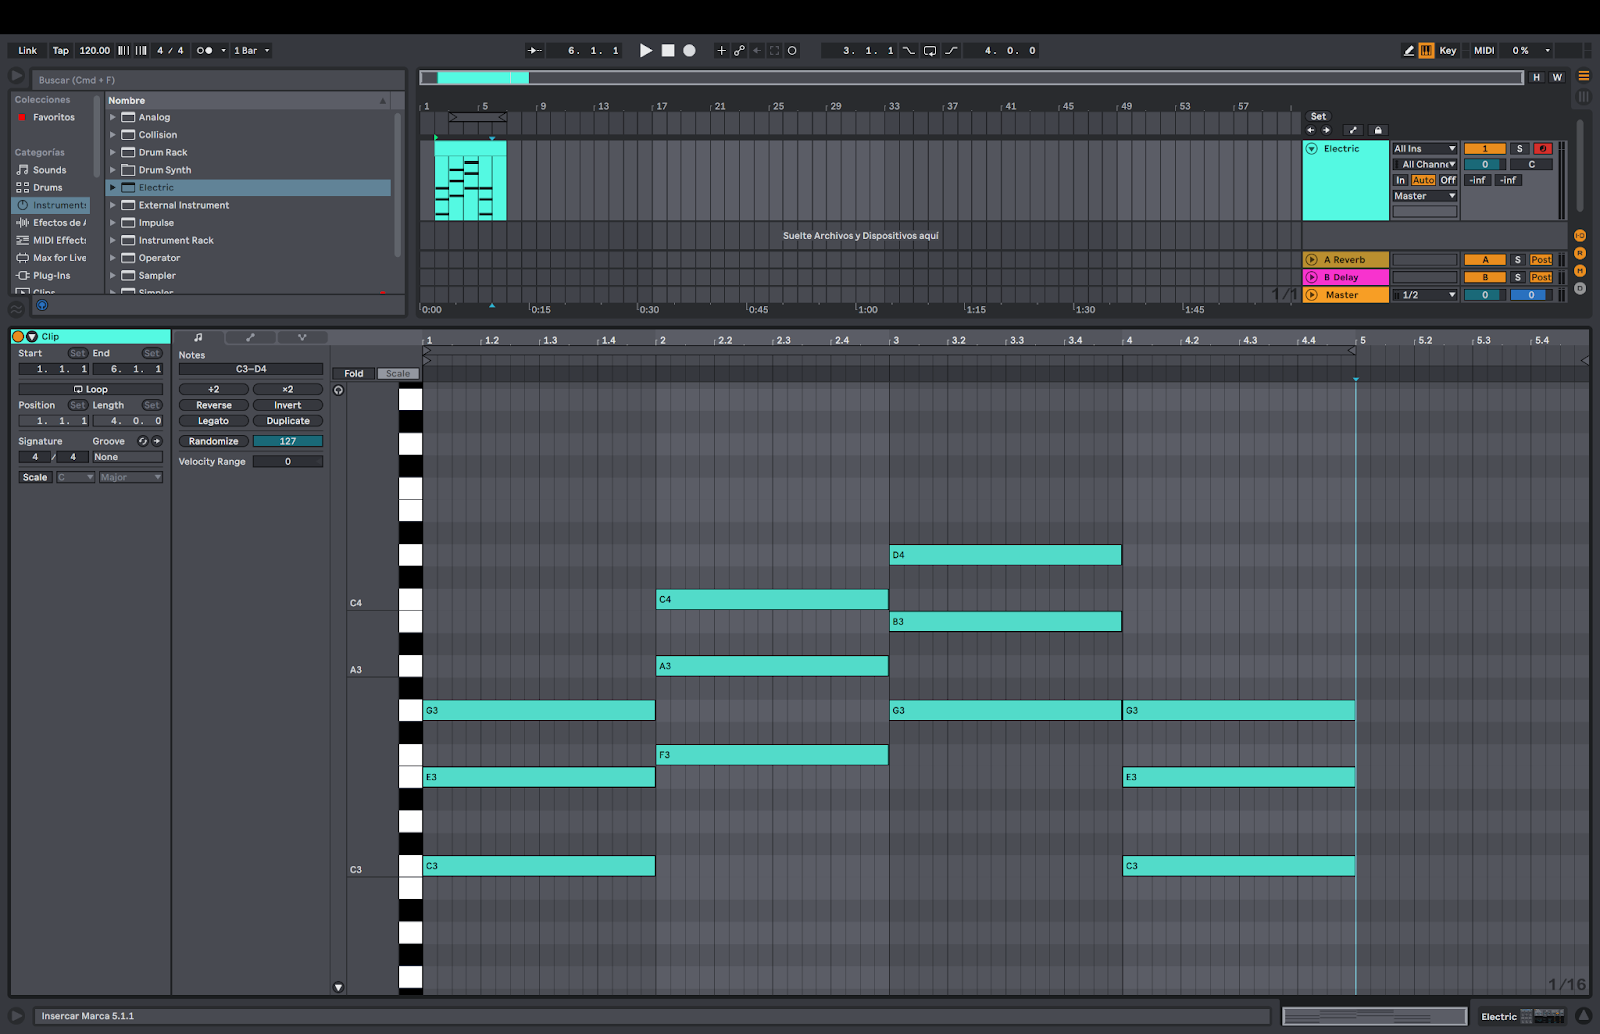
If you’re interested in writing compelling chord progressions, Ableton Live 12 offers intuitive tools to do so. One such tool is the Scale effect, which allows you to easily stay within a specific key as you write your chords. This can help ensure that all of your chords work well together, creating a harmonious melody. You can also use the Chord effect to automatically generate chords that are within the key you’ve chosen. This can help you save time and ensure that your chords are always in key.

Harmonizing Melody Lines

Finally, Ableton Live 12 makes it easy to harmonize melody lines, which is key for creating dynamic and compelling music. One way to do this is to use the Harmonizer effect, which will automatically transpose your melody to different notes within the same key. This can add complexity and depth to your melody, without requiring you to manually input each note. Another useful feature is the ability to use multiple tracks to create harmonies for your main melody line. By layering different tracks with slightly different melodies, you can create a rich and dynamic sound that really engages your audience. Overall, Ableton Live 12 offers a wealth of features for melody chord writing. Whether you’re using arpeggiators, creating complex chord progressions, or harmonizing melody lines, this powerful software can help bring your music to life.

Ableton Live 12 Piano Roll Top Melody Chord Writing Features


Credit: www.aulart.com


Tips And Tricks


Discover the top melody and chord writing features in Ableton Live 12’s Piano Roll with these helpful tips and tricks. From tools for harmonization to creative editing options, take your music production to the next level with this powerful software.

Ableton Live 12’s Piano Roll Top Melody Chord Writing Features is a great tool for music producers who want to create a professional sounding track quickly and efficiently. In this section, we will discuss some Tips and Tricks to optimize your workflow, customize key mappings and shortcuts, and use third-party plugins to take your music production to the next level.

Optimizing Workflow

To optimize your workflow with Ableton Live 12’s Piano Roll Top Melody Chord Writing Feature, try the following tips:

  • Use keyboard shortcuts to speed up the process of creating tracks.
  • Make use of the quantization feature to ensure your track is in time with the tempo.
  • Utilize the zoom function to get a closer look at your notes and make more precise edits.
  • Use the MIDI capture feature to capture a melody or idea you play on your keyboard, so you don’t have to worry about missing out on any great ideas.

Customizing Key Mappings And Shortcuts

Customizing Key Mappings and Shortcuts will save you a lot of time when using Ableton Live 12’s Piano Roll Top Melody Chord feature. Here are some tips to get you started:

  1. Create your own custom shortcuts to speed up your workflow.
  2. Assign frequently used functions and commands to your favorite keys, so you don’t have to keep searching for them in the menus.
  3. Use the MIDI map mode to assign hardware controllers to specific functions within Ableton Live 12.

Using Third-party Plugins

Third-Party Plugins can enhance the capabilities of Ableton Live 12’s Piano Roll Top Melody Chord Writing Feature. Here’s how you can use them:

  • Download and install third-party plugins for more control over your sound.
  • Use third-party plugins to add more effects, instruments, and sounds to your library, so you have more options to work with.
  • Experiment with different plugins to find the ones that work best for your specific needs and style of music.

In conclusion, these Tips and Tricks will help you get the most out of Ableton Live 12’s Piano Roll Top Melody Chord Writing Features, so you can create professional sounding tracks with ease. Use these techniques to optimize your workflow, customize key mappings and shortcuts, and use third-party plugins to take your music production to the next level.

Examples Of Melody Chord Writing In Ableton Live 12


Discover the top melody chord writing features of Ableton Live 12’s piano roll. Learn from examples of melody chord writing, showcasing the software’s advanced capabilities for music composition and production.

Examples of Melody Chord Writing in Ableton Live 12 The Piano Roll is an essential feature of Ableton Live 12, which provides a comprehensive set of tools to create harmonic progressions and musical arrangements. The Piano Roll comes with a host of features to enhance the melody and chord writing process. In this post, we will take a look at some case studies of successful tracks created using Ableton Live 12 Piano Roll’s top melody chord writing features. H3: Case Study 1: “Hold On” by Calvin Harris ft. Ayah Marar Calvin Harris’s “Hold On” is a great example of how melody chord writing in Ableton Live 12 can produce a catchy and upbeat track. The song’s main synth riff is based on a simple chord progression of Dm–Bb–C–Gm, which creates a catchy and memorable melody that sticks in the listener’s head. The song’s structure is built around this chord progression, with the melody subtly changing throughout. The Piano Roll’s Chord Trigger and Scale Highlight features helped Harris to quickly build a chord progression that matched his initial vision. H3: Case Study 2: “Midnight” by Coldplay Coldplay’s “Midnight” is another successful track that was created using Ableton Live 12 Piano Roll’s top melody chord writing features. The song is built around a single chord progression throughout and features a hauntingly beautiful melody. Jon Hopkins, the track’s producer, used Ableton’s Chord Trigger feature to experiment with different chord progressions before settling on the final one. Hopkins then used the Scale Highlight feature to ensure that the melody remained within the desired scale, resulting in a captivating and harmonious track. H3: Case Study 3: “Uptown Funk” by Mark Ronson ft. Bruno Mars “Uptown Funk” is a popular track that perfectly blends funk, soul, and pop elements. Mark Ronson used Ableton Live 12 Piano Roll’s Scale Highlight and Chord Trigger features to create the song’s upbeat and catchy melody. Ronson started by selecting a minor pentatonic scale and then used the Chord Trigger feature to try out different chord progressions. Once he settled on the final progression, he used the Scale Highlight feature to ensure that every note he played was within the pentatonic scale. In conclusion, these case studies show how Ableton Live 12 Piano Roll’s top melody chord writing features can help producers create successful and memorable tracks. The Piano Roll’s Chord Trigger and Scale Highlight features make it easy to experiment with different chord progressions and scales, enabling producers to refine and perfect their melodies.

Ableton Live 12 Piano Roll Top Melody Chord Writing Features


Credit: www.productionmusiclive.com


Ableton Live 12 Piano Roll Top Melody Chord Writing Features


Credit: www.aulart.com


Frequently Asked Questions On Ableton Live 12 Piano Roll Top Melody Chord Writing Features


How Do I Use Draw Mode In Ableton?


To access draw mode in Ableton, first select the pencil icon from your chosen audio or MIDI clip. This will activate draw mode, allowing you to use your mouse or touchpad to draw in MIDI notes or automation data on the clip’s grid.


How Do You Hear Notes In Piano Roll Ableton?


To hear the notes in the piano roll Ableton, first select the instrument track. Then click the “Fold” button to isolate the notes. Finally, click the “Solo” button on the left side of the track to hear the notes played back.


How Do You Move Notes On A Piano Roll In Ableton?


To move notes on a piano roll in Ableton, simply select the note(s) you want to move and drag them to the desired position within the roll. You can also use the arrow keys to move notes one step at a time.


Is Ableton Piano Roll Good?


Ableton piano roll is a good option for creating, editing, and organizing MIDI notes. Its interface is user-friendly, allowing for easy manipulation of notes, chords, and rhythms. With its advanced features like scale highlighting and probability options, it’s an excellent tool for music production and composition.


Conclusion


Overall, Ableton Live 12’s Piano Roll Top Melody Chord Writing Features are impressive and make creating music more intuitive and enjoyable. From the ability to easily switch between chord and melody modes to the inclusion of helpful features like the Scale Highlighting, these updates enhance the user experience.


With these new tools at their disposal, musicians can explore new creative possibilities and produce even better music. As Ableton continues to improve and innovate, we can expect to see even more exciting updates in the future.


Categories
Archive

Do You Retain The Copyright Of The Music After Your Services

Yes, you usually retain the copyright of the music after providing your services. As a music service provider, you may be wondering whether you retain ownership of the content you create or if it belongs to the client.


This raises questions about intellectual property rights, ownership, and legal responsibilities. Understanding these issues is important because it can prevent disputes from arising in the future. We’ll discuss the basics of copyright, how it works in the music industry, and what you can do to ensure that you maintain ownership of your musical works.


Overview Of Music Copyrights


As a music creator, it’s important to understand music copyrights. If you’ve created music for someone else, you may still retain the copyright unless you’ve signed a contract that transfers ownership. It’s crucial to have a clear agreement between you and the person using your music to avoid any legal disputes in the future.

As a musician, it’s important to know about music copyrights. This means understanding what they are, how they work, and why they’re important. Essentially, copyright law grants creators the exclusive right to use and distribute their work, including music. But what does this mean for you? Do you retain the copyright of the music after your services? We’ll explore the answers to these questions below.

What Are Copyrights?

Copyrights refer to a set of exclusive legal rights given to the creator of an original work. In terms of music, this means that the composer or songwriter has the right to control the use and distribution of their work. This includes the right to reproduce, distribute, and perform the music. It is important to note that copyrights apply to both the music and the lyrics of a song and exist automatically from the moment a work is created.

How Do They Work?

Copyrights work by giving creators the exclusive right to control their work. This means that no one else can use or distribute the music without permission from the copyright owner. In terms of music, this includes the right to make copies of the music, distribute it, perform it in public, and create derivative works based on the original composition. Copyrights also allow the creator to sell or license their work to others for use in various media and contexts.

Why Are Copyrights Important?

Copyrights are essential for protecting the rights of creators and ensuring that they are fairly compensated for their work. Without copyright protection, anyone could use and distribute original works without permission or compensation. This would undermine the value of creative works and discourage artists from producing new content. Copyright protection helps to incentivize creativity and innovation by providing a measure of security and financial reward for creators. As a musician, understanding and protecting your copyrights is essential for building a successful and sustainable career in the industry.

Do You Retain The Copyright Of The Music After Your Services


Credit: support.apple.com


Music Copyright Ownership


As a music creator, you typically retain copyright ownership of your work after providing services, unless it’s stated in a contract that you transfer the rights. It’s essential to understand your rights as an owner and the terms of any agreements you sign to avoid losing control over your work.

If you are working with music, it’s important to understand the copyright ownership to avoid any legal disputes. Many musicians create their own compositions and lyrics, and they must know their rights as the owners of their work. In this article, we will discuss who owns the music copyrights, the Copyright Act, and how it applies to the music industry, and if copyrights can be transferred.

Who Owns The Music Copyrights?

The first inquiry that arises when discussing music copyright ownership is who owns the music copyrights. Typically, the owner is the composer and lyricist of the music. When they create the music, they immediately own the copyright, without any requirement for registration or paperwork. For example, if you composed a song, you automatically have the exclusive right to produce, reproduce, and distribute your work as you see fit. This approach ensures that the creator has the legal rights to their work without creating any additional hurdles for them.

What Is The Copyright Act?

The US Copyright Act is a federal law enacted in 1976 that governs copyright protection for original works of authorship. The act’s purpose is to encourage literary, artistic, and scientific creativity while ensuring that copyright owners have control over their works. For instance, under the act, copyright protection extends to original works of authorship, such as literary, musical, and dramatic works, including songs, software, and other creative works. The Copyright Act aims to ensure creators have the exclusive right to their work, while also allowing for some exceptions, like the fair use of copyrighted materials.

How It Applies To The Music Industry?

When it comes to the music industry, the Copyright Act plays a significant role in regulating and controlling the rights of music creators, performers, and producers. It guarantees that musicians receive copyright protection for their songs and performances and allows them to take the necessary legal action to protect their work. The act also ensures that musicians receive fair compensation for the use of their work, including royalties for digital downloads, streaming, and live performances.

Can Copyrights Be Transferred?

Copyright ownership can indeed be transferred, provided there is written consent from the original copyright owner. In some cases, a record label or a publisher may purchase the rights to a musician’s work, giving them the ability to use and distribute the music. The author must sign an agreement transferring the rights permanently or temporarily to the new owner. Copyright transfer agreements should be drafted carefully to ensure that the author is adequately compensated, and the new owner’s rights are clearly outlined. In conclusion, understanding music copyright ownership is crucial for musicians, producers, and anyone that works with music. Knowing who owns the music copyrights, the Copyright Act, and how it applies to the music industry and if copyrights can be transferred can help prevent legal complications and ensure that creators’ rights are protected.

Retaining Copyrights After Services

As a musician, it’s crucial to understand your rights when it comes to ownership and copyright of your music. Many musicians are unaware that the copyright ownership of their music can become unclear after providing their services. In this article, we’ll take a closer look at the importance of retaining copyrights after services and what you can do to ensure you’re protected.

What Are Service Agreements?

Service agreements are legal documents that outline the terms and conditions of services being provided. In the music industry, service agreements may include things like performance agreements, recording agreements, and licensing agreements. These agreements are typically signed before services are rendered and can have a significant impact on copyright ownership.

How Do They Affect Copyright Ownership?

Service agreements can impact copyright ownership in several ways. For example, a service agreement may state that the copyright ownership of any new music created during the service period belongs to the person or entity paying for the services. Alternatively, a service agreement may allow the musician to retain copyright ownership but require the person or entity paying for the services to obtain a license to use the music.

Why It’s Important To Read Contracts Before Signing

It’s crucial to read contracts before signing to ensure you fully understand the terms and conditions outlined in the agreement. If you’re unsure about any part of the agreement, seek legal advice. Signing a contract without fully understanding the terms can lead to confusion, misunderstandings, and potential legal issues down the line.

How To Negotiate Ownership Rights?

If you want to negotiate ownership rights, it’s essential to understand the value you bring to the table. You may be able to negotiate either a full transfer of ownership rights or a licensing agreement that ensures you retain ownership but allows the other party to use the music. Be sure to understand the potential future earnings the music may generate and to factor this into any negotiations.

Conclusion

Retaining copyright ownership of your music is crucial for any musician looking to get the most out of their creations. Understanding service agreements and the impact they can have on copyright is key to protecting your rights.

Do You Retain The Copyright Of The Music After Your Services


Credit: www.bmi.com


Legal Protection And Enforcement


As a music service provider, it is important to understand the legal aspects of copyright protection. Generally, the creators of music retain the copyright ownership unless they sign it away in a contract or agreement. It is crucial to have enforceable legal agreements in place to protect the original creators and the service provider’s rights.

As a music creator, protecting your work and retaining the copyright is important. Once your music is out in the open, you should consider taking legal action if it is being infringed upon. Legal protection and enforcement may sound scary, but it doesn’t have to be. Here are some key points to keep in mind.

How Are Copyrights Enforced?

If someone is using your music without your permission or licensing your music without proper compensation, you can enforce your copyright through legal action. Typically, this would involve hiring an intellectual property lawyer who can help you navigate the legal system. You can also file a Digital Millennium Copyright Act takedown notice with websites hosting infringing content.

What Are The Consequences Of Violation?

If someone violates your copyright, it can have serious consequences. The infringer may be sued for damages, and you may be entitled to compensation for any money they made off of your music. In extreme cases, infringers can be subject to criminal penalties.

What Is The Fair Use Doctrine?

The fair use doctrine is an exception to copyright law that allows for limited use of copyrighted material without permission from the owner. This includes uses such as criticism, commentary, parody, or news reporting. However, fair use is a complex legal concept, and it is not always clear-cut when a use is fair.

How To Take Legal Action On Infringement?

If you determine that someone is infringing on your copyright, the first step is usually to send a cease and desist letter. This puts the infringer on notice and gives them a chance to stop the infringing behavior. If they do not comply, you can pursue legal action. This may involve filing a complaint in court and proving that the infringing behavior took place. In conclusion, retaining the copyright of your music is crucial, and there are legal means to enforce your rights if need be. If you are unsure about the best way to protect your work, consult with an experienced intellectual property lawyer who can guide you through the process.

Frequently Asked Questions On Do You Retain The Copyright Of The Music After Your Services


How Long Does Music Stay Copyrighted?


Music stays copyrighted for the duration of the artist’s life plus 70 years after their death. This is known as the copyright term and applies to both published and unpublished music. After the copyright term expires, the music enters the public domain and can be used freely without permission or royalties.


Is Your Music Automatically Copyrighted?


No, your music is not automatically copyrighted. In order to have legal protection for your music, you must register it with the Copyright Office. Without registration, you may not be able to pursue legal action against someone who uses your music without permission.


What Is The Copyright Rule For Music?


Copyright rules for music protect the creator’s exclusive rights to their work. This includes the right to make copies of the music, distribute it, and control how it is used. To use someone else’s music legally, you need to obtain permission, typically through a license or permission from the copyright holder.


Do I Copyright Music Before Or After Publishing?


You should copyright your music before publishing it to protect your rights and ensure you are the rightful owner of the content. This can be done by registering your work with the U. S. Copyright Office or hiring an experienced music attorney.


Conclusion


Your music is your creation, your hard work, and your property. As a musician, it is essential to understand the copyright laws and the consequences of not owning them. With the right knowledge and protection, you can safeguard your music and reap the benefits of your hard work.


By retaining the copyright of your music after rendering services, you are not only protecting your rights, but also ensuring that you earn the rightful rewards for your art. So, it is always advisable to take the necessary precautions and secure the copyright of your music.


Categories
Archive

A Systematic Approach To Actually Improve As A Music Producer

To systematically improve as a music producer, focus on consistent practice and learning from feedback. By developing strong technical skills and seeking out opportunities to collaborate and network, you can advance your craft and build a successful career in music production.


Music production is a complex and challenging field that requires significant dedication and effort to thrive in. While some people may have a natural aptitude for music, improving as a producer is ultimately a matter of consistent practice and a willingness to learn from feedback.


Whether you’re beginning your music production journey or looking to take your skills to the next level, a systematic approach can help you achieve your goals and build a successful career in this exciting industry. We’ll explore some key strategies for improving as a music producer and advancing your craft over time.


Start With Clear Goals


To truly improve as a music producer, it’s crucial to start with clear goals. A systematic approach allows for focused development of specific skills and techniques. By setting achievable targets, producers can track their progress and make meaningful strides towards honing their craft.

As a music producer, you need to have a systematic approach to improve your skills. And it all starts with setting clear goals for yourself. Having specific goals help you stay focused and motivated on your journey to becoming a better producer. In this article, we will guide you through a systematic approach to actually improve as a music producer. Our first step is to identify your strengths and weaknesses and set specific and measurable goals.

Identify Your Strengths And Weaknesses

Everyone has strengths and weaknesses. As a music producer, you need to identify what your strengths are and where you need improvement. To do this, listen to your previous works, have trusted friends and mentors give you feedback, and compare your skills to those of other producers. Taking note of your strengths and weaknesses will help you have a better understanding of what you need to work on.

Set Specific And Measurable Goals

After identifying your strengths and weaknesses, set specific and measurable goals for yourself. These goals should be achievable and aligned with your long-term vision. For instance, instead of setting a goal to “make better music”, set a goal to “create three new tracks with more complex chord progressions and intricate melodies within the next three months”. This way, you can track your progress and keep yourself accountable.

Goals Not Specific Specific
Composition Make better music Create three new tracks with more complex chord progressions and intricate melodies within the next three months.
Production Improve my mixing Increase clarity and dynamics on low-end frequency by utilizing various techniques I will learn from online courses and personal research.

In conclusion, a systematic approach to improving your skills as a music producer starts with setting clear goals. Identifying your strengths and weaknesses and setting specific and measurable goals enable you to track your progress and stay motivated. With this approach, you will be able to achieve your long-term vision as a music producer.

A Systematic Approach To Actually Improve As A Music Producer


Credit: www.masteringthemix.com


Master Your Tools


‘Master Your Tools’ offers a systematic approach for music producers to improve their skills. By focusing on mastering their tools and techniques, producers can create better quality music and reach their full potential in the industry.

As a music producer, it’s essential to know your tools inside and out. Your Digital Audio Workstation (DAW) and plugins are essential for producing quality music. Therefore, you need to improve your skills in these areas continually. Follow these easy steps outlined below to take your production to the next level.

Know Your Daw Inside And Out

The first step in mastering your tools is to become an expert in your DAW. It would be best if you learned the ins and outs of the software, shortcuts, features, and plugins. This knowledge helps you to be more efficient and work productively. You will save time and create awesome music. Take classes, watch tutorials, and read articles about your DAW to acquire more in-depth knowledge.

Discover New Plugins And Samples

Discovering new plugins and samples increases your chance of producing better music. As a producer, you are continually learning new techniques, and it’s important to be open to new ideas and plugins. There are thousands of plugins and samples available on the internet, and you can use them to make your music unique. A variety of plugins and samples helps you to create a unique sound and improve the quality of your music.

Practice Sound Design Techniques

Sound design techniques are also essential for music production. It would be best if you spent time experimenting with various sounds to create an excellent production. There is a wide range of sound design tools available, including synthesizers and samplers. By using these tools, you can create custom sounds, add layers to your production, and refine your music. The more you practice sound design techniques, the better you become at music production. In conclusion, by mastering your tools, you will produce better music. You need to become an expert in your DAW, discover new plugins and samples, and practice sound design techniques. Experimenting gives you the opportunity to create unique sounds that set you apart from other producers. Your journey to becoming a top music producer requires patience, consistency, and, most importantly, mastering your tools.

Learn Music Theory


Learning music theory is a systematic approach to improve your skills as a music producer. By understanding the fundamental concepts such as chords, scales, and rhythm, you can elevate your production game and create better music.

If you want to improve as a music producer, it’s essential to learn music theory. This knowledge will help you make informed choices while you’re creating your music. You’ll have a better understanding of what sounds good together, whether a track is in key, and why certain melodies work better than others.

Study Basic Music Theory Concepts

Getting started with music theory can be overwhelming, but it doesn’t have to be. Begin by studying basic concepts such as scales, chords, and keys. Learn how to read music notation, and identify notes on the keyboard or the fretboard of your instrument. Here are a few essential concepts to get you started:

  • Scales: A series of notes that create a specific sound (for example, the C Major Scale)
  • Chords: Two or more notes played together (C Major Chord)
  • Keys: The group of notes that make up a scale (C Major Key)

Apply Music Theory To Your Productions

Once you’ve grasped the basics of music theory, it’s time to apply it to your productions actively. Work on building chord progressions, melodies, basslines, and drum patterns that fit within a specific key. Experiment with different scales, and consider using modes to create a unique feel in your tracks. Remember, not all music has to be complex. Simplicity often works the best. Work on developing catchy melodies and grooves that capture your listener’s ear. Coding Example: “`html

If you want to improve as a music producer, it’s essential to learn music theory. This knowledge will help you make informed choices while you’re creating your music. You’ll have a better understanding of what sounds good together, whether a track is in key, and why certain melodies work better than others.

Study Basic Music Theory Concepts

Getting started with music theory can be overwhelming, but it doesn’t have to be. Begin by studying basic concepts such as scales, chords, and keys. Learn how to read music notation, and identify notes on the keyboard or the fretboard of your instrument.

  • Scales: A series of notes that create a specific sound (for example, the C Major Scale)
  • Chords: Two or more notes played together (C Major Chord)
  • Keys: The group of notes that make up a scale (C Major Key)

Apply Music Theory To Your Productions

Once you’ve grasped the basics of music theory, it’s time to apply it to your productions actively. Work on building chord progressions, melodies, basslines, and drum patterns that fit within a specific key. Experiment with different scales, and consider using modes to create a unique feel in your tracks. Remember, not all music has to be complex. Simplicity often works the best. Work on developing catchy melodies and grooves that capture your listener’s ear.

Analyze And Emulate


Analyze and Emulate offers a systematic approach for music producers to improve their craft. By breaking down and studying successful tracks, producers can learn to emulate the techniques used and implement them into their own music. This method can lead to significant growth and development as a producer.

As a music producer, it can be challenging to improve your skills and take your music production game to the next level. While it is tempting to seek inspiration from others, copying their work could lead to a lack of originality and make it harder to stand out in the industry. That’s where the systematic approach of analyzing and emulating comes in handy.

Analyze Tracks From Your Favorite Producers

Analyzing tracks from your favorite producers can help you understand their music production style. Listen to the tracks and pay attention to the rhythms, melodies, and overall sound structure. Analyze how they use different elements to create their signature sound. Take notes and try to identify any similarities or differences between your work and theirs. Doing so can help you learn and implement new techniques in your music production process.

Emulate Production Techniques You Admire

Once you have identified the techniques that make your favorite producer’s music unique, it’s time to start emulating! Emulation is different from copying as it involves learning from someone else’s techniques to improve your own skills. Emulating production techniques will help you gain a better understanding of how your favorite producers create their sound and give you knowledge to integrate their style into your own music.

Develop Your Own Unique Sound

The biggest mistake music producers make is copying and not developing their unique sound. While it’s important to analyze and emulate techniques you like, doing so can only take you so far. To stand out in the competitive industry of music production, you must create something that represents you. Take the techniques you have analyzed and emulated, and with dedication and commitment, combine them to create your own unique sound. In conclusion, the systematic approach of analyzing and emulating is an excellent way to improve your music production game. By taking your time to learn from the best, not only will you improve as a music producer but you will also stand out in a highly competitive industry.

Collaborate And Network


Collaborating and networking with other music producers is a systematic approach towards improvement. By sharing and exchanging ideas, techniques and experiences, you are able to learn and grow as a music producer. Expand your network and continue to learn from others to enhance your skills.

Collaborate and Network Collaboration and networking are essential to improve as a music producer. Collaborating with other producers and musicians can widen your perspective, provide new ideas, and help you learn from their experiences. Networking can also lead to new opportunities and relationships that can help you grow in your career.

Collaborate With Other Producers And Musicians

Finding other producers and musicians to collaborate with can be as simple as reaching out to other creatives on social media platforms such as Instagram or Twitter. Joining music producer groups or forums is also a great way to connect with like-minded individuals. Collaborations can be beneficial to expand your knowledge and build relationships within the industry.

Attend Music Conferences And Events

Attending music conferences and events can also provide opportunities to network. Events such as music festivals, concerts, and industry conferences allow you to connect with musicians, producers, and even music executives. Engaging in conversations and sharing your passion for music can spark relationships with people in the industry who can help you grow as a producer.

Build Your Online Presence

Building your online presence is also critical in today’s digital age. Having a strong online presence can showcase your work, attract potential collaborators, and even grab the attention of industry professionals. Creating a website or social media account specifically for your music production can be a great start. Utilizing platforms like Soundcloud, Bandcamp, or YouTube can also help you reach a wider audience and highlight your skills. In conclusion, collaborating with other producers and musicians, attending music events, and building your online presence can all contribute towards improving as a music producer. The music industry is constantly evolving, and it’s important to keep growing your skills and knowledge. Take advantage of these opportunities to network and showcase your work to make a name for yourself in the industry.

Practice Consistently

Improving as a music producer takes a lot of hard work and dedication. It’s not just enough to come up with a few decent songs and expect to become a top producer overnight. You need to put in consistent effort and develop a systematic approach to improve your skills. This process involves setting aside designated practice time, refining old projects, and exploring new techniques and styles.

Set Aside Designated Practice Time

One of the most important aspects of improving as a music producer is to develop a habit of practicing consistently. This means setting aside time each day to work on your craft, whether it’s composing, arranging, or mixing tracks. By practicing consistently, you will not only improve your technical skills but also develop your creativity and originality.

It can be helpful to create a practice schedule and stick to it. Whether you choose to practice for 30 minutes or several hours a day, make sure to set aside dedicated time for your craft. This helps to build momentum and ensures that you are continually making progress towards your goals.

Create Refinements On Old Projects

Another way to improve as a music producer is to revisit old projects and refine them. As you continue to develop your skills, you will likely find that you can improve on tracks that you thought were perfect at the time. Take the time to listen to your old projects with fresh ears and identify areas that could use improvement.

This may involve re-working the arrangement of the track, adding new elements, or re-mixing the track for better sound quality. By refining your old projects, you can not only improve your technical ability but also develop your creative eye.

Explore New Techniques And Styles

If you want to improve as a music producer, you need to be constantly learning and experimenting with new techniques and styles. This may mean stepping out of your comfort zone and trying new things that you’re not necessarily comfortable with. By exploring different genres and techniques, you can gain a better understanding of what works for you and what does not.

Another way to explore new techniques and styles is to learn from other producers and artists in the industry. Attend workshops and conferences, watch online tutorials, and read industry publications to stay up-to-date with the latest trends and best practices.

In conclusion, improving as a music producer takes time and effort. By adopting a systematic approach focused on practicing consistently, refining old projects, and exploring new techniques and styles, you can develop the skills necessary to succeed in the music industry.


Seek Feedback And Criticism

Making music is an art form that requires an immense amount of skill and creativity. A music producer has to be able to compose, arrange, and mix a track to create a masterpiece that moves people. However, becoming a successful music producer is not an easy feat. It takes time, effort, and most importantly, a systematic approach to improving oneself. In this blog post, we will be discussing one of the most important aspects of music production: seeking feedback and criticism.

Share Your Work With A Trusted Circle For Feedback

Music can be a very personal thing, and it can be difficult to share your work with others. However, it is important to get feedback on your work from other people in the industry who can provide an objective opinion. Sharing your work with a trusted circle of other music producers, sound engineers, and DJs can help you get valuable feedback on your track’s composition and mix.

Additionally, it’s essential to get feedback from people who are your target audience. The people who will be listening to your music regularly are the ones who can give you the best insight into what they like and dislike about your work. This feedback can help you refine your craft and create music that resonates with your audience.

Take Criticism As A Learning Opportunity

Criticism can be hard to hear, especially if it’s a negative one. Still, it is essential to remember that every piece of constructive feedback can be taken as a learning opportunity. Criticism is not a reflection of you as a person or your abilities as a music producer. Rather, it’s a chance to learn from your mistakes and improve your craft.

It’s important to approach criticism with an open mind and not take it personally. Instead, try to see it as a way to grow and develop your skills as a music producer. Constructive feedback can help you identify areas where you need to improve and point out weaknesses in your work that you may not have noticed before.

Constantly Refine Your Craft Based On Feedback

Feedback is crucial to improving your skills as a music producer, but it’s essential to apply this feedback to your work continually. You should always be refining your craft based on the feedback you receive.

Take the feedback you receive and use it to develop new strategies for composing, arranging, and mixing tracks. Apply what you learn in every project you work on, constantly seeking ways to improve your work. Remember, the biggest challenge for most music producers is not getting feedback but implementing it.

In conclusion, as a music producer, seeking feedback and criticism is an essential part of the process, helping you improve your craft and create music that resonates with your audience. Share your work with a trusted circle, take criticism as a learning opportunity, and continuously refine your craft based on feedback.

Stay Inspired

One of the biggest challenges for music producers is staying inspired and productive. It’s easy to get burnt out or stuck while working on a project. But, there are some strategies you can follow to overcome creative hurdles and keep pushing forward.

Find Your Sources Of Inspiration

In order to stay inspired, it’s important to surround yourself with things that inspire you. This can be anything from music itself to artwork, movies, literature, or even nature. Make a list of the things that excite you and keep them close while you’re working. You could also create playlists of your favorite music tracks, which can serve as a source of inspiration when you face creative blocks.

Take Breaks To Avoid Creative Blocks

It’s easy to become overpowered and miss vital aspects of the music you’re producing if you don’t take some breaks. When you are well-rested, your mind becomes more imaginative and remains inspired. Make sure you take short breaks to get up and walk around from your producer study so that you don’t end up with an ear-fatigue. It’s easy to get a creative block when you’re feeling overwhelmed or stressed out.

Experiment With New Sounds And Styles

If you want to advance as a producer, you need to experiment with various sounds and styles. Staying stuck in one genre will limit your creativity and productivity. Use new instruments, try out different genres or styles of music that you usually don’t venture on. This aids in discovering new sources of inspiration to bring to your music.

Overall, these are just a few ways you can stay inspired as a music producer. Pay attention to your mood and energy levels while you’re working, establish inspiration, and take breaks when you need them. These strategies could help you to develop your musical ability and creativity as you learn new things and ensure a steady growth as a producer.

A Systematic Approach To Actually Improve As A Music Producer


Credit: www.masteringthemix.com


Frequently Asked Questions For A Systematic Approach To Actually Improve As A Music Producer


How Can I Improve My Music Production?


To improve your music production, focus on learning and mastering your tools, regularly practice and experiment with different techniques, study music theory, listen to music from different genres, and collaborate with other musicians or producers to expand your knowledge and skills.


It’s important to stay organized and maintain good communication throughout the production process.


What Does It Take To Be A Successful Music Producer?


To be a successful music producer, you need to have a creative mind, knowledge or experience in the music industry, great communication skills, patience and the ability to network. It’s essential to continuously improve your skills, be open to learn new techniques and stay up-to-date with the latest trends in the music industry.


How Do You Approach A Music Producer?


Approaching a music producer requires research, preparation and professionalism. Start by researching their previous work and approach them with a clear and concise pitch that showcases your talent, goals and personal brand. Be respectful, concise and direct in your communication, and highlight how you can bring value to their work.


How Can A Music Producer Be More Productive?


There are several ways a music producer can improve productivity. One effective way is to establish a routine. By setting specific times to work on projects, prioritizing tasks, and taking breaks when needed, a producer can maximize their time. Collaboration with artists and using efficient software and equipment can also help.


Lastly, staying organized and focused can further enhance productivity.


Conclusion


By following the systematic approach outlined in this post, you can actually improve as a music producer. Starting with setting specific goals, staying disciplined, and practicing regularly, you can develop your skills and refine your craft. Utilizing feedback from others and taking advantage of available resources can also improve your work.


Remember, improvement takes time and effort, but with dedication and perseverance, you can achieve your music production goals. Keep learning, experimenting, and making music!

Categories
Archive

How To Jump To Your Reference Track Using A Midi Controller

Jumping to your reference track using a MIDI controller is quick and easy. Simply press the designated button on your controller and you will be brought to your reference track instantly.


Also, as a musician or producer, referencing tracks is an essential part of the creative process. Also, it allows you to compare your mix to a professionally mixed and mastered track. This gives you a benchmark to work towards. With the help of a MIDI controller, you can streamline your workflow and make referencing tracks a seamless part of your mixing process.

Related reading: Best Cubase Midi Controller and How To Create Default Midi Track. For background, see the Wikipedia article on MIDI controller.


Moreover, we will go through the steps of how to jump to your the reference and explore some of the benefits that come with this approach.

How To Jump To Your Reference Track Using A Midi Controller


Credit: www.masteringthemix.com


Selecting A Reference Track


In addition, selecting your reference track is crucial for getting the perfect mix. In addition, by using a MIDI controller, you can easily jump to your reference track and improve your production skills. With the right track selected, you can effectively compare and adjust your own mix to achieve the desired sound.

Furthermore, selecting a Reference Track is perhaps the most important aspect of producing music. For example, it acts as the base point that guides the production process and sets the tone for the final product. However, it is not always easy to choose a suitable reference track from scratch. Fortunately, using a midi controller to jump to your reference track can make this process easier. In this post, we will discuss how to use a midi controller to select a reference track efficiently.

Using A Daw

Additionally, one of the most vital aspects of using a midi controller to select a reference track is choosing the appropriate Digital Audio Workstation (DAW). As a result, this software acts as the control center for your entire production process. The compatibility and integration of your DAW and midi controller are essential. Check to ensure that your midi controller is compatible with the DAW you will be using to avoid latency or compatibility issues. In addition, try to customize your DAW’s settings to optimize the usage of your midi controller.

Choosing The Right Track

Also, after selecting the ideal DAW for your music production process, the next step is picking the reference track you will use to guide your production. However, the right reference track should have a similar tempo, key, and genre to your upcoming project. It should be a well-produced track that has a similar feel to your intended production. The reference track should serve as guidance to help you make critical decisions during the production process. One practical method for choosing an ideal reference track is by analyzing your favorite artists or producers’ style.

Moreover, look for successful tracks in the same genre, and use them as reference points for your production. Additionally, take note of the elements that make these songs successful, such as structure, rhythm, chords, and the type of instruments used. Then, this analysis can help you create a cohesive final product that communicates the intended message to your audience. In conclusion, selecting an appropriate reference track is a foundational step that can influence the quality of your final product. Using a midi controller can make this task easier by allowing you to switch between tracks easily. Remember to find the perfect balance between your inspirations and originality to create a distinct and compelling final product.

Connecting Your Midi Controller


In addition, by connecting your MIDI controller, you can easily jump to your reference track and make adjustments as needed. In short, with just a few clicks, you can improve your music production and achieve your desired sound.

Furthermore, connecting Your MIDI Controller: Jumping to your reference track has never been easier with a MIDI controller. Similarly, here is a step-by-step guide on connecting your MIDI controller to your DAW for seamless workflow. H3: Wired Connection The most reliable and responsive way to connect your MIDI controller is through a wired connection. Follow these steps: 1. Connect the MIDI Out port on your controller to the MIDI In port on your audio interface. 2. Launch your DAW and navigate to the MIDI Controller preferences.

3. Choose your controller from the list of available devices and select “Enable MIDI Input”. 4.

Practical Tips

Additionally, test the connection by pressing a key or moving a slider on your controller. Also, the corresponding MIDI signal should be received by your DAW. 5. Once you have confirmed the connection, you can start mapping your controls. H3: Wireless Connection If your controller supports Bluetooth connectivity, you can connect it wirelessly to your computer. Follow these steps: 1. Enable Bluetooth on your computer and MIDI controller. 2. Navigate to the MIDI Controller preferences in your DAW and select “Enable MIDI Input” for your controller. 3. Pair your controller with your computer using the on-screen prompts. 4. Also, test the connection by pressing a key or moving a slider on your controller. In addition, the corresponding MIDI signal should be received by your DAW. 5. Once you have confirmed the connection, you can start mapping your controls. H3: Mapping Your Controls To jump to your reference track using your MIDI controller, you’ll need to map your controls to the necessary functions in your DAW. Here’s how: 1. Open the preferences or settings menu in your DAW and navigate to the MIDI Controller settings. 2. Choose the function you want to map to your controller (such as play/pause or next track). 3. For example, click on the mapping button and move the relevant control on your MIDI controller. 4. Moreover, save the mapping, and your control is now linked to the function in your DAW. 5. Repeat this process for any other controls you want to map. In conclusion, connecting your MIDI controller to your DAW is an easy process that will benefit your workflow. By mapping your controls, you can quickly jump to your reference track and stay focused on the task at hand.

In addition, whether you choose a wired or wireless connection, a MIDI controller is a valuable tool for any producer or engineer.

Setting Up Your Daw for Reference Track Using a MIDI Controller


Furthermore, set up your DAW like a pro by using a MIDI controller to easily switch between your reference track and your own mix. This allows you to stay focused and stay on track while producing high-quality music.

Additionally, setting Up Your DAW Jumping to your a controller button is swift and easy. But the first step is to set up your DAW correctly. In this guide, we’ll show you how to enable external control, configure MIDI channels and ensure that your MIDI controller is set up correctly so that you can start seamlessly jumping between tracks.

Enabling External Control for Reference Track Using a MIDI Controller

Before you can jump to your reference track using a MIDI controller, you’ll need to enable external control in your DAW. As a result, by doing this, you give your MIDI controller the ability to control your DAW directly. The following steps show you how to enable external control in Ableton Live:

  1. Open the Preferences dialog box in Ableton Live.
  2. Click on the “Link/MIDI” tab.
  3. Enable the “Remote” switch beside your connected MIDI controller.

Configuring Midi Channels

To start using your MIDI controller to jump to reference tracks, you’ll need to configure MIDI channels. However, this ensures that each command you send from your MIDI controller is routed to the right track. The following steps show you how to configure MIDI channels in Ableton Live:

  1. Open the Preferences dialog box in Ableton Live.
  2. Click the “MIDI Sync” tab.
  3. Select your MIDI controller from the “Input” drop-down list.
  4. Assign each MIDI channel to a specific track in Ableton Live.

Once you’ve configured your MIDI channels, you can start using your MIDI controller to jump to reference tracks. Then, by pressing a button or turning a knob, you can instantly switch between tracks. This makes it easy to compare your mix to your reference track. In conclusion, setting up your DAW correctly is essential to jump to reference tracks easily using a MIDI controller. By enabling external control and configuring MIDI channels, you can make your workflow more efficient and start producing better mixes in no time.

Navigating Your Reference Track


Learn how to navigate your reference track seamlessly with the help of a MIDI controller. In short, this guide will assist you in jumping to your desired reference track to achieve the perfect mixing and mastering of your audio.

Navigating Your Reference Track can be a daunting task, especially if you are working with a lengthy and complex reference track. However, it doesn’t have to be difficult or time-consuming if you know the right tools and tricks to navigate your track efficiently. Similarly, one of the most useful tools is a MIDI controller. This gives you the power to jump to specific sections of your reference track quickly and easily. In this post, we will walk through some of the key steps involved in navigating your the reference, including Syncing Your Tempo, Play, Pause, and Stop buttons, and Jumping to Specific Sections.

Syncing Your Tempo for Reference Track Using a MIDI Controller

The first step in navigating your reference track is syncing your project tempo with the tempo of your reference track. This is important because it ensures that your project and reference tracks are in perfect sync. Also, this makes it easier to jump to specific sections of your reference track. To sync the tempo, you need to know the tempo of your reference track. You can find this out by using a tap tempo tool or by checking the tempo in the metadata of the track. Once you know the tempo, you can set the tempo of your project to match it. Most DAWs have a tempo sync feature that allows you to sync your project tempo to an external MIDI clock. Once you have synced your tempo, you can use your MIDI controller to navigate your reference track with ease.

Play, Pause, And Stop for Reference Track Using a MIDI Controller

Once your tempo is synced, you can start navigating your reference track using your MIDI controller. In addition, the first set of buttons you should familiarize yourself with are the Play, Pause, and Stop buttons. These buttons allow you to start, pause, and stop the playback of your reference track. When you press the Play button, your reference track will start playing from the beginning. If you press the Pause button, the track will pause at the current position. The Stop button will stop the playback entirely. These buttons are essential for navigating your reference track, as they allow you to start and stop the track as needed to jump to specific sections.

Jumping To Specific Sections for Reference Track Using a MIDI Controller

The most important function of a MIDI controller when navigating your reference track is the ability to jump to specific sections. For example, this is where the real power of a MIDI controller comes into play, as it saves you time and makes the process much more efficient. Most MIDI controllers allow you to assign buttons or pads to specific markers or sections of your reference track. To do this, you need to create markers or sections in your DAW that correspond to specific sections of your reference track.

Once you have created these markers, you can assign them to buttons or pads on your MIDI controller. When you press a button or pad, your reference track will jump to the corresponding marker or section. As a result, this allows you to navigate your reference track quickly and easily, without needing to search through the entire track for the section you need. Navigating Your Reference Track is an essential skill for any producer or engineer. Using a MIDI controller can make the process much easier and more efficient, saving you time and allowing you to focus on creating great music.

By syncing your tempo, using the Play, Pause, and Stop buttons, and jumping to specific sections, you can navigate your reference track like a pro.

Improving Your Workflow for Reference Track Using a MIDI Controller

If you are a music producer, you know how important it is to have a reference track while working on a project. However, it helps you stay on track and ensures that your mix is at the same level as other professionally mixed tracks. But switching back and forth between your DAW and media player can be time-consuming and hinder your workflow. This is where using a MIDI controller to jump to your reference track can come in handy. In this article, we will discuss how you can improve your workflow by using a MIDI controller to jump to your reference track.

Customizing Your Controls for Reference Track Using a MIDI Controller

Most MIDI controllers come with default settings that may not suit your workflow. Then, this is why it is important to customize your controls to make the process more efficient. You can do this by assigning specific controls to jump to your reference track. For example, you can assign a button to jump to the next track on your media player or assign a knob to adjust the volume of your reference track.

Saving Your Settings in Reference Track Using a MIDI Controller

Once you have customized your controls according to your workflow, you should save your settings. In short, this will ensure that you don’t have to go through the process of customizing your controls every time you work on a new project. You can save your settings and load them for future use.

Experimenting With Different Controllers

If you are not satisfied with your current MIDI controller, you can always experiment with different ones. Every MIDI controller has its own set of features, and some might be better suited to your workflow than others. For example, some MIDI controllers may have more knobs and buttons than others, which can make it easier to customize your controls.

By using a MIDI controller to jump to your reference track, you can save time and improve your workflow. Similarly, customizing your controls, saving your settings, and experimenting with different MIDI controllers are all great ways to make the process more efficient. Give it a try and see how it can enhance your music production process!

How To Jump To Your Reference Track Using A Midi Controller


Credit: www.amazon.com


Troubleshooting Common Issues for Reference Track Using a MIDI Controller

Jumping to your reference track with a MIDI controller can greatly improve your workflow. However, like with any technology, there are bound to be issues encountered while using MIDI controllers. Also, here are some common problems and solutions:

Incorrect Midi Mapping

If your MIDI controller is not jumping to your reference correctly, there may be an issue with the MIDI mapping. In addition, double-check that the MIDI mapping for your controller matches the mapping in your DAW.

STEP 1 STEP 2 STEP 3
Open your Preferences menu in your DAW. Select the MIDI controller that you are using. Ensure that the correct MIDI mapping is selected for your reference track.

Daw Incompatibility for Reference Track Using a MIDI Controller

If you are using a MIDI controller with a DAW that is not compatible, it may not function correctly. Ensure that your DAW is compatible with your MIDI controller.

  • Check the manufacturer’s website for compatibility information.
  • Search online forums to see if others are experiencing similar issues.
  • Contact the manufacturer for support.

Latency And Syncing Issues

If there is a delay between your MIDI controller and your reference track, or if they are not syncing correctly, there are a few things you can try:

  1. Adjust your buffer size to reduce latency.
  2. Ensure that your MIDI controller and reference track are on the same tempo and time signature.
  3. Turn off any unnecessary plugins or effects that may be causing latency.
  4. Close any other programs or applications that may be running in the background and using up valuable resources.

By troubleshooting these common issues, you can ensure that your MIDI controller is functioning correctly and you can easily jump to your reference track for a smoother workflow.


How To Jump To Your Reference Track Using A Midi Controller


Credit: www.zzounds.com


Frequently Asked Questions Of How To Jump To Your Reference Track Using A Midi Controller


How Do I Find A Reference Track For Mixing?


To find a reference track for mixing, look for a song that has a similar sound, genre, and style as the one you want to mix. You can search for reference tracks online or use top charting songs as a reference.


Choose a track that has a professional mix and has been mixed by a credible mixer.


How Loud Should Reference Track Be?


The loudness of a reference track should be set at the same volume you want to achieve in your final mix. It should be used as a guide for overall mix level, balance and tonality. Avoid pushing the volume too high to ensure the track is not compressed or distorted.


What Can You Do With A Midi Controller?


A MIDI controller can be used to create, record, and manipulate music on a computer or other digital audio workstation. It allows musicians to input musical notes, control virtual instruments and software effects. It enables them to play, record, and edit music in real-time, making production and performance smoother and more expressive.


MIDI controllers also offer a range of customization options for personalized control over the music-making process.


How Do I Connect My Midi Controller To Logic?


Connecting a MIDI controller to Logic is simple. Start by plugging your MIDI controller into your computer’s USB port. Then, in Logic, go to the Preferences menu and choose MIDI. Select your MIDI controller from the list, and you’re all set! Happy music-making!


Conclusion


After all, utilizing a MIDI controller can be a game-changer for music producers looking to save time and streamline their workflow. Jumping to reference tracks using your controller can help you better analyze your mix, make necessary adjustments, and ultimately, improve the quality of your final product.


With these simple steps, you can boost your productivity and take your productions to the next level. So go ahead, grab your controller, and start jumping to your reference tracks with ease. Happy producing!

Categories
Archive

How To Get A Tight And Balanced Low End When Mastering Music

To get a tight and balanced low-end when mastering music, ensure that the mix has good low-end balance and use EQ and compression judiciously. Getting a tight and balanced low-end is all about managing the bass frequencies and optimizing your mix for the mastering process.


Start by ensuring that your mix has good low-end balance before proceeding to the mastering stage. Also, Use gentle EQ to get rid of any problematic frequencies and avoid overcompressing the low-end. This will help ensure a tight and focused bass response in your final master.

Related reading: What Eq Filter Is Best For Bass And Low End and How To Eq Kick And Bass For Powerful Low End. For background, see the Wikipedia article on Audio mastering.


In addition, consider using tools like limiters and saturation to add warmth and character to your low-end.

How To Get A Tight And Balanced Low End When Mastering Music


Credit: m.youtube.com


Eq Techniques For Balancing The Low End


Moreover, achieving a tight and balanced low end in mastering music is crucial for a polished sound. EQ techniques can help to balance out the low frequencies, removing any muddiness and adding clarity to the mix. Work through the low end with care. You’ll get a powerful, controlled sound that translates across playback devices.

If you’re working on mastering music, you know that getting a tight and balanced low end is critical. But achieving it isn’t always straightforward. EQ techniques can go a long way in helping you balance your low end, ultimately leading to better sound quality. In this blog post, we’ll go over some of the most effective EQ techniques for balancing the low end. We’ll cover Notch Filtering, Low Shelf EQ, High Pass Filtering, and Mid-Side EQing.

Notch Filtering for Balanced Low End

Notch filtering is an EQ technique that helps you remove a particular frequency from a mix. This technique works best when you know which frequency is causing issues in your mix. By setting a narrow notch using an EQ, you can remove that problematic frequency from your mix. This helps to clean up your low end. Use this technique carefully, as removing too much of a frequency could leave your mix sounding weak or muffled.

Low Shelf Eq

Low shelf EQ is great for adding or removing bass from a mix. It allows you to boost or cut all frequencies below a certain point. This can be helpful when you want to balance your low end. For example, if you feel your mix has too much bass, you can use low shelf EQ to remove some of the lower frequencies. On the other hand, if your mix could use a bit more bass, you can use low shelf EQ to boost frequencies below a specific point.

High Pass Filtering for Balanced Low End

High pass filtering is the process of removing low frequencies from a mix. It is useful in situations where there is unwanted low-frequency content in a mix. For example, if you have a mix that is bass-heavy, you can use high pass filtering to remove some of the bass frequencies from the rest of the mix. It’s essential to be careful with high pass filtering, as removing too much of the low end could leave your mix sounding thin or weak.

Mid-side Eqing for Balanced Low End

Mid-side EQing is a technique that separates the stereo information of a mix and processes it individually. When balancing your low end, it can be helpful to use mid-side EQing to make sure the low end is properly balanced between the left and right channels. This technique allows you to isolate problematic frequencies and adjust their balance between the left and right channels. This helps you achieve a more balanced low end in your mix. In conclusion, these EQ techniques are crucial when it comes to balancing the low end in your mixes. Notch filtering, low shelf EQ, high pass filtering, and mid-side EQing all play their part. Remember, it is important to use them effectively and sparingly. This ensures that you achieve the perfect balance without removing too much of the low end or causing other issues in the mix.

How To Get A Tight And Balanced Low End When Mastering Music


Credit: www.masteringthemix.com


Other Tips And Tricks For Tightening The Low End


To achieve a tight and balanced low end in mastering music, there are a few other tips and tricks to consider. High-pass filtering, tuning your kick and bass, and sidechain compression all help. Together they give a cleaner, tighter low end.

Other Tips And Tricks For Tightening The Low End EQ and balance are not the only tools. There are other ways to tighten your low end when mastering. These techniques are often used by mastering engineers and producers to add excitement, warmth, and clarity to the low end. Below are some of the go-to techniques for tightening the low end. H3: Saturation And Harmonic Excitement Saturation is the process of adding harmonic excitement to the low end of your mix. This technique involves using analog or digital saturation plugins to add harmonic distortion to your low end.

Practical Tips

Saturation enriches the harmonic content of the bass, making it more prominent and fuller without necessarily increasing the volume. You can experiment with different types of saturation plugins to find the one that best suits your mix. H3: Multiband Compression Multiband compression is a popular technique used to control the dynamics of specific frequency ranges in your mix. Instead of applying compression to the whole mix, you can apply different compression settings to different frequency ranges. This helps to tame any harsh frequencies and tighten the low end of your mix.

You can use plugins like Fabfilter Pro-MB, Waves C6, or iZotope Ozone to apply Multiband Compression. H3: Stereo Widening Techniques Stereo widening techniques like Mid-side EQing and stereo imaging plugins help to create a wider sound field for your low end. You can use a stereo-imaging plugin like Ozone Imager to widen the stereo field of your low end to create a more spacious and immersive sound. Make sure you use stereo widening sparingly and avoid overdoing it as it may cause phase issues.

Putting It Into Practice

H3: Using Subharmonic Generators Subharmonic generators are plugins that add extra low frequency content to your mix. These plugins generate subharmonic frequencies that are an octave below your existing bass. This technique can add weight, depth, and warmth to your low end. The Waves MaxxBass plugin is an excellent example of a subharmonic generator. H3: Limiting And Dynamic EQing Limiting involves setting a maximum level for the low end of your mix. Applying limiting to your low end helps to control any excessive peaks and ensure that the bass stays tight and balanced.

Dynamic EQing is another popular technique used to control particular frequency ranges in your low end. The Pro-Q 3 plugin by Fabfilter is an excellent tool for dynamic EQing. In conclusion, mastering the low end of your mix is crucial for creating a professional sounding track. Using these tips and techniques, you can tighten and balance your low end to make it sound powerful, punchy, and clear. However, note that these techniques should be used in moderation. It’s essential to trust your ears when mixing and mastering your music. Happy mixing!

How To Get A Tight And Balanced Low End When Mastering Music


Credit: www.masteringthemix.com


Frequently Asked Questions For How To Get A Tight And Balanced Low End When Mastering Music


How Do You Get Consistent Low End?


To get consistent low end, consider the following tips: properly monitor your audio levels, ensure your speakers and headphones are calibrated for neutral representation, use the right mixing techniques such as high-pass filtering, avoid over-compressing, and establish a good recording environment with sound treatment and isolation measures.


How Do You Balance A Low End Mix?


Careful balancing of low-end mix involves adjusting the levels of bass frequencies to create a clear and defined sound. Key balance techniques start with high-pass filters for unwanted lows. Add EQ to boost or cut ranges and compression to manage dynamics.


Additionally, using reference tracks to compare and fine-tune the mix is crucial.


What Is An Ideal Eq Type To Use During Mastering?


The ideal EQ type during mastering depends on the music genre, mix, and desired outcome. Generally, a linear phase EQ is recommended as it has less phase distortion. However, a minimum phase EQ gives a more natural sound and is more commonly used.


The key is to listen and adjust to achieve a balanced and polished sound.


What Db Level Should Your Mix Be Before Mastering?


The ideal dB level for a mix before mastering is between -6 and -3dB. This allows for ample headroom and prevents clipping and distortion during the mastering process. However, the specific level can vary depending on the genre, the overall loudness of the mix, and personal preference.


Conclusion


Overall, achieving a tight and balanced low end is essential to the success of your mastered music. Apply the tips in this post to nail your low end. Your music will sound clean and professional.


Always remember to keep your mix simple, take time to test on different speakers and have patience when working on your low end. By utilizing these tools, you’ll have a strong foundation for mastering your low end and taking your music to the next level.


Categories
Archive

Advanced Techniques In Stereo Width And Imaging When Mastering

Advanced techniques in stereo width and imaging when mastering involve careful use of panning, EQ and spatial processing to enhance the separation between instruments and create a wider, more immersive soundscape. Achieving a balanced and natural stereo image can greatly enhance the impact and clarity of a mix, as well as create a sense of depth and width that draws the listener in and enhances the emotional impact of the music.


This involves careful consideration of each element in the mix, as well as attention to the technical aspects of the mastering process such as phase coherence and monitoring on different speaker systems. By mastering the art of stereo imaging, producers and engineers can take their mixes to the next level and create a truly immersive listening experience for their audience.

Advanced Techniques In Stereo Width And Imaging When Mastering


Credit: www.masteringthemix.com


Stereo Width And Imaging


Mastering engineers use advanced techniques to enhance stereo width and imaging. These methods involve careful processing of the left and right channels of the audio signal to achieve a wider and more detailed soundstage. With the right approach, a track can be transformed, making it sound more spacious and engaging to the listener.

The stereo width and imaging of a mix can greatly affect the overall sound and perception of a song, making it essential to master the techniques required to achieve the best possible result. In this article, we will delve into the basics of stereo sound, creating a wide stereo image, and the importance of imaging, offering tips and techniques for an outstanding mastered piece.

The Basics Of Stereo Sound

In simple terms, stereo sound refers to a way of recording and reproducing sound using two or more channels. Most common are the left and right channels of a mix. The positioning of sounds across these channels is what creates a stereo image. However, stereo sound goes beyond just simple panning and requires understanding the intricate balance required to create a harmonious mix of sounds across both channels.

Creating A Wide Stereo Image

Creating a wide stereo image can provide a sense of spaciousness to a mix, making the sound more immersive. To achieve this, it is essential to use panning and other advanced techniques such as reverb, delay, and stereo wideners. However, it is crucial to ensure that the mix remains balanced and that no element overpowers the others.

Understanding The Importance Of Imaging

Imaging refers to how elements are arranged and positioned in the stereo field. A good imaging technique can create a sense of space and depth and makes a mix more enjoyable. To achieve optimal imaging, it is necessary to ensure that each element of the mix has its own space in the stereo image, and no two elements clash with each other. In mastering, imaging is often used to enhance the perceived loudness of the mix without increasing the volume. In conclusion, mastering stereo width and imaging techniques can significantly enhance the sound and quality of a mix. By understanding the basics of stereo sound, creating a wide stereo image, and mastering imaging, a mix can become more immersive, enjoyable, and professional. By implementing the above techniques, a mastering engineer can create a masterpiece that stands the test of time.

Mastering Techniques For Stereo Width

When it comes to mastering, a crucial factor to keep in mind is the stereo width of your mix. Stereo width refers to the spatial separation between the left and right channels of your audio signal and it can greatly affect the overall sound and feel of your mix. In order to achieve optimal stereo width and imaging, advanced techniques are often employed by audio engineers during the mastering process. Let’s take a closer look at some of these techniques below:

One technique that can greatly enhance the stereo width of your mix is adding depth with the use of reverb and delays. By applying these effects to certain elements of your mix, you can create a sense of depth and dimension, allowing for a wider stereo image. However, it’s important to be careful not to overdo it with these effects as it can result in a muddy and cluttered mix.

Another technique that can help in achieving a wider stereo image is using panning and EQ. By panning certain elements of your mix towards the left or right channels, you can create more space and separation between the two channels. EQ can also be employed to boost or cut certain frequencies in each channel, further enhancing the stereo width.

A more advanced technique for achieving precise control over the stereo width of your mix is using mid-side processing. This technique involves separating the center (mid) and side information of your audio signal and processing them independently. By doing so, you can adjust the stereo width of your mix with great accuracy, making it wider or narrower as desired.

Overall, these mastering techniques for stereo width can greatly improve the quality and impact of your mix. By employing them carefully and strategically, you can achieve a wider, more dynamic stereo image and create a more immersive listening experience for your audience.

Imaging Techniques For Mastering


Achieving a wider, fuller and crisp sound in mastering requires advanced techniques in stereo width and imaging. Effective imaging techniques enable you to create a bigger soundstage while ensuring that various instrumental elements in a mix don’t clash with each other.

As a mastering engineer, one of the critical aspects of perfecting a mix is the imaging aspect. The imaging of a mix refers to how the various elements of the song are spread across the stereo field to achieve balance and coherence. With the right imaging techniques, you can create a mix that is both wide and clear, ensuring that it translates well in different listening environments. In this article, we explore some advanced imaging techniques that will help you achieve a balanced and cohesive image in your mastering process.

Exploring Different Imaging Techniques

The first step in achieving a perfect image is to be familiar with the different imaging techniques available. Some common imaging techniques include panning, balance, M-S processing, and stereo widening. Panning is the basic technique where you place the different elements of a mix in the stereo field. Balance, on the other hand, refers to the even distribution of elements within the stereo field. M-S processing involves the adjustment of the mid-side signal balance to enhance imaging. Stereo widening is the technique used to make a mix sound wider without compromising the mono compatibility of the mix. By understanding these techniques, you can apply the most appropriate in different scenarios to achieve the best imaging possible.

Using Stereo Imaging Plugins To Enhance The Mix

Stereo imaging plugins are an essential tool in achieving the perfect imaging in your mix. These plugins are designed to enhance the stereo field of a mix by manipulating the width, depth, and separation of different elements. Some popular stereo imaging plugins you can use include S1 Imager, Ozone Imager, and Waves Center. These plugins come with different controls to help you adjust the imaging based on your requirements. By mastering the use of stereo imaging plugins, you can achieve a more polished and professional-sounding mix.

Creating A Balanced And Cohesive Image With Mastering

In mastering, creating a balanced and cohesive image requires a combination of different techniques. You need to focus on the EQ, compression, and levels of the mix to create a more balanced image. Proper EQ will ensure that different elements fit well within the frequency spectrum, while compression will help tame any inconsistencies in the dynamic range of the mix. Ensuring that the levels of the mix are well balanced will also contribute to the imaging aspect of the mix. The final result should be an image that sounds clean and polished, with all elements fitting well within the stereo field. In conclusion, achieving the perfect imaging in a mix requires a good understanding of the various techniques available, the proper use of stereo imaging plugins, and the combination of various mastering tools to create a balanced image. With the right skills, you can create a mix that sounds wider, clearer and more professional.

Advanced Techniques In Stereo Width And Imaging When Mastering


Credit: www.izotope.com


Advanced Mastering Methods For Stereo Width And Imaging

When it comes to mastering music, stereo width and imaging are key components that can make or break the final product. While basic stereo imaging techniques involve panning and creating space between the left and right channels, advanced mastering methods can take the soundstage to a whole new level.

Using Hardware To Create A Unique Sound

One way to achieve a unique sound when mastering is by using hardware such as analog equalizers and compressors. By running the audio signal through analog hardware, engineers can add different harmonics and saturations that are difficult to replicate digitally.

  • Analog compressors like the Fairchild 660 or the SSL G Series can add warmth and punch to the mix.
  • Analog equalizers like the Pultec EQP-1A or the Neve 1073 can add character and depth to the sound.

By experimenting with different combinations of hardware, engineers can create a unique sound that sets the final product apart from others in the same genre.

Experimenting With Different Mastering Techniques

Another way to achieve advanced stereo width and imaging is by experimenting with different mastering techniques. Some techniques that engineers use include:

  1. Mid/Side Processing: This technique involves splitting the stereo signal into its mid and side components, allowing the engineer to adjust the width and panning of the mix.
  2. Harmonic Exciters: These tools add harmonic distortion to the signal, making it sound fuller, wider, and more dynamic.
  3. Reverb: Adding reverb can create a sense of space and depth in the mix, making elements sound like they’re in different positions in the soundstage.
  4. EQ: Equalization is used to shape each element of the mix, allowing them to sit better in the frequency spectrum and giving more space for other elements to shine.

By combining different mastering techniques, engineers can create a unique sound that enhances the stereo width and imaging of the final product.

Innovative Ways To Create A 3d Soundstage

Finally, some engineers use innovative ways to create a 3D soundstage that goes beyond the traditional left-right panning technique. For example:

  • Binaural Audio: This technique involves recording audio with a binaural microphone, which captures sound in 3D from the listener’s perspective. This can create an immersive experience that feels like the sound is happening all around the listener.
  • Ambisonic Audio: Ambisonic audio is an encoding and decoding technique that allows for a 360-degree soundscape. This technique can create an immersive experience that places the listener in the center of the audio.

While these techniques require specialized equipment and software, they can create a unique and immersive sound that sets the final product apart from other music in the same genre.

Advanced Techniques In Stereo Width And Imaging When Mastering


Credit: www.masteringthemix.com


Frequently Asked Questions For Advanced Techniques In Stereo Width And Imaging When Mastering


Should I Use Stereo Imager For Master?


No, using a stereo imager for mastering is not recommended as it can lead to phasing issues, loss of mono compatibility and affect the balance of the mix. It is better to focus on enhancing the existing stereo width of the mix rather than adding more with an imager during mastering.


How Can I Improve My Stereo Image?


To improve your stereo image, use panning and stereo wideners to adjust the placement and width of sounds in your mix. Use EQ to ensure each track has its own space in the frequency spectrum. Make sure your mix is balanced and not too crowded.


Try adding spatial effects like reverb and delay.


What Is Stereo Width In Mastering?


Stereo width in mastering refers to the space between the left and right audio channels. This can be adjusted by manipulating the stereo image through techniques such as panning, EQ, and stereo widening plugins to create a wider or narrower sound.


It is an important aspect of mastering as it can affect the overall balance and impact of the final mix.


How Do I Make My Master Sound Wider?


To make your master sound wider, try using stereo widening techniques such as panning, stereo imaging, and using stereo effects like reverbs and delays. You can also consider using a stereo widener plugin or EQ to boost the high frequencies.


Additionally, using different techniques like mid-side processing can also enhance the stereo width of your master.


Conclusion


In mastering, stereo width and imaging play a vital role in achieving a well-balanced and impressive sound. Applying advanced techniques like using mid-side processing, stereo wideners, and EQ can help enhance the dimensionality and clarity of your mix. Always remember to use these techniques with caution, as over-processing can lead to undesirable results.


Balanced implementation should always be the key. By following these mastering techniques, one can produce a sound that is dynamic and professional. Happy mastering!