Before sending your songs to get mixed, clean up your tracks, make sure they’re in tune and in time, and create a reference mix. Properly preparing your songs beforehand can save time, money and even improve the final mix.
Starting the process of getting a song mixed can be exciting, but it’s important to take a few steps before sending your tracks to a mixing engineer. There are a few things you can do to ensure the success of the mixing process and make things easier on the engineer.
These include cleaning up your tracks, checking for timing and pitch issues, and creating a reference mix. By following these steps, you can save time and money, and ultimately end up with a better sounding mix. We will go into more detail about each step, and provide some tips to help you prepare your tracks for mixing.
Prepare Your Audio Tracks
Preparing your audio tracks before sending them for mixing is key to ensure that you end up with the sound you desire. If you send your tracks without taking these essential steps, you might not get the desired outcome, which can be disappointing and frustrating. This blog post outlines three things you need to do before sending your songs to get mixed, and this section will focus on the first: preparing your audio tracks.
Organize Your Tracks
When mixing audio tracks, the engineer needs to know what each track contains. Therefore, it is essential to label your tracks correctly and organize them properly. For instance, if you record a drum set, each part of the set should be placed in different tracks for easy mixing. Label the tracks according to the part of the set to help the engineer easily identify each track. This way, you save time and ensure that the final product is up to your expectations.
Clean Up Your Tracks
Before sending your tracks to get mixed, it is critical to remove any unwanted noise or distortion. These sounds can be distracting and lower the quality of your tracks. Ensure that you go through each track and remove any unwanted noises or room sounds. You can also tune individual instruments and vocals to ensure they are in key. This way, you save time and minimize the amount of work that the mixing engineer has to do to achieve your desired outcome.
Consolidate Your Tracks
Consolidating your tracks involves merging several tracks into one track to save on space. This step is crucial if you are sending your tracks to get mixed by someone else. To consolidate your tracks, select the range of each track, and merge them into a new track. This way, you minimize the number of files you send and make it easy for the mixing engineer to work on your tracks. Consolidating your tracks also ensures that all the effects and automation on each track are included in the final mix.
Following these steps before sending your audio tracks to get mixed is necessary to save time, minimize costs, and ensure that the final product is up to your expectations. Remember to label your tracks correctly, remove any unwanted noises, and consolidate your tracks to make the mixing engineer’s job more manageable.
Take Time To Do Some Rough Mixes
Before sending your songs to get mixed, take some time to create rough mixes. This will help you identify any issues with your tracks and make necessary adjustments before handing them over to a professional mixer. It can also improve the overall sound quality and ensure you get the desired end result.
Before sending your songs for mixing, it is essential to spend some time doing rough mixes. Rough mixes serve as reference points for the mix engineer, helping them understand your vision for the song. Here are some steps to follow when creating your rough mixes.
Understand The Role Of Each Track
It is vital to identify the critical elements of your song and assign roles to each track. Understanding the role of each track helps to balance levels and apply the right EQ and compression. Here is an overview of the primary tracks of a song.
Track
Role
Drums
Provide rhythm and groove
Bass
Provides foundation and low-end frequency
Guitars/Keys
Provides melody, harmony, and texture
Vocals
Carries the song’s message and creates emotion
Balance The Levels
Balancing the levels means adjusting the relative loudness of each track to create an overall balanced mix. You can use the faders in your DAW to adjust the volume levels. Start with the drums, then add bass, guitars, and vocals. Ensure that no track is overpowering another and that everything is audible.
Use Basic Eq And Compression
Basic EQ and compression help to refine your rough mixes and create a foundation for the final mix. EQ removes unwanted frequencies and enhances the essential elements of each track, while compression helps to control the dynamics of each track. Apply EQ and compression sparingly, aiming for a subtle effect that supports the track.
Create Sampling Rough Mixes
Finally, it is a good idea to create sampling rough mixes to get feedback from others. Share your mixes with others and ask for feedback on the song’s overall sound, including the levels, EQ, and compression. Use their feedback to refine your rough mixes and ensure that your vision for the song is clear. In conclusion, taking the time to do some rough mixes before sending your songs for mixing can make a significant difference in the outcome. Understanding the role of each track, balancing the levels, and using basic EQ and compression are essential steps that can help you achieve the perfect mix.
Communicate Clearly With Your Mixing Engineer
Before sending your songs to be mixed, it’s important to communicate clearly with your mixing engineer. First, provide them with a reference track for the desired sound. Second, organize and label your files properly. Third, give the engineer specific instructions for what you want to hear in the mix.
Before sending your songs for mixing it is important to communicate clearly with your mixing engineer. This will help in achieving the desired sound and save time and efforts for both, you and your mixing engineer.
Prepare A Brief Of What You Want
The first thing to do is to prepare a brief of what you want. It can be a written document, a voice note, or a detailed conversation with your mixing engineer. Be specific about what you want; it can be about the overall sound, level of detail, or specific instruments’ placement. Provide all the necessary details to your mixing engineer so you can both be on the same page.
Tell Your Mixing Engineer What You Don’t Want
Just like knowing what you want is important, it’s equally important to tell your mixing engineer what you don’t want. If you have any specific dislikes or things you want to avoid, ensure to voice it out. This will save time and help achieve the desired outcome. It’s always better to give as much information as possible than to have surprises later.
Explain What’s Important To You
It’s also valuable to explain what’s important to you. Discuss the main aim and goal of your song and the important elements that you believe should stand out. This will help your mixing engineer know what to focus on while blending and mixing your tracks.
Provide Audio References
Providing audio references is always helpful for your mixing engineer. Share with them tracks or songs whose sound you like and want to replicate. This can give your mixing engineer a clear vision of what you desire and work accordingly. Also, avoid sending too many songs, and label the sections that you want to replicate or stand out. Before sending your songs for mixing, clearly communicate with your mixing engineer using the above points and ensure that they understand what you require. This will help in achieving the desired sound and attaining your goal.
Credit: mixandmastermysong.com
Frequently Asked Questions On Three Things To Do Before Sending Your Songs To Get Mixed
What To Do Before Mixing A Song?
Before mixing a song, make sure to organize your tracks, clean up any unwanted noise, adjust the levels of each track, tune your instruments or vocals, and edit any timing issues. This will ensure a smoother and more efficient mixing process, leading to a better end result.
How Do You Send A Song To A Mix?
To send a song to a mix, you need to export or bounce the audio file for your song from your digital audio workstation (DAW) software. Save the file in a lossless audio format such as WAV or AIFF, and then upload the file to the mix session on the shared platform or to the mixer directly.
Make sure to label the file with the correct track name and mix version.
How Do You Get Songs To Mix?
To get songs to mix, you need to start by selecting the tracks you want to mix. Then, you’ll need to ensure the tempo, key, and timing of each track is compatible before using a mixing software or DJ equipment to blend them together.
Practice and experimentation are key to achieving a seamless and enjoyable mix.
What Makes A Song Well Mixed?
A well-mixed song has balanced levels of all instruments and vocals. The dynamics, or the difference between the soft and loud parts of the song, should also be controlled. The frequencies of each instrument should be distributed across the frequency spectrum without clashing with each other.
Reverb and other effects should be used appropriately to enhance the overall sound. Finally, the mix should be consistent throughout the entire song.
Conclusion
Ensuring your song is ready for mixing is crucial for achieving the quality sound you desire. By taking the time to prep your tracks, organize your files, and communicate effectively with your mixing engineer, you can increase your chances of a successful mixing process.
Remember, the more effort you put in before sending your songs to be mixed, the better the end result will be. Happy mixing!
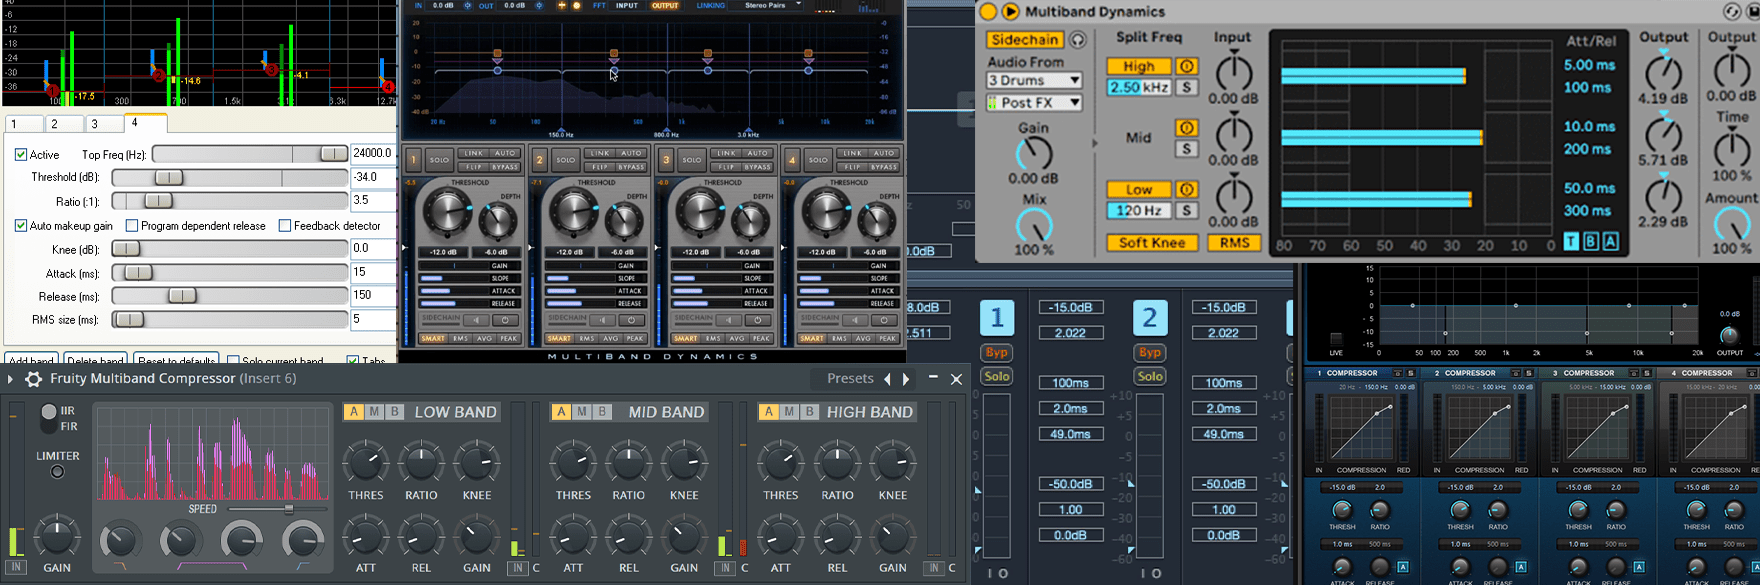
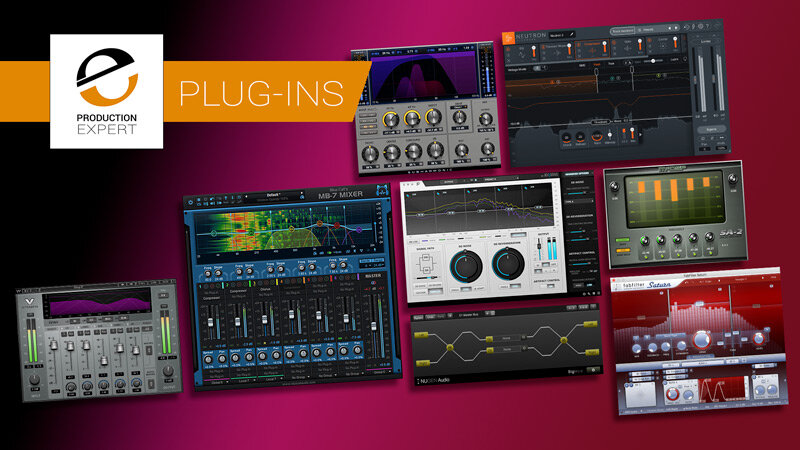
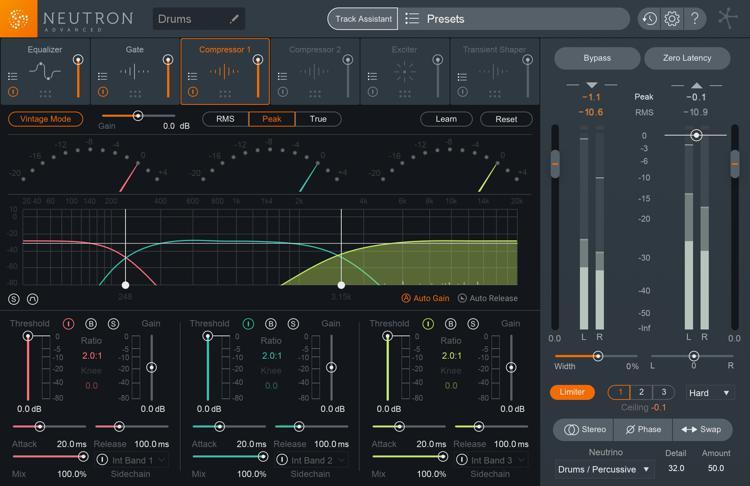
The best multiband compressor plugins for mixing and mastering are FabFilter Pro-MB, Waves C6 Multiband Compressor, and iZotope Ozone 9 Multiband Compressor. Multiband compressors are a powerful tool for both mixing and mastering engineers to have in their arsenal.
They allow for precise control over the dynamics of a specific frequency range and can help even out problematic areas in a mix. However, with so many options available in the market, it can be overwhelming to choose the right plugin.
We’ll take a closer look at three of the best multiband compressor plugins available: FabFilter Pro-MB, Waves C6 Multiband Compressor, and iZotope Ozone 9 Multiband Compressor. Whether you’re a seasoned professional or just starting, these tools can help take your mixes to the next level.
What Are Multiband Compressors?
When it comes to mixing and mastering, multiband compressors are essential tools for any audio engineer. But what are multiband compressors exactly? In this article, we’ll define multiband compressors, explain how they work, and explore the best multiband compressor plugins available for your mixing and mastering projects.
Definition
A multiband compressor is a type of dynamic range compressor that splits the audio signal into multiple frequency bands and applies compression to each band independently. Traditional compressors apply the same amount of gain reduction across the entire frequency range, which can alter the tonal balance of the mix. Multiband compressors allow the engineer to control the dynamics of different frequency ranges separately, resulting in a more transparent and targeted compression effect.
How Do They Work?
There are two main types of multiband compressors: crossover-based and split-band. Crossover-based multiband compressors use a set of crossover filters to divide the audio signal into multiple frequency bands. Each band then passes through a separate compressor with adjustable threshold, ratio, attack, and release settings. The crossover filters determine the frequency ranges affected by each compressor. Split-band multiband compressors, on the other hand, use a set of bandpass filters to isolate different frequency ranges, which are then individually compressed using the same controls as a traditional compressor.
Multiband compressors are commonly used in mixing and mastering to control the dynamic range of individual instruments or entire mixes. For example, a multiband compressor can be used to reduce the volume of harsh vocals without affecting the bass and drums in a mix. In mastering, multiband compression can be used to balance the tonality of a track, make it louder, and glue all elements together more cohesively.
Top Multiband Compressor Plugins
There are many multiband compressor plugins available on the market, each with its strengths and weaknesses. Here are some of the top multiband compressor plugins for mixing and mastering:
Plugin Name
Price
Key Features
Waves C6
$179
Internal and external sidechain, adjustable crossover filters, parallel compression, solo mode
FabFilter Pro-MB
$349
Multiband expander, mid-side processing, intelligent dynamic range processing, linear phase mode
Five bands with adjustable threshold, ratio, attack, and release, sidechain filter, M/S processing, impedance switching
These multiband compressor plugins offer powerful and flexible processing options for your mixing and mastering projects, providing transparent and precise dynamic control over your audio signal. Experiment with different plugins and settings to find the ideal multiband compression solution for your unique needs.
Credit: majormixing.com
Why Use Multiband Compressor Plugins?
Multiband compressors are versatile audio tools that can elevate your music production game. While traditional compressors work well for a wide range of frequencies, a multiband compressor can target specific frequency ranges to control the dynamics of your audio signal.
Advantages Over Single Band Compressors
The primary advantage of using a multiband compressor over a traditional single-band compressor is its ability to balance the dynamics of your track without negatively affecting the overall sound quality. With a multiband compressor, you can separately compress low, mid, and high-frequency ranges, producing a more balanced and polished sound with less effort.
By using a multiband compressor, you can have much greater control over your mix, as you’ll be able to target your adjustments very precisely. If you want your drums to punch through the mix a little more, you can address the mid-range frequencies without changing the sound of the entire track.
Drawbacks
Despite the many advantages of multiband compressors, they are not without their drawbacks.
One potential issue is that if used excessively or incorrectly, your mix can sound unnatural or over-compressed. Multiband compressors should be used judiciously, both in terms of how often you apply compression and how much compression you apply.
In addition, not all multiband compressors are created equal. Some plugins can negatively impact the overall sound quality, so it’s important to do your research and choose high-quality plugins from reputable brands.
Conclusion
The best multiband compressor plugins can make a significant difference in the quality of your mixes and masters. With proper use and an understanding of its benefits and limitations, a multiband compressor can help you create a polished and professional sound in your productions.
Factors To Consider
When selecting the best multiband compressor plugins for mixing and mastering, factors to consider include the plugin’s compatibility with your DAW, its price, user interface, and features. It is also important to consider the type of music you will be working with and the overall quality of the plugin’s sound.
Mixing and mastering are two essential stages in music production that require attention. Multiband compressor plugins are essential tools to balance and EQ different sound frequencies to achieve an optimal sound. With several options available, choosing the best multiband compressor plugin can be overwhelming. Here, we’ll discuss important factors to consider when choosing the best multiband compressor plugins for mixing and mastering.
Compatibility With Daws
Before purchasing a multiband compressor plugin, ensure it’s compatible with your Digital Audio Workstation (DAW). Different plugins function differently and might require specific DAW plugins. It’s essential to consider the compatibility of the audio plugin to avoid disappointments or waste of investments.
Price
As with any music production tools, the price for multiband compressor plugins can vary significantly. While some plugins are free, others can cost hundreds of dollars. A budget-friendly plugin doesn’t always mean it’s not efficient. Consider your budget and choose a plugin that suits your financial plan.
Ease Of Use
A quality multiband compressor plugin should be easy to use, even for beginners. A user guide with tutorials can make it easier to navigate the software. Aside from the user guide, a plugin with a simple interface can help you focus more on the music mix and less on the tool. In conclusion, choosing the best multiband compressor plugin should not be a daunting task. With these factors in mind, you can make an informed decision and choose a plugin that efficiently meets your music production needs.
Credit: www.production-expert.com
Top Multiband Compressor Plugins For Mixing And Mastering
Discover the top multiband compressor plugins for your mixing and mastering needs. These innovative plugins offer exceptional sound quality and flexibility for achieving your desired results with ease. Whether you’re a professional music producer or an enthusiast looking to elevate your audio quality, these multiband compressor plugins are a game-changer.
Top Multiband Compressor Plugins for Mixing and Mastering Multiband compressors are essential tools in the mixing and mastering process, allowing producers to control the dynamics of different frequency ranges independently. Multiband compression helps achieve better clarity and balance in the mix, enhancing the overall sound quality. In this post, we take a closer look at some of the best multiband compressor plugins available in the market. Let’s get started. FabFilter Pro-MB tops the list as the most versatile multiband compressor plugin. Its intuitive interface allows you to create up to six bands, with each section having its individual compressor, expander, and dynamic EQ. This allows for precise control of each frequency band, ensuring the best possible audio quality. Additionally, Pro-MB features per-band side-chain input, mid-side processing option, and customizable slope, making it suitable for any mix or mastering project. The C6 combines the functions of a stereo equalizer and multiband compressor into one plugin. Its unique side-chain feature allows you to adjust the threshold for each band and eliminate unnecessary pumping or breathing. The C6 also features four crossover modes, a comprehensive metering system, and a compressor limiter to add extra control. iZotope Ozone 9’s latest version is an all-in-one mastering plugin that includes a powerful multiband compressor. It features eight bands, mid-side processing capabilities, and dynamic EQ. Also noteworthy is its adaptive mode technology, which adjusts the compressor settings automatically based on the audio content. In addition, Ozone 9 comes with preset banks that provide a starting point for mastering, making it a good pick for beginners. The Precision Multiband plugin from Universal Audio is a four-band compressor that features the famous UA analog modeling technology. With adjustable threshold, attack, and release controls for each band, you can fine-tune the dynamics to attain the desired sound. It has a high-pass filter to target specific frequency areas and a mix control for parallel compression. The Universal Audio Precision Multiband is an excellent choice for those who want to achieve an authentic analog sound. In conclusion, a multiband compressor is a powerful tool to enhance the sound quality of your tracks. The above plugins are undoubtedly some of the best in the market, each with unique features to help you achieve the best possible results. With careful selection and application, these plugins can make a significant difference in the final mix.
Fabfilter Pro-mb
FabFilter Pro-MB is an excellent choice for those who are looking for an all-in-one multiband compressor that offers great flexibility and control over the audio. It is packed with powerful features that make it a go-to plugin for both mixing and mastering.
Features
The FabFilter Pro-MB comes with an intuitive, user-friendly interface that makes it easy to work with. Here are some of its notable features:
Feature
Description
Up to six bands
You can add up to six bands and adjust the frequency range and crossover points for each band to target specific areas of the audio.
Multiband Expander
You can expand specific frequency areas to enhance the dynamics of audio.
Dynamic Phase Processing
You can adjust the phase response and stereo image for each individual band, allowing for precise control over the sound.
Linear Phase Mode
The Linear Phase Mode ensures that the phase response stays linear and doesn’t introduce any phase distortion.
Pros
The FabFilter Pro-MB offers great flexibility and control over the audio, making it a go-to plugin for both mixing and mastering.
The dynamic phase processing and linear phase mode help to keep the audio transparent, preserving its natural sound.
The multiband expander allows for precise enhancement of specific frequency areas, leading to a more polished and professional sound.
Cons
The FabFilter Pro-MB is a bit pricey compared to other multiband compressors on the market.
The interface may be overwhelming to some users, especially those who are new to multiband compression.
Overall, the FabFilter Pro-MB is an excellent multiband compressor that offers great flexibility and control over the audio. While it may be a bit pricey, its powerful features and intuitive interface make it a worthy investment for any serious music producer or sound engineer.
Waves C6 Multiband Compressor
The Waves C6 Multiband Compressor is a versatile and highly-effective plugin for mixing and mastering. With its six bands of compression and dynamic EQ, it allows for precise control and shaping of individual frequencies, leading to a more balanced and professional sound.
The Waves C6 Multiband Compressor is one of the most versatile and powerful plugins out there when it comes to mixing and mastering. It offers advanced features and powerful tools that can help you to achieve a polished, professional sound in your music productions. Let’s take a closer look at its main features, pros and cons.
Features
The Waves C6 Multiband Compressor is a six-band compressor that allows you to independently compress different frequency ranges of your audio signal. This means that you can selectively apply compression to different parts of your mix, rather than just applying it globally. The plugin also offers threshold, ratio, attack, release, and makeup gain controls for each band, giving you complete control over your sound.
Pros And Cons
There are several advantages to using the Waves C6 Multiband Compressor. Firstly, the ability to apply compression to specific frequency ranges means that you can achieve a more transparent and natural-sounding mix. Additionally, the plugin offers a range of presets that are designed for specific instruments and genres, making it easy to get started with your mixing and mastering. However, one potential disadvantage of the Waves C6 Multiband Compressor is that it can be quite complex to use, especially for beginners. There are a lot of controls and settings to work with, and it may take some time to fully understand how to use them effectively. Additionally, the plugin can be quite CPU-intensive, so it may not be suitable for use on older or less powerful computers. Overall, the Waves C6 Multiband Compressor is a powerful and versatile plugin that can help you to achieve a professional sound in your music productions. While it may be somewhat complex to use, its advanced features and range of presets make it a great option for more experienced mixers and producers.
Izotope Ozone 9
IZotope Ozone 9 is a powerful multiband compressor plugin for mixing and mastering that offers advanced features, including up to eight bands of compression, dynamic EQ, and a variety of vintage and modern modes. It’s a great choice for achieving professional-sounding final mixes.
The iZotope Ozone 9 is a popular multiband compressor plugin used for mixing and mastering music. This plugin is known for its precision and versatility, allowing engineers to achieve a professional sound with ease. One of the standout features of iZotope Ozone 9 is its powerful tools for enhancing and controlling the tonal balance of a mix, including spectral shapers and a comprehensive EQ section. In this section, we’ll take a closer look at the Features, Pros, and Cons of this plugin. ### Features iZotope Ozone 9 comes with an impressive range of features that make it a great choice for both mixing and mastering engineers. Some of the key features of this plugin include: – Spectral Shaper: Allows you to precisely control the tonal balance of your mix by adjusting individual frequency bands – EQ Section: Provides an extensive range of EQ parameters for precise adjustment of mix balance – Master Rebalance: Lets you adjust the levels of individual elements in the mix even after it has been mastered – Vintage Modules: Gives you access to a range of vintage emulations, including tape saturation, EQ, and compression – Dynamic EQ: Allows you to create dynamic EQ curves that respond to changes in the input signal ### Pros iZotope Ozone 9 has several advantages over other multiband compressors on the market. Some of the pros of this plugin include: – Easy to use: Despite its advanced features, iZotope Ozone 9 is intuitive and user-friendly – Comprehensive: With a full suite of tools for mixing and mastering, this plugin can handle almost any task – Precise: The Spectral Shaper and other tools allow for precise control over the tonal balance of a mix – Versatile: The Vintage Modules and other features give engineers the flexibility to experiment with different tonalities and textures ### Cons While iZotope Ozone 9 is a highly regarded plugin, there are a few potential drawbacks to consider. Some of the cons of this plugin include: – Resource-intensive: iZotope Ozone 9 can be CPU-intensive, so users with older or less powerful computers may experience latency or other performance issues – Cost: At around $500 per license, iZotope Ozone 9 is a significant investment for many engineers – Steep learning curve: While the plugin itself is easy to use, mastering the full range of features and tools can take some time and effort In conclusion, iZotope Ozone 9 is a powerful and versatile multiband compressor plugin that offers a wide range of tools for mixing and mastering. Its intuitive interface and precise control make it a favorite among engineers, while its Vintage Modules and dynamic EQ capabilities add to its versatility. However, users should be aware of the potential resource requirements and investment necessary to fully utilize this plugin.
Credit: majormixing.com
Universal Audio Precision Multiband
The Universal Audio Precision Multiband is one of the best multiband compressor plugins for mixing and mastering. Its precision EQ and dynamic processing controls allow for fine-tuning and shaping sounds across the frequency spectrum, resulting in polished and professional tracks.
The Universal Audio Precision Multiband is a powerful and versatile plugin that has become a popular choice for mixing and mastering engineers. This multiband compressor plugin is a real-time plugin that is used for real-time monitoring, mixing and mastering. It is known for its precision and accuracy in manipulating audio signals.
Features
The Universal Audio Precision Multiband provides some remarkable features that make it a remarkable plugin for audio engineers. The plugin allows for precise control over various frequency bands, making it possible to fine-tune audio as per the user’s requirements. Additionally, it has various filter types, making it possible to use it adaptively in the mix. It also comes with a Module version and plug-in version. Its intuitive interface enables users to adjust the gain range, stereo width, and other parameters easily. Furthermore, it also has a mix knob that makes it possible to blend the processed audio with the original sound.
Pros And Cons
The Universal Audio Precision Multiband has numerous benefits that make it a great choice for mixing and mastering engineers. Firstly, the plugin is known for its precision and accuracy in manipulating audio signals. Secondly, its intuitive interface enables users to adjust the gain range, stereo width, and other parameters easily. Thirdly, it has various filter types, making it possible to use it adaptively in the mix. Fourthly, Its mix knob compensates for phasing issues that may arise due to the signal processing. However, the Universal Audio Precision Multiband plugin has some drawbacks as well. Firstly, it has a steep learning curve, and beginners may find it challenging to use. Secondly, it requires a lot of processing power, and it may not be suitable for users with low-end computers. Lastly, it is quite expensive compared to other multiband compressor plugins in the market. Overall, the Universal Audio Precision Multiband is a powerful and effective multiband compressor plugin for audio engineers looking for precise control over various frequency bands and adaptability in the mix. Its intuitive interface enables users to fine-tune their audio to perfection, and although it has some drawbacks, the benefits outweigh them.
Frequently Asked Questions Of Best Multiband Compressor Plugins For Mixing And Mastering
Should You Use Multiband Compressor For Mastering?
Yes, multiband compressor can be used for mastering to control specific frequencies and improve overall sound quality. However, it requires advanced knowledge and skills in using a compressor. It is recommended to seek assistance from a professional mastering engineer or a qualified audio technician to obtain the best results.
Which Compressor Is Best For Mastering?
The best compressor for mastering varies depending on personal preference and the genre of music. Some popular options include the SSL G-Master Buss Compressor, the Waves SSL G-Master Buss Compressor, and the Shadow Hills Mastering Compressor. It’s crucial to choose a compressor that fits your style and can enhance the final mix.
Is A De Esser A Multiband Compressor?
No, a De Esser is not a multiband compressor. A De Esser is a type of audio processor that reduces or removes unwanted sibilance or “ess” sounds in vocal recordings. Whereas, a multiband compressor is a dynamic processing tool that splits an audio signal into several frequency bands and applies compression independently to each band.
Is A Dynamic Eq The Same As A Multiband Compressor?
No, a dynamic EQ and a multiband compressor are not the same. A dynamic EQ modifies the EQ of a particular frequency range, while a multiband compressor modifies the dynamics of a particular frequency range. Both processes can be used together to achieve more precise control over the sound.
Conclusion
Multiband compressors are incredible tools that can add depth and dimension to your mixes and mastering. These plugins allow you to control individual frequency bands, resulting in a more balanced and polished sound. Whether you’re a professional audio engineer or a home-based producer, incorporating multiband compressors into your workflow can take your sound to the next level.
So, give these top multiband compressor plugins a try and see the difference they can make in your music production.
Mastering audio for Soundcloud, iTunes, Spotify, and YouTube is essential for getting the most out of your music on these platforms. In order to optimize your tracks, you need to ensure that the levels are balanced, the frequencies are equalized, and the dynamics are controlled.
By doing this, you can guarantee that your music will sound great no matter where it is played. Are you wondering how to make your music stand out on Soundcloud, iTunes, Spotify, and YouTube? Look no further than mastering audio.
This process involves balancing levels, equalizing frequencies, and controlling dynamics to ensure your tracks sound their best on every platform. In today’s digital age, mastering audio is more important than ever as the quality of your sound can have a significant impact on how your music is received by listeners. We will explore the various elements of mastering audio and provide tips on how you can optimize your music for each platform.
The Importance Of Audio Mastering
Mastering audio is a crucial step in producing high-quality music for platforms like Soundcloud, iTunes, Spotify, and YouTube. It ensures that the final product has consistent sound levels, clarity, depth, and is optimized for streaming. Having well-mastered audio can make a huge difference in the overall listening experience.
Mastering audio is one of the crucial stages in music production. It involves taking a final mix and preparing it for distribution. With the rise of music streaming platforms, such as SoundCloud, iTunes, Spotify, and YouTube, you need to ensure that your music sounds well-optimized and professional.
What Is Audio Mastering?
Audio mastering is a process of preparing a final mix of recorded music for distribution. It involves balancing tonal and dynamic elements of the recording and adding final touches to make it sound consistent, polished, and ready for the audience. Mastering involves tasks such as equalization, compression, stereo enhancement, and volume maximization.
Why Is Audio Mastering Important?
Without audio mastering, your music may not be able to compete with other professionally mixed and mastered records out there. Many streaming platforms such as Spotify and Apple Music have loudness normalization capabilities that ensure that all tracks are played back at similar volumes. Mastering helps bring your music up to the required level while maintaining clarity and punch. A well-mastered track is also more likely to grab the attention of listeners and help you stand out. It showcases the artist’s style and intention in the best possible way, and it can help increase playbacks, likes, and shares.
How Can Good Mastering Help In The Music Industry?
For musicians in the industry, a poorly mastered track can get in the way of landing a recording deal or performing live on stage. For indie artists, it can reduce chances of getting discovered and create negative feedback online, negatively affecting their online reputation. In contrast, good mastering gives you a higher chance of being considered for airplay on radio stations, playlists, and online platforms. It also showcases the seriousness and commitment towards the music career to listeners, music industry professionals, and potential clients. In conclusion, mastering audio plays a significant role in making your music sound professional and reach its full potential. It ensures that your tracks are competitive and ready for distribution on various social platforms. Therefore, it is important to invest in the right gear, software, and techniques so that you can deliver quality sound to your listeners.
Credit: www.youtube.com
Audio Mastering Techniques
Audio mastering techniques are crucial for creating high-quality sound recordings for various platforms such as Soundcloud, iTunes, Spotify, and YouTube. By mastering audio, you can enhance the overall sound quality, loudness, and clarity of your recordings, ensuring they stand out in the competitive world of digital audio.
Audio Mastering Techniques: Audio mastering is the final step in music production, where the audio engineer polishes the song and makes it sound better by applying a variety of audio mastering techniques. Here are some of the most important techniques used in audio mastering: Equalization (EQ): Equalization, or EQ, is a process that adjusts the frequencies of an audio track, to enhance or reduce specific sounds or frequencies in the song. EQ is one of the most essential tools for audio mastering that enables the engineer to tweak the overall sound of the mixdown and make it sound more balanced and professional. Compression: Compression is a technique used to reduce the dynamic range of an audio track, which means it reduces the difference between the loudest and quietest parts of the track. This helps to make the song sound more consistent and even, which results in a more polished and professional sound. Stereo Widening: Stereo widening is a process that enhances the stereo image of the audio track, which makes the song sound wider and more spacious. This technique is used to ensure that the instruments have their specific place in the sound field, allowing the listener to differentiate and appreciate each instrument. Limiting: Limiting is a technique used to prevent the audio track from clipping, which is a distortion that occurs when the audio signal exceeds its maximum level. This technique ensures that the song is loud and punchy without distorting or losing any clarity. Dithering: Dithering is a technique used when converting 24-bit audio to 16-bit audio. It adds a low-level noise to the audio signal, which helps to preserve the integrity of the audio by reducing quantization errors, resulting in a cleaner and more accurate sound. Normalization: Normalization is a process that adjusts the overall volume of an audio track, ensuring that it reaches a certain level without distortion. It is used to make sure that all tracks play at a standard level without the listener having to adjust the volume for each track. By mastering these audio mastering techniques, you’ll be able to make your sound more professional, which will get you more plays, more followers, and gain more appreciation from your audience on platforms such as Soundcloud, iTunes, Spotify, and Youtube. Make sure to always keep learning and practicing, to keep on improving your techniques and achieve a unique and polished sound.
Audio Mastering For Soundcloud
Mastering audio for Soundcloud, iTunes, Spotify, and YouTube can be a challenging task, but it’s crucial for producing high-quality music and getting noticed by the right audience. Audio mastering fine-tunes specific audio elements, including EQ, dynamics, and stereo imaging, resulting in a polished and professional sound.
If you’re serious about producing music, you should consider investing in quality audio mastering services.
Soundcloud is a popular platform for musicians to showcase their talent. As an artist, you want your music to sound perfect on SoundCloud. Audio mastering is the process of preparing your music for release. This involves making sure that the audio has the right volume, clarity, and depth. In this article, we will discuss audio mastering for SoundCloud and share some tips to help you produce the highest quality audio.
Soundcloud Audio Format Requirements
Before mastering your audio for SoundCloud, it’s essential to understand the format requirements. SoundCloud will accept the following audio formats:
MP3
FLAC
WAV
AIF
It’s critical that you export your audio file to one of these formats before uploading it onto SoundCloud. Otherwise, your audio file won’t be compatible with the platform, and it will be rejected.
Mastering Tips For Soundcloud
Here are some tips for mastering your music for SoundCloud:
1. Set the right volume level
Make sure that your audio level is set correctly. If your audio level is too low, listeners will have to increase the volume on their device to hear it. On the other hand, if the volume is too high, it can cause distortion and audio clipping.
2. Use EQ to balance the frequencies
Equalization is a crucial technique in audio mastering. Use EQ to balance the frequencies in your audio. Make sure that the bass, midrange, and treble are balanced correctly.
3. Add Compression to Control Dynamics
Compression is essential to ensure that your audio maintains a consistent volume level. It’s particularly important for tracks with varying levels of dynamics. Use it to control the dynamics and to add punch to your audio.
4. Consider the Loudness
SoundCloud uses loudness normalization to maintain a consistent volume level across all tracks. Make sure that your audio is sufficiently loud, but avoid the temptation to make it too loud. If it’s too loud, it can cause distortion and audio clipping.
5. Listen to the final mix on a different device
Before you upload your audio to SoundCloud, listen to the final mix on a different device. This will help you identify any issues that you may have missed on your studio monitors.
6. Check your metadata
Finally, ensure that your metadata is accurate. Include information such as track title, artist name, and release date.
Conclusion
By following these tips, you can produce the highest quality audio for Soundcloud. Remember, mastering is essential to ensure that your tracks sound the best they can. With a little attention to detail and some patience, you’ll be able to master your audio like a pro.
Audio Mastering For Itunes
Audio mastering is an essential step in music production, especially if you intend to distribute your songs digitally on different platforms. Each platform has specific requirements and guidelines that you need to follow for your music to sound great and meet industry standards. In this post, we will focus on iTunes and offer some tips on how to master your audio for this platform.
Itunes Audio Format Requirements
iTunes is one of the most used digital music platforms globally, and for you to sell your music on iTunes, you have to meet certain requirements. Firstly, your audio must be in either the AIFF or WAV format. Additionally, iTunes only accepts audio files with a bit depth of 16 bits and a sample rate of 44.1 kHz. Your track’s sample rate has to match that of the original recording, or you risk losing quality during the conversion process.
Mastering Tips For Itunes
Now that you know the audio format requirements for iTunes, it’s time to master your music for a better listening experience for your fans. Below are some tips to help you master your audio to meet iTunes standards:
Ensure that your mix is balanced and that no instrument is overpowering the others.
Reduce the level of the low-frequency sounds in your track as they can be overpowering on small speakers, e.g., earphones and car speakers.
Use a limiter to set the maximum level of your audio and avoid clipping.
Use a compressor to control the dynamic range of your track and make it more appealing to the listener.
Beware of over-compression, as it can lead to a loss in audio quality.
Avoid excessive use of equalizers that can lead to unnecessary alterations to your audio.
The above tips will ensure that your audio meets iTunes audio standards and sounds excellent to your listeners. Remember to check your music before uploading it to iTunes to avoid any technical issues. With these tips, your music will stand out on iTunes and compete with the best in the industry.
Audio Mastering For Spotify
If you want your music to be heard globally, it’s essential to master your audio specifically for each platform. While Spotify might not require a particular type of mastering, there are some helpful tips that you can follow to ensure your audio content sounds its best.
Spotify Audio Format Requirements
Spotify has specific audio format requirements for optimal playback. Make sure that you follow the following audio format guidelines:
Audio Format
Codec
Bitrate
Sample Rate
Lossless
FLAC
1,411 kbps
44.1 kHz
Lossy
OGG (Vorbis)
320 kbps
44.1 kHz
Mastering Tips For Spotify
Here are some Mastering Tips for Spotify:
Limit your audio tracks to -2dB to avoid distortion, as Spotify applies its own compression to tracks.
Ensure your audio tracks are appropriately balanced, EQ’d, and compressed as Spotify highlights those that aren’t.
Listen to your final audio track in different environments (phones, car speakers, etc.) to make sure your tracks stand out on Spotify, and there’s nothing you’ve missed.
By following these tips, you’ll be one step closer to mastering your content exclusively for Spotify. It’s best to follow specific guidelines for every platform since each platform has its unique requirements. This will help you get the most out of each platform and ensure your content sounds the way you want it.
Credit: www.masteringthemix.com
Audio Mastering For Youtube
Mastering audio for streaming platforms such as Soundcloud, iTunes, Spotify and YouTube is crucial for creating a professional and polished sound. Proper mastering techniques can improve the overall sound quality and level of your tracks, making them stand out from the rest.
In today’s digital world, mastering audio is a crucial aspect of creating a polished and professional sound. Whether you’re a musician, podcast creator, or any content creator, you probably want your music to sound its best on every available platform. In this article, we’ll take a closer look at Audio Mastering for YouTube. YouTube is one of the most significant platforms for sharing audio content. With over 2 billion monthly active users, it’s an opportunity to reach new audiences, and it’s essential to ensure your music sounds great when streaming on this popular platform.
Youtube Audio Format Requirements
Before diving into the mastering tips for YouTube, it’s essential to understand the audio format requirements for YouTube. YouTube supports a wide range of audio formats, including MP3, AAC, FLAC, and WAV files. However, it’s recommended to upload lossless audio like WAV or FLAC as YouTube re-encodes your audio in AAC format, causing some loss in quality. The recommended audio bitrate for YouTube is 320kbps for the best audio quality.
Mastering Tips For Youtube
Mastering audio for YouTube can be challenging, but there are ways you can optimize your audio to sound great on this platform. Here are a few essential mastering tips to keep in mind when preparing your music for YouTube:
1. Keep Your Volume Levels in Check
When mastering audio for YouTube, ensure that the overall volume levels are not too loud or too quiet as it can affect the overall sound quality. Try to get a balanced and consistent sound level throughout your song.
2. Consider the Sound Quality of the Original Recording
It’s essential to ensure that the original recording is of high quality as it will affect the overall sound quality when mastering for YouTube. If the original recording quality is poor, no amount of mastering can fix it, so make sure to use a high-quality audio recording in the first place.
3. Pay Attention to EQ and Compression
When mastering for YouTube, it’s essential to pay attention to EQ and compression. Use EQ to adjust the tonal balance of your song, and compression to reduce the dynamic range of your track. Compressing your audio can help to increase its loudness and make it sound more polished and professional.
4. Listen to Your Mastered Tracks on Different Devices
Before uploading your mastered audio to YouTube, be sure to listen to it on different devices and speakers to ensure that it sounds great across different platforms. This way, you can ensure that your music sounds great, no matter where it’s being played.
5. Leave Headroom for YouTube Re-encoding
As mentioned earlier, YouTube re-encodes your audio in AAC format, causing some loss in quality. Hence, it’s essential to leave some headroom for this re-encoding process. Leaving headroom allows YouTube to re-encode your audio with minimal loss in quality, resulting in a better sound quality for your listeners. In conclusion, mastering audio for YouTube can be a daunting task. However, by adhering to the simple tips provided above, you can optimize your audio for this popular platform and ensure that your music sounds its best. So get started with mastering your audio today, and start reaching new audiences on this popular platform.
Frequently Asked Questions On Mastering Audio For Soundcloud Itunes Spotify And Youtube
What Lufs Should I Master For Youtube?
The recommended LUFS for mastering audio for YouTube is -14 LUFS integrated loudness with a True Peak of -1dB. This ensures that your audio is loud enough without being too distorted or clipped.
What Level Of Mastering Is Soundcloud?
SoundCloud is an online platform for music sharing, discovery, and distribution. It is an excellent platform for emerging artists to showcase their talents and attract a large following. However, it may not be considered a high-level mastering tool, as it primarily focuses on music sharing and distribution rather than professional audio mastering.
What Is The Best Lufs For Soundcloud?
The ideal LUFS for Soundcloud is around -14 to -16 LUFS. This level ensures that your music sounds loud and clear on Soundcloud without any distortion or loss of quality. It is also important to ensure that your music is mastered for the platform to maximize its potential on Soundcloud.
What Is The Mastering Level For Spotify?
The mastering level for Spotify is -14 LUFS integrated with a true peak of -1 dB. This level helps to standardize the loudness of music across the platform and ensures a consistent listening experience for users.
Conclusion
Mastering audio can be a daunting task, but it’s crucial if you want your music to sound professional and engaging across different platforms. By following the tips and processes outlined you can confidently prepare your tracks for release on SoundCloud, iTunes, Spotify, and YouTube.
Remember to keep experimenting to find what works best for your unique sound, and don’t forget to regularly check and update your tracks for the best possible listening experience. Happy mastering!
To produce your first album, you need a computer, a DAW software, a microphone, headphones and an audio interface. As a beginner, this basic equipment will suffice for your recording needs.
Producing your first album can be an exciting but daunting task. You may be eager to start recording, but you need to ensure that you have the essential equipment to produce a quality album. While there are various equipment options in the market, it’s not always necessary to invest in high-end gear as a beginner.
The minimum equipment required to produce your first album includes a computer, a digital audio workstation (DAW) software, a microphone, headphones, and an audio interface. These tools will enable you to record and monitor your tracks and give you a good foundation to work with as you hone your recording skills. Let’s explore each essential equipment required in more detail.
Choose Your Weapons Wisely
Producing your first album can be exciting and overwhelming all at once. With so many equipment options available, it’s essential to choose wisely to create high-quality music. The following subheadings will help you make informed decisions and create the best tracks possible.
Computer Or Mobile Device
Your computer or mobile device is the first tool you need to produce your album. It’s crucial to choose wisely when selecting your computer or mobile device. A mobile device can allow for music production on-the-go, while a computer may offer more processing power and larger storage capacity. Consider the following:
Mobile devices are perfect for quick recordings and inspiration on-the-go.
Computers tend to give more processing power and the ability to store large amounts of data.
Both mobile devices and computers offer software solutions for music production, such as GarageBand, Ableton Live, and Pro Tools.
Audio Interface
An audio interface is essential equipment for recording and producing your album. It converts analog sound signals into digital audio signals that your device can process. The audio interface you choose can make a significant difference in the quality of your recordings. Consider the following:
Considerations
Options
Number of inputs needed
2, 4, or 8 inputs interfaces
Connection type
USB, Thunderbolt, or Firewire
Preamp quality
Focusrite Scarlett or Universal Audio Arrow
Choosing The Right Microphone
A microphone is a critical tool in the production of your album. The right microphone can capture the essence of your music in a way that resonates with your audience. Consider the following:
Dynamic microphones are best for loud instruments, such as drums and guitar amps.
Condenser microphones are perfect for recording vocals or softer instruments, like acoustic guitar or piano.
Consider the polar pattern, frequency response, and sensitivity when selecting a microphone.
Headphones Or Studio Monitors
Finally, you’ll need a way to listen to your recordings accurately. Headphones or studio monitors are essential tools for you to evaluate your recordings and make critical decisions. Consider the following:
Headphones tend to be more affordable and offer a more closed-off listening experience.
Studio monitors tend to offer a more accurate representation of the music, but they can be more expensive.
Consider the size, frequency response, and connection type when selecting headphones or studio monitors.
Get Your Sound Right
If you are planning to produce your first album, the most important thing that you need to consider is to get your sound right. The quality of your audio recording will determine the success of your music. It is essential to invest in the right equipment to produce high-quality sound. In this blog post, we will discuss the minimum equipment needed to produce your first album.
The Microphone
When it comes to recording music, a high-quality microphone is a must-have. It is essential to choose a mic that will capture your voice or instrument’s true sound. You can choose between dynamic, condenser, or ribbon microphones. Condenser mics are the most popular choice among musicians due to their versatility. You can also choose between a USB or XLR connection. A USB microphone is an ideal choice for beginners who want a plug-and-play setup. However, XLR microphones are the professional choice.
Headphones And Monitors
Investing in high-quality headphones and monitors is also crucial for producing your first album. Headphones are excellent for critical listening and mixing. When choosing headphones, make sure they have a flat response so you can hear your music’s true sound. Studio monitors, on the other hand, are speakers that are designed for audio production. They are an essential piece of equipment for mixing and mastering your tracks. Choose monitors with a flat frequency response and accurate sound reproduction for the best results.
If you are on a tight budget, you can consider purchasing a good-quality headphone for the time being. At the end of the day, quality is what matters most.
Overall, the minimum equipment needed to produce your first album is subjective and depends on your budget, genre, and recording environment. However, a high-quality microphone, headphones, and monitors are essential for any successful recording. Invest wisely in your equipment to produce the best possible sound for your music.
Create Your Setup
To produce your first album, you’ll need several minimum essential pieces of equipment. A computer with adequate power and storage, a DAW or recording software, an audio interface, headphones, and a microphone are all examples of essential tools. With these tools, you can begin recording and mixing your music with ease.
If you want to produce your first album, congratulations. It means you have some musical talent and creativity. Now it’s time to create your music setup. In this setup, you need some minimum equipment required to get started.
Daw Software
The DAW (Digital Audio Workstation) software will be the central hub of your setup. It’s the software that you’ll use to record, edit, and mix your music tracks. There are many options available in the market such as Ableton, Logic Pro, Cubase, and Pro Tools. Each software has its advantages and features. So, you have to choose the one that suits your preferences.
Midi Controller
A MIDI (Musical Instrument Digital Interface) controller is another essential piece of your music setup. It’s like a keyboard but different. A MIDI controller is a keyboard that produces only digital sounds. So, it’s essential to buy a quality MIDI controller to produce good quality digital music. There are various types of MIDI controllers available, such as a single keyboard, drum pads, and MIDI guitars.
Headphones Or Speakers
To monitor your music, you need a pair of studio-quality headphones or speakers. The studio-grade headphones will let you hear everything in detail, while the studio-quality speakers will give you a better feel for the overall sound. Both headphones and speakers have their advantages and disadvantages. So, choose the one that fits your situation.
Microphone
If you are a singer or want to record other instruments such as guitars, drums, or brass, you will need a good quality microphone. There are different types of microphones available, such as condenser microphones, dynamic microphones, and ribbon microphones. Each type of microphone has its purpose. So, choose the one that best fits your requirement. In conclusion, the minimum setup required to produce music includes a DAW software, MIDI controller, speakers or headphones, and a microphone. These are the basic pieces of equipment that you need to bring your music ideas to life.
Record Your Tracks
To create your first album, all you need is a computer, audio interface, microphone, headphones, and digital audio workstation software. With these minimum equipment, you can record your tracks and start producing your album. Don’t forget to mix and master your tracks to achieve professional sound quality.
When it comes to producing your first album, recording your tracks can seem like a daunting task, but with the right equipment, it can be a breeze. This article will outline the minimum equipment needed to record vocals and instruments for your first album.
Recording Vocals
Recording vocals is an important part of producing an album, and with the right equipment, it can be done from the comfort of your own home. To get started recording vocals, you will need: – A Condenser microphone – A pop filter – A microphone stand – A Digital Audio Workstation (DAW) A high-quality condenser microphone will pick up all the nuances in your voice and produce a clean, studio-quality sound. A pop filter is essential for reducing plosives and ensuring clear vocals. A microphone stand will keep your microphone in place and allow you to record without holding the microphone. Finally, a DAW will record and edit your vocals, offering tools like EQ and compression to enhance the sound.
Instruments Recording
When it comes to recording instruments for your album, you will need some additional equipment beyond what you used for recording vocals. The minimum equipment needed for recording instruments includes: – Audio Interface – Instrument cable – Studio headphones – Studio monitors An audio interface will allow you to connect your instrument to your computer and record it into your DAW. It converts the analog signal from your instrument into a digital signal that your computer can understand. To connect your instrument to the audio interface, you will need an instrument cable. Studio headphones and monitors will allow you to hear the playback of your instrument and make adjustments as needed. With this minimum equipment, you can start recording your tracks and creating an album that is uniquely yours. Remember, the key is to invest in high-quality equipment that will produce the best sound for your recordings.
Post-production
Post-production is the final step in music production and involves various processes that are necessary to bring all the elements of a track together. This phase includes editing, mixing, mastering, and adding special effects to enhance the overall audio quality of your tracks. One of the key aspects of post-production is applying equalization, compression, and limiting to your tracks.
Equalization
Equalization or EQ controls the balance between frequency components in your tracks. It helps to remove unwanted frequencies from the sound and allows you to emphasize certain frequencies to enhance the overall sound quality of your tracks. You can use parametric EQs, semi-parametric EQs, and graphic EQs to make changes to your tracks.
Compression And Limiting
Compression and limiting are dynamic range processors that help control the volume of your tracks. Compression reduces the dynamic range of the audio signal by attenuating the loudest parts of the sound and boosting the quietest parts. This helps to balance the overall volume of the track. Limiting, on the other hand, is a more extreme form of compression that prevents the audio signal from exceeding a certain threshold. This ensures that your tracks don’t clip and maintain a consistent volume throughout the track.
Credit: www.masteringthemix.com
Music Editing
To produce your first album, you need some minimum equipment for music editing. These essential tools include a computer, DAW software, audio interface, microphone, headphones, and studio monitors. With this gear, you can start recording, mixing, and mastering your music to create an impressive album that meets your vision.
Editing plays a crucial role in refining the recorded sound and gives a final touch to the music. It enhances the listening experience and makes it presentable to the listeners. Music editing involves arranging tracks, editing clips and regions, adding effects, and cleaning up any unwanted noise. Let’s explore the essential aspects of music editing needed to produce your first album.
Track Arrangement
Track arrangement involves organizing various tracks recorded separately into a sequence to form a song. It enables you to place the correct instrument and vocals where they belong, creating the desired sound. To arrange tracks, use the audio editing software with an easy-to-use interface, which provides several options for mixing and arranging the music.
Editing Clips And Regions
Editing individual clips and regions is the next step in music editing. It allows you to cut, copy, and paste specific sections of the recording to refine the song. You can remove any extra idle noises, adjust tempo and pitch, and change the volume levels for each section. The main challenge in editing is matching the timing and rhythm of each instrument to create a cohesive sound.
Adding Effects
After arranging the tracks and editing clips and regions, the next step is adding effects. Effects range from equalizing, reverb, delay, and compression, and there are several plugins available to add various effects to the music. The right selection of effects enhances the music quality and creates the desired sound effect.
Cleaning Up Unwanted Noise
The final step in music editing is cleaning up any unwanted noise in the recording. This may include background noise, hissing, humming, or other sounds that distract from the music. Use tools like noise reduction software, which removes unwanted noise while maintaining the quality of the music.
Conclusion
Music editing requires patience, practice, and precision to create a professional-sounding album. With the minimum equipment available, one can produce high-quality music and gain recognition for their work. Stick to the basic principles of music editing and create a cohesive sound, and your music is ready for the world!
Add The Final Touches
Once you’re done with the recording and post-production, it’s time to add the final touches to your music tracks. This step will help you take your music to the next level and make it sound more polished and professional. In this section, we’ll discuss some of the minimum equipment you need to add effects and mixdown your music tracks.
Add Effects
Adding effects to your music tracks can help you create a unique sound and style that sets you apart from other artists. Some of the essential effects you need include reverb, delay, chorus, and distortion. You can use a variety of effect pedals, plugins, or software to add these effects to your music tracks. Most digital audio workstations come with built-in effect plugins that you can use to add different effects to your tracks.
Reverb – adds a natural echo and ambiance to your music
Delay – creates a repeating sound effect
Chorus – adds a swirling, shimmering sound to your music
Distortion – adds grit and crunch to your music
Mixdown
Mixing your music tracks involves blending multiple audio tracks together to create a balanced and cohesive sound. During the mixing process, you can adjust volume levels, panning, and apply EQ to each track. To mix your tracks, you need a good pair of headphones or studio monitors and a mixing console or a digital audio workstation. These tools will help you create a professional-sounding mix of your music tracks that is worthy of publishing.
Studio Monitors – used to listen and adjust the levels of your tracks
Mixing Console – a hardware device used to mix audio signals
Digital Audio Workstation – software that allows you to mix and edit audio tracks on your computer
Equalizer (EQ) – used to fine-tune the frequency balance of your music tracks
Now that you know the minimum equipment needed to add effects and mixdown your music tracks, you can start producing your first album. Remember, the equipment you choose should depend on your budget, music genre, and personal preference. With determination and hard work, you can release your first album and take your music career to new heights.
Distribute Your Music
Producing your first album requires a minimum set of equipment including a computer with recording software, a microphone, headphones, and an audio interface. With these tools, you can record, mix and master your music, preparing it for distribution to your audience.
Once you’ve completed your album, it’s time to distribute your music. The process can seem daunting, but it’s essential to get your music heard by as many people as possible. There are many distribution options available, but we’ll focus on the basics.
Choosing A Distro
Choosing the right distribution platform is crucial for reaching your target audience. Some popular distributors include TuneCore, DistroKid, and CD Baby. Before committing to a distributor, make sure to research their fees, distribution options, and customer service.
Uploading And Releasing
After choosing your distributor, it’s time to upload and release your album. Most distributors will require you to provide a digital copy of your album, along with album artwork and metadata such as song titles and artist name. Once your music is submitted, it can take several days or weeks for it to be available on streaming platforms such as Spotify and Apple Music.
Helpful Tips:
Provide high-quality album artwork that represents your music.
Include detailed metadata to ensure proper crediting on digital platforms.
Consider releasing singles before releasing your full album to build momentum.
Register your music with a performance rights organization to collect royalties.
Example Code:
Distribution Platform Comparison
TuneCore: $29.99 per album, distributes to over 150 platforms.
DistroKid: $19.99 per year, unlimited uploads.
CD Baby: $29 per single, $49 per album, distributes to over 150 platforms.
In conclusion, distributing your music is a crucial step in getting your music heard by a broader audience. By choosing the right distribution platform and following best practices for uploading and releasing, you can ensure that your music reaches its fullest potential.
https://www.youtube.com/watch?v=QJE60nTeTJk
Frequently Asked Questions Of The Minimum Equipment Needed To Produce Your First Album
What Do You Need To Make An Album?
To make an album, you need to have the following: a collection of songs or tracks that you want to include in your album, recording equipment, sound engineers or producers, a recording studio, and a budget. Additionally, you may need graphic designers for album artwork and marketing strategies for promotion.
What Is The Minimum For An Album?
The minimum for an album varies depending on the country, type of album, and format. In the United States, the minimum for an album is typically 7-8 songs or at least 25 minutes in length. However, in some countries, the minimum may be as low as 2-3 songs.
How Do You Make A Good First Album?
To create a good first album, you should focus on the quality of your songwriting and production. Make sure to invest in a good recording studio, work with experienced producers and engineers, and collaborate with talented musicians. Additionally, it’s important to create a cohesive and memorable brand image and to promote your music through social media and live performances.
With dedication and hard work, your first album can be a success.
What Equipment Is Needed To Make A Song?
To make a song, you need a computer or mobile device with music production software, a microphone to record vocals or live instruments, headphones or speakers to hear the playback, and a MIDI keyboard to create melodies and chords. You may also need audio interfaces, mixing boards, and preamps for more advanced setups.
Conclusion
Creating a music album is an exciting journey, and it doesn’t have to cost a fortune. You don’t need expensive equipment to start producing your first album. By focusing on the essentials, like a computer, microphone, headphones, and some software, you can get started on your musical journey without breaking the bank.
With a little bit of practice and patience, you’ll be amazed at what you can produce. So don’t let a limited budget discourage you from making your music dreams a reality!
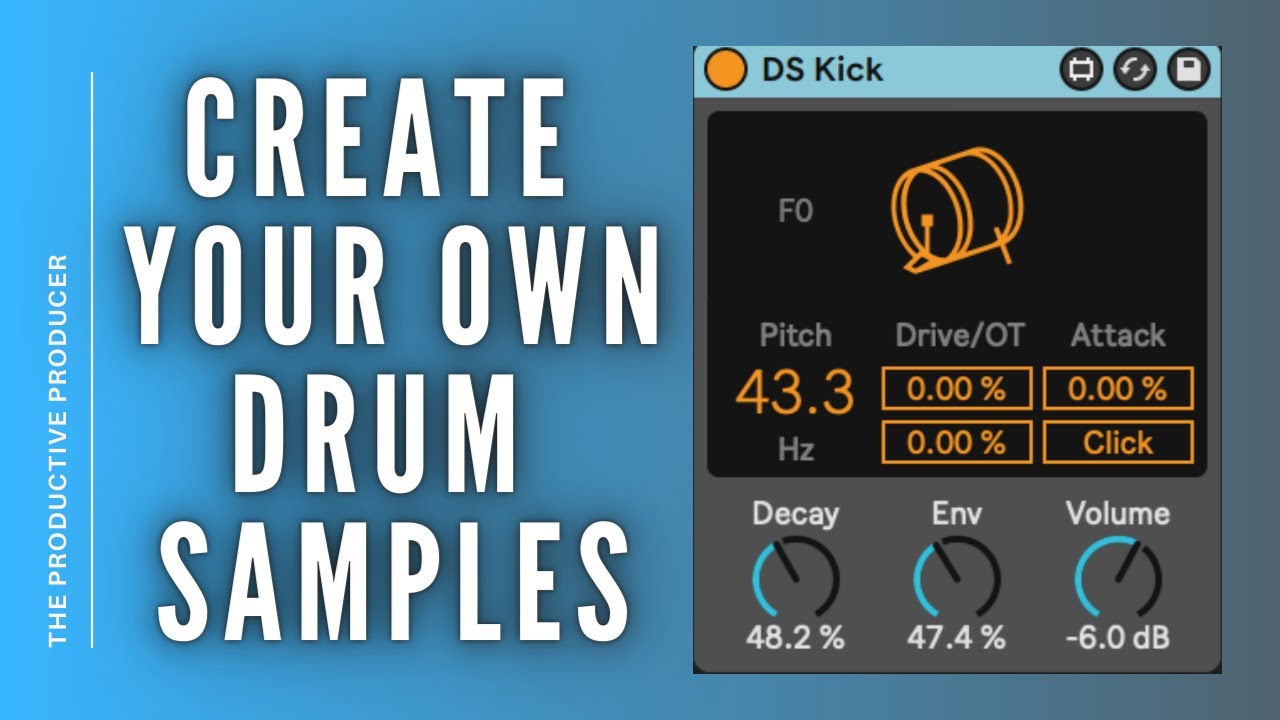
To design your own kick drum in Ableton, create a new MIDI track, select a drum rack, choose a kick sound and edit it to your desired taste. With these 4 simple steps, you can easily make samples in Ableton and craft your own kick drum sound.
As a music producer, it’s crucial to have a unique sound that sets you apart from other artists. Creating your own samples, particularly kick drums, is a great way to achieve this goal. Ableton Live offers an abundance of tools and features, including the ability to create and customize drum sounds.
We will explore step by step how to design your very own kick drum in Ableton Live. We will cover the basics of creating a new MIDI track, selecting a drum rack, choosing a kick sound, and editing it to your desired taste. So, let’s dive in and get started!
Credit: m.youtube.com
Understanding Kick Drums
Create custom kick drum samples using Ableton’s built-in synthesizers and audio effects to achieve a unique sound. Experiment with various settings and adjustments to get the desired tone, pitch, and punch for your tracks.
Kick drums are the foundation of modern music production, providing the pulse and rhythm that drives the track. As a music producer, it is essential to have a clear understanding of kick drums and their importance in shaping the sound of your productions. In this article, we will discuss what a kick drum is, its role in music and how to design your own kick drum samples in Ableton.
What Is A Kick Drum?
A kick drum, also known as a bass drum, is a percussion instrument that provides the low-frequency pulse in a piece of music. It is typically played with a pedal-operated beater and produces a deep, booming sound that forms the heartbeat of a track.
The Role Of Kick Drum In Music
The kick drum plays a vital role in modern music production, providing the rhythmic backbone of a track. Its primary function is to give the music a sense of pulse and groove. Without a well-designed kick drum, a track can feel flat and lifeless. In addition to its rhythmic importance, the kick drum also contributes to the tonal balance of a track. Its low-frequency content complements the other elements of the mix, adding weight and depth to the overall sound.
Designing Your Own Kick Drum Samples In Ableton
Ableton is a powerful digital audio workstation that makes designing kick drums easy and intuitive. To create your own kick drum samples:
Start with a blank slate and create a new MIDI track.
Open the Simpler instrument in Ableton and drag and drop a sample or synthesized waveform onto the waveform display.
Adjust the ADSR envelope to shape the volume and sustain of the kick drum.
Use EQ to adjust the tonal balance of the kick drum, focusing on the low frequencies.
Apply compression to control the dynamics of the kick drum and add punch and sustain.
With these simple steps, you can create a unique and powerful kick drum that will drive your productions forward and give your music a professional edge. In conclusion, understanding kick drums and how to design your own kick drum samples is an essential skill for modern music producers. With the right tools and techniques, you can create powerful and compelling kick drum sounds that will take your music to the next level.
Choosing Sample For Kick Drum
Designing your own kick drum sample in Ableton can be a daunting task, but choosing the right sample to start with can make all the difference. Experiment with different samples to find one that fits your track’s style and EQ it to your liking before layering other samples on top.
Creating your own kick drum sound can be a challenging and rewarding experience. The kick drum is the heartbeat of any dance track, and using the wrong sample can make or break your production. It’s crucial to select the right sample that fits your track’s genre and style to make your kick drum the best it can be. Here are some useful tips to help you choose the perfect sample for your kick drum:
Selecting The Right Sample
Choosing the perfect sample for your kick drum can be a daunting task. However, once you have found the right sample, you can create an exceptional sound that will make your track stand out. There are several things to consider when selecting the right sample. Firstly, you need to ensure the sample fits the genre of your track. A deep, punchy kick drum may not be suitable for a melodic or chillout track.
Analyzing The Quality Of Sample
When selecting a sample for your kick drum, it’s important to analyze the quality of the sample carefully. You want to choose a sample that is of high-quality and sounds professional. Low-quality samples will sound cheap and can ruin a mix. Therefore, it’s crucial to choose a sample that has a high sample rate and bit depth. A sample with a bit depth of 24 or more will provide more harmonics, which creates a better sound.
Editing Samples
Once you’ve decided on the perfect sample, you may need to edit it to fit your track better. You can adjust the length, pitch, or add effects to the sample. Making these adjustments can make the sample fit better within your track. To do this, you can use Ableton’s built-in effects like EQ or compression to enhance the sample and make it sound even better.
Conclusion
In conclusion, choosing the right sample for your kick drum is crucial to your production. Ensuring the sample fits your track’s style and has a high-quality sound is essential. Once you have found the perfect sample, you can edit it to fit better within your track using Ableton’s built-in effects. By following these tips, you can create an exceptional kick drum sound that will elevate your track and make it stand out.
Arrangement Of Samples In Ableton
Learn how to make your own kick drum samples in Ableton by arranging different sounds and effects. With Ableton’s versatile tools and features, you can easily design unique and personalized kick drum samples that suit your music production needs.
Setting Up The Grid
To arrange samples in Ableton, you need to set up your grid first. This is important because it will determine the placement of your samples. To do this, click on the “Grid” button located on the top of your session view. From there, you can choose the size of the grid squares.
Placing Samples On The Grid
Once you have your grid set up, you can start placing your samples. To do this, simply click and drag the sample from your browser into the session view. You can then move it around to the desired placement on the grid.
Compressing And Equalizing The Samples
After placing your samples, it’s important to compress and equalize them to ensure they sit well in your mix. To do this, select the sample and navigate to the “Audio Effects” category in the browser. From there, choose a compressor and an equalizer to apply to your sample. Make adjustments to the settings to achieve the desired sound. By following these steps, you can arrange your samples in Ableton to create your own custom kick drum. Remember to experiment with different samples and settings to find the perfect sound for your mix.
Designing Your Own Kick Drum
Learn how to create unique kick drum samples in Ableton by designing your own. With a few simple steps, you can customize your sound and add a personal touch to your music production.
Designing Your Own Kick Drum A kick drum is the foundation of a song’s rhythm. Making your personalized kick drum can help you stand out from the crowd. Ableton Live makes it easy to craft your kick drum from scratch. In this section, we’ll show you how to create your kick drum rack using Ableton’s Operator and then manipulate it as per your requirement. Creating A Kick Drum Rack The first step to designing your kick drum is to open Ableton and create a new MIDI track. Select instruments and choose the “Drum Rack” option. Once you have your Drum Rack, you can add a variety of sounds and samples, including your kick drum. To create a Kick Drum Rack, click on the “Drum Rack” instrument and drag it onto your MIDI track. Now, click on the “Simpler” instrument. Drag and drop your kick drum sample into the “Simpler” instrument and adjust the settings based on your preference. Your kick drum rack is now created, and you’re all set to design your customized kick drum sound. Using Ableton’s Operator To Synthesize A Kick Drum Ableton’s Operator is a powerful synthesis tool that enables you to create an array of sounds, including your personalized kick drum. To synthesize a kick drum in Operator, click on the “Operator” instrument and select “Init Preset.” Now, adjust the settings such as the Decay, Sustain, and Release of the oscillator as per your requirement. The lower the pitch, the fatter and less sharp your kick will sound. Experiment with the settings until you find the perfect balance between punch and boom. You can also layer your synthesized kick drum with your sample, use Ableton’s built-in effects, like EQ and distortion, to add more personality to your sound. Manipulating The Synthesized Kick Drum Once you’ve created your Kick Drum Rack, you can manipulate it in several ways to create your unique kick drum sound. You can adjust the volume, tuning, and effects to your preference. You can add an extra layer to the synthesized drum, distort it, or use filter effects to add some texture. Ableton’s Drum Rack’s unique features also include the ability to switch between the drum samples quickly, allowing you to experiment until you find the ideal sound. Once you’ve created a sound you love, you can save it as a preset for future projects. Conclusion Creating your customized kick drum can seem challenging initially, but with Ableton’s tools, it’s a breeze. Start by designing your Kick Drum Rack, experiment with Ableton’s Operator to synthesize a kick drum to your likings, and finish by manipulating and layering to create your ideal sound. Your personalized kick drum will be unique, and you’ll stand out from the crowd.
Fine-tuning Your Kick Drum
If you have listened to some of the greatest electronic tracks, you’ll have noticed that the Kick Drum is the centerpiece of dance music. Making a perfect Kick Drum that can perfectly blend in with your mix is a crucial part of music production. It is only with a well-crafted Kick Drum that you can make a track that can turn heads and get people dancing. And if you’re using Ableton, it’s relatively easy to design your Kick Drum. But how about fine-tuning it?
Adding Effects Like Reverb And Delay
One of the most effective ways to fine-tune your Kick Drum is by adding effects like Reverb and Delay that can make your Kick Drum sound more powerful and punchier. By adding these effects, you can make your Kick Drum more lively and add some dimension to it. To add Reverb or Delay, you can select your Kick Drum clip and add an Audio Effect Rack to it. In the rack, you can insert the Reverb or Delay effect, and adjust the parameters and settings to your desired level.
Adjusting The Frequency And Amplitude Envelopes Of The Kick Drum
The Frequency and Amplitude envelopes play a significant role in fine-tuning your Kick Drum. By tweaking the Amplitude envelope, you can control the volume and make sure it sits perfectly in the mix, without overpowering other elements. And by adjusting the Frequency envelope, you can control the tonal character of the Kick Drum, making it sound more prominent or subtle. To adjust the envelopes, select your Kick Drum clip and open the Envelope box. From the box, you can drag the line up or down to make the necessary adjustments.
Layering Your Kick Drum With Other Sounds
Another great way to fine-tune your Kick Drum is by layering it with other sounds, such as percussion or different kick samples. By doing this, you can add a unique sonic character to your Kick Drum, making it stand out in the mix. To layer your Kick Drum with other sounds, select your Kick Drum clip, and drag and drop the new sample into the audio track. From there, you can adjust the volume, EQ, and other parameters to your liking.
Fine-tuning your Kick Drum is an essential aspect of music production. Adding effects like Reverb and Delay, adjusting the Frequency and Amplitude envelopes, and layering the Kick Drum with other sounds can help you achieve the desired sound that will make your mix stand out. Experiment with these techniques and create your custom Kick Drum that will make people want to dance.
Experimenting With Different Styles Of Kick Drums
Discovering your own kick drum sample in Ableton can be a creative journey that involves experimenting with different styles of kick drums. By playing around with different sounds and effects, you can design a kick drum that suits your unique style and gives your track the perfect beat it needs.
Kick drums are the backbone of electronic music, and Ableton Live offers a plethora of tools to create your own custom kick drums. Experimenting with different styles of kick drums is an excellent way to develop your unique sound. In this post, we’ll discuss the characteristics of different kick drum styles and how to create kick drums for different genres of music.
Breaking Down The Characteristics Of Different Kick Drum Styles
Before we dive into creating kick drums for different genres, it’s crucial to understand the characteristics of different kick drum styles. Here are some of the most common styles:
Kick Drum Style
Characteristics
808
Subdued bass, punchy attack, and a short decay
Hardstyle
High-pitched, punchy attack, with a long tail and distortion
Techno
Short, punchy attack with a mid-range frequency and a moderate decay
Each style has unique characteristics, and by understanding them, you can create original kick drums tailored to your music.
Creating Kick Drums For Different Genres Of Music
Now that you understand the various kick drum styles let’s discuss how to create kick drums for different genres of music. Keep in mind that these are just general guidelines, and feel free to experiment and create your unique sound. House: For house music, you’ll want a four on the floor kick drum pattern. Choose a low pitch and a moderate decay, and add some reverb for a sense of space. Dubstep: Dubstep kick drums usually have a punchy attack with a long tail. Add some distortion or saturation to make it sound more aggressive. Future Bass: Future bass kick drums are usually softer and more melodic. Use a short decay, a moderate attack, and some compression to make it sound punchier. Hip Hop: Hip hop kick drums are usually punchy and hard-hitting. Choose a short decay, a moderate pitch, and add some saturation for warmth. In conclusion, creating kick drums in Ableton Live is an excellent way to develop your unique sound. Experiment with various styles and tailor them to your music genre. With these tips, you’ll be on your way to creating custom kick drums that set your tracks apart.
Frequently Asked Questions For How To Make Samples In Ableton Design Your Own Kick Drum
How To Design A Kick Drum?
To design a kick drum, you need to consider the size, material, and tuning. The size depends on the style of music you want to play, the material on the type of sound you want to achieve, and the tuning on the pitch and resonance.
Experimentation and practice can help you find the perfect design for your kick drum.
How Do You Synthesize A Kick Drum?
To synthesize a kick drum, use a software or hardware drum synthesizer. Start by selecting the appropriate waveform and adjusting the pitch. Add a soft transient for a softer kick or a sharp transient for a punchier kick. Enhance the tone with filters, equalizers, and compression.
Adjust the decay, sustain, and release to shape the sound.
How Do You Sample A Kick Drum?
To sample a kick drum, you need to record the sound of the drum using a microphone or software. Next, you can use audio editing software to manipulate and shape the sound to create a sample. This involves adjusting the volume, EQ, and adding effects as desired.
Ensure the final sample is crisp, clear, and fits within the mix.
How Do I Add A Drum Sample In Ableton?
To add a drum sample in Ableton, go to the browser tab, find the folder where your drum sample is stored, drag and drop it onto an audio track in Ableton. Alternatively, use the “Add Folder” option in the browser tab to import the folder containing your drum sample.
Conclusion
Creating your own kick drum in Ableton Live is a simple yet effective way of making your tracks sound unique. Remember that with these steps, you can design your own custom kick drum sound that will perfectly fit your production.
Spend time experimenting with different samples, processing techniques, and plug-ins to achieve the desired output. Above all, continue exploring and experimenting with various sound design elements to expand your creativity and enhance your productions. Happy producing!
To use Melodyne for pitch correction like a pro, you need to understand how to manipulate pitch and timing. We will guide you through using Melodyne effectively for pitch correction.
Whether you’re a singer, producer, or engineer, you can take advantage of Melodyne’s advanced pitch correction tools to create a polished and professional sound. We’ll explain the basics of pitch manipulation, as well as some advanced techniques that will help you achieve a high-quality result.
At the end of this article, you’ll know everything you need to use Melodyne for pitch correction like a pro.
Credit: m.youtube.com
Getting Started With Melodyne
Discover effective techniques on how to use Melodyne for pitch correction like a pro with our comprehensive guide. Learn how to correct and enhance vocals, instruments, and more to improve the overall quality of your music production.
Melodyne is a powerful software designed to help music producers and audio engineers polish their musical creations to perfection. If you’re new to Melodyne, getting started may seem daunting at first, but worry not, because we’ve got you covered! In this post, we’ll walk you through the essential steps of installing, setting up, and understanding the Melodyne interface to ensure that you’re all set to use Melodyne for pitch correction like a pro.
Installation Of Melodyne
The first step to using Melodyne is to install it on your computer. The installation process is straightforward and can be completed in just a few simple steps:
Download the latest version of Melodyne from the Celemony website.
Run the installer and follow the on-screen instructions.
Once the installation is complete, open your DAW and create a new track.
Insert Melodyne as a plugin on the new track.
Now that you’ve installed Melodyne, it’s time to set it up for use.
Setting Up Melodyne For Use
Before you start using Melodyne for pitch correction, you need to ensure that it is properly set up. Here are four essential settings to keep in mind:
Pitch Grid: This setting determines the smallest pitch variation that Melodyne can detect and correct. Set it to a suitable value based on the type of music you’re working on.
Analysis: This setting determines how Melodyne analyzes the audio. Choose the appropriate setting based on the type of audio you’re working on.
Formants: This setting determines whether Melodyne should preserve or correct the formants in the audio. Choose the appropriate setting based on the type of music you’re working on.
Tracking: This setting determines how Melodyne tracks changes to the pitch and timing of the audio. Choose the appropriate setting based on the type of music you’re working on.
Now that you’ve set up Melodyne, it’s time to dive into the interface and start working on your pitch correction project.
Understanding The Melodyne Interface
The Melodyne interface consists of several sections, each designed to help you achieve your pitch correction goals:
Tools: These are the various tools you use to make pitch and timing adjustments to your audio.
Note editing: This section displays the selected note and allows you to make fine adjustments to its pitch and timing.
Blobs: This section displays the pitch and timing of each note in your audio.
Formants: This section displays the formants in your audio.
Spectrum: This section displays the frequency spectrum of your audio.
Timing: This section displays the timing and rhythm of your audio.
Understanding and using the various sections of the Melodyne interface is crucial to achieving your pitch correction goals. In conclusion, getting started with Melodyne is essential to using it effectively for pitch correction. Following the steps outlined in this post will set you on the right path to becoming a Melodyne pro.
Basic Pitch Correction Techniques With Melodyne
Discover the best tips and tricks for basic pitch correction techniques with Melodyne. Learn how to use this powerful tool to produce professional-level pitch correction on any track like a pro.
Basic Pitch Correction Techniques with Melodyne Melodyne has become the go-to pitch correction tool for professional audio engineers and music producers alike. Its advanced algorithms allow users to correct even the slightest pitch imperfections in a recording, making it sound polished and professional. In this post, we will be discussing the basic pitch correction techniques that you can perform using Melodyne. From importing audio into Melodyne to identifying pitch issues in audio tracks, we have got you covered. So, without further ado, let’s dive in. Importing audio into Melodyne The first step to using Melodyne for pitch correction is to import the audio file you want to work with into the software. This can be done by simply dragging and dropping the file onto the Melodyne interface or by using the File menu and selecting ‘Open File’. Once the file is loaded, Melodyne will analyze the pitch and timing information of the audio. Identifying pitch issues in audio tracks After loading the audio file into Melodyne, the next step is to identify any pitch issues in the performance. This can be done by using Melodyne’s intuitive interface, which displays the pitch and timing information of the audio in a graphical format. Pitch issues can be easily spotted and corrected using Melodyne’s powerful set of tools. Correcting pitch in audio with Melodyne tools Once pitch issues have been identified, the next step is to correct them using Melodyne’s set of tools. The most common tool used for pitch correction is the Pitch tool, which allows users to adjust the pitch of individual notes within the audio. Other useful tools include the Timing tool, which can be used to fix timing issues, and the Melodyne’s powerful Formant tool, which can be used to adjust the timbre of a vocalist’s tone. Conclusion Melodyne is an incredibly powerful tool for pitch correction and a must-have for anyone working in the field of audio engineering and music production. With its intuitive interface and powerful set of tools, users can easily correct pitch and timing issues in recordings. So, if you want to take your recordings to the next level, be sure to give Melodyne a try.
https://www.youtube.com/watch?v=eynDPoci9EE
Advanced Pitch Correction Techniques With Melodyne
Master advanced pitch correction techniques and take your music production to the next level with Melodyne. Learn how to use this powerful tool to correct pitch like a pro and create professional-quality tracks that stand out.
Advanced pitch correction techniques with Melodyne can help you achieve professional-sounding tracks that are pitch-perfect. Not only can you correct pitch issues with precision, but you can also do it in a timely and efficient manner using Melodyne’s many tools. In this article, we’ll dive into some of the advanced pitch correction techniques using Melodyne, including working with complex pitch issues in audio, using Melodyne’s macros to speed up workflow, and working with multiple tracks in Melodyne.
Working With Complex Pitch Issues In Audio
Melodyne can easily correct simple pitch issues, but sometimes you need a little more precision when working with complex pitch issues. One of Melodyne’s most useful features is that it allows you to see the pitches in your audio track and manipulate them as needed. With Melodyne, you can adjust the pitch curve to sharpen or flatten individual notes to ensure that they are all in tune. Additionally, you can use Melodyne’s formant tool to adjust the sound of the vocals to fit with the rest of your track.
Using Melodyne’s Macros To Speed Up Workflow
Melodyne’s macros are a set of pre-defined actions that help automate the pitch correction process. These macros are designed to speed up your workflow and save you time when working on your tracks. One example of a macro is the “correct pitch drift” macro. This macro can instantly correct long pitch drifts in an audio track, saving the user valuable time. Another macro is the “align pitch centers” macro, which helps to correct tuning discrepancies across multiple tracks. By using Melodyne’s macros, you can achieve polished-sounding tracks in a fraction of the time it would take to do manually.
Working With Multiple Tracks In Melodyne, Ensuring Each
Melodyne also allows you to work with multiple tracks simultaneously, enabling you to concentrate on creating the perfect harmonies. By using Melodyne’s multitrack editor, you have the ability to view and work with several tracks at once, including harmonies and backing vocals. Additionally, Melodyne’s note assignment mode allows you to assign individual notes to specific tracks, making it easier to work with complex arrangements. You can use Melodyne’s multitrack editor to edit pitch, timing, and even formant to ensure that every track is perfectly tuned and in harmony with the rest of the mix. In conclusion, Melodyne offers a comprehensive set of advanced pitch correction techniques that can help you take your tracks to the next level. From working with complex pitch issues to using Melodyne’s macros and multitrack editor, Melodyne truly is a dream come true for producers and musicians alike. By incorporating Melodyne into your workflow, you can achieve professional-sounding tracks with ease, precision, and speed.
Using Melodyne For Creative Purposes
Melodyne is commonly known as a pitch correction tool, but it can be used for far more than just fixing vocal performances. With its advanced capabilities, Melodyne can be used for creative purposes too. In this article we will explore how to use Melodyne for pitch shifting, vocal effects creation and sound design.
Using Melodyne’s Pitch Shifting Tools To Create Harmonies
If you’re looking to add harmonies to an existing vocal track, Melodyne can be an excellent tool for creating them. You can extract the melody from the original vocal recording and use it to create additional harmonies. Melodyne’s pitch shifting tools allow you to easily change the pitch of individual notes without affecting the timing, enabling you to create complex harmonies.
Creating Unique Vocal Effects With Melodyne
Melodyne can be also used to create unique vocal effects that are impossible to achieve with a traditional signal chain. You can use Melodyne to manipulate the pitch and timing of individual notes, create stutter effects, and even completely change the melody of a vocal line.
Using Melodyne For Sound Design
Melodyne’s advanced editing capabilities make it a powerful tool for sound design. Whether you’re working on a film score or a dance track, Melodyne can be used to manipulate and transform sounds in a myriad of ways. You can use Melodyne to change the pitch and timbre of a sound, chop up and rearrange audio, and even create new instruments from existing samples.
Overall, Melodyne is a versatile tool that can be used for far more than just pitch correction. Whether you’re looking to add harmonies to a vocal recording, create unique vocal effects, or design new sounds, Melodyne offers a wide range of possibilities for creative exploration.
Tips And Tricks For Using Melodyne Like A Pro
Master the art of pitch correction with Melodyne by learning expert tips and tricks. Enhance your vocal recordings like a pro with this powerful tool.
Melodyne is one of the most powerful pitch correction tools available on the market. It’s used by everyone from top-level audio engineers to bedroom pop producers. However, mastering this software can be an overwhelming task, especially if you’re new to working with it. With that in mind, let’s take a look at some tips and tricks to help you get the most out of Melodyne.
Using Melodyne With Other Plugins For Better Results
Melodyne is a versatile tool, and it can be used in conjunction with other plugins to achieve better results. One plugin that works really well with Melodyne is the DeEsser. If you have problems with sibilance in your vocals, adding a DeEsser plugin before Melodyne can help. Another plugin that works great with Melodyne is the Auto-Tune plugin. By using it before or after Melodyne, you can achieve a more polished sound.
Saving Time With Keyboard Shortcuts
Melodyne has several keyboard shortcuts that can help you to work more efficiently. The ‘F’ key, for example, opens up the floating window, allowing you to easily navigate between tracks. The ‘T’ key toggles between the pitch and timing view, and the ‘R’ key toggles between the pitch and formant tools. Other useful keyboard shortcuts include ‘Ctrl + Click’, which creates a new correction object, ‘Shift + Click’, which allows you to select multiple notes, and ‘Ctrl + Alt + Up/Down Arrow’, which allows you to change the pitch of a note by octaves.
Organizing And Optimizing Your Melodyne Workflow
Lastly, it’s important to optimize your Melodyne workflow by organizing your tracks. One way to do this is by color-coding your tracks to make it easier to identify them. It’s also a good idea to group similar tracks together, such as backing vocals or drums. In addition, Melodyne allows you to create presets that can save you time when working on similar tracks. Simply apply the preset to the track, and the settings will be automatically adjusted. In conclusion, if you’re looking to take your pitch correction skills to the next level, mastering Melodyne is a must. By using it in conjunction with other plugins, using keyboard shortcuts, and organizing your tracks, you’ll be able to use Melodyne like a pro in no time.
Troubleshooting Common Issues With Melodyne
Learn how to troubleshoot common issues with Melodyne and improve your pitch correction skills like a pro. Master the art of melody tuning with ease and overcome any obstacles you may encounter along the way.
As a music producer or audio engineer, you must have had some experience using pitch correction software, and Melodyne is undoubtedly one of the bests in the game. However, like any other software, Melodyne has its fair share of glitches and user-errors issues, which can be frustrating. In this blog post, we will delve into the common issues you may encounter while using Melodyne and discuss tips on how to troubleshoot them effectively.
Fixing Issues With Plugin Compatibility In Melodyne
One common problem with using Melodyne is plugin compatibility issues. This is because Melodyne comes as a VST, AU, or AAX plugin, so its compatibility with other plugins depends on the DAW you are using. The problem could be that Melodyne is not loading correctly, or it is not showing up on your plugin list. Here are some tips on how you can fix this issue. – First, make sure that you have installed the correct version of Melodyne that is compatible with your DAW. – Try rescanning your plugin folder in your DAW to see if Melodyne shows up. – If Melodyne pops up, but it doesn’t load correctly, try disabling other plugins to see if it will load. If it does, it means that the incompatible plugin is causing the issue, and you may have to uninstall it or find a compatible version.
Dealing With Glitches And Audio Artifacts In Melodyne
Glitches and audio artifacts are another common issue with Melodyne, and they can be a bit challenging to deal with. Audio artifacts appear when Melodyne’s algorithms detect notes where they don’t exist, causing the pitch to modulate unnaturally. Here’s what you can do to deal with glitches and audio artifacts. – First, try re-analyzing the audio with Melodyne to see if it eliminates any glitches or artifacts. – You can also try adjusting the detection settings in Melodyne to get a better analysis.
Solving Common User Error Problems
Finally, as a user, you may run into some problems while using Melodyne, causing the software to malfunction. These are some steps to take if you face common user error problems. – Make sure you follow the manufacturer’s instructions on how to install and use Melodyne. – If you are pasting audio into Melodyne, make sure that it lines up correctly with the grid. – Try to avoid any edits that might cause detection problems, such as drastic time-stretching or moving notes too far away from their original position. In conclusion, troubleshooting Melodyne issues can be daunting, especially when you have a tight deadline. However, with the tips we’ve provided in this article, you should be able to handle any issues that come your way and use Melodyne like a pro.
Credit: mixandmastermysong.com
Frequently Asked Questions Of Learn How To Use Melodyne For Pitch Correction Like A Pro
Does Melodyne Do Pitch Correction?
Yes, Melodyne has pitch correction capabilities. It allows users to adjust and correct pitch in audio recordings with precision.
Why Is Melodyne Better Than Auto-tune?
Melodyne is better than Auto-Tune because it allows pitch correction with greater control and flexibility. It can work with polyphonic audio and offer more natural-sounding results. Unlike Auto-Tune, it offers features for timing and note length adjustment, double-tracking, and more advanced editing.
Is Pitch Correction Better Than Auto-tune?
Pitch correction and Auto-Tune are two different tools for manipulating pitch in music. Pitch correction is a generic term for correcting or adjusting pitch, while Auto-Tune is a specific brand of pitch correction software. Both have their uses depending on the situation, but it ultimately depends on personal preference and the type of music being produced.
Which Melodyne Algorithm Is Best?
There is no single best Melodyne algorithm, as each algorithm has different strengths and is suitable for different types of audio recordings. It’s important to choose the right algorithm based on the specific needs of your project.
Conclusion
Melodyne is a powerful tool for pitch correction in today’s music industry. If you want to take your vocal editing skills to the next level, learn how to use it like a pro. With its advanced algorithms and intuitive interface, you can manipulate individual notes like never before.
Whether you’re recording a full album or just a single track, Melodyne can help you achieve the perfect pitch. So what are you waiting for? Start exploring this amazing software today!
Field recordings offer creative ways for producers to add unique sounds to their music productions, such as sampling natural environments and human interactions. In today’s technology-driven world, producers are increasingly incorporating real-world sounds into their tracks to make them more immersive and original.
Incorporating field recordings into music production adds an extra dimension to the finished product. With the right recording equipment, producers can capture a range of sounds, including the hustle and bustle of a busy street, the sound of waves crashing on the beach, or the chirping of birds in a forest.
As well as being a cost-saving technique, using field recordings can also add a personal touch to one’s music production by allowing producers to incorporate their unique experiences and environments into their tracks. We will explore some creative ways to use field recordings in your productions, such as creating unique percussion sounds, adding textures, and building ambience.
Credit: www.masteringthemix.com
Finding Sounds In Unusual Places
Field recordings can give your productions a unique flair. From the sound of a bustling city to the rustling of leaves in the countryside, there are sounds to be found in unconventional places that can bring your project to life.
Get creative with field recordings!
Field recordings are a wonderful way to add uniqueness and creativity to your productions. With advancements in technology, it is now easier than ever to capture sounds from any environment and incorporate them into your work. One of the best ways to gather interesting sounds is to find them in unusual places.
Recording In Nature
Nature provides an incredible range of sounds that can be used in music and other productions. Recording in nature allows you to capture sounds that cannot be found in any other setting. A few examples of sounds you can find in nature include chirping birds, running waterfalls, rustling leaves, and cracking tree branches. When recording in nature, be sure to select the right time of day for the type of sounds you want to capture. For example, morning recordings are ideal for capturing bird sounds, while nighttime recordings are perfect for capturing the sounds of nocturnal animals.
Urban Exploration
Urban environments provide endless opportunities for unique sound recordings. Everything from the sounds of traffic to the sounds of people talking can be used in your productions. In addition to these common sounds, urban exploration can also lead you to discover sounds that are more obscure, such as the creaking of old buildings, the hum of electrical transformers, or the sounds of construction sites. However, when recording in urban environments, be sure to follow all safety precautions. Avoid recording in dangerous or restricted areas, and always be aware of your surroundings to ensure your own safety.
Conclusion
By finding sounds in unusual places, you can add a unique touch to your productions that cannot be found anywhere else. Whether you are recording in nature or exploring urban environments, be creative and have fun capturing interesting sounds to enhance your work.
Manipulating Field Recordings
Field recordings can add a unique and authentic touch to your productions. By manipulating these sounds, you can create new and creative audio content that provides a sense of place and atmosphere to your audience. Consider using filters, effects, and layering techniques to enhance and transform your field recordings for a truly one-of-a-kind listening experience.
Field recordings are a great way to add unique and interesting sounds to your productions. But what happens when you want to take those recordings and manipulate them to create something entirely new? That’s where these creative techniques come in handy.
Pitch Shifting And Time Stretching
Pitch shifting and time stretching are two techniques that can drastically alter the sound of your field recordings. Pitch shifting allows you to raise or lower the pitch of a recording without affecting its length, while time stretching lets you alter the length of a recording without changing its pitch. One creative way to use pitch shifting is to create a unique vocal effect. Record a spoken word or phrase, pitch shift it down, and then layer the original recording on top. This will create a ghostly, otherworldly effect that can add depth and interest to your productions. Time stretching can also be used to create interesting effects. For example, try stretching out the sound of a bird chirping and layering it with a reversed version of the same recording. This can create a dreamy, ethereal sound that’s perfect for ambient music.
Reverse Playback
Reversing a field recording can completely transform the sound. For example, recording the sound of a car driving by and then reversing it can create an interesting whooshing effect that’s perfect for electronic music. Another creative way to use reverse playback is to layer two recordings together. Reverse one of the recordings and then play them together simultaneously. This can create a unique, almost alien sound that’s sure to grab your listener’s attention.
Layering And Looping
Layering and looping are two techniques that can be used to create intricate, complex soundscapes. Layering involves taking multiple recordings and playing them together, while looping involves taking a small section of a recording and playing it repeatedly. One creative way to use layering is to take multiple recordings of the same sound and pan them in different directions. For example, recording the sound of waves crashing and then playing one recording in the left speaker and another in the right can create a realistic, immersive sound. Looping can also be used to create interesting effects. For example, taking a short recording of a water droplet and looping it can create a rhythmic, percussive sound that’s perfect for electronic music. By experimenting with these creative techniques, you can take your field recordings to the next level and create unique, interesting sounds that will set your productions apart from the rest.
Incorporating Field Recordings Into Musical Compositions
Field recordings can add a unique dimension to your musical compositions, allowing you to incorporate ambient sounds into your productions. Utilizing field recordings creatively can help bring an organic and authentic feel to your music, resulting in a more dynamic and engaging listening experience.
Creating Ambient Soundscapes
Creating ambient soundscapes through the use of field recordings is an excellent way to add depth and richness to your musical compositions. By layering field recordings such as wind, rain, or even traffic noise, you can create a unique sonic environment that blends seamlessly with your music. To accomplish this, experiment with various combinations of field recordings and different instrumentation. Focus on the way the sounds interact with each other to create a cohesive and intriguing soundscape.
Rhythmic Elements And Percussion
Field recordings can also be used to create rhythmic elements and percussion in your musical compositions. Recordings of real-world sounds such as footsteps, clapping, or even kitchen utensils being used can be manipulated and layered to create unique and compelling percussion sounds. These sounds can add a human touch to your music and provide a unique sonic signature to your compositions. Experiment with different combinations of recorded sounds and synthesized percussion to create a varied and textured rhythmic foundation for your music.
Wrapping Up
Incorporating field recordings into your musical compositions can add depth and character to your music and unlock a whole new world of sonic possibilities. Experiment with the creative use of ambient soundscapes, rhythmic elements, and percussion, and see where your imagination takes you. The possibilities are endless, and the results can be truly unique and inspiring.
Using Field Recordings In Film And Video Game Sound Design
Field recordings present an exciting opportunity to bring your film or video game to life. By using sounds from the real world, you can add a level of authenticity and depth that can’t be achieved through synthesized sound effects alone.
With a bit of creativity and ingenuity, you can turn almost any sound into a powerful asset for your productions.
Designing sound for films or video games that captivates and transports the audience to different environments is crucial for an immersive experience. The use of field recordings is an excellent way to accomplish this feat. Whether you are looking to create realistic environments, quirky sounds, or unique sound effects, utilizing field recordings can elevate the quality of your production immensely.
Creating Realistic Environments
Field recordings can be used to create immersive, realistic environments for films or video games. By capturing sounds from different locations, you can create a soundscape that transports the listener to that particular setting. For example, if your film or game is set in a park, you could use recordings of birds chirping, leaves rustling, and children playing to create an experience that truly feels like being in a park.
Designing Unique Sound Effects
Field recordings can also be used to create unique sound effects that can add depth and texture to your production. For instance, if you are working on a sci-fi movie, you could use recordings of machinery or mechanical sounds to create a futuristic vibe. You could even record unusual sounds and manipulate them with software to create entirely new, one-of-a-kind sound effects. When it comes to sound production, the right tools are crucial. Utilizing the power of field recordings with their unique sound qualities and the natural environment can add a new level of authenticity to your projects. Not only can it save time and money, but it can also bring life to your productions and leave a lasting impression on your audience.
Legal Considerations Of Using Field Recordings
Legal considerations are crucial when using field recordings in your productions. Obtaining proper permission for any copyrighted sounds used and ensuring audio quality meets industry standards are necessary steps for safe and ethical use of field recordings.
Field recordings are an excellent way to add authenticity to your production, but it’s imperative to understand the legal considerations before using them. If appropriate permissions and licenses are not obtained, it could result in legal troubles, fines, and penalties that could affect your reputation and your finances. Here are factors to take into account when using field recordings in your production.
Understanding Copyright And Licensing
Copyright is a legal right granted to the creator of the work to protect against infringement of the intellectual property. Field recordings are considered as intellectual property; therefore, the creator holds the exclusive right to use, distribute, and reproduce the work. Licensing is used when the rights holder gives permission for others to use their work. However, there are different types of licenses, and it’s essential to choose the right license for your project.
How To Obtain Proper Permissions
To obtain permissions, you need to identify the owner or the copyright holder of the field record of interest. You can reach out to the creator directly by email, phone or mail. If you cannot locate the owner, it’s best to use a licensing agency to acquire the necessary rights. There are many licensing agencies that specialize in field recordings, and they will obtain the permissions you need for a fee. It’s critical to keep verification of the rights to the field recording.
Conclusion
Before using field recordings in your production, be sure to obtain the necessary licenses and permissions to protect yourself from legal trouble. Adhering to copyright laws and obtaining proper licenses and permissions is vital when using field recordings.
Frequently Asked Questions Of Creative Ways To Use Field Recordings In Your Productions
What Can You Do With A Field Recorder?
A field recorder can record audio when out in the field. It can capture high-quality audio for films, music, podcasts, and interviews. Additionally, it can be used to record nature sounds or ambient noise for sound design. It also has features like adjusting microphone levels and filtering background noise to create clear audio recordings.
What Is A Field Audio Recorder?
A field audio recorder is a portable device used to capture high-quality sound outside a studio or controlled environment. It is commonly used in video production, journalism, and music recording. Field audio recorders are designed to be rugged and easy to use, with features like built-in microphones, XLR inputs, and digital storage.
They allow users to capture clear, professional-quality audio in a variety of challenging environments.
What Is A Field Recording Genre?
Field recording is a genre of sound production that involves capturing real-world audio with recorders to create albums or sound designs.
What Does It Mean To Say Field Recordings Capture Ambient Sounds?
Field recordings capture environmental sounds or ambient sounds, such as the natural noises of a specific location or event. The recordings can be used to preserve and study soundscapes, to create music and sound design, or to document cultural practices and traditions.
Capturing these sounds allows for an immersive experience that transports the listener to another place or time.
Conclusion
Field recordings offer endless possibilities for producers to create unique and captivating sounds in their productions. From nature sounds to human interactions, the possibilities are endless. By experimenting with layering, manipulating, and combining different field recordings, producers can create unique soundscapes that set their productions apart.
These creative applications of field recordings not only add depth to productions but also allow for a more immersive listening experience. So, go ahead and explore the world of field recordings and create something truly extraordinary.
Musical modes in EDM evoke various emotions based on their unique characteristics. We will explore the different modes used in electronic dance music and how they affect the listener’s mood.
Understanding the relationship between musical modes and their emotional impact can offer valuable insights to musicians and producers, helping them to create tracks that resonate with their listeners on a deep level. Whether you are a musician looking to expand your knowledge of music theory or a fan seeking a better understanding of what makes EDM so emotionally powerful, this article will provide valuable insights and information.
So, let’s get started!
What Are Musical Modes?
Musical modes are scales that create a distinctive mood or emotional character throughout music. EDM often employs modes like Dorian or Mixolydian to create an emotional or psychological impact on the listener. The modes help producers and musicians develop unique sounds with different emotional characteristics.
Musical modes are a set of notes or scales arranged in a particular sequence to create different emotional effects or feelings. These modes have been used for centuries in various musical genres, including Electronic Dance Music (EDM). If you are an aspiring producer or DJ who wants to create music that connects with your audience emotionally, then understanding the different musical modes is crucial. Below, we’ll look at the definition and explanation of musical modes as well as the types of modes that can inspire your next EDM hit.
Definition And Explanation
Musical modes can be defined as a series of notes or pitches arranged in a particular sequence, starting from a different note than the typical major and minor scales. Each mode has its unique pattern of half and whole steps that give it its characteristic sound and emotional effect. These modes originated in medieval music and were widely used in the classical and baroque era. However, they have now found their place in contemporary music, including EDM.
Types Of Modes
There are seven main modes, each with their unique emotional characteristics that make them suitable for specific genres. Here are the seven modes you should know when producing or mixing EDM:
Ionian mode – This is the standard major scale that evokes a happy and upbeat feeling.
Dorian mode – This mode creates a laid-back, minor-key feeling that’s perfect for chill or trance music.
Phrygian mode – This mode has a Spanish or Middle Eastern vibe and is suitable for creating a darker or exotic atmosphere in your production.
Lydian mode – This mode creates a dreamy, psychedelic feeling that is perfect for progressive or psychedelic EDM genres.
Mixolydian mode – This mode gives off a bluesy or jazzy vibe and is perfect for creating catchy hooks in your tracks.
Aeolian mode – This is the natural minor scale that creates intense emotional feelings in your music, particularly suitable for deep house or techno music.
Locrian mode – This mode has a tense or unsettling feeling and is suitable for creating dissonant or experimental styles in your music.
In conclusion, understanding the different modes is crucial if you want to create and produce emotionally resonant music that connects with your audience. With this knowledge, you can use the right mode to create the perfect atmosphere for your next EDM hit.
Emotional Characteristics Of Musical Modes
Musical modes have unique emotional characteristics that can greatly affect the audience’s experience when listening to EDM. Each mode represents a different mood, ranging from happy and uplifting to dark and introspective. Understanding the emotions associated with each mode can help EDM producers create more impactful and emotionally resonant music.
Musical modes are a set of notes arranged in a specific sequence that gives a particular mood or emotional feel to a melody. Different modes evoke different emotions, and for EDM, it’s essential to understand how the different modes work to create the desired emotional response. Below are the emotional characteristics of the four most popular modes used in EDM:
Major Modes
Major modes are generally happy, upbeat, and elicit positive emotions when used in melodies. They create a sense of joy, energy, and positivity that can uplift the listener. The most popular of the major modes in EDM is Ionian, which has the classic major sound and is perfect for creating a feel-good vibe on the dance floor.
Minor Modes
Minor modes, on the other hand, are sad, melancholic and evoke emotional responses that are often used in slower and more introspective EDM styles. Aeolian is the most commonly used minor mode in EDM, and it is often used to create a sense of sorrow, longing, and introspection.
Dorian Mode
The Dorian mode is a minor mode that has a classic rock and blues feel to it. It is less sad than the Aeolian mode but still has a touch of melancholy and is perfect for creating a nostalgic atmosphere. The Dorian mode is a popular choice for more relaxed EDM, including chillout and ambient styles.
Mixolydian Mode
This mode is a dominant mode and used in various styles of music. Mixolydian is perfect for creating a sense of tension and release and commonly used in electronic dance music to create a progressive and dynamic atmosphere. It has a bluesy feel to it, and when used in EDM, it brings a sense of excitement and energy to the dance floor. In conclusion, the emotional characteristics of musical modes are essential in creating the desired emotional response in EDM. Understanding which modes create specific moods and emotions can help producers create more deliberate and intentional melodies that will resonate with their audience.
Applying Musical Modes In Edm
Musical modes can evoke powerful emotions in EDM, and can be used to create a unique sound. By understanding the characteristics of each mode, producers can create music that resonates deeply with their audience.
As EDM continues to grow in popularity, producers are always looking for ways to make their music stand out. One way to achieve this is by using musical modes to add unique flavors and emotions to tracks. Musical modes are essentially scales that have distinct emotional characteristics, which can be used to elicit specific moods in the listener. By understanding the different modes and the emotions they evoke, EDM producers can create compositions that are more dynamic and engaging.
Benefits Of Using Musical Modes In Edm
There are several benefits to using musical modes in EDM. One of the main advantages is that it allows producers to create more diverse compositions by layering and combining different modes. This can result in tracks that are more interesting and engaging for listeners. Another advantage is that it can help to convey specific emotions more effectively. By using modes that are associated with certain emotions, producers can create tracks that are more evocative and impactful.
Popular Edm Songs That Use Musical Modes
Many popular EDM songs incorporate musical modes to create unique and memorable tracks. Below are some examples:
Dorian mode: One of the most popular modes in EDM, the Dorian mode is frequently used in melodies and basslines. A great example of this is Deadmau5’s “Strobe.”
Mixolydian mode: This mode is used to create suspenseful, energetic tracks. A classic example of this is Daft Punk’s “One More Time.”
Phrygian mode: Often used in darker, more ominous tracks, the Phrygian mode can add an element of tension to compositions. A good example is Skrillex’s “Scary Monsters and Nice Sprites.”
In conclusion, using musical modes in EDM can be a powerful technique for creating more diverse, emotionally effective tracks. By exploring different modes and experimenting with combinations, producers can develop their signature sound and stand out in the crowded EDM scene.
Understand Edm’s Emotional Language
Musical modes in EDM have unique emotional characteristics that can impact the listener’s mood. Learning to understand these emotional languages can enhance your appreciation for the genre and help you better connect with the music on a deeper level.
The Emotions Most Commonly Portrayed In Edm
EDM, or Electronic Dance Music, is a genre that is highly appreciated for its ability to connect with people’s emotions. Unlike other forms of music, EDM has a unique set of emotions that it portrays, which is why it is so popular among the younger crowd. Some of the emotions most commonly portrayed in EDM include joy, euphoria, ecstasy, and even sadness. While the range of emotions portrayed in EDM may not be as wide as other genres, it is still one of the most powerful forms of music in the world today.
Musical Modes Used To Depict Emotions In Edm
One of the reasons why EDM is so effective in portraying emotions is because of its use of musical modes. A musical mode is a specific type of pitch collection that is used to create a particular sound or feeling. In EDM, different musical modes are used to depict different emotions. For example, the Phrygian or Locrian modes are often used to create a sense of tension or suspense, while the Ionian or Mixolydian modes are used to create a feeling of joy or happiness. Similarly, the Dorian mode is often used to create a sense of melancholy or sadness. In fact, many EDM producers use a combination of different musical modes to create a more complex emotional landscape. For example, a track might start in a minor key to create a sense of melancholy before transitioning to a major key to create a sense of joy. Alternatively, it might use a combination of different modes to create a more complex emotional journey, with each mode representing a different stage in the story. Conclusion Understanding the emotional language of EDM is essential for anyone who wants to appreciate the genre fully. By understanding the musical modes used to create different emotions, you can better appreciate how EDM producers construct their tracks and the emotional impact that each track is trying to convey. Whether you’re a die-hard EDM fan or a newcomer to the genre, taking the time to understand its emotional language is a great way to deepen your appreciation for this powerful form of music.
How To Utilize Musical Modes Effectively In Edm Production
Learn how to effectively use different musical modes to create different emotional characteristics in your EDM productions. By understanding the unique qualities of each mode, you can produce tracks that evoke specific moods and feelings in your listeners. Incorporating modes into your music can add depth and complexity to your compositions, making them more compelling and dynamic.
As an EDM producer, music theory plays a crucial role in creating tracks that resonate with your audience. One aspect of music theory that has a significant impact on the emotional impact of a track is musical modes. By utilizing the different characteristics of each mode, you can create powerful chord progressions that evoke specific emotions. In this section, we’ll explore how to pick the right mode for your track and provide tips for creating interesting chord progressions with musical modes.
Picking The Right Mode For Your Track
When choosing a mode for your track, it’s essential to consider the emotions you want to convey. Each musical mode has its unique emotional characteristics, and by selecting the right one, you can create a powerful piece of music that resonates with your audience. Here are some of the most popular musical modes and their emotions characteristics:
Mode
Emotion Characteristics
Ionian (Major)
Happy, Bright, Cheerful
Aeolian (Minor)
Sad, Dark, Serene
Dorian
Melancholy, Soulful, Jazzy
Phrygian
Mysterious, Exotic, Tense
Lydian
Dreamy, Ethereal, Mystical
Mixolydian
Bluesy, Groovy, Energetic
By selecting the appropriate mode for your track, you can create a powerful emotional response in your listeners.
Tips For Creating Interesting Chord Progressions With Musical Modes
Once you’ve chosen the mode that best suits your track’s desired emotional impact, it’s time to start creating some chord progressions. Here are some tips for creating interesting chord progressions with musical modes:
Start with the root chord and experiment with different chords that contain the same notes as the mode you’re using.
Use inversions to create smoother chord progressions.
Don’t be afraid to use uncommon chords or unexpected chord progressions to create a unique sound.
Experiment with adding or removing notes from the chords to create tension and release within your progressions.
By utilizing these tips, you can create compelling chord progressions that take full advantage of the emotional impact of musical modes in your EDM productions. In conclusion, by understanding and utilizing the emotional characteristics of musical modes, you can create powerful EDM tracks that resonate with your audience. By picking the right mode for your track and using interesting chord progressions, you can take your EDM production to the next level.
Examples Of Successful Edm Tracks That Use Musical Modes
Successful EDM tracks harness the emotional power of musical modes to create compelling sonic landscapes. These musical modes can evince a range of emotions, from joy and happiness to melancholy and introspection, and have been used to great effect in modern electronic music.
Here are some examples of popular tracks that have effectively employed musical modes to create powerful emotional resonances with listeners.
Detailed Analysis Of Each Track’s Composition And Use Of Music Modes
When it comes to successful EDM tracks, musical modes play a critical role in setting the mood and creating an emotional response in the listener. Here are some examples of how top EDM tracks use musical modes to achieve their desired emotional effects:
1. “Strobe” by Deadmau5
“Strobe” is a classic example of an EDM track that uses the Mixolydian mode to create a feeling of euphoria and optimism. This mode is characterized by its dominant seventh chord, which gives it a bluesy, rock and roll feel while still retaining a sense of brightness and energy. Deadmau5 uses this mode to build a sense of anticipation throughout the track, gradually adding new layers of instrumentation and driving the energy higher and higher until the final climax. Additionally, the use of Mixolydian mode makes this track highly danceable, with a driving beat that’s impossible to resist.
2. “Silent Shout” by The Knife
In contrast to the bright, happy feel of “Strobe,” “Silent Shout” by The Knife uses the Phrygian mode to create a dark, mysterious atmosphere. This mode is characterized by its minor third interval, which gives it a distinctly exotic and otherworldly feel. The Knife uses this mode to create a feeling of tension and unease throughout the track, using eerie synths and distorted beats to keep the listener on edge. The use of Phrygian mode also makes this track highly distinctive, with a sound that’s unlike anything else in the EDM world.
3. “Bad Guy” by Billie Eilish (with Justin Bieber)
Although it’s not a traditional EDM track, “Bad Guy” by Billie Eilish (with Justin Bieber) is a great example of how different modes can be combined to create a complex and emotionally engaging sound. In this case, the track uses both Dorian and Phrygian modes to create a feeling of tension and conflict. The Dorian mode is used in the verses, creating a sense of cool detachment and confidence in Billie Eilish’s vocals. Meanwhile, the Phrygian mode is used in the chorus to create a more emotional, vulnerable feeling in the vocals by Justin Bieber. This combination of modes adds a layer of complexity and richness to the track that keeps the listener engaged from start to finish. In conclusion, by using different musical modes, top EDM artists create compelling and diverse tracks that capture a range of emotions and moods. Whether it’s the euphoria of Mixolydian mode, the darkness of Phrygian mode, or the unique sound of combining multiple modes, it’s clear that musical modes are an essential tool in the EDM composer’s toolkit.
Credit: www.researchgate.net
Frequently Asked Questions For Musical Modes And Their Emotions Characteristics For Edm
What Are The Emotions Of Modes In Music?
Emotions of modes in music refer to the feelings and moods evoked by different musical modes, such as major or minor scales. For example, major scales may elicit emotions of happiness or triumph, while minor scales tend to evoke sadness or melancholy.
Modes can be used to convey a range of emotions in music.
What Is The Emotion Of Dorian Mode?
The Dorian mode evokes an introspective and melancholic emotion, often used in music to portray the feelings of uncertainty, longing, and reflection.
What Are The 7 Feelings Of Music?
The 7 feelings of music are happiness, sadness, anger, fear, love, excitement, and nostalgia. Music has the power to evoke powerful emotions and can affect our mood in various ways. Each person may have different emotional responses to music based on their personal experiences.
What Feeling Does Mixolydian Give?
Mixolydian gives a feeling of blues, country and rock music style. It is often associated with a cheerful, upbeat and playful melody, which is slightly different from the major and minor scales.
Conclusion
Understanding the musical modes and their emotional characteristics provide a valuable tool for electronic dance music producers. By utilizing the right mode for a desired emotion, producers can elevate their music and create an intense impact on their audience. Through experimentation and understanding of the seven modes, producers can unlock the key to their musical success.
Incorporating various modes in EDM tracks adds complexity and interest, and ultimately leads to a more cohesive and emotive musical experience for listeners.
In Studio One 3, the splitter feature enables users to perform parallel compression effortlessly. By splitting the signal into two or more streams, it is easy to apply different processing to each stream and blend them together to achieve the desired effect.
To use the splitter feature for parallel compression, users need to send the audio to different buses and use a compressor on each bus. The compressed signals then get blended together to create a more natural and dynamic sound. With this feature, users can achieve a more transparent and musical parallel compression quickly and easily.
Studio One 3’s splitter feature is a powerful tool for achieving parallel compression. By splitting audio signals into two or more streams, users can apply different processing to each stream and blend them together for a more natural and dynamic sound. We will show you how to use Studio One 3’s splitter feature for parallel compression. We will walk you through the process of sending audio to different buses and using a compressor on each bus. We’ll also discuss how to blend the compressed signals together to achieve a transparent and musical sound. With this guide, you can use Studio One 3’s splitter feature to take your music production to the next level.
Credit: blog.presonus.com
Step-by-step Guide
If you want to add some punch and power to your mix, utilizing the splitter feature in Studio One 3 can be a game changer. In this guide, we’ll take you step-by-step through using the splitter feature for parallel compression.
Setting Up The Tracks
The first step is to set up the tracks you want to use for parallel compression. Let’s say you have a drum track that needs some extra oomph. Duplicate the track by right-clicking on it and selecting ‘Duplicate Track’. You can name the duplicate track something like ‘Drums Comp’.
Adding The Splitter Effect To The Track
Next, add the splitter effect to the new ‘Drums Comp’ track by selecting the track and clicking on Studio One 3’s ‘FX’ button. From there, select ‘Splitter’ from the list of effects. You should see the splitter effect at the top of the screen.
Adding The Compression Effect To The Split Tracks
Now that the splitter effect is in place, add a compressor to each of the split tracks. You can do this by selecting each track and clicking on the ‘FX’ button again and selecting ‘Compressor’.
Adjusting The Compression Settings
After you’ve added the compressor to each of the split tracks, it’s time to adjust the settings. Play back the track and adjust the compression parameters until it sounds the way you want it to. You can adjust the ratio, threshold, attack, release and makeup gain.
Blending The Compressed And Uncompressed Tracks
The key to getting the best sound using parallel compression is to blend the compressed and uncompressed tracks. To do this, go back to your original drum track and reduce its volume, up to 6 dB should be fine. Once you’ve done that, gradually bring up the compressor on the ‘Drums Comp’ track until you reach the desired sound.
There you have it, a step-by-step guide on using the splitter feature in Studio One 3 for parallel compression. Give it a try, and see how much power and punch you can add to your mixes.
Credit: www.soundonsound.com
Frequently Asked Questions For Using Studio One 3 Splitter Feature Parallel Compression
Should You Always Use Parallel Compression?
Parallel compression should not be used in all situations. It depends on the specific music production needs and goals. Parallel compression can enhance the sound and add depth, but it can also cause unwanted artifacts and distortions if not used properly.
Therefore, it’s important to evaluate the situation and decide whether to use parallel compression or not.
What Are The Best Parallel Compression Settings For Vocals?
For parallel compression on vocals, use a compression ratio of 2:1 to 4:1, a fast attack time of 10 ms and a slow release time of 100 to 300 ms. Adjust the threshold so the compression engages evenly across the vocal track.
Blend the compressed track with the dry track to taste.
How Do You Set Up Parallel Compression?
To set up parallel compression, follow these steps: 1. Create a duplicate of the audio track and send one to a compressor (that will affect the compressed track) 2. Apply a high ratio and low threshold on the compressor 3. Adjust the volume of the compressed track to match the level of the original track 4.
Blend both tracks together to get a noticeable yet balanced compression effect
Does Parallel Compression Cause Phasing?
Parallel compression can cause phasing if the phase relationships between the dry and compressed signals are not in sync. To avoid phasing, it’s important to match the phase of the compressed signal to that of the dry signal.
Conclusion
To sum it up, the splitter feature in Studio One 3 is a powerful tool that can be used to create unique and dynamic sounds through parallel compression. By splitting the signal and applying different processing to each part, you can achieve a more balanced and textured sound.
With a little experimentation and practice, you can take your production skills to the next level. So, give it a try and see the difference for yourself!
The difference between FL Studio Mobile and FL Studio is that FL Studio is a full-featured DAW for desktop. FL Studio Mobile is a streamlined version for mobile devices. FL Studio Mobile is a simplified version of the FL Studio desktop software, designed for use on smartphones and tablets.
Also, its user interface suits touch screens. This makes it easy to create music on the go without need for a computer. In contrast, FL Studio desktop is a full-featured digital audio workstation for Windows and Mac, with more advanced features such as VST plugin support, automation, and custom effects chains.
While FL Studio Mobile offers a convenient and portable option for music production, serious producers will likely opt for the additional features and power of the desktop version.
Credit: www.image-line.com
Fl Studio Mobile: Features And Capabilities
Moreover, the mobile app is a popular music production app with powerful features and capabilities, just like Fl Studio. However, the app is specifically designed for on-the-go music making and allows users to create high-quality music using their smartphones or tablets.
Overall, the main difference between Fl Studio Mobile and Fl Studio is their respective platforms – mobile vs desktop.
The phone version: Features and Capabilities Are you considering using the mobile version of FL Studio but wondering what the differences are? In addition, FL Studio is a popular digital audio workstation used in music production. The mobile version, the mobile app, is a streamlined version of the software designed with the mobile user in mind. In this post, we will explore the features and capabilities of the app in terms of interface and navigation, compatibility with mobile devices, and plugins and sound packs. Interface and Navigation FL Studio Mobile has a user-friendly interface that is optimized for mobile devices.
Practical Tips
Furthermore, the interface is intuitive, and users can quickly navigate around the software to access various features. The app’s compact size makes it easy to navigate through menus and toolbars with minimal effort. Additionally, the interface’s touch-screen input allows for a tactile and hassle-free user experience. Compatibility with Mobile Devices The app runs on both Android and iOS devices. You can purchas the app from the app store of your device, and you can start producing music anywhere, anytime.
Additionally, it does not require high-end mobile devices and runs smoothly on most devices, simulating the same experience as on a laptop or desktop. Its compatibility with mobile devices has made it a go-to tool for mobile music production enthusiasts. Plugins and Sound Packs Plugins and sound packs enhance the functionality of music software. The phone version comes with a selection of plugins and sound packs that are suitable for mobile music production. Users can also purchase extra plugins and sound packs from FL Studio’s website.
Putting It Into Practice
Plugins such as the GMS synth and Drumaxx drum machines give FL Studio Mobile users access to a vast library of sounds. Also, this allows flexibility and creativity in music production. In summary, the mobile app is a powerful and capable music production tool designed for mobile devices. Its user-friendly interface, compatibility with mobile devices, and plugins and sound packs make it a valuable tool in the hands of mobile music production enthusiasts. Whether you are an amateur or professional music producer, the app is a great option worth considering.
Credit: www.image-line.com
Fl Studio: Features And Capabilities
Moreover, the phone version and FL Studio are two versions of the popular digital audio workstation. The main difference is that the mobile app is designed for use on mobile devices and has fewer features than the desktop version.
FL Studio is a popular digital audio workstation that has been helping musicians and producers create music since 1997. With the constant evolution of technology, Image-Line – the creators of the software – has made it accessible for users to create music on-the-go with “FL Studio Mobile.” If you are familiar with FL Studio, you may wonder what the difference is between FL Studio Mobile vs. FL Studio. In this blog post, we’ll explore the features and capabilities of FL Studio. This includes the interface and navigation, compatibility with desktops and laptops, plugins and sound packs.
Interface And Navigation for FL Studio Mobile
FL Studio’s interface is user-friendly, which has contributed to its popularity over the years. Its interface is customizable, allowing producers to tailor their workflow to suit their needs. Users can customize the interface by adding or removing various windows and toolbars. On the other hand, the phone version has a simplified interface suitable for smartphones and tablets. The interface of the mobile app includes all essential features that a mobile user requires and gives easy navigation options whereby selecting options from the menu can be executed by just tapping on it.
Compatibility With Desktops And Laptops
FL Studio is a fully-fledged digital audio workstation made primarily for desktops and laptops. Its compatibility with PCs and Mac makes it a go-to choice for most music producers. FL Studio can run on any computer, and its system requirements are relatively low compared to other digital audio workstations. The app targets smartphones and tablets. This means you can use your mobile device to open and edit FL Studio Mobile projects. But you can’t use the software on any desktop or laptop.
Plugins And Sound Packs
Plugins and sound packs are crucial when it comes to music production. FL Studio has several plugins and sound packs. FL Studio has a wide range of stock plugins like Sytrus, Harmor, and Vocodex, which are critically acclaimed. Additionally, they have an impressive library of sounds and loops. The phone version, on the other hand, has limited sound packs and plugins. It is mainly focused on MIDI sequencing and beat-making, and while it is still a powerful software, it can’t match the desktop version.
In conclusion, while FL Studio Mobile is suitable for music production on-the-go or for those who just need basic software, FL Studio’s desktop version offers a full range of functionalities that will come in handy for the music production process. The differences between the two are evident. It’s up to the user to choose the software that best suits their needs.
Differences Between Fl Studio Mobile And Fl Studio
FL Studio and the mobile app are two versions of the popular digital audio workstation software, with FL Studio Mobile designed specifically for use on mobile devices. The main differences between the two are the features offered, with FL Studio offering more advanced functions, plugins and options on desktop. FL Studio Mobile offers more streamlined features for on-the-go music creation.
Differences between FL Studio Mobile and FL Studio FL Studio is a digital audio workstation that has long been a mainstay in the music production industry. With the advent of the app, the software has become even more accessible to music producers looking to create music on-the-go. Despite their similar names, the phone version and FL Studio pack some unique differences and features worth considering. Let’s take a look at some of the differences between FL Studio Mobile and FL Studio.
Functionality
The mobile app is essentially a scaled-down version of FL Studio. This mobile version enables you to create music tracks, record audio, and import/export content. Unlike the desktop version, the app allows you to use touch-screen device gestures like pinch and swipe to manipulate images, note data, and patterns. However, when it comes to functionality, FL Studio is more advanced, with features such as VST plugins support, and more sophisticated mixing and mastering tools that the phone version doesn’t have.
Pricing
In comparison to FL Studio’s pricing, the mobile app is relatively cheaper. It costs about $14.99, while the FL Studio desktop editions cost far more. However, the mobile version requires in-app purchases to unlock certain features, which can add up the cost. Moreover, FL Studio Desktop’s cost varies by version, depending on whether you are buying the Fruity Edition, Producer Edition, or Signature Edition.
System Requirements
The app’s system requirements are relatively lightweight; it can work on Android and iOS devices, and Windows 8 touch devices. It doesn’t require a powerful device to run, which makes it suitable for mobile phones and tablets. Please note that for better performance, you may need high-end devices. In contrast, FL Studio requires a powerful computer that meets its minimum system requirements. This includes a processor with a clock speed of 2 GHz or higher and at least 4 gigabytes of RAM.
In conclusion, both FL Studio Mobile and FL Studio have their unique features and limitations. This makes them suitable for different users, depending on their needs. However, if you are a full-time music producer, FL Studio should be your go-to software as it’s more advanced and feature-packed. On the other hand, if you are a beginner or keen on creating music on-the-go, the phone version can be a perfect starting point.
Credit: www.youtube.com
Which One Should You Choose?
FL Studio has been a popular name amongst budding music producers for many years now. With the introduction of the mobile app, music production has become even more accessible. While both software shares a similar name, there are several differences between FL Studio and the app that an aspiring producer should consider before investing in one.
Considerations
Several factors should guide your choice between FL Studio and the phone version. The following are the key considerations you must keep in mind when deciding between these two:
Intended Use
Your intended use of the software is the most significant factor when deciding between FL Studio and the mobile app. If you’re a beginner or working with a tight budget, the mobile version might seem like an attractive option. It is relatively affordable and comes with numerous features that can help you bring your music to life. On the other hand, FL Studio is the perfect choice for those working from a studio or more traditional setup. It provides you with a more comprehensive range of features, such as complex automation, advanced editing options, and virtual instruments.
Budget
Budget plays a vital role in choosing between FL Studio and the app. The mobile version is significantly cheaper than the desktop version. This makes it a better option for those working on a tight budget. However, if you are willing to invest in more advanced music production software, FL Studio may be the better option for you.
Ultimately, whether you choose FL Studio or the phone version will depend on your personal preference and budget. Regardless of which software you choose, it is crucial to keep developing your skills and knowledge to take your music production to the next level.
Frequently Asked Questions For What Is The Difference Between Fl Studio Mobile And Fl Studio
Is Fl Studio Mobile As Good As Pc?
Yes, the mobile app is a good option for music production on the go. But it has some limitations compared to the PC version. It offers a simplified user interface and fewer features than the desktop version. But it’s still a powerful tool for creating music.
You can create and edit your projects, mix tracks, and use various effects and instruments.
What Is The Purpose Of Fl Studio Mobile?
The app is a digital audio workstation designed for mobile devices. It allows users to create and produce music on-the-go using a range of virtual instruments, audio effects, and editing tools. Its purpose is to provide a portable and versatile music-making platform for musicians and producers.
Can Fl Studio Mobile Be Used Professionally?
Yes, you can use the phone version professionally. It is a powerful music production app with tools and features that can cater to the needs of professional musicians and producers. The app offers multi-track recording, editing, mixing, and exporting capabilities. This makes it a versatile tool for creating music on the go.
Do You Have To Buy Fl Studio Mobile If You Own Fl Studio?
No. The phone app is a separate purchase, even if you already own the desktop software. FL Studio’s “Lifetime Free Updates” policy covers the desktop edition you bought, not the phone app.
Simply log-in to your account and download the mobile version.
Conclusion
To sum up, the mobile app and FL Studio may have similar features, but they are designed for different users. The app focuses on music-making on the go, with a simple interface. Meanwhile, the latter desktop version offers more advanced music production tools.
Choose the software that best suits your creative needs and enjoy producing your music anytime, anywhere.