Categories
Archive

Everything You Need To Know About Music Distribution

Music distribution is the process of getting your music out to listeners through various platforms. This involves the distribution of physical copies of the music or digital uploads to streaming services and download stores.


Music distribution is vital for artists who want to reach a wide audience and generate revenue from their music. In the digital age, there are now more options than ever before when it comes to music distribution, with platforms such as iTunes, Spotify, and Bandcamp allowing artists to reach fans all over the world with ease.


However, navigating the various options and ensuring that your music is distributed correctly can be a challenge. We’ll explore everything you need to know about music distribution and how you can make the most of it as an artist.

Everything You Need To Know About Music Distribution


Credit: podcasters.spotify.com


History Of Music Distribution

The history of music distribution dates back to the 1800s when sheet music was sold by publishers. However, it wasn’t until the invention of the phonograph and vinyl records in the late 1800s that the music industry began to take shape. From its humble beginnings, music distribution has evolved significantly in the past couple of decades due to technological advancements.

From Physical Formats To Digital Era

With the introduction of vinyl records, the recording industry became a multi-billion dollar industry. Cassette tapes and CDs followed suit, but it was the advent of the internet that changed the music industry forever. The internet allowed for easy digital distribution of music files, making it easier for artists to reach a wider audience.

It wasn’t until the introduction of the iTunes Store in 2003 that digital music distribution gained mainstream acceptance among consumers. This marked the beginning of the end for physical formats such as CDs and cassette tapes. In recent years, physical formats have continued to decline in popularity while digital music distribution has become the norm.

Online Music Distribution Services

Online music distribution services such as Tunecore, DistroKid, and CD Baby have significantly simplified the music distribution process for independent artists. These services allow artists to distribute their music across multiple platforms such as iTunes, Spotify, Amazon Music, and more, without the need for a record label.

Examples of Online Music Distribution Services: Tunecore DistroKid CD Baby
Platforms Supported: iTunes, Spotify, Amazon Music, etc. iTunes, Spotify, TikTok, etc. iTunes, Spotify, Amazon Music, etc.
Pricing: $29.99 per year for a single $19.99 per year for unlimited uploads $9.95 one-time fee per single

The rise of online music distribution has also led to the emergence of new business models in the industry such as streaming, where consumers pay a monthly subscription fee to access an unlimited amount of music on platforms such as Spotify and Apple Music.

In conclusion, the history of music distribution has seen significant developments over time from the physical formats of vinyl records, cassette tapes, and CDs to the current digital era that has made music accessible to a wider audience. Online music distribution services and streaming platforms have revolutionized the music industry and made it easier for independent artists to reach audiences without the need for a record label.

Different Types Of Music Distribution


Music distribution refers to the ways in which music is made available to the public. There are various types of distribution methods, including physical distribution, digital distribution, direct-to-fan distribution, and more. Understanding these methods can help artists and labels effectively reach their target audience.

Different types of music distribution exist and they cater to the diverse needs of musicians. Musicians now have the luxury of choosing from a broad range of distribution channels, including major label distribution, indie distribution, and DIY distribution. Each type of distribution has its pros and cons, hence it’s crucial for musicians to determine which distribution method is suitable for them based on their goals and resources. Here’s an overview of the different types of music distribution, which would help musicians decide which option is best for them.

Major Label Distribution

Major label distribution involves partnering with a major music label that uses its resources to distribute and promote the musician’s music across various media outlets. The record label assumes responsibility for handling all aspects of the distribution process, including marketing, sales, manufacturing, shipping, and more. One of the main advantages of major label distribution is that the label has an established relationship with key players in the music industry. Major labels have the resources to promote and market music to a broad and diverse audience. Additionally, major labels offer financing options that make it easier for musicians to record and distribute their music. Some of the downsides of major label distribution include a lack of creative control and a reduced share of royalties.

Indie Distribution

For musicians who want more control over their music’s distribution process and marketing efforts, indie distribution is a suitable option. Indie distribution involves artists partnering with independent labels that focus on distributing and promoting independent music. Artists retain more creative control over their music and earn a higher percentage of royalties. Additionally, independent labels provide access to valuable resources while still allowing musicians to maintain creative control. However, indie distribution requires significant work on the artist’s part as they will be responsible for funding the recording and distribution of their music as well as overseeing the marketing and promotion of their music.

Diy Distribution

DIY distribution is a popular option among musicians who prefer to retain complete creative control over their music’s distribution and promotion processes. With DIY distribution, musicians handle all aspects of the distribution process themselves, which eliminates the need for a middleman. This method allows musicians to keep all the royalties earned from streaming services and sales. It also provides musicians with excellent opportunities to be more actively involved in promoting their music. However, the process can be time-consuming, and musicians must be willing to learn the ins and outs of music distribution and marketing. A DIY approach also means that the musician must bear the financial burden of recording, packaging, shipping, and promoting their music. In conclusion, the music distribution industry offers different distribution options for musicians. Musicians must carefully consider their goals and resources when choosing a distribution method. Whether a musician partners with a major label, an independent label or decides to handle distribution themselves, success depends largely on the level of dedication and willingness to learn and work hard to promote their music.

How Music Distribution Works

Music distribution is the process of making music available to a wide audience. It involves getting music from the artist to the listener through various means, including streaming platforms, downloads, and physical media. In this article, we’re going to explore how music distribution works, including the rights ownership and licensing, distribution process, and royalties and payments.

Rights Ownership And Licensing

Before music can be distributed, it’s essential to determine who owns the rights to the music. This can vary depending on the situation. For example, if an artist wrote and produced a song on their own, they own the rights to the song. However, if the artist worked with a record label or other collaborators, ownership may be more complicated. In those cases, the parties involved will need to determine the split of ownership and licensing rights.

Distribution Process

Once ownership and licensing are settled, the distribution process can begin. Artists can choose to distribute their music through various channels, including streaming platforms like Spotify and Apple Music, digital downloads through platforms such as iTunes and Amazon, or physical copies through retailers like Walmart and Target. Music distribution companies can help artists navigate this process, providing the resources and connections necessary to deliver their music to a wider audience.

Royalties And Payments

When an artist’s music is distributed, they receive royalties and payments. Royalties are the payments made to the artist for the use of their work. This can include streaming revenue or royalty payments from physical sales. Additionally, artists may receive royalties for music used in other media, such as film or television. Payments are typically processed through the artist’s chosen distribution platform or company, which takes a commission from sales or streams. The exact percentage of commission varies depending on the platform and contract negotiated.

Platforms Commission Percentage
Spotify 15%
Apple Music 30%
iTunes 30%
Amazon 30%

Knowing how music distribution works is essential for artists looking to make their music available to a wider audience. It’s important to understand ownership and licensing, the distribution process, and how royalties and payments work. With the right resources and support, artists can successfully navigate the music distribution process and find the success they deserve.

Everything You Need To Know About Music Distribution


Credit: www.amuse.io


Benefits Of Music Distribution


Music distribution provides various benefits for independent artists, including wider audience reach, increased royalties, and accessibility to various platforms. It allows musicians to bring their music to the masses and build their fan base on a global scale.

As an independent artist or label, it’s crucial to embrace music distribution to reach out to a broader audience. Music distribution enables you to share your music with fans all across the world while increasing your revenue streams. Here are some benefits of music distribution:

Wider Audience Reach

One of the most significant benefits of music distribution is the ability to reach a wide range of audiences. By distributing your music across various online music platforms such as iTunes, Spotify, and YouTube, you can expose your music to a nearly unlimited number of potential fans. With so many music listeners utilizing digital music streaming platforms, the opportunities to raise brand awareness and track discoveries are endless.

Increased Revenue Streams

As an independent artist or label, monetizing your music is critical to sustaining and expanding your career. By using music distribution, you can generate revenue streams through digital downloads, streams, and physical sales. With music distribution, you also have the opportunity to receive royalties from music licensing deals, synchronization placements, and performance rights organizations (PROs). This increased revenue stream provides a reliable income source that you can invest back into your music.

Flexibility And Independence

Music distribution also provides flexibility and independence for independent artists and labels. You have full control over how your music is distributed, allowing you to experiment with different channels and platforms to reach your intended audience. You can release your music independently outside the confines of record labels, enabling you to make your choices, decide your prices, and choose your distribution partners. This independence empowers you to build your brand, connect with your fans, and grow your career on your terms. Music distribution provides independent artists and labels with unmatched opportunities to share their music and connect with a wider fan base. With wider audience reach, increased revenue streams, flexibility, and independence, music distribution is a key aspect of succeeding in the music industry today.

Challenges And Risks Of Music Distribution


Music distribution is a complex process that comes with challenges and risks. From copyright infringement to royalty distribution, artists and distributors need to navigate a myriad of issues to ensure their music reaches listeners legally and effectively.

Music distribution is an essential part of the music industry that helps artists reach their audience, but with it come several challenges and risks. Musicians and producers have to navigate through a complex network of distributors, streaming services, and record labels. Hence, it is necessary to understand the risks and challenges associated with music distribution.

Royalty Collection Issues

One of the biggest challenges of music distribution is the issue of royalty collection. Royalties are the payments made to artists for the use of their music. However, the collection of royalties is often complicated as several entities are involved in the distribution process. It can be difficult to keep track of all the payments made by streaming services and record labels, leading to lower revenue for artists. Many artists either don’t receive proper payment for their work or received too little because of missing or incorrect information.

Illegal Distribution And Piracy

Illegal distribution and piracy are significant threats to the music industry. Piracy involves the unauthorized copying, distribution, and sharing of copyrighted music. This results in a significant loss of revenue for artists and piracy has become prevalent with the rise of digital music. Illegal distribution through unlicensed streaming services and downloads leads to less compensation for musicians and can harm the ability of artists to make a living from their music.

Distribution Cost

The cost of distribution is also a significant challenge for artists and producers. Distributors and streaming platforms charge fees for their services and while they are responsible for much of the promotion and marketing of the music, the cost of this can be high. With the rise of independent and self-publishing, many artists are required to handle some aspects of distribution themselves, which can lead to higher expenses. In conclusion, music distribution is an intricate part of the music industry, and it comes with its share of challenges and risks. The issues surrounding royalties, illegal distribution and piracy, and the cost of distribution are just a few of the challenges that musicians and producers face. It is vital for artists to understand these challenges and find ways to mitigate risks to ensure that they receive fair compensation for their hard work.

Everything You Need To Know About Music Distribution


Credit: distrobuddy.com


Top Music Distribution Companies


Discover the top music distribution companies that can help artists and indie musicians get their music heard by millions of potential fans. With a variety of services like digital music distribution, music licensing, and music marketing, these companies offer everything you need to succeed in the competitive world of music.

If you’re a musician or band looking to get your music out into the world, you’re going to need the help of a top-notch music distribution company. Music distribution companies handle the distribution and marketing of your music across major digital platforms and streaming services, making it easier for music fans to find and purchase your music. Below are some of the top music distribution companies, along with some of their key features.

Distrokid

DistroKid is known for being one of the most affordable options for music distribution. For a low annual fee, you can distribute unlimited songs to all of the major digital platforms, including Spotify, Apple Music, and Amazon Music. DistroKid also offers a range of additional services, such as YouTube monetization and automatic splits, which make it a popular choice among independent musicians.

Tunecore

TuneCore is a well-established music distribution company that prides itself on its transparency and artist-friendly approach. They offer distribution to all the major platforms, as well as a range of additional services such as publishing administration and sync licensing. TuneCore’s pricing structure is simple and affordable, making it a popular choice among musicians.

Cd Baby

CD Baby has been around for over 20 years and is one of the oldest and most established music distribution companies in the game. They offer distribution to all major platforms, as well as a range of additional services such as physical CD distribution and sync licensing. CD Baby has a reputation for excellent customer service and artist support.

Awal

AWAL is a music distribution and marketing company that prides itself on its artist-friendly and transparent approach. They offer distribution to all of the major platforms, as well as a range of marketing and promotional services to help you grow your fan base. AWAL also offers detailed analytics and reporting, so you can track the performance of your music and see where your fans are coming from. Overall, choosing the right music distribution company can make a big difference in the success of your music career. Whether you’re an independent musician or part of a band, consider your options carefully and choose a company that will support you in achieving your goals.

Frequently Asked Questions For Everything You Need To Know About Music Distribution


What Are The Basics Of Music Distribution?


Music distribution is the process of getting your music in the hands of your listeners. It involves making your music available on different platforms, such as streaming services and physical stores. The basics include finding a distributor, setting up distribution agreements, uploading your music, and marketing your music to your audience.


How Do I Start Distributing Music?


To start distributing music, you need to choose a music distribution company, create an account, upload your music, set your release date, and select the platforms you want to distribute your music on. Make sure to read the terms and conditions carefully before choosing a company and distributing your music.


How Does A Music Distributor Make Money?


A music distributor makes money by taking a percentage of the sales revenue that they generate for the artist. Typically, this ranges from 10-20%. Additionally, they may charge fees for their services such as marketing, promotion, and distribution.


What Percentage Do Music Distributors Take?


Music distributors usually take a percentage of around 20-30% from the sales or streams of an artist’s music. However, the exact percentage may vary depending on the distributor and the specific deal made with the artist.


Conclusion


Distribution is key to success in the world of music, it can make or break an artist’s career. By understanding the various distribution options available, artists can make informed decisions on how to get their music out to the masses.


In today’s digital age, there are endless ways to distribute music and ensure it reaches the right audience. So, with the help of this guide, artists should be well equipped to navigate the world of music distribution and find the perfect route to success.


Keep creating and sharing your music!


Categories
Archive

The Secrets To Transparent Vocal Tuning In Melodyne

In order to achieve transparent vocal tuning in Melodyne, it is crucial to use the correct tools and techniques. By adjusting pitch centers, setting note separation, and utilizing formant editing, you can achieve a natural vocal sound without sacrificing pitch precision.


Melodyne is a powerful tool for vocal tuning, but it can also be challenging to use effectively. If you’re struggling to achieve a natural, transparent sound when working with vocal tracks, there are a few key techniques to keep in mind.


By focusing on pitch centers, note separation, and formant editing, you can achieve a polished, professional sound without sacrificing the natural nuances of the singer’s voice. We’ll dive into the secrets of transparent vocal tuning in Melodyne, including practical tips for optimizing your workflow and getting the best possible results.


Understanding Melodyne


Explore the secrets to transparent vocal tuning with Melodyne. This powerful software allows for precise pitch and timing adjustments while maintaining the natural sound of your vocals. With Melodyne, you can achieve professional-quality results for any recording project.

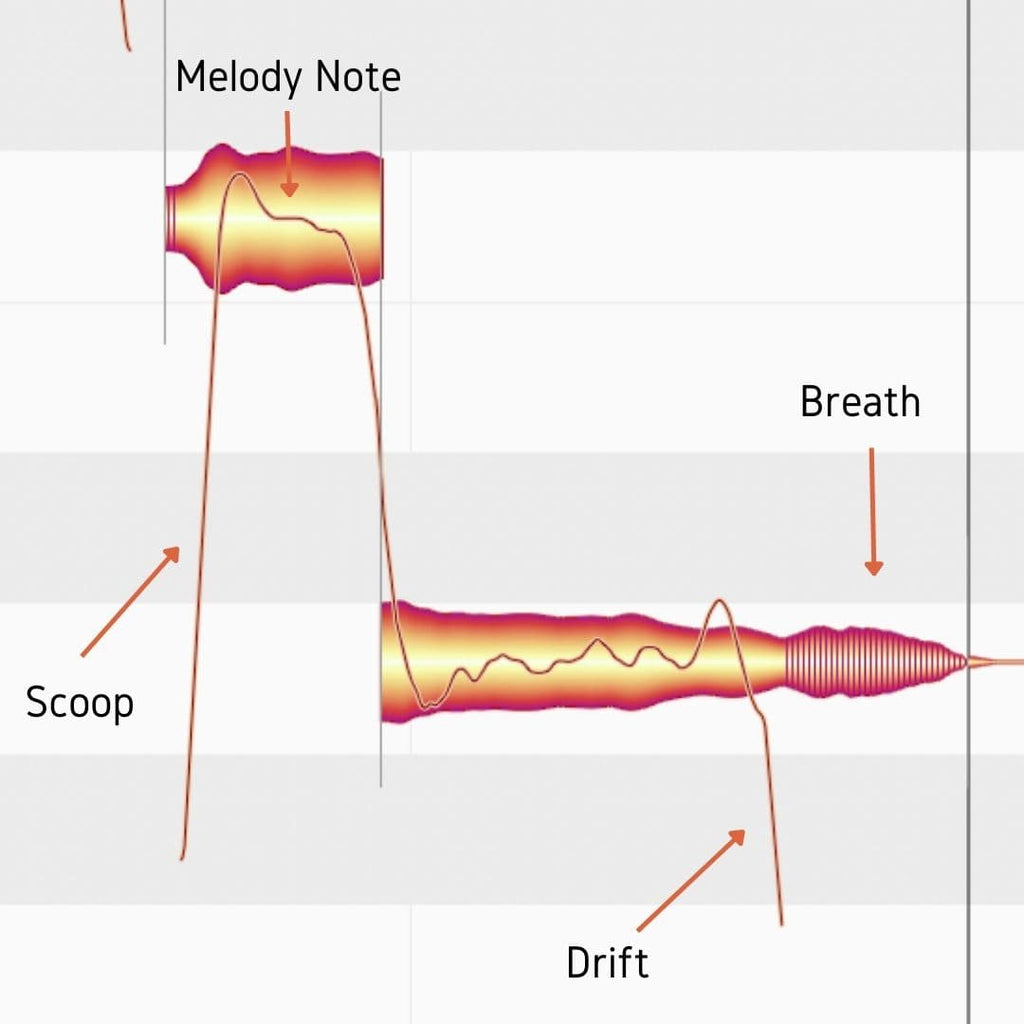
Understanding Melodyne Melodyne is a powerful tool for audio editing that allows musicians, sound engineers, and producers to manipulate the pitch, timing, and intensity of individual notes in a recording. With Melodyne, you can correct pitch and timing errors, create harmonies, and even create entirely new performances from existing recordings. Understanding how Melodyne works is essential to mastering its many powerful features. How Melodyne works Melodyne works by analyzing the audio recording you import and converting the various elements of the performance into isolated “blobs.” These blobs represent individual notes, and you can manipulate them independently of one another. Using various tools in the Melodyne interface, you can adjust the pitch and timing of each note, as well as change the intensity and duration of each performance. You can also use Melodyne to create harmonies, change the key of a recording, or even create new melodies from existing performances. Different Versions of Melodyne Melodyne is available in several different versions, each of which offers different features and capabilities. The most basic version of Melodyne is Melodyne Essential, which allows you to manipulate the pitch and timing of individual notes as well as make basic corrections, such as removing pops and clicks. Melodyne Assistant offers more advanced pitch and timing correction tools, as well as the ability to create harmonies and adjust the formant of a recording. Melodyne Editor adds even more advanced tools, such as the ability to manipulate individual overtones and create new harmonics from existing recordings. Finally, Melodyne Studio is the most advanced version of the software, offering all the tools of the other versions, as well as support for polyphonic audio recordings, which allows you to separate and manipulate individual notes from a chord or harmony. Features of Melodyne Melodyne offers a wide range of features and tools, each of which can be used to manipulate and edit individual notes in a recording. Some of the most powerful features of Melodyne include: – Sibilant detection, which helps to identify and isolate unwanted sibilance in a recording. – Formant editing, which allows you to adjust the timbre and character of a performance without affecting the pitch or timing. – A range of pitch correction tools, including automatic correction and manual pitch correction. – Harmony creation tools, which allow you to add new vocal harmonies to an existing recording. – A range of time stretching and compression tools, which allow you to adjust the tempo and timing of a recording without affecting the pitch. Using Melodyne effectively requires a bit of practice and experimentation, but once you get the hang of it, the software can be an invaluable asset in your audio editing toolset. By understanding Melodyne and its many powerful features, you can take your audio editing skills to the next level and create recordings that are truly professional-grade.


Preparing The Audio In Melodyne


To achieve transparent vocal tuning in Melodyne, proper audio preparation is essential. This includes ensuring that there are no timing or pitch issues with the recording, as well as properly adjusting the formants and vibrato. By taking the time to prepare the audio correctly, Melodyne can then be used to make subtle, transparent adjustments to the vocals without sacrificing their natural sound.

Preparing the audio in Melodyne is an important step in achieving transparent vocal tuning. To ensure the vocal sounds natural and not robotic, it’s vital that you set up the parameters correctly in Melodyne. In this blog post, we’ll guide you through the process of preparing audio in Melodyne to get the best results possible. In this section, we’ll focus on the first step, which is importing the audio into Melodyne and setting up the parameters for the vocal using the following H3 headings in HTML format:

Importing The Audio Into Melodyne

The first step in preparing the audio in Melodyne is to import it into the software. You can do this by dragging and dropping the audio file into Melodyne, or by using the “File” menu to import it. Once the audio is imported, Melodyne will automatically detect the pitch and timing of the vocal.

Setting Up The Parameters For The Vocal

Next, you’ll need to set up the parameters in Melodyne to achieve the desired results. To do this, you’ll need to select the notes you want to work on, and then adjust the pitch, timing, and formant settings accordingly. It’s important to note that the goal of transparent vocal tuning is to maintain the natural sound of the vocal as much as possible.

Navigating The Track In Melodyne

Navigating the track in Melodyne is easy. You can use the zoom tool to get a closer look at the notes and adjust them as necessary. You can also use the pitch and time tools to make fine adjustments to the notes. It’s important to take your time when editing vocals in Melodyne to ensure that they sound natural and not over-processed. In conclusion, preparing the audio in Melodyne is a crucial step in achieving transparent vocal tuning. By importing the audio, setting up the parameters correctly, and navigating the track in Melodyne, you’ll be well on your way to achieving natural and professional-sounding vocals.

Pitch Correction In Melodyne

Melodyne is a revolutionary music production software that allows users to manipulate audio at a level of detail that was never possible before. One of its most powerful features is pitch correction, which allows users to fix out-of-tune notes in vocal recordings quickly and effortlessly. In this article, we will explore the secrets to transparent vocal tuning in Melodyne, with a focus on pitch correction.

Identifying Out-of-tune Notes

The first step in pitch correction with Melodyne is to identify any out-of-tune notes. These can be easily identified on the note editor screen as notes that do not line up with the pitch grid. Melodyne makes this process incredibly efficient as it can detect the pitch of each note and display it on the editor screen, making identification much easier than trying to hear the problem areas in the recording.

Correcting Pitch In Melodyne

Once you have identified the out-of-tune notes, it’s time to start correcting them. Melodyne offers two primary correction methods – pitch drift and pitch modulation. Pitch drift will make small adjustments to the pitch of the note, while pitch modulation will apply a vibrato effect. A combination of the two methods can create a natural-sounding correction, which is essential for vocal tuning as it should retain the unique character of the vocalist without sounding robotic or unnatural.

Using Pitch Modulation

One of the essential elements in transparent vocal tuning is using pitch modulation. This technique allows you to control the vibrato of the vocal tracks by adjusting the speed and depth of the pitch modulation. The goal is to ensure that the pitch modulation matches the original recording and doesn’t sound unnatural or overdone. If done correctly, the pitch modulation will bring life to the vocals and create a natural-sounding correction.

The Secrets To Transparent Vocal Tuning In Melodyne


Credit: www.linkedin.com


Timing Correction In Melodyne


To achieve transparent vocal tuning in Melodyne, timing correction is key. By manipulating the timing and alignment of individual notes, Melodyne allows for subtle adjustments that can make a big difference in the overall sound of a vocal track. With careful use of the timing correction tools, a natural and polished vocal performance can be achieved.

Identifying Timing Issues In Vocals

It is common to encounter timing issues in vocal recordings, making the sound lack coherence and punch. Timing issues can be hard to identify but are not impossible to notice. In Melodyne, directors can identify timing issues by visually analyzing the waveform displayed in the software. Irregularities or inconsistencies in the waveform indicate timing issues in the vocal performance. Therefore, it is essential to identify timing issues before proceeding to fix the problem with Melodyne.

Quantizing Vocals In Melodyne

Quantizing is a technique used to align the timing of a vocal performance to a pre-set time grid. This technique is commonly used in electronic music production, but it can improve the coherence and punch in vocal recordings. Directors can quantize vocals in Melodyne by using the Grid Snap feature, which snaps every note to a pre-set rhythm and tuning. This feature saves directors time by automatically correcting timing inconsistency and distortion in the vocal recording. However, overusing the feature can negatively affect the natural flow of the vocal performance, resulting in an artificial and computerized sound.

Fixing Rhythmic Issues With Melodyne

Melodyne offers several tools to fix rhythmic issues in vocal recordings. Directors can move and stretch notes to match the desired timing using Melodyne’s Time Handle. Additionally, directors can adjust the velocity to correct inconsistencies in volume and create a more natural sound. The Pitch Tool in Melodyne can also be used to adjust the timing by modifying the pitch. Directors can slide the pitch up or down to align the vocal performance to the desired rhythm. With Melodyne, directors have the tools to fix rhythmic issues and transform a lackluster vocal recording into a professional-sounding hit. Timing correction is an essential aspect of vocal tuning, and in Melodyne, directors have a powerful tool to fix rhythmic inconsistencies. By using the Grid Snap feature, directors can quantize vocals to a pre-set rhythm and improve coherence and punch. Directors can also use various other tools, such as the Time Handle and Pitch Tool, to correct inconsistencies in timing and pitch. With Melodyne, directors can take their vocal recordings to the next level and ensure transparent vocal tuning for a professional-sounding hit.

https://www.youtube.com/watch?v=eynDPoci9EE


Advanced Techniques In Vocal Tuning


Discover the secrets to achieving transparent vocal tuning using Melodyne’s advanced techniques. Elevate your music production skills with this tool and learn how to create a polished, professional sound that stands out.

Vocal tuning is an essential part of music production, and Melodyne is a powerful tool that can be used to achieve the perfect pitch. However, there are some advanced techniques that you can use to take your vocal tuning to the next level.

Enhancing Vibrato In Vocals

Vibrato is an essential component of a good vocal performance, and it can be challenging to capture the natural vibrato of a singer. However, with Melodyne, you can easily enhance the vibrato in vocals. Simply select the vibrato in your vocal track and adjust its parameters to achieve the desired effect. By doing so, the vibrato will sound more natural and organic.

Creating Harmonies With Melodyne

Melodyne is not only a great tool for pitch correction, but it can also be used to create harmonies. First, duplicate your vocal track in Melodyne and then shift the pitch of the duplicated track to the desired note. After that, you can blend the two tracks together to create beautiful harmonies. This technique is particularly effective for creating background vocals, which can add depth and richness to your mix.

Manipulating Formants In Melodyne

Formants are essential to the character and timbre of a vocal performance. With Melodyne, you can manipulate the formants of a vocal track to achieve a variety of effects. For example, you can use formant shifting to change the perceived gender of the singer or create a unique vocal texture. Additionally, you can use formant control to enhance the richness and warmth of a vocal track. In conclusion, these advanced techniques in Melodyne can help you achieve a higher level of vocal tuning and bring out the best in your vocal performances. Try them out in your next music production project and see how they can transform your sound.

The Secrets To Transparent Vocal Tuning In Melodyne


Credit: www.masteringthemix.com


Tips For Transparent Vocal Tuning


Learn the secrets to transparent vocal tuning in Melodyne with these essential tips. From staying in key to avoiding over-tuning, this guide will help you achieve a natural and polished vocal sound.

When it comes to vocal tuning, achieving a natural and transparent sound is essential. Melodyne, a popular pitch-correction software, is widely used to achieve perfect pitch in vocals. However, improper use of Melodyne can result in a robotic and unnatural sounding vocal. In this section, we’ll discuss some tips for achieving transparent vocal tuning using Melodyne.

Avoiding The ‘robotic’ Sound

One common pitfall of vocal tuning is creating a robotic or artificial sound in the vocals. To avoid this, it’s important to use Melodyne sparingly and only on problematic notes. Overusing Melodyne can lead to over-correction, resulting in a monotonous and lifeless vocal performance. To prevent this, try using a combination of manual pitch correction and Melodyne to achieve a more natural sound.

Using Melodyne Sparingly

As mentioned earlier, using Melodyne sparingly is crucial in achieving transparent vocal tuning. Before diving into pitch correction, start by identifying and fixing any issues with vocal performance technique. This will make the pitch correction process much easier and result in a more natural-sounding vocal. When using Melodyne, only focus on the notes that are off-pitch or have noticeable tuning issues.

Retaining The Natural Expression Of The Vocal

Lastly, it’s important to ensure that the natural expression and emotion of the vocal performance is retained during the tuning process. This can be done by zooming in on each note and adjusting the pitch and timing manually. This will help to preserve the authentic character of the original vocal track and prevent it from sounding robotic or overly edited. In conclusion, using Melodyne for vocal tuning can help to achieve a flawless vocal performance. By following these tips for transparent vocal tuning, you can ensure that your final mix still retains the natural expression, feeling, and character of the original vocal track.

Frequently Asked Questions For The Secrets To Transparent Vocal Tuning In Melodyne


Is Melodyne Transparent?


Yes, Melodyne is transparent. It allows you to manipulate audio in a natural and authentic way, without compromising the original quality. Melodyne is designed to preserve the natural sound and character of the source material, making it a powerful and versatile tool for editing and enhancing audio recordings.


How Do You Tune Your Vocals Perfectly?


To tune your vocals perfectly, you can use auto-tune software, vocal tuning plugins, or pitch correction tools. It is also crucial to record in a noise-free environment, use a good microphone, and sing with proper technique. Practice regularly to improve your vocals and always listen to your recordings to identify areas that need tuning.


Do Most Singers Use Melodyne?


Melodyne is a popular pitch correction software used by many singers in the music industry.


Can Melodyne Automatically Fix Vocals?


Yes, Melodyne can automatically fix vocals in terms of pitch and timing. It is a powerful tool that can correct pitch errors, adjust timing, and align tracks. However, manual editing may sometimes be necessary for optimal results.


Conclusion


Incorporating Melodyne’s transparent tuning techniques into your vocal production can elevate your music to the next level. Experimenting with formants, vibrato and pitch can unlock a world of creative possibilities. Consistency is key, and understanding how to utilize Melodyne’s toolkit can lead to a polished, professional result.


By following these tips, you can achieve the seamless vocal tuning needed to make your tracks stand out in today’s competitive music industry. Happy tuning!

Categories
Archive

Difficult Mastering Problems And How To Solve Them

Difficult mastering problems can be solved by identifying the specific areas of struggle and implementing strategies to address them effectively. Mastering a skill is a process that requires sustained effort, focus, and dedication.


However, even with consistent practice, some learners may encounter difficulties that impede their progress. Whether it’s learning a new language, mastering a musical instrument, or improving a particular technique, encountering challenges is an inevitable part of the process. Challenges can arise due to a variety of reasons, such as lack of motivation, ineffective practice strategies, or inadequate resources.


However, by understanding the nature of the difficulties and implementing targeted solutions, learners can overcome the hurdles and make progress towards achieving their mastery goals. We will explore some common mastering problems, their causes, and strategies to overcome them.


Identifying Difficult Problems

As a master in a particular field, you are expected to solve problems that your peers find challenging to overcome. However, not all problems are easy to solve. Identifying difficult problems is the first step towards finding a solution. This article outlines ways to understand and break down complicated issues to develop an effective and lasting solution.

Understanding The Problem

To solve a challenging problem, you need to get a deep understanding of it. Understanding the problem involves asking questions and providing answers to determine the root cause of the problem. You should ask questions like:

What happened? The first step is to determine what happened that caused the problem. This helps you develop a clear picture of the problem.
How often does it happen? Knowing the frequency of the problem helps determine its severity and how often it can occur.
What factors are contributing to the problem? Understanding the factors involved is important because it helps you identify potential solutions.
What are the potential risks or consequences of the problem? Understanding the risks and consequences involved helps you develop strategies to mitigate them.

Breaking Down The Problem

Breaking down the problem into smaller chunks makes it easier to understand and solve. Here are some steps to follow when breaking down challenging problems:

  1. Define the problem: Clearly Define what the problem is and what’s causing it.
  2. Identify potential causes: List out all potential sources that could be contributing to the problem.
  3. Test potential causes: Test each potential cause to determine if it’s the sole cause or a factor contributing to the problem.
  4. Develop a solution: Brainstorm and develop potential solutions to the problem.
  5. Test the solution: Test the effectiveness of the solution and refine as needed until you find the best solution.

With these steps, you can effectively identify difficult problems and find lasting solutions. Remember to take the time to understand the problem and break it down into smaller pieces to develop effective solutions.


Creative Problem Solving Techniques


Discovering new creative problem-solving techniques can help you overcome difficult mastering problems. Consider techniques such as brainstorming, breaking problems down into smaller segments, asking questions, and mind mapping to approach problems from different angles and come up with innovative solutions.

When it comes to mastering skills, there are always difficult problems that arise. These problems can be frustrating and demotivating. However, with the right mindset and approach, these challenges can be overcome. Creative problem solving techniques can help you to tackle difficult mastering problems with ease. In this post, we will explore effective problem solving strategies such as brainstorming, mind mapping, and reverse thinking.

Brainstorming

Brainstorming is a popular problem-solving technique that involves generating a large number of ideas in a short period. It is done by free-association of ideas related to a specific problem. One effective way to brainstorm is to collaborate with others. This technique can help you to gather a diverse range of ideas and perspectives to tackle difficult problems. Here are a few tips that can help you with brainstorming:

  • Set a specific problem statement to focus the brainstorm
  • Encourage creativity and free-thinking, even if the idea seems far-fetched
  • Quantity over quality: don’t evaluate or critique each idea during brainstorming session
  • Combine ideas to create more ideas in sensing and identifying possible solutions to solve a given problem.

Mind Mapping

Mind mapping is a technique that helps to visualize information and ideas. This technique can help you to organize your thoughts and connect concepts in a creative and logical way. Mind maps consist of a central idea or problem statement that is surrounded by related ideas and sub-topics. Here are a few tips for mind mapping:

  1. Start by writing the central problem statement in the center of a blank page
  2. Use keywords, images, and phrases to represent related ideas and sub-topics
  3. Connect each subtopic with lines to show the relationship between them and with the central topic
  4. Structure your mind map in a way that makes sense to you and your thinking

Reverse Thinking

Reverse thinking is a powerful problem-solving technique that involves flipping the problem statement on its head. This technique will help you think outside the box and come up with innovative solutions to difficult problems. Instead of trying to solve the problem in a traditional way, reverse your thinking and approach the problem from a different angle. Here are a few tips for reverse thinking:

Step Strategy
1 Rephrase the problem statement in a negative way such as “How can I make the problem worse?”
2 Think of solutions that are the opposite of what the problem is asking for
3 Consider trying new approaches and taking risks

In conclusion, creative problem-solving techniques like brainstorming, mind mapping, and reverse thinking are valuable tools to approach difficult mastering problems. By applying these techniques, you can solve problems in a more effective and efficient way while fostering creativity, innovation, and exploration. Try these approaches to solve those tough problems, and just remember that you got this!


Collaborative Problem Solving

Collaborative problem solving is essential for any learning process. Sometimes it’s difficult to master certain concepts and subjects alone. Collaborating on problem-solving exercises with peers can help you better understand the subject matter and help avoid the frustration of solitary studying. Below are some tips on how to solve difficult mastering problems collaboratively:

Asking For Help

Asking for help is the first step in collaborative problem-solving. It’s crucial to communicate with your peers and be open about the challenges you face. By doing this, you open the door for new insights that could potentially help you understand the difficult problem. When you ask for help, be specific and clear about your needs. This will enable your peers to provide relevant assistance and allow for effective problem-solving.

Peer Review

Peer review is another efficient way to solve difficult problems collaboratively. Before submitting or presenting your solution, allow your peers to review your work. Peer review provides a fresh set of eyes to look for any mistakes you may have overlooked. Peer reviews can also help to identify alternative solutions to problems you may not have considered before.

Moreover, peer review allows the exchange of feedback. Constructive criticism and feedback from peers can help you improve problem-solving skills and enhance your solution-making process. This feedback is essential in identifying areas where you need to pay more attention and allowing you to better understand the problem at hand.

Conclusion

In conclusion, collaborating on difficult mastering problems can aid your understanding of the subject matter and offer potential solutions. Peer review and asking for help are great tools to solve problems collaboratively. Collaborative problem-solving fosters a conducive and dynamic learning environment and helps prepare individuals for real-world problem-solving scenarios.

Difficult Mastering Problems And How To Solve Them


Credit: www.frontiersin.org


Staying Focused And Persistent

Staying focused and persistent is key when it comes to mastering a new skill or subject. It’s normal to face progress plateaus and setbacks while learning, but with the right mindset and techniques, anyone can overcome these obstacles and achieve their goals.

Avoiding Distractions

One of the biggest hurdles in staying focused is distractions. It’s easy to get sidetracked by notifications, social media, or other non-essential tasks. To avoid these distractions, try the following:

  • Turn off notifications
  • Block distracting websites or apps
  • Set dedicated working hours and stick to them
  • Find a quiet and comfortable workspace

Setting Small Goals And Deadlines

Another effective technique to stay persistent is to set small and achievable goals with deadlines. Breaking down larger tasks into smaller, more manageable ones can make them feel less overwhelming and more achievable. Try setting daily or weekly goals, and establish a reward system upon completion to maintain motivation.

By implementing strategies to avoid distractions and setting small goals and deadlines, staying focused and persistent during mastering becomes more achievable. Remember that progress may not always be linear but with persistence, anyone can reach their desired level of mastery.

Overcoming Frustration And Discouragement


Mastering difficult problems is a significant challenge that can lead to frustration and discouragement. However, shifting your mindset and focusing on problem-solving strategies can help overcome these obstacles. By taking a step back, analyzing the situation, and developing a plan, you can overcome even the most challenging problems.

Seeing Failure As A Learning Opportunity

Failure can be discouraging, especially when it feels like you have put in a lot of effort. However, it is important to realise that failure is an opportunity to learn and grow. Rather than seeing it as a setback, you can use it as a stepping stone to improve. Take the time to reflect on what went wrong, what you could have done differently and how you can improve in the future. By doing this, you will gain valuable insights that can help you in your mastering journey.

Staying Positive

Maintaining a positive attitude can be a challenge when you are faced with difficult mastering problems. However, it is important to remember that negativity and self-doubt will only make matters worse. To overcome this, try looking at your progress from a different perspective. Celebrate small victories, even if they seem insignificant. Set goals for yourself, no matter how small they may be. By doing this, you can build momentum and keep making progress towards your mastering goals.

Perseverance

Finally, the key to overcoming frustration and discouragement is perseverance. Mastering a skill is not easy and requires time, effort and dedication. There will be times when you feel like giving up, but it is important to keep pushing forward. Remember that every mastering challenge is an opportunity to learn and grow. By persevering through the tough times, you will develop the resilience and mental toughness needed to succeed.

Conclusion

In conclusion, mastering a skill can be challenging and at times frustrating. However, by seeing failure as a learning opportunity, staying positive, and persevering through tough times, you can overcome any obstacle. Remember that with patience, dedication, and hard work, you can achieve your mastering goals.


Frequently Asked Questions Of Difficult Mastering Problems And How To Solve Them


What Do You Do When You Can’t Solve A Problem?


When you can’t solve a problem, take a step back and assess it. Break it down into smaller parts and try to identify the root cause. Consider brainstorming with others or seeking outside help. Don’t be afraid to try different approaches and solutions.


Remember to stay calm and focused.


What Do You Do When You Have A Problem?


To solve a problem, start by identifying the issue and analyzing it objectively. Brainstorm solutions and evaluate their effectiveness. Take action on the best solution and monitor progress to ensure desired outcomes. Seek help from others if necessary. Finally, learn from the experience to prevent similar problems in the future.


What Are Some Of The Most Difficult Mastering Problems?


Some of the most difficult mastering problems include frequency balancing, stereo adjustments, and dynamic range control. These issues require careful consideration to ensure that the final product sounds cohesive and consistent.


How Can You Overcome Bass Frequency Issues During Mastering?


To overcome bass frequency issues, use a spectrum analyzer to identify problem areas. Then, use EQ to cut or boost certain frequencies. Limiting or compression can also help to control bass levels and ensure a balanced final mix.


Conclusion


To summarize, mastering difficult problems requires a combination of mindset, strategies, and tools. By understanding the root cause of the problem and identifying effective techniques to overcome them, you’ll be well on your way to achieving mastery. It’s important to remember that overcoming difficulties takes time, patience, and persistence.


Stay motivated, continue learning and growing, and don’t be afraid to ask for help when you need it. By following these tips, you can become a master in any field and achieve your goals.

Categories
Archive

What is the Difference between Piano And Synthesizer

A piano is an acoustic instrument that produces sound through hammers striking strings, while a synthesizer generates sound electronically through a range of controls and settings. The piano and the synthesizer are two widely-used musical instruments that are often compared and contrasted.


Although both have a keyboard, there are significant differences between the two. While a piano is an acoustic instrument that produces sound through hammers striking strings, a synthesizer generates sound electronically through a range of controls and settings. Pianos are usually larger and heavier than synthesizers, and their sound is affected by the environment in which they are played.


Synthesizers, on the other hand, are portable and can produce a wide range of sounds, including those not found in traditional acoustic instruments. We’ll explore the differences between piano and synthesizer in more detail.

What is the Difference between Piano And Synthesizer


Credit: www.rimmersmusic.co.uk


Piano Basics


Playing the piano involves pressing keys to create acoustic sound, while synthesizer uses electronic sound created by waveform generators. The sound produced by a piano has a natural feel, while synthesizer sounds are digitally produced.

If you are someone who is new to music or just starting to learn an instrument, it is essential to understand the basics of an instrument before you dive into learning. Piano is one of the most popular musical instruments globally, and it is often talked about in comparison to a digital synthesizer. While both pianos and synthesizers produce sound by hitting keys, the functioning and mechanism of producing music are different. In this article, we will discuss the basic differences between an acoustic and digital piano.

Acoustic Piano

An acoustic piano produces sound by striking the strings with felt-covered hammers. When a key is pressed, a corresponding hammer strikes the string and produces a sound. Acoustic pianos are usually made of wood, and the sound-producing parts require regular maintenance. It requires tuning to keep the instrument sounding perfect. One of the advantages of owning an acoustic piano is that it produces rich and authentic sound that is hard to replicate on a digital instrument.

Digital Piano

A digital piano uses digitally sampled sounds or synthesizing technology to produce the sound of a traditional piano. Digital pianos are usually designed to feel and sound like an acoustic instrument. It comes with a headphone jack, which allows for practical practice without disturbing others. Digital pianos often come with various features like recording, built-in metronome, and different sound options. It requires less maintenance than an acoustic piano and is comparatively more affordable. However, it still lacks the natural authenticity of an acoustic piano. In conclusion, acoustic piano produces rich and authentic sound, while digital pianos provide a more practical experience with their additional features. The choice ultimately boils down to your personal preferences and needs. We hope this article helps you understand the fundamental differences between acoustic and digital pianos.

What is the Difference between Piano And Synthesizer


Credit: pickmypiano.com


Synthesizer Basics

When it comes to music, pianos and synthesizers are two of the most popular instruments. Although they may seem similar, there are significant differences between the two that are important to understand. In this article, we will focus on synthesizer basics, including the differences between analog and digital synthesizers.

Analog Synthesizer

Analog synthesizers were the first type of synthesizer to be invented. They work by adjusting the electrical signals generated within the instrument to create different sounds. Analog synthesizers use analog circuitry, which means that the signals are represented by continuously varying voltages. This produces a warm, organic sound that is highly sought after by many musicians. Analog synthesizers are also known for their ability to create modulation effects, such as vibrato and tremolo.

Digital Synthesizer

Digital synthesizers, on the other hand, use digital signal processing to create sound. Instead of adjusting electrical signals, they use software algorithms to generate sound waves. Digital synthesizers offer a wide range of sounds, including realistic simulations of acoustic instruments, and can be more versatile than analog synthesizers. They are also easier to integrate with other digital recording equipment and can be controlled via MIDI (Musical Instrument Digital Interface).

Overall, the choice between a piano and a synthesizer ultimately comes down to personal preference. While a piano produces a pure acoustic sound, a synthesizer offers a wider range of sounds and effects. Depending on the type of music you want to create, one may be more suitable than the other. Regardless of which you choose, both pianos and synthesizers are incredible instruments that offer endless possibilities for musical expression.


Sound Production


Pianos produce sound through hammers striking strings, while synthesizers use electronic sound generators to produce their sounds. The resulting sound and feel are quite different between the two instruments, making each useful for different musical purposes.

When it comes to music production, pianos and synthesizers are two popular instruments used for composing and recording music. Both produce different sounds, and each has its unique features. One of the significant differences between the piano and synthesizer is the sound production mechanism.

Piano – String And Hammer Mechanism

The piano is a stringed instrument with a hammer mechanism that strikes the keys to produce the sound. Each key on the piano has a corresponding string, which vibrates when the hammer strikes it. The sound produced by the piano is warm, organic, and rich, which is why it has been a popular choice for centuries. The piano’s sound production mechanism is entirely mechanical, which means there is no need for external amplification. It produces sound acoustically, and the volume and tone of the sound depend on the player’s touch and the piano’s quality.

Synthesizer – Electronic Sound Generation

The synthesizer, on the other hand, produces sound electronically. It has various sound generators that create sound by manipulating digital oscillators. The sound produced by a synthesizer can range from soft and mellow to harsh and aggressive, depending on the settings and presets used. The key difference between a synthesizer and a piano is that the former is capable of producing sounds that are not found in traditional instruments. Synthesizers have become popular in various music genres because of their versatility and ability to create unique sounds. In conclusion, the main difference between a piano and a synthesizer’s sound production mechanism lies in their respective design and structure. While pianos produce sound mechanically, synthesizers do so electronically. However, both instruments have their unique features, and each is an excellent tool for music production.

Tonal Qualities

Both pianos and synthesizers are widely used in musical compositions. While each is capable of producing beautiful melodies and harmonies, there are several differences in their tonal qualities. In this article, we’ll take a closer look at the differences between a piano and a synthesizer, with a focus on their tonal qualities.

Piano – Dynamic Range And Expressiveness

The piano is a traditional musical instrument that has been widely used for centuries. Pianos are known for their dynamic range and expressiveness, which allow the performer to create a wide range of emotions in their music. The piano is an acoustic instrument, meaning that the sound is produced by the striking of strings with hammers. The vibrations of the strings are then amplified by the wooden case of the piano, producing the characteristic sound we’re familiar with.

  • Piano produces sound by striking strings with hammers.
  • Piano is an acoustic instrument.
  • Dynamic range and expressiveness are the key features of a piano.
  • The wooden case of a piano amplifies the sound.

Synthesizer – Versatility And Manipulability

A synthesizer is an electronic musical instrument that uses electronic circuits to produce and manipulate sound. Unlike a piano, a synthesizer does not produce sound acoustically. Instead, it uses electronic circuits and digital technology to generate sound. Synthesizers are known for their versatility and manipulability, which allows musicians to create a wide range of unique sounds.

  • Synthesizer uses electronic circuits and digital technology to produce sound.
  • Synthesizer is an electronic musical instrument.
  • Versatility and manipulability are the key features of a synthesizer.
  • Synthesizer allows the creation of a wide range of unique sounds.

In conclusion, the differences in tonal qualities of a piano and a synthesizer are significant. While pianos are known for their dynamic range and expressiveness, synthesizers are prized for their versatility and manipulability. Both instruments have their unique advantages and drawbacks, and which one you choose to use will depend on your personal preferences and musical style.

Portability And Cost


Piano and synthesizer differ significantly in terms of cost and portability. While a piano is not portable and requires a lot of space and money, a synthesizer is relatively cheap and compact. Therefore, the choice between the two depends on the player’s needs and budget.

Pianos and synthesizers are two different instruments with unique characteristics. One factor that distinguishes them is their portability and cost aspect. This section focuses on how pianos and synthesizers differ in terms of their weight and price.

Piano – Heavy And Expensive

Piano is a bulky, heavy, and large instrument that requires considerable space and effort to move. The weight of a piano ranges from 300 to 1200 pounds, depending on the size and type. Grand pianos are the heaviest with a weight of up to 1200 pounds. Due to its weight, it is challenging to move a piano, and it requires several people to do so. Pianos are also expensive. An entry-level acoustic piano can cost at least $3000. High-end pianos can range up to $200,000. The maintenance of a piano is also costly, requiring regular tuning and repair by a professional technician.

Synthesizer – Lightweight And Affordable

Synthesizers, on the other hand, are lightweight and portable. They can be carried around easily. Portable synthesizers typically weigh about 2 to 20 pounds, making them easy to move around. The cost of a synthesizer is much lower compared to a piano. An entry-level synthesizer can cost as little as $100. High-end synthesizers can range up to $20,000. The maintenance of a synthesizer is also less expensive, with most repairs and servicing done by the owner.

Conclusion

In conclusion, pianos and synthesizers have unique characteristics that suit different musicians’ needs. The portability and cost aspect are critical factors that influence a musician’s instrument choice. Pianos are heavy and expensive, but they produce high-quality sound and offer great playing experience. Synthesizers are lightweight and affordable but produce a digital sound that may not appeal to some musicians. Ultimately, the choice between a piano and a synthesizer depends on a musician’s style, preference, and budget.

What is the Difference between Piano And Synthesizer


Credit: www.quora.com


Demand And Usage

When it comes to musical instruments, Piano and Synthesizer have always been compared and contrasted due to their differences in sound, structure, and usage. Both are significant in the music industry and have their own fan base. A piano is a traditional and classic instrument used for centuries in music genres like classical, jazz, and pop. On the other hand, synthesizers are modern and contemporary instruments and mostly used in genres like electronic, house, and techno.

Piano – Traditional And Classical Music

In the world of classical music, pianos have been and still are the most-used musical instrument. Since the inception of this instrument, piano music has been played in a variety of different styles, including Baroque, Classical, Romantic, and modern-day pop and jazz. According to the demand, Pianos come in many sizes and shapes to cater to different needs. For instance, Grand Pianos are usually used in concerts, and upright Pianos are ideal for home use. Pianos create a unique and natural sound that is impossible to replicate electronically. While pianos can be expensive, they are considered a lifetime investment and a valuable addition to any home or music studio.

Synthesizer – Modern And Contemporary Music

Unlike pianos, synthesizers are modern and electronic instruments used mainly in modern genres. Synthesizers are the foundational backbone of electronic dance music. They are popular for producing unique sounds and tones that pianos cannot produce. Synthesizers come with several controls, knobs, and settings that give musicians the freedom to create customized sound effects. Due to their portability, flexibility, and versatility, Synthesizers are preferred by many musicians. Synthesizers are an integral part of the modern music world, and their popularity continues to rise.

Frequently Asked Questions For What Is The Difference Between Piano And Synthesizer


Can You Play A Synth Like A Piano?


Yes, you can play a synth like a piano. Synthesizers have a keyboard just like a piano, but with additional features like the ability to manipulate sound with knobs and buttons. You can create all kinds of sounds with a synth that you can’t with a traditional piano.


Which Is Better Synthesizer Or Keyboard?


A keyboard is a versatile instrument that can play different sounds including piano, drums, and strings. A synthesizer, on the other hand, can create new sounds and manipulate existing ones. Which one to choose depends on your musical needs. If you want to create new sounds, go for a synthesizer.


If you want to play a variety of existing sounds, go for a keyboard.


How Do You Tell If A Keyboard Is A Synthesizer?


A synthesizer is a type of keyboard that can create sounds and manipulate them. Look for keyboards with features like sound editing, programmable patches and modulations, and MIDI capabilities to identify them as synthesizers. They often have a distinct design and can be used for electronic music.


What Is The Point Of A Synthesizer?


A synthesizer is an electronic instrument that creates and manipulates sound waves to produce a wide range of tones and textures. Synthesizers are used to create music and sound effects for various media, such as film and video games. The point of a synthesizer is to provide musicians and sound designers with a versatile and customizable tool for expressing their artistic vision.


Conclusion


Ultimately, the difference between a piano and a synthesizer lies in their sound and capabilities. While both instruments offer unique sounds and playing experiences, pianos offer a classic and timeless sound that cannot be replicated by a synthesizer. However, synthesizers offer limitless opportunities for exploring and creating new sounds.


Whatever your preference may be, both instruments are enjoyable to play and offer endless possibilities for musical expression.

Categories
Archive

Ways To Make Your Home Studio Sound Professional

To make your home studio sound professional, invest in a good audio interface and studio monitors. Then, treat your room with acoustic treatment to prevent unwanted reflections and improve sound quality.


Creating a professional sound in a home studio requires more than just high-quality equipment. While investing in a good audio interface and studio monitors is crucial, treating your room with proper acoustic treatment is equally important. This means controlling the reflections of sound waves in your space to improve the quality of recordings and overall sound.


Other factors to consider include finding the best microphone placement, using proper cables, and minimizing noise interference. By paying attention to these details and fine-tuning your setup, you can create a professional sound in your home studio.

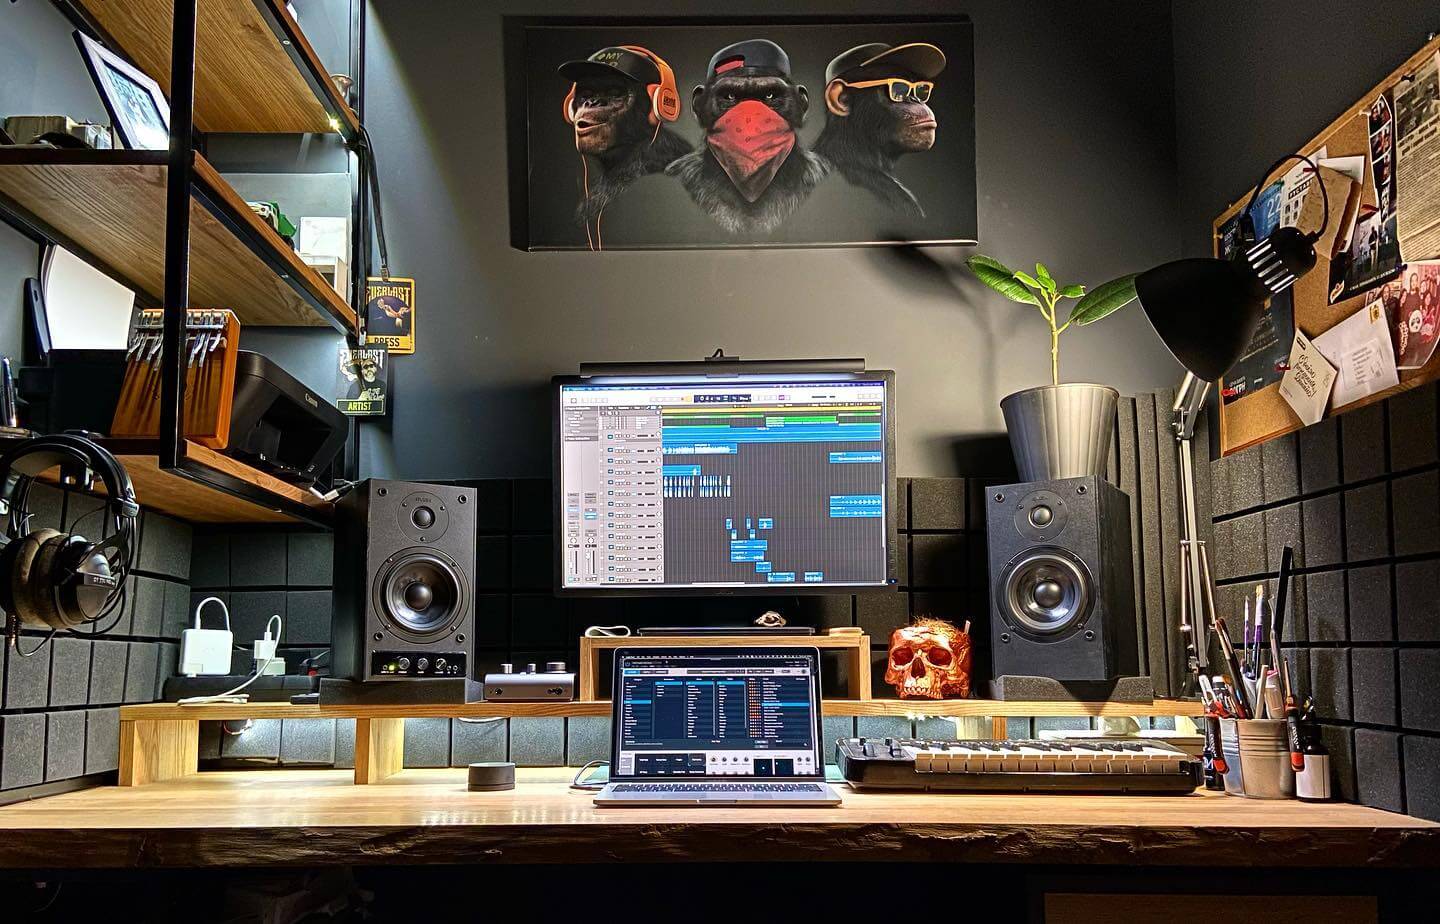
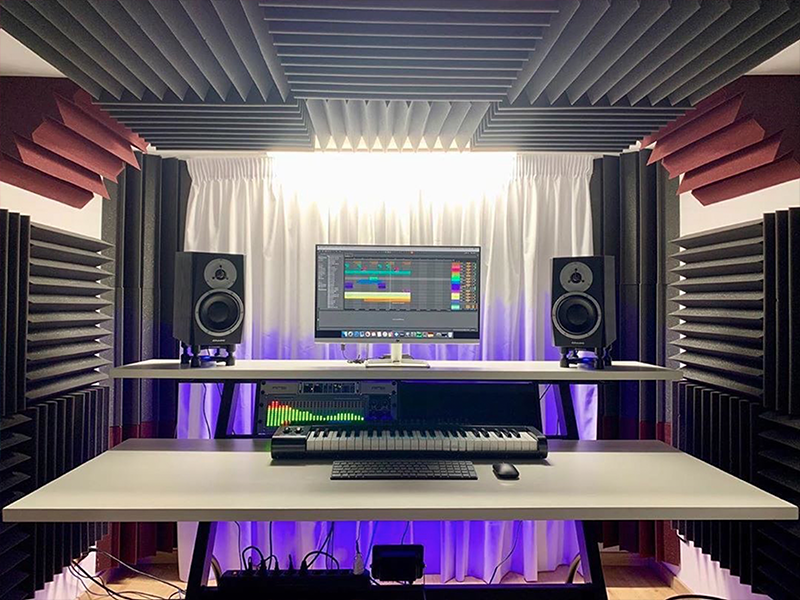
Ways To Make Your Home Studio Sound Professional


Credit: audient.com


Invest In Quality Equipment


Investing in quality equipment is crucial if you want your home studio to sound professional. High-quality microphones, headphones, and speakers can make a world of difference in the final output of your recordings.

Investing in quality equipment is a crucial step towards setting up a home studio that sounds professional. With the right gear and tools, you can achieve a sound that rivals that of a professional recording studio. In this article, we will explore the essential types of equipment that you should invest in to make your home studio sound professional.

Microphones

Microphones are an essential piece of equipment in any recording studio. They are responsible for capturing and transmitting the voice or instrument’s sound to the recording device. Investing in quality microphones will ensure that you achieve a professional sound in your recordings. There are several types of microphones to choose from, including dynamic, condenser, and ribbon microphones. Dynamic microphones are the most common type used in home studios due to their affordability and versatility. On the other hand, condenser microphones are ideal for recording vocals as they are sensitive and capture a wide frequency range. Ribbon microphones are excellent for recording instruments such as drums and guitar amps. Whatever type of microphone you choose, ensure that it is of high quality and matches your recording needs.

Mixing Console

A mixing console is a device that is used to combine and adjust the level, timbre, and dynamics of audio signals. It plays a crucial role in shaping the sound of your recordings. Investing in a quality mixing console will provide you with better control over your recordings and an overall better sound. There are several types of mixing consoles, including analog and digital mixers. Analog mixers offer a warm and natural sound, while digital mixers provide more processing power, automation, and flexibility. Whichever type of mixer you choose, ensure that it has enough channels to accommodate your recording needs and offers good sound quality.

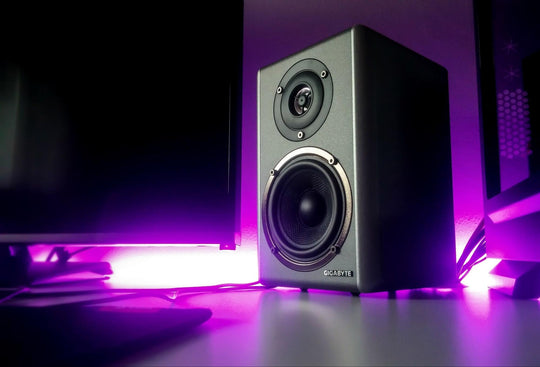
Monitor Speakers

Monitor speakers are designed for accurate and transparent sound reproduction. They allow you to hear your recordings accurately and make critical decisions when mixing and mastering. Investing in quality monitor speakers will ensure that your recordings and mixes sound great, even on other playback systems. There are several types of monitor speakers, including near-field and far-field monitors. Near-field monitors are designed to be used in small rooms, while far-field monitors are suitable for larger rooms. Ensure that your monitor speakers offer good sound quality, accurate frequency response, and enough power to fill your recording space. In conclusion, investing in quality equipment is essential to achieve a professional sound in your home studio. Microphones, mixing consoles, and monitor speakers are some of the essential pieces of equipment that you should consider investing in to make your recordings sound professional. By choosing the right gear and tools, you can set up a home studio that sounds just as good as a professional recording studio.

Take Care Of Acoustics

One of the most crucial elements of creating professional-sounding audio in your home studio is paying attention to acoustics. This means optimizing your recording space to achieve the best possible sound quality. Here are some effective ways to take care of acoustics in your home studio:

Reduce Echoes

One way to improve the acoustics of your home studio is to reduce echoes. Echoes occur when sound waves bounce off hard surfaces, such as walls, ceiling, and floors, causing a distorted and uneven sound. To reduce echoes, you can use sound-absorbing materials such as acoustic foam, carpets, or curtains. Acoustic foam panels are a popular choice since they are affordable, easy to install, and highly effective in absorbing sound waves.

Add Soundproofing

To prevent outside noise from entering your home studio and disrupting your recordings, you may want to consider adding soundproofing to your walls and doors. Soundproofing materials, such as mass-loaded vinyl, are effective in blocking unwanted noise and can be easily installed. By adding soundproofing to your home studio, you can ensure that your recordings have minimal background noise and are of the highest quality.

Assess Room Modes

Room modes are standing waves that occur in enclosed spaces, such as home studios, and can cause resonances, amplifying certain frequencies while minimizing others. Assessing your room modes can help you determine which areas in your studio need to be optimized to achieve better sound quality. You can use various apps and software programs to help you with this process, or you can seek advice from an acoustics professional.

By taking care of acoustics in your home studio through reducing echoes, adding soundproofing, and assessing room modes, you can create a professional and high-quality recording space. With the right equipment and techniques, you can capture excellent sound recordings that are perfect for your needs.

Proper Microphone Placement

One of the most important factors in making your home studio sound professional is proper microphone placement. This involves selecting the best microphone for your needs, positioning it at the right distance and angle, and avoiding plosives. By following these tips, you can ensure that your recordings sound clear and professional, whether you’re recording vocals, instruments, or any other type of audio.

Select The Best Microphone

The first step to proper microphone placement is selecting the best microphone for your needs. There are many different types of microphones available, including condenser microphones, dynamic microphones, and ribbon microphones, each with their own unique characteristics and applications. To ensure optimal sound quality, choose a microphone that is best suited for the sound source you will be recording.

Distance And Angle

Once you have selected the best microphone, it’s important to position it at the right distance and angle. The distance between the microphone and the sound source will determine the level of direct and indirect sound that is picked up, and the angle at which the microphone is pointed will affect the frequency response and off-axis rejection. As a general rule, position the microphone about 6-12 inches away from the sound source and point it directly at the source for the best sound quality.

Avoid Plosives

Plosives are the explosive sounds made when pronouncing certain letters, such as “p” and “b,” that can cause a popping sound in the microphone. To avoid plosives, use a pop filter or windscreen to prevent the blasts of air from hitting the microphone directly. You can also instruct the singer or speaker to move slightly to the side of the microphone when pronouncing these letters.

By carefully selecting the right microphone, positioning it at the correct distance and angle, and avoiding plosives, you can make your home studio recordings sound professional and polished. With these tips, you’ll be well on your way to creating great-sounding audio in no time!

Ways To Make Your Home Studio Sound Professional


Credit: m.youtube.com


Learn To Mix And Master

If you’re looking to produce quality music from your home studio, then learning to mix and master is a crucial skill to have. Mixing and mastering are the final stages of music production, where you balance, equalize, and compress your tracks to make them sound crisp and professional. In this article, we’ll discuss some tips and tricks to help you improve your mixes and take them to the next level.

Balance The Mix

The first step in achieving a professional sound is to balance your mix. This means ensuring that each element in your track sits well with the others and can be heard clearly. This can be achieved by adjusting the volume levels of each element and panning them from left to right to create a sense of space. Remember, the goal is to achieve a cohesive sound where all the instruments, vocals, and effects work together to create a harmonious mix.

Equalization

Equalization, or EQ, is the process of adjusting the frequency levels of your tracks to eliminate frequency clashes and unwanted sounds. It involves boosting or cutting specific frequency ranges to achieve a more balanced sound. For instance, you can use EQ to boost the high frequencies of a vocal track to make it sound more crisp and clear. Alternatively, you can use EQ to cut the low-end frequencies of a bass track to make room for the kick drums. EQ can significantly impact the overall quality of your mix, so it’s essential to use it correctly.

Compression

Compression is the process of reducing the dynamic range of your tracks, ensuring that the loudest parts don’t overpower the quieter ones. It involves using a compressor, which automatically adjusts the volume levels of your tracks based on specific settings. Compression can be used to add punch to your drums, smooth out vocal tracks, and give your mix an overall polished sound. However, it’s important not to overdo it as too much compression can lead to a loss of dynamics in your tracks.

In conclusion, learning to mix and master is a key skill for anyone looking to produce music from their home studio. Balancing the mix, equalization, and compression are essential processes that can help take your tracks to the next level. Experiment with these tips and tricks and listen to the difference they can make in your mixes.


Control The Environment

Making your home studio sound professional is crucial if you want to achieve the best quality recording. One of the most important factors to consider when setting up a studio is controlling the environment in which you will be recording. This will ensure that there are no unwanted sounds that may affect the recordings. Here are some tips on how to control the environment in your home studio:

Minimize External Noise

Noise can be a real issue when recording in a home studio as it can be difficult to completely eliminate external sounds. However, there are some things you can do to minimize them:

  • Install soundproofing materials like acoustic foam panels, bass traps, and diffusion panels on the walls and ceilings to absorb sound waves and reduce echoes.
  • Double-glaze your windows or use noise-reducing curtains to keep external noise out.
  • Record at times when noise levels are lower, such as early in the morning or late at night.

Maintain Stable Temperature

Temperature fluctuations can affect the quality of sound in your studio. Here are some ways to maintain a stable temperature:

  • Use air conditioning or heating systems to regulate the temperature.
  • Make sure the room is insulated to keep the temperature stable.
  • Keep the studio room door closed to maintain a consistent temperature.

Regulate Humidity

Humidity can also affect the quality of sound and the equipment in your studio. Follow these tips to regulate humidity:

  • Use a dehumidifier to prevent excess moisture from building up in the room.
  • Use a humidifier to keep the air in the room from becoming too dry.
  • Avoid drinking, smoking, or bringing plants into the studio room as they can all add moisture to the air.
Ways To Make Your Home Studio Sound Professional


Credit: auralex.com


Choose The Right Software

If you’re new to home recording, one of the most daunting tasks can be figuring out how to get your studio to sound professional. One of the most important decisions you’ll make is choosing the right software. Your choice of digital audio workstation (DAW) will have a significant impact on the quality of your recordings.

Digital Audio Workstation

A DAW is the backbone of your home studio. It’s the software you’ll use to record, process, and mix your music. Some popular options include Logic Pro X, Pro Tools, Ableton Live, and FL Studio. Each DAW has its own strengths and weaknesses, so it’s essential to select one that best suits your needs.

Plugins And Virtual Instruments

Plugins and virtual instruments are software programs that add additional functionality to your DAW. There are thousands of plugins available to choose from, ranging from guitar amp simulators to EQs and compressors. Virtual instruments are software versions of real instruments and can be used to create high-quality, realistic recordings without the need for expensive hardware.

Automation

Automation is the process of programming your DAW to make changes to a track automatically. This can help save time and ensure that your mix sounds cohesive. For example, you could program your DAW to increase the volume of a guitar solo during its climax automatically.

Summary

In conclusion, selecting the right software is the first step towards creating professional-sounding recordings in your home studio. With the right DAW, plugins, and automation techniques, you can achieve high-quality, polished results without the need for pricey equipment.

Record In High Resolution

Recording music at home is convenient and cost-effective, but it can be challenging to achieve professional-quality sound. One simple way to improve the quality of your recordings is to record in high resolution. High-resolution audio captures more detail and nuance than lower-quality formats, resulting in more detailed and accurate recordings.

Choosing The Sample Rate

When recording in high resolution, you need to choose the right sample rate. Sample rate refers to the number of times per second a recording device captures audio data. The standard sample rate for CDs is 44.1 kHz, but for high-resolution recordings, sample rates of 88.2 kHz, 96 kHz, and even 192 kHz are common. The higher the sample rate, the more detailed and accurate the recording will be.

Choosing The Bit Depth

In addition to sample rate, you also need to choose the right bit depth. Bit depth refers to the number of bits used to describe each audio sample. The standard bit depth for CDs is 16 bits, but for high-resolution recordings, bit depths of 24 bits are common. The higher the bit depth, the more dynamic range and detail your recordings will have.

Avoid Clipping

When recording in high resolution, it’s important to avoid clipping. Clipping occurs when the audio signal exceeds the maximum level that can be recorded. This can result in distortion and a loss of detail in the recording. To avoid clipping, make sure to set your input levels correctly and monitor the levels throughout the recording process. It’s better to record at a lower level and boost the volume in post-production than to risk clipping during the initial recording.

By following these simple tips, you can make your home studio sound more professional and achieve high-quality recordings that will impress your listeners.

Get Professional Feedback

When it comes to creating a professional-sounding recording in your home studio, it can be challenging to know where to begin. One of the best ways to improve the sound quality of your recordings is to get feedback from professionals in the audio production industry. Here are some strategies that you can use to obtain feedback to help make your studio recordings sound more polished.

Use A Reference Track

One way to get professional feedback is to use a reference track. A reference track is a song that you admire and can act as a comparative tool for your work. Listening to a reference track while you mix your recording can help you to identify areas that need improvement. It can assist you in determining what adjustments you need to make to your production to make it sound more professional.

Find Online Communities

Another approach that you can take is to get feedback from online communities. There are many online communities for musicians and audio production professionals that you can join. These communities are a fantastic way to interact with and learn from other people in the industry. You can post your home recordings on these websites and receive feedback and recommendations. Make sure that you take the critique in a positive manner and learn from it.

Take Audio Production Courses

Lastly, taking an audio production course can be immensely helpful in obtaining professional feedback on your recording. The curriculum is structured to teach you the ins and outs of audio production, mastering, and mixing. You will have the opportunity to submit your recordings to your instructor, who will provide you with comprehensive feedback on how to enhance them to sound professional.

Professional feedback is vital if you are looking to make your home studio sound professional. The strategies mentioned above can assist you in obtaining feedback from professionals in the audio production industry, so you can enhance your recording skills and create studio-quality tracks from the comfort of your home.

Frequently Asked Questions On Ways To Make Your Home Studio Sound Professional


How Do I Get Professional Sound In My Home Studio?


To get professional sound in your home studio, follow these steps: 1. Invest in quality equipment like microphones, audio interfaces and monitors. 2. Set up your studio in an acoustically treated room. 3. Properly position your equipment and use equalization techniques.


4. Create a good mix by balancing volume levels and adjusting levels of tracks. 5. Master your final track to ensure it sounds polished.


How Can I Improve The Sound In My Home Studio?


To improve the sound in your home studio, use acoustic treatment in your room, invest in quality studio monitors, use headphones for critical listening, position your speakers and monitoring position properly, and consider using a subwoofer to balance low frequencies.


How Do I Make A Professional Home Studio?


To make a professional home studio, follow these guidelines: 1. Choose a room with good acoustics, size, and accessibility. 2. Invest in high-quality audio equipment like microphones, headphones, and speakers. 3. Soundproof your room with acoustic panels, curtains or foam.


4. Add a desk, an ergonomic chair, and proper lighting. 5. Use software like GarageBand or Audacity for recording, editing, and mixing your tracks.


How Do I Make My Audio Recording Sound Professional?


To make your audio recording sound professional, use a good quality microphone and record in a quiet environment. Use post-production tools like EQ and compression to improve sound quality. Edit out any mistakes or unwanted noise. And finally, adjust the volume levels to ensure consistent sound throughout the recording.


Conclusion


Finally, achieving a professional sound in your home studio also requires constant practice and experimentation with equipment and techniques. Keep in mind that every room and setting has its unique acoustic characteristics that can affect your recordings. Therefore, always listen carefully to your recordings and make the necessary adjustments.


By following the tips outlined and combining them with your creativity, you can achieve a professional sound in your home studio.

Categories
Archive

Using Reference Tracks To Get Better Sounding Masters

Using reference tracks can help you achieve better sounding masters. Reference tracks can guide you in terms of EQ, compression, levels, and overall sound characteristics.


Also, every producer or mix engineer who wants pro-quality music needs a reference point. Compare your own tracks against it. To achieve the best results, a reference are an effective tool to use. A reference track is a professionally produced and mastered song with sound characteristics that the artist wants to achieve in their own music.

Related reading: What is a Reference Master? and Manley Reference Cardioid Microphone. For background, see the Wikipedia article on Audio mastering.


Moreover, comparison songs let you check specific elements against your own mix. Listen to tonality, panning, and dynamics. When done correctly, it can improve the sound and quality of your mixes, resulting in a better final product.

Using Reference Tracks To Get Better Sounding Masters


Credit: www.masteringthemix.com


How To Choose Reference Tracks?

When it comes to getting better-sounding masters, using pro tracks is a great way to achieve your desired result. A reference are existing tracks that you use as a comparison while mastering your own music. In addition, they help to ensure that your music is on par with professional music in terms of quality and loudness. In this blog post, we’ll discuss how to choose comparison songs that can help you get great sounding masters.

Selecting Tracks With Similar Genres

Furthermore, the first step to choosing a good reference track is to pick a similar genre to your music. This is because different genres have different sonic characteristics that can affect how your final mix sounds. For instance, hip-hop music has more emphasis on the low-end. In contrast, acoustic music will place more emphasis on the mid and high-range frequencies. By selecting a reference track of the same genre, you can ensure that your mix sounds similar and is on par with professional music.

Matching Loudness

When selecting a reference track, you need to make sure that it matches the loudness of your track. Additionally, meters show loudness in LUFS or decibels (dB). It’s essential to have your track’s loudness to be similar to that of professional music. A track that is too quiet may not stand out among other music. One that is too loud may cause ear fatigue and distortion. You can use loudness meters to compare the loudness of your track with the reference track.

Considering The Production Techniques

Another factor to weigh when you pick a reference track is how the producer made it. Also, you need to listen to the track carefully and take note of the production techniques used to create it. Some techniques that you should consider include EQ, compression, reverb, and stereo imaging. These techniques shape the overall sound of the mix. Using them in your own mix can improve your final master.

In conclusion, selecting a good reference track is an essential part of the mastering process. Moreover, pick a similar genre, match loudness, and study the production techniques. Your master can then stand next to professional releases.

Using Reference Tracks To Get Better Sounding Masters


Credit: www.izotope.com


Benefits Of Using Reference Tracks


In addition, Using pro tracks helps you get better masters. They show how you want your track to sound. Referencing your mix against other commercially successful tracks can help identify any mix deficiencies and help you make better mixing and mastering decisions. This results in a higher quality final product.

Furthermore, benefits of Using Reference Tracks Using reference tracks is an effective technique to achieve better sounding masters. It is a process that involves listening to a particular piece of music that has been mixed and mastered to a high standard. It is an excellent tool for spotting where you can improve. In this section, we will discuss the three main benefits of using a reference in the music mixing and mastering process. Provide A Benchmark For Comparison Using comparison songs provides a benchmark for comparison when creating a mix.

Practical Tips

Additionally, it is essential to have a clear understanding of the desired sound and style of music, and pro tracks can provide this. By listening and comparing the reference track with the mix being worked on, we can quickly identify areas that require significant improvement. This process can also help set goals, objectives and save time during the mixing process. Help To Identify The Weakness In Your Mix One big benefit of reference tracks is that they reveal weak spots in a mix.

Many producers and mix engineers often struggle with identifying problematic elements in a mix. However, with the use of reference tracks, it becomes easier to spot and understand such issues. Comparing the reference track with your mix reveals problems. Look at the frequency spectrum, stereo image, and dynamics. Offer Insight Into What Elements Need Changing In Your Mix Reference tracks show you which elements of a mix need work.

Putting It Into Practice

By listening to the reference track, it becomes clear where the weak points in the mix are and what needs to be changed. This process helps you spot the elements to bring back or remove from the mix. Additionally, the reference track provides a better understanding of how different elements can be centered and balanced to achieve a more cohesive sound. In conclusion, using reference tracks is an essential technique in achieving a better sounding mix and master.

Reference tracks give you a benchmark and expose weak spots in a mix. They also show which elements need changing, so every mix engineer can use them. By adopting this technique, you can achieve an excellent sounding mix that can stand out from the rest.


How To Use Reference Tracks Effectively?

Mastering is the final step in the music production process that ensures a balanced and polished sound to the audio track. However, getting the right mastering sound can be challenging as it is subjective and depends on a listener’s preferences. This is where using reference tracks can come in handy. Reference tracks are pro-quality songs that sound similar to the track you’re mastering. They help you benchmark your mix against a successful track to see where your track falls short. In this post, we will discuss how to use reference tracks effectively to get better sounding masters.

Focusing On The Tonality

The tonality of a song determines how the song sounds to the listener. It’s essential to focus on the tonality of your reference track to identify the frequency ranges that work for your specific genre. Listen carefully to the tonality of the reference track and compare it to your track. This will help you identify which frequency ranges to boost or cut to get the desired sound. You can use a frequency analyzer tool to see the frequency spectrum and make adjustments to your mix.

Analyzing The Dynamics

Dynamics refer to the variation between the loudest and quietest parts of a track. A good mastering job should ensure that the dynamics are consistent throughout the track. Analyze the dynamics of your reference track by using a tool like a compressor or limiter. This will help you get a better idea of what dynamics to target in your mix. Make sure to avoid over-compressing, as it can lead to a lifeless and flat sound.

Evaluating Spatial Characteristics

Spatial characteristics refer to the presence of different elements in the stereo field, such as panning, reverb, and delay. Analyze the spatial characteristics of your reference track to identify how elements are placed in the stereo field. This can help in creating a similar spatial image in your track. Use a stereo imaging tool to analyze and make adjustments to your mix.

Using reference tracks is an excellent way to ensure that your track is polished and balanced to a professional level. Remember to compare your mix with a reference track that is similar to your track for genre, mix, and instrumentation. Focusing on tonality, analyzing the dynamics, and evaluating spatial characteristics are key steps to use reference tracks effectively. Follow these steps to get better sounding masters and take your music to the next level.

Common Pitfalls To Avoid When Using Reference Tracks

Using reference tracks can massively improve the quality of your masters. A reference track is a high-quality audio file you compare your mix against. It helps you get close to that same standard. However, there are several common pitfalls to avoid when using reference tracks. These include:

Copying The Reference Too Closely

While it’s important to reference your track against a high-quality mix, it’s important not to copy it too closely. Your track should still sound like yours, not an exact replica of the reference mix. Instead, use the reference track as a guide to achieve a similar level of quality while maintaining your own unique sound.

Choosing Inappropriate Reference Tracks

Choosing the right reference track is crucial. It should be in the same genre as your track and feature similar instrumentation and arrangement. Otherwise, the reference track may not accurately represent the sound you are trying to achieve and could potentially lead you down the wrong path.

Not Being Objective In Your Analysis

It’s important to approach the reference track analysis objectively. Don’t let personal preferences or biases come into the equation. Instead, focus solely on the technical aspects such as the frequency balance, dynamics, and overall tonality of the reference track. This lets you judge your own mix without bias. Then you can make the changes needed for a professional sound.

By being aware of these common pitfalls, you will be able to use reference tracks effectively and avoid any potential mistakes. Remember to treat reference tracks as a guide, not a blueprint. This allows you to stay true to your own unique sound while still achieving a professional-quality mix.

Incorporating Reference Tracks Into Your Mastering Process


Incorporating reference tracks into your mastering process can significantly improve the overall sound quality of your tracks. By comparing your mix to professionally mastered tracks, you can identify and correct any issues before finalizing your master. This technique can help you achieve a more polished, radio-ready sound.

How To Integrate Reference Tracks Into Your Workflow

As a mastering engineer, incorporating reference tracks into your workflow is crucial to achieving a polished and professional sounding master. To begin with, it’s important to choose a reference track that is similar in style and genre to the track you’re mastering. This gives you a benchmark for your work. It also guides your choices on EQ, compression, and overall loudness.

Once you’ve chosen your reference track, import it into your mastering session and begin A/Bing it with your own mix. Toggle between the two tracks. You will hear where your mix falls short and where you overdid the processing. You can use this information to make adjustments and fine-tune your mix until it matches the sound of the reference track.

It’s important to note, however, that your ultimate goal should not be to make your mix sound exactly like the reference track. Let the reference track serve as a guidepost. It helps you reach a similar quality and balance in your own mix.

Alternative Approaches To Using Reference Tracks

A/B comparison is the most common way to use a reference track in mastering. There are other ways to use one too. For example, you can use a reference track as a point of comparison during each stage of the mastering process, such as when making EQ or compression adjustments, or when making final volume adjustments.

Additionally, you can create a playlist of multiple reference tracks that represent different sonic characteristics you’re trying to achieve with your own mix. For example, you might choose one reference track for its overall loudness, another for its detailed high-end, and another for its tight low-end. By referencing these tracks throughout the mastering process, you can ensure that your final mix is well balanced across all frequency ranges.

Using Reference Tracks To Get Better Sounding Masters


Credit: www.masteringthemix.com


Frequently Asked Questions For Using Reference Tracks To Get Better Sounding Masters


Do Professionals Use Reference Tracks?


Yes, professionals use reference tracks to check their work against industry standards. They also use them for accurate mixes and for inspiration. It’s a common practice in audio production to reference successful songs in the same genre and aim to match or exceed their quality.


How Do You Use Reference Tracks For Songwriting?


Reference tracks are a valuable tool for songwriting. They help you get an idea of the sound you want to achieve and inspire creativity. Listen to the reference tracks and analyze their structure, melody, rhythm, and sound arrangement. Understand the elements you like and incorporate them into your own work.


Does Mastering Improve Sound Quality?


Mastering can improve sound quality by enhancing its overall loudness and clarity. It can also add warmth, depth, and detail to the audio. Ultimately, mastering is an essential step in audio production that ensures a consistent sound across different playback devices and enhances the listener’s experience.


What Makes A Good Audio Master?


A good audio master should have a balanced sound, with frequencies evenly distributed. The right amount of compression and limiting to control dynamics and volume. It should also be free from distortion and noise, with a consistent level and tonality throughout.


Good mastering requires skill and experience to achieve the best possible outcome.


Conclusion


Using reference tracks is a powerful way to enhance the quality of your masters. By analyzing the production techniques, sonic characteristics and overall sound, you can gain valuable insights into how top-tier tracks were made. Whether you’re a mixing engineer or a music producer, incorporating this practice into your workflow will help take your creations to the next level.


Utilize the tips and tricks provided to refine your listening skills, unleash your creativity, and achieve the best sounding masters possible.

Categories
Archive

Ways To Fix Or Even Prevent Frequency Collisions

Preventing frequency collisions can be done by adjusting the frequency and power levels of your devices. This can be achieved by using specialized software and monitoring tools that can detect interferences and provide solutions to fix the problem.


Frequency collisions can lead to disrupted connections, data loss, and network congestion, which can be costly for businesses. To ensure proper functioning of your devices and network, it is important to take preventative measures to avoid frequency collisions. Frequency collisions can be a significant issue for businesses that rely heavily on their network connectivity and data transmissions.


Whether it is for wireless communication or wired Ethernet, network devices need to operate in an environment that is free of interferences. When multiple devices transmit data signals using the same frequency range, collisions can happen leading to unstable connections, data loss, and network congestion. These issues can affect the productivity of a business, causing delays and additional expenses. Therefore, it is essential for businesses to take proactive measures to prevent and fix frequency collisions. This article will discuss effective ways to prevent frequency collisions.

Ways To Fix Or Even Prevent Frequency Collisions


Credit: www.masteringthemix.com


Ways To Prevent Frequency Collisions


Preventing frequency collisions involves carefully managing the allocation of radio channels and frequencies to avoid interference between communication devices. Other solutions include using directional antennas and increasing the power of the signal. It is important to follow best practices and guidelines to ensure a smooth operation for all devices utilizing the frequencies.

Preventing frequency collisions is essential for ensuring efficient and reliable communication in wireless networks. Frequency collisions can occur when multiple devices transmit signals on the same frequency simultaneously, leading to interference and reduced network performance. However, there are several ways to prevent frequency collisions.

Implementing Frequency Hopping

One effective way to prevent frequency collisions is through frequency hopping. This technique involves rapidly switching frequencies during transmission, making it difficult for colliding signals to interfere with each other. Frequency hopping can be implemented through software-based algorithms and can be highly effective in preventing frequency collisions.

Increasing Bandwidth

Another way to prevent frequency collisions is by increasing the available bandwidth. Networks with limited bandwidth are more susceptible to collisions, so increasing bandwidth can help reduce the likelihood of collisions occurring. This can be accomplished by upgrading network hardware or by using technologies such as channel bonding.

Reducing Power

Reducing the power of wireless signals can also help prevent frequency collisions. Lower-powered devices are less likely to interfere with each other, reducing the risk of collisions. This approach is particularly effective in crowded environments where many devices are transmitting on the same frequency.

Using Directional Antennas

Finally, using directional antennas can help prevent frequency collisions by focusing the wireless signal in a specific direction. This reduces the likelihood of signals colliding and interfering with each other. Directional antennas are particularly useful in outdoor environments where signals can be easily scattered or reflected. In conclusion, preventing frequency collisions is essential for maintaining reliable wireless communication. By implementing techniques such as frequency hopping, increasing bandwidth, reducing power, and using directional antennas, it is possible to minimize the risk of collisions and ensure efficient network performance.

Ways To Fix Or Even Prevent Frequency Collisions


Credit: www.masteringthemix.com


Ways To Fix Frequency Collisions


Preventing frequency collisions can be achieved by carefully organizing the use of different wireless devices. One way to fix collision is by assigning separate channels to devices that operate on the same frequency. Changing the access point’s location can also improve network coverage and reduce interference.

Frequency collisions are a common issue faced in wireless networks. These collisions can lead to slow network speeds, interference, and connection issues. However, there are a few ways to fix frequency collisions and prevent them from occurring in the first place.

Performing A Site Survey

One way to fix frequency collisions is by performing a site survey. This involves analyzing the layout of your network and identifying areas of congestion. By doing so, you can determine the best location for access points to avoid frequency collisions.

Using A Spectrum Analyzer

Another way to fix frequency collisions is by using a spectrum analyzer. This tool helps you identify the channels with the least amount of traffic and interference, allowing you to select the optimal channel. By doing so, you can prevent frequency collisions and ensure smooth network performance.

Changing The Channel

Changing the channel is another effective way to fix frequency collisions. By selecting a different channel, you can avoid interference from nearby wireless networks. It is crucial to choose the right channel to prevent future frequency collisions from occurring. In conclusion, frequency collisions can cause many issues for wireless networks. By performing a site survey, using a spectrum analyzer, and changing the channel, you can fix frequency collisions and prevent them from recurring.


Frequently Asked Questions Of Ways To Fix Or Even Prevent Frequency Collisions


How Do You Fix Clashing Frequencies?


To fix clashing frequencies, you need to identify the conflicting frequencies and adjust them to harmonize with each other. You can do this by using a frequency analyzer tool to determine the conflicting frequencies and then adjust the EQ settings of each instrument accordingly.


It’s important to give each instrument its own space in the frequency spectrum to avoid clashing frequencies.


How Do You Deal With Frequency Masking?


To deal with frequency masking, it is crucial to identify the problematic frequency and then reduce its overall amplitude. This can be done by either using EQ to tame the frequency or using multiband compression to reduce the dynamic range.


Additionally, using narrow notches in the EQ can also help to target the specific frequency.


What Is Frequency Masking?


Frequency masking occurs when a strong audio frequency masks or hides a weaker frequency, making it difficult to detect or hear. It is a perceptual phenomenon that affects how we hear sounds in different frequencies. In simpler words, when a loud sound covers or mutes another weaker sound, that’s frequency masking.


How Do Frequency Collisions Happen?


Frequency collisions happen when different wireless devices simultaneously use the same frequency. This creates interference resulting in poor signal quality and connection.


Conclusion


In short, frequency collisions can be frustrating, but there are several ways to fix or even prevent them. It’s essential to ensure the proper frequency coordination, mandatory site surveys, and deploying remote monitoring systems to monitor the frequency jamming accurately.


By keeping a few essential things in mind, frequency collisions can be avoided, and your network can run smoothly without any hitch. So keep these tips in mind to stay ahead of the game and prevent frequency collisions before they become a problem.


Categories
Archive

Experts Guide To Using Harmonic Distortion In Music

Harmonic distortion in music can add depth and richness to sound. It involves intentionally adding harmonic overtones to an audio signal, resulting in a warmer, more organic texture.


By using harmonics, music producers can create a unique sound signature that can differentiate their music from others. However, the technique must be used carefully, as too much harmonic distortion can result in a sound that is irritating to the ear.


In this expert’s guide, we will explore how to use harmonic distortion in music and provide tips for achieving the desired effect without causing harshness in sound.

Experts Guide To Using Harmonic Distortion In Music


Credit: www.masteringthemix.com


Types Of Harmonic Distortion

Types of Harmonic Distortion:

Harmonic distortion is a technique used by music producers and sound engineers to create unique sound effects in music. It can be created using a variety of methods, but all types of harmonic distortion are categorized as either odd-order or even-order harmonics. Additionally, total harmonic distortion (THD) and intermodulation distortion (IMD) are two other forms of harmonic distortion commonly used in music production.

Odd-order Harmonics:

Odd-order harmonic distortion occurs when overtones or harmonics are created from every other odd-numbered harmonic. This type of distortion creates a harsh and gritty sound that can be useful for rock, metal, and industrial music.

Even-order Harmonics:

Even-order harmonic distortion occurs when overtones or harmonics are created from every other even-numbered harmonic. This type of distortion creates a warm and full-bodied sound that can be useful for jazz, blues, and soul music.

Total Harmonic Distortion (thd):

Total harmonic distortion (THD) is the sum of distortion from all harmonics, both odd and even. THD is used to measure the overall distortion in audio equipment and is expressed as a percentage of the total signal.

Intermodulation Distortion (imd):

Intermodulation distortion (IMD) is a type of harmonic distortion that occurs when two or more frequencies are combined in an audio circuit. IMD can create unwanted artifacts and artifacts in audio signals and is commonly used in electronic music production.

Understanding the different types of harmonic distortion is essential for creating unique and captivating music. Sound engineers and producers should experiment with different types of distortion to find the perfect balance for each track.

Applications Of Harmonic Distortion


The use of harmonic distortion in music can add warmth, depth, and texture to audio recordings. It can be applied creatively to achieve unique sound effects or subtly to enhance the overall sound quality. Expert audio engineers understand how to use harmonic distortion effectively to achieve desired results.

Applications of Harmonic Distortion: Harmonic distortion is widely used in music to add character, create unique sound effects, enhance guitar and bass tones, and for mastering. Let’s explore the various applications of harmonic distortion in detail. Adding Character to Audio Tracks: Adding harmonic distortion to an audio track can create a warm, analog-like character that is pleasing to the ear. This technique is commonly used in genres like rock, blues, and jazz to add grit and depth to the music. By carefully adjusting the amount of harmonic distortion, you can enhance the nuances and subtleties of the recording. Creating Unique Sound Effects: Harmonic distortion can also be used to create unique sound effects in music. For example, by adding distortion to a drum track, you can create a distorted and gritty sound that gives the drums a more organic and natural feel. Similarly, by adding distortion to vocals, you can create a distorted voice effect that is common in genres like alternative and punk rock. Enhancing Guitar and Bass Tones: Guitarists and bassists often use harmonic distortion to enhance their tone. By adding distortion to their signal, they can create a thicker, more sustained sound that is ideal for playing lead or rhythm parts. Additionally, harmonic distortion can be used to add warmth and depth to their tone, making it more pleasant to the ear. Using Harmonic Saturation for Mastering: Harmonic saturation is a form of harmonic distortion that is used in mastering to give the music a richer, fuller sound. By saturating the mix bus with a slight amount of distortion, you can enhance the harmonics of the music, making it sound more vibrant and exciting. This technique is commonly used in genres like electronic dance music (EDM) to create a fuller and more energetic sound. In conclusion, harmonic distortion is a powerful tool for music producers and engineers. By understanding its various applications and how to use it, you can enhance your music in a way that is unique and pleasing to the ear.

Tools For Creating Harmonic Distortion

Creating harmonic distortion is a great way to add warmth, depth, and character to your music. Tools like overdrive and distortion pedals, tube preamps, saturation plugins, and analog tape machines can help you achieve this effect. In this post, we’ll explore each of these tools and how you can use them to create harmonic distortion.

Overdrive And Distortion Pedals

Overdrive and distortion pedals are popular tools used by guitarists to create harmonic distortion. These pedals work by amplifying the guitar’s signal and breaking it up into smaller pieces, creating a distorted sound. Overdrive pedals typically produce a more subtle distortion, while distortion pedals create a more aggressive and heavy sound.

To use overdrive and distortion pedals, simply connect them between your guitar and amplifier. Adjust the settings to your desired level of distortion, and experiment with different combinations to find the perfect sound. Some popular overdrive and distortion pedals include the Boss DS-1 Distortion Pedal and the Ibanez TS9 Tube Screamer Overdrive Pedal.

Tube Preamps

Tube preamps are another tool used to create harmonic distortion. These devices use vacuum tubes to amplify the input signal, creating a natural warmth and distortion. Tube preamps are commonly used in recording studios to add depth and character to vocals, guitars, and other instruments.

To use a tube preamp, simply connect it between your microphone or instrument and your recording device. Adjust the settings to your desired level of distortion, and experiment with different tubes to find the perfect sound. Some popular tube preamps include the Universal Audio 710 Twin-Finity Mic Preamp and the ART Pro MPA-II Tube Preamp.

Saturation Plugins

Saturation plugins are digital tools used to create harmonic distortion in recordings. These plugins simulate the sound of analog tape machines and tube preamps, allowing you to add warmth and depth to your music. Saturation plugins are commonly used in mixing and mastering to add character and excitement to tracks.

To use a saturation plugin, simply add it to your audio track or bus in your digital audio workstation. Adjust the settings to your desired level of distortion, and experiment with different plugins to find the perfect sound. Some popular saturation plugins include Waves J37 Tape and Slate Digital Virtual Tape Machines.

Analog Tape Machines

Analog tape machines are a classic tool used to create harmonic distortion. These devices use magnetic tape to record and playback audio, creating a natural warmth and saturation. Analog tape machines are commonly used in recording studios and can add depth and character to vocals, guitars, and other instruments.

To use an analog tape machine, simply connect it between your microphone or instrument and your recording device. Adjust the settings to your desired level of distortion, and experiment with different tapes to find the perfect sound. Some popular analog tape machines include the Studer A800 and the Ampex ATR-102.


Tips For Using Harmonic Distortion In Mixing And Mastering


Discover how to utilize harmonic distortion in mixing and mastering to add warmth and depth to your music. In this expert guide, you’ll learn tips and techniques for achieving the perfect balance of harmonics for a professional sound.

When it comes to mixing and mastering, harmonic distortion can be a powerful tool to add warmth, punch, and character to your tracks. However, it can be a delicate balance to use it properly. In this post, we’ll guide you through some tips on how to effectively use harmonic distortion in your mixing and mastering.

Start With A Clean Signal

Before applying any harmonic distortion, it’s important to start with a clean signal. This means ensuring a good recording and minimizing any noise or hiss. A clean signal will provide a solid foundation for adding harmonics and will prevent any unwanted artifacts.

Use Eq To Shape The Harmonic Content

Using EQ before applying harmonic distortion can help shape the harmonic content in a way that complements the mix. It’s important to emphasize the right frequencies and remove any unwanted ones. This will prevent any masking of other instruments or sounds in the mix and help the harmonics blend in seamlessly.

Blend With The Dry Signal

When applying harmonic distortion, it’s important to blend it with the dry signal in a way that sounds natural. Don’t overdo it or it will start to sound unnatural and forced. Make small adjustments and listen carefully to how it’s affecting the track.

Consider The Mix As A Whole

It’s crucial to consider the mix as a whole when applying harmonic distortion to specific tracks. Each instrument and sound should complement each other and not clash or overpower each other. It’s also important to listen to the mix in different environments to ensure it sounds good universally. In conclusion, harmonic distortion can be an excellent tool in mixing and mastering when used properly and effectively. Start with a clean signal, use EQ to shape the harmonic content, blend with the dry signal, and consider the mix as a whole. Use these tips as a guide to add warmth, depth, and character to your tracks.


Famous Examples Of Harmonic Distortion In Music


Harmonic distortion can add unique character to music. Well-known examples include Jimi Hendrix’s guitar sound and the crunchy guitar riffs in Nirvana’s “Smells Like Teen Spirit. ” Using harmonic distortion can give your music a signature sound and make it stand out from the crowd.

Famous Examples of Harmonic Distortion in Music Harmonic distortion is a popular technique used by music producers to add warmth, grit and character to a recording. The technique can be applied to any instrument or sound, and the results are often outstanding. There are many famous examples of harmonic distortion in music, where this technique was used to create some of the most iconic sounds in history. In this article, we will take a closer look at some of these examples and how they were achieved. The Distorted Guitar Tone of Jimi Hendrix One of the most famous examples of harmonic distortion in music is Jimi Hendrix’s distorted guitar tone. Hendrix used a Fuzz Face pedal to create his signature sound, which was a fuzzed-out, distorted tone that became his hallmark. The Fuzz Face pedal creates its distortion by amplifying the guitar signal until it starts to clip, creating a warm and fuzzed-out tone that Hendrix loved. This technique has since been used by countless guitarists, and the Fuzz Face pedal has become a classic piece of equipment in the world of music production. The Saturation and Compression on Led Zeppelin’s ‘When the Levee Breaks’ Another great example of harmonic distortion in music comes from Led Zeppelin’s ‘When the Levee Breaks’. The song features a drum loop that was recorded in a stairwell, giving it an ambient and spacious sound. However, to achieve the desired effect, the engineers had to saturate and compress the signal heavily. This processing added a warm and gritty tone to the drums, making them sound larger than life and giving the song the iconic sound it is known for today. The Overdriven Bass on The Beatles’ ‘Revolution’ ‘Revolution’ is a classic rock song by The Beatles that features an overdriven bass guitar tone. This overdriven tone was achieved by running the bass guitar signal through a distortion pedal, giving it a warm and fuzzy sound. The distortion pedal added harmonics to the signal, enhancing the tone in a way that could not be achieved with a clean signal. The result is a bass guitar tone that cuts through the mix and adds a new dimension to the song. The Analog Warmth on Daft Punk’s ‘Random Access Memories’ Finally, Daft Punk’s ‘Random Access Memories’ is a great example of how harmonic distortion can be used to add analog warmth to a digital recording. The album was recorded entirely on digital equipment, but the engineers wanted to create a vintage sound that captured the warmth of recordings from the ’70s. To achieve this, they used analog emulators and saturation plugins to add harmonic distortion to the tracks. This processing added a warmth and character to the recordings, giving the album a classic sound that became an instant classic. In conclusion, harmonic distortion is a great technique that can add warmth, character, and grit to a recording. There are many famous examples of harmonic distortion in music, where this technique was used to create some of the most iconic sounds in history. The examples discussed in this article are just a few of many, and there is no doubt that there will be many more to come as music production continues to evolve.

Common Mistakes To Avoid When Using Harmonic Distortion

Harmonic distortion is a popular effect in music production that adds warmth, character, and depth to your tracks. When used correctly, it can enhance your mix and make your music sound more natural and engaging. However, there are some common mistakes to avoid when using harmonic distortion as it can potentially ruin your sound. Let’s explore the most typical pitfalls and how to avoid them.

Overdoing The Effect

The most common mistake when using harmonic distortion is overdoing it. While it may seem tempting to crank up the distortion to make your sound more prominent, excessive use can decrease clarity and make your music sound muddy. To prevent this issue, start with a small amount of distortion and gradually increase it until you reach the desired level.

Using Too Much Low-end Boost

Another common mistake is using too much low-end boost. Although adding more bass can create a sense of warmth and depth, it can also cause a muddy mix. Using too much low-end boost can overpower other elements in your track, making them less audible. To avoid this problem, use a high-pass filter to cut off the excess low end before adding harmonic distortion.

Ignoring Phase Issues

Phase issues are a common problem that often goes unnoticed when using harmonic distortion. When two or more signals are out of phase, they can cancel out each other, resulting in weak and thin sound. To prevent this issue, check the phase of your tracks before adding harmonic distortion. You can use a phase correlation meter to detect any phase issues and make the necessary adjustments to fix it.

Forgetting About Headroom

Headroom is the amount of room left in your mix before it reaches its maximum level. Forgetting about headroom when using harmonic distortion can cause clipping, distortion, and other unwanted artifacts. To avoid this problem, ensure that you leave enough headroom in your mix by keeping the levels below the maximum. You can also use a limiter or compressor to control the level and prevent clipping.


Frequently Asked Questions Of Experts Guide To Using Harmonic Distortion In Music


How Many Decibels Is 1% Thd?


1% THD is not a measure of decibels, but a measure of distortion. It refers to 1% total harmonic distortion, which is a measure of the distortion in a sound signal. However, the level of distortion can affect the decibel level of the audio output.


What Is An Acceptable Level Of Thd?


An acceptable level of Total Harmonic Distortion (THD) varies depending on the specific application. For audio equipment, a THD of less than 1% is typically considered acceptable. However, for power systems, a THD of less than 5% is generally acceptable.


It is important to refer to manufacturer specifications and industry standards to determine an appropriate level for each application.


How Much Total Harmonic Distortion Is Acceptable Audio?


Ideal total harmonic distortion (THD) for audio is generally considered to be less than 1%. However, it ultimately depends on personal preference and the equipment being used. Some may find a THD of up to 3% acceptable for certain music genres, while others may only tolerate THD levels below 0.


1%.


What Does 30% Thd Mean?


30% THD stands for Total Harmonic Distortion, which refers to the amount of distortion in an electrical signal. A 30% THD means that the waveform contains 30% of harmonic distortion in addition to the fundamental frequency. This can affect the quality of audio or electricity in a device or system.


Conclusion


To sum it up, harmonic distortion can add depth and character to music when used creatively and intentionally. With the right tools, techniques, and understanding, musicians can experiment with distortion in a controlled manner to achieve the desired effect. Whether you are a producer or an artist, incorporating harmonic distortion in your music can elevate your sound and set you apart from the crowd.


So, don’t shy away from experimenting with harmonic distortion and see the magic it can bring to your music.

Categories
Archive

How To Eq Vocals To Shine Without Sounding Harsh

To EQ vocals to shine without sounding harsh, cut the frequencies that cause harshness and enhance the frequencies that give clarity and fullness. Proper equalization is essential in creating a well-balanced mix that highlights the strongest qualities of each sound.


Vocals, in particular, need to be given proper attention during EQ to stand out and shine in a mix without sounding too abrasive or harsh to the listener’s ears. EQing vocals involves removing unwanted frequencies that cause harshness and enhancing the ones that give clarity and fullness to the vocals.


Skillful EQing requires some training, experience, and a good pair of ears. We will discuss some tips and techniques that can help you EQ vocals to shine without sounding harsh. Let’s dive in.


Importance Of Eq’ing Vocals

As an audio producer or sound engineer, it’s essential to recognize the Importance of EQ’ing vocals. EQ or equalization is the process of adjusting the balance between frequency components. It is used to enhance or reduce certain frequencies to achieve a specific sound. EQing a vocal track is critical in the mixing process to ensure that the vocals shine and stand out in the mix harmoniously with other instruments.

Achieving Clarity And Presence:

When EQing vocals, one crucial objective is to achieve clarity and presence. To achieve clarity, you need to enhance the frequencies that give vocal tracks its characteristic, such as the high-mid frequencies of about 2 kHz to 5 kHz, then apply a high-pass filter to remove any unwanted low frequencies that can muddy the mix. Doing this ensures that vocals cut through the mix and are heard clearly.

To achieve presence, boosting the mid frequencies from 1 kHz to 2.5 kHz helps the vocals sit upfront in the mix and make them sound more distinct and present. This technique is commonly used for lead vocals, making them sound more prominent and present.

Removing Muddiness:

Muddiness in vocals is caused by unessential low-mid frequencies, resulting in the vocals sounding muddy and cluttered. EQing through the problematic low-mid frequencies and removing those – especially nearer to the bass frequencies, can remove the muddiness. In contrast, a low-pass filter can be applied to remove the disturbing high-frequency content.

Another important way to remove muddiness in vocal tracks is to check for very low frequencies like rumbling noise that is below the audible range of hearing. This noise reduces the clarity of the mix; hence removing it with a high-pass filter will restore clarity to the mix.

Conclusion:

EQing vocals is an art that requires a trained ear and a careful approach. Applying the right EQ techniques will ensure that the vocals cut through the mix, have clarity, and presence without sounding harsh. Achieving these critical elements will help the vocal tracks sit well with other instruments and make the mix sound professional and polished.

Understanding Vocal Eq’ing


Achieving a polished vocal sound is all about proper EQing. By understanding the frequencies that can enhance or detract from a vocal track, you can EQ vocals in a way that highlights their best qualities without harshness or muddiness.

Understanding Vocal EQ’ing Getting the vocal mix clear and defined can be a challenging task for many music producers. Poor EQ’ing can ruin an otherwise perfect vocal performance, making it sound harsh and abrasive. However, by understanding vocal EQ’ing, you can bring out the best in the vocals in your mix and make them shine. In this article, we’ll explore the various concepts that will help you achieve precisely that. Frequency Bands: Before we dive into the various types of EQ, it’s essential to understand frequency bands. The frequency spectrum of human hearing ranges from 20Hz to 20kHz. EQ’ing is performed by attenuating or boosting specific frequency ranges. The three most important frequency ranges for vocal EQ’ing are low frequencies, mid frequencies, and high frequencies. 1. Low Frequencies: The low-frequency range of 20Hz-150Hz is where you’ll find the bass frequencies of a voice, including the chest and proximity effect. Boosting these frequencies can add warmth and body to a vocal performance, while cutting can reduce muddiness and give clarity. 2. Mid Frequencies: The mid-frequency range of 200Hz-2kHz covers the fundamental notes of the vocal performance, including the presence and clarity. Boosting these frequencies can help the vocal performance to cut through the mix, although too much boosting can make it sound harsh. Cutting these frequencies can reduce vocal harshness and add clarity. 3. High Frequencies: The high-frequency range of 2kHz-20kHz includes the harmonics and air of a vocal performance. Boosting these frequencies can add sparkle and clarity to the vocal performance. Cutting these frequencies can reduce sibilance and vocal harshness. Types of EQ: Now that we’ve talked about frequency bands, let’s dive into the types of EQ. 1. Parametric EQ: Possessing adjustable frequency ranges, bandwidth Q, and gain, parametric EQ is best for precise and surgical EQ’ing. 2. Graphic EQ: Having a fixed frequency range with multiple bands, graphic EQ is useful for broad EQ’ing and tonal shaping. 3. Dynamic EQ: Combining the features of both parametric and graphic EQ, dynamic EQ allows you to set threshold, attack, release, and ratio. This type of EQ is useful for controlling certain frequency ranges. Conclusion: EQ’ing can be an intricate process, especially when it comes to vocals. By understanding vocal EQ’ing’s critical concepts, such as frequency bands and different types of EQ, we can make the vocals shine without making them sound harsh. Always remember to EQ in moderation and have the right equipment to get the best results.

Setting Up The Eq


Discover how to equalize vocals to achieve a polished sound without harshness. By setting up the EQ properly, you can enhance the singer’s vocals and their overall performance. Eqing vocals can be the difference between a mediocre and a professional-sounding production.

To get the best sound for your vocals, you need to understand how to set up the EQ correctly. EQ stands for equalization, and it allows you to adjust specific frequencies in your audio signal. In this section, we’ll cover the basics of setting up the EQ for your vocals.

Start With A Flat Eq

When you begin setting up the EQ for your vocals, it’s important to start with a flat EQ. This means that all the frequencies are at the same level. You can achieve this by turning off any EQ settings that may be applied to your microphone or recording software. Once you have a flat EQ, you’ll be able to identify frequencies that need to be adjusted.

Identifying Problematic Frequencies

To identify problematic frequencies, you need to listen closely to your vocal recording. Keep in mind that each voice is unique, so you’ll need to adjust the EQ accordingly. Here are some steps to follow when identifying problematic frequencies:

  • Listen to the vocal recording and pay attention to any frequencies that sound harsh or muddy.
  • Use a frequency analyzer to determine the specific frequencies that need to be adjusted.
  • Consider the genre of music you’re working with, as different genres may require different EQ settings.

Once you’ve identified problematic frequencies, you can begin making adjustments to the EQ. Remember to make subtle changes to the frequencies, as drastic changes can result in an unnatural sound. In conclusion, setting up the EQ for your vocals is an important step in producing high-quality audio. By starting with a flat EQ and identifying problematic frequencies, you can make the necessary adjustments to achieve a polished sound without any harshness.

How To Eq Vocals To Shine Without Sounding Harsh


Credit: www.masteringthemix.com


Eq’ing Techniques For Enhancing Vocals

If you’re a music producer, you know that enhancing vocals can be a challenging task. While vocals often sit in the middle of the mix, they need to shine without being too harsh. This is where EQ’ing comes in. By using EQ’ing techniques, you can manipulate the frequency response of the vocal, highlighting its best qualities.

Boosting The High Frequencies

The high frequencies of vocals are what give them clarity and presence in a mix. To enhance the high frequencies, you want to use a high shelf EQ. By boosting the high shelf, you can increase the level of the high frequencies, making them more audible without altering the natural tone of the vocal.

Here’s how you can boost the high frequencies:

Frequency Range Boost Level
10 kHz and above +2 dB to +4 dB

Cutting Problematic Frequencies

While boosting the high frequencies is essential, it’s equally important to remove any problematic frequencies that can make the vocal sound harsh. The most common problematic frequencies are around the 2-4 kHz range. By cutting these frequencies, you can remove any harshness and create a smoother, more balanced vocal sound.

Here’s how you can cut problematic frequencies:

  • Identify the problematic frequency using a narrow band EQ
  • Reduce the level of the frequency by 3-5 dB

By using these EQ’ing techniques, you can enhance the vocals in your mix, making them shine without sounding harsh. Remember, it’s all about finding the right balance between boosting and cutting frequencies to create a natural, balanced vocal sound.

Avoiding Harshness In Vocals

Vocals are an important part of any music track. It is crucial to ensure that the vocals have the right EQ balance to enhance their clarity and presence. However, over EQing vocals can lead to harshness in the sound, making it unpleasant to the ears. In this section, we will discuss how to EQ vocals to shine without sounding harsh.

Use A Gentle Touch

When EQing vocals, it is essential to use a gentle touch and avoid boosting or cutting frequencies by too much. Doing so can end up making the vocals sound unnatural and harsh. Start by making small adjustments to the frequency bands and listen carefully to how they affect the vocals. Use small Q values to narrow the band to only affect the specific frequencies that need treatment. A gentle touch will allow you to create a smooth, natural-sounding vocal, free from harshness.

Avoid Boosting High Frequencies Too Much

The high frequencies are often boosted to give the vocals a sparkling presence. However, boosting these frequencies too much can lead to harshness and sibilance in the sound. To avoid this, start by reducing any harshness in the high frequencies by using a gentle dip in the EQ. The precise frequency depends on the source material, but it’s commonly around 5 to 8 kHz. Once the harshness is removed, add some sparkle from 8-16 kHz by gently boosting it by about 2 dB. Ensure that the vocals still sound natural and not over EQed.

When EQing vocals, it is essential to remember that less is often more. Do not push the vocals too hard to stand out in the mix but instead, find their sweet spot by using a gentle touch and avoiding harshness.

How To Eq Vocals To Shine Without Sounding Harsh


Credit: www.musicguymixing.com


Additional Tips For Eq’ing Vocals

EQ’ing vocals can be quite challenging, and it might take some time before you can achieve the perfect sound. However, with a little bit of patience, some creativity, and the following additional tips, you can eq vocals to shine without sounding harsh.

Use Complementary Effects

When it comes to adjusting your vocal EQ, it’s important to consider using complementary effects. These effects can work together to enhance your vocals and help them stand out in a mix. For instance, you might consider using a de-esser to reduce the harshness in some of your high-frequency vocals. Pairing the de-esser with a boost of low-end on your EQ can help warm up the vocal sound, making it sound fuller and more inviting.

Consider The Genre

Another crucial factor to consider when EQ’ing vocals is the genre of the music you’re working with. Different music genres have distinct vocal sounds, and as such, require different EQ settings. For example, if you’re working on rock music, you’ll want to emphasize the mid-range frequencies to add some punch to the vocals. On the other hand, if you’re working on jazz music, you might want to reduce the low-end frequencies a bit to give the vocals some clarity.

Don’t Overdo It

While some EQ is necessary for getting the perfect vocal sound, it’s essential to avoid overdoing it. Over-EQ-ing can lead to a harsh or unnatural sound, causing the vocals to lose their originality. Hence, take your time, and make sure that you apply subtle tweaks to the vocals, aiming for a natural sound. Remember, less is sometimes more, and a few small tweaks can make all the difference.

EQ’ing vocals can be a bit tricky, but with these additional tips, you can create a beautiful vocal sound that stands out in your mix. Remember, always consider the genre of the music you’re working with, use complementary effects, and avoid overdoing it with your EQ. By doing this, you can ensure that your vocals shine and sound clear and rich without any harshness.

Practicing Eq’ing Vocals


To achieve a balanced and polished vocal sound, EQ-ing is essential. Start by cutting off frequencies that cause muddiness, and then enhance higher frequency ranges to add clarity. Remember to avoid overuse and harshness by constantly referencing the mix and making small adjustments.

One of the most vital parts of audio mixing is to EQ the vocals, which can shine without being too harsh on the ears. However, EQ’ing vocals correctly requires practice, patience, and a keen ear. Here are some steps that will help you practice EQ’ing your vocals that will make a significant difference in your mixes.

Experiment

Just like any other craft, getting EQ right on vocals requires experimentation. To EQ vocals, you need to try out different settings using your EQ plugin to adjust the gain, frequency, and bandwidth. You can also experiment with subtracting frequencies to reduce muddiness and surgical adjustments to remove unpleasant resonances. The key is to not be afraid to try things out and experiment until you come up with an EQ setting that works perfectly for your vocals.

Practice Often

To become an expert in EQ’ing the vocals, you must practice often. The more you practice your vocals, the more you familiarize yourself with the sound and Knowing the right frequencies to adjust. You can practice EQ’ing vocals on any sample vocal track you can find or on tracks you’ve recorded from previous sessions. With time you begin to be able to pinpoint the frequency ranges to adjust, where to remove certain frequencies, and when to add others to the mix.

Listen And Trust Your Ears

Practicing EQ’ing vocals involves using your ears alot. When it comes to vocals, your ears are the most critical tool to get the perfect mix. Listen and trust your ears, as this will help you pick out any problem areas in the vocal tracks. If it sounds muddy or boxy, reduce some of the middle-frequency ranges. Alternatively, if the vocals are too thin, boost the treble. Implementing what your ears tell you will help you achieve a better vocal mix.

Conclusion:

Practicing EQ’ing vocals is all about experimentation and practicing often while listening and trusting your ears. These three elements are sure to help you polish your mixing skills and achieve a great vocal mix every time. Remember that becoming a master of EQ’ing vocals takes time and patience, so don’t rush the process. Follow these steps consistently, and you will become a pro in no time.


Frequently Asked Questions Of How To Eq Vocals To Shine Without Sounding Harsh


How Do You Make Vocals Less Harsh Logic?


To make vocals less harsh in Logic, try using EQ to reduce frequencies between 2,000 to 4,000 Hz. Use a de-esser plugin to reduce harsh sibilant sounds. Adjust the compressor settings to soften the vocal and avoid clipping. Make sure the mic and recording environment are optimal to avoid harshness in the first place.


Why Does My Vocal Sound Harsh?


Your voice may sound harsh due to several reasons, such as dehydration, improper breathing, vocal nodules, or misuse of your vocal cords. Practice good vocal hygiene, stay hydrated, and monitor your voice use. If the problem persists, consult a healthcare professional or voice therapist.


How Do You Add Sheen To Vocals?


To add sheen to vocals, apply gentle and musical EQ boosts between 8kHz and 15kHz. You can also use a de-esser to control harsh S sounds. Finally, apply a small amount of a stereo enhancer to help vocals shine and blend within a mix.


How Do I Clean Up Vocals In Eq?


To clean up vocals in EQ, start with a high-pass filter to remove low-frequency rumble. Then, use a parametric EQ to reduce any harsh frequencies and boost any pleasant ones. Be careful not to overdo it and make sure to always listen to the track in context.


Finally, use a de-esser to reduce any sibilance or “ess” sounds.


Conclusion


Vocals are an essential component of any track, and it’s crucial to eq them correctly. By following the tips and techniques shared in this post, you can achieve a polished and professional-sounding vocal without harshness. Remember to always apply eq judiciously and trust your ears instead of merely following rules.


Experimentation is key to finding the sweet spot for each track. By being patient and persistent, you’ll soon master the art of eq-ing vocals in your music. Happy mixing!


https://www.youtube.com/watch?v=q3EVvhlcCcE


More in our EQ guide.

Categories
Archive

How To Get A Super Clean Bass Sound When Mastering

To get a super clean bass sound when mastering, use EQ and compression in moderation. Avoid over-processing and aim for clarity in the low frequencies.


When mastering a track, achieving a clean and powerful bass sound can be challenging. The low frequency range is where many issues can arise, such as muddiness and lack of definition. To avoid these problems, it’s important to use EQ and compression techniques in moderation.


Over-processing can easily lead to an unnatural and distorted sound. Instead, aim for clarity and punch in the low end by carefully selecting the right frequencies to boost or cut. Additionally, consider using sidechain compression to create space in the mix and prevent the bass from overpowering other elements. With these tips in mind, you can achieve a super clean bass sound in your mastered tracks.

How To Get A Super Clean Bass Sound When Mastering


Credit: www.masteringthemix.com


Bass Sound Basics

Bass is a crucial element of any music production, and getting a super clean bass sound requires careful mastering. Bass can add depth and warmth to a mix, but if it is not managed properly, it can also muddy up the mix and make everything sound cluttered.

Understanding The Role Of Bass

The role of bass in music is to provide the foundation and rhythm of the track. A clean bass sound will add a sense of power and control and make it easy for the listener to follow along with the music. However, if the bass sound is too heavy, it can lead to distortion, which can be detrimental to the overall sound quality of the track.

To achieve a super clean bass sound, it is essential to understand and manage the role of bass in the mix.

The Importance Of Properly Cleaning Up Low-frequency Content

Low-frequency content is often the culprit when it comes to unwanted muddiness in the mix. It is also one of the most challenging frequency ranges to master effectively. Properly cleaning up low-frequency content requires a lot of skill and expertise in mastering techniques.

One of the most effective ways to clean up low-frequency content is to use a high-pass filter. This filter will remove any unwanted low-frequency content in the mix and help to make the bass sound brighter and cleaner. Another way to manage low-frequency content is to use a low-shelf EQ to cut out any unwanted frequencies.

When it comes to mastering bass, it is important to pay attention to even the smallest details. By understanding the role of bass in the mix and properly cleaning up low-frequency content, you can achieve a super clean bass sound that will help your music stand out and sound professional.

Preparing For Mastering

Preparing for mastering is vital in achieving a clean and polished bass sound. A good bass is the foundation of a great mix, and it is essential to get it right. Whether you have recorded your bass or have a pre-recorded track, the process of preparing for mastering is similar. In this section, we will discuss techniques for optimal bass sound during recording and how to use high-quality monitoring systems to check the bass level.

Recording Techniques For Optimal Bass Sound

The first step towards getting a clean bass sound is recording it properly. Here are some recording techniques that can help:

  • Use a high-quality microphone to capture the sound of the bass properly.
  • Ensure the room is acoustically treated to reduce any unwanted reflections.
  • Set the levels correctly to avoid clipping or distortion.
  • Consider using a Direct Input (DI) box to record the bass directly into the mixer.
  • Try different playing techniques to achieve the desired tone and timbre.

Using High-quality Monitoring Systems To Check The Bass Level

Using high-quality monitoring systems is important when checking the bass level. Here are some tips:

  • Use studio monitors or headphones that reproduce low frequencies accurately.
  • Ensure the room is acoustically treated to eliminate any unwanted reflections or standing waves.
  • Check the bass level in mono to ensure that it won’t disappear when played on a mono system.
  • Consider using a spectrum analyzer to check the frequency balance and make any necessary adjustments.

By following these techniques, you can achieve a super clean and polished bass sound during mastering. Remember, the bass is the foundation of a great mix, and getting it right is essential. Proper preparation, execution, and monitoring are key to achieving an optimal bass sound.

Eq Techniques


To achieve a super clean bass sound when mastering, there are several EQ techniques you can use. Firstly, consider cutting the low frequencies that are not needed, then boost the bass frequencies that enhance the overall tone of the mix.


Finally, use a high-pass filter to clean up any unwanted low-end rumble.

Eq Techniques For A Super Clean Bass Sound

Achieving a super clean bass sound is crucial for a professional sounding track. Using the right EQ techniques can help you achieve a clear and defined bass sound that cuts through the mix. EQ is an essential tool for controlling the bass frequencies and enhancing the desirable ones.

Notch Filtering To Remove Problematic Frequency Range

Notch filtering is the process of removing a specific problematic frequency range from the bass sound. A notch filter is a band-stop filter that’s designed to attenuate a narrow frequency band. It is useful for removing unwanted frequencies that cause a muddy or boomy sound in the bass. By narrowing the notch filter’s bandwidth, you can remove the problematic frequency range without affecting the cleaner bass frequencies.

Notch Filtering Techniques Usage 
Using a Spectrum Analyzer Identify the frequency range that creates problematic resonance. Use a notch filter with a narrow bandwidth to reduce that frequency spectrum.
Solo Bass and Sweep with an EQ Sweep through the most bass range to identify the frequency range that makes unwanted sounds. Create a narrow notch filter inside it on the higher octave to remove the unwanted sounds.

Applying Equalization To Boost The Desired Frequency Range

Equalization is another essential tool for enhancing the bass frequencies. It allows you to boost or attenuate specific frequency ranges of the bass sound. Applying EQ to boost the desired frequency range will help you achieve a clear and defined bass sound.

  1. Use a Parametric EQ to boost the fundamental frequency range of the bass sound.
  2. Add character to the bass sound by boosting the highs above 1kHz.
  3. Use a High-Pass Filter to attenuate unwanted low-frequency content below 30Hz.
  4. Use a Low-Pass Filter to remove unwanted high-frequency content above 200Hz.

A super clean bass sound is essential in any professional mix. By using notch filtering to remove problematic frequencies and applying EQ techniques to boost the desired frequency range, you can achieve a clear and defined bass sound that will cut through the mix.

How To Get A Super Clean Bass Sound When Mastering


Credit: www.masteringthemix.com


Compressing The Bass


Achieving a super clean bass sound during mastering can be done by compressing the bass. Use a low ratio compressor and set the attack to around 10ms for a punchy sound, and the release to match the song’s tempo.

If you want a super clean bass sound when mastering, then you need to pay attention to compressing the bass. Compression can help bring out the dynamics and punch in your bass sound, making it sound stronger and clearer. Here are some things to consider when compressing the bass:

Applying Compression To Bring Out The Dynamics And Punch

When it comes to compressing the bass, you want to focus on bringing out the dynamics and punch while still maintaining clarity. So how do you do this? One technique is to use a compressor with a fast attack and release time. This will allow the compressor to quickly respond to the peaks in your bass sound, but also release quickly so as not to squish the entire sound. It’s also important to adjust the threshold and ratio carefully to avoid over-compressing the bass.

Using Sidechain Compression For More Control

Another technique for compressing the bass is to use sidechain compression. This involves using a separate audio track, such as the kick drum, to trigger the compressor on the bass track. By using sidechain compression in this way, you can ensure that the kick and bass don’t compete for the same frequencies, making each sound clearer and more defined.

Tips For Balancing Compression With Eq

When compressing the bass, it’s important to balance it with EQ. This will help you achieve a well-rounded sound that is neither too boomy nor too thin. One tip is to use a high-pass filter to remove unwanted low frequencies that can muddy up your mix. You can also use a low-frequency shelf to boost the bass frequencies that you want to bring out. Finally, don’t be afraid to experiment with different EQ settings to achieve the perfect balance between compression and EQ. In conclusion, compressing the bass is essential to achieving a super clean sound when mastering. By using techniques like fast attack and release time, sidechain compression, and EQ balancing, you can bring out the dynamics and punch in your bass sound while maintaining clarity and definition.

Using Saturation


Saturation is a technique that can help you achieve a super clean bass sound when mastering. By using saturation, you can add harmonics and warmth to your bass without muddying up the low end. Experiment with different types of saturation plugins and find the one that works best for your mix.

Optimal Use Of Saturation To Add Harmonic Information And Enhance Bass Sound

Saturation is a great technique to utilize when you want to add warmth to your bass sound during the mastering process. Saturation adds additional harmonic information to the bass track, which enhances the overall sound of the bass. The method of saturation is commonly used by mixing and mastering engineers to add a subtle distortion effect to a mix that can provide depth and richness to the bass sound.

Applying Saturation To The Bass:

To apply saturation to your bass sound, you can use a saturation plugin or a hardware unit. Saturation can be used lightly, or excessively to achieve the desired results. Keep in mind that using too much saturation can lead to overbearing, distorted, and even flabby bass. Here are some steps you may want to follow for optimal use of saturation:

  • Insert a saturation plugin on the bass channel or use a hardware unit.
  • Choose the type of saturation you want to apply. There are many types of saturation available, including tape, tube, and harmonics.
  • Select the amount (or threshold) of saturation applied to the track. Use your ears to determine the right amount of saturation for your bass sound.
  • Adjust other parameters such as the input gain, output gain, and mix level to achieve the optimal sound.
  • Listen closely to the bass sound to determine if any more tweaking is necessary.
  • Make fine adjustments to the saturation levels and recheck the sound.

Using saturation correctly can provide your bass tracks with that extra warmth and harmonic information that can enhance the overall sound and feel of your music. Keep in mind that while you add the saturation, do not add too much of it that may lead to degradation of bass quality.

How To Get A Super Clean Bass Sound When Mastering


Credit: www.masteringthemix.com


Stereo Imaging


To achieve a clean bass sound when mastering, paying attention to stereo imaging is crucial. Make sure to balance the low end and panning of the track, as well as using EQ and compression to control any unwanted frequencies or dynamic range.

Stereo imaging refers to the placement of sounds on the stereo spectrum. When mastering bass sound, it is important to pay attention to the stereo imaging to achieve a wide and full bass sound. Here are some tips for achieving a clean bass sound through stereo imaging:

Tips For Achieving A Wide And Full Bass Sound

1. Pay Attention To The Low-End Frequencies:

Ensure that the low-end frequencies of the bass sound are not too dominant in the mix. This can be done by using EQ to reduce the bass frequencies in other elements of the mix.

2. Use Panning:

Panning is the process of placing sounds in the stereo field. Panning the bass sound towards the center can make it sound more focused, while panning it towards the sides can create a wider sound. Experiment with different panning techniques to find what works best for your mix.

3. Try Mid-Side Processing:

Mid-Side processing is a technique that separates the mono and stereo elements in a mix. By isolating the bass sound and processing it separately, you can achieve a more defined and focused bass sound.

4. Use Stereo Widening Plugins:

Stereo widening plugins can be used to make the bass sound wider without affecting its frequency response. However, be cautious as this can result in phase cancellation and weaken the overall bass sound quality.

5. Consider The Room Acoustics:

The acoustics of the room can also affect the stereo imaging of the bass sound. Make sure to monitor the mix in a good quality studio environment or use room correction software to ensure the bass sound is accurately placed on the stereo spectrum. In conclusion, achieving a super clean bass sound through stereo imaging involves paying attention to the low-end frequencies, using panning, trying mid-side processing, using stereo widening plugins cautiously, and considering the room acoustics. Keep experimenting with these techniques to achieve the best results for your mix.


Avoiding Common Mistakes


To achieve a super clean bass sound when mastering, it’s important to avoid common mistakes. Start by carefully EQing the track and using compression to control the dynamics. Limiting can be used to boost the perceived loudness without distorting the sound.


It’s all about finding the right balance and taking the time to fine-tune the mix.

When it comes to producing good music, mastering the bass sound plays a significant role. But many music producers and engineers make common mistakes while handling bass sounds during the mastering process. These mistakes can ruin the quality of the bass guitar sound and affect the overall quality of the music. In this post, we will cover some tips to help you avoid these mistakes and get a super clean bass sound when mastering.

Over-processing Can Ruin The Bass Sound

One of the common mistakes that producers make when mastering the bass sound is over-processing. It is essential to understand that over-processing can ruin the quality of the sound and make it sound unnatural. Using compression and EQ can indeed make the bass sound punchy and tighter, but too much of it can kill the dynamics and natural feel of the sound. Therefore, it is crucial to use these processors with care and in moderation. Here are some tips to avoid over-processing the bass sound:

  • Use minimal EQ and compression to maintain the natural sound of the bass guitar
  • Use EQ to cut any unwanted frequencies and boost essential ones
  • Avoid using too much compression that can affect the dynamics of the bass sound.

Solve Problems In The Mix Rather Than In Mastering

Another common mistake when mastering bass sound is trying to fix problems in the mix during the mastering stage. While mastering can make a good mix sound great, it cannot fix a bad mix. It is crucial to solve problems in the mix first, such as balancing the levels, applying EQ and compression, before proceeding with the mastering stage. Here are some tips to solve problems in the mix:

  • Ensure the bass guitar is in tune and the right notes are being played
  • Ensure that there is no unwanted noise, clicks, or pops in the bass signal
  • Ensure that the fundamental frequency and harmonics are in balance
  • Listen to the mix on different speakers and devices to check for consistency in the bass sound

In conclusion, avoiding these common mistakes can help you master the bass sound with excellence, making your music sound professional and enjoyable. Take time to understand these tips and apply them to your music production process to get a super clean bass sound when mastering.

Final Steps For Creation Of A Super Clean Bass Sound


Achieving a super clean bass sound in mastering requires attention to detail and careful implementation. Start by reducing any unwanted low-end frequencies, using compression and EQ to tighten up the sound, and experimenting with parallel processing to add depth and character.


Finally, adjust the overall mix to ensure the bass sits well with the rest of the track.

As a music producer or sound engineer, creating a super clean bass sound is crucial to produce high-quality music that can leave a lasting impression on listeners. Achieving this goal involves several steps that start with identifying the right equipment and optimizing the sound through mixing and mastering. In this article, we will focus on the final steps for the creation of a super clean bass sound.

Aiming For A Balanced Overall Mix

The first step towards getting a super clean bass sound is to ensure that you have a well-balanced overall mix. Balancing means ensuring that all the different frequencies in your mix do not clash with each other and are properly working together. To balance the bass sound, you need to determine its frequency range and adjust accordingly. This can be achieved by filtering out unwanted frequencies and emphasizing the essential frequency ranges.

Check The Mastered Track On Different Playback Systems

The next step for mastering a super clean bass sound is to check the final mastered track on various playback systems, such as headphones, studio monitors, and home stereo systems. This step is crucial as different playback systems can reveal flaws in the mix that might not be evident on one specific system. It is therefore essential to ensure that the bass sound is well-balanced across all types of playback devices and that it sounds good on each of them.

Review And Make Necessary Adjustments

The final and most critical step to creating a super clean bass sound is to review and make necessary adjustments to the mastered track. This step involves listening to the track critically, focusing on the bass sound, and correcting any flaws you might have noticed. You can use various audio editing tools to adjust the sound and enhance the overall mix to achieve the desired super-clean bass sound. In conclusion, the final steps for creating a super clean bass sound involve aiming for a balanced overall mix, checking the mastered track on different playback systems, and reviewing and making necessary adjustments to achieve the desired sound. If you follow these steps, you can achieve a professional, high-quality sound that will make your music stand out.

Frequently Asked Questions Of How To Get A Super Clean Bass Sound When Mastering


How Do You Get A Loud Clean Master?


To get a loud, clean master, ensure that your mix has enough headroom, use compression to control dynamic range, EQ to balance frequencies, and limit the peaks. Also, consider using a maximizer or a limiter to raise the overall level of your master without clipping.


It’s best to rely on a professional mastering engineer with the right gear and experience to achieve the best result.


How Do I Make My Bass Sound Full?


To make your bass sound full, try these tips: 1. Adjust the EQ settings, boost the low frequencies and cut the high frequencies. 2. Experiment with different amplifiers and speakers for a more ‘thick’ sound. 3. Use compression and distortion effects to add depth and warmth.


4. Play with the attack and release settings to shape the sound. 5. Balance the levels of your bass with the rest of the mix to avoid overpowering other instruments.


How Do I Make My Bass Clearer In Mix?


To make your bass clearer in a mix, follow these steps: 1. Cut out any frequencies that clash with the bass using an equalizer. 2. Boost the higher frequencies of the bass slightly (around 2-3kHz) to add clarity. 3.


Ensure the bass is properly balanced with the rest of the instruments. 4. Avoid over-processing the bass with excessive compression or distortion. 5. Use quality monitors or headphones to monitor the mix accurately.


How Do I Make My Bass Sound Fat?


To make your bass sound fat, try adding a bit of distortion or saturation to fill out the lower end. Boosting the low frequencies and cutting some high mids can also help create a fuller sound. Experiment with different EQ settings and compression techniques to find the perfect combination for your desired sound.


Conclusion


Mastering a super clean bass sound can elevate the overall quality of your music. By using the tips and techniques outlined you can achieve a professional sound that will impress your listeners. Remember to pay close attention to the arrangement, EQ and compression, and to use appropriate monitoring systems for accurate feedback.


With practice and patience, you can create bass tracks that are both punchy and clear, and that will stand the test of time.