Categories
Archive

Essential Tips For Recording Vocals In Fl Studio

To record vocals in FL Studio, ensure you have a good microphone, adjust input levels, use effects sparingly and record in a sound treated space. Recording vocals in FL Studio is an essential part of producing music.


However, it can be tricky to get the perfect sound. Whether you’re an experienced producer or a beginner, there are a few essential tips that can help you achieve high-quality recordings. We’ll provide you with the basic guidelines for recording vocals in FL Studio.


We’ll also discuss how to use plugins and effects, how to adjust input levels, and the importance of recording in a sound treated space. These tips will help you take your recordings to the next level and create professional-sounding tracks.
Essential Tips For Recording Vocals In Fl Studio


Credit: productionden.com


Setting Up Your Microphone

When it comes to recording vocals in FL Studio, a good microphone setup is essential to achieving high-quality sound. Setting up your microphone involves two crucial factors: choosing the right microphone and positioning it in the right place. Here are some tips to help you improve your microphone setup and achieve the best possible recordings.

Choosing The Right Microphone

Choosing the right microphone for your recording is crucial as it can have a significant impact on the quality of your recordings. There are several types of microphones available, but the most commonly used microphones for recording vocals are:

Type of Microphone Advantages Disadvantages
Condenser Microphone Produces warm, natural sound, perfect for vocals Expensive and delicate, requires phantom power
Dynamic Microphone Durable, affordable, and versatile, good for live performances Produces less detailed sound, not ideal for soft vocals

For recording vocals in FL Studio, a condenser microphone is generally recommended, but a dynamic mic can also work well if you are on a tight budget. Just make sure to choose a microphone that is compatible with your audio interface and suits your singing style.

Positioning Your Microphone

Once you’ve chosen the right microphone, it’s time to position it properly. Here are some tips to help you get the best sound:

  • Choose a quiet recording environment free from external noises and echoes.
  • Position the microphone at least 6 inches away from your mouth to avoid popping and sibilance sounds.
  • Position the microphone at a 45-degree angle below your mouth for a more natural sound.
  • Use a pop filter to minimize plosives and improve vocal clarity.
  • Avoid placing the microphone too close to a reflective surface or a wall that can cause echoes.

By following these tips, you’ll be able to set up your microphone properly and achieve professional-sounding recordings in FL Studio. Remember, a good microphone setup is just one of the many components of a good vocal recording. With practice and patience, you’ll be able to master the art of recording vocals and take your music to the next level.

Preparing The Recording Environment


To ensure optimal recording quality in FL Studio, it’s important to prepare the recording environment. This includes selecting the right microphone and room, minimizing background noise and reflections, and proper microphone placement. By following these essential tips, you can achieve professional-sounding vocal recordings in FL Studio.

Preparing the recording environment is crucial to getting a high-quality recording. Whether you’re a seasoned pro or new to FL Studio, selecting the right studio space and minimizing background noise are essential. In this section, we’ll go over some essential tips to ensure that your recording environment is optimized for vocals.

Selecting The Right Studio Space

Choosing the right studio space is key to a good recording. You want to look for a space that is quiet and has good acoustics. If possible, try to find a room that has been specifically designed for recording. Spaces with hardwood floors and flat walls are ideal for sound quality. You will also want to ensure that the studio space has enough room for you, your microphone, and any other equipment you’ll be using.

Minimizing Background Noise

Background noise can ruin a recording. To minimize noise, start by turning off any unnecessary electronic equipment in the room. Fans, air conditioning, and refrigerators can all produce unwanted noise. If you’re recording in a room with windows, close them to reduce outside noise. You can also use sound-absorbing materials like acoustic foam to help eliminate echoes and other noise reflections. One of the easiest ways to reduce background noise is to use a pop filter. Pop filters are designed to eliminate the popping sounds that often occur when recording vocals. They work by placing a barrier between the singer and the microphone, reducing the amount of air that hits the microphone. Finally, make sure that everyone in the recording environment knows to be as quiet as possible while the recording is in progress. This includes turning off cell phones and other devices that might produce noise. By following these tips for preparing the recording environment, you’ll be well on your way to getting a high-quality vocal recording in FL Studio.


Optimizing Fl Studio Settings For Recording


Optimizing FL Studio settings is crucial when recording vocals. Follow these essential tips: use a high-quality microphone, adjust the input gain, set the ASIO driver, use headphones, and reduce background noise. With these steps, you can achieve high-quality vocal recordings in FL Studio.

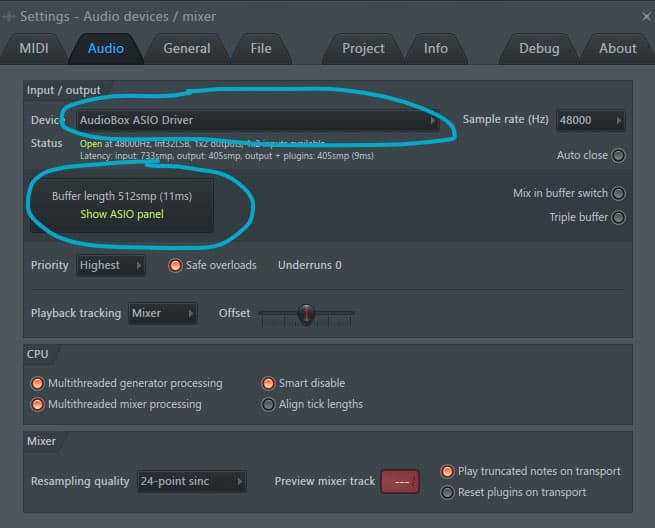
Optimizing FL Studio Settings for Recording When it comes to recording vocals, having the right tools and settings in place is essential to achieving professional-sounding results. In this article, we’ll delve into the necessary steps to optimize FL Studio settings for recording. Here are the key areas we’ll cover. Audio Device Setup Before you start your recording session, ensure that your audio interface is properly connected to your computer. Here is how you can set up an audio device in FL Studio. 1. Navigate to Options > Audio Settings 2. Select your audio device from the dropdown menu 3. In the Input/Output section, select your desired input and output ports 4. Click on the ‘Show ASIO panel’ button to further configure your audio device 5. Adjust the buffer length to achieve the lowest latency possible Setting up the Mixer The mixer in FL Studio plays a significant role in the recording process. You’ll need to set up the mixer correctly to achieve optimal sound quality. Here are the steps to follow. 1. Open the mixer by clicking on the mixer icon in the toolbar or by hitting F9 2. Ensure that the input track is enabled, and the record arm button is turned on 3. Mute unnecessary mixer tracks to prevent bleed and noise 4. Set the levels of each channel by adjusting the faders 5. Add effects such as EQ, compression, and reverb to enhance the vocals Configuring FL Studio’s Recording Settings Lastly, adjusting the recording settings is crucial to ensure that your recorded vocals are clear and distortion-free. Here are the essential recording settings in FL Studio that you need to configure. 1. Navigate to Options > Audio Settings 2. In the Input/Output section, select your desired sample rate and bit-depth 3. Ensure that ‘Auto Close’ is enabled so that FL Studio can close other programs when you start recording 4. Turn on the Metronome to keep the recording in time with your project 5. Select your desired recording mode from the dropdown menu (Playlist or Pattern) 6. Adjust the recording volume before starting your recording By optimizing FL Studio settings for recording, you can achieve outstanding vocal recordings and produce professional-sounding tracks. Be sure to follow the above guide, and you’ll be well on your way to making great music.

Essential Tips For Recording Vocals In Fl Studio


Credit: www.productionmusiclive.com


Tips For Vocal Recording


Recording vocals in FL Studio can be a tricky process, but with these essential tips, you’ll get the perfect sound every time. Start by choosing the right mic and interface, setting adequate gain levels, and managing your recording environment to reduce unwanted noise.


Remember to experiment with different effects and vocal processing techniques to find your unique style.

Recording vocals in FL Studio can be challenging, especially if you’re new to music production. However, with the right techniques and tools, you can capture high-quality vocal recordings that sound professional. Here are some tips for vocal recording in FL Studio.

Recording At The Right Volume Levels

One of the most important aspects of vocal recording is setting the right volume levels. If the vocals are too low, there won’t be enough volume to work with during the mixing process. On the other hand, if the vocals are too loud, they may clip and distort, making them unusable. To ensure that you’re recording at the right volume levels, use the mixer to monitor your recording levels. You can use the channel rack to adjust the volume of the mixer tracks and set the levels for each individual track. Try to keep your vocals within the yellow/orange range on the mixer meter, as this is the sweet spot for recording vocals.

Getting The Best Vocal Performance

Getting a great vocal performance is crucial in getting the best possible recording. To achieve this, it’s important to create a comfortable and relaxed environment for the vocalist. Make sure the room is quiet, and the temperature is comfortable. Additionally, you should encourage the artist to warm up their vocals before recording and take breaks if they need them. Also, ensure they hydrate their body by drinking a glass of water before the recording to prevent dry mouth, which could affect their performance.

Using Headphones For Monitoring

When recording vocals, using headphones can help you monitor the recording while preventing any sound leakage into the microphone. Be sure to adjust the headphone volume levels so that the artist can hear their voice clearly without being too loud and causing feedback. Moreover, you can use FL Studio’s plugin ‘Fruity Convolver’ to add reverb and compression to the headphones, so the artist can hear themselves better and stay on pitch. It would help if you also used a pop filter to prevent plosive sounds from reaching the microphone. In conclusion, these tips will help you record high-quality vocal tracks in FL studio. Remember to experiment with different techniques and settings until you find the perfect combination for capturing vocals that sound professional and polished.

Processing And Mixing Vocals


Learn the essential tips for recording clear and crisp vocals in FL Studio by focusing on techniques like microphone placement, proper gain staging, and processing. A combination of EQ, compression, and reverb effects can help in mixing the vocals to perfection.

Once you have recorded your vocals, the next step is to process and mix them to achieve a polished and professional sound. There are various techniques you can use to achieve this, which we will be discussing below.

Comping And Editing Vocals

Comping is the process of combining the best parts of multiple takes to create a single, perfect take. This helps in eliminating mistakes, vocal inconsistencies, and other issues. In FL Studio, you can use the playlist and take lanes to create a comped vocal track. After creating a comped track, it’s time to edit vocals. It’s recommended to use a headphone while editing, which helps in identifying the imperfections clearly. Cut out the unwanted parts, such as breaths and pops, and adjust the timing to ensure the vocals sit well with the beat.

Removing Noise And Pops

Background noise and pops can be distracting and take away from the vocal clarity. FL Studio comes with various plugins that can effectively remove pops, clicks, and noise from the vocals. Use the Edison plugin to remove noise and pops, and ensure the vocal remains clear and clean.

Applying Eq And Compression

Equalization and compression are the most crucial steps in vocal processing. EQ helps in balancing the vocal frequencies, while compression evens out the dynamic range of the vocal. In FL Studio, the Fruity Parametric EQ and Fruity Compressor plugins can be used to apply EQ and compression on vocals. Ensure to apply EQ and compression in moderation and never over-process the vocals. Over-processing can result in a harsh and unnatural sound, which can be detrimental to the overall song quality. By following the tips mentioned above, you can achieve a professional and polished vocal sound in FL Studio. Remember to experiment with different techniques and plugins, and trust your ears to achieve the best possible result.

Adding Effects And Enhancements


To take your recorded vocals to the next level, adding effects and enhancements in FL Studio is essential. Utilize tools like reverb, compression, EQ, and distortion to polish your vocals and make them stand out in your mix. Experiment with different settings and plugins to find the perfect sound for your track.

Using Reverb And Time-based Effects

Adding effects is an important aspect of enhancing the quality and richness of vocal recordings. Reverb and time-based effects are two popular ways of doing so. Reverb can add space and depth to vocals while time-based effects include delay and echo and can create a sense of presence and depth. Using these effects in moderation can enhance the recording quality and make it more appealing to the listener.

Adding Harmonies And Doubling

Another widely used technique for enhancing vocal recordings in FL Studio is adding harmonies and doubling. By duplicating the original recording and creating multiple vocal tracks, you can create harmonies by adjusting the pitch and timing of the added tracks. Doubling can create a richer and fuller sound by adding a second voice and panning it opposite to the original track. However, make sure not to overdo it as it can lead to a cluttered and distracting sound.

Pitch Correction

Pitch correction is an effective technique in fixing small pitch errors in vocals. It’s important to keep the pitch correction natural to avoid making the vocals sound robotic. FL Studio comes with a built-in pitch correction plugin, but it is better to do it manually using the pitch shifter tool and adjusting the pitch as needed. While applying pitch correction, make sure to keep the original recording intact and always use it as a reference. By following these simple techniques of adding effects, harmonies, and pitch correction, you can ensure a polished and professional vocal recording in FL Studio. Remember to use these techniques in moderation and always keep the original recording as a reference to maintain the authenticity of the performance.

Advanced Techniques And Tips


Learn how to improve your vocal recordings in FL Studio with these essential tips. From microphone placement to vocal editing techniques, this guide covers all you need to know to achieve professional-sounding results.

Advanced Techniques and Tips Recording vocals in FL Studio can be a challenging task. However, with advanced techniques and tips, you can achieve a professional sound that will elevate your music to the next level. Here are some great tips to help you layer vocals for depth and impact and use automation for effect and EQ changes. Layering Vocals for Depth and Impact Layering vocals is a powerful technique to create depth and impact in your recordings. It involves recording different versions of the same vocal part and blending them to create a larger sounding track. Here are some tips to get started with layering vocals in FL Studio:

  1. Record multiple versions of the same vocal part, experiment with different vocal styles, harmonies, and melodies.
  2. Be mindful of pitch and timing when recording each part.
  3. Use a combination of EQ, compression, and reverb to blend the different vocal parts together.
  4. Separate each vocal part into its mixer track to have more control over the individual levels and effects applied.
  5. Create duplicates of each vocal part and pan each duplicate hard left and right to create a wider stereo image.

Using Automation for Effect and EQ changes Automation is an essential tool in FL Studio that can create more nuanced vocal recordings. It involves gradually increasing or decreasing an effect or EQ parameter over time. Here are some tips for using automation in FL Studio:

  • Choose the parameter you want to automate, such as reverb, delay, or EQ.
  • Right-click on the parameter to open up the automation menu.
  • Draw in the automation using a mouse or MIDI controller to adjust the parameter over time.
  • Be subtle with your automation to create a natural-sounding and dynamic recording.
  • Use automation to create build-ups and breakdowns in the vocals, adding to the overall musicality of the track.

In conclusion, FL Studio offers tremendous capabilities to take your vocal recordings to the next level. With advanced techniques and tips, such as layering vocals and automation, you can create a professional and dynamic vocal recording.

Essential Tips For Recording Vocals In Fl Studio


Credit: www.editorskeys.com


Frequently Asked Questions For Essential Tips For Recording Vocals In Fl Studio


How Do You Record Good Vocals In Fl?


To record good vocals in FL Studio, you need to follow these steps: 1. Choose the right microphone and interface. 2. Set up your recording session correctly. 3. Optimize your recording environment. 4. Use proper microphone techniques. 5. Apply EQ, compression, and other effects to enhance the vocals.


Is Fl Studio Good For Voice Recording?


FL Studio is primarily a music production software, but it can also be used for voice recording. It has a range of features that are useful for recording and editing vocals, including multi-track recording, built-in effects, and a mixer. However, it may not be the best option for professional-grade voice recording.


How Do You Master Vocals In Fl Studio?


To master vocals in FL Studio, use EQ, compression and reverb plugins to adjust levels, reduce interference and add depth. Edit pitch with Autotune or Melodyne, and add harmonies with FL’s Vocodex feature. Practice with different effects and workflows until you perfect your sound.


How Do You Not Hear Yourself When Recording Vocals In Fl Studio?


To not hear yourself when recording vocals in FL Studio, use headphones to monitor the audio. Connect the headphones to your audio interface’s headphone output and select that input as your monitoring source. Adjust the mix so that there’s no latency or delay, and then start recording.


Conclusion


As we come to the end of our journey into recording vocals in FL Studio, we hope you’ve found our essential tips to be helpful in achieving top-notch results. With the right tools and techniques, you can create recordings that are rich in clarity, depth, and emotion.


Remember to always pay attention to acoustics, microphone placement, gain staging, and post-processing. Above all, practice makes perfect, so don’t be afraid to experiment and find your own unique style. Happy recording!

Categories
Archive

How To Write A Progressive House Track From Scratch

To write a progressive house track from scratch, start with a steady four-on-the-floor beat and blend atmospheric pads, soaring melodies, and heavy basslines that build steadily in energy and complexity. Progressive house tracks usually range from 120 to 130 bpm and feature long, gradually evolving sections with minimal vocals.


Progressive house is a subgenre of house music that emerged in the early 1990s and is characterized by its hypnotic and gradual build-ups. As one of the most popular styles of electronic dance music, progressive house has spawned countless hits and continues to be a go-to genre for DJs and producers alike.


Writing a progressive house track from scratch can seem daunting, but by following a few key principles and experimenting with different sounds and textures, anyone can create a memorable and dynamic track that moves dancefloors and captivates listeners.


Choosing Your Sound Palette

When it comes to writing a progressive house track from scratch, choosing your sound palette is one of the most important decisions that you will make. Your sound palette will determine the overall mood and tone of your track, as well as the energy level and intensity.

Selecting Synth Patches

The first step in selecting your sound palette is to choose your synth patches. Synth patches are essentially the building blocks of your track, and can include everything from chords and melodies to textures and sound effects.

When selecting your synth patches, it’s important to keep in mind the tone and mood that you want to convey. For example, if you’re going for a more melancholic, introspective vibe, you might want to go with softer, smoother sounds. On the other hand, if you’re aiming for a more upbeat, energetic feel, you might opt for sharper, more aggressive sounds.

Drum Samples

After choosing your synth patches, the next step is to select your drum samples. Your drum samples are crucial for setting the energy level and rhythm of your track.

When selecting your drum samples, you should pay attention to factors such as tempo, timing, and overall feel. For example, if you’re going for a more laid-back, soulful vibe, you might want to choose drum samples that are more organic and live-sounding. Alternatively, if you’re aiming for a more high-energy, club-ready sound, you might opt for more electronic-sounding drum samples.

Bass Sounds

Finally, once you’ve selected your synth patches and drum samples, you’ll want to focus on choosing your bass sounds. Your bassline is instrumental in creating the groove and movement of your track, and can help to tie everything together.

When selecting your bass sounds, you should consider factors such as tone, rhythm, and complexity. For example, if you’re going for a more minimalistic, stripped-back sound, you might want to opt for a simple, straightforward bassline. On the other hand, if you’re aiming for a more intricate, complex feel, you might choose a more intricate bassline with more layering and effects.

How To Write A Progressive House Track From Scratch


Credit: blog.native-instruments.com


Structuring Your Track


Structuring your track is key when writing a progressive house song from scratch. Begin by determining your intro, verse, chorus, breakdown, and build-up sections, and then move on to developing a melody and adding unique elements to enhance the progressive feel of the track.

Structuring Your Track: Structuring a progressive house track is the key to achieving a well-crafted and polished final product. It is essential to have a solid foundation in order to build the rest of the track around it. In this section, we will discuss the different elements to consider when structuring your track, ranging from creating an intro to arranging your track. Creating an Intro: The intro is the first impression your track will make and it sets the tone for the rest of the song. It’s vital to make it engaging and interesting while also providing some hints about what’s to come. Some tips for creating an intro include: – Start with a simple beat and gradually add in additional elements to build anticipation. It should have a similar feel to the rest of the song. – Experiment with different effects and filters to create tension and excitement. – Keep it short and sweet, around 16-32 bars is a good length so that it doesn’t get too repetitive. Building Your Main Sections: The main sections are the meat of your track and typically consist of the verse, chorus, and drop. They should build upon each other effortlessly to keep the listener engaged. Here are some elements to consider when constructing your main sections: – Establish a clear melody early on that can be built on throughout the track. – Use contrasting elements such as different synths, drum patterns, or chord progressions to add depth. – Add variation throughout each section so that it doesn’t feel repetitive. Crafting a Breakdown: The breakdown serves to give the listener a break from the main sections of the track, and to add some emotional depth. It should be a moment of relief and calm, before building back up into the climax. Here are some techniques to try when crafting a breakdown: – Strip back all the elements in your track, leaving just the essential melodic elements to create a sense of space. – Experiment with different effects and transitions to make the transition from the main sections to the breakdown feel seamless. – Include some ambient sounds or transitional elements to help the track feel cohesive and polished. Arranging Your Track: Arranging your track is the final step in the process and it’s essential that it flows smoothly from beginning to end. Good arrangement can make all the difference in the final product. Here are some points to consider when arranging your track: – Start with the intro and work your way to the climax, considering how each section transitions and flows into the next. – Make sure each section complements the section that came before it and sets up the section that comes after it logically. – Consider the energy and emotion of each section, vary the intensity, and keep it dynamic. In conclusion, structuring your progressive house track is vital to achieving a polished final product that captivates the listener. Consider the elements discussed in this article, experiment, and have fun with it!


Creating Rhythmic Interest


To create rhythmic interest in your Progressive House track from scratch, experiment with unconventional time signatures, incorporate intricate drum patterns, and use subtle variations throughout the song. By layering different elements and gradually building up the intensity, you can create a dynamic and engaging experience for the listener.

Creating Rhythmic Interest is a crucial component of writing a Progressive House track as it keeps your audience engaged and interested in the music. This entails incorporating percussive elements and experimenting with syncopation to create off-beat rhythms that add depth and complexity to the music.

Adding Percussive Elements

To create rhythmic interest, you must add percussive elements to your Progressive House track. These elements may include drums, cymbals, and other percussion instruments that help to maintain the energy level of the track. Percussion can be found in the intro, breakdown, and drop sections of the song.

Experimenting With Syncopation

To add variety to your percussion, you can experiment with syncopation. Syncopation involves placing an accent on an offbeat section of the rhythm, like the upbeats. Experimentation with syncopation can result in a more complex and unexpected rhythm.

Creating Off-beat Rhythms

Creating off-beat rhythms is another way to add rhythmic interest to your Progressive House track. You can add variation by placing percussion or bass notes off the typical-on beat of the track. It creates a unique rhythm and adds dimension to the song. To conclude, creating rhythmic interest in Progressive House tracks is essential. It involves the addition of percussive elements, experimenting with syncopation, and creating off-beat rhythms. These create complexity and depth, keeping your audience engaged and interested in your music.

Working With Melodies

When it comes to producing a quality progressive house track, melody plays a crucial role. It’s the part of the song that takes the listener on a journey, while also making the track memorable. If you want to create a solid melody for your progressive house track, there are a few key things to keep in mind. Below are some tips on developing chord progressions, designing lead melodies, and crafting arpeggiated parts.

Developing Your Chord Progression

Before you dive into creating melodies, it’s important to establish the harmonic foundation of your track. To do this, start by identifying what key you want to work in. Once you’ve determined your key, experiment with different chord progressions to find what feels right for your track. A basic four-chord progression is an excellent starting point and can be expanded upon as you build out your song.

Designing Lead Melodies

Once your chord progression is in place, it’s time to start layering in melody. One way to do this is to develop a lead melody that will be the focal point of the track. Keep in mind that your lead melody should complement the chord progression and not clash with it. Furthermore, it should be catchy without being too simplistic or repetitive as it’s the melody that will be stuck in your listener’s head long after the song has ended. When crafting your lead melody, consider incorporating various musical techniques such as syncopation, staccato notes, and rests to add rhythmic interest.

Crafting Arpeggiated Parts

In addition to your lead melody, you can also incorporate arpeggiated parts into your track to add depth and complexity. An arpeggio is essentially a broken chord that’s played one note at a time. One way to create an arpeggio is to select a chord from your progression and play each note in succession, either ascending or descending. You can experiment with various rhythm patterns to create interesting and unique arpeggiated parts. Don’t be afraid to layer multiple arpeggiated parts to add complexity to the track.

In conclusion, developing a solid melody for a progressive house track takes time and experimentation. Focus on establishing a strong chord progression first, then layer in your lead melody and arpeggiated parts. Remember, the art of writing melody is not static, so feel free to experiment and try new things.

Using Effects To Add Depth


To create a progressive house track from scratch, adding effects is key to creating depth and complexity in your sound. Experiment with filters, reverbs, and delays to create a dynamic and evolving sound that keeps the listener engaged. Combine these effects with creative synth programming and solid drum beats to craft a track that stands out in the genre.

Using effects is one of the most important techniques to add depth to your progressive house tracks. By applying effects, you can create a unique atmosphere and take your listener on a musical journey. In this section, we will discuss three ways in which you can use effects to add depth: creating swells and risers, adding reverb and delay, and using modulation effects.

Creating Swells And Risers

One effective way to add depth to your progressive house track is by creating swells and risers. Swells are gradual increases in volume, while risers are gradual increases in pitch. These effects build tension and excitement and can be used to transition between different parts of the track. To create a swell, you can use a volume envelope in your DAW or a plugin such as Soundtoys’ MicroShift. Simply draw in a gradual increase in volume over the desired length of time. For a riser, you can use a pitch-shifting plugin such as Soundtoys’ Little AlterBoy. Draw in a gradual increase in pitch over the desired length of time, and adjust the formant to match the pitch shift.

Adding Reverb And Delay

Reverb and delay are two essential effects that can add depth to any track. Reverb creates a sense of space and can make sounds feel larger than life. Delay creates echoes and can add motion and dimension to the sound. To add reverb, you can use a plugin such as Valhalla Room or Waves Abbey Road Reverb Plates. Adjust the parameters to create the desired amount of decay time, size, and wet/dry mix. For delay, you can use a plugin such as EchoBoy or H-Delay. Adjust the delay time, feedback, and wet/dry mix to achieve the desired effect.

Using Modulation Effects

Modulation effects like chorus, flanger, and phaser can add movement and depth to your track. Chorus creates a thick, lush sound by duplicating the original signal and detuning it slightly. Flanger creates a sweeping, jet-like effect by taking the original signal and duplicating it with a slight delay. Phaser creates a sweeping, vibrato-like effect by processing the original signal with a series of all-pass filters. To add modulation effects, you can use plugins such as Waves’ MetaFlanger or Soundtoys’ PhaseMistress. Adjust the parameters to create the desired effect and depth. Adding effects is a crucial step in creating a progressive house track. By applying swells and risers, reverb and delay, and modulation effects, you can create a unique atmosphere and take your listener on a musical journey. Experiment with different plugins and settings to find the perfect combination for your track.


Mixing Your Track


Learn the steps on how to write a progressive house track from scratch by mixing your track. Start with choosing the right tempo and constructing the beat, add layers of melodic elements, and use different effects and automation to create a dynamic sound.

Mixing a progressive house track is one of the most crucial stages when it comes to producing music from scratch. It can make or break your track. Therefore, it is essential to focus on balancing your levels, applying EQ techniques, and using compression and sidechain techniques. This section will dive deeper into these techniques.

Balancing Your Levels

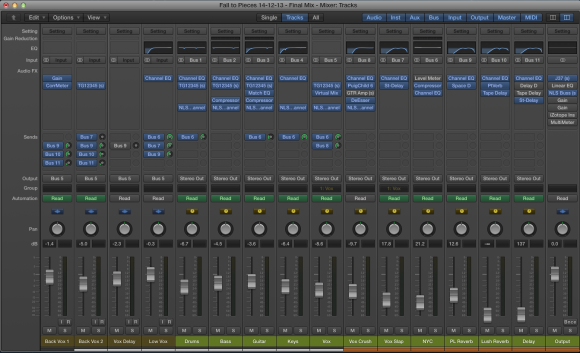
Your first step is balancing your levels. This means ensuring all the elements in your track are at an appropriate volume level. You don’t want some sounds to be too loud while others are too quiet, as they might overpower or get lost in the mix, respectively. To balance your levels, use a reference track, either one that is in the same genre of music or a professional mix, and use it as a guide. Adjust your levels accordingly, making sure all instruments and sounds fit together well. It is also important not to overdo it with volume. Too much volume can lead to distortion and a loss of clarity. Thus, aim for a balanced mix where everything sounds clear and coherent.

Eqing Your Sounds

After balancing your levels, you can now begin EQing your sounds. EQ or equalization involves cutting or boosting certain frequencies of a sound, making it fit better into the mix. For instance, you might want to cut the low end on your pad sound so that it does not clash with your bassline. Likewise, you might want to boost the high-end on your hi-hat to give it extra sparkle and energy. It’s essential to use EQ tastefully and minimally. Too much EQ can alter the original sound too much, leading to an unnatural mix. Thus, aim for subtle changes that enhance your mix, making it more cohesive.

Using Compression And Sidechain Techniques

Compression and sidechain techniques are useful tools for creating an impactful and dynamic mix. Compression helps control the dynamic range of your sounds, bringing down the volume of the parts that peak too high. On the other hand, sidechaining involves using a separate signal to trigger a compressor or volume gate to reduce the volume of another sound. This technique is particularly useful for genres such as progressive house where the bassline and kick drum are prominent. To apply these techniques, start with compression on individual channels, then try applying it to groups of channels. For sidechaining, place a compressor on your bassline or kick drum and set it to trigger when your kick drum or bassline hits. In conclusion, Mixing your track can be a challenging stage, but with the right tools and techniques, you can create a cohesive and impactful track. Focus on balancing your levels, EQing your sounds, and using compression and sidechain techniques to get the most out of your mix.

Mastering Your Track


Learn how to write a progressive house track from scratch by mastering the audio mixing process. By understanding the key elements of the genre, including build-ups, drops and breakdowns, you can create a unique and polished track that will stand out from the crowd.

Preparing Your Mix For Mastering

Before jumping into mastering your progressive house track, it’s crucial to make sure your mix is prepared for the final touches. This involves exporting an un-mastered version of your track and making sure the levels are balanced, there is no clipping, and all elements can be heard clearly. A great tip is to reference your mix on different speakers and in different environments to ensure it translates well across all systems.

Using Mastering Tools

Once your mix is prepared and ready to go, it’s time to use the mastering tools to polish your track. These tools include various processors like EQ, compression, reverb, and stereo imaging. When using these processors, it’s important to apply them carefully and not overdo it. A little bit of processing goes a long way in mastering, and it’s important to trust your ears more than anything.

Exporting Your Final Track

After mastering your track and making sure it sounds the way you want it to, it’s time to export your final version. This involves choosing the appropriate file settings like bit depth and sample rate and rendering the file. It’s important to keep in mind where the final track will be played and choose the appropriate format, whether it’s for digital distribution or physical media. In conclusion, mastering your progressive house track is the final step in the production process and is crucial in making sure your track sounds the best it possibly can. By preparing your mix, using mastering tools carefully, and exporting your final track thoughtfully, you can ensure your track stands out among the rest.


Promoting Your Music


Learn how to write a progressive house track from scratch and promote your music with these helpful tips. Start with a strong melody, layer in percussion and bass, and use automation to create dynamic soundscapes. Share your creation on social media, collaborate with other artists, and connect with music industry professionals to get your music heard.

If you have written, produced and mixed your progressive house track, it is now time to promote it. To do that, you need to reach your audience and build your fanbase. In this section, we’ll take a look at some effective ways to promote your music.

Using Social Media To Reach Your Audience

Social media is an incredibly powerful tool for promoting your music. You can use platforms like Facebook, Twitter, Instagram, and TikTok to reach your audience and build your fanbase. Here are some tips to help you use social media effectively:

  • Create a strong online presence by creating profiles on all major social media platforms.
  • Post regular updates about your music, gigs, and other events.
  • Engage with your followers by responding to their comments and messages.
  • Share your music videos, behind-the-scenes footage, and other interesting content with your followers.
  • Run social media ads to reach new audiences and promote your music.

Building Your Fanbase

Building a fanbase is crucial if you want to promote your music. Here are some tips to help you build a loyal fanbase:

  • Perform at local gigs and events to showcase your talent and build a local fanbase.
  • Create a website where fans can listen to your music and find out more about you.
  • Join online music communities to network with other musicians and industry professionals.
  • Collaborate with other musicians and artists to reach new audiences.
  • Offer exclusive content to your fans, such as behind-the-scenes footage, early access to new songs, and special discounts.

Approaching Labels And Djs

Getting your music played by popular DJs and signed to a label can be a great way to promote your music. Here are some tips for approaching labels and DJs:

  • Research the labels and DJs that align with your music style and genre.
  • Prepare a professional press kit that includes your bio, press photos, and samples of your music.
  • Send your press kit to labels and DJs using email or social media.
  • Follow up with the labels and DJs to see if they received your press kit and if they are interested in working with you.
  • If you get signed to a label, make sure you promote your music through their channels and social media.

Promoting your progressive house track from scratch can be challenging, but by using social media, building your fanbase, and approaching labels and DJs, you can reach a wider audience and build a successful music career.

Frequently Asked Questions Of How To Write A Progressive House Track From Scratch


How Do You Structure A Progressive House Song?


A progressive house song typically follows a basic structure of an intro, buildup, breakdown, climax, and outro. The intro sets the tone, while the buildup slowly adds layers and energy. The breakdown reduces the energy, leading into the climax which is the high point of the song.


The outro smooths the song to a close. However, the exact structure can vary depending on the artist and their style.


How Do You Structure A House Track?


Structure a house track by starting with the rhythm, building layers of percussion, adding in basslines and melodies, and utilizing effects and transitions to create interest and variation. Remember to also consider the arrangement and progression of the track, as well as how it will fit into a DJ set.


What Are The Characteristics Of Progressive House Music?


Progressive house music is characterized by its steady and hypnotic beat, gradually building up to climactic moments. It features long, intricate melodies, lush pads, and layered synths. Additionally, it incorporates elements of trance and techno, creating a mesmerizing and uplifting atmosphere.


What Is The Progressive House Music Theory?


Progressive house music theory is a sub-genre of electronic dance music. It is characterized by its use of gradual development and subtle transitions in melody, harmony and rhythm. The genre originated in the UK in the 1990s and gained popularity worldwide in the following decade.


Conclusion


To summarize, writing a progressive house track from scratch requires creativity, patience, and technical knowledge. You should start by sketching your musical idea and focusing on creating a powerful melody. Build your track step by step and make sure that you use proper mixing and mastering techniques.


In the end, don’t forget to test your track and receive feedback from other producers and music lovers. By following these simple steps, you can create a unique and powerful progressive house track that will attract listeners and fans. So, grab your tools and start creating your masterpiece today!

For more background, see Progressive house on Wikipedia. You may also like our guide: Making A Piano House Track From Start To Finish In Ableton Live.

Categories
Archive

How To Create And Control A Click Track In Pro Tools

To create and control a click track in Pro Tools, first enable the click track in the transport window and adjust the tempo and time signature settings. Then choose a click sound and customize its volume and panning as desired.


Creating and controlling a click track in Pro Tools is crucial for maintaining proper timing and rhythm in your recording or mixing session. Enabling the click track can be done easily through the transport window, where you can adjust the tempo and time signature to match your project.


Once the click track is enabled, you can choose from a variety of click sounds and customize its volume and panning to fit your preferences. By mastering the click track function in Pro Tools, you can ensure that your music is tight and polished, with a professional sound that will impress any listener.

How To Create And Control A Click Track In Pro Tools


Credit: www.youtube.com


What Is A Click Track?

What Is A Click Track?

A click track is an audio guide that is used as a reference to maintain a steady tempo and rhythm in a music production. In simpler terms, it is a digital metronome that musicians use to stay in sync with the tempo of a song. A click track is an essential part of the recording process, especially in modern music production, for ensuring rhythm and timing consistency across multiple tracks. In this article, we are going to outline the importance of a click track and guide you on how to create and control it in Pro Tools.

Definition:

At its core, a click track is a timekeeping device that provides musicians with a fixed tempo to follow. It is a digital metronome that plays a non-musical audio signal that acts as a timing reference point in a music production. The click track is an essential tool that ensures that each performance can be edited accurately and that all instruments stay synchronized.

Importance:

The click track is an essential part of modern music production, and it plays a crucial role in ensuring that the final product is polished and professional. A click track improves the accuracy of recordings, and it helps to maintain a consistent tempo and rhythm throughout the production. Without a click track, musicians may lose their timing or speed up or slow down unintentionally, and these inconsistencies can be difficult to correct in post-production. Therefore, it is essential to have a properly created and controlled click track to ensure that your music production achieves the desired professional standard.

Creating and controlling a click track in Pro Tools:

In Pro Tools, the click track is a separate track that is created and added to the session. To create a click track, go to the Track menu at the top of the screen and select ‘New’. Then select ‘Click’ from the pop-up menu to create a new click track. From this point, Pro Tools allows you to customize the click track to your desired tempo, time signature, and audio output. The click track is typically inaudible until you enable it by selecting the ‘Click’ button on the transport bar. You can also edit the volume, panning, and rhythmic pattern of the click track as needed.


Creating A Click Track In Pro Tools


Learn how to create and control a click track in Pro Tools with ease. This essential function is vital for keeping a steady tempo while recording, helping you stay in sync with your music.

Creating a click track in Pro Tools is an essential requirement for any recording session. A click track keeps musicians in time, making it easier to record a song that achieves the desired rhythm and tempo. In this section, we will look at the step-by-step process of creating and controlling a click track in Pro Tools.

Step 1: Launch Pro Tools And Create A New Session

The first step to creating a click track is to launch Pro Tools software and create a new session. Click on the “File” menu and select “New Session.” You can then customize your session by specifying the sample rate, bit depth, and tempo.

Step 2: Add A Click Track To The Session

Once you have customized your session, the next step is to add a click track. To add a click track, click on the “Track” menu, then select “New Track.” Choose the “Stereo Master” option, then click on “Create.” Now, click on the “Track” menu again and select “New Track.” This time, choose the “Click” option, and click on “Create.” After successfully creating the click track, you can now enable it by clicking on the “Track” menu and choosing “Click” from the options.

Step 3: Customize The Click Sound

The default click sound may not always suit your musical style. Fortunately, Pro Tools allows you to customize the click sound to your desired preferences. To do this, click on the “Setup” menu, then select “Click/Countoff.” You can then choose one of the numerous available click sounds.

Step 4: Adjust The Click Settings To Your Preferences

Pro Tools gives you the freedom to adjust click settings to fit your preferences. For instance, you can adjust the volume of the click sound by clicking on the fader in the mix window and dragging it up or down. Additionally, you can choose the number of beats in a bar, set the tempo, and adjust the time signature. To sum up, creating a click track in Pro Tools is a straightforward process that can significantly improve your recording quality. By following the above steps, you can successfully create a click track and adjust the sound settings to match your desired style.

Benefits Of Using A Click Track

Using a click track in pro tools has several benefits that can help improve your workflow and the overall sound quality of your recordings. Some of the benefits include:

Improved Timing

When recording music, timing is everything. Using a click track can improve your timing and ensure that all instruments are in sync with each other. This is especially important when recording with multiple musicians or in a band setting where timing can easily be thrown off. With a click track, you can easily maintain a consistent tempo throughout the recording process, resulting in a more polished final product.

Easier Editing

Editing tracks in Pro Tools is made much easier when using a click track. By having a consistent tempo throughout the song, you can easily cut and paste sections of audio without worrying about timing issues. This can save you a lot of time when trying to piece together a perfect take or fixing a mistake in the recording.

Smoother Mixing

Using a click track can also make the mixing process much smoother. With a consistent tempo, you can easily align all of the tracks within the song and avoid any phase issues or other timing problems. This will result in a cleaner and more cohesive mix that will sound great on any playback system.

In conclusion, using a click track in Pro Tools is essential for any serious musician or audio engineer. With improved timing, easier editing, and smoother mixing, the benefits of using a click track are undeniable.

Controlling The Click Track In Pro Tools


Learn how to create and take control of a click track in Pro Tools. Keep in mind that the click track is crucial to keeping all instruments and vocals in sync throughout the recording process.

If you want to create a consistent tempo for your recordings while using Pro Tools, it’s essential to learn how to control the click track. When you’re working through a recording session, it’s critical to ensure everything stays in sync. Therefore, learning how to mute the click track, adjust its volume, and change the click track tempo is necessary.

Muting The Click Track

Sometimes, you might need to mute the click track, such as when you’re recording a vocal or acoustic guitar. To mute the click track in Pro Tools, select the click track in the ‘mixer’ window and mute it. Alternatively, click on the ‘click’ button on the transport window to turn off the click track entirely.

Adjusting The Click Track Volume

The click track volume should be at an optimal level to help you keep time, but It shouldn’t overpower the other tracks. To adjust the click volume, head to the ‘mixer’ window, and adjust the slider to increase or decrease the volume of the click track.

Changing The Click Track Tempo

There might come a time when you need to change the tempo of the click track during a recording session. Fortunately, changing the click track tempo is easy in Pro Tools. To change the click track’s tempo, head to the ‘tempo ruler’ located at the top of the edit window. Use the ‘grabber’ tool to click and drag the tempo ruler to your desired tempo. In conclusion, learning how to control the click track in Pro Tools is necessary to produce high-quality recordings. With these simple tips, you can mute the click track, adjust its volume, and change the click track tempo, thereby helping you keep time with ease.

https://www.youtube.com/watch?v=PAocmilPkjY


Tips For Working With Click Tracks In Pro Tools


Learn the ins and outs of click tracks in Pro Tools with these helpful tips. Discover how to create, control and customize click tracks to efficiently guide your recording sessions.

Creating a click track in Pro Tools is a great way to keep your music project in time. Whether you’re recording musicians, creating electronic music or just need a steady beat to work with, a click track can help you lock in your timing. While using a click track, it is essential to keep in mind a few tips to ensure accuracy. Let’s have a look at these tips for working with click tracks in Pro Tools.

Use Headphones For Accuracy

When recording with a click track, it’s essential to use headphones. Headphones will help you hear the click more clearly, so you can play along with it more accurately. Also, it can help you to focus on your music while recording. Without headphones, you may pick up the sound of the click through the room’s speakers, which may be delayed or distorted timings when it gets to the microphone. Using headphones will ensure the click track records cleanly and accurately.

Start Slow And Build Up

When you first start playing with a click track, it can be a little bit tricky to keep up with it. So it is better to start the tempo at a slower speed, so you can get comfortable with playing along with the click. Once you’re comfortable, slowly increase the tempo to your desired speed. Starting slow and building up will help you achieve the desired tempo without losing accuracy.

Quantize Your Recordings If Necessary

If you find that your timing is slightly off while recording, you can use the quantize feature. Quantizing will snap your performance to the nearest beat or subdivision and can help you tighten up your audio for a more polished sound. It is better to use the quantize feature after you finish all the recordings for a better result. In conclusion, using click tracks make your recording more precise and faster. Though it can be slightly tricky, it is better to learn and work with it. These tips will help you work with click tracks more accurately and make the recording process more enjoyable.


Frequently Asked Questions On How To Create And Control A Click Track In Pro Tools


How Do I Create A Click Track In Pro Tools?


To create a click track in Pro Tools: 1. Open a new session and select a tempo. 2. Create a new track and select “Click” as the track type. 3. Choose the desired click sound and adjust the volume and pan as needed.


4. Set the click to either Follow Transport or Fixed Time, depending on your preference. 5. Start recording or playing back your session with the click track.


What Is The Easiest Way To Create A Click Track For Your Session?


Creating a click track for your session is easy with software like Pro Tools, Logic Pro, or Ableton Live. Simply choose the click track option, set the tempo, and customize the sound. You can also download click track software or use a metronome app on your phone.


How Do You Make Pro Tools Play Where You Click?


To make Pro Tools play where you click, simply click on the location in the timeline where you want the playback to begin. Then press the spacebar to start playback from that point. You can also use the play button on the transport window to start playback from the same location.


How Do I Get The Metronome To Work In Pro Tools?


To get the metronome to work in Pro Tools, you need to navigate to the Setup menu and select Click/Countoff. Then, choose the desired beat and tempo and ensure that the metronome is selected in the Transport window. Finally, hit the Play button to enable it.


Conclusion


Creating and controlling a click track in Pro Tools is essential for every musician and music producer out there. It not only makes the recording process easier but also helps in achieving the desired musical arrangement. With the simple steps outlined in this guide, you can easily create and control a click track in Pro Tools.


Remember to always practice with the click before using it for the final take. Perfect timing is key to making great music, and with Pro Tools, you have all the tools you need to achieve success.

Categories
Archive

Making Musicians Comfortable In The Recording Studio

To make musicians comfortable in the recording studio, ensure that they have proper gear and clear communication with the sound engineer. Recording music is an intricate process that requires a lot of effort from musicians and engineers alike.


The musician must feel comfortable and confident to create their best work. This guide offers tips on how to create an environment that inspires creativity and ease. From gear to communication, every detail matters in ensuring that musicians can perform to their best ability.


The sound engineer can help by providing crystal clear communication, breaking down technical details into simple language, and being patient when artists need more time to get comfortable. By prioritizing musicians’ comfort, the recording process will be more enjoyable and fruitful for both parties involved.


Creating A Welcoming Environment


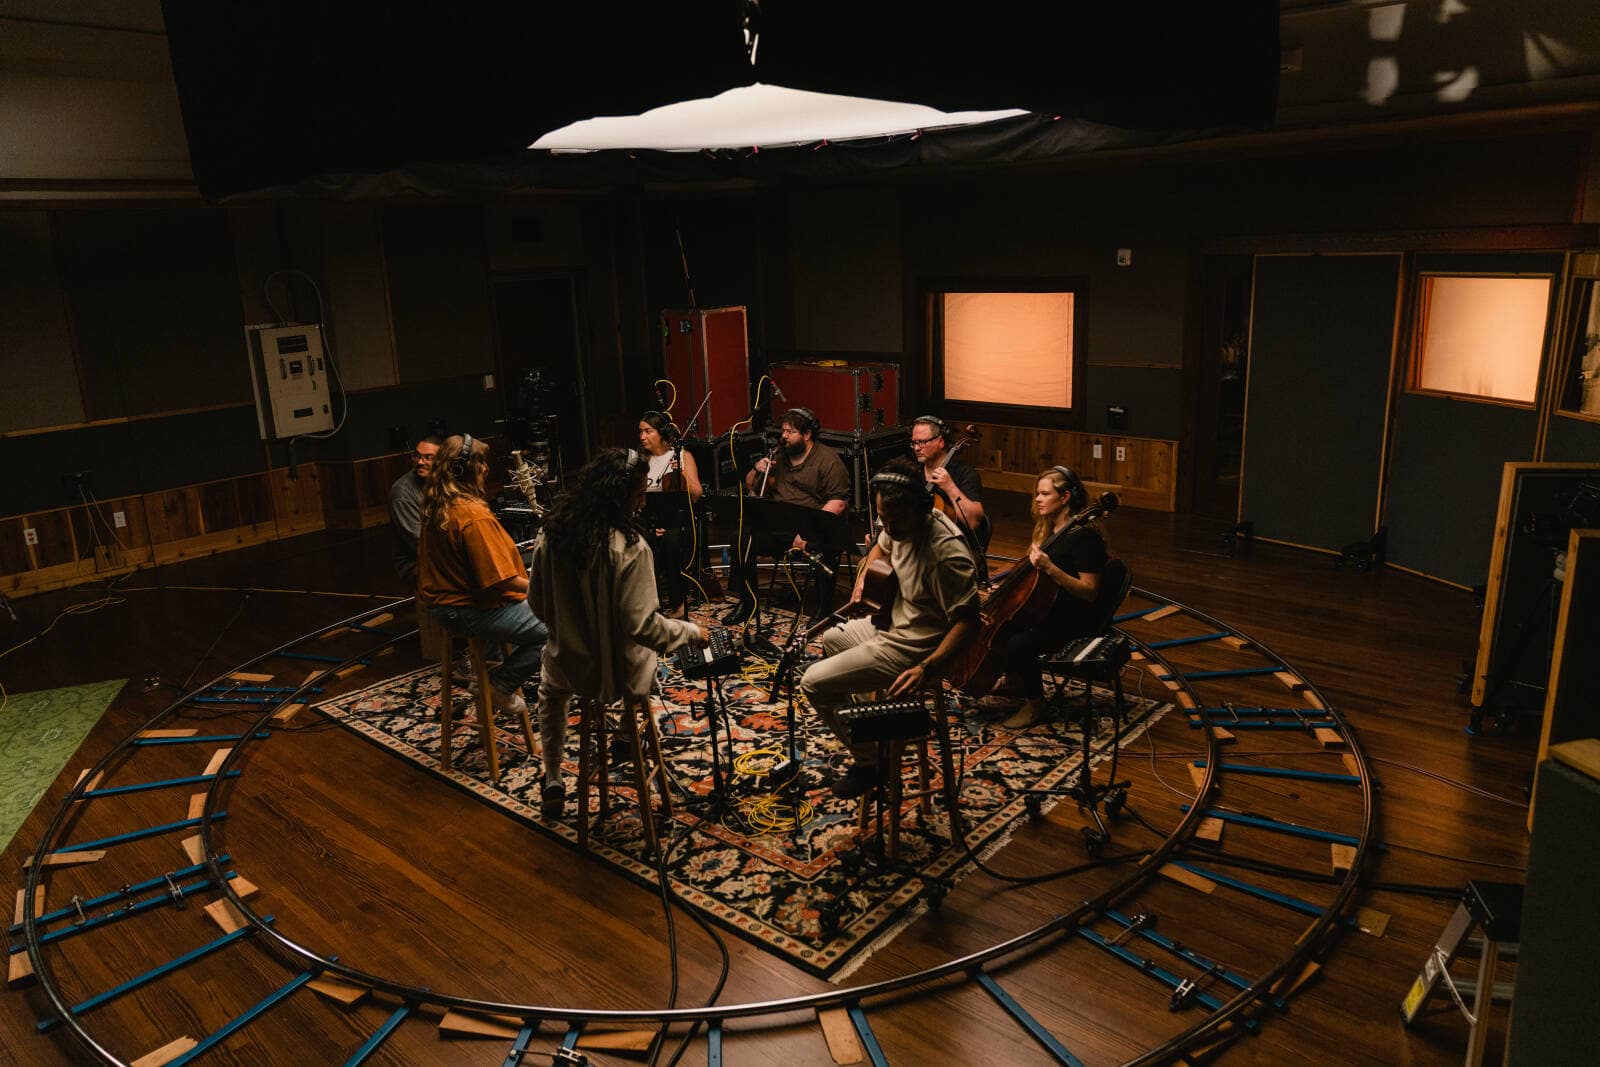
Recording studio sessions can be nerve-wracking for musicians. Creating a welcoming environment with comfortable seating, proper lighting and temperature can ease their nerves and enhance their performance. Offering refreshments and taking breaks can also help them feel relaxed and energized.

Recording music in a studio can be a daunting experience for musicians. Therefore, creating a welcoming environment is crucial to help them relax and get comfortable. Here are some tips on how to do it:

Decor And Lighting

The decor and lighting of a recording studio can have a significant impact on the ambiance. A studio that looks and feels professional while also being warm and inviting will make musicians feel much more at ease. Consider using warm, soft lighting to create a calming environment. Choose decor that is soothing and comfortable, such as plush seating, cozy throw pillows, and soft rugs. Your goal is to make the musicians feel as though they are in a second home, so make sure the decor matches the atmosphere.

Temperature And Air Quality

Temperature and air quality are another important factor to consider when creating a welcoming environment in the studio. Make sure the temperature is comfortable so that musicians don’t feel too hot or too cold. Invest in an air filtration system to ensure the air quality is top-notch. Nobody wants to record music in a stuffy room, and good air circulation can help keep everyone focused and alert.

Conclusion

Creating a welcoming environment in a recording studio can help musicians feel comfortable and produce better music. By paying attention to the decor and lighting, as well as the temperature and air quality, you can create a space that is both inviting and professional. Once the artists feel relaxed, they can concentrate on making outstanding music.

Managing Expectations

Recording music can be a daunting experience, especially for beginners who are unfamiliar with the process. As a producer or engineer, it’s essential to manage your musicians’ expectations to ensure that everyone is on the same page, and the recording session runs smoothly.

Discussing Goals And Vision

Prior to the recording session, it’s important to have a clear understanding of the musician’s goals and vision for the project. This can be achieved during pre-production meetings. By discussing the desired outcome, you can determine the appropriate recording techniques, equipment, and personnel required to achieve the desired result. Make sure your musicians know the end goal and what is expected of them throughout the recording process.

Reviewing Song Arrangements

The song arrangement can significantly affect how a recording session pans out. Sit down with your musicians and go through the arrangement. If there are any adjustments that need to be made, make them before the recording session begins. This ensures that all parties involved know the part they’re playing, and there are no surprises during the recording process. By reviewing the songs beforehand, you can also determine which instruments are required and which should be left out.

Preparing For Technical Challenges

Recording sessions can present numerous technical challenges, but with the proper preparation, you can avoid or mitigate them. Before the recording session, ensure that all equipment is functioning correctly, and there are no compatibility issues between software and hardware. Prepare backup equipment and make sure all cables are in good condition. Ensure that your musicians are aware of any technical requirements, such as click tracks or accompaniments, for a smooth recording process.

By managing expectations through goal-setting, arrangement review, and technical preparation, you can create a comfortable environment where musicians can deliver their best performances. This sets the foundation for a successful and fulfilling recording session.

Offering Amenities

Offering Amenities: Making Musicians Comfortable In The Recording Studio

Musicians are artists who pour their heart and soul into their music. Recording a song in a studio can be an intense experience, and it is important to ensure that musicians feel comfortable in their environment. Making available certain amenities can help musicians unwind and feel at ease. It can also boost their creativity and productivity while laying down tracks. Here are some amenities that recording studios can offer to make musicians comfortable.

Providing Refreshments

Recording in a studio can be a time-consuming process. Musicians might have multiple sessions in a day, and it is essential to keep them hydrated and energized. Providing refreshments such as water, tea, coffee, and snacks can keep musicians’ spirits up and keep them motivated. Having a mini-fridge stocked with healthy snacks and beverages can boost the morale of musicians during long recording sessions.

Comfortable Seating

Recording a song can take hours, sometimes even days. It is essential to have comfortable seating arrangements for musicians to relax during break time. Uncomfortable chairs can put a strain on the musician’s back, leading to reduced efficiency during recording. Investing in ergonomic chairs can help keep musicians physically comfortable and prevent fatigue.

Break Areas

Recording sessions can be grueling. Musicians need time to rest, relax and recharge between sessions. Offering break areas where musicians can unwind, take a nap or catch up on a favorite book, can help musicians alleviate stress. Creating break areas with comfortable couches, bean bags, and a small library can go a long way in ensuring that musicians feel relaxed and at home in the studio.

Code:


Providing Refreshments

Recording in a studio can be a time-consuming process. Musicians might have multiple sessions in a day, and it is essential to keep them hydrated and energized. Providing refreshments such as water, tea, coffee, and snacks can keep musicians’ spirits up and keep them motivated. Having a mini-fridge stocked with healthy snacks and beverages can boost the morale of musicians during long recording sessions.


Comfortable Seating

Recording a song can take hours, sometimes even days. It is essential to have comfortable seating arrangements for musicians to relax during break time. Uncomfortable chairs can put a strain on the musician’s back, leading to reduced efficiency during recording. Investing in ergonomic chairs can help keep musicians physically comfortable and prevent fatigue.


Break Areas

Recording sessions can be grueling. Musicians need time to rest, relax and recharge between sessions. Offering break areas where musicians can unwind, take a nap or catch up on a favorite book, can help musicians alleviate stress. Creating break areas with comfortable couches, bean bags, and a small library can go a long way in ensuring that musicians feel relaxed and at home in the studio.

 
Making Musicians Comfortable In The Recording Studio


Credit: newsroom.spotify.com


Fostering Communication


Creating a comfortable environment for musicians is essential in the recording studio. Fostering communication between the musicians and the studio team can greatly improve the recording process and enhance the quality of the music. This can ultimately lead to a better final product.

Facilitating Open Dialogue

In the recording studio, it’s important for musicians to feel comfortable expressing their thoughts and concerns. This can be achieved by facilitating open dialogue. It’s essential to create an environment where everyone’s opinions are valued. Begin by asking the musicians if they have any questions or concerns. Avoid interrupting them and ensure that you give them enough time to speak. In doing so, you’ll create a relaxed atmosphere that will encourage everyone to communicate openly and honestly. Listening to them and considering their opinions is the key to an effective dialogue.

Respecting Boundaries

Everyone has their own limits and preferences when it comes to recording music. As a studio engineer, it’s your responsibility to respect each musician’s boundaries. Before starting the recording, discuss what each musician is and isn’t comfortable with. Ensure that the studio environment is conducive to everyone’s needs. Respect their privacy and avoid overstepping boundaries without prior consent. Keeping the musicians comfortable and happy can go a long way in improving the quality of the recording.

Encouraging Feedback

As a studio engineer, it’s your job to ensure that the music is recorded in a way that satisfies the needs of all the musicians. Encourage the musicians to provide feedback on the recording as you progress. Give them room to suggest improvements, and make changes where necessary. This way, you’ll get a better understanding of what everyone wants. In the end, the recording will be a collaborative effort, with each musician contributing their unique perspectives. In conclusion, making musicians feel comfortable in the recording studio is crucial for producing high-quality music. By fostering communication through open dialogue, respecting boundaries, and encouraging feedback, you can create an environment that encourages creativity, honesty, and collaboration. Remember, the better the environment, the better the music.


Maximizing Creativity


Creating an optimal environment for musicians in the recording studio is the key to maximizing creativity. From comfortable furnishings to the right equipment, ensuring that the artist is at ease can lead to more inspired performances and recordings.

As a music producer or a recording engineer, one of your primary responsibilities is to capture the best possible performance from the musicians in a recording studio. To achieve this, you need not only offer great recording equipment but also ensure that the musicians feel comfortable in the studio. Moreover, creating a creative atmosphere in the studio will help musicians to perform their best and provide you with content that can stand out. Here are some effective ways of maximizing creativity in the recording studio:

Encouraging Experimentation

Encourage experimentation in the recording studio by allowing and supporting the artists to try new things. Let the musicians try different approaches to the music they are recording. They may play with different instruments, sounds, or effects. You never know; their experimentation may lead to uncover new melodies and styles that are not primarily part of their routine.

Offering Multiple Takes

Sometimes musicians miss a particular note or play a wrong chord during recording. However, it doesn’t mean that their performance is a failure. It is essential to remind artists that great recordings often require numerous takes. Offer multiple takes, and encourage them not to worry about perfection, but instead let them focus on getting creative with their performance and expression.

Inspiring Different Approaches

Inspire musicians to take different approaches to their music while recording. Suggest that they try different arrangements, tempos, or dynamics. For example, if the song is a standard 4/4 rock song, suggest trying a different feel like a 6/8 jazz waltz. These different approaches can provide the artist with a fresh perspective, help them avoid creative ruts, and provide you with a unique album. In summary, maximizing creativity in the recording studio means creating a comfortable atmosphere for musicians to experiment, offer multiple takes, and try different approaches. Following these tips can inspire artists to unlock their creativity and provide you with the best possible recordings.

Making Musicians Comfortable In The Recording Studio


Credit: thechurchstudio.com


Easing Recording Anxiety


As a musician, being in the recording studio can be nerve-racking. However, there are ways to ease recording anxiety and make musicians feel comfortable. Setting up a relaxed atmosphere, taking breaks, and providing constructive feedback can all help to make the recording process a smoother and less stressful experience.

Recording anxiety can be a significant obstacle for musicians in the studio, making it challenging to produce their best work. Fortunately, there are strategies that recording studios can implement to help ease anxiety and make musicians feel more comfortable. In this post, we will discuss three proven methods for easing recording anxiety: building trust and rapport, reducing distractions, and creating a stress-free environment.

Building Trust And Rapport

Establishing trust and rapport with musicians is essential to ensure they feel comfortable in the recording studio. A good way to build trust is by having a conversation with the artist before the recording session. This can be done over the phone or in person, and it is an excellent opportunity to get to know the musician, understand their music and personal preferences. During the conversation, you can ask them about their musical influences, their goals and aspirations, and what they hope to achieve in the recording session. These questions not only provide insight into the musician’s personality, but they also communicate that you are interested in their music and want to help them achieve their goals.

Reducing Distractions

Distractions in the recording studio can exacerbate anxiety for musicians. One of the best ways to reduce distractions is by making sure the studio equipment is in good working condition and that the recording space is free from extraneous noises. Additionally, make sure that the artist has everything they need to perform at their best, like good headphones, a comfortable chair, and adequate lighting. Ensure a quiet and calm environment, free of interruptions. This helps to create a positive, stress-free environment for musicians in the recording studio, making them feel more comfortable, which in turn improves the quality of the record.

Creating A Stress-free Environment

Stress and anxiety can inhibit the creative process for musicians in the studio. To create a stress-free environment, it is important to set up the studio space to be as comfortable as possible. You can create a calming ambience by dimming the lights and adding some greenery to the studio, such as plants or flowers. Consider providing snacks and refreshments for the musician during the recording session. This tiny gesture can go a long way in making the musicians feel more at ease and help them perform better. Finally, ensure that the session fits the artist’s schedule, not forcing them to record when they are not in the right mood to do so. Overall, the secret to easing recording anxiety is to make the musicians feel comfortable in the recording studio. Building trust and rapport with the artist, reducing distractions, and creating a stress-free environment can help reduce anxiety and improve the quality of the recording. By following these simple tips, you can help take the stress out of recording sessions, allowing musicians to focus on their craft and create beautiful music.

Providing Technical Assistance


As a technical assistant, our goal is to create a comfortable environment for musicians during recording sessions. We provide guidance on equipment usage and help troubleshoot any technical difficulties that may arise, ensuring a seamless recording process for the artist.

Providing Technical Assistance: When it comes to recording music, there are a few technicalities that can make or break a session. That’s where providing technical assistance comes in – it’s crucial to make musicians feel comfortable in the studio and ensure that they can focus on creating the best possible music. Here are a few ways to provide technical assistance: Offering Soundproof Rooms: Soundproof rooms are essential to block out external noises and to prevent sound leakage into other rooms. This not only enables the musicians to concentrate better but also ensures clean recordings. The recording studio needs to provide a soundproof environment to the artists, so they are not distracted by outside noise and can put all their focus on playing and performing. Assisting with Instrument Tuning: Tuning instruments can be a frustrating experience, especially if the musician doesn’t have experience with the particular instrument they are playing. The recording studio can offer technical assistance in this regard and ensure that the instruments are perfectly in tune. By having someone on hand who knows the ins and outs of different instruments, musicians can save time and focus on making music. Providing Equipment and Gear: The quality of the recording is heavily guided by the quality of equipment used. When recording in a professional studio, the recording engineer will have all the necessary equipment that musicians may not have access to. The studio should provide a variety of equipment and gear, such as microphones, monitors, headphones, and so on, where the artists can make their selection depending on their preference. In conclusion, providing technical assistance is one of the most important aspects of operating a successful recording studio. By offering soundproof rooms, assisting with instrument tuning, and providing necessary equipment and gear, musicians can feel comfortable and perform their very best in a recording environment.

Promoting Musicians’ Well-being

Recording sessions can be stressful for musicians, making it essential to prioritize their well-being. By creating a comfortable space and catering to their needs, the recording studio can become a conducive environment for creativity. Here are some ways to promote musicians’ well-being during a recording session.

Monitoring Musicians’ Health

It’s crucial to keep an eye on musicians’ health during the recording process. Long hours in the studio can lead to fatigue, dehydration, and physical strain. Providing water, healthy snacks, and regular breaks can help keep musicians energized and prevent burnout. Additionally, monitoring the studio’s sound levels can prevent hearing damage, which is a common issue among musicians and audio professionals.

Encouraging Rest And Self-care

Recording sessions can be mentally and physically draining, making rest and self-care essential. Encourage musicians to take breaks, stretch, and practice mindfulness exercises during downtime. Additionally, providing comfortable seating, lighting, and temperature control can help create a relaxing ambiance. By prioritizing rest and self-care, musicians can maintain their focus and productivity throughout the recording process.

Addressing Any Concerns

Before the recording session, ensure that musicians have everything they need for a successful session. Address any concerns they may have, such as instrument or equipment issues, and provide solutions to alleviate the stressors. Additionally, create an open and supportive environment where musicians can voice any concerns or feedback throughout the recording process. By addressing concerns promptly, you can prevent frustrations and keep the recording process running smoothly.

Tip: Encourage musicians to communicate any physical or mental health needs before the recording session to ensure a safe and comfortable environment.

By prioritizing musicians’ well-being during the recording process, you can create an encouraging and supportive environment that fosters creativity. Addressing their needs, promoting rest and self-care, and monitoring their health can help keep them energized, focused, and productive throughout the session.

Frequently Asked Questions On Making Musicians Comfortable In The Recording Studio


How Do You Not Get Nervous When Recording?


To not get nervous when recording, you can practice and prepare beforehand. Familiarize yourself with your script, take deep breaths before recording, and focus on speaking slowly and clearly. Use visualization techniques to imagine yourself succeeding and delivering your message confidently.


Finally, try recording with a friend or colleague to get feedback and build your confidence.


What Is Recording Studio Etiquette?


Recording studio etiquette refers to the set of proper behaviors that one should adhere to in a recording studio to maintain a professional and respectful environment. This includes respecting other people’s time, equipment and space, avoiding excessive noise or distractions, being organized and prepared, and communicating effectively with others in the studio.


How Do You Prepare To Record In A Studio?


To prepare for recording in a studio, ensure your vocals and instrumentals are well-rehearsed. Familiarize yourself with the studio equipment and acoustics. Get enough rest, warm up your voice, and hydrate well. Discuss your music vision with the sound engineer.


Lastly, bring any necessary equipment and backup tracks.


How Can I Improve My Recording Studio?


To improve your recording studio, consider upgrading your equipment, optimizing your acoustic treatment, implementing a proper cable management system, investing in professional mixing and mastering services, and continuously learning new techniques and technologies within the industry.


Conclusion


To conclude, making musicians comfortable in the recording studio is crucial for capturing the best possible performance. By providing a comfortable atmosphere, being patient, and ensuring the equipment is up to par, musicians can focus on their craft and produce quality recordings.


It’s important for studios to remember that each artist is unique and may require different accommodations. A successful recording session is a collaboration between the artist and studio, and with a little effort, both parties can achieve their goals.

Categories
Archive

How To Make A Song Punchier During Stereo Mastering

To make a song punchier during stereo mastering, enhance the mid and high frequencies and add compression to the drum and bass tracks. This will create a clearer and more defined sound.


Stereo mastering is the final step in the music production process, where a professional engineer fine-tunes the mix for commercial release. It involves techniques such as equalization, compression, and limiting to enhance the overall sound quality. Among these techniques, the most important one is making the song punchier.


A punchy song has a stronger impact on the listener and captures their attention from the beginning to the end. We will discuss some tips and tricks to make a song punchier and more dynamic, making it stand out from the rest. Whether you are a professional musician or a beginner, these techniques can help you create a better mix and make your music more appealing to audiences.

How To Make A Song Punchier During Stereo Mastering


Credit: www.youtube.com


Choosing The Right Elements To Enhance The Punch


To make a song punchier during stereo mastering, it’s crucial to choose the right elements. This involves careful consideration of the bass, kick, and vocal levels, as well as compression and EQ adjustments. By enhancing these elements, you can add a powerful, dynamic quality to your music.

Stereo mastering is a crucial step in music production. It ensures that your song sounds professional and polished. One of the goals of stereo mastering is to enhance the punch of your song. The punch is the impact and energy that a song delivers. It is what makes people dance, nod their heads, and tap their feet. However, achieving punchy sound is not easy. It requires some technical skills and creative approaches. In this post, we will explore some techniques on how to make your song punchier during stereo mastering. Specifically, we will look at how to choose the right elements to enhance the punch.

Making The Kick And Bass Work Together

The kick and bass are the foundation of any dance track. They provide the rhythm and groove that make people move. However, to achieve a punchy sound, you need to make sure that these two elements work together in harmony. The kick and bass should not compete for space in the frequency spectrum. Instead, they should complement each other. Here are some tips on how to make the kick and bass work together:

  • Use EQ to remove conflicting frequencies
  • Ensure that the kick and bass are in key
  • Add sidechain compression to duck the bass when the kick hits

Adding Parallel Compression

Parallel compression is a technique that involves blending a heavily compressed version of the mix with the dry version. It can add punch and impact to a mix without sacrificing the dynamic range. Here’s how to add parallel compression to your mix:

  1. Send the stereo mix to a compressor with a high compression ratio and fast attack and release times
  2. Mix the heavily compressed signal with the dry signal to taste
  3. Adjust the balance between the compressed and dry signals until you achieve the desired punchiness

Remember, the key to achieving a punchy mix is to choose the right elements and techniques that enhance the energy and impact of your song. Try these tips on your next mastering project, and you’ll be on your way to creating punchier and more professional-sounding mixes.


Eq Adjustment For Added Punch


During stereo mastering, adding punch to a song can be achieved through EQ adjustment. By carefully boosting the right frequencies, the song can sound more dynamic and impactful without sacrificing clarity and balance in the mix.

During stereo mastering, achieving a punchy sound can make all the difference in taking your song to the next level. One way to achieve this is through EQ adjustments. Through EQ, you can both identify and cut problem frequencies, as well as boost essential frequencies to bring out the best in your mix.

Identifying And Cutting Problem Frequencies

To start, it’s important to identify any problem frequencies that may be detracting from your mix’s punchiness. These can include frequencies that are too harsh or muddy, for example. You can use a spectrum analyzer to help identify these areas in your mix. Once you’ve identified the problem frequencies, you can use EQ to cut them. This process involves lowering the gain on the problem frequency to smooth out your mix and get rid of any harsh or muddy tones. By doing so, you’ll create a cleaner and more defined mix.

Boosting Essential Frequencies

After cutting any problem frequencies in your mix, the next step is to boost essential frequencies that help to add punch. These are often found in the low and mid-range, as well as the high-end. By boosting these frequencies, you can increase the overall impact and intensity of your mix. This will help your song to stand out and grab attention. However, it’s important not to overdo it – too much boosting can result in an overly harsh or distorted sound. In conclusion, adjusting your EQ during stereo mastering is an essential step in creating a punchy and impactful mix. By identifying and cutting problem frequencies, as well as boosting essential frequencies, you can bring out the best in your song and take it to the next level.

Importance Of Balance In The Stereo Field

During the mastering process, it’s important to create a balanced stereo image of your mix. Achieving this balance is crucial for producing a punchy and tight sounding song that will captivate your listeners. Mastering the stereo field is a subtle art form, and it requires attention to detail and a deep understanding of the sound spectrum.

Stereo Width Adjustment

The stereo width of a song is an essential element that can make a mix sound more spacious or compact. By adjusting the stereo width, you can control the perceived depth and add more style to your song. However, you should be careful not to overdo it, as too much stereo widening can cause phase issues or make your mix sound unnatural.

Here are some tips to adjust the stereo width:

  • Use a stereo imaging tool to adjust the stereo field
  • Add subtle stereo widening to the elements that need breathing space, such as the vocals or lead instruments
  • Reduce the stereo width of elements that need focus and clarity, like the bass and drums

Panning For Clarity

Panning is another essential tool to balance the stereo field and create a crystal-clear sound. By panning different elements to specific positions within the stereo field, you can improve the separation between the instruments and enhance the clarity of the mix.

Here are some tips for panning:

  • Pan the lead vocal to the center, so it remains the focus of the mix
  • Support the lead vocal with panned backups or harmony vocals
  • Pan the drums and the bass to the center to anchor the overall mix and give it a solid foundation
  • Pan guitars or keyboards to the sides to add spaciousness and interest

Overall, achieving balance in the stereo field is crucial for mastering a punchy and tight sounding song. Using stereo width adjustments and panning techniques, you can create a balanced stereo image that will add depth and clarity to your mix.

Adding Glue To The Mix With Multiband Compression


To add more power to a song during stereo mastering, consider using multiband compression along with glue compression. This technique can help make the mix punchier and more cohesive, improving the overall sound quality of the final product.

Multiband compression is a powerful tool used during stereo mastering to enhance the punch and presence of a song. It works by splitting the frequency spectrum into different bands and applying individual compression settings to each band. This allows for fine-tuned control over the dynamics of the mix, resulting in a cohesive and dynamic sound.

Threshold And Ratio Settings

When using multiband compression to add glue to a mix, it’s important to pay attention to the threshold and ratio settings. These settings determine when the compressor kicks in and how much gain reduction is applied when it does. A lower threshold means the compressor will start working sooner, while a higher ratio means more gain reduction will be applied. Finding the right balance between these settings is essential to achieving a punchier sound without sacrificing dynamic range.

Adjusting The Attack And Release

Another important aspect of multiband compression is adjusting the attack and release times. Attack determines how quickly the compressor responds to changes in volume, while release determines how long it takes for the compressor to release its grip on the signal. Fast attack times can help to bring out the transients in a mix, while slower release times can help to smooth out the sound and add sustain. Balancing these settings is key to achieving a cohesive and punchy sound. By using multiband compression to add glue to a mix, you can bring out the best in your song and give it the edge it needs to stand out. Remember to pay close attention to threshold and ratio settings, as well as attack and release times, in order to achieve the desired result. With practice and experimentation, you’ll be able to take your mixes to the next level and create truly dynamic and powerful tracks.


Frequently Asked Questions Of How To Make A Song Punchier During Stereo Mastering


How Do You Get The Right Amount Of Punch In Your Master?


To get the right amount of punch in your master, you should focus on proper EQ and compression techniques. Use EQ to enhance the punchy elements of the mix while cutting out any unnecessary frequencies. Use compression to control and enhance the transients of the mix.


Experiment with different attack and release times to find the perfect balance.


How Do You Make A Punchy Song?


To make a punchy song, start with a strong, catchy melody that will grab the listener’s attention. Add energetic and upbeat instrumentation that complements the melody, while keeping the tempo lively. Use simple yet powerful lyrics that connect with the listener and create a memorable hook.


Ensure the song has a clear structure and builds to a climactic chorus. Finally, mix and master the song to ensure it packs a sonic punch and retains its energy throughout.


How Do You Add Punch To A Mix?


To add punch to a mix, you need to focus on the key elements of the song. Enhance the bass and drums, use compression and EQ to bring out the vocals, and add space and depth with reverb and delay.


Adjust the levels carefully and pay close attention to the transitions between sections. Finally, use automation to add excitement and variation, and use reference tracks to compare your mix to professional-quality recordings.


How Should A Mix Sound Before Mastering?


The mix should be balanced, with all elements sitting comfortably within their own frequency ranges and not overpowering each other. It should also have a good level of clarity and separation between instruments. However, it is important to note that there is no one exact or right way for a mix to sound before mastering, as it depends on the desired style and genre.


Conclusion


To summarize, making a song punchier during stereo mastering is an essential step for any music producer. With the right techniques, such as narrowing the stereo field, adding compression and EQ, and adjusting the levels, you can ensure that your song will sound fuller and more impactful.


Remember that each song is unique and requires specific attention to detail during the mastering process. Implement these tips carefully, and enjoy the punchy and powerful results in your final product.

Categories
Archive

Writing Chord Progressions Melodies From Scratch

To write chord progressions and melodies from scratch, first choose a key and a tempo. Then, experiment with different chord patterns and melodies until you find the perfect combination for your song.

Writing Chord Progressions Melodies From Scratch


Credit: www.productionmusiclive.com


Understanding Chord Progressions


Understanding chord progressions is crucial for writing melodies from scratch. Incorporating different chord progressions can add depth and emotion to your music. Experimentation and theory knowledge can help you create unique progressions that will enhance your compositions.

When it comes to writing chord progressions and melodies from scratch, understanding chord progressions is crucial. Chord progressions are a series of chords played in a specific order and are the foundation of most music. By understanding chords and their relationship with each other, you can create more interesting and dynamic melodies.

Major And Minor Chords

Chords are made up of three or more notes played together. The two most common types of chords are major and minor chords. Major chords have a bright, happy sound to them, while minor chords have a darker, sadder sound. The difference between major and minor chords is the third note played. In a major chord, the third note is a major third (four semitones above the root note), while in a minor chord, the third note is a minor third (three semitones above the root note).

Common Chord Progressions

There are many different chord progressions that you can use when writing melodies. However, there are some that are more common than others. Here are some of the most common chord progressions:

Chord Progression Example
I-IV-V C-F-G
I-V-vi-IV C-G-Am-F
vi-IV-I-V Am-F-C-G

The I-IV-V chord progression is often referred to as the “three-chord progression” and is used in many popular songs. The I-V-vi-IV chord progression is also very common and is used in songs such as “Let It Be” by The Beatles and “Someone Like You” by Adele. When writing chord progressions and melodies from scratch, it’s important to experiment with different chord progressions and see what works best for your song. By understanding chord progressions and how they work together, you can create more interesting and dynamic melodies that will keep your audience engaged.

Writing Chord Progressions Melodies From Scratch


Credit: m.youtube.com


Creating Chord Progressions


Crafting unique and memorable chord progressions for your melodies can be a daunting task, but with the right approach, it can be a fun and creative process. Start by experimenting with different chord voicings and progressions, exploring different genres, and letting your ear guide you towards the perfect progression for your melody.

Creating Chord Progressions is a crucial aspect of writing melodies from scratch. It refers to the process of selecting and arranging a series of chords that sound harmonious together. While there are no hard and fast rules when it comes to creating chord progressions, there are some guidelines that can help you in making better choices. In this blog post, we will explore the three key steps in creating chord progressions: Choosing the Key, Selecting Chord Types, and Adding Variations and Extensions.

Choosing The Key

Choosing the key is the first step in creating chord progressions. The key you choose will determine the notes and chords you can use in your progression. The most common keys to write in are major and minor keys. In major keys, the chords that are commonly used are the I, IV, and V chords. For example, if you are in the key of C major, the chords commonly used are C, F, and G. These chords sound harmonious when played together and are a great place to start when creating chord progressions. In contrast, in minor keys, the chords that are commonly used are the i, iv, and V chords. For example, if you are in the key of A minor, the chords commonly used are Am, Dm, and E. These chords sound harmonious when played together and can help you create a melancholic or moody sound in your chord progressions.

Selecting Chord Types

Once you have chosen the key, the next step is to select the types of chords you want to use. There are different types of chords, including triads, seventh chords, and extended chords. Triads are three-note chords, while seventh chords have four notes and extended chords have five or more notes. When selecting chord types, it’s important to consider the melody you want to write. For example, if you want to write a melody with a happy and upbeat feel, major triads are a great choice. In contrast, if you want to write a melody with a jazzy feel, seventh and extended chords are a great choice.

Adding Variations And Extensions

Adding variations and extensions to your chord progressions can help you create a more interesting melody. Variations refer to altering the tempo, melody, or rhythm in your chord progression. Extensions refer to adding additional notes to your chords, such as a ninth or eleventh. For example, if you want to create a more complex chord progression, you can add an extension to your chords. This can be achieved by adding a ninth note to your seventh chords, or an eleventh to your ninth chords. These additions can help you create a unique sound in your chord progressions. In conclusion, creating chord progressions is an essential part of writing melodies from scratch. By following these three steps: Choosing the Key, Selecting Chord Types, and Adding Variations and Extensions, you can create harmonious and interesting chord progressions that will help you write great melodies.


Writing Melodies


Writing melodies can be a challenging task, especially if you’re starting from scratch. To write effective chord progression melodies, it’s important to experiment with different sounds and patterns, and to allow your creativity to flow freely. With practice and persistence, you can create unique, memorable melodies that will capture your audience’s attention.

Crafting a melody has a powerful impact on a song. It defines a track’s identity and can make it memorable. Writing one, however, can be a tough challenge. To create something that sounds right, one needs a bit of music theory as well as some creativity and experimentation. In this post, we’ll explore some tips and techniques that can help you write fantastic melodies from scratch.

Using Scales And Modes

Choosing the right scale or mode can set the mood for your composition. A scale is a group of notes played in a specific order, while modes are scales that start from different notes but share the same set of intervals. Playing around with them can produce different emotions, which can lead to unique melodies. Here are some common modes to start with:

Mode Intervals Emotion
Major W-W-H-W-W-W-H Happy, uplifting, triumphant
Minor W-H-W-W-H-W-W Sad, melancholic, intense
Phrygian H-W-W-W-H-W-W Mysterious, exotic, Spanish-flavored

Incorporating Chords

Chords serve as the backbone of a song. They support the melody and dictate its harmonic progression. When writing melodies from scratch, it’s best to know your chords inside and out. Experimenting with different chord progressions can help you create unique melodies. Here are some common progressions to try:

  1. I-IV-V (also known as the “three-chord trick”)
  2. vi-IV-I-V
  3. ii-V-I

Crafting A Memorable Hook

A hook is a catchy, memorable phrase that sticks in the listener’s head. It’s usually the chorus or the main melody of the song. Creating a memorable hook requires a combination of musical instincts and good craftsmanship. There’s no magic formula, but here are some tips that can help:

  • Keep it simple
  • Repeat the melody
  • Add variation to create interest
  • Use a strong rhythm and catchy lyrics

When writing melodies, keep in mind that it’s not just about playing the right notes. It’s also about conveying emotion, telling a story, and creating a unique identity for your track. Experiment, practice, and most importantly, have fun!

Harmonizing Melodies With Chords

Harmonizing melodies with chords is one of the most important skills to have as a songwriter. In this post, we will cover some of the basics of chord progressions and how to create them from scratch.

Identifying Key Centers

The first step in harmonizing melodies with chords is to identify the key center of the melody. This means figuring out which note or chord the melody resolves to or feels like its “home” note. Once you have identified the key center, you can create a chord progression that supports the melody.

One easy way to identify the key center is to play the melody and try to sing a note that feels like the “home” note. It’s usually the last note of the melody or the note that is held the longest. You can also try playing different chords under the melody until one feels like it fits well.

Matching Chords With Melody Notes

Once you have identified the key center, the next step is to match chords with the melody notes. This means finding chords that contain the same notes as the melody or that fit within the key center.

For example, if the melody has a C note, you could try playing a C major or C minor chord. If the melody has a D note, you could try playing a D major or D minor chord. You can also try playing different inversions of the chords to see what sounds best.

Experimenting With Different Variations

Once you have created a basic chord progression that supports the melody, it’s time to experiment with different variations. You can try adding or removing chords, changing the rhythm or tempo, or even transposing the melody to a different key.

One popular variation is to create a “bridge” section that provides a contrast to the main chord progression. This can be achieved by playing a different set of chords or by changing the melody to a different key.

Key Chords
C Major C Dm Em F G Am Bdim
G Major G Am Bm C D Em F#dim
D Major D Em F#m G A Bm C#dim
  • Always start with the key center when creating a chord progression.
  • Try different chords that contain the same notes as the melody.
  • Experiment with different variations to find what sounds best.
  • Use inversions and different rhythms to create interest.

By following these basic guidelines, you can create chord progressions that support your melodies and help convey the emotion and message of your song.

Tools And Techniques For Songwriters


Learn the skills of writing chord progressions and melodies from scratch with the help of tools and techniques for songwriters. With a wide range of software tools available, songwriting becomes an easier task, resulting in better outcomes. Gain expertise in songwriting by putting your creativity to work with these tools and techniques.

As a songwriter, coming up with chord progressions and melodies can be challenging, but it doesn’t have to be. With the right tools and techniques, you can create amazing songs that will wow your audience. In this article, we will explore some of the essential tools and techniques that songwriters can use to create chord progressions and melodies from scratch. These include music theory fundamentals, digital audio workstations, and collaboration strategies.

Music Theory Fundamentals

One of the most critical tools for any songwriter is a good understanding of music theory fundamentals. With a solid grasp of music theory, songwriters can create chord progressions and melodies that are both compelling and emotionally resonant. Some of the key music theory fundamentals that songwriters should know include:

  • Key signatures
  • Chord construction
  • Chord progressions
  • Scale degrees

By understanding these basic concepts, songwriters can better understand how to create chord progressions and melodies that fit together harmoniously.

Digital Audio Workstations

Another critical tool for songwriters is a digital audio workstation (DAW). A DAW is a software program that allows songwriters to record and edit their music digitally. Some of the top DAWs on the market include:

DAW Price
Logic Pro X $199.99
Ableton Live $99-$749
Pro Tools $29.99-$79.99/month

These DAWs come equipped with a range of virtual instruments and effects that can help musicians create a full and vibrant sound. With a DAW, songwriters can experiment with different chord progressions and melodies until they find the perfect combination.

Collaboration Strategies

Finally, songwriters can also benefit from collaborating with others. By working with other songwriters, producers, and musicians, songwriters can get new ideas and perspectives on their work. Some effective collaboration strategies for songwriters include:

  1. Inviting other musicians to jam and improvise together
  2. Co-writing songs with other songwriters
  3. Working with a producer who can provide guidance and feedback

By collaborating with others, songwriters can stay motivated, inspired, and continually improve their craft. In conclusion, creating chord progressions and melodies from scratch can be a challenging task for songwriters. However, with the right tools and techniques, songwriters can overcome these challenges and create amazing music that resonates with their audience. By mastering music theory fundamentals, using digital audio workstations, and collaborating with others, songwriters can take their music to the next level.

Tips For Crafting Unique And Engaging Music

As a musician, writing chord progressions melodies from scratch can be a challenging, yet rewarding experience. One of the key factors that contribute to crafting a captivating piece of music is the ability to create something that stands out among the countless songs that already exist. In this blog post, we’ll explore three tips for how to make music that is both unique and engaging.

Drawing Inspiration From Personal Experience

One of the most effective ways to create something unique is by drawing from your personal experiences. Whether it’s a feeling, an event, or a relationship, your personal life can be an endless source of inspiration. By infusing your music with your own life, you’re able to create something that resonates with you emotionally and connects with others on a deeply personal level.

Combining Different Styles

Another effective method for crafting unique music is by combining different styles. Taking inspiration from multiple genres and blending them together can create something wholly new and unexpected. This technique has been used by many successful artists and can help you to stand out in a crowded industry.

Taking Risks And Pushing Boundaries

Finally, taking risks and pushing boundaries can lead to writing chord progressions melodies that feel truly unique and surprising. Whether it’s experimenting with unconventional song structures, instrumentation, or production techniques, taking chances can set your music apart from the rest.

  • Draw from personal experience to create emotionally resonant music
  • Combine different styles to create something wholly new and unexpected
  • Take risks and push boundaries to set your music apart from the rest

Bringing Your Music To Life

Writing chord progressions and melodies from scratch can seem overwhelming at first, but with practice and patience, you can bring your music to life. In this blog post, we will explore some tips and techniques that will help you create memorable compositions that resonate with your audience.

Recording And Mixing Techniques:

Recording and mixing your music can make or break your final product. To ensure the best quality, it’s important to invest in good equipment such as microphones and audio interfaces. You should also experiment with different recording techniques such as panning and compression to create a fuller sound. When mixing your track, make sure to EQ each instrument individually to avoid frequency clashes and give each element its space to shine.

Promoting Your Music Online:

With today’s technology, promoting your music online has never been easier. You can use social media platforms to share snippets of your music, engage with fans, and build a following. You should also make use of digital distribution services such as DistroKid and Tunecore to get your music on popular streaming platforms such as Spotify and Apple Music.

Generating Buzz And Building A Fanbase:

Building a fanbase takes time and effort, but it’s crucial for any aspiring musician. One effective way to generate buzz is to collaborate with other artists and musicians. You can also offer exclusive content and merchandise to your fans to keep them engaged. Finally, make sure to perform live shows whenever possible. Nothing beats the energy and excitement of a live performance, and it’s a great way to connect with your audience.

Writing Chord Progressions Melodies From Scratch


Credit: www.productionmusiclive.com


Frequently Asked Questions Of Writing Chord Progressions Melodies From Scratch


How Do You Create A Melody Based On A Chord Progression?


To create a melody based on a chord progression, start by identifying the key and choosing chords that belong to that key. Then, use the chord tones to create a melody. Try emphasizing the root, third, or fifth of each chord and vary the rhythm and contour to add interest.


Experiment with different melodies until you find one that fits the chord progression.


How Do I Make My Own Chord Progression?


To create your own chord progression, start by choosing a key and a scale. Then experiment with different chord combinations that fit within the chosen scale. You can use online resources, such as chord progression generators or music theory books, to help you find chord progressions that sound good together.


Don’t be afraid to try out different chord progressions until you find one that feels right for your song.


How Do You Build Off A Chord Progression?


To build off a chord progression, you can add a melody or bass line that complements the existing chords. Experiment with different rhythms or inversions of the chords to add variation and interest. Don’t be afraid to try out different keys or modulations to create a unique sound.


Do Melodies Follow Chord Progression?


Yes, melodies often follow chord progressions. Chords provide a harmonic framework for melodies to follow, creating a sense of harmony and cohesion within a song. Melodies can use individual notes from the chords or arpeggios to create a connection to the chord progression.


Conclusion


To sum up, writing chord progressions and melodies from scratch can be a daunting task, but it can also be extremely rewarding. With the tips and techniques outlined in this post, you should be well on your way to creating memorable and engaging music that connects with your audience.


Remember to experiment, trust your instincts, and have fun while creating your own unique sound. The musical possibilities are endless!

Categories
Archive

Top Free Vst Synthesizers Analog Digital Modular

Top free VST synthesizers include Analog Lab Lite, Synth1, Tyrell N6, and Helm. There are numerous VST synthesizers available for music production, but finding the best free ones can be daunting.


Also, thankfully, there are many fantastic options to choose from. Also, whether you’re looking for an analog, digital, or modular sound, there are VST synthesizers that deliver. We will showcase some of the top free VST synthesizers available, highlighting their unique features and benefits for music makers.

Related reading: Most Popular Vst Synthesizers and Amazing Free Vst Synth Plugins. For background, see the Wikipedia article on Virtual Studio Technology.


Moreover, from the legendary Analog Lab Lite to the versatile Tyrell N6, these synthesizers offer a world of possibilities at no cost.

Top Free Vst Synthesizers Analog Digital Modular


Credit: routenote.com


Analog Synthesizers


In addition, looking for top free VST synthesizers with an analog, digital, or modular sound? In addition, check out these excellent models that can bring some serious flair to your music productions. Experiment with sound design and manipulate these synthesized sounds to elevate your final product.

Analog Synthesizers: Tal-bassline And Dexed

Furthermore, Analog synthesizers have an authentic and warm sound that many electronic music producers prefer. For example, TAL-BassLine is a free VST plugin that emulates the classic Roland TB-303 bassline synthesizer. It has a simple and intuitive interface that allows users to quickly generate classic bassline sounds. The plugin includes features such as a step sequencer, arpeggiator, and effects like distortion and chorus. The TAL-BassLine also has a low CPU usage, making it an ideal plugin for those working on older computers or laptops. Dexed is another free VST plugin that emulates a classic Yamaha DX7 synthesizer.

Additionally, it’s based on the open-source DX7 clone, and it’s capable of reproducing the lush pads, bells, and FM basses of the original DX7. As a result, Dexed has numerous parameters that allow users to recreate the DX7’s complex sounds, making it perfect for sound designers and musicians who want to add a retro sound to their compositions.

Tal-bassline

Also, TAL-BassLine is a straightforward virtual synthesizer plugin that emulates the famous Roland TB-303 bassline synthesizer. However, it has a simple interface that emulates the original design of the hardware unit. It has synthwave and acid sound settings that make it ideal for electronic dance and house music genres. The plugin has a classic ladder filter and distortion effects that can create the sound that producers crave. TAL-BassLine supports MIDI automation and it’s easy to use, making it an ideal tool for beginners and experts alike.

Dexed

Moreover, Dexed is a free VST plugin that reproduces the sound of the Yamaha DX7 synthesizer. Then, the DX7 synthesizer was popular in the 80s and 90s and used a unique FM synthesis method. Dexed emulates the DX7’s sound and gives users access to its diverse and vibrant sound library. It has features such as a built-in sequencer, arpeggiator, and FX unit. Not only that, Dexed supports MIDI implementation, allowing users to control it from external keyboards and controllers. Dexed is perfect for those who want to explore classic sounds but have a tight budget.

Top Free Vst Synthesizers Analog Digital Modular


Credit: bedroomproducersblog.com


Digital Synthesizers


In addition, Digital synthesizers are a great way to produce high-quality sounds. Top free VST synthesizers such as Analog, Digital, and Modular allow for realistic simulations of classic analog synth sounds while offering a wide variety of sound design options for modern music production.

Next on our list of top free VST synthesizers are the ever-popular digital synthesizers. Unlike analogue synthesizers, digital synthesizers use digital signal processing techniques to generate sound. In short, these VSTs often come with a plethora of preset sounds that can be easily tweaked to your preferences. Let’s take a look at two of the most popular free digital synthesizers available in the market.

Helm

Helm is a free, open-source, polyphonic, virtual synthesizer. Similarly, this digital synthesizer comes equipped with a plethora of modulation options and an intuitive interface. With Helm, users can create sounds using the many oscillators that are available, including additive, subtractive, and FM. Furthermore, Helm boasts of a robust modulation system that can be used in tandem with the step sequencer and arpeggiator. Some of the features of Helm include:

  • Advanced wavetable oscillators
  • Flexible modulation options
  • Filter and effects modules
  • Unison mode

Synth1

Synth1 is a highly acclaimed digital synthesizer that has over 25,000 presets available. Also, this virtual synth offers users a cutting-edge sound engine that is capable of producing some of the most complex sounds possible. Synth1 provides users with an intuitive interface that allows presets to be loaded and then modified to user preference. Some of the features of Synth1 include:

  • Two oscillators that can be synced and cross-modulated
  • A variety of filter types
  • Two LFOs, four ADSR envelopes, and two modulation envelopes
  • Built-in arpeggiator and step sequencer
  • 16-note polyphony

In conclusion, these two free digital synthesizers are some of the best in the market and should be at the top of every sound designer’s list. In addition, they offer unparalleled sound quality and a variety of sound design options for anyone looking to create their own unique sounds.

Modular Synthesizers

Modular synthesizers are unique in that they allow you to build a custom synthesizer piece by piece. For example, you can mix and match modules to create a truly one-of-a-kind sound. With the rise of digital synthesizers, many people have turned to software and VSTs to get their modular fix. In this post, we’ll be taking a look at some of the top free VST modular synthesizers available today. Here are three of our top picks for analog, digital, and modular synthesizers:

Vcv Rack for Free VST Synthesizers

VCV Rack is a free, open-source virtual modular synthesizer. It’s compatible with many popular plugin formats, including VST, AU, and LV2. What sets VCV Rack apart is its vast library of modules. The library contains many modules that emulate classic analog hardware, as well as new digital modules.

You can create patches by dragging and dropping modules onto the virtual rack. The sound quality is excellent, and the interface is intuitive, which makes it easy to learn for beginners. If you’re looking for a versatile and easy-to-use virtual modular synthesizer, VCV Rack is an excellent choice.

Mutable Instruments Plaits for Free VST Synthesizers

Mutable Instruments Plaits is a free virtual synthesizer that emulates a wide range of sounds. The interface is simple, but don’t let that fool you. This synthesizer is capable of creating complex sounds with ease. The module features traditional waveforms, but it also has many modern wavetables. The interface gives you access to each of the parameters, so you can shape the sound to your liking.

Plaits is perfect for those who want an all-in-one synthesizer. It can create everything from bass to lead to percussion. The sound quality is excellent, and the interface is easy to use. If you’re looking for a fully-featured virtual synthesizer module, Mutable Instruments Plaits has you covered.

Modular synthesizers are a type of synthesizer made up of separate modules that can be connected together to create a custom sound. The modules can be anything from oscillators to filters to effects units. You can mix and match modules to create a unique sound that no one else has.

Modular synthesizers can be expensive, which is why virtual modular synthesizers have become so popular. They give you access to a massive library of modules without having to spend thousands of dollars. If you’re interested in getting into modular synthesis but don’t want to break the bank, check out VCV Rack and Mutable Instruments Plaits. They’re both excellent virtual modular synthesizers and are completely free.

Top Free Vst Synthesizers Analog Digital Modular


Credit: www.productionmusiclive.com


Hybrid Synthesizers

When it comes to synthesizers, hybrid models offer a perfect blend of both analog and digital features. These versatile synthesizers bring the best of both worlds to produce a wide range of sounds that take music production to a new level. In this article, we will take a look at the top free VST synthesizers for hybrid sound generation.

U-he Tyrell N6

The U-He Tyrell N6 synthesizer is a free VST plugin that emulates the classic Roland Juno-60 synth. This feature-packed hybrid synthesizer comes with a powerful virtual analog sound engine, modulation capabilities, and a range of built-in effects. The user-friendly interface of Tyrell N6 makes it easy for users of all skill levels to create complex sounds with ease.

Surge Synthesizer for Free VST Synthesizers

Surge Synthesizer is a free VST synth that offers a flexible hybrid architecture and an intuitive interface. It combines the best of both worlds by offering a range of analog-style waveforms alongside a digital synthesis engine. With a massive modulation matrix and a collection of built-in effects, Surge is perfect for creating complex and evolving sounds that can cut through any mix.

Frequently Asked Questions On Top Free Vst Synthesizers Analog Digital Modular


Are Modular Synths Analog Or Digital?


Modular synths can be either analog or digital. Analog modular synths use electronic circuitry to create sounds, while digital modular synths use computer software to generate and manipulate sound. Both types have their own unique qualities and advantages.


What Are The Best Free Synth Plugins?


There are several free synth plugins available online, but some of the best options include: Helm, Dexed, Tyrell N6, TAL-Noisemaker, and OB-Xd. These plugins offer a range of features and sounds, making them perfect for music production beginners or anyone on a budget.


Do Analog Synths Sound Better Than Digital?


Analog synths and digital synths have their own unique sound qualities. The analog sound is warmer and has a vintage character, whereas digital offers cleaner and more precise sounds. Ultimately, the choice between the two depends on personal preference, budget, and the type of music being produced.


What Is The Free Plugin Like Diva?


A free plugin similar to Diva is Gutenberg, which comes pre-installed in WordPress. It offers drag-and-drop page building functionalities with blocks and offers more customization options.


Conclusion


After exploring some of the top free Vst synthesizers for analog, digital, and modular sounds, it’s clear that the world of music production has become more accessible than ever before. With numerous options available, producers can experiment with different sounds and styles without breaking the bank.


These tools not only enhance creativity, but also help in achieving professional-quality production. As technology continues to advance, it’s exciting to see how the world of synthesizers evolves to cater to diverse musical expressions.


Categories
Archive

How To Prepare A Multitrack Session Before Mixing

To prepare a multitrack session before mixing, organize your tracks, label them clearly, adjust levels and panning, and apply any necessary processing. In multitrack recording, each instrument or element of a song is recorded on a separate track, allowing for greater control during the mixing process.


To ensure an efficient and effective mixing session, it is essential to prepare the multitrack session properly. This involves organizing tracks in a logical order, labeling them clearly, adjusting the levels and panning, and applying any necessary processing, such as EQ or compression.


By taking the time to properly prepare the multitrack session, you can streamline the mixing process and achieve a more polished and professional sound.

How To Prepare A Multitrack Session Before Mixing


Credit: www.thebeachhousestudios.com


Organizing Your Multitrack Session


Preparing your multitrack session before mixing is crucial for achieving a high-quality audio production. You should organize your tracks, eliminate unnecessary noises, and label each component properly for a more efficient mixing process. Stay focused and pay attention to detail to ensure the best outcome.

Before you start mixing your multitrack session, it’s essential to organize your tracks properly. A well-organized session can make the mixing process more enjoyable and efficient. Here are a few tips on how to organize your multitrack session effectively.

Grouping Tracks By Instruments

One of the best ways to organize your multitrack session is to group the tracks by instrument. Grouping similar instruments together not only makes it easy to navigate but also helps you identify any issues and make EQ and compression decisions. For instance, you can group all the drum tracks into a single folder or bus, which you can then process collectively. Here’s an example of how you can group tracks by instruments for a typical rock song:

  • Drums
    • Bass Drum
    • Snare Drum
    • Tom-Toms
    • Cymbals
  • Bass
  • Guitars
    • Lead Guitar
    • Rhythm Guitar
  • Keyboards
  • Vocals
    • Lead Vocal
    • Backing Vocals
  • Other Instruments

By grouping your tracks together, you can save time and keep your session well-organized.

Color-coding Tracks By Type

Another way to organize your multitrack session is to color-code your tracks by type. You can use different colors to differentiate between drums, guitars, and vocals, making it easier to navigate your session. For example, you can use the following colors for different instruments:

  • Drums – Blue
  • Bass – Green
  • Guitars – Yellow
  • Keyboards – Red
  • Vocals – Purple
  • Other Instruments – Orange

Color-coding your tracks can make it easy to pick out specific tracks at a glance and help you quickly identify any issues or discrepancies in the mix.

Naming Tracks For Clarity

Naming your tracks is vital for clarity and helps you keep track of your mix. Use simple yet descriptive names for each track, which will make it easier to navigate through the mix and make the mixing process more efficient. For example, instead of naming your tracks as “Track 1”, “Track 2”, etc., you can use more descriptive names such as “Lead Vocal”, “Bass Guitar”, “Crash Cymbal”, “Kick Drum”, etc. By naming your tracks descriptively, you can quickly navigate through the session, make critical mixing decisions, and make the mixing process more efficient.

Conclusion

In conclusion, organizing your multitrack session might seem time-consuming, but it’s an essential step for a successful mix. Follow the tips above and group your tracks by instruments, color-code them by type, and name your tracks descriptively to make the mixing process more efficient and enjoyable.

Cleaning Up The Tracks


Preparing a multitrack session before mixing is essential for achieving a professional sound. Cleaning up the tracks involves removing excessive noise, organizing the channels, and eliminating any unwanted tracks that could negatively affect the final mix.

Cleaning Up The Tracks Before you dive into the mixing process, it is important to prepare your multitrack session properly for a smooth experience. One of the crucial steps is cleaning up the tracks. In this section, we will discuss the best practices for removing unnecessary tracks, deleting unused audio clips, and correcting track alignment. Removing Unnecessary Tracks The first step towards cleaning up your multitrack session is to remove any unnecessary tracks. These could be empty tracks or tracks that do not contribute to the final mix. Having too many tracks in your session can make it cluttered and confusing, leading to a messy mix. To remove unnecessary tracks, simply select them and delete them. However, before deleting a track, make sure that it does not have any important information in it. If you are unsure about a track, mute it and listen to the mix without it. This will give you a better idea of whether the track is needed or not. Deleting Unused Audio Clips Another step to clean up your session is deleting the unused audio clips. These are clips that were recorded but not used in the final mix. They can take up unnecessary space, making it difficult to navigate through the session. To delete the unused audio clips, select them and delete them. You can also use the “Clean Up” function to remove all the unused clips from your session. This will free up space and make it easier to manage your session. Correcting Track Alignment In a multitrack session, it is crucial to ensure that all the tracks are aligned properly. Misaligned tracks can cause phasing issues and affect the overall sound quality of the mix. To correct track alignment, simply select the tracks and use the “Align Tracks” function. This will align the tracks based on their start points, ensuring that they are synchronized with each other. You can also use the “Nudge” function to adjust the timing of individual tracks. In conclusion, cleaning up the tracks is an essential step to prepare your multitrack session for mixing. Removing unnecessary tracks, deleting unused audio clips, and correcting track alignment can make the mix process smoother and more productive.

Fixing The Timing And Pitch Issues


To ensure a smooth mixing process, it is crucial to fix any timing and pitch issues in a multitrack session beforehand. This involves aligning the different tracks and adjusting the pitch as necessary to achieve a clean, polished sound. Proper preparation can save time and lead to a better end result.

If you want to create a professional-sounding mix, it’s essential to address any timing or pitch issues before you start mixing. Fortunately, most DAWs provide tools that can help fix these issues with ease. In this post, we’ll discuss two common methods for fixing timing issues – correcting timing issues with quantization and adjusting the timing using your ears. we’ll also be looking at how to fix pitch issues with auto-tune plugins.

Correcting Timing Issues With Quantization

Quantization is the process of snapping recorded audio to a grid. It’s the easiest and quickest way to fix timing issues, though it may not always produce the most natural-sounding results. Here’s how to do it:

  1. Select the track you want to quantize
  2. Open up your DAW’s quantization options
  3. Select the quantization settings that best suit the track
  4. Apply quantization to the track
  5. Preview the change using the solo button to ensure the timing is more precise but still sounds natural

Adjusting The Timing Using Your Ears

While quantization may be a quick way to correct timing issues, adjusting the timing using your ears is the most effective way to make sure the timing is perfect. Here are some steps to adjust the timing:

  • Zoom into the waveform and find the section where the timing issue occurs
  • Identify the beats or notes that are off-time
  • Move these parts forward or backward in the timeline to correct the timing
  • Repeat this process for all the sections with timing issues
  • Listen to the track multiple times to ensure the timing is perfect

Fixing Pitch Issues With Auto-tune Plugins

Auto-Tune is an audio plugin that automatically tunes pitch in vocals and instruments. Here’s how you can use Auto-Tune:

Step Description
1 Select the track that you want to use Auto-Tune on.
2 Open Auto-Tune on the track.
3 Choose the desired scale and key that the track is in.
4 Set the retune speed to your preference.
5 Preview the change using the solo button to ensure it sounds natural.

In conclusion, fixing timing and pitch issues before mixing is essential for creating a professional-sounding mix. Whether you choose to use quantization, adjust timing using your ears, or use an auto-tune plugin, make sure to take the time to ensure each element is in sync and in tune.

Mix Preparation Techniques


Before mixing a multitrack session, it’s crucial to prepare your mix by organizing your tracks, setting levels, panning, and routing. This will save time during the actual mixing process and improve the overall quality of your mix. Consider using templates for quicker preparation.

Preparing a multitrack session before mixing is crucial for producing a high-quality mix. Mix preparation techniques include balancing track levels, panning, setting up bus sends, and Aux tracks. Following these techniques can make your mixing process more manageable and efficient.

Balancing Track Levels

Balancing track levels is an essential step in the mix preparation process. In this step, you need to adjust the volume levels of the individual tracks to ensure that they sit well in the mix. You can use the gain plugin or the volume fader to adjust the levels. Make sure that the levels are consistent throughout the session, without any unwanted peaking or audio clipping.

Setting The Panning

Panning is the process of placing each track in the stereo field to create a spatial balance. Proper panning can help create separation between different instruments and sounds. In this step, you can use the pan function to adjust the position of each track in the stereo field. Make sure to pan each track according to its role in the mix and create a balanced stereo image.

Setting Up Bus Sends And Aux Tracks

Bus sends and Aux tracks allow you to apply effects to multiple tracks simultaneously. This technique helps keep your mix organized and can simplify your workflow. In this step, create an Aux channel and assign it to the tracks you want to affect. Then add the desired effect to the Aux channel. You can make adjustments to the effect for all the tracks at once using the Aux channel’s fader. In conclusion, follow these mix preparation techniques to make your mixing process more manageable and efficient. Balancing track levels, panning, and setting up bus sends and Aux tracks ensure that your mix is consistent and well balanced. These simple steps can help produce high-quality mixes that your clients will love.


Plugins And Processing Techniques

Plugins are an essential component of mixing music as they allow you to sculpt and enhance your tracks in numerous ways. Processing techniques, on the other hand, refer to the different methods and strategies used to improve the sonic quality of your tracks. When preparing a multitrack session, understanding how to utilize plugins and processing techniques effectively can significantly impact the final mix. Below are some tips for optimizing your plugins and processing techniques:

Eq And Compression Settings

Equalization (EQ) allows you to adjust the frequency balance of a track by cutting or boosting certain frequency ranges. Compression, on the other hand, reduces the dynamic range of a track by automatically reducing the volume of high-level signals. This combination of techniques can add clarity, definition, and depth to your mix. Some tips to keep in mind include:

  • Use EQ to remove unwanted frequencies and to create space between instruments.
  • Apply compression to individual tracks to control the dynamics of each instrument, but don’t overdo it.
  • Use parallel compression if you want to add more punch to specific tracks.

Using Reverb And Delay Effectively

Reverb and delay are two key effects used to add ambiance and depth to individual tracks or to the entire mix. They can help to create a sense of space, depth and distance. Here are some tips for using reverb and delay:

  • Use reverb to create a sense of space or to add a naturalistic feel to the track.
  • Apply delay to give more space and distance to tracks, especially for vocals.
  • Adjust decay time and mix level to find the appropriate amount of reverb or delay that works best for the mix.

Adding Creative Effects

Adding creative effects is a great way to bring out the unique character and personality of your tracks. These effects can range from pitch-shifting and distortion to more subtle effects like modulation and stereo imaging. Here are some tips to help you add creative effects:

  • Apply creative effects sparingly to keep the track focused and clean.
  • Use modulation effects to add movement and interest to slow-moving tracks.
  • Use automation to add variation and dynamics to the track as necessary.

Create A Rough Mix


To prepare a multitrack session before mixing, it’s essential to create a rough mix. This involves setting the levels and panning of each track, adding basic effects, and creating a general balance of the mix. A well-prepared rough mix is crucial to achieve a polished final mix.

Before diving into the mixing process, it’s essential to create a rough mix that brings your tracks to a basic level of balance and harmony. A rough mix is like a sketch that outlines the direction of the final shared vision; it’s crucial to dedicate enough time and attention to this step. The rough mix should provide enough clarity to allow the mixer to make informed decisions as he progresses. Here are three crucial steps in creating an effective rough mix:

Crafting The Basic Structure Of The Song

Crafting the basic structure of the song means considering the arrangement and whether the song makes sense in its current state. Evaluate how the sections of the song transition and compare how one verse is different from another as they proceed through the song. A well-crafted song should have a clear and concise form, meaning it’s essential to pay attention to the arrangement. This step should also include removing unnecessary noises or silences, so the song’s structure aligns perfectly with the listeners’ expectations.

Determining The Focus Of The Mix

Determining the focus of the mix requires a clear understanding of the intended emotion and energy of each track. It means evaluating whether the lead vocal track carries enough weight in relation to the rest of the mix and even how each instrument blends with the others. In this step, it’s essential to set the tone that resonates with the listeners on a deeper emotional level.

Making Critical Mix Decisions

After crafting the basic structure of the song and determining the mix’s focus, it’s time to make critical mix decisions that create a cohesive arrangement of each track. This step includes decisions about panning, EQ, reverb, compression, and levels. It’s where the mixer makes creative choices that immerse the listener into the song’s world. Creating a rough mix is not only a vital stage in the mixing process, but it is also what separates a good mix from a great one. Make sure to give this step the attention it deserves, and you’ll be setting yourself up for success in the subsequent phases of the mixing process.

Preparing For The Final Mix


Before starting the final mix, it’s important to prepare your multitrack session properly. This involves organizing your tracks, labeling them clearly, and ensuring that there are no unwanted sounds or glitches in the recordings. With a well-prepared multitrack session, you’ll be able to mix your tracks more effectively and get the best possible sound for your final mix.

Mixing is a crucial process in the music production industry. It is the art of balancing the levels, panning, and creating an equalization of all tracks in your multitrack session. Before you begin mixing, there are several things you need to do to prepare your multitrack session for the final mix. In this article, we will cover the steps you need to take to ensure a successful and efficient final mix.

Leaving Headroom For The Mastering Process

Before you start mixing your tracks, you should leave enough headroom to make sure your tracks are not too loud. This is important because once you bring all the tracks together, it can create a sound that is too loud or distorted. Leaving enough headroom will give you room to adjust levels later in the mixing process or mastering process, and avoid losing audio quality. Generally, it is recommended to leave a minimum of 6 dB of headroom.

Exporting Individual Tracks For A Professional Mix Engineer

Exporting individual tracks is essential if you are planning to hire a professional mix engineer. It will allow the engineer to work on each track separately and enhance the overall quality of the mix. You should export each track as a separate audio file without any effects or processing. Make sure to label each track with its name, tempo, and key signature, so the engineer can quickly understand the original arrangement.

Storing And Saving The Multitrack Session For Future Use

After you have exported individual tracks, save your multitrack session in a secured location for future use. It will allow you to revisit the session if any changes or revisions need to be made later. It would be best to organize the session by creating a folder with all the exported tracks and the session file. Also, store the session on an external hard drive or cloud service to avoid the risk of losing the data. In conclusion, preparing your multitrack session before mixing is crucial to ensure a quality final mix. By leaving headroom, exporting individual tracks, and saving the session, you can avoid any complications and improve the efficiency of the mixing process.


How To Prepare A Multitrack Session Before Mixing


Credit: majormixing.com


Frequently Asked Questions On How To Prepare A Multitrack Session Before Mixing


How Do You Prepare A Track For Mixing?


Preparing a track for mixing involves essential steps such as organizing your files, editing and cleaning up the audio, setting the level and panning, applying effects and EQ, and exporting the consolidated tracks. Make sure to label everything clearly and have backups of your original files.


How Do I Prepare Files For Mixing?


To prepare your files for mixing, make sure they are properly organized with clear file names and labeled tracks. Adjust the levels of each track and ensure they are properly synced. Use EQ, compression, and other effects to enhance the sound quality.


Finally, export the files in the required format and provide them to the mixing engineer with clear instructions.


How Do You Organize Tracks For Mixing?


To organize tracks for mixing, start by naming them clearly and grouping similar ones together. Use color coding or labeling to make it easy to identify each track. Remove any unnecessary tracks or elements, and adjust volumes to create balance.


Finally, create busses or groups for easier control over similar tracks during mixing.


How Do You Set Up A Mixing Session?


To set up a mixing session, ensure that you have the necessary equipment and software. Start by organizing your files and labeling tracks. Set the tempo and sync your tracks accordingly. Begin crafting your mix by adjusting levels, panning, and EQ.


Use effects like reverb and compression to enhance the sound. Finally, bounce your mix to a mastered file.


Conclusion


To sum up, preparing a multitrack session before mixing is crucial in achieving a well-balanced and cohesive mix. It helps streamline the process, avoids unnecessary headaches, and ultimately saves time and effort. Following the guidelines covered here – organizing the tracks, naming, color-coding, and preparing templates – will lead to a productive and effective mixing session.


By putting in a little bit of effort beforehand and sticking to a structured workflow, you can achieve professional-level mixes that sound amazing on any sound system.

Categories
Archive

Tips For Mastering If Youre Not A Mastering Engineer

To master without being a mastering engineer: Learn basic skills, pay attention to detail, listen critically, and use reference tracks. Mastering is a crucial step in music production that involves ensuring that a recording is polished, consistent, and ready for distribution.


However, mastering can be a complex and specialized process that requires the expertise of a professional mastering engineer. Also, for those who don’t have access to a mastering engineer or want to learn how to master their own music, there are a few tips to follow to help achieve a better result.

Related reading: AI Audio Mastering and Dolby Atmos Mastering. For background, see the Wikipedia article on Audio mastering.


Moreover, we will discuss how to master without being a mastering engineer by learning some basic skills, paying attention to detail, listening critically, and using reference tracks. These tips can help you take your music to the next level and achieve great-sounding results.


Listen On Multiple Playback Systems for Mastering Engineer

In addition, if you’re not a professional audio mastering engineer, mastering can be a daunting task. But with the right approach and tools, you can master your music like a pro. One of the essential tips for mastering is to listen to your music on multiple playback systems.

Why It’s Important

Furthermore, Mastering is all about making your music sound great on different systems and platforms. Your fans will listen to your music on various devices, such as earphones, speakers, car stereo systems, and more. By listening to your music on different systems, you can ensure that it sounds great everywhere.

How To Choose Systems

When choosing multiple playback systems, aim for a variety of devices that represent different listening environments. Take note of popular devices that your fans are likely to use, such as iPhones, Android phones, laptops, and Bluetooth speakers. You can also consider high-end reference monitors and headphones for critical listening.

Device Type
iPhone Mobile phone
Laptop Computer
Bluetooth speaker Speaker
Studio monitor Reference monitor
Headphones Reference headphones

What To Listen For

When listening to your music on multiple playback systems, pay attention to the following aspects:

  • Additionally, frequency balance: Do the highs, mids, and lows sound balanced on each system?
  • Also, dynamics: Are the dynamics consistent across different systems?
  • Moreover, clipping: Is your music clipping or distorted on any system?
  • In addition, Stereo Width: is the stereo width consistent on every device?
  • Furthermore, compression: have you used unnecessary compression that can affect the sound on different systems?
  • Overall sound quality: Does your music sound professional and polished on every device?

Additionally, listening to your music on multiple playback systems is an essential step in the mastering process. By doing so, you can ensure that your music sounds fantastic on all devices, making your fans happy and loyal.

Tips For Mastering If Youre Not A Mastering Engineer


Credit: www.masteringthemix.com


Focus On Communication With Your Mix Engineer


Also, to ensure a successful mastering process, communication with your mix engineer is essential. It’s important to express your vision and make sure you’re both on the same page. Provide clear instructions and feedback to achieve the desired final result.

Why It’s Necessary

Moreover, effective communication with your mix engineer is crucial. Clear and concise direction can save countless hours of time and prevent frustration for both parties. It’s important to establish open lines of communication and build a rapport with your mix engineer to ensure the best possible outcome for your project.

How To Effectively Communicate

When communicating with your mix engineer, it’s important to be specific about what you’re looking for in the final master. In addition, Use simple, non-technical language that your mix engineer can easily understand. Avoid vague feedback such as “make it sound better” or “give it more punch.” Instead, provide specific direction such as “boost the bass and reduce the mid-range” or “make the vocals stand out more.” Be open to feedback and willing to compromise. Your mix engineer has experience and expertise in manipulating audio to create a professional, polished sound. They may have suggestions to improve your mix that you hadn’t considered.

What Information To Provide

To ensure a smooth and successful mastering process, provide your mix engineer with as much information as possible. This includes the genre and style of music, the intended audience, and any specific references or examples of the sound you’re aiming for. Additionally, provide your mix engineer with technical details such as the intended output format (CD, digital download, vinyl, etc.), the desired volume level, and any other mastering preferences or requirements you may have. In summary, effective communication is key to achieving a successful mastering process. Establish open lines of communication with your mix engineer, be specific in your feedback, and provide as much information as possible to ensure the best possible outcome for your project.

https://www.youtube.com/watch?v=H5imUCJbQmc


Invest In Good Quality Monitoring Headphones for Mastering Engineer


To achieve a good quality sound output, investing in monitoring headphones is a must for non-mastering engineers. These headphones aid in identifying problems in the mix, providing clarity and accuracy in the sound. With the right tools, anyone can achieve the quality output they desire.

Why It’s Beneficial

Investing in good quality headphones is an essential step for those who want to master their music production skills. Monitoring headphones provide clear, accurate, and detailed sound, which is essential for mixing and mastering. They help you hear every minor detail within the mix, including low-frequency sounds. Good quality headphones enable you to work and make crucial decisions on equalizing, compression, and other critical aspects that make up a well-rounded mix. They give you the advantage of being in an acoustically treated room while in reality, you are in an untreated environment.

How To Choose Headphones

Choosing the right headphones for your monitoring needs can be overwhelming and complicated. However, with a few factors in mind, you can narrow down the options and find the perfect pair of headphones tailored for you.

What To Look For In Headphones

When you’re considering headphones for music production tasks, sound quality isn’t the only critical factor. Here are some of the essential factors to consider when choosing headphones:

Factor Description
Frequency Response Choose headphones with a balanced sound that doesn’t boost or cut any frequencies.
Comfortability Since you’ll spend countless hours wearing your headphones, choose headphones with comfortable earpads that won’t hurt your ears after longer sessions.
Impedance If you’re using headphones with pro-level gear, go for headphones with high impedance.
Portability If you’re always on the move, go for light and portable headphones that you can take anywhere with ease.

In conclusion, investing in good quality monitoring headphones is a crucial step towards improving your music production, mixing, and mastering skills. Consider the various factors when selecting the perfect pair of headphones suited to your needs. With the right pair of headphones, you’ll be able to hear every detail in the mix. This makes informed decisions that lead to an excellent end-product.

Make Use Of High-quality Mastering Software


To achieve a professional sound for your music, consider using high-quality mastering software. With user-friendly interfaces and many tools, these programs can help you achieve the perfect balance of volume, EQ, and compression. Even if you’re not a mastering engineer, mastering software can give you the power to create polished and professional-sounding tracks.

Mastering is the final stage in music production before the music hits the market. It is an essential process that enhances the overall musical experience. Mastering brings polish, coherence, and consistency to the music, making it sound more professional. While mastering is typically done by mastering engineers, less experienced producers and musicians who cannot afford a professional mastering engineer can still master their music using high-quality mastering software.

Why It’s Necessary

Mastering software offers users the ability to apply essential mastering processes to their music. This enables them to achieve a professional-sounding final product. Mastering software helps to add a professional touch to the sound of the music, adding clarity, punch, and overall refinement. Even experienced mastering engineers use mastering software as a tool to aid their work. Therefore, it is equally necessary for less experienced producers and musicians to use high-quality mastering software to give their music a competitive edge in the market.

How To Choose Software

Choosing the right mastering software requires research, understanding of the mastering process, and budget considerations. It is essential to choose software that is suitable for the user’s level of experience and genre of music. Some mastering software is less expensive and relatively easy to use, making them suitable for beginners. In contrast, others are more complex and require more in-depth knowledge of mastering processes. It is also important to consider the compatibility of the software with the user’s computer operating system and Digital Audio Workstation (DAW).

What To Look For In Software

When selecting mastering software, several factors need to be considered to ensure that it is of high quality. Some of the essential features to look for in mastering software include:

  • Equalizer (EQ) to balance the frequency of tracks and add clarity
  • Compressor to limit the dynamic range and increase the overall loudness of the tracks
  • Limiter to prevent distortion and maintain consistent volume levels
  • Multiband dynamics to fine-tune the tone and give the mix a polished and professional sound
  • Stereo imaging to give the mix width and depth
  • High-quality signal processing to avoid adding unwanted artifacts and distortion

In conclusion, making use of high-quality mastering software can put less experienced music producers and musicians on a level playing field with professional mastering engineers. It is essential to choose appropriate software that fits the user’s level of experience, budget, and genre of music. By looking out for critical features like EQ, compressor, limiter, and multiband dynamics, users of mastering software can achieve a polished and professional sound.

Don’t Overdo The Processing for Mastering Engineer


To master audio tracks without the expertise of a mastering engineer, it’s important to remember not to overdo the processing. Applying too many effects and adjustments can lead to a loss in quality and an unnatural sound. Keep it simple and follow the less is more mantra.

As a non-mastering engineer, you may be tempted to over-process your audio tracks to make them sound better. However, this approach might lead to a suboptimal result, as over-processing can significantly degrade the quality of your music. Therefore, it’s crucial to learn why it’s important to avoid over-processing and how to do it correctly.

Why It’s Important

Over-processing can make your songs sound artificial, lifeless, and compressed, detracting from the natural sound and character of your recordings. Moreover, it can cause listener fatigue, making it challenging to enjoy the music for extended periods. As such, it’s essential to strike a balance between achieving a clean, polished sound and retaining the dynamic range and musicality of the track.

How To Avoid Over-processing

Fortunately, avoiding over-processing is relatively straightforward with a bit of practice. A good rule of thumb is to use as little processing as possible and only where necessary. Some tips to avoid over-processing include:

  • Start with a good mix – Start by ensuring that your mix is balanced, and all the elements have enough space to breathe without conflicting with one another.
  • Use EQ sparingly – Only use EQ to correct issues or enhance the sound. Avoid excessive boosts or cuts as this can create excessive resonance or attenuate important frequencies.
  • Limit compression – Use compression to control the dynamics of the track. But avoid excessive compression as it can lead to pumping, breathing, and distortion.
  • Use saturation wisely – Saturation can add warmth, character, and harmonics to your sound. But too much can make it sound distorted and muffled.

What To Be Cautious Of

While avoiding over-processing can significantly improve the quality of your music, it’s crucial not to fall into the trap of under-processing your track. Under-processing can make your tracks sound amateurish and unfinished, detracting from the overall listening experience. Therefore, make sure to:

  • Use reference tracks – Use reference tracks from other artists to gauge the appropriate level of processing and compare your mix to professional standards.
  • Take breaks – Take frequent breaks to rest your ears to avoid listener fatigue and make more accurate judgments about the sound of your mix.
  • Learn from others – Listen to tutorials and advice from seasoned professionals to improve your mixing and mastering skills and avoid common pitfalls.

With the above tips, you can achieve a well-balanced, polished, and natural sound without over-processing or under-processing your music. Remember, mastering is an art form that takes time, effort, and practice to master. But with patience and dedication, you can achieve incredible results.

Tips For Mastering If Youre Not A Mastering Engineer


Credit: www.izotope.com


Focus On The Overall Cohesion And Dynamic Range Of The Album


To achieve a well-mastered album without being a mastering engineer, focus on the overall cohesion and dynamic range. Pay attention to how the songs flow together, ensuring consistency in volume, frequencies, and tonal balance throughout the album. Strive for a final product that sounds like a cohesive, polished collection of songs.

Why It’s Important

Mastering an album is a crucial step in the music production process. It involves adding the final touches to the mix and making sure that each song flows seamlessly into the next. The overall cohesion and dynamic range of the album play a significant role in creating a memorable listening experience. Cohesion refers to how well the different songs on an album fit together as a whole. It involves ensuring that the album has a consistent sound and feel. On the other hand, dynamic range refers to the difference between the softest and loudest parts of a song. A good dynamic range ensures that each song has a balanced mix and that the listener can hear all the instruments and vocals clearly.

How To Achieve Cohesion

To achieve cohesion, it’s essential to maintain consistency throughout the entire album. This involves paying attention to the following aspects:

  • Key: Make sure that the songs are all in the same key or compatible keys.
  • Tempo: Keep the tempo consistent throughout the album.
  • Tone: Ensure that all the songs have a similar tonal quality and that they complement each other.
  • Genre: Stick to a similar genre or theme for the whole album.

It’s also crucial to ensure that each song has a clear beginning and end to avoid abrupt transitions.

How To Achieve Good Dynamic Range

To achieve good dynamic range, it’s essential to balance the levels of each instrument and vocal in the mix. The following tips can help:

  • Use compression: Compression helps to balance the levels of the different parts of the mix and reduce any peaks and troughs.
  • EQ: Use EQ to enhance the tonal quality of each instrument and vocal and remove any unwanted frequencies that may clash with others in the mix.
  • Stereo imaging: Ensure that each instrument and vocal has its place in the stereo field. This makes it easier for the listener to separate the different parts of the mix.
  • Limiting: Use limiting to ensure that the loudest parts of the mix don’t distort and remain clear.

Overall, the overall cohesion and dynamic range of an album are critical factors that can make the difference between a good and a great listening experience. By paying attention to these elements during the mastering process, you can create an album that creates a lasting impression on your listeners.

Master Material In The Highest Resolution Possible


Achieving a high-quality audio master requires more than just the right equipment. Even if you’re not a mastering engineer, there are several tips you can follow to help master your material in the highest resolution possible. By paying attention to details like levels, EQ, and compression, you can achieve a professional sound for your music.

Mastering audio is a crucial step in the production process. While mastering engineers have the experience and knowledge to bring out the best in a mix, sometimes it’s not possible to bring in a mastering engineer due to budget constraints. It’s essential to master material in the highest resolution possible to ensure that the final product sounds as great as it can. In this post, we’ll look at why it’s necessary, what to look for in resolution, and how to work with high-resolution material.

Why It’s Necessary

Mastering is all about making sure that the final mix sounds as good as possible across all playback devices. The mastering process involves balancing the levels of all the tracks and making sure that the dynamic range is consistent. This process also involves making tonal adjustments, ensuring that the mix sounds great on all systems. Mastering also involves adding the necessary processing, such as EQ, compression, and limiting, to ensure that the track can compete against other commercial releases. To ensure that the final product sounds the best it can, it’s essential to master material in the highest resolution possible.

By working with a higher resolution, you’ll have access to more detail, which can help in the mastering process. When you’re working with a higher resolution, you’ll have more to work with. You’ll be able to make more precise adjustments.

What To Look For In Resolution

When mastering material, it’s essential to work with a high-resolution file. Ideally, you should have access to a minimum of 24-bit/96kHz files. When you have high-resolution files, you’ll have more detail to work with, which is especially crucial when making tonal adjustments. You’ll be able to hear more of the mix, and you’ll be able to identify what needs to be adjusted.

How To Work With High-resolution Material

When working with high-resolution material, it’s essential to ensure that your entire signal path is capable of handling the increased detail. You’ll need to ensure that your audio interface can handle the increased resolution and that you’re monitoring in a suitable environment. It’s also important to ensure that you’re using plugins that are capable of processing high-resolution material. Once you have everything set up, it’s time to begin the mastering process. The first step is to analyze the mix and identify any issues that need to be addressed. Once you’ve identified any issues, you can begin making tonal adjustments.

It’s essential to be precise when making adjustments. Meanwhile, the increased detail in the material can make small changes more noticeable. In conclusion, mastering material in the highest resolution possible is essential to ensure that the final product sounds as great as it can. By working with a higher resolution, you’ll have access to more detail, which can help in the mastering process. When working with high-resolution material, it’s essential to ensure that your entire signal path is capable of handling the increased detail. With these tips, you’ll be able to master material even if you’re not a mastering engineer.

Know Your Digital And Analog Gear for Mastering Engineer


Learn more about your digital and analog gear to improve your mastering, even if you’re not a mastering engineer. It’s important to understand the tools of the trade and how to use them effectively to achieve the best results.

Why It’s Important

Mastering is an integral part of the music production process, and knowing your digital and analog gear is crucial to achieving the best results. Digital and analog gear are different in their functions, capabilities, and sound. Understanding them will help you make informed decisions about using them creatively to master your music.

How To Understand Digital Gear

Digital gear is widely used in music production, and it’s essential to know how it works. For mastering, digital gear allows you to process the audio signal in a non-linear way. This enables you to shape and enhance the sound to your liking. To understand digital gear, you need to:

  • Read the manual – each device has its own manual
  • Understand digital signal processing (DSP) – this is the engine that drives digital gear
  • Research on digital tools and plugins – knowing their features, and how they work will be helpful.

How To Understand Analog Gear

Analog gear is still the go-to in music production, particularly for mastering. While digital gear offers a wide range of options, analog gear adds warmth to your audio. This makes it sound more musical. Understanding analog gear involves:

  • Learning about circuitry – circuits are the foundation of analog gear
  • Understand signal flow – knowing where the audio goes in the equipment and how it is processed
  • Comparing analog to digital – understanding the differences between these two types of gear will guide you when making choices

Conclusion

Knowing your digital and analog gear is essential in music production, particularly for mastering. While both types of gear have their strengths, understanding their differences, capabilities, and limitations will better guide you when using them creatively. Whether you’re mastering your own music, or working with someone else, mastering to a professional standard starts with knowing your gear.


Frequently Asked Questions On Tips For Mastering If Youre Not A Mastering Engineer


What Level Should I Master Before Mastering?


You should master the fundamentals before moving on to more advanced techniques. It’s important to have a solid foundation in the basics before attempting to master higher-level skills.


Are Mastering Engineers Worth It?


Yes, mastering engineers are crucial for professional-sounding recordings with a balanced and polished tonality. They specialize in the final stages of music production, ensuring optimal sound quality across all playback systems. Their expertise and knowledge in audio processing technologies and techniques make them worth investing in for a high-quality finished product.


What Is Too Loud For Mastering?


The loudness of mastering depends on various factors like genre, target audience and playback medium. However, excessively loud mastering can result in clipping, distortion and loss of dynamic range. It’s important to maintain a balanced loudness level while mastering to ensure optimal sound quality and clarity.


What Are The Basic Mastering Techniques?


Basic mastering techniques include using EQ to balance frequencies, compressing to even out dynamics. This adds reverb or delay for space, stereo imaging to widen or narrow the stereo field, and limiting to raise overall loudness.


Conclusion


Mastering is an intricate process that requires both technical knowledge and creativity. While you may not be a mastering engineer, these tips will help you improve the quality of your recordings and achieve a more polished final product. Remember to be patient, take breaks, and trust your ears.


With practice and dedication, you can become a master of your own sound.

Categories
Archive

Recording Preparation Tips For Any Studio Session

To prepare for a studio session, ensure that you have practiced your material thoroughly beforehand and have all necessary equipment and accessories. Additionally, communicate effectively with the engineer and producer to ensure a smooth recording process.


Proper planning and organization are key to a successful session. The first step in preparing for a studio session is to practice your material sufficiently to ensure you are confident and comfortable with it. The second step is to ensure that you have all of the necessary equipment and accessories, such as cables, adapters, and backup storage devices.


It is also crucial to communicate effectively with the engineer and producer, discussing deadlines, revisions, and any other pertinent details to make the recording process a success. Finally, being organized and planning ahead can help prevent any unexpected issues or delays, helping to ensure a smooth and productive session.

Recording Preparation Tips For Any Studio Session


Credit: ldb10.com


Prepare Your Gear

Preparing your gear properly is critical for an efficient and effective studio session. Don’t let technical difficulties ruin your creative flow. Here are some tips to help you prepare your gear for a successful recording session.

Check All Cables And Connections

Ensure that all your cables and connections are working correctly, and there are no loose connections. Faulty cables or connections can result in unwanted noise and audio dropouts, which can compromise your recording quality. Check every cable and connection, from microphones to headphones, to avoid any interruptions in your session.

Charge Batteries And Replace Memory Cards

Before you head to the studio, check your battery levels and replace any memory cards that are full or damaged. Keeping extra charged batteries and memory cards can save you time and prevent delays during a session. You don’t want to get stuck in the middle of a recording with a dead battery or a full memory card.

If you’re using a hard drive or other storage devices, make sure to format them before heading to the studio. Formatting will erase any files stored on the device, so backup everything before formatting.

Organize Your Gear And Pack Accordingly

Make a list of all the necessary gear that you need to bring to the studio. You don’t want to forget any essential items during your session. Organize your gear and pack it accordingly. Label your equipment bags properly to make it easier to set up and tear down. Keep your gear to a minimum, so it’s easier to pack and transport to and from the studio.

Avoid bringing distractions such as your phone, laptop, or tablet to the studio. Picking them up now and then will break your creative flow. Instead, switch them off and keep them away while you work.

By adhering to these tips, you will be on your way to a smooth and productive recording session. Proper gear preparation minimizes stress and maximizes creativity.

Organize Your Space

Organizing your space is probably one of the most crucial things you could do before a recording session. As you are preparing for your studio session, you have to ensure that the environment is conducive to creativity and productivity. The following are some tips that will guide you through this process.

Clean And Declutter The Studio

It is always important to keep your recording area tidy and organized. This means getting rid of all the clutter, and removing anything that may distract you or make it difficult to access the equipment. An untidy recording area can negatively impact your focus and creativity, so it’s important to take a few minutes to clean up the space. Keep all your cables and equipment well-organized, and ensure everything has its designated place.

Set Up Enough Chairs And Tables

Having enough space for everyone involved in the recording session is crucial for comfort and effectiveness. Make sure the session musicians, sound engineers, producers, and any other team members have a comfortable space to work. Tables and chairs should be arranged in a position that allows easy access to the recording equipment and keeps the space well-organized. Make sure everyone can see each other and communicate effectively throughout the session.

Tip Description
Invest in Storage Solutions Make use of shelves, cabinets, and containers to keep all your equipment and accessories properly stowed away and easy to access.
Maximize Space Ensure that the microphones, monitor speakers, and other studio equipment have good positioning to enable great performance for recording.
Eliminate Noise Reduce background noise in your studio. It will increase comfort and enable the recording of high-quality audio.

With these tips, you can make sure that your studio recording session goes without a hitch. Your setup will be comfortable, well-organized, and conducive to creativity, ensuring that the final result is a masterpiece everyone will be proud of.

Set Up Your Instruments


Properly setting up your instruments is crucial for a successful studio recording session. Ensure that all equipment is in working order, properly tuned, and positioned correctly for the best sound quality.

Recording Preparation Tips For Any Studio Session

As a musician, you want to make sure that every recording session is as productive as possible. One of the keys to a successful session is to set up your instruments properly. This will reduce the amount of time spent on fixing instrument-related problems during the recording process. Here are some preparation tips for setting up your instruments before diving into the recording process.

Tune Your Instruments

Before the recording session, ensure that your instruments are in tune. Your sound engineer may have a tuner in the studio, but it’s always a good idea to tune your instruments ahead of time. This will save time and ensure that there are no discrepancies in tuning during the recording process. A guitar that is out of tune can cause problems such as intonation issues, which can lead to a poor-sounding recording.

Warm Up Before Recording

Warming up before recording is crucial to ensure that you’re playing at your best. It’s vital to loosen up your fingers and get your hands warm before playing any faster or intricate parts. It’s also an excellent opportunity to practice the parts you’ll be recording. Take the time to play through the parts you’re going to record a few times and make any necessary adjustments. This will help ensure that you’re well-prepared and can perform at your best when you hit the record button. In conclusion, proper preparation is key to a successful recording session. By setting up your instruments correctly, you’ll save time and have a more productive recording experience. Remember to tune your instruments ahead of time and warm up before recording to avoid any unnecessary issues during the recording process.

Recording Preparation Tips For Any Studio Session


Credit: www.studio77lv.com


Prepare The Musicians


Get ready for your next studio session with these recording preparation tips for musicians. Make sure to rehearse beforehand, double-check your equipment and settings, and communicate clearly with your sound engineer to ensure a successful recording session.

As a recording engineer, it is crucial to have a well-prepared team of musicians to make a successful recording session. Musicians play a vital role in creating memorable recordings. To get the best out of their performance, you will need to prepare them well before the recording session. Here are some tips to help you prepare the musicians for a recording session.

Communicate Your Expectations

The first step in preparing musicians for a recording session is to communicate your expectations. Discuss with them the project’s goals and what you want to achieve in the session. Be clear about your expectations, including the tone, style, and overall sound you are hoping to achieve. Make sure everyone understands the project’s scope, time frame, and deadline.

Guide Them Through The Arrangement

The arrangement of a song plays a significant role in how it will sound overall. You can guide musicians through the arrangement to get the best performance. The arrangement involves the structuring of the song, such as the intro, verse, chorus, bridge, and outro. Ensure that each part of the arrangement serves its purpose and that everything flows smoothly. A good arrangement will make it easier for the musicians to perform, and you will get an excellent recording.

Provide A Comfortable Environment

Creating a comfortable environment is essential to allow musicians to perform to their best. Ensure the recording room is comfortable, well-ventilated, and appropriately lit. Also, make sure the musicians have access to water and food during the session. Treatment options like diffusers and absorbers help control the room’s acoustics and make the musicians feel at ease.

Make Them Feel Valuable

Making musicians feel valued and appreciated is crucial for getting the best performance. Take the time to connect with each member of the team, encourage them, and offer positive feedback. When they feel appreciated, they are likely to put more effort into their performance, and this will get you a great recording. In conclusion, proper preparation of musicians is essential to the success of any recording session. Ensure you communicate your expectations, guide them through the arrangement, provide a comfortable environment, and make them feel valuable. Take the time to prepare your team, and you can expect a great recording that everyone will love.

Test The Levels And Eq


Proper sound recording preparation includes testing the levels and equalizer (EQ) to ensure the best quality possible for any studio session. This helps to eliminate any potential issues and ensure that the final result is as professional as possible.

Before starting any studio recording, you need to test the mics and levels first. Mics and levels are two of the most essential elements of a studio recording. You don’t want to spend time recording a track, only to find out that the levels are too low or too high. Likewise, you don’t want to experience the same thing with the EQ of your recording.

Test The Mics And Levels

Firstly, set up your microphone and test the levels. Make sure that it’s correctly connected to your audio interface. You could use a sound check recording to ensure everything is captured correctly. Once you have set up the microphones, test the levels by hitting the record button and playing the instrument or singing to ensure that the sound is captured correctly.

Use Eq To Balance The Sound

After setting up and testing your microphones, it’s time to balance the sound to make sure that it’s optimized. Use your EQ to balance the different frequencies of the instruments, giving each one a clear and crisp sound. Overcrowding frequencies may create a muddy or distorted sound. Thus, it’s essential to clear the sound by balancing the frequencies. You can cut some of the problematic frequencies with EQ to get the desired result. Using a high-pass filter, a low-pass filter, or a frequency band to cut some of the problematic areas can be helpful to obtain a clear and professional sound. In conclusion, testing the levels and EQ of your studio is the key to successful recordings. By doing this, you can avoid wasting time, energy, and resources in producing a poorly mixed track. So, be sure to meticulously check the mics and levels, and use powerful EQ to refine your recording to have a successful studio session.

Check The Recording Quality


Before starting any studio session, it is crucial to check the recording quality of your equipment. This includes testing your microphones, speakers, and recording software to ensure that everything is working correctly. Doing so can help you avoid any technical difficulties and ensure that your recordings come out sounding professional.

Monitor The Recording Quality

Before starting with the recording, it is crucial to check the recording quality. The recording quality has a huge impact on the final outcome. You don’t want to spend hours in the studio and then realize that the recording quality is not up to the mark. So, make sure to check the recording quality before starting with the recording.

Rerecord If Necessary

If you find that the recording quality is not up to the mark, then it’s better to rerecord the track. It’s always better to have a good quality recording as it can make a huge difference in the final outcome. Take your time and make sure to record the track again if necessary.

Use A Pop Filter

Pop filters are essential for a good recording. They help to eliminate popping sounds that occur when you pronounce words that have the letters ‘P’ and ‘B.’ Using a pop filter helps to smoothen out these sounds and gives a clean recording.

Check The Microphone Placement

The placement of the microphone plays a vital role in the recording quality. Placing the microphone in the right position can make a huge difference in the recording quality. So, make sure to check the placement of the microphone and adjust it accordingly.

Eliminate Background Noise

Background noise can ruin a recording. Make sure to eliminate all the background noise before starting with the recording. You can use a noise gate to eliminate low-level background noise, and use acoustic treatment to eliminate higher level noises.

Conclusion

By following the tips mentioned above, you can ensure to have a good recording quality. Take your time in the studio and make sure to check the recording quality before proceeding with the recording. With a little bit of effort and attention to detail, you can end up with a high-quality recording that you can be proud of.

Take Breaks Regularly

Recording in a studio can be a mentally and physically demanding task. It’s crucial to take breaks regularly to avoid burnout, stay hydrated, and rest your ears and eyes. Here are some tips on how to take breaks effectively:

Take Breaks For Hydration And Rest

It’s essential to take breaks for hydration and rest, especially during long sessions. Staying hydrated is crucial to maintain your energy levels and keep your voice healthy. Take a 10 to 15-minute break every hour to drink water, a sports drink, or any other non-alcoholic beverage. This helps you stay hydrated after hours of singing or playing an instrument, reducing the risk of vocal strain, cramps, and potential injuries.

Find Ways To Alleviate Stress

Recording in a studio can be a stressful situation, leading to frustration, exhaustion, and burnout. It’s essential to find ways to alleviate stress and maintain your mental state effectively. Consider taking a short walk or stretching during your break to help clear your mind and reduce the tension in your muscles. Practicing meditation or deep breathing exercises can also help reduce stress levels and allow you to refocus on the tasks ahead.

Remember, taking breaks regularly is crucial in keeping you energized and motivated throughout your studio session. Use your break time to recharge yourself physically, mentally, and emotionally, and you’ll perform to the best of your ability in no time.

Recording Preparation Tips For Any Studio Session


Credit: www.mixinglessons.com


Wrap Up The Session

Recording studio sessions can be an intensive process and require meticulous attention to detail. Your hard work and preparation can all go to waste if you don’t wrap up the session correctly. The final stage of the session involves reviewing, backing up files and cleaning up the studio. This stage is essential to ensure that all completed recordings are safe and secure, enabling you to return to them at any time in the future.

Review The Recordings

Before wrapping up the session, it is essential to review all the recordings to ensure that you have captured everything you need and that the quality is up to standard. Play the tracks back and listen carefully for any glitches or errors that need to be corrected.

A useful tip is to compare the recordings to a reference track. The reference track can help you identify any areas that need improvement and guide your editing process.

Back Up The Files And Clean Up The Studio

Backing up all the audio files is crucial to ensure that you don’t lose anything during the recording process. It’s crucial to have multiple copies of the files stored in different locations, ensuring their safety. Create a final mix and master copy and also save a copy of the raw files for future use.

Once the files have been backed up, it’s time to clean up the studio. Ensure that all equipment is returned to its original place and cleaned to avoid any damage. Check that all cables and connectors are correctly coiled and stored away.

Back Up Checklist
Save a copy of both raw and final mix files
Store files in multiple locations
Delete any unused files and folders to free up space

In Conclusion,

The wrap-up stage is a critical aspect of any recording session. Review all the recordings, back up the files and clean up the studio to ensure that your hard work is safe and secure. These three vital tips will help you complete a successful recording session with peace of mind knowing that your recordings are safe and secure.


Frequently Asked Questions For Recording Preparation Tips For Any Studio Session


How Do You Prepare For A Studio Session?


To prepare for a studio session, first make a checklist of everything you’ll need. Practice your parts and ensure your instruments are in top condition. Get proper rest beforehand to maintain mental focus. Arrive early to set up and soundcheck.


Finally, stay hydrated and bring snacks to keep your energy level up.


How Do You Prepare A Song For A Studio?


To prepare a song for a studio recording, you need to follow a few steps. First, write the song and practice it thoroughly. Then, decide on the instrumentation and structure. Next, record a demo to get an idea of how the song will sound in the studio.


Finally, book a studio and hire a producer and engineer to help you perfect the final recording.


How Do You Plan A Recording Session?


To plan a recording session, you need to determine the goals and objectives of the session, select the appropriate recording equipment, set up the recording space, prepare the performers or speakers, and test the equipment and sound levels before recording.


It is also important to establish a clear timeline and schedule for the session.


What Not To Do In A Recording Studio?


When in a recording studio, avoid the following: 1. Don’t be noisy or careless with equipment. 2. Don’t waste time, especially if you’re paying by the hour. 3. Don’t argue or be negative with other members of the team. 4. Don’t rely too much on auto-tune or other editing tools.


5. Don’t make major changes to your music or lyrics without discussing it with the rest of your team.


Conclusion


To sum up, preparing for a studio session requires focused and structured work to ensure the best results. Understanding the equipment, practicing your performance, and taking breaks during recording sessions are just a few of the many important aspects to keep in mind.


Remember, preparation is key to success, and following these tips will help you create high-quality recordings that truly showcase your talents. Happy recording!